How to delete your Hiver account
If you’ve decided to stop using Hiver, you can request to delete your account by following the steps listed below.
1. Click the Hiver settings icon in Gmail and select Admin Panel.
2. Click on the Settings tab.
3. Select Delete Organization.
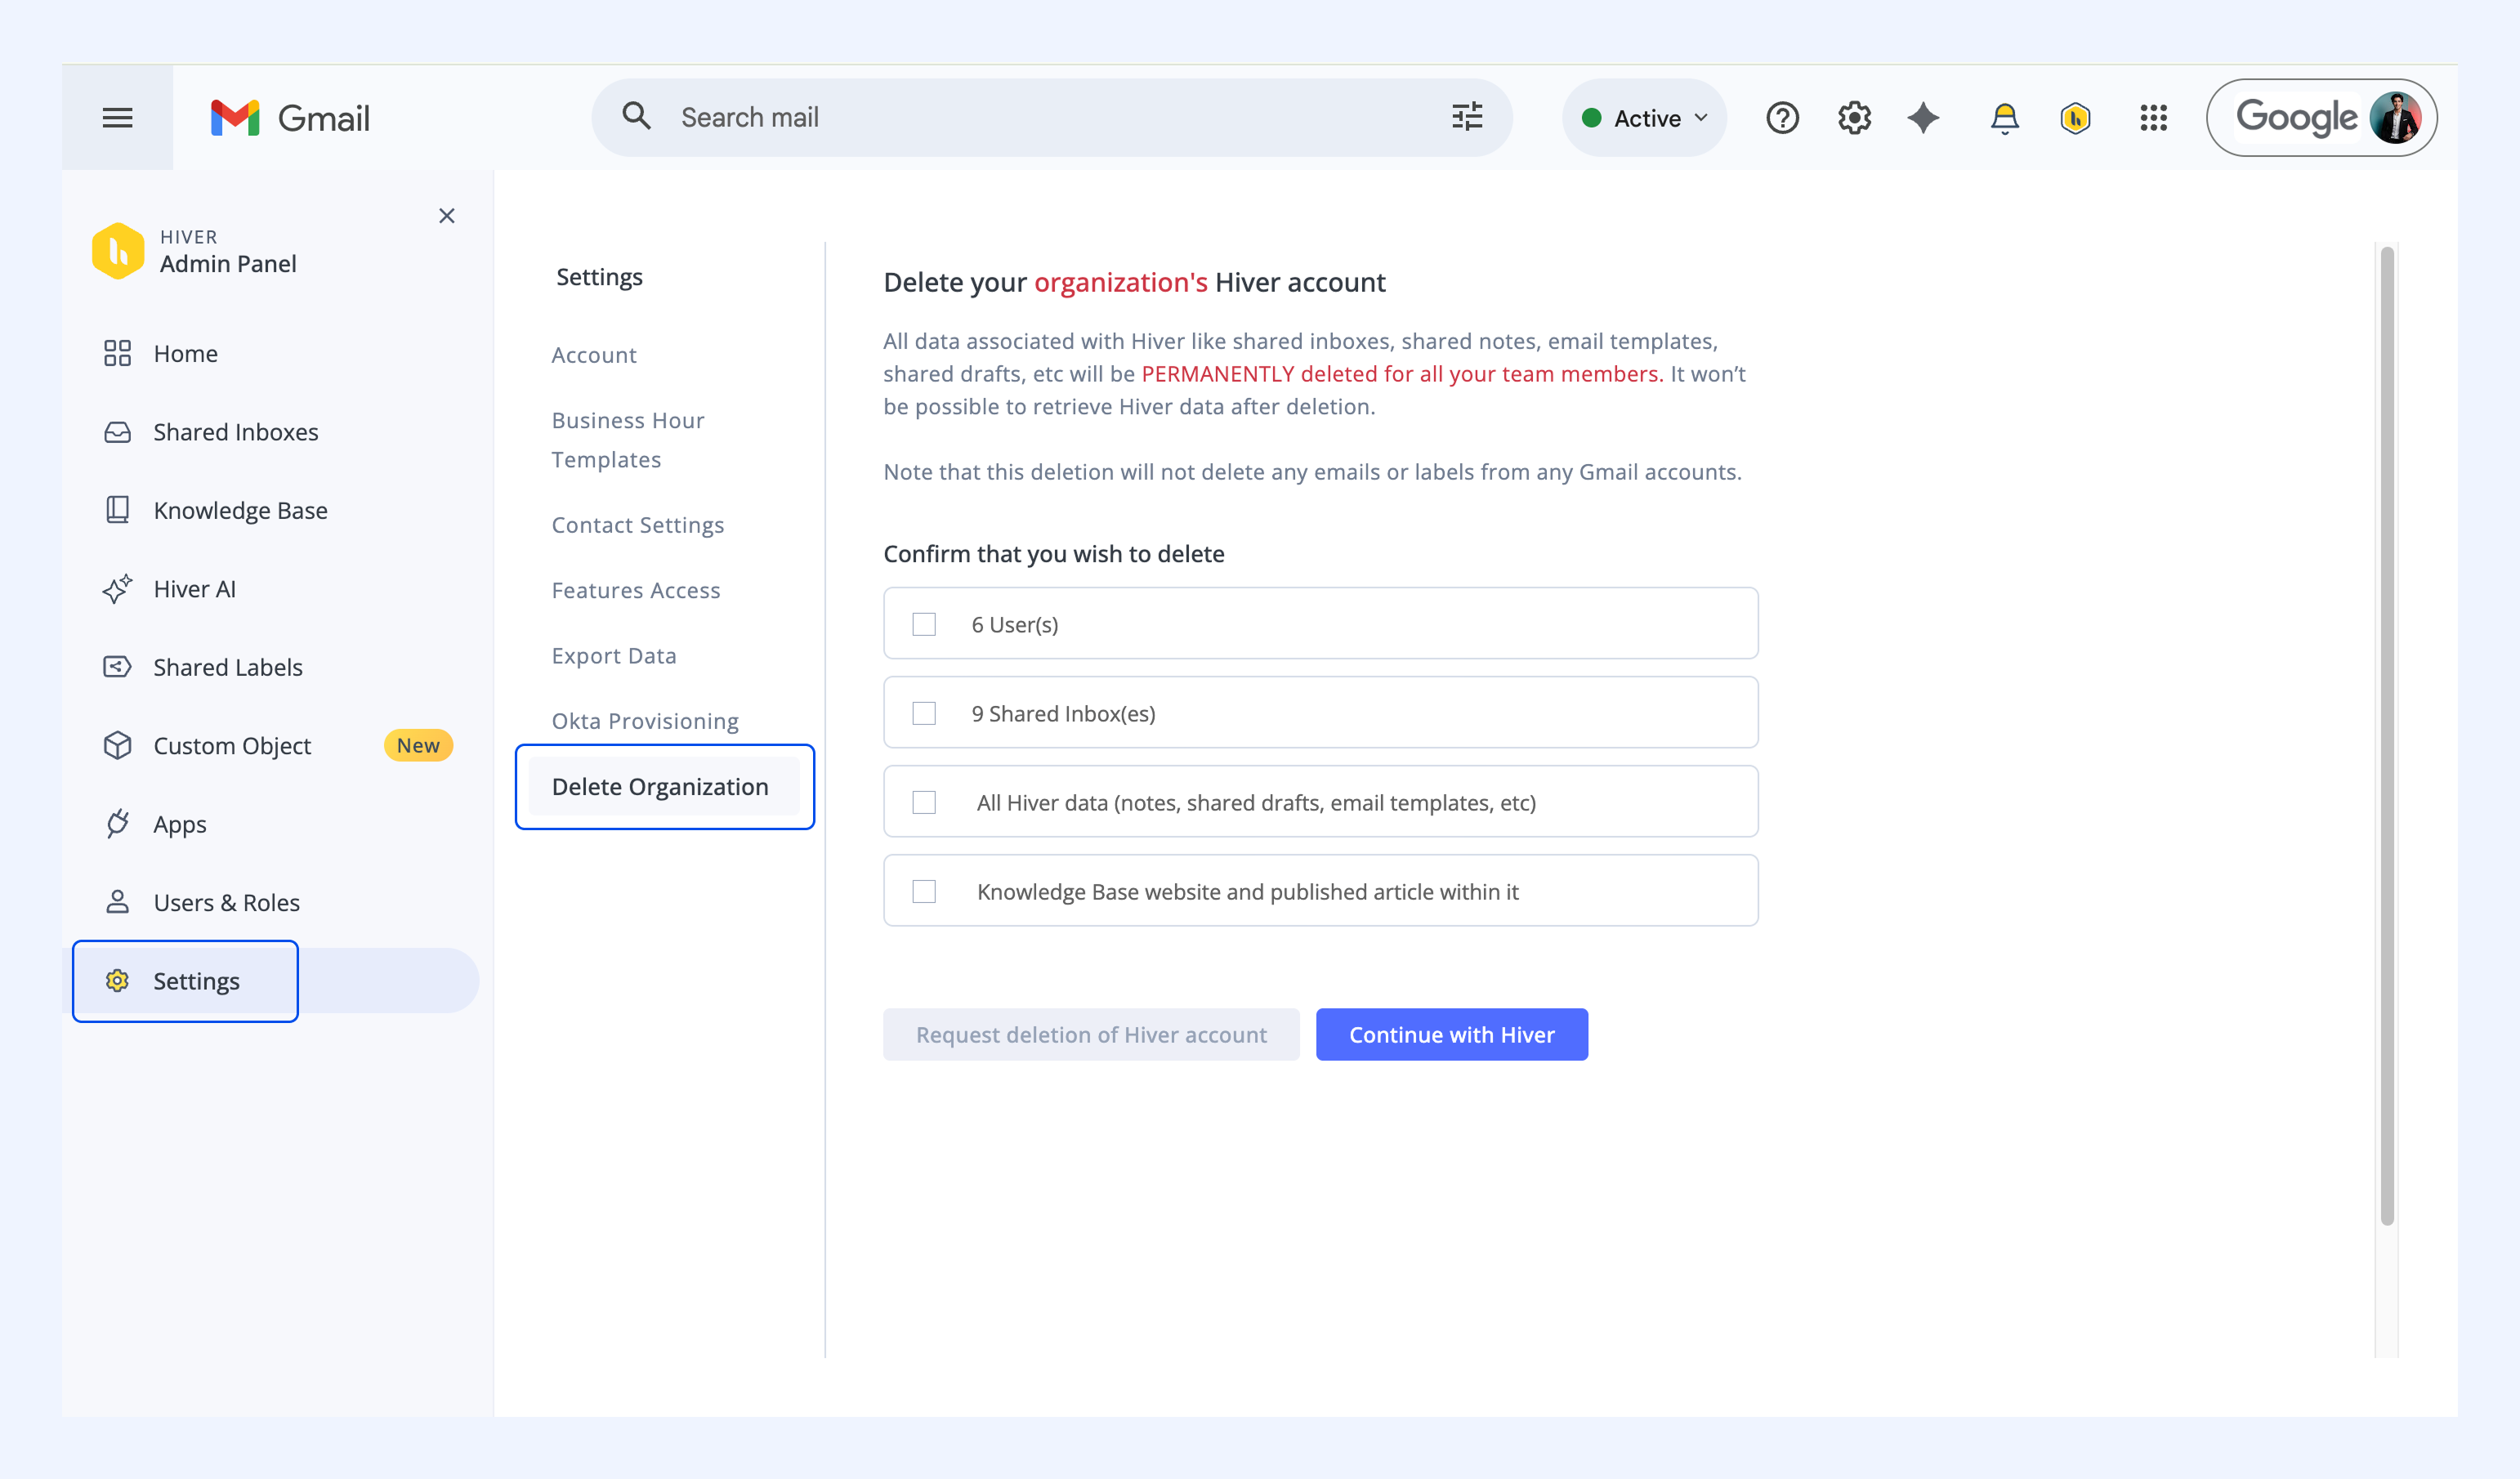
4. Review the deletion warning. All data associated with Hiver will be permanently deleted for all your team members.
5. Check all four confirmation boxes to confirm deletion of users, Shared Inboxes, Hiver data, and your Hiver Knowledge Base.
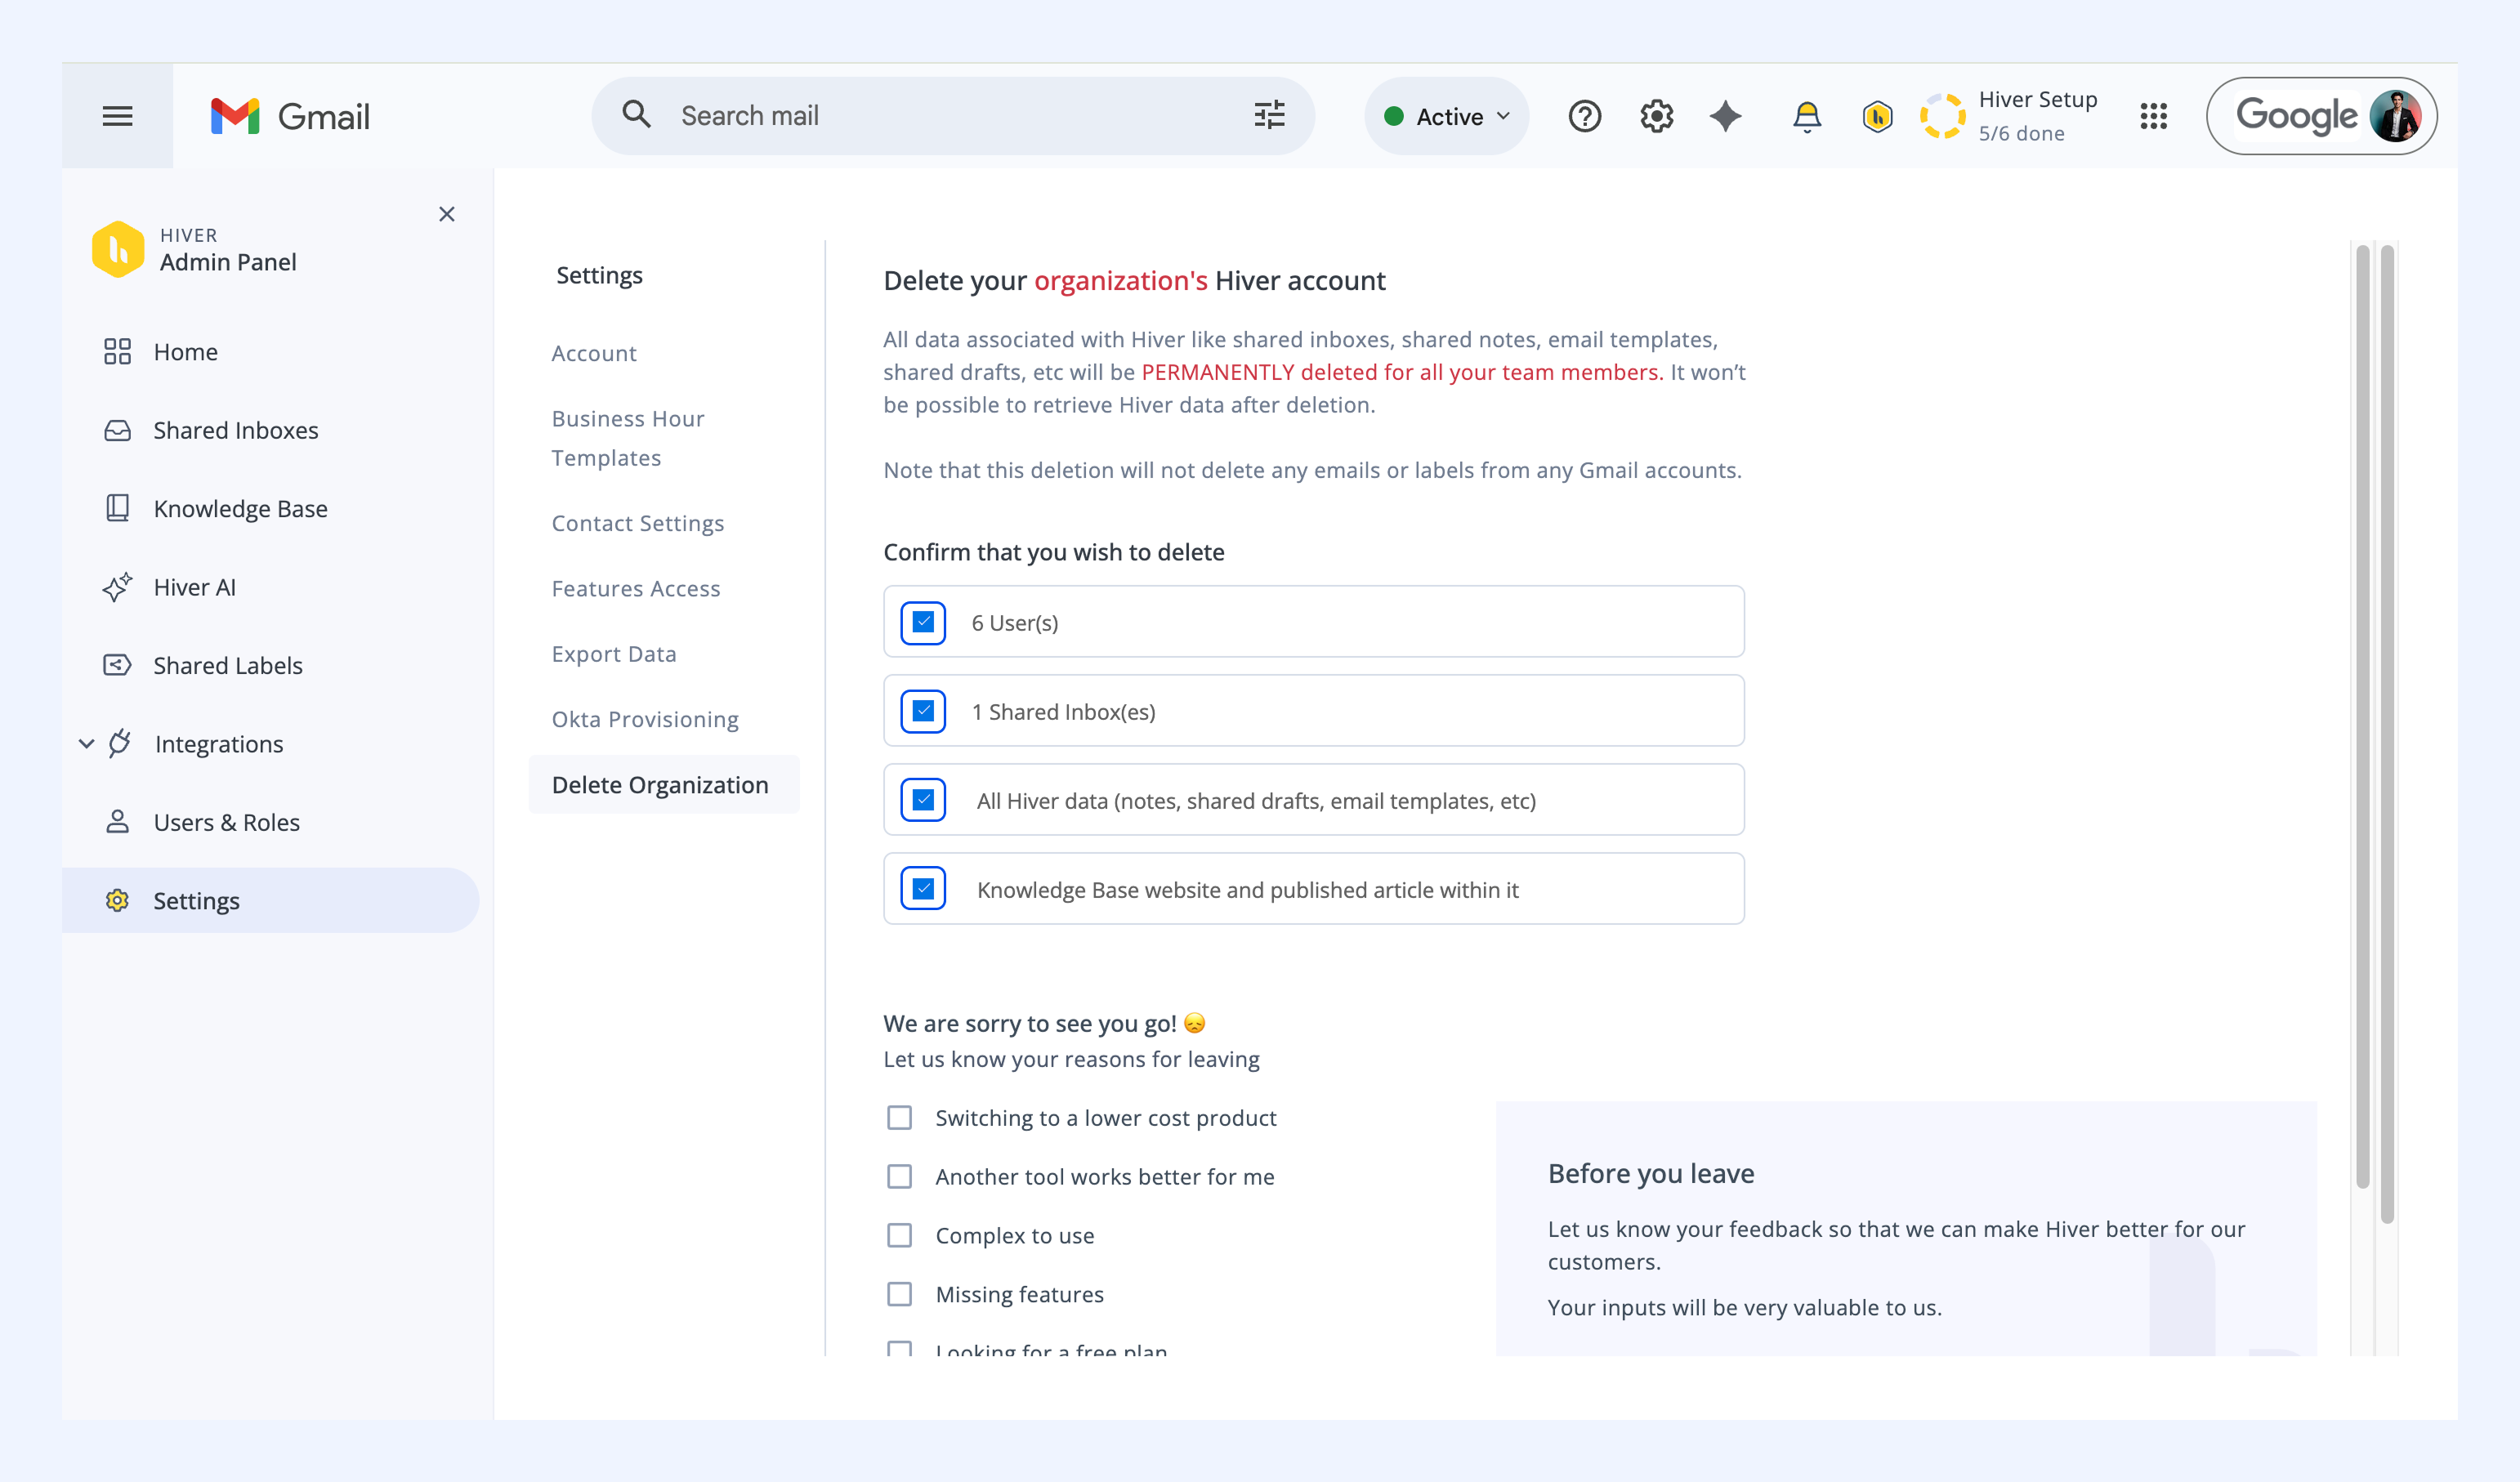
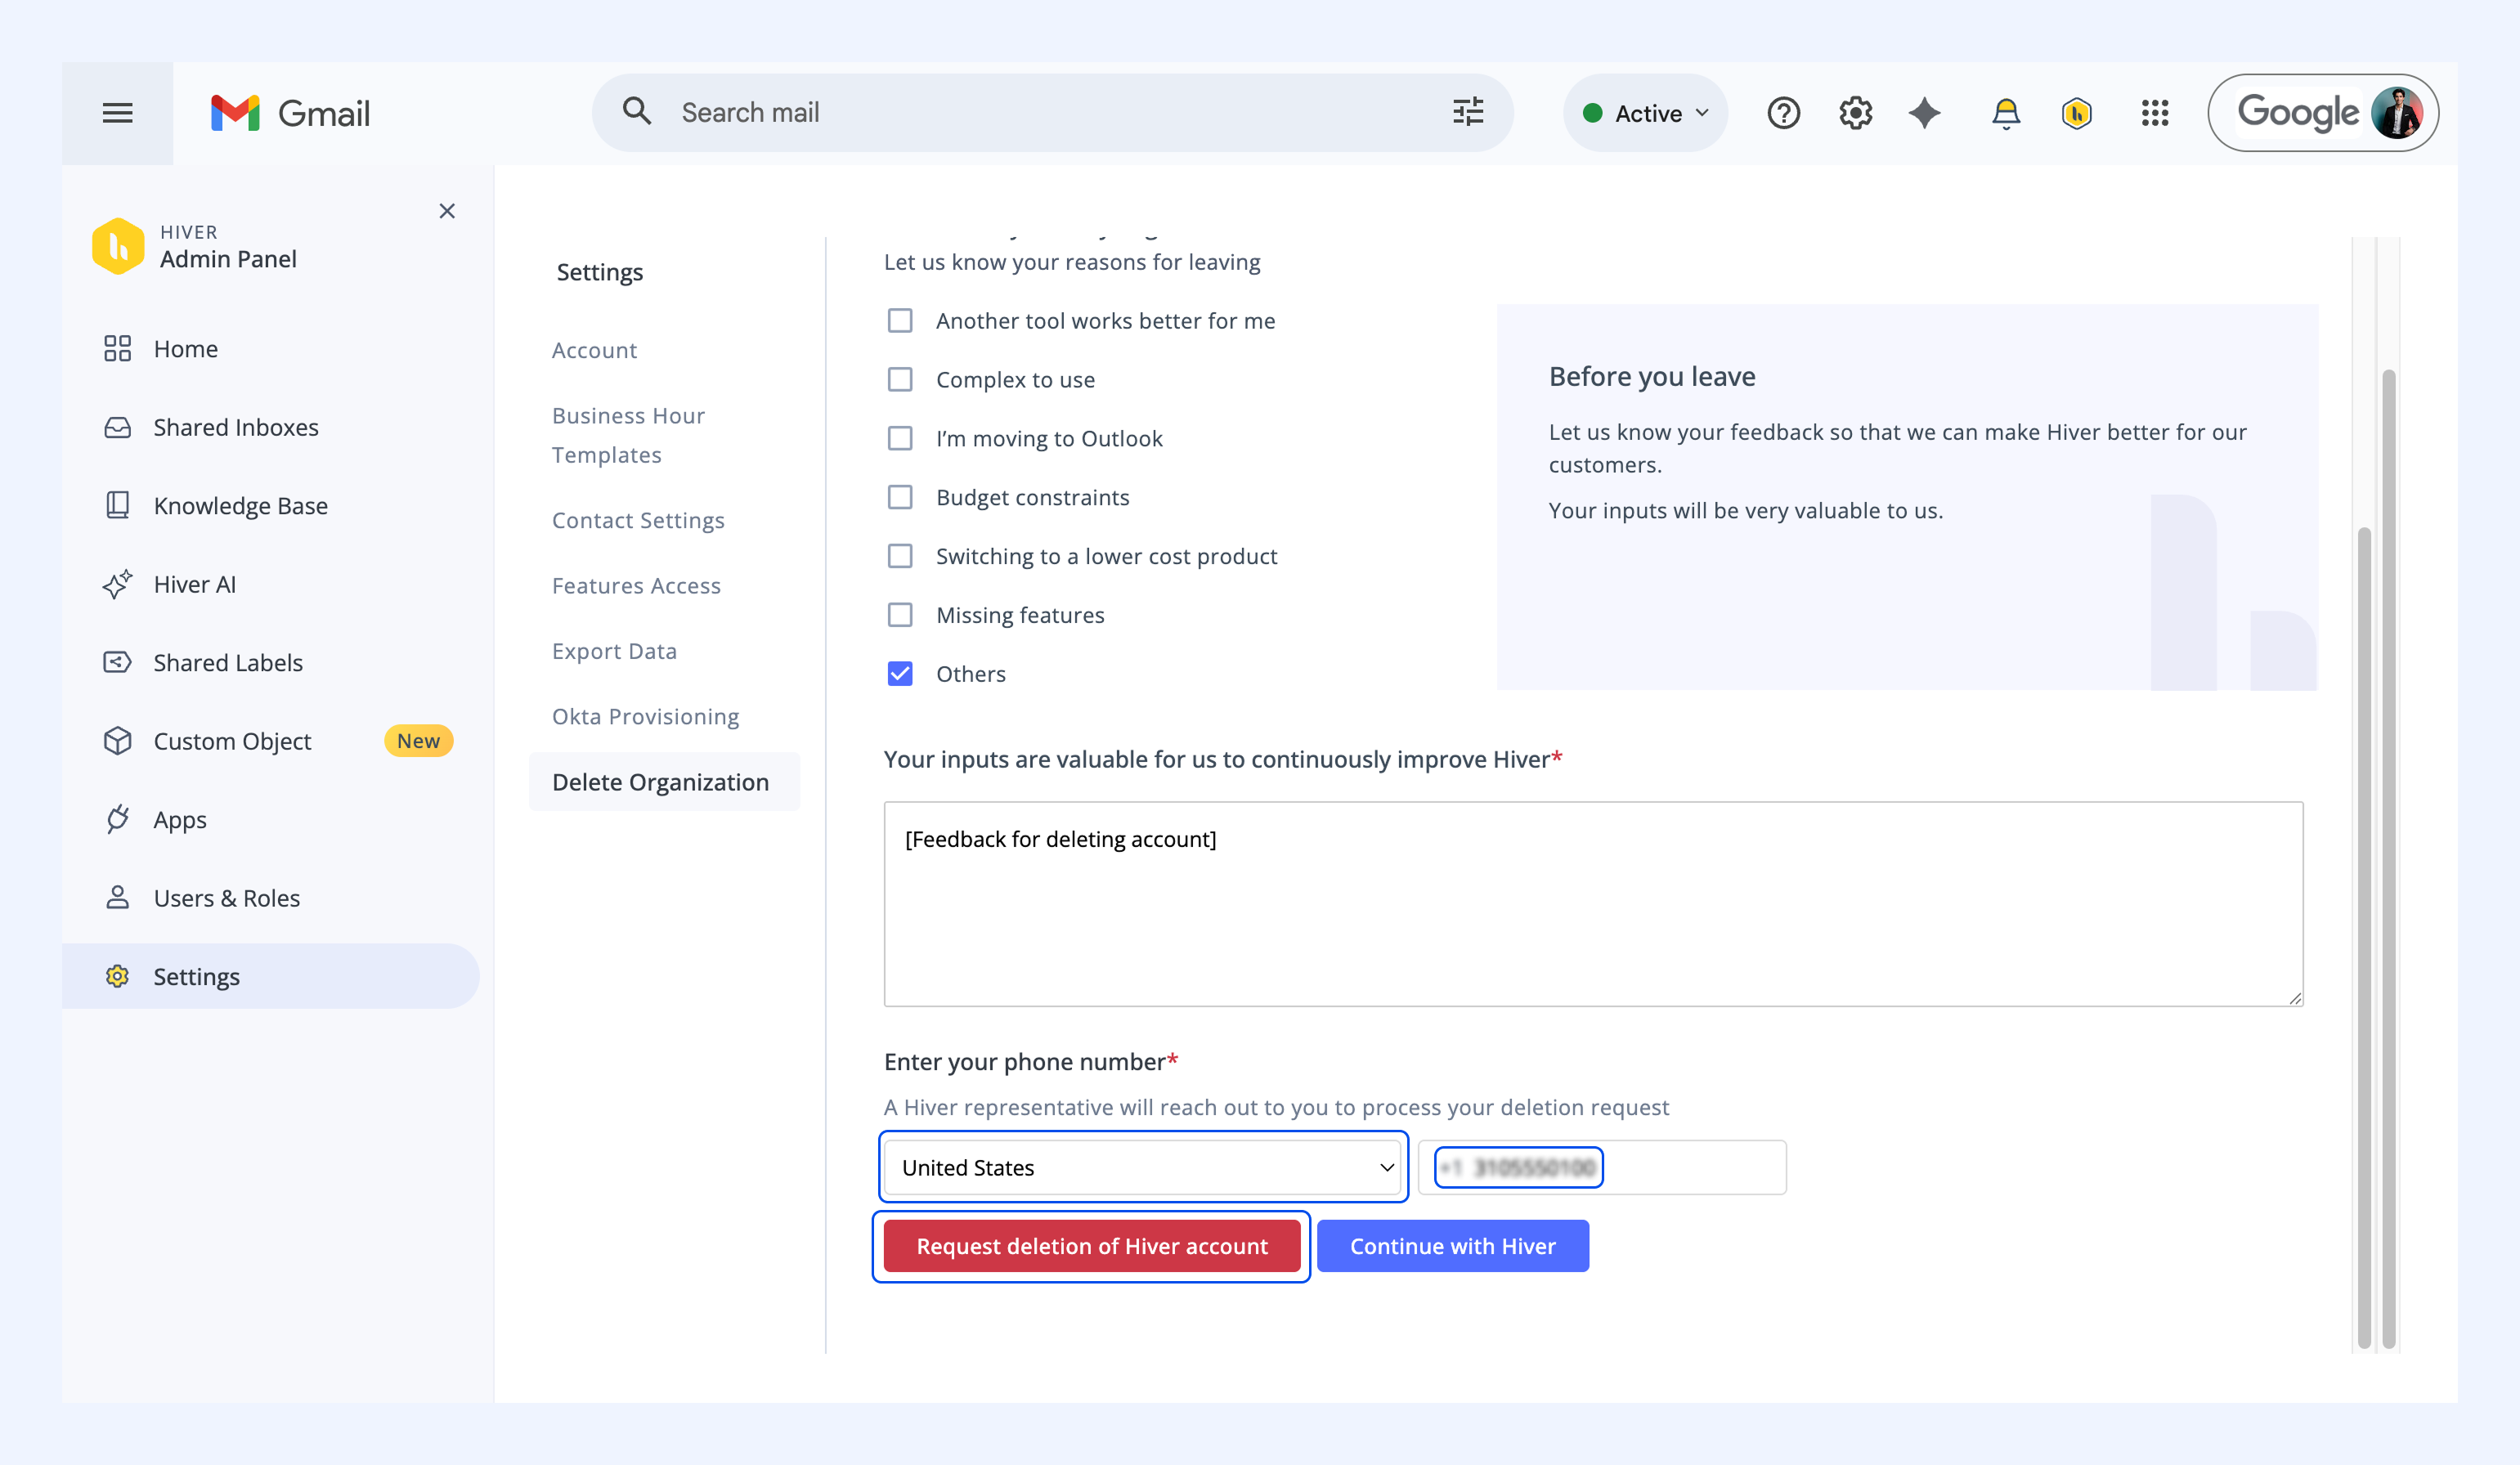
6. Provide feedback on your reasons for leaving.
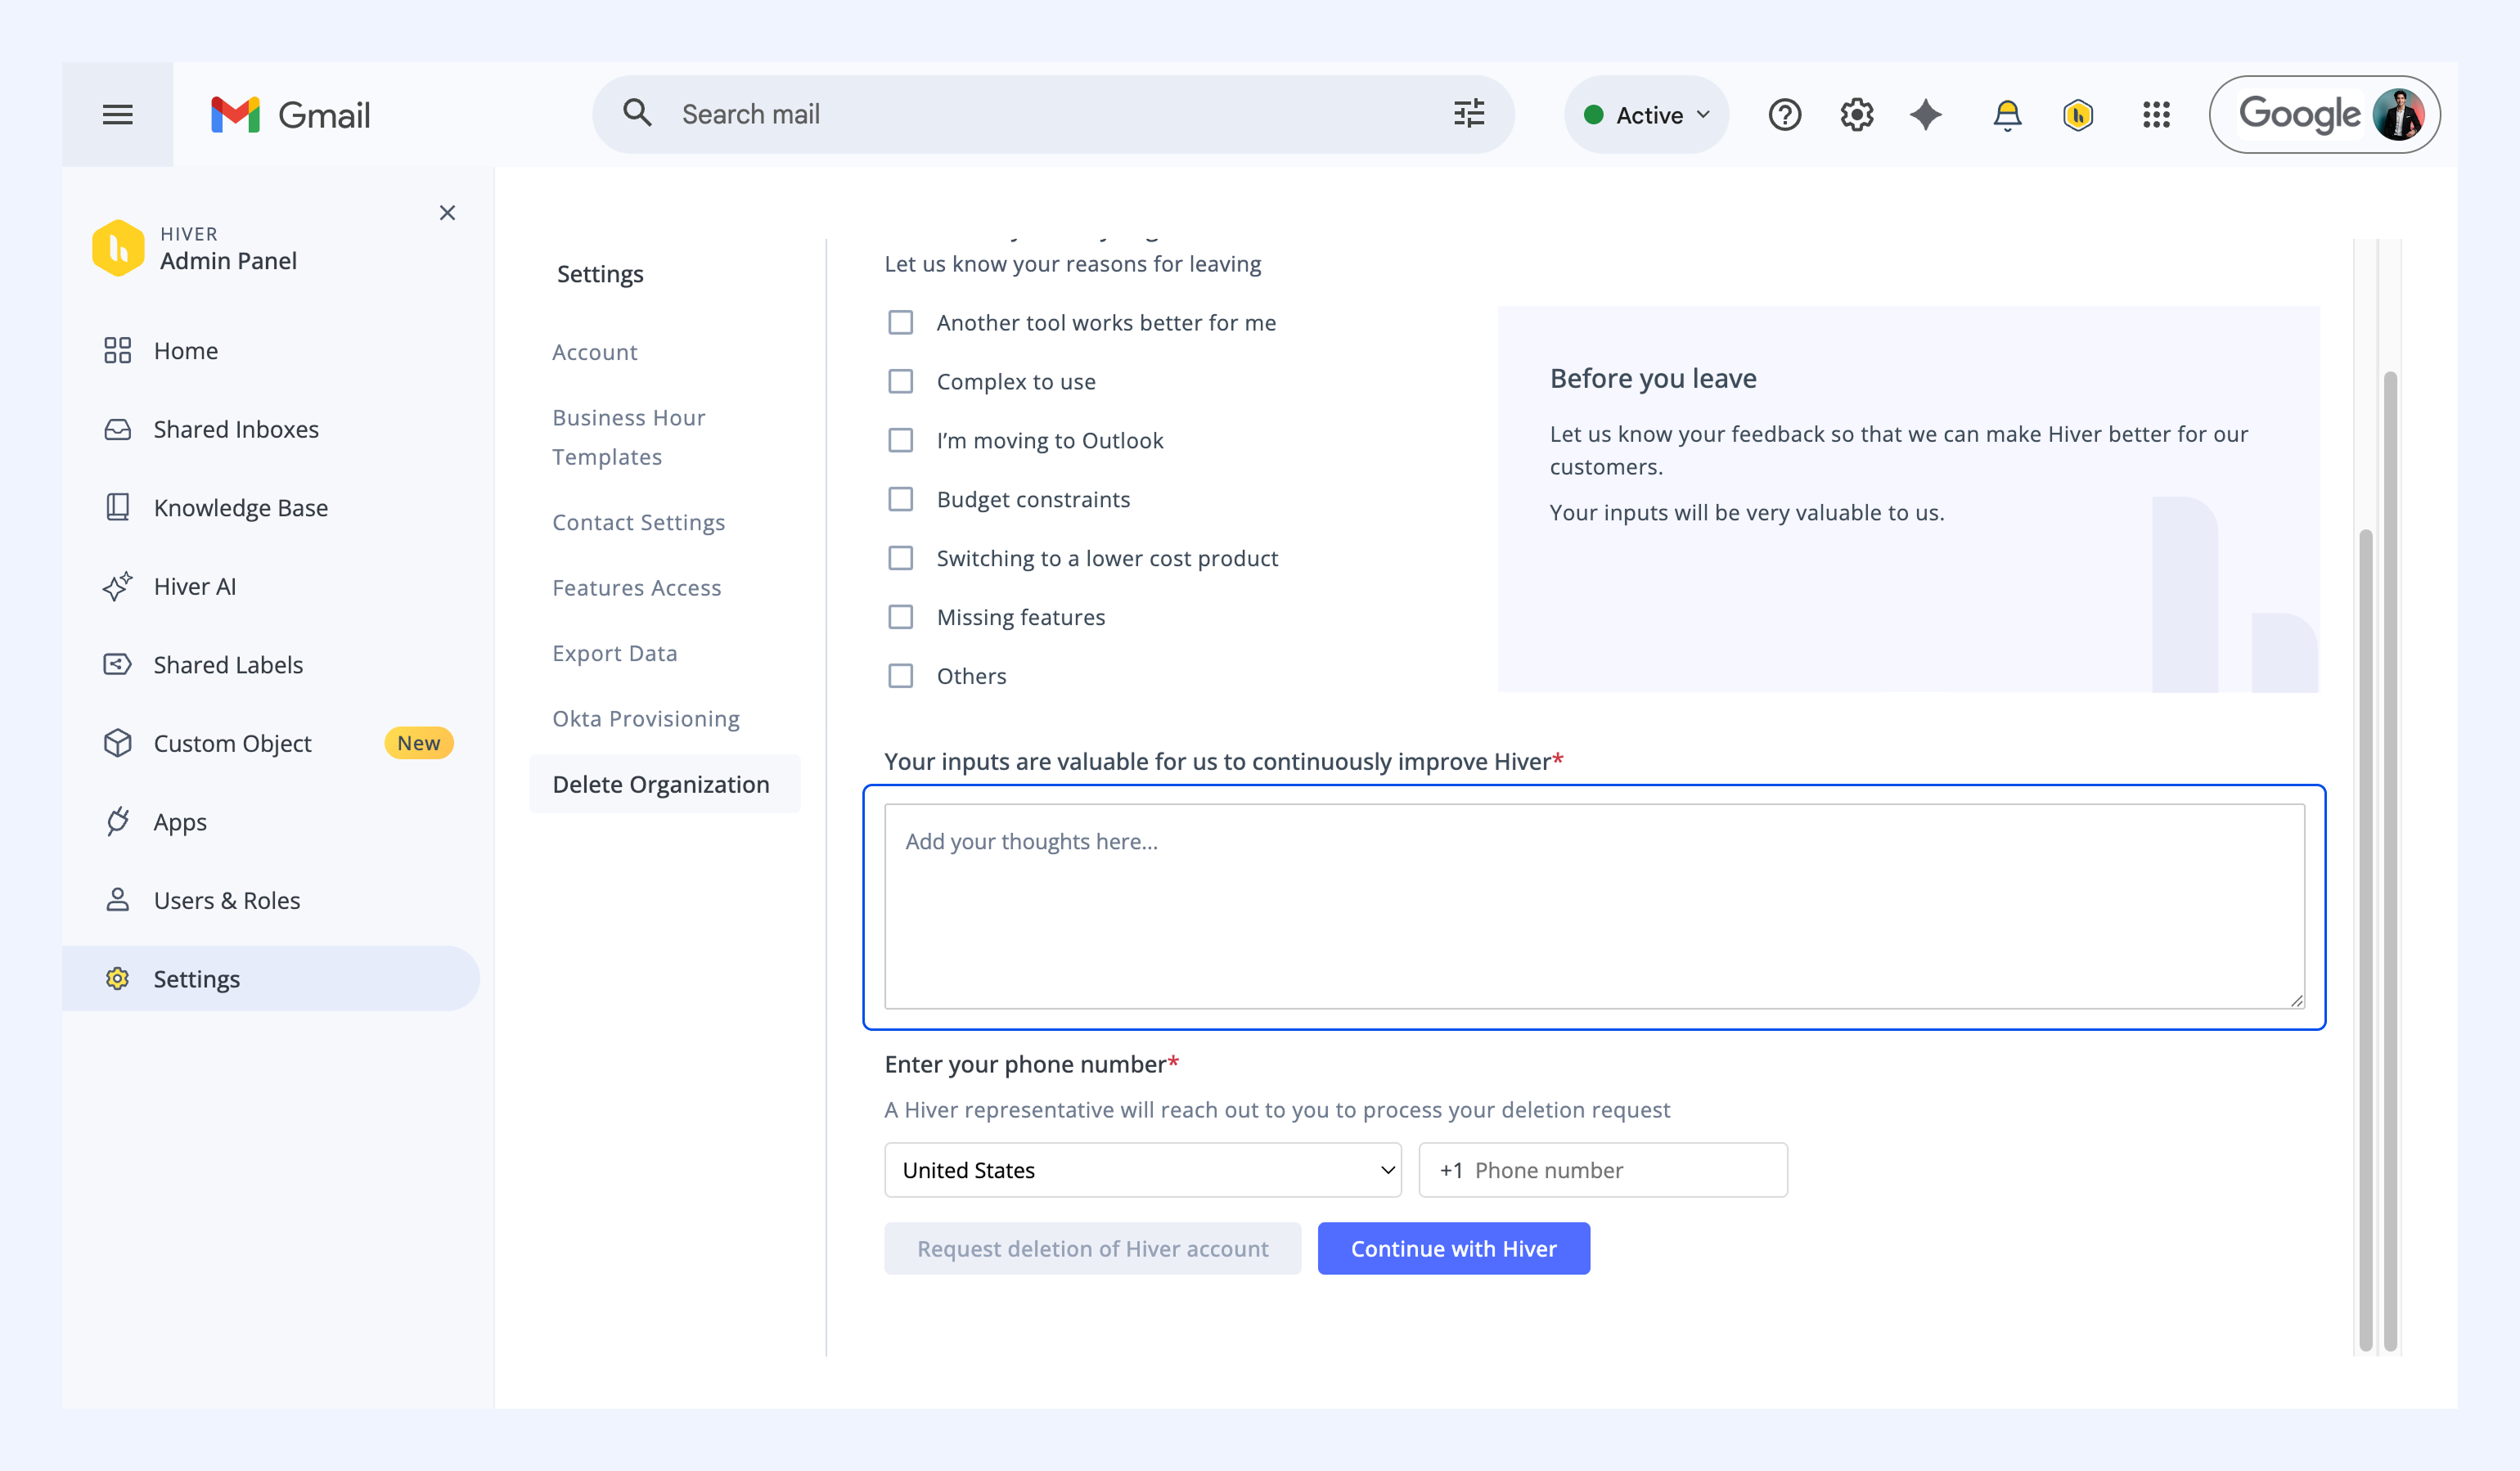
7. Enter your phone number. A Hiver representative will reach out to you to process your deletion request.
8. Click Request deletion of Hiver account.
Note: If your account is due for renewal in the next few days, you may be charged during this period. We will issue a refund if this occurs.
Once you submit the deletion request, we will contact you shortly to complete the deletion process. We recommend taking a data export before requesting deletion. Learn more about exporting Hiver data.
What happens after deletion
After the Hiver team contacts you, we will begin your account deletion. You will receive an email notification when your account is deleted.
Deleting your Hiver account does not delete any labels or emails from Gmail accounts associated with Hiver. However, all Shared Inboxes and data created within Hiver (such as shared Notes and shared Templates) will be deleted.
Deleting the browser extension
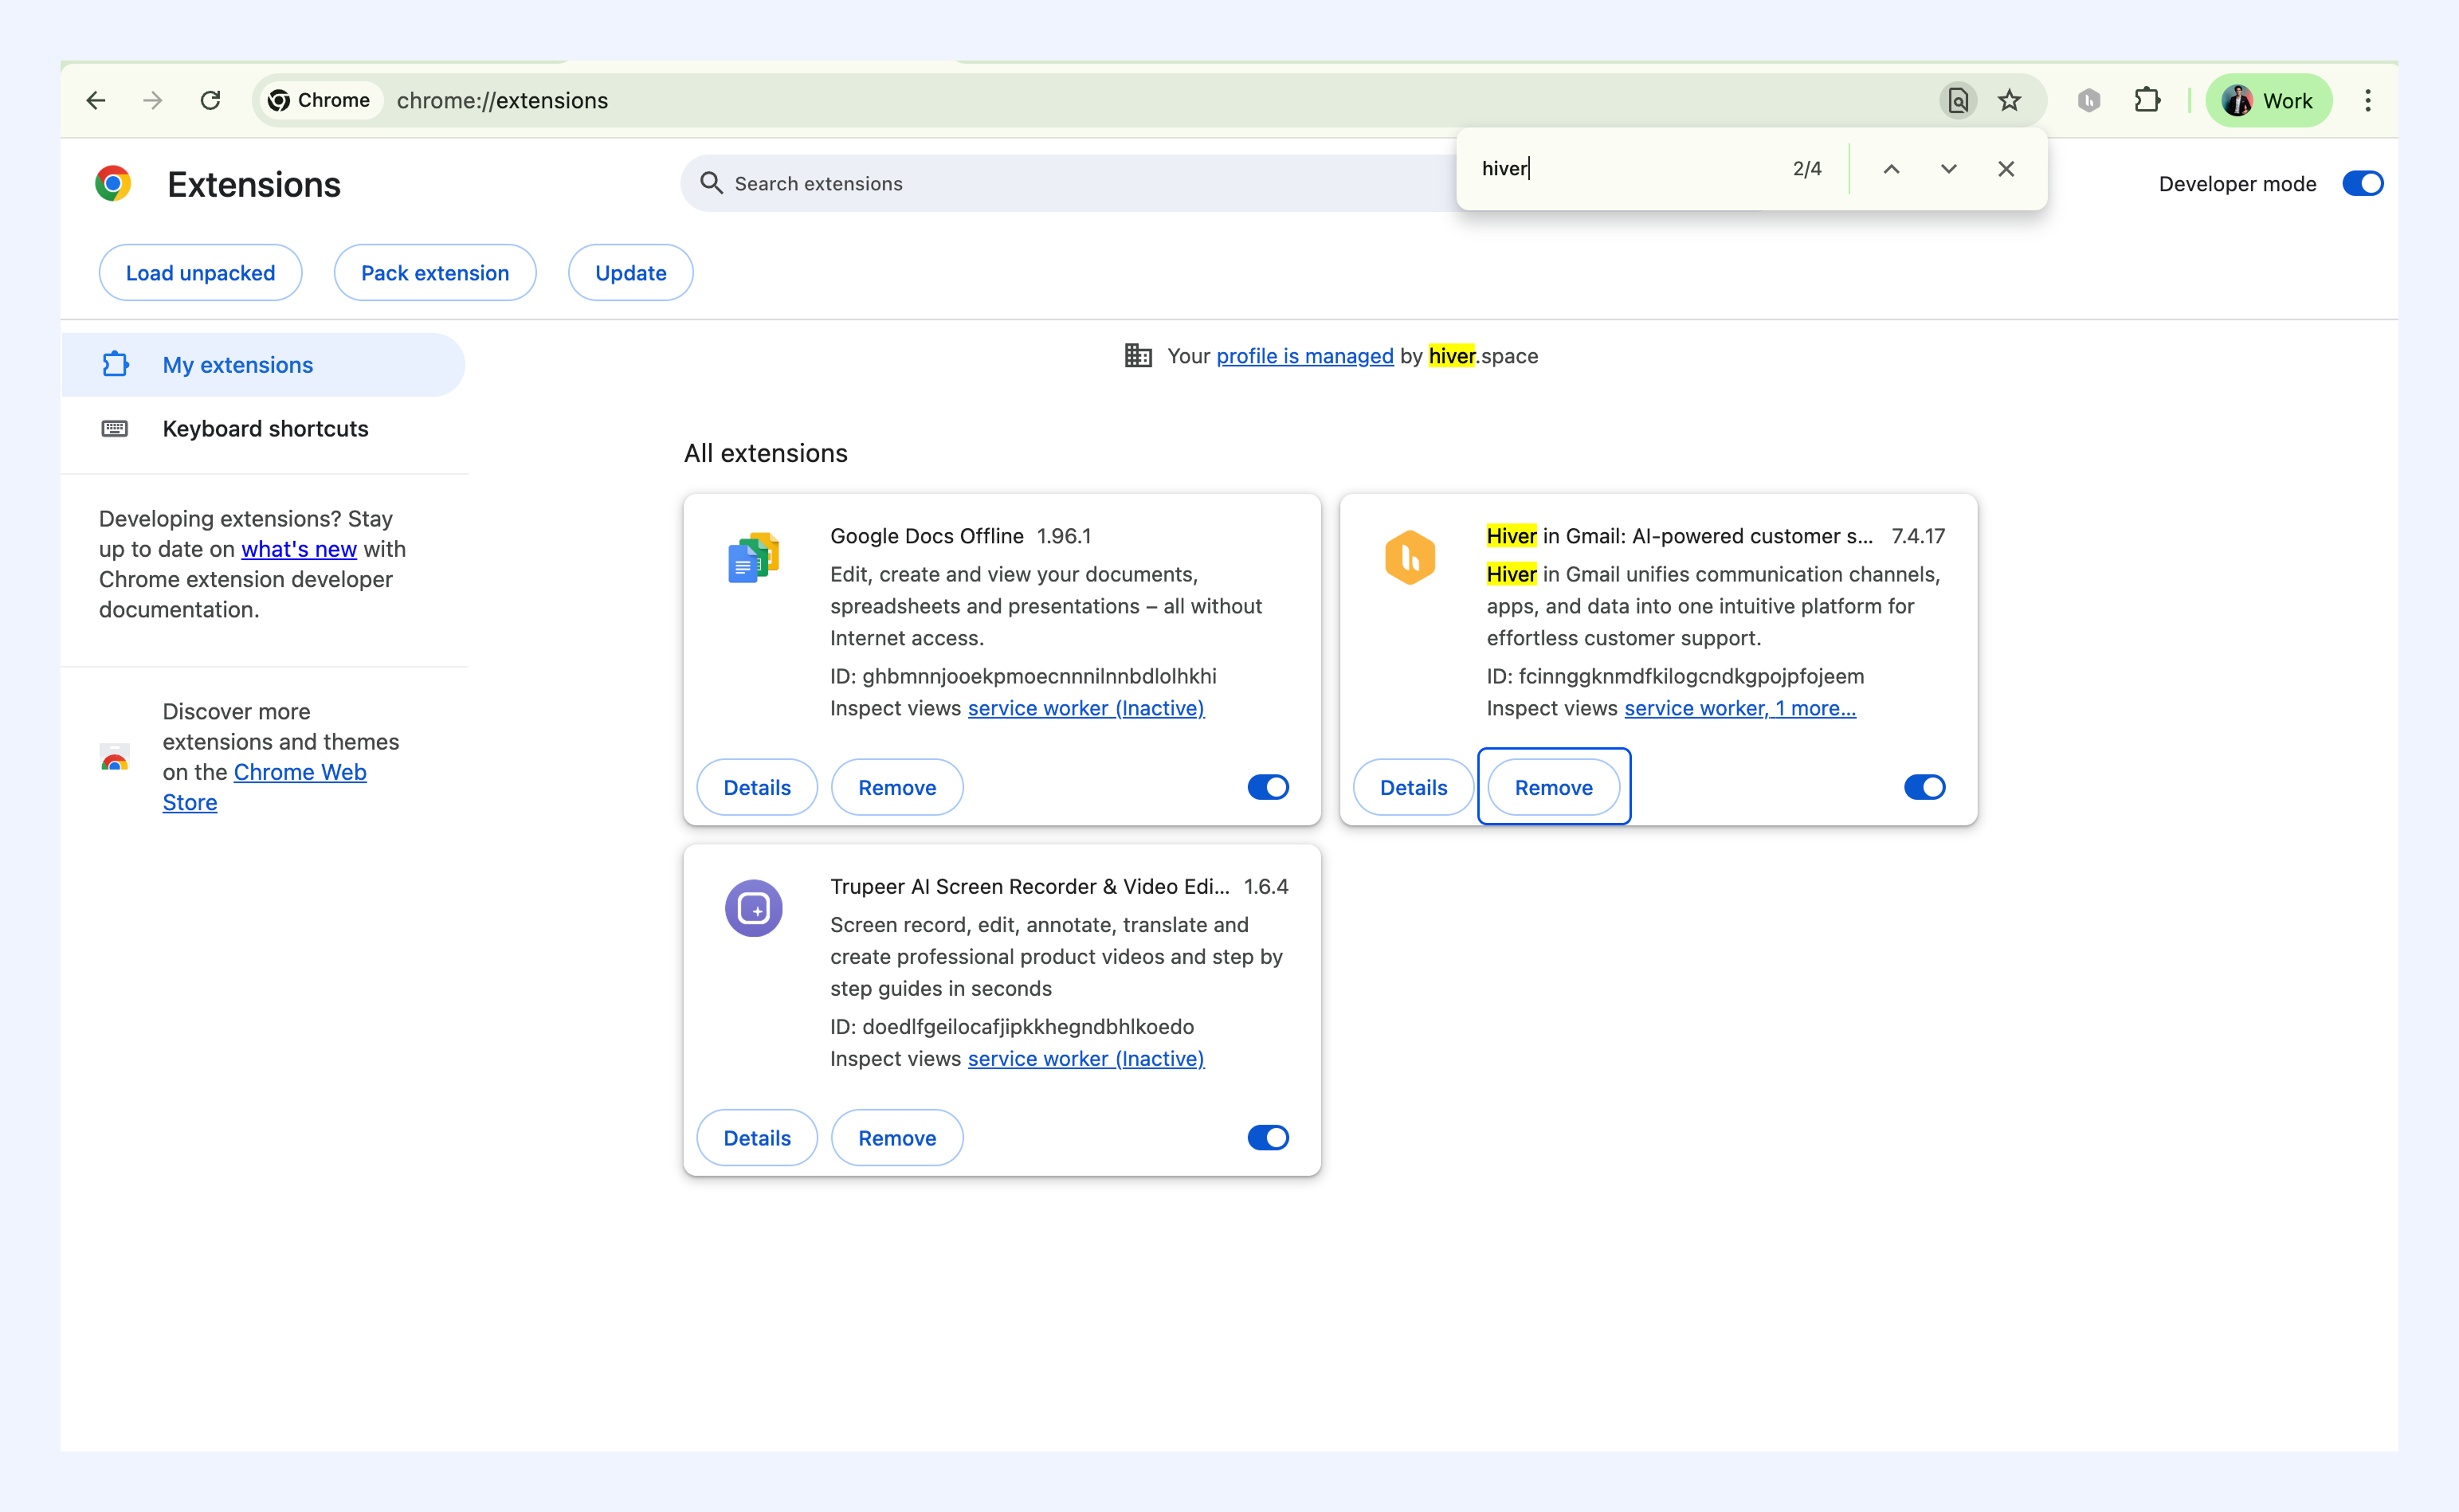
1. Go to chrome://extensions.
2. Press Ctrl + F to search for Hiver.
3. Click the Remove button to delete the Hiver extension.