Getting started with AI Tagging
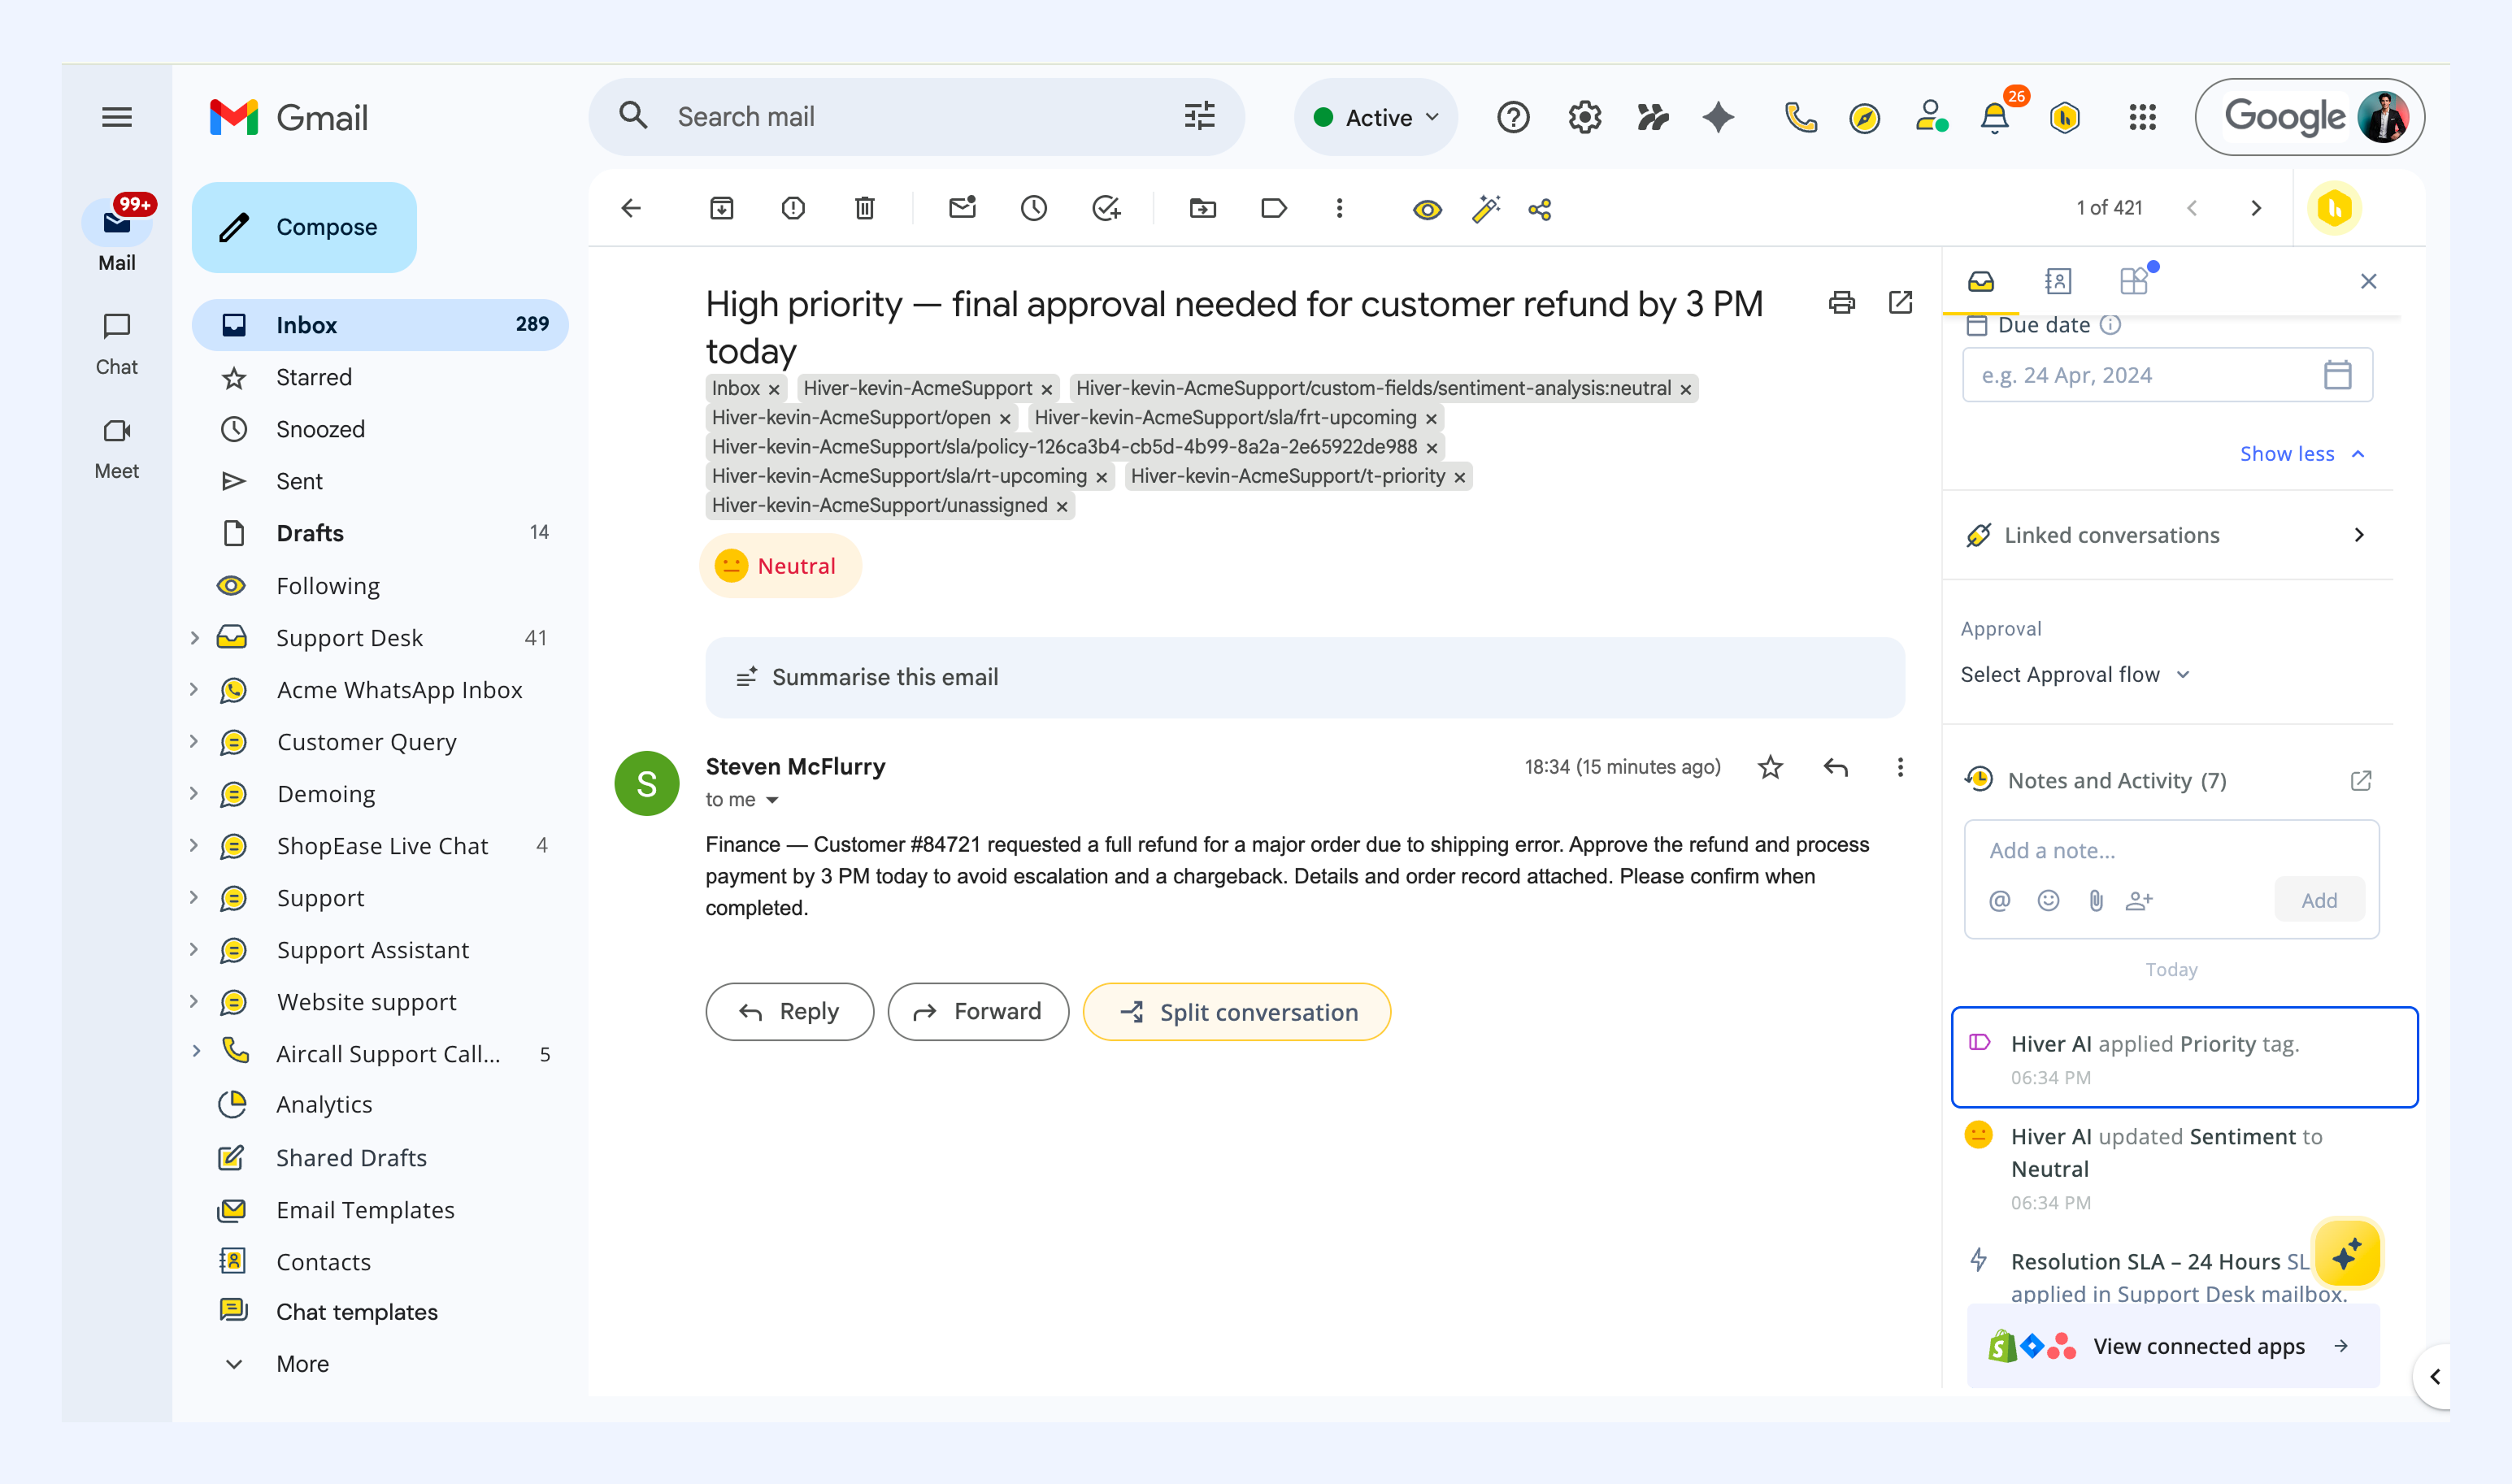
Manual tagging is time-consuming, inconsistent, and often skipped during busy hours. Hiver’s AI Tagging automates this process by applying relevant Tags based on the content of incoming conversations, saving time, improving accuracy, and keeping your inbox organized.
This article guides you through the process of using AI to add category-based Tags, including how to train it and maintain its accuracy over time.
What are category-based Tags
Hiver's AI Tagging automatically classifies conversations by adding category-based Tags, such as a billing issue, feature request, or bug report. Once trained on your frequently used Tags and their associated conversations, Hiver AI automatically applies the most relevant Category-based Tag to each new conversation.
For example:
- A refund-related email gets tagged as a Billing issue
- A usability complaint gets tagged as a Bug report
- A request for a new feature gets tagged as a Feature request
This allows you to streamline triaging, enable better routing, and generate cleaner reports, without agents having to tag conversations manually.
How does AI Tagging work
Here’s how Hiver AI applies Tags in your inbox:
- AI only evaluates the first email in a new conversation (not replies or follow-ups).
- It uses your manually tagged conversations to learn which Tags match which content.
- If there's a strong match, AI applies the most relevant Tag.
- Only one Tag is applied per conversation.
- If the message is too vague or untrained, tagging is skipped.
- This ensures tagging is helpful and relevant without overloading the conversation with multiple labels.
Note: Hiver does not train AI models with your customer emails. Training happens only within your Hiver account, and your data is never shared outside it.
Prerequisites
To start using AI Tagging, you will need to ensure these conditions are met:
- Plan: AI Tagging is available only in the Pro and Elite plans for customers who signed up after December 22, 2025.
- Access: You need to be a Shared Inbox admin or have Tag management permissions.
- Tag availability: Only Tags in use are eligible for AI Tagging. Hiver AI will need at least 10 associated conversations per Tag for training. If your Tag doesn't meet this threshold, encourage your team to tag conversations manually. Manual tagging must follow a shared logic to train AI effectively.
Setting up AI Tagging
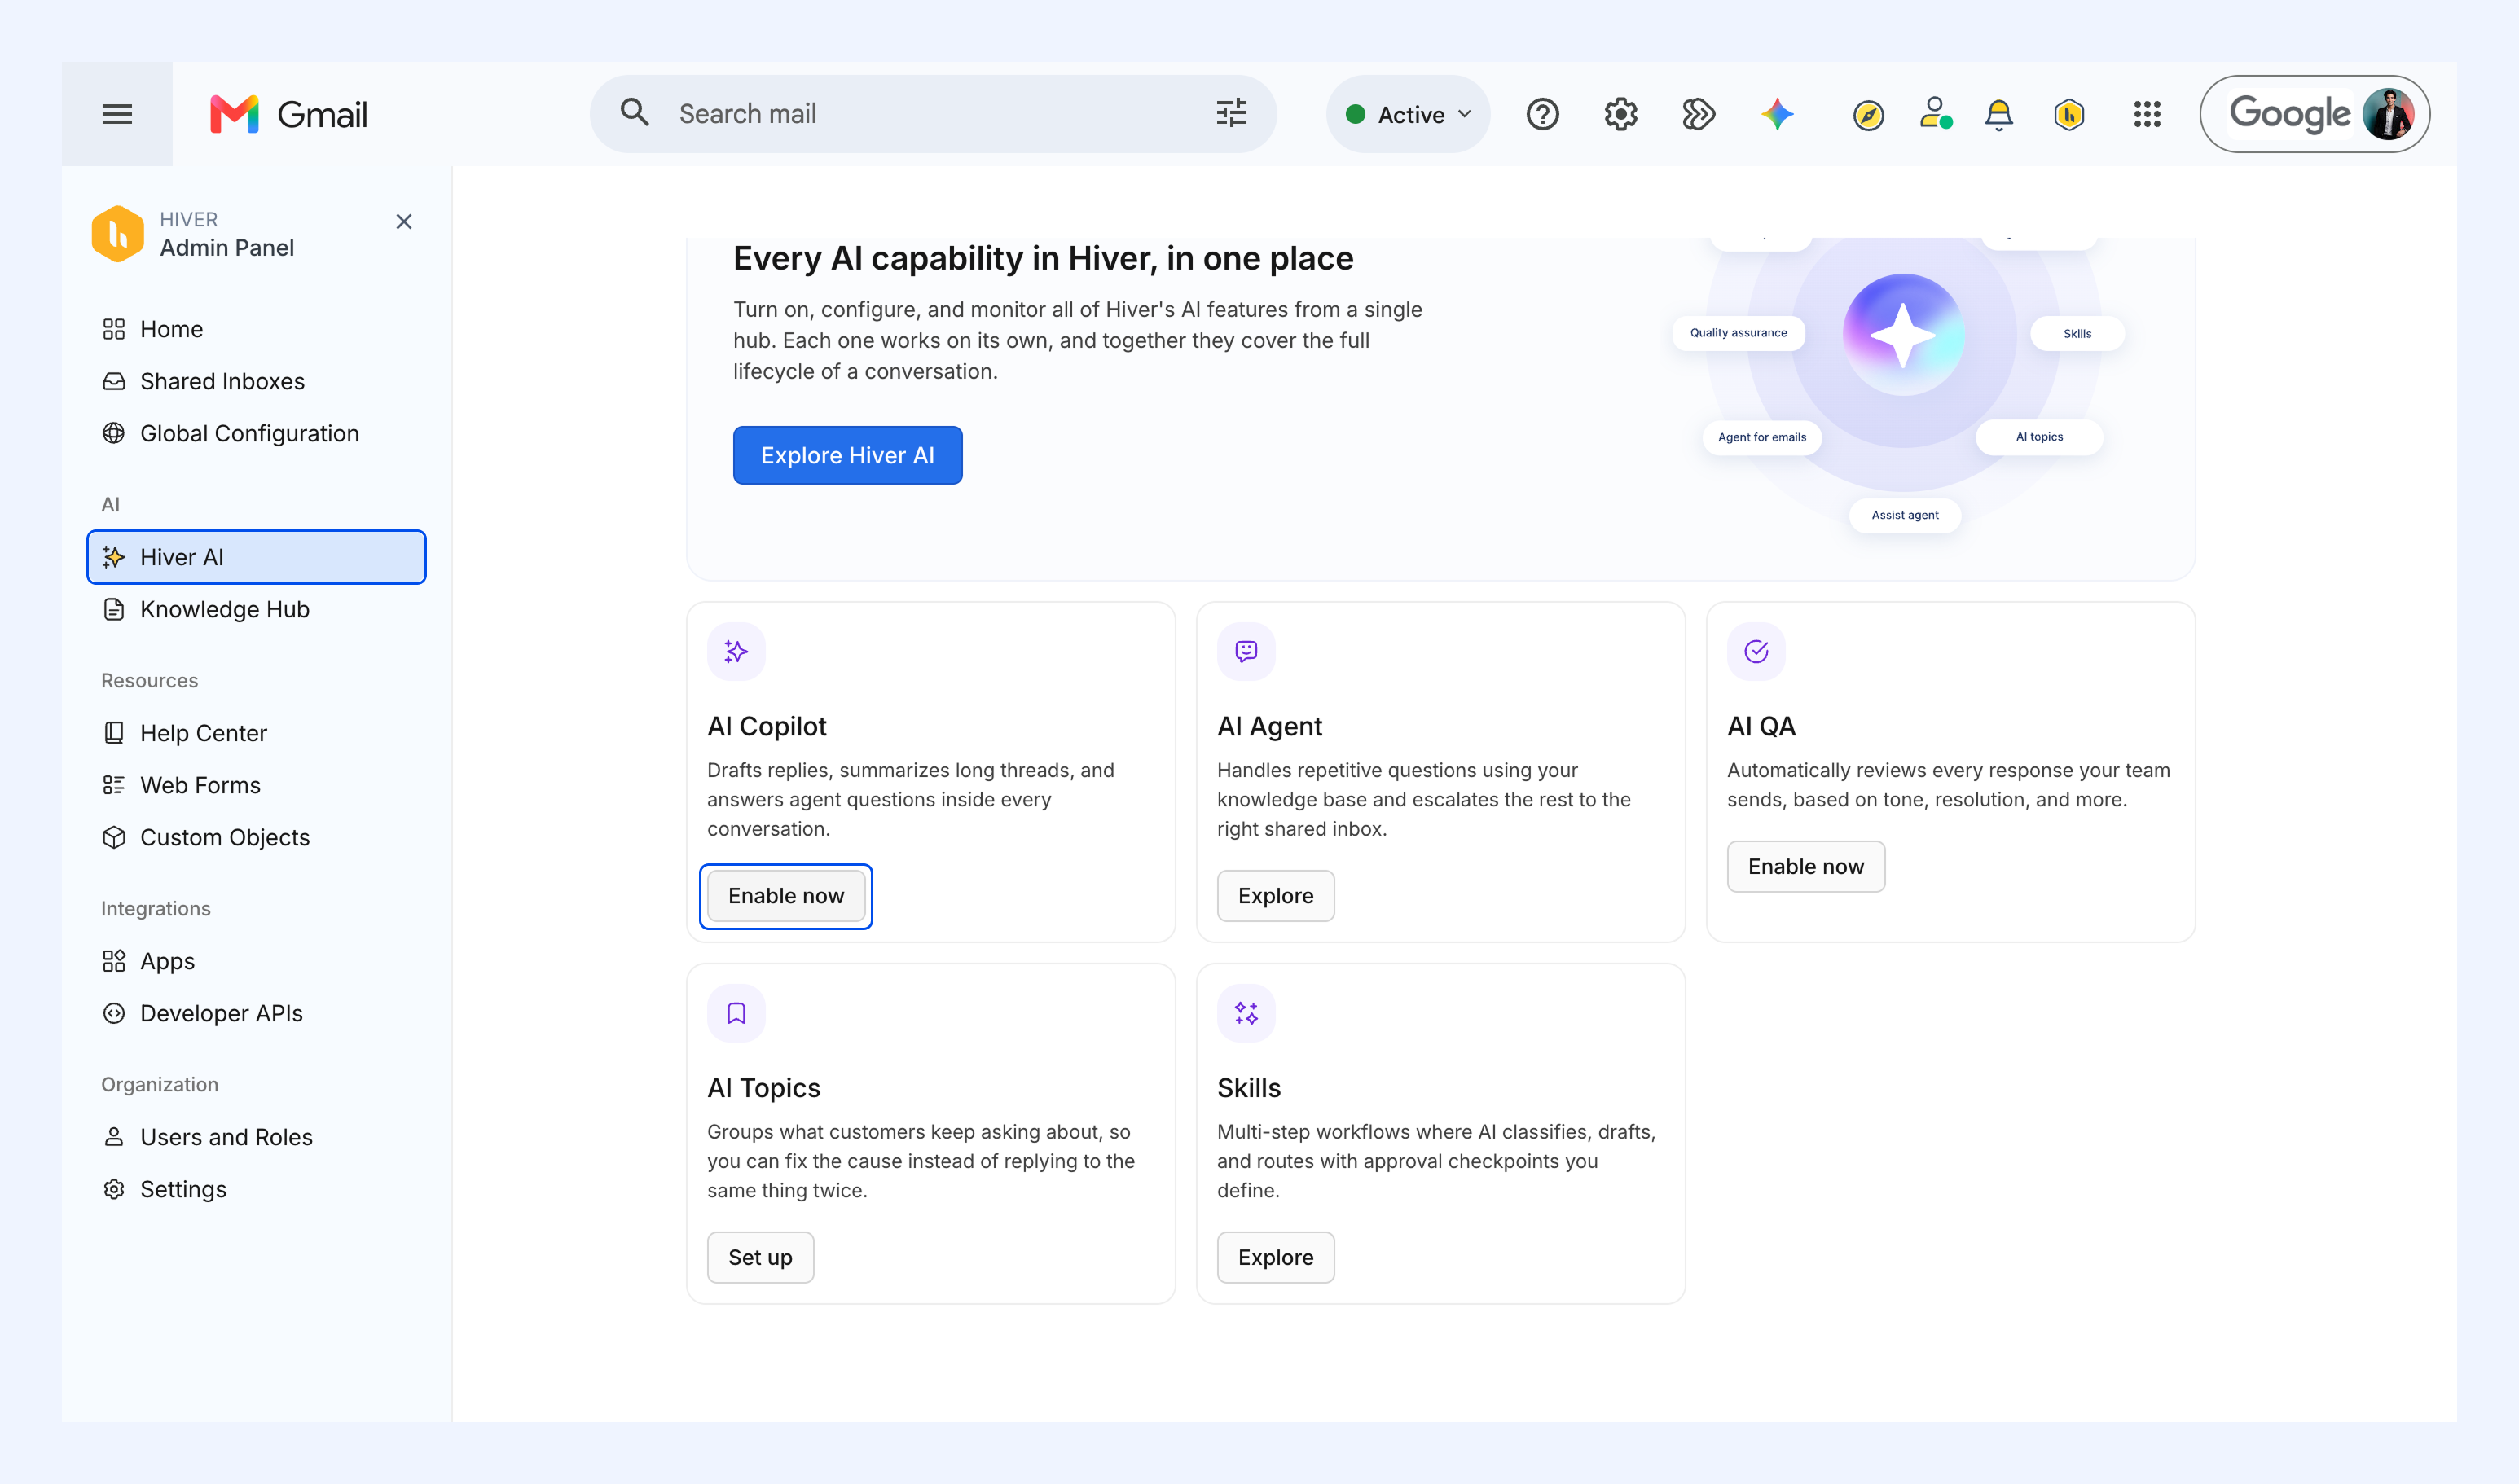
1. Go to Admin Panel → Hiver AI, click Enable now under AI Copilot.
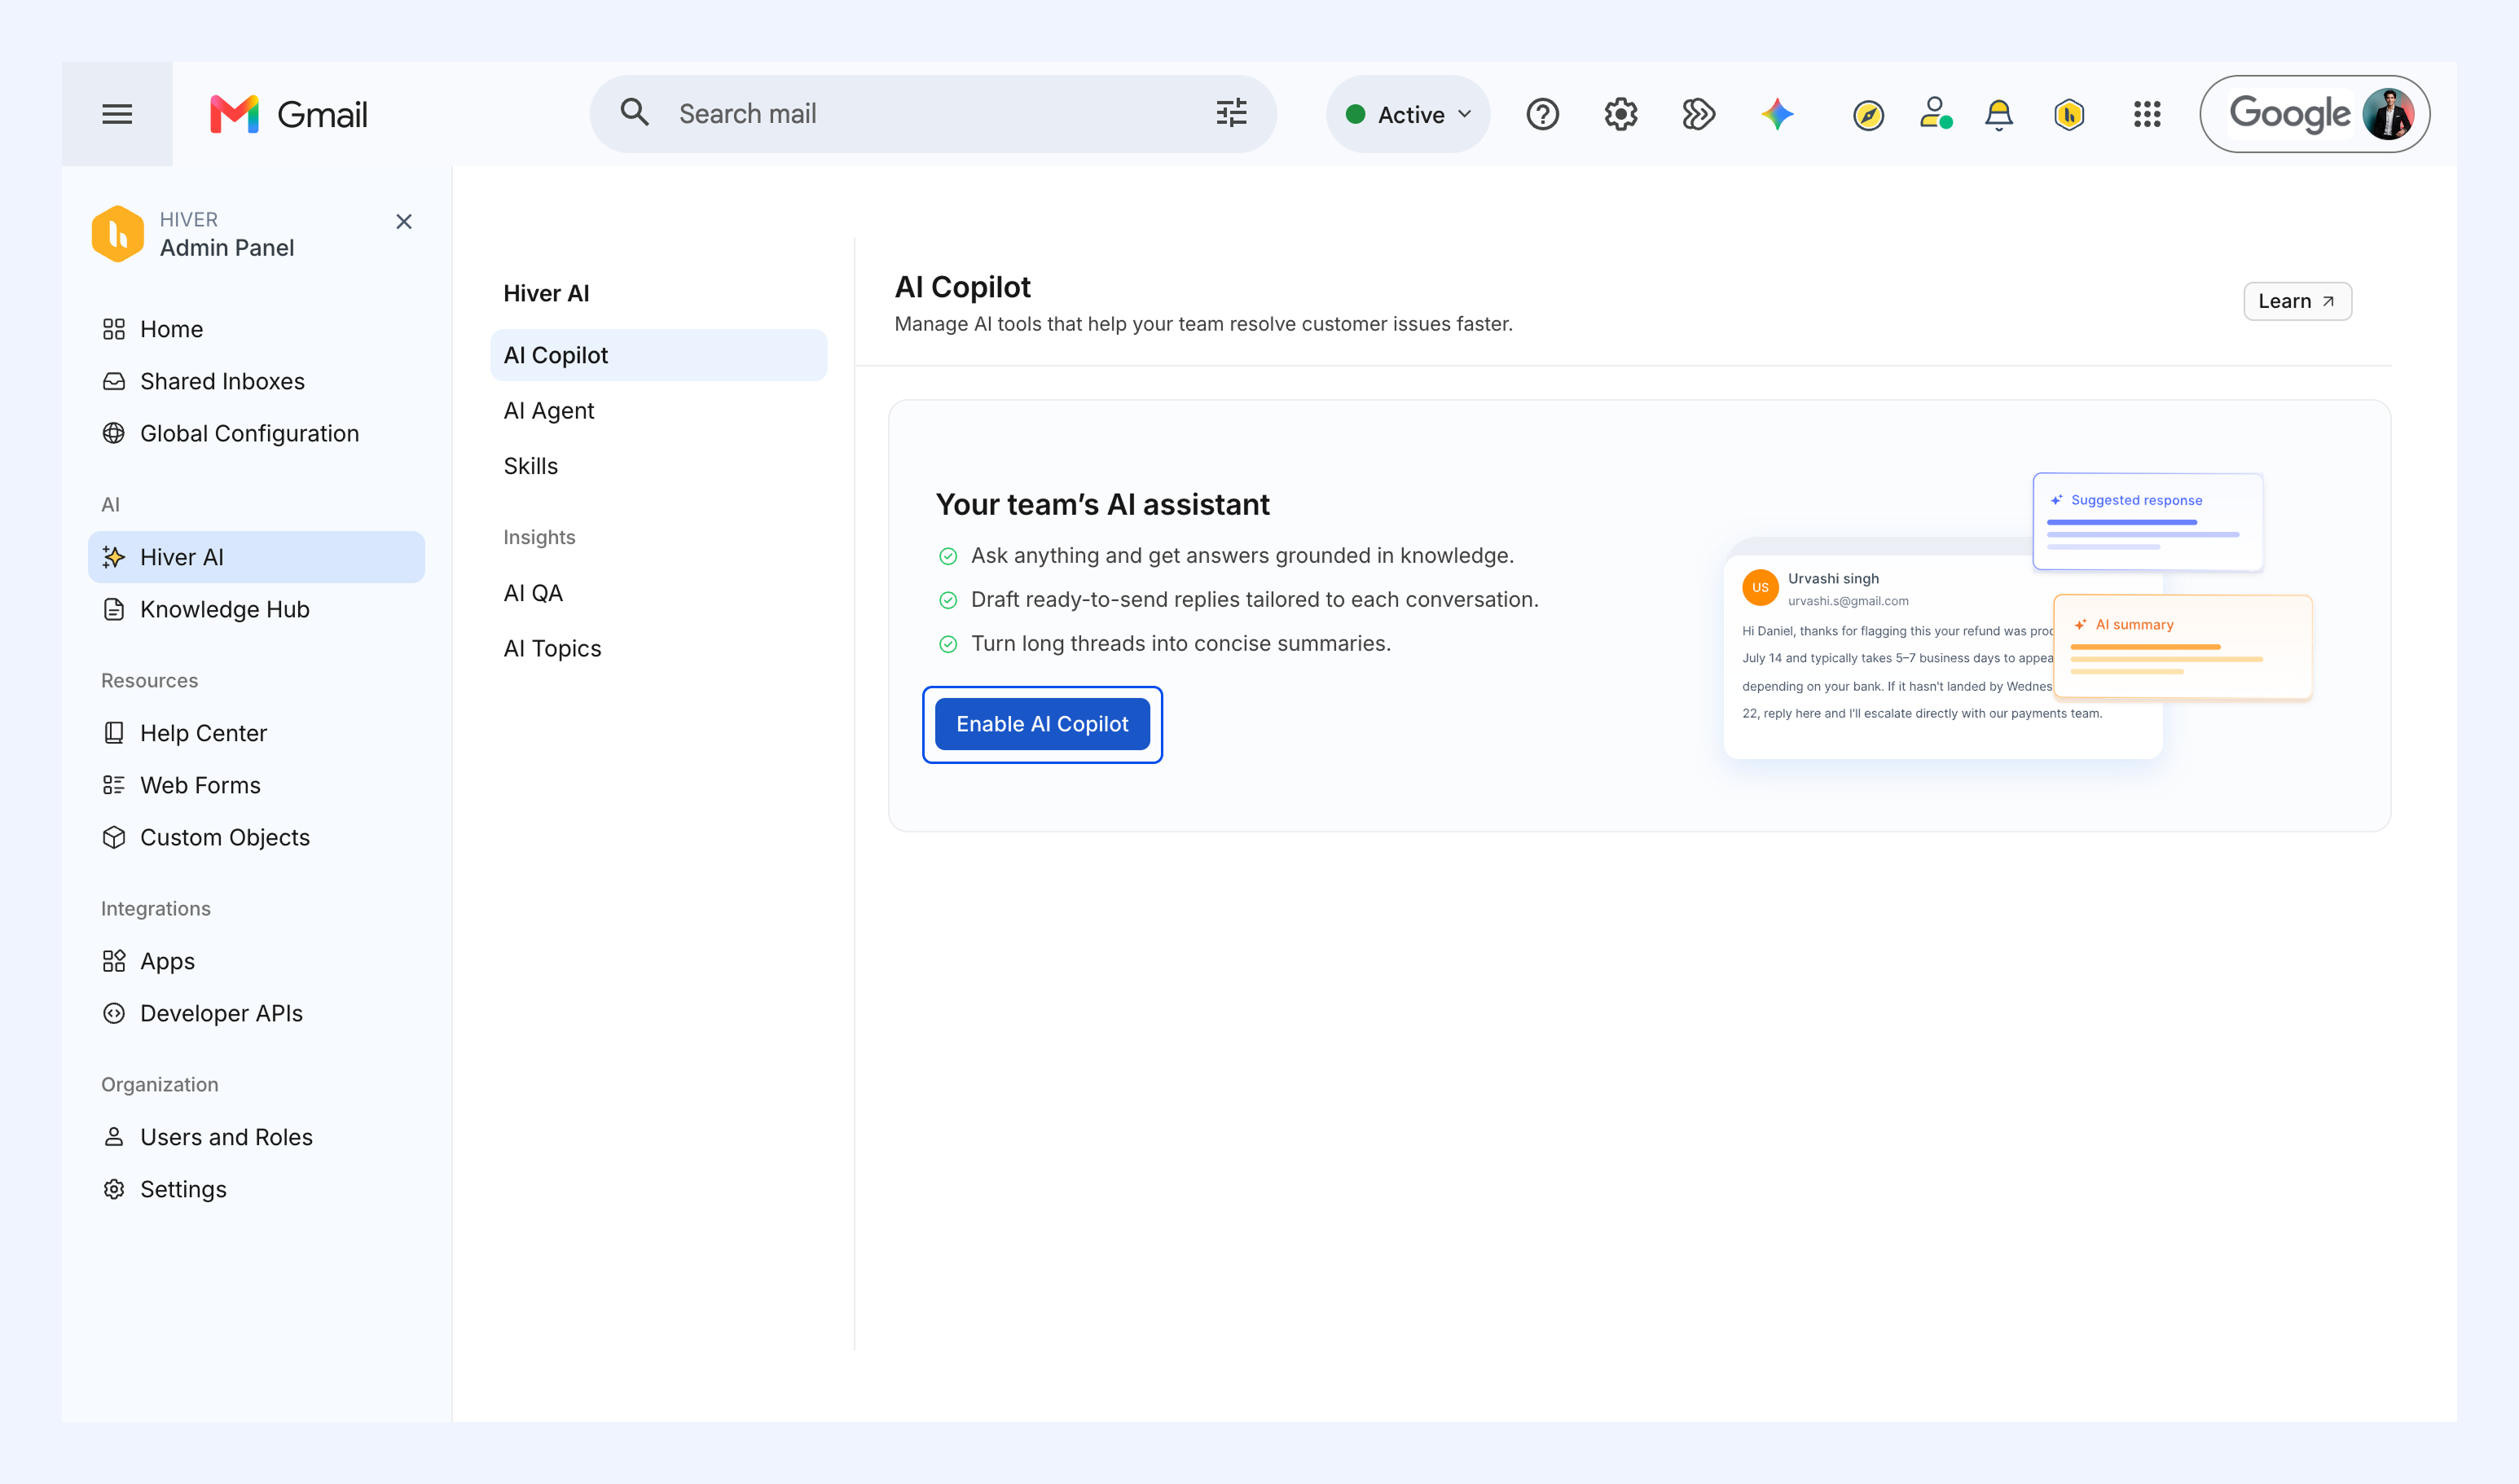
2. Click Enable AI Copilot.
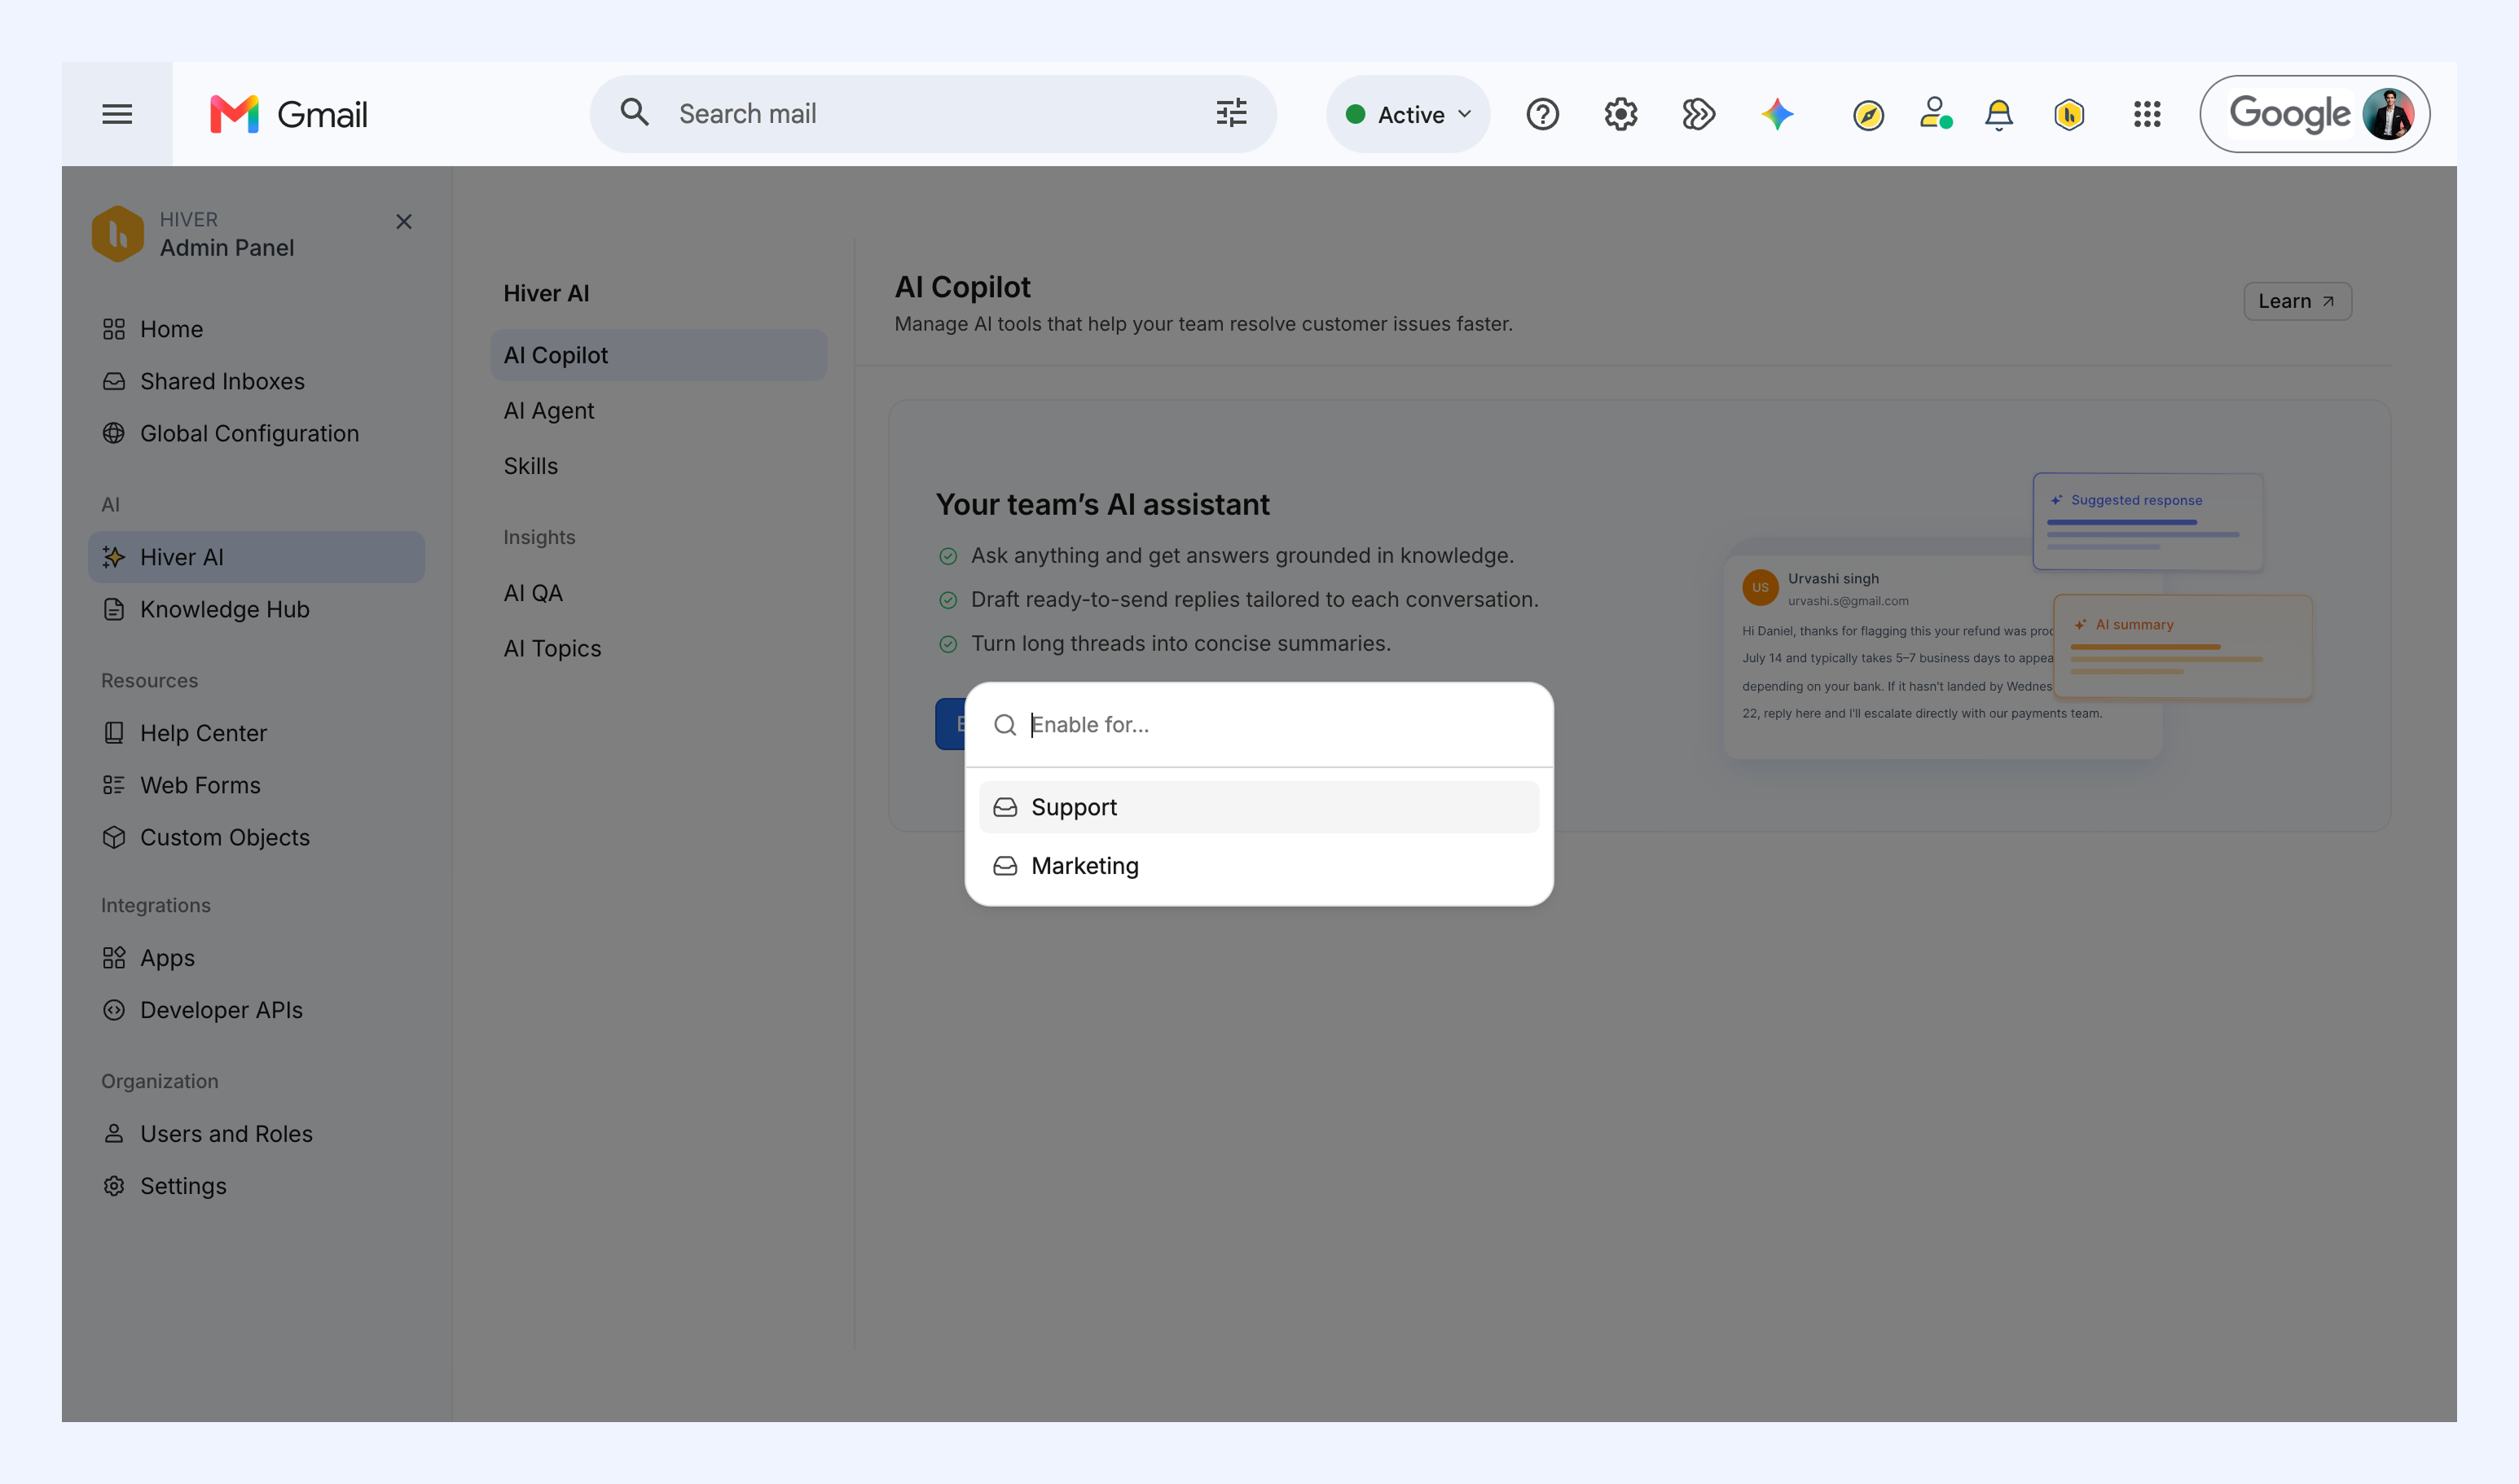
3. Select the Shared Inbox where you want to enable AI Tagging.
4. Under Additional AI tools, go to AI Tagging and click Configure.
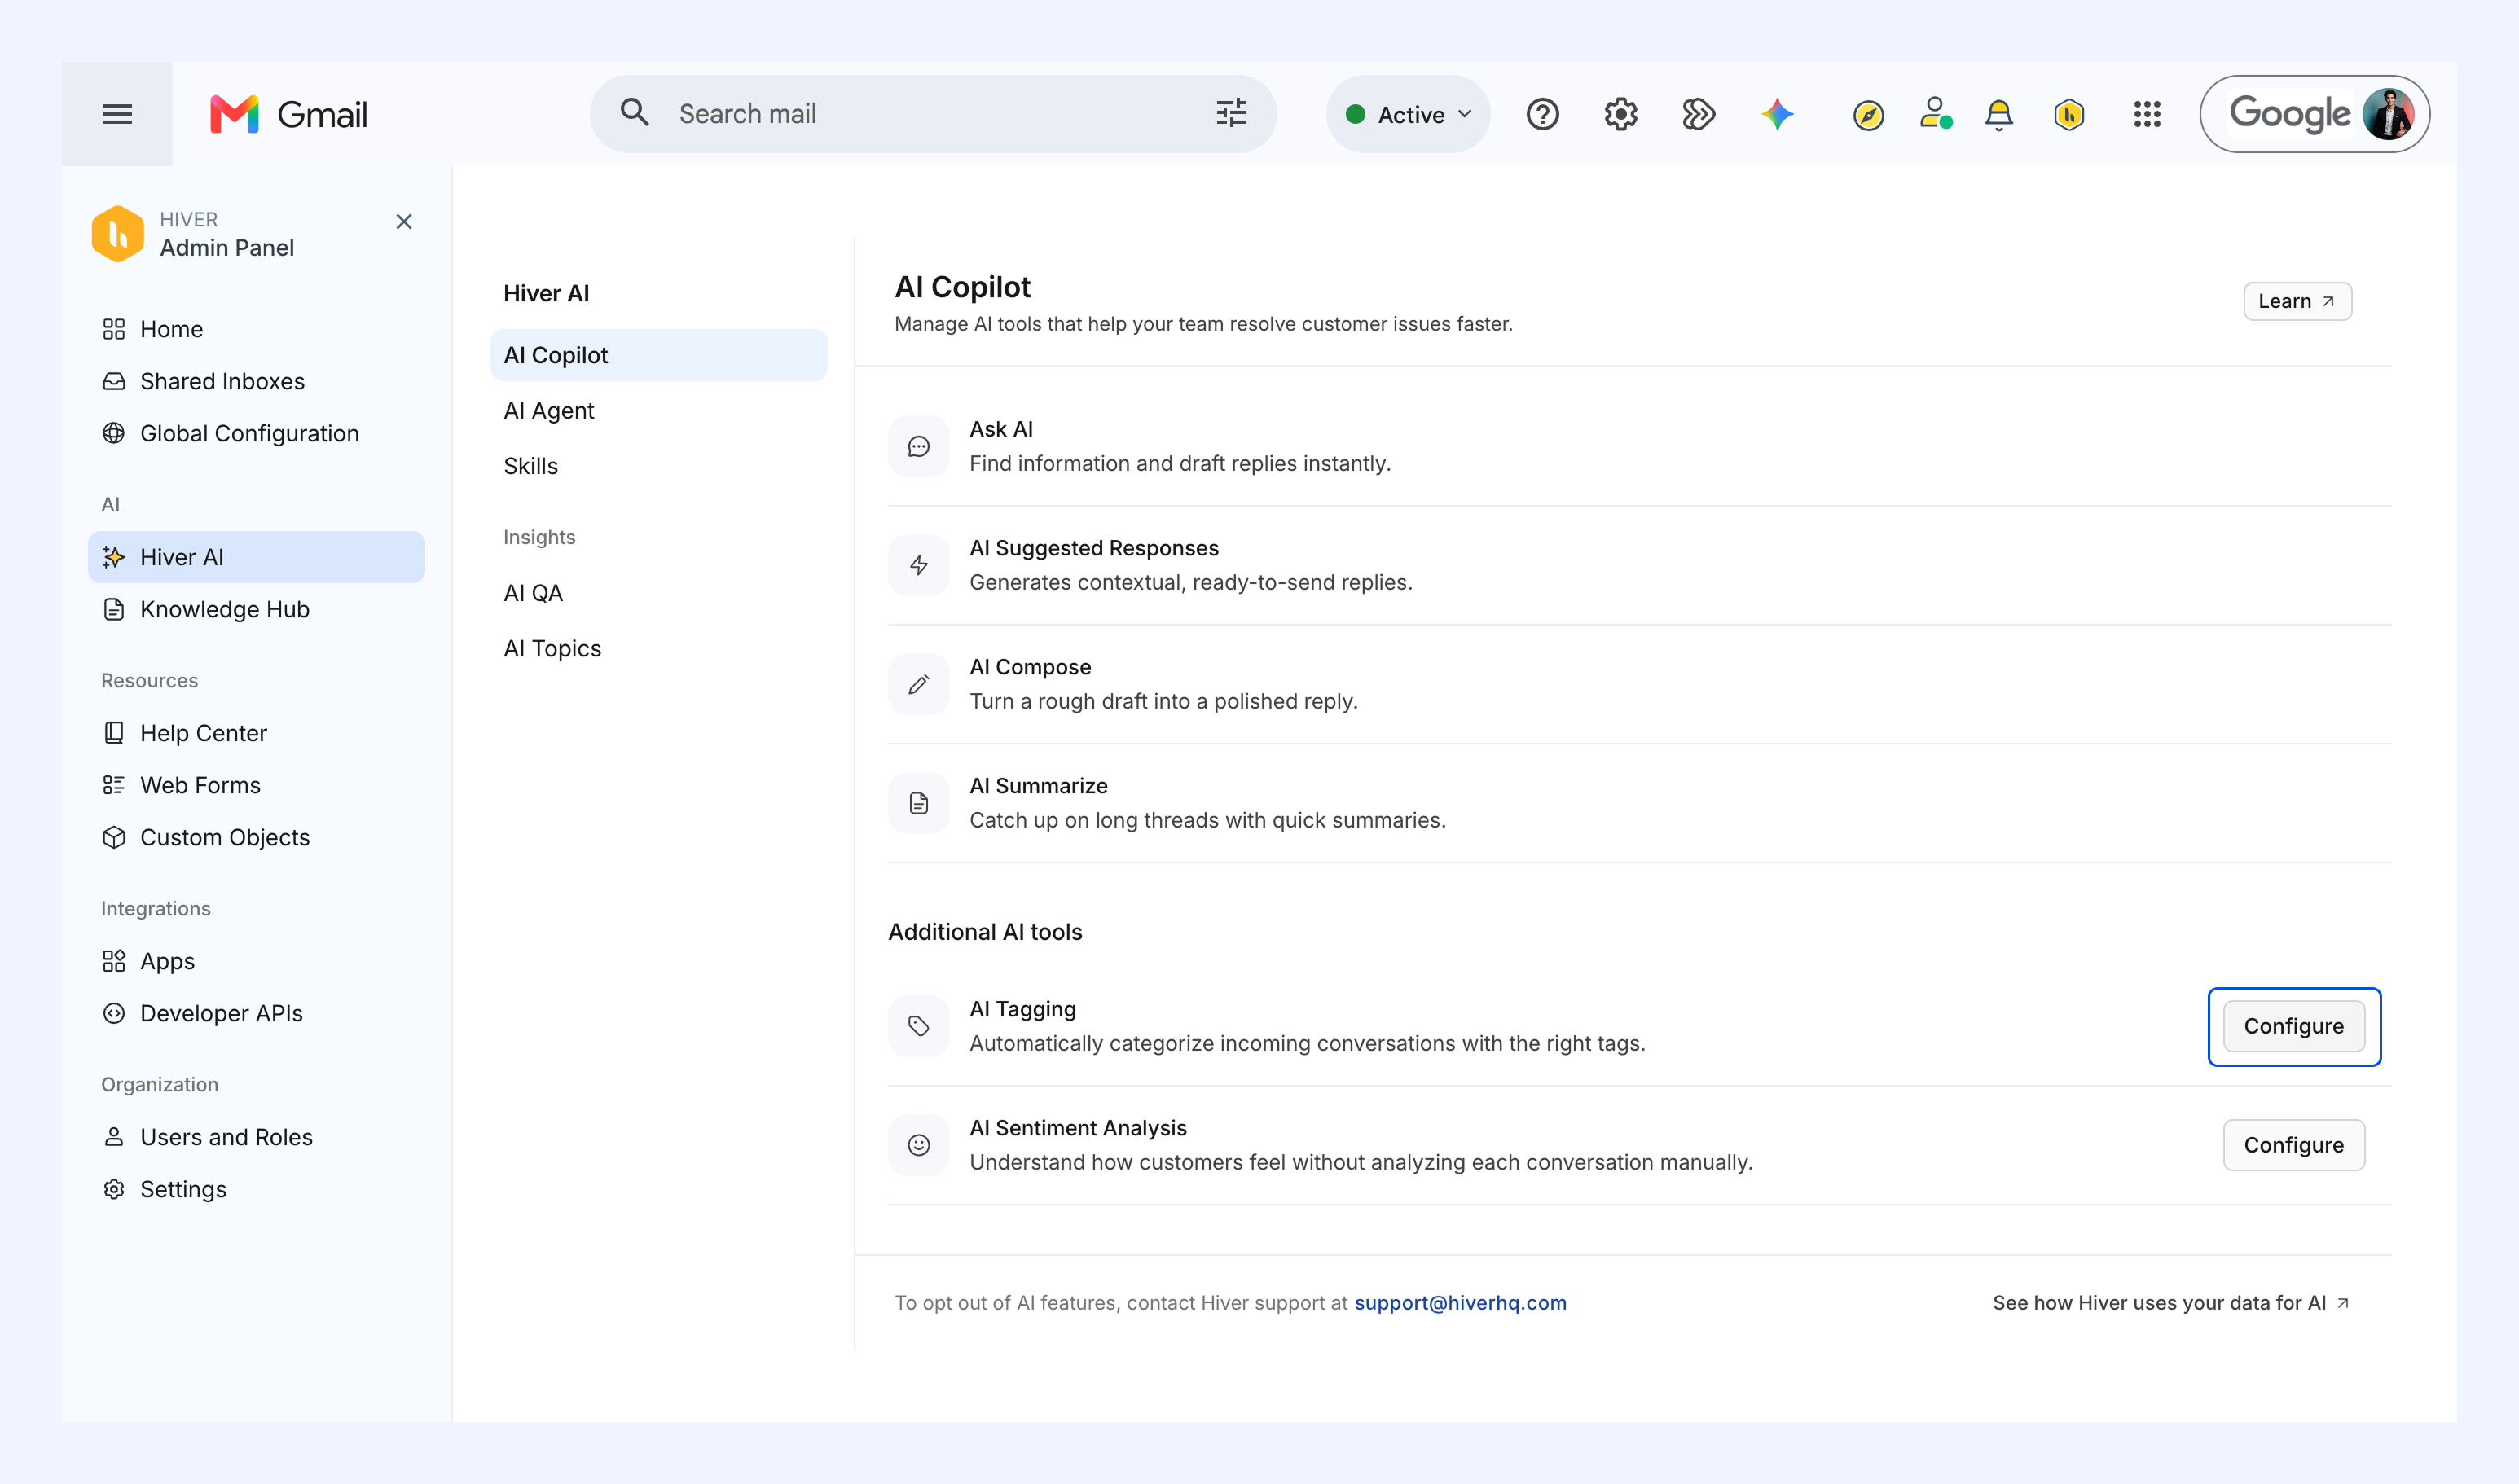
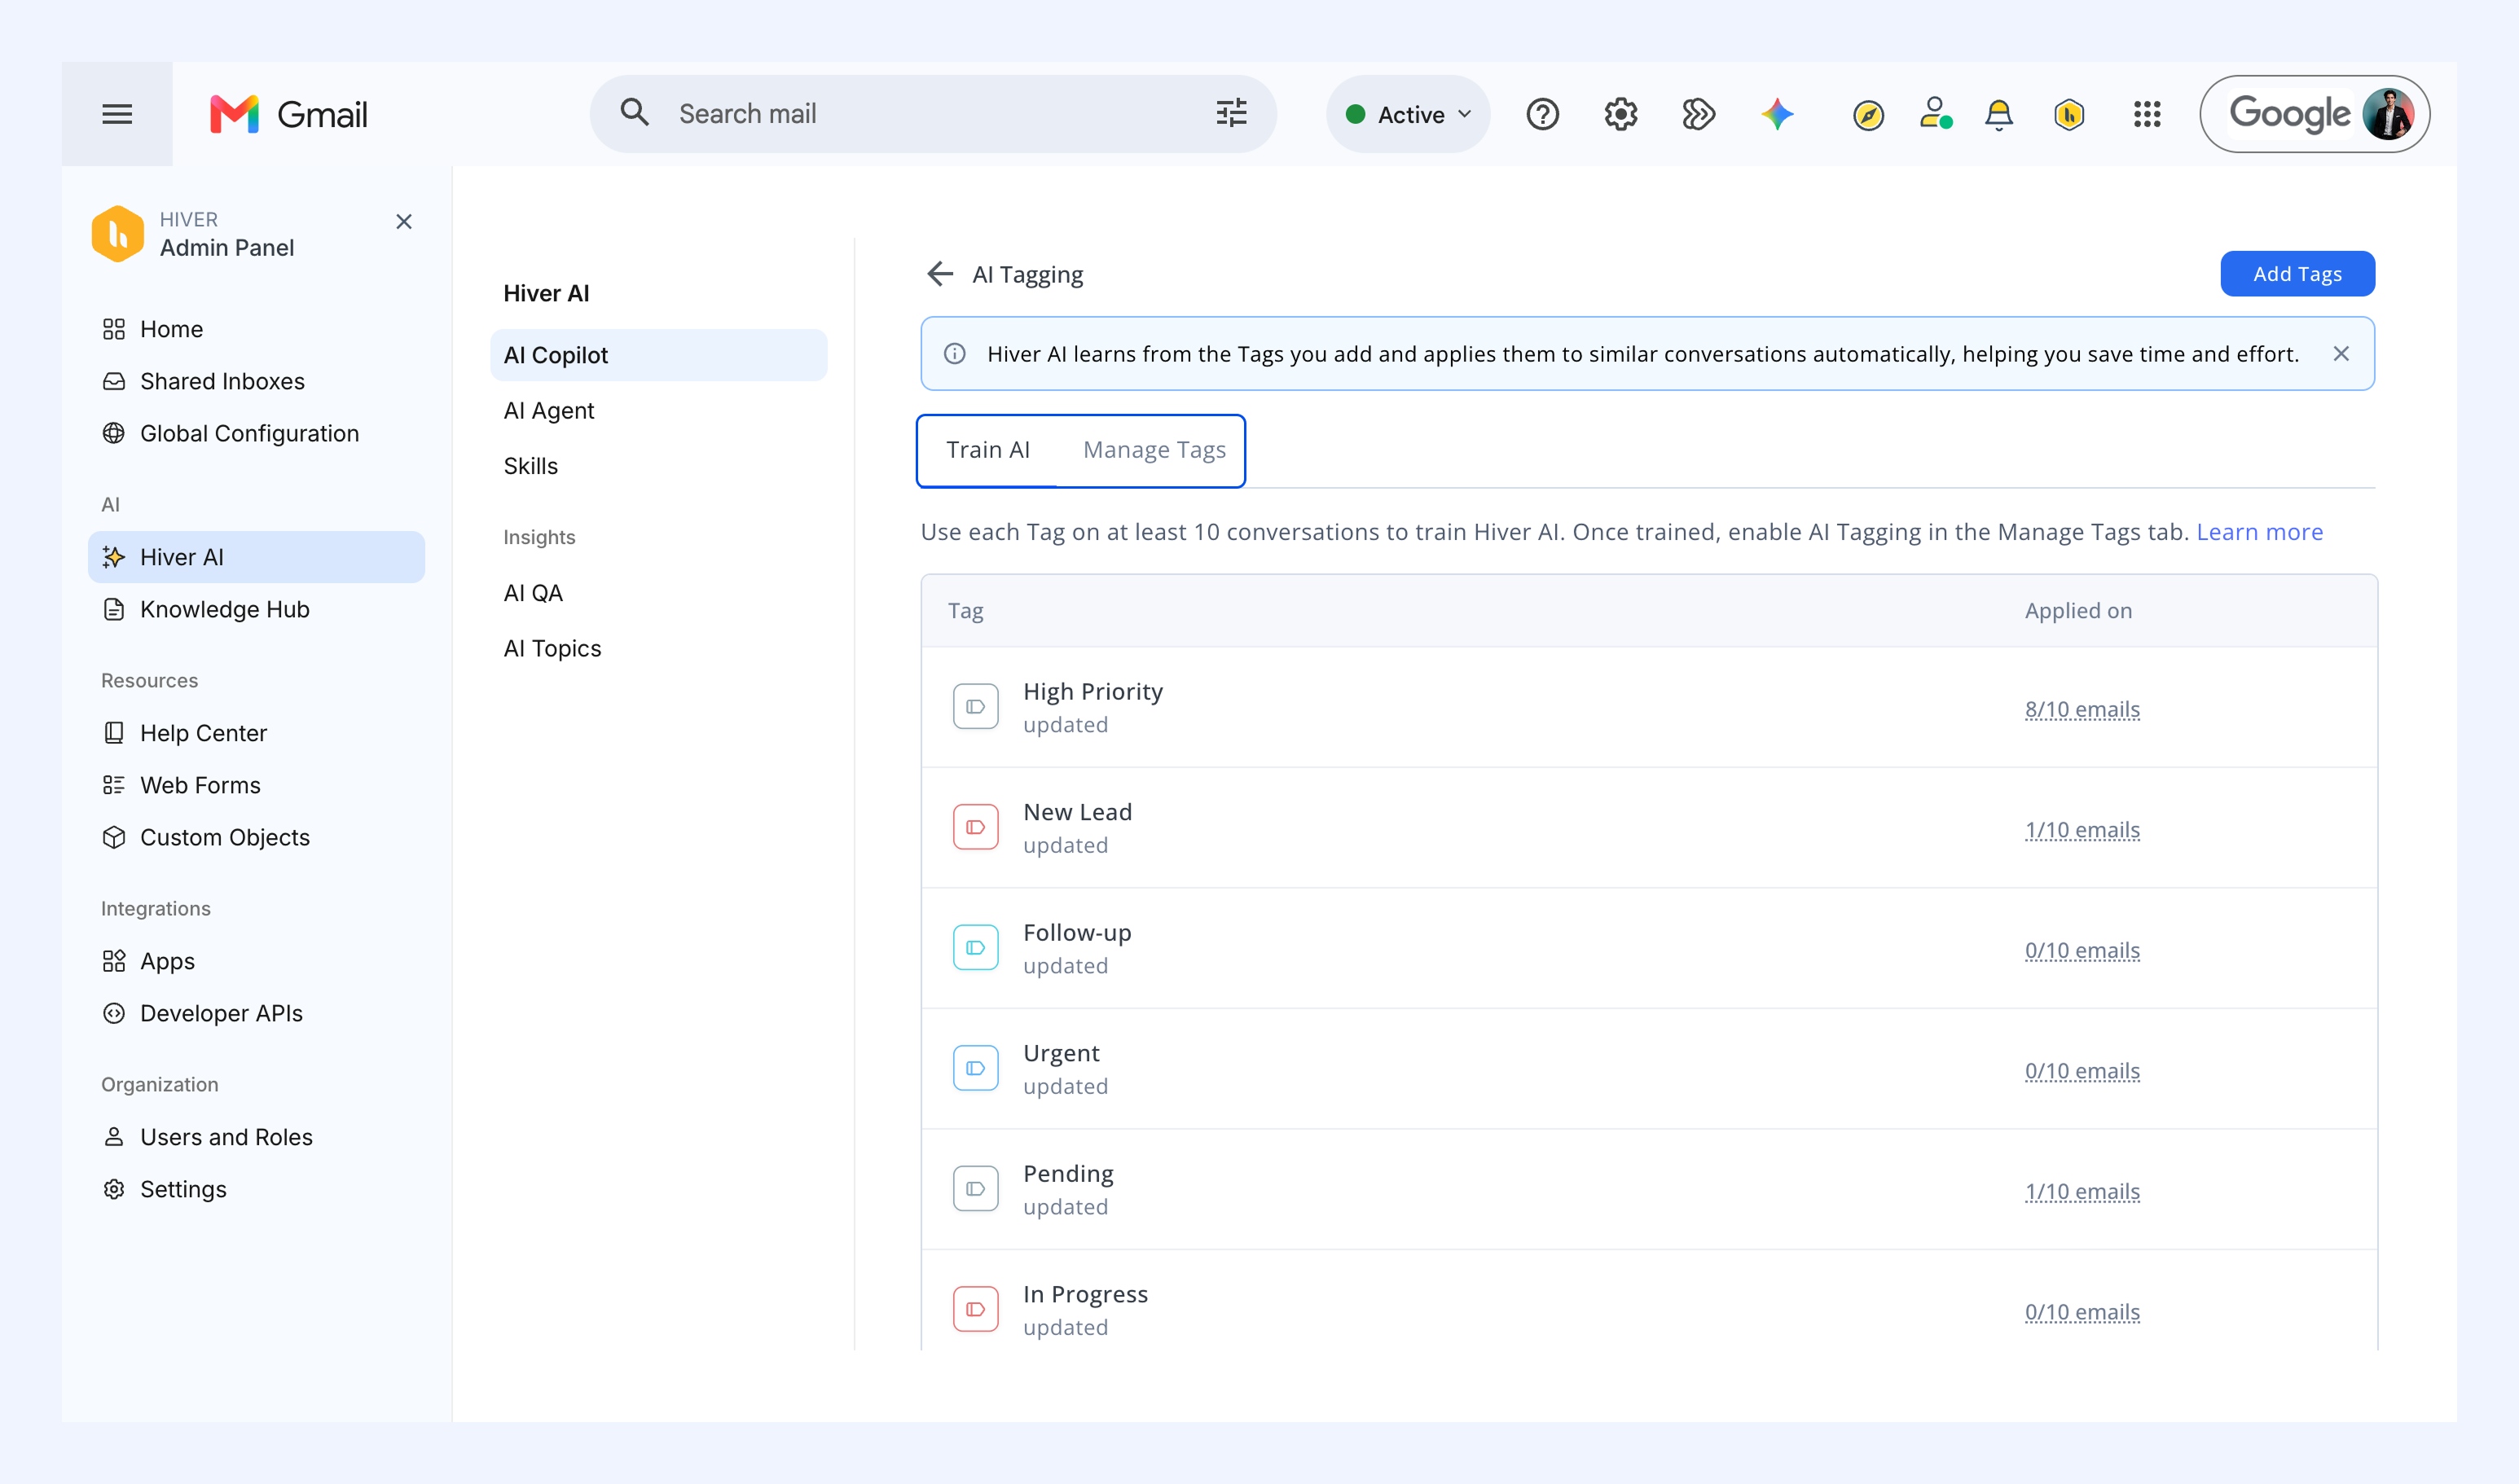
5. Inside AI Tagging, you’ll see two tabs:
- Train AI: this is where you teach Hiver AI how to apply your Tags.
- Manage Tags: this is where you turn AI Tagging on or off for AI-ready Tags, and refine learning data.
Training Hiver AI
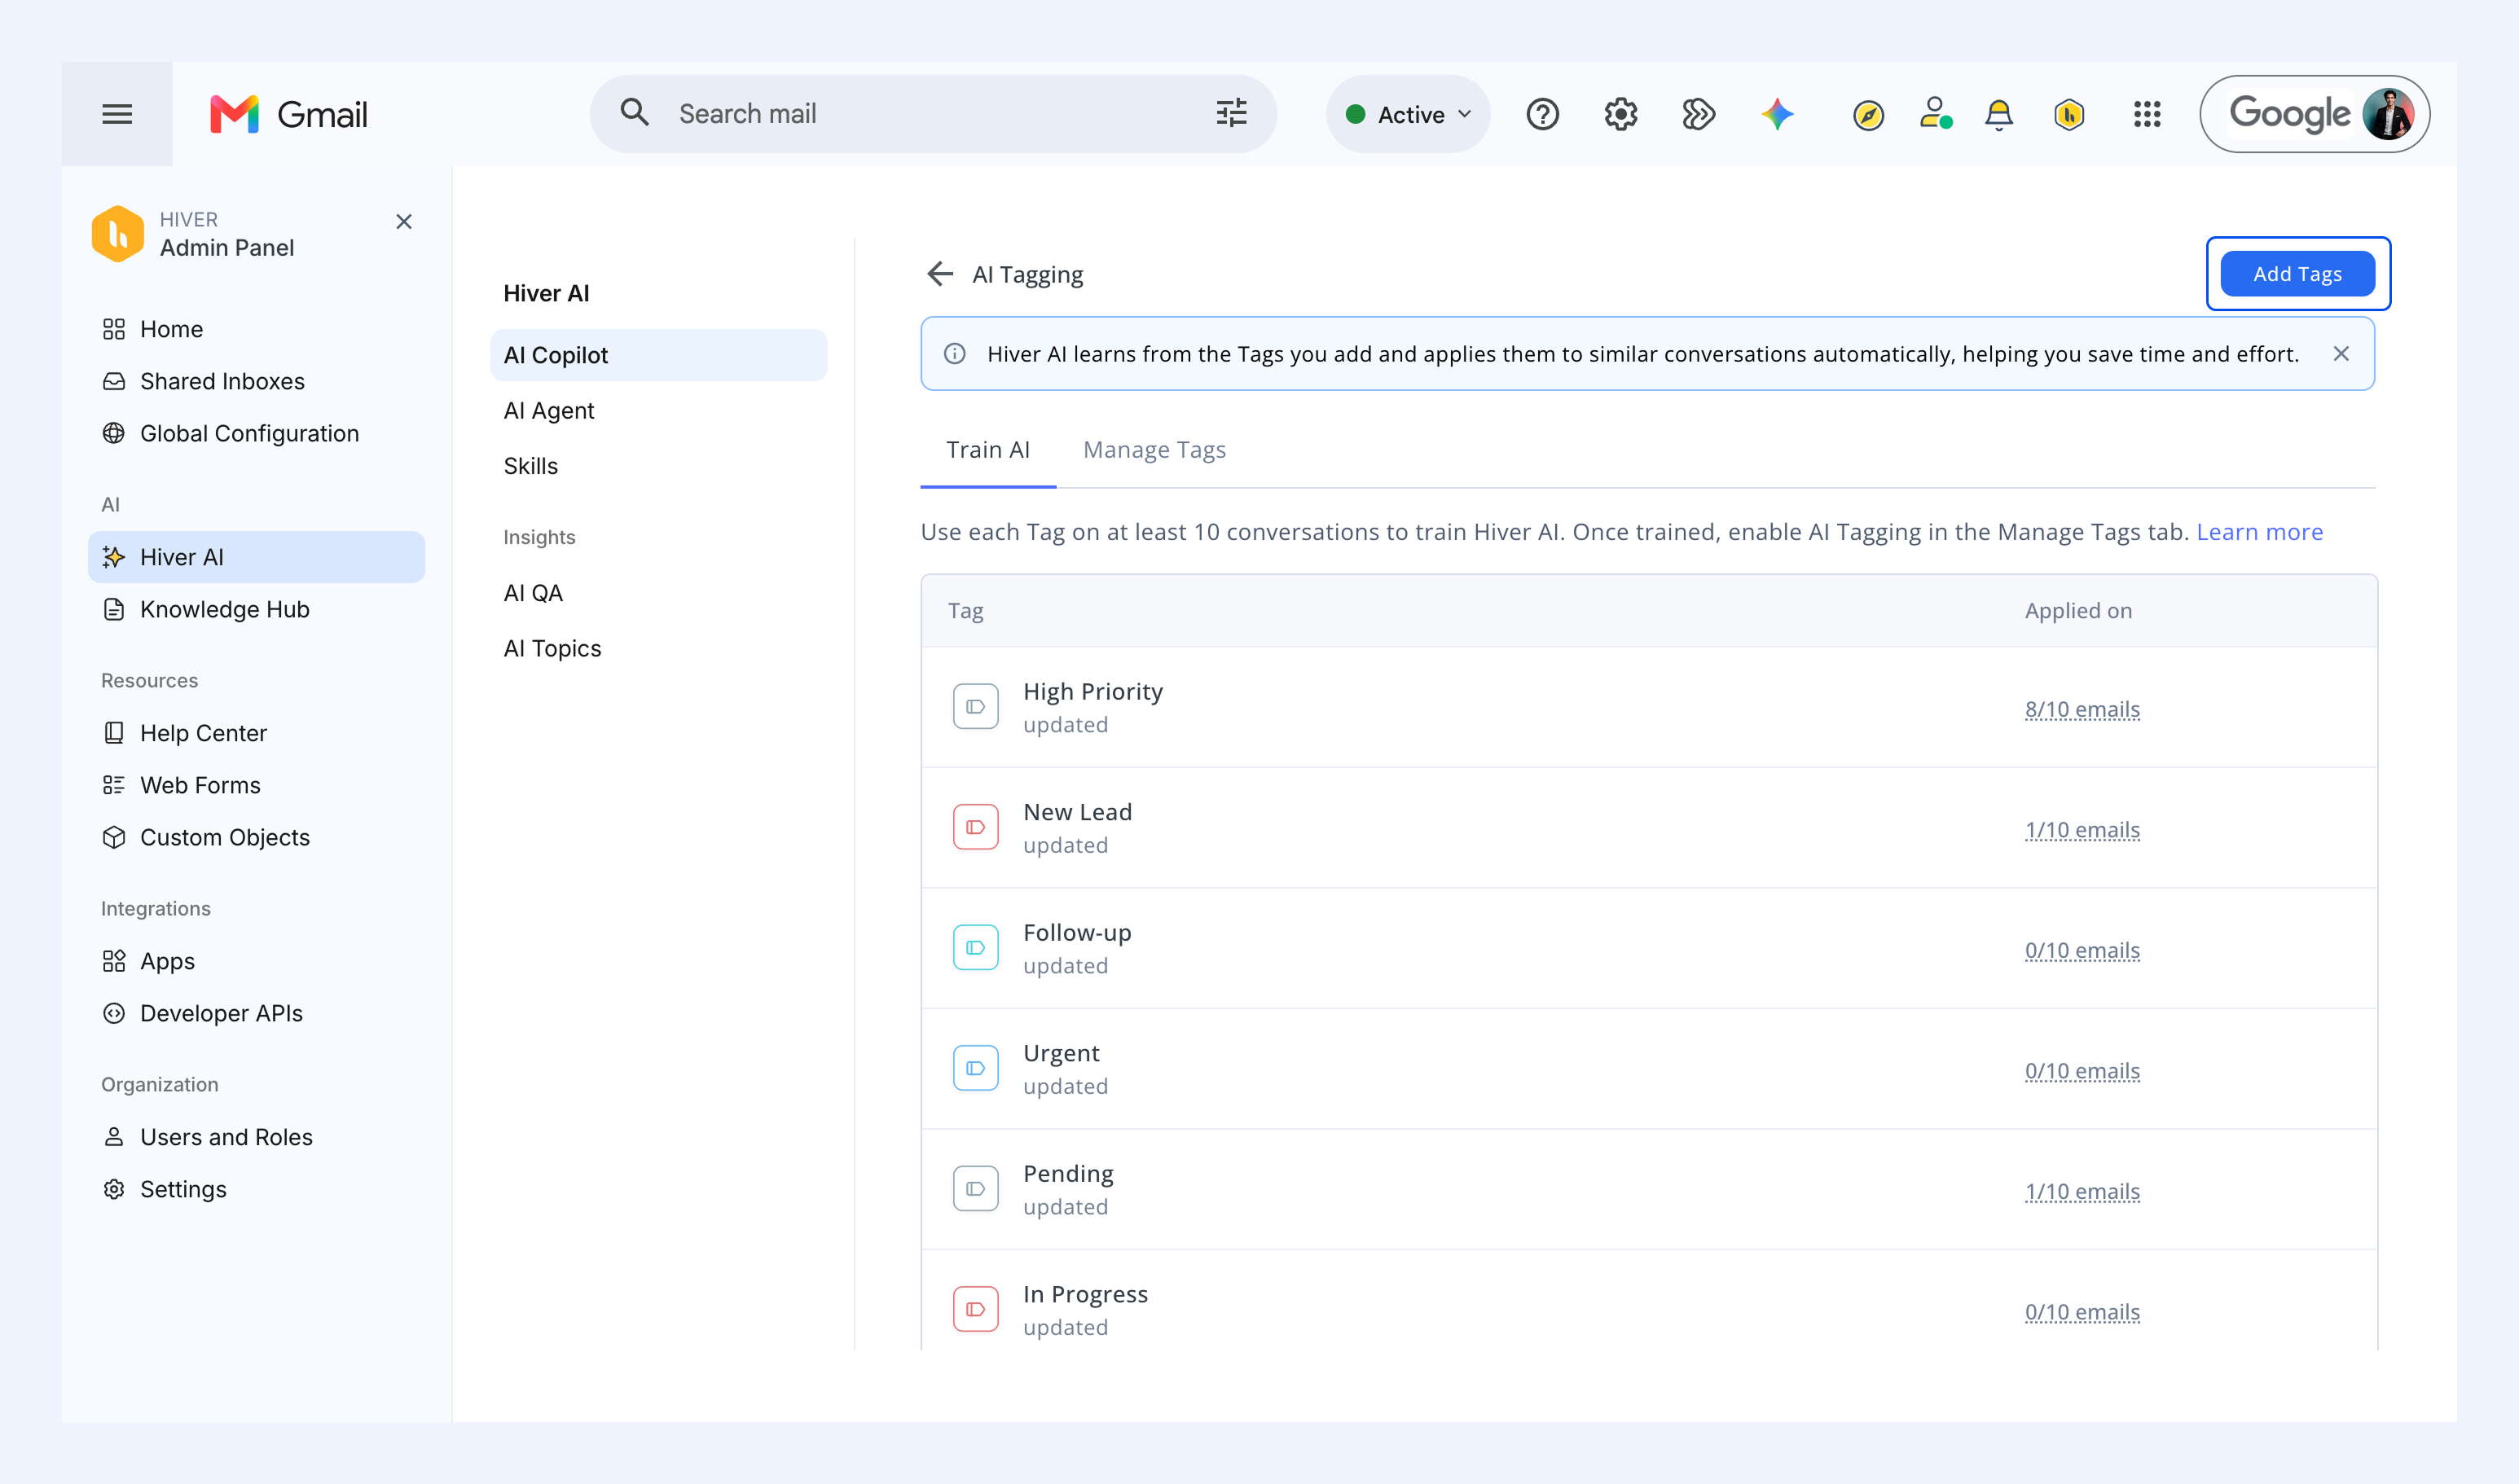
1. In the Train AI tab, click Add Tags to create a new Tag or choose from existing ones.
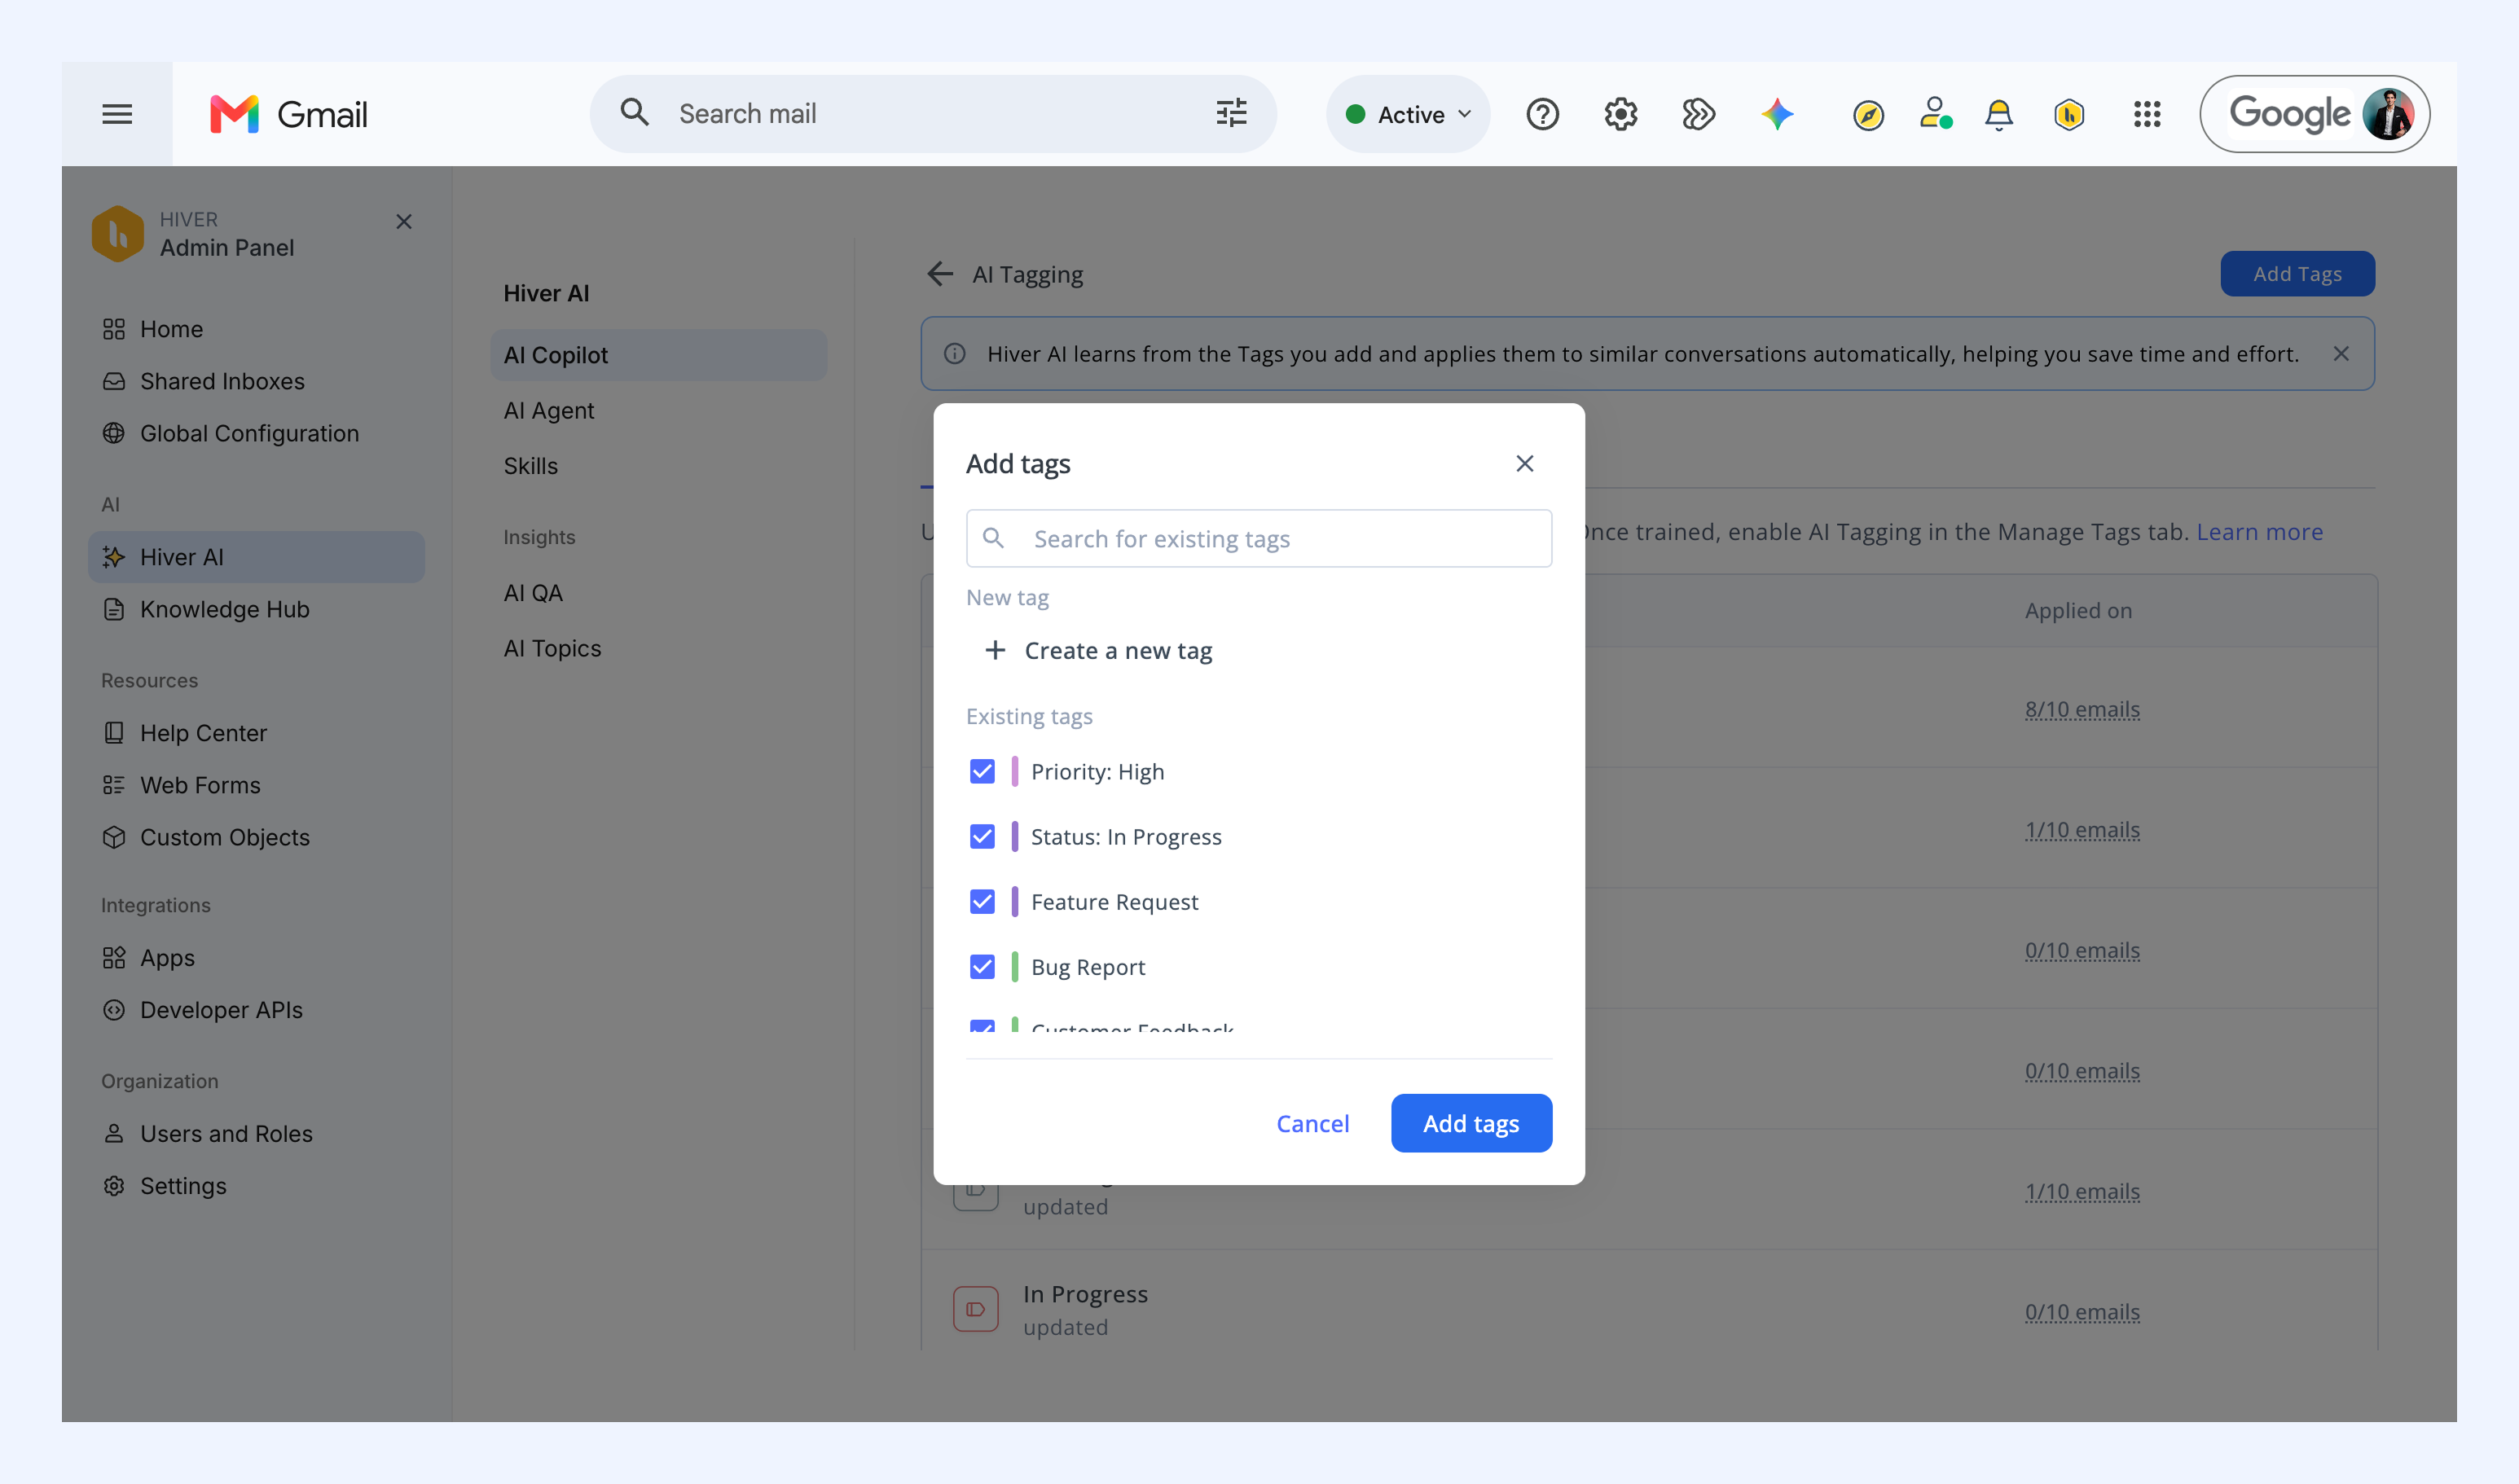
2. In the pop-up, either:
- Select an existing Tag, or
- Create a new one
3. Use the Tag on at least 10 relevant conversations. Each manual Tag helps AI learn when to apply it.
4. Check progress in the Train AI tab:
- You can see how many conversations a Tag has been used on in the Applied on column.
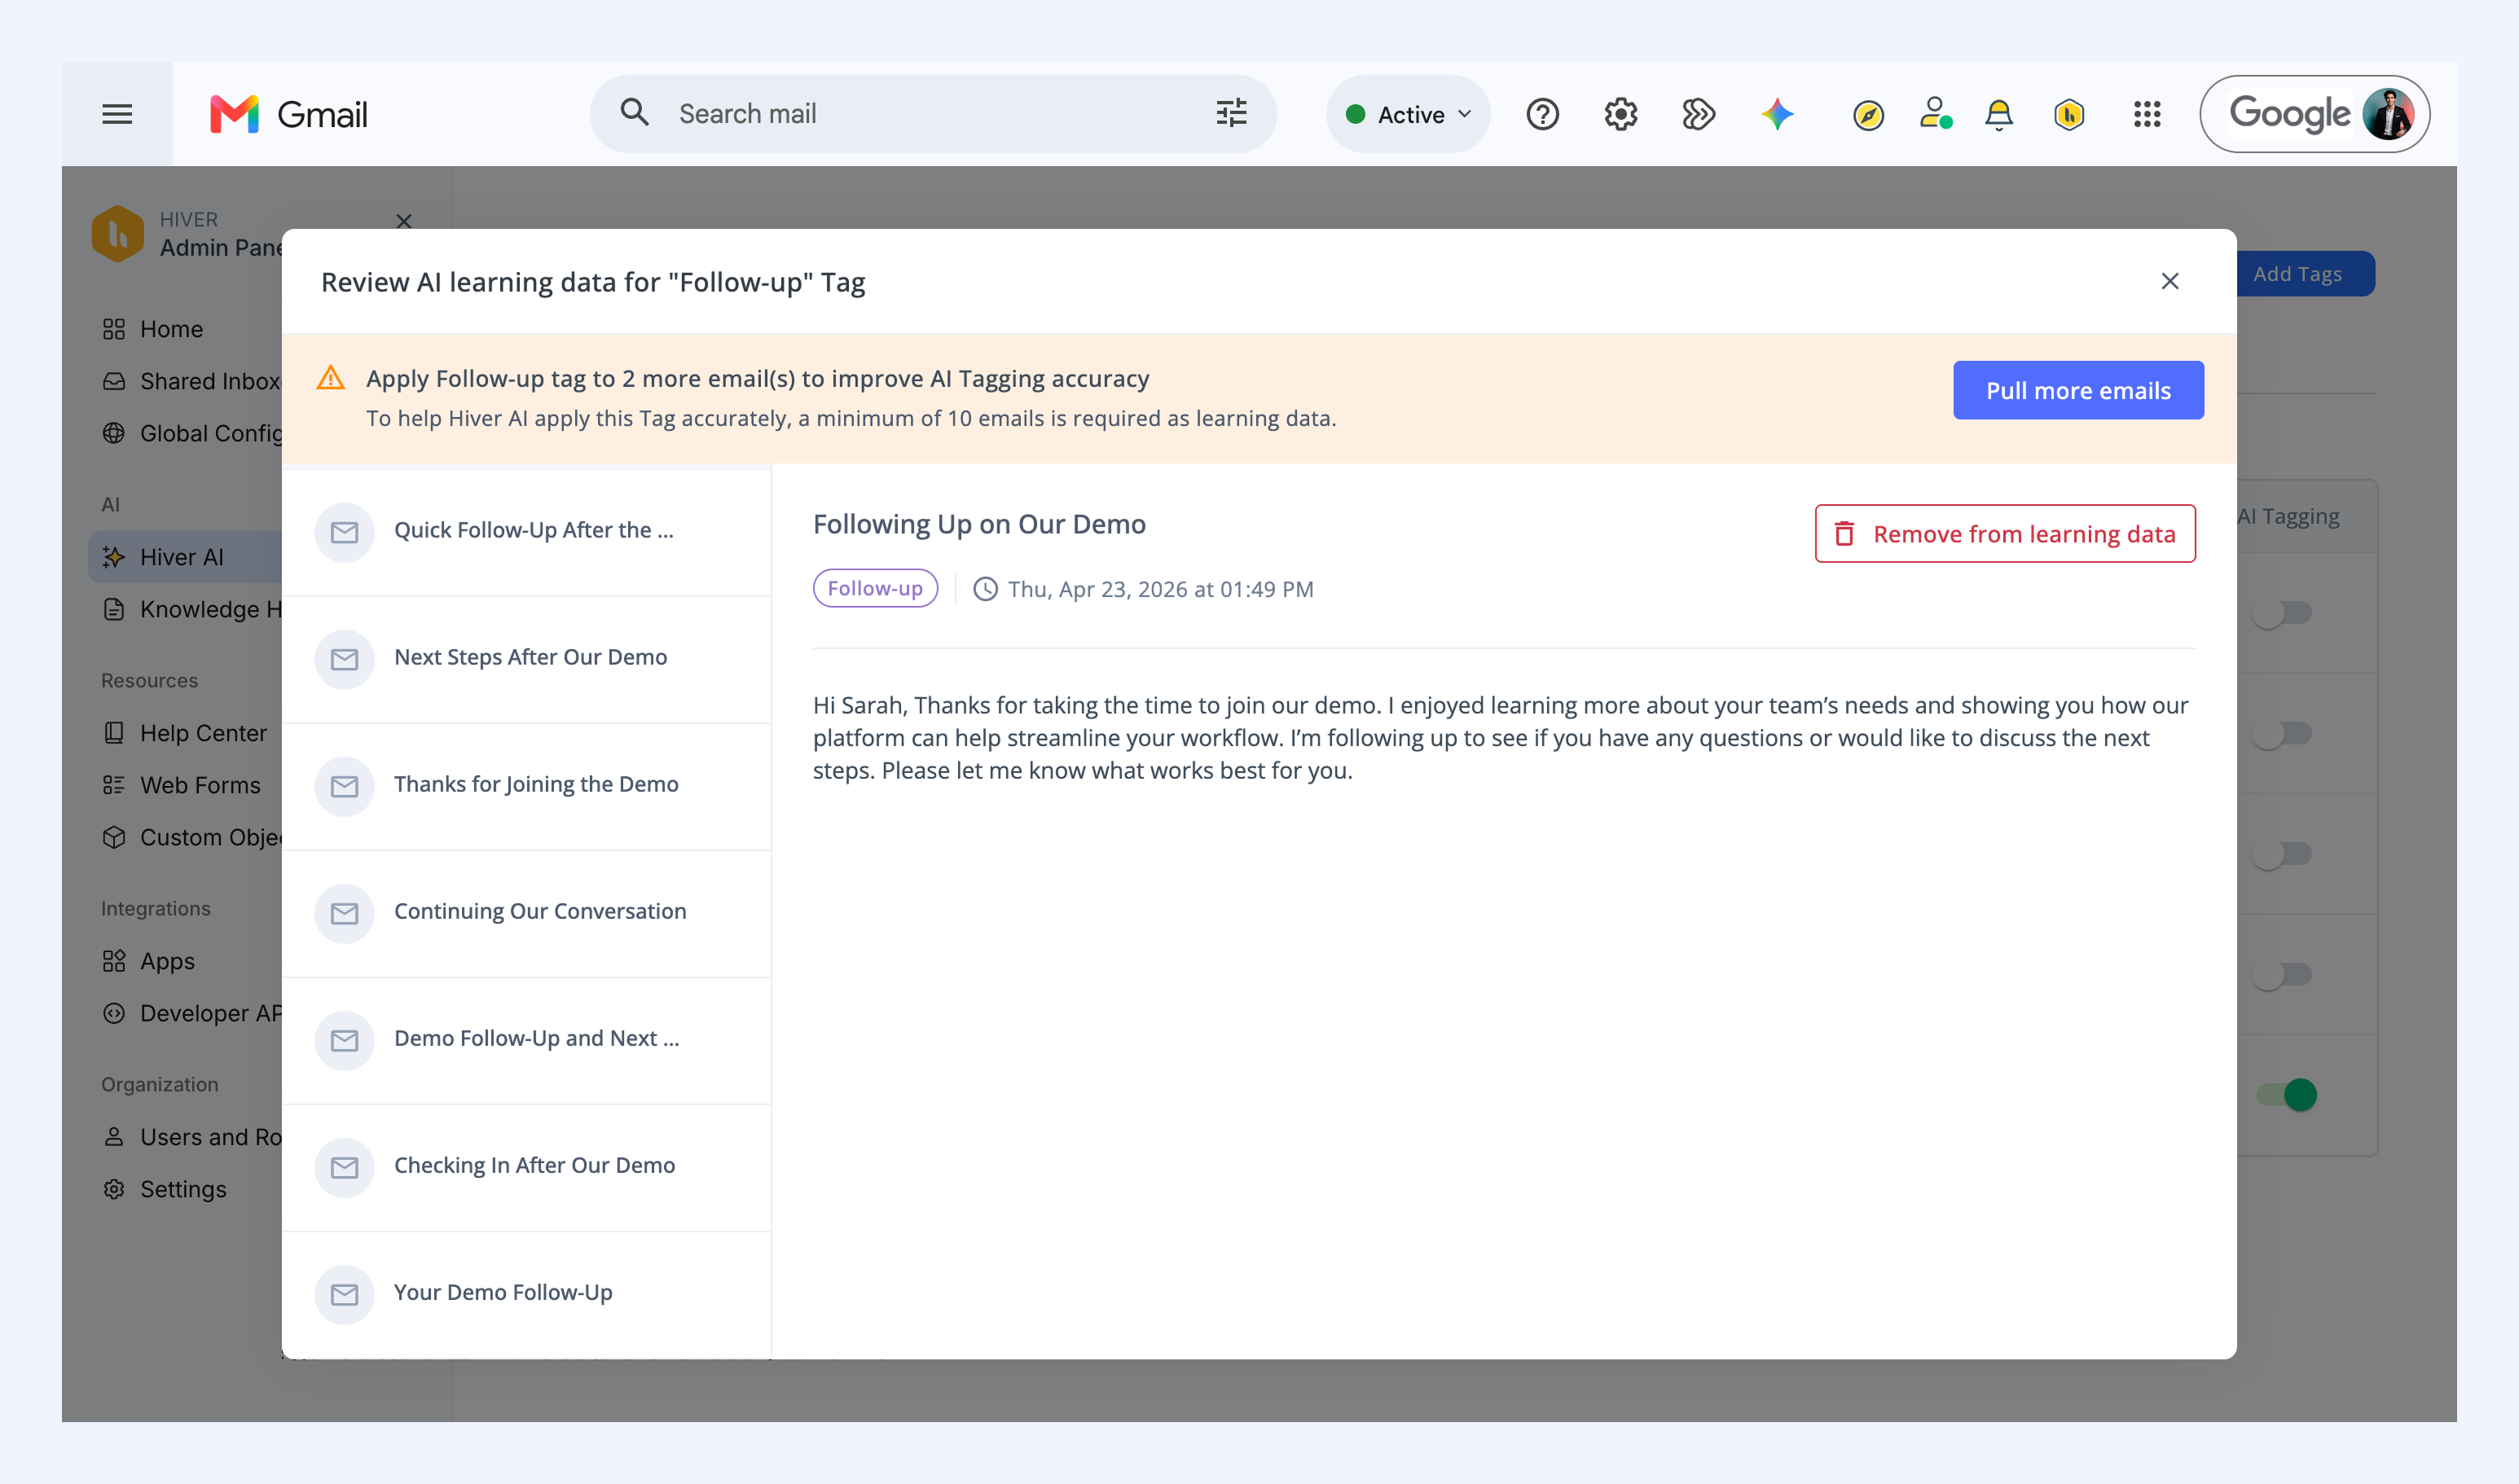
- Click the count to review and refine learning data.
Tips for setting up a Tag for AI training
- Tag name: Choose a clear, topic-based label (e.g., “Billing Issue”).
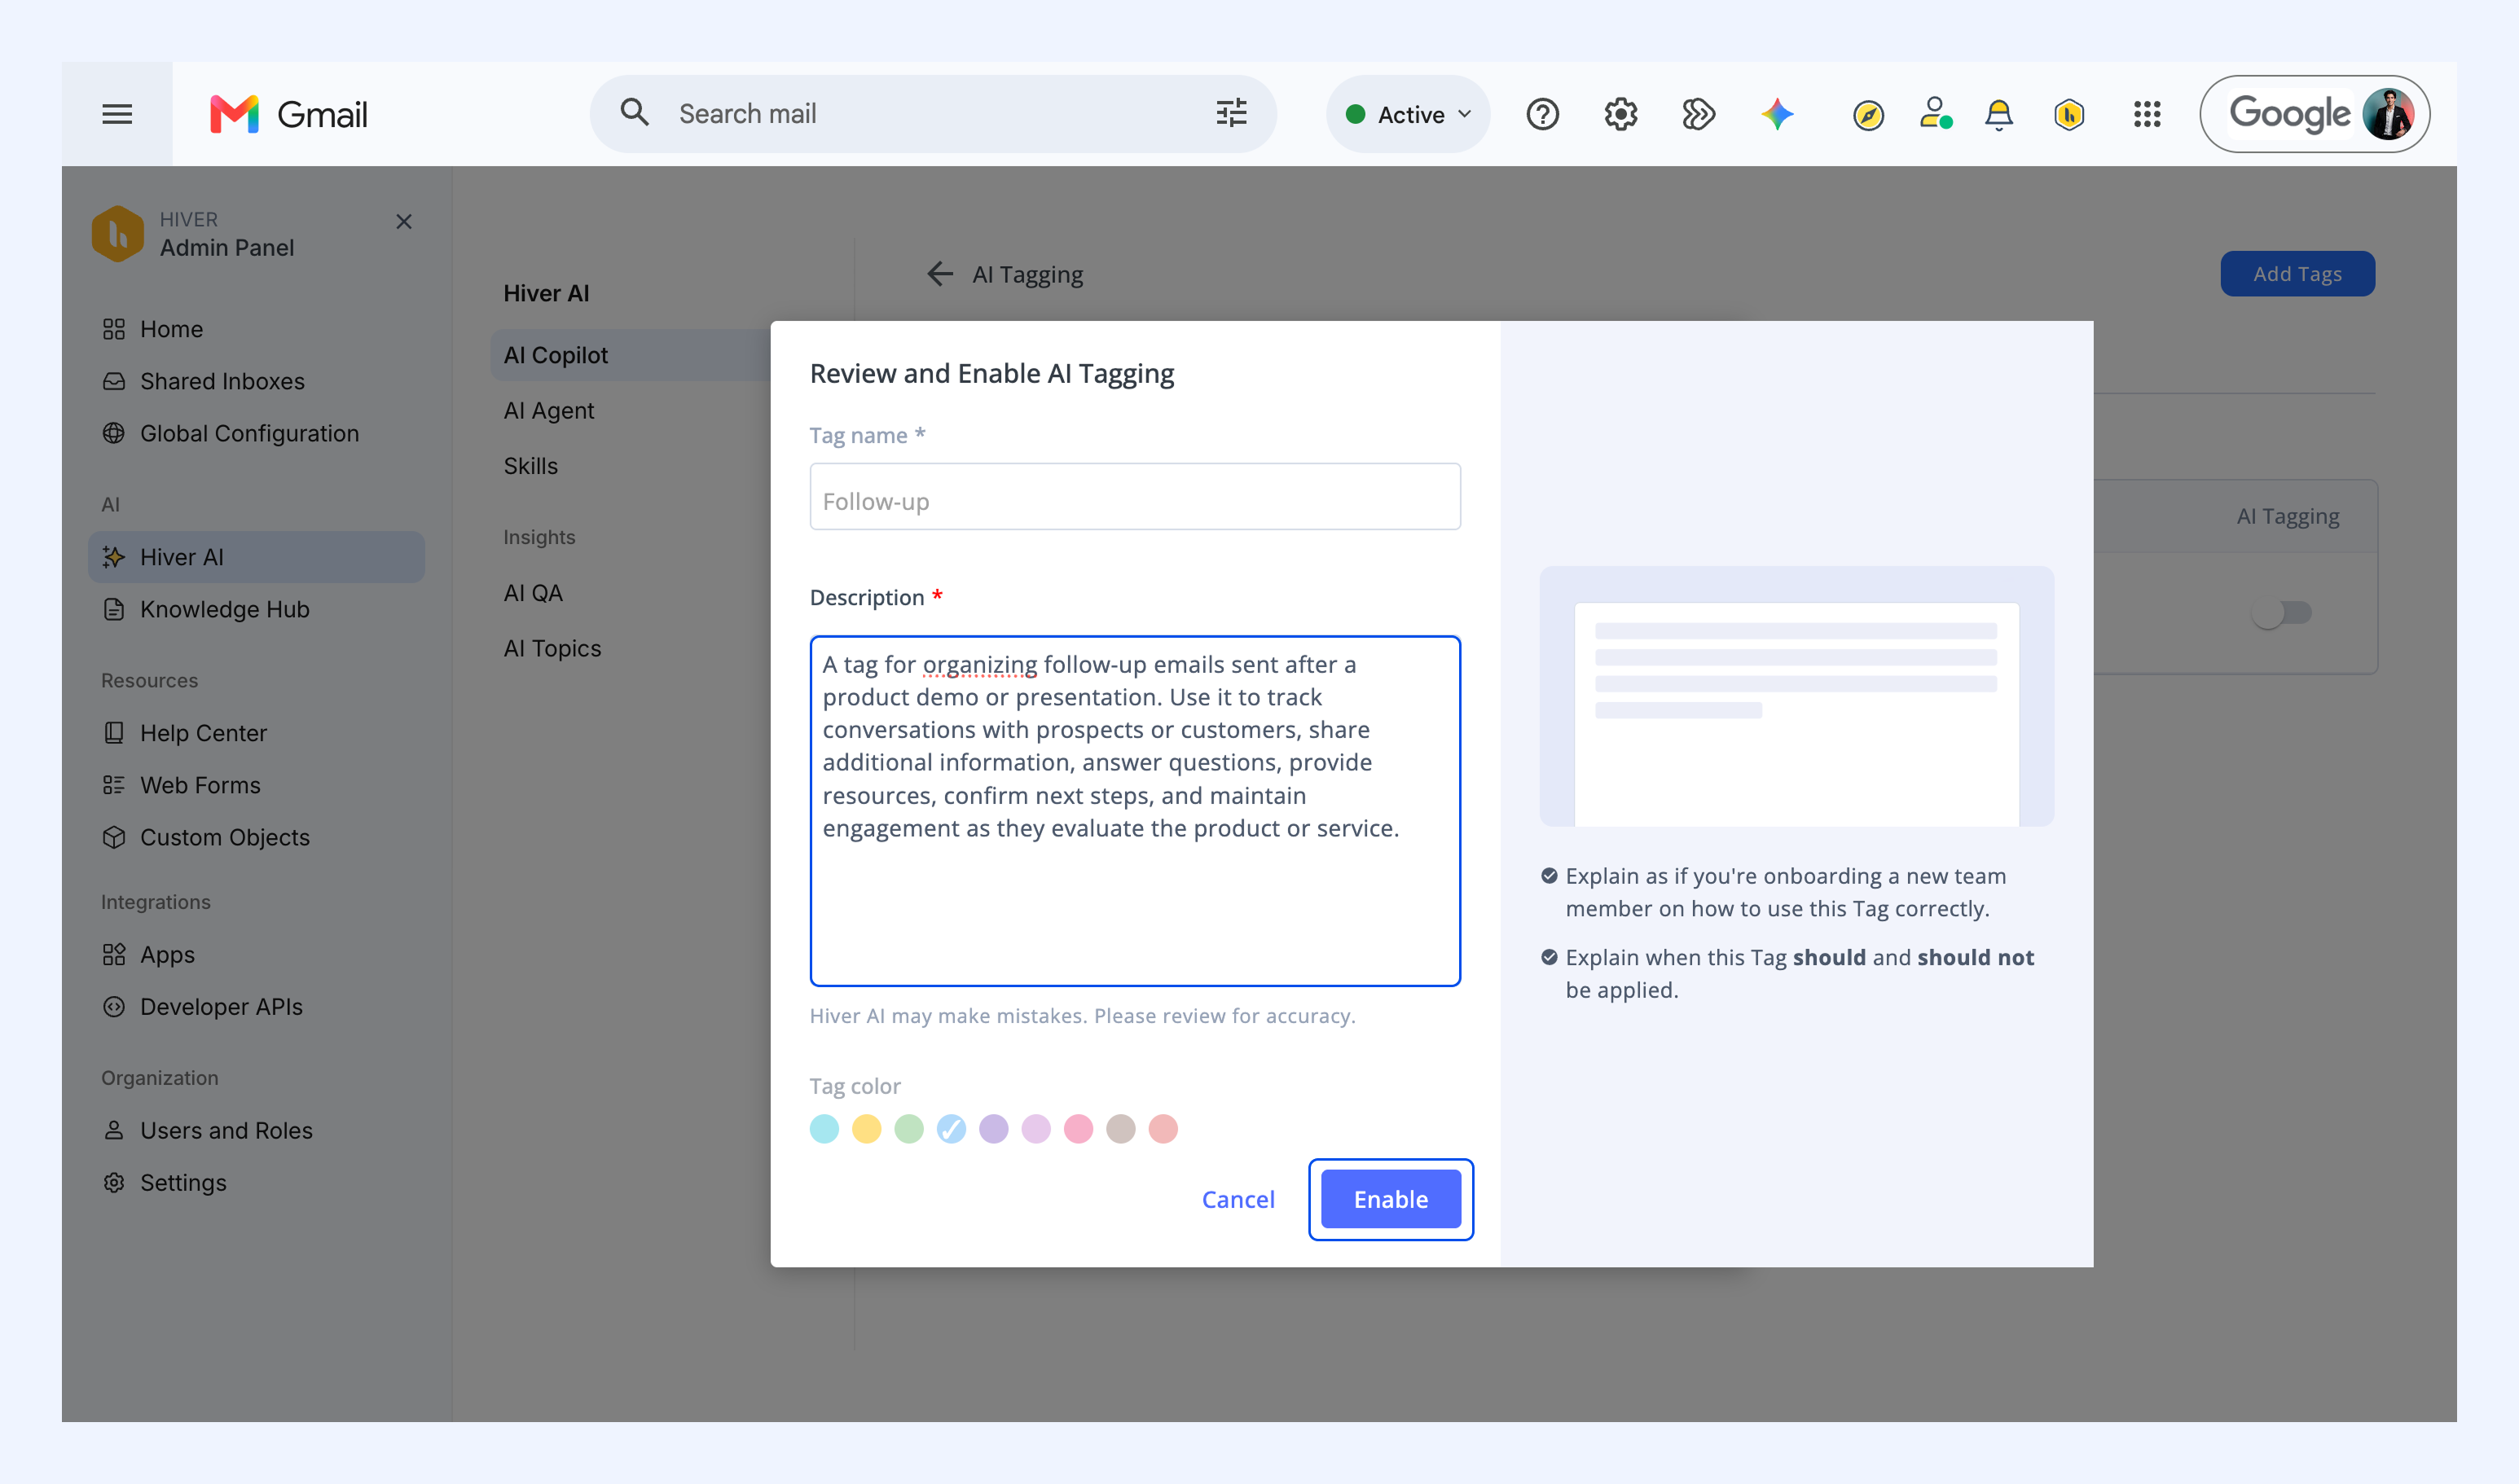
- Description: Explain when this Tag should and shouldn’t be applied. This helps both AI and agents understand the Tag’s purpose. Explain the Tag like you’re onboarding a new team member, what should and shouldn’t be tagged this way.
- Color: Optionally assign a color to identify the Tag visually.
Managing AI-ready Tags
Once a Tag has been applied to 10 conversations, you can enable AI Tagging for it:
1. Go to the Manage Tags tab.
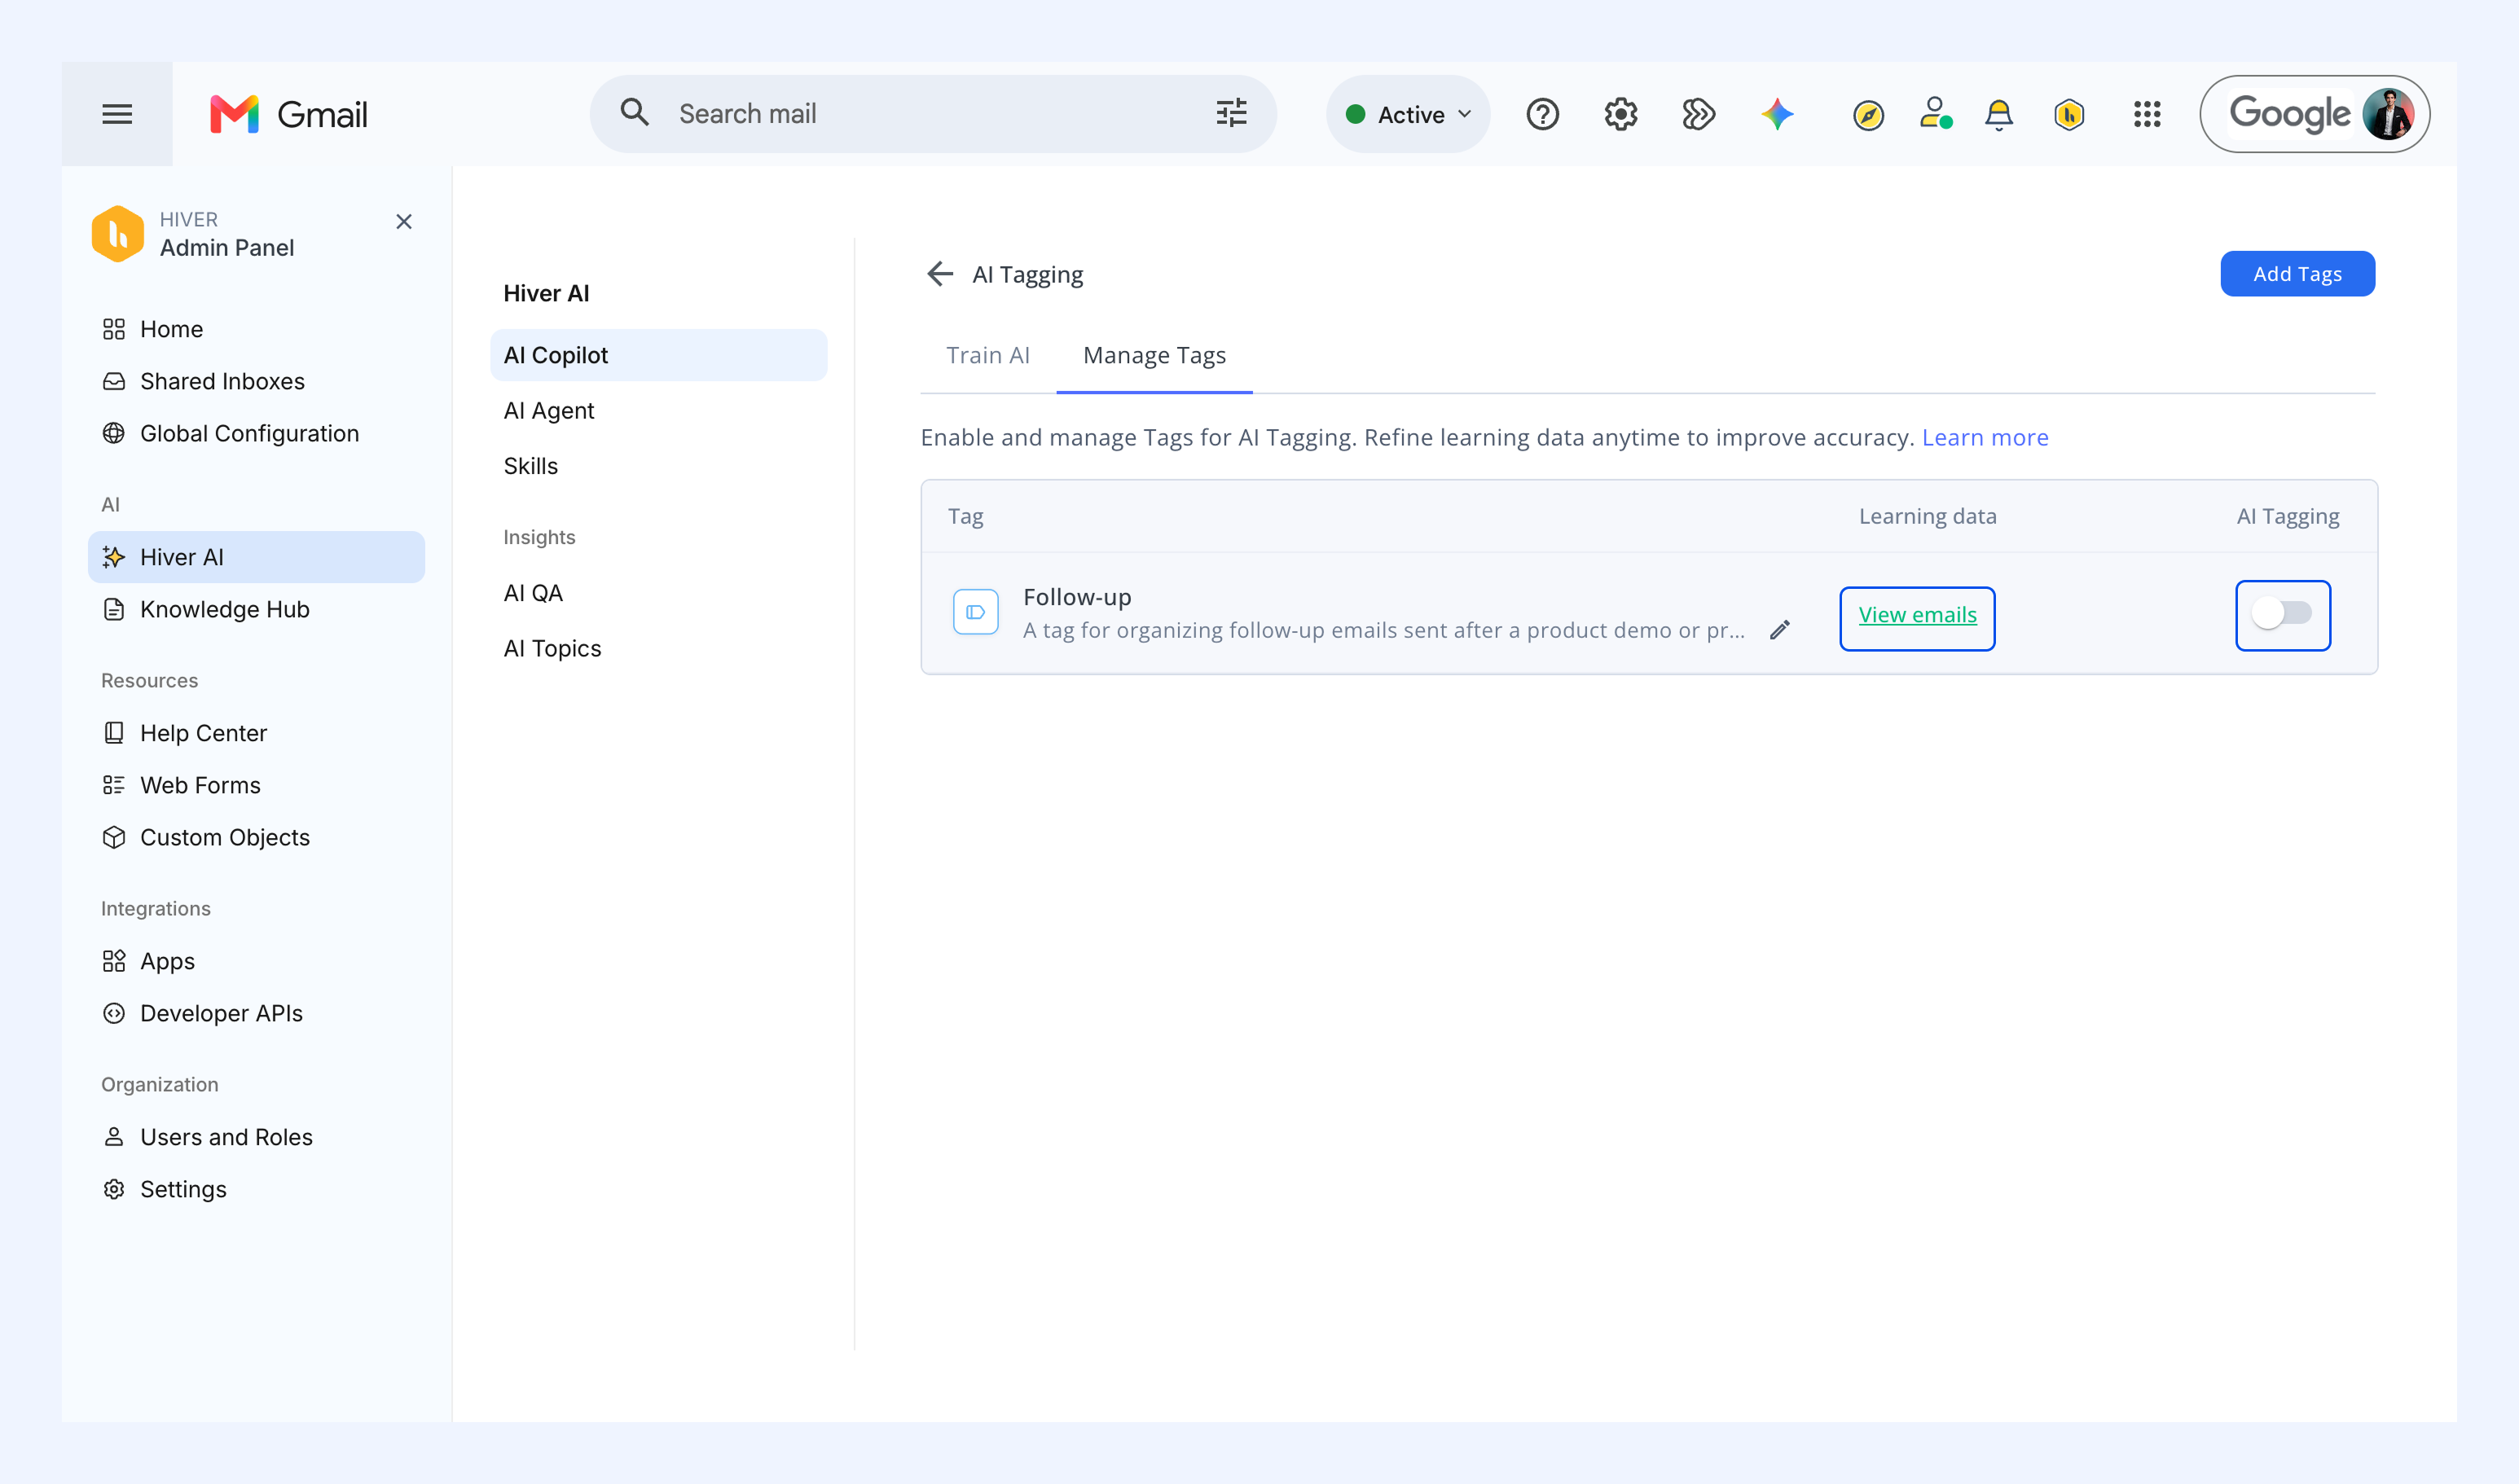
2. To review or refine the learning data, click View emails anytime.
3. Toggle on AI Tagging for the Tag.
4. Review the Tag description, edit it if needed, and click Enable.
Training AI with real examples
Every time your team manually applies a Tag, it teaches Hiver AI what to look for. Once a Tag is added to 10 conversations, Hiver uses those to make predictions.
To help the AI learn better:
- Apply Tags consistently across similar types of conversations
- Use real customer language instead of internal shorthand in training examples
- Avoid overlapping Tags that can confuse the model
- Add examples for edge cases to make Hiver AI more resilient
You can review and manage the learning data for a Tag by clicking on the conversations it’s applied to when you’re training AI or even after the Tag has been enabled.
What if the training set drops below 10
If you remove too many examples and the training set falls below 10:
- You’ll see a warning message
- Simply add the Tag to relevant conversations to resume learning
Improving performance and accuracy
To get the most out of AI Tagging:
- Use diverse examples: Different ways customers phrase similar topics
- Avoid overlapping tags: Tags should be distinct
- Monitor accuracy: Use agent feedback to identify weak predictions
- Start small: Focus on 3-4 high-volume Tags to begin with
- Report incorrect tags: Agents can report misapplied Tags directly from the inbox to help the AI learn.
- Refine learning data: Review the conversations listed under each tag (click View emails in the Manage Tags tab). Remove examples that don’t fit, and retag the right conversations. This helps improve accuracy over time.
Frequently Asked Questions
How many training examples do I need?
A minimum of 10 manually tagged conversations per Tag. You can continue to improve performance with more examples over time.
Will turning off tagging delete AI learning?
No. You can pause AI Tagging anytime, and Hiver will retain the learning data.
Can I edit Tag names and descriptions later?
Yes. Editing the description can improve AI performance. Renaming Tags won’t affect learning.
What if a Tag is applied incorrectly?
Agents can remove the Tag or apply the correct one manually. They can also report it, which helps the AI learn from the correction.
Can I use this across multiple Shared Inboxes?
Yes, but Tag performance may vary depending on the type of conversations in each inbox. It’s best to test and tune separately if needed.