Getting started with AI Agents
Support teams spend a significant amount of time answering repetitive questions such as:
- Setup and onboarding queries
- Troubleshooting steps
- Pricing and plan questions
- Integration and configuration help
- Workflow and feature questions
Hiver's AI Agents in Chat use generative AI to autonomously handle customer conversations. Unlike traditional rule-based chatbots that follow rigid scripts, AI Agents can understand intent, ask follow-up questions, and respond naturally, all while staying grounded in your trusted knowledge sources.
This can help your team:
- Resolve repetitive customer queries automatically
- Automate multi-touch actions without human interaction
- Offer 24/7 support coverage
- Reduce response volume for agents
- Scale support without increasing headcount
How AI Agents in Chat work
Your AI Agent relies on the information you provide through knowledge sources such as help articles, websites, PDFs, and internal documentation. Using generative AI, AI Agents autonomously guide customers through conversations rather than just responding with static answers.
For example, if a customer says “I’m not receiving Slack notifications”, the AI Agent can:
- Ask follow-up questions to better understand the issue
- Guide the customer through setup steps
- Show a screenshot or GIF from your help articles
- Help troubleshoot issues and continue helping if the customer gets stuck
- Escalate the conversation if additional assistance is needed
This helps customers get answers faster while reducing repetitive support work for your team.
How AI Agents stay accurate and safe
Hiver's AI Agents are designed with built-in safeguards to ensure reliable customer interactions:
- Grounded responses: Agents only provide answers based on your approved knowledge sources. They won't make up information or guess answers.
- Confidence-based escalation: When the AI Agent isn't confident it can resolve an issue, it automatically hands off to your team.
- Custom instructions: You control how your AI Agent behaves through clear guidelines and escalation rules.
- Full transparency: Every conversation includes a complete transcript so you can review exactly what was shared.
Prerequisites
Before you begin, make sure you have:
- A Pro or Elite plan
- Admin access in Hiver Omni
- An active Chat Inbox with a chat widget deployed on your website
Note: AI Agents in Chat is currently a part of an early access program. To enable this in your account, reach out to us at support@hiverhq.com
Steps to set up AI Agents
To get started, go to Admin Panel → Shared Inboxes → Chat Inbox → AI Agents, and click Create your first AI Agent.
.png)
Alternatively, you can also go to Admin Panel → Hiver AI → Chat Agents, and click Create AI Agent.
Step 1: Train your AI Agent
Your AI Agent is only as helpful as the information it can access. You add information about:
- Your product and features
- Setup and onboarding steps
- Troubleshooting workflows
- Pricing and billing information
- Policies and support processes
- Common customer questions
Supported knowledge formats
Knowledge Base
Your published help articles can also be used as knowledge sources.
By default, your connected Hiver Knowledge Base appears under Added Sources but remains disabled. Toggle it on to include it as a knowledge source for your AI Agent.
.png)
Website
Hiver AI can learn from pages published on your website.
To add your website:
1. Click Website
.png)
2. Paste your website link. Enable Crawl links if you want Hiver AI to automatically scan linked pages such as:
- Help center articles
- Setup guides
- FAQ pages
- Pricing pages
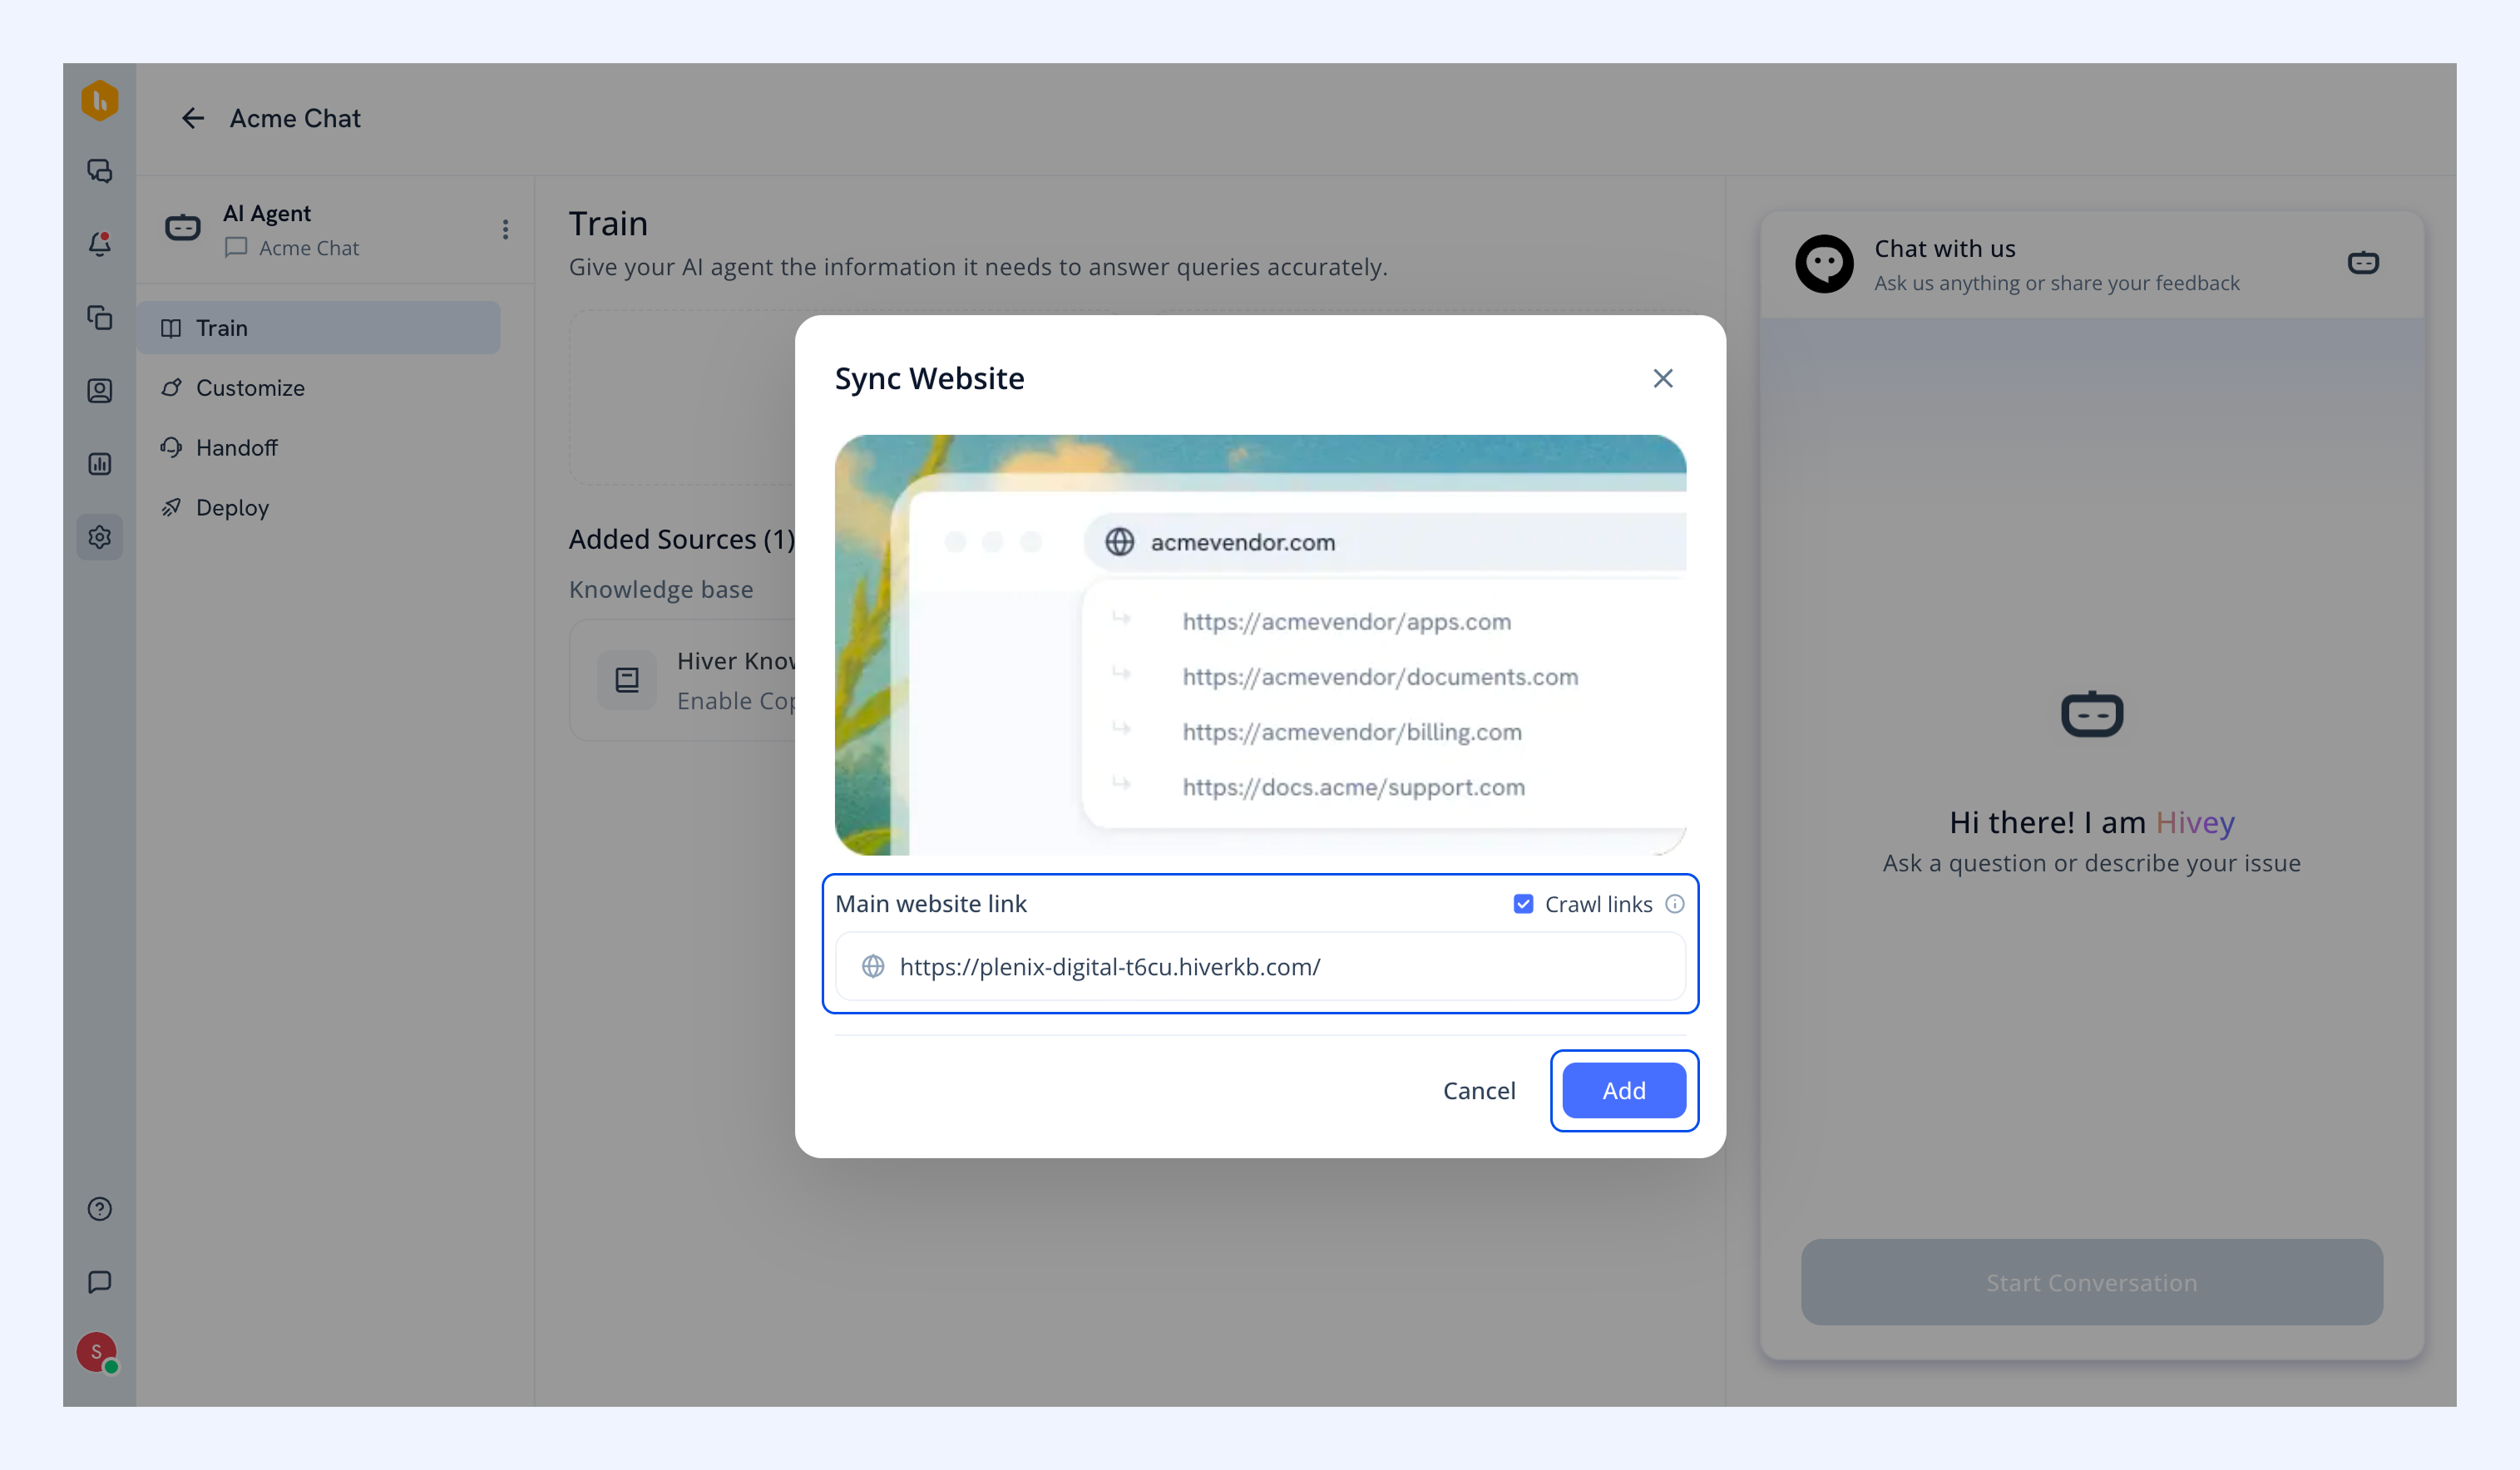
3. Click Add.
Note: Hiver AI might take a while to go through the information depending on the volume of pages available. Once synced, your website will appear under the Added sources section.
Documents
You can upload text-based files (PDF, docx., txt files) or text-based files containing:
- Product documentation
- Internal SOPs
- Troubleshooting guides
- FAQs
- Setup instructions
- Policy documents
Note: You can select up to 5 files at a time. Ensure that each file does not exceed 30MB.
To upload a document:
1. Click Documents.
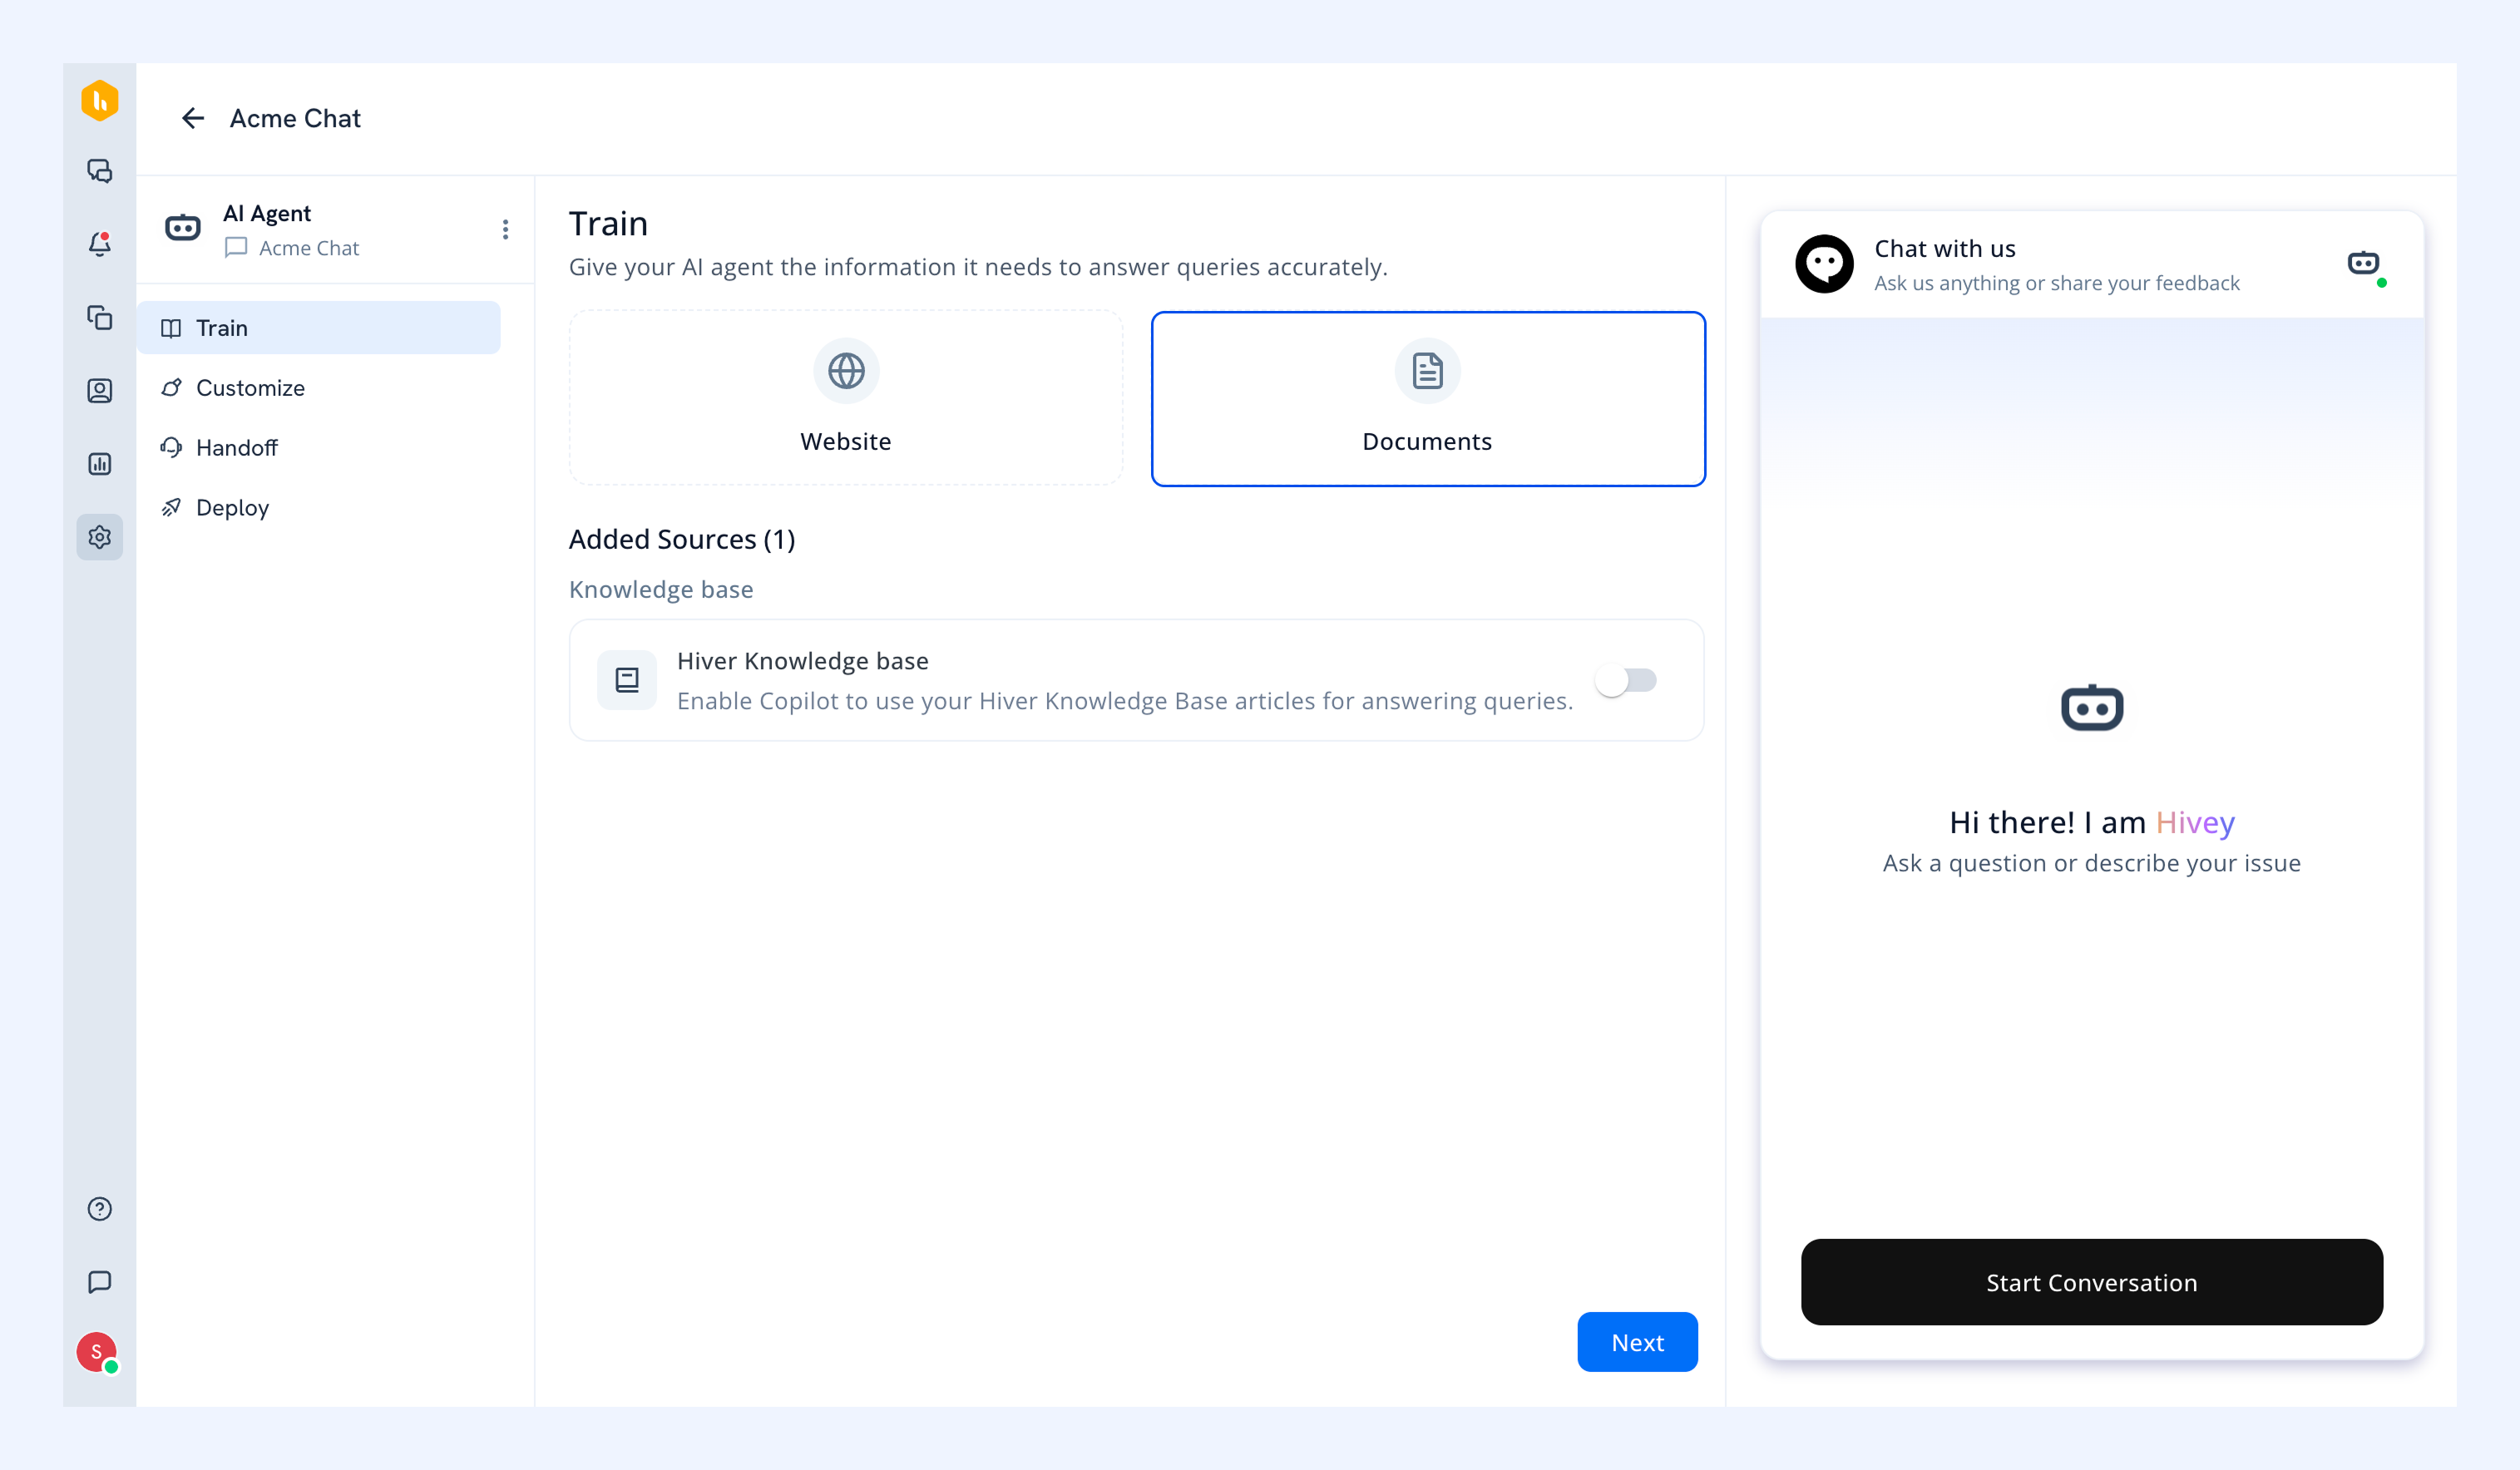
2. Select a file and click Upload.
.png)
Once you’re done adding knowledge sources, use the preview on the right to test how your AI Agent responds to customer questions based on what it has been trained on so far. Click Start Conversation to initiate a chat.
.png)
Try asking a few sample questions as customers would.
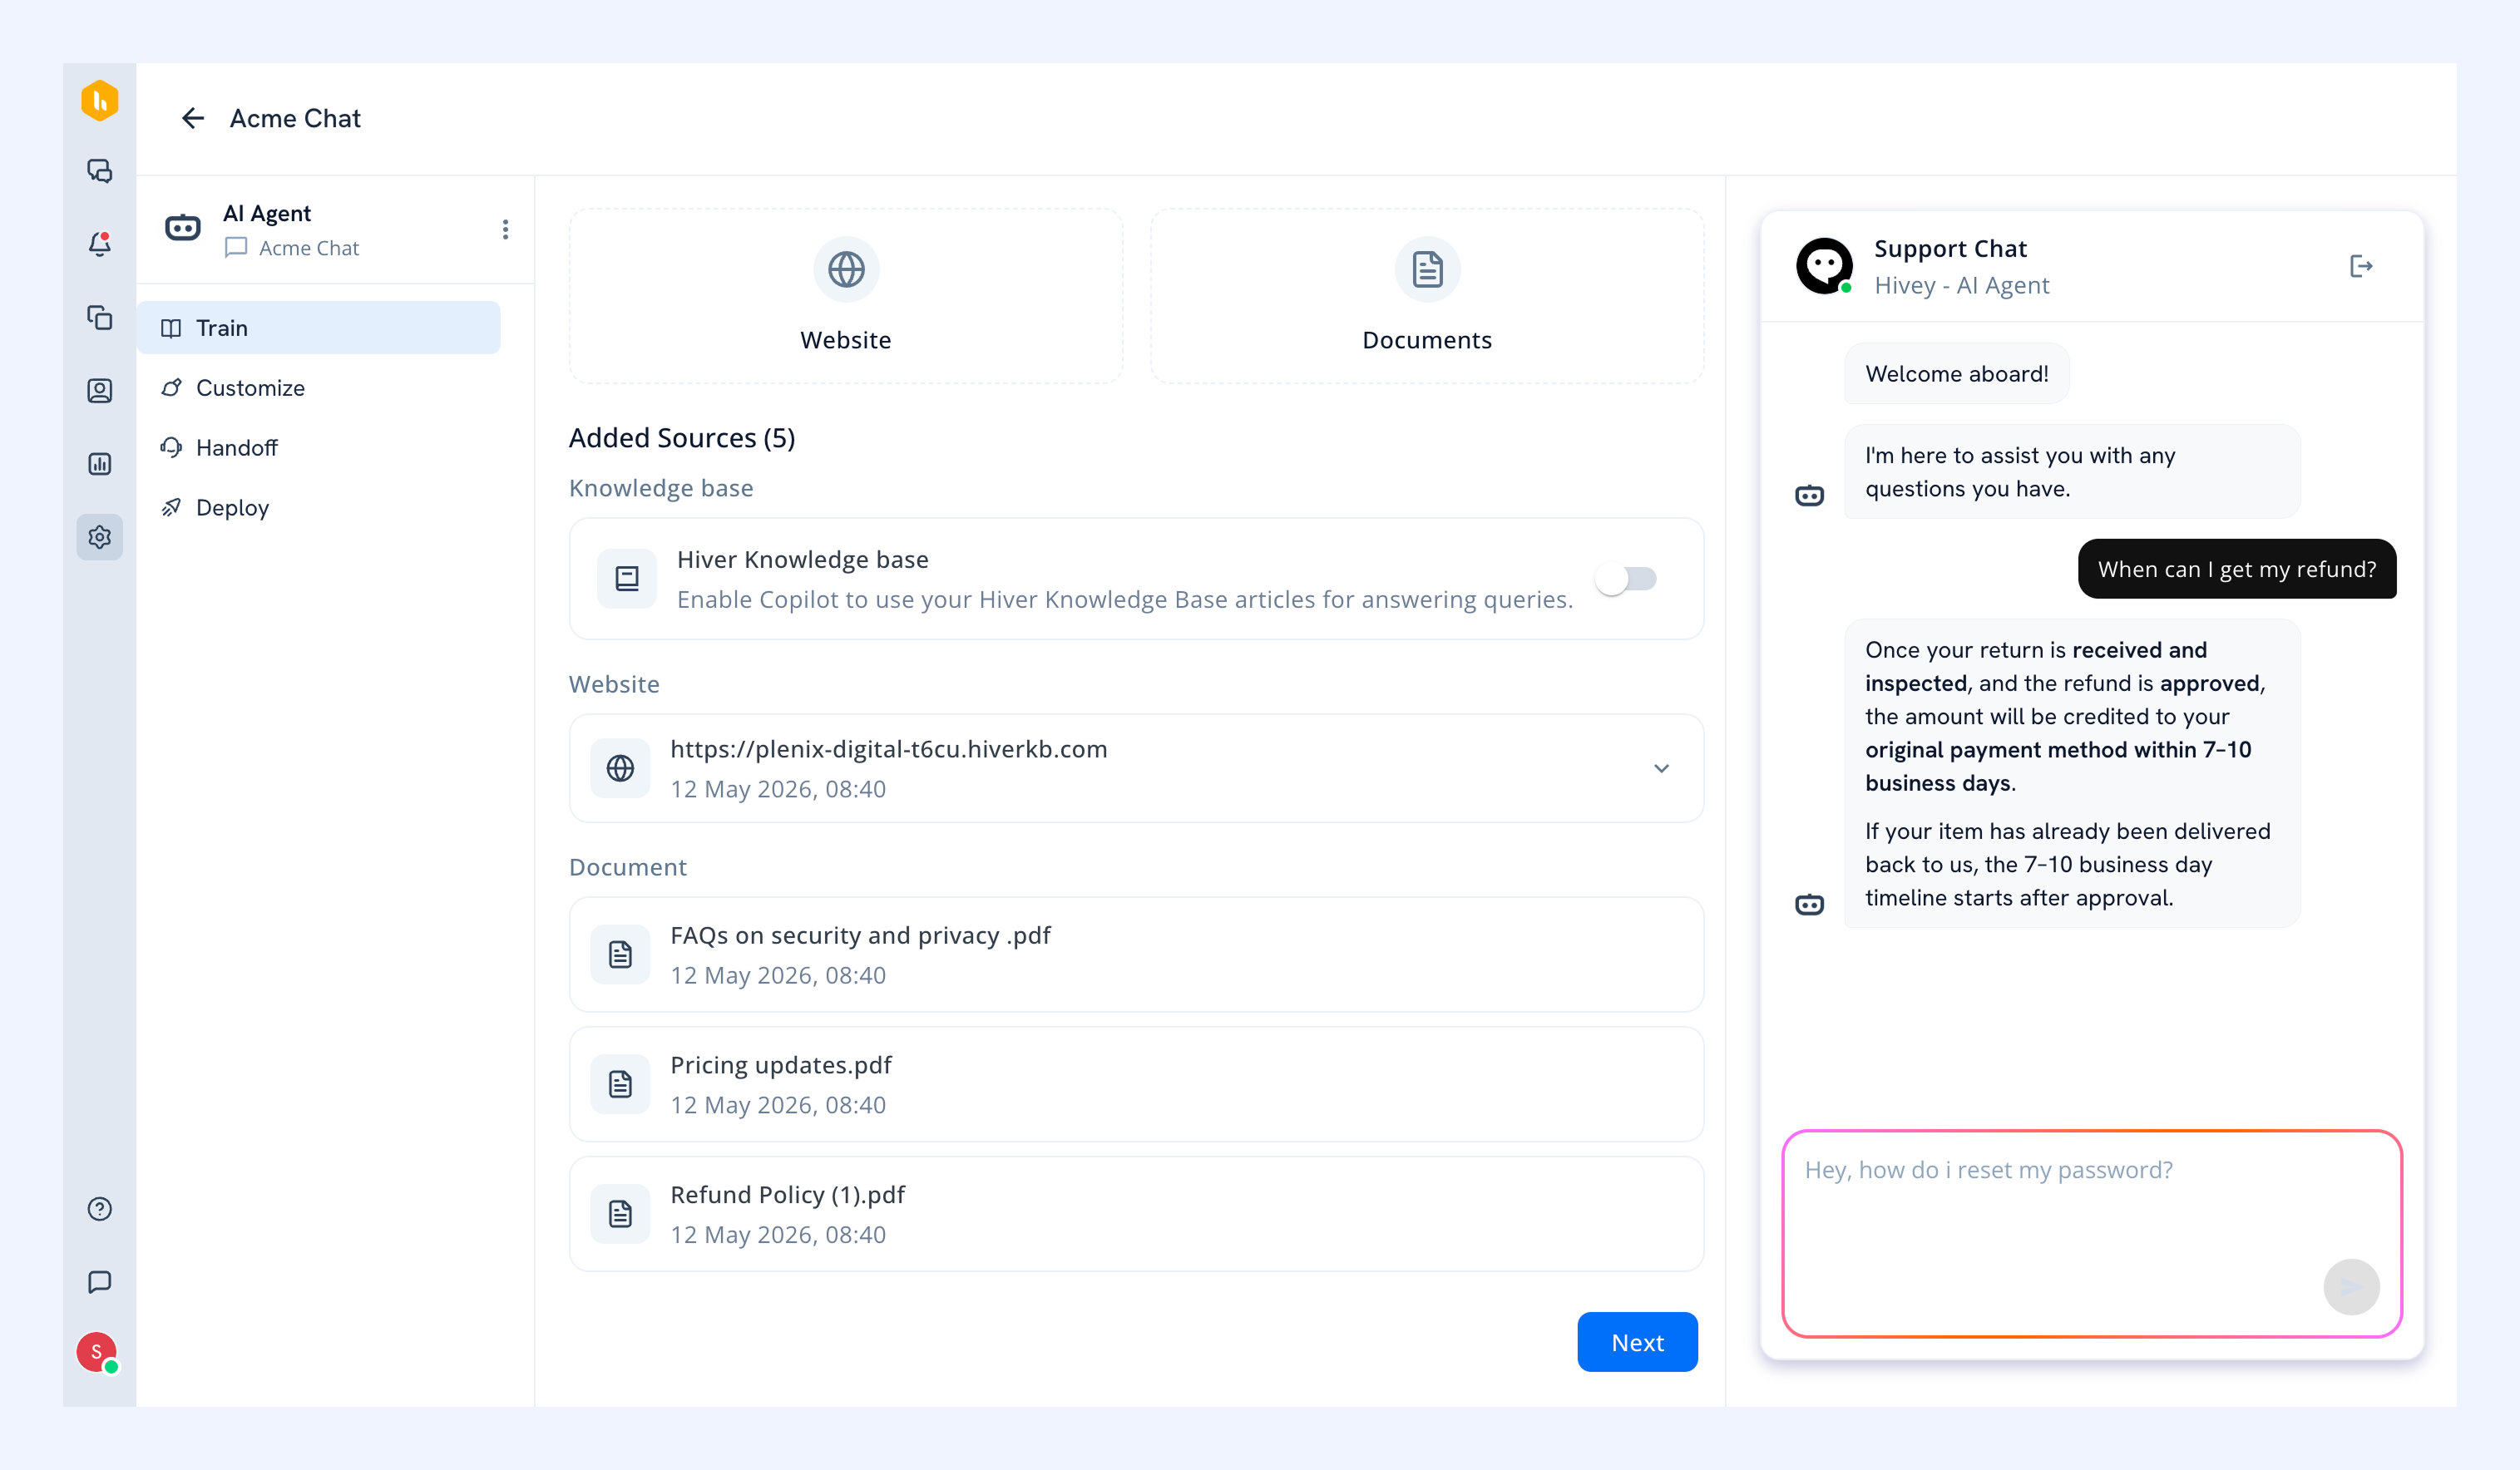
Review the answers returned and tweak your questions or your knowledge sources to improve accuracy. Once done, click Next.
Step 2: Customize your AI Agent
Customize how your AI Agent looks and communicates with customers. This section includes:
- Identity
- Conversation style
- Instructions/guardrails for your AI Agent
1. Identity
Add a name
Choose a name that matches your brand.
Examples:
- Hivey from Hiver
- Acme Support Assistant
Upload an avatar
Add an image that represents your brand or support team.
Once you're done, click Save and proceed.
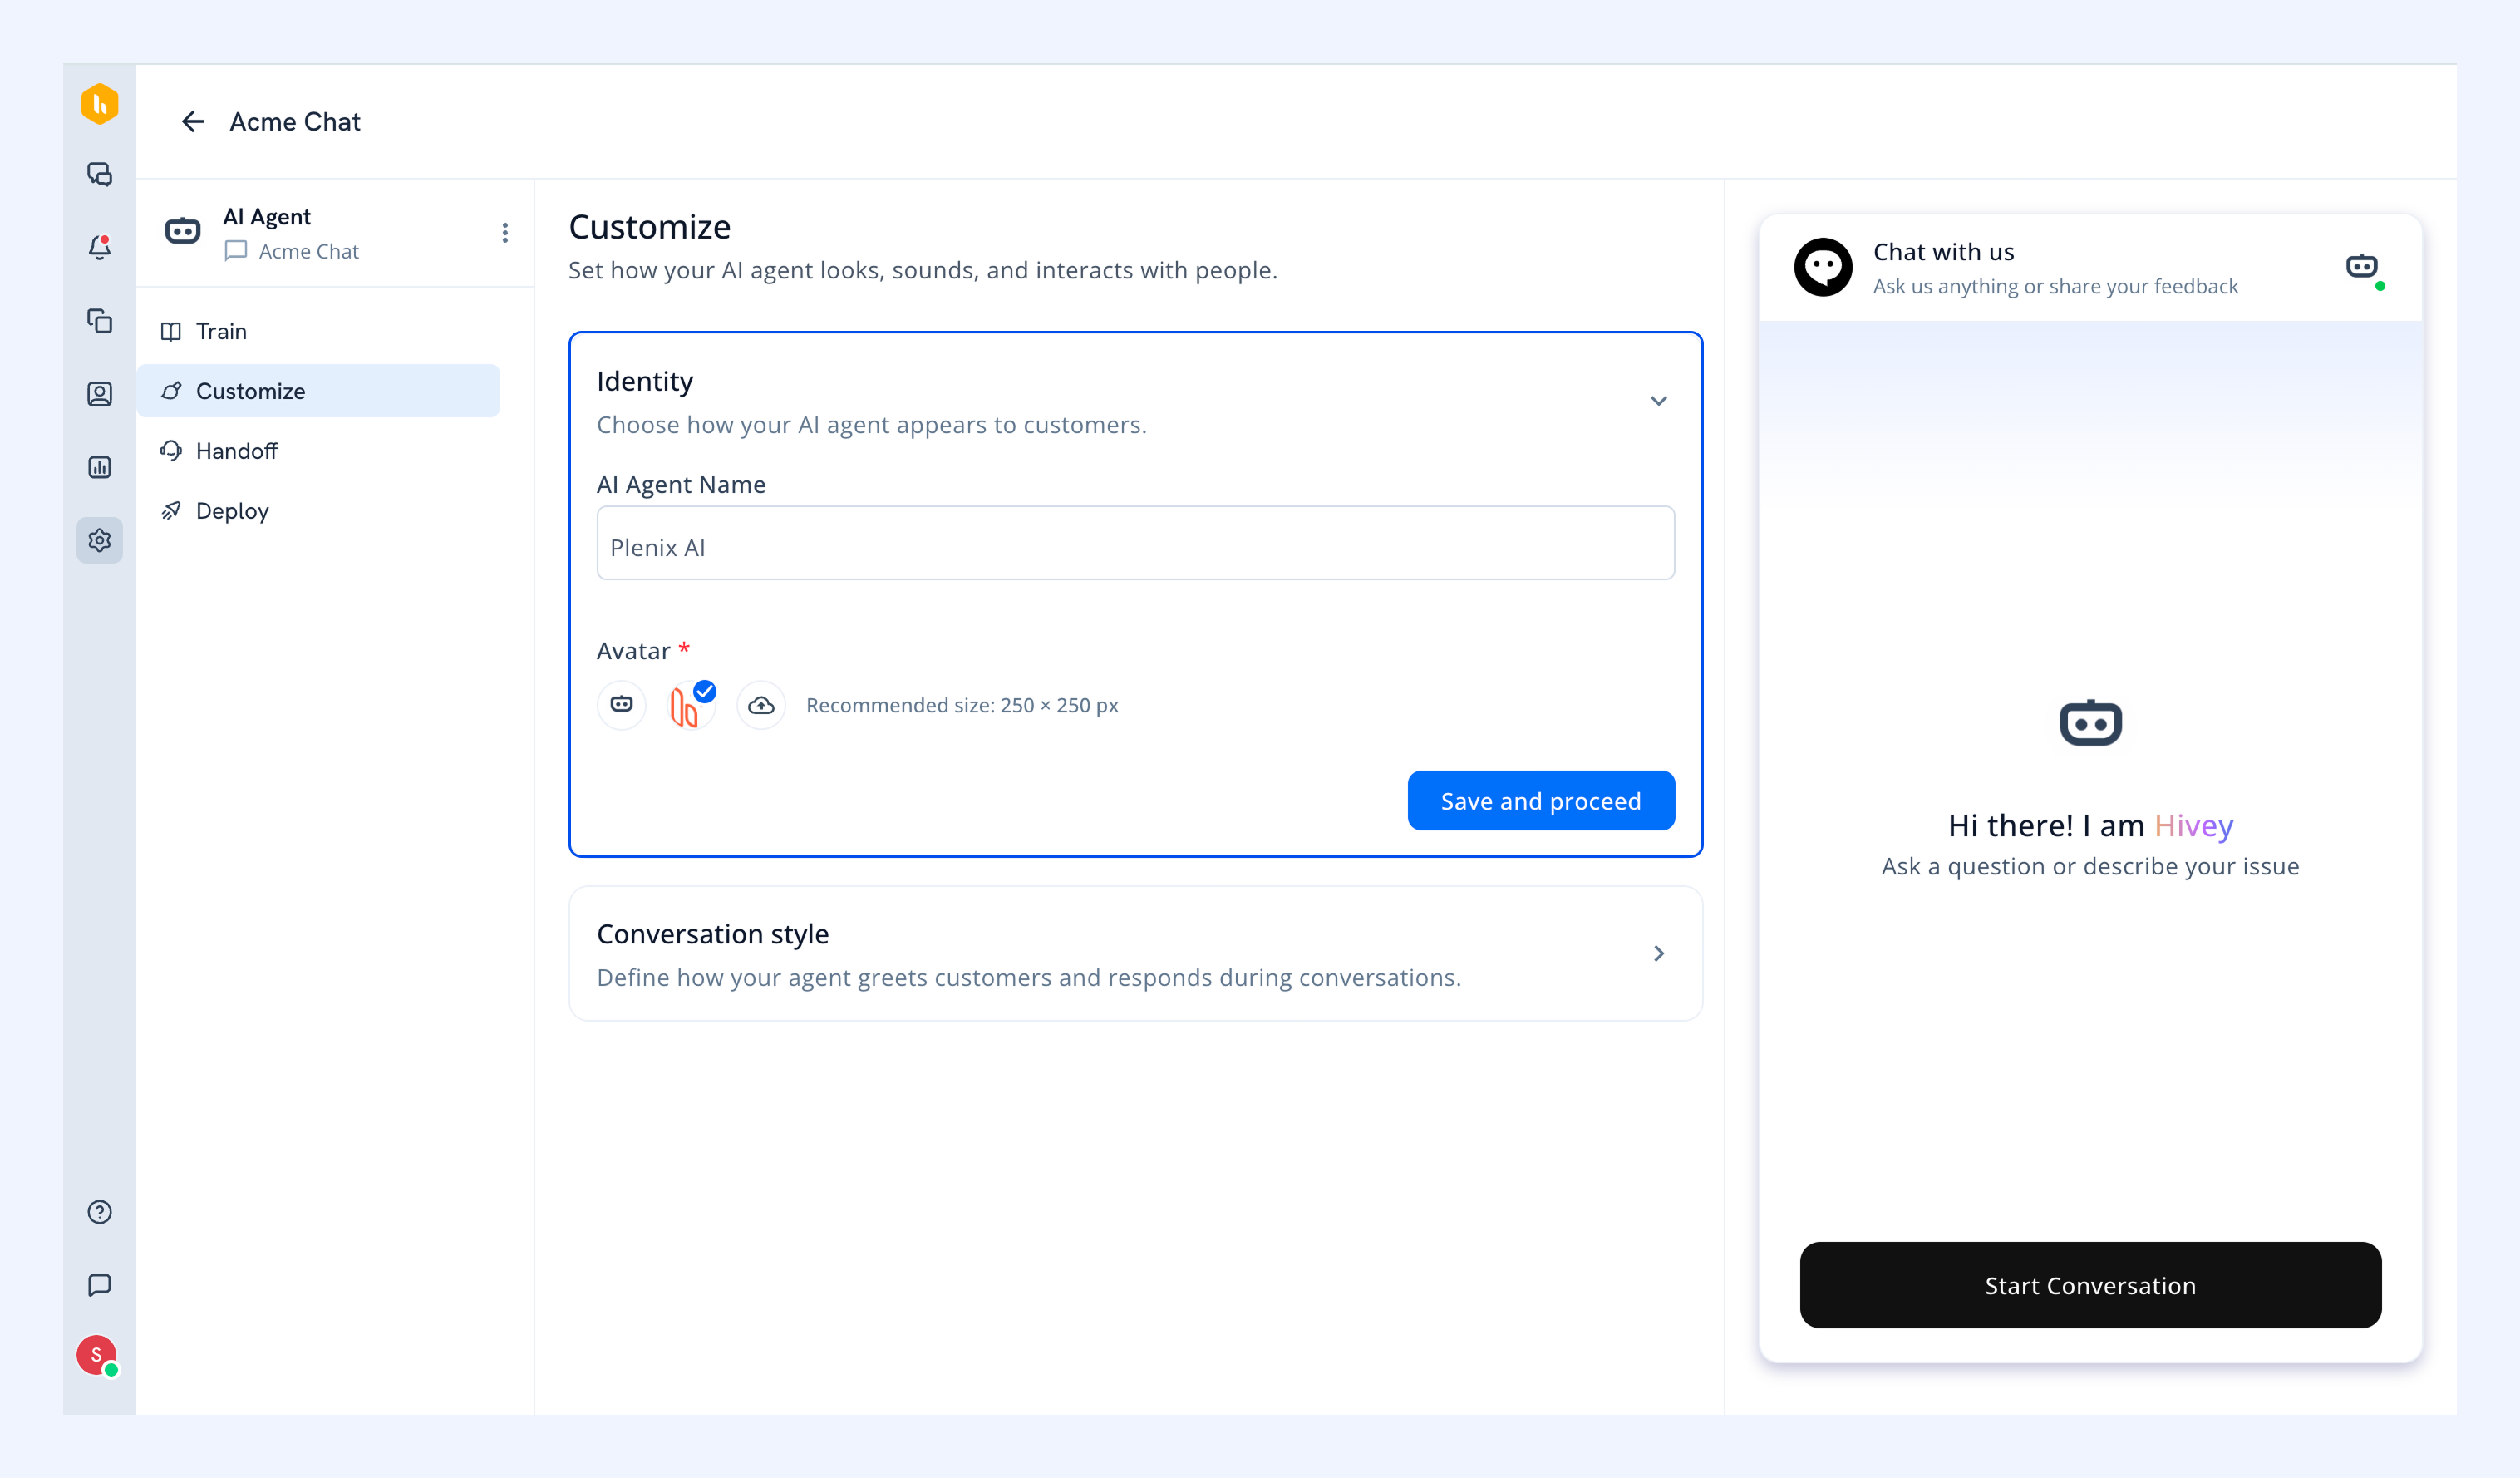
2. Conversation style
Welcome message
Add a welcome message that appears when customers start a chat.
For example:
'Hey there!
I’m Plenix AI, and I’m here to help you today.'
To include another message, type it out, and click + Add
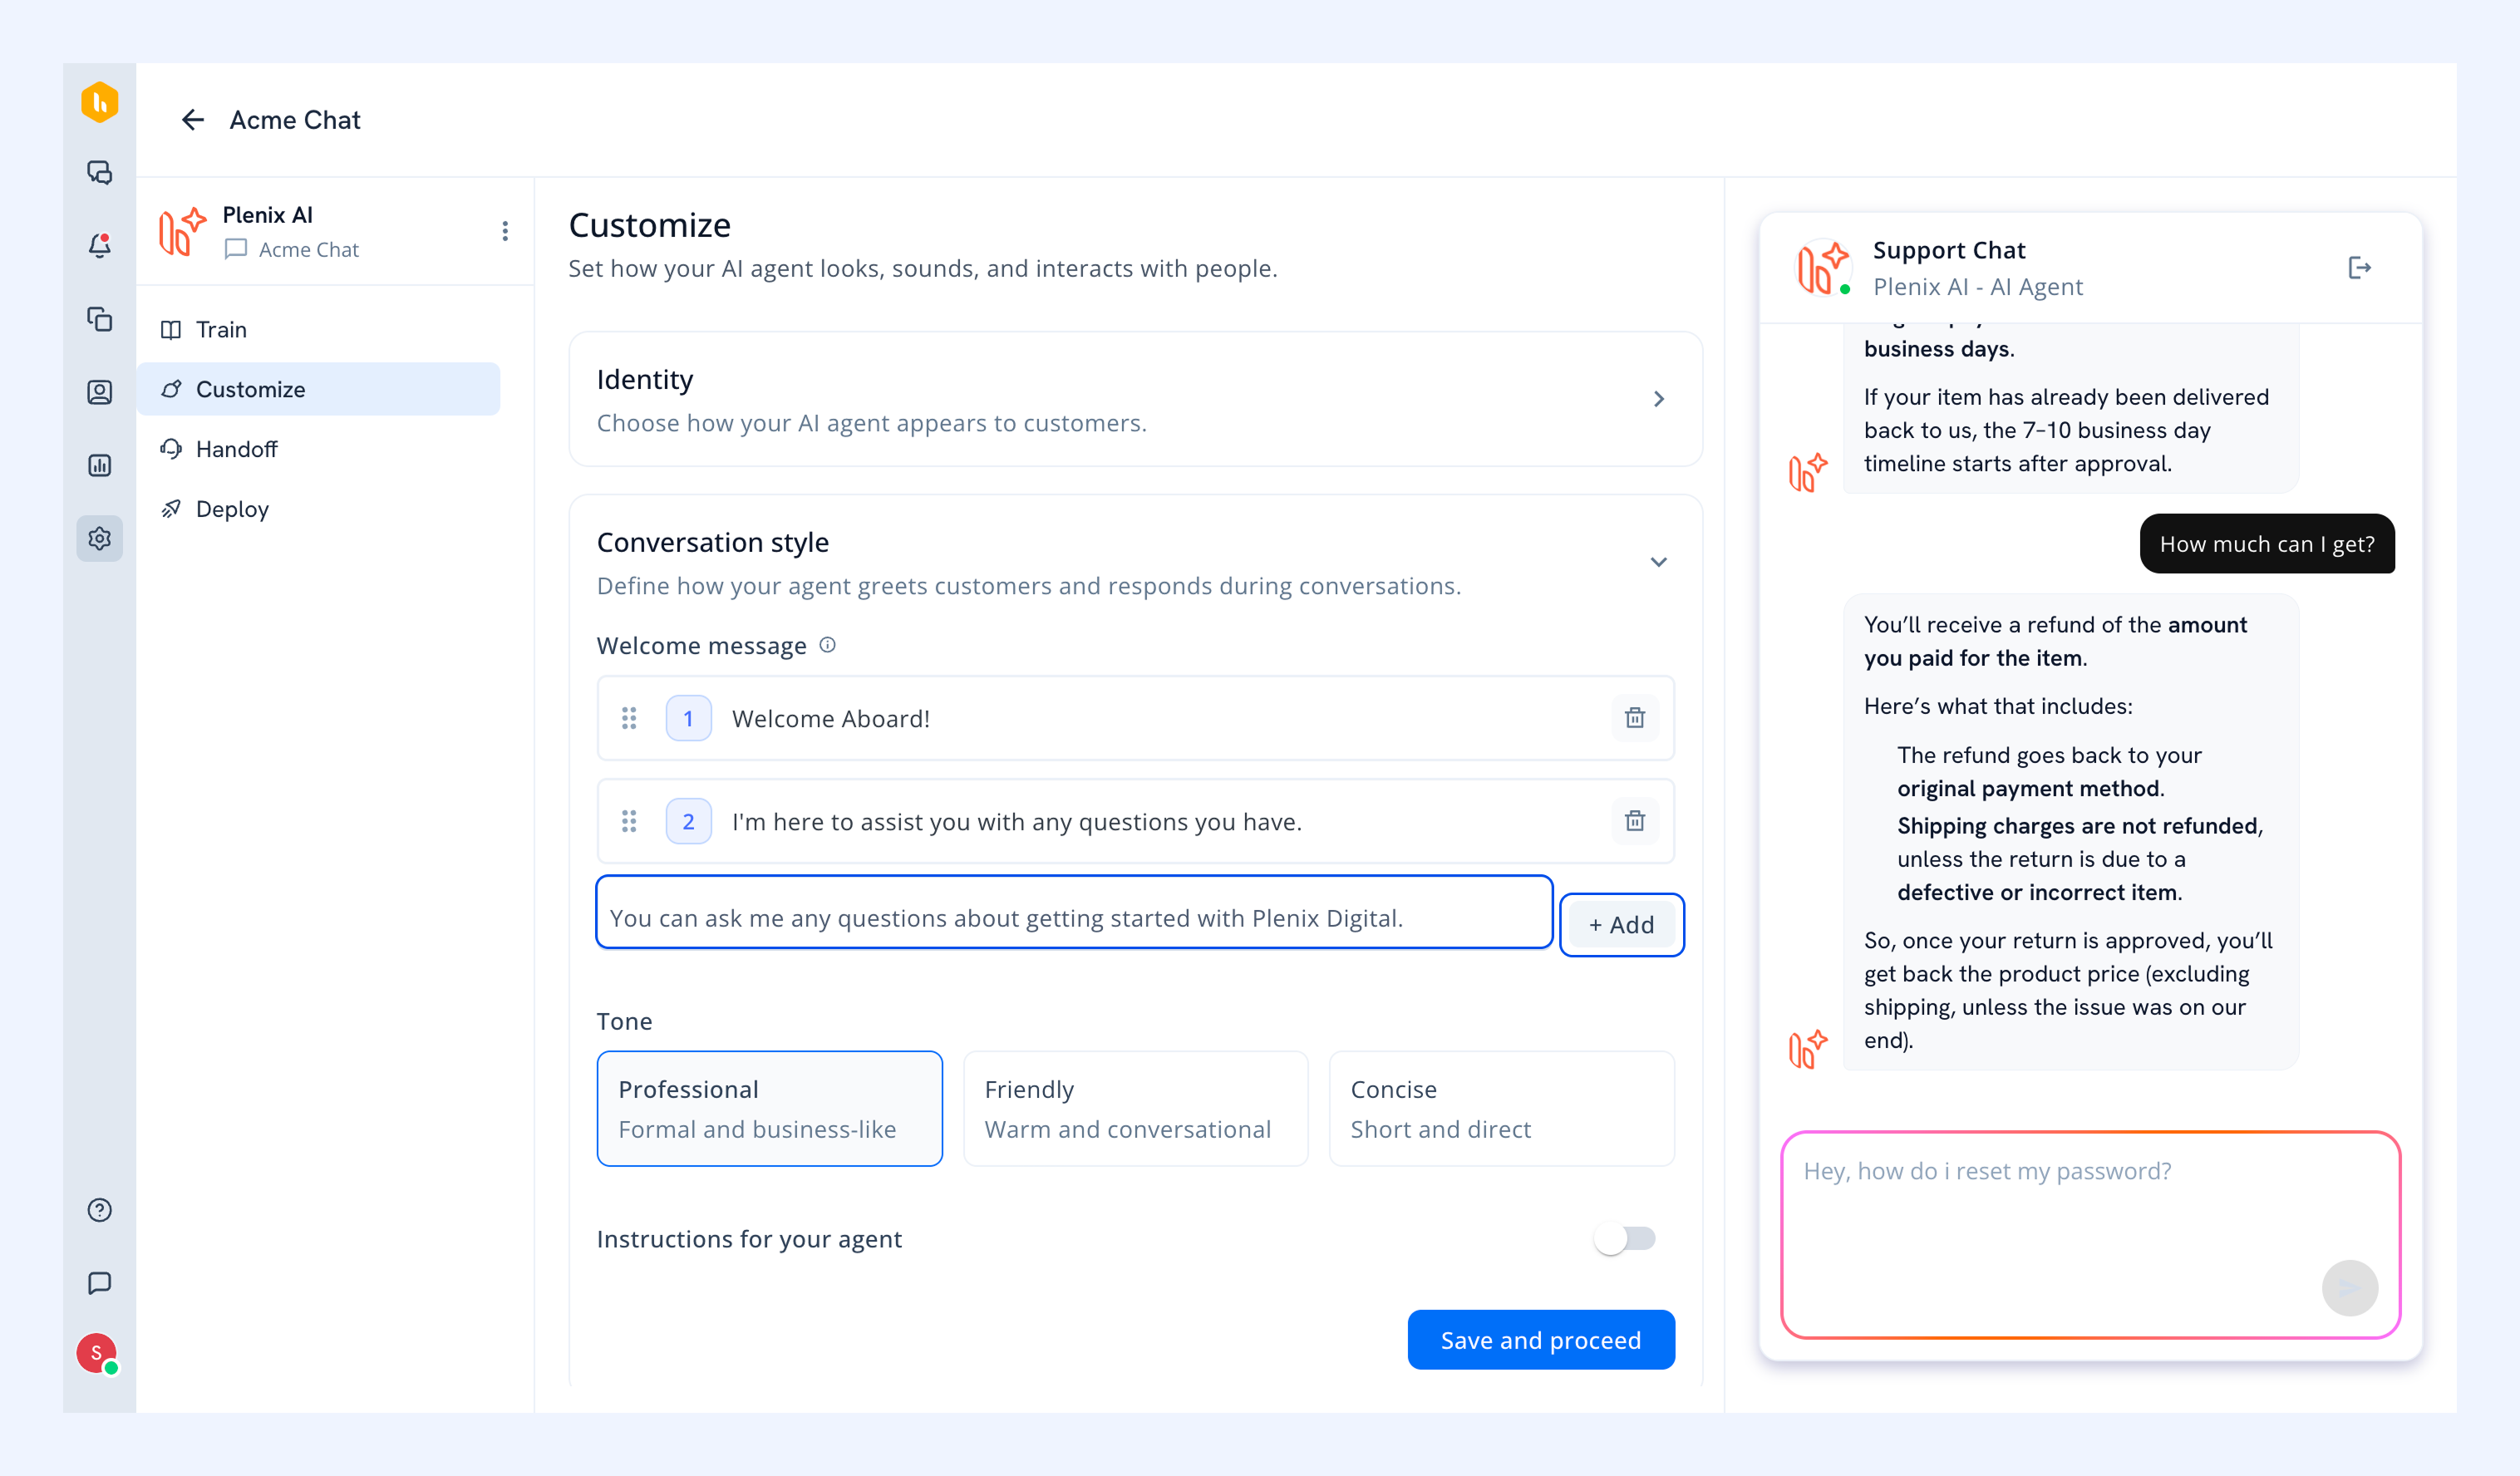
To remove a message, click the delete icon.
Tone
Choose how your AI Agent should sound. You can select between:
- Professional
- Friendly
- Concise
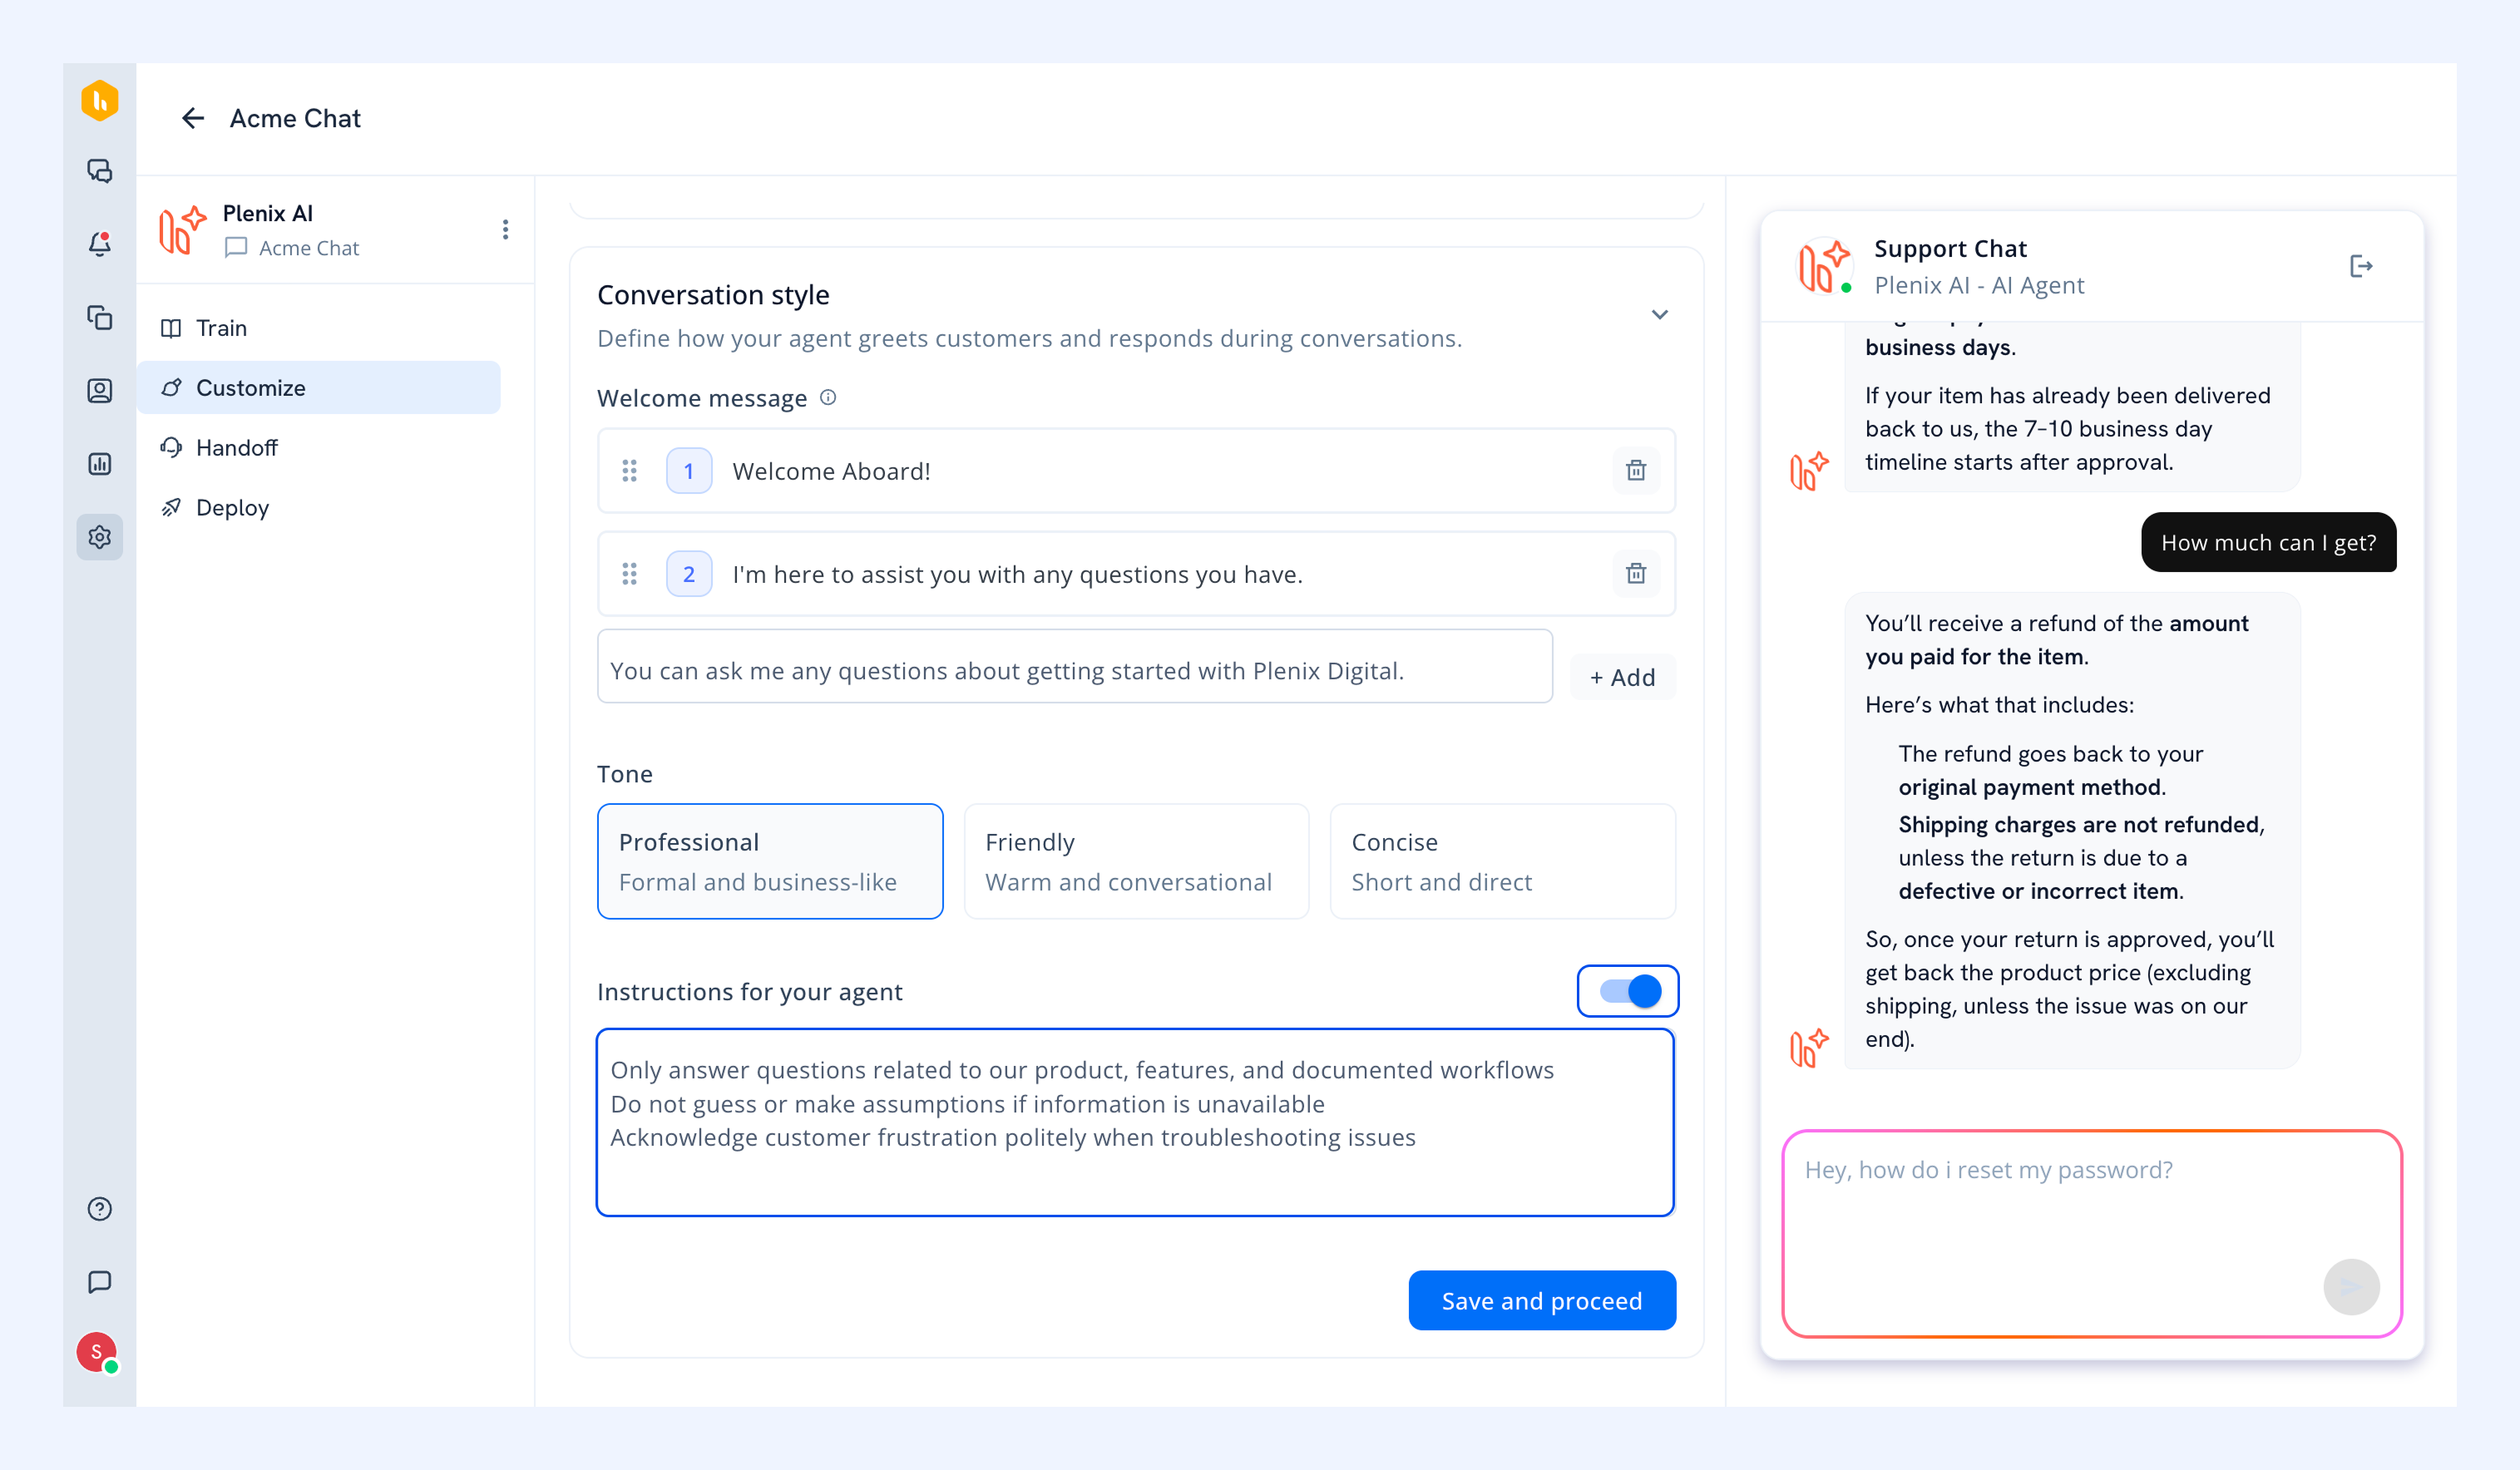
Instructions for your AI Agent
Use custom instructions to guide how your AI Agent should respond. These instructions act as guardrails to ensure your AI Agent operates within your support policies and maintains your brand standards. For example, you can instruct the AI Agent to:
- Keep responses short and direct
- Share help articles before escalating conversations
- Always guide customers step-by-step
- Avoid answering questions outside the scope of customer support questions
You can test these changes in the preview.
Once done, click Save and proceed.
Step 3: Set up hand-off rules
AI Agents can autonomously manage repetitive and informational queries while handing more sensitive or complex conversations to your team. Hand-off rules help you define where that transition should happen.
For example, you may want to escalate conversations involving:
- Account-specific issues
- Frustrated customers
- Pricing discussions
- Requests requiring manual investigation
- Questions outside your documented workflows
When a hand-off rule is triggered, the conversation is added to the Unassigned view along with the full conversation transcript.
There are a few hand-off rules added by default. Enable the ones you want to use.
.png)
To add a custom hand-off rule:
1. Click + New
Describe the situations where the AI Agent should escalate the conversation. For example,
- “Escalate conversations where the customer asks to speak with a human.”
- “Escalate conversations involving account access issues.”
- “Escalate conversations where troubleshooting steps do not resolve the issue.”
.png)
2. Click Optimise. Hiver AI will rephrase the hand-off rule and optimise for accuracy.
3. Click Save and enable to start using the hand-off rule.
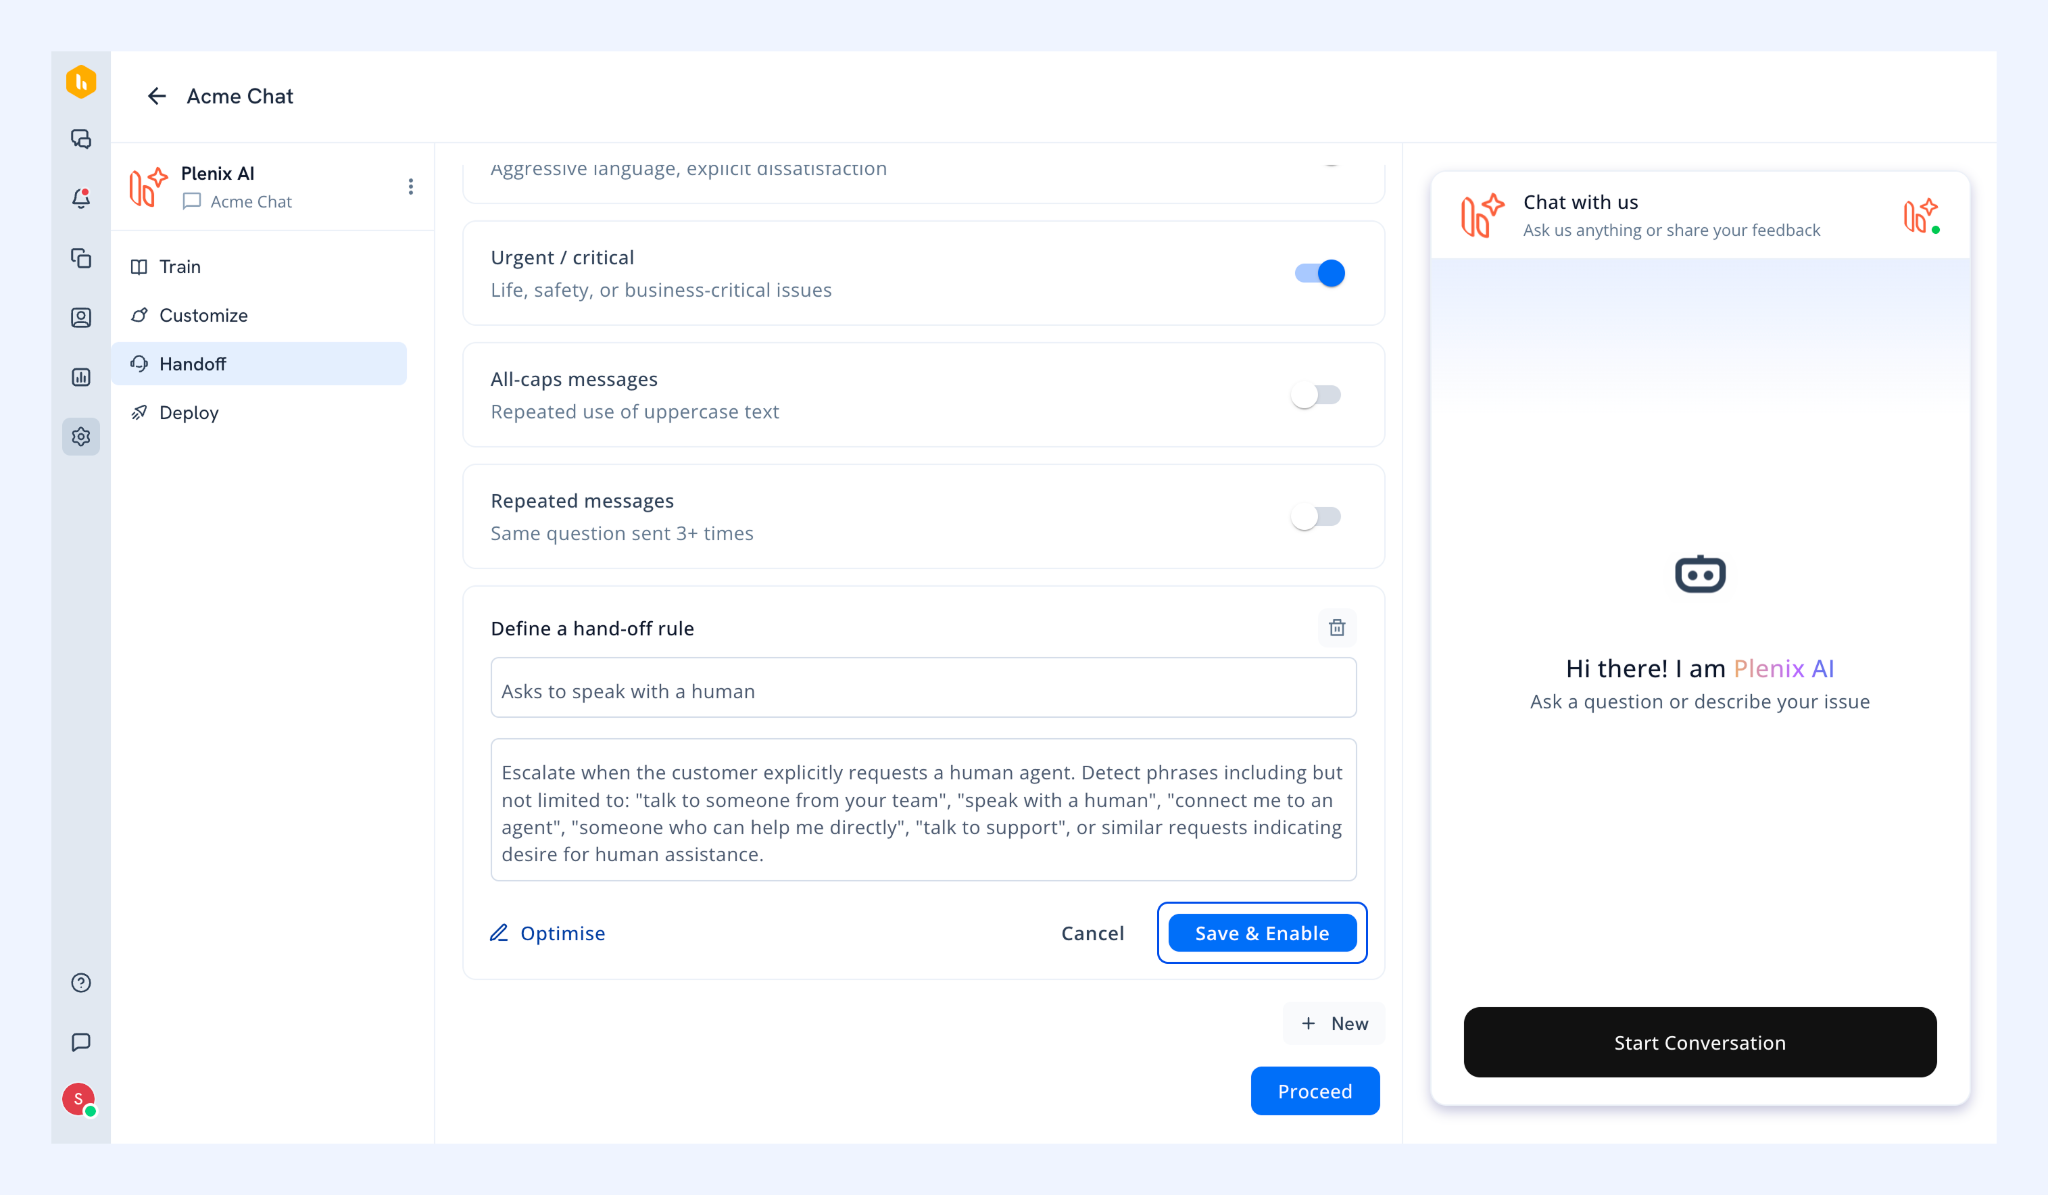
4. Once done, click Proceed.
Step 4: Deploy AI Agent
Once your AI Agent is ready, choose which Chat Inbox you want to deploy it in.
Under Deployment channels, select an inbox.
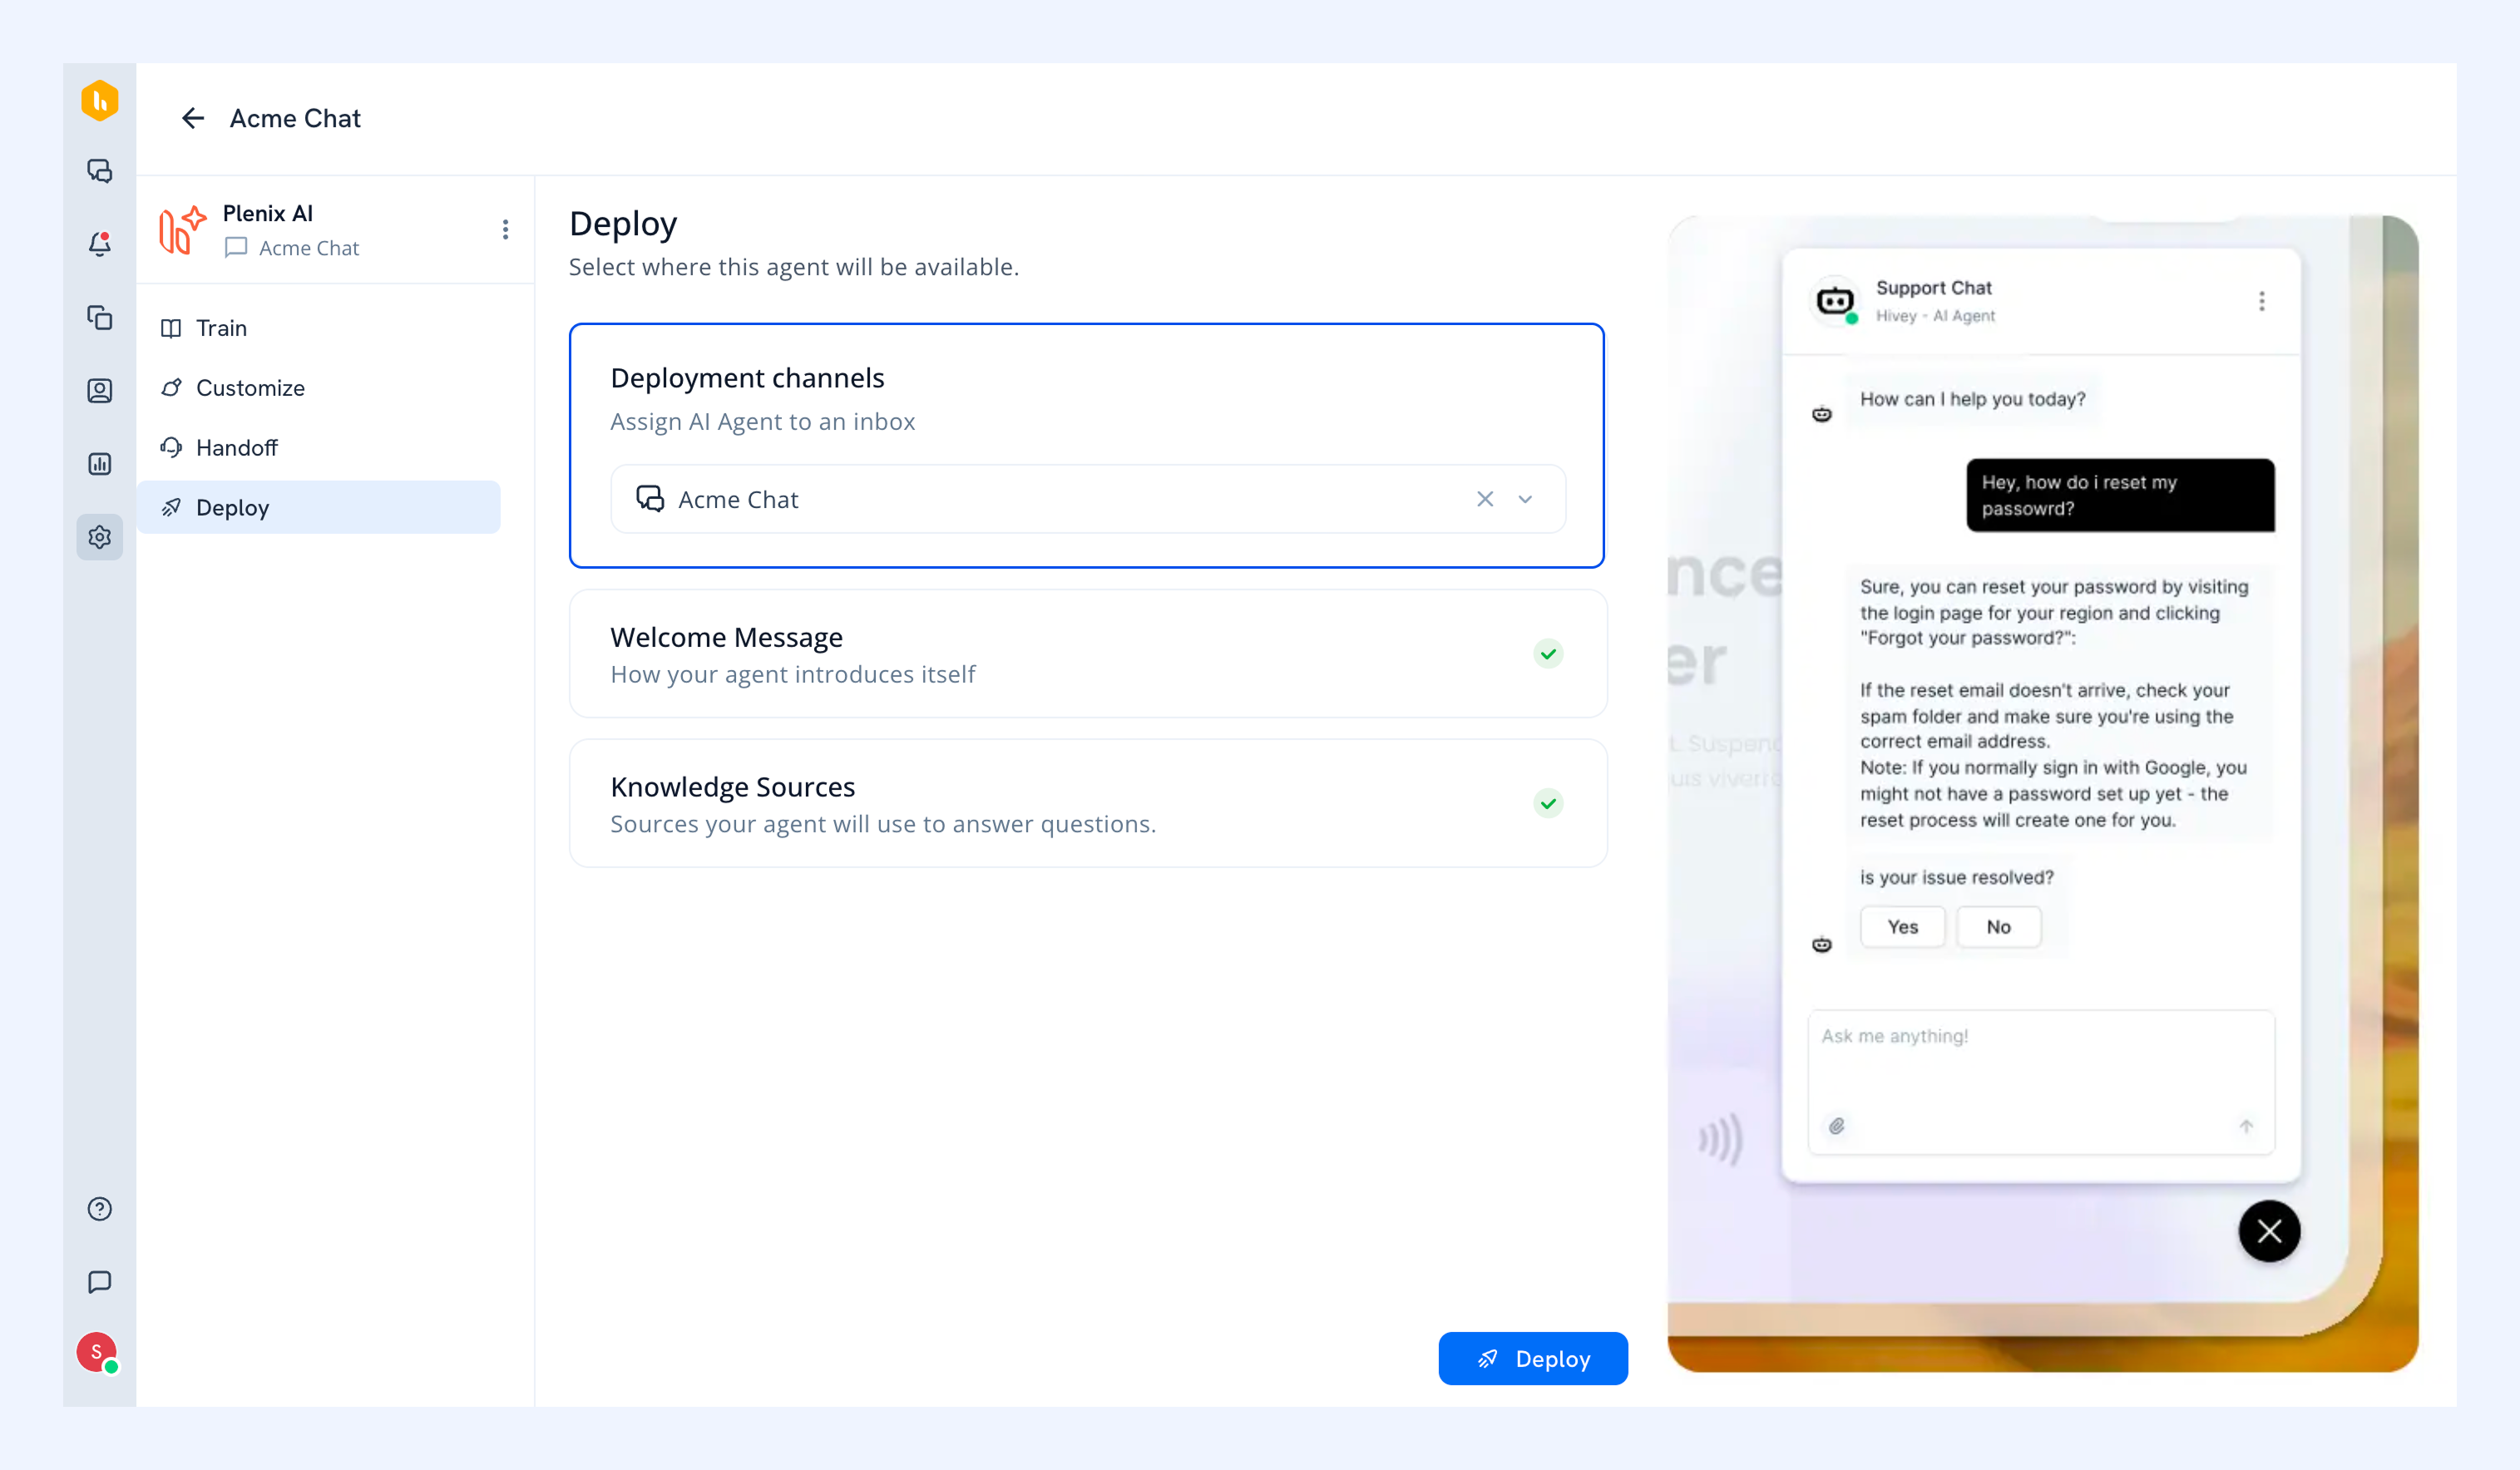
You can also refer to the checklist given to verify if you’ve configured required details including a welcome message and knowledge sources. When you’re ready, click Deploy.
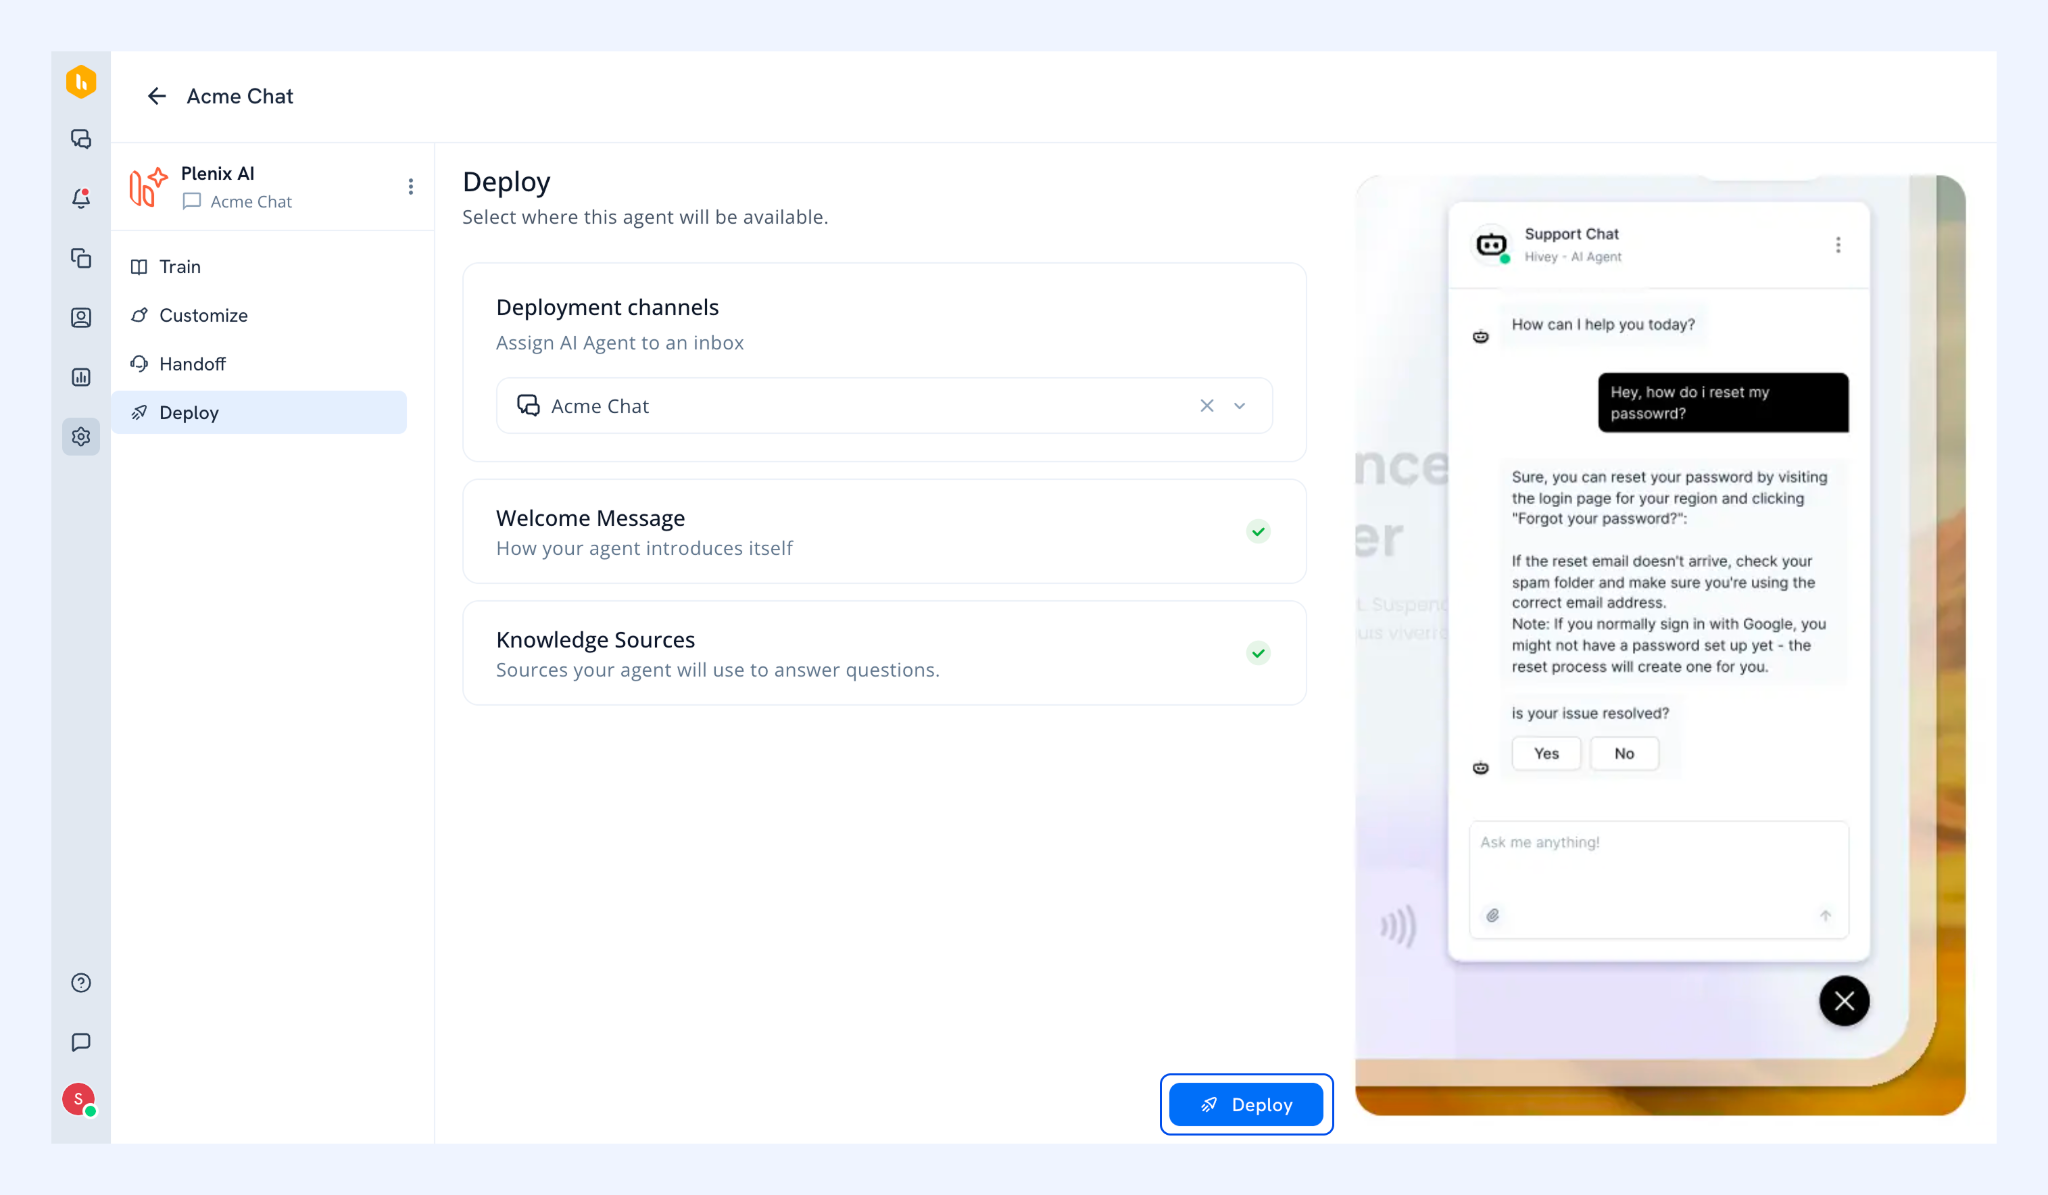
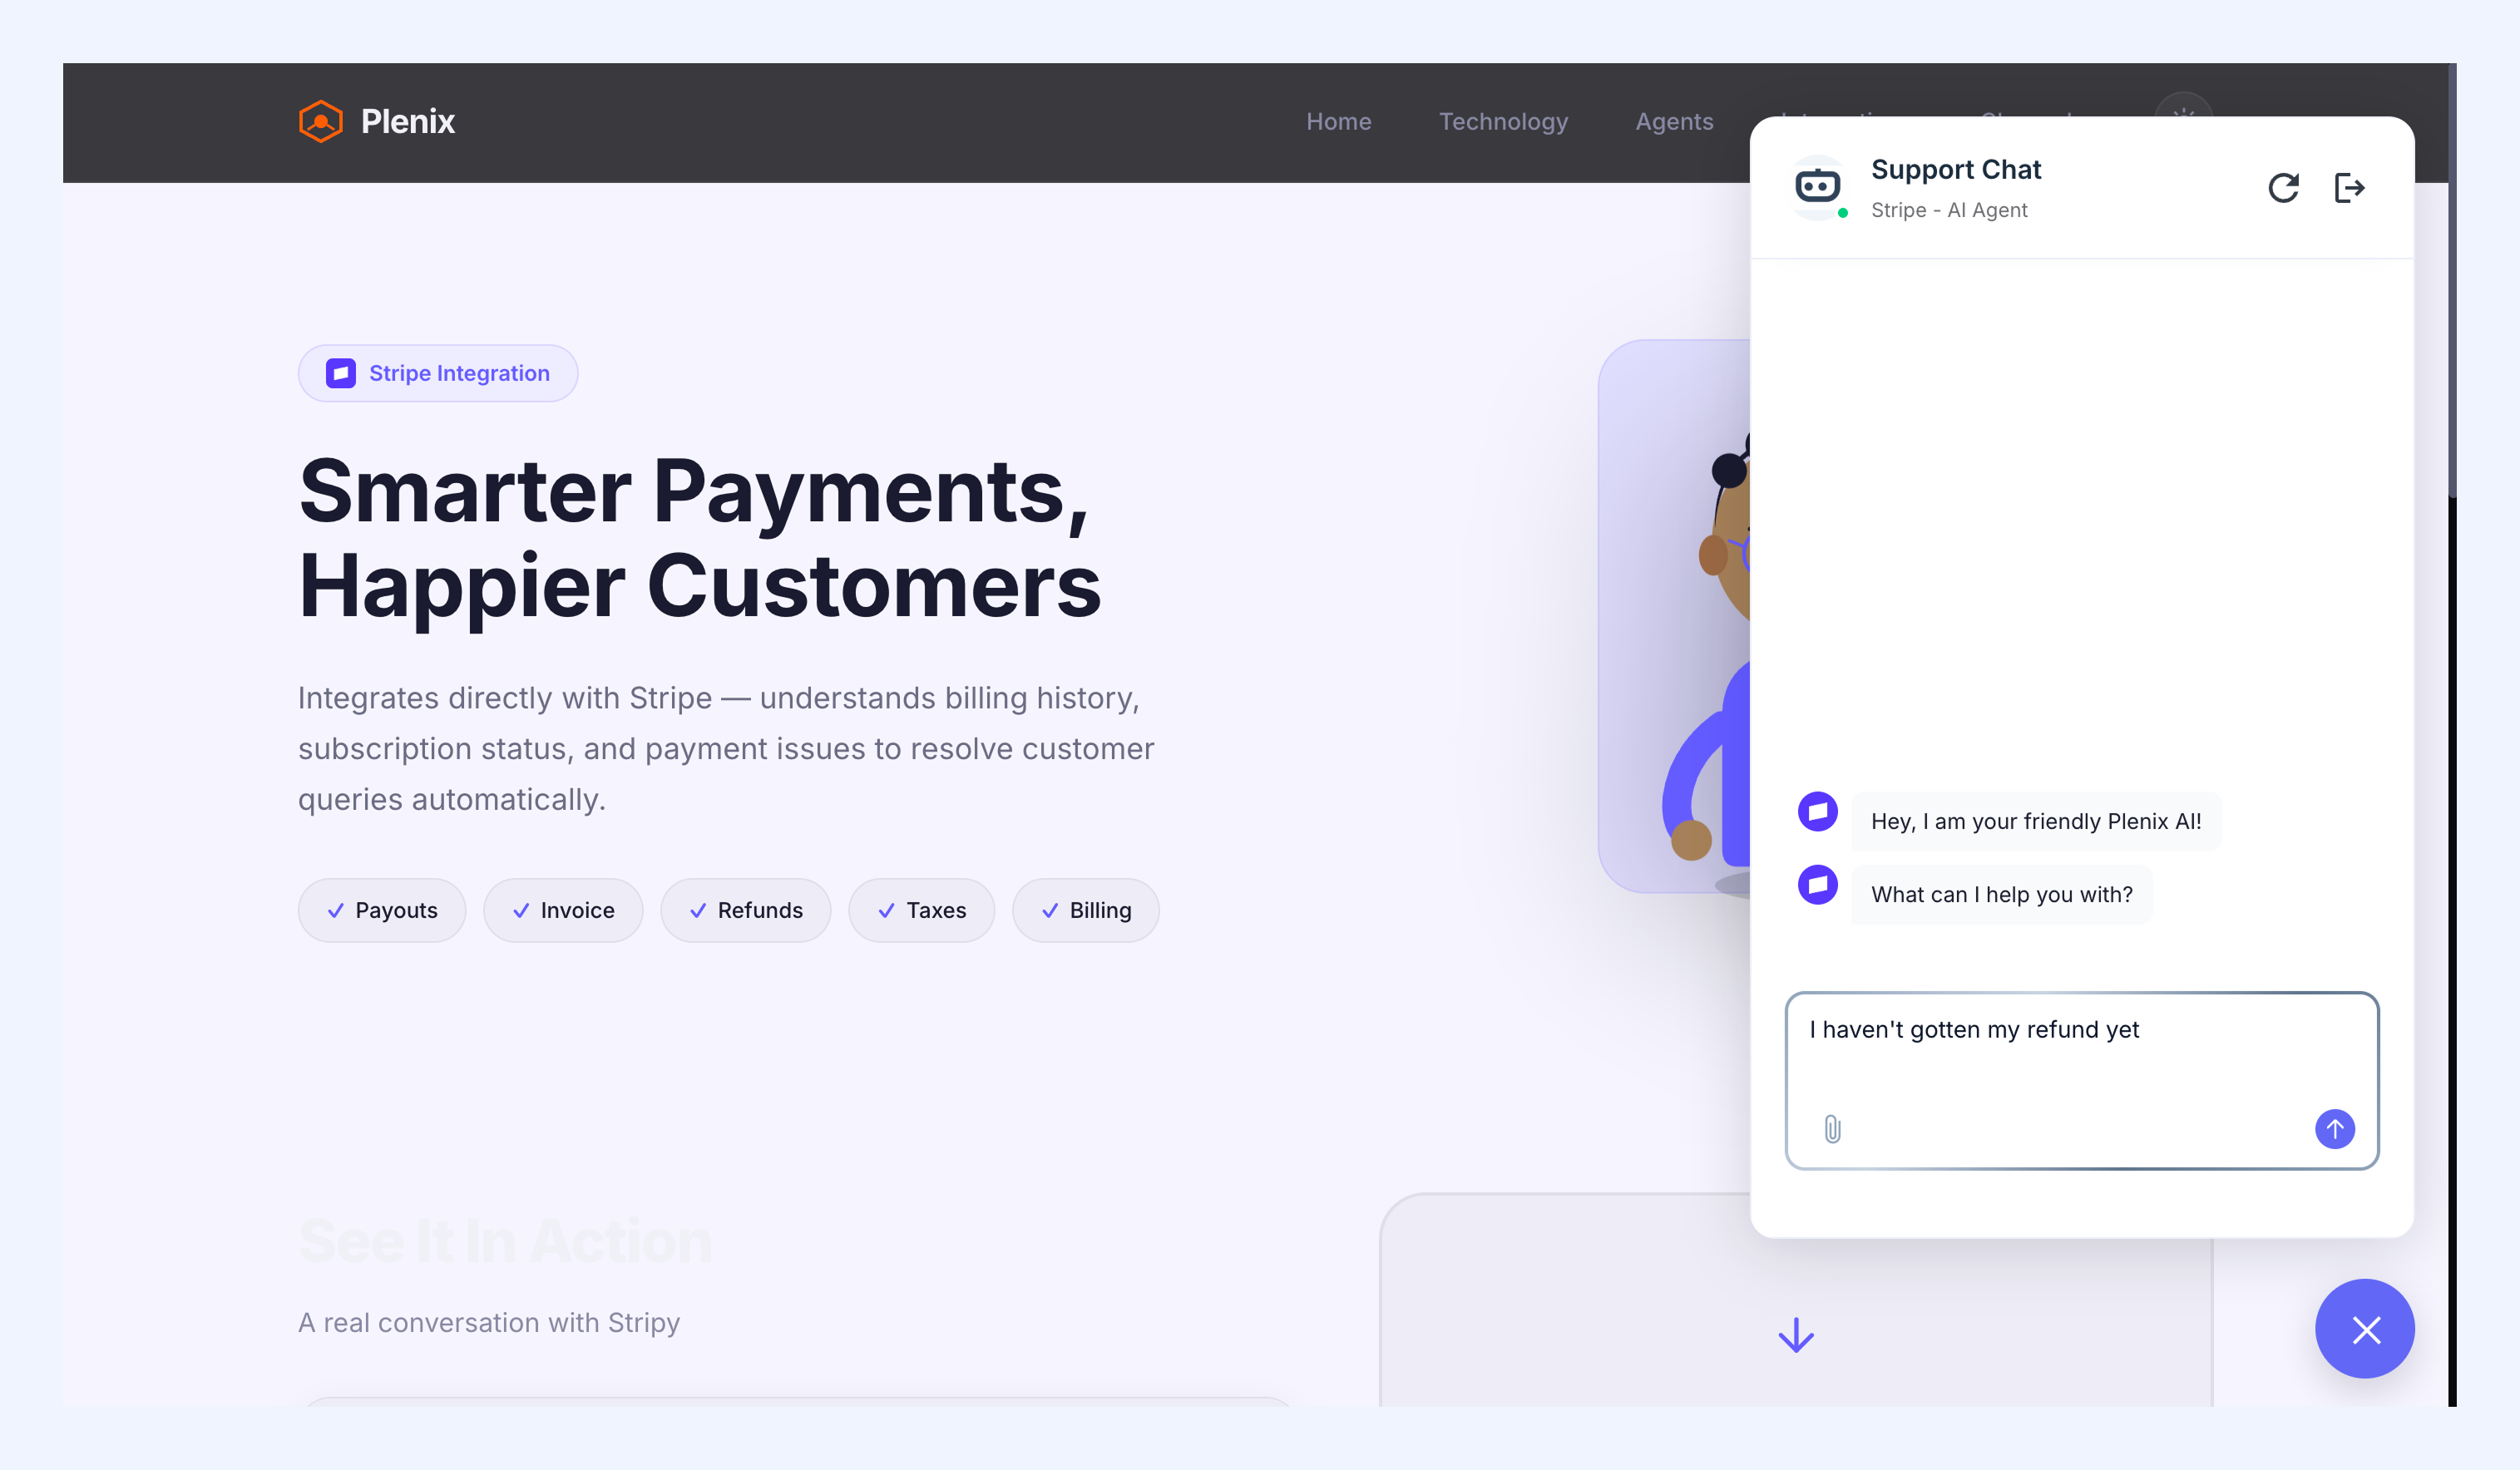
Once deployed, the AI Agent will begin handling conversations from your chat widget on your website.
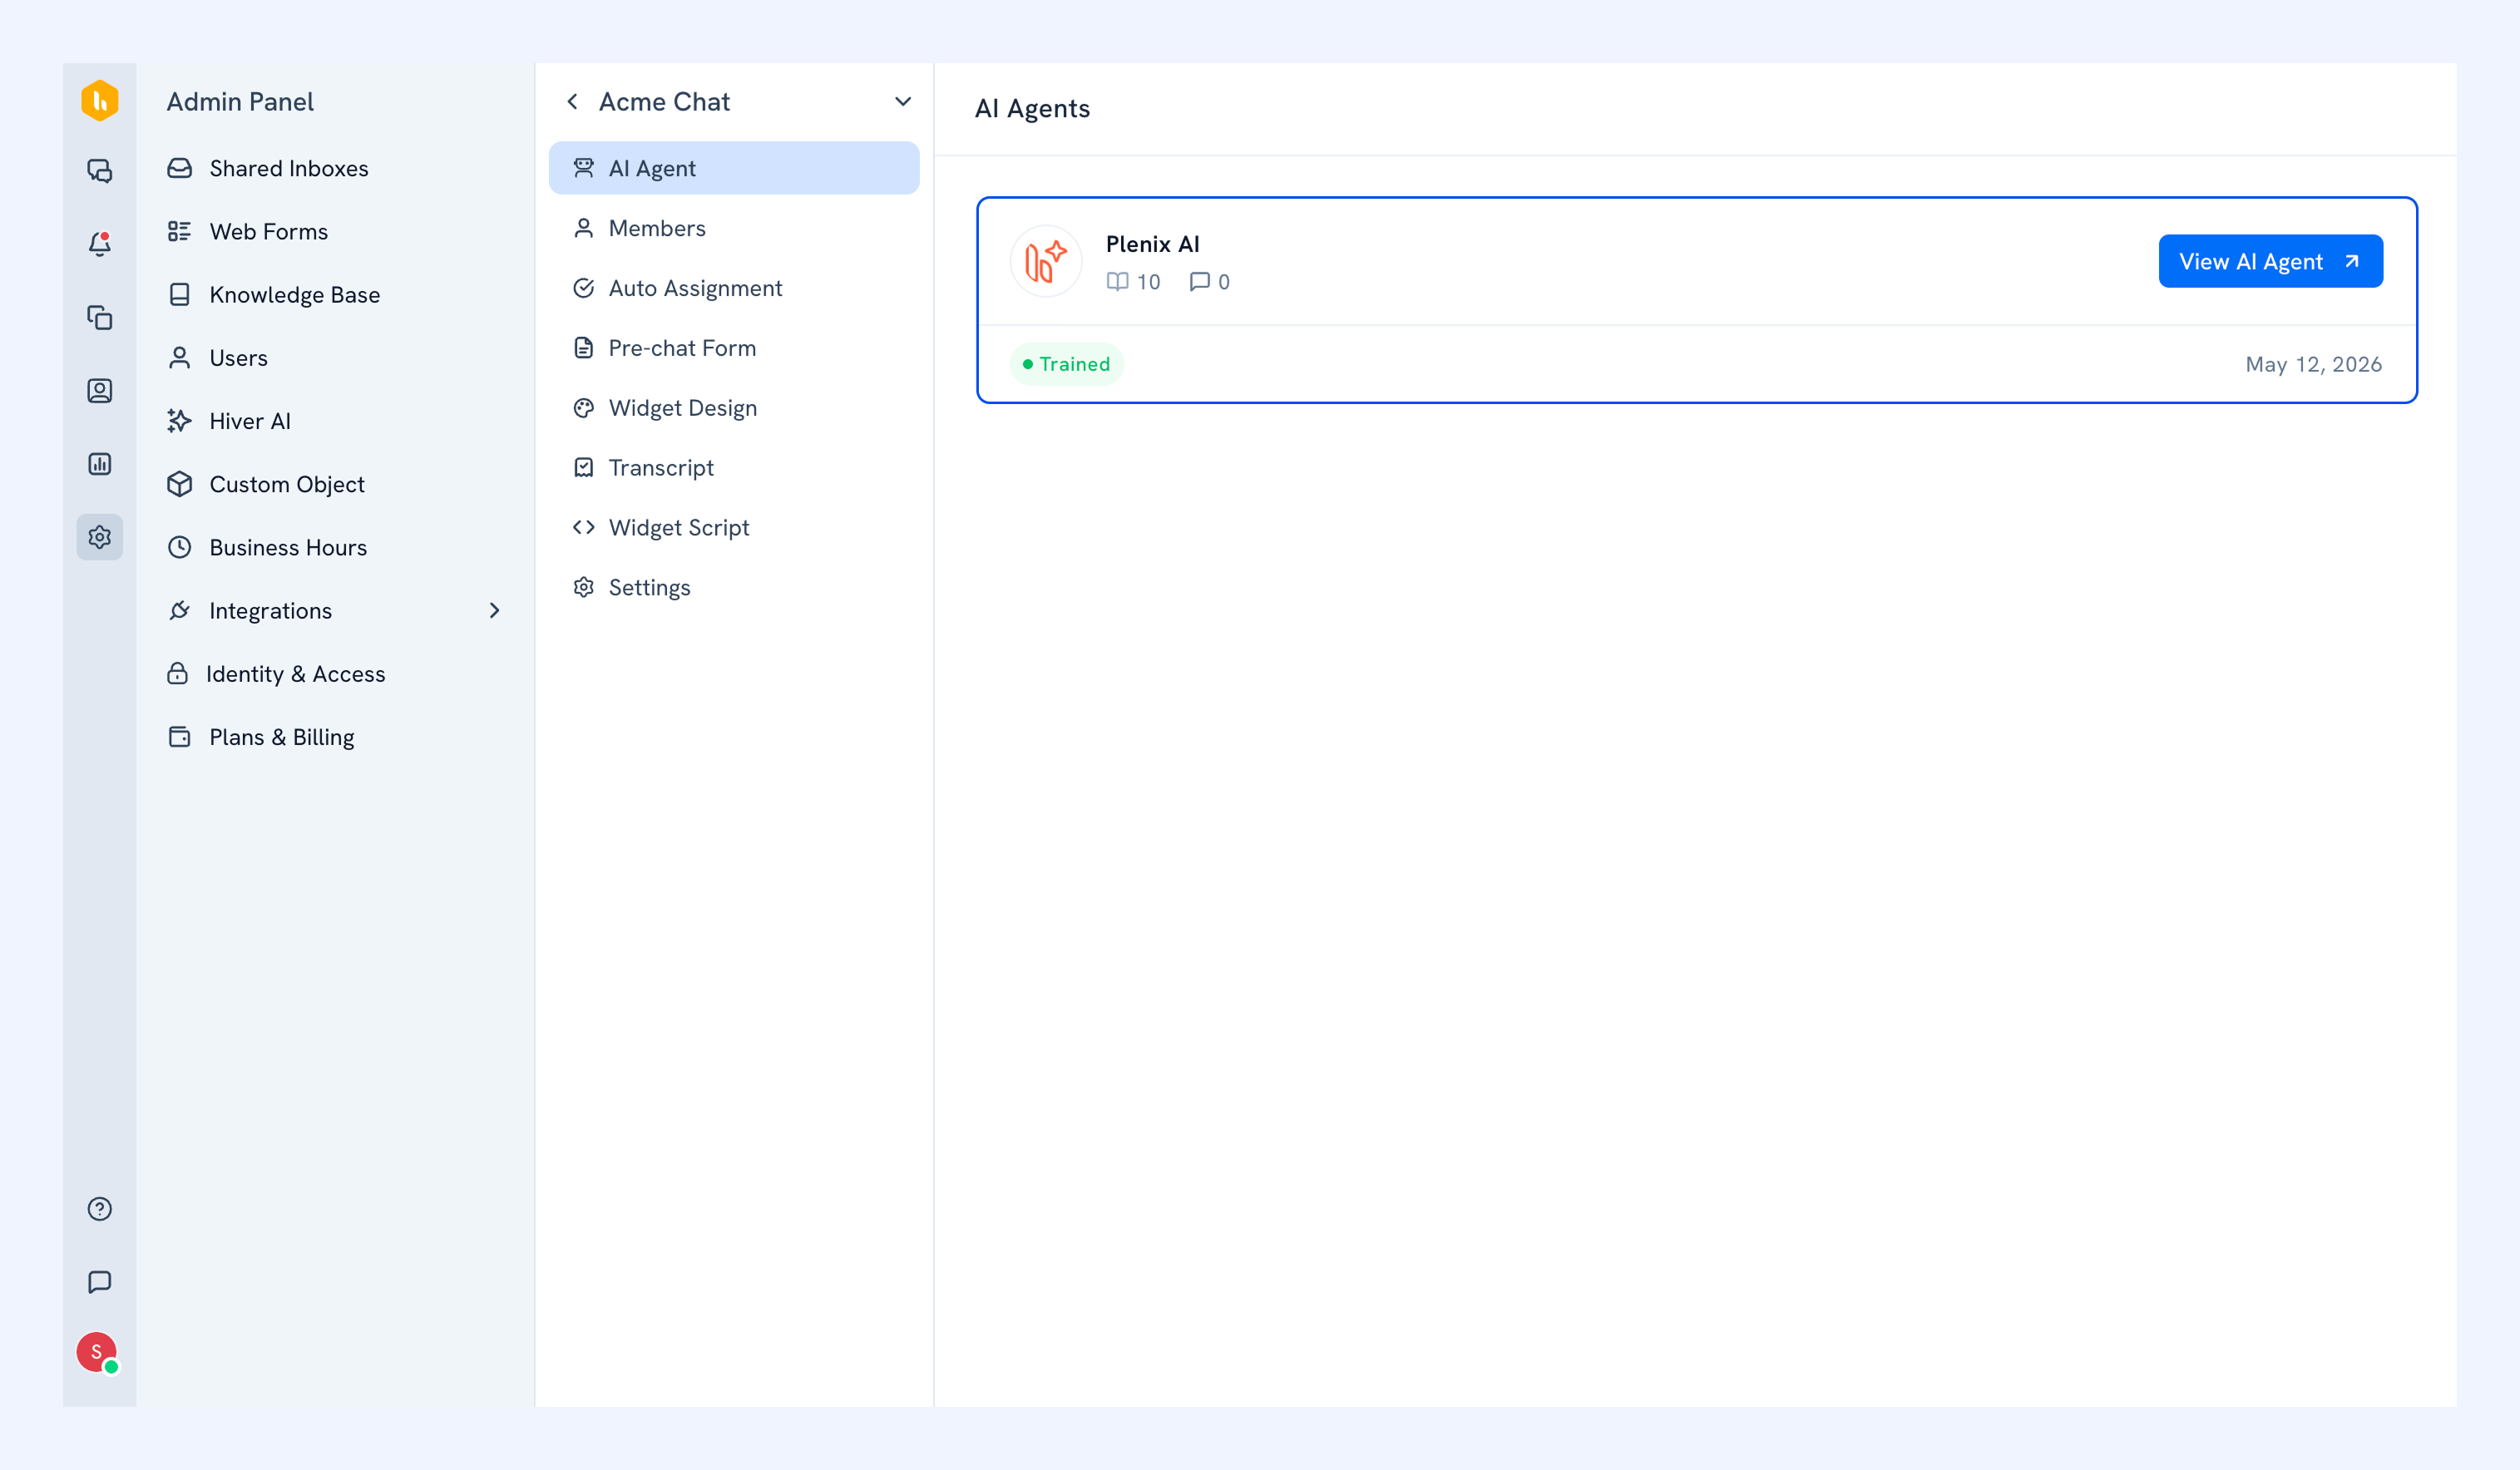
You can access your AI Agent from Hiver AI → Chat Agents or from your Chat Inbox’s settings, and make changes as and when needed.
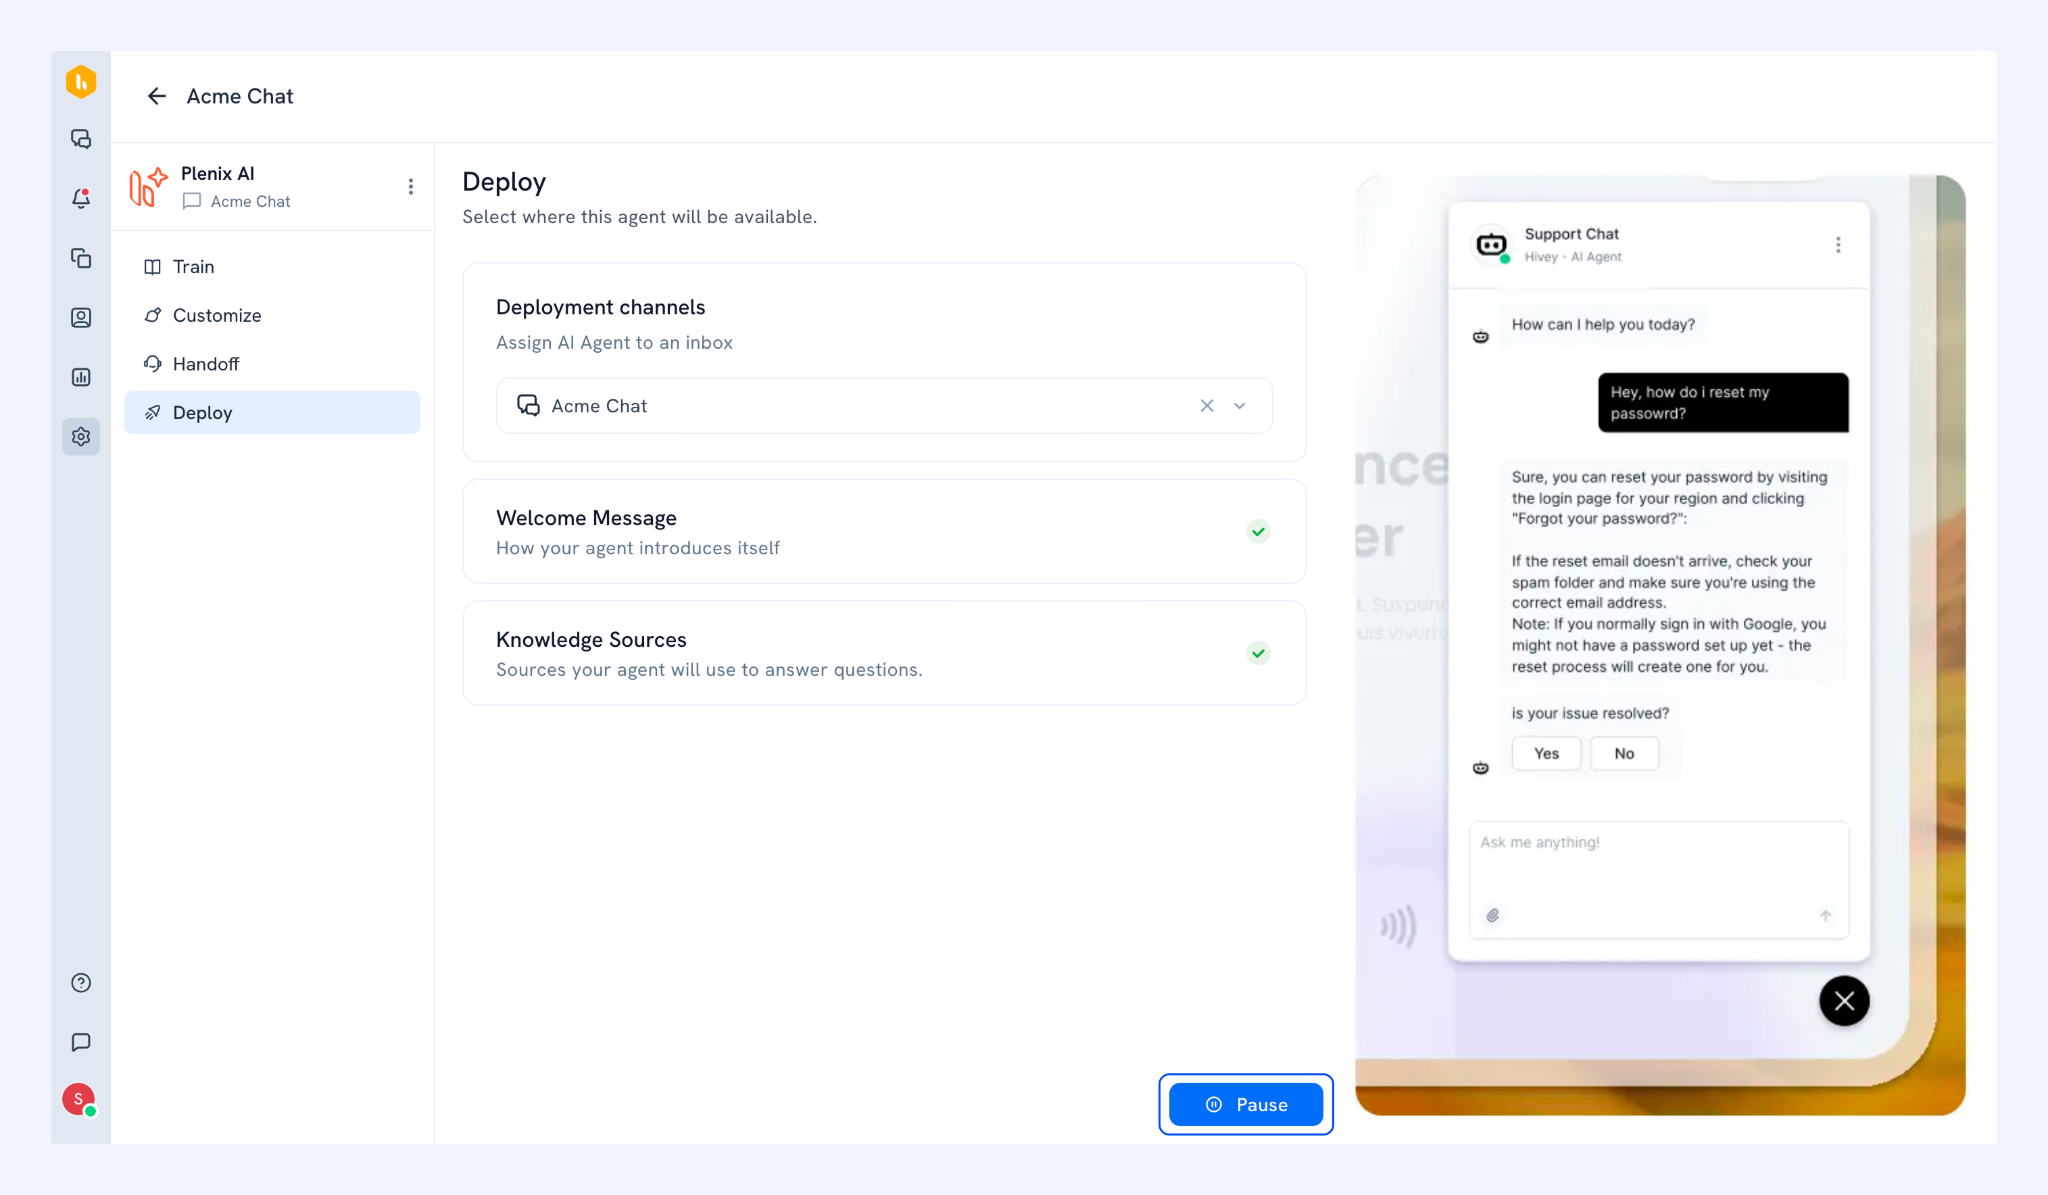
Note: To disable your AI Agent, open it, go to Deploy and click Pause.
Viewing AI-managed conversations
You can access conversations handled by Chat Agents from the Assigned to Bot view in your Chat Inbox. Every conversation has a full transcript available.
You can also monitor chat as when they’re happening and assign it to a teammate to let them take over the conversation.
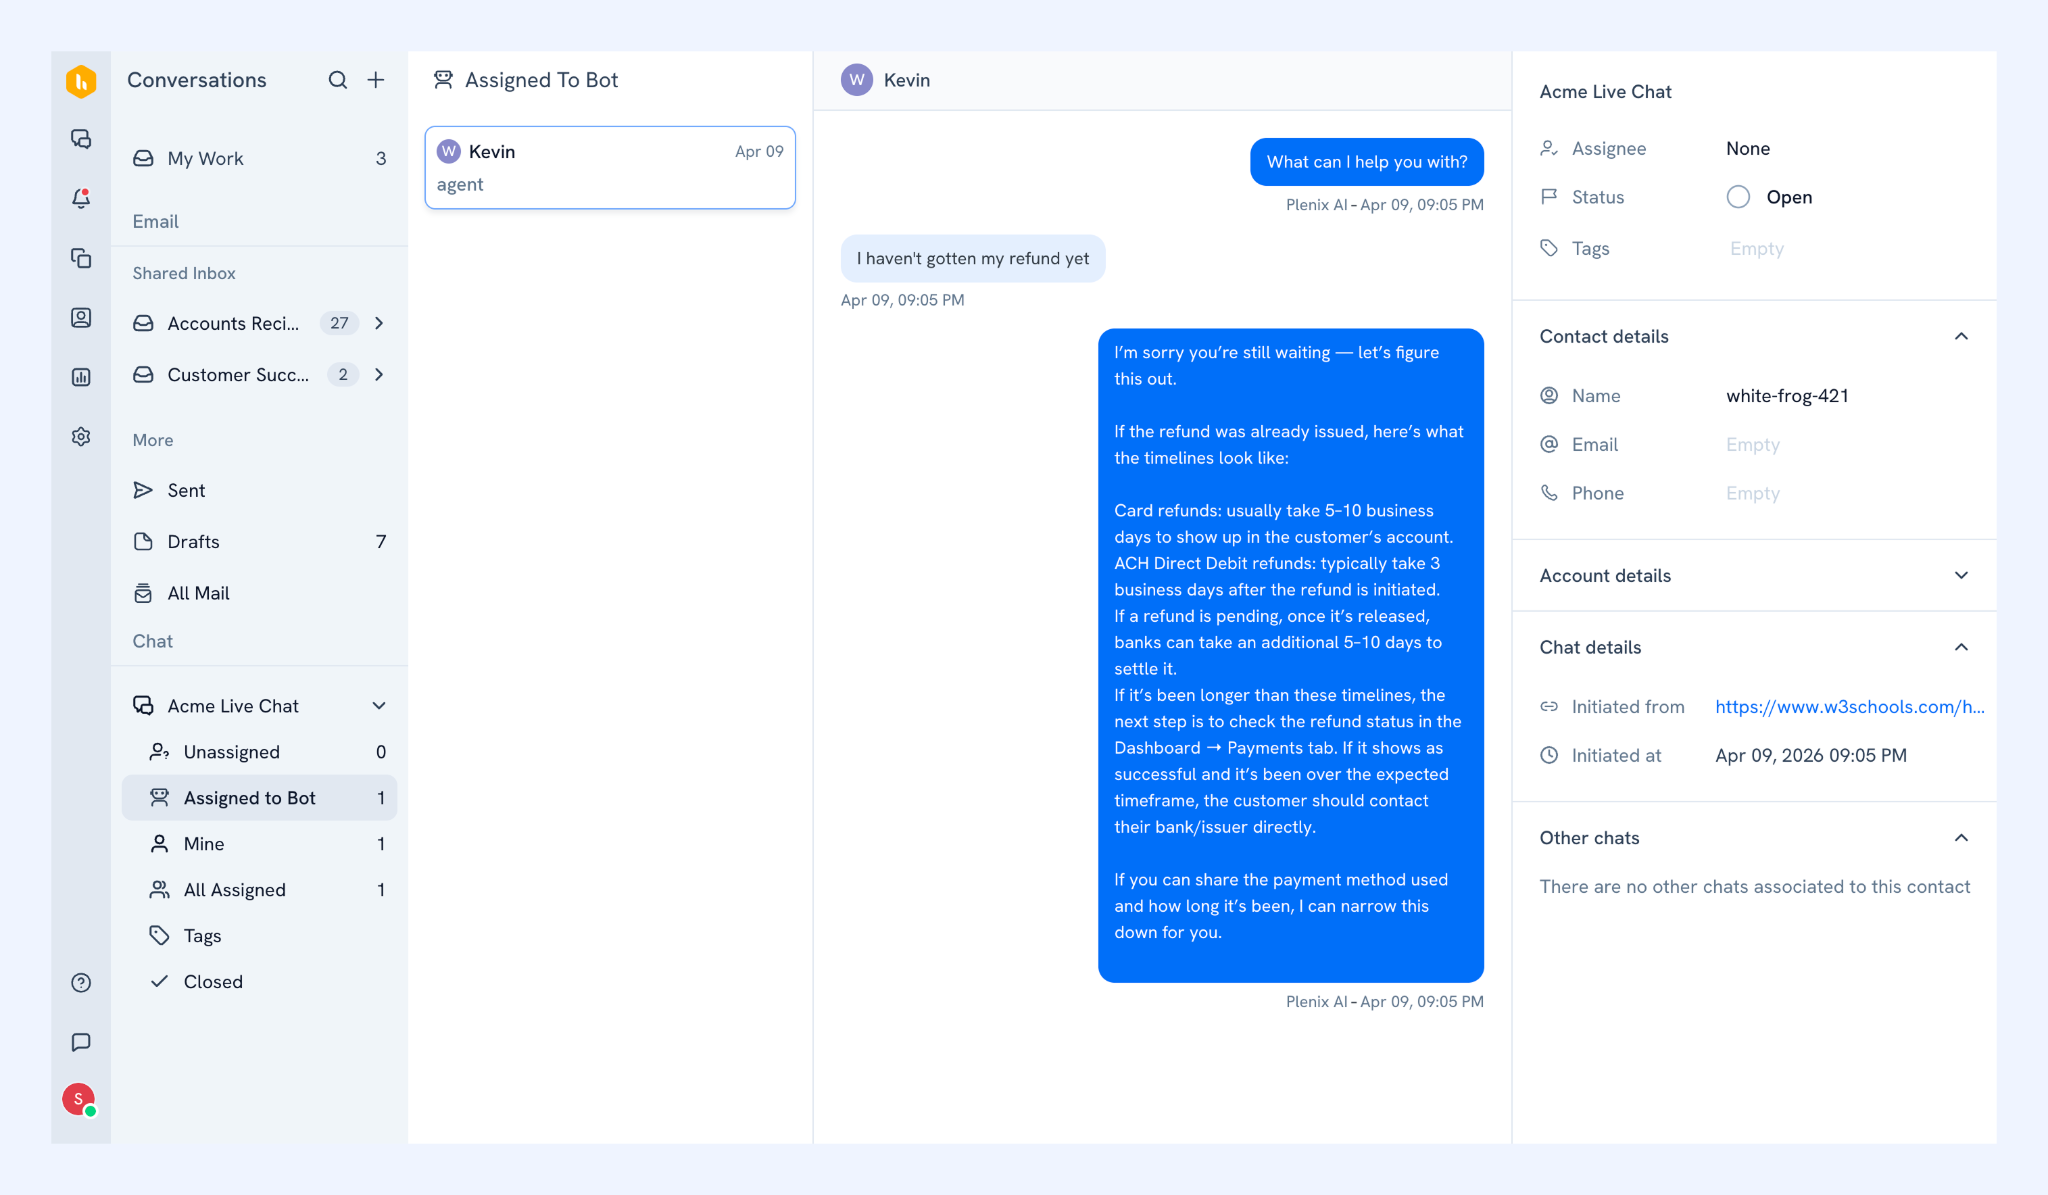
Reviewing AI-managed conversations regularly can help you:
- Identify gaps in your knowledge sources
- Improve hand-off rules
- Refine AI instructions
- Spot incomplete responses
- Understand which customer queries are being resolved successfully
Tips for training your AI Agent effectively
Here are some best practices for improving response quality and customer experience.
1. Cover your most common support workflows
Think about the questions your support team answers repeatedly every day.
For example:
- Account setup
- Feature onboarding
- Troubleshooting steps
- Billing FAQs
- Integration setup
- Permission and access questions
Your goal is to ensure your AI Agent has enough information to guide customers through these workflows confidently.
2. Write knowledge sources the way customers ask questions
Customers often describe issues differently than how internal teams do. For example:
- “I’m locked out”
- “I didn’t get the reset email”