Using AI Tasks in Automations
Using Hiver’s AI Tasks, you can use AI within Automations to analyze conversations and take action based on what customers are asking, reporting, or requesting.
For example, you can use AI Tasks to:
- Identify billing, refund, or cancellation requests and assign them to the right queue
- Detect feature requests and route them to product teams
- Extract order IDs or account details to and use that to look up information in a third-party tool
- Summarize long conversations for faster handoffs between teams
- Detect messages with a “thank you” intent and close that conversation automatically
- Extract bug reports or urgent issues and send them to Slack
You can use the information generated by AI Tasks in internal notes, Custom Fields, routing logic, or send details and more.
This helps teams automate repetitive work, respond faster, and ensure important customer information doesn’t get missed.
Prerequisites
- AI Task is available only in the Pro and Elite plans for customers who signed up after December 22, 2025.
- You need to have Admin access to configure AI Tasks.
Steps to create an AI Task
Let’s say you want to identify whether an incoming conversation contains a feature request. If it does, you want to extract the request details along with the sender’s email address, and automatically add them to a Hiver Note for easy reference.
1. Go to Admin Panel → Shared Inboxes, and select the inbox where you want to set up an AI Task.
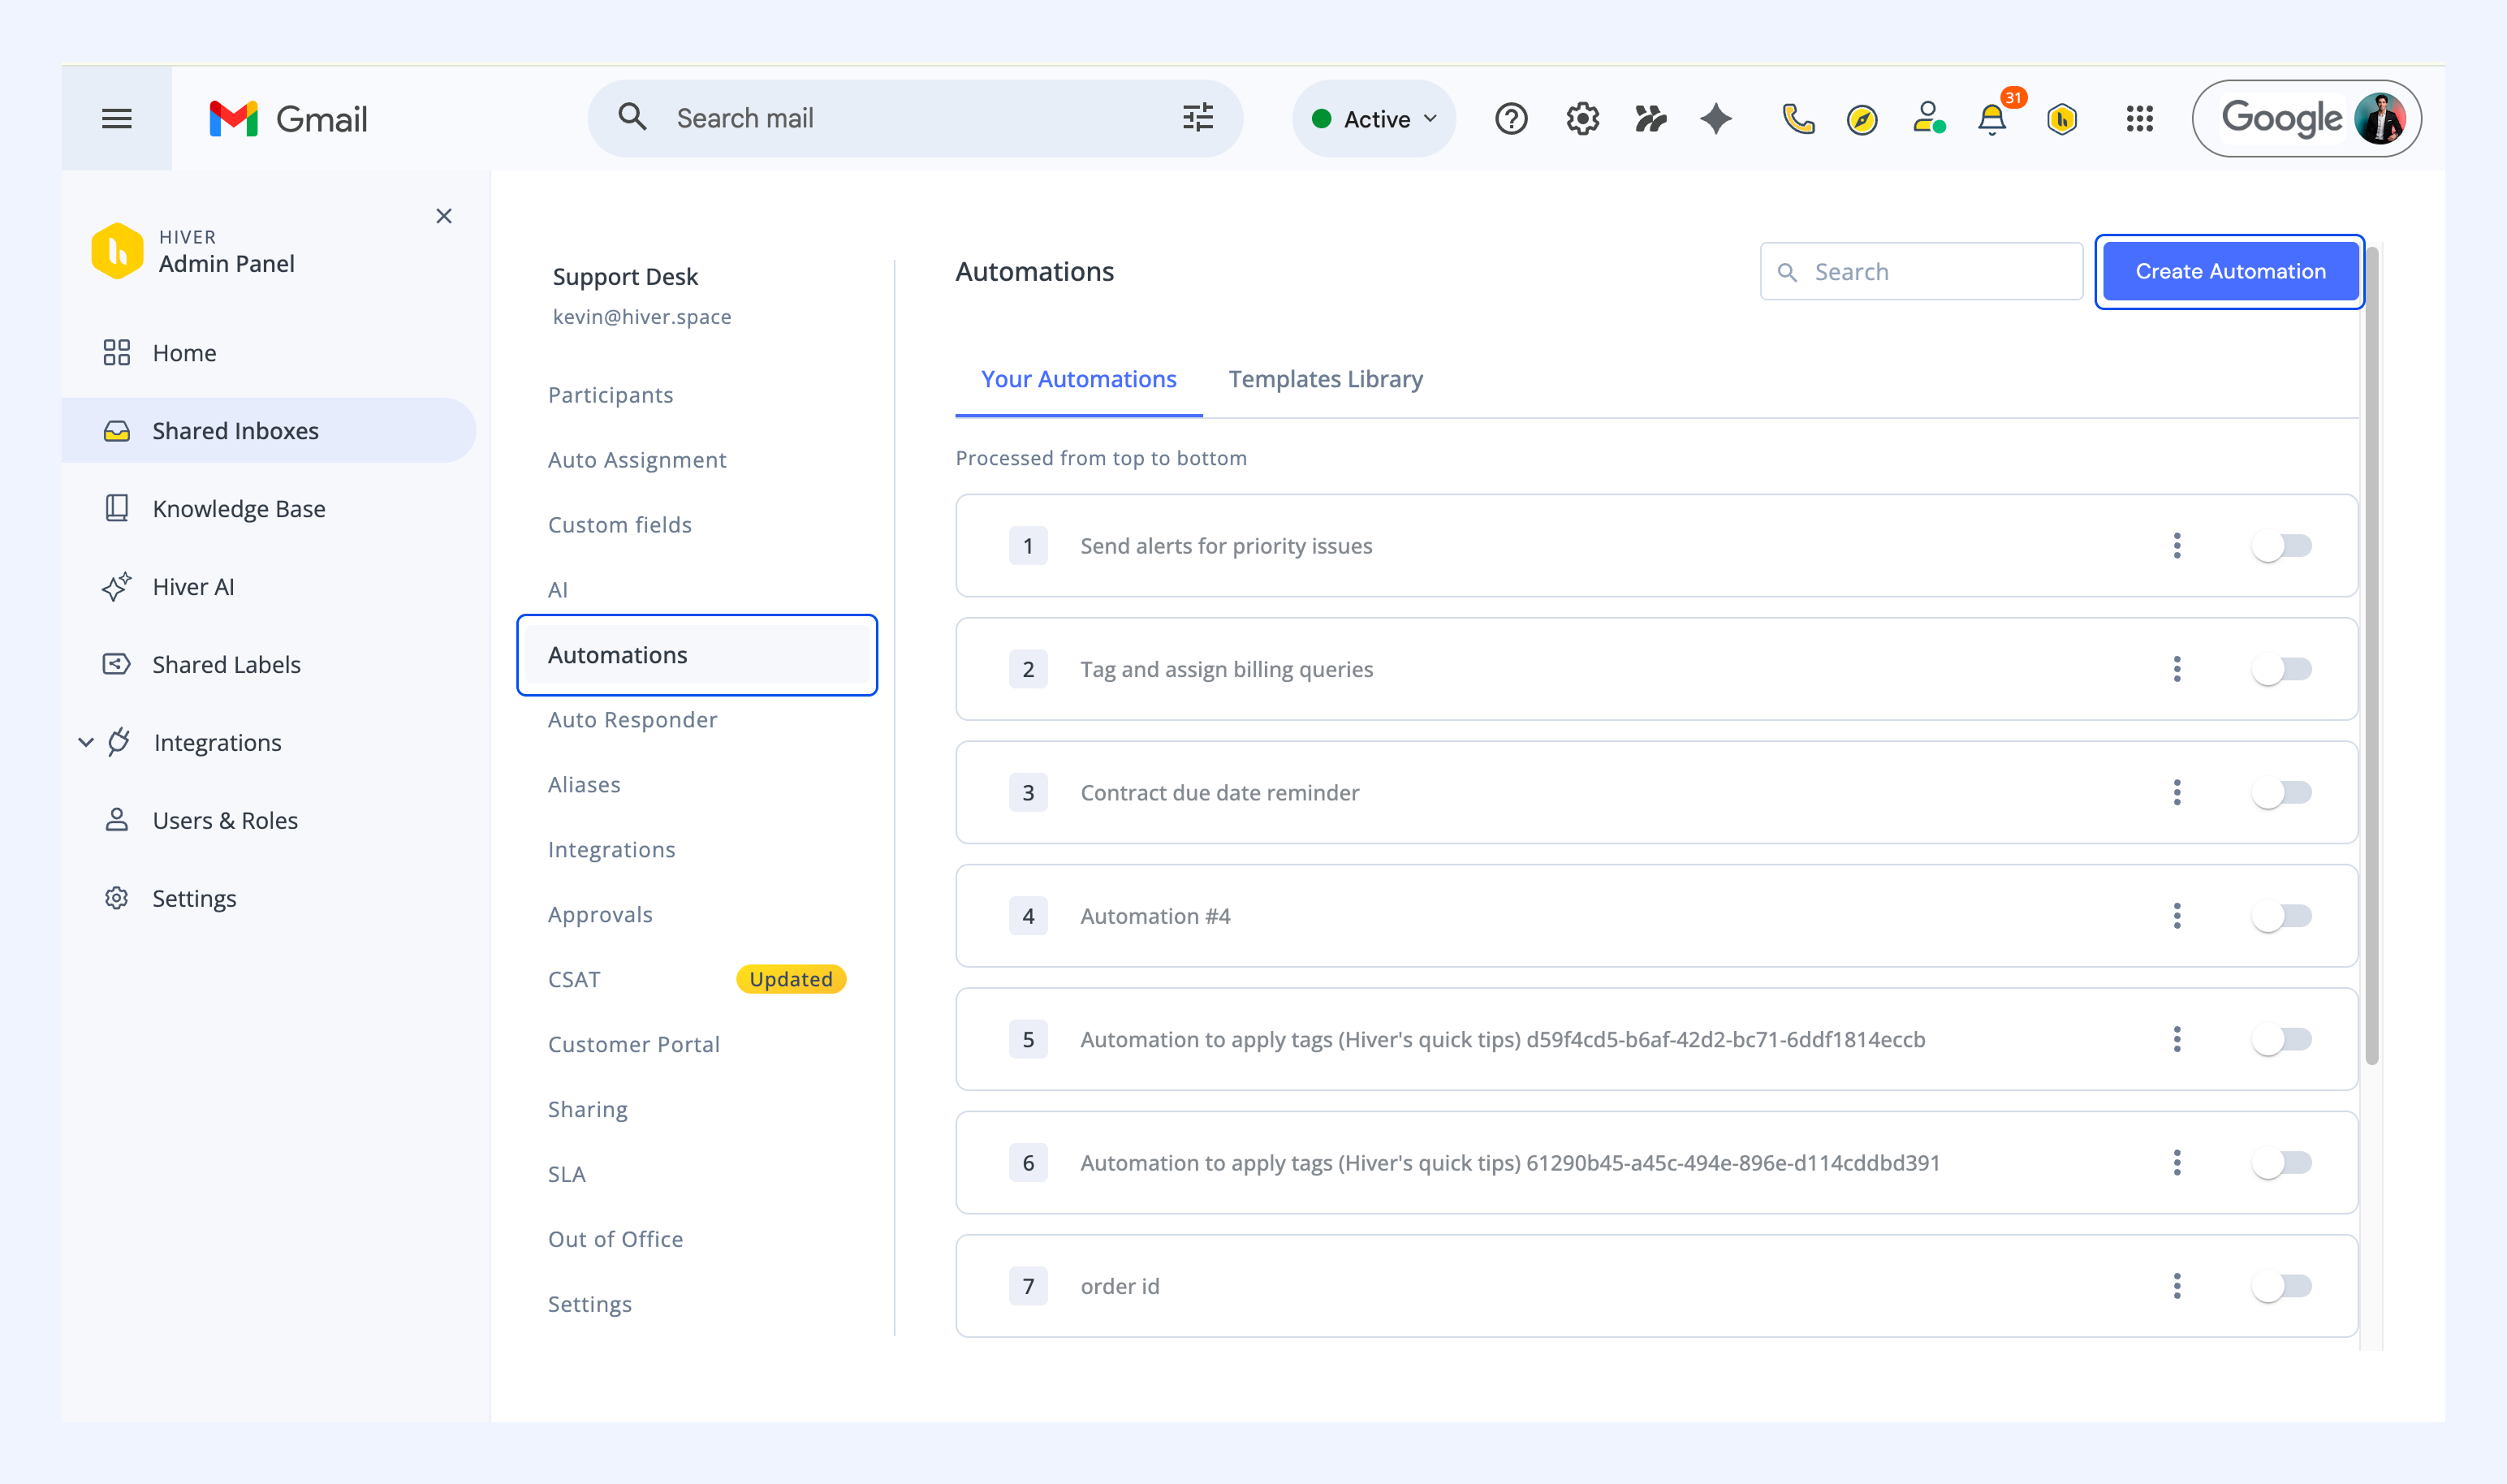
2. Navigate to Automations → Create Automation → Create from scratch.
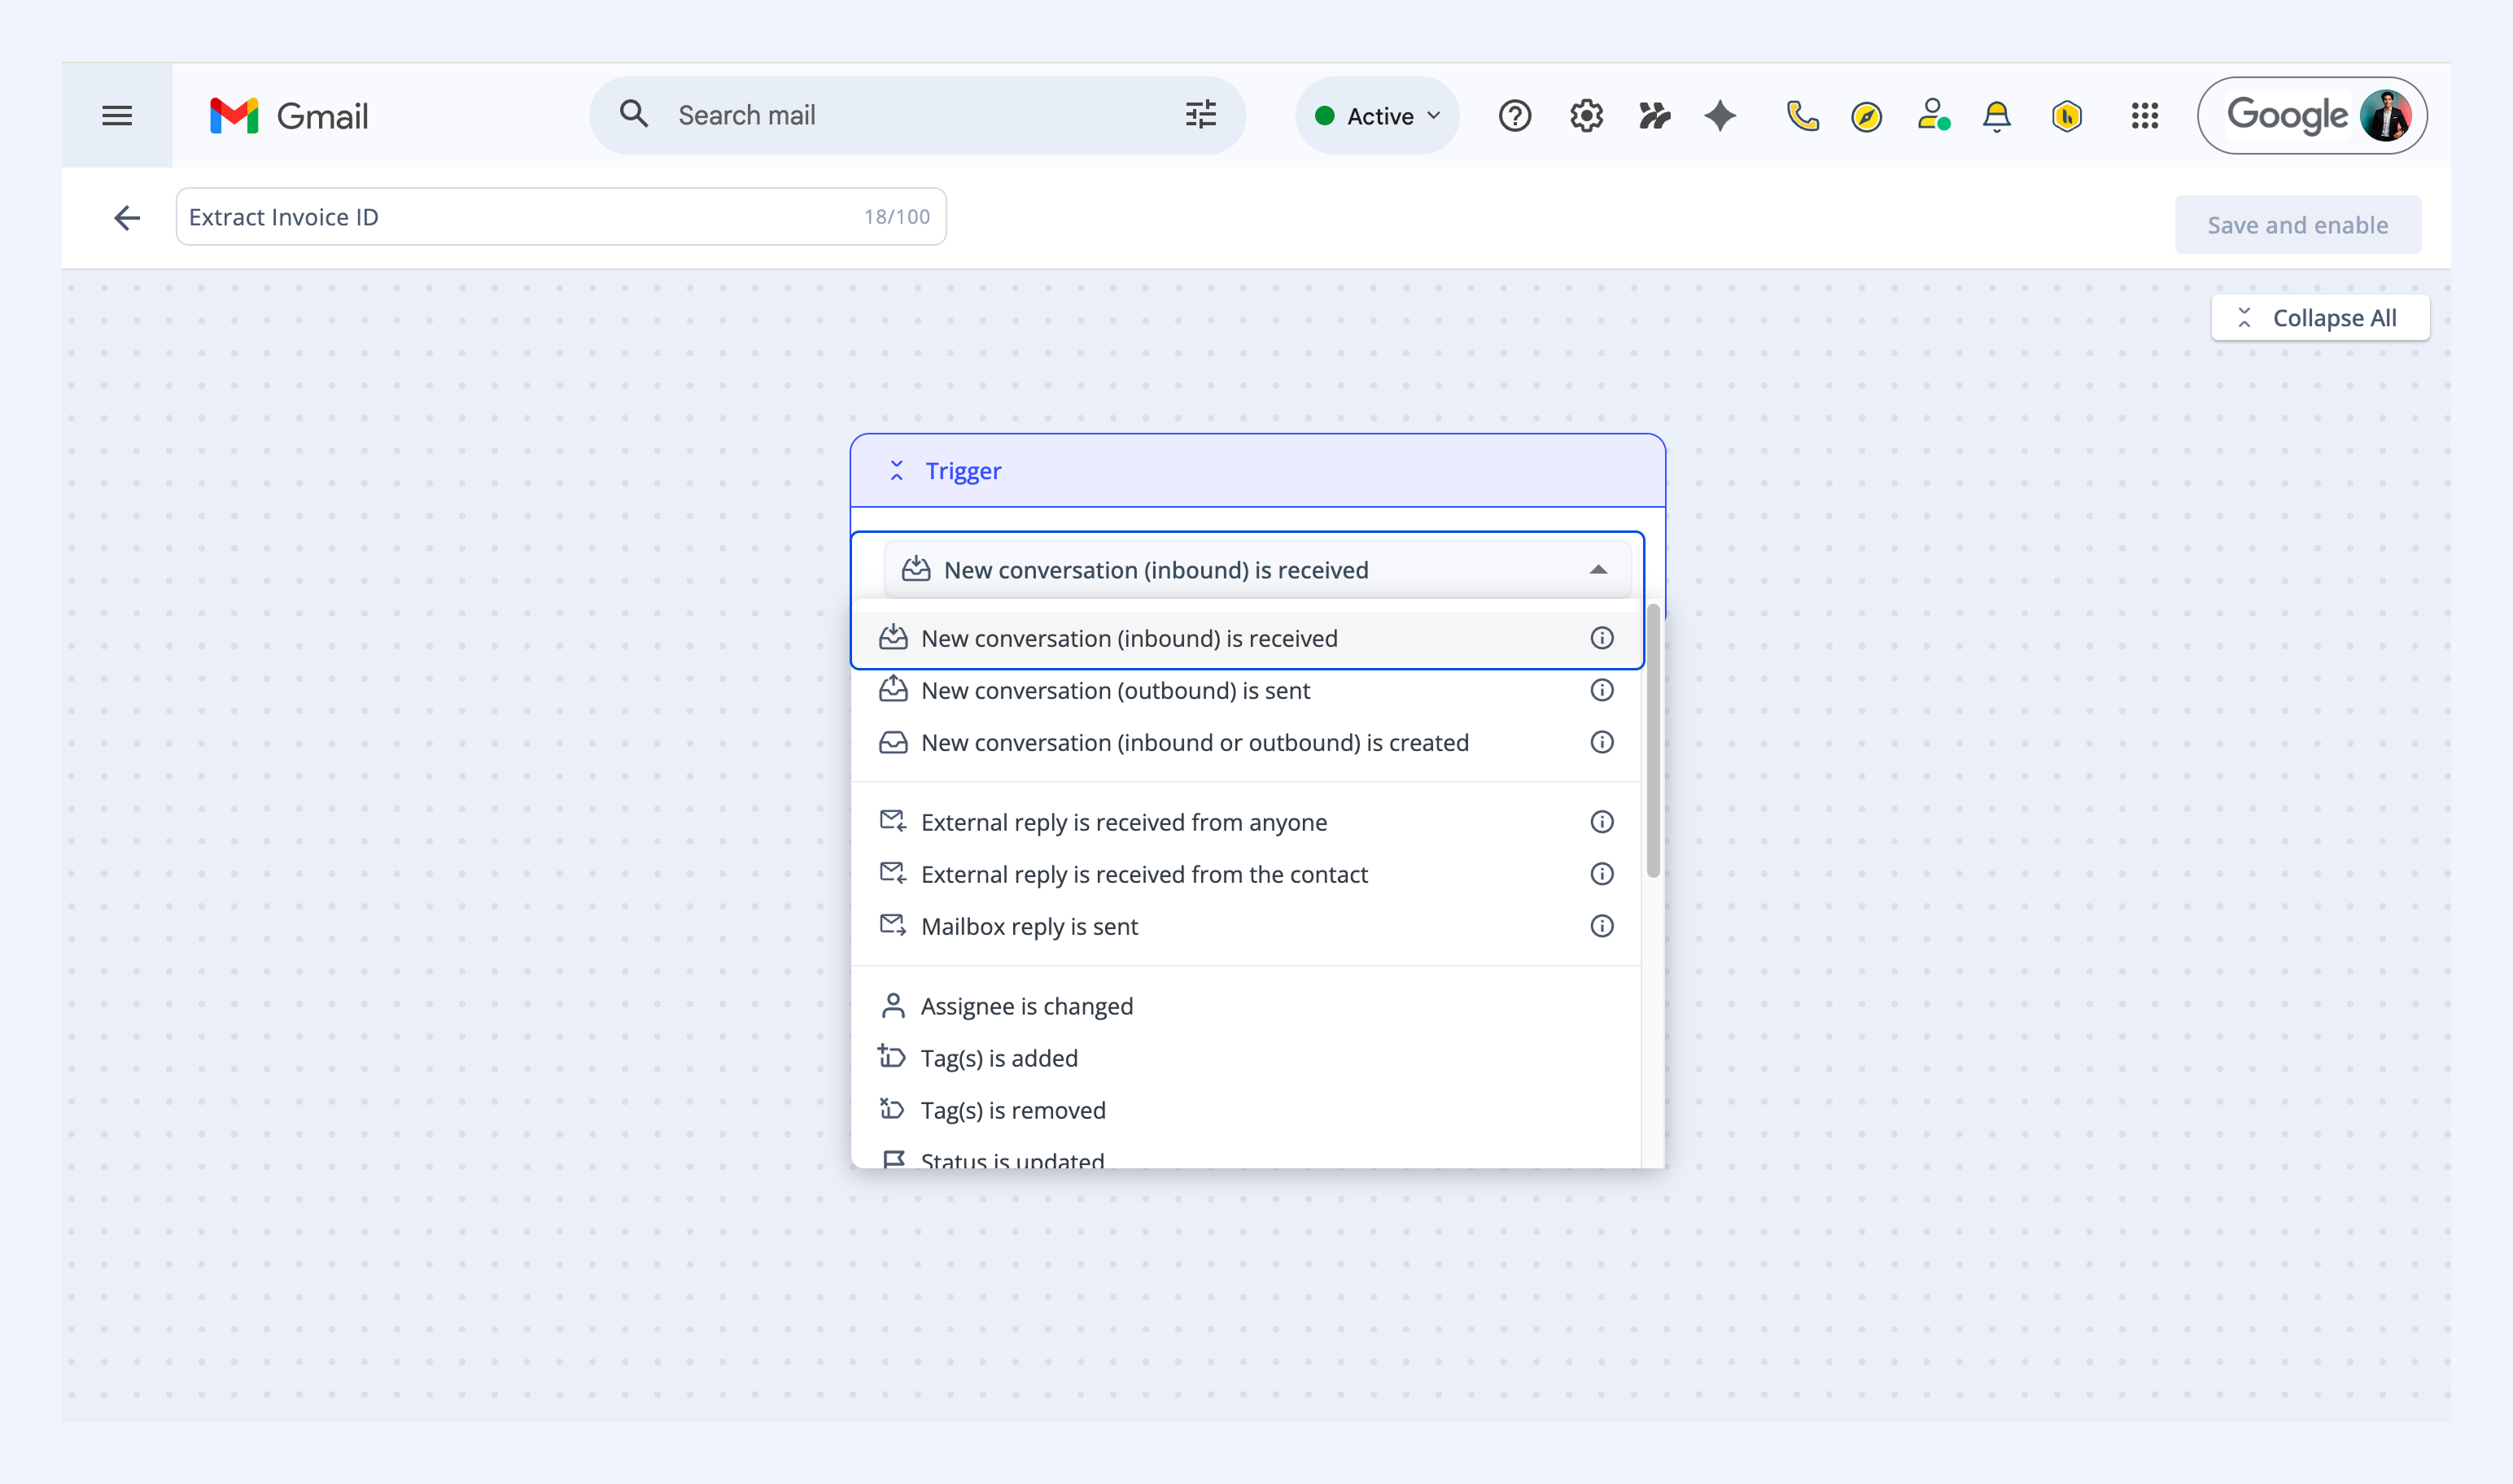
3. Give your automation rule a name and choose a trigger. For this example, select New inbound conversation is received.
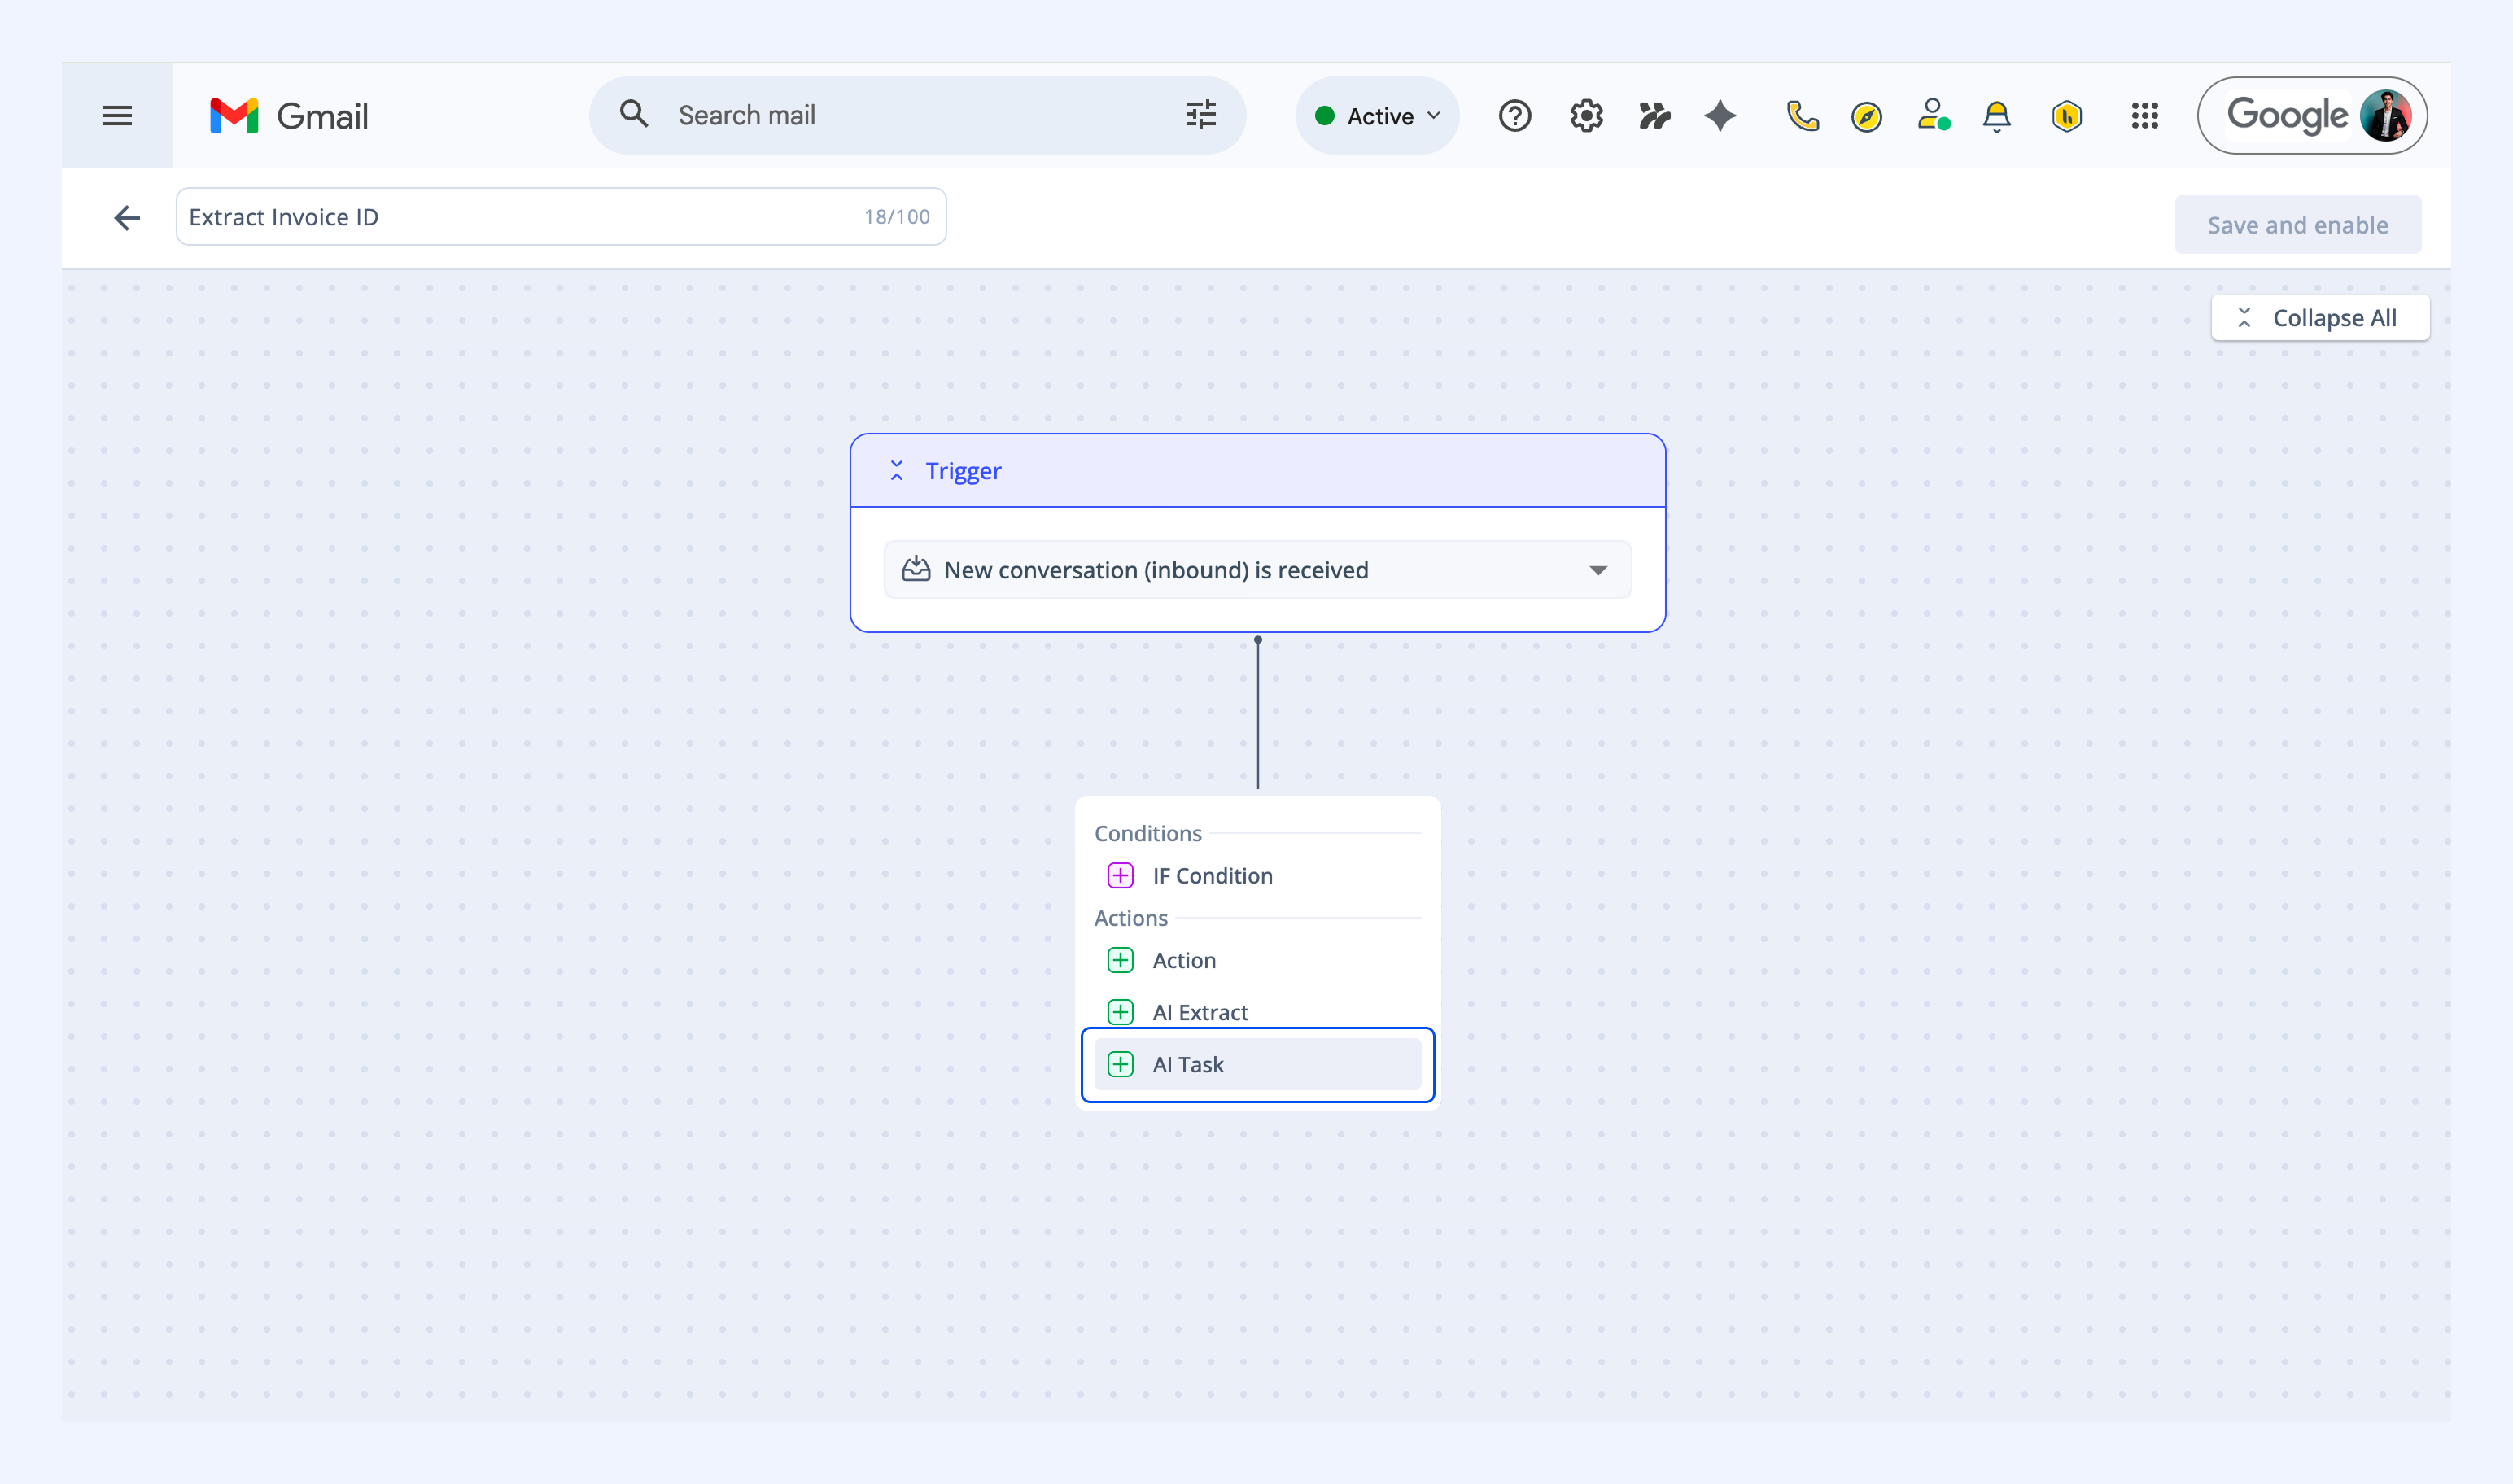
4. Click Add step and under Actions, select AI Task.
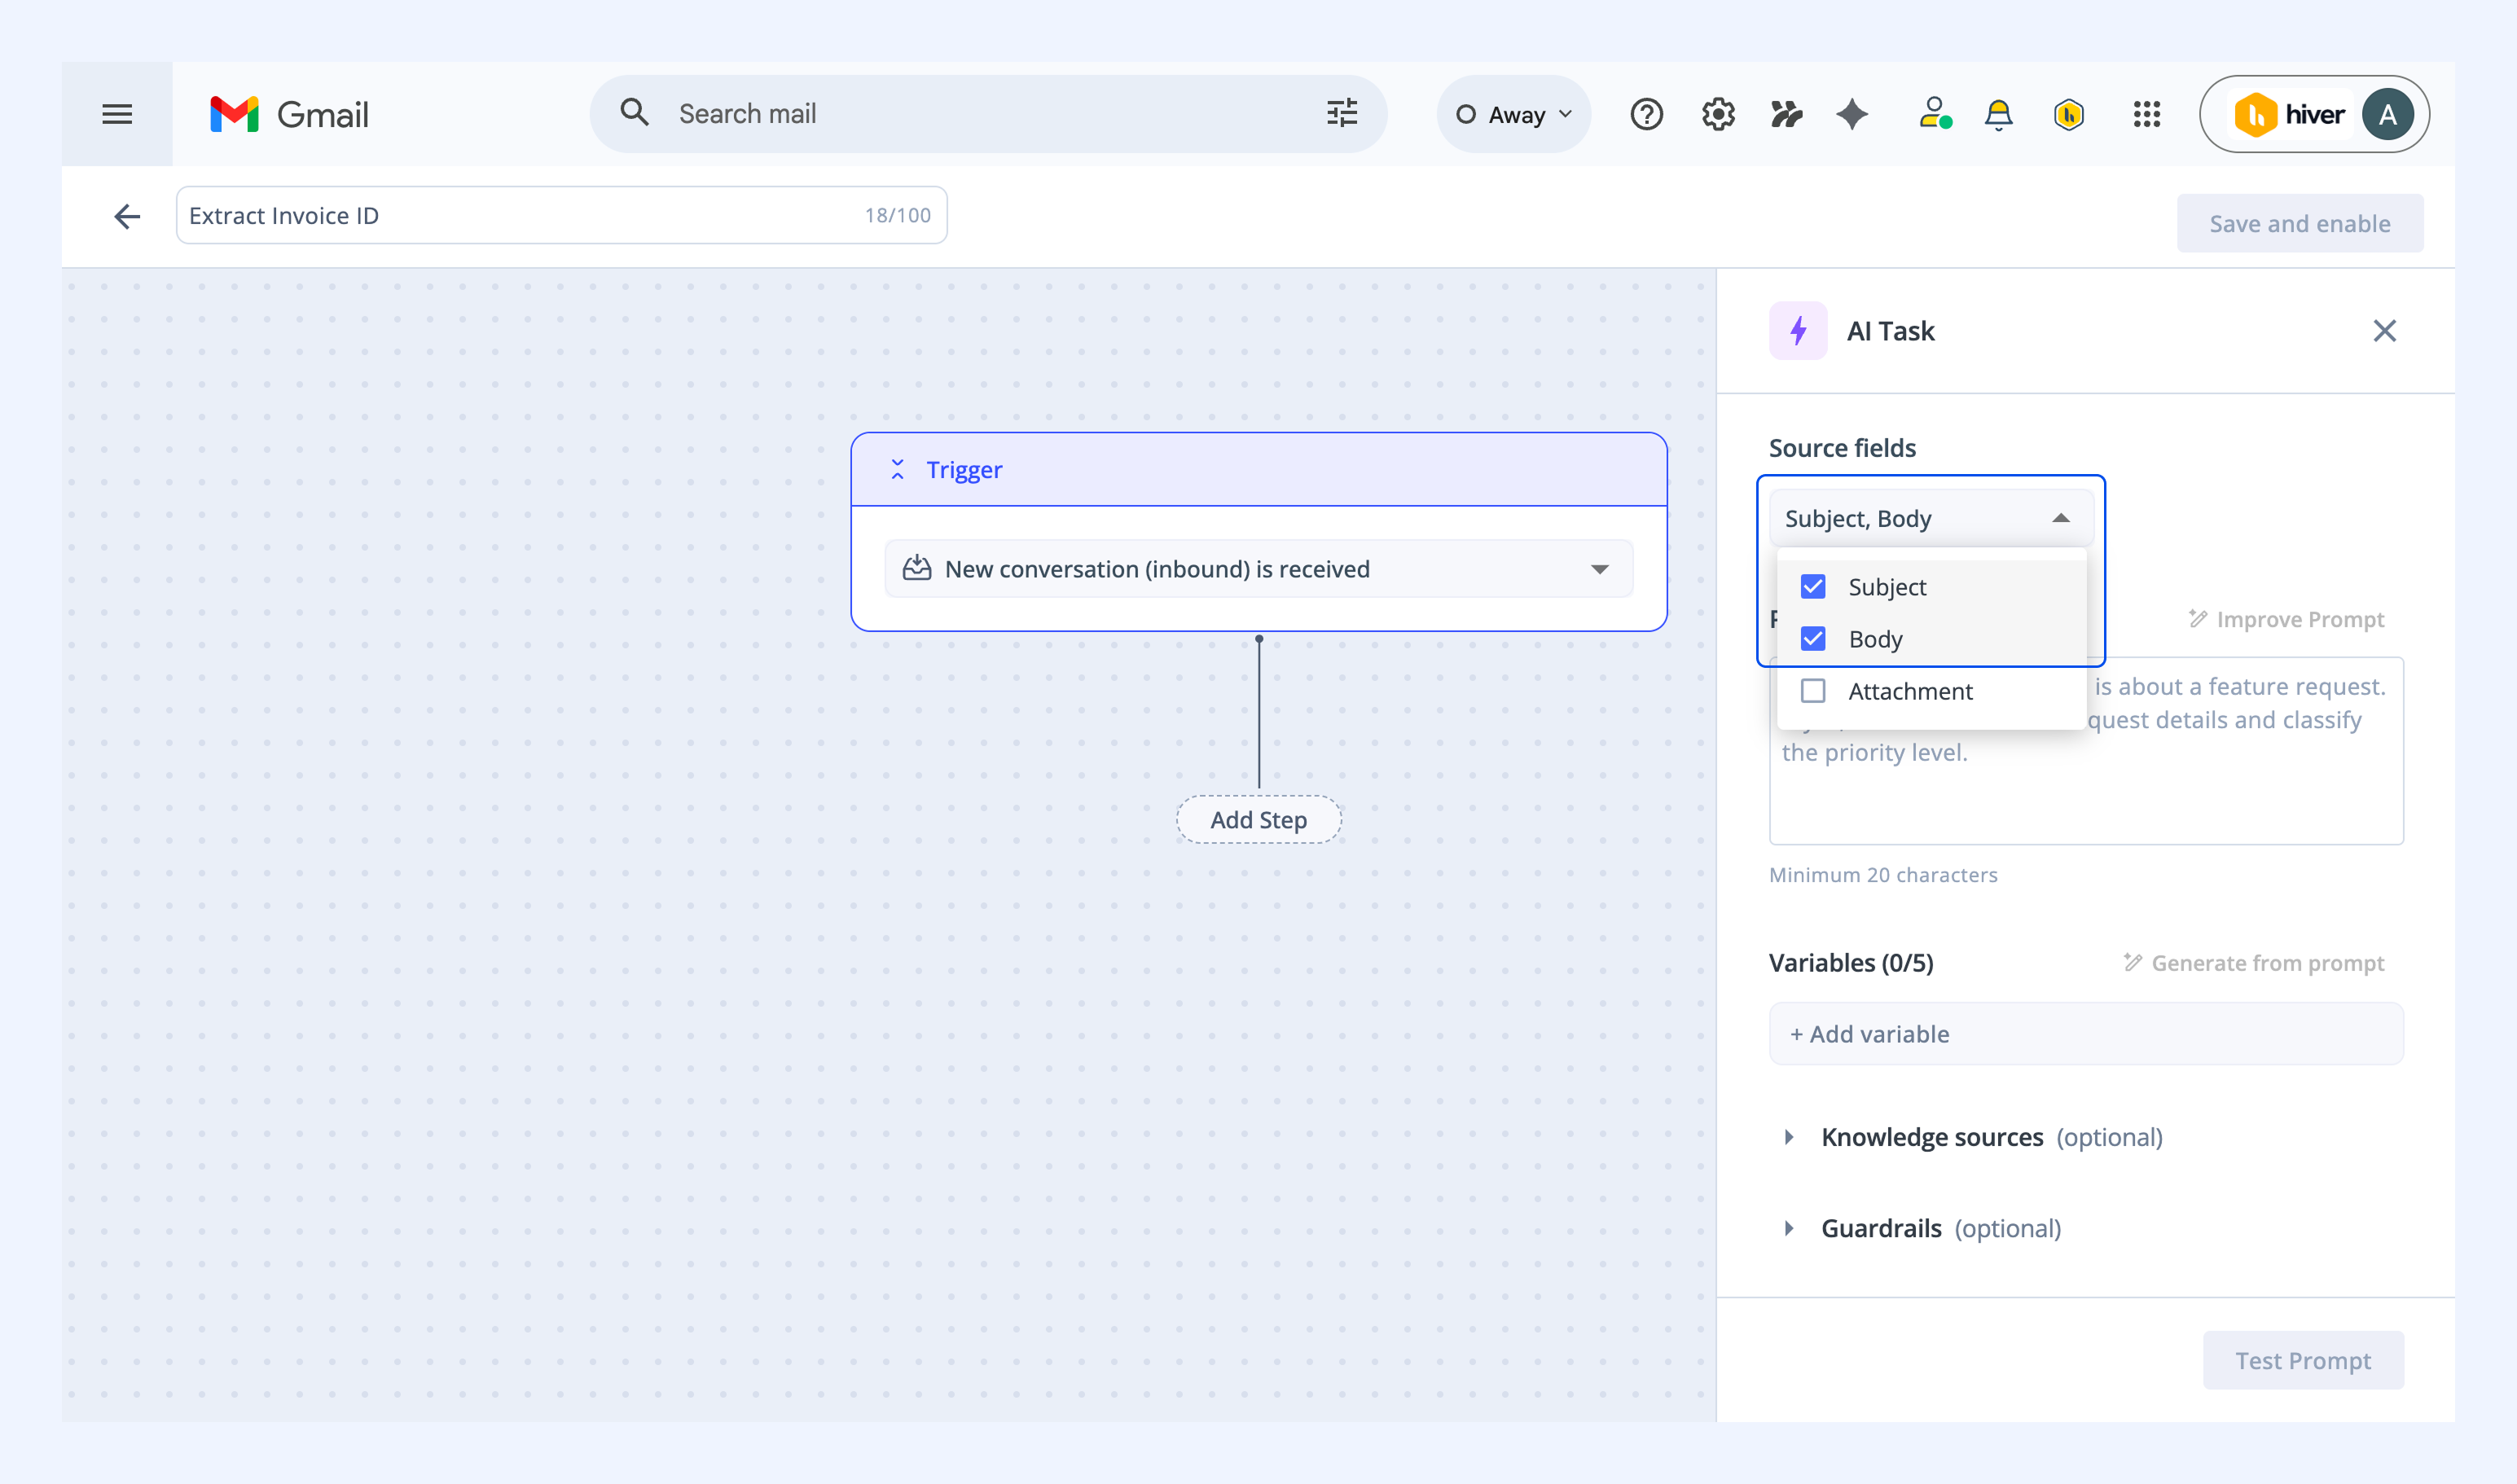
5. Select the part of the conversation where AI should look for information:
- Subject
- Body
- Attachment
6. Enter a prompt describing what you want to extract. For example, “Check if this email contains a feature request. If yes, extract the feature request description”.
Once you’re done, click Improve Prompt.
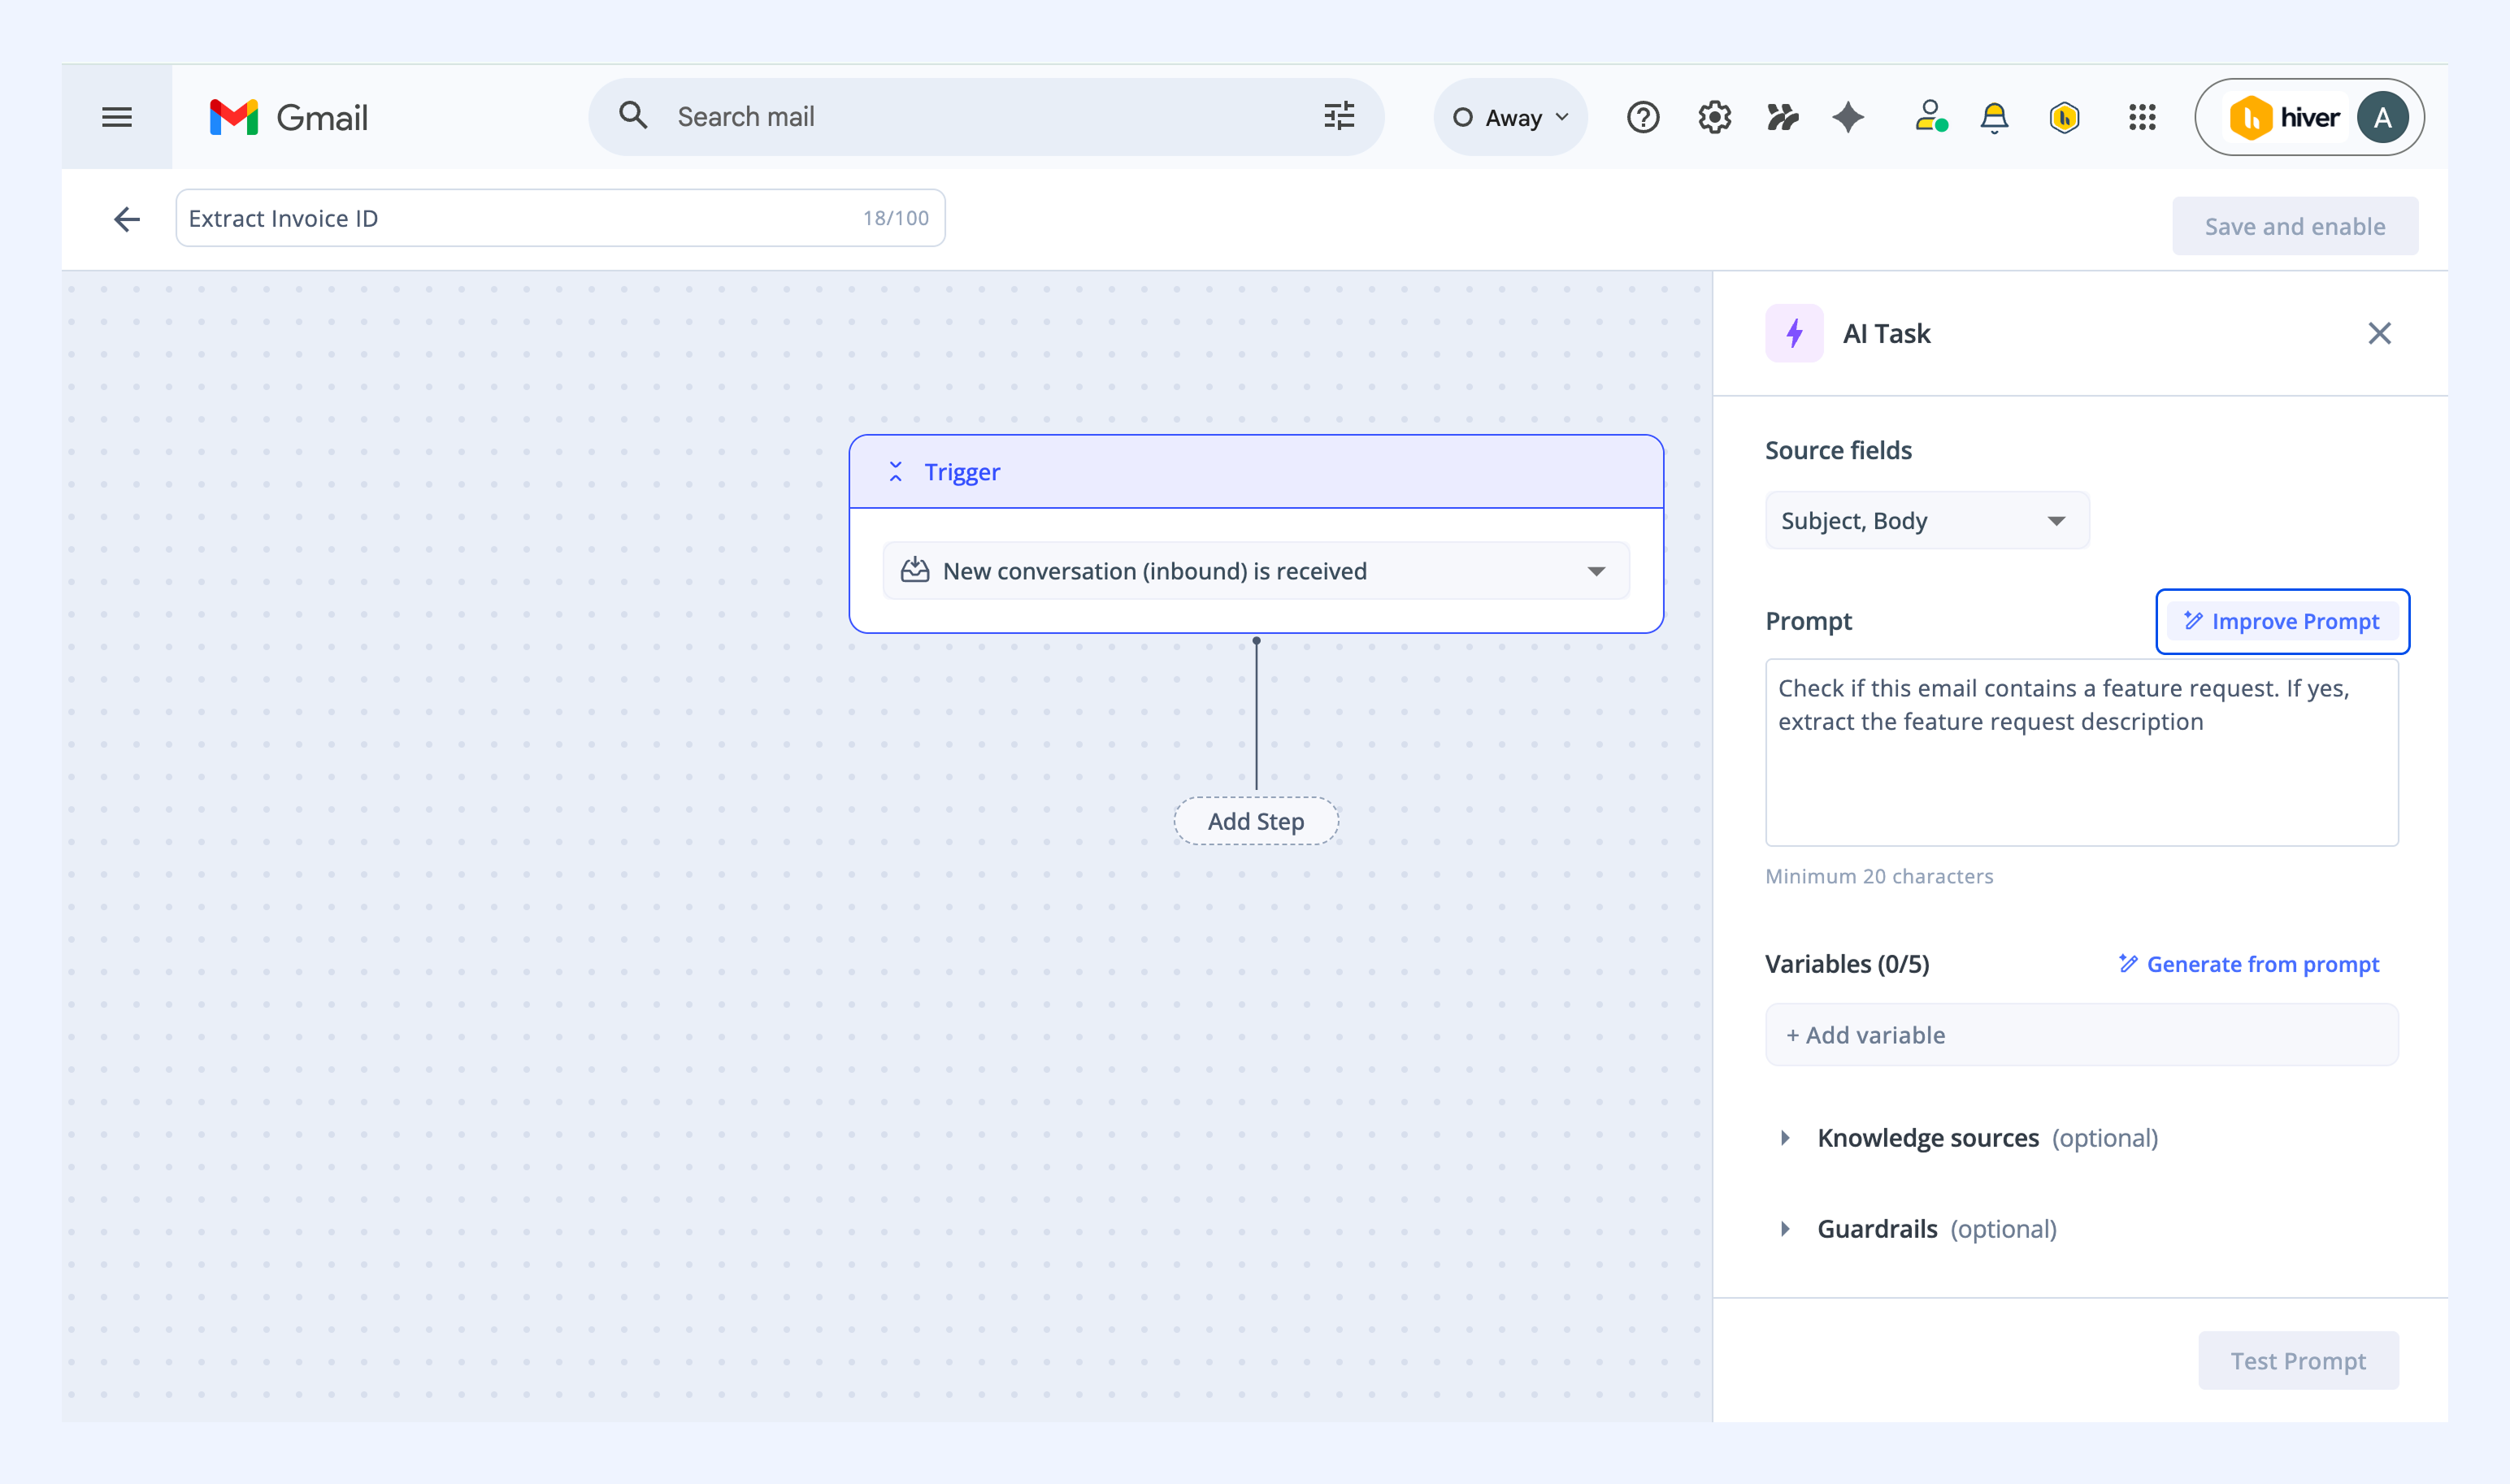
This helps refine your instructions, making them clearer and more effective.
7. Next, click Generate from prompt. Hiver AI will analyze your prompt and suggest variables (entities that will be extracted from conversations).
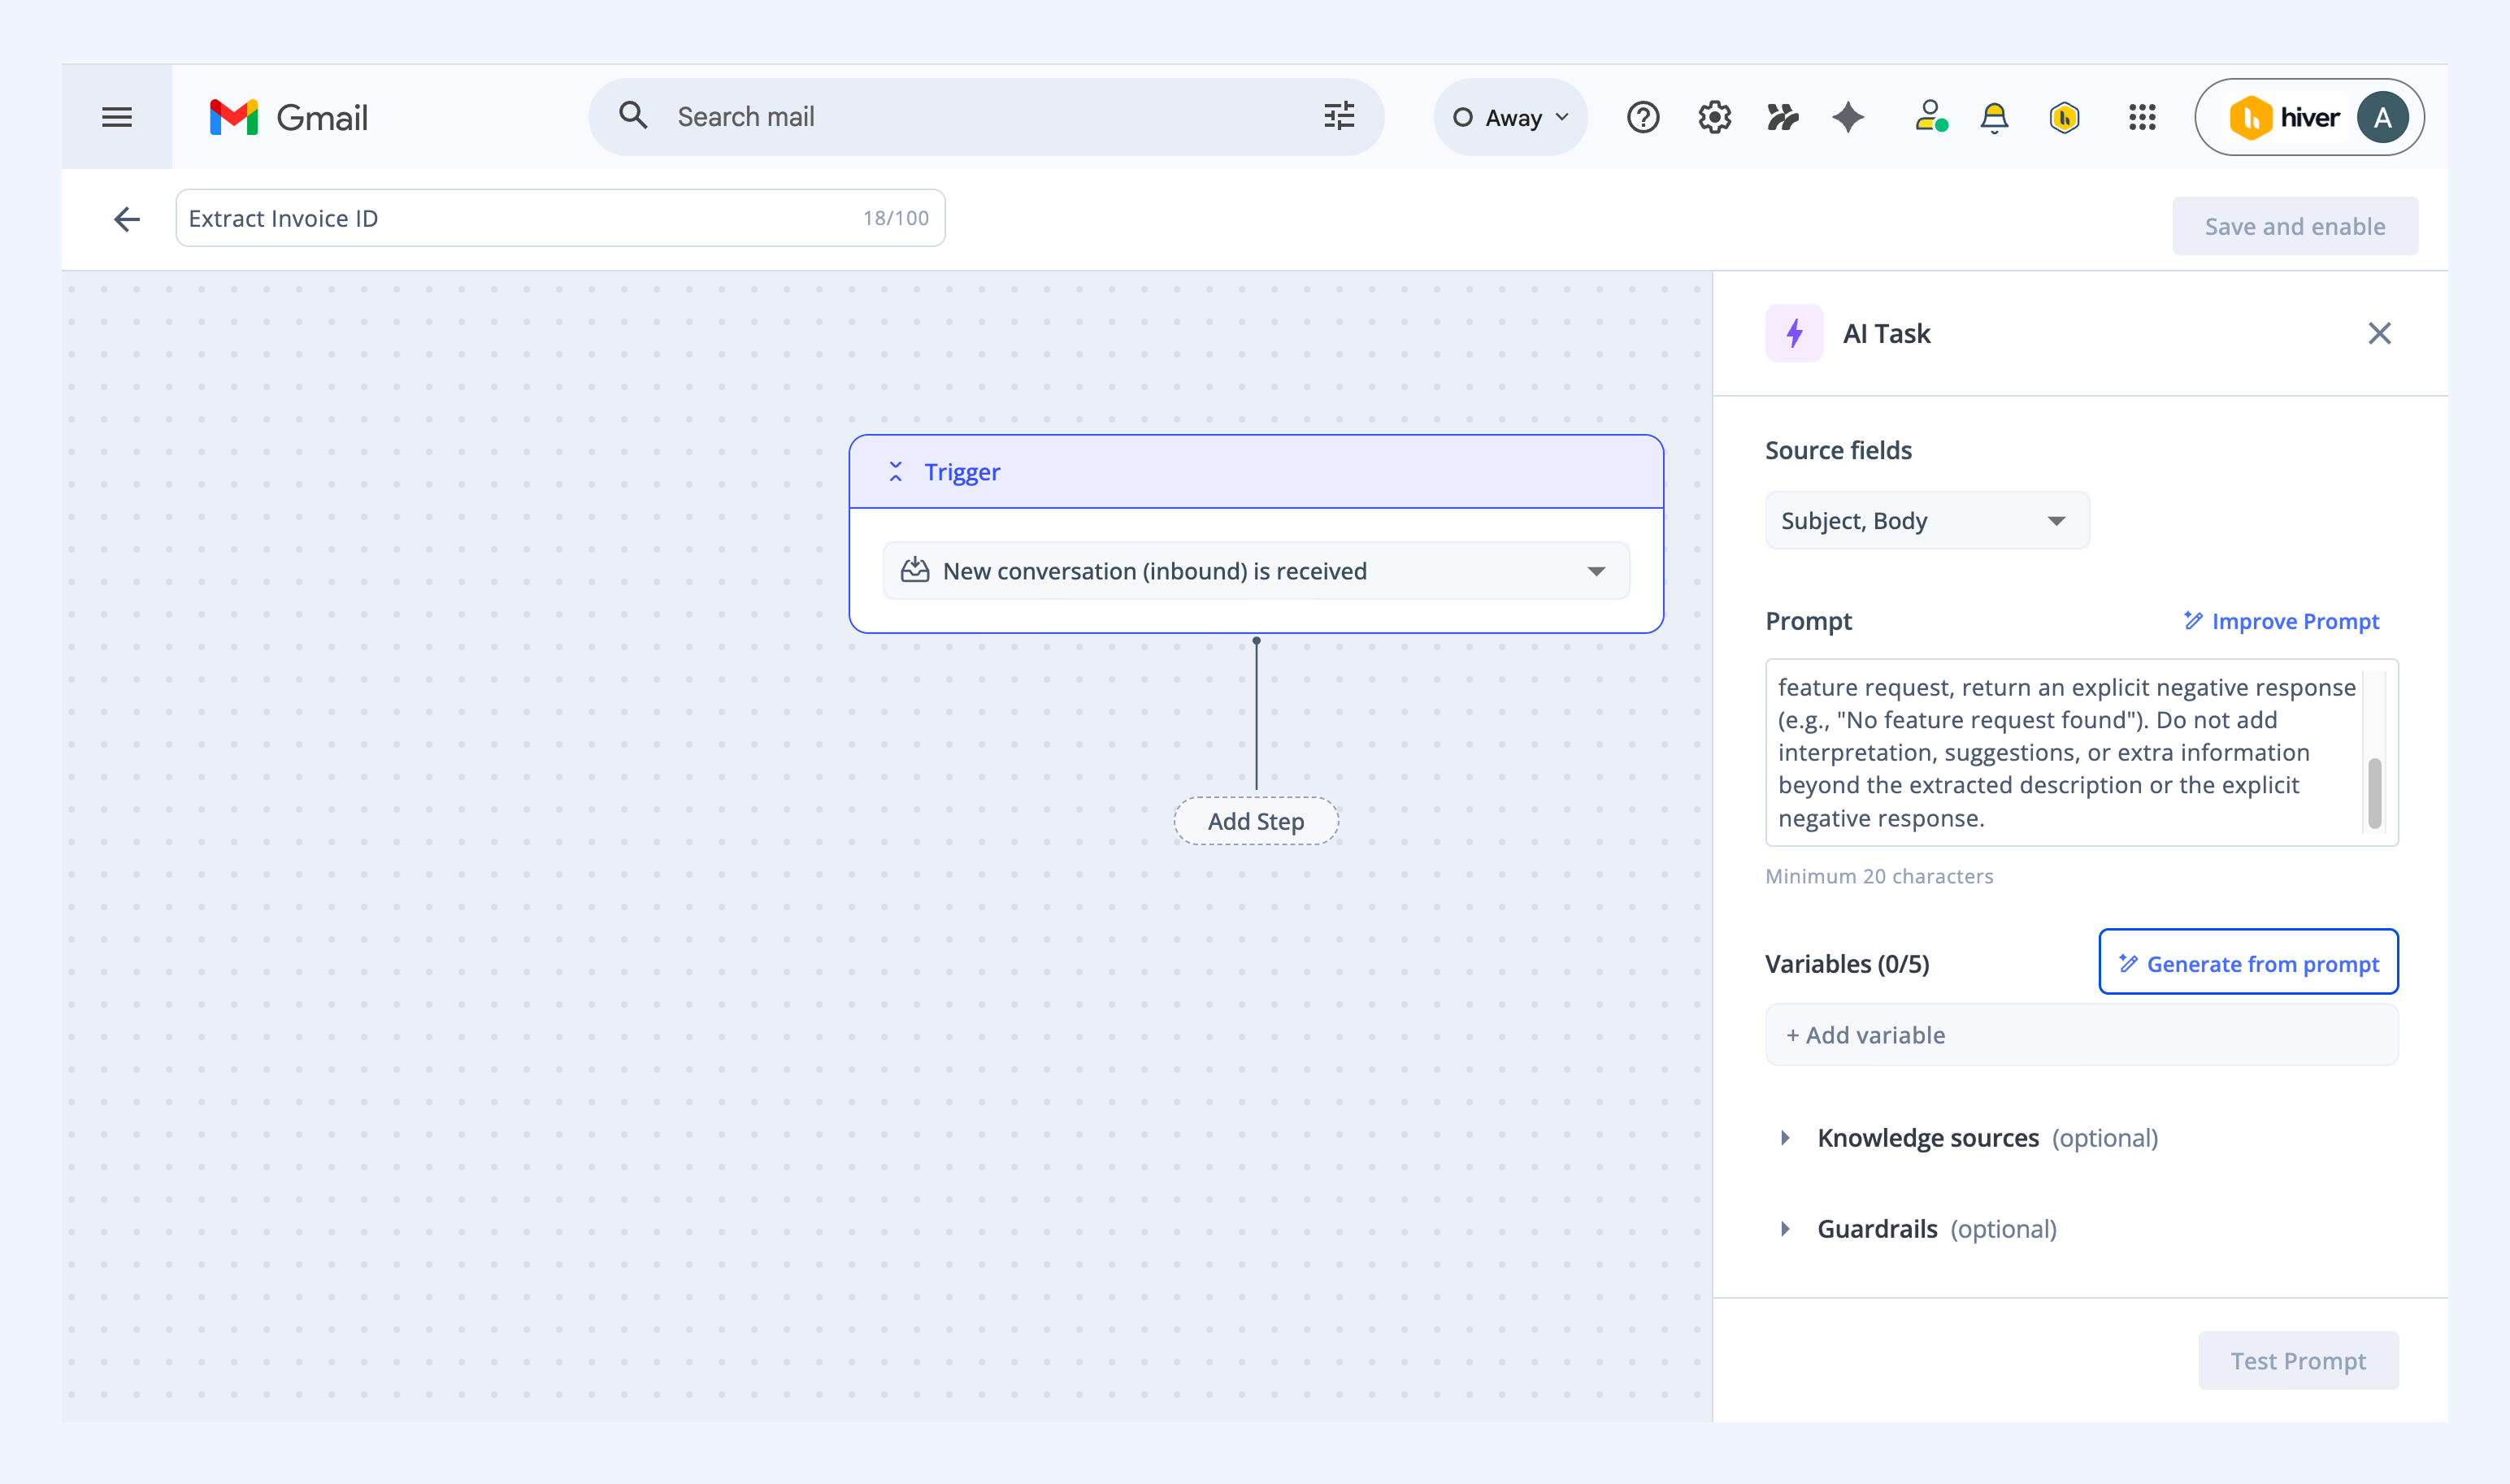
8. Review the suggestions. If needed, refine your prompt and click Generate from prompt again.
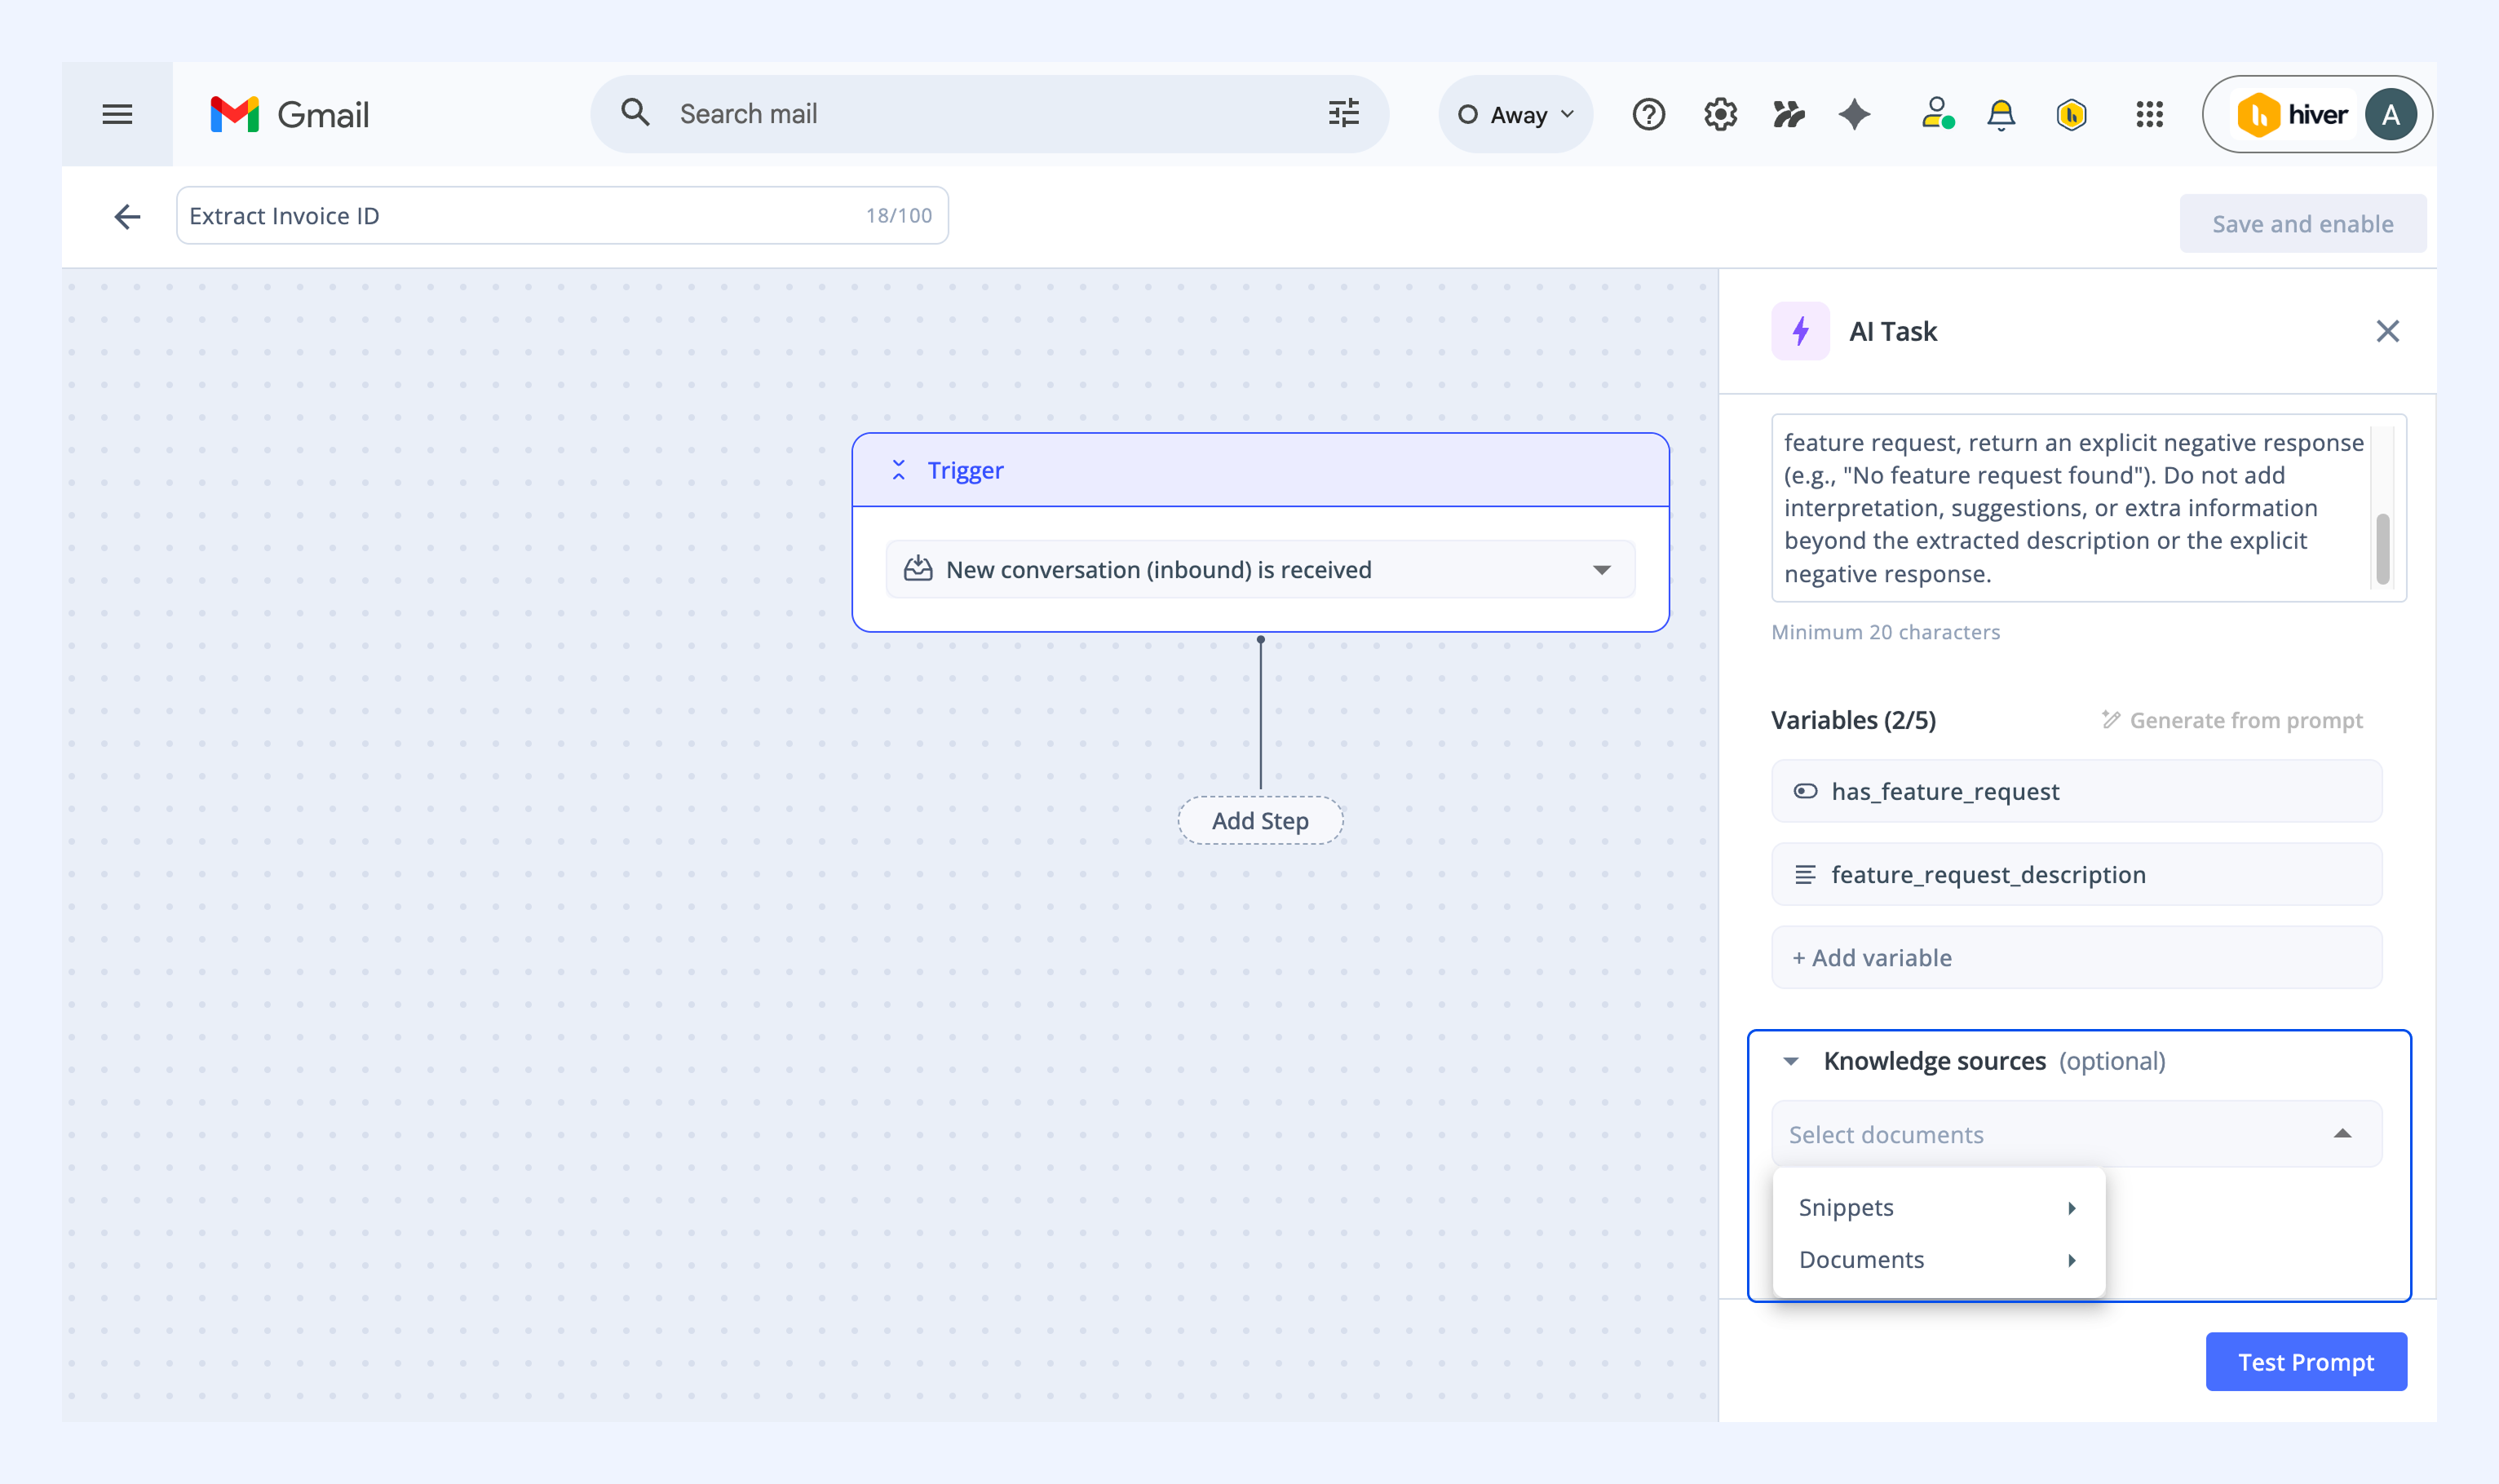
9. Optionally, you can further improve how Hiver AI executes this by adding:
- Knowledge sources
Select snippets or custom documents that Hiver AI can reference while running this task. This helps ensure responses are grounded in your approved content and reduces the risk of incorrect or made-up information.
Use this when:
- The task depends on specific policies, pricing, or processes
- You want AI to stay aligned with internal documentation
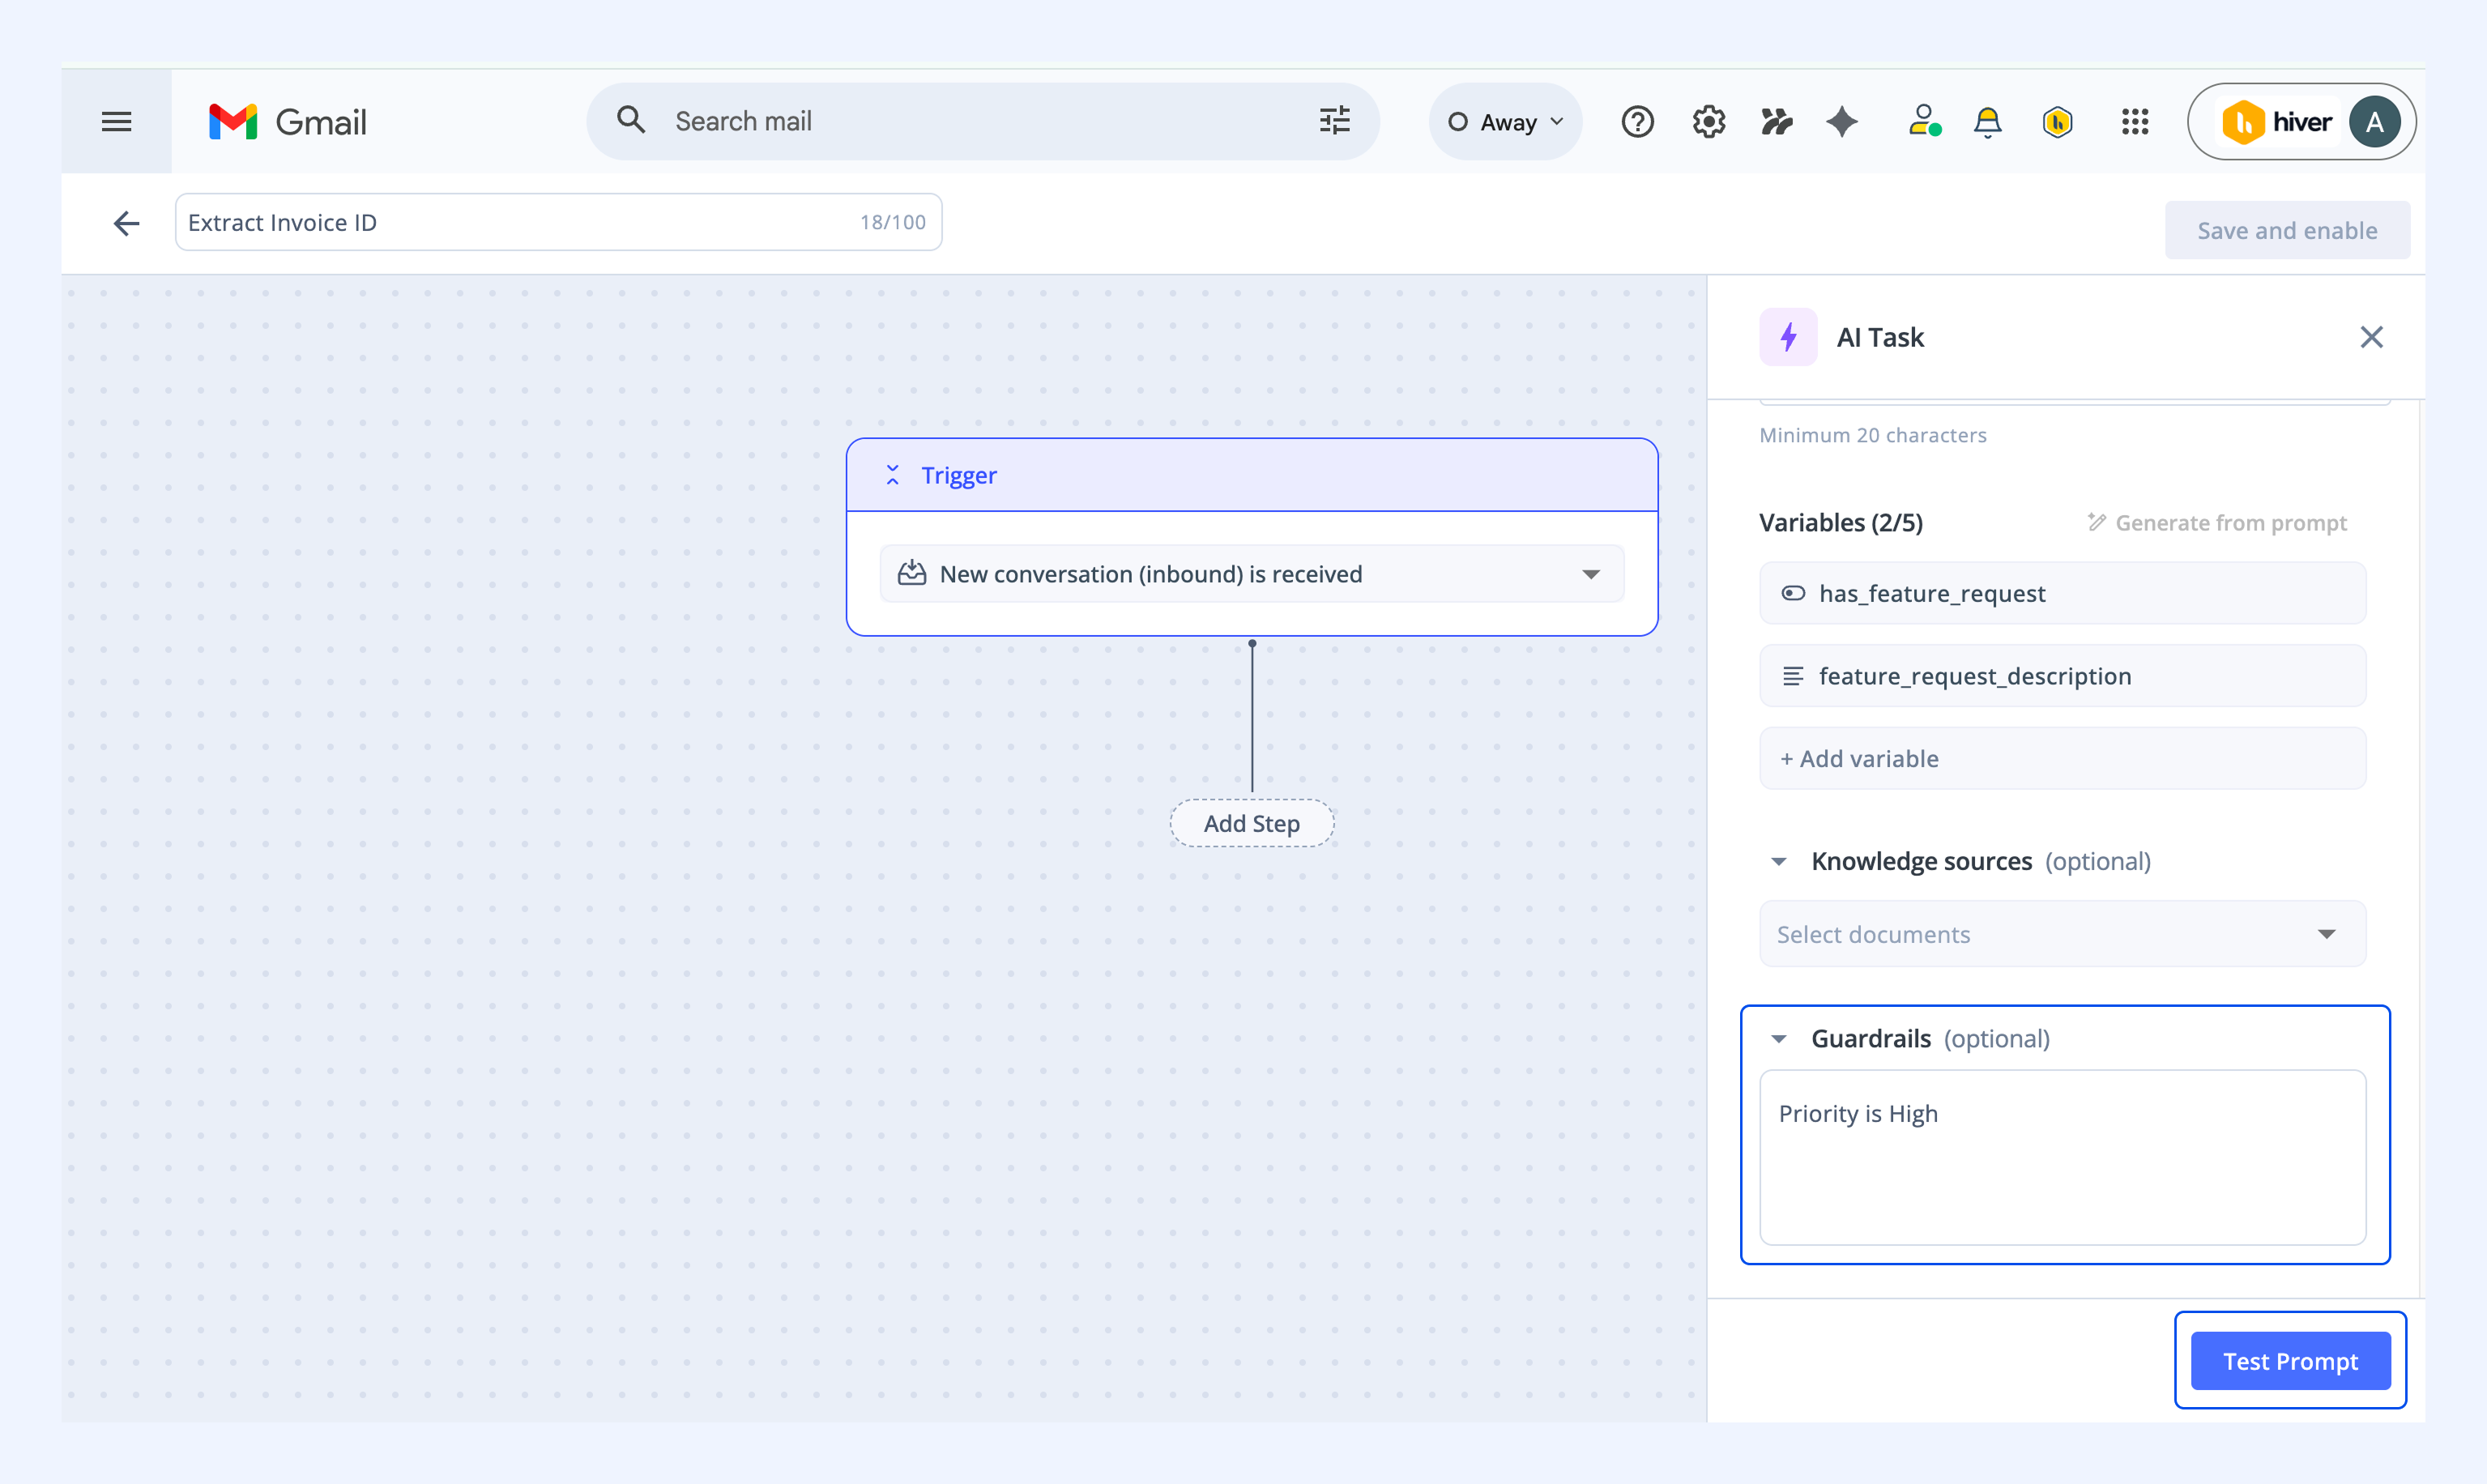
- Guardrails
Define the rules Hiver AI must follow when executing the task. For example:
- Restrict outputs to specific allowed values (e.g., Priority must be Low, Medium, or High).
- Return null if information is missing instead of inferring.
- Only extract data when confidence exceeds a certain threshold.
Use guardrails when:
- Accuracy is critical
- You want predictable, structured outputs
- You need to prevent assumptions or hallucinations
10. To test your prompt, click Test prompt and select a recent conversation you want to test it on.
11. Review the details of the selected conversation and click Confirm to run the test.
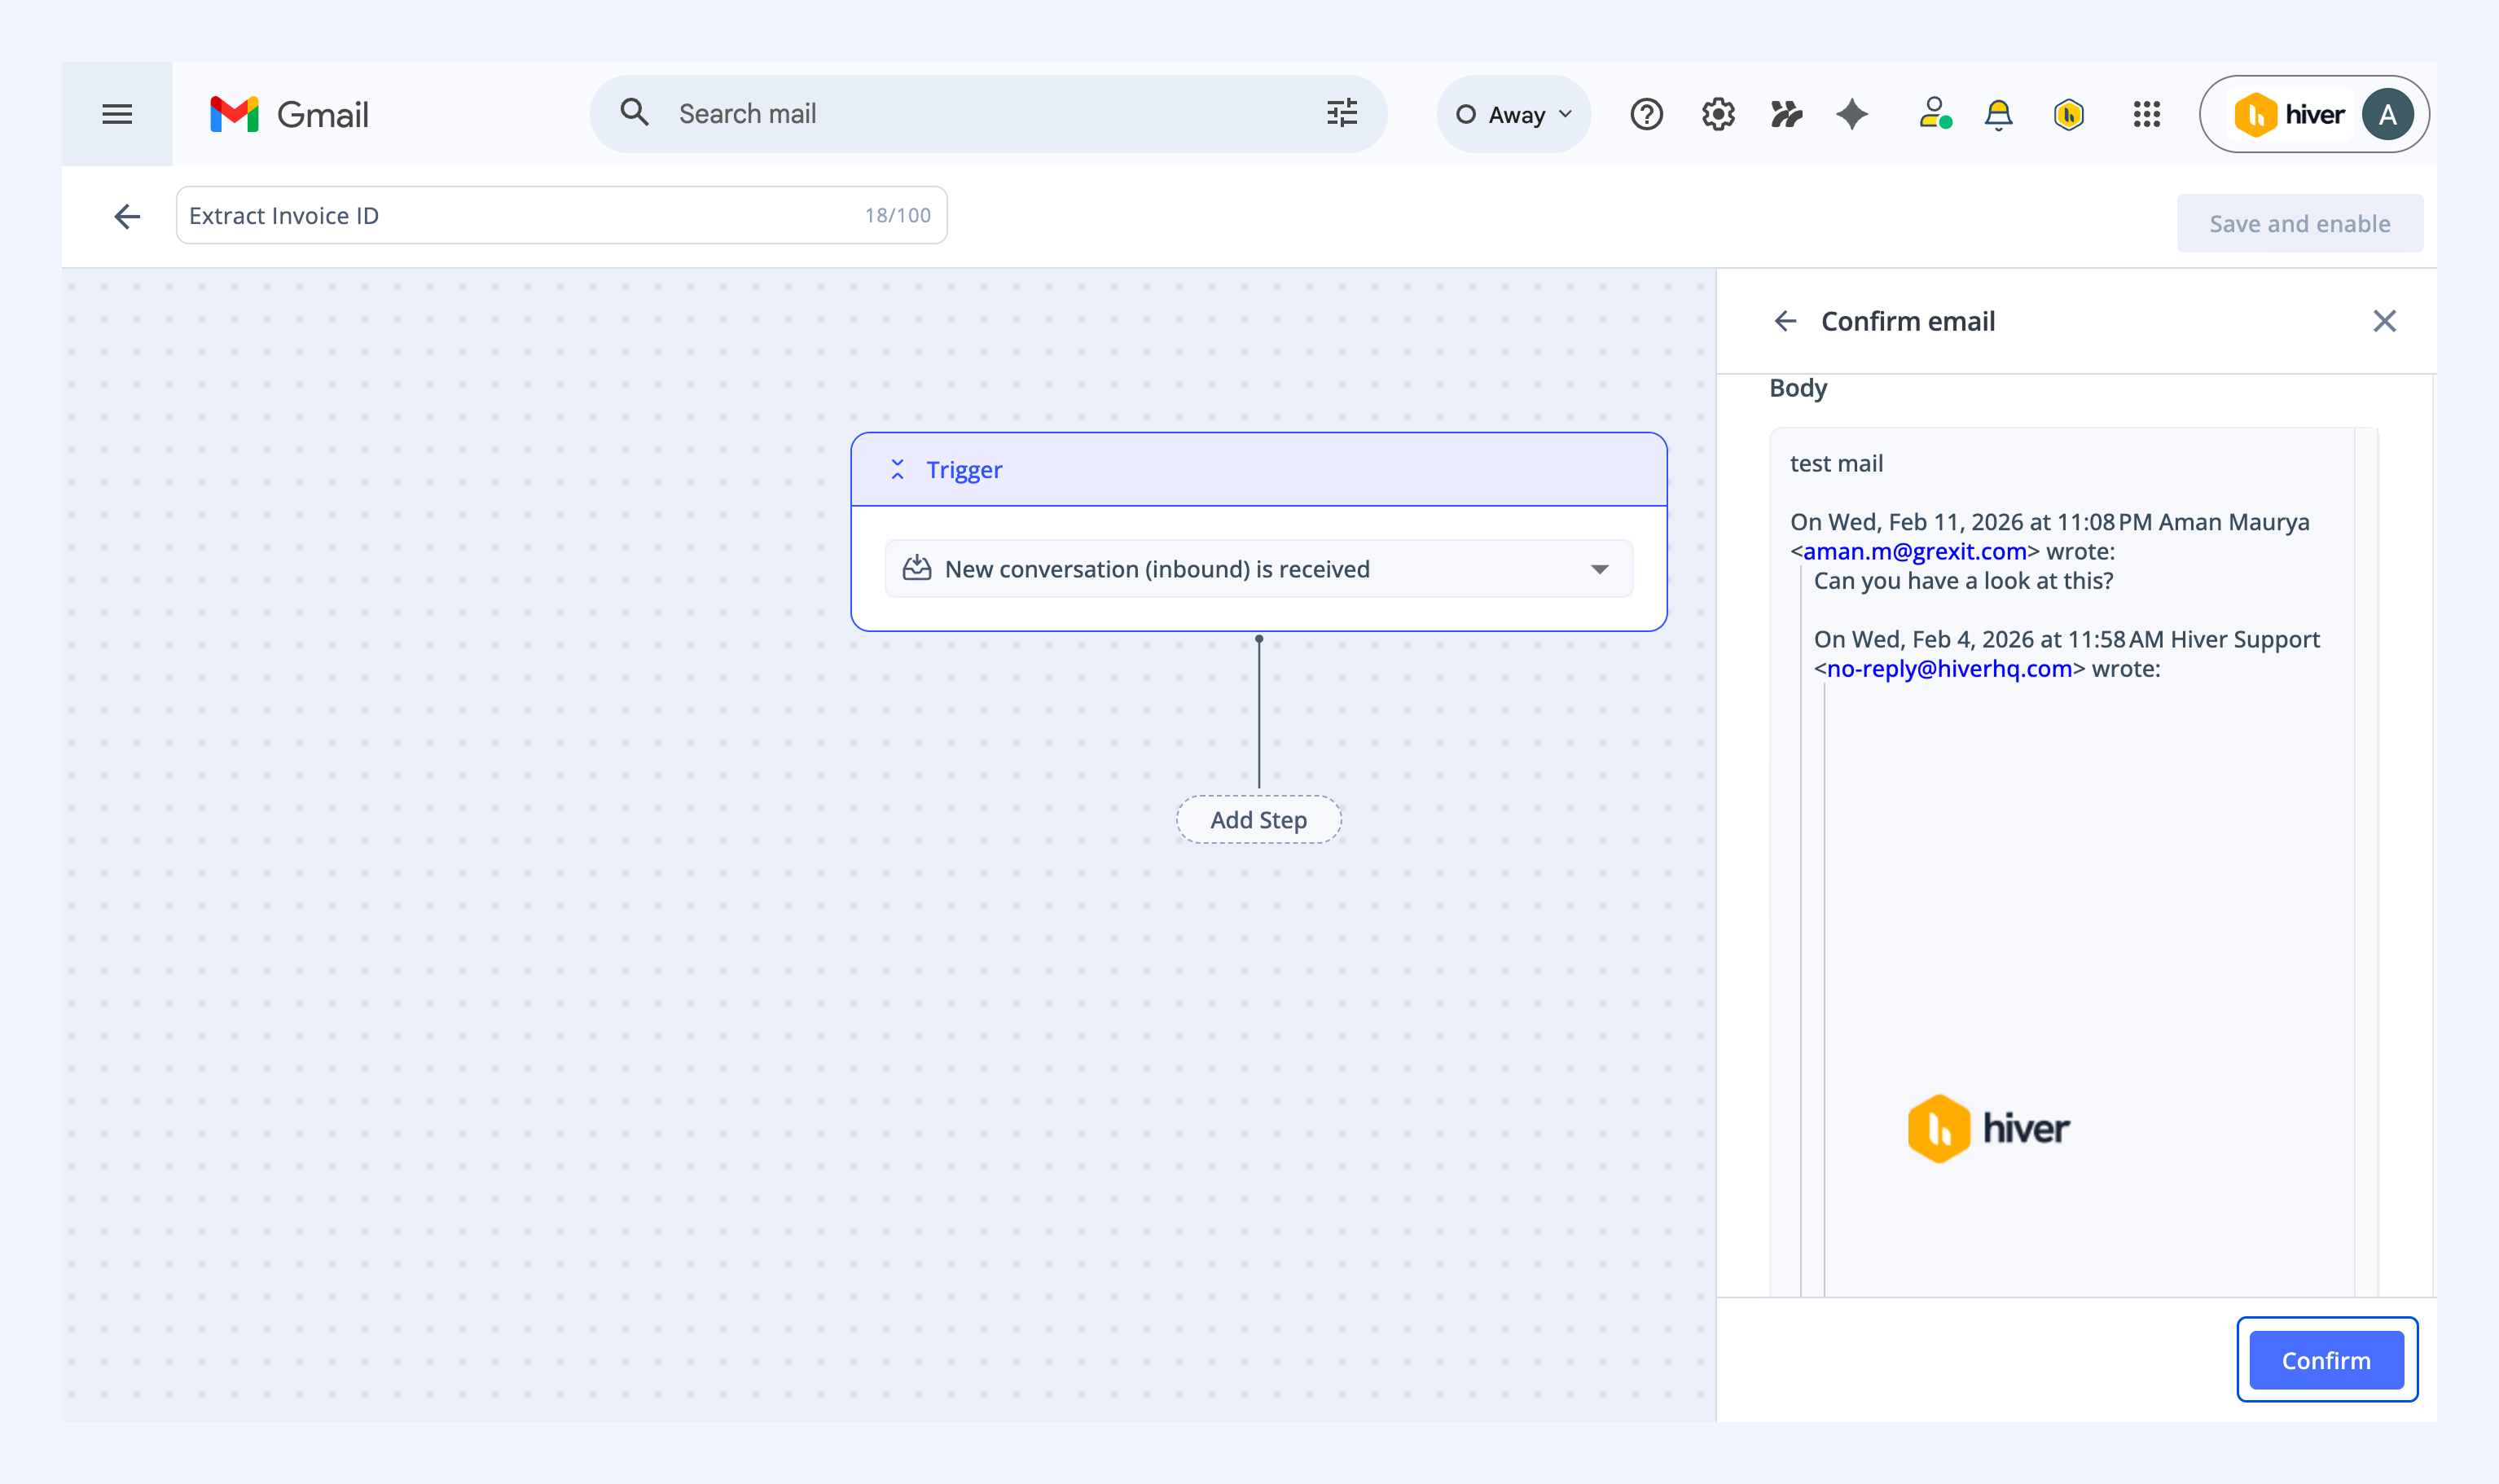
12. Hiver AI will run the Task on the conversation and display the results. If the output looks accurate, click Add AI Task.
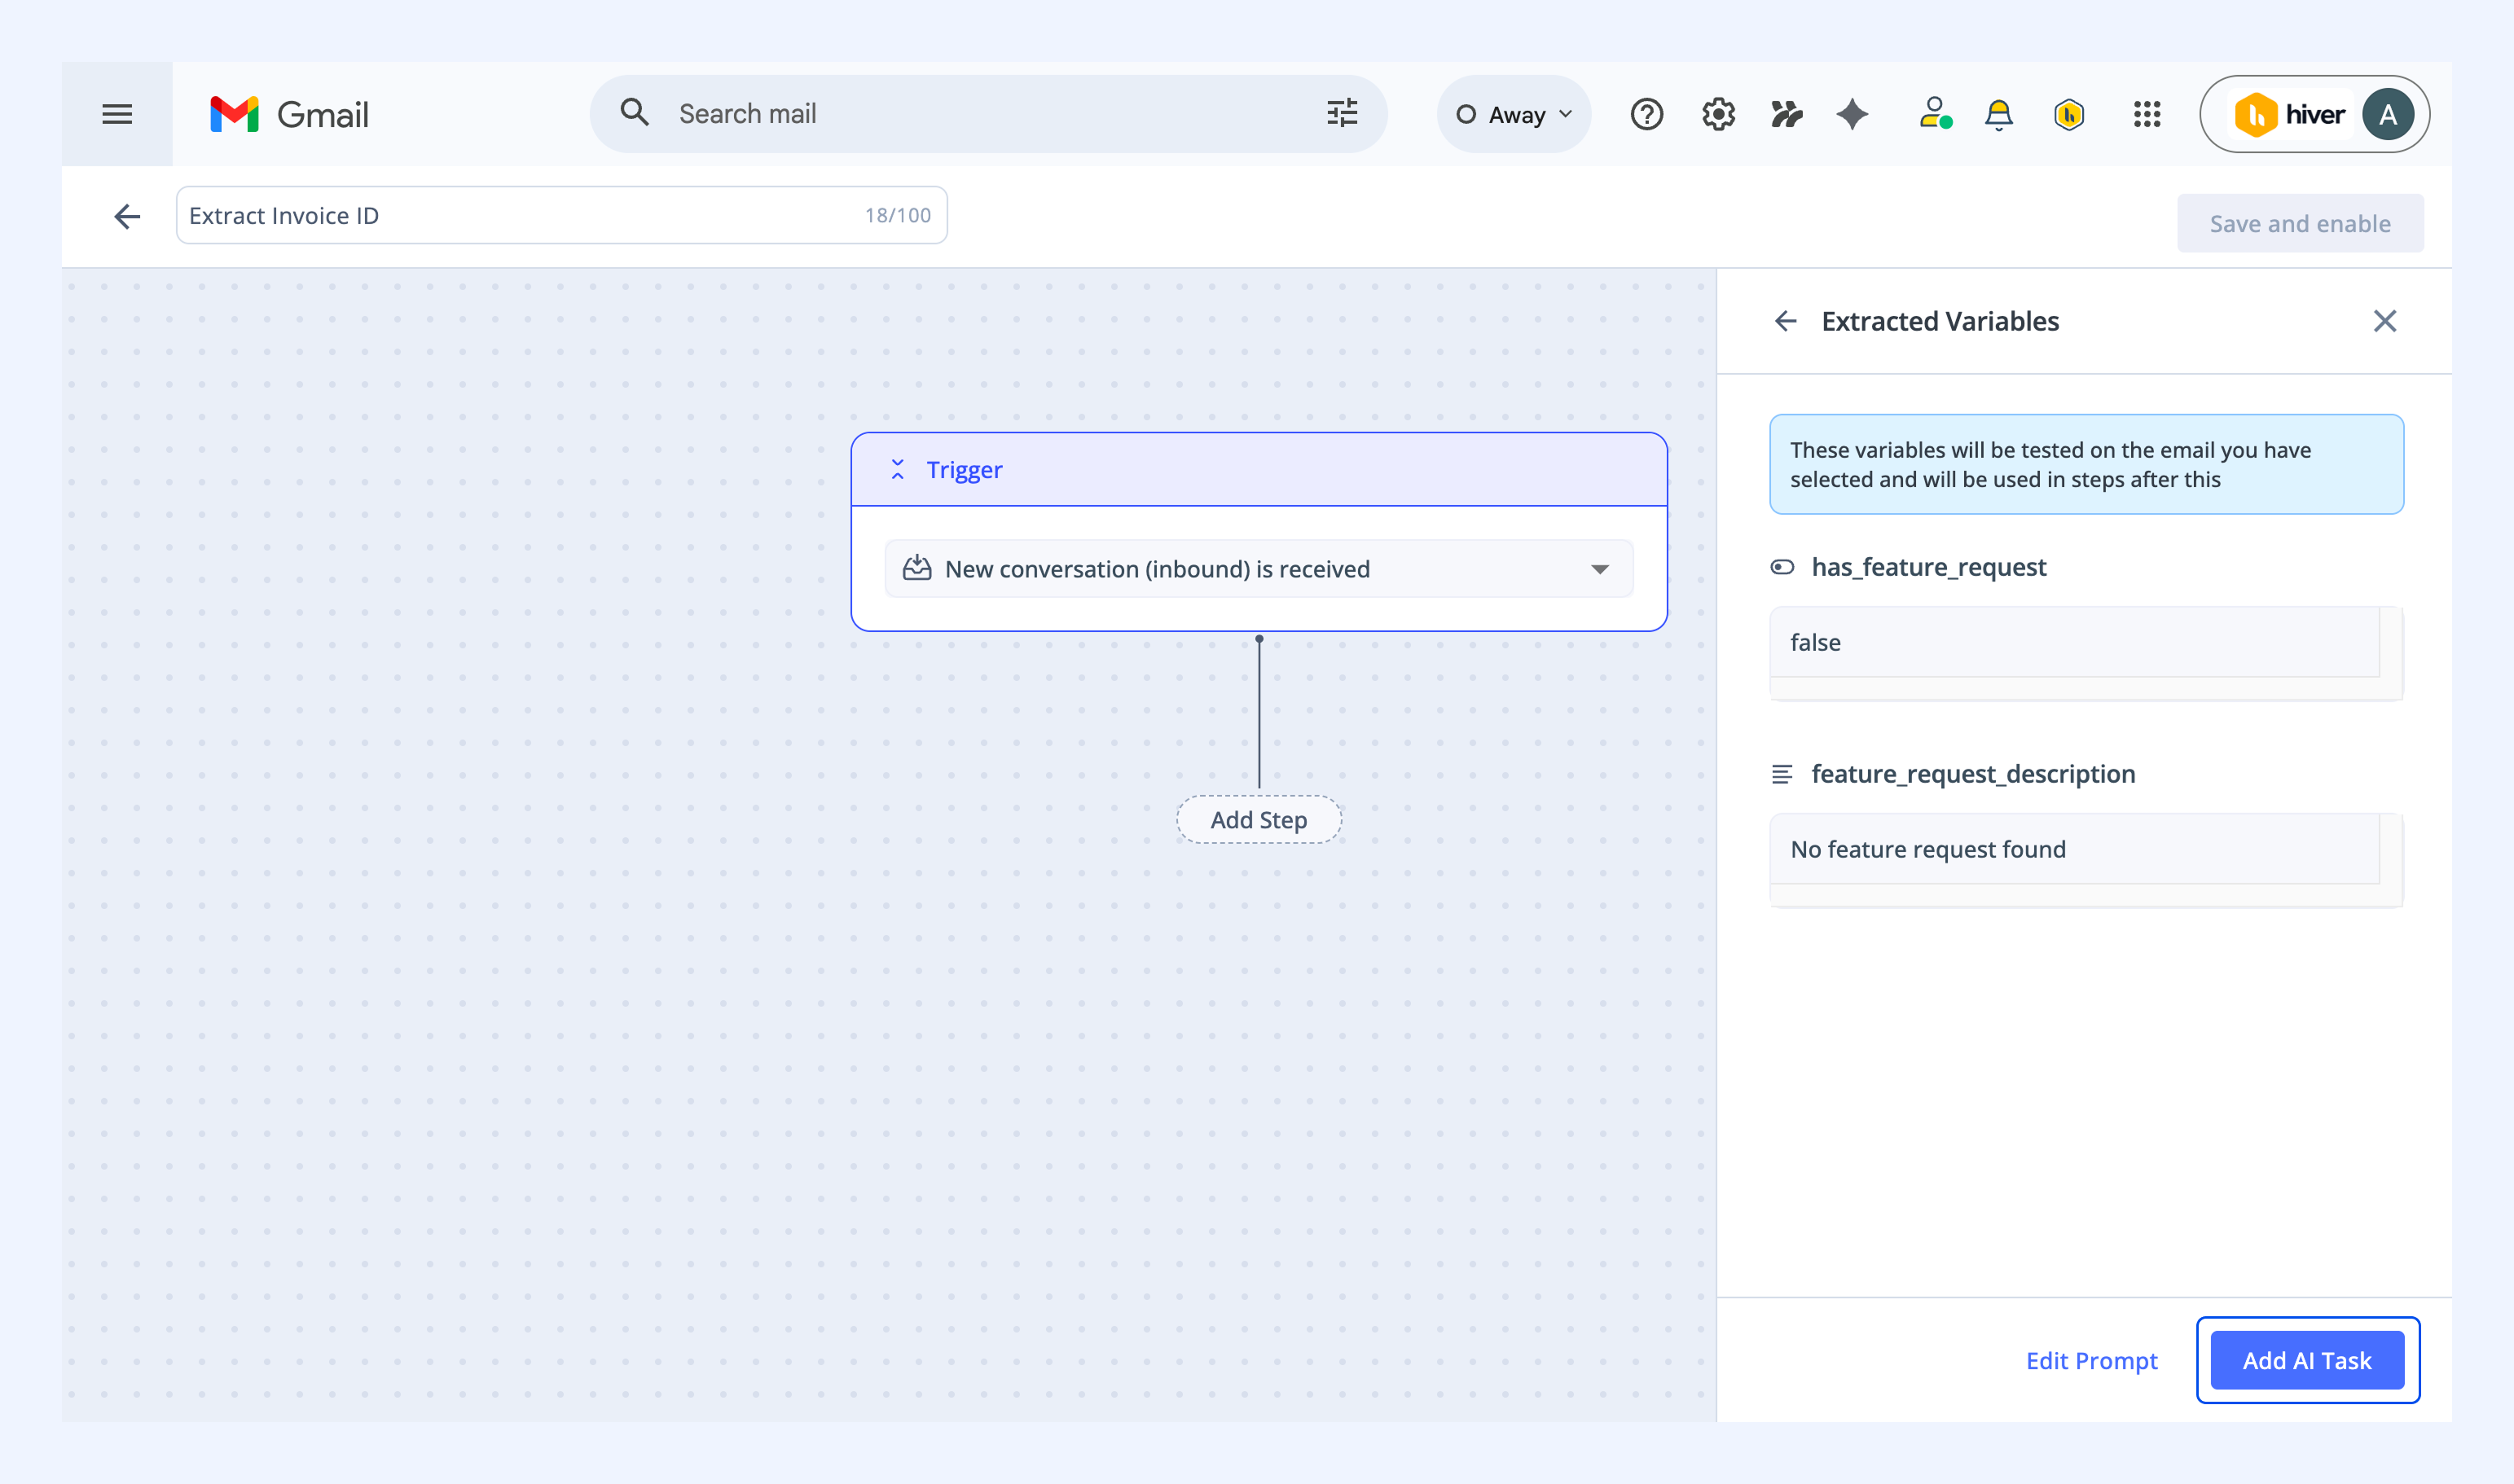
If not, click Edit prompt to refine your instructions and test again.
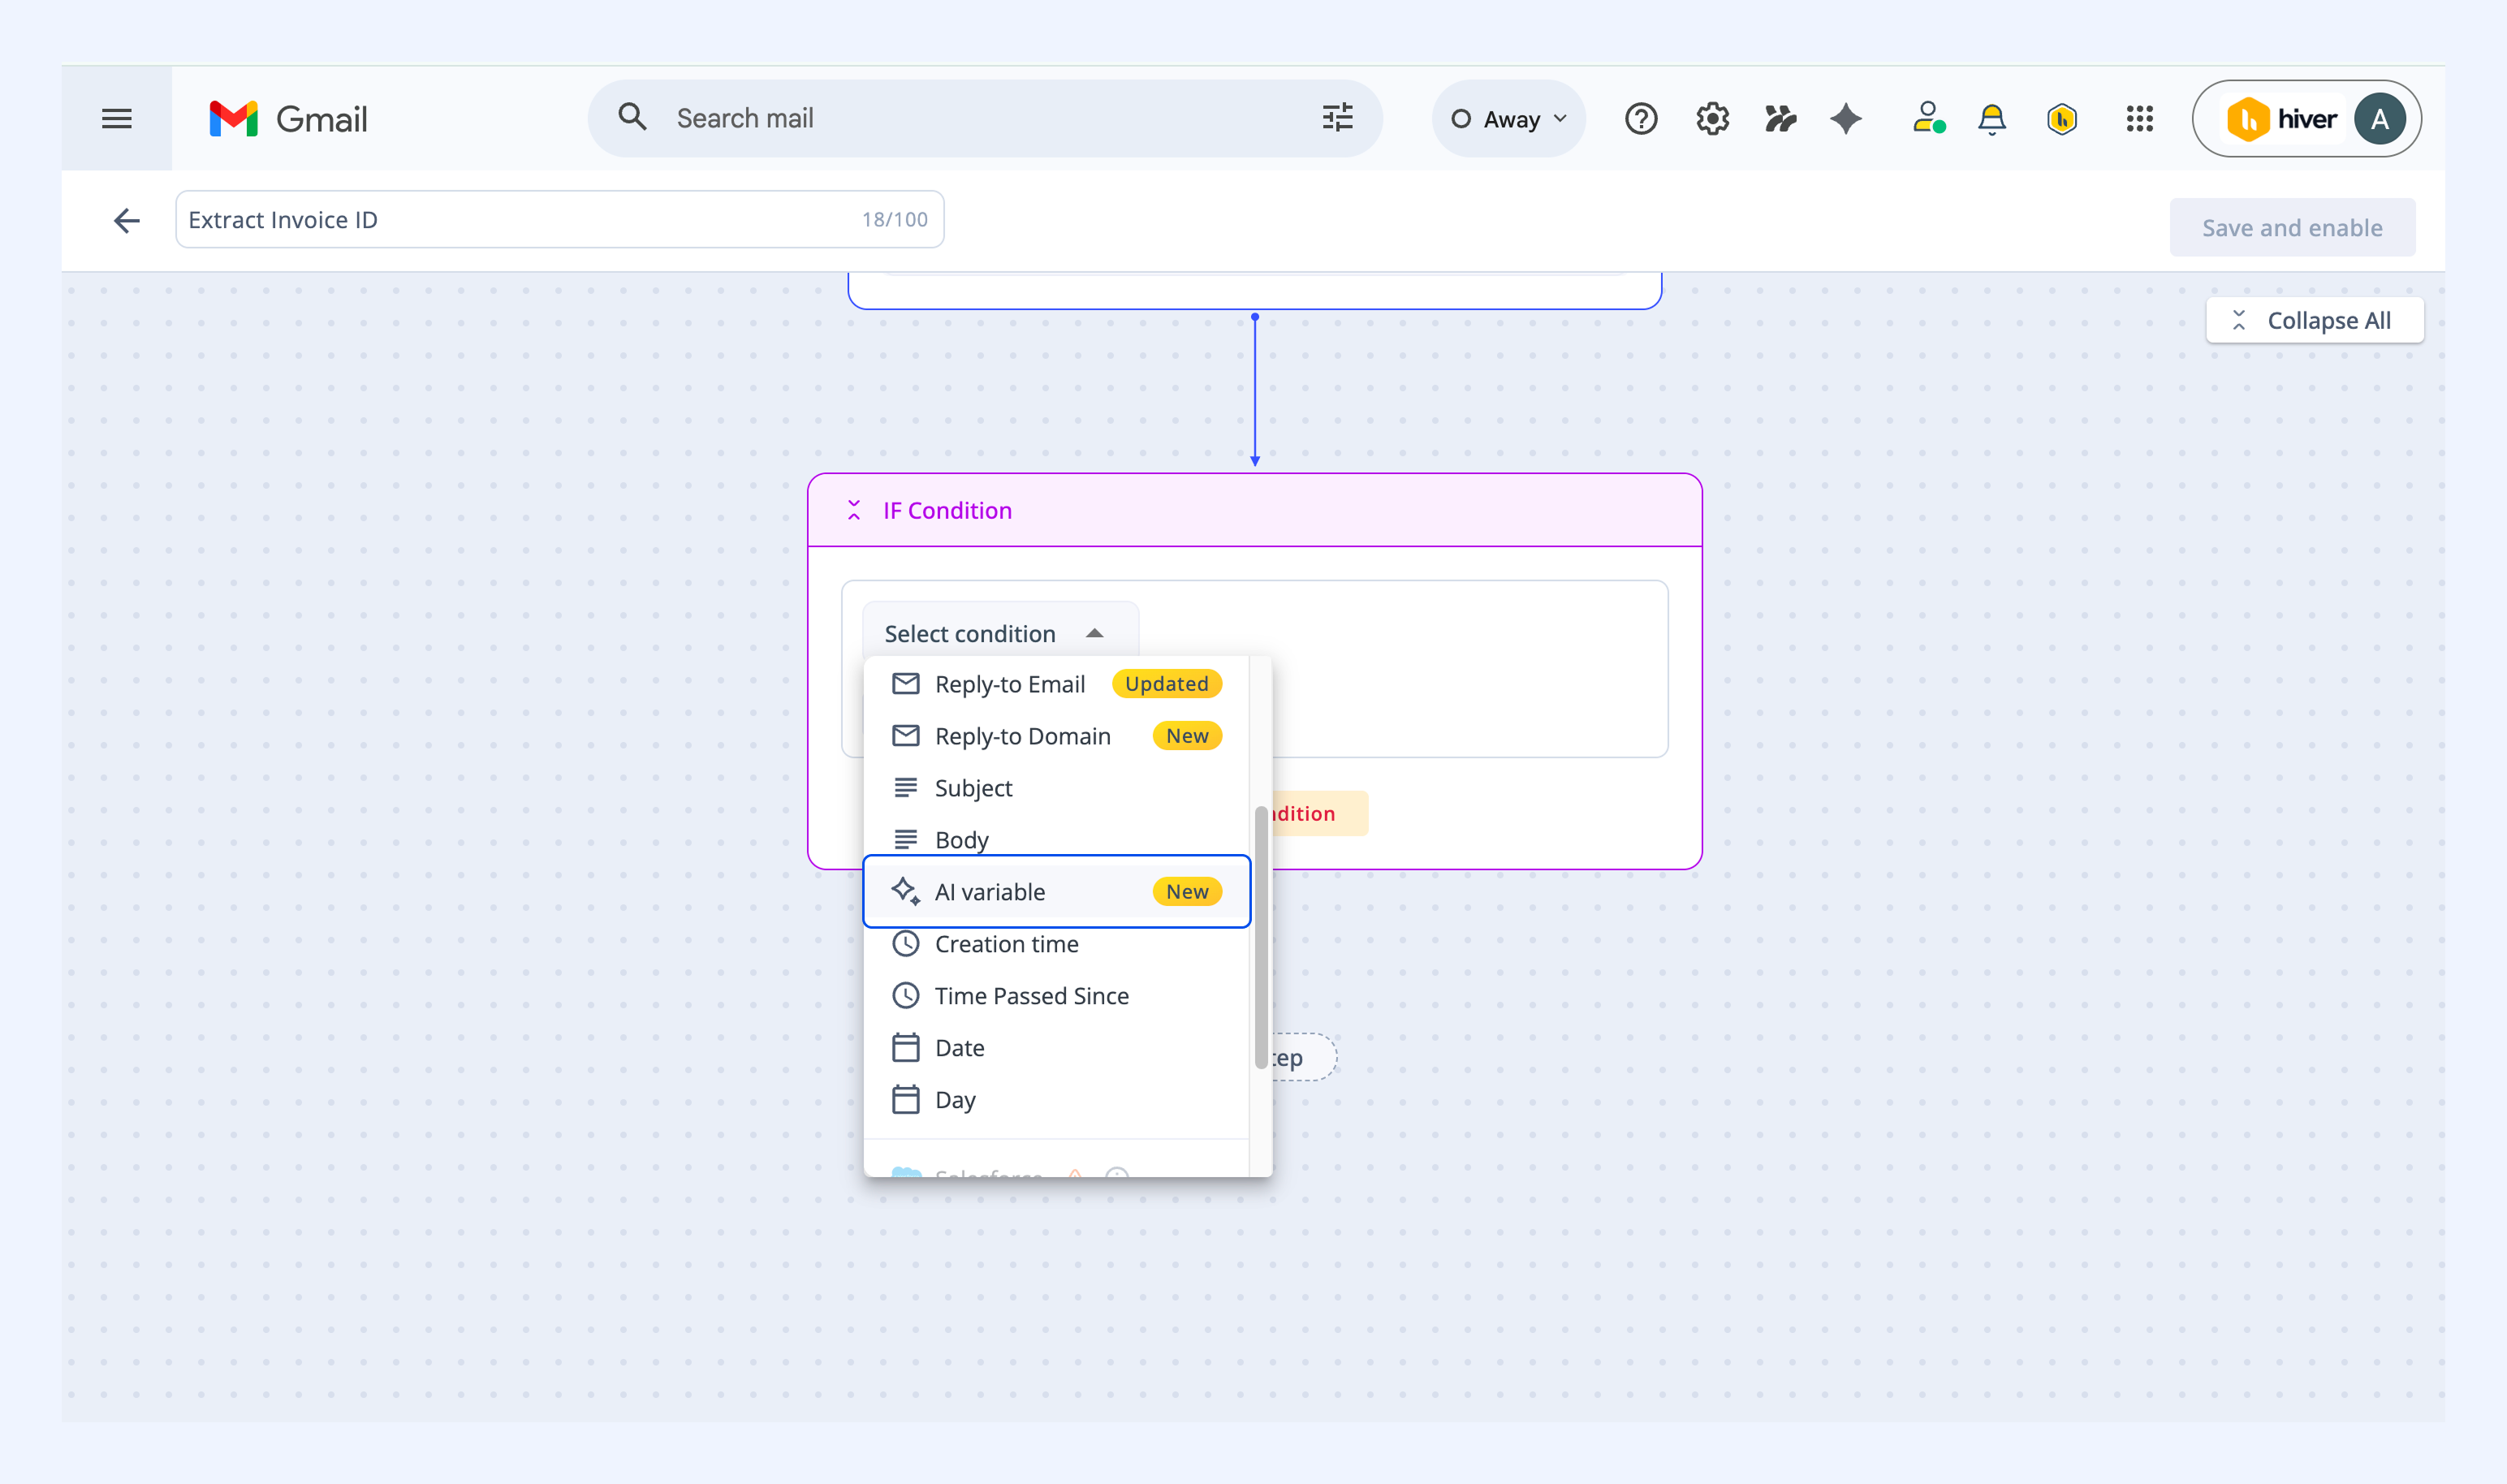
13. Next, let’s add a condition to check whether the conversation contains a feature request. Click Add step → IF condition, and choose AI Variable. This lets you create logic based on the value returned by your AI variable.
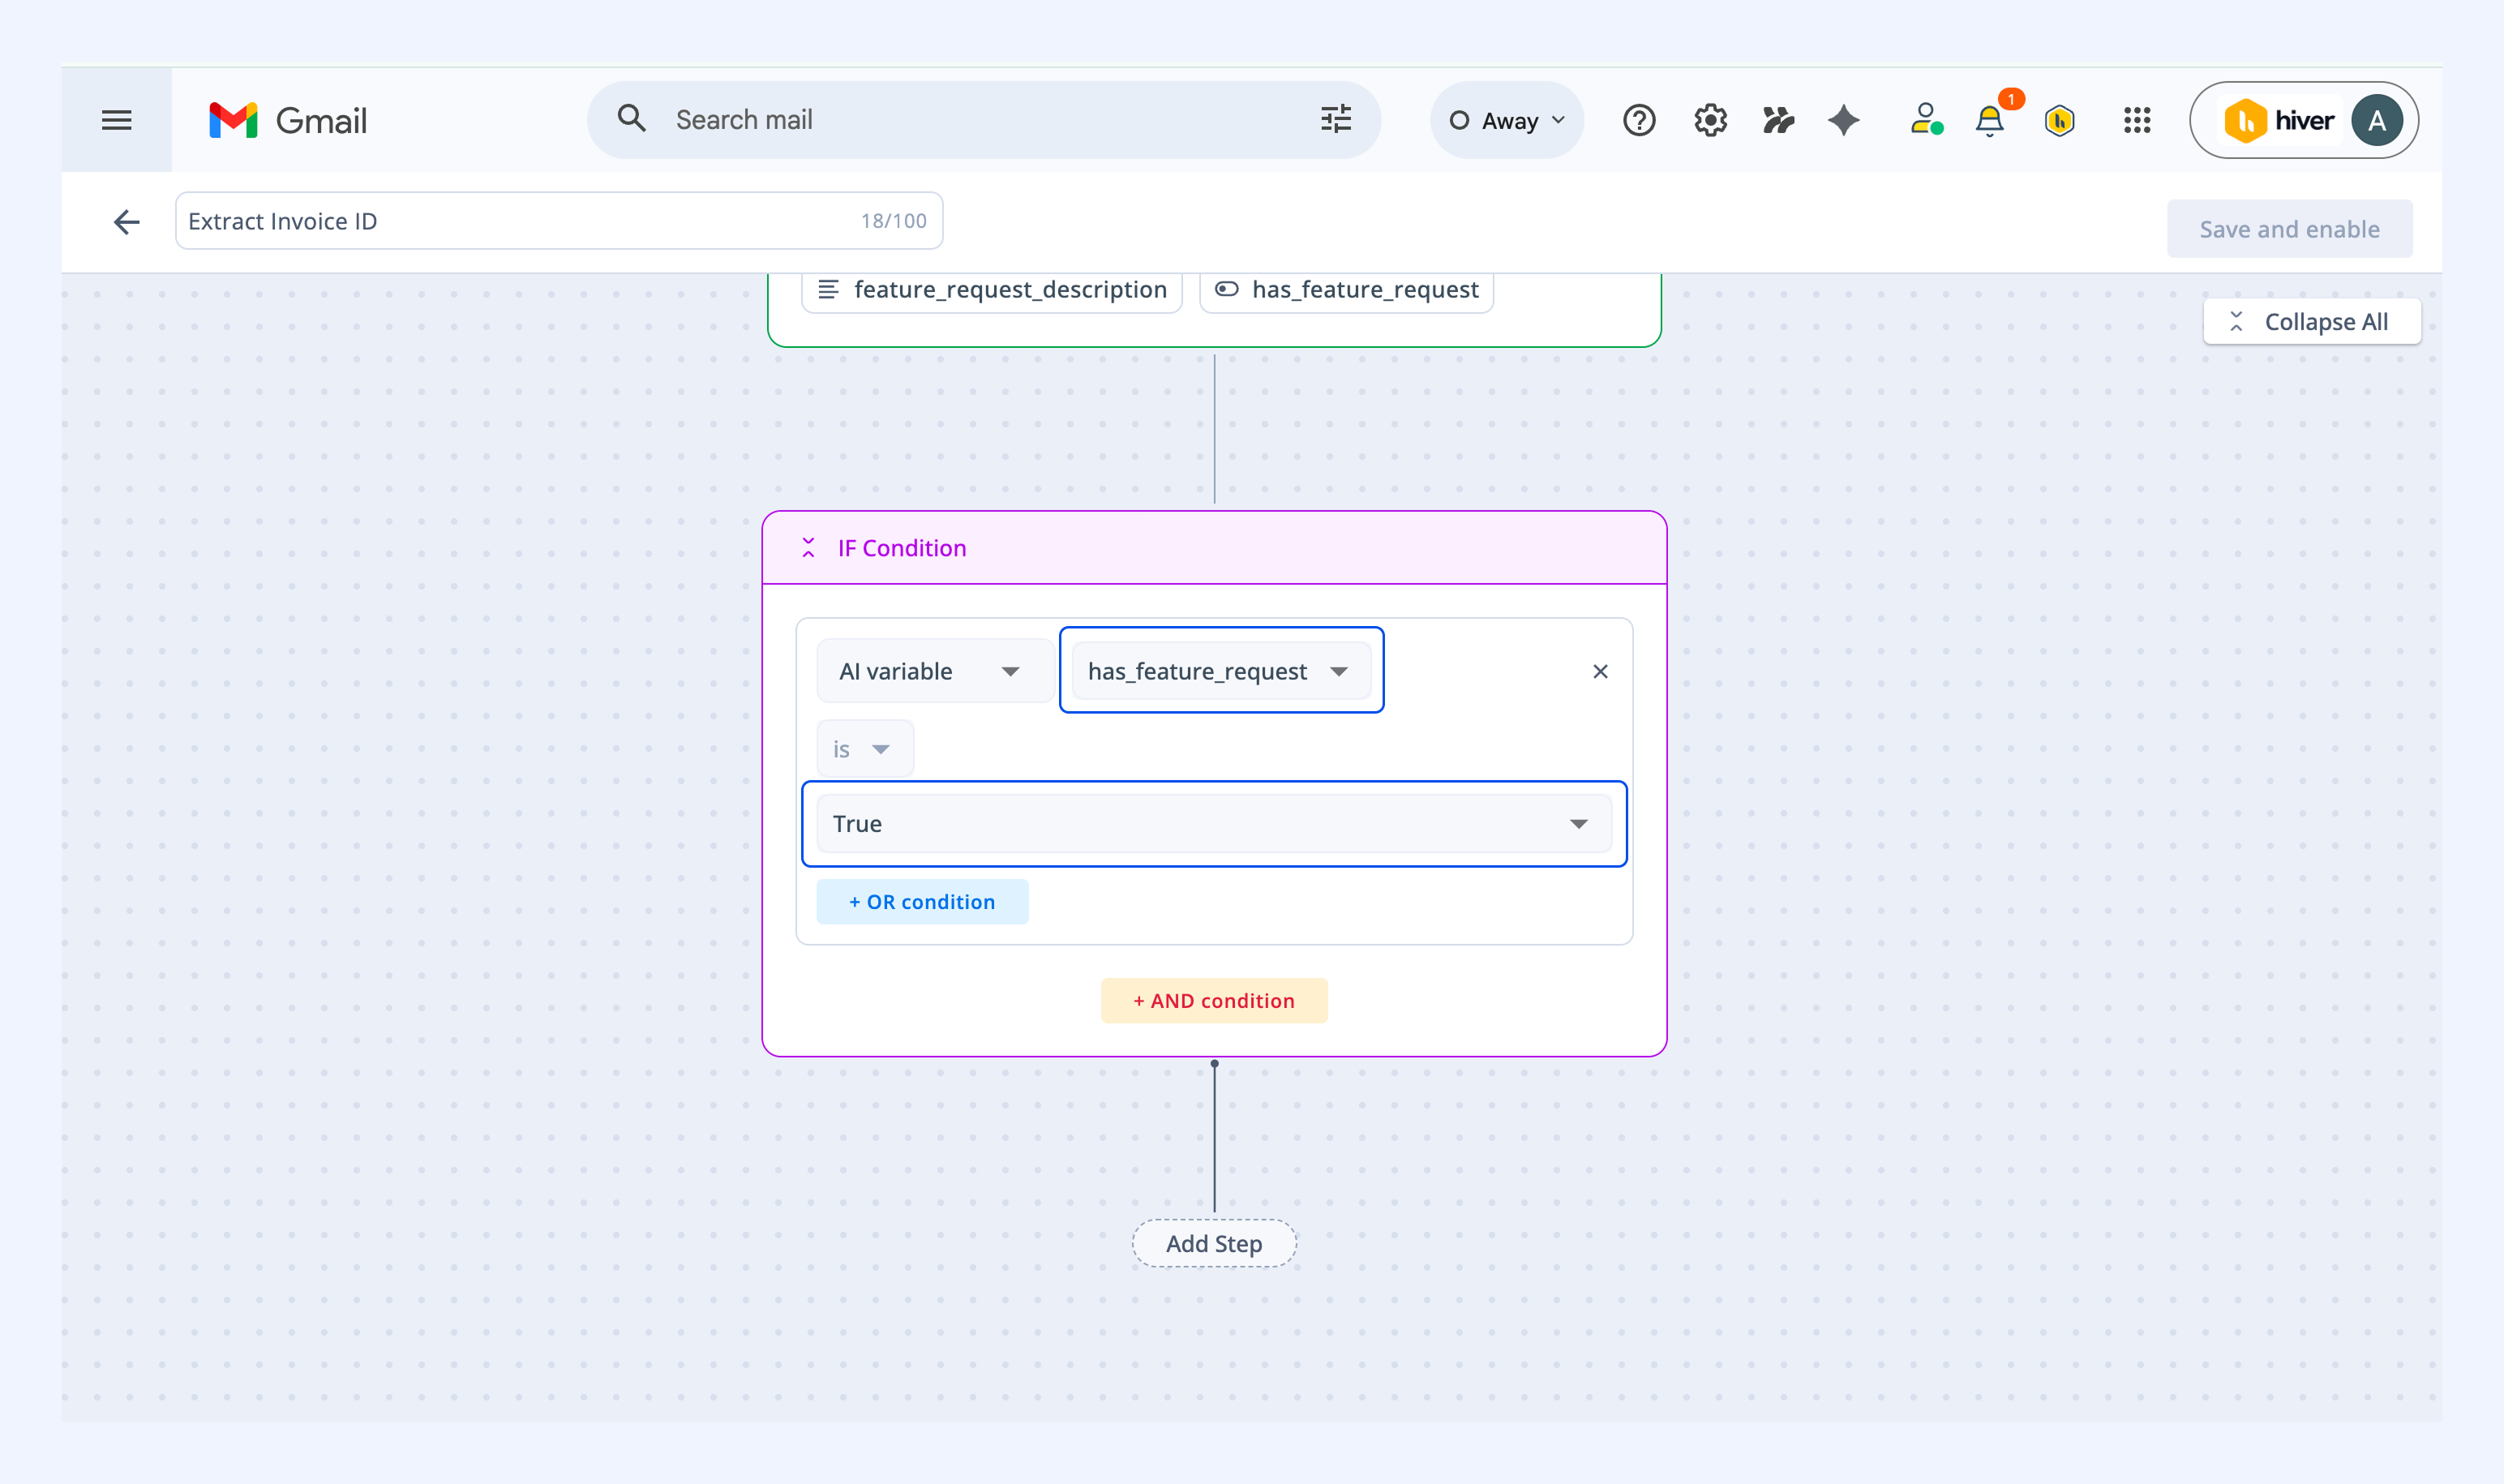
14. To configure the condition for this example, select the variable contains_feature_request, and set the value to True. This ensures the subsequent action runs only when Hiver AI detects a feature request in the conversation.
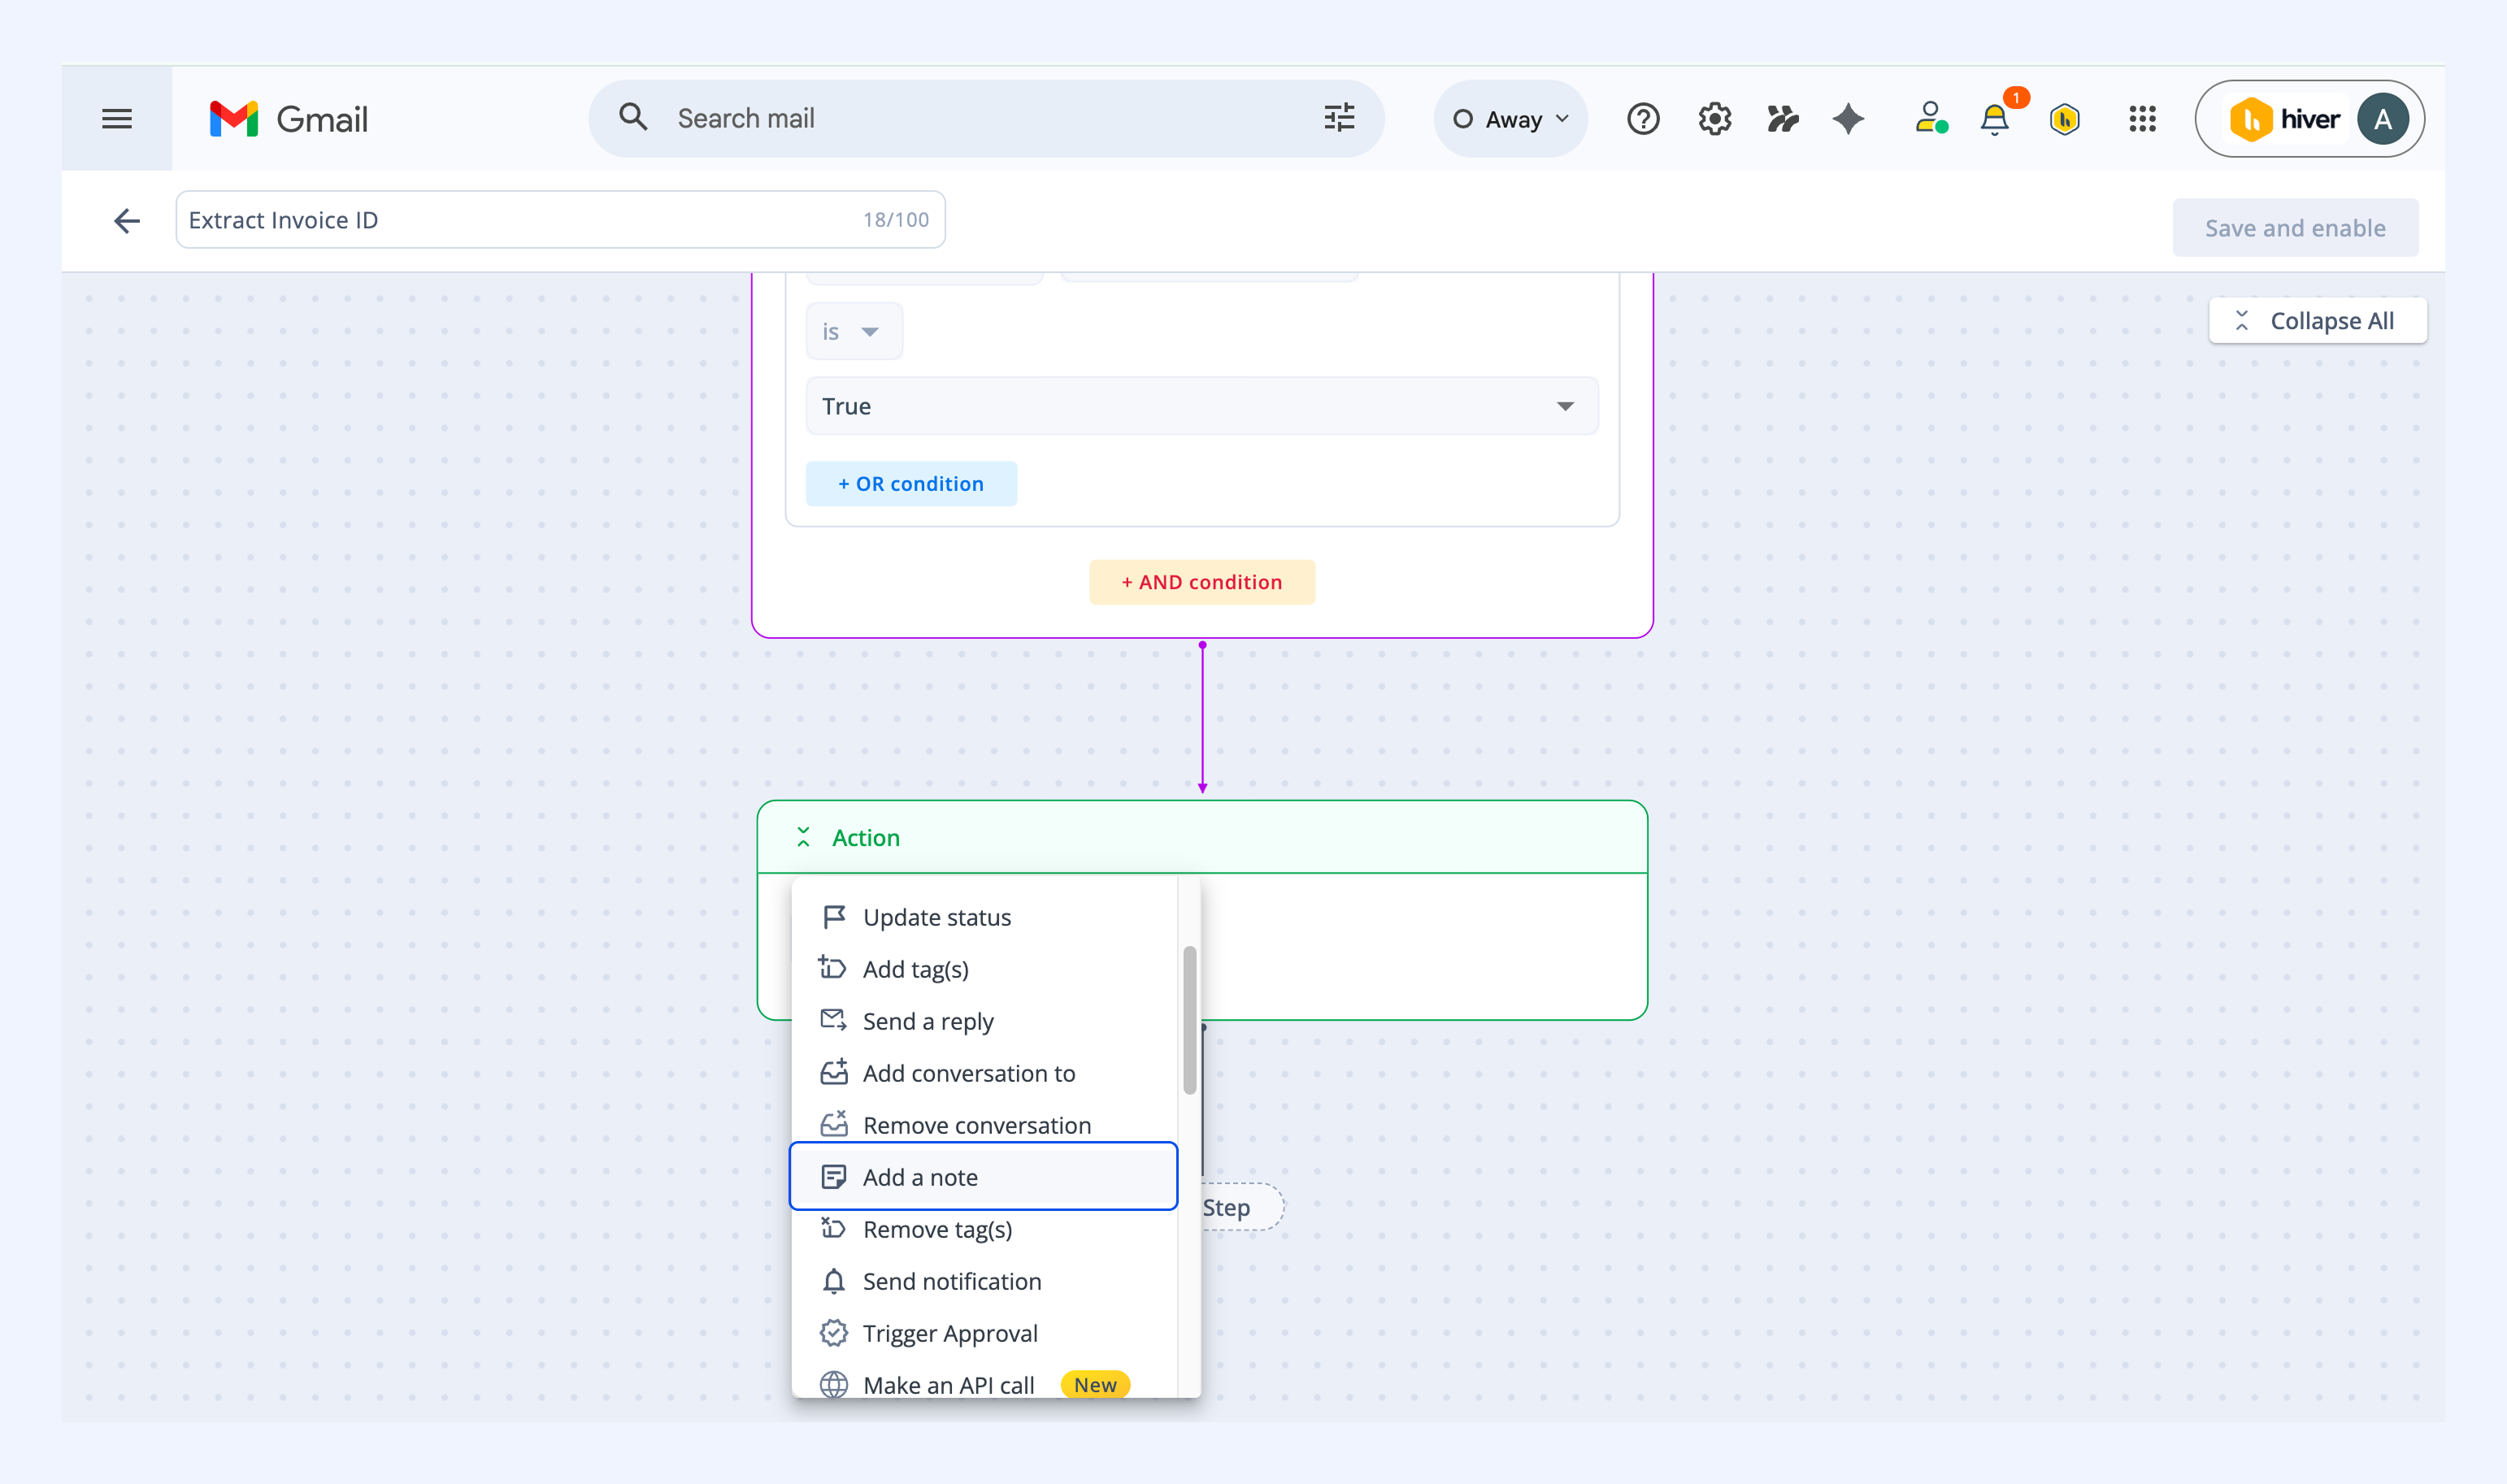
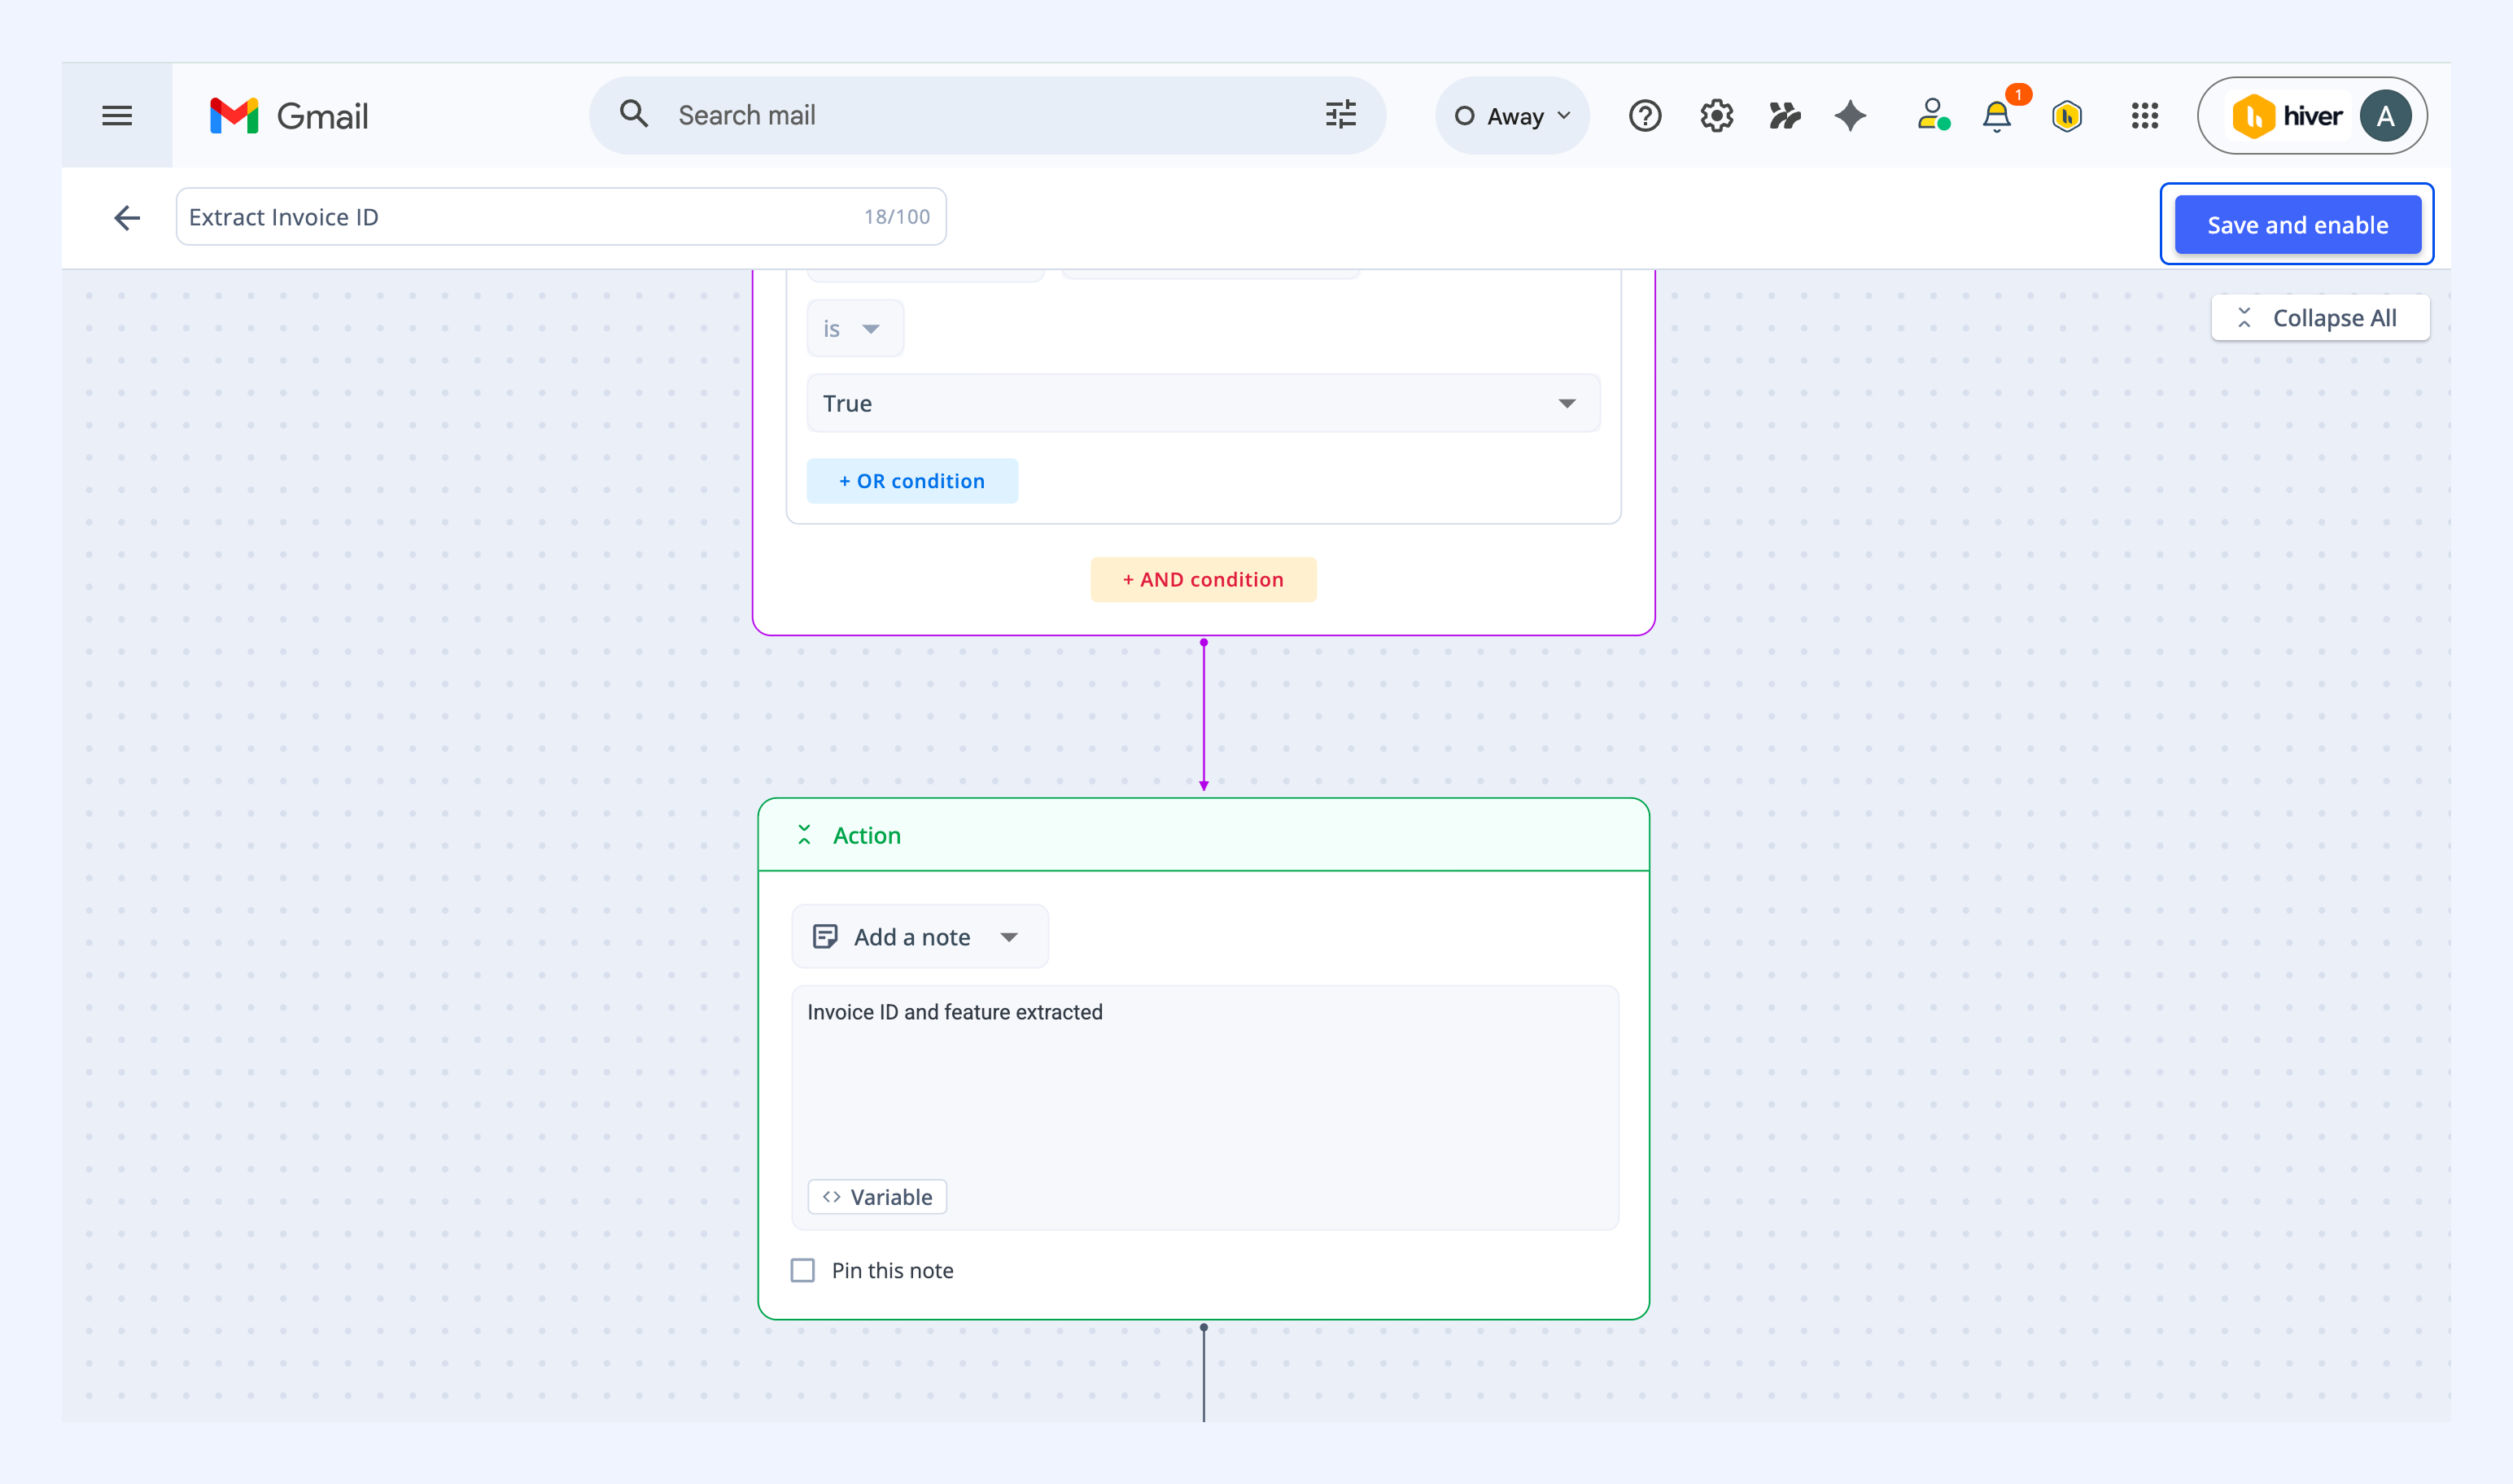
15. Now add the action. Click Add step → Action, and select Add a note. In the note editor, click Variable and select the AI-extracted variables you’d like to include.
16. Once you’re ready, click Save and Enable to publish the Automation.
Once your automation is live, whenever a new conversation meets your trigger condition:
- Hiver AI checks the email for the requested information
- Extracts the relevant details
- Adds them to the note (or performs any follow-up actions you’ve configured)