Moving conversations from personal to Shared Inbox
In most customer service or sales teams, customers often continue conversations by emailing a specific team member, for example, ryan@acme.com instead of support@acme.com.
While this feels natural, it creates gaps in how your team manages conversations:
- Only one person has visibility into the conversation
- SLAs, tags, and analytics don’t apply
- Important emails may not be shared with the team
- Conversations lose continuity if the owner is unavailable
Hiver solves this by letting you create Individual Inbox Automations rules that automatically bring these emails into a Shared Inbox ensuring no gaps in workflows.
Prerequisites
Before you begin:
- You must be an Admin in Hiver
- Your account must be on the Elite plan
How Individual Inbox Automations work
An Individual Inbox Automation monitors emails received in team members’ individual inboxes, even though it is created inside a Shared Inbox.
For example, if Adam is part of a Shared Inbox ‘Support’ but receives a direct email to adam@acme.com, the Automation recognizes the email and automatically adds it to the Support Shared Inbox so it can be tracked and managed by the team.
Behind the scenes:
- Trigger: A new email is received in a member’s inbox
- Condition: The sender matches a defined email address or domain
- Action: The email is added to the Shared Inbox
As an admin, you can choose whether the rule applies to everyone in the Shared Inbox or only selected teammates. You can also choose to move:
- All emails from specific email addresses or domains.
For example, automatically move all emails from @acme.com to the Enterprise Support Shared Inbox. - All emails except those from specific email addresses or domains.
For example, move all emails except internal conversations sent from @yourcompany.com.
Note: Conditional operators is not and is not present in are currently part of an early access program. To enable them for your account, reach out to us at support@hiverhq.com.
Steps to set up an Individual Inbox Automation
1. Go to Admin Panel → Shared Inboxes, and select the Shared Inbox where you want conversations to be added to.
2. Open Automations → Individual Inbox → Create Individual Inbox Automation.
.png)
3. Enter a name for your Automation.
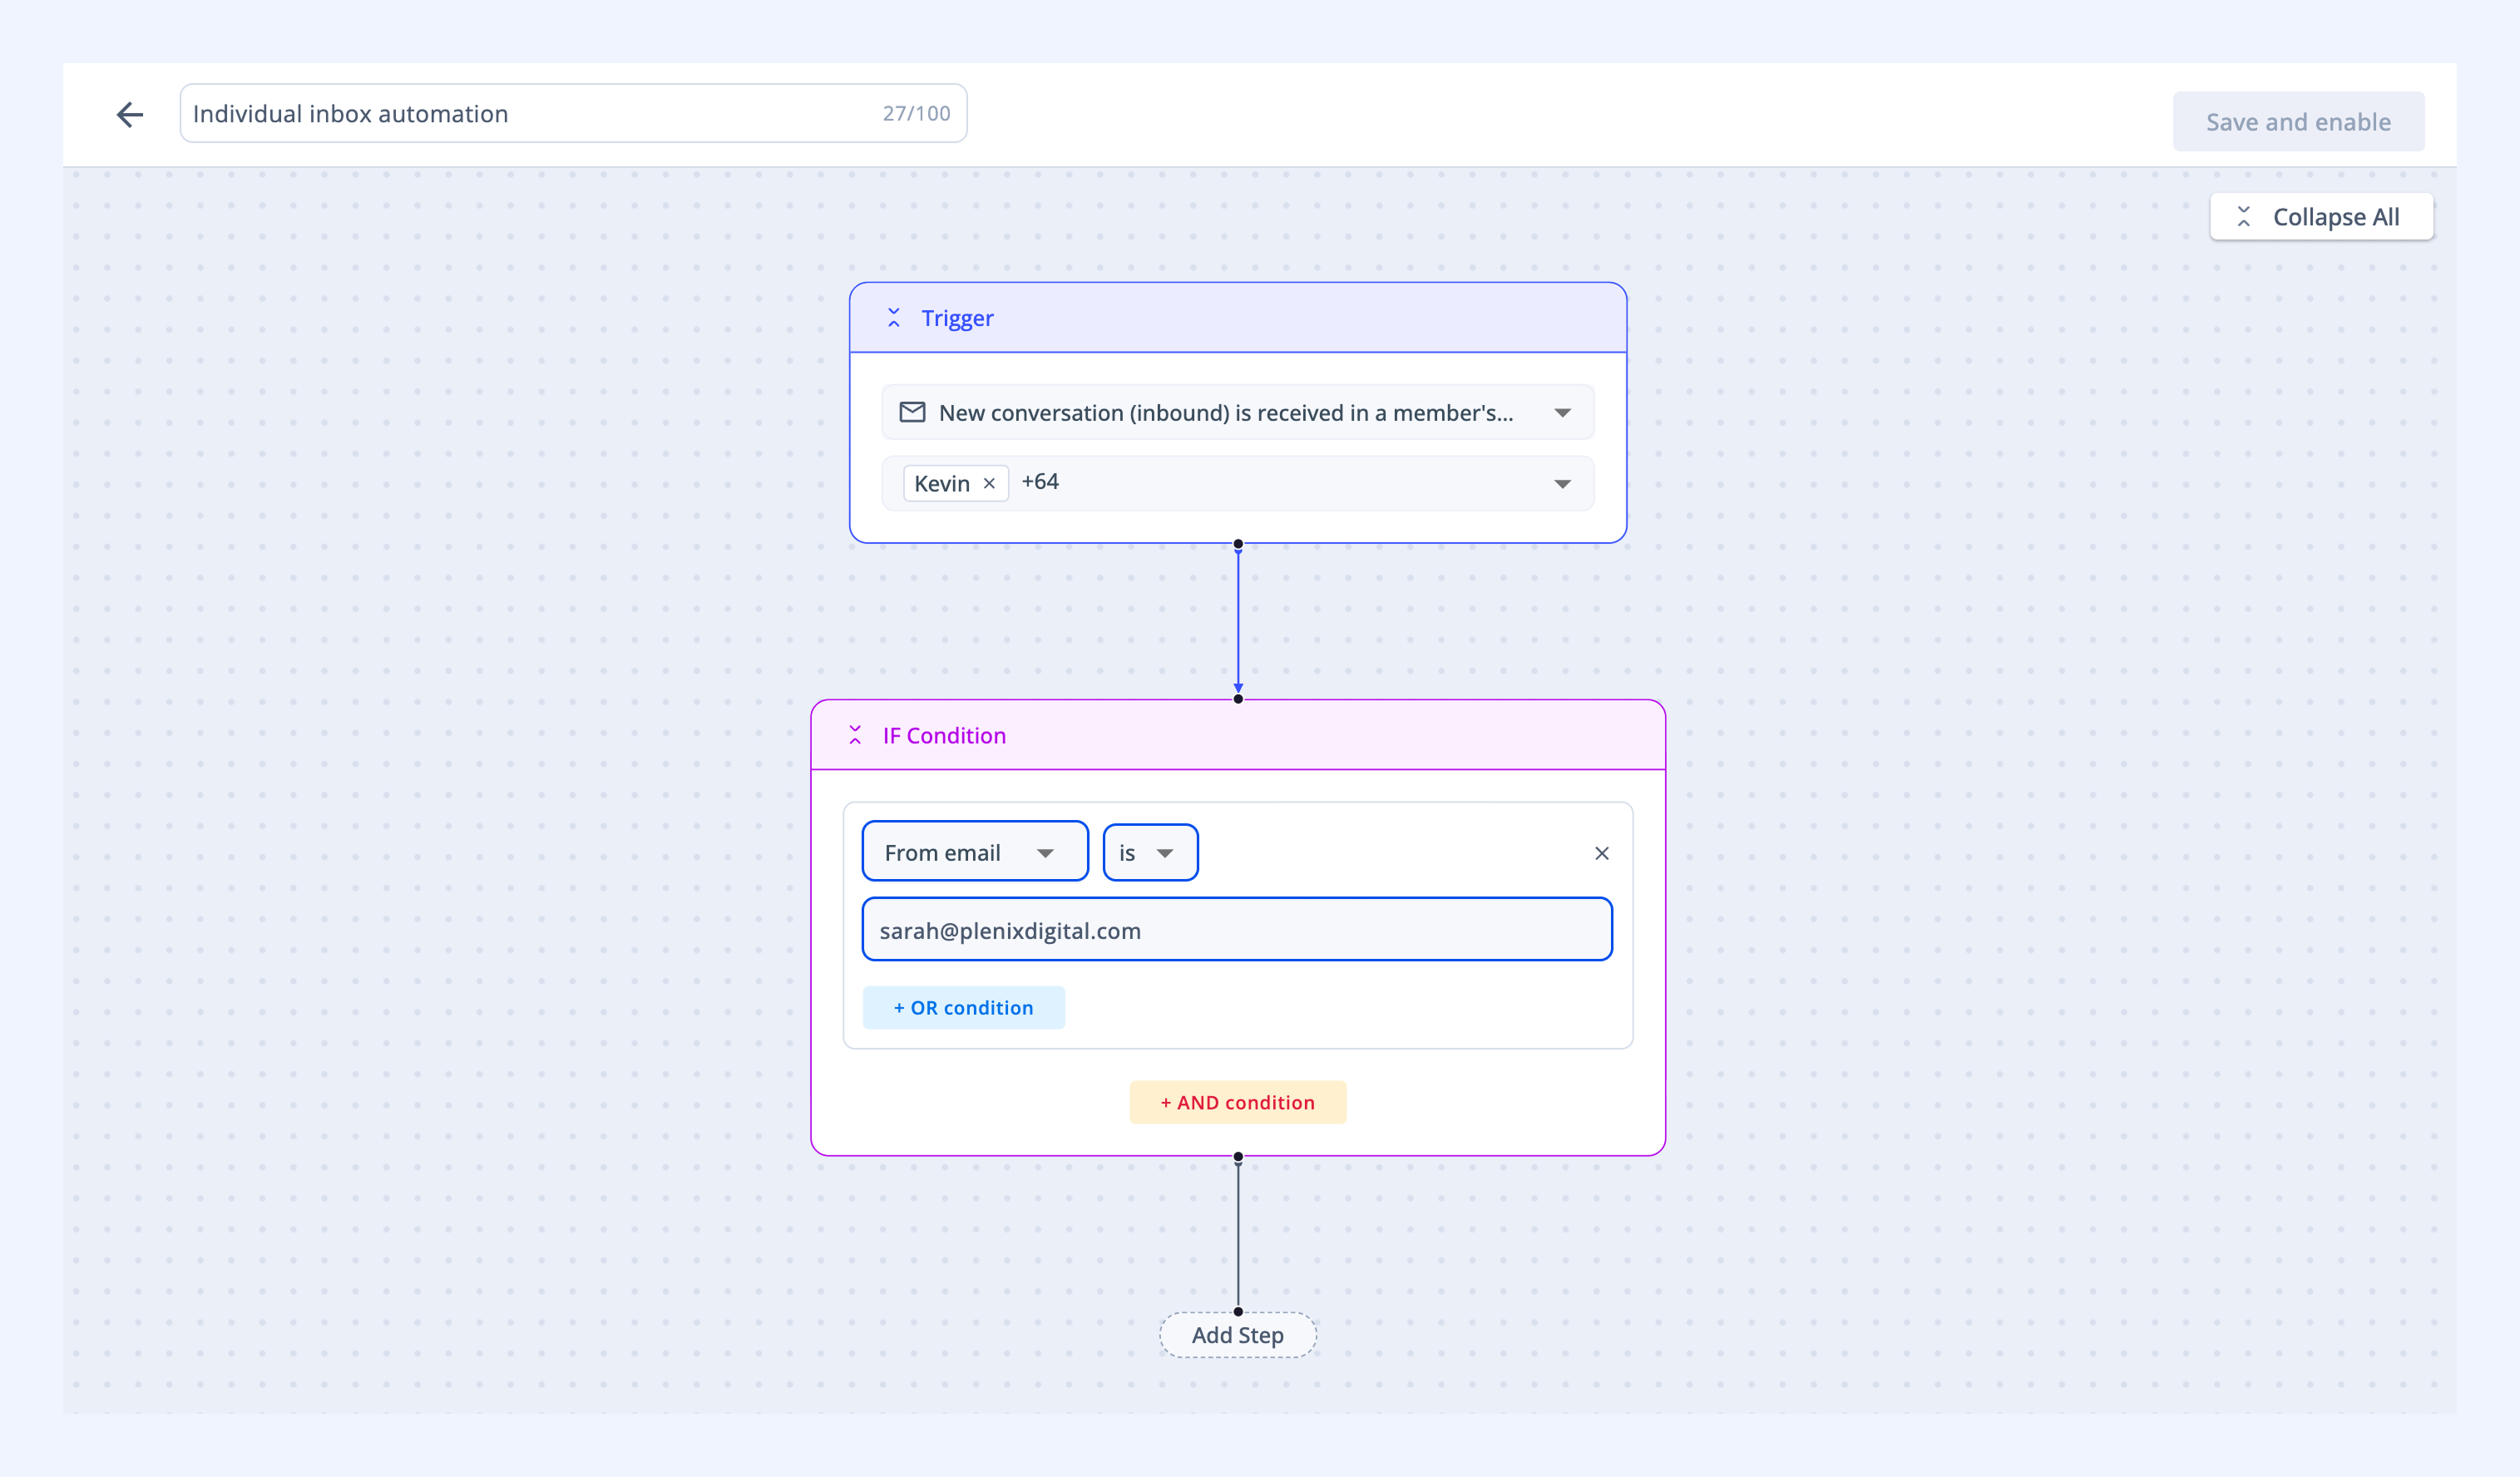
4. Choose a trigger. You can choose between:
- New inbound conversation in a member’s inbox
- New outbound conversation sent from a member’s inbox
Then select the members this rule should apply to (all members are selected by default).
.png)
5. Define the condition to identify conversations that should be moved to your Shared Inbox:
- Use From email to add specific senders
- Use From domain for all emails from a company’s domain
6. Then set how values are matched, depending on whether you want to include or exclude senders:
- is: Include emails or domains you enter manually
- is present in: Include emails or domains from a Custom Object
- is not: Exclude emails or domains you enter manually
- is not present in: Exclude emails or domains from a Custom Object
Tip: Using a Custom Object lets you manage which customers’ emails should be routed to the Shared Inbox from one place. As your customer list changes, you can update the Custom Object without editing the Automation each time.
7. Next, click Add step → Action. The action is fixed to Add conversation to, with the current Shared Inbox selected.
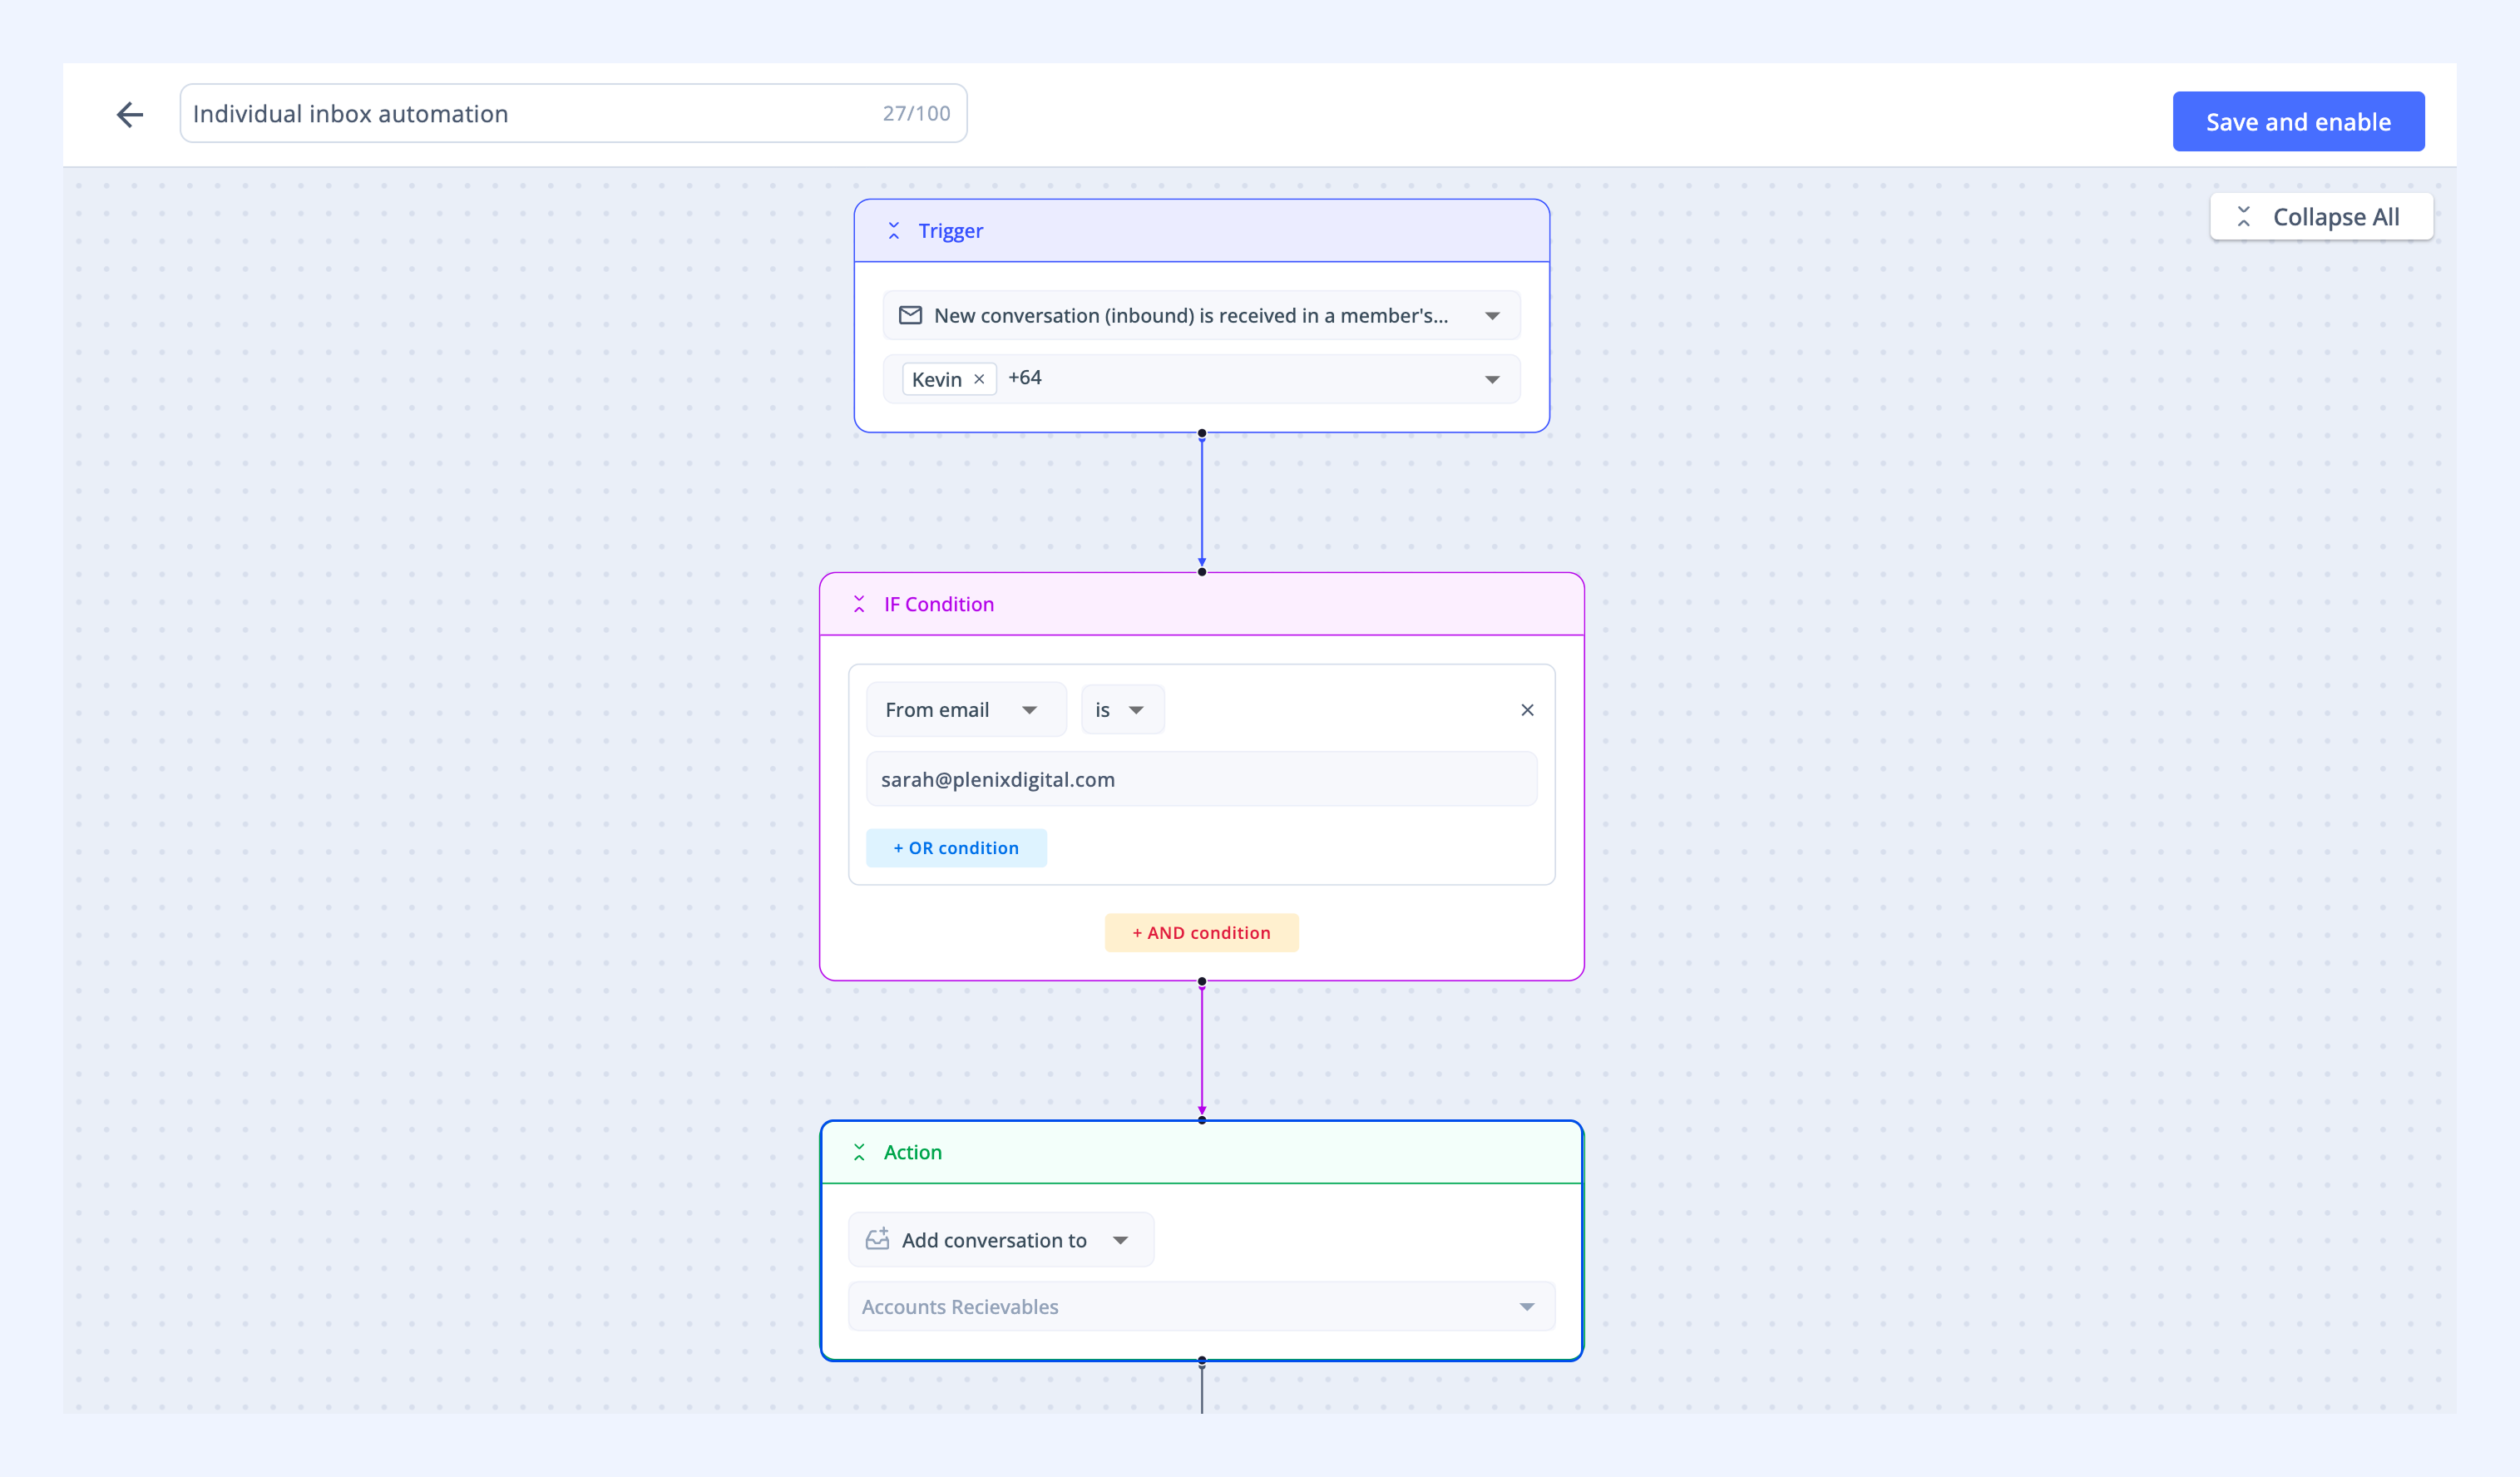
7. Click Save and Enable. You’ll see a pop-up stating that approval is required to enable the automation. Click Send approval requests.
.png)
All team members selected in the Automation will receive an approval request via email. The Automation is activated only after all members approve. You can monitor approval status from the Automations list, which shows you the number of pending approvals.
Once all members approve, any email received in a member’s inbox that matches the condition will be automatically routed to the Shared Inbox.
FAQs
Does this Automation work for past emails?
No, it only applies to emails received after the Automation is enabled.
Can I modify or turn off the Automation later?
Yes, you can edit or disable it anytime.
Will emails be removed from the individual inbox?
Yes, the conversation is moved to the Shared Inbox.
What if the conversation is already in a Shared Inbox?
It won’t be added again.
Can the same email appear in multiple Shared Inboxes?
Yes, this can happen when multiple inboxes have this Automation enabled for a specific team member.
Do CC’d emails get added?
No, the team member must be a direct recipient.
What if a team member belongs to multiple Shared Inboxes but only one has this Automation enabled?
In this case, the conversation will be routed only to that Shared Inbox.
When should I use is not vs. is not present in operators?
Use is not to enter the exclusion list directly in the Automation. Use is not present in if the list lives in a Custom Object, so any changes to the list apply automatically.
Does excluding a domain also exclude its subdomains?
No. Add subdomains separately, or list them in a Custom Object and reference it with is not present in operator.
What if the Custom Object used in is not present in is empty or deleted?
If the Custom Object is empty, all emails that fit the rest of the rule will move to the Shared Inbox. The same happens if you delete the Custom Object. Hiver warns you first so you can update the Automation.