Purchasing your Hiver subscription
If your trial is ending or you’re ready to purchase Hiver, you can easily upgrade to a paid plan from your Admin Panel. This guide explains how to purchase your subscription, manage billing preferences, and ensure a smooth transition from trial to a paid plan.
Before you begin
Make sure you:
- Have Admin access to your Hiver account (only Admins can manage billing and plans).
- Have a valid credit or debit card ready for payment.
Note: During your trial, you have access to all Elite plan features. Once you select a different plan, you will need to deactivate features not included in that plan.
Steps to purchase your Hiver subscription
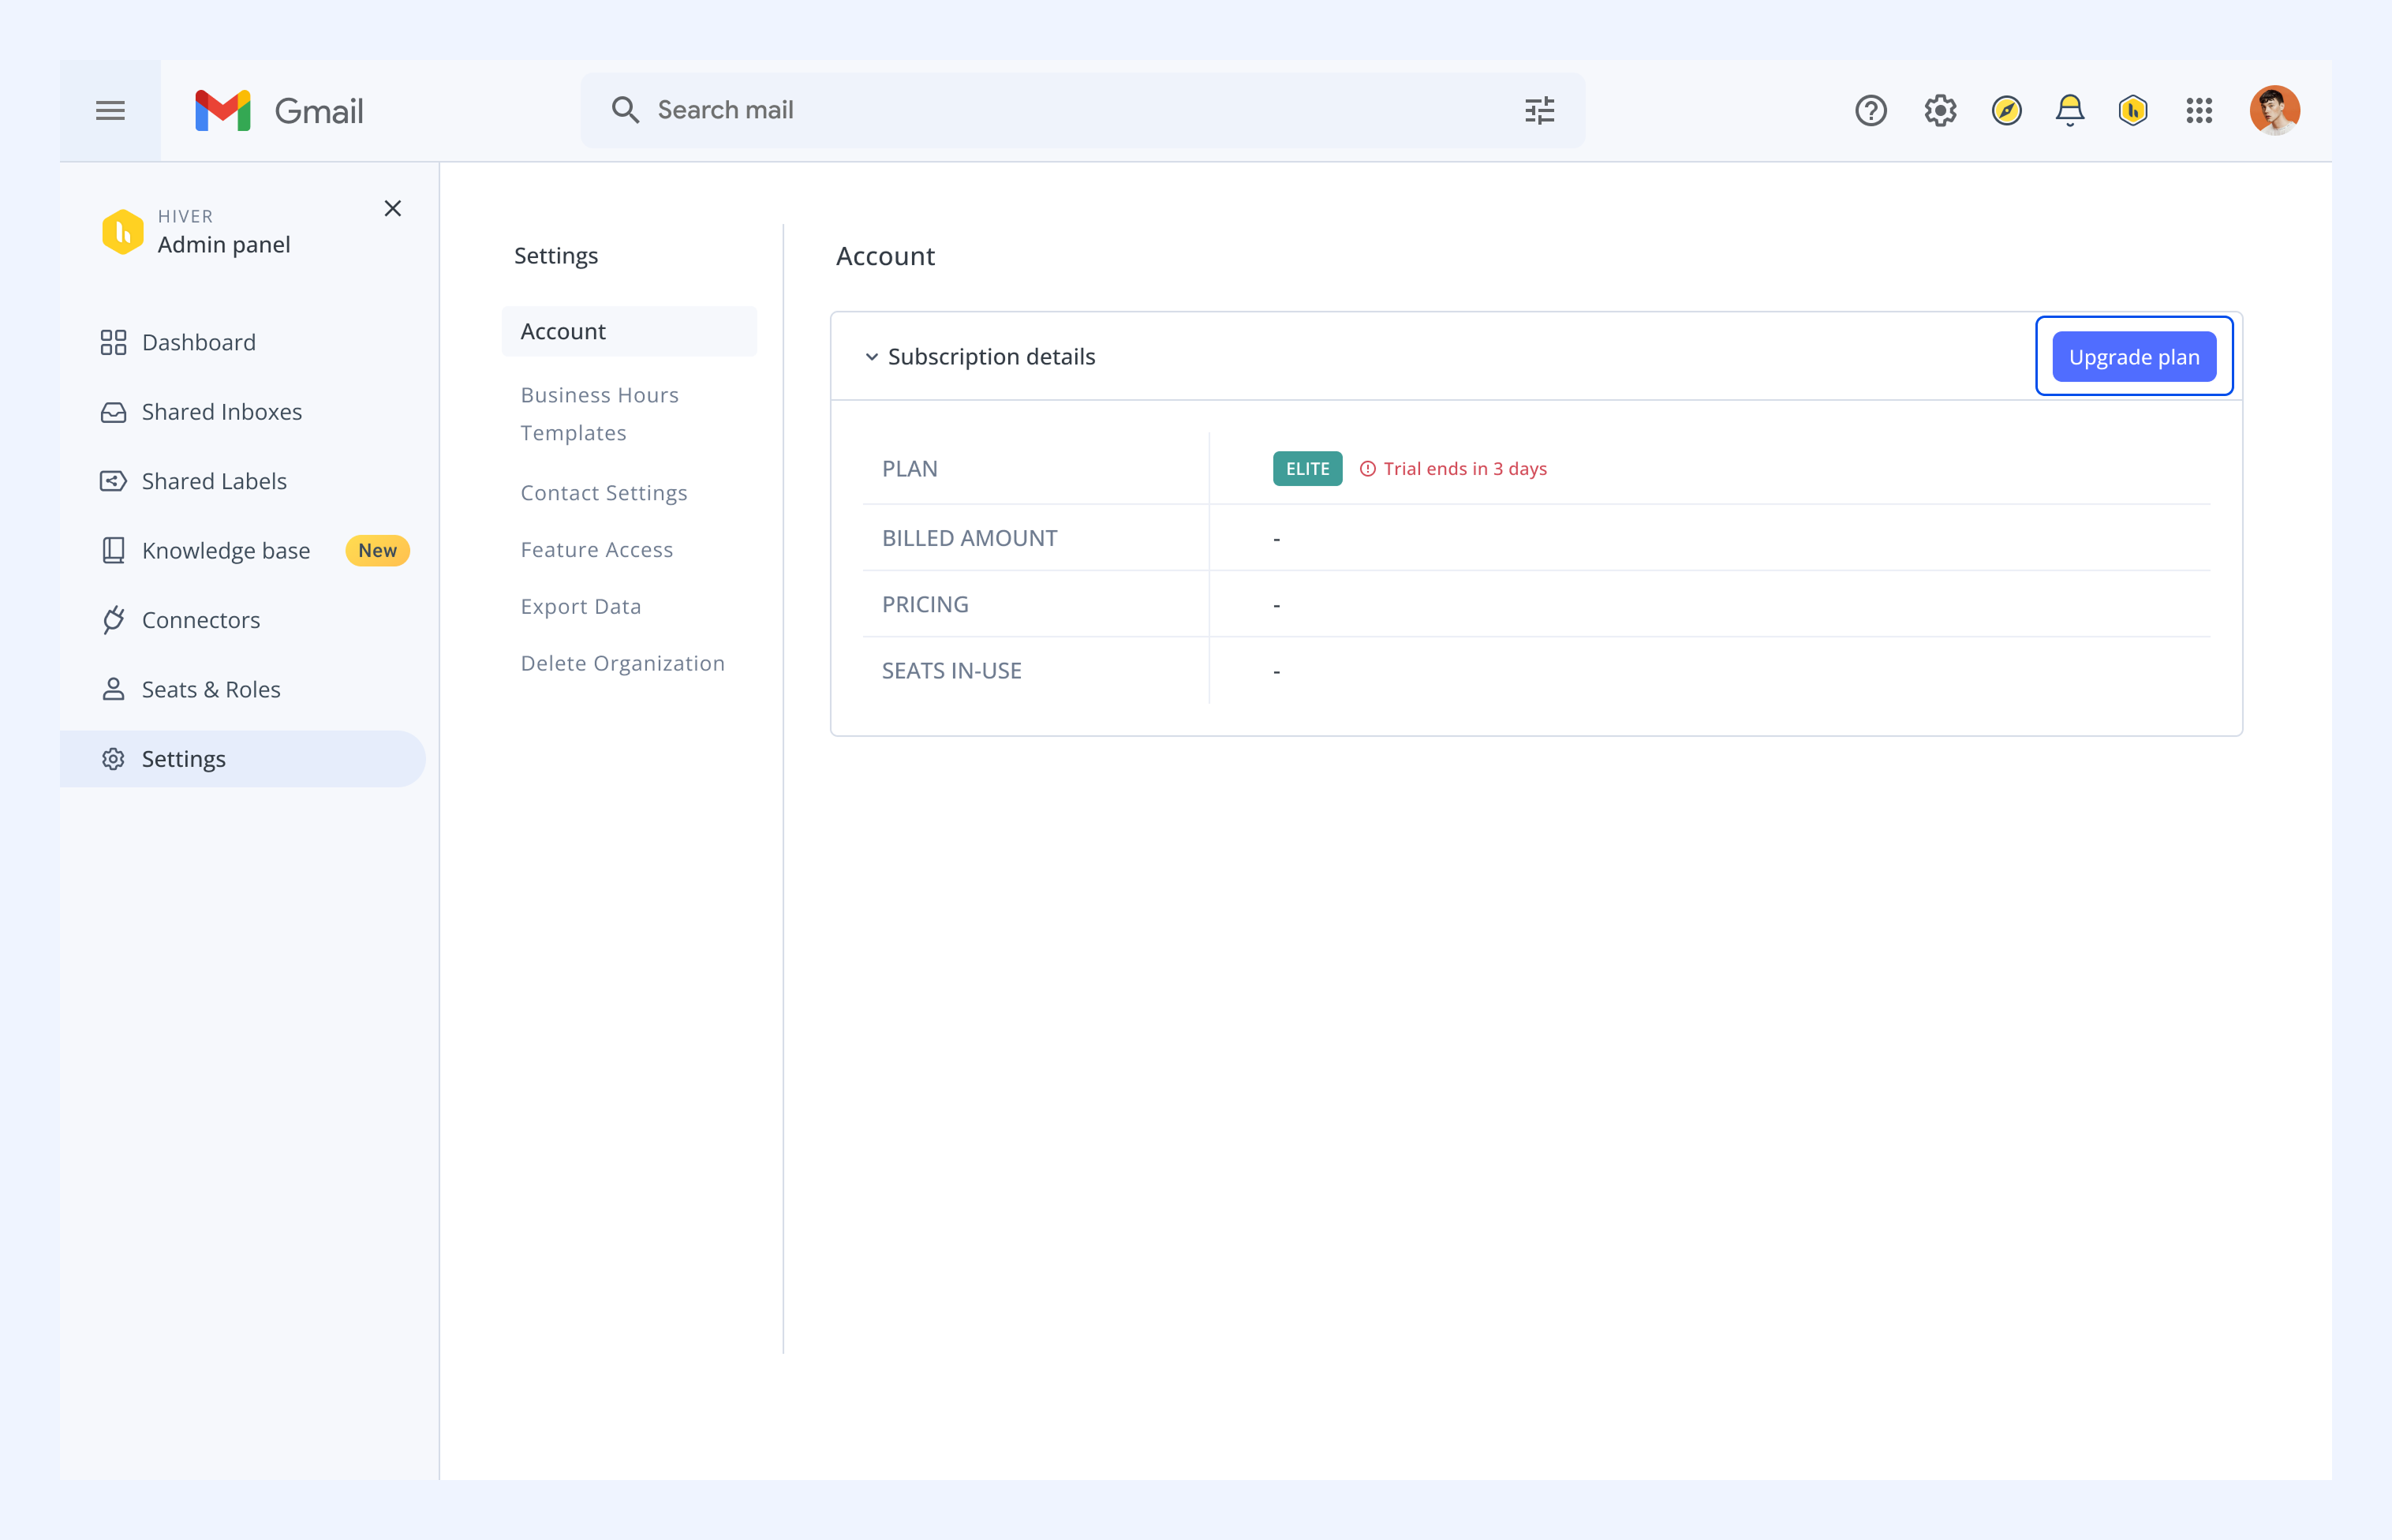
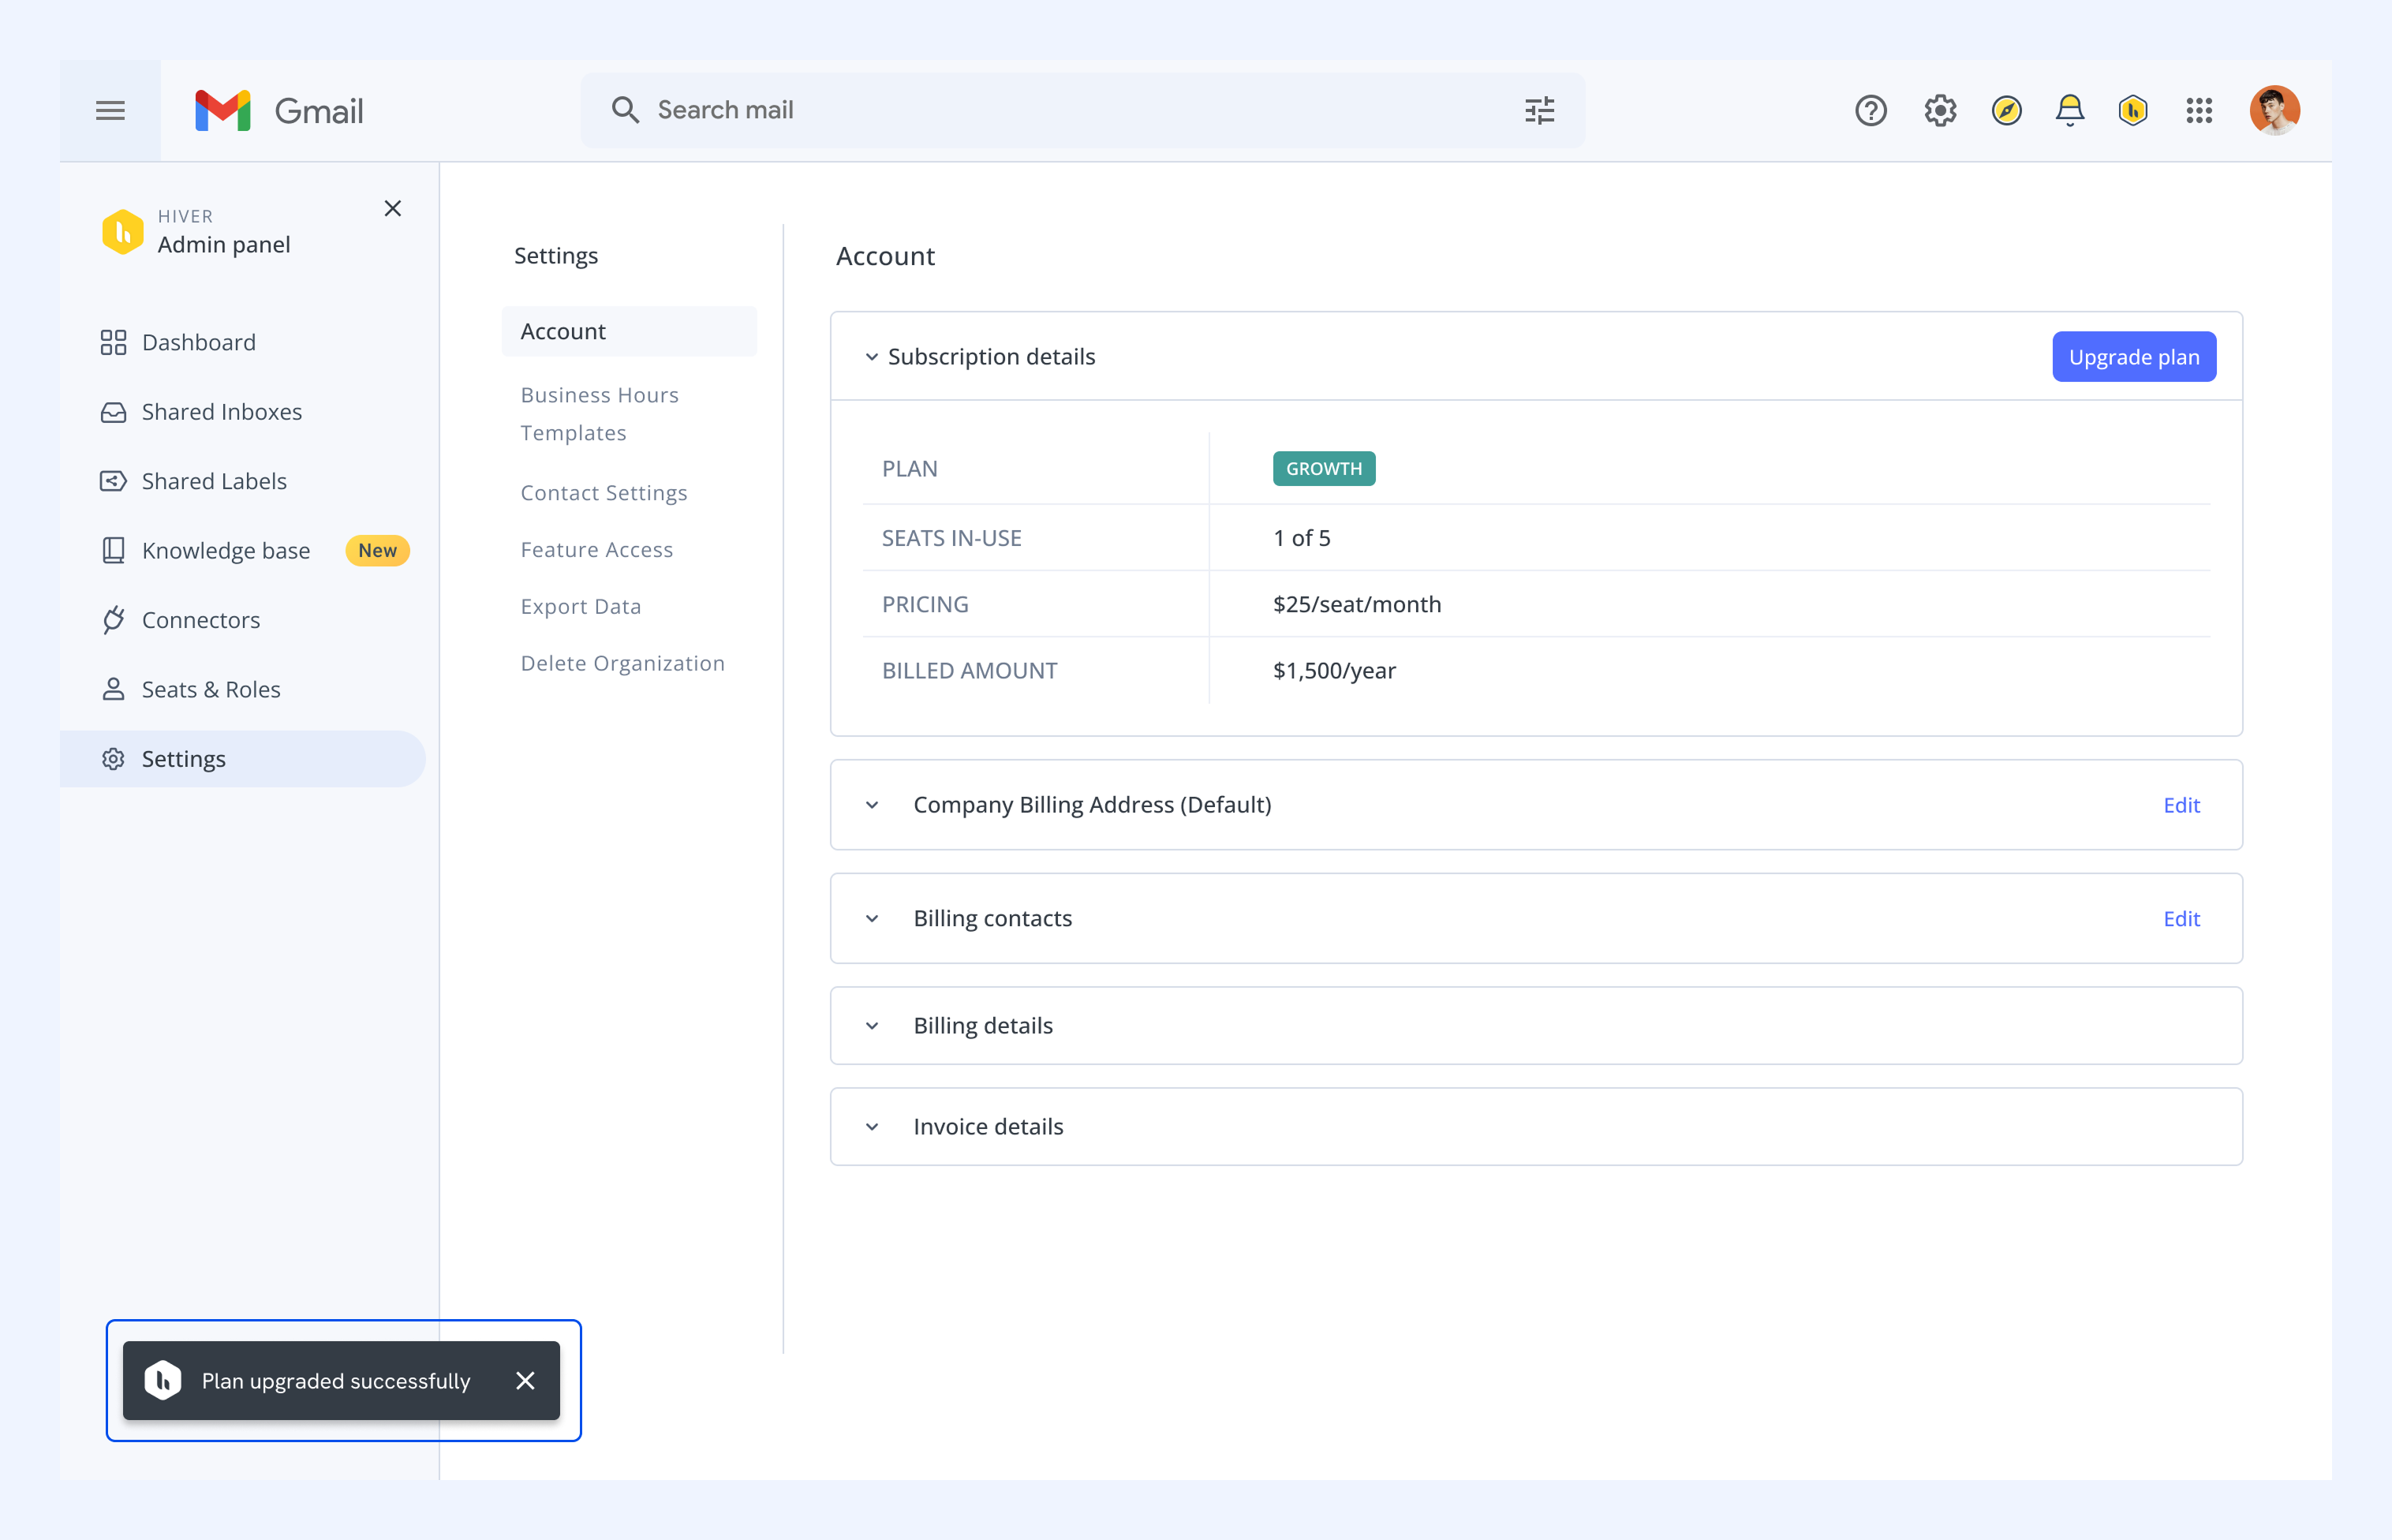
1. Go to Admin Panel → Settings → Account, and click Upgrade plan.
2. Compare the available plans (Growth, Pro, and Elite) to find the right fit.
Note: If you’re unsure which plan to choose, contact our Support team at support@hiverhq.com for personalized guidance.
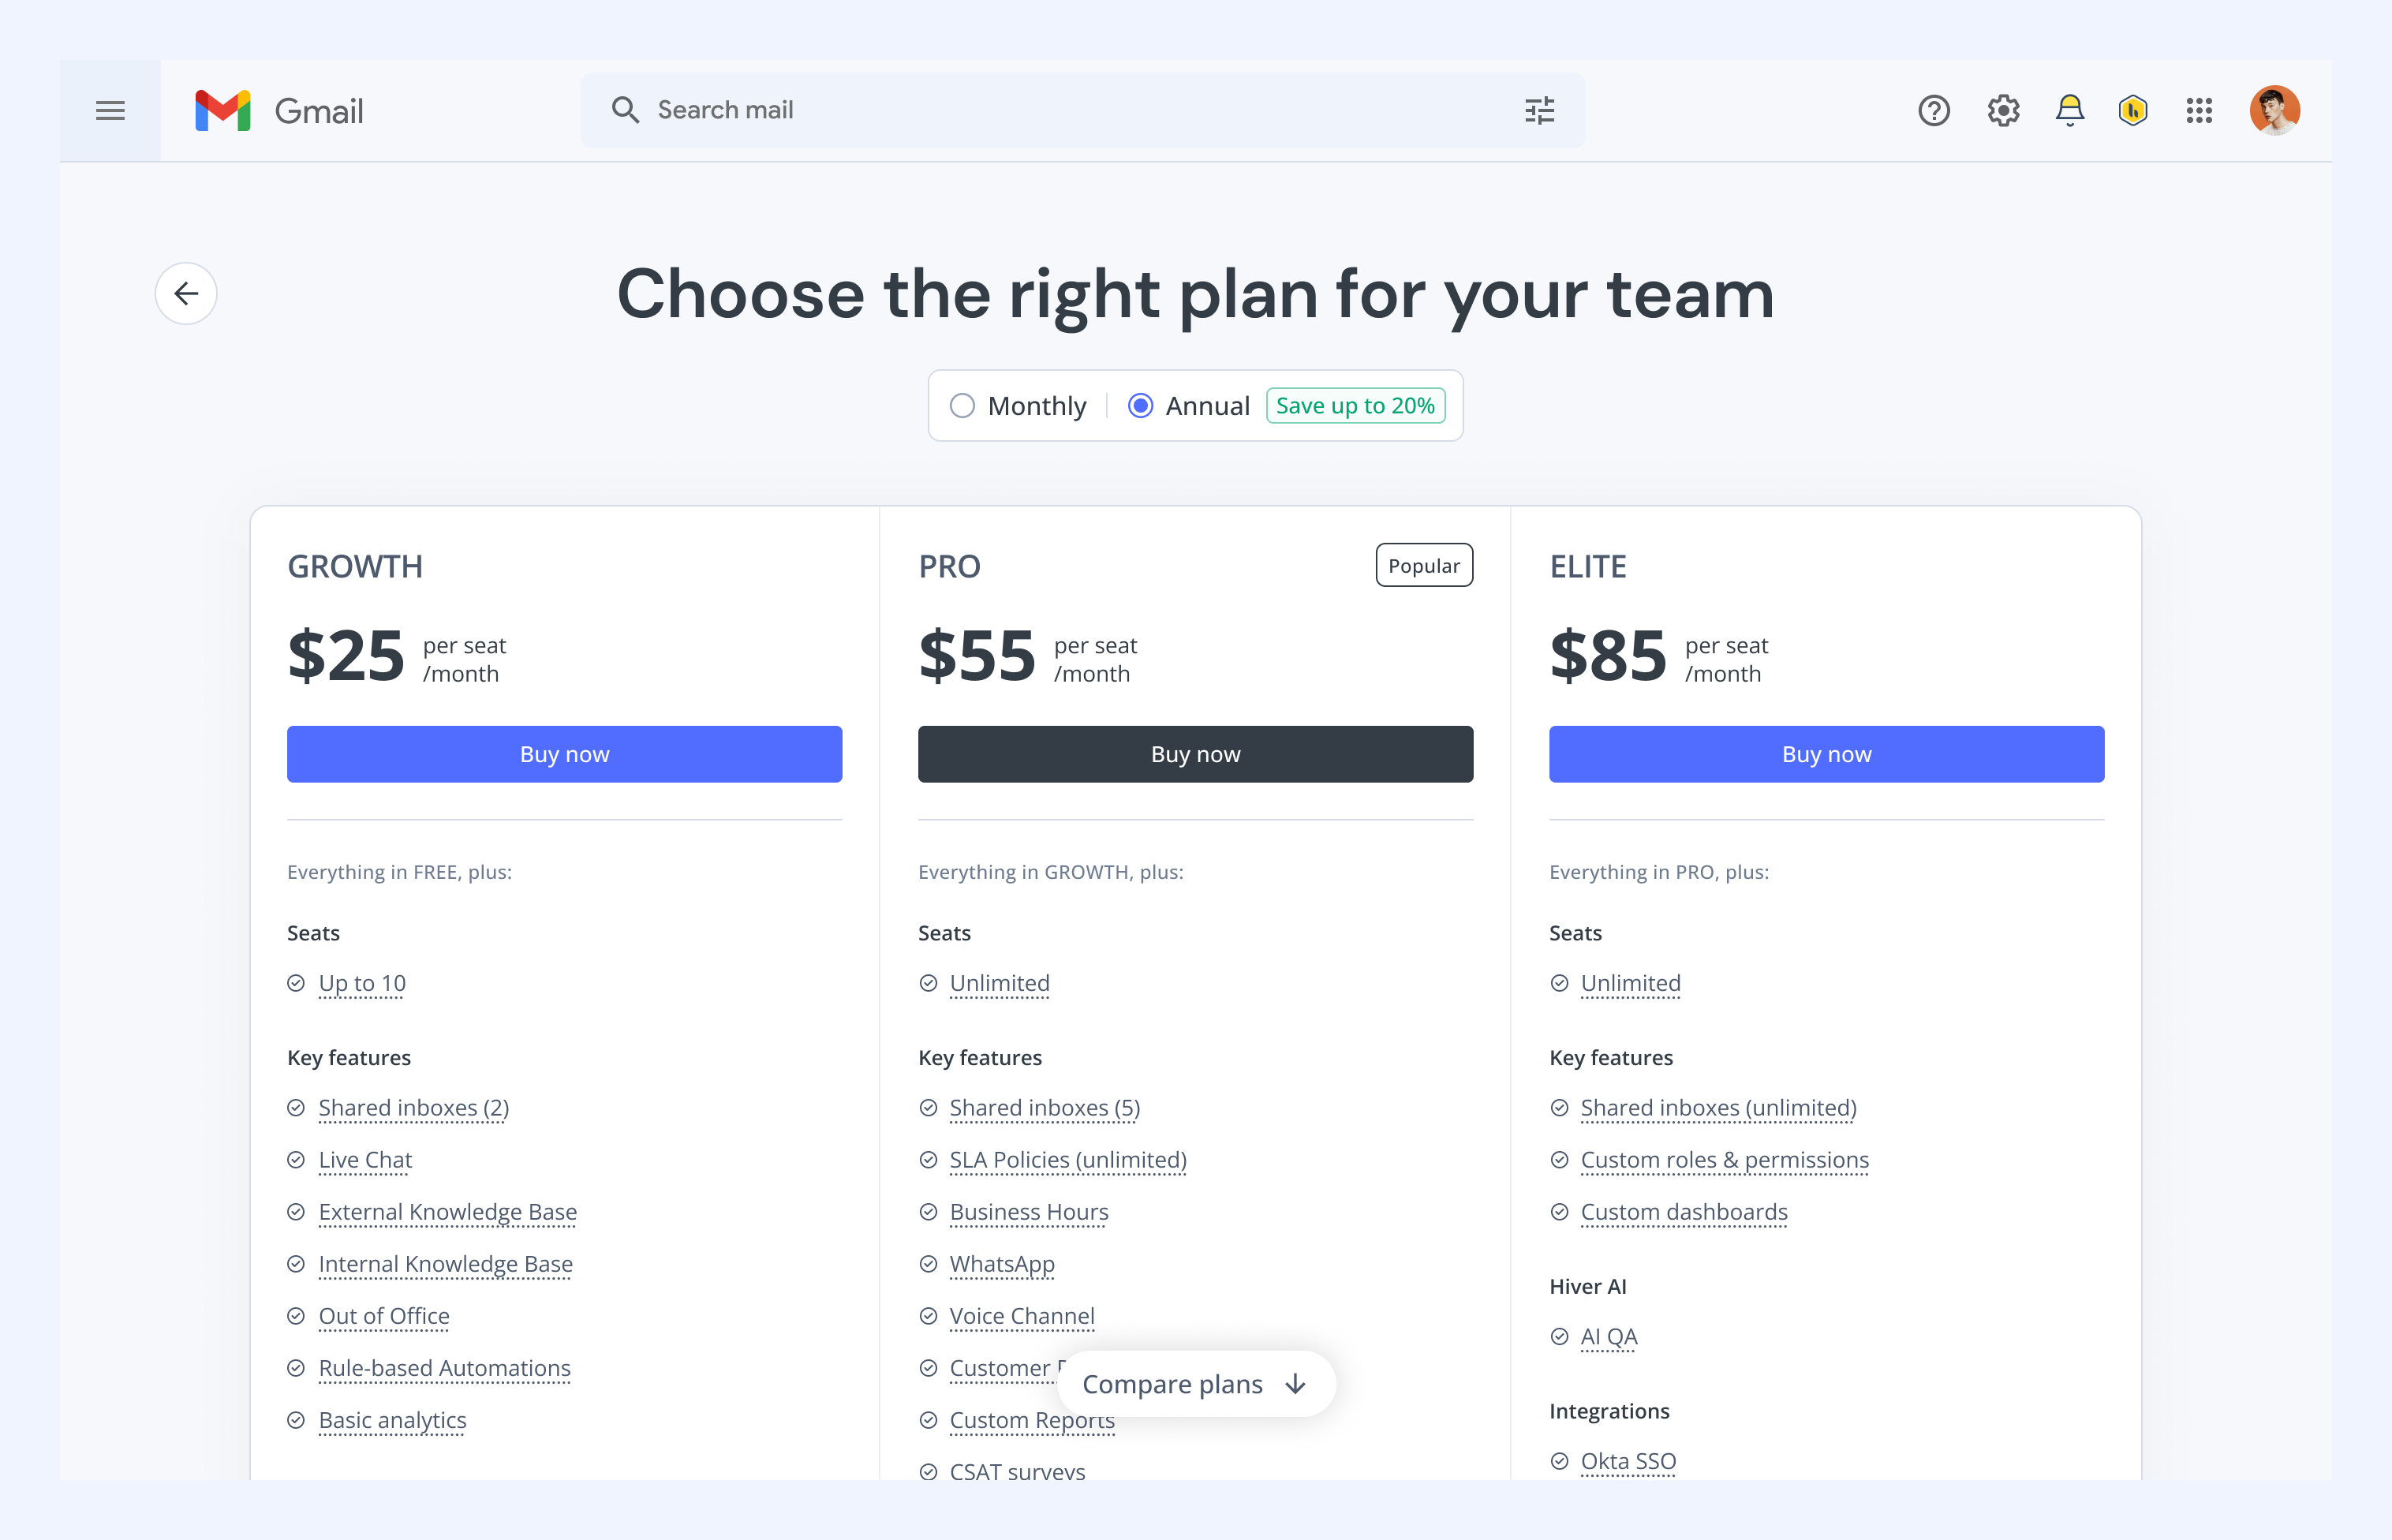
3. Select the number of licenses you need (based on the number of users in your account) using the Choose team size dropdown.
Note: Hiver sells licenses in bundles of 5, so you can choose from 5, 10, 15, and so on based on your needs.
4. Select your billing cycle, either Annual or Monthly (annual billing saves up to 20%).
5. Select the plan that best suits your team’s needs.
6. If you’re switching from the trial (Elite) plan, Hiver will display a list of features and usage limits that won’t be available in your new plan. Review and confirm to continue.
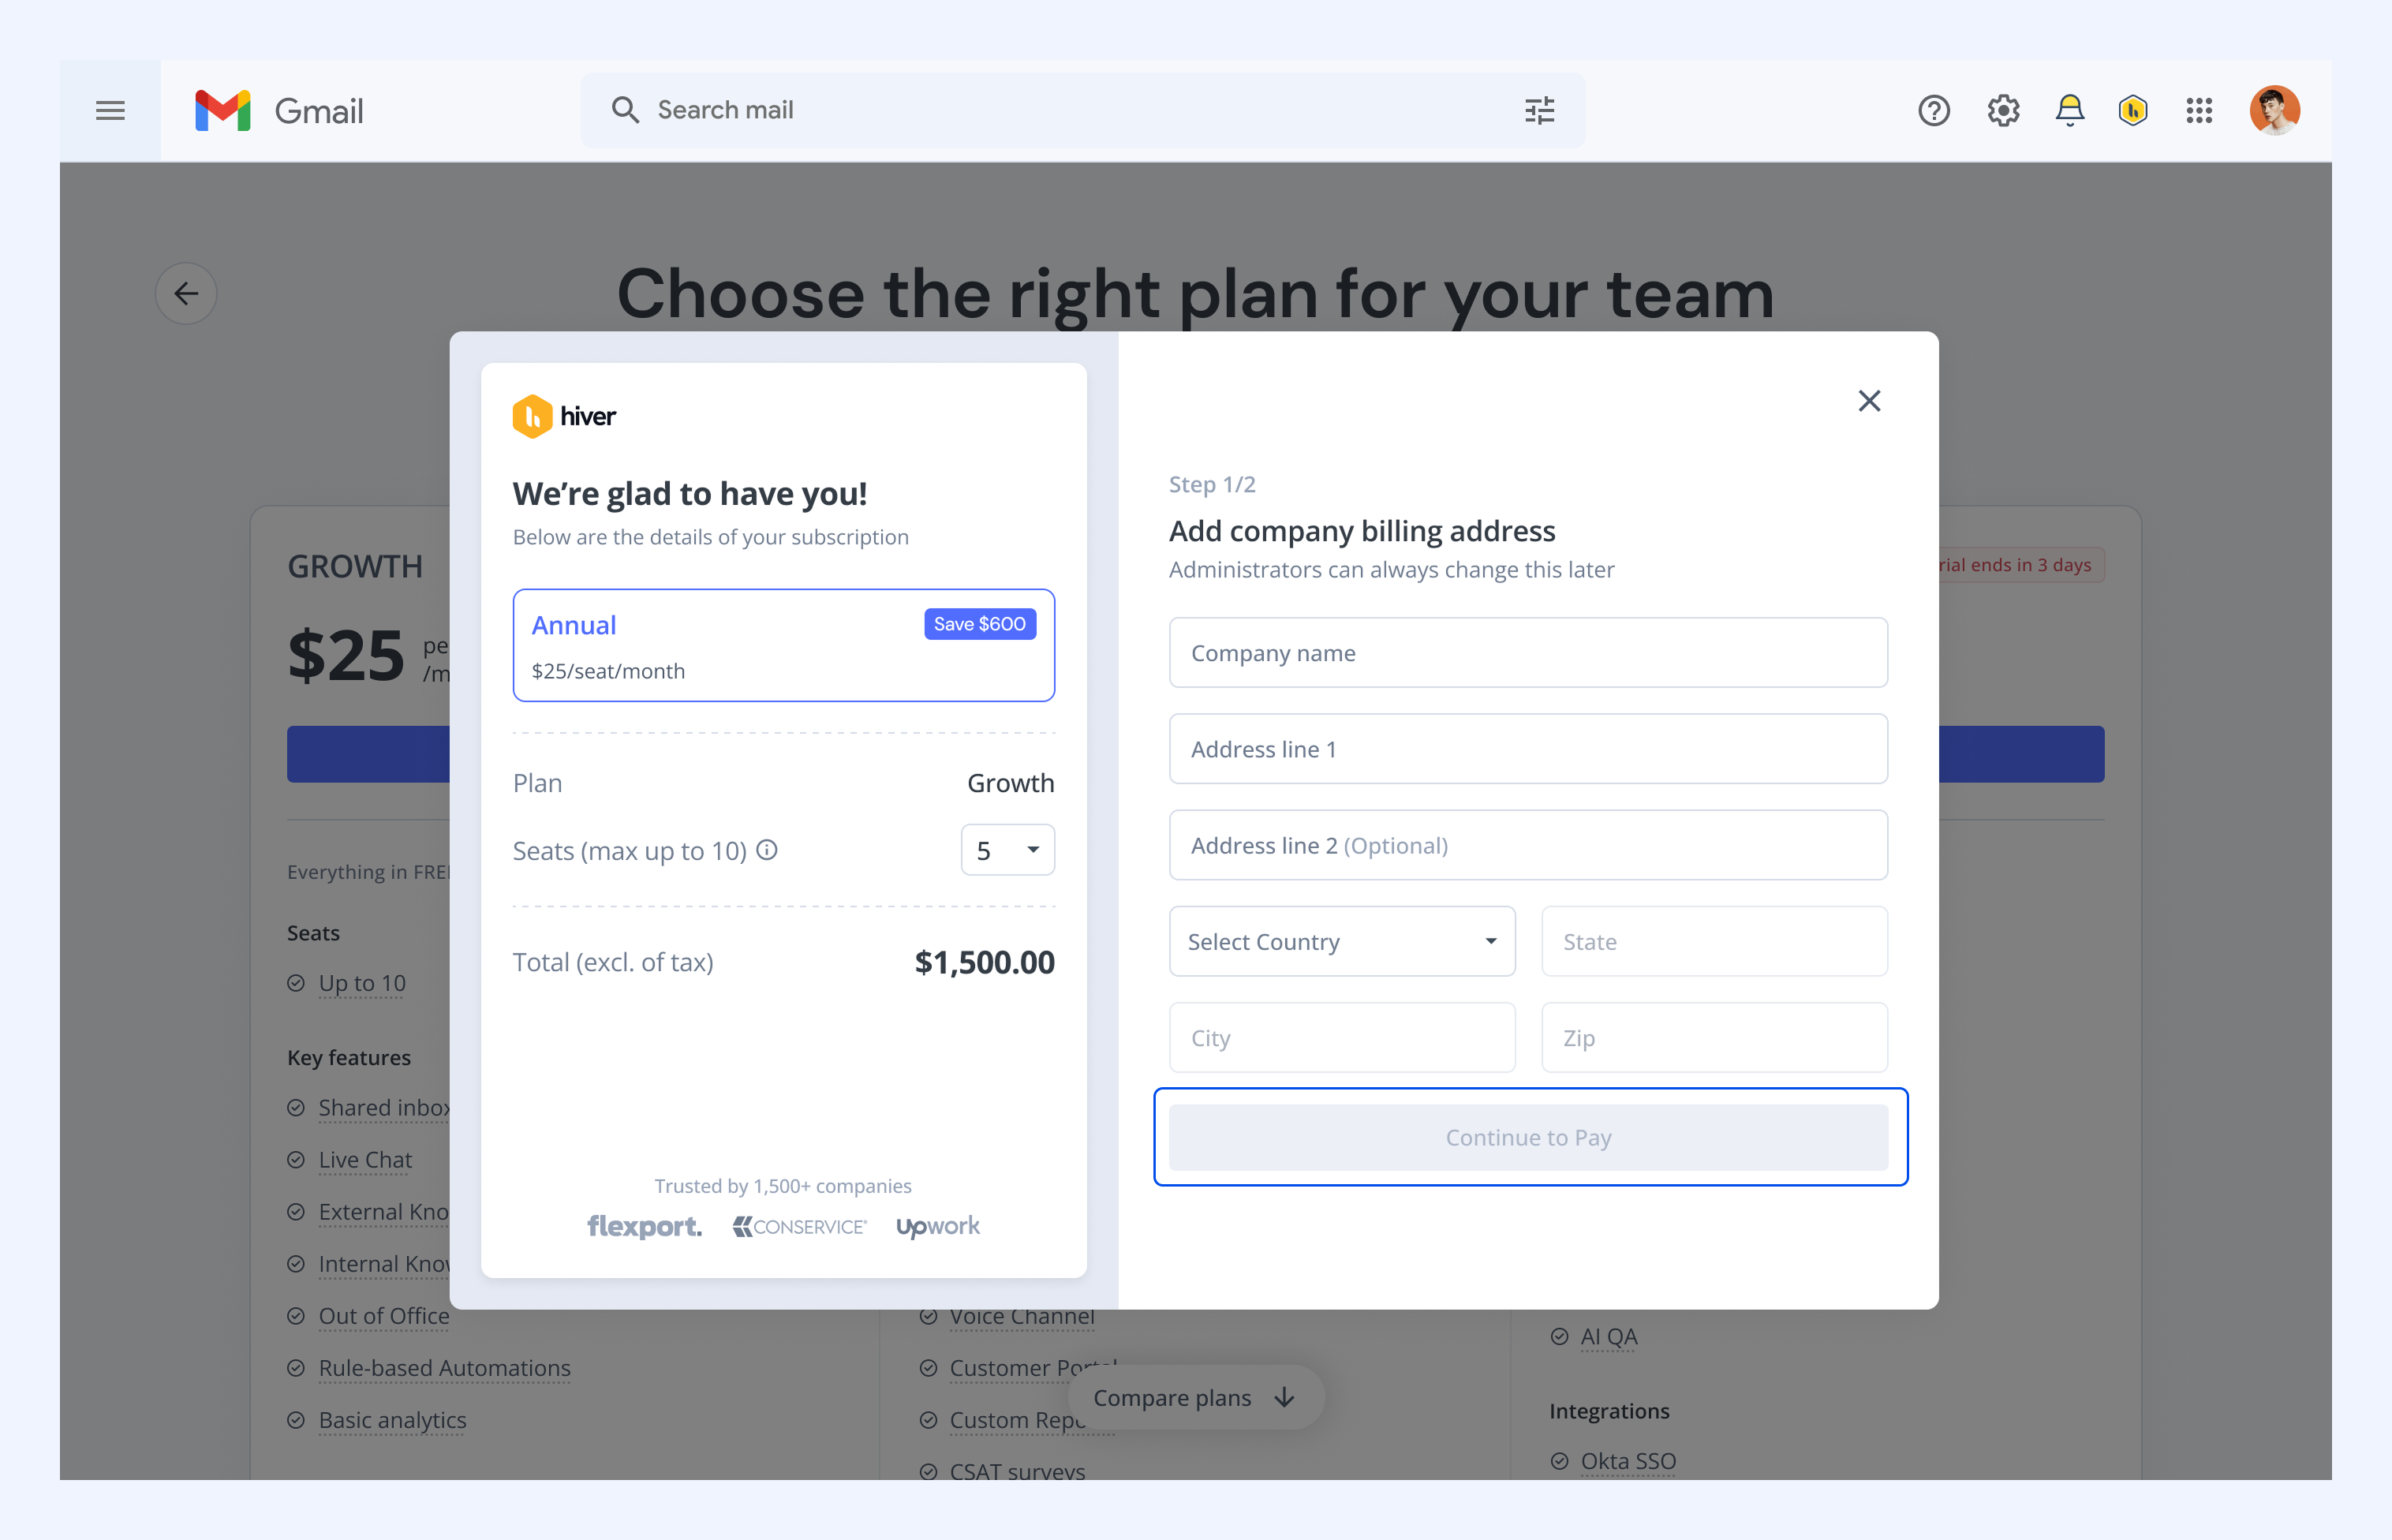
7. Enter your billing address and click Continue to Pay.
8. Add your payment details and click Save card & pay.
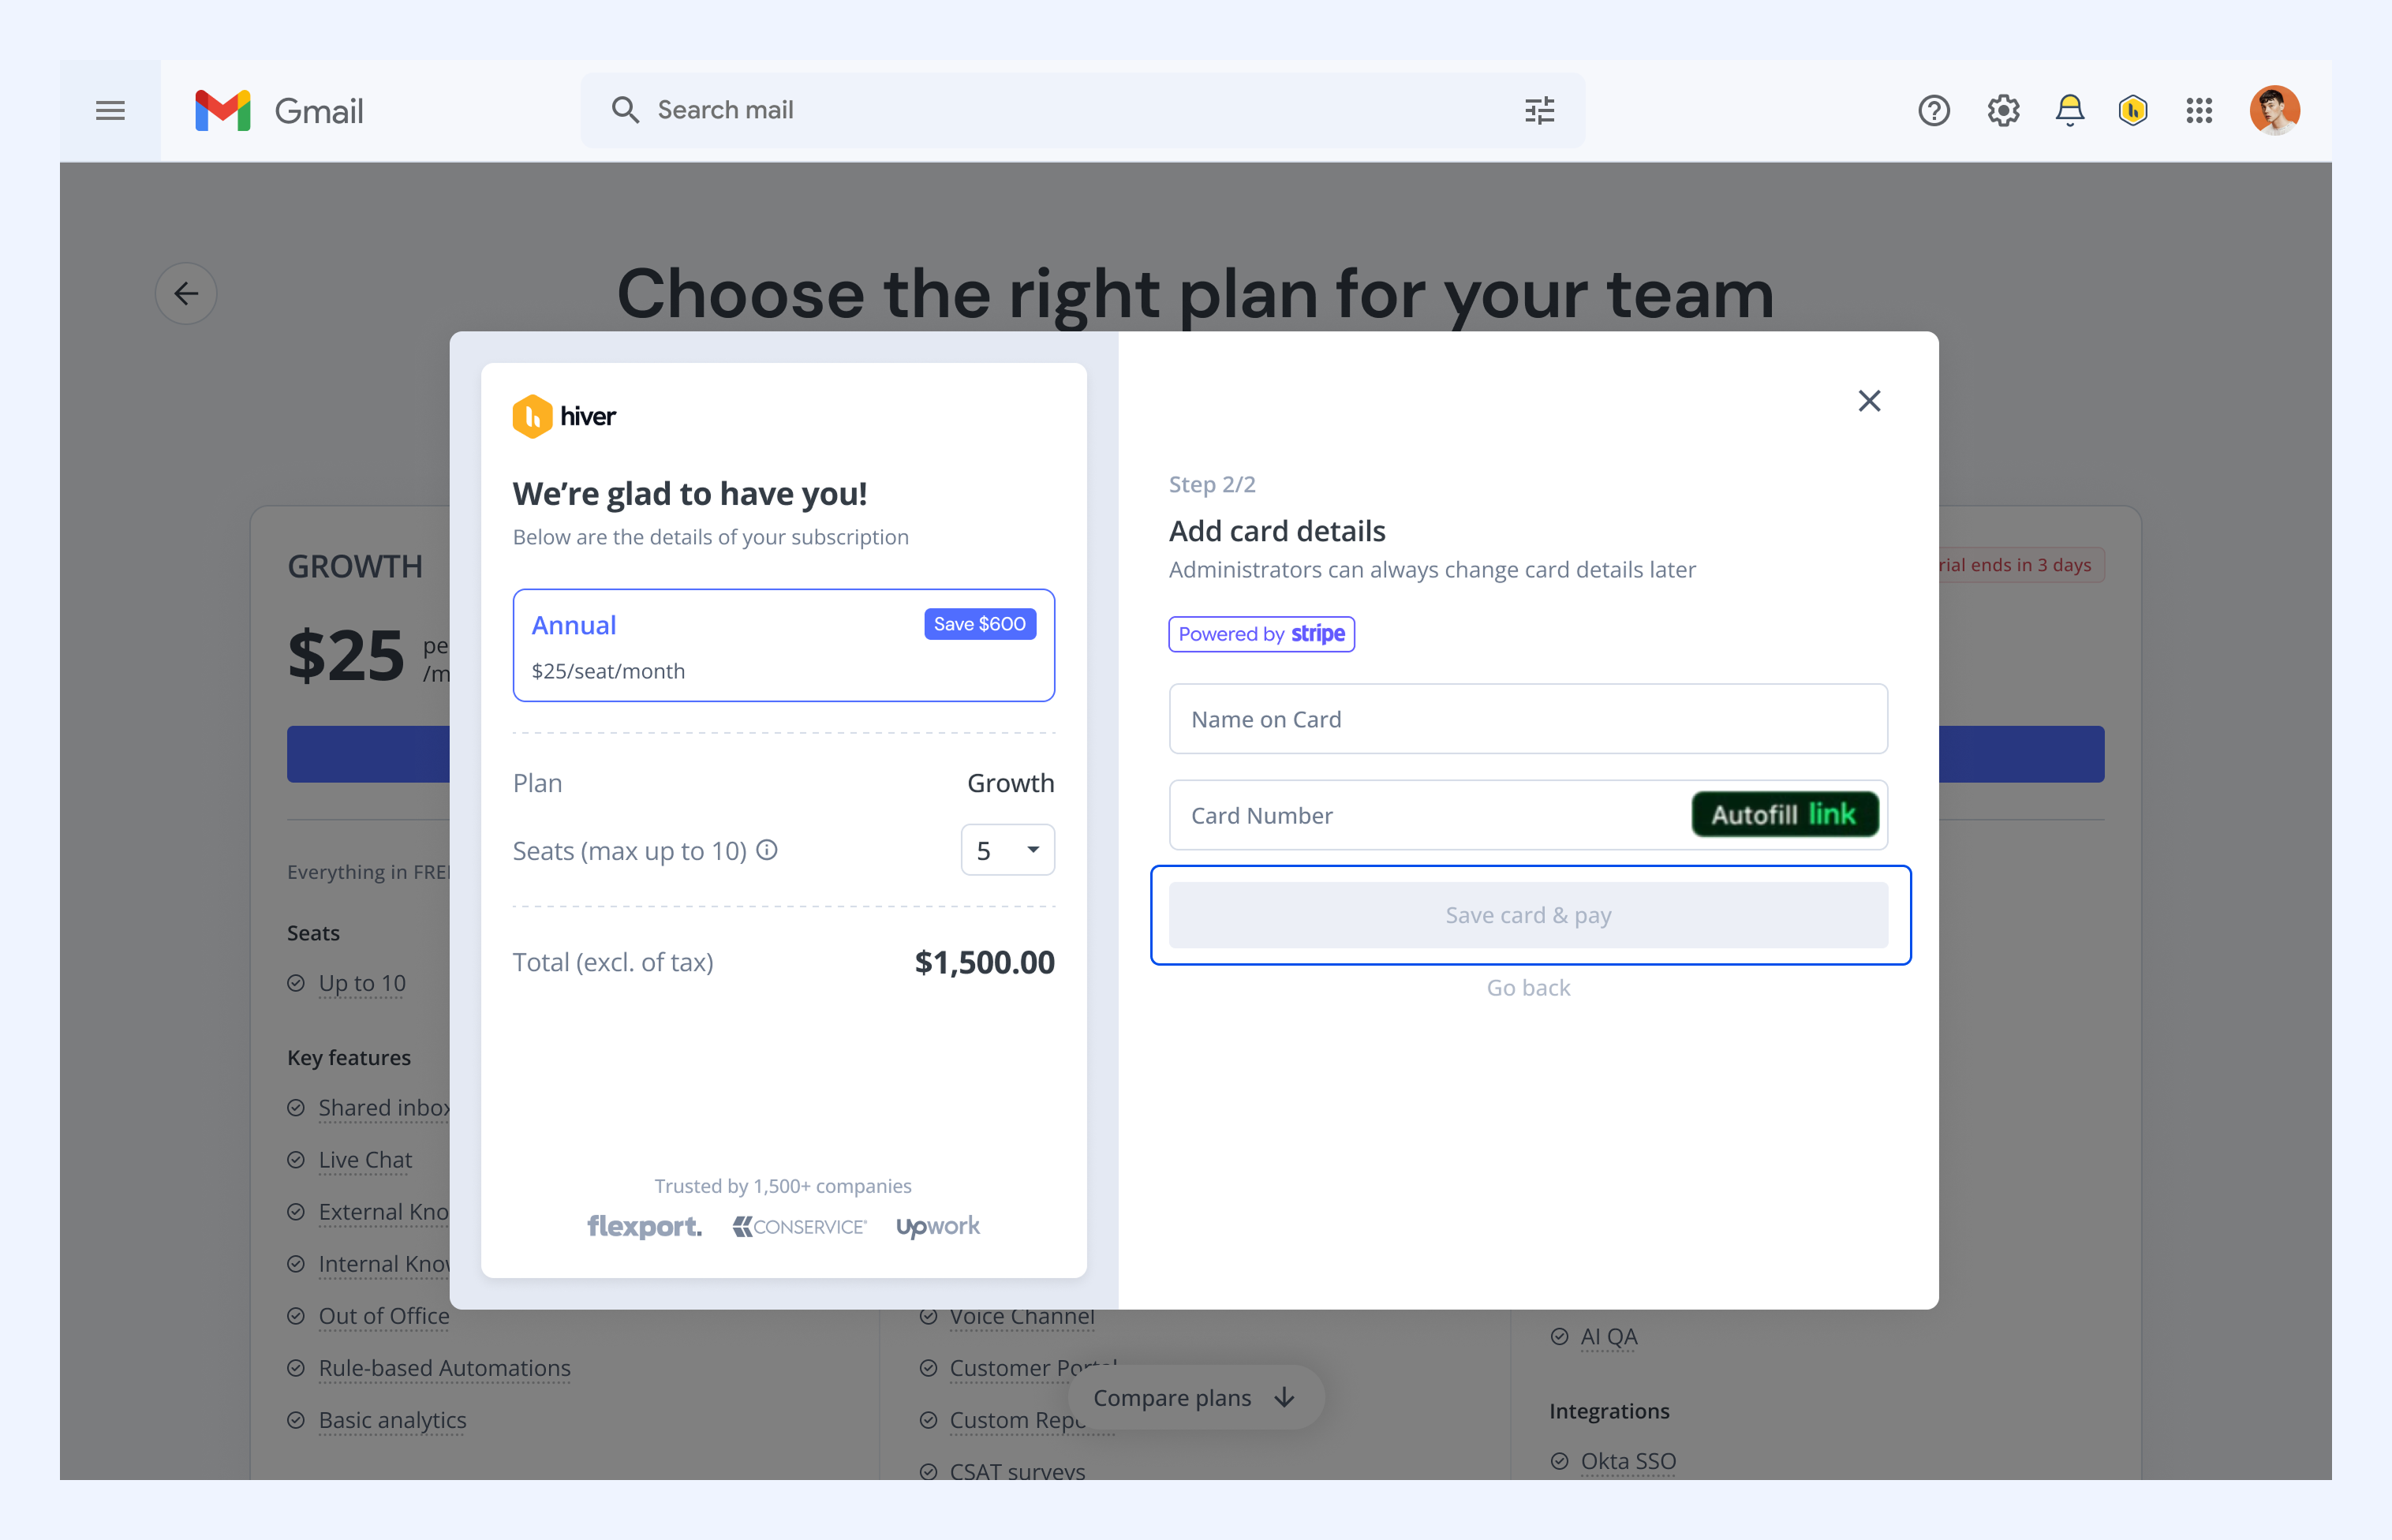
9. Follow the prompts to finalize your subscription and complete the payment process.
Note: Hiver does not store your card details. All card information is saved directly on Stripe and is PCI DSS compliant for security.