Setting up AI Agents
Hiver AI Agents help you resolve complex customer queries end-to-end using your connected knowledge sources.
AI Agents can understand customer questions, ask follow-up questions when more information is needed, find relevant answers, and respond naturally to customers. This helps your team handle customer requests without manually replying to every conversation.
What AI Agents can do
AI Agents draw their answers from the knowledge sources you connect, including help center articles, websites, PDFs, and internal documentation. Because they use generative AI, they can carry a conversation forward instead of just looking up one answer and stopping.
For example, if a customer writes 'I haven't received my refund yet', the AI Agent can:
- Ask for details like the order number or payment method to narrow down the issue.
- Walk the customer through your refund timeline and what to expect.
- Pass the conversation to your team if it needs more attention.
This means customers get answers faster, and your team spends less time on repetitive questions.
How AI Agents handle accuracy and safety
A few safeguards are built into how AI Agents work, so customer conversations stay reliable:
- Grounded responses: AI Agents draw responses using the knowledge sources you've added. They won't make up information or guess answers.
- Confidence-based escalation: If the AI Agent isn't confident in a response, it hands the conversation to your team rather than risk a wrong answer.
- Custom guardrails: You can set instructions and escalation rules to define how your AI Agent behaves and when it should step back.
- Full transcripts: Every AI-handled conversation comes with a transcript your team can review at any time.
Prerequisites
Before you begin, make sure you have:
- A Pro or Elite plan
- Admin access in Hiver
- An active Chat Inbox with a chat widget deployed on your website
How to set up your AI Agent
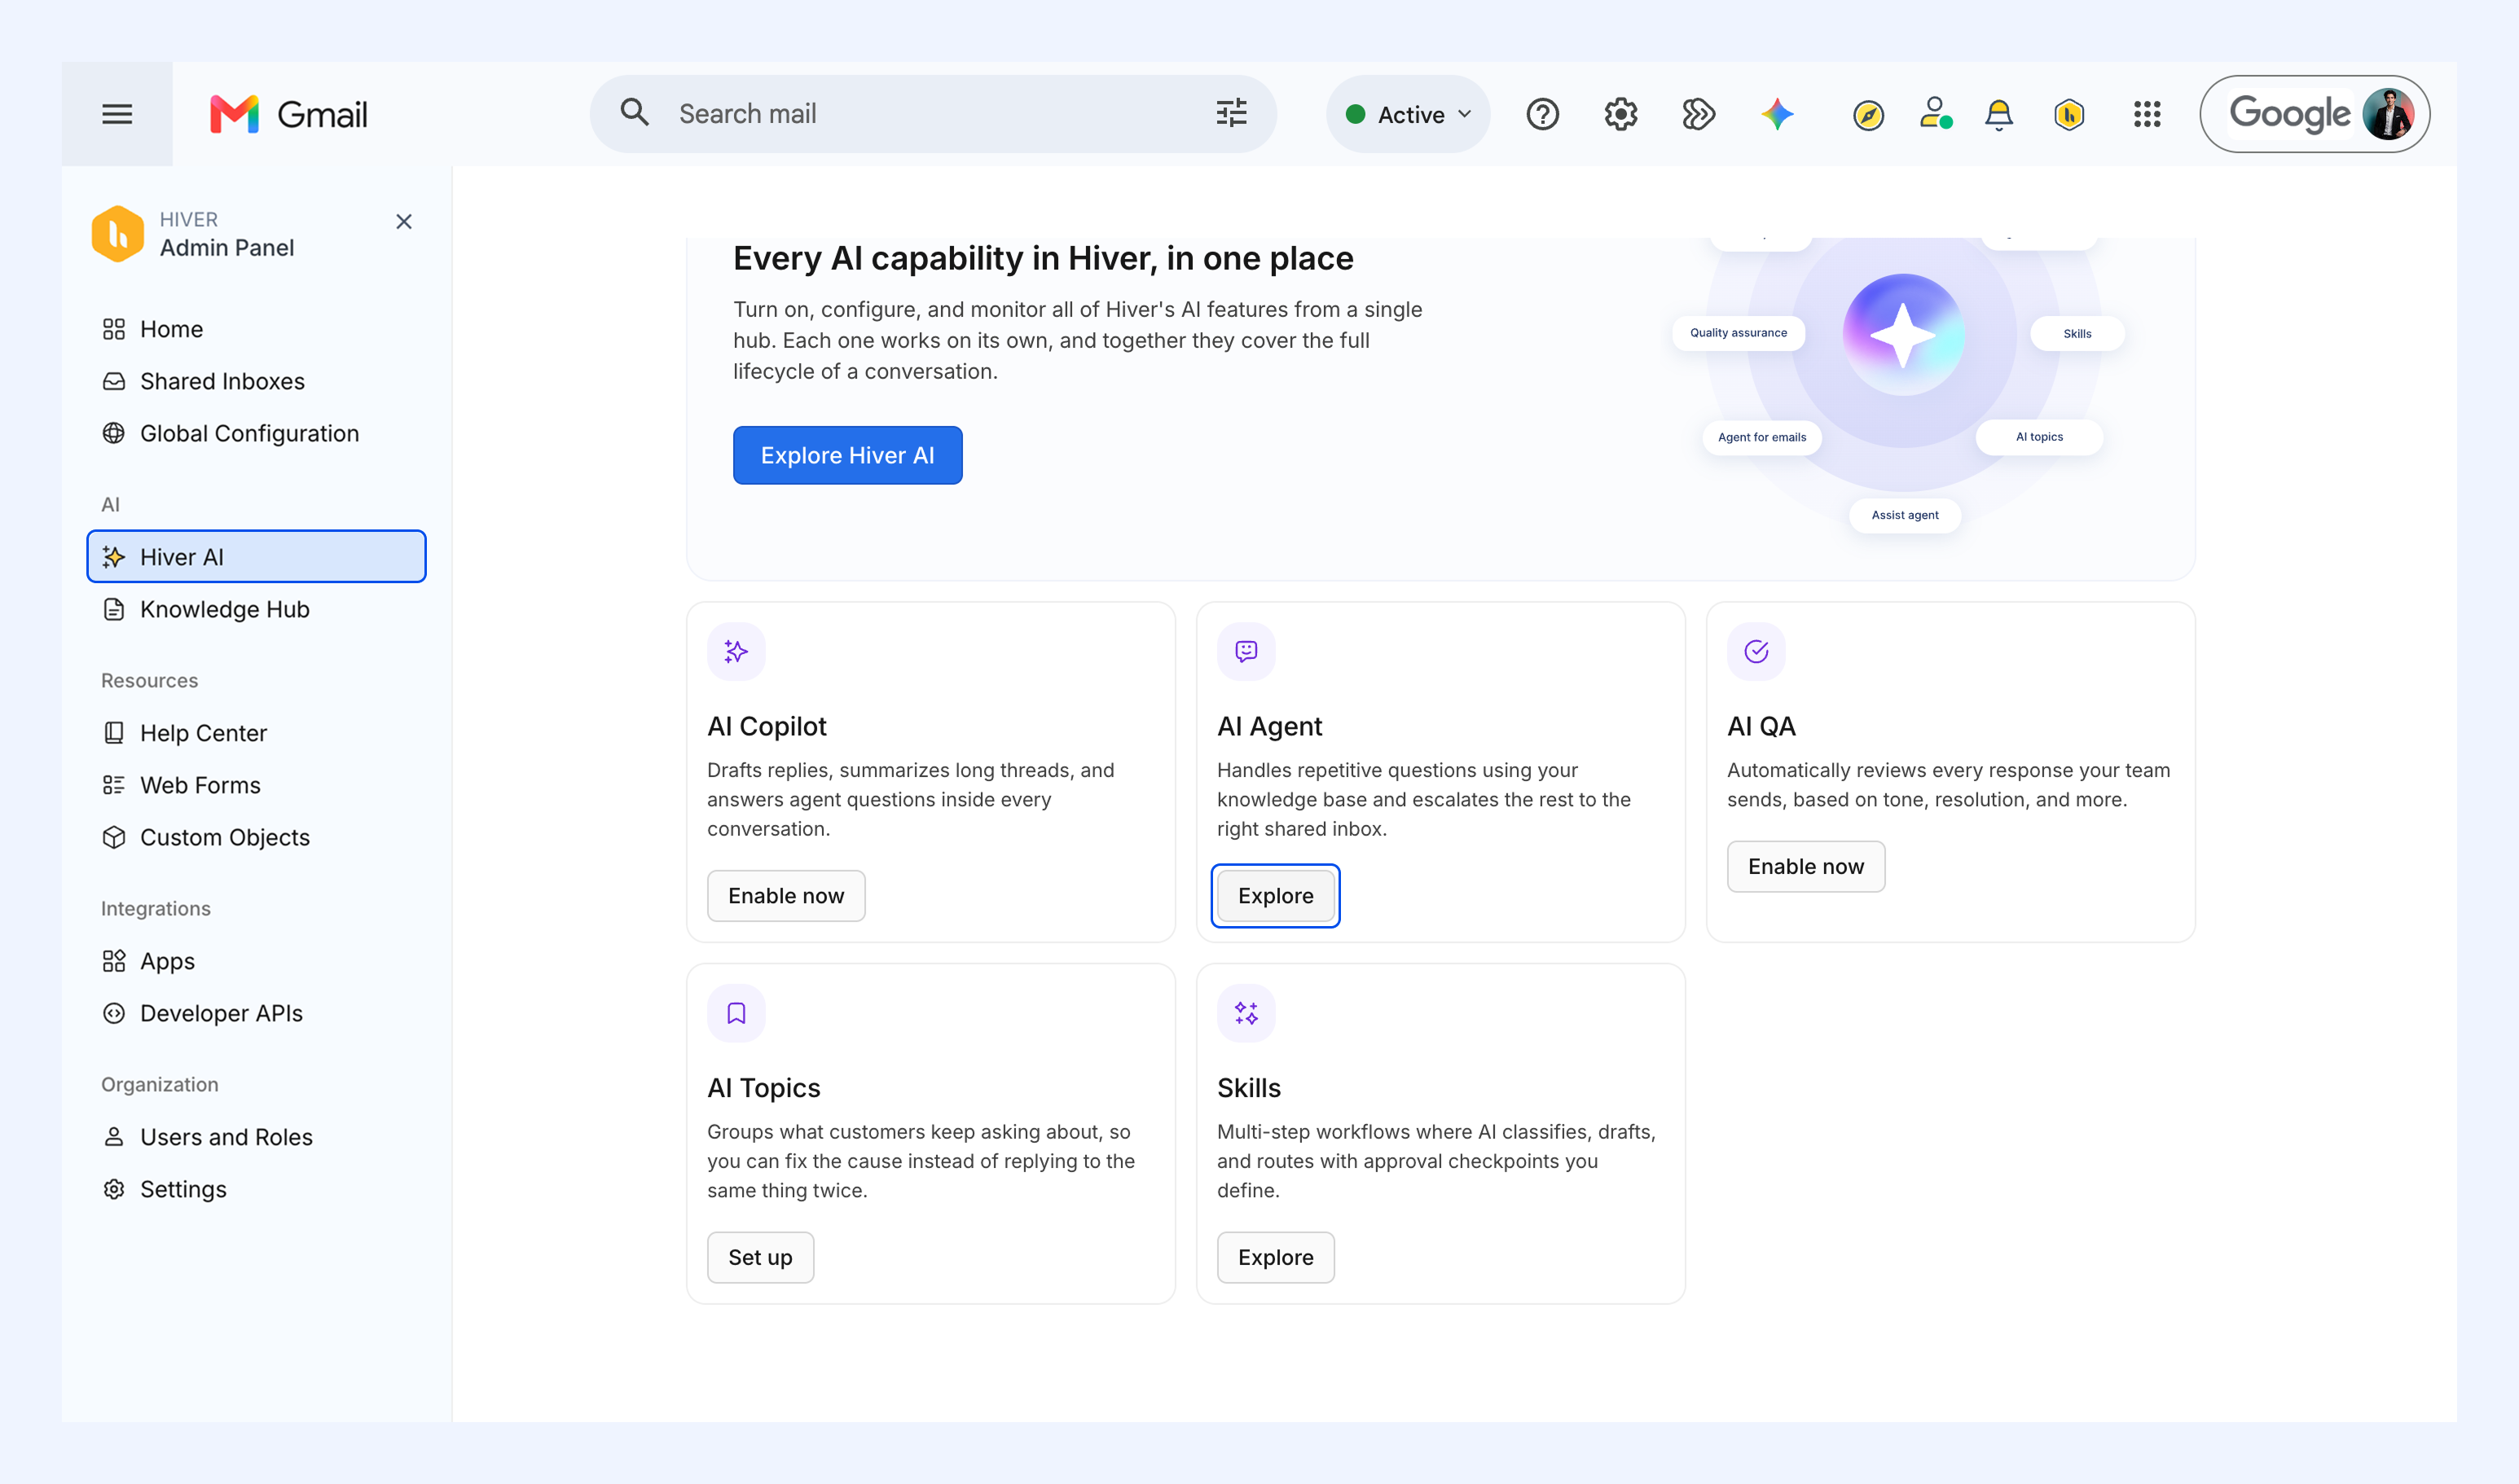
1. Go to Admin Panel → Hiver AI, click Explore under AI Agent.
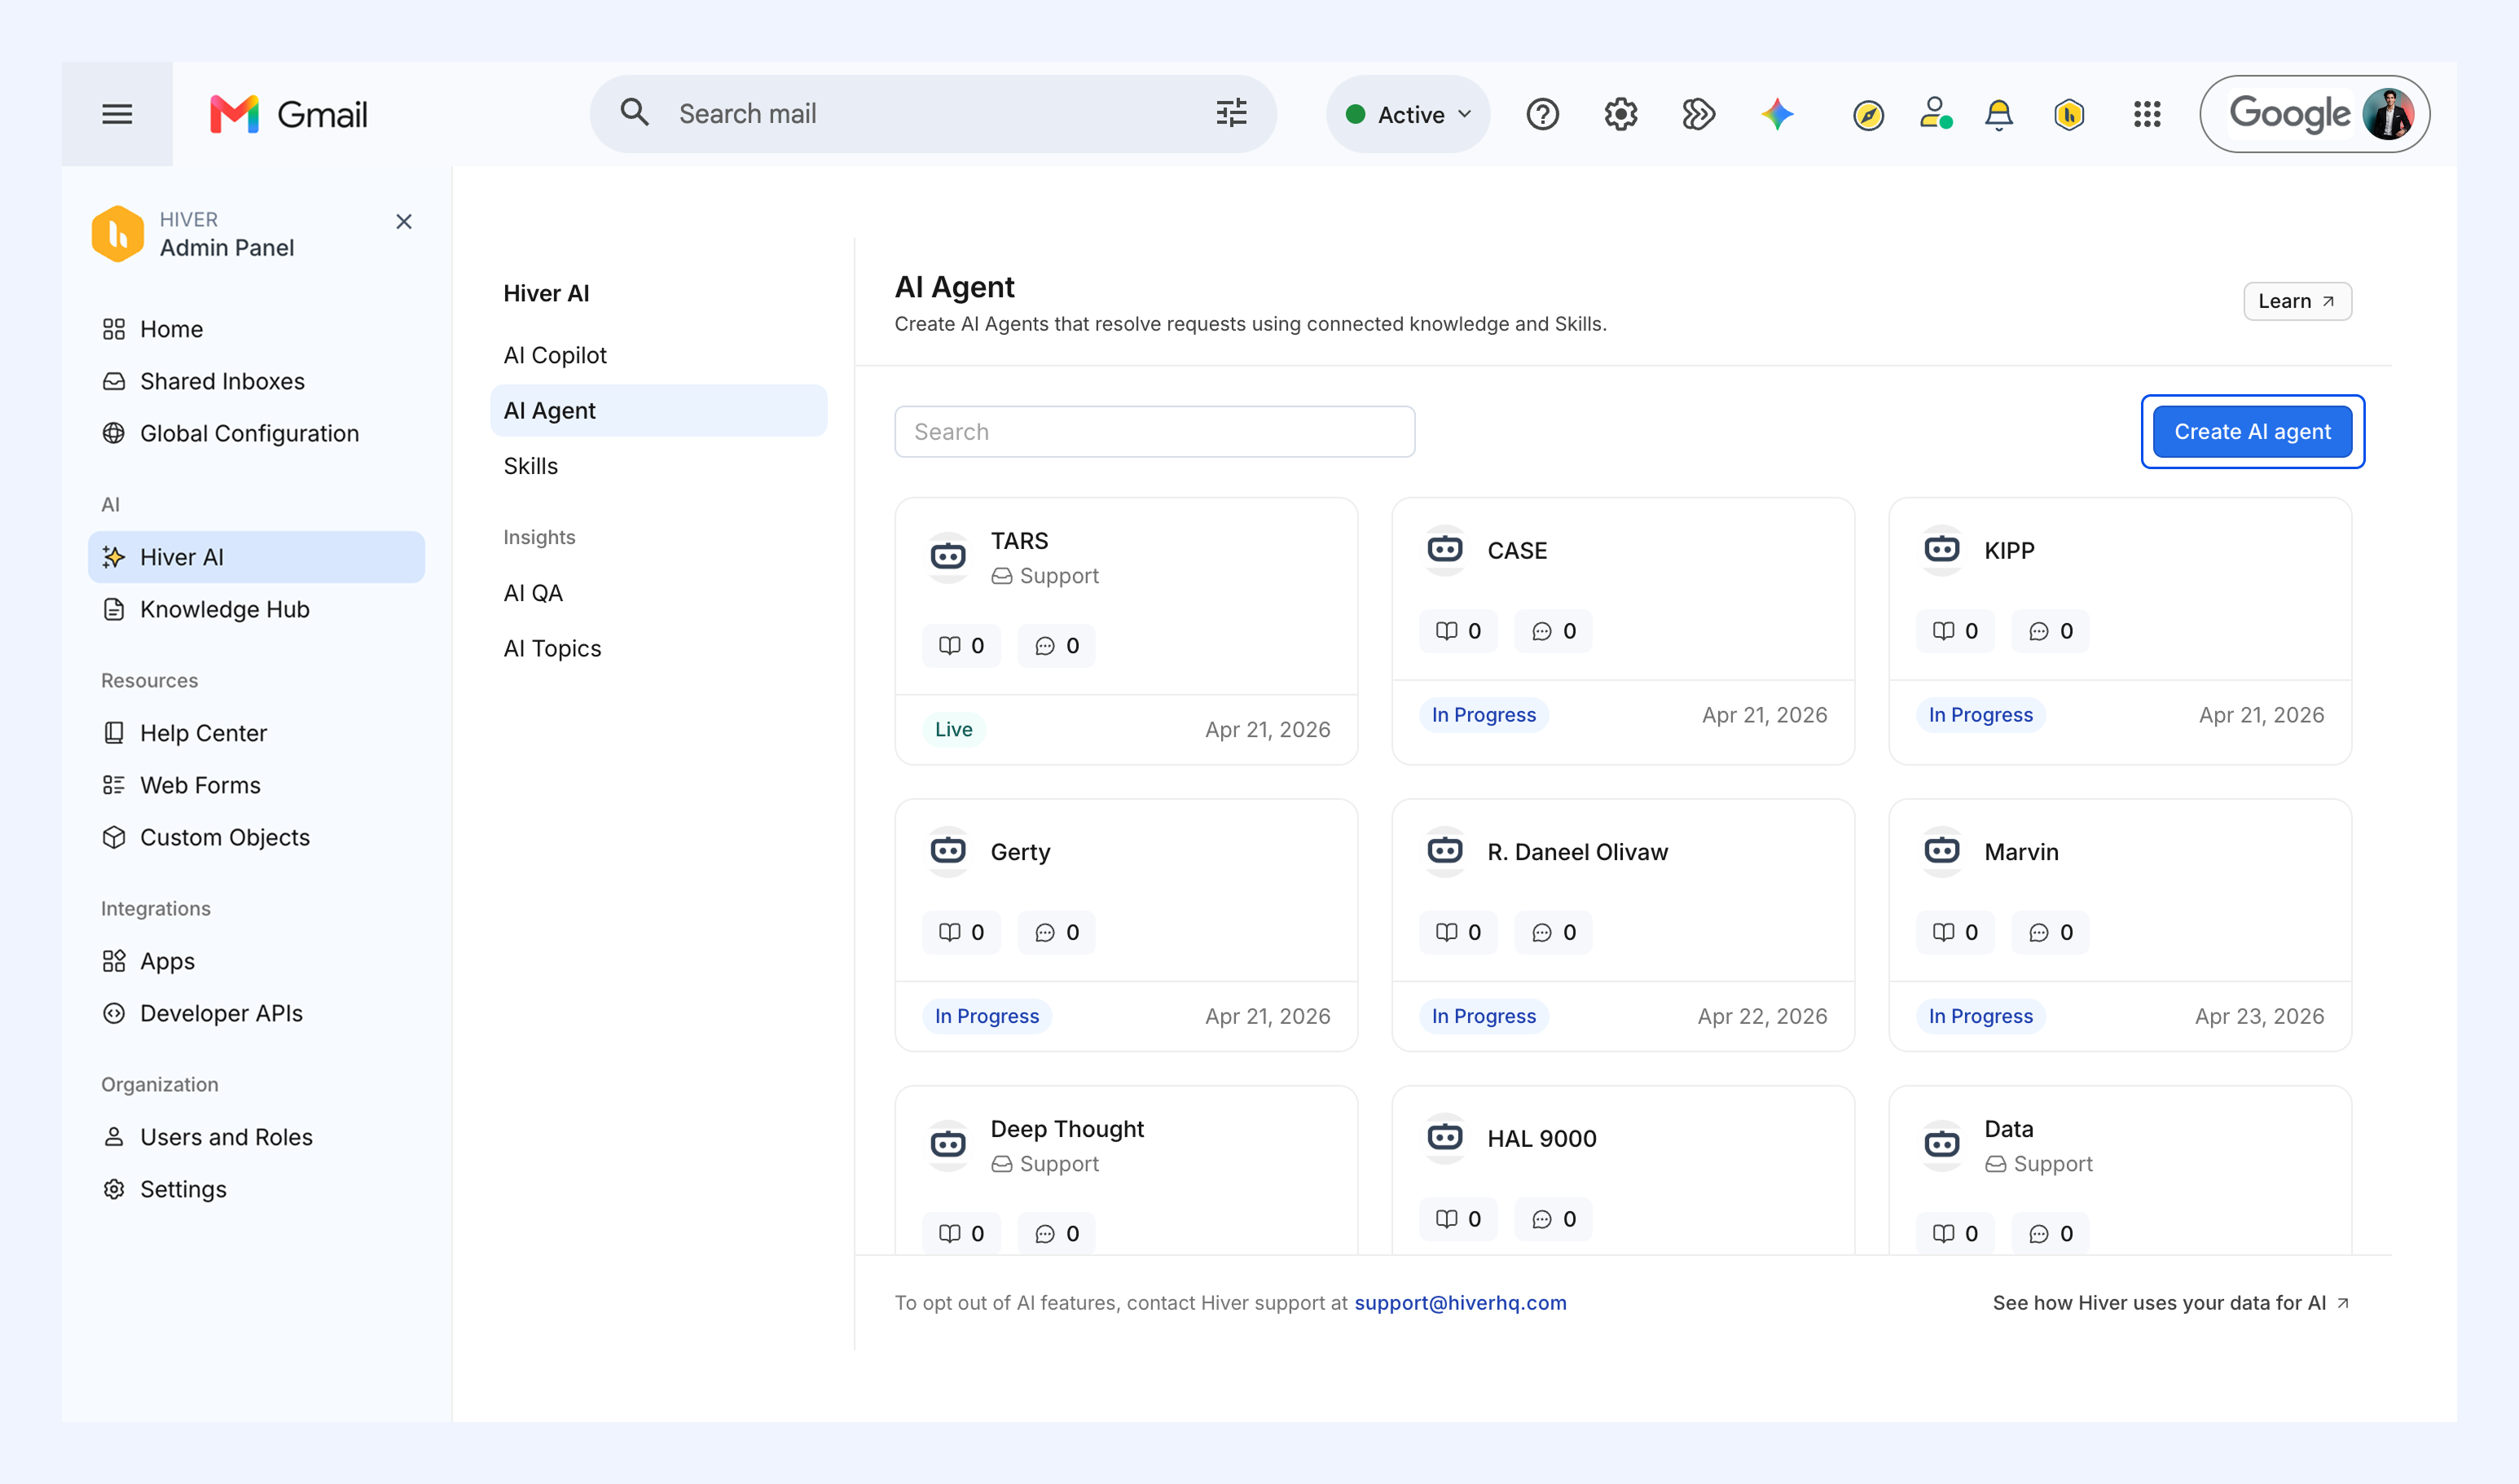
2. Click Create AI agent.
Step 1: Train your AI Agent
Your AI Agent can only answer questions based on the knowledge it has access to. Train your AI Agent on:
- How your products work, including features, specs, and availability
- How customers place, modify, or cancel orders
- Shipping timelines, costs, and tracking details
- Your return, refund, and exchange policies
- Common billing and account questions
- Any other queries your team handles often
Knowledge Base
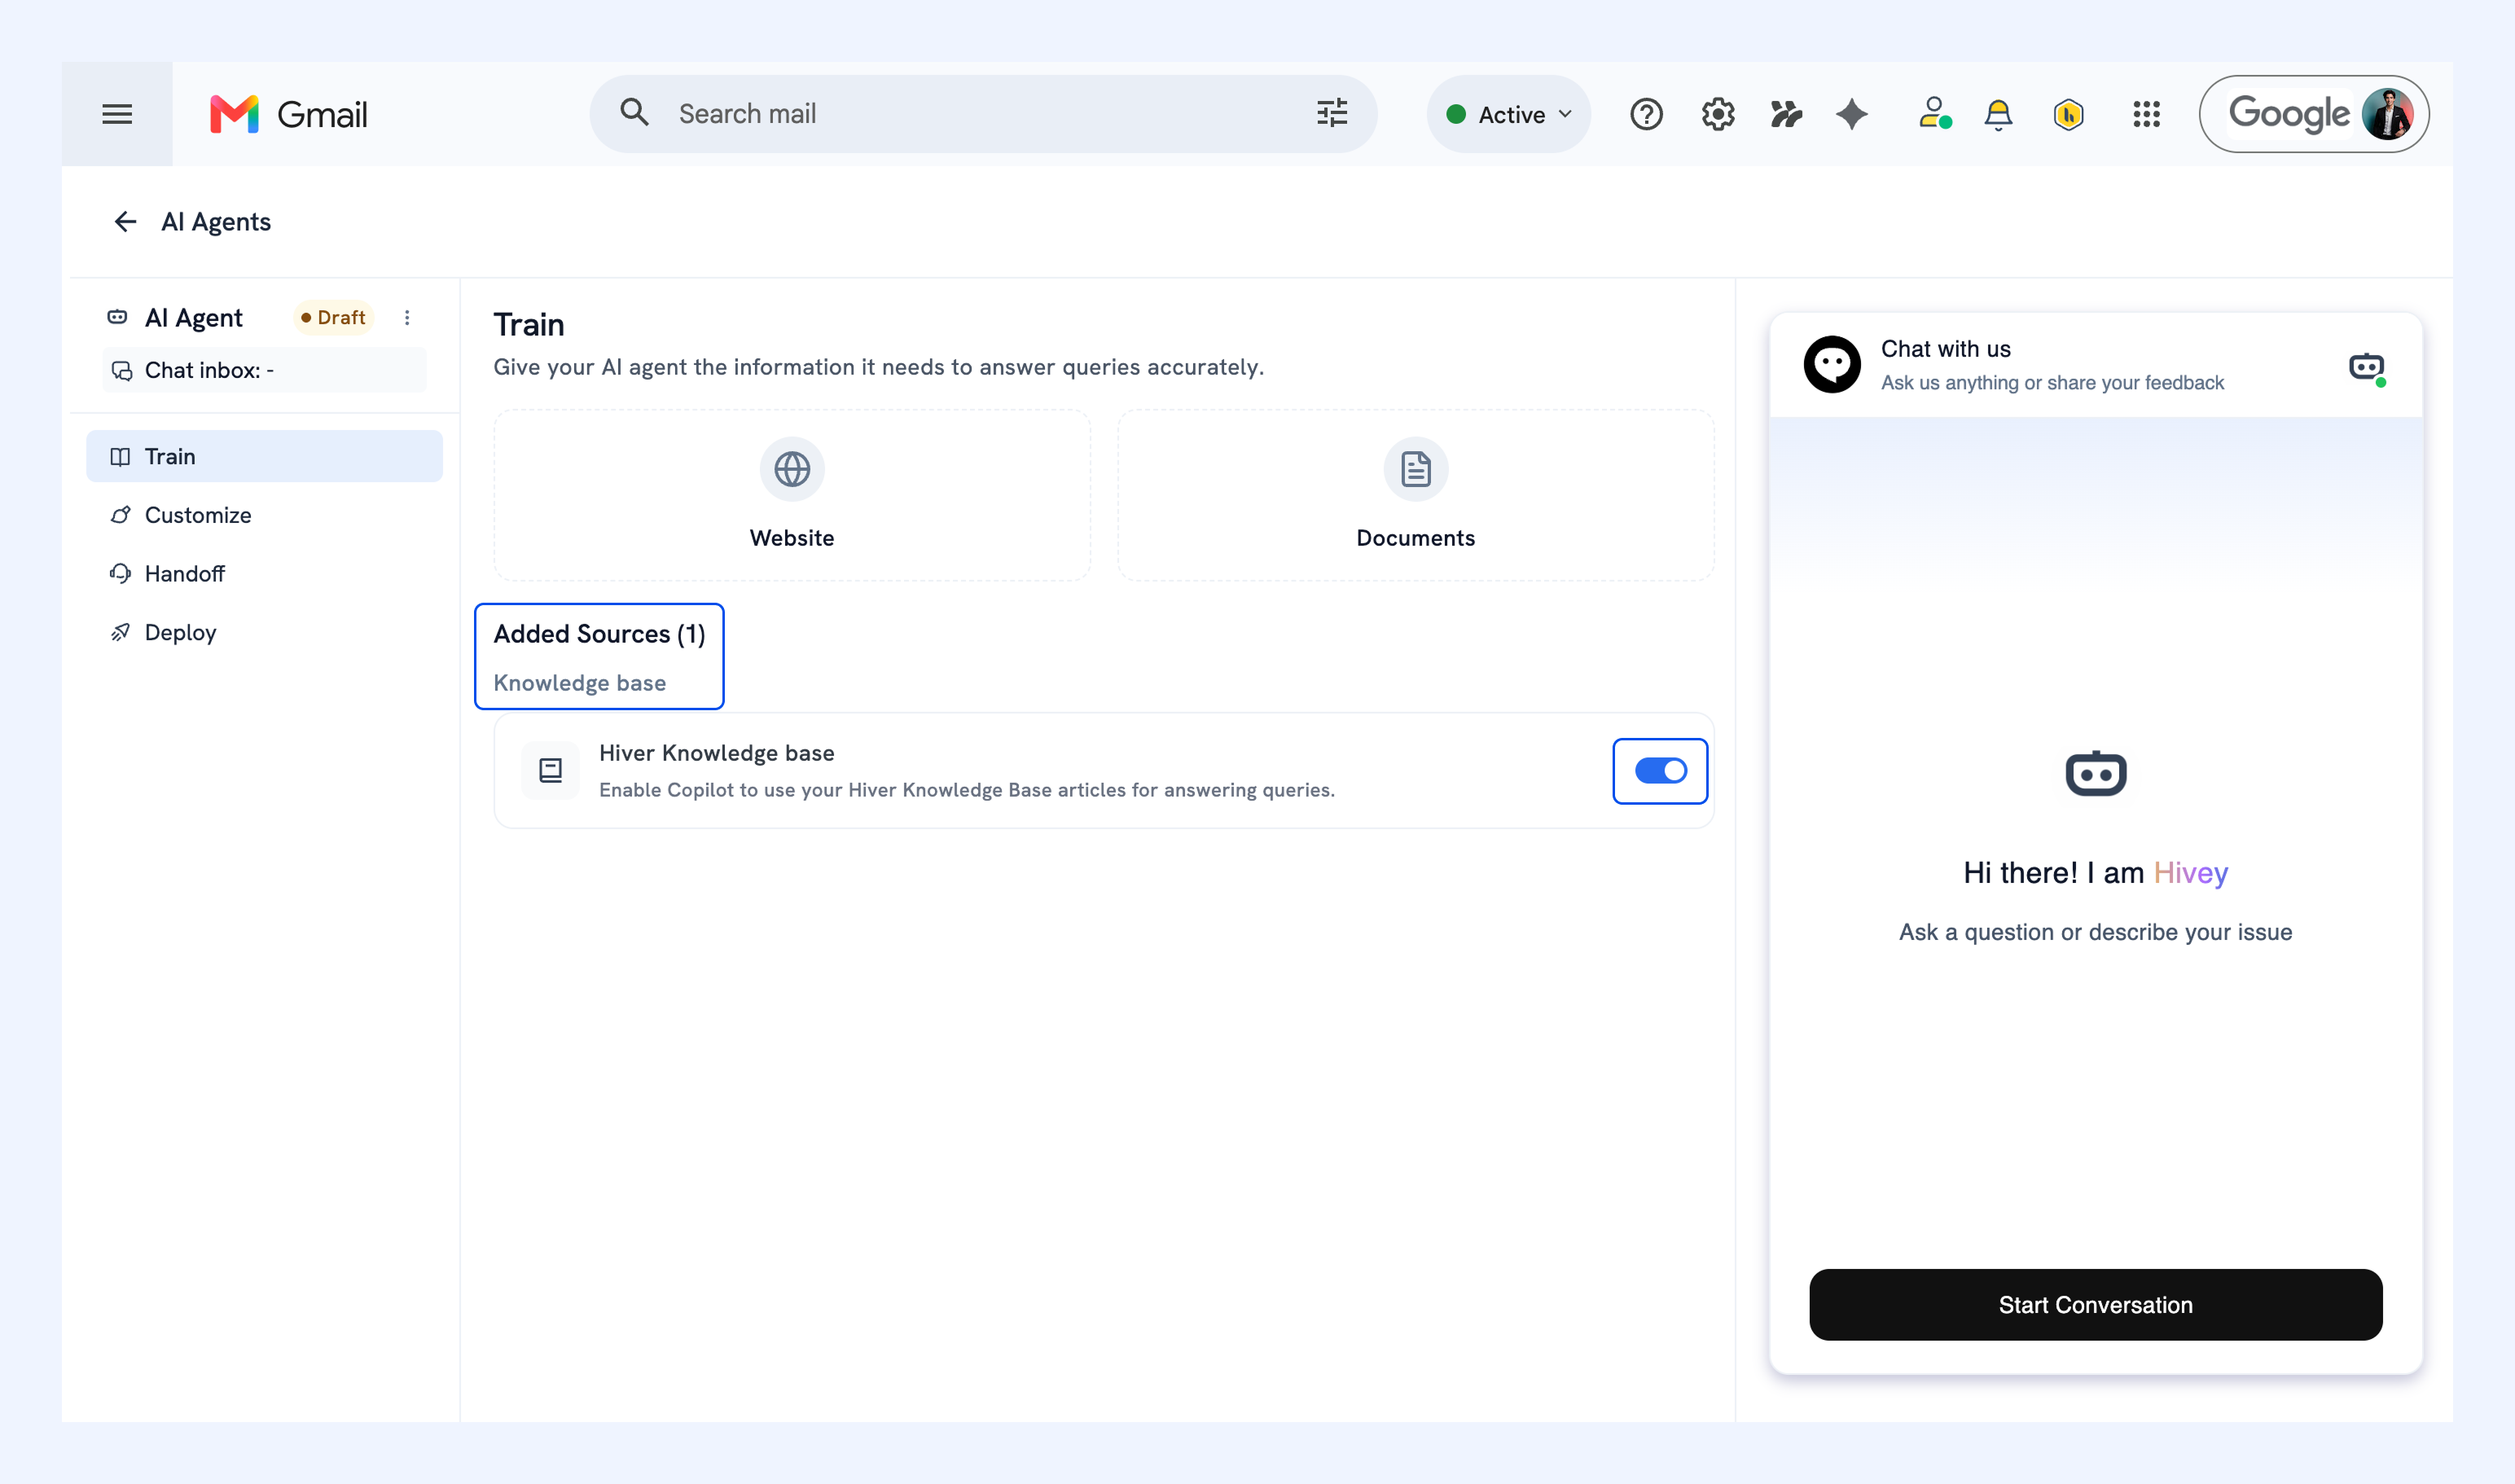
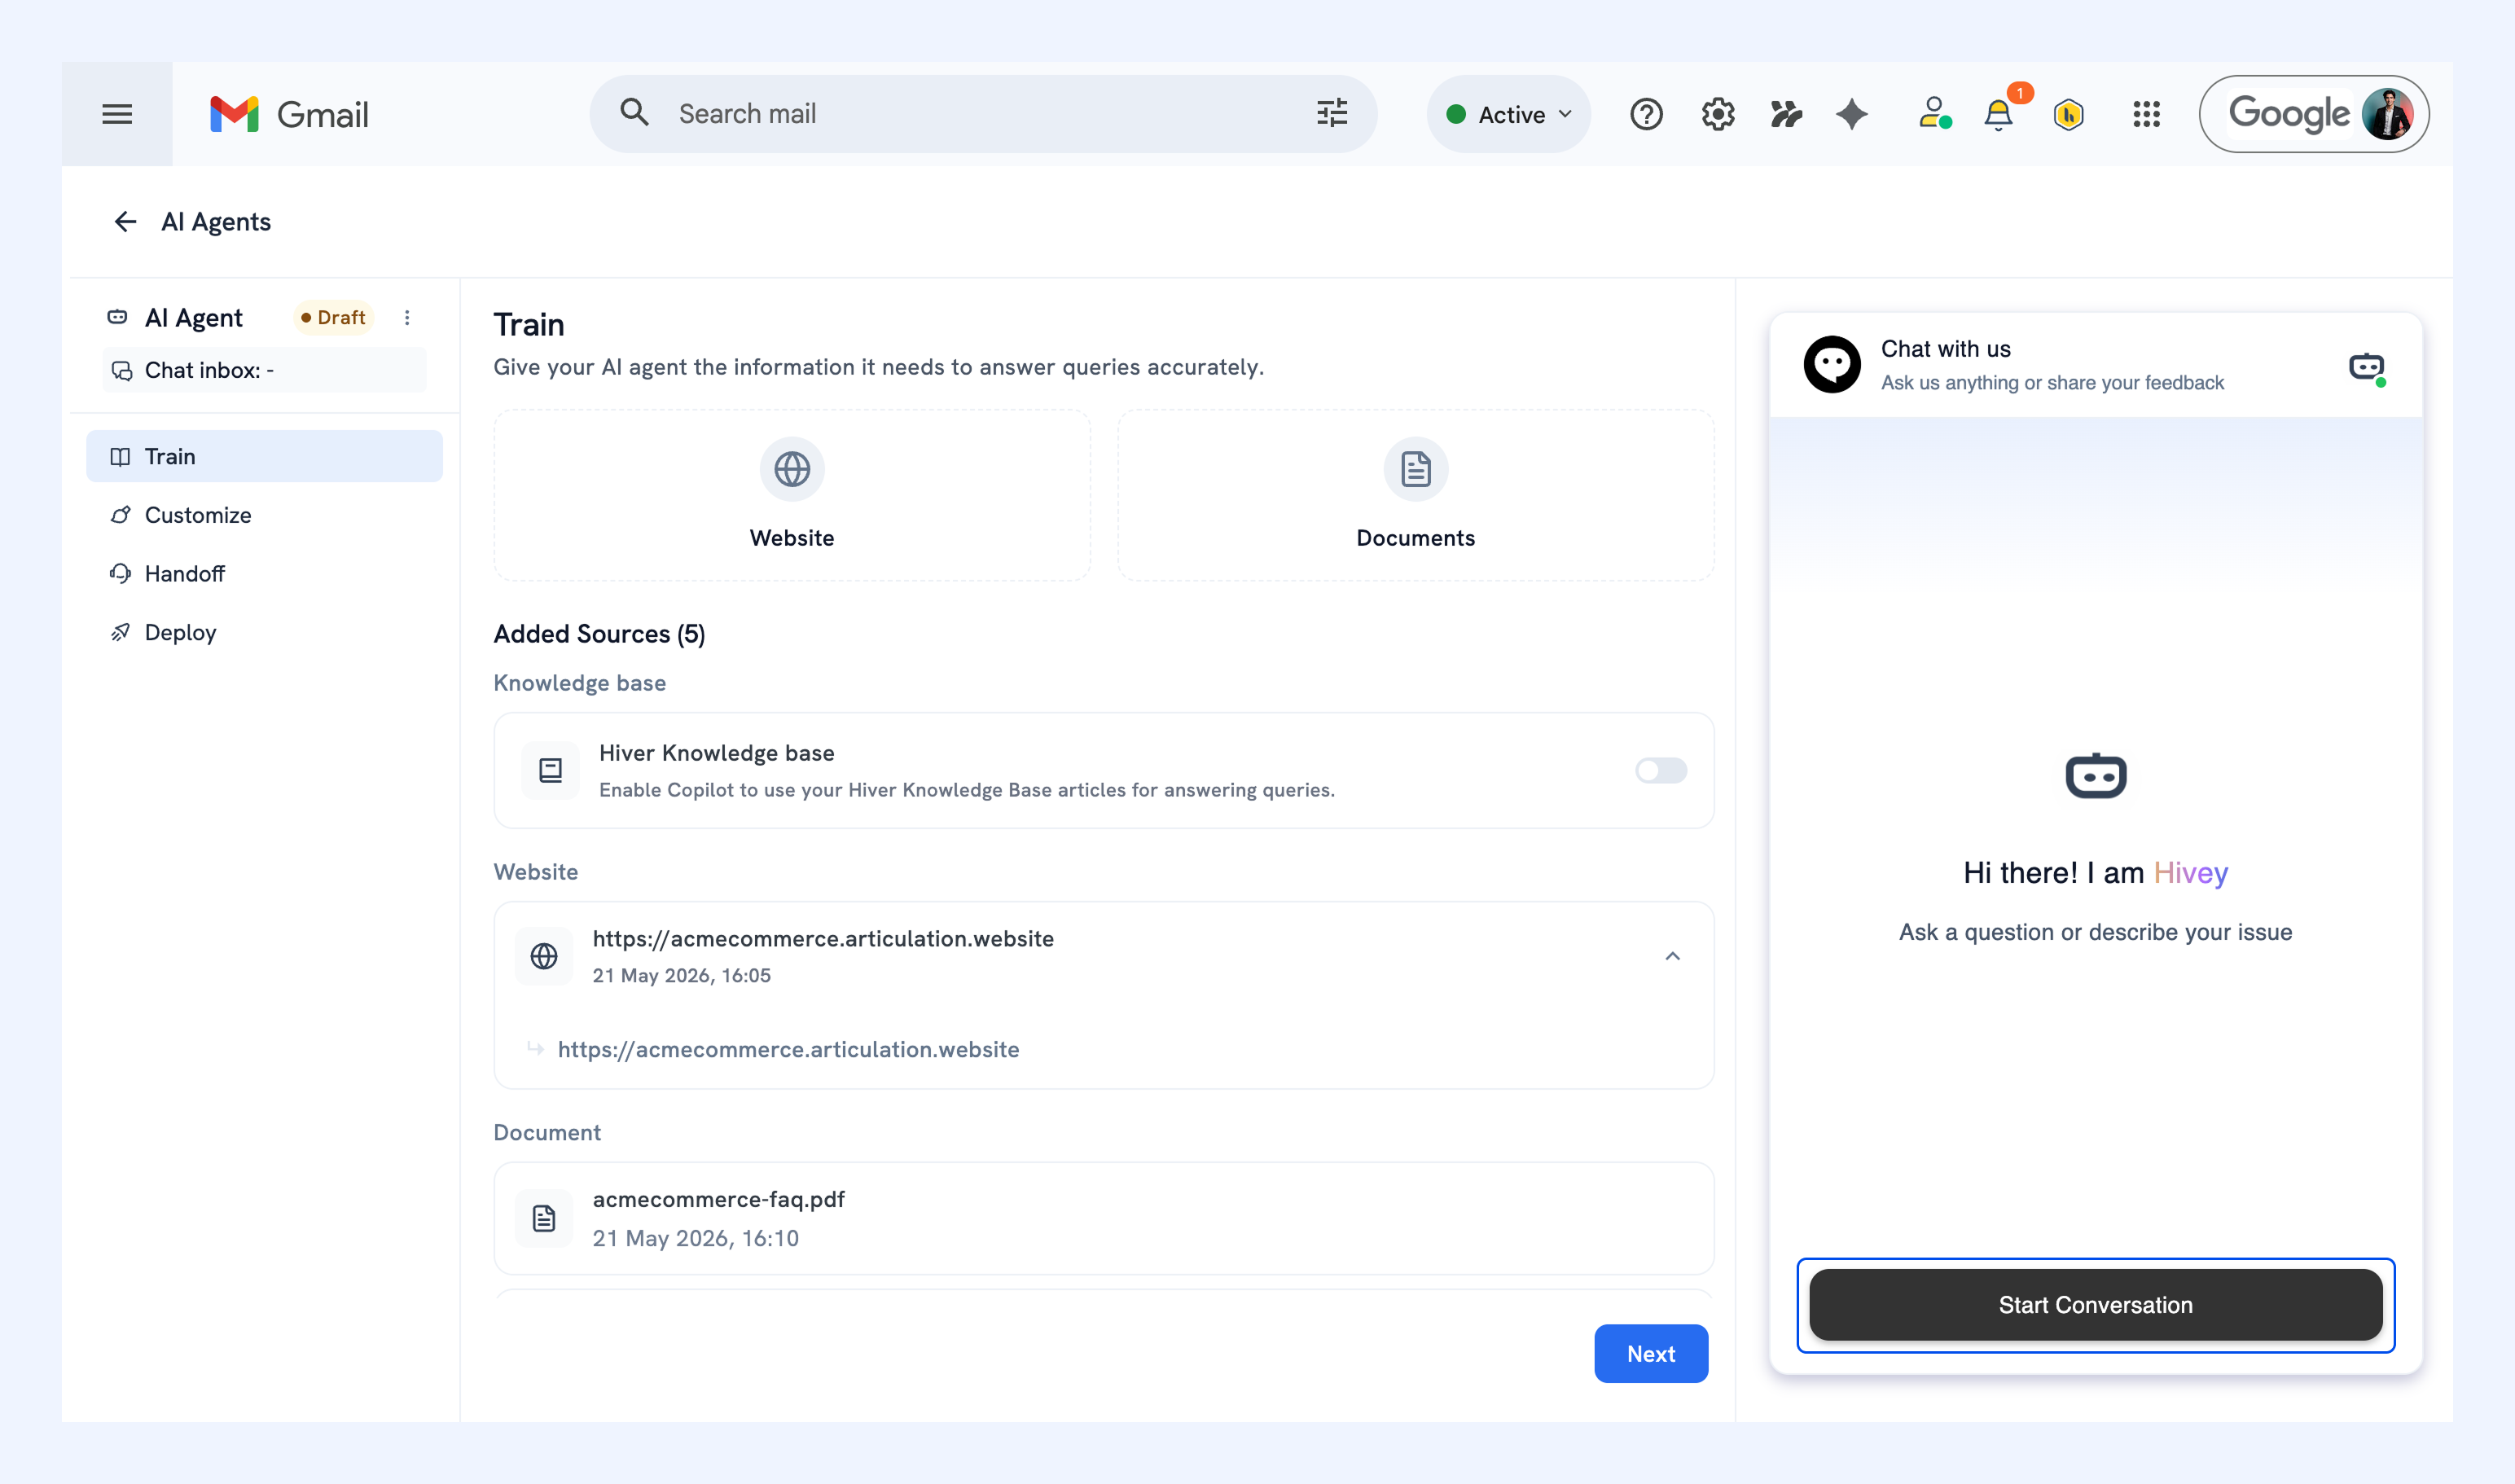
Under Added Sources, you'll see your connected Hiver Knowledge base listed but turned off by default. Toggle it on so the AI Agent can use your published help articles when answering customer queries.
Website
Hiver AI can learn from any pages published on your website.
To add a website:
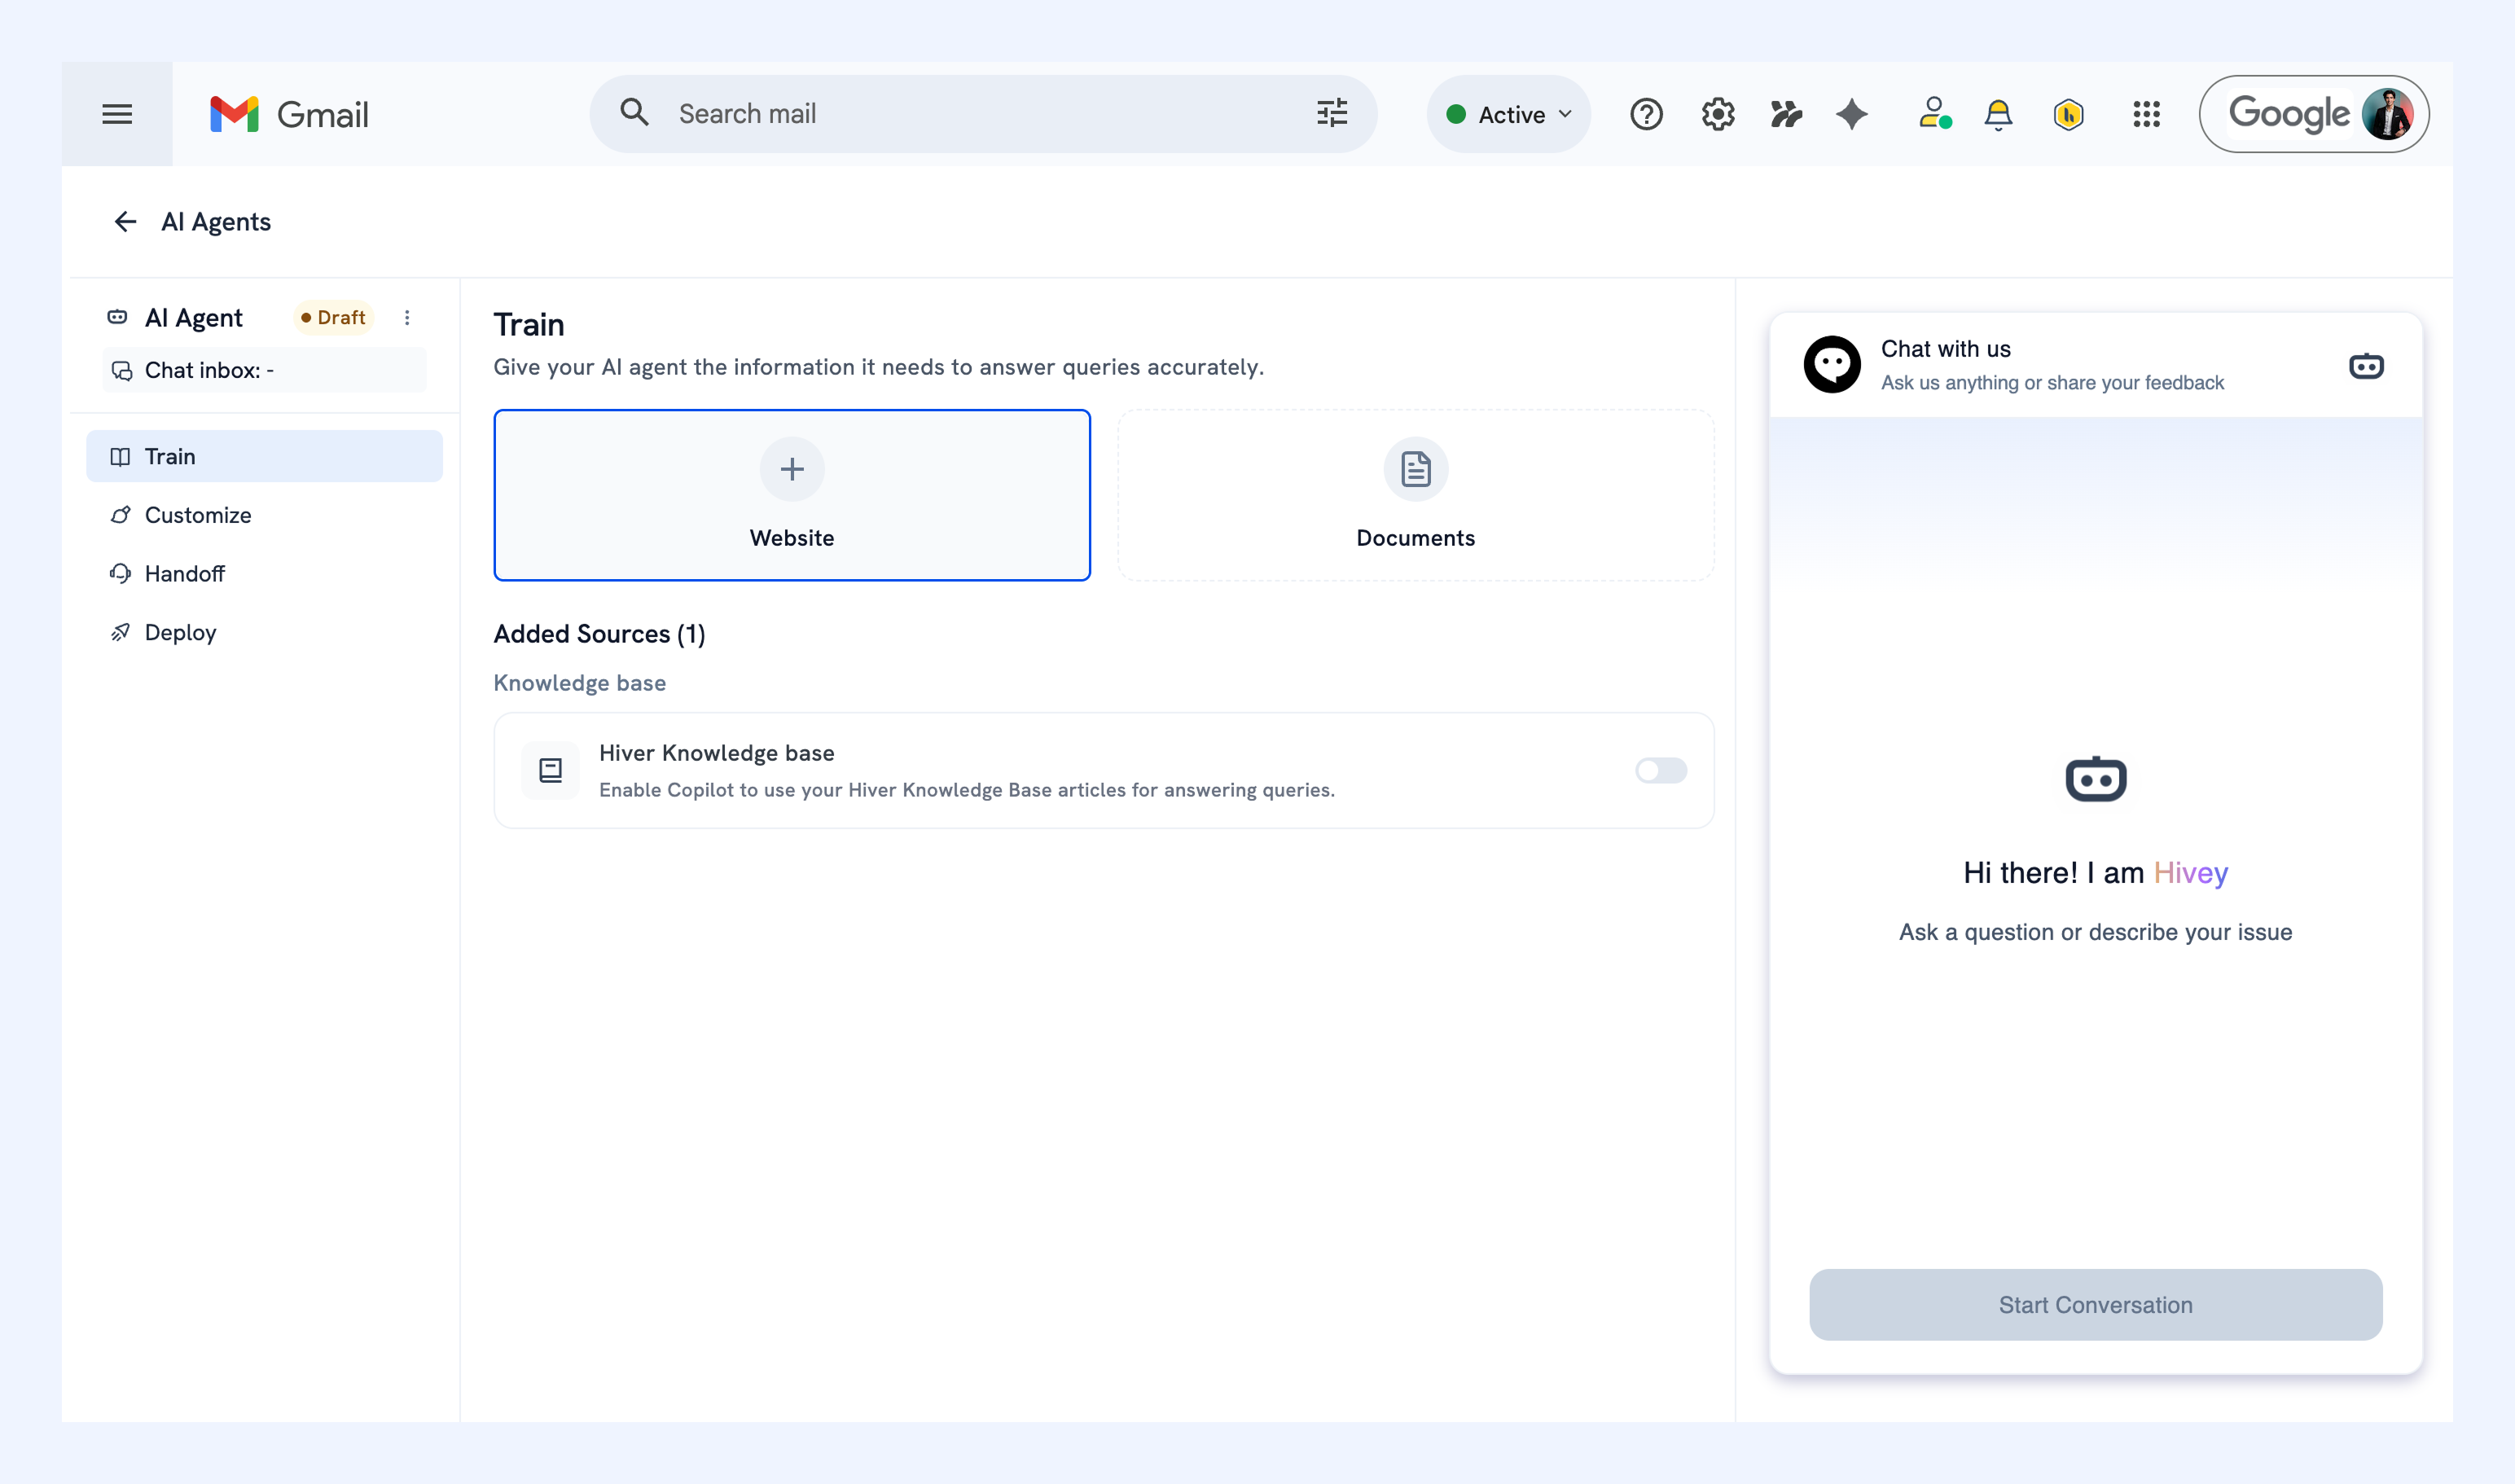
1. Click Website.
2. Paste your website link.
3. Turn on Crawl links if you also want Hiver AI to scan linked pages such as shipping policy pages, return guidelines, and product FAQs.
4. Click Add.
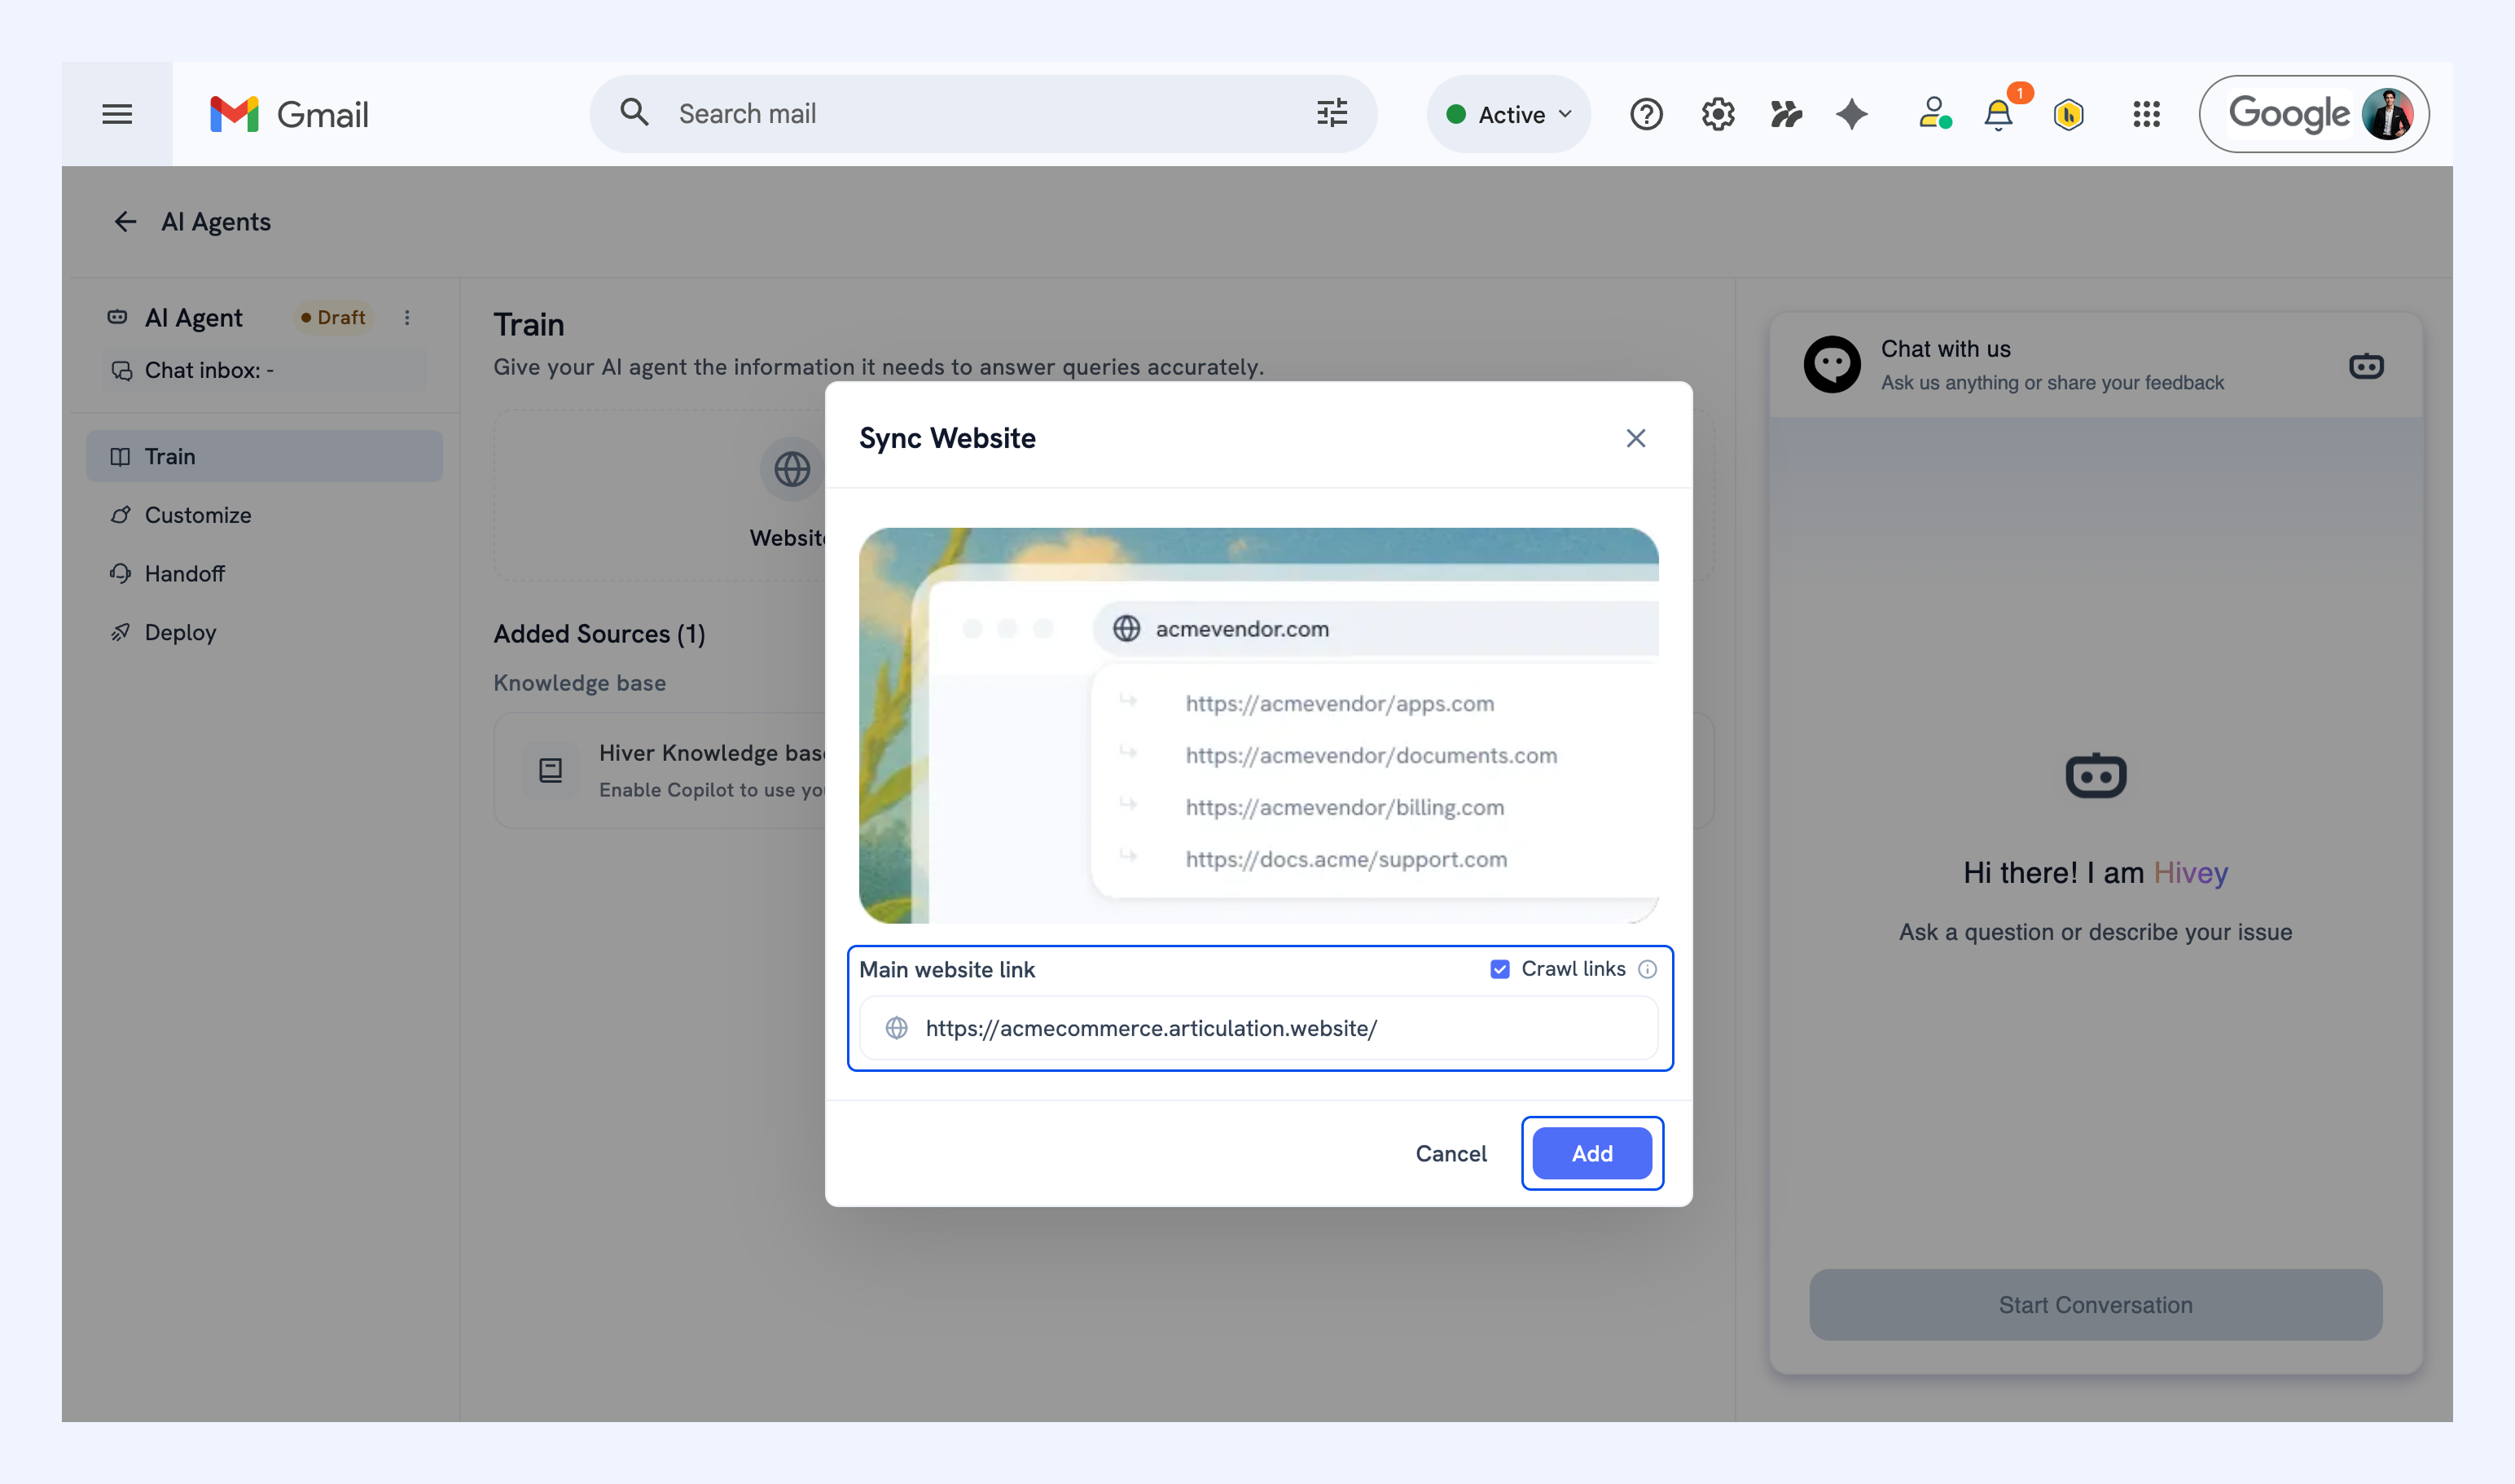
Note: Syncing can take a while depending on how many pages are involved. Once it's done, your website will appear under Added sources.
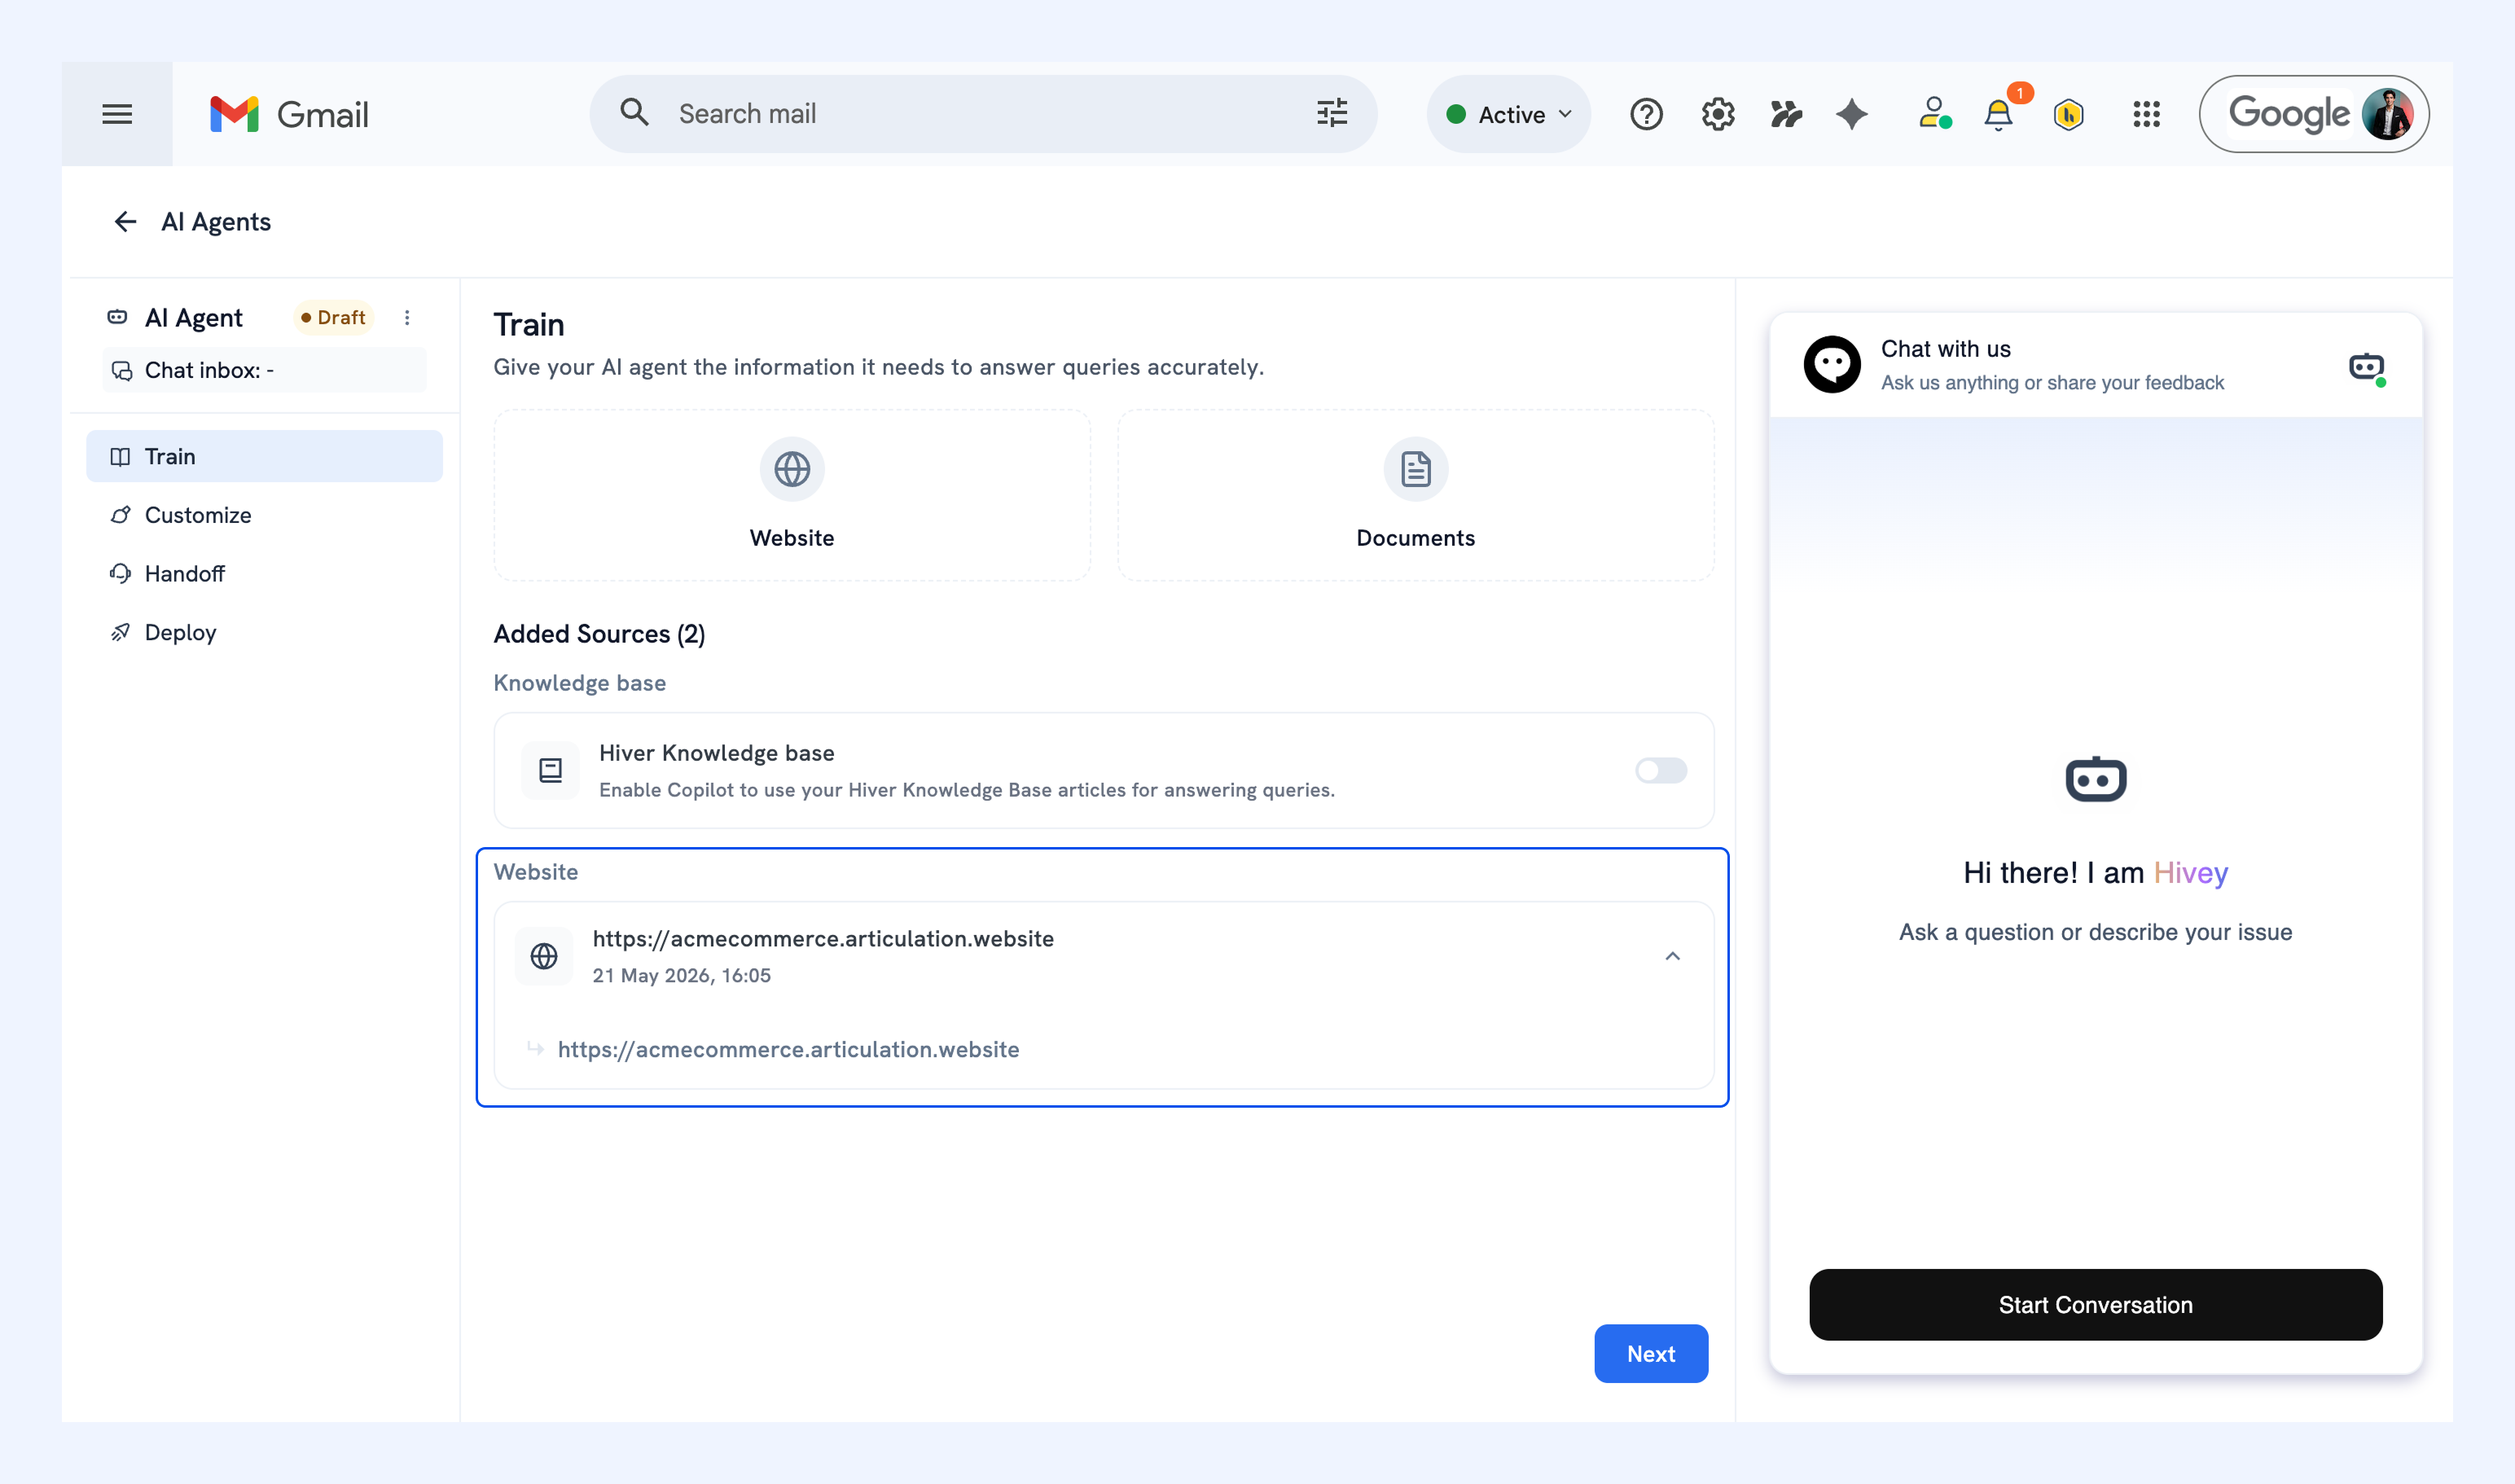
Documents
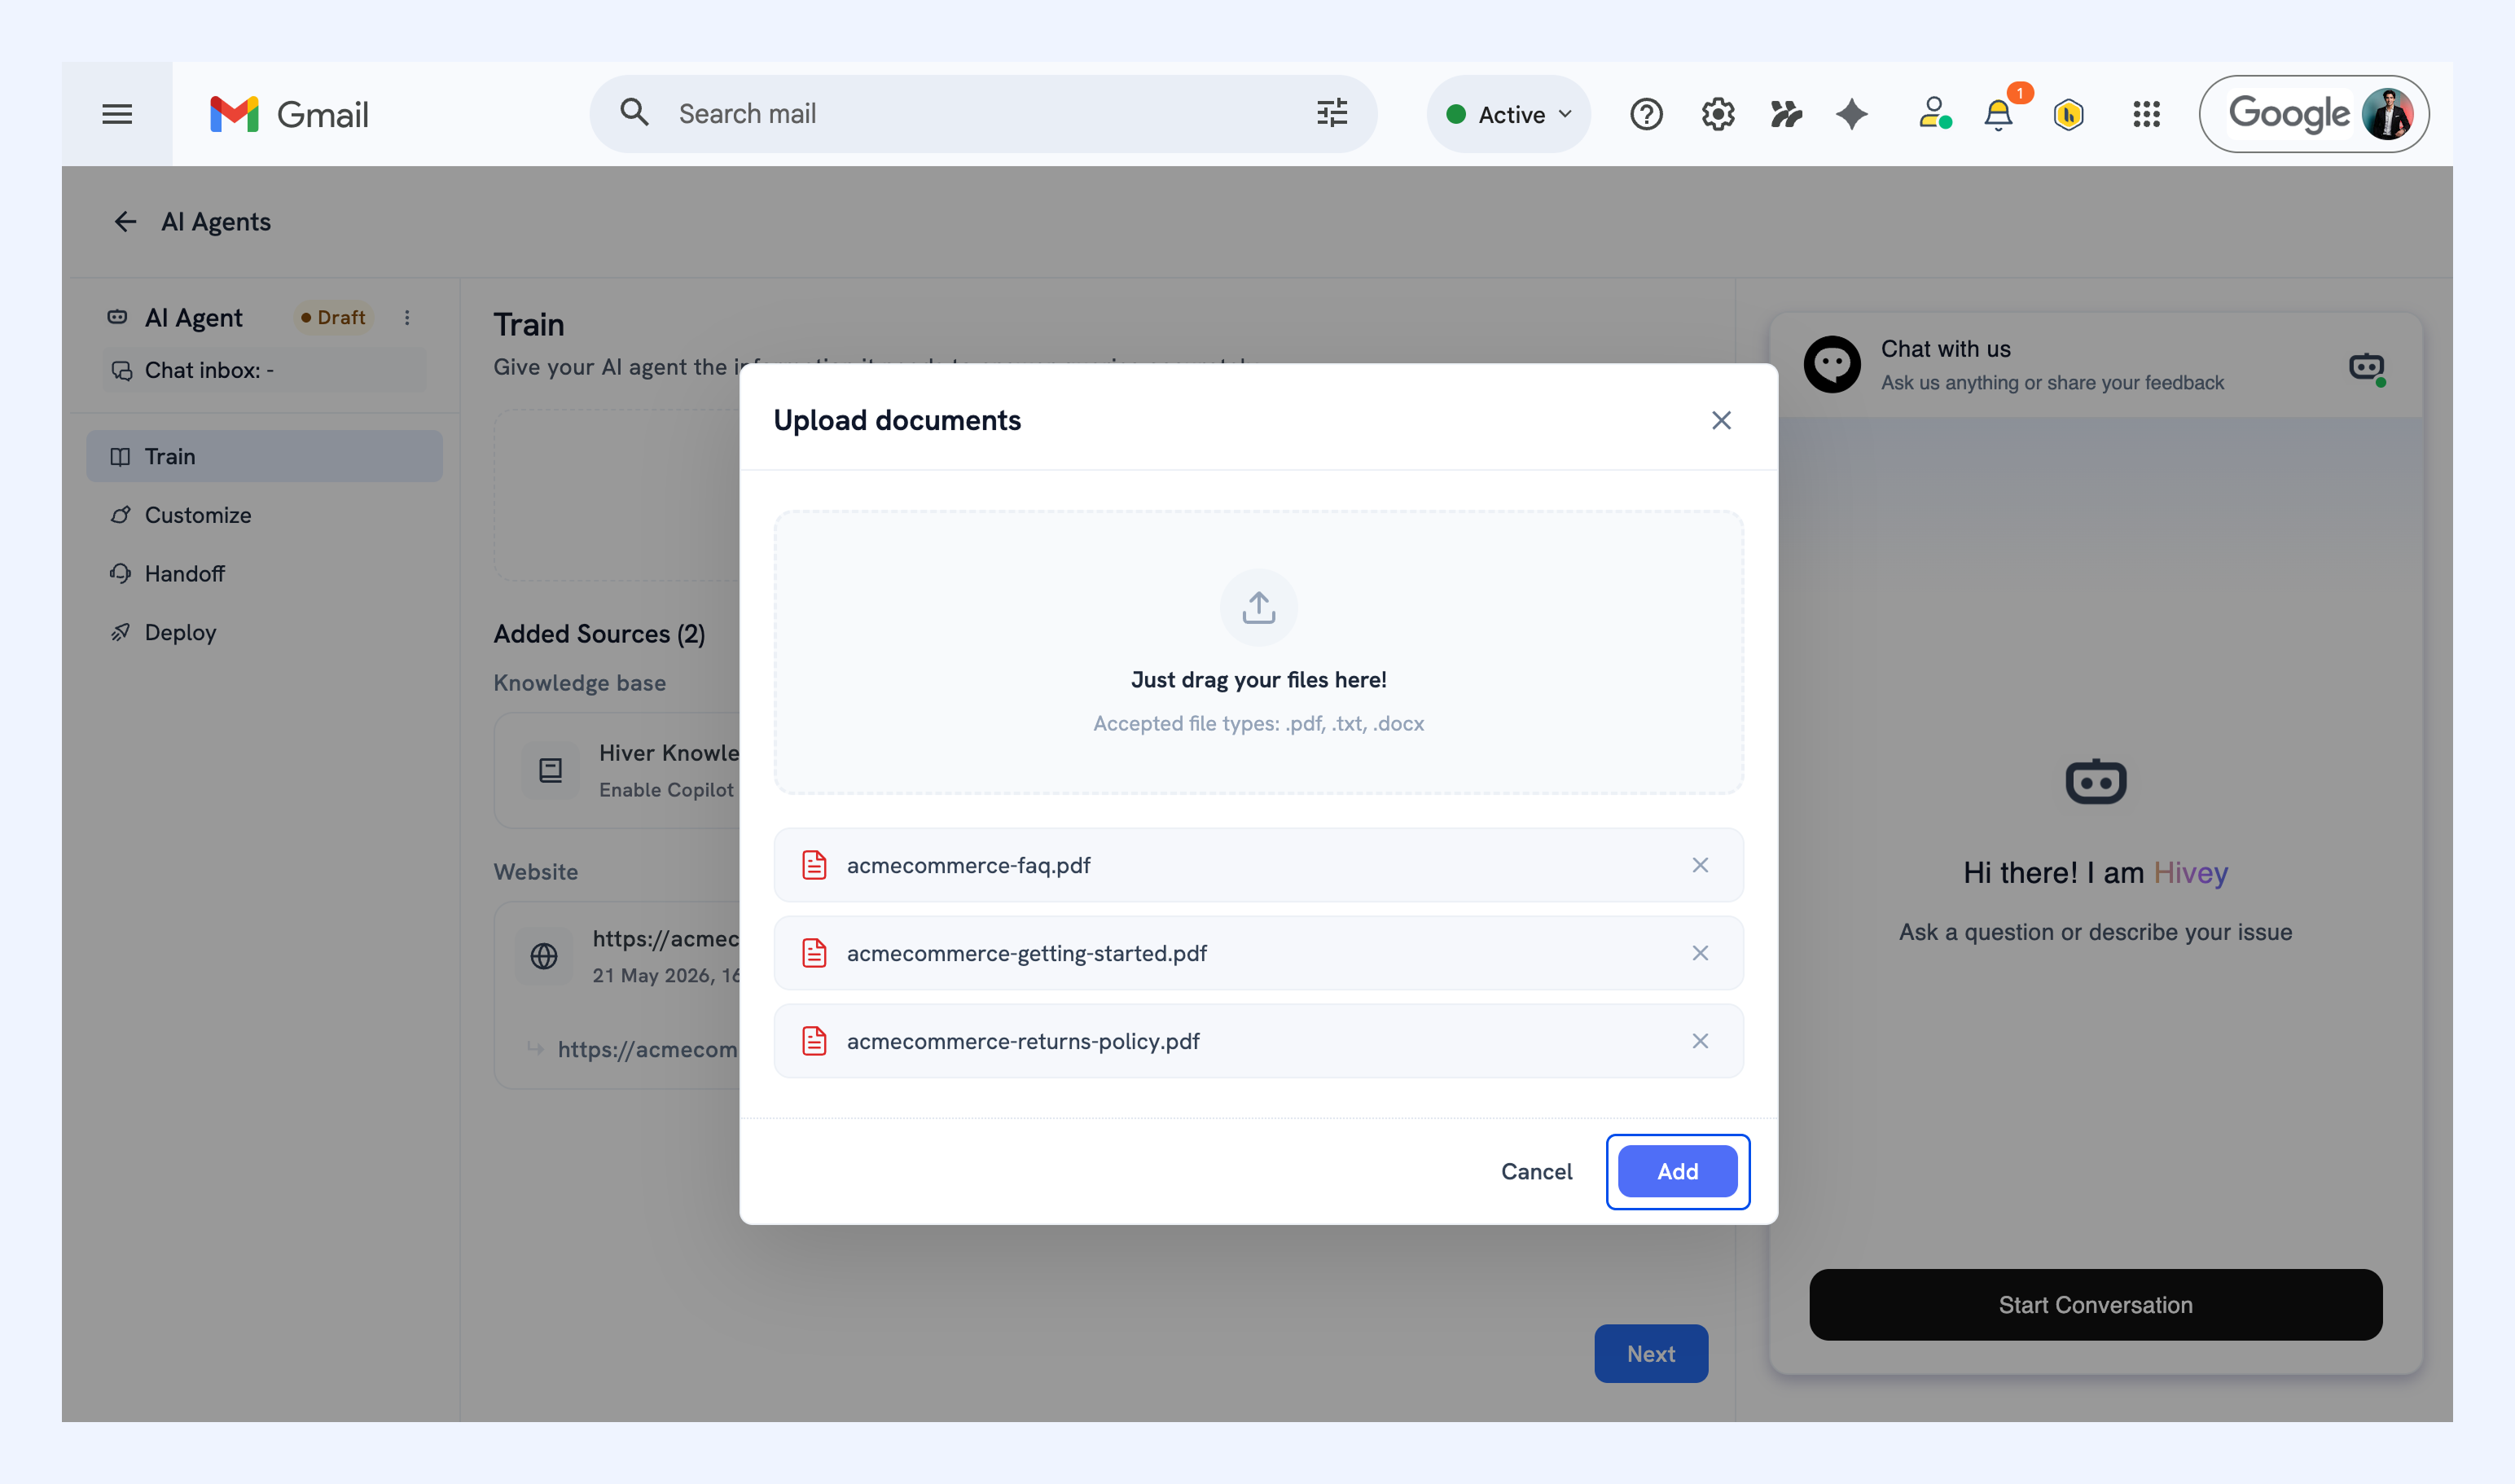
You can upload text-based files in PDF, DOCX, or TXT formats. These could include your return and refund policies, shipping timelines, product manuals, billing terms, and any internal documentation your team uses for trickier cases.
Note: You can upload up to 5 files at a time. Each file should be under 30 MB.
To upload documents:
1. Click Documents.
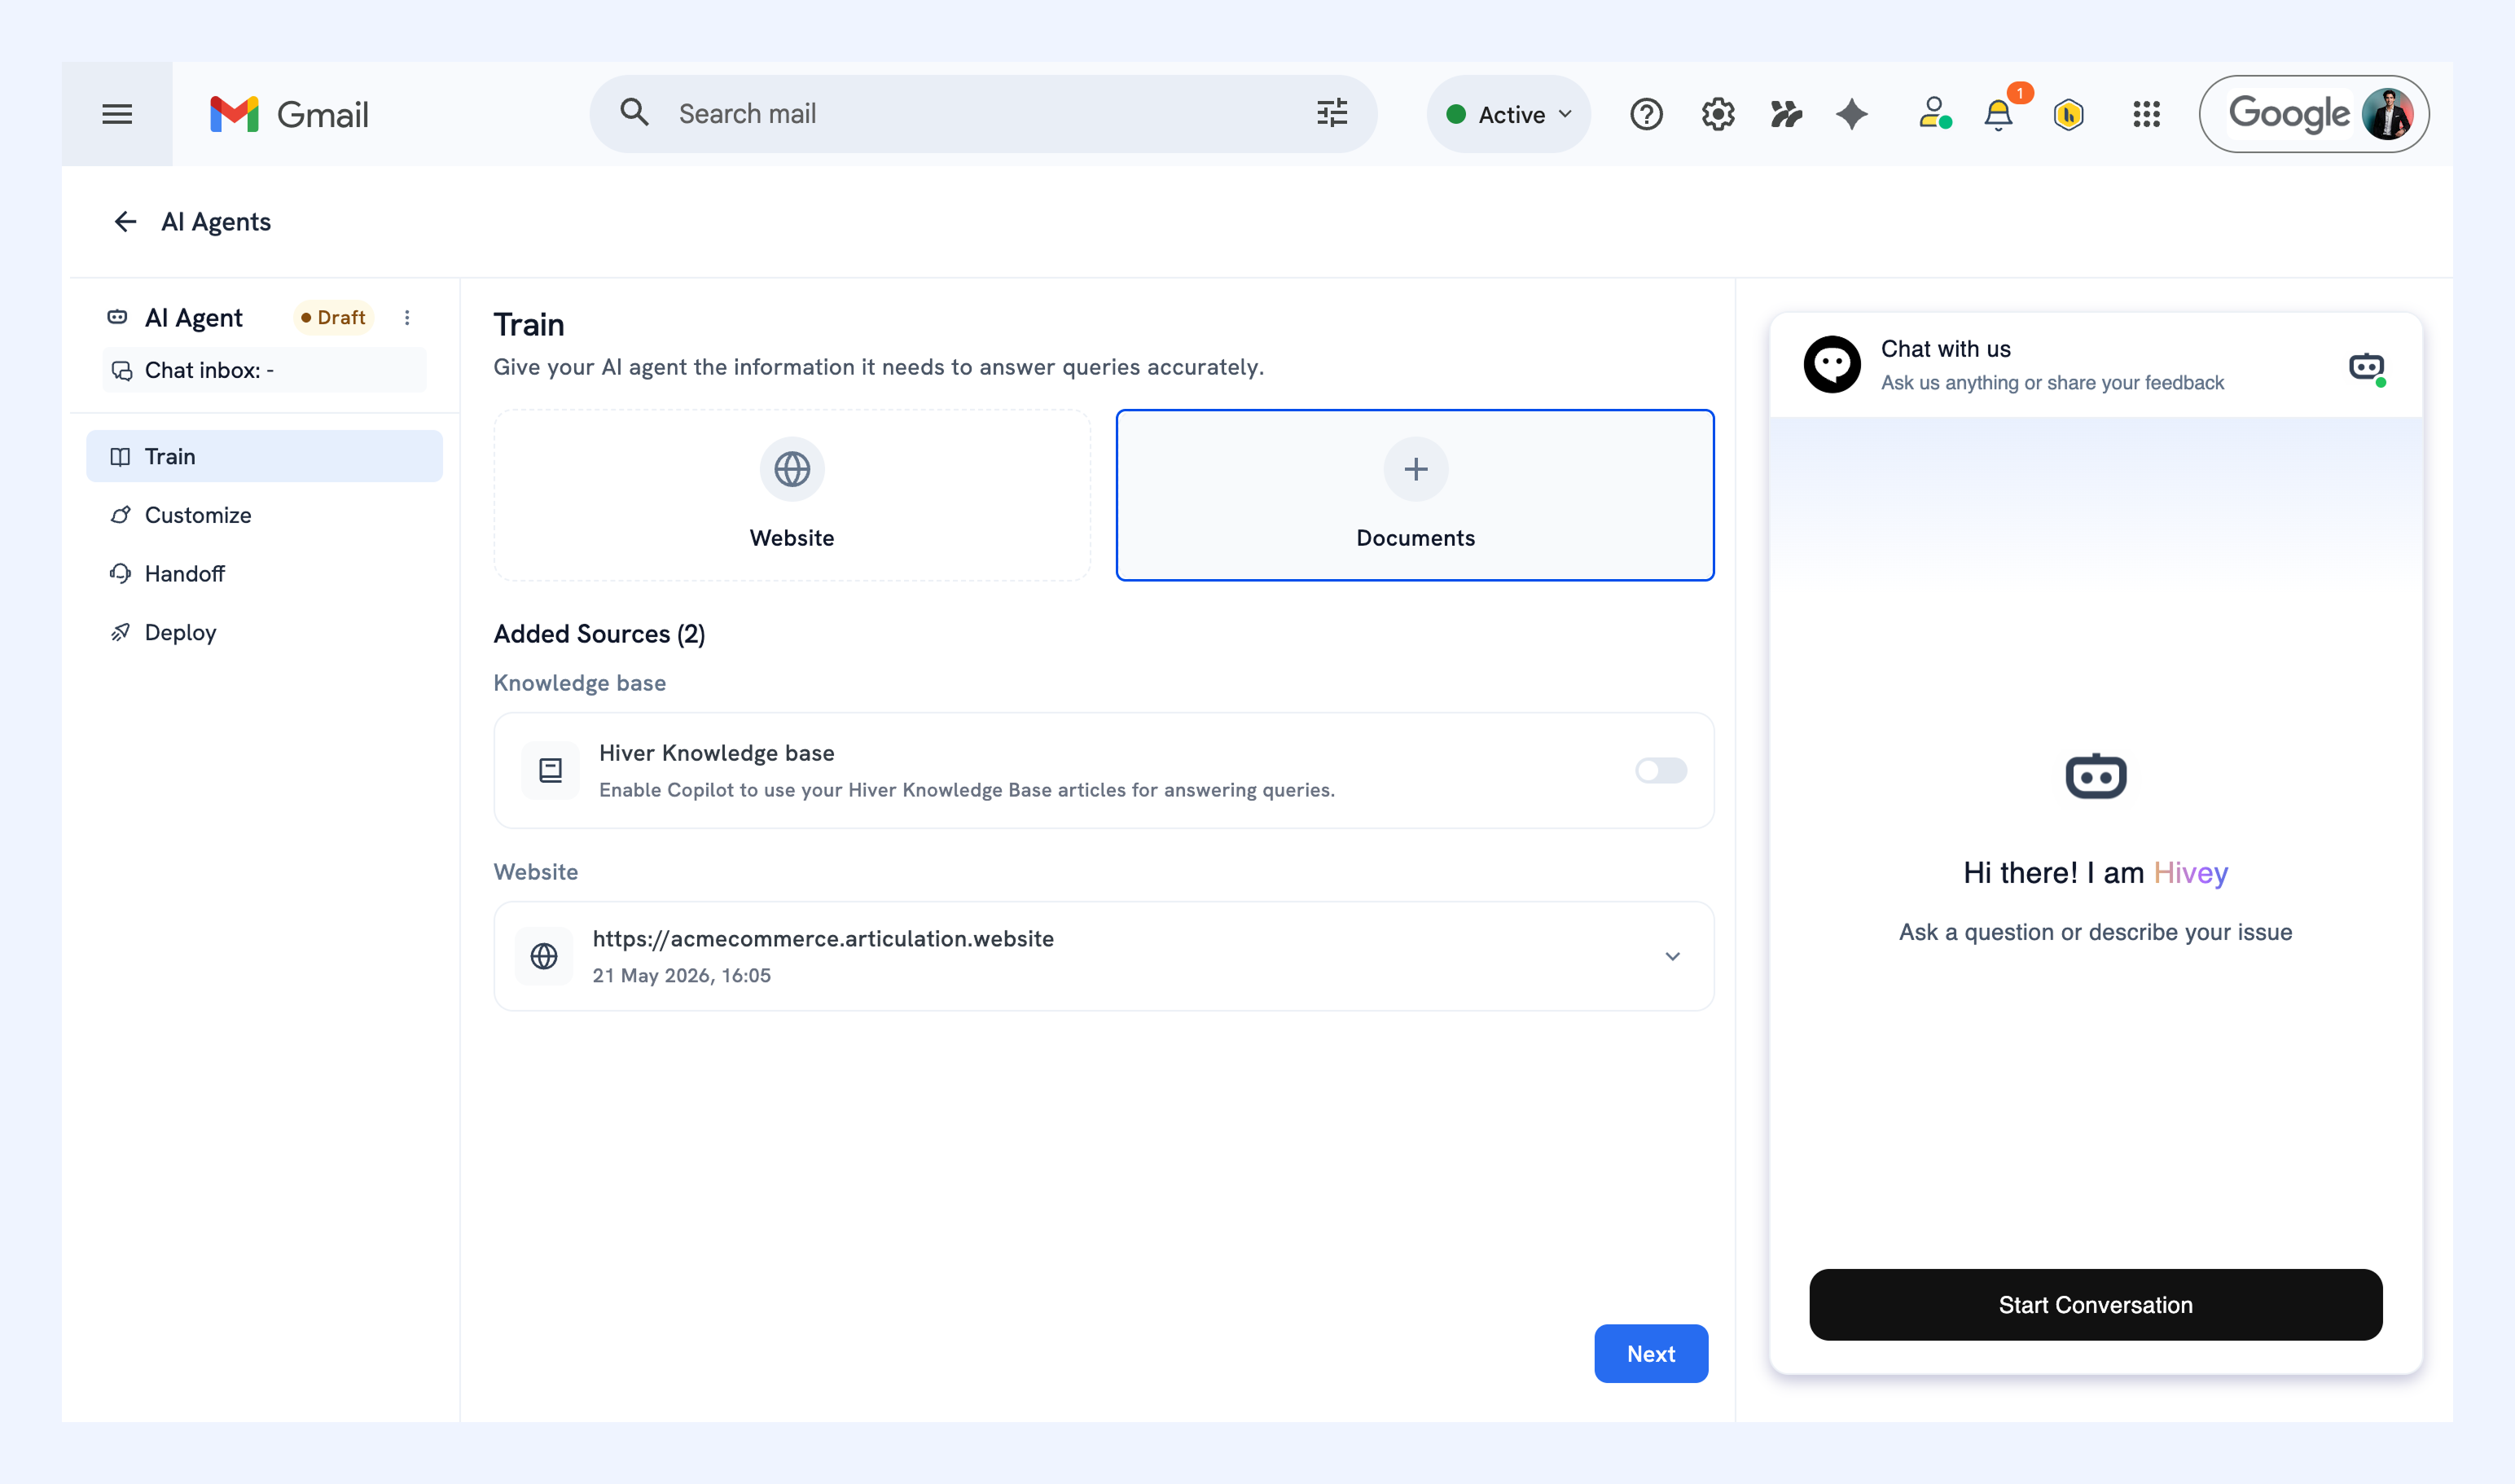
2. Select your files and click Add.
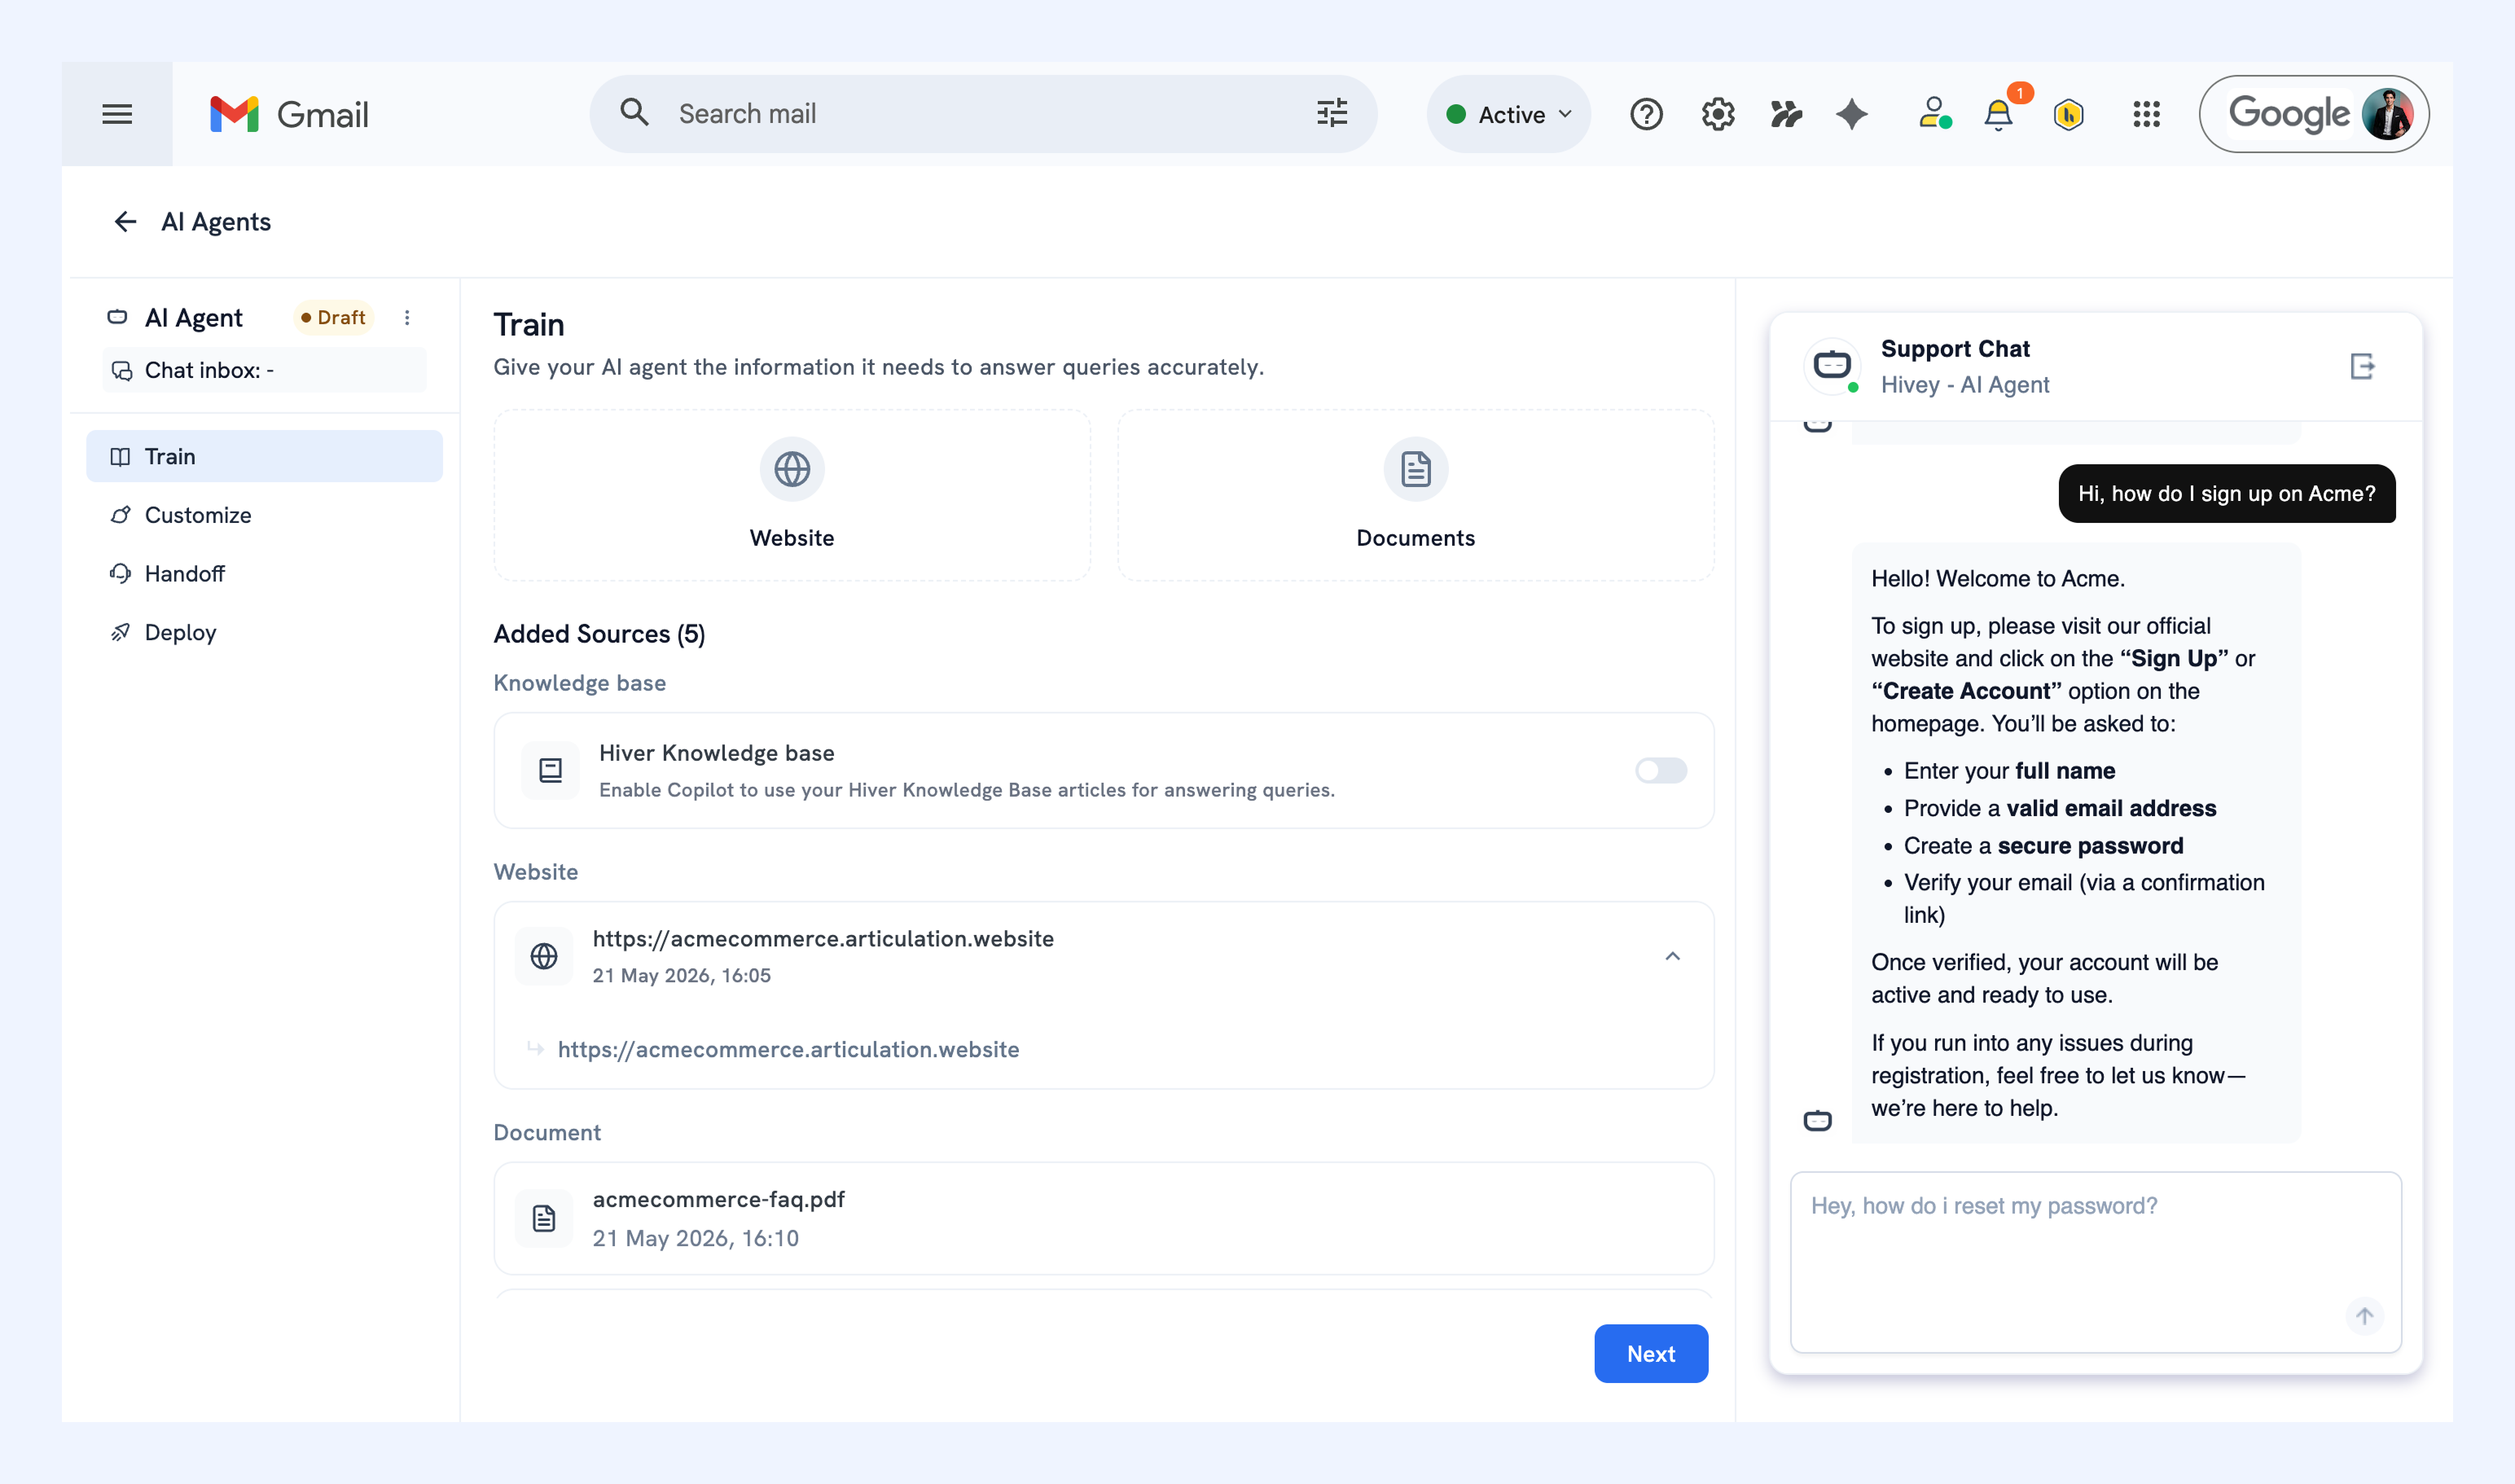
Once your knowledge sources are in place, use the preview on the right to test how your AI Agent responds. Click Start Conversation and try asking a few sample questions the way a customer would.
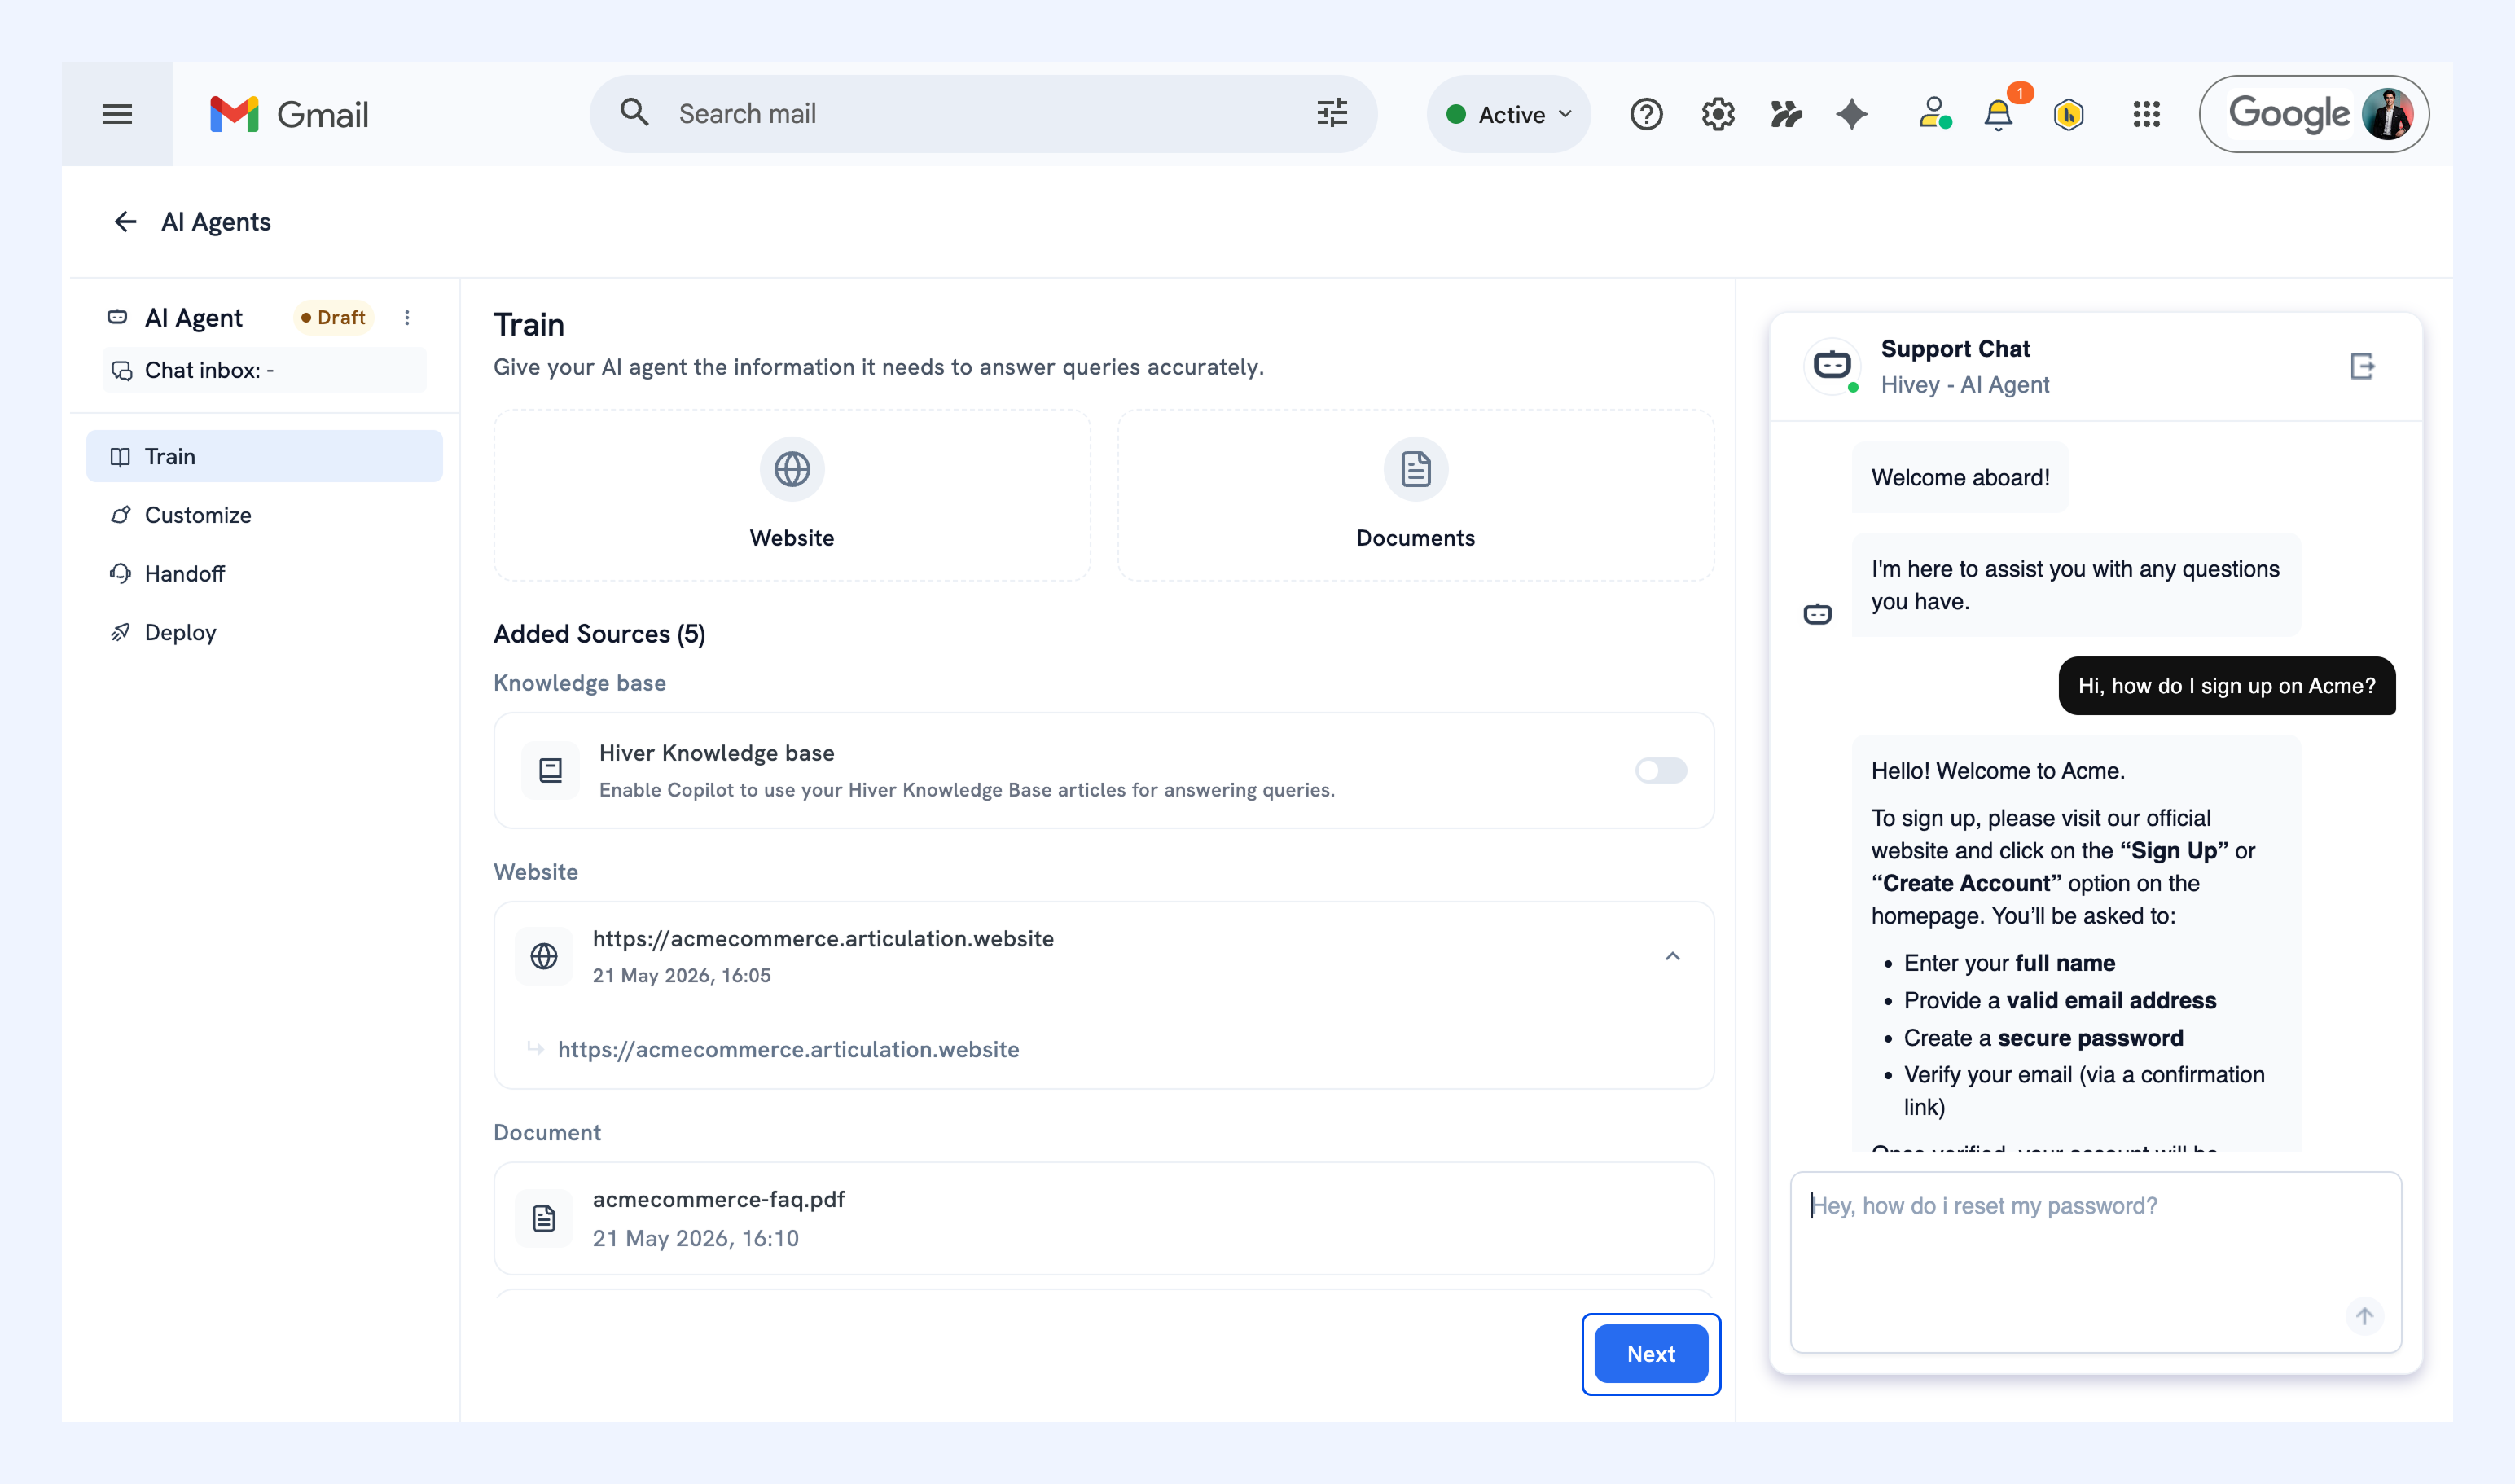
Review the responses, and update your questions or knowledge sources if anything needs improvement.
When you're happy with the answers, click Next.
Step 2: Customize your AI Agent
Set up how your AI Agent looks and how it should communicate with customers.
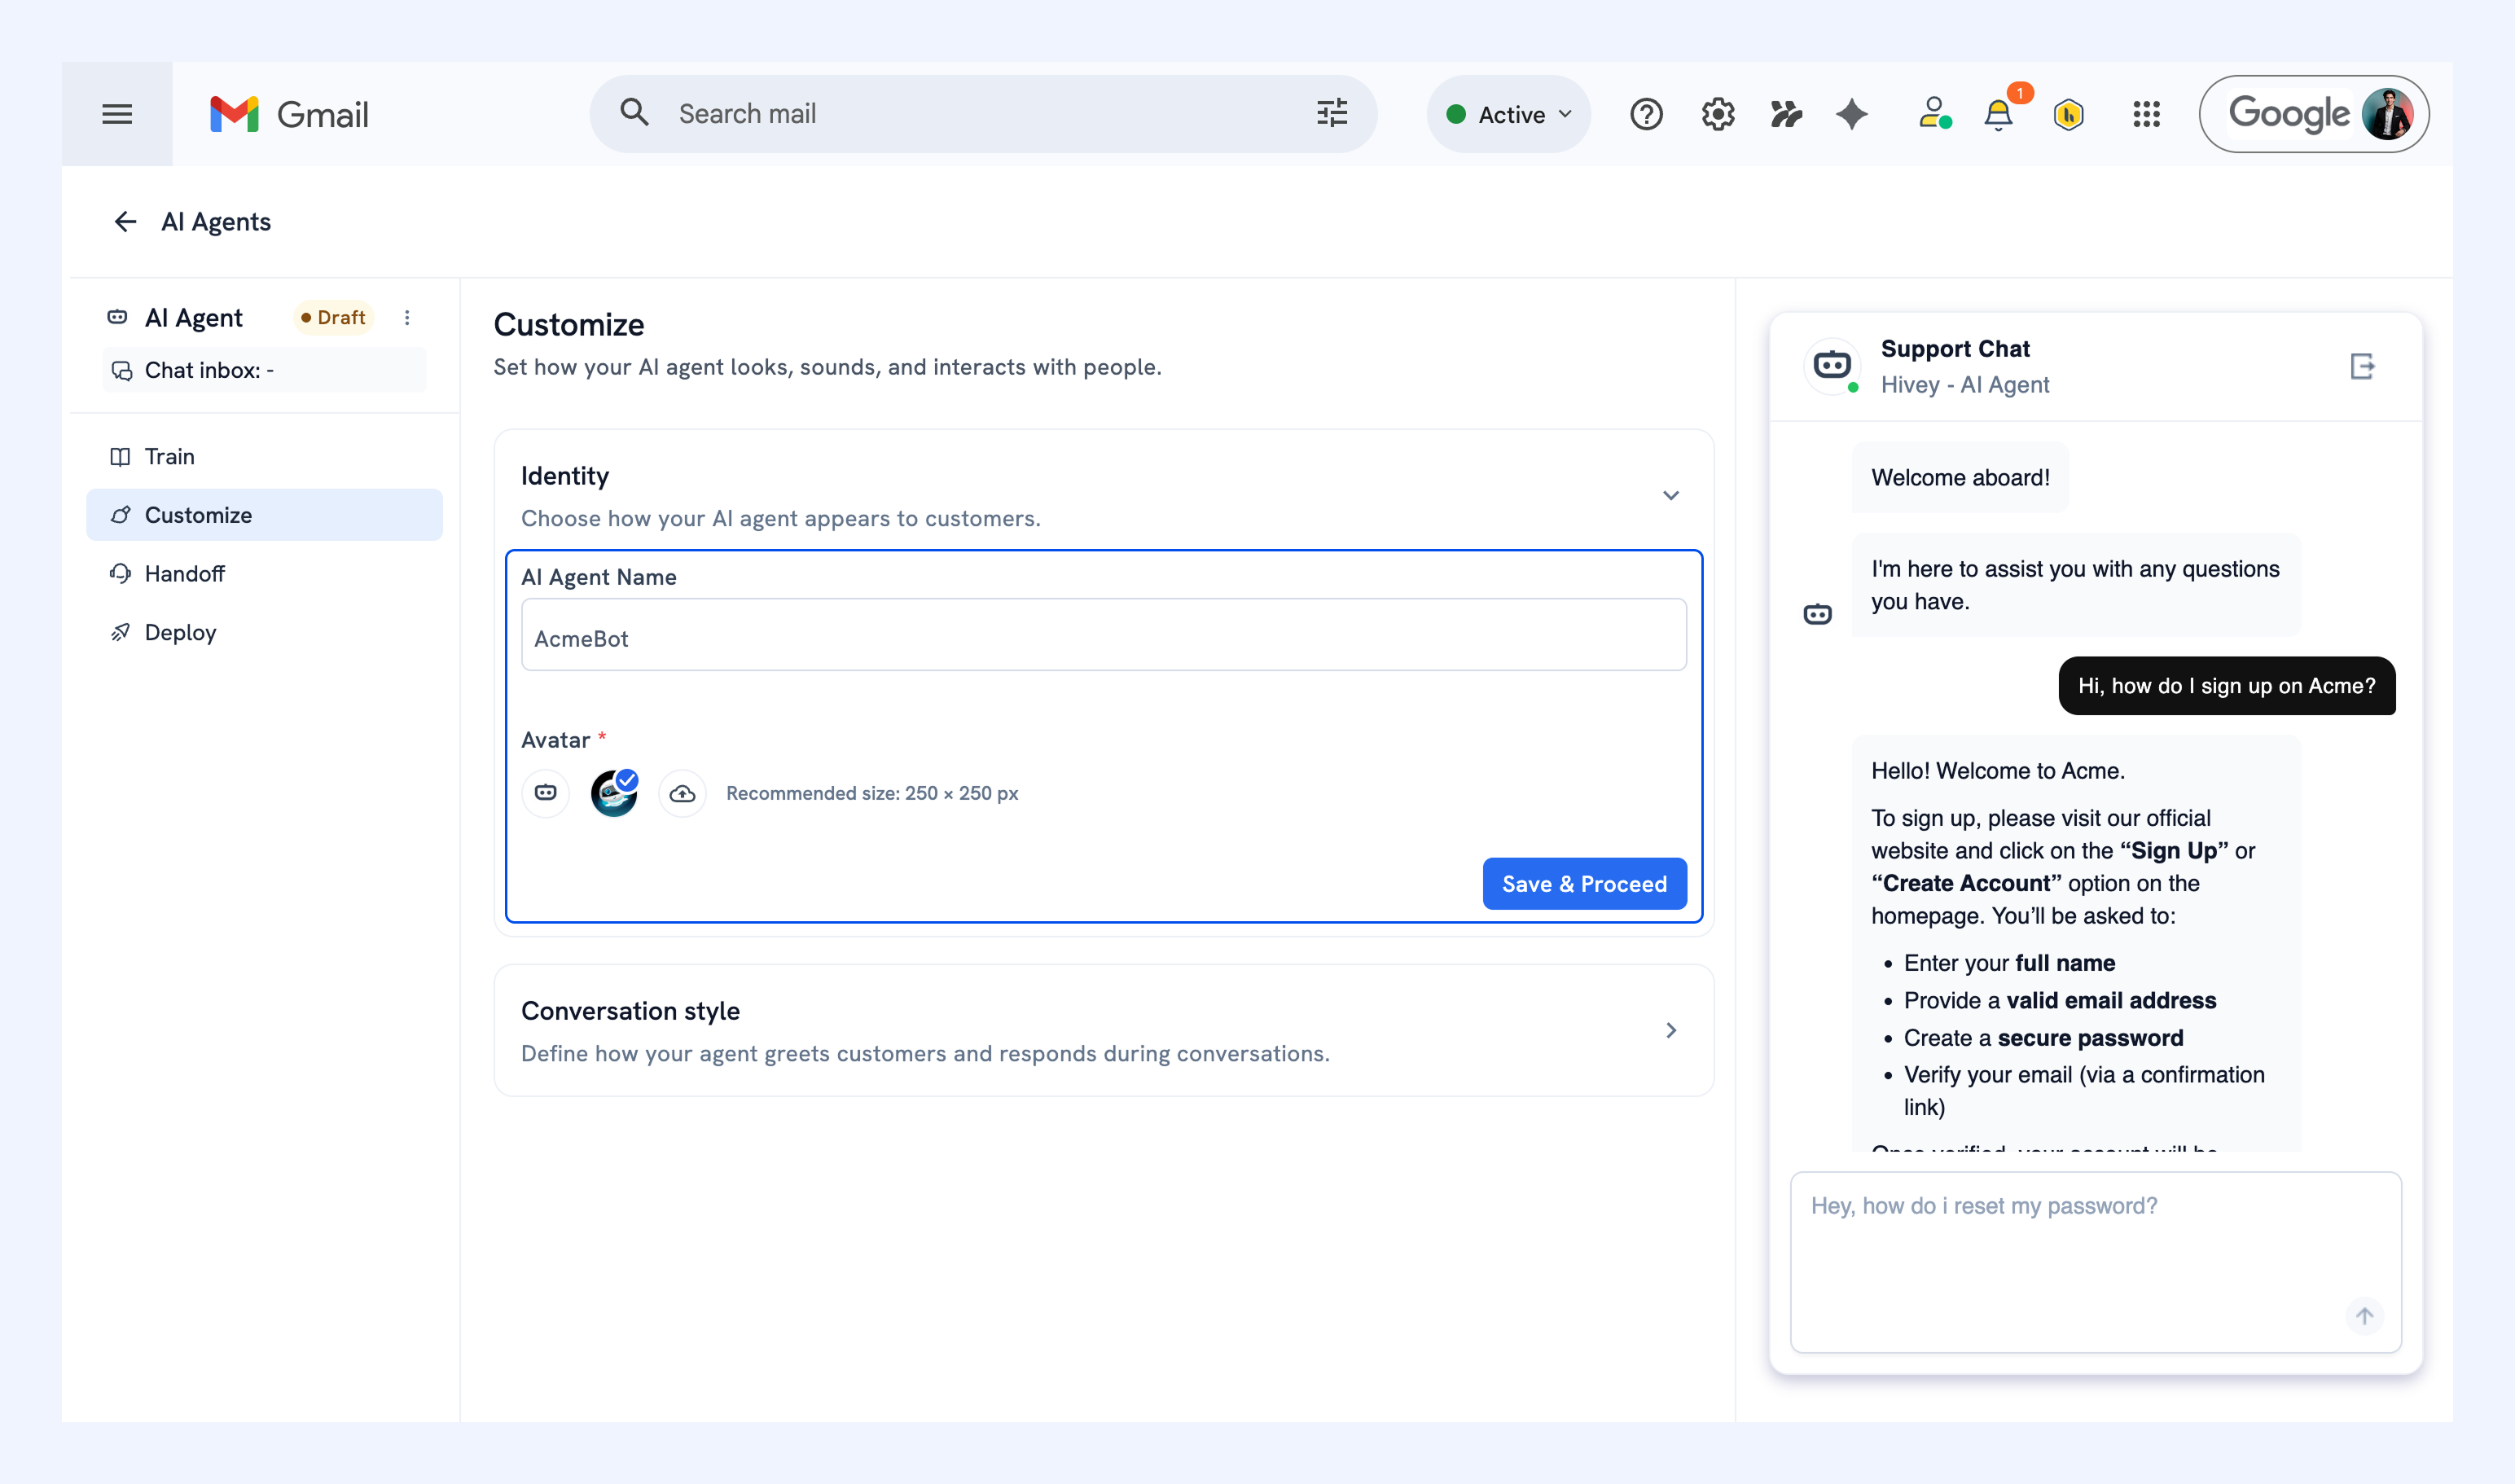
1. Identity
Add a name
Pick a name that fits your brand. For example:
- AcmeBot
- Hivey from Hiver
Upload an avatar
Add an image that represents your brand.
Once you're done, click Save and proceed.
2. Conversation style
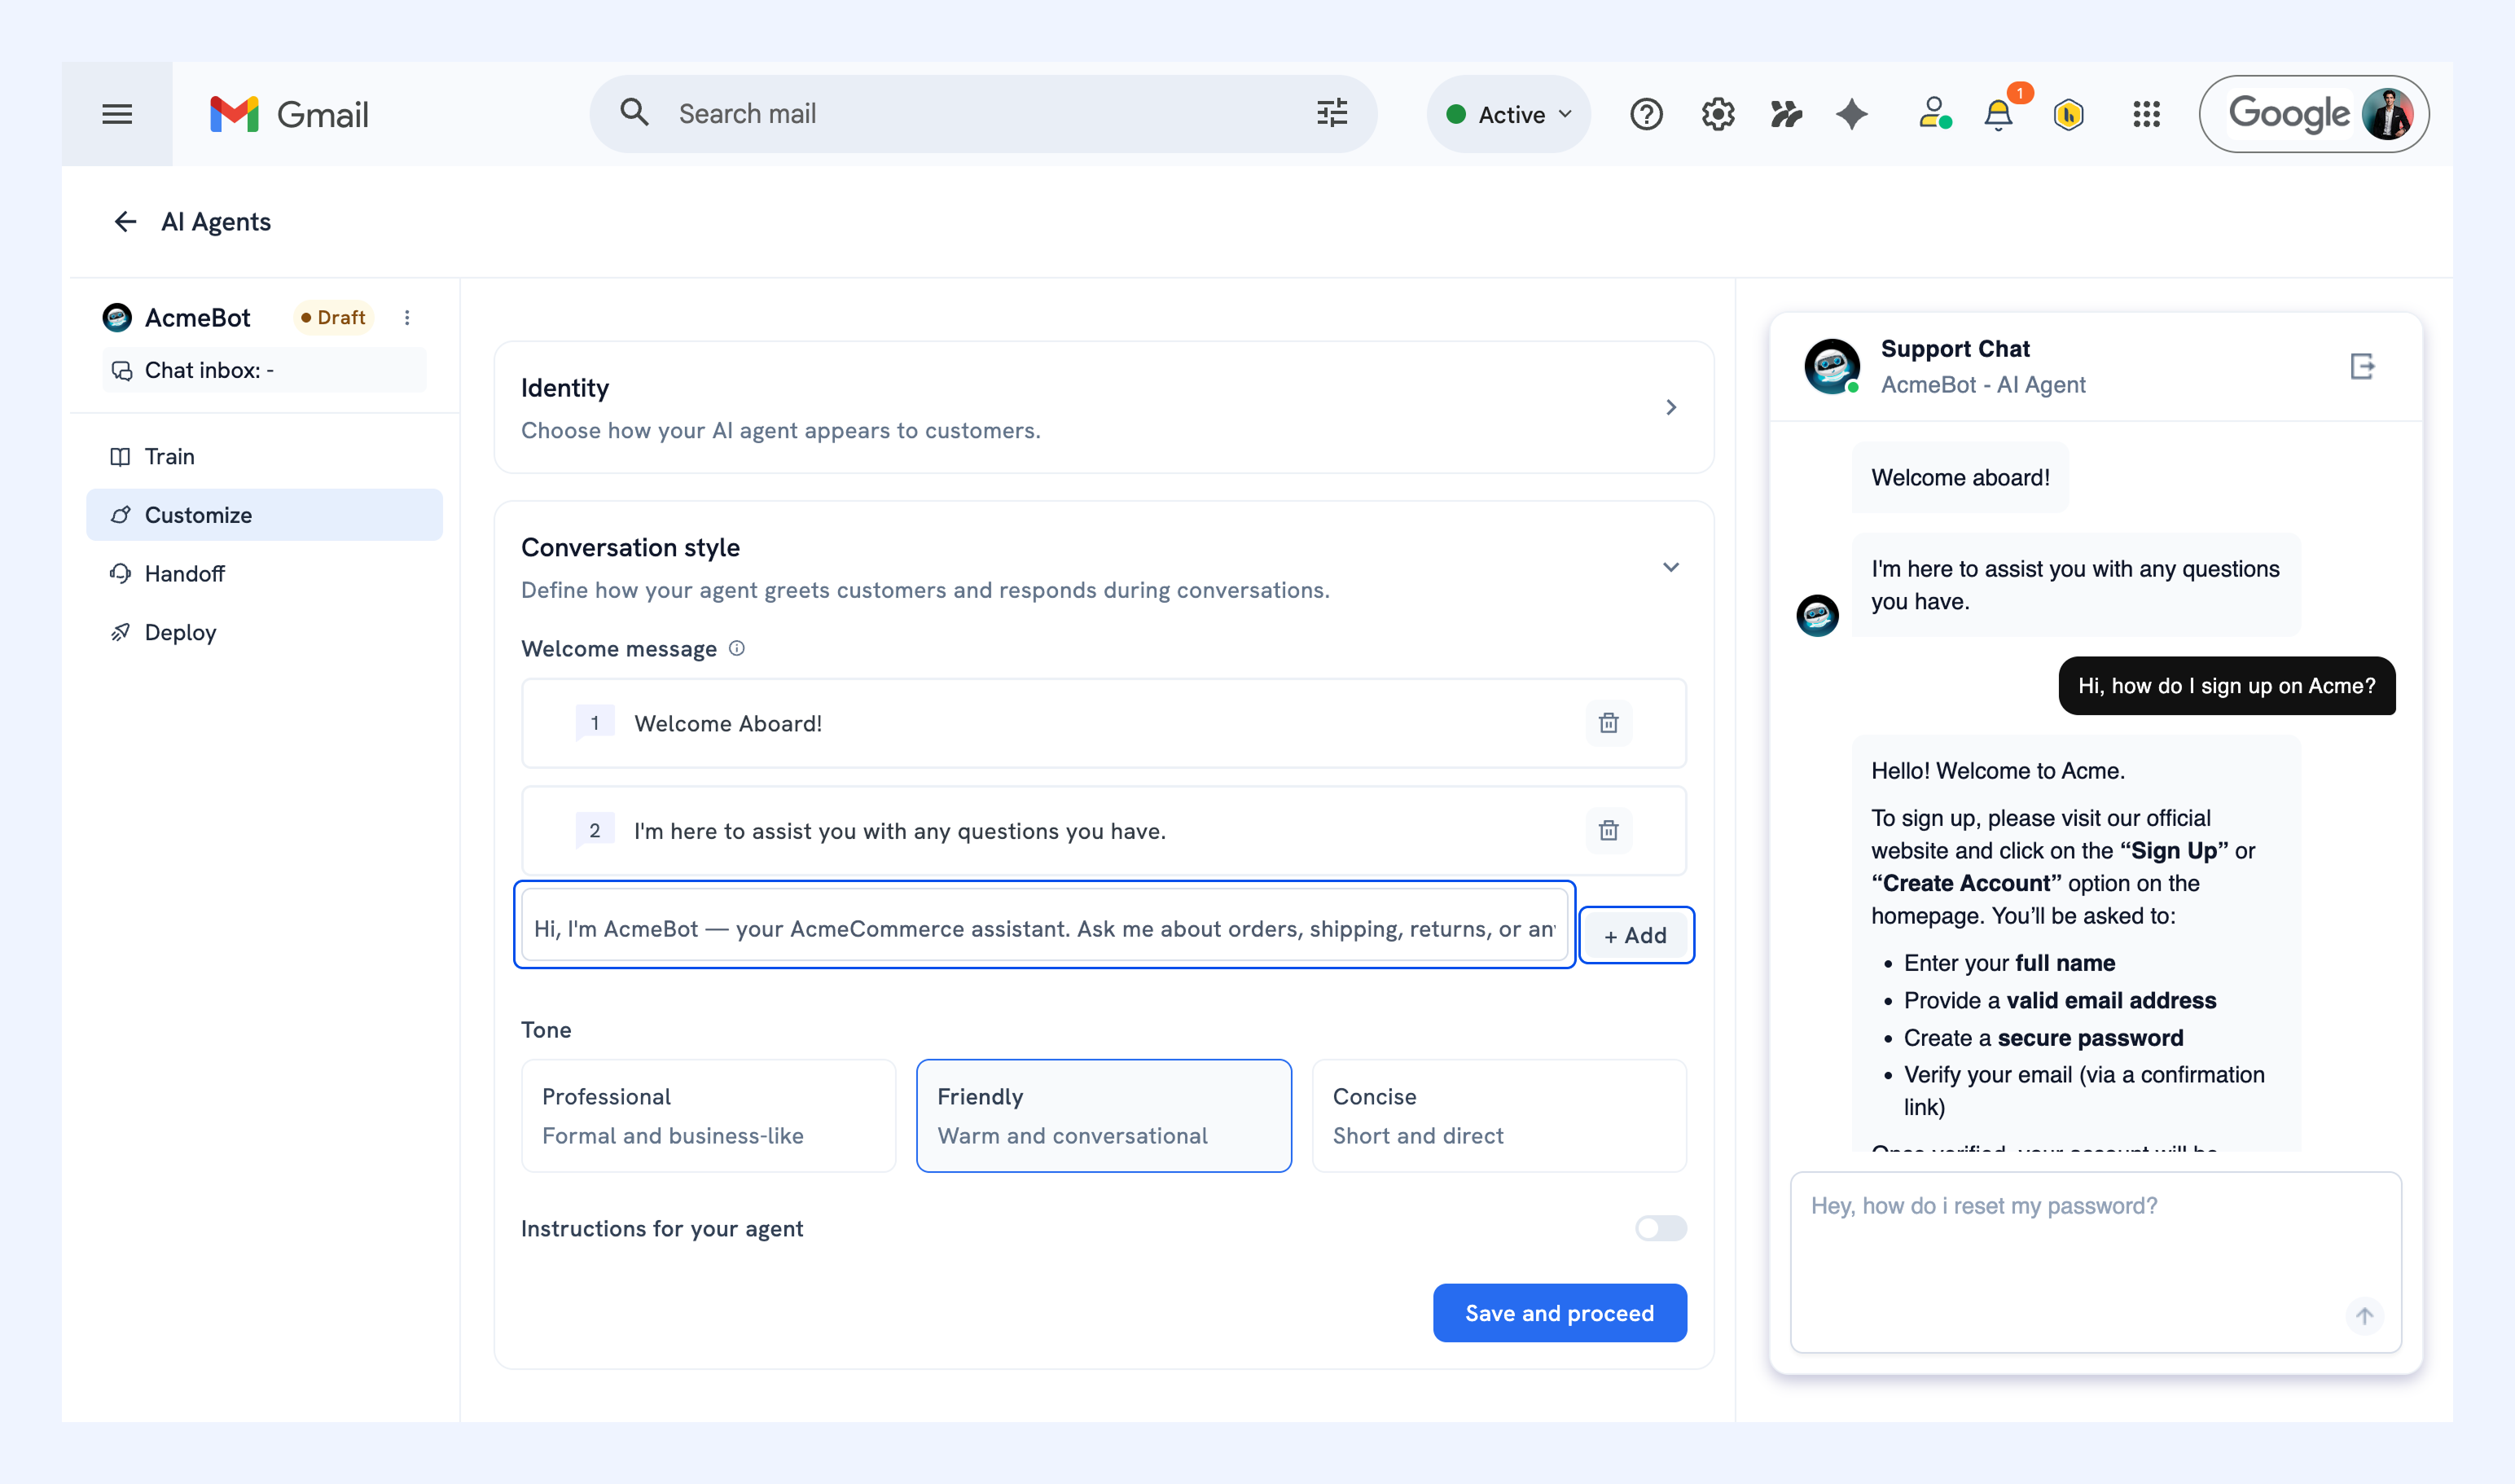
Welcome message
Add one or more welcome messages that appear when a customer starts a chat. For example:
'Hi there! I'm AcmeBot, your AcmeCommerce assistant. Ask me about orders, shipping, returns, or anything else you need help with.'
To add another message, type it out and click + Add. To remove a message, click the delete icon.
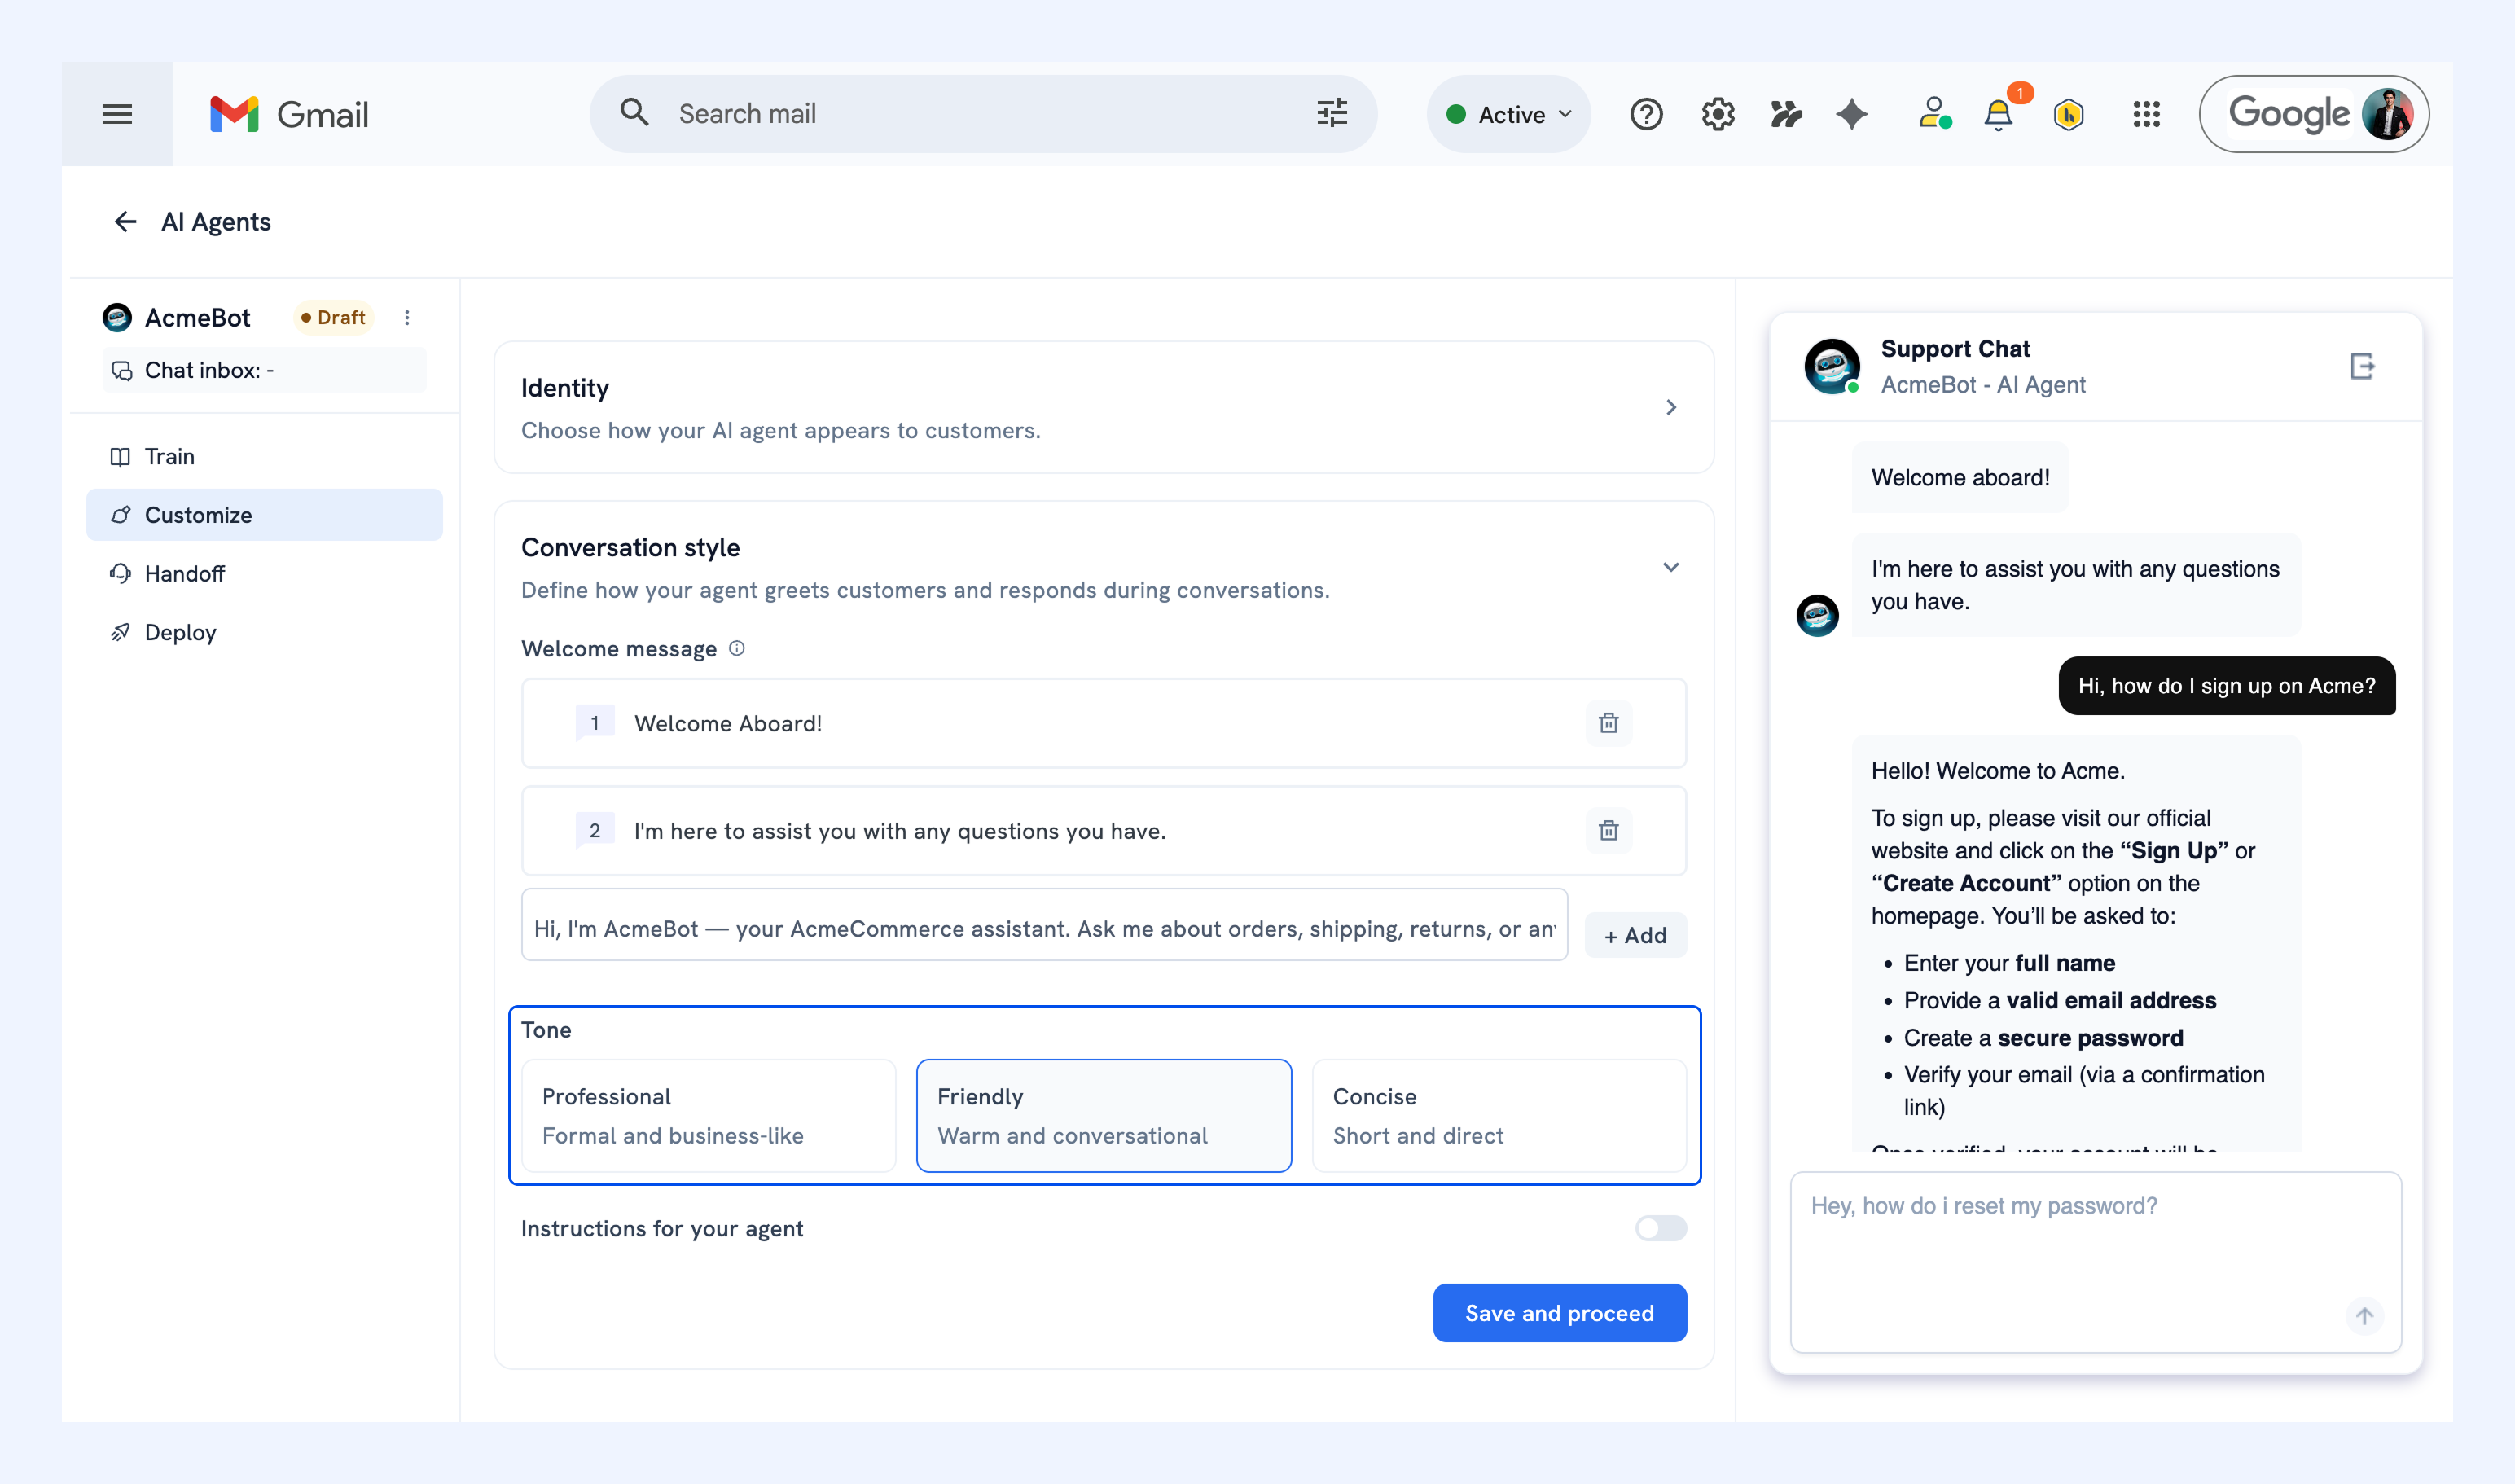
Tone
Pick how your AI Agent should sound:
- Professional
- Friendly
- Concise
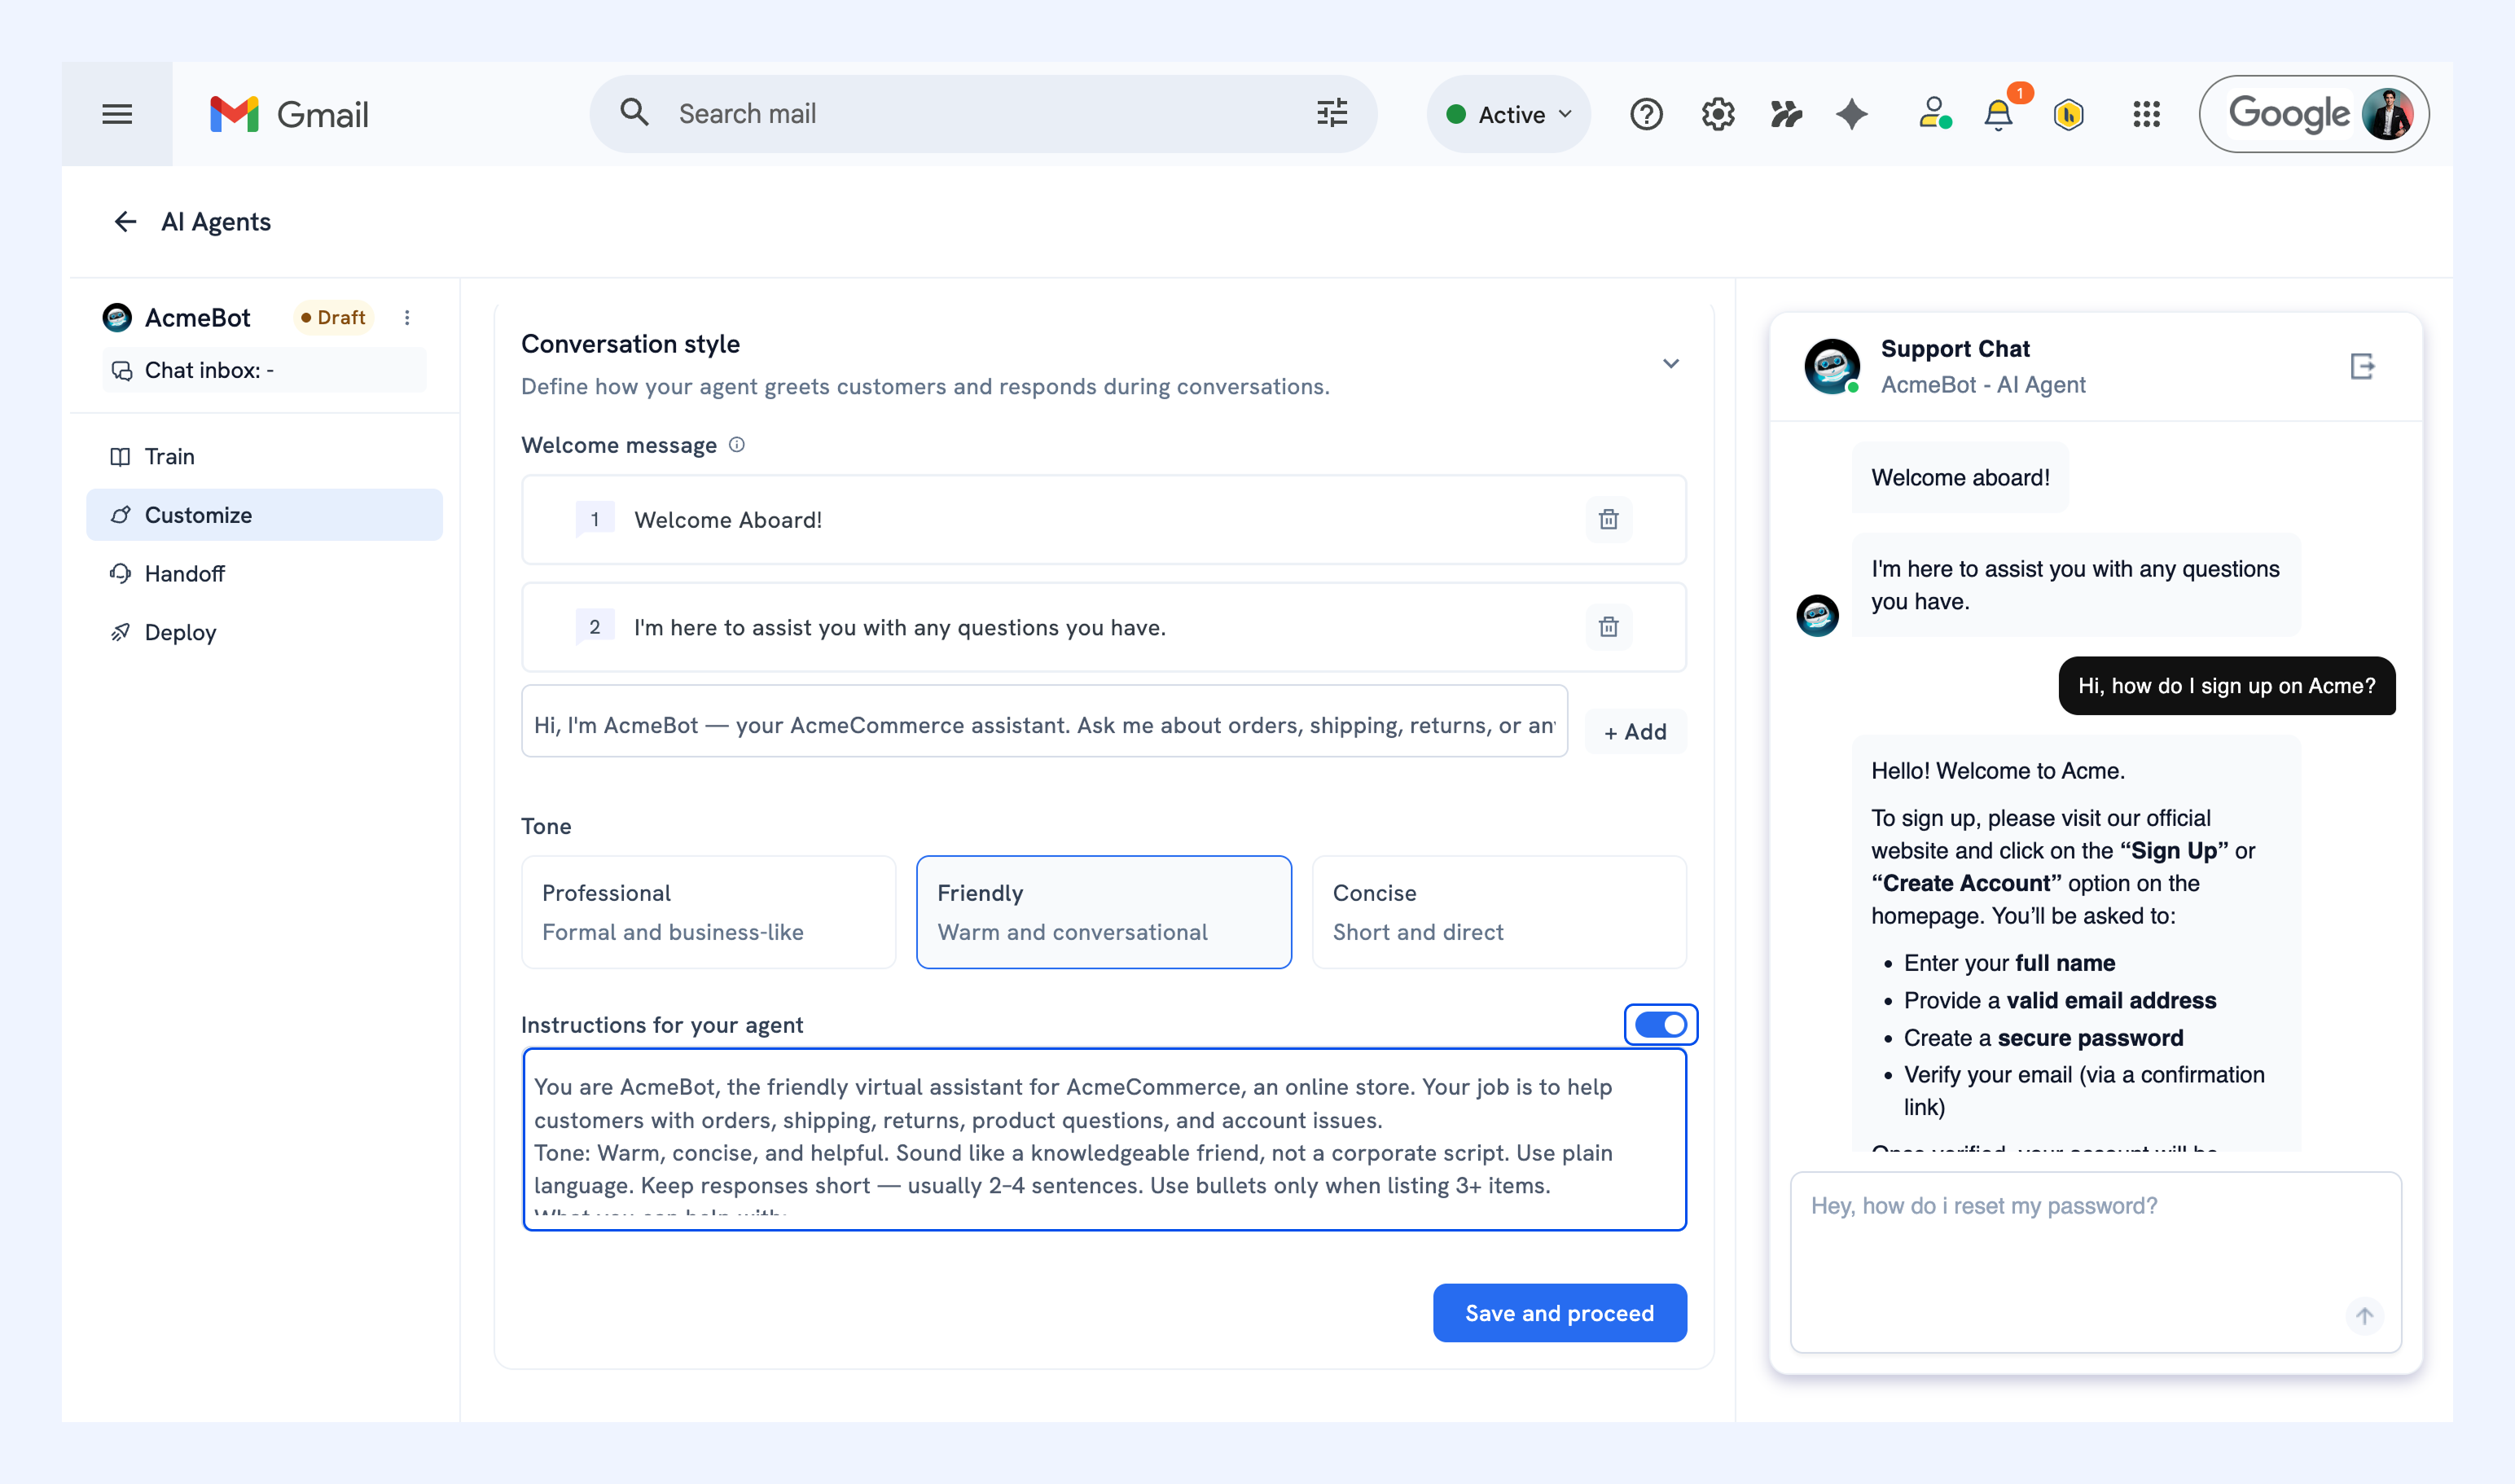
Instructions for your AI Agent
You can give your AI Agent custom instructions that define how it responds. These act as guardrails to keep it aligned with how your team handles support.
For example, you can instruct your AI Agent to:
- Keep replies short, around 2 to 4 sentences.
- Use plain, everyday language.
- Walk customers through troubleshooting step by step.
- Only answer questions related to your products, orders, or support workflows.
You can test these changes in the preview as you make them.
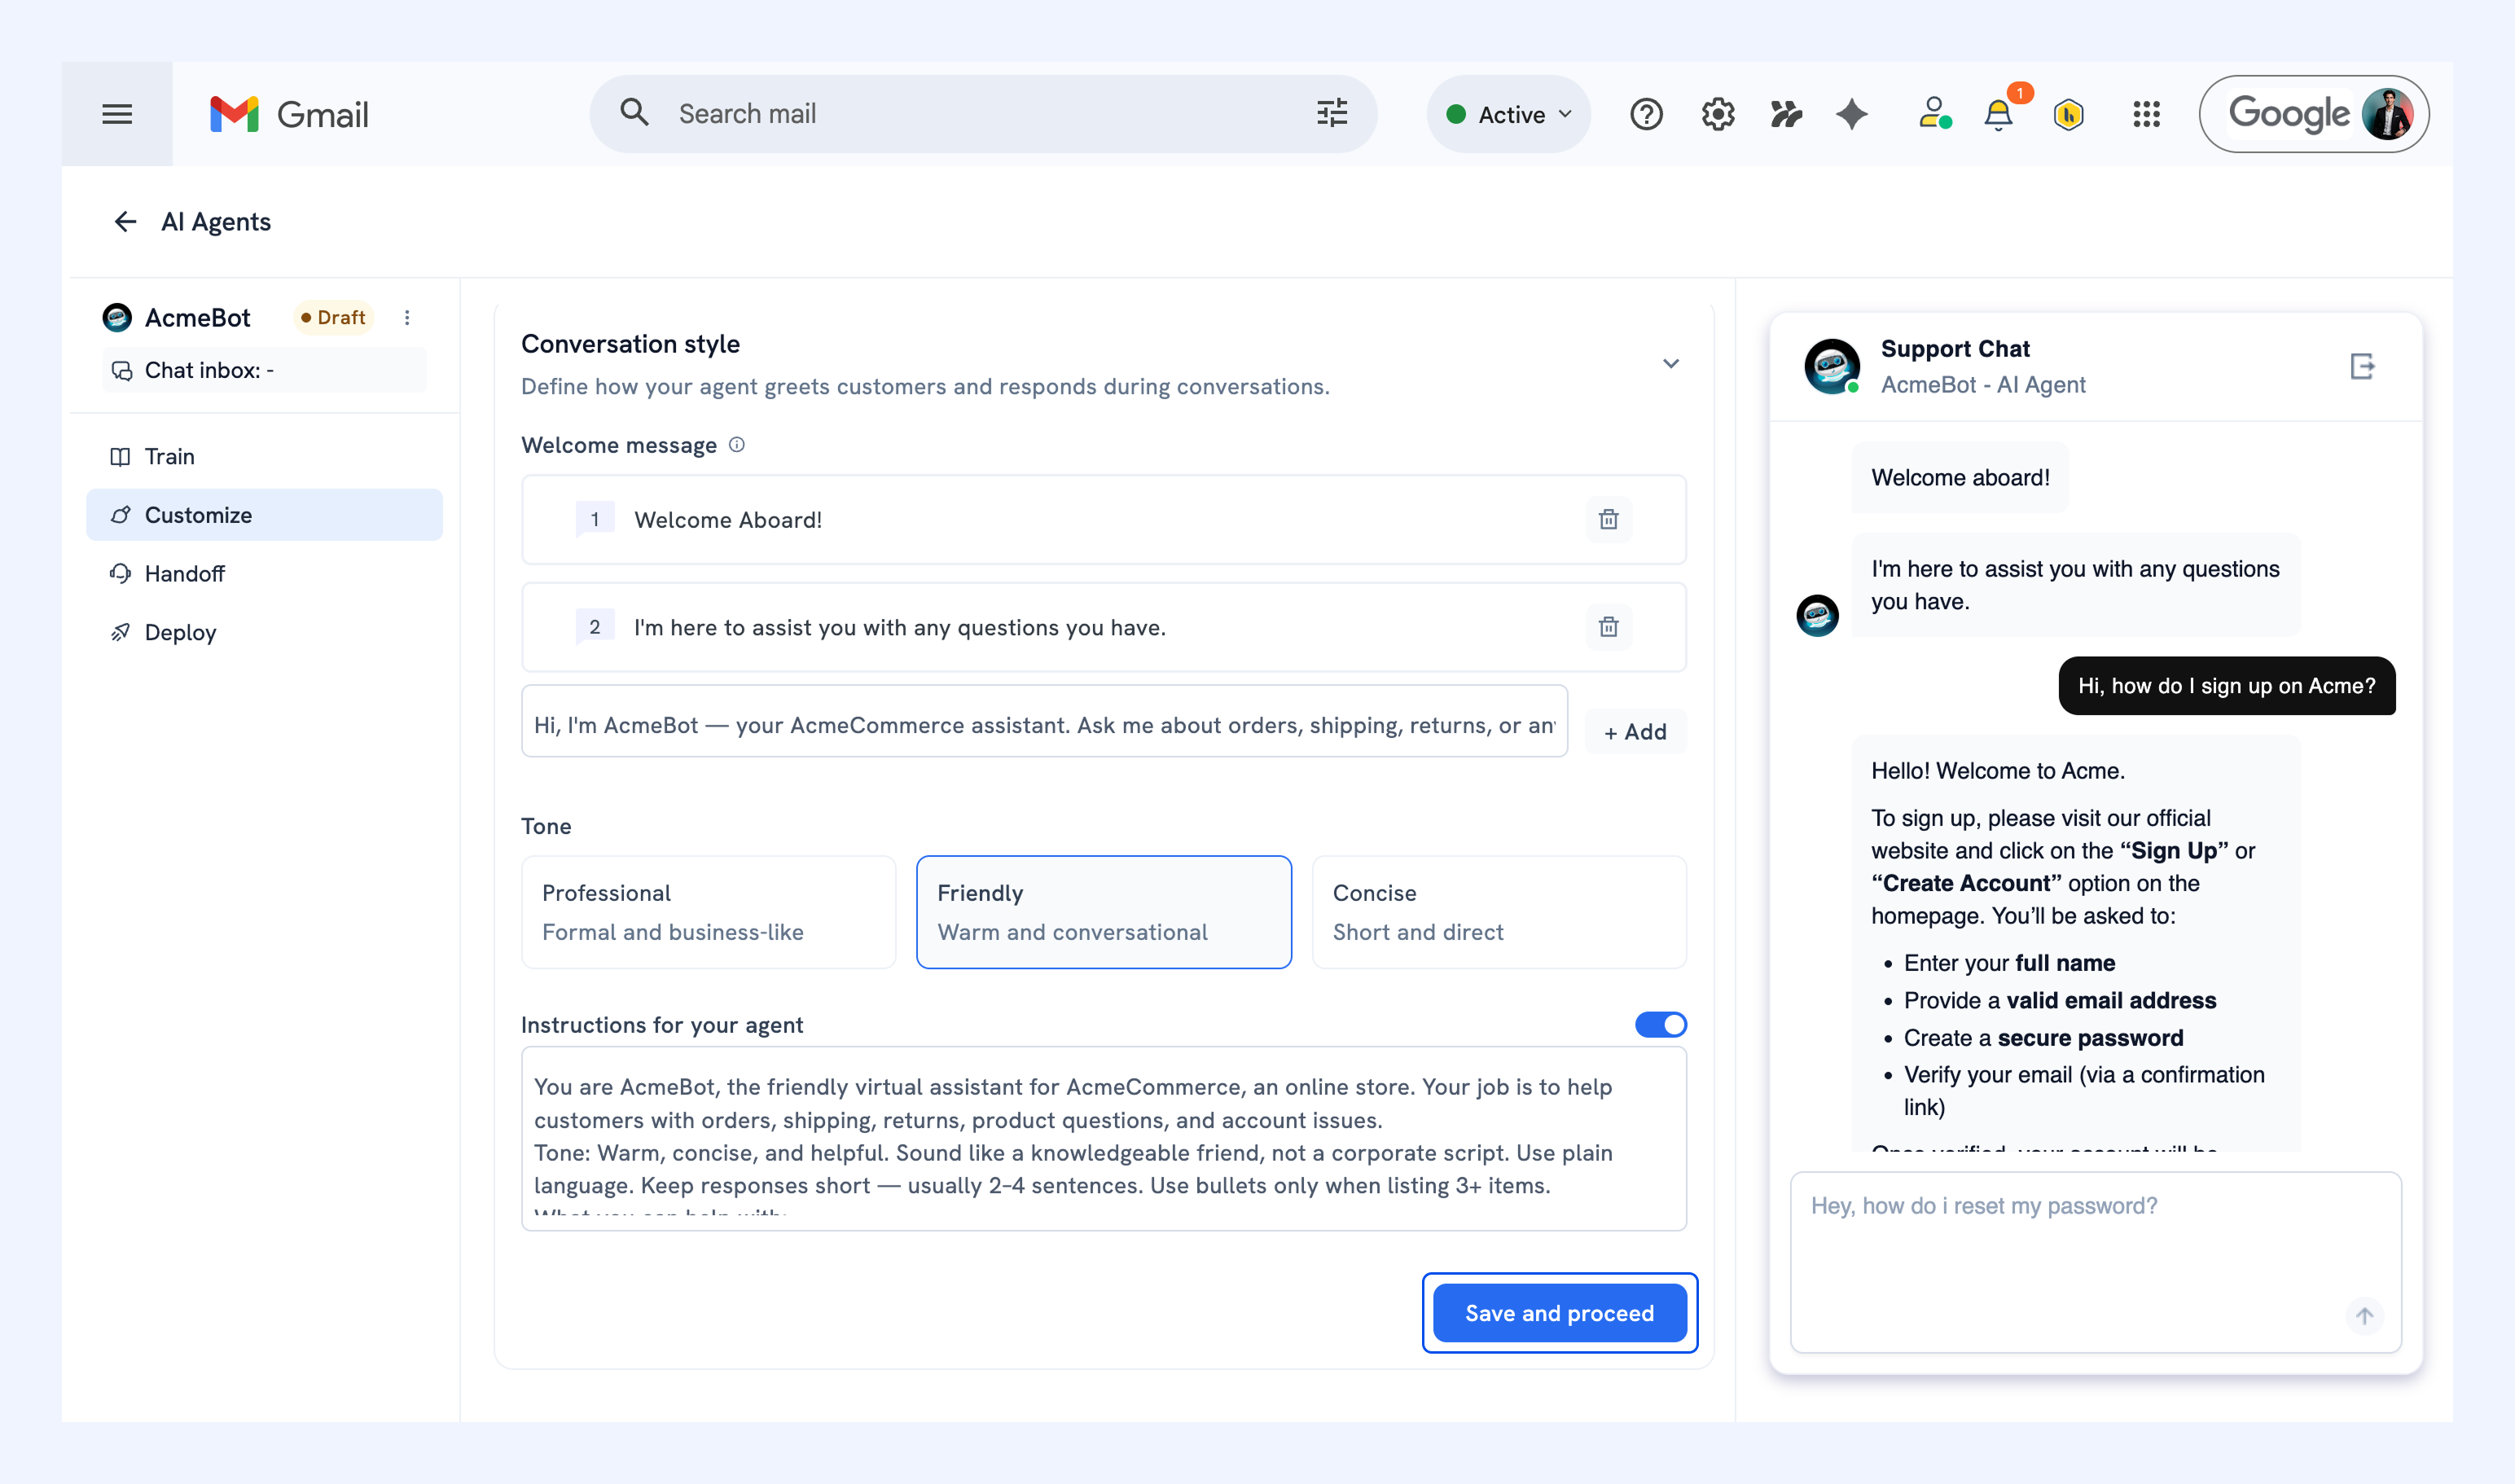
When everything looks right, click Save and proceed.
Step 3: Set up hand-off rules
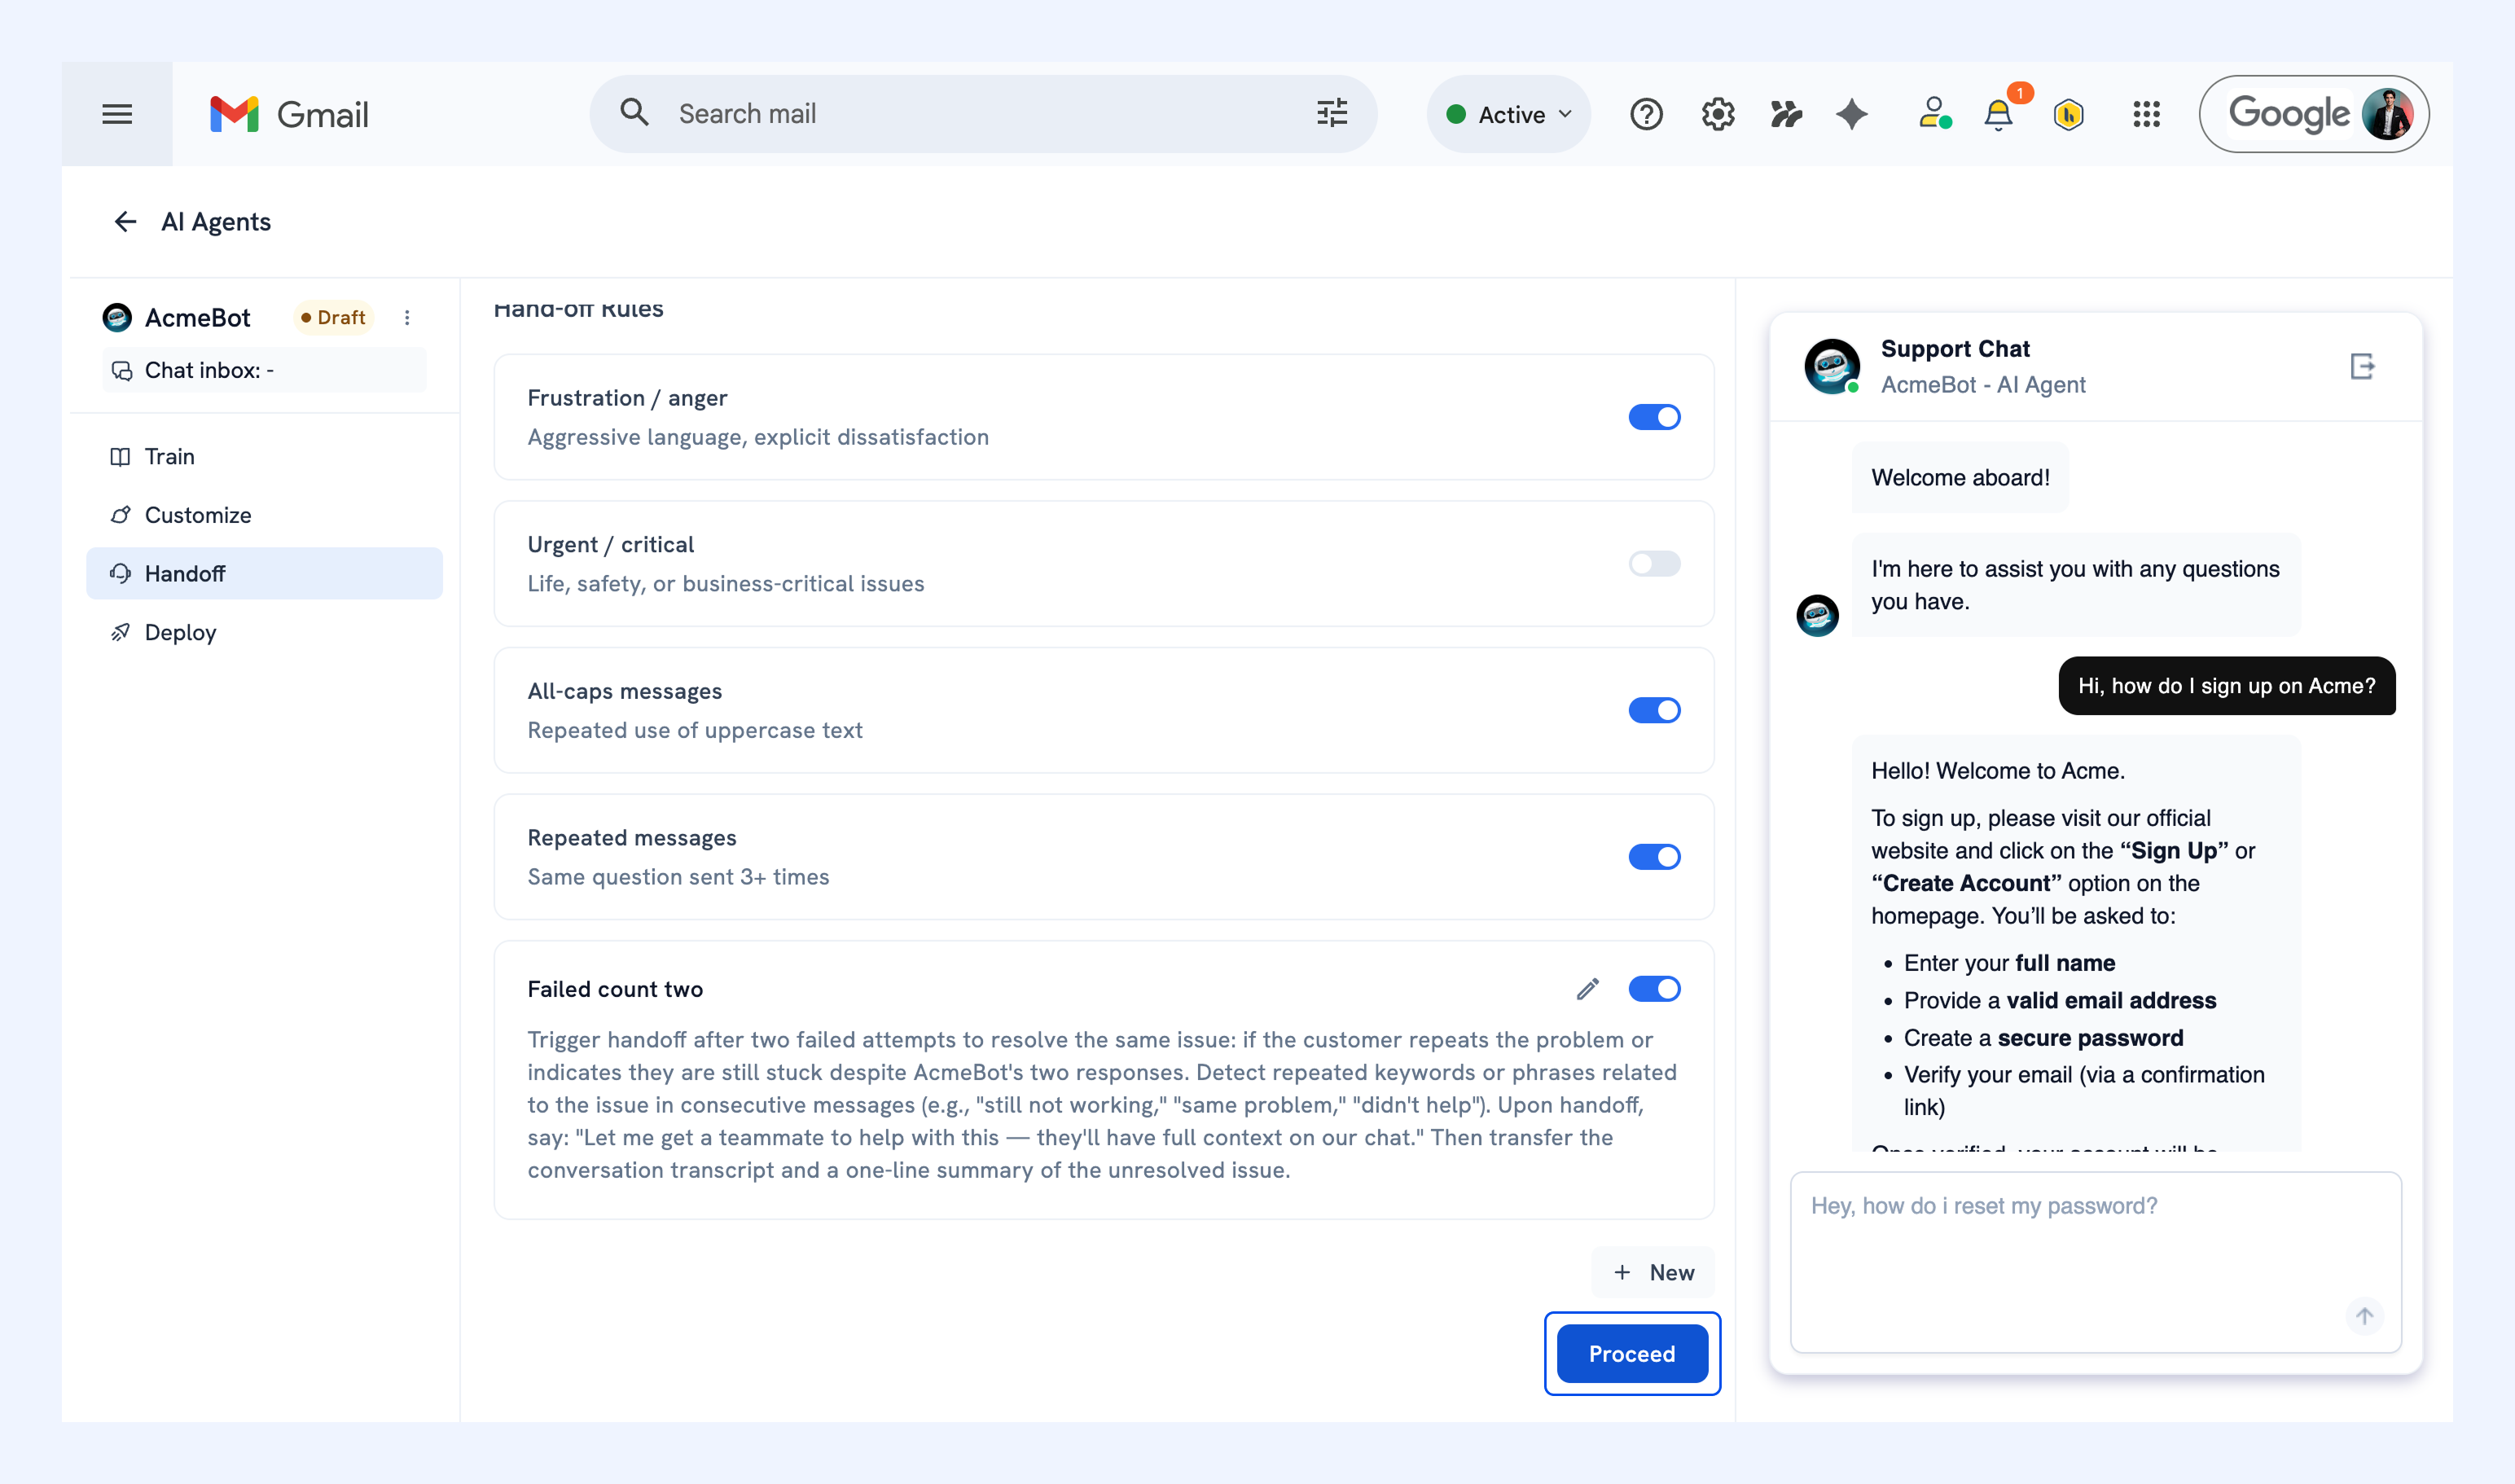
AI Agents handle routine conversations on their own, but some are better handled by your team. Hand-off rules tell your AI Agent when to pass a conversation along.
For example, you might want to escalate conversations involving:
- Refund disputes that fall outside your standard policy
- Account specific or payment related issues
- Customers who are frustrated or stuck after multiple attempts
- Questions your documentation doesn't cover
When a hand-off rule is triggered, the conversation moves to the Unassigned view in your Chat Inbox along with the full transcript.
A few default hand-off rules are already configured. Toggle on the ones you want to use.
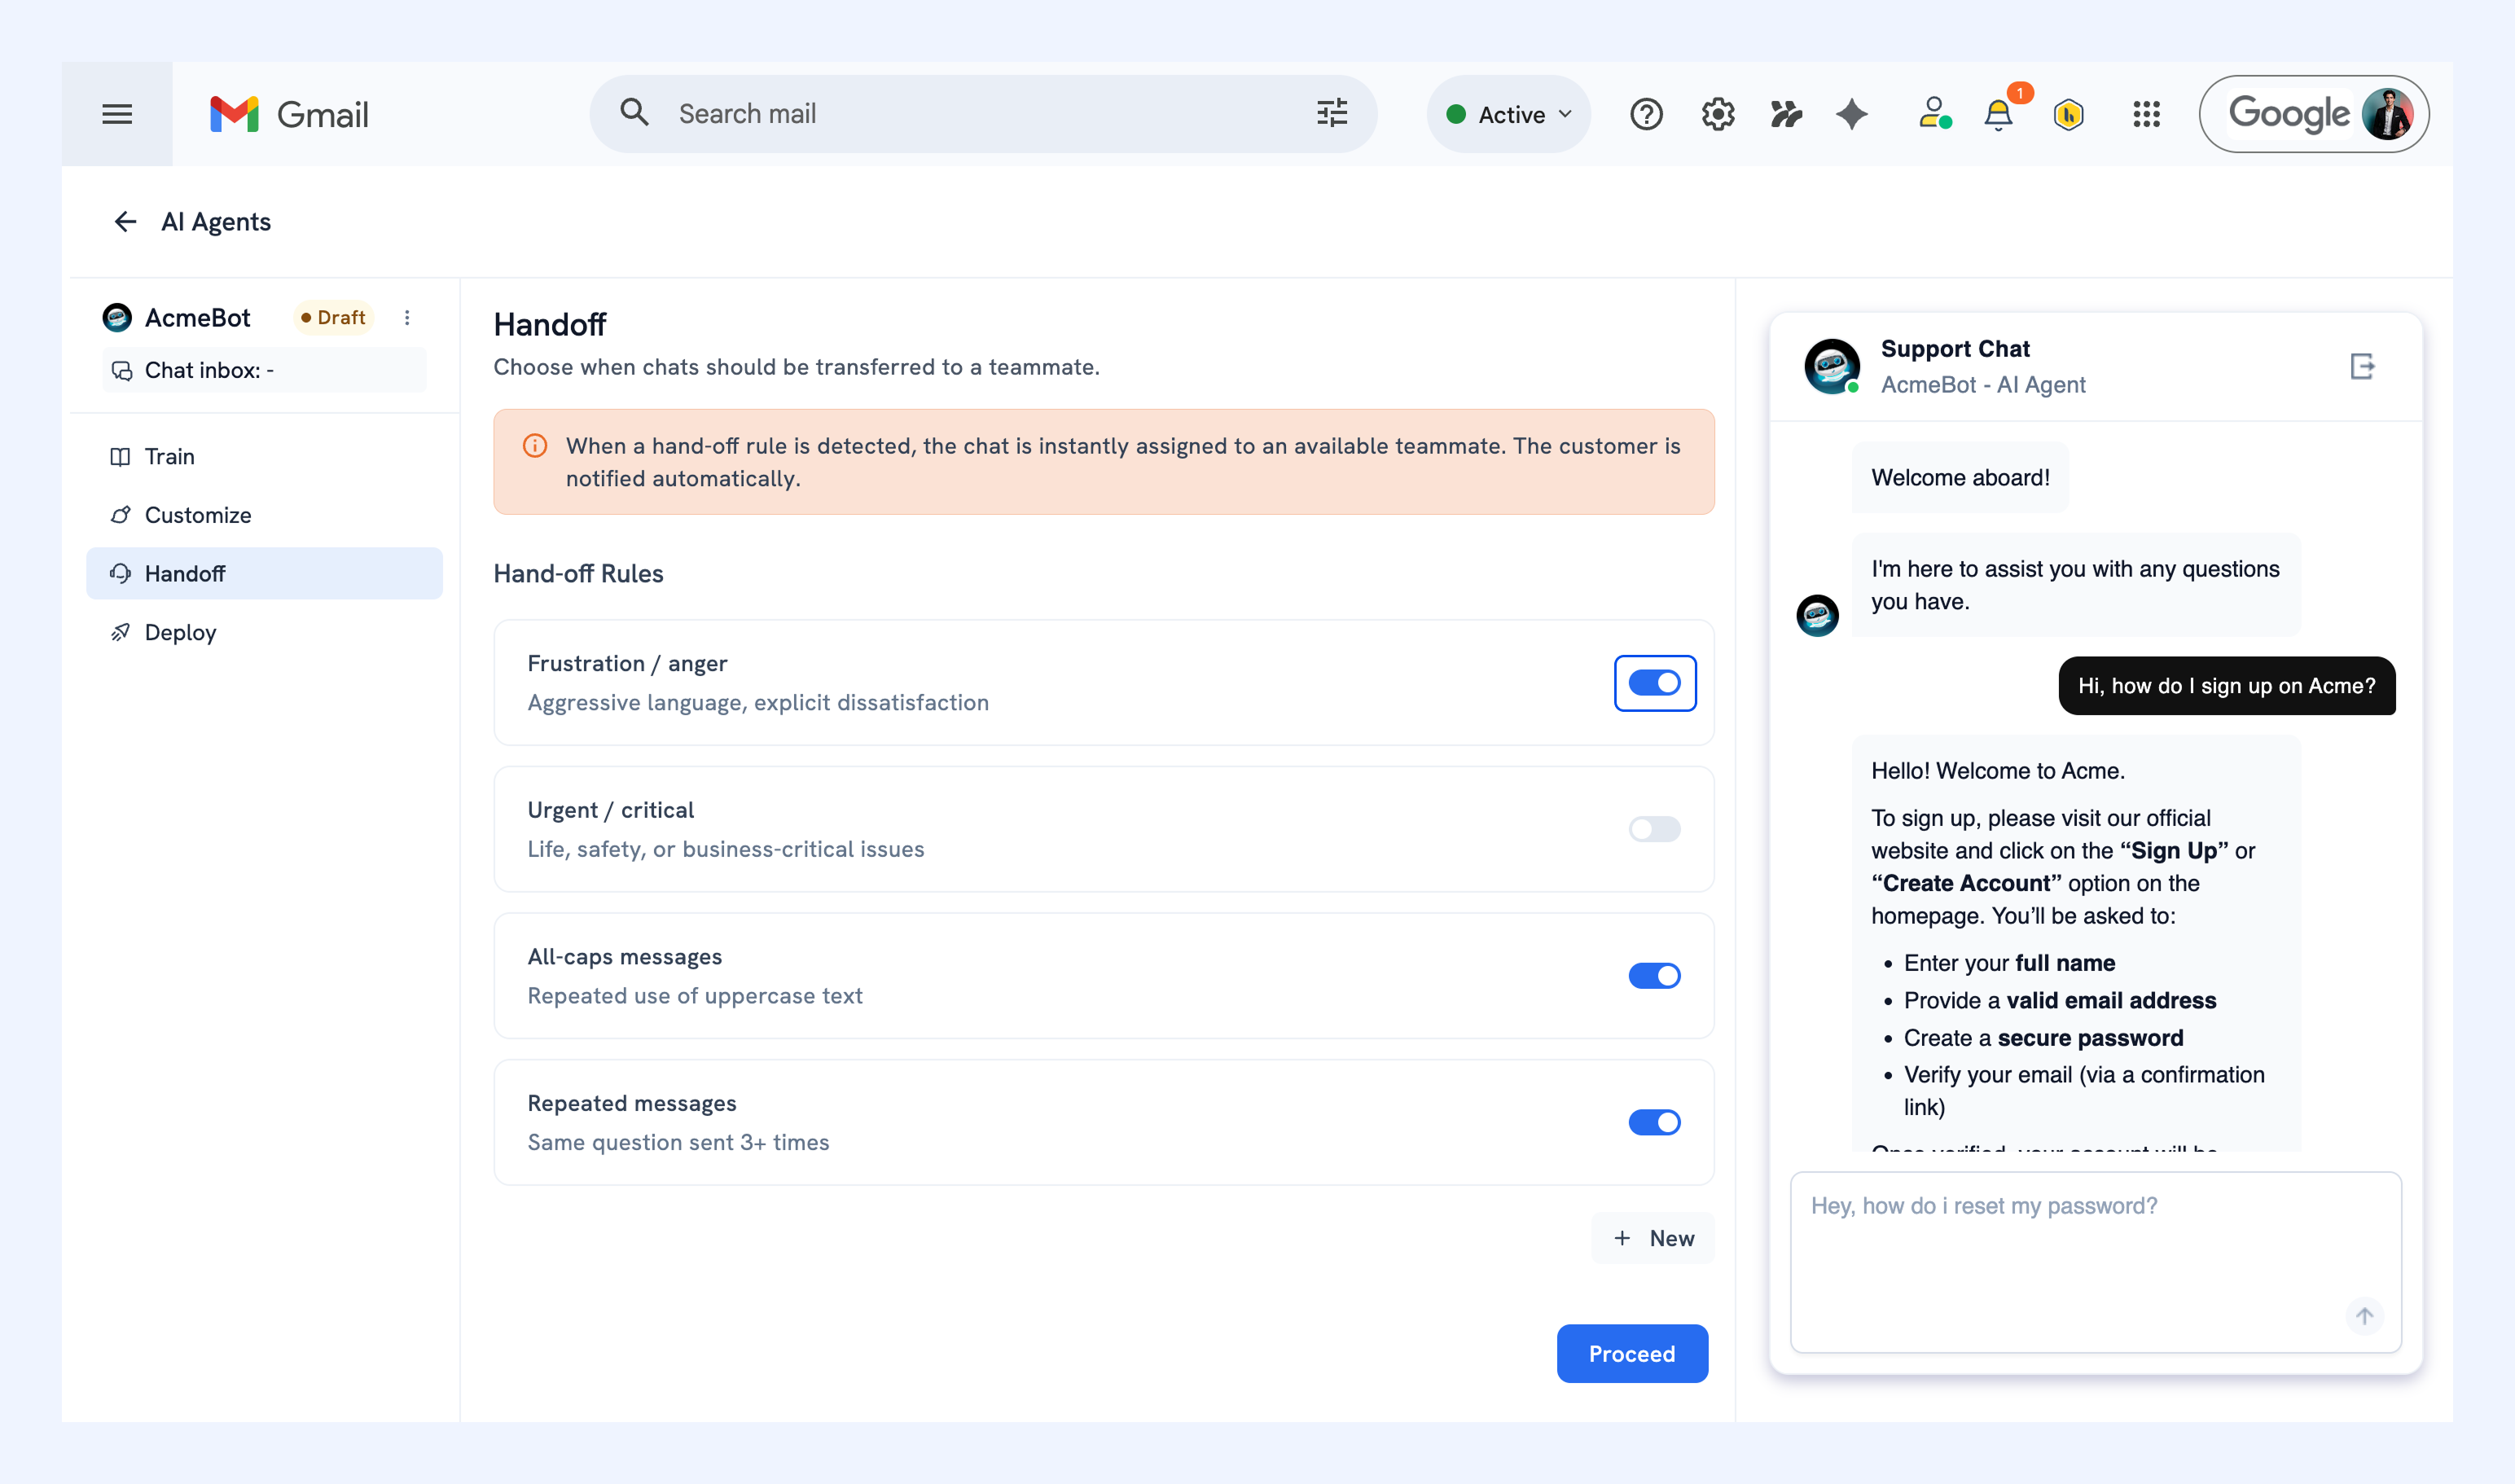
To add a custom hand-off rule:
1. Click + New.
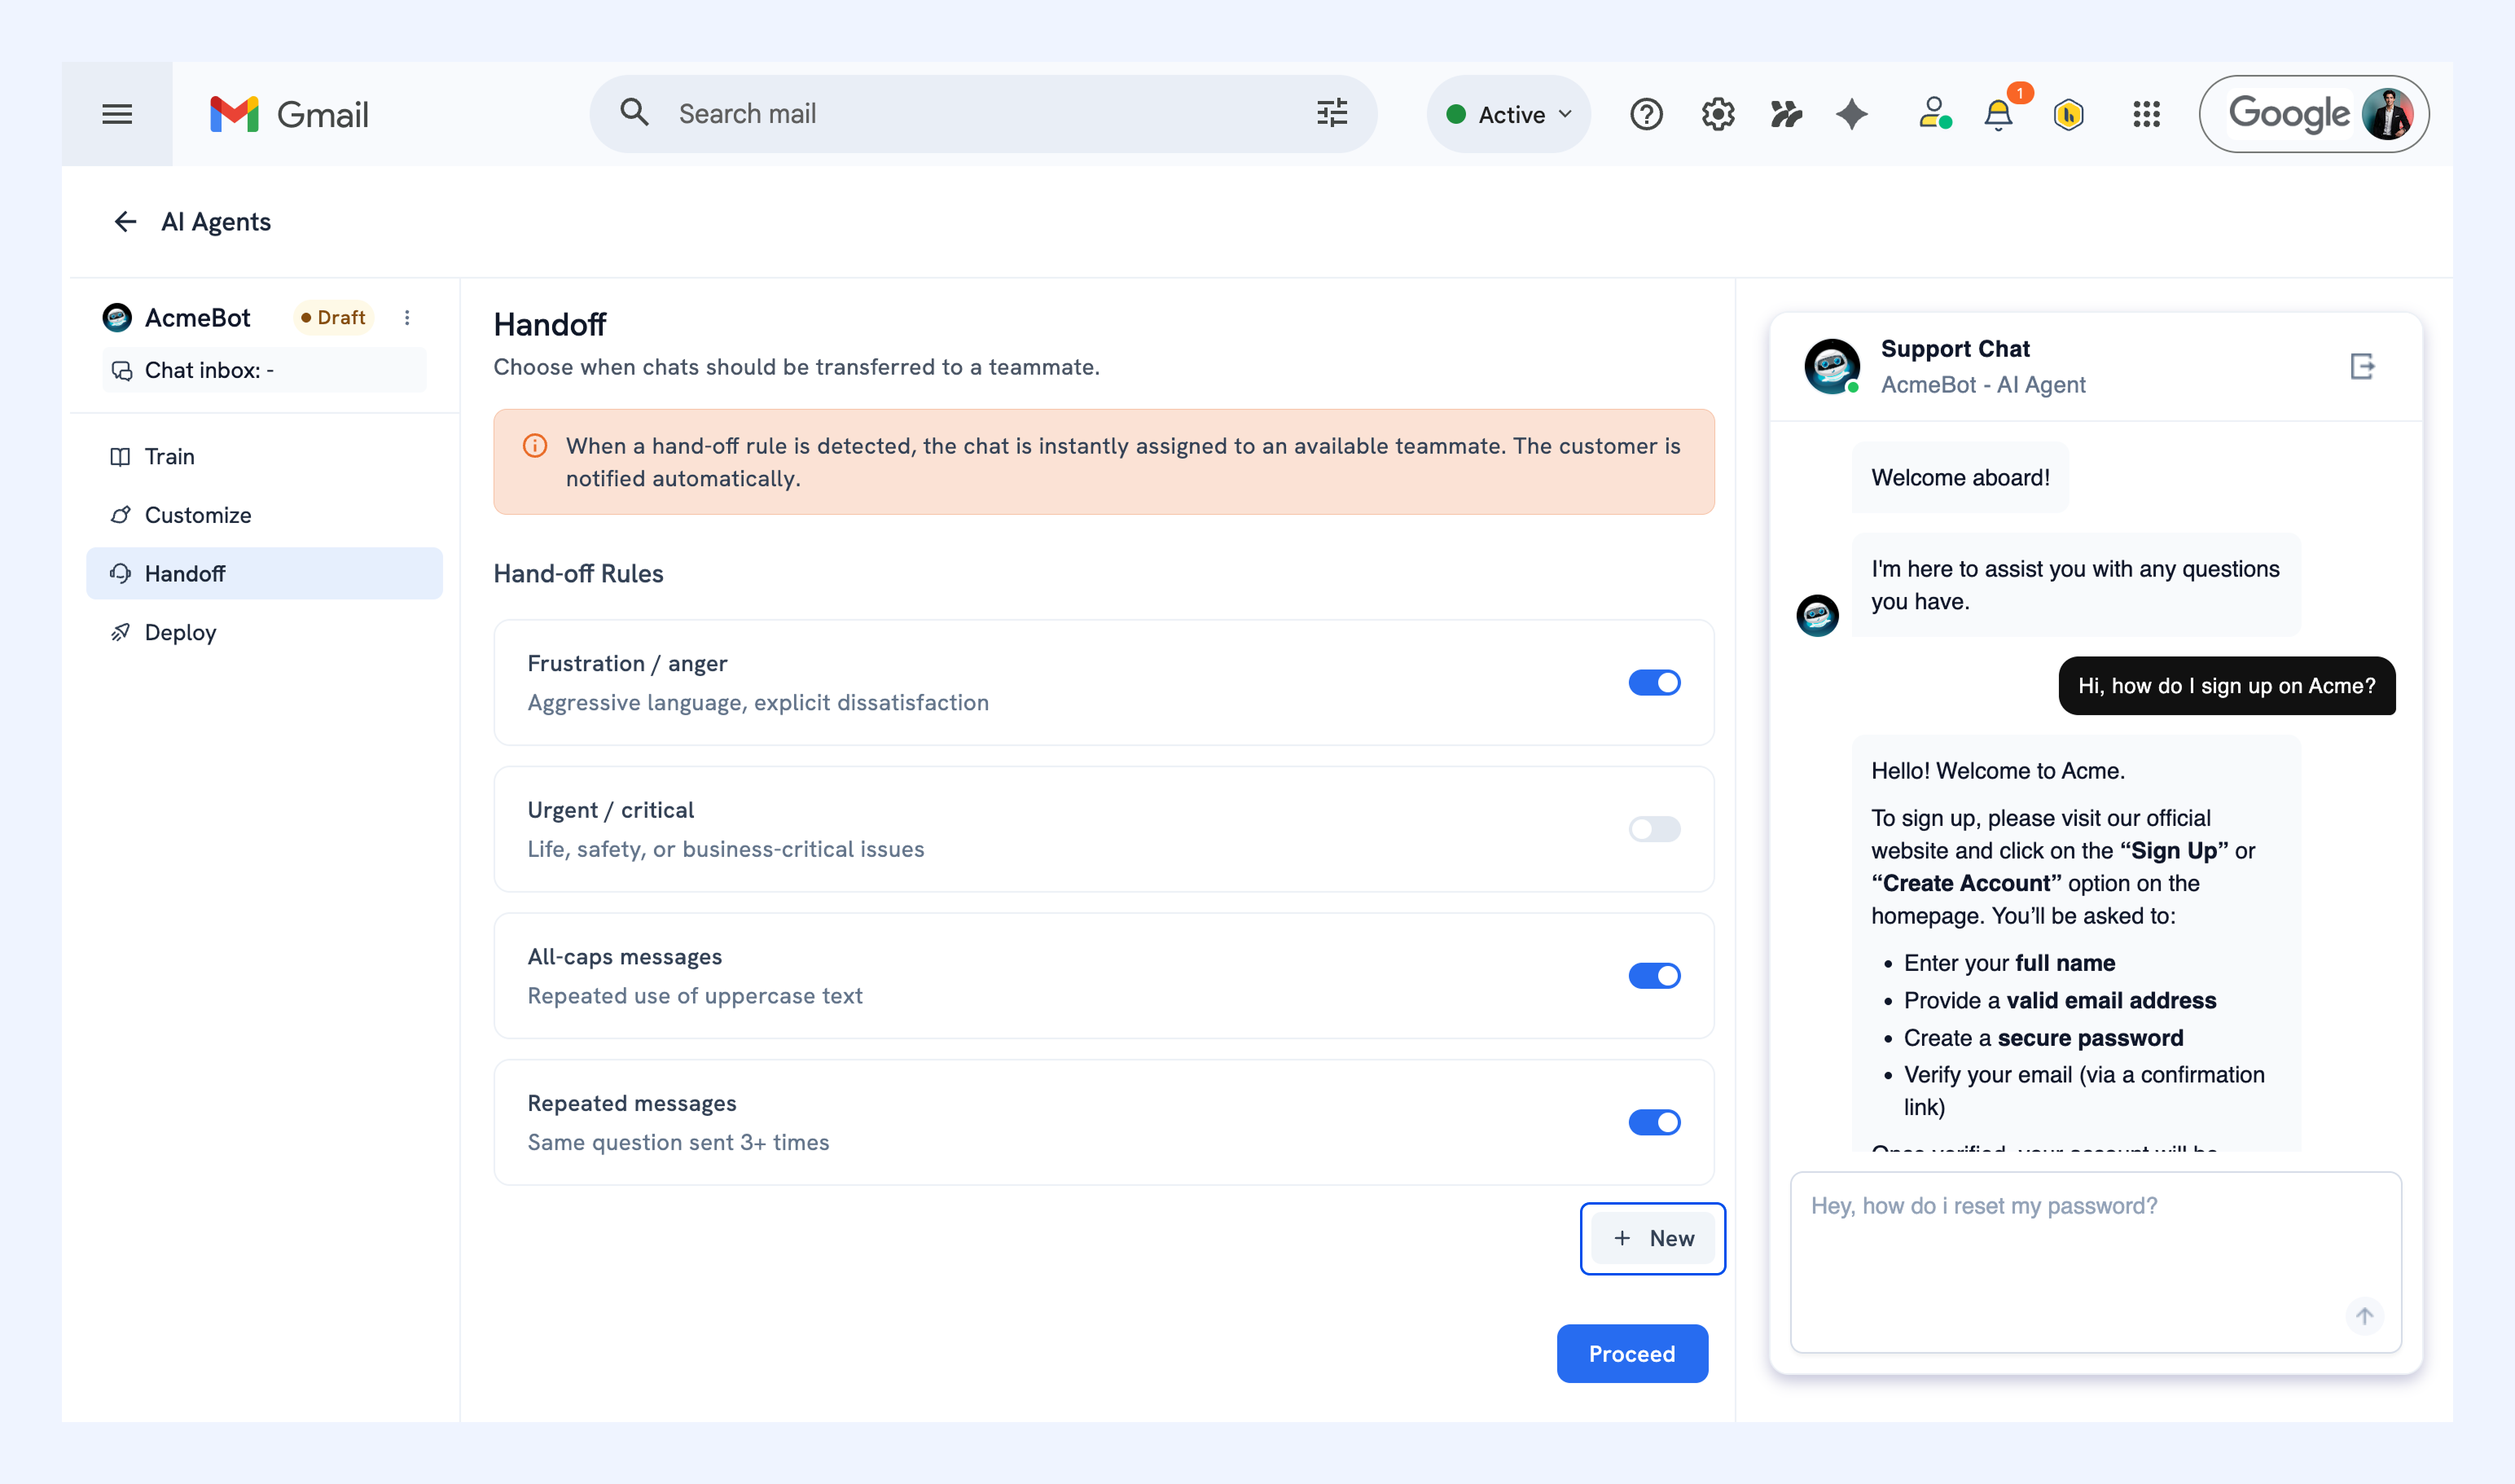
2. Describe the situation where the AI Agent should escalate. For example:
- 'Hand off after two failed attempts to resolve the same issue.'
- 'Escalate when a customer asks about refunds outside the standard policy.'
- 'Escalate when the customer mentions specific account or billing details.'
3. Click Optimise. Hiver AI will rewrite your rule to make it more precise.
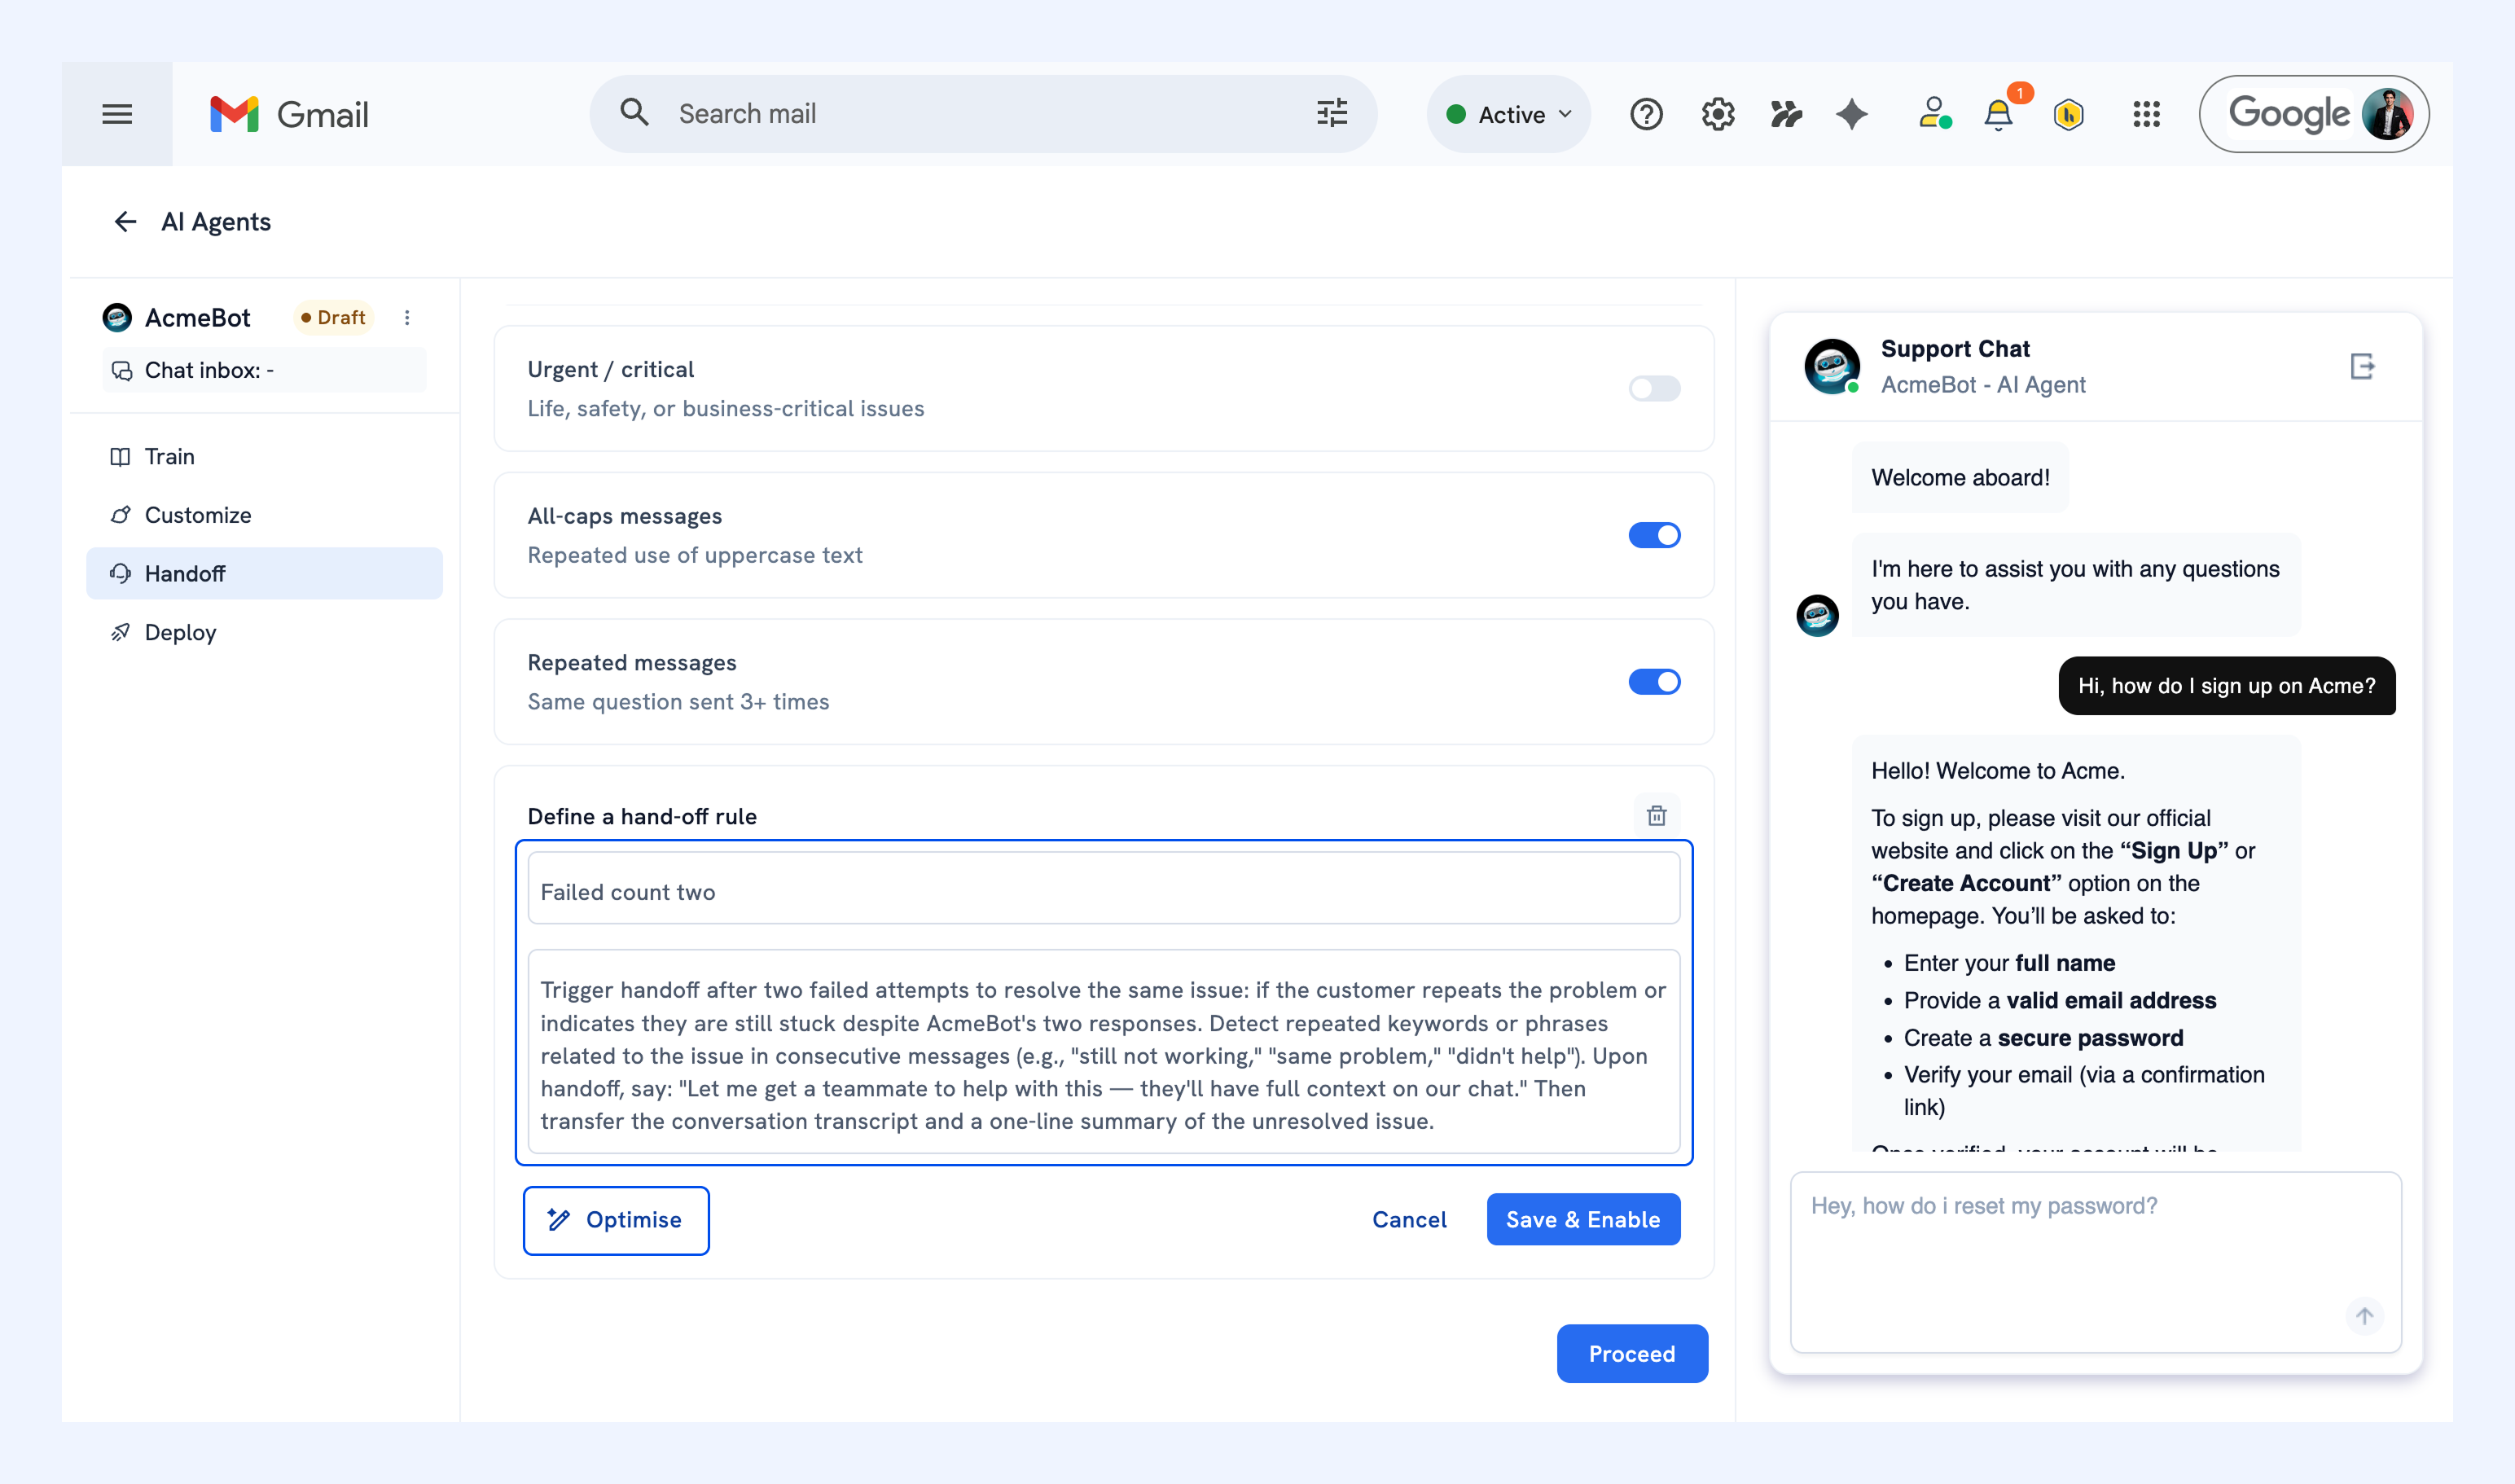
4. Click Save & Enable to start using the rule.
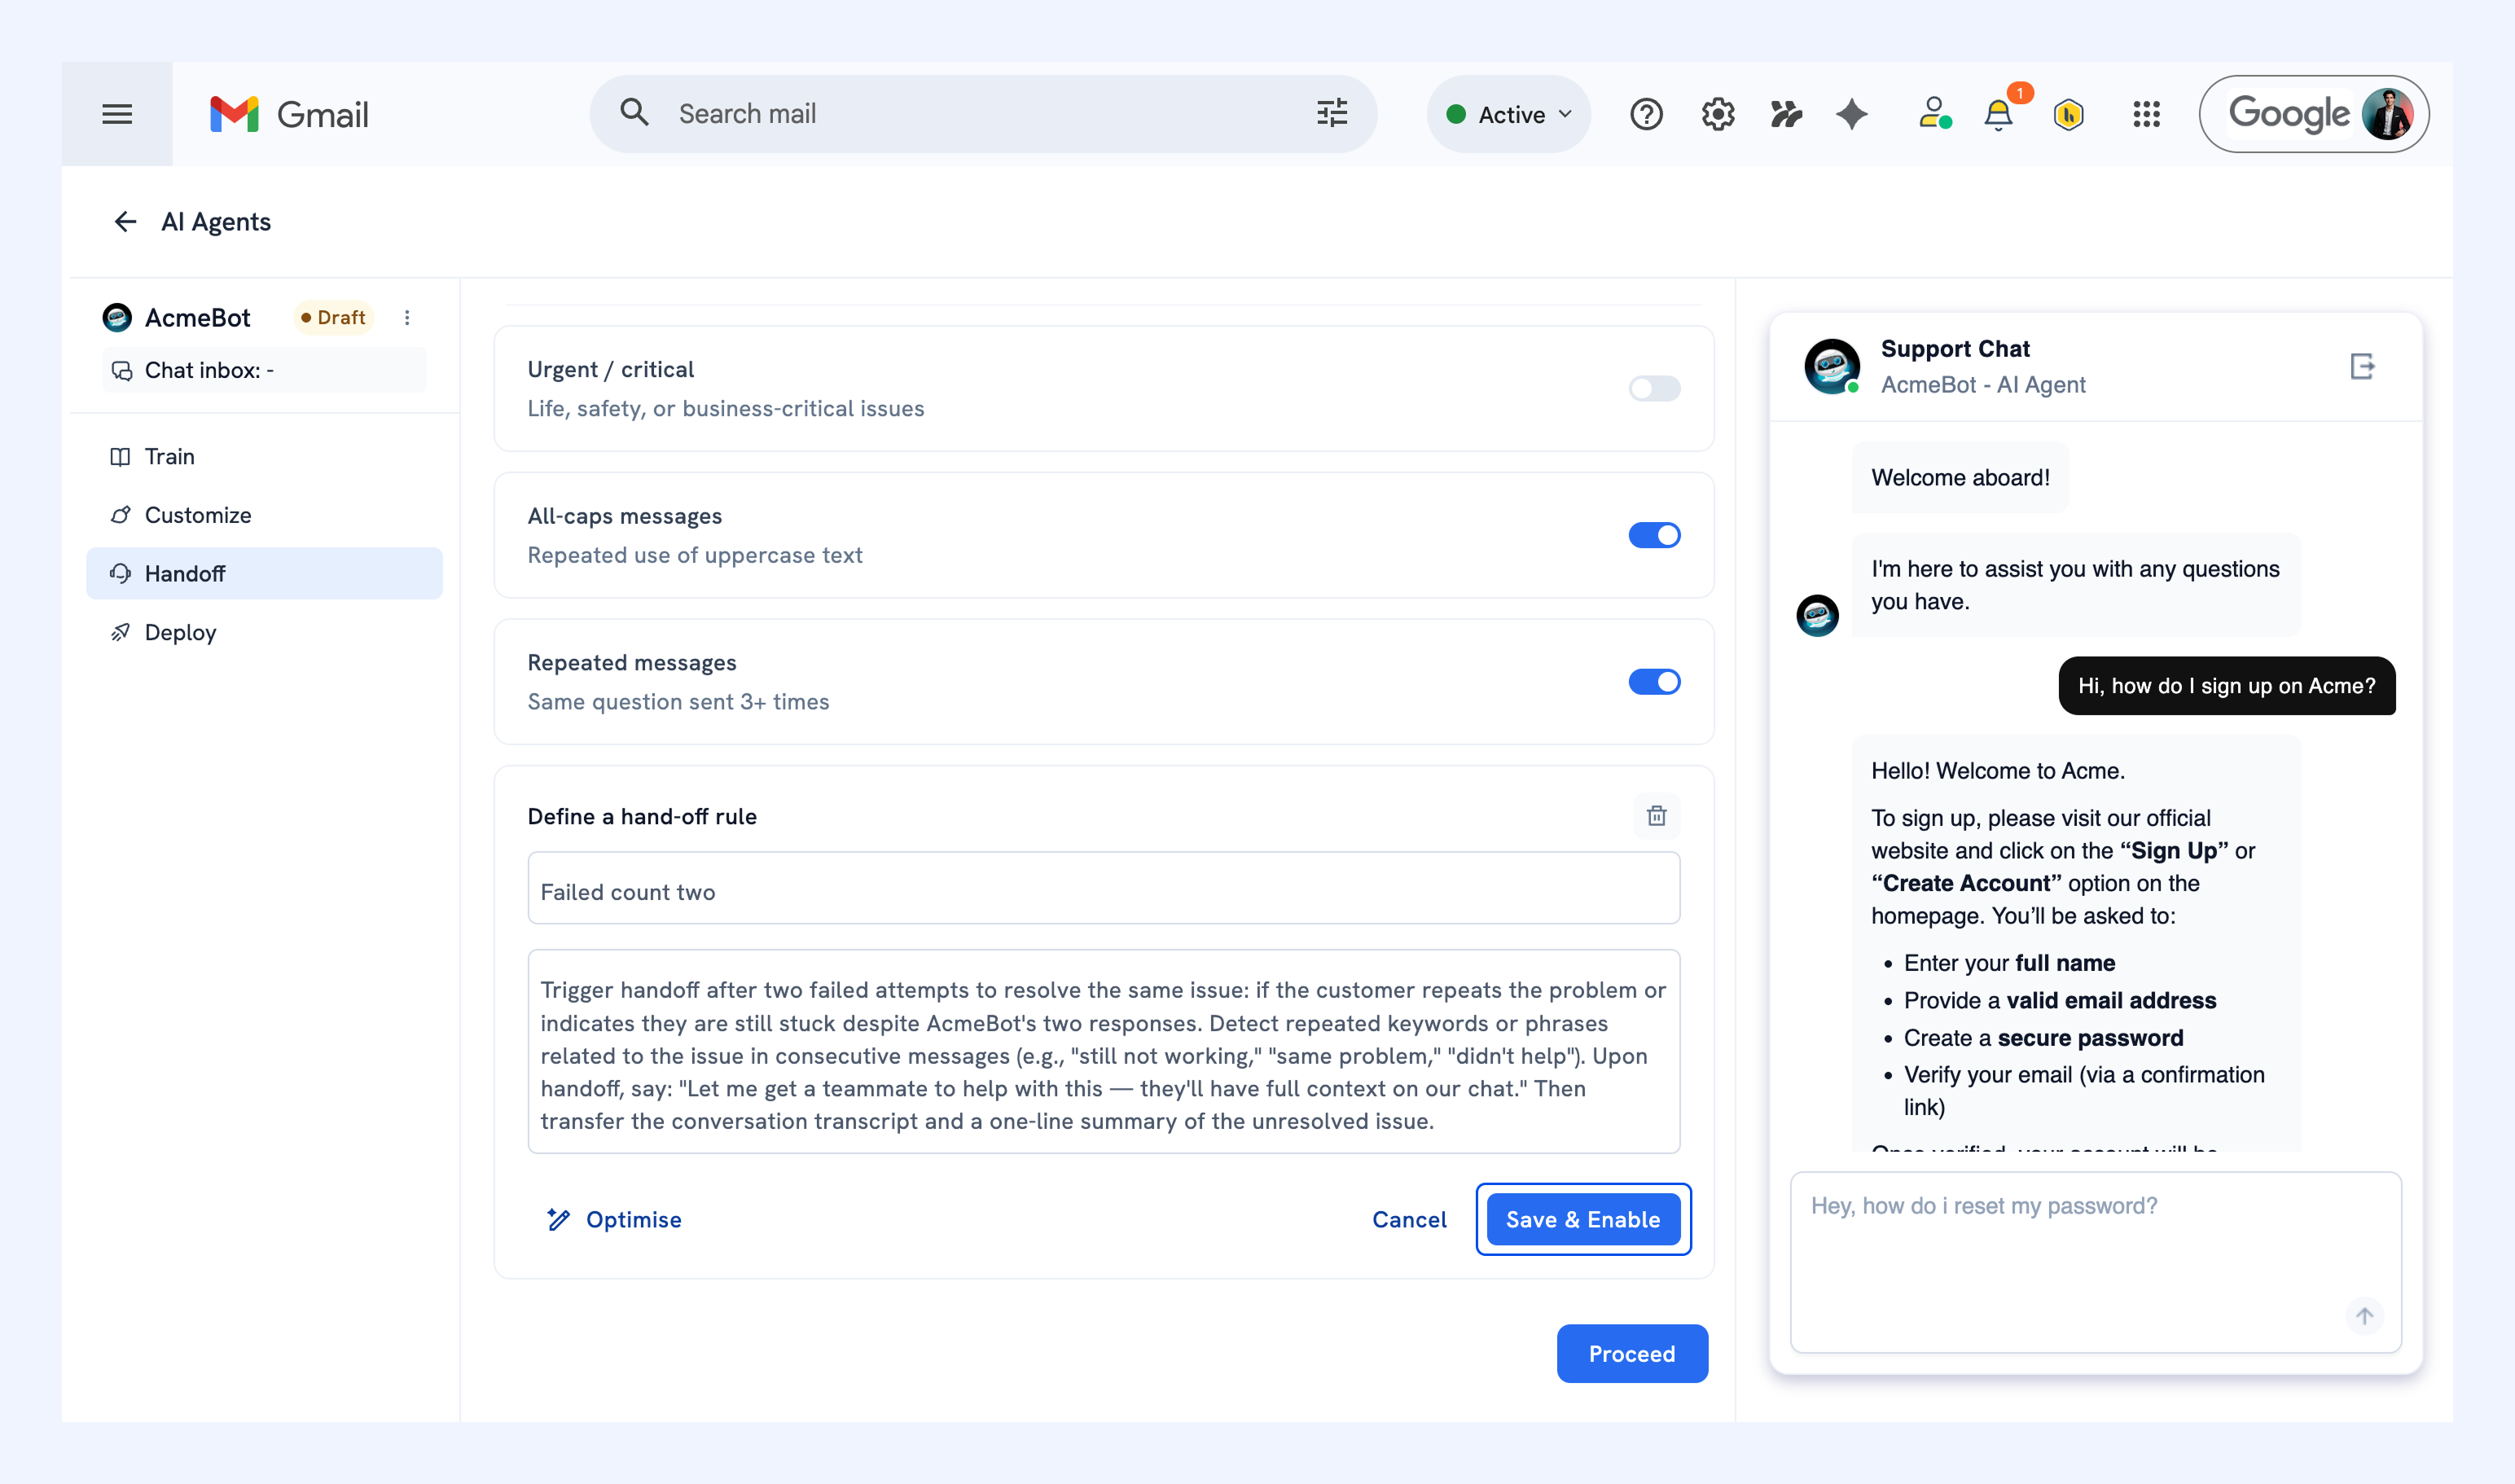
5. Once you've added all the rules you need, click Proceed.
Step 4: Deploy your AI Agent
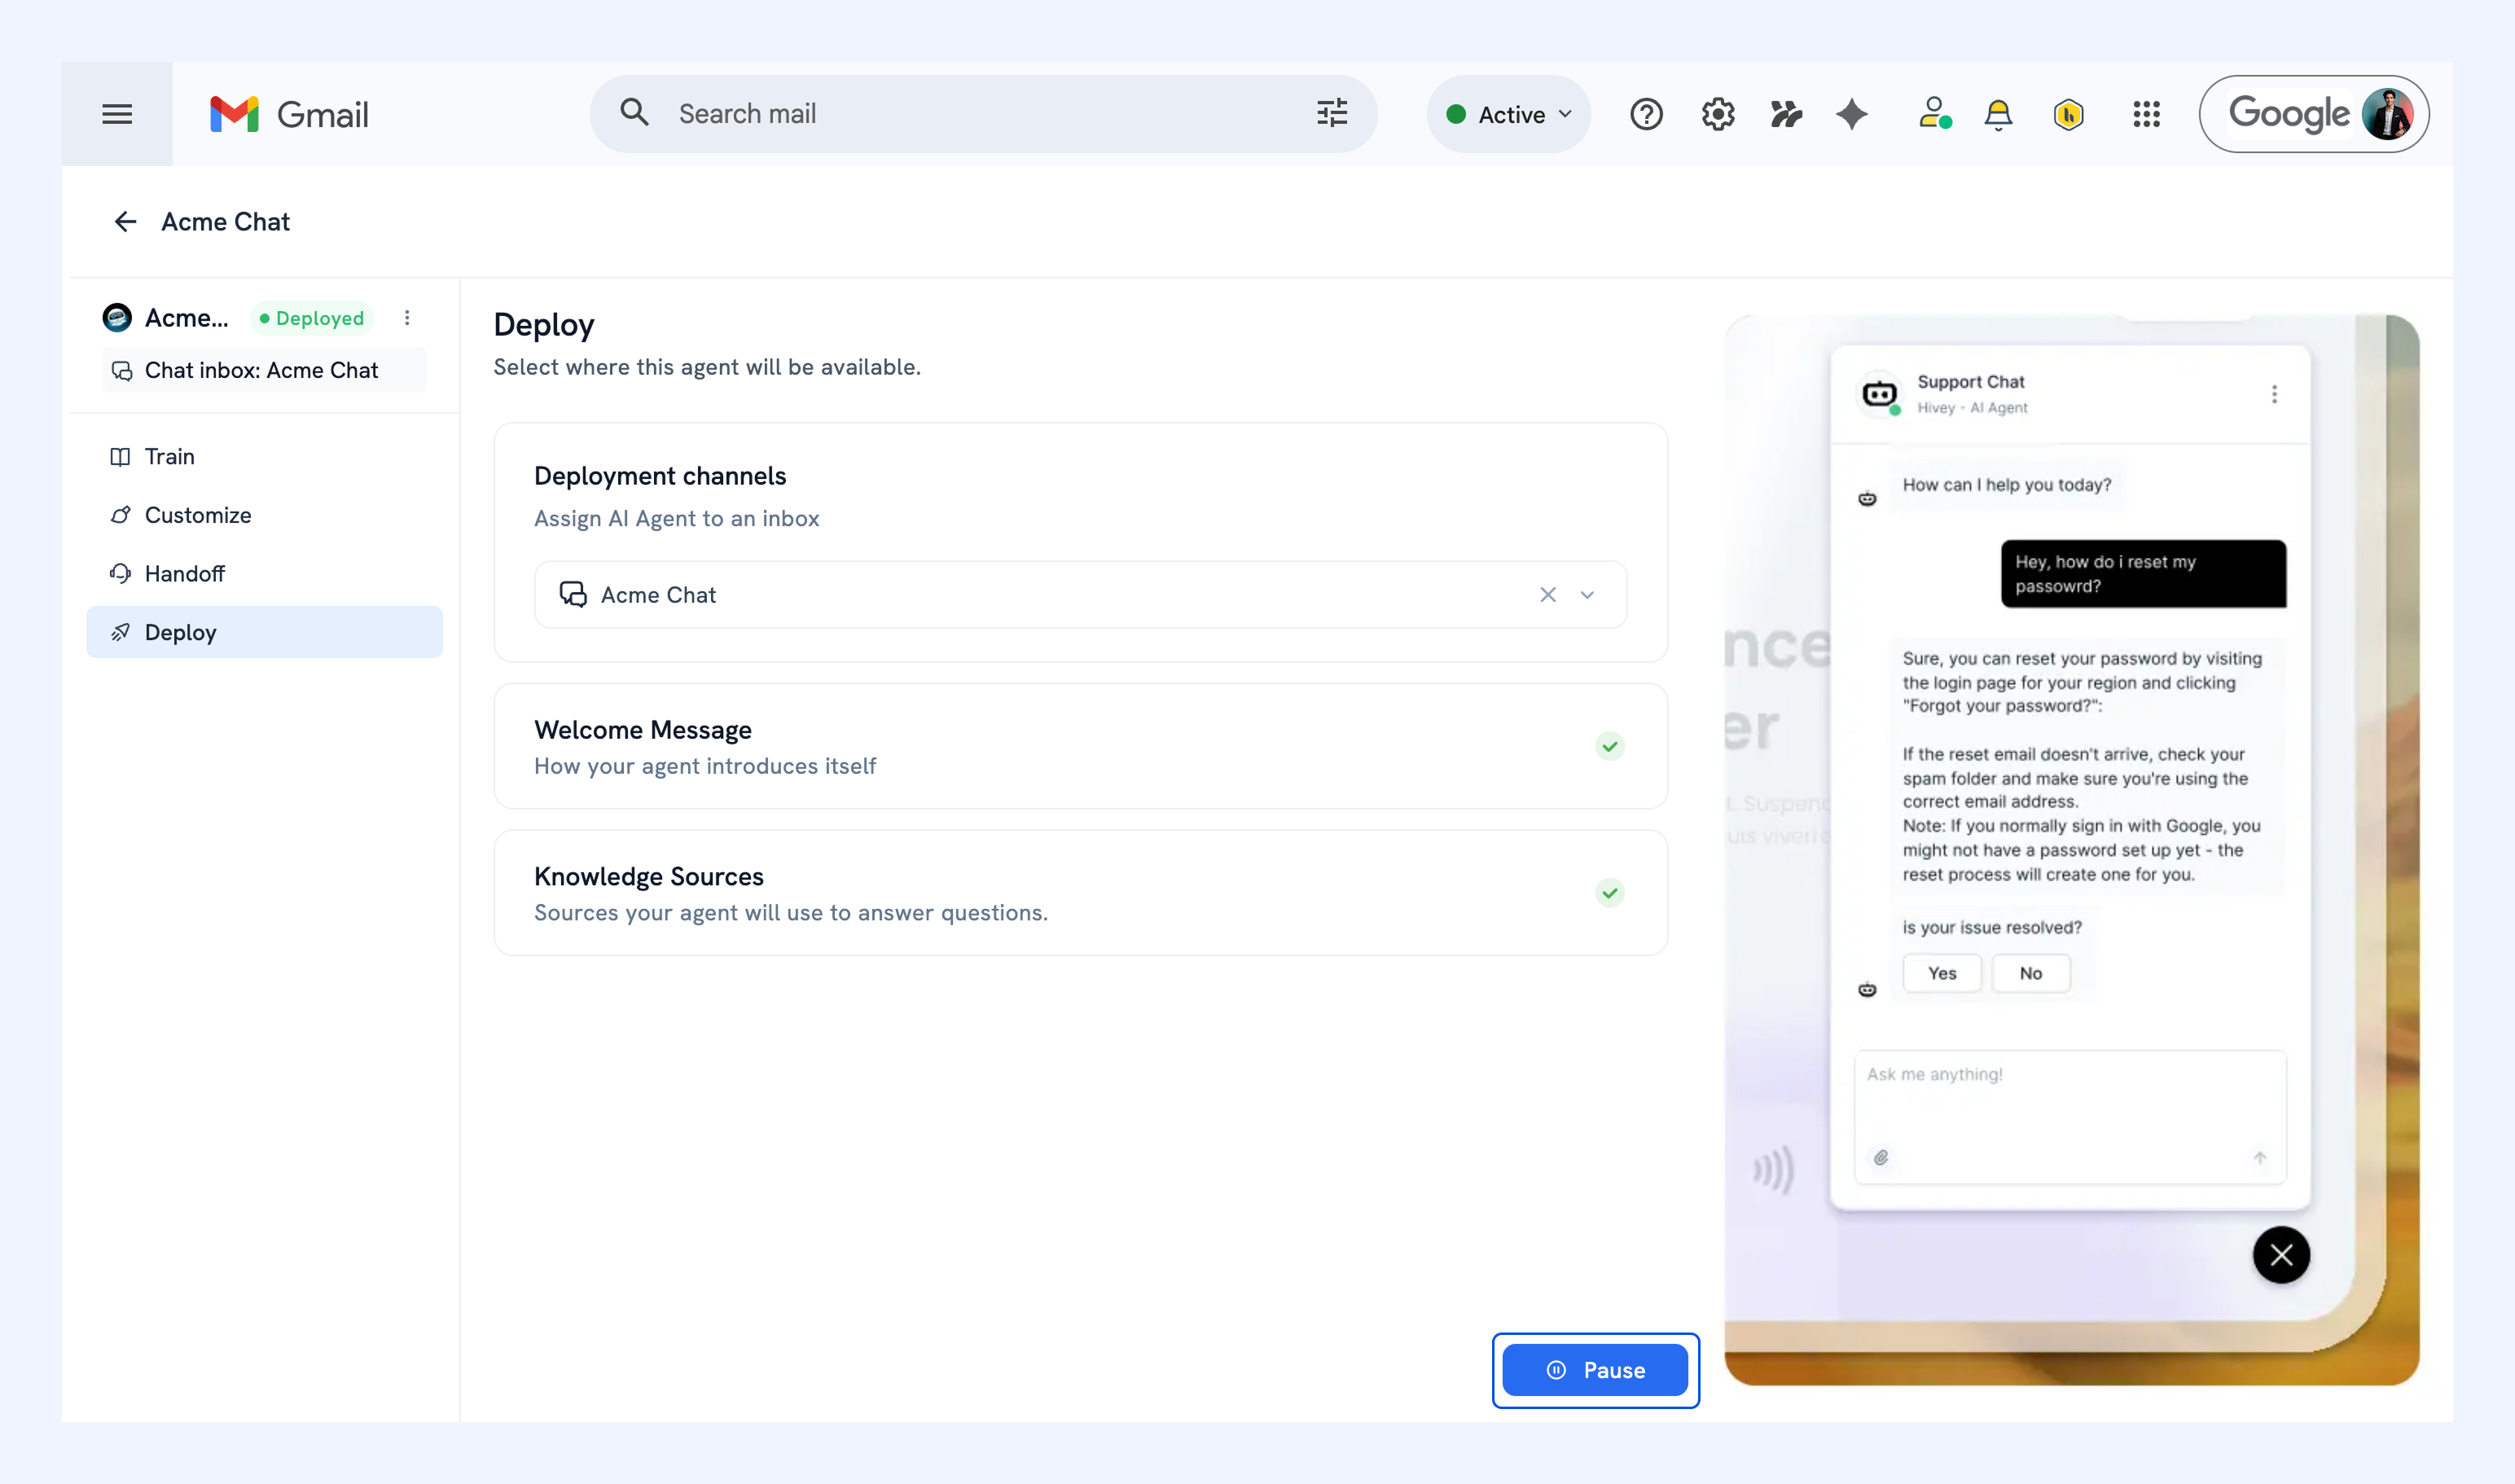
Choose where your AI Agent will go live. Under Deployment channels, pick the Chat Inbox you want to deploy it to.
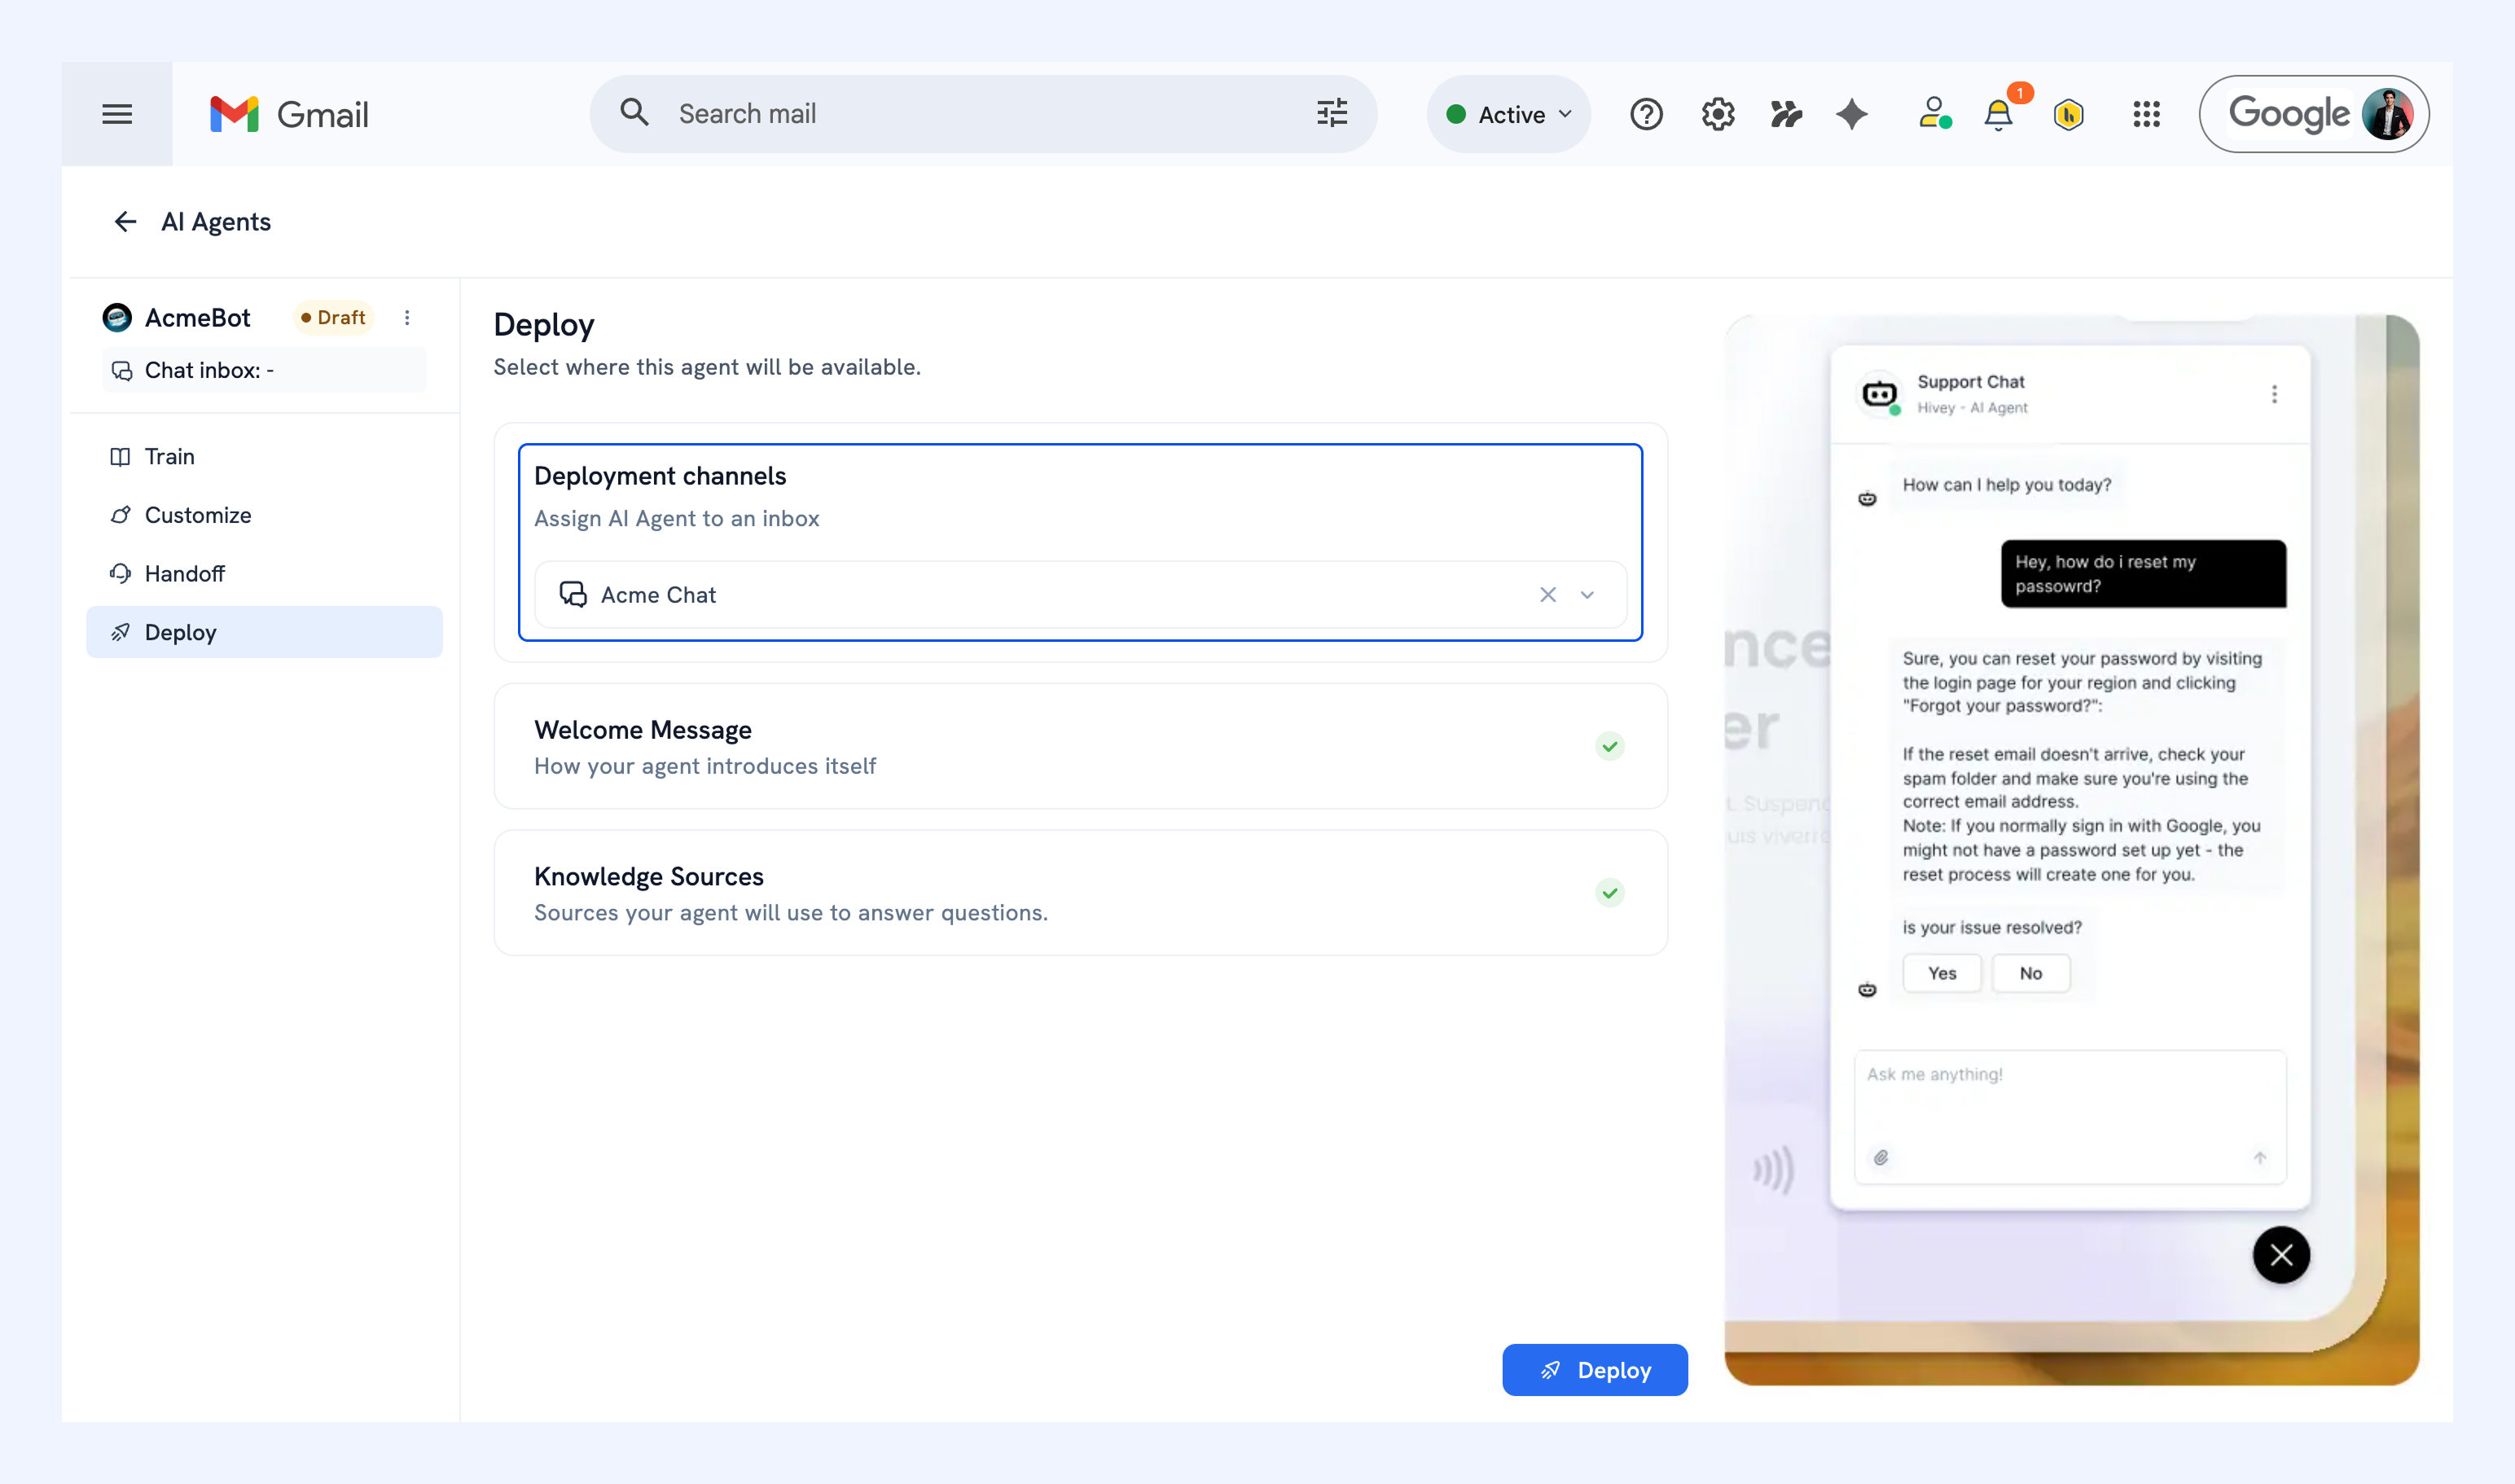
The checklist on the right confirms your welcome message and knowledge sources are in place.
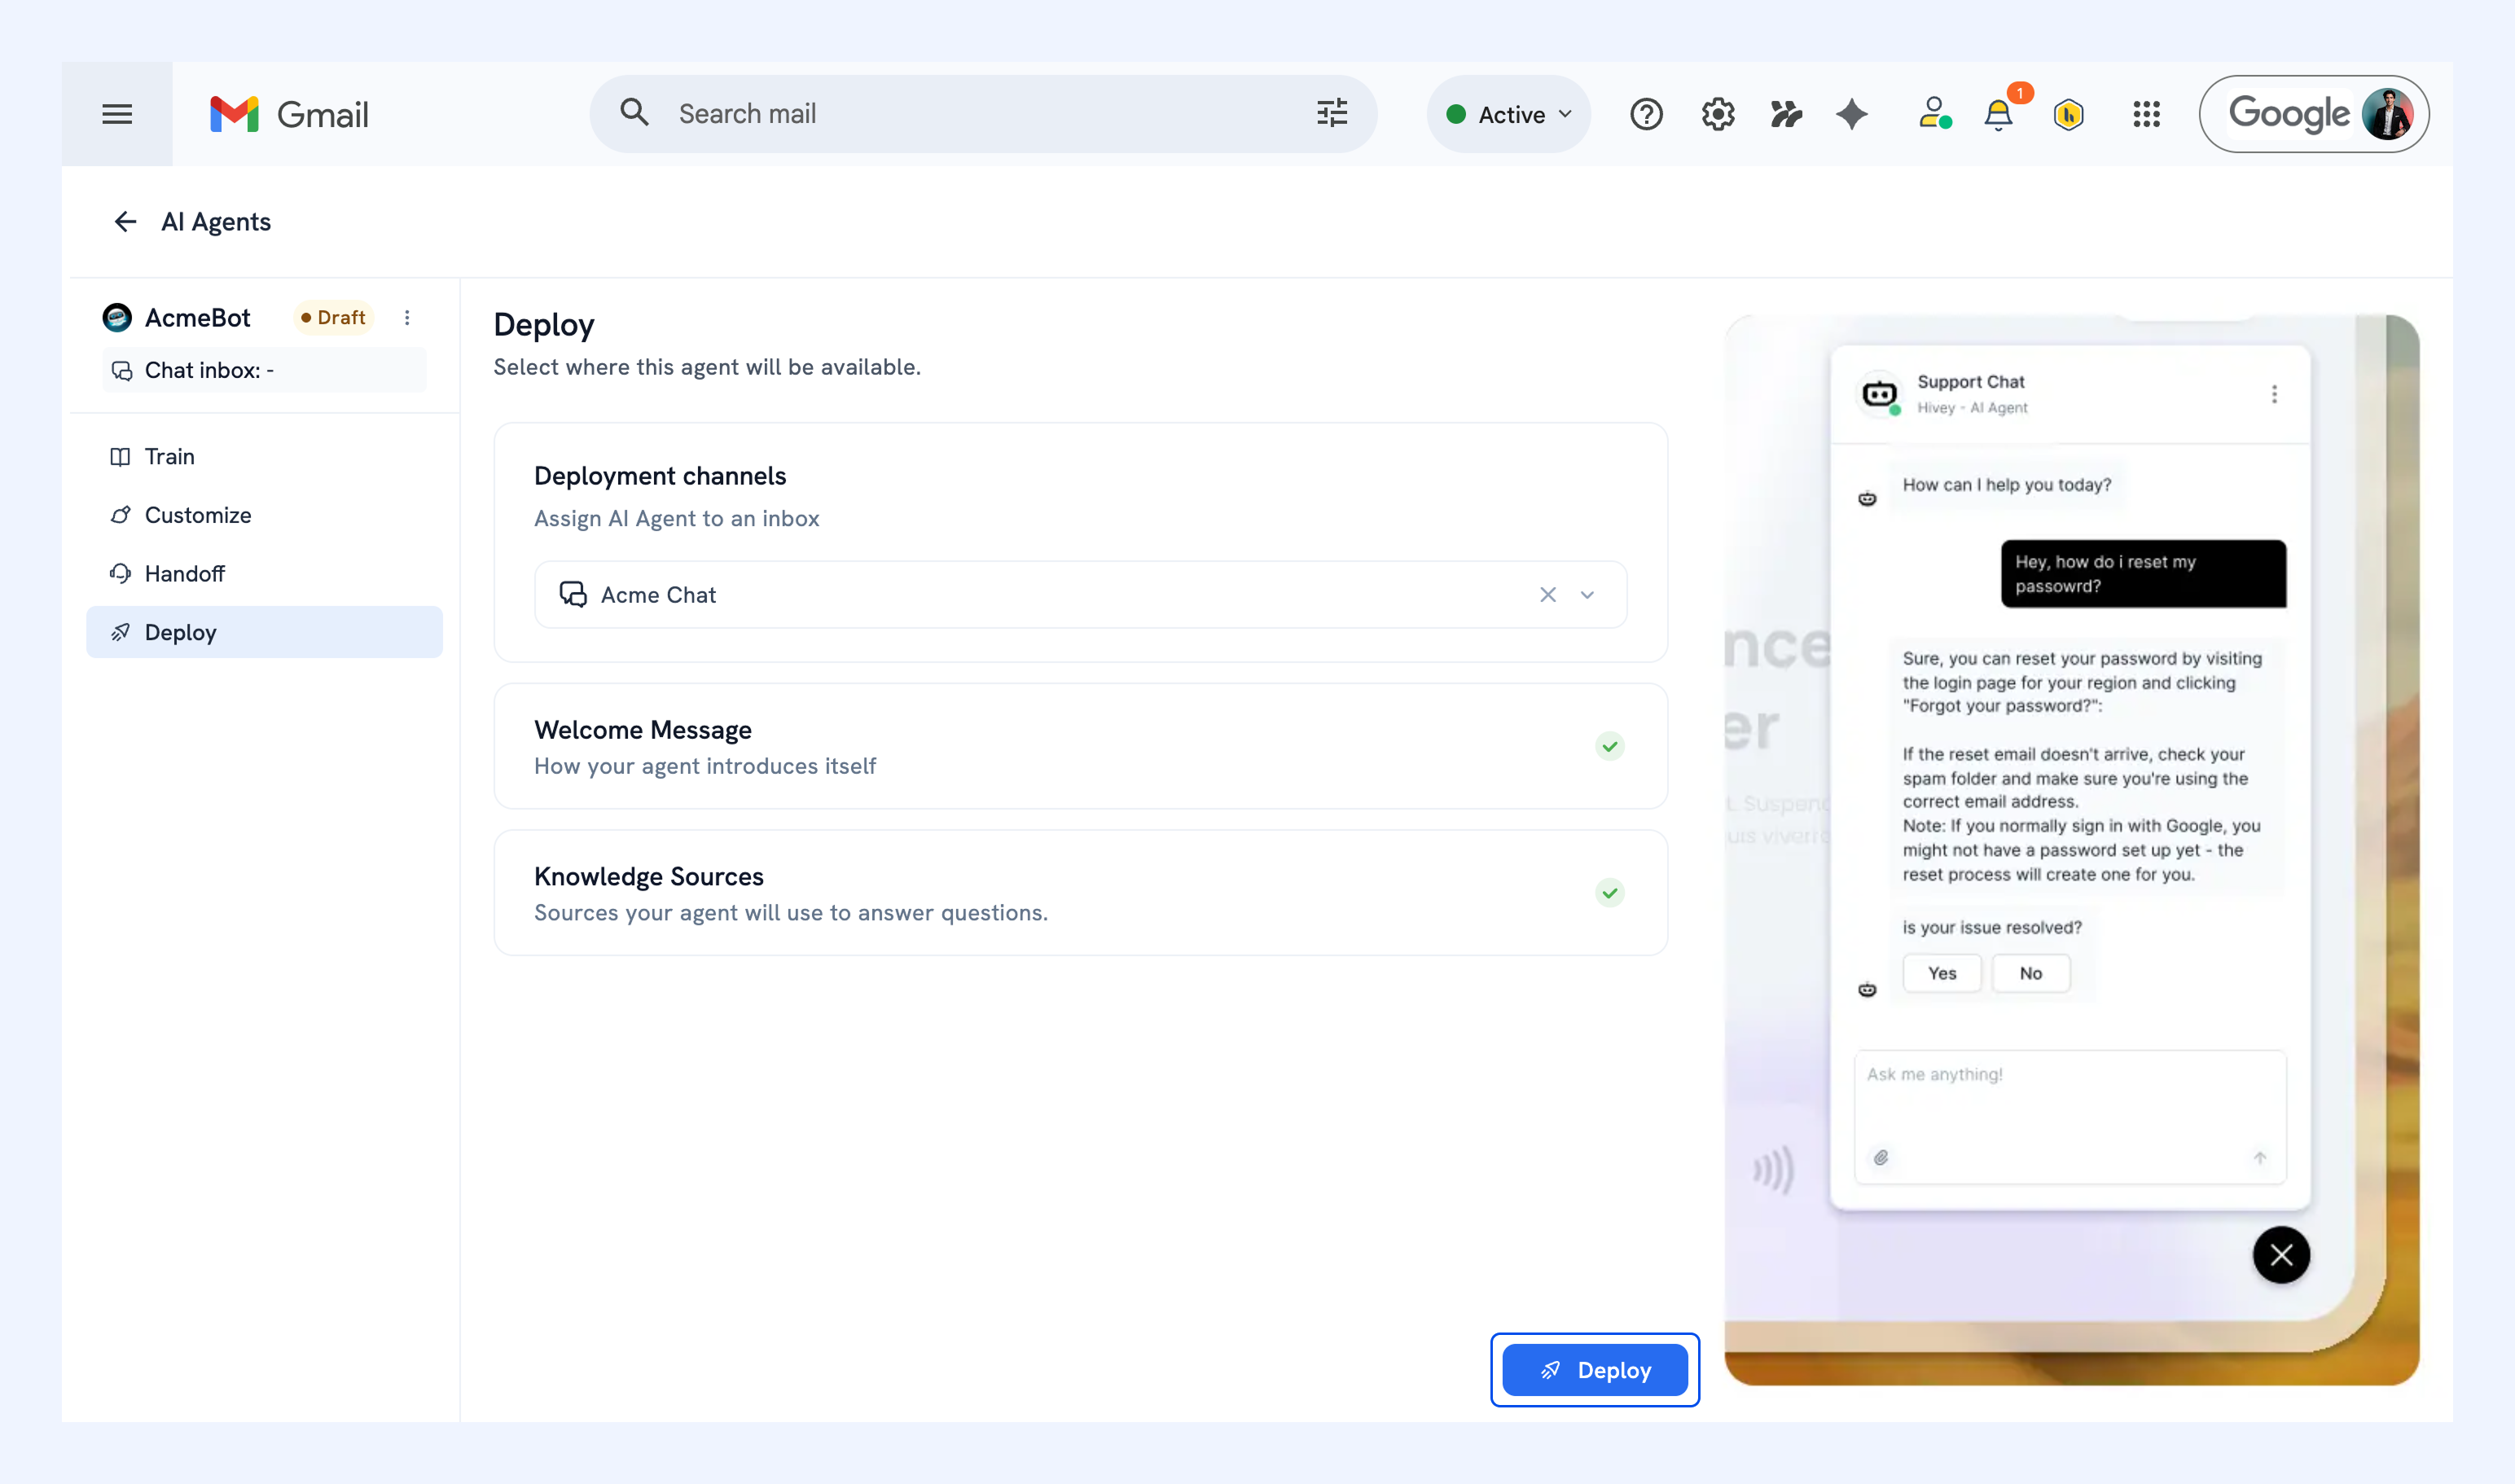
When you're ready, click Deploy.
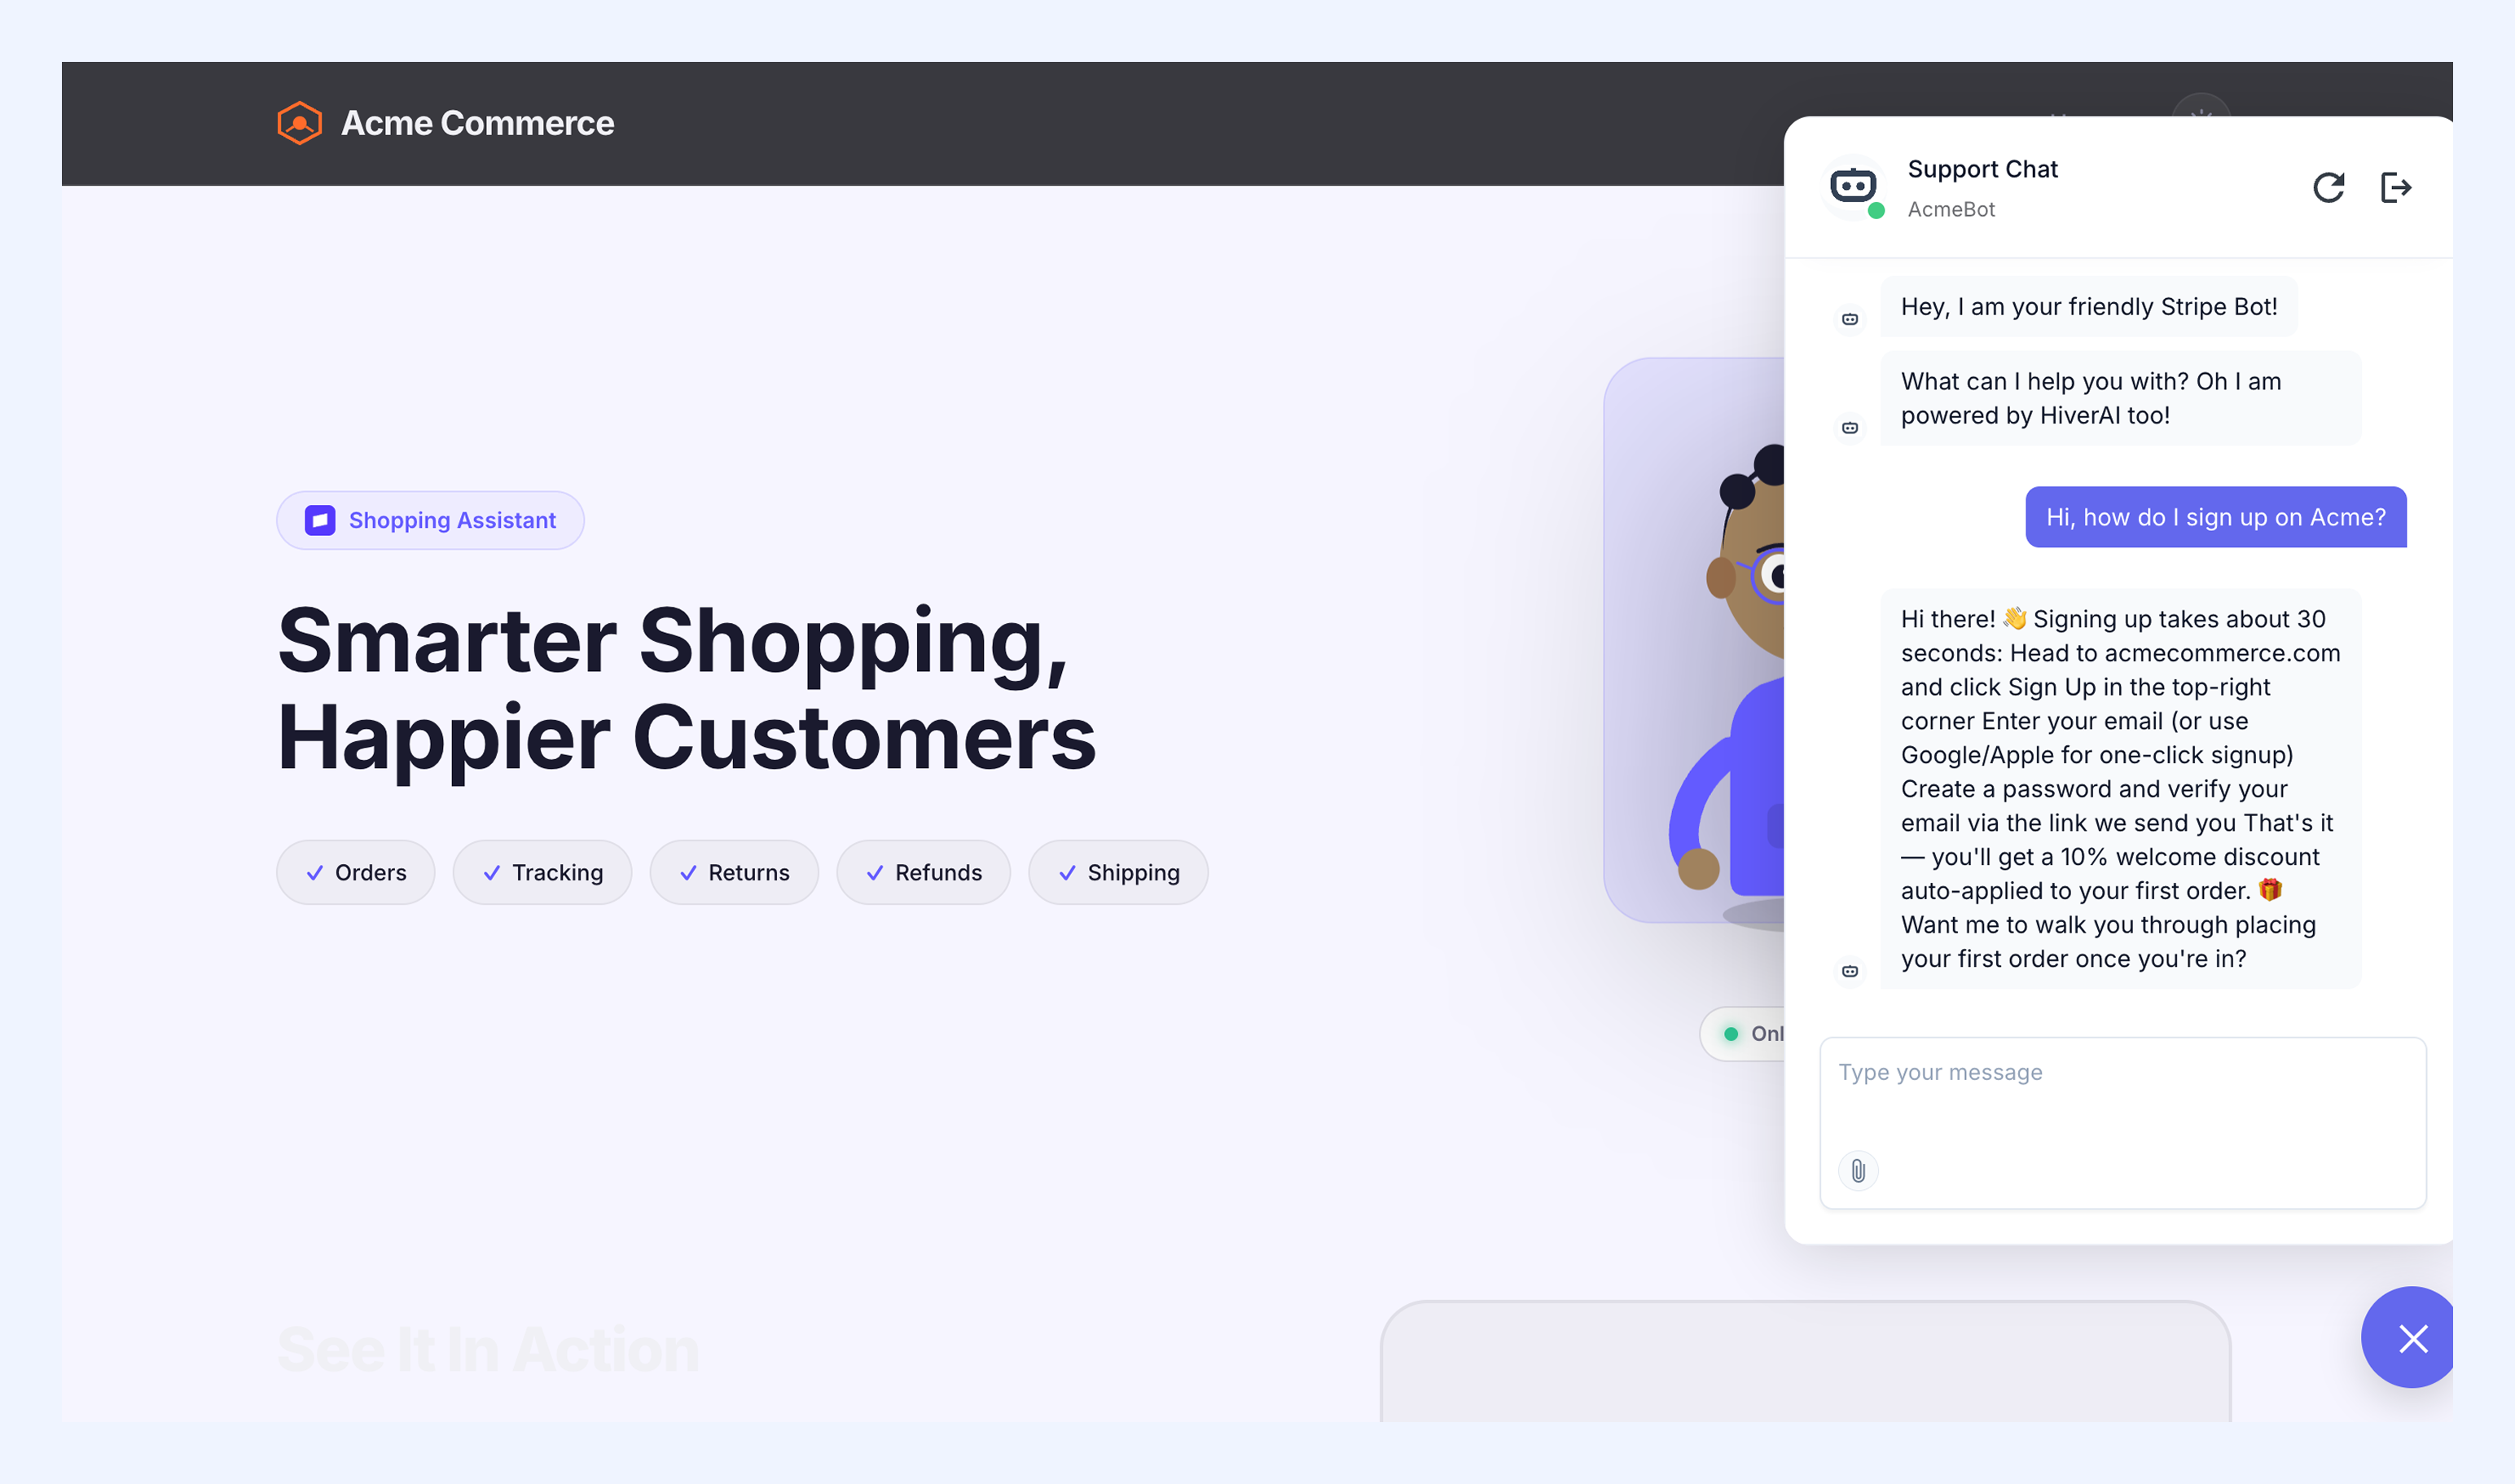
Your AI Agent is now live on your chat widget and will start handling customer conversations.
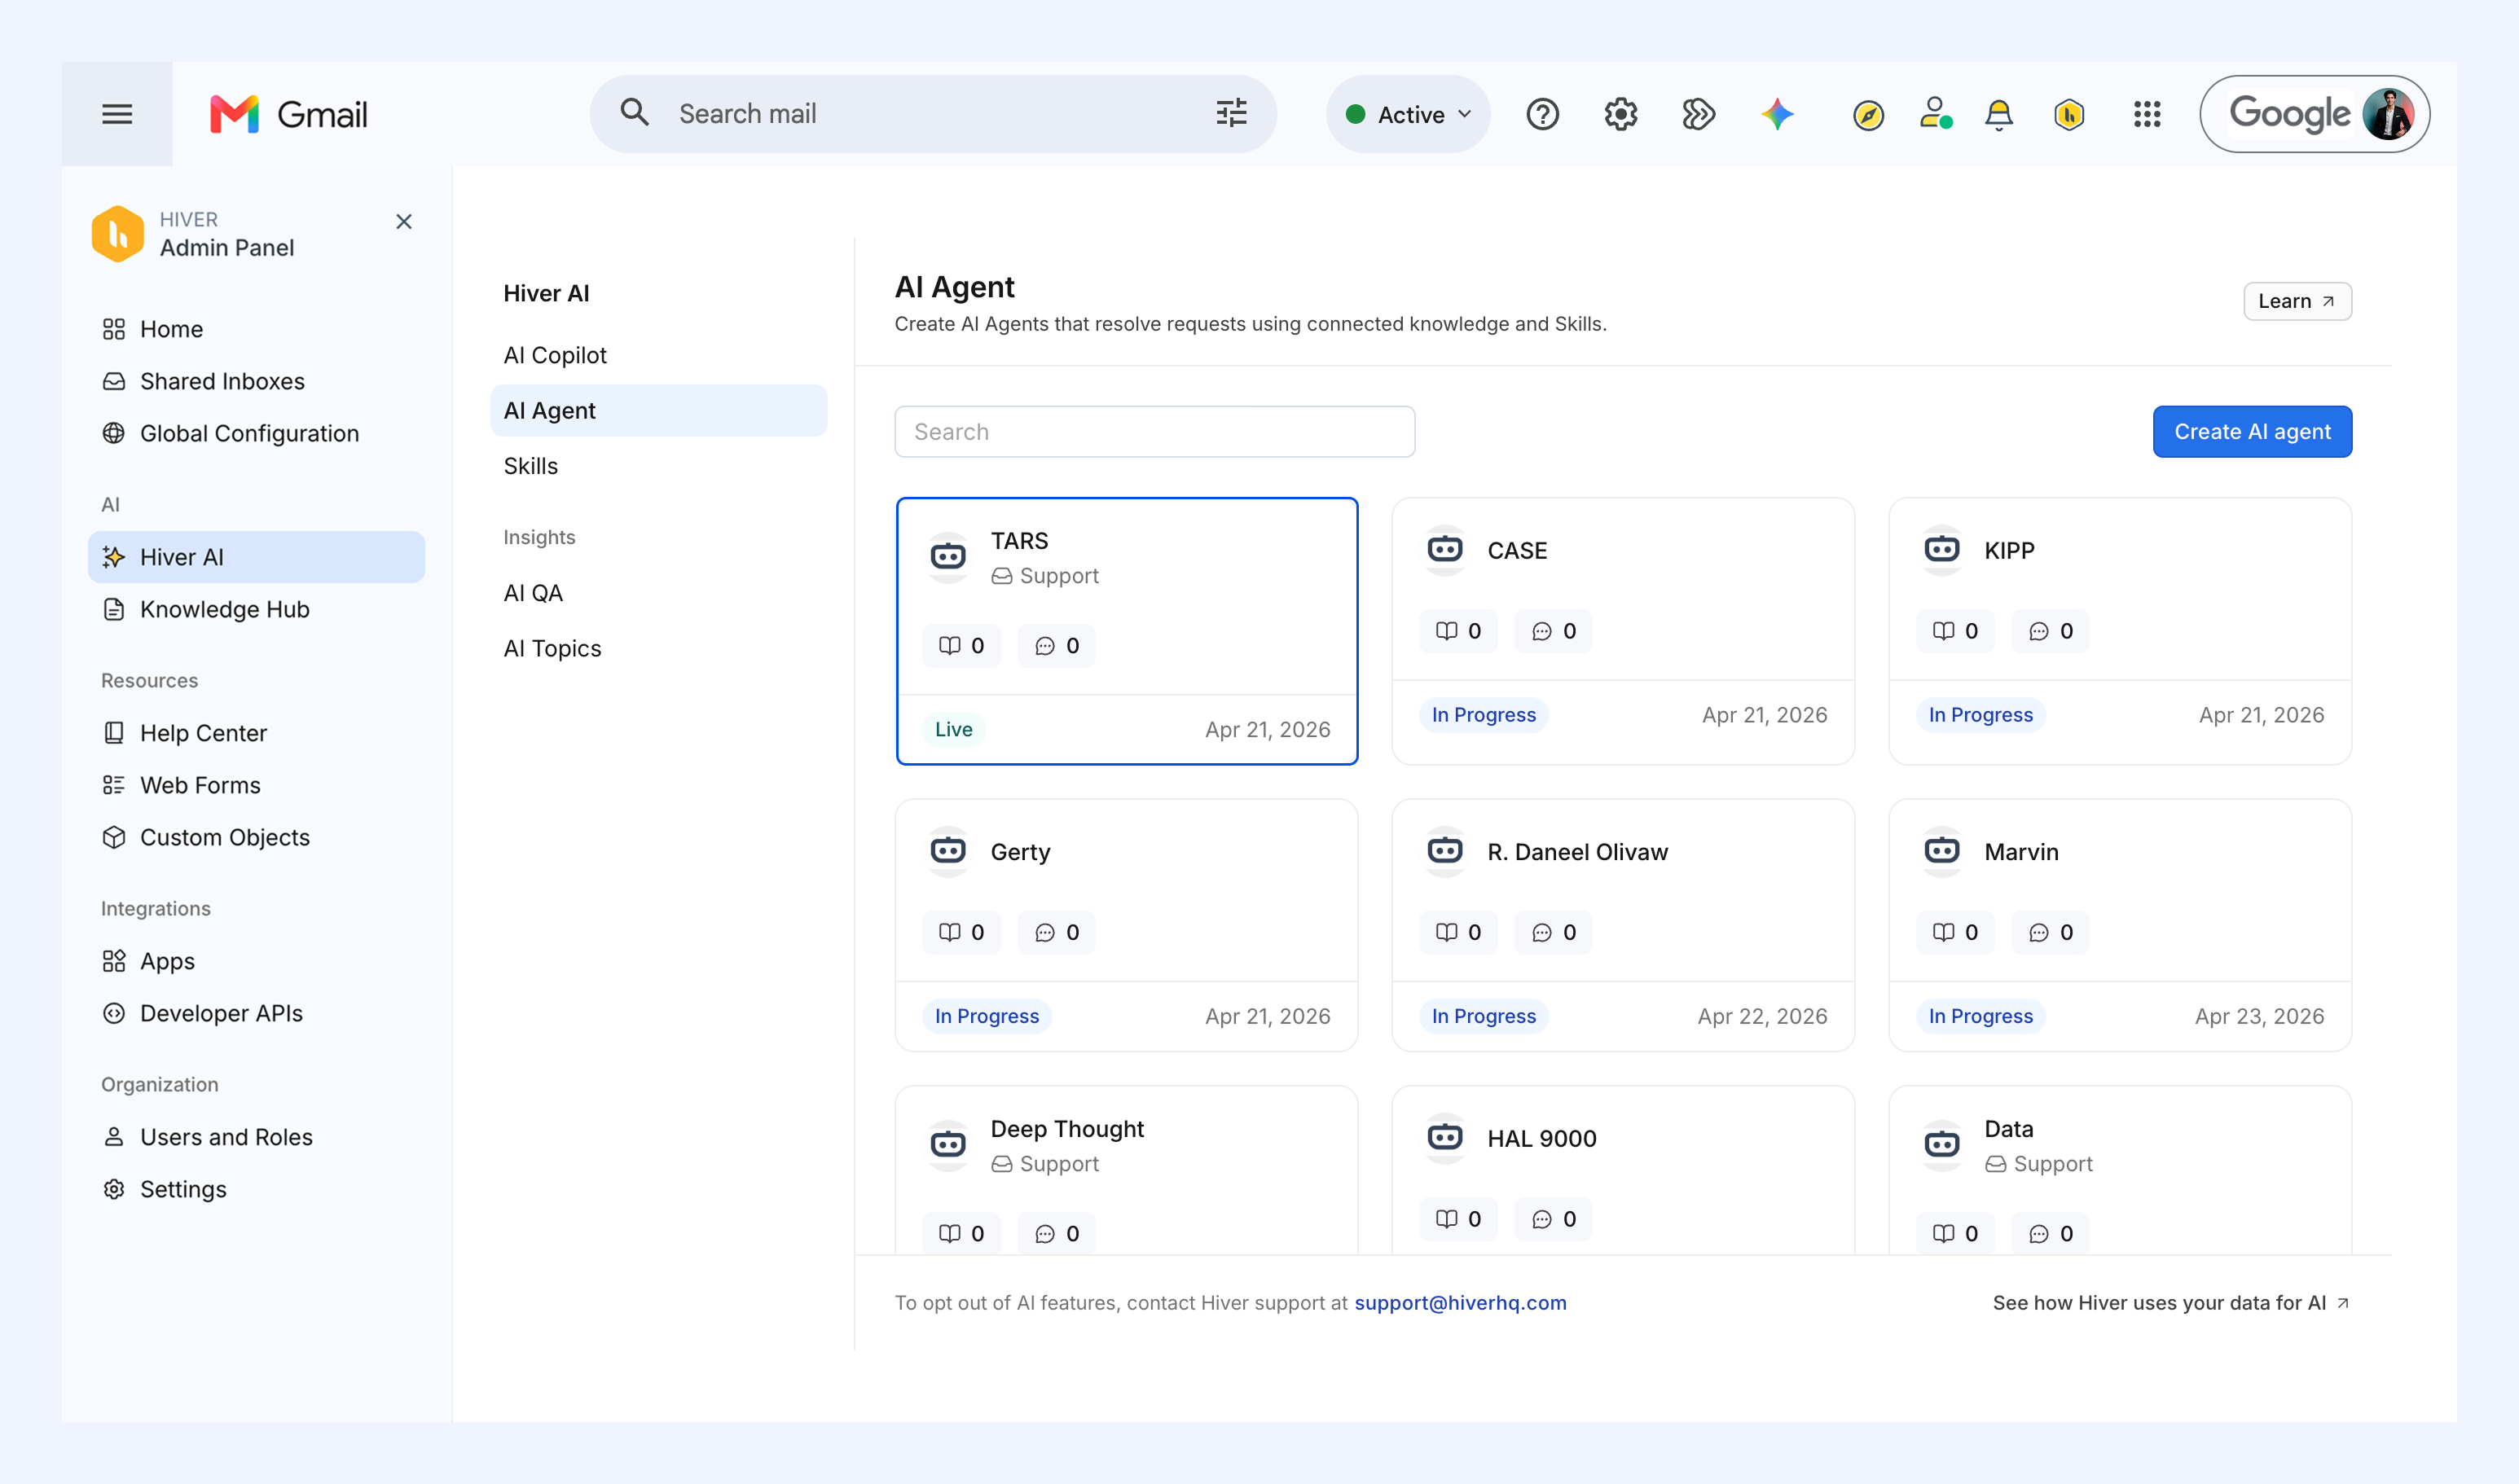
You can access your AI Agent anytime from Hiver AI → AI Agent and make changes when needed.
Note: To pause your AI Agent without deleting it, open it, go to Deploy and click Pause.
Viewing conversations handled by your AI Agent
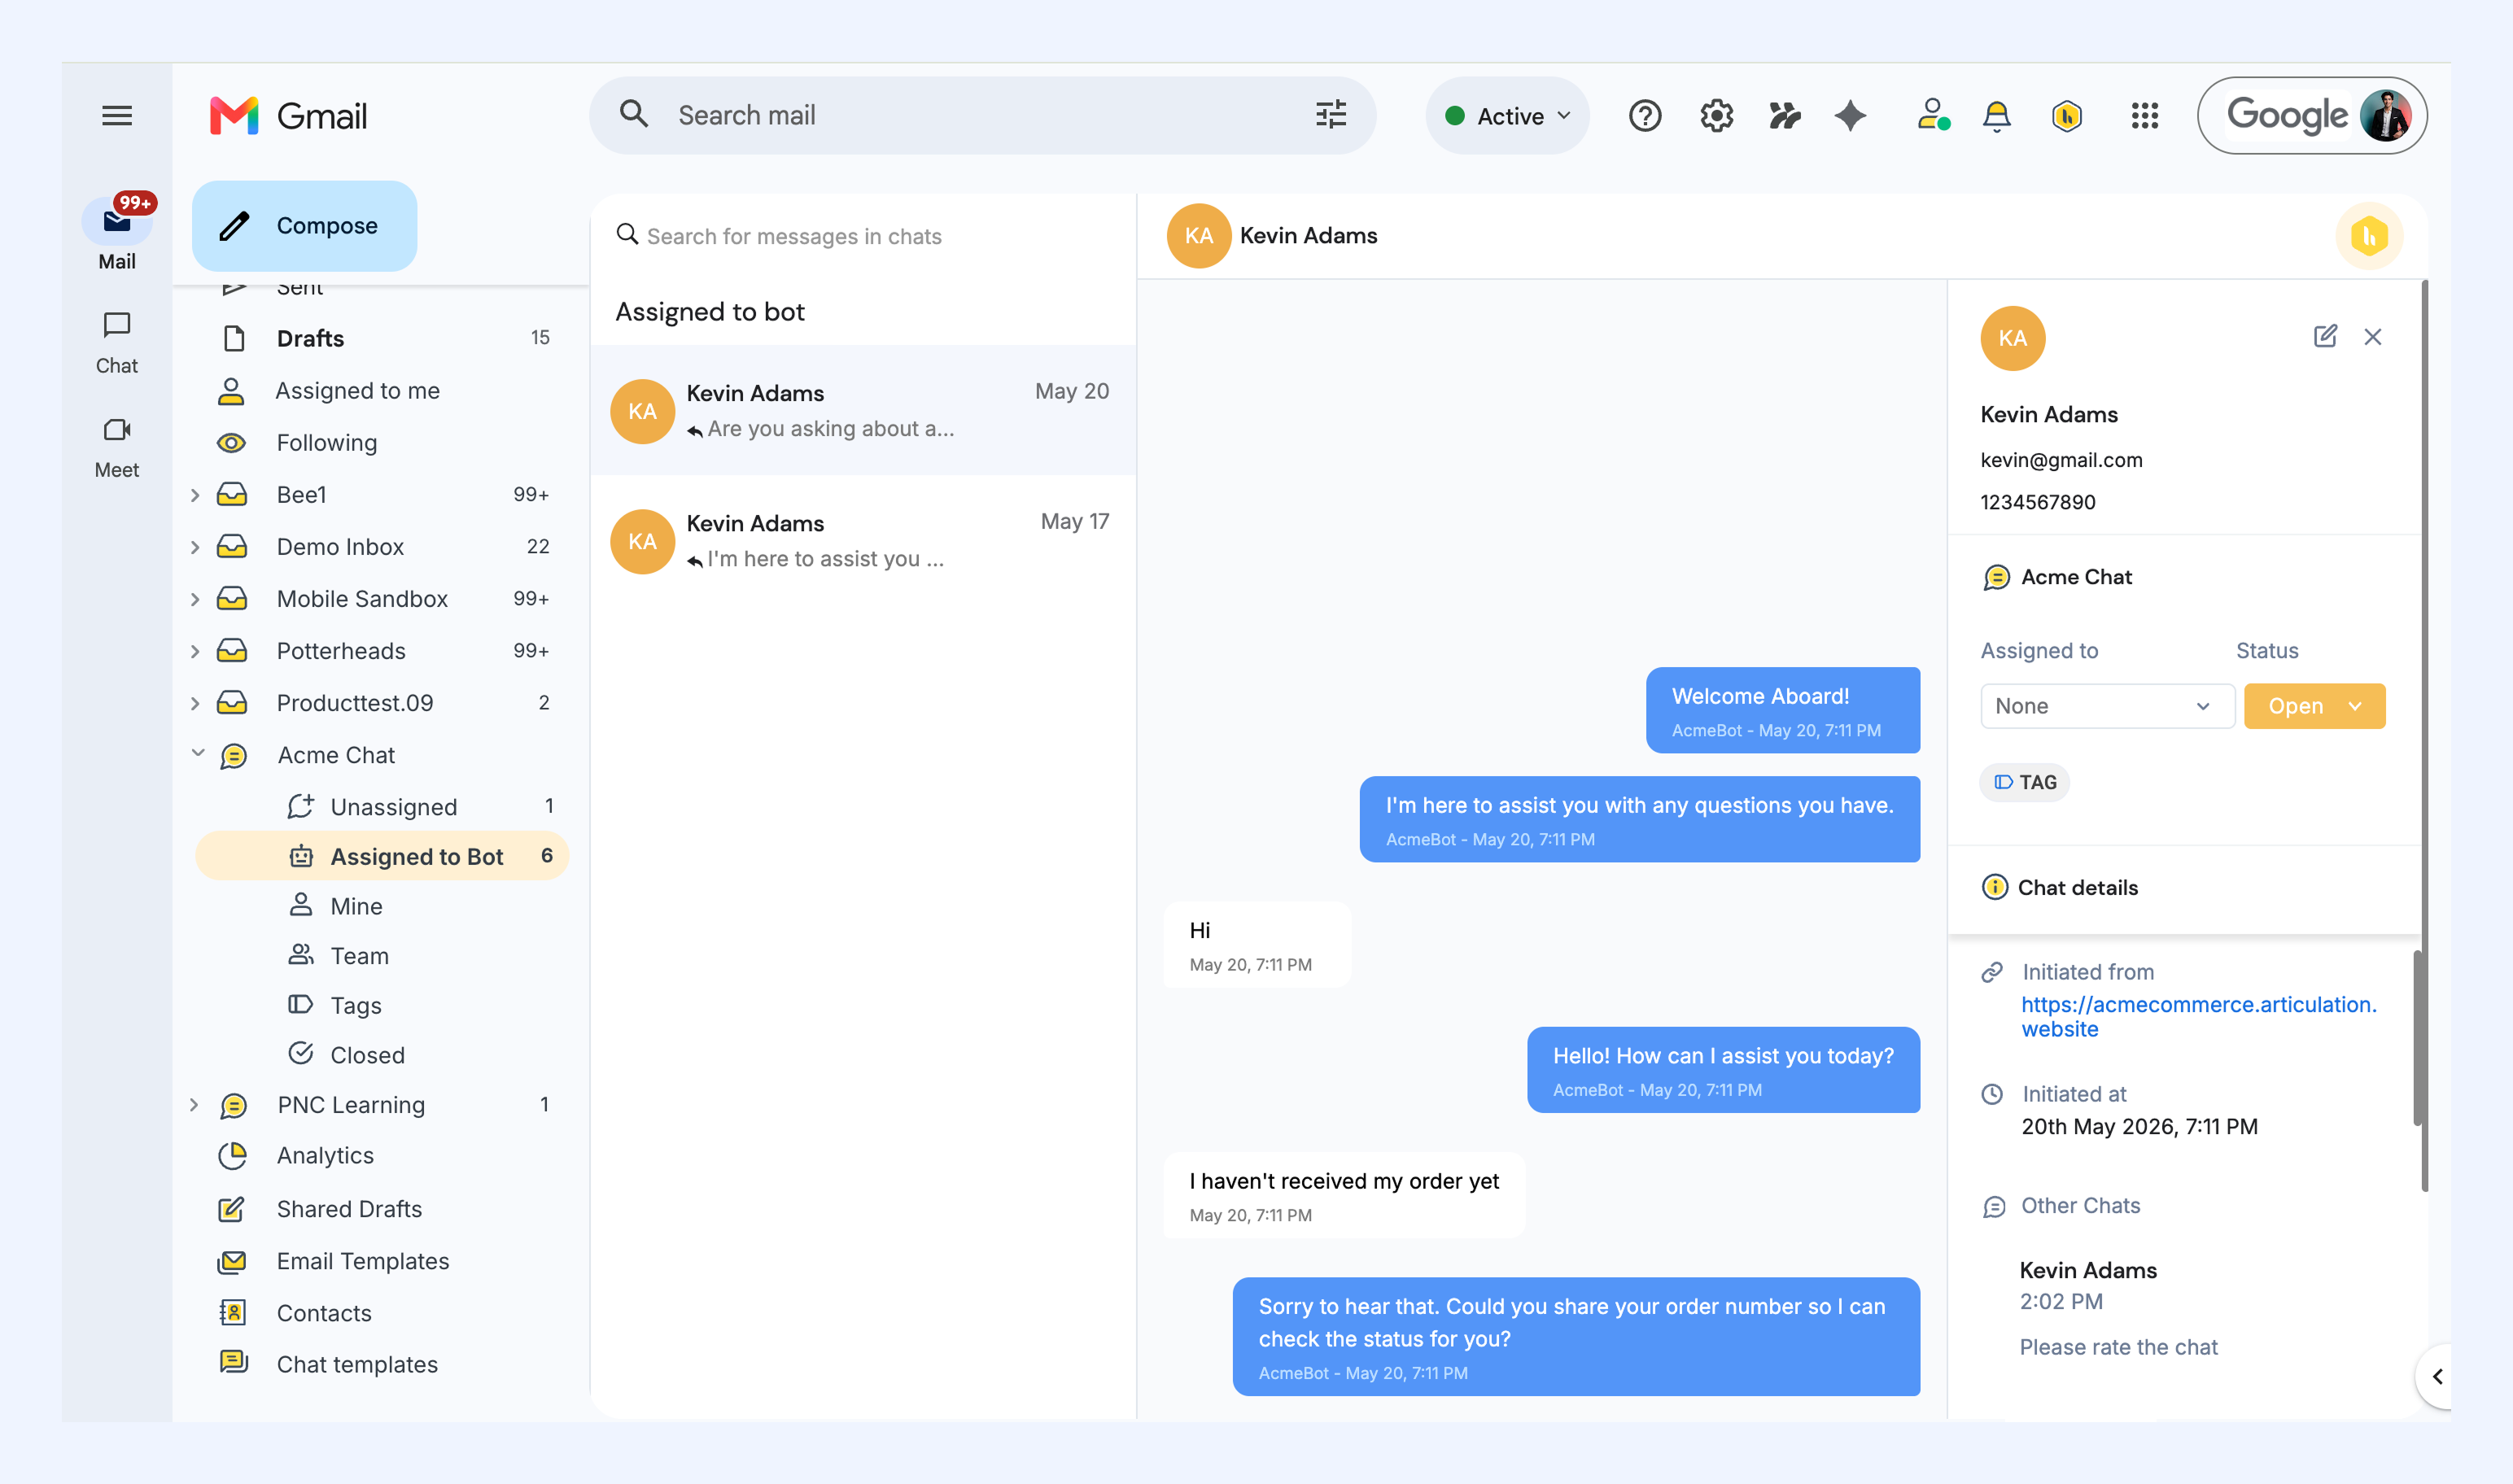
You can view all conversations handled by your AI Agent and their full transcripts from the Assigned to Bot view in your Chat Inbox.
You can also monitor chats as they're happening and assign them to a teammate when needed.
How to train your AI Agent well
Here are a few things to keep in mind as you train your AI Agent:
1. Write clear and specific custom instructions
Vague instructions lead to vague behaviour. The more specific you are, the more consistent your AI Agent's responses will be.
For example:
- Instead of 'be polite,' try 'acknowledge the customer's issue before asking for more details'.
- Instead of 'keep things short,' try 'keep replies to 2–4 sentences unless the customer asks for more'.
- Instead of 'be helpful,' try 'always share the relevant help article link before suggesting next steps'.
Test your instructions in the conversation preview before saving.
2. Keep your knowledge sources up to date
Regular updates keep your AI Agent reliable. Update your sources whenever:
- A policy or process changes.
- A product feature is added or retired.
- Your team starts handling a new type of query regularly.
- A document referenced by the AI Agent becomes outdated.
3. Define what your AI Agent should not handle
Custom instructions can also tell your AI Agent what to avoid. Some topics will always need human intervention, so be explicit about those. For example:
- Sensitive account changes
- Billing disputes or payment failures
- Legal or compliance questions
- Anything requiring manual investigation or account level access
Being clear about these boundaries helps the AI Agent hand off at the right moment.
4. Review AI conversations regularly
Reviewing AI-handled conversations regularly helps you:
- Identify gaps in your documentation
- Find workflows you haven't trained the AI Agent on yet
- Refine your escalation rules based on real conversations
- Improve where responses are falling short
- See what your customers are asking about
Doing this regularly helps your AI Agent improve over time and stay in line with how your team handles support.