Salesforce Integration with Hiver Omni
Salesforce is widely used for managing customer relationships, tracking opportunities, and maintaining accurate account details. The Salesforce integration brings essential CRM information directly into Hiver Omni.
With the integration enabled, you can view relevant customer data and create new Salesforce records right from your inbox, keeping your workflows organized and up to date.
Supported features
- Access CRM data: View the following Salesforce records associated with the customer:
- Lead info
- Opportunity info
- Contact info
- Case info
- Linked cases info
- Case info Automation
- Account info
- Create records quickly: Add new Leads, Contacts, Accounts, or Opportunities from your inbox.
- Log emails automatically: Log emails to Salesforce accounts and person accounts with Automations.
- Access records in Salesforce: View the entire Salesforce record in a new tab when needed.
- Choose what Salesforce data is shown: You can control which Salesforce details show up in the sidebar for different Shared Inboxes and roles.
Prerequisites
Before starting the setup, ensure you have:
- Access to your Salesforce admin account credentials.
- Admin access to both Hiver and Salesforce.
- Permission to authorize connected apps in Salesforce.
Setting up the Salesforce integration
Step 1: Copy the Redirect URL from Hiver
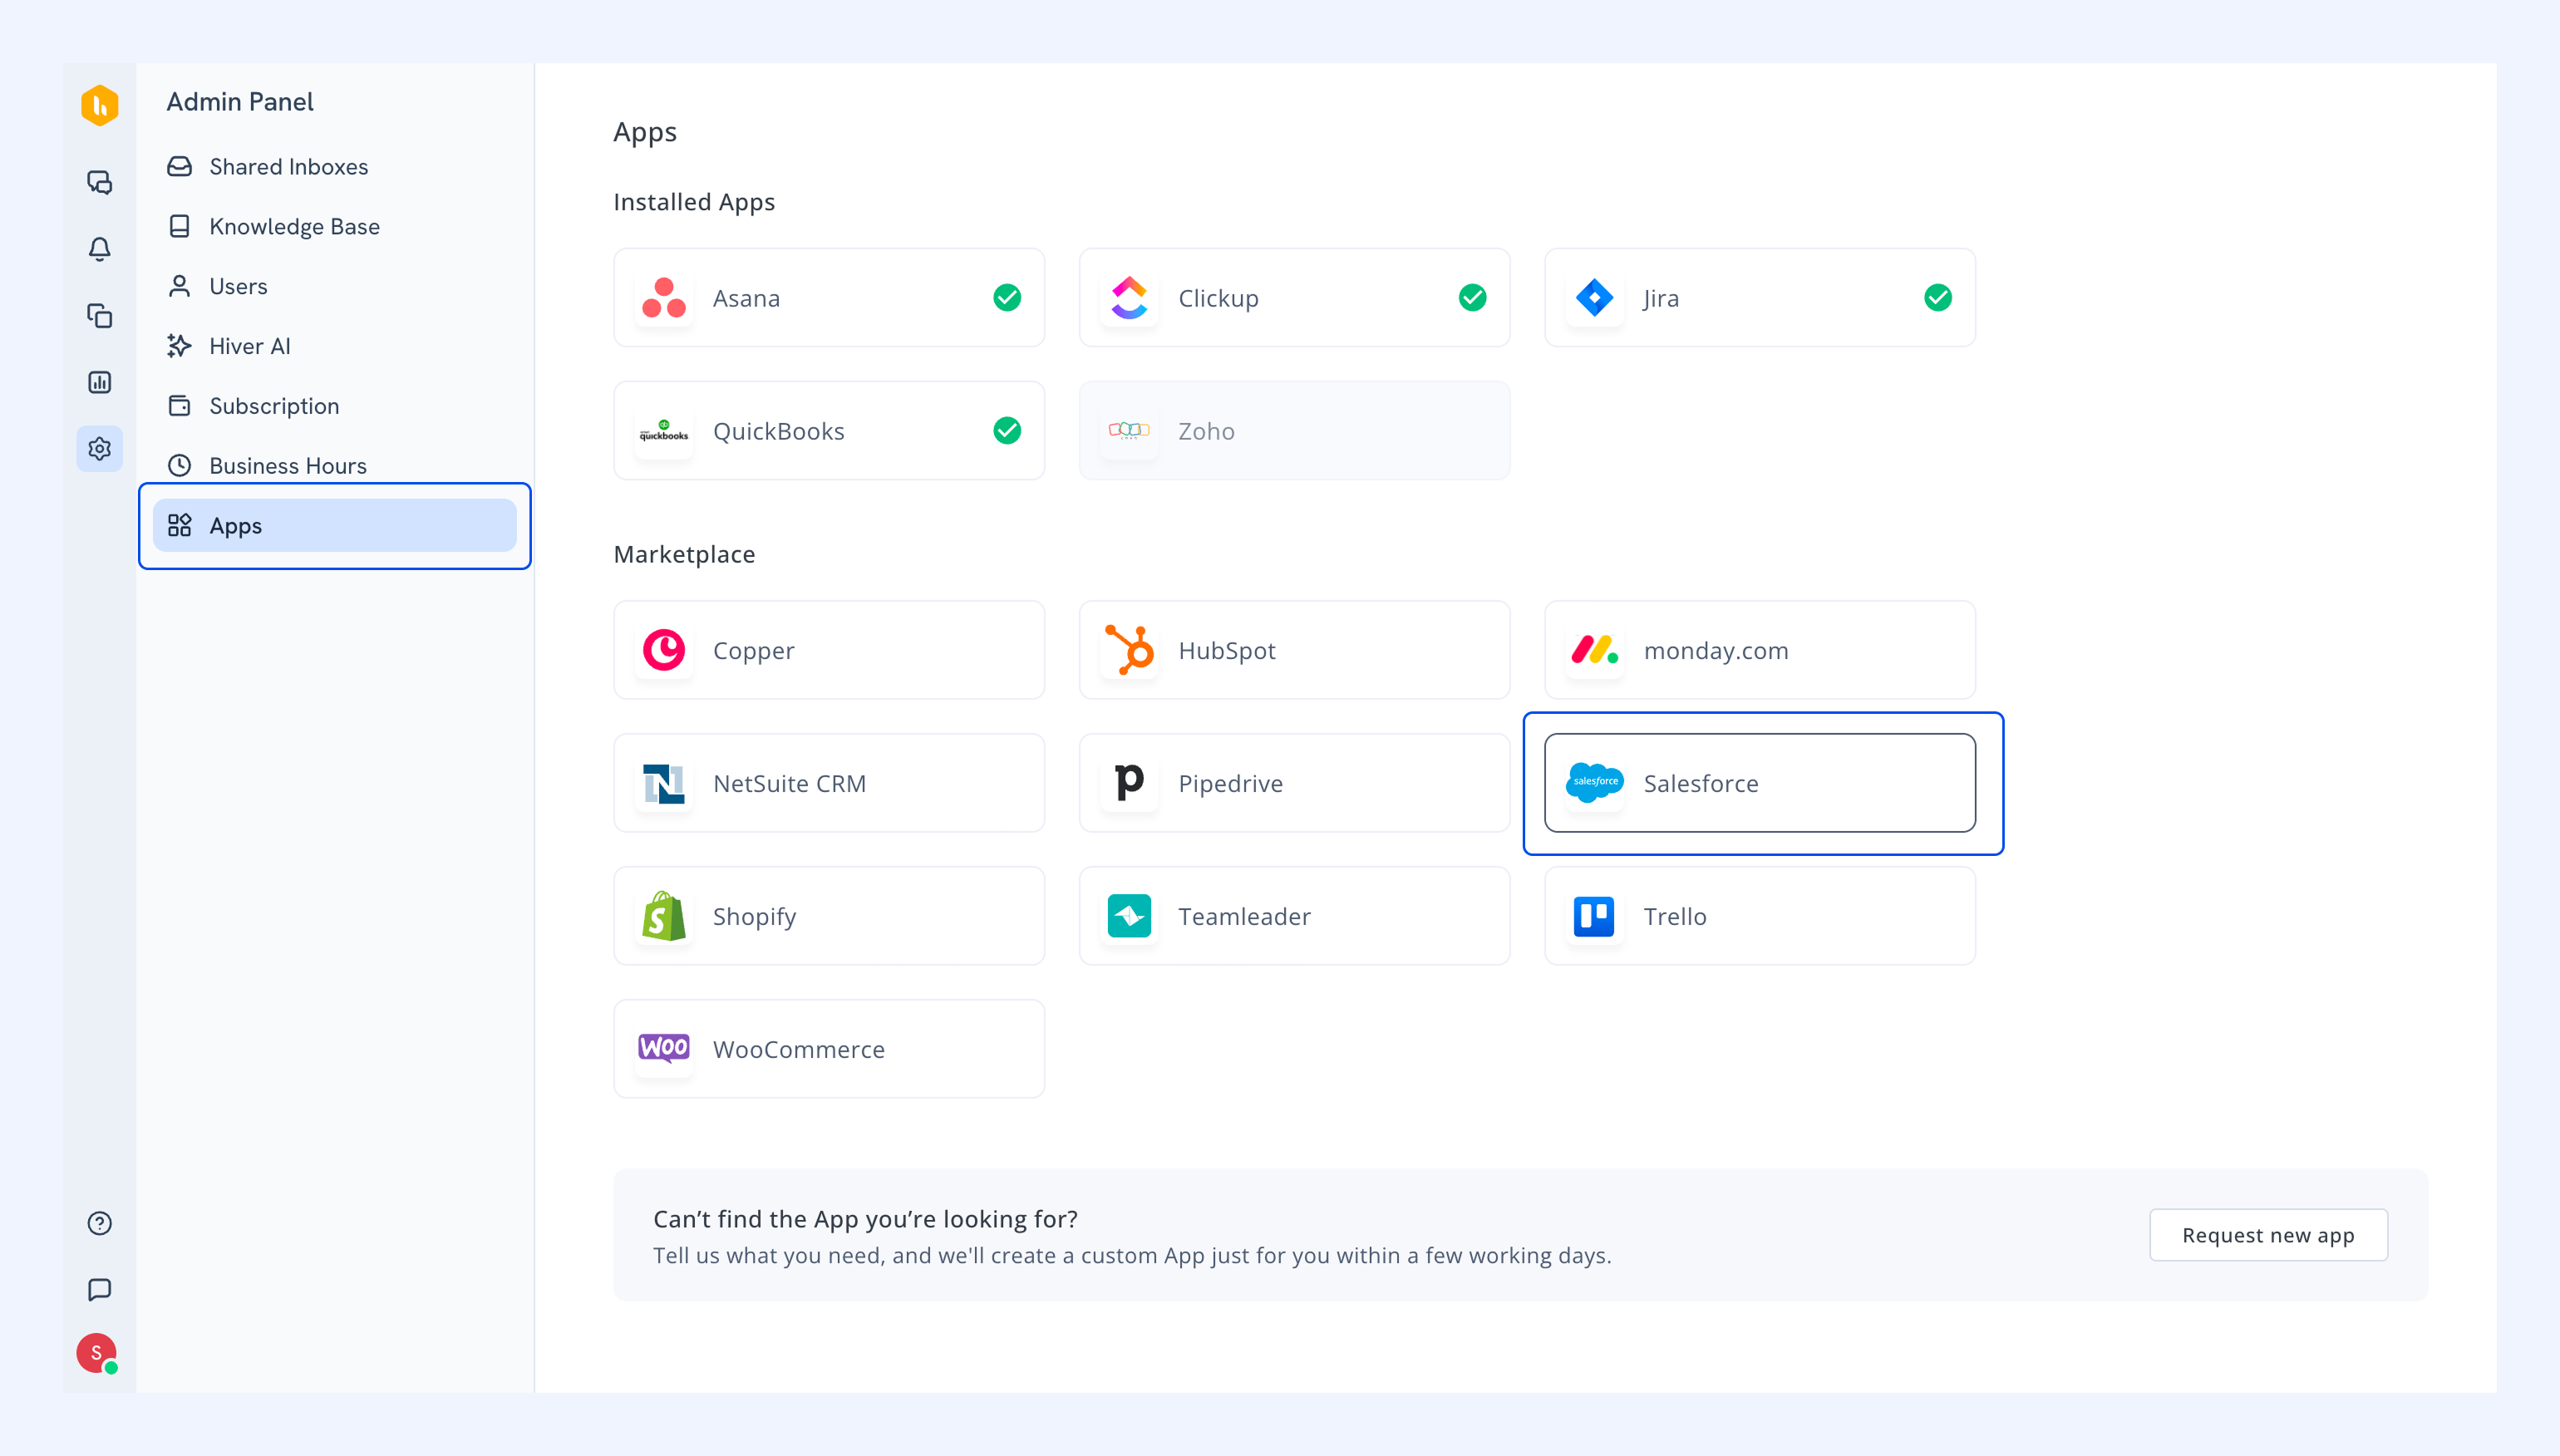
1. Go to Admin Panel → Apps.
2. Find and select Salesforce.
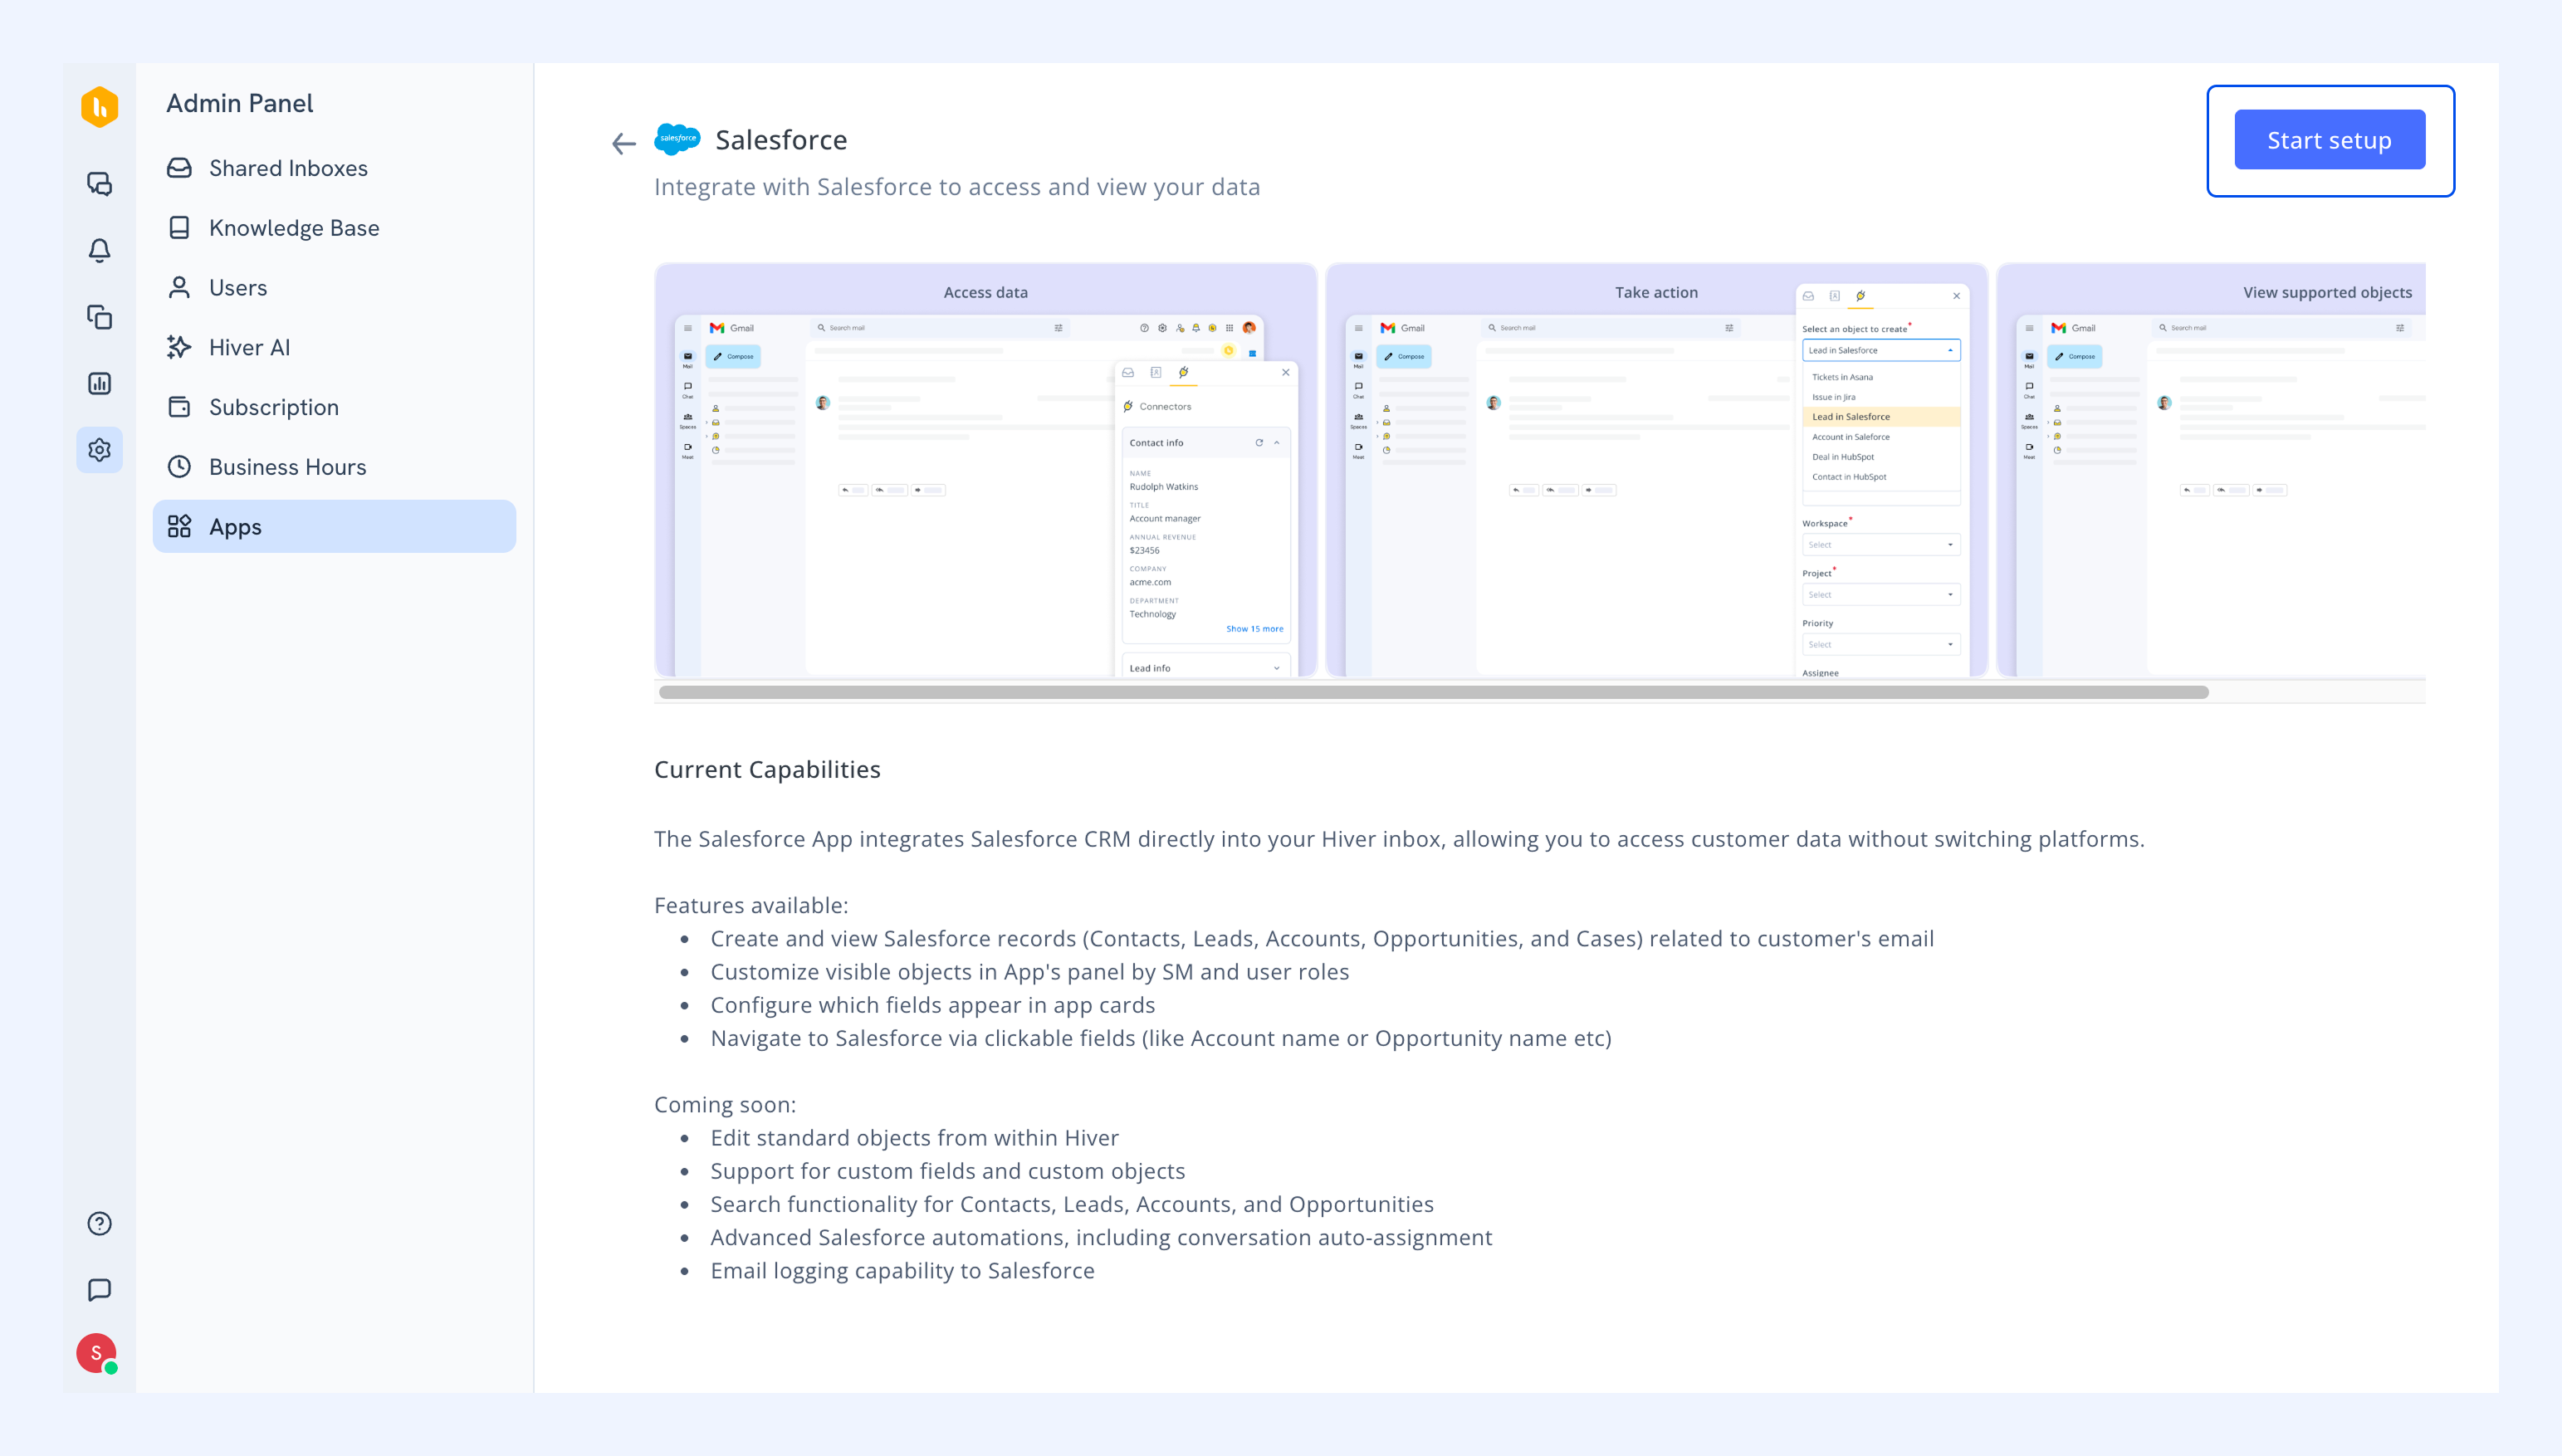
3. Review the integration features and click Start setup.
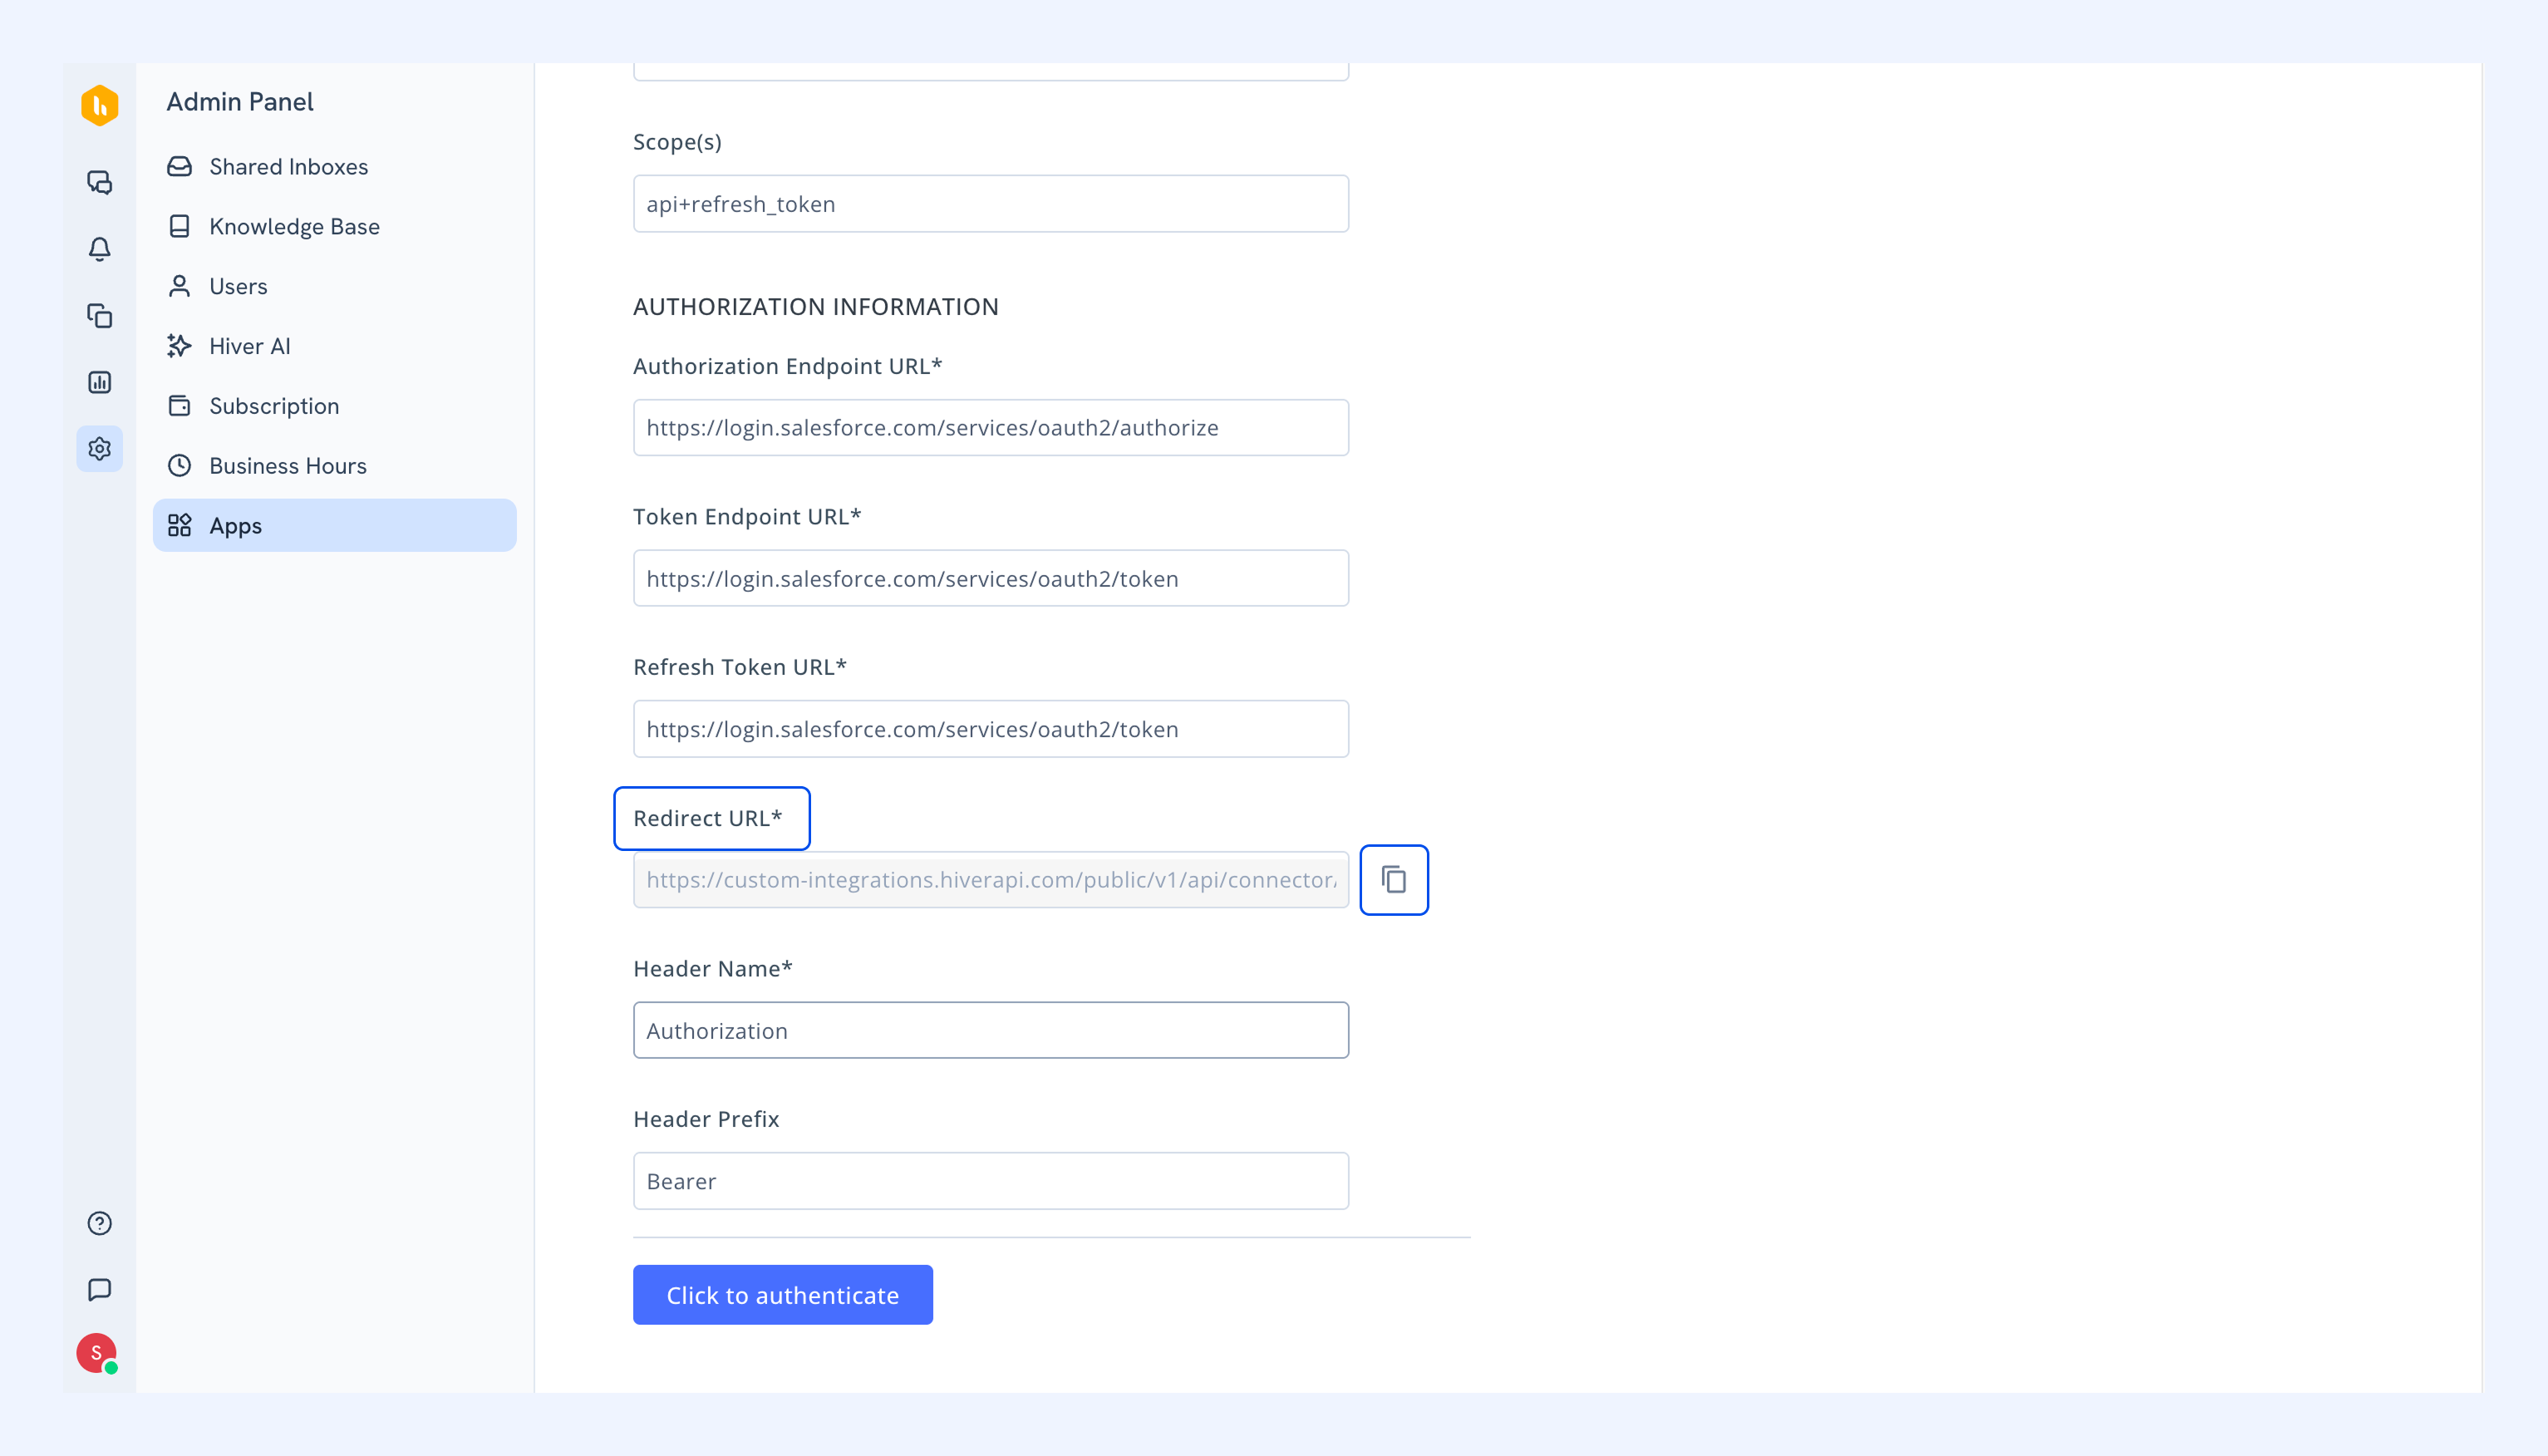
4. On the setup screen, copy the Redirect URL. You need to use this in Salesforce while creating the connected app.
Step 2: Set up a connected app in Salesforce
To continue the setup, you will need to create a connected app in Salesforce and obtain the required credentials.
1. Log in to your Salesforce account and go to Setup.
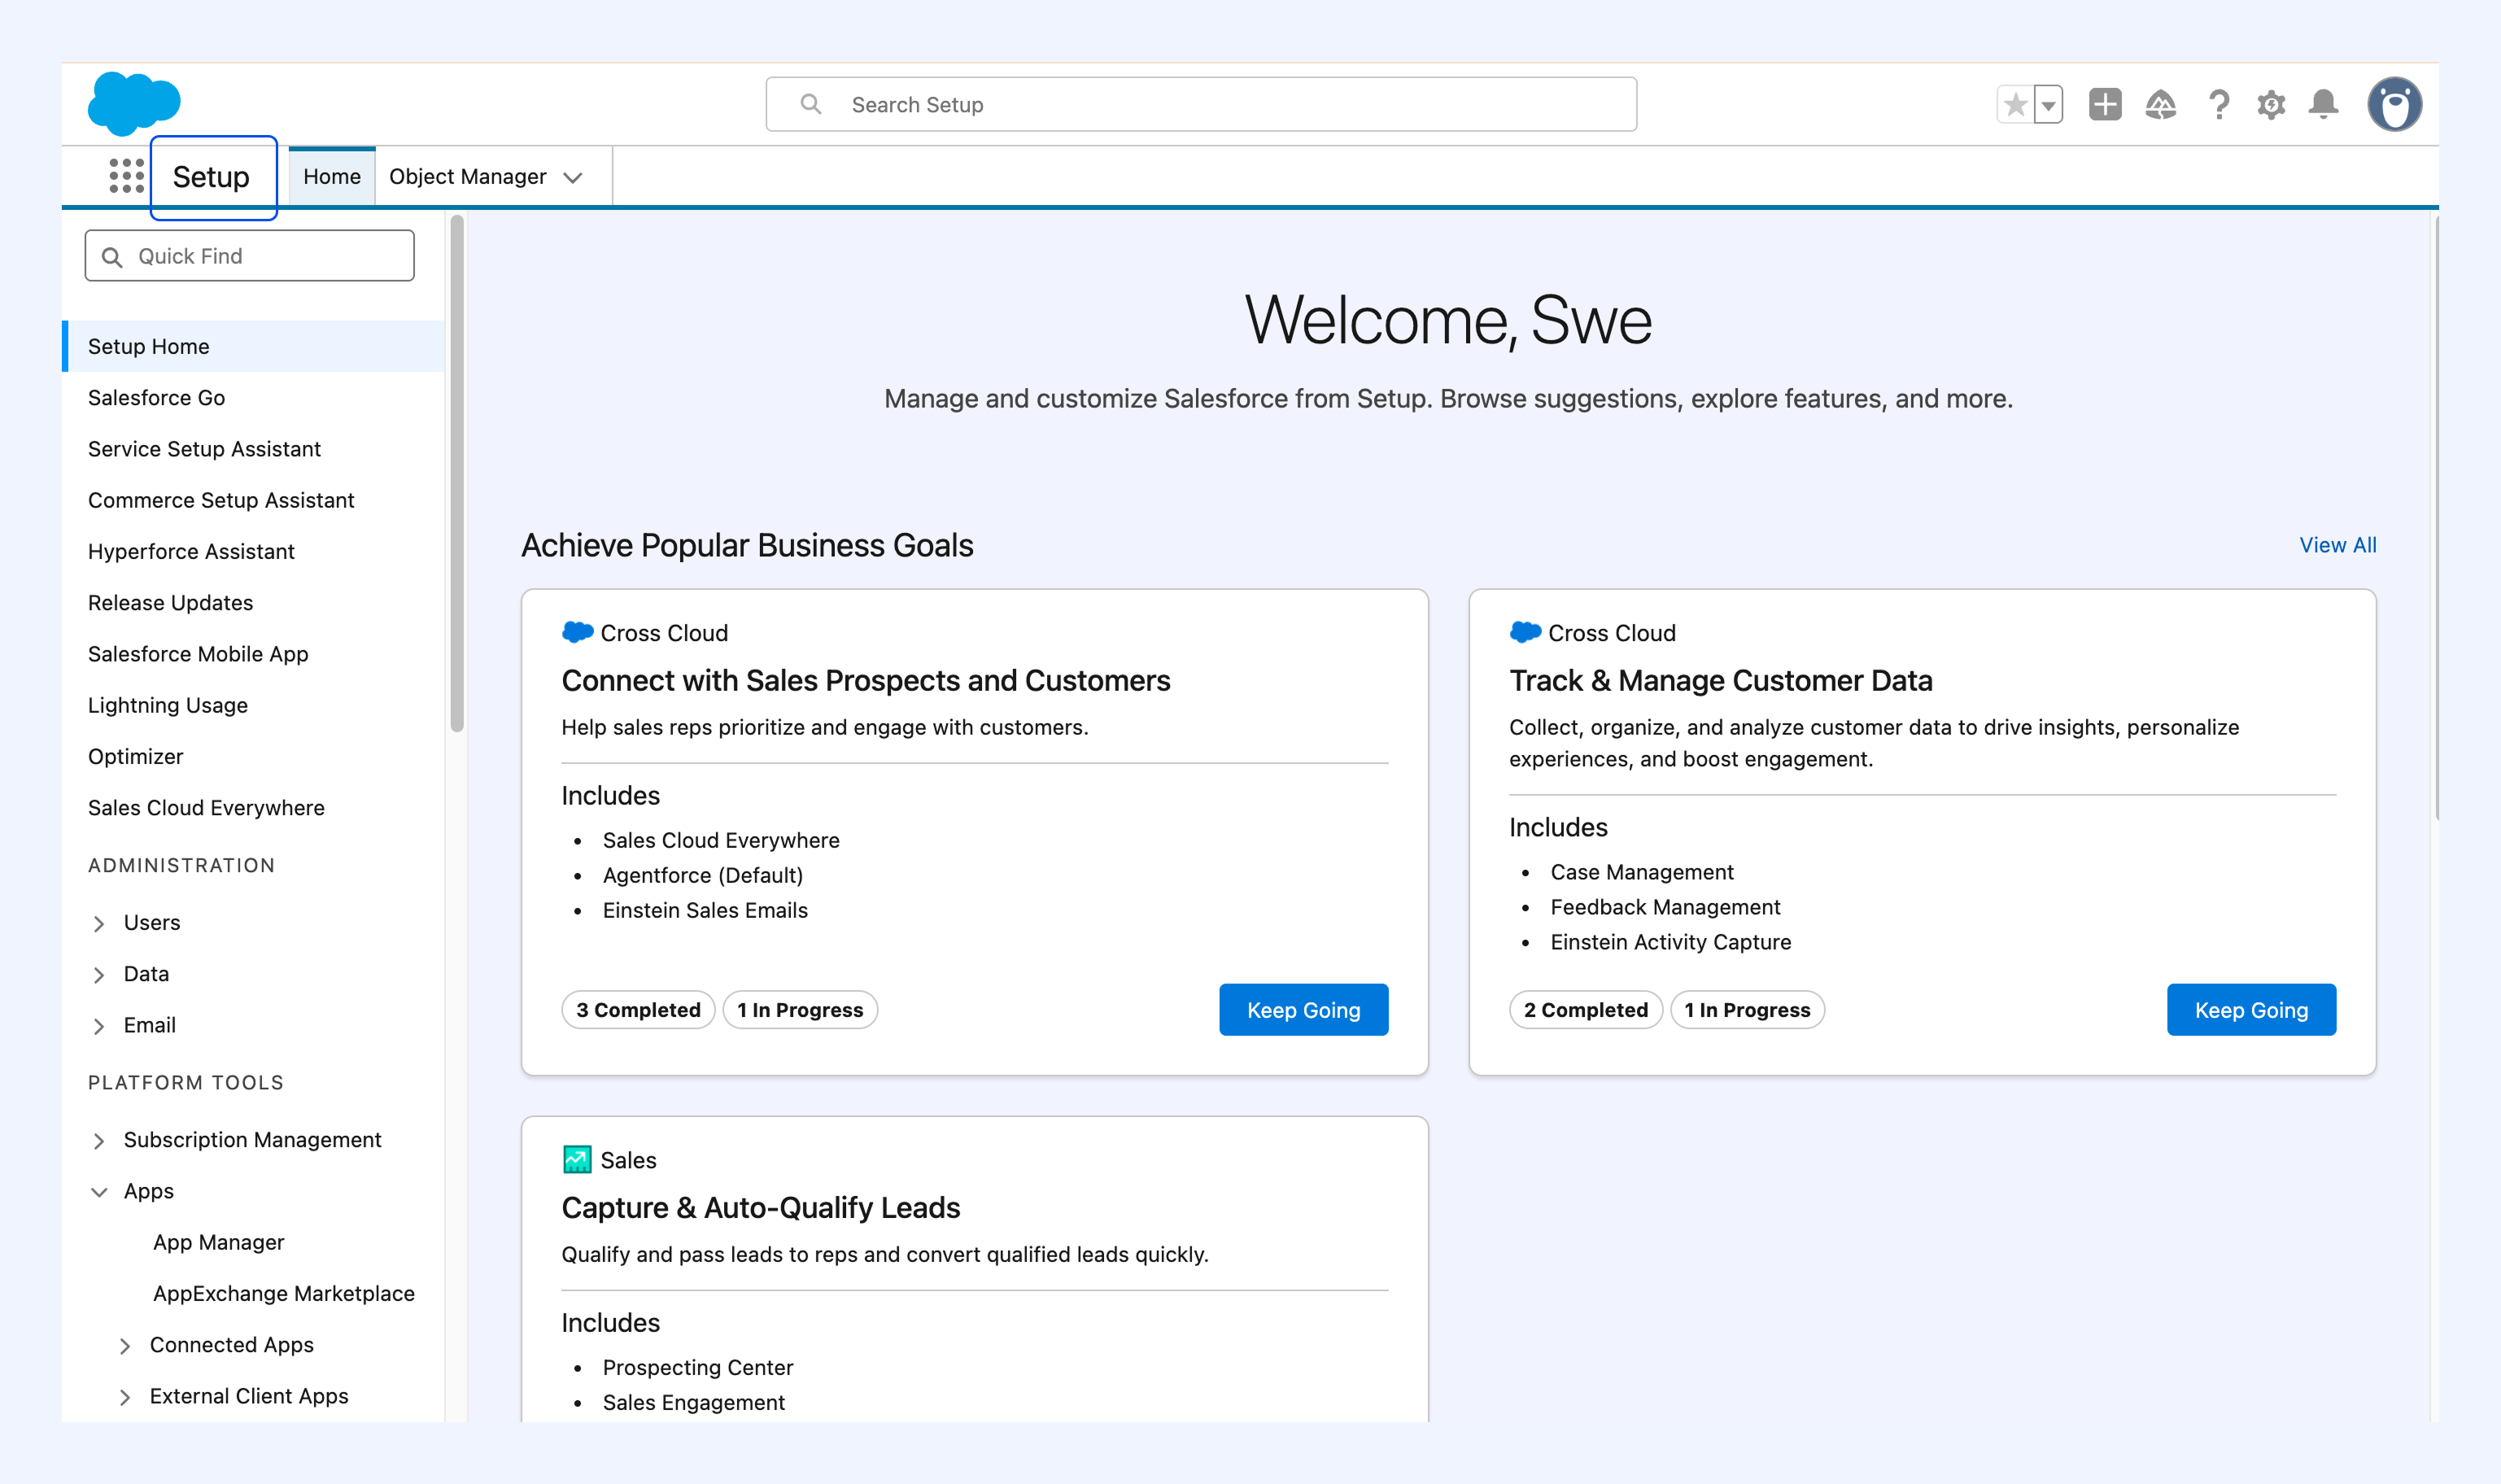
2. Go to External Client Apps → Settings.
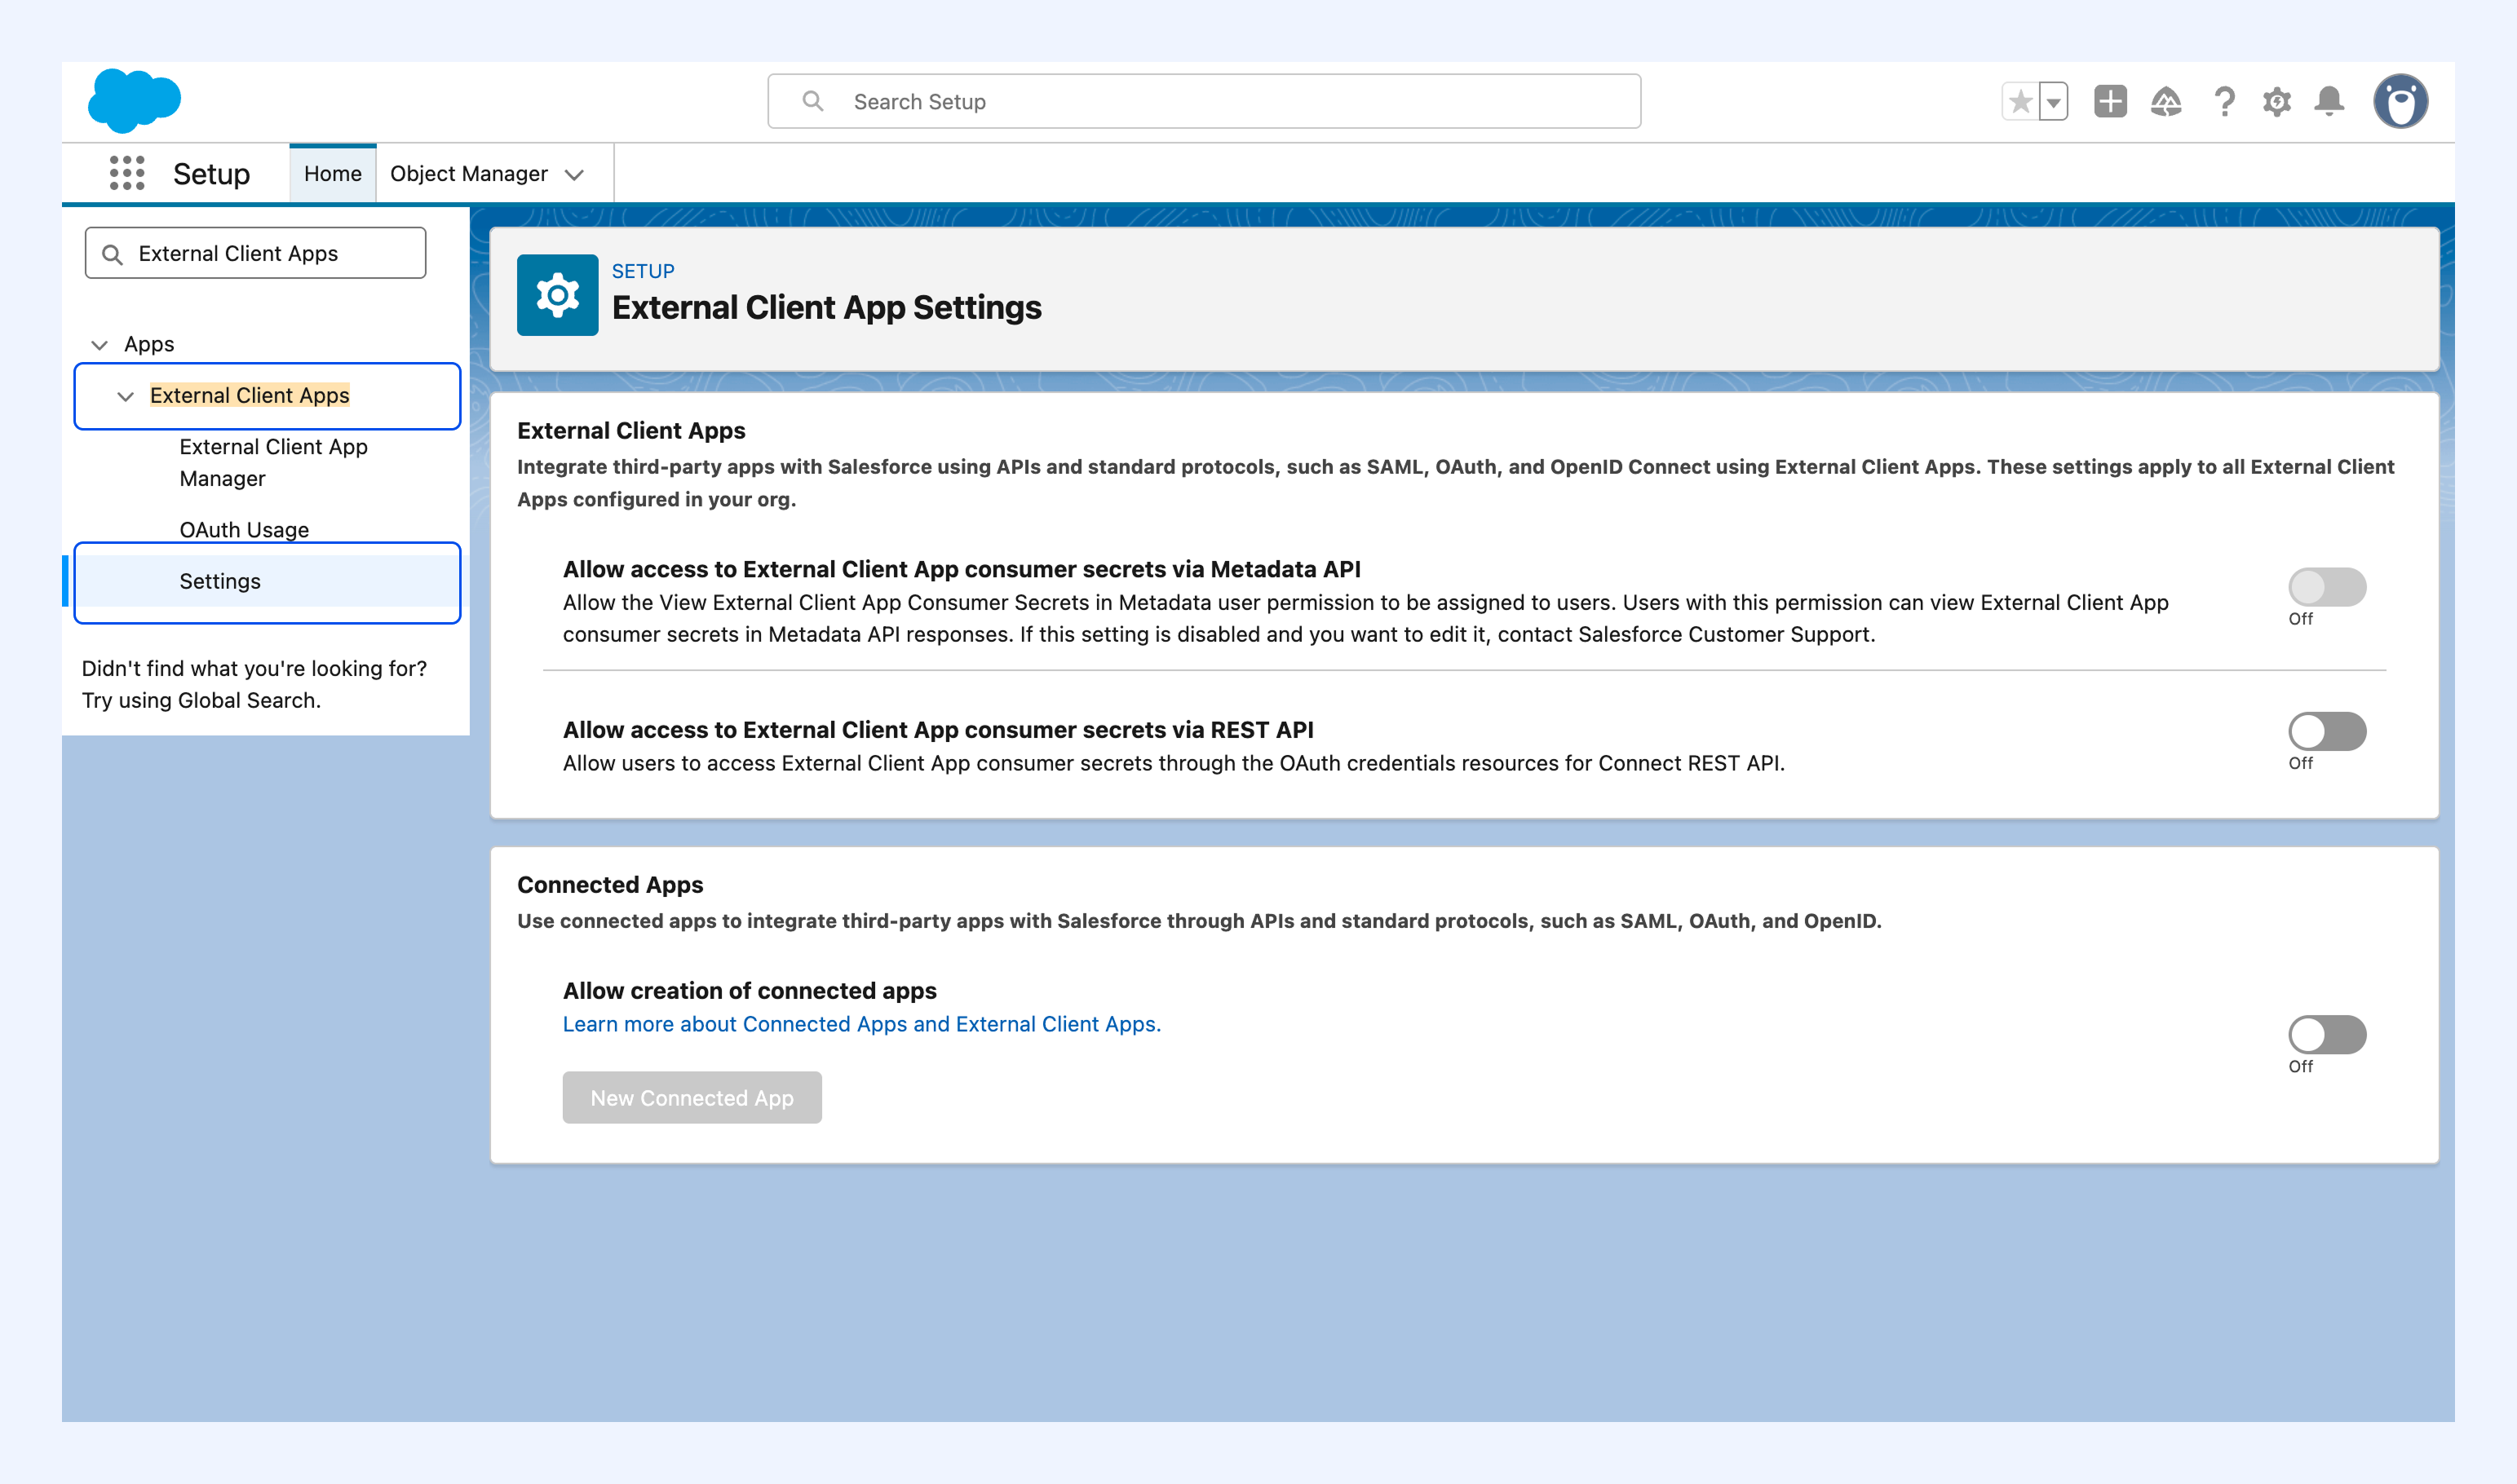
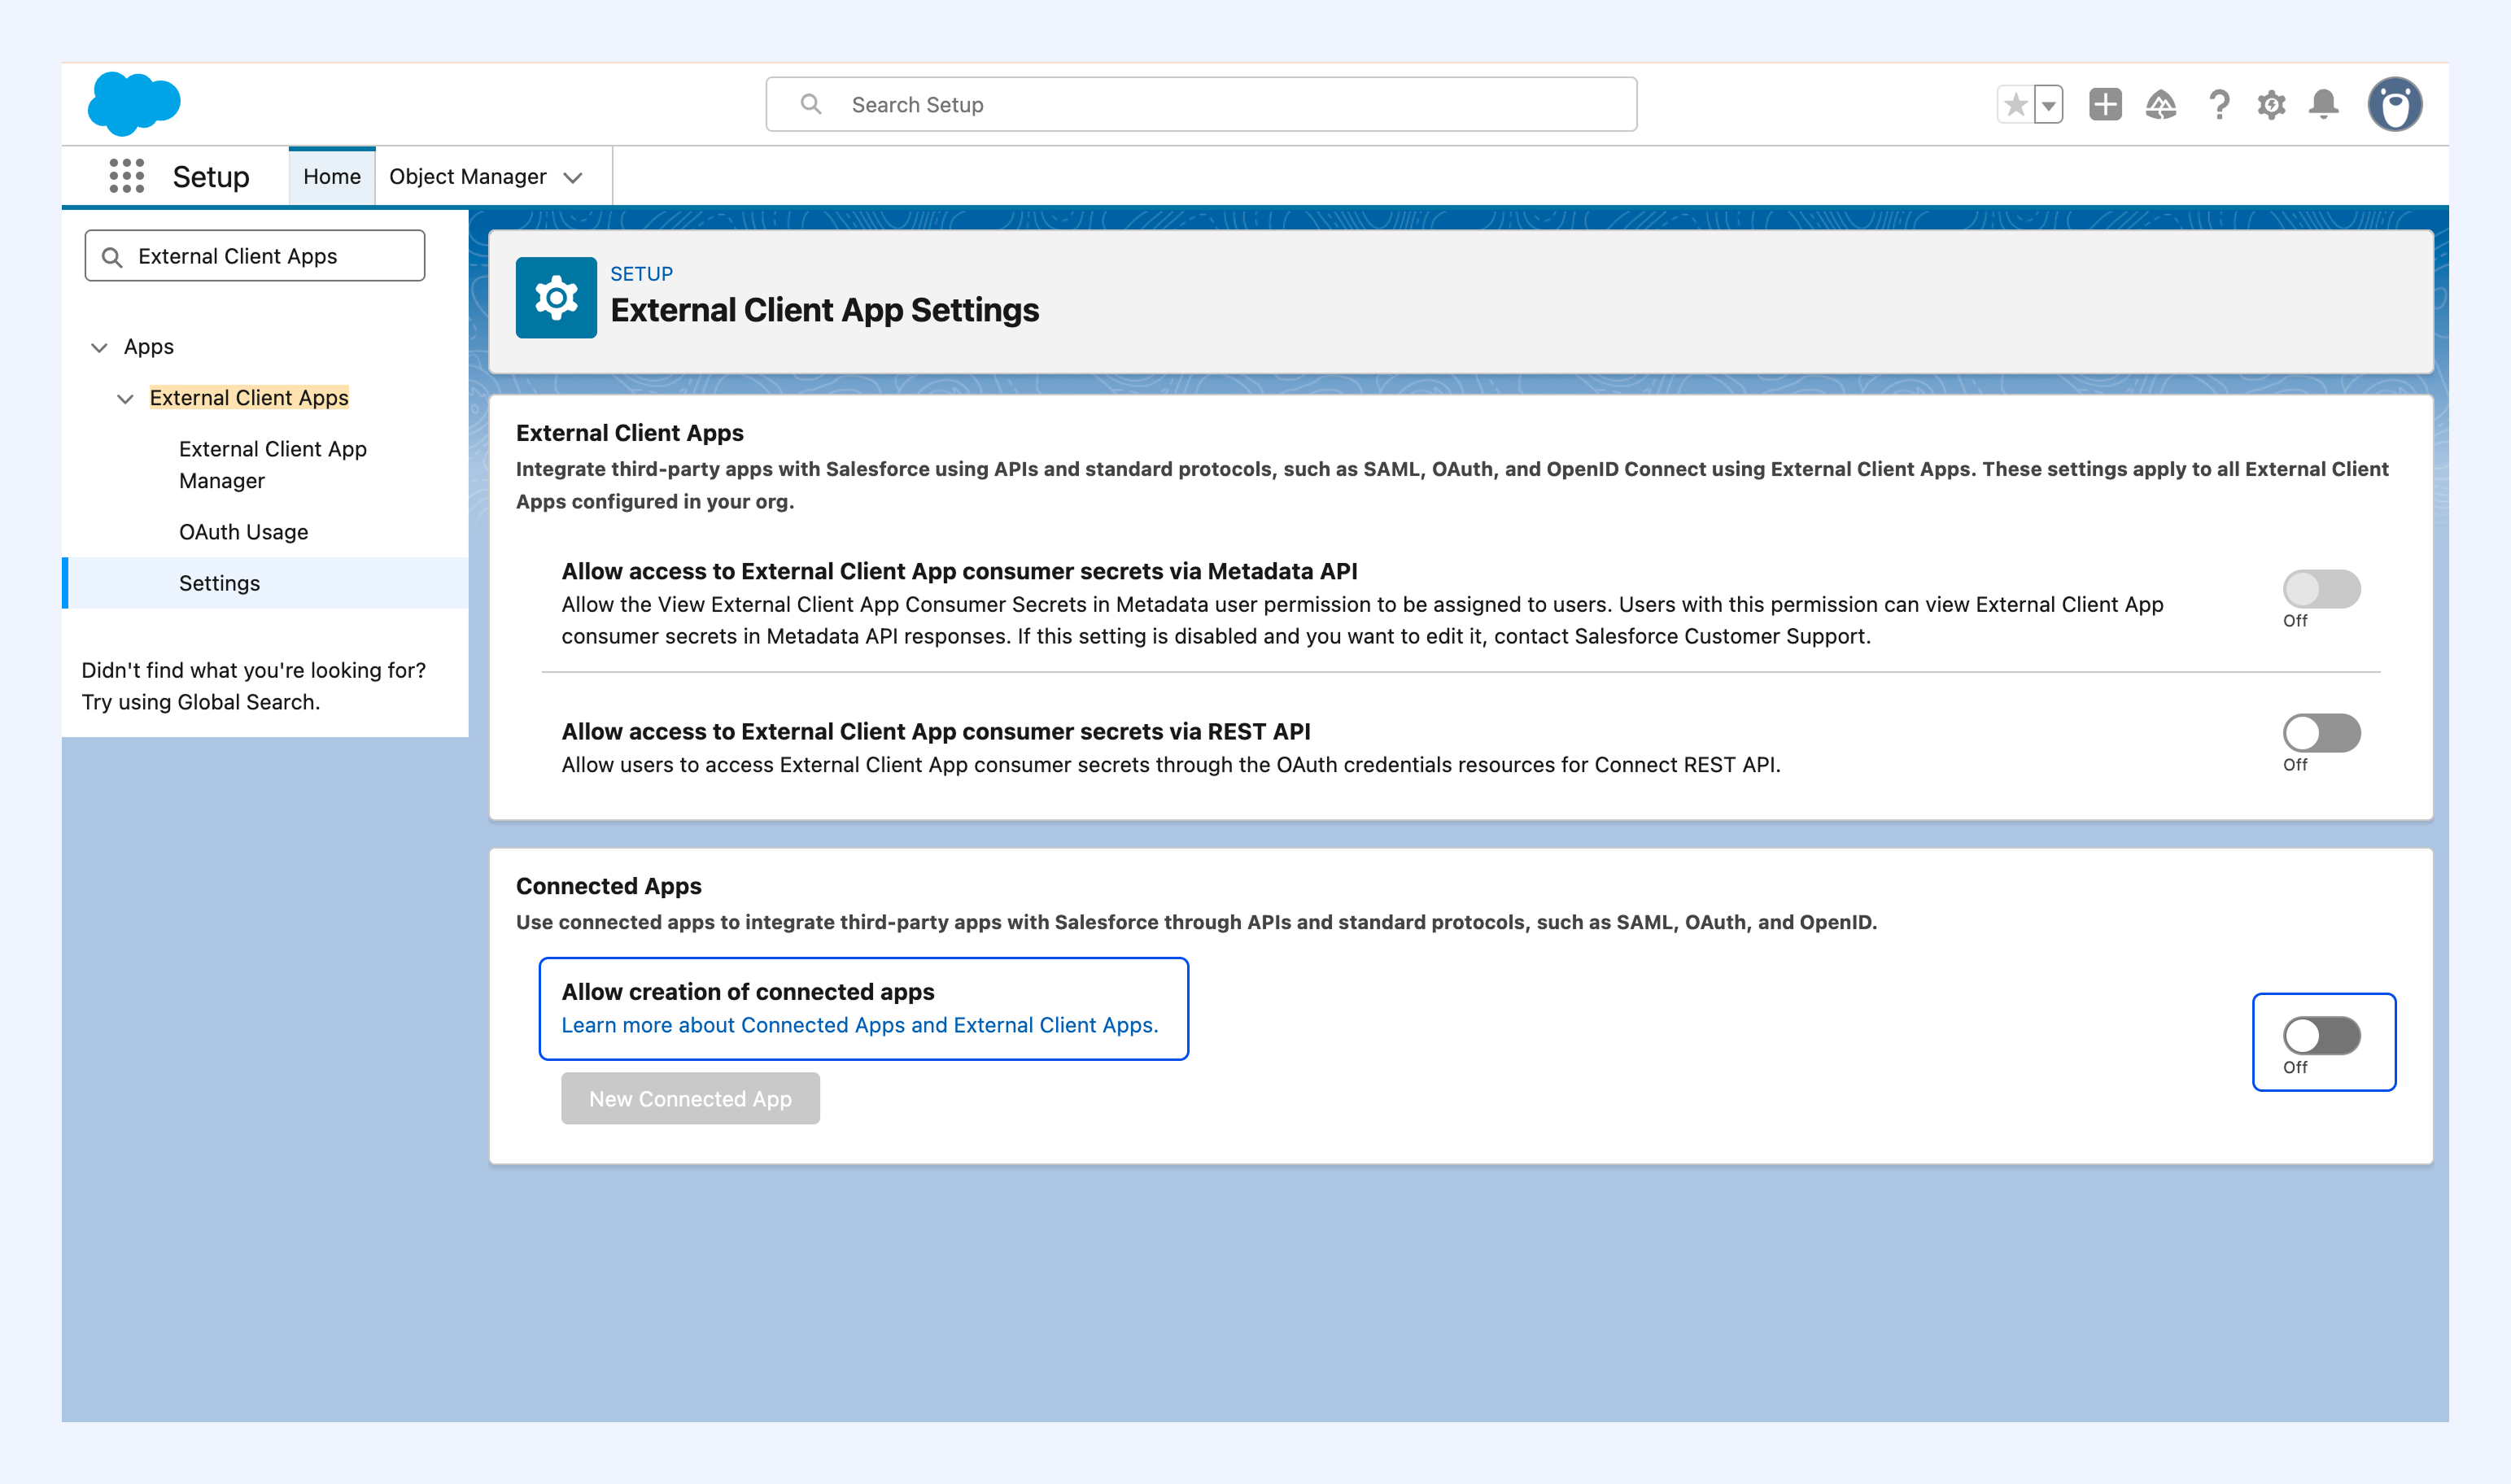
3. Turn on the toggle for Allow creation of connected apps.
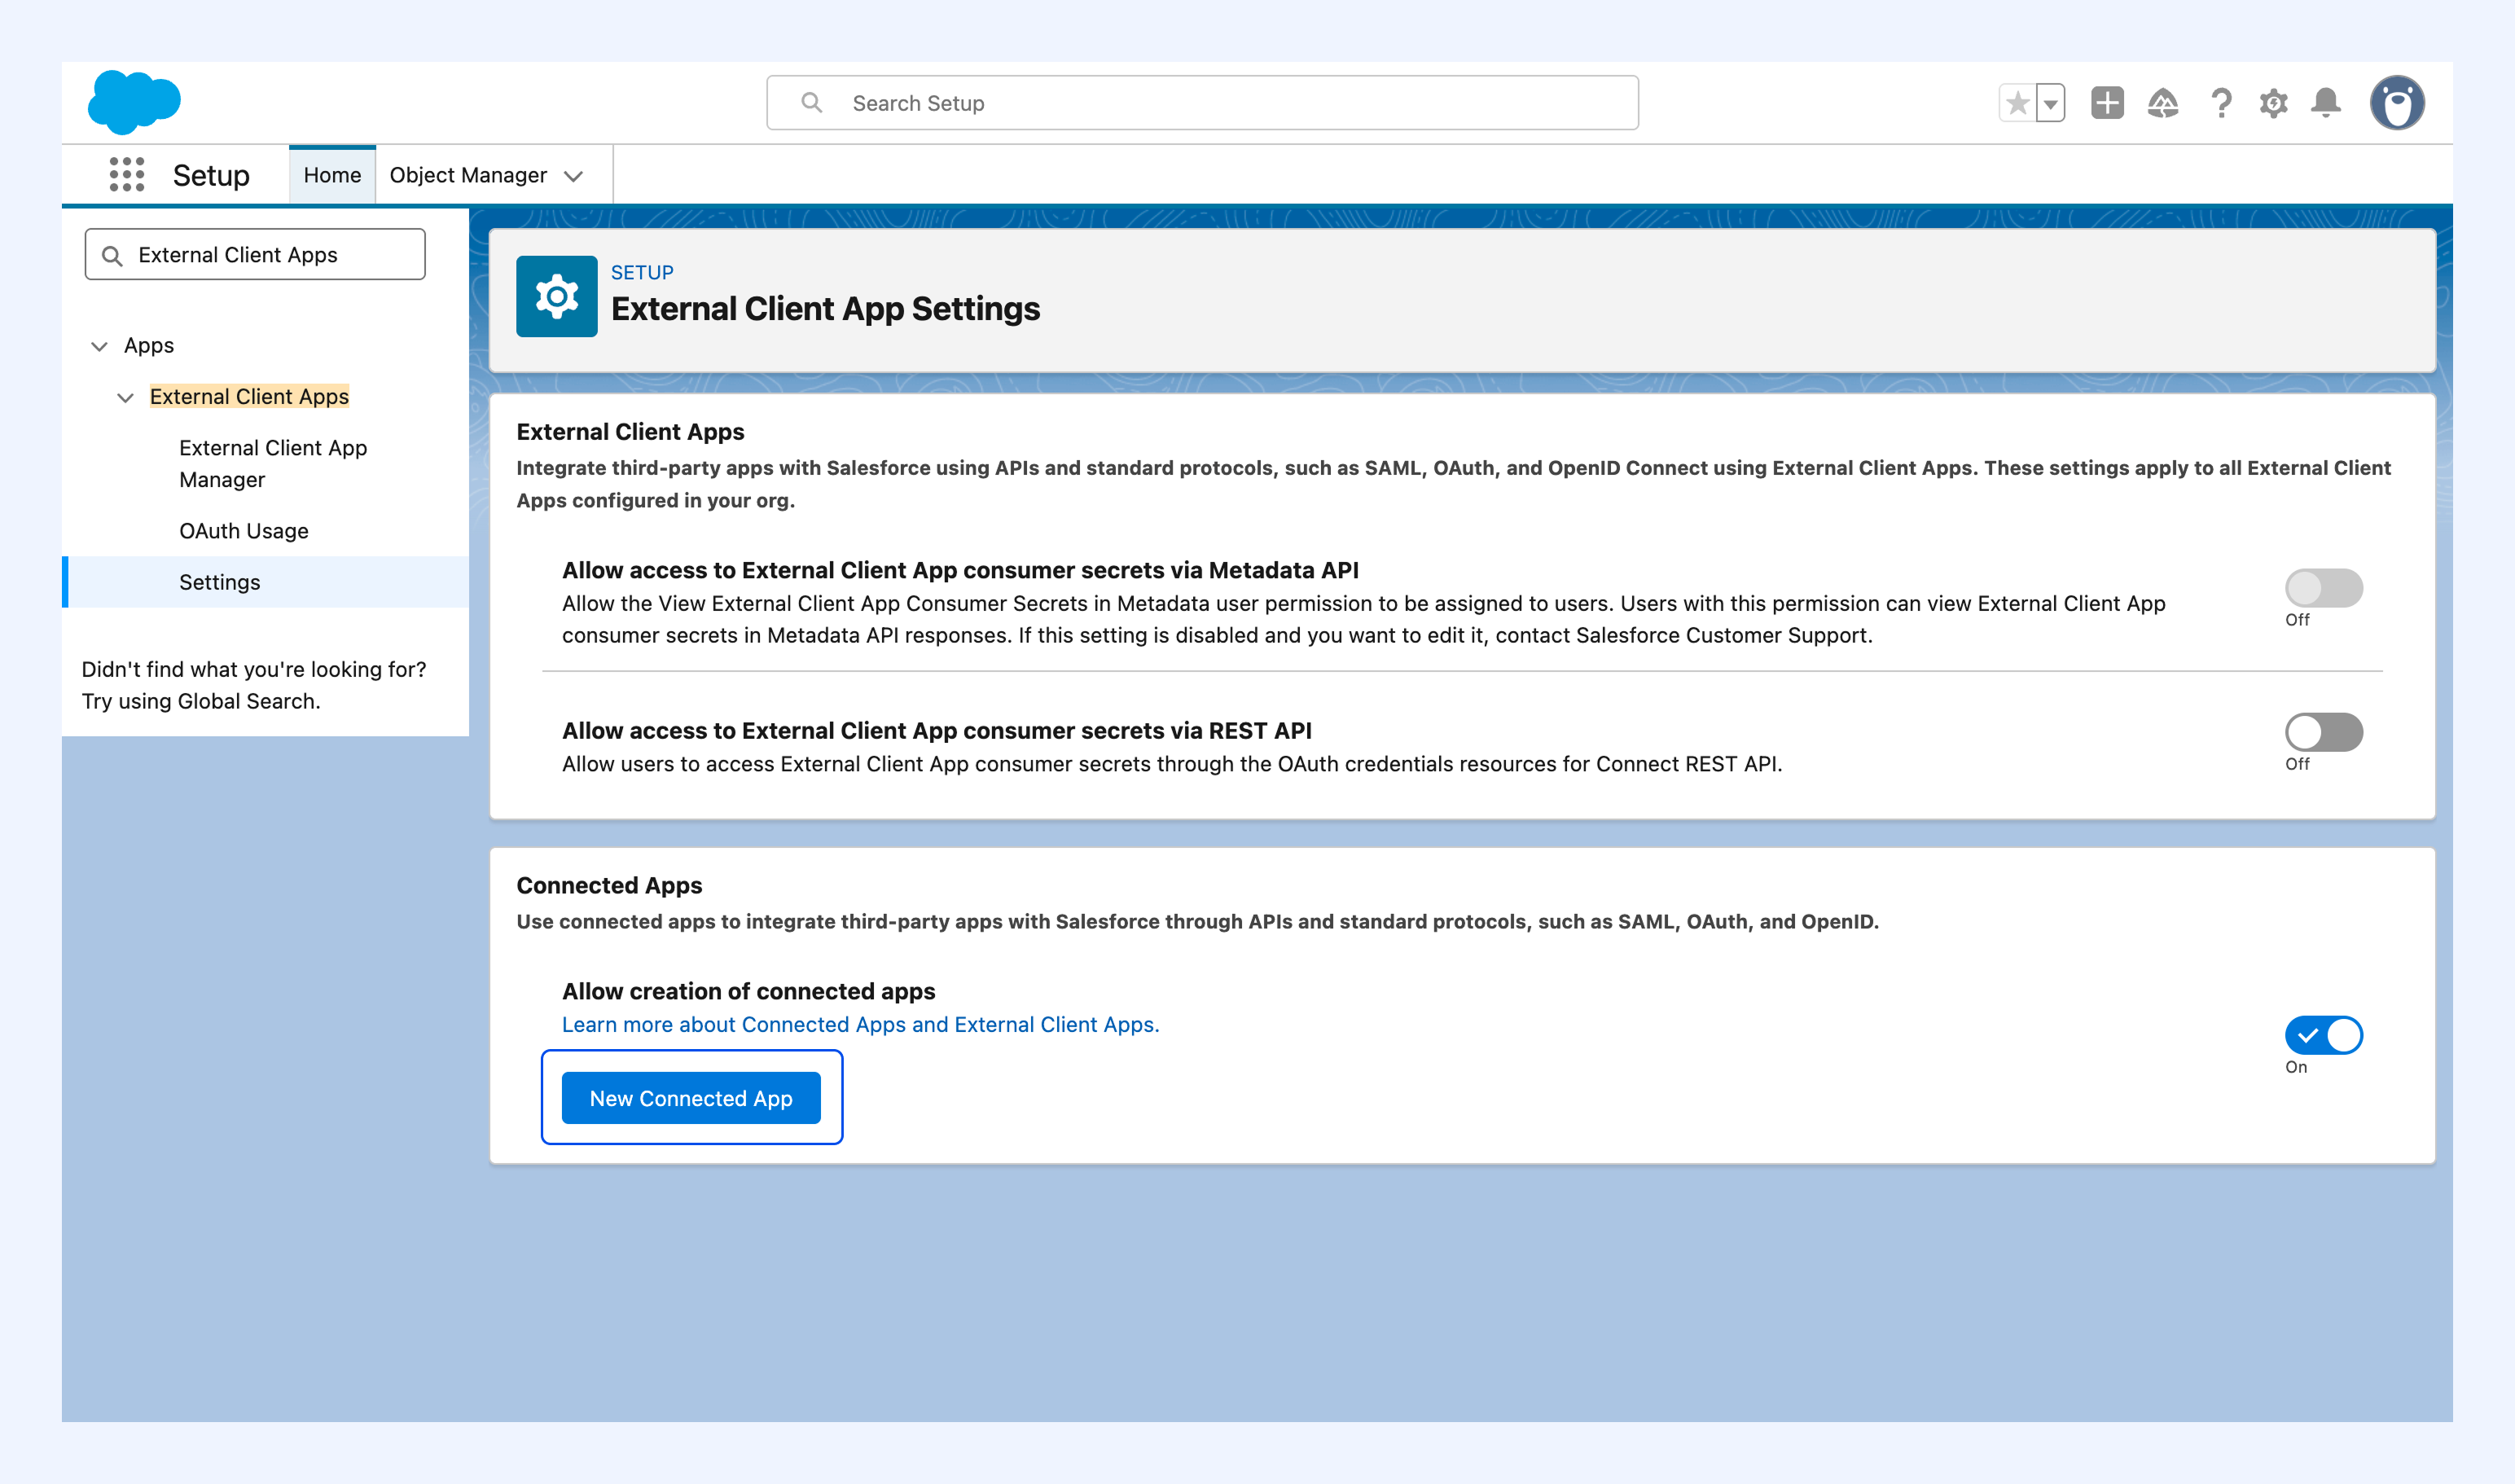
4. Click New Connected App.
5. Enter the Connected App Name and Contact Email.
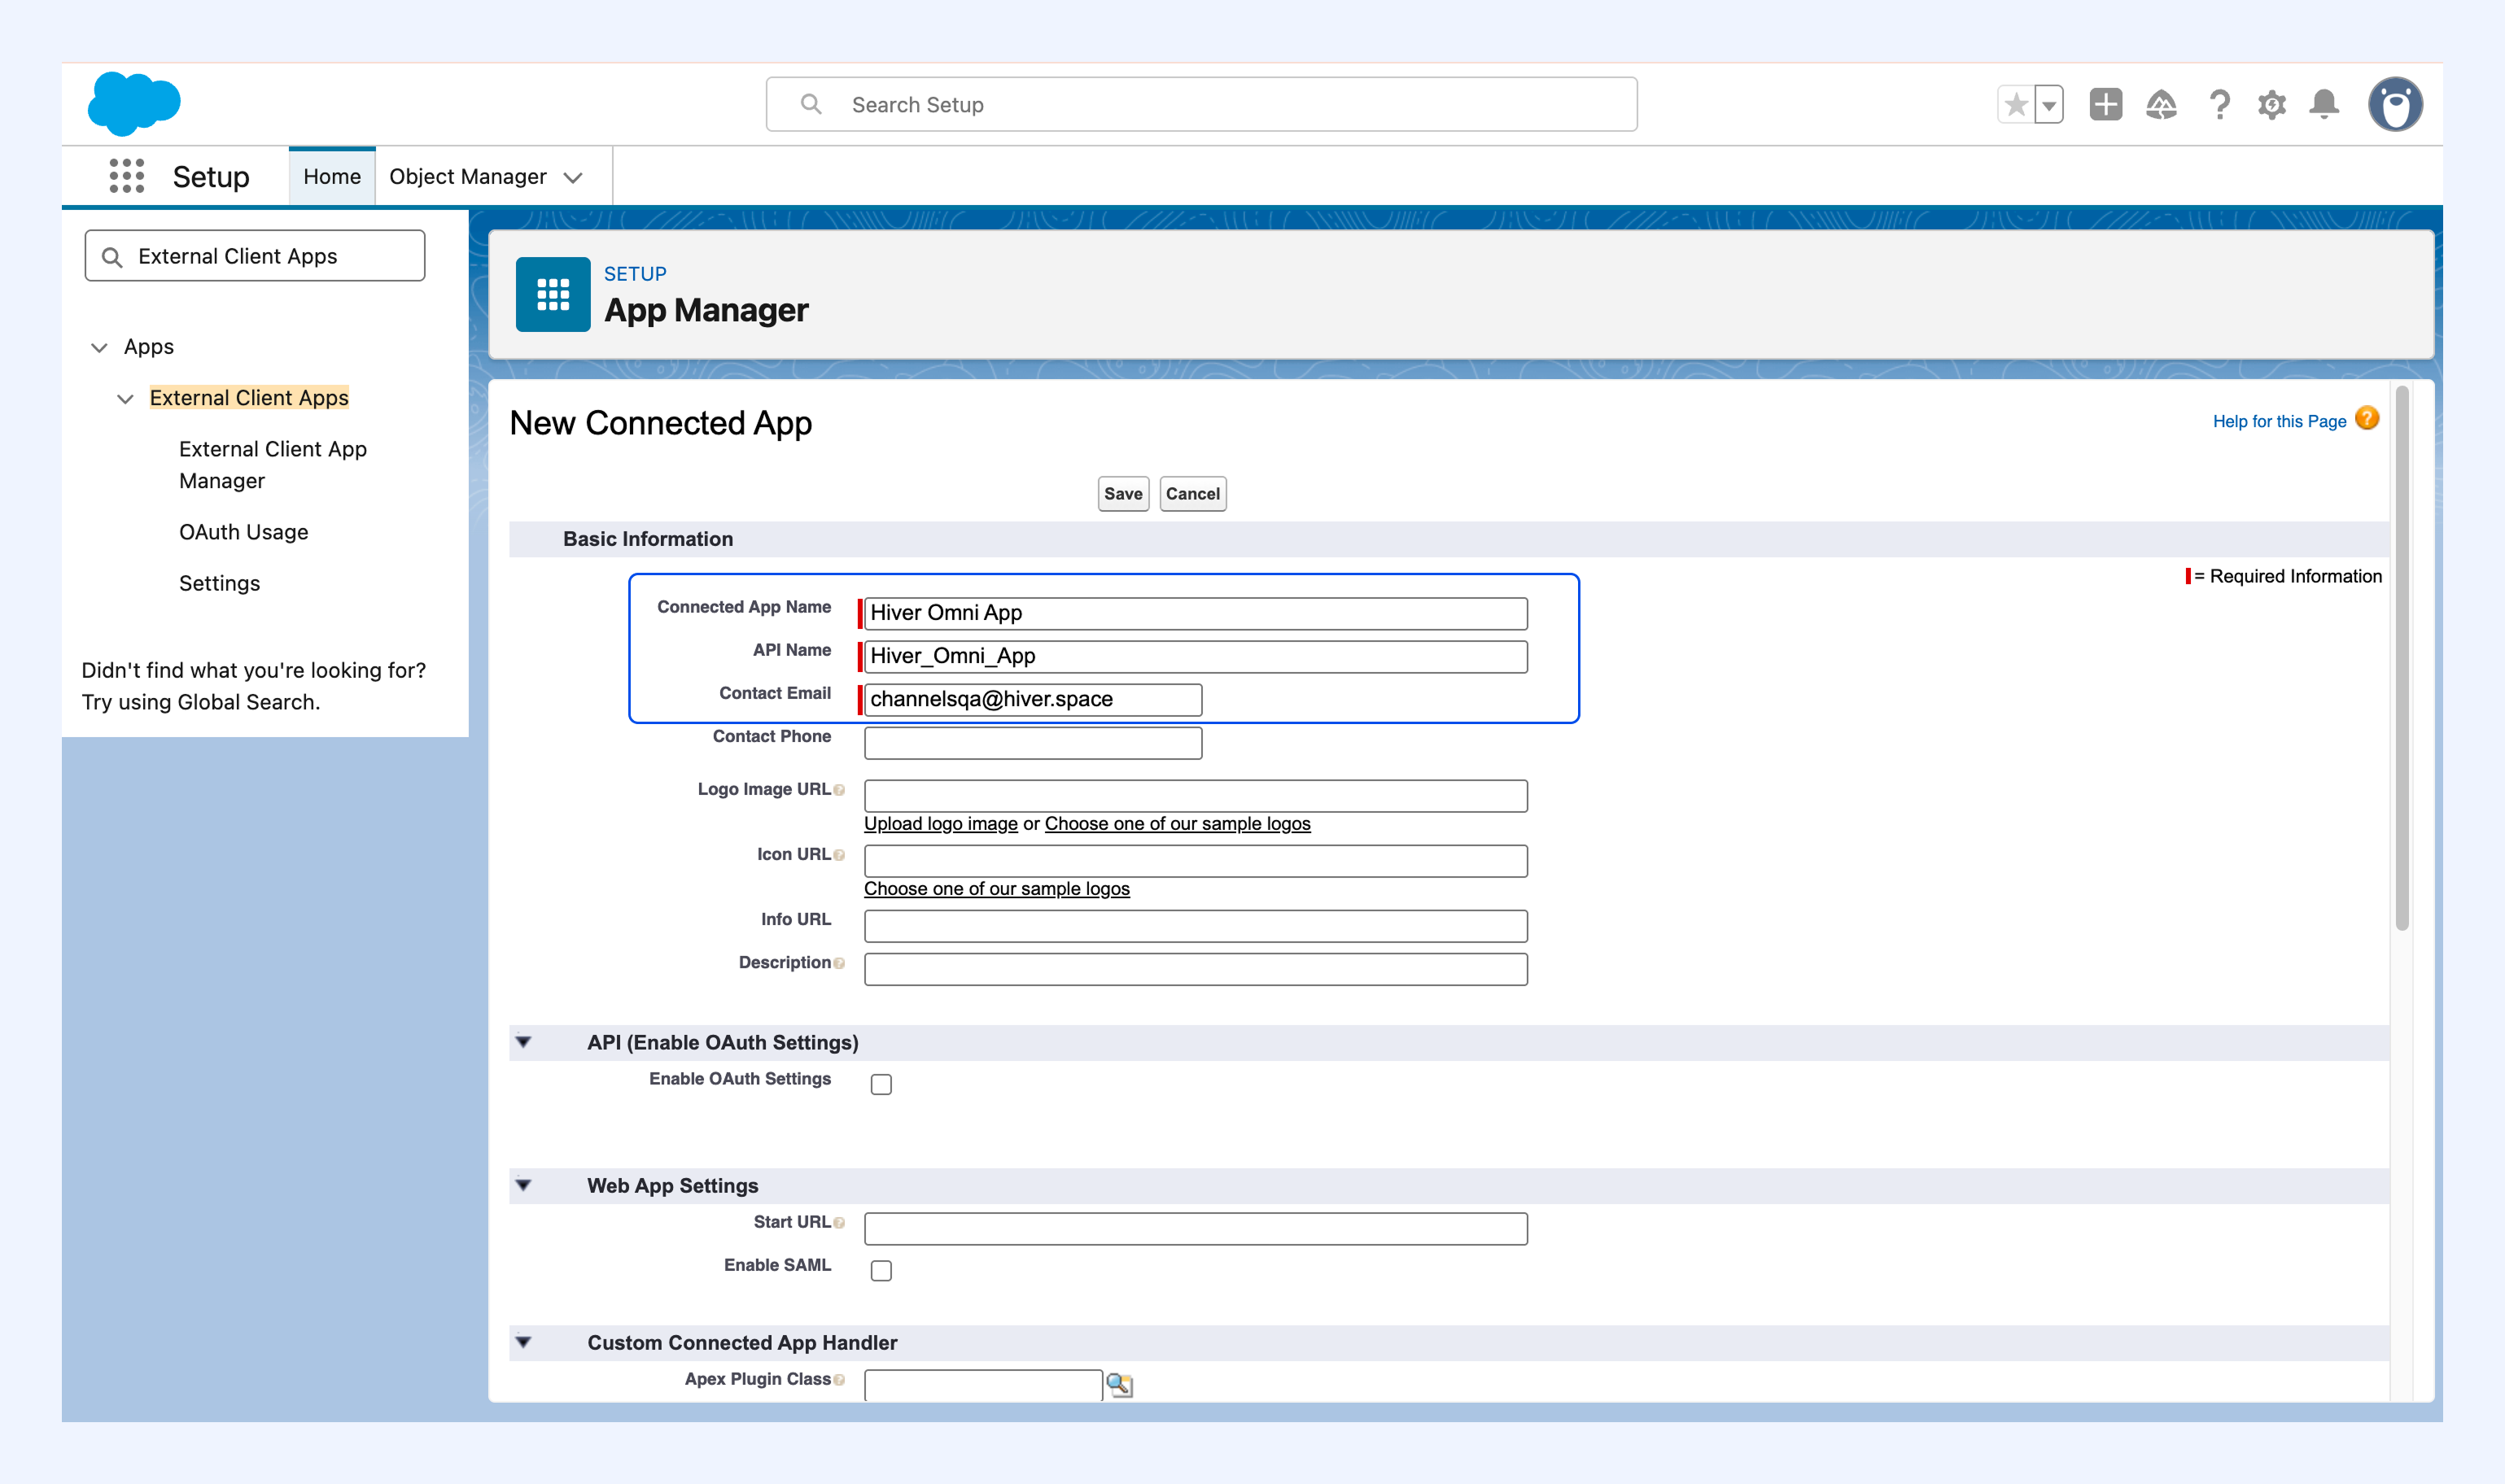
6. Under API (Enable OAuth Settings), select Enable OAuth Settings.
7. Paste the Redirect URL you copied from Hiver into Callback URL.
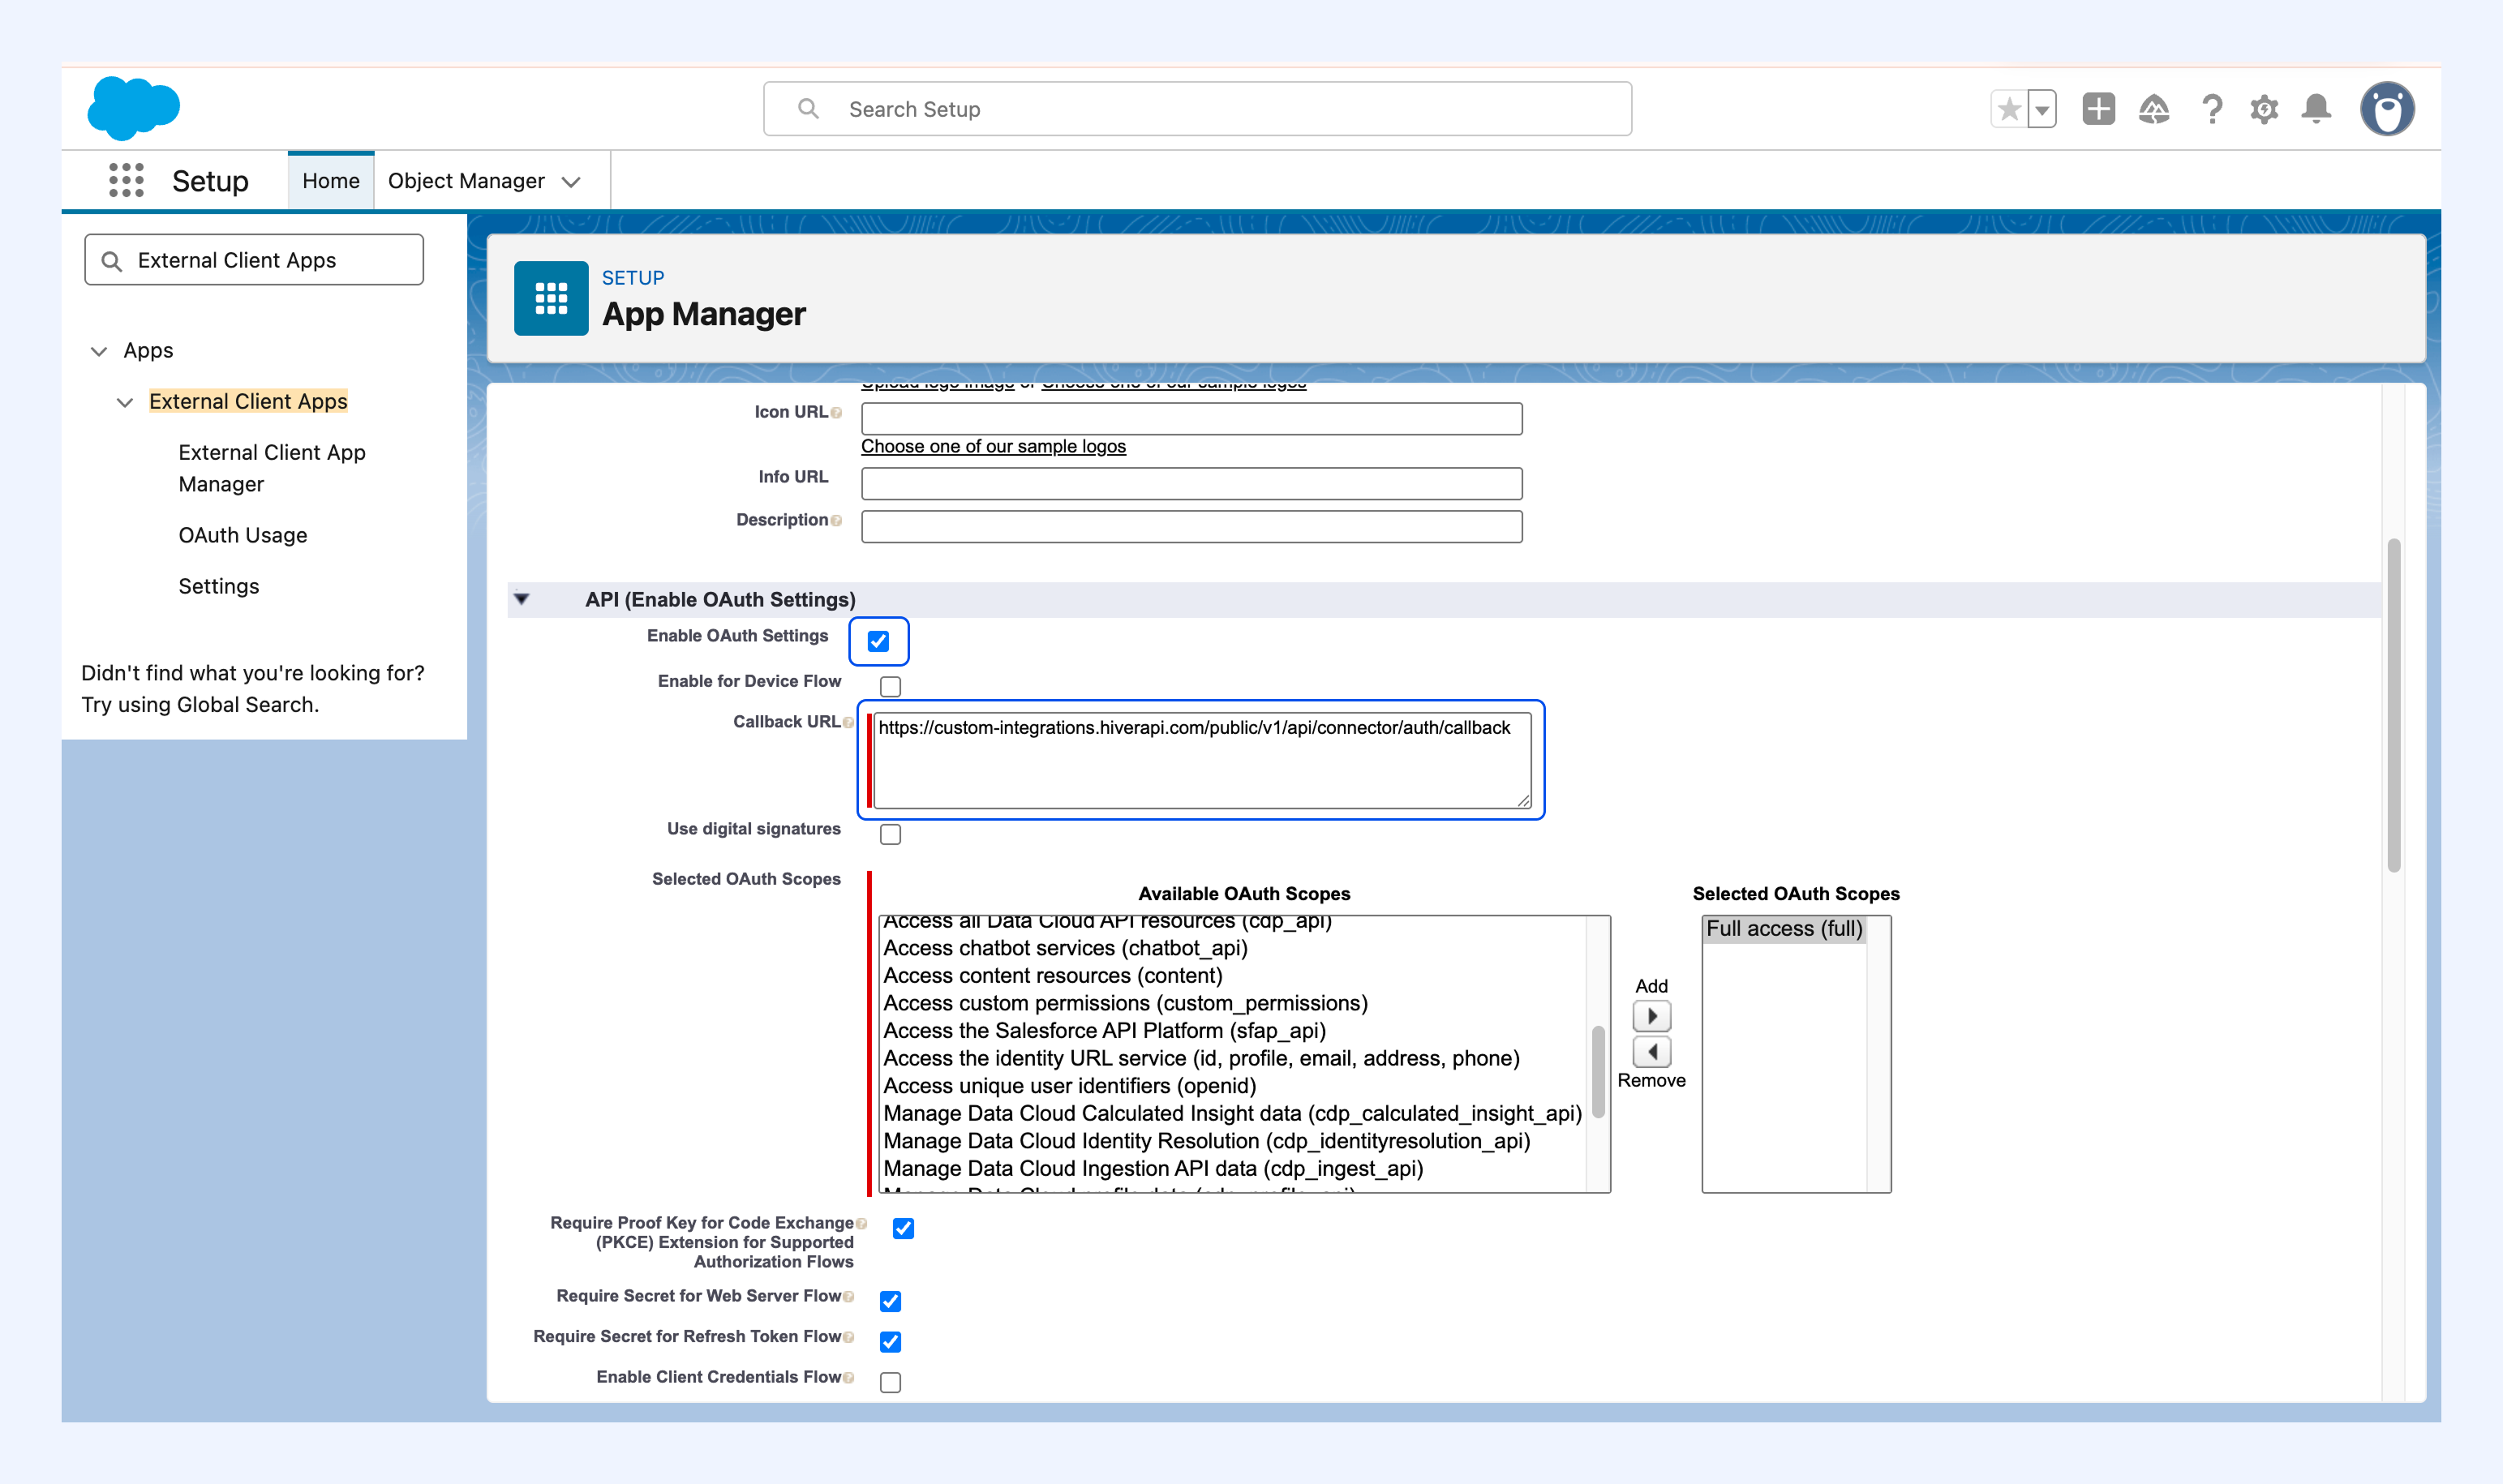
8. Click Save.
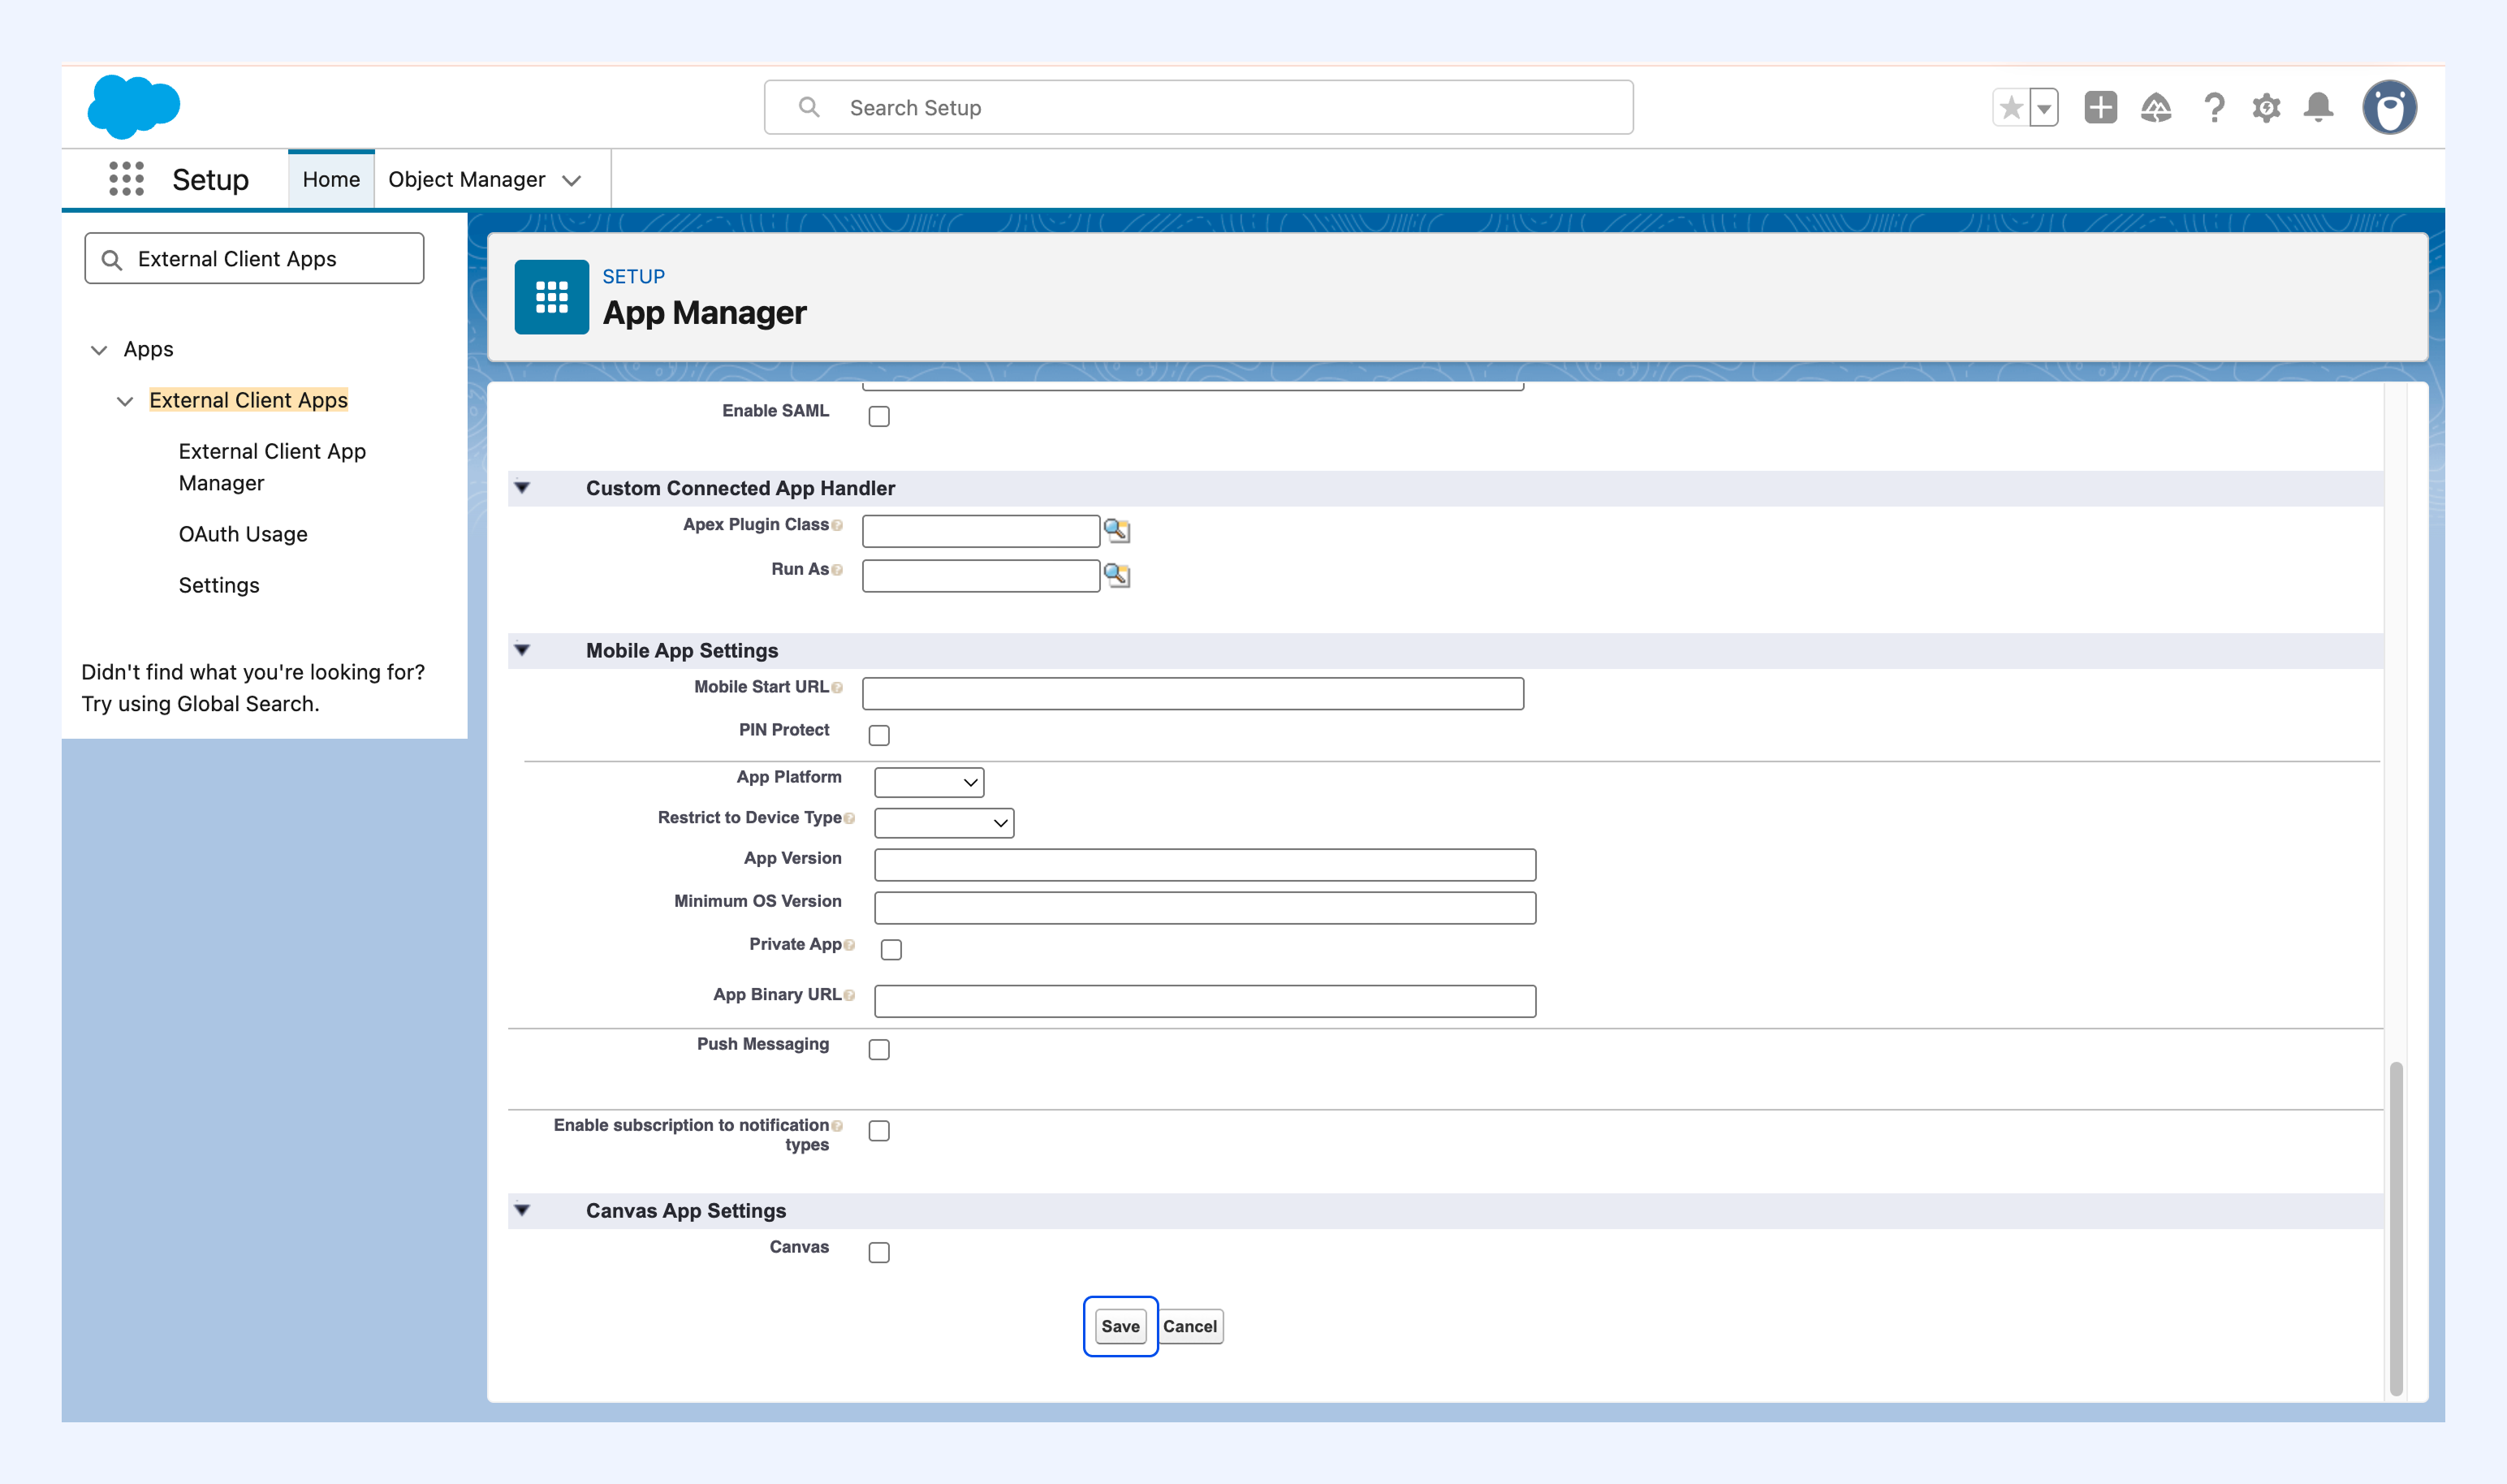
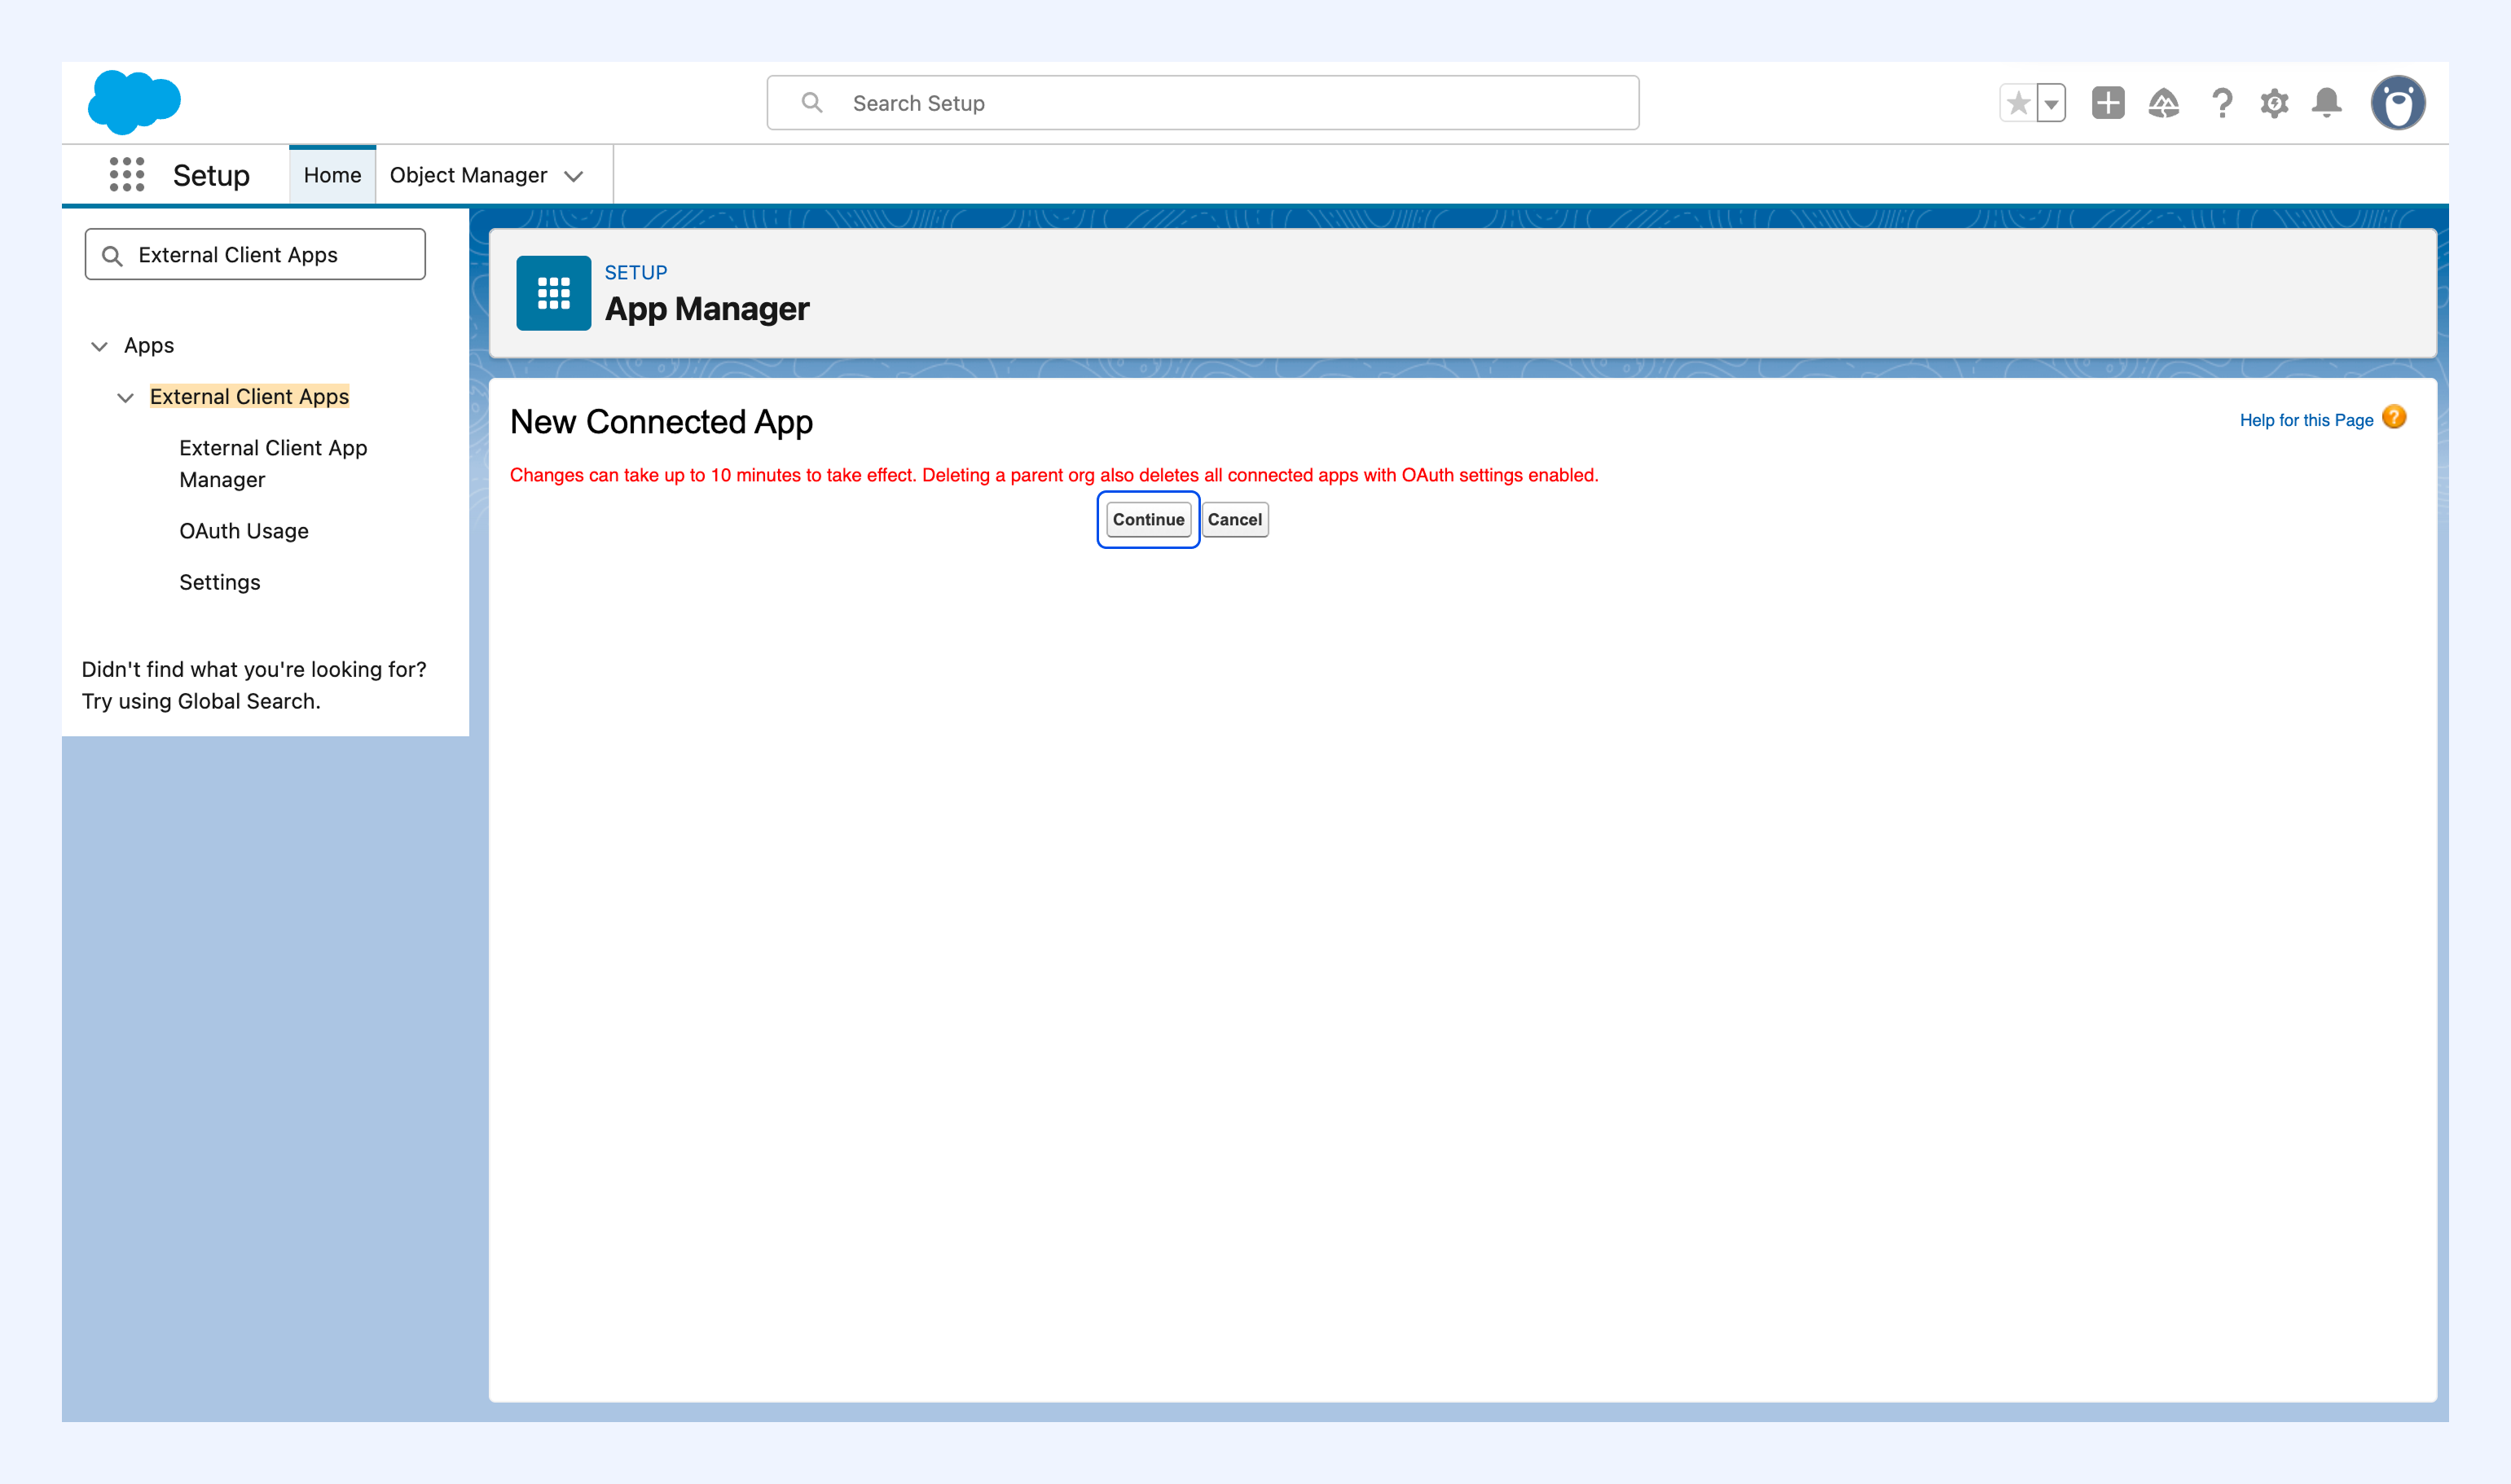
9. Click Continue if prompted.
Note: It may take a few minutes for Salesforce to activate your connected app for use.
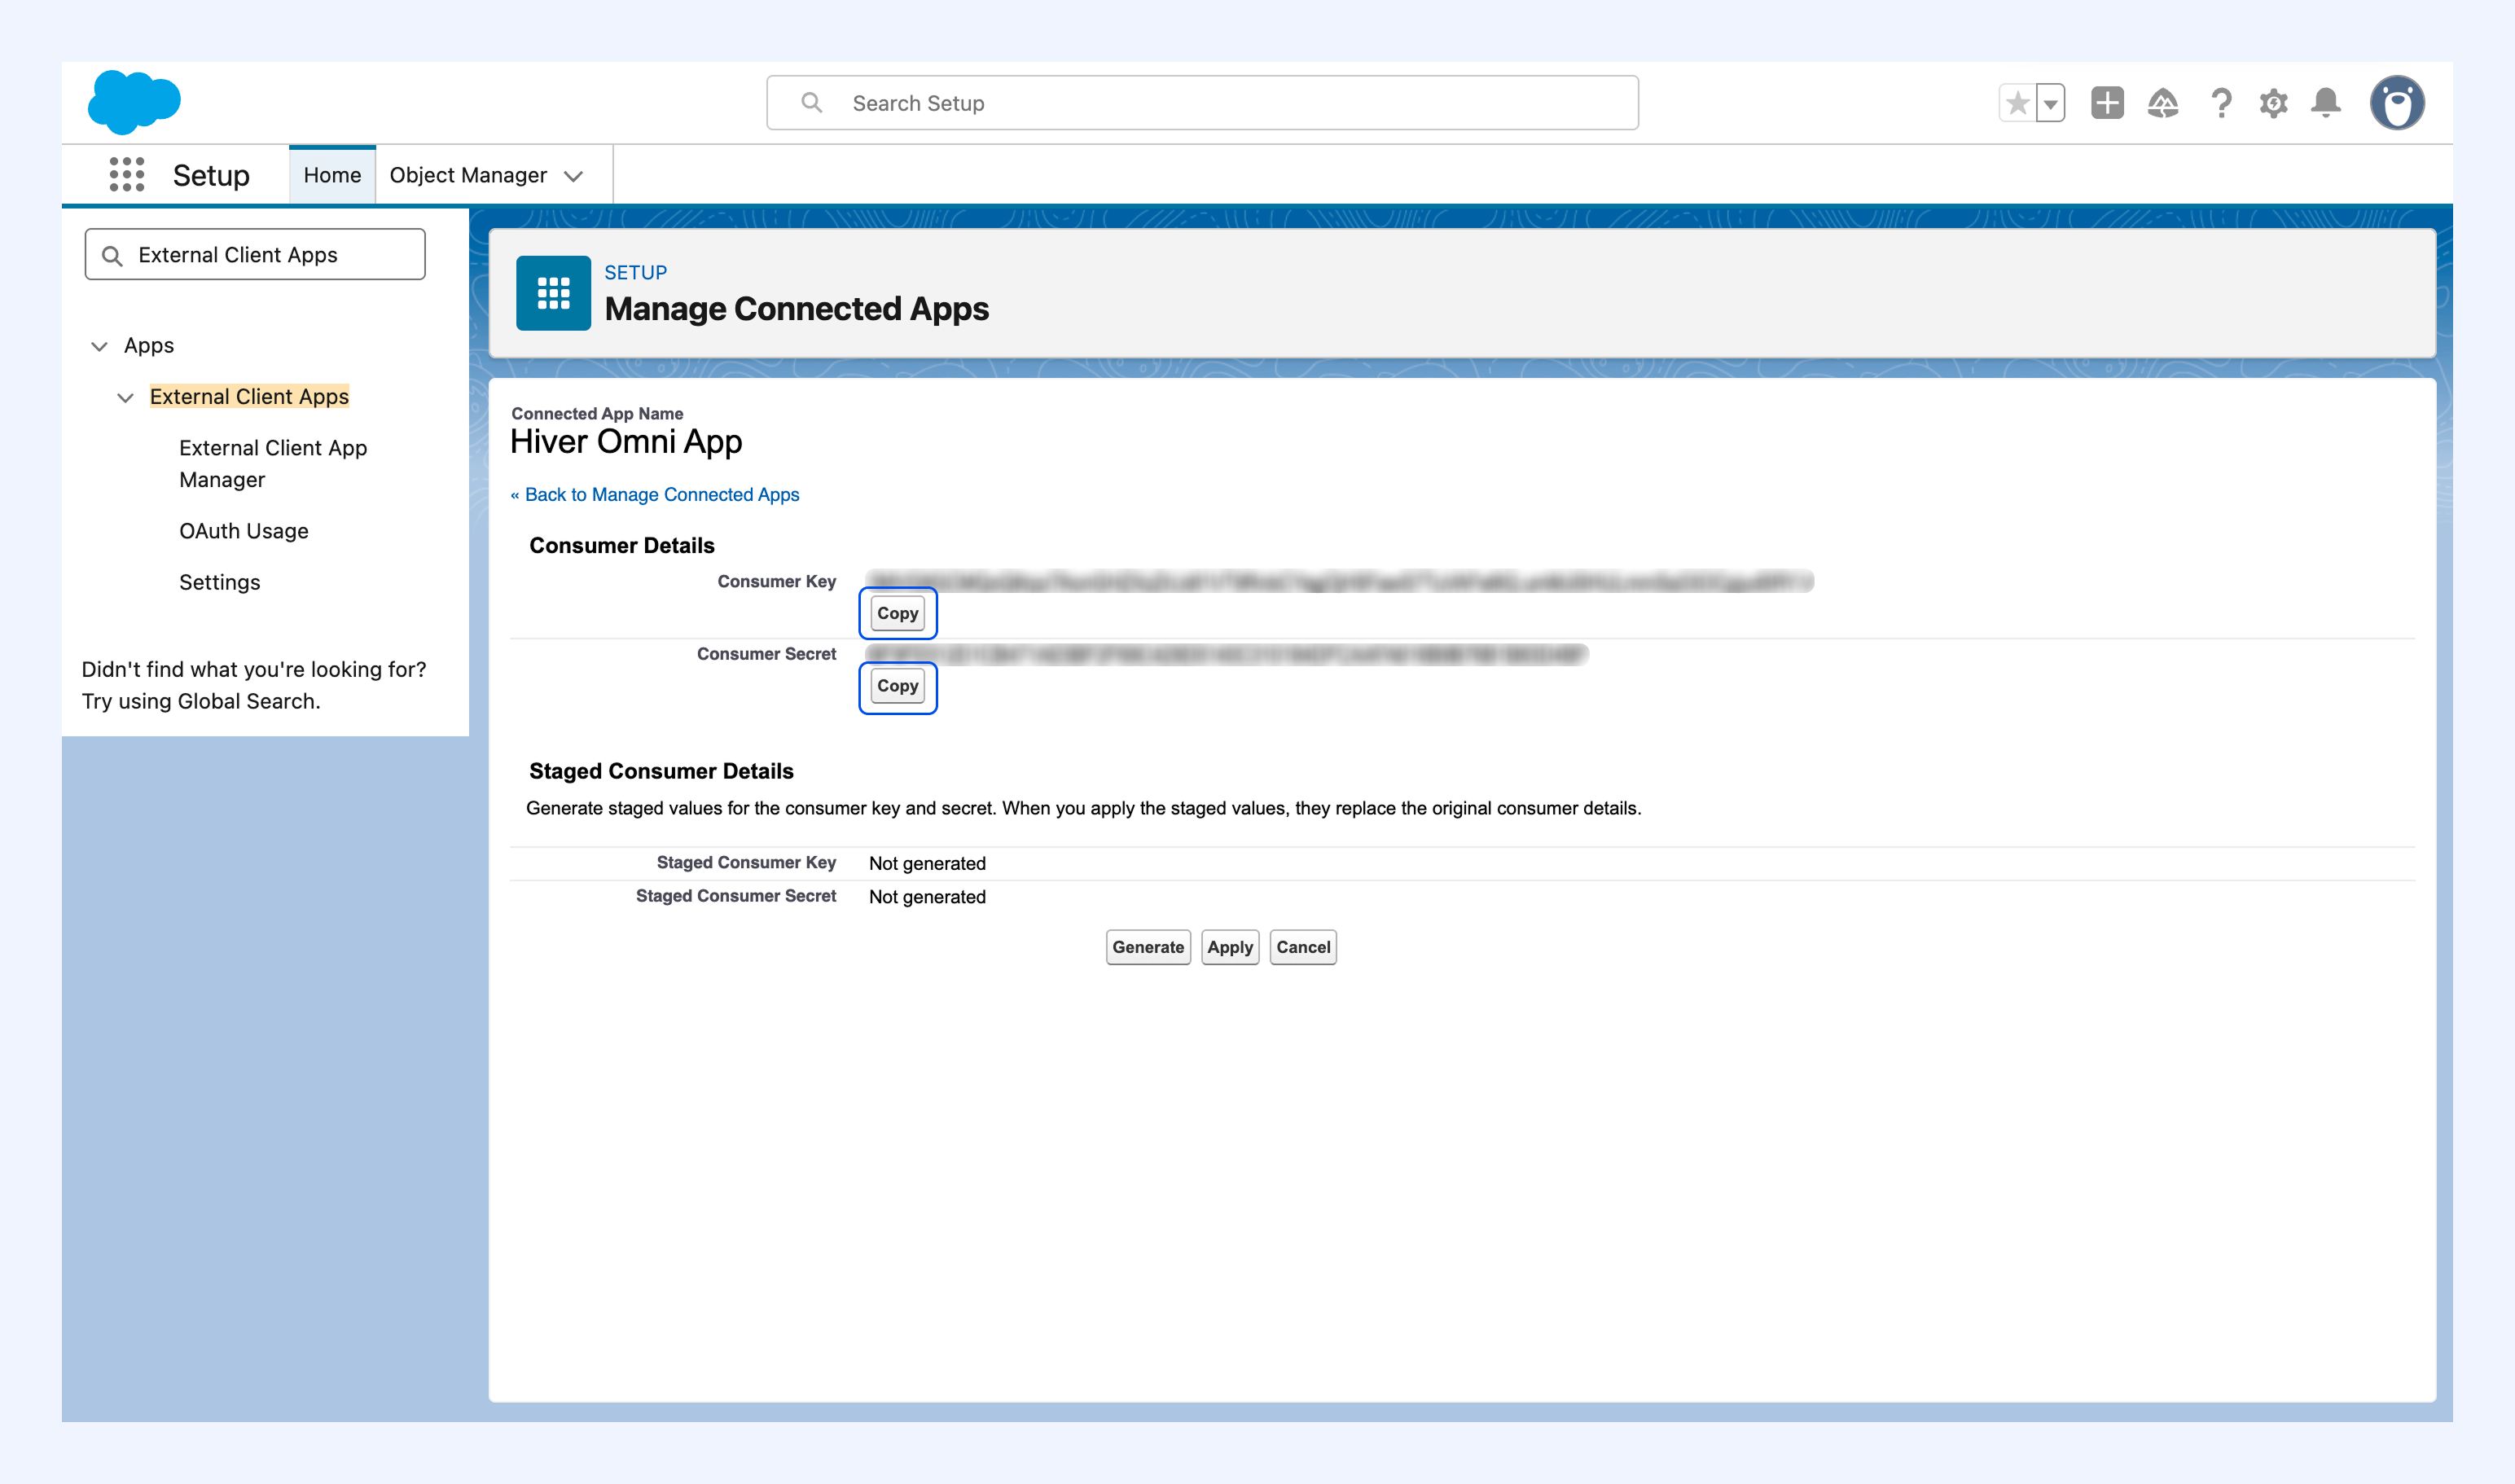
10. Under the app details, click Manage Consumer Details.
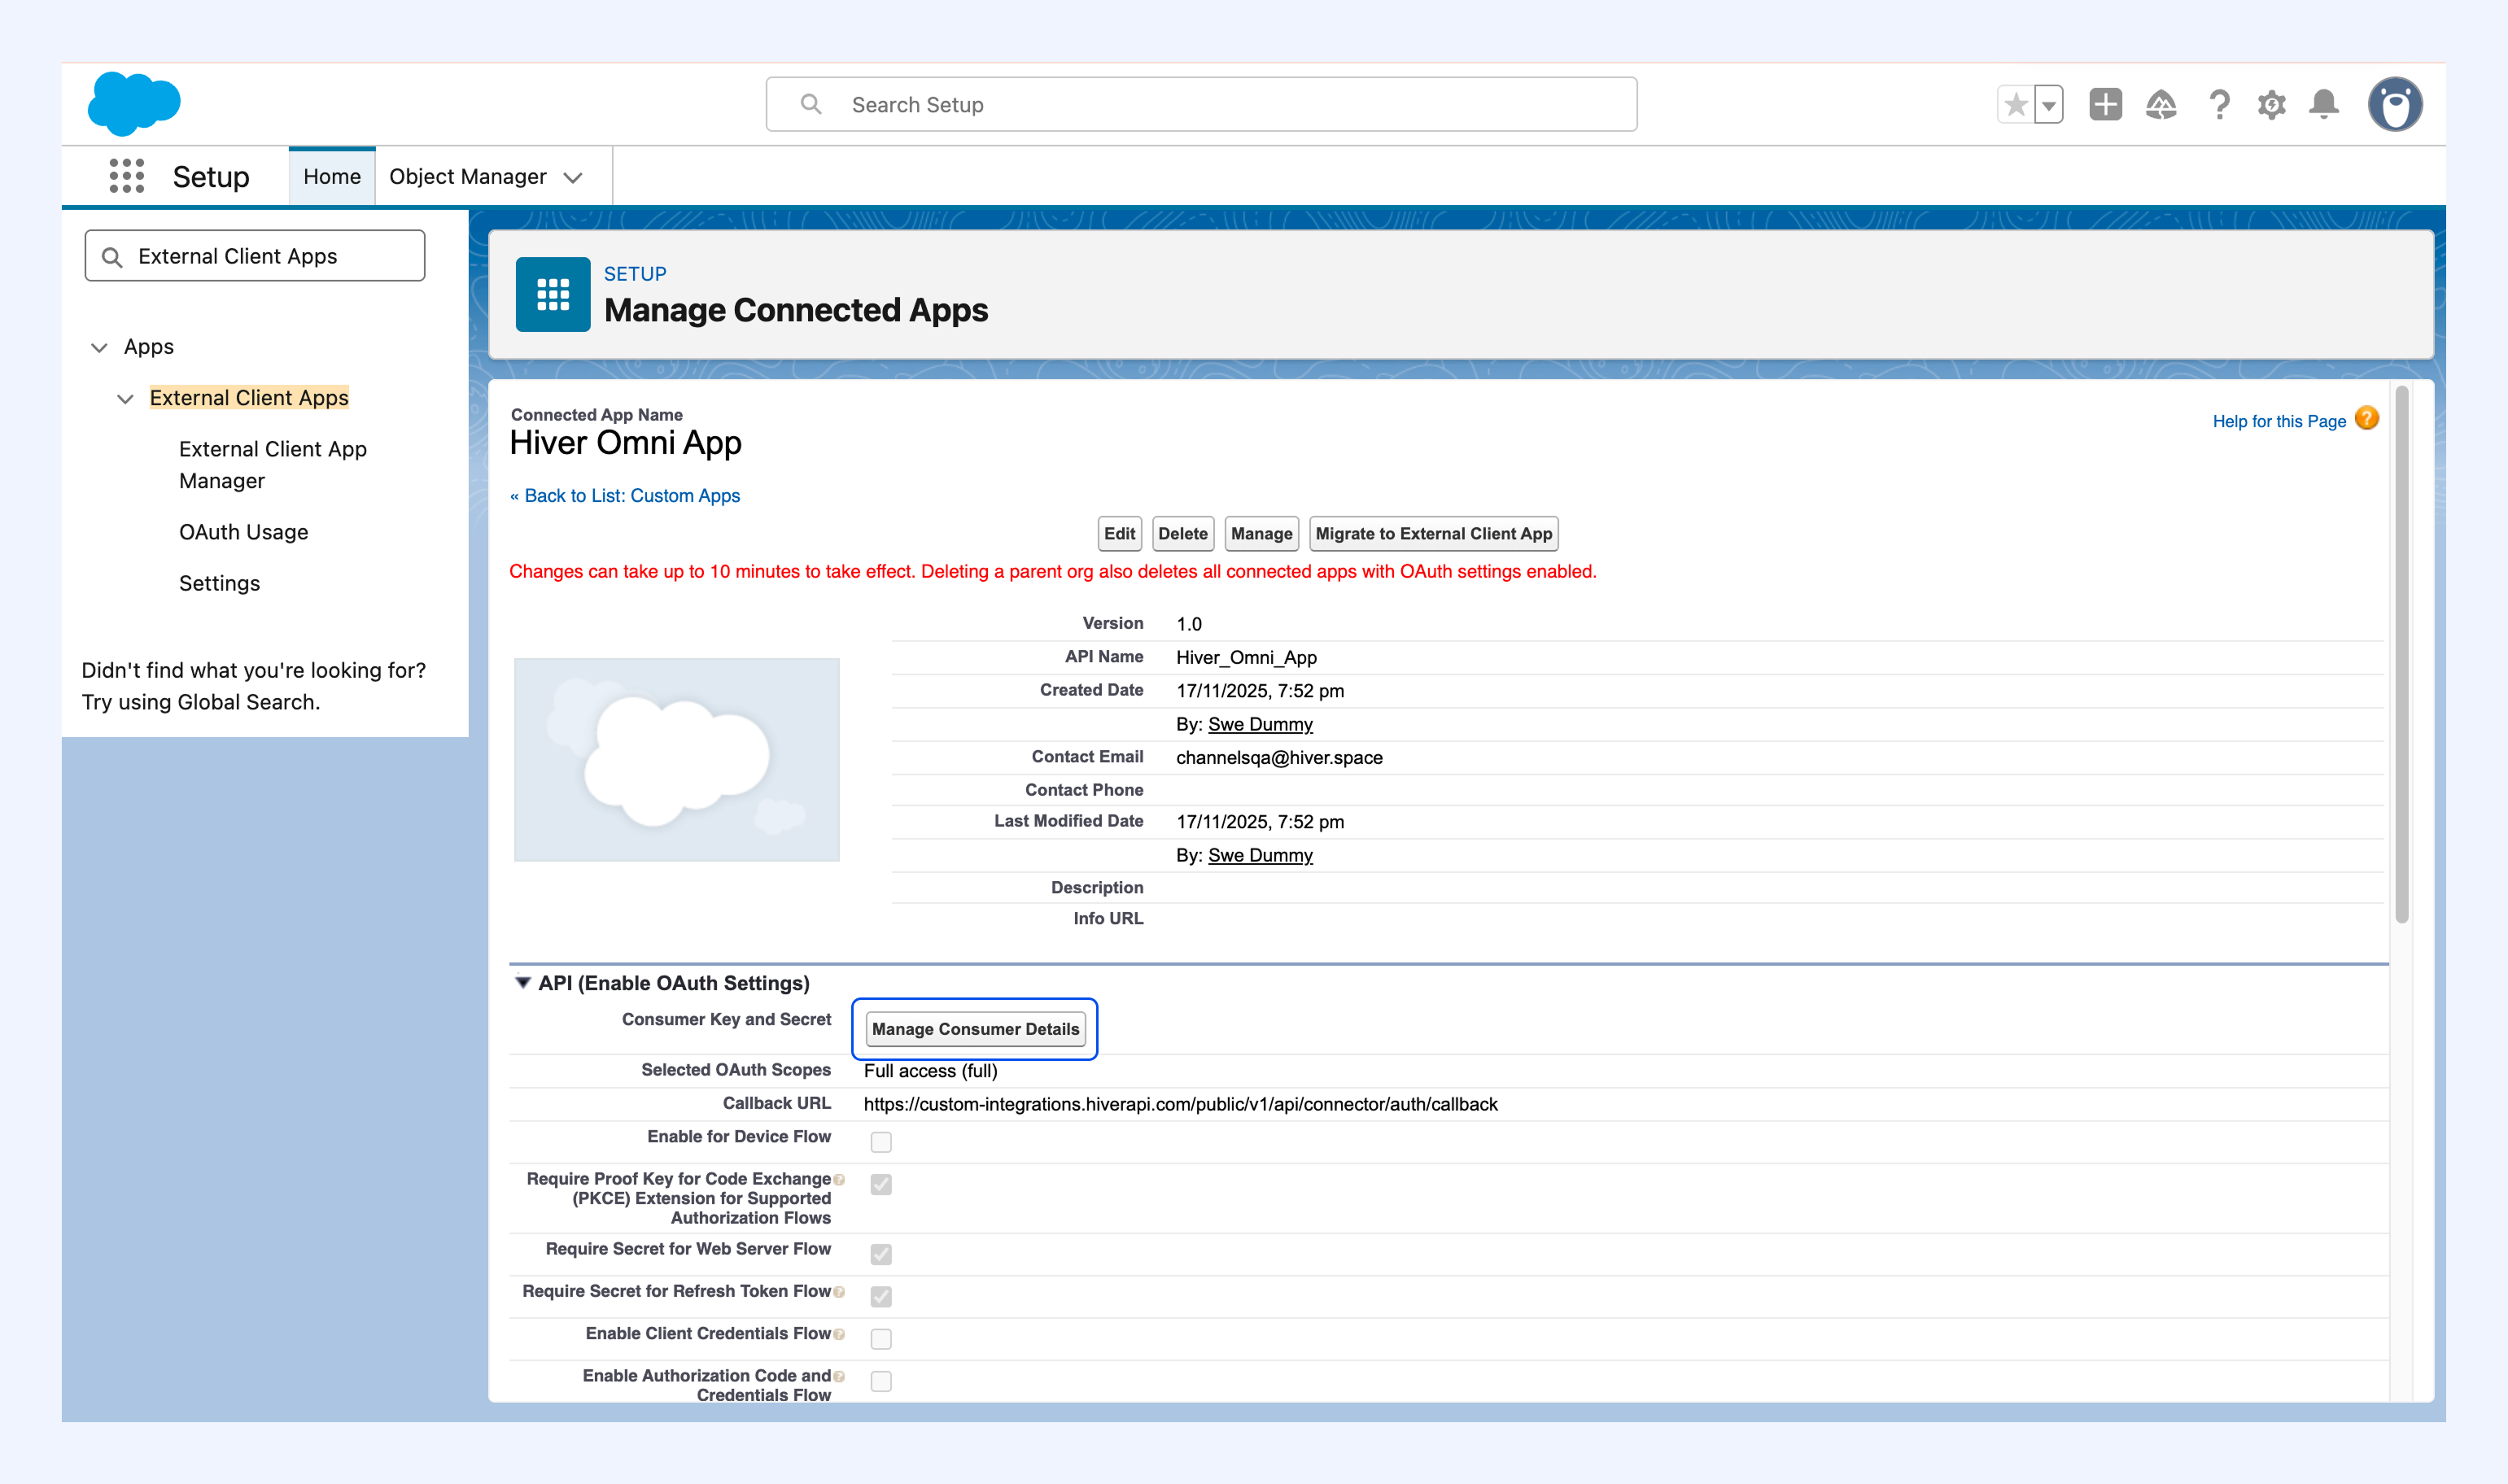
11. Copy the Consumer Key and Consumer Secret for your Connected App.
Step 3: Enter authentication details in Hiver
1. Go back to the Salesforce setup in Hiver.
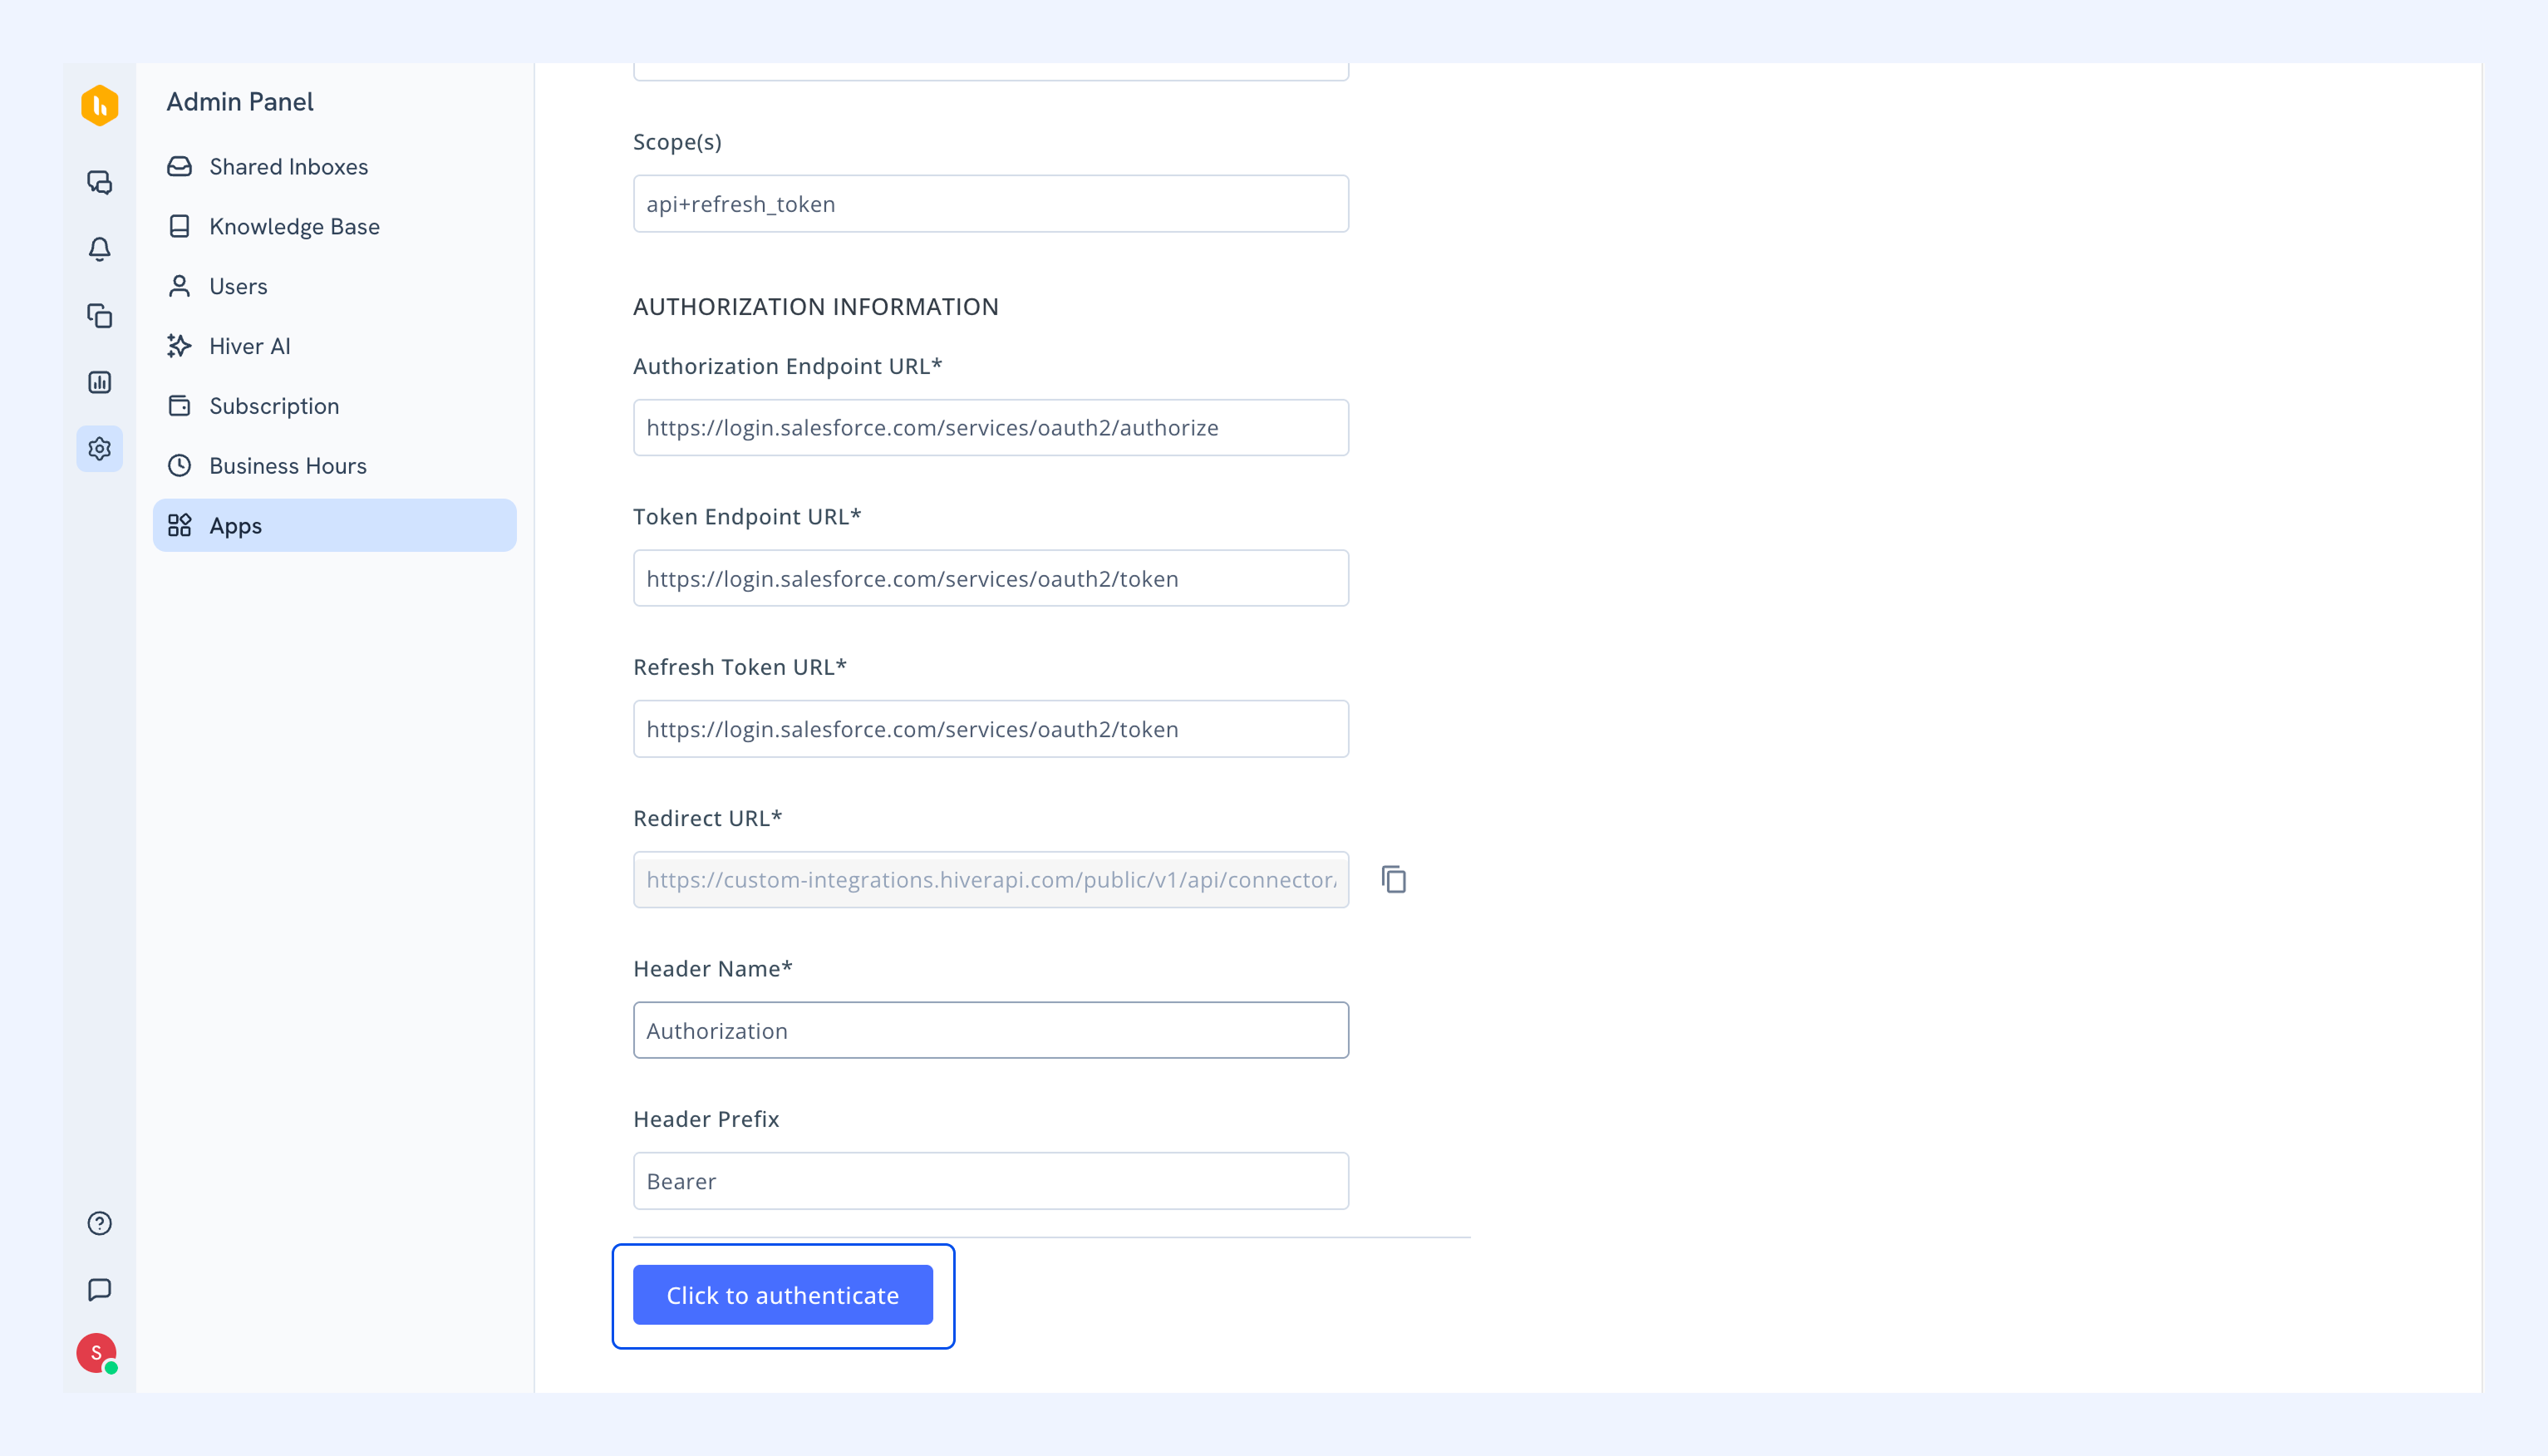
2. Fill in the required authentication details on the setup screen.
Field | What to enter | Notes |
| Base URL | Your Salesforce instance URL | e.g., https://.my.salesforce.com |
| Authentication Type | OAuth 2.0 | Keep this as OAuth 2.0 |
| Client ID | Value from your Salesforce Connected App | Consumer Key from Salesforce |
| Client Secret | Value from your Salesforce Connected App | Consumer Secret from Salesforce |
| Scopes | api+refresh_token | Required for API access and token refresh |
| Authorization Endpoint URL | https://login.salesforce.com/services/oauth2/authorize | Pre-filled |
| Token Endpoint URL | https://login.salesforce.com/services/oauth2/token | Pre-filled |
| Refresh Token URL | https://login.salesforce.com/services/oauth2/token | Pre-filled |
| Redirect URL | Pre-filled Hiver URL | Must remain unchanged |
| Header Name | Authorization | Pre-filled |
| Header Prefix | Bearer | Pre-filled |
3. Select Click to authenticate.
4. Sign in to your Salesforce account in the new tab that opens.
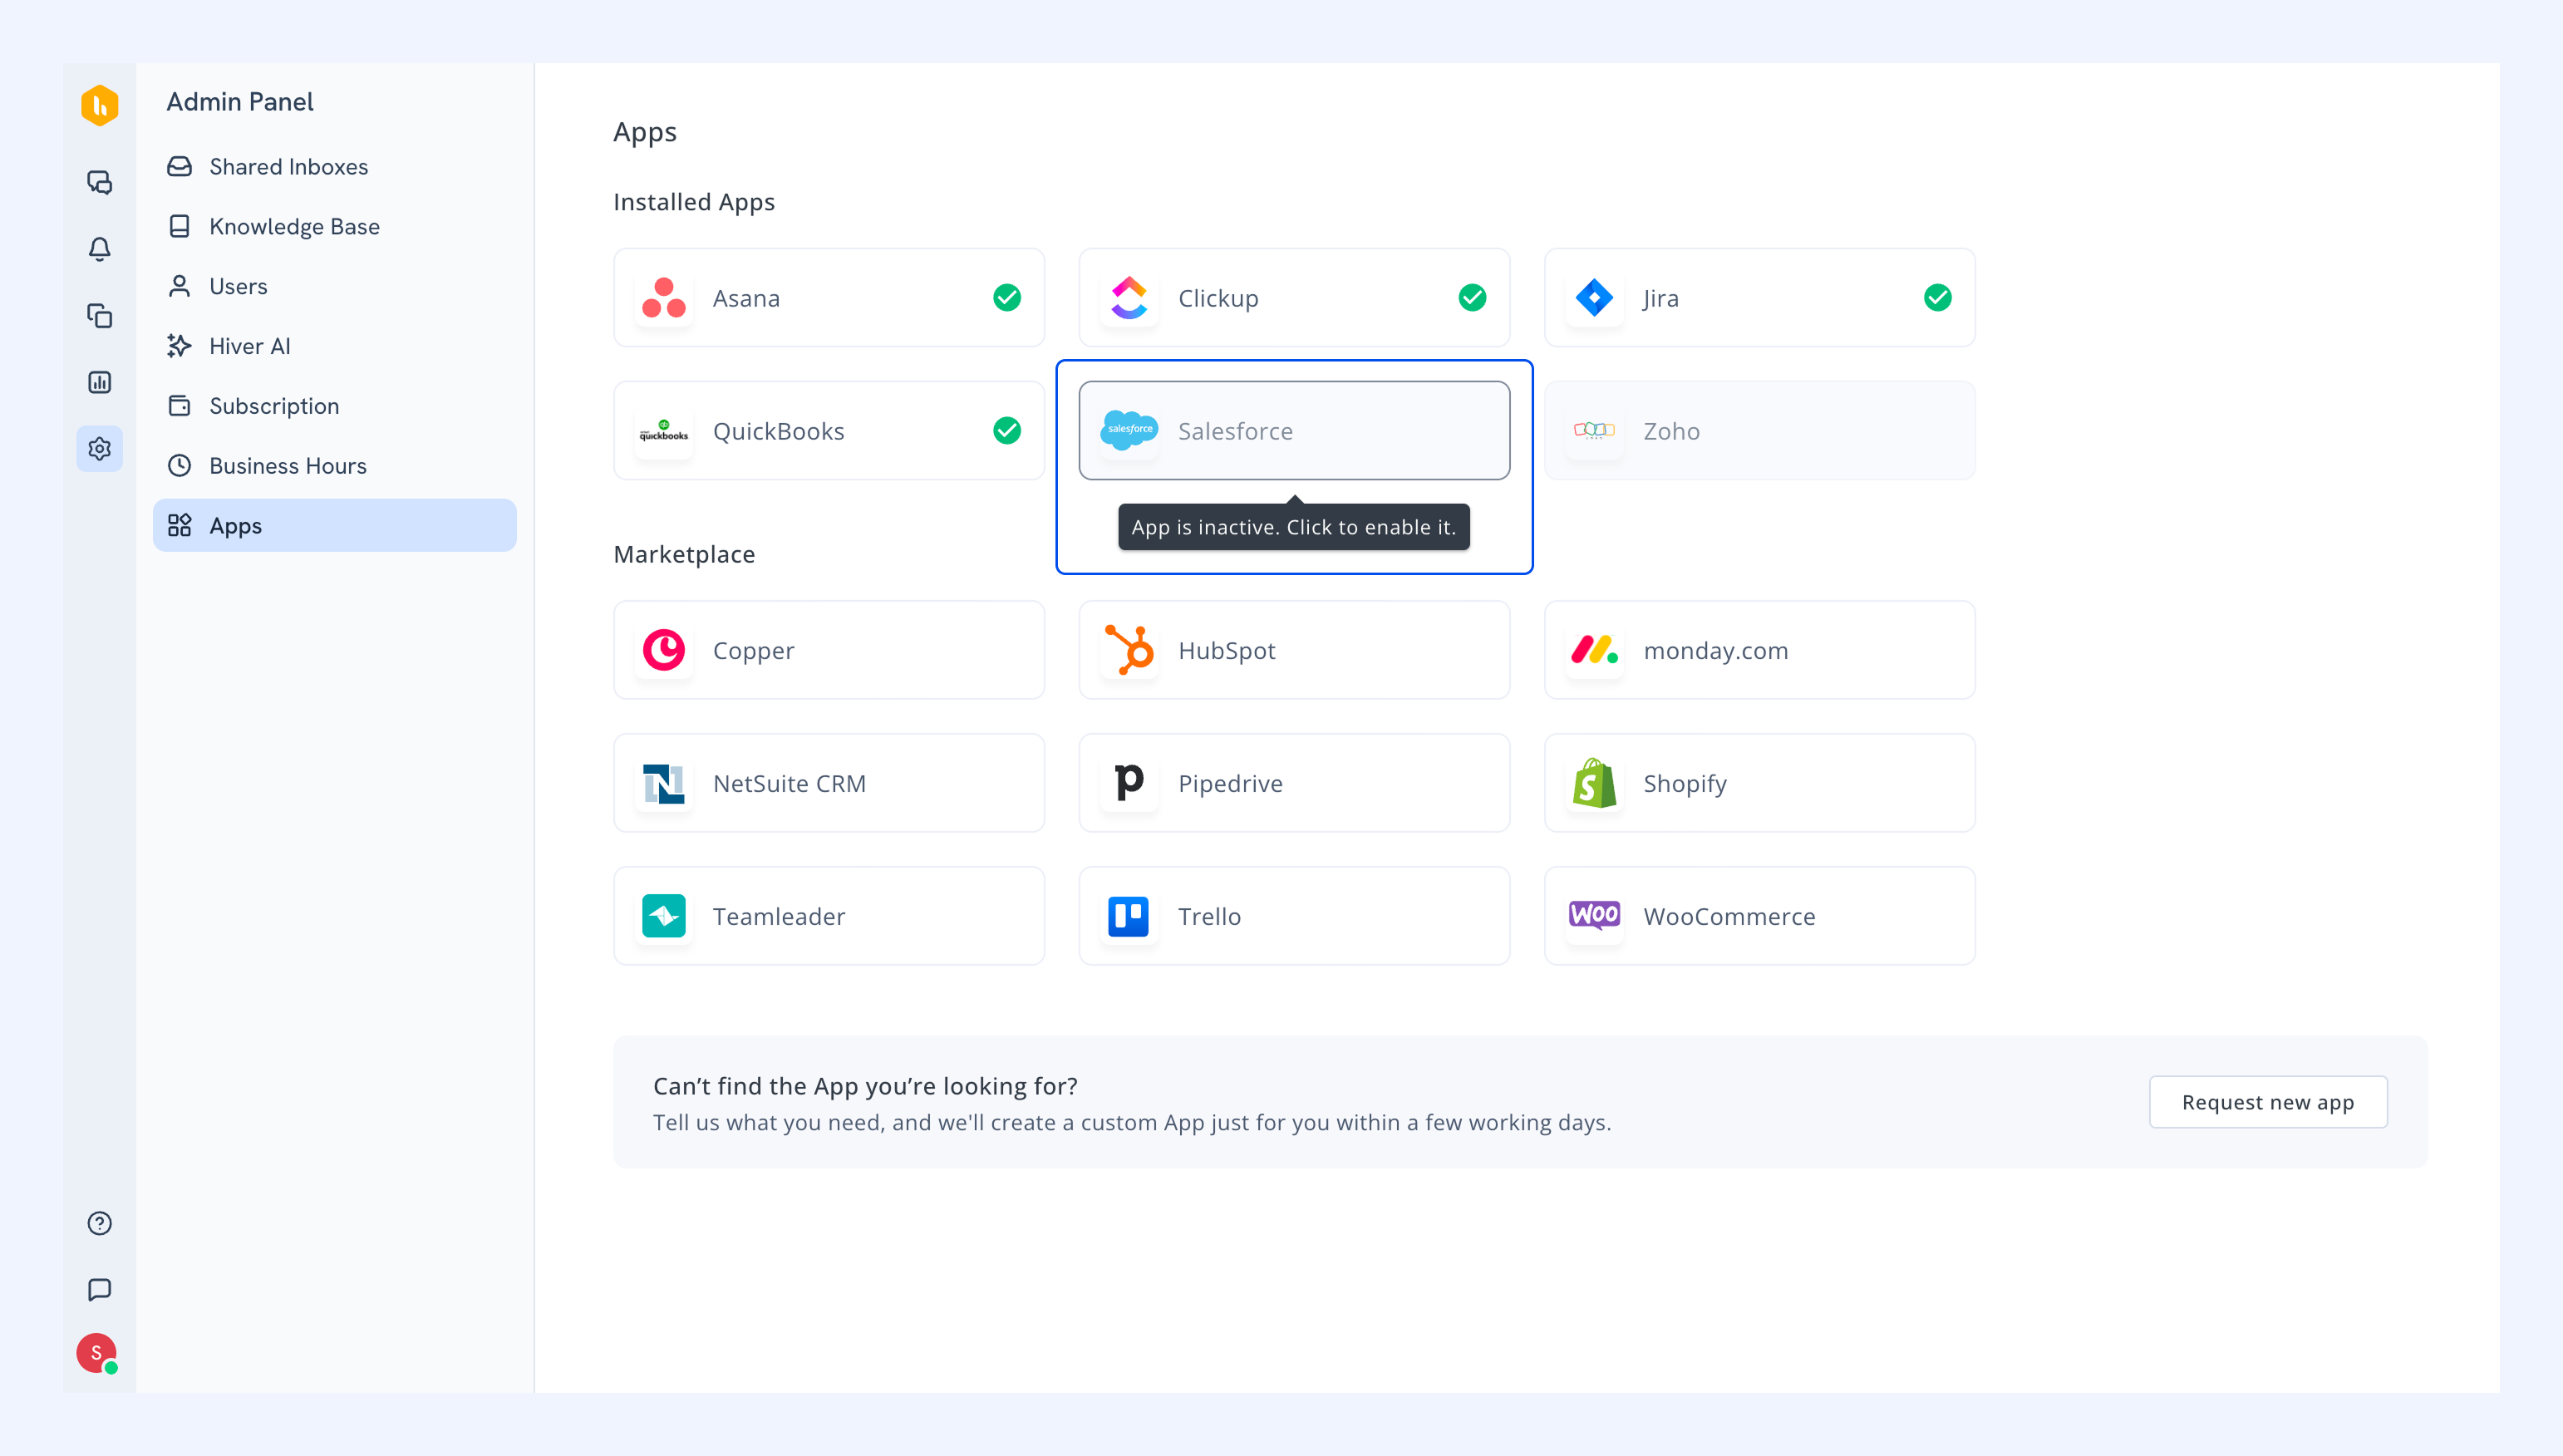
5. After authentication, you'll return to the Apps screen. Initially, the app will appear as inactive.
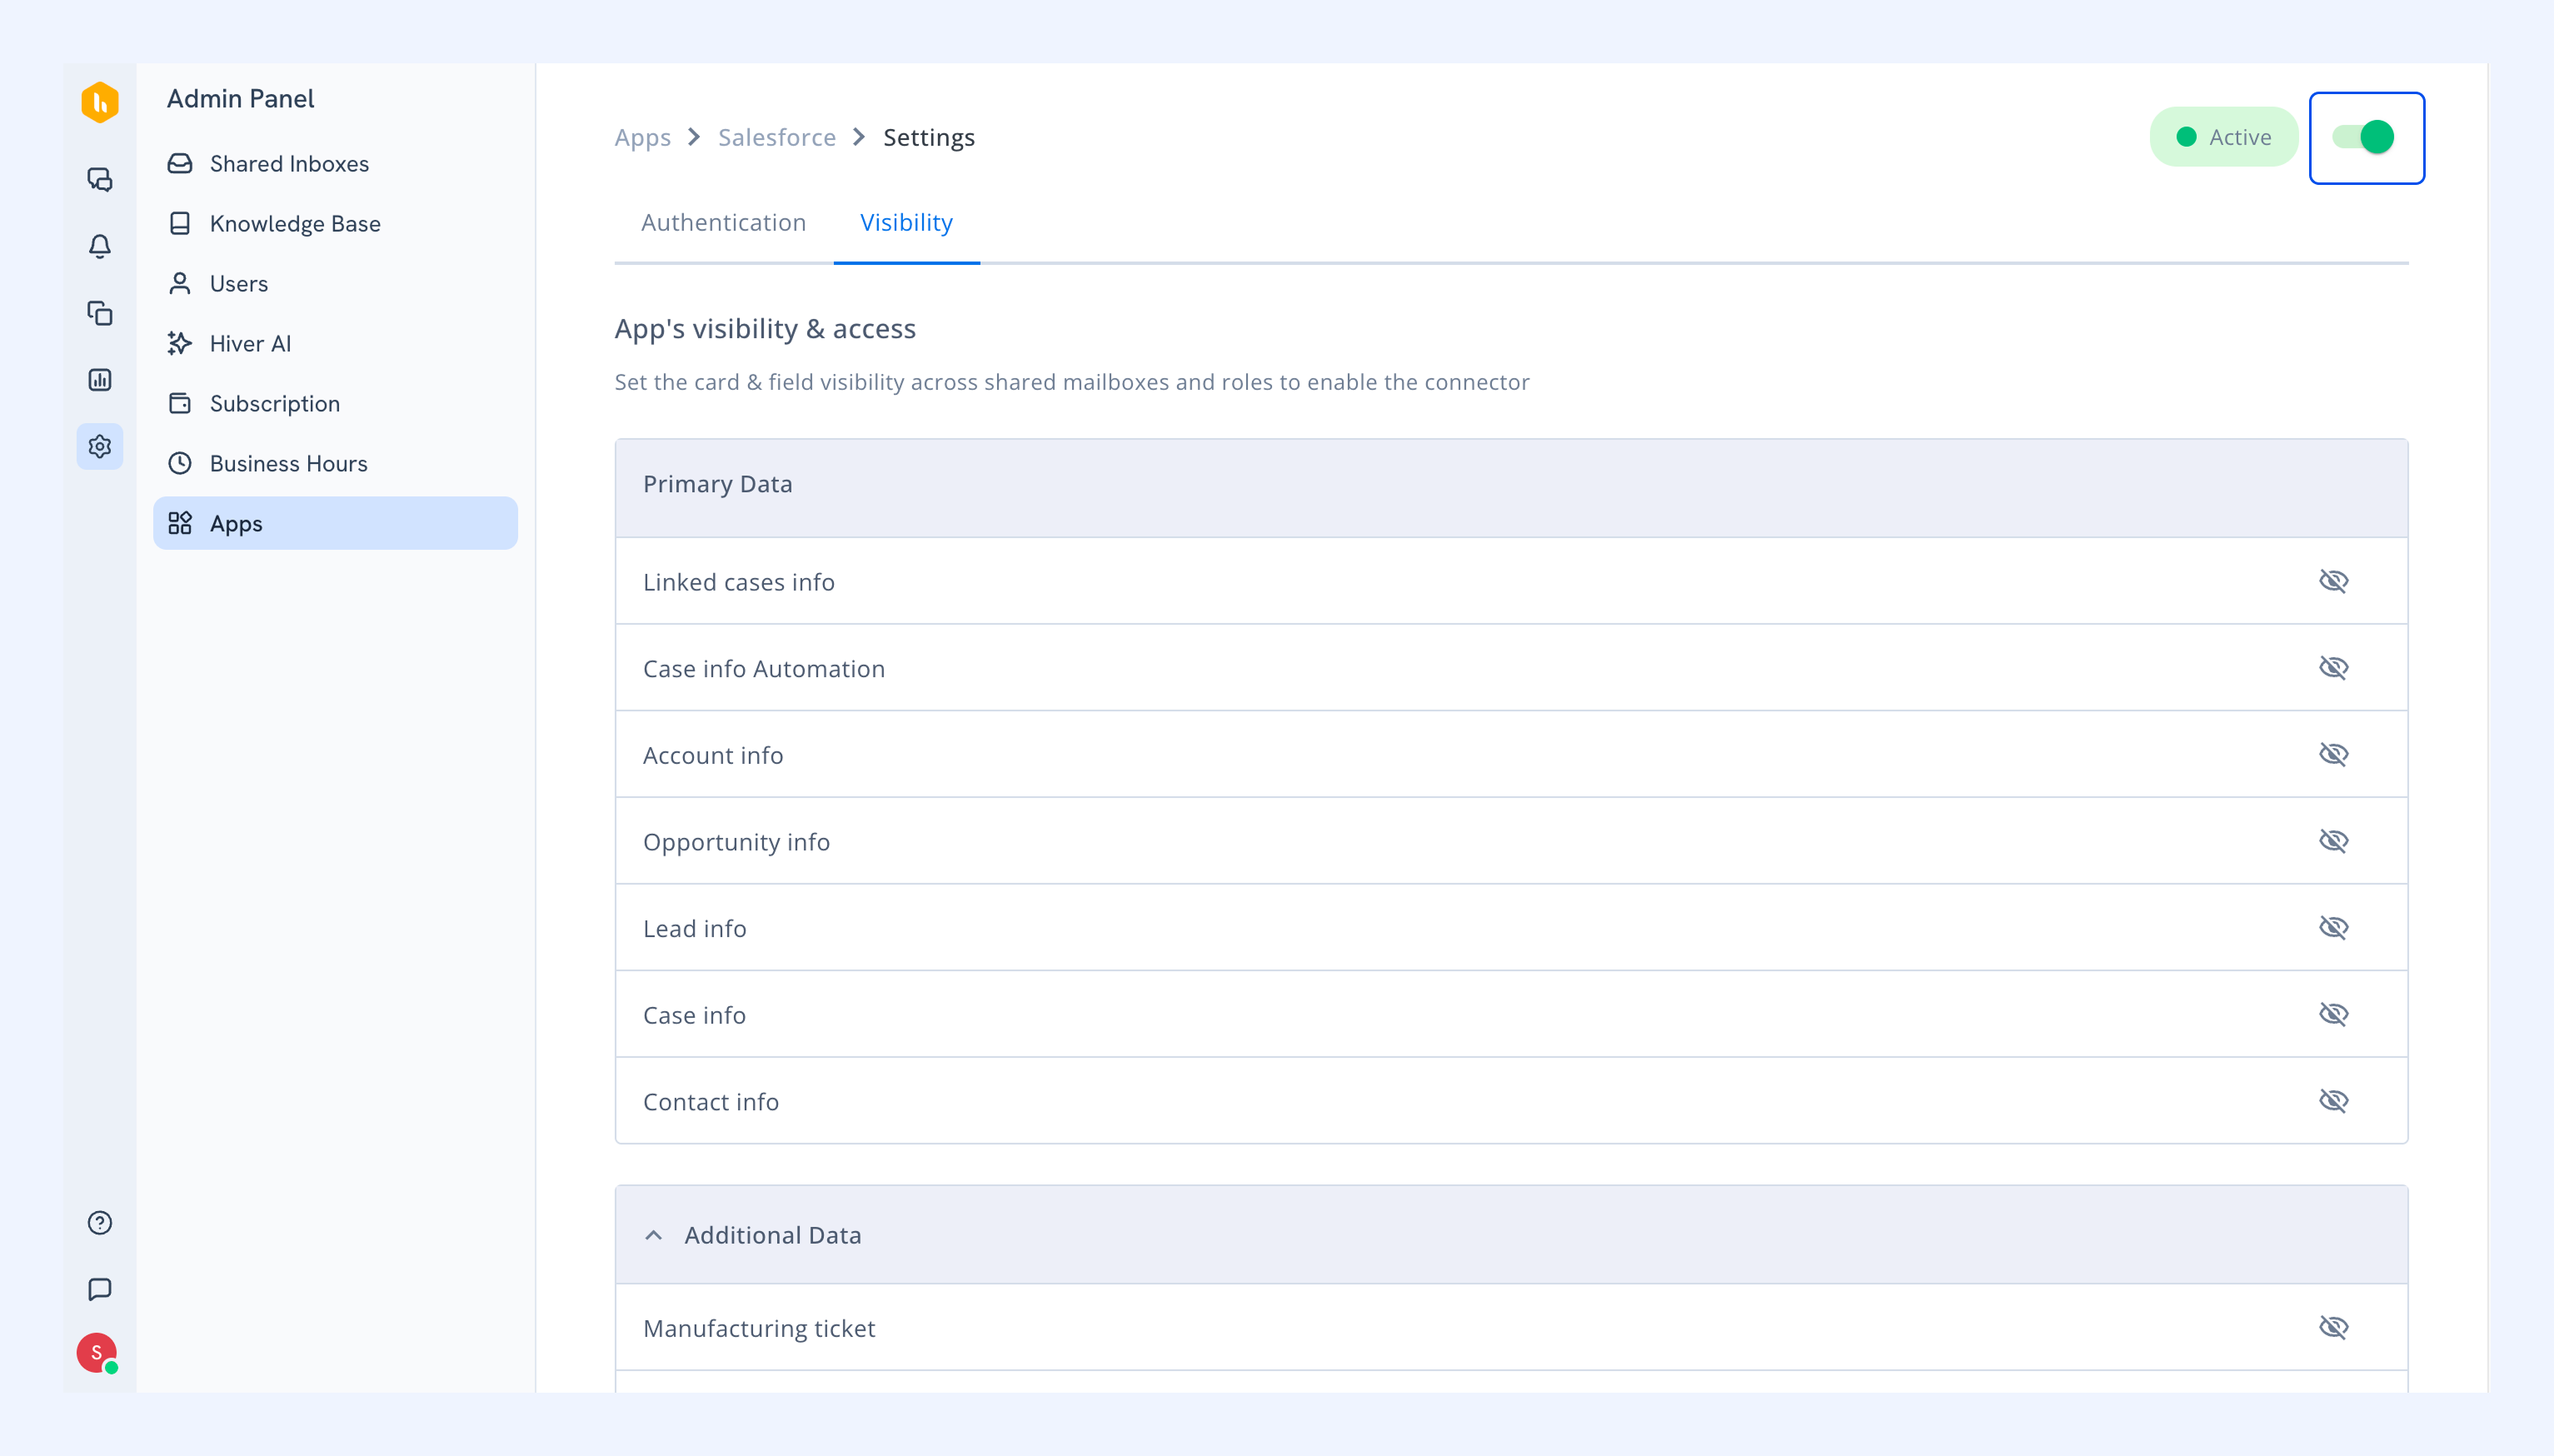
6. Turn on the toggle to activate the integration.
Step 4: Customize the integration
1. To define the integration’s availability across Shared Inboxes and member roles, go to the Visibility tab .
2. Click the eye icon (Configure visibility settings).
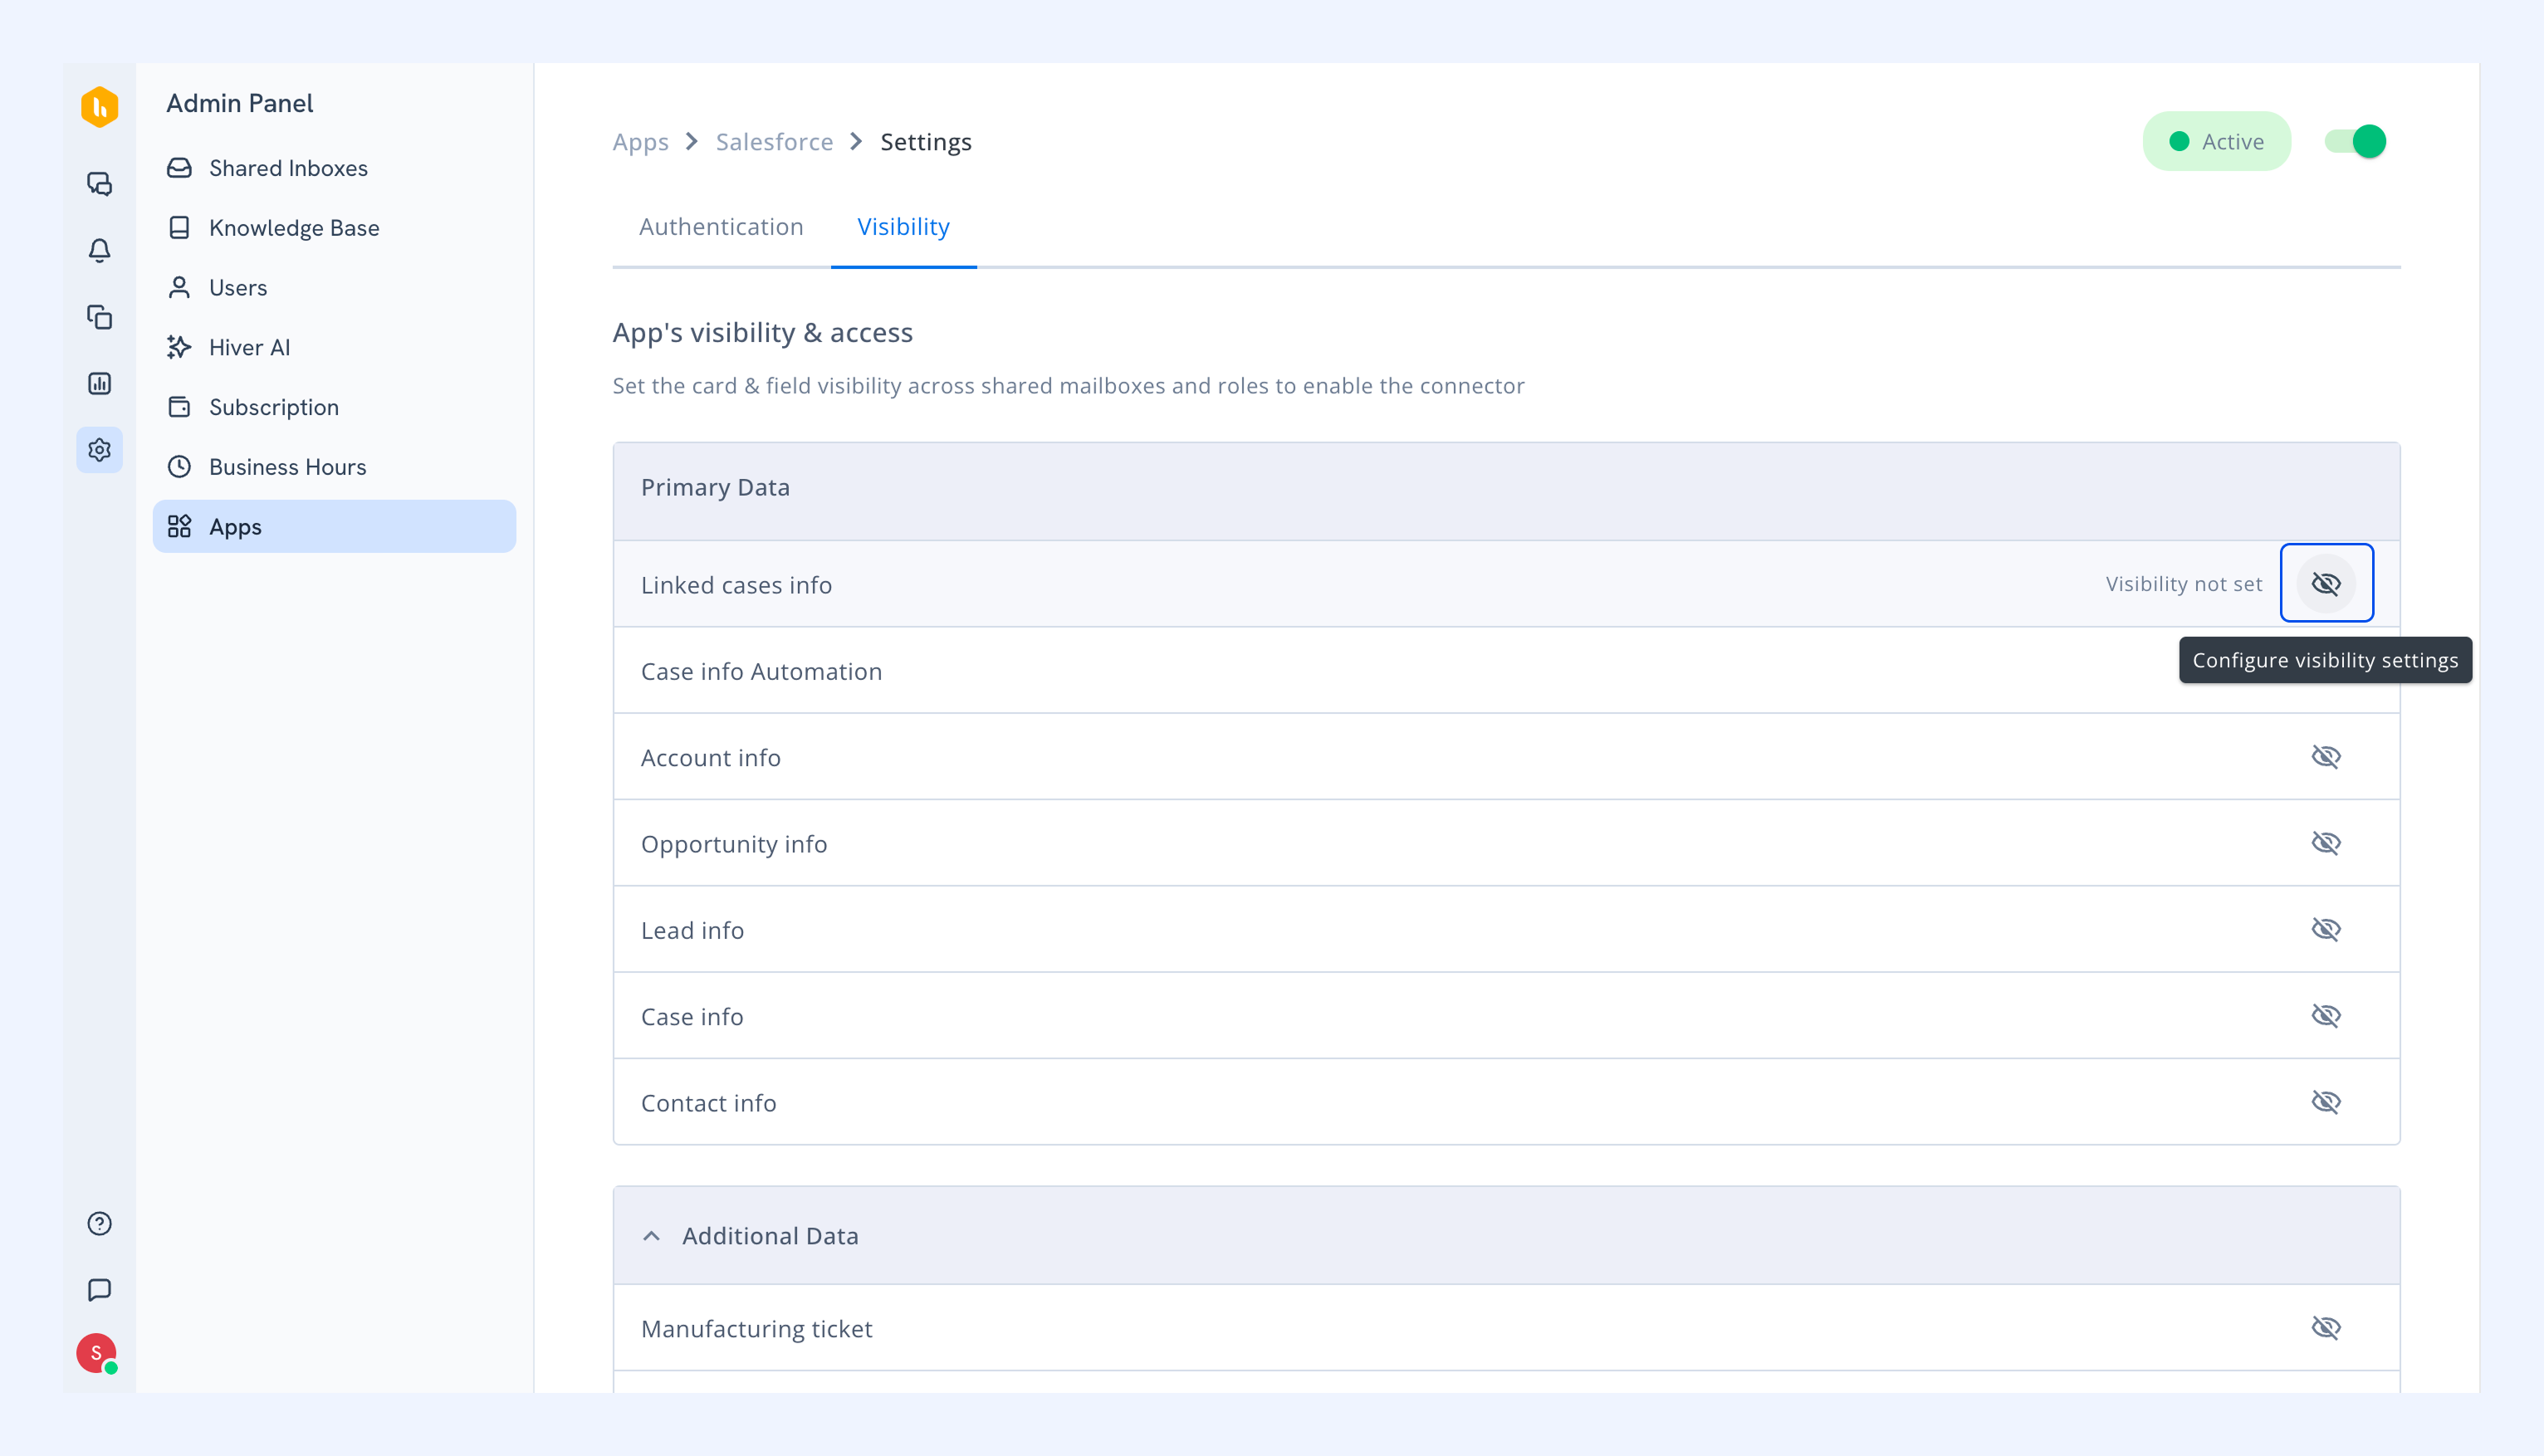
Card visibility
- In the Card visibility tab, choose the Shared Inboxes where you want to activate the Salesforce integration, and choose if it should be accessible to Admins only or to All members.
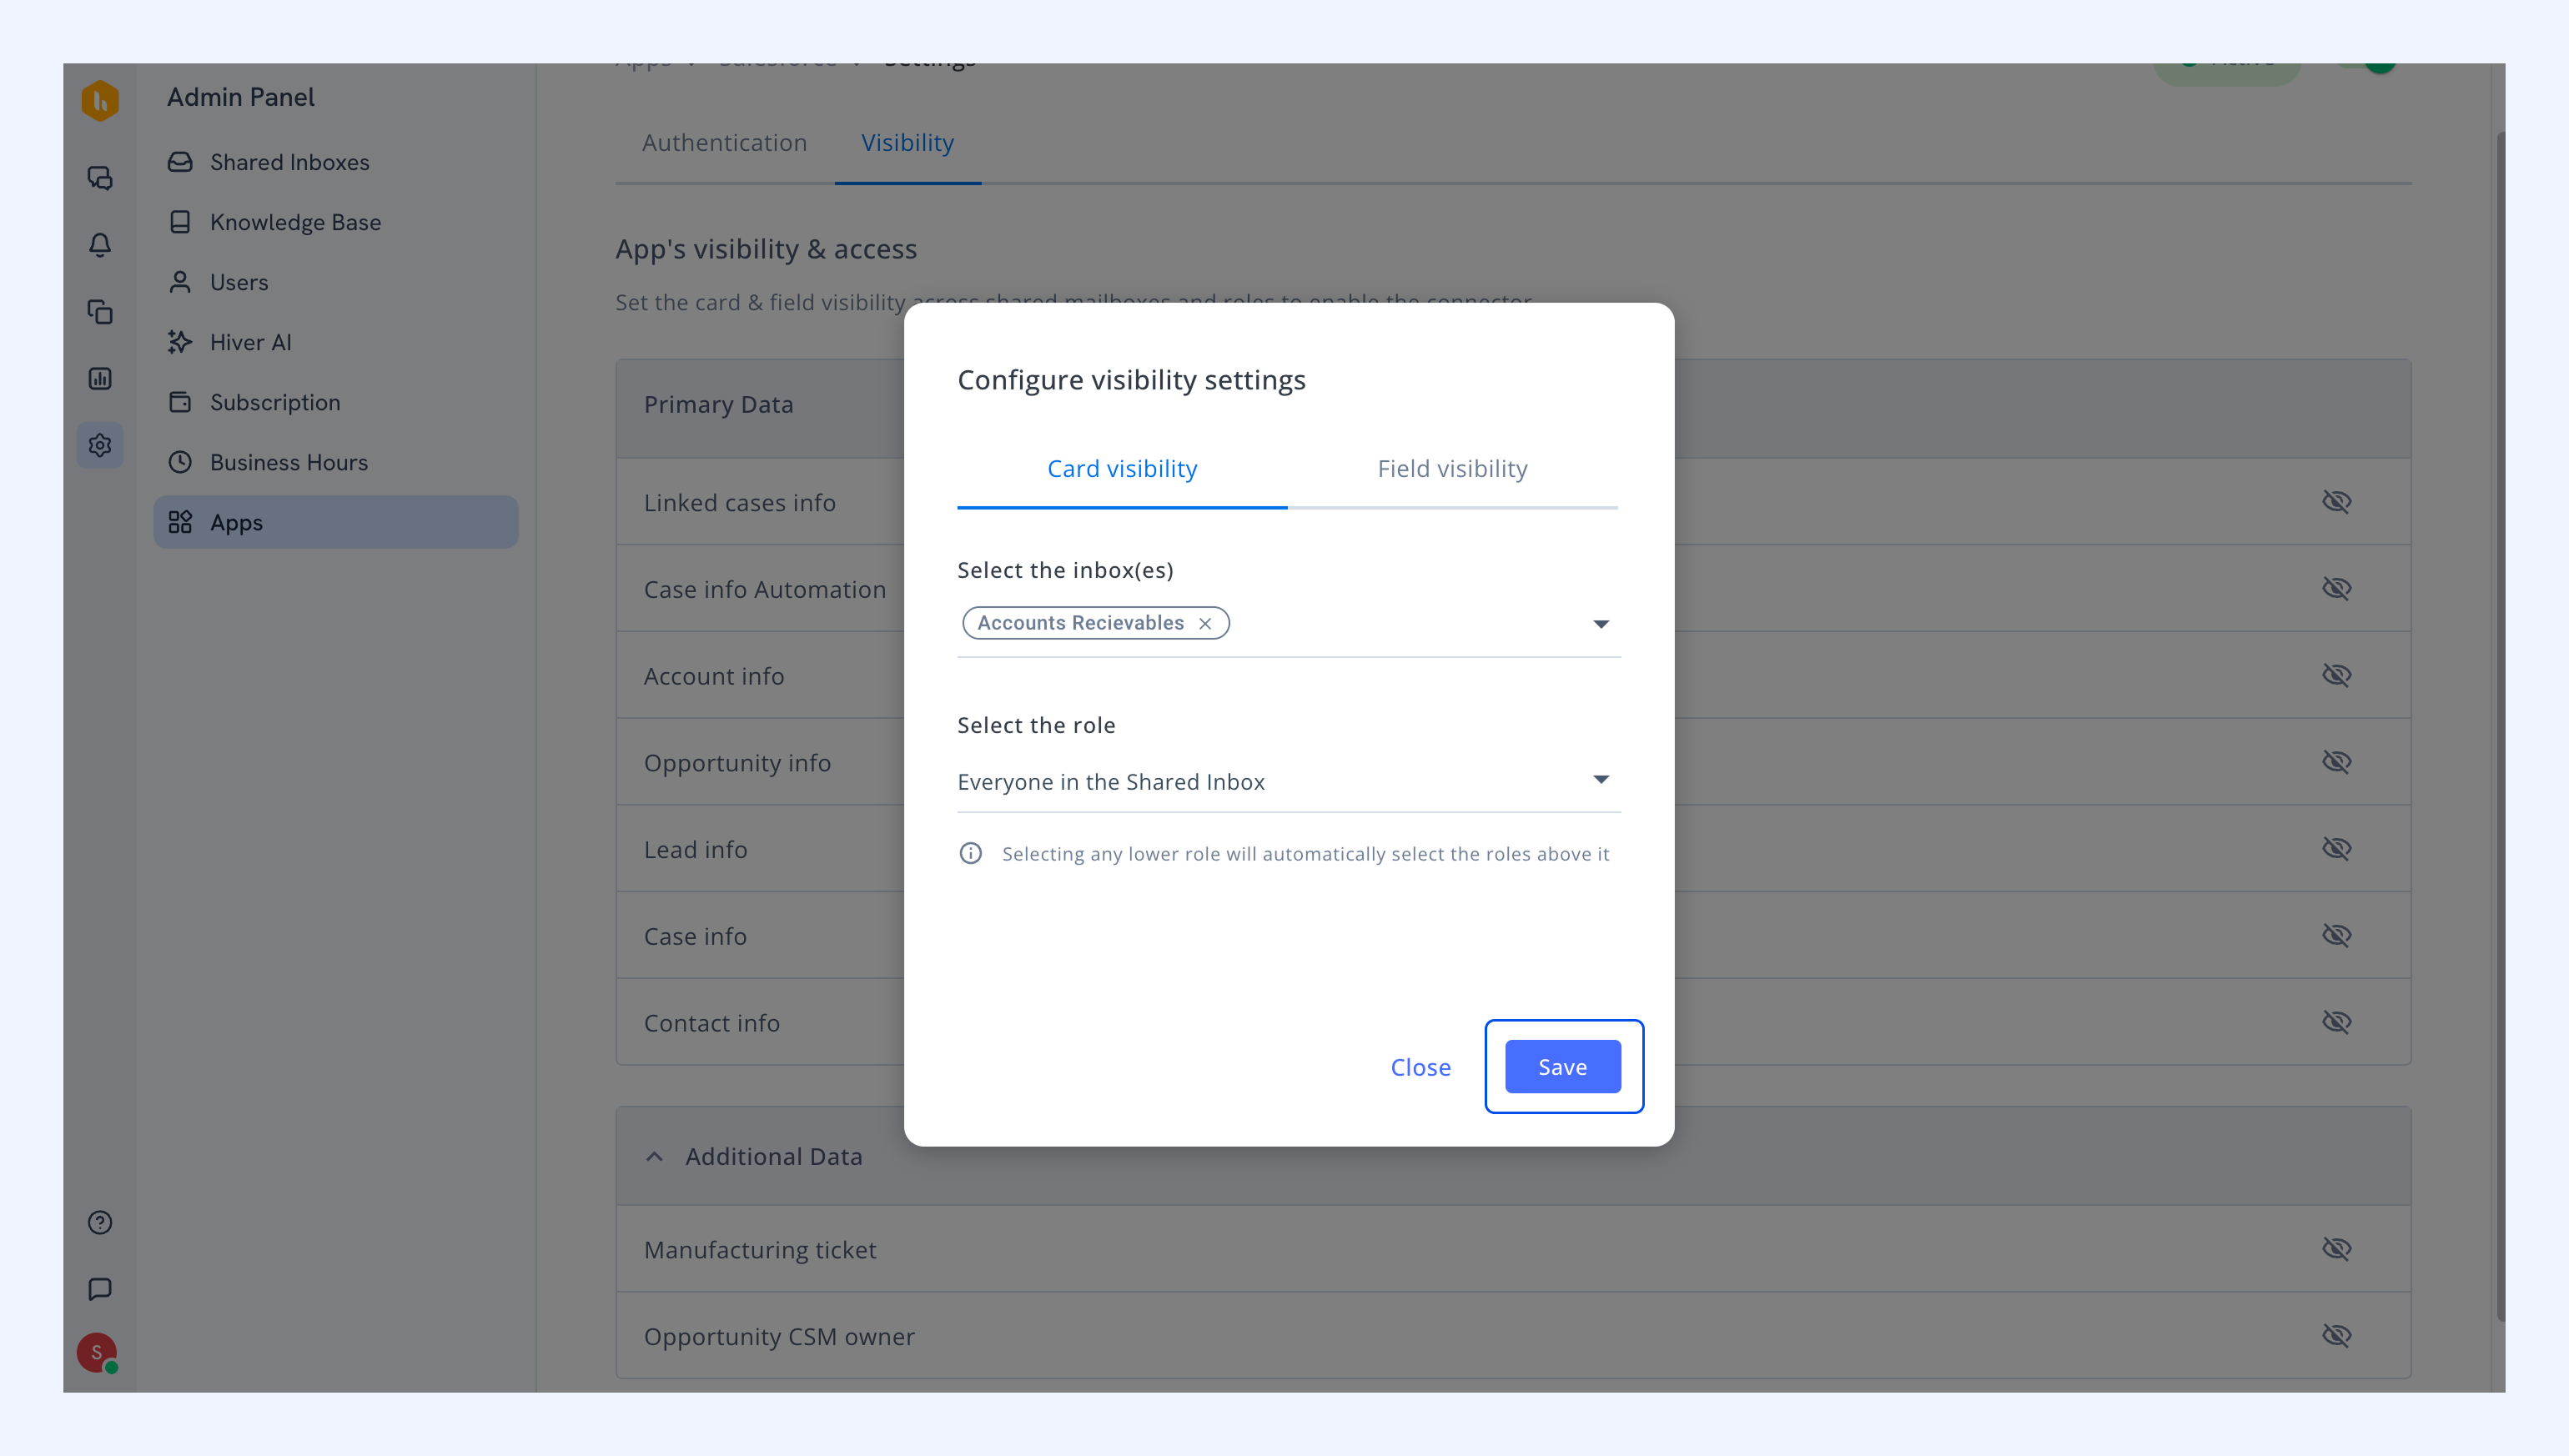
Field visibility
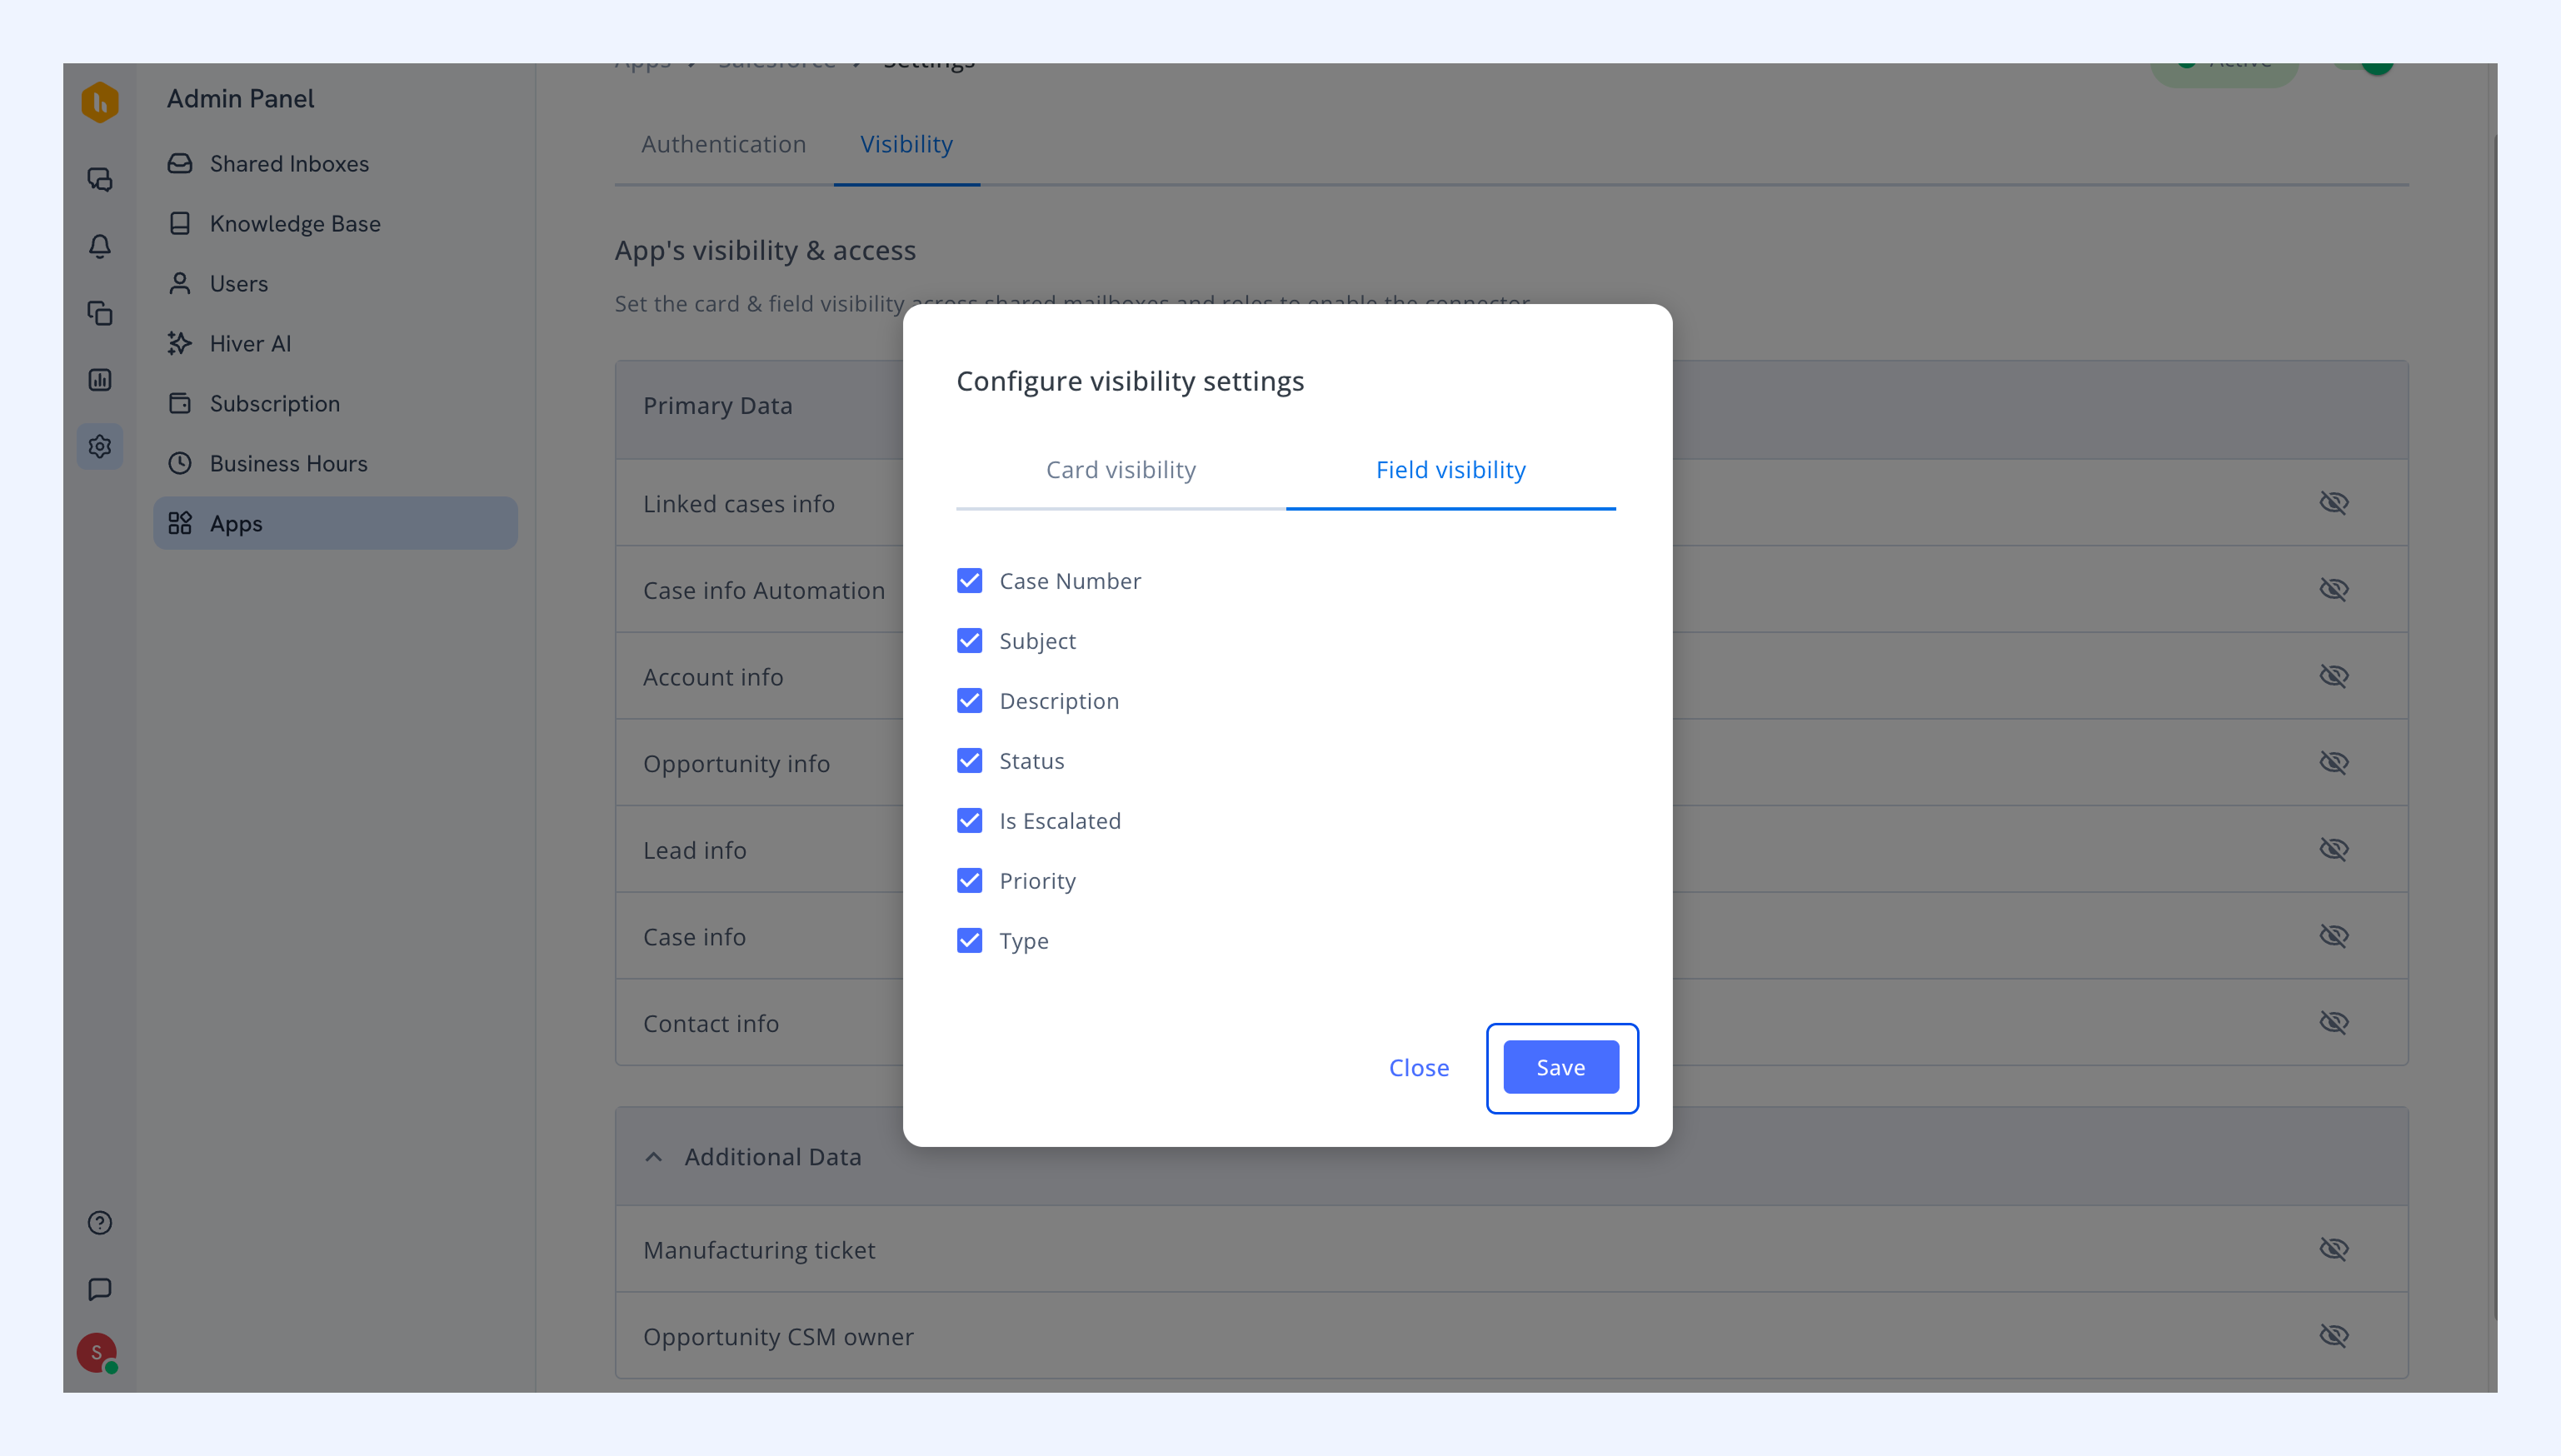
- In the Field visibility tab, select which Salesforce fields should be visible within cards.
- Click Save.
Using the Salesforce integration in Hiver
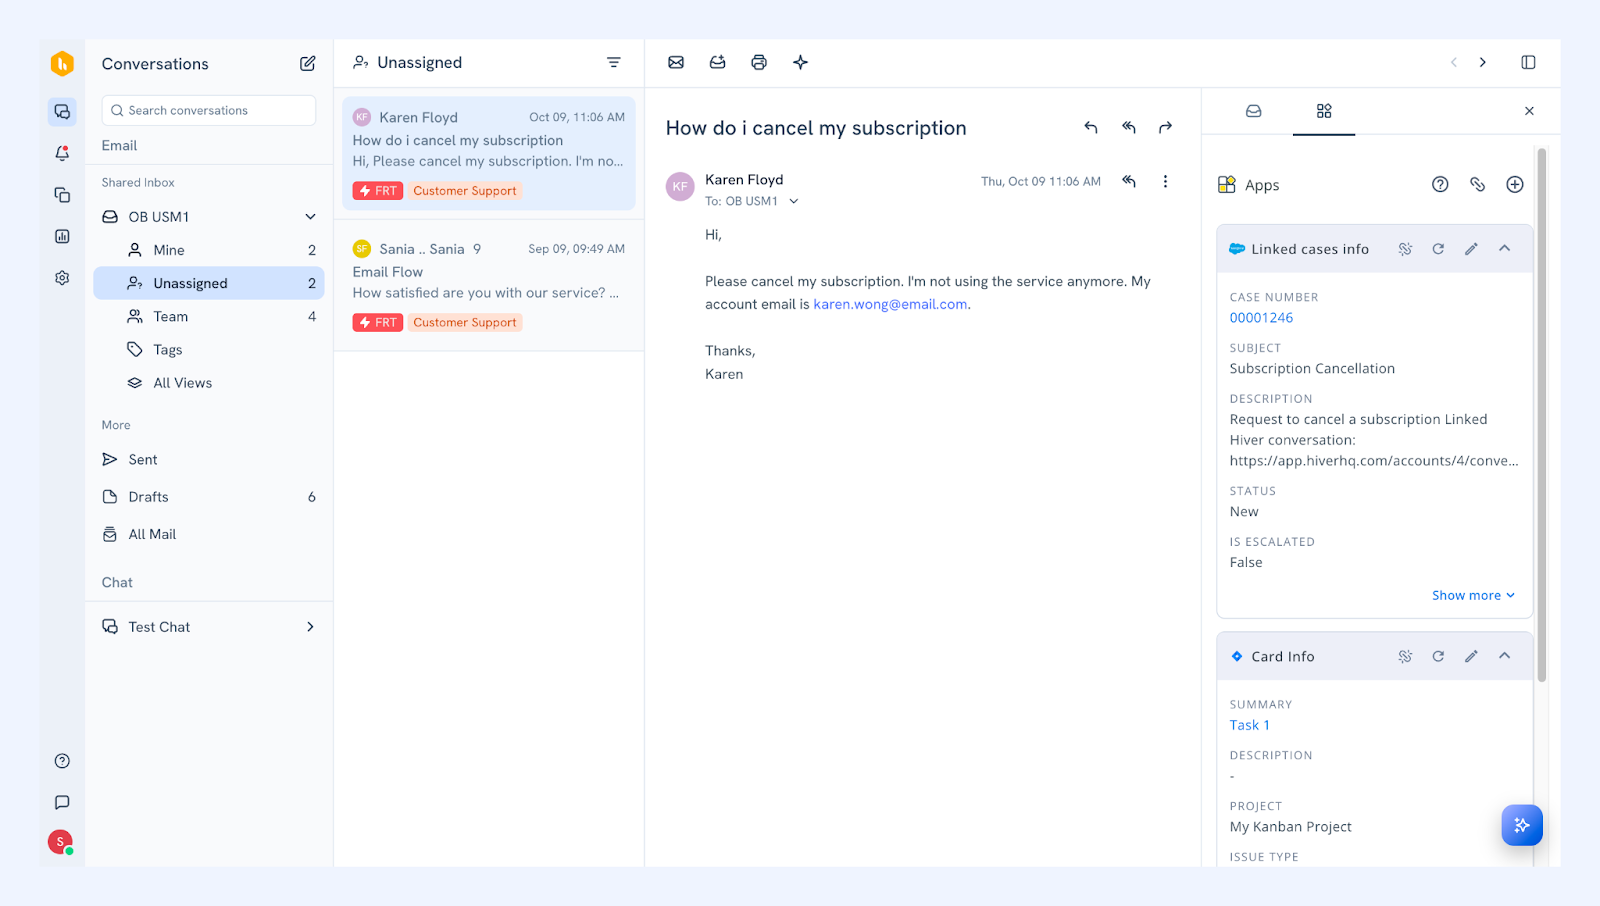
Once set up, you can view Salesforce information and create CRM records directly from the Apps tab in your conversations.
View Salesforce details
Access relevant Salesforce records for your customer conversations in the dedicated Apps tab.
Create a new Salesforce record
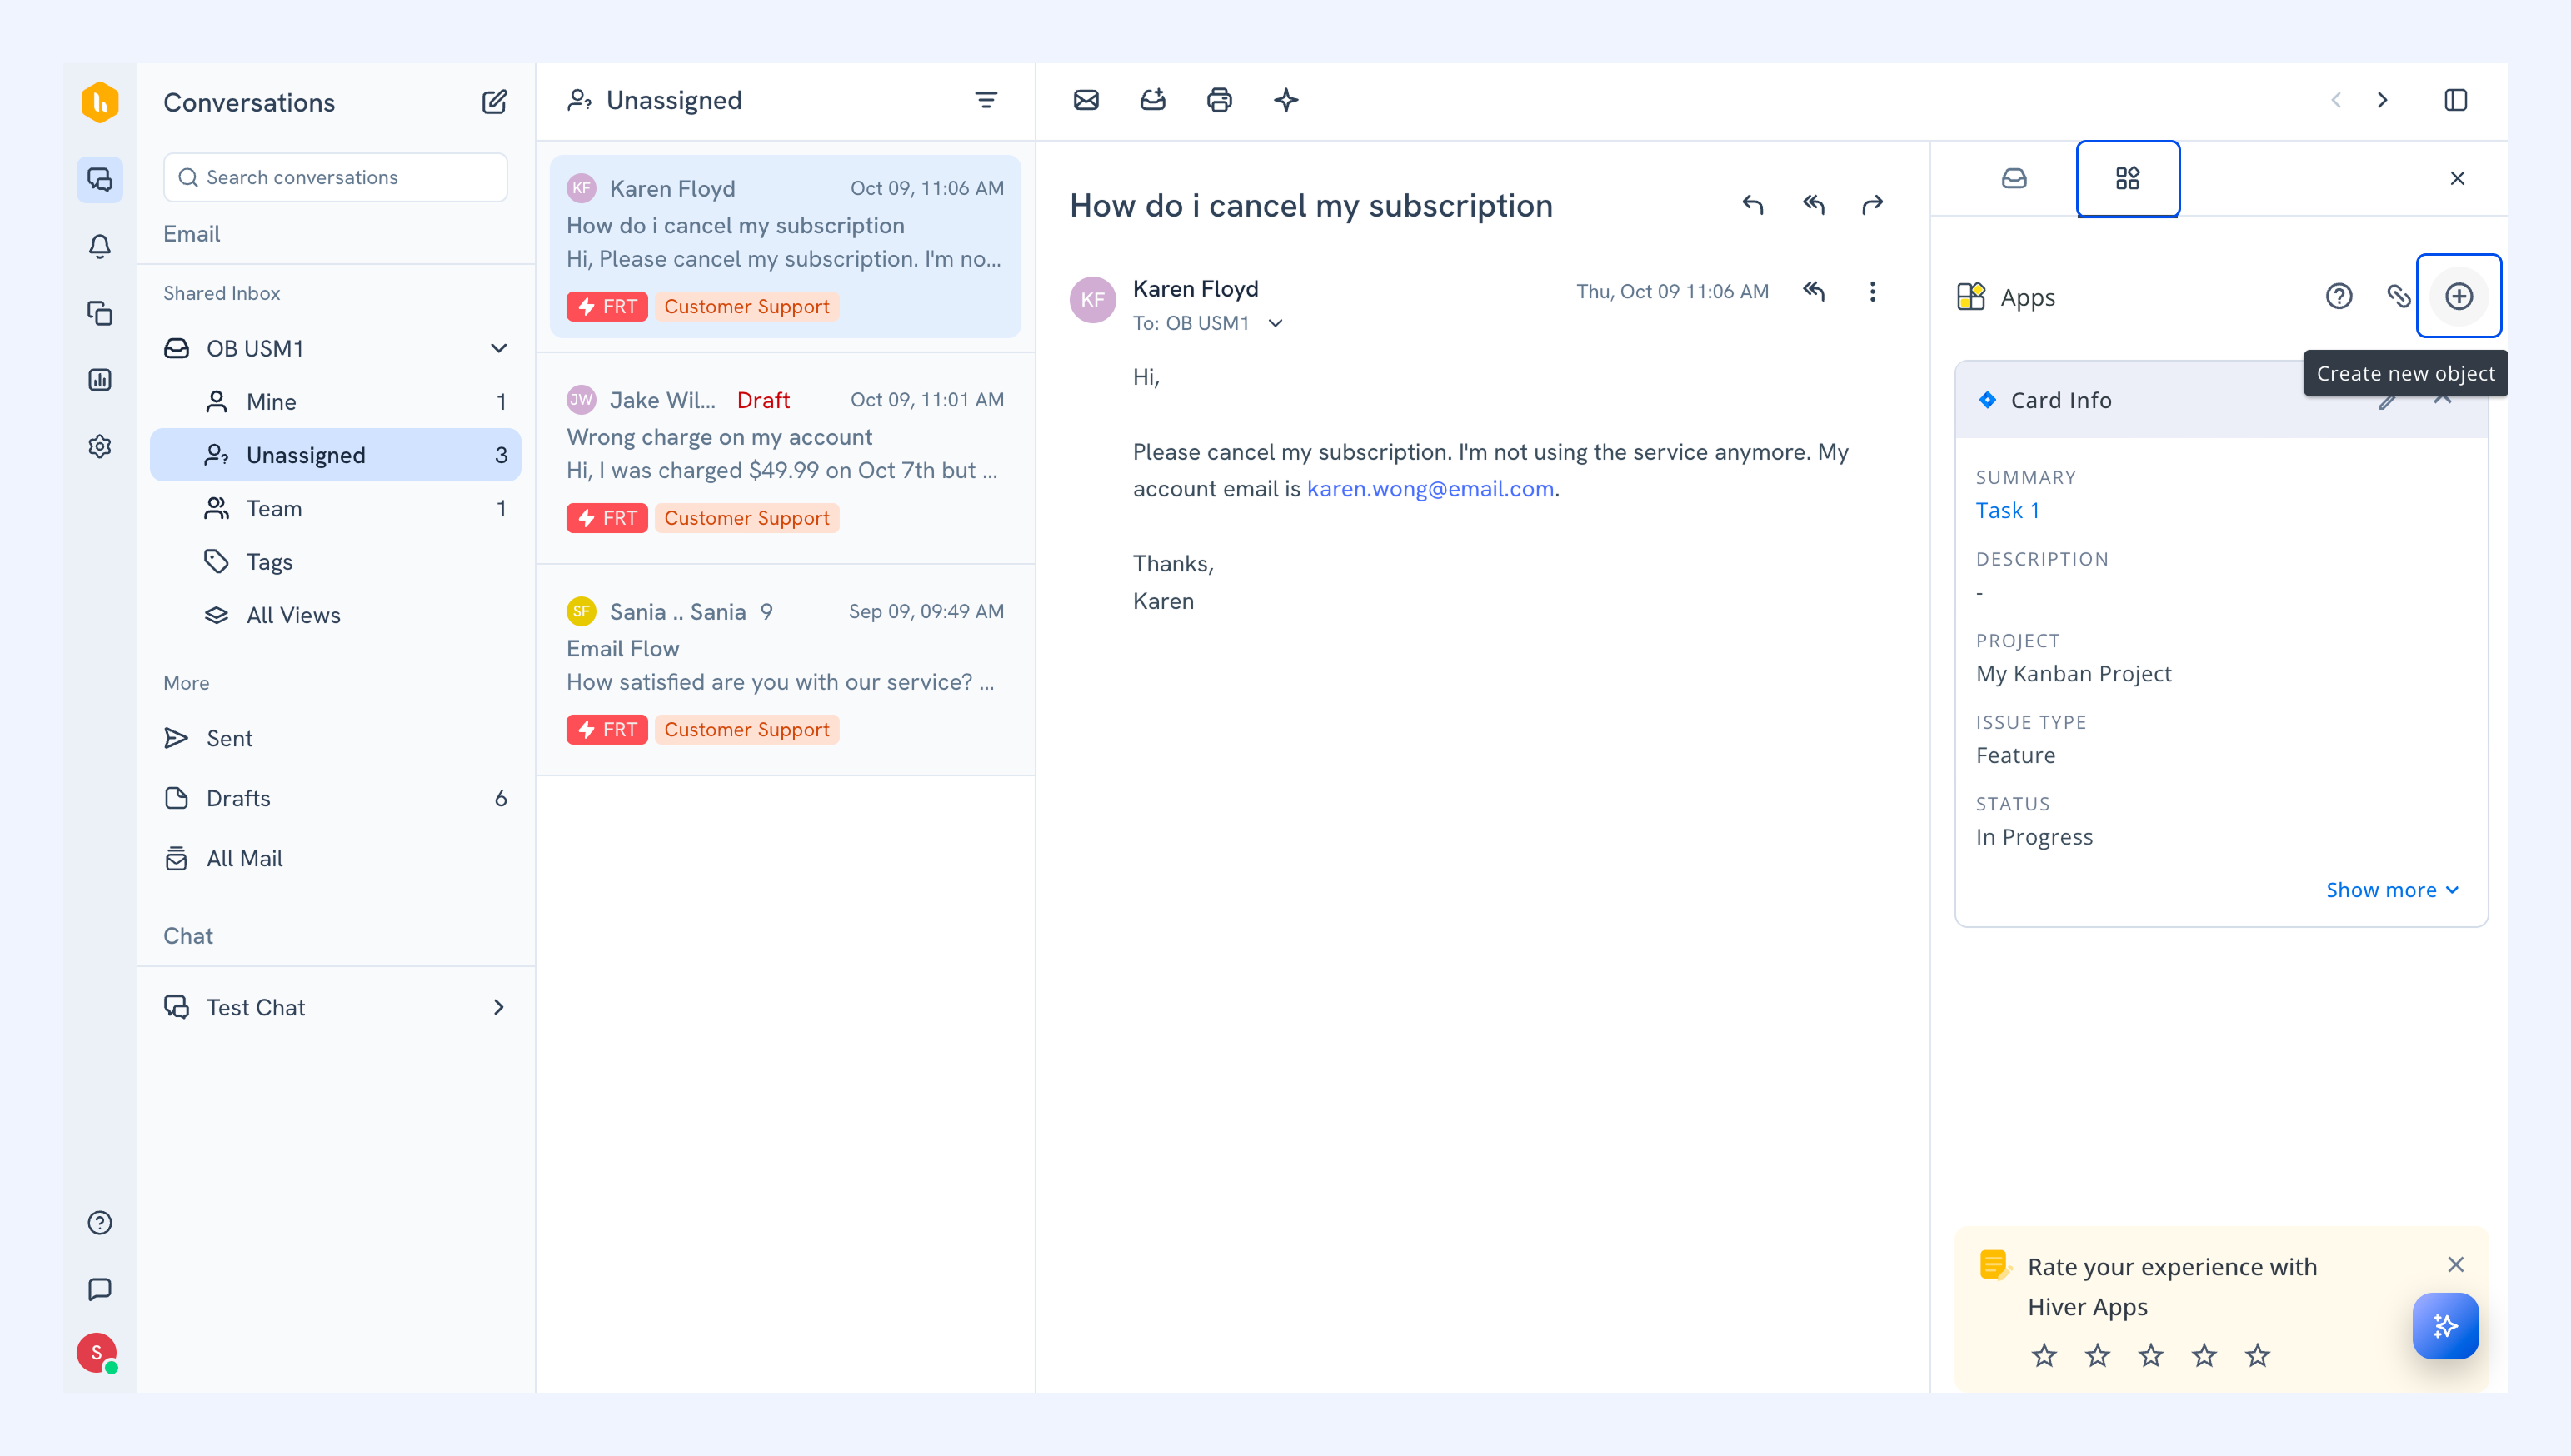
1. Open a conversation and go to the Apps tab.
2. Click Create new object.
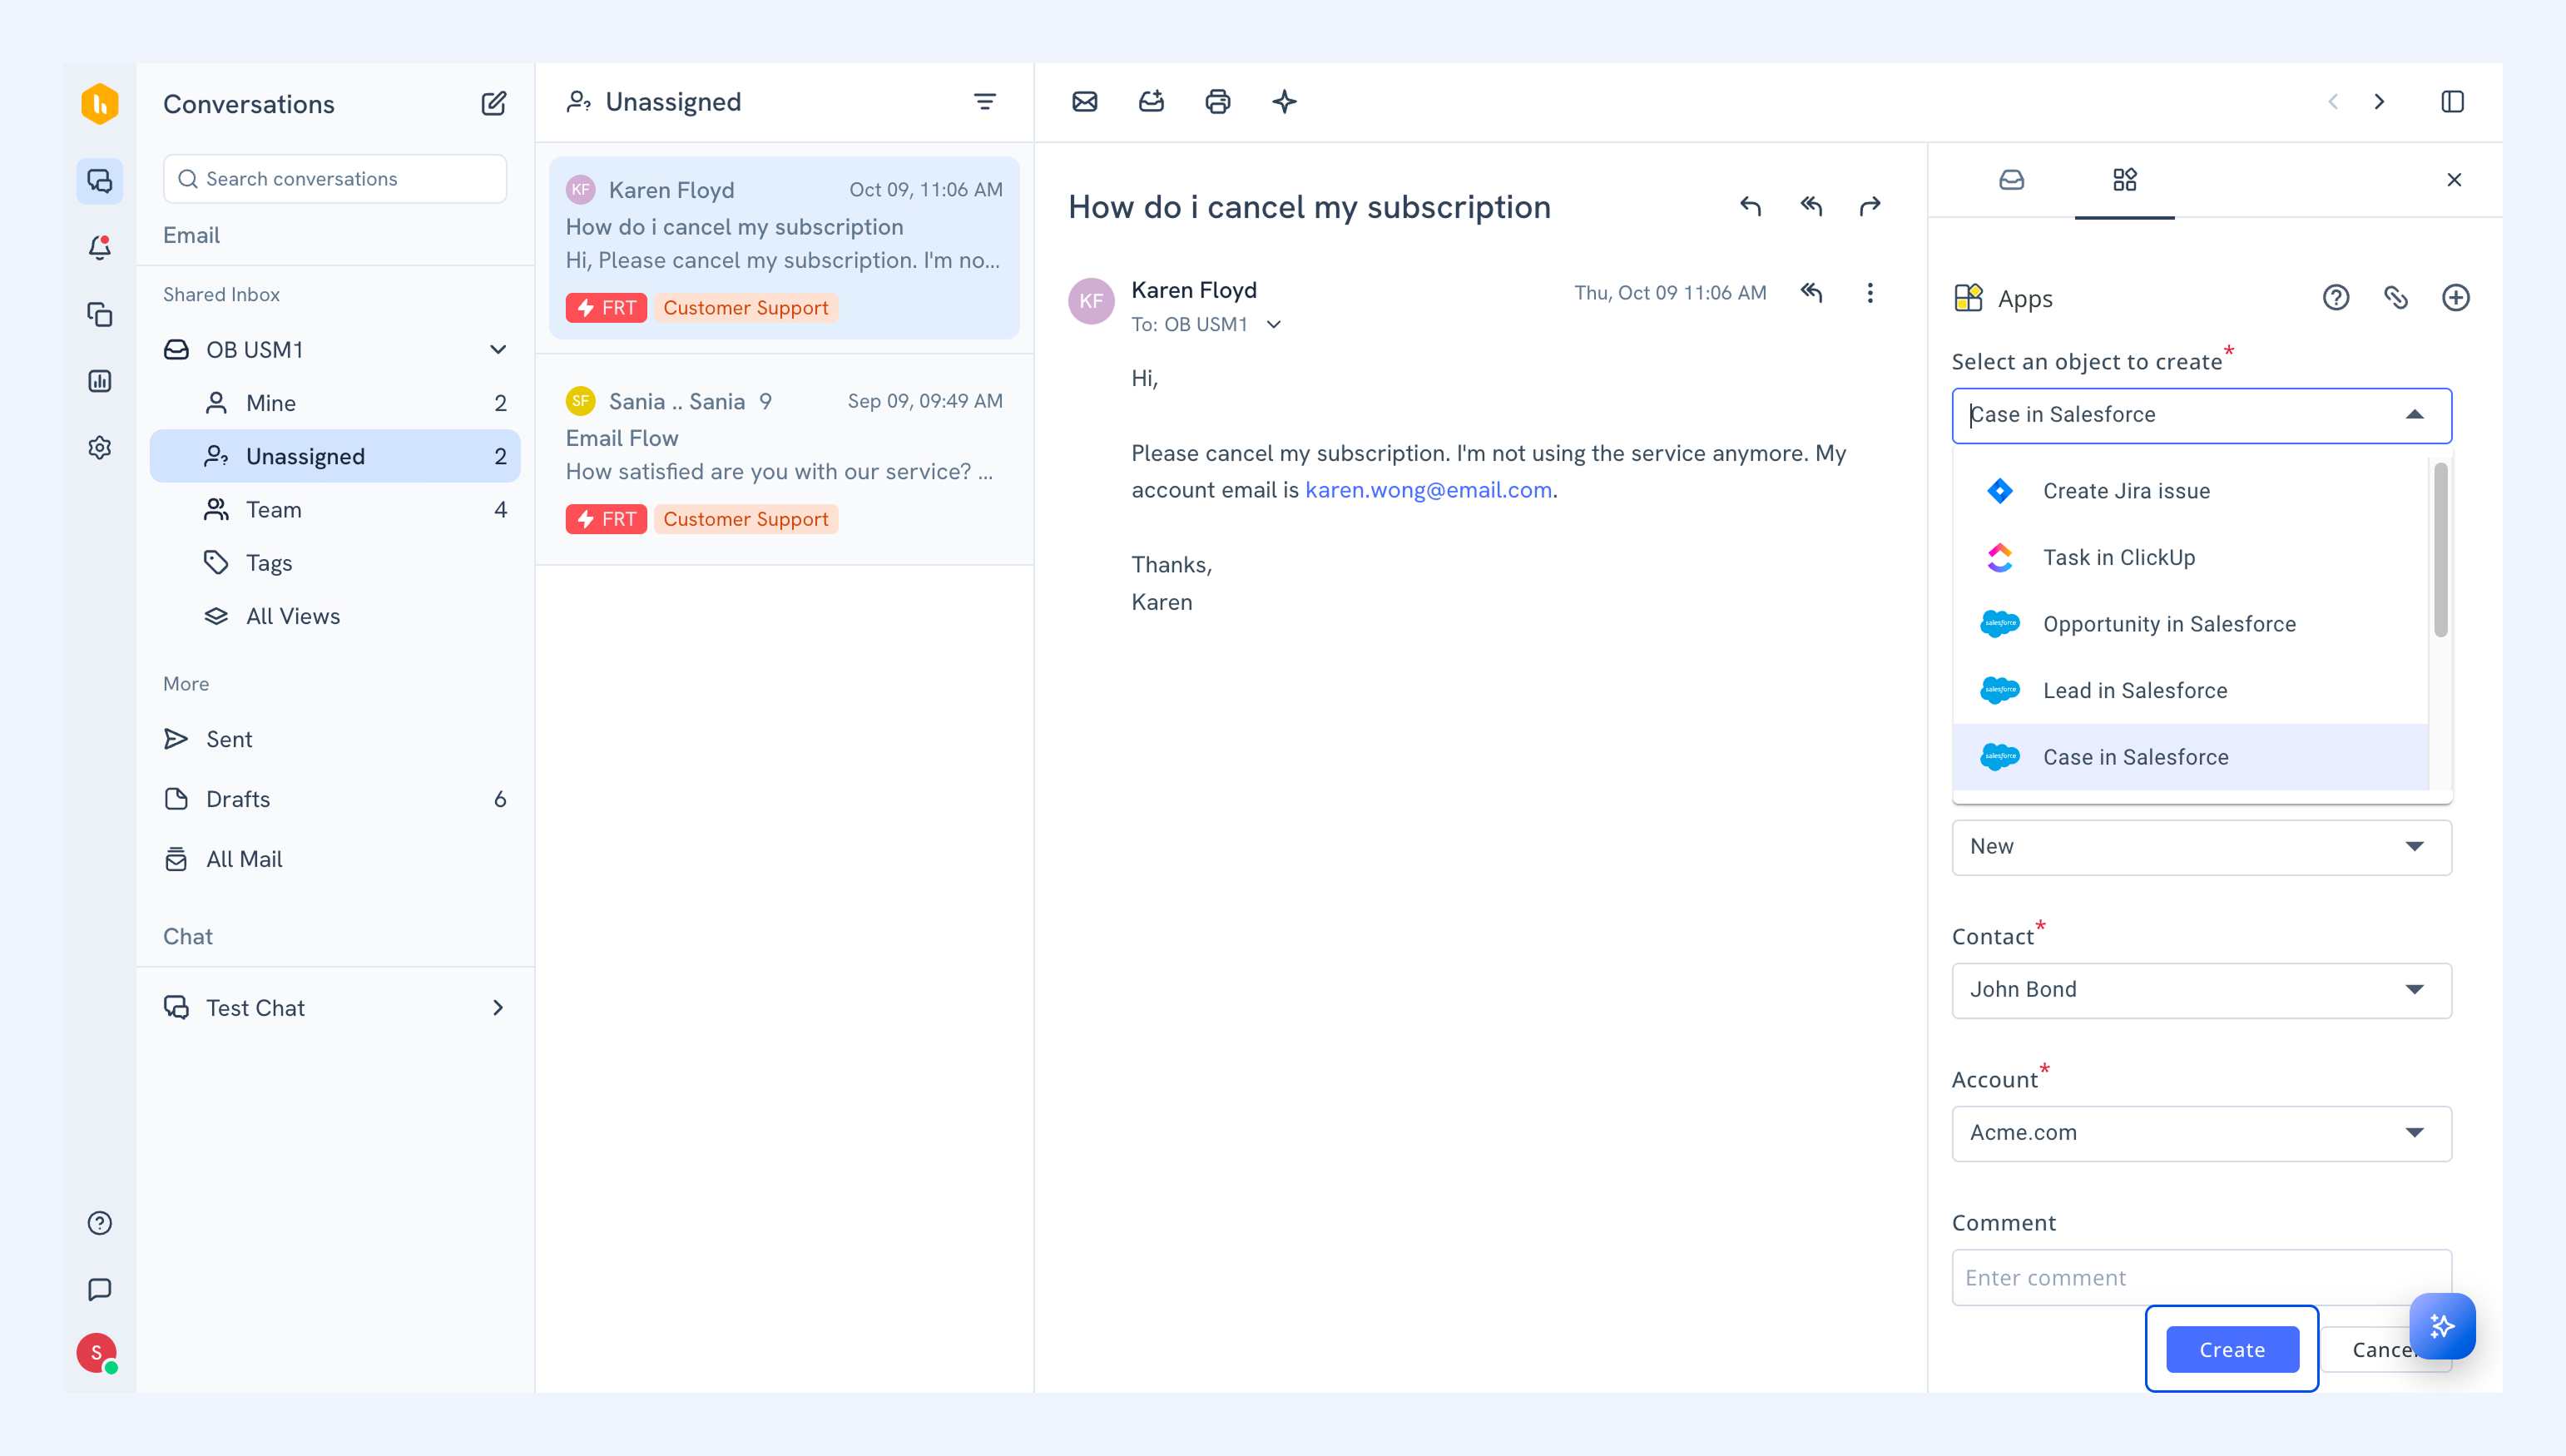
3. Choose the Salesforce object type (such as Lead, Contact, Account, or Opportunity).
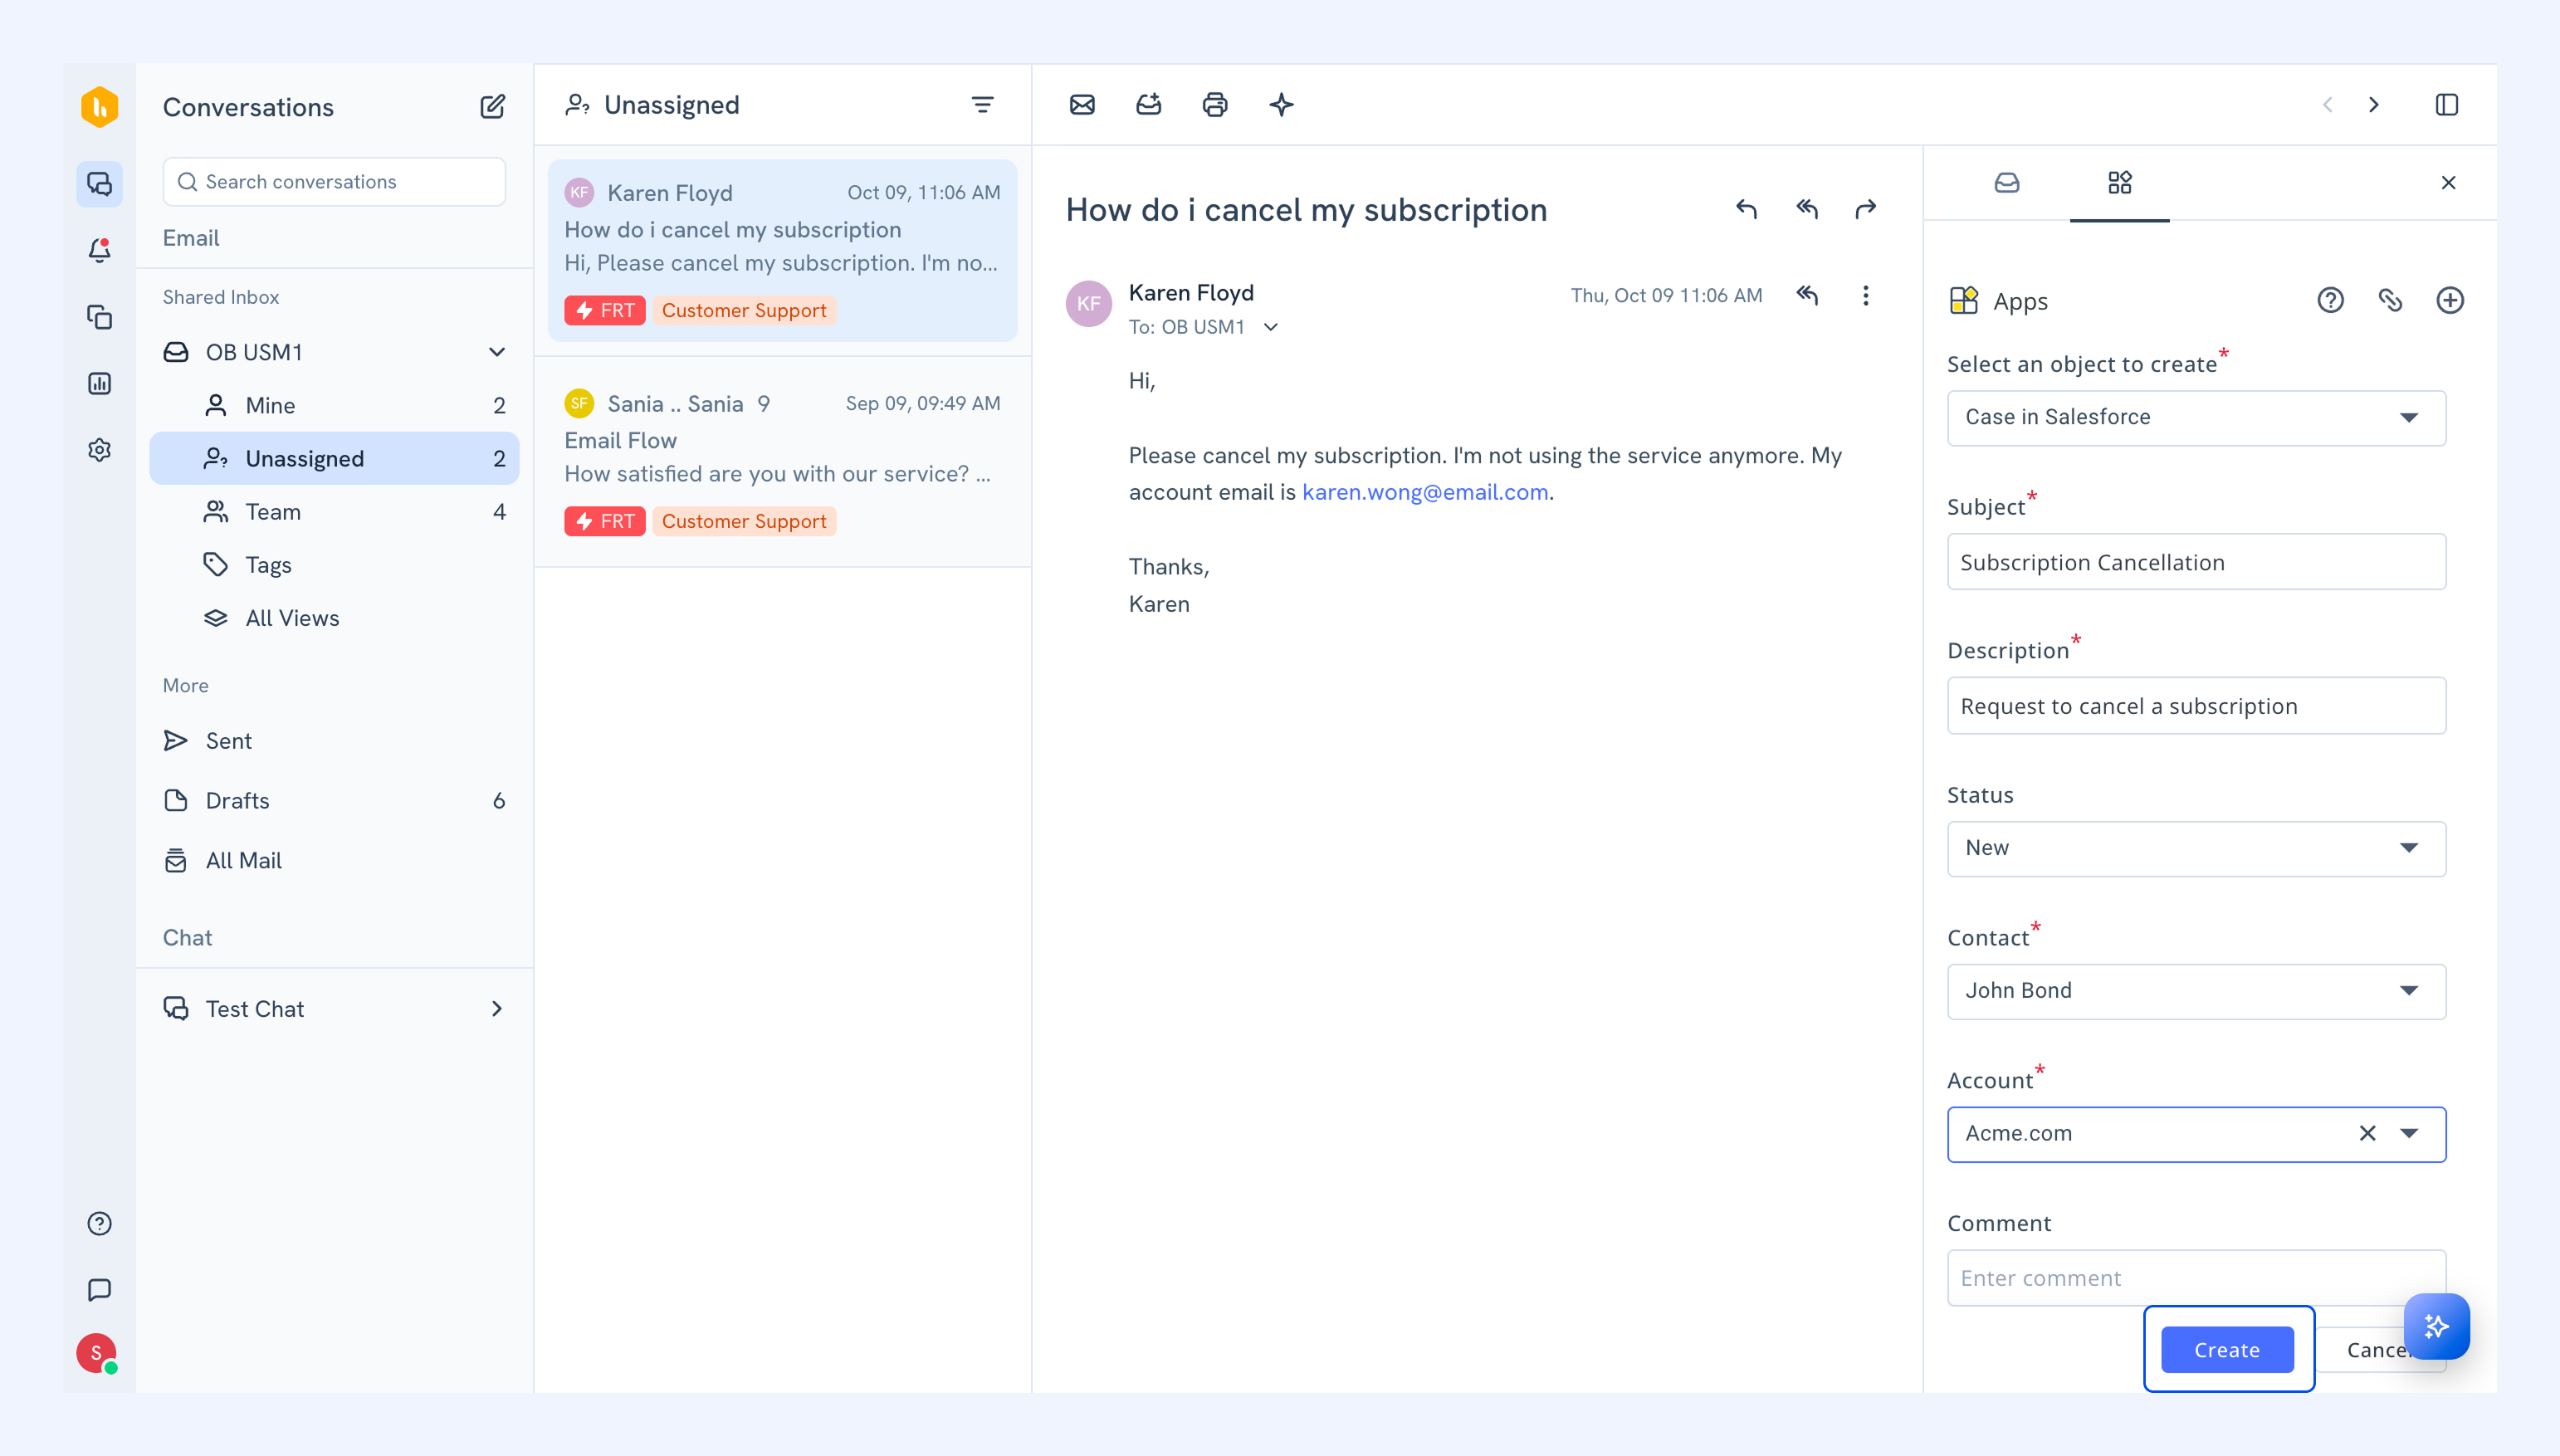
4. Fill in the required details, and click Create.
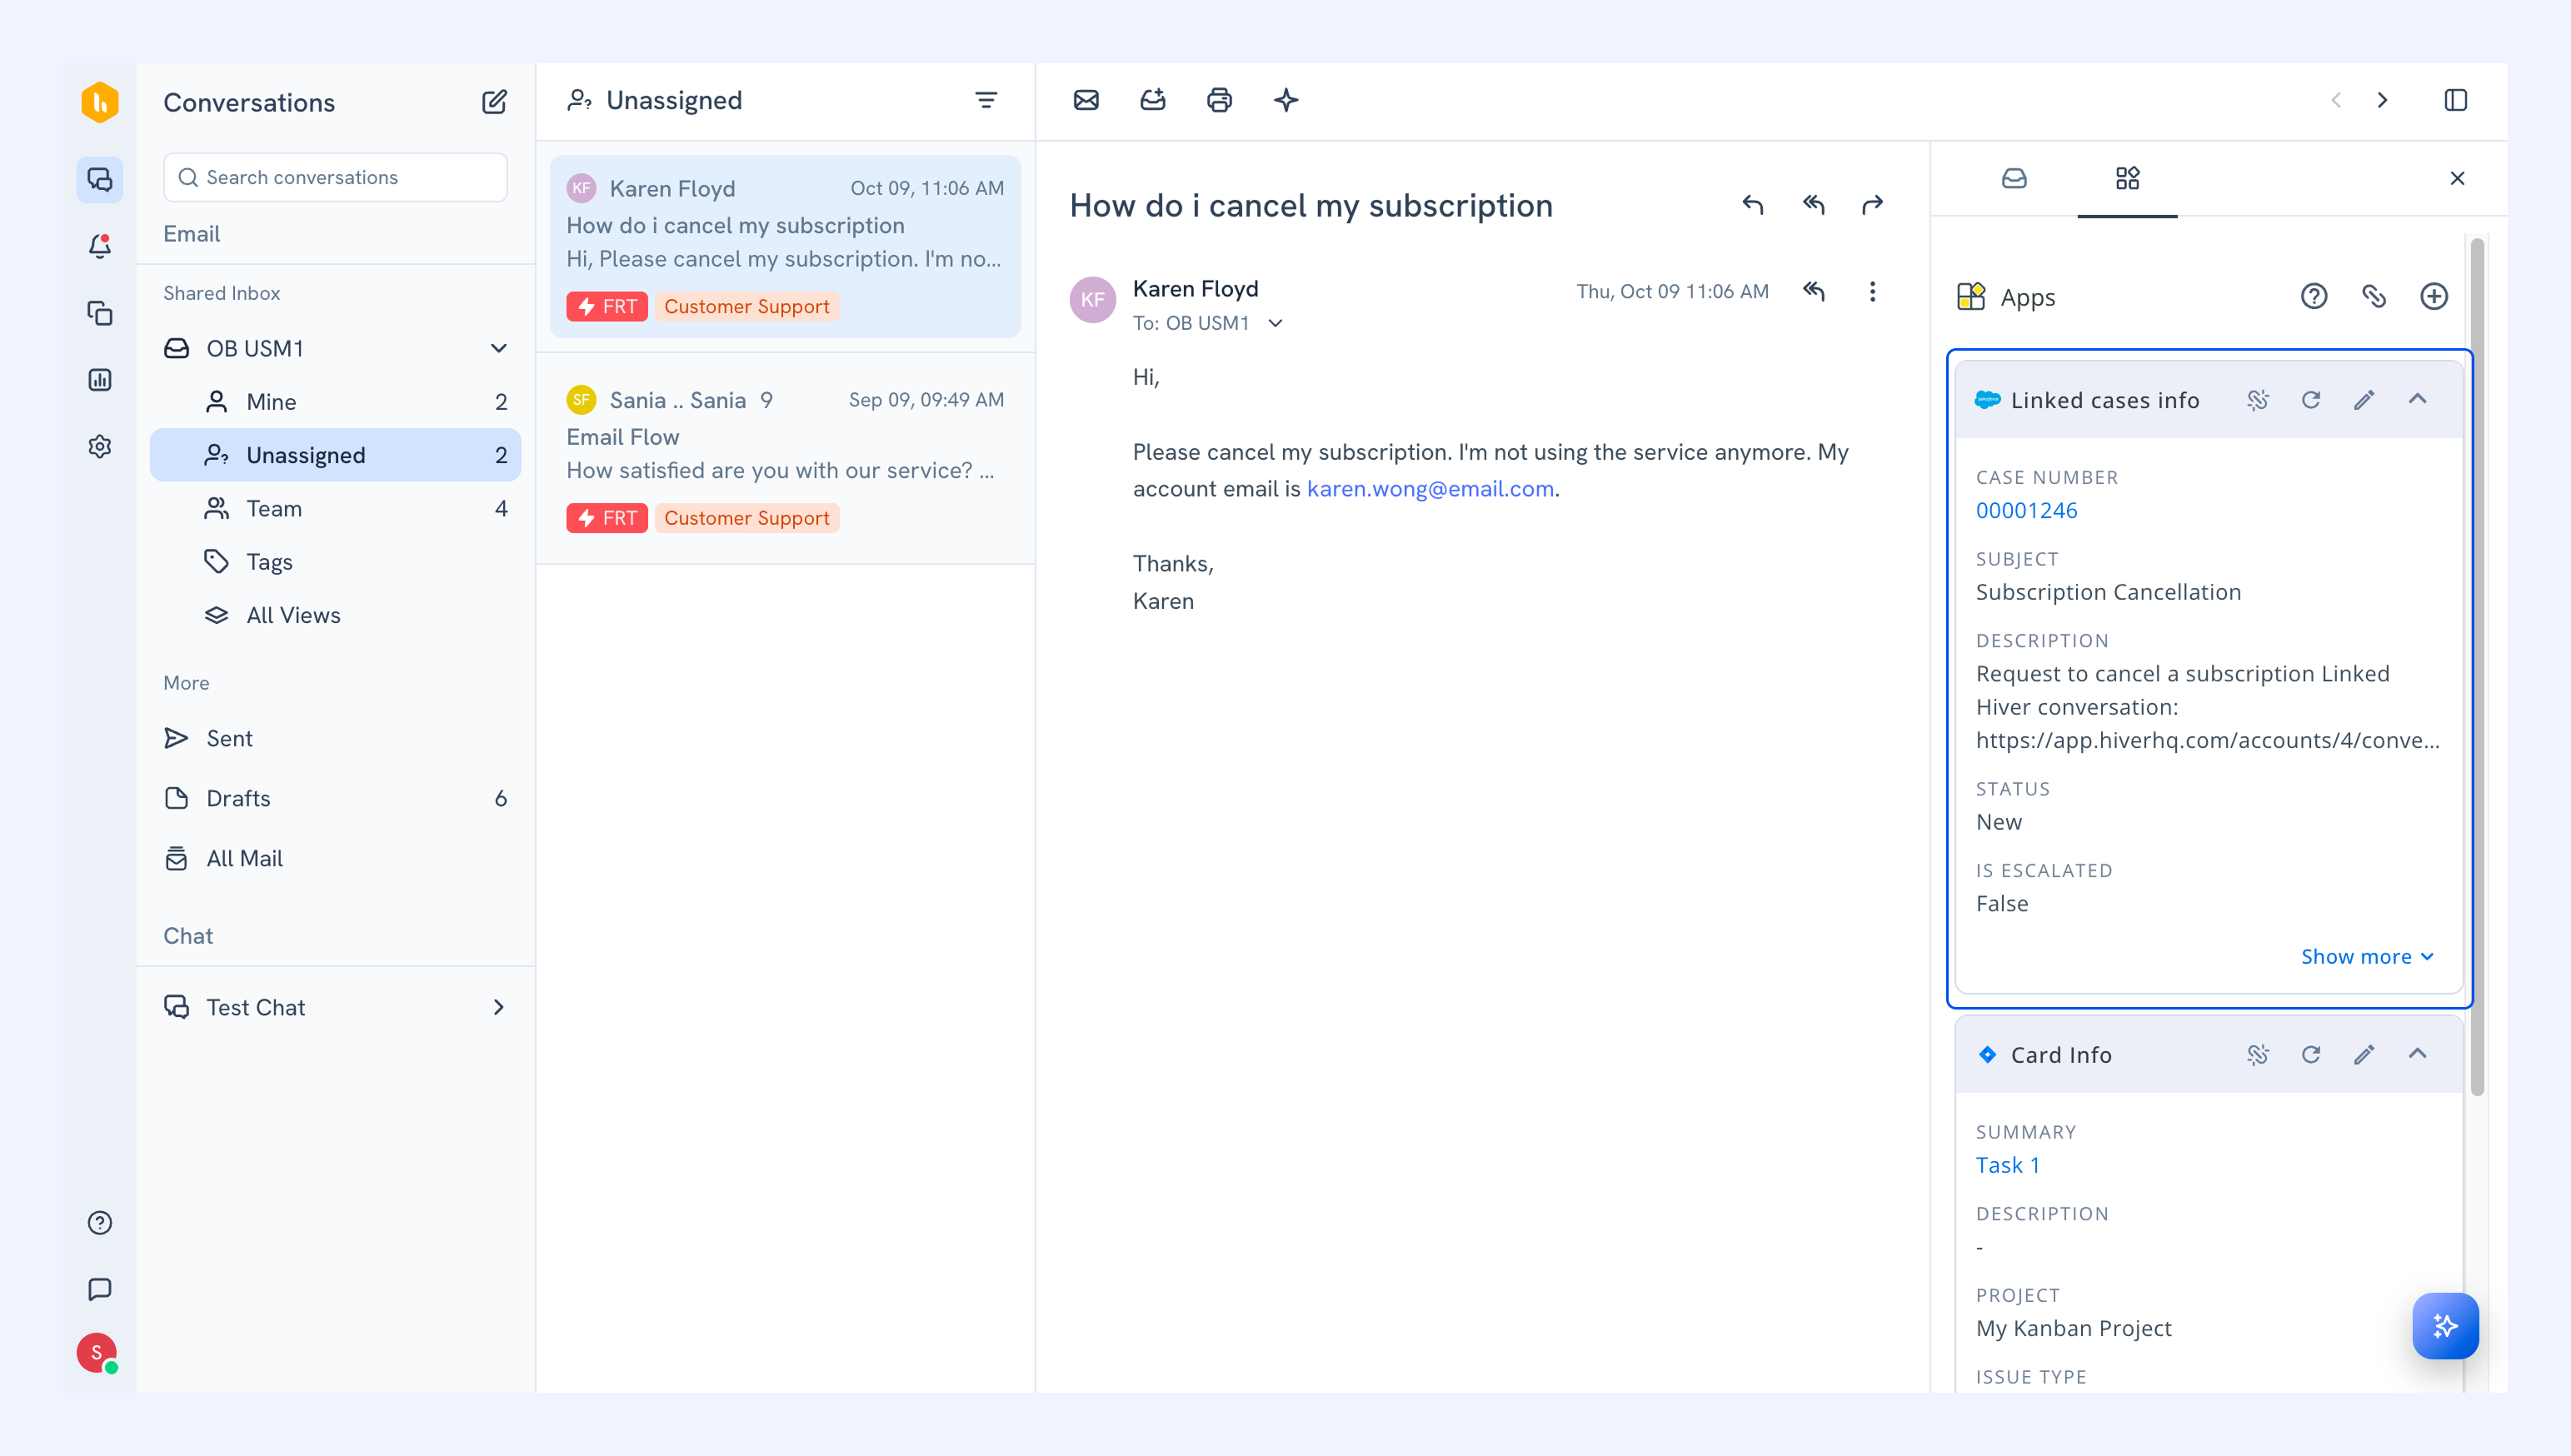
After creating the record, the new Salesforce card will appear in the Apps tab.
Automating Salesforce actions from Hiver
You can use Automations to create Salesforce records and log emails for conversations that meet the trigger and conditions you define. For example, you can create a case in Salesforce for every new conversation in your support inbox, or log every email a customer sends to your billing inbox to their account.
Supported actions
You can automate the following actions in Salesforce:
- Create Lead in Salesforce: Creates a lead in Salesforce using the details from the conversation.
- Create Case in Salesforce: Creates a case in Salesforce using the details from the conversation.
- Log email to Salesforce Lead: Logs the email to the matching lead in Salesforce.
- Log email to Salesforce Account: Logs the email to the customer’s account in Salesforce.
- Log email to Salesforce Person Account: Logs the email to the customer’s person account.
Supported Salesforce conditions
You can use these Salesforce fields to set conditions:
| Salesforce record | Fields |
| Lead | Lead’s email, Lead website |
| Case | Case’s email |