Using Custom Object
Custom Object lets you import external data into Hiver. This data can be crucial information in your CRM or an Excel sheet where you maintain your account book, like the account owner and tags mapped to your customer accounts. Once imported, you can use this data to create dynamic Automation rules.
For instance, let’s say your CRM or Excel sheet has a list of customer emails/domains and the account owner for each. You can export this as a CSV file with three columns as shown below:

Once this CSV file is uploaded to Hiver as a Custom Object, you can create a single dynamic Automation rule that uses this mapping to automatically assign any email from apple.com to Sarah and all emails from adidas.com to Mike. This eliminates the need to create multiple Automation rules. Any change in the account owner? Just update the CSV and you’re good to go.
Note: You can create a Custom Object and dynamic mapping based on the From email, From domain, To email, To Domain, Cc, Reply-to email, Reply-to domain, and Subject.
Why use a Custom Object
Custom Objects unlock two powerful advantages:
1. Use external business data to power your workflows
To ensure compliance with your SOPs across all your business applications, including Hiver, you need to provide uninterrupted access to your customer and company data. In its absence, teams resort to convoluted manual or automated workarounds. Just bring the necessary data into Hiver using Custom Objects and build Automation that uses it.
2. Simplify and scale your Automations
Instead of creating one rule for every team member or customer account, use a single dynamic rule powered by your data. It’s easier to manage, quicker to update, and scales effortlessly as your customer base grows.
Prerequisites
- You must be an Admin or a Shared Inbox Admin.
- You must be on the Elite plan.
Creating a Custom Object
There are two ways to bring your data into a Custom Object: connect a Google Sheet or upload a CSV file.
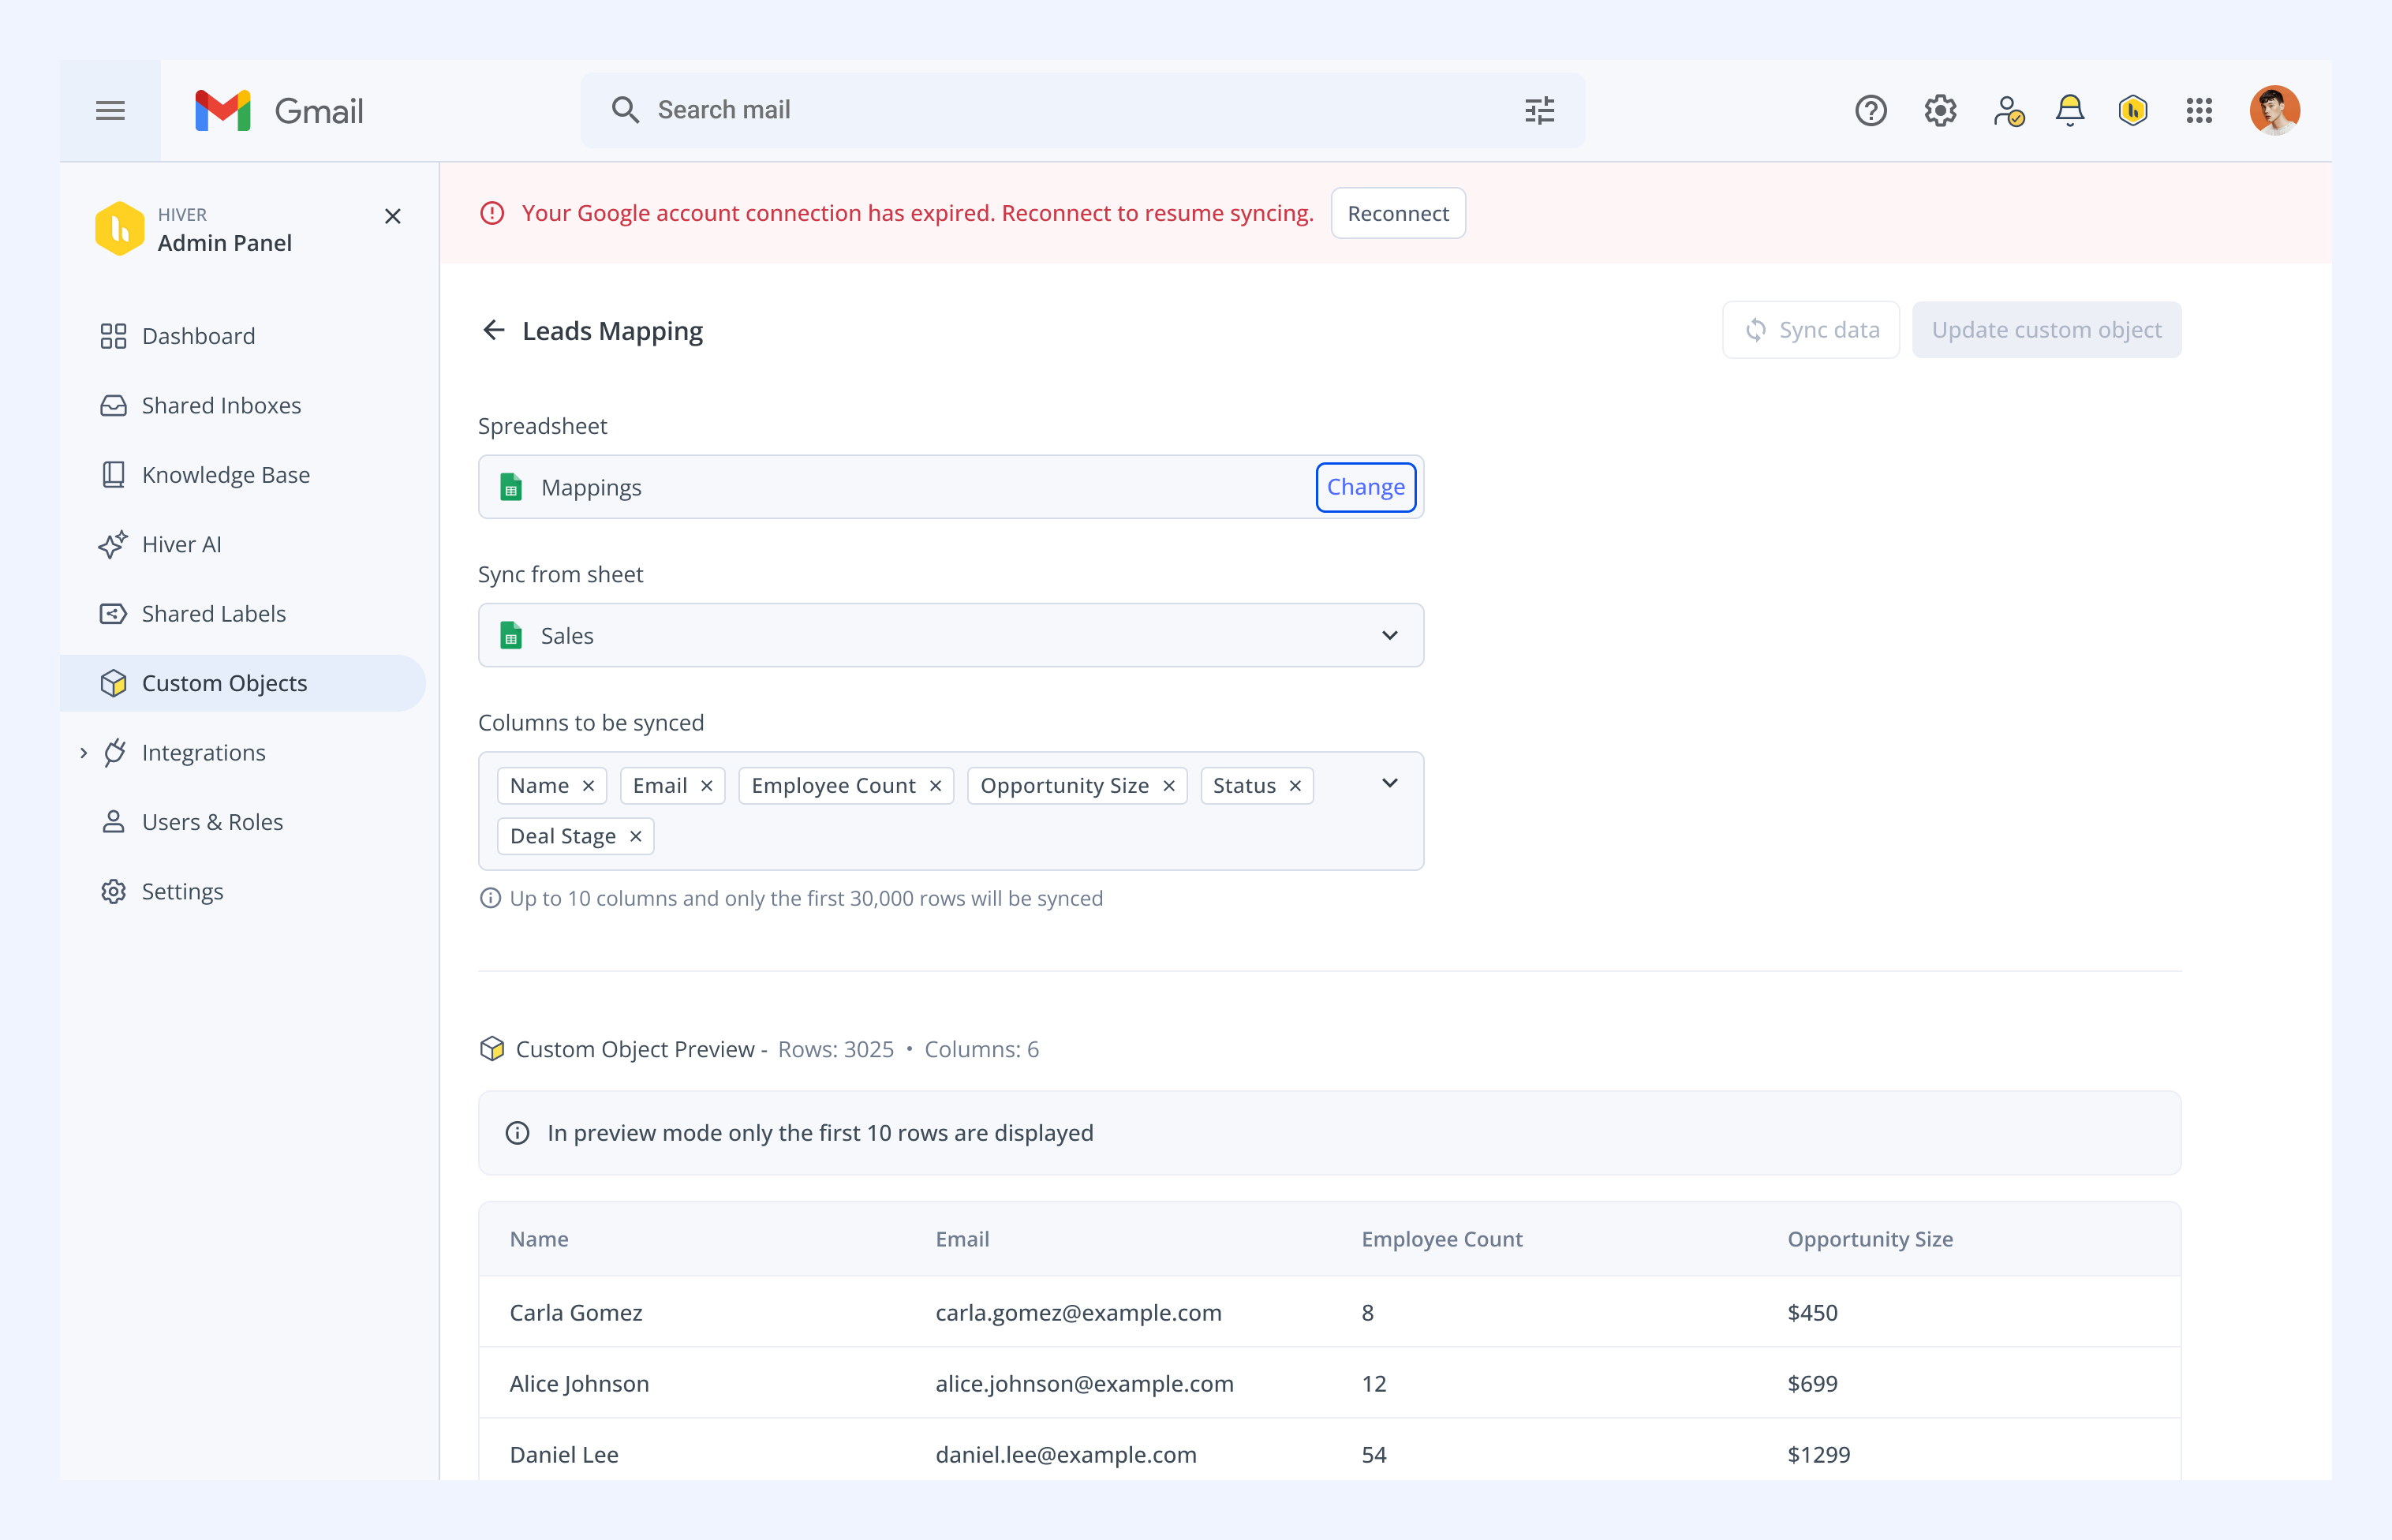
If your team already keeps customer data in a Google Sheet, say, a list of accounts and their owners, you can sync that sheet directly to your Custom Object. Updates flow in on their own, so your Automations always work off the latest data.
Connect a Google Sheet
1. Go to Admin Panel → Custom Objects, and click Create Custom Object.
2. Give your Custom Object a unique name.
3. Under Data source, select Apps, then choose Google Sheets from the dropdown.
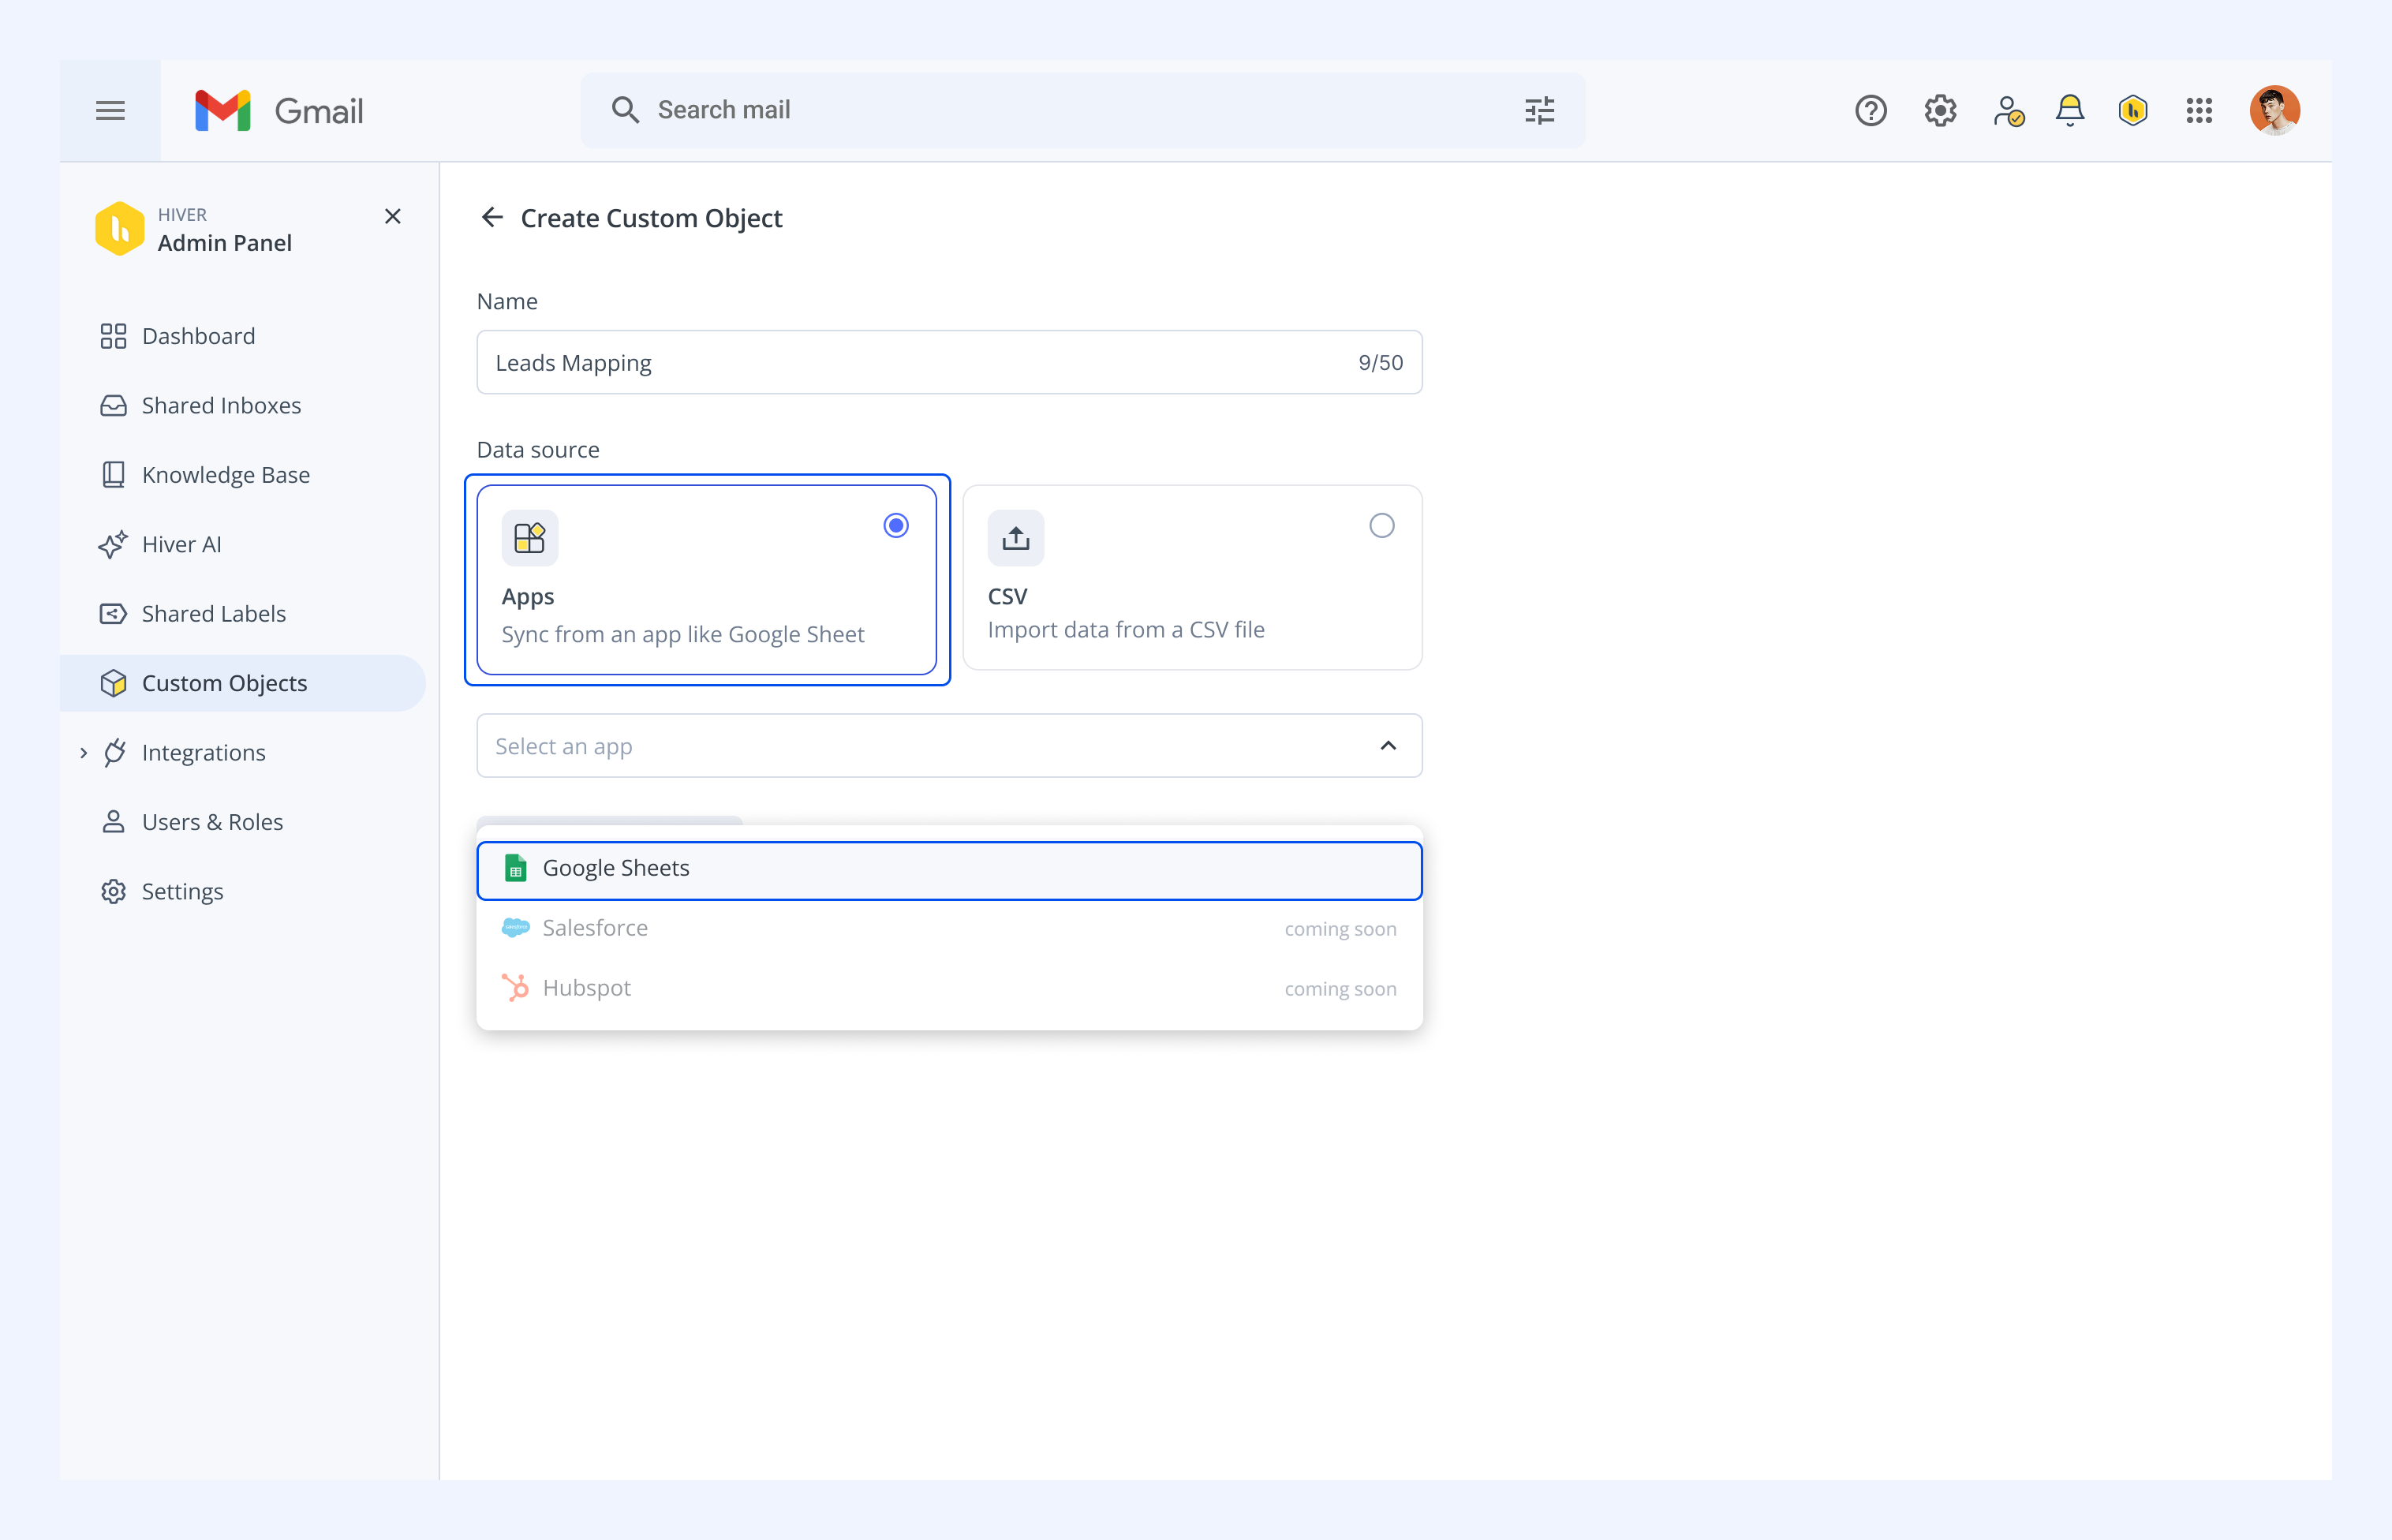
4. Click Continue.
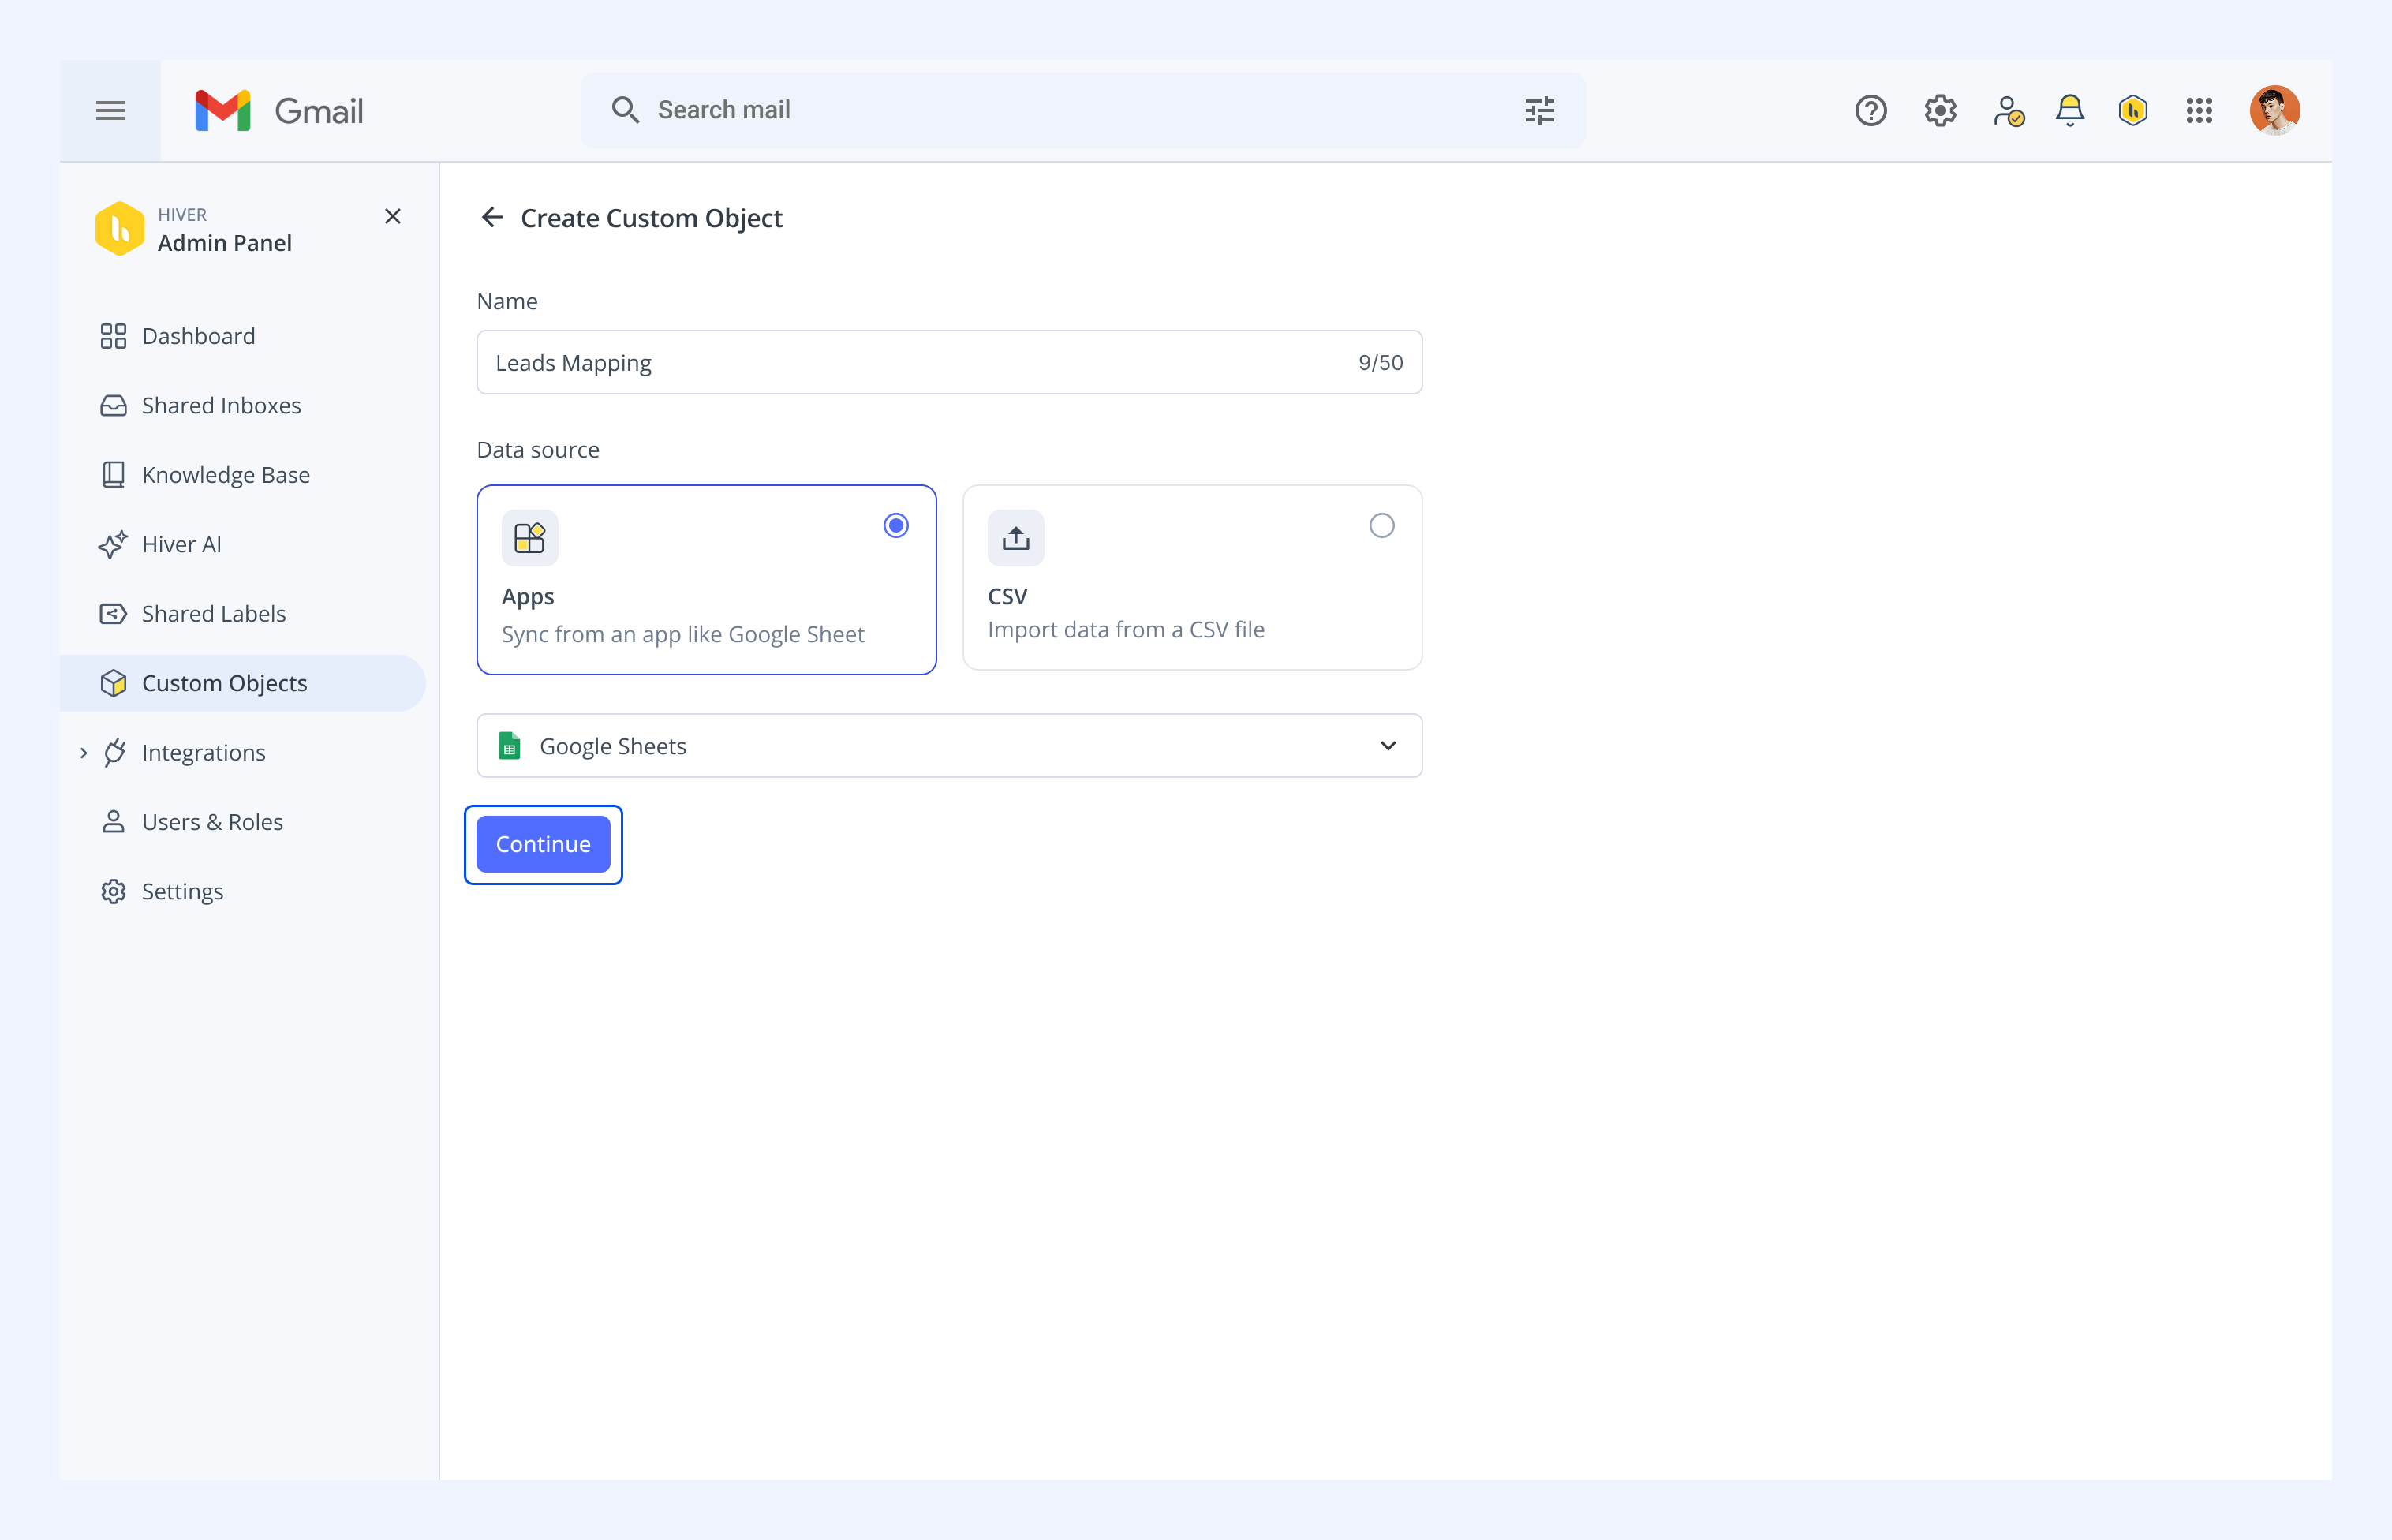
5. In the new tab that opens, sign in to your Google account and pick the spreadsheet you want to connect.
6. Next, choose the sheet and the columns you want to sync. Use the preview to check that everything looks right.
Note: You can include up to 10 columns and the first 30,000 rows from your sheet.
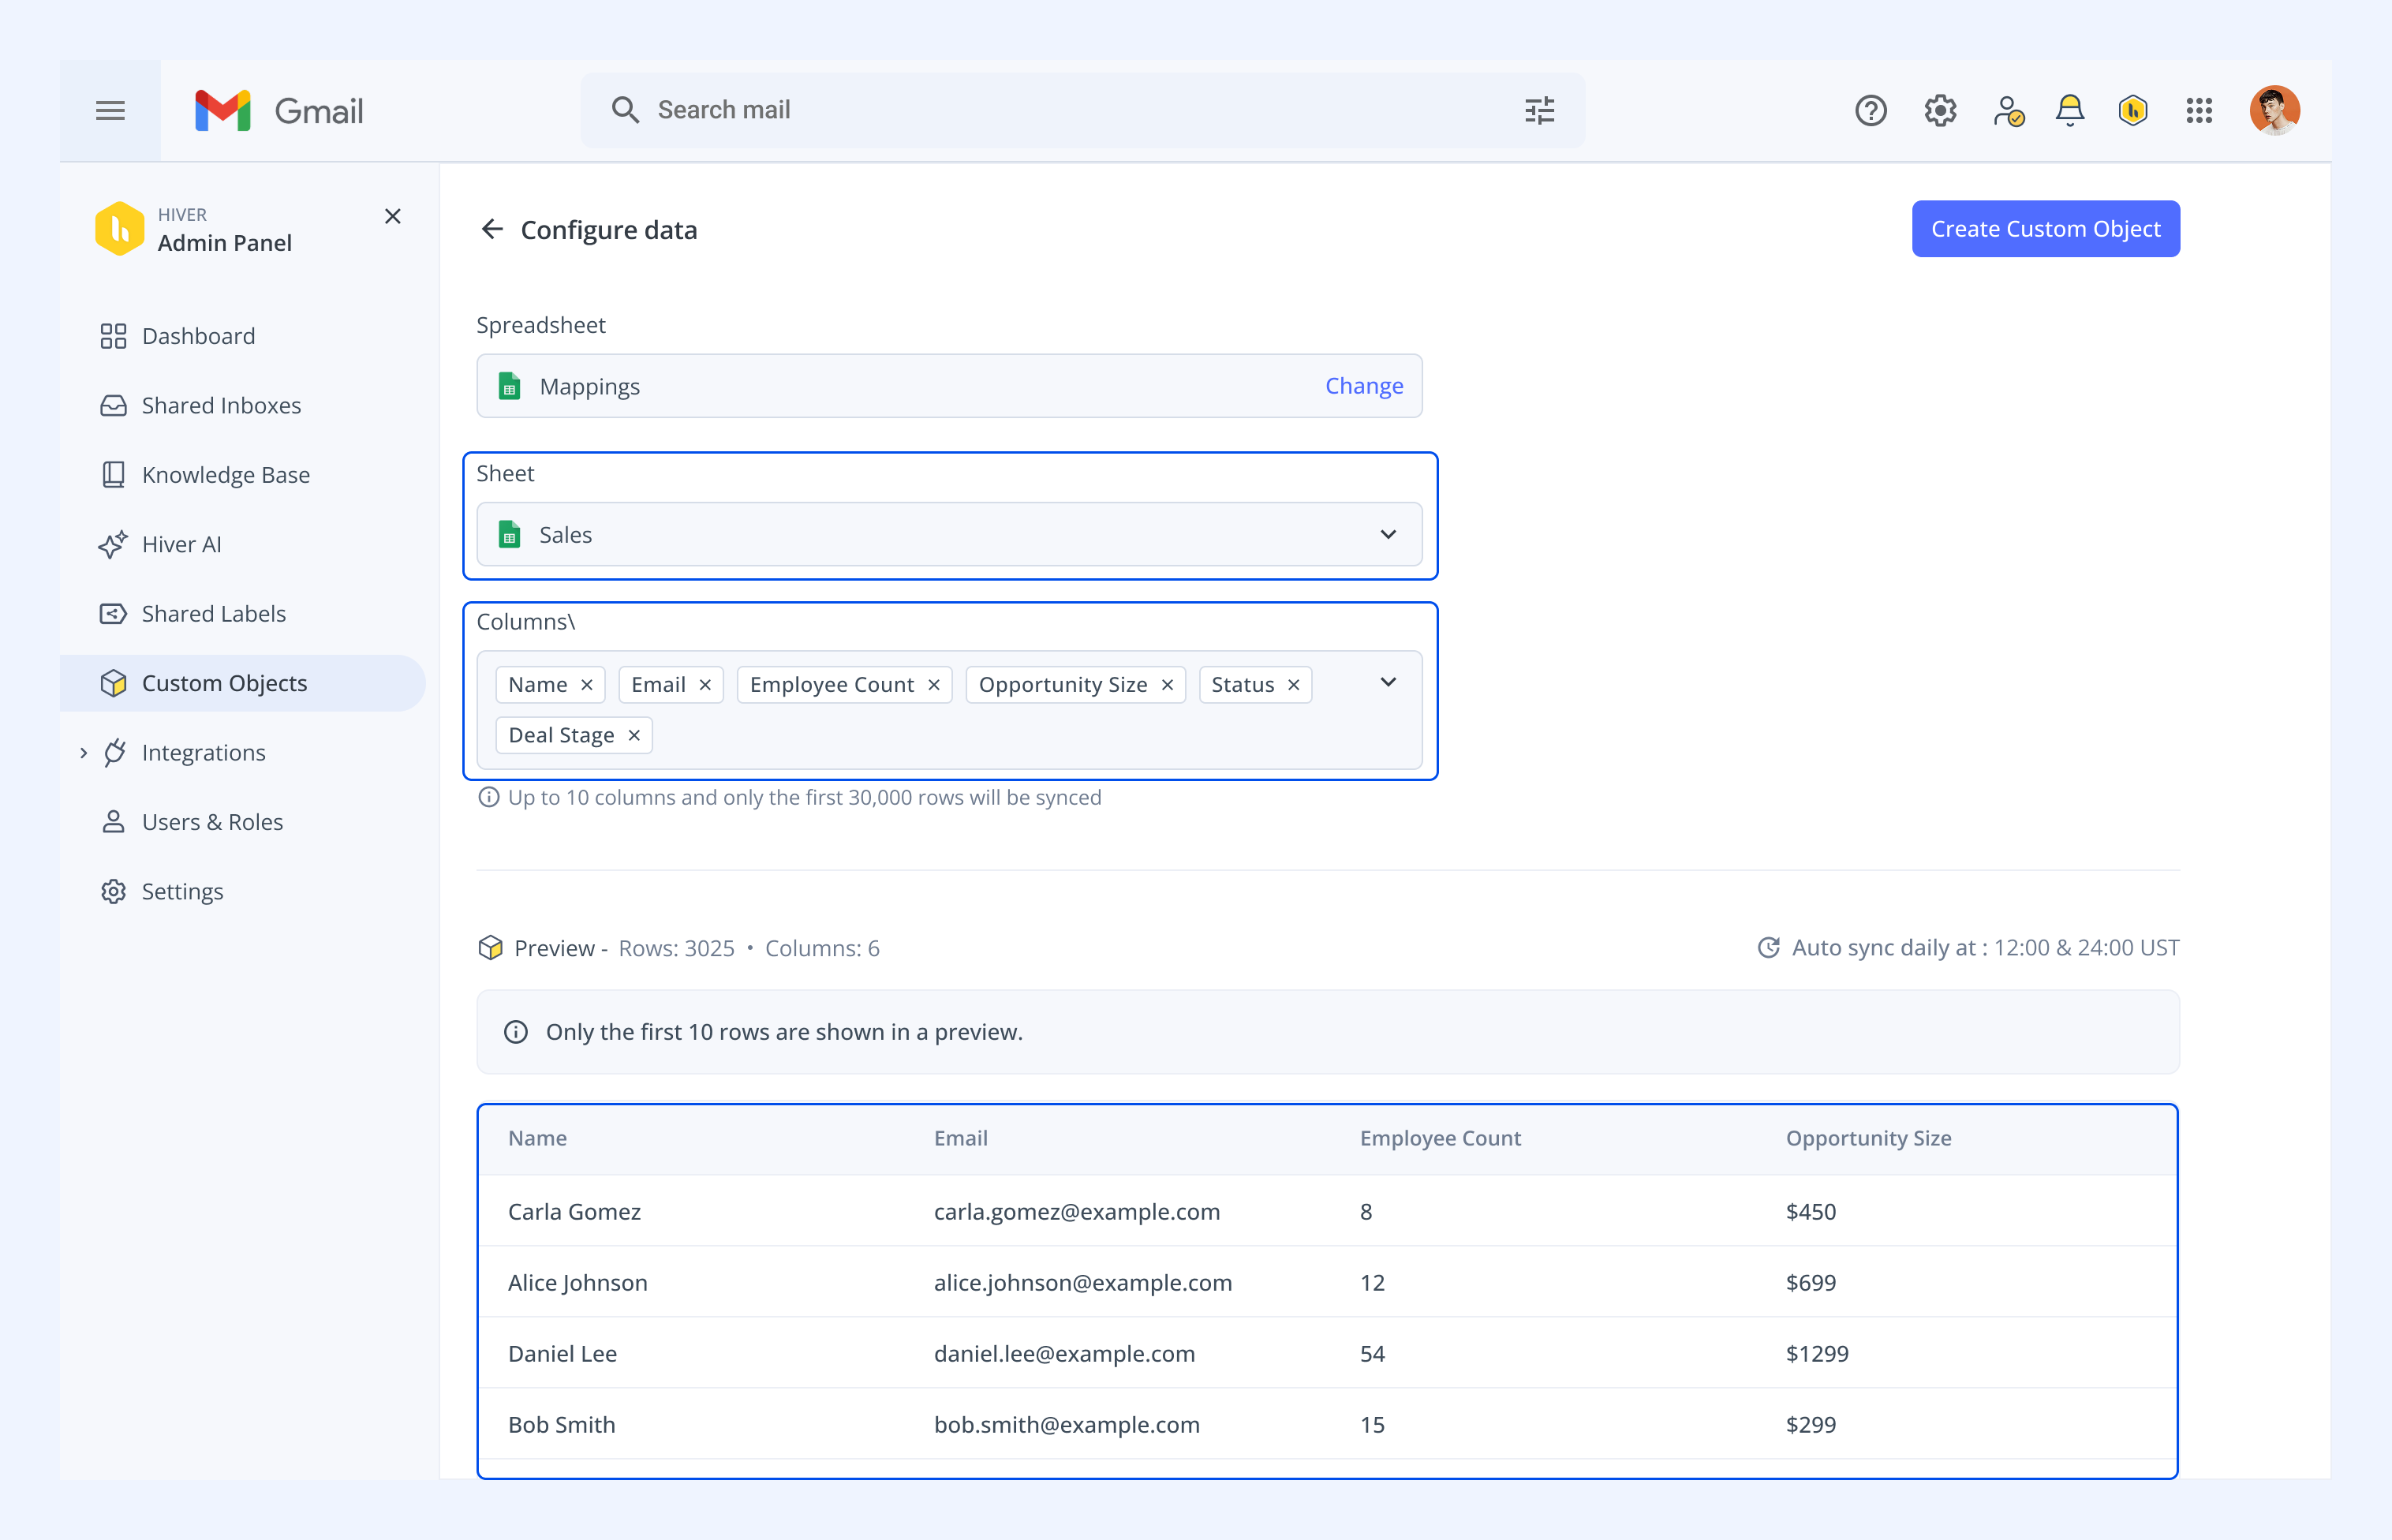
7. Click Create Custom Object.
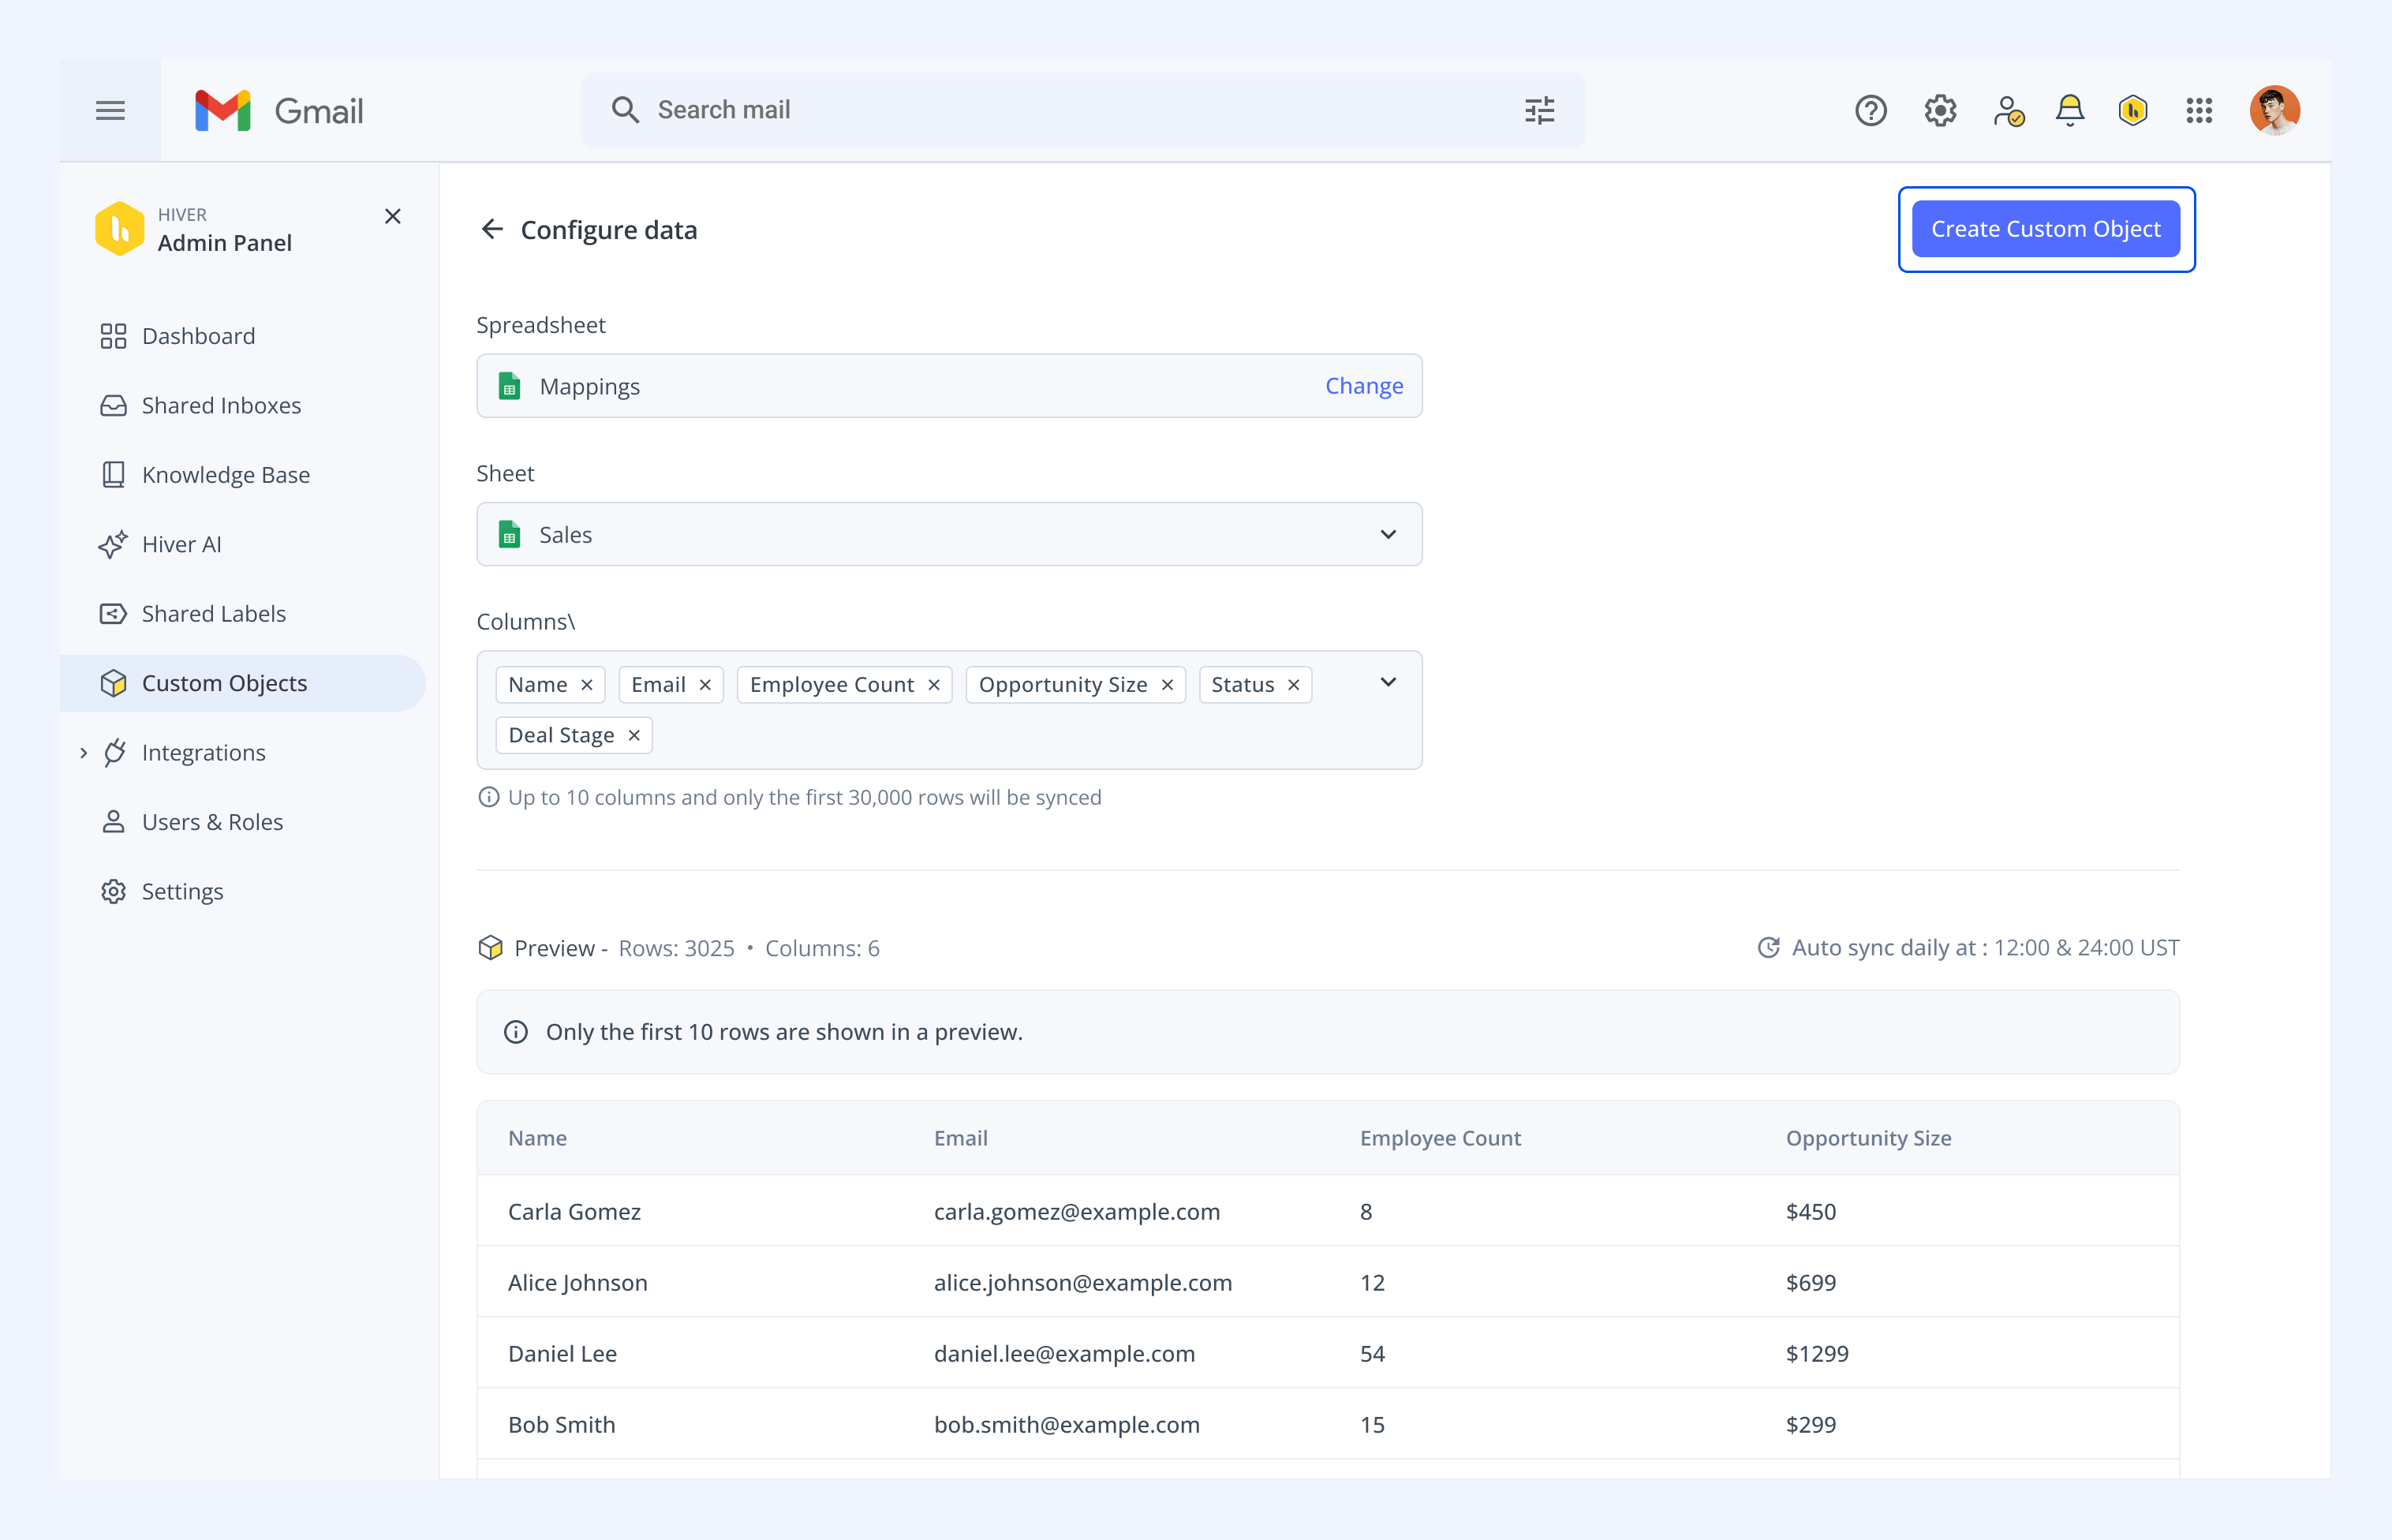
Hiver re-syncs your sheet automatically every 12 hours, so any updates you make in Google Sheets show up in your Custom Object.
Upload a CSV file
1. Under Data source, select CSV, then click Upload file.
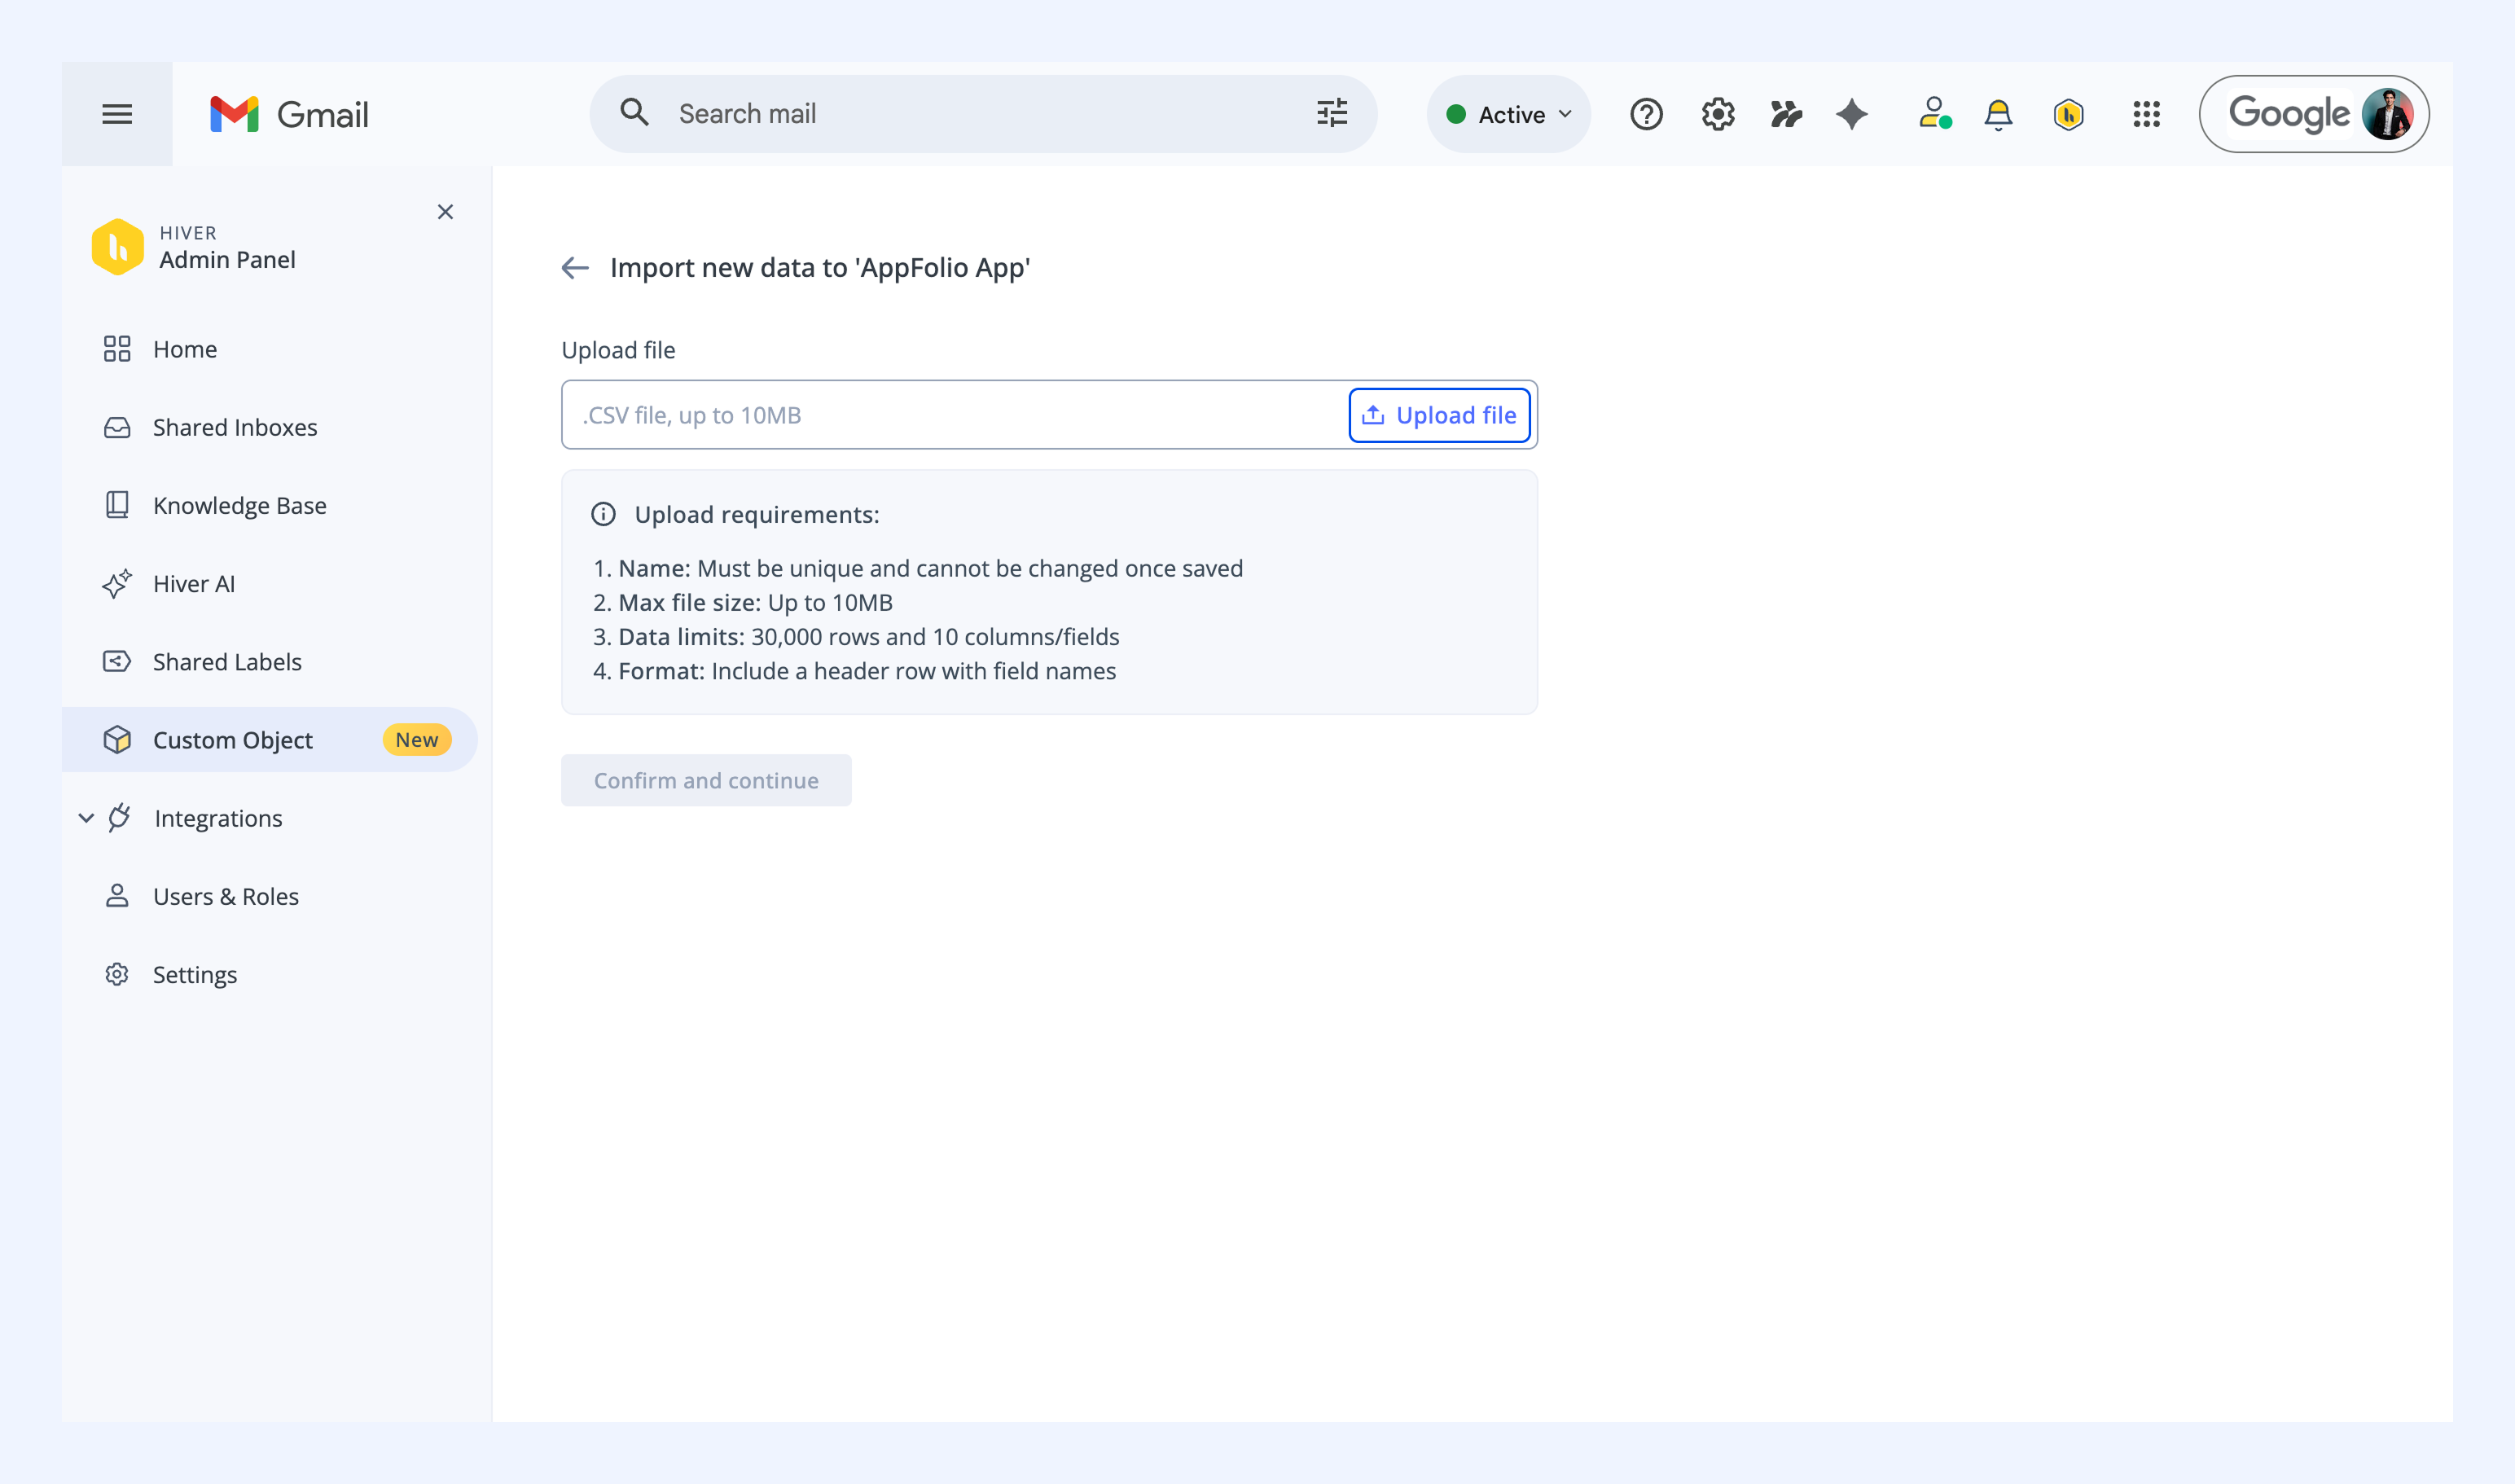
- Max file size: 10MB
- Data limits: 30,000 rows and 10 columns
- Format: Include a header row with field names
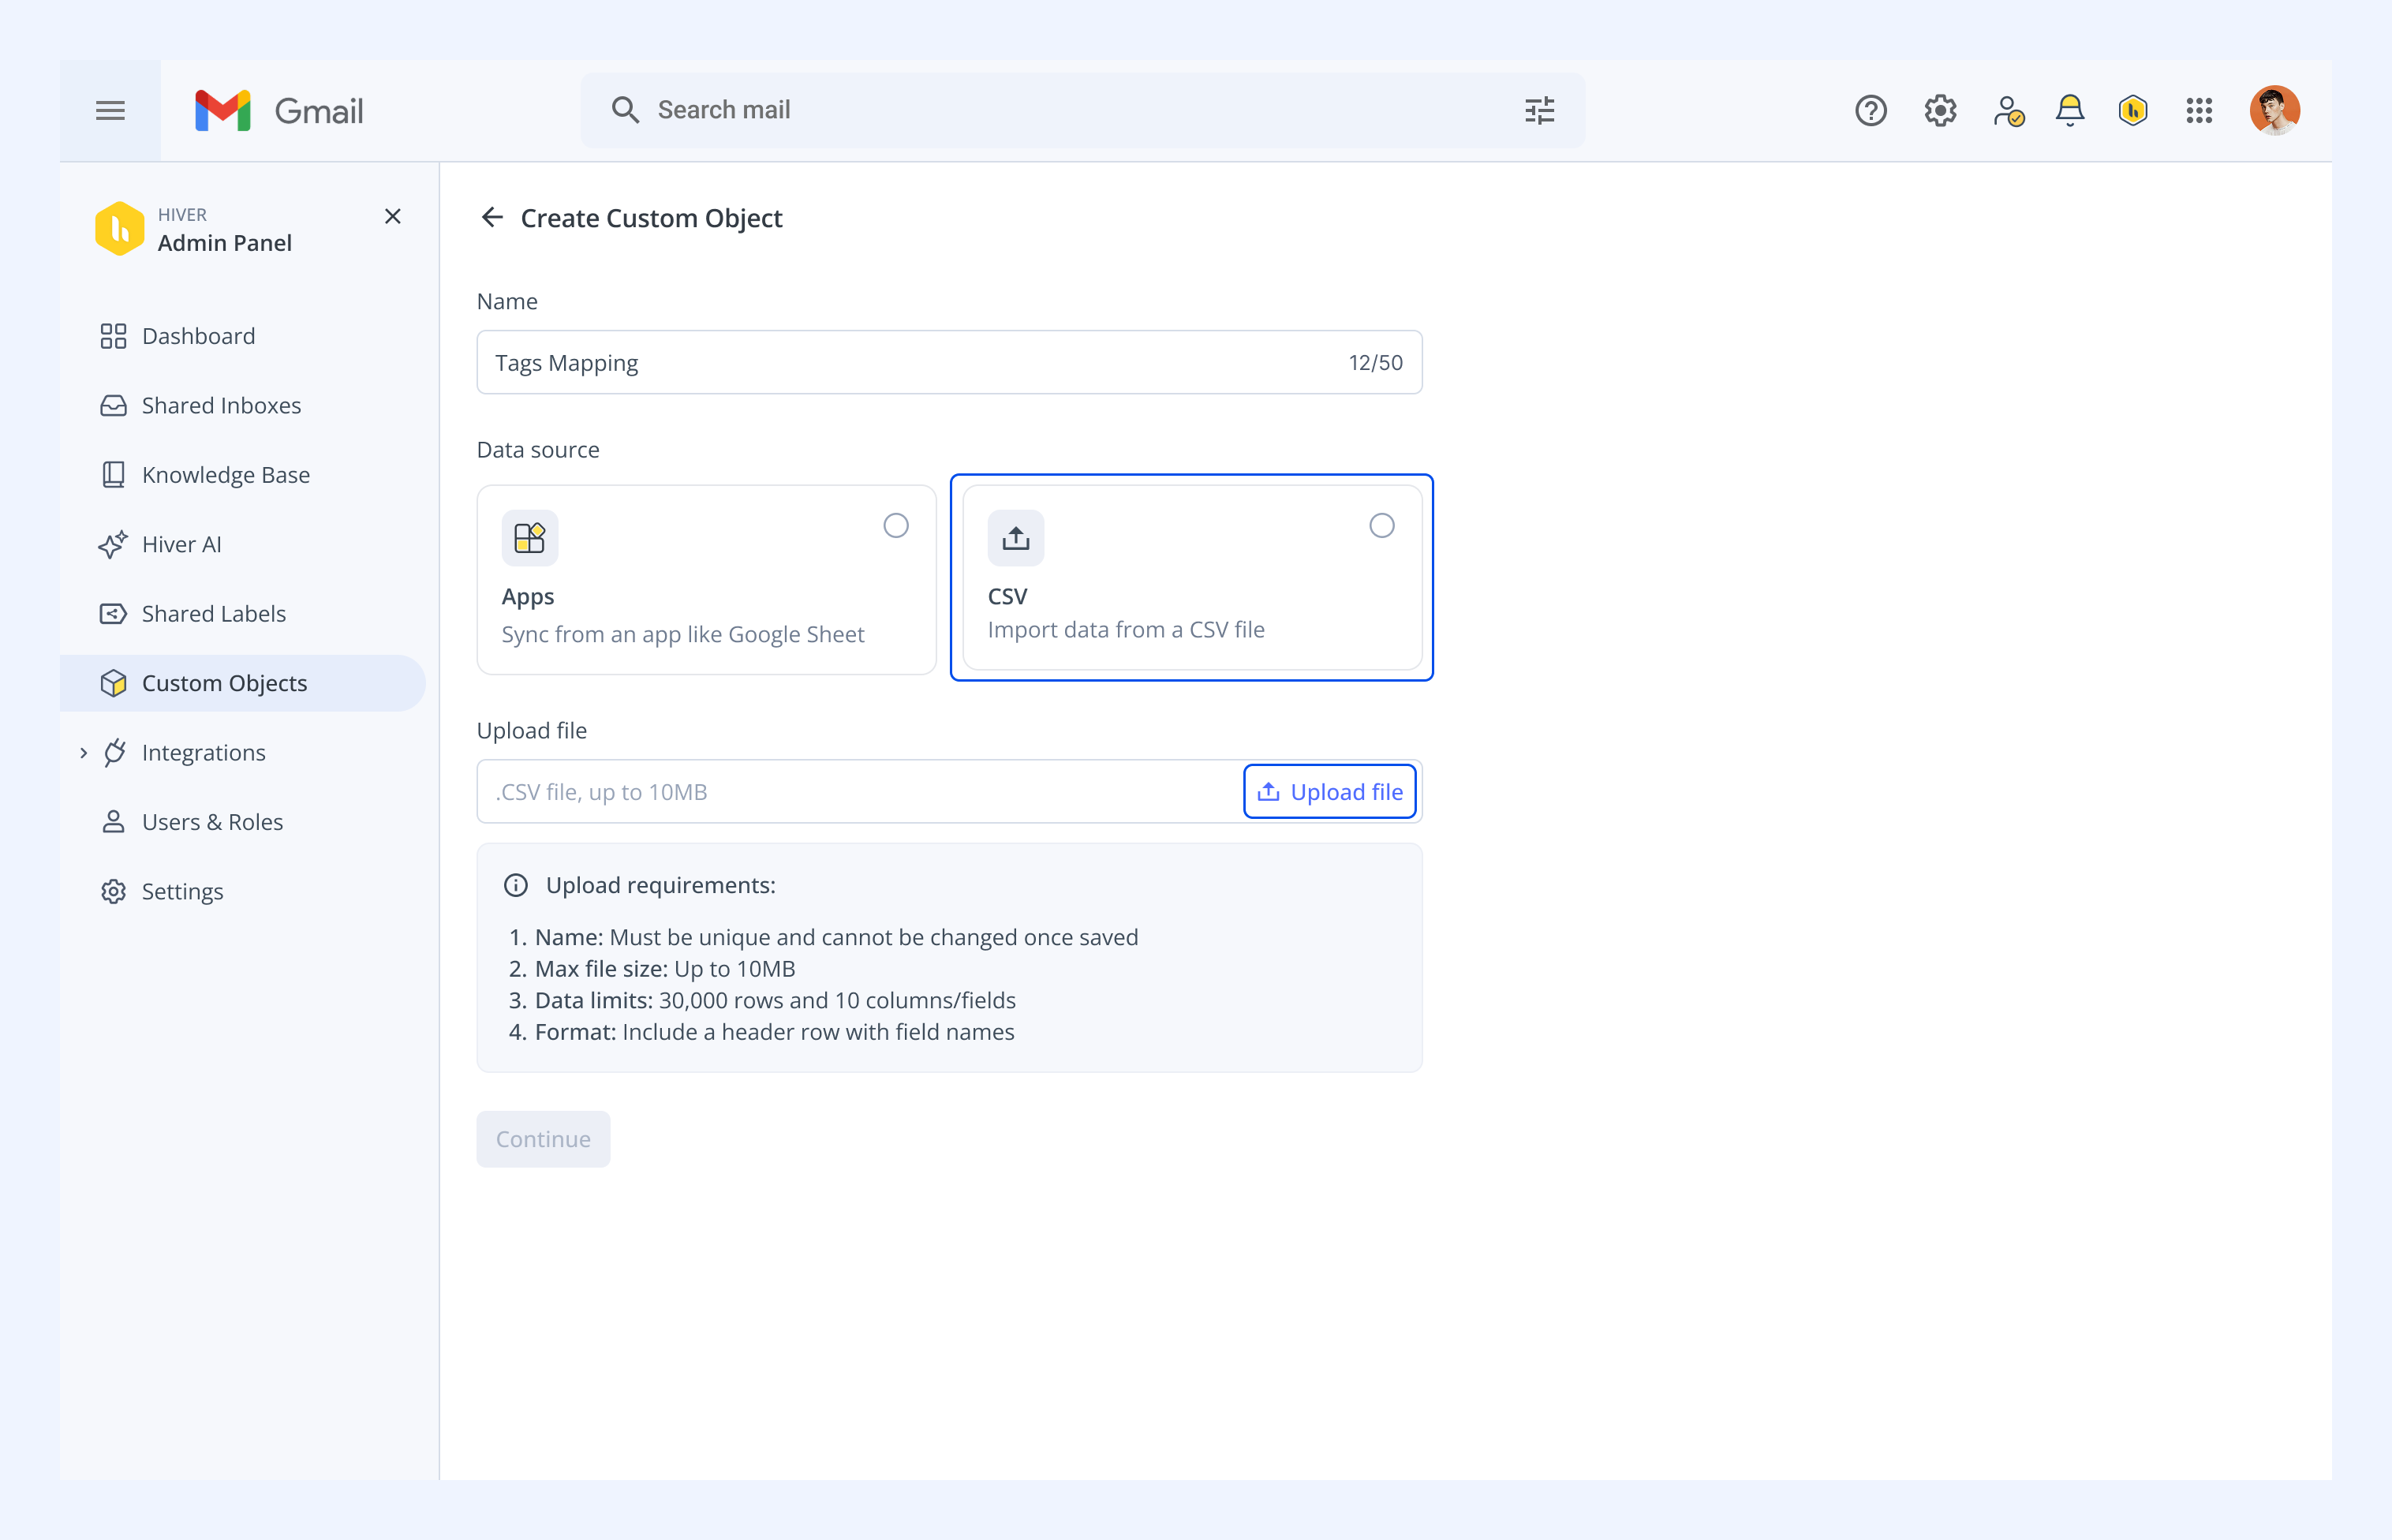
Note: Your CSV cannot have empty cells. All columns must have values.
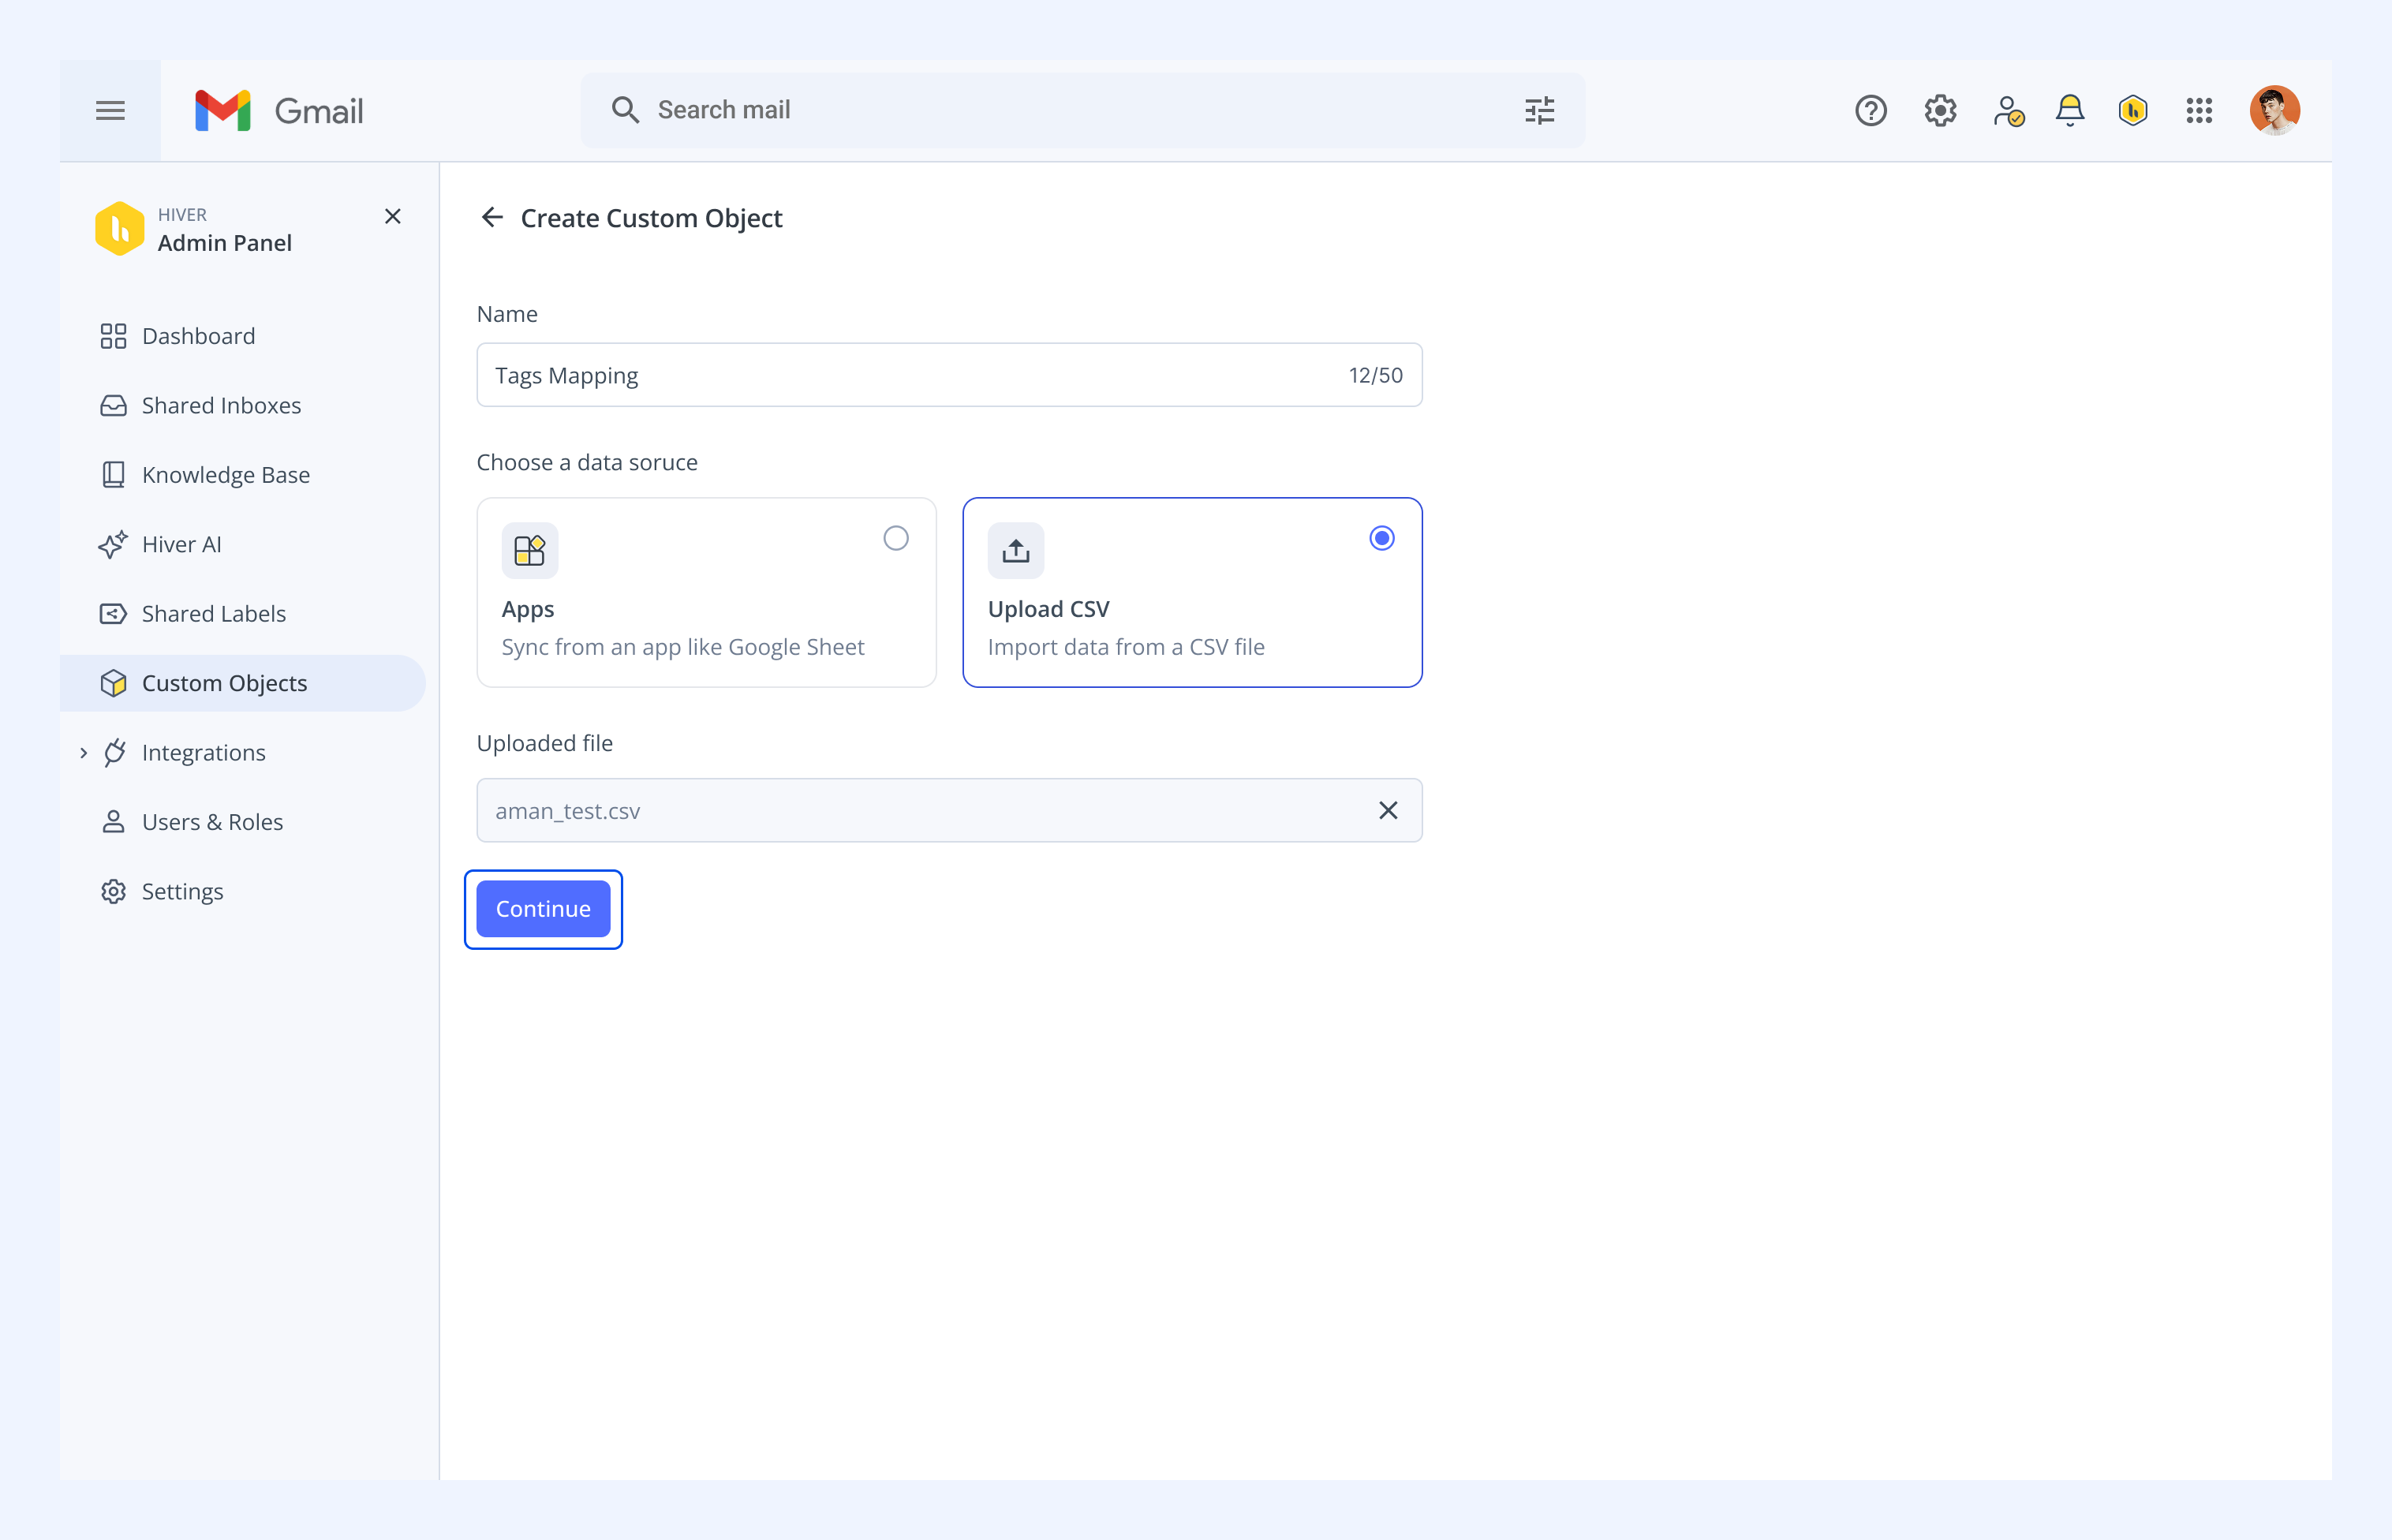
2. After uploading your file, click Continue.
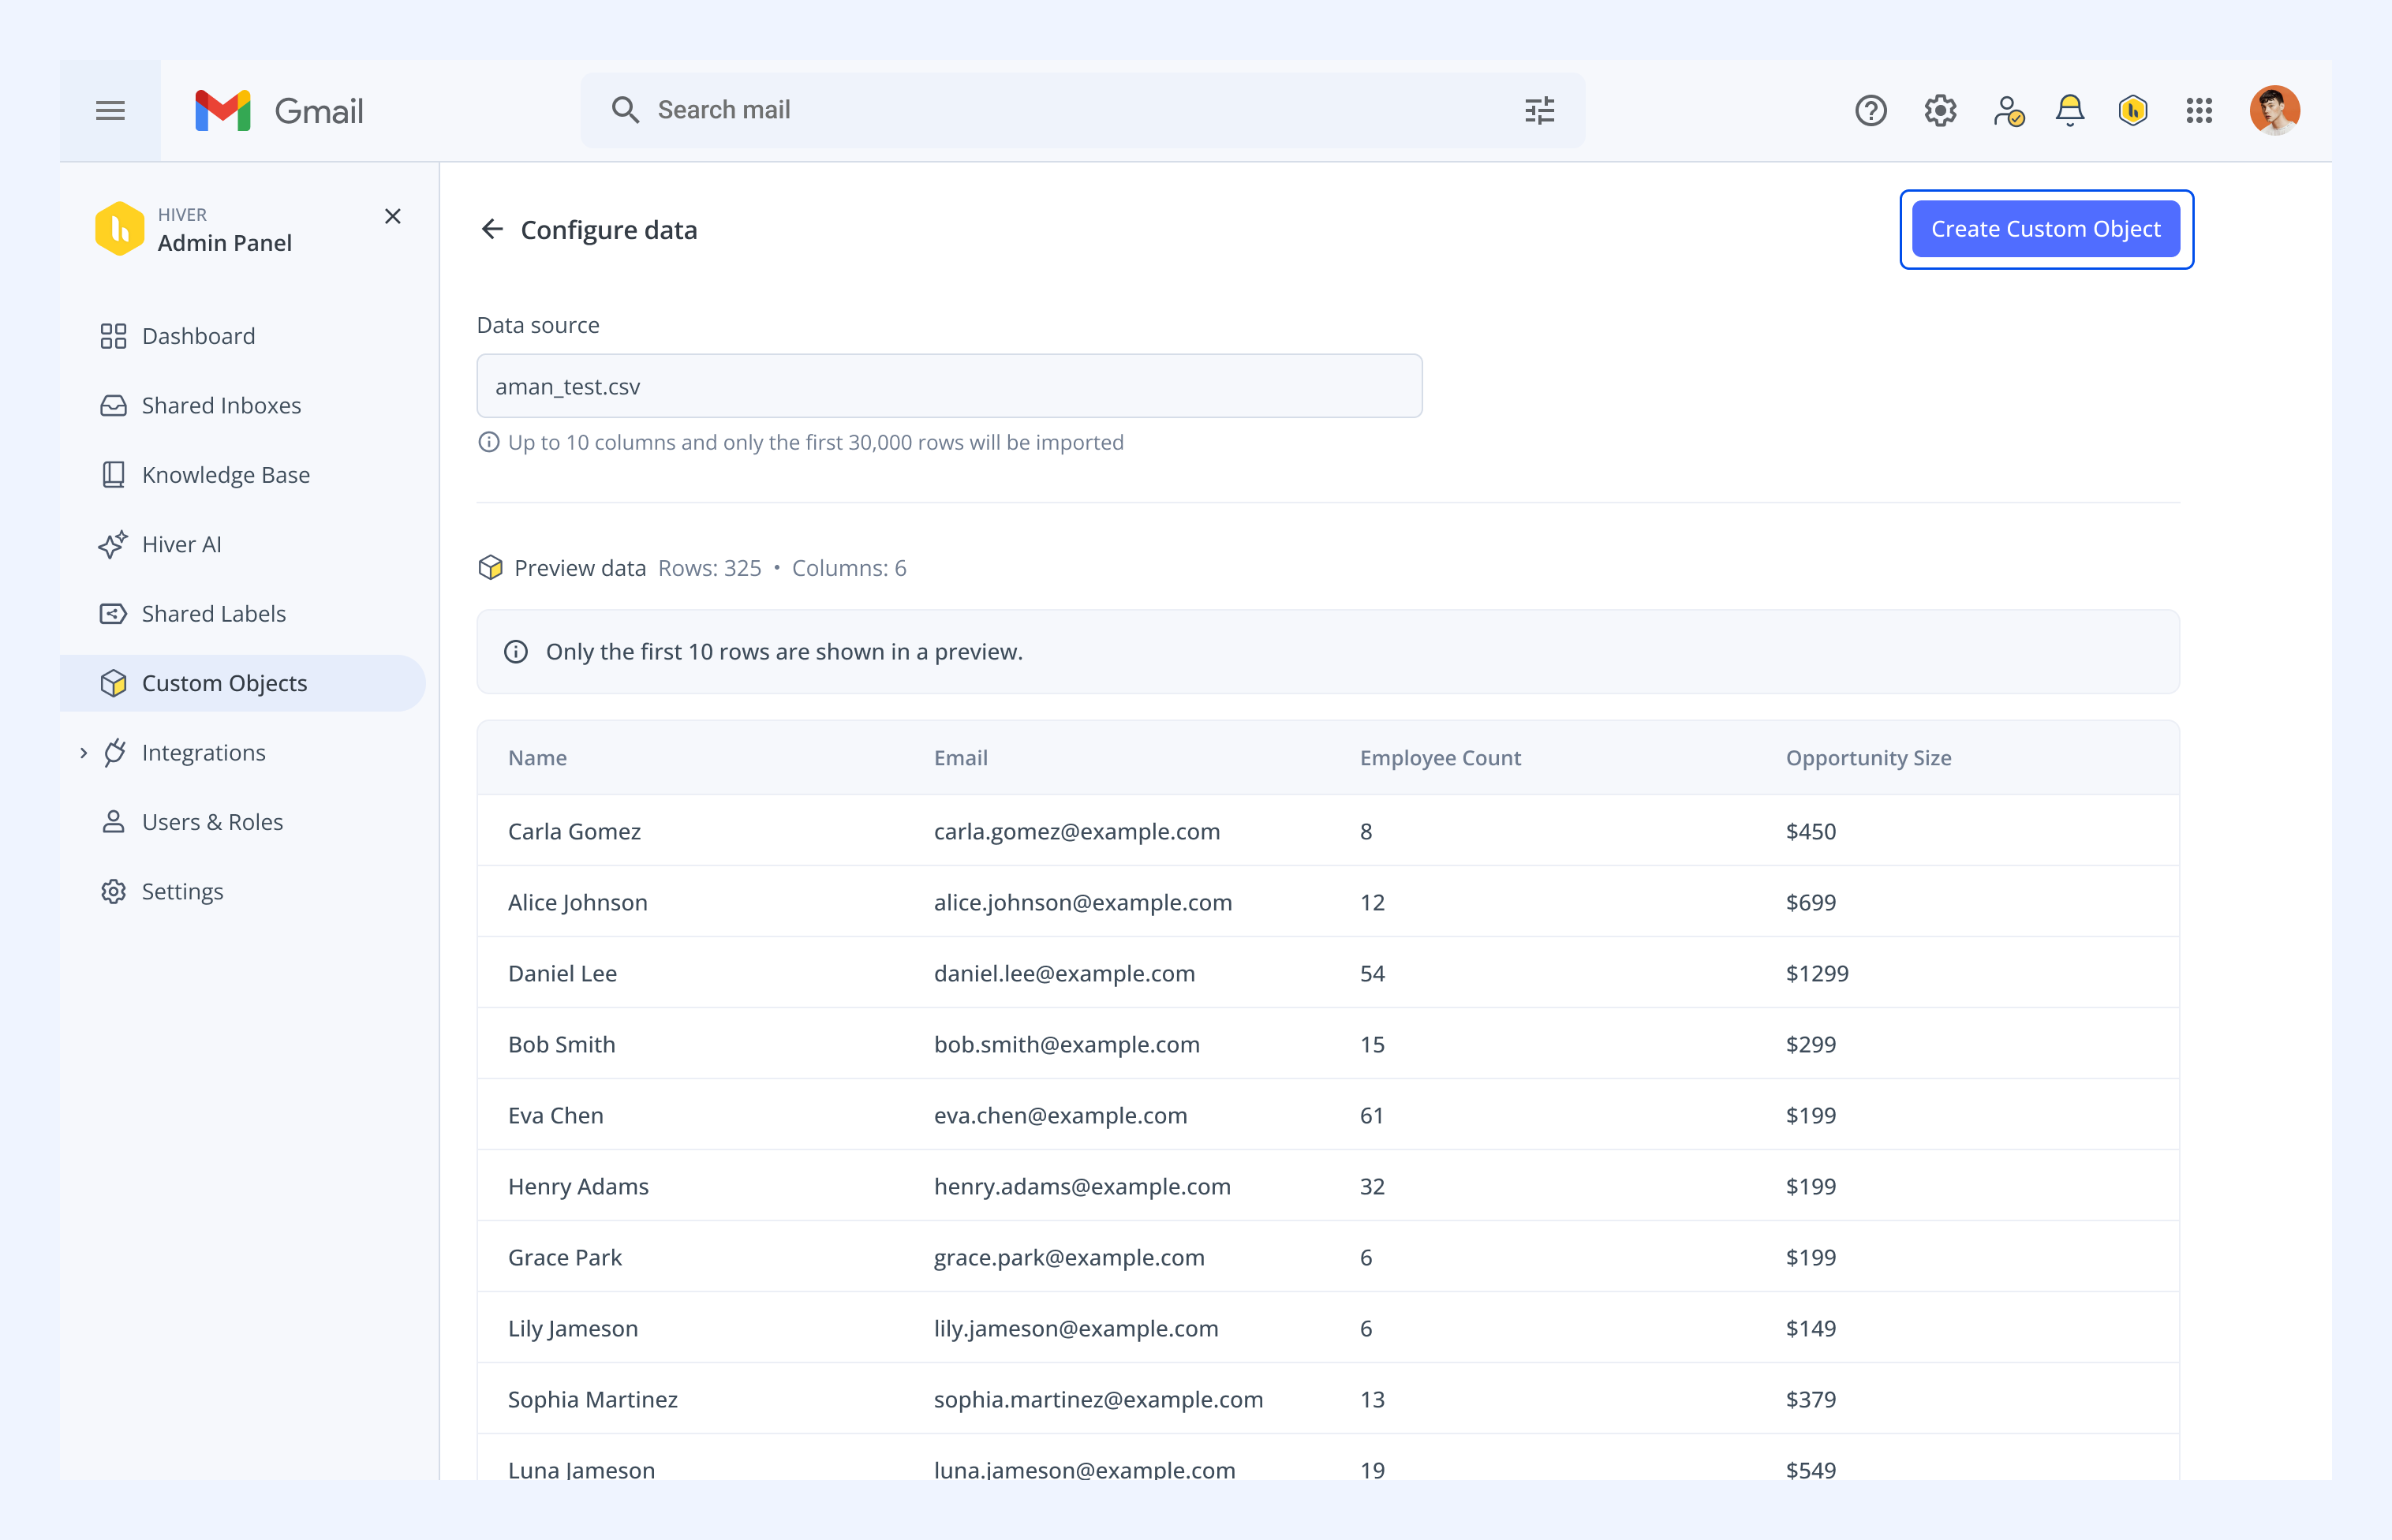
3. Check the preview and click Create Custom Object.
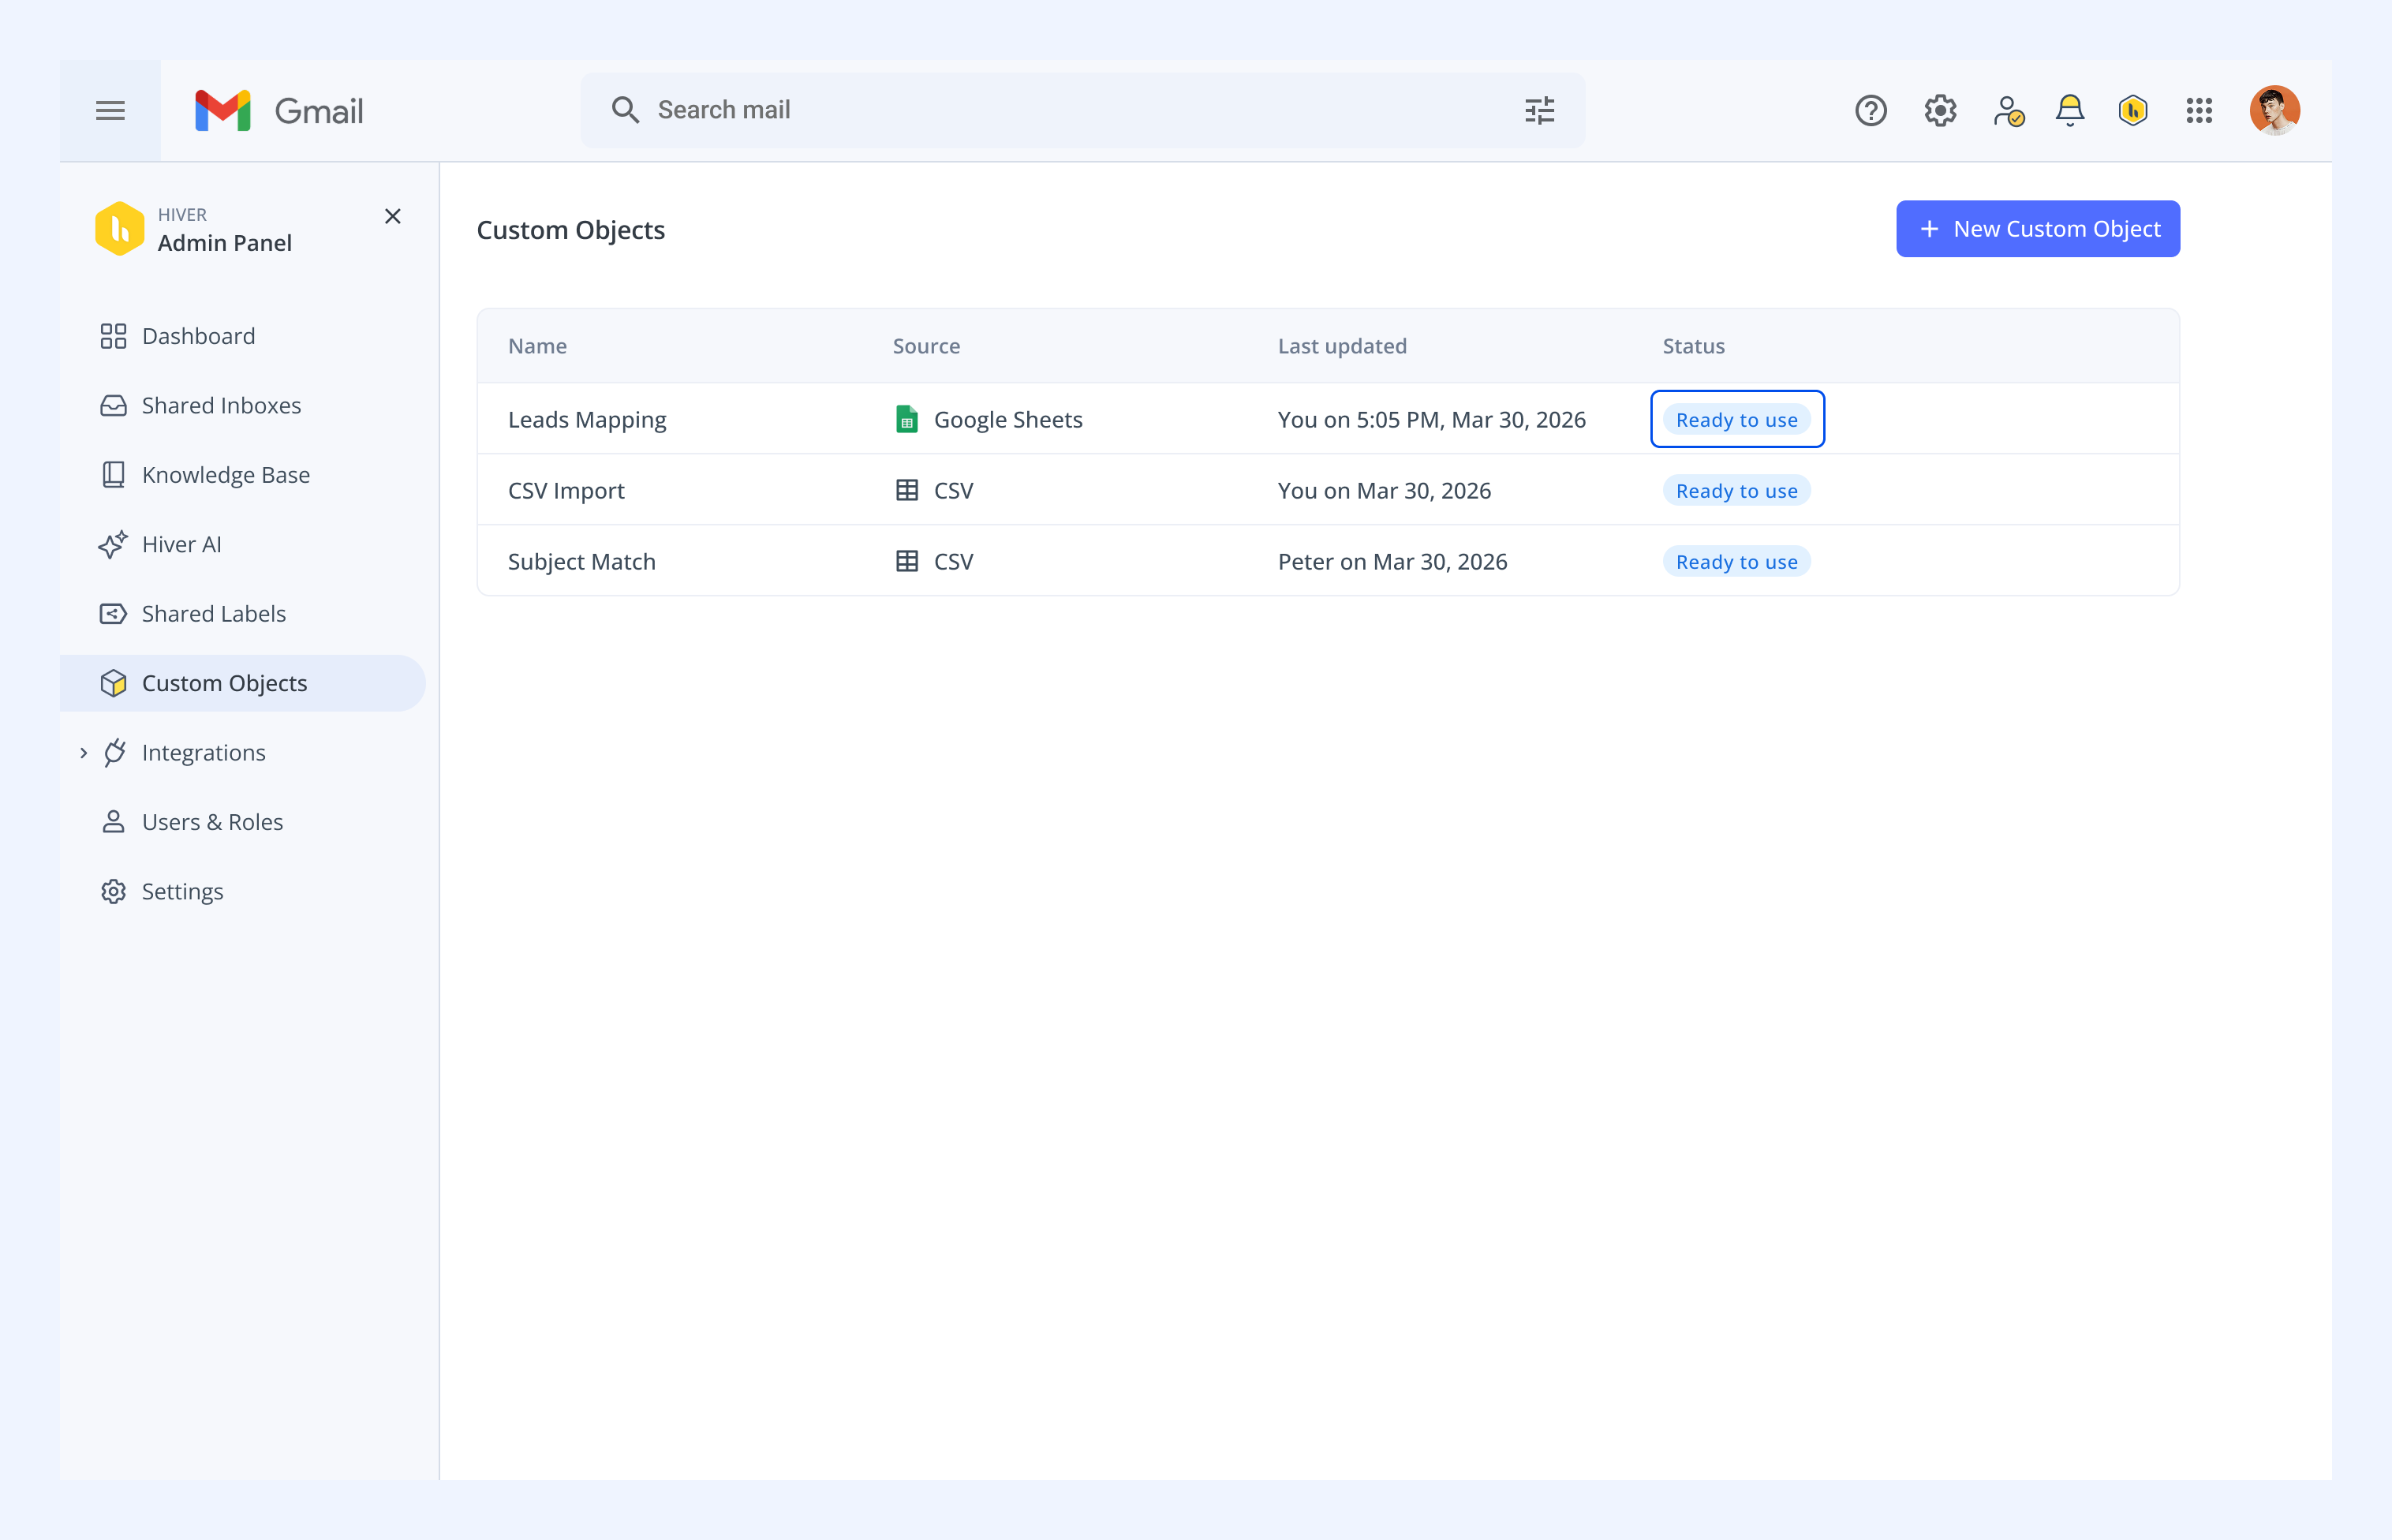
Hiver will take a few seconds to validate the data. When the status switches from Validating data to Ready to use, you can start using your Custom Object in Automations.
Updating a Custom Object
You can update a Custom Object to change its data, switch the source sheet, or modify the columns being synced.
To update a Custom Object:
1. Go to Admin Panel → Custom Objects.
2. Hover over the Custom Object you want to edit and click the pencil icon.
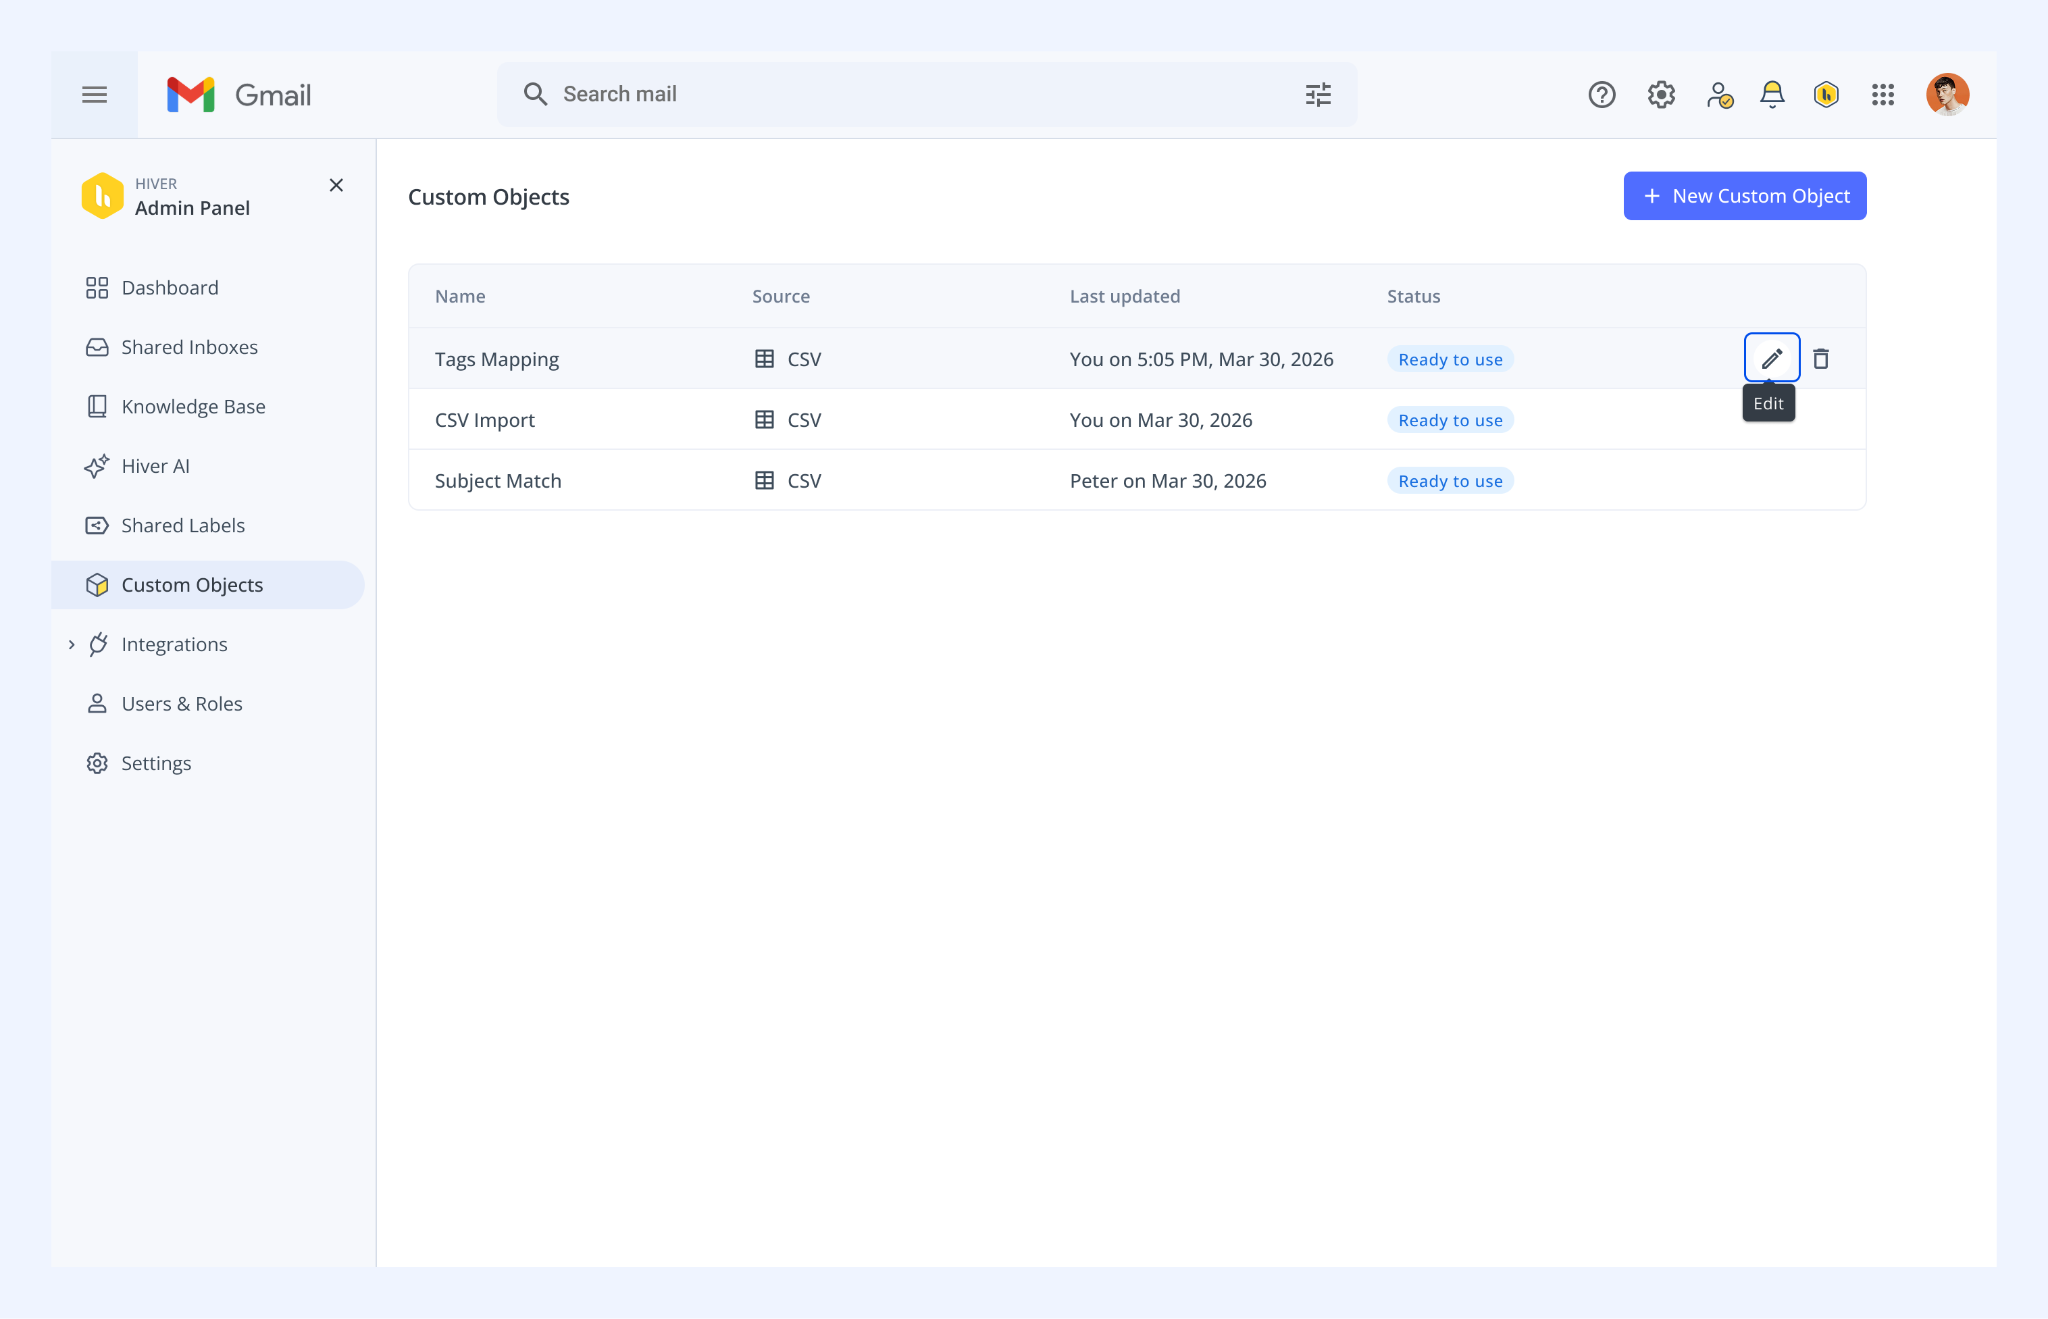
What you can change depends on how the Custom Object was created.
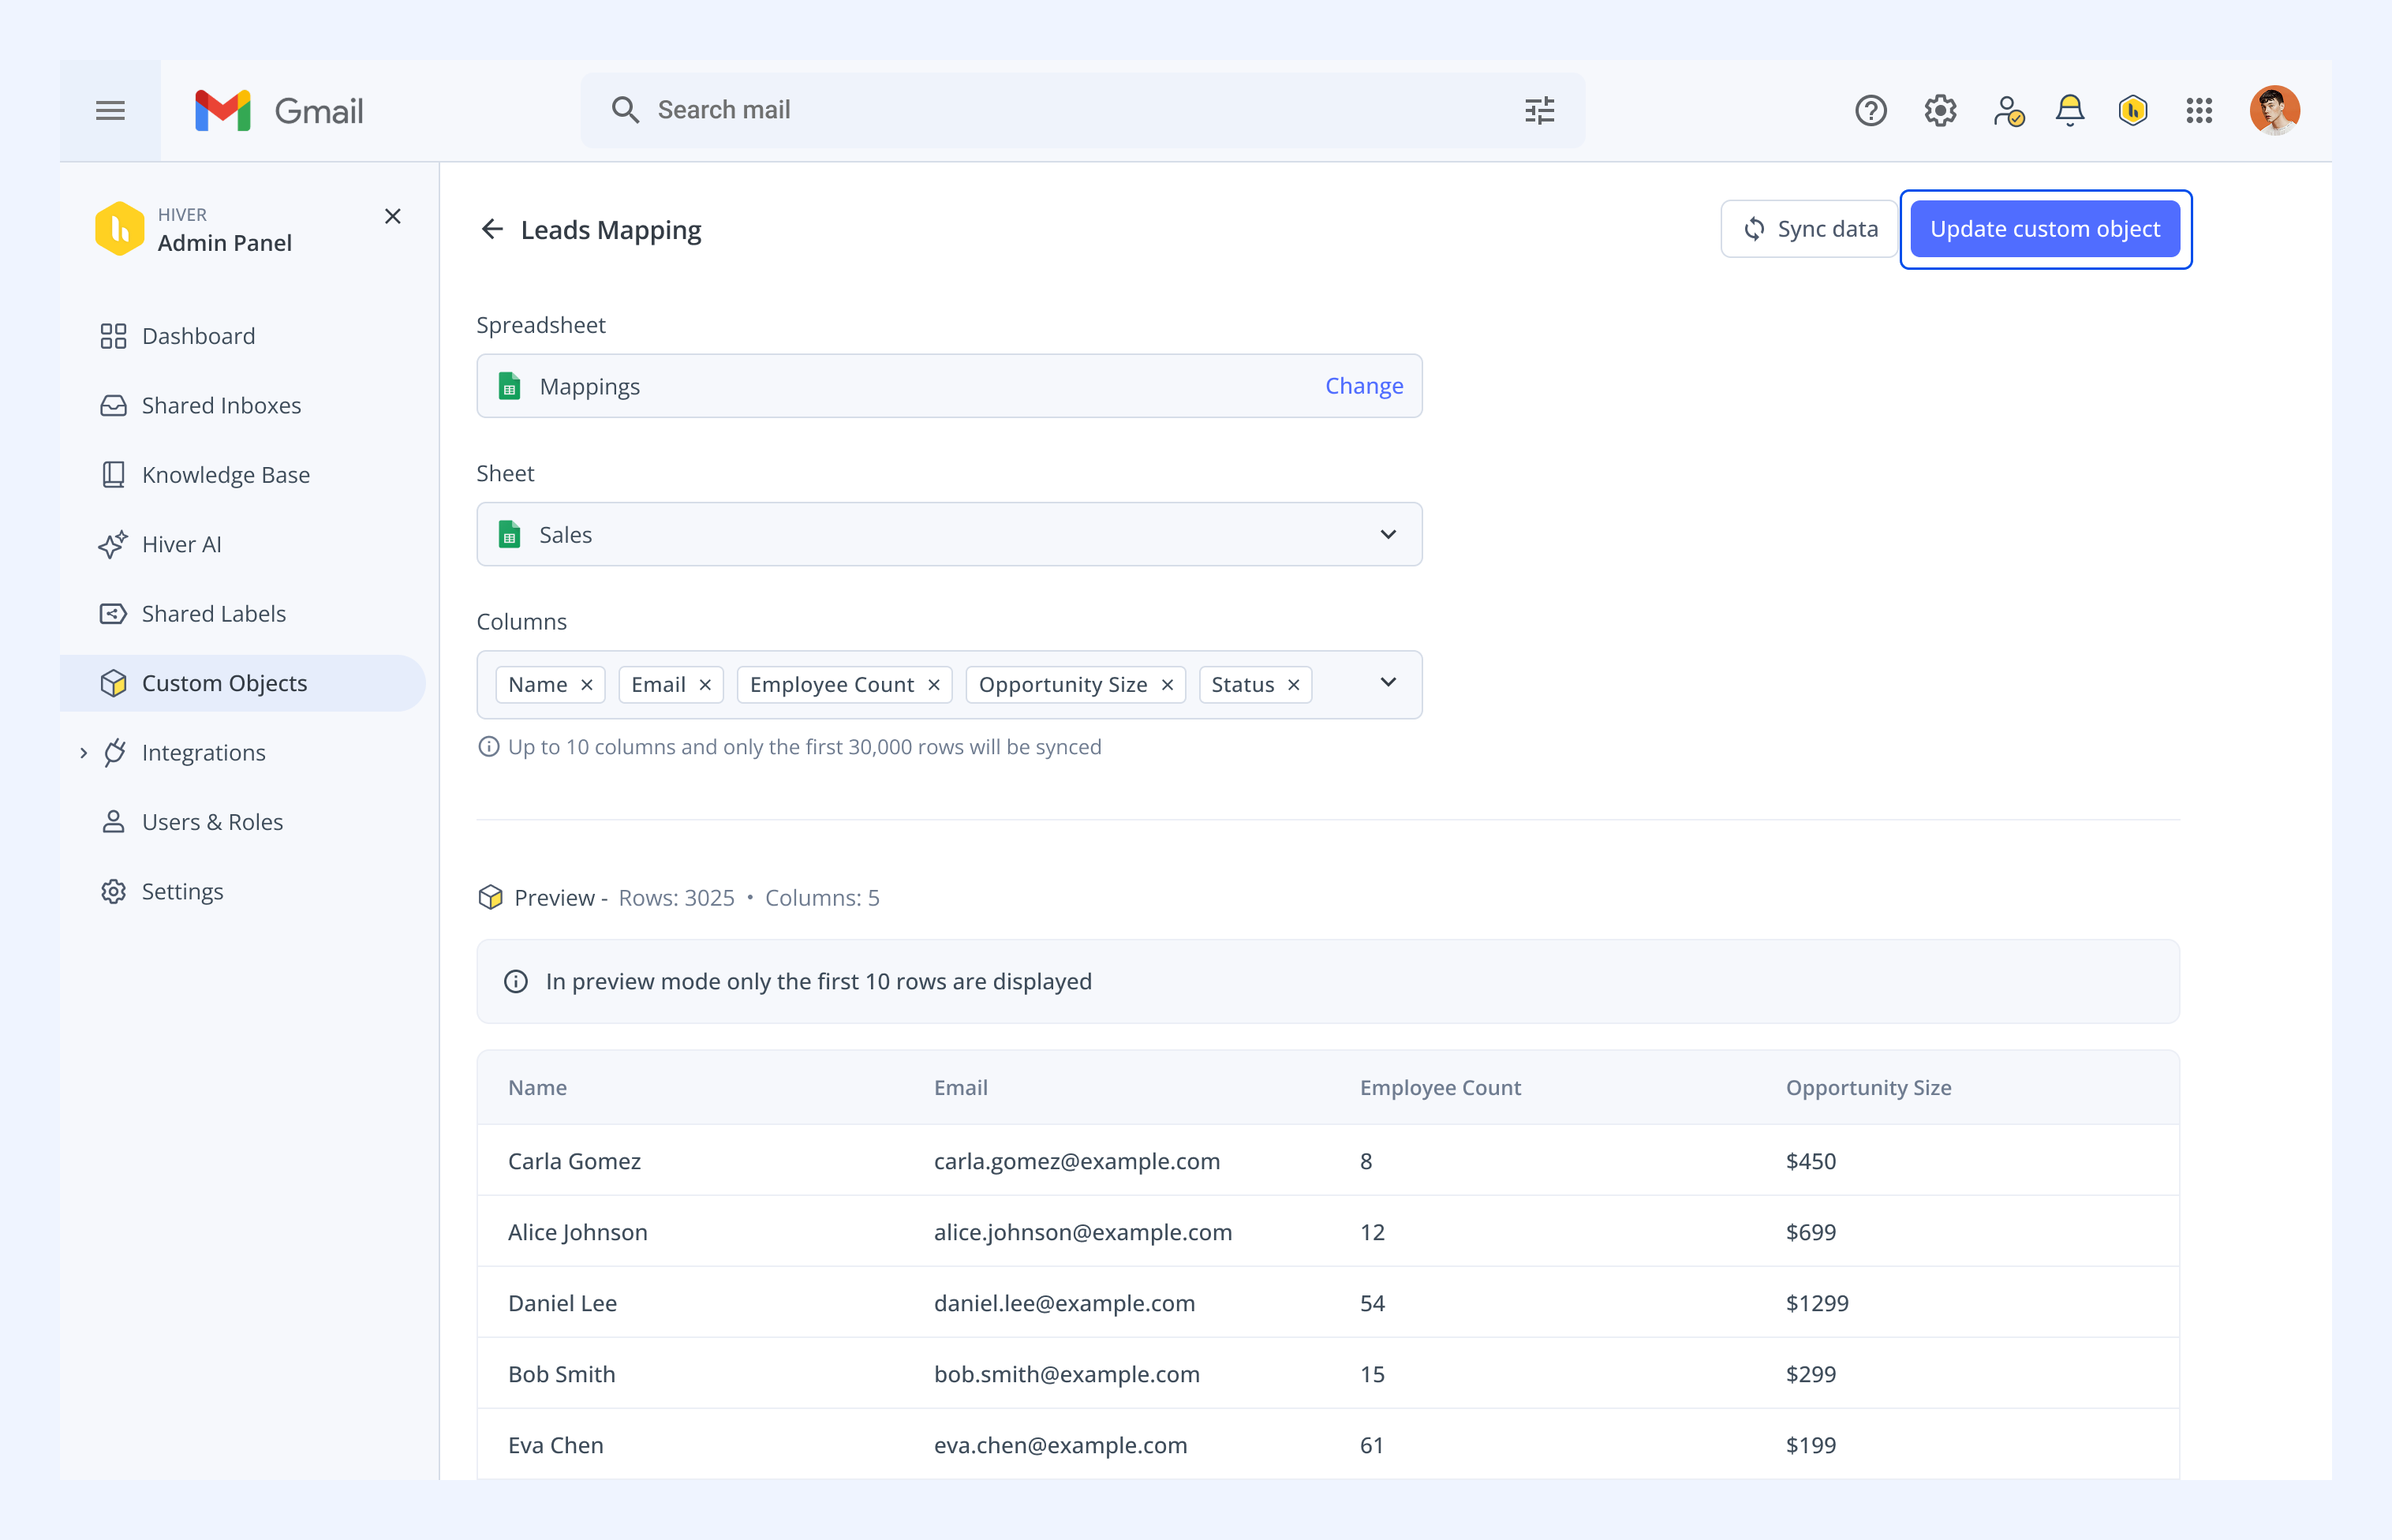
Updating Google Sheets
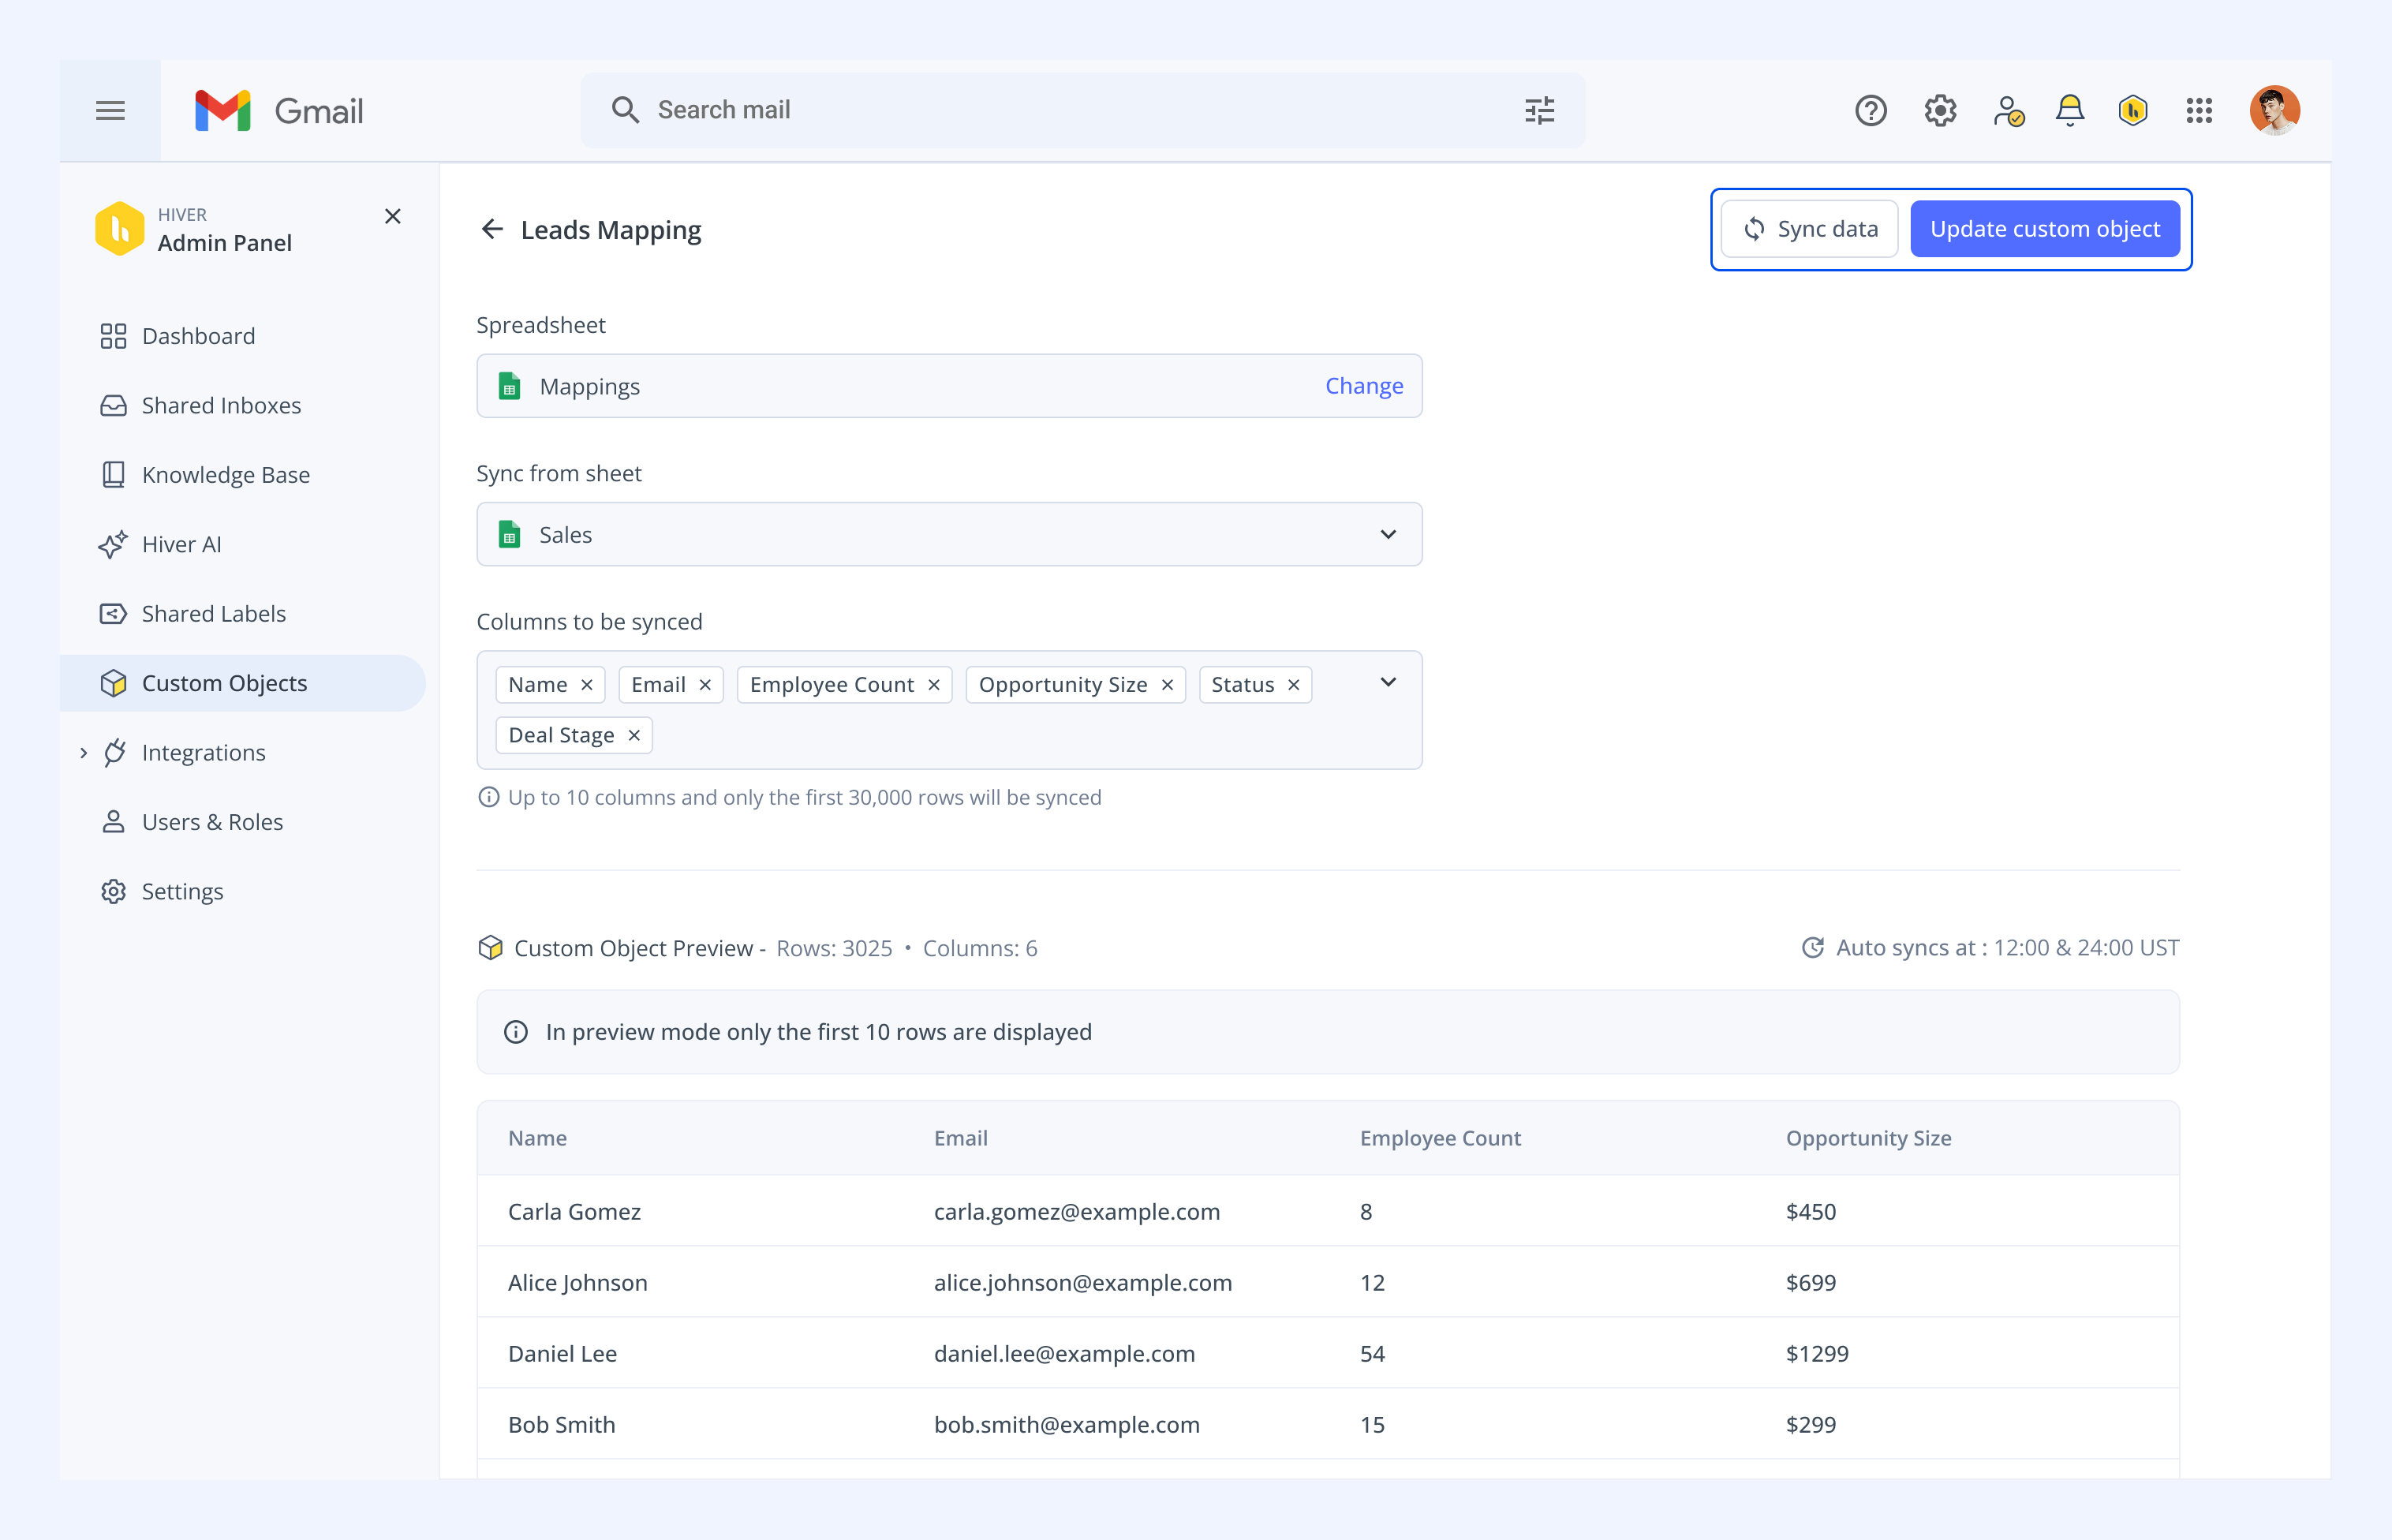
If you’re using a Google Sheet, you can change the spreadsheet, sheet, and columns you want to sync. Click Update custom object once done.
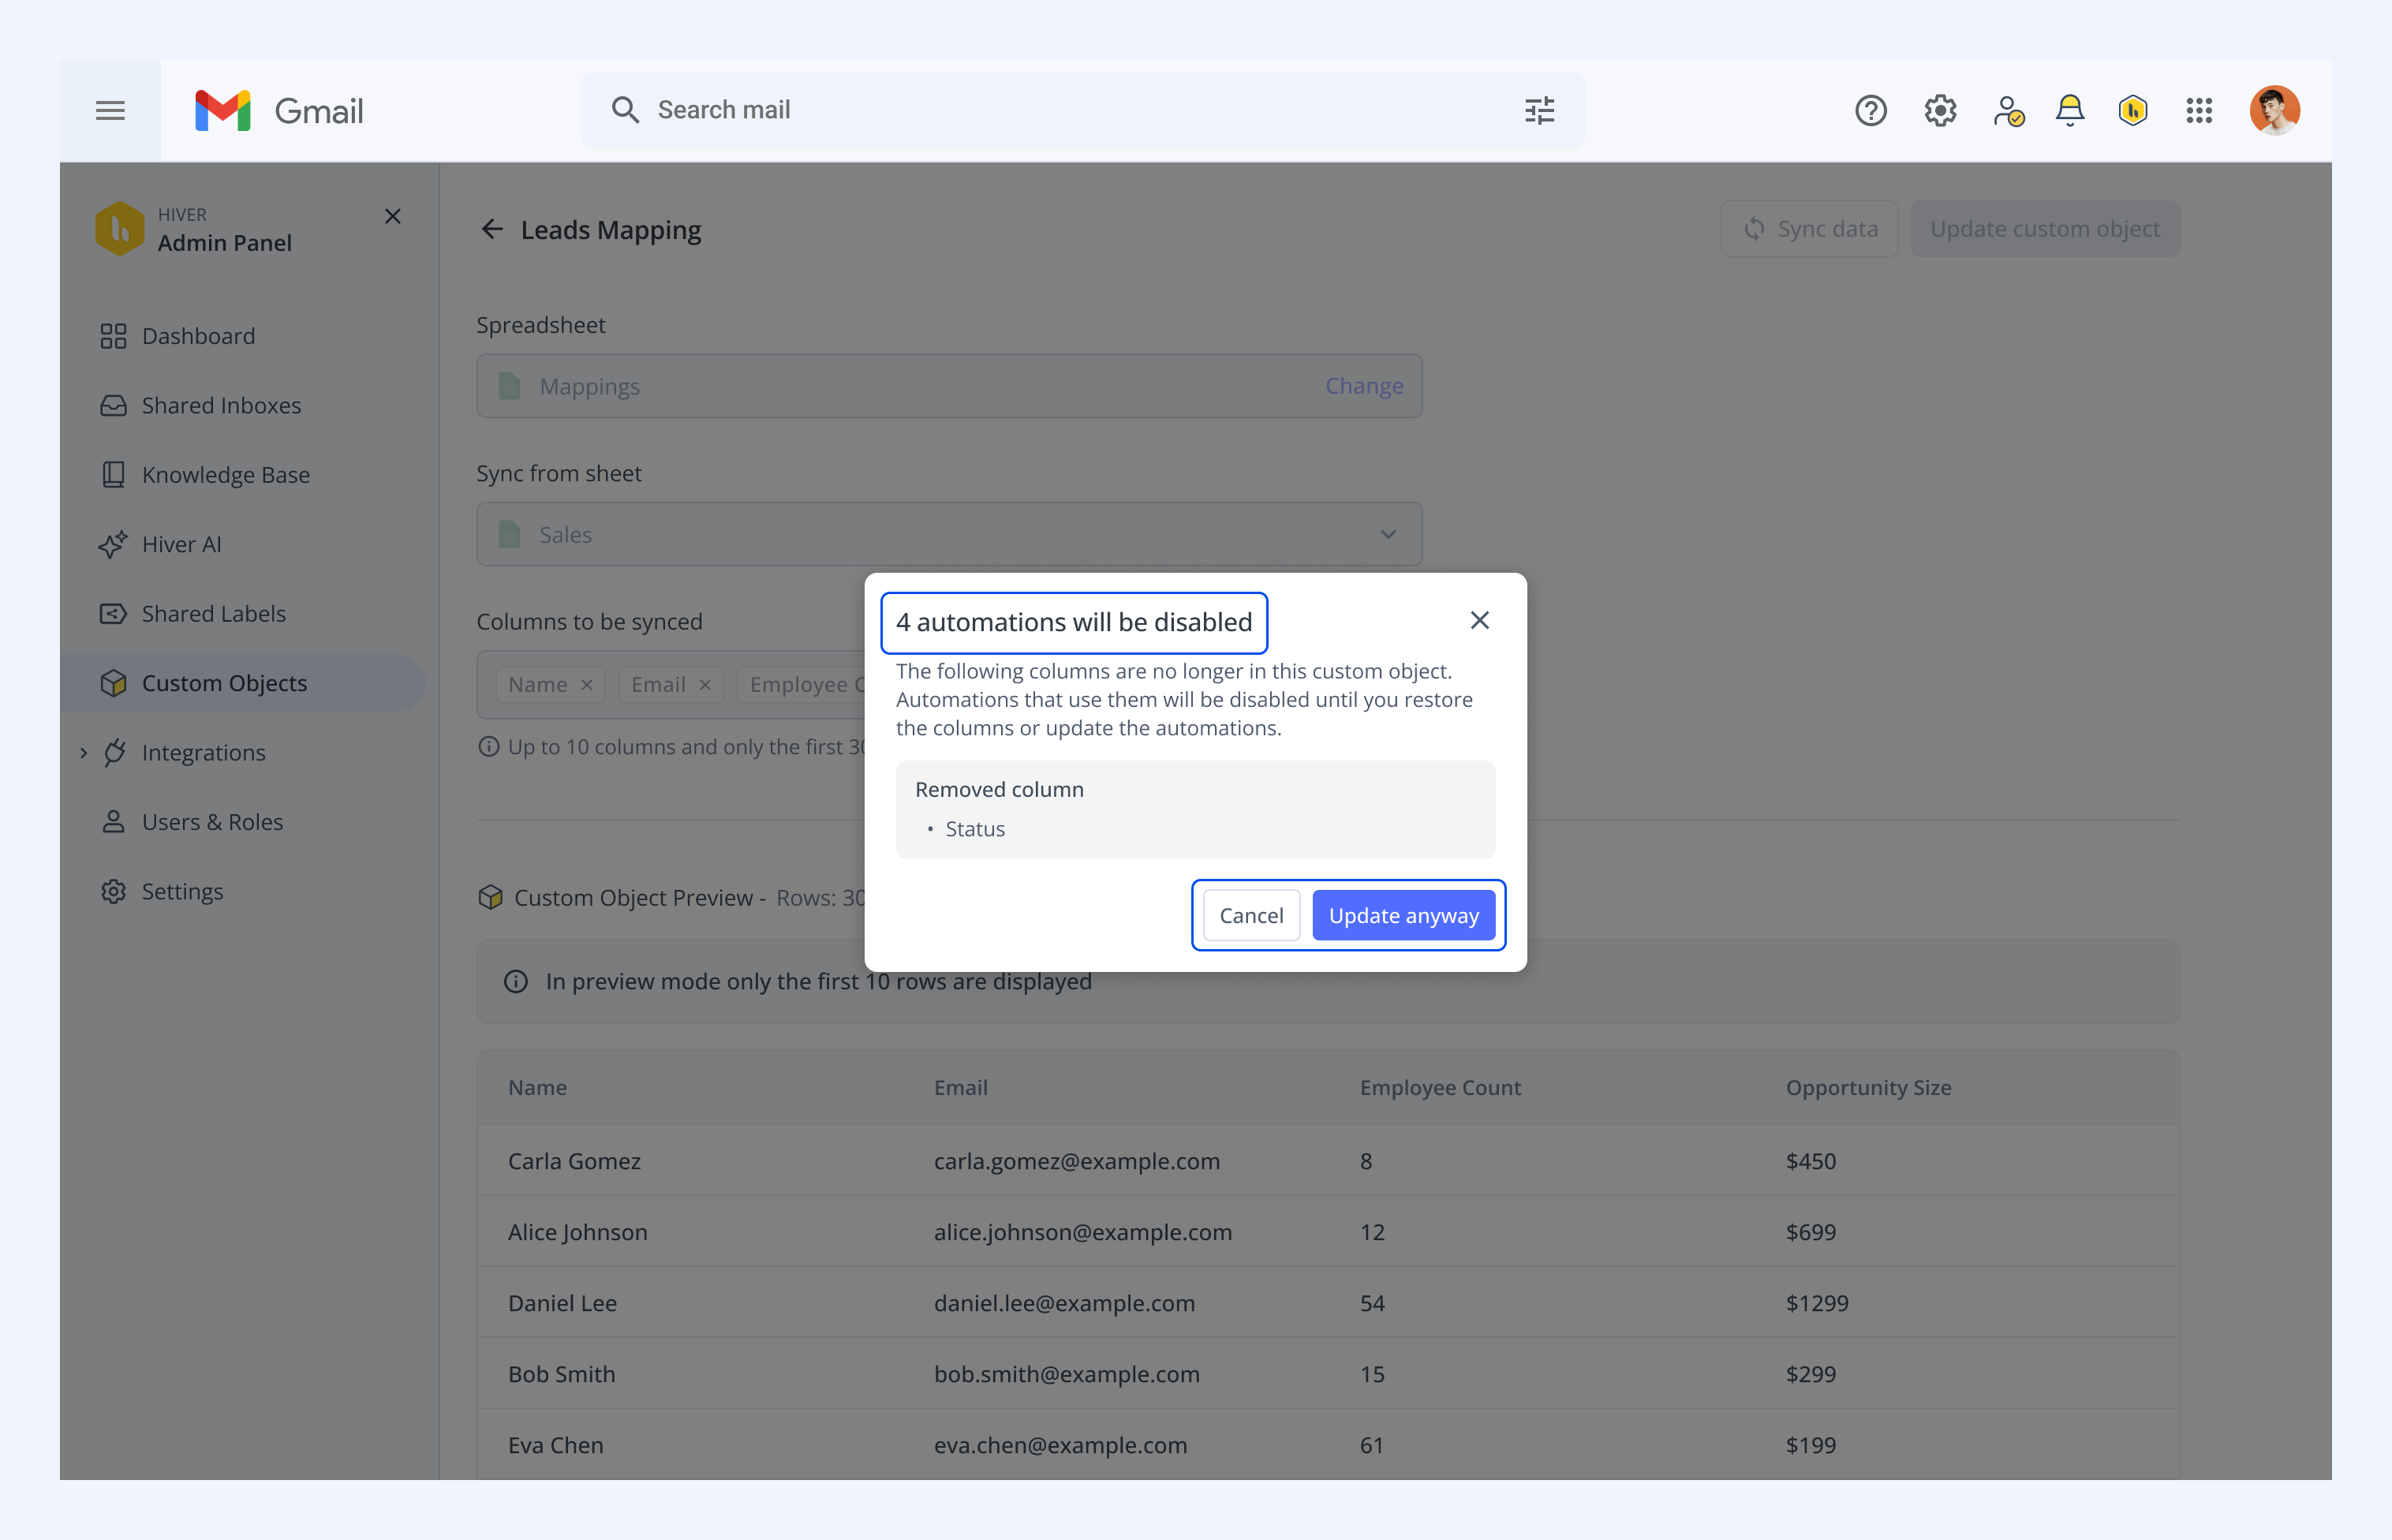
Note: If you change the selected columns in a Custom Object used in an Automation, the Automation will be disabled.
You can either click Cancel to go back, or click Update anyway to apply your changes. Affected Automations stay disabled until you either restore the columns or update the automations to use the new data.
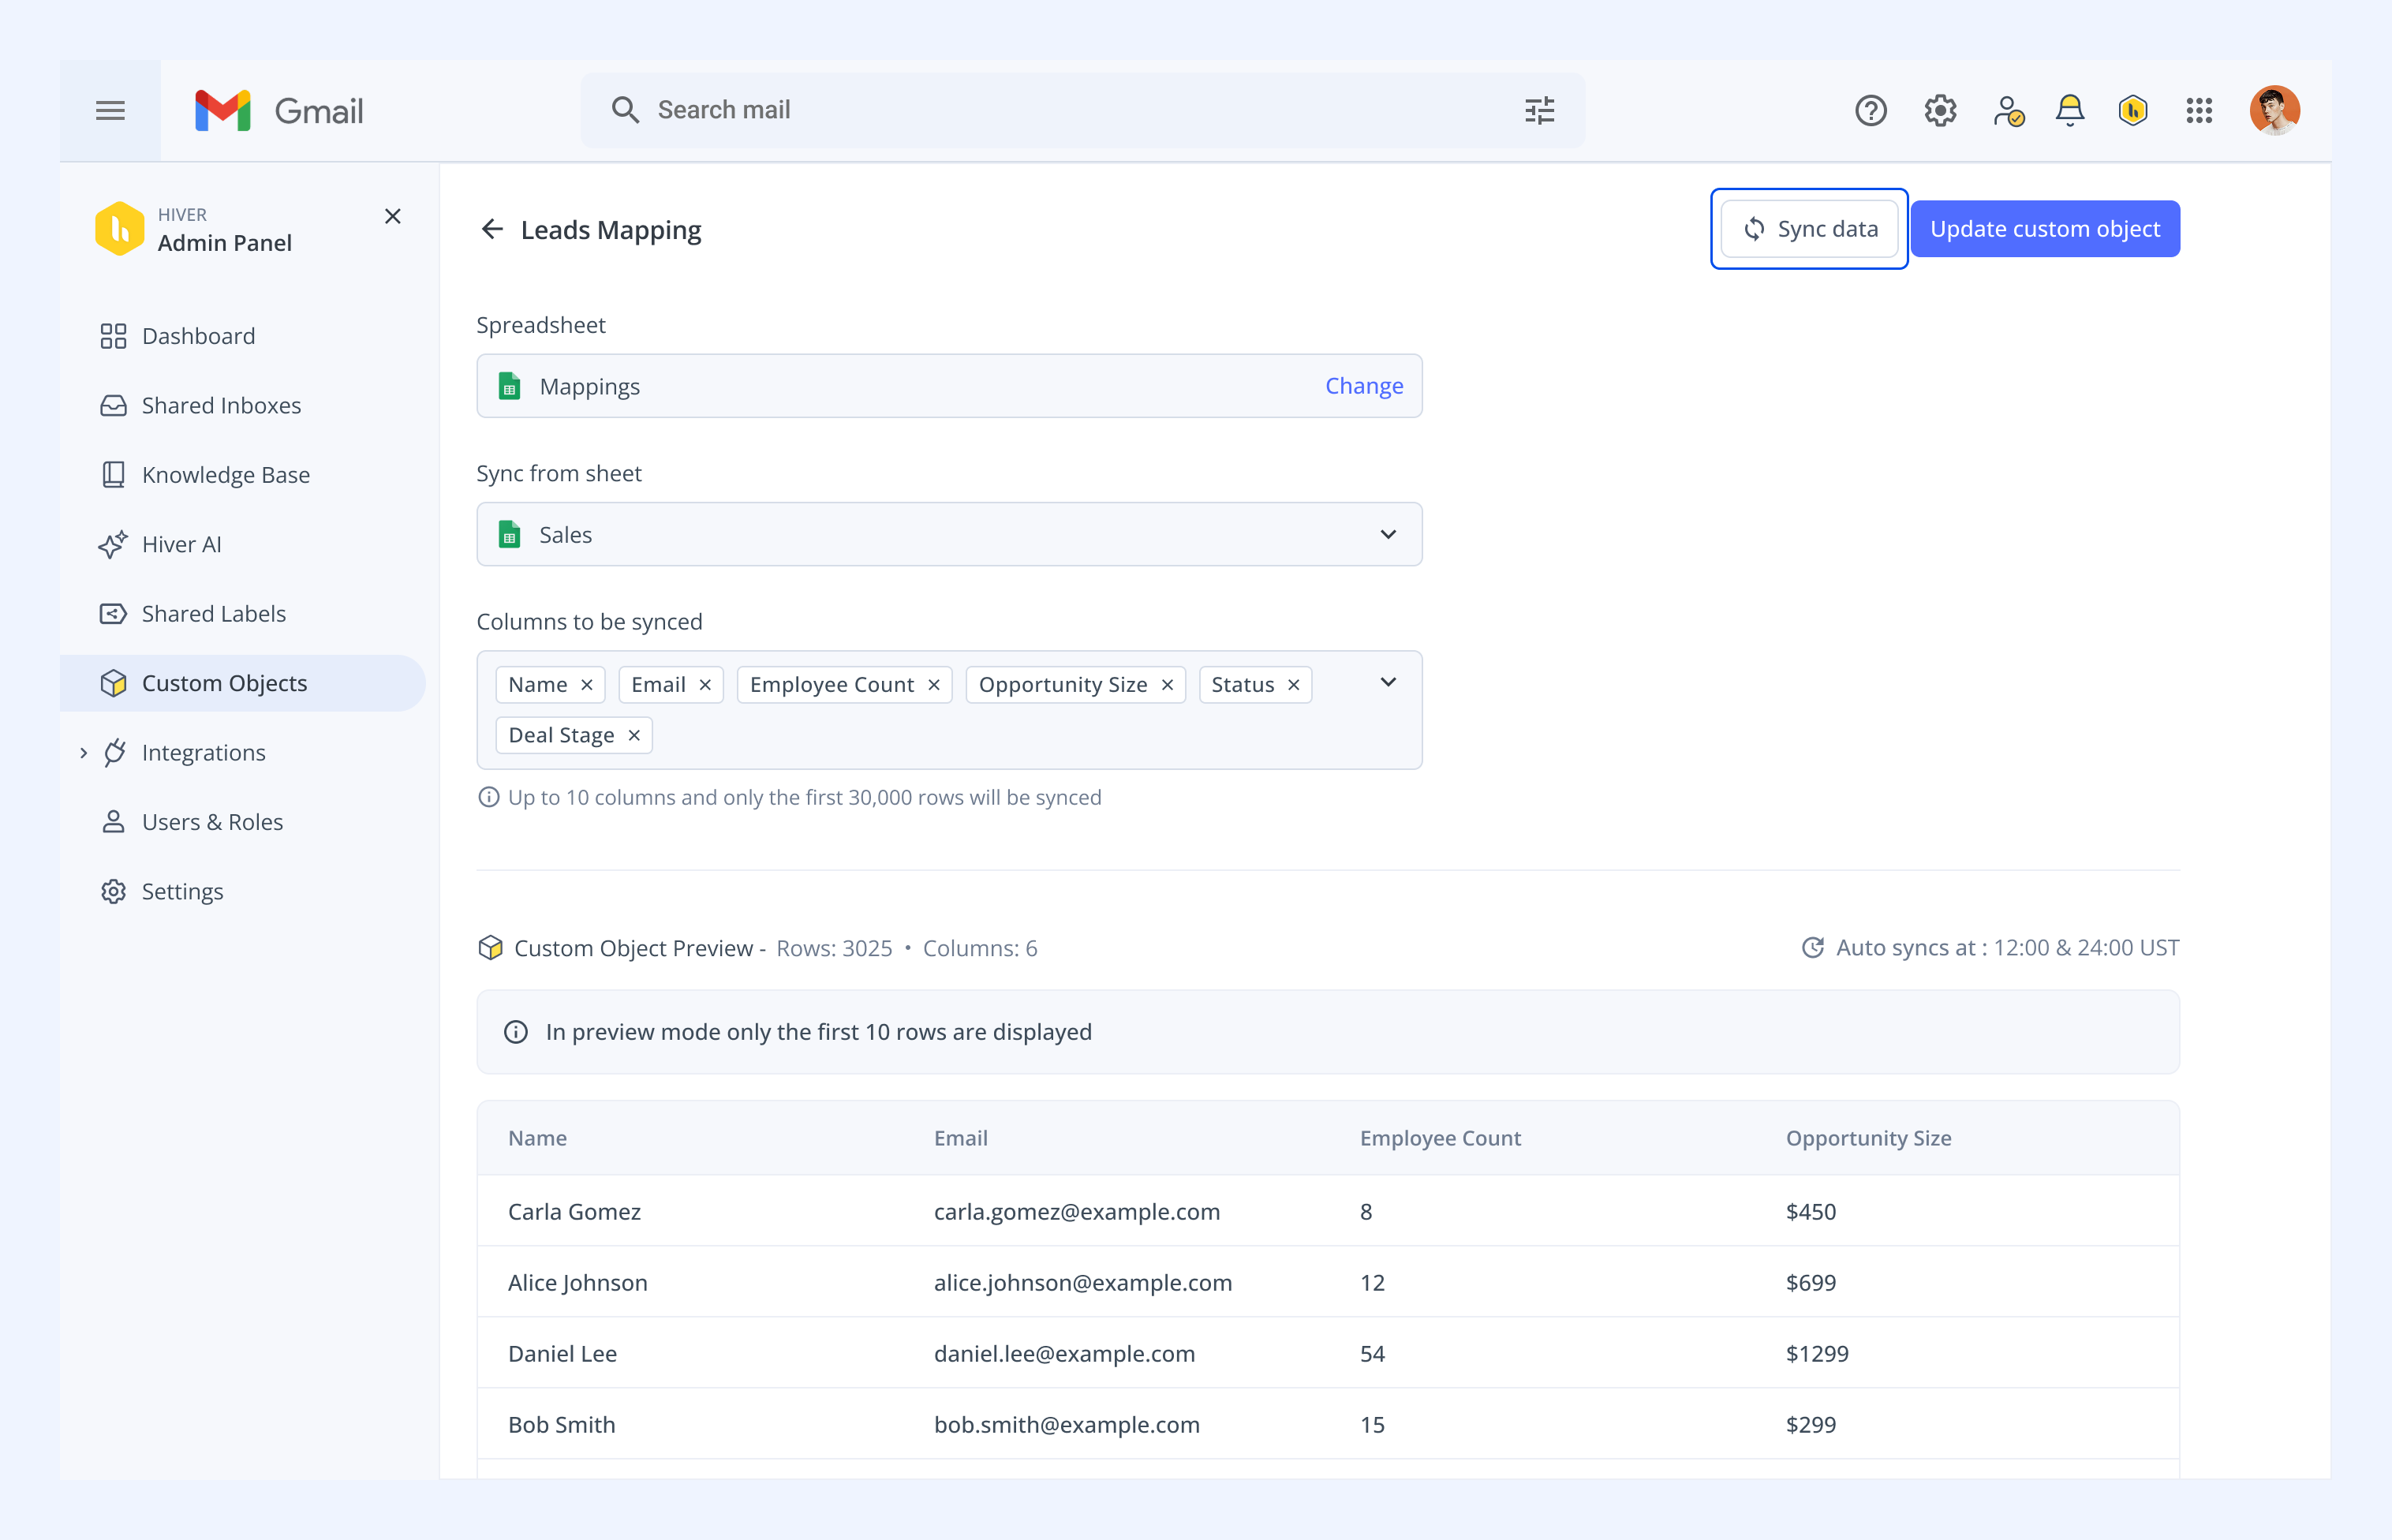
Tip: Click Sync data any time you want to pull the latest from your sheet manually, instead of waiting for the next scheduled sync.
Updating CSV files
1. On the edit screen, click Import new data.
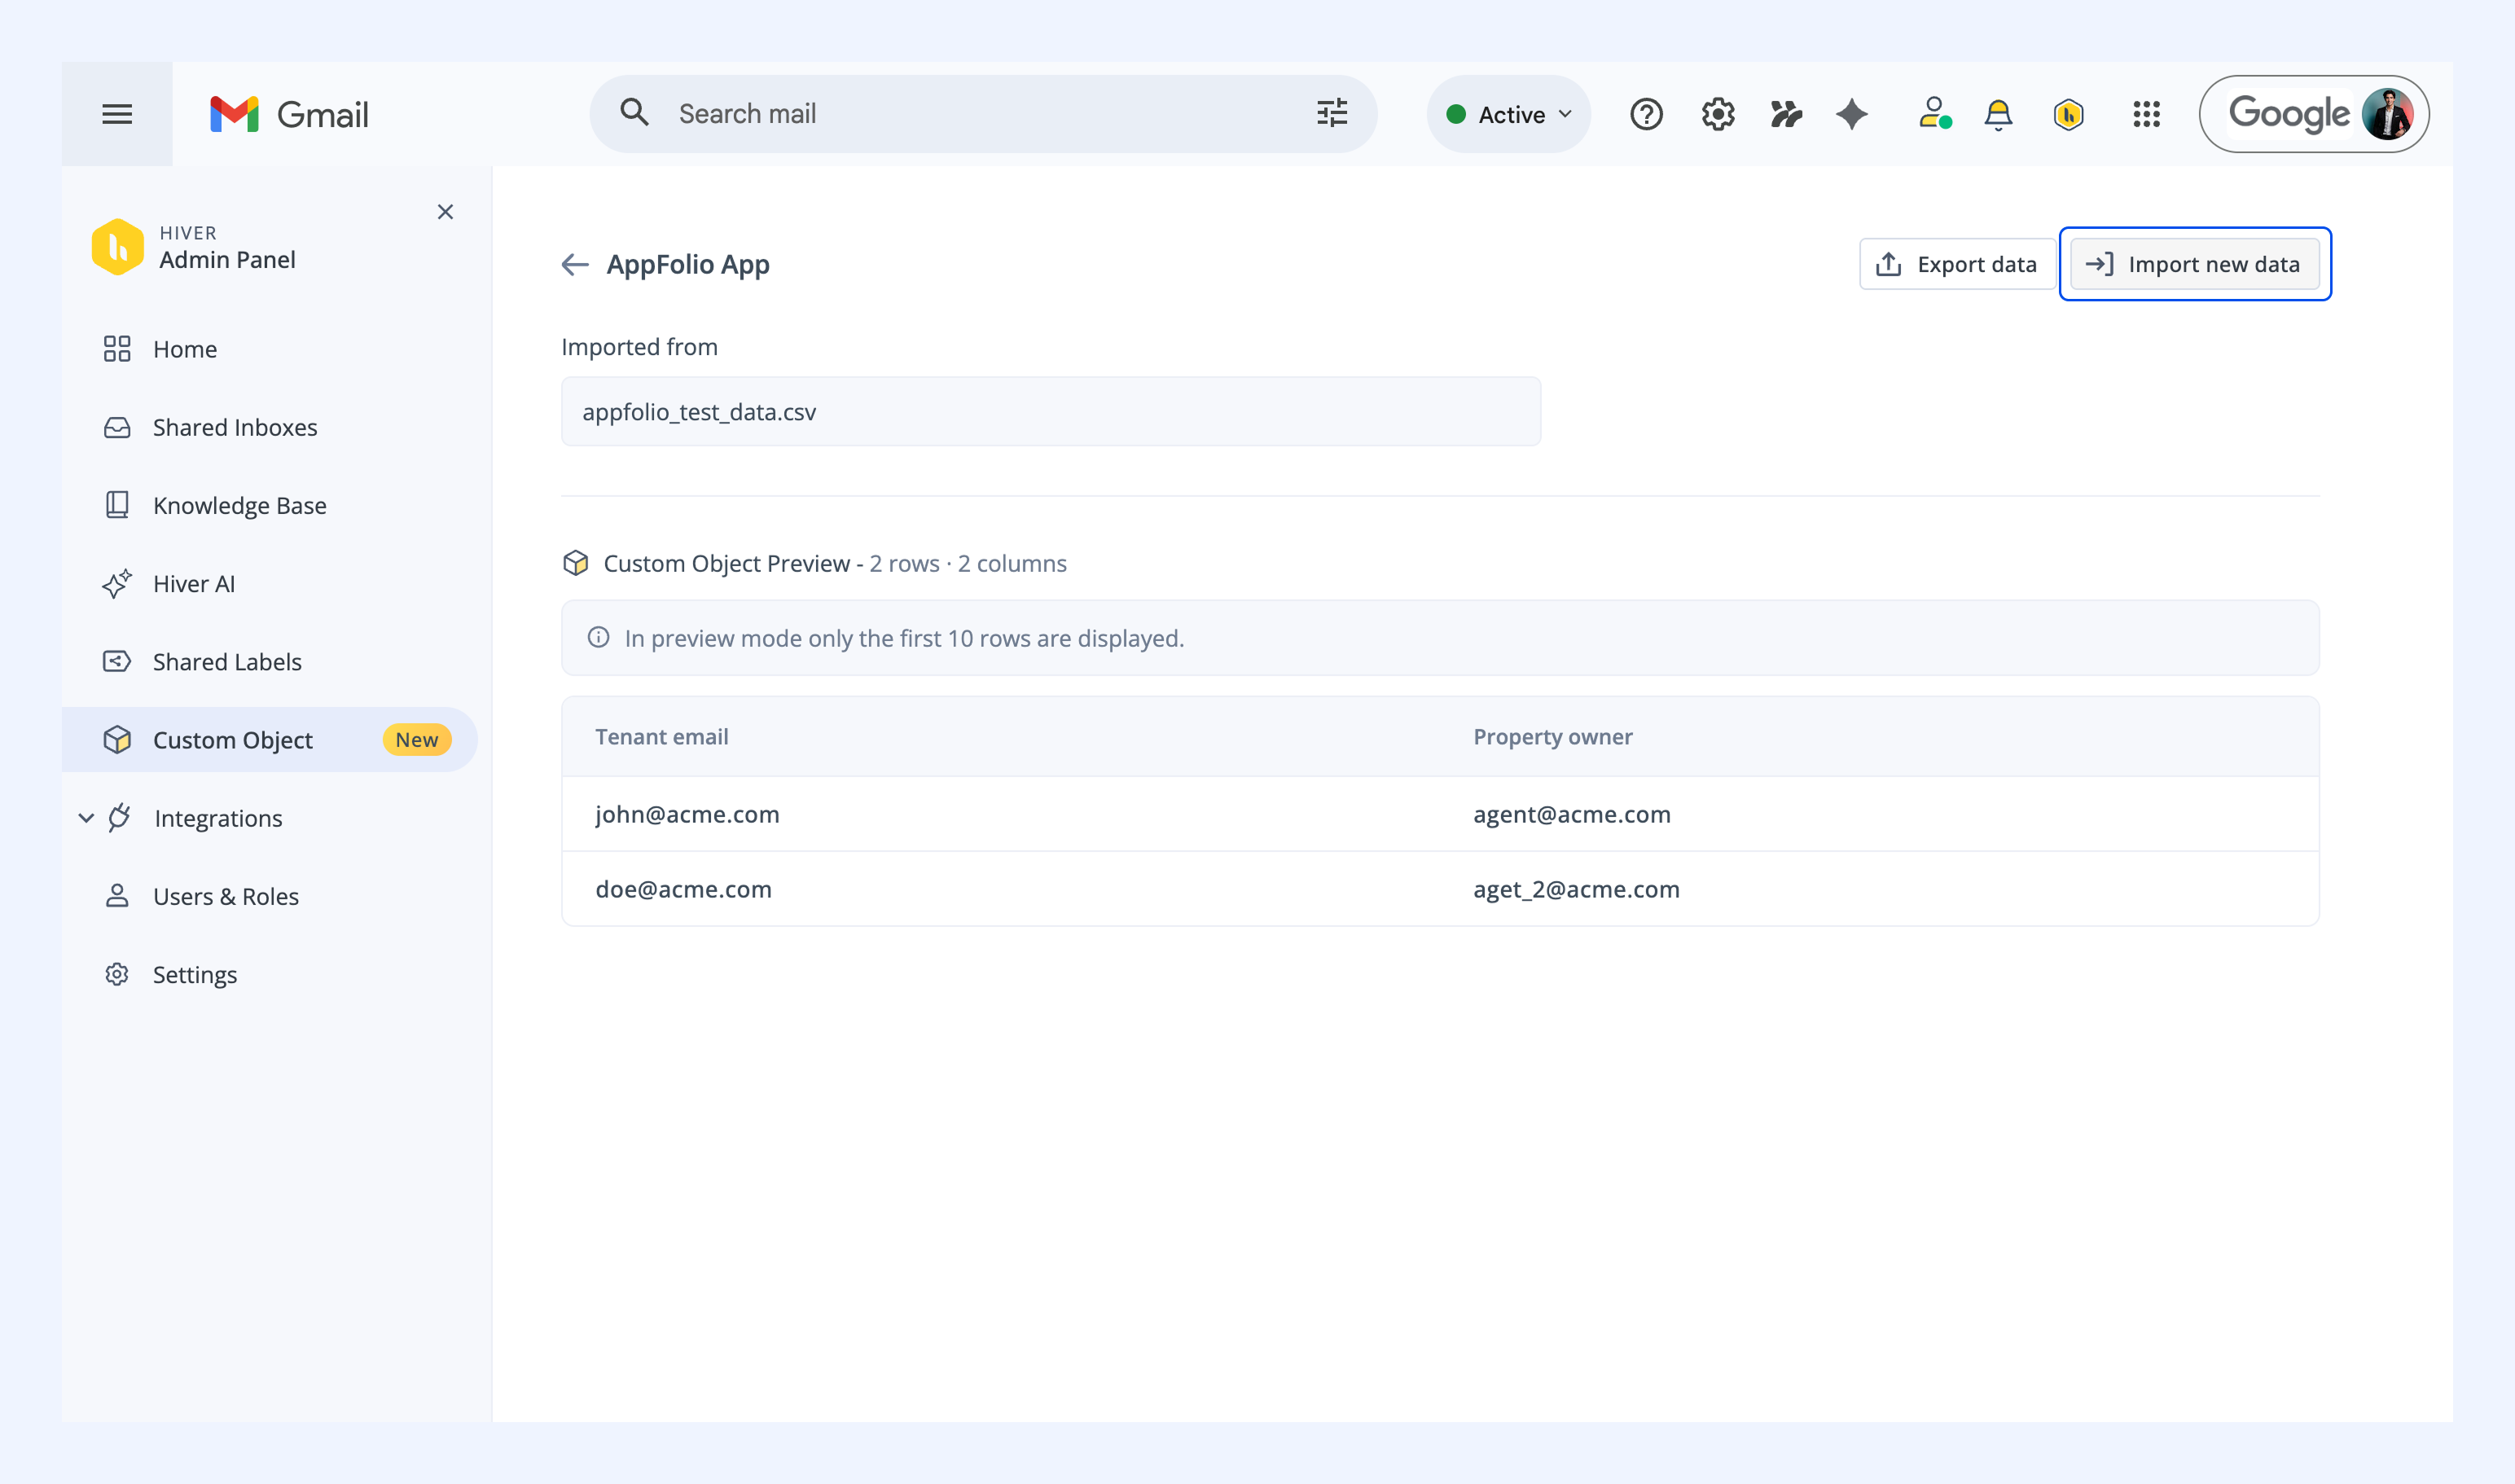
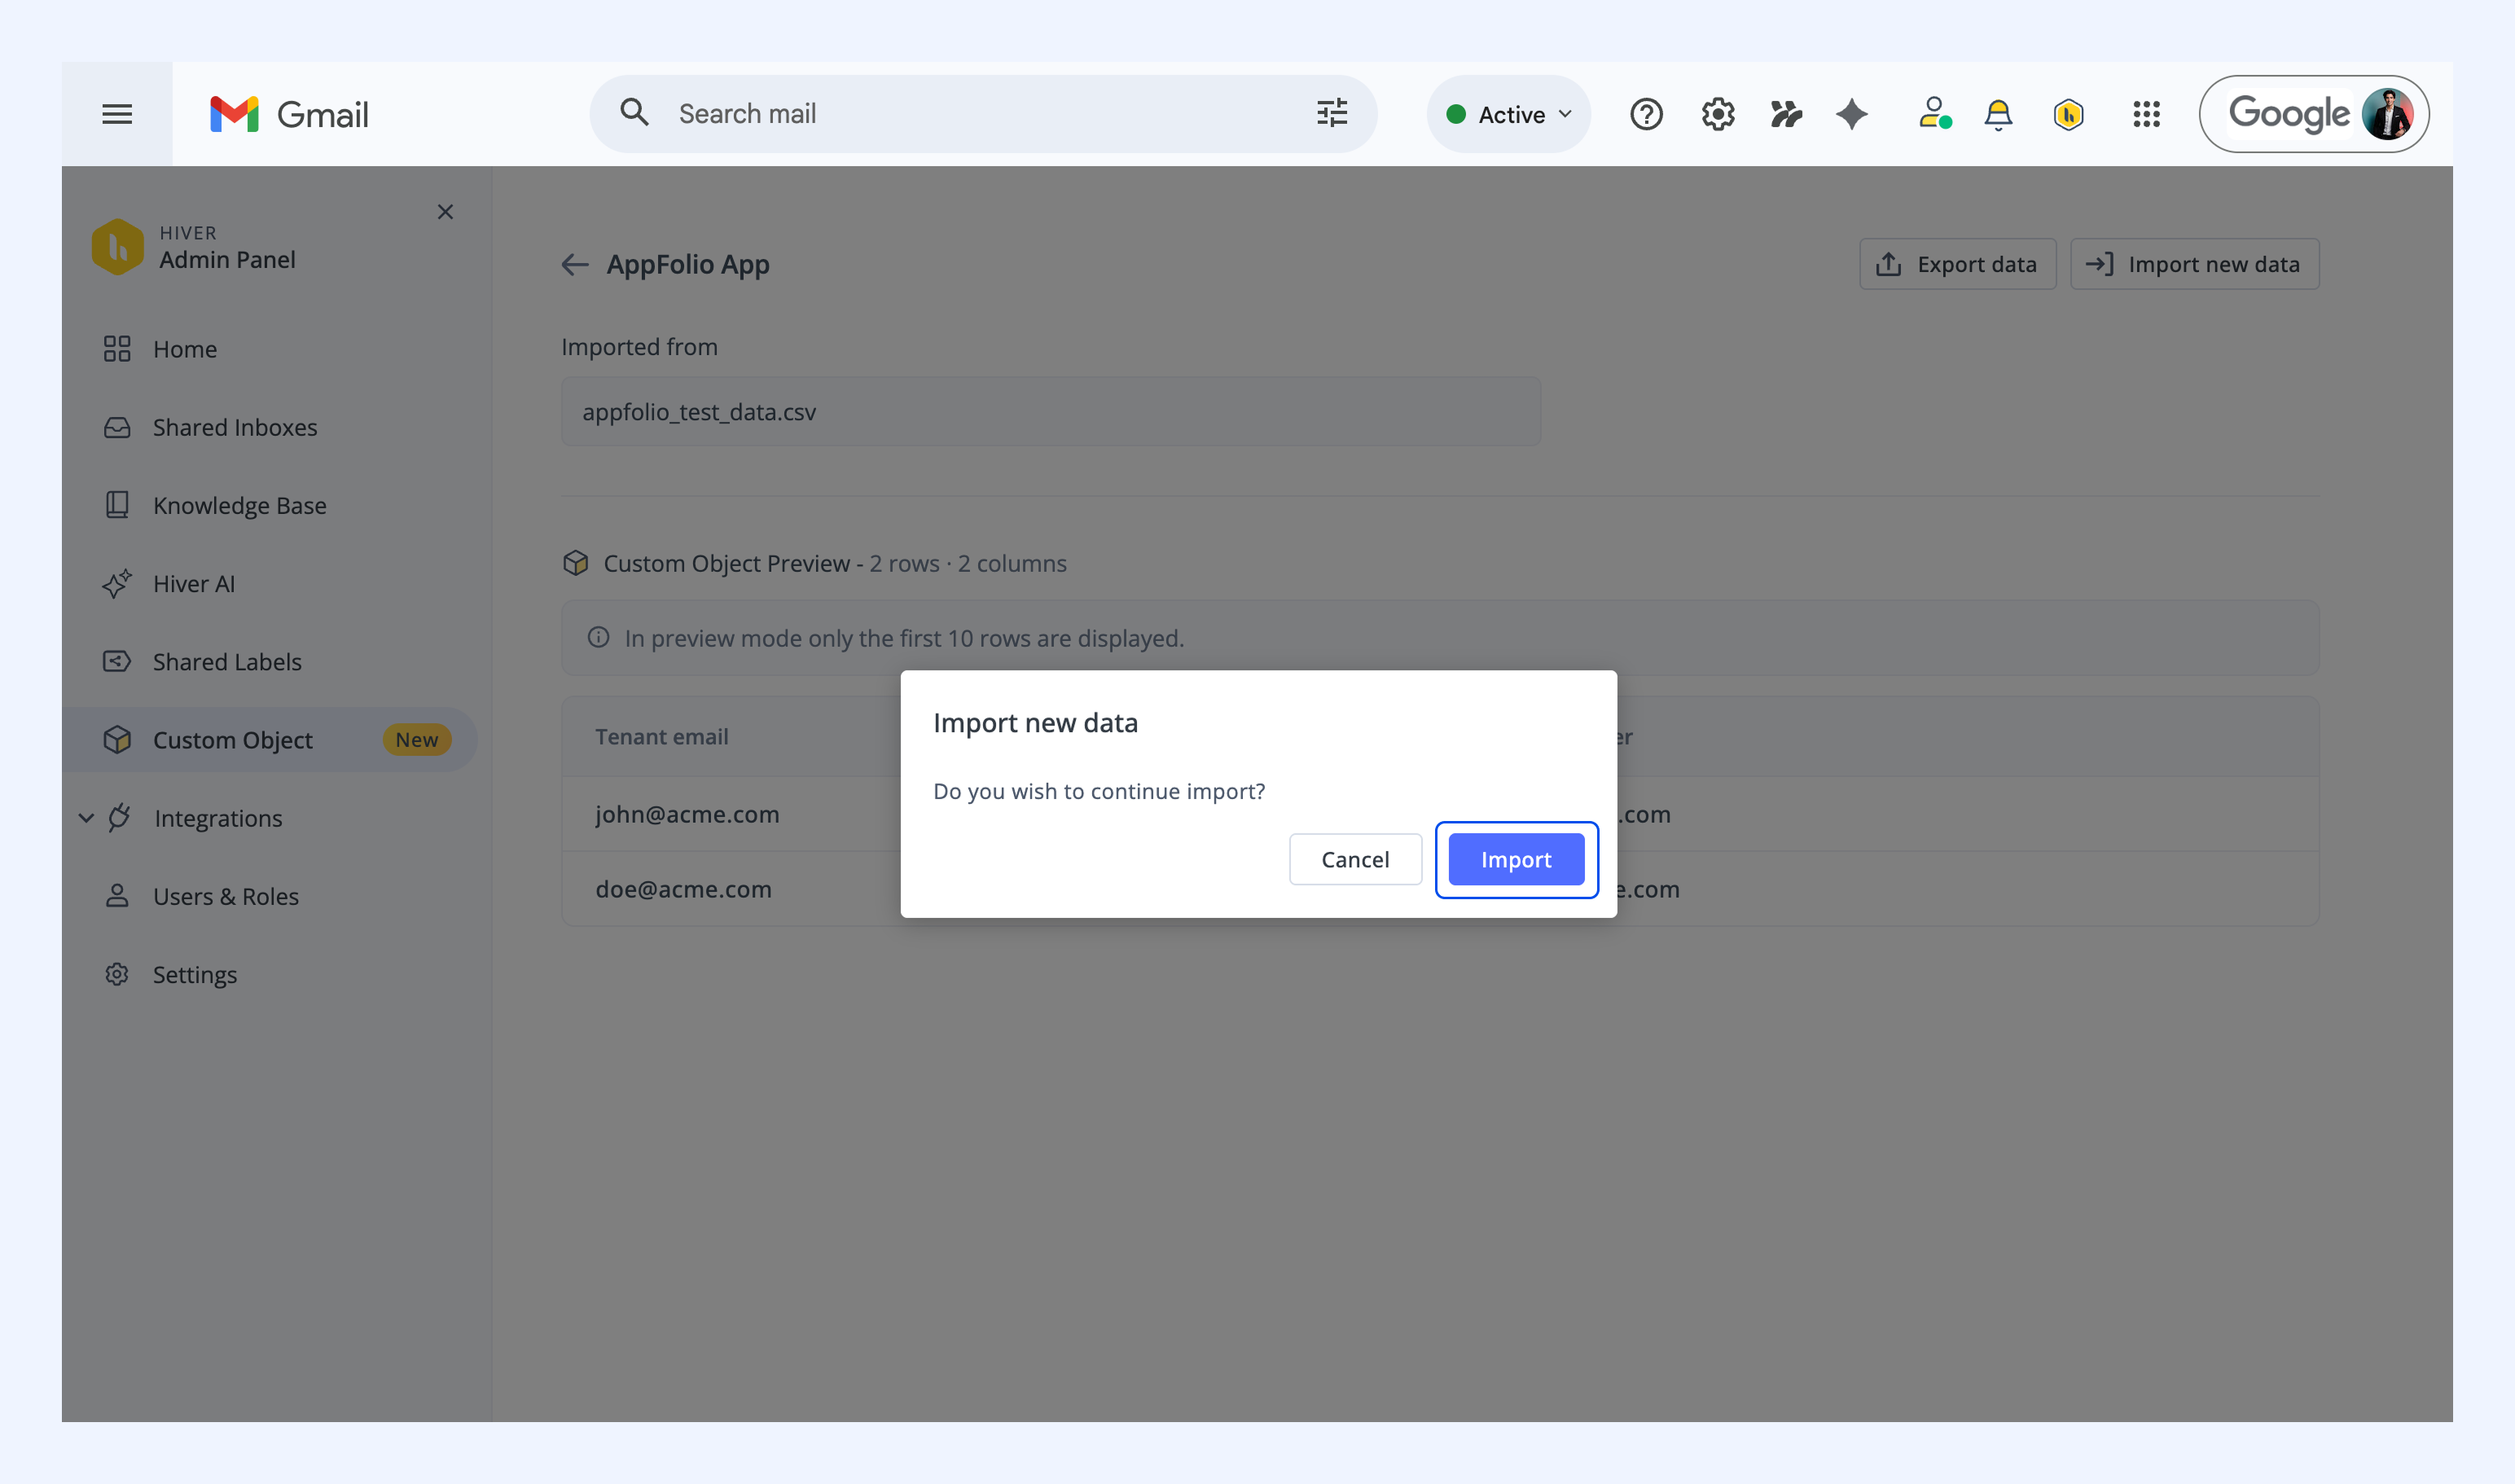
2. Click Import.
3. Click Upload file and upload your file. Make sure it has the same column headers as your current data.
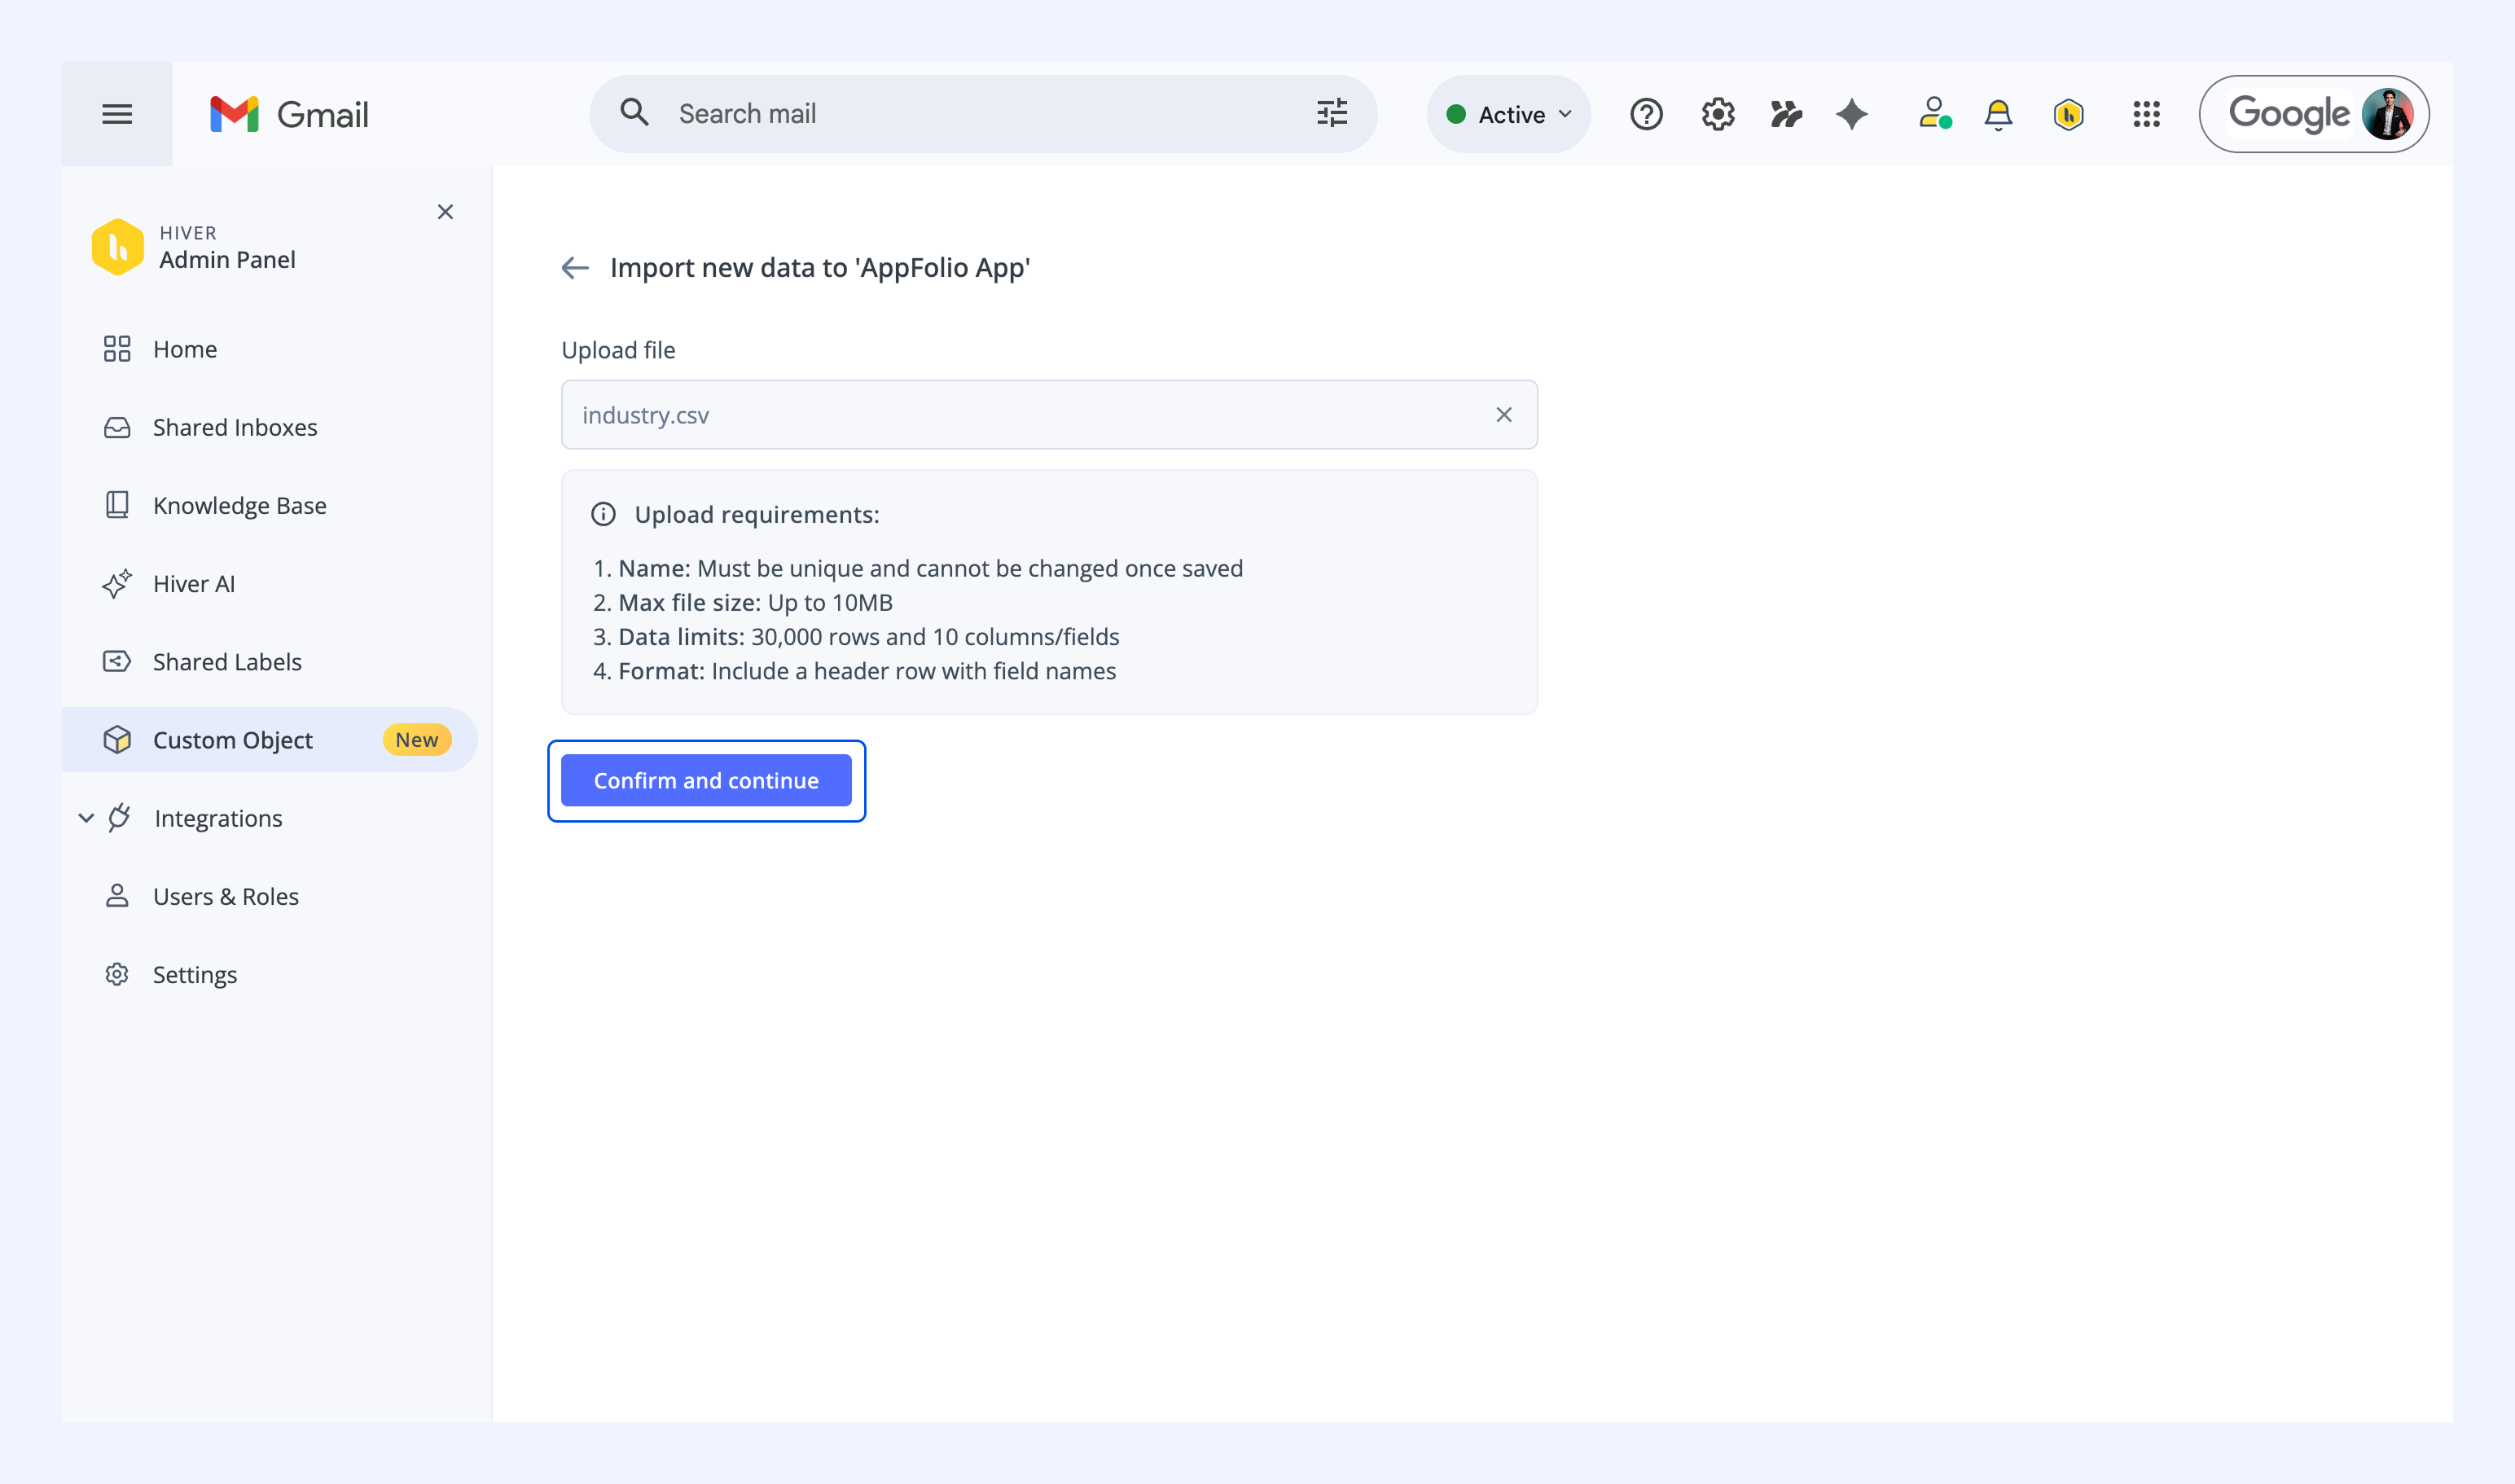
4. Click Confirm and continue.
5. Check the preview and click Import new data.
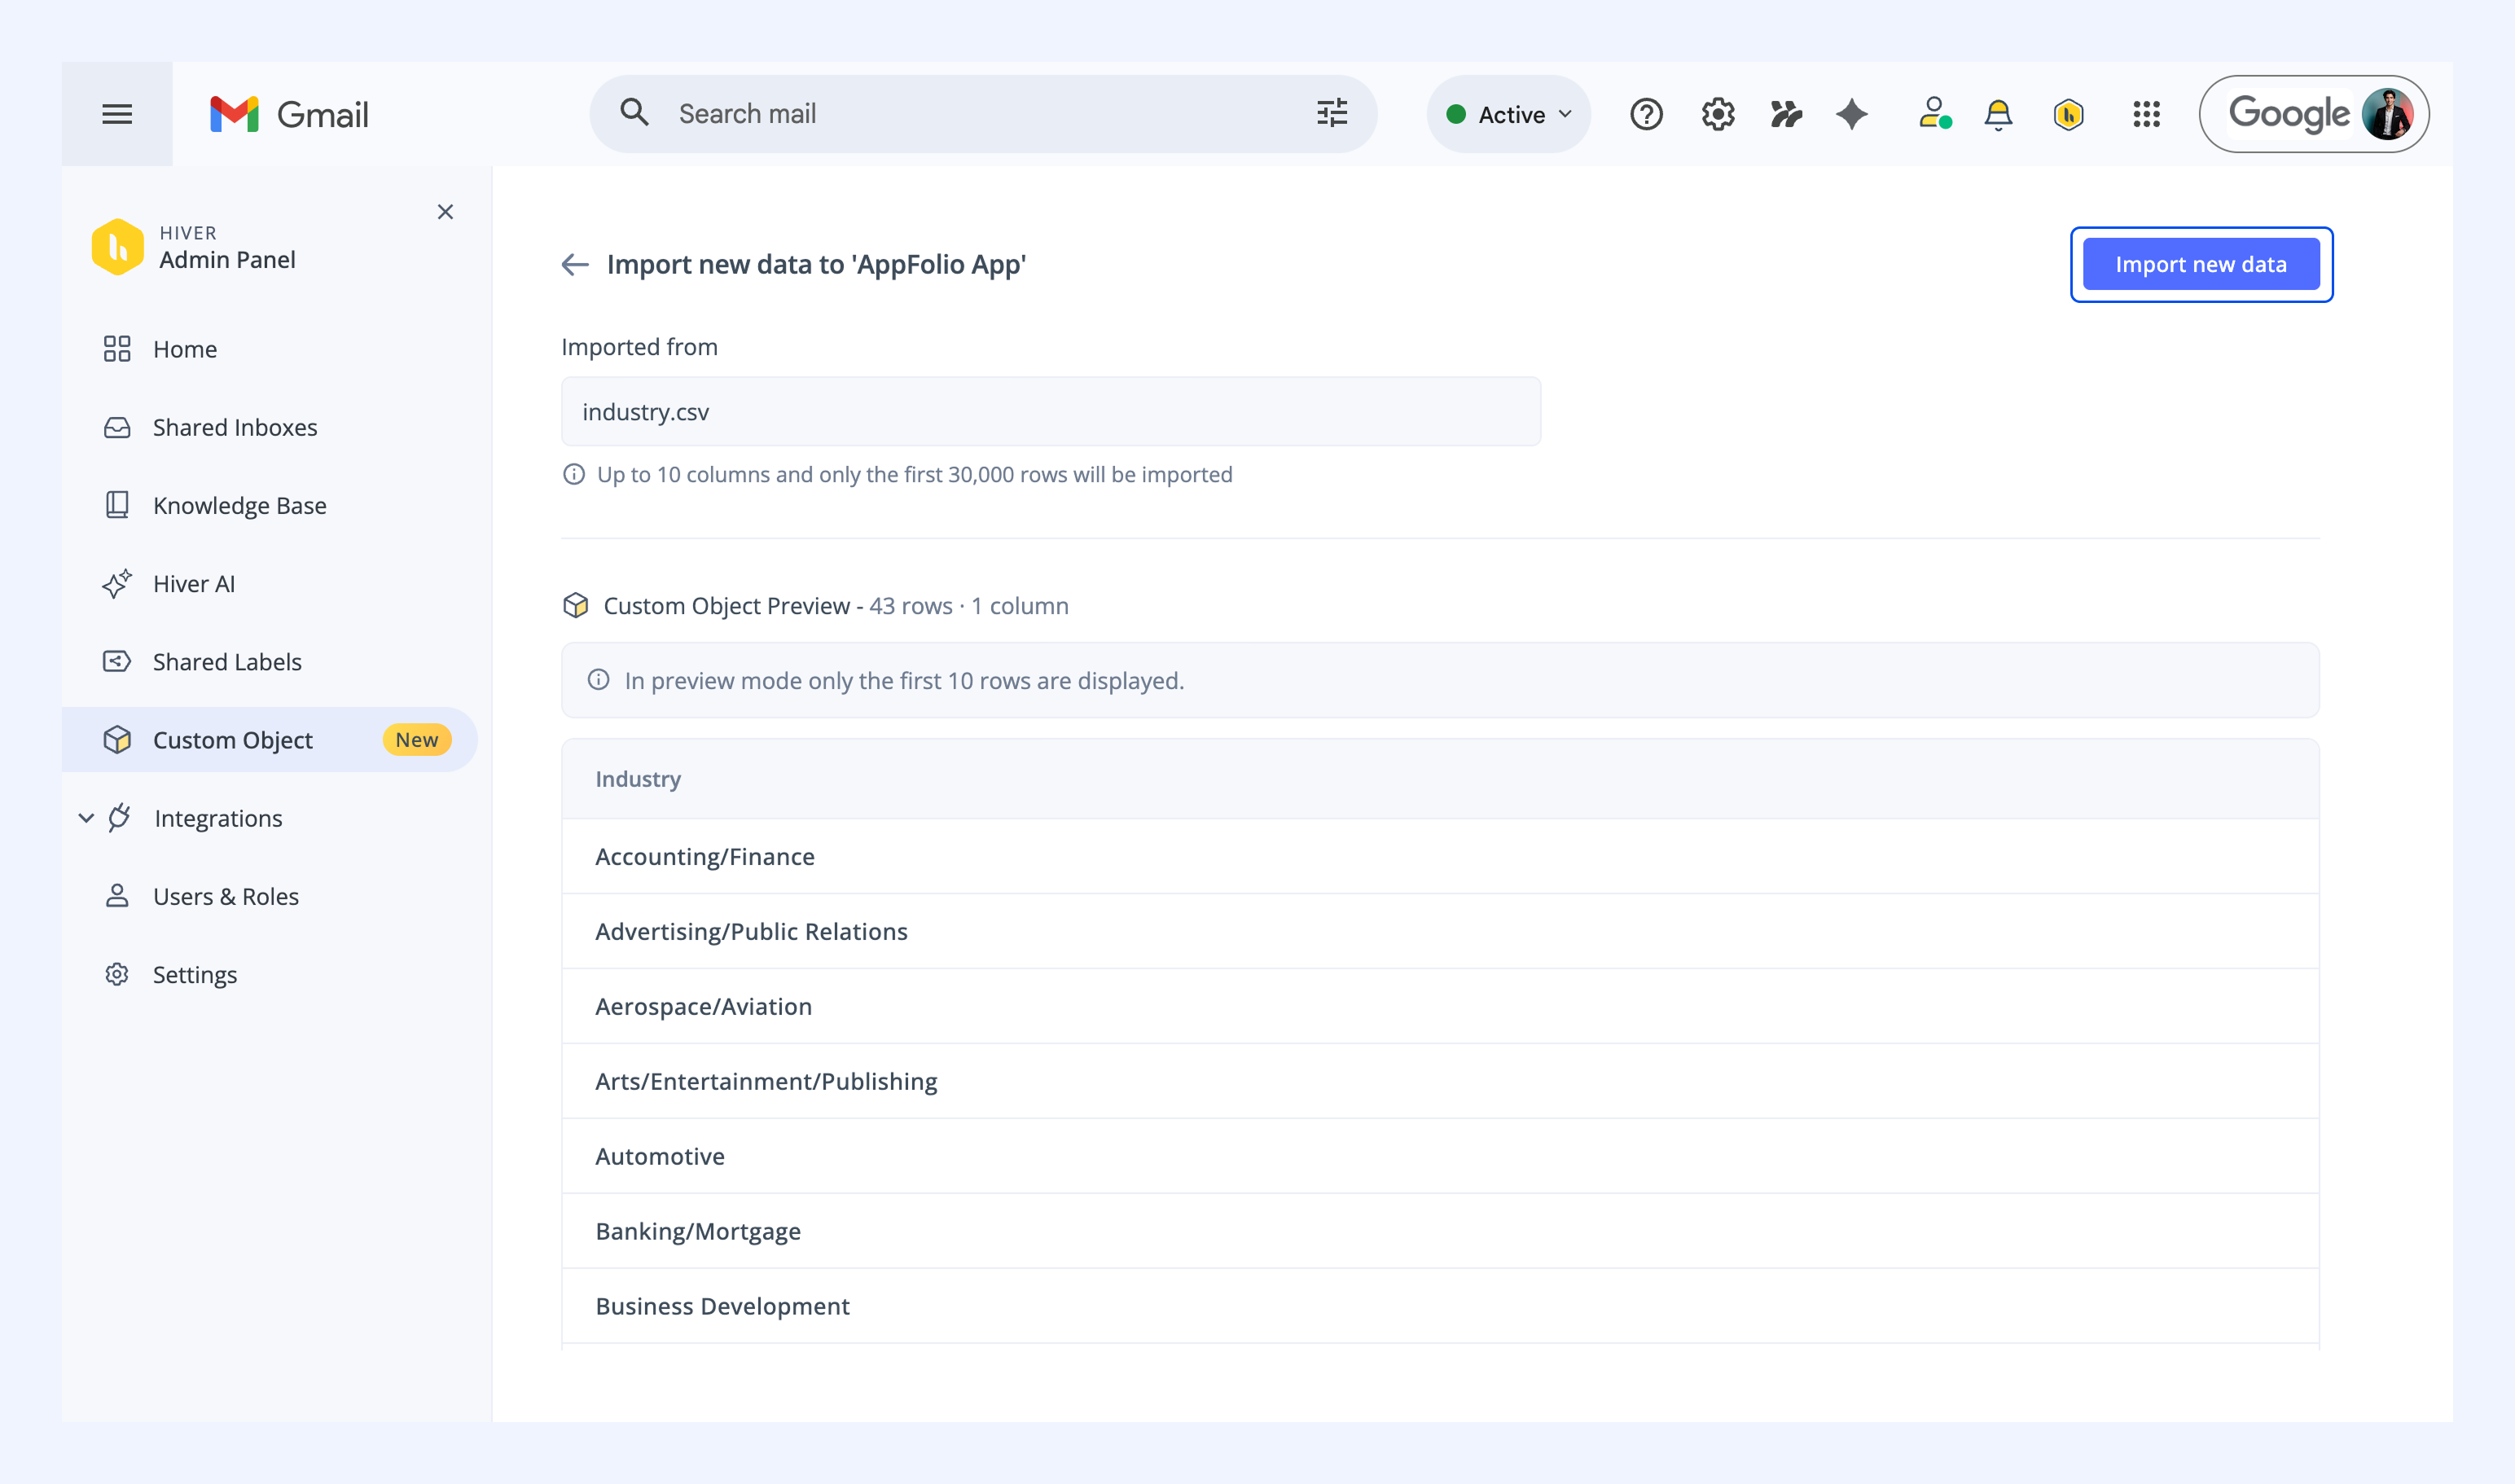
The new data is now live in your Custom Object.
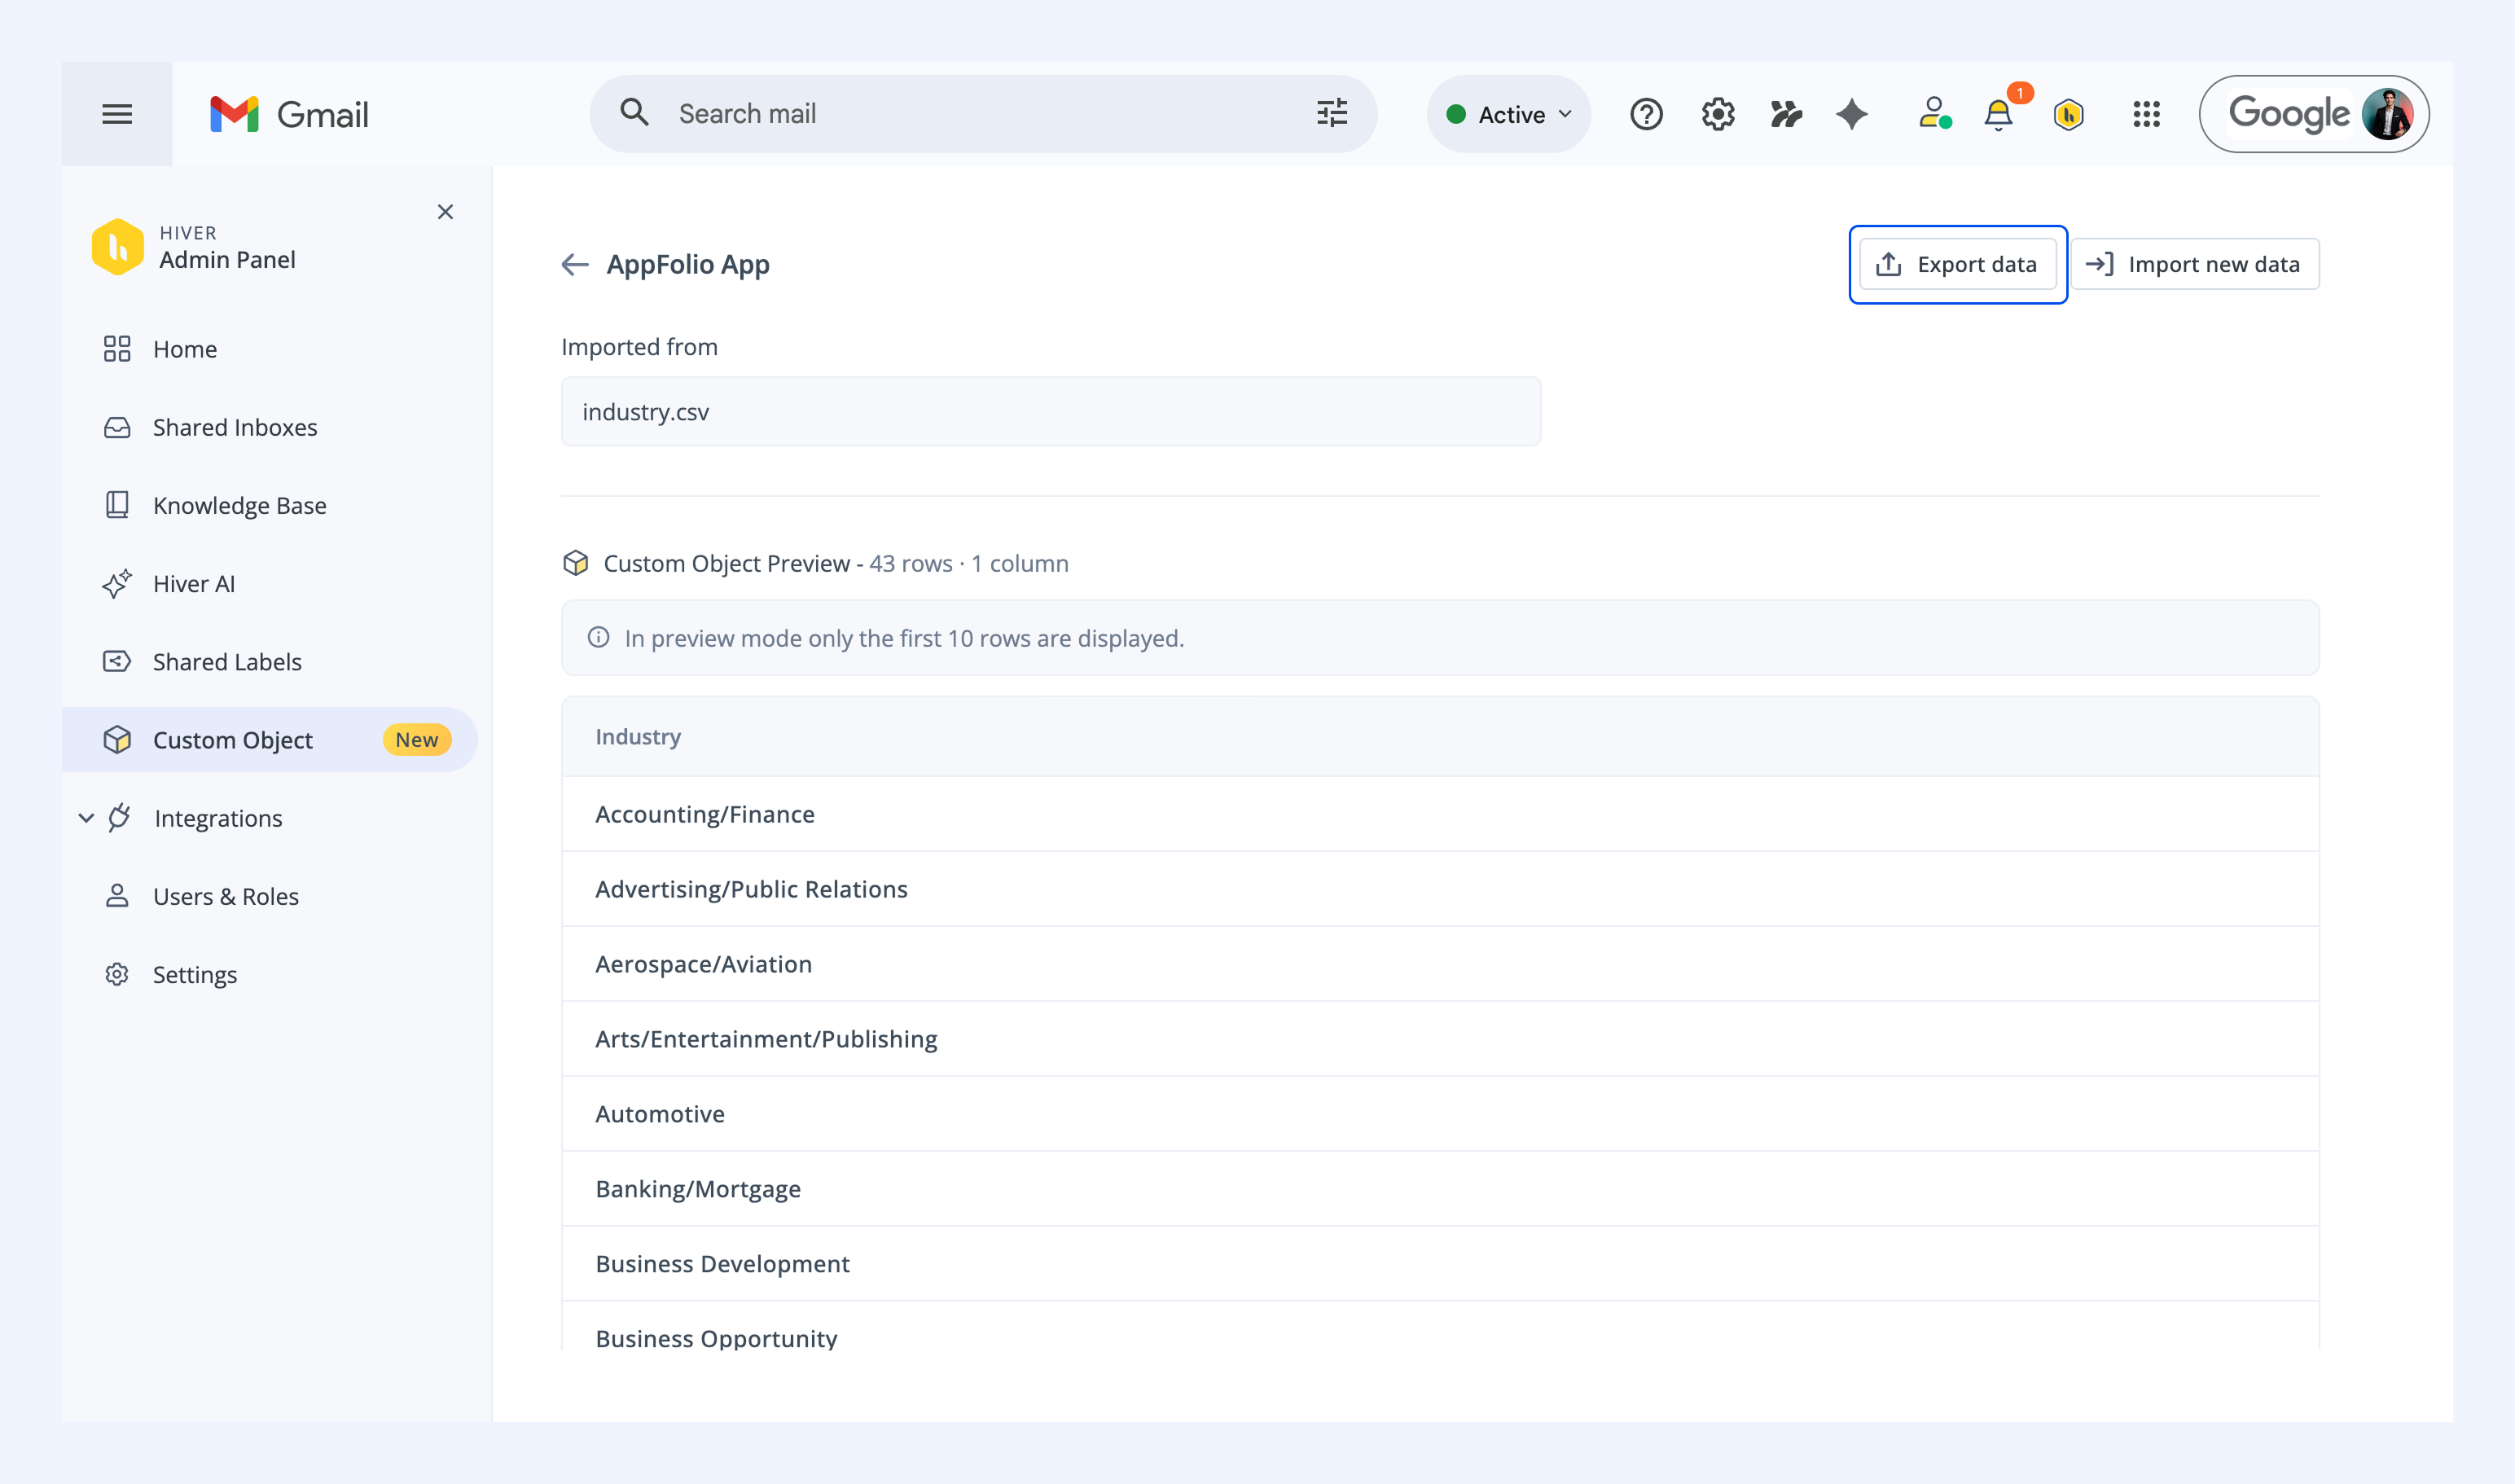
Note: You can download a copy of your Custom Object data as a CSV file by clicking Export data on the edit screen.
Important things to know
Here's how Custom Objects handle a few situations:
- Column changes in Custom Objects: If you update a Custom Object with columns added, removed, or renamed, Hiver shows you which Automations will be disabled before you confirm. If no Automations are using it, Hiver simply replaces the data.
- Duplicate column headers: You can't connect a Google Sheet with two or more columns that share the same header. Rename the duplicates in your sheet and try again.
- Empty sheets: Sheets with no data can't be connected. Add data to your sheet before syncing the Custom Object.
- Renamed or removed columns in Google Sheets: Editing the sheet doesn't disable your Automations. They keep running on the last synced data until you manually update the Custom Object. Automatic syncs will fail in the meantime, and the Custom Object will show a failed status in Admin Panel → Custom Objects.
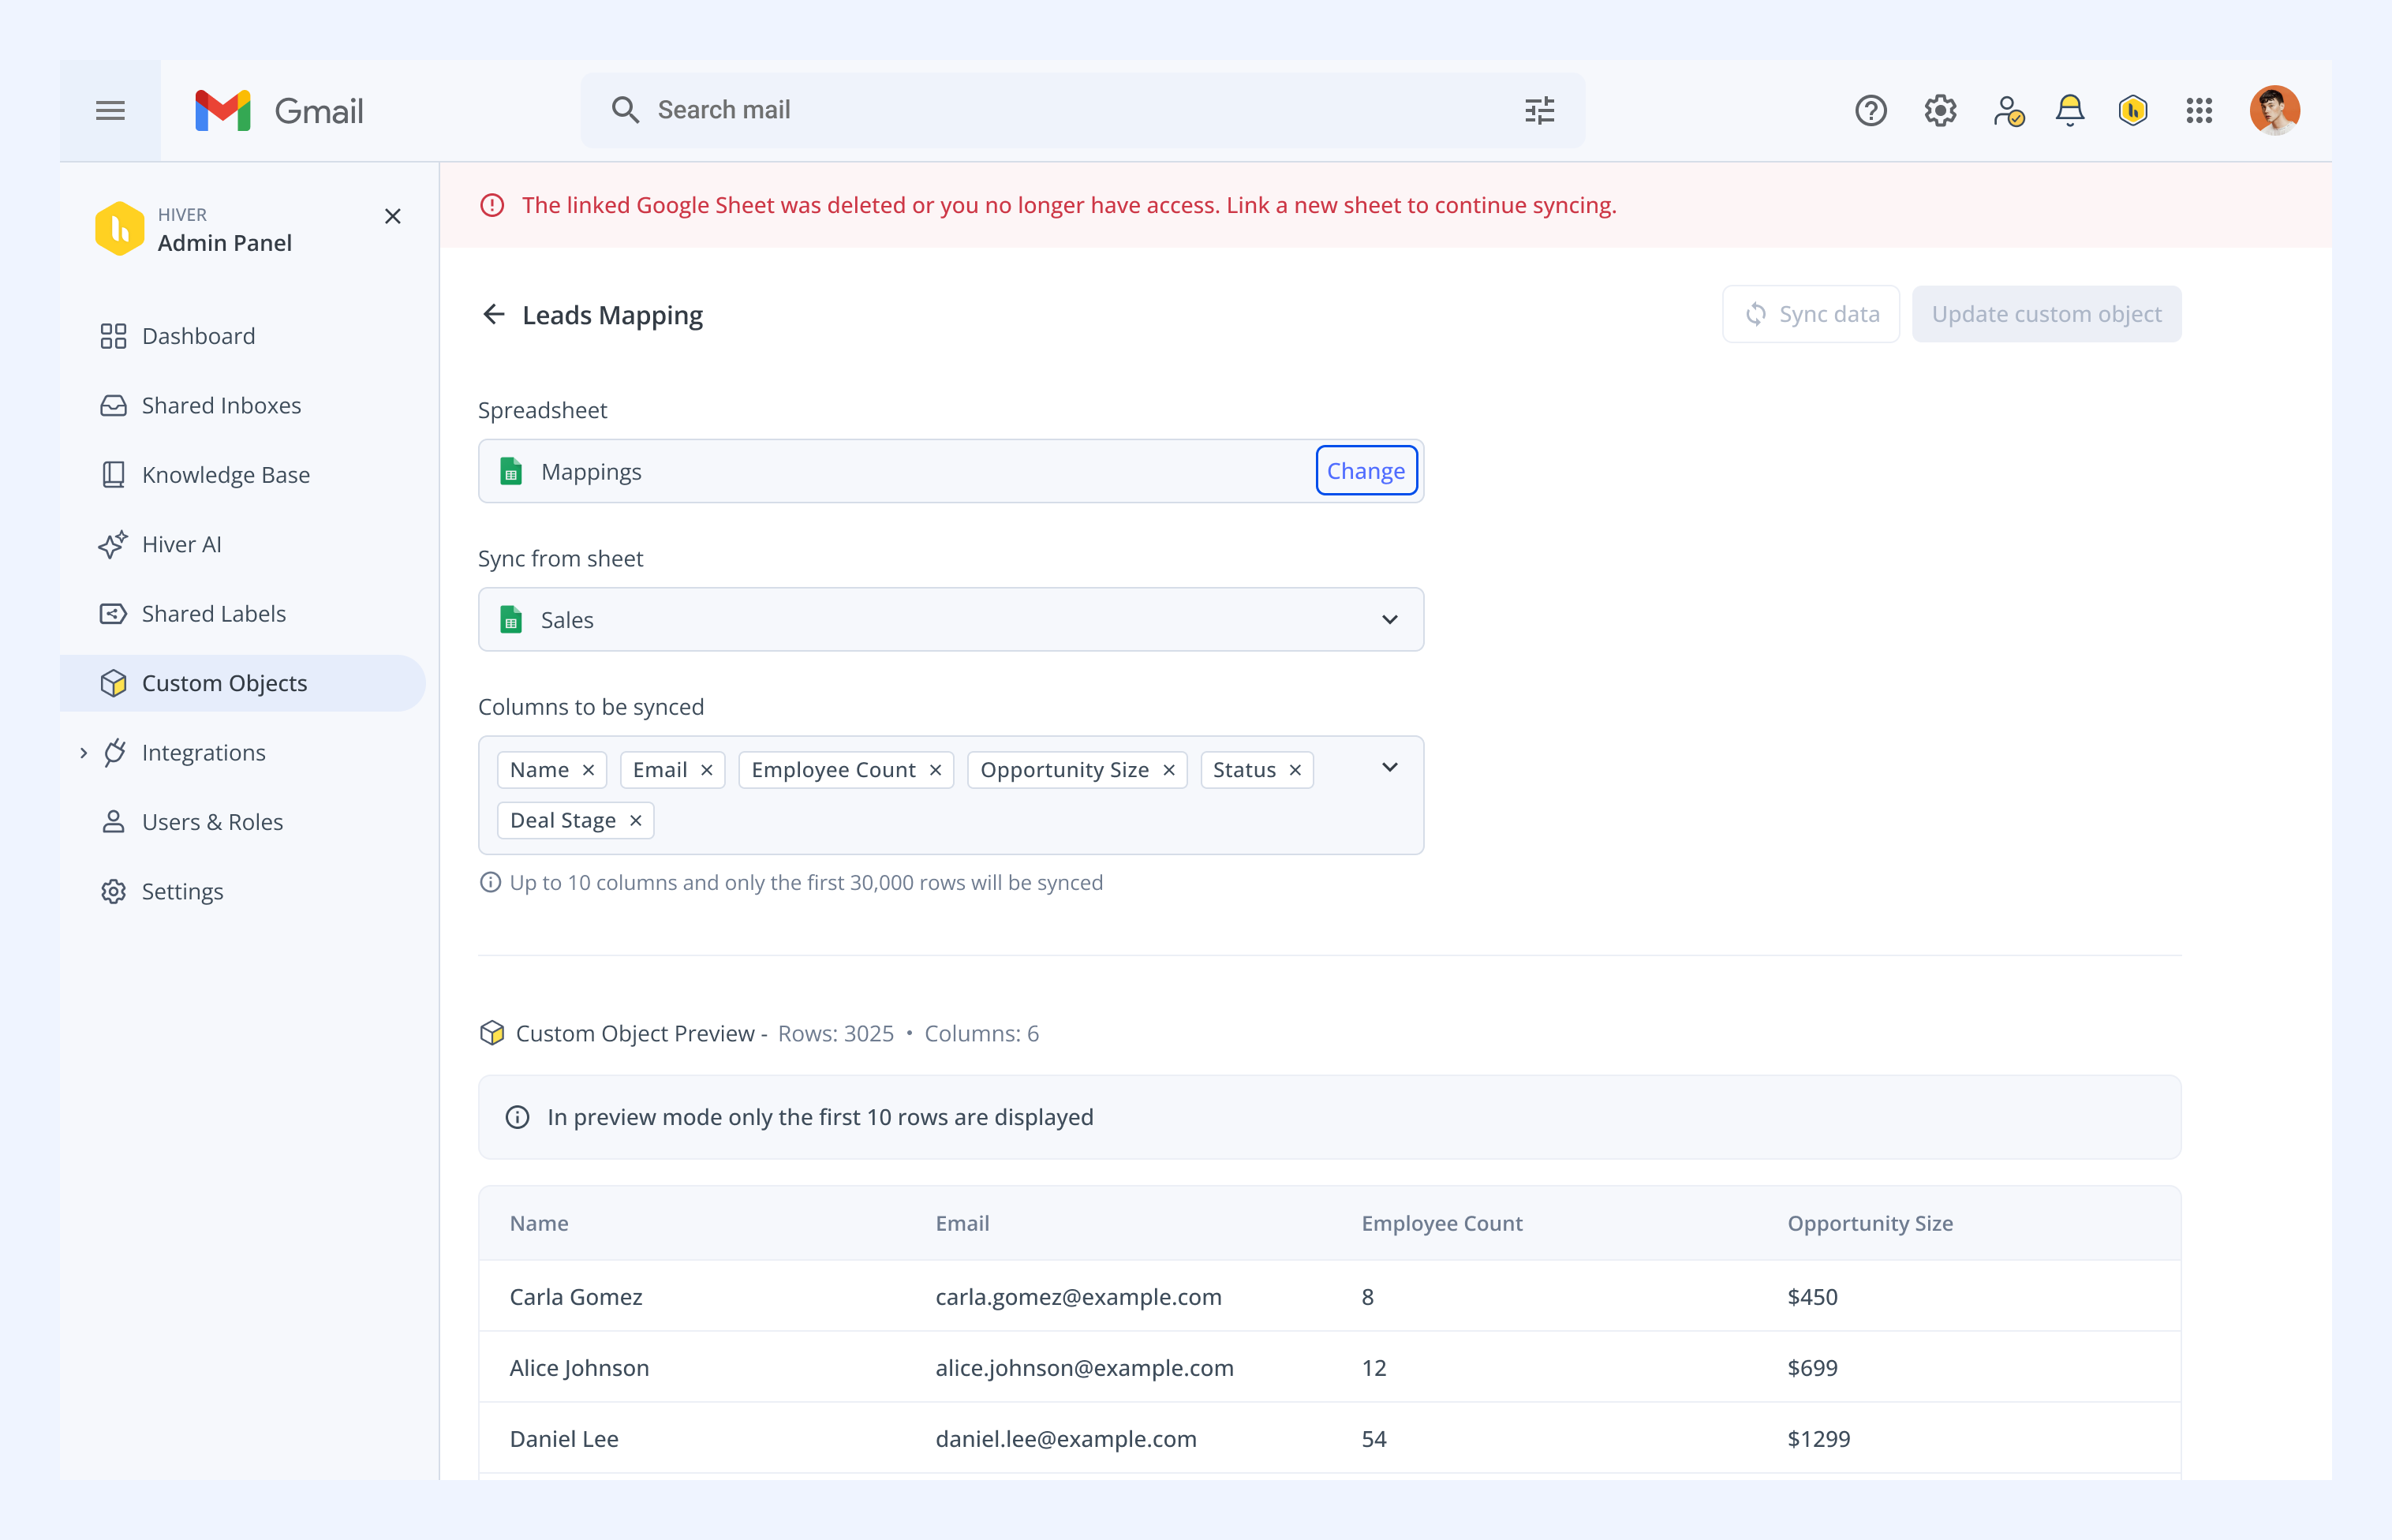
- Linked sheet deleted or access removed: The Google Sheet stops syncing with your Custom Object when the spreadsheet is deleted or you lose access to it. Your existing Automations keep working on the last synced data. To resume syncing, click Change and link a new spreadsheet.
- Signed out of Google: If you've signed out of the Google account used to connect the sheet, the connection expires. Click Change to sign back in and resume syncing.
Deleting a Custom Object
1. In Custom Object, hover over the object you want to delete and click the trash icon.
.png)
At this stage, Hiver will highlight the number of Automations this deletion will impact. You can update the Automation rules, if needed, and then delete the Custom Object to prevent interruptions.
2. Review the alert and click Delete.
Your Custom Object will be deleted permanently and Automations using those Custom Object will be disabled.
Using Custom Object in Automation
Custom Objects can be used in Shared Inbox Automations and Individual Inbox Automations to help simplify and scale your workflows. Here are a few examples:
1. Automatically triage incoming conversations
Instead of creating multiple rules to assign or tag conversations, you can use a Custom Object to map customers (by email or domain) to the right assignee, tag, or team.
How it works:
- When a new conversation is received
- If the sender’s email or domain matches a value in your Custom Object
- Then assign the conversation and apply tags using mapped values
This lets you manage routing through a single dynamic rule instead of maintaining multiple static ones.
.png)
2. Automatically populate Custom Fields
You can use Custom Objects to enrich conversations with additional context, such as support tier, account owner, plan type, or deal stage.
How it works:
- When a conversation is received (or updated)
- If the sender matches a value in your Custom Object
- Then update Custom Fields with the corresponding values
This ensures your team has the right context available without manual input.
.png)
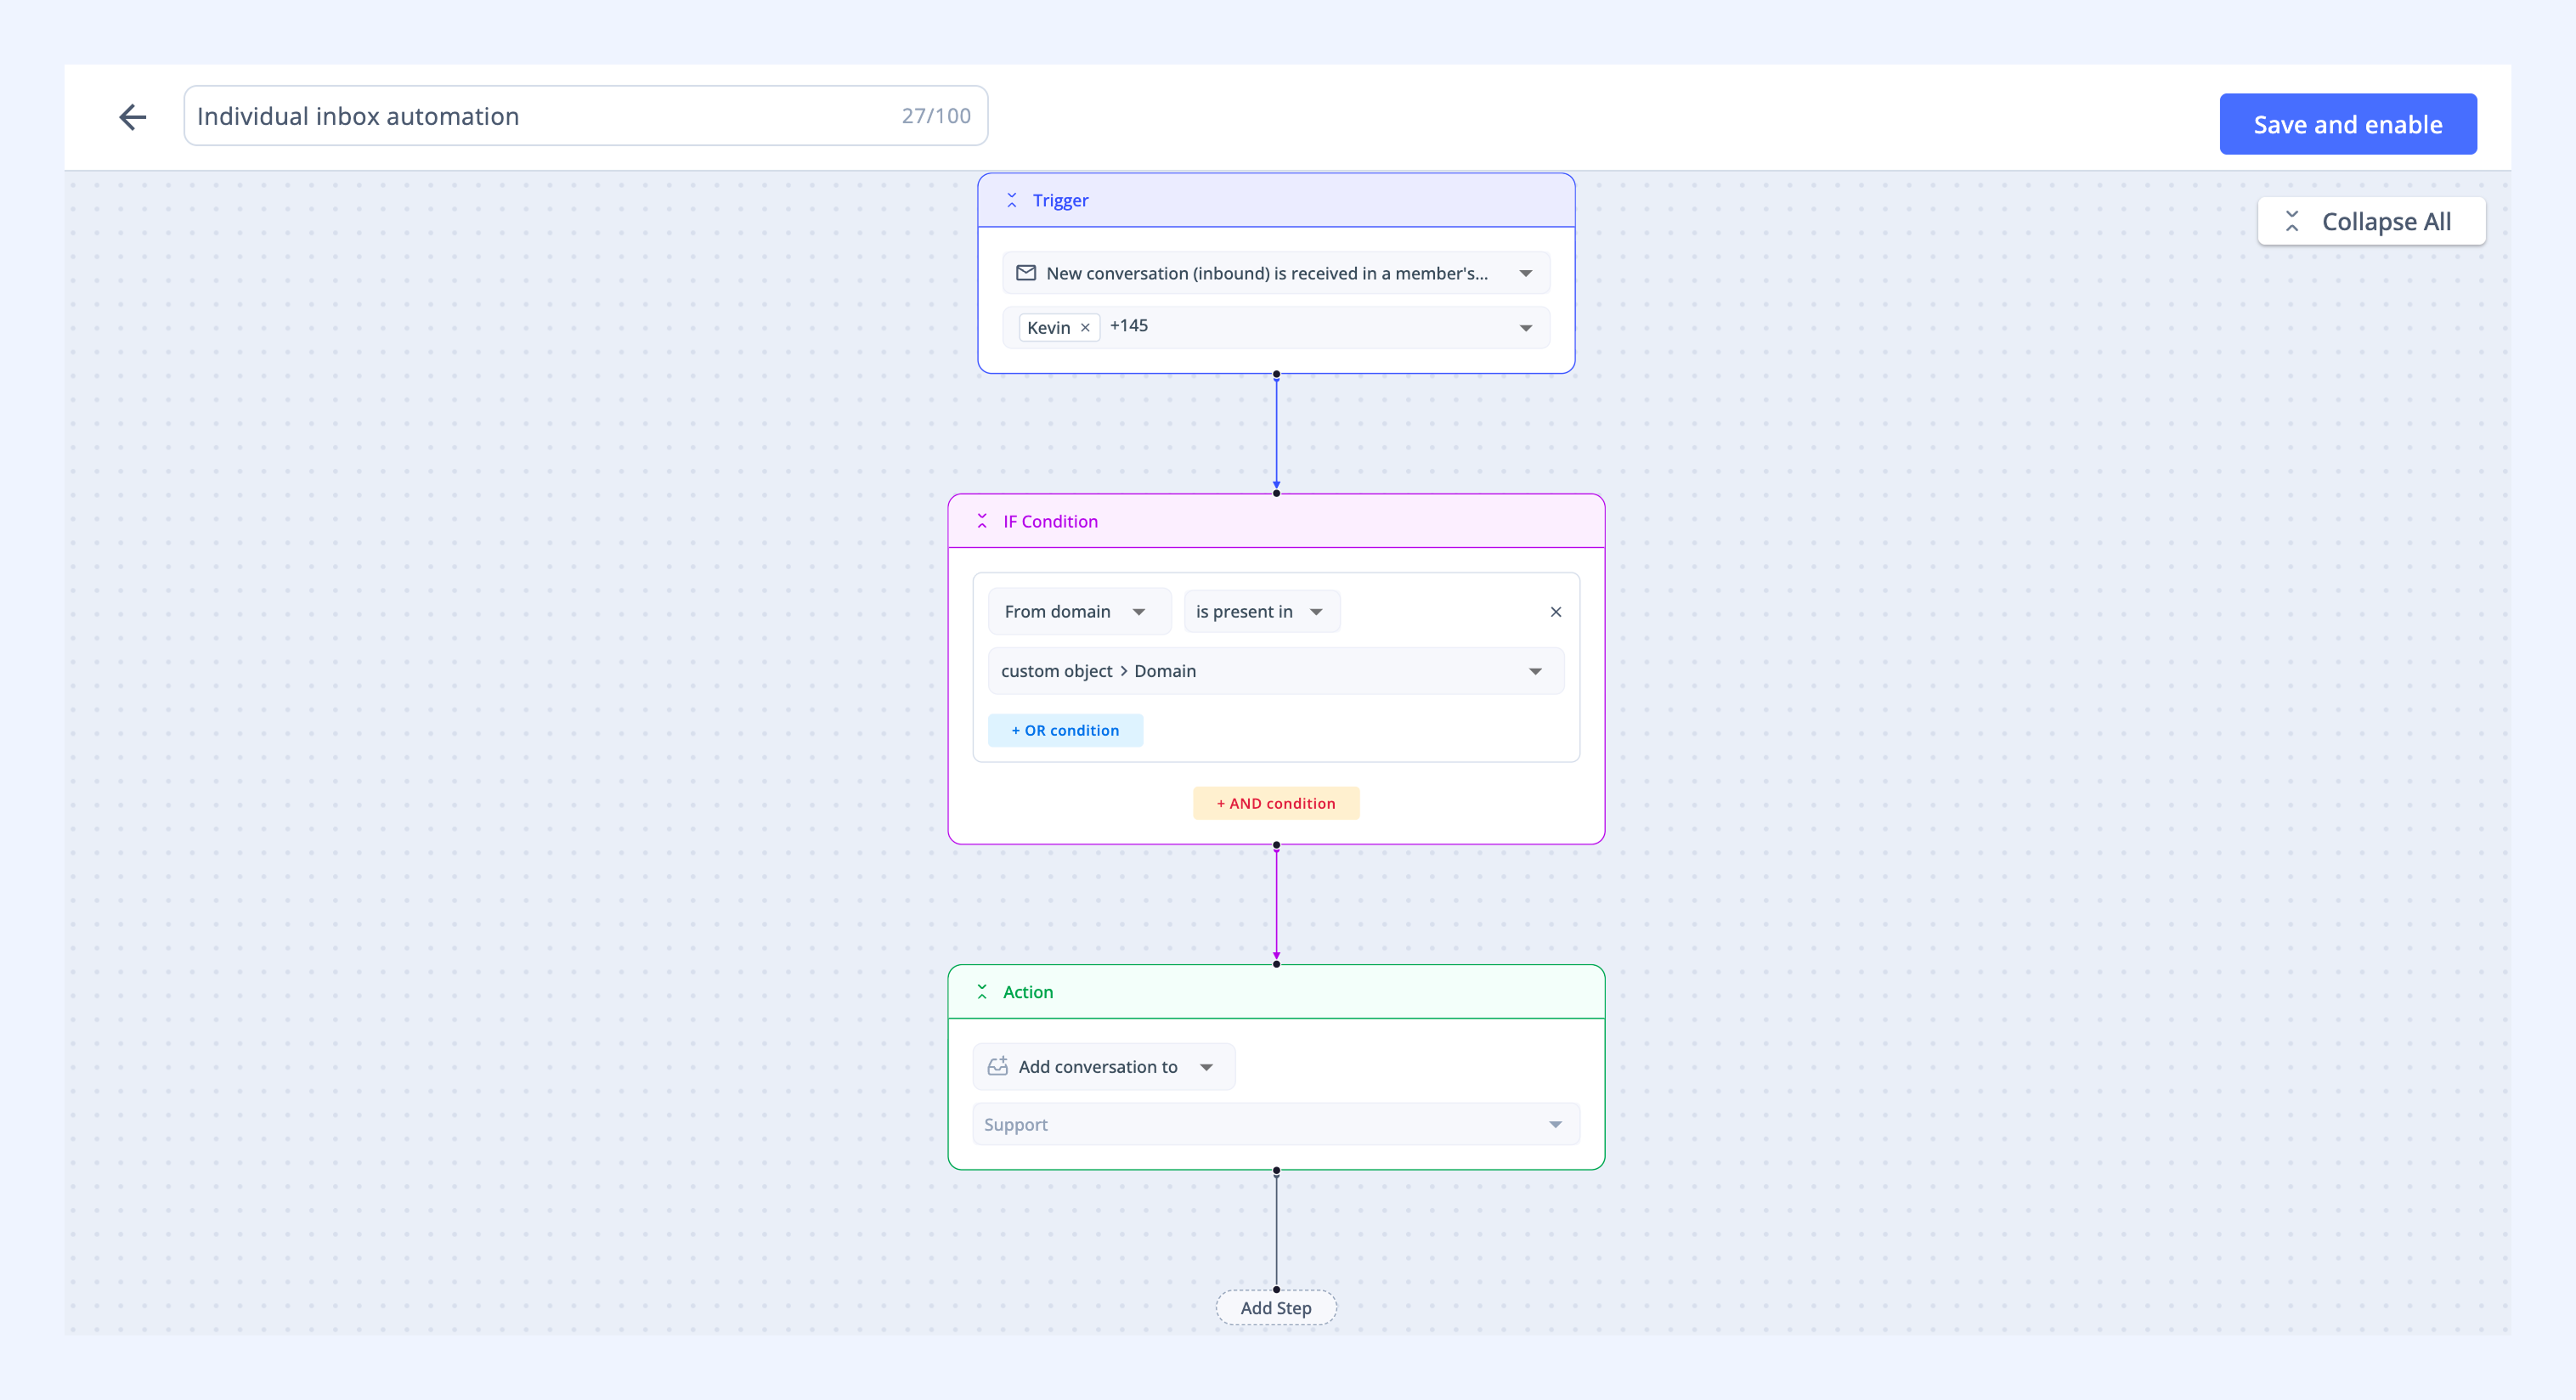
3. Automatically move conversations from individual inboxes to your Shared Inbox
When customers email team members directly, those conversations can stay siloed. Custom Objects help route them to the Shared Inbox automatically.
How it works:
- When a new conversation is received in a team member’s inbox
- If the sender’s email or domain matches a value in your Custom Object
- Then add the conversation to the Shared Inbox
This ensures all conversations are tracked and handled in the right place without relying on manual forwarding.
Steps to set up an Automation using a Custom Object
Let’s say you want to auto-assign conversations to the right account manager based on the sender’s domain, such as apple.com or asics.com. Here’s how you can do that:
1. Create a new Custom Object by uploading a single CSV file with all customer-to-team-member mappings. This will be the Custom Object you use within Shared Inbox Automation.
Here’s a sample of what your CSV file could look like with three columns - Customer, Assignee and Tag.

Note:
- Ensure the Assignee column in your Custom Object contains email addresses, not names.
- The assignee email addresses and tags used in the Custom Object must exist within the Shared Inbox where you're creating the Automation.
- All referenced values in the Custom Object must exactly match what exists in your Hiver account. Even small differences in spelling, spacing, or pluralization (for example, AP Credit vs AP Credits) will prevent the Automation from applying the action.
2. Go to Admin Panel → Shared Inboxes, and select the Shared Inbox where you want to create the Automation.
3. Select Automations → Create Automation → Create from scratch.
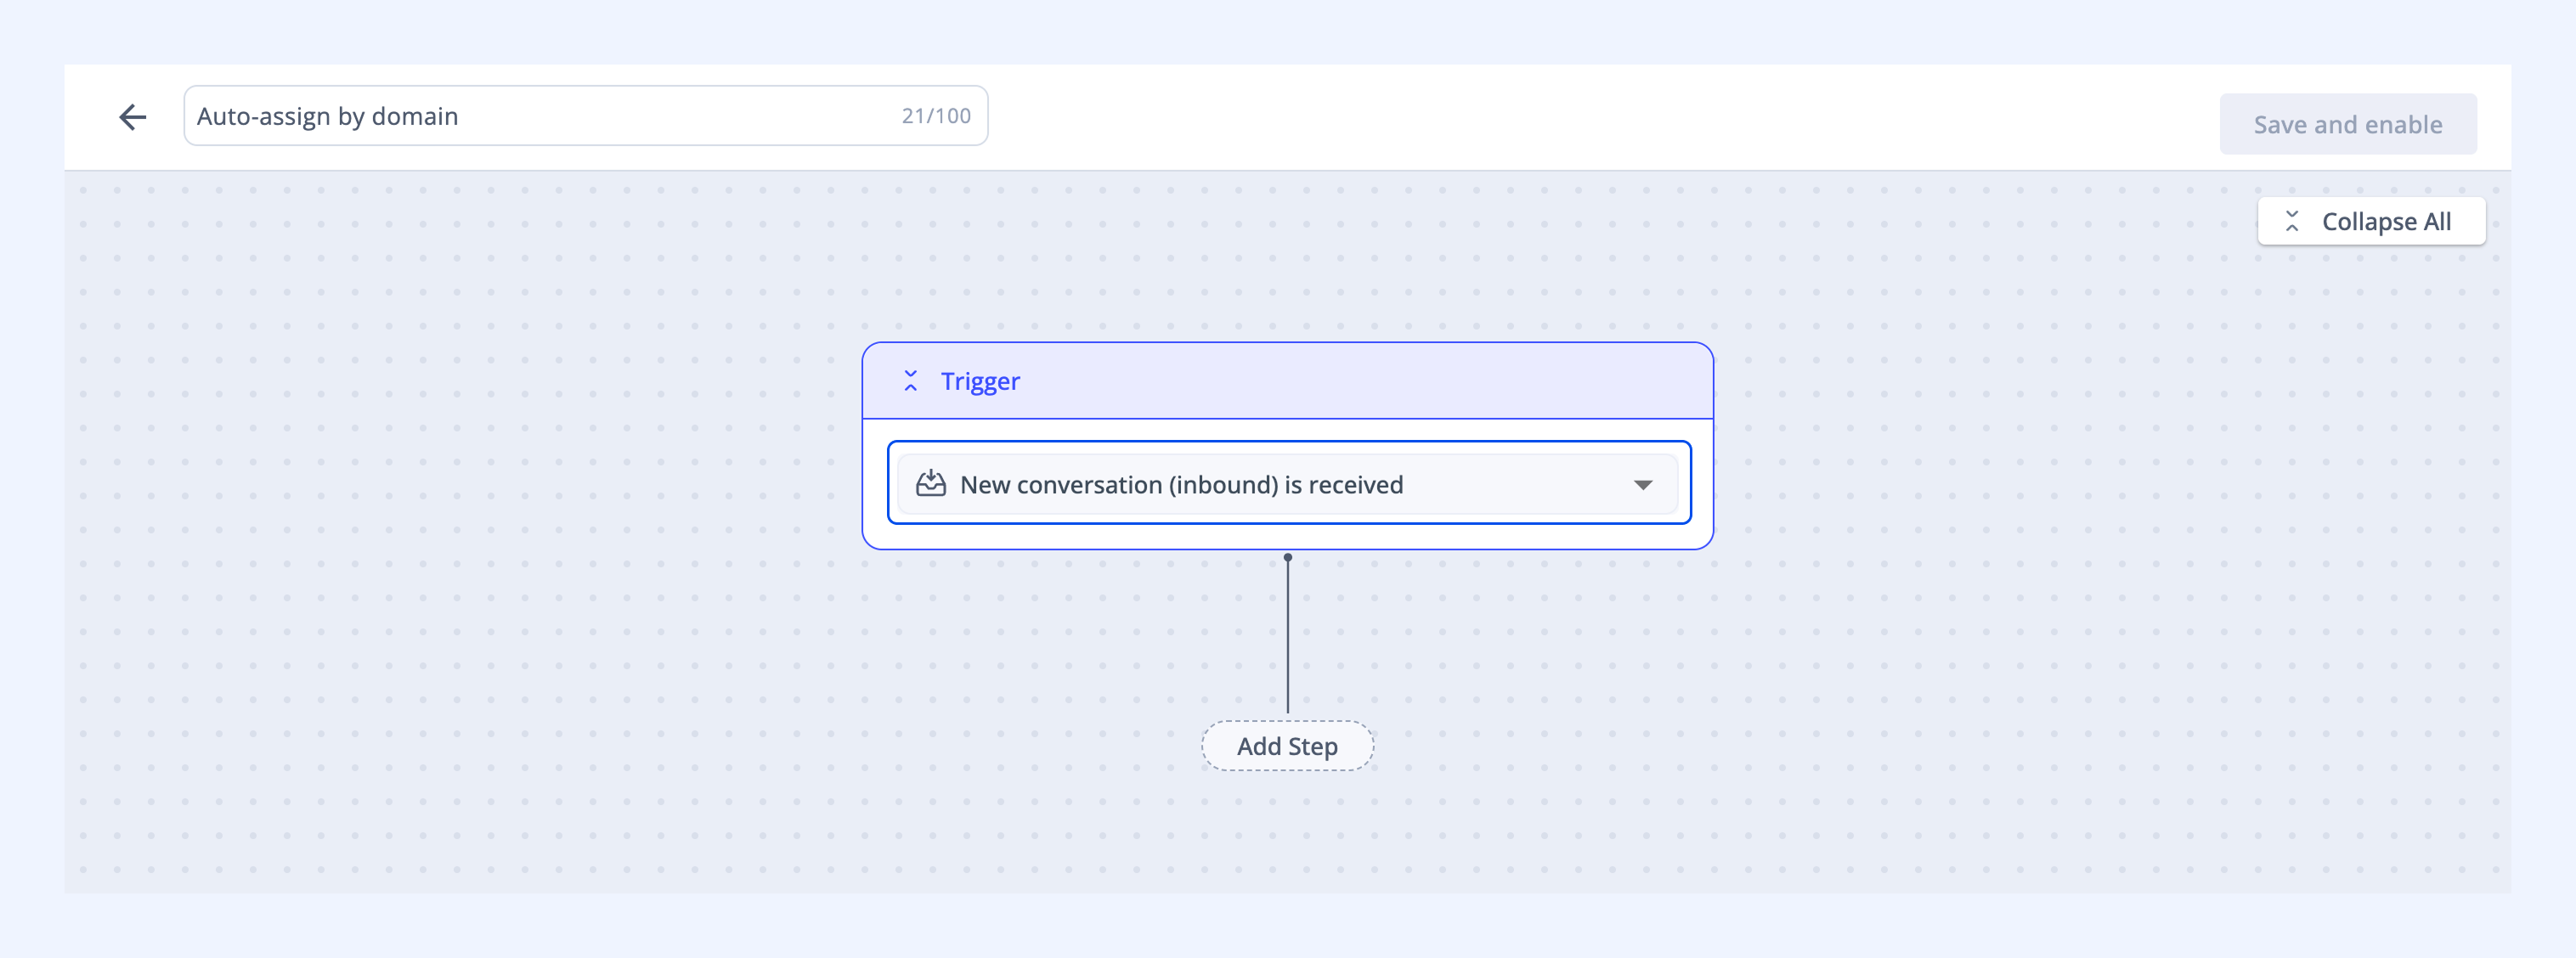
4. Give your Automation a clear name (e.g., 'Auto-assign by domain').
5. In the Trigger, select New conversation (Inbound) is received.
6. Click Add step → IF condition, and select:
- From domain or email addresses
- The operator is present in
- Source: Select the column from your Custom Object that contains the customer domains. In this example, the column would be ‘Customers’.
.png)
Tip: You can also use the following conditions to build Automations with a Custom Object:
| Condition | Operator | Ideal for |
| To domain | is present in | Matching recipient domains |
| To email | is present in |