Using bulk actions in Hiver for Gmail
Bulk actions let you perform the same action on multiple emails in a Shared Inbox at once. This helps you save time and stay organized without having to update each email individually.
Note: You can process up to 50 emails in a single bulk action.
Actions you can perform
1. Assign to
- Select multiple emails in your Shared Inbox and click the Assign to icon to assign them to a teammate.
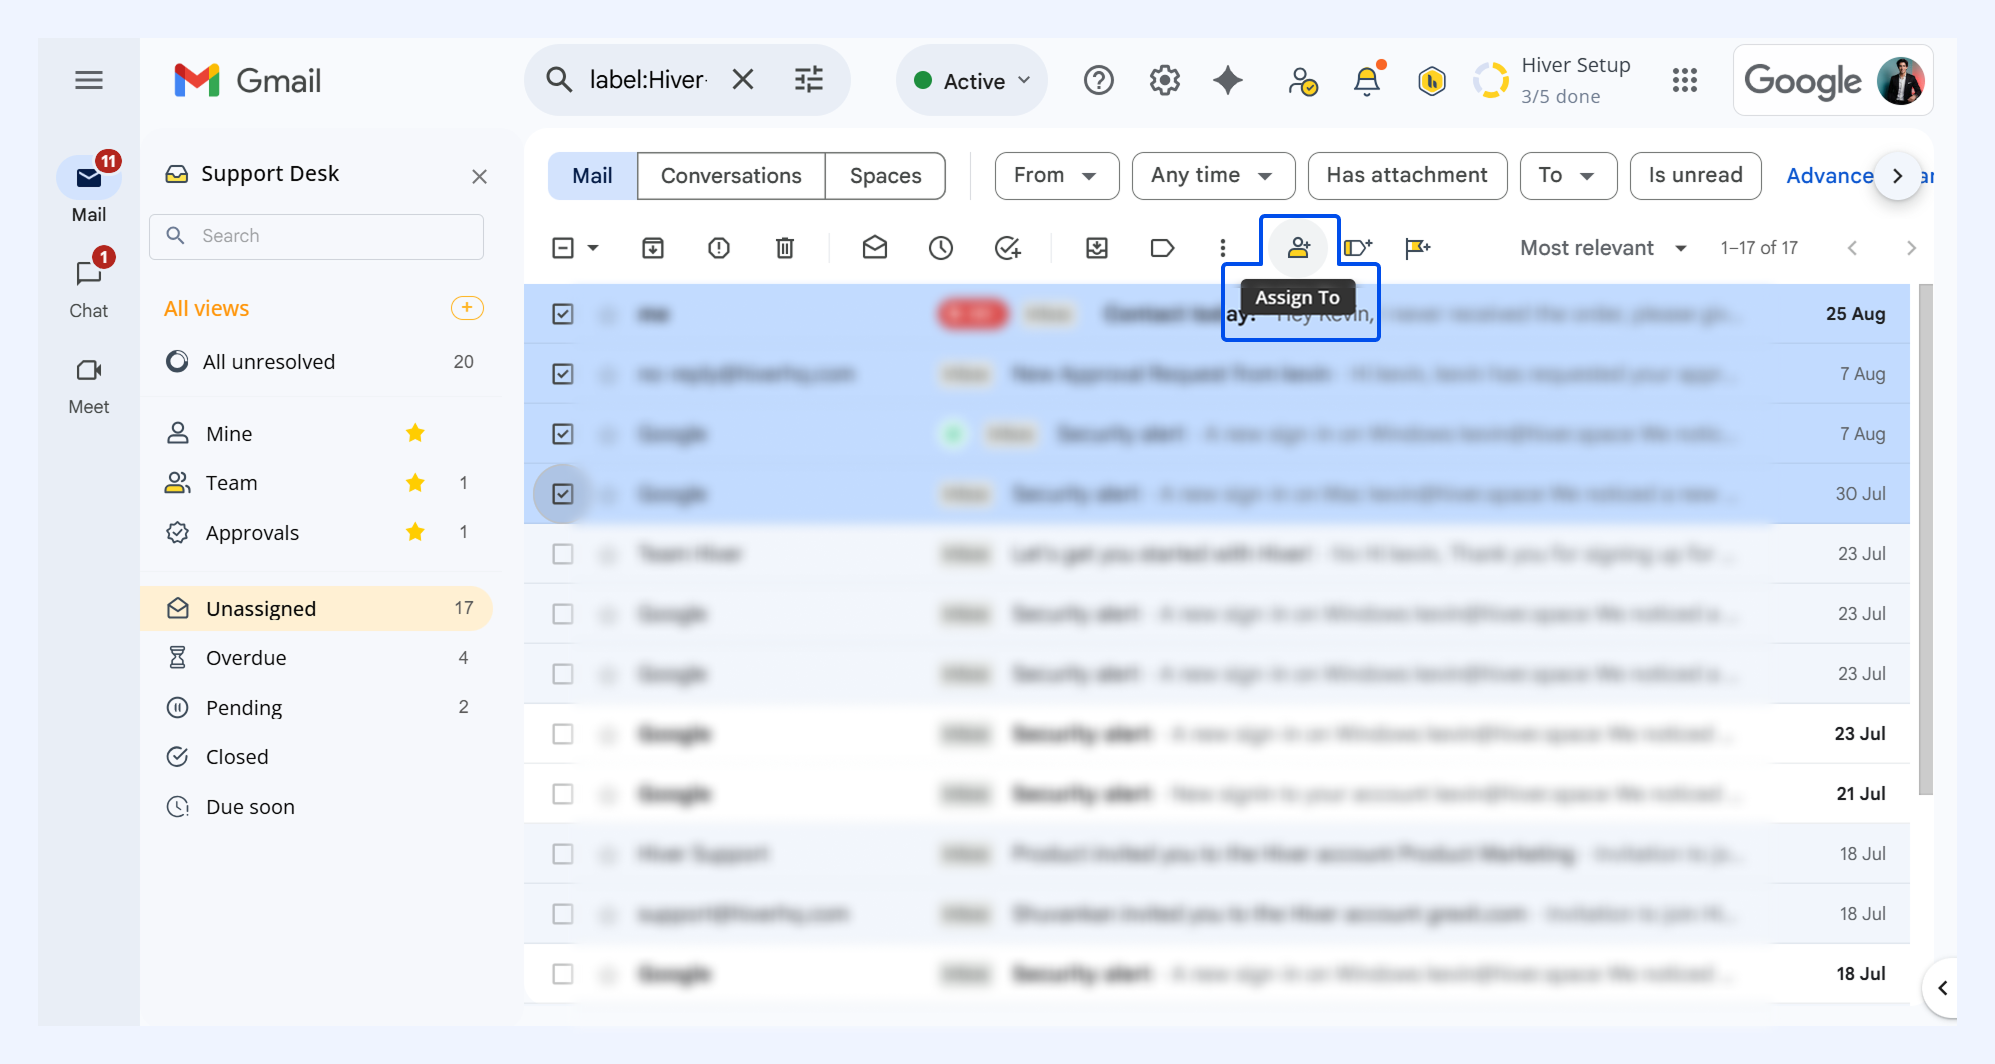
- Select a teammate and click Apply.
Tip: Select None if you want to unassign emails in one go.
2. Manage tags
You can add, remove, or create tags in bulk.
- Add a tag
- Select multiple emails, then click Manage tags.
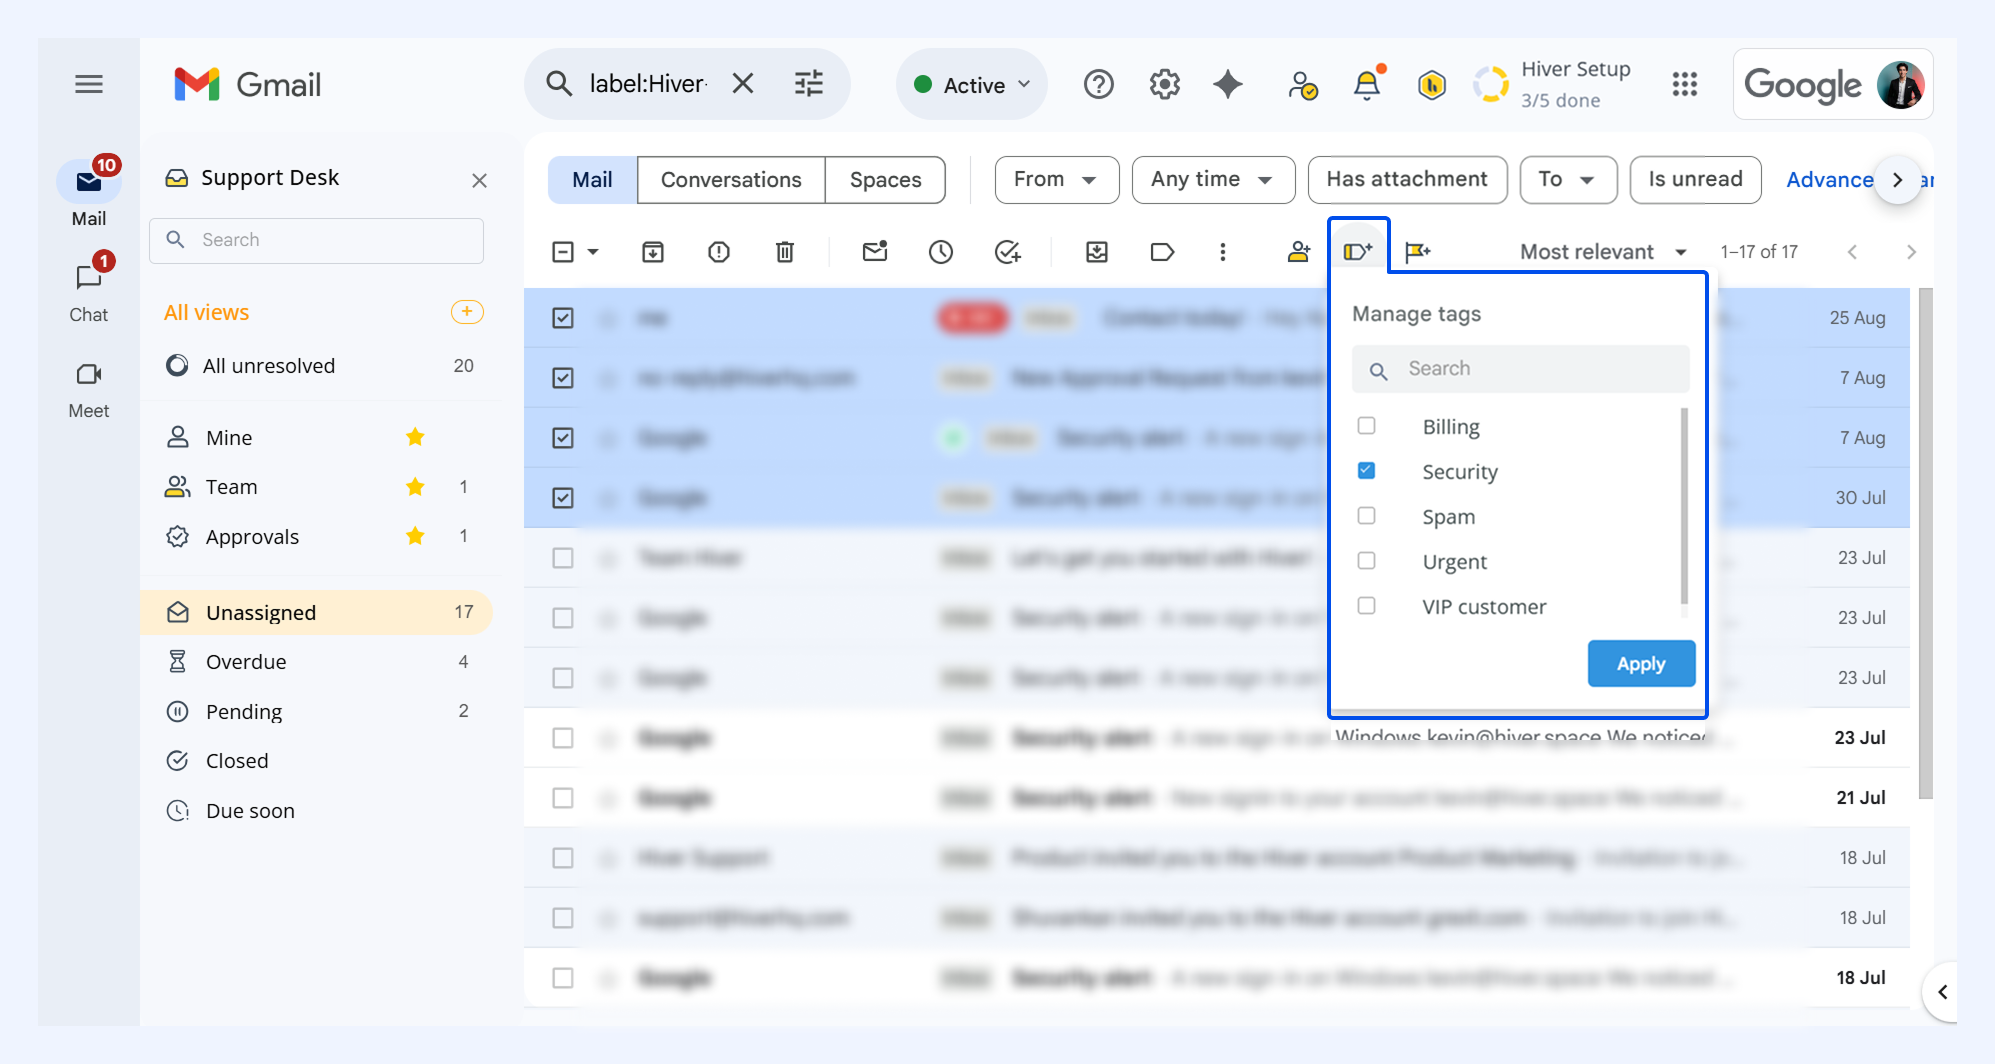
- Enter the tag name in the search bar or select a tag from the list and click Apply.
- Remove a tag
- Select multiple emails, then click Manage tags.
- At the top of the list, you’ll see applied tags with a check mark. Deselect the tags you want to remove and click Apply.
- Create a new tag
- Select multiple emails and click Manage tags.
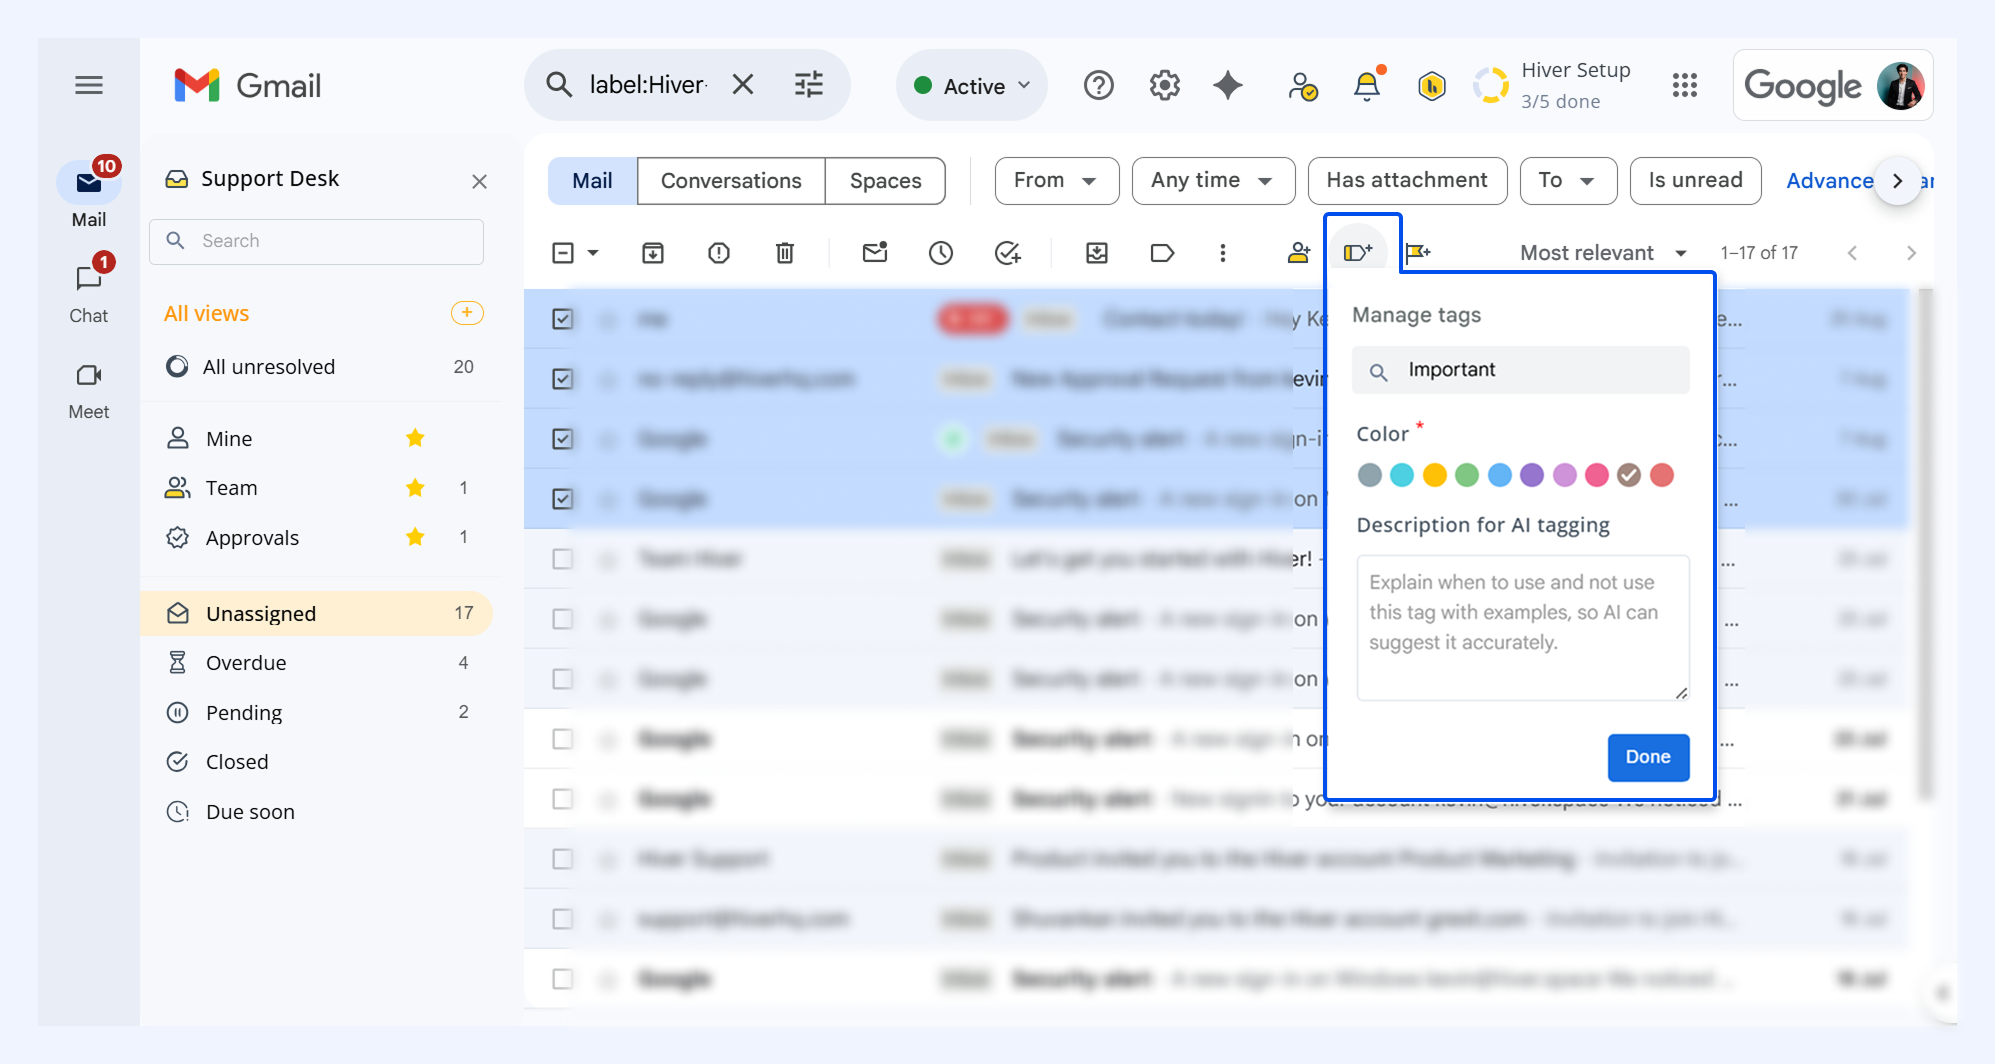
- Enter the new tag name in the search bar and click Create tag.
- Choose a color and apply it to add the new tag to your emails.
- Optionally, if you’ve enabled AI tagging, add a description to train Hiver AI.
3. Change status
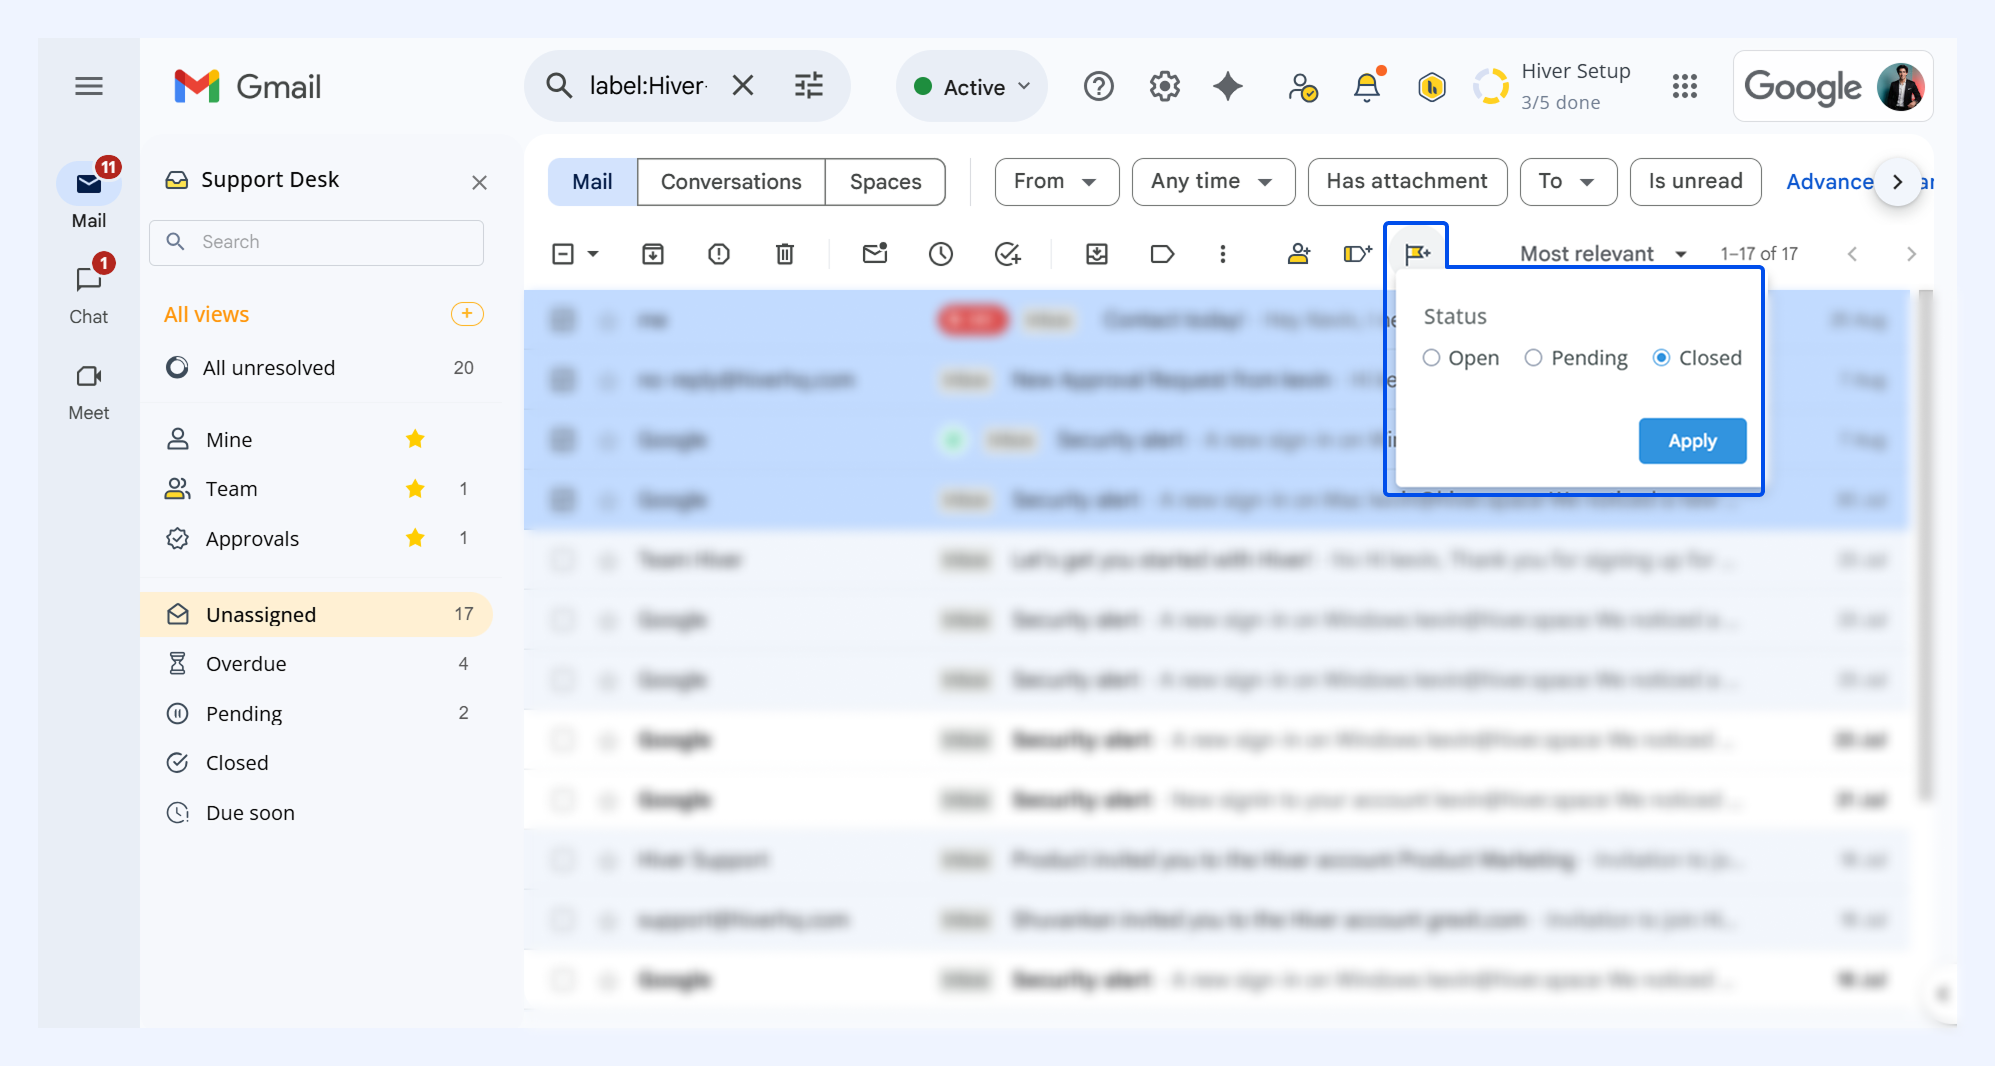
- Select multiple emails and click Change status to update statuses.
- Choose between Open, Pending, or Closed and click Apply.
How to choose emails for bulk action
If you want to apply bulk actions only to specific emails, you can do this with email Views:
- Create a View with conditions that match the emails you want.
- Open the View to display only those emails.
- Apply the bulk action to the filtered list.
Using Views helps you target the right emails and avoid making unnecessary changes across your inbox.
Next steps
Advanced Shared Inbox settings
Monitoring workload distribution across your team