How to set up Hiver for Gmail: A complete installation and onboarding guide
Welcome to Hiver!
Hiver is an AI-powered customer service platform that helps teams manage conversations across email, live chat, WhatsApp, voice, SMS, and social media, all from one modern, intuitive interface.
It brings your entire customer communication workflow into one place, so your team can manage, assign, and track queries without juggling multiple tools. From automating routine tasks to analyzing trends with AI, Hiver enables faster and more personal customer service right from the workspace your team already uses every day.
If your business uses Gmail, this guide shows you how to set up your Hiver account and start handling conversations from shared addresses like support@yourcompany.com or sales@yourcompany.com.
System requirements for successful installation
Make sure your system meets these requirements before installing Hiver.
- Browser compatibility: Hiver works only with Google Chrome (latest stable version). It doesn't support Firefox, Safari, Edge, or other browsers.
- Gmail settings: Use Gmail in its standard view. If you're using the basic HTML view, Hiver features may not appear correctly.
- Operating system:
- Windows: Windows 10 or higher
- macOS: macOS 11 (Big Sur) or higher
- Linux: Modern 64-bit distributions like Ubuntu 20.04+
- Hardware requirements:
- RAM: 8 GB minimum
- Processor: Dual-core or better (Intel i5 or equivalent recommended)
- Internet connection: You'll need a stable broadband connection with at least 10 Mbps upload/download speed.
Installing Hiver for Gmail
Hiver for Gmail is a Chrome extension that integrates directly into Gmail, helping you manage Shared Inboxes and collaborate without leaving Gmail. You can install Hiver in two ways:
Option 1: From the Hiver website
- Go to hiverhq.com and click Start Free Trial
- Fill out the form to download the extension
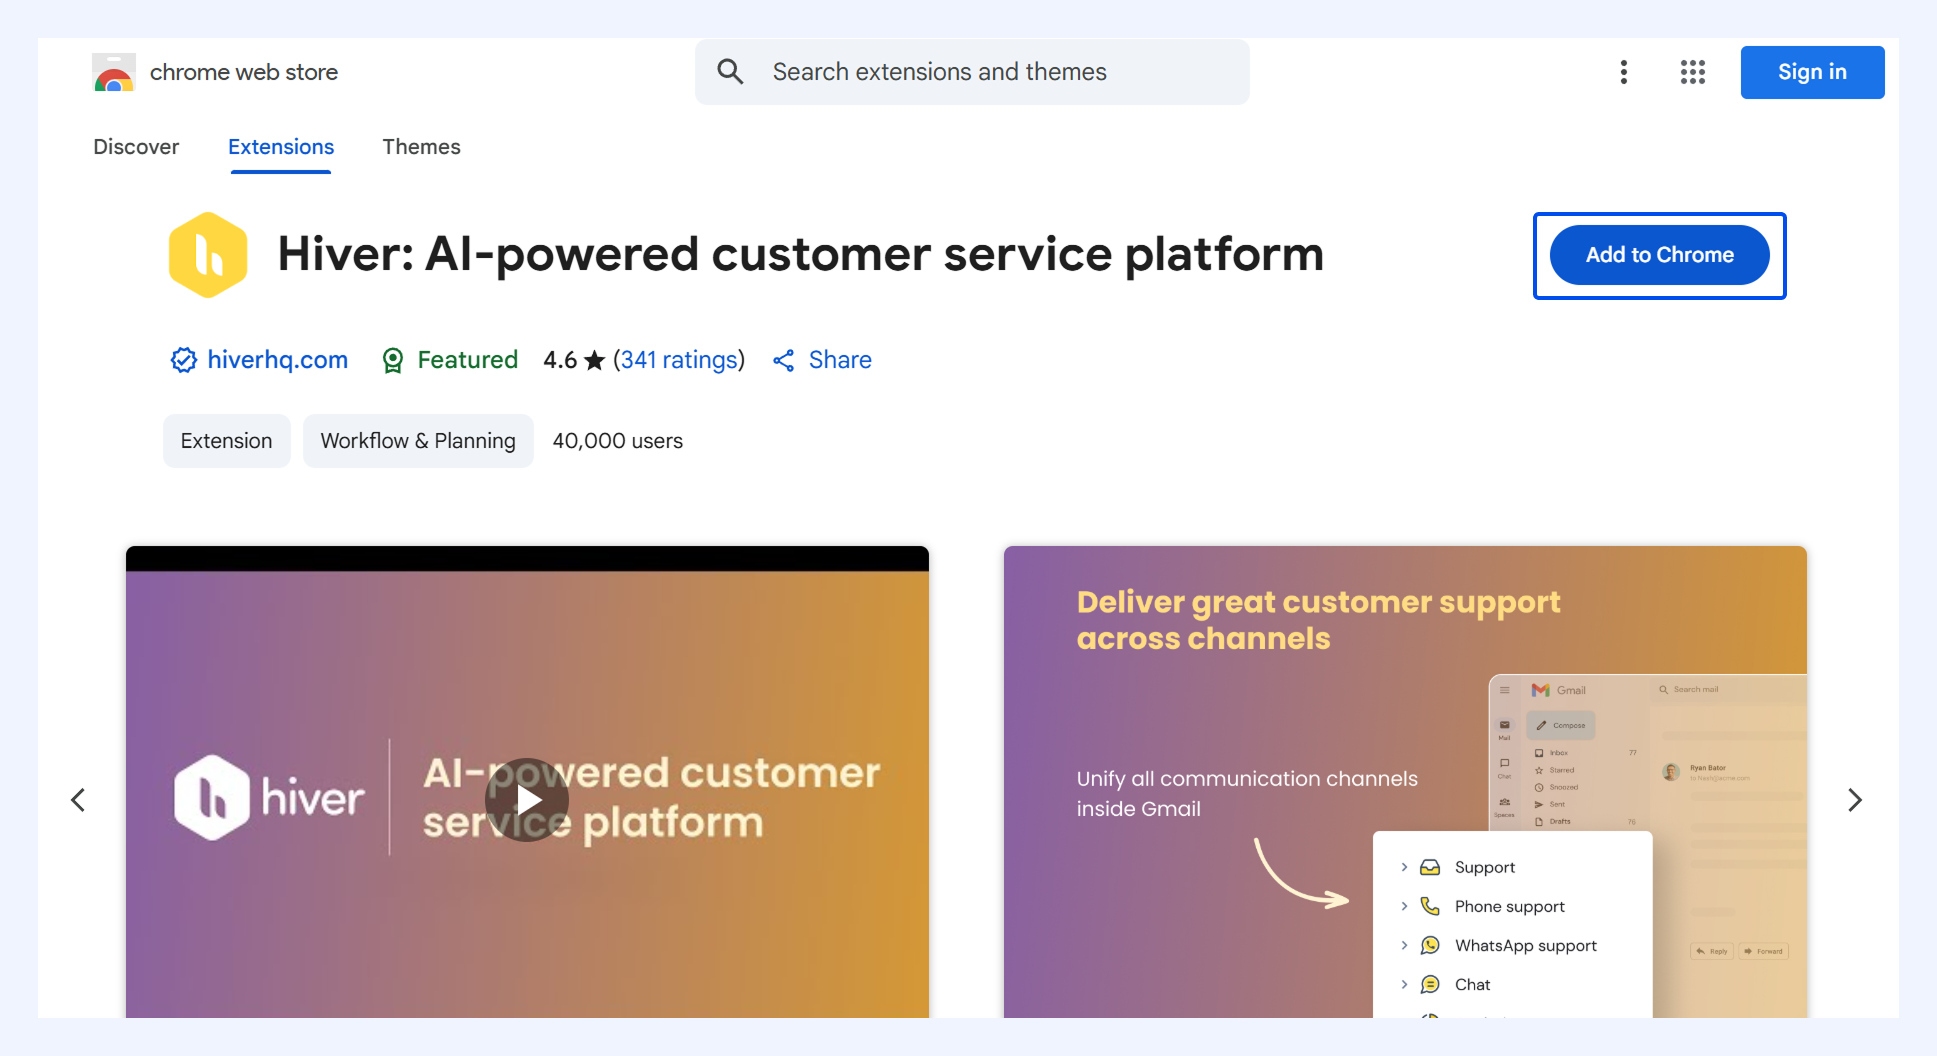
Option 2: From the Chrome store
- Go to the Chrome Web Store or Google Workspace Marketplace
- Search for 'Hiver' and click Add to Chrome
Creating your Hiver account
Hiver works only with Google Workspace accounts and not personal Gmail accounts because of the following reasons:
- Shared Inbox support: Only Google Workspace accounts can have group addresses like support@mycompany.com and sales@mycompany.com that teams can manage together.
- Admin controls: Workspace provides centralized user permissions and access management for team collaboration.
- Security standards: Workspace offers enterprise-grade authentication and compliance, ensuring Hiver can run securely.
- Compliance requirements: Meets business data regulations and auditing standards that personal Gmail does not.
If you don't have a professional email address through Google Workspace, contact our support team for guidance on setting up your account.
Follow these steps to create your Hiver account.
Step 1: Check account details
Before you sign in, make sure you're logged into the Gmail account that's registered with your Hiver workspace. You need to use the same workspace email address for both Gmail and Hiver to access your team's Shared Inboxes and features.
Step 2: Sign in with your Gmail account
Once the Hiver extension is installed, Google Chrome will automatically inform you.
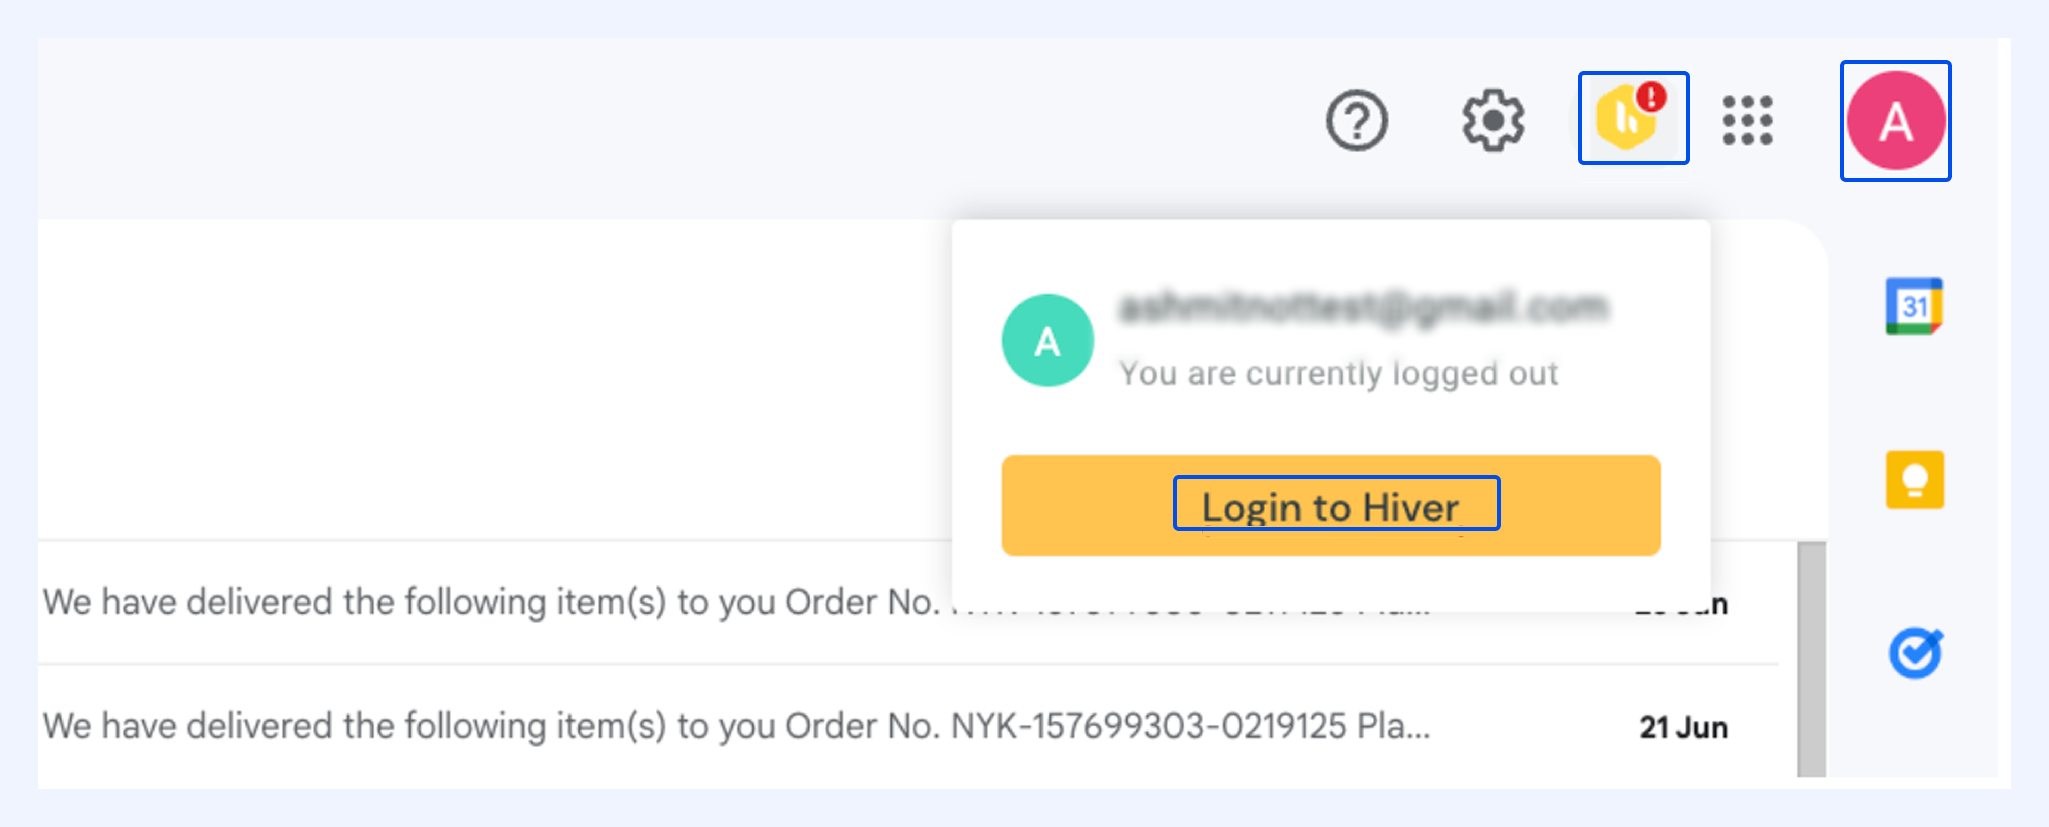
Next, open Gmail and click the Hiver icon in the toolbar (top right corner). Then, select 'Login to Hiver' to connect the extension.
Step 3: Authorize your Hiver account
Once you sign in, you'll need to authorize it through Google's OAuth system. This gives Hiver permission to access your Gmail account and manage emails on your behalf.
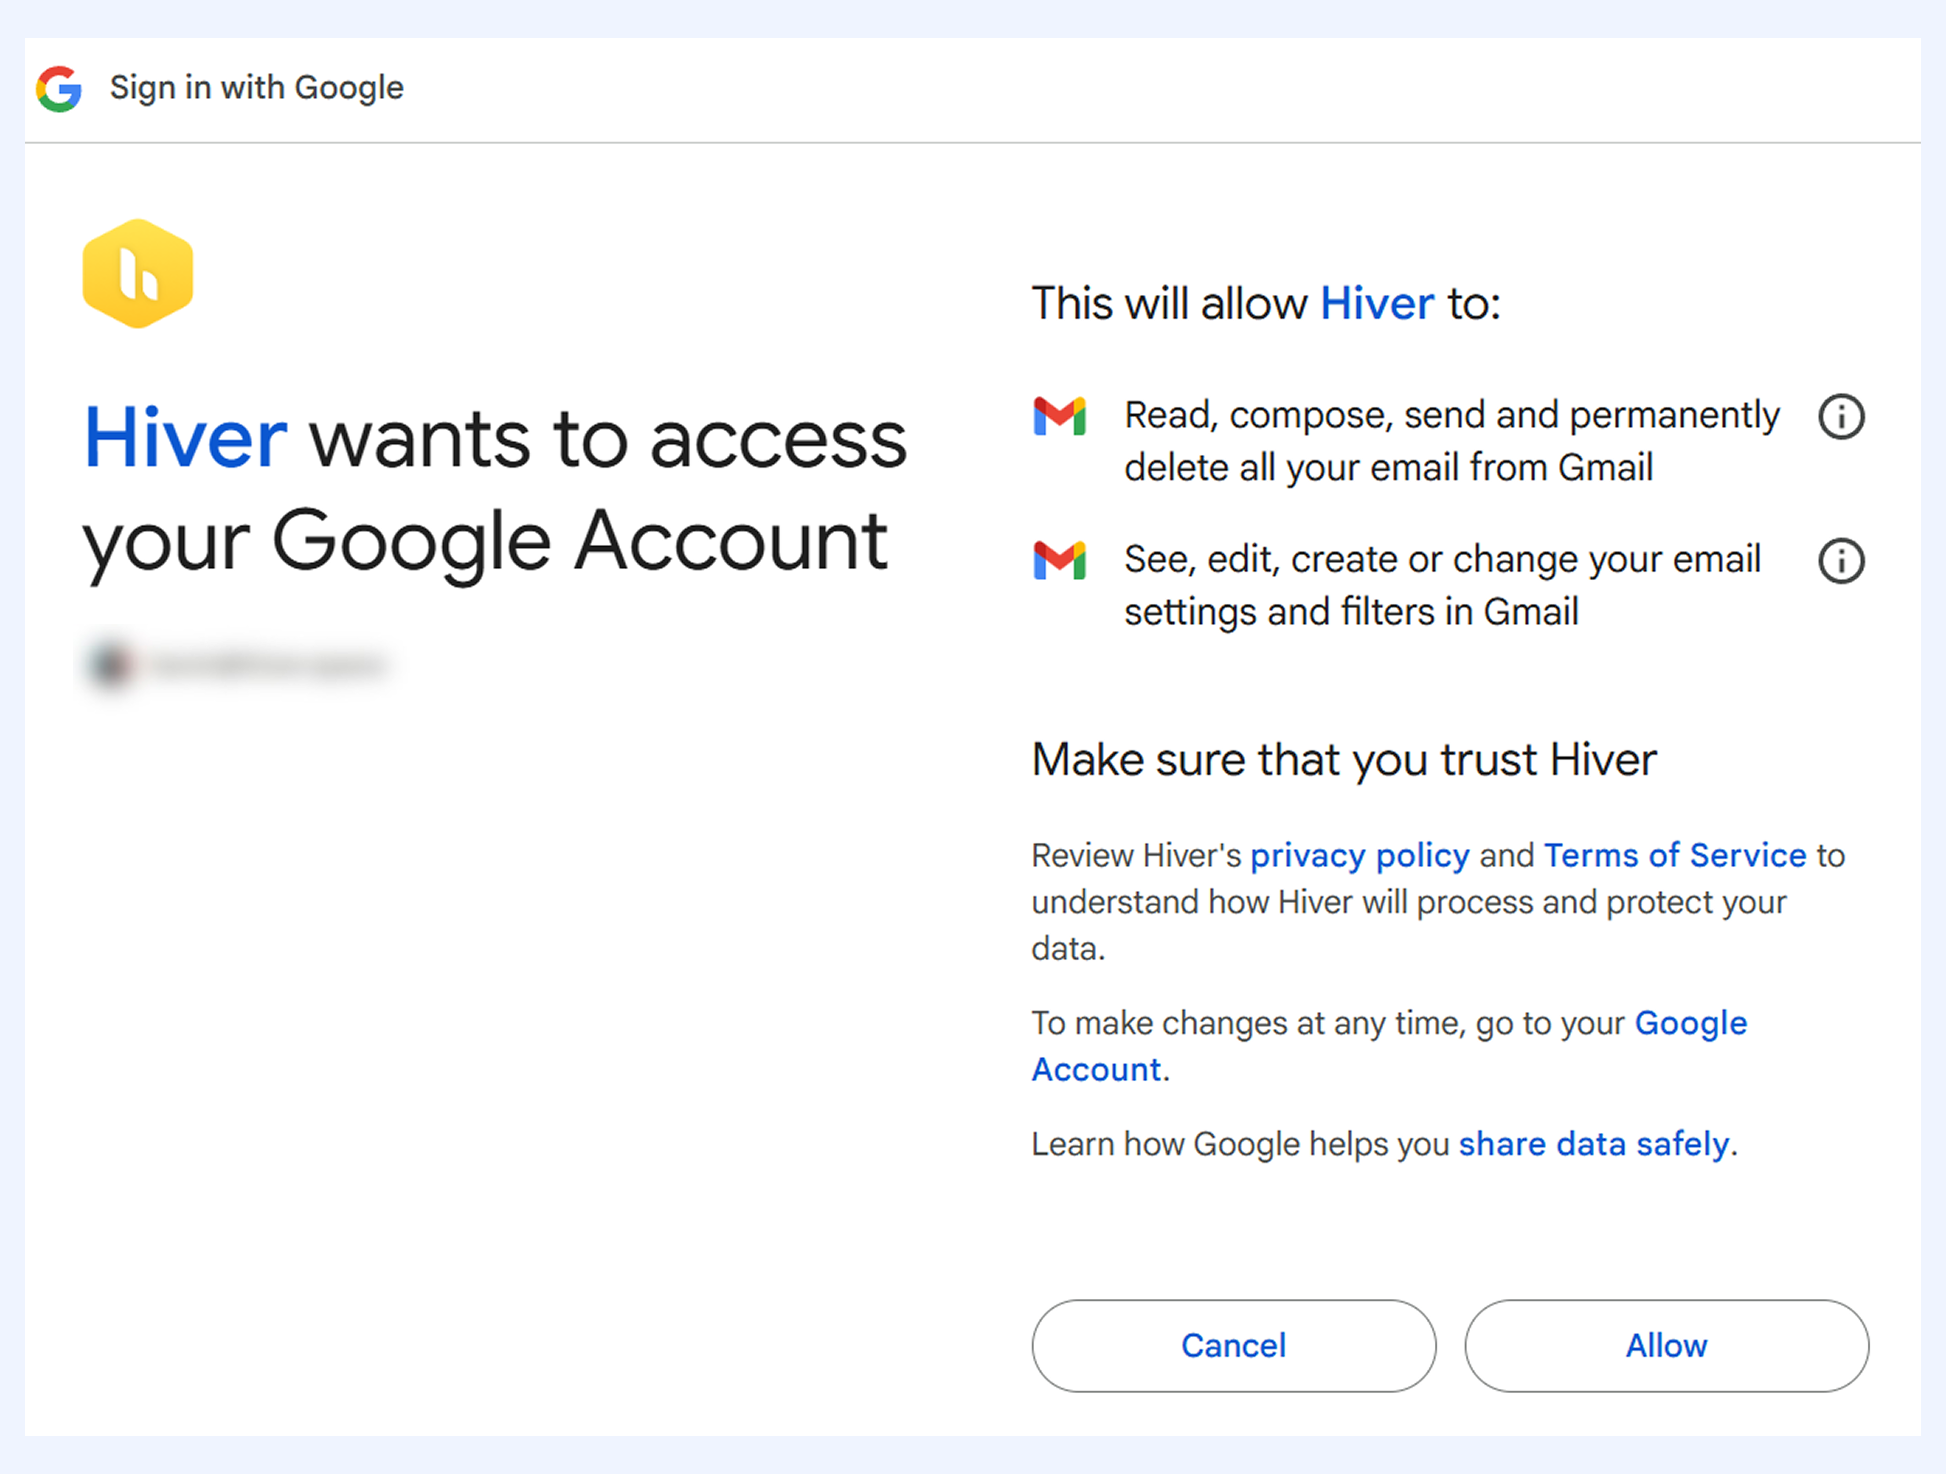
Hiver requires two main permissions to work properly:
1. Read, compose, send, and permanently delete all your emails
This permission lets Hiver:
- Read emails to sync them with your Shared Inboxes
- Compose and send emails, including scheduled messages and autoresponders
- Delete emails when splitting conversation threads between different inboxes
2. See, edit, create, or change your email settings and filters
This permission allows Hiver to:
- Set up email forwarding and filters for Shared Inbox management
- Configure send-as settings so you can send emails from different addresses
- Update Gmail settings needed for team collaboration features
Note: Hiver only accesses the information needed to power collaboration features. It doesn't read, delete, or modify your emails without your consent.
Setting up Hiver for use
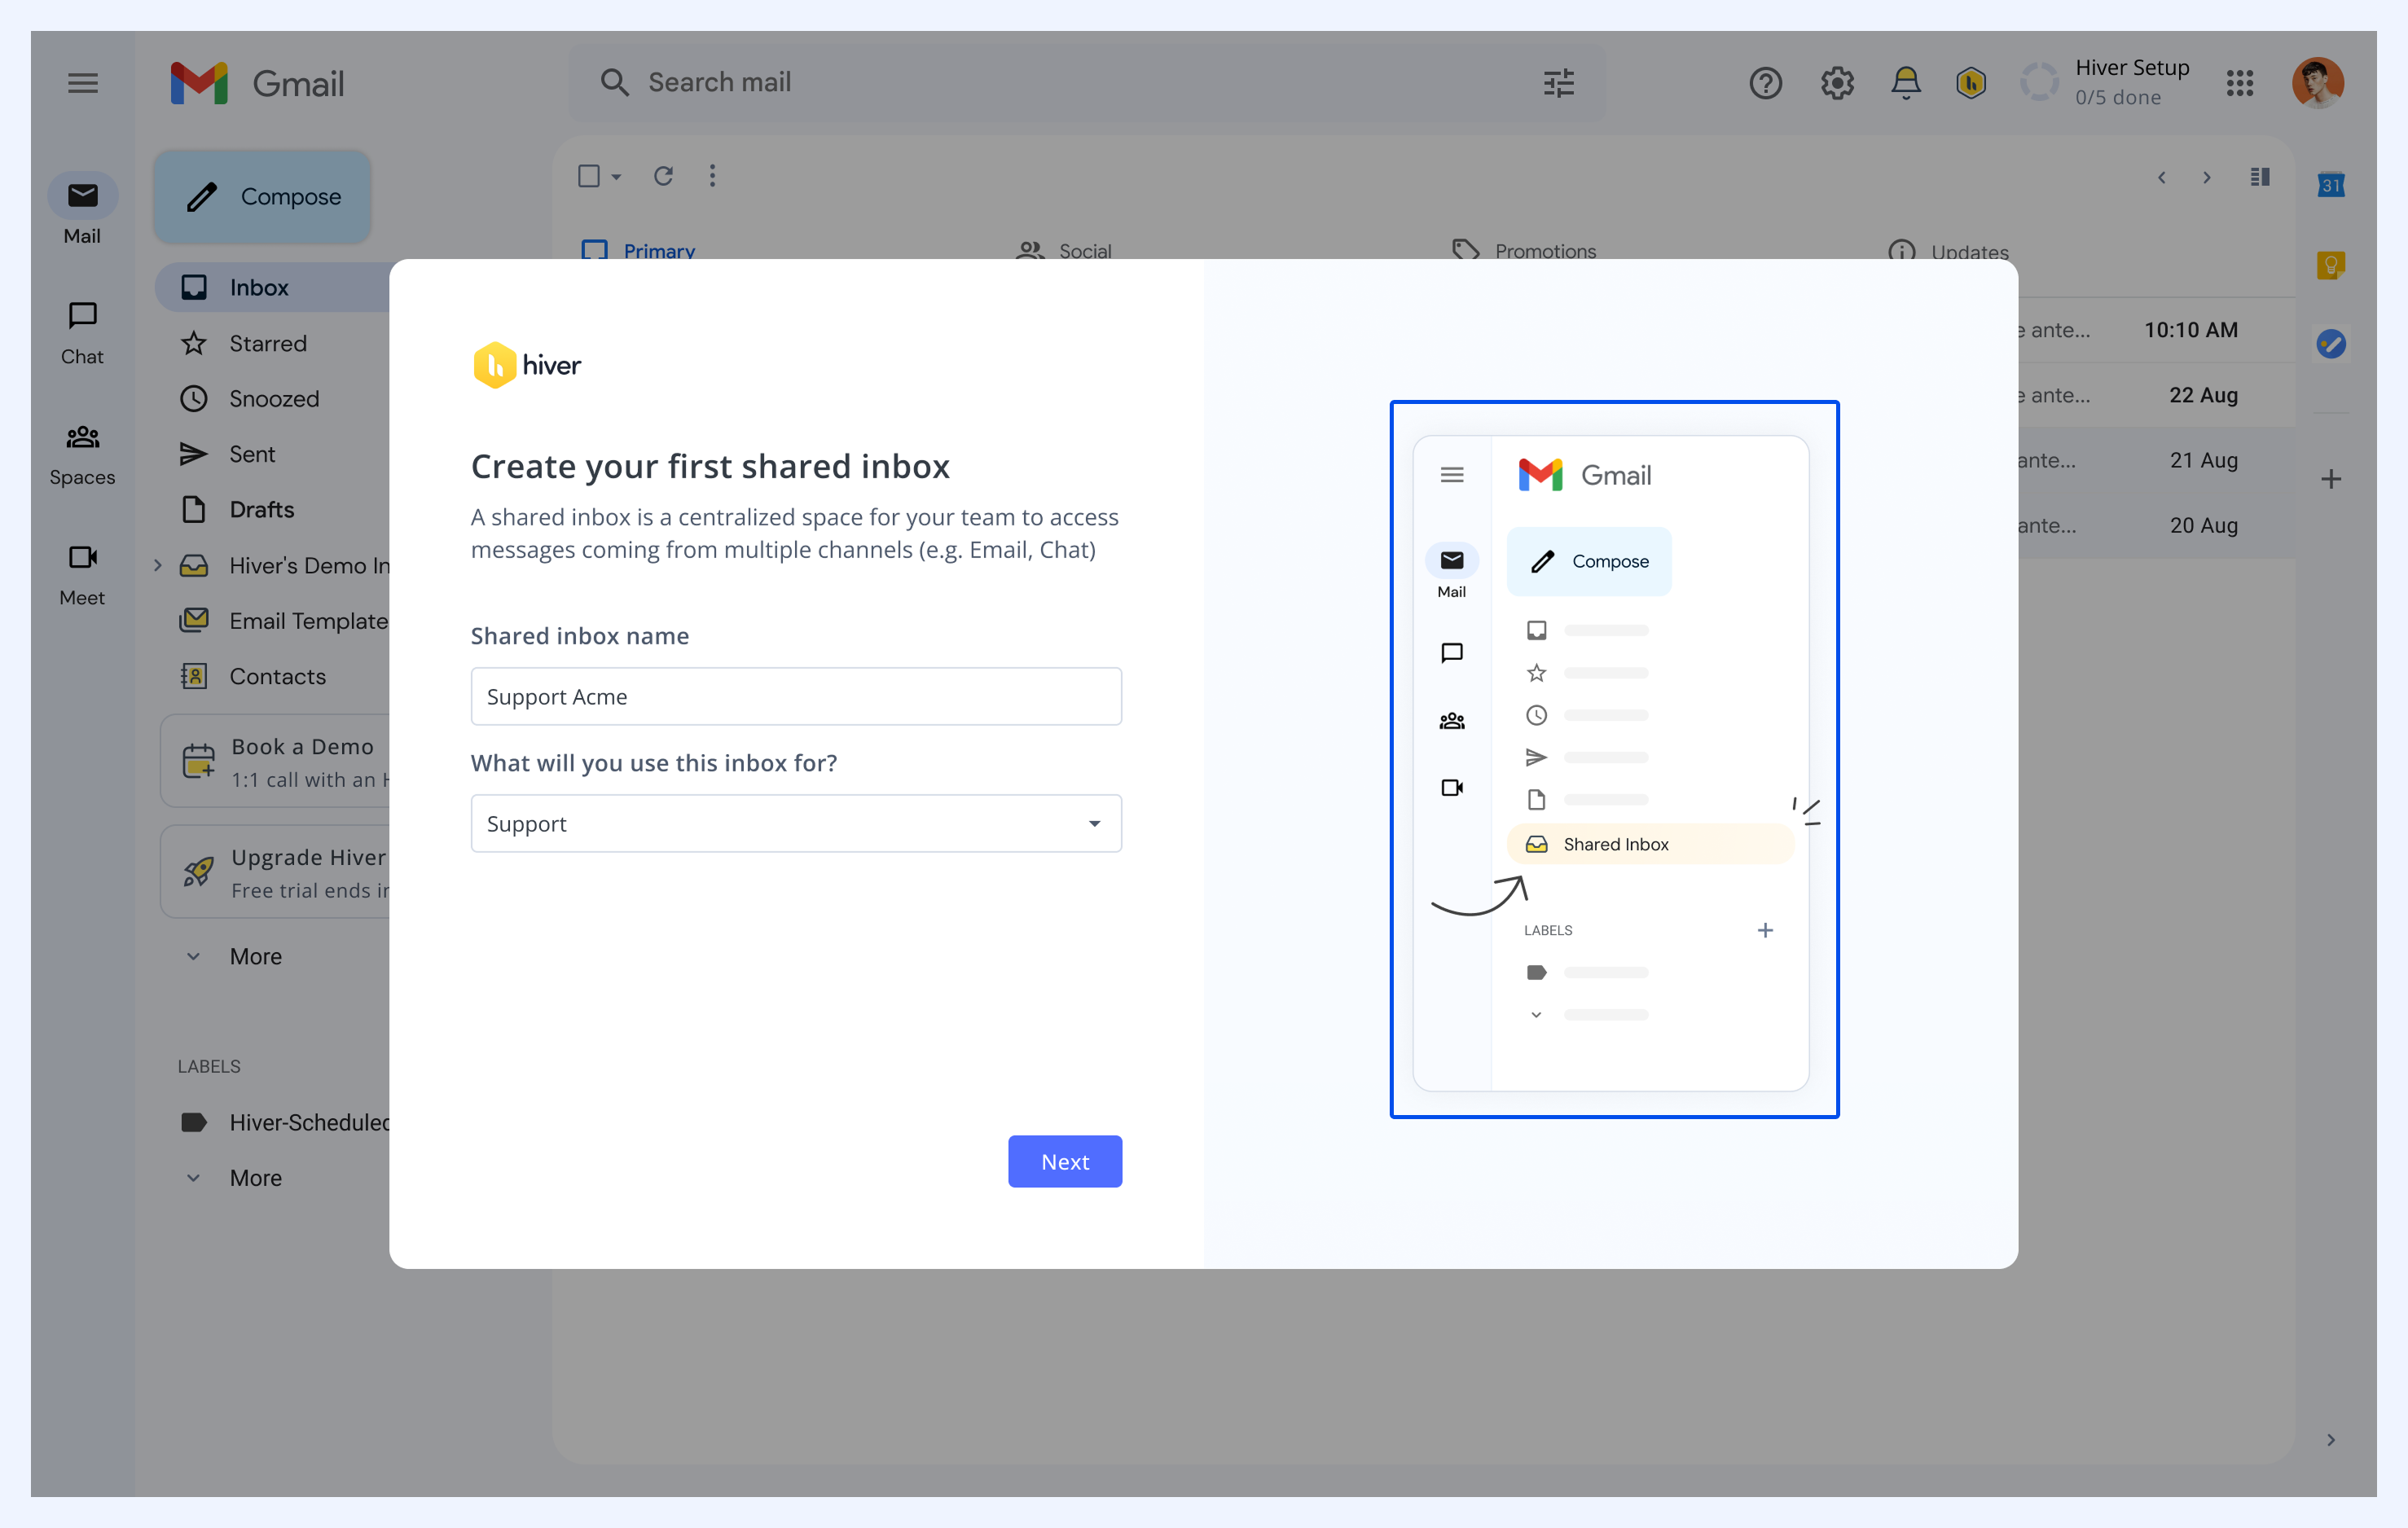
After creating an account, you’ll be prompted to create your first Shared Inbox. Once that’s done, you can either connect your email right away or explore Hiver using a guided tour. You’ll also see an onboarding checklist to track your setup progress.
Step 1: Create your first Shared Inbox
- Enter a name for your Shared Inbox (for example, Support or Sales).
- Select what you’ll use this Shared Inbox for.
- Click Next.
Step 2: Explore Hiver with the demo inbox
Once the Shared Inbox is created, you’ll see two options: Take a guided tour and Connect email.
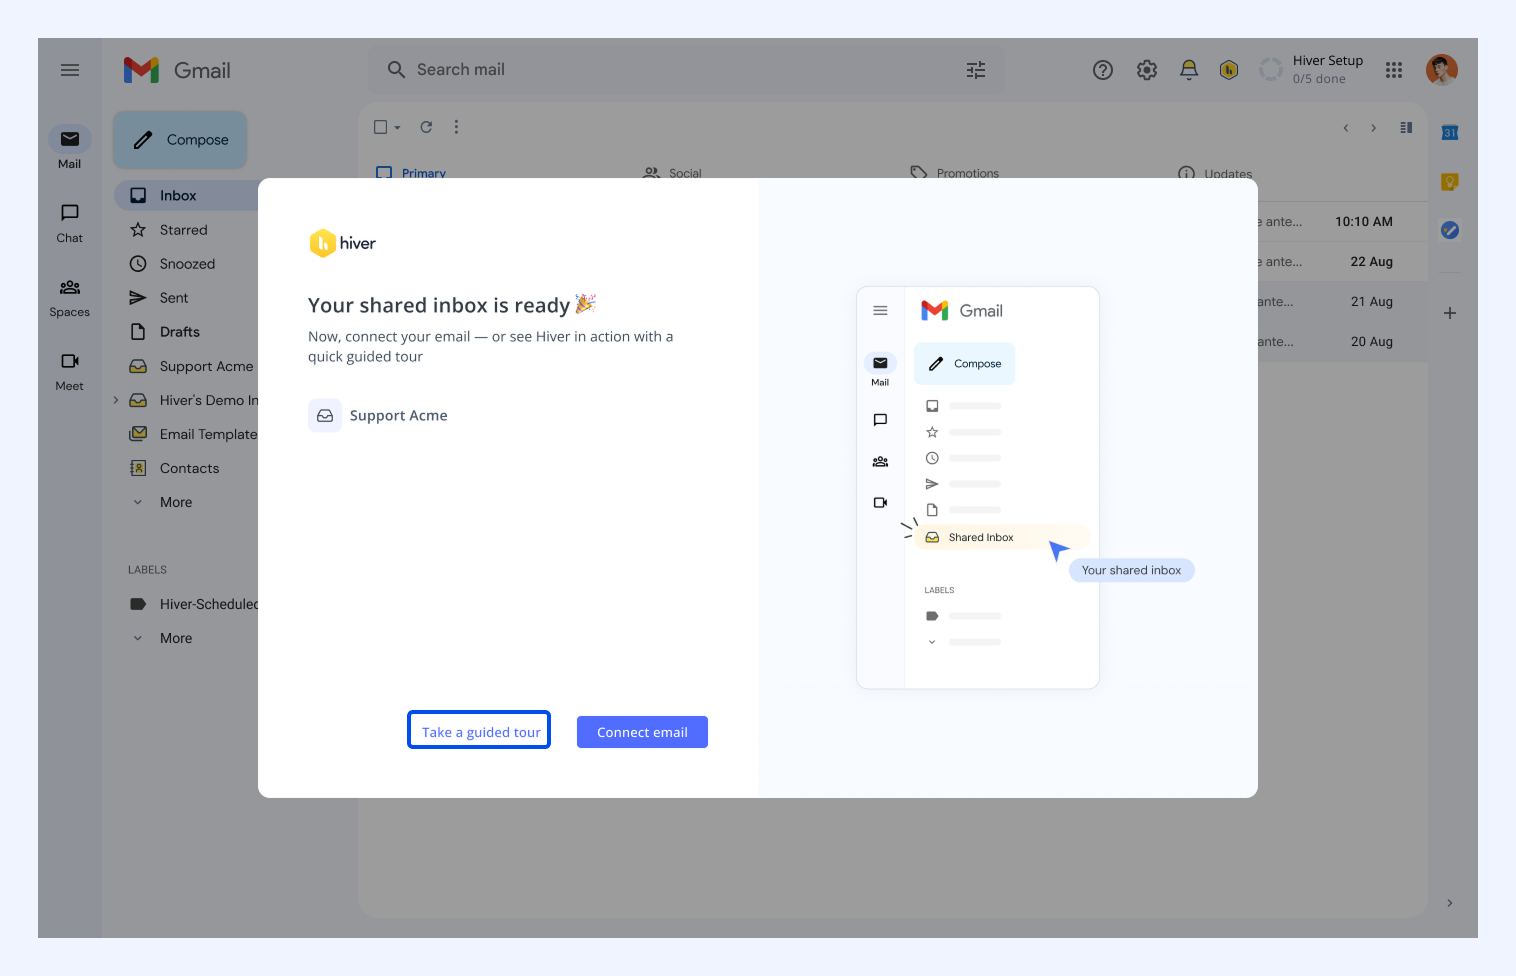
1. Take a guided tour
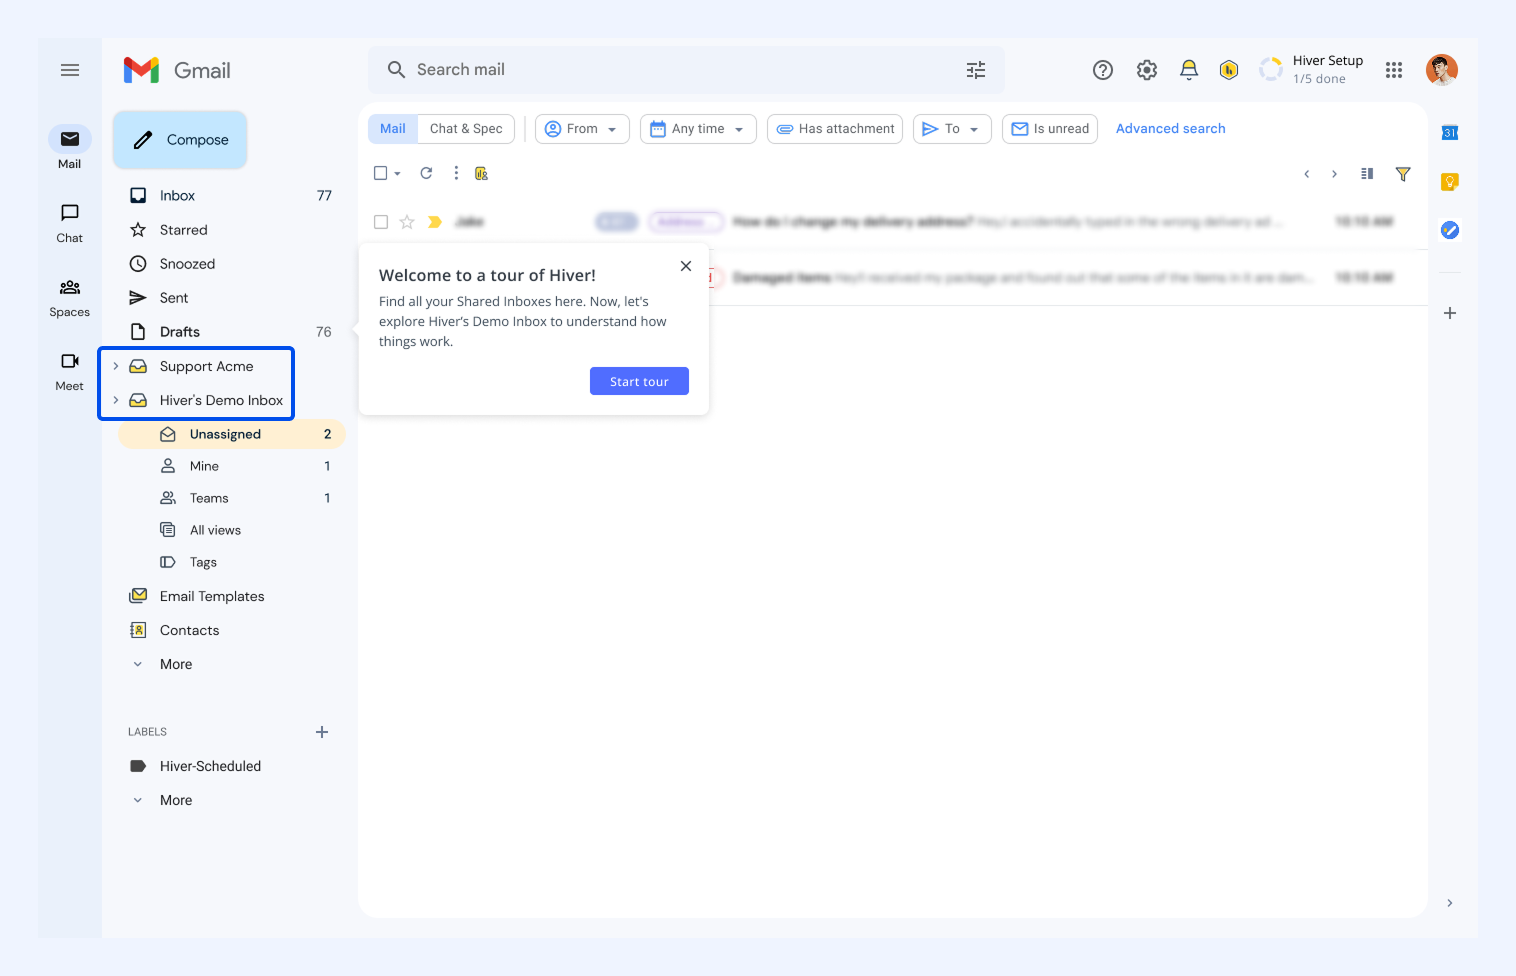
- Explore the Hiver extension in a sample inbox without affecting your real emails.
- Get a walkthrough of key features like the email Views, the Hiver right panel, and more.
- Jump back to your Shared Inbox anytime to continue setup.
2. Connect email
If you’re ready to set up your Shared Inbox, follow our detailed guide on creating a Shared Inbox.
Step 3: Access the onboarding checklist
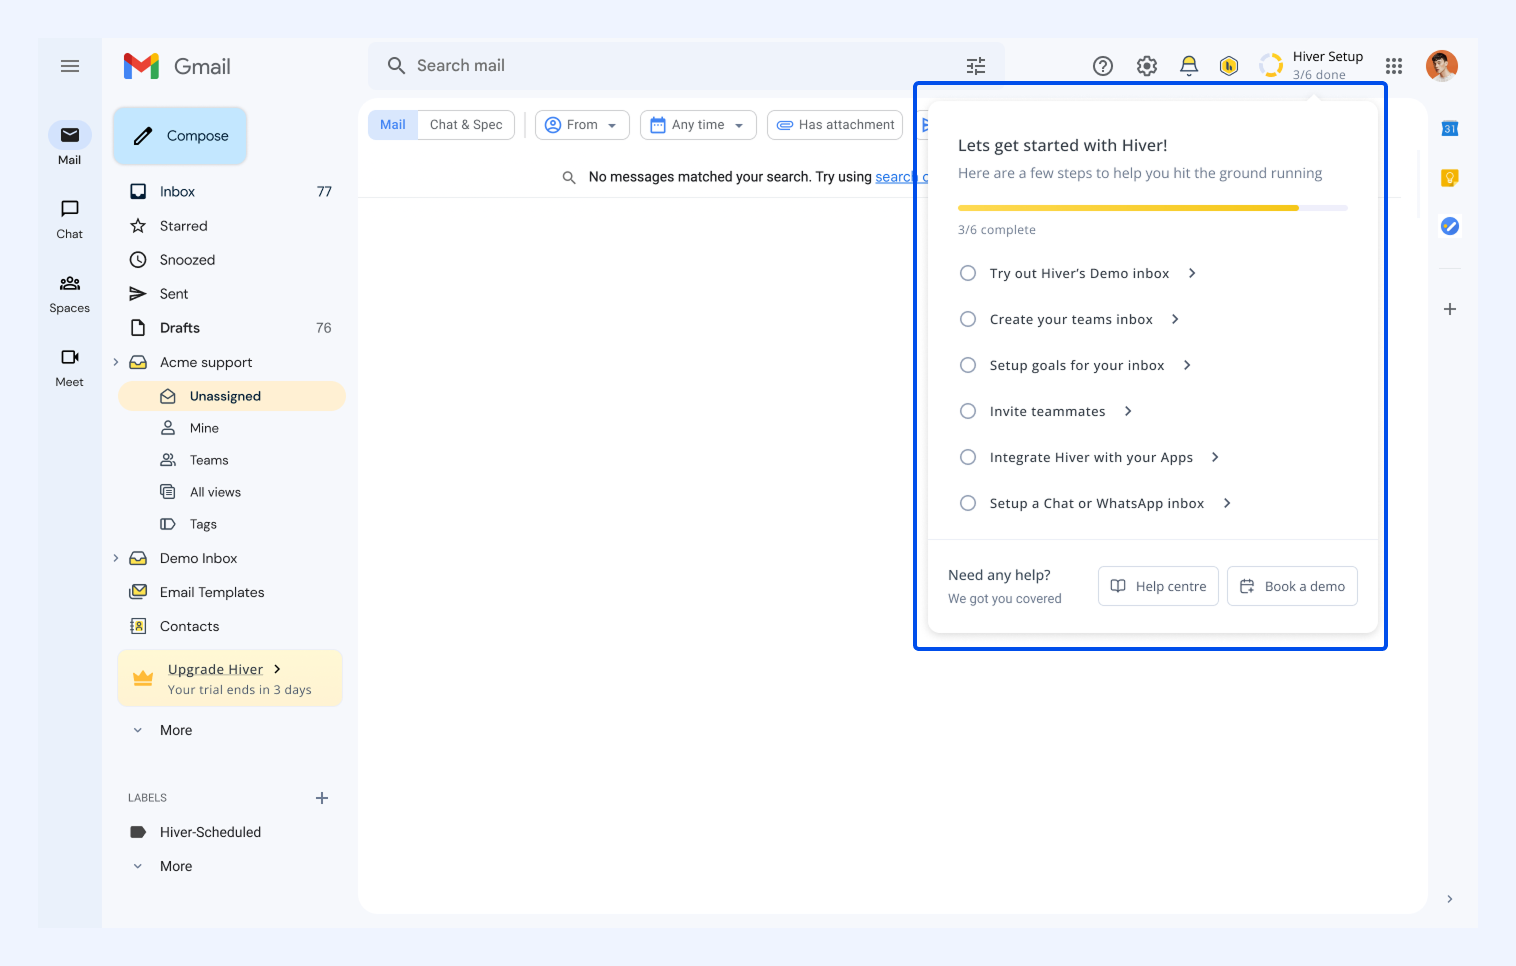
Once you’ve set up your Shared Inbox, use the onboarding checklist to get started faster. This checklist helps you complete setup tasks in any order, and it will automatically update as you make progress.
Next steps
Once you’re done with setting up Hiver, check out the following guides:
- Managing emails in Hiver Shared Inbox
- Inviting your team to Hiver
- Setting up the sender ID for your Shared Inbox
FAQs
Will installing Hiver affect my existing Gmail settings or emails?
No. Installing Hiver doesn’t change your Gmail inbox or delete anything. It simply adds features of Shared Inboxes on top of Gmail. All your personal settings and emails remain intact.
What are the Hiver labels I can see in Gmail?
Hiver automatically adds labels to your Gmail account to organize conversations in your Shared Inboxes.
If you don’t want to see the labels, you can hide them under Gmail settings → Labels.
Note: Deleting Hiver labels can cause the Shared Inbox to show an incorrect number of conversations for everyone.
What should I do if the Hiver Chrome extension doesn’t appear in Gmail after installation?
Try refreshing Gmail or restarting Chrome. If the issue still persists, check that you’re signed into the correct Google Workspace account (not a personal Gmail account) and that the extension is enabled in Chrome.
How to remove the Hiver extension?
Click the extension icon in Chrome's top right corner and locate the Hiver extension from the list. Then, find the three dots next to the Hiver extension and select Remove from Chrome. This will completely uninstall Hiver from your browser.
Do I need admin rights in Google Workspace to install Hiver?
While anyone can install Hiver, it only works with a Google Workspace account. You'll need to use that account to log in and set up your Shared Inbox. Once that's done, you can invite your team members, and they can access Hiver directly from their Gmail without needing any special permissions.