Setting up your Help Center
A Help Center is a self-service hub where customers or your teammates can quickly find answers to questions on their own. By setting up a Help Center on Hiver in Gmail, you can create, update, and share help articles that address common questions, enabling people to solve problems on their own.
With a Help Center, you can:
- Reduce support requests by helping customers find instant answers.
- Improve customer experience with fast, flexible self-service options.
- Empower internal teams with a secure space to share information.
- Save time by cutting down on repetitive queries and focus more on pressing issues.
- Build a reliable help center that Hiver AI can draw from.
You can set up as many Help Centers as required. Each one can either be:
- External: A public-facing help center for your customers that includes guides and FAQs.
- Internal: A private space for your team to access internal documents and company policies. Only authorized team members can view your Internal Help Center.
How to set up a Help Center in Hiver
Step 1: Choose the Help Center type
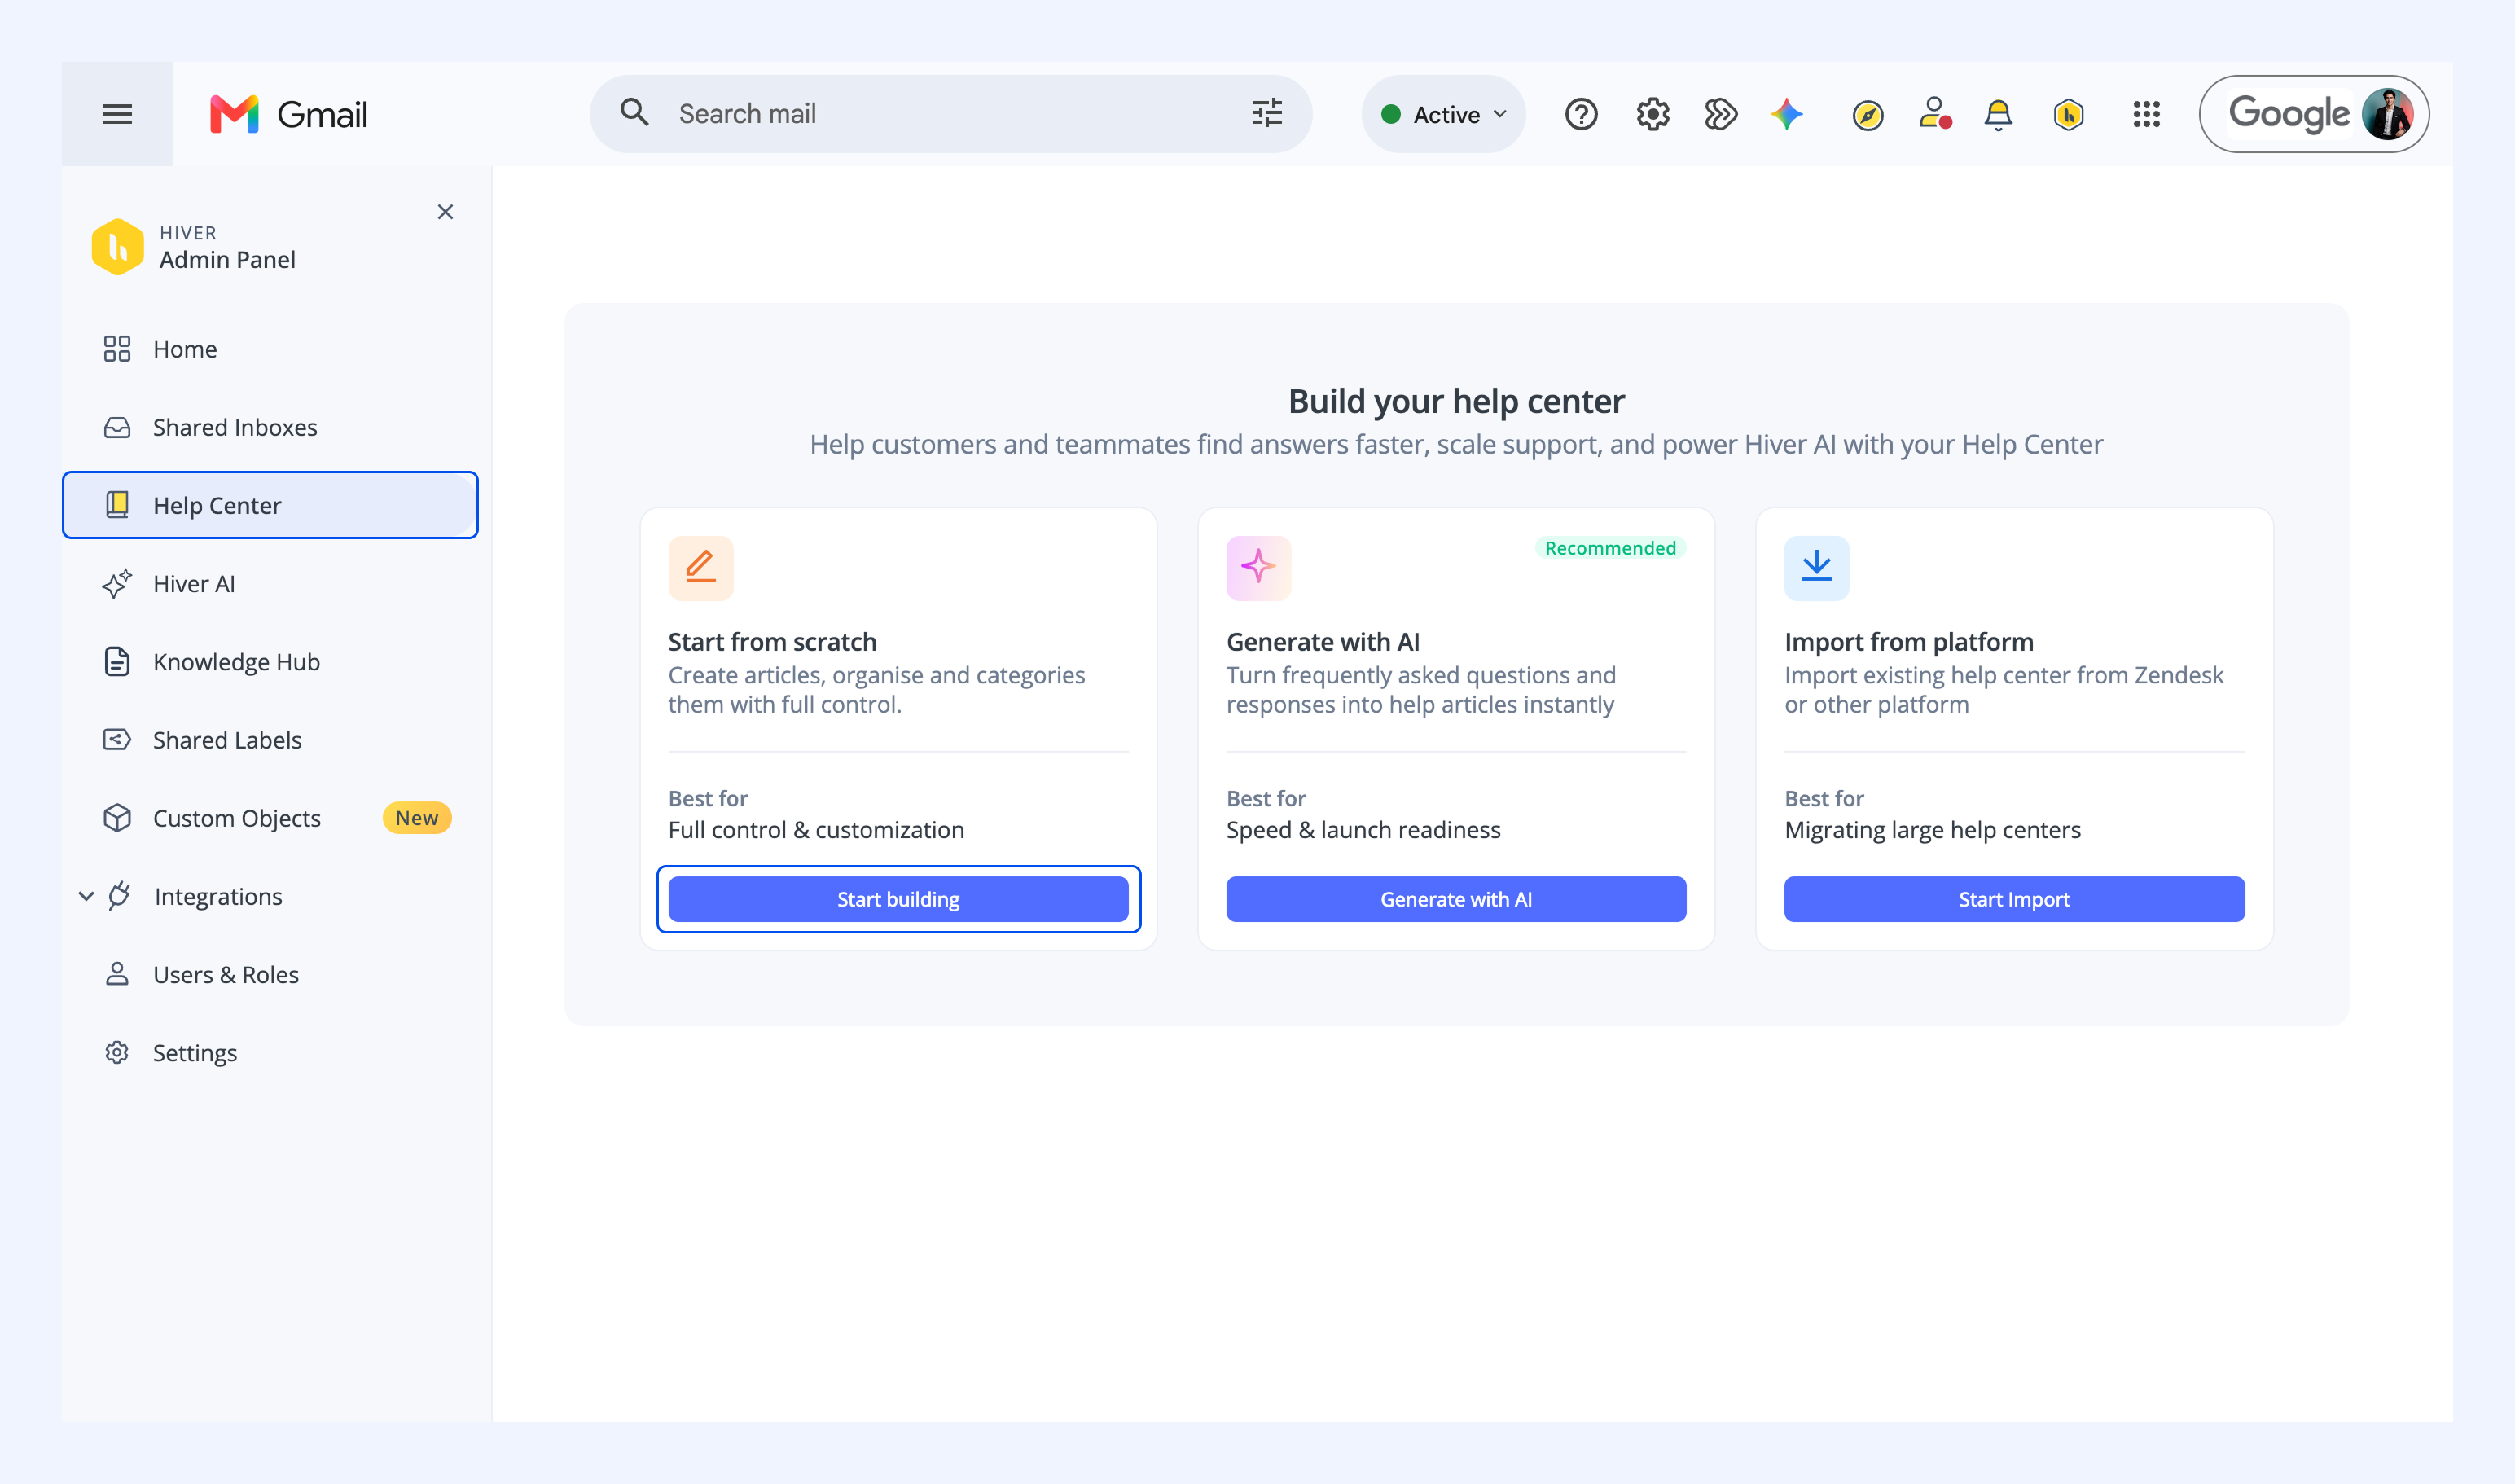
1. Go to Admin Panel → Help Center → Start from scratch, and click Start building.
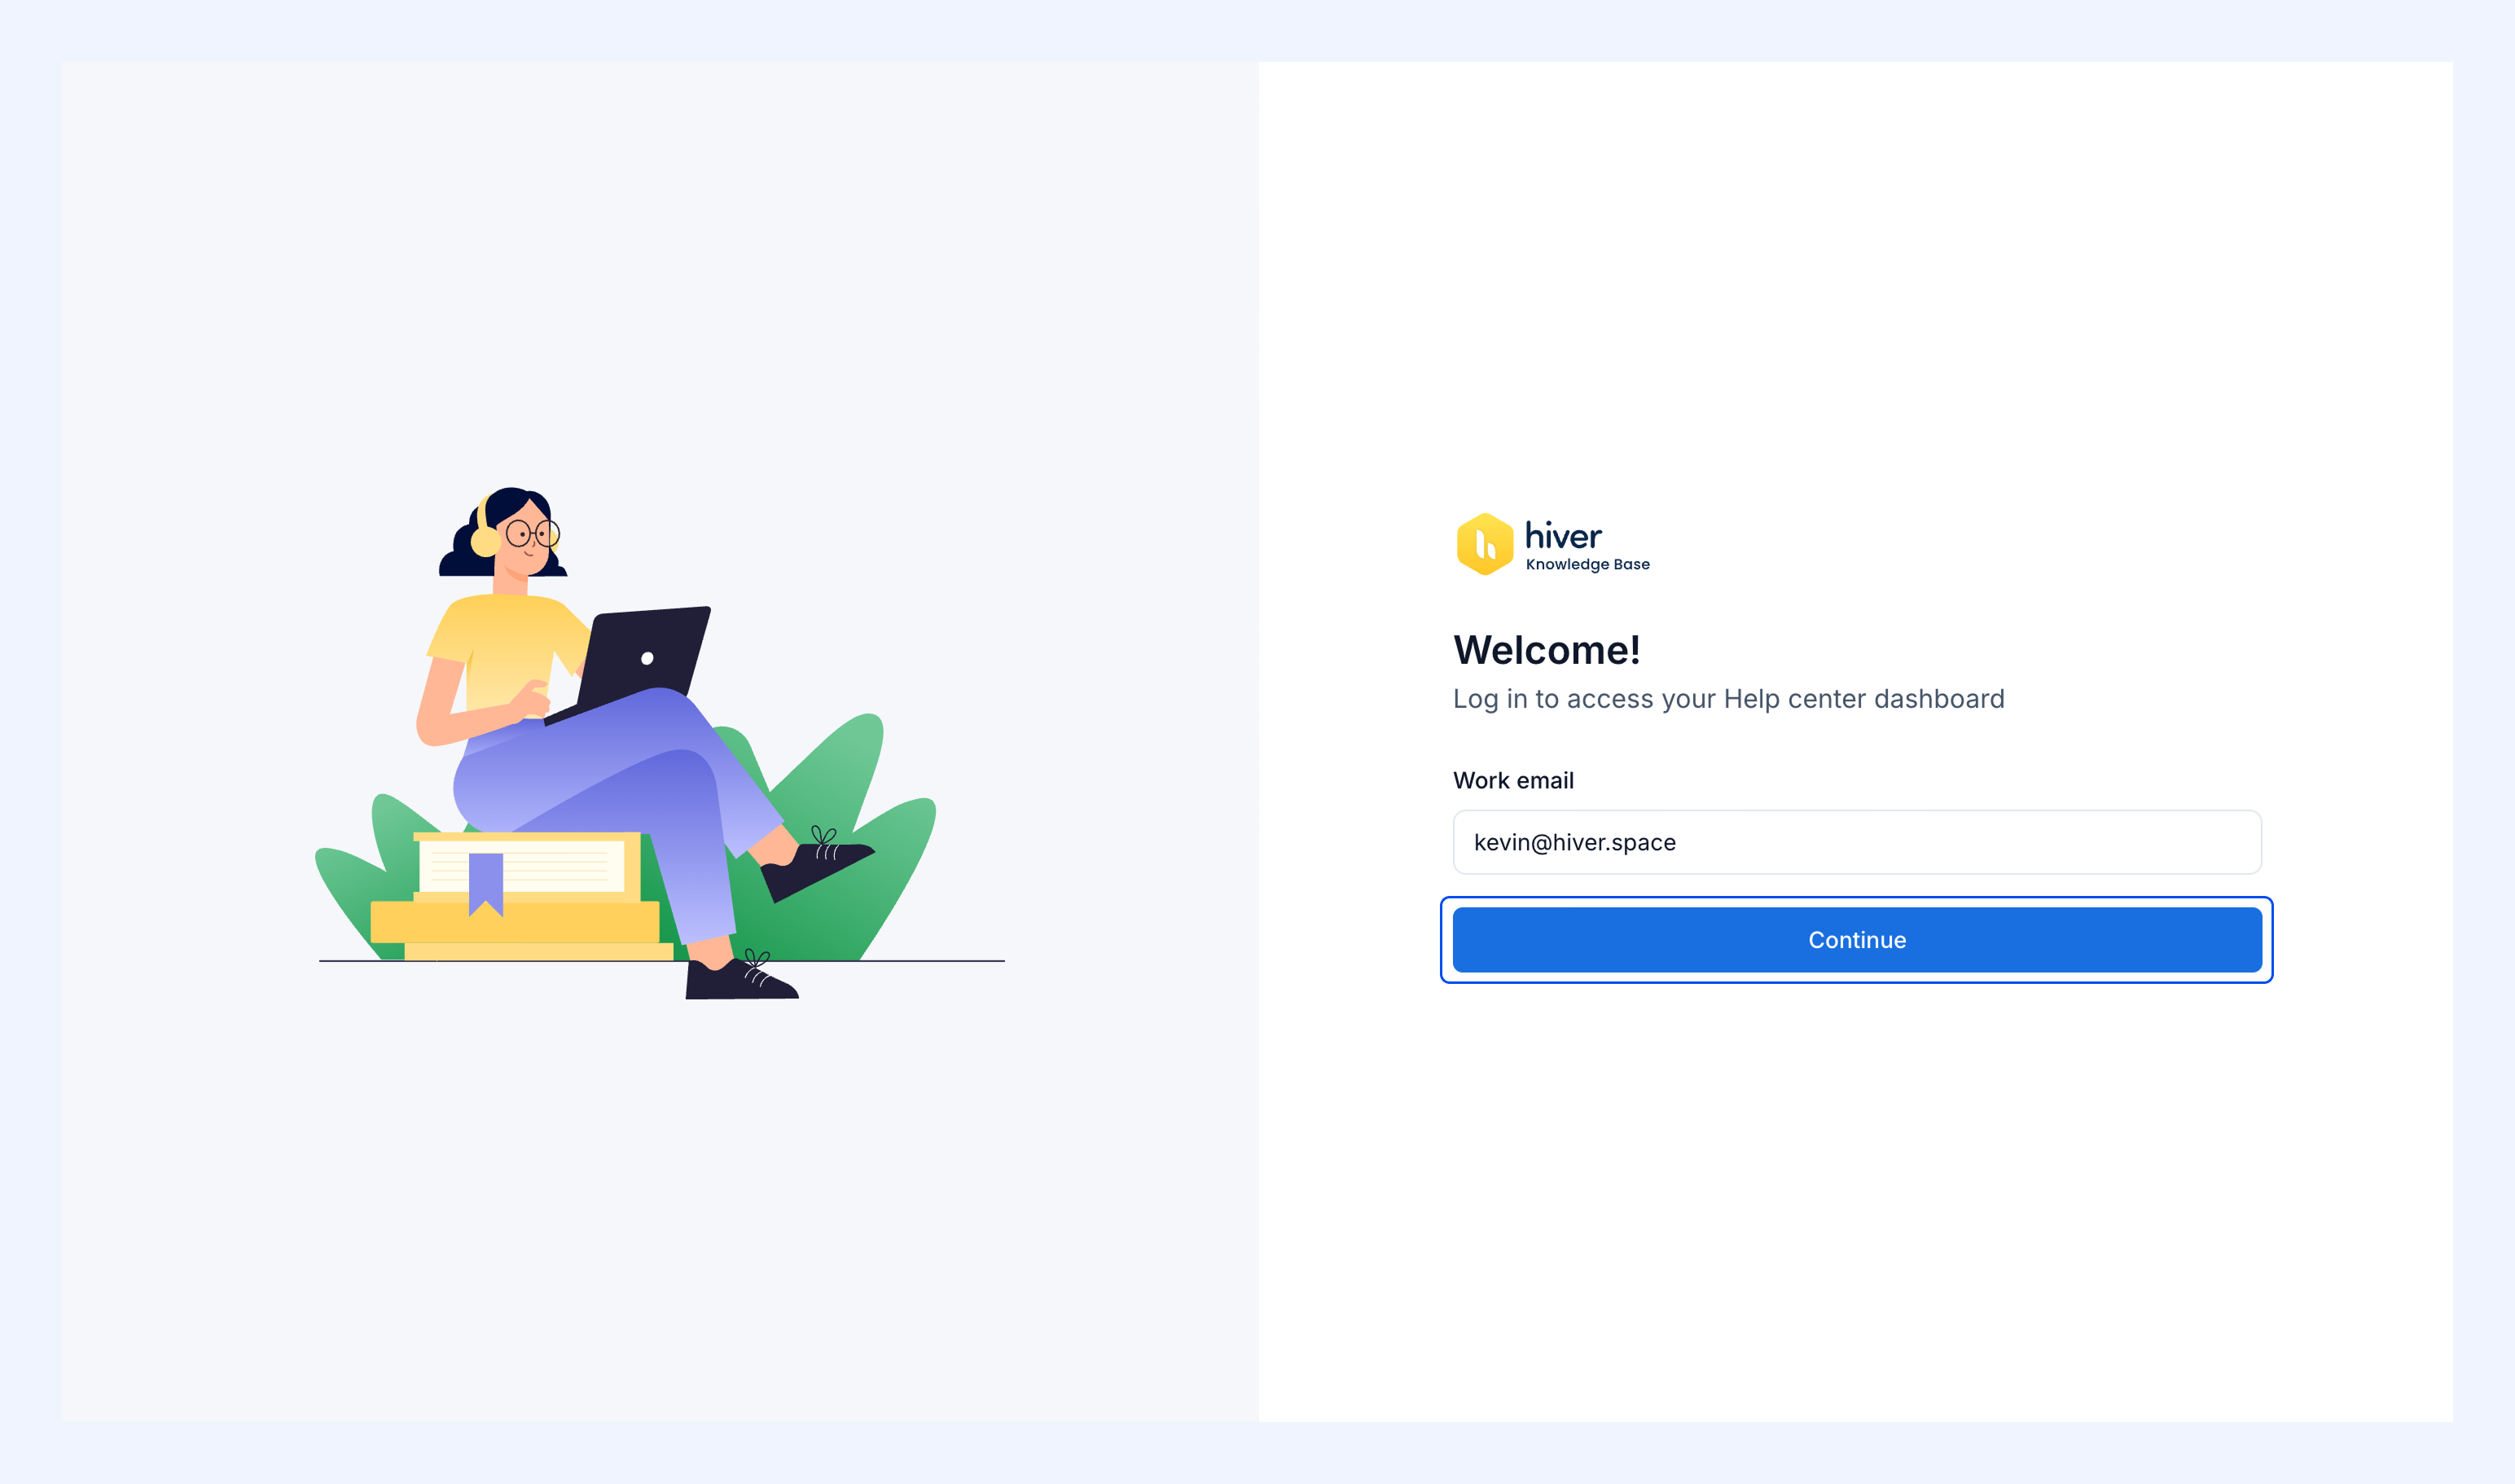
2. You’ll be redirected to the login page. Sign in with your Hiver credentials.
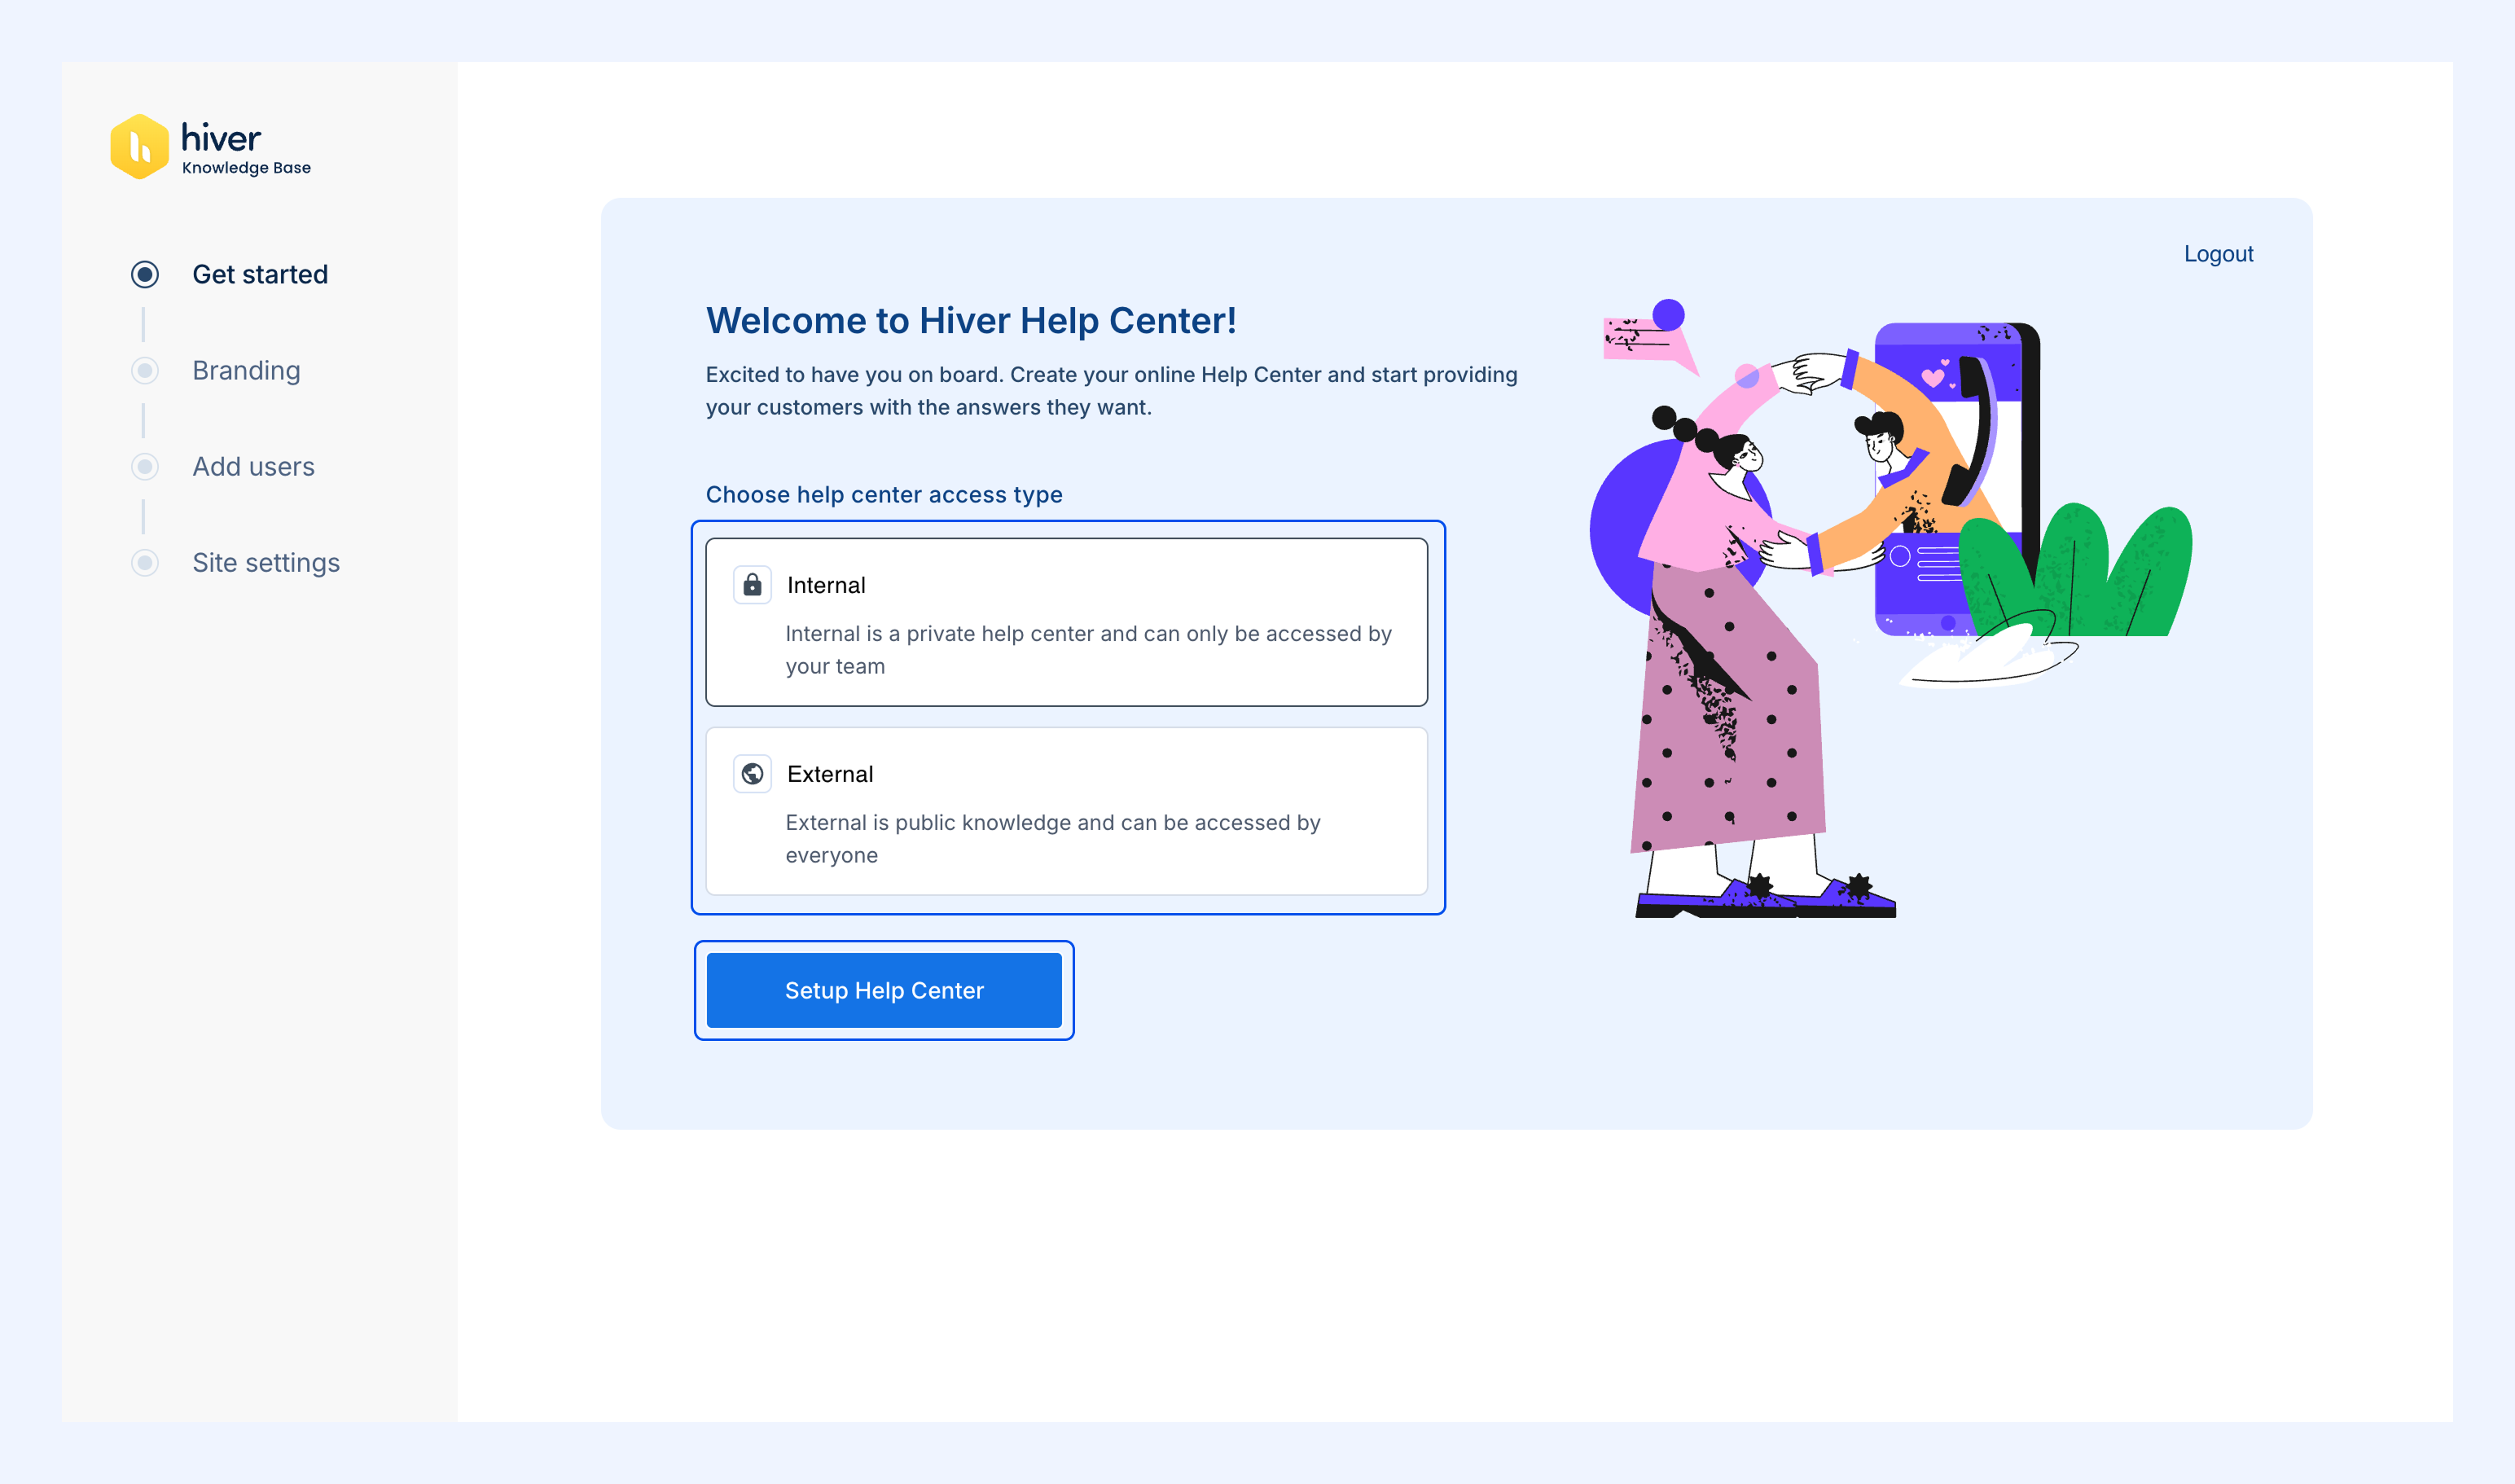
3. Select whether you want your Help Center to be Internal or External.
Note:
- Once you choose a type (internal or external), you cannot change it later.
- Internal Help Centers are marked with a lock icon on the dashboard.
Step 2: Customize the look and feel
You can customize your Help Center so it matches your organization’s branding. From the Settings page, you can:
- Upload your logo and favicon.
- Adjust your brand color, banner image, and banner text (include emojis if you’d like).
- Preview all changes in real time before saving.
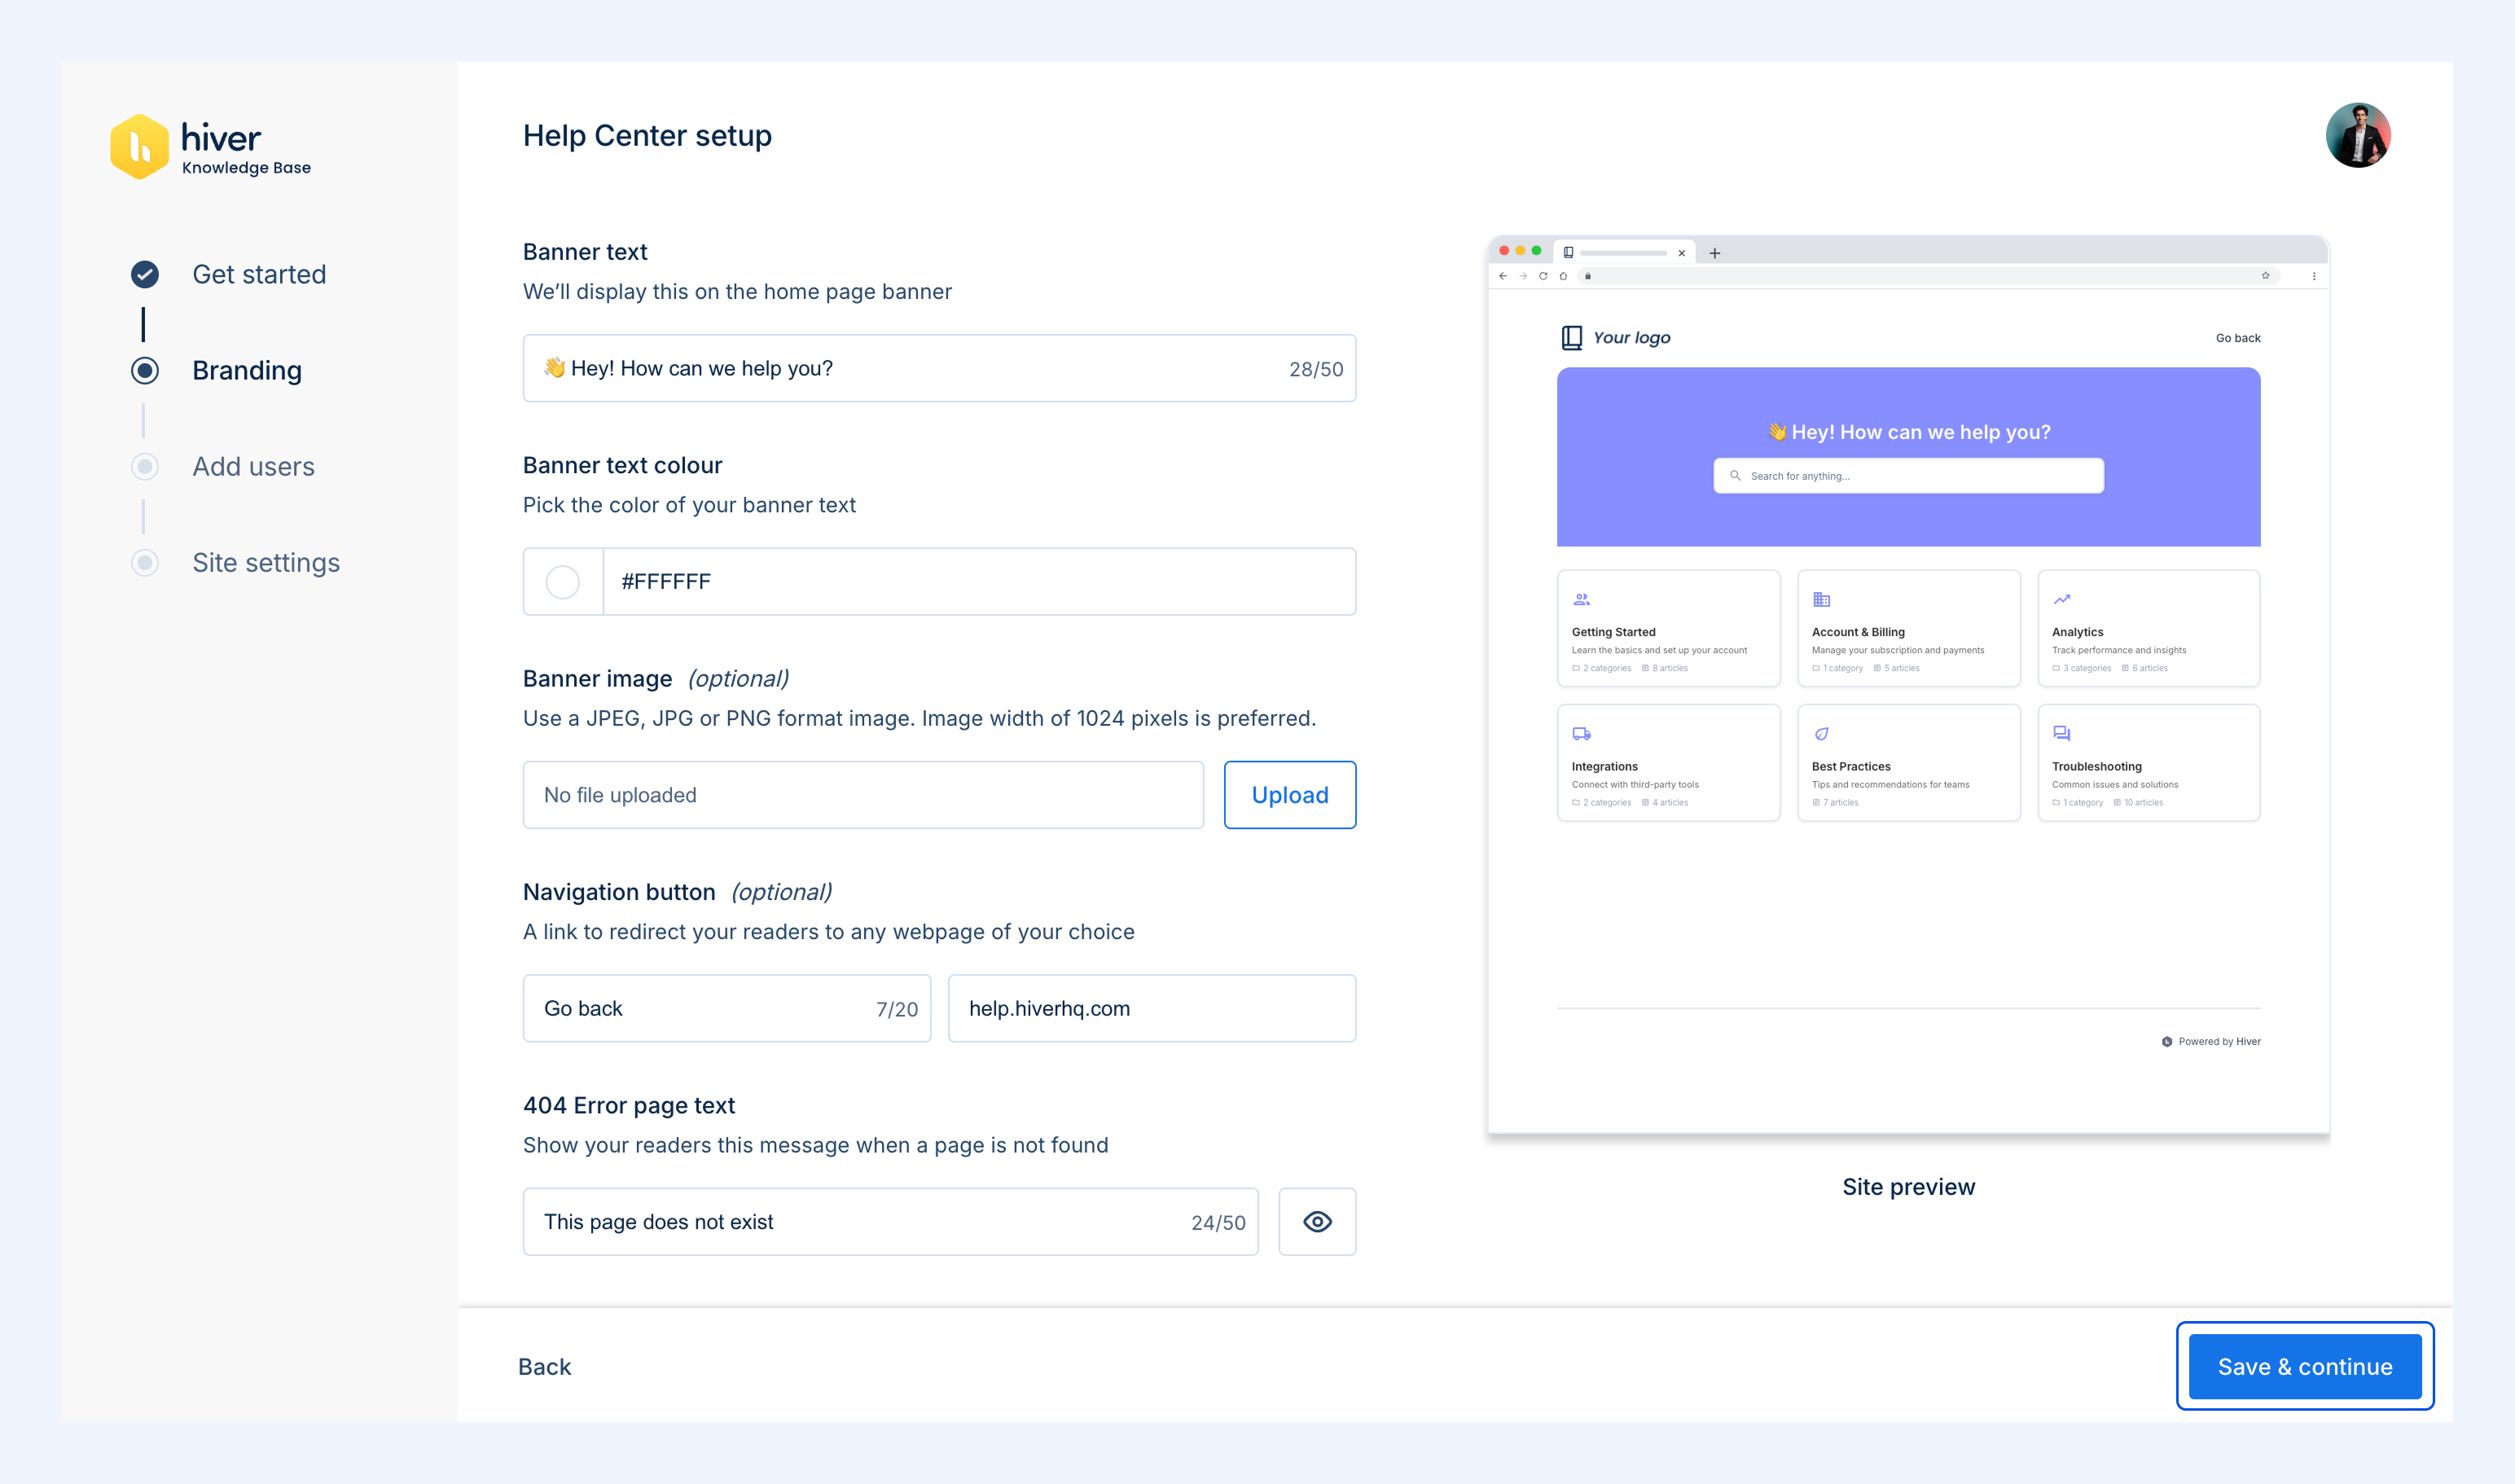
Requirements
Requirements | Mandatory? | Input format |
Logo | Yes | PNG, JPEG, JPG (Max 5 MB) |
Favicon | Yes | ICO, PNG (32×32 px) |
Brand color | Yes | HEX input or color picker |
Banner image | No | JPG, JPEG, PNG (Max 10 MB) |
Banner text | Yes | UTF-8 (supports emojis) |
Banner text color | Yes | HEX input or color picker |
Navigation button | No | Text + URL |
Step 3: Add users to your Help Center
Hiver lets you assign roles to manage access and collaboration.
Adding users to an Internal Help Center
1. Search for the teammate’s name.
2. Assign them a role:
- Editor: Can log in from Hiver in Gmail and manage articles and categories. Editors cannot update brand or site settings.
- Viewer: Can log in from Hiver in Gmail and read published articles.
3. Click Save & Continue.
Note: You can update user roles anytime from Admin Panel → Help Center → Settings → Users. Changes take effect immediately.
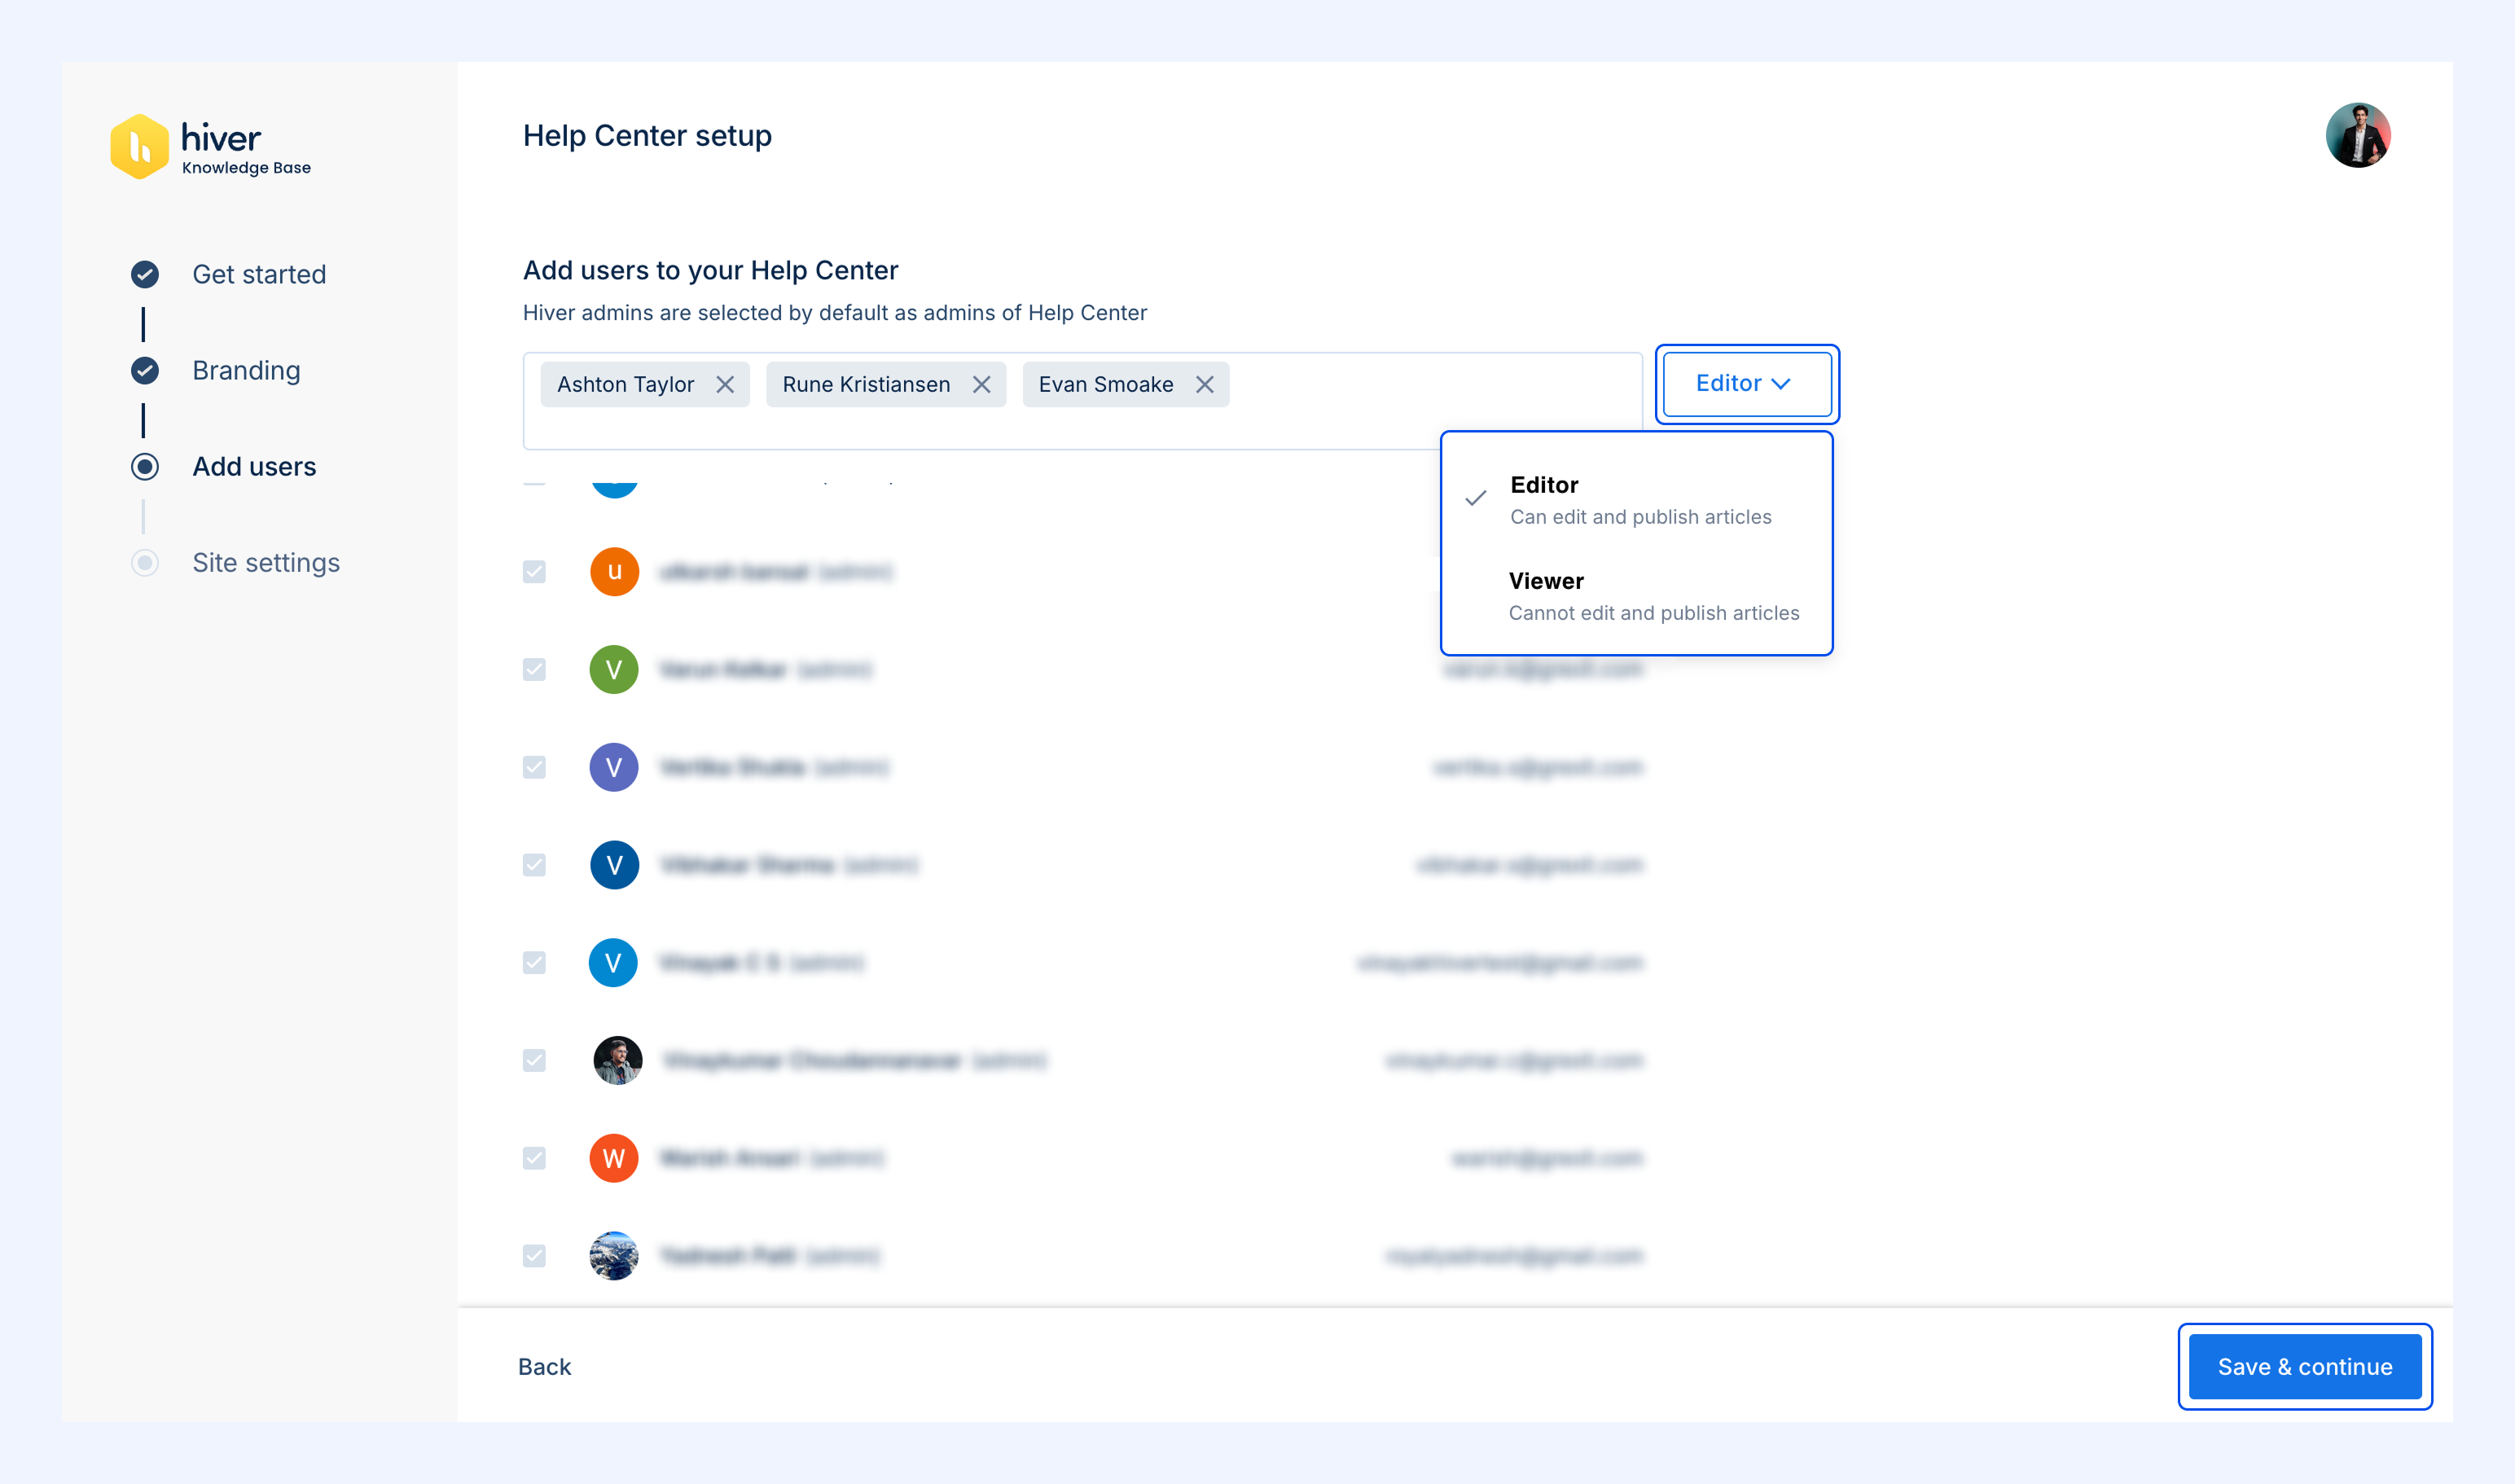
Note: Shared Inbox Admins are automatically added as Help Center admins.
Adding users to an External Help Center
For external Help Centers, roles map to your Hiver account roles:
Hiver role | Mapped KB role | Can configure settings/manage users | Can create/edit/publish articles |
Hiver Admin | Admin | Yes | Yes |
Shared Inbox Admin | Member | No | Yes |
Supervisor | Member | No | Yes |
Member | Member | No | Yes |
Note: By default, all Hiver Admins are added as Help Center Admins.
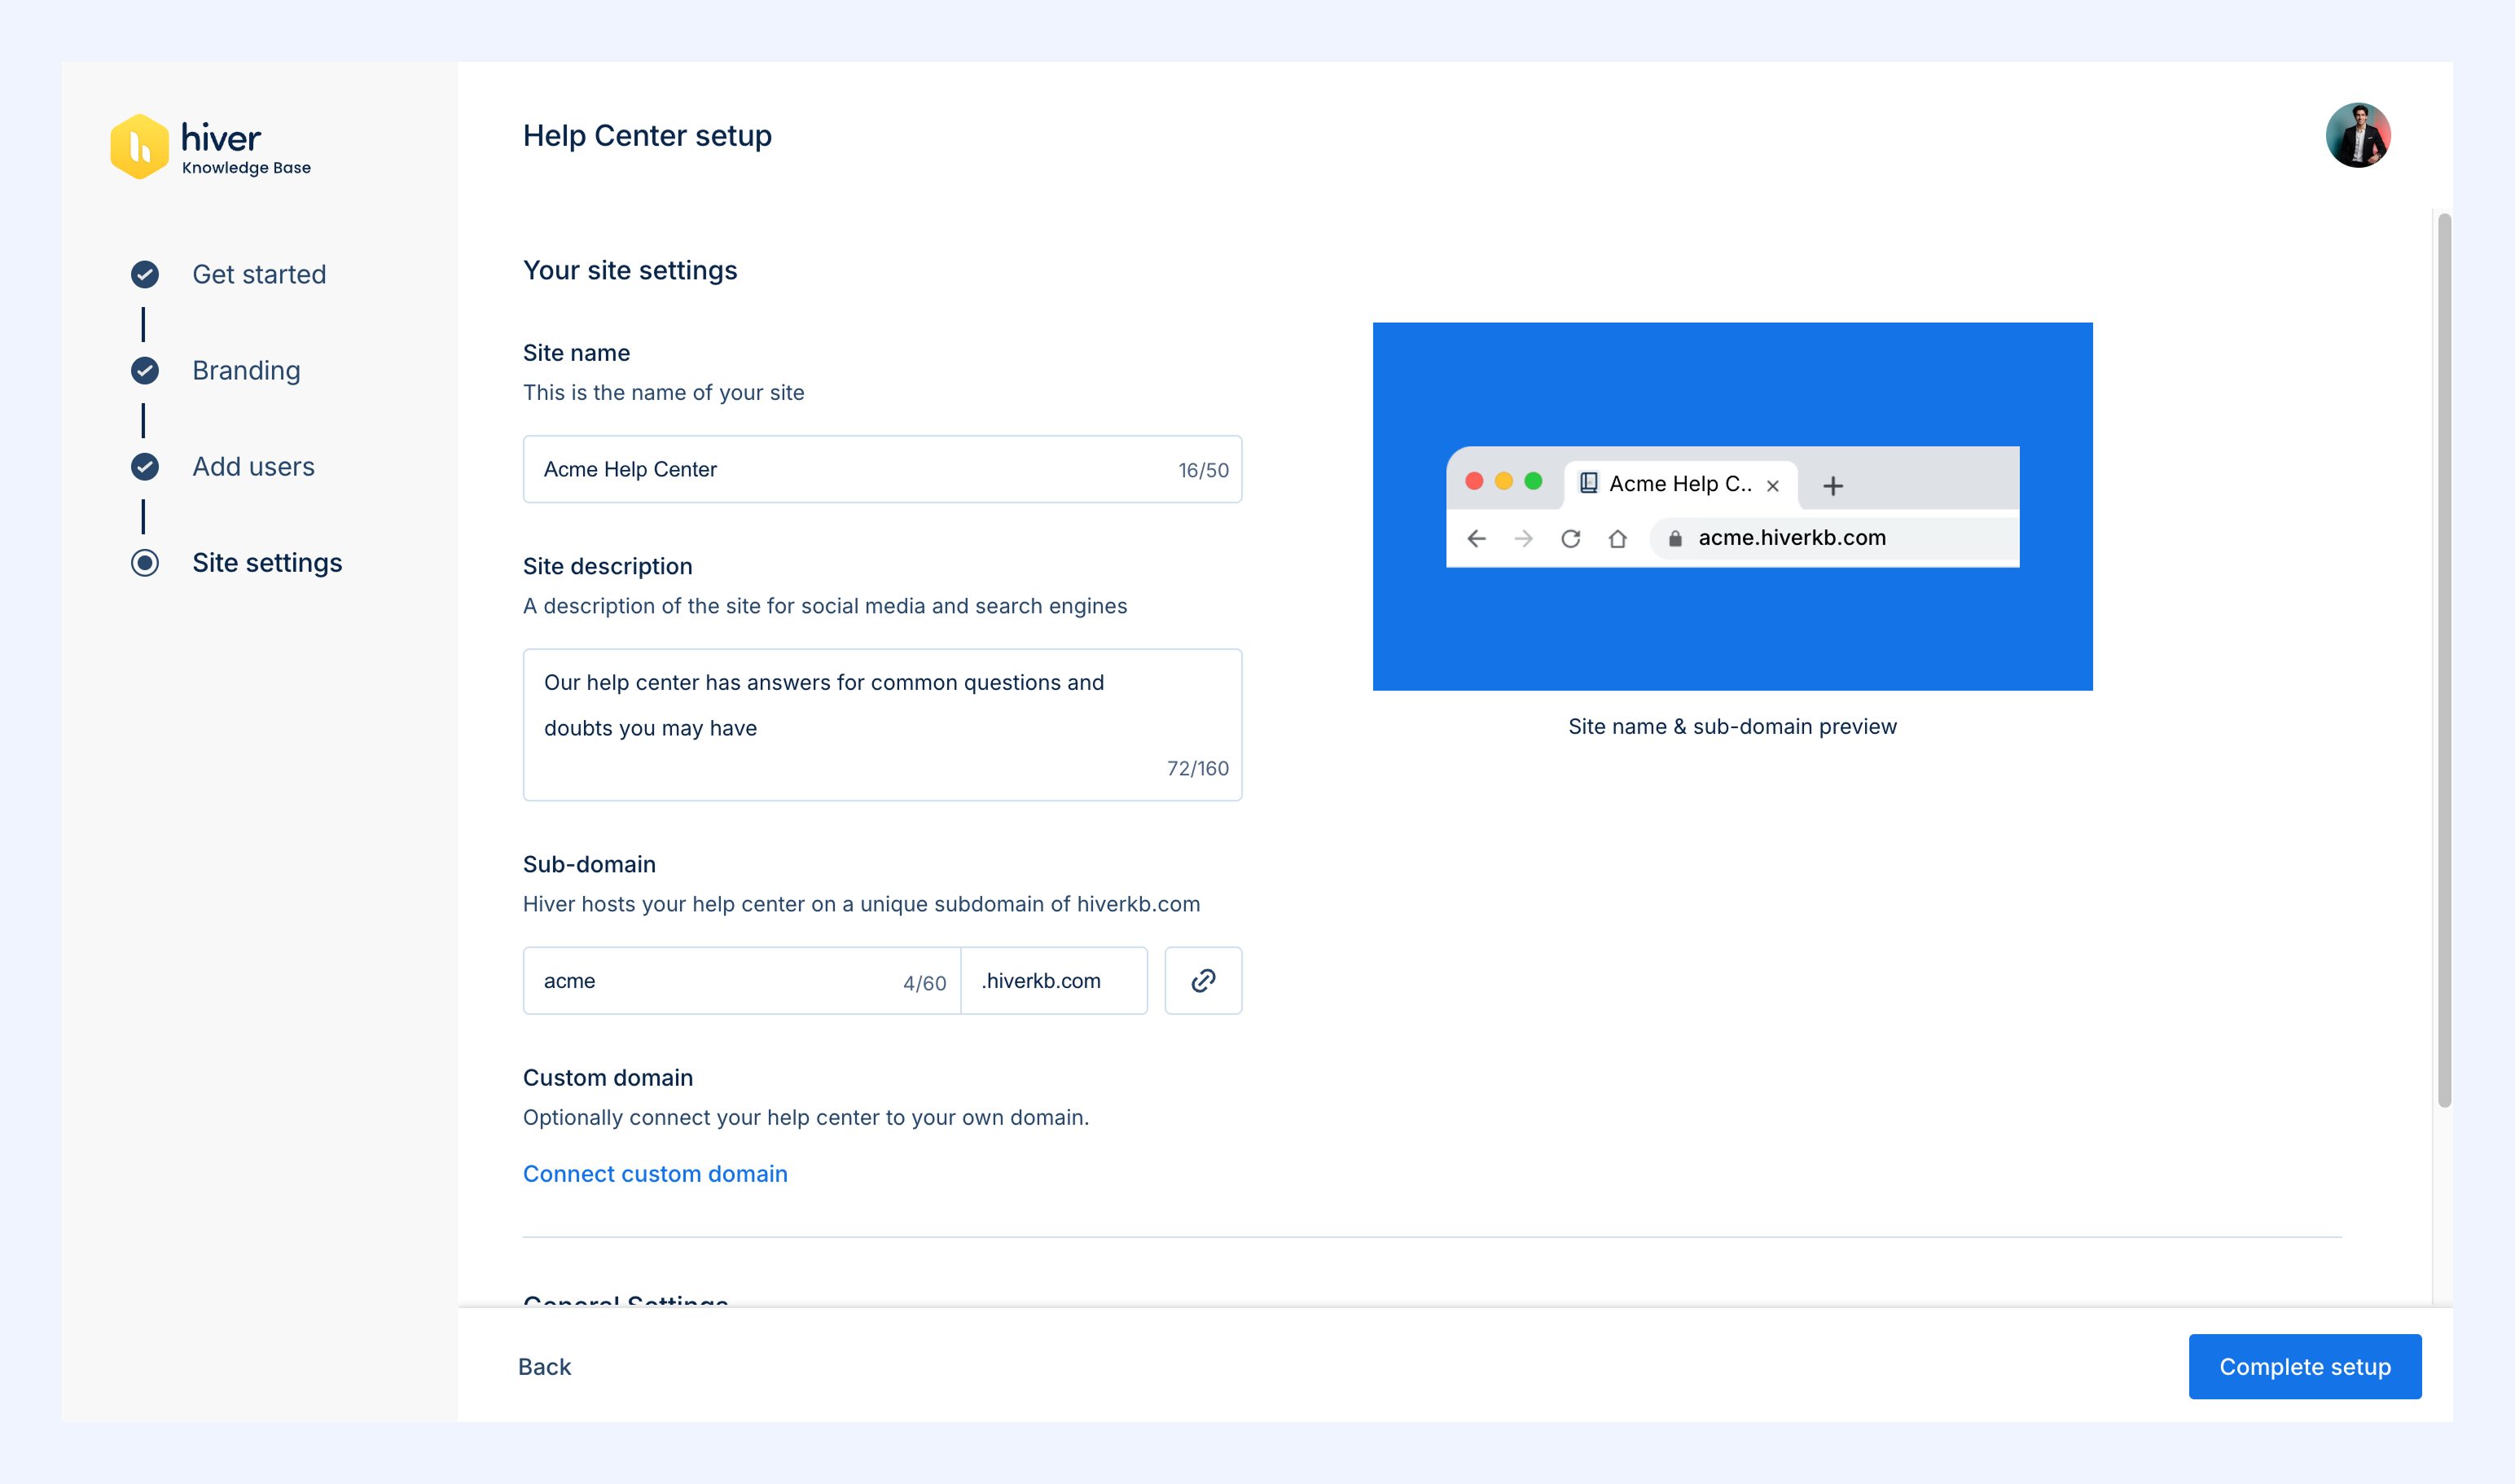
Step 4: Configure site settings
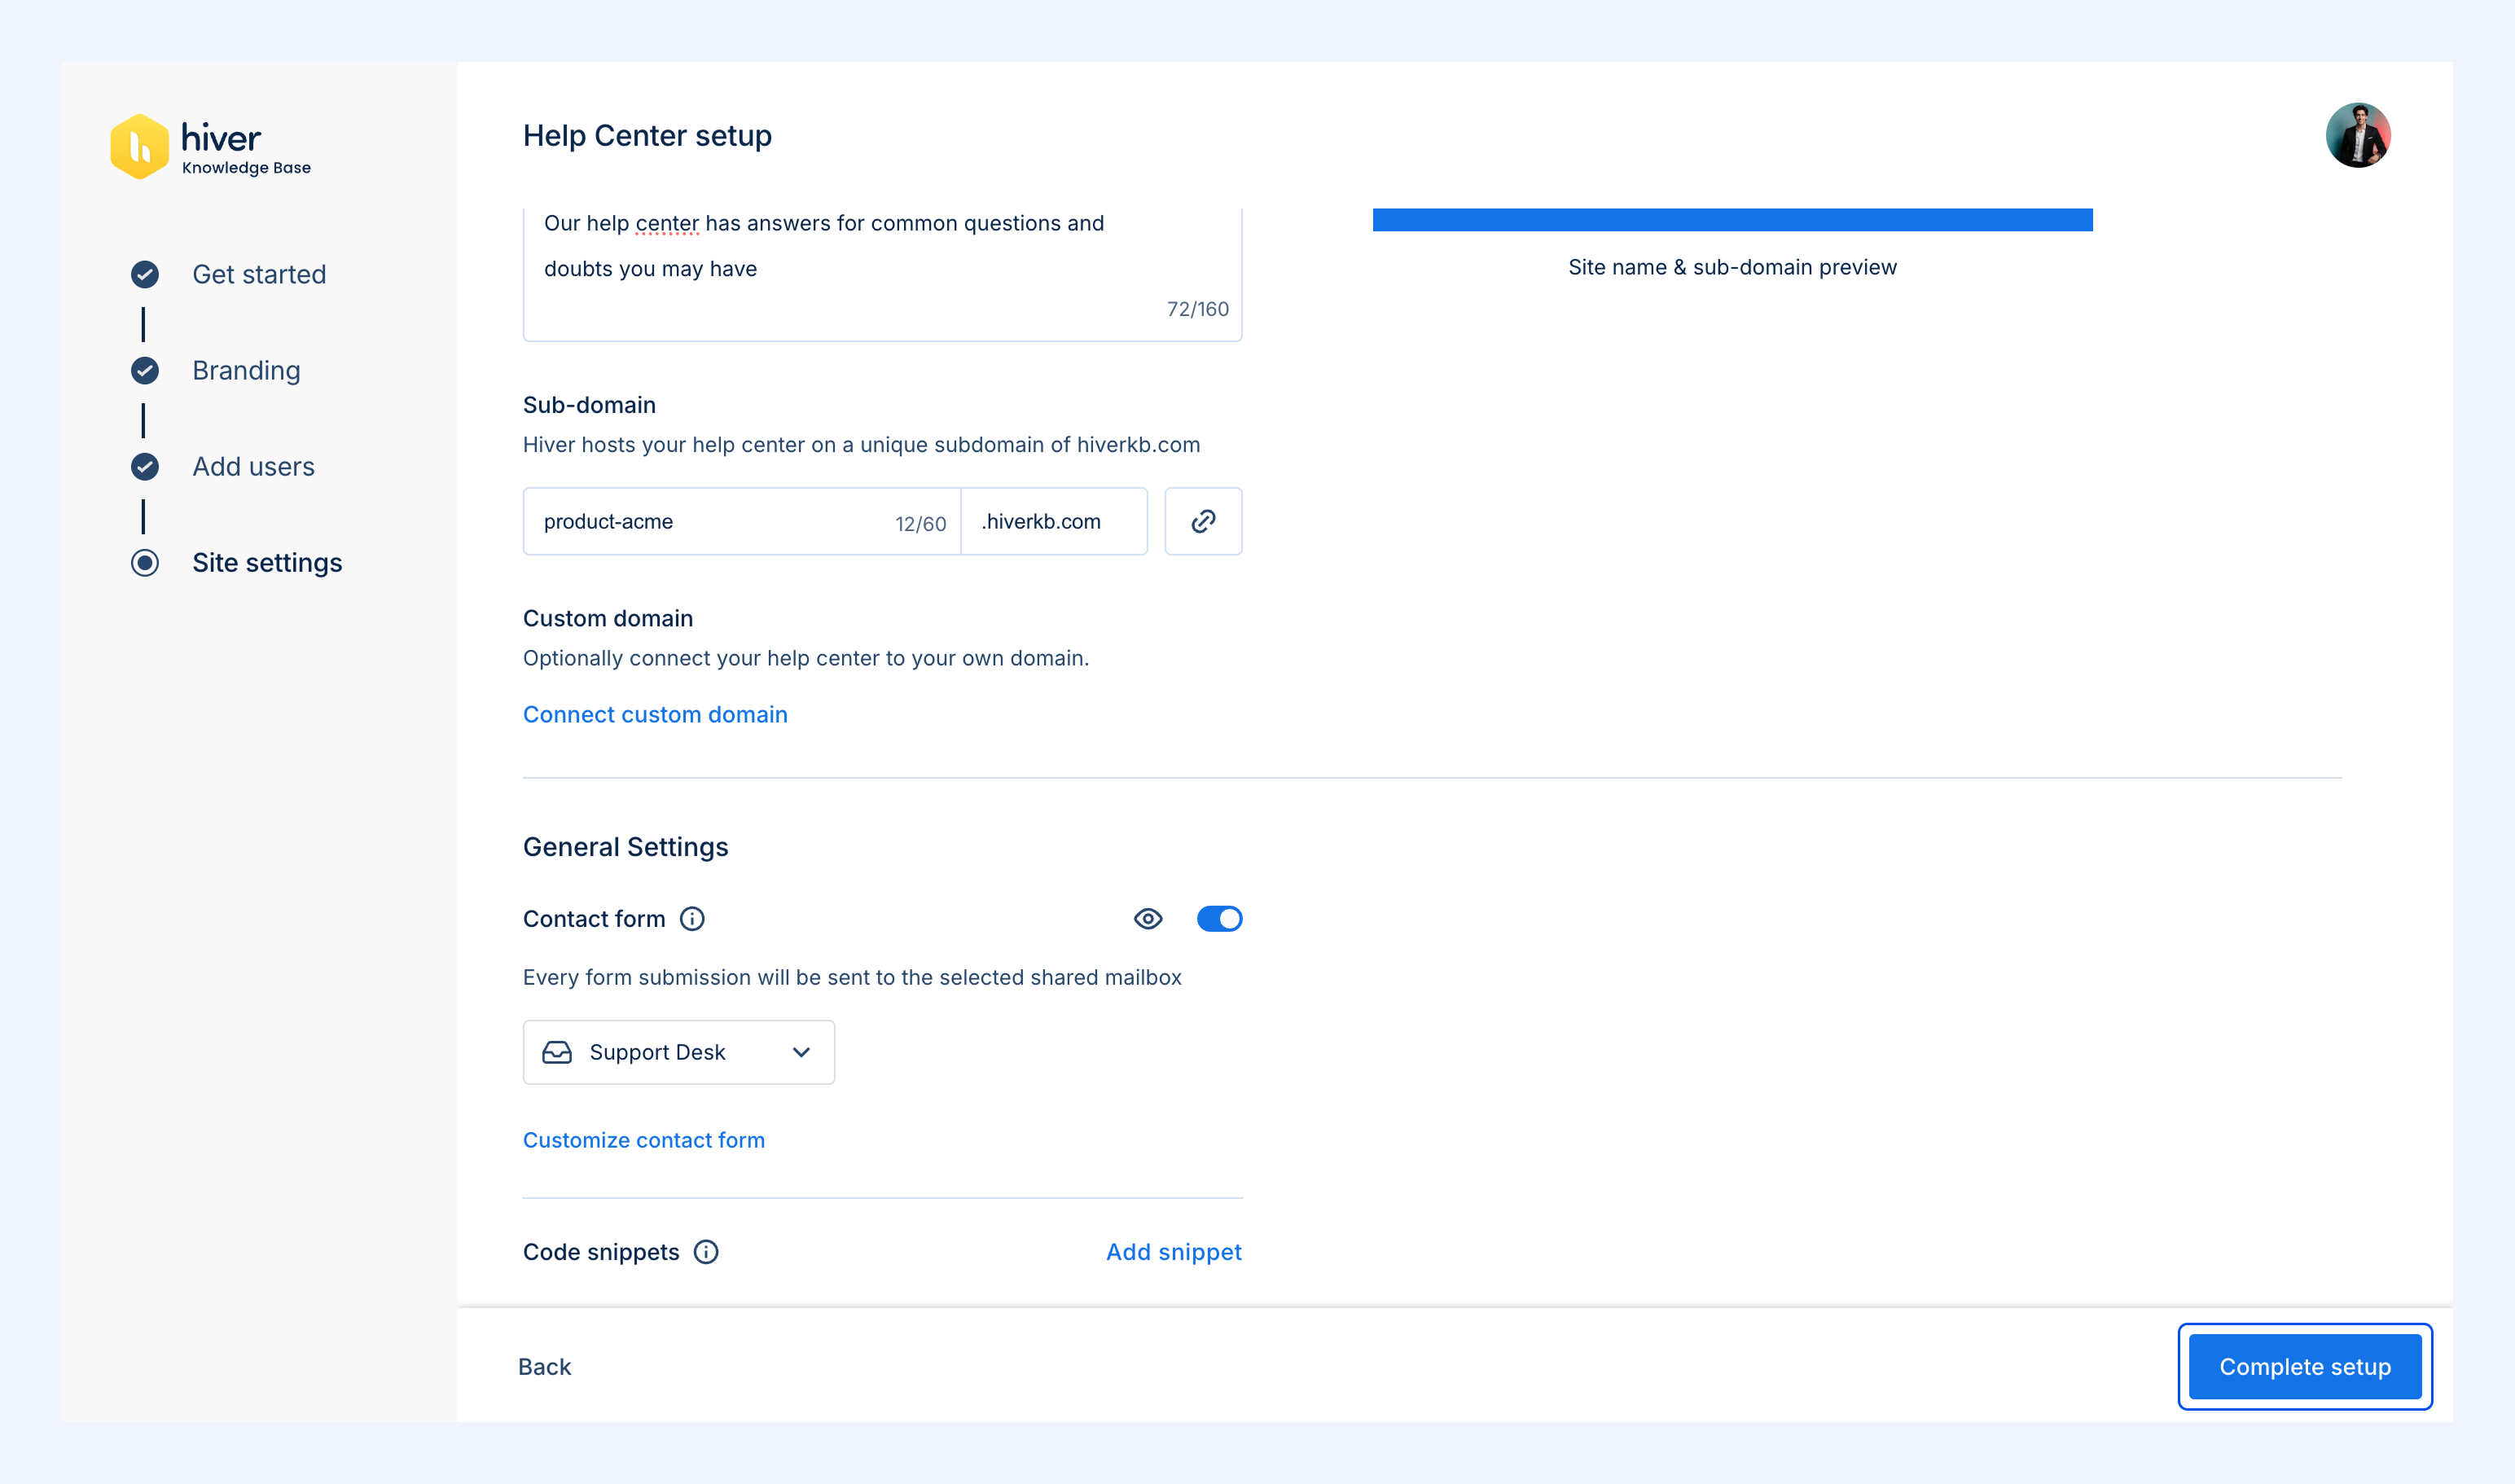
You can customize your site details to match your brand.
- Site name and subdomain: Set up a recognizable identity for your Help Center.
- Custom domain: Add your own domain if needed. Learn more about setting up a custom domain for your Help Center.
Preview all changes in real time before saving.
General settings
To help you do more with your Help Center, Hiver lets you add a contact form and code snippet.
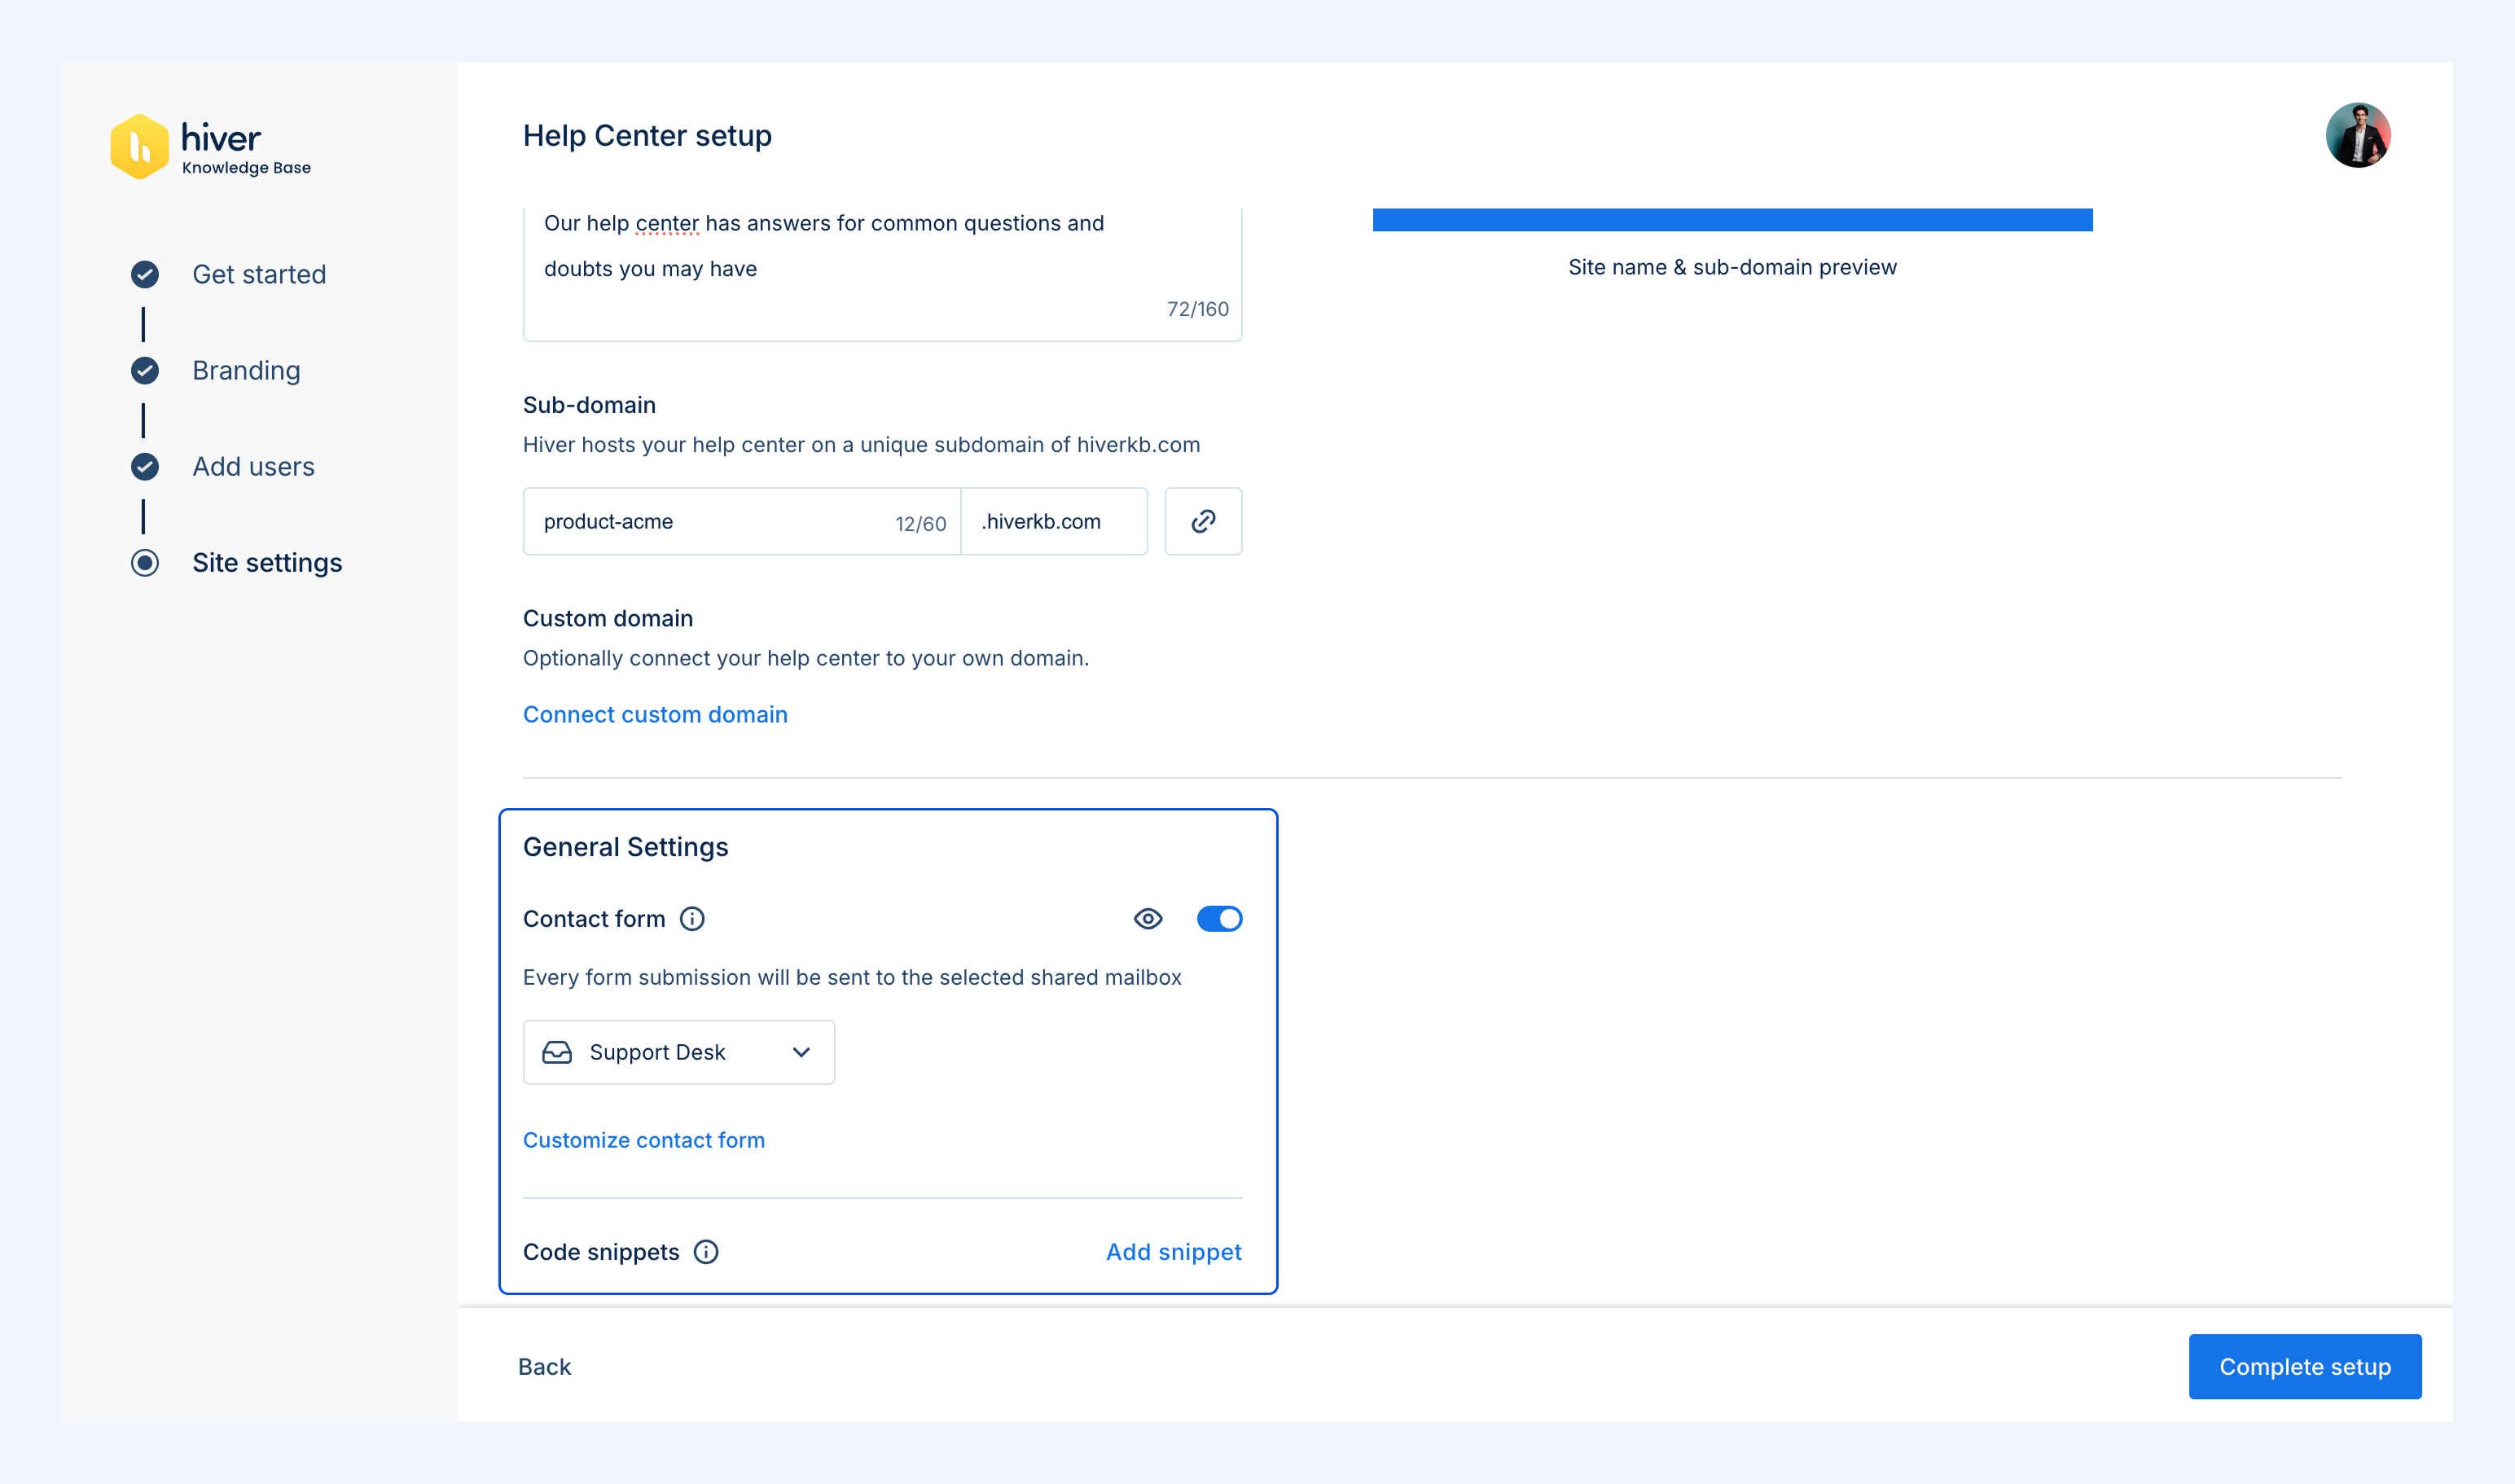
i) Contact forms: Create forms so customers can send feedback or raise requests directly from your Help Center. Each submission is sent to the Shared Inbox you select. Learn more about setting up a contact form in your Help Center.
ii) Code snippets: You can enhance your Help Center with third-party tools such as live chat widgets, engagement apps, or website analytics. You can do this by embedding a code snippet.
Each snippet should include the:
- Snippet name: Up to 50 characters (alphanumeric and special characters allowed).
- Snippet code: The code you want to insert (ASCII characters accepted).
To create a snippet, click Add snippet, enter the snippet name and snippet code, and click Save.
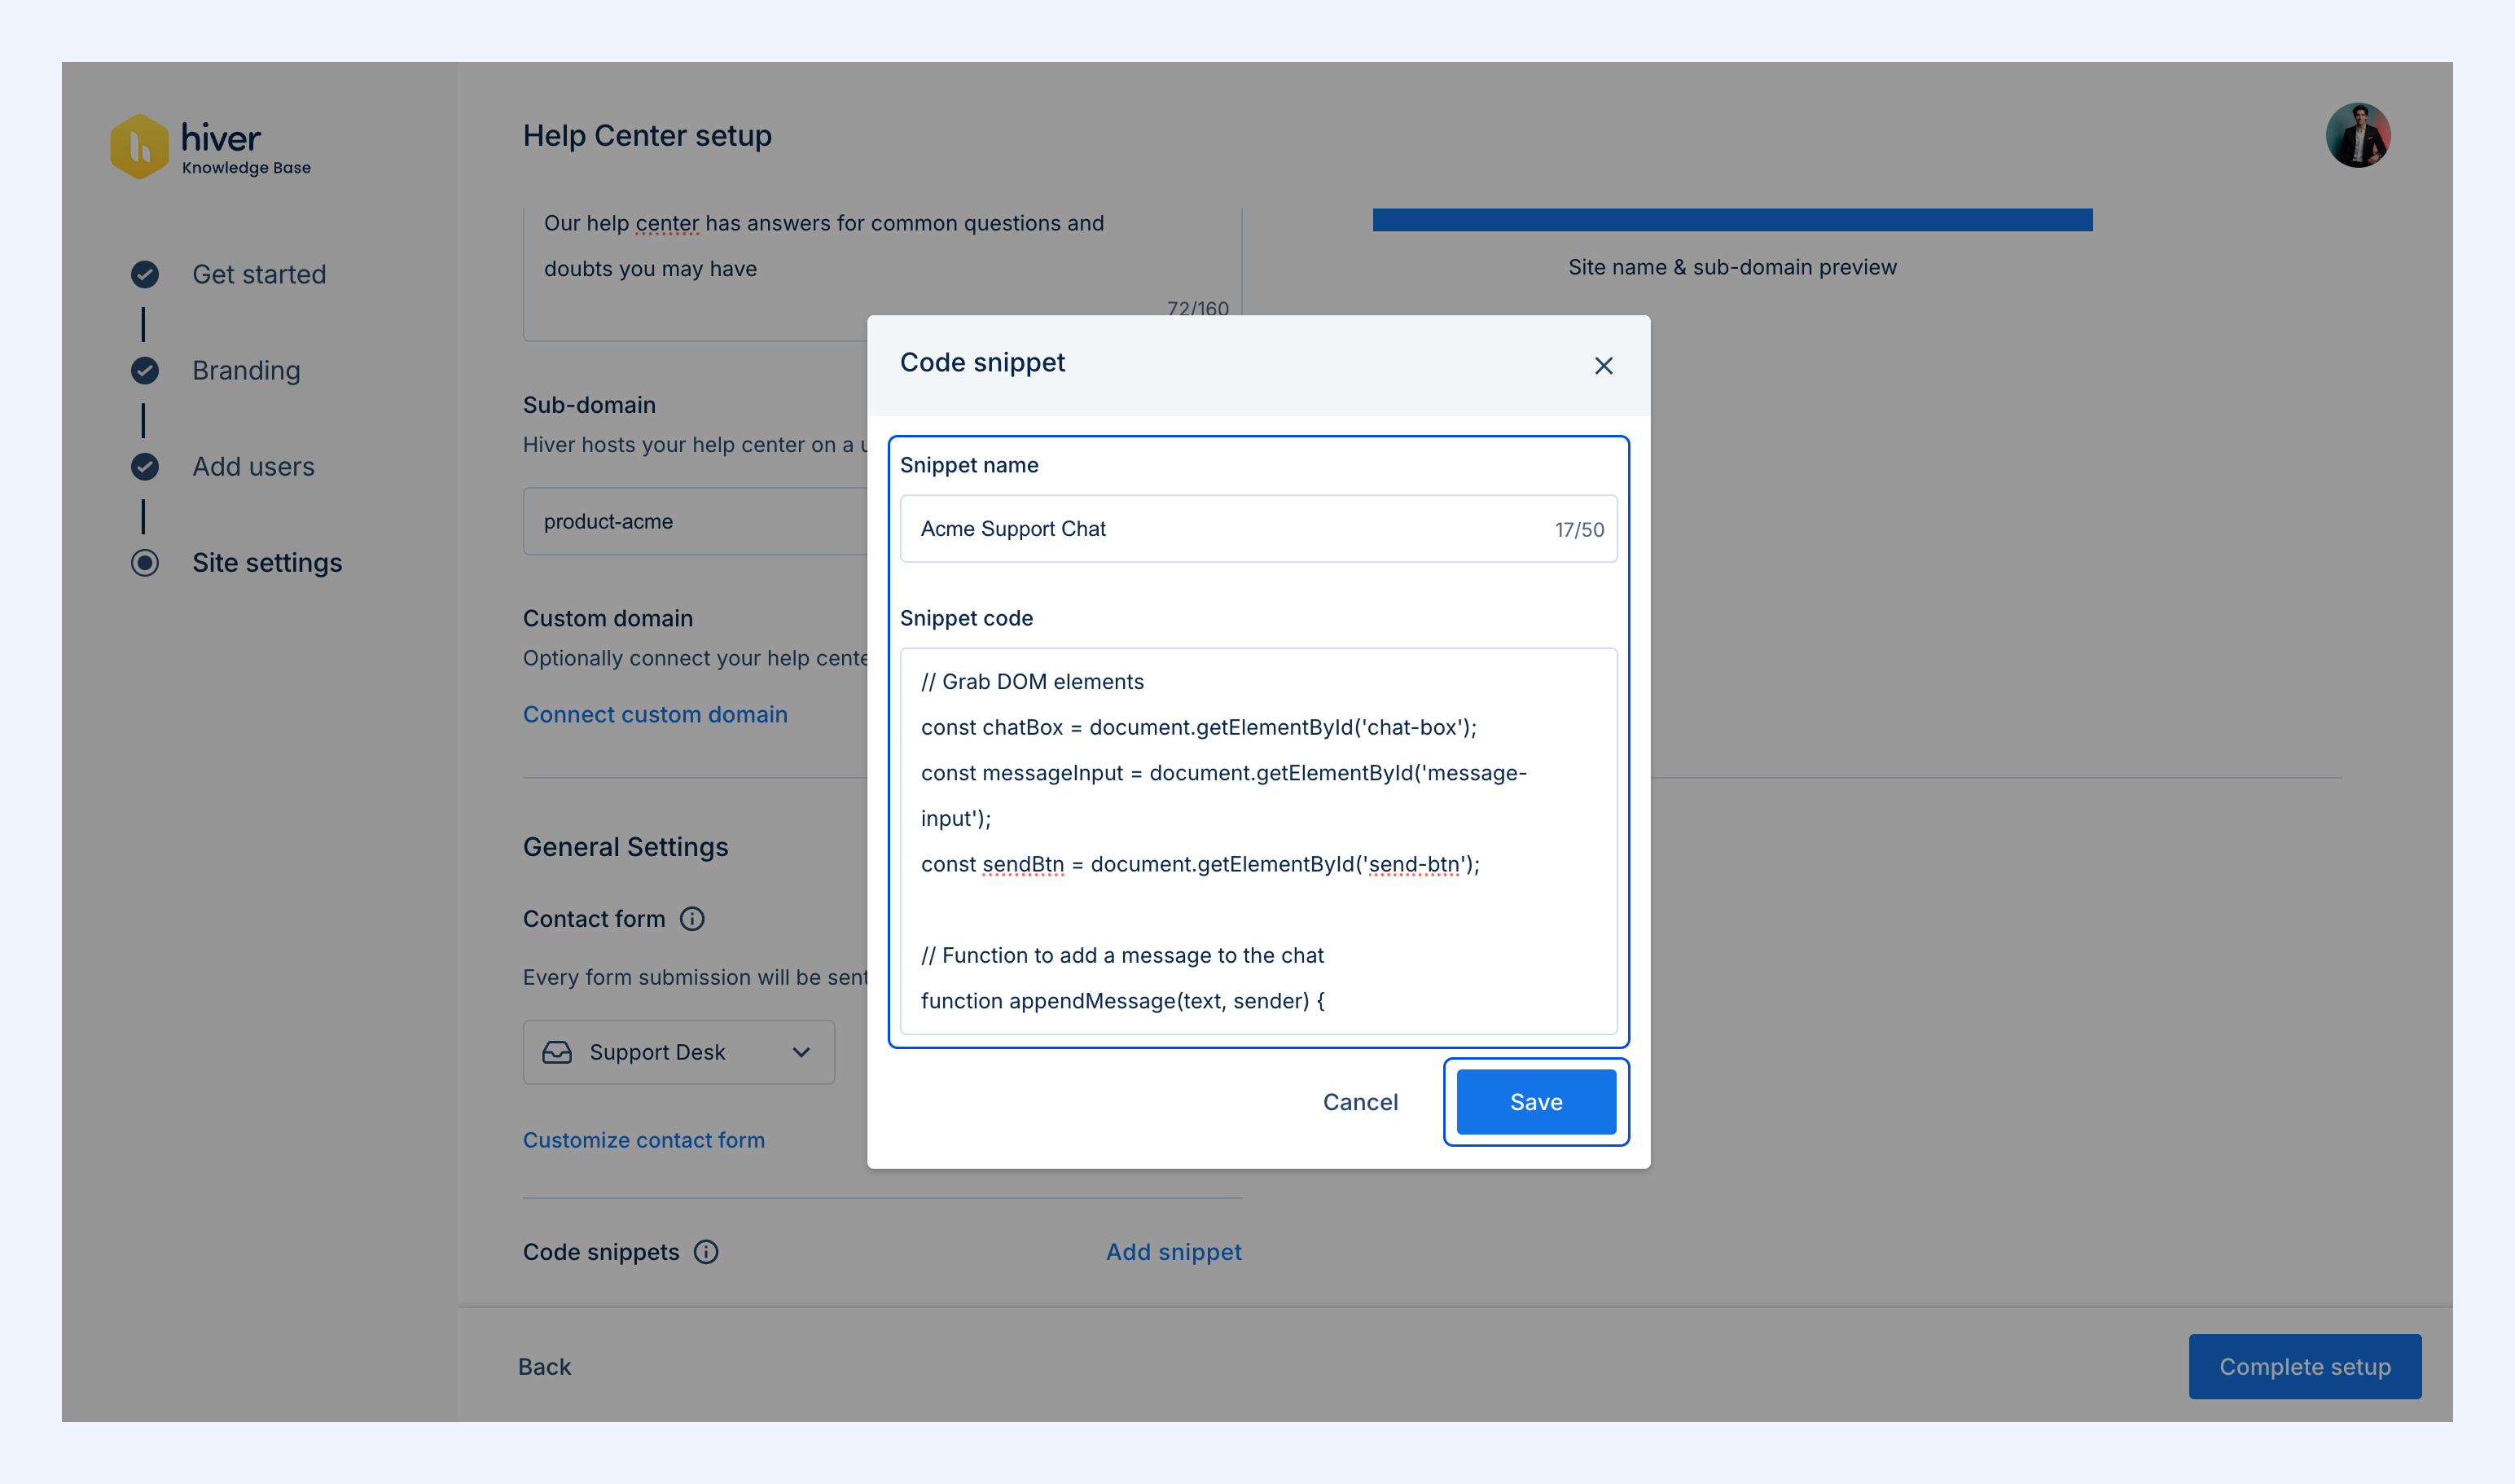
Note: If you add multiple snippets, they execute in the order they were created.
Once you’re done, click Complete setup. In the pop-up that appears, click Go to Dashboard.
Your Help Center will now appear in Admin Panel → Help Center. You can also access it from the Hiver Settings dropdown.
Creating and managing multiple Help Centers
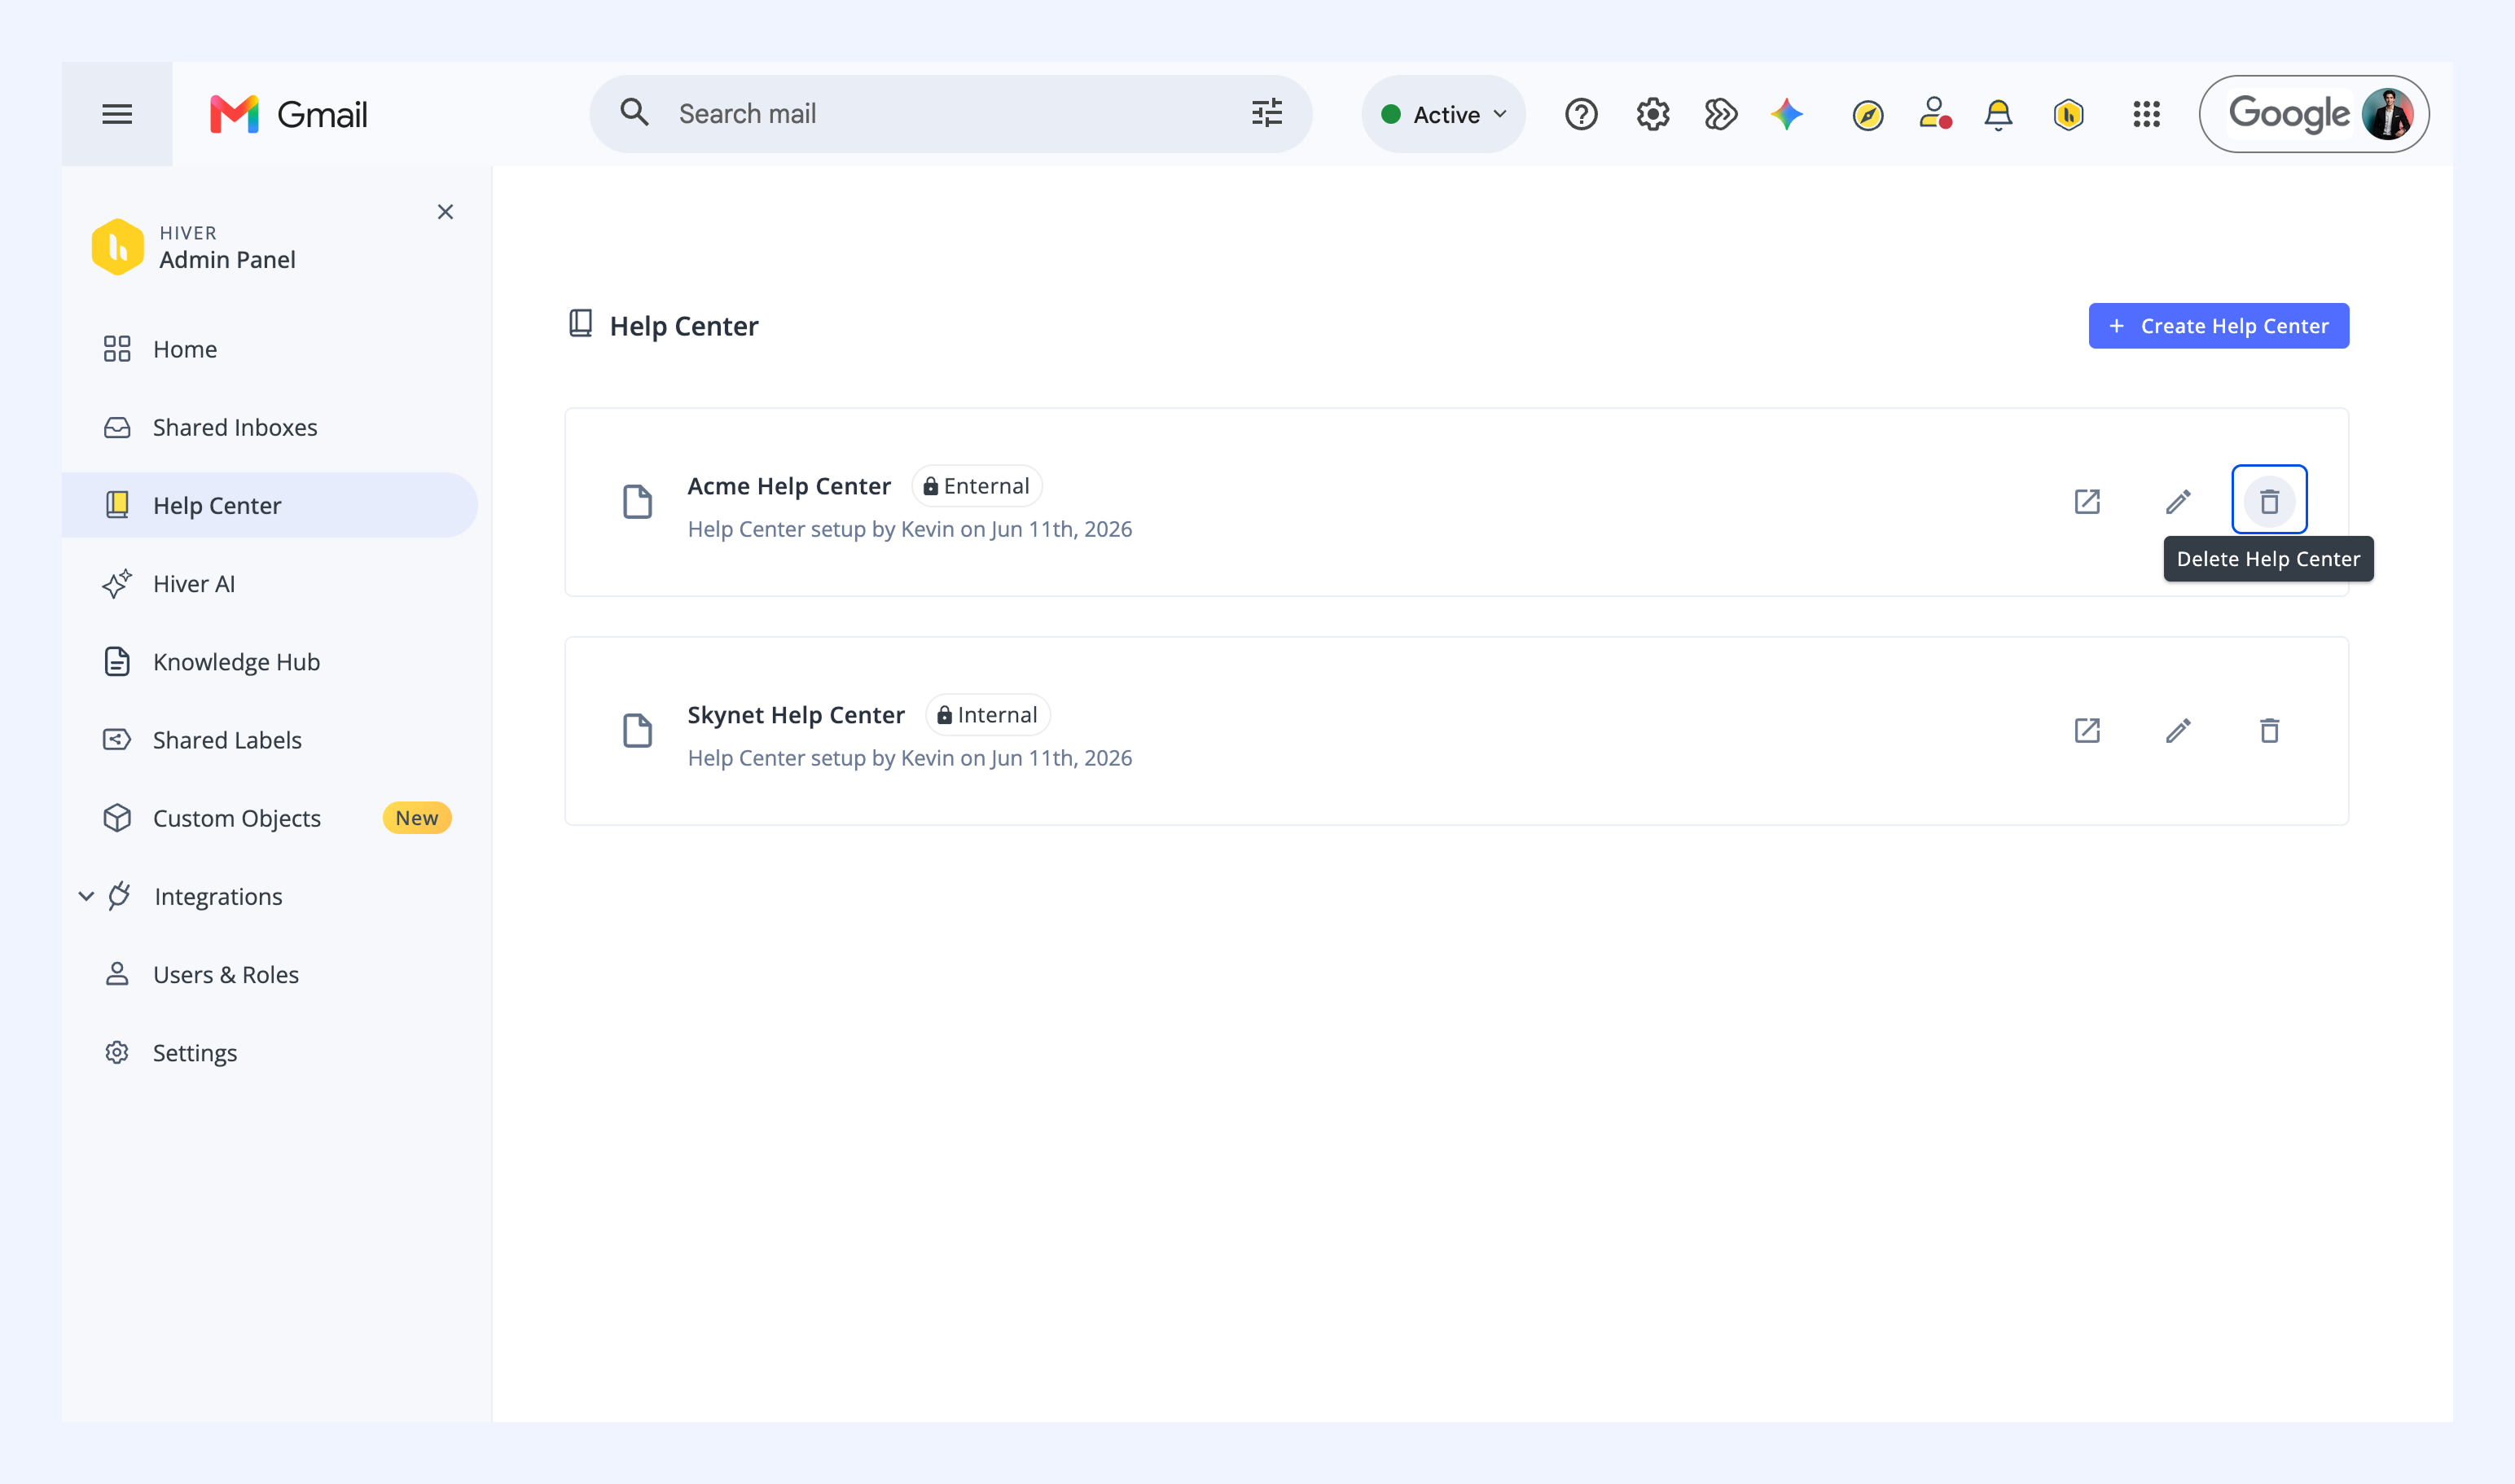
You can create, access, and manage your Help Centers from Admin Panel → Help Center.
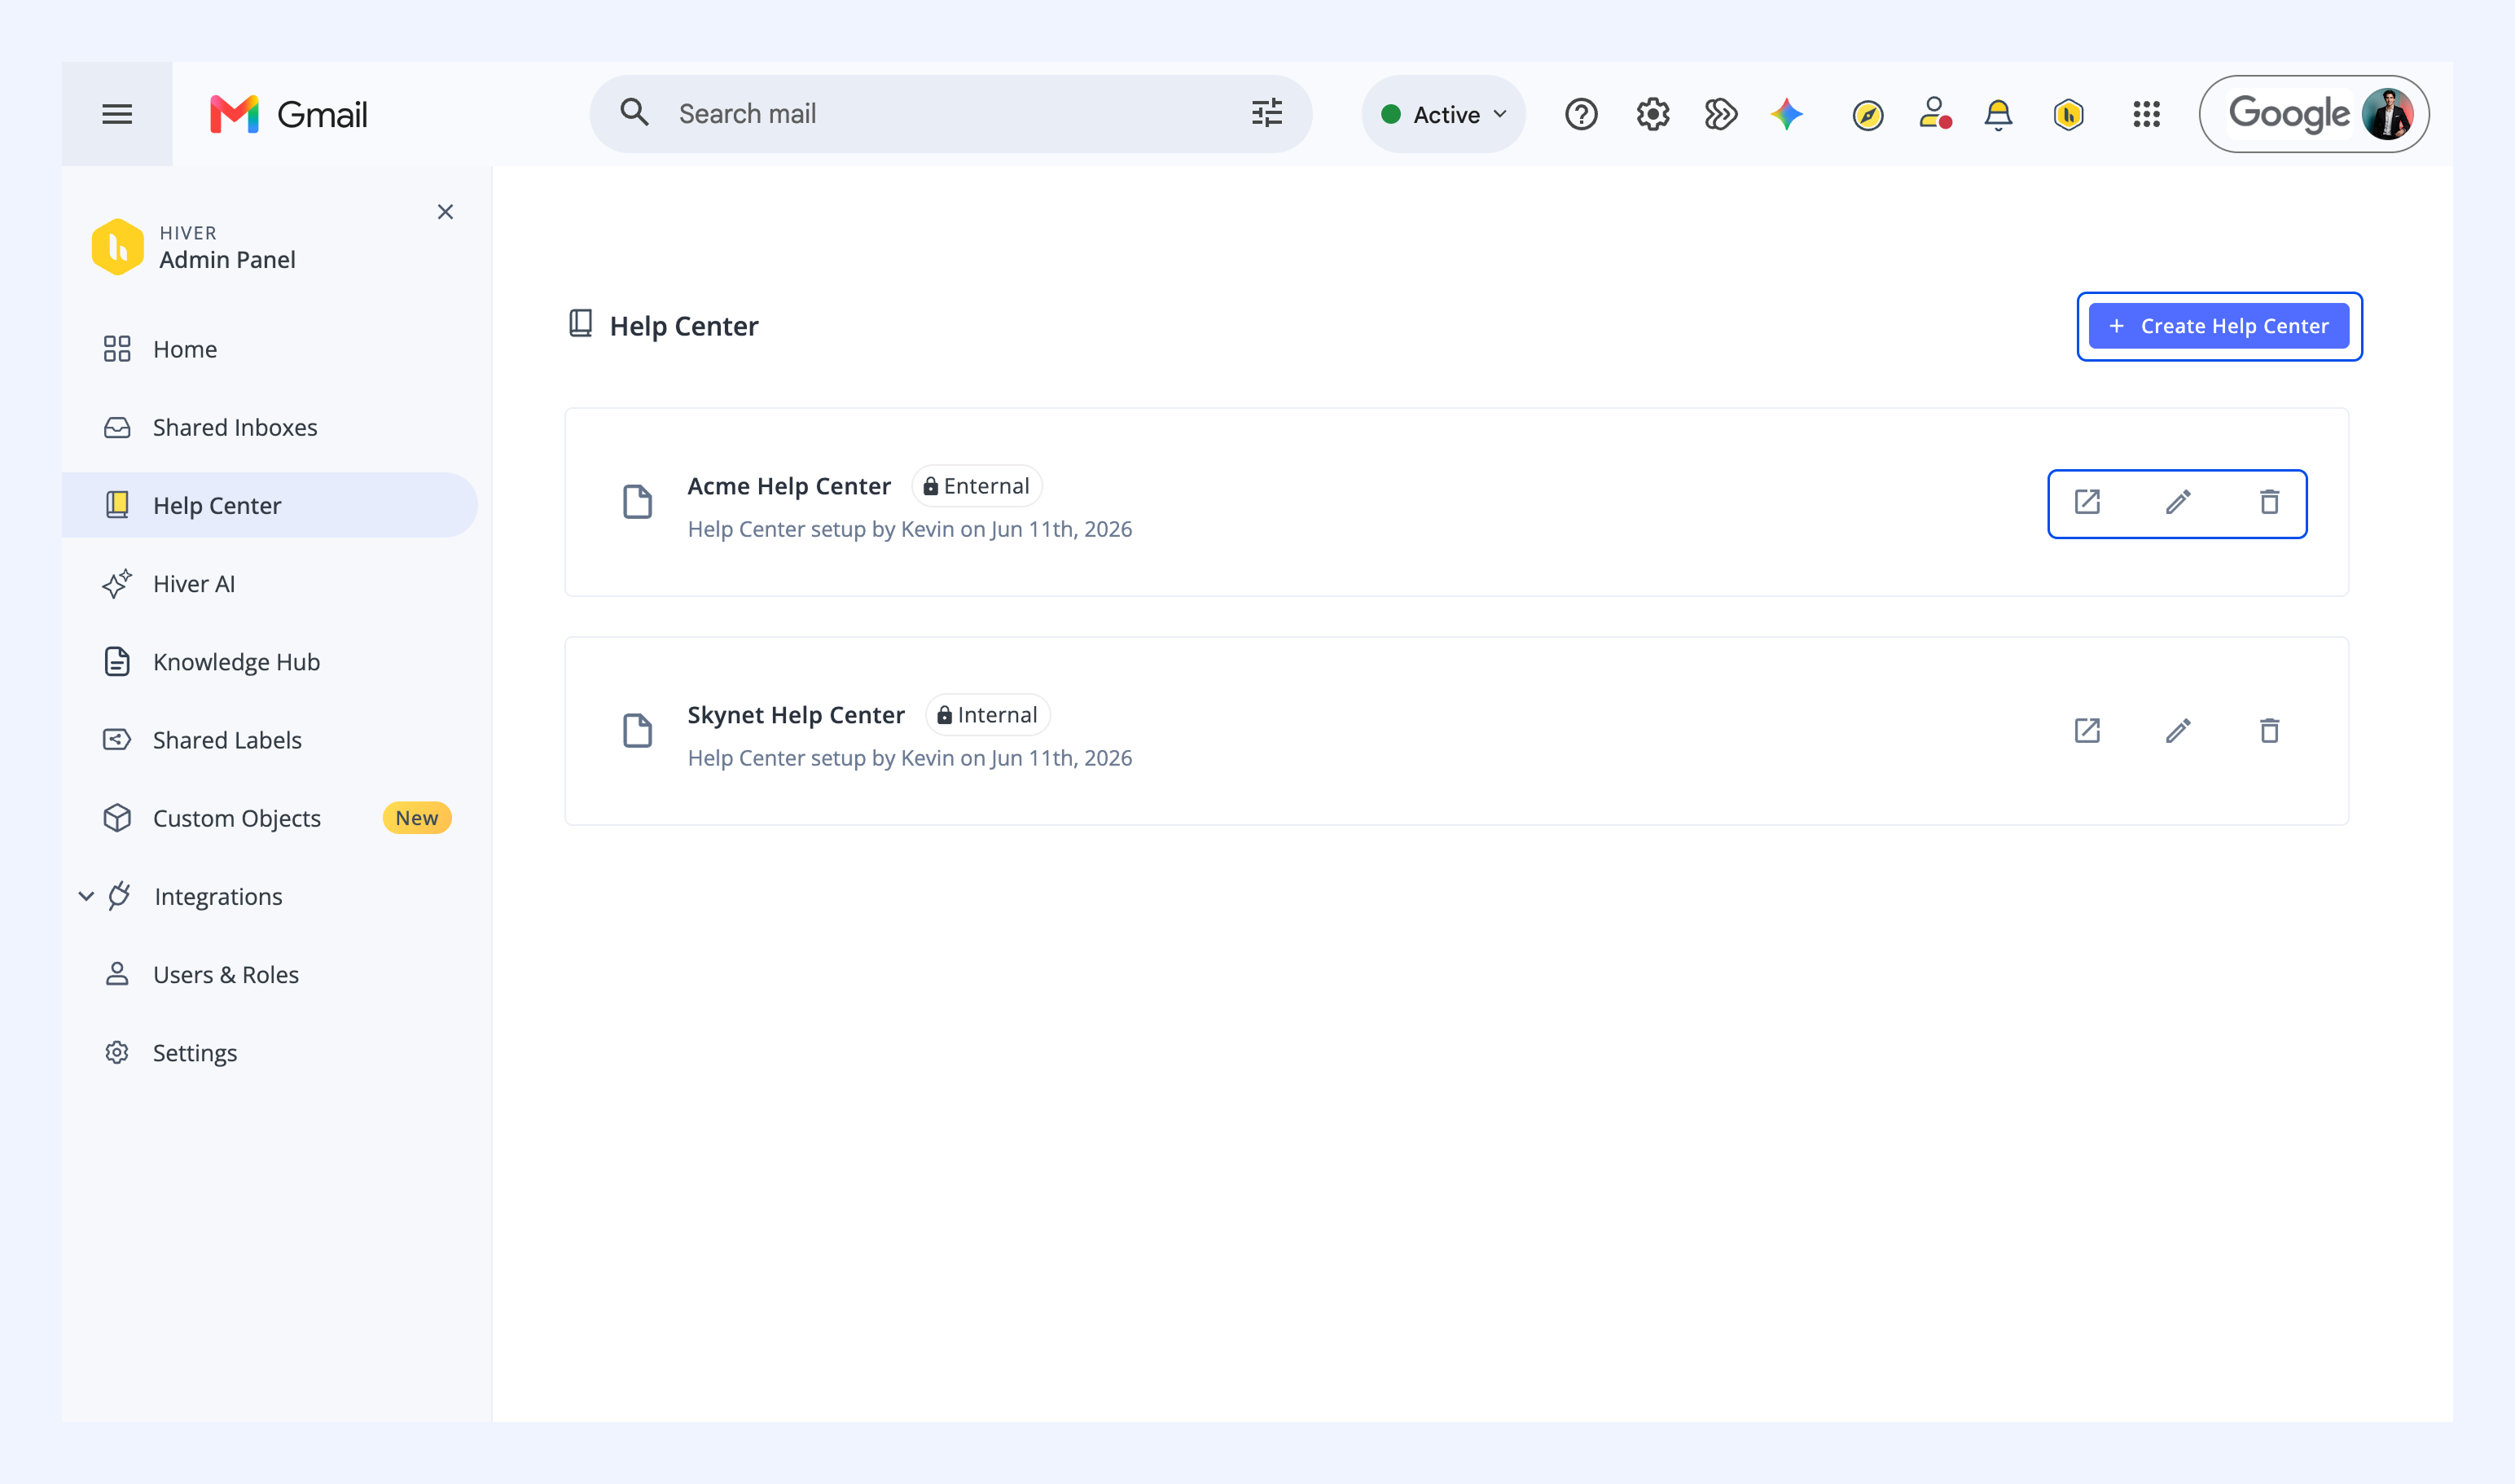
- Create a new Help Center: Click + Create Help Center and follow the steps listed above.
- View a Help Center: Click the open icon (↗) to see the published Help Center as your customers would see it.
- Create and manage content: Click the edit icon (pencil icon) to open the Dashboard, where you can create, update, and organize articles and categories.
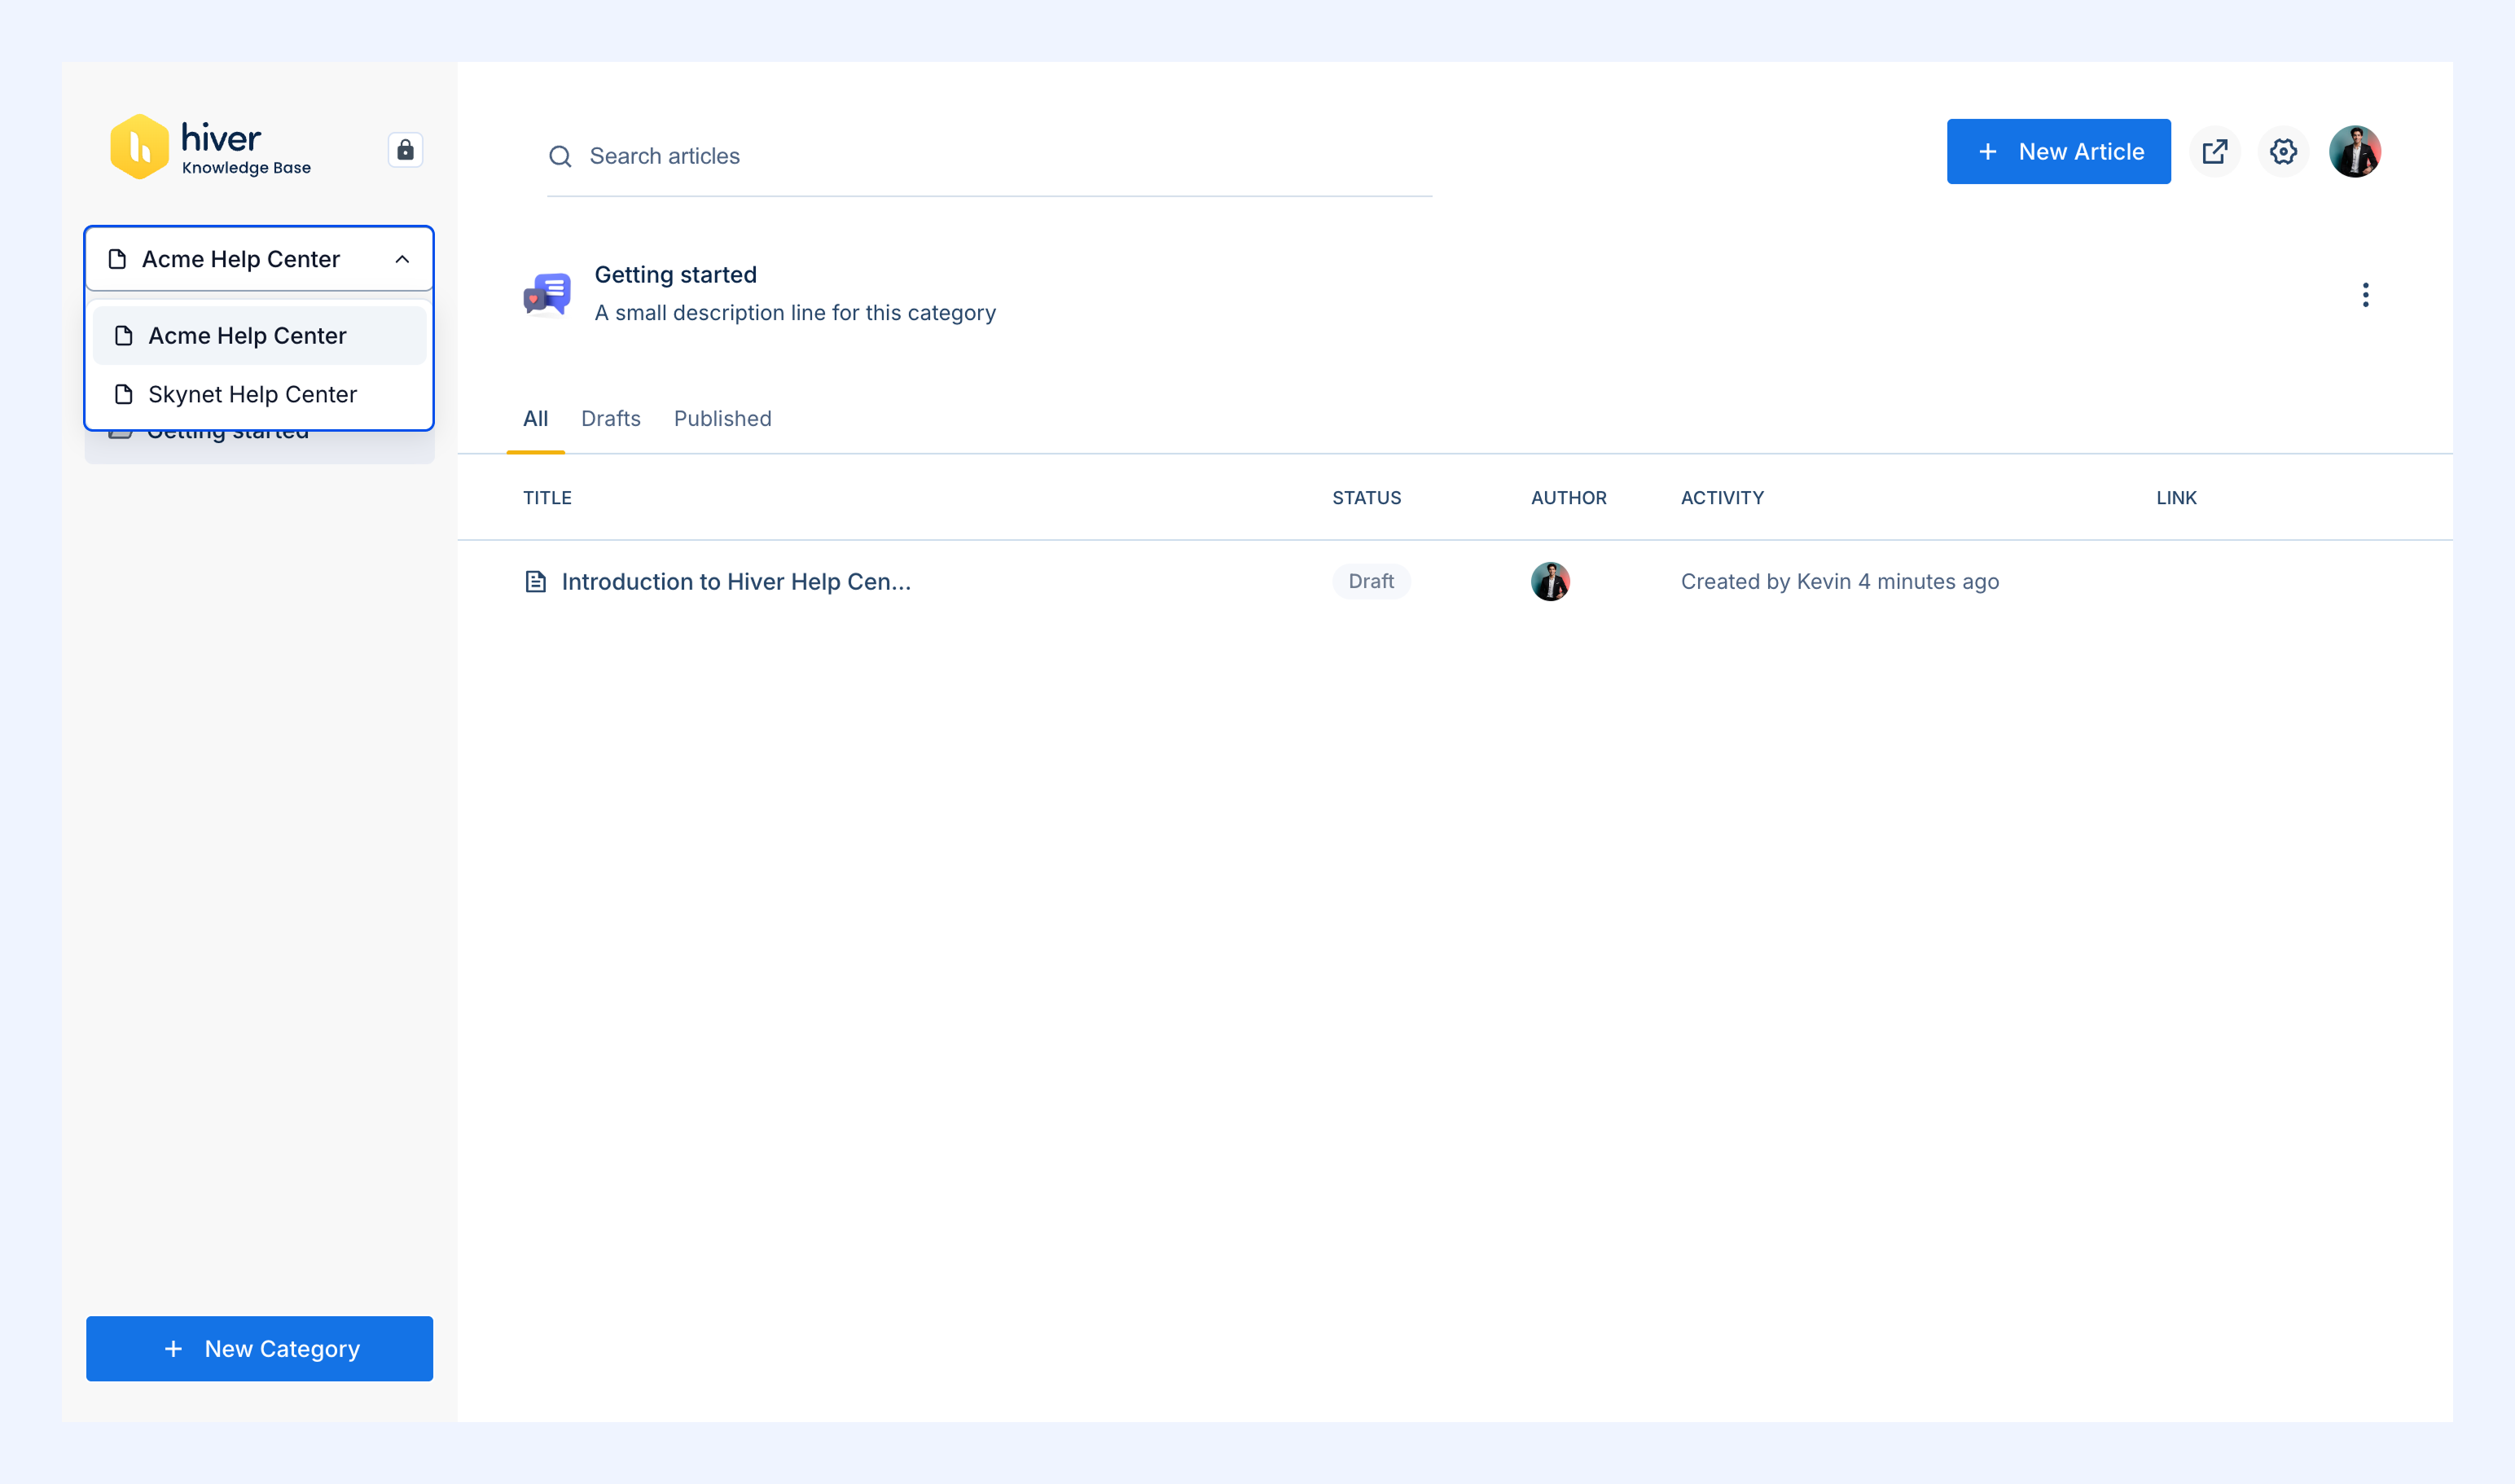
- Switch between Help Centers: In the Dashboard, use the Help Center dropdown in the top-left corner to switch between different Help Centers.
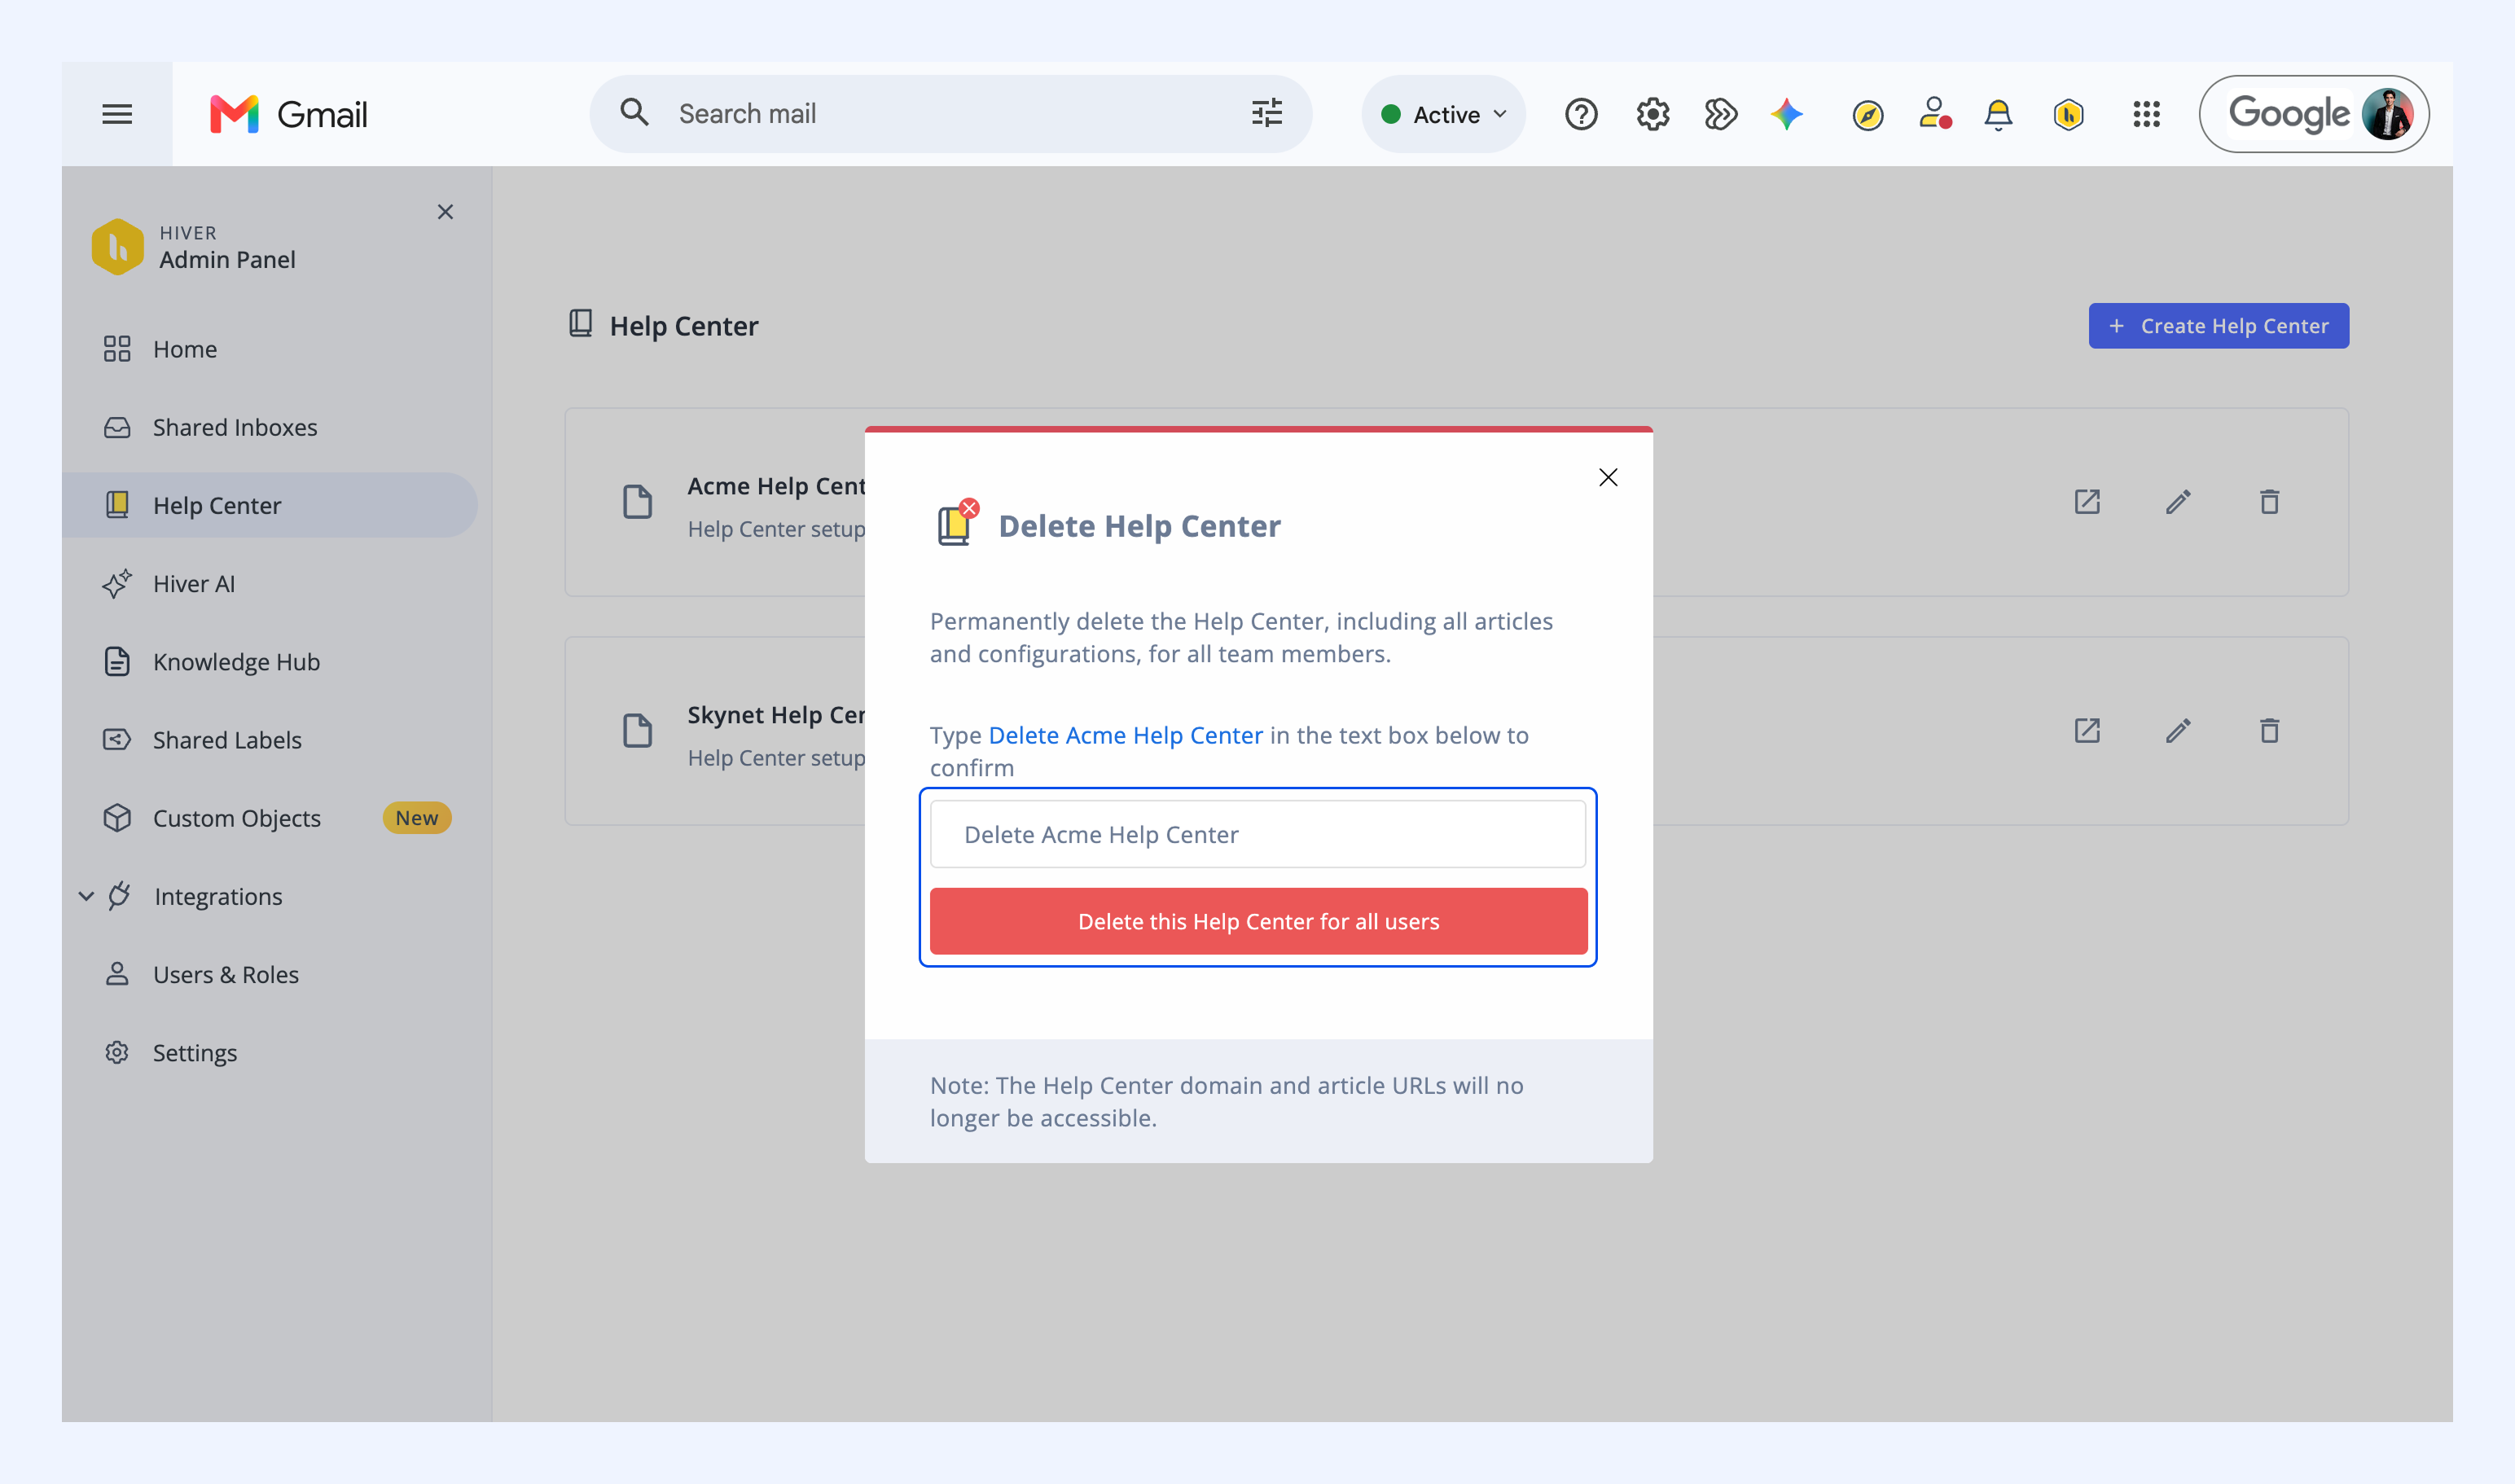
- Delete a Help Center: Click the delete icon. (See the section below for detailed steps.)
How to delete a Help Center
If you no longer need a Help Center, you can delete it by following:
1. Go Admin Panel → Help Center.
2. Click the Delete Help Center icon.
3. In the pop-up that appears, confirm your action by typing your Help Center’s name and click Delete this Help Center for all users.
After deletion, the Help Center will be permanently removed from your Admin Panel and will no longer be accessible.