Chat Inbox in action
This article guides agents/users in effectively managing incoming live chat queries.
Send rich responses
Users/Live agents can efficiently manage and respond to live chats using the following features from Hiver Omni:
- Chat templates: Use pre-made chat templates for quicker responses.
- Emojis: Add emojis to personalize your messages.
- File attachments: Attach files to your messages to improve your response quality. The maximum file size that can be attached is 40 MB. You can attach files in the following formats when responding to chats:
Images: bmp, gif, jpeg, jpg, png, tiff
Documents: 7z, csv, doc, docx, json, ods, odt, ott, pdf, ppt, tar, rtf, txt, xlsx, zip
Videos: avi, flv, mkv, mov, mp4, mpeg, webm, wmv, webp
Audio: aac, aiff, flac, m4a, mp3, ogg, wav, wma
Managing chat status
- A chat status is set to “Open” by default
- Once you mark the chat “Closed” in the “Status” drop-down menu in the right-side panel, it will be considered closed.
- If you have enabled CSAT, the customer will automatically receive a feedback form to rate their experience once a chat is closed.
Note: Closed chats cannot be reopened because chat is a real-time communication channel, unlike email.
View visitor details during a chat
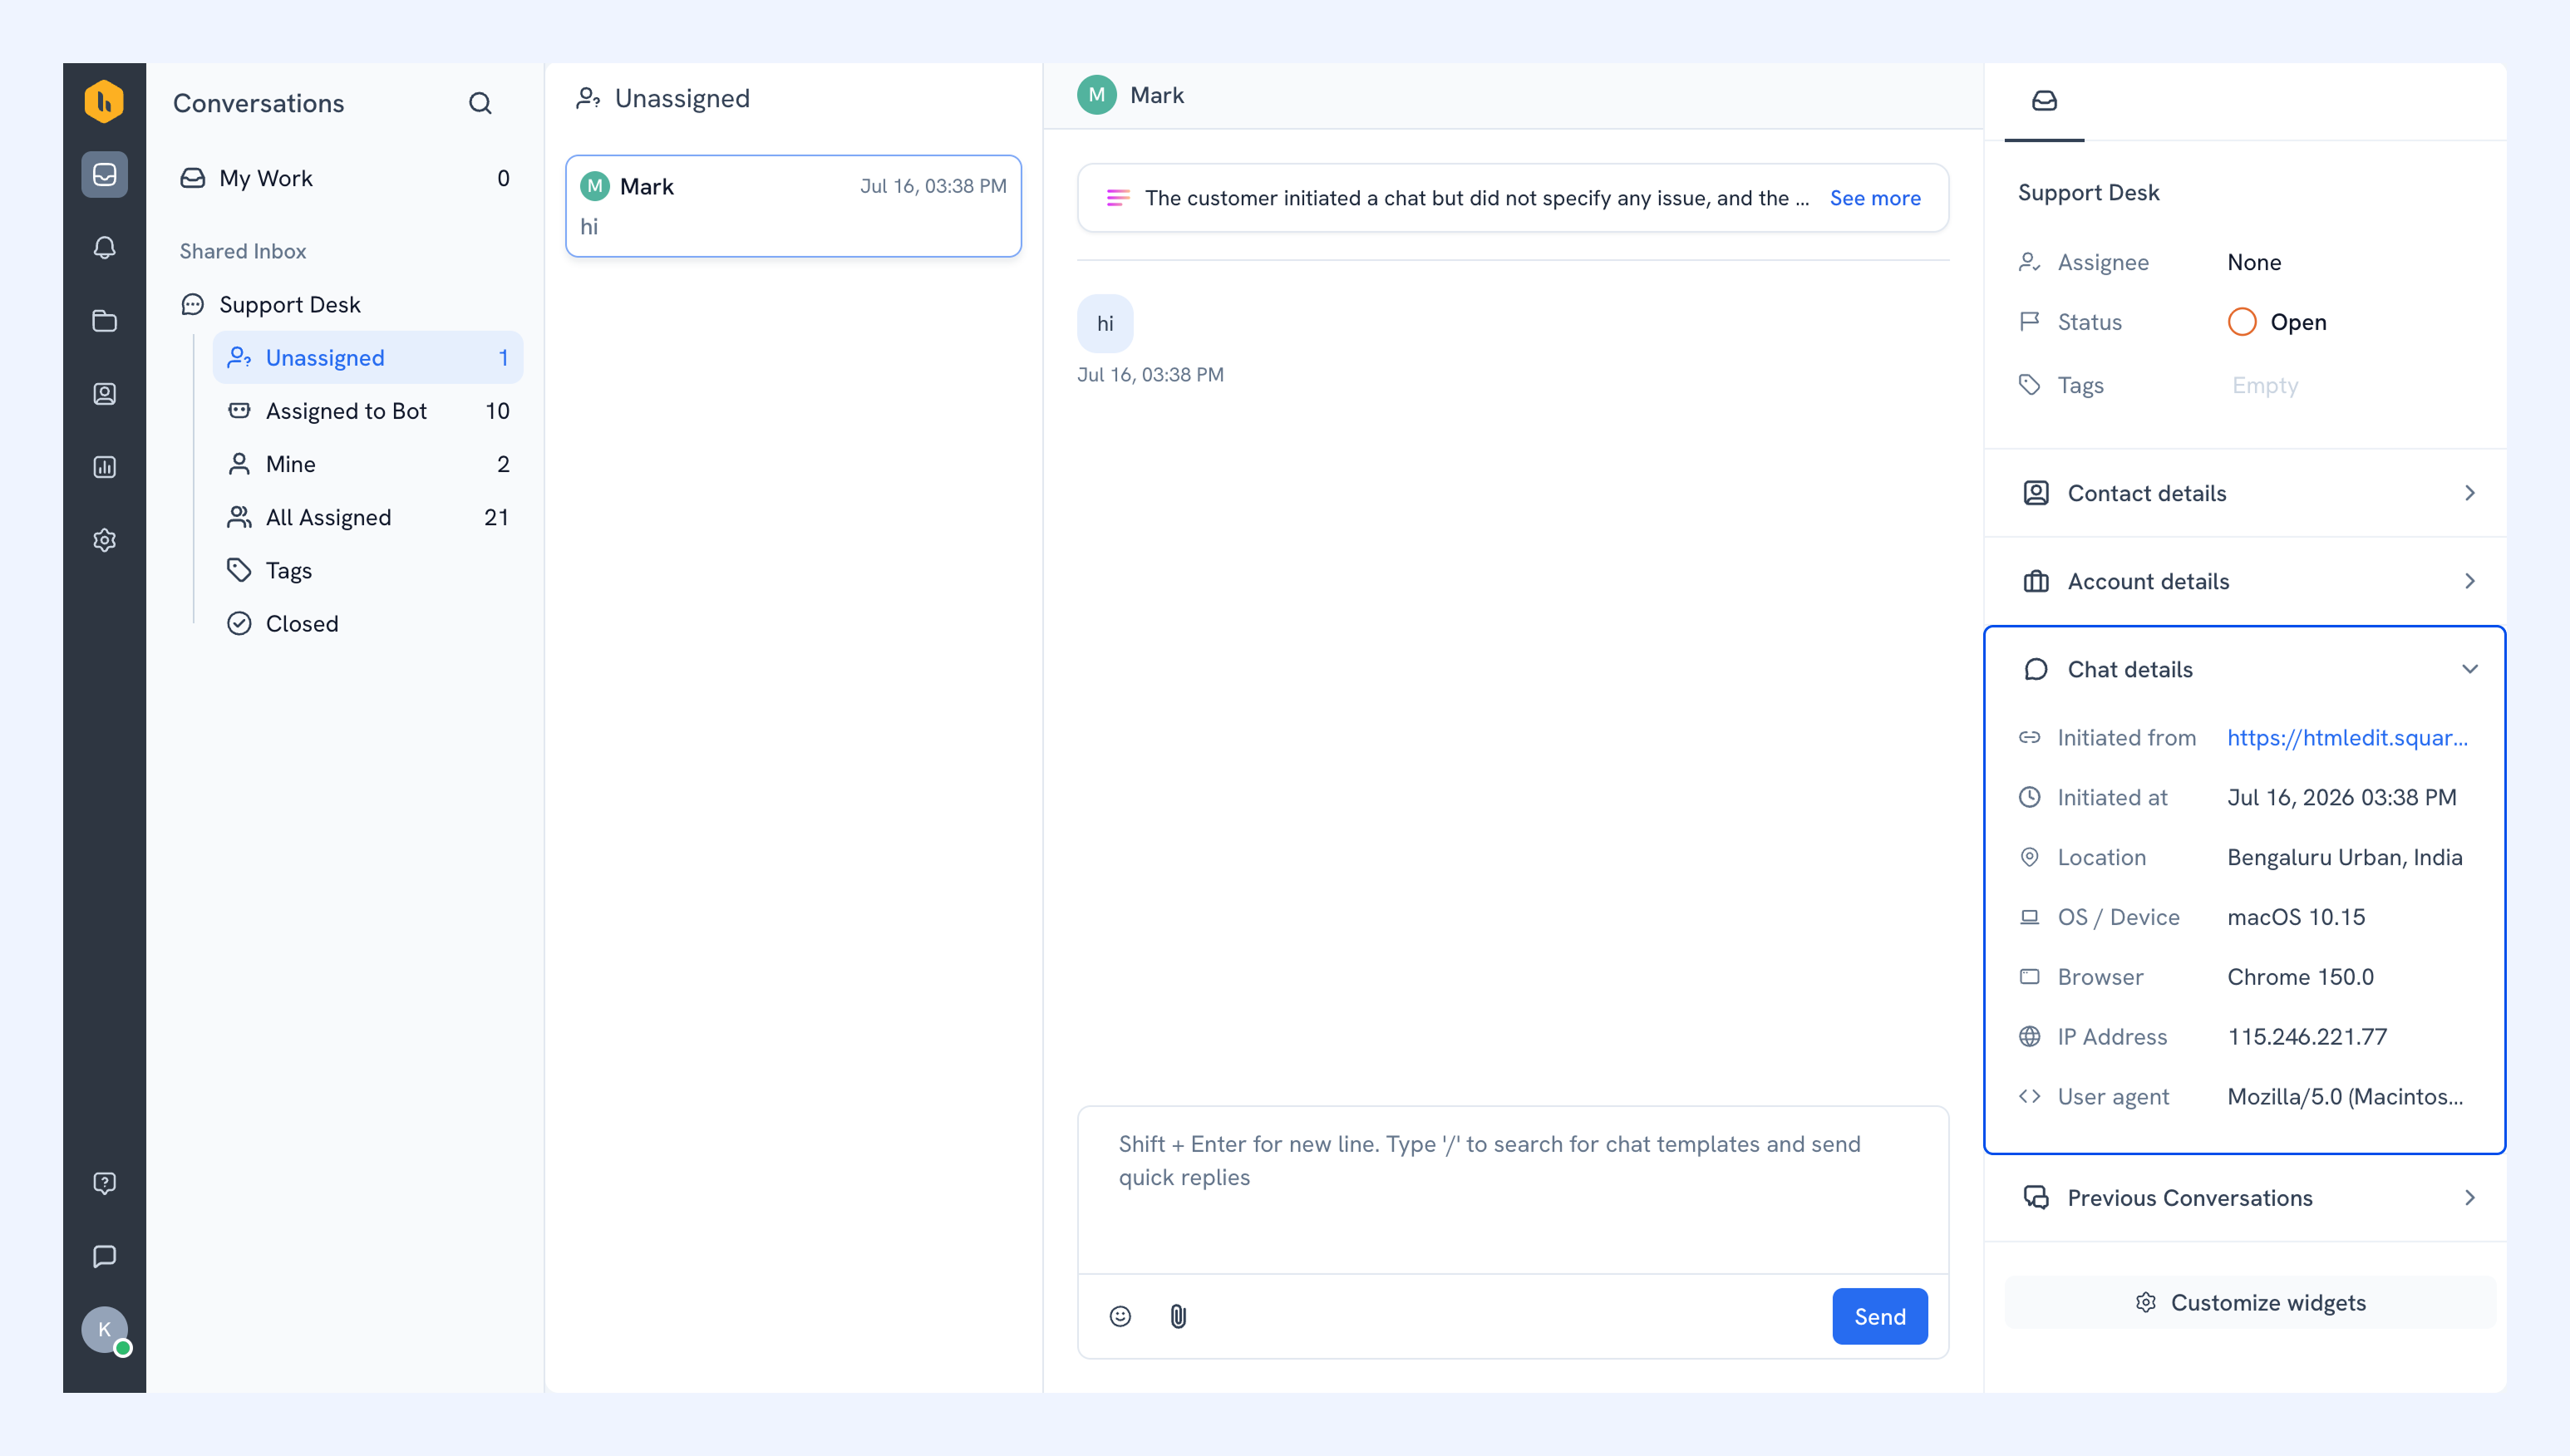
When a visitor starts a chat from your website, Chat details shows where the chat started, where the visitor is located, and what device they’re using.
Note: This feature is currently in an early access program. To enable them for your account, reach out to us at support@hiverhq.com.
| Detail | What it shows |
| Initiated from | The page the visitor started the chat from. |
| Initiated at | The date and time the chat started. |
| Location | The city and country the visitor is browsing from. |
| OS / Device | The operating system and device the visitor is using. |
| Browser | The name and version of the visitor’s browser. |
| IP Address | The IP address the visitor is connecting from. |
| User agent | The full text string that identifies the visitor’s browser, operating system, and device. |
Chat Templates
To create a Chat Template, click the “Templates” icon on the left-side navigation menu.
- You will see a list of existing chat templates (if any).
- To create a new chat template, click the “Create Template” button in the upper-right corner of the screen.

Give your template a name and define the content for it.

Finish by clicking “Save.” Your new template will now be added to the list of chat templates.
Using a chat template:
To access a chat template while responding to a customer, use the slash key ( / )in the ‘Reply box’.
- Pressing the slash key will show a list of all existing chat templates.
- To search for a specific template, start typing its name, and the list will narrow.
- Press the Enter key or cursor to insert the template in your reply box.

Auto assigning chats
When a new chat conversation is started, it gets automatically categorized under “Unassigned” in the chat inbox menu
Manually, there are two ways in which a new chat can be assigned:
By admin: An admin can assign it to an agent, OR
By agent: If an agent has marked themself as 'Available for chat', they can → Select the “Unassigned” view to see a list of all open chats → Click on any chat to open it and navigate to the right-side panel → Assign it to themself from the “Assigned to” drop-down menu.
With Auto Assignment, new chat conversations can be automatically assigned to available agents in a round-robin manner or to the agent who responds to the chat.
Prerequisite for auto-assignments
Agents' availability can be managed either by admins or by agents themselves. Admins will be able to manage everyone's availability by clicking on the “User icon” → “Team availability” as shown below.

Agents can manage their own availability by clicking on “User icon” → “Available for chat”.

Once chat auto-assignment has been enabled for a chat inbox, available agents will receive a notification when a new chat is assigned to them.
When an agent marks themselves away
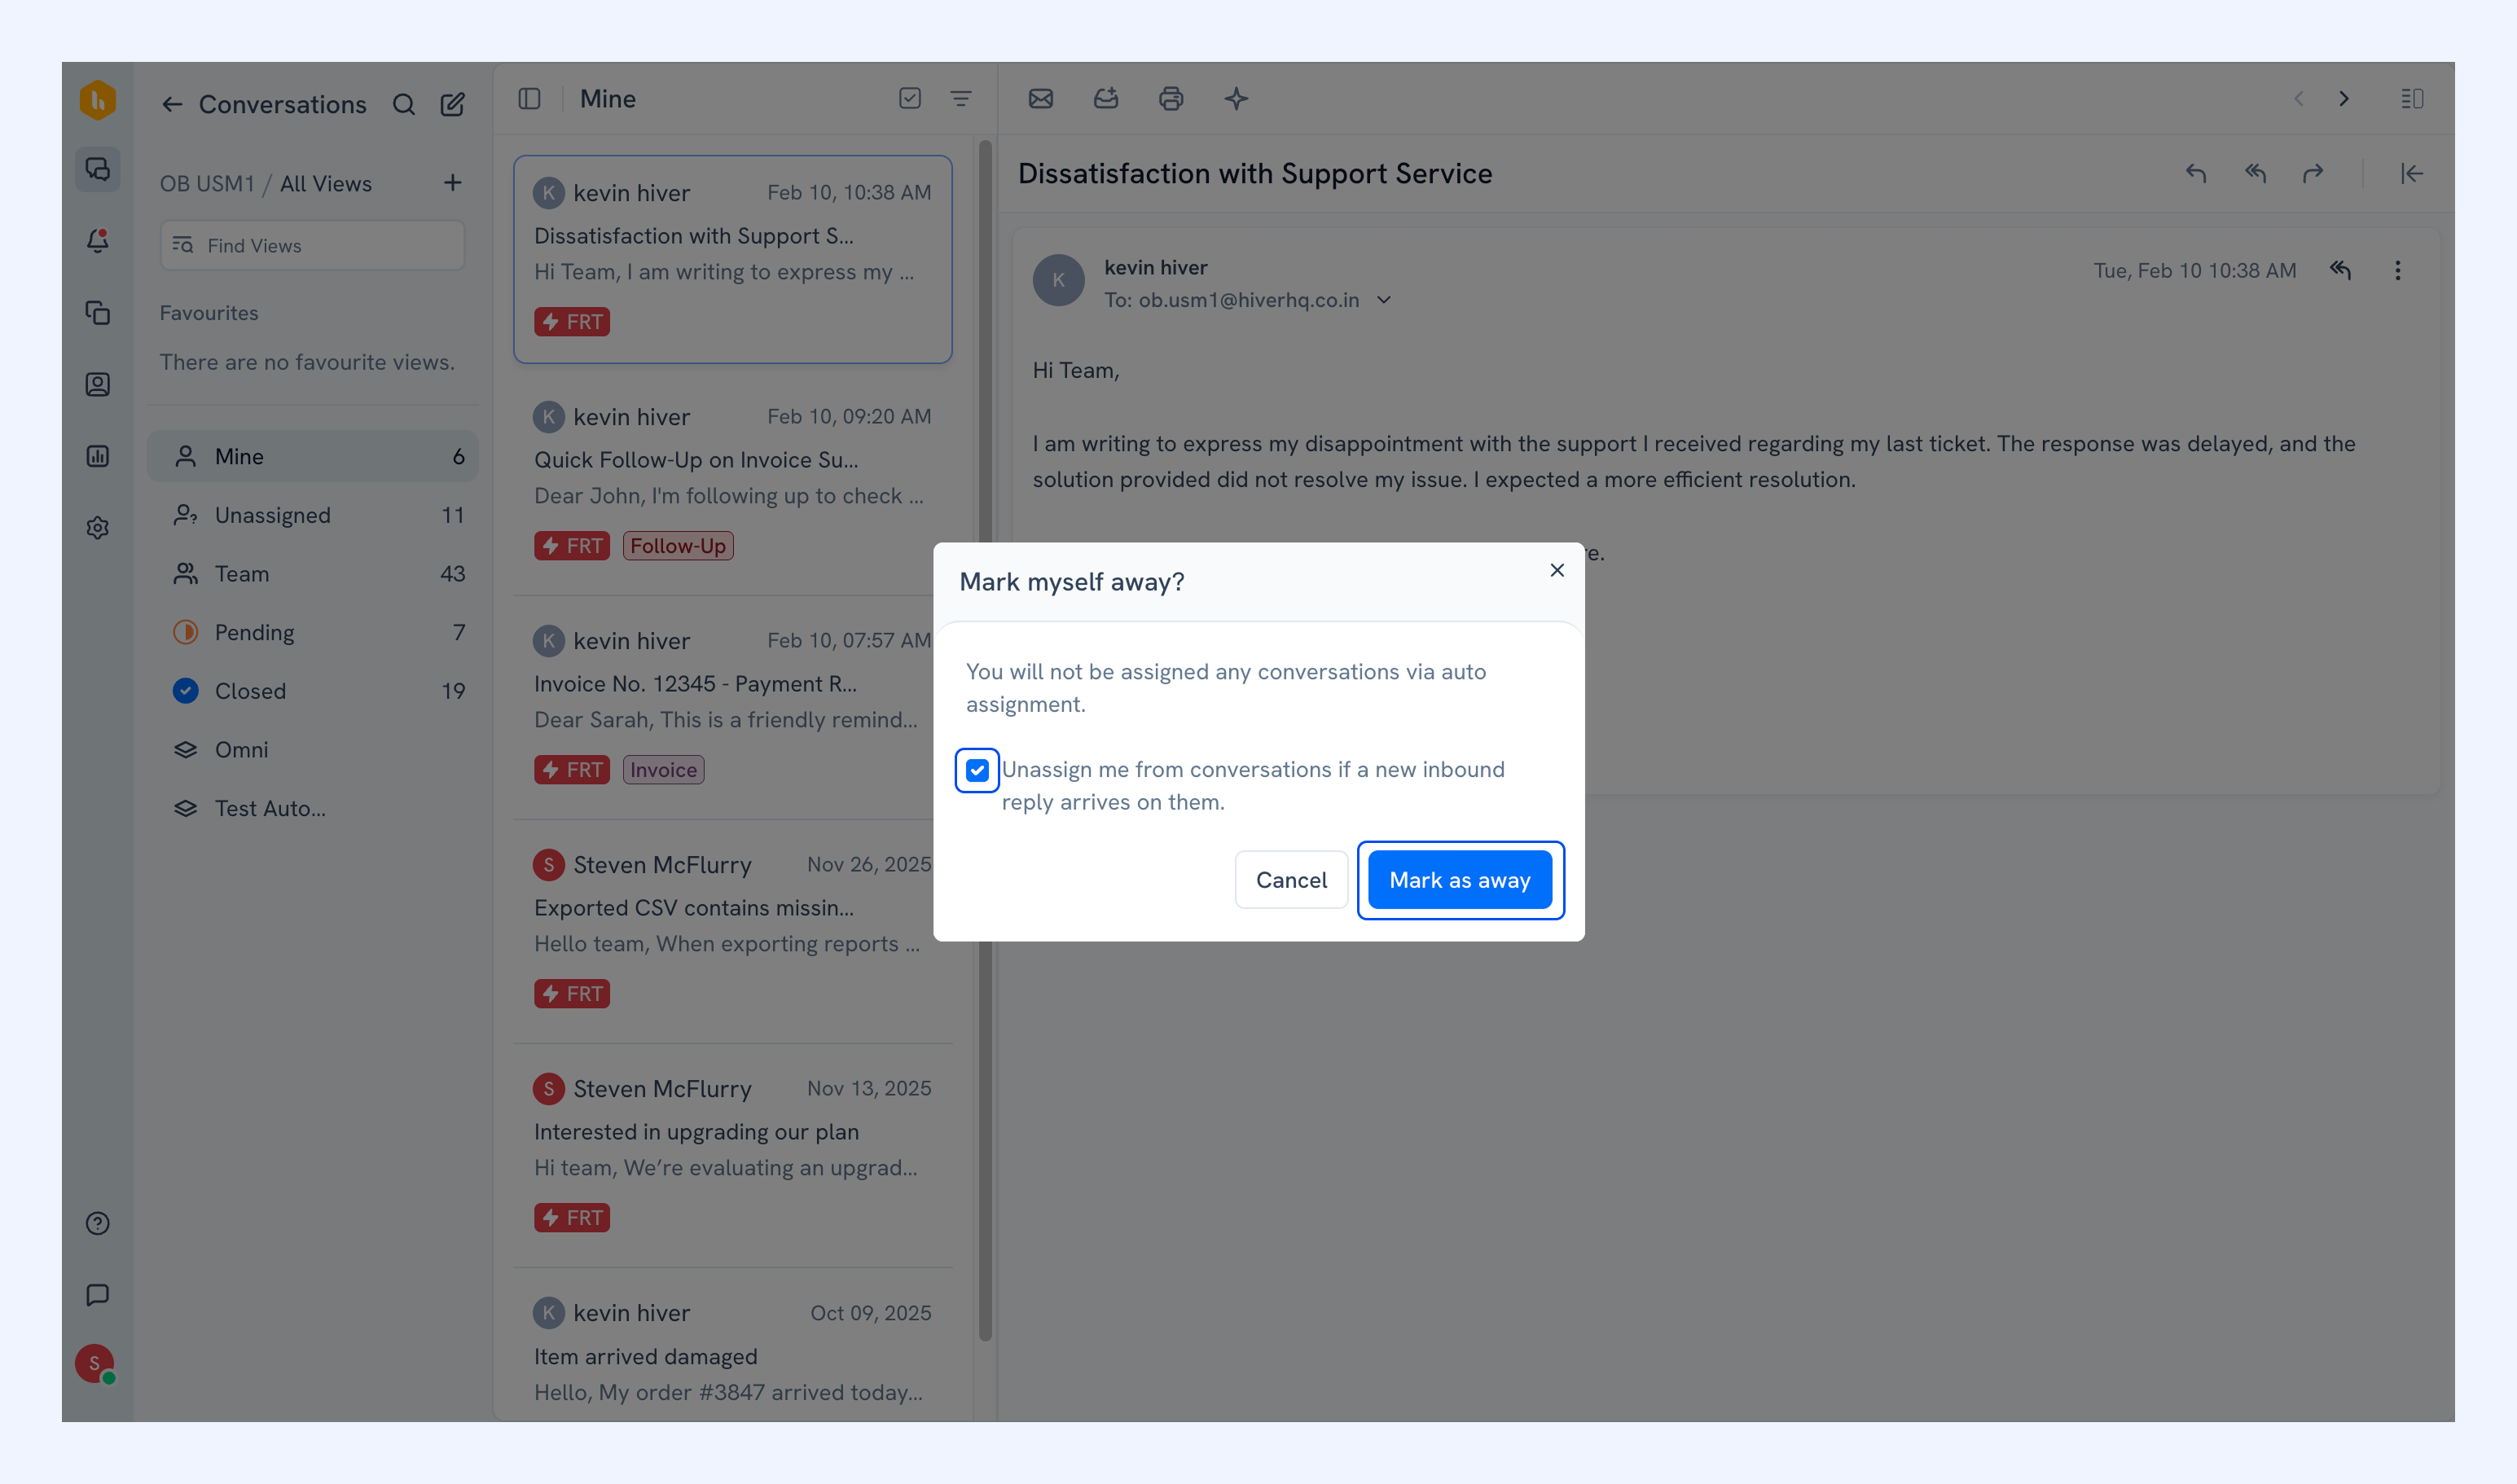
When an agent marks themselves as away, they can choose to unassign existing conversations when a new inbound reply arrives on them.
- If the option is not selected, existing conversations remain assigned to them.
- If the option is selected, conversations are automatically unassigned and reassigned to an available agent via round robin when a new inbound reply arrives.
How chats are auto-assigned
- Chats are auto-assigned only if there are available agents.
- Agents’ capacity includes any existing chats that they might already be handling.
- When there are more chats to handle beyond the combined capacity of all online agents, the remaining chats will remain unassigned.
How to enable auto assignment
- Go to Settings and navigate to Shared Inboxes
- Select 'Chat Inboxes'
- Choose your desired inbox and select ‘Auto-assignment’
To enable automatic assignment, toggle ON “Round robin assignment”
For scenarios where the chat volume is high, admins can set the maximum number of chats an agent can handle simultaneously.
This enables the admin to auto-assign chats to available agents in a round-robin manner.
Admins can also toggle “Auto-assign unassigned chats to responder” to automatically assign an unassigned chat to the agent who responds to the visitor.

Need Help?
If you face any issues enabling or using Live Chat, reach out to our support team. We’re here to help you get the most out of Hiver.