Setting up live chat
Live chat lets you connect with website visitors in real time and answer their questions instantly. This guide walks you through creating a Chat Inbox, designing your chat widget, and adding it to your website.
Note: Chat Inbox is a legacy feature and is only available to customers who signed up before May 18, 2026.
Create a live Chat Inbox
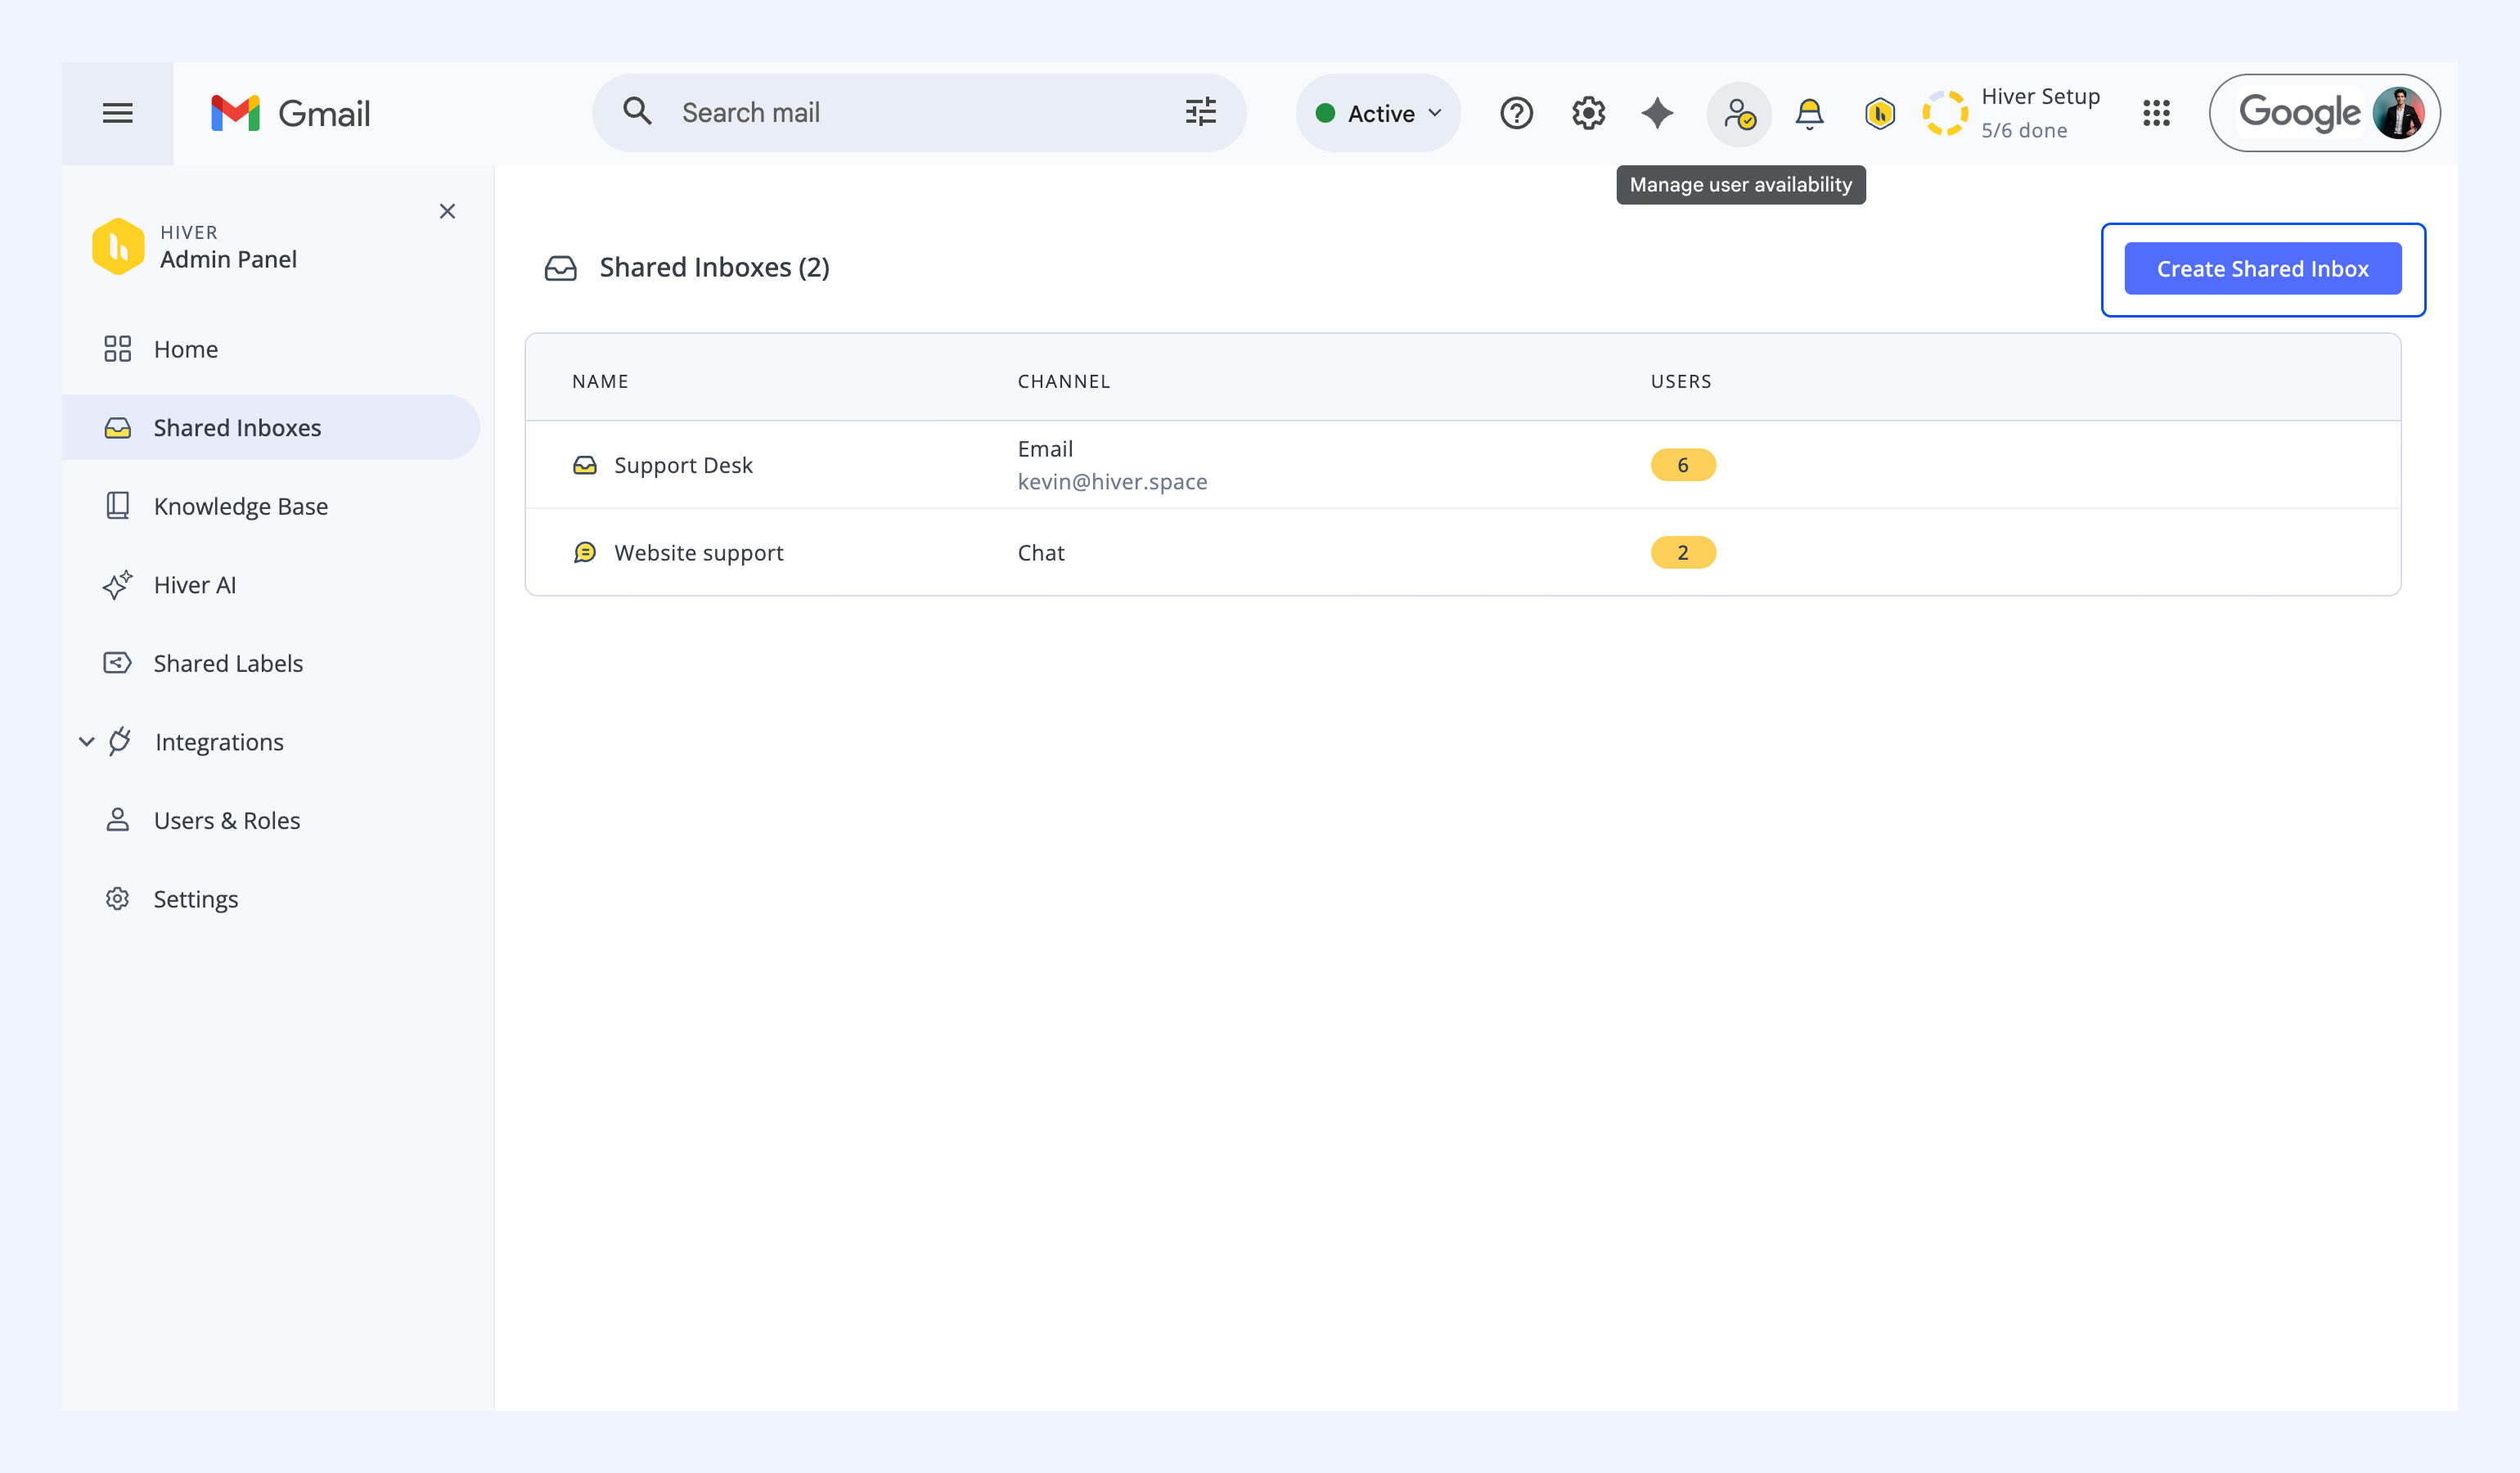
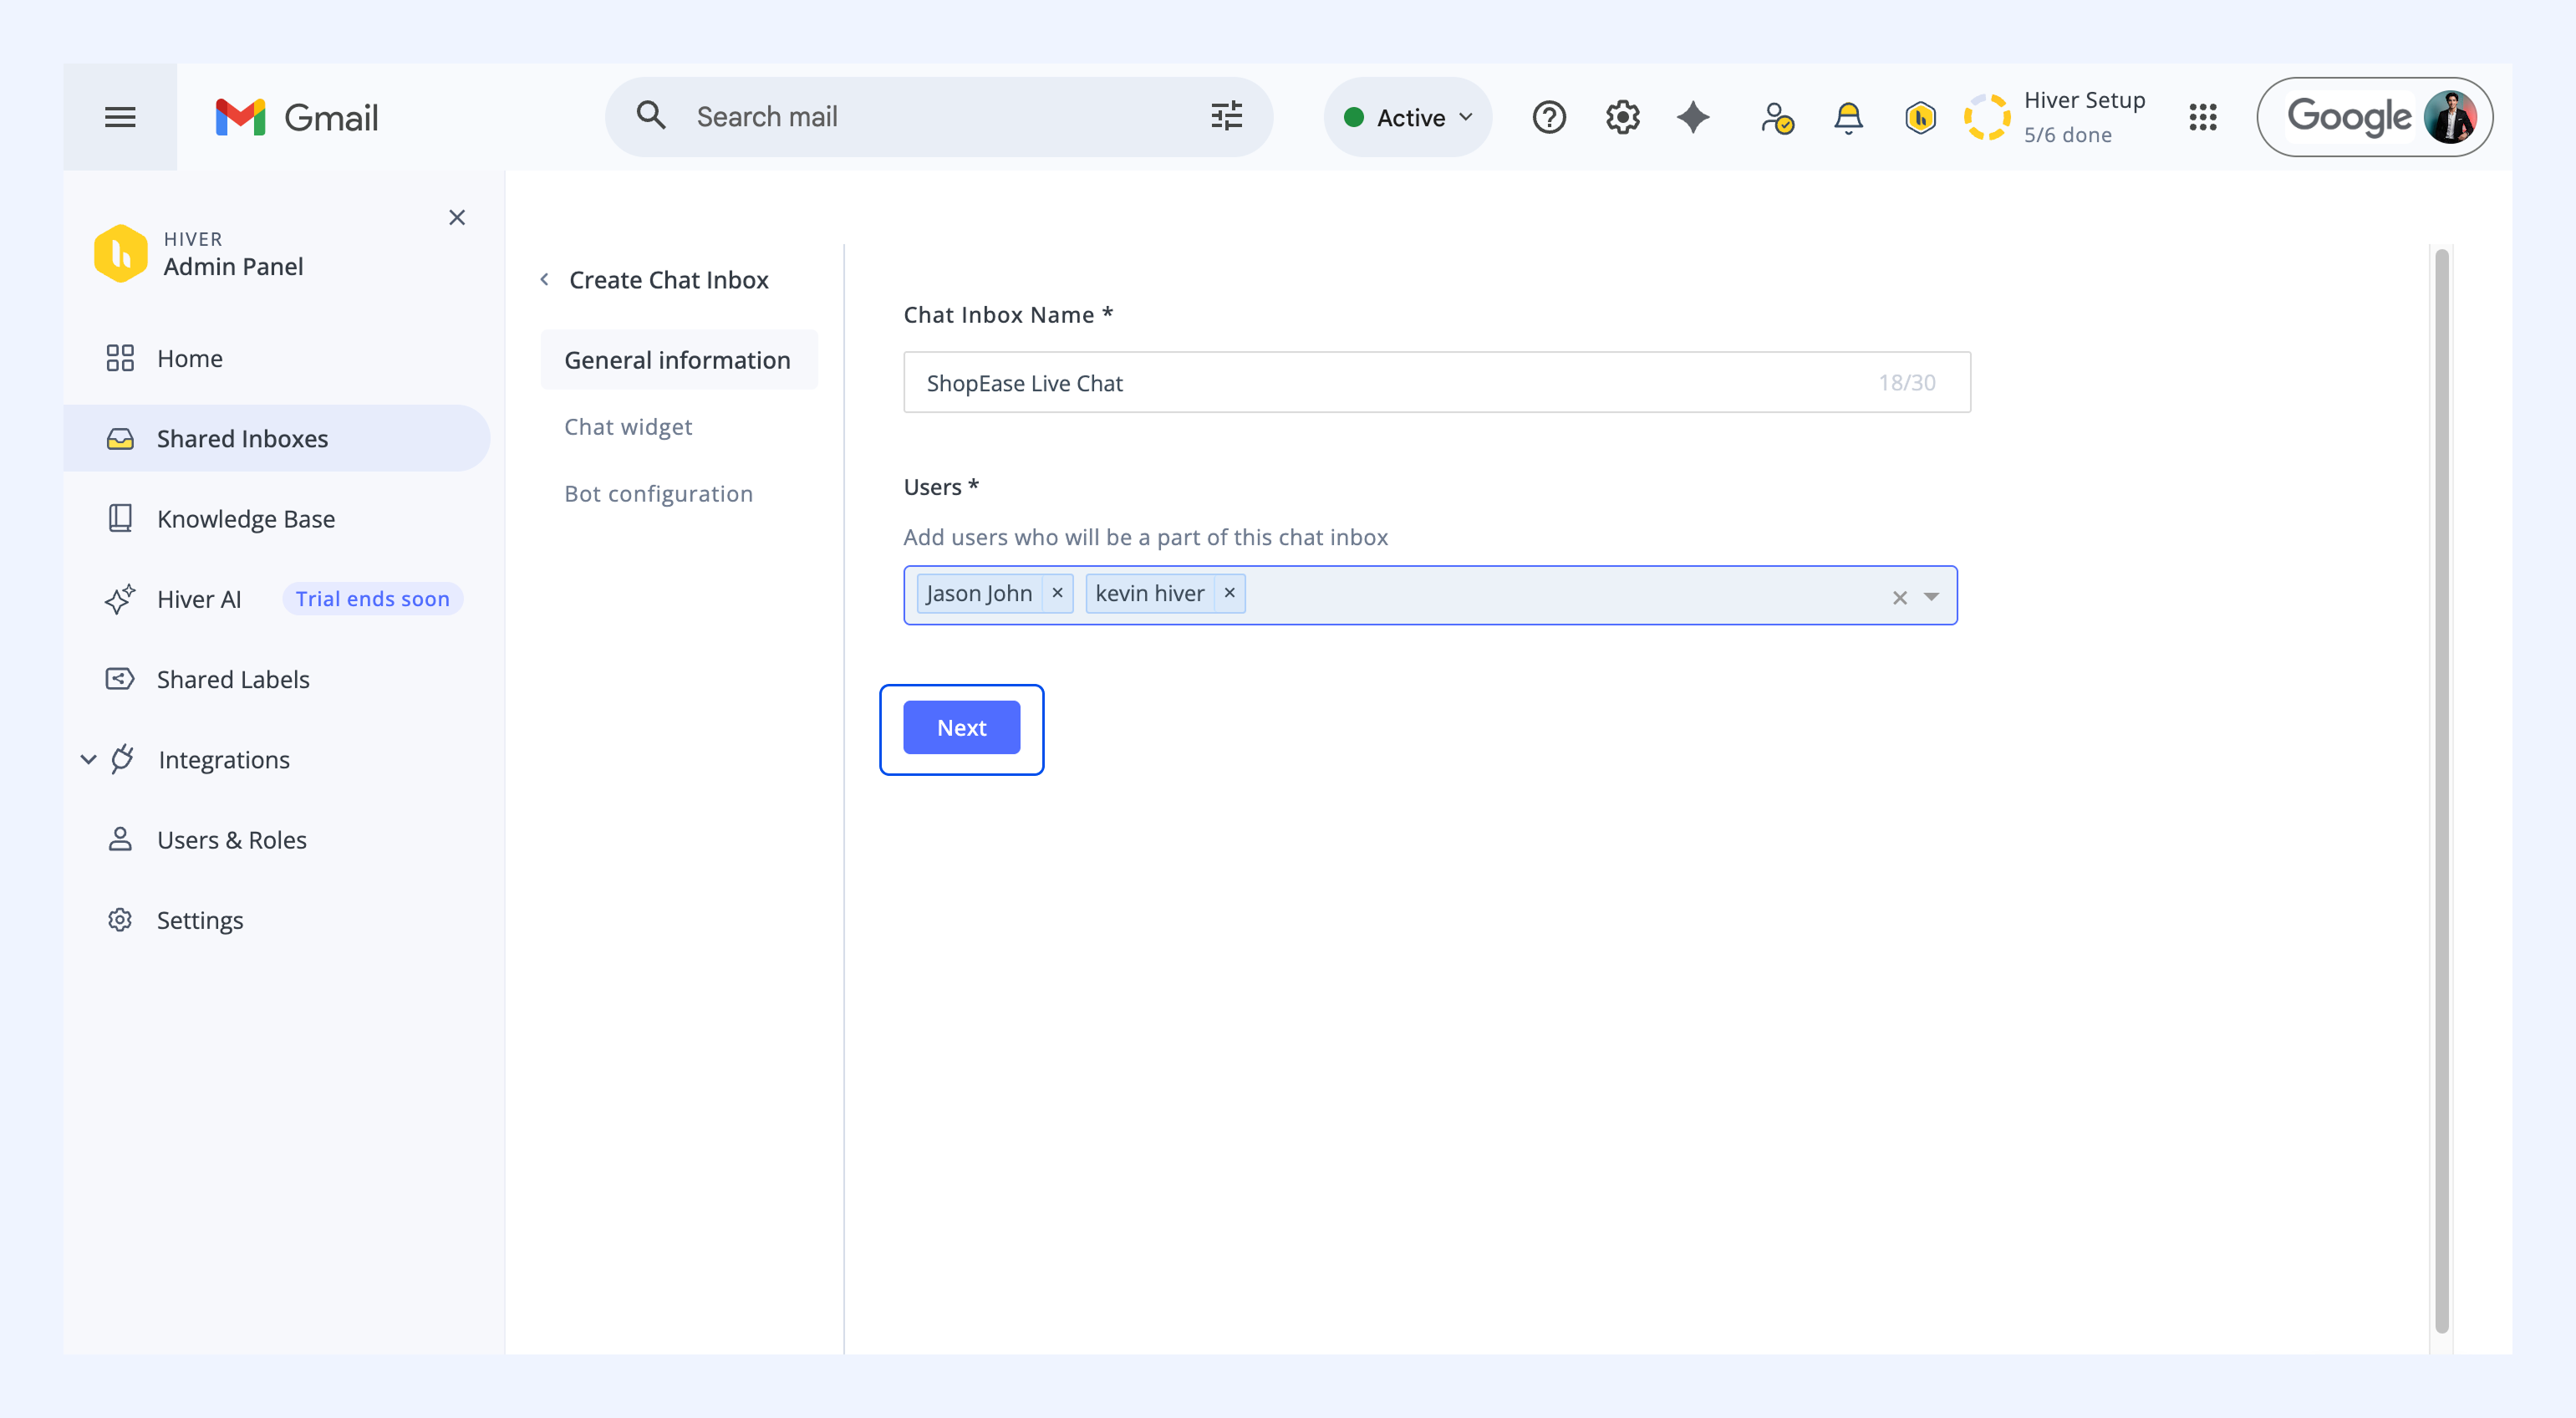
1. Go to Hiver settings → Admin Panel → Shared Inboxes, and click Create Shared Inbox.
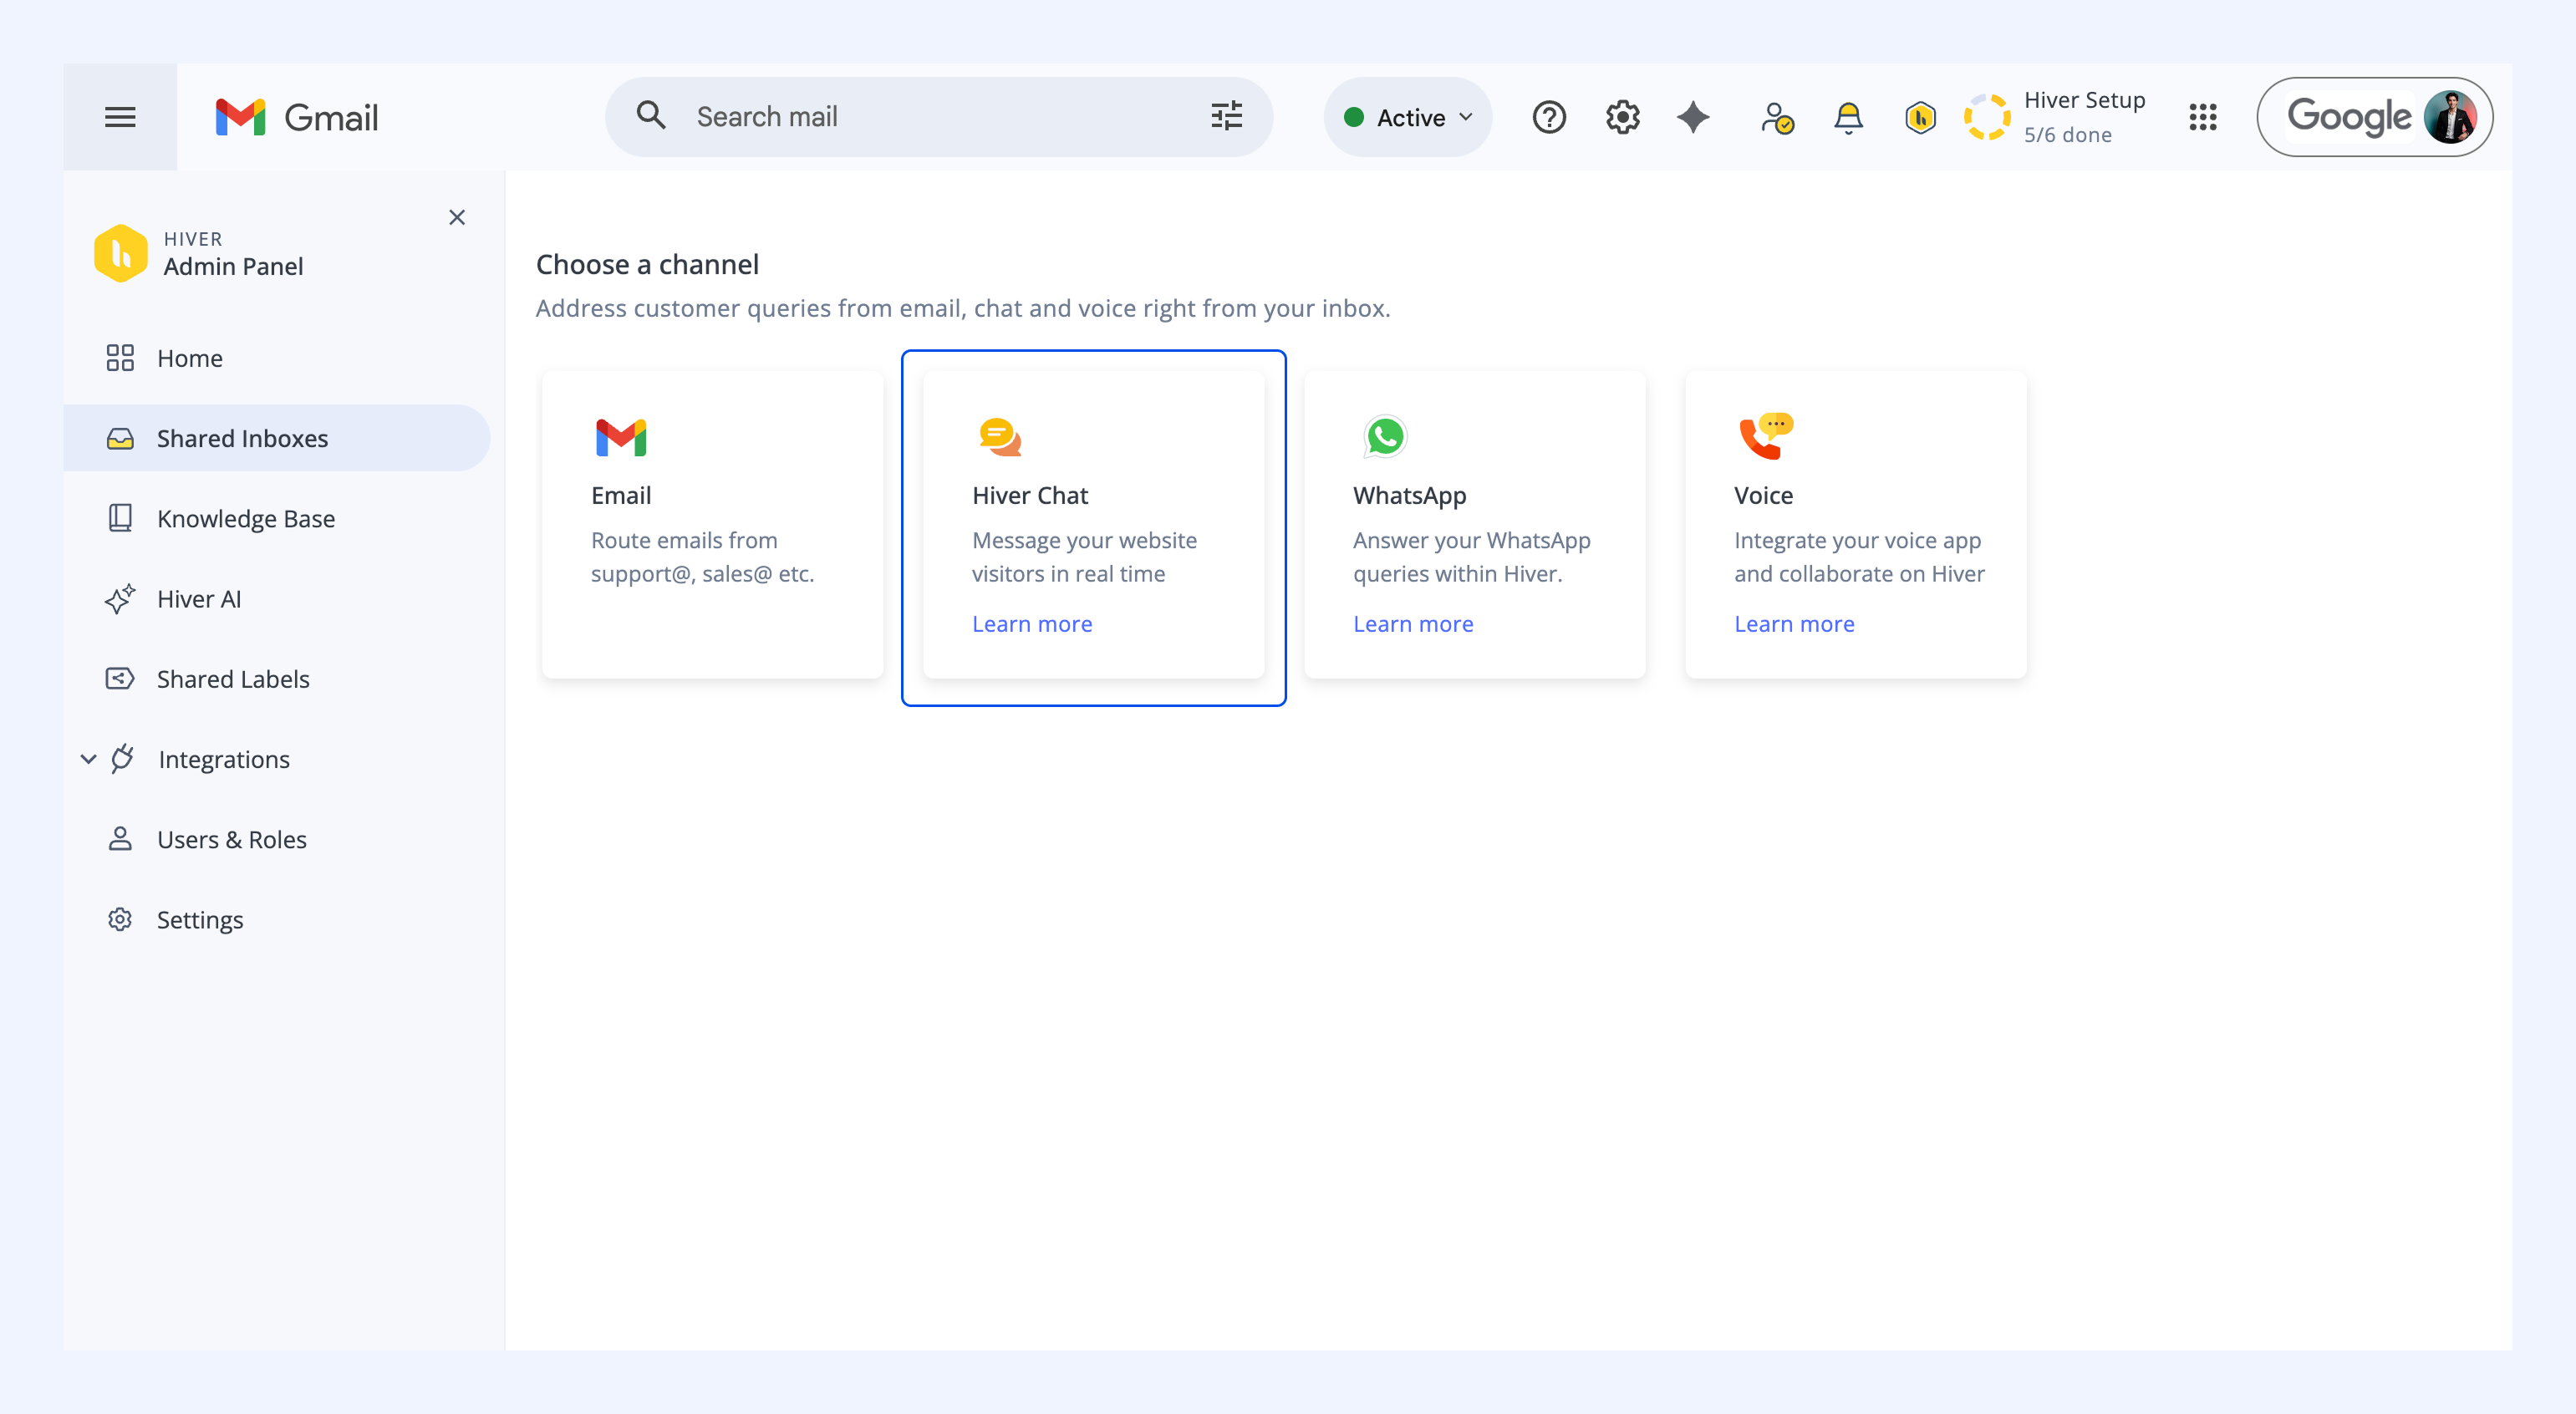
2. Select Hiver Chat as your channel.
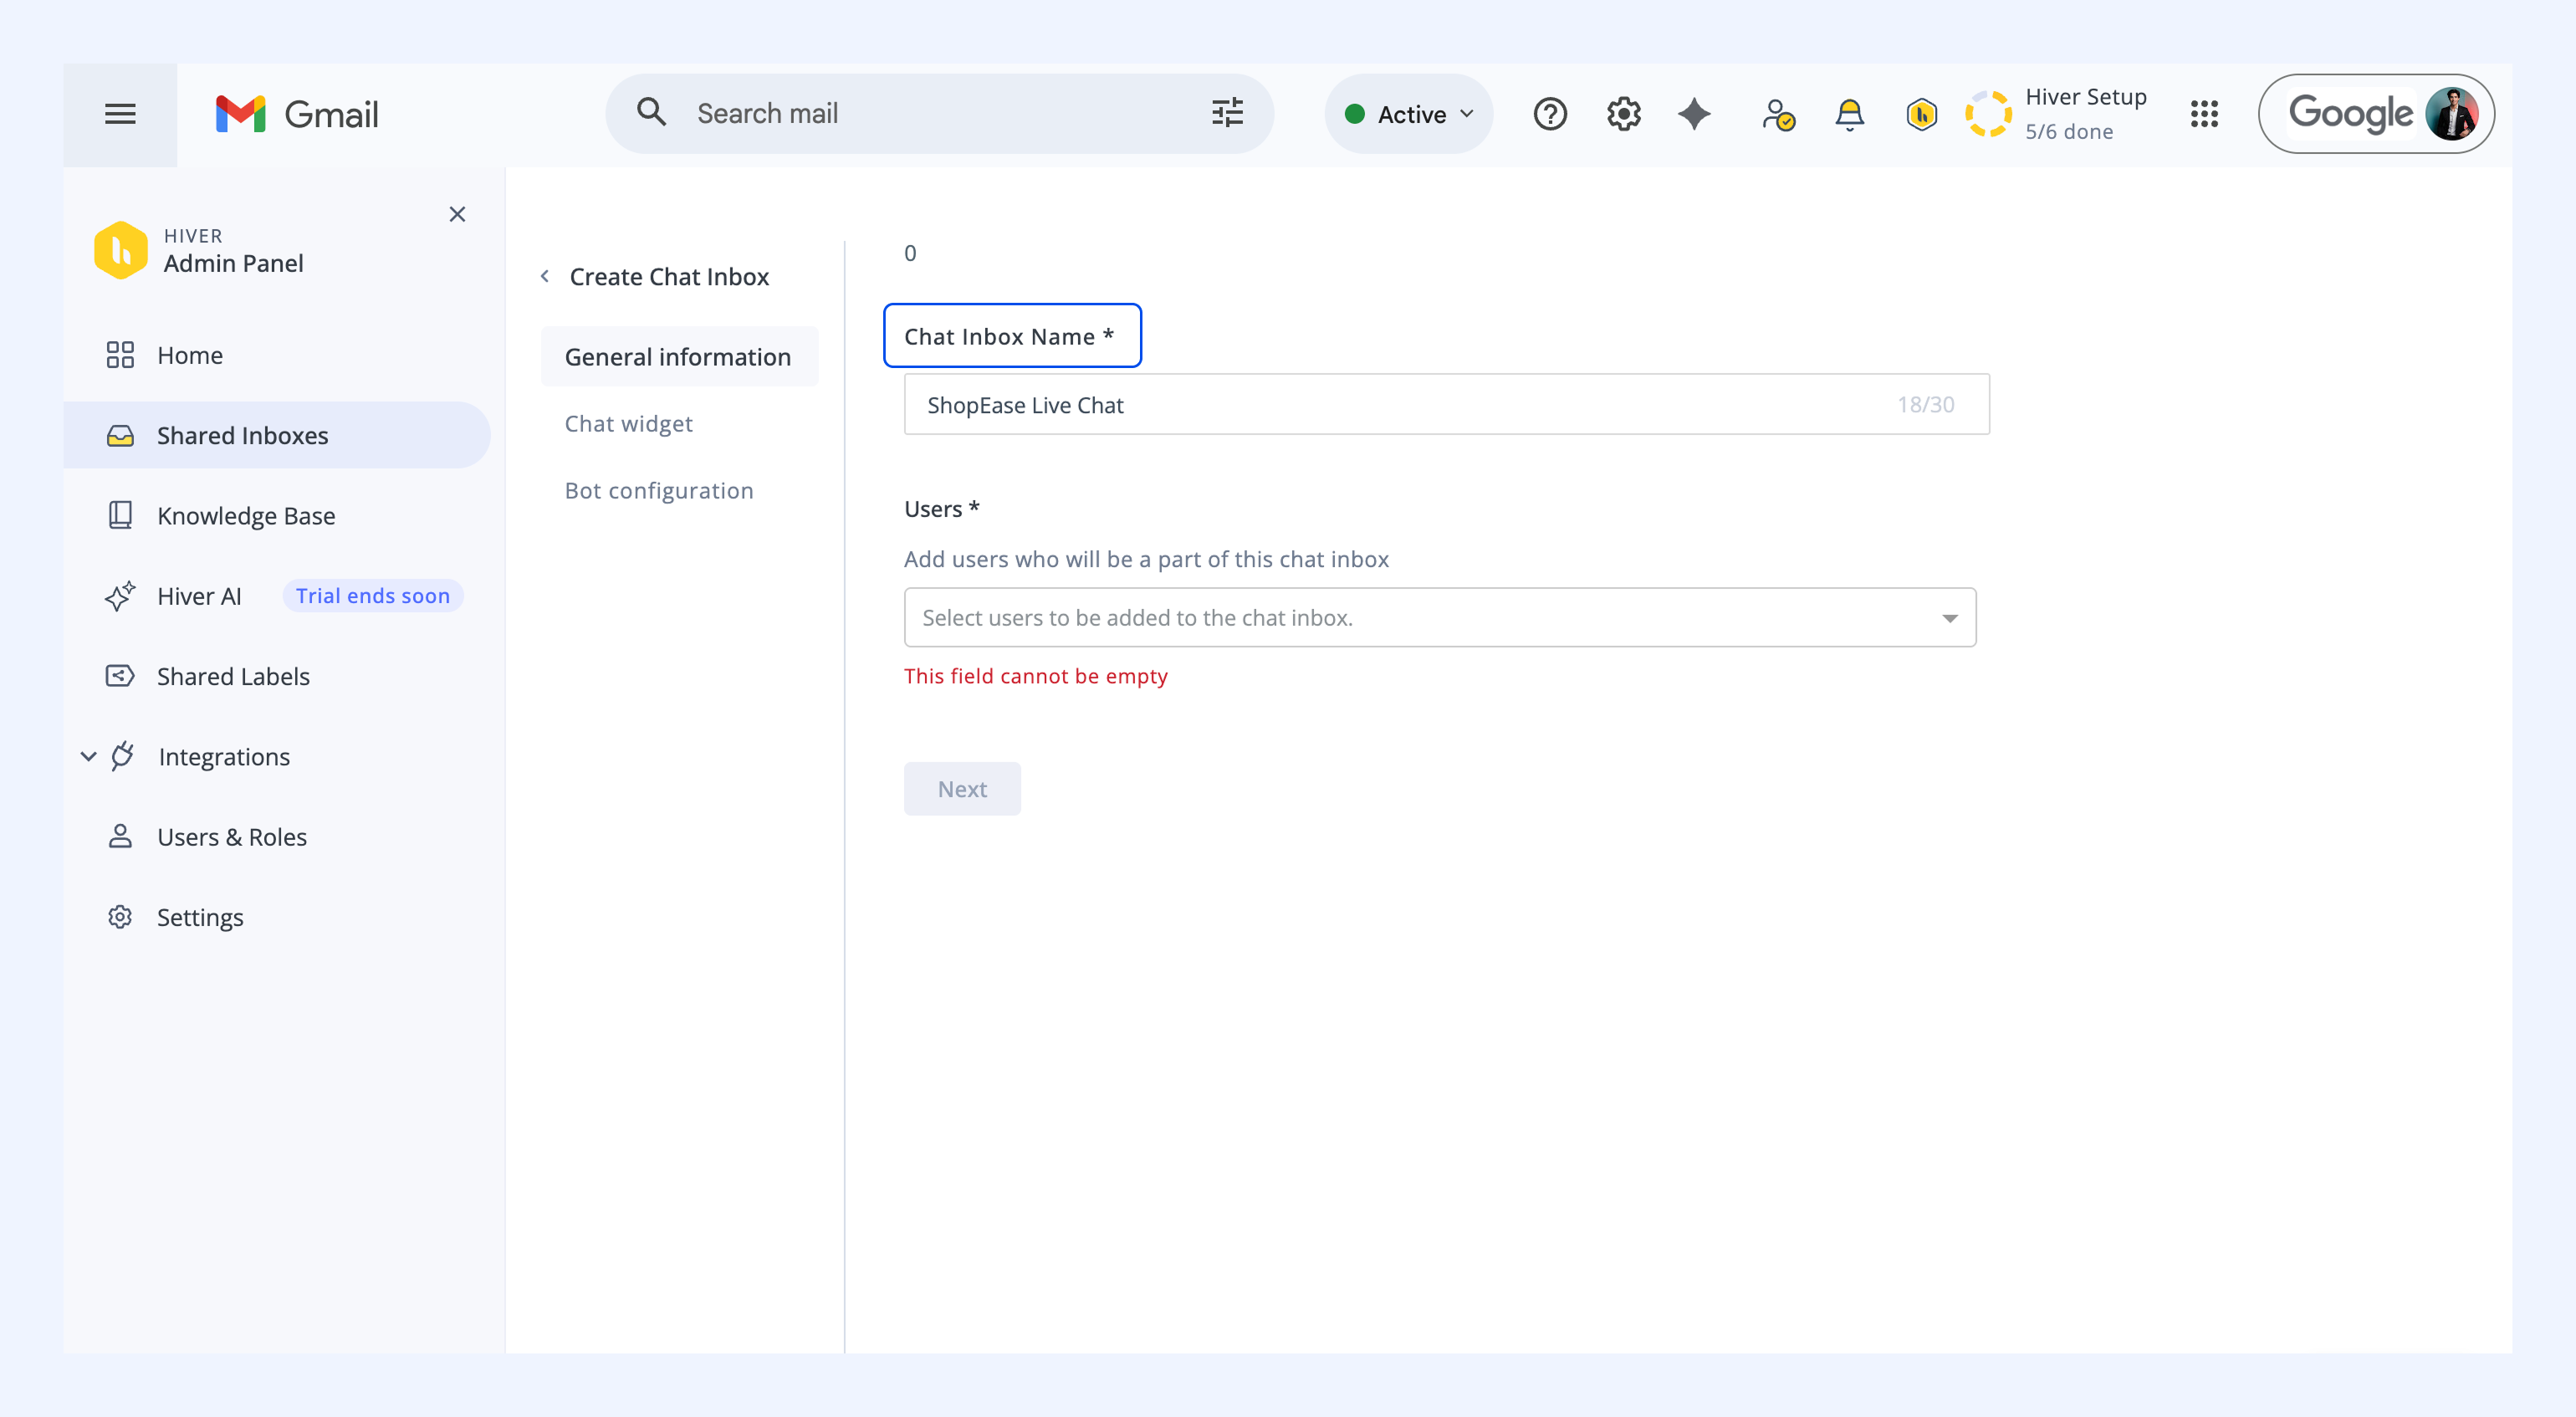
3. Enter a name for your Chat Inbox. This is for internal use only; visitors won’t see it.
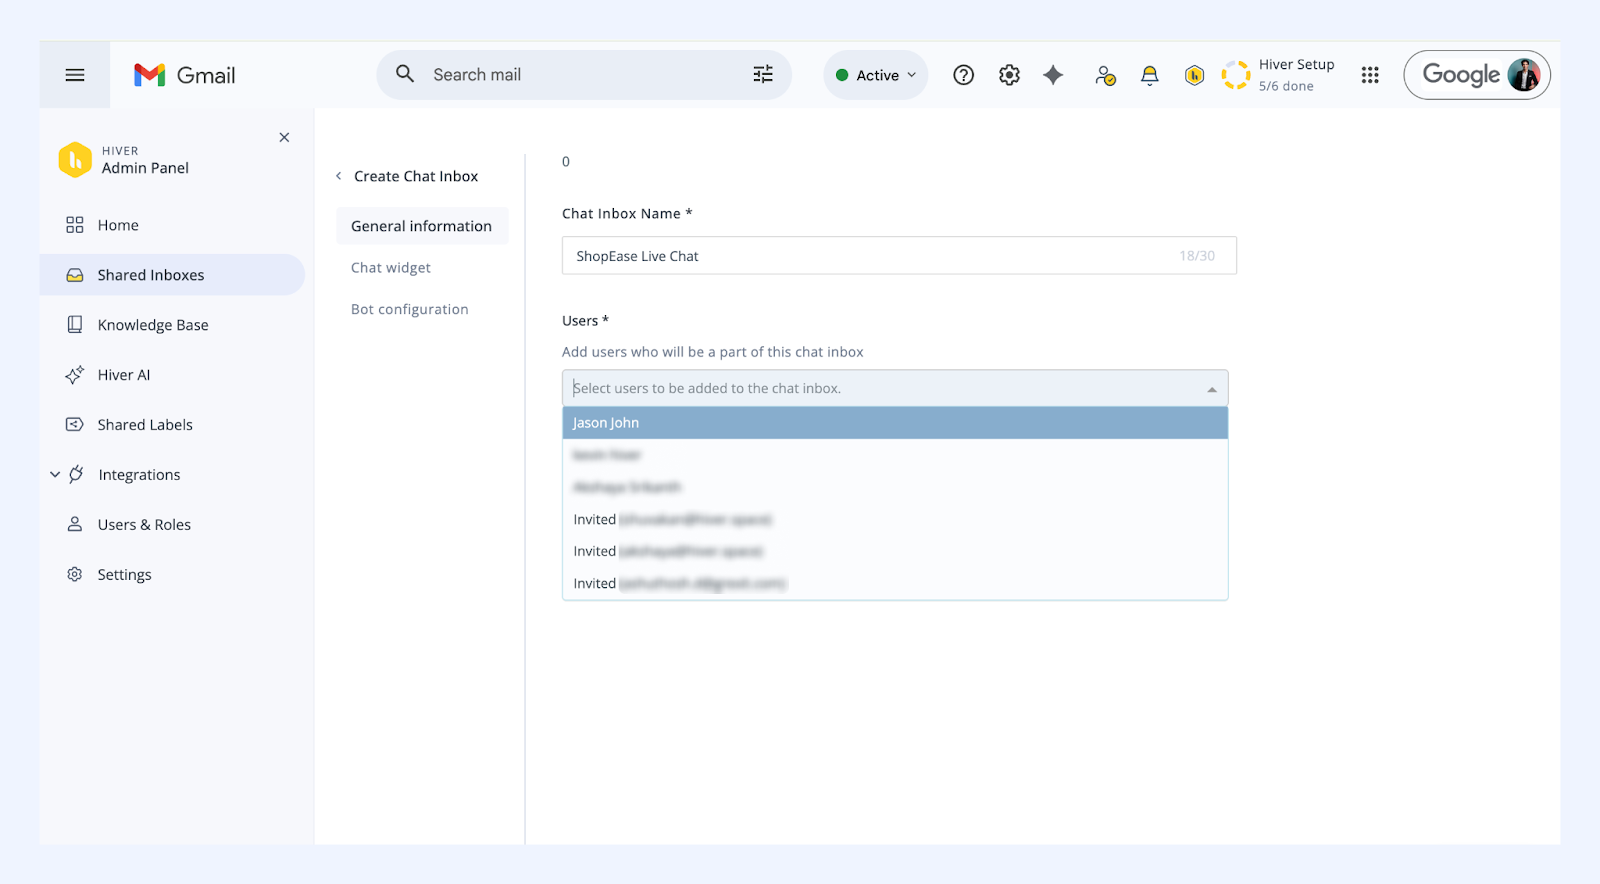
4. Add team members who should handle chats by selecting them or entering their email addresses.
5. Click Next.
Design your chat widget
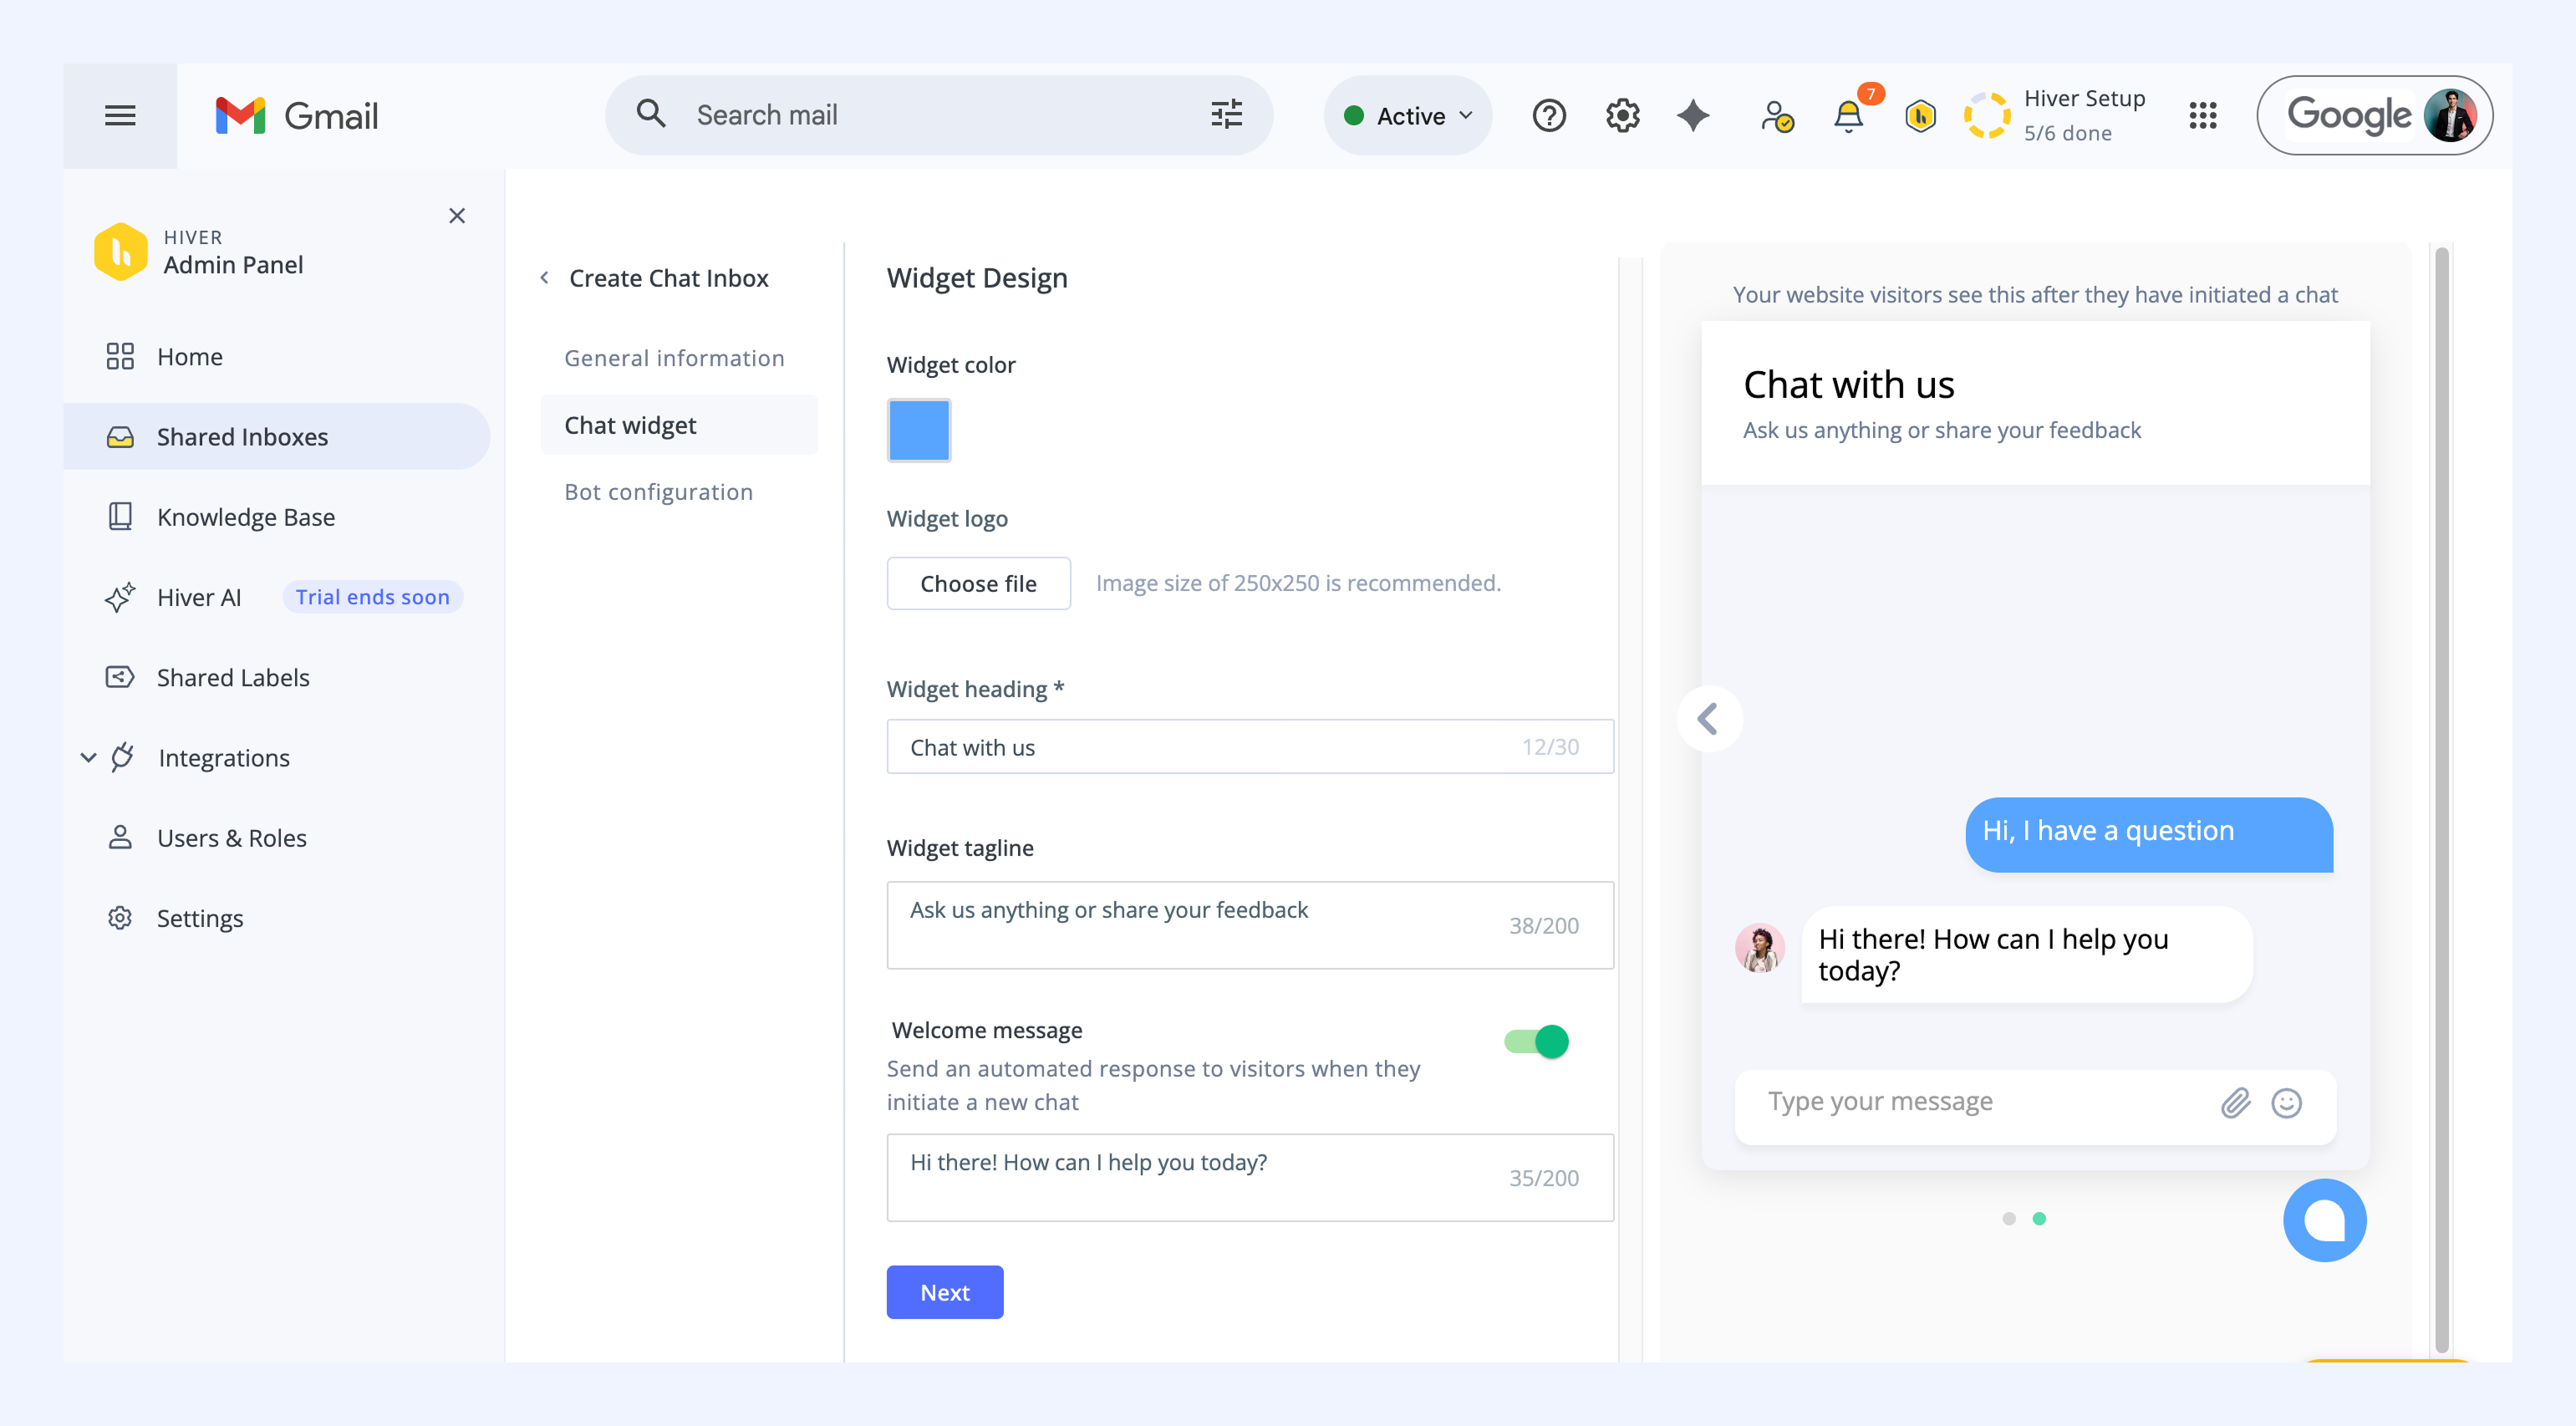
During setup, you can configure:
• Widget color – Choose from predefined colors or enter your brand color code.
• Widget logo – Upload your brand logo to display at the top of the widget.
• Widget heading – The headline shown at the top of the widget.
• Widget tagline – A short subheading under the heading.
• Welcome message – An automated greeting for new visitors (off by default).
The preview on the right shows how the widget will look on your website.
Note:
- The chat widget appears automatically when a page loads. This works on all websites, including Google Sites.
- The chat icon doesn't support custom text labels or hover tooltips.
Once you’re done, click Next.
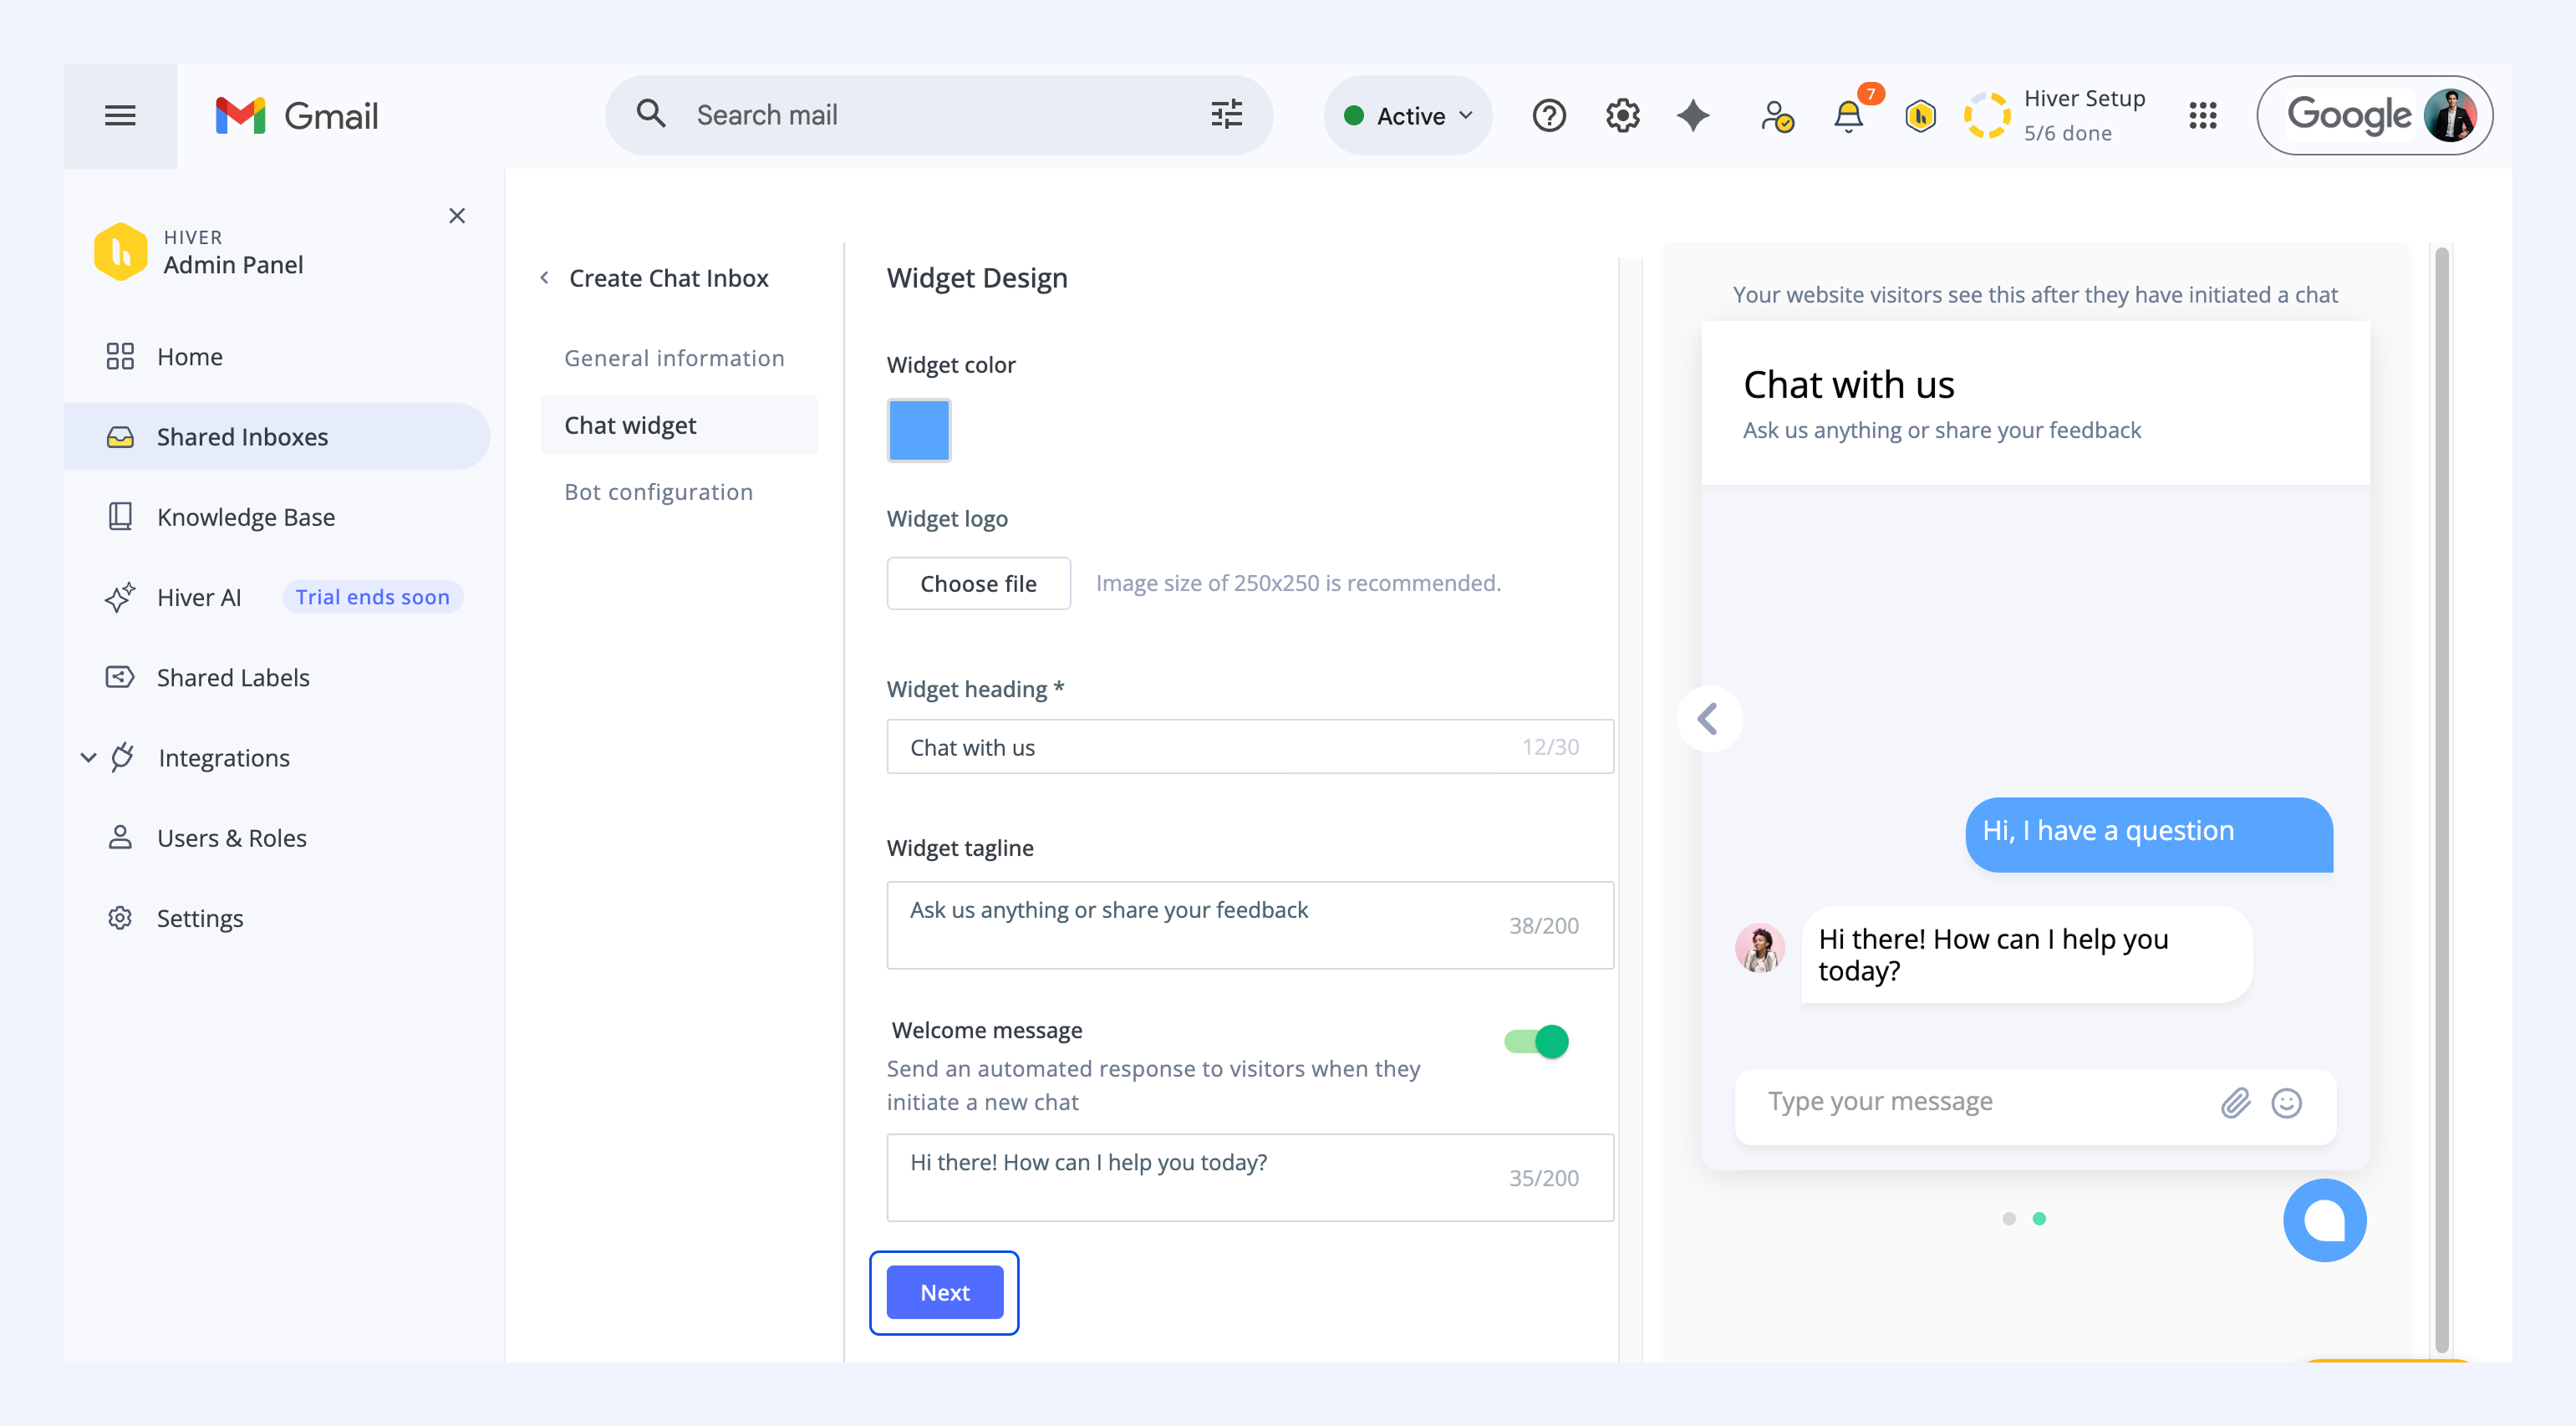
Configure your chatbot
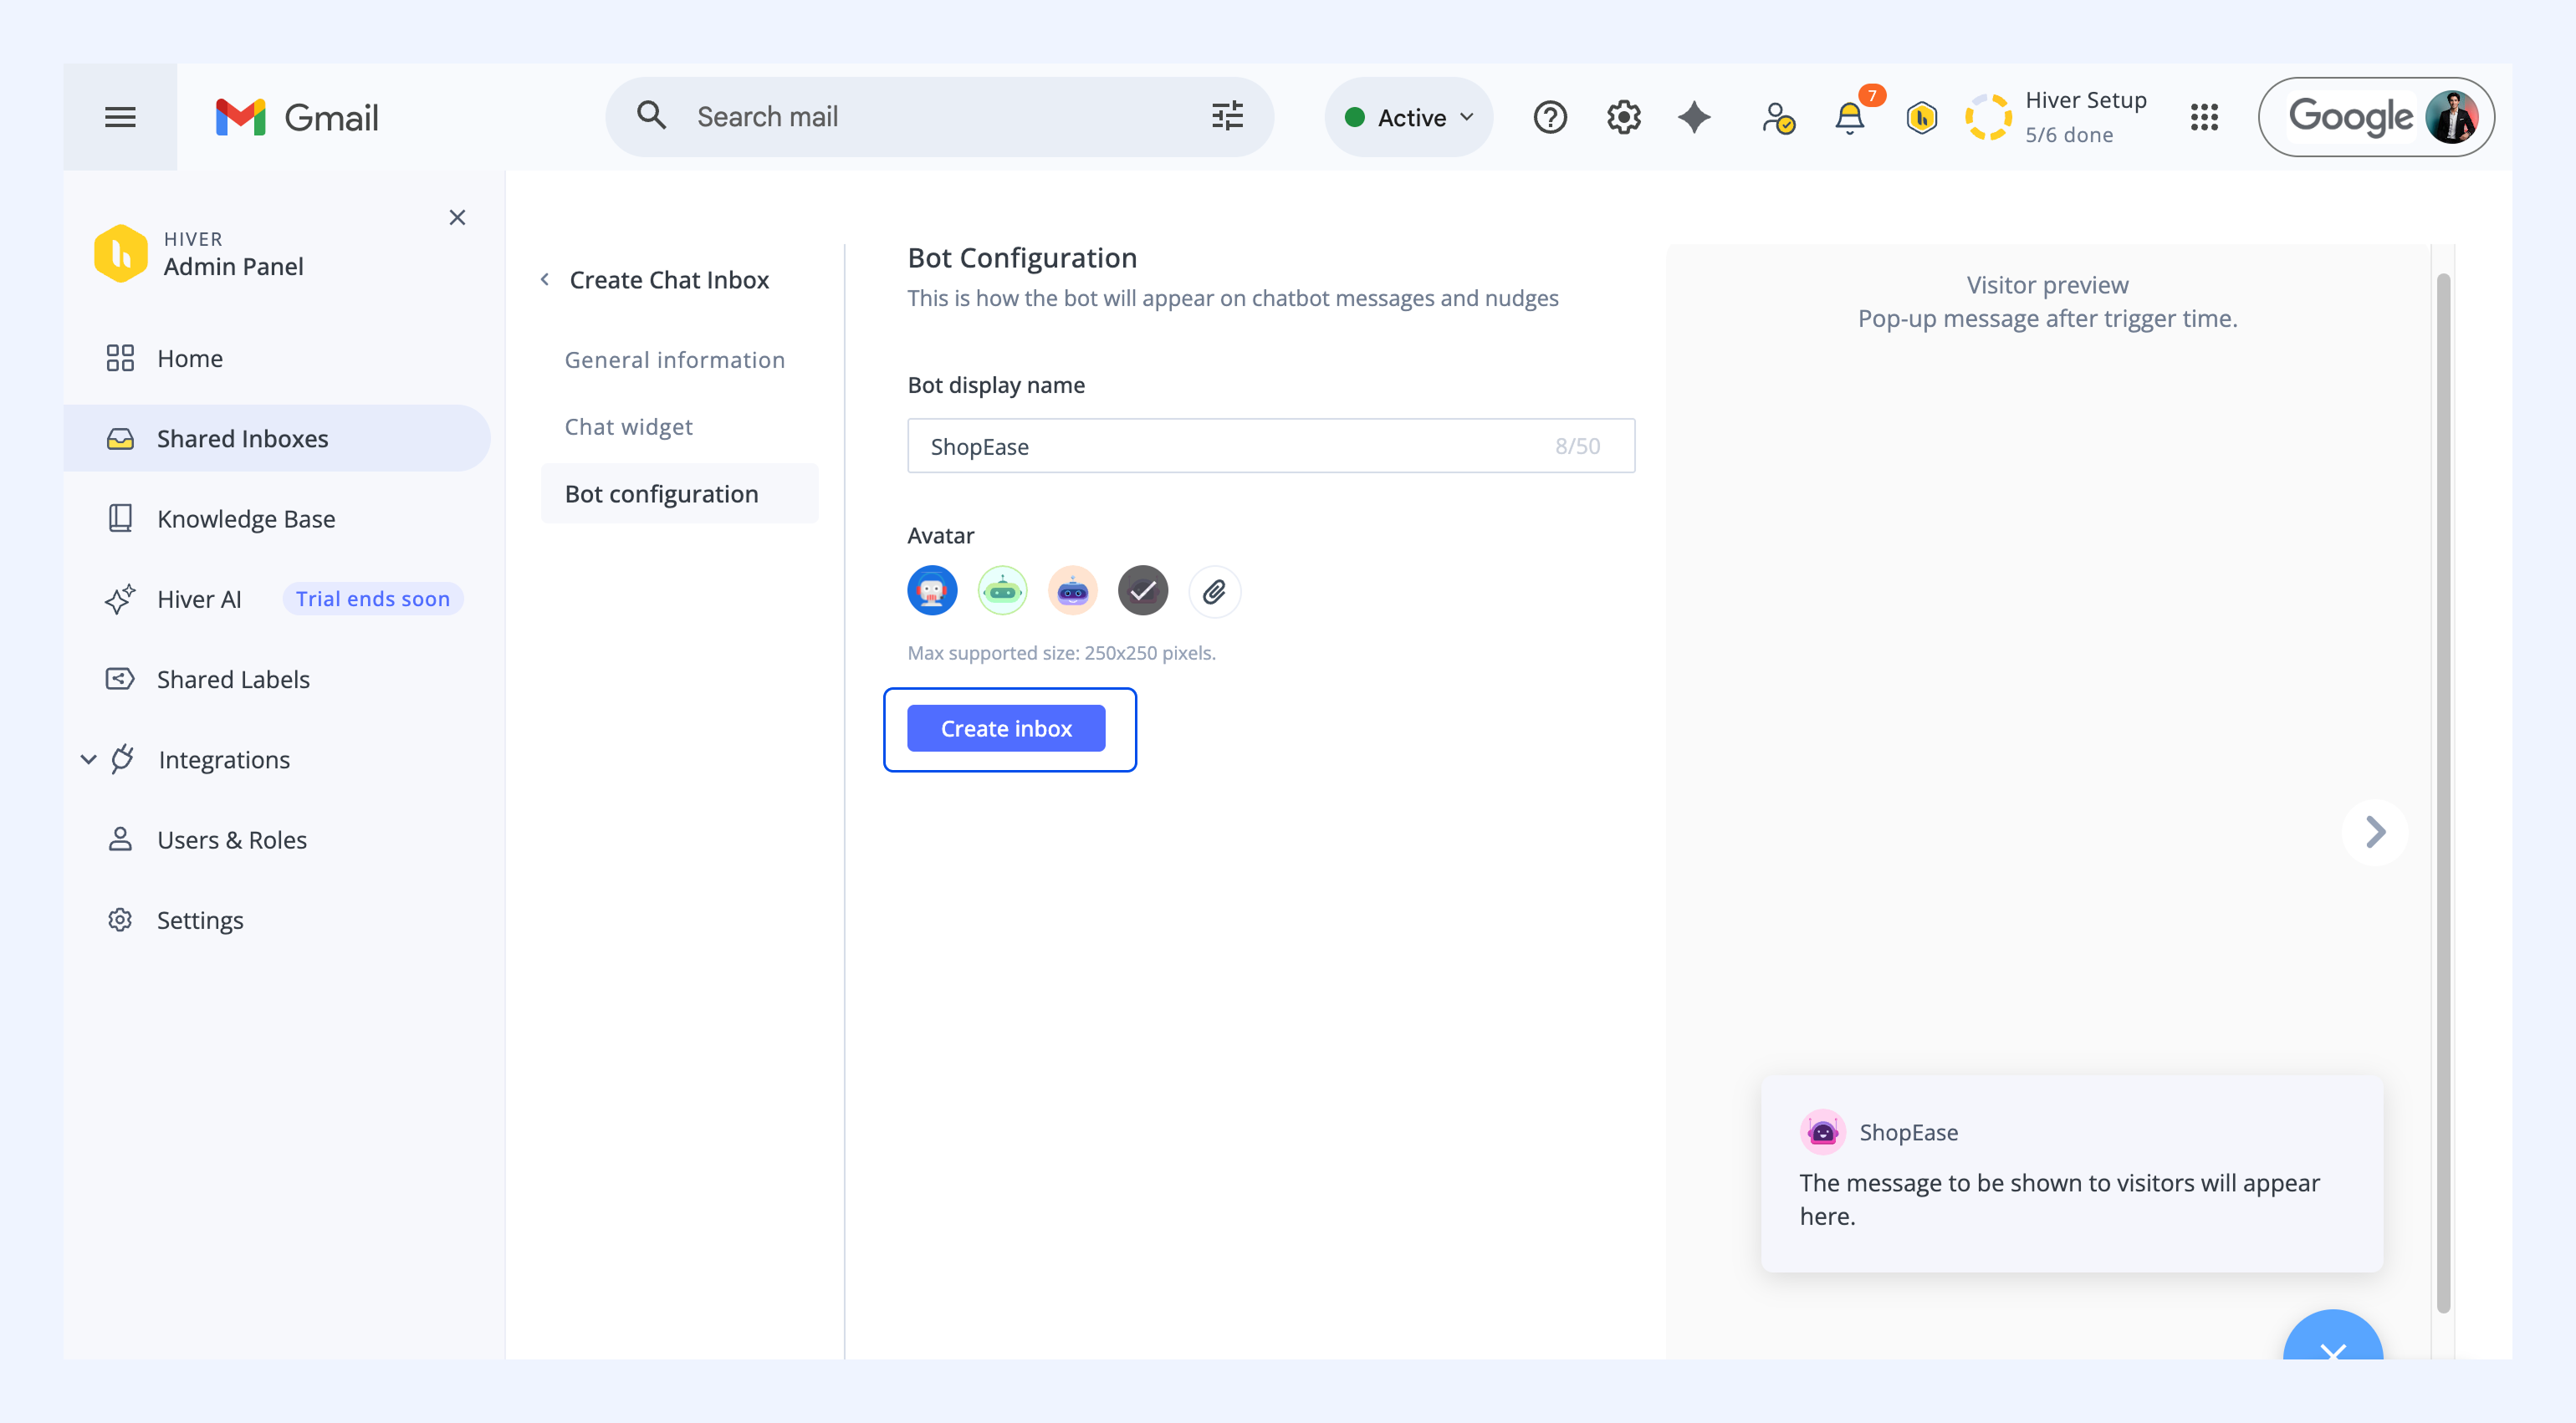
The chatbot is what visitors see when they open your chat widget.
1. Enter the Bot display name and choose an avatar. You can choose a default avatar or upload a custom one.
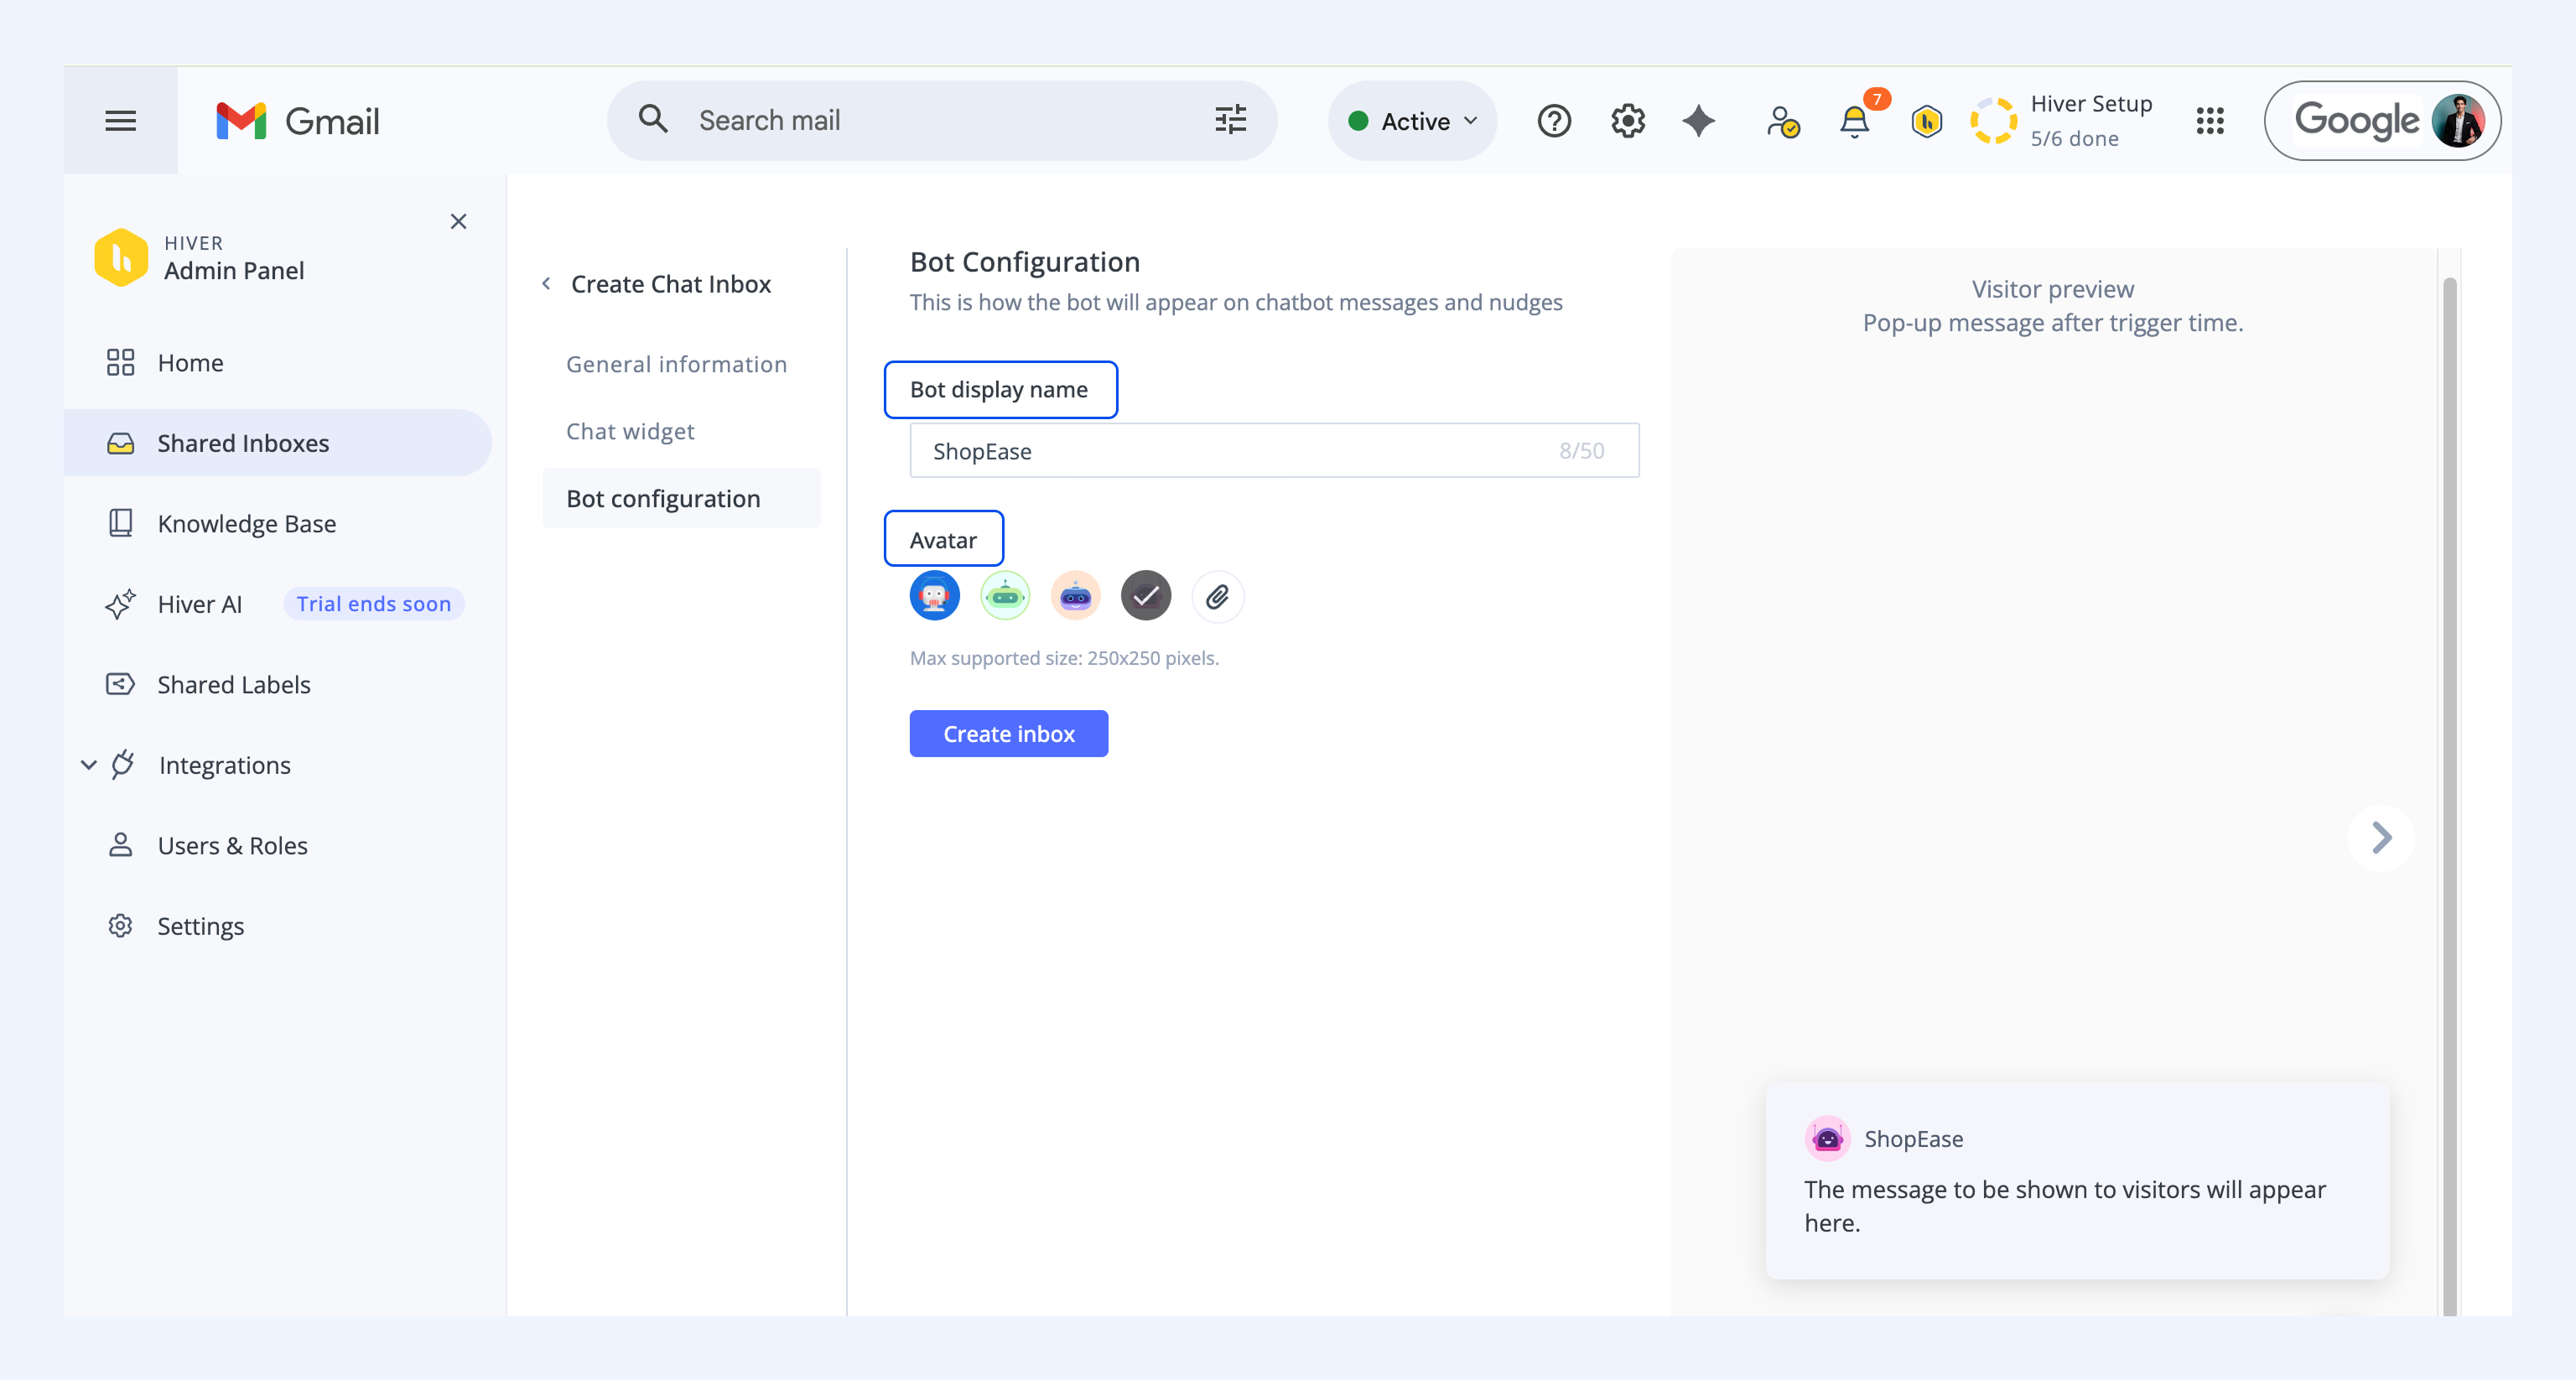
2. Click Create Inbox.
Add the chat widget to your website
After your inbox is created, you will see that a script has been generated. Use this script to embed your chat widget in your website.
You'll need to paste this script just before the /body tag on every webpage where you want the chat widget to appear.
Note: You can access this script at any time from the General Settings in your chat inbox settings.
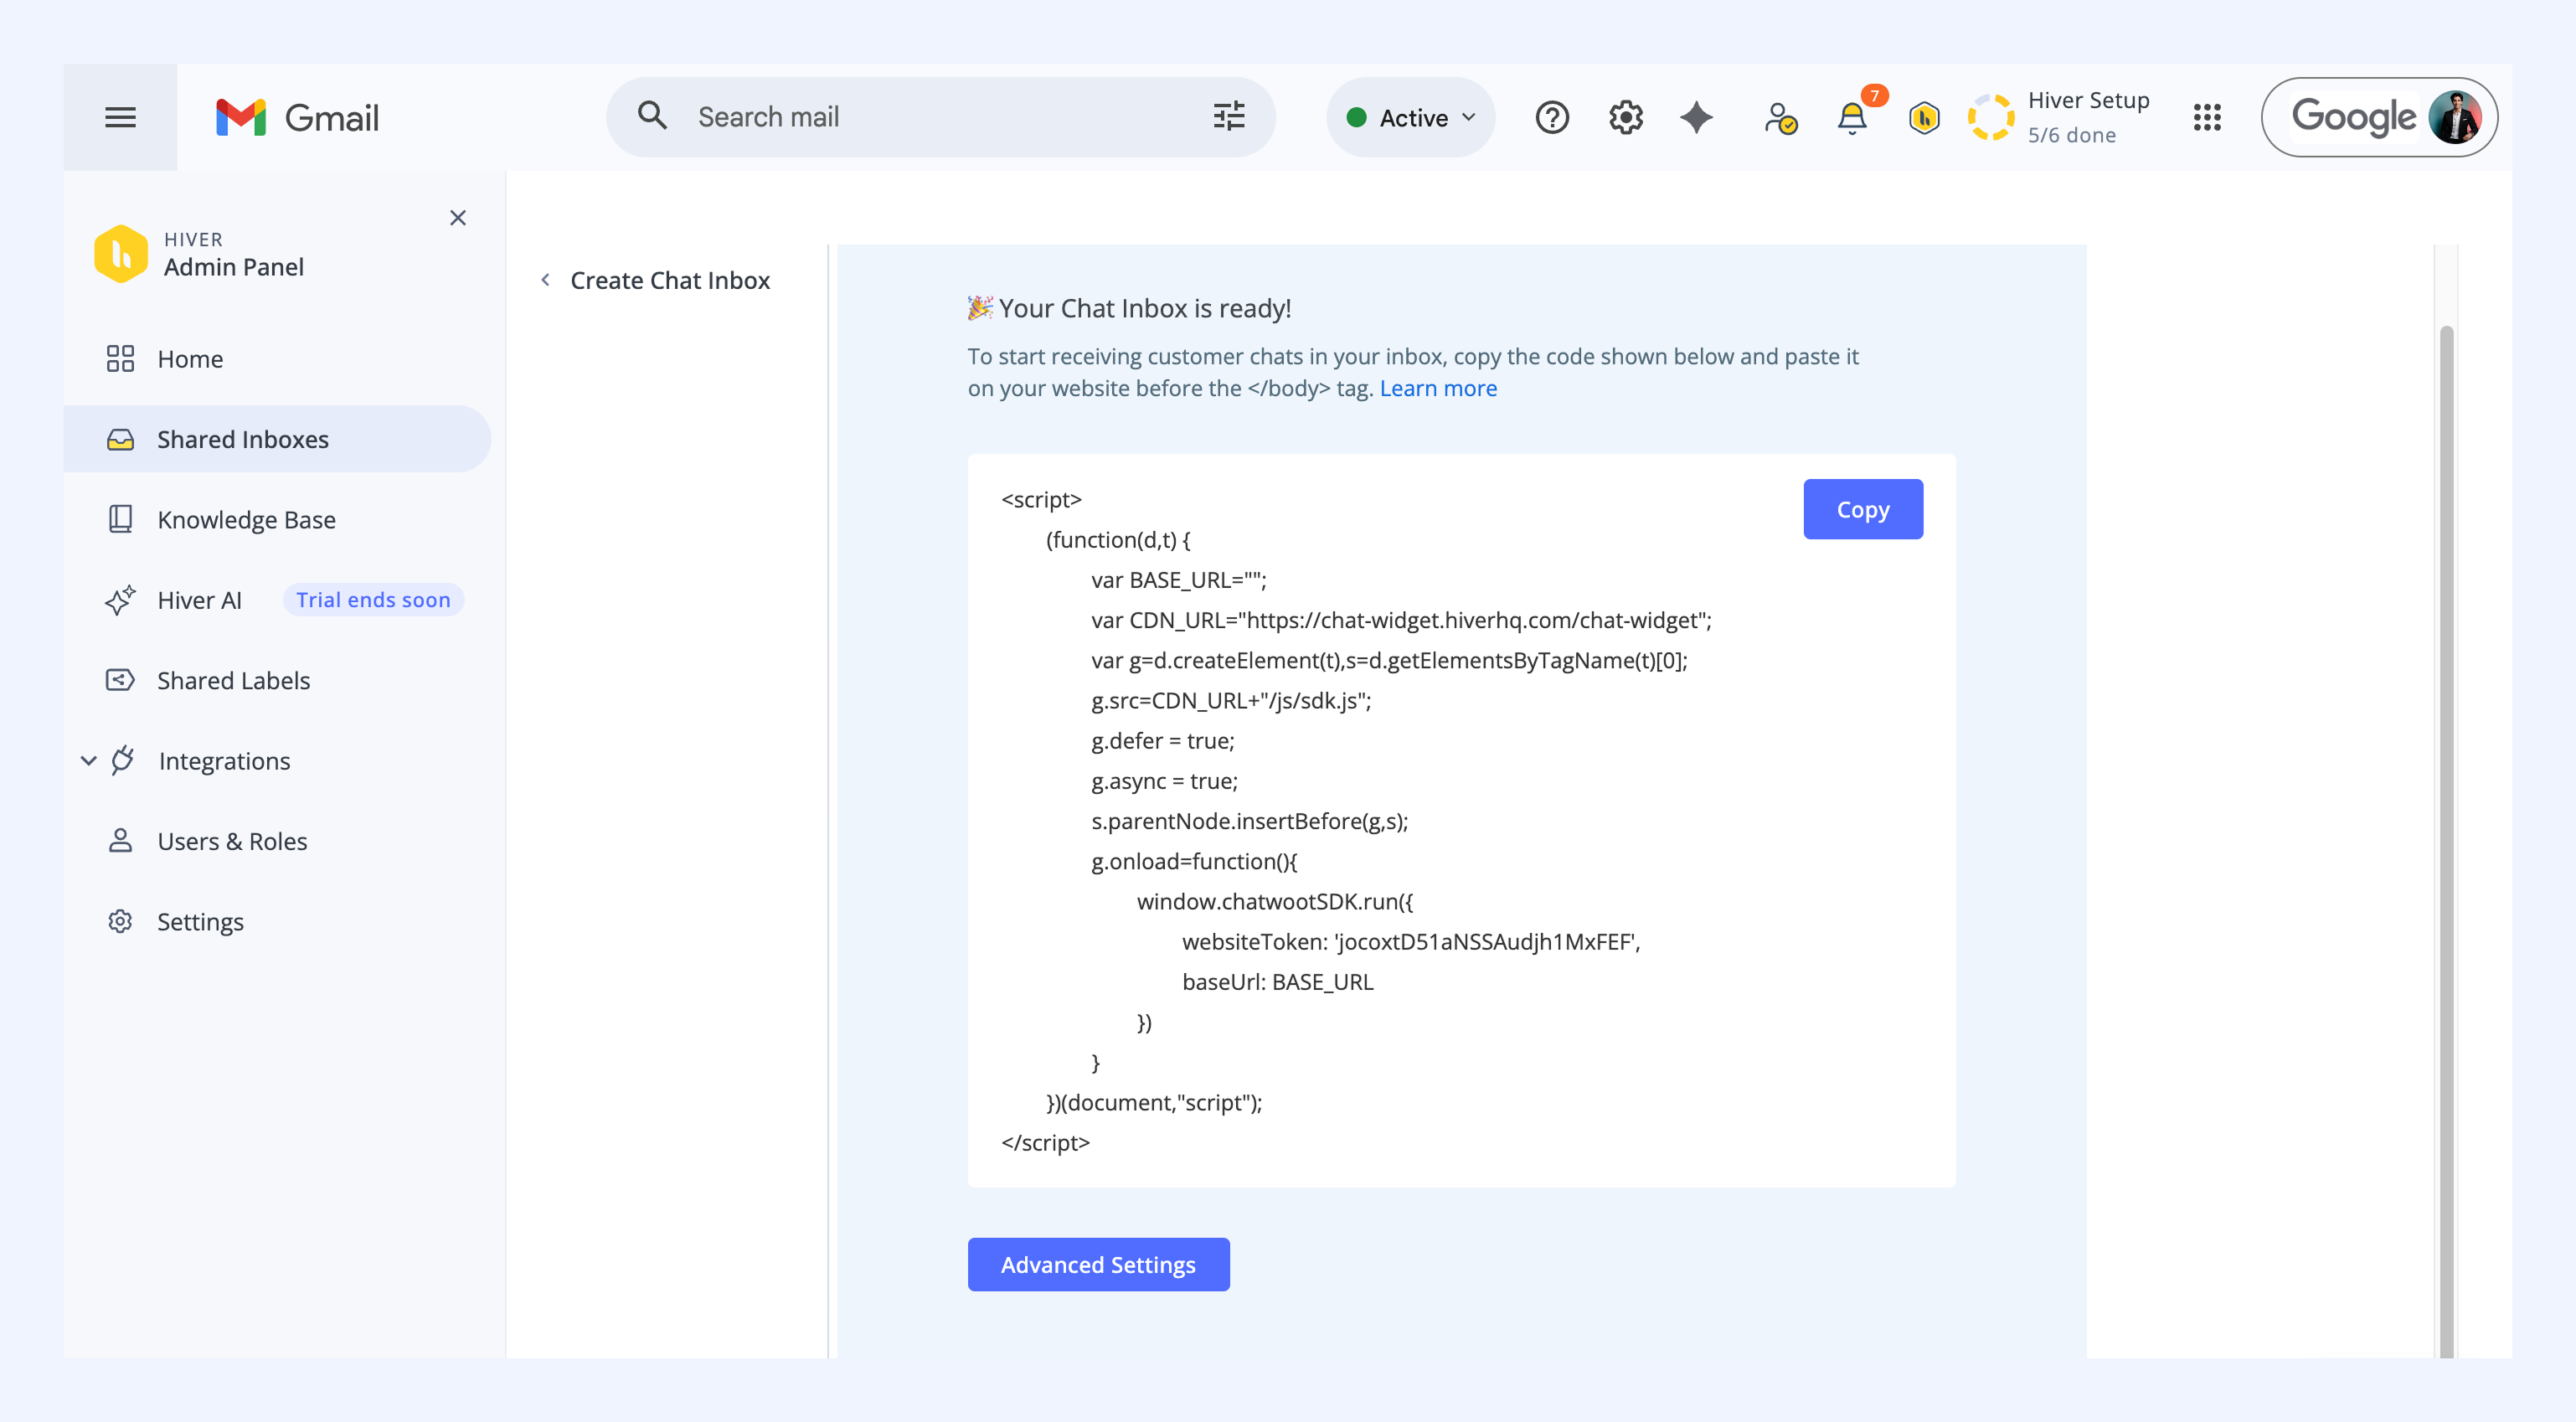
Note: Clicking Advanced settings opens the Pre-chat form configuration page, where you can manage visitor information fields shown before a chat begins.
Next steps