Set up Okta Provisioning for Hiver
Okta helps organizations manage identity and access across their tools. When you connect Okta with Hiver, users can be automatically created, updated, and removed in Hiver based on your Okta directory.
Prerequisites
Before you begin, make sure you have:
1. Admin access in Hiver.
2. An active Elite plan in Hiver.
3. Admin access in Okta.
Enable Okta Provisioning in Hiver
To get started, enable Okta provisioning from the Admin Panel settings.
1. Go to the Admin Panel → Settings → Okta Provisioning.
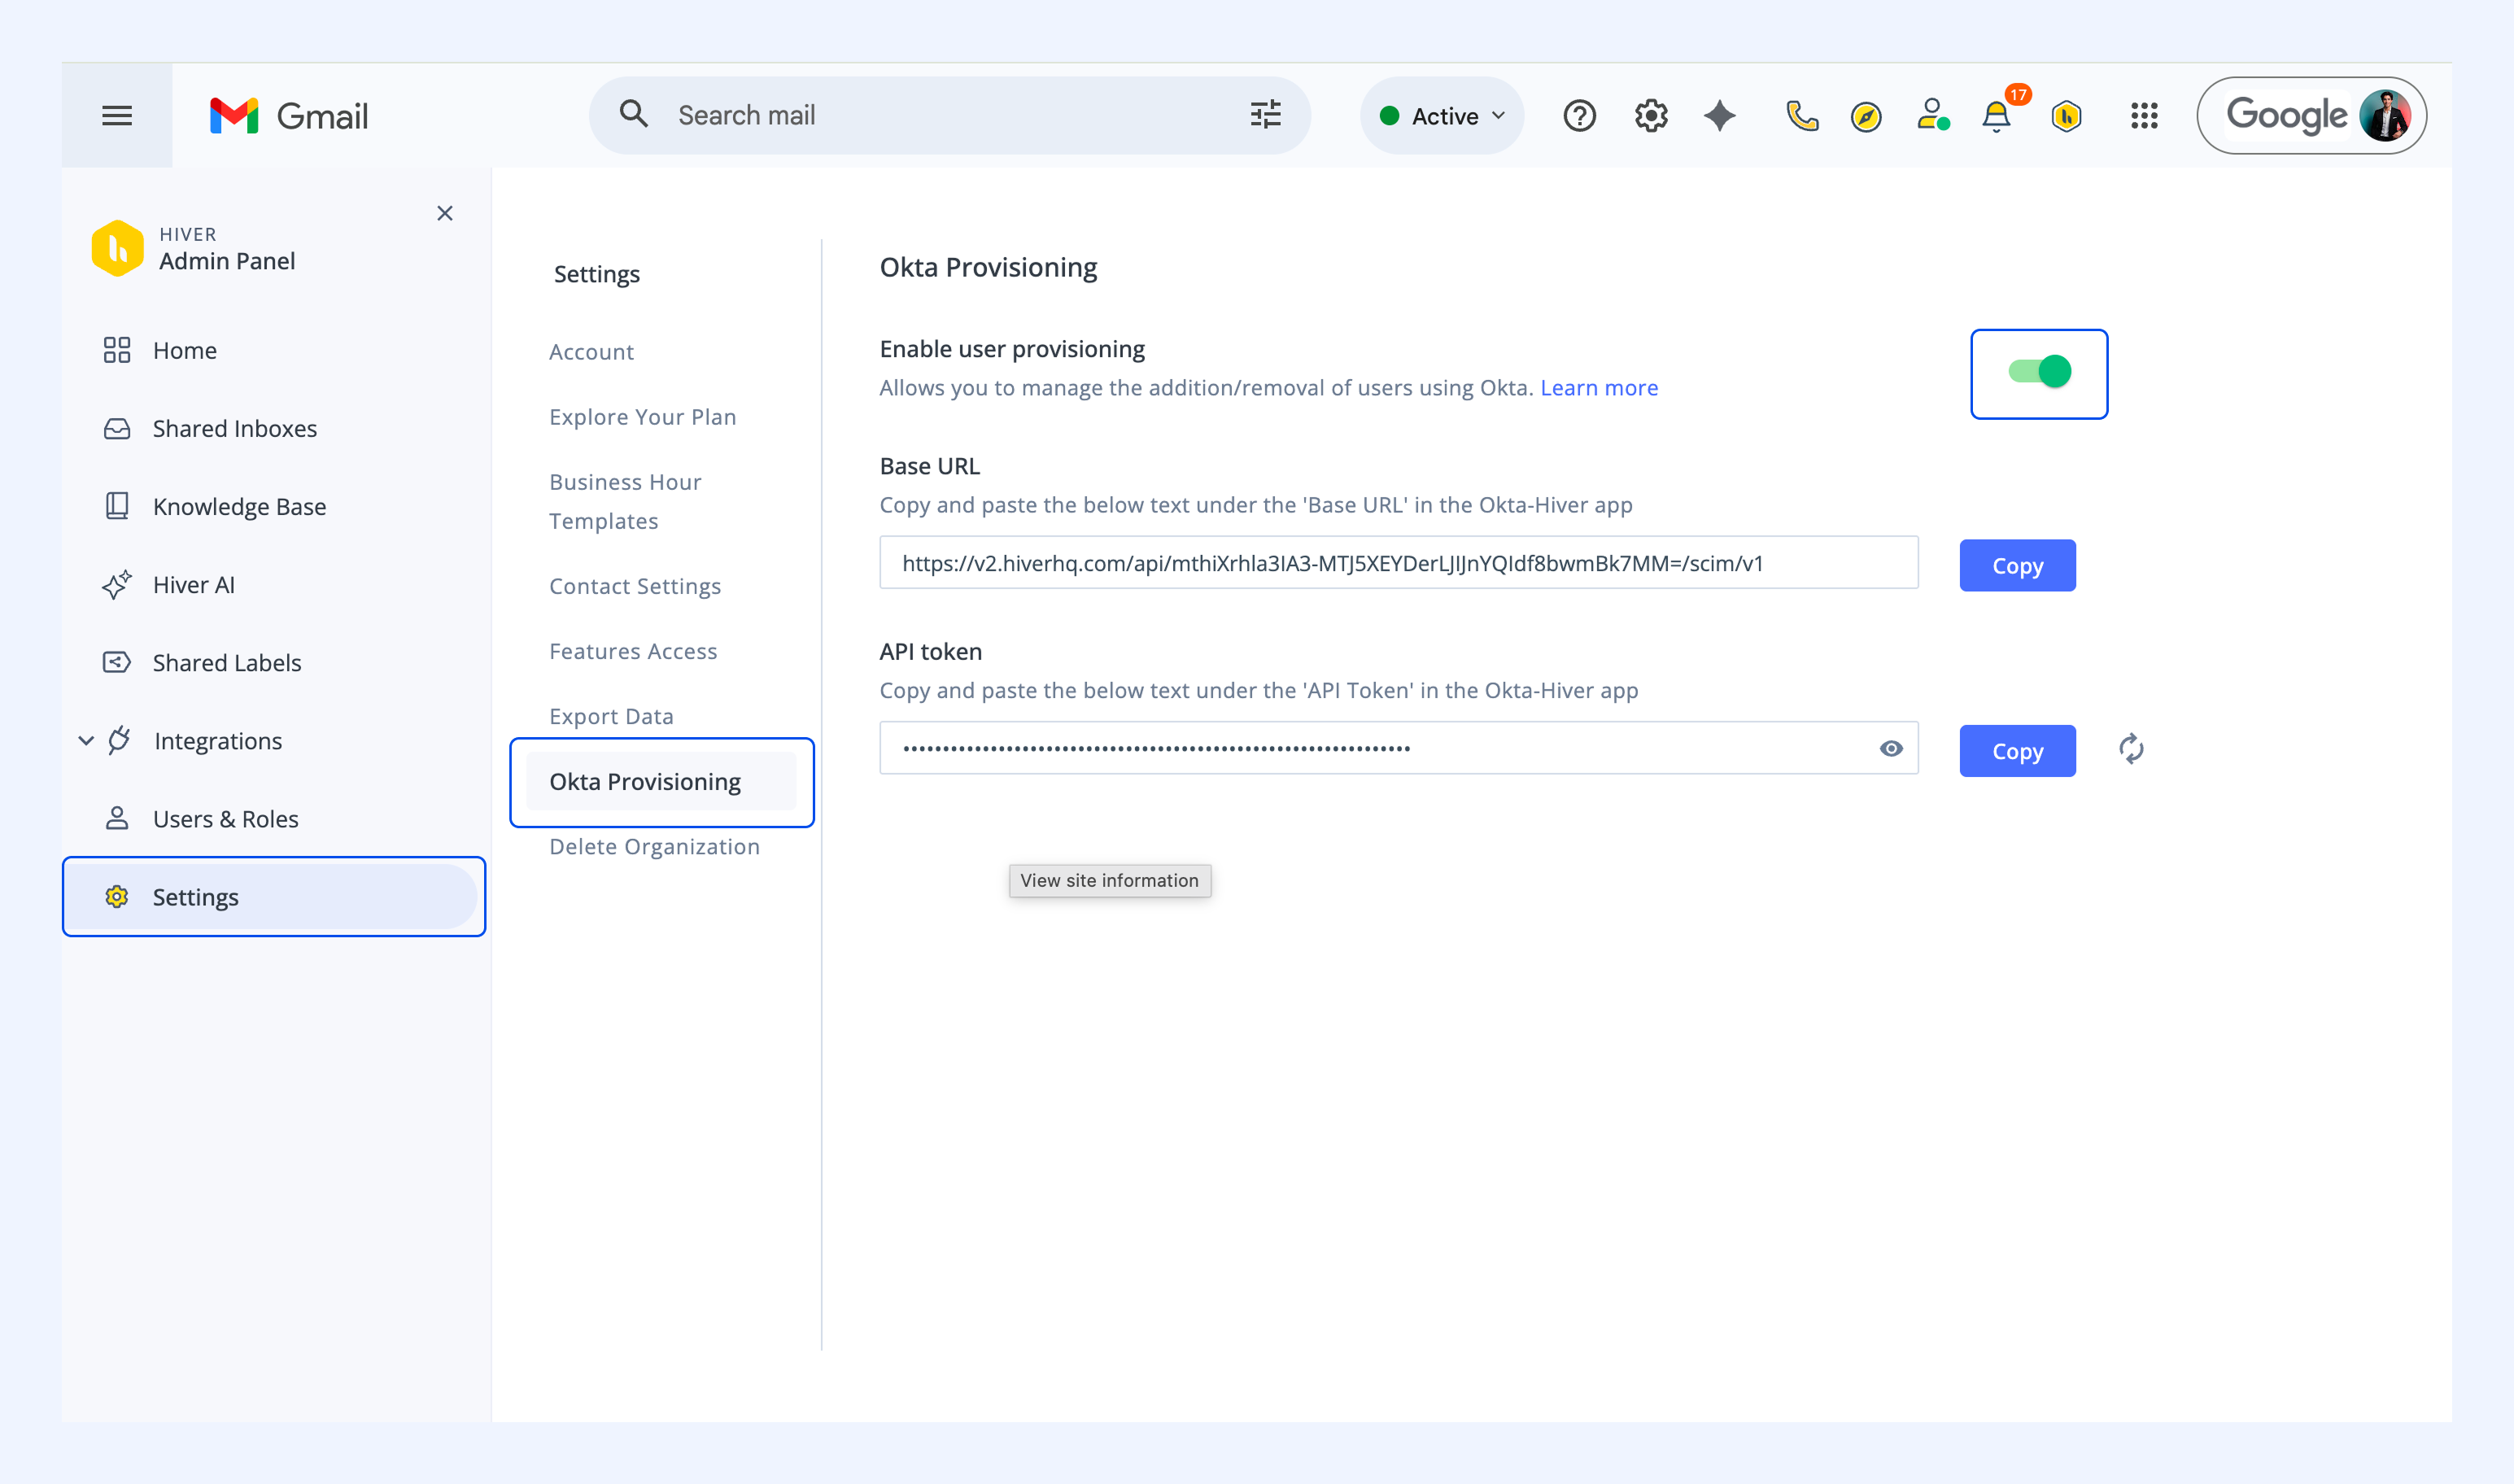
2. Turn on the toggle to Enable user provisioning.
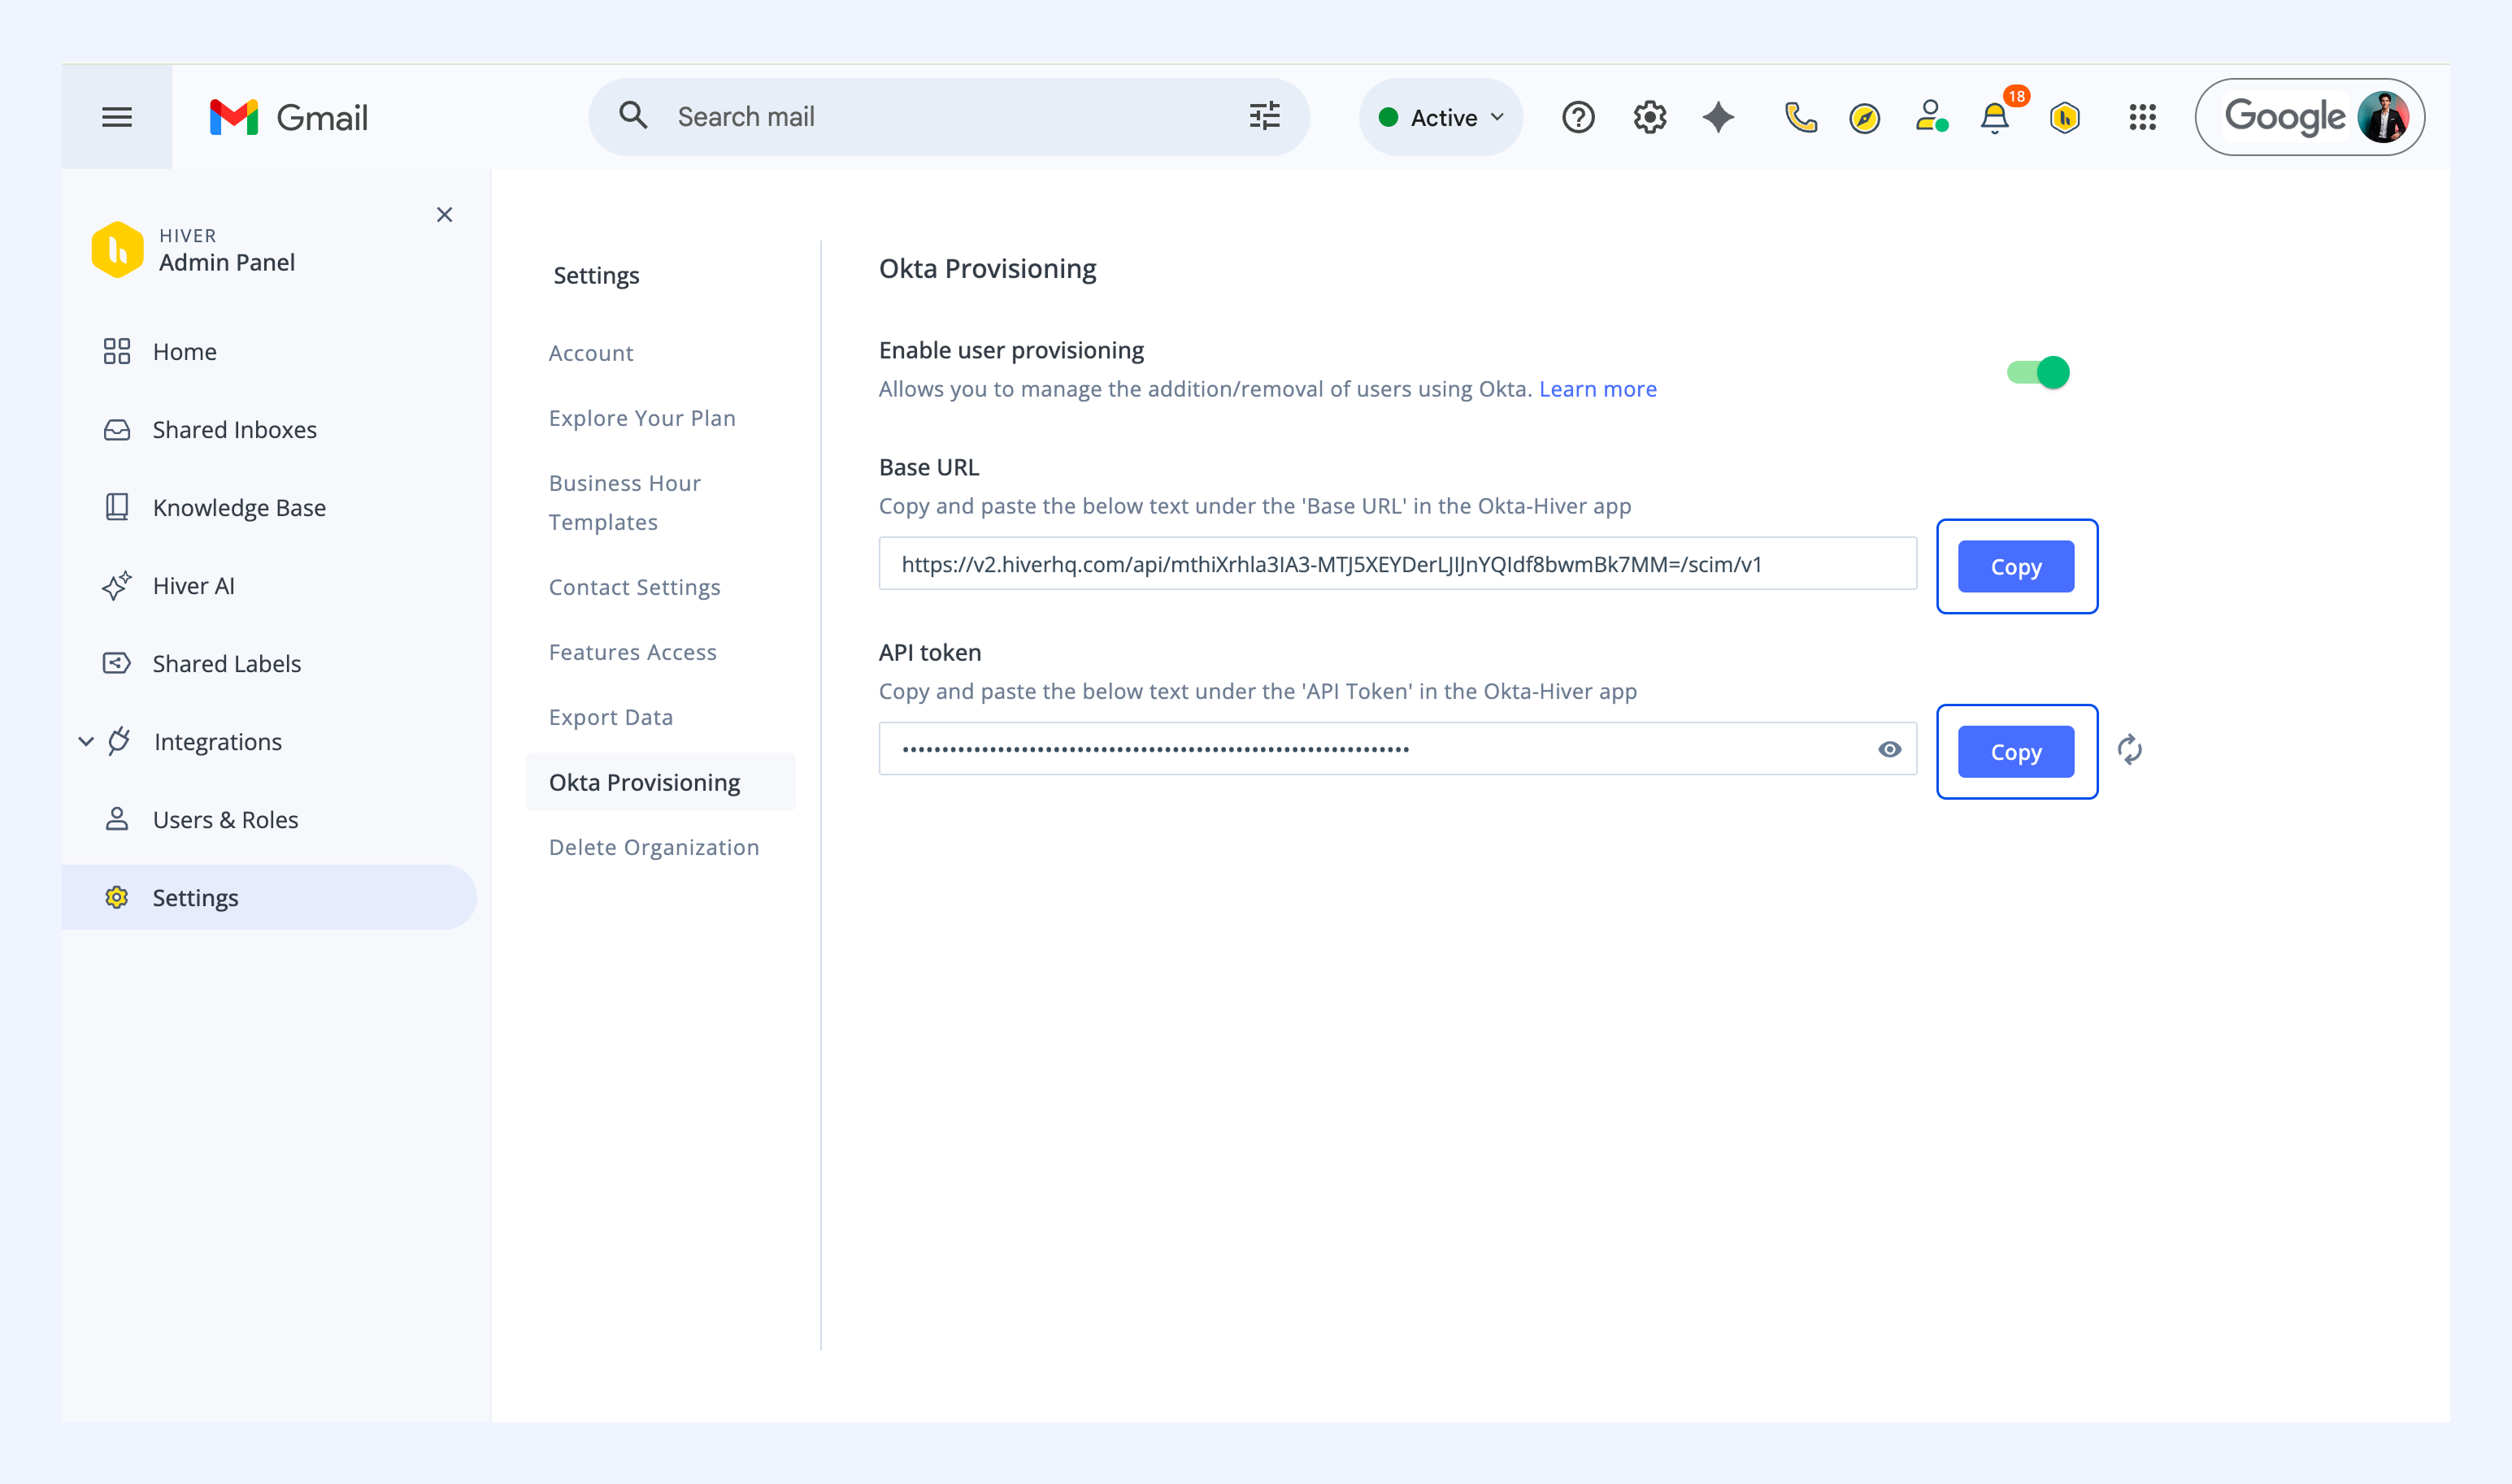
3. Copy the Base URL and API Token, you'll need them for the setup in Okta.
Add Hiver in Okta
Next, you need to add Hiver as an application in your Okta organization.
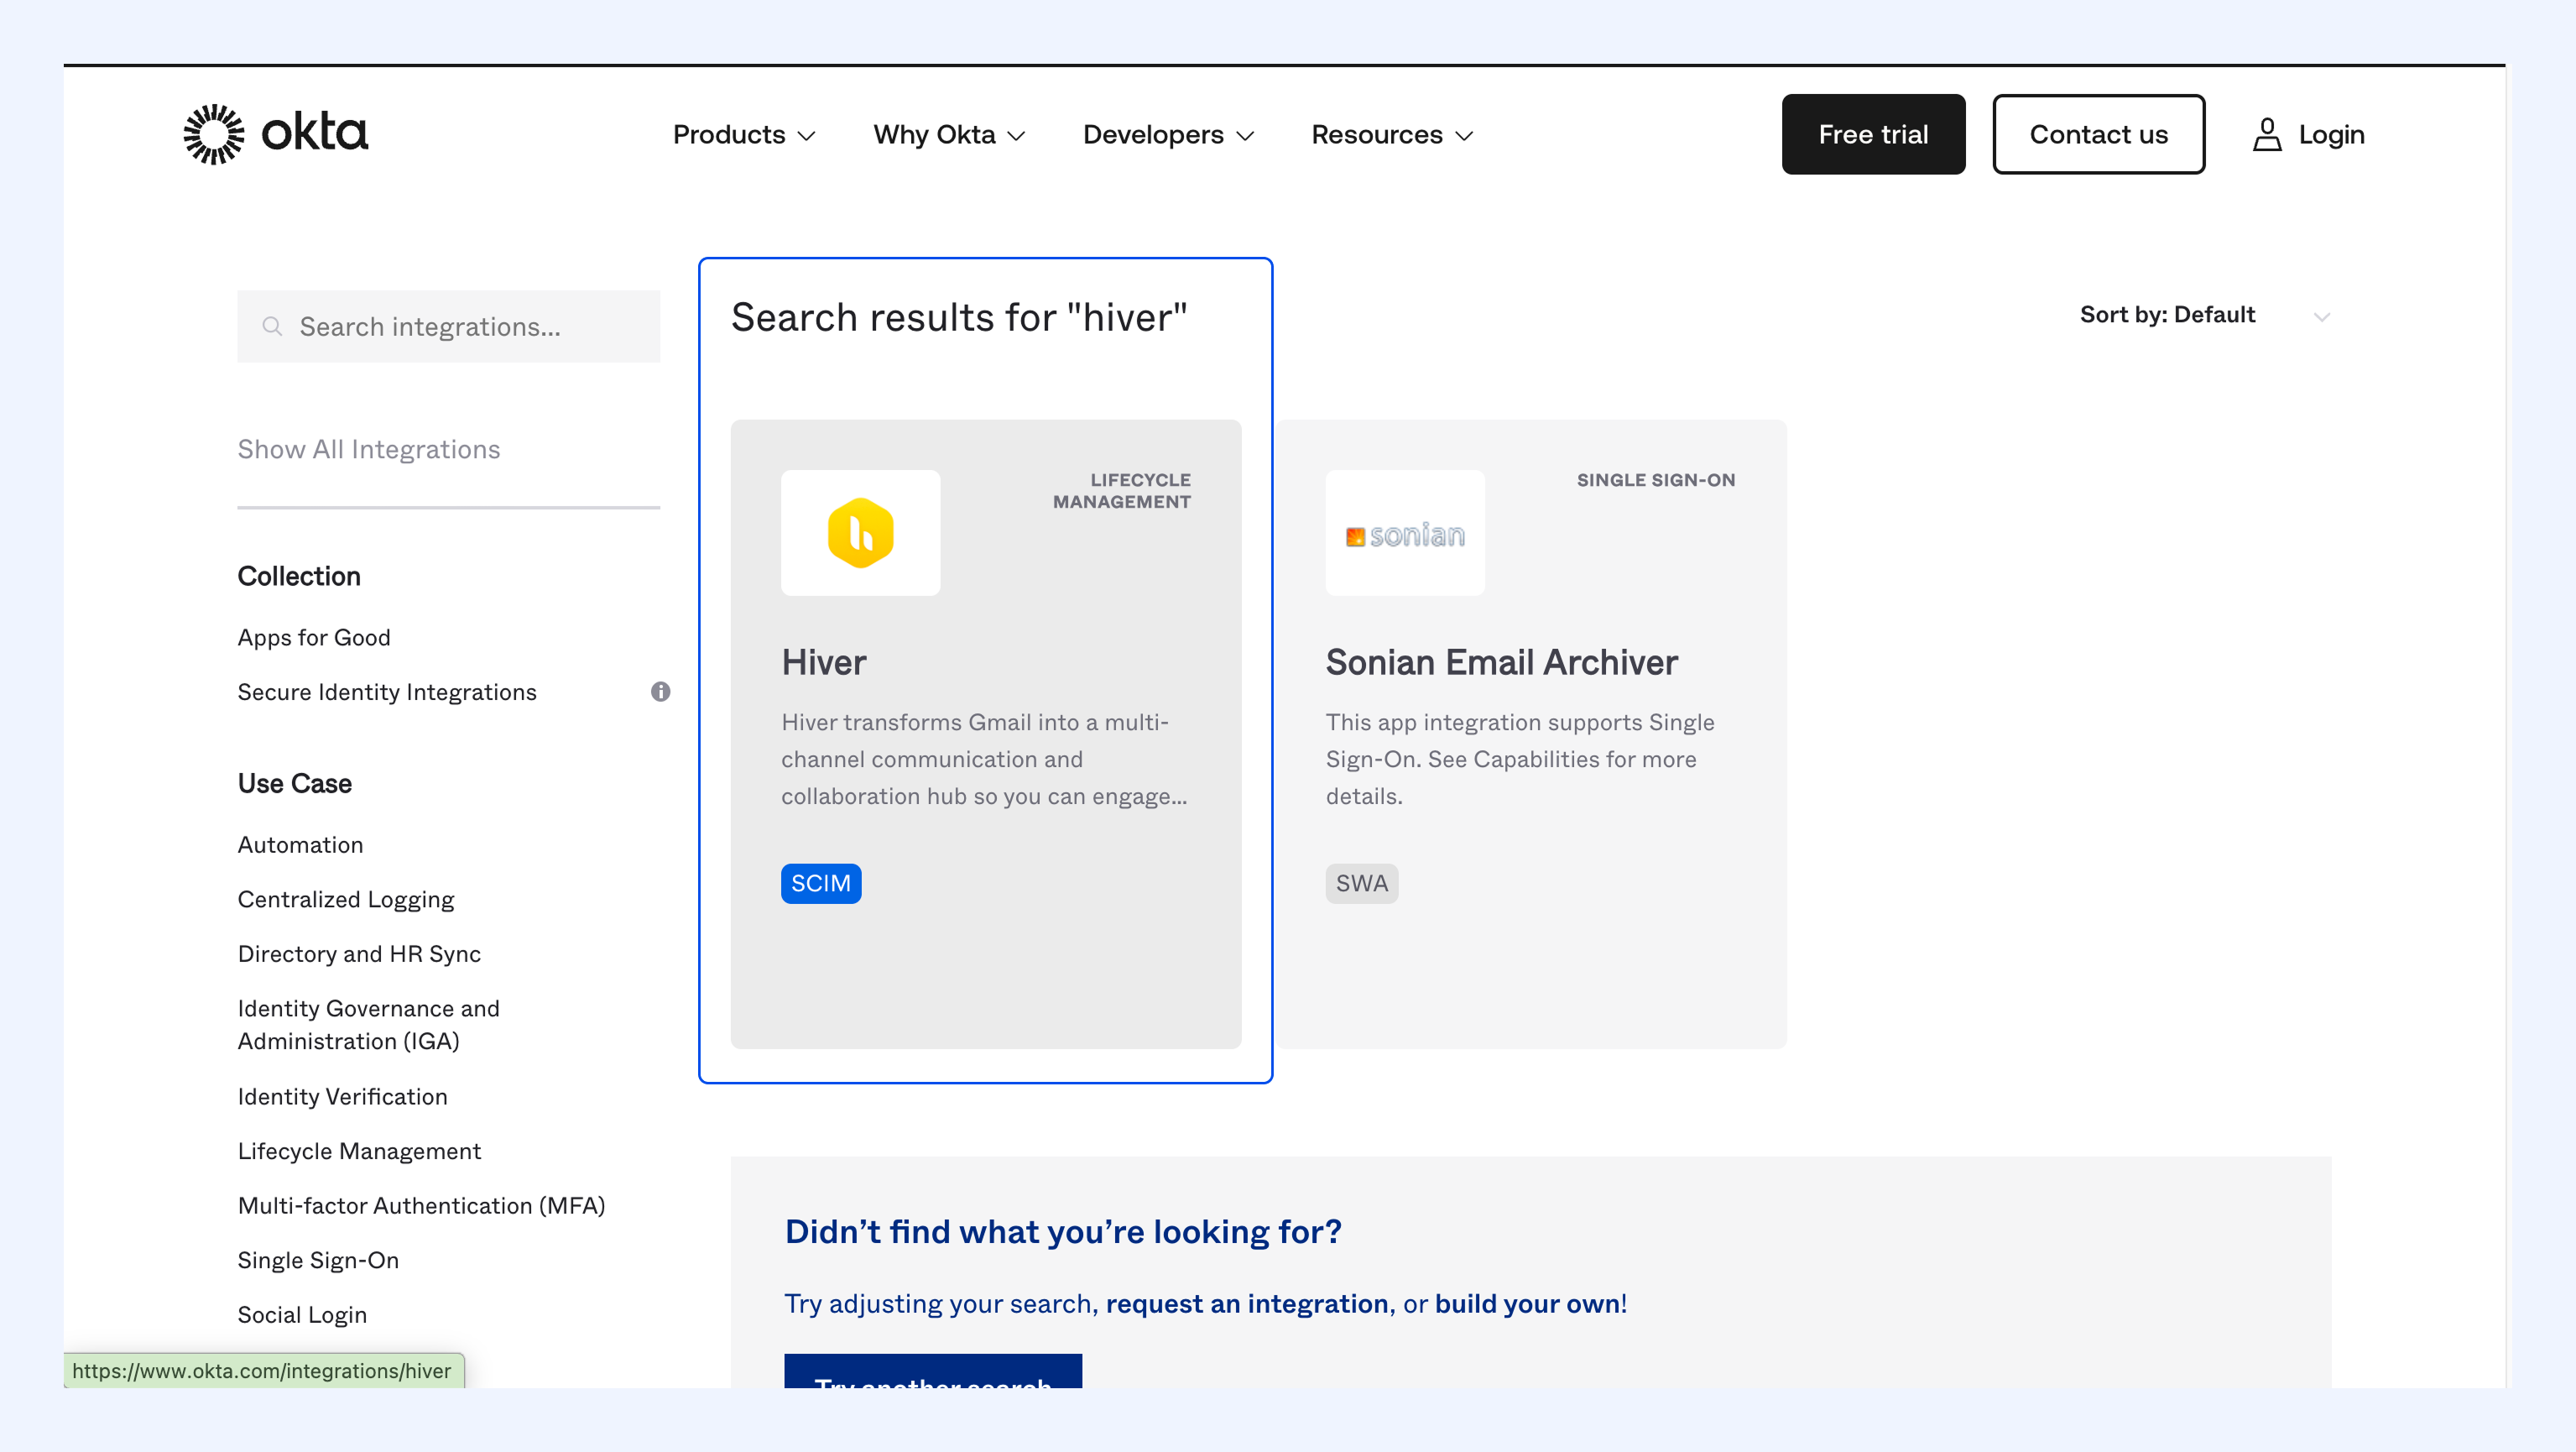
1. Open the Okta Integrations page and search for Hiver.
2. Click +Add Integration.
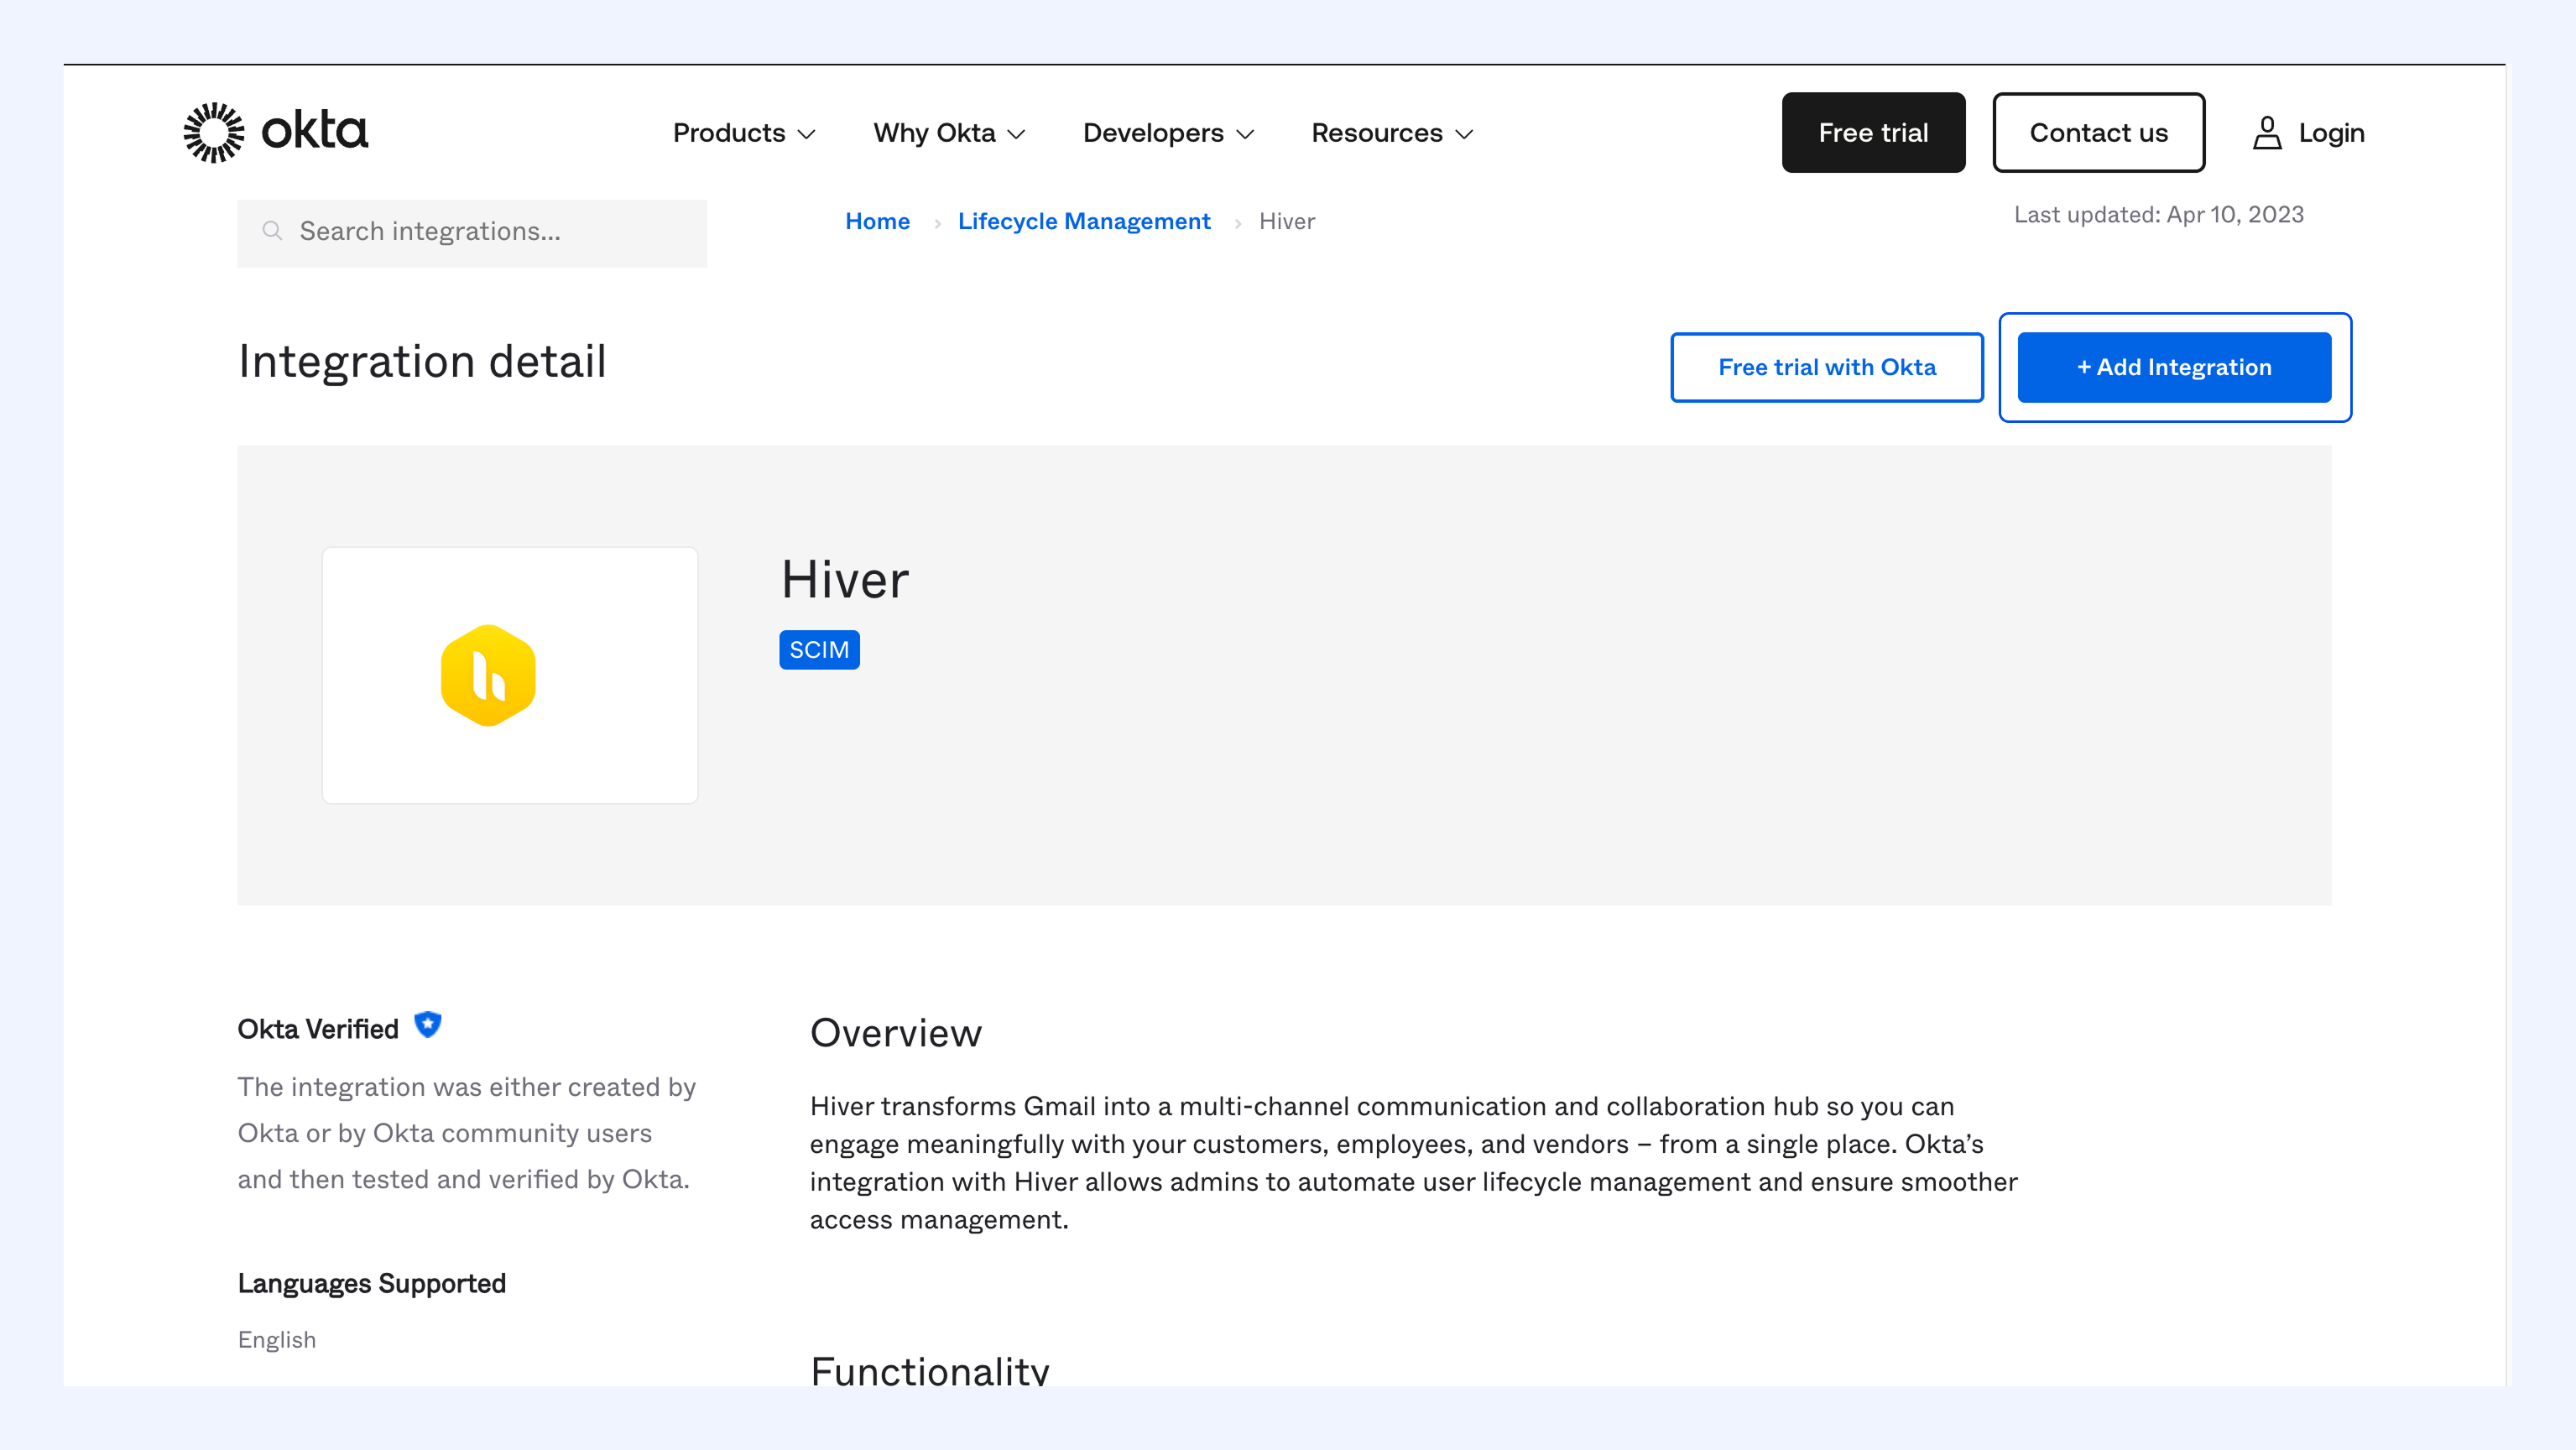
3. In the new tab that opens, sign in to your Okta organization.
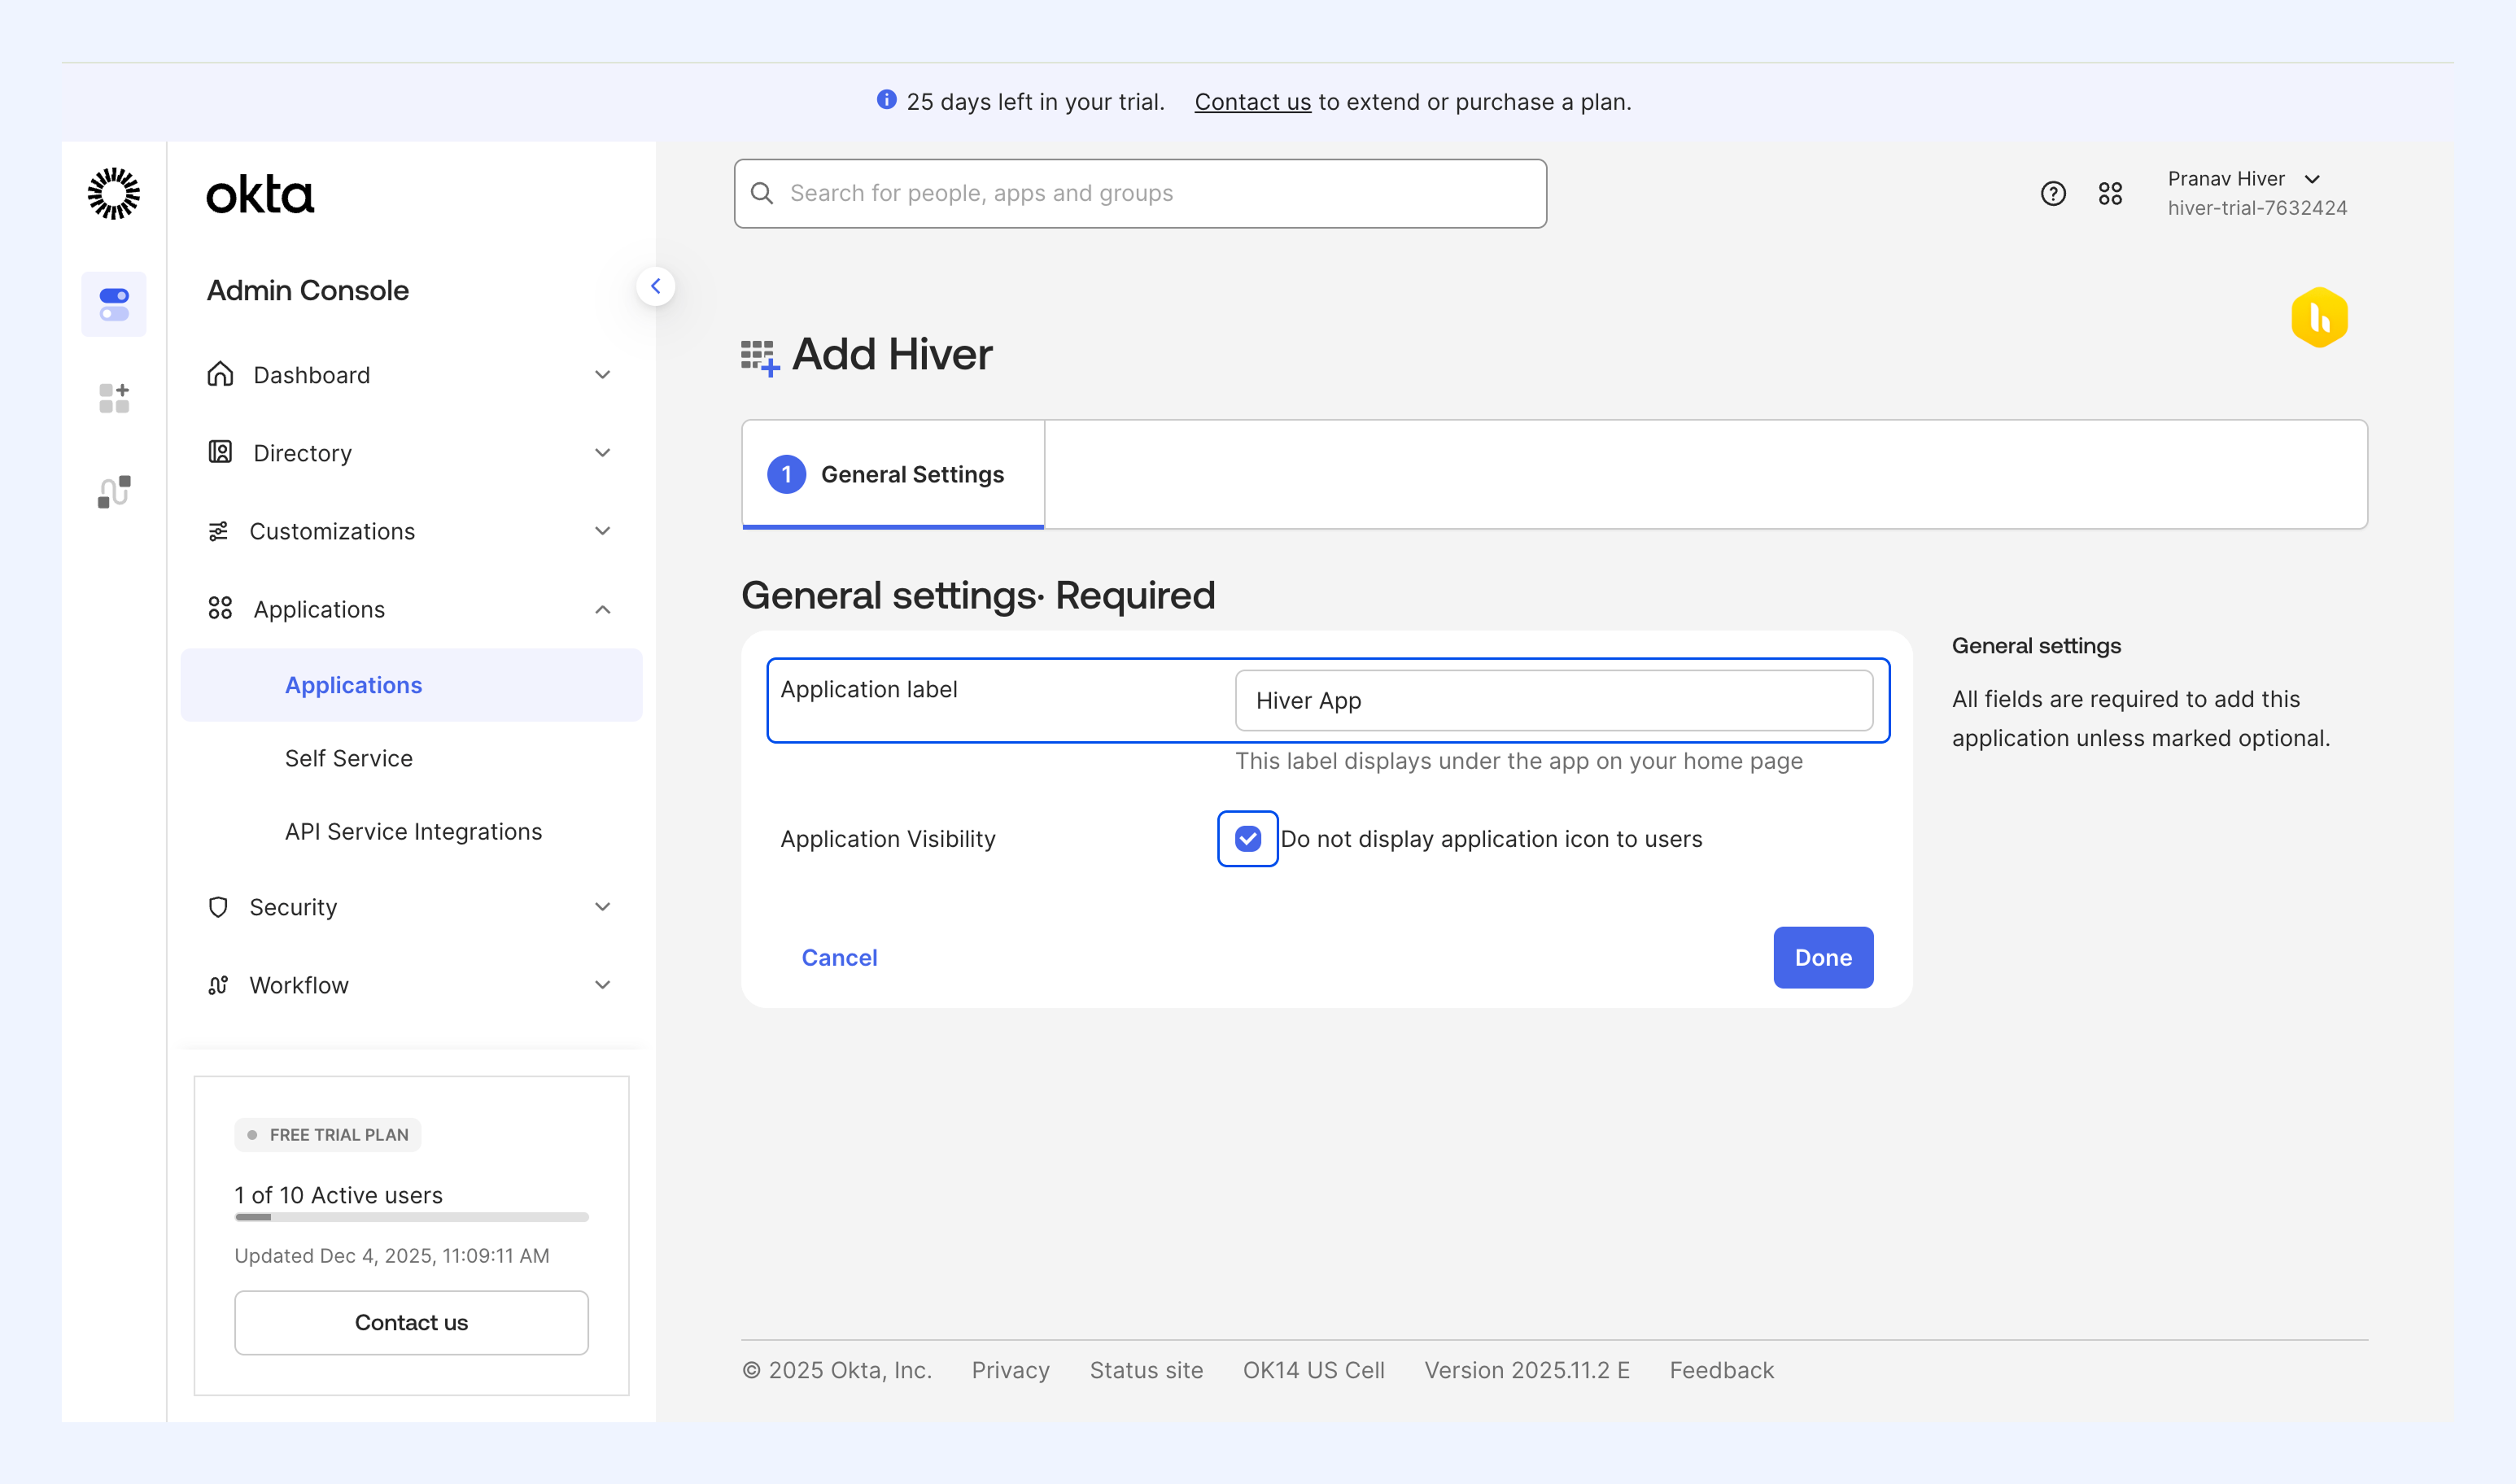
4. Fill in the Application label with a name for your app (e.g., 'Hiver App').
5. Under Application Visibility, select Do not display application icon to users checkbox.
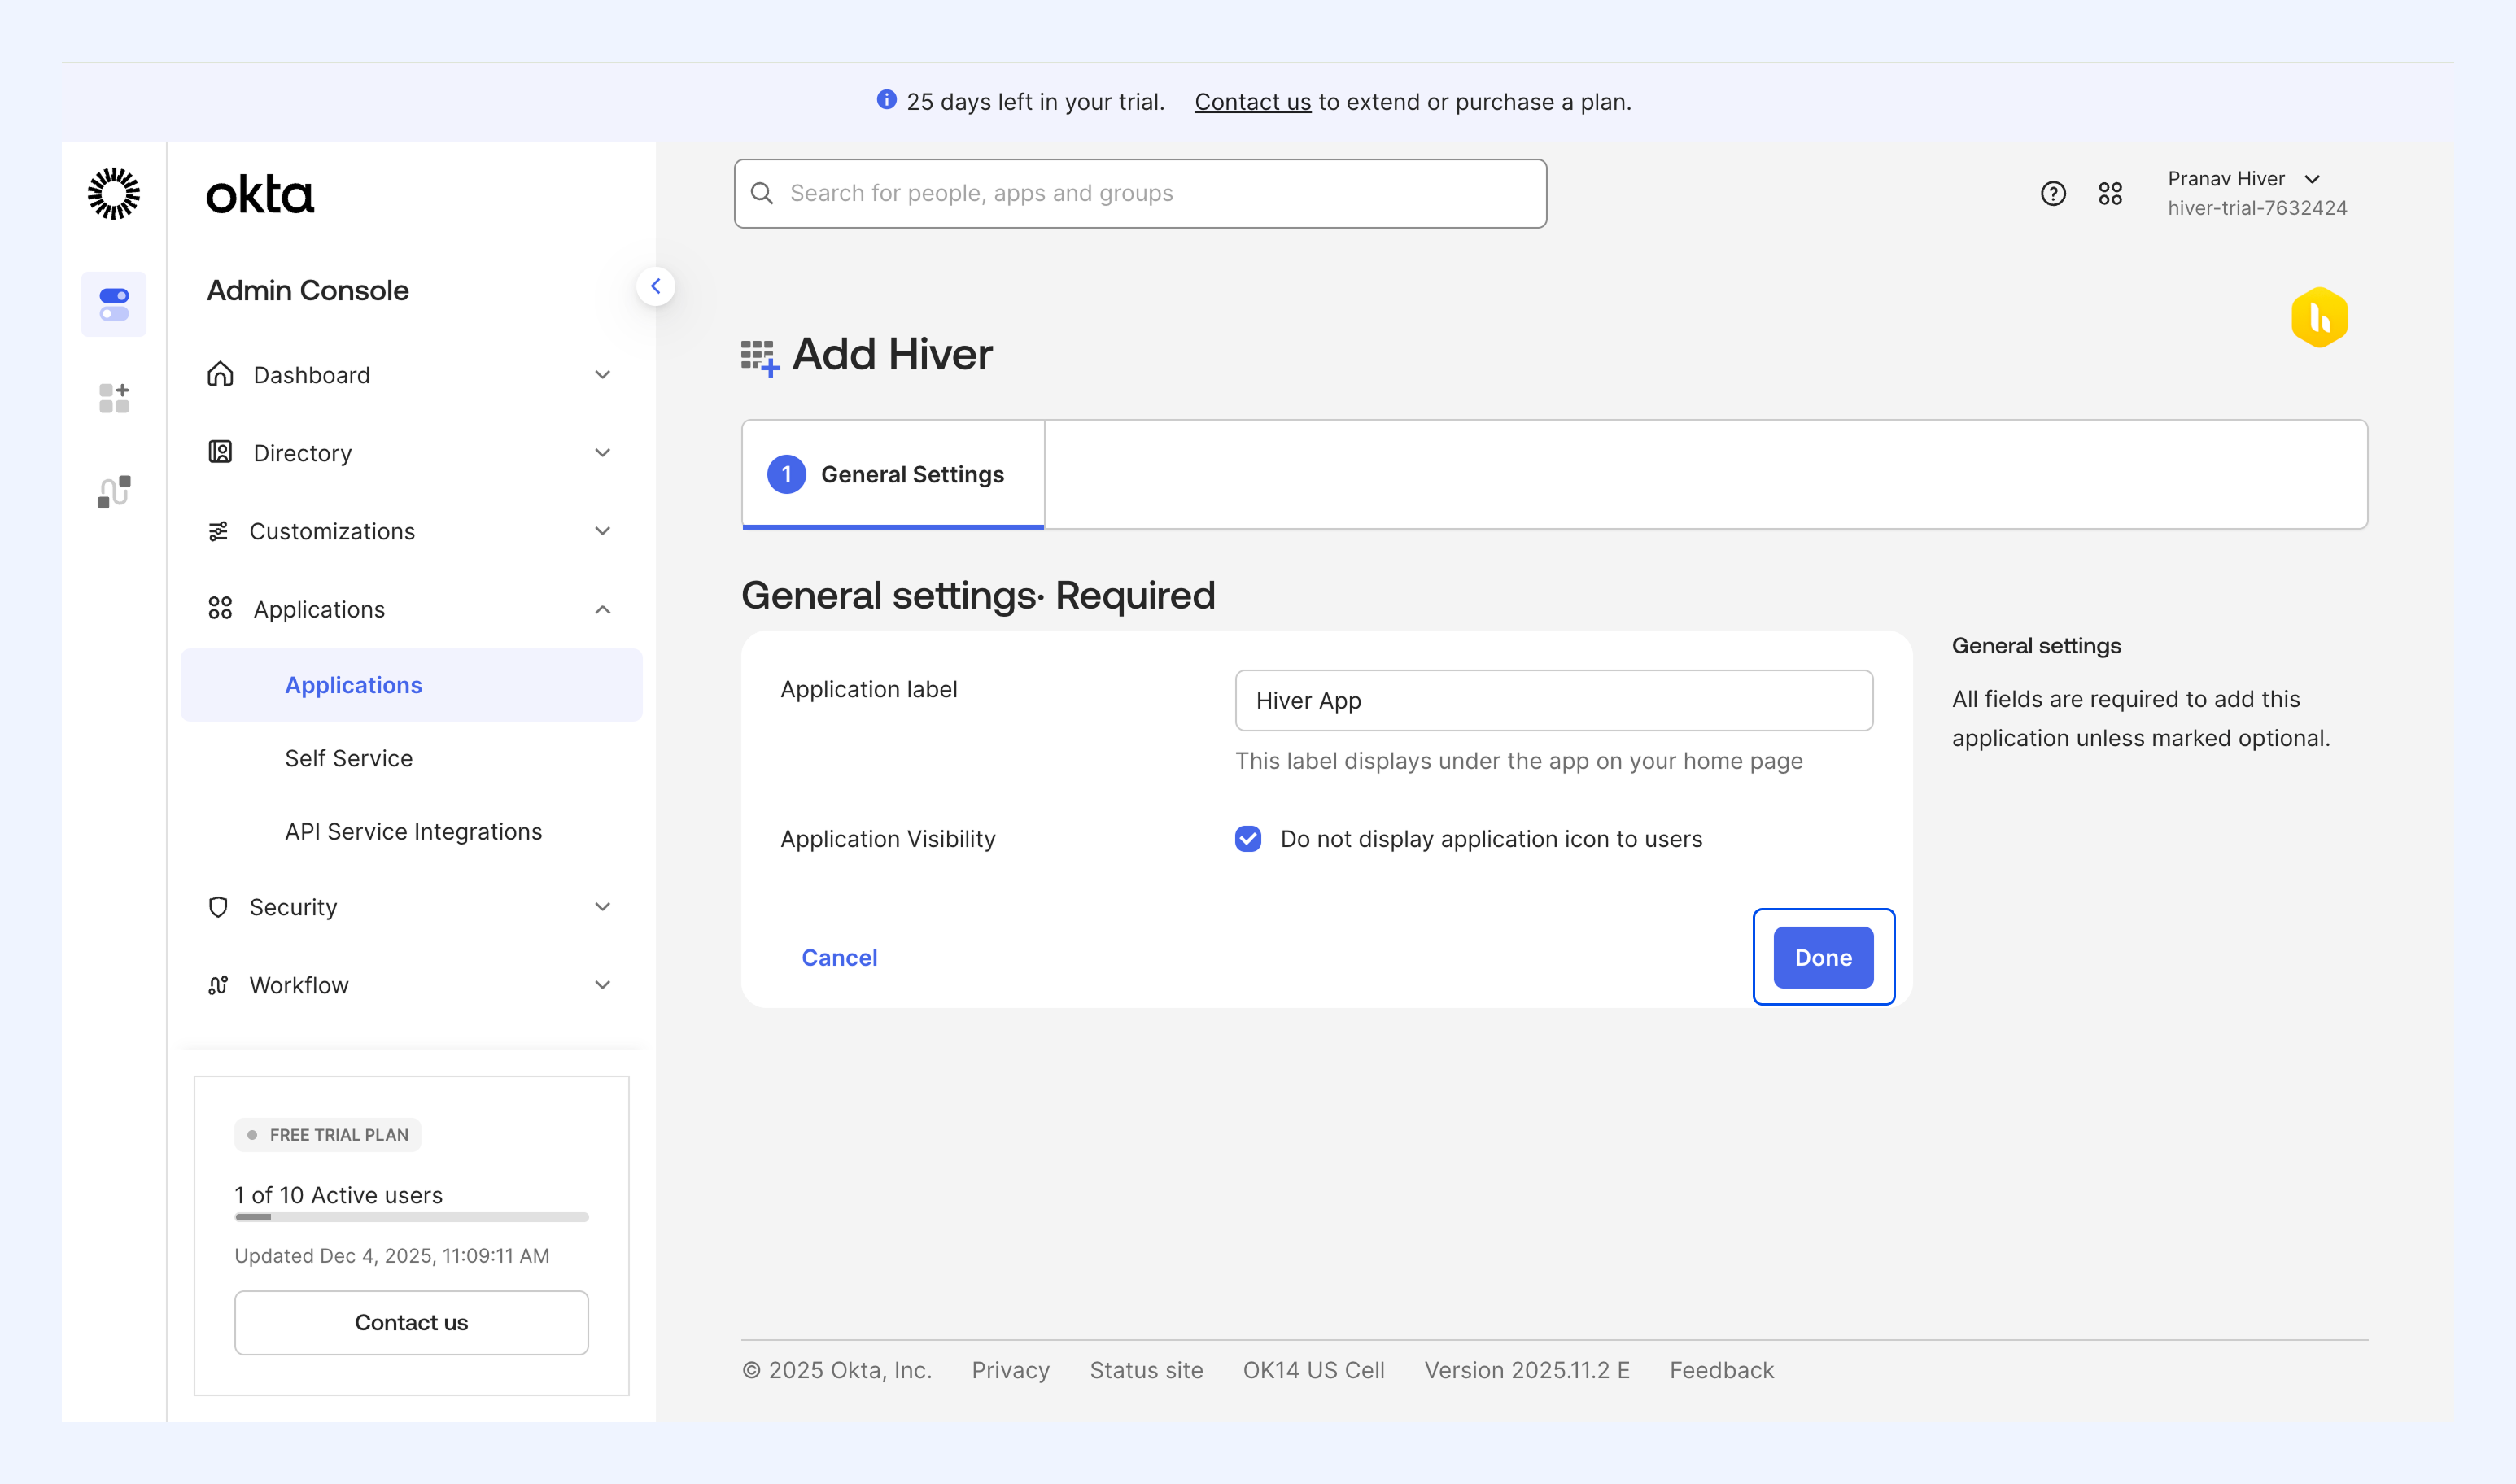
6. Click Done.
Configure API Integration
Now, you need to connect Okta to Hiver using the credentials you copied earlier.
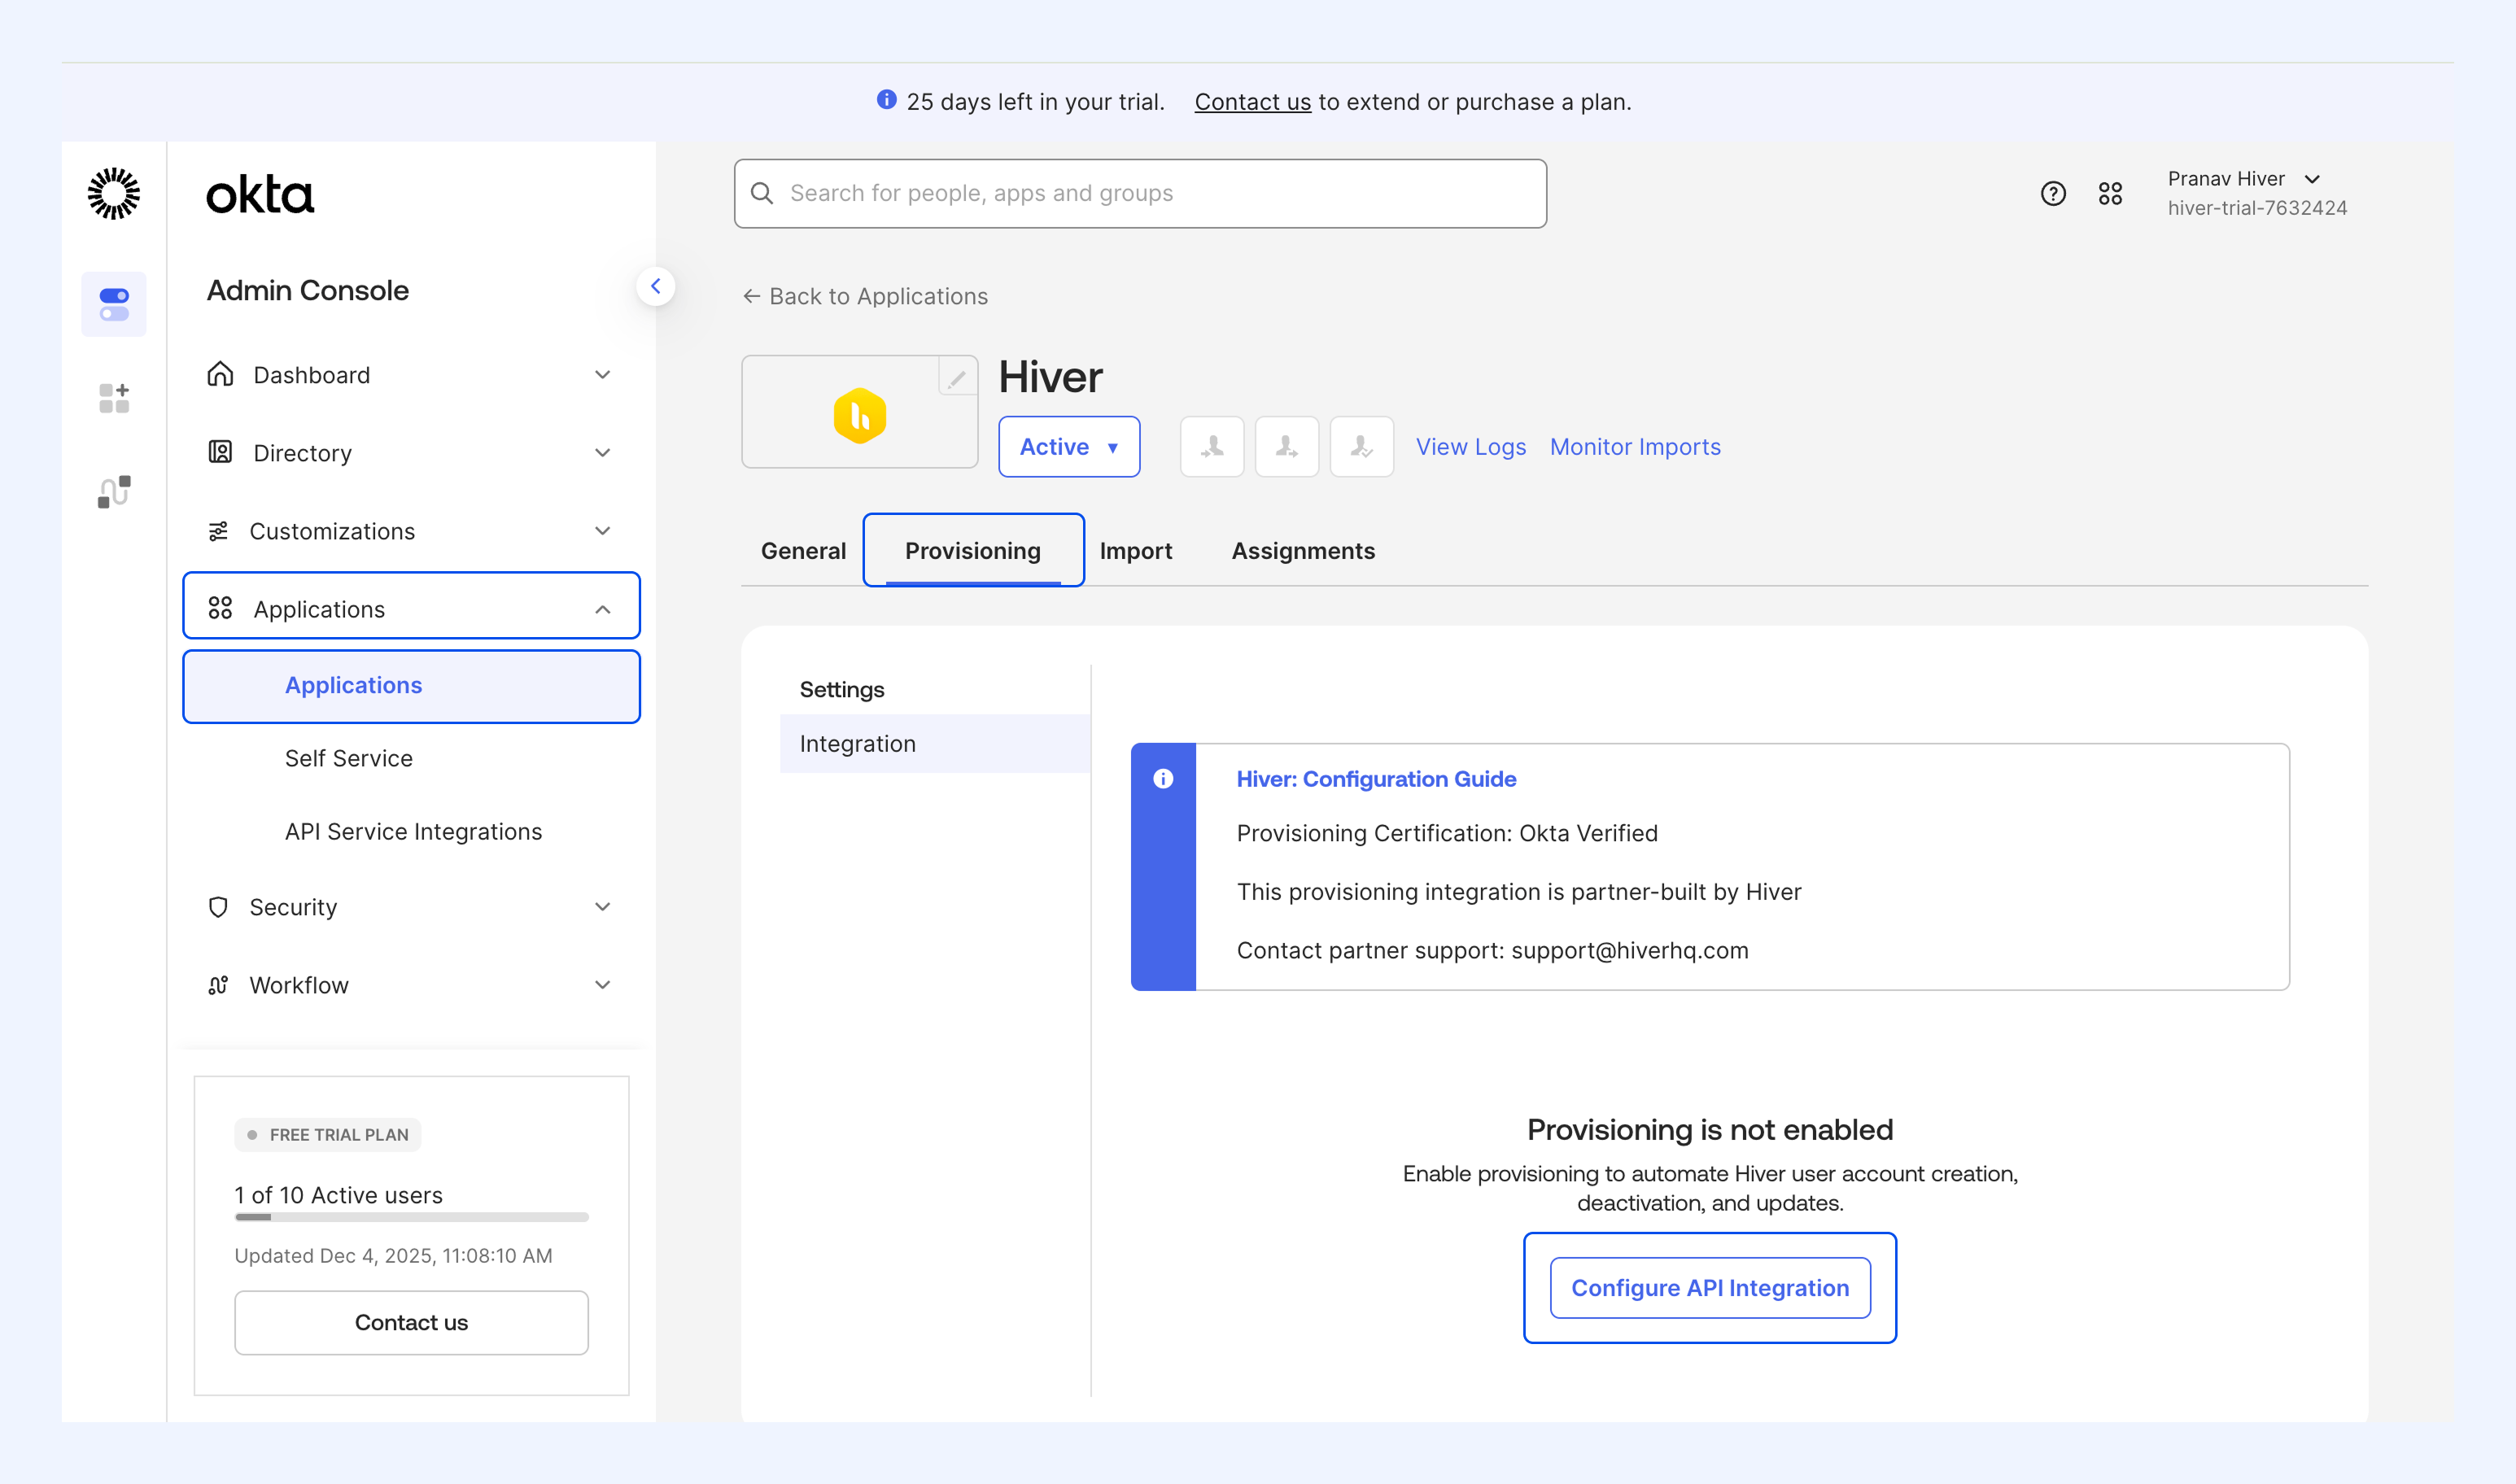
1. In Okta, go to Applications and open the Provisioning tab.
2. Click Configure API Integration.
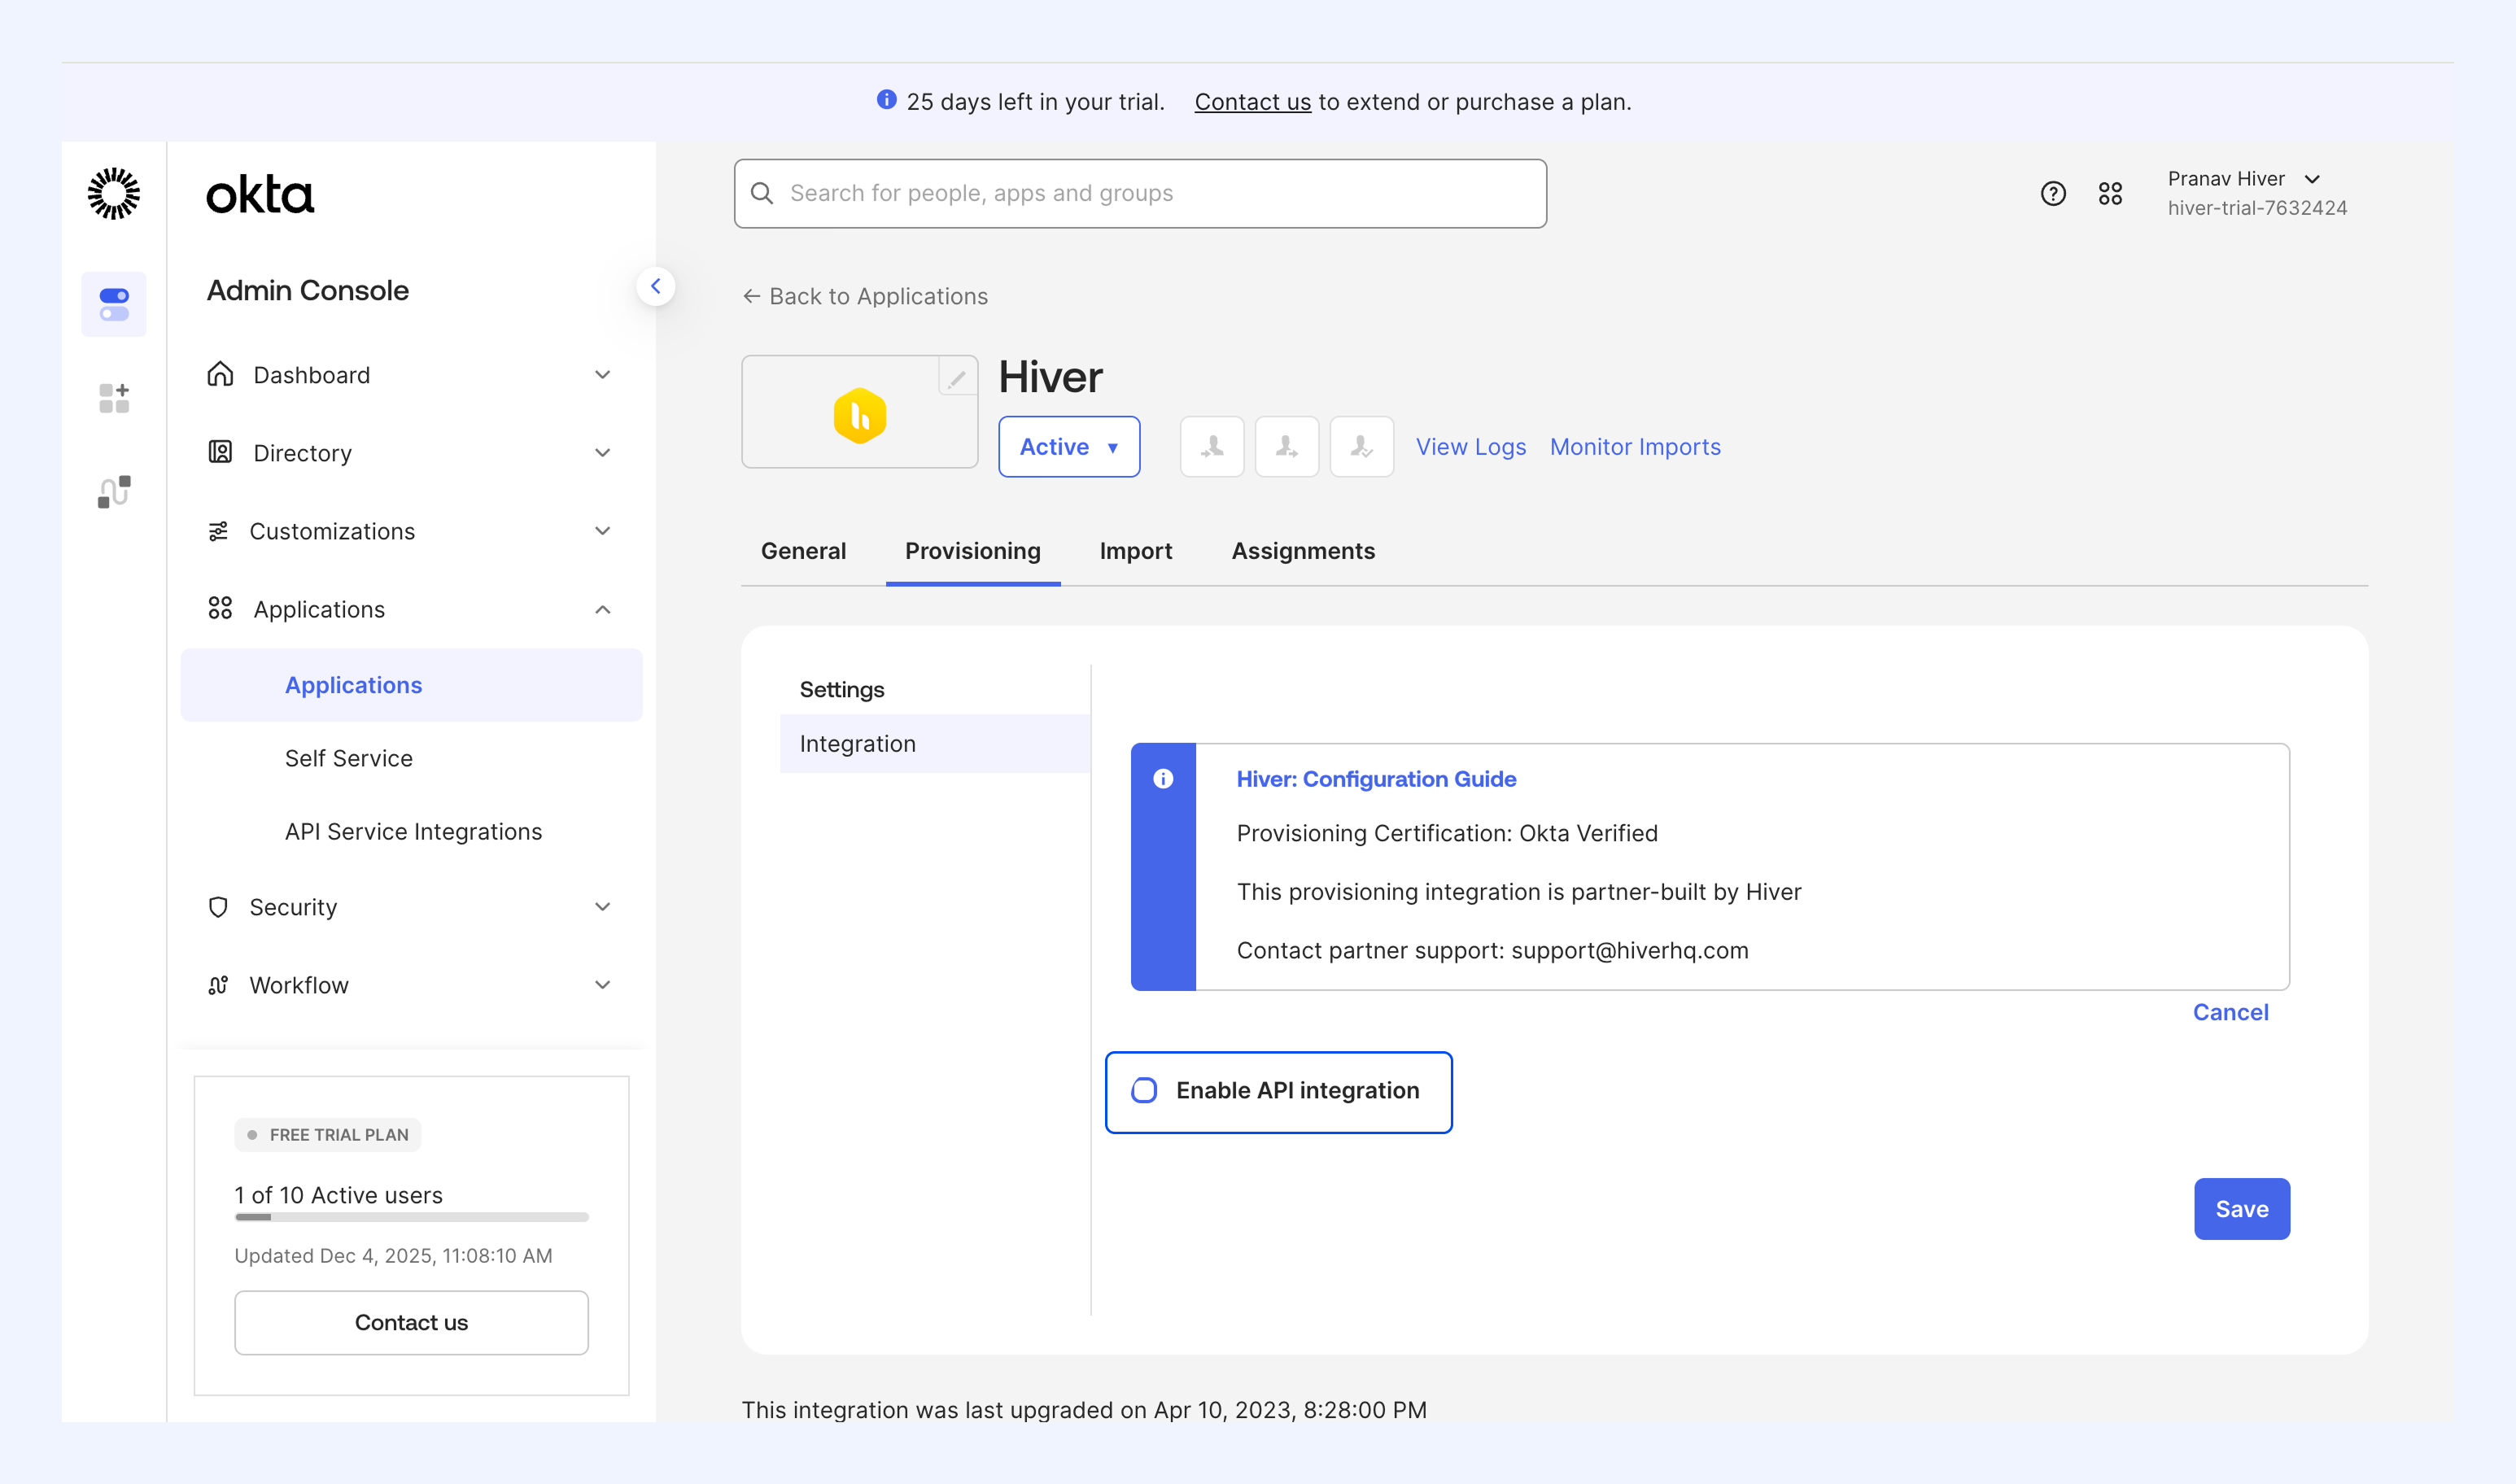
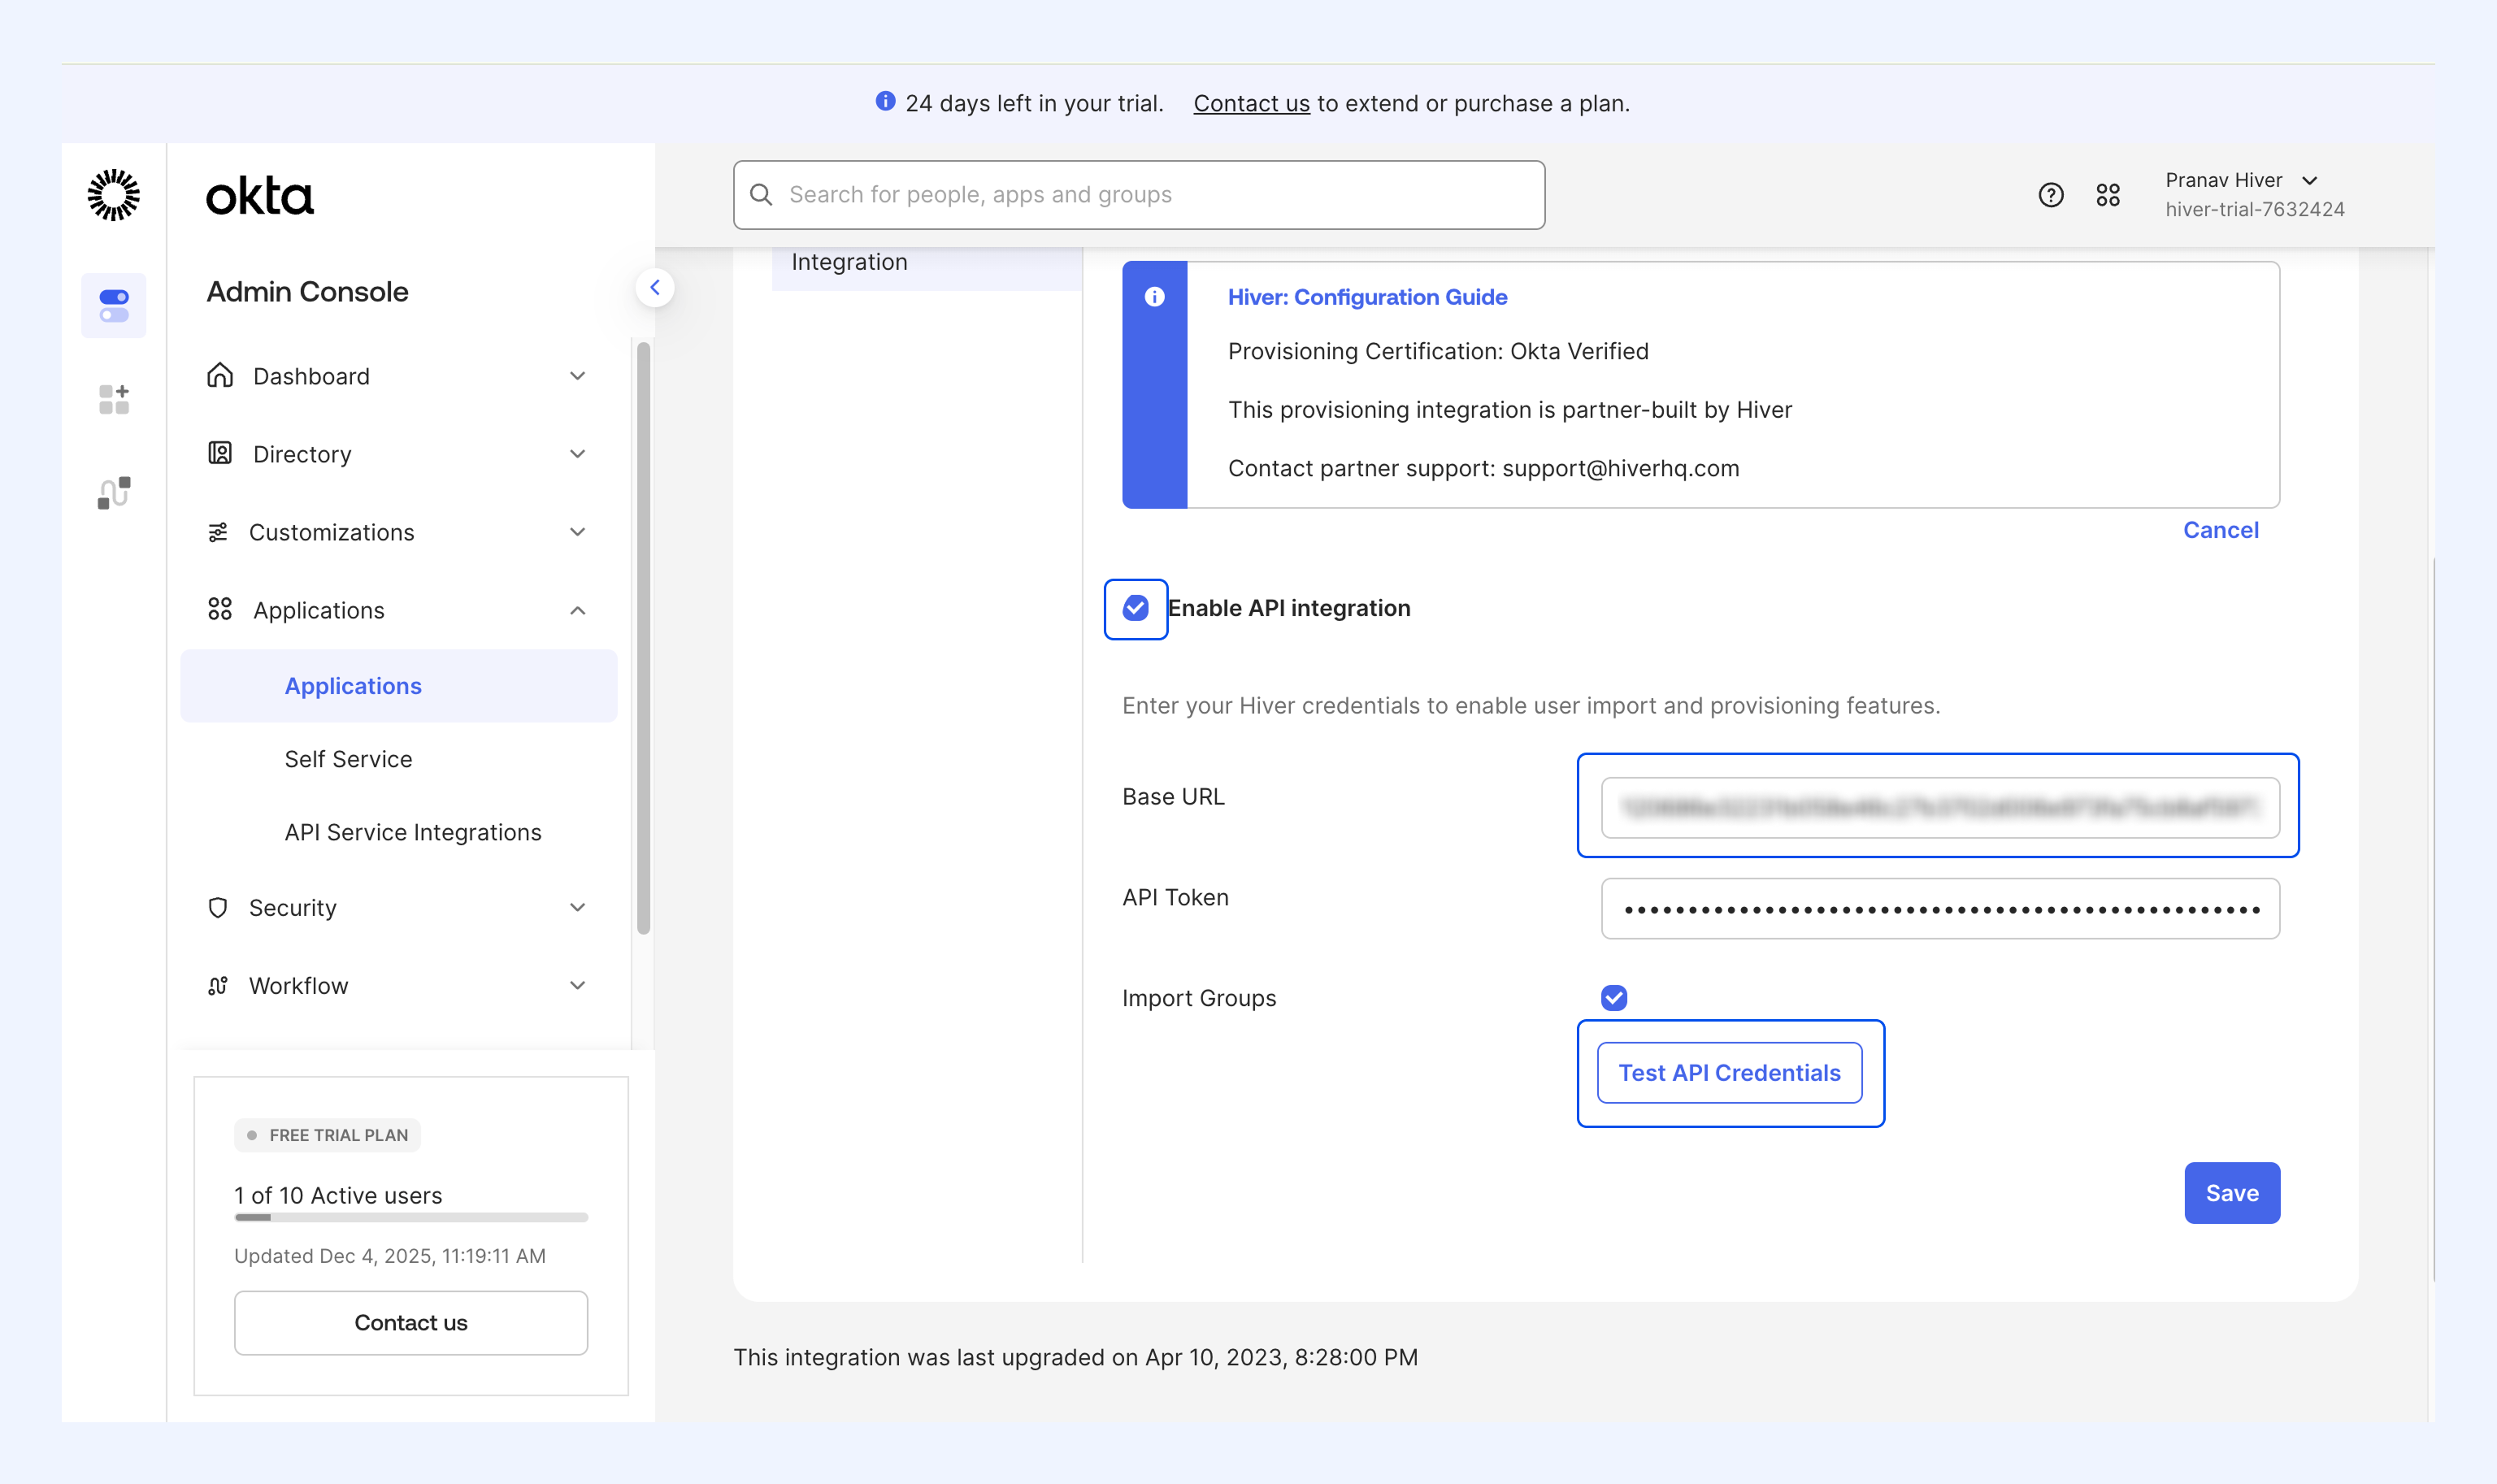
3. Check the Enable API Integration checkbox.
4. The details will expand. Enter the Base URL and API token you copied from Hiver.
5. Click Test API Credentials.
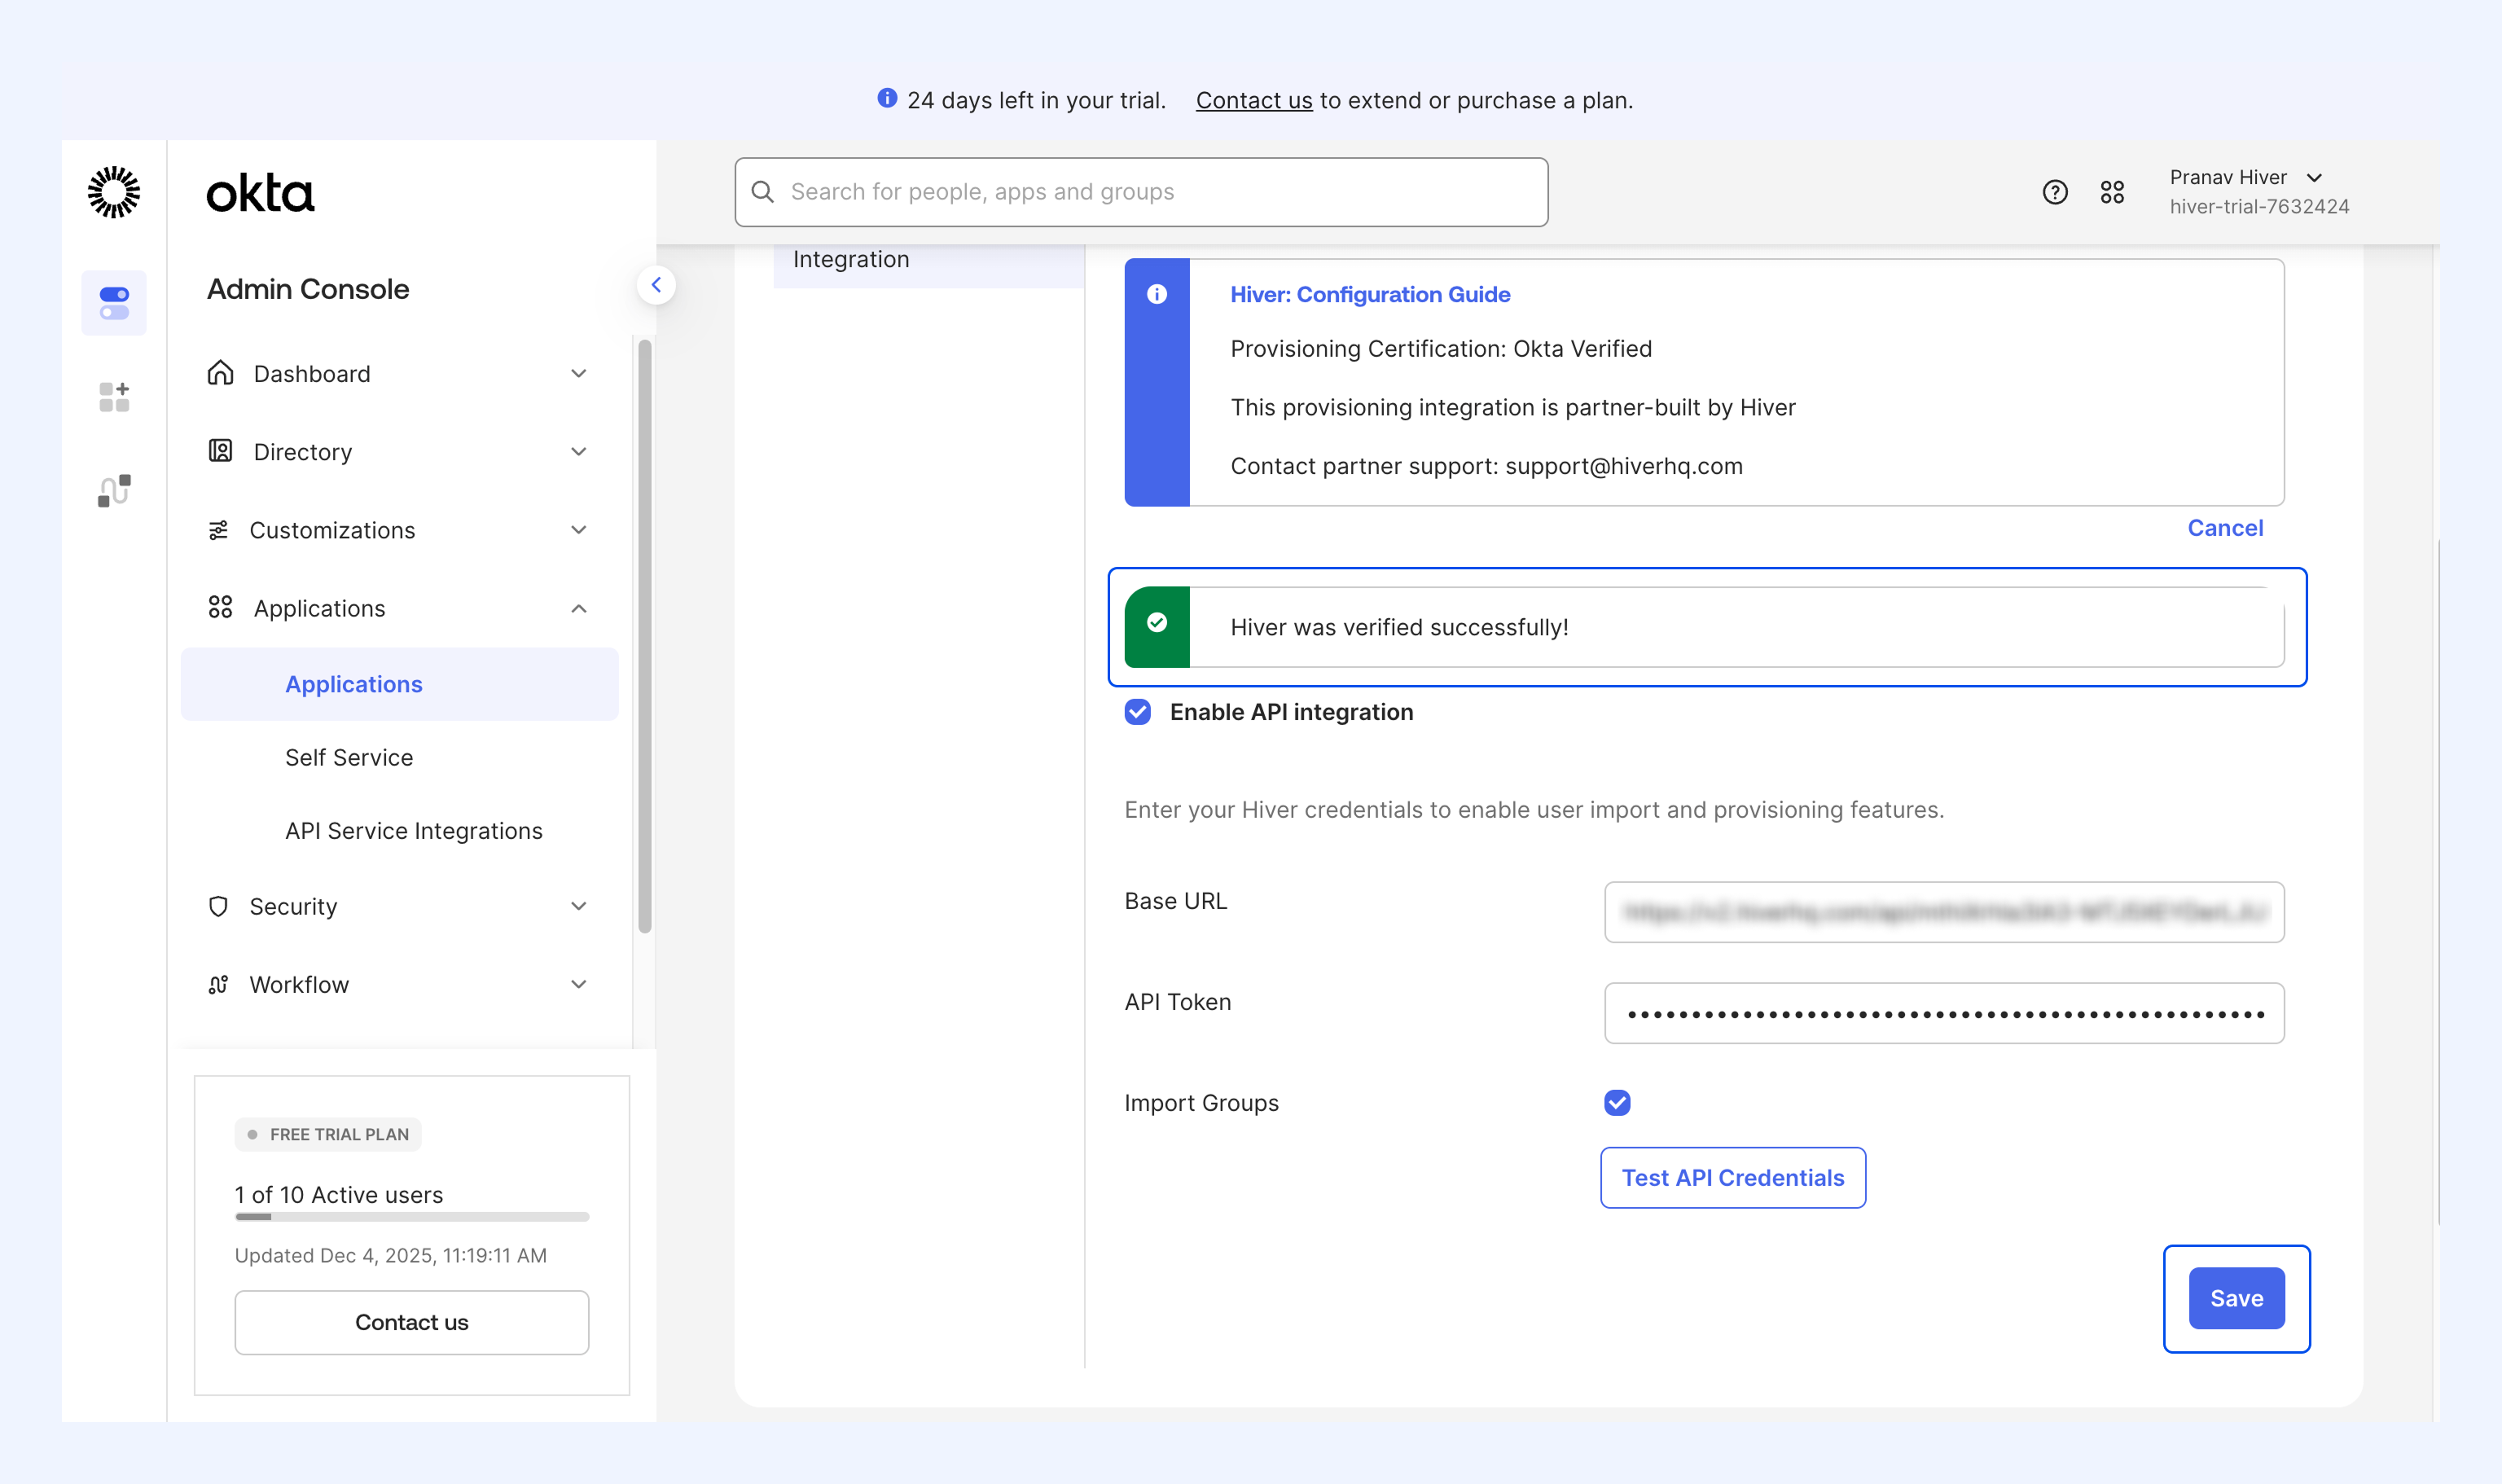
6. You should see a message saying Hiver was verified successfully.
7. Click Save.
Configure provisioning settings
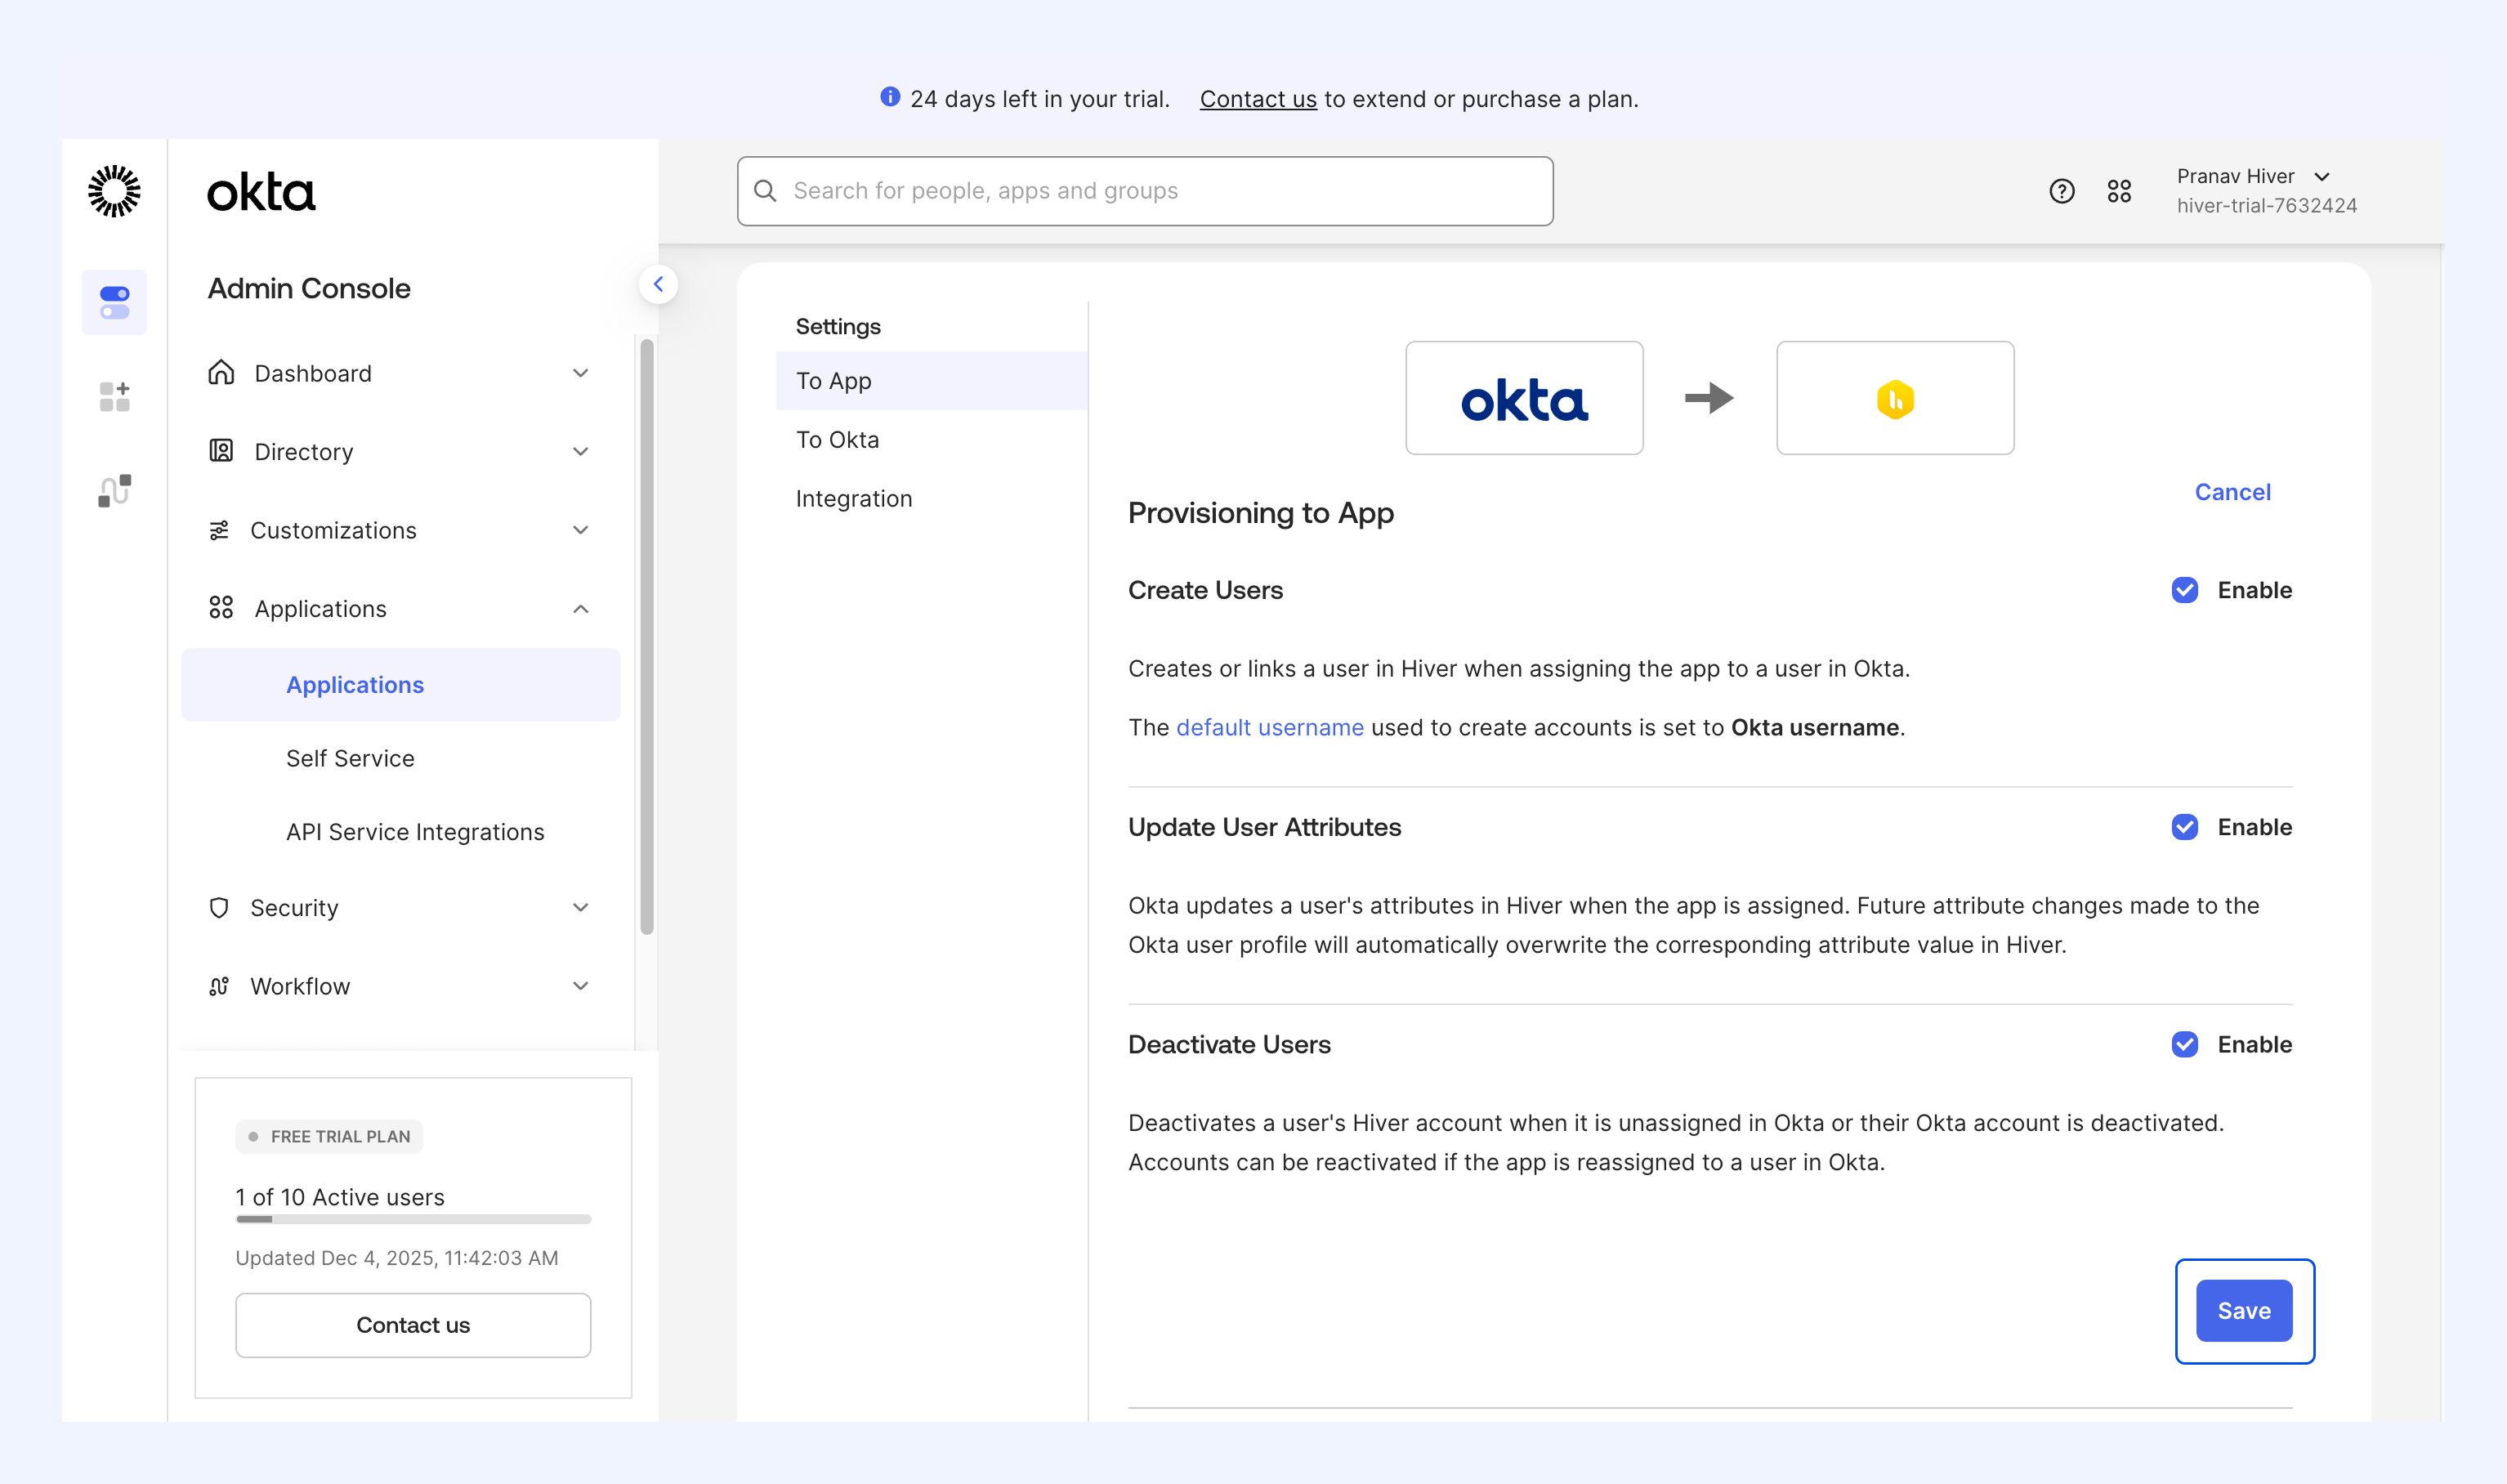
Next, you need to define what Okta is allowed to do in Hiver.
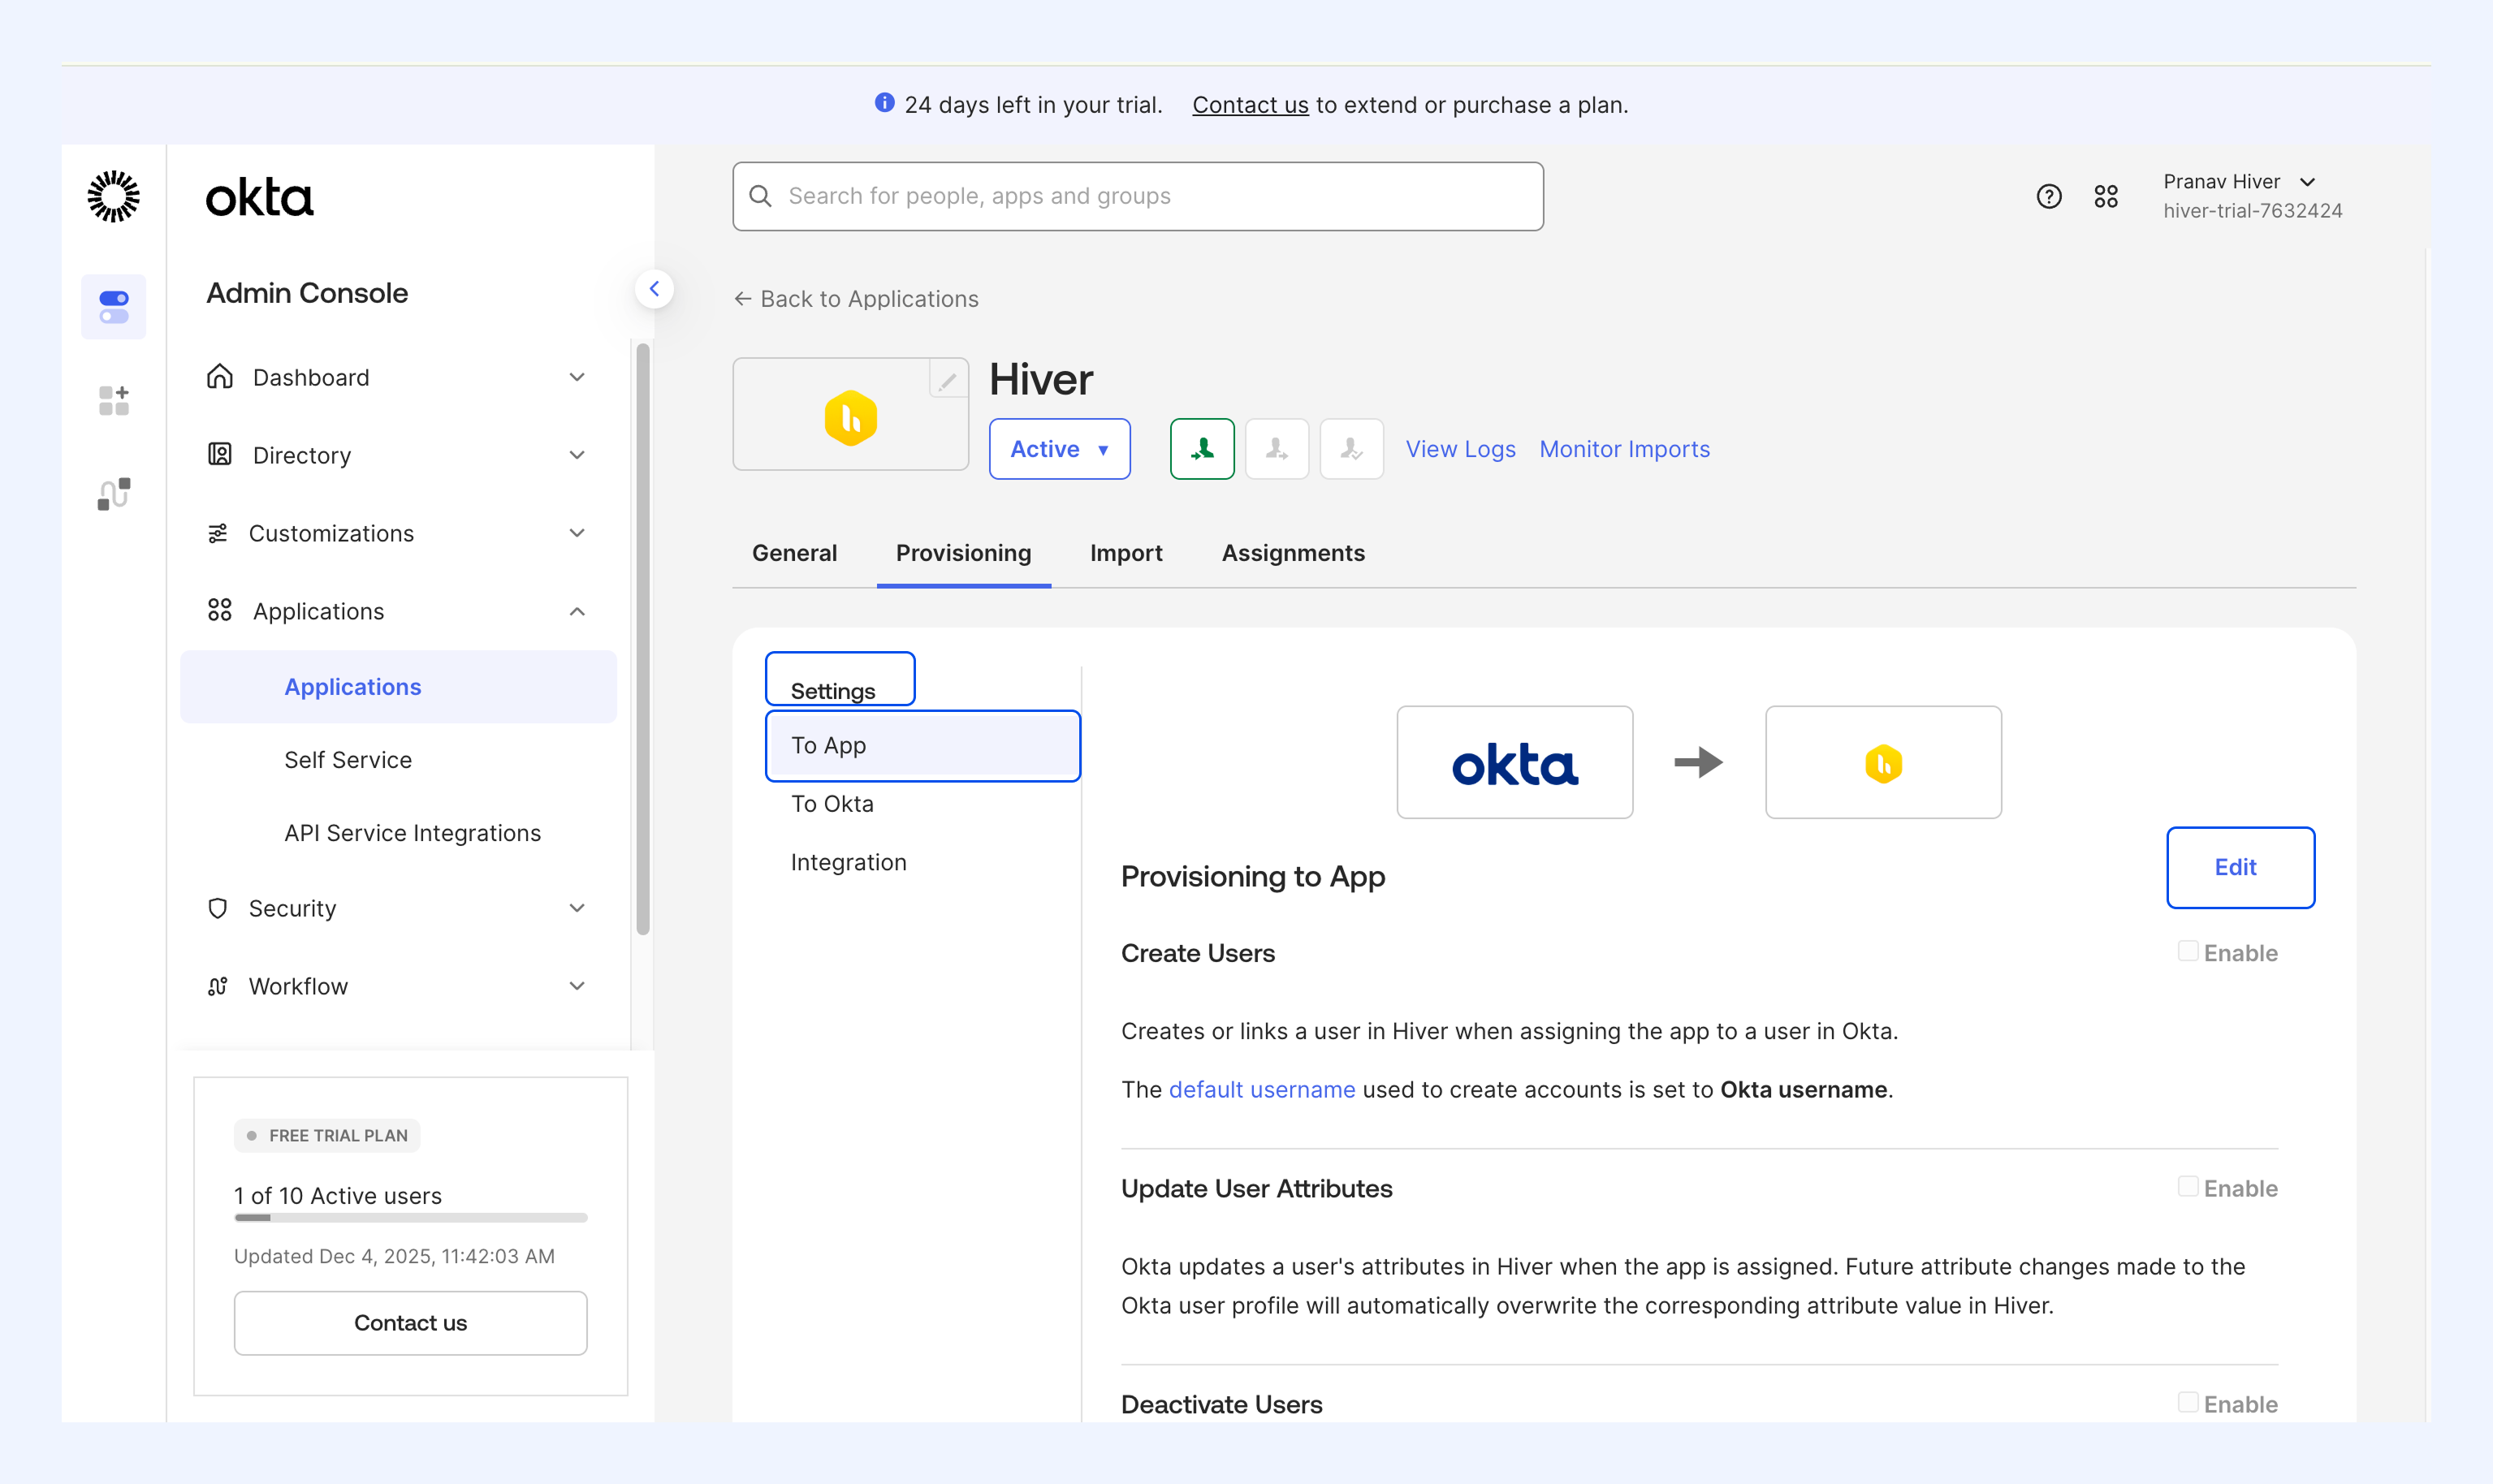
1. Go to Settings → To App within your Hiver app in Okta.
2. Click Edit.
3. Select the following options:
- Create Users
- Update User Attributes
- Deactivate Users
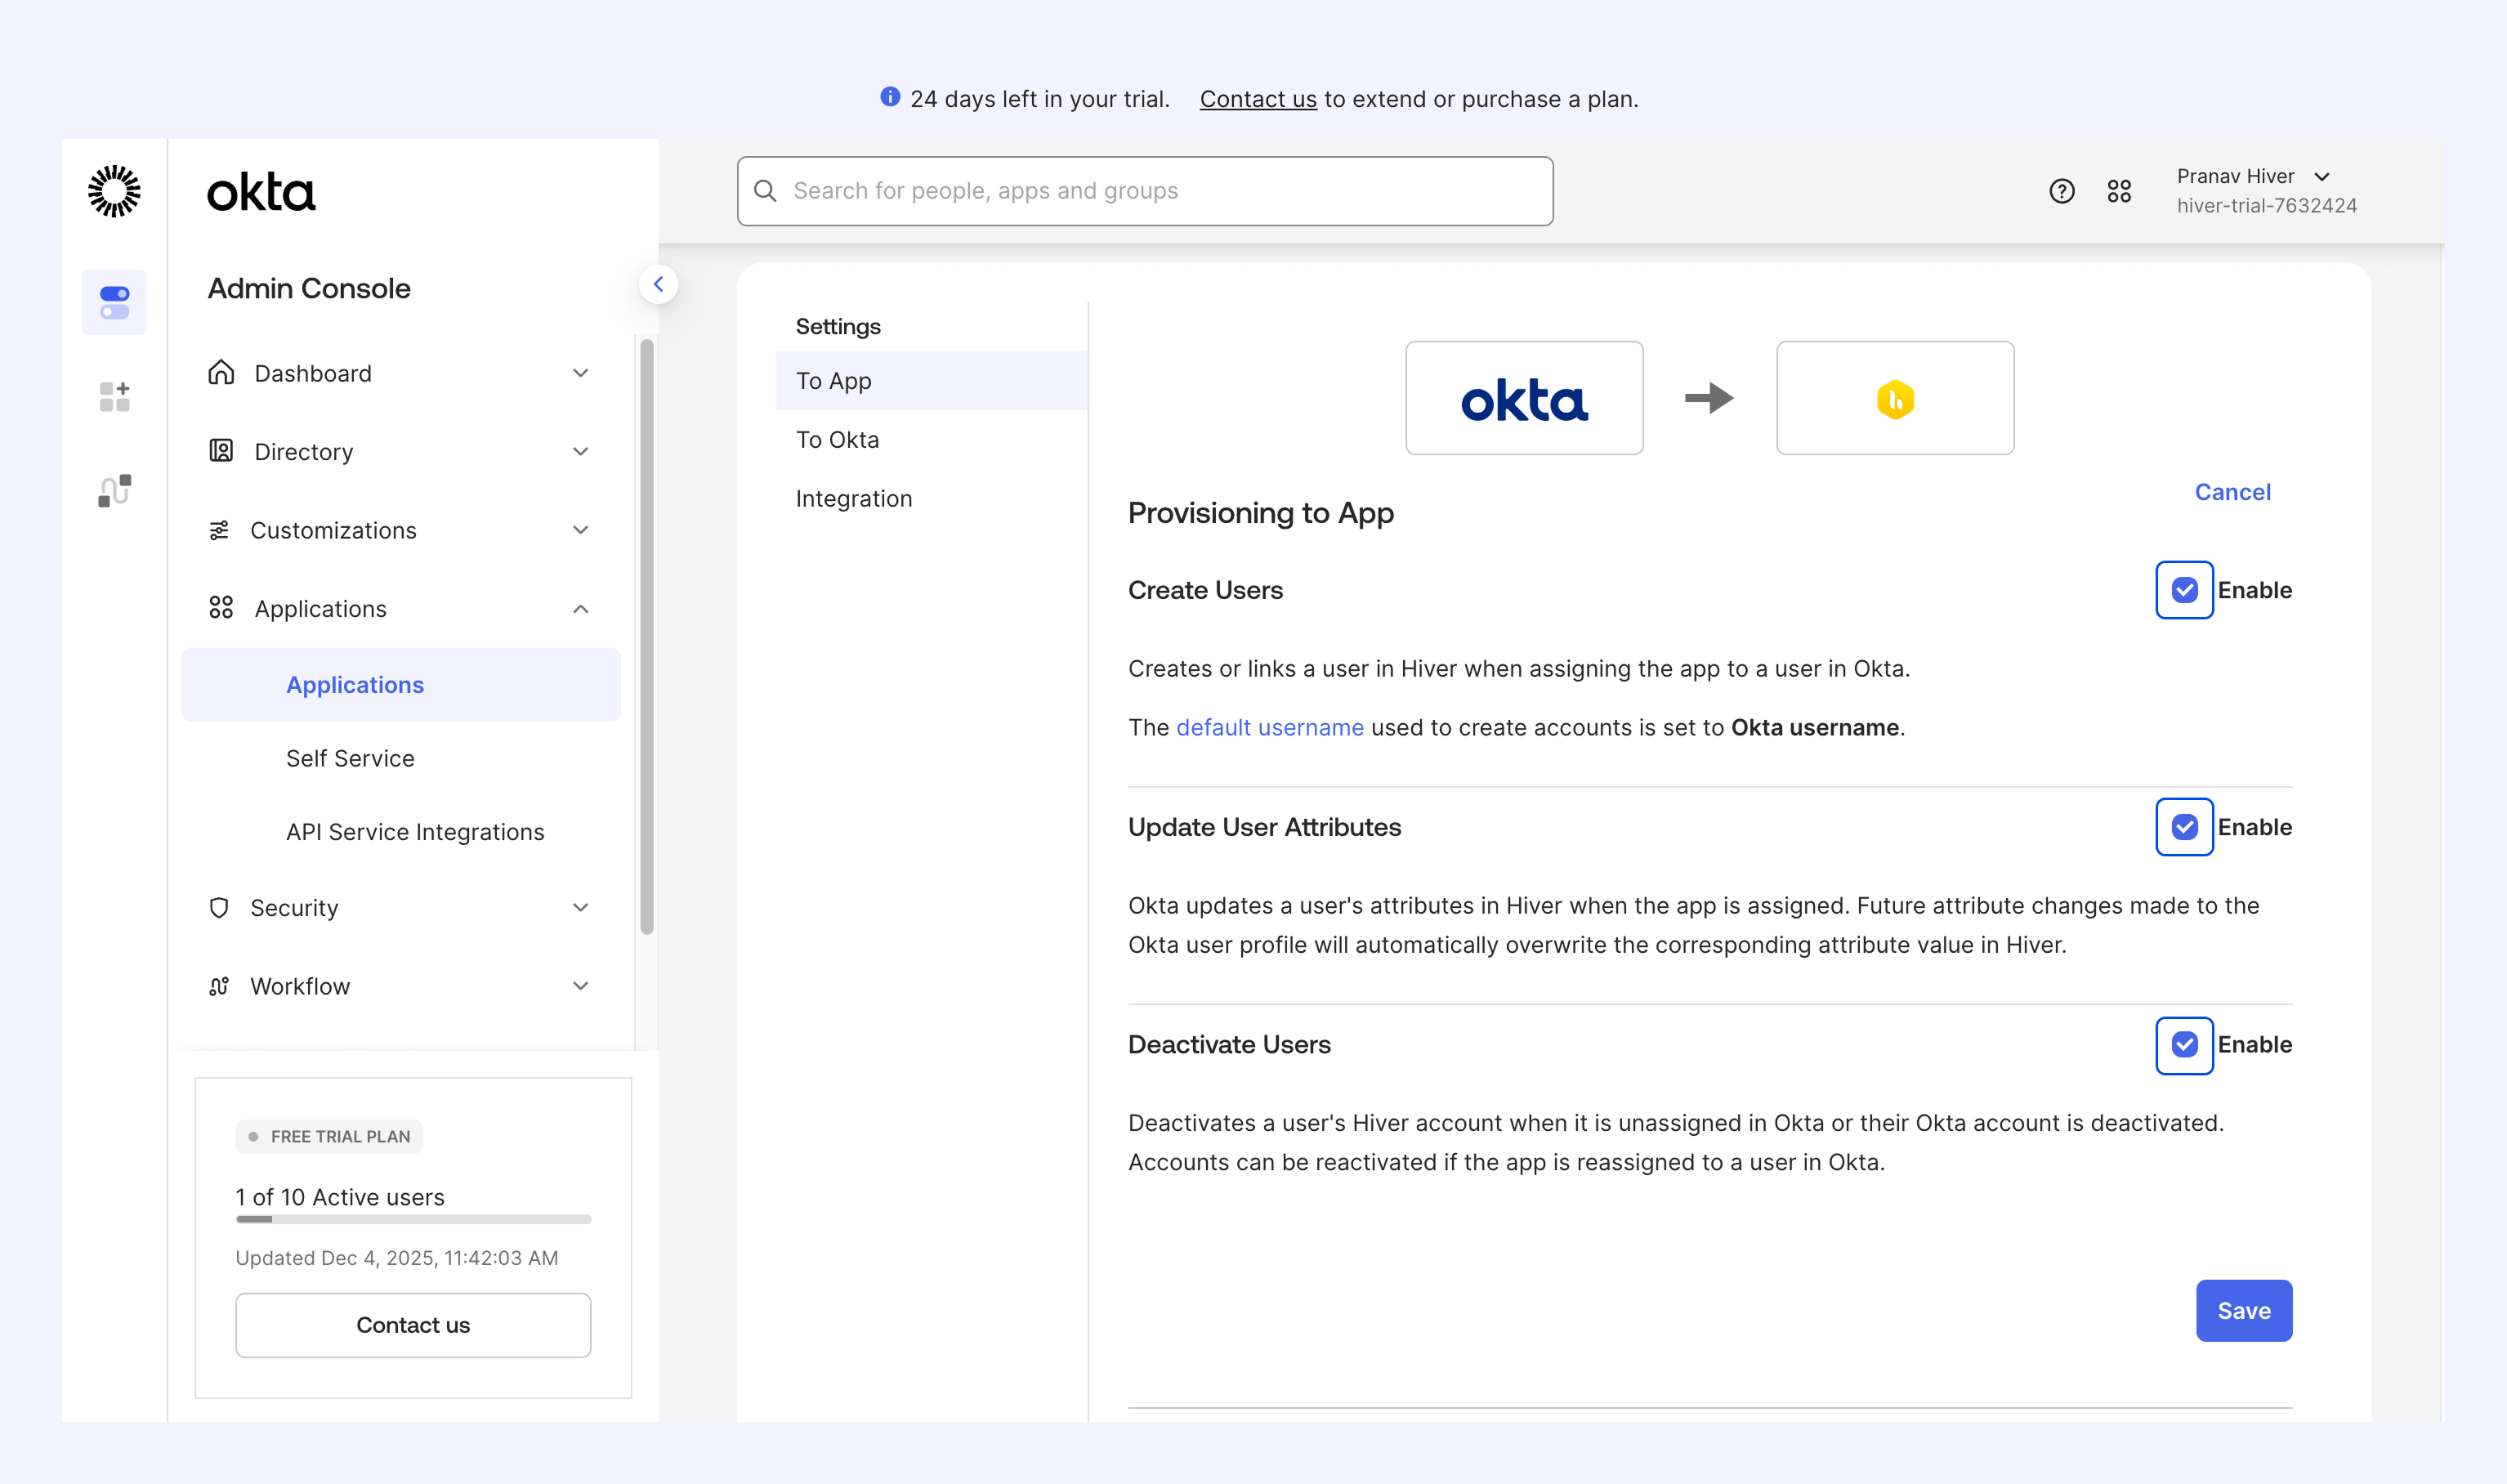
4. Click Save.
Import users into Okta
If you're setting up for the first time or adding users in bulk, you can import them via a CSV file.
1. Select the Hiver app under Applications.
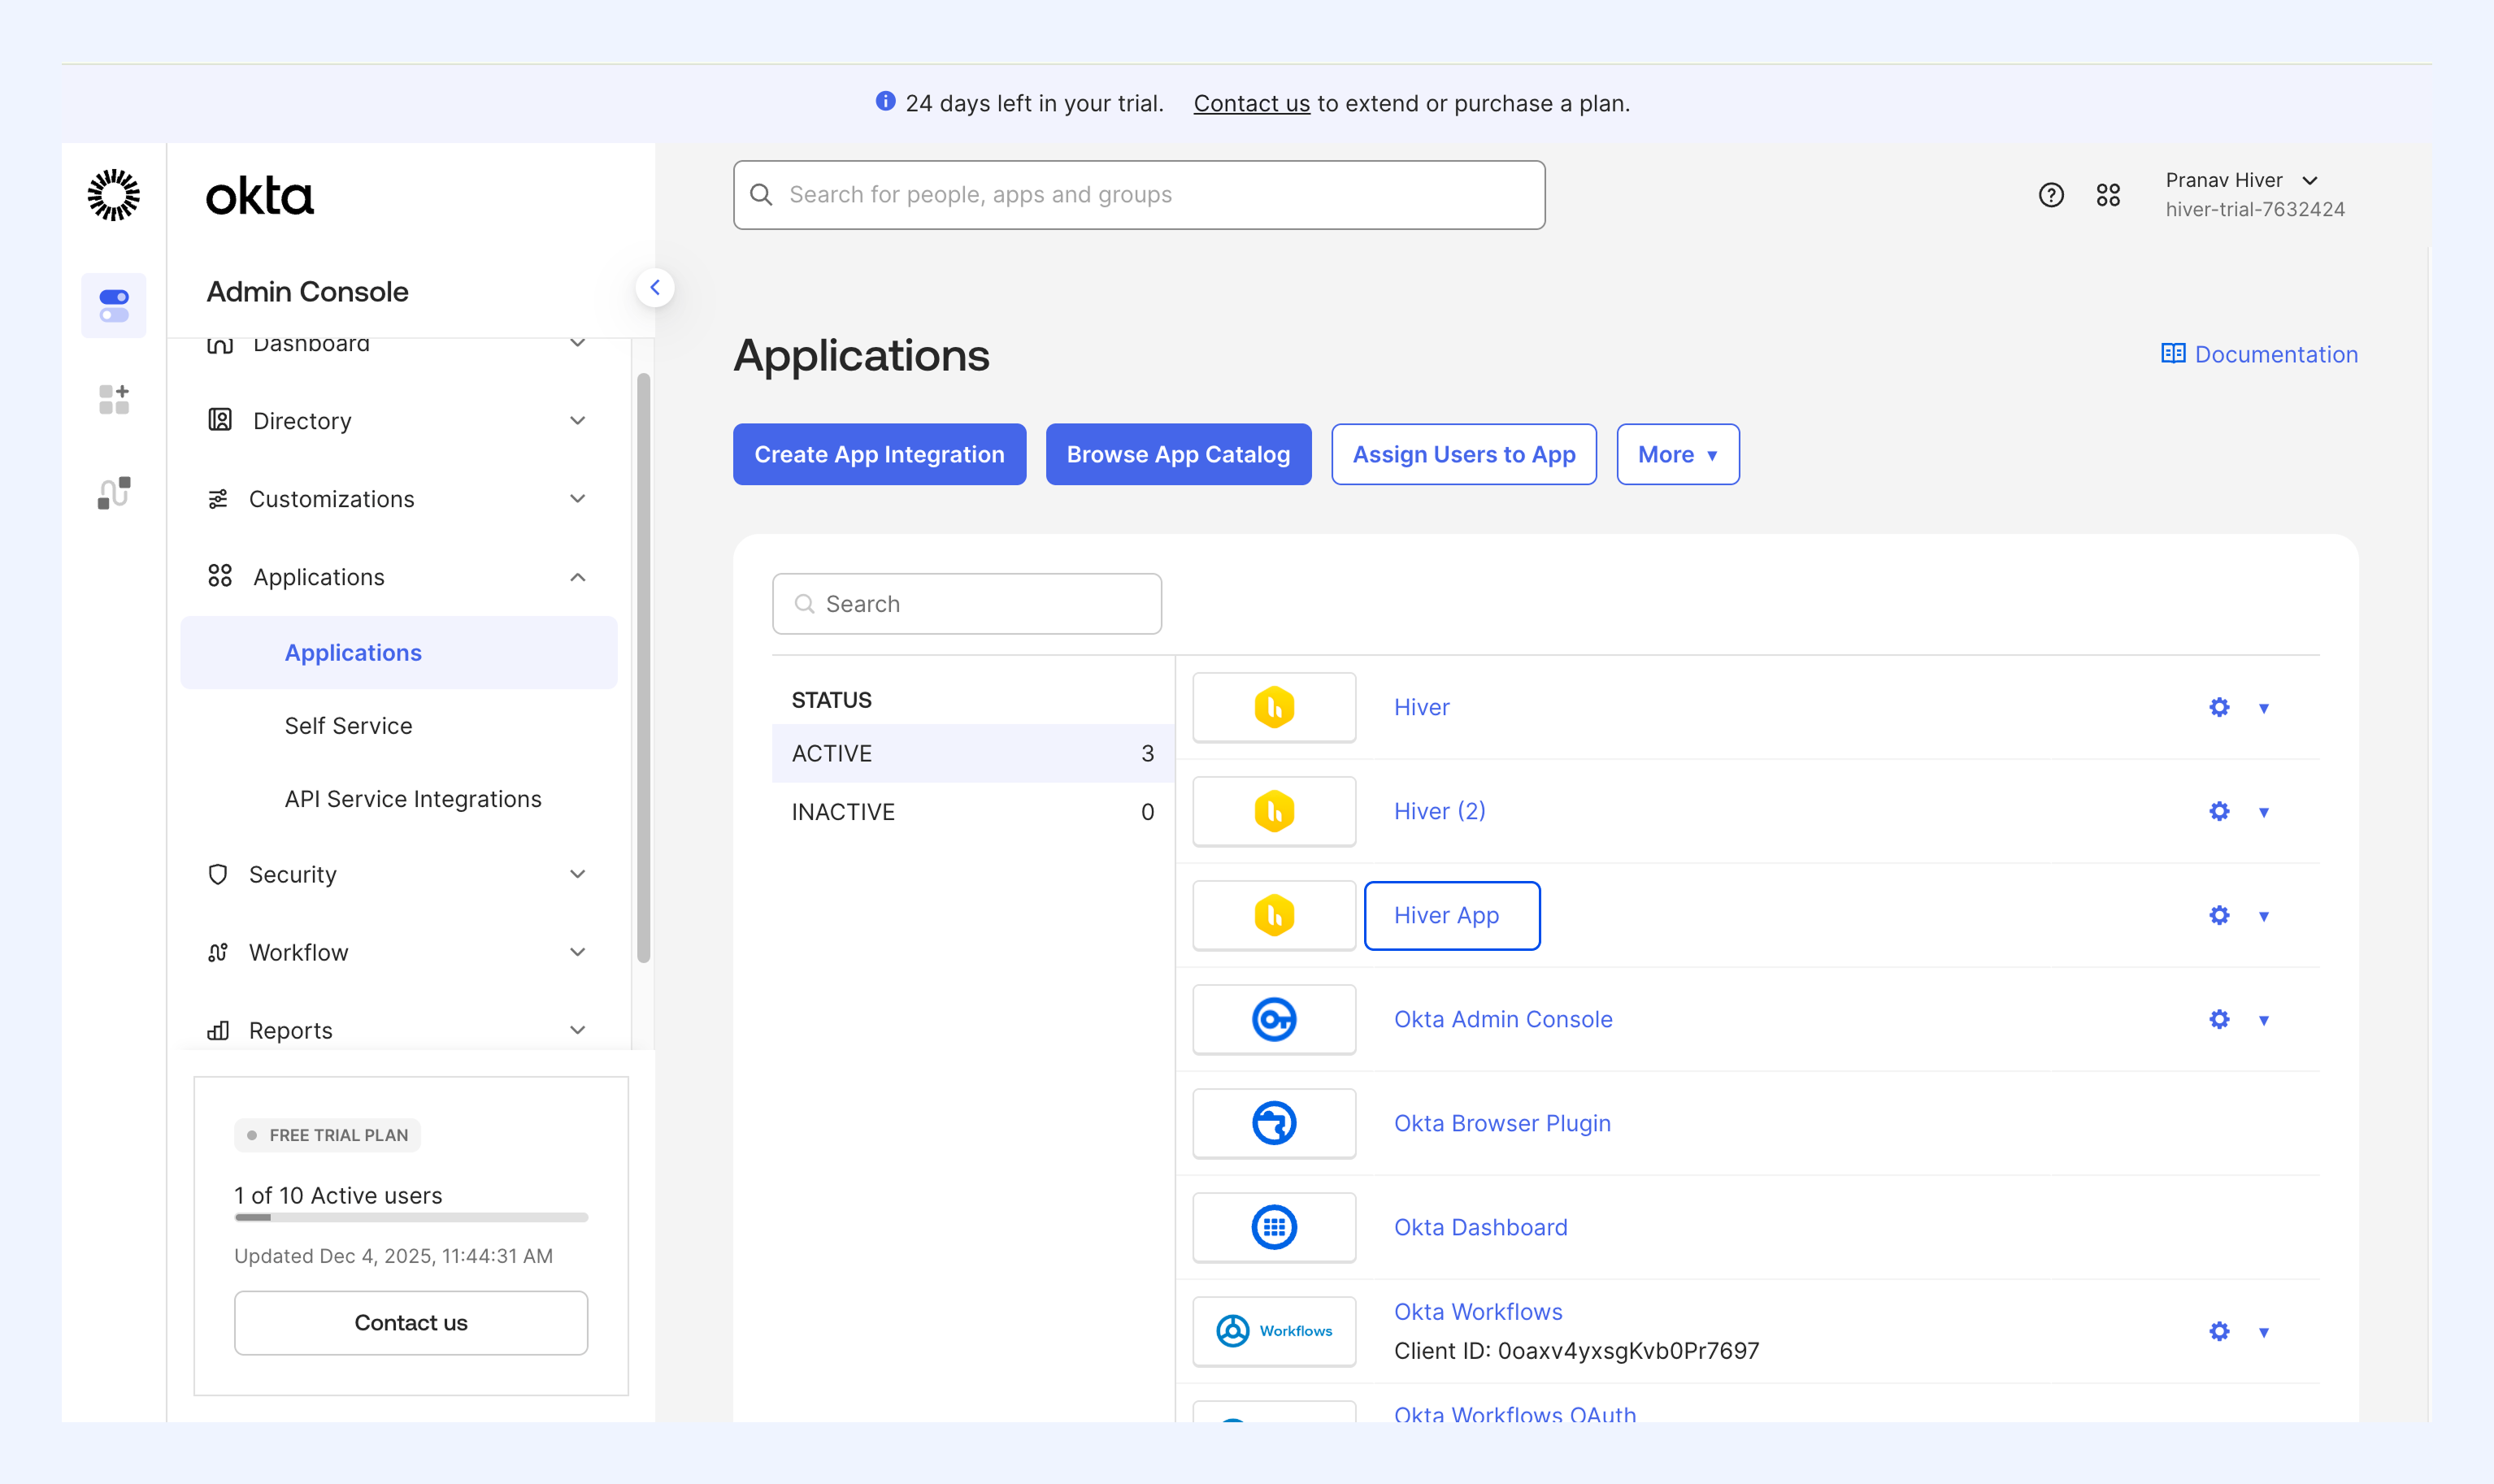
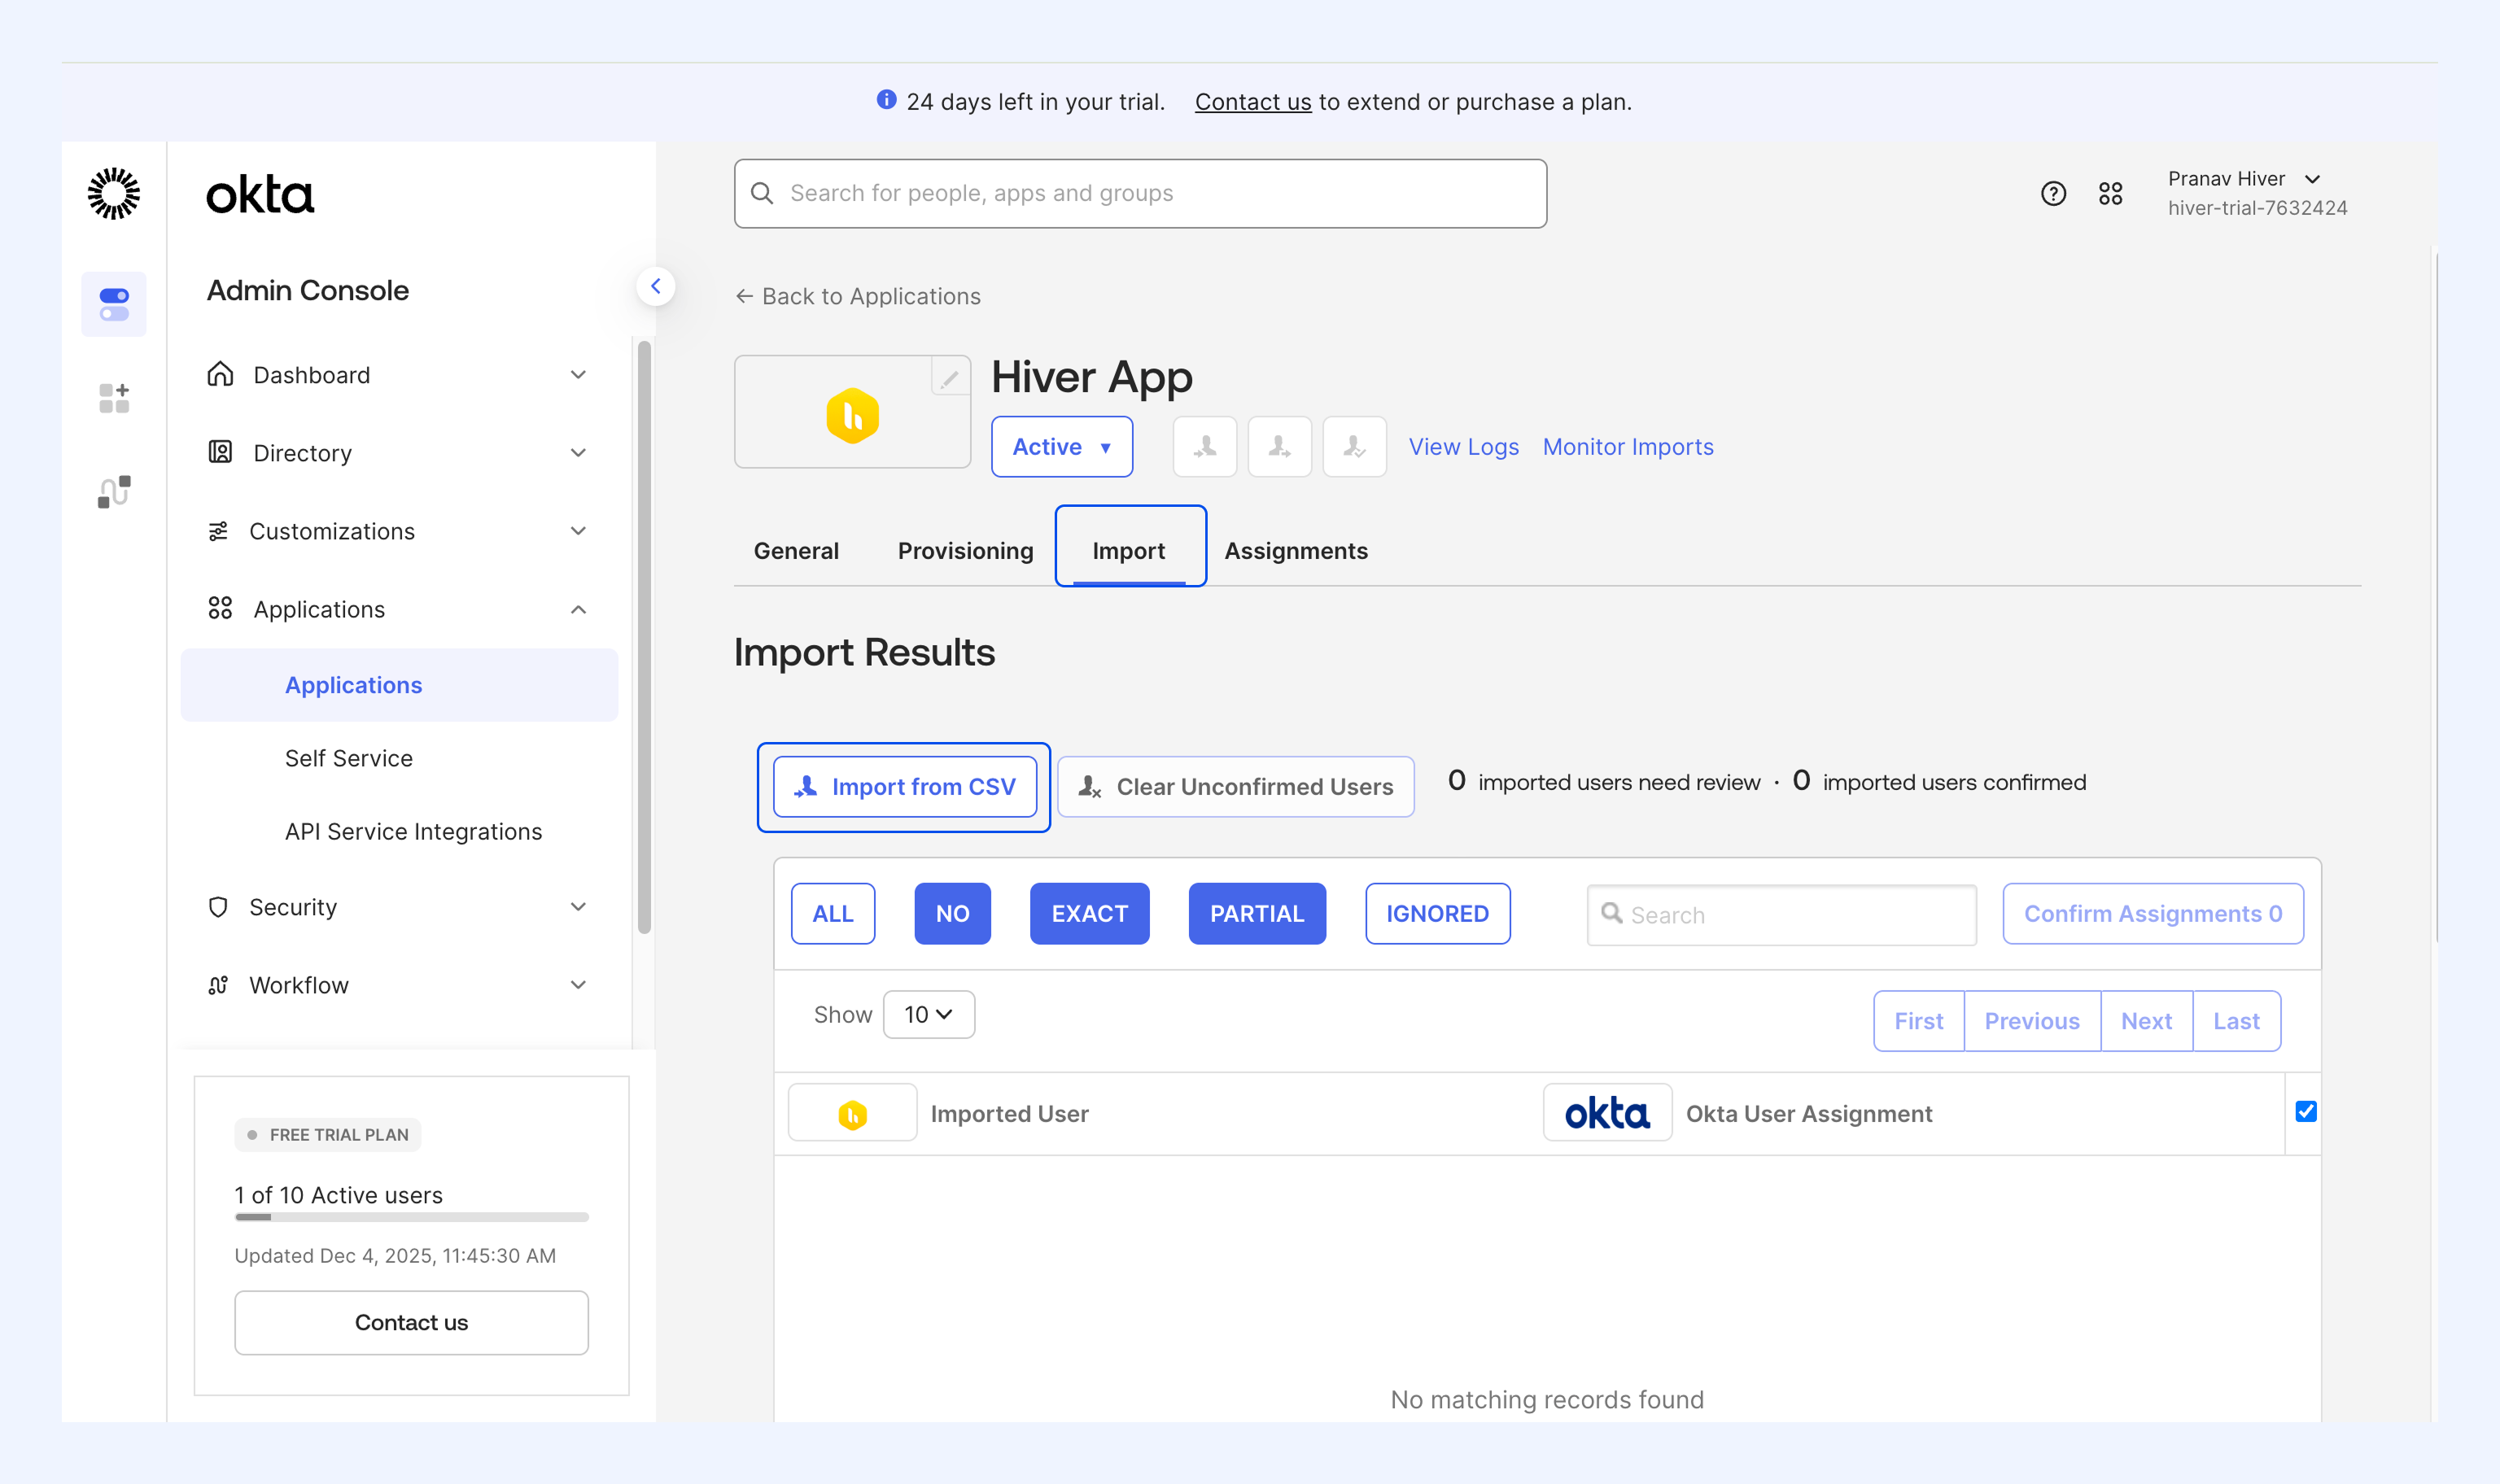
2. Go to the Import tab.
3. Click Import from CSV.
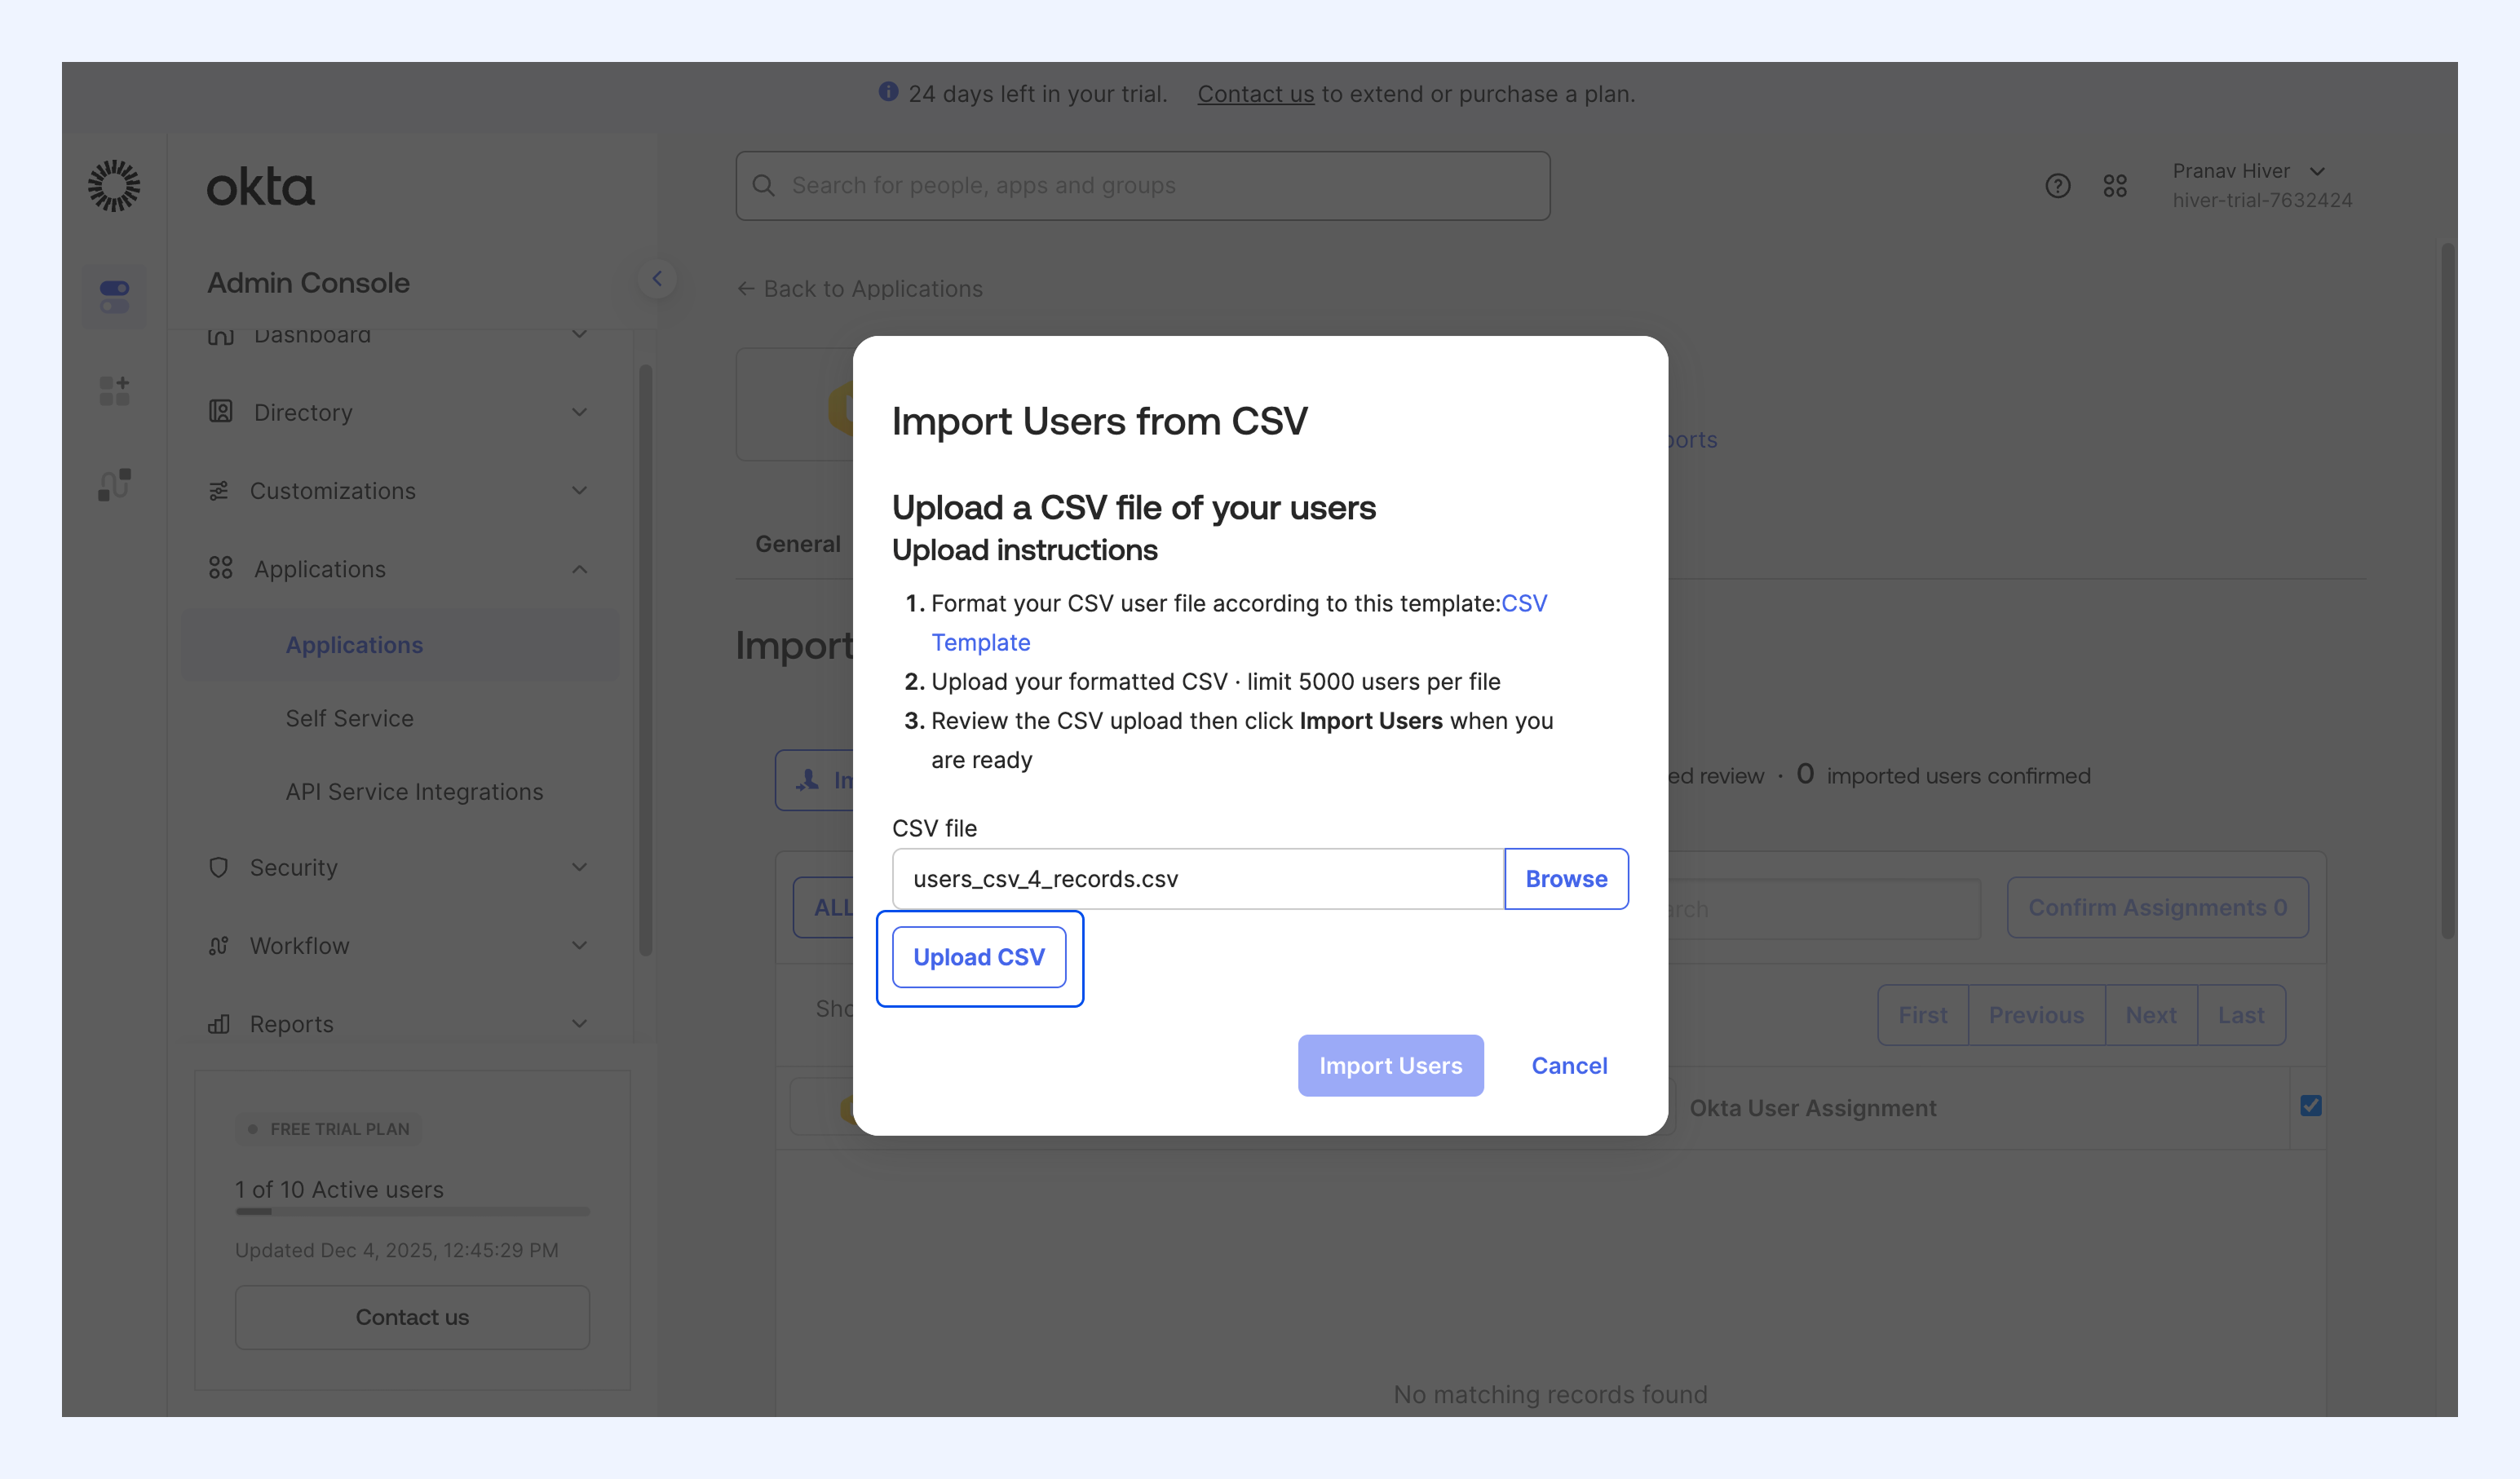
4. Click Browse and upload your CSV file.
Note: Click CSV Template to download the correct CSV format.
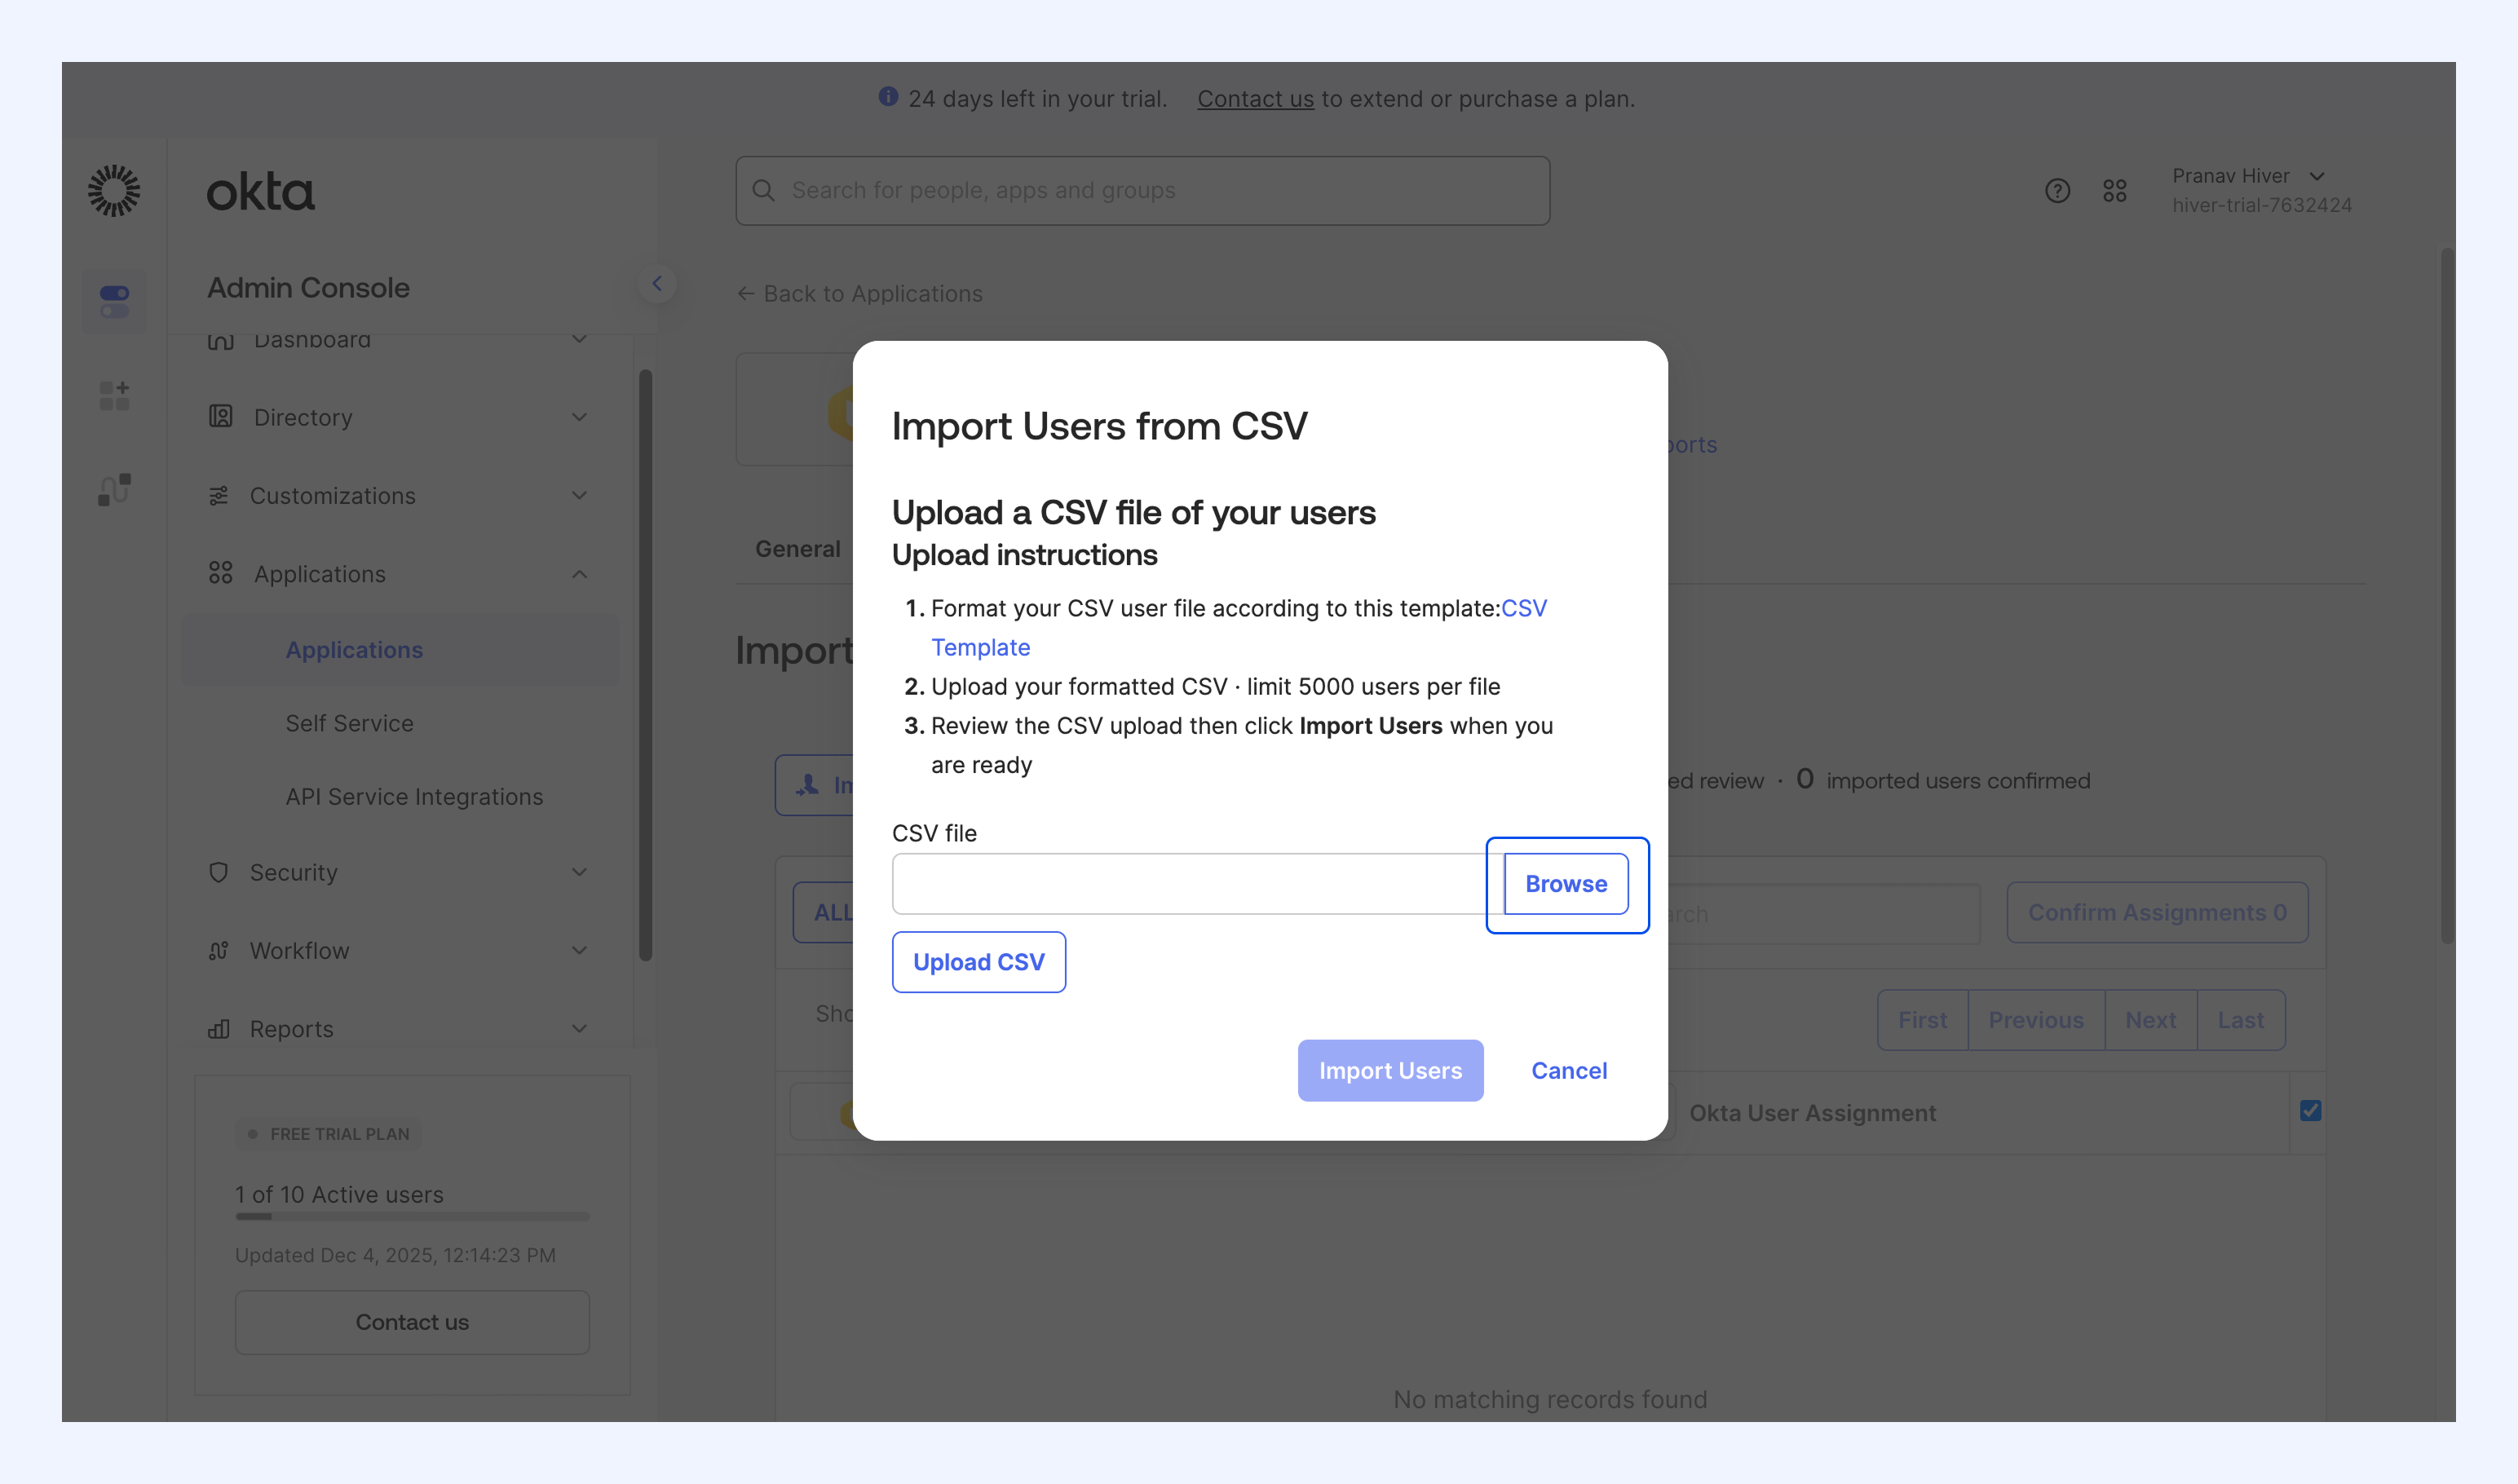
5. After selecting the file, click Upload CSV.
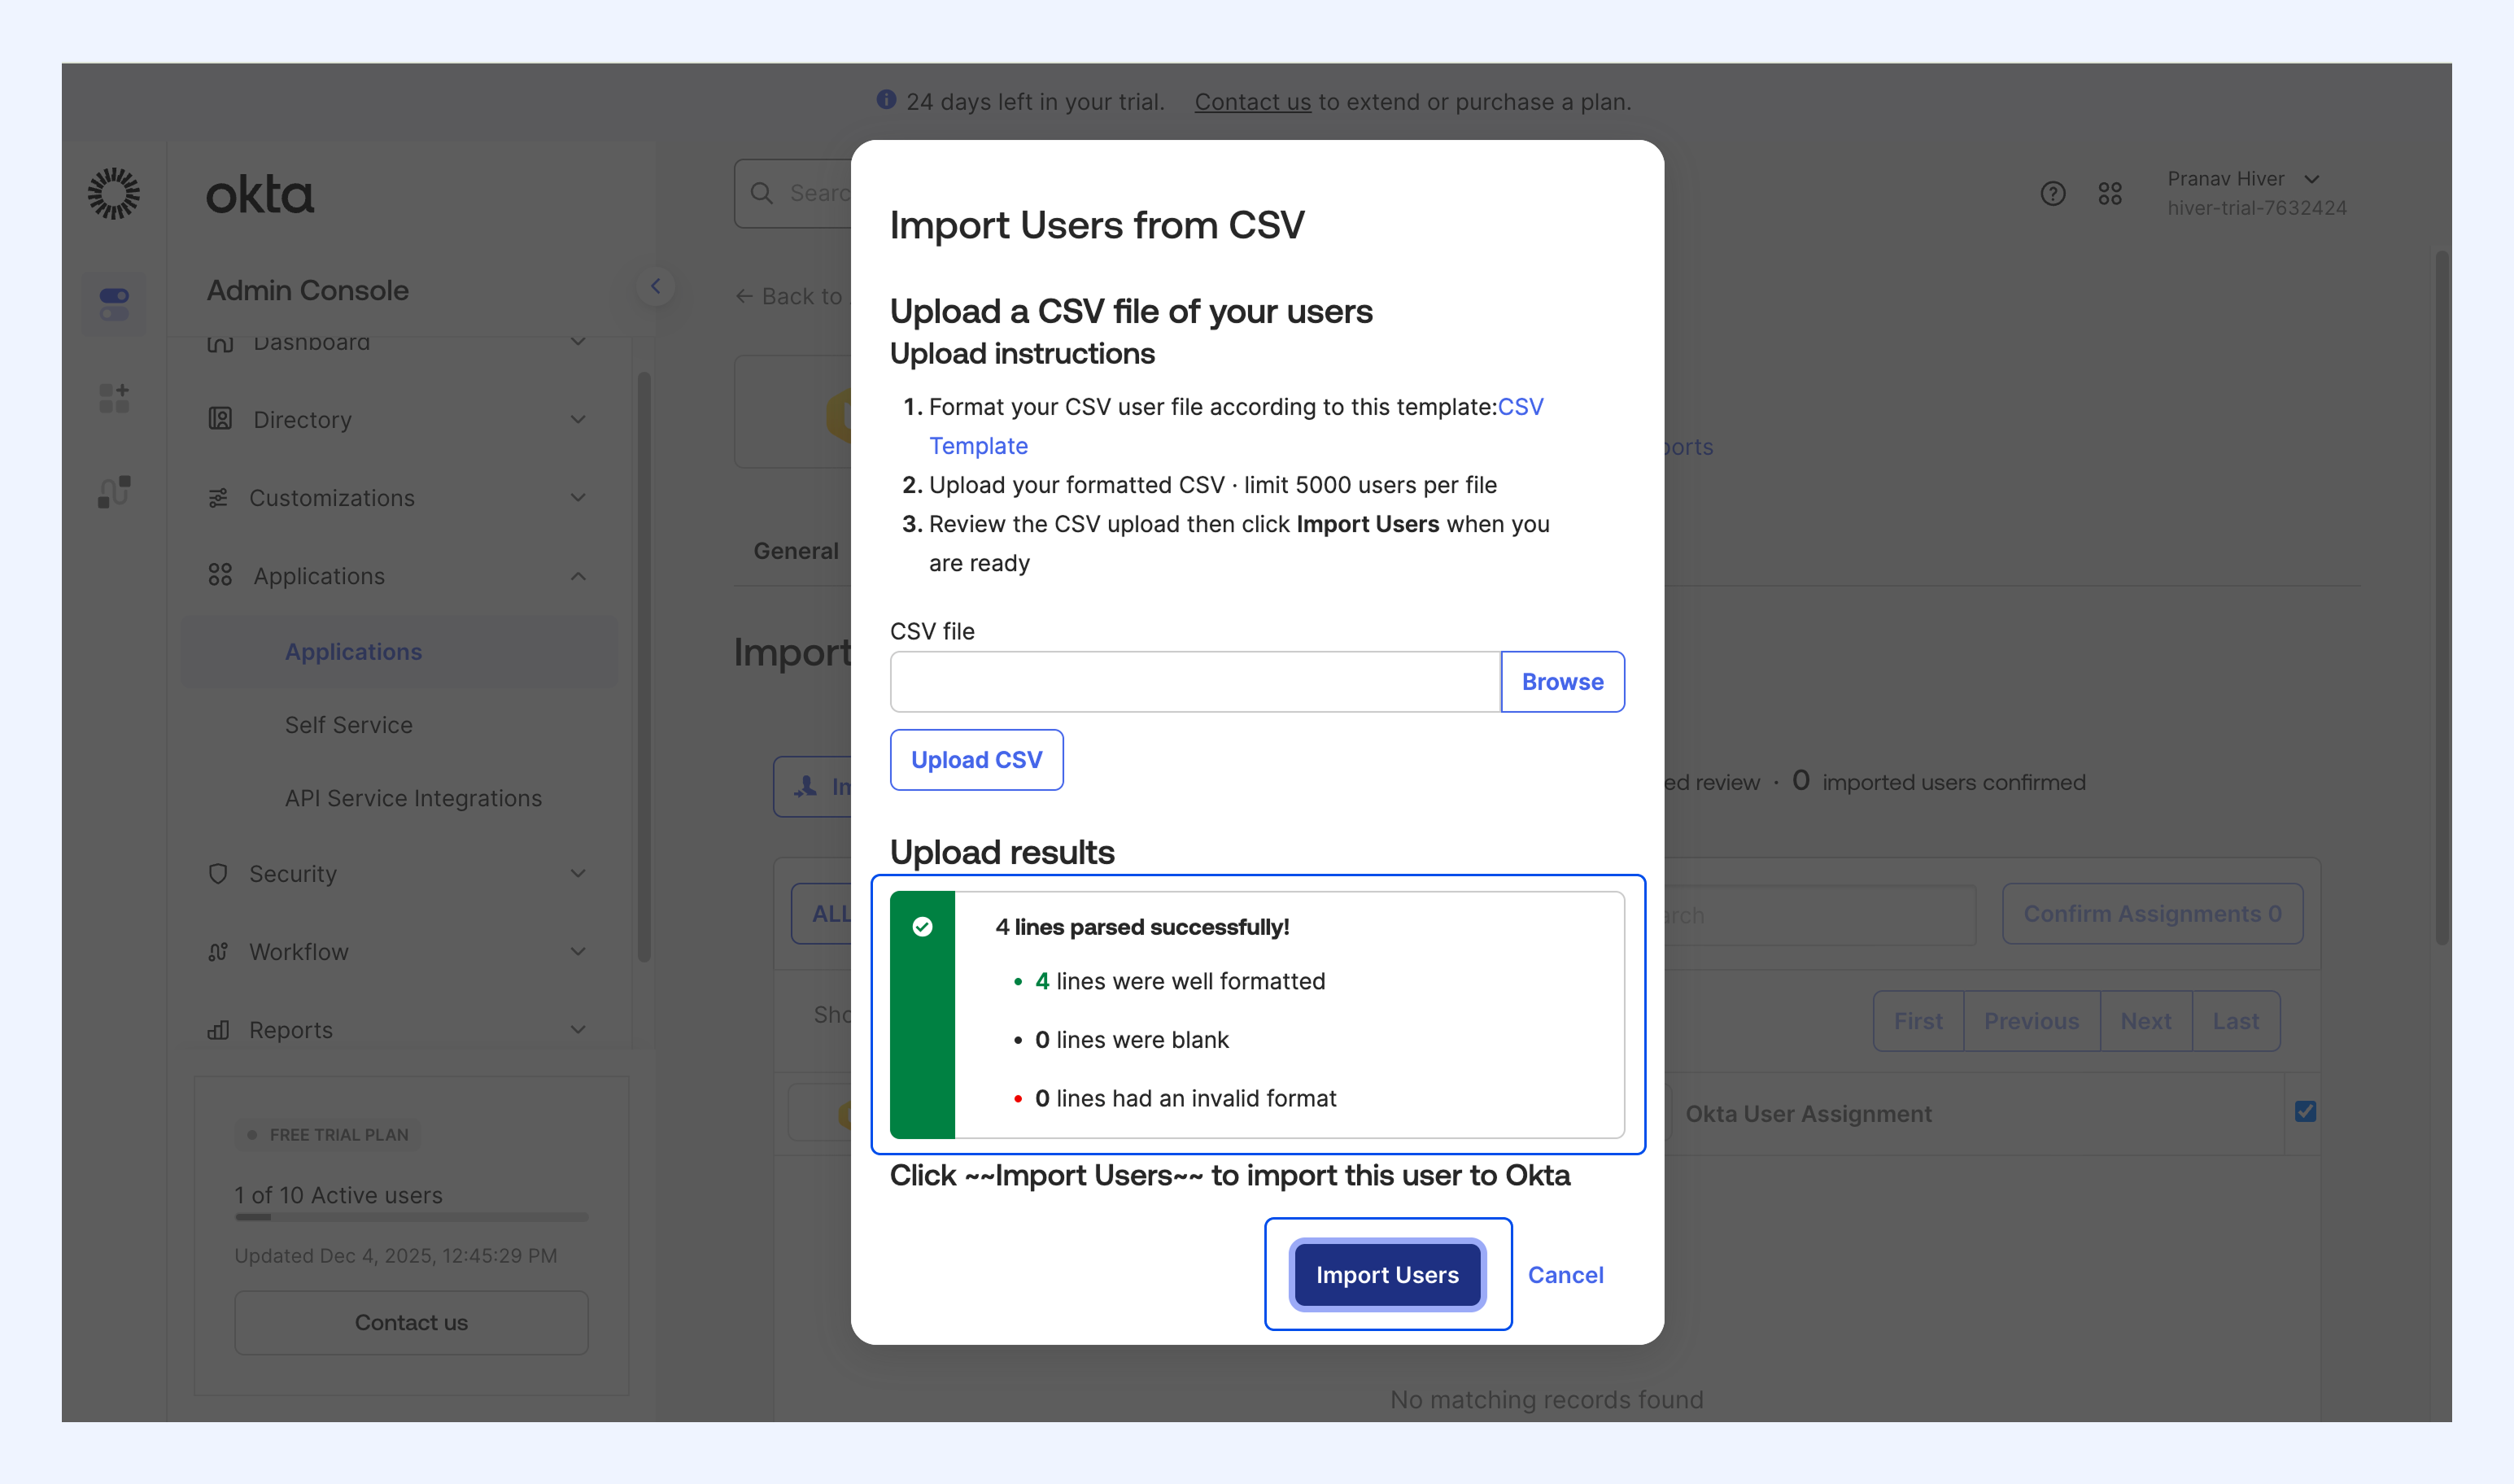
6. You should see a confirmation showing how many lines were successfully read.
7. Click Import Users.
Assign users to Hiver
Once users are imported, you need to assign them to the Hiver app.
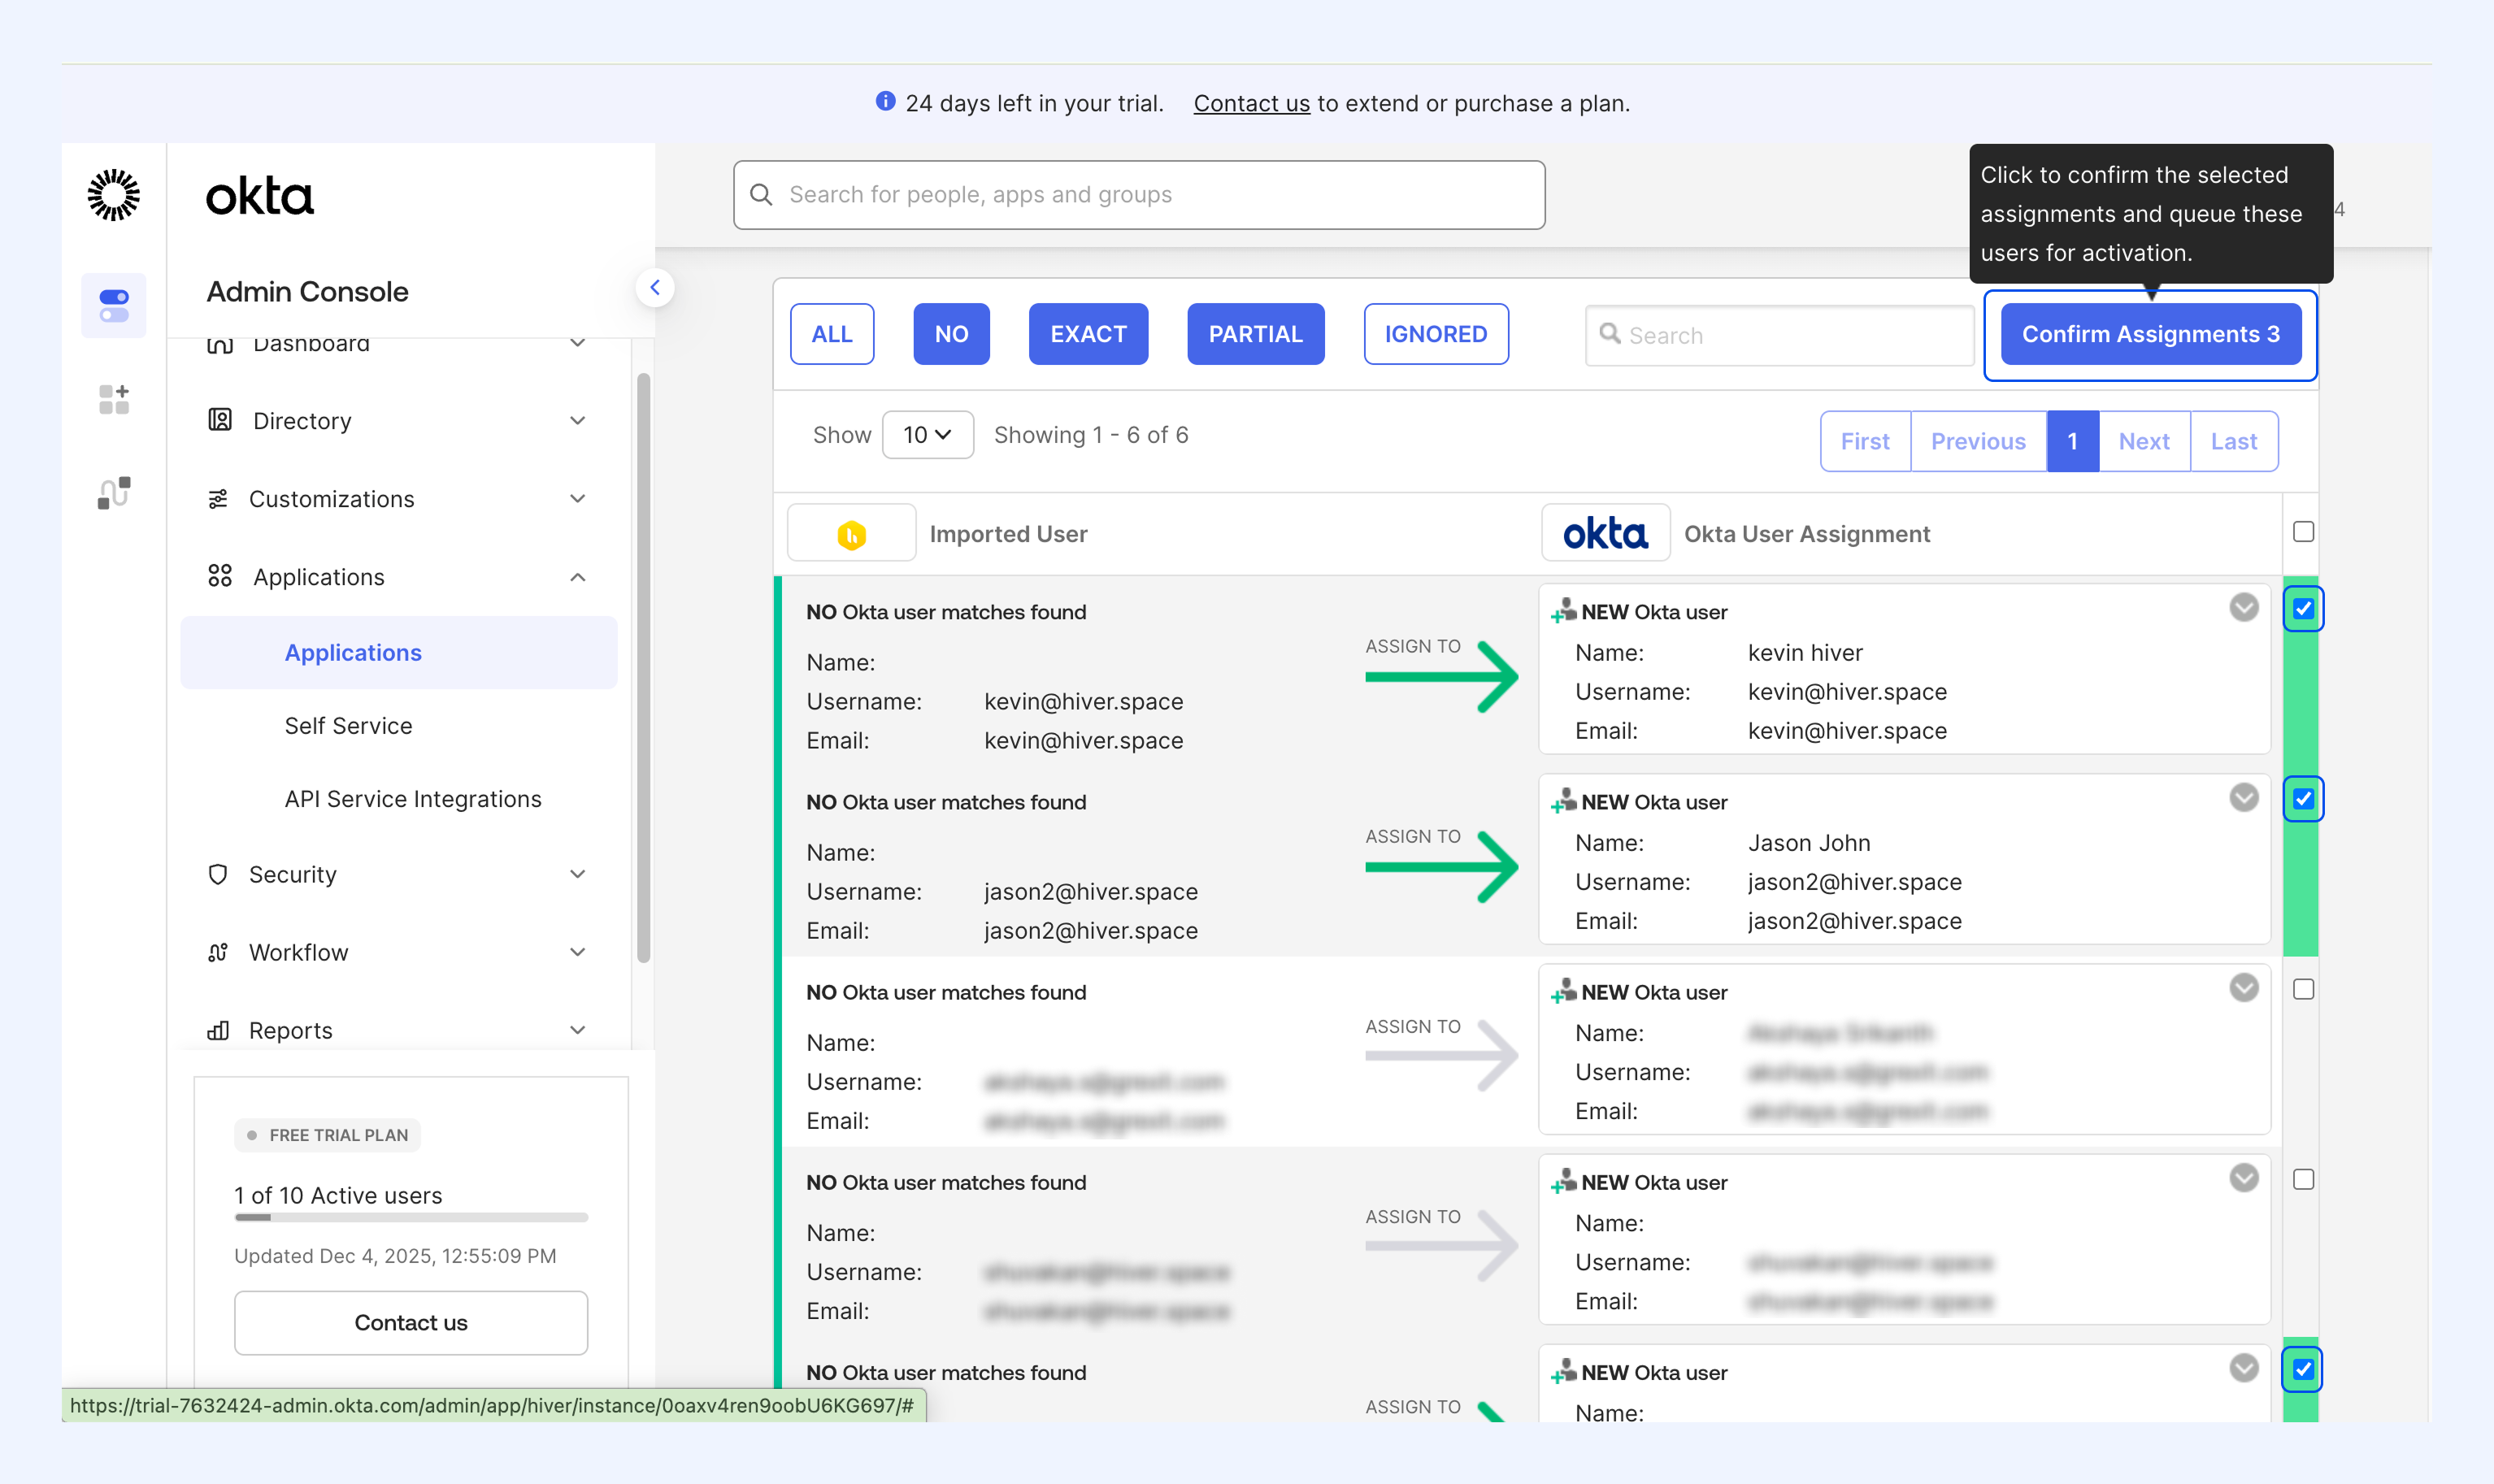
1. Select the users you want to assign by checking the corresponding user checkboxes.
2. Click Confirm Assignments.
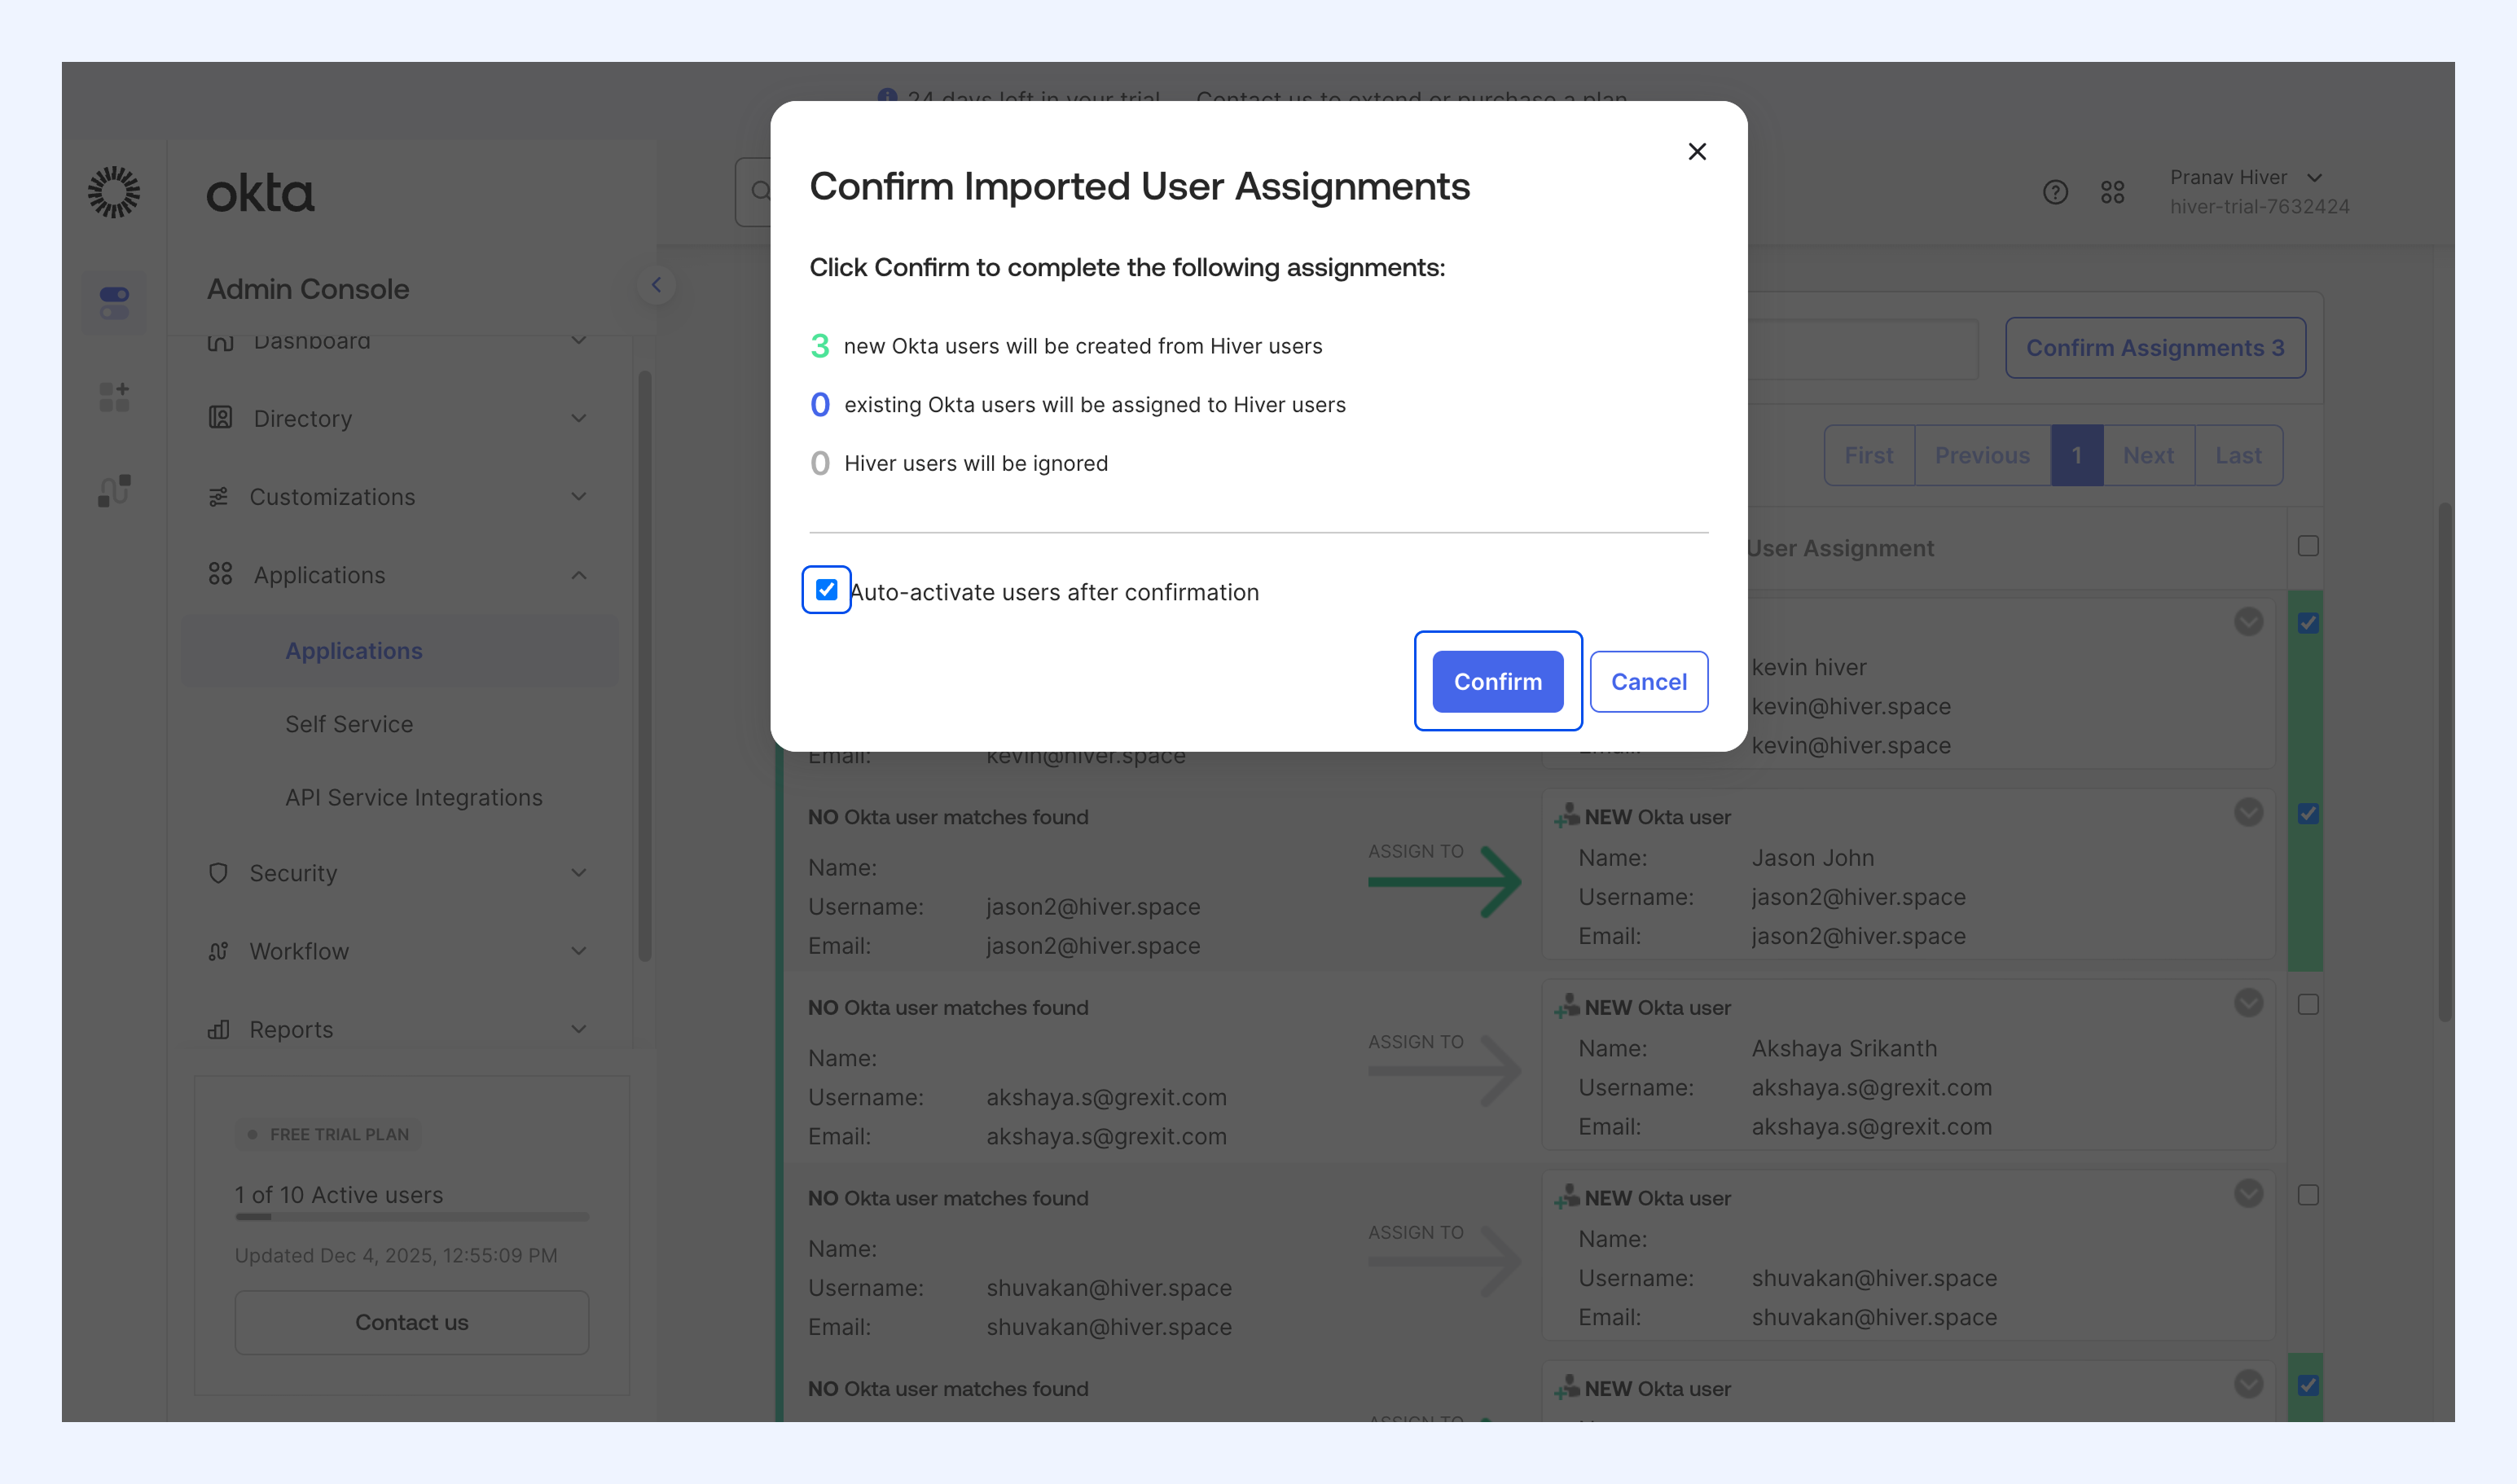
3. Select Auto-activate users after confirmation.
4. Click Confirm.
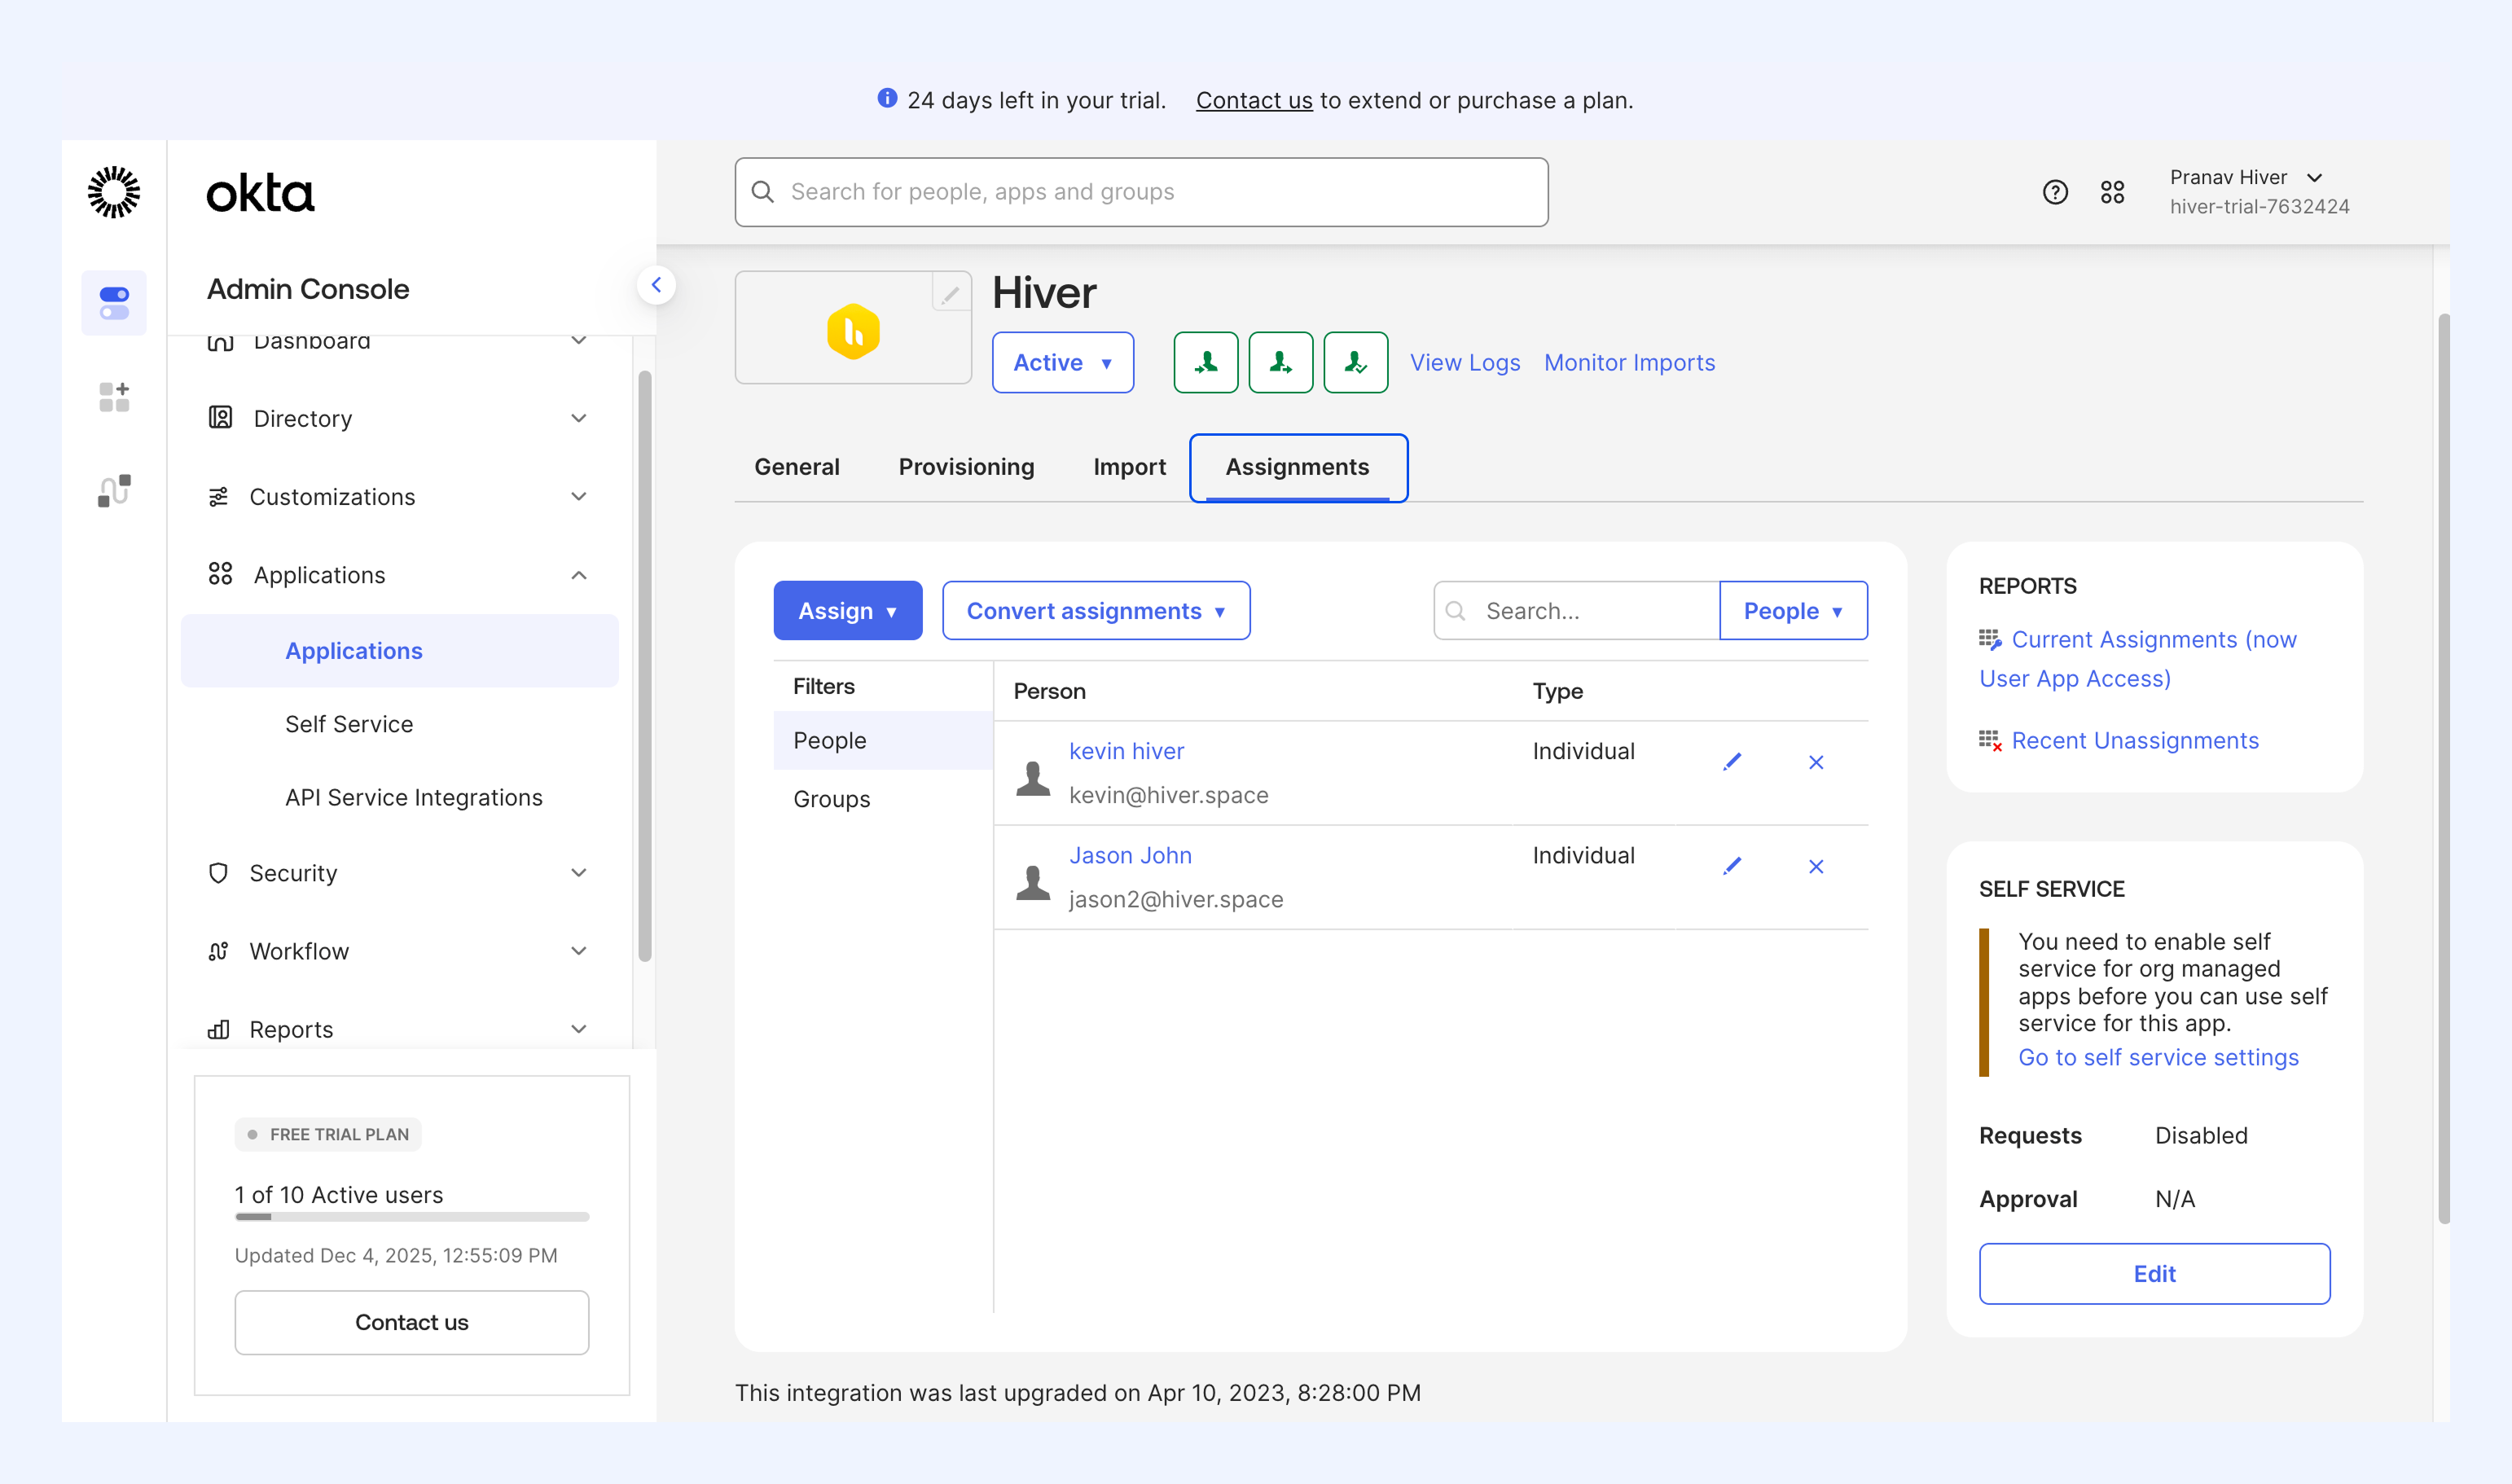
Once done, assigned users will appear under the Assignments tab.
Assign individual users
1. Go to the Assignments tab.
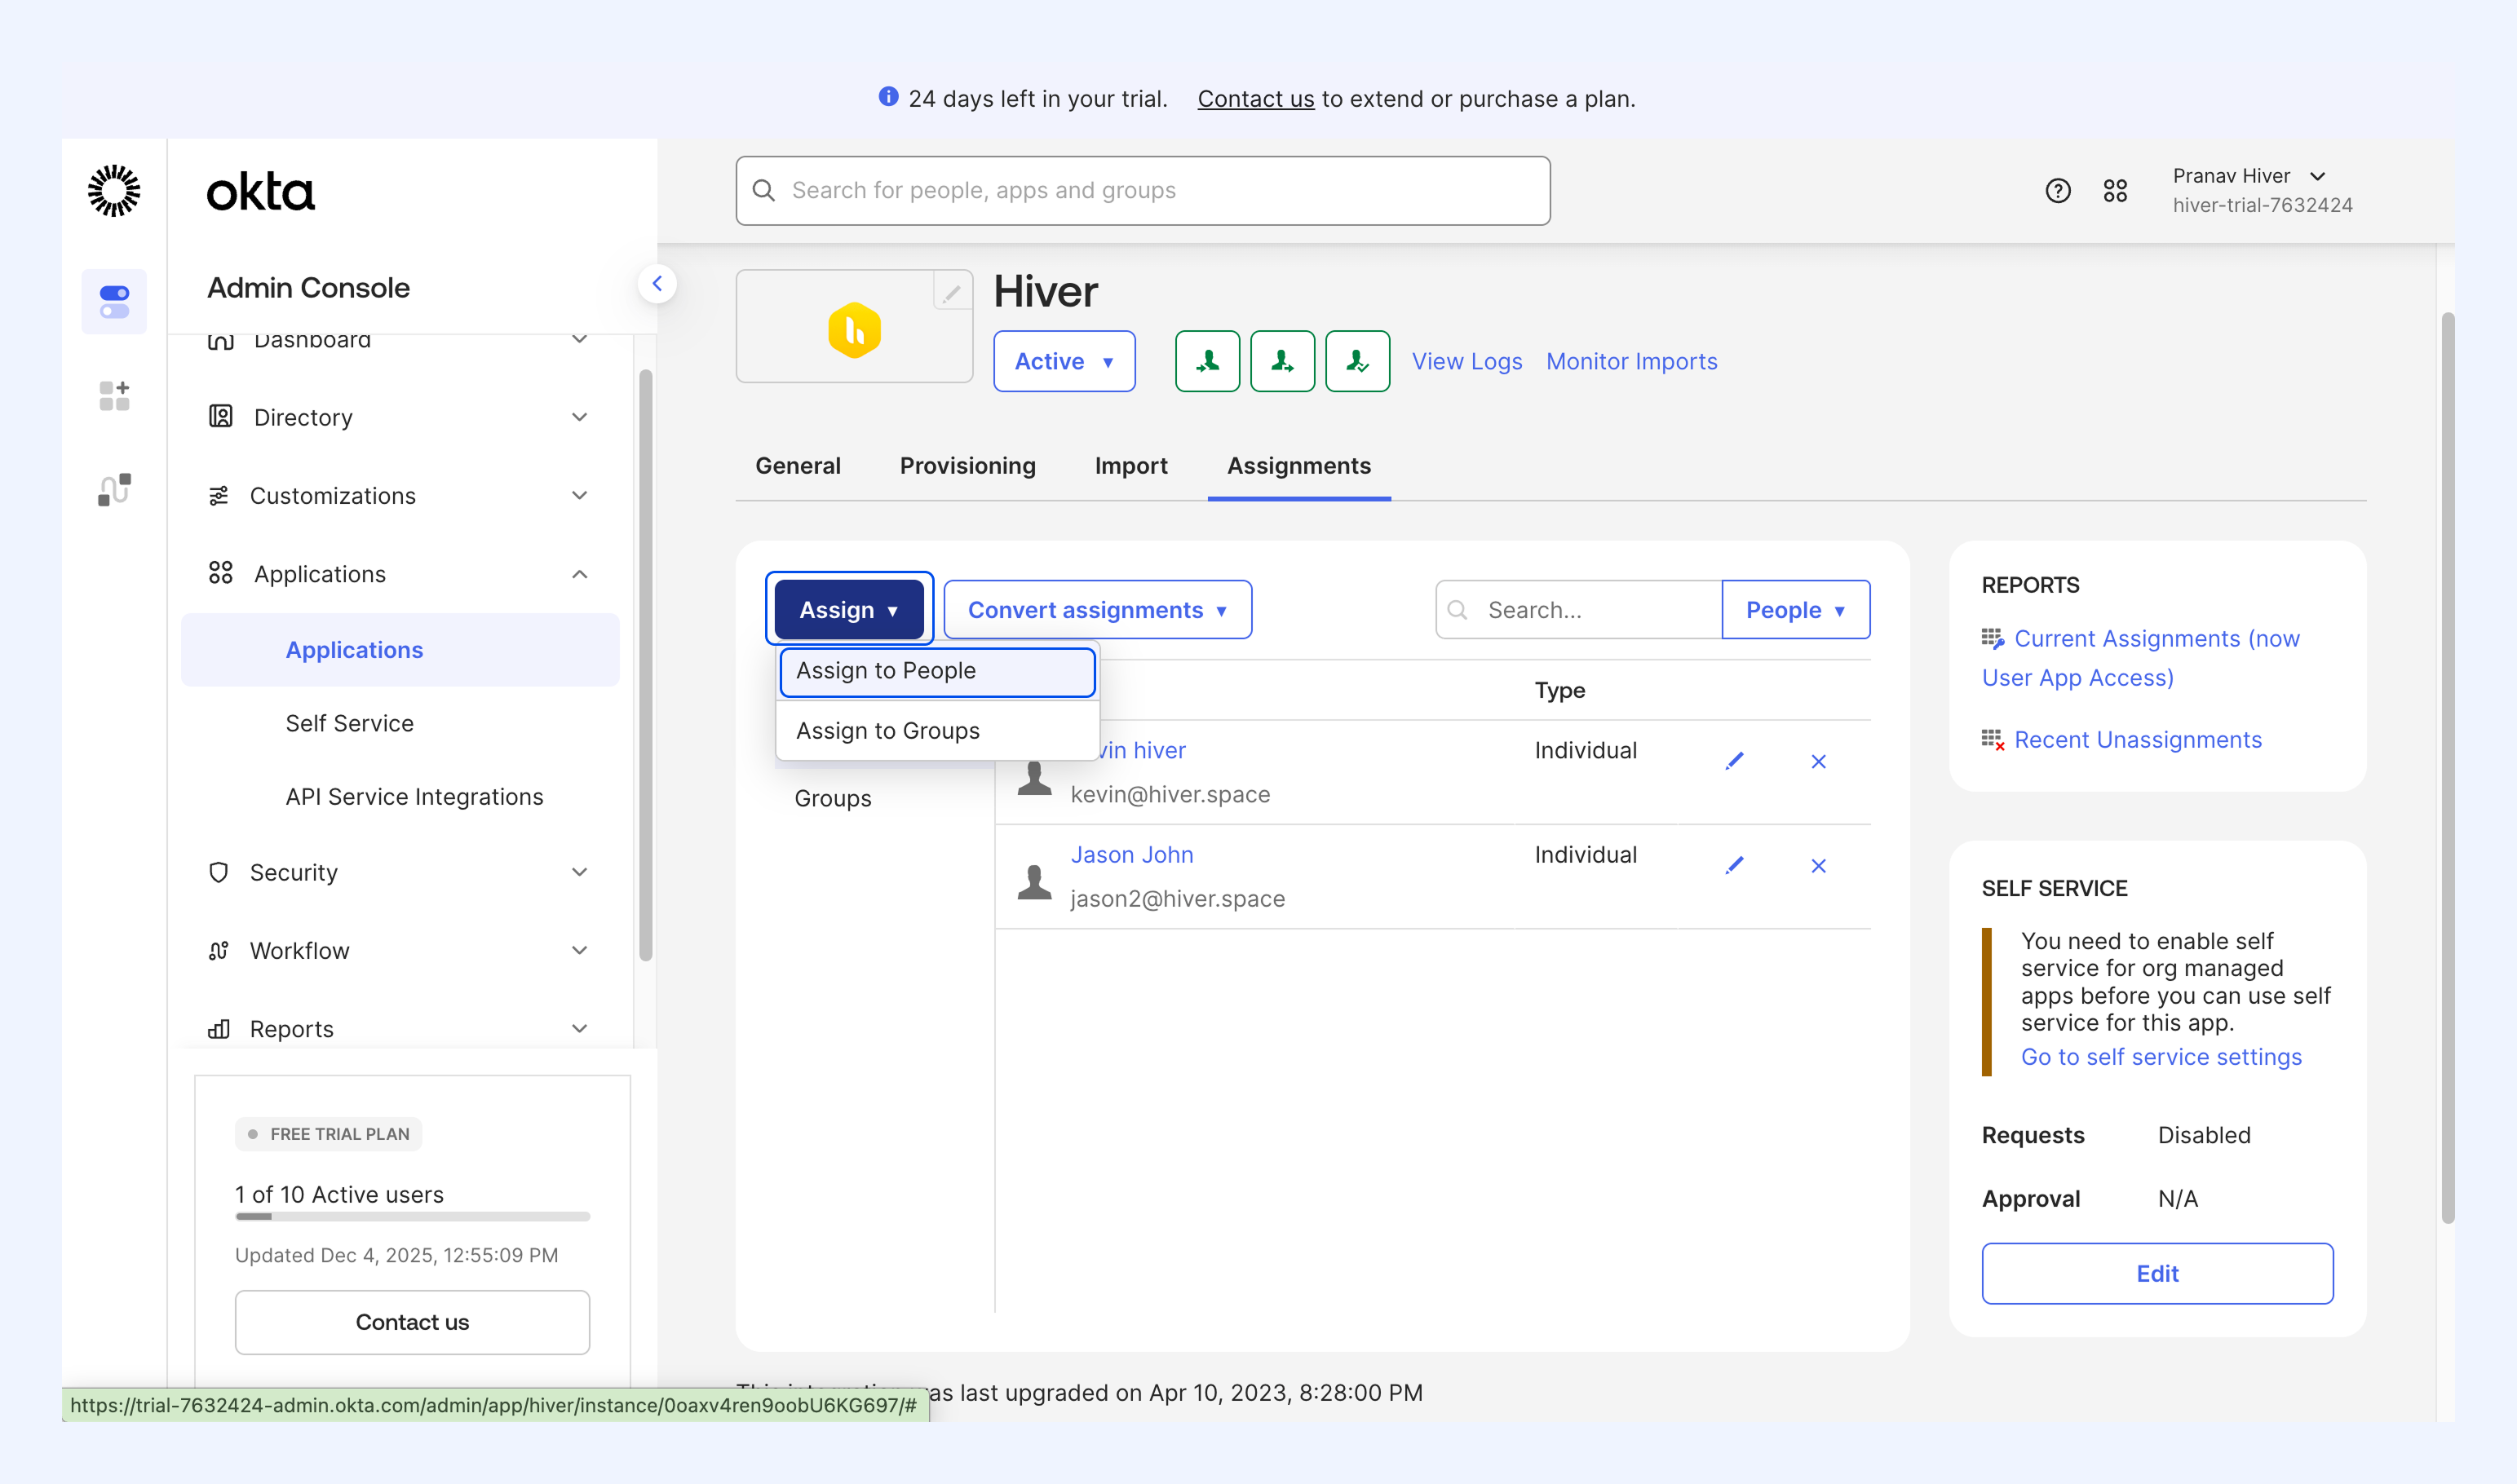
2. Click Assign → Assign to People.
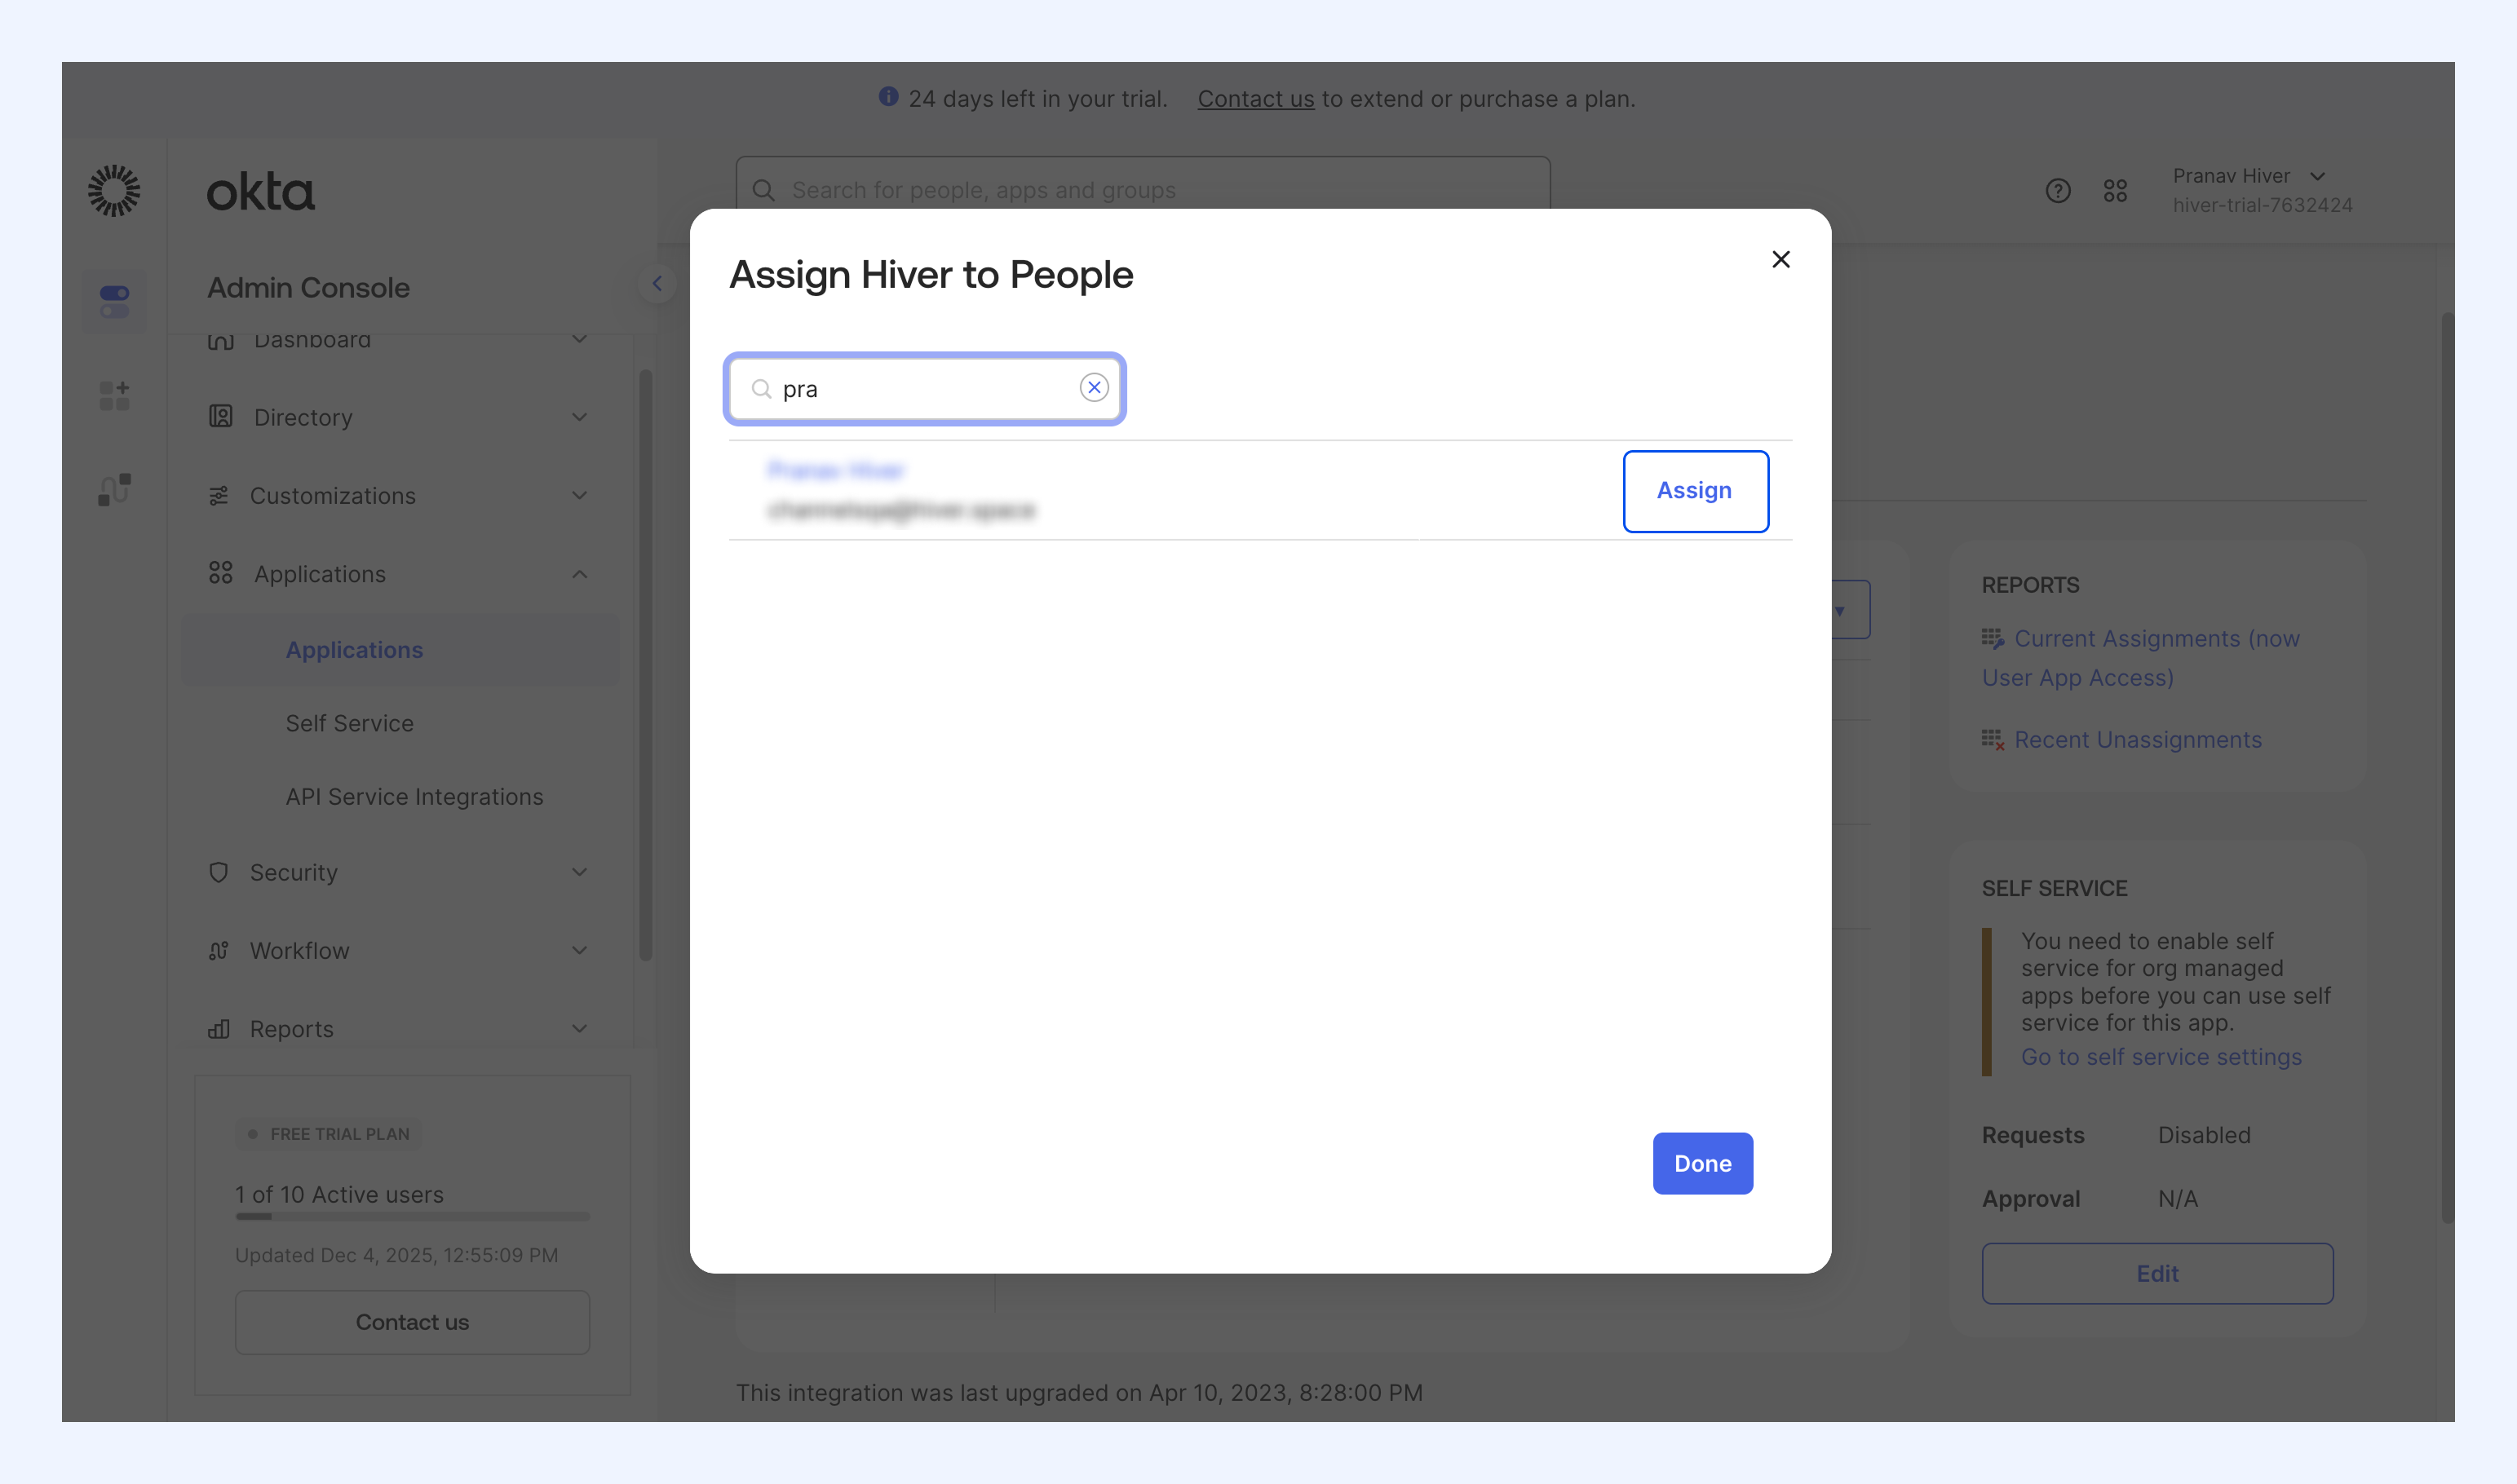
3. Search for the user you want to add and click Assign.
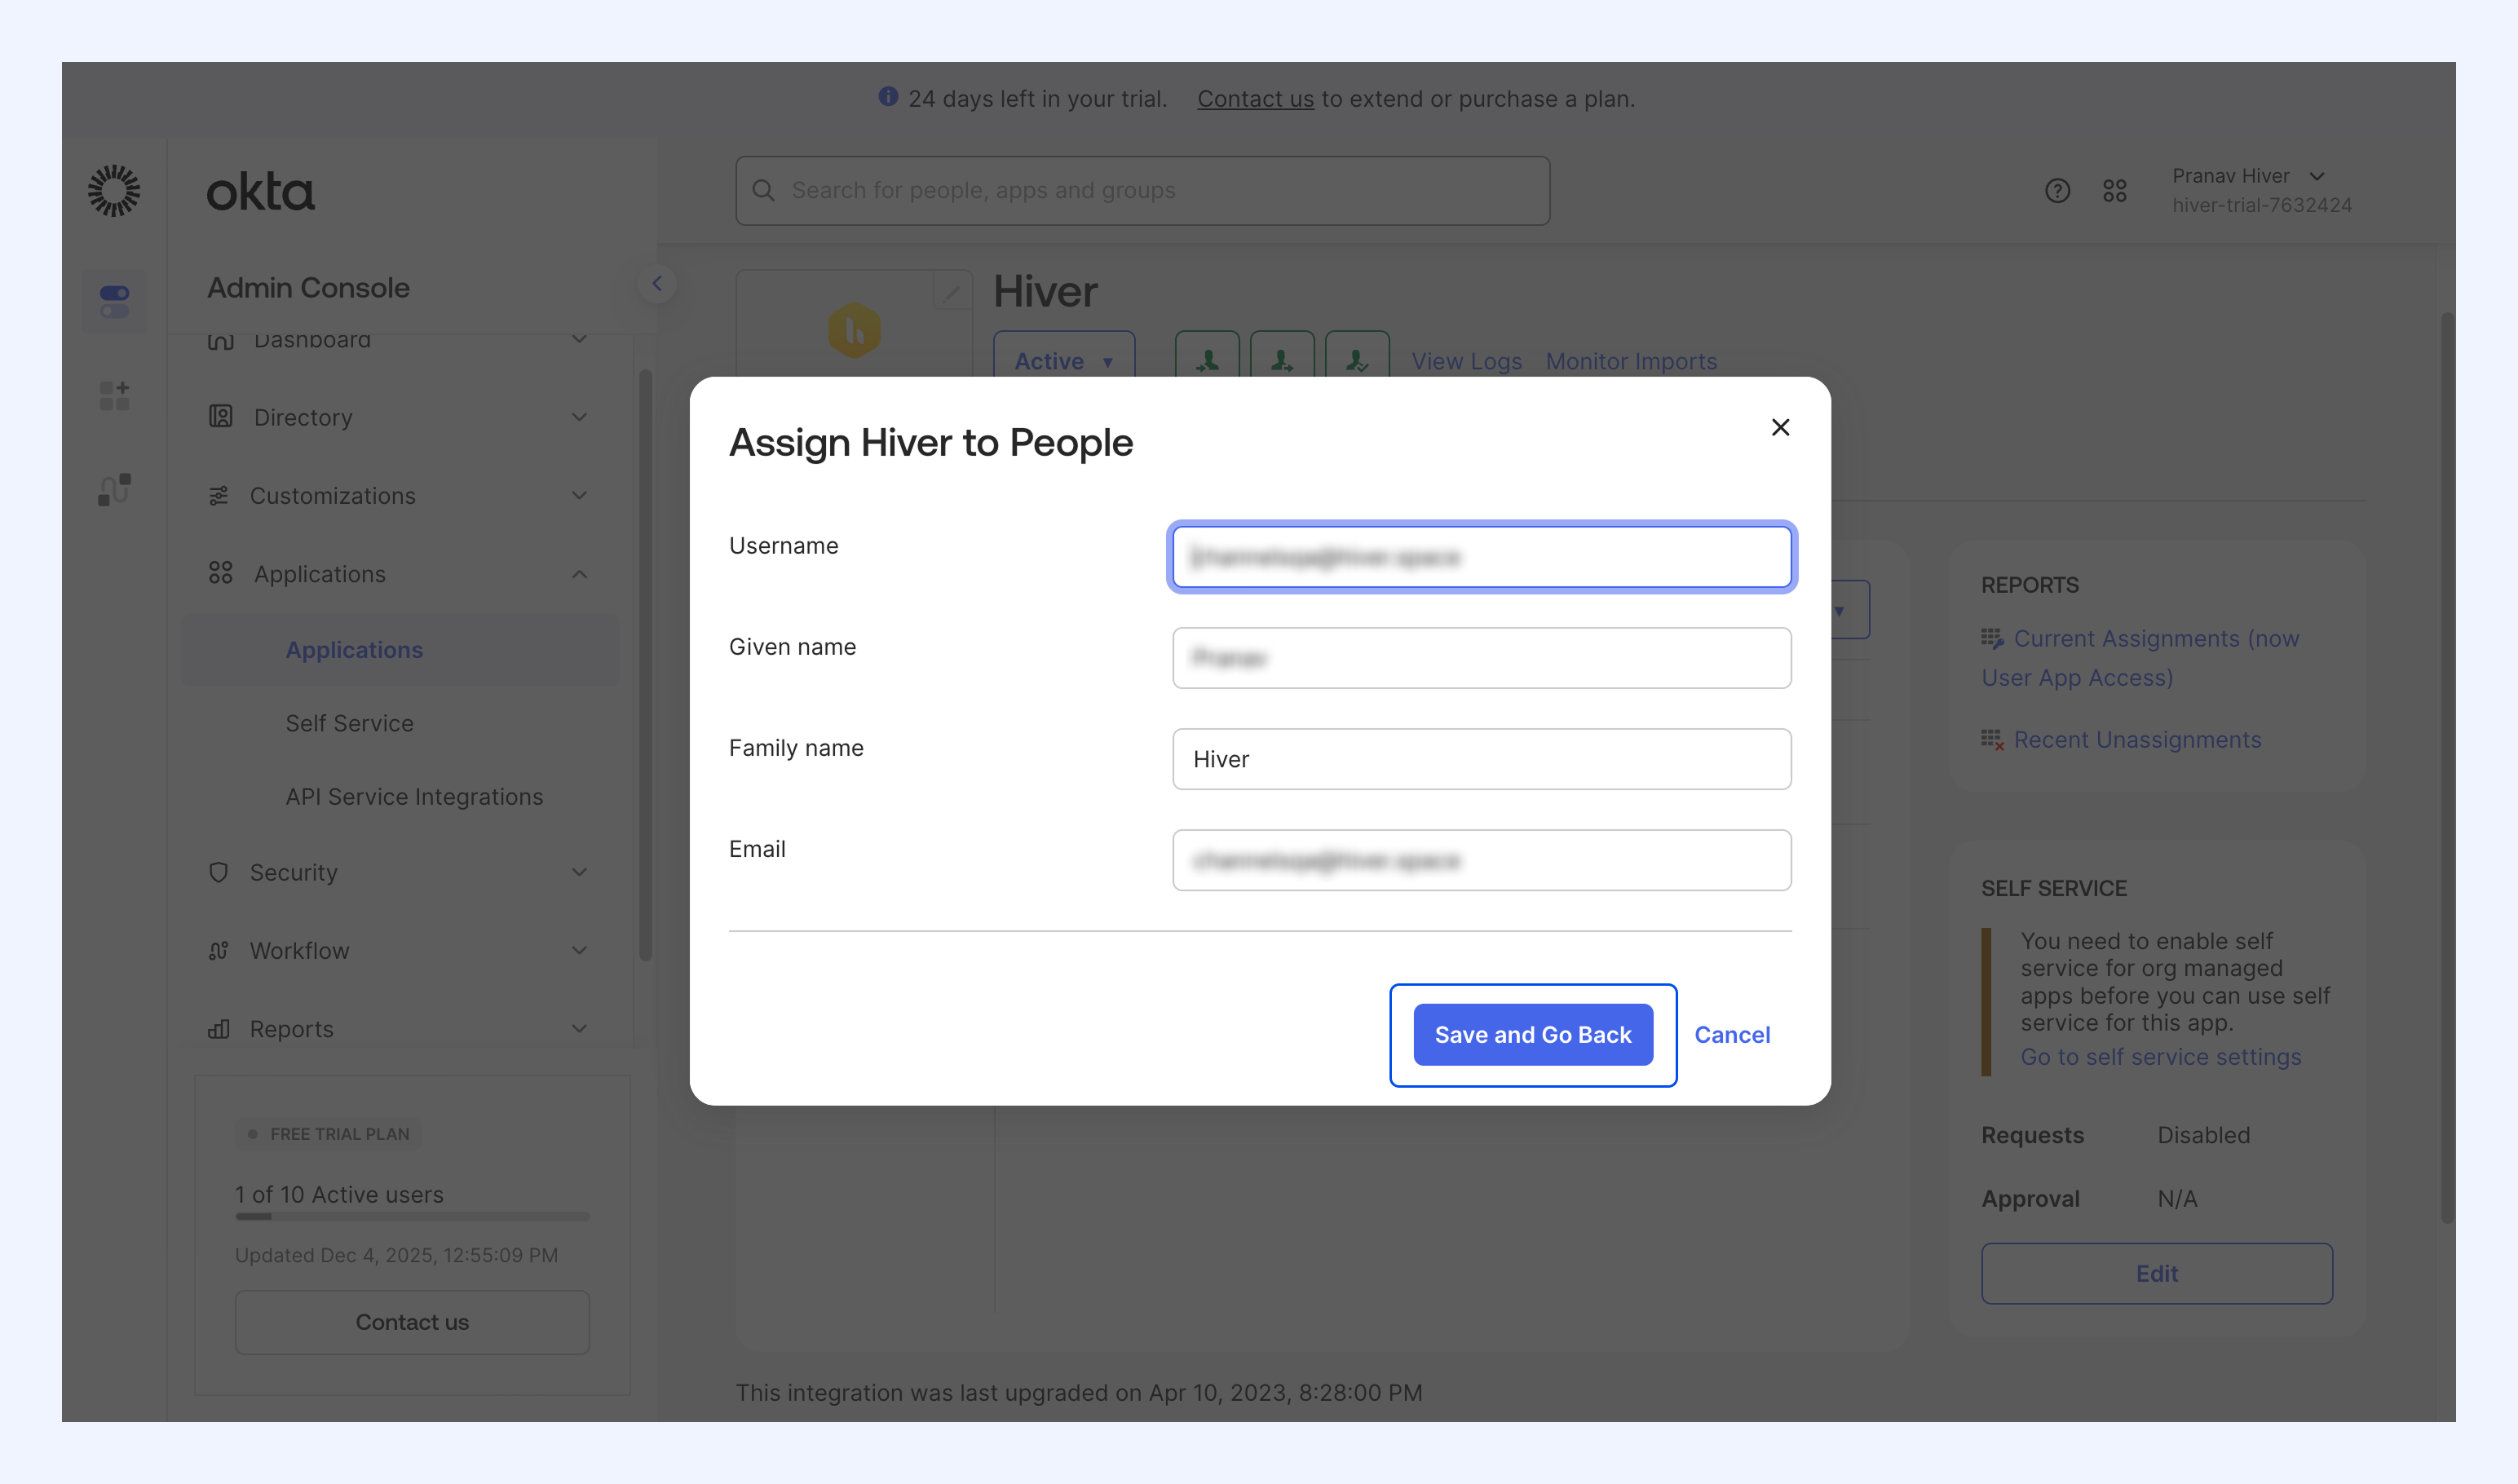
4. Click Save and Go Back to confirm the assignment.
Unassign users from Hiver
To remove a user's access to Hiver through Okta:
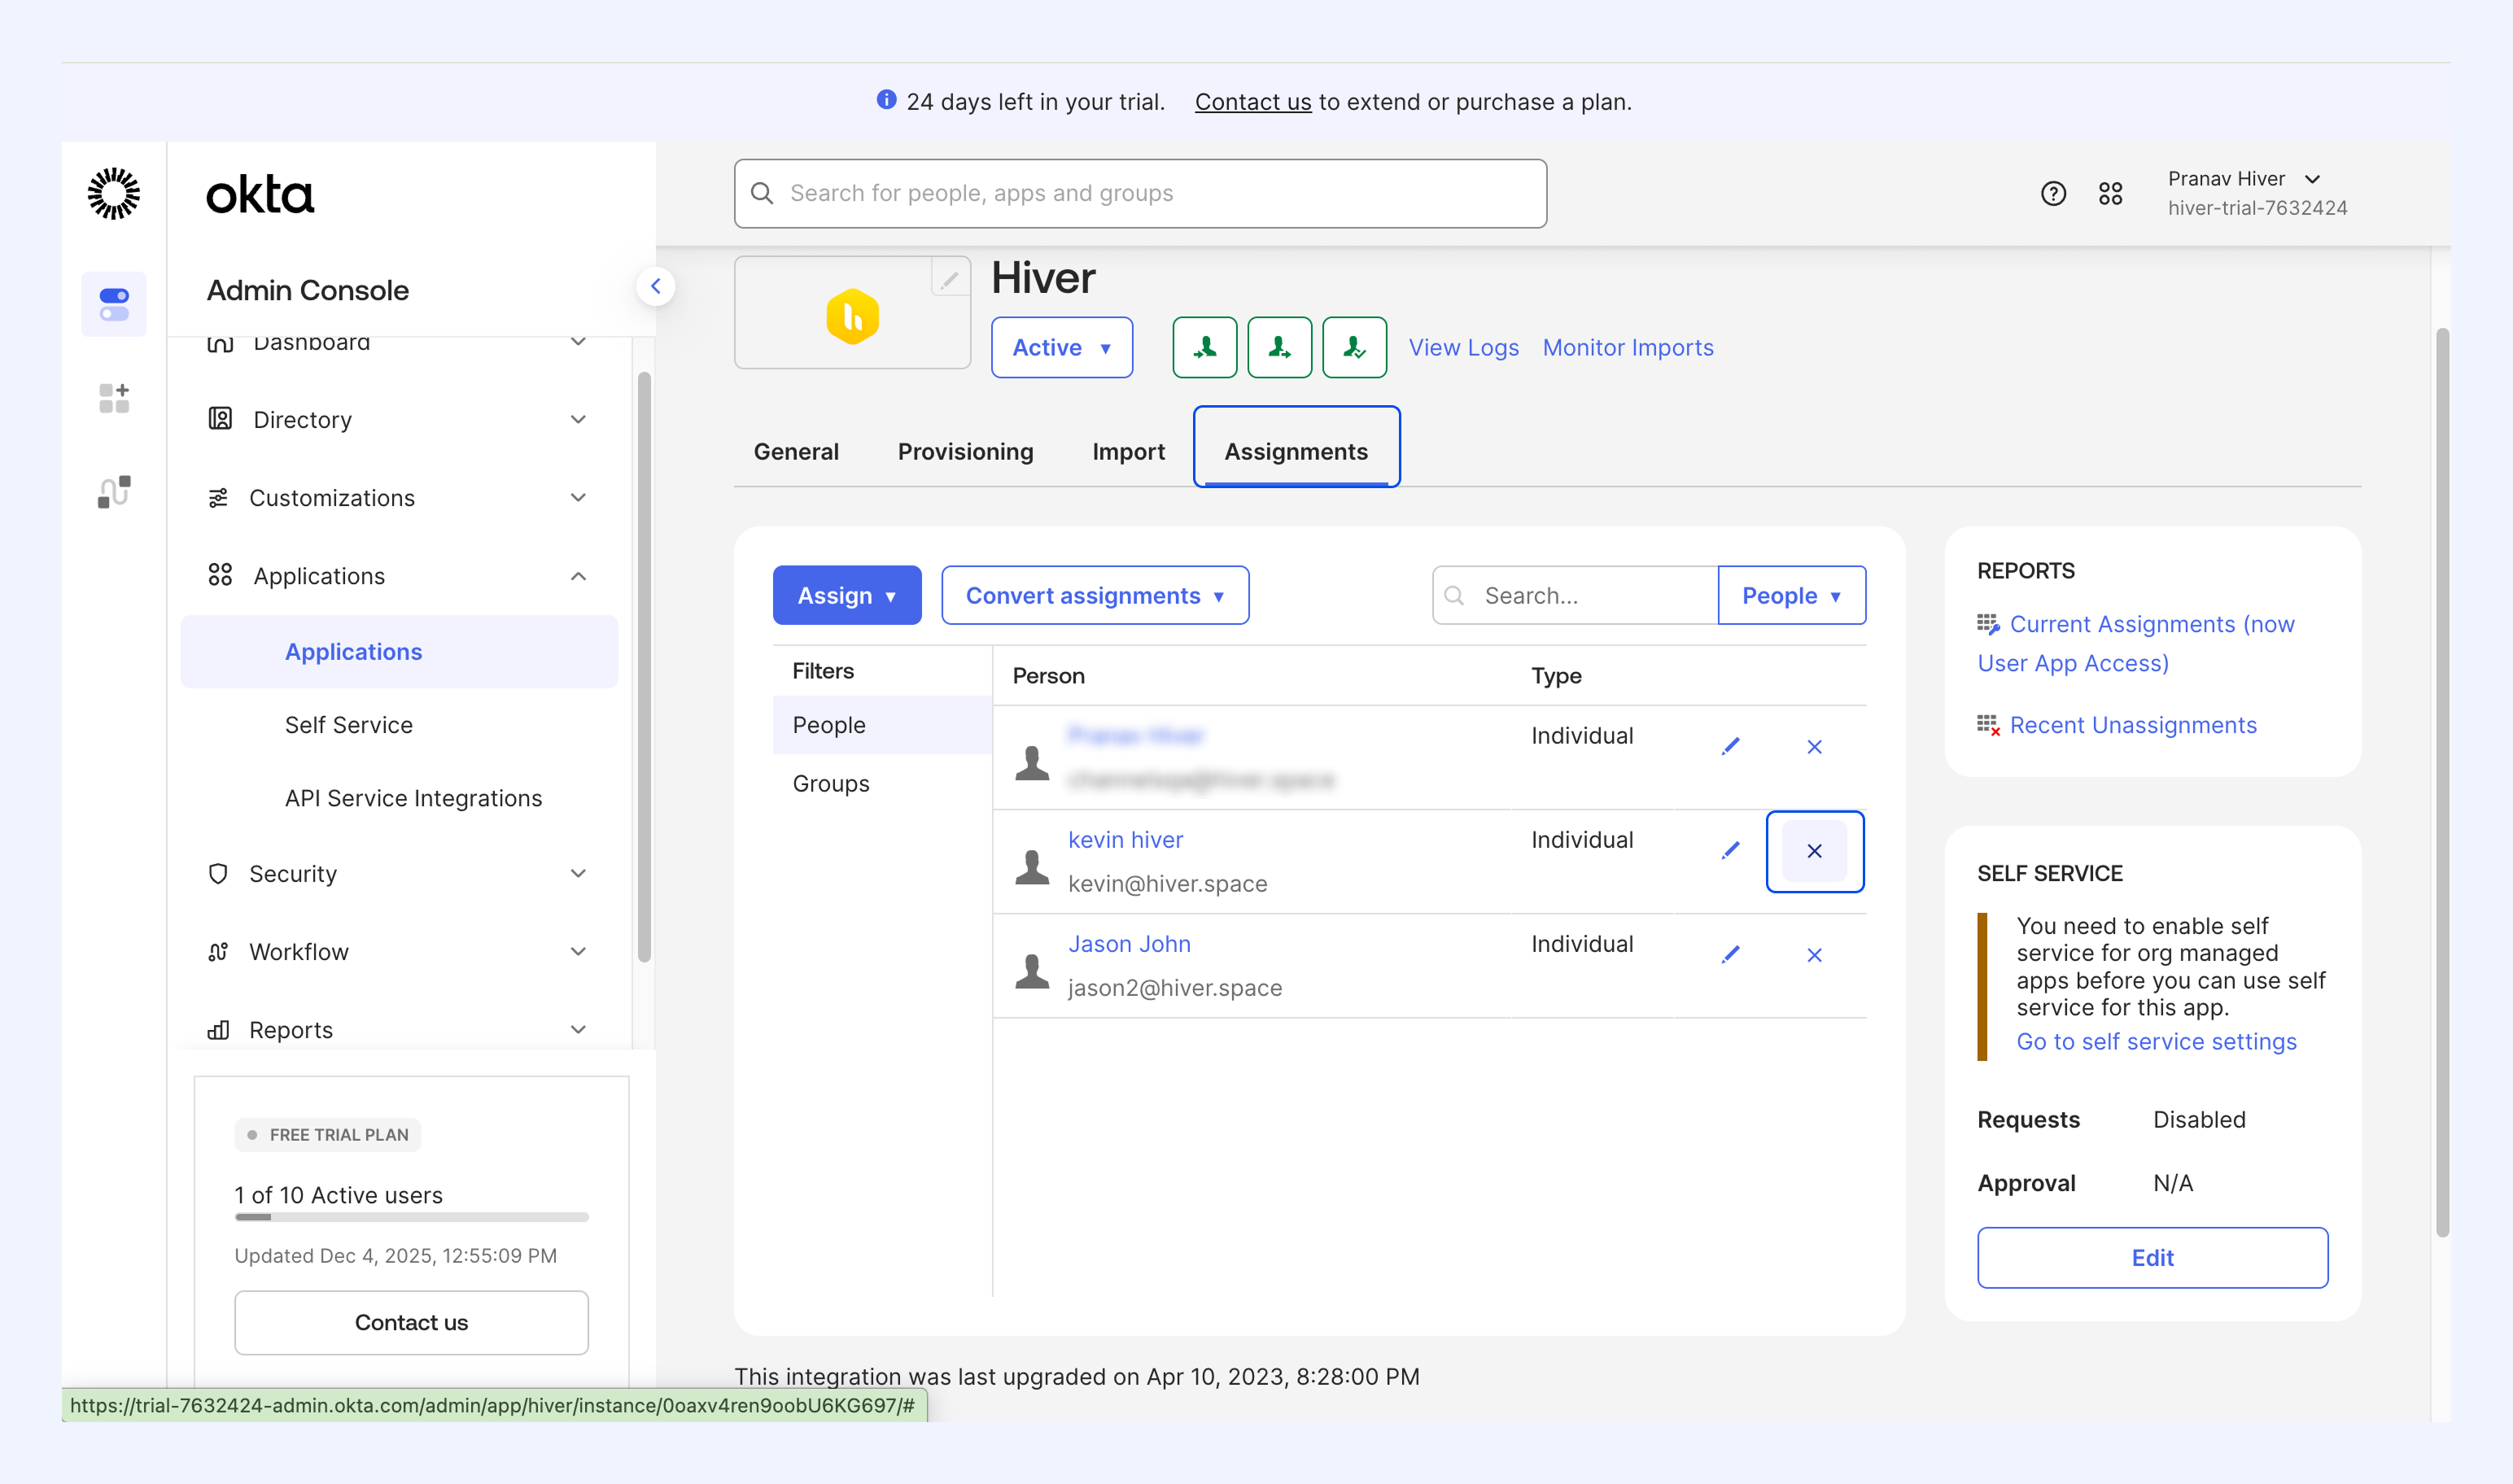
1. In the Assignments tab, click the X icon next to the user you want to remove.
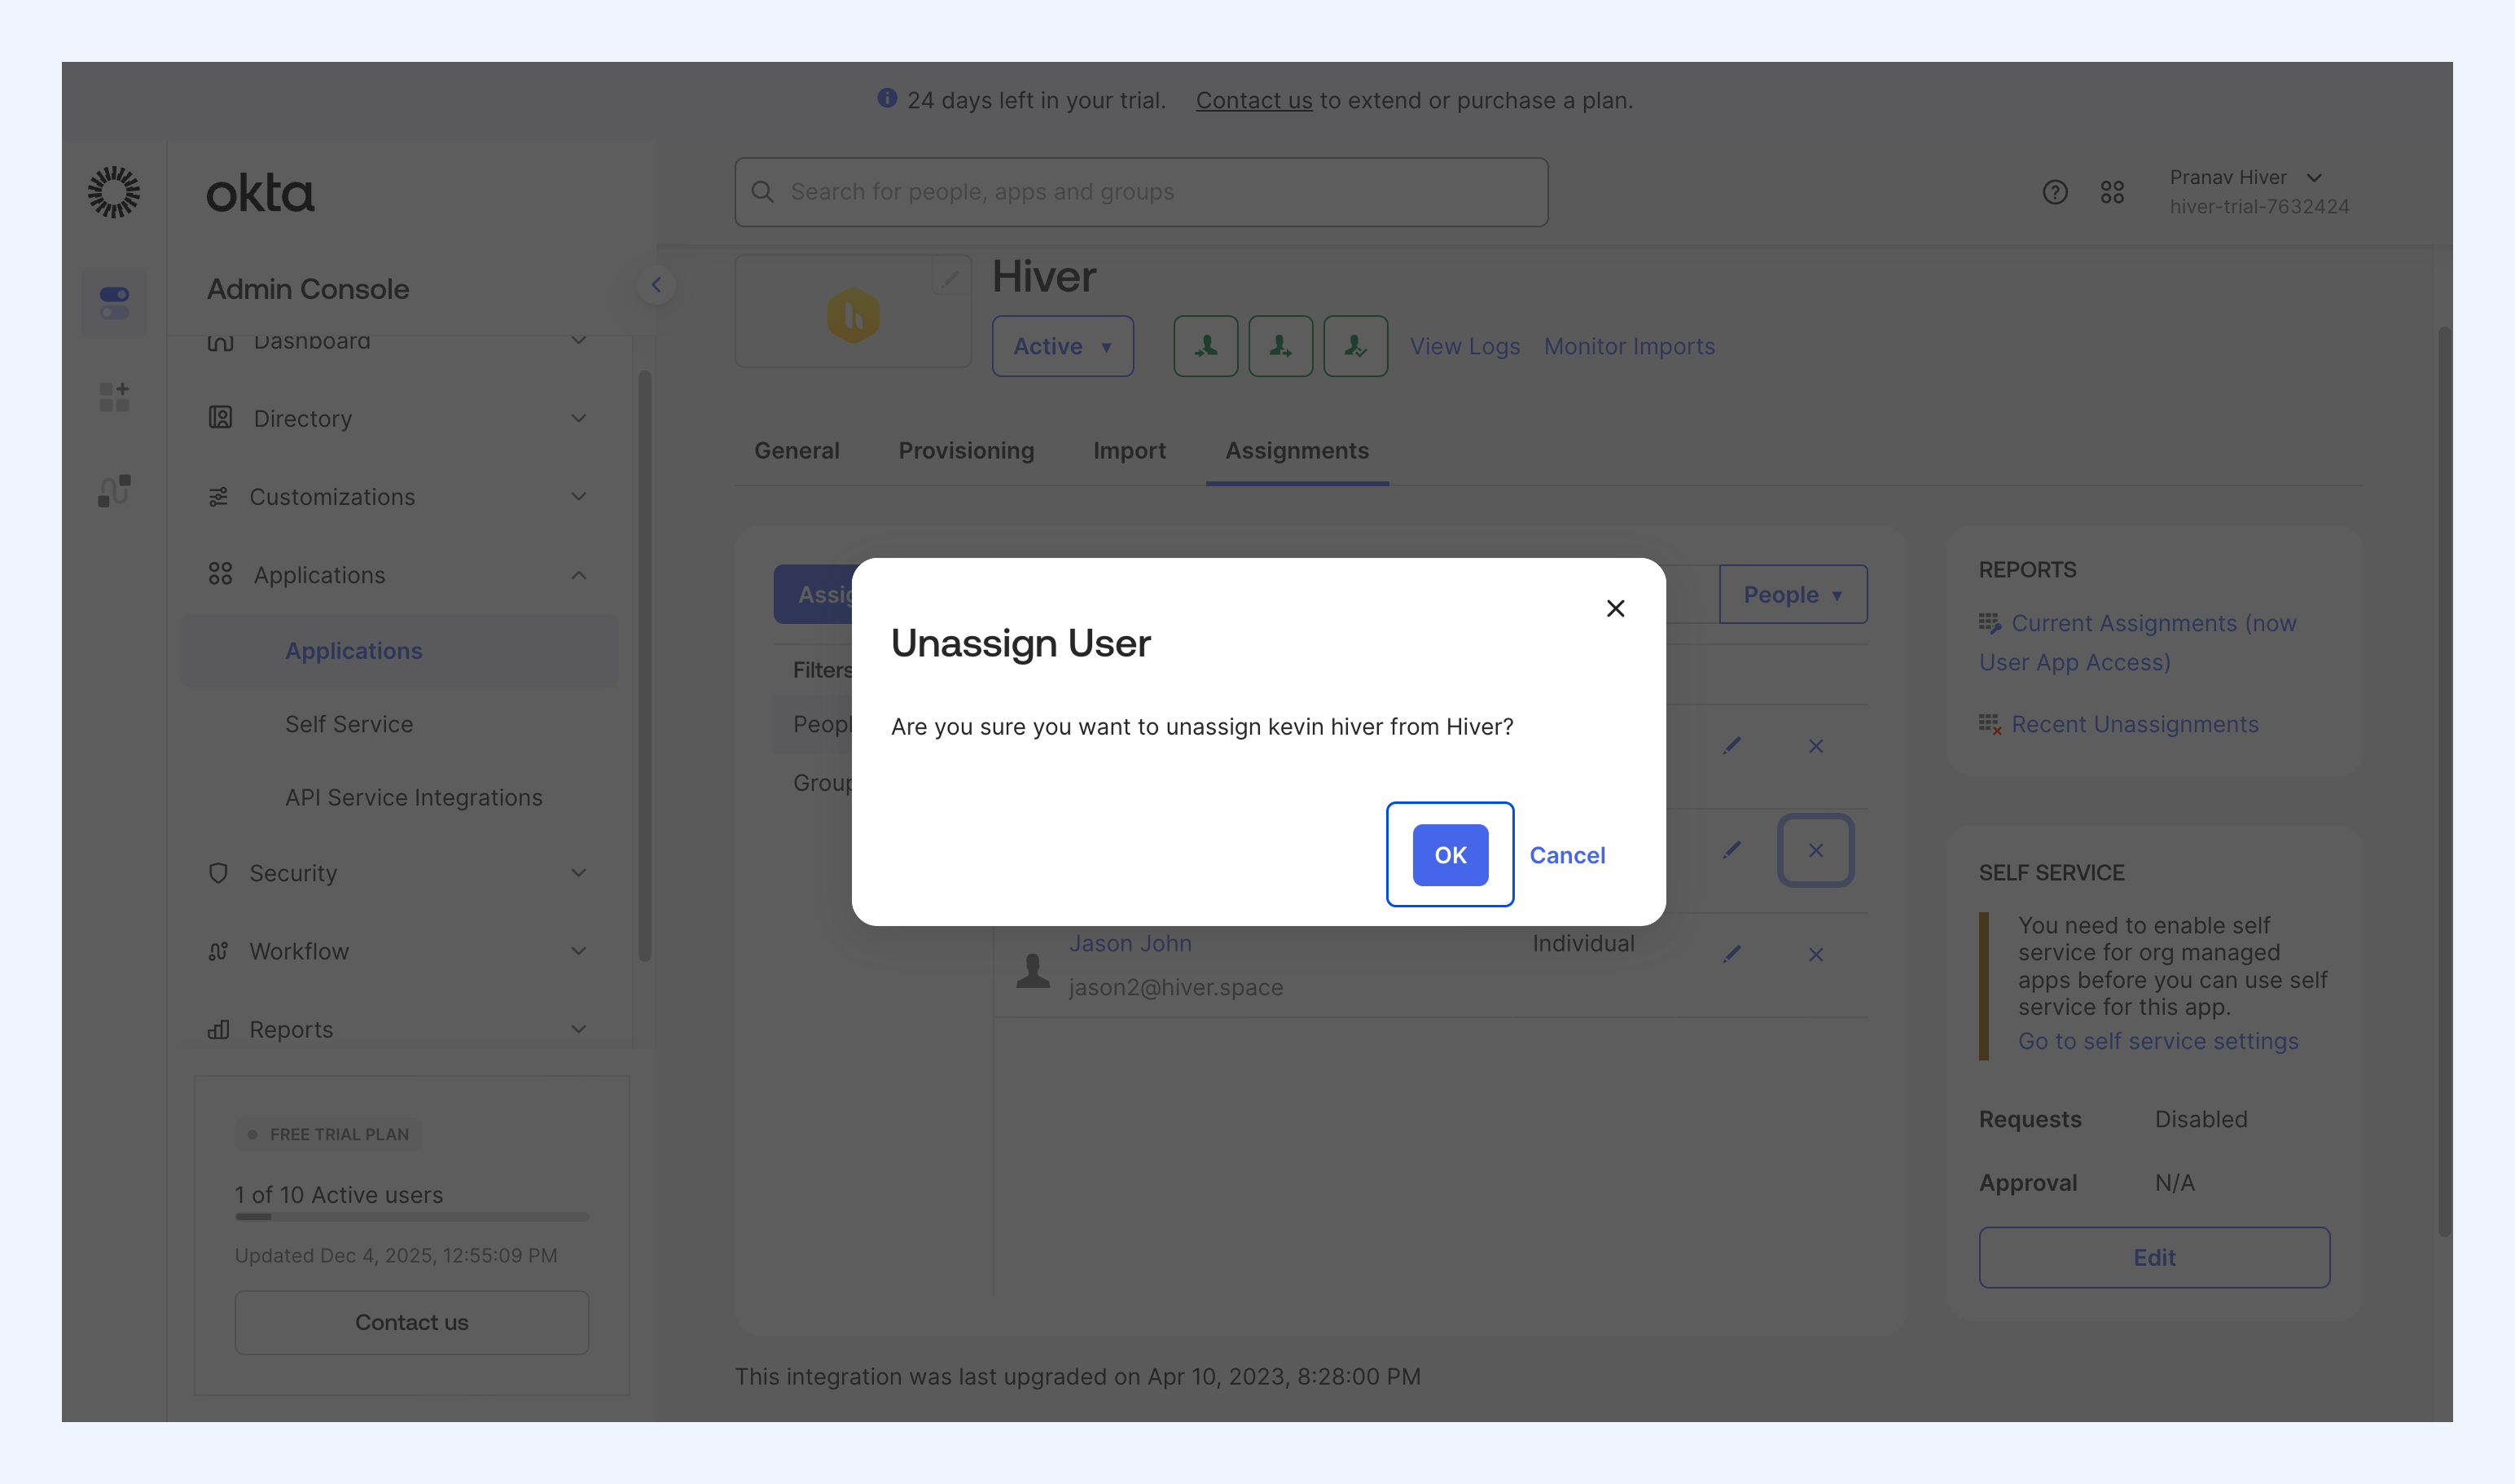
2. Click OK to confirm the action.
Related articles
Netsuite integration with Hiver