Using Hiver layout settings
Hiver’s Layout Settings is designed to improve productivity for teams handling multiple inboxes. Layout Settings provide a side-by-side interface allowing users to view the conversation list and a selected email thread without leaving the current screen. It allows you to quickly view, tag, and reply to emails without navigating away from the inbox view, reducing clicks and saving valuable time.
In this article, we’ll explain:
- What are Layout Settings
- How to enable layout options
- Set up your layout preferences
- FAQs on key tools and actions in the Layout Settings
What are Layout Settings
Layout Settings allow you to tailor how conversations and emails appear in your workspace, making it easier to match your view to how you work easier. You can choose from multiple layout options to best suit your workflow, whether you prefer seeing several panels side by side, focusing on just a list, or using a simplified view.
- Choose from a variety of layout options, such as split view or list view, depending on whether you want a more broader overview or a more focused display.
- Switch between layouts easily to match your task, whether it’s multitasking across multiple inboxes, scanning through conversations, or zeroing in on a single thread.
- Panels can be shown or collapsed to reduce clutter or bring specific information into focus.
- Once you’ve selected your preferred layout, it’s saved automatically and stays consistent across sessions.
These customizable views help ensure a more comfortable, distraction-free, and efficient support experience.
How to enable layout options
You can activate the layout preferences from the menu with just a few clicks:
- Log in to Hiver and head over to the Conversations tab
- Click the Layout settings icon in the top right corner of your navigation bar
- Select your preferred split layout or list view. Your layout preference is automatically saved and remembered across sessions and inboxes
- Manual panel changes, like collapsing the left panel or the Hiver panel, are also saved
- When you return, the inbox will open exactly as you left it
- You can toggle between conversations using the up and down arrows
Example: If you closed the Hiver Panel, it will remain closed next time you return

Set up your layout preferences
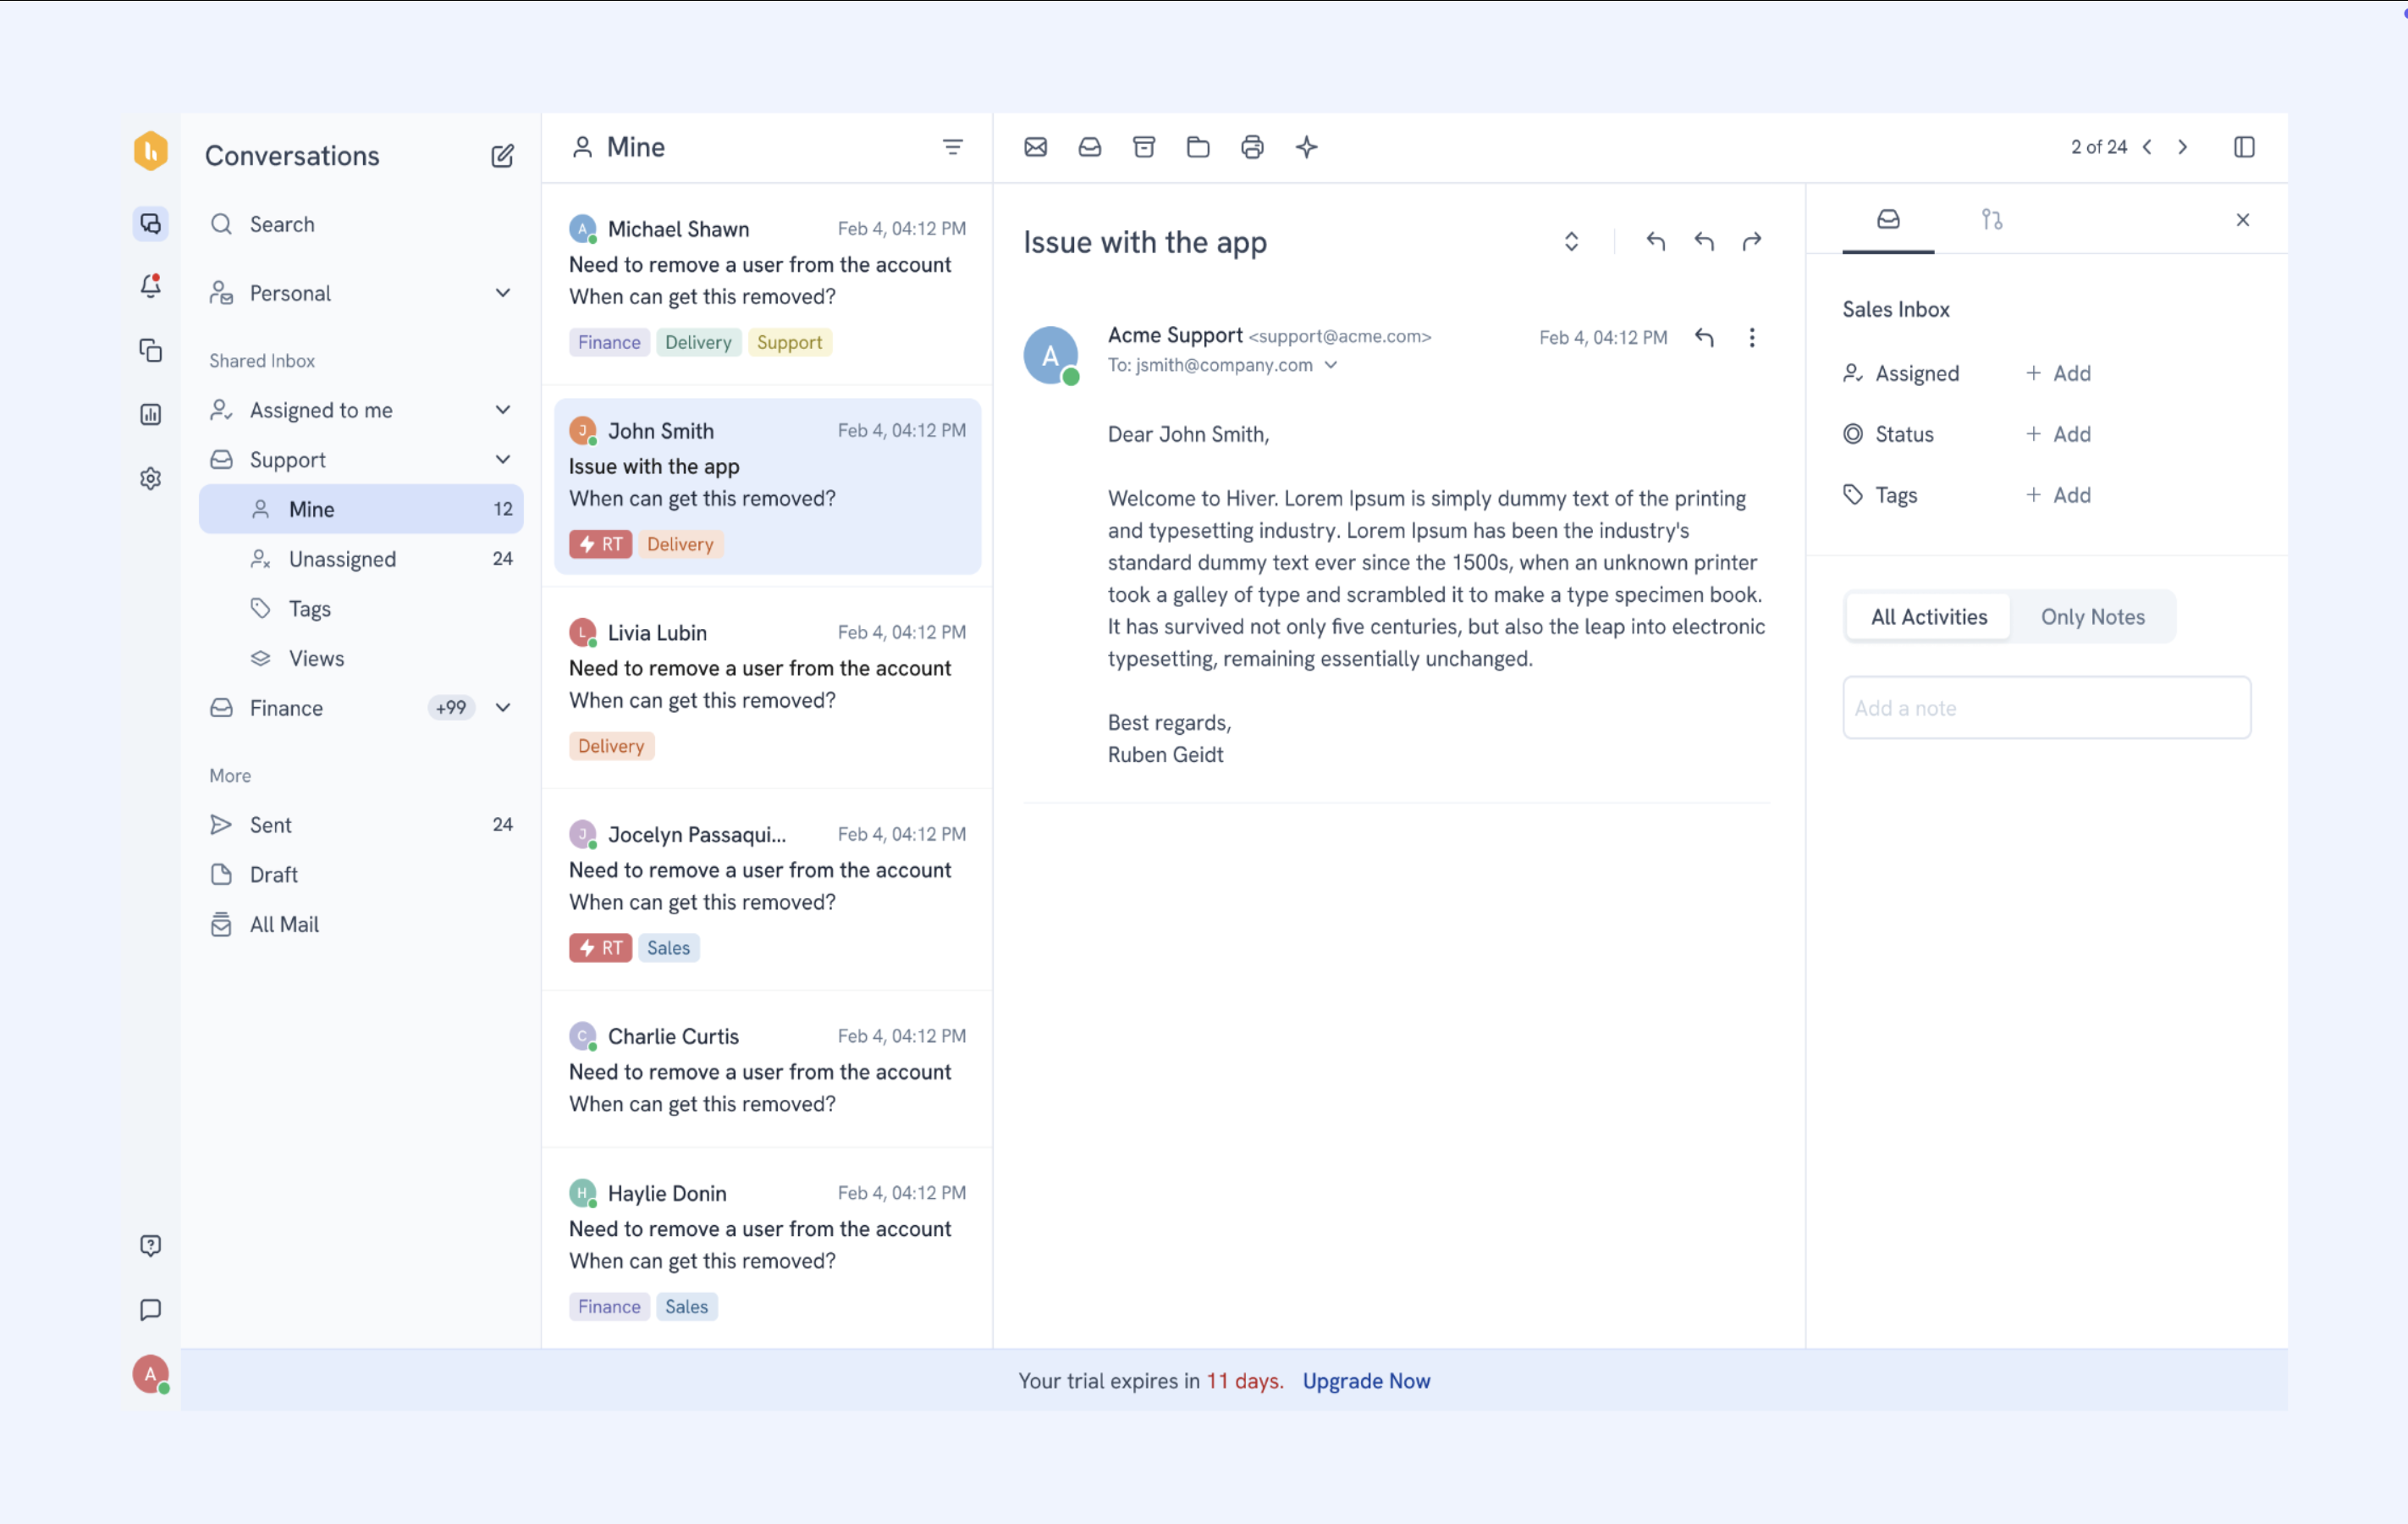
You can choose from 4 layout options based on your role and workflow:
Full view
A 4-column layout:
Navigation → Folder List → Conversation List → Thread + Hiver Panel
- Best for team leads who need a complete overview
- Ideal for multitasking between folders and Shared Inboxes
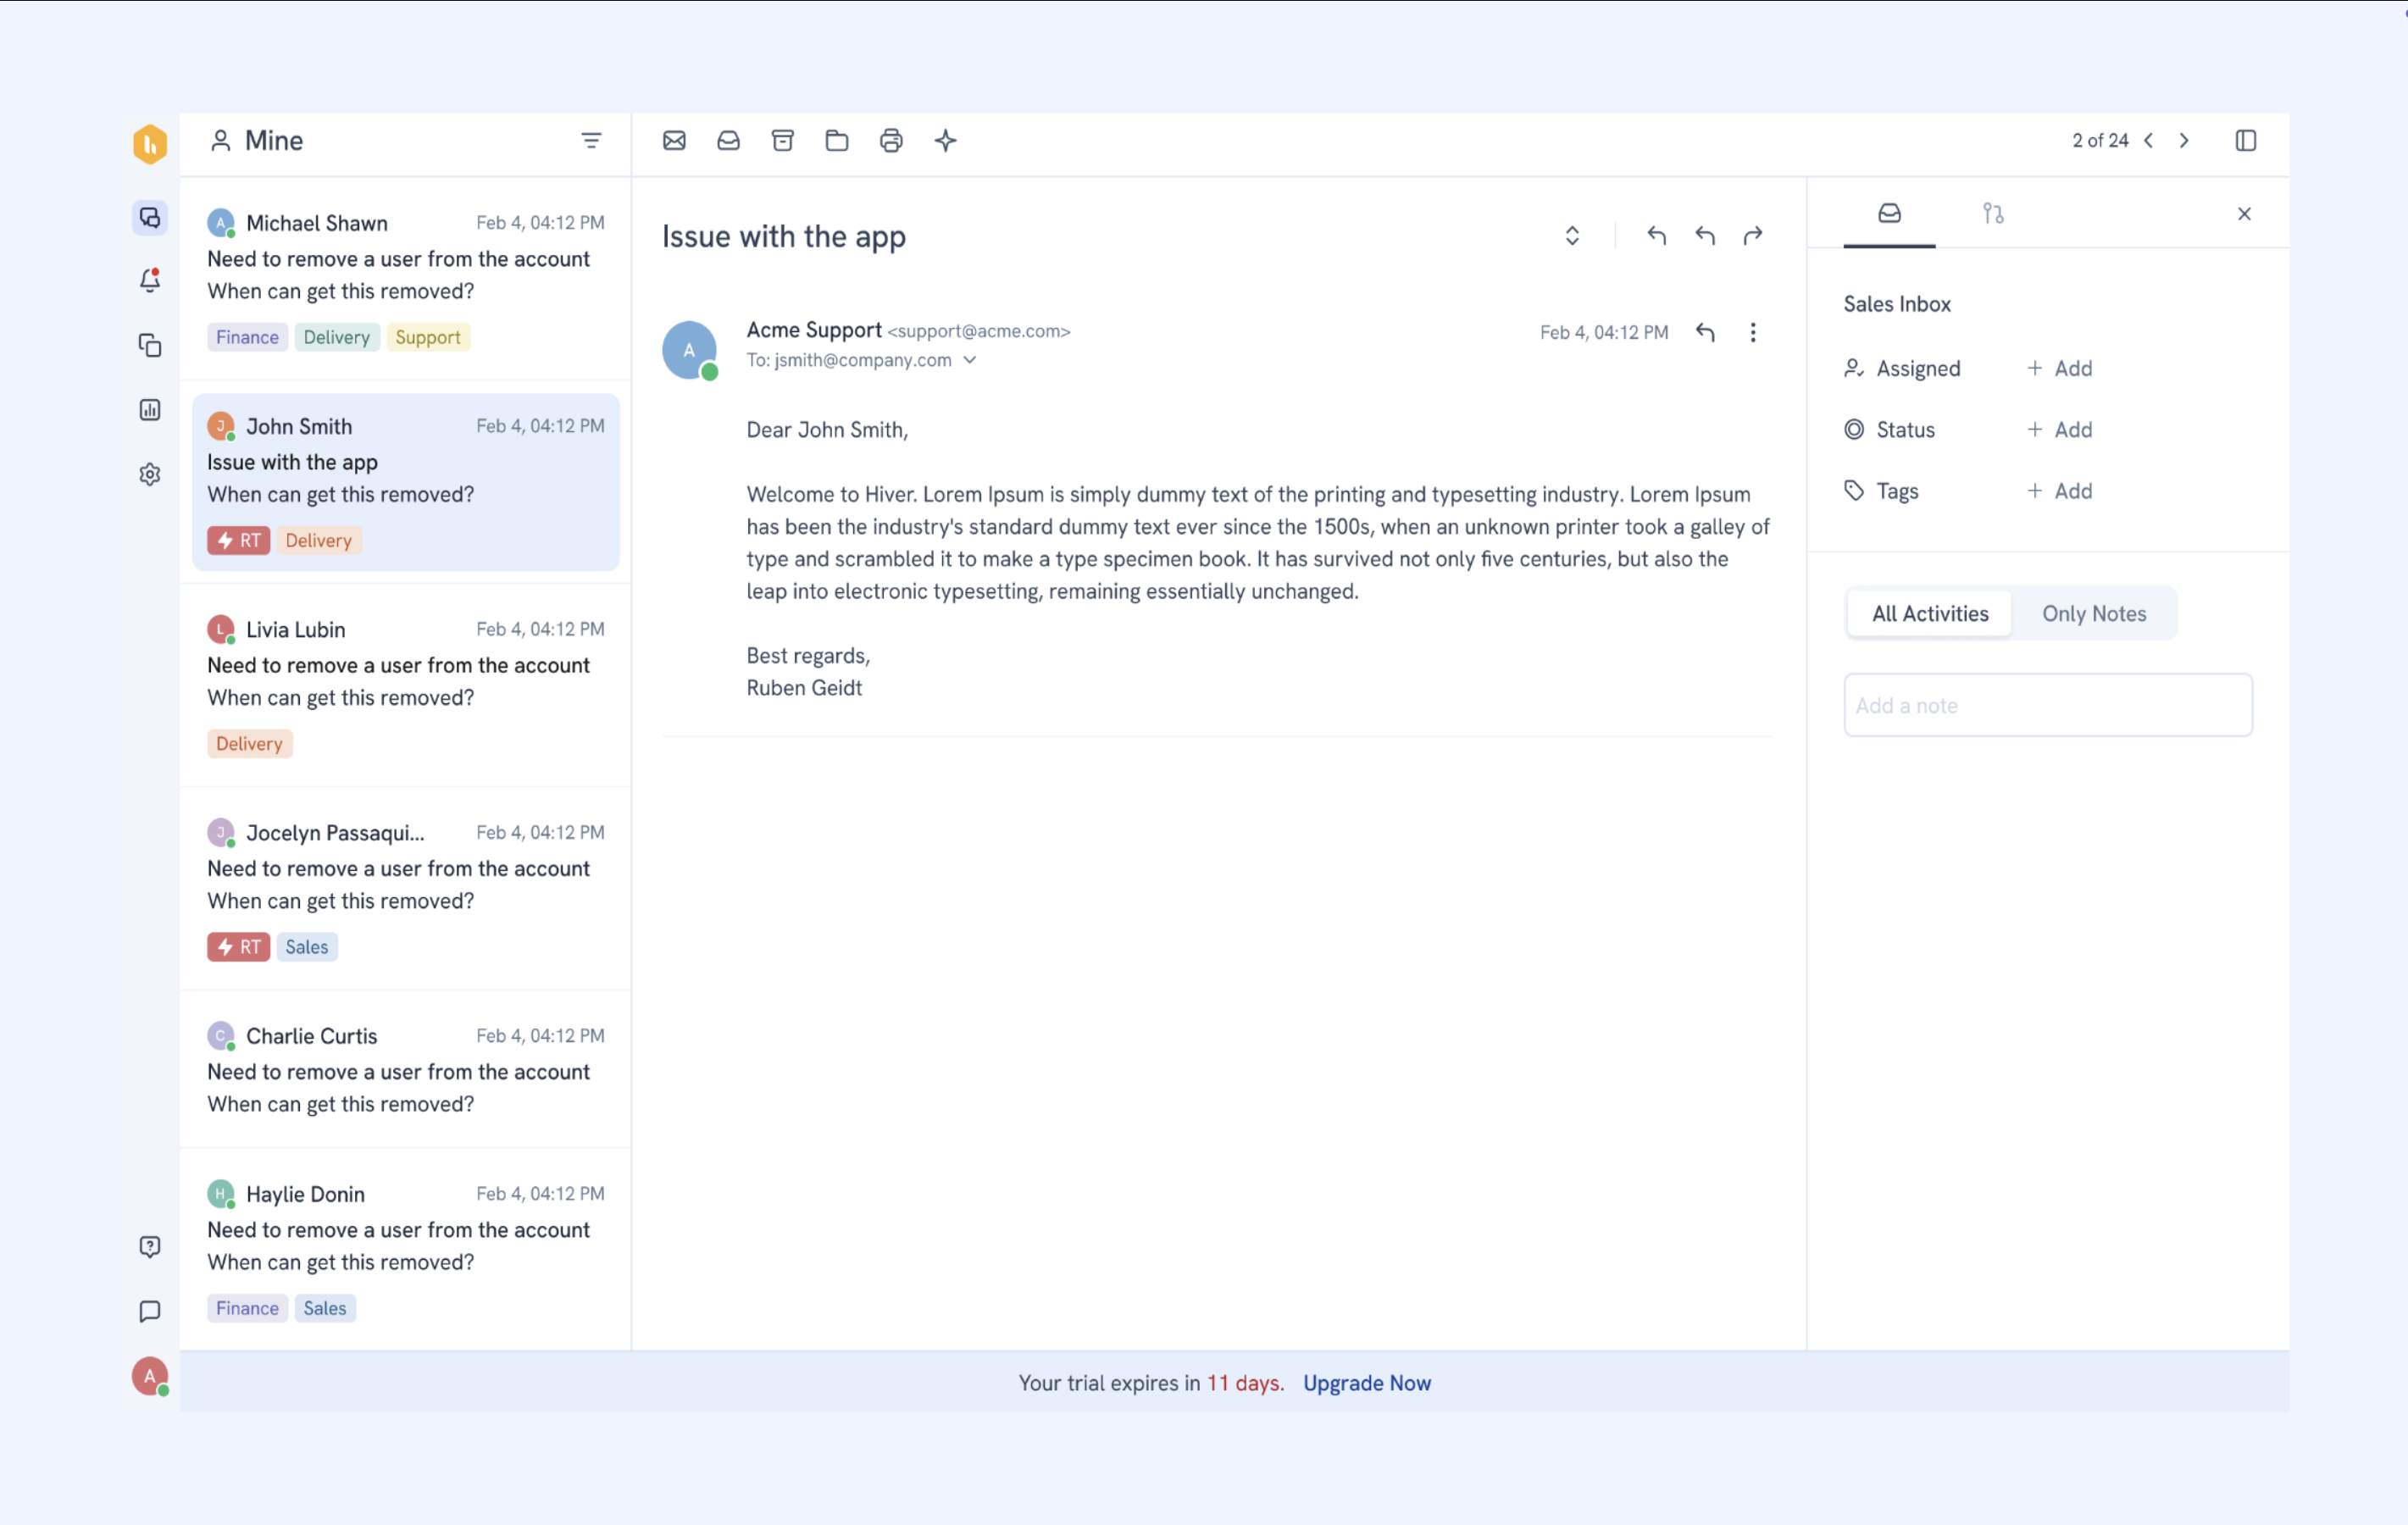
Focused view
Hides navigation and folder panels
- Ideal for agents working in Mine, Team, or specific filtered views
- Reduces distractions for faster inline responses
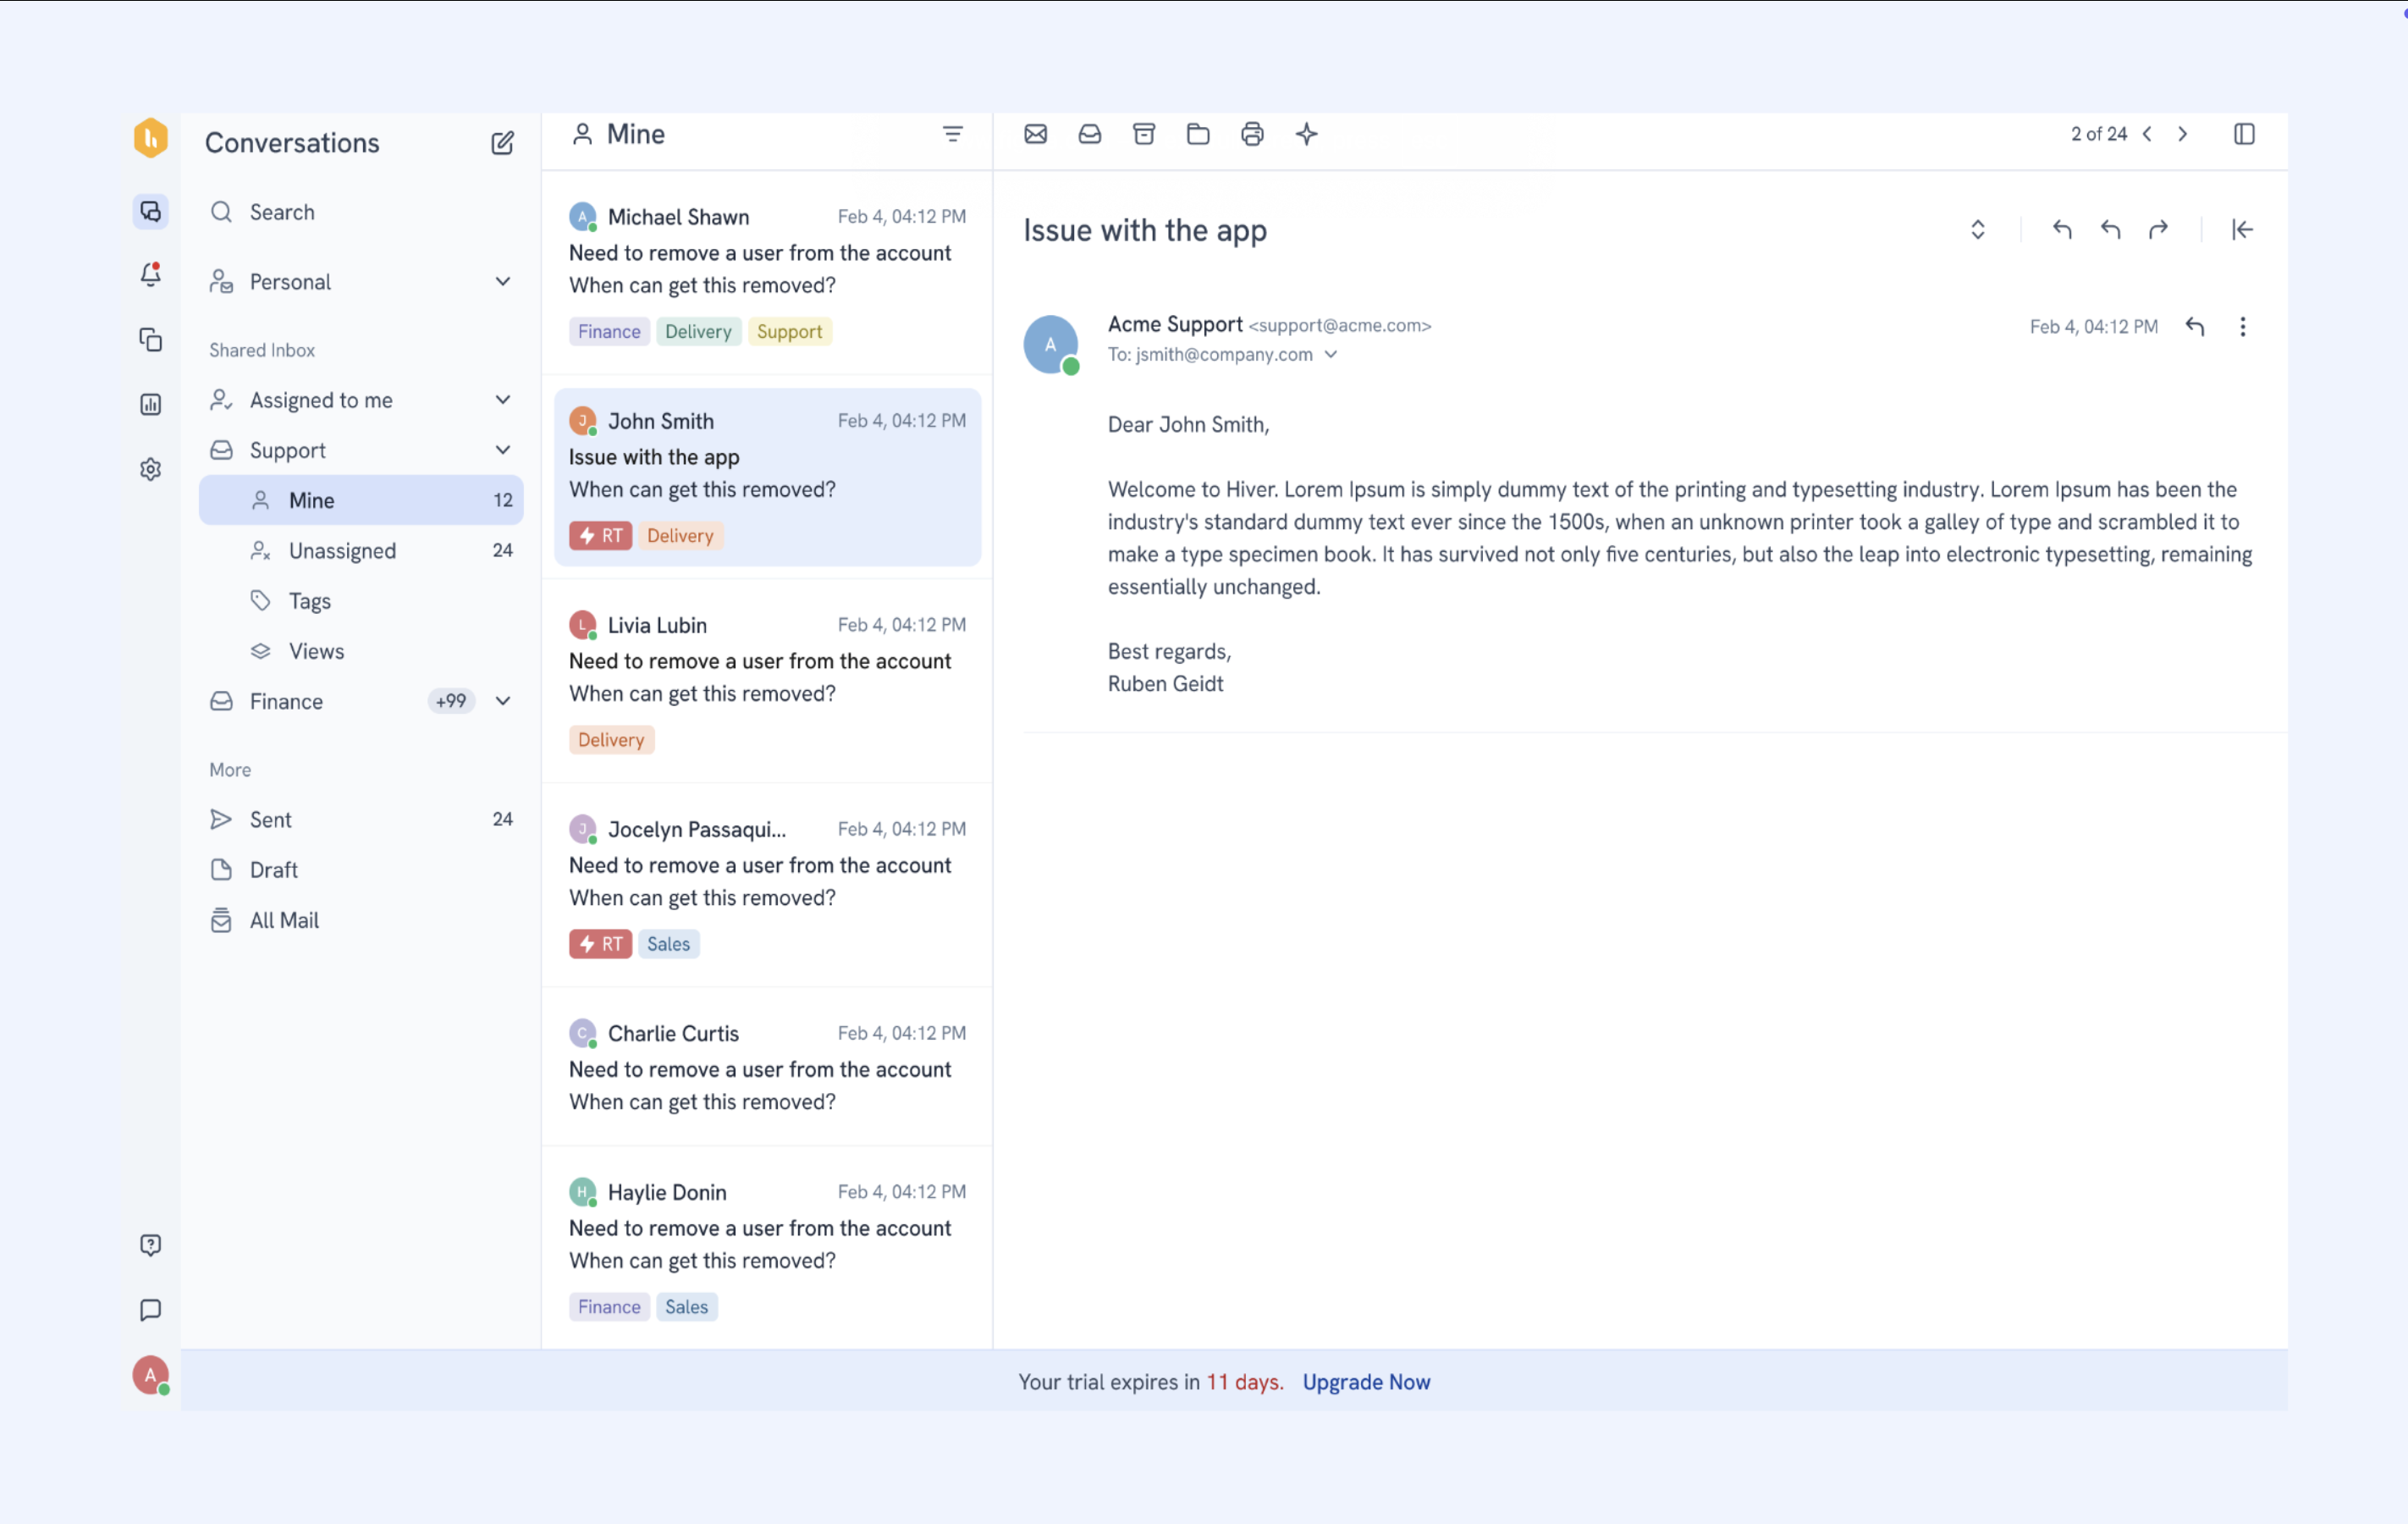
Slim view
- Keeps Conversation List visible on the left
- Hides the Hiver Panel by default
- Suitable for agents scanning or browsing multiple inboxes quickly
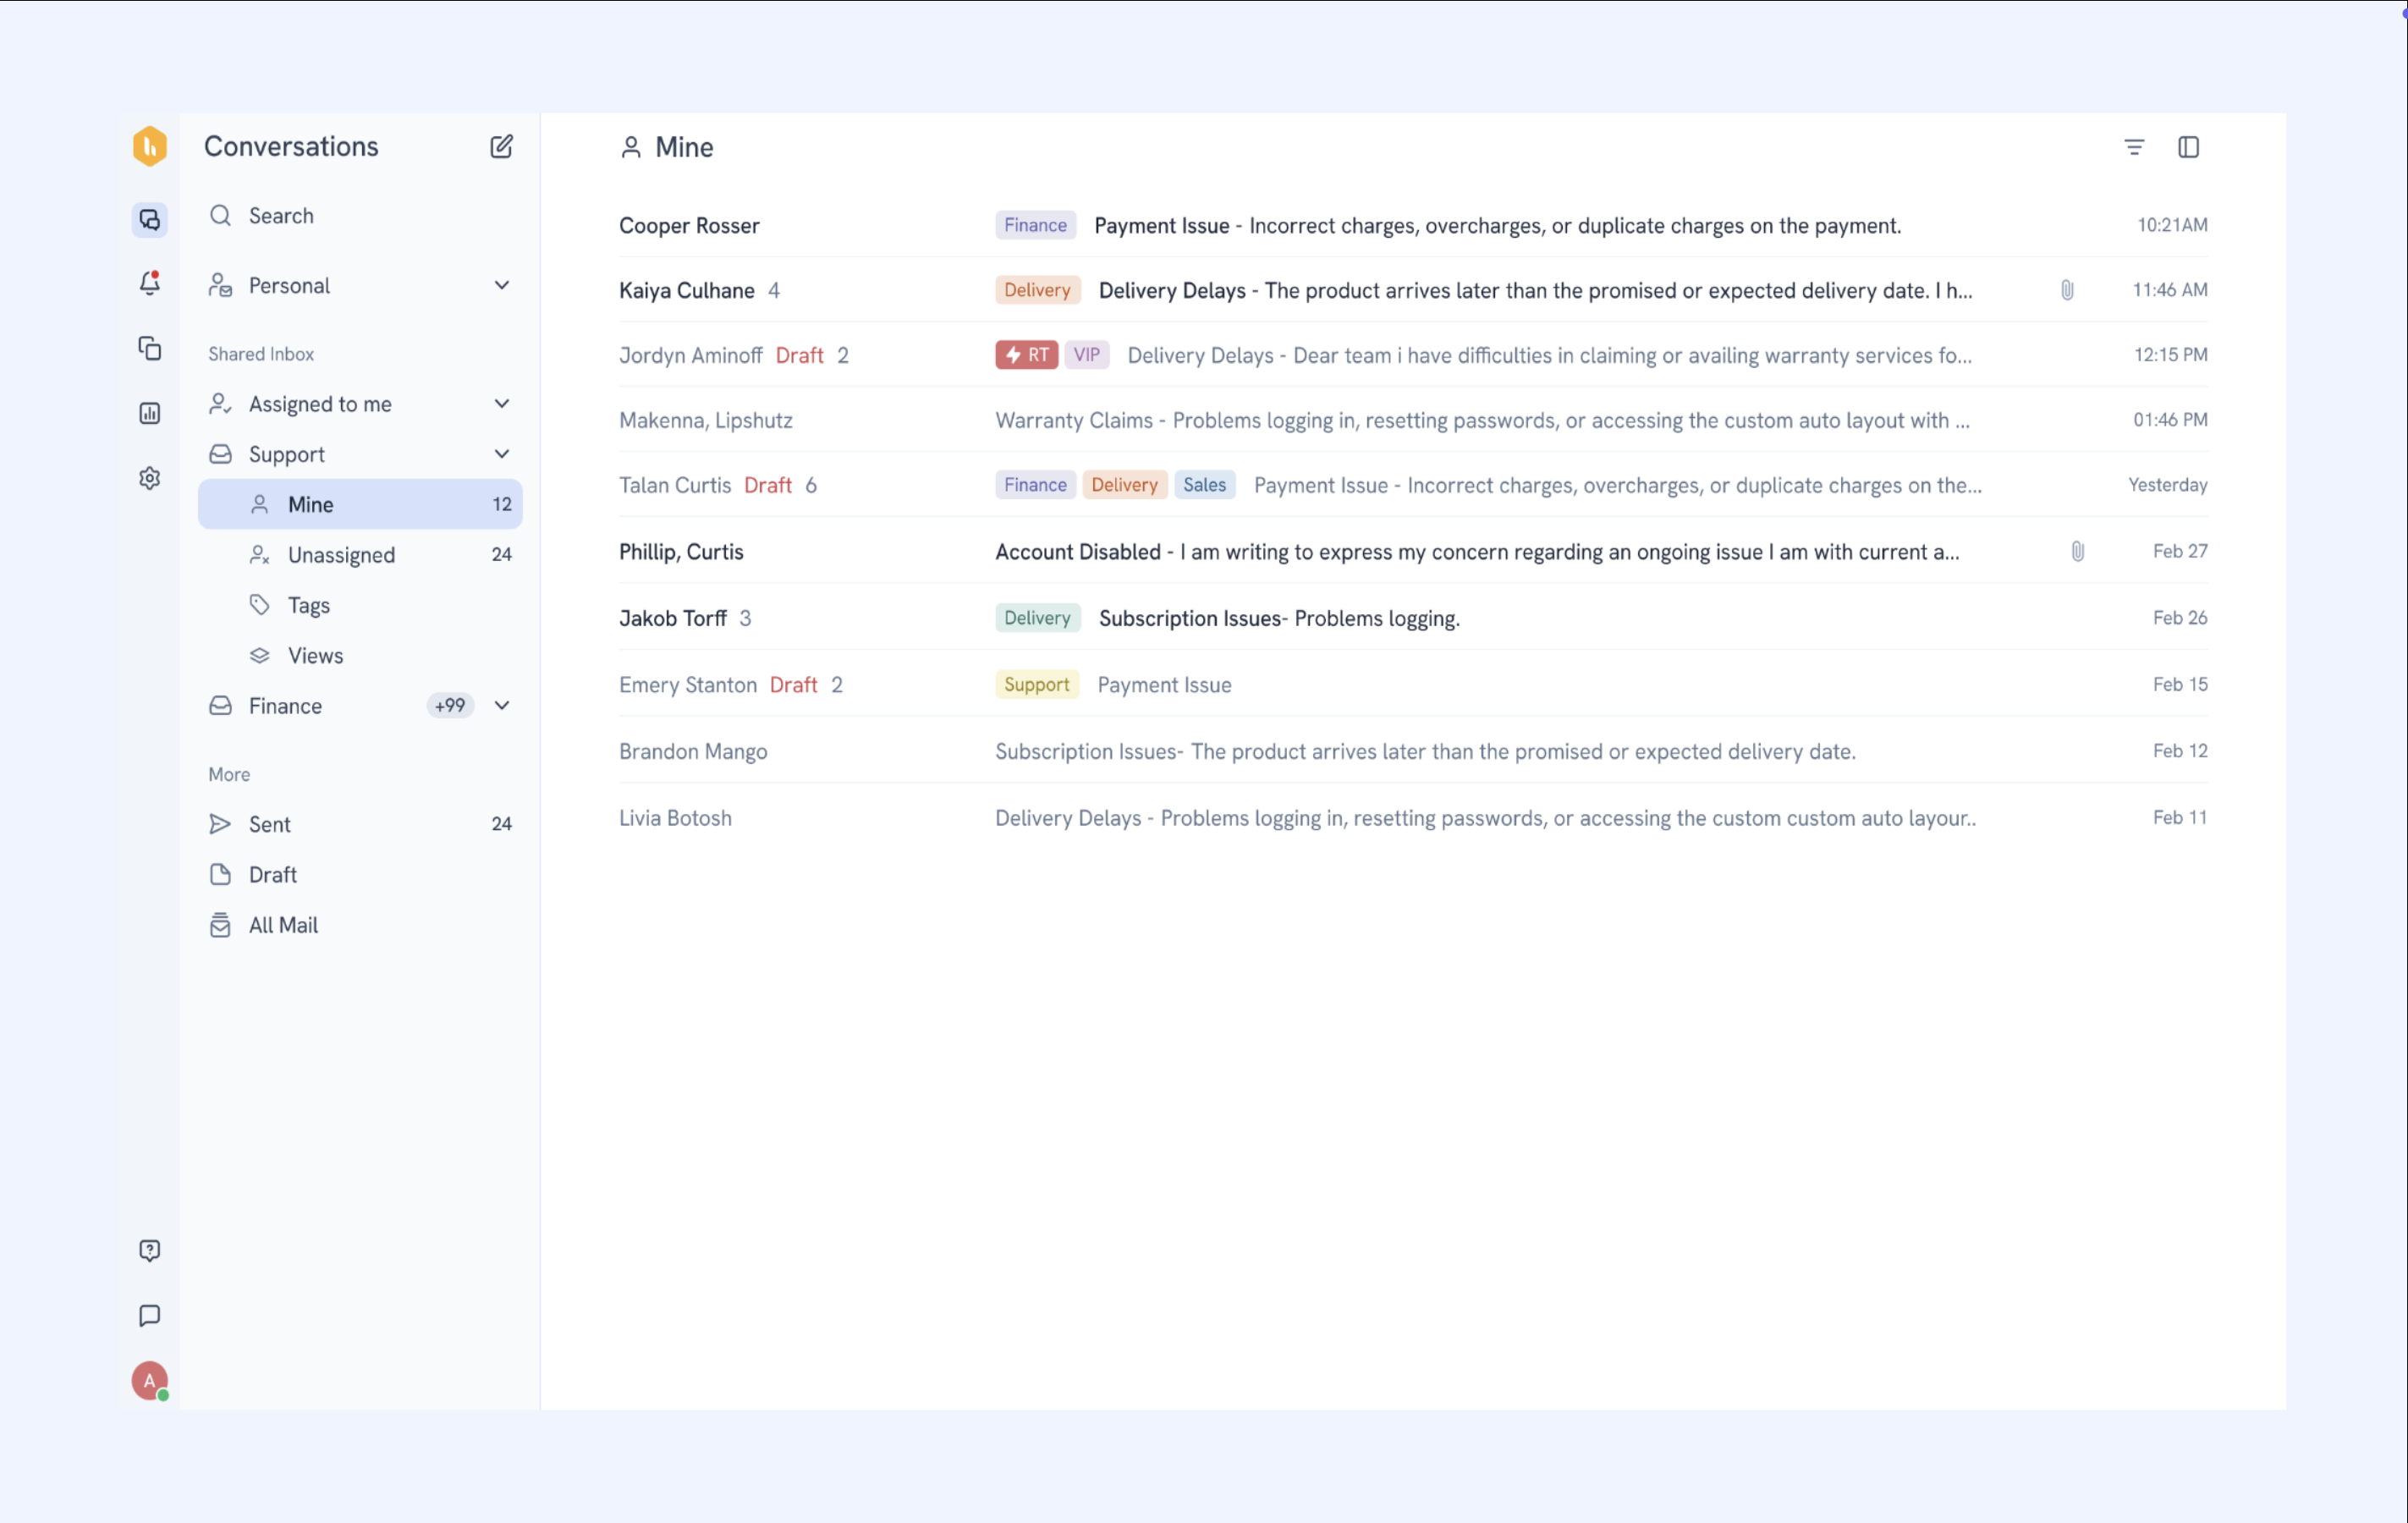
List view (Legacy default)
- Only shows Conversation List
- Clicking on a thread opens it in full screen
- The bulk selection checkbox is always visible
FAQs on key tools and actions in the Layout Settings
Bulk actions
1. How can I select multiple conversations at once?
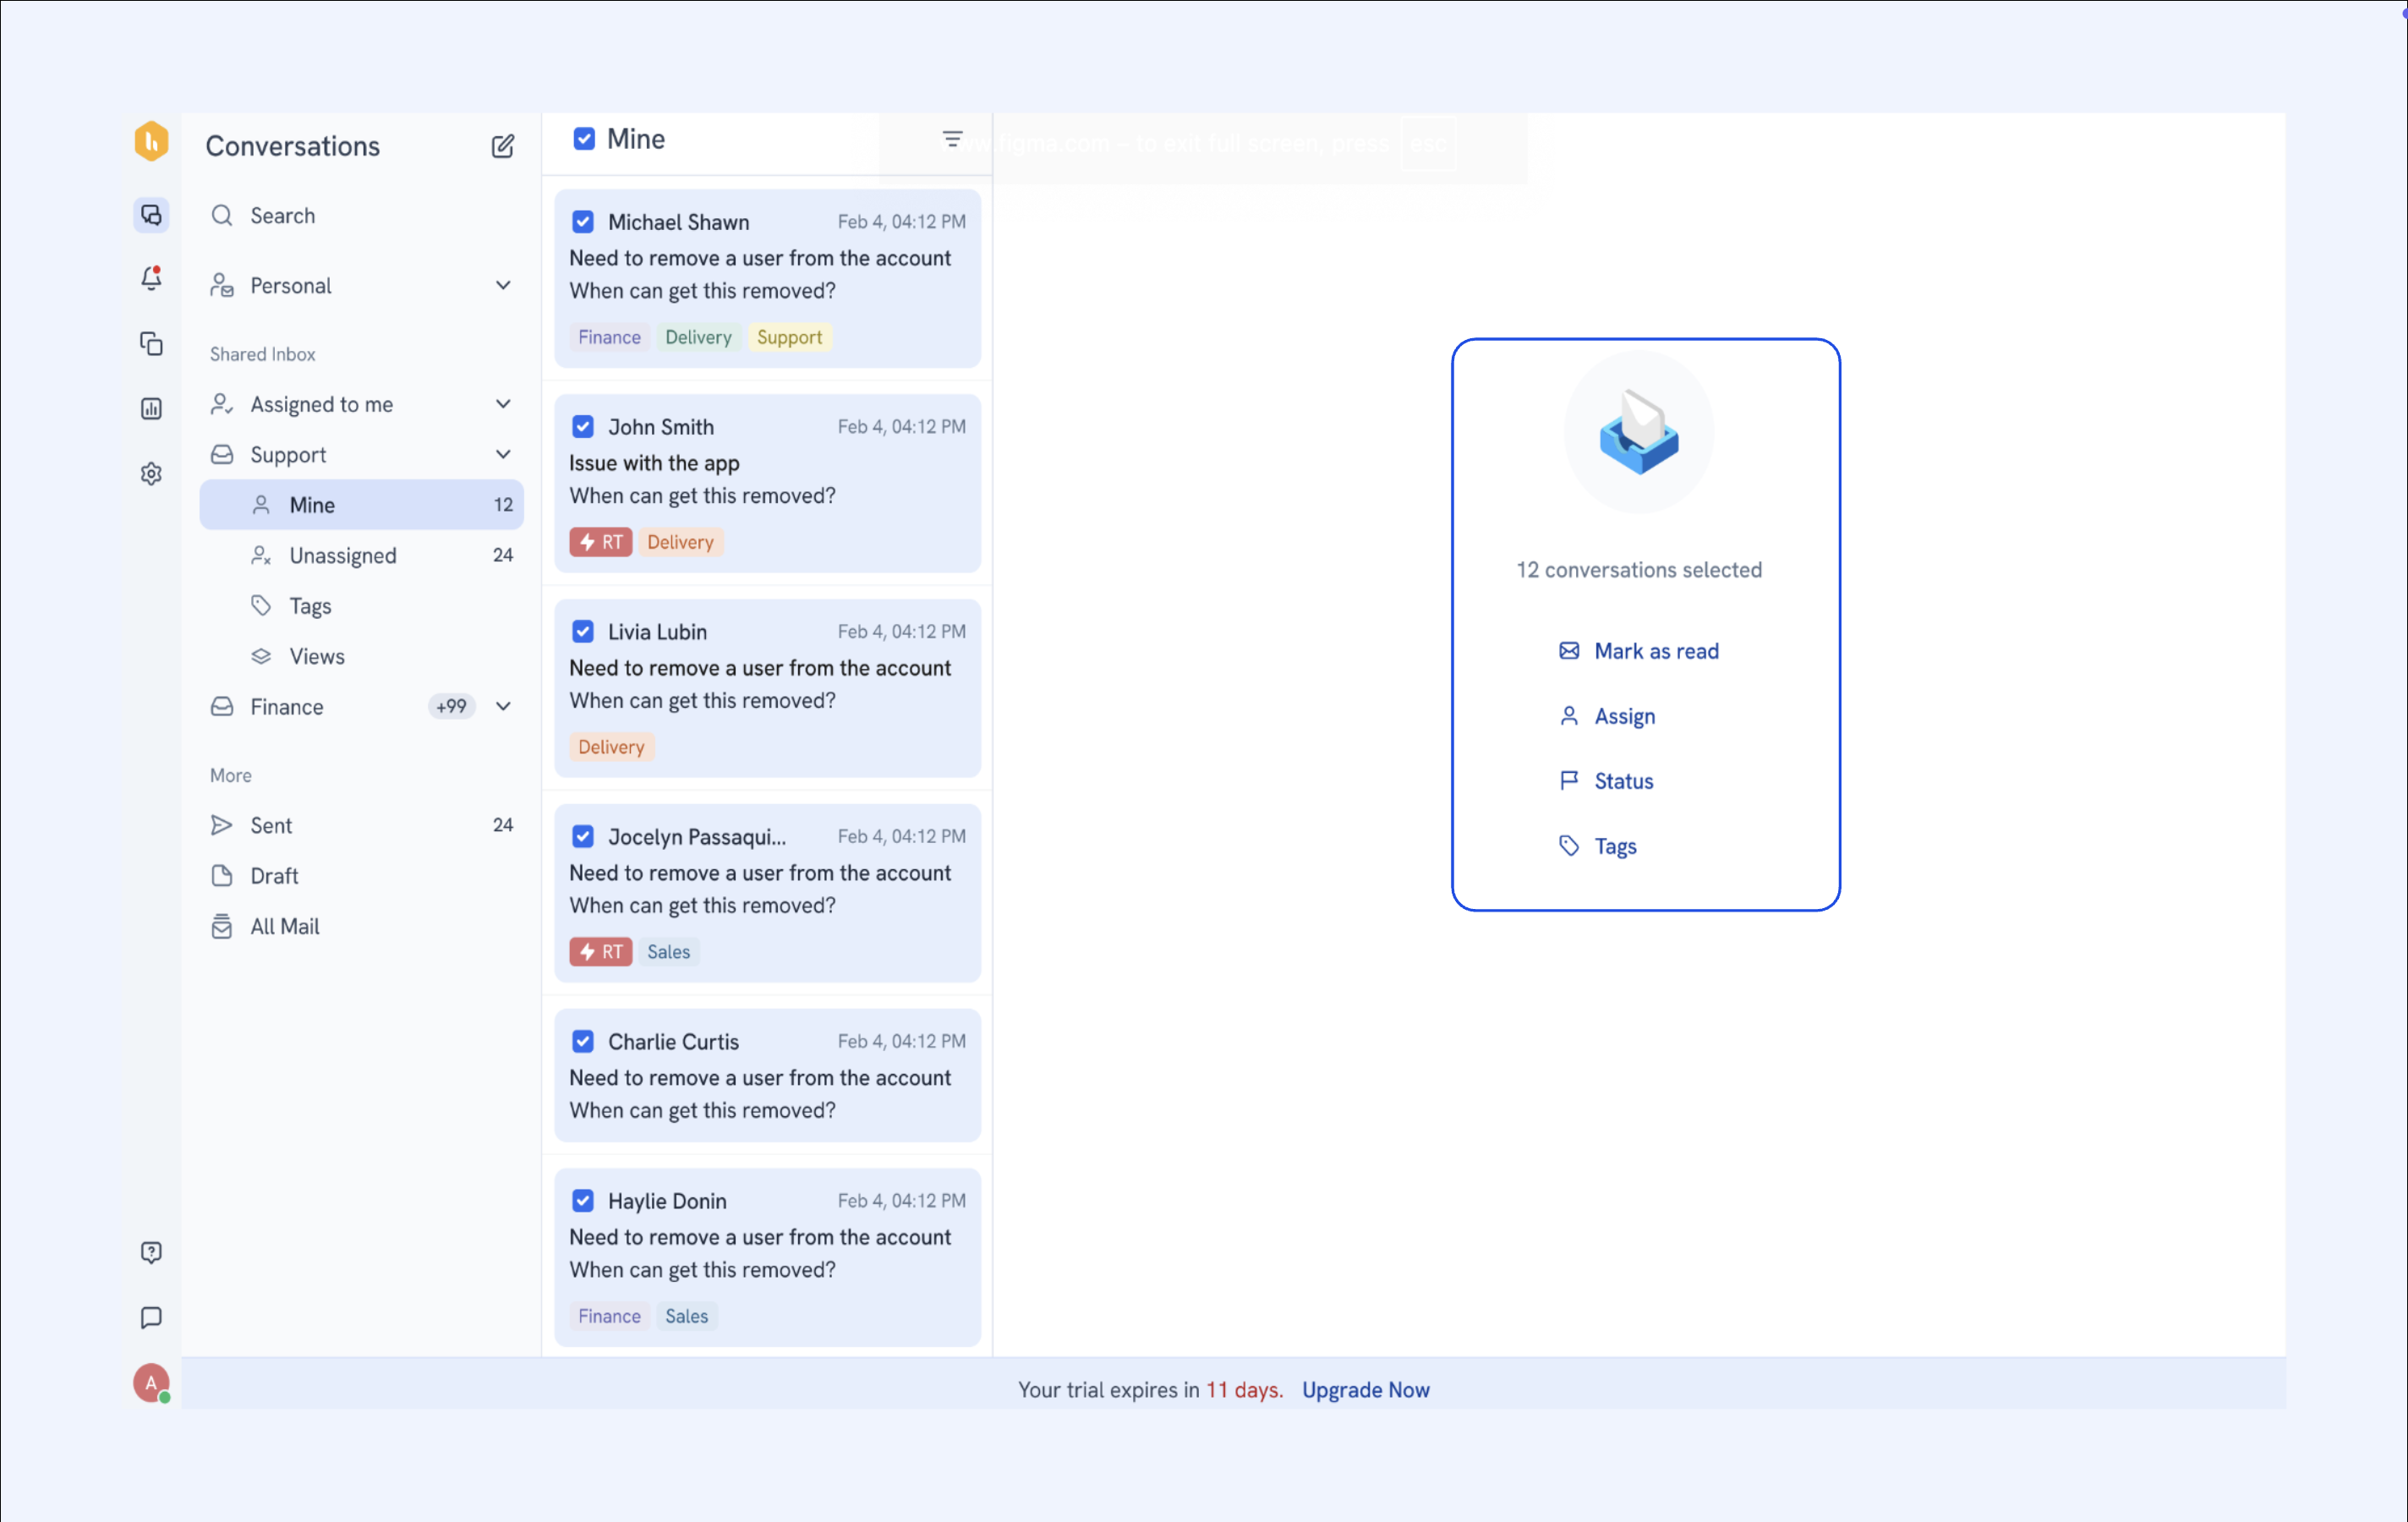
Hover over any conversation to reveal a checkbox next to it. You can select multiple threads by clicking on individual checkboxes or use the master checkbox at the top to select all conversations at once.
2. What bulk actions can I perform on selected conversations?
Once conversations are selected, the right pane displays several bulk action options. These include:
Mark as Read – Instantly mark all selected threads as read.
Assign – Assign conversations to yourself or another team member.
Update Status – Change the status of the selected threads (e.g., Open, Pending, Closed).
Apply Tags – Add tags to categorize or prioritize the selected conversations.
Filters
How do I filter conversations?
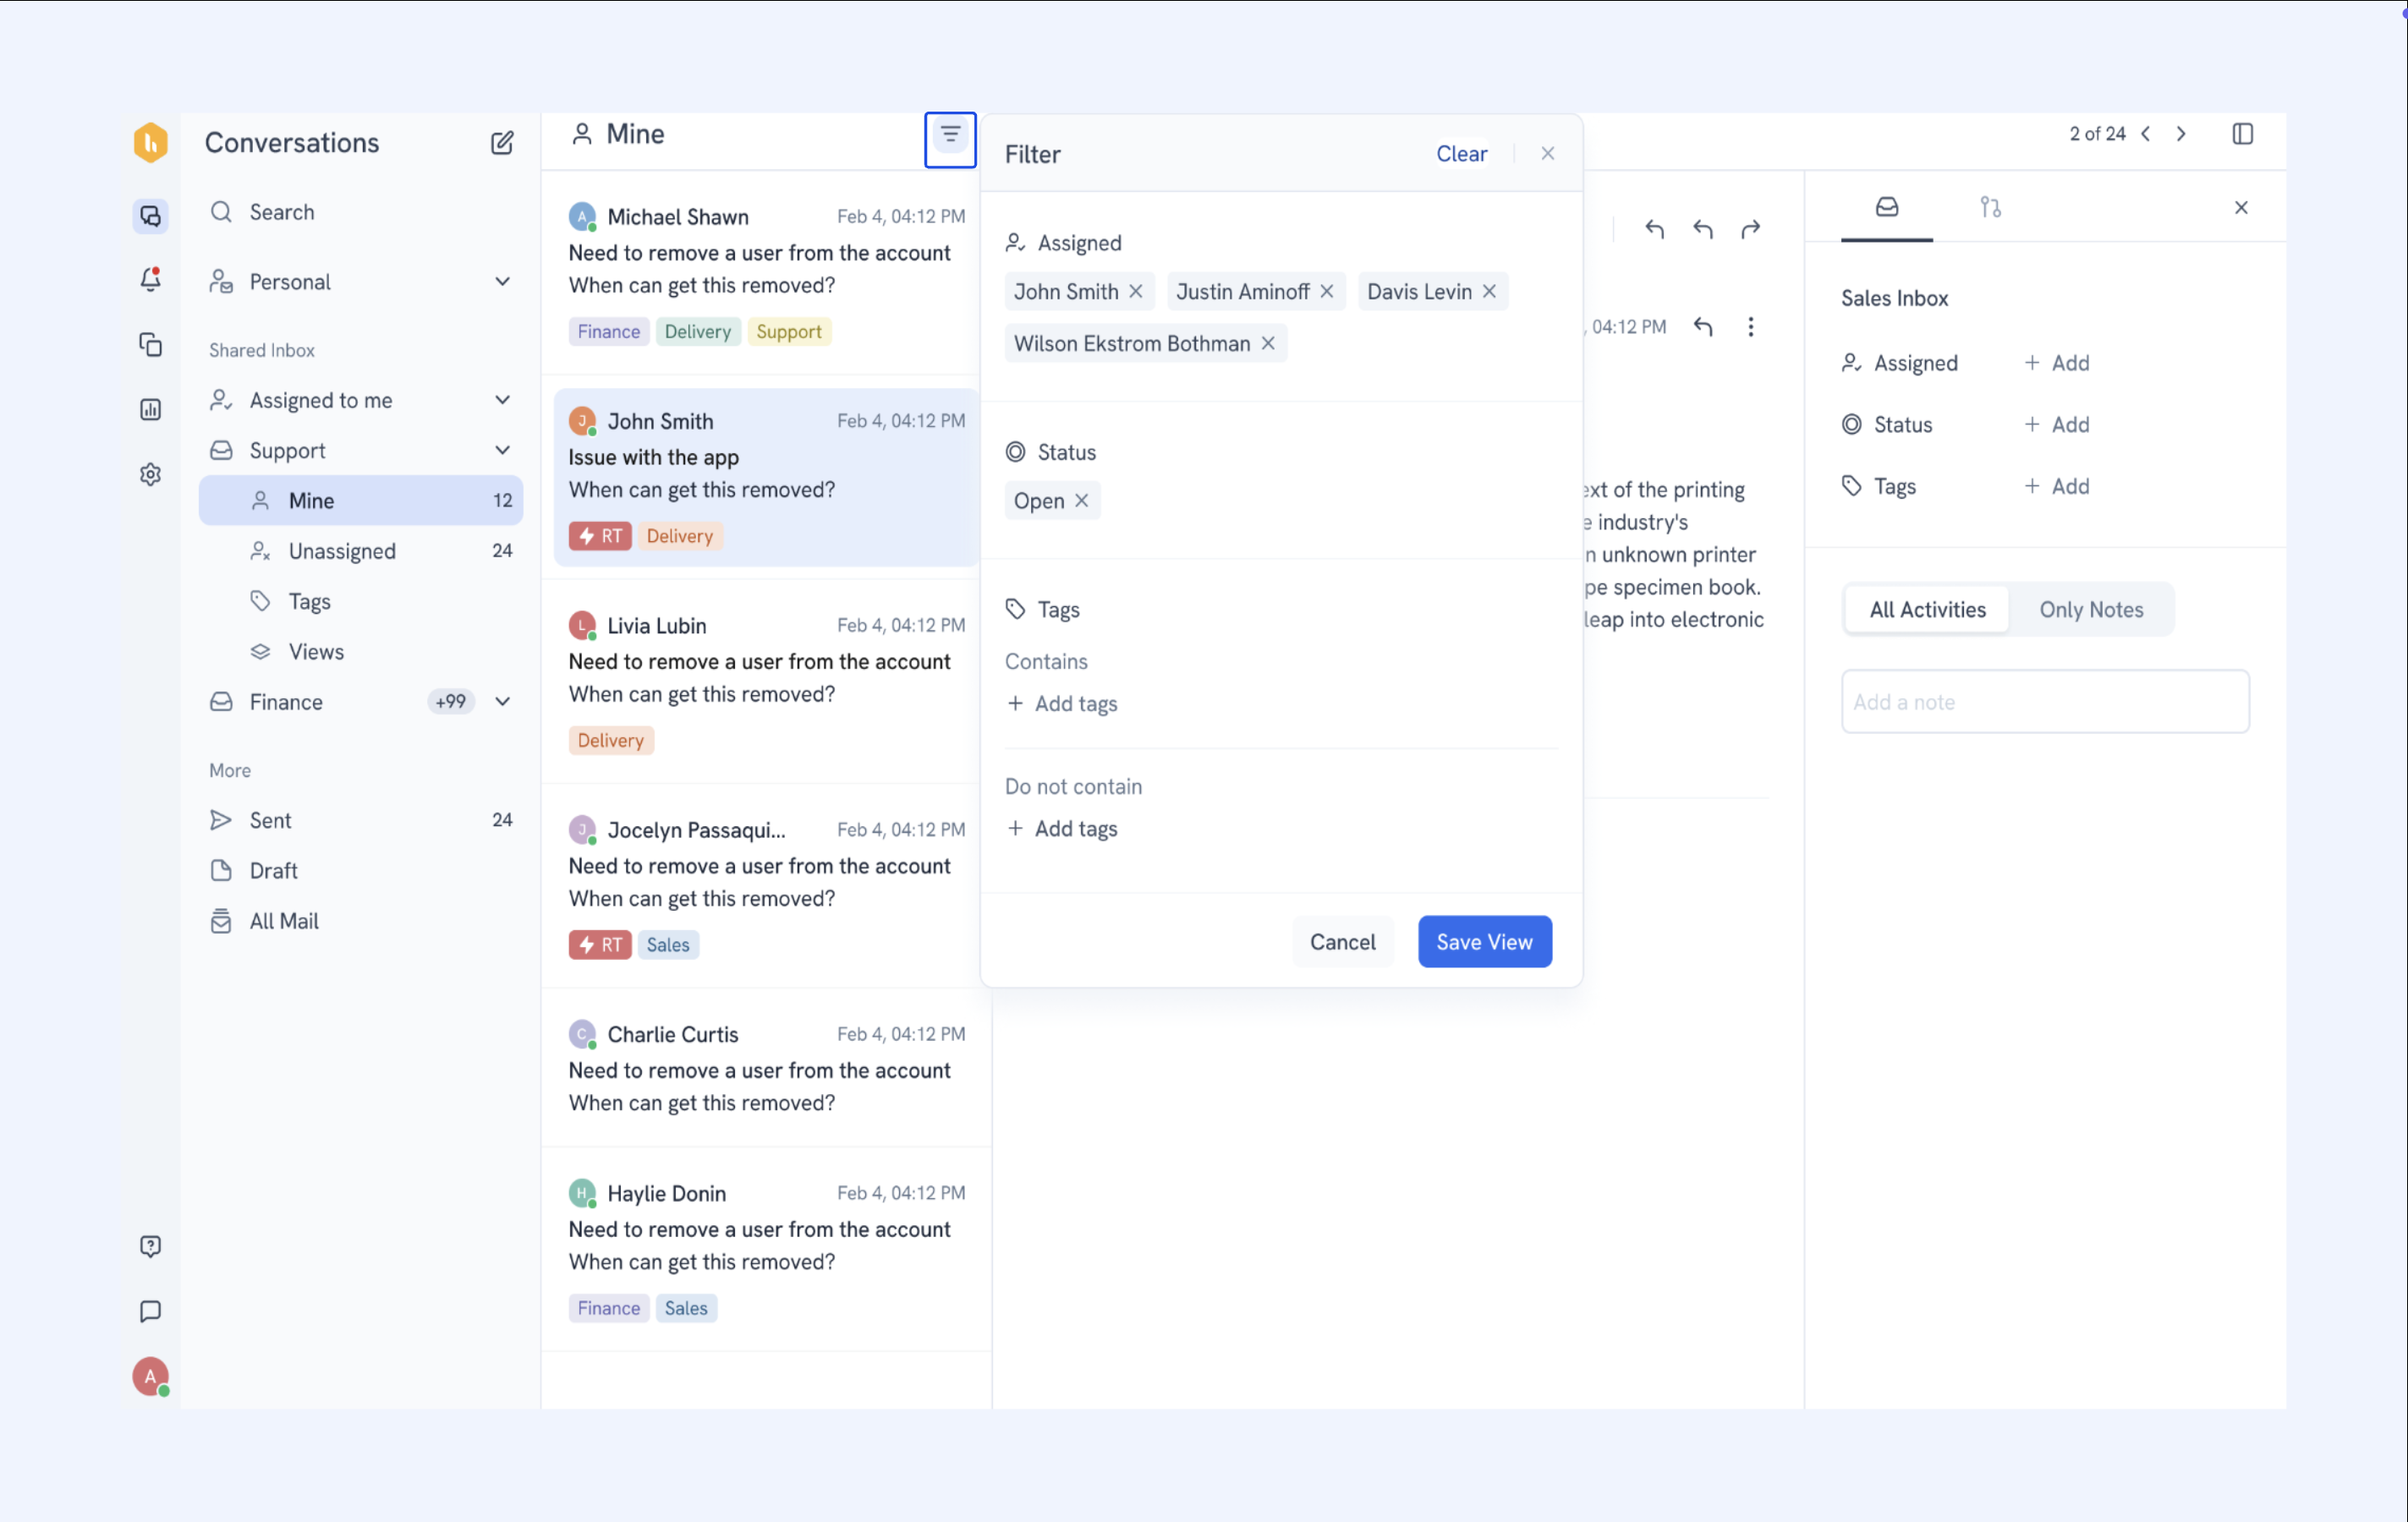
Click on the filter icon to open the filter panel. You can refine your conversation list using the following filters:
- Assignee – Filter by one or more assigned team members.
- Status – Narrow down by conversation status.
- Tags – Include or exclude conversations based on specific tags.
Need help?
If you face any issues enabling or using the Hiver Layout Settings, reach out to our support team. We’re here to help you get the most out of Hiver.