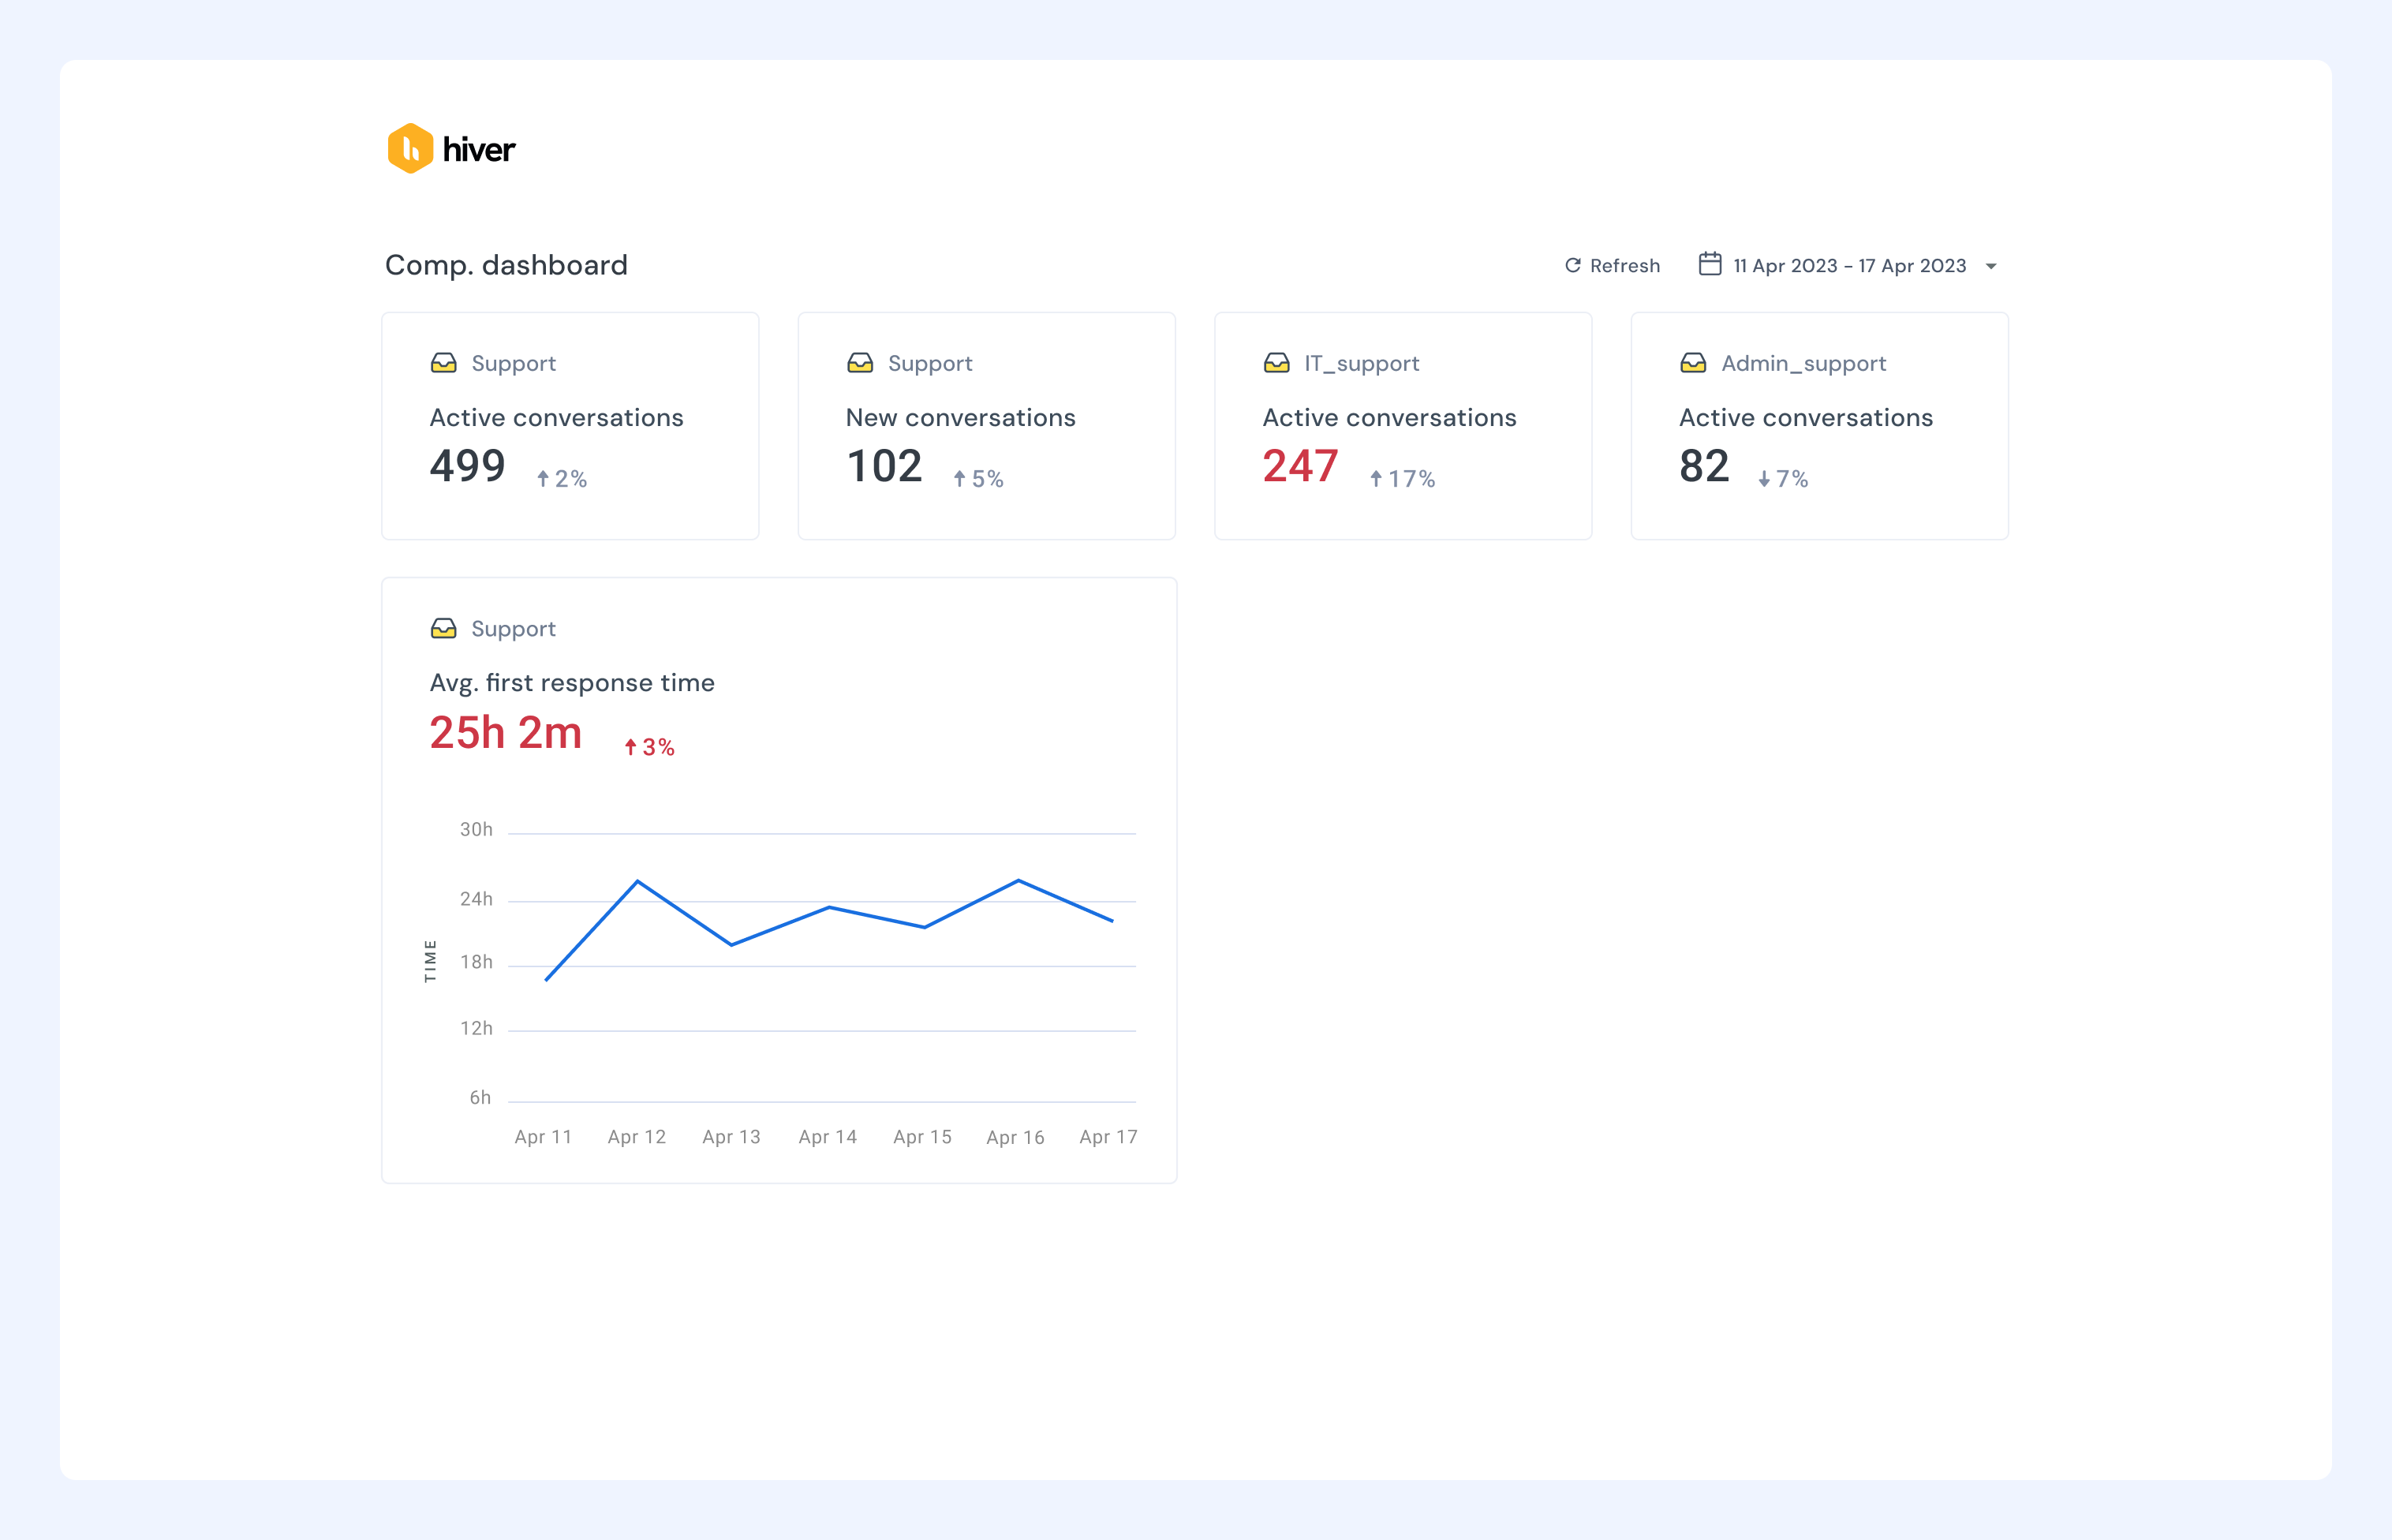
Custom Dashboards
Custom Dashboards offers you a centralized hub to monitor metrics and performance across Shared Inboxes. Instead of checking each inbox separately, you can now track essential metrics and analyze team performance from one place.
You can create Custom Dashboards to:
- Get a consolidated view of all metrics in one place.
- Access detailed reports about your email workflow and analyze trends over time.
- Compare performance across different teams or departments simultaneously.
- Evaluate workload distribution and team efficiency.
Note: Custom Dashboards are currently available for shared email inboxes only.
Creating a new Custom Dashboard
1. Go to Analytics → Dashboards → Create new dashboard.
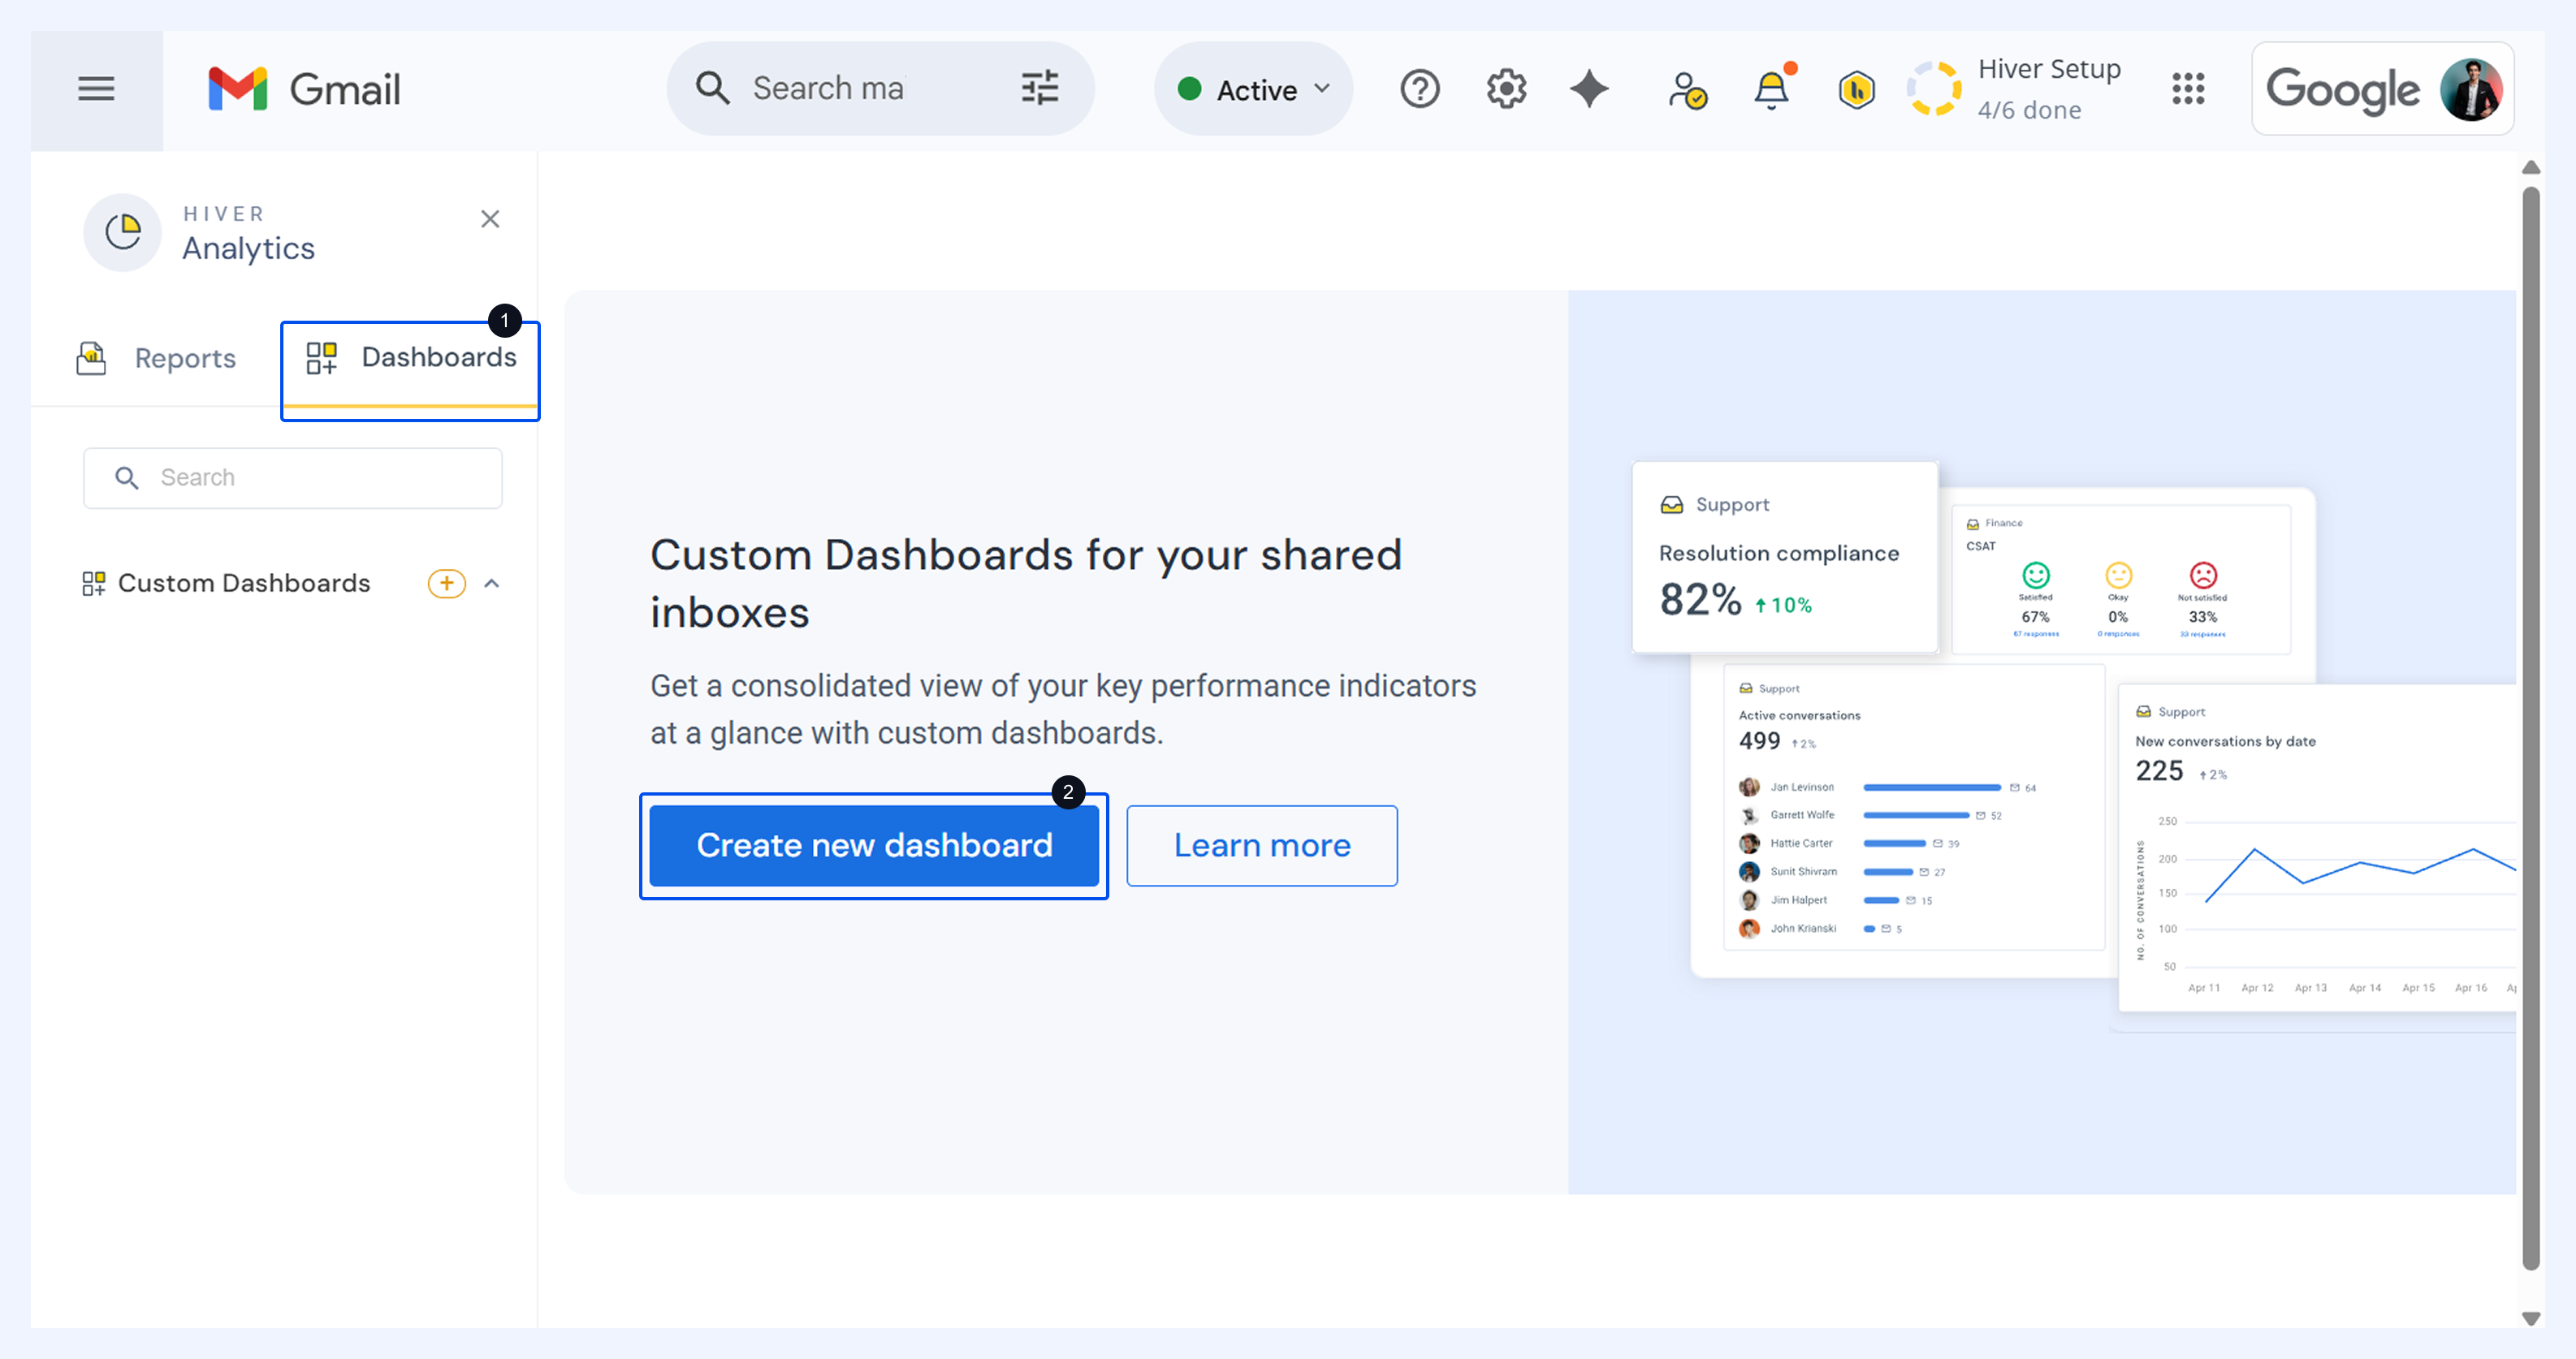
2. Enter your dashboard name and click Next. Update the date range if needed.
3. Choose from workload or performance metrics depending on what you want to track.
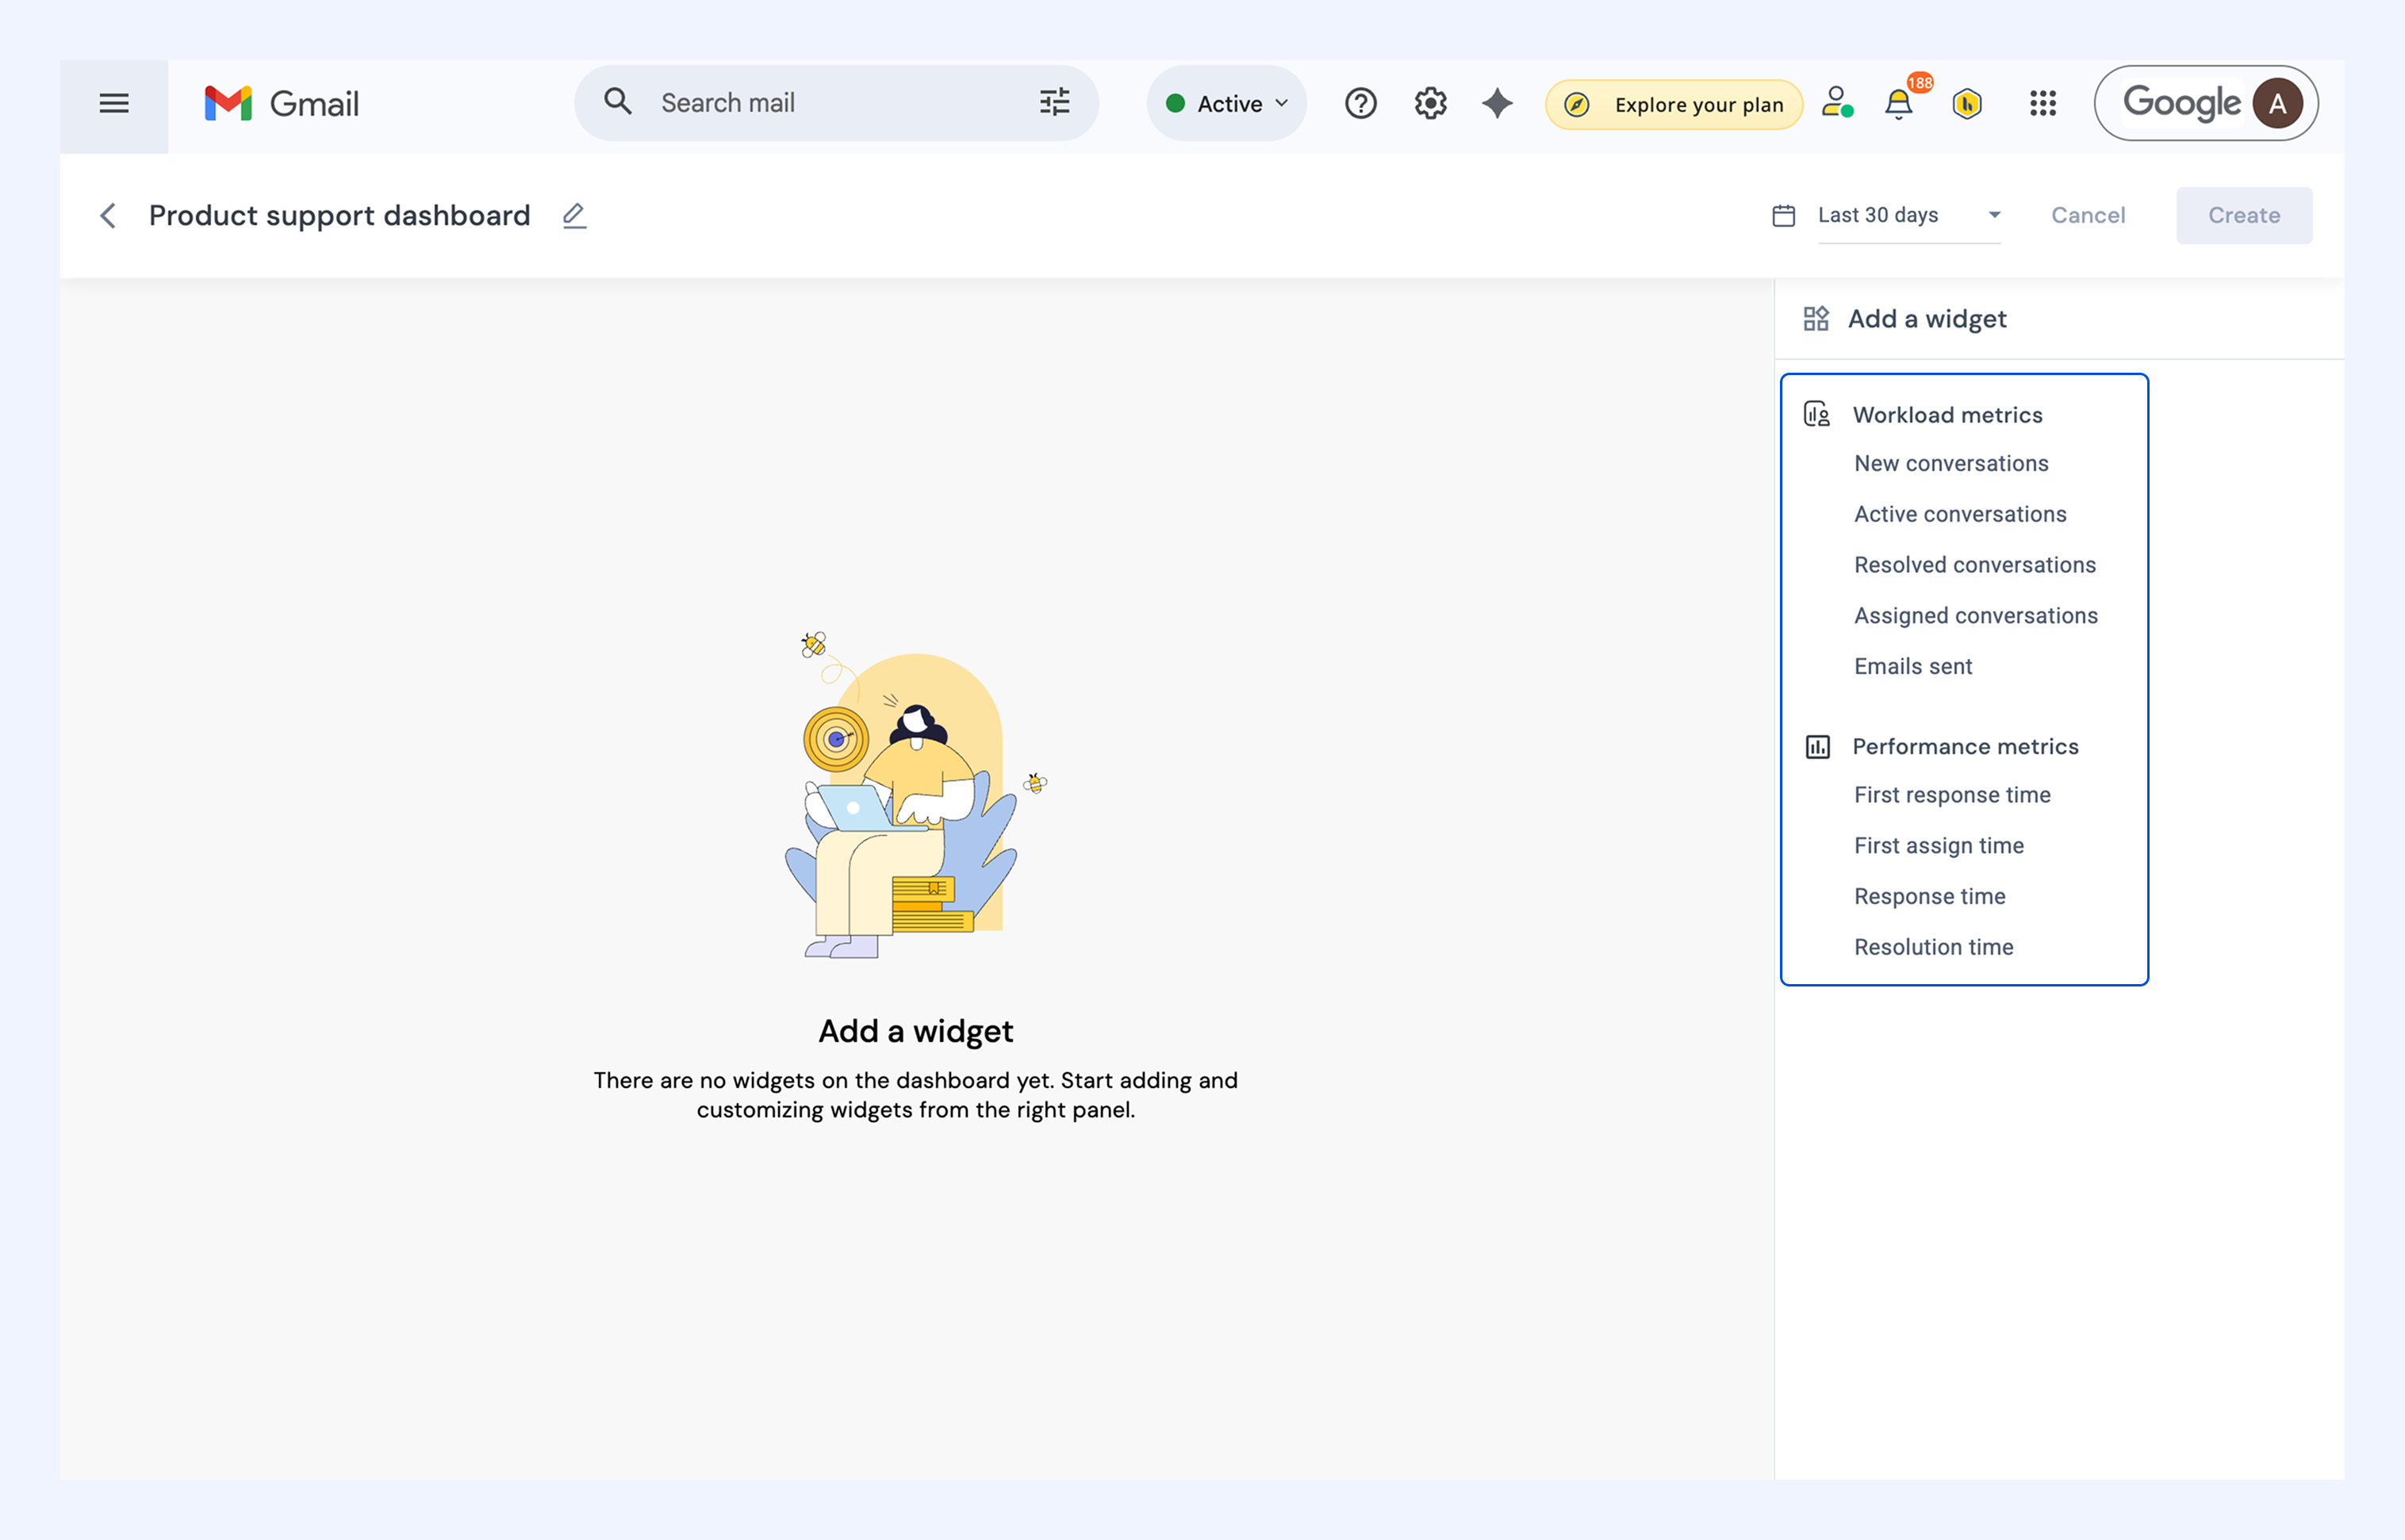
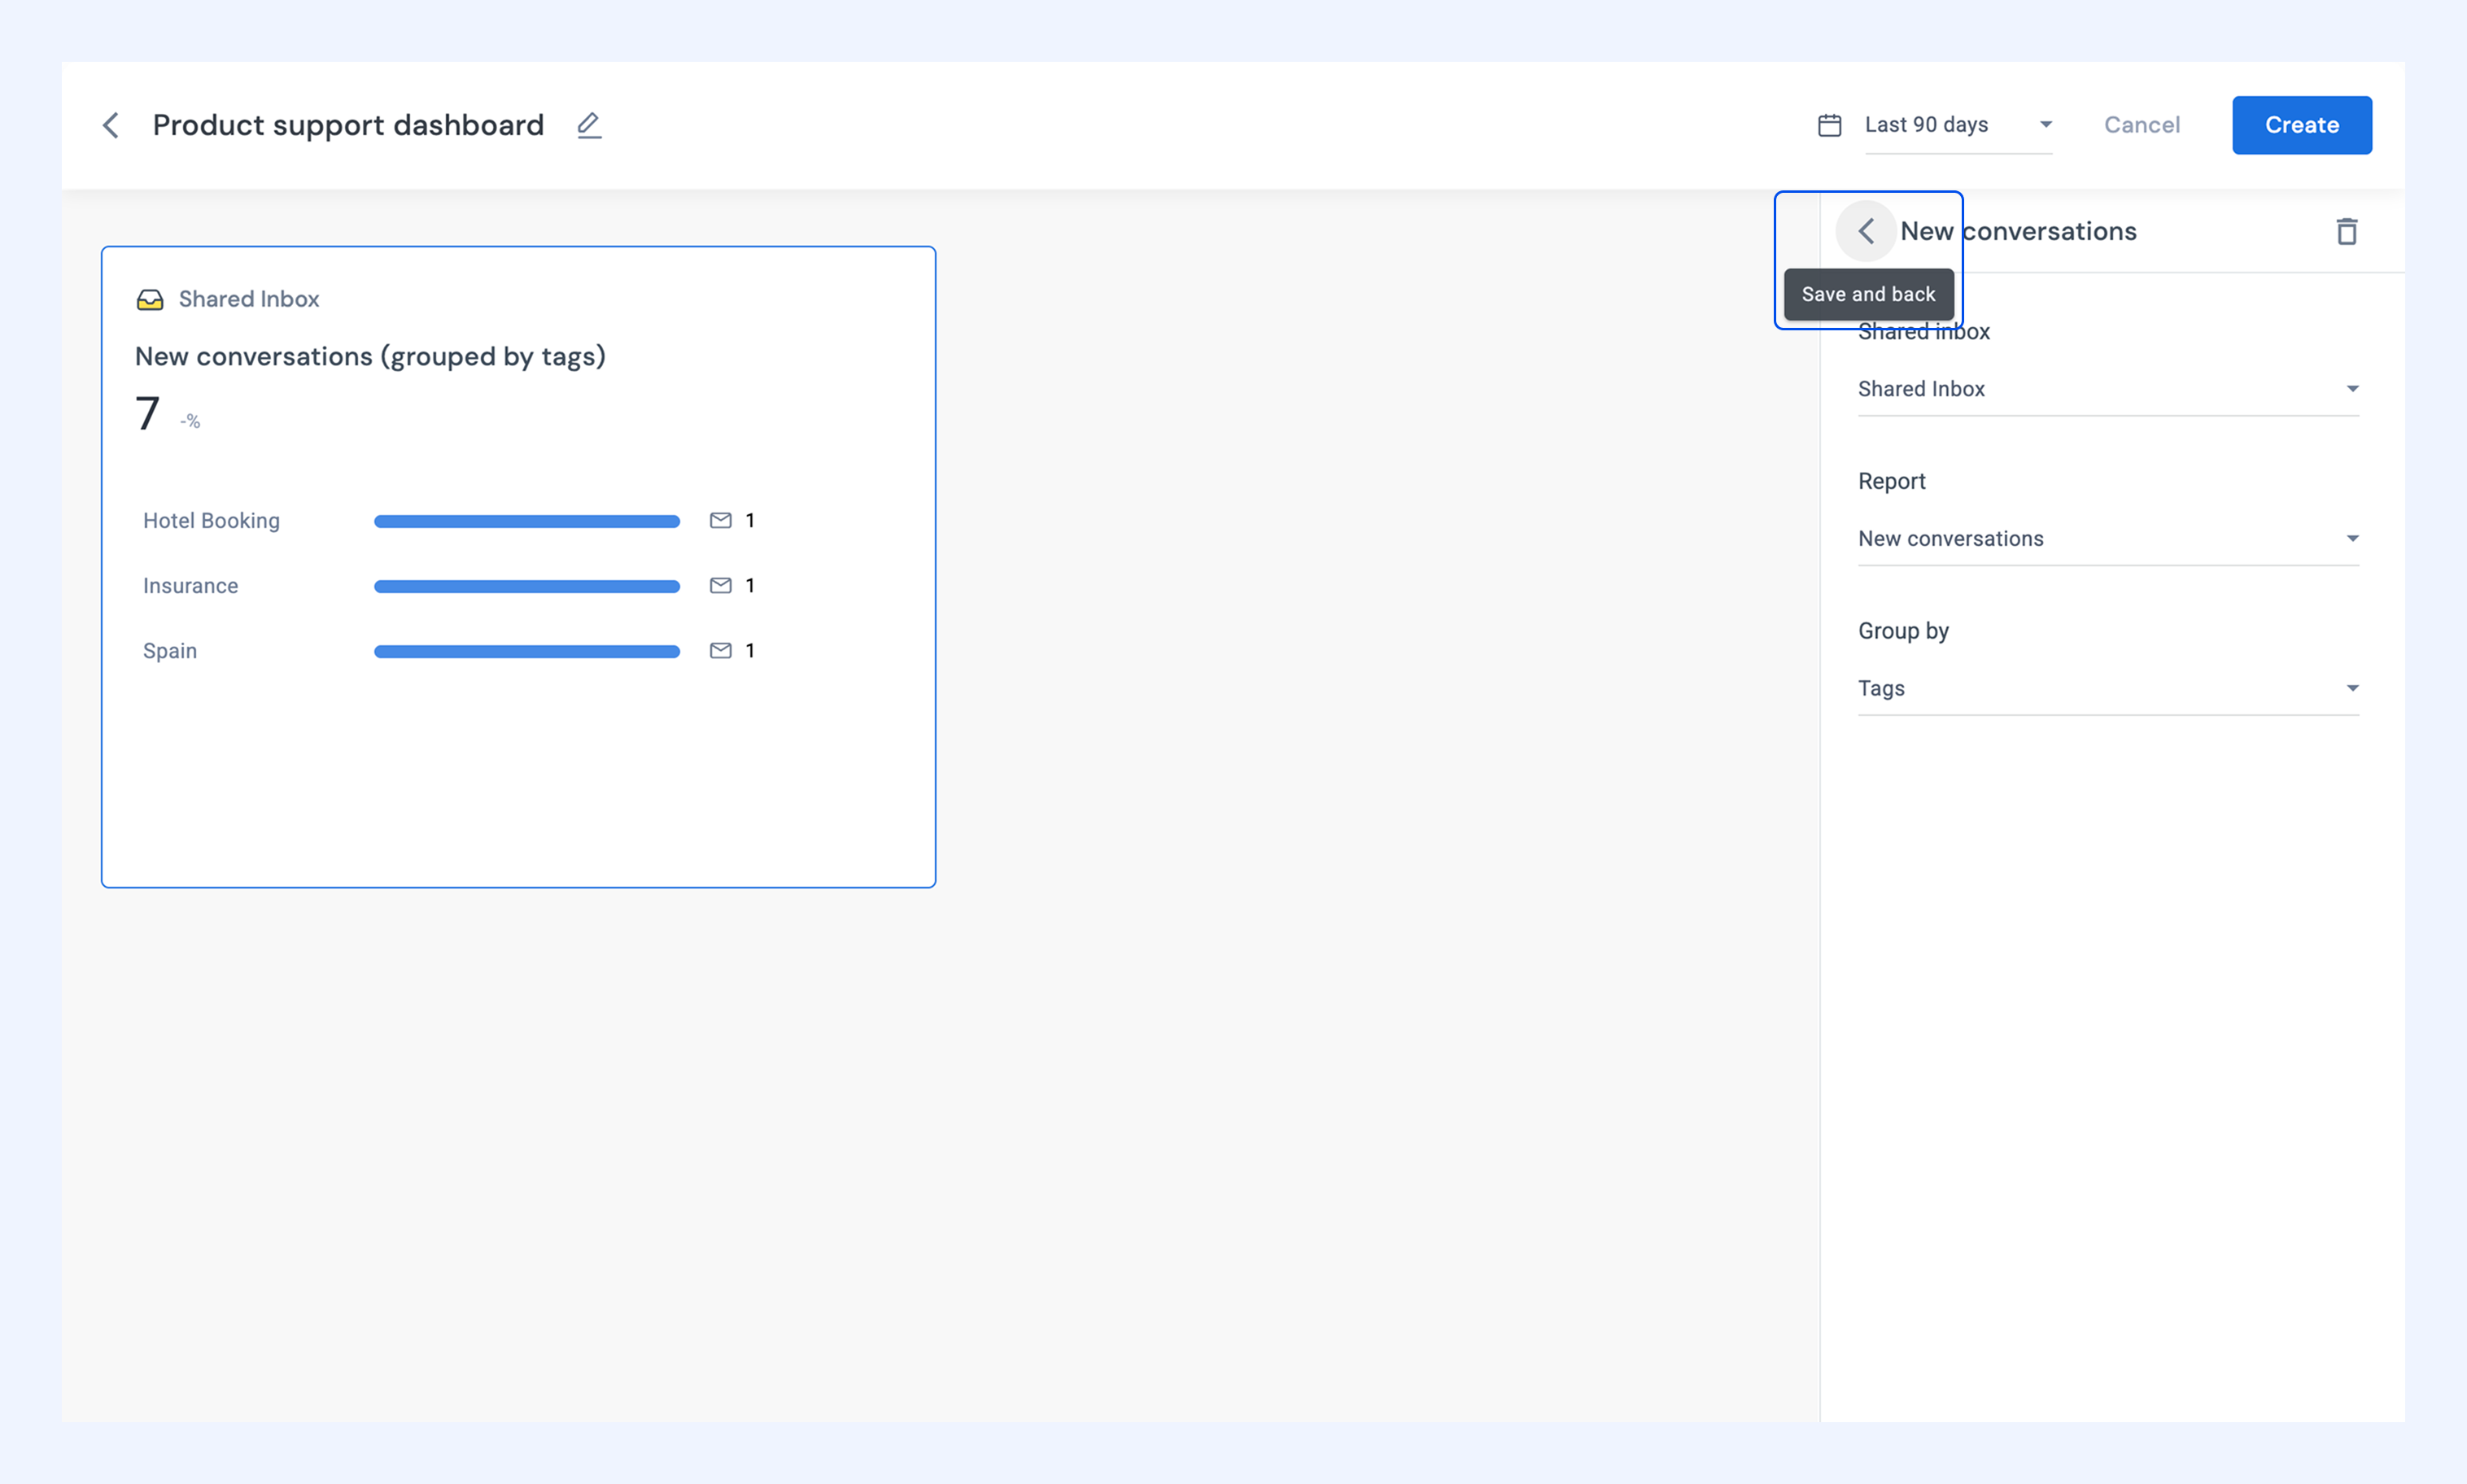
4. For the metric selected,
- Select the Shared Inboxes from the dropdown menu.
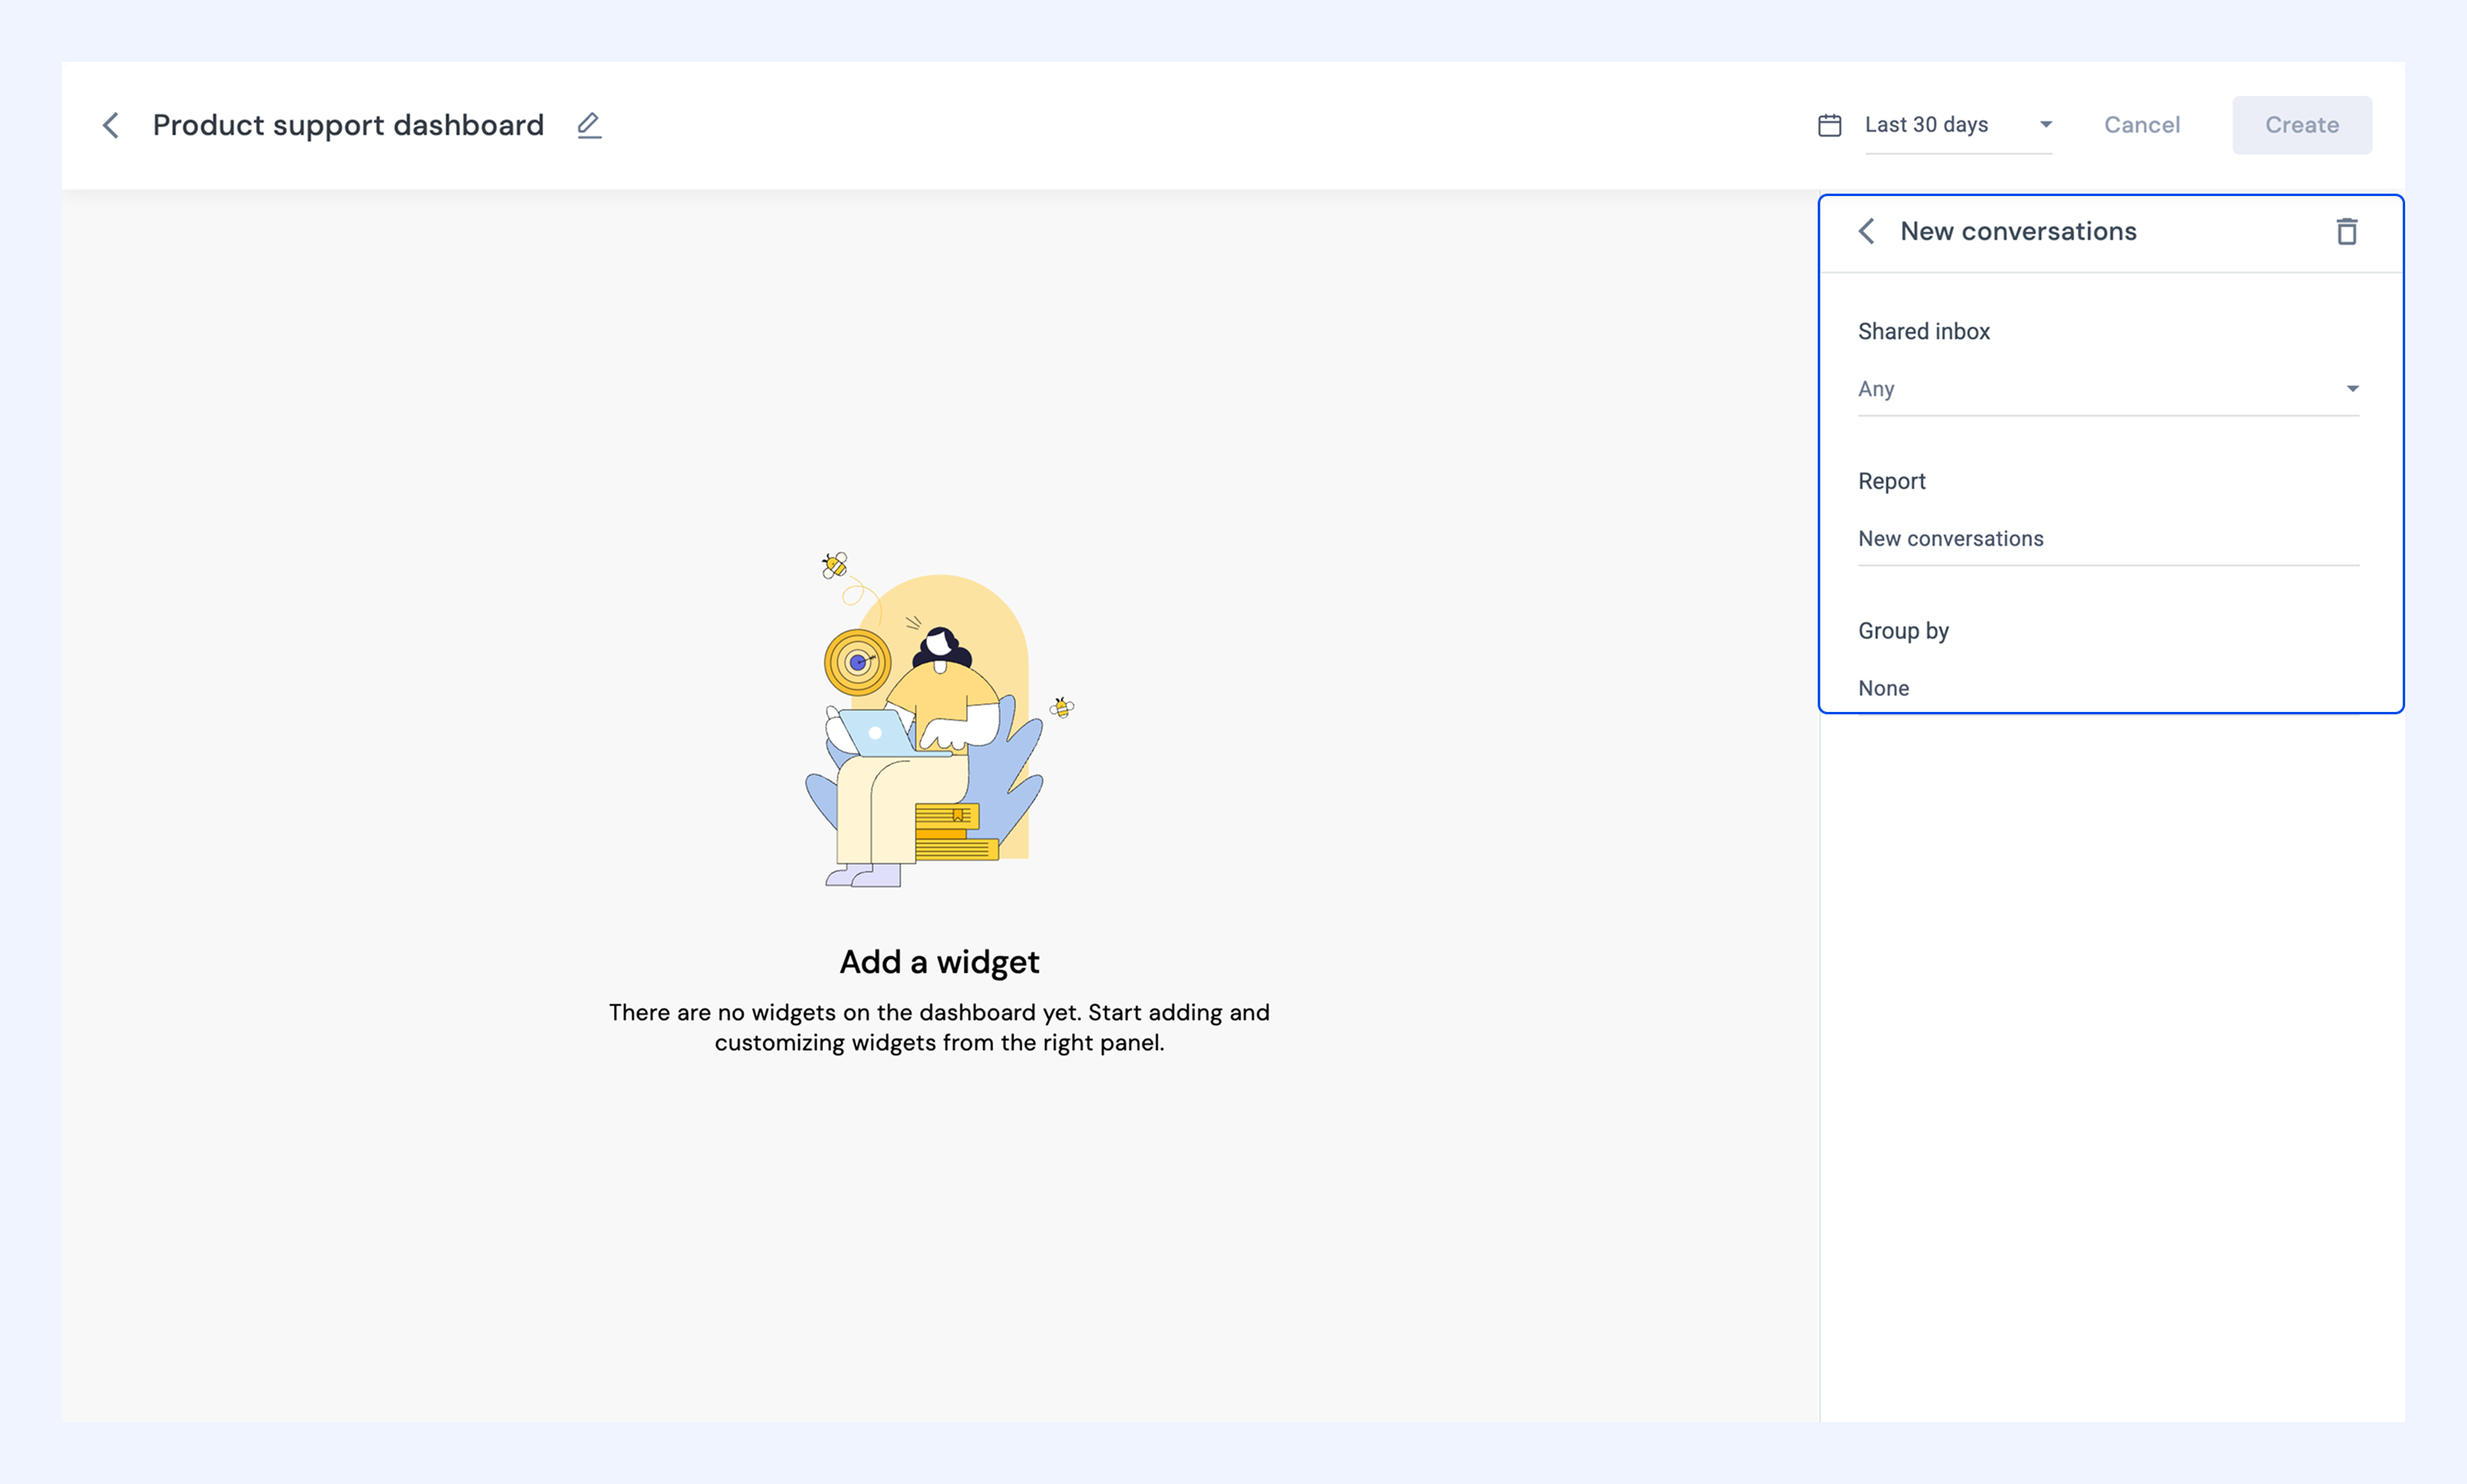
- Add a report: You can keep the default report for the metric or add a custom report.
- Use Group by to organize data by assignee, tags, date, or other relevant categories.
5. Once you’re done, click the back arrow to save and go back.
6. Repeat this process to add more metrics as needed.
7. Click Create to save your Custom Dashboard.
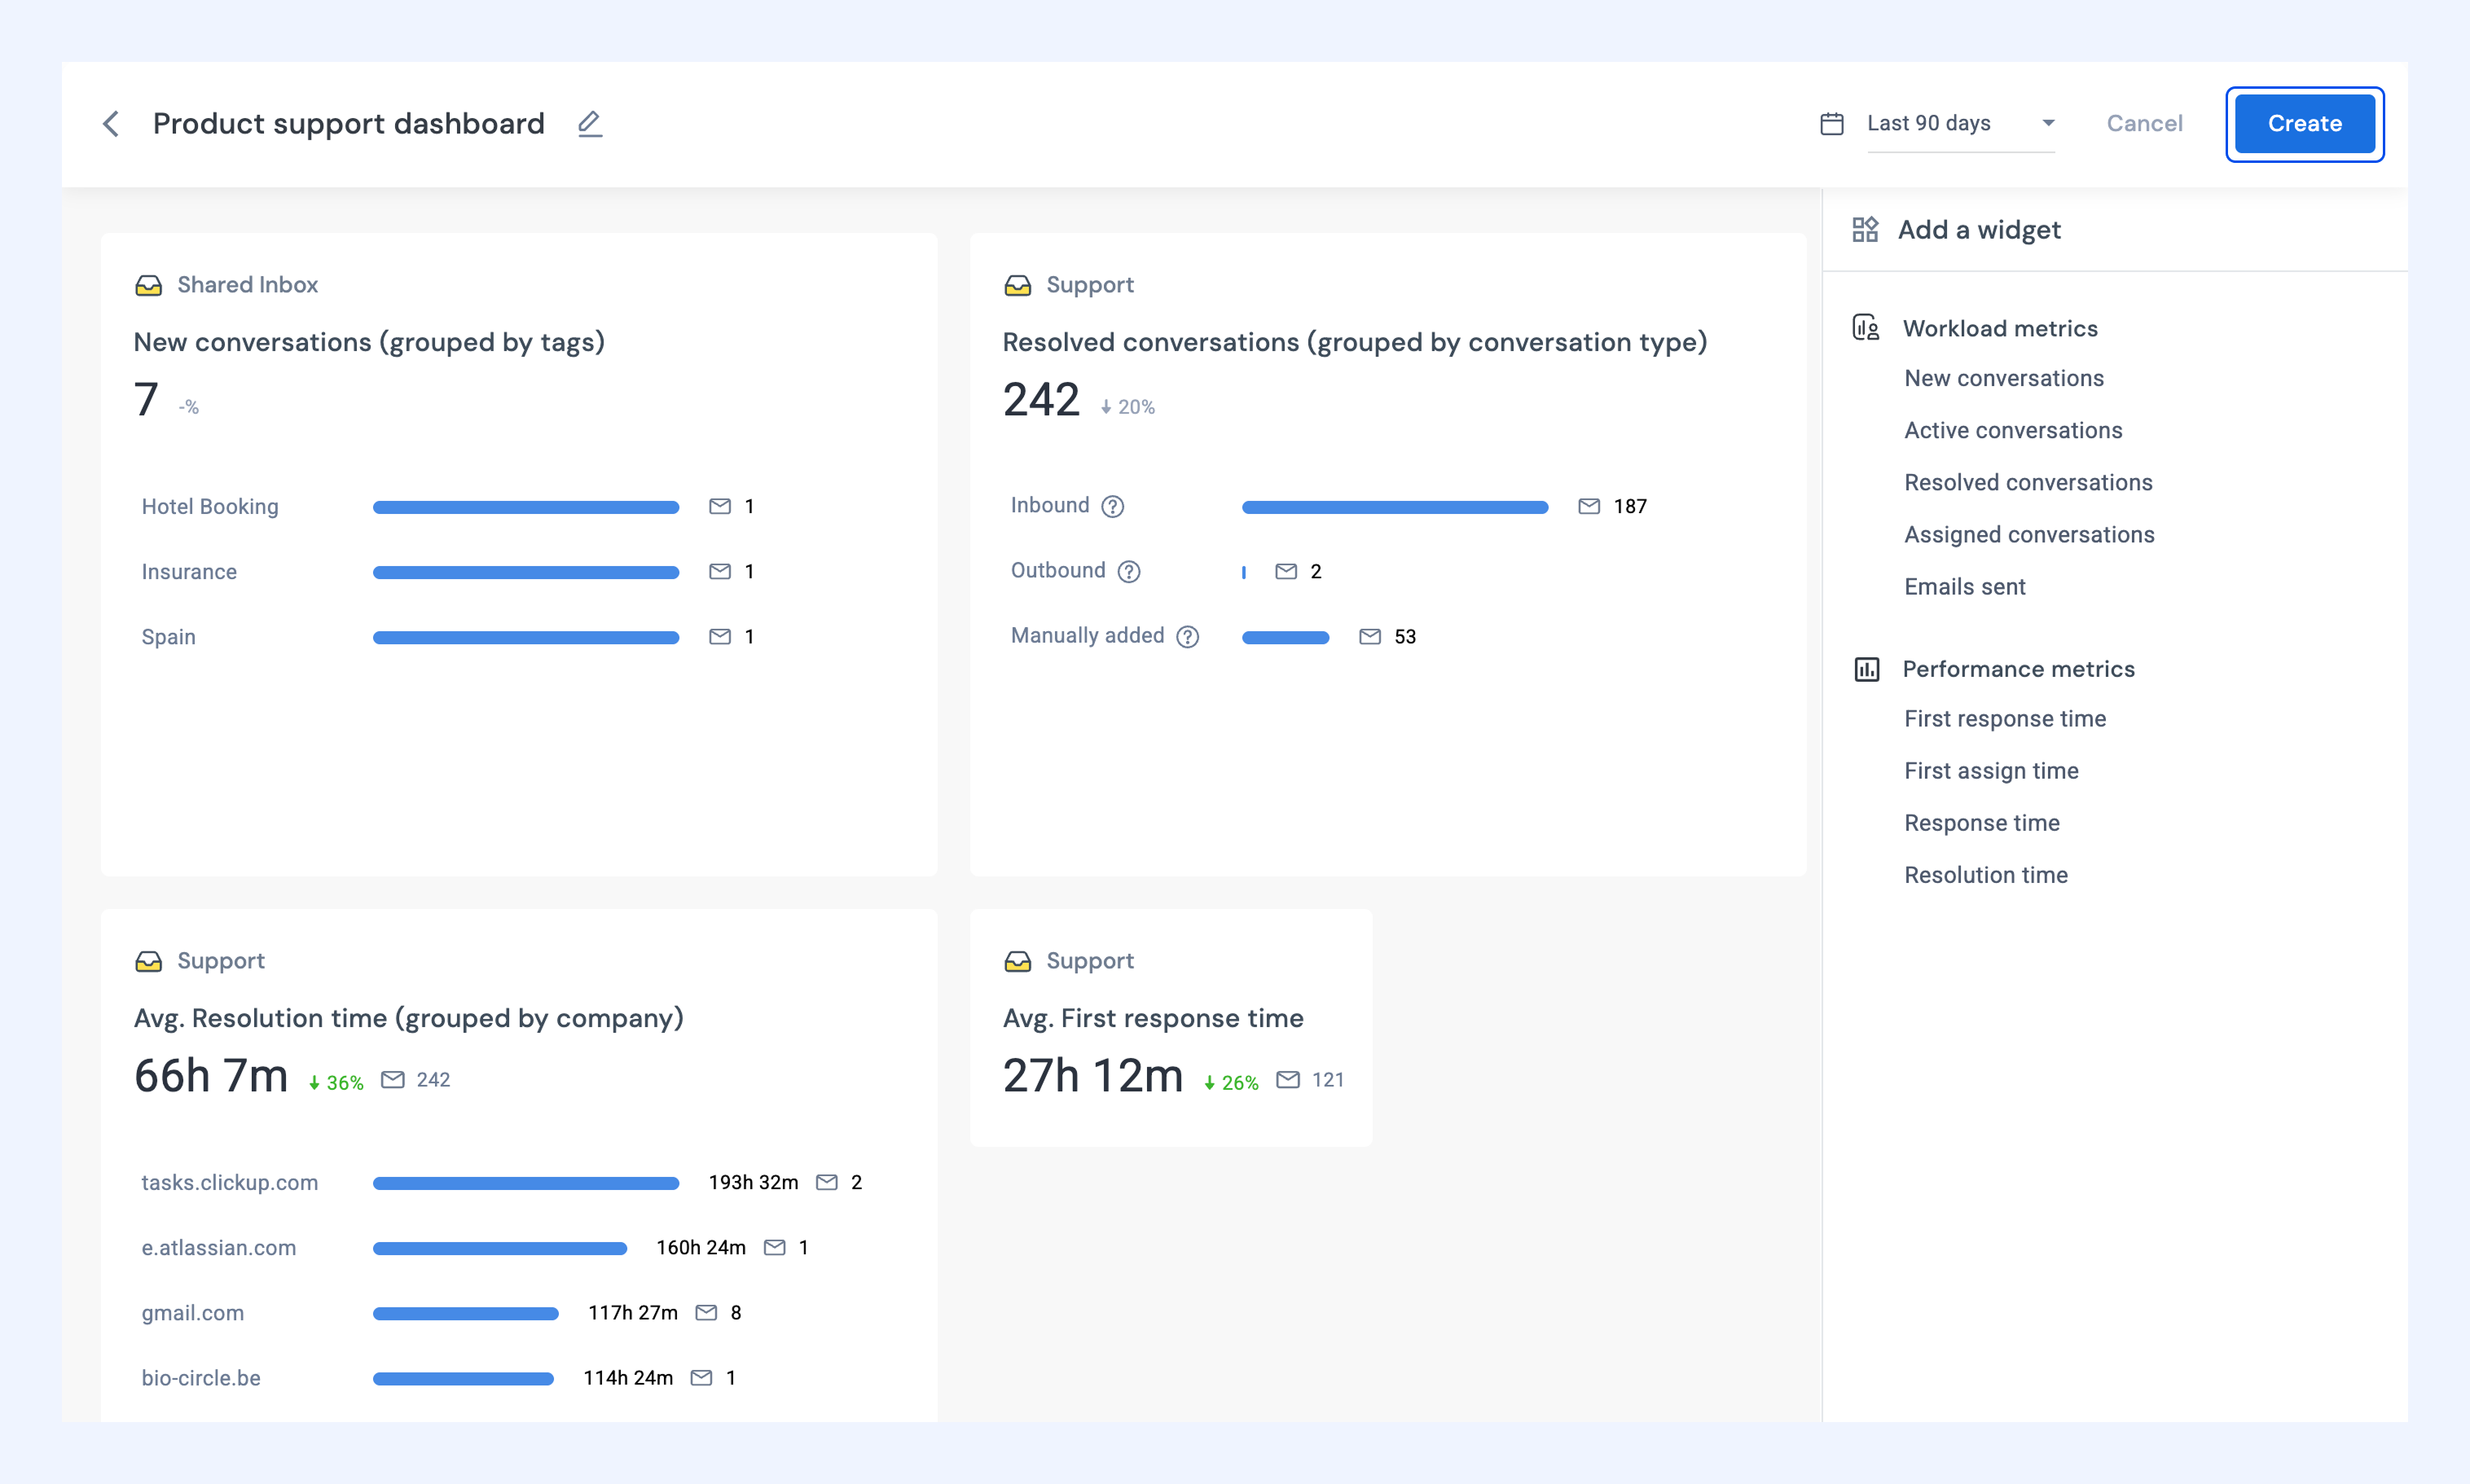
Your dashboard will be created and accessible under Custom Dashboards. To create more Custom Dashboards, Go to Analytics → Dashboards → Custom Dashboards → + (New Dashboard).
Note: After setting up a dashboard, you can click on any widget to view the detailed report.
Managing your Custom Dashboards
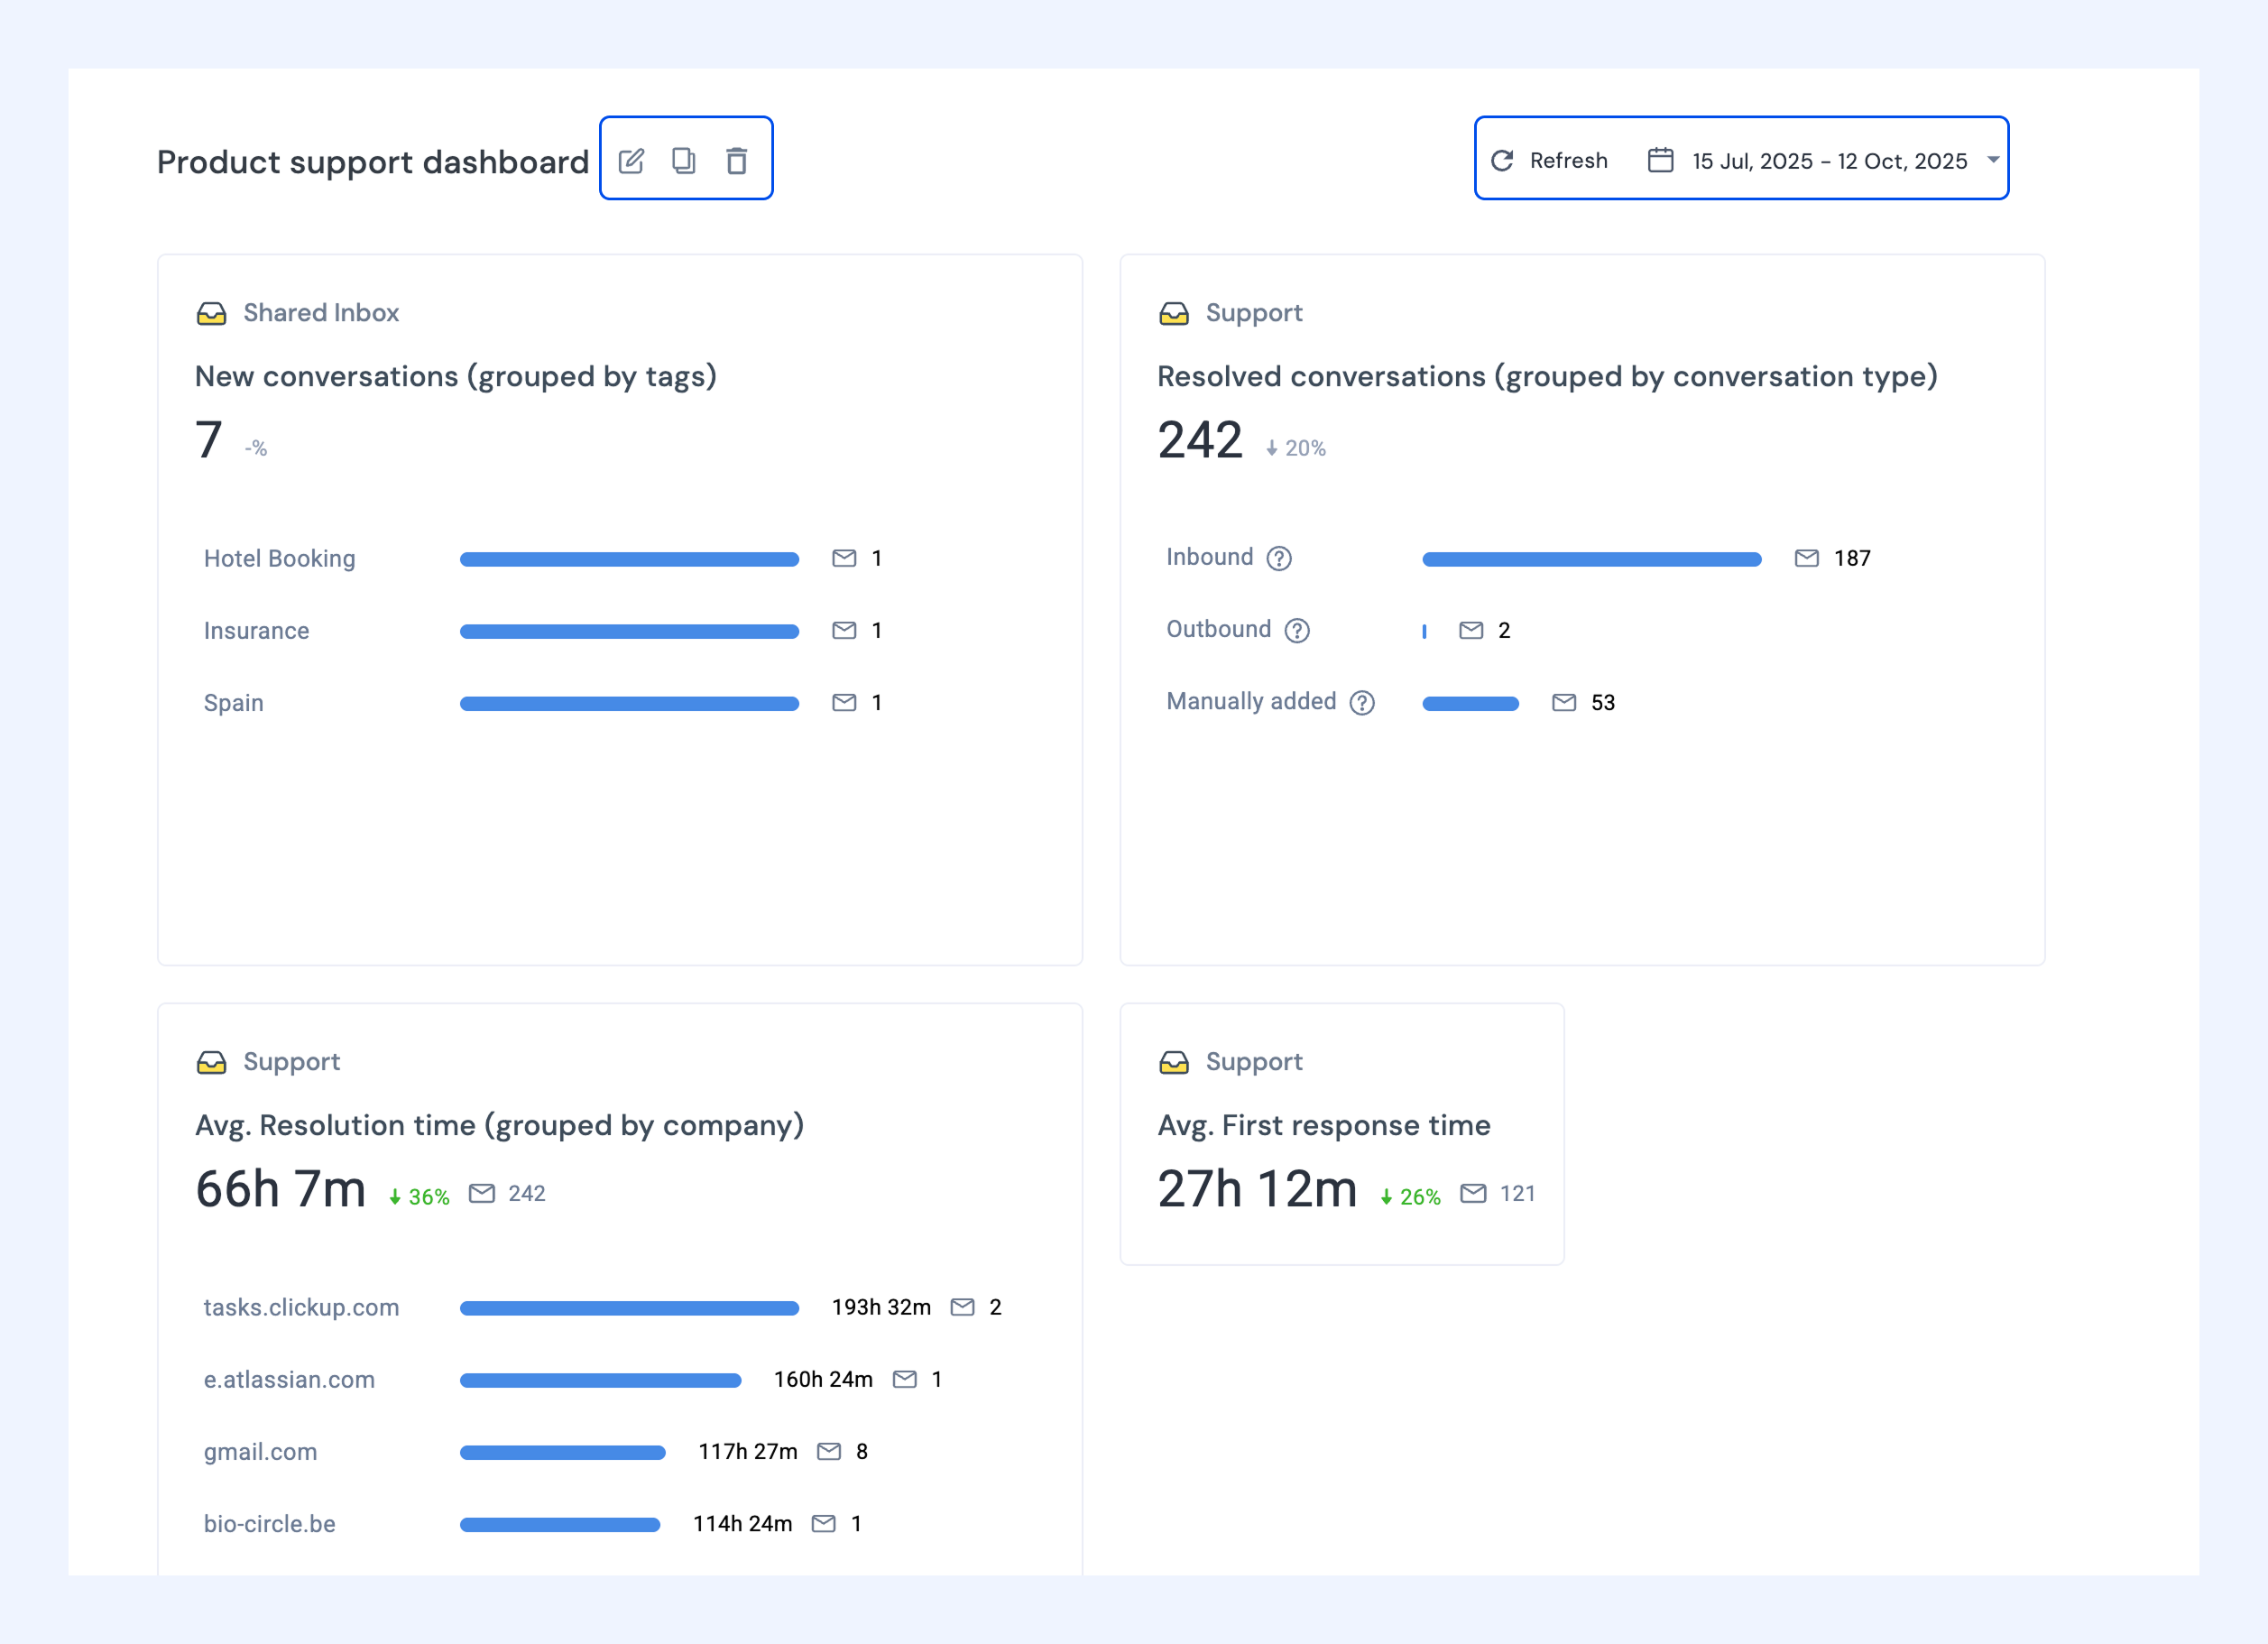
- Edit: Click the pencil icon to modify your existing dashboard and update widgets or settings.
- Clone: Use the Clone icon to duplicate a dashboard and create variations for different teams or purposes.
- Delete: Select the bin icon to remove dashboards you no longer need permanently.
- Refresh: Click Refresh to update your dashboard with the latest data.
- Update date range: Adjust the date range to analyze data over a different period.
Publishing and sharing Dashboards
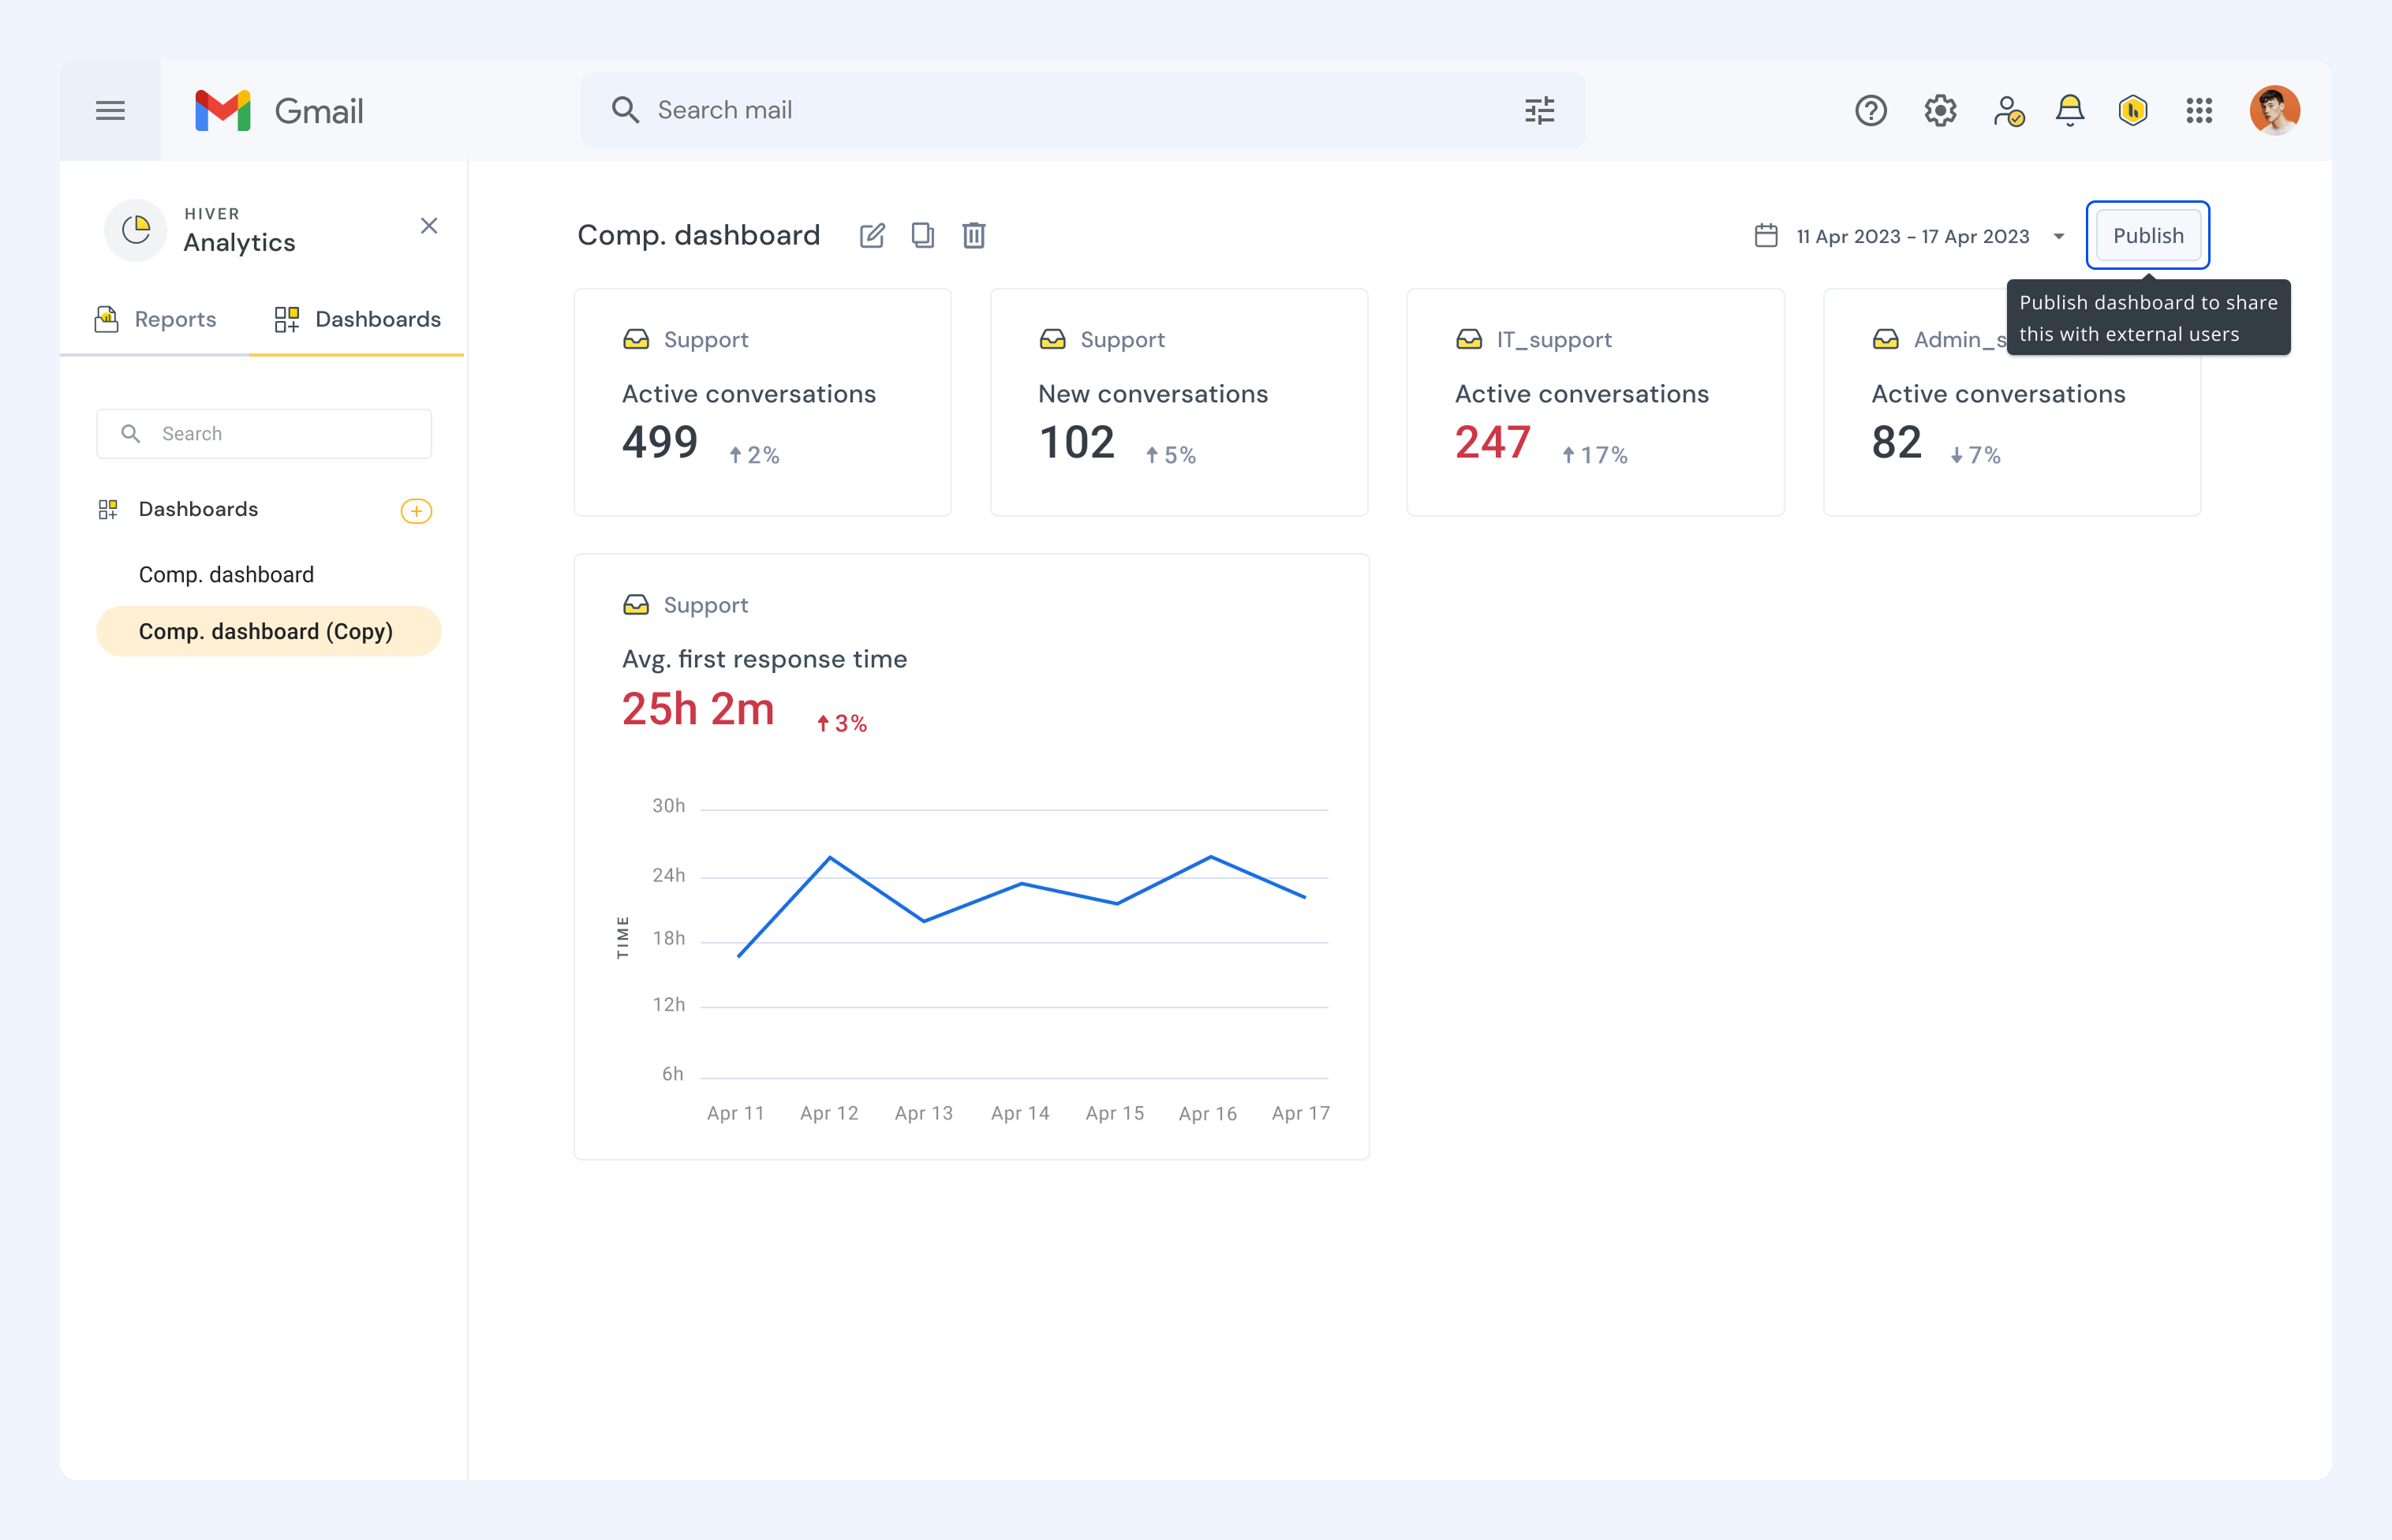
Once you've created a Custom Dashboard, you can publish it to generate a shareable link that allows anyone to view the dashboard in read-only mode.
Publishing a Dashboard
1. Open the Dashboard you want to share.
2. Click Publish.
Sharing the Dashboard link
After publishing your dashboard:
1. Click the Share icon (next to Unpublish).
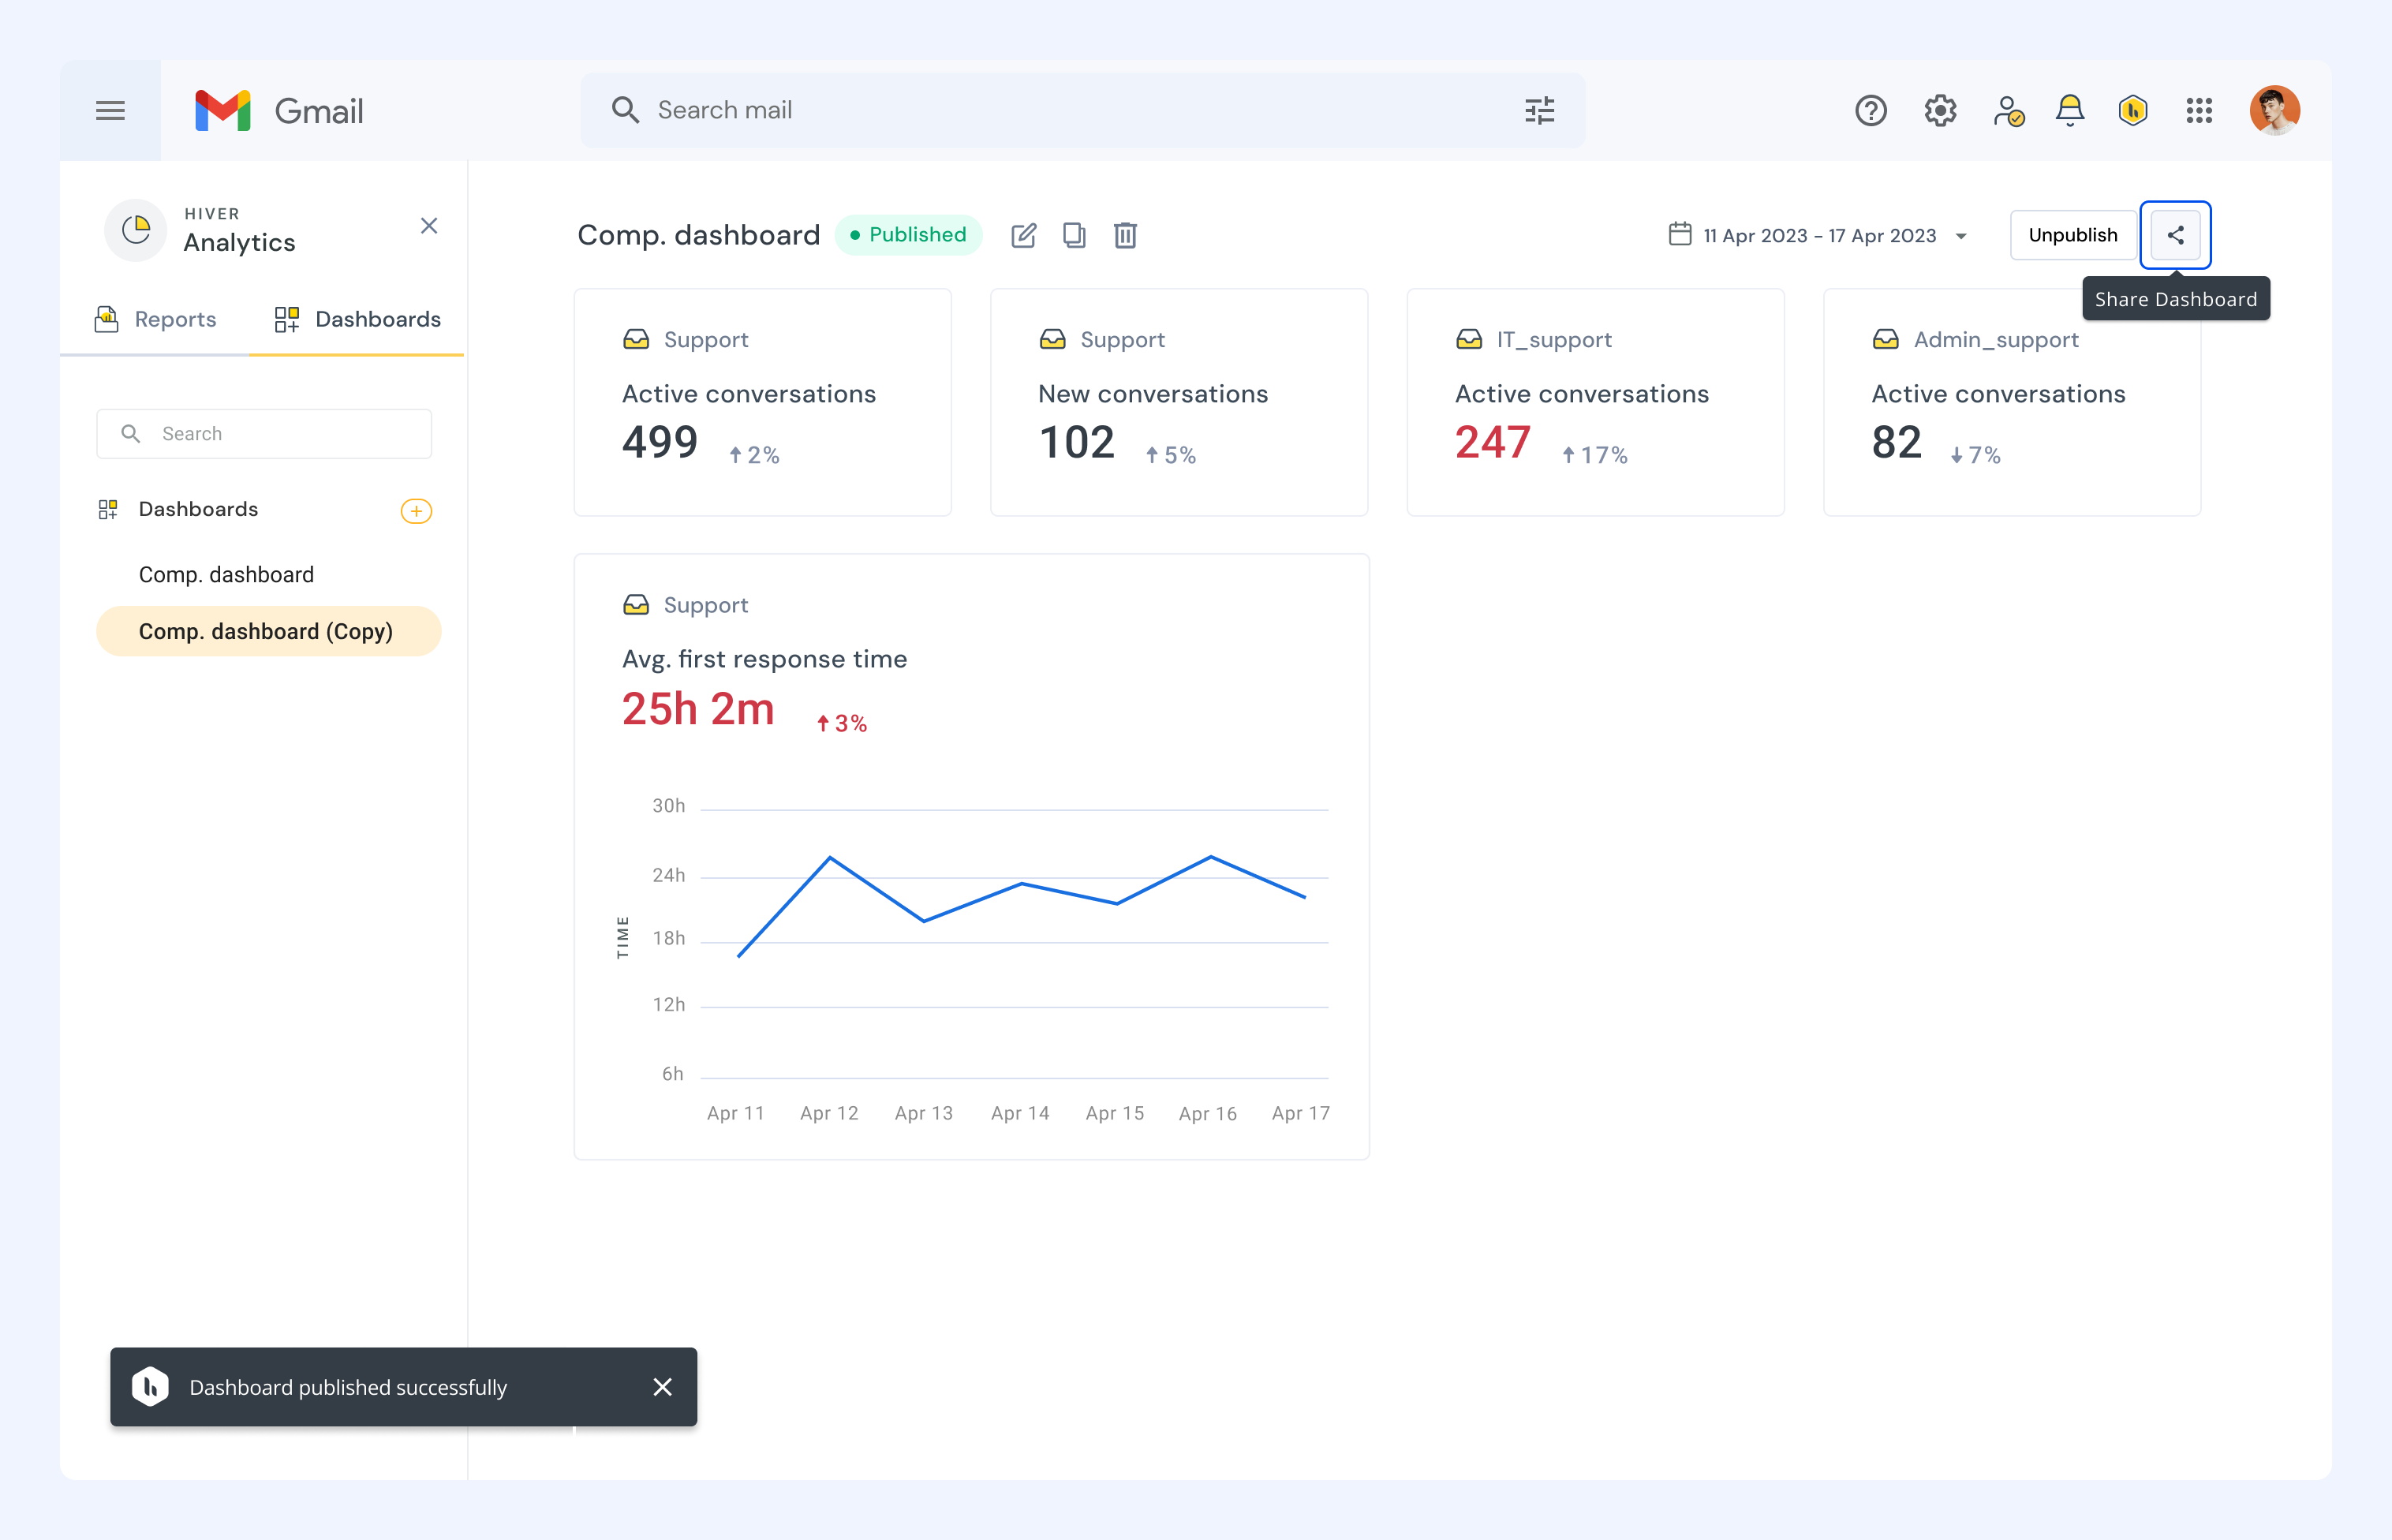
2. A dialog box will appear with a shareable link.
3. Click Copy link to copy the URL.
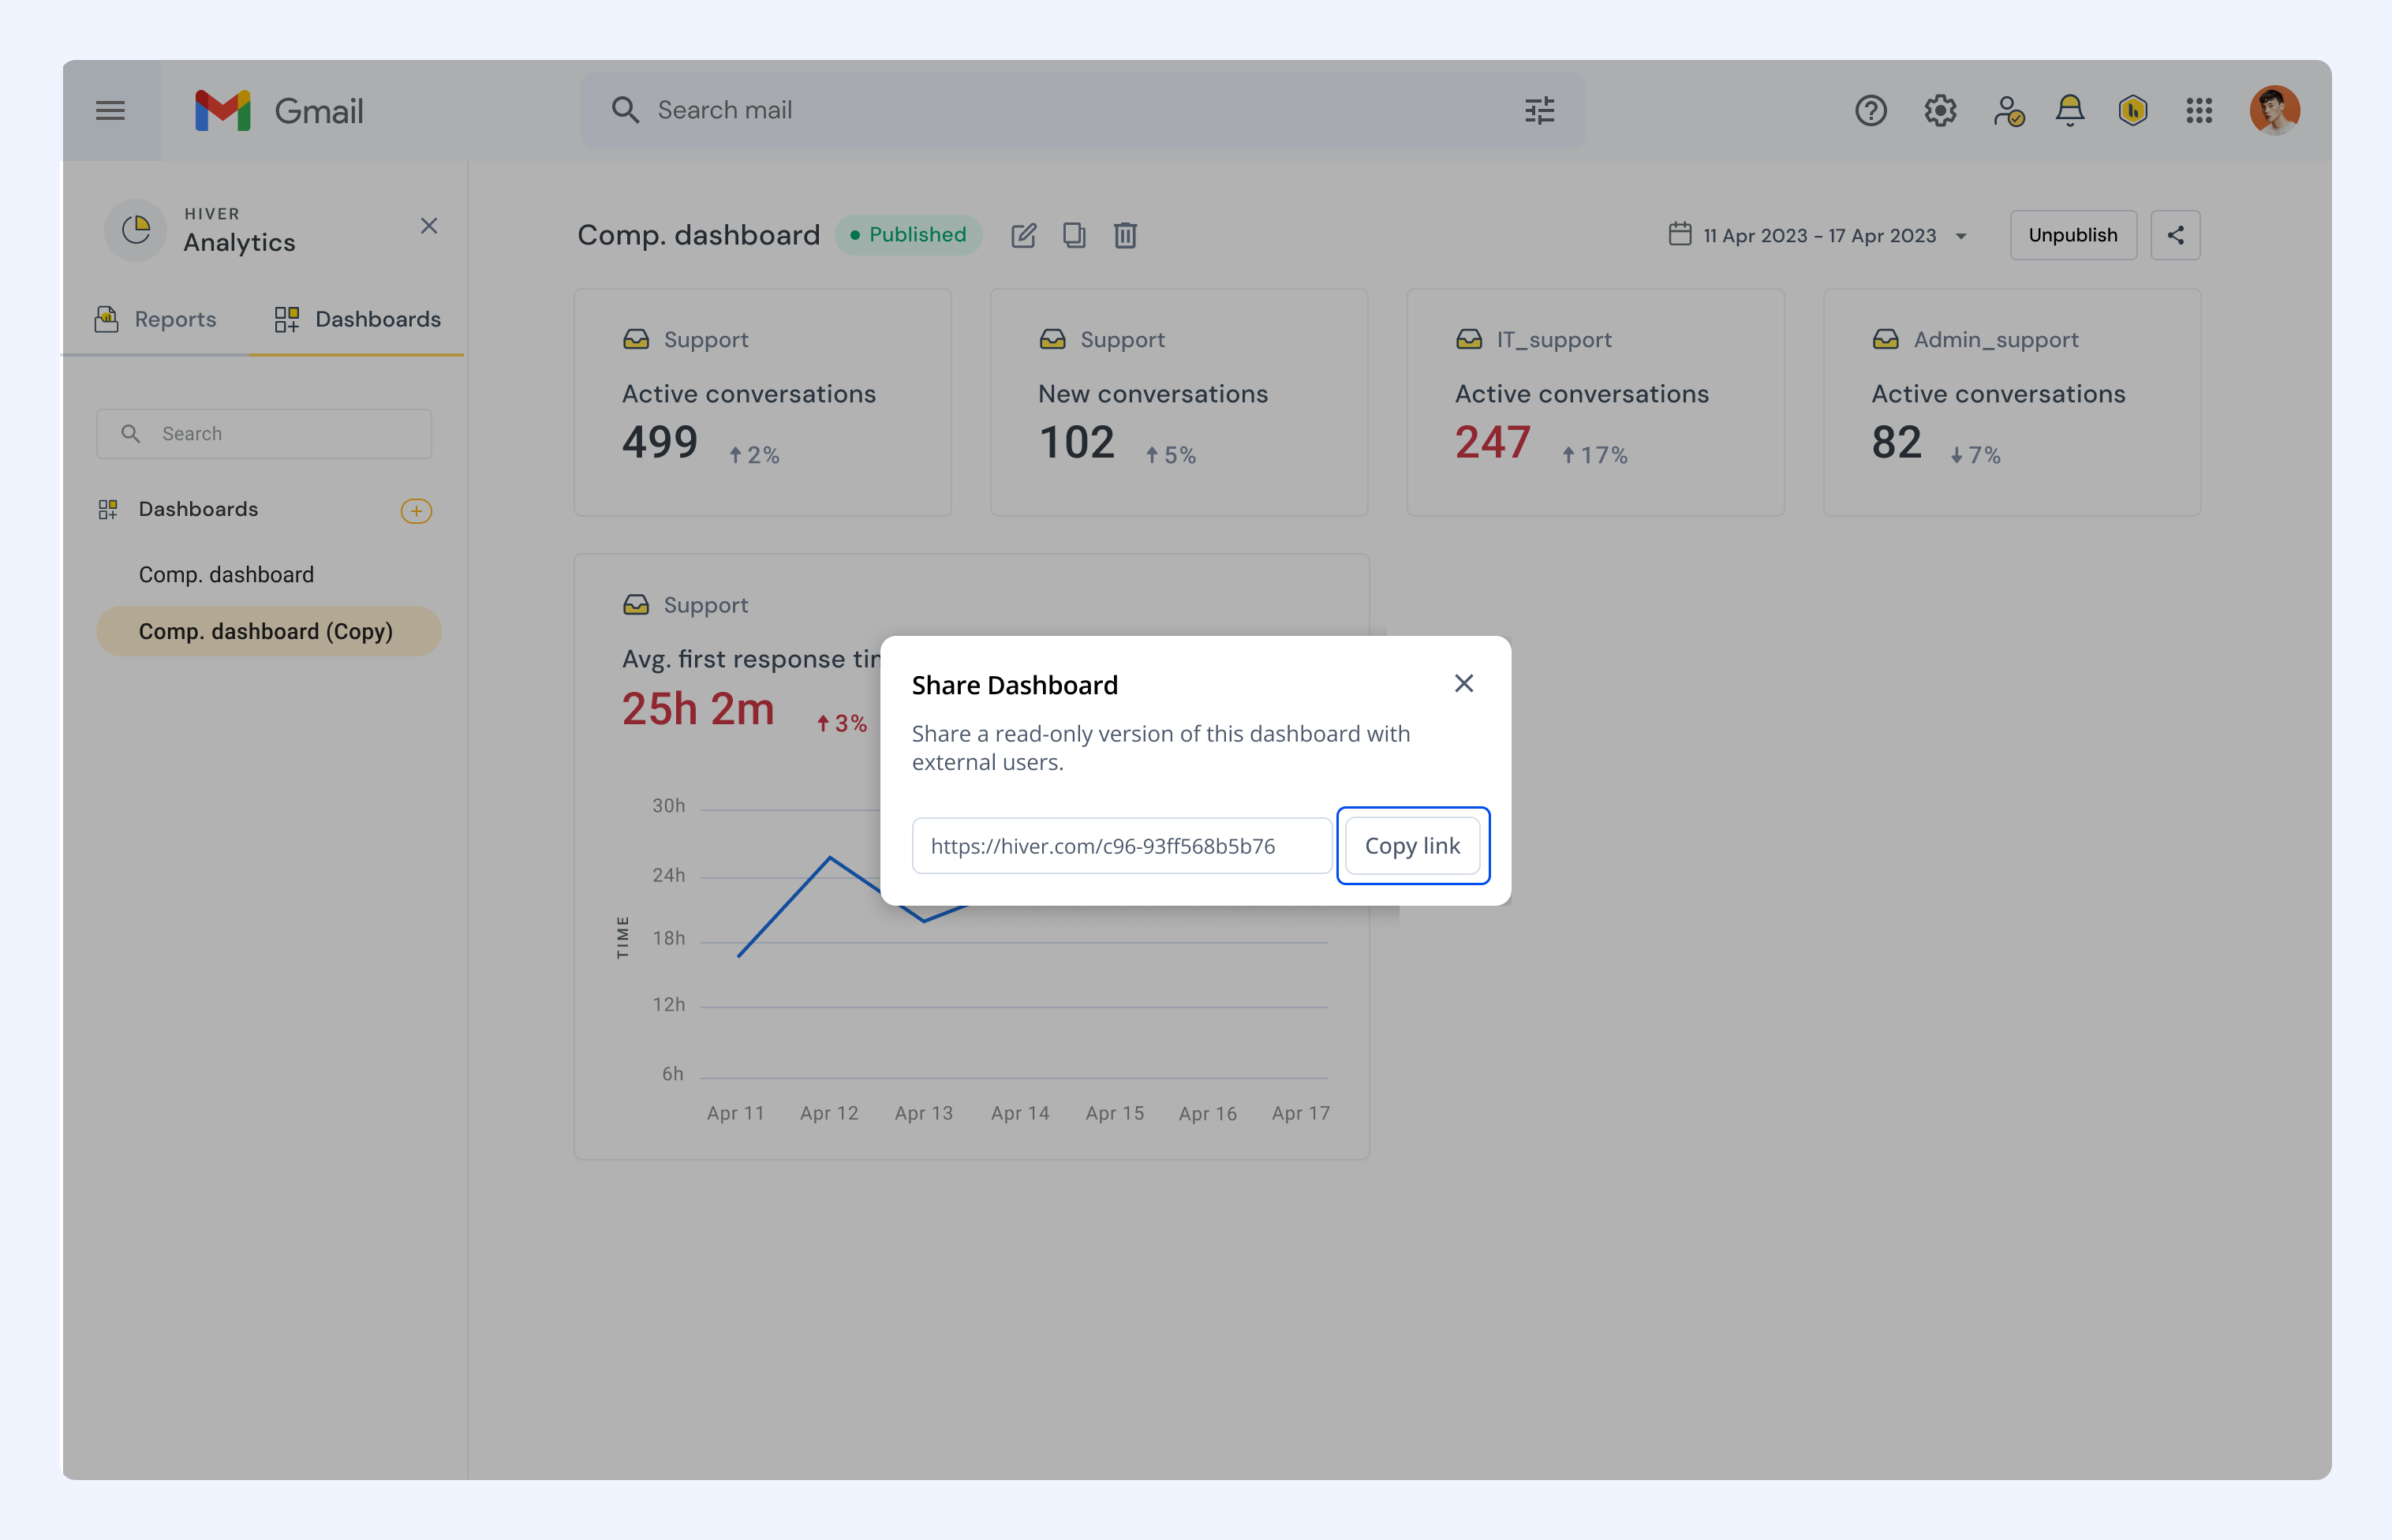
4. Share this link with external users who need access to the dashboard.
Unpublishing a Dashboard
To revoke access to a shared dashboard:
1. Click Unpublish.
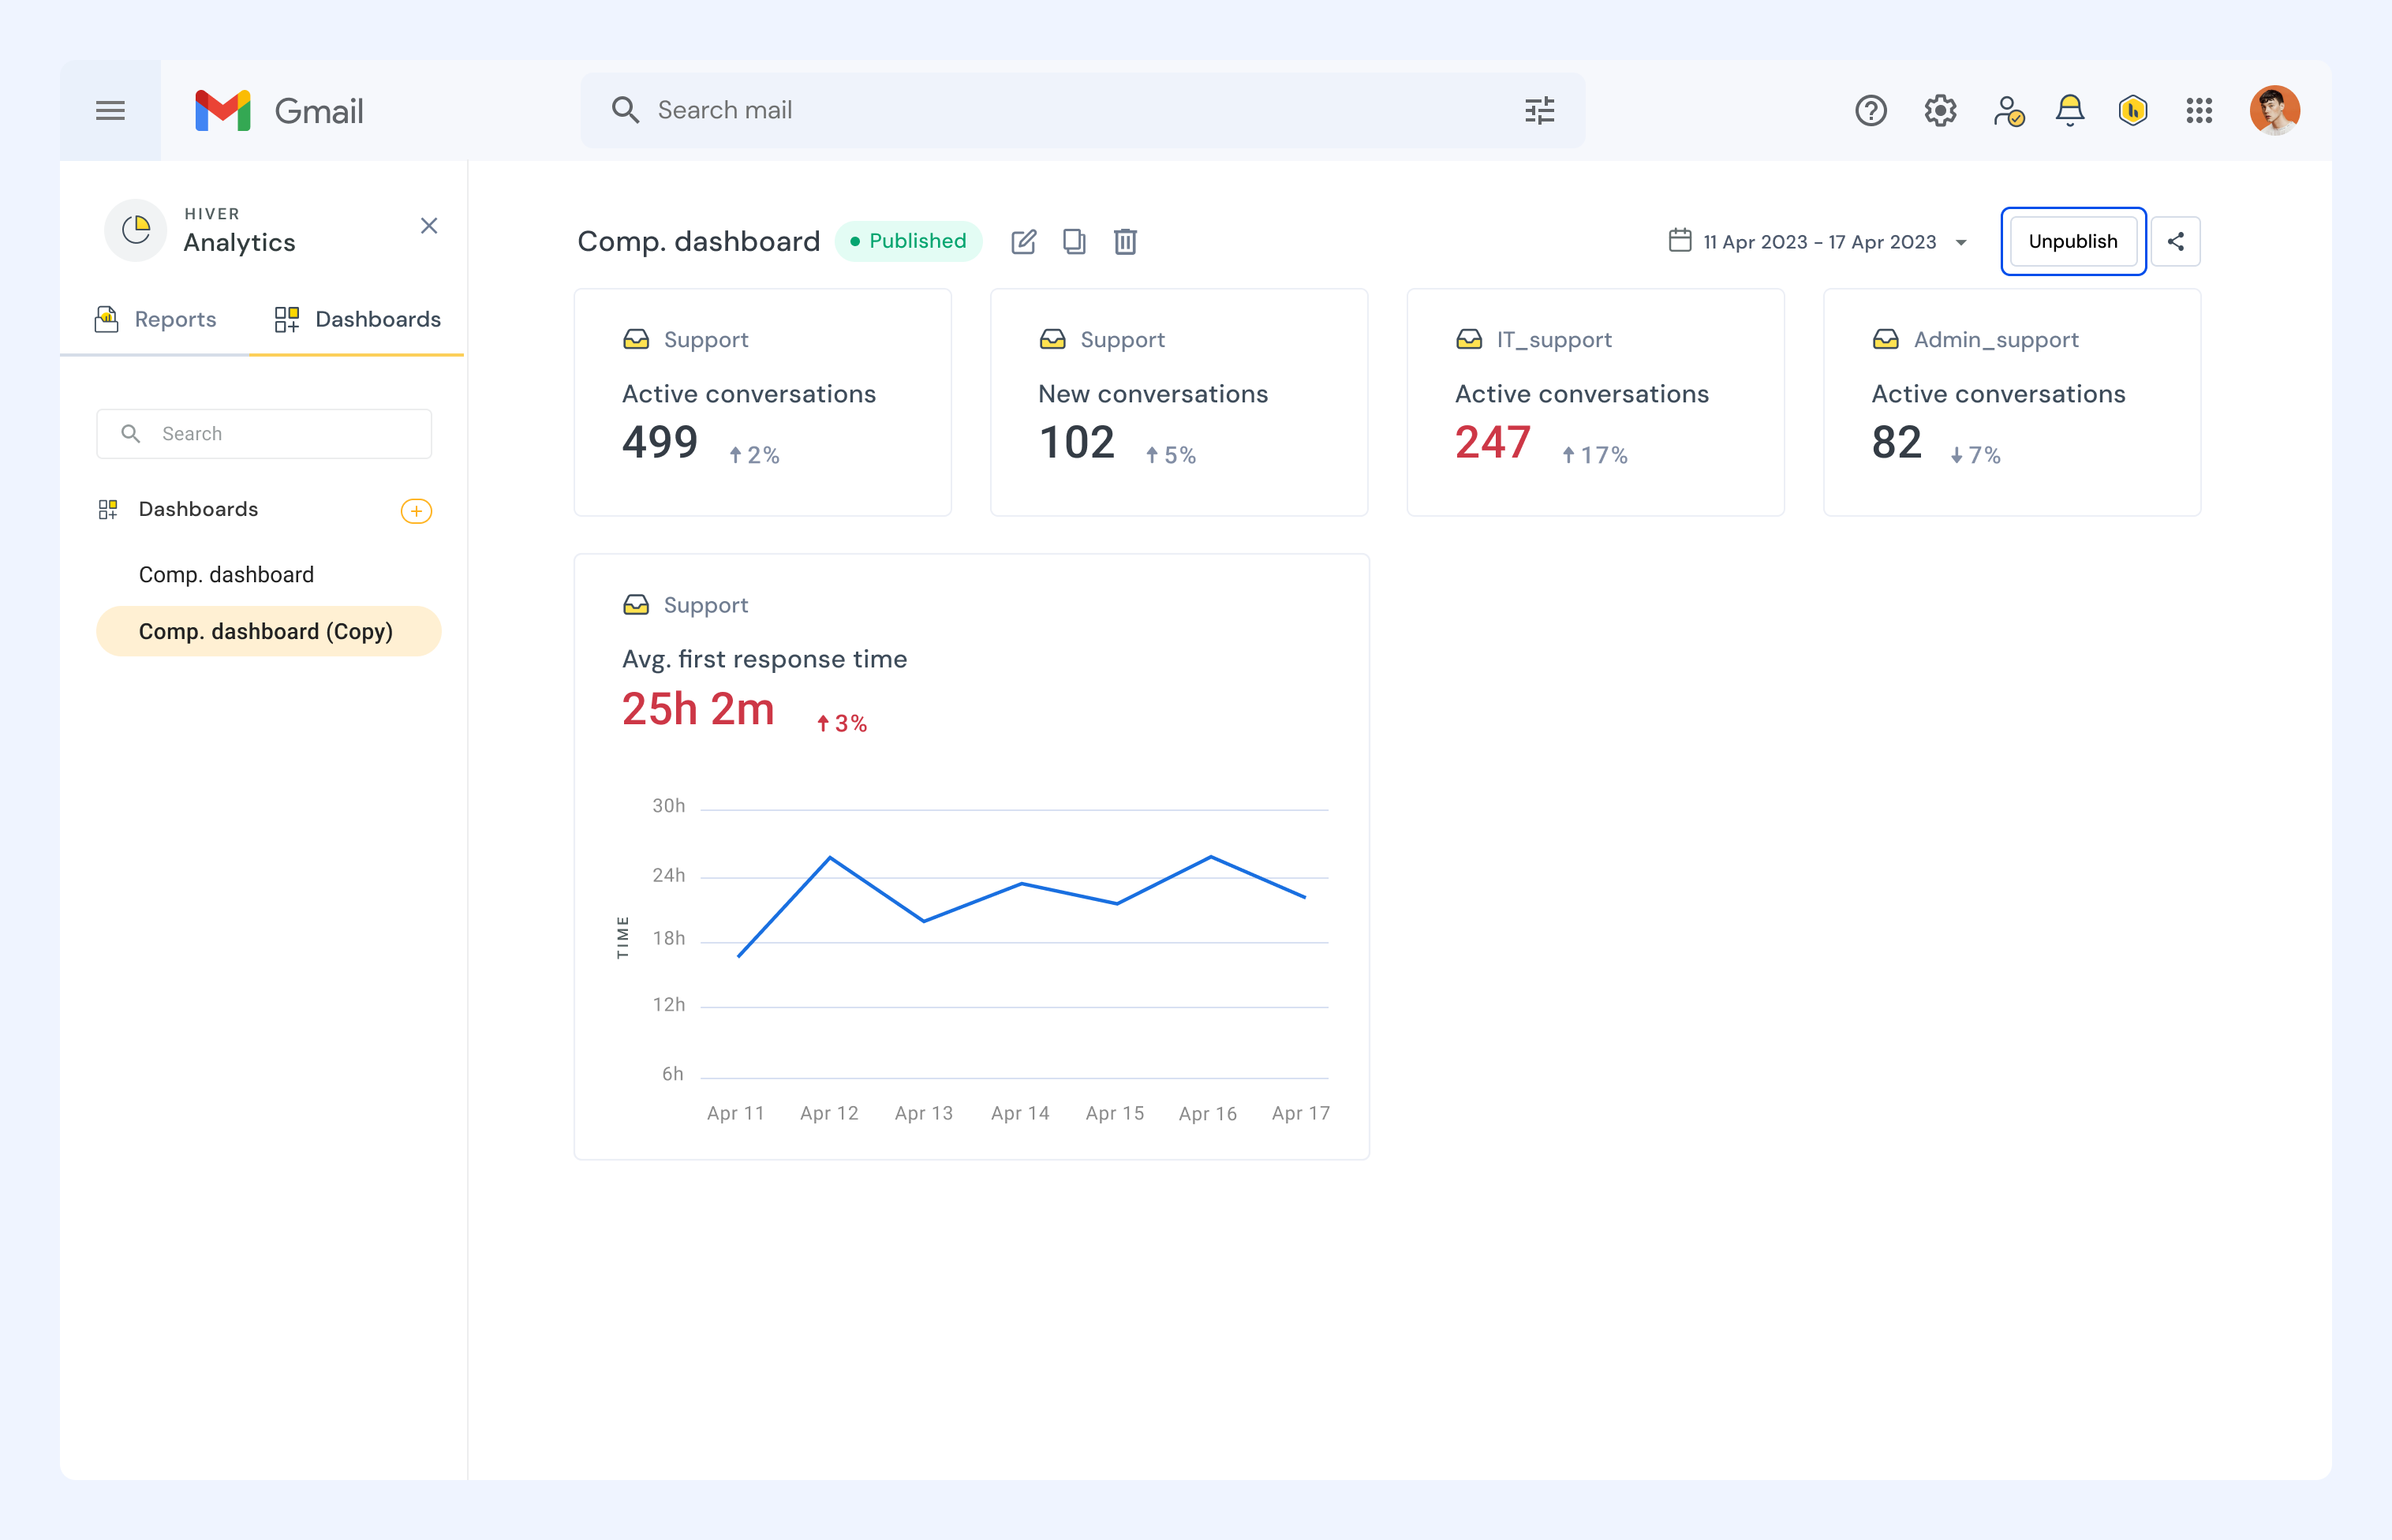
2. In the confirmation dialog, click Unpublish to confirm.
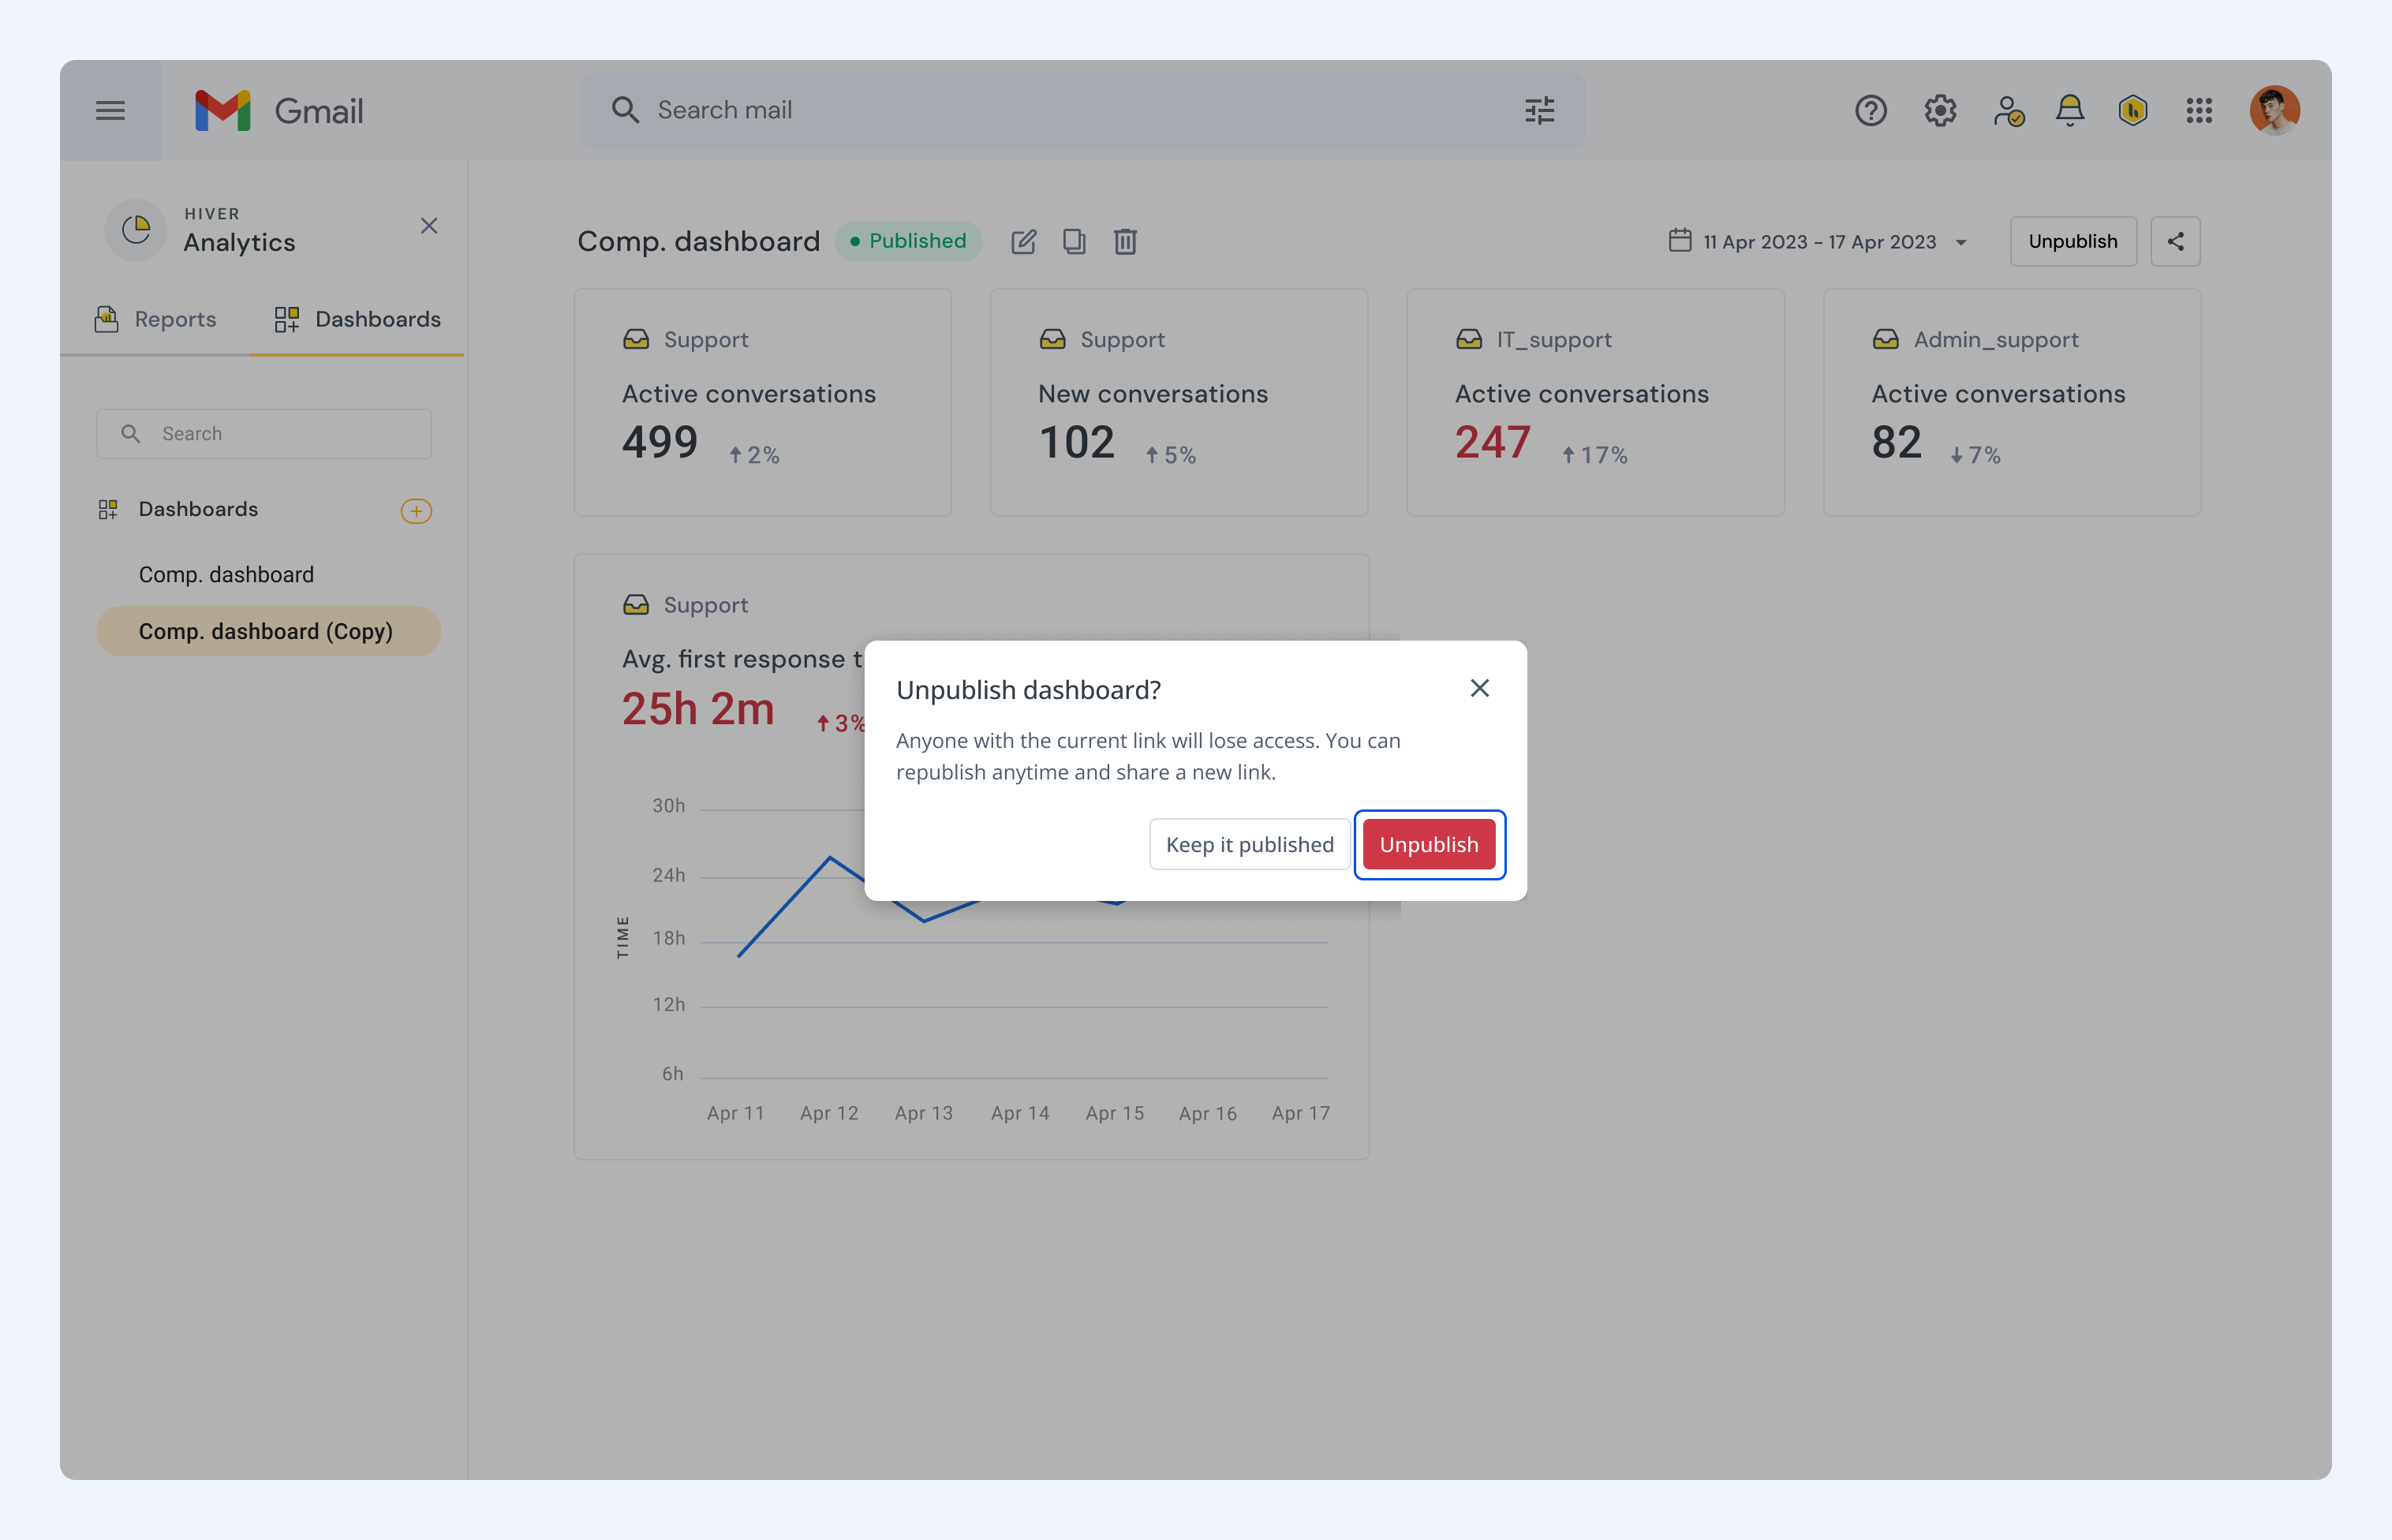
Once unpublished, anyone with the previous link will lose access. You can republish anytime and share a new link if needed.
Viewer experience
When external users access your shared dashboard link, they'll see a standalone view of the dashboard without the Gmail sidebar or editing controls. The view includes: