Importing and syncing accounts and contacts
You can bring your accounts and contacts into Hiver from a CRM or a spreadsheet:
- Sync from a CRM (Salesforce or HubSpot) to pull in details like segment or account owner, and keep them up to date automatically.
- Import a CSV for a one-time upload from a spreadsheet.
This guide covers both methods. To add records directly, see managing accounts and contacts.
Syncing from Salesforce or HubSpot
Before you connect
Make sure you have the following permissions before you start:
Salesforce
- Admin access in Salesforce
- Permission to create an app in Salesforce
- Access to the email for your Salesforce admin account
HubSpot
- Admin access in HubSpot
- A HubSpot developer account with permission to create an app
Connecting a CRM
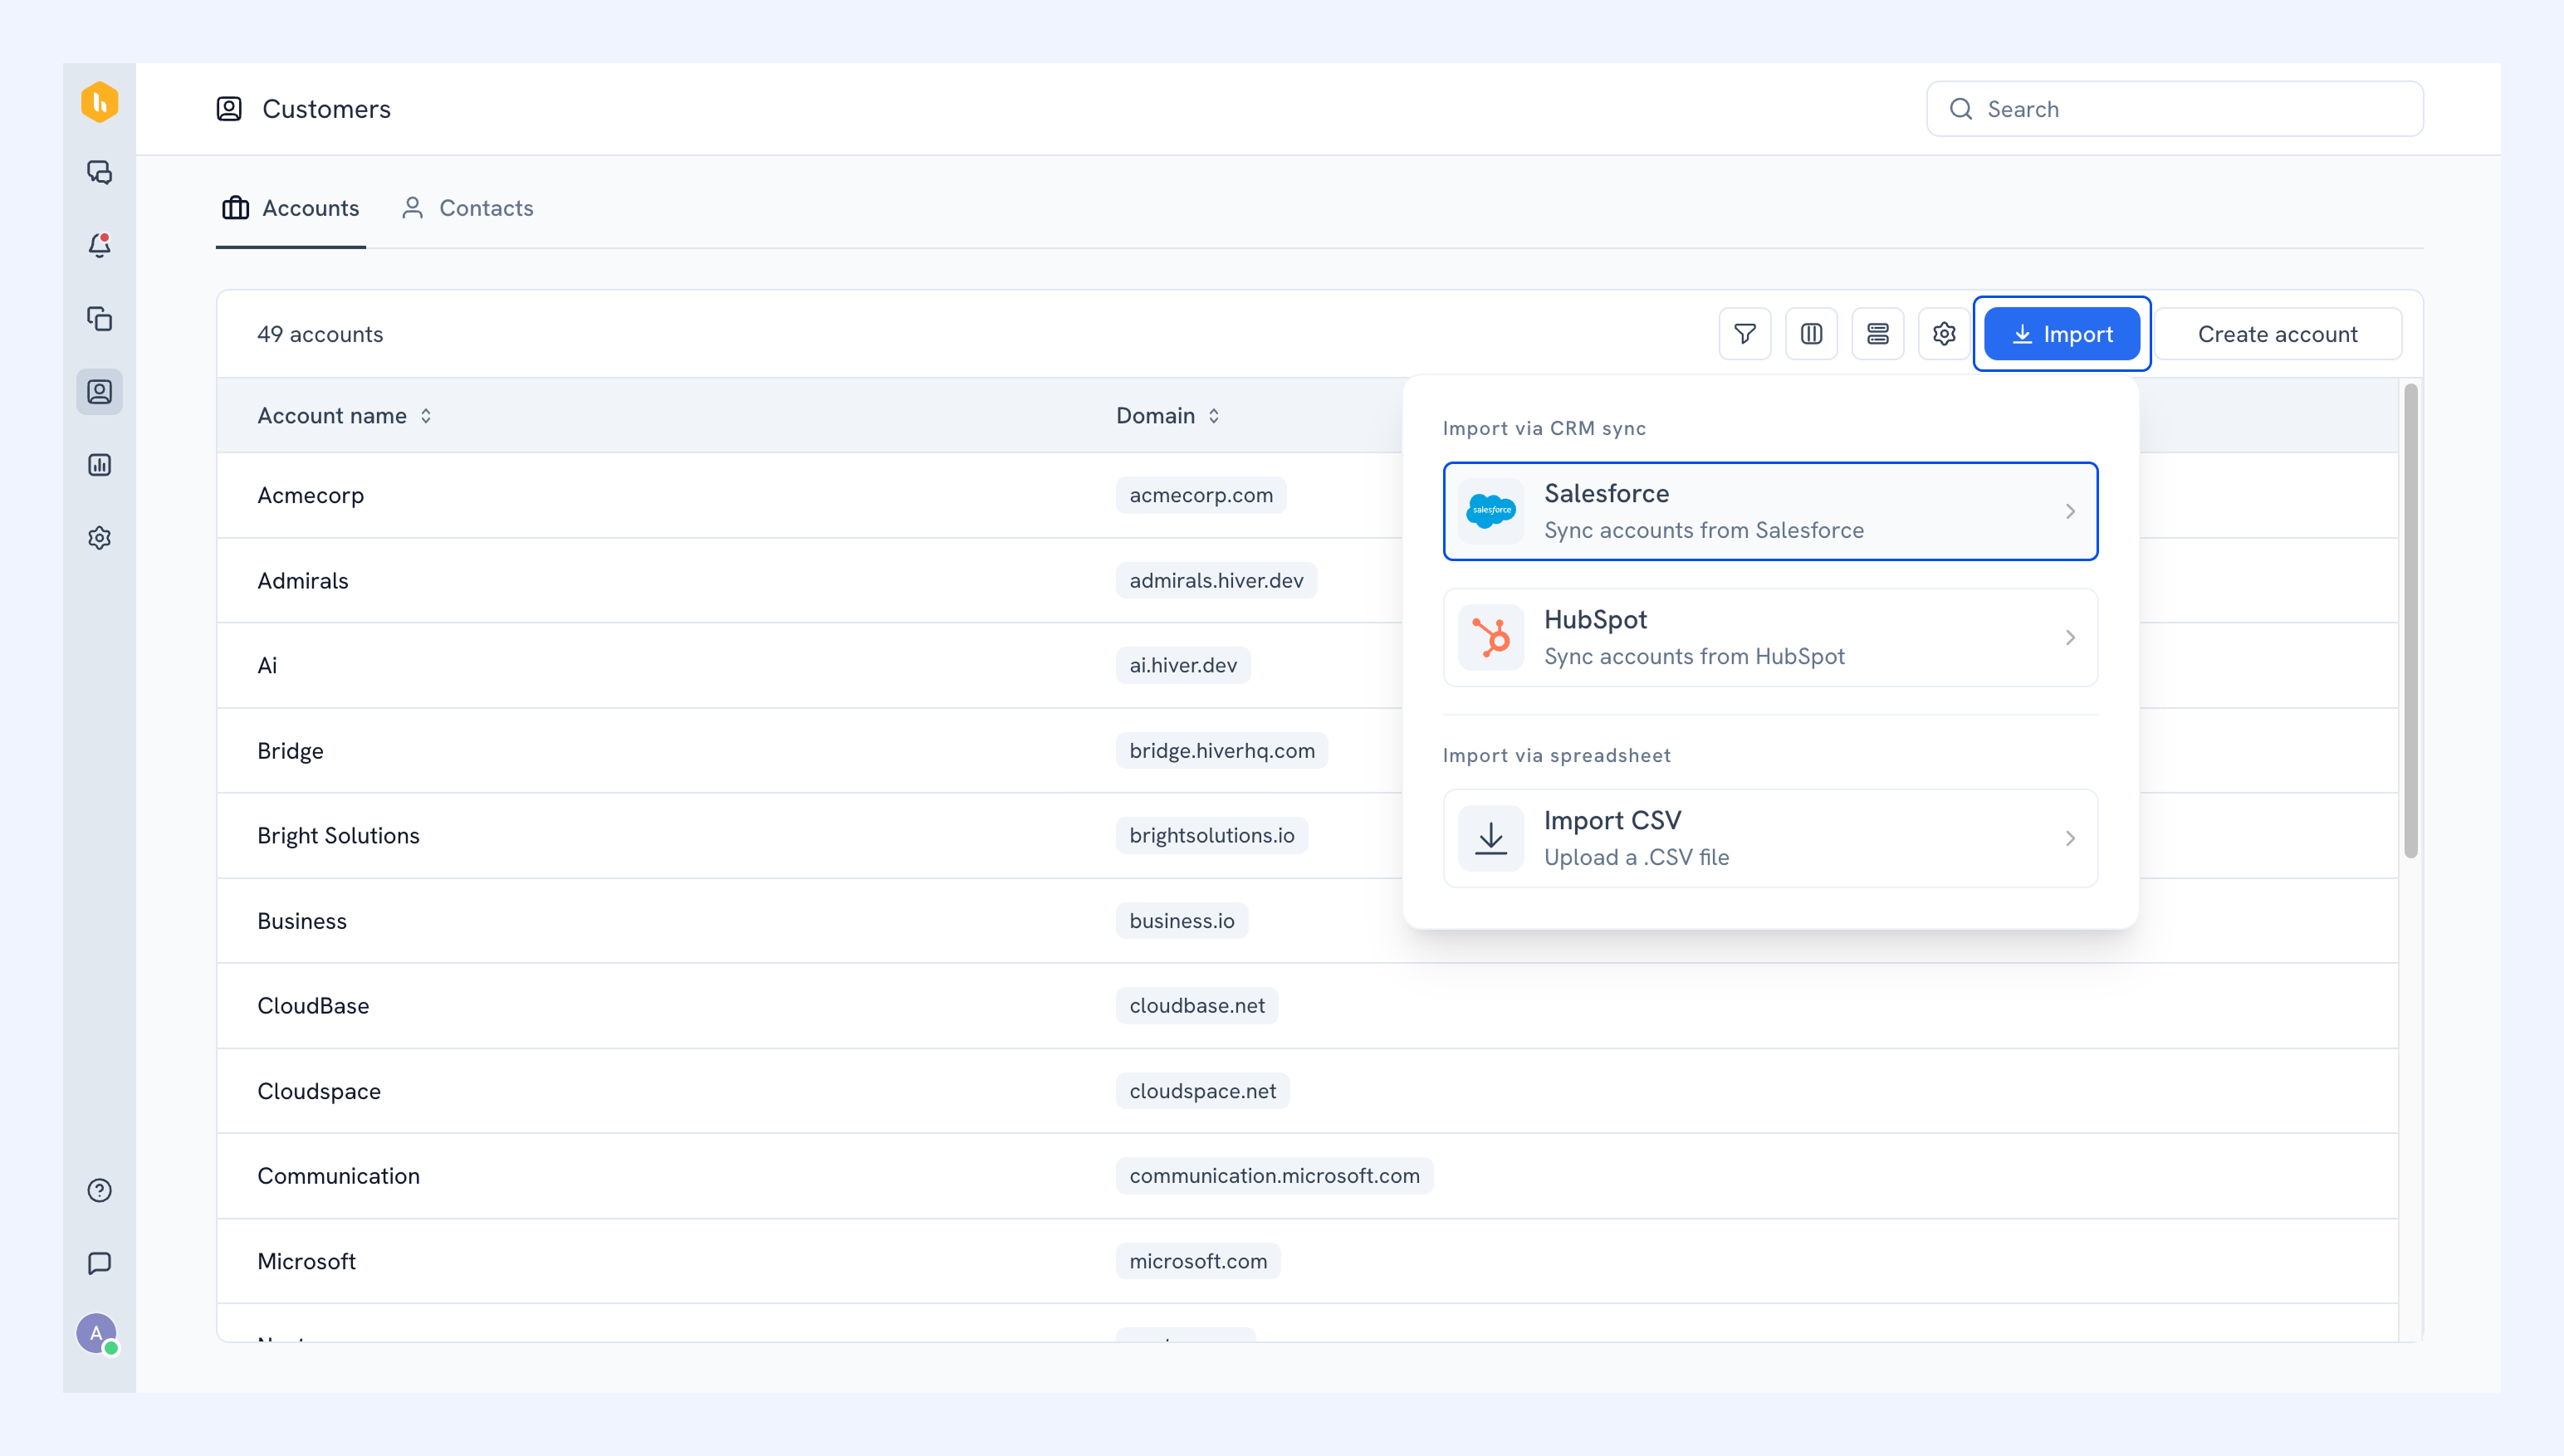
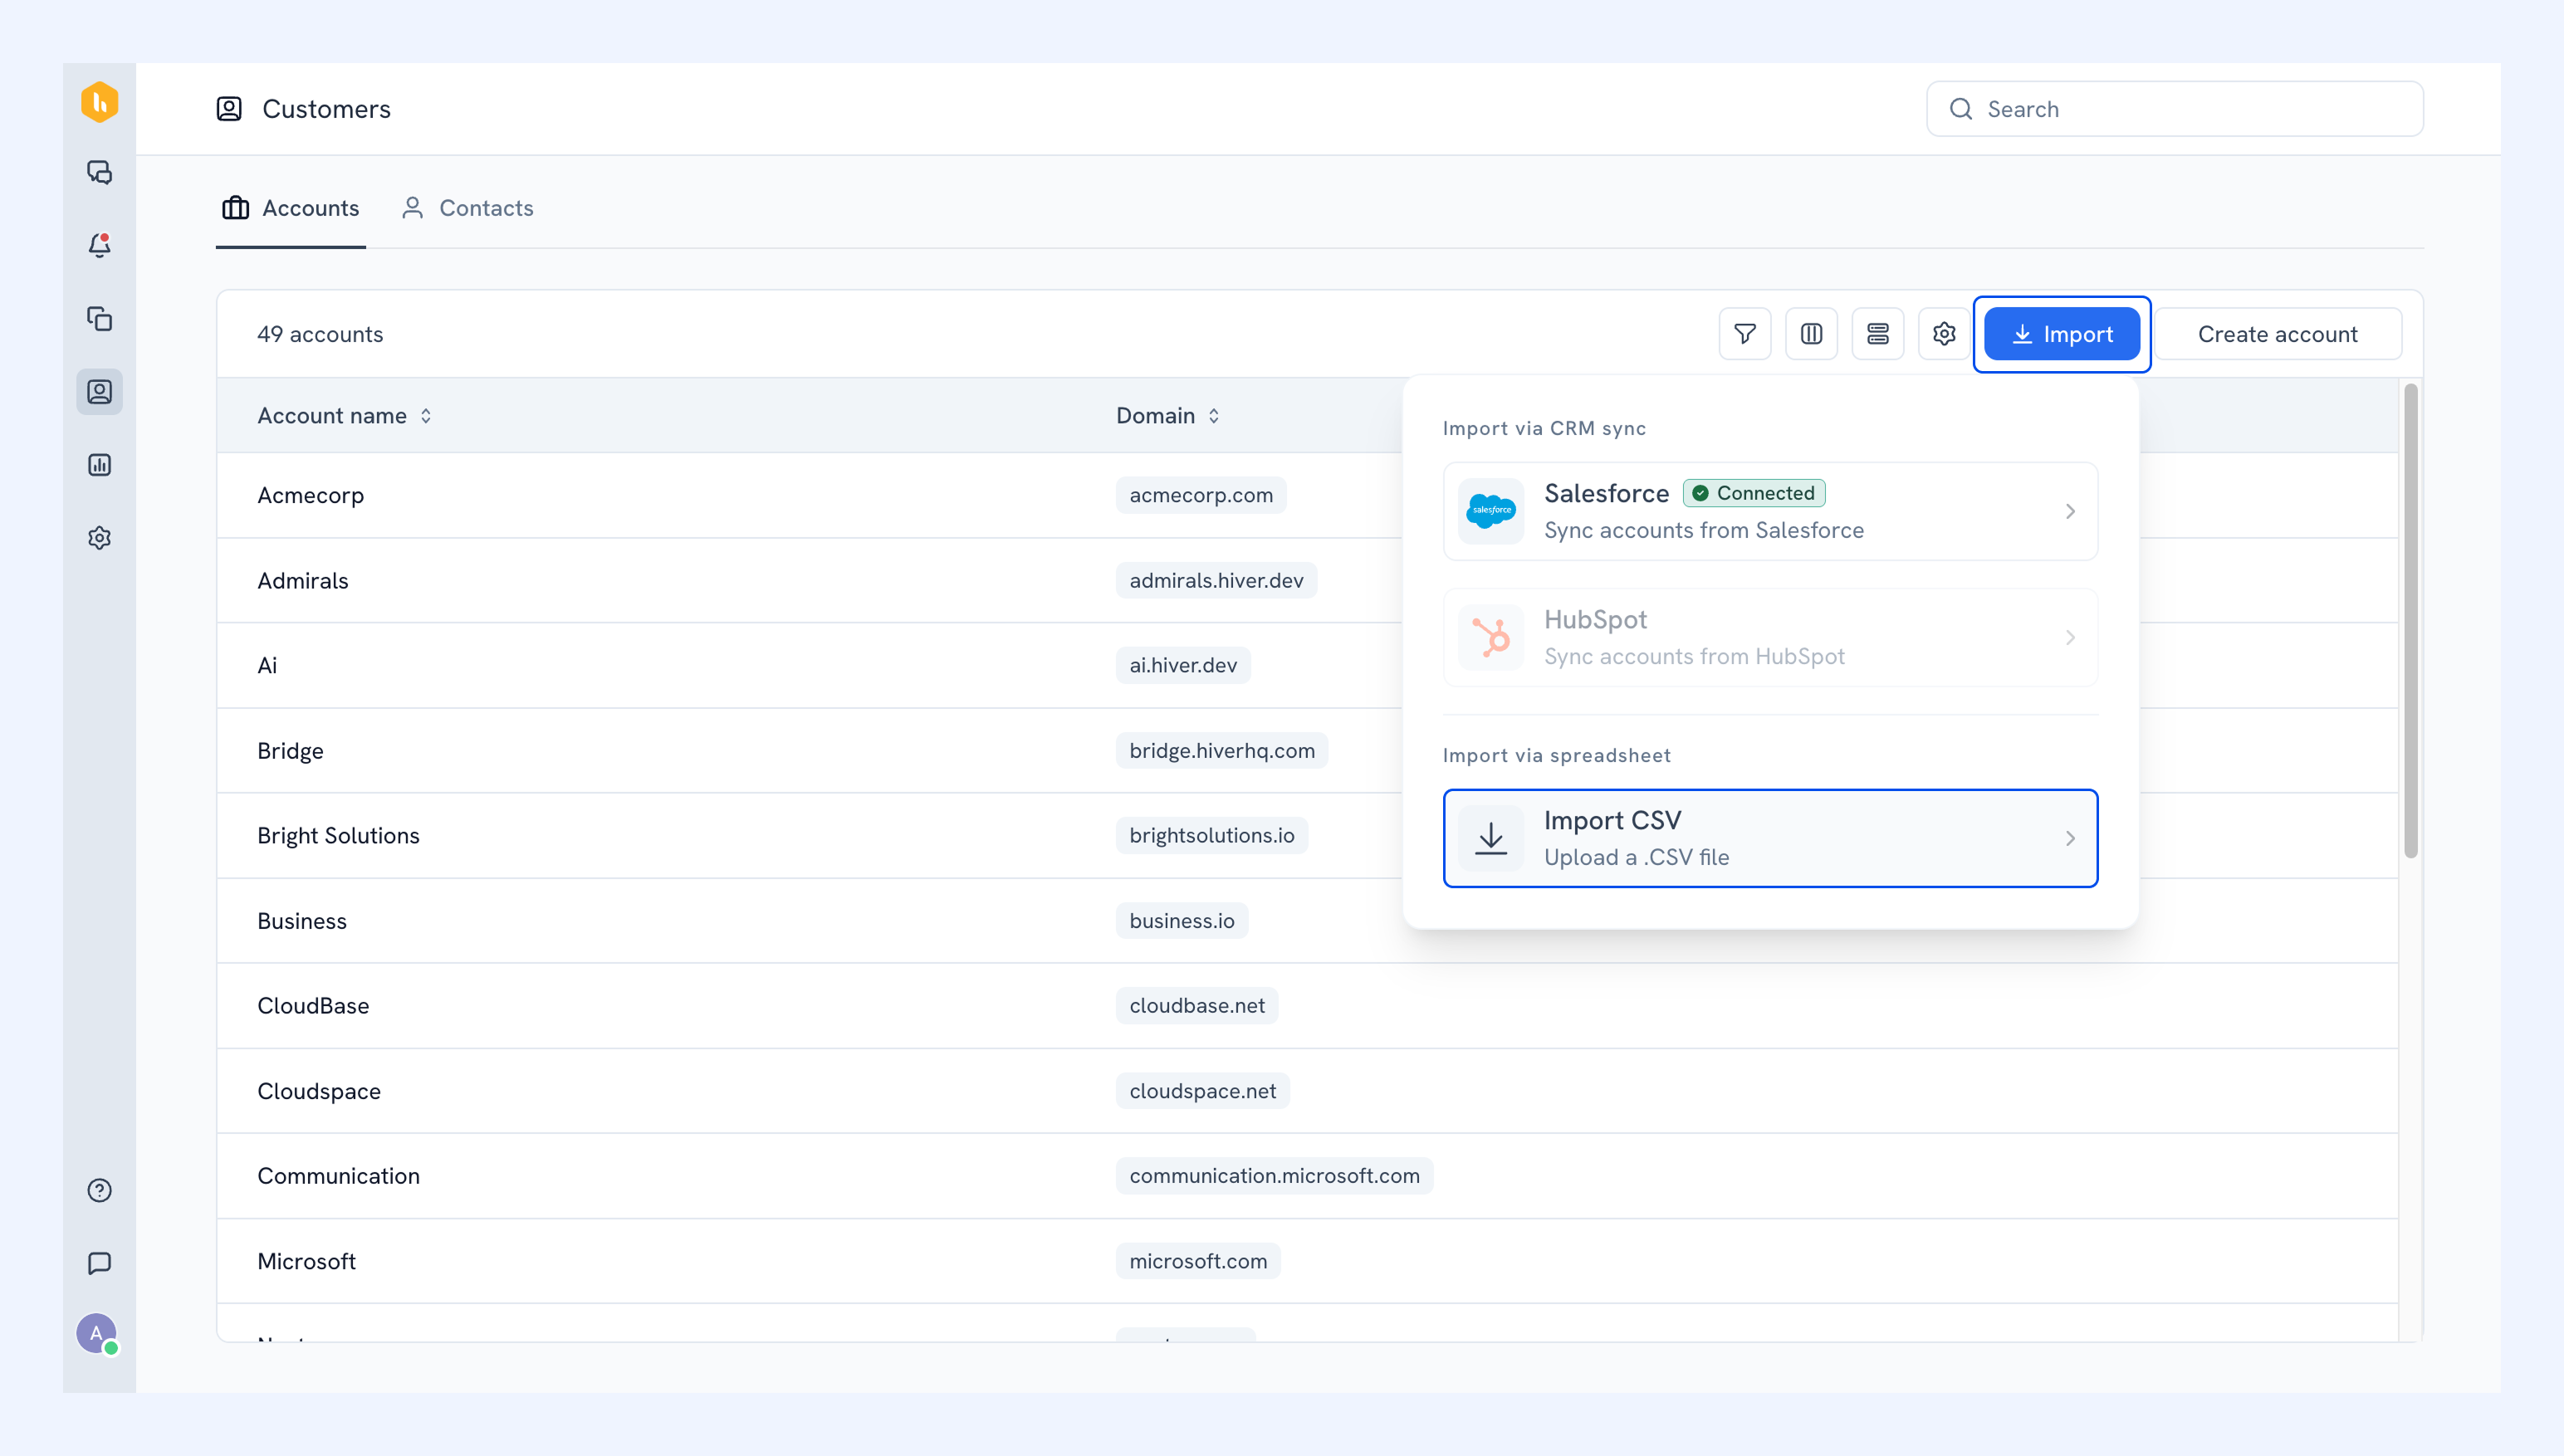
1. Click Import, then select Salesforce.
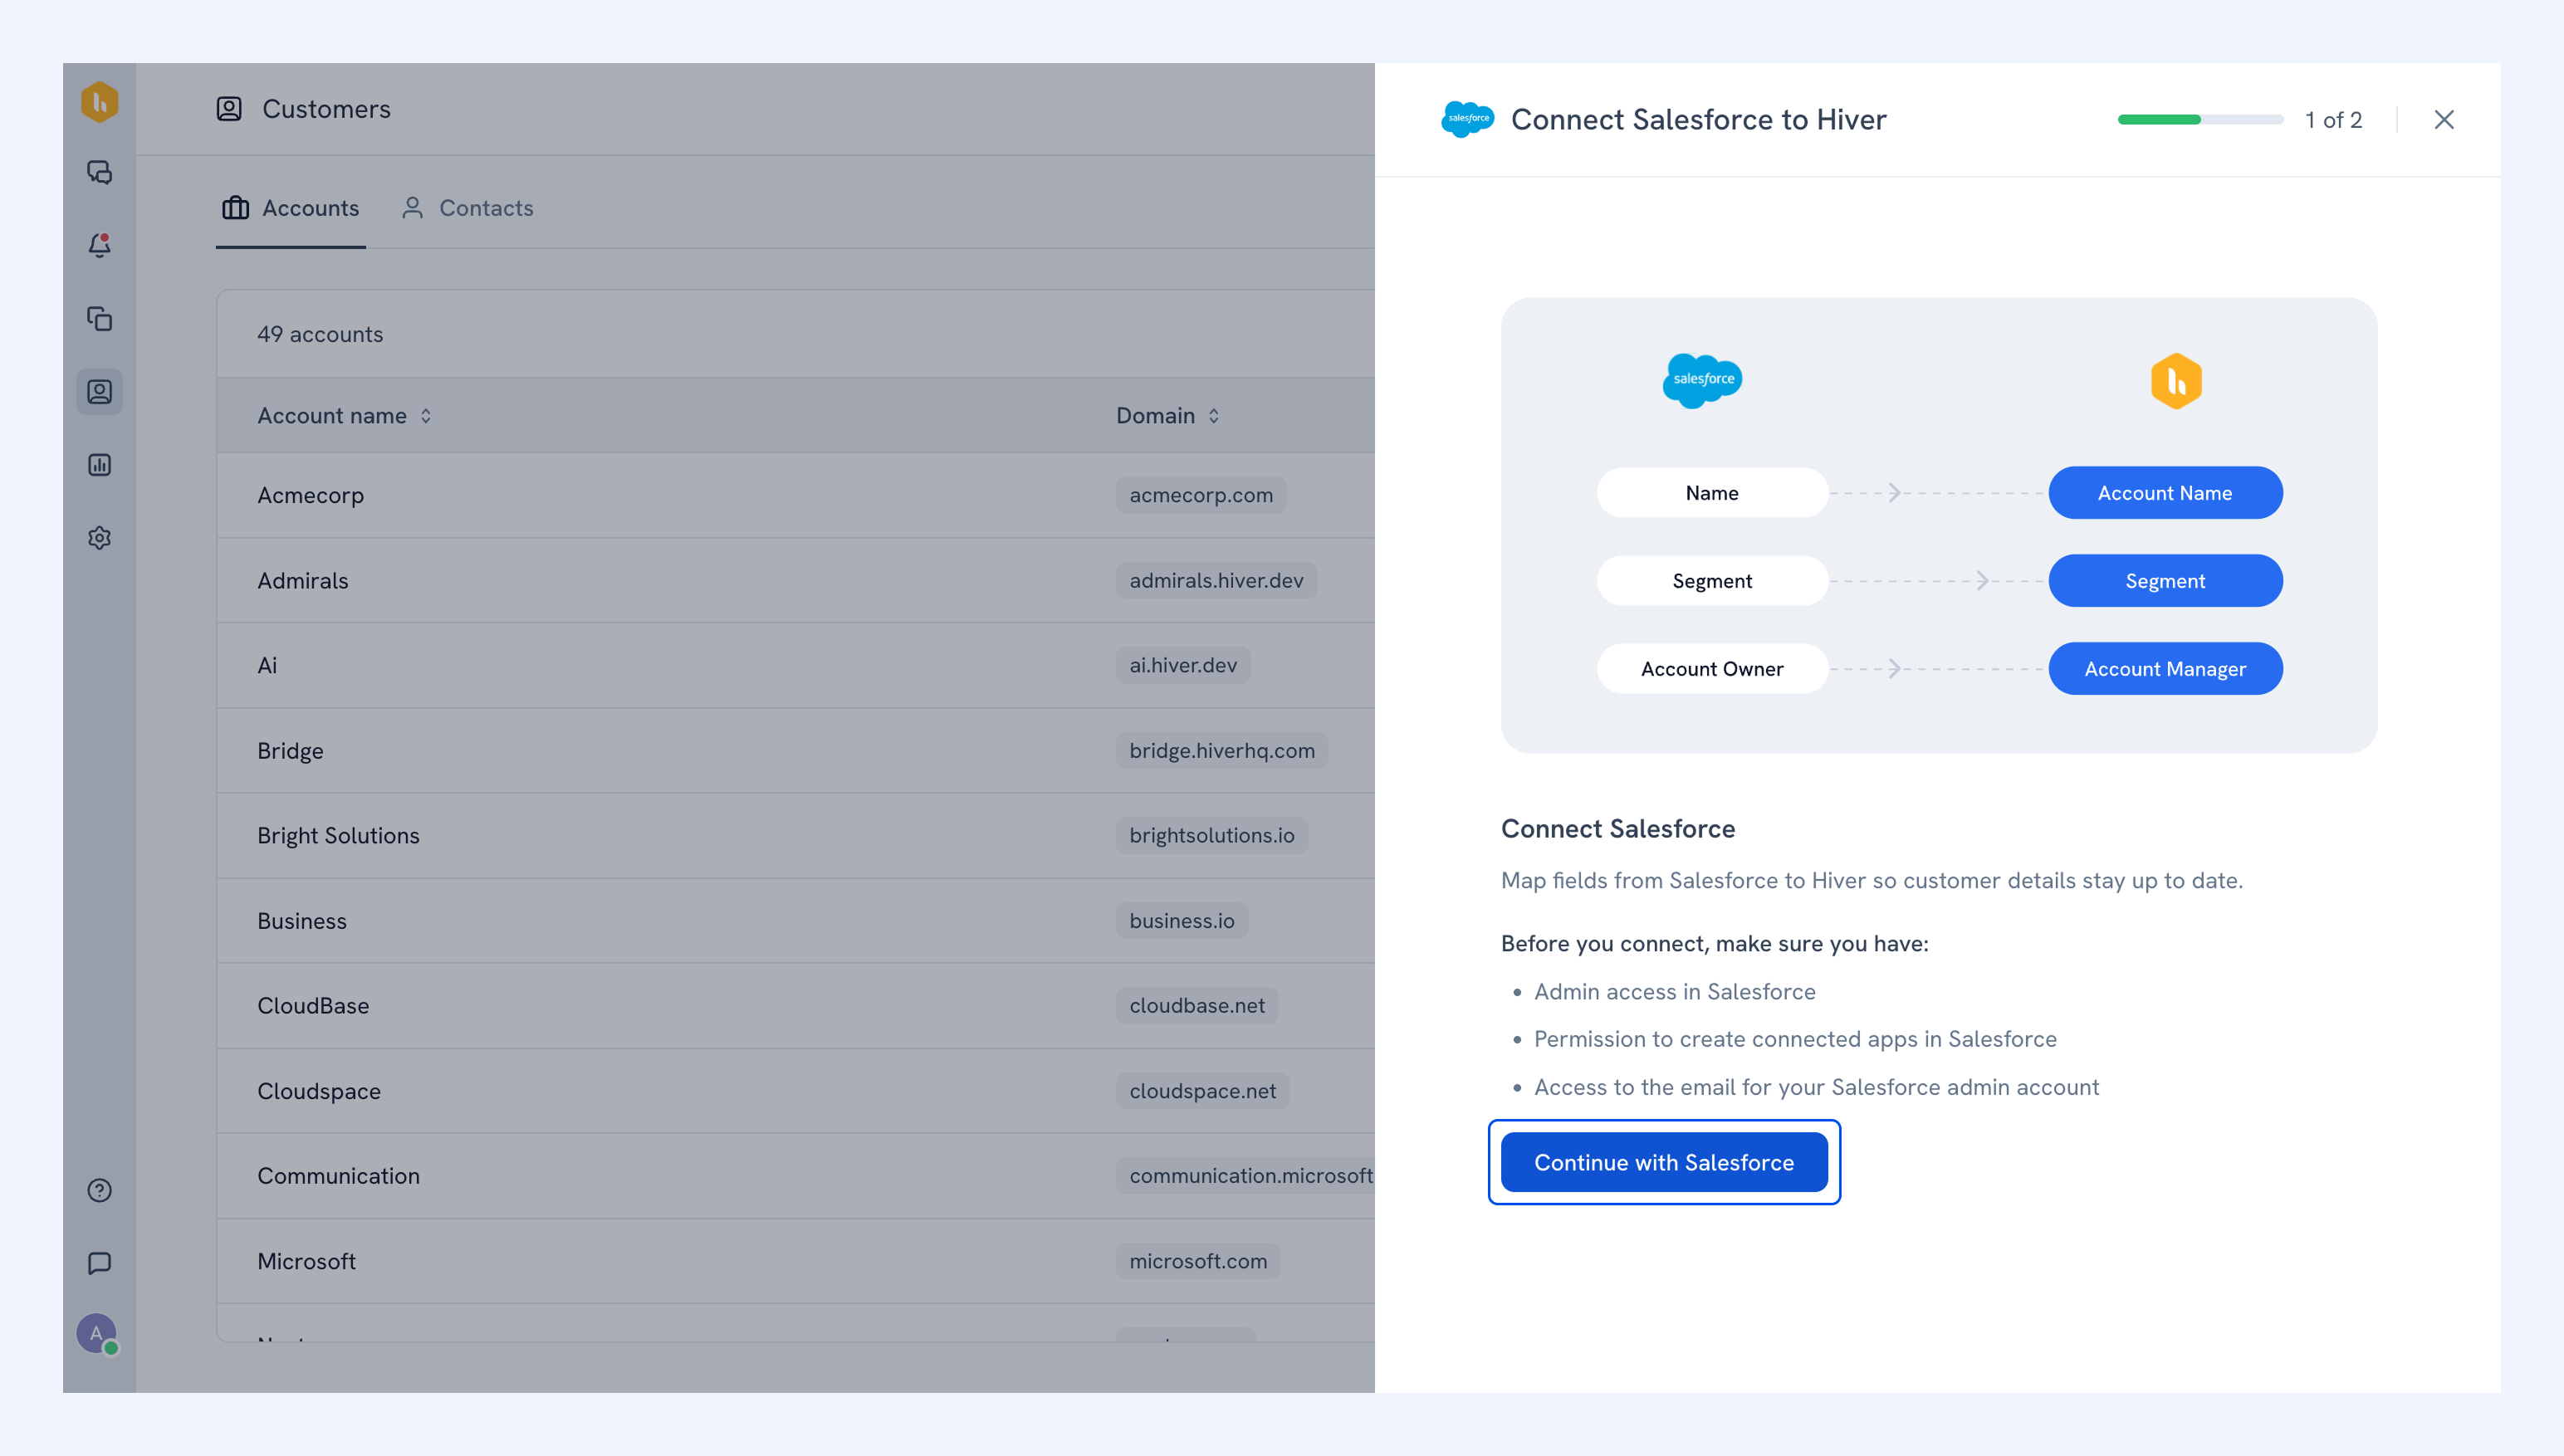
2. Click Continue with Salesforce and log in to your Salesforce account.
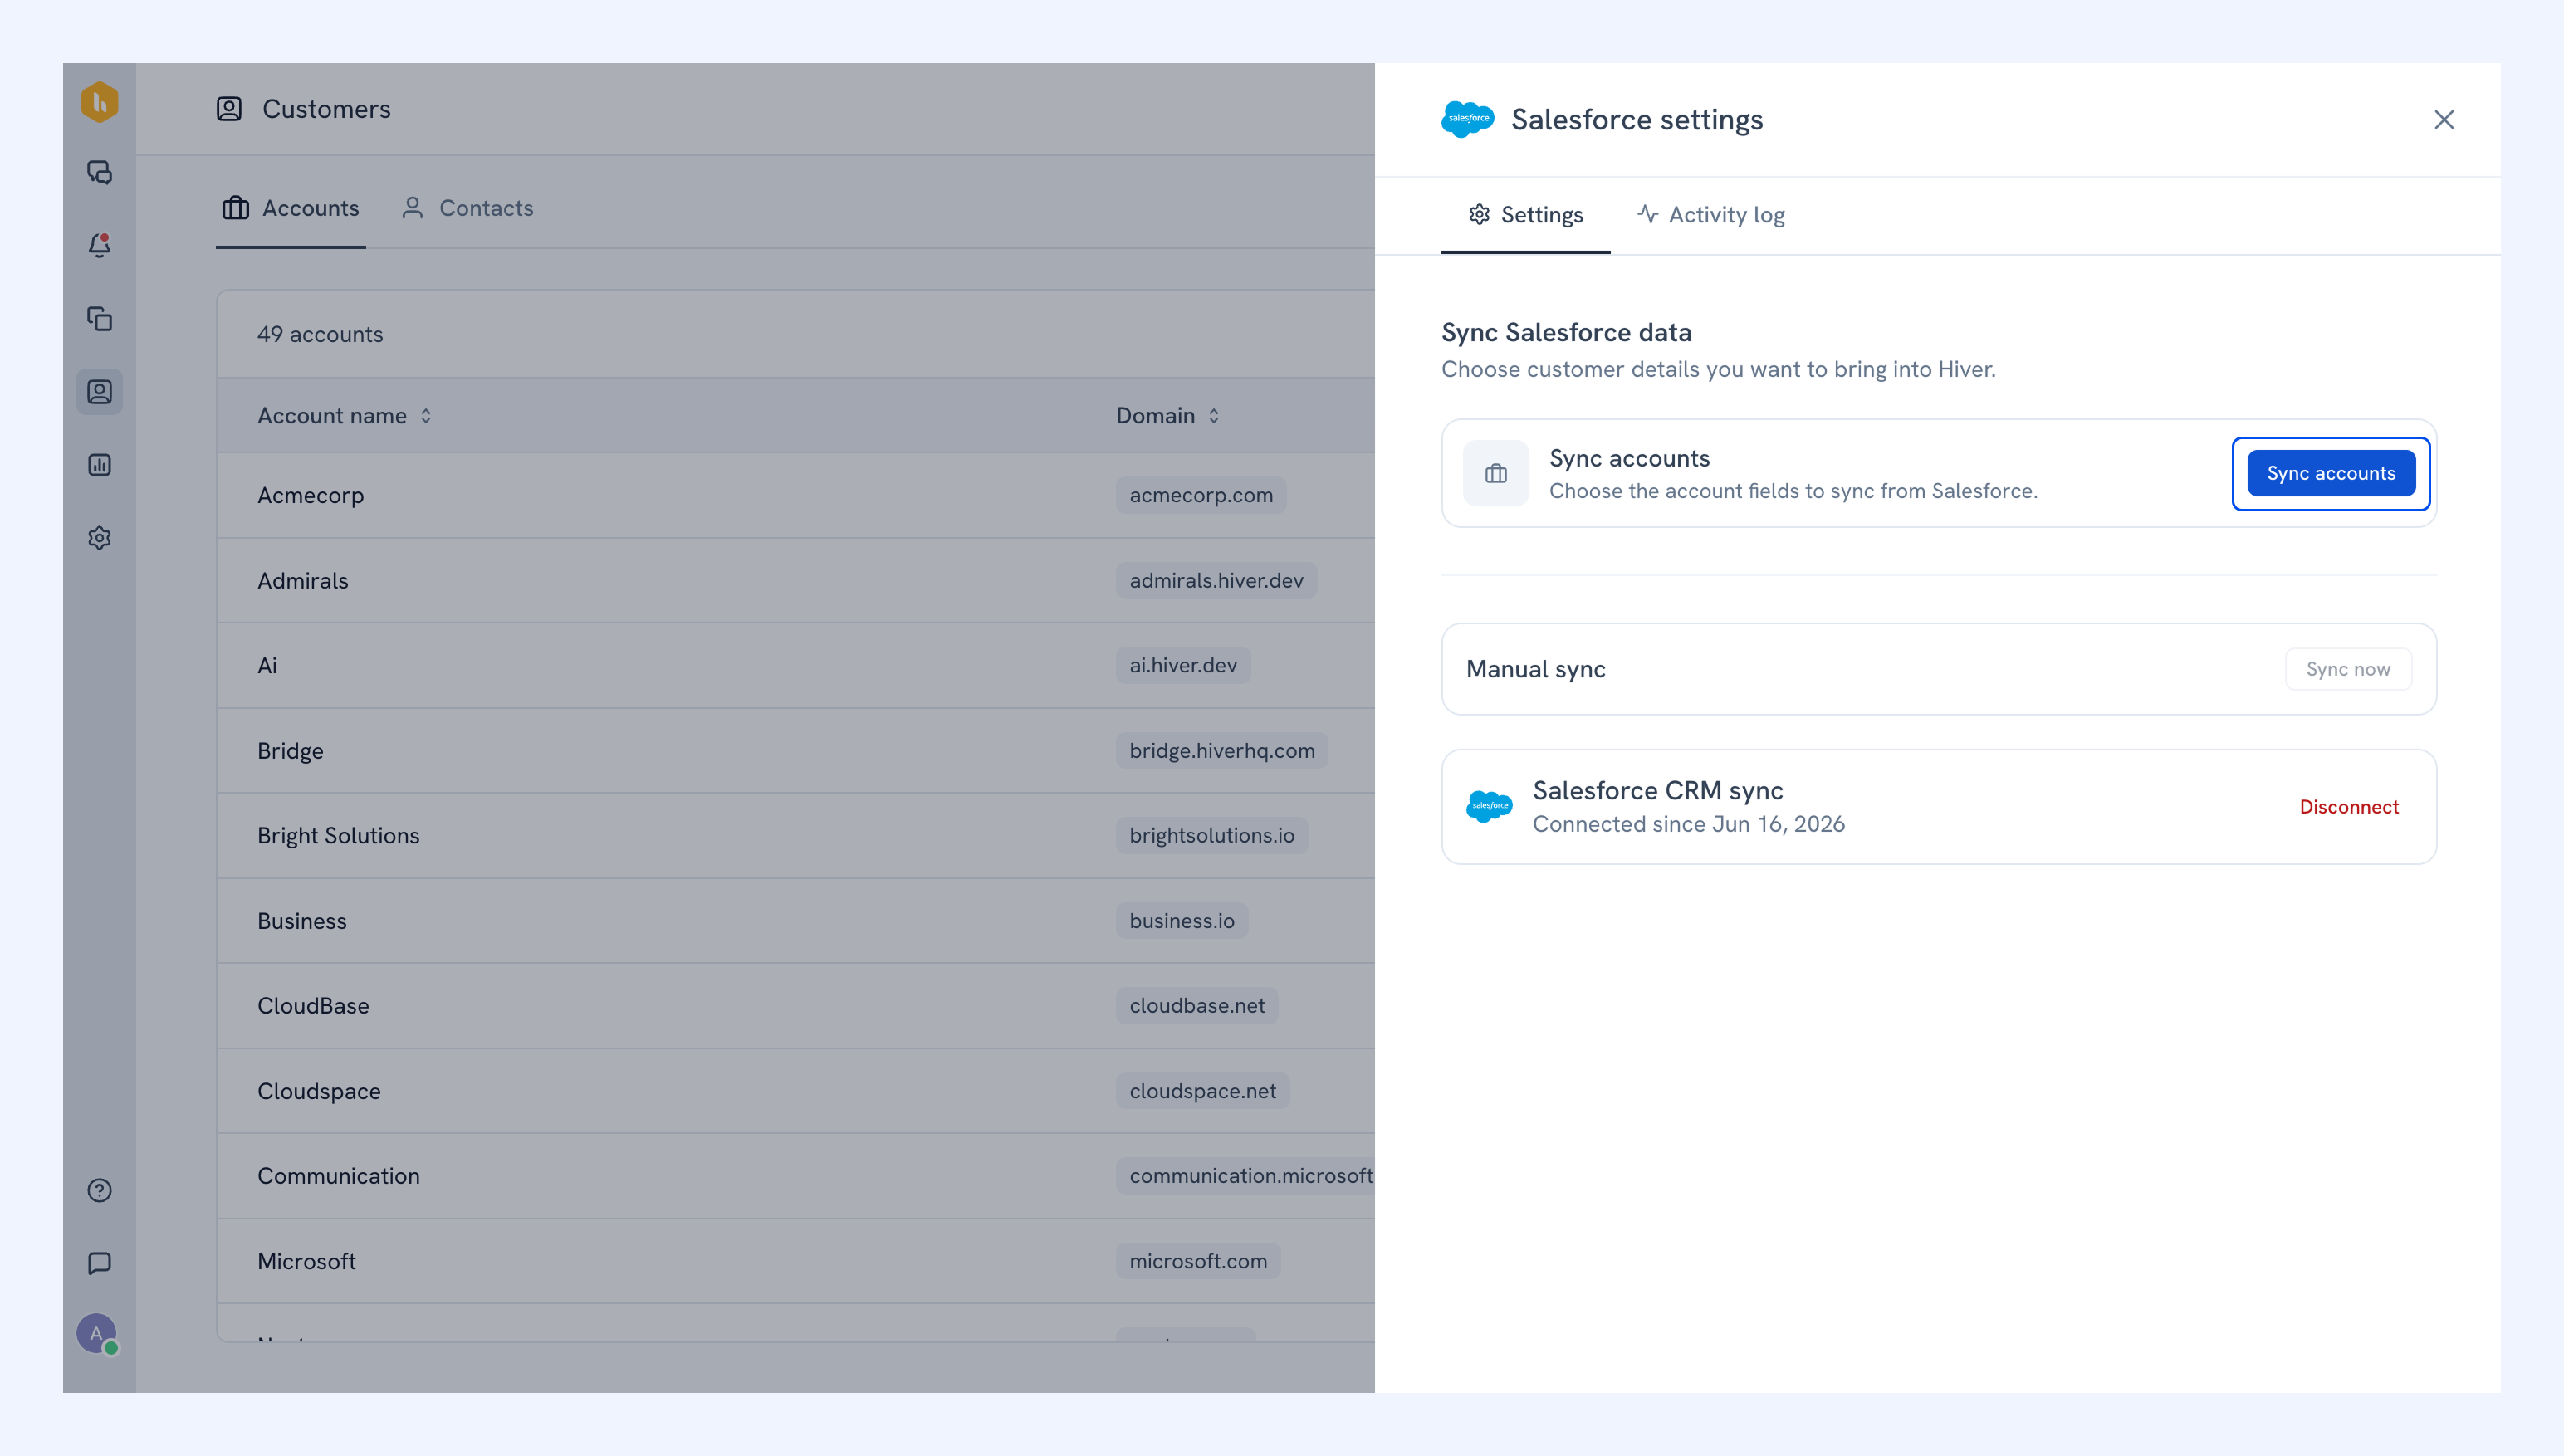
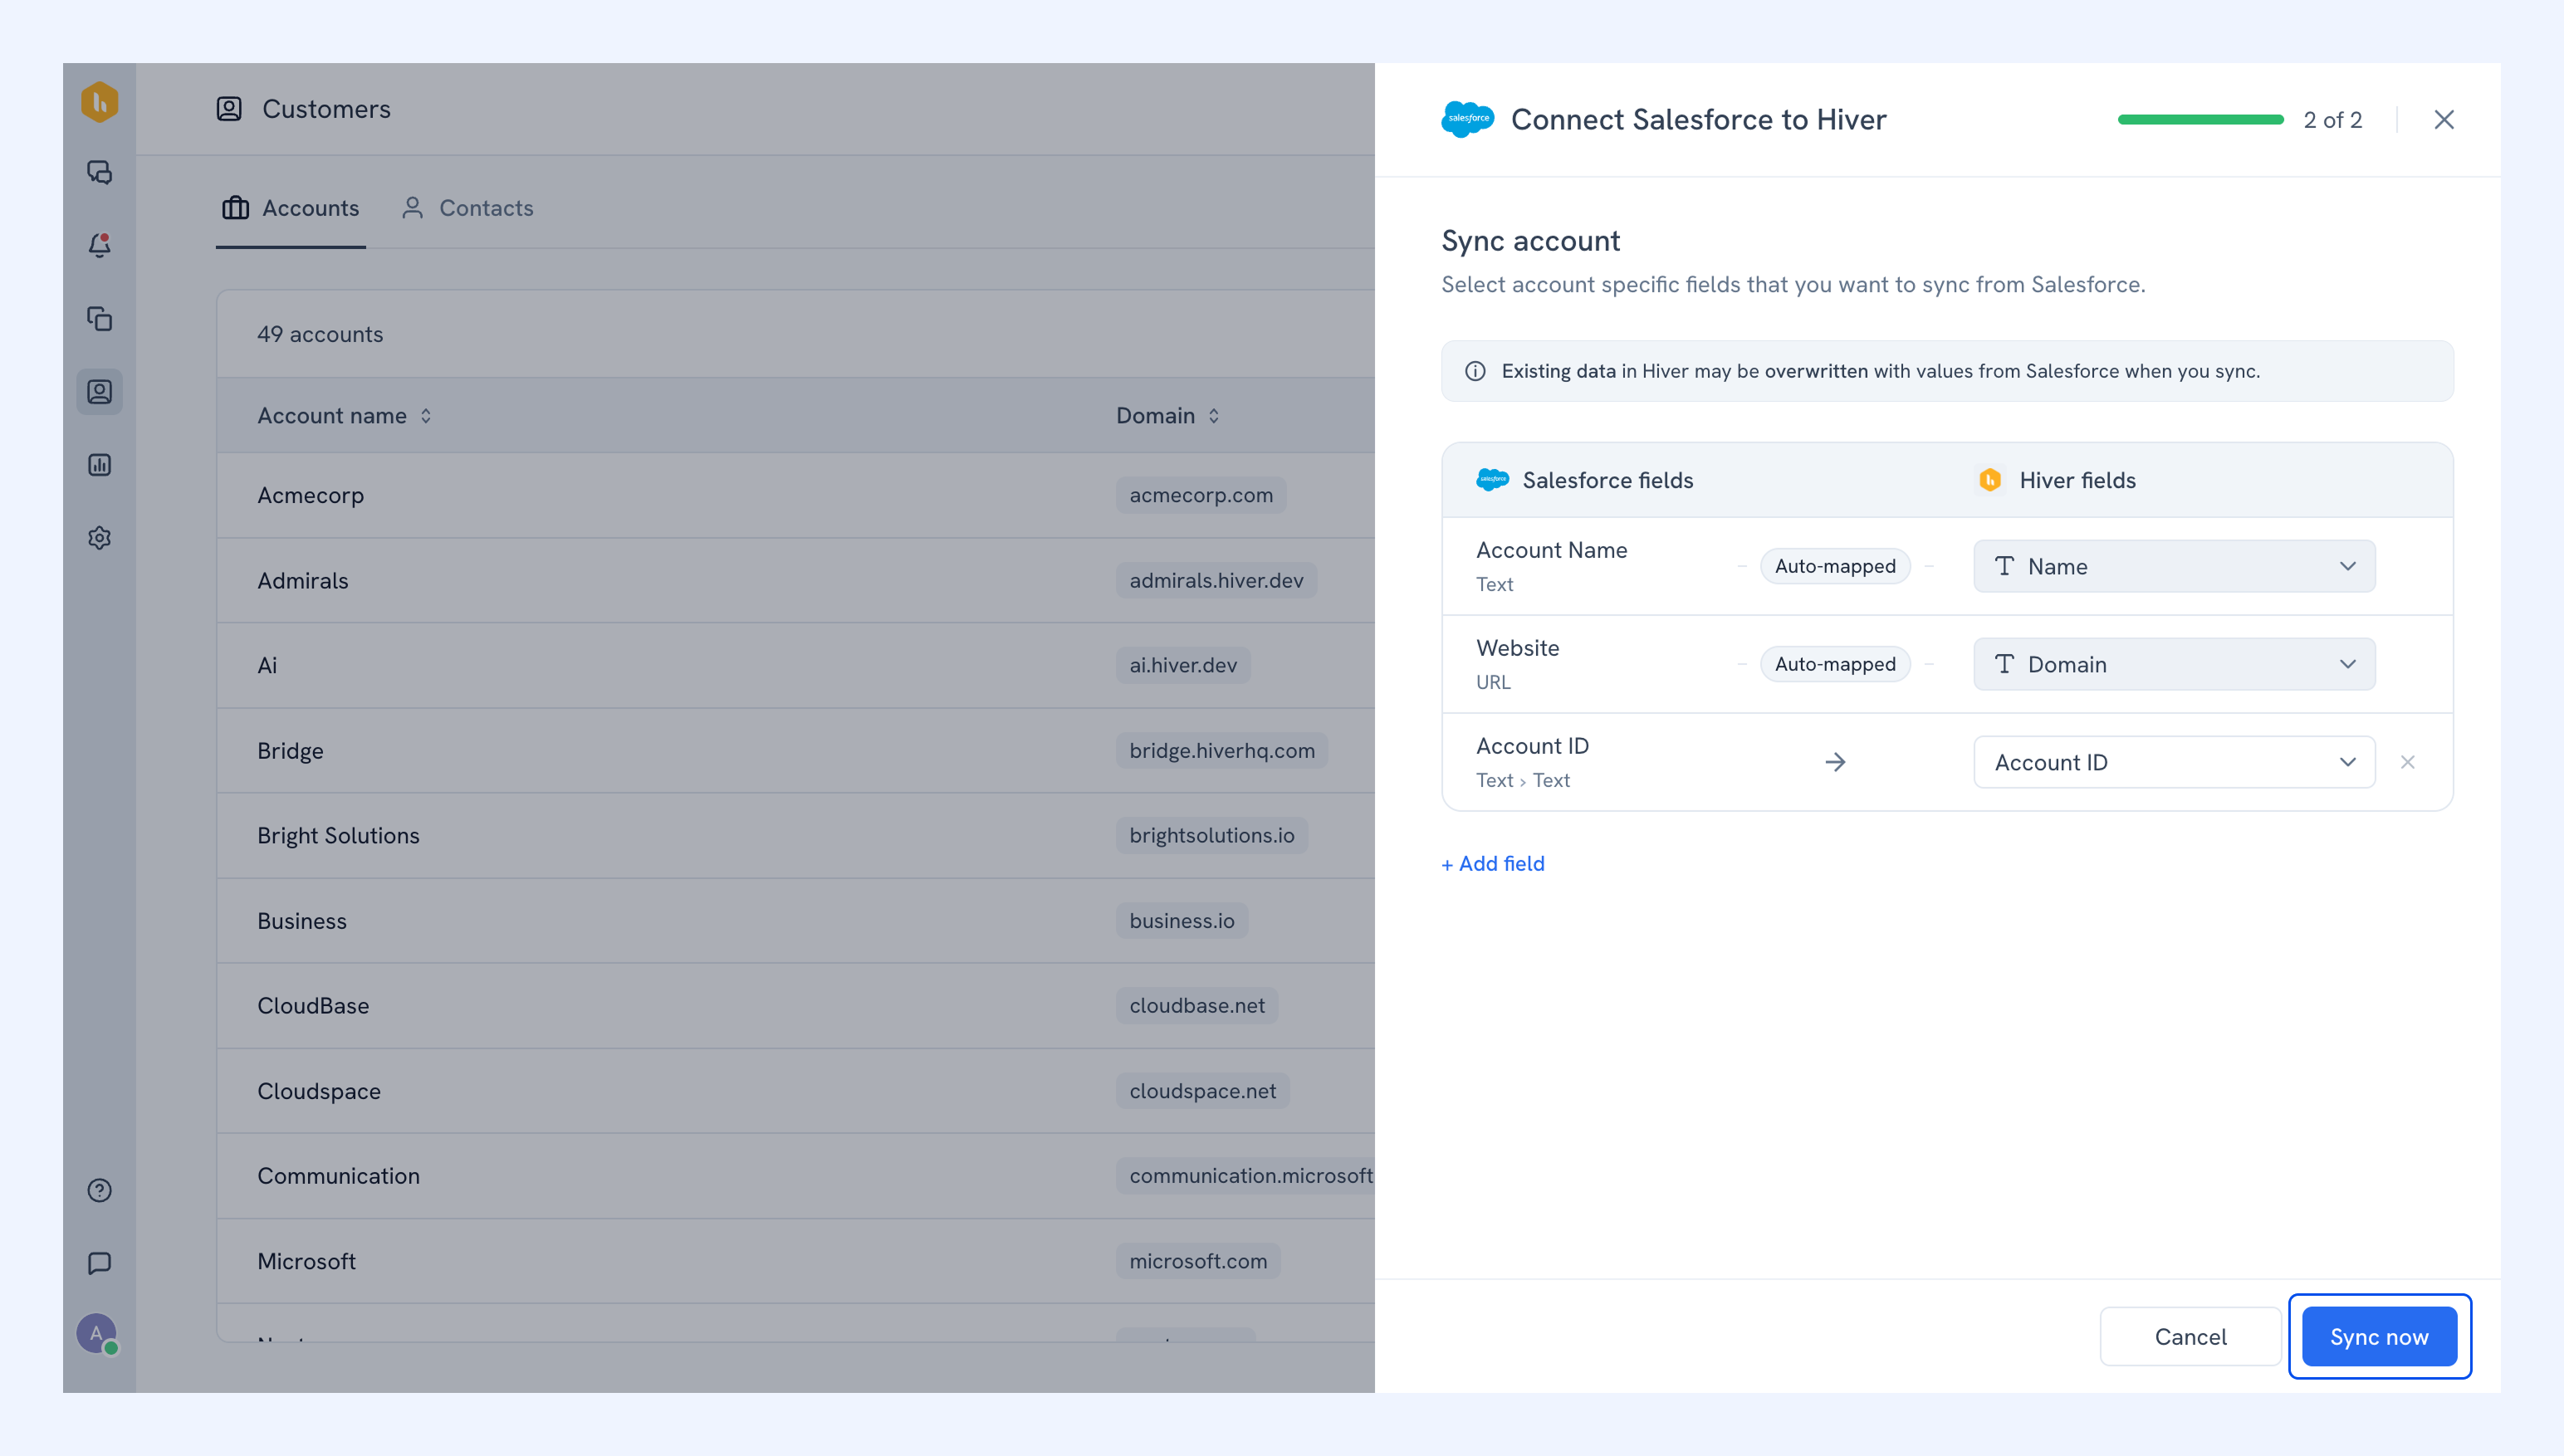
3. Click Sync accounts.
Note: You'll see Sync accounts on the Accounts tab and Sync contacts on the Contacts tab. Open the matching tab for the records you want to sync.
4. Map the fields you want to bring into Hiver. To import more fields, click Add field, then choose a Salesforce field and map it to a Hiver field.
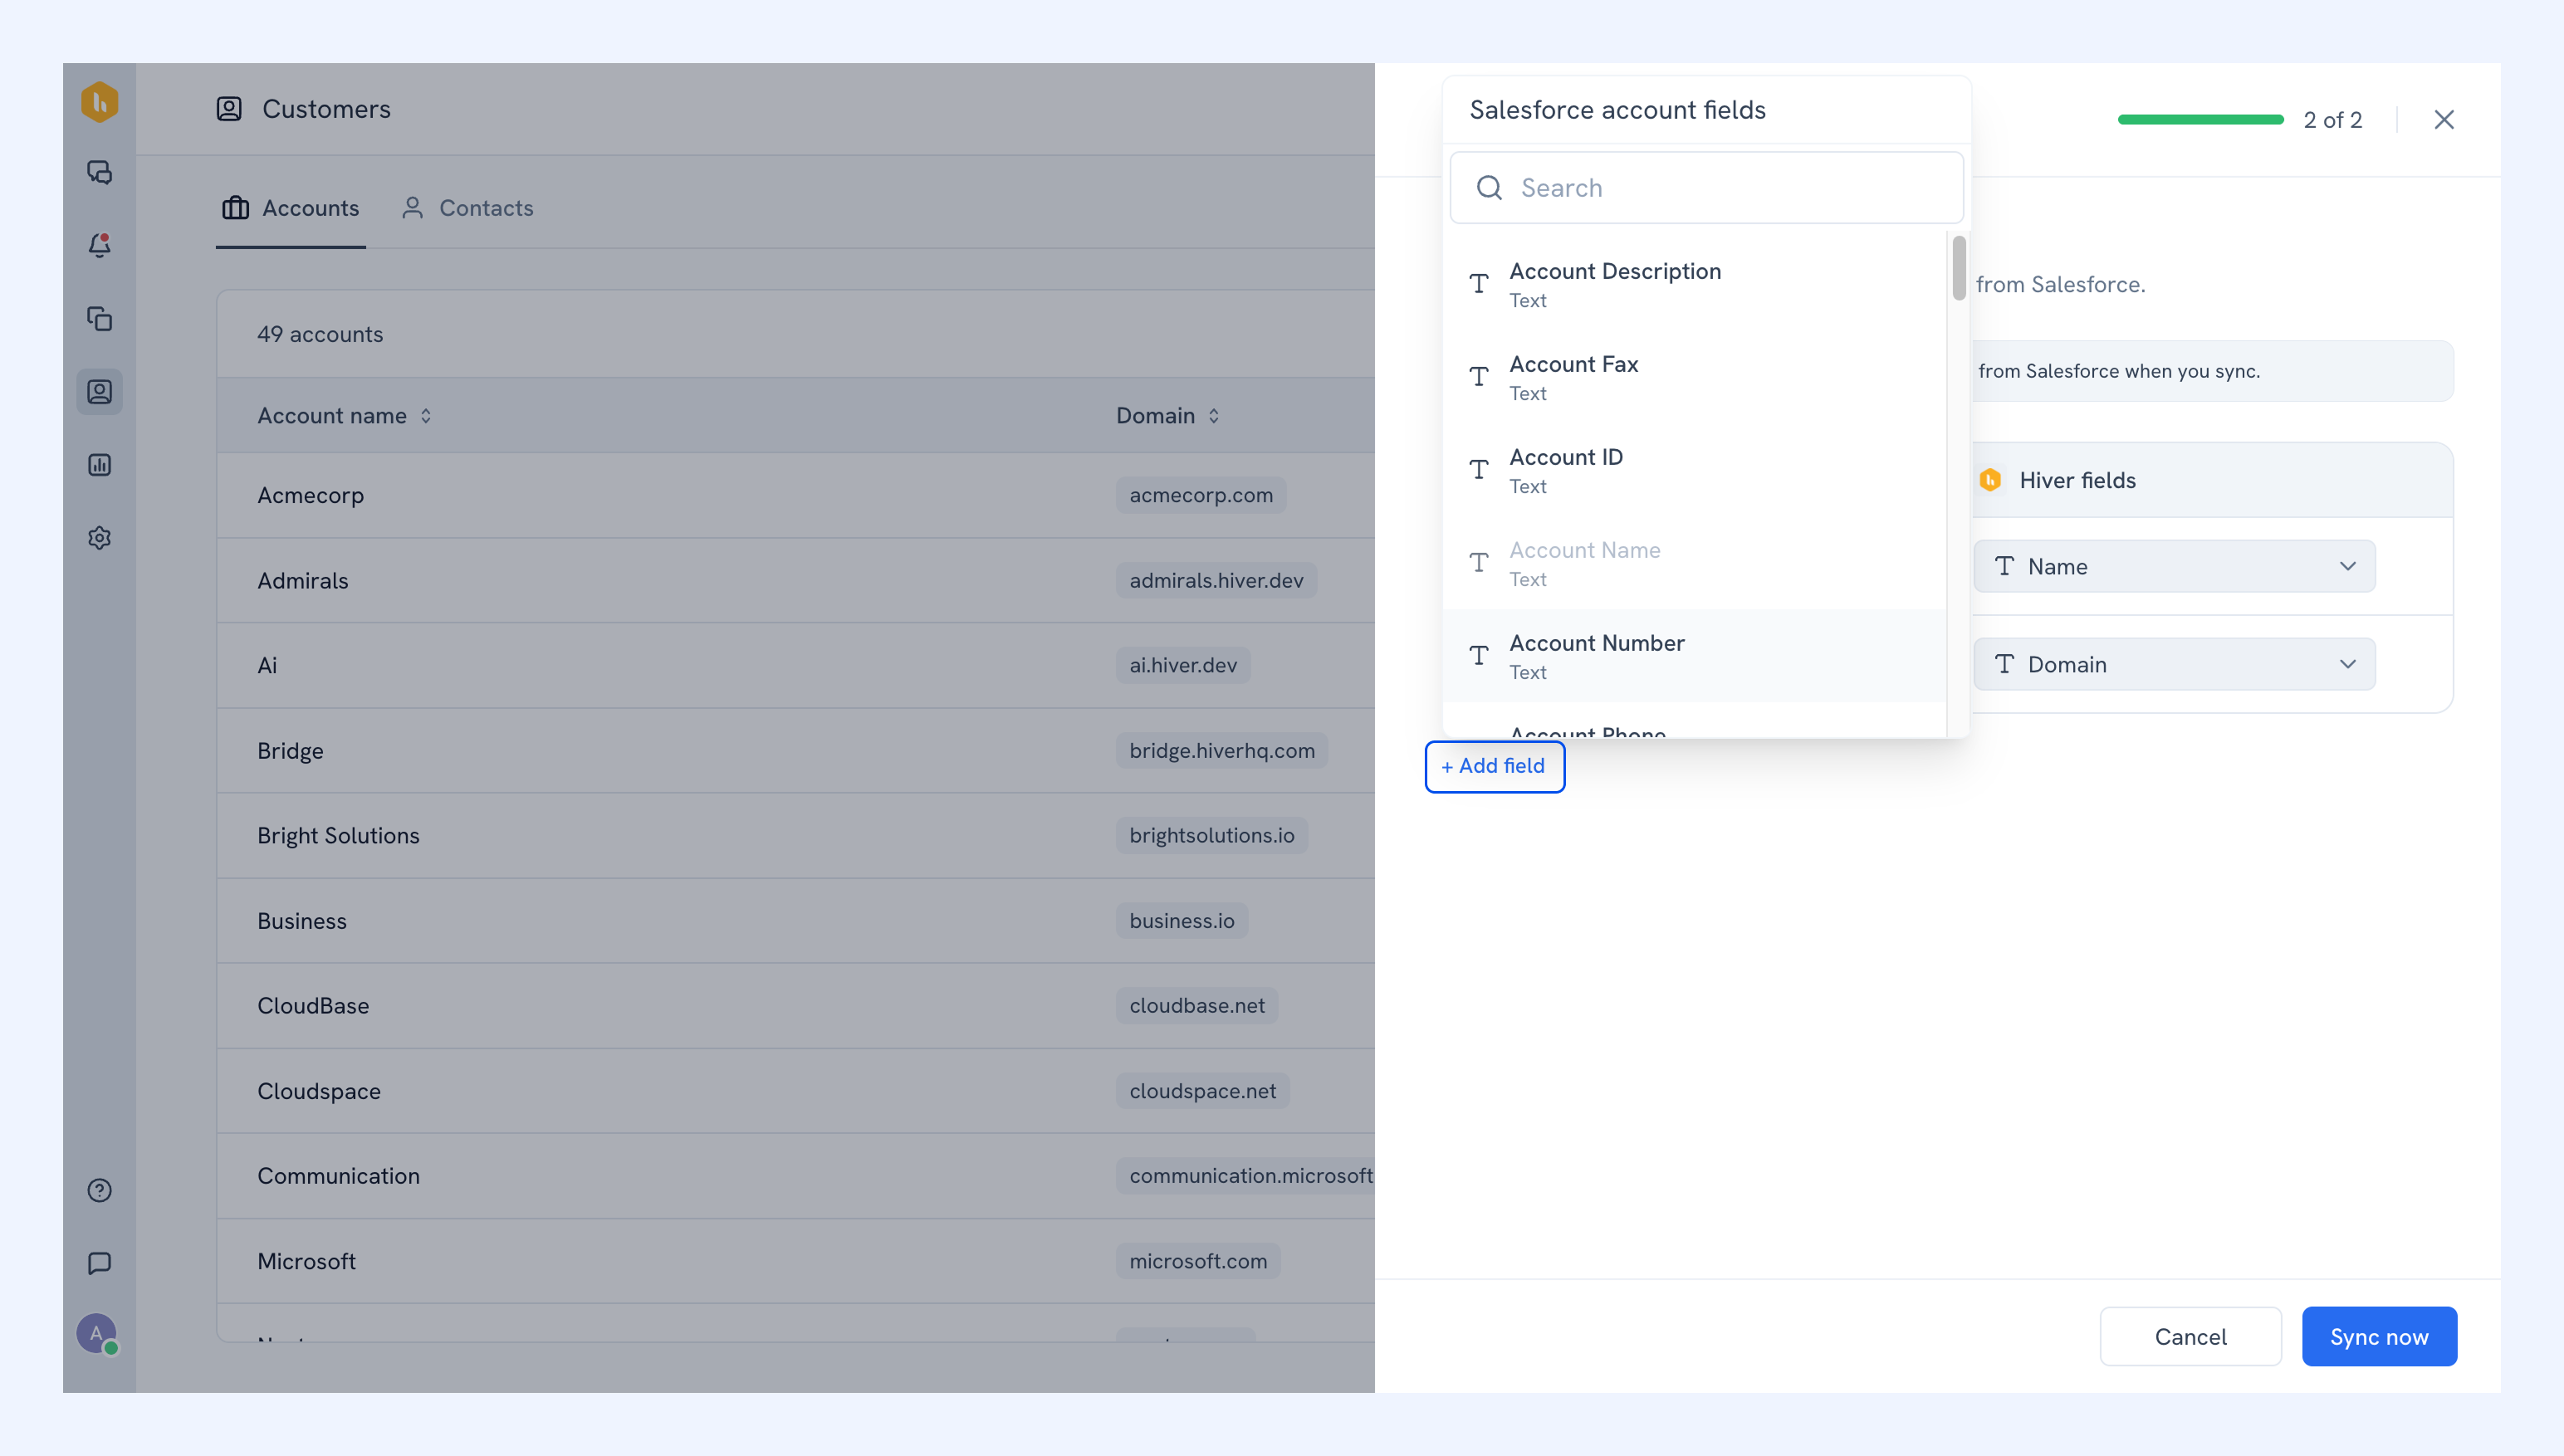
5. Click Sync now.
Note: If a mapped field already has a value in Hiver, Salesforce replaces it.
Managing your connection
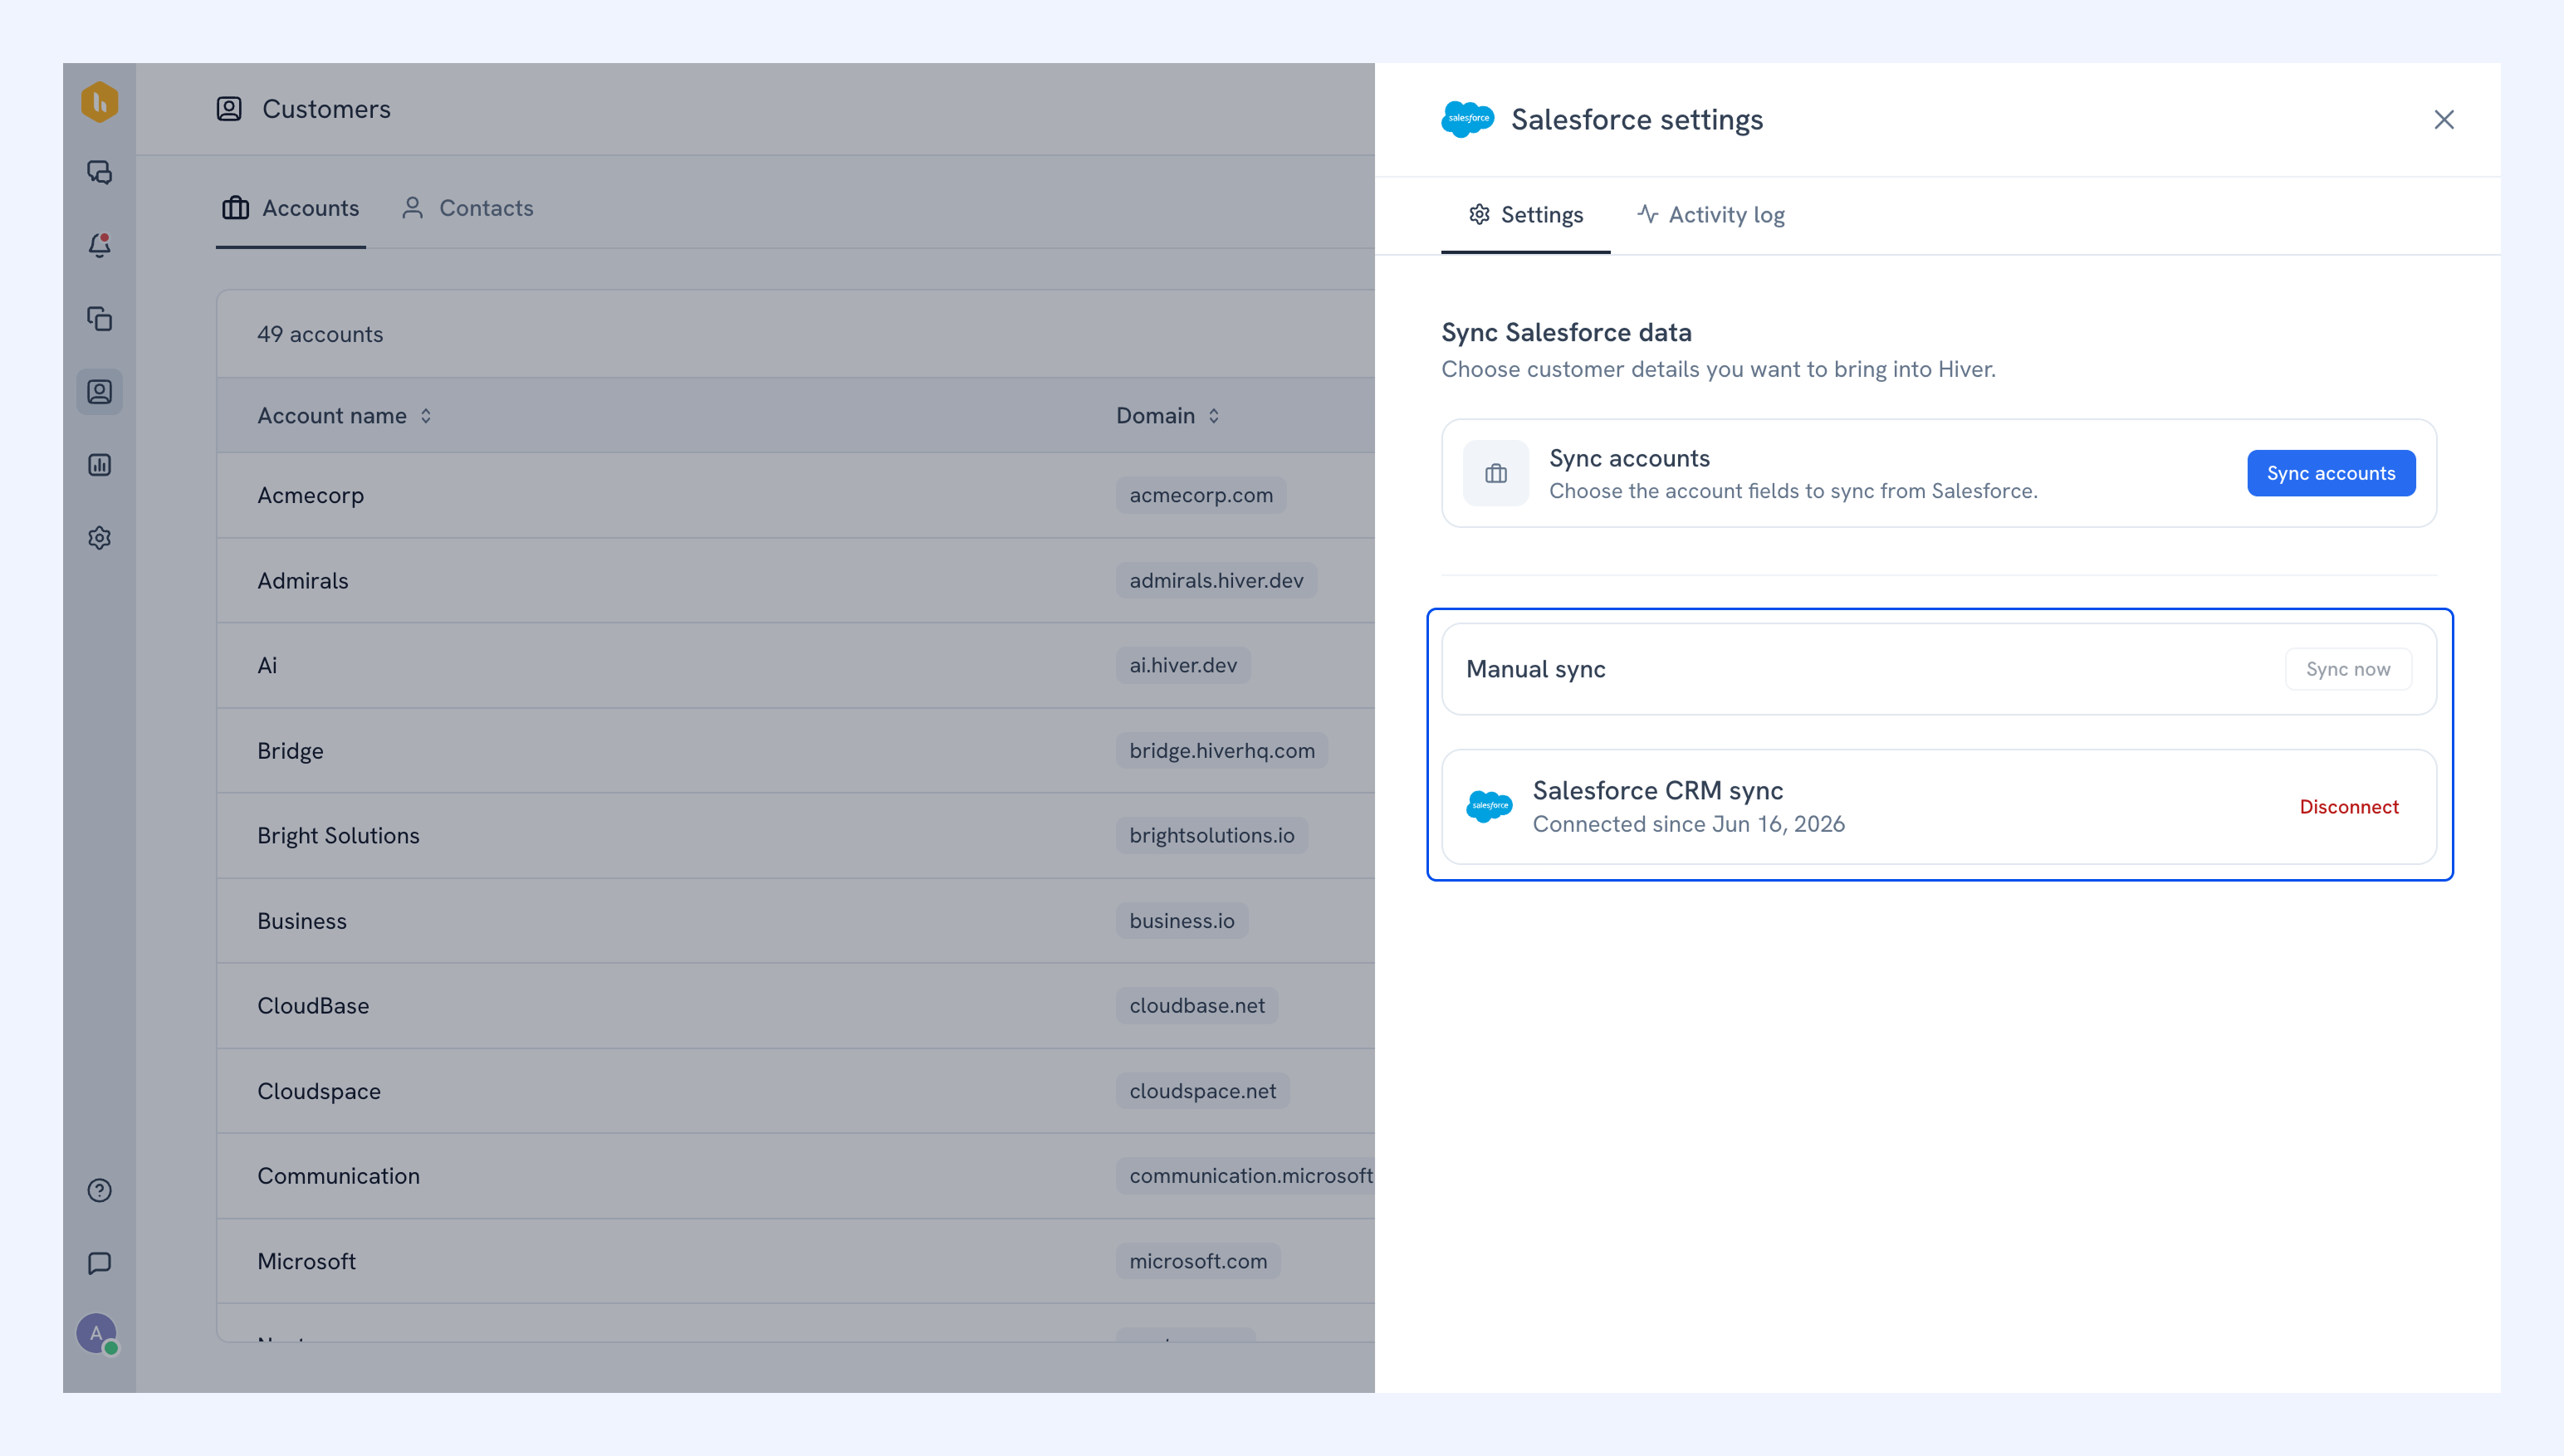
Once you've connected your CRM, you can:
- Run a manual sync: Pull the latest account and contact updates into Hiver.
- Disconnect the CRM: Stop syncing customer details from your CRM into Hiver.
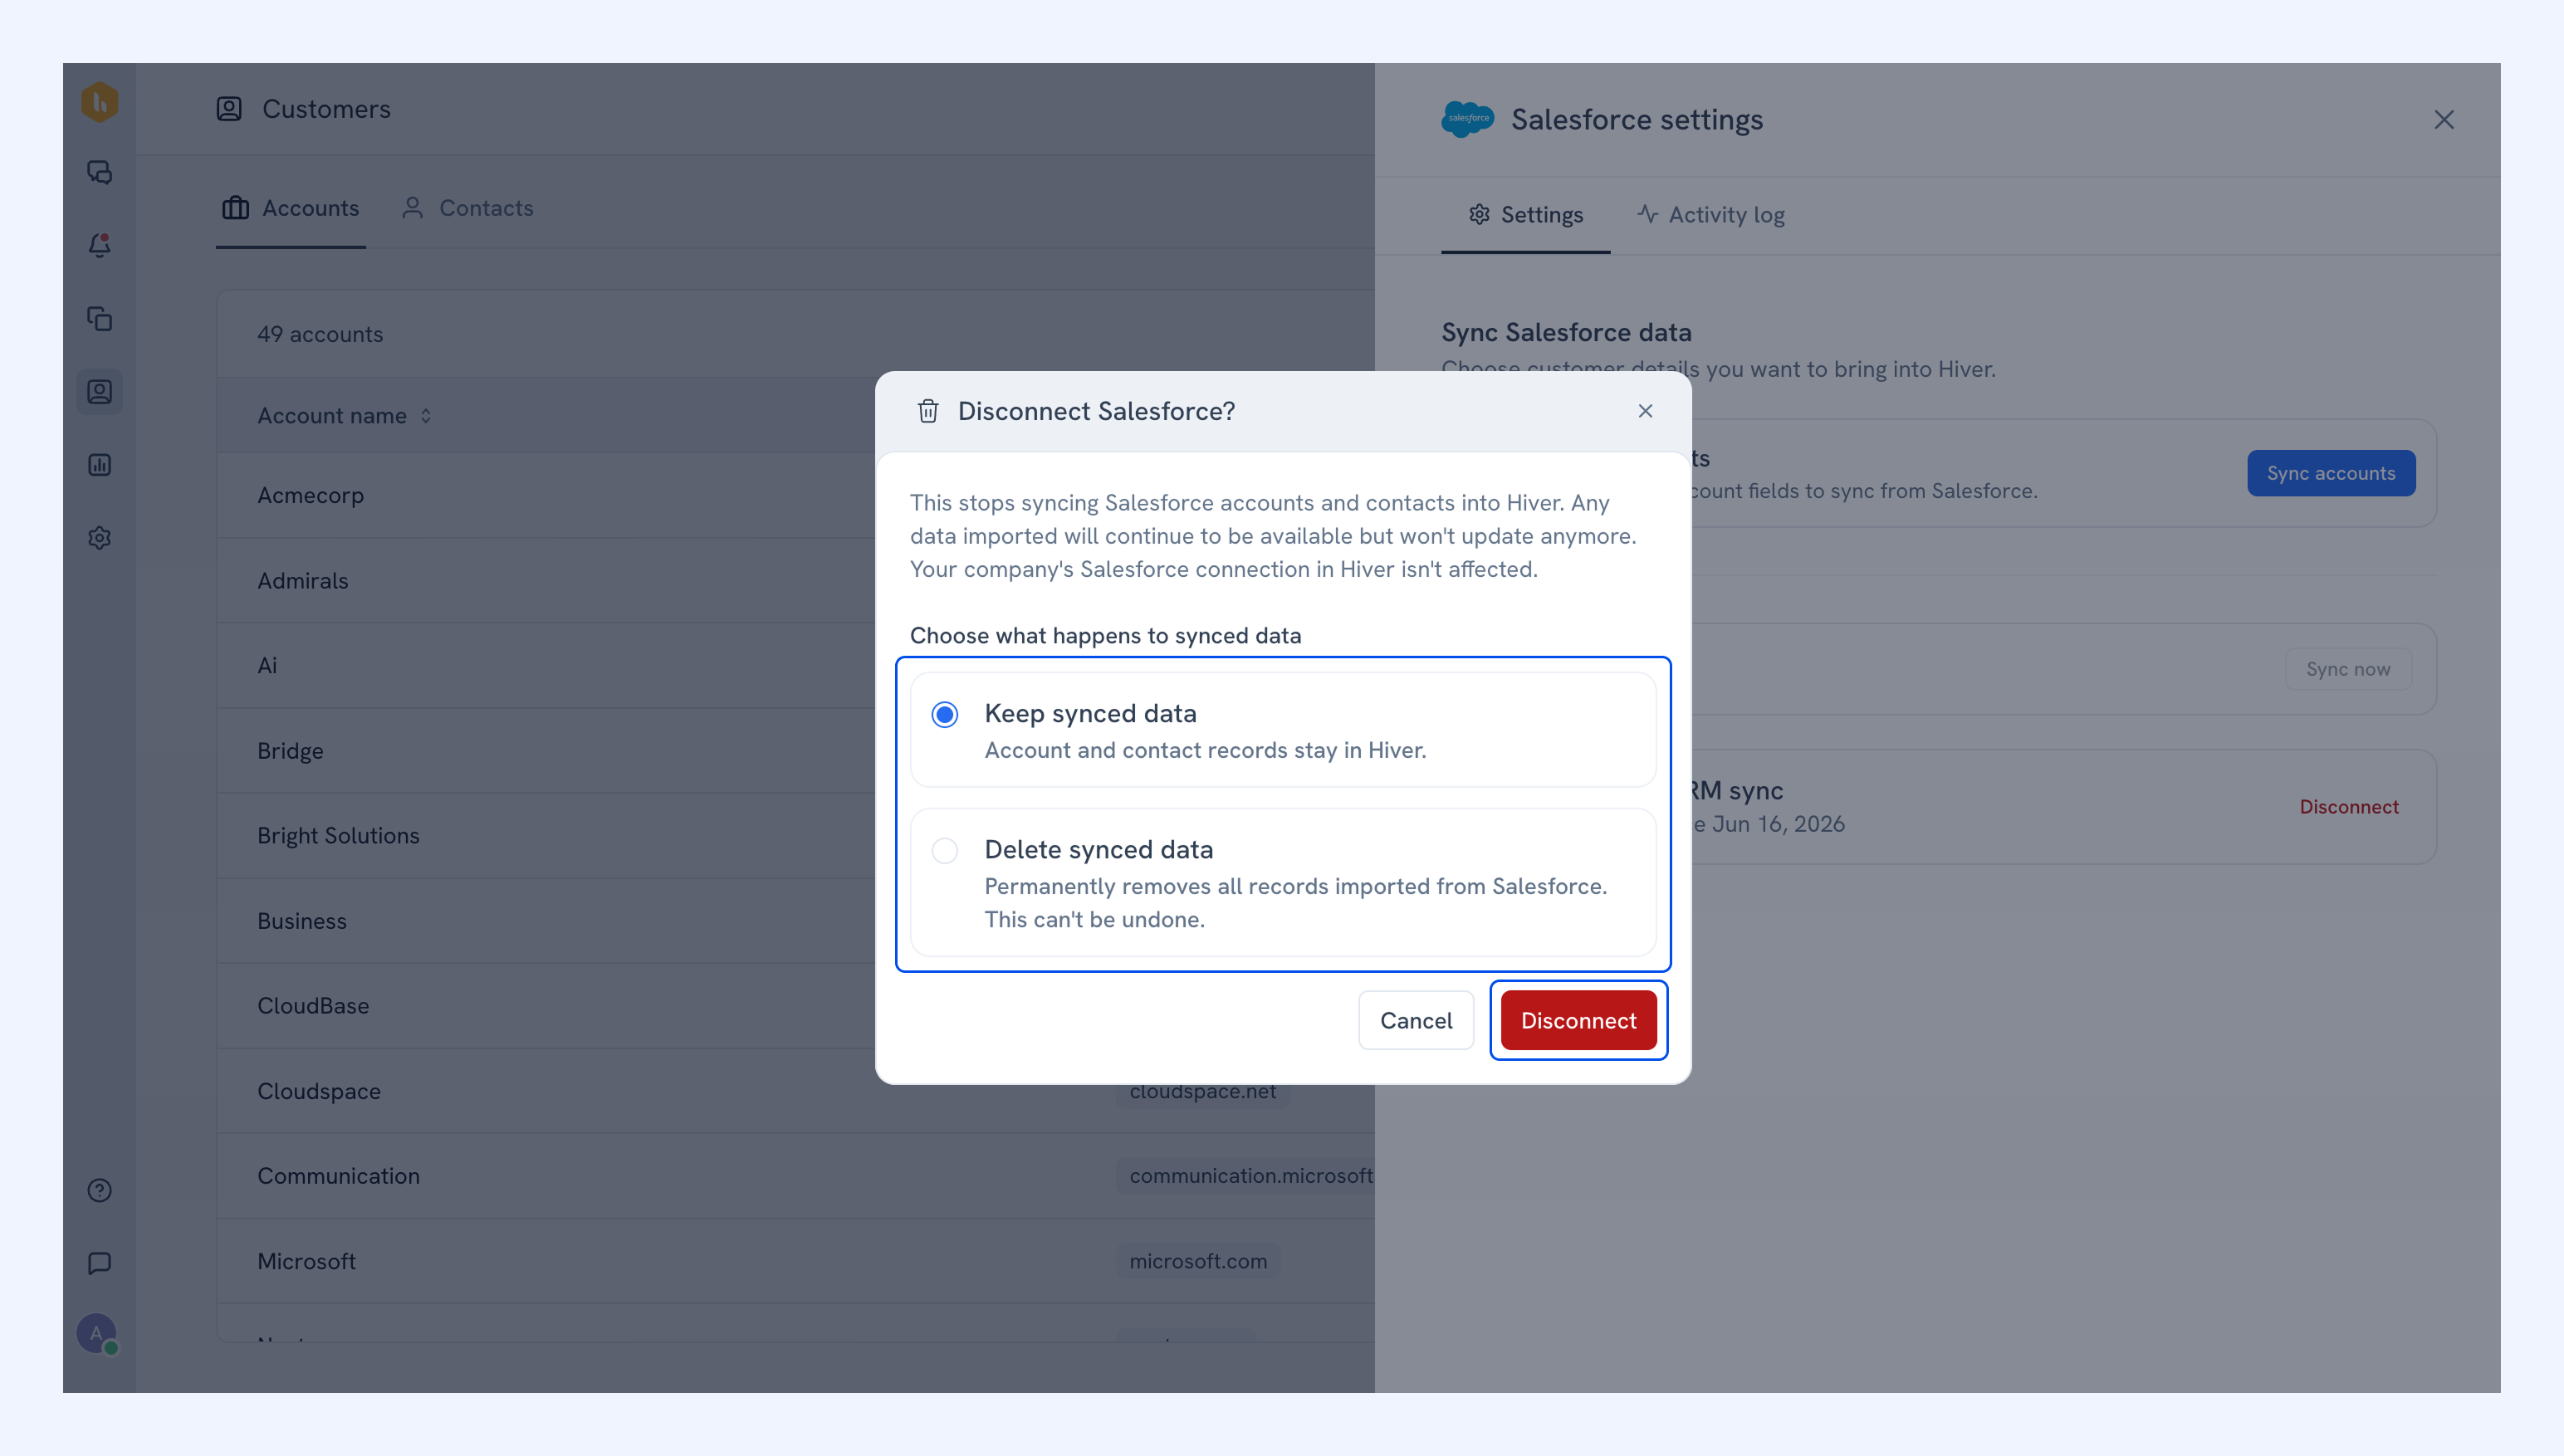
To disconnect the CRM:
1. Click Disconnect.
2. Choose what happens to your synced data:
- Keep synced data: Account and contact records stay in Hiver.
- Delete synced data: Permanently removes all records imported from the CRM. This can't be undone.
3. Click Disconnect to confirm.
Note: When you disconnect, Hiver stops syncing accounts and contacts from your CRM. Data already imported stays available but no longer updates.
Importing from a CSV file
If your account or contact details are in a spreadsheet, you can export it into a CSV file and use that to import details in Hiver.
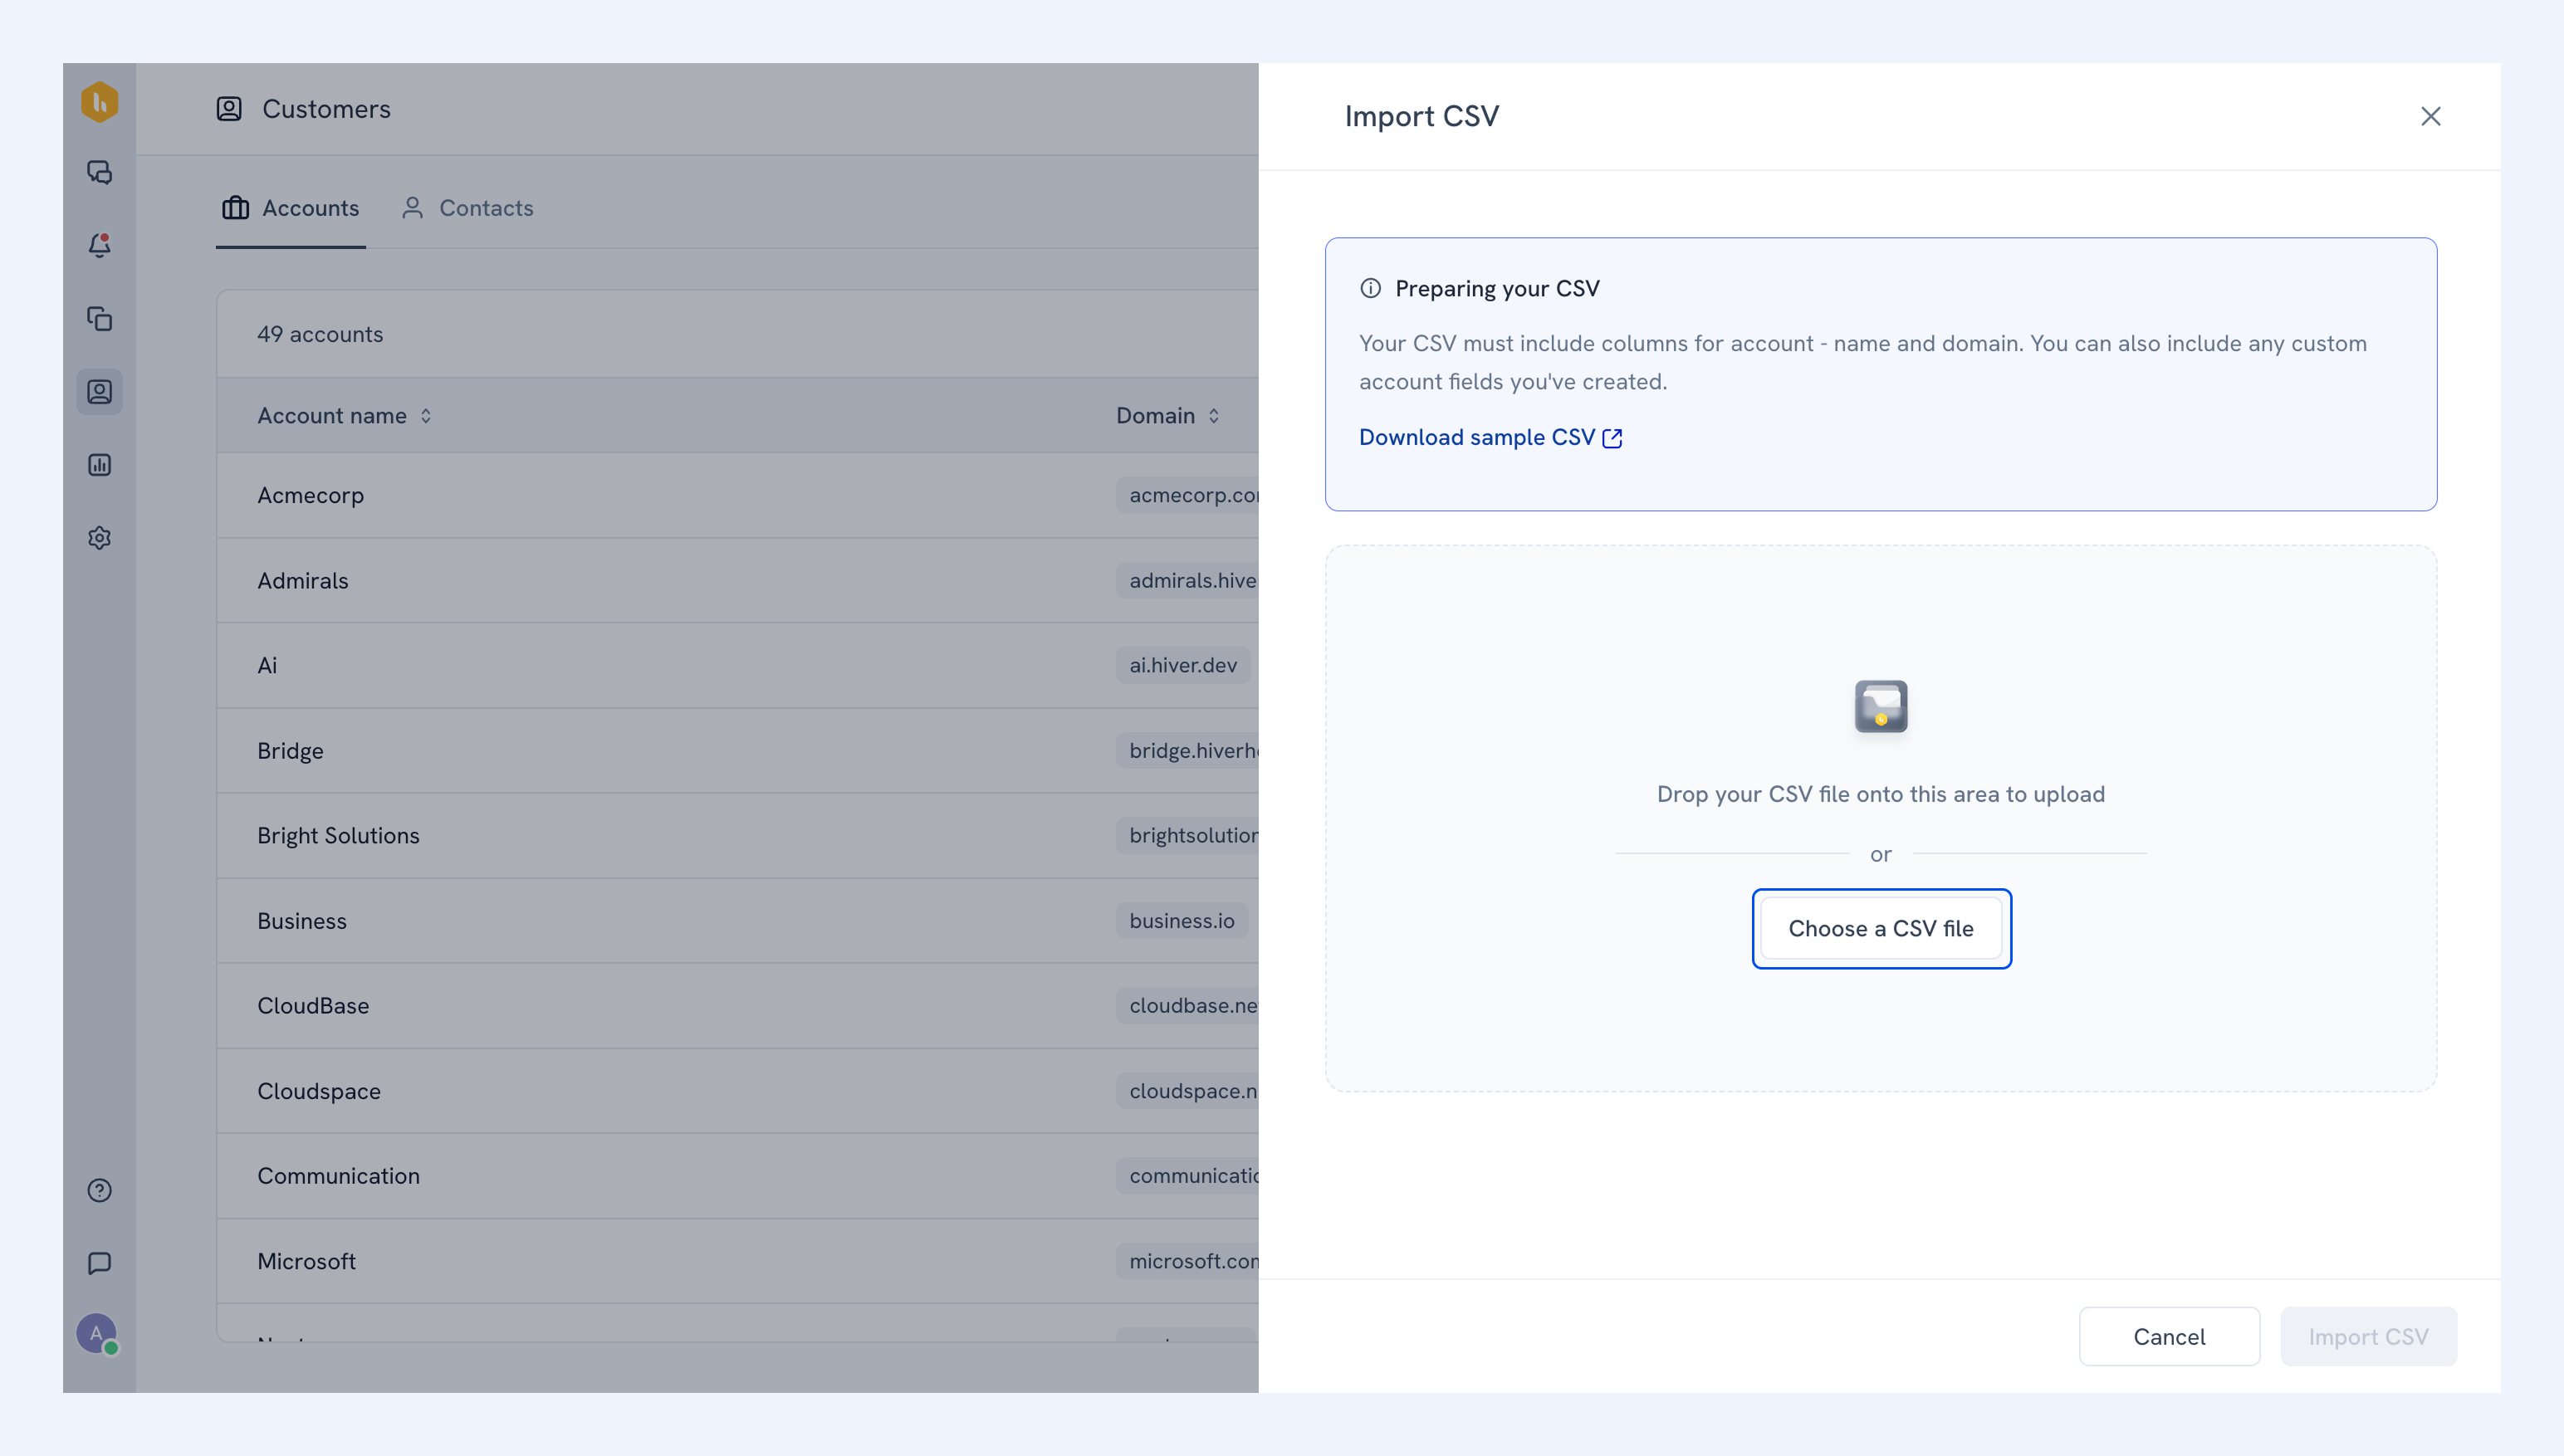
1. Click Import, then select Import CSV.
2. Click Download sample CSV and use it as the template for your file.
Note:
- Your file must include the required columns:
- For importing accounts: name and domains
- For importing contacts: email
- If you've created account or contact fields, the sample file includes a column for each one. You can leave the values in these extra columns blank, and fill in only the ones you need.
- Use the sample CSV file to get an idea on how to format your file.
3. Click Choose a .CSV file and upload your file.
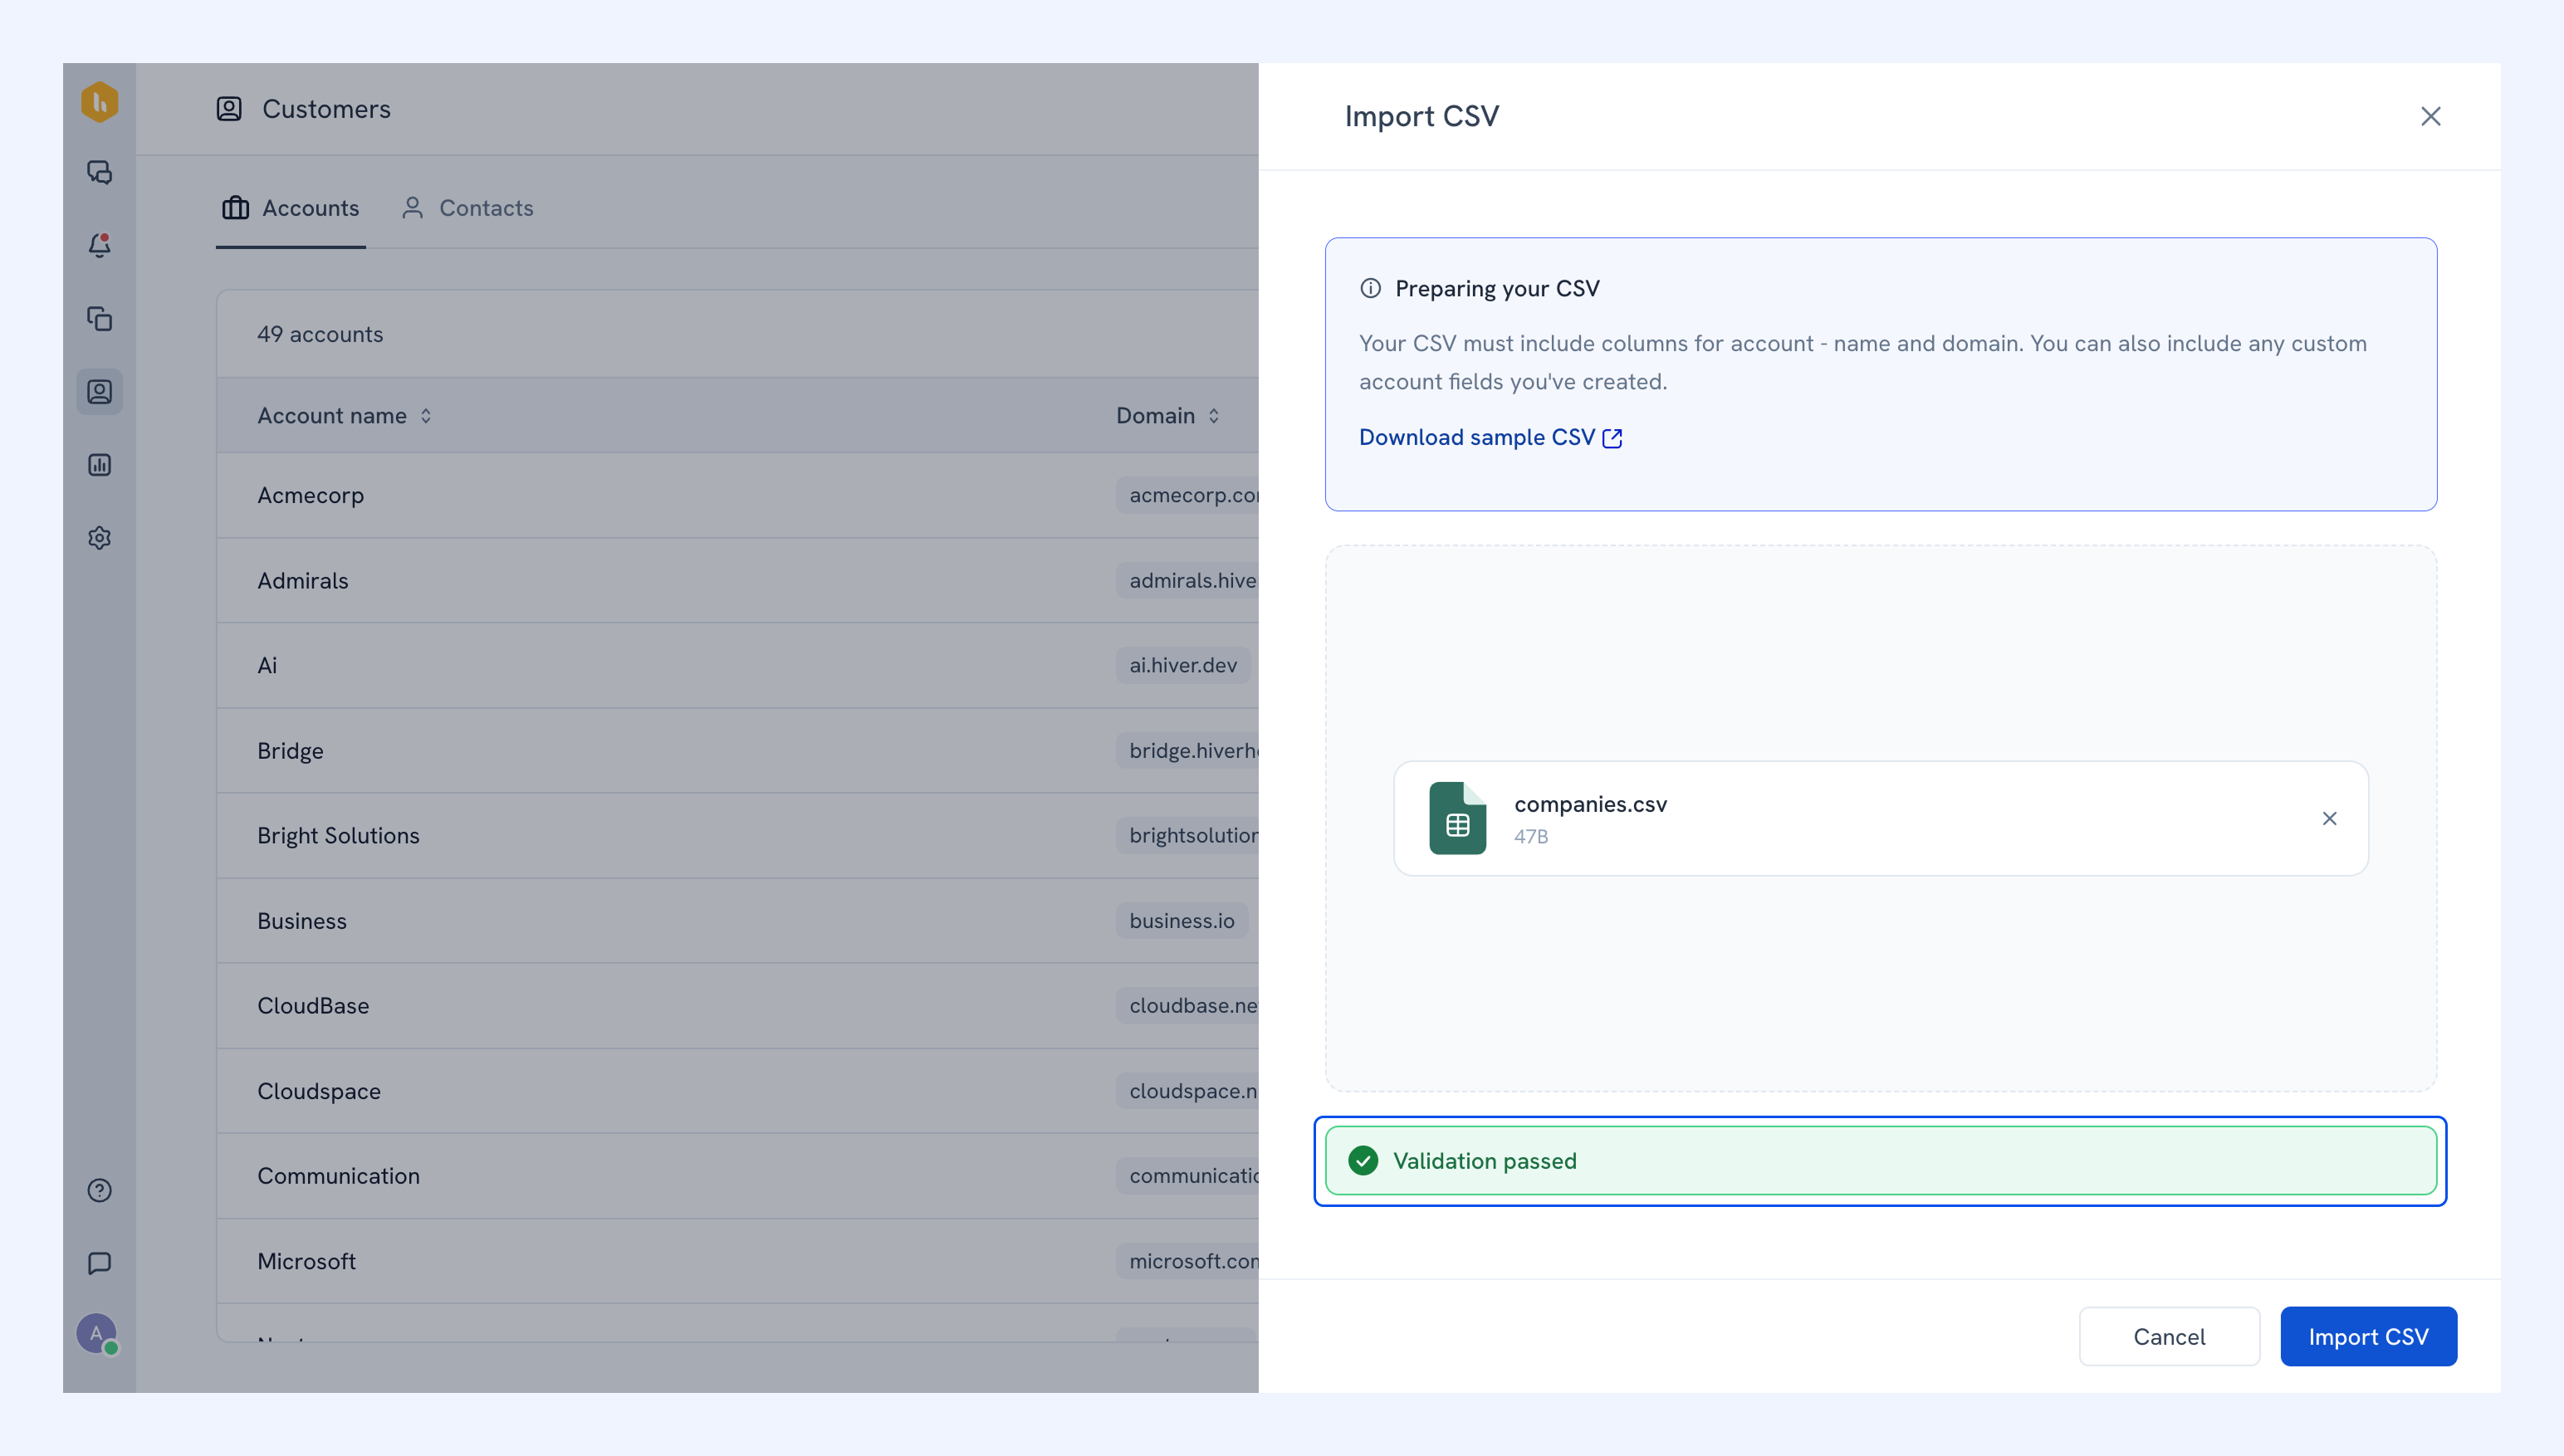
4. Once done, Hiver checks for formatting issues. If no issues are found, you’ll see Validation passed.
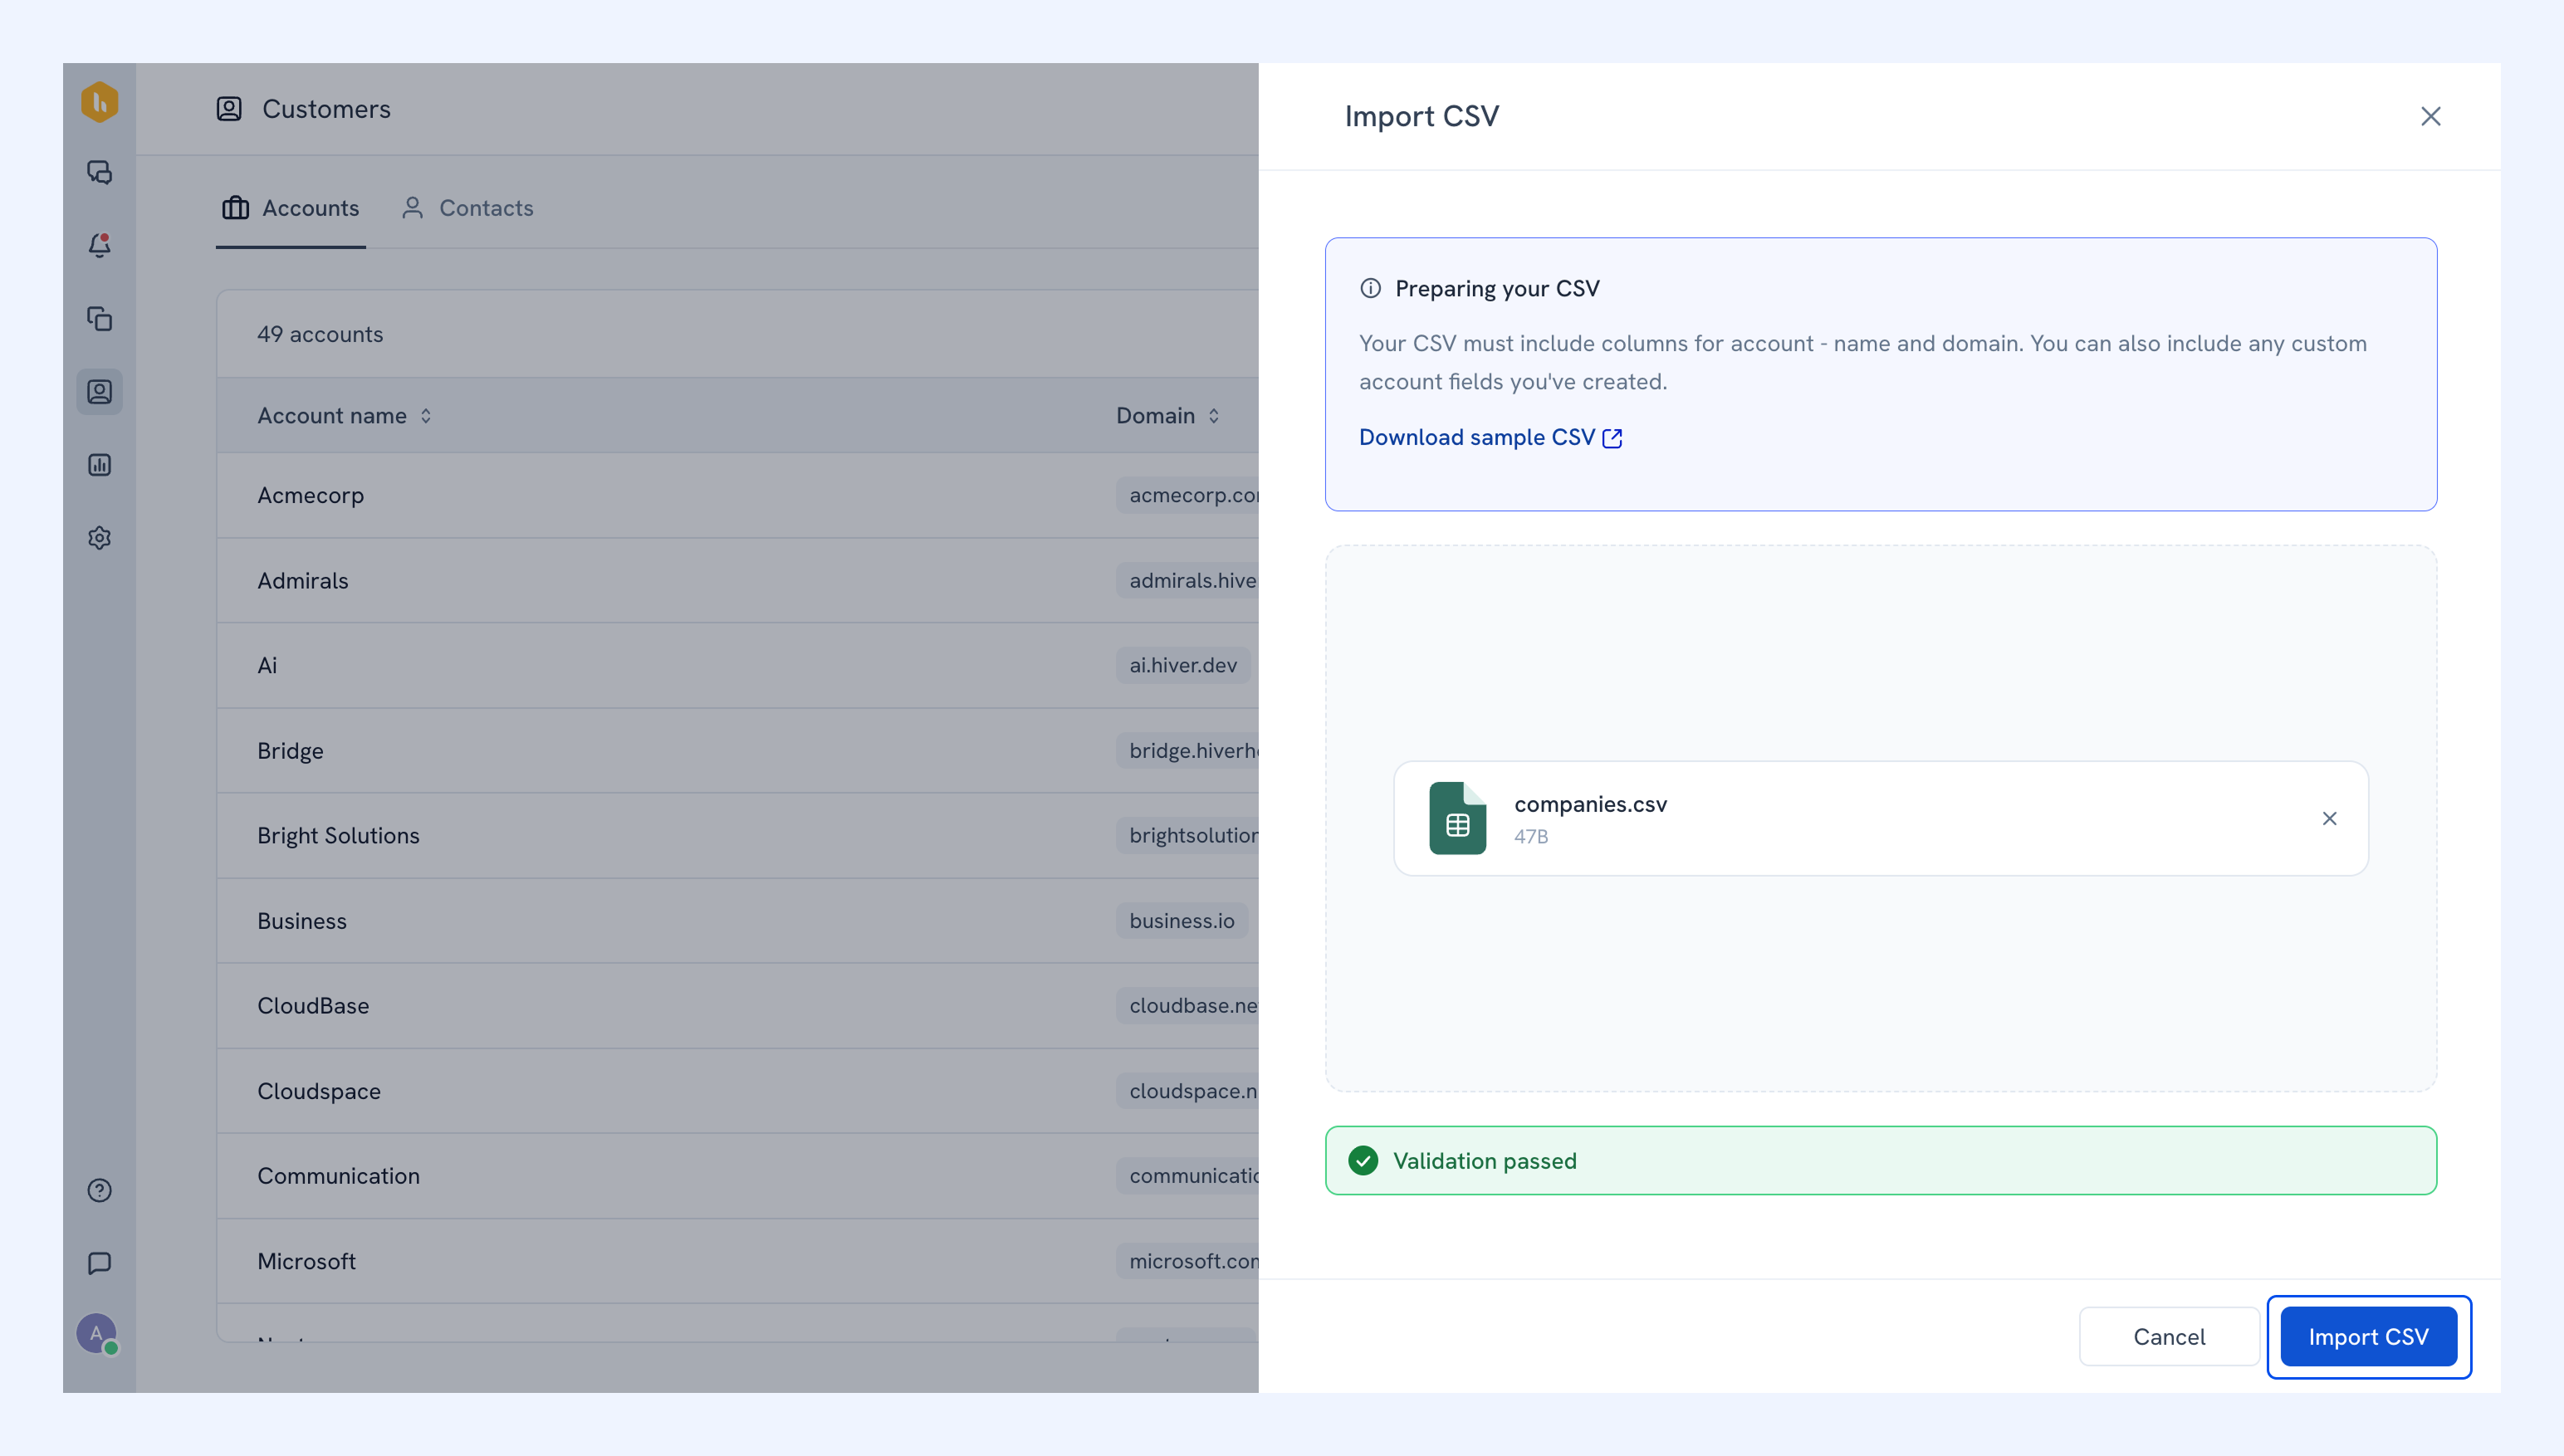
5. Click Import CSV to complete the import.
Note: If CSV contains any errors, you can make changes and upload the file again.
Related articles
Managing accounts and contacts
Viewing account and contact details in conversations
Managing emails in Shared Inbox