Auto-assigning incoming conversations
Auto-assignment routes incoming conversations to specific team members based on rules you define, eliminating the need to manually assign each conversation.
Without an assignment system in place, new conversations can pile up, leading to slower response times, uneven workloads, or important issues slipping through the cracks.
Hiver offers Round robin assignment to automatically distribute incoming conversations among team members, ensuring every message is picked up promptly and workloads stay balanced.
You can also use Automations to set up specific routing rules based on conditions like sender, subject, or tags. Learn more about Automations.
Round robin assignment
Round robin assignment distributes incoming conversations equally among team members in a circular rotation.
For example, if your team has three members — Sarah, Kevin, and Mike. The first conversation goes to Sarah, the second to Kevin, the third to Mike, and then the cycle repeats. This ensures everyone gets an equal share of the workload.
The order of assignment follows the sequence in which members were added to the Shared Inbox. After the last member receives a conversation, the assignment cycle restarts from the first member in the list.
To enable round robin assignment:
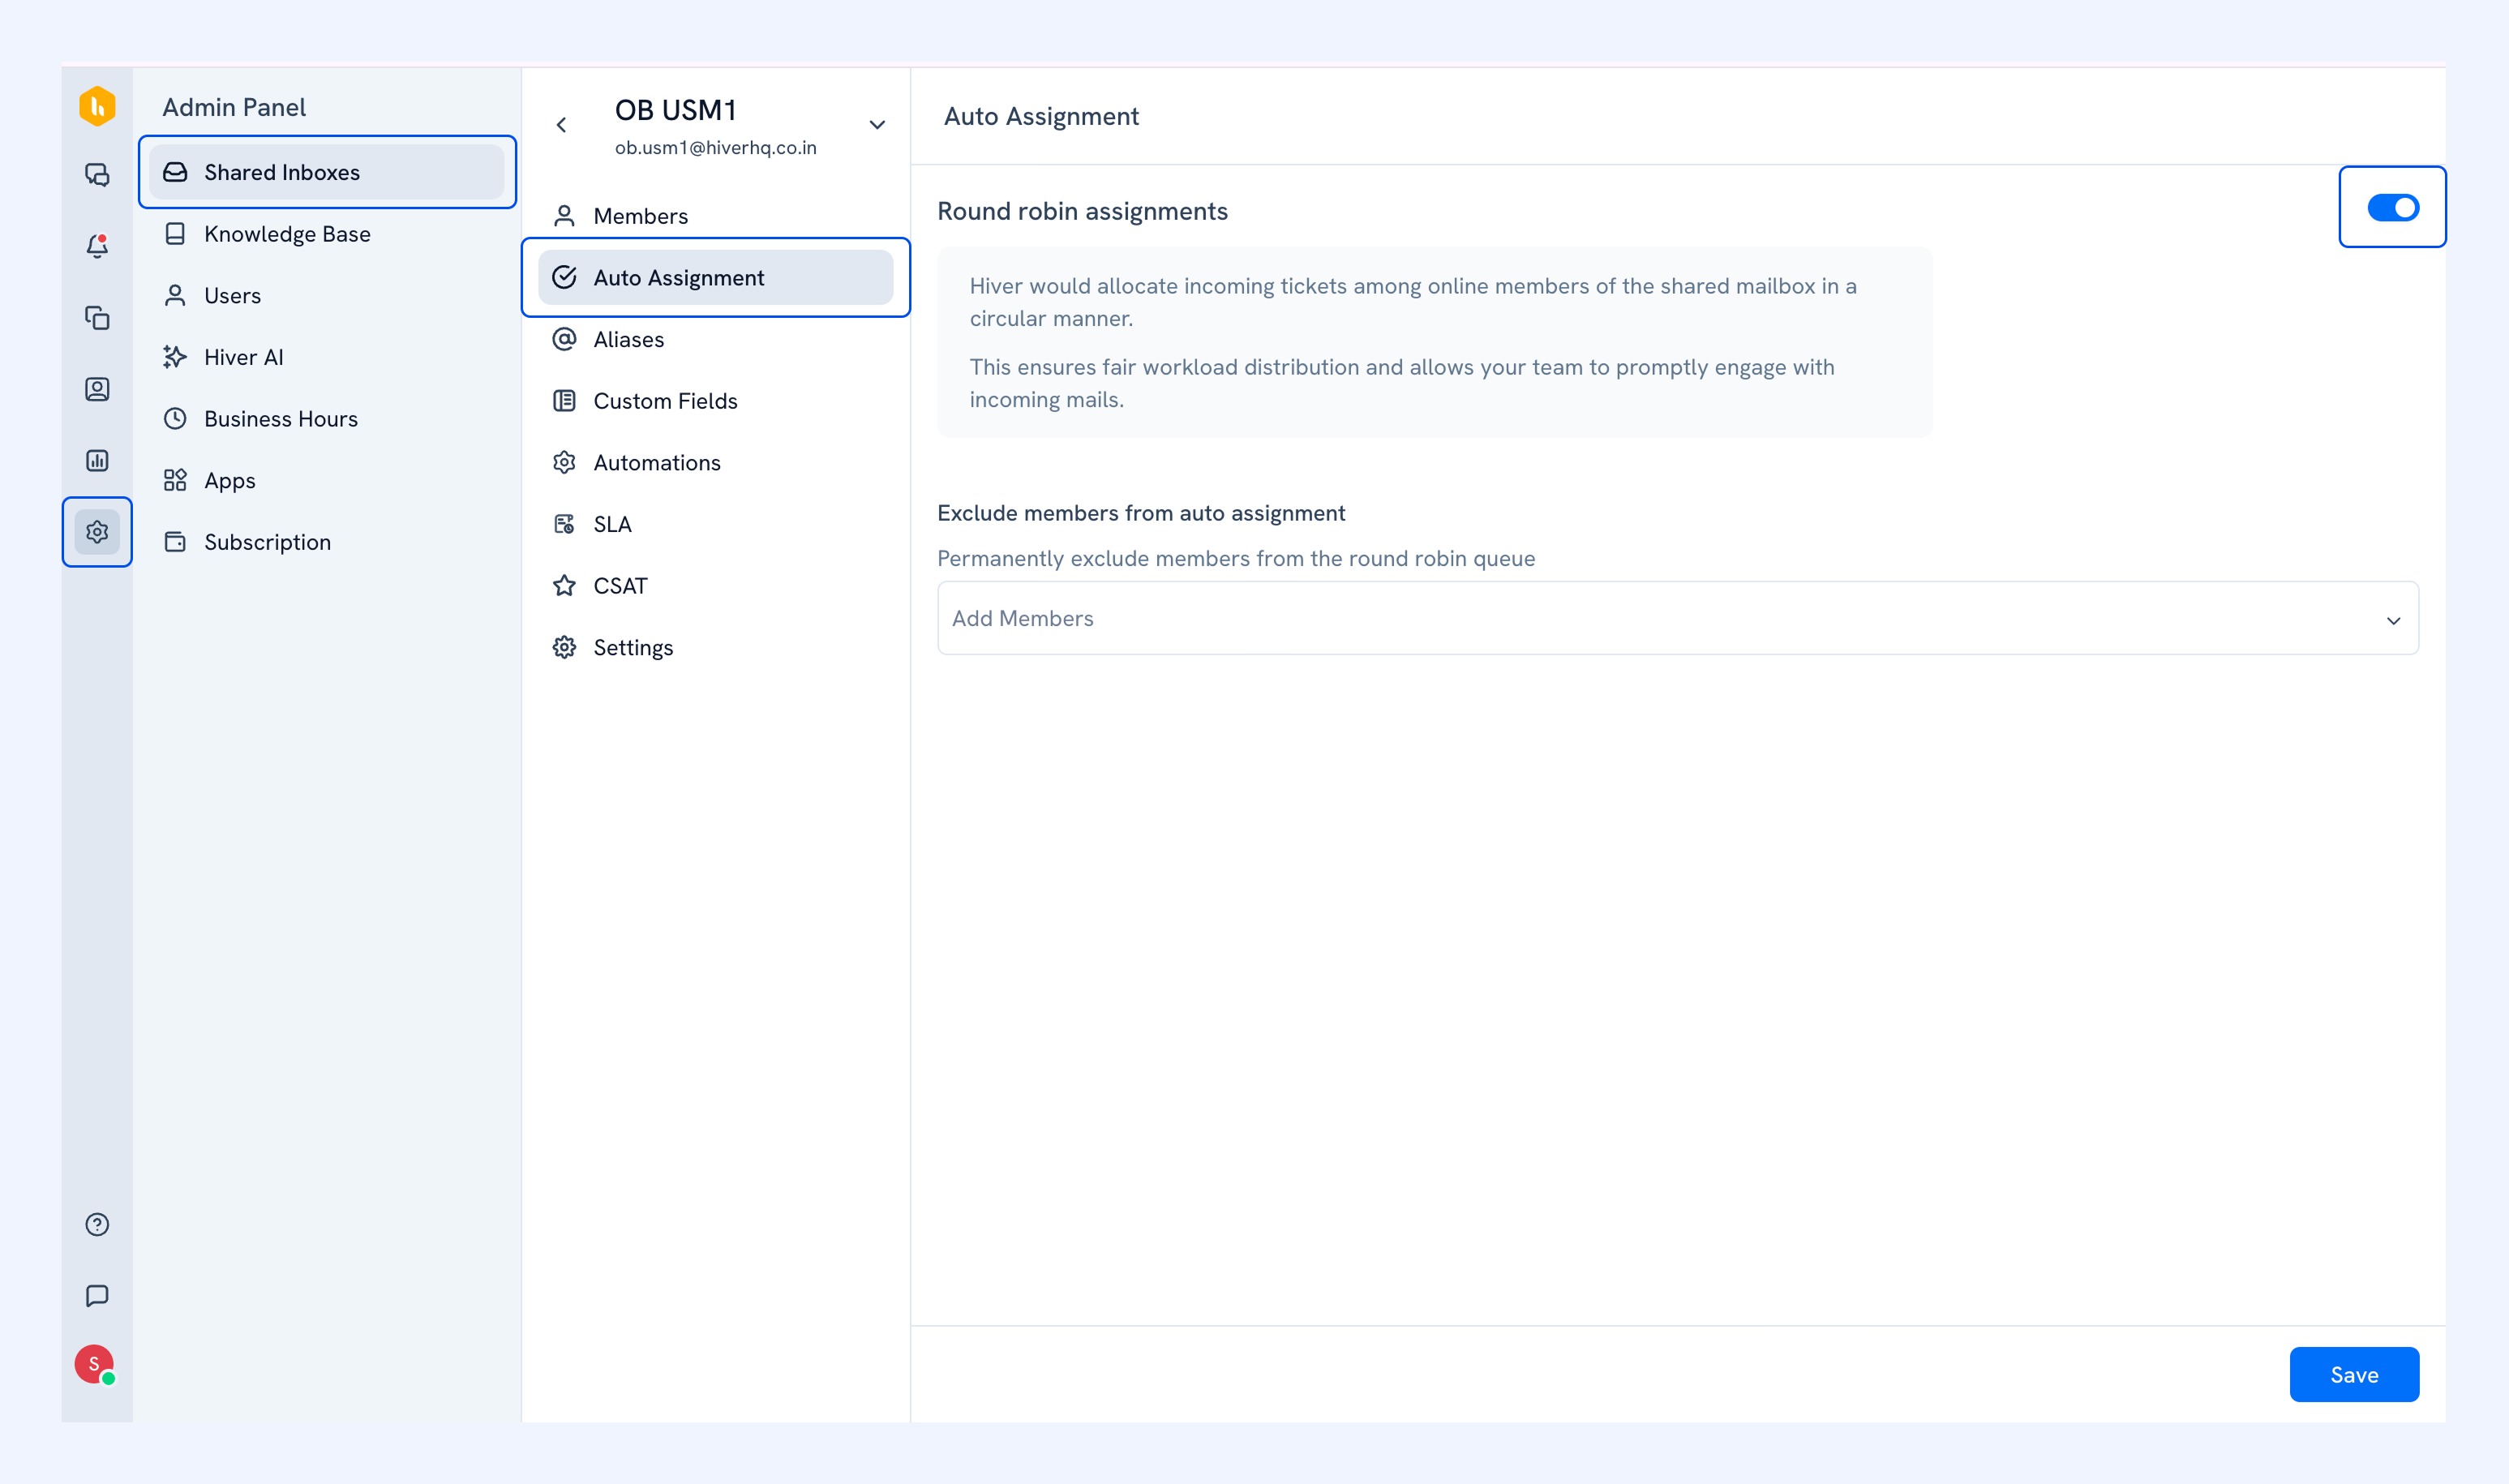
1. Go to Admin Panel → Shared Inboxes → Select a Shared Inbox → Auto Assignment.
2. Turn on the toggle to enable Round robin assignment.
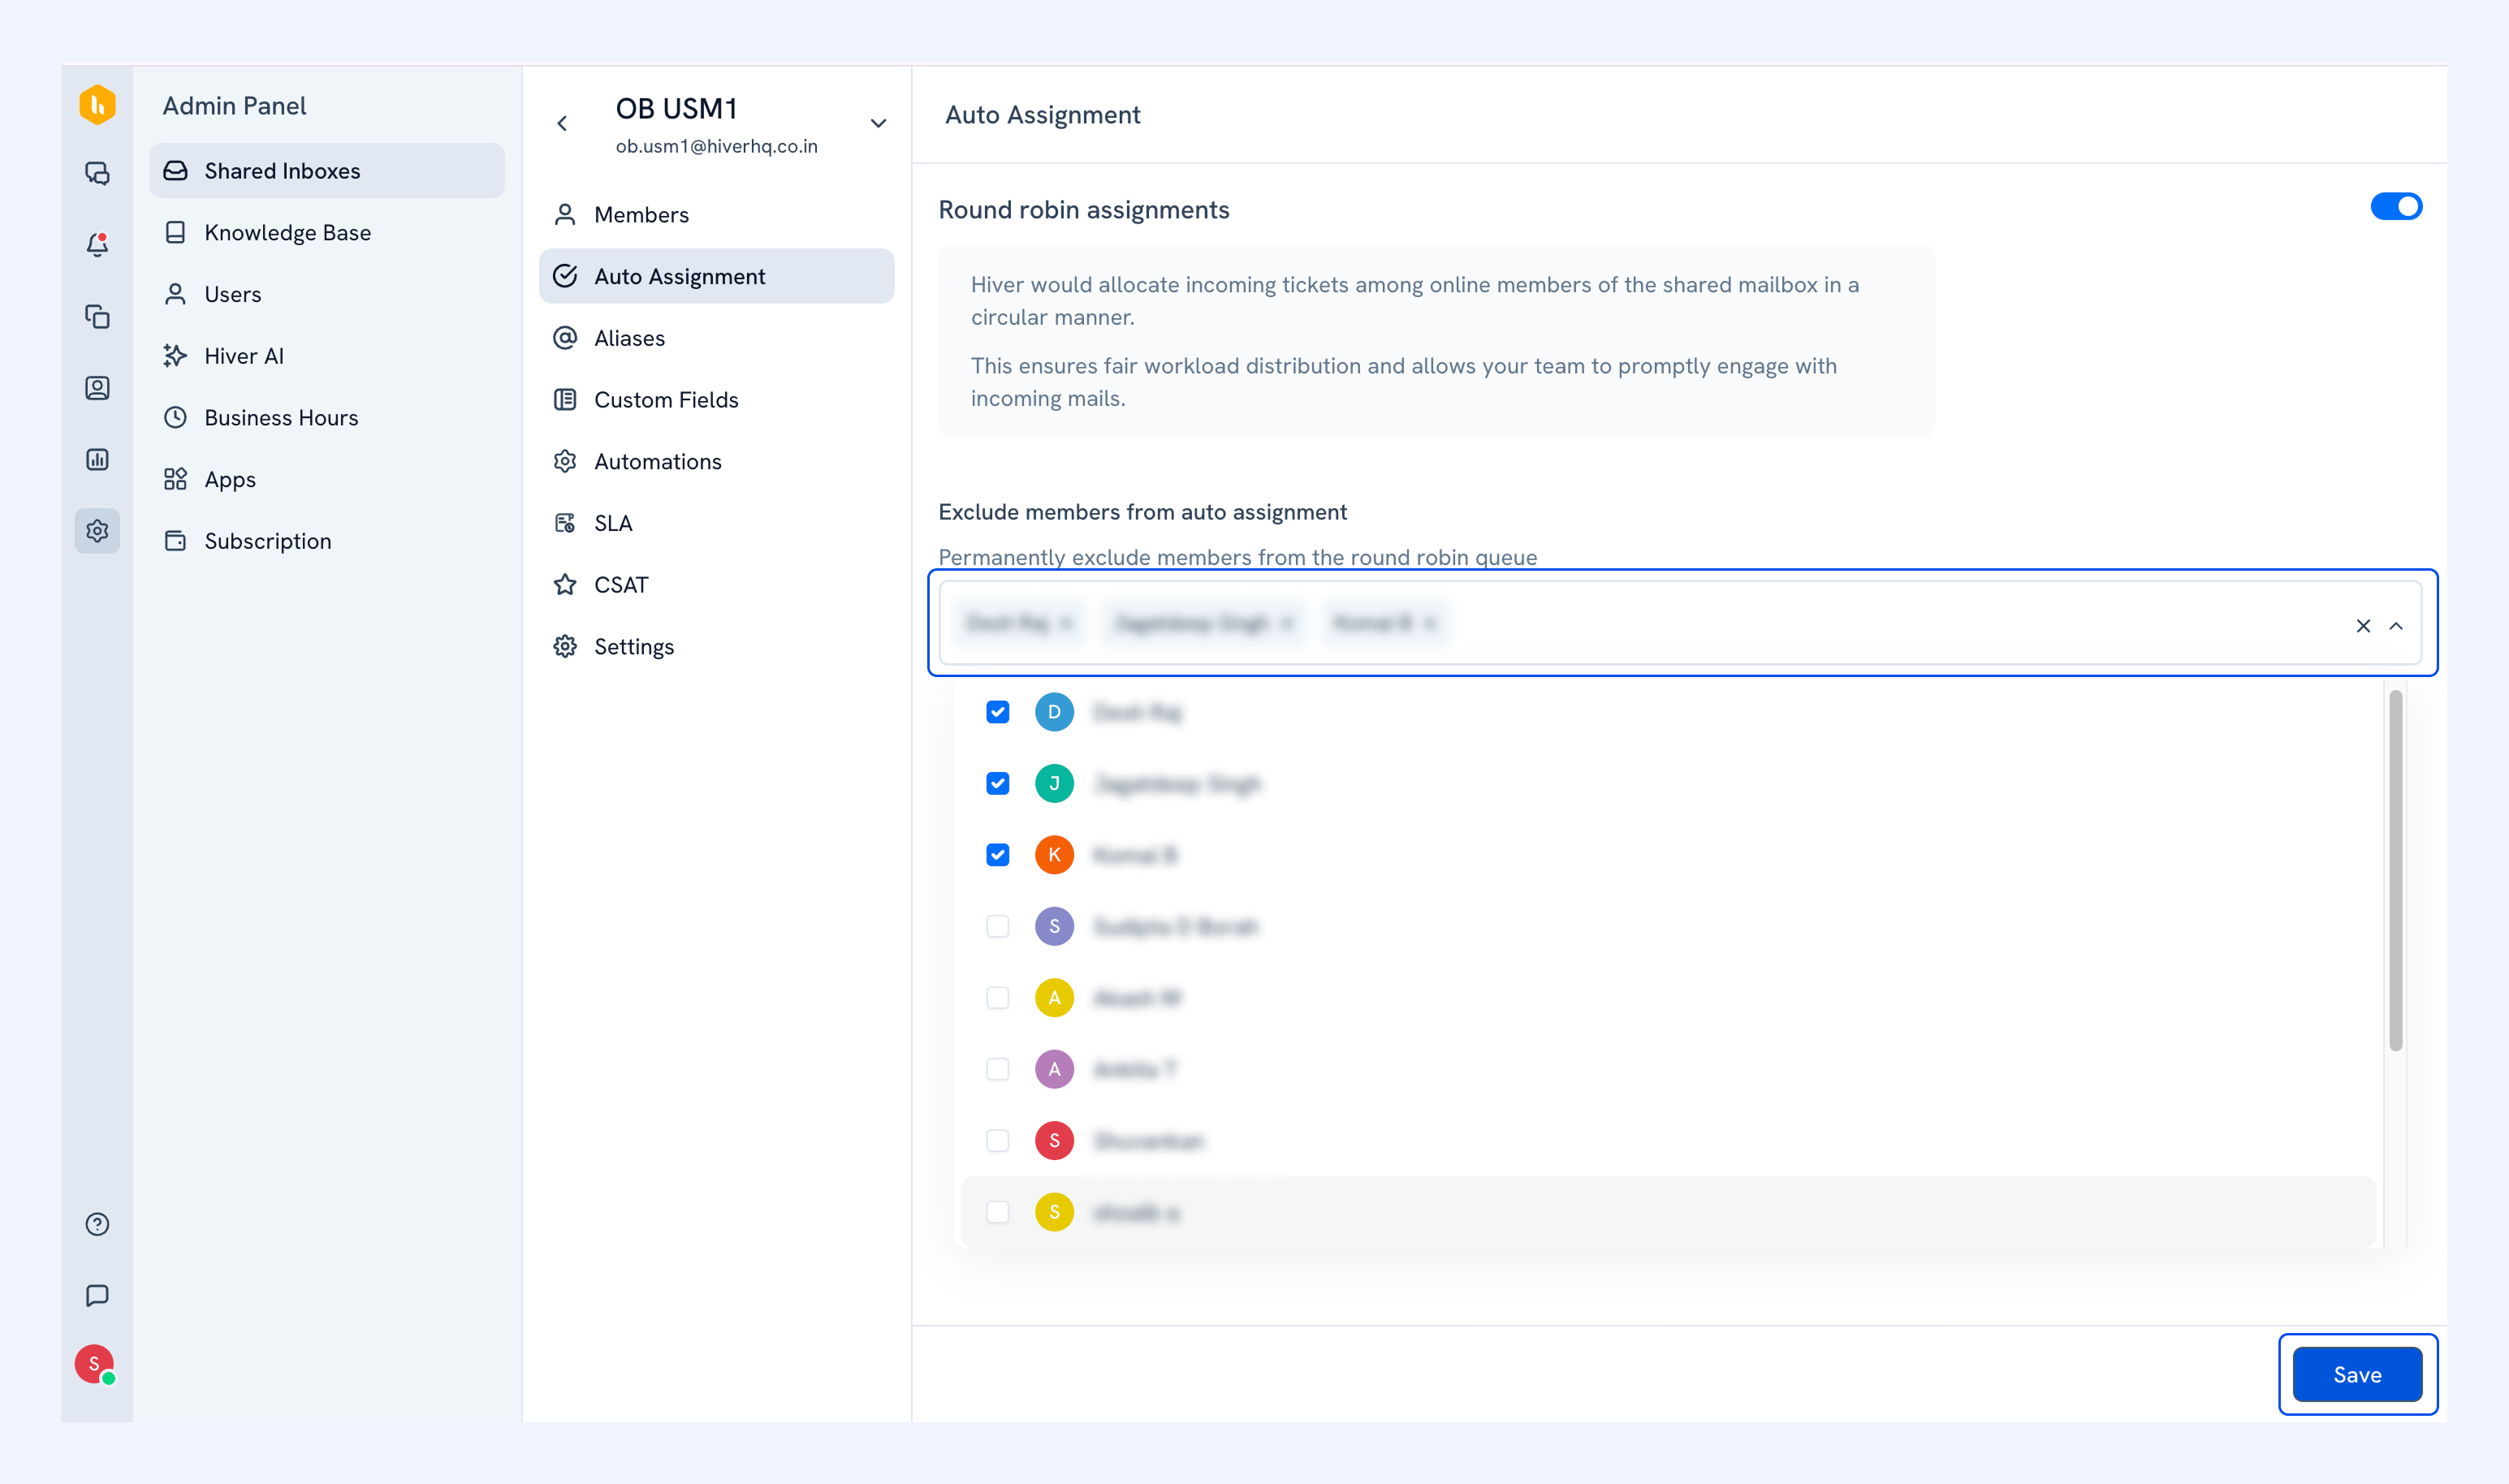
You can exclude members from the auto-assign queue using the dropdown menu. After selecting the members you wish to exclude, click Save.
Note: If a team member is marked as away, new conversations are assigned to an available member instead.
Setting up assignment rules using Automations
Automations help you define how conversations are routed automatically based on specific conditions.
Note: If a team member is marked as away, the Assign to and Assign among actions won't assign conversations to them. New conversations will be assigned to an available member instead.
Here are some examples of common ways to auto-assign conversations, you can customize these to suit your workflow.
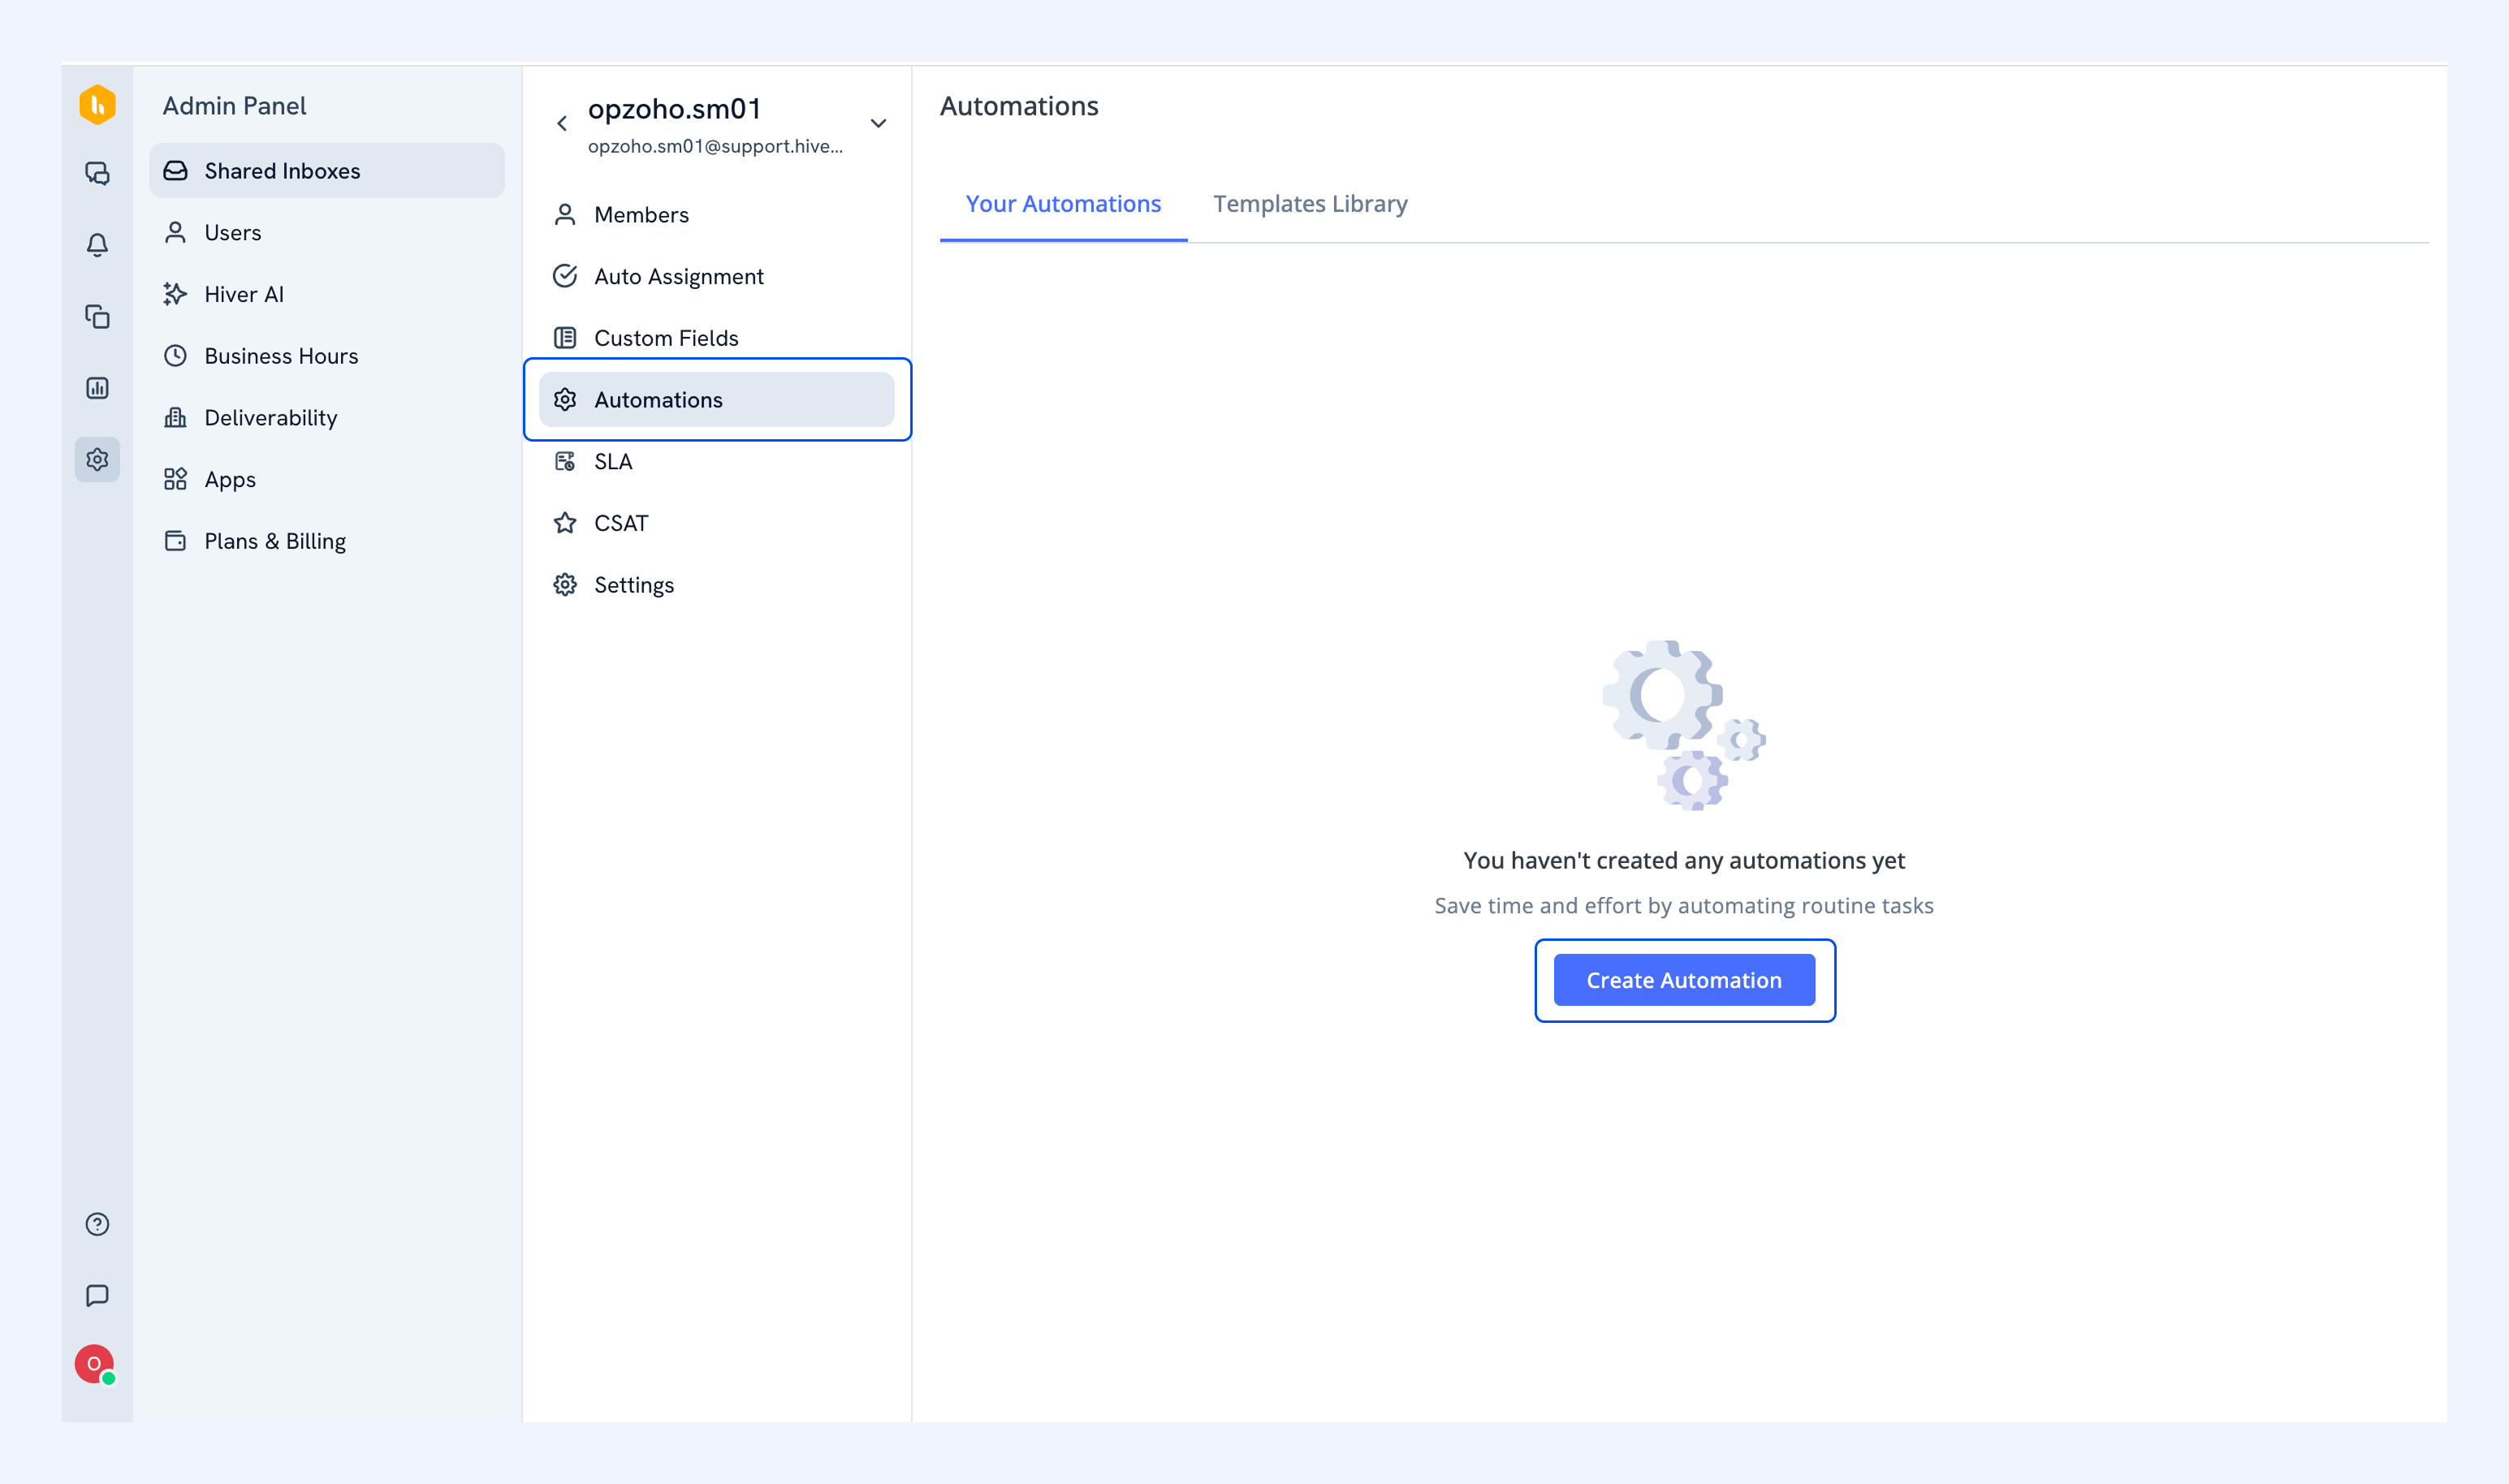
In the Automations tab click Create Automation.
Assign by sender
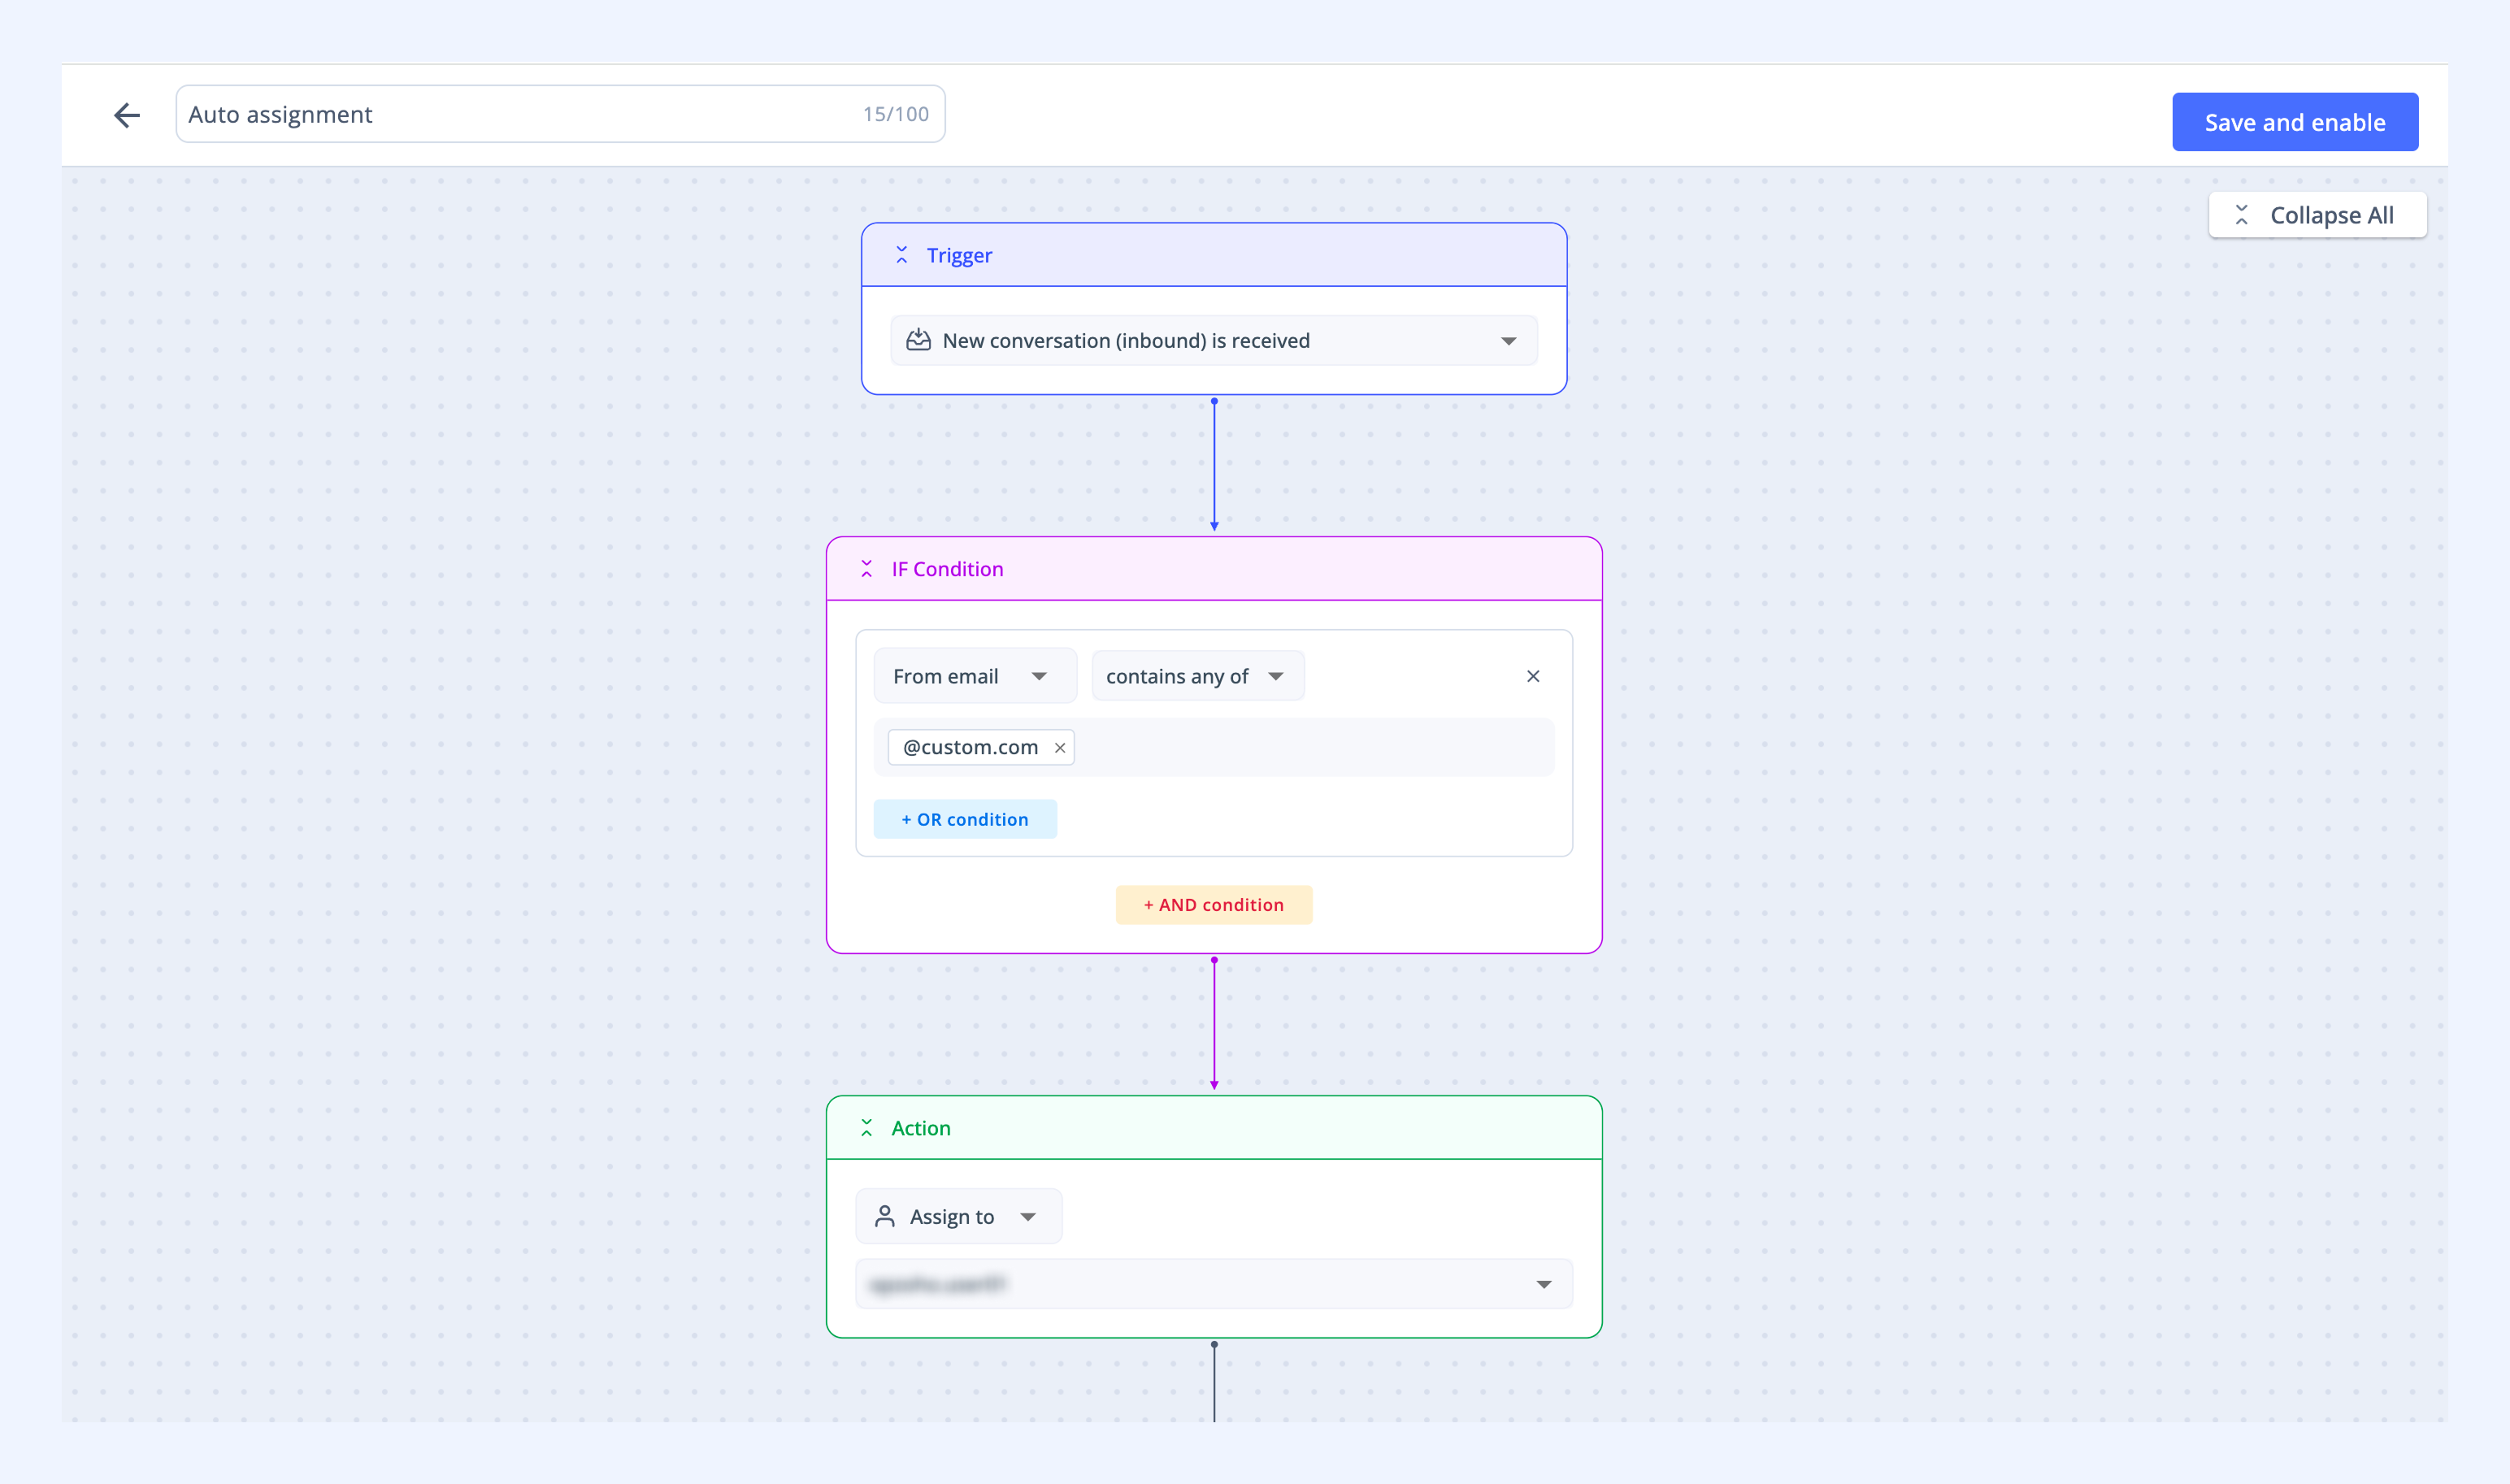
Route conversations from specific customers or partners to dedicated team members. This ensures messages from known contacts always reach the right person.
For example:
- When a new conversation is received
- If the sender’s email address contains @customer.com
- Then assign it to the relevant account manager
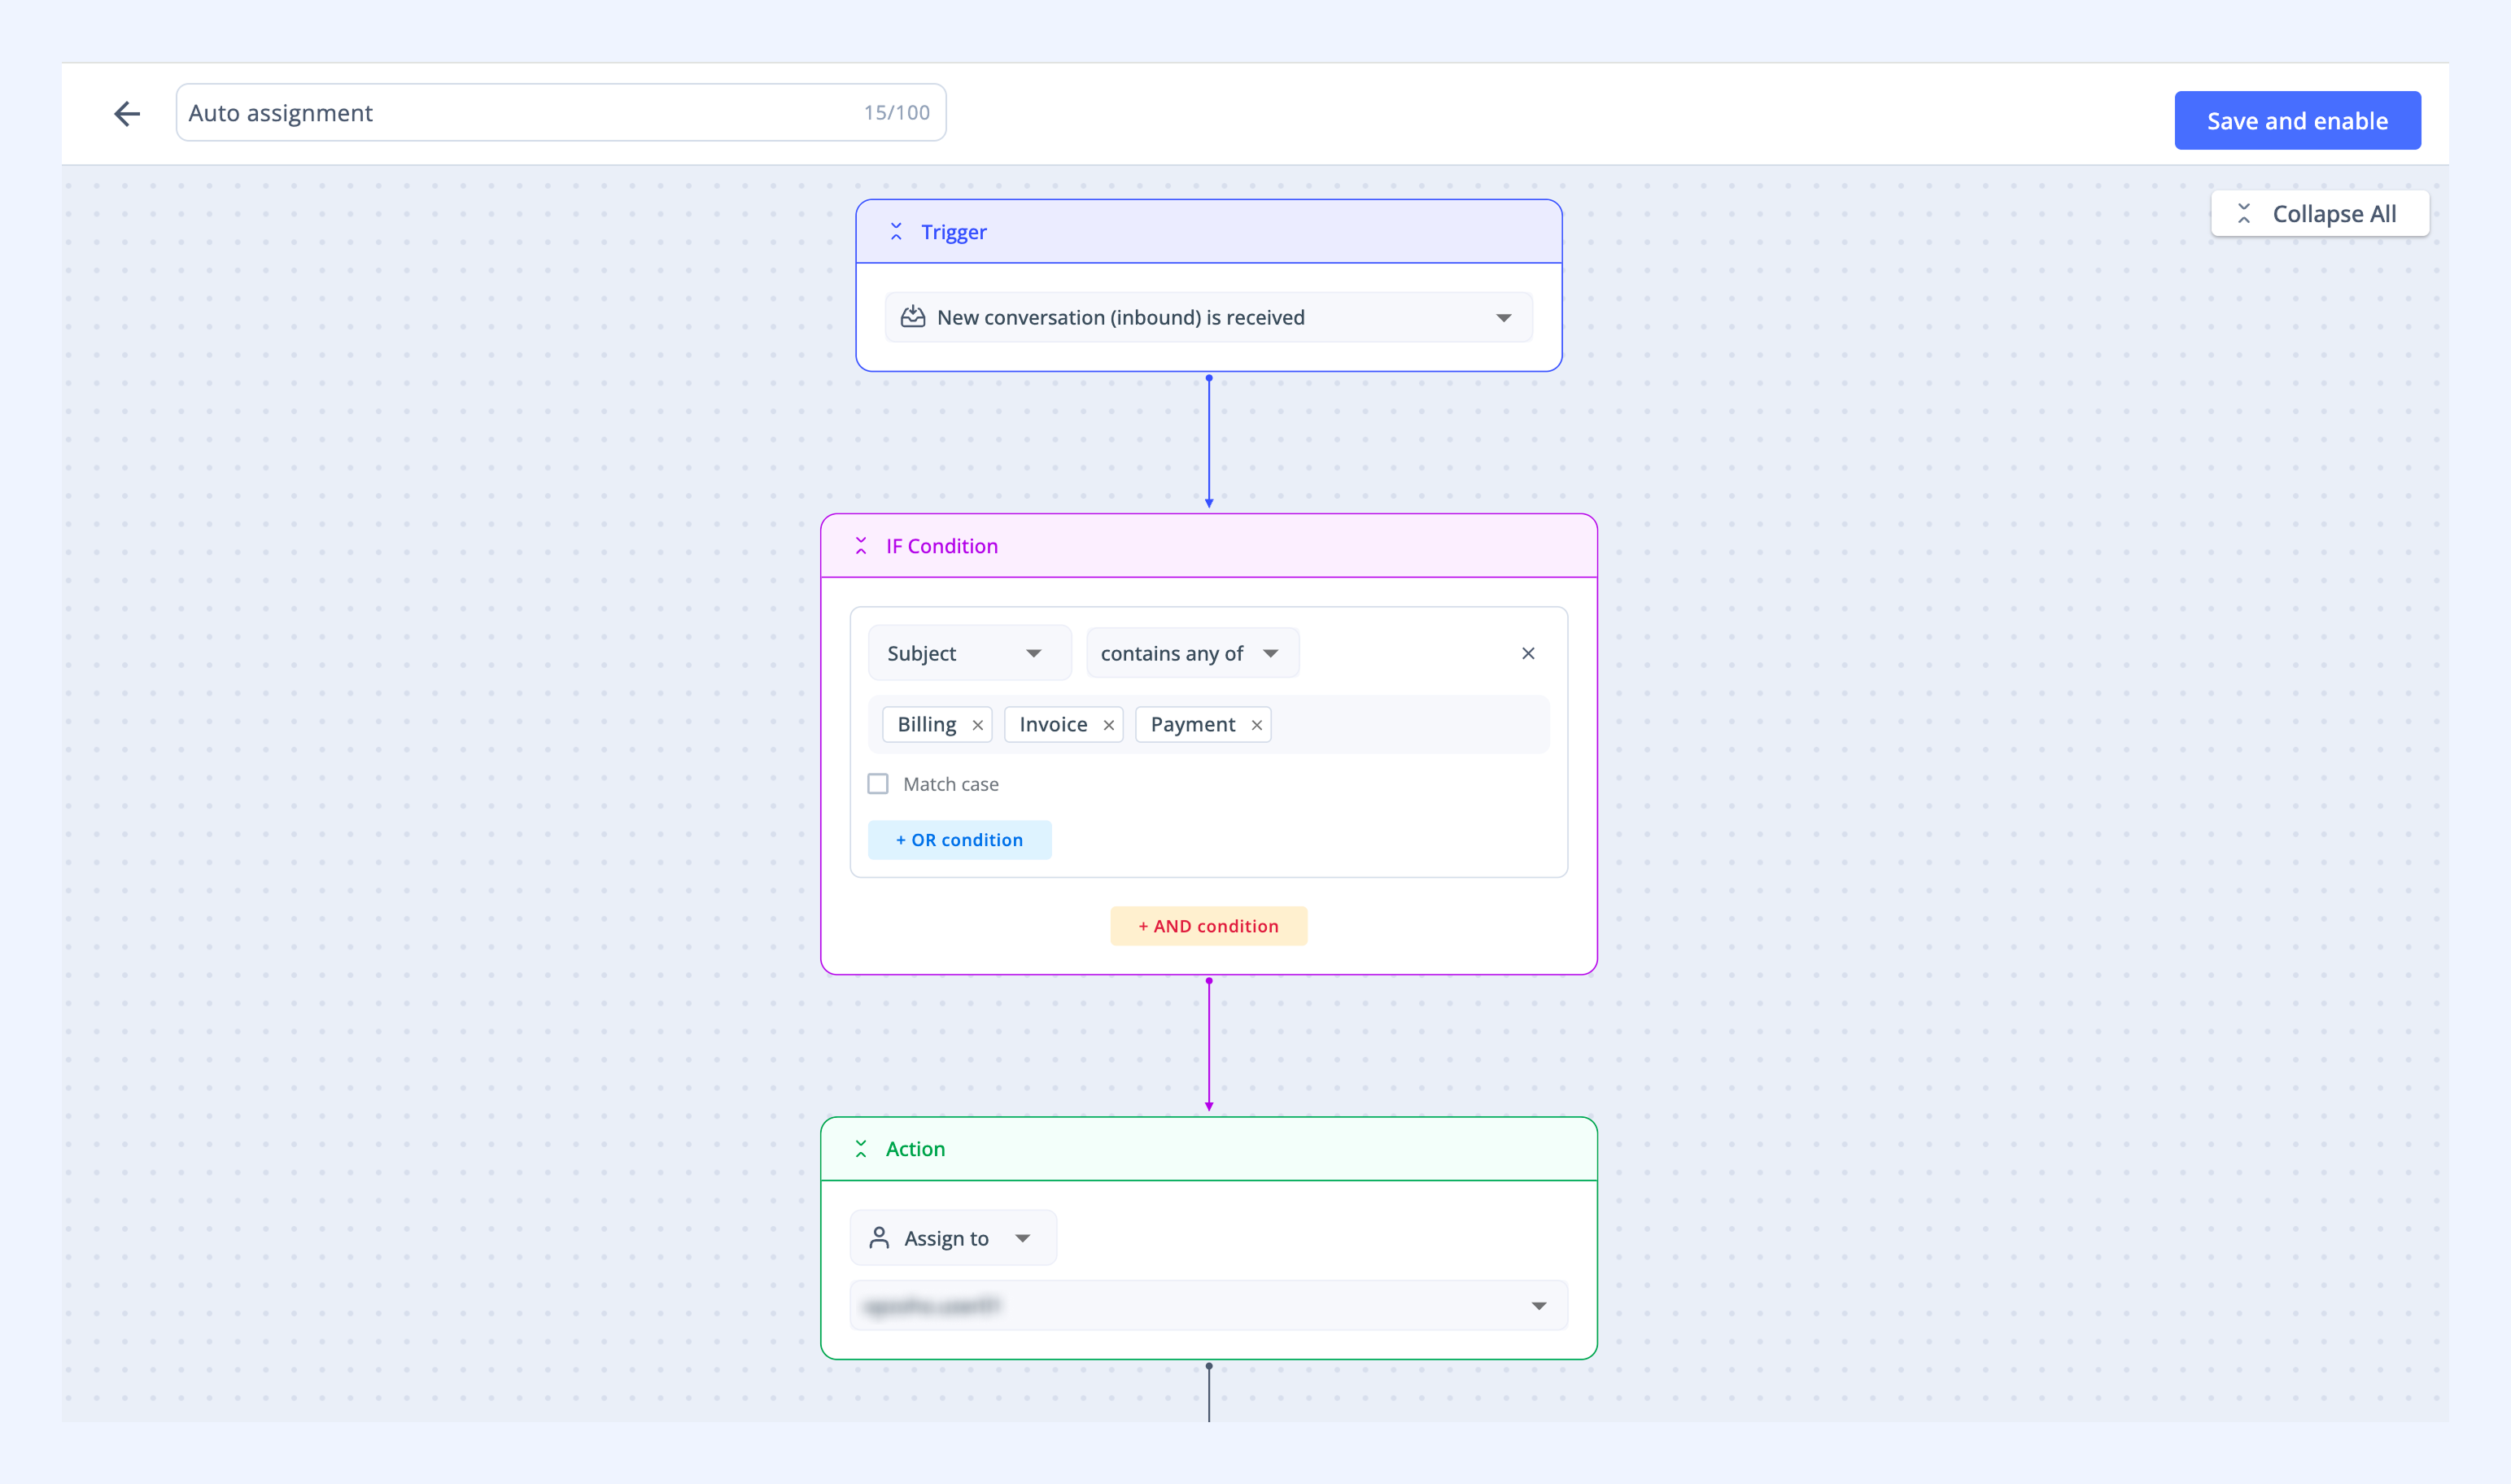
Assign by keywords
Route conversations to team members based on their area of expertise, like billing, technical support, or sales inquiries. You can check for keywords in either the subject line or message body.
For example:
1. When a new conversation is received
2. If the subject contains billing, invoice, or payment
3. Then assign it to a member of the Finance team
Assign by recipient address
When your team manages multiple aliases (like support@, sales@, or billing@), you can ensure each goes to the right team.
For example:
1. When a new conversation is received
2. If the recipient’s email address contains support@company.com
3. Then assign it to a member of the Support team
Assign based on multiple conditions
You can combine conditions to manage priority or complex routing scenarios, such as urgent requests from customers.
For example:
1. When a new conversation is received
2. If the sender’s email address contains @customer.com
3. And the subject contains urgent
4. Then assign it to the priority support lead and add an Urgent Tag