Using Automations
Automations help you manage your Shared Inbox more efficiently by handling repetitive actions automatically. Route conversations to the right team members, apply tags, update statuses, send replies, and trigger notifications, all based on rules you define. This ensures consistent workflows, faster response times, and less manual work for your team.
Prerequisites
- Only admins can create automations.
- Requires a Growth, Pro, or Elite plan.
What Automations can do
Use Automations to automate common workflows across your team:
- Route conversations to team members: Assign tickets to your customer support team based on keywords in the subject line, or send billing inquiries to your finance department, and more.
- Organize with tags: Apply tags automatically based on sender domain (e.g., tag all emails from @partner.com as Partner) or email content (e.g., tag messages containing refund as Priority).
- Create time-based reminders: Set up follow-up rules that trigger after a specific time period without a response.
How automation rules are structured
Each automation can have the following up to four steps:
| Step | What it does | Example |
| Trigger | Starts the automation when a specific event occurs | New email arrives in Shared Inbox |
| Condition | Filters which emails the automation applies to | Sender contains @company.com and subject contains issue |
| Action | Performs the automated task | Assign to Support team |
All automation rules need to start with a trigger, but can have a combination of conditions and actions based on your workflow.
Learn more about available triggers, conditions, and actions.
Creating an Automation
Step 1: Navigate to Automations
1. Go to Admin panel → Shared Inboxes → Email Inboxes, and select the Shared Inbox you want to configure the Automation in.
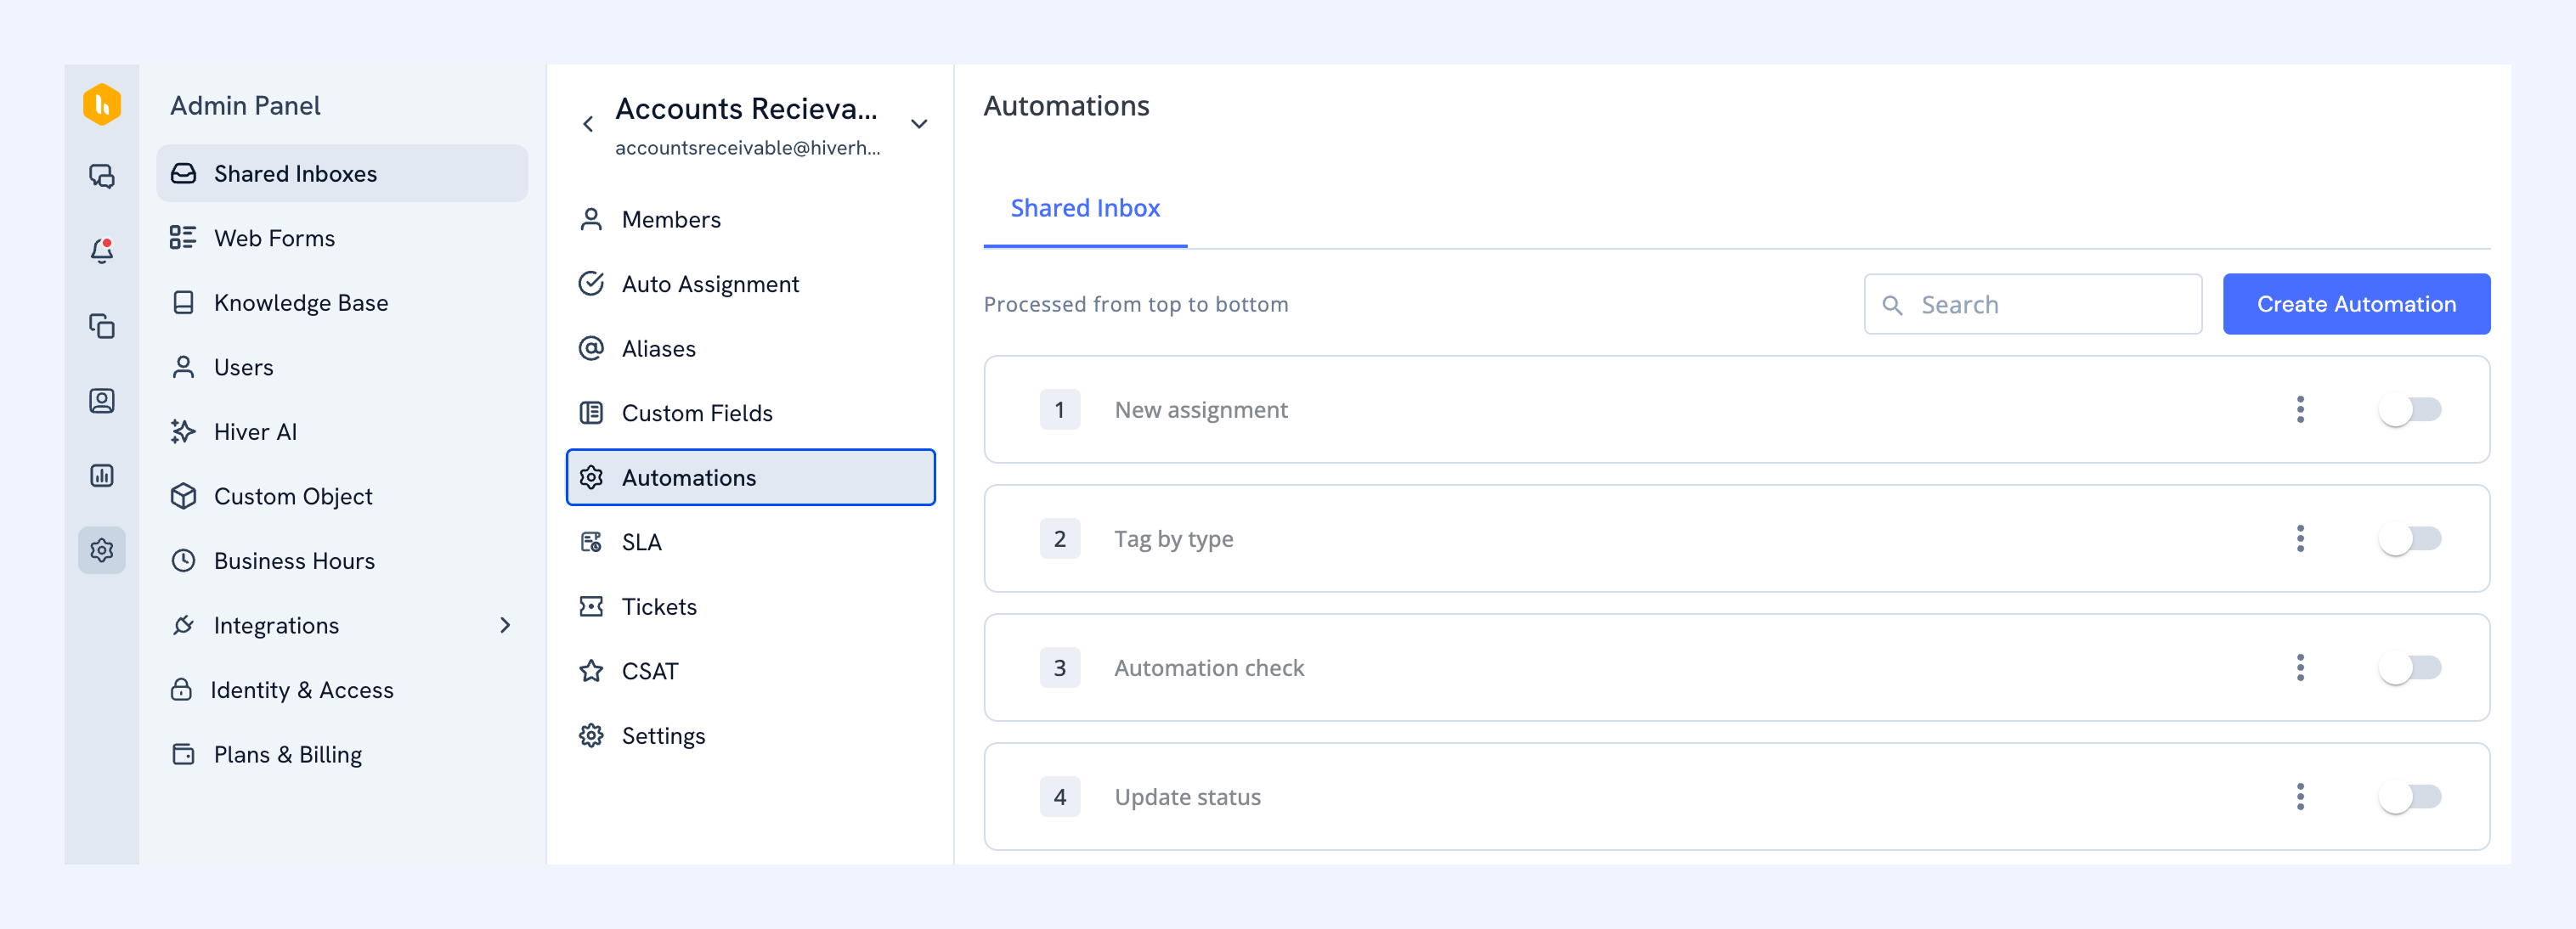
2. Click Automations.
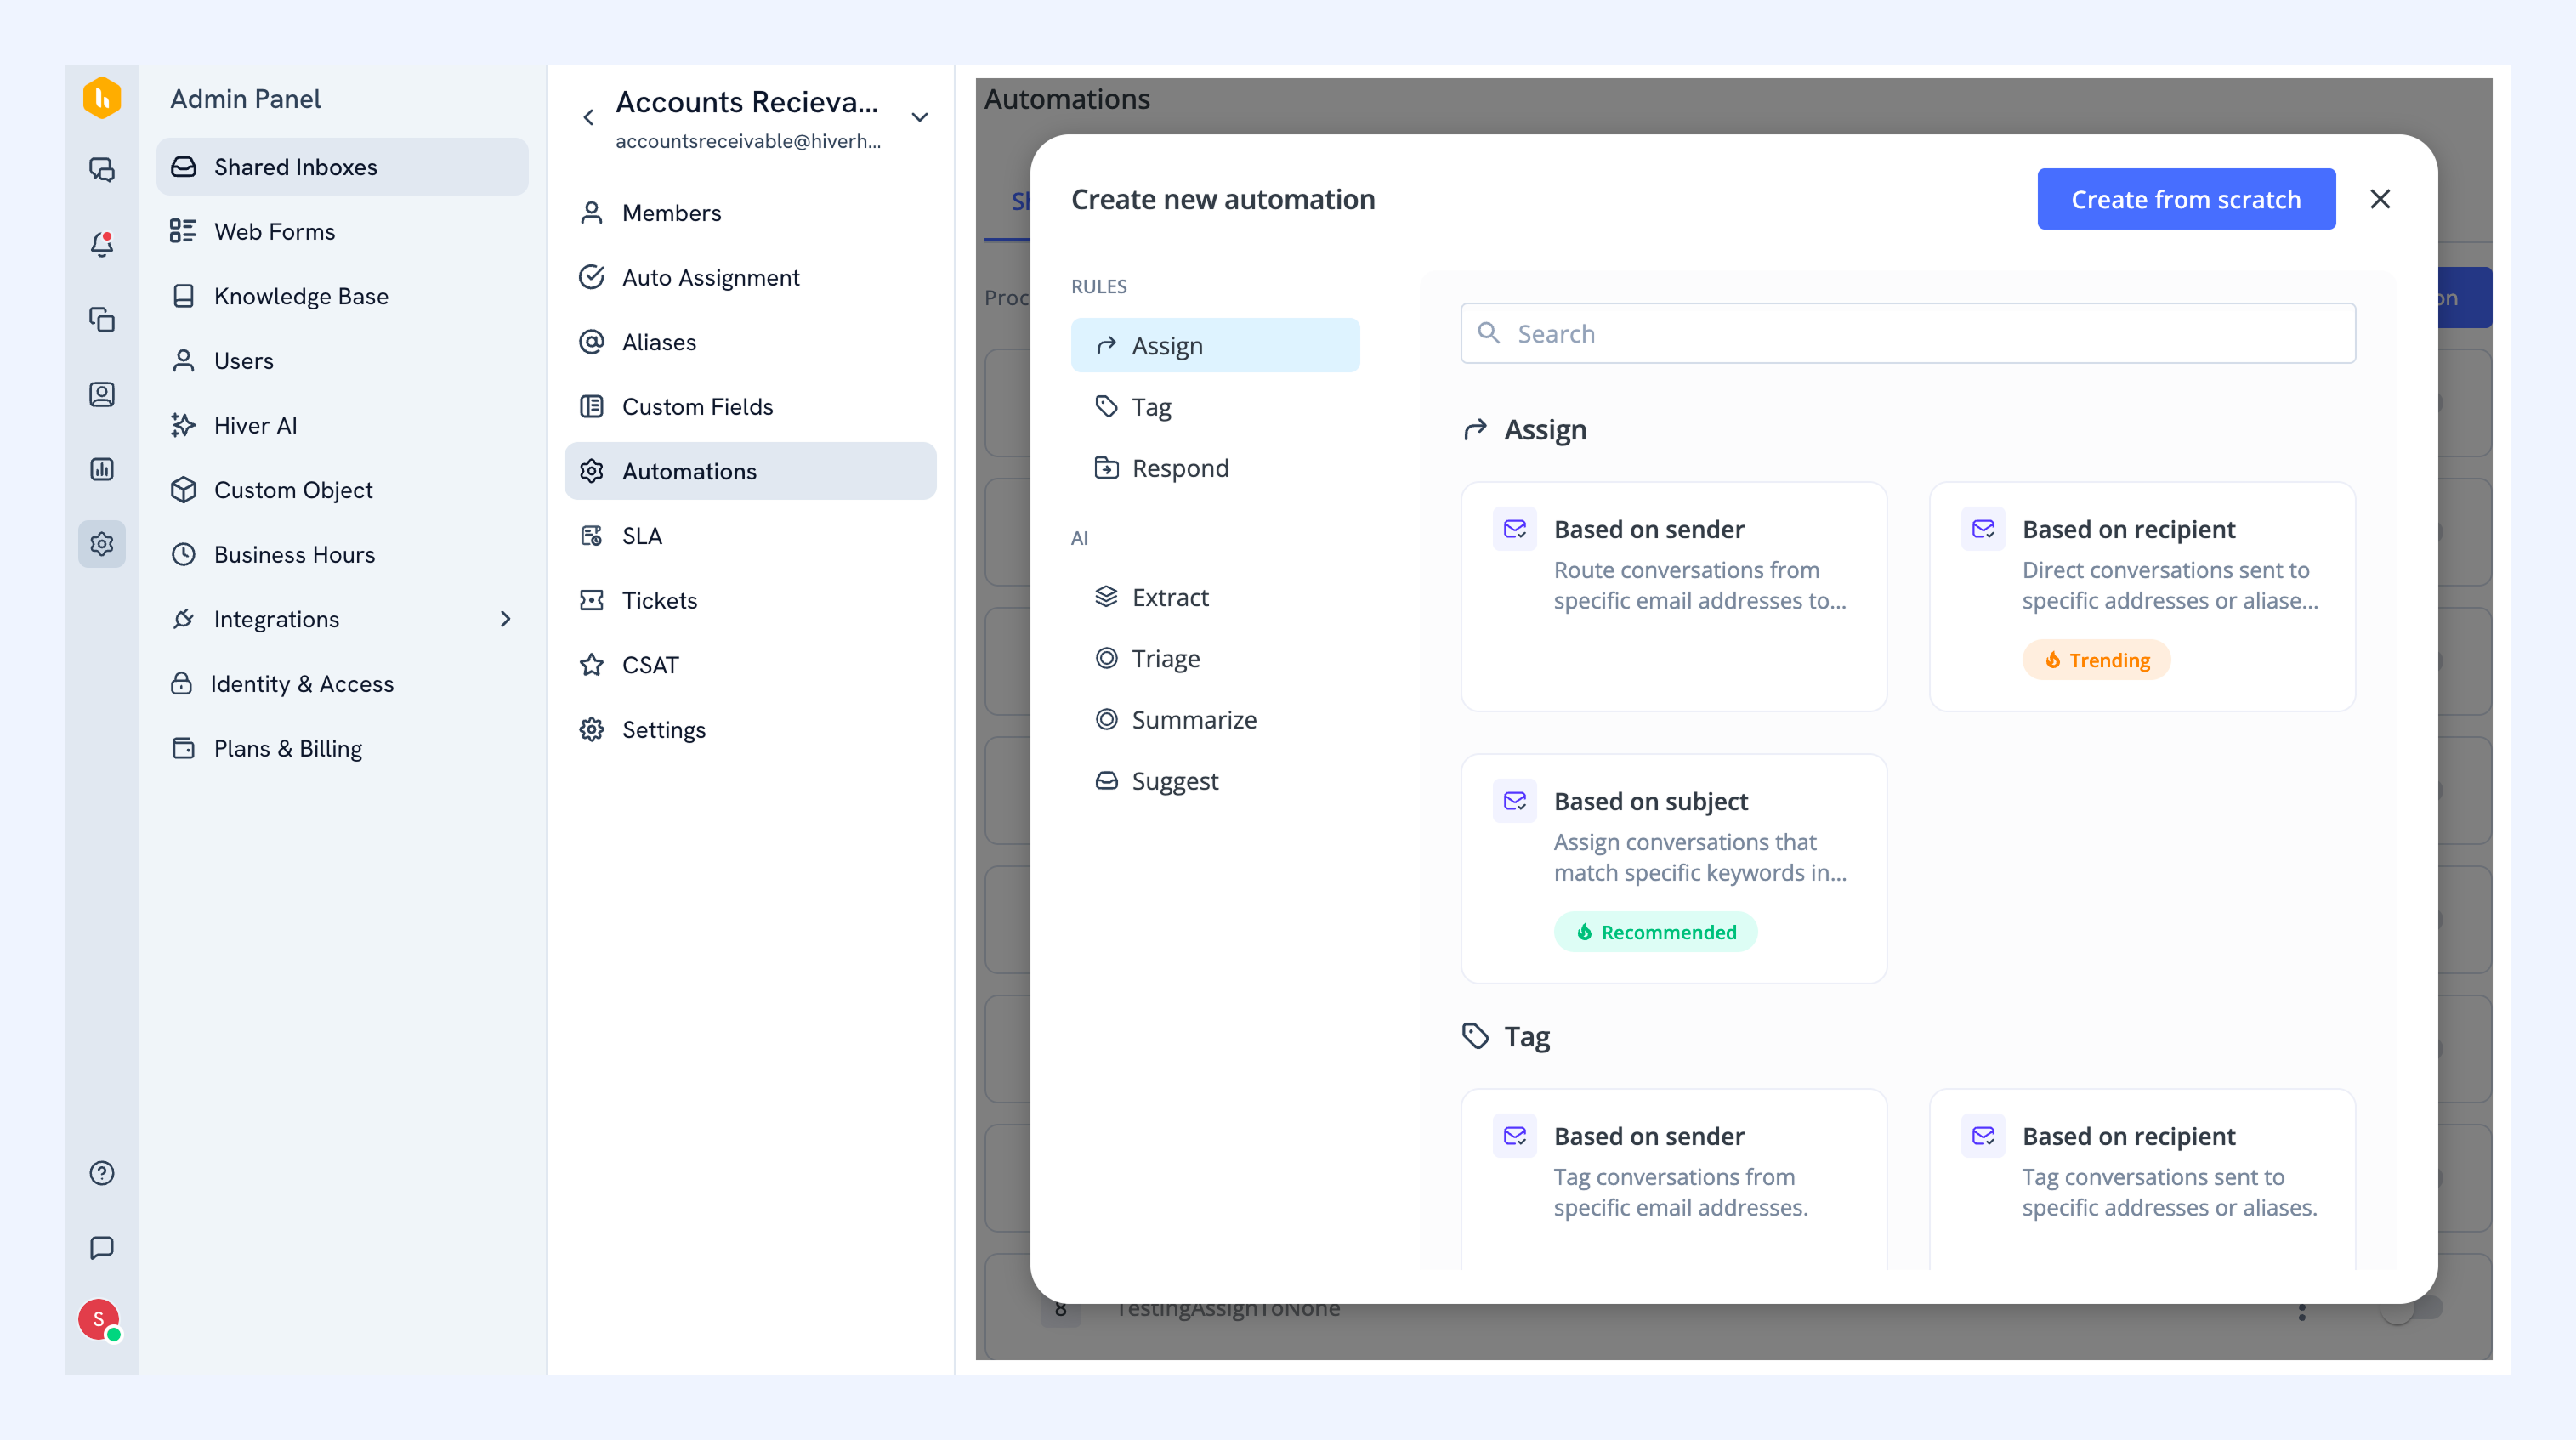
You'll see a library of pre-built automations for common workflows. You can select a template to customize it for your needs and launch your automated workflow faster.
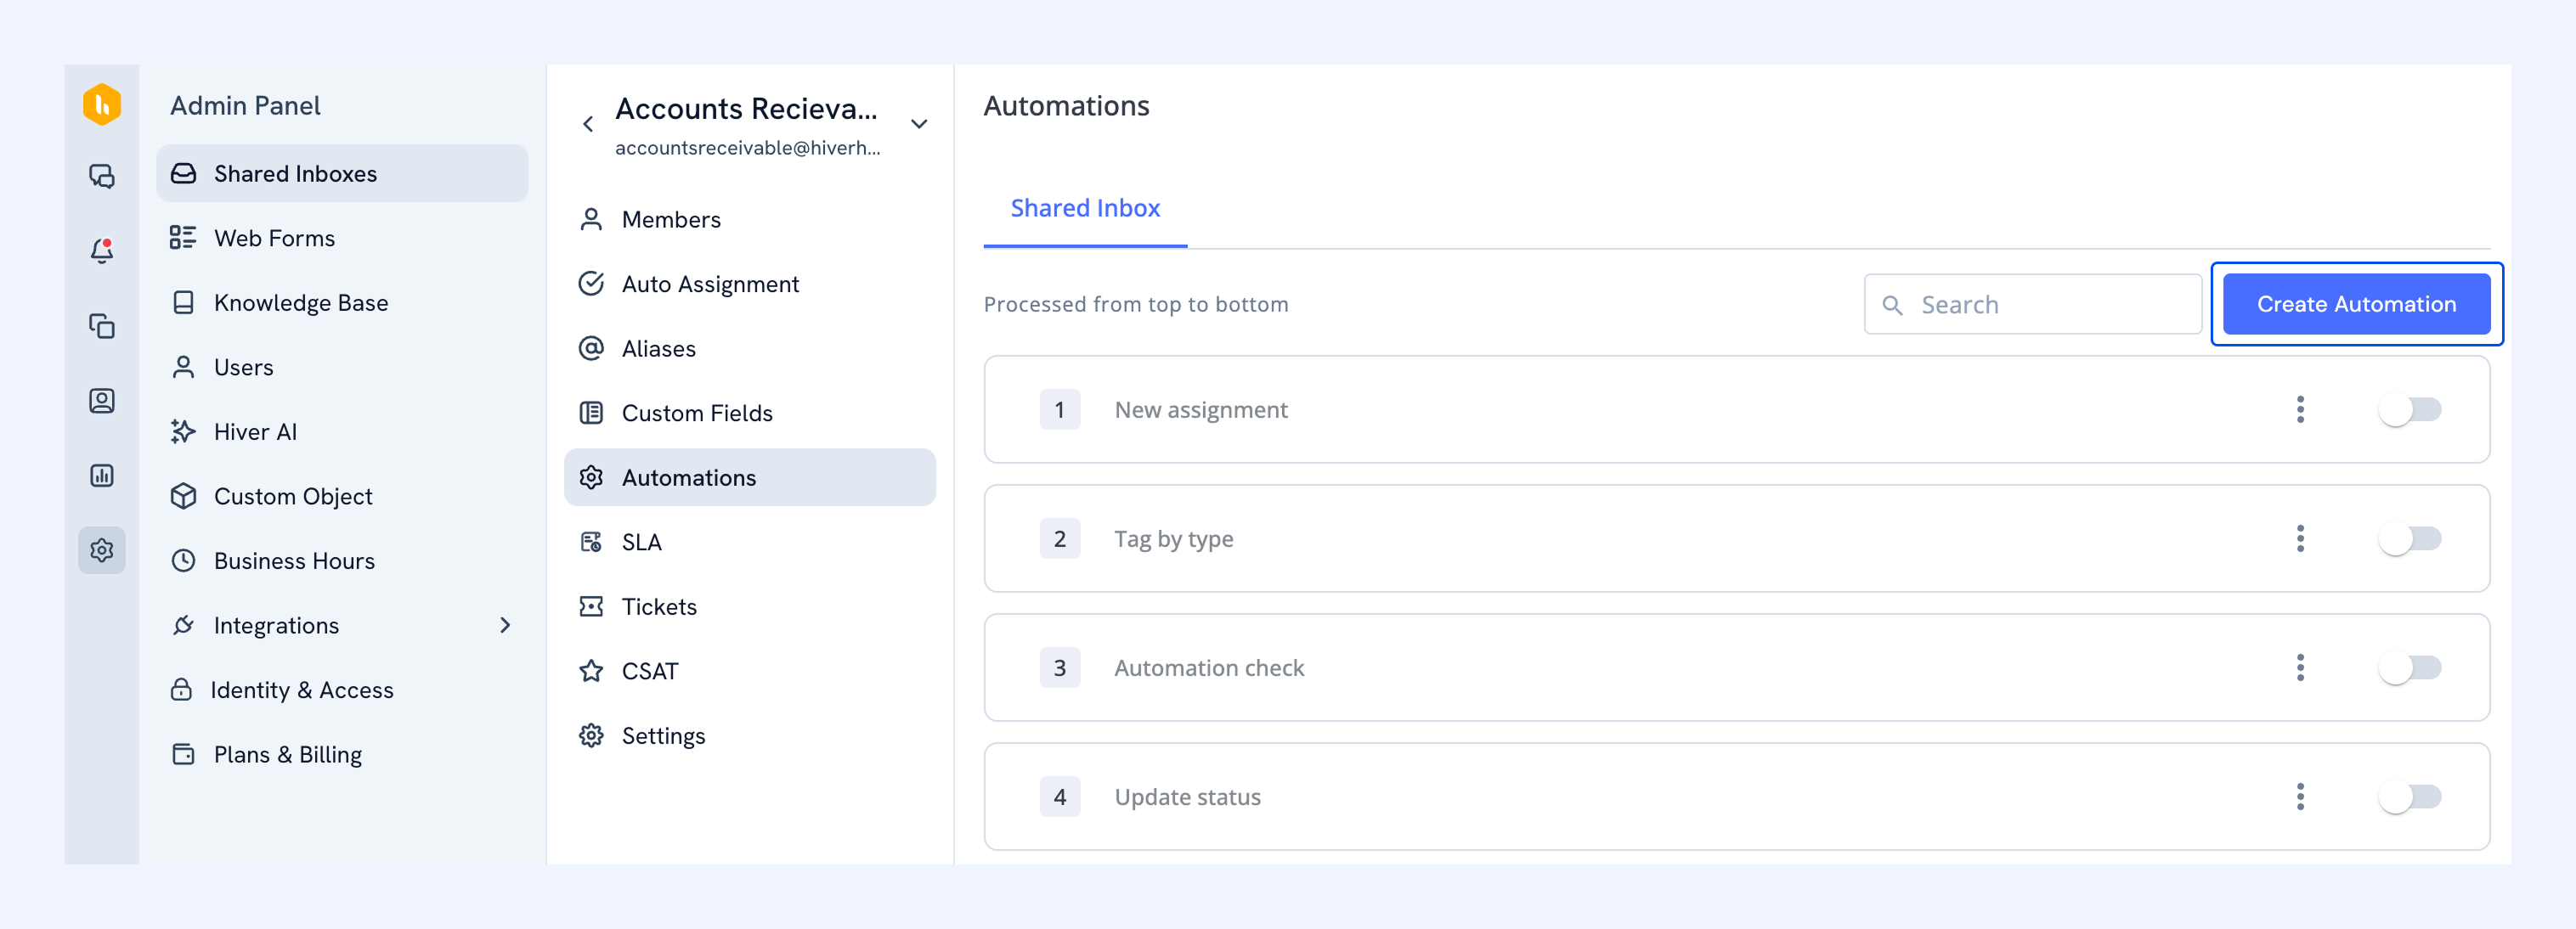
Step 2: Start building your Automation
1. To create a new Automation, click Create from scratch.
.png)
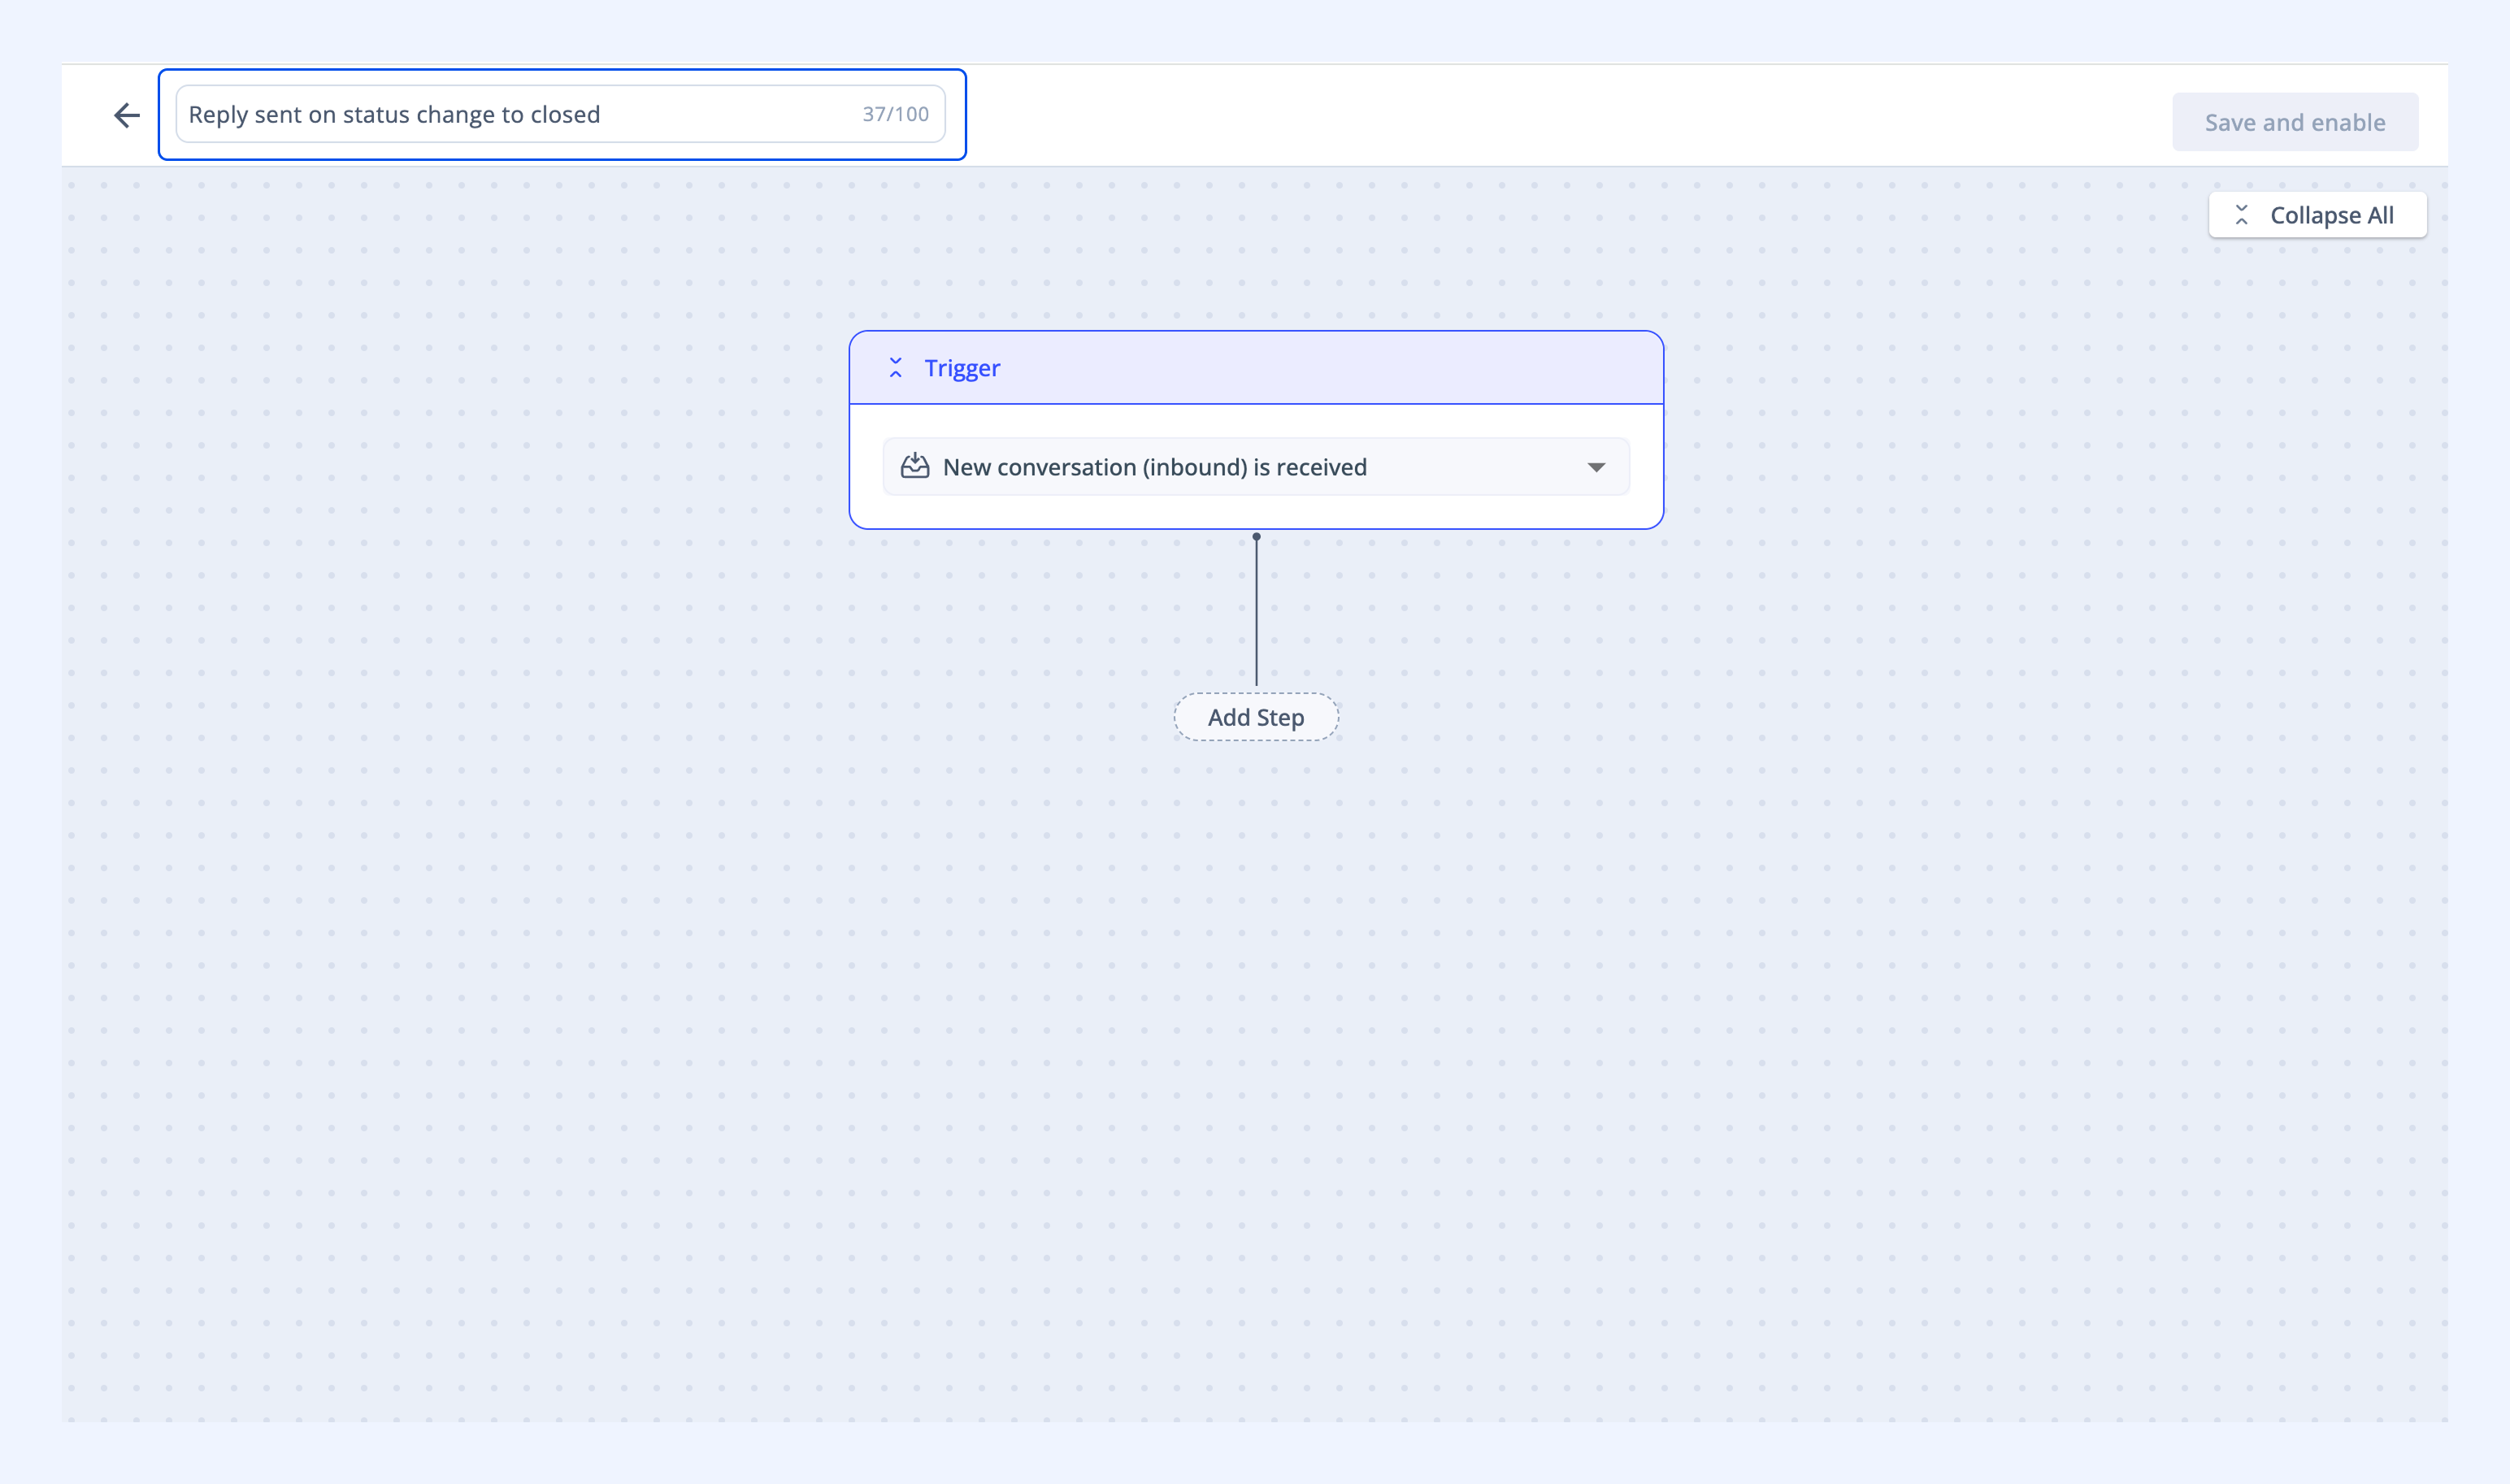
2. Enter a name that describes what the Automation does.
Step 3: Select a trigger
Choose the event that will activate this Automation.
The default trigger is New conversation (inbound) is received. Click the dropdown to view all available triggers.
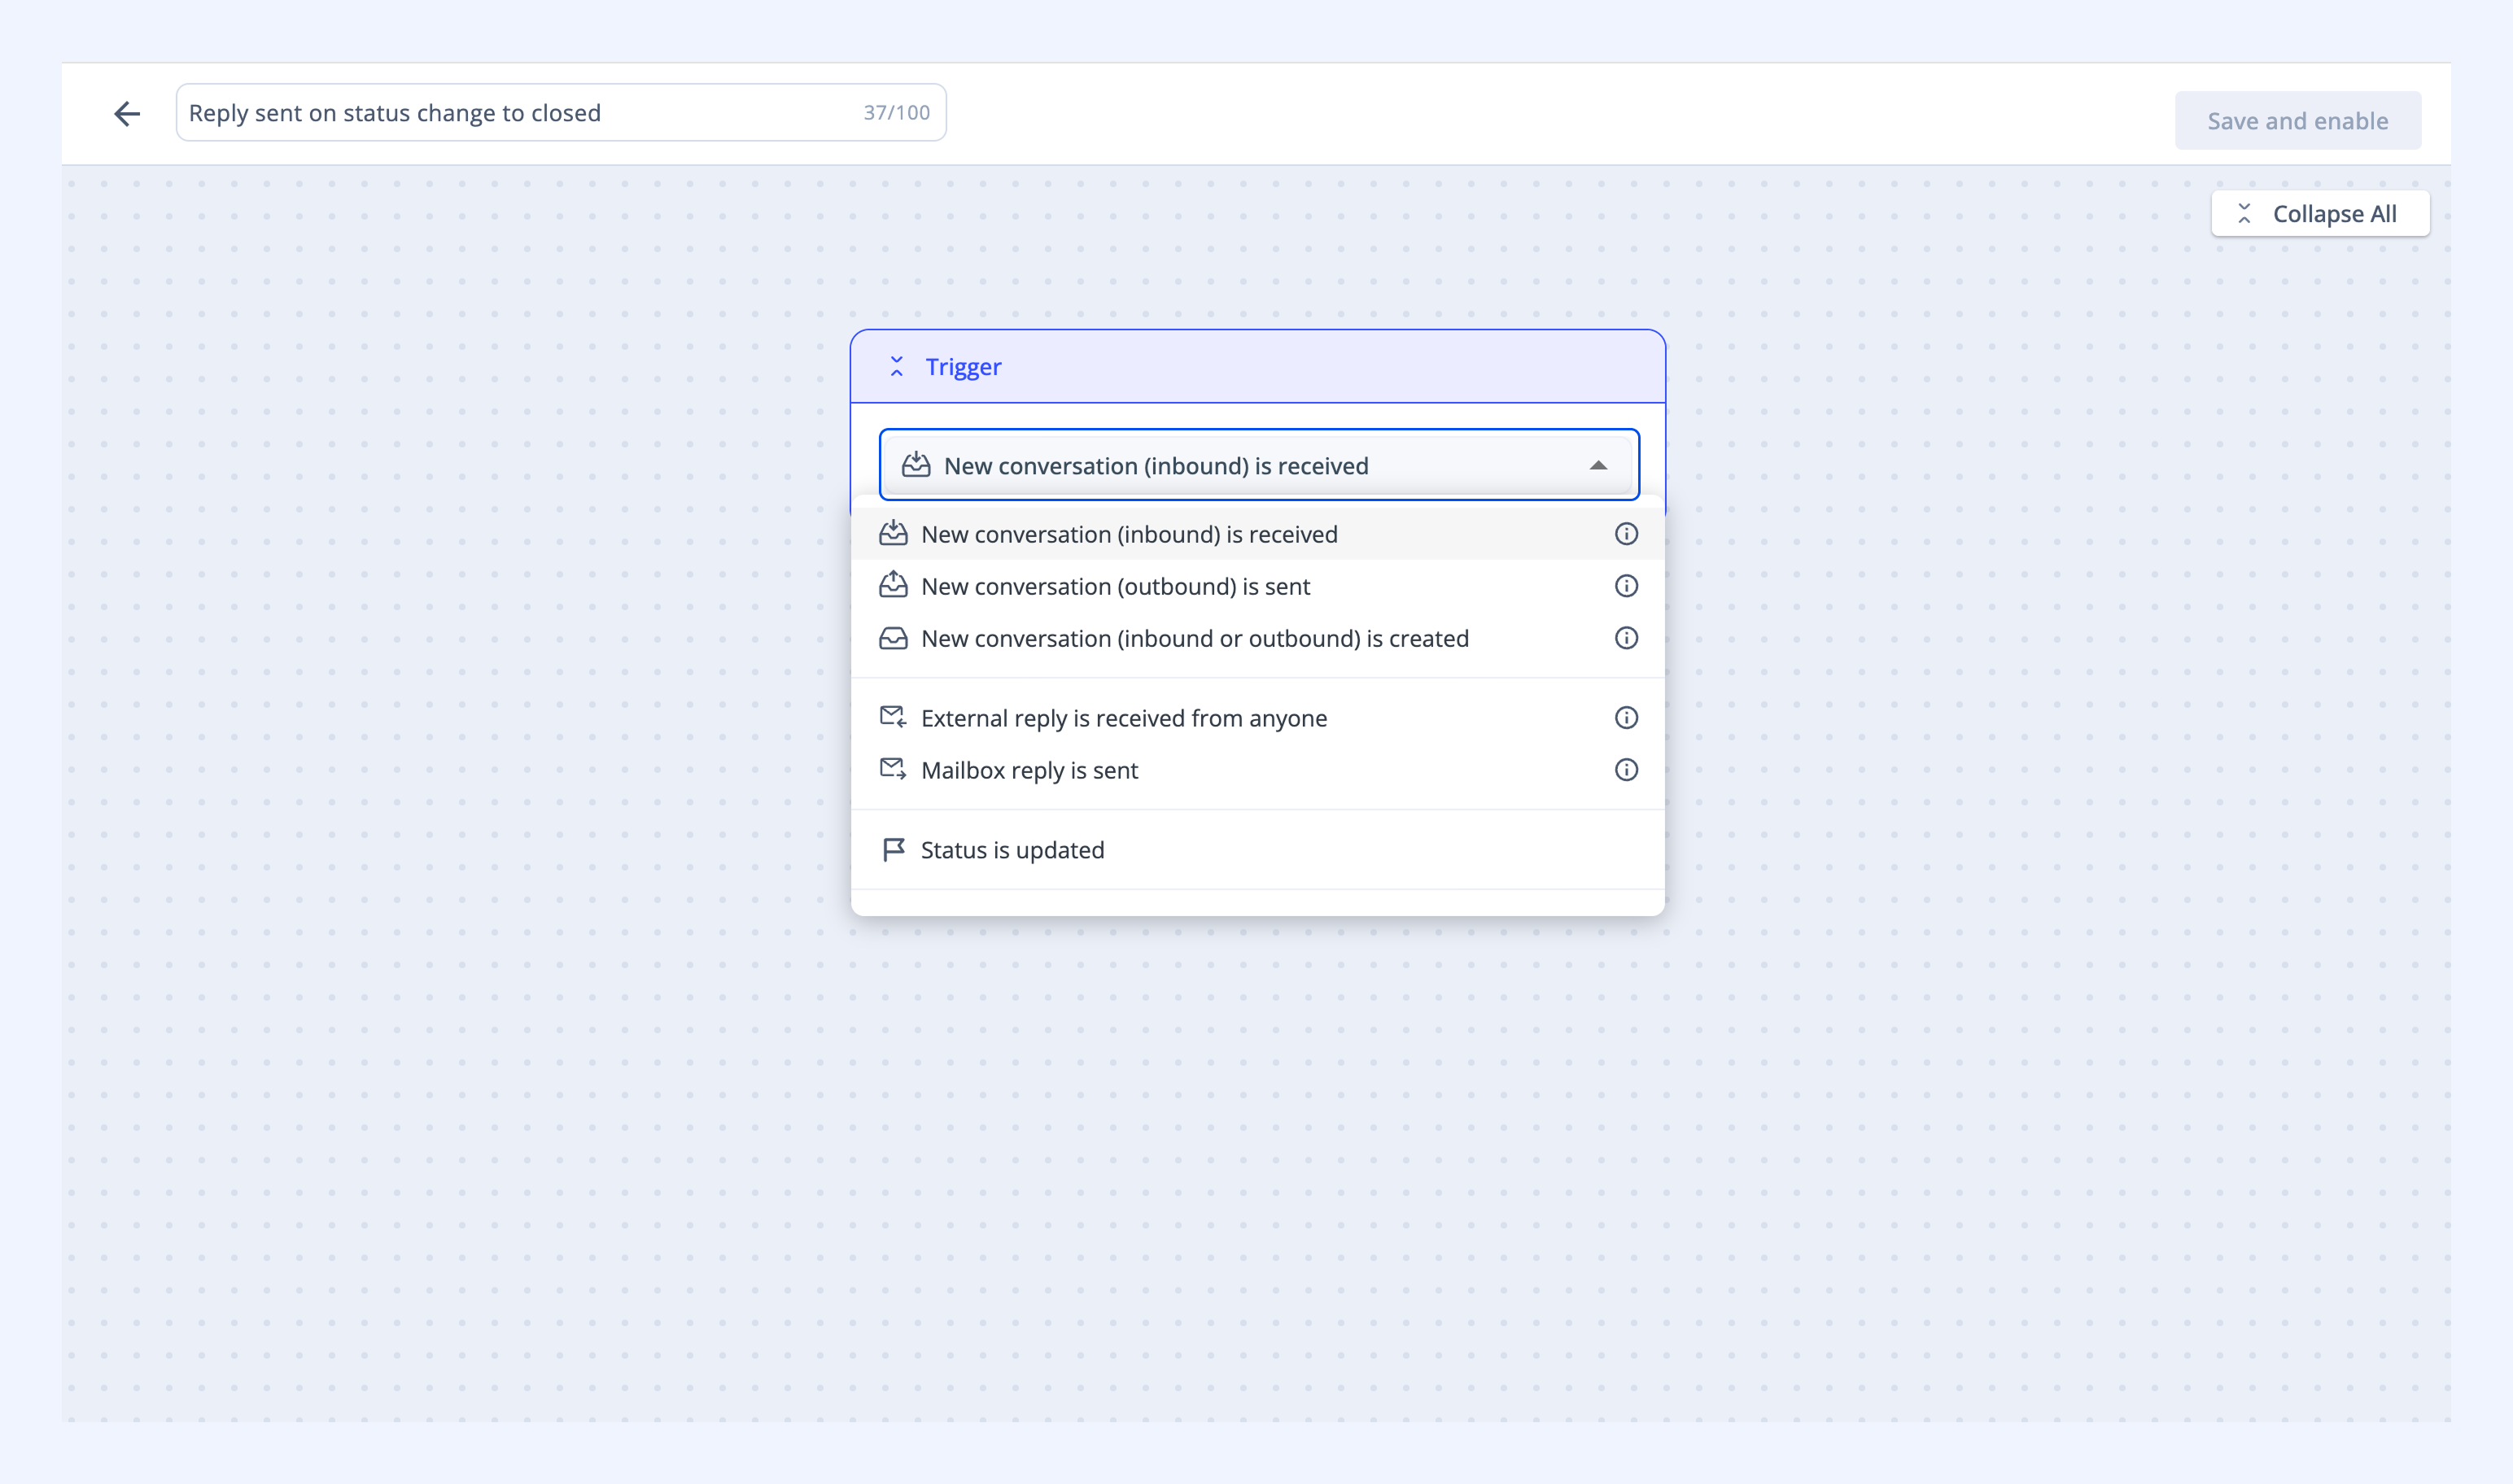
Note: Your Automations run when:
- New emails arrive in your Shared Inbox.
- New emails are sent from your Shared Inbox.
- Emails are received via inbox aliases.
Automations do not run for:
- Emails manually moved into the Shared Inbox.
- Conversations removed then manually re-added.
- Emails cc'd back after removal.
- Emails sent directly to a team member's personal email address (for example, ryan@acme.com) instead of the Shared Inbox address.
Learn more about supported triggers in automations.
Step 4: Add conditions
1. Click Add step → IF Condition.
2. Choose conditions to specify which emails should trigger this Automation.
Note: You can create an Automation without conditions, it will apply to all conversations matching the trigger.
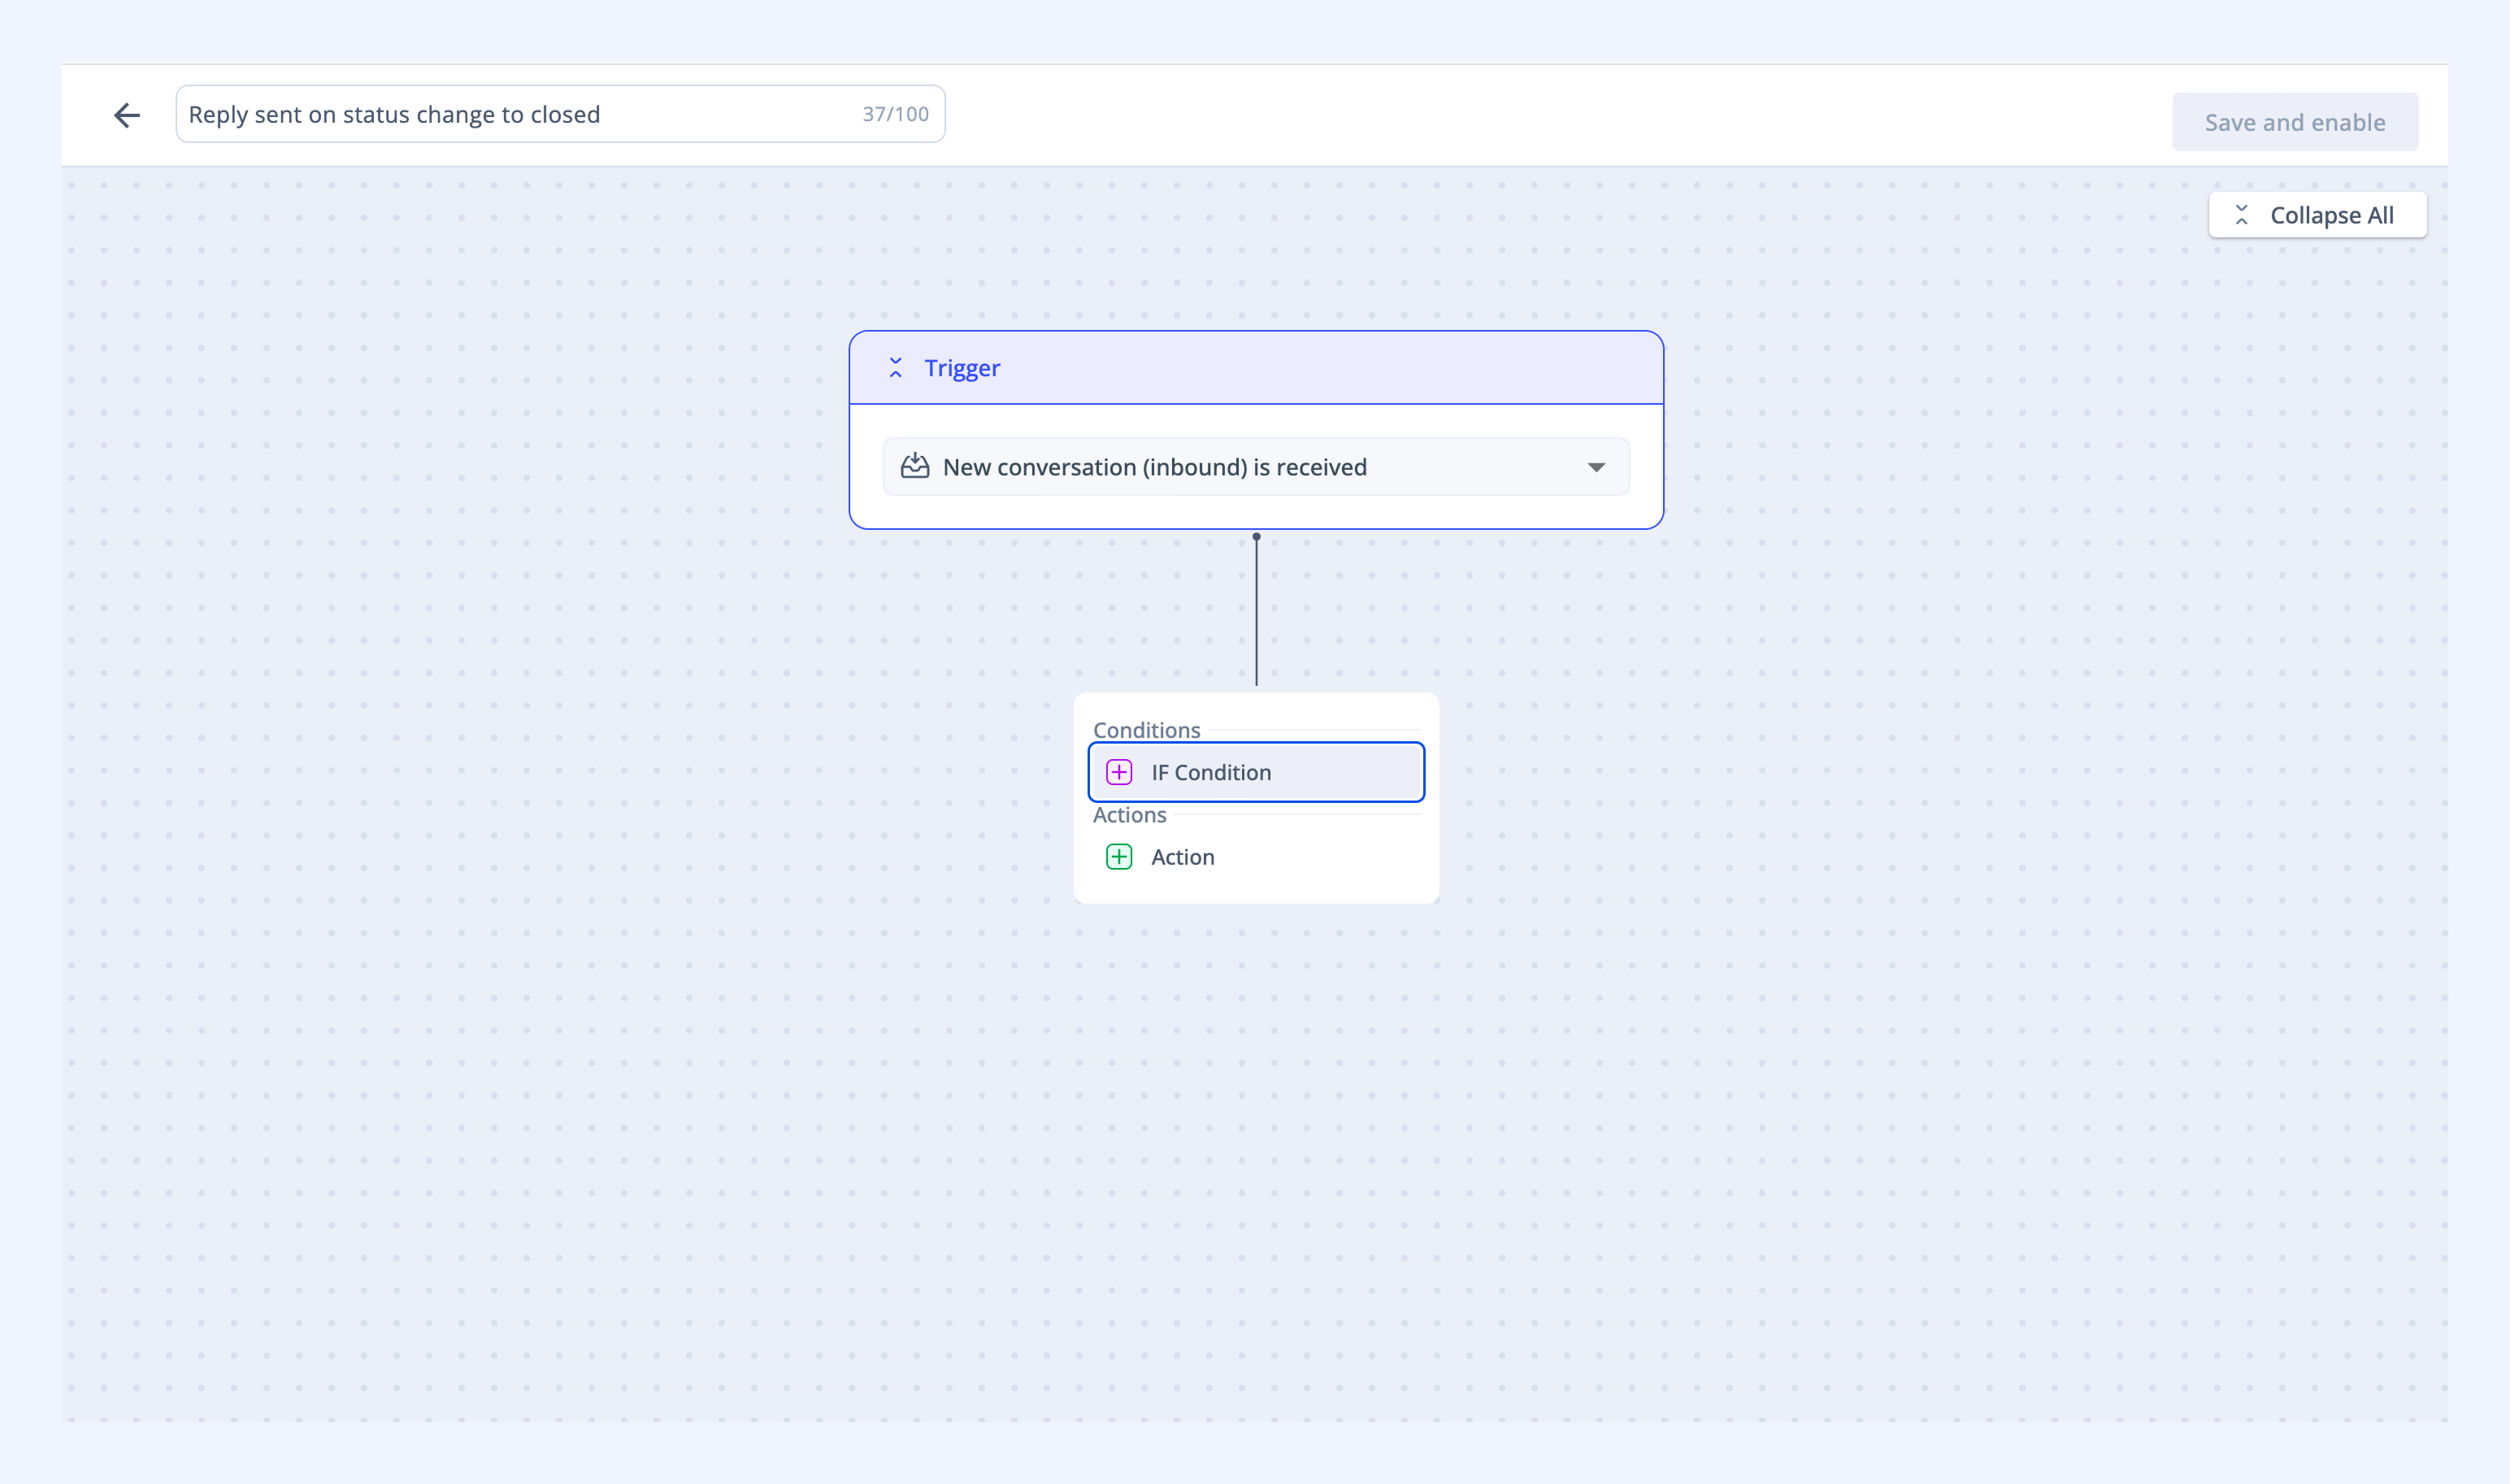
Tip: Stack multiple conditions using AND and OR operators to create specific filters.
Learn more about supported conditions in automations.
Step 5: Define actions
1. Click Add step → Action.
2. Select what should happen when conditions are met.
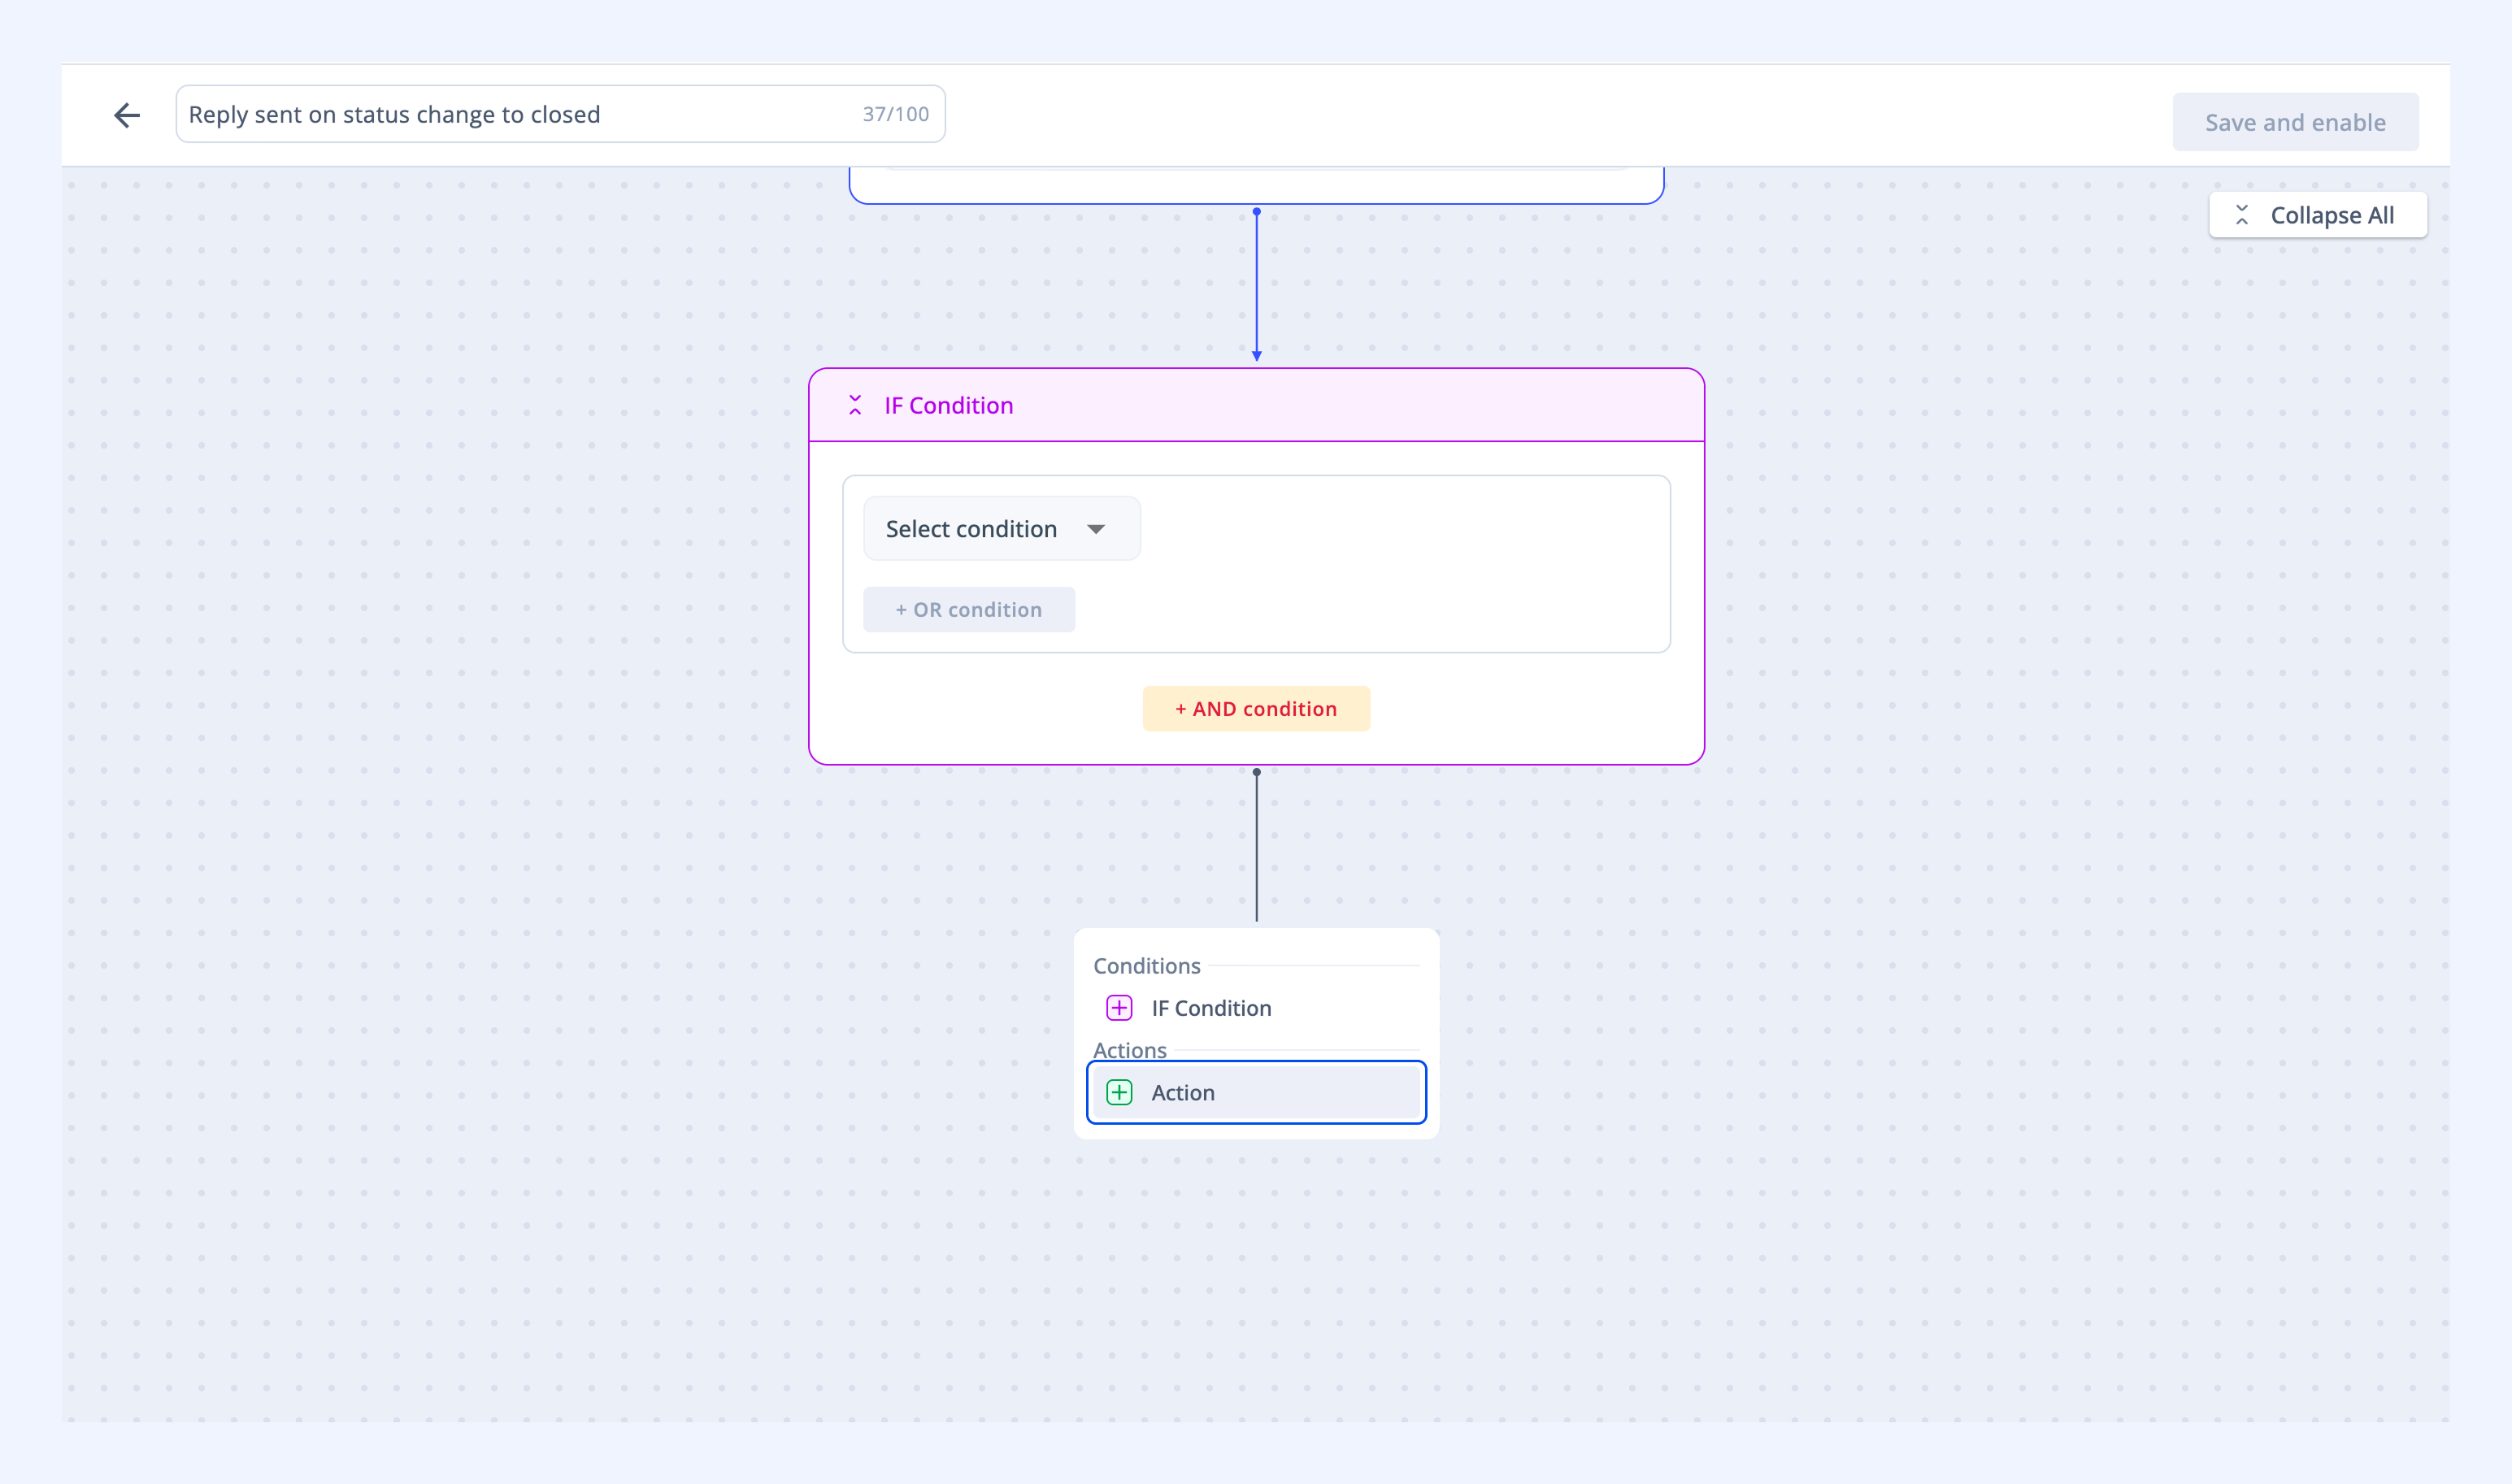
Learn more about supported actions in automations.
Step 6: Save and activate
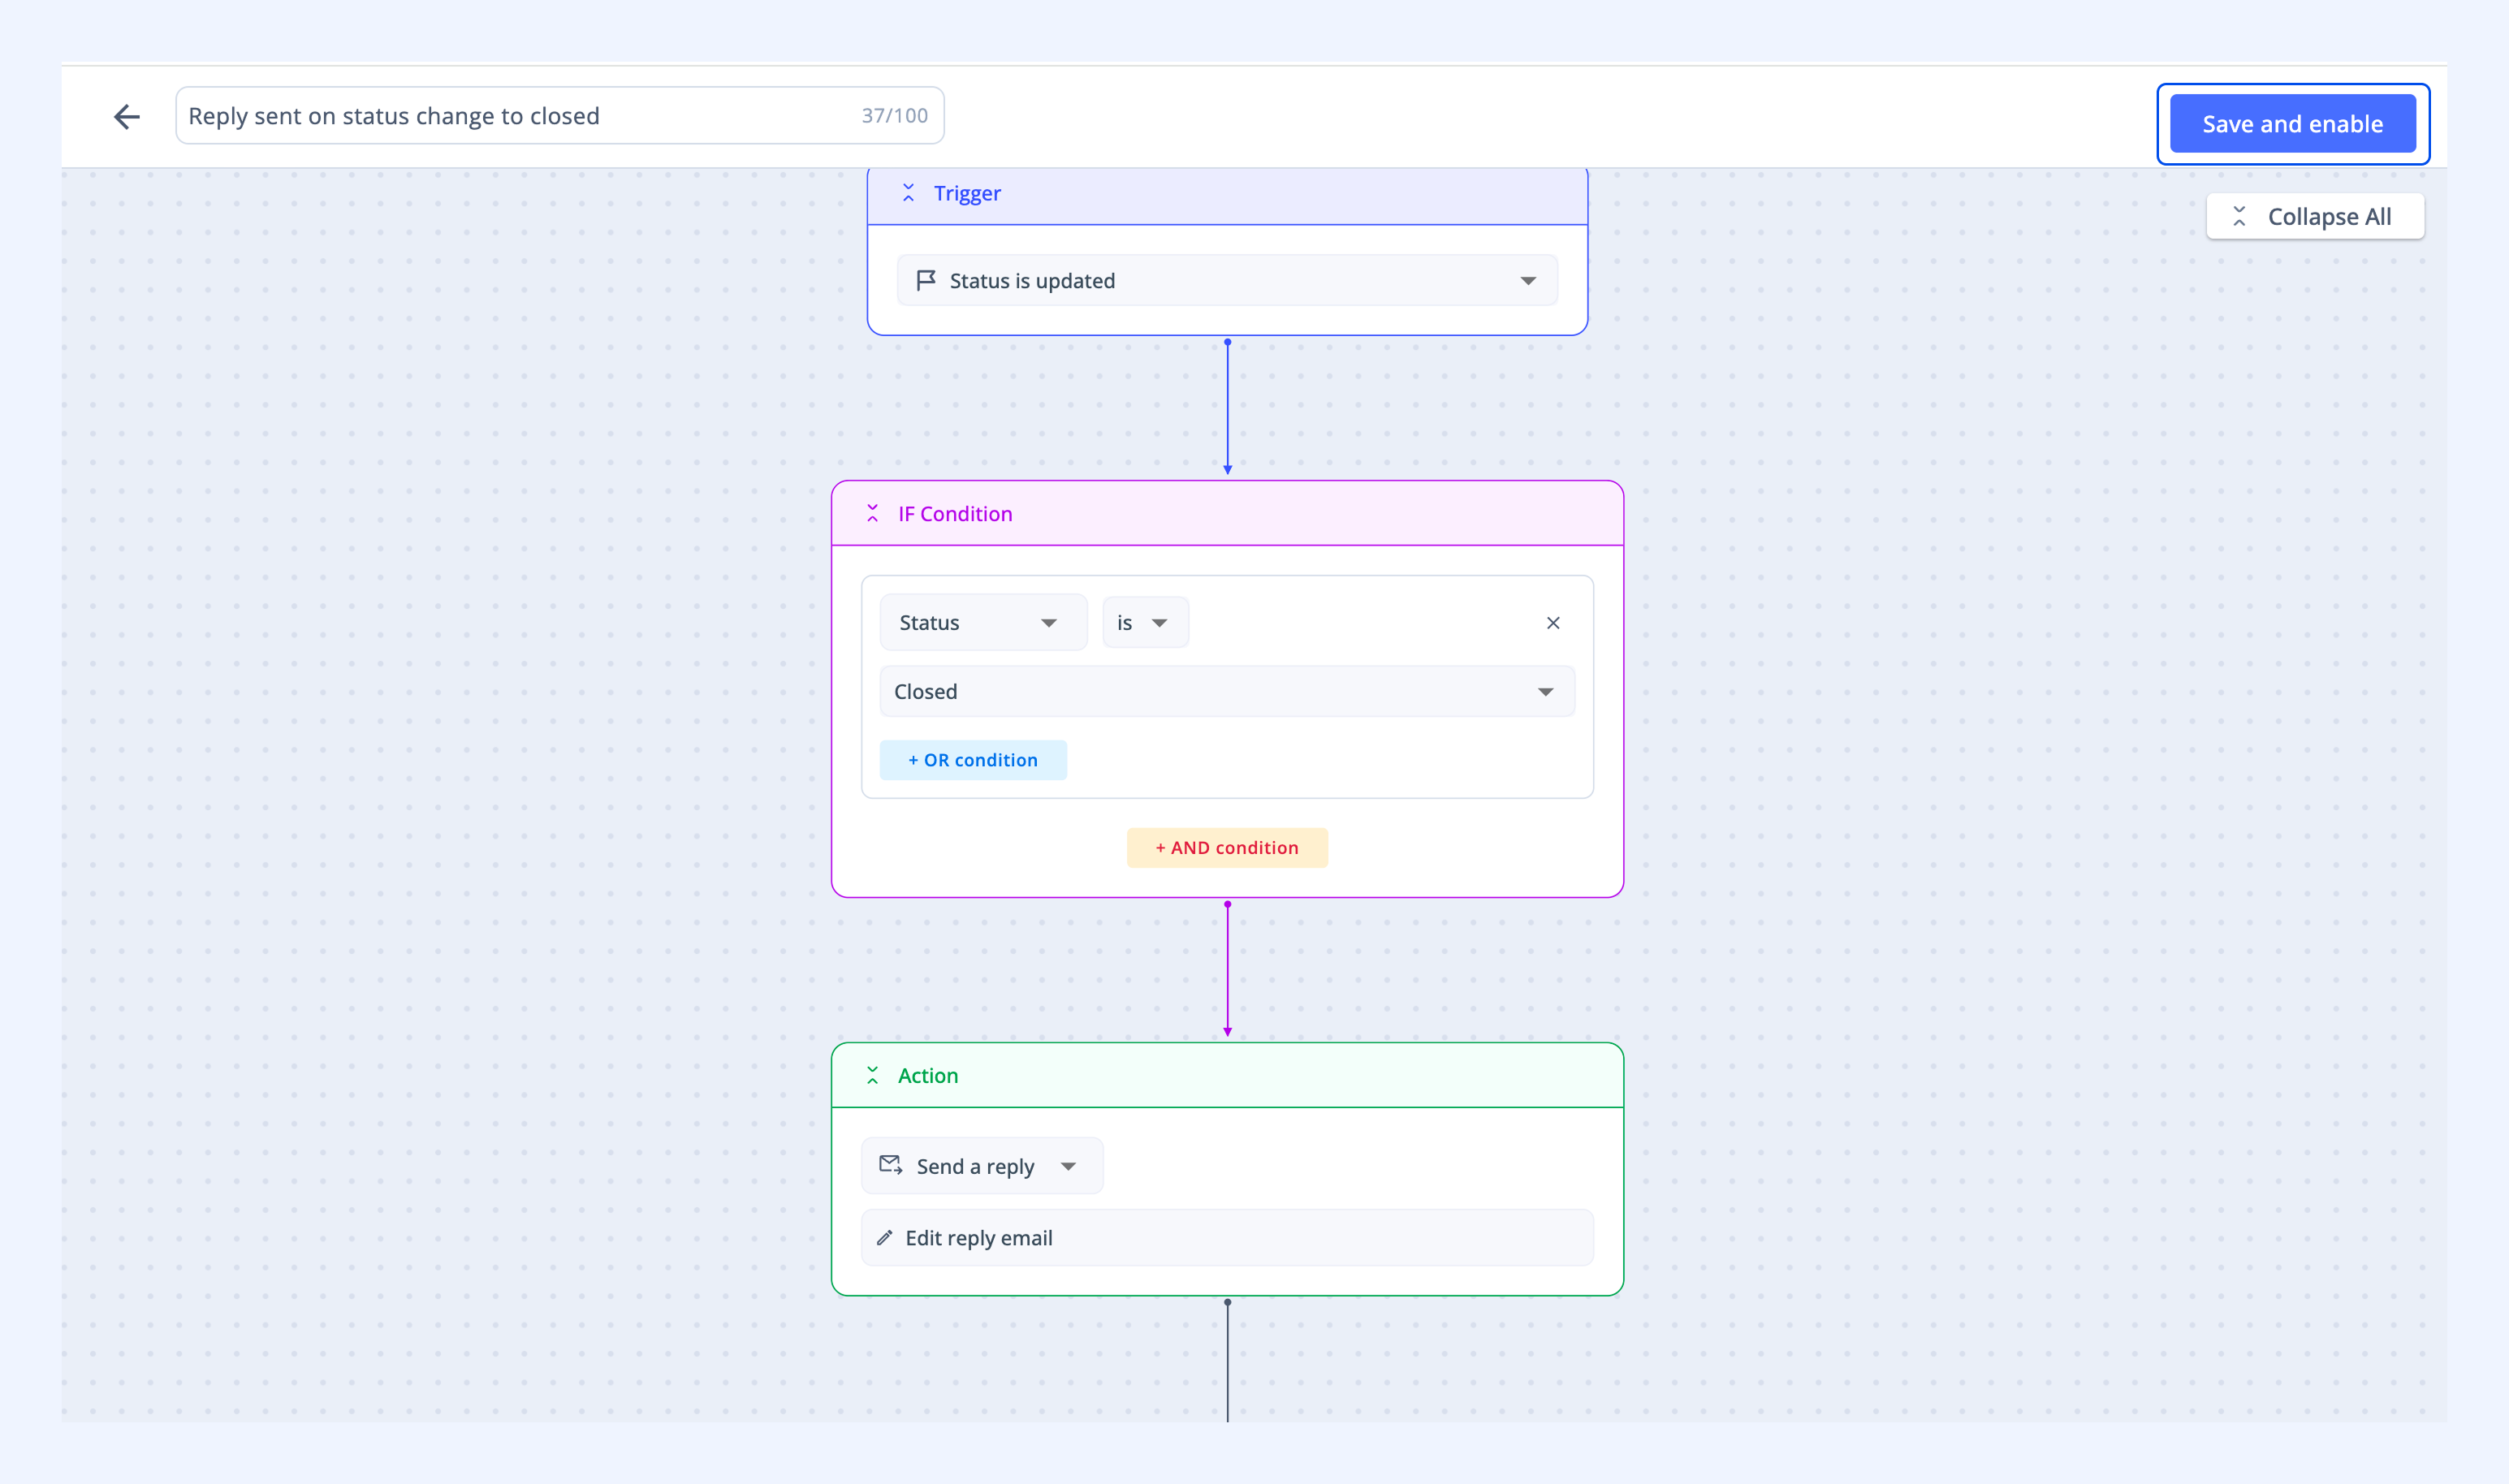
Before saving, review your Automation workflow.
Click Save and enable to activate the Automation.
Managing Automations
All Automations for a Shared Inbox appear in the Your Automations tab.
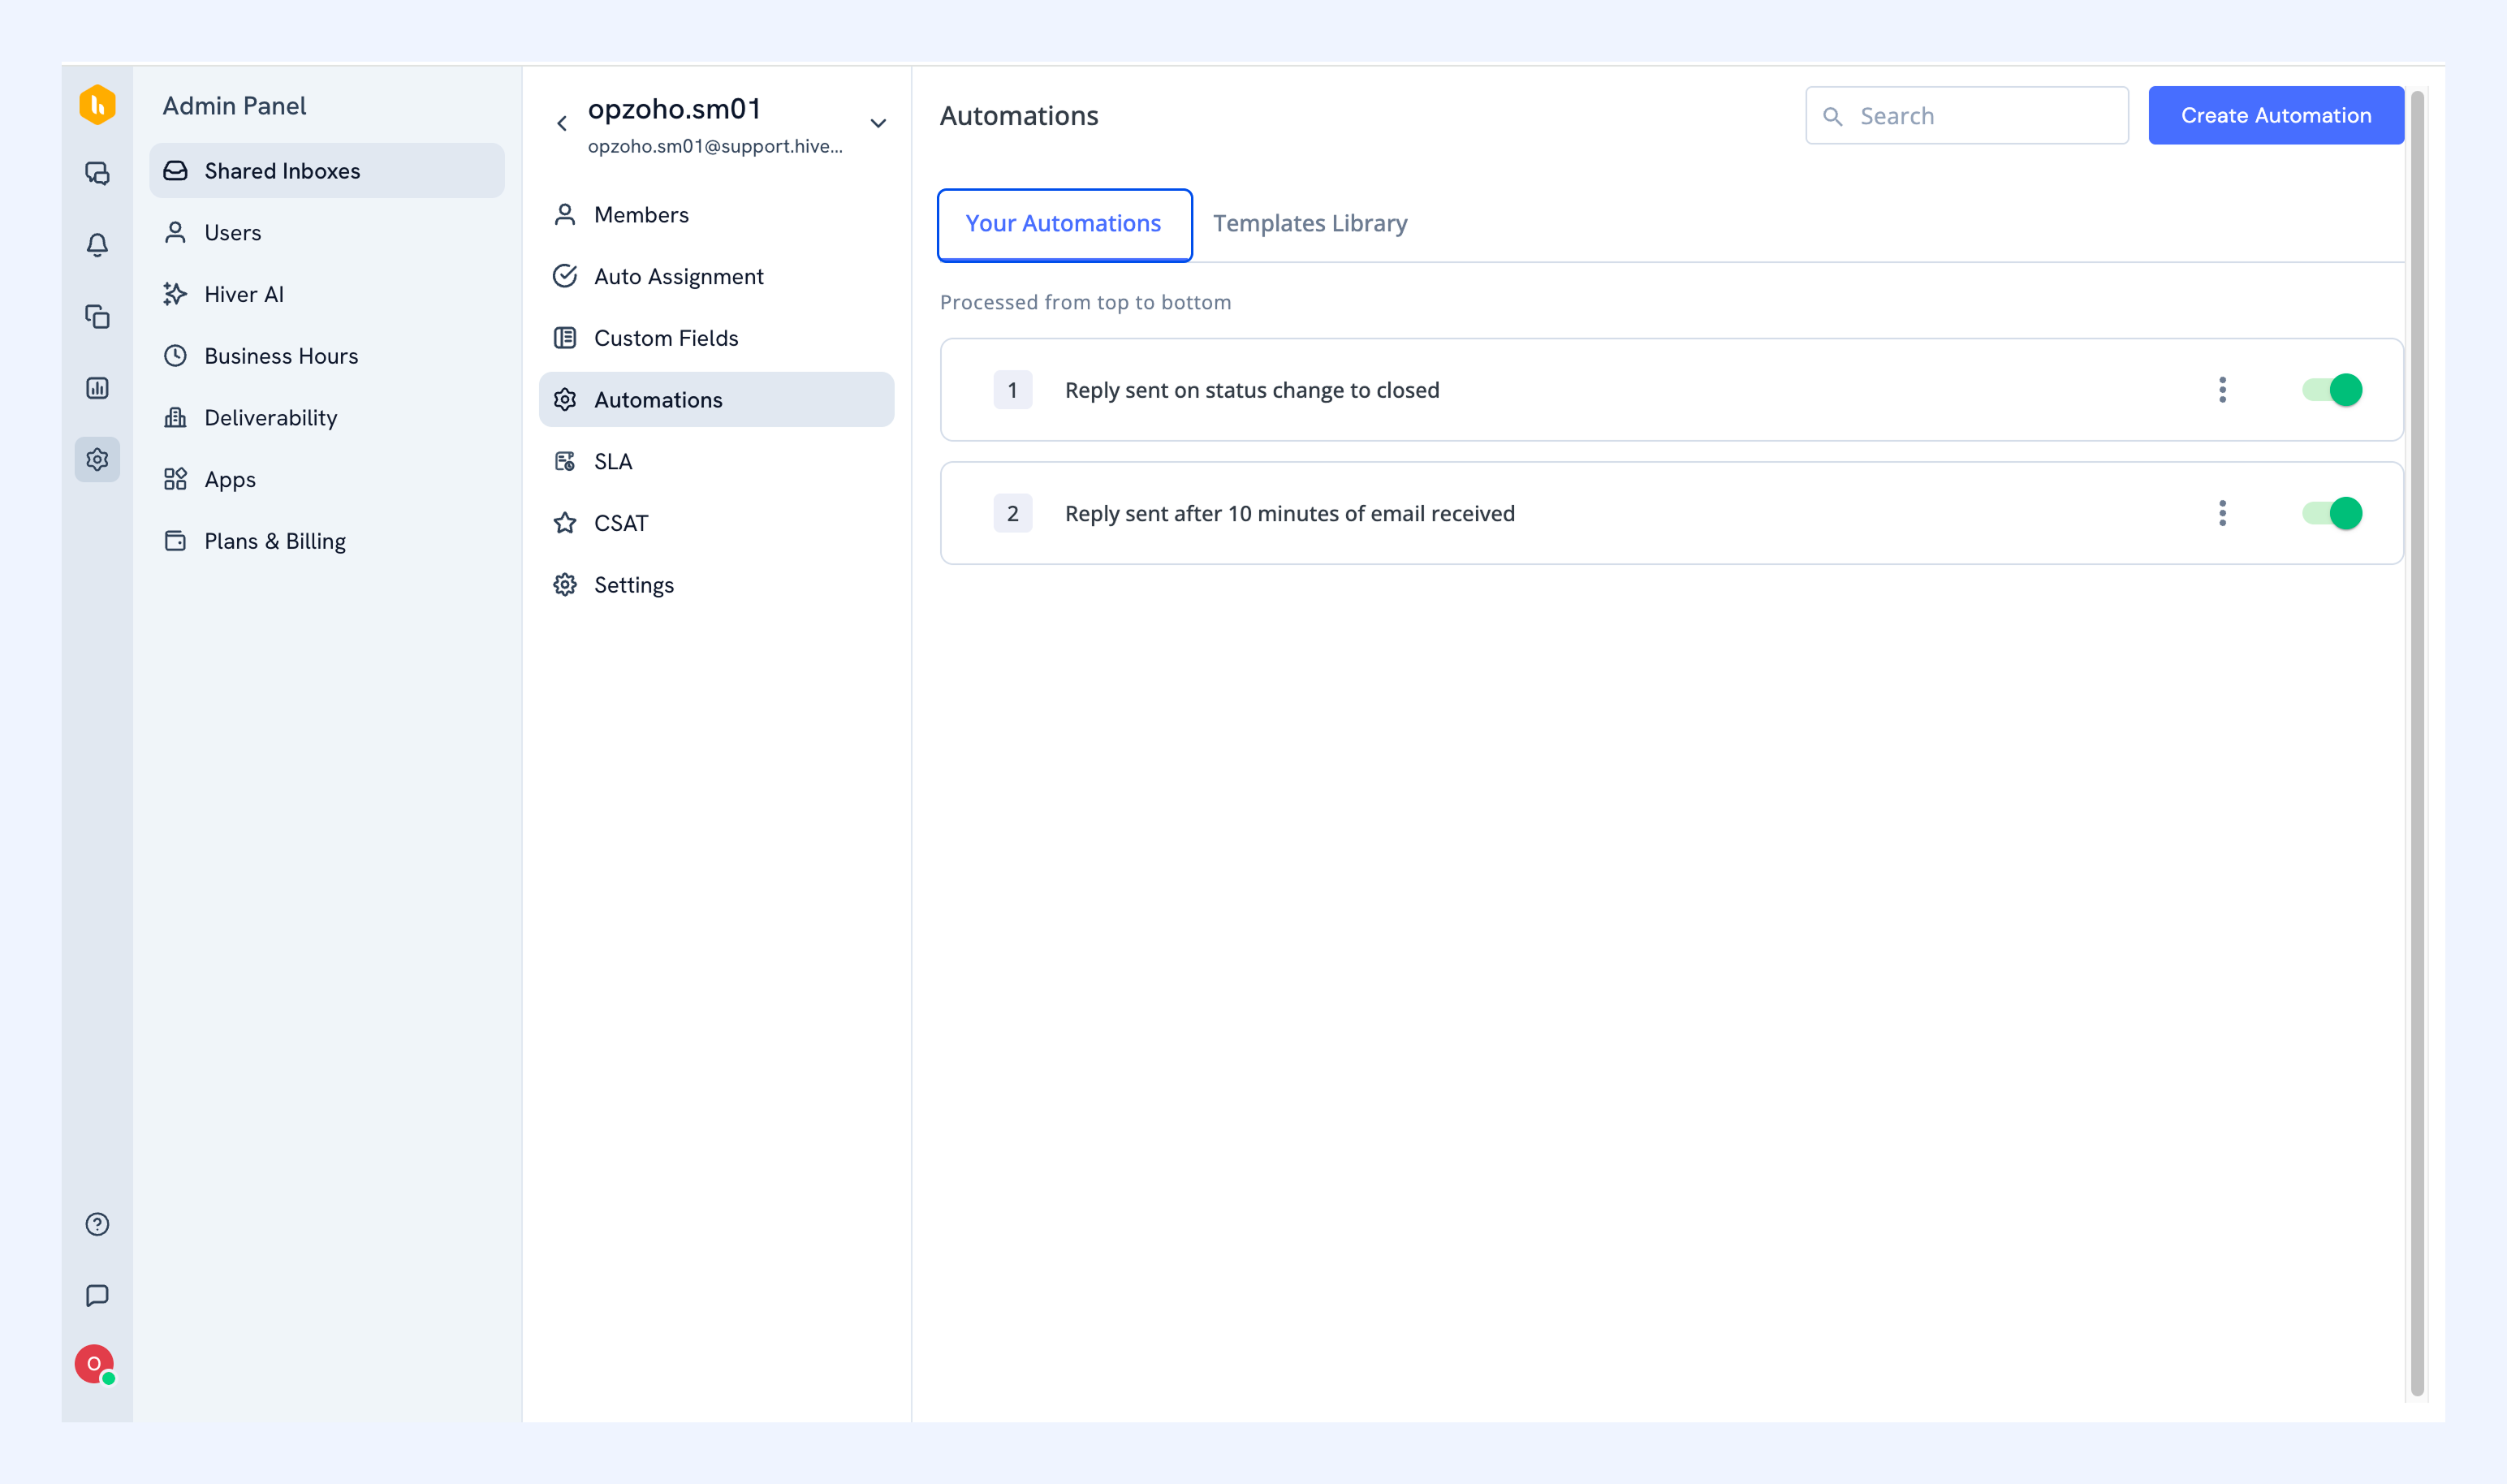
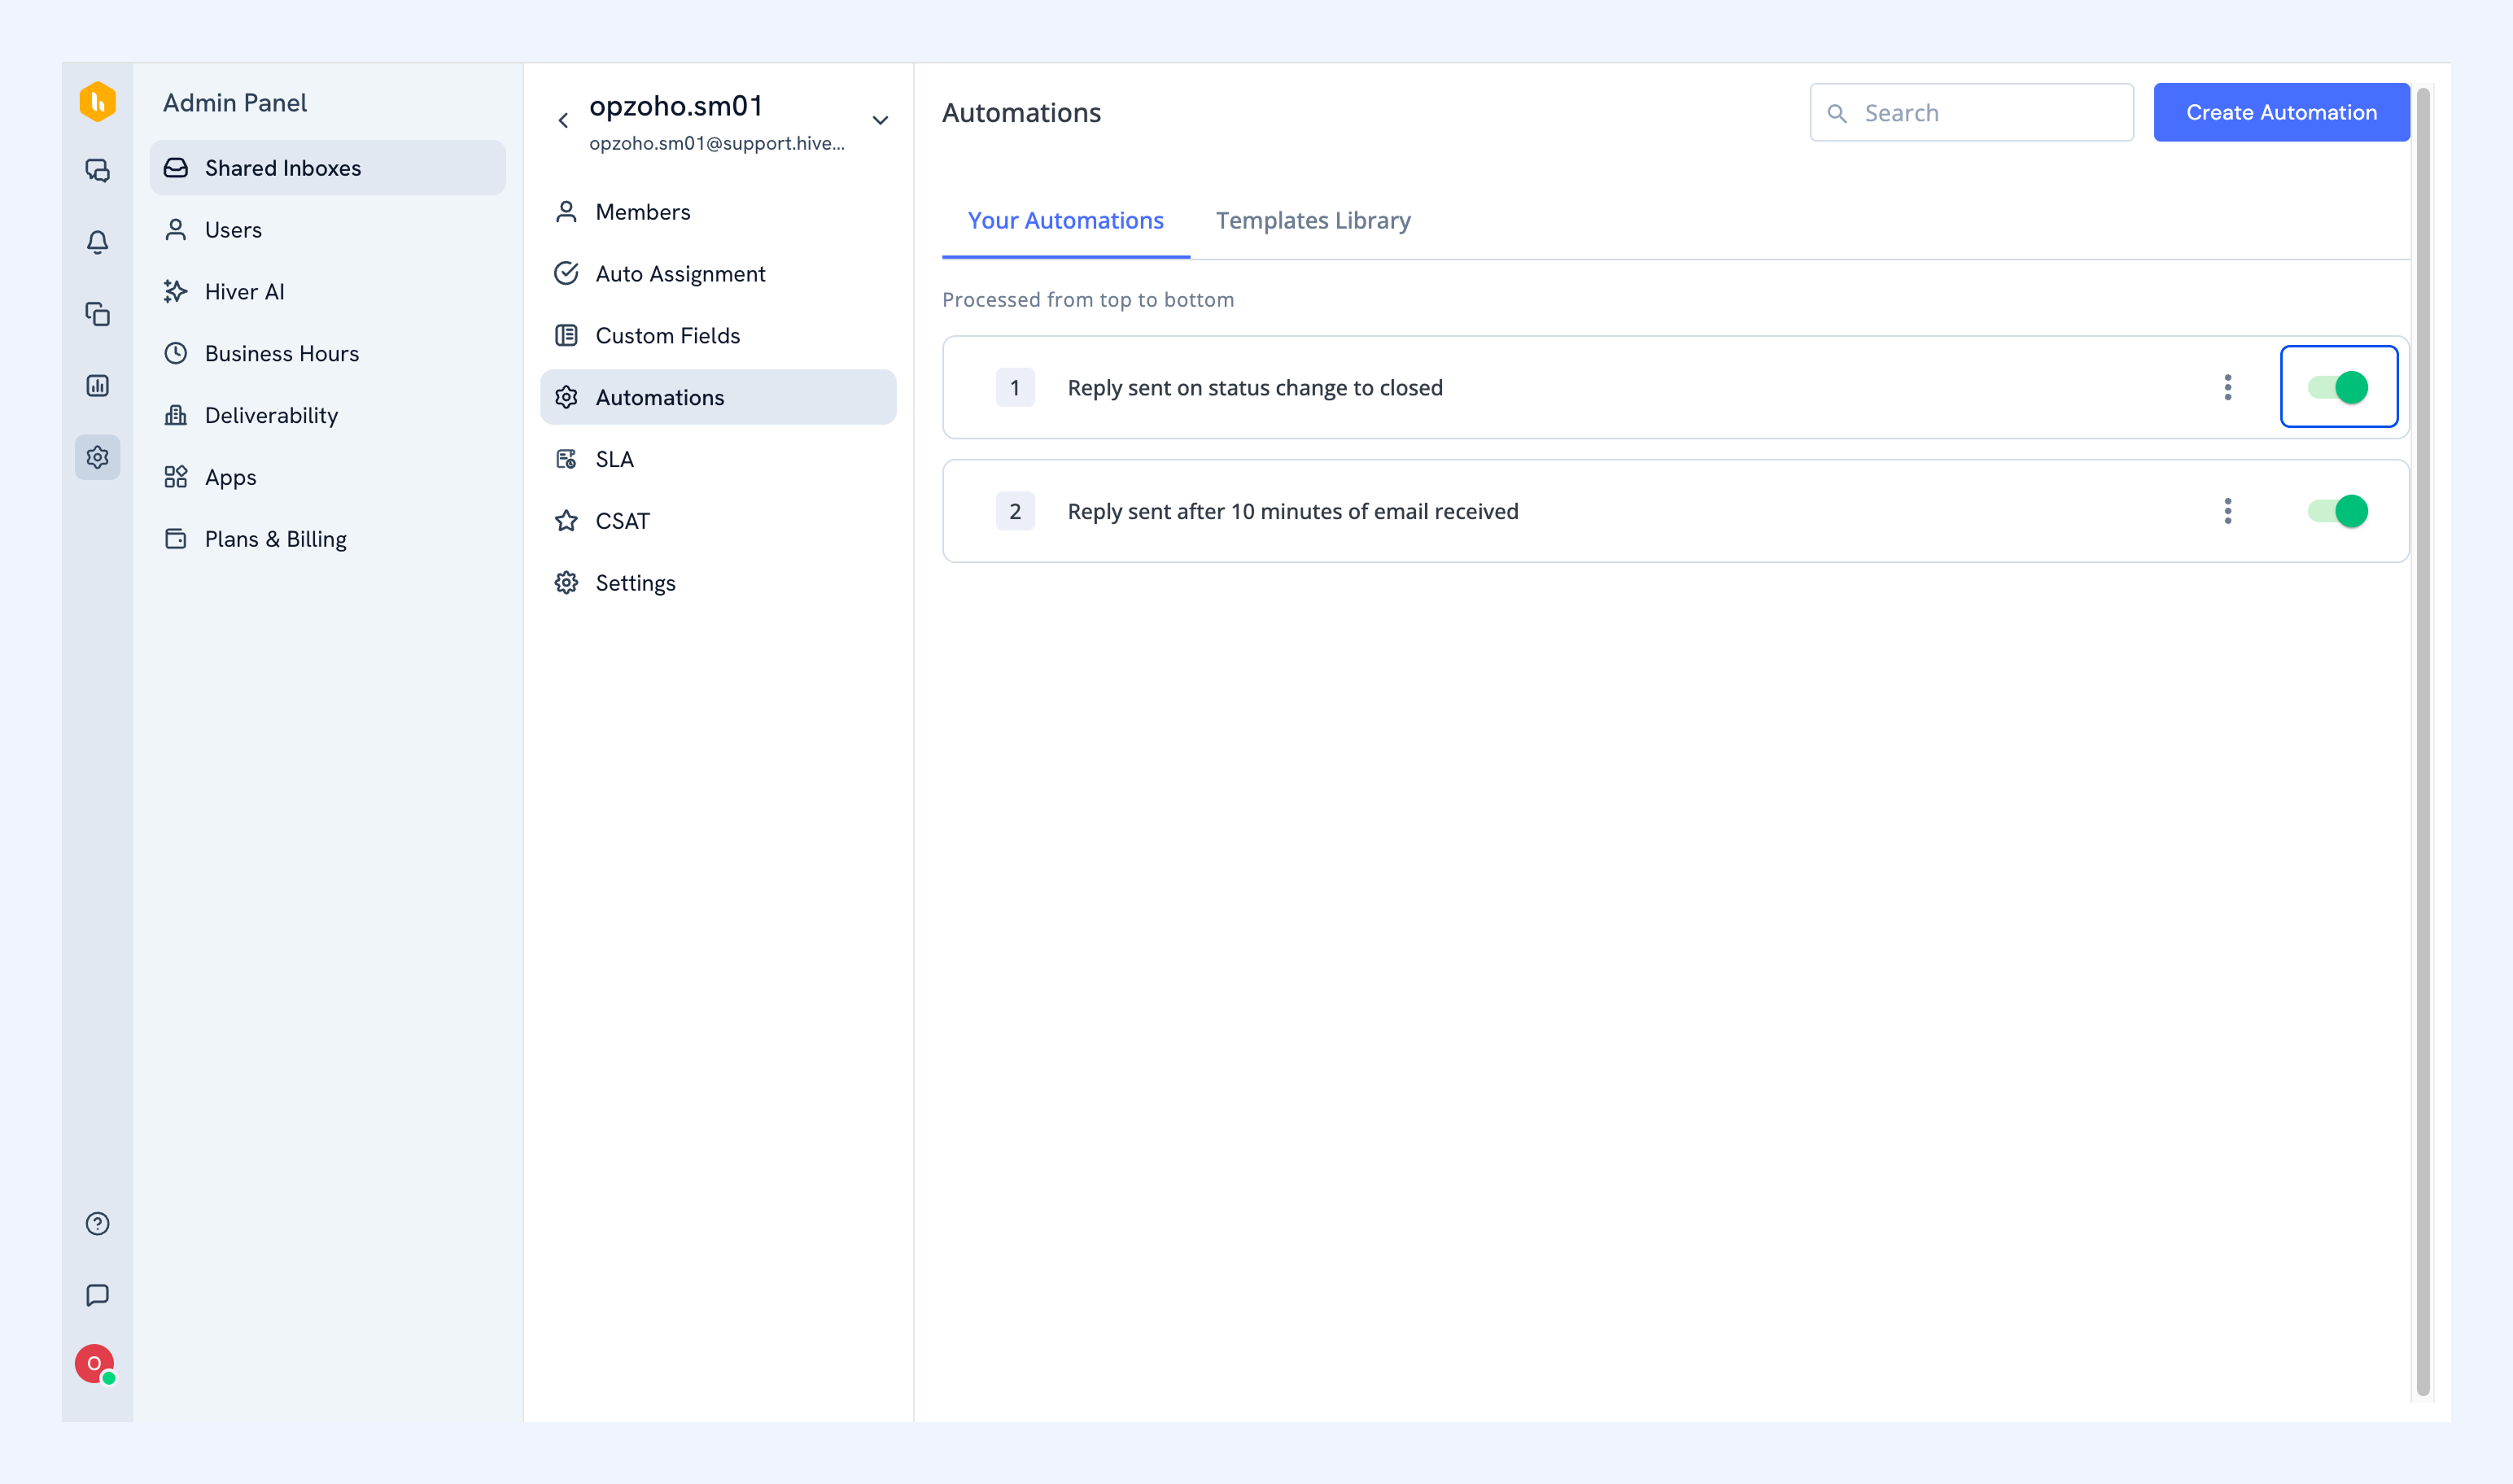
Enable or disable:Toggle the switch next to an Automation to turn it on or off.
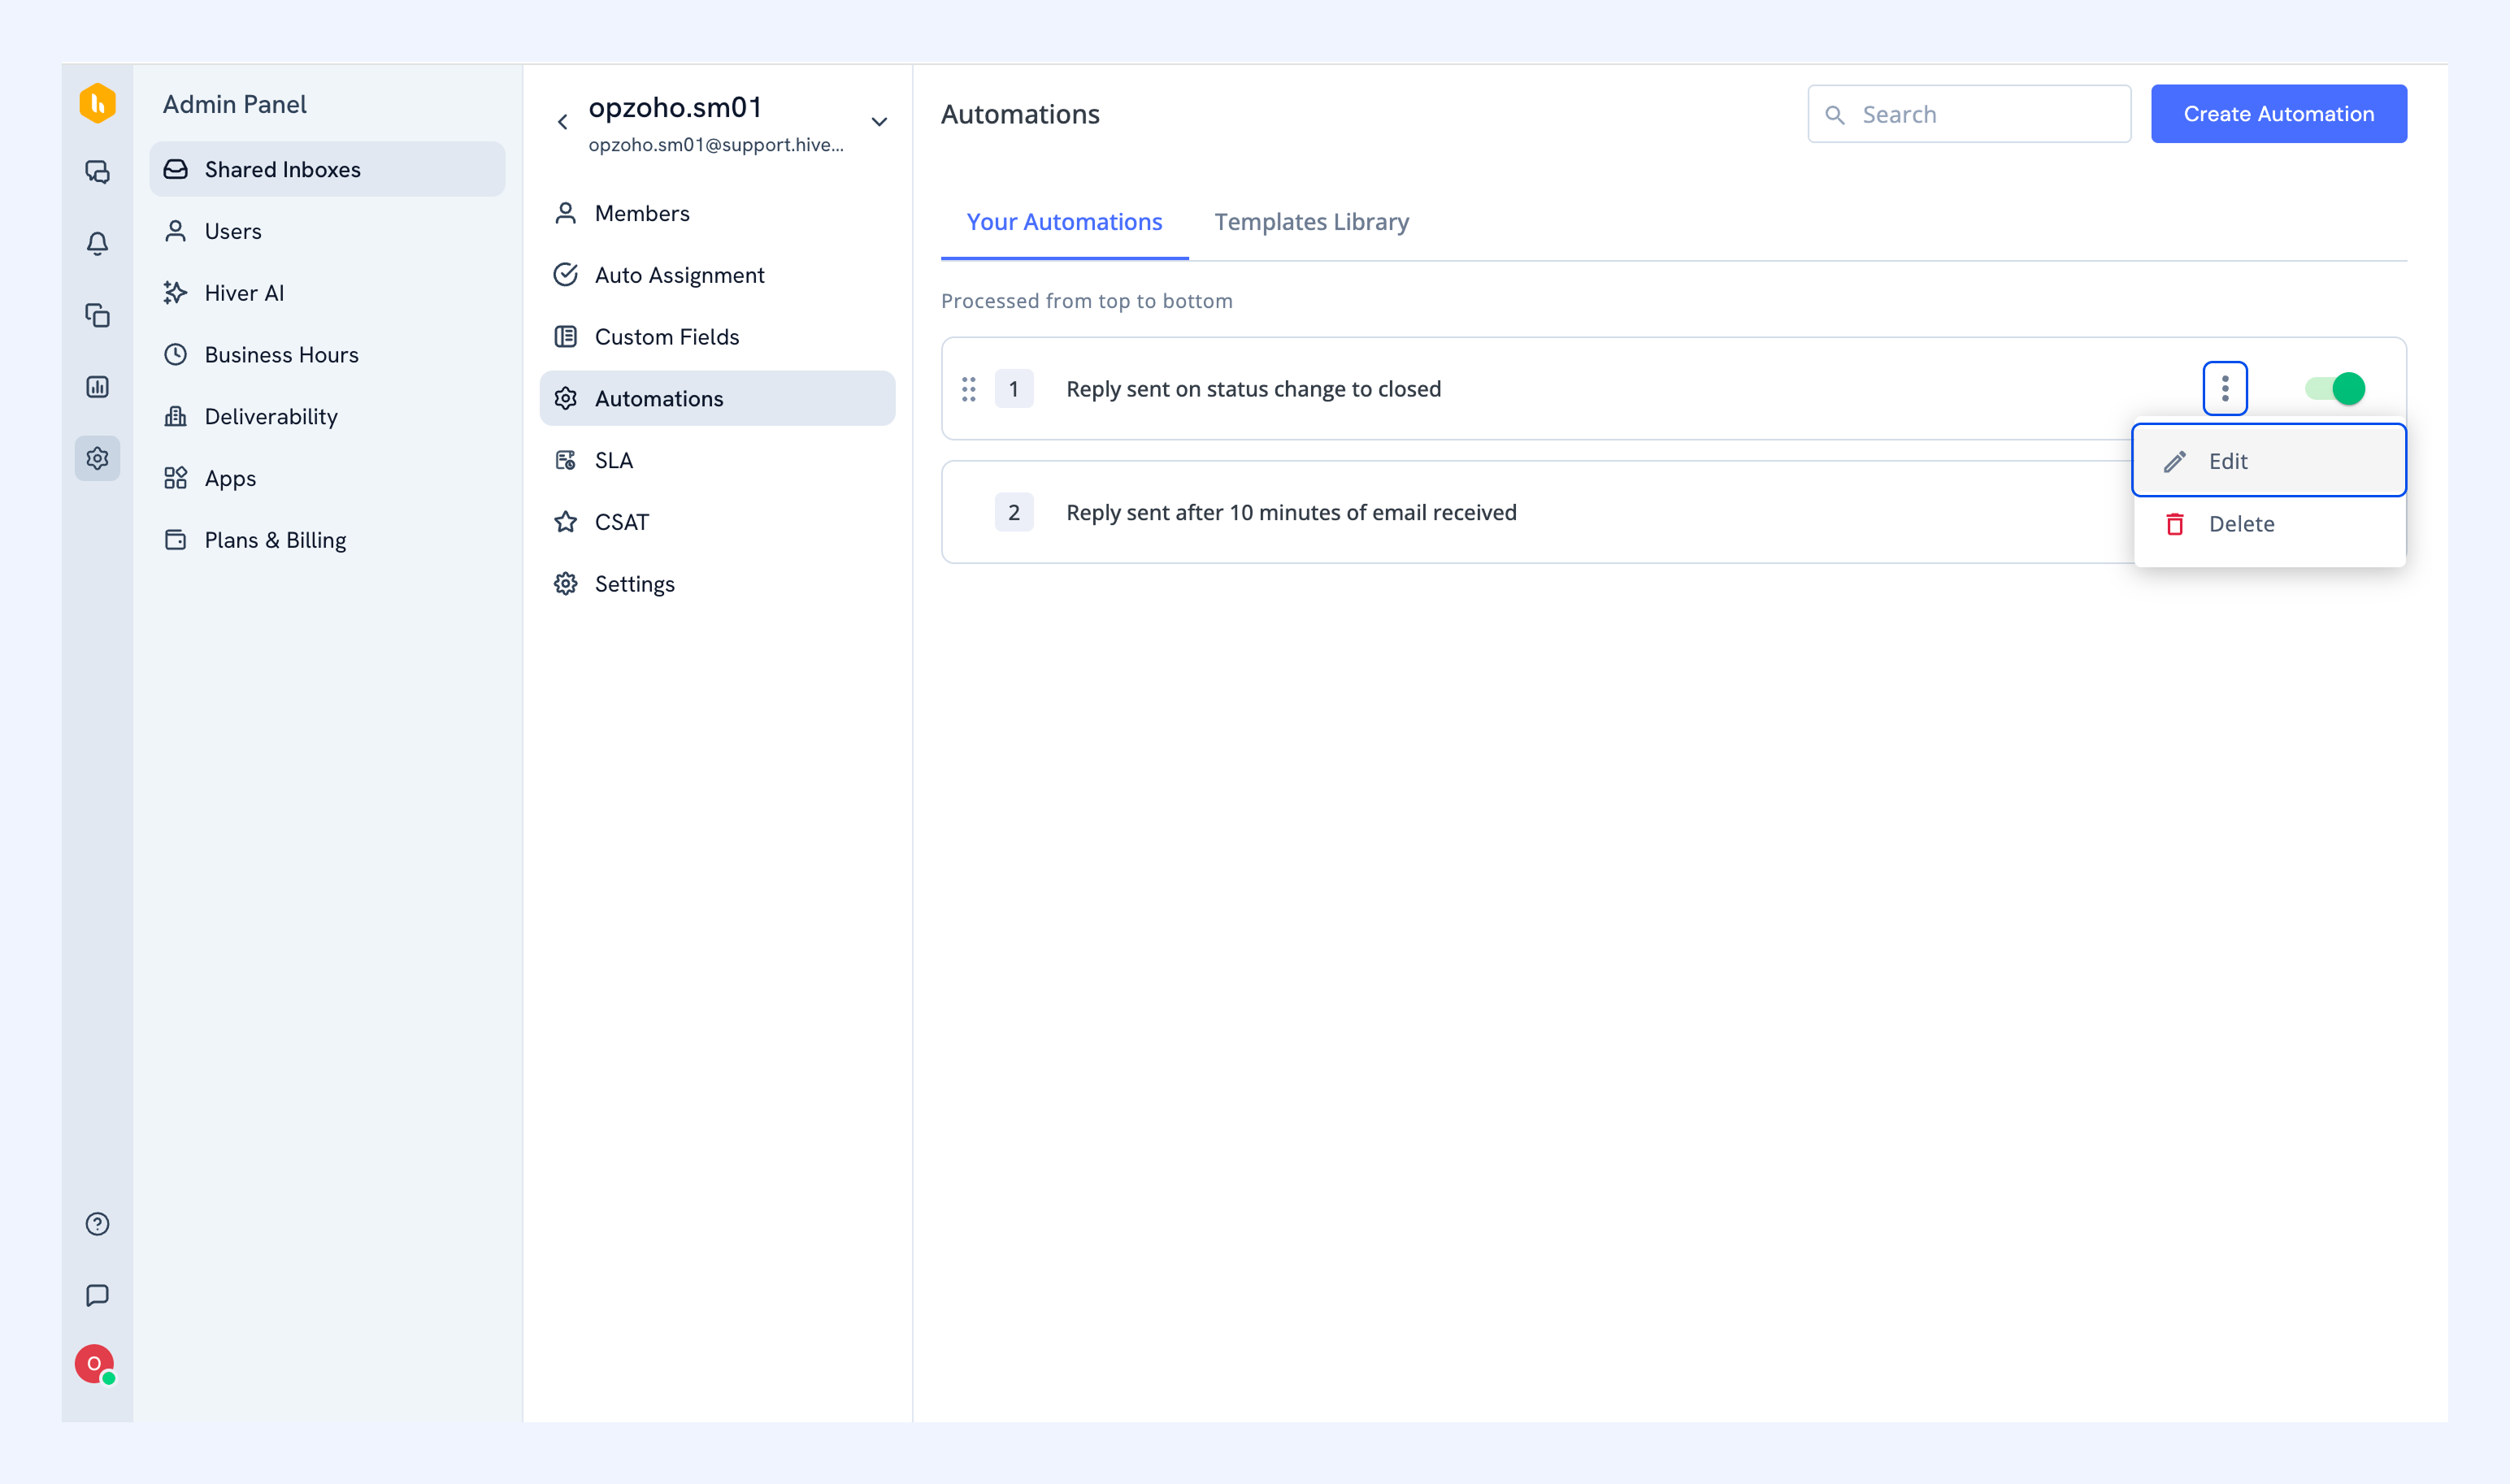
Editing an Automation
- Click the three dots menu next to the Automation. Select Edit.
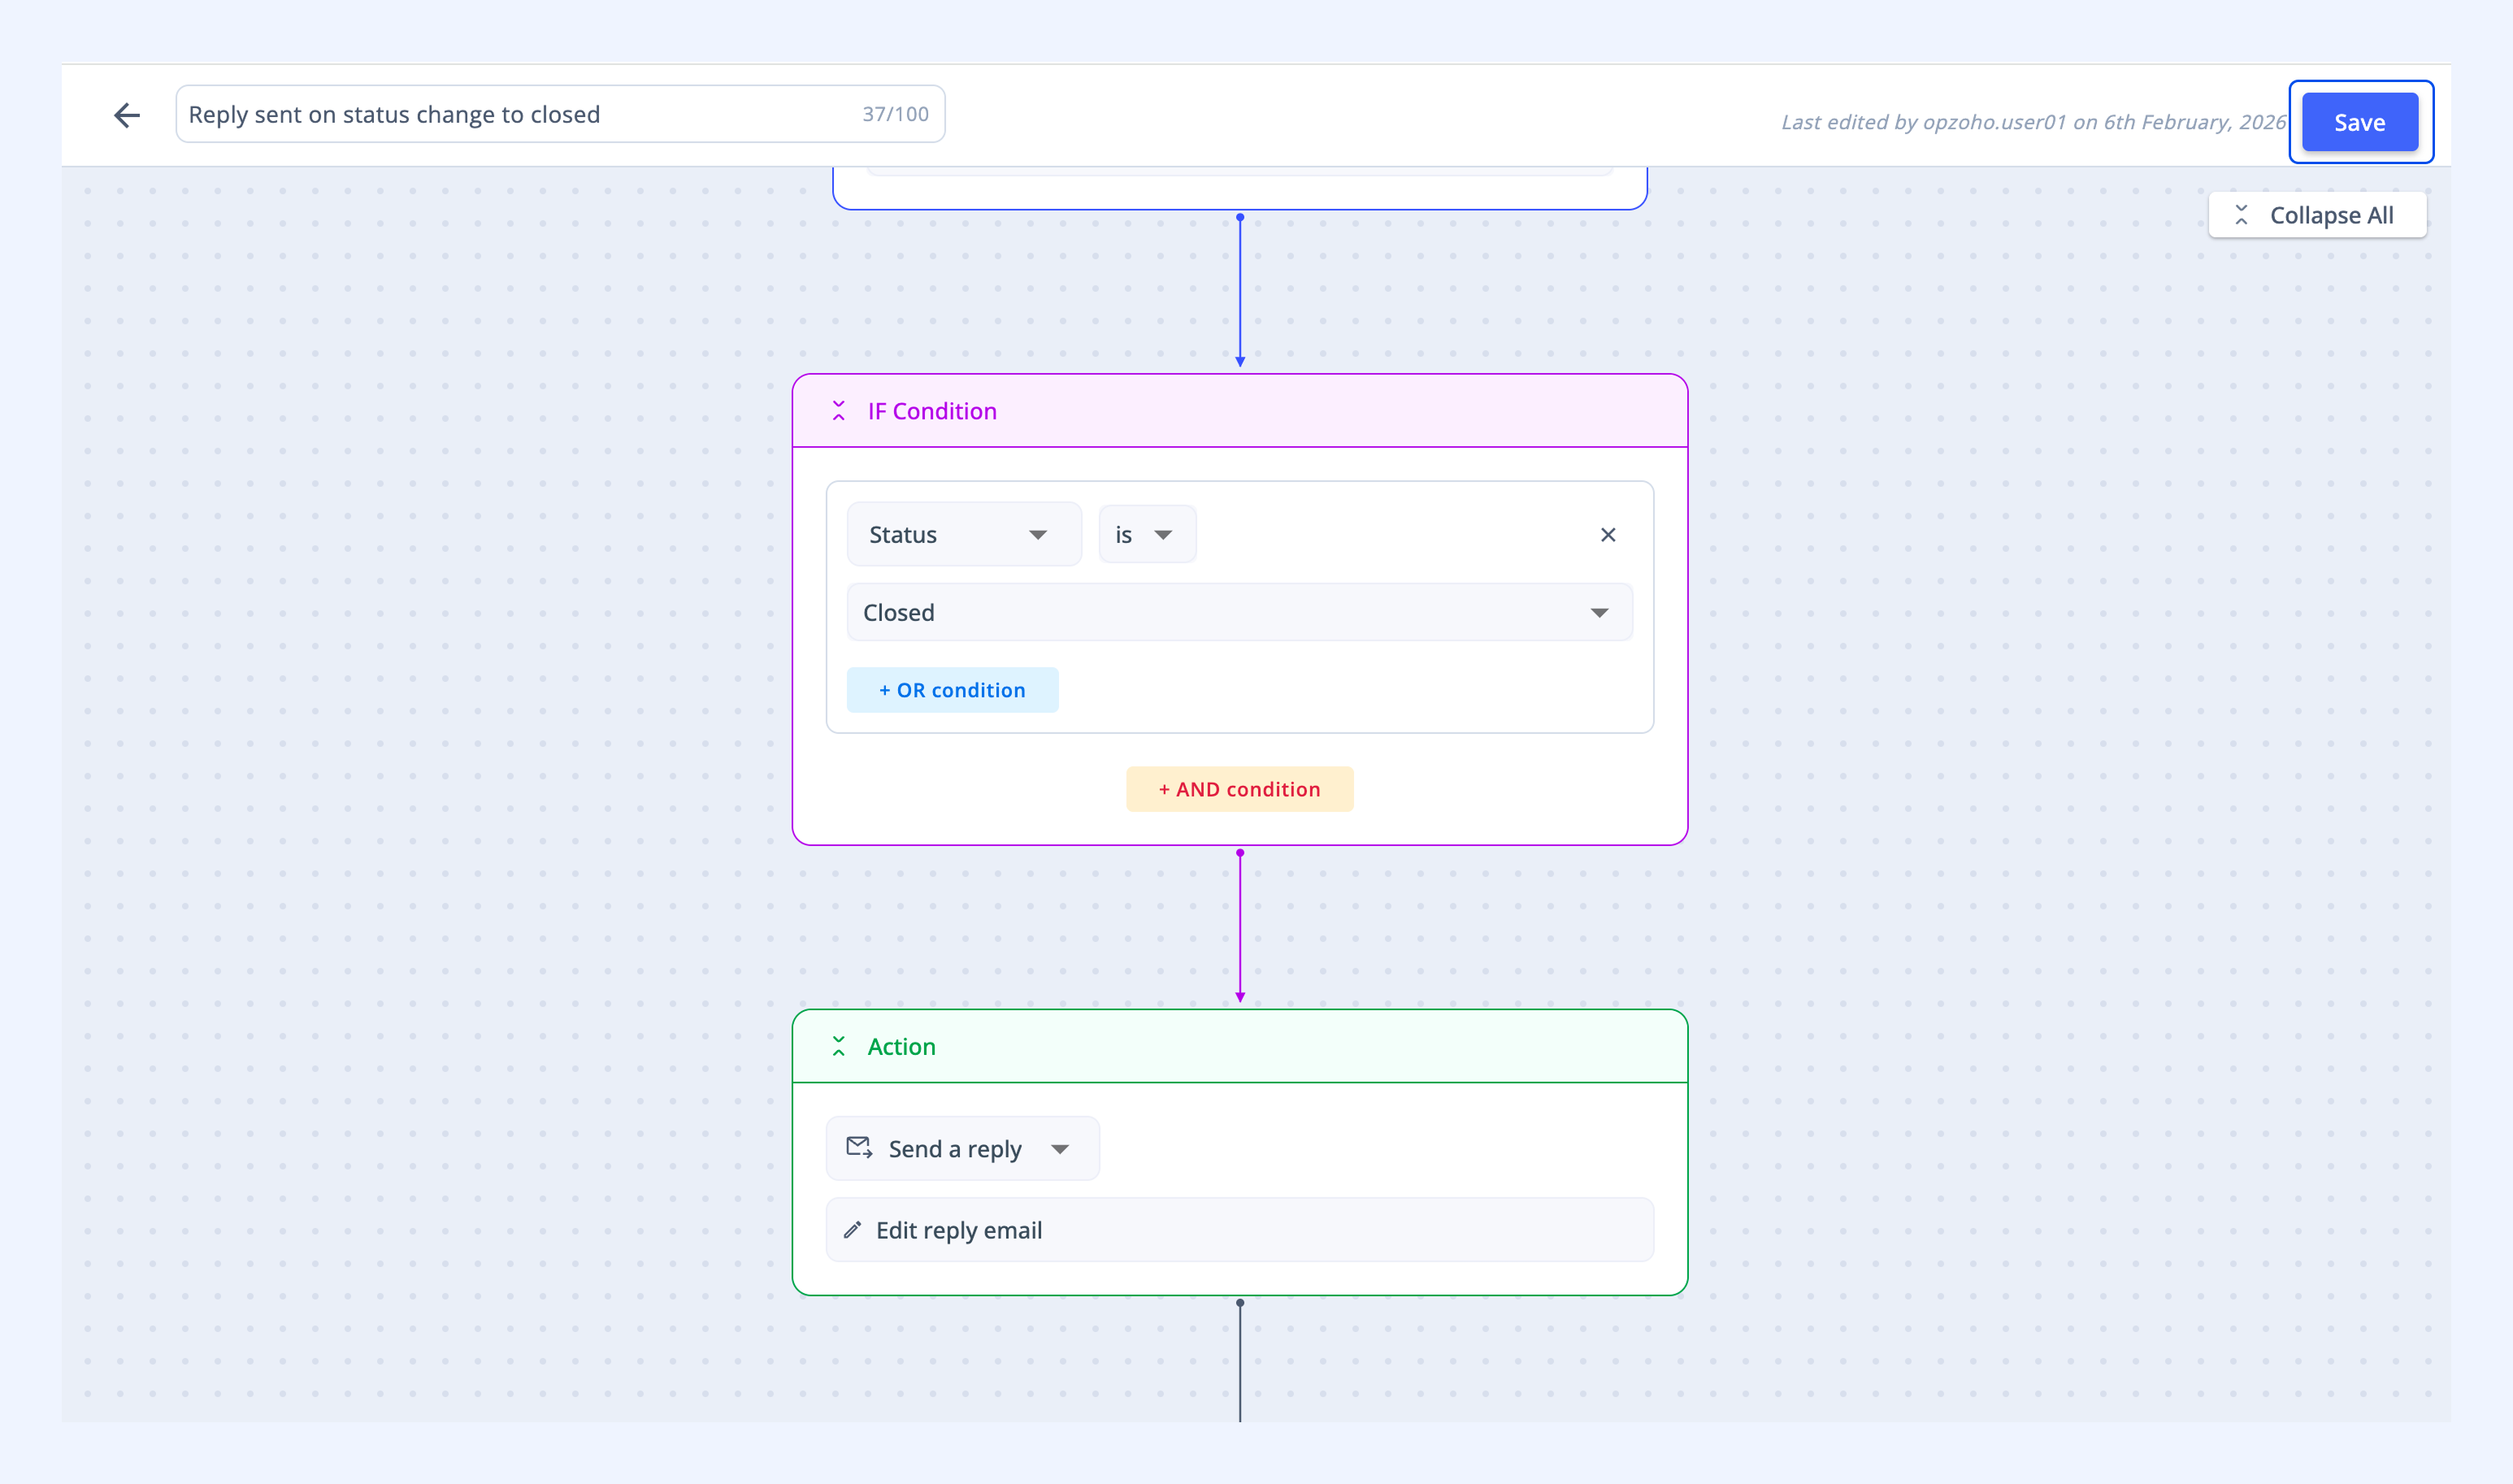
Make your changes and click lick Save.
Deleting an Automation
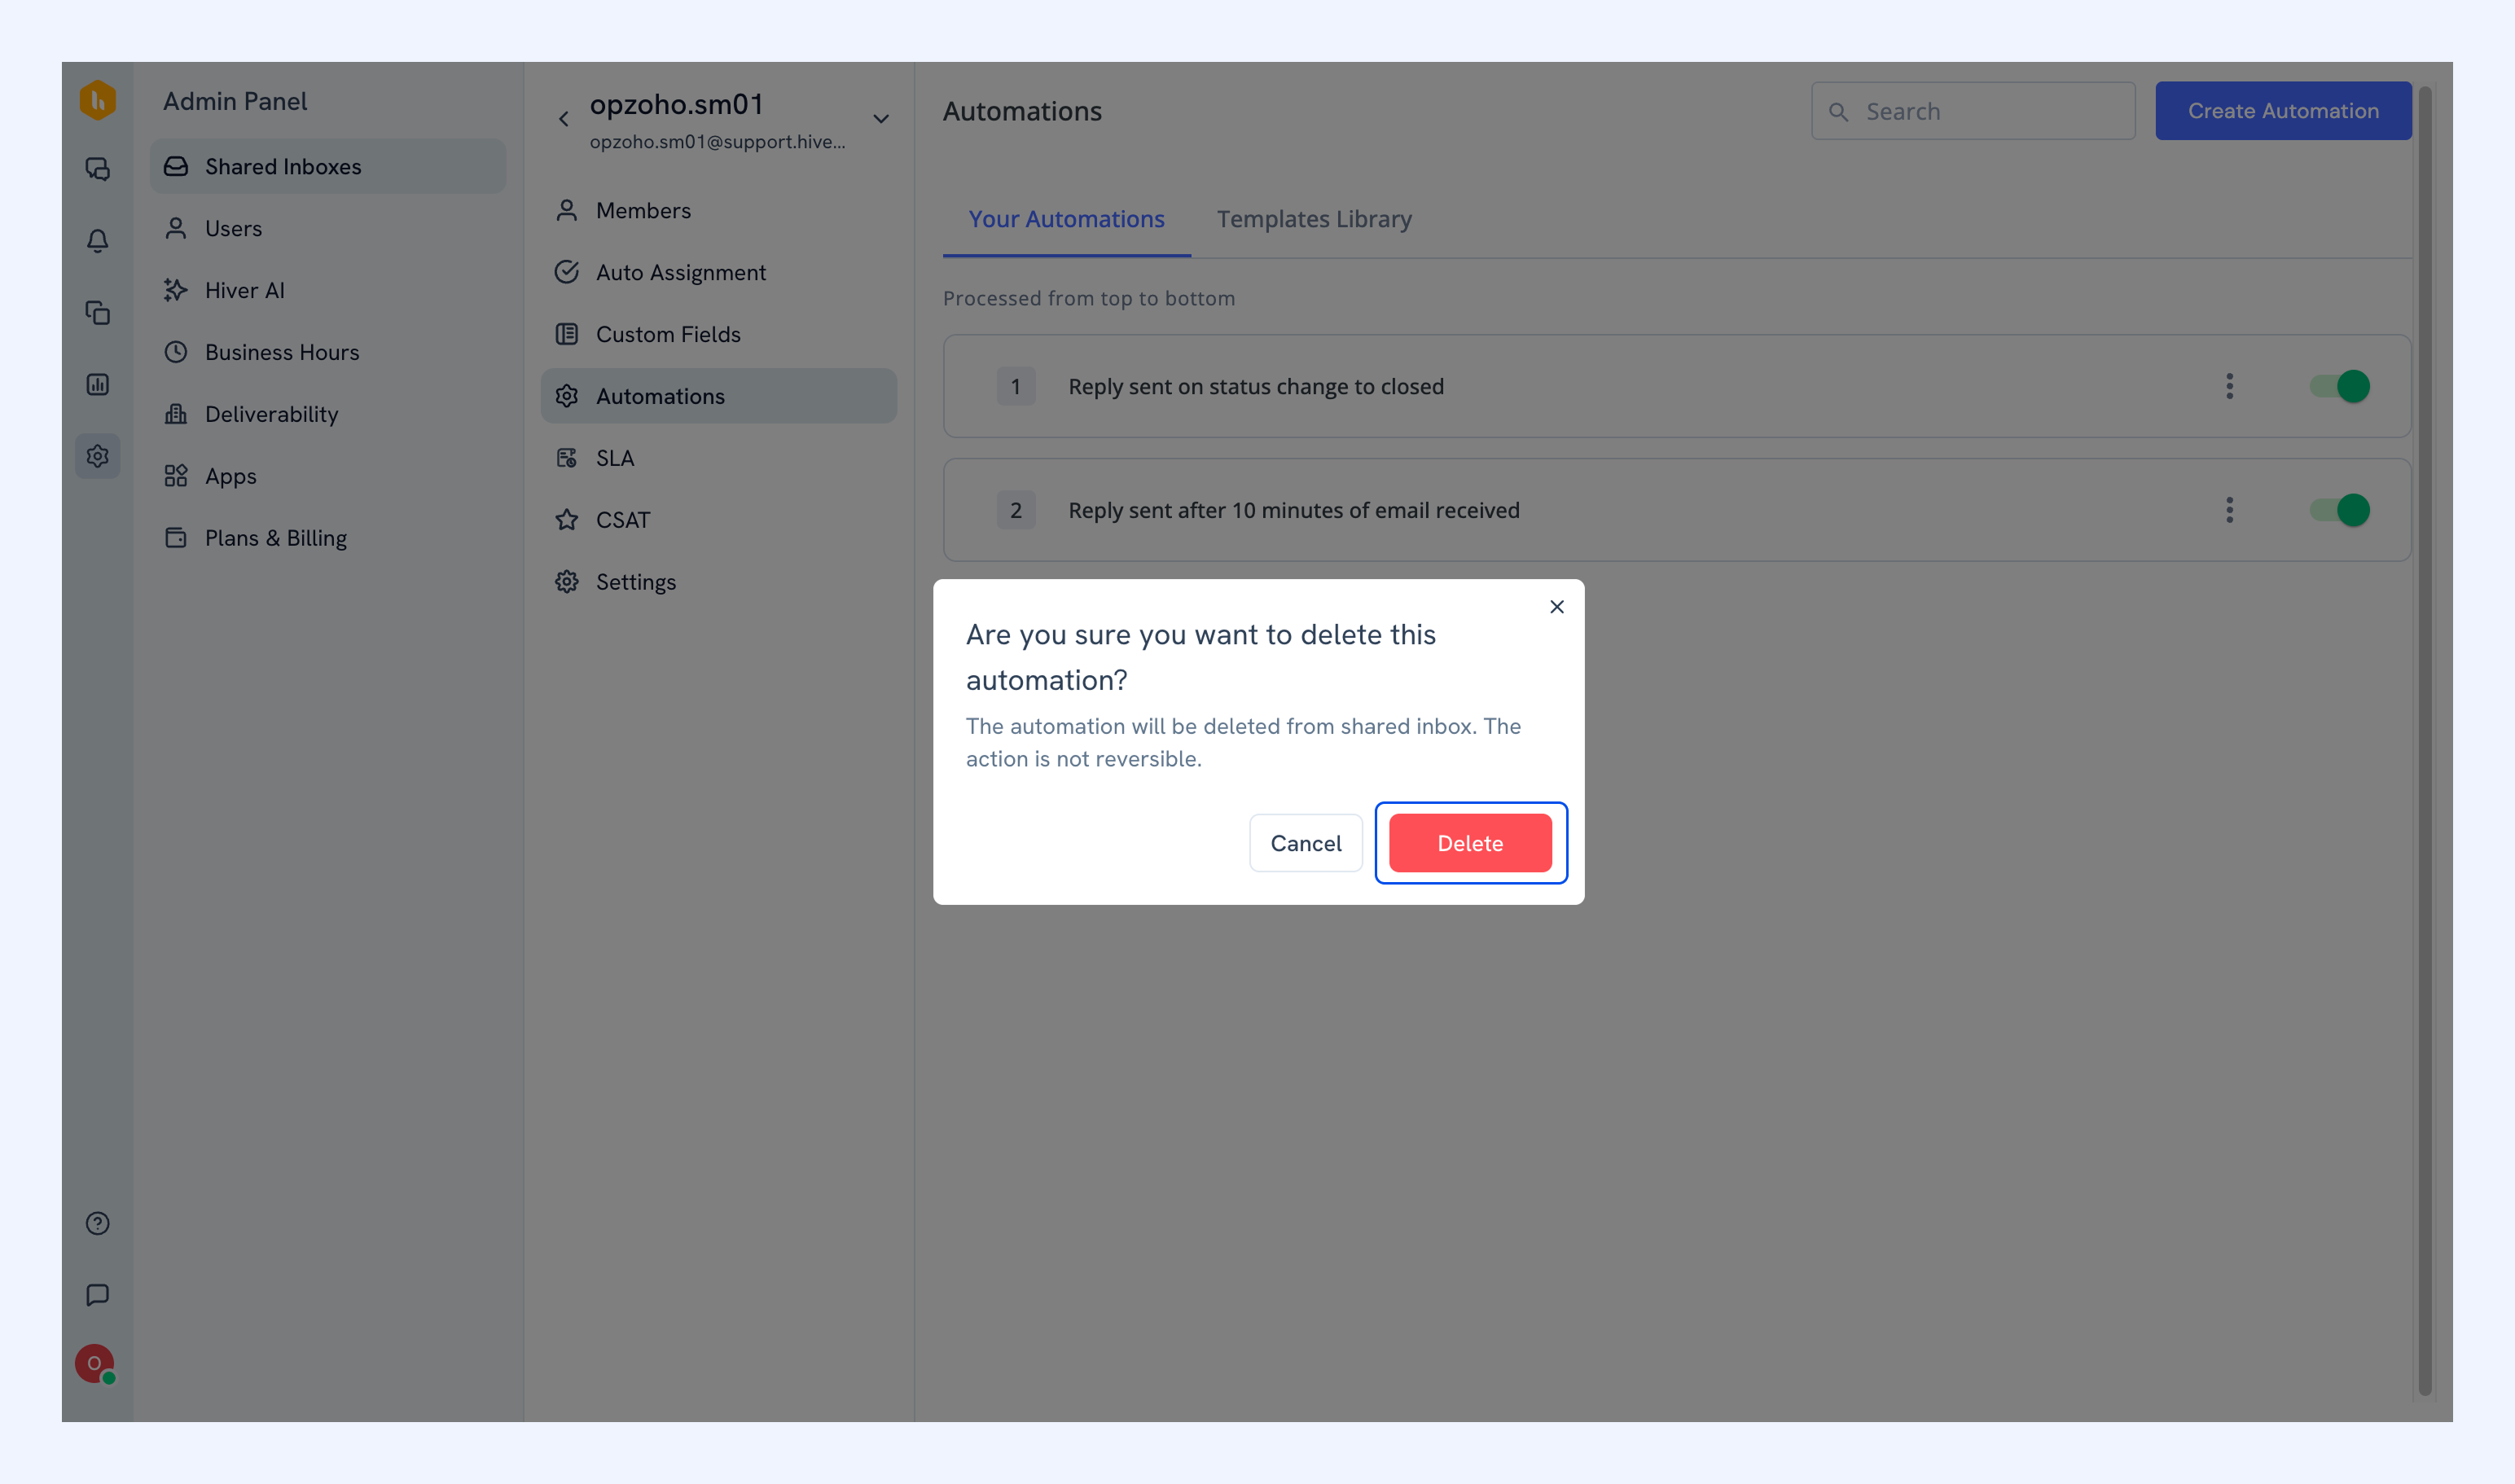
- Click the three dots menu next to the Automation. Select Delete.
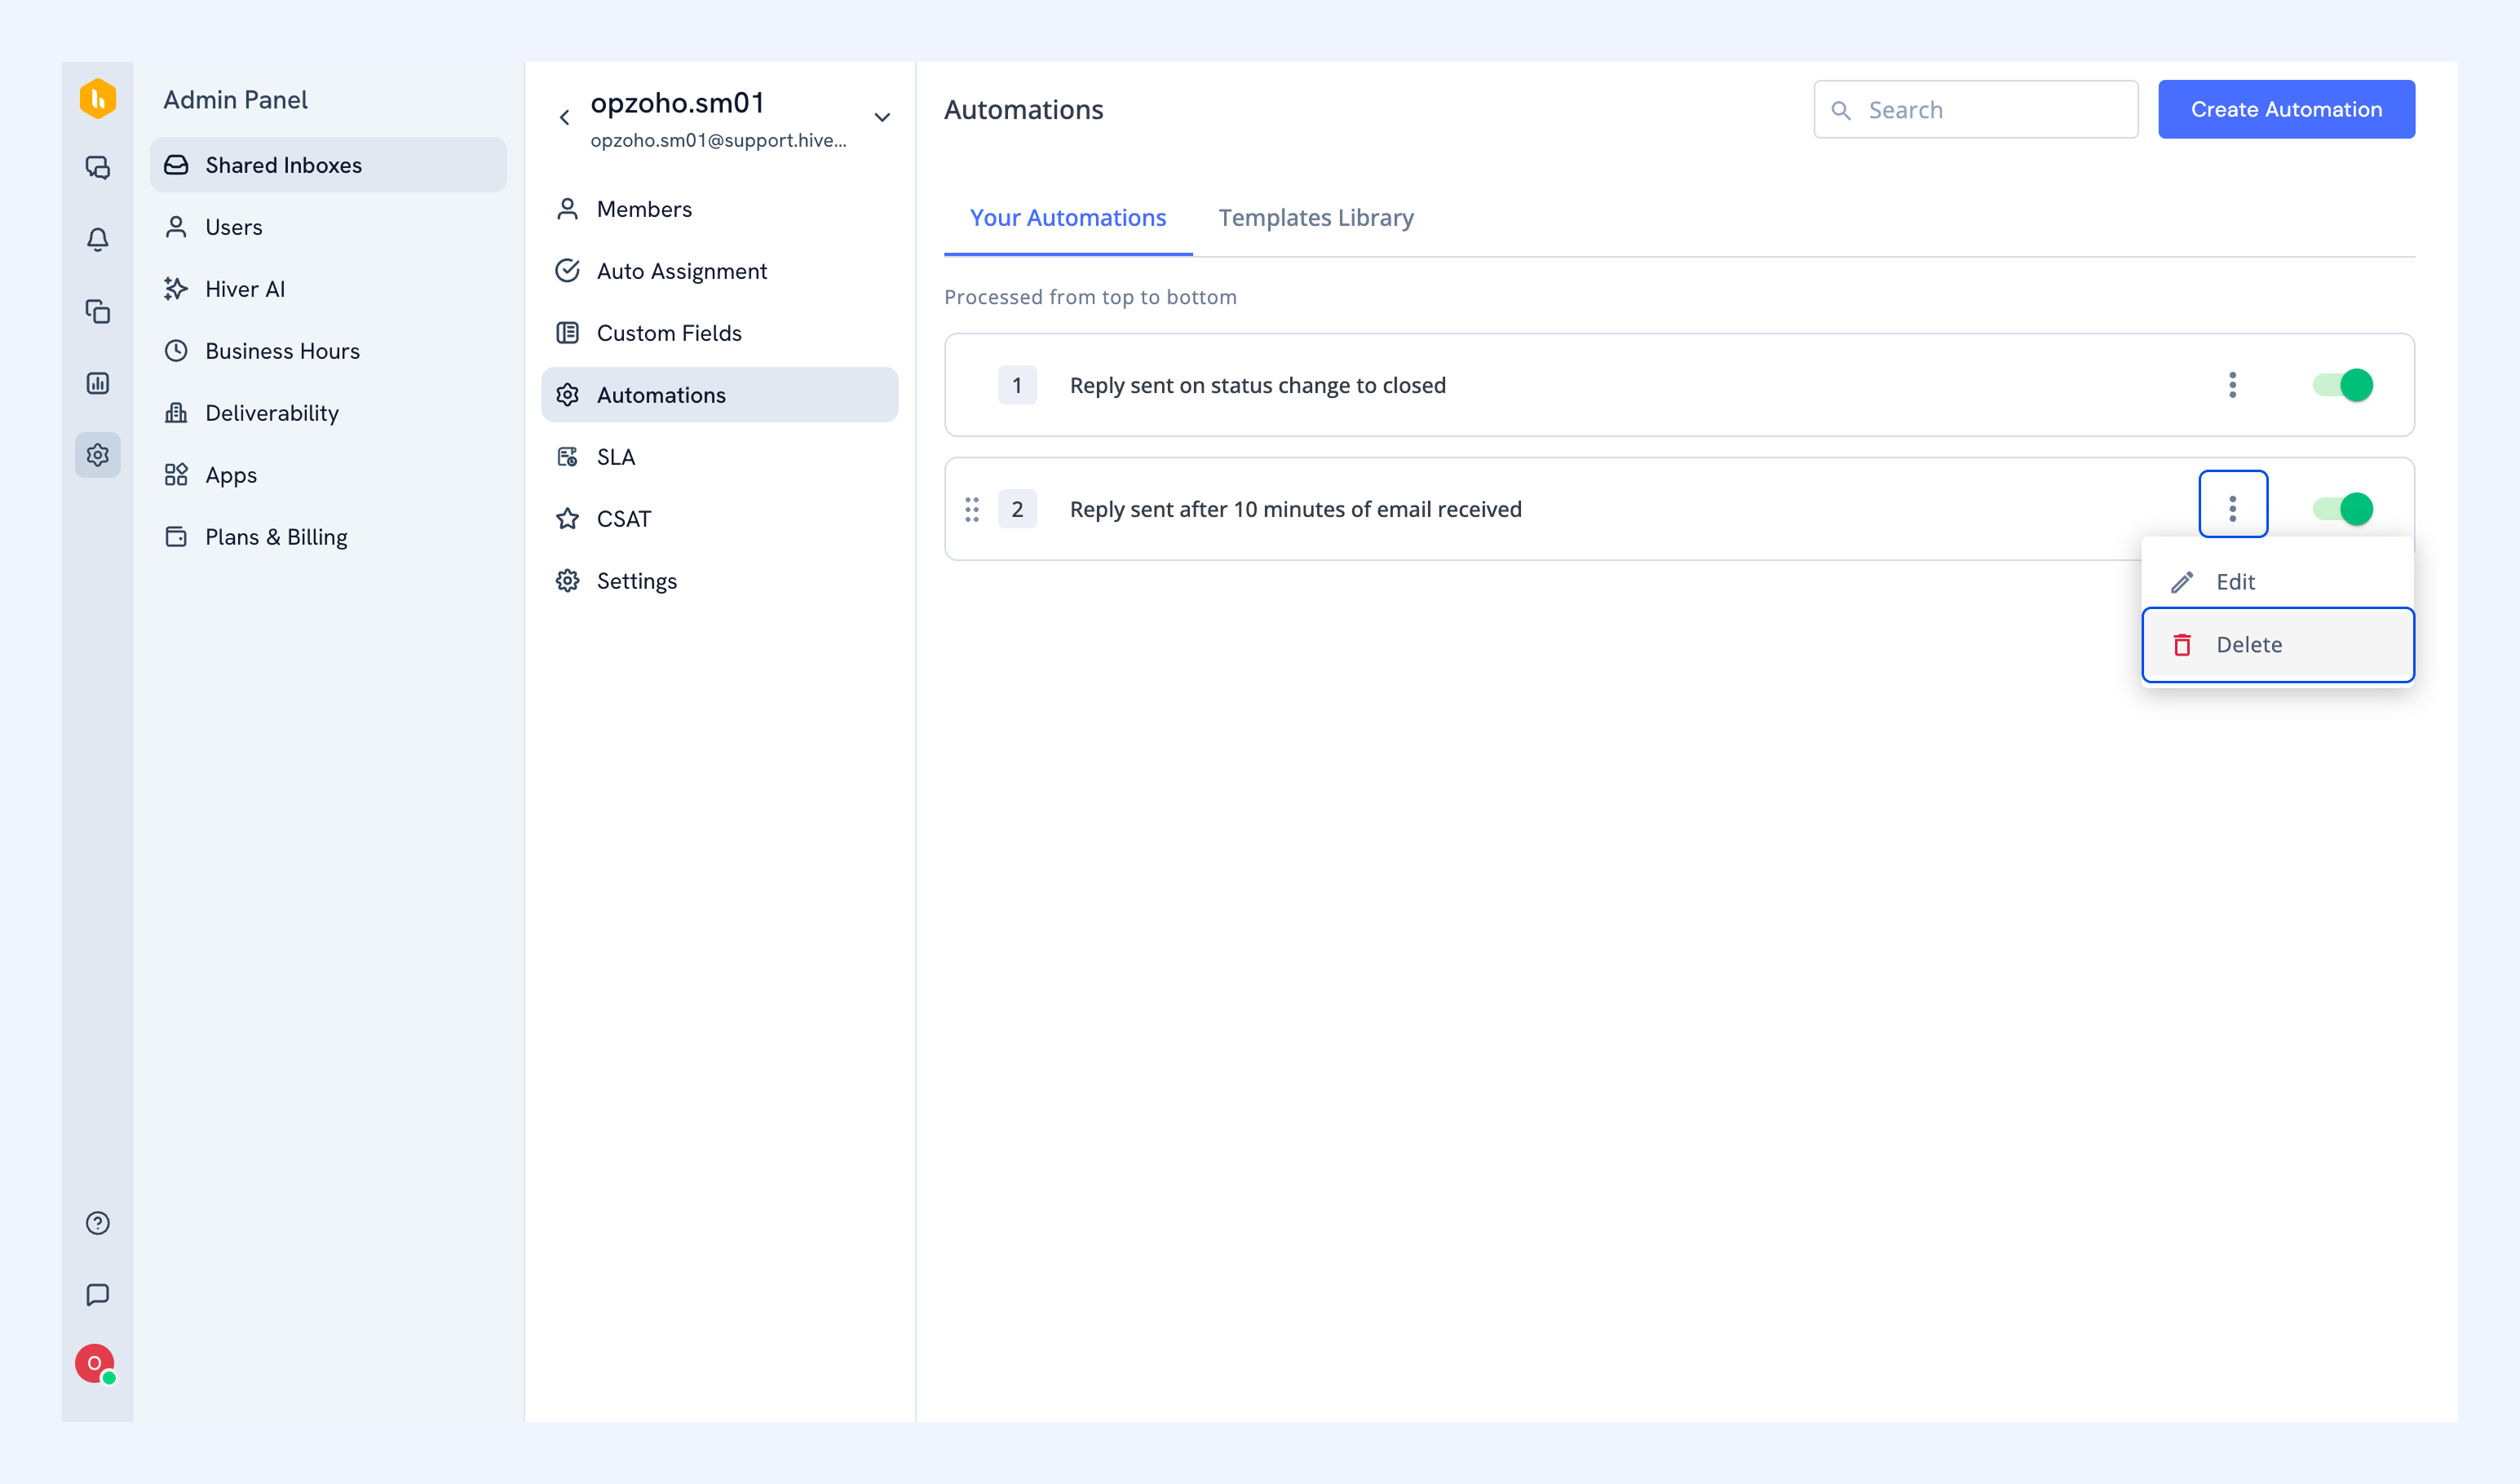
Click Delete to confirm deletion.
Note: Deleting an Automation is permanent and cannot be undone.
Changing execution order
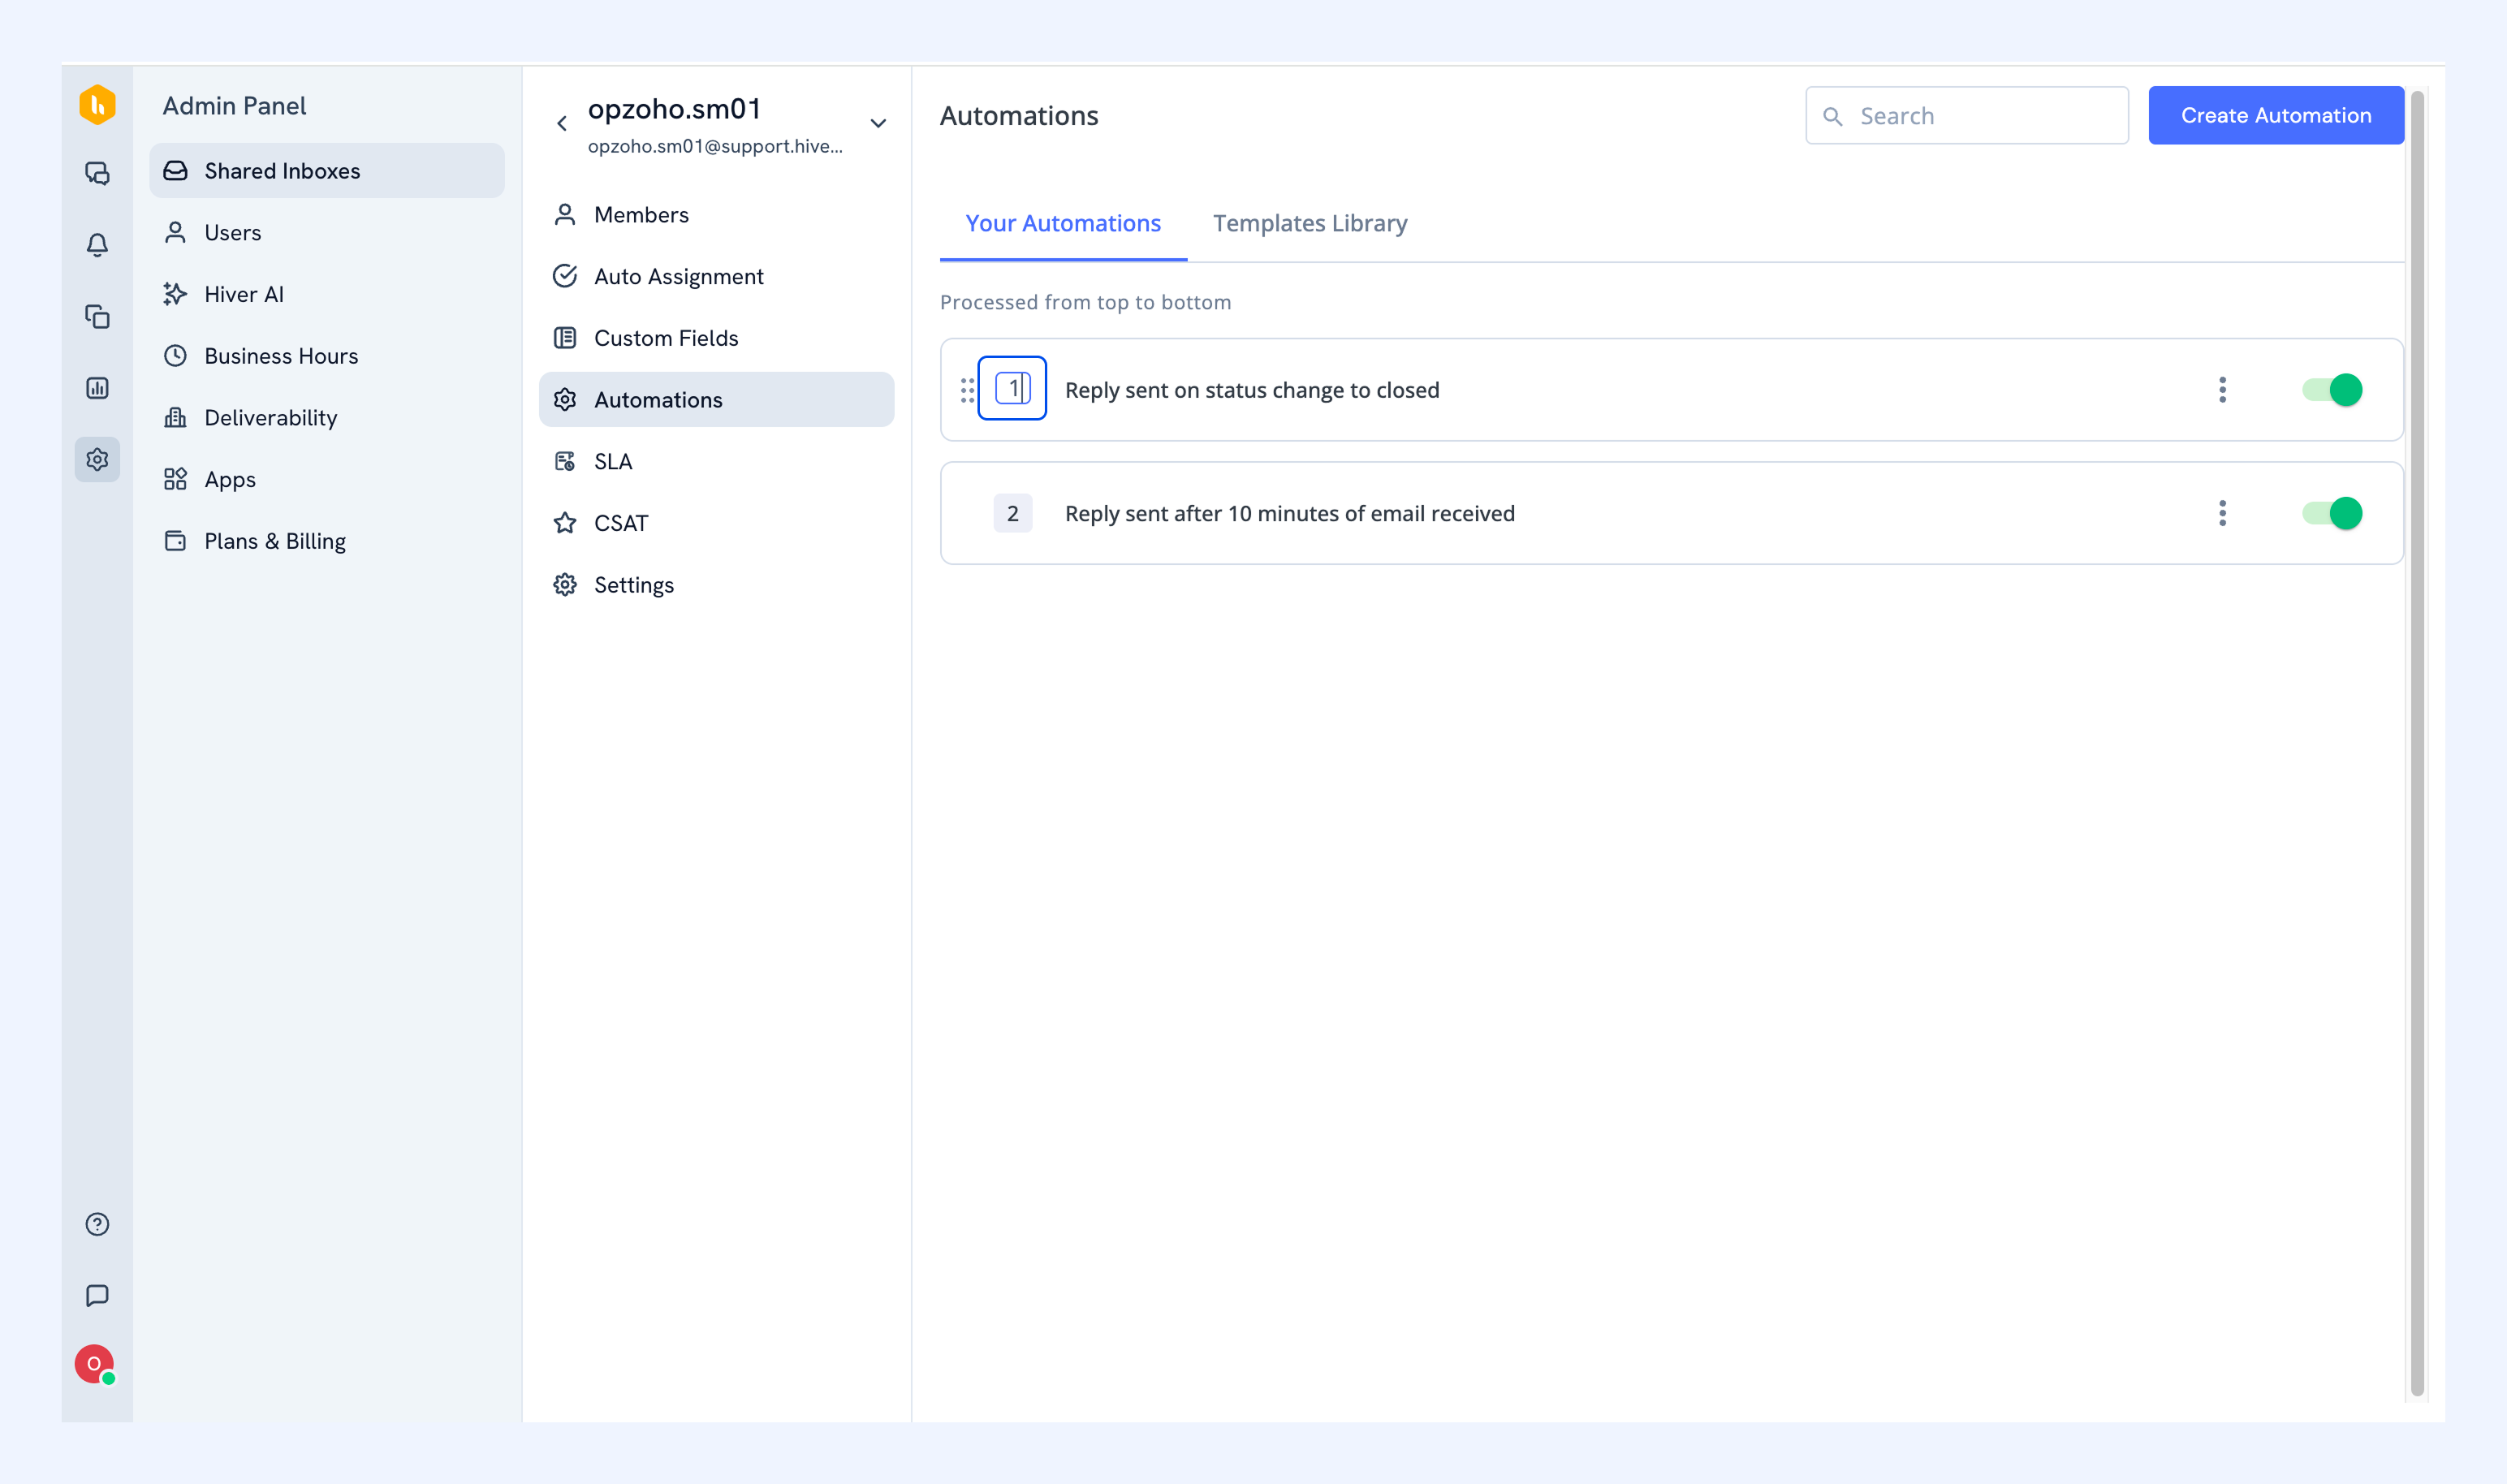
When multiple automations apply to the same email, they run in sequence from top to bottom.
If automations have conflicting actions (such as assigning to different team members), the action from the Automation that runs last will be applied to the conversation.
To reorder Automations, edit the order number displayed next to each automation.
Important:
- New automations are added at the bottom of the list.
- Automations execute in numerical order.
What happens when users or tags are removed
When you delete a user or tag referenced in an Automation:
1. Affected automations are automatically disabled.
2. Admins receive a notification listing the impacted automations.
3. Open the notification to reassign users or replace tags, then re-enable the Automation.