Using Automations
Automations in Hiver help your team save time by performing repetitive actions automatically. You can use them to assign and tag conversations, close resolved threads, or even escalate issues based on a missed SLA deadline, a poor CSAT rating, or a negative customer sentiment.
With Automations 2.0, Hiver introduces a new step-based builder and a fresh interface that makes it easier to create and manage workflows for your Shared Inboxes.
What you can do with Automations
Automations help your team stay productive and manage conversations at scale by removing manual effort.
Here are a few examples of what you can do with Automations:
- Auto-assign conversations: Assign billing-related emails to your Finance team or route “Urgent” messages to a priority queue based on keywords or sender details.
- Tag customer conversations: Automatically tag conversations based on keywords or sender details (e.g., tag all “@abc.com” as “Enterprise”).
- Schedule reminders: Create date-based Automations to follow up on conversations.
- Trigger workflows based on sentiment: Escalate and prioritize conversations when the sentiment is updated to negative.
- Extract data with AI: Use AI Extract to capture data (like order IDs or invoice numbers) from emails and automatically add them to a note.
Prerequisites and availability
- You need to have Admin access to create Automations.
- The plan you're on determines how many Automations you can create:
- Growth: 10
- Pro: 20
- Elite: Unlimited
Structure of an Automation rule
Automations are created step-by-step. An Automation rule starts with a trigger and can have the following steps:
| Step | Description | Example |
| Trigger | The event that starts the Automation. | When a new reply is received |
| Condition | Filters that define which conversations the rule applies to. | If subject contains “invoice” and tag is “Finance” |
| Action | The task that Hiver performs automatically. | Assign to John |
| AI Extract | An AI agent that extracts details from conversations automatically | Extract ‘Invoice ID’ from the conversation |
An Automation rule can have one trigger and multiple conditions and actions. Learn more about supported triggers, conditions, and actions.
How to create an Automation
1. Go to Admin Panel → Shared Inboxes → Select an inbox → Automations, and click Create automation.
.png)
2. You'll see pre-built Automations templates for common workflows. You can select a template to customize and launch in a few clicks.
To create a new rule from scratch, click Create from scratch.
.png)
Note: If you're on the Elite plan, you'll see a tab called Individual Inbox that lets you create Automations to automatically move emails sent to personal inboxes into a Shared Inbox. Learn more about Individual Inbox Automations.
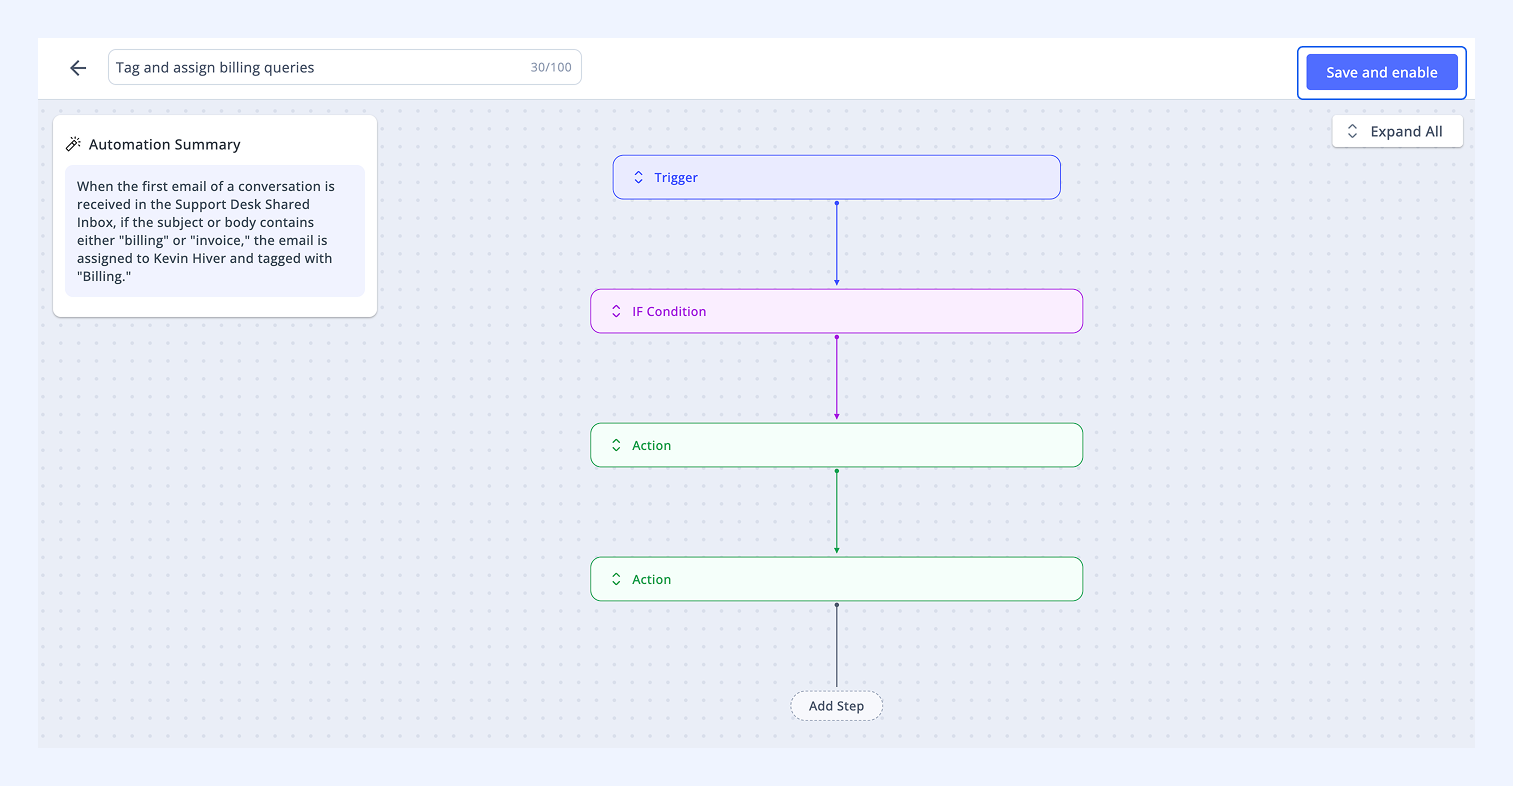
3. Give your Automation a name (e.g., Tag and assign billing queries) and then proceed to the Automation canvas to build your rule.
4. All Automation rules start with a trigger. By default, New conversation (inbound) is received is selected. Click the dropdown to view more triggers and choose one.
.png)
5. Click Add step → IF Condition.
.png)
6. Choose a condition to specify which conversations the Automation applies to. View all supported conditions.
Note: You can also choose an action directly here instead of adding a condition first.
.png)
Tip: You can use multiple conditions by combining AND and OR operators to create more precise filters.
7. Click Add step again and choose an action to set what Hiver should do when the conditions are met. View all supported actions.
.png)
8. Review your Automation, click Save and enable to activate the Automation.
Tips: To verify your steps quickly, use the Automation Summary generated by Hiver. You can also click Collapse All to minimize steps and get an overview of the workflow.
Automation rules are activated when:
- A new conversation is sent to or received from the Shared Inbox or any of its aliases.
Automation rules will not be activated for conversations that:
- Are manually moved into the Shared Inbox.
- Are removed and then manually re-added or cc'ed back into the Shared Inbox.
Define execution order
Automations run from top to bottom in the list. When multiple Automations match the same conversation, they run one after the other in that order.
This means that actions from Automations lower in the list run later, and can update or change actions performed by Automations above if there are conflicts.
For example, if one Automation assigns a conversation to Sam and another assigns it to Jake, and both apply to the same conversation:
- The Automation higher in the list runs first
- The one below runs next and updates the assignment
As a result, the conversation will be assigned to Jake.
When a new Automation is created, it is placed at the bottom of the list by default. To change execution order, drag and drop automations to reorder them, or manually edit the order number.
Tip: If you want a more specific Automation (such as one using a Custom Object) to take precedence, place it below broader Automations.
Manage Automations
1. Enable or disable an Automation: Use the toggle beside each Automation.
.png)
2. Edit an Automation: Click the three dots menu, select Edit, make your changes, and click Save.
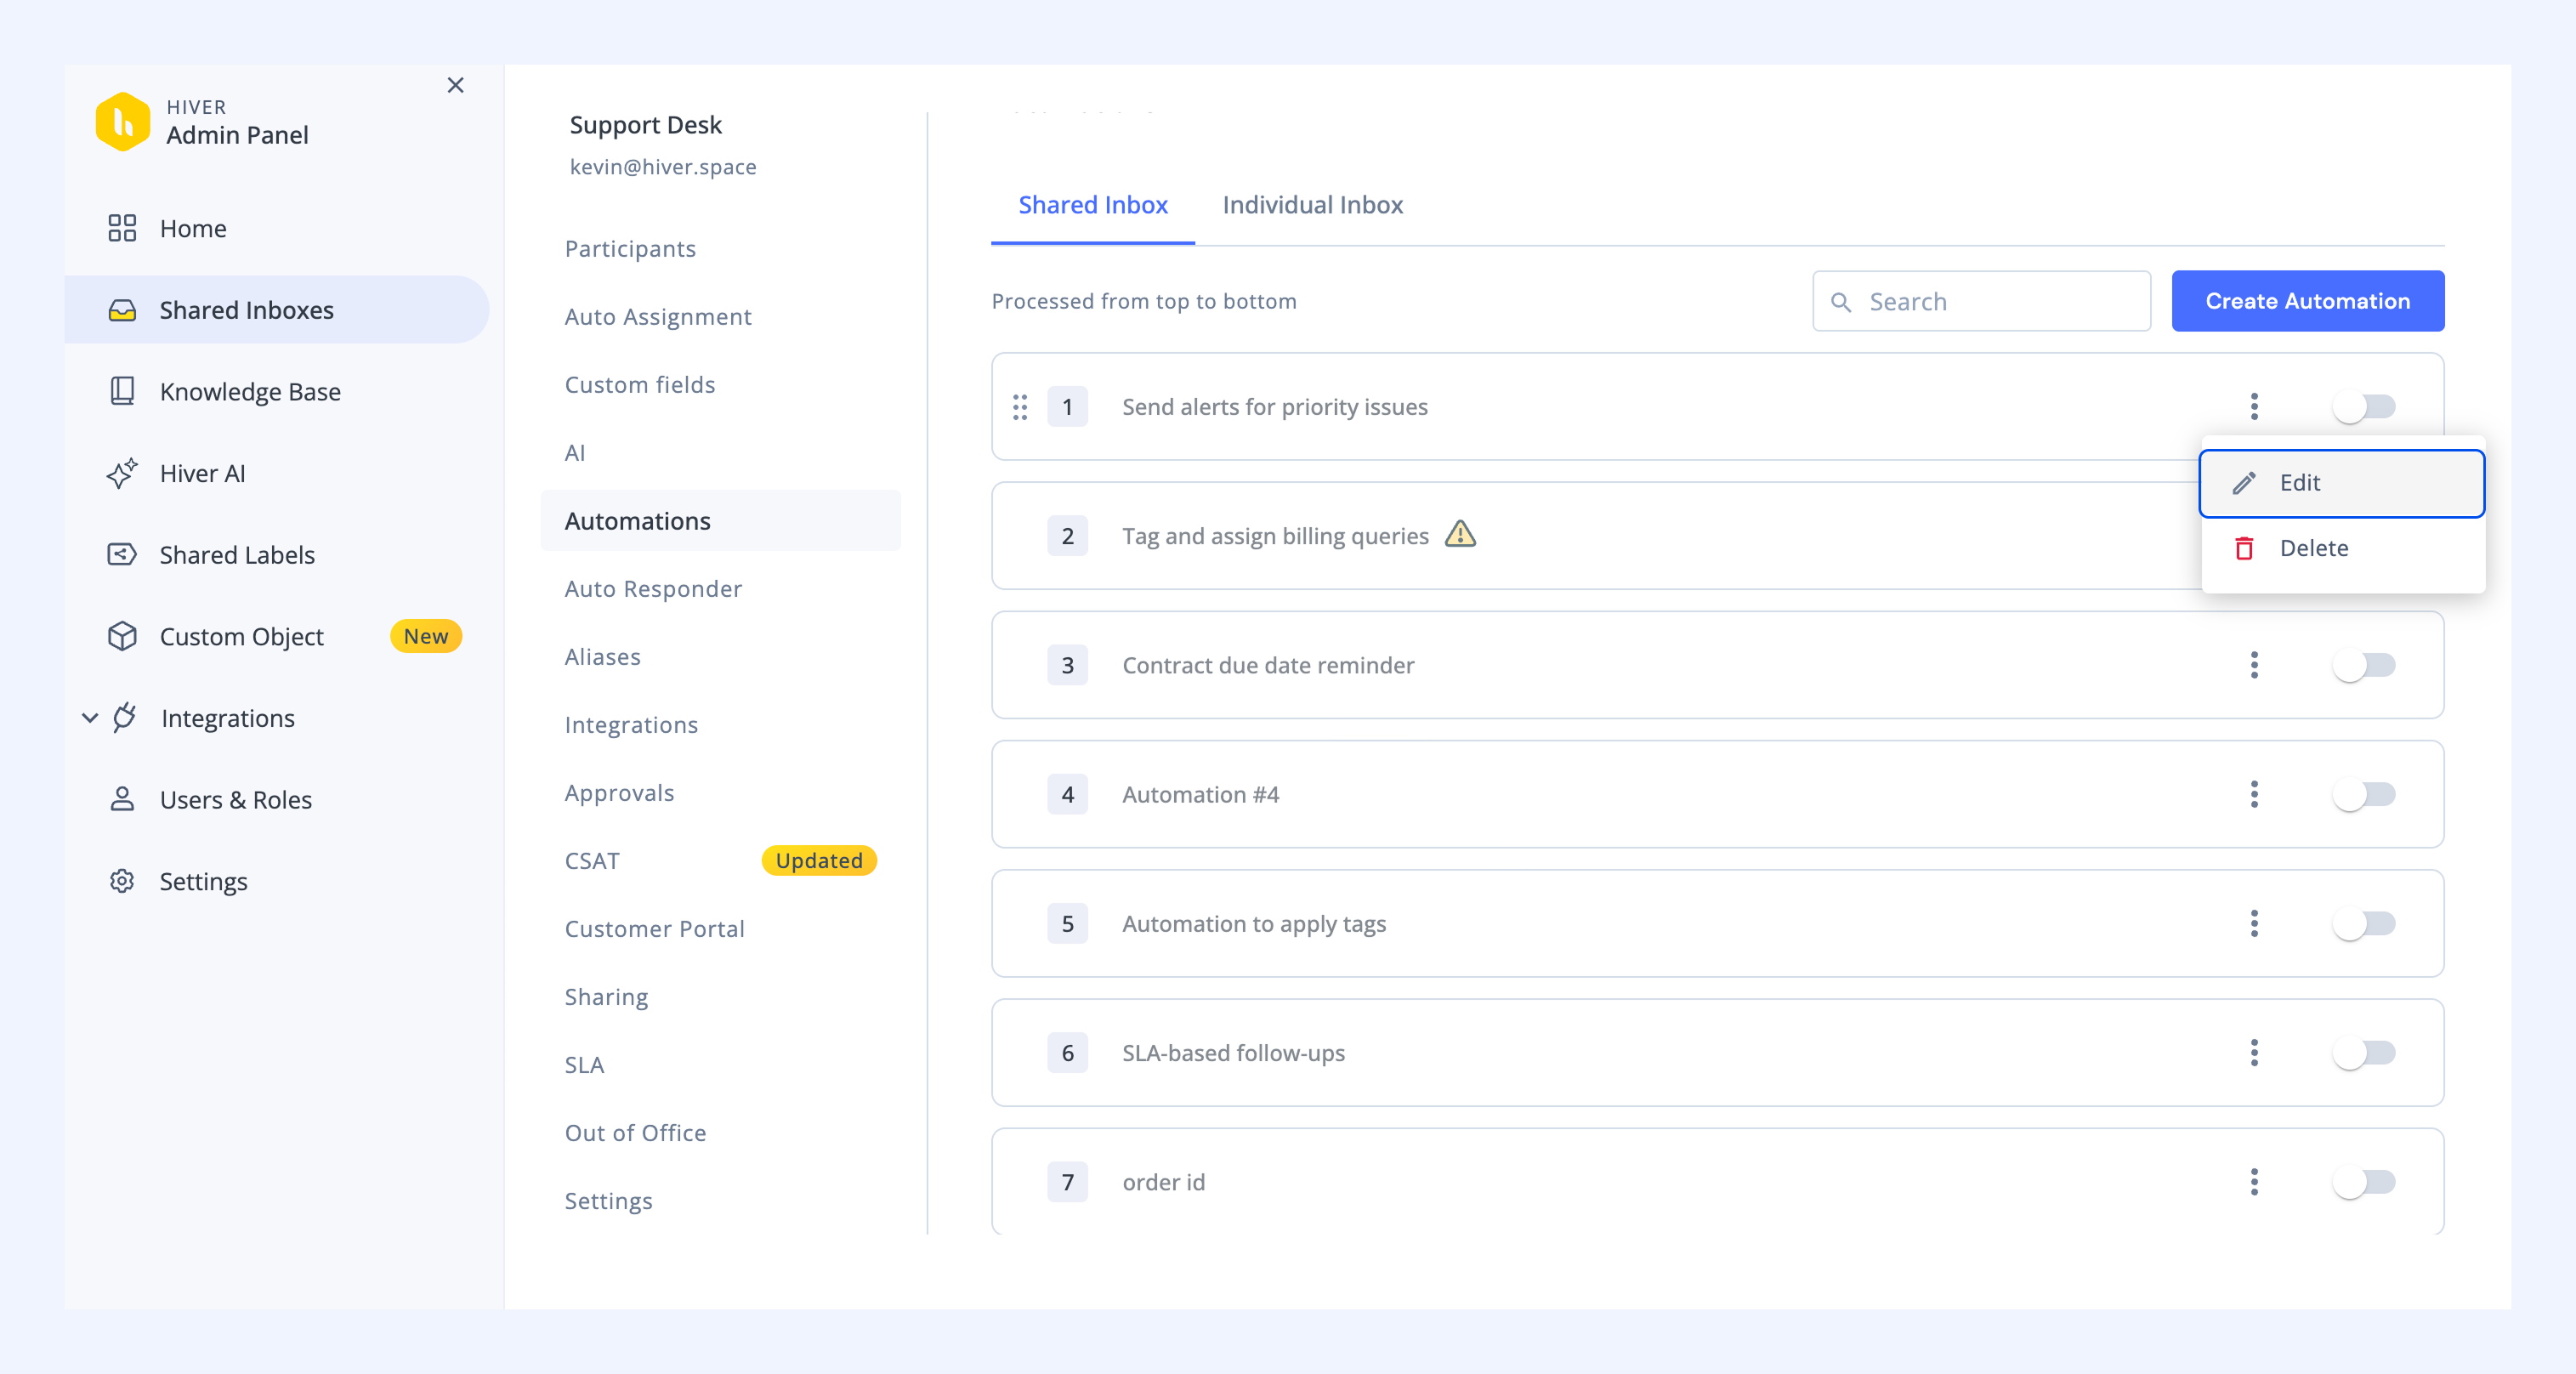
3. Delete an Automation: Click the three dots menu and select Delete. Confirm your choice to continue.
Note: Deleting an Automation is a permanent change and cannot be reversed.
Handling Automations when users or Tags are deleted
If a user or Tag referenced in an Automation is removed:
- The affected Automations are automatically disabled.
- Admins receive a notification listing impacted Automations.
- You can open the list, reassign or replace the missing element, and re-enable the Automation.