NetSuite integration with Hiver Omni
The NetSuite integration with Hiver Omni brings customer, vendor, and contact details directly into your email conversations. Your team can view relevant NetSuite records without switching between tabs or apps.
When an email arrives, Hiver automatically displays related NetSuite information based on the sender's email address to have all the context they need before responding.
Why should you integrate Hiver Omni with NetSuite
When your team handles customer emails, having instant access to CRM data makes responses faster and more accurate. Here's how this integration helps:
- Agents reply faster when customer data appears right in their inbox
- Response quality improves when teams have a full account history before answering
- Productivity increases as agents stop switching between multiple tools
- Customer satisfaction grows when agents provide informed, personalized responses
- Decision-making becomes easier with instant access to vendor and contact information
Supported capabilities
The NetSuite integration enables you to:
- View customer, vendor, and contact records in Hiver Omni's Apps panel
- See contact details linked to your email conversations
- Open records directly in NetSuite through quick links for detailed information
- Search NetSuite records within Hiver Omni’s Apps panel
- Create a Sales Order in NetSuite from a conversation
Prerequisites
Before you begin, ensure you have:
1. Admin permissions in Hiver Omni.
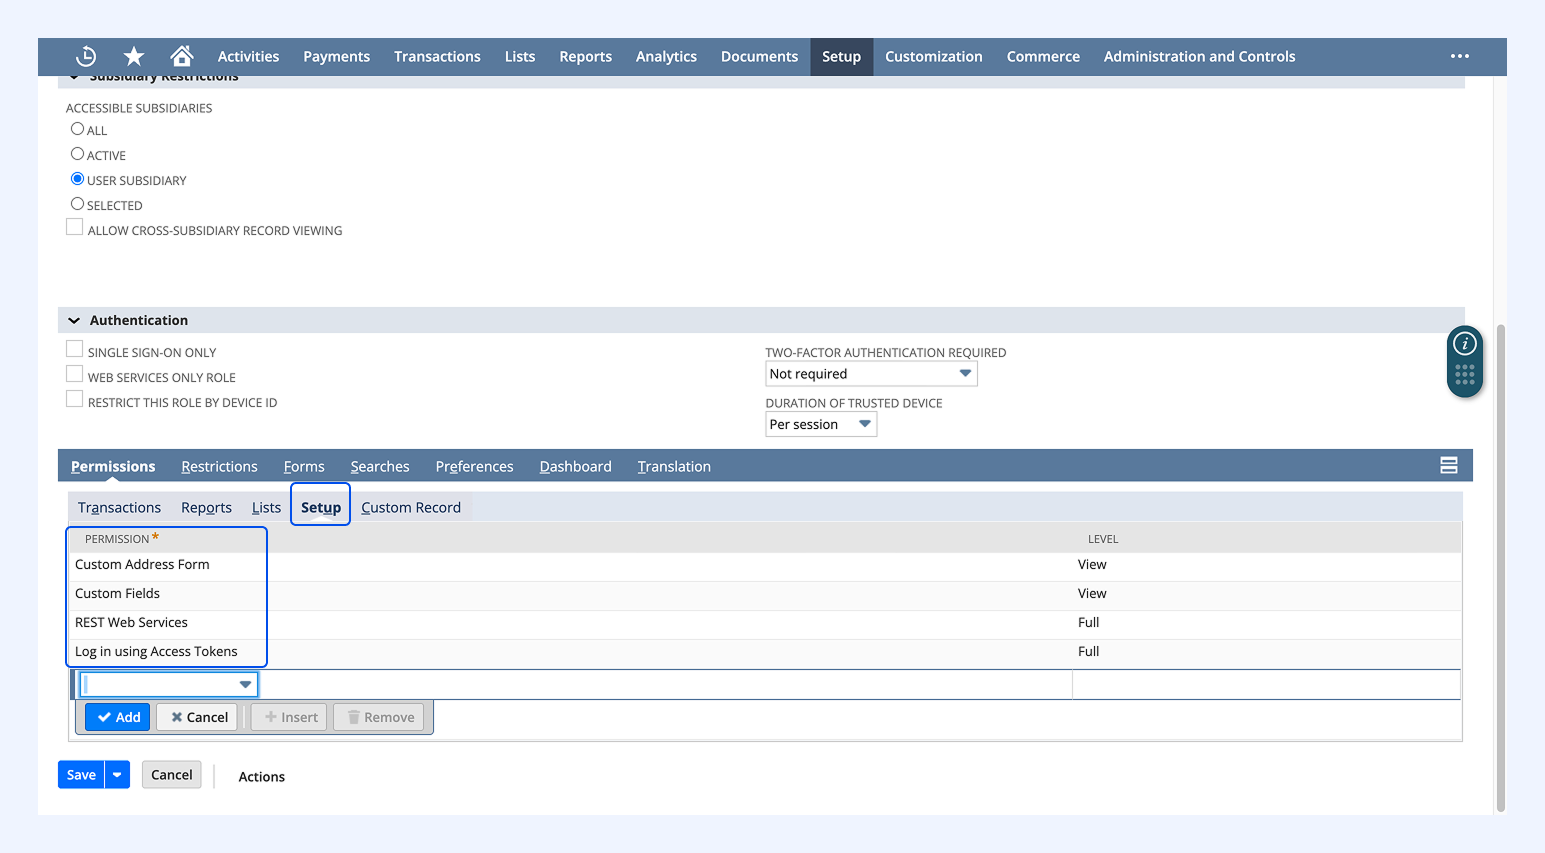
2. A custom role with the following permissions in NetSuite.
Note: To create a custom role, log in to NetSuite and go to Setup → Users/Roles → Manage Roles → New.
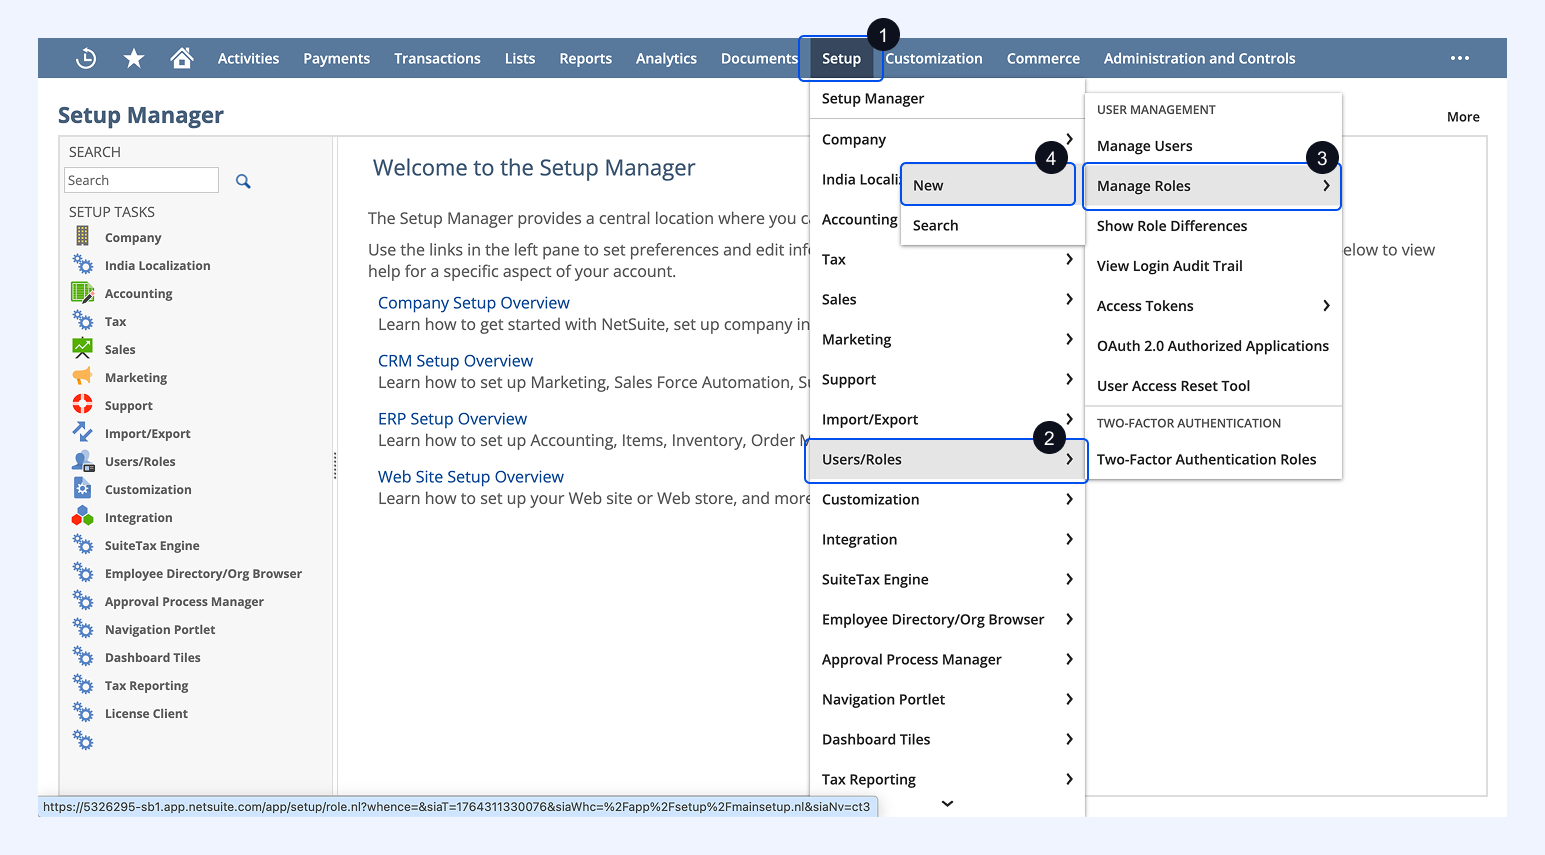
- Transactions: View permissions for purchase order, sales order, invoice, and search transaction.
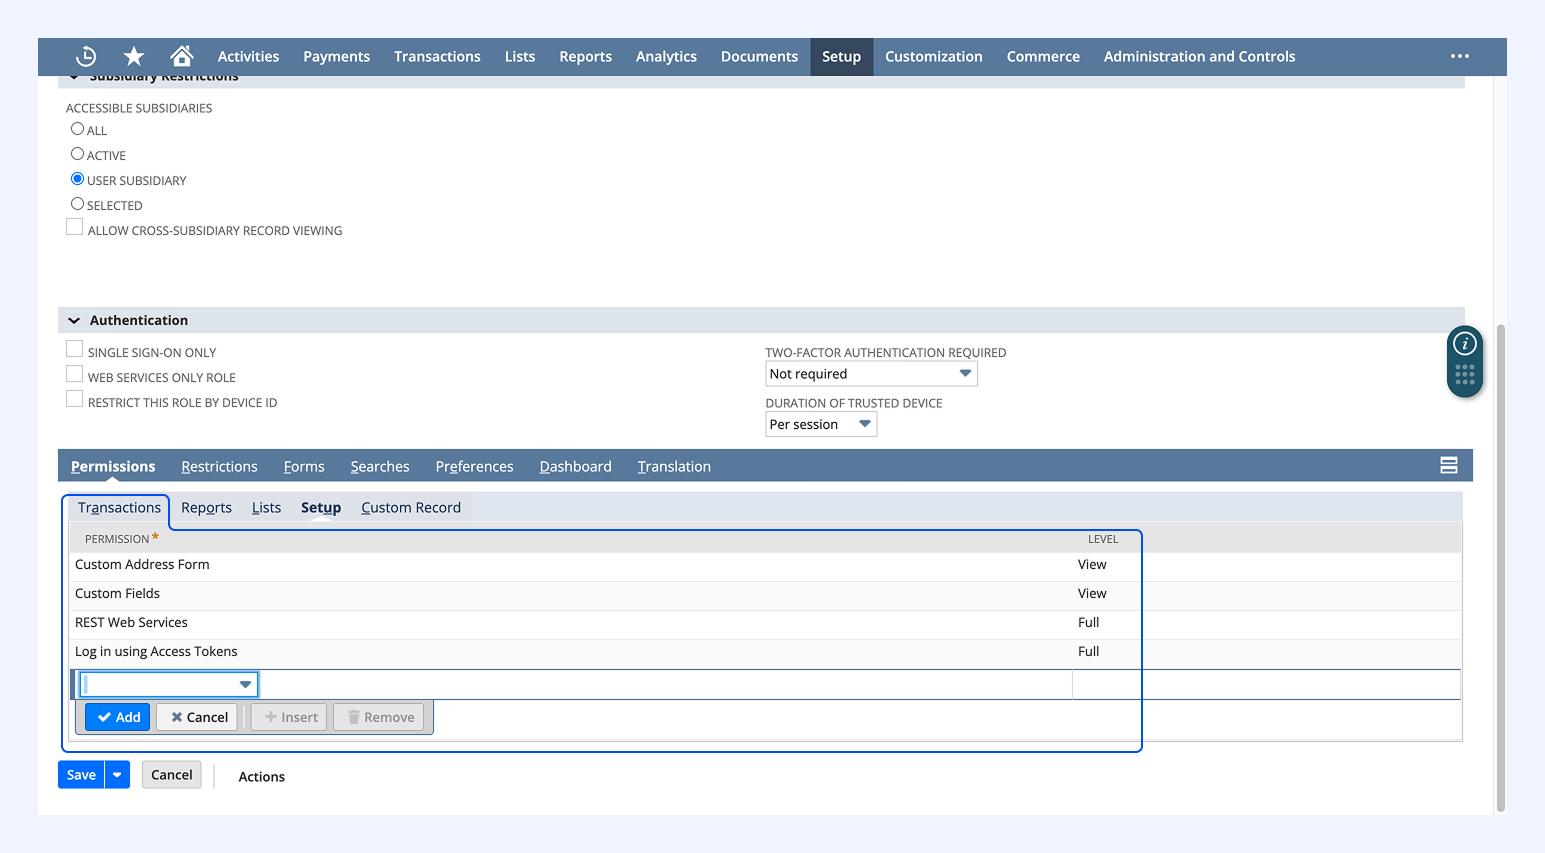
- Reports: Edit permissions for the SuiteAnalytics Workbook.
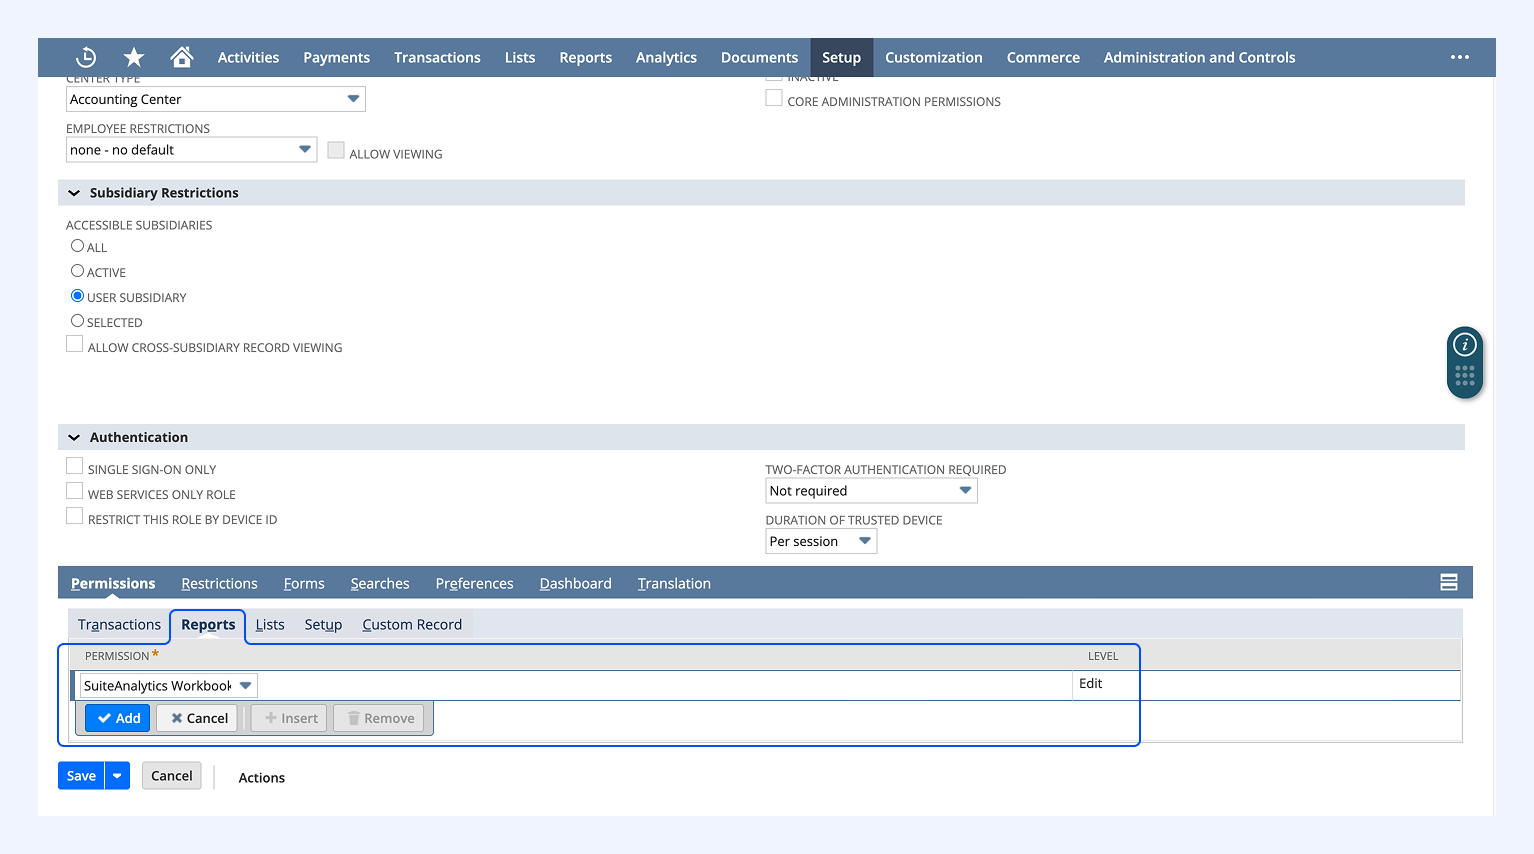
- Lists:
- View permissions for vendor, customers, contacts, employees, employee records, and currency.
- Full permissions for track messages.
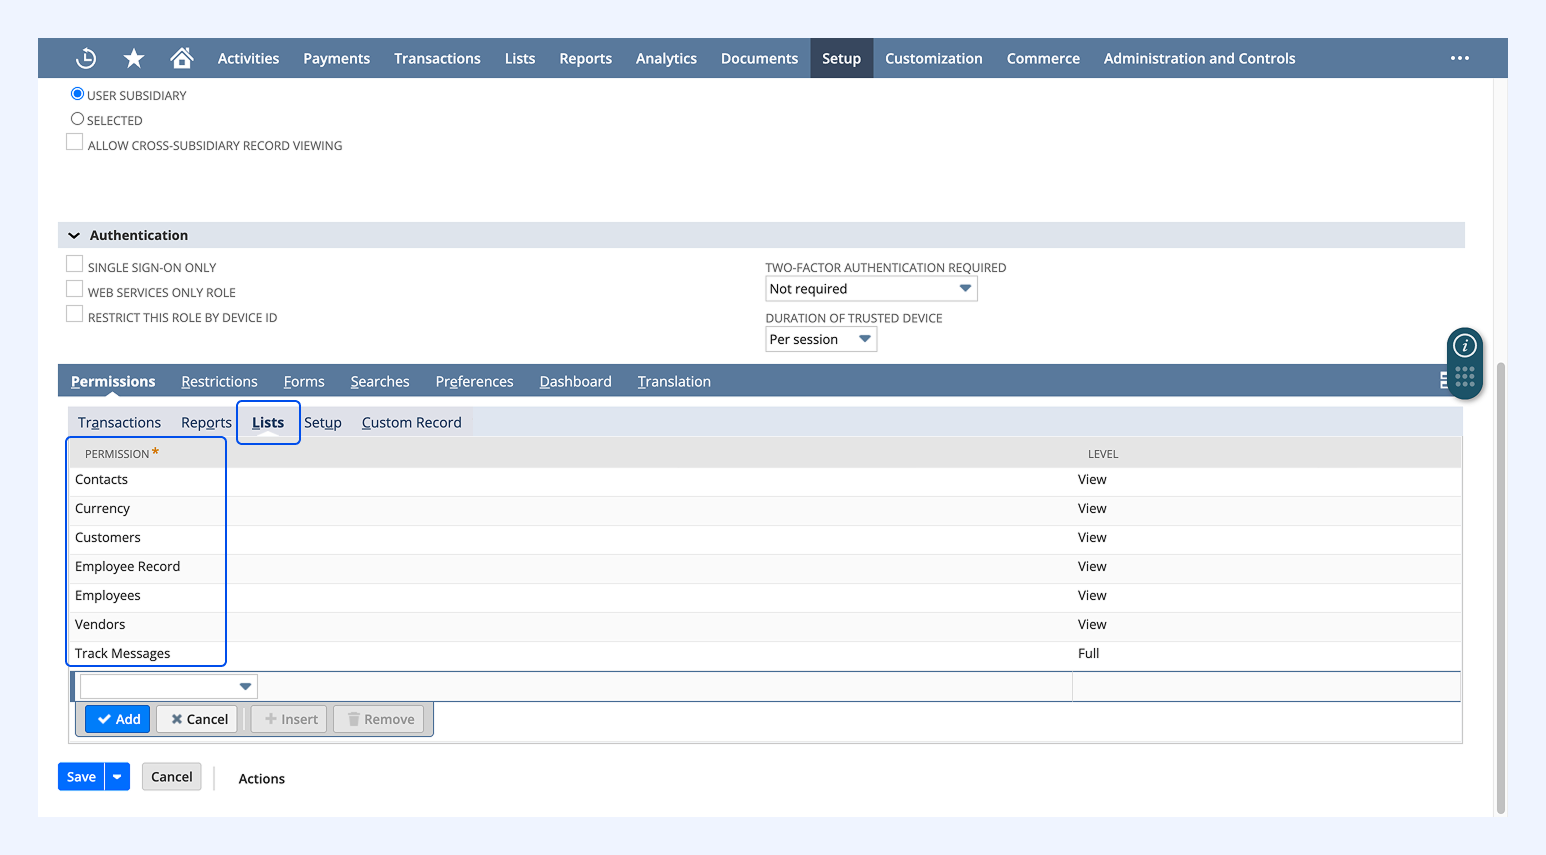
- Set up permissions:
- View permissions for custom fields and the custom address form.
- Full permissions for login using access tokens and REST web services.
Setting up NetSuite with Hiver Omni
Step 1: Initiate set up in Hiver
- Go to Admin panel → Apps → NetSuite CRM.
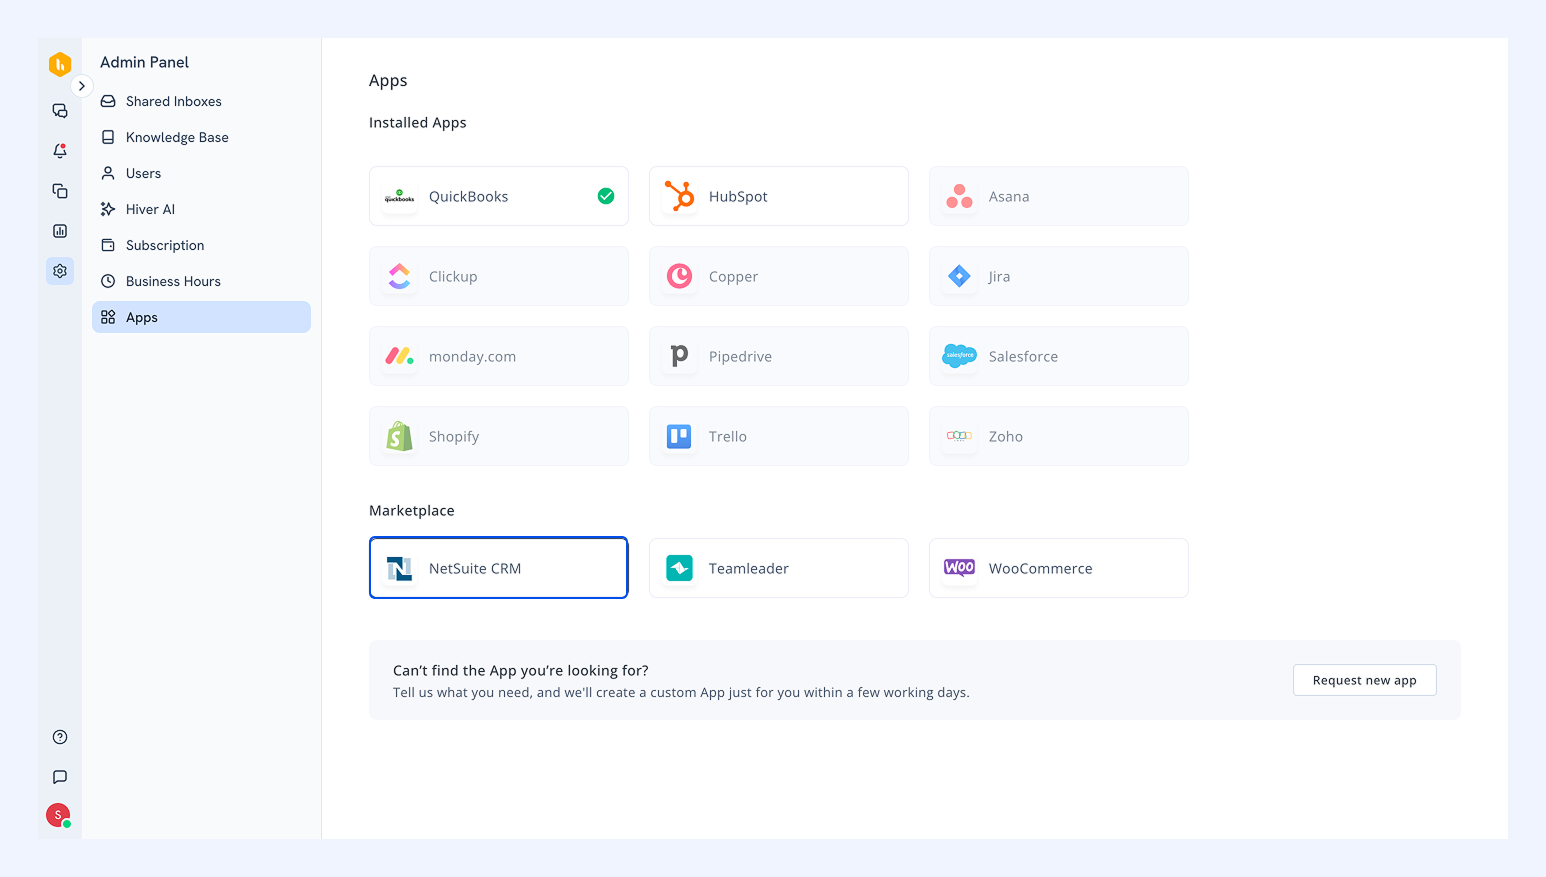
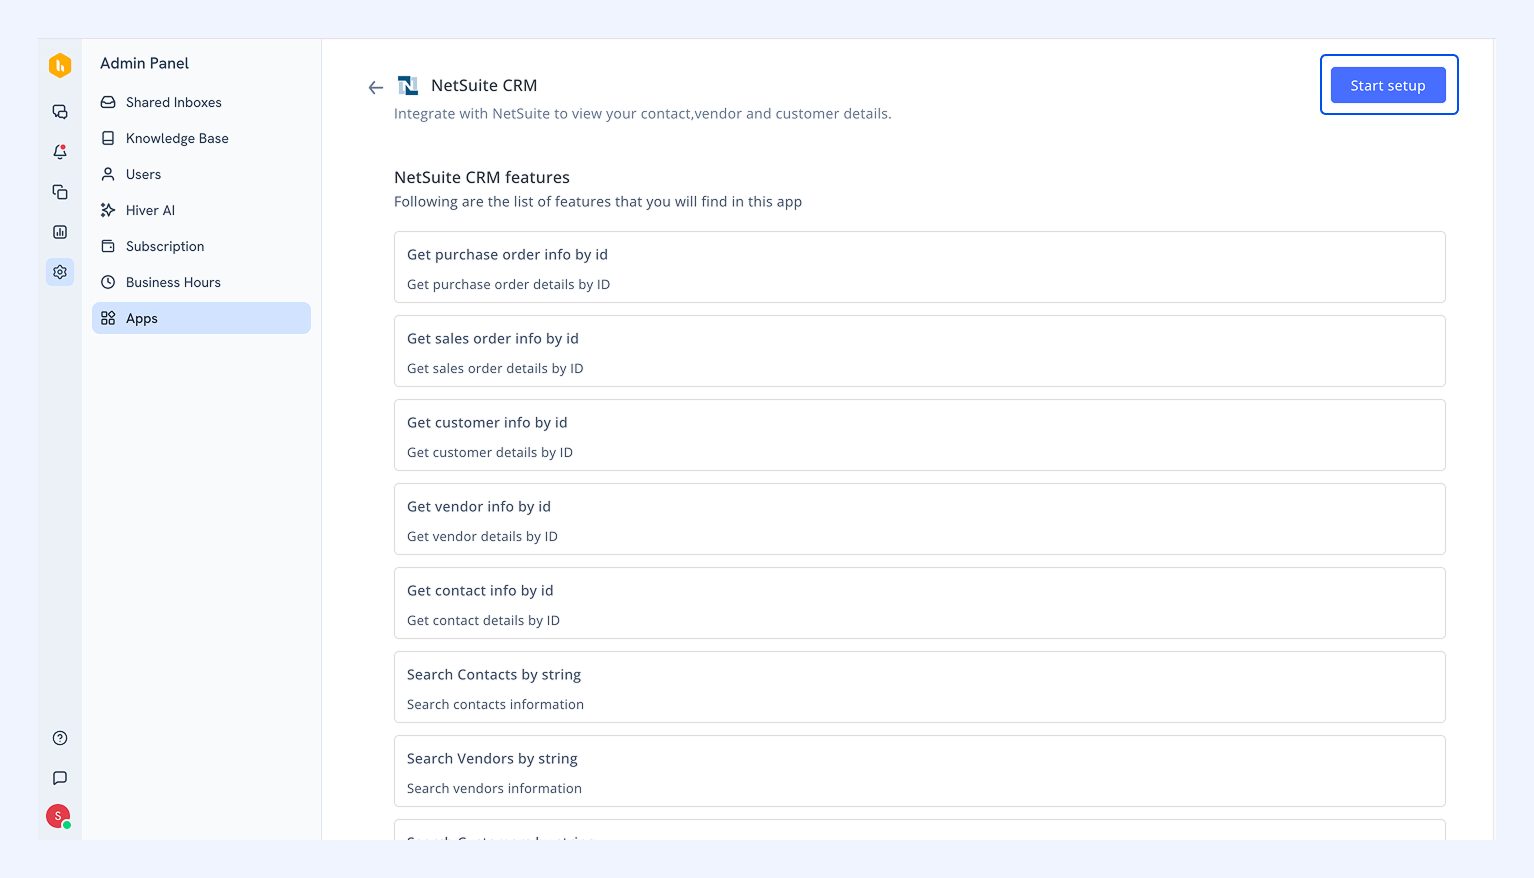
- Review the integration features and click Start Setup.
Step 2: Create a new integration
You'll need to set up an integration to connect both platforms. On the setup page of NetSuite, gather the following information:
- Account ID: Find this in your NetSuite URL. For example, in https://5326295-sb1.app.netsuite.com/app/setup/, the Account ID is “5326295.”
- Authentication types: Create a new NetSuite integration by going to Setup → Integration → Manage Integrations → New.
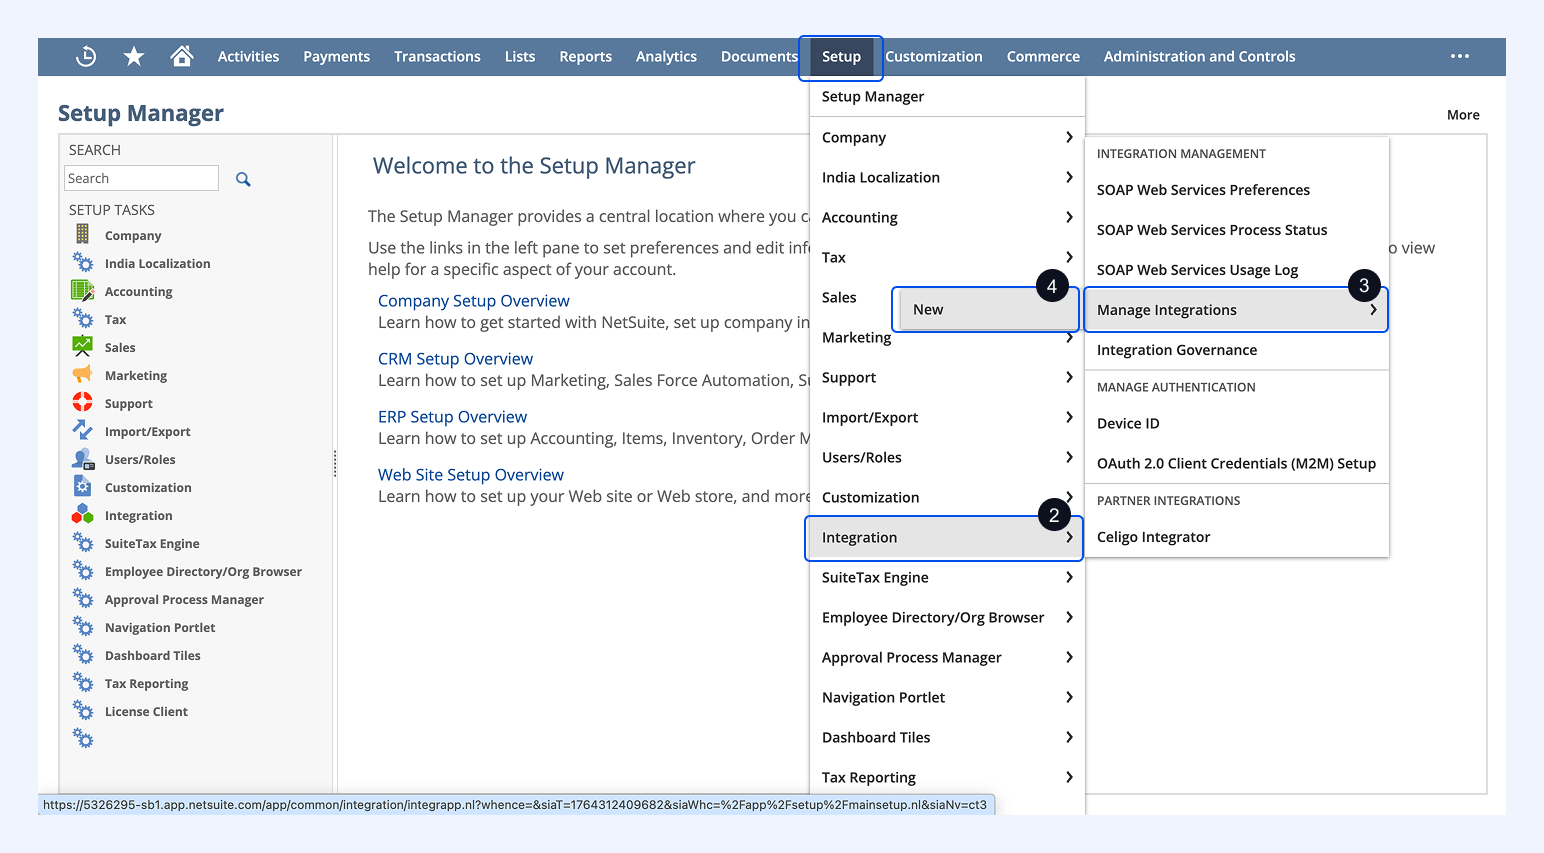
- Fill in the integration details:
- Name: NetSuite integration for Hiver (you can customize this)
- Description: Integration for accessing NetSuite data in Hiver (you can customize this)
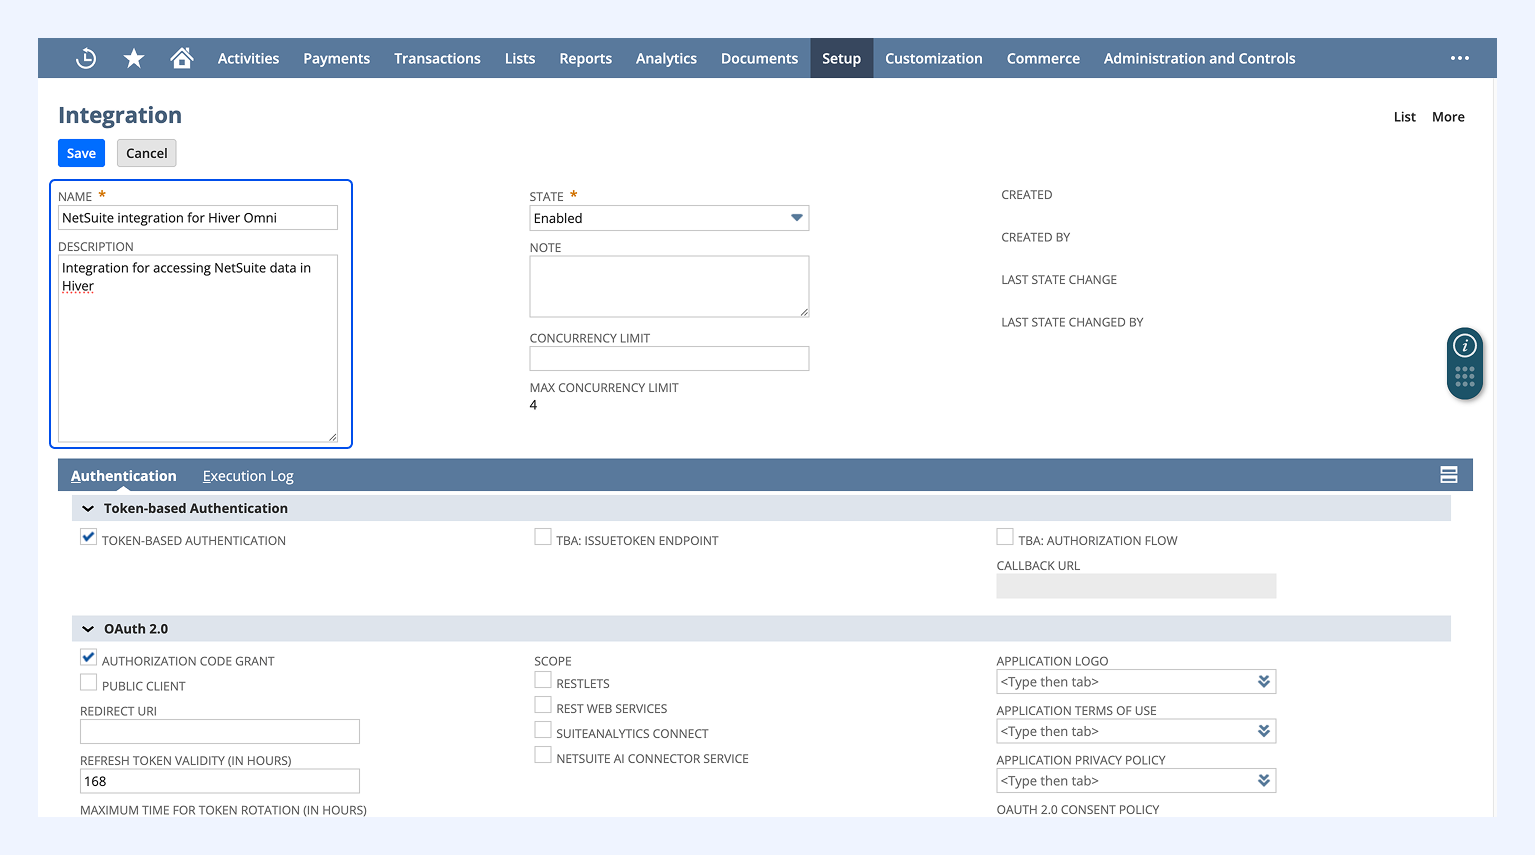
- Under Authentication, select Token-Based Authentication. Uncheck all other checkboxes.
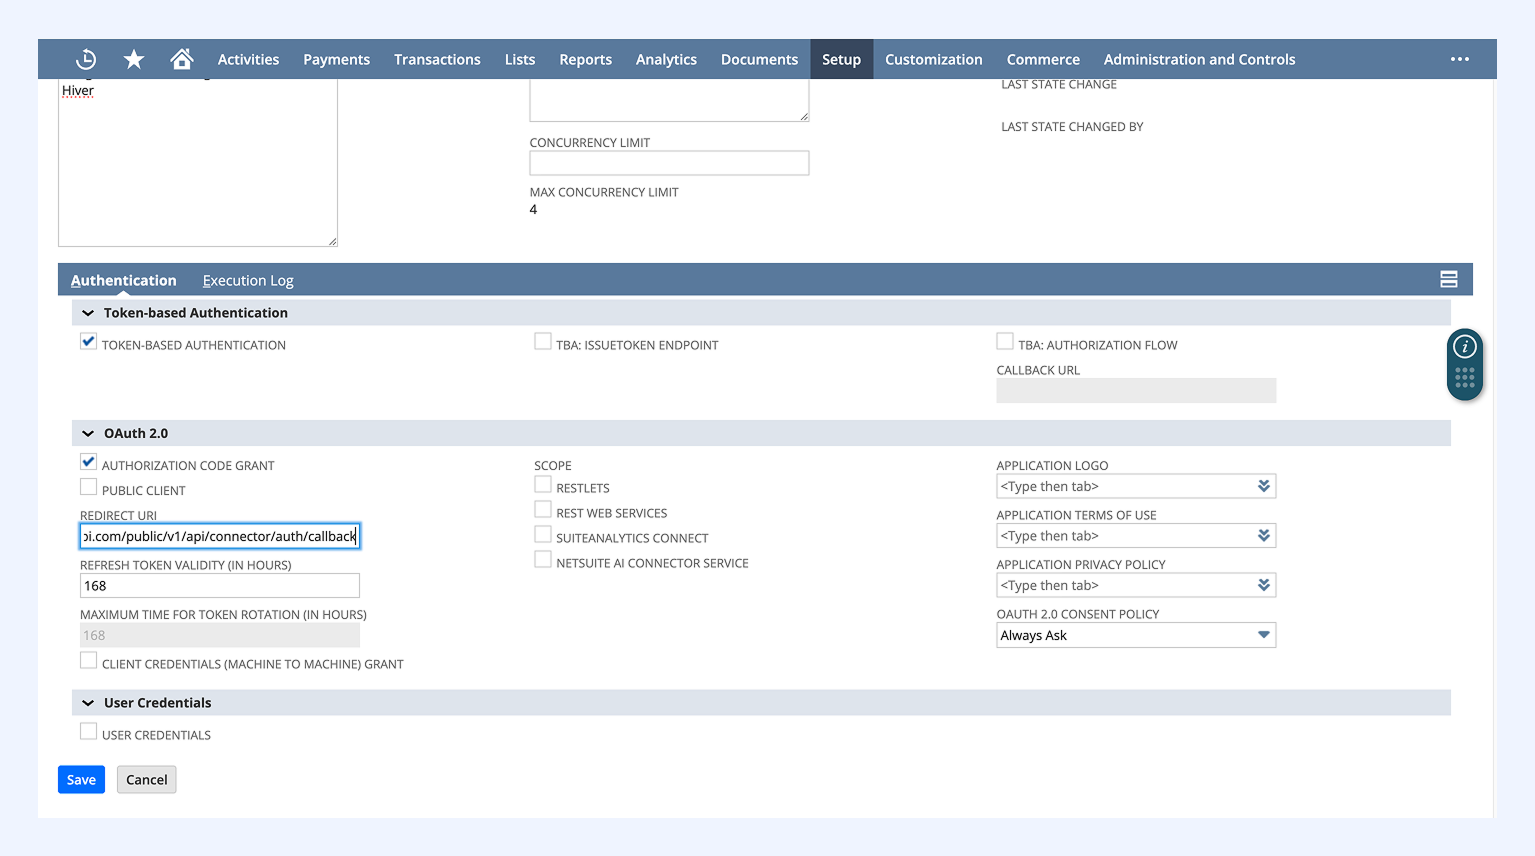
- Click Save, and you will see a banner confirming that the integration is successfully saved.
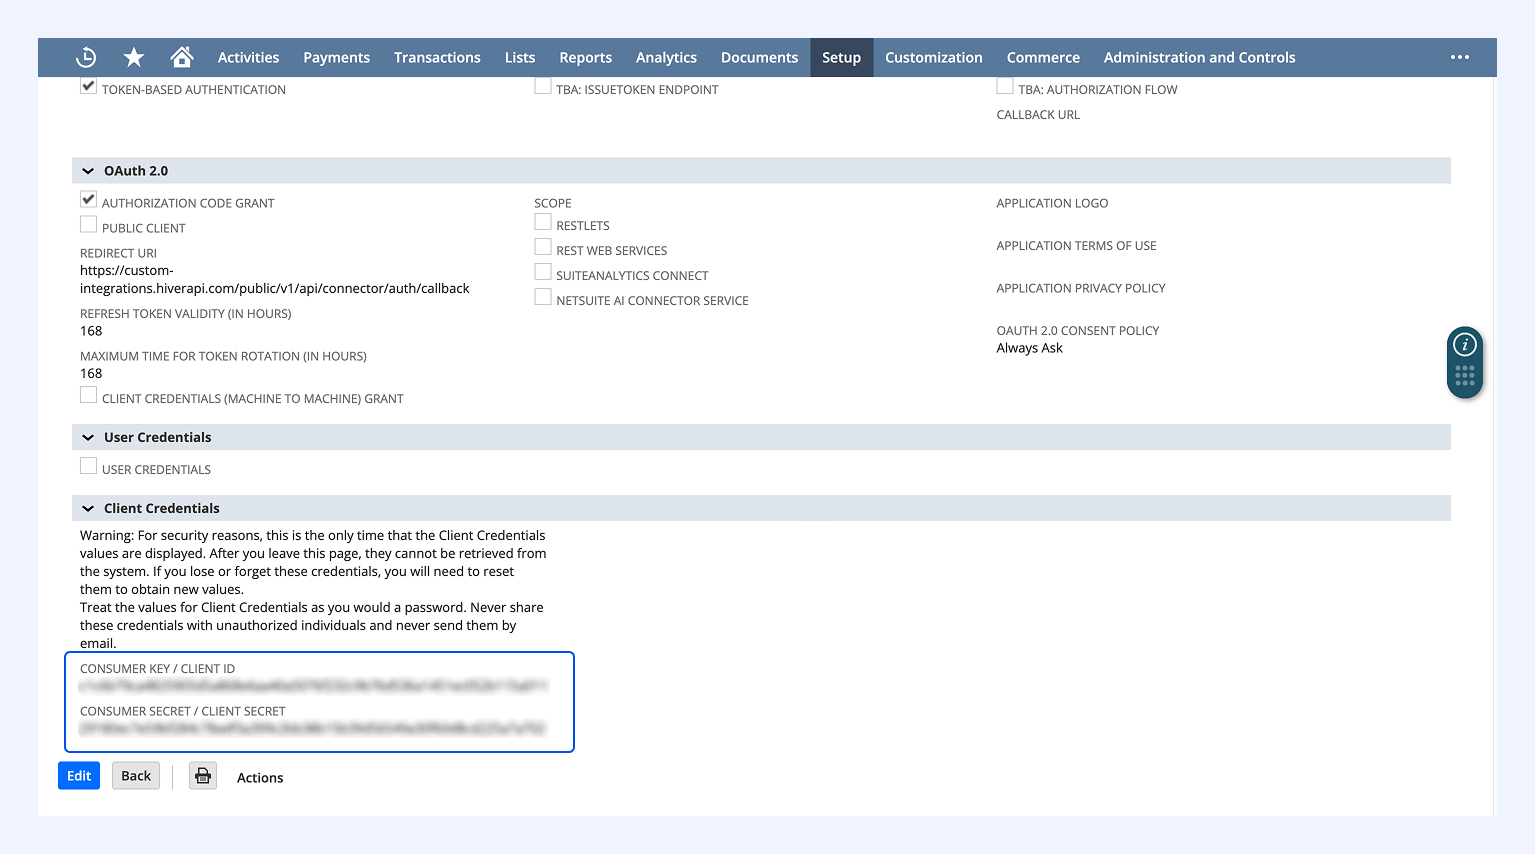
Scroll down to find the Consumer Key and Secret. Remember to store them securely as they only appear once.
Step 3: Generate an access token
Now you'll create a token to authorize the connection.
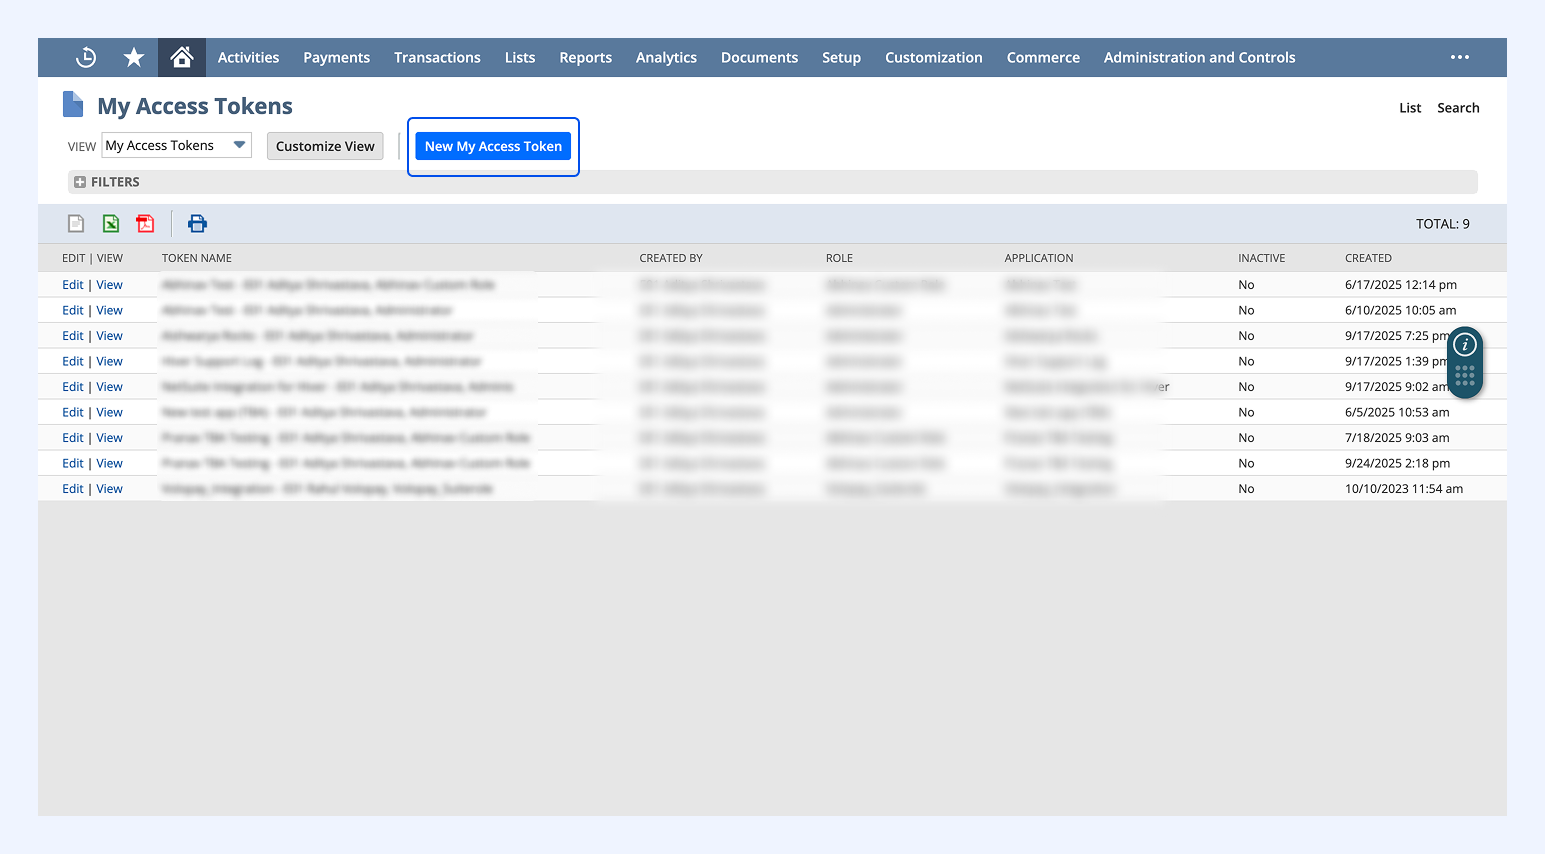
- Go to NetSuite Home → Settings → Manage Access Tokens.
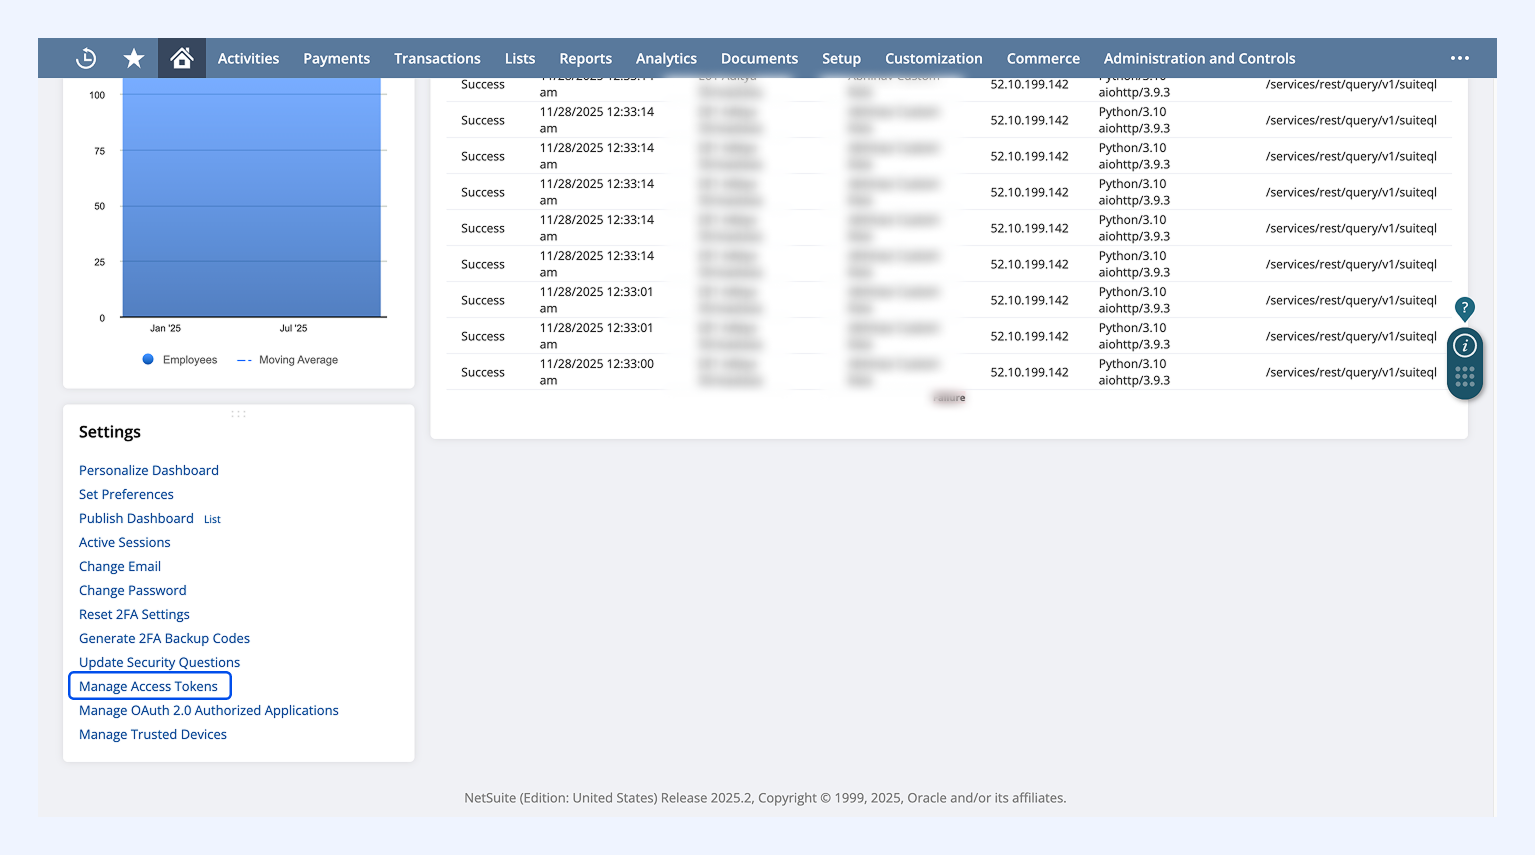
- Click New My Access Token.
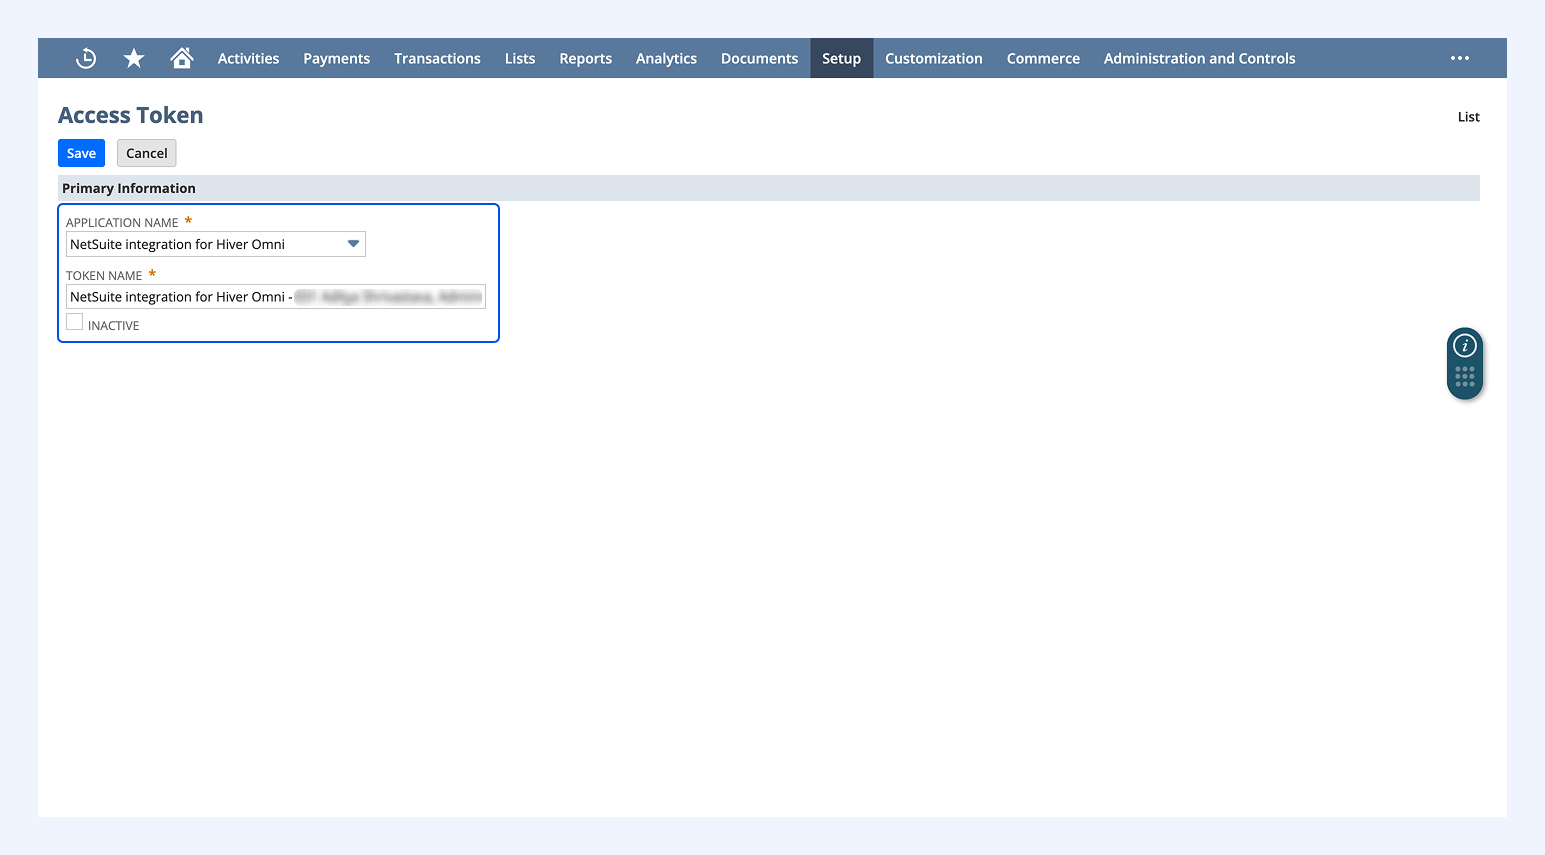
- In the Application Name dropdown, select the integration you just created. Make sure the Inactive checkbox is unchecked.
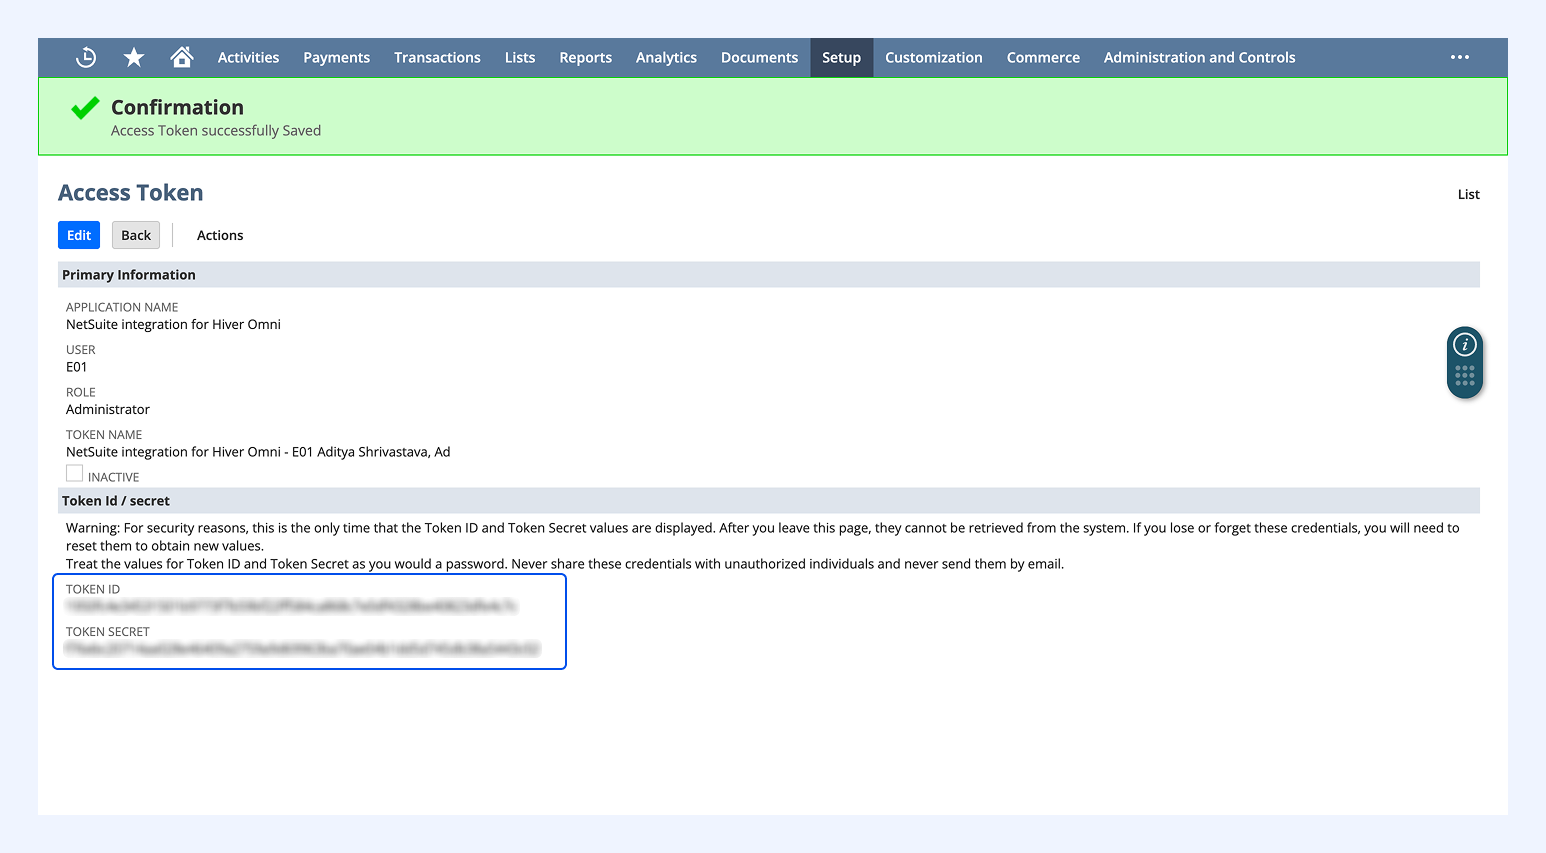
- Click Save to generate the token. You'll see a confirmation that the access token was successfully saved. Store the Token ID and Secret immediately, as these also appear only once.
Step 4: Get the realm field
You need one final value to complete the setup.
- Go to Setup → Company → Company Information.
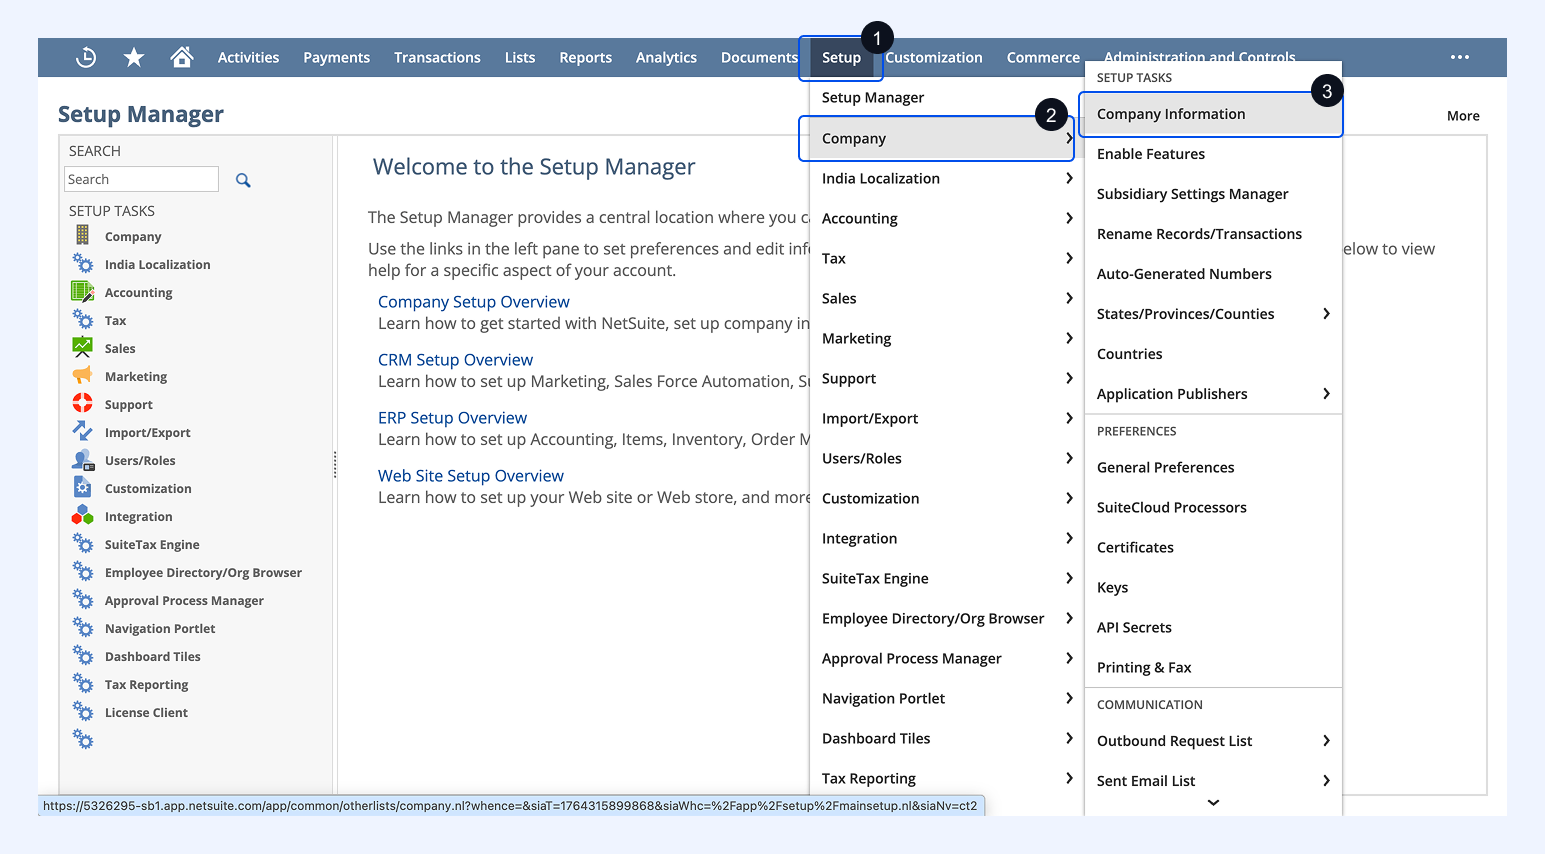
- Look for the Account_ID field. This value is your Realm.
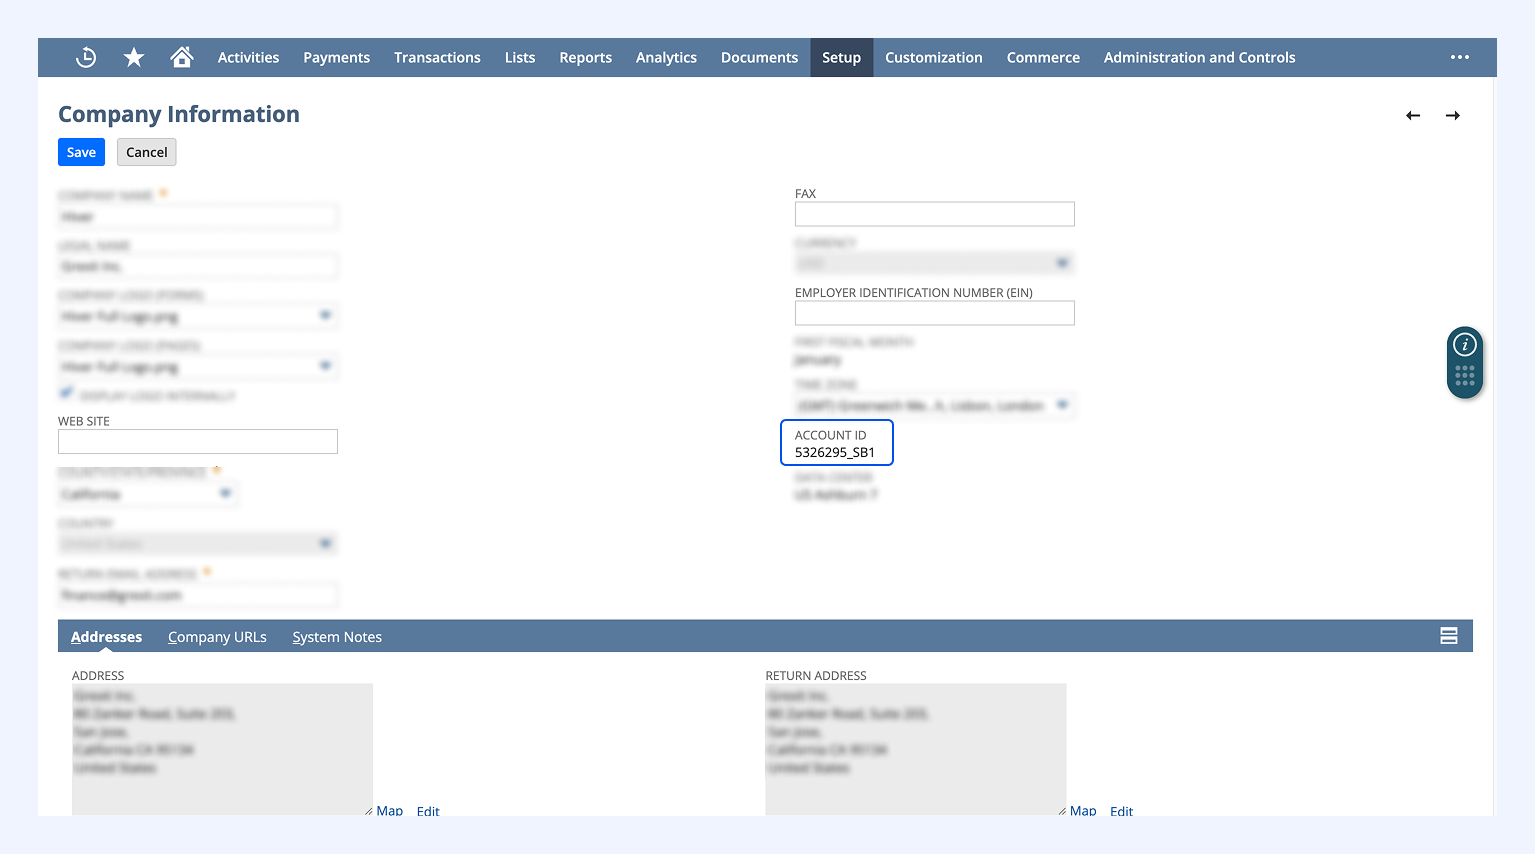
Step 5: Complete the final setup
You now have all the details needed to connect Hiver Omni with NetSuite.
- Go back to Hiver Omni, select authentication type as OAuth 1.0 and paste all the details you’ve stored here:
- Consumer Key
- Consumer Secret
- Access Token
- Token Secret
- Realm
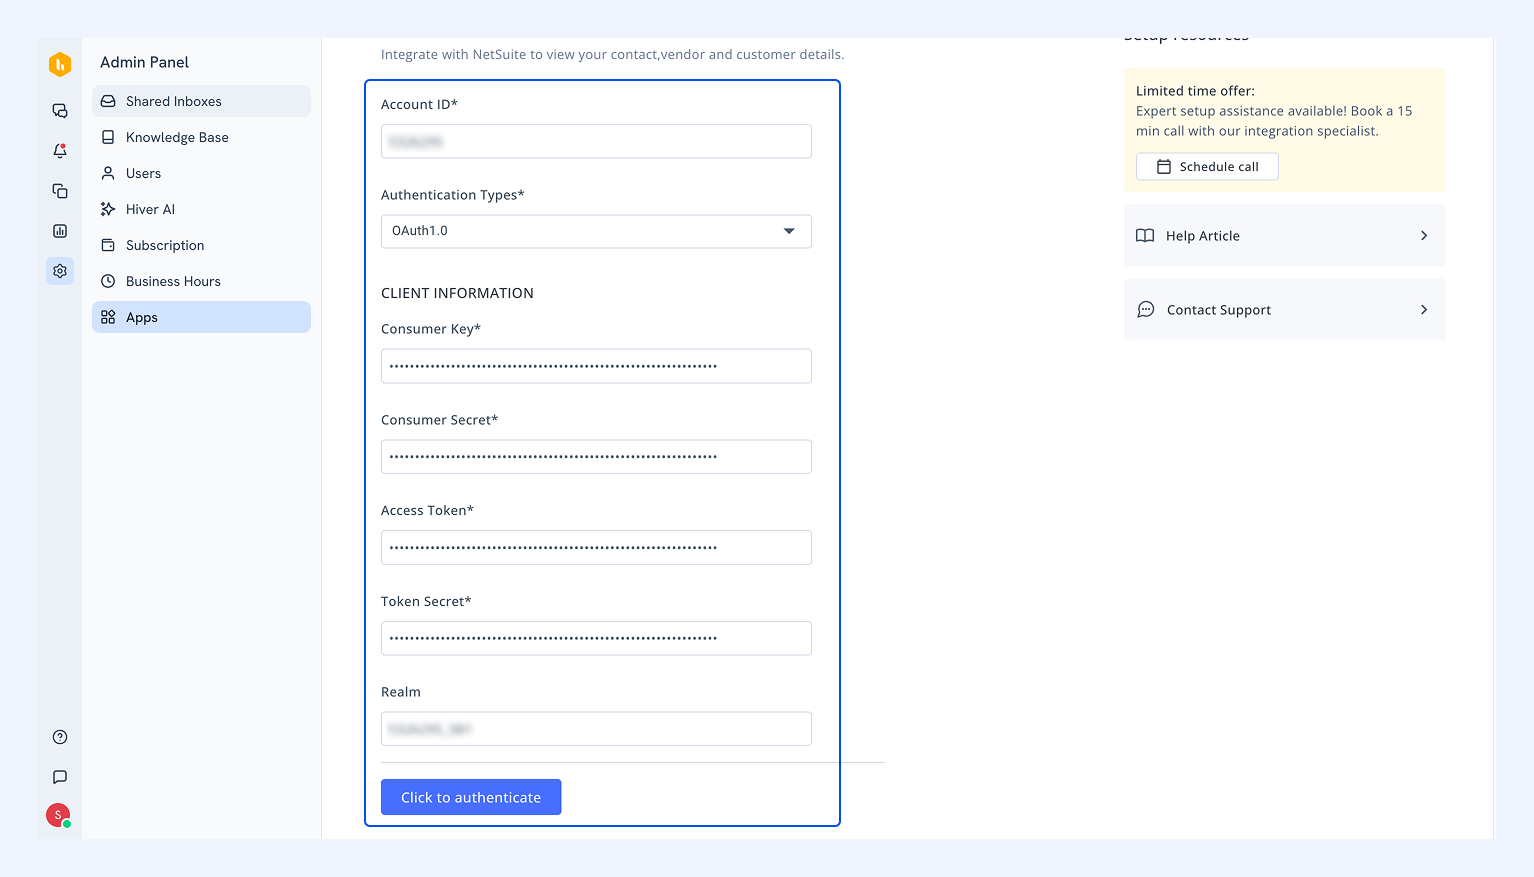
- After entering the details, select Click to authenticate.
Enabling the NetSuite integration with Hiver Omni
Now that authentication is set up, activate the integration for your team:
- Choose the Shared Inboxes where NetSuite data should appear.
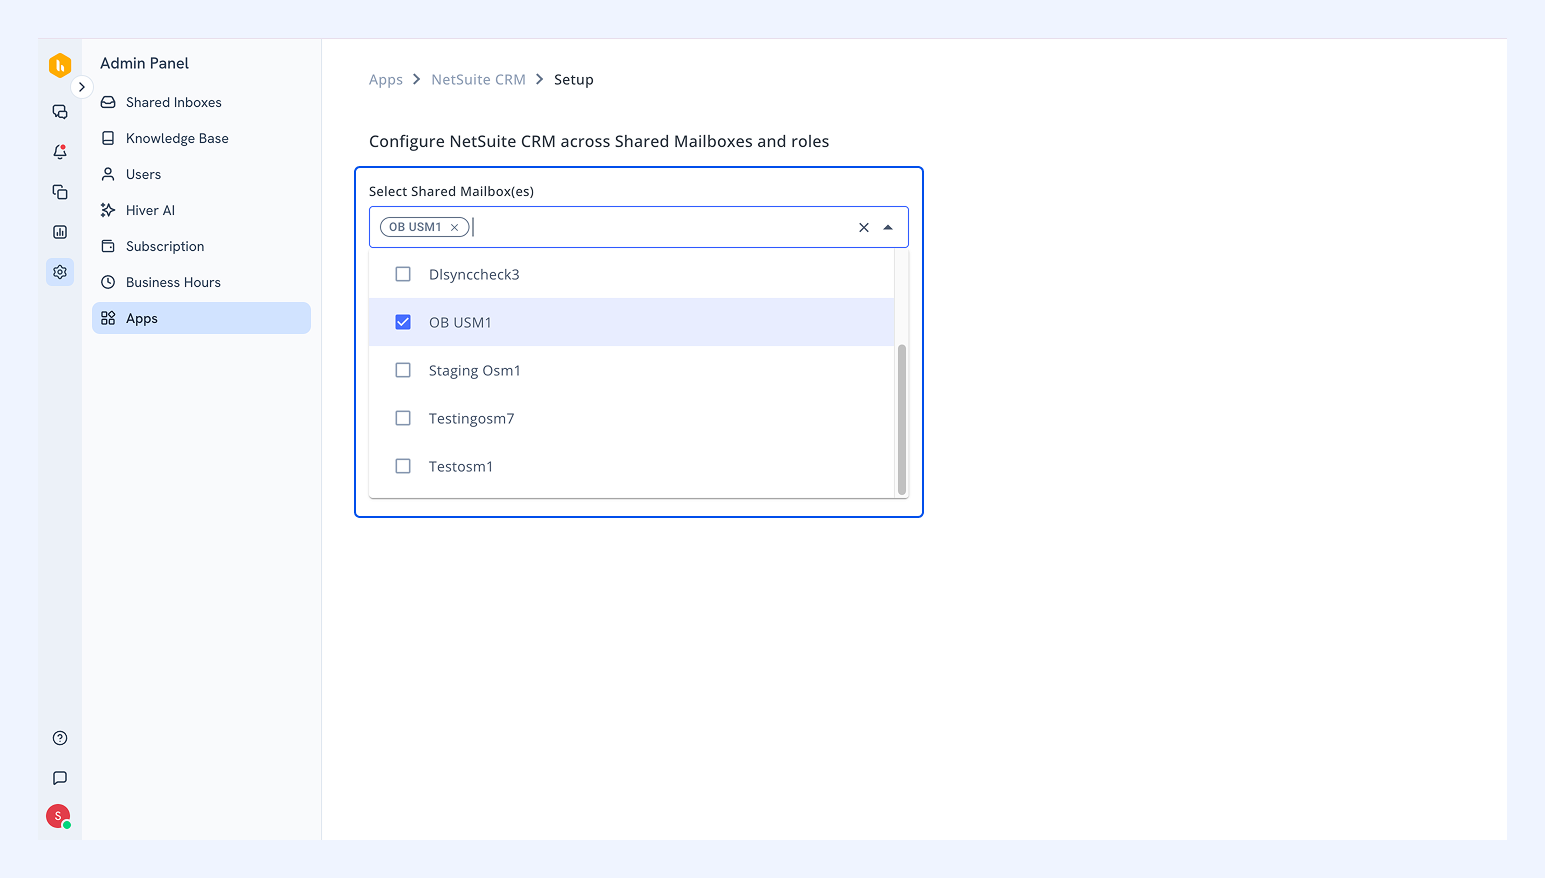
- Select the roles that can view and manage NetSuite data in those inboxes.
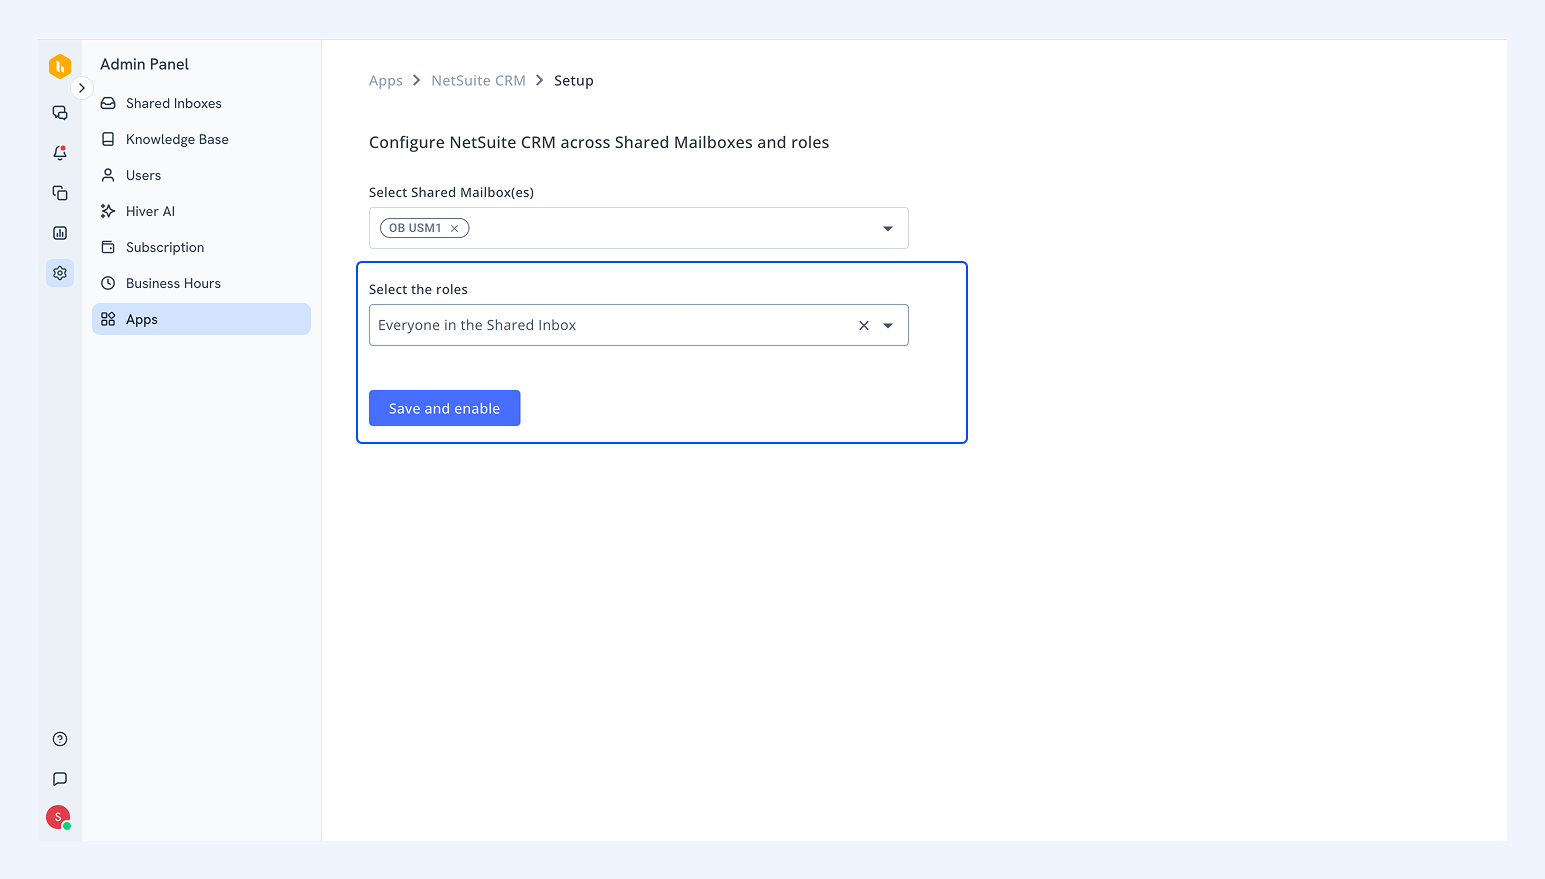
- Click Save and Enable.
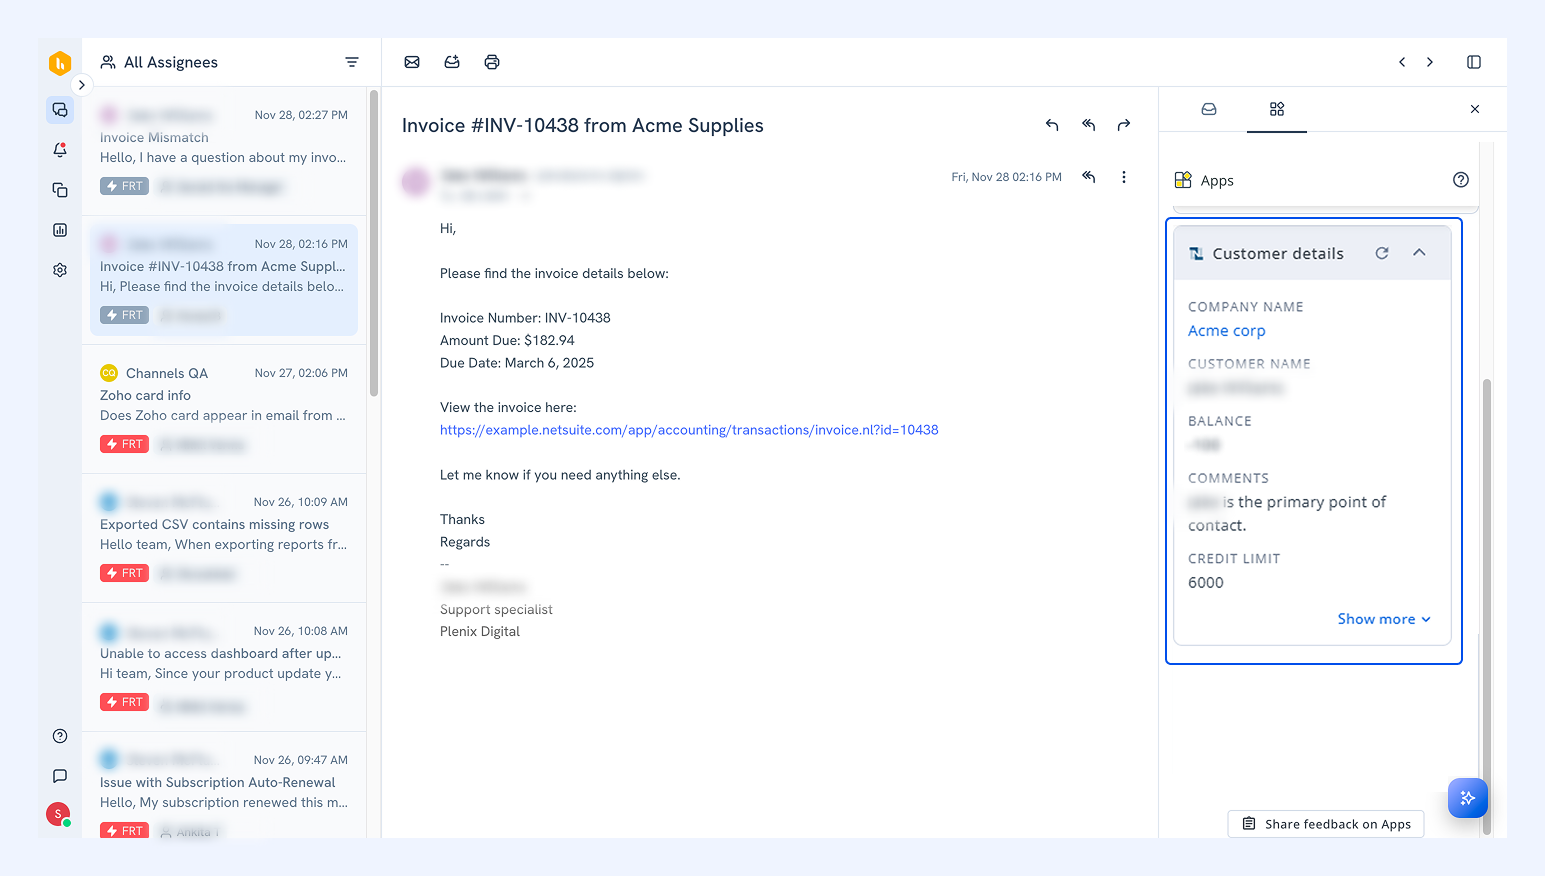
Once enabled, open any conversation, and NetSuite data cards will appear alongside it.
Managing visibility of NetSuite
After enabling the integration, you can customize what data appears and who can see it.
- Go back to the Apps and locate NetSuite.
- Navigate to the Visibility tab and click the eye icon.
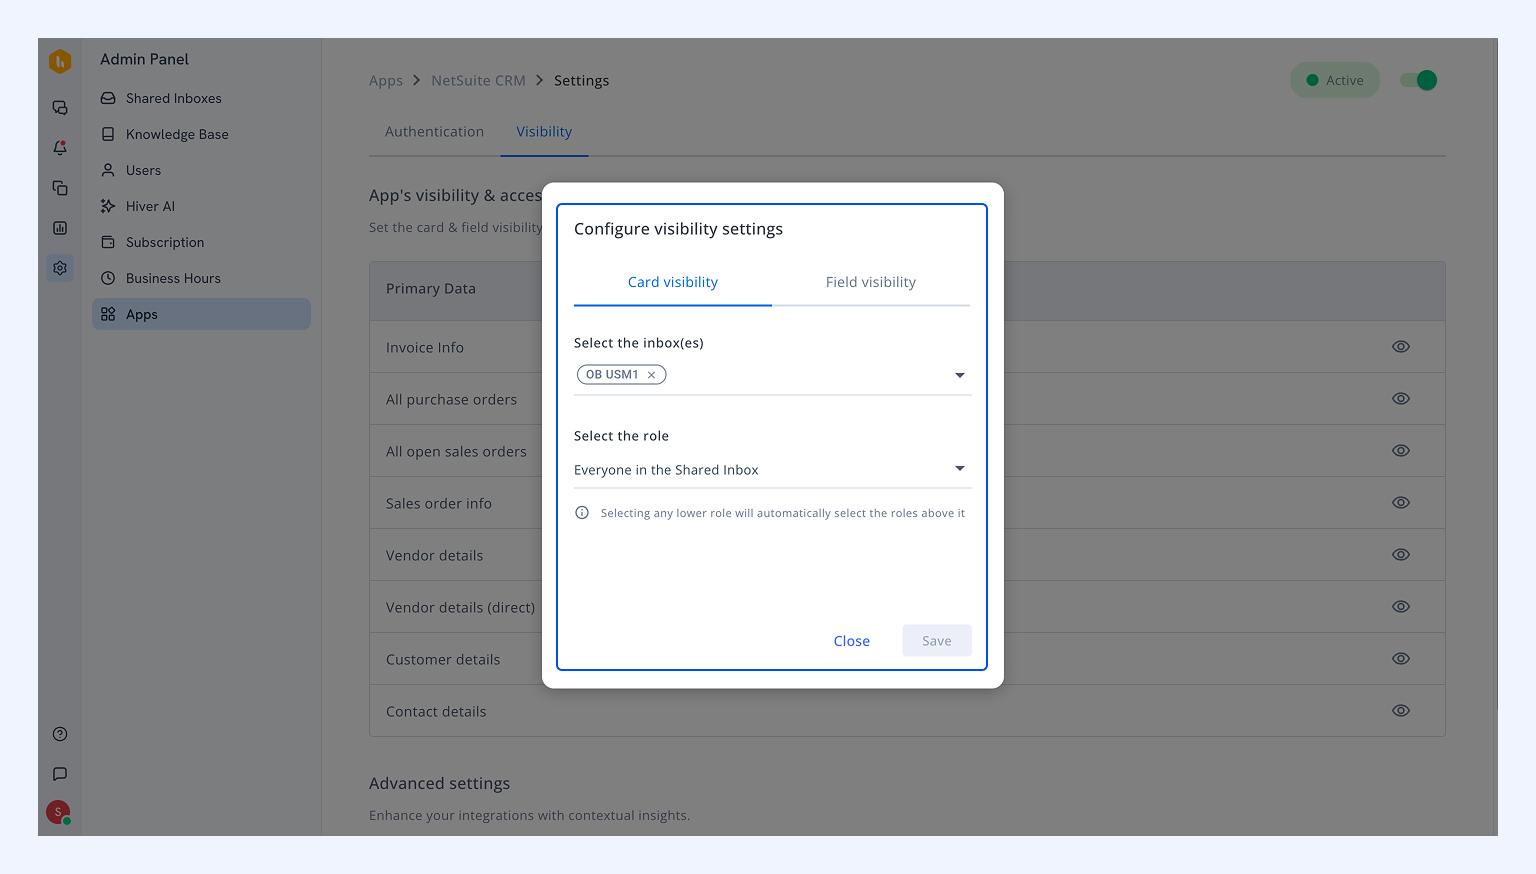
- Card visibility: Choose the Shared Inboxes where this NetSuite data card should appear. Then select the user roles that can view and manage the card information.
- Field visibility: Select which data fields you want displayed on the card.
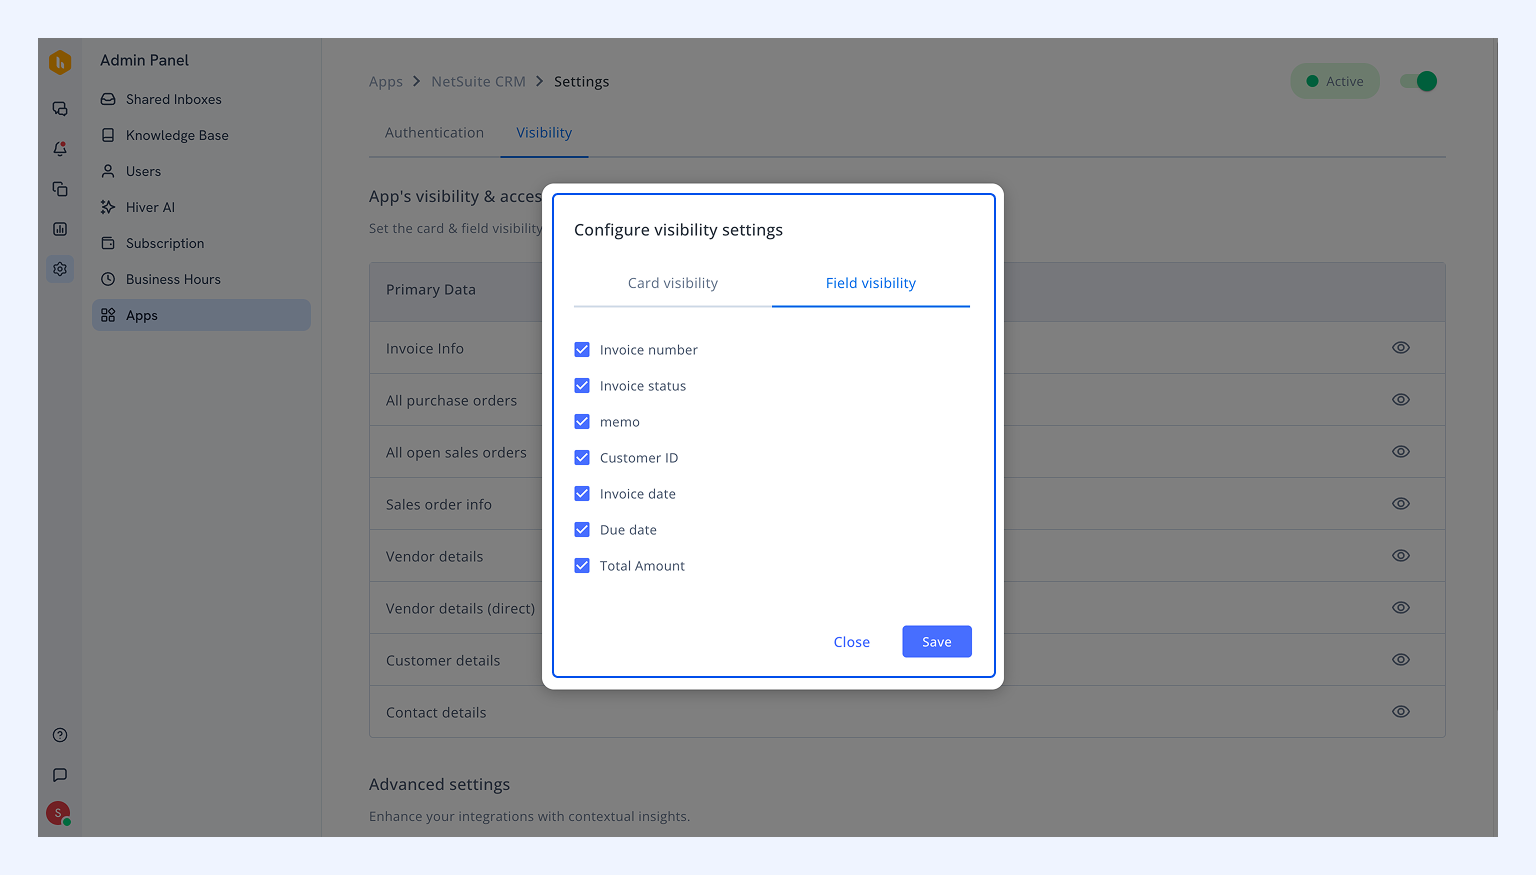
- Click Save to apply your visibility settings.
Managing advanced settings
Under Advanced Settings, you'll find the Smart Previews toggle enabled by default.
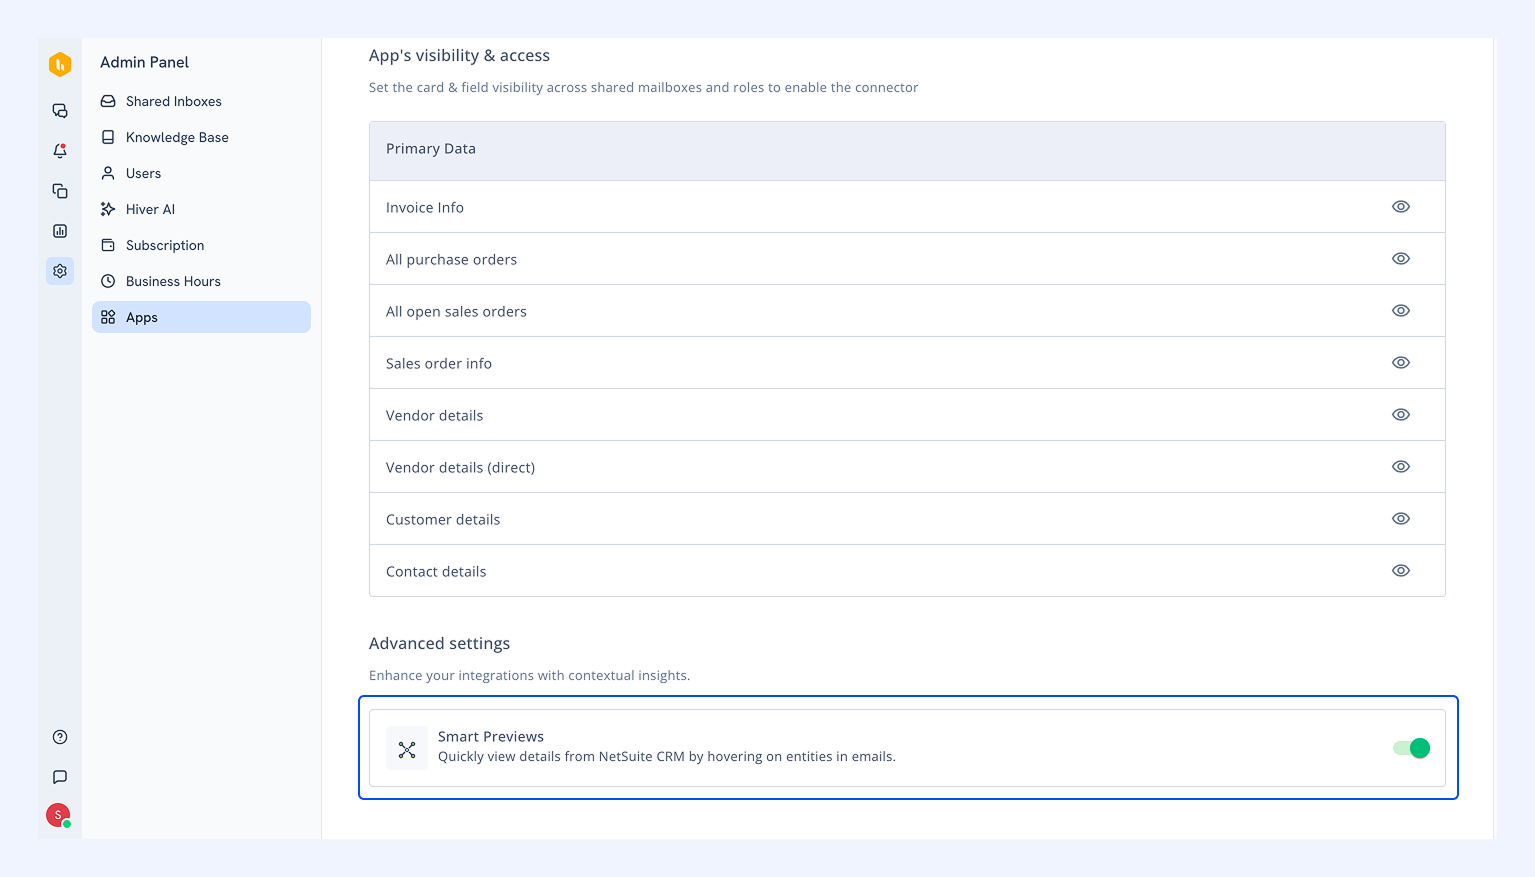
Smart Previews lets your team view NetSuite data instantly by hovering over invoice IDs, sales orders, and purchase orders in email subjects and bodies.
Turn off the toggle to disable this feature.
Creating a sales order in NetSuite
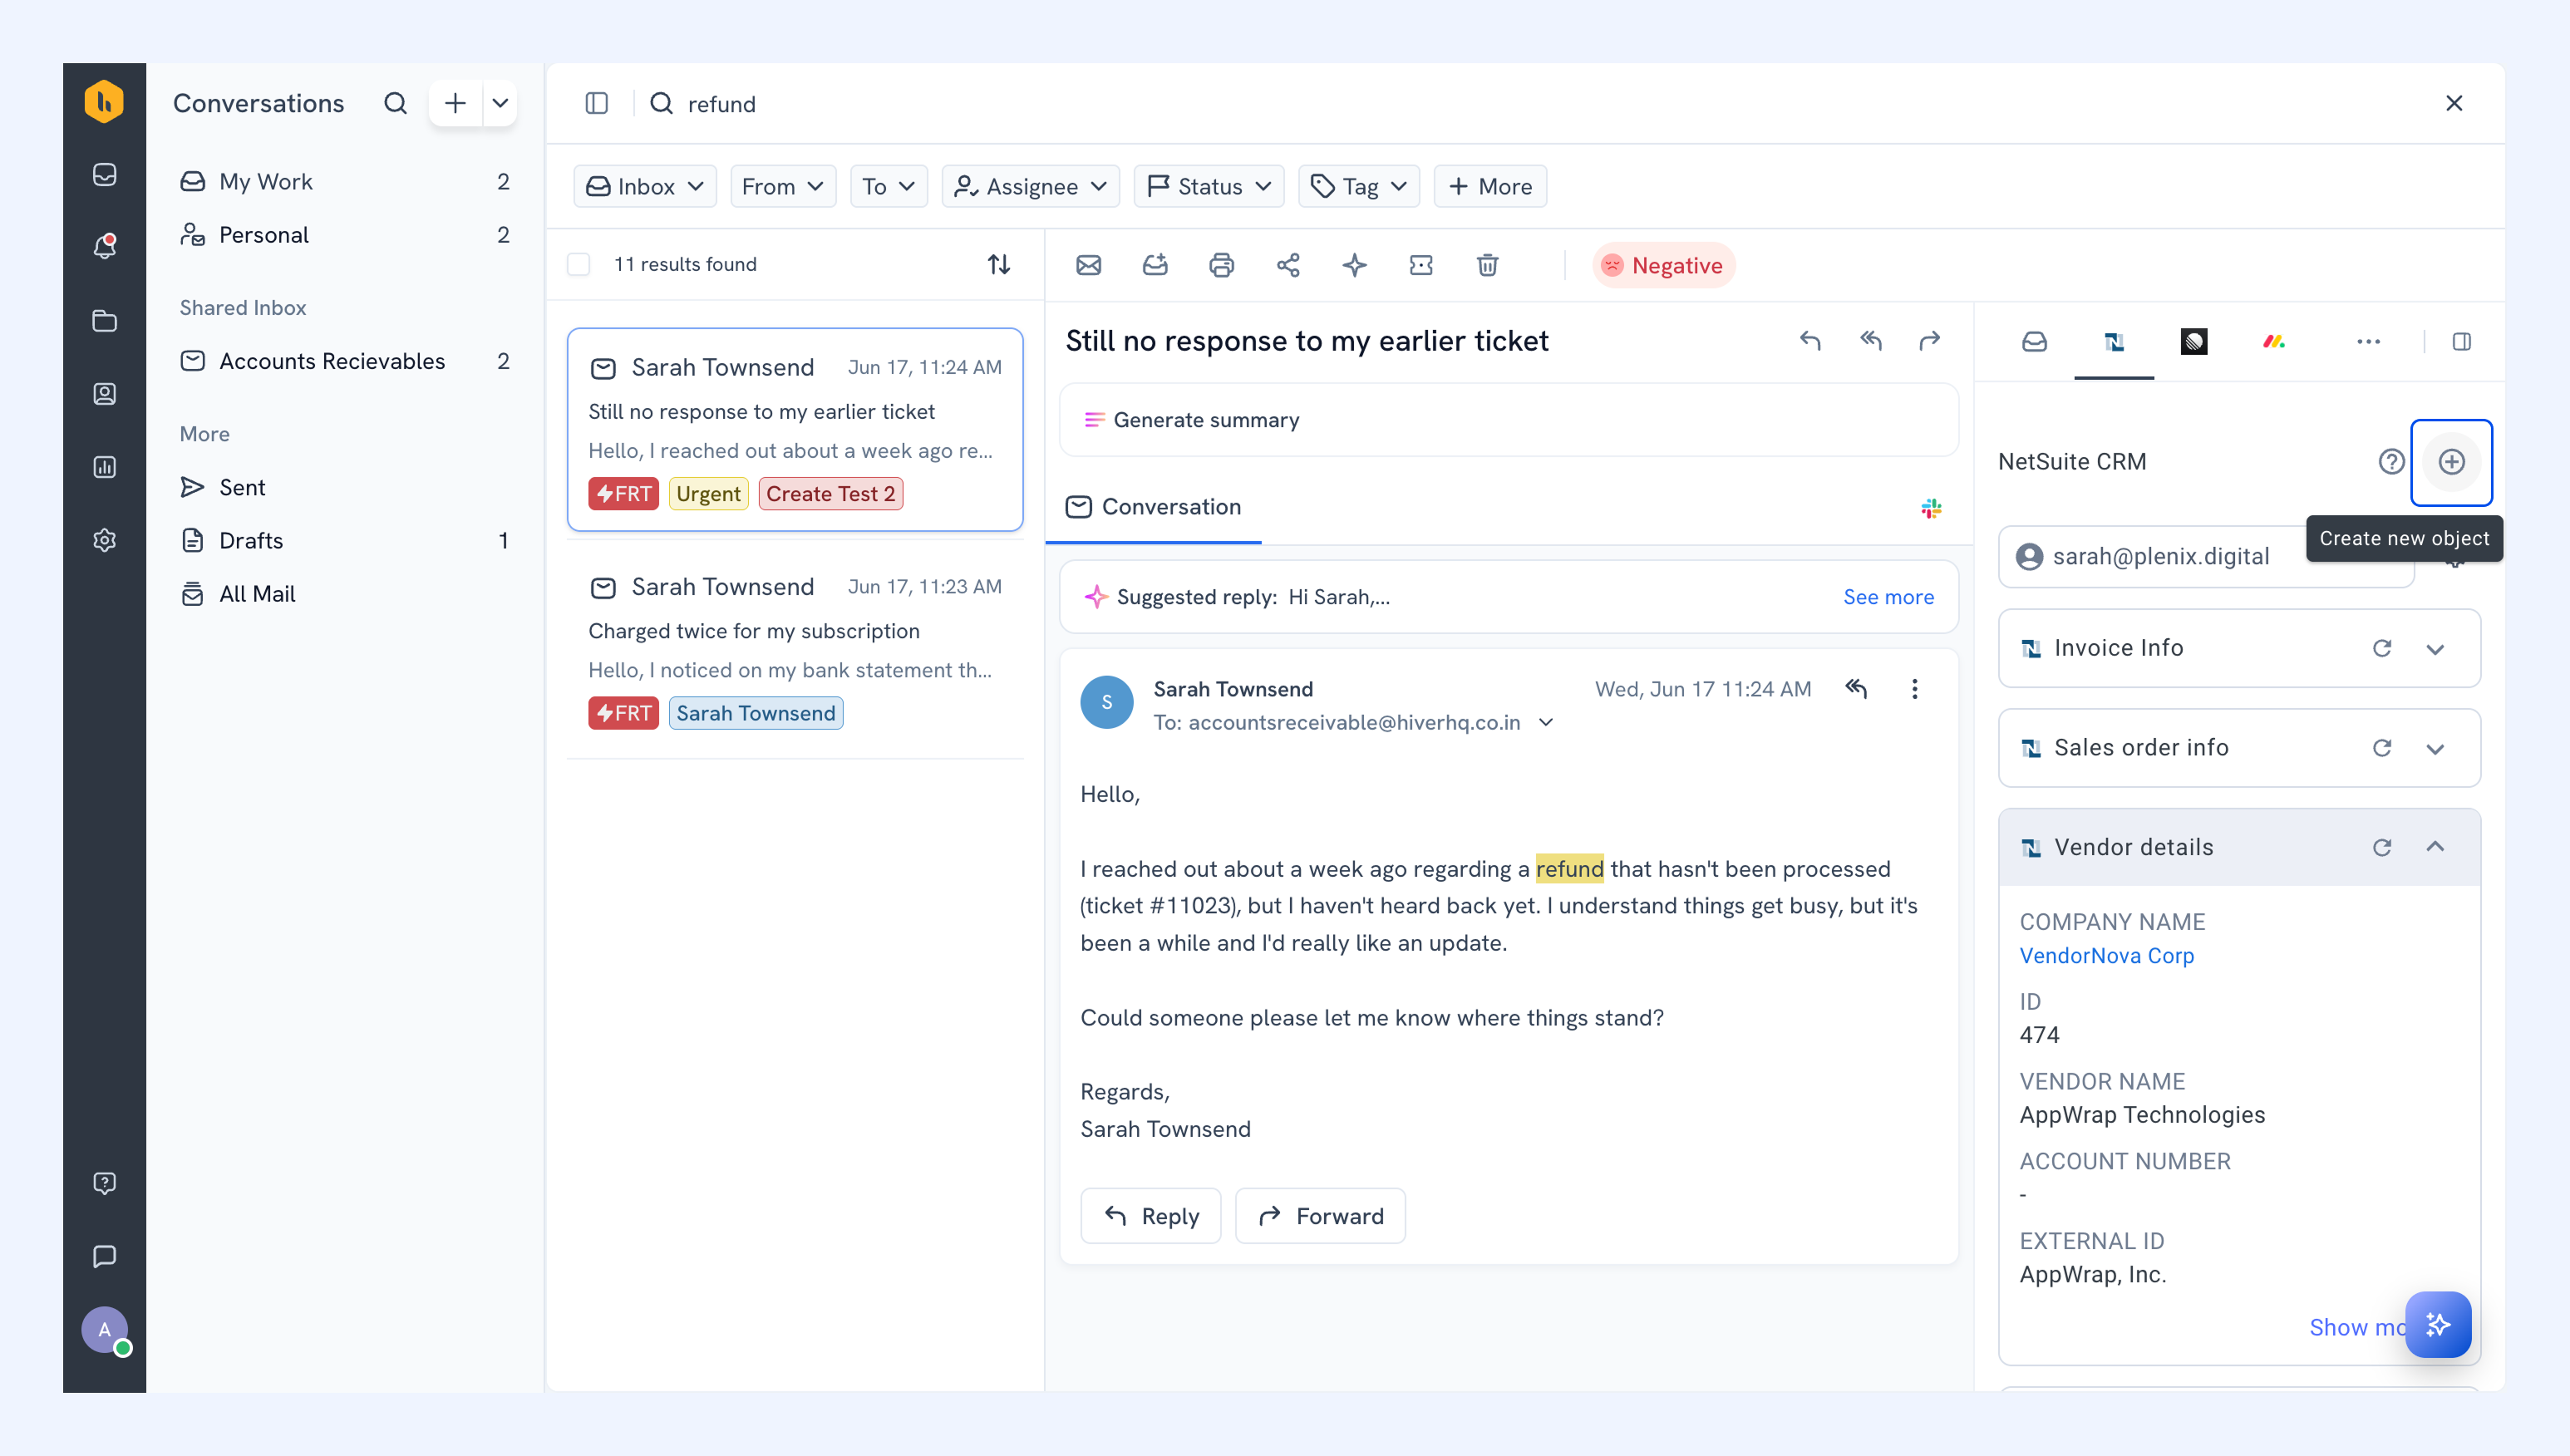
You can create a sales order in NetSuite from a conversation from the right panel.
1. Open a conversation and in the right panel select the NetSuite app.
2. Click the plus icon to create a new object.
3. Click Add custom field to include custom fields created in your NetSuite account.
4. Enter the sales order details and click Create.
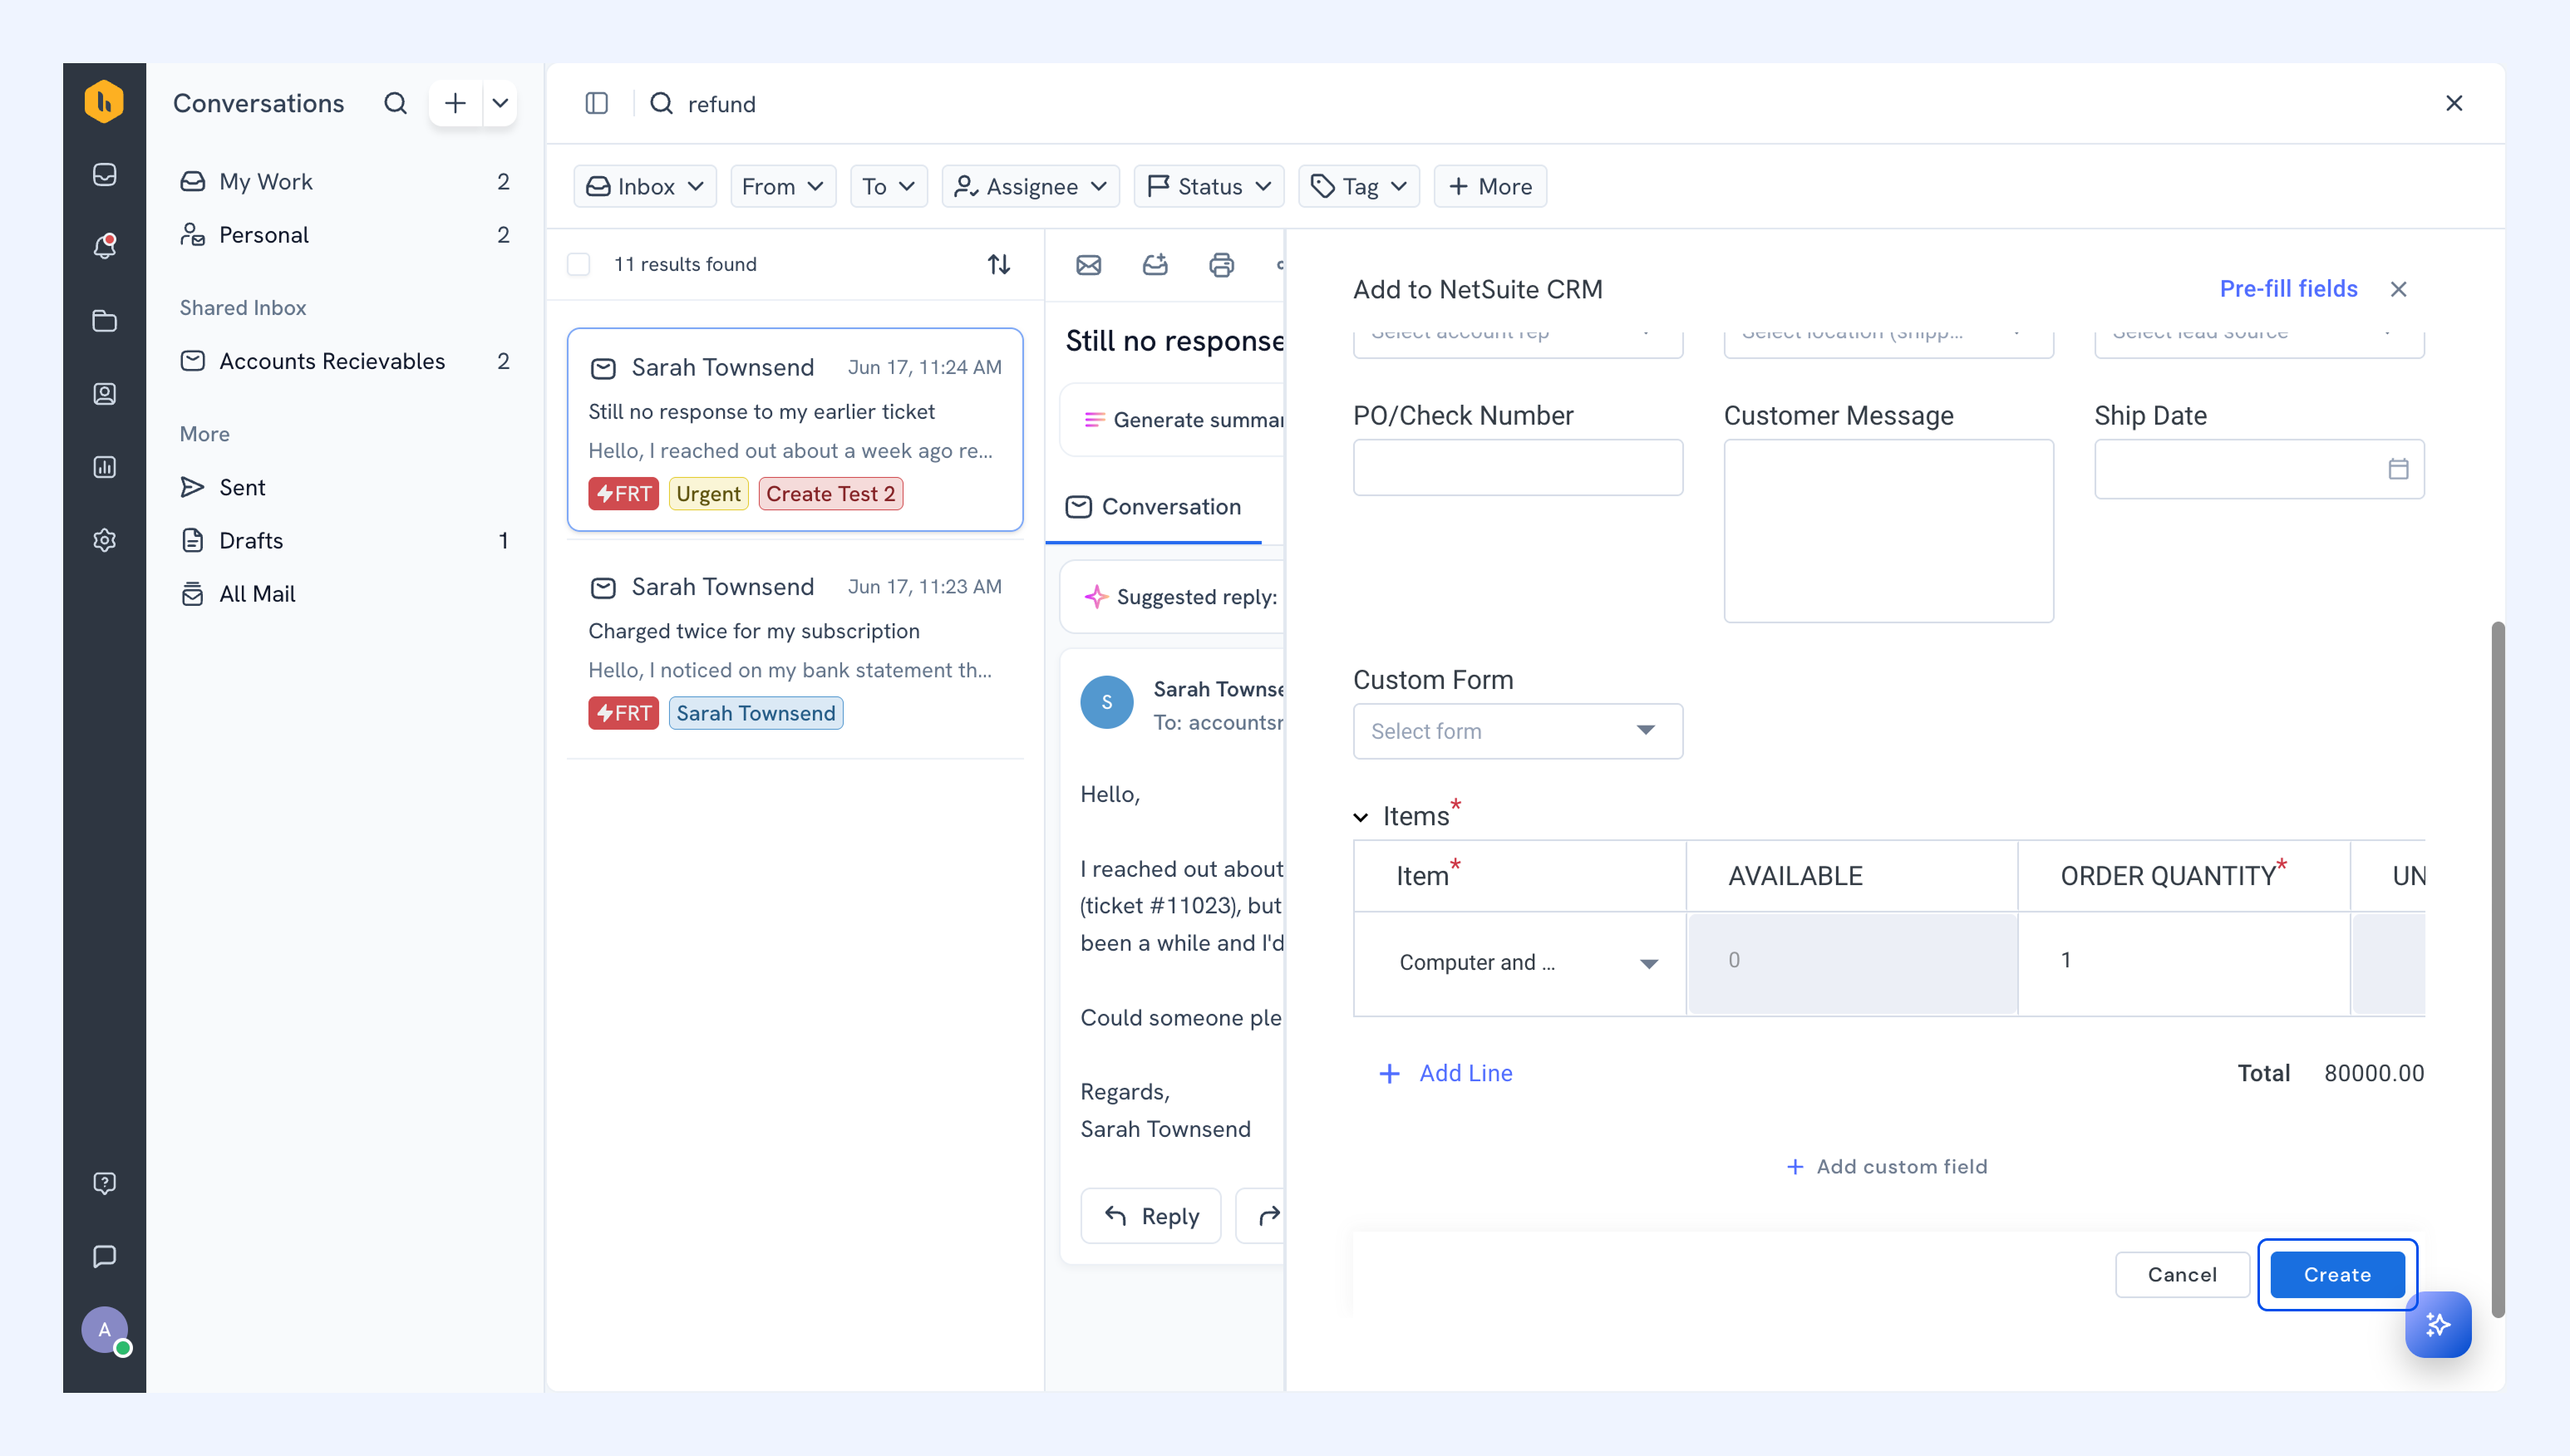
The new sales order appears in the right panel and is created in NetSuite.
Next steps
HubSpot integration with Hiver Omni
ClickUp integration with Hiver Omni