Setting up a Customer Portal
Customers often want to check on a request without emailing your support team for an update. With Hiver Omni, you can create a branded Customer Portal where customers can submit and track their support requests.
Each request becomes a Ticket in the relevant Shared Inbox, so your team can assign ownership, collaborate, and respond from one place.
Prerequisites
Before you create a Customer Portal, make sure you have:
- Admin permissions in Hiver.
- At least one Web Form created in your account. If you haven't created a Web Form yet, learn how to create Web Forms.
Creating a Customer Portal
1. Go to Admin Panel → Customer Portal, and click Create portal.
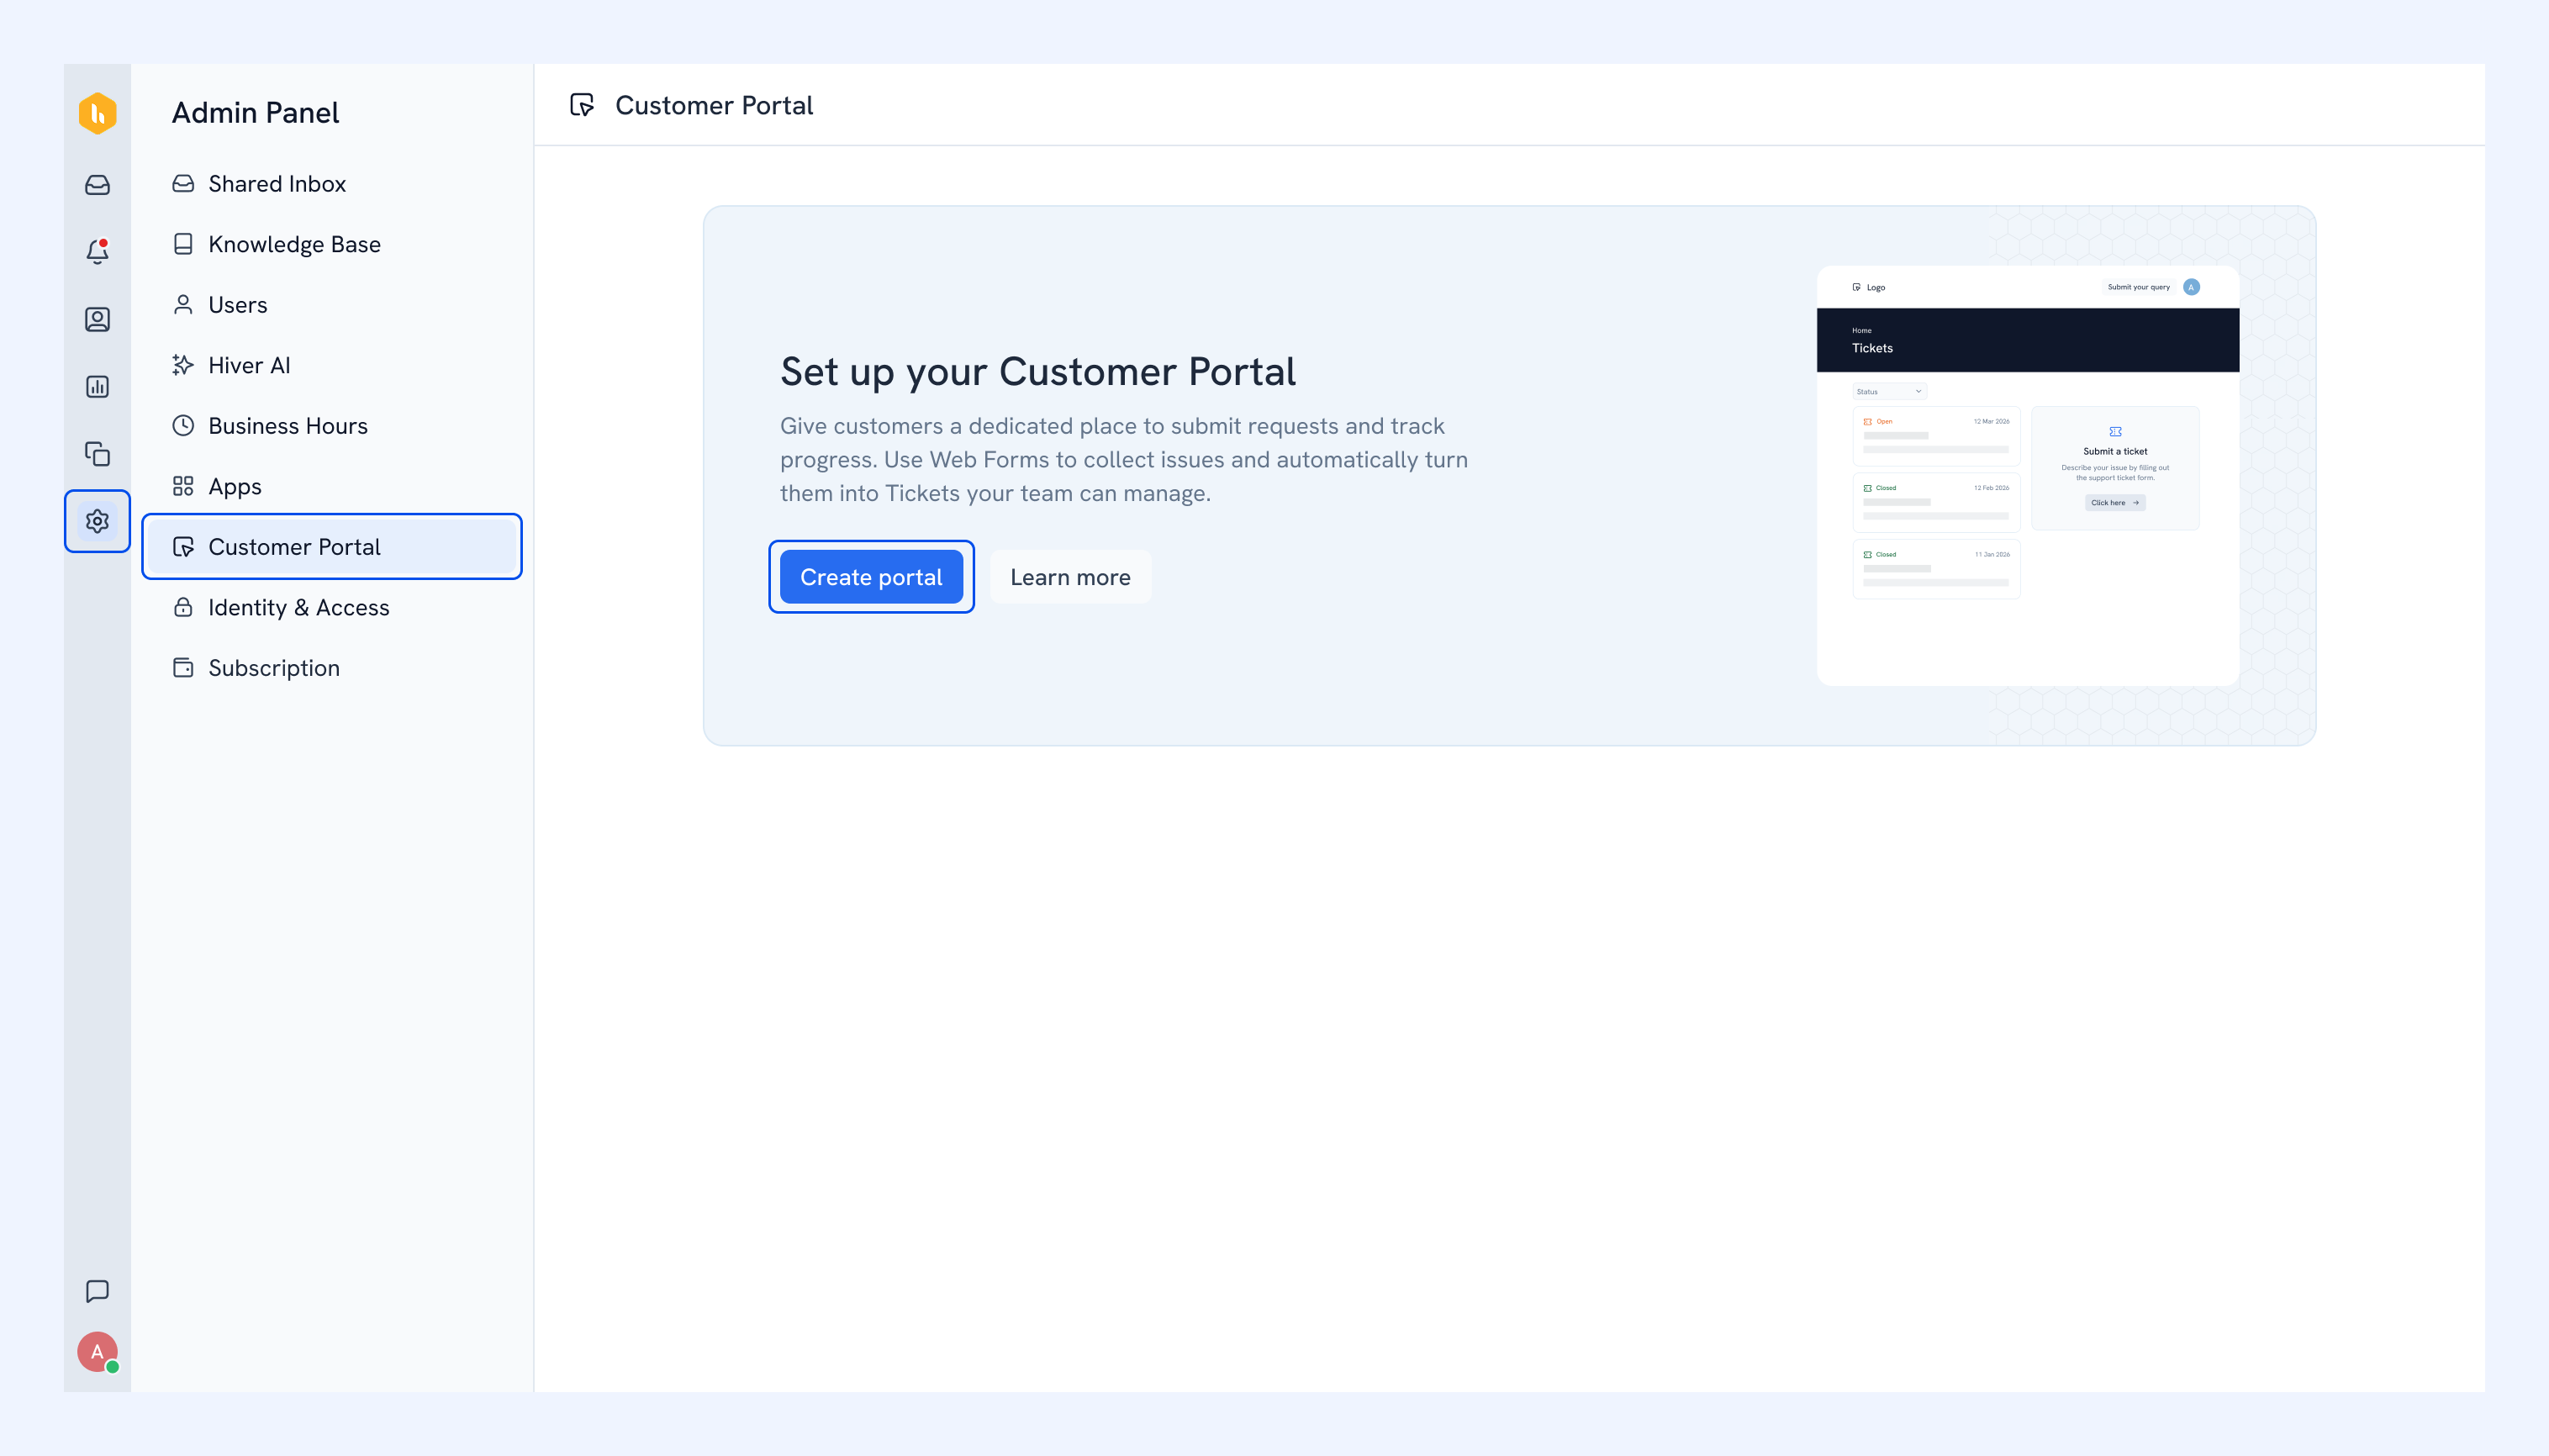
2. The first step is choosing where you want to host your portal. You can host your portal on Hiver's domain (e.g. yoursubdomain.portal.hiverhq.com) or on your own domain (e.g. support.yourcompany.com).
Using Hiver’s domain
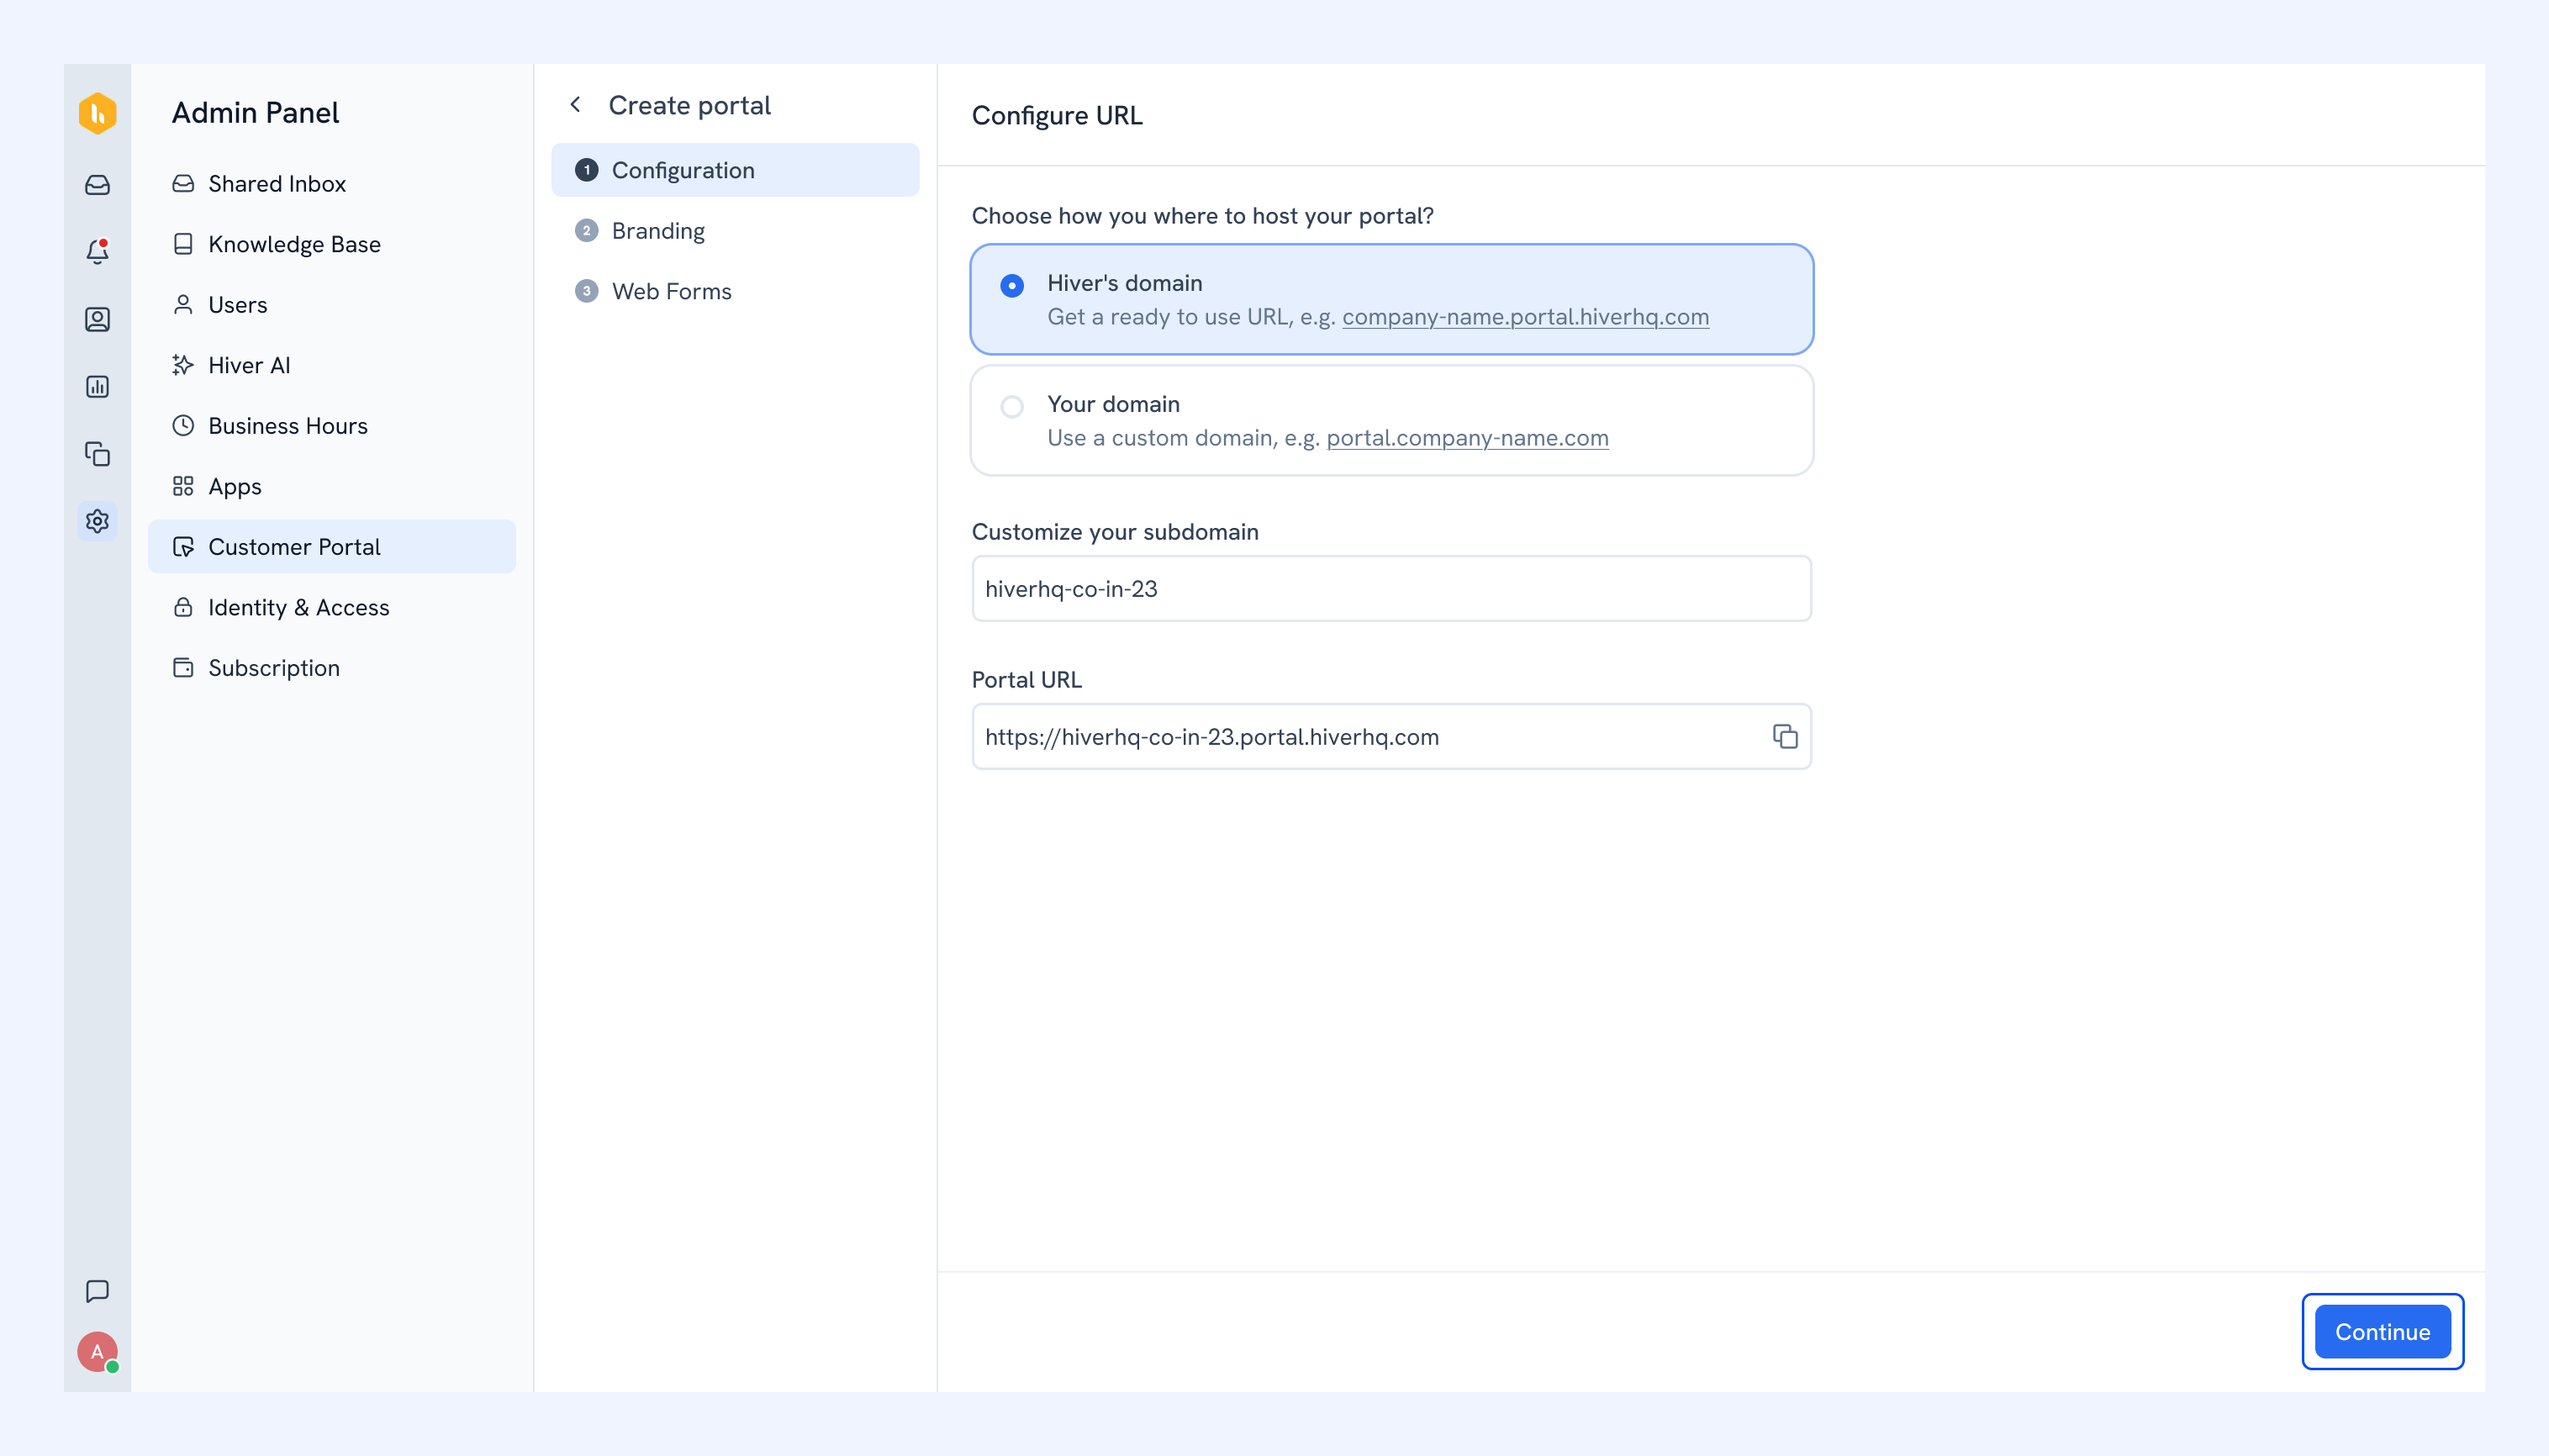
- Select Hiver's domain and enter a subdomain name. Check if it's available, and if not, try a variation of the name.
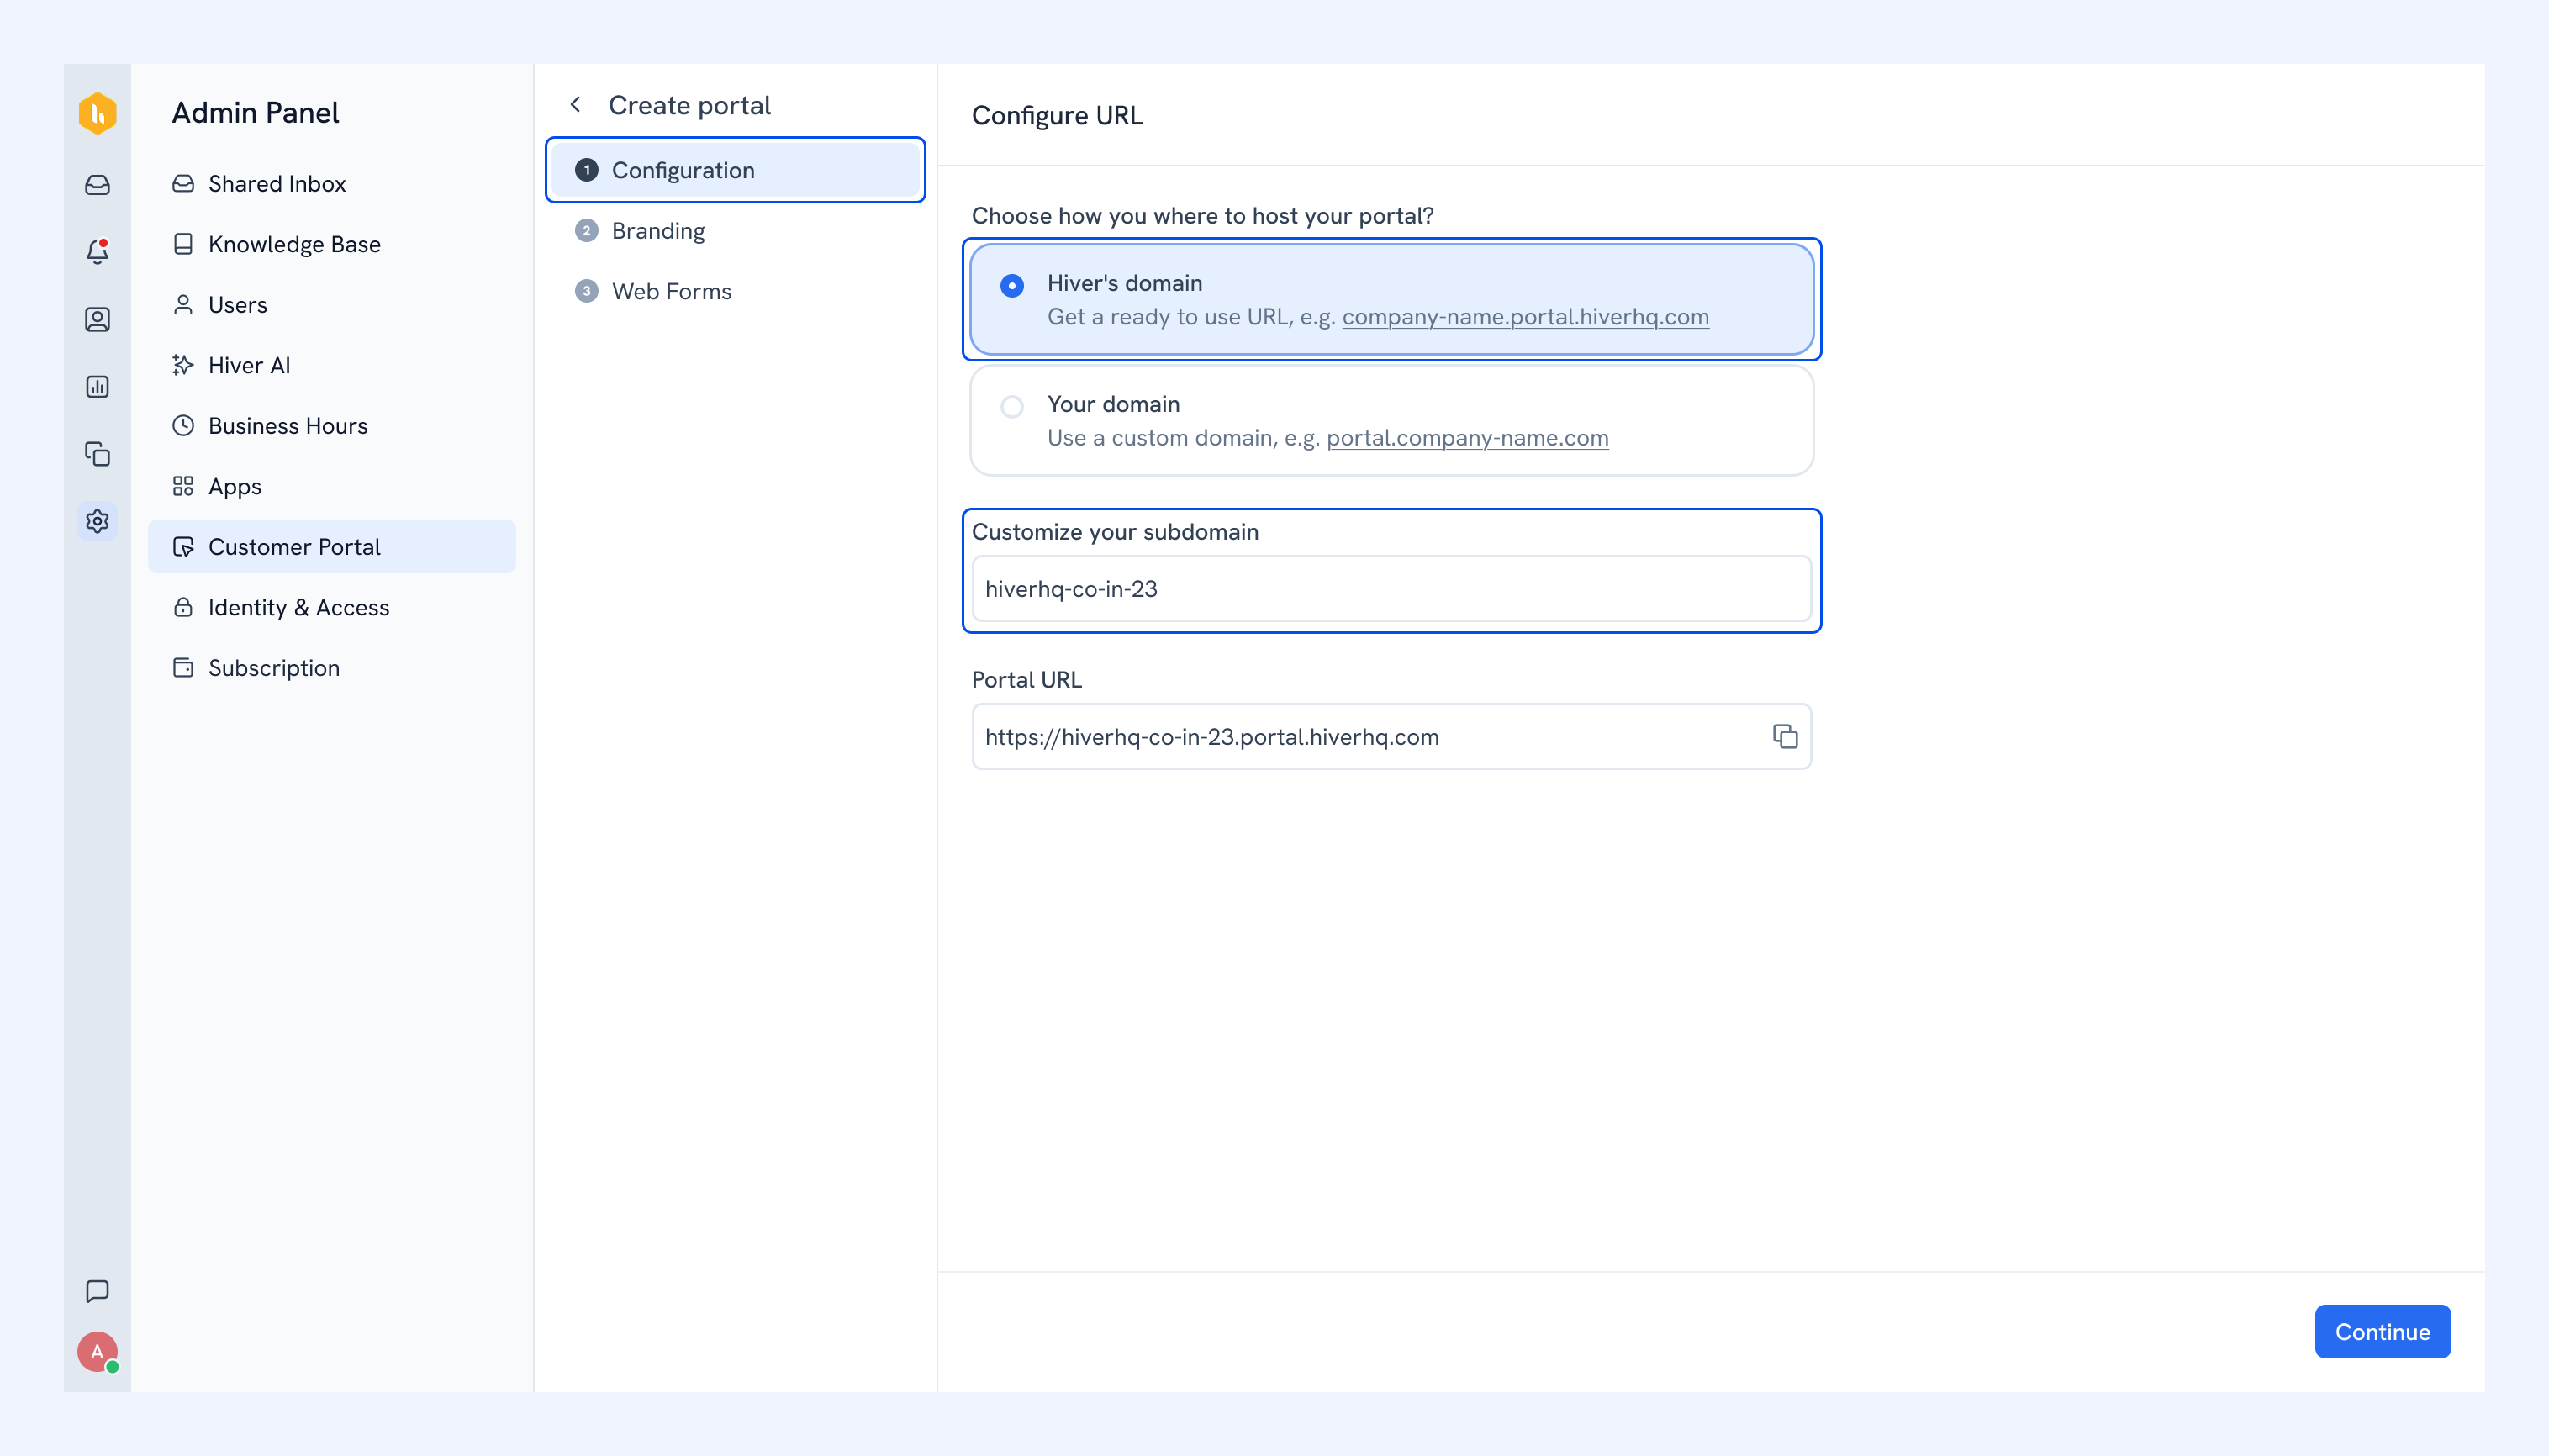
- Click Continue. Your portal will be hosted at yoursubdomain.portal.hiverhq.com.
Note: You can't change the URL once the portal is created.
Using a custom domain
- Select Your domain and paste your custom domain.
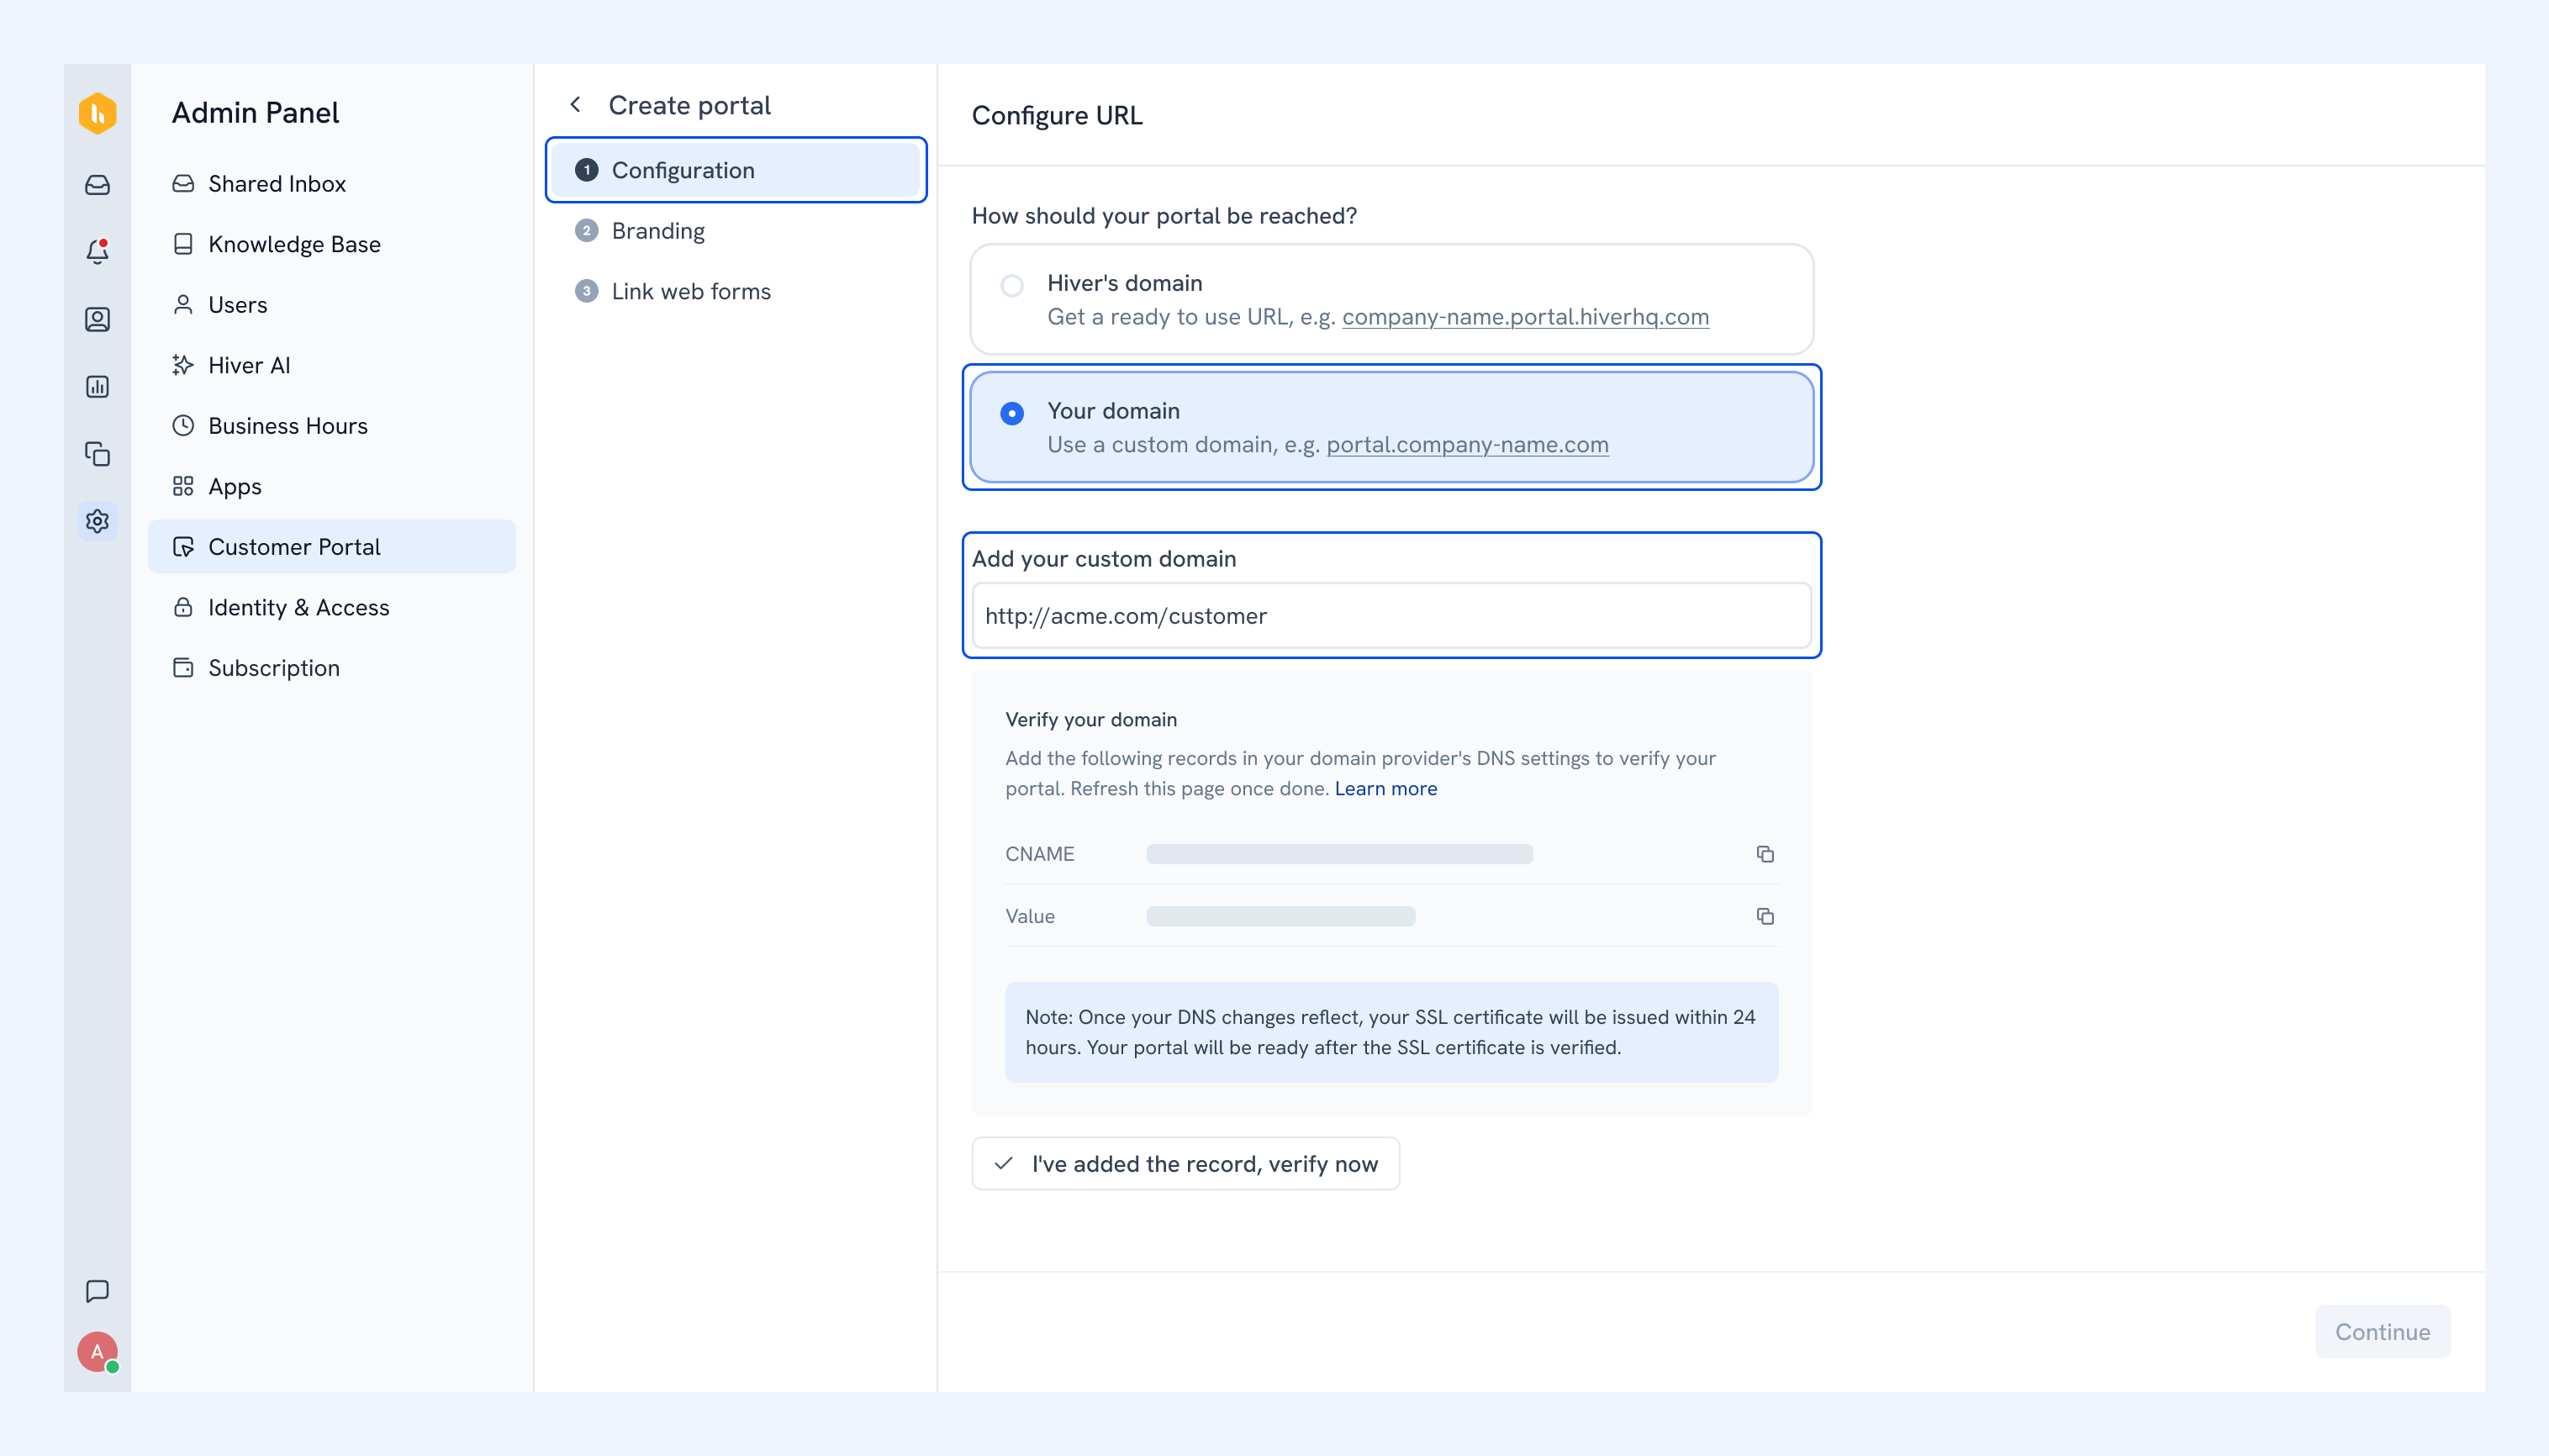
- Next, copy the CNAME and Value records and add it to your DNS provider’s domain settings.
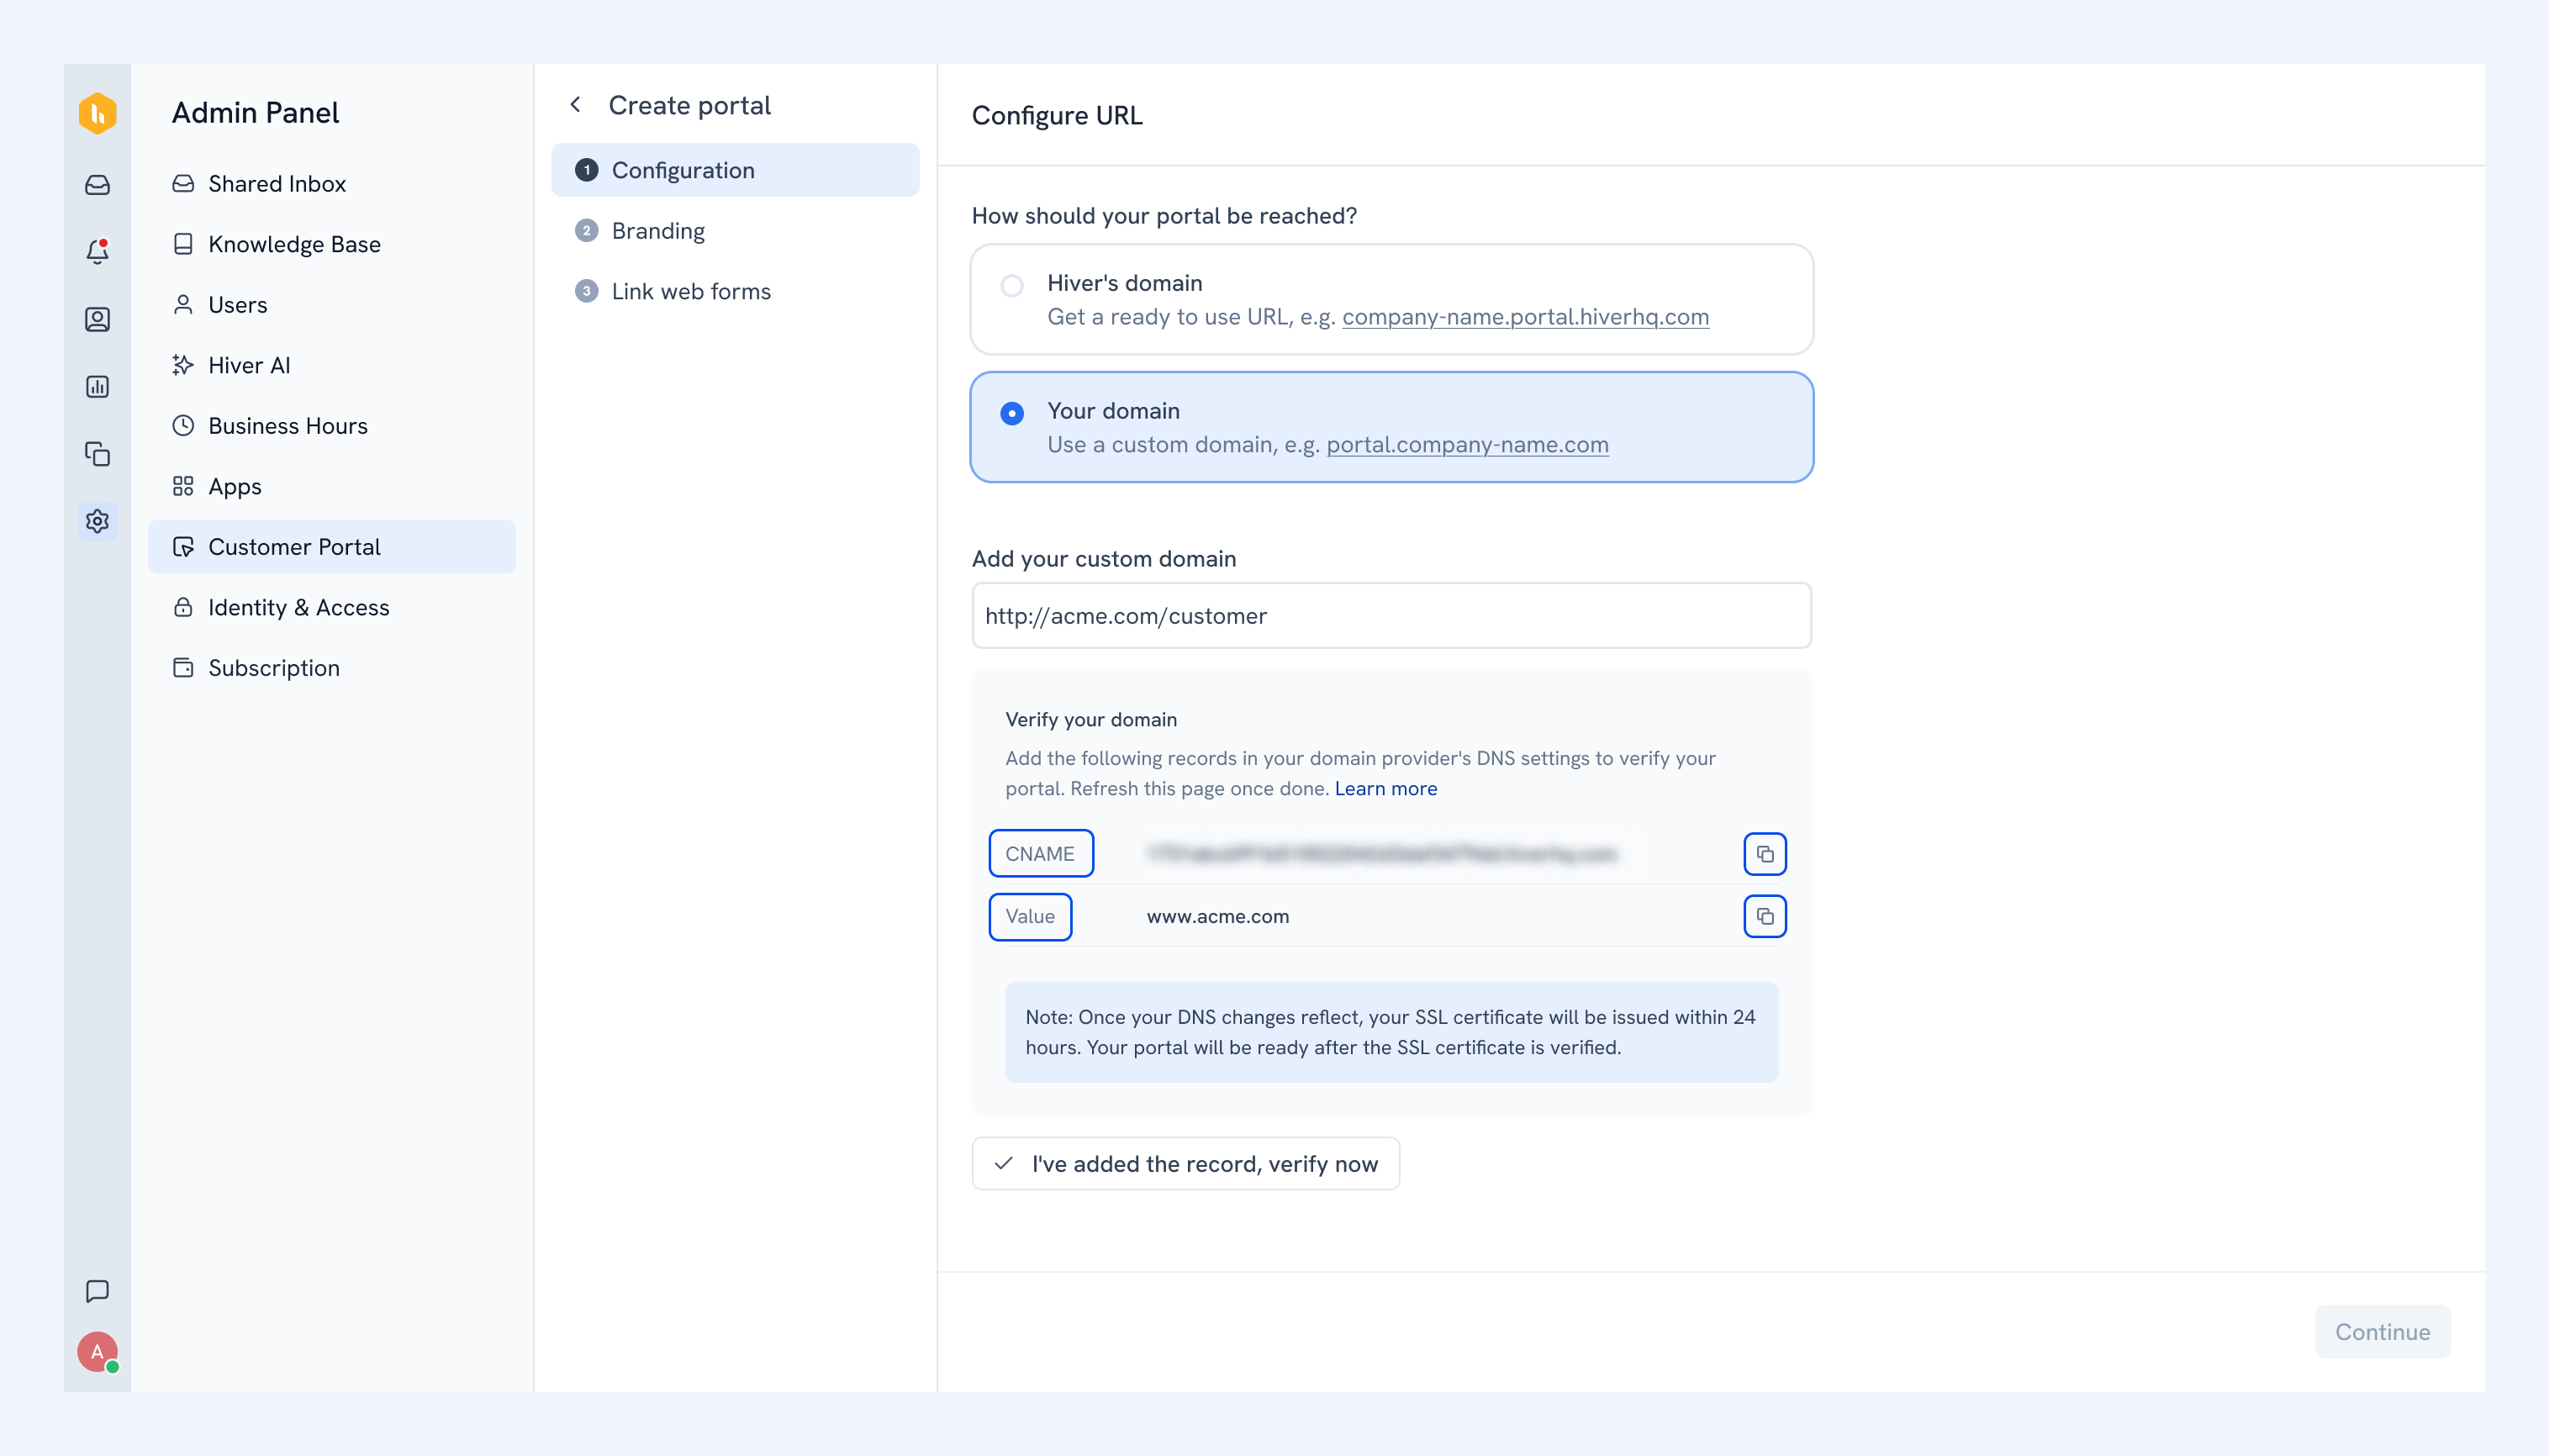
- After verification, an SSL certificate is automatically issued within 24 hours. Your portal URL won't be active until the certificate is verified.
Note: If SSL activation takes longer than 24 hours, contact support@hiverhq.com.
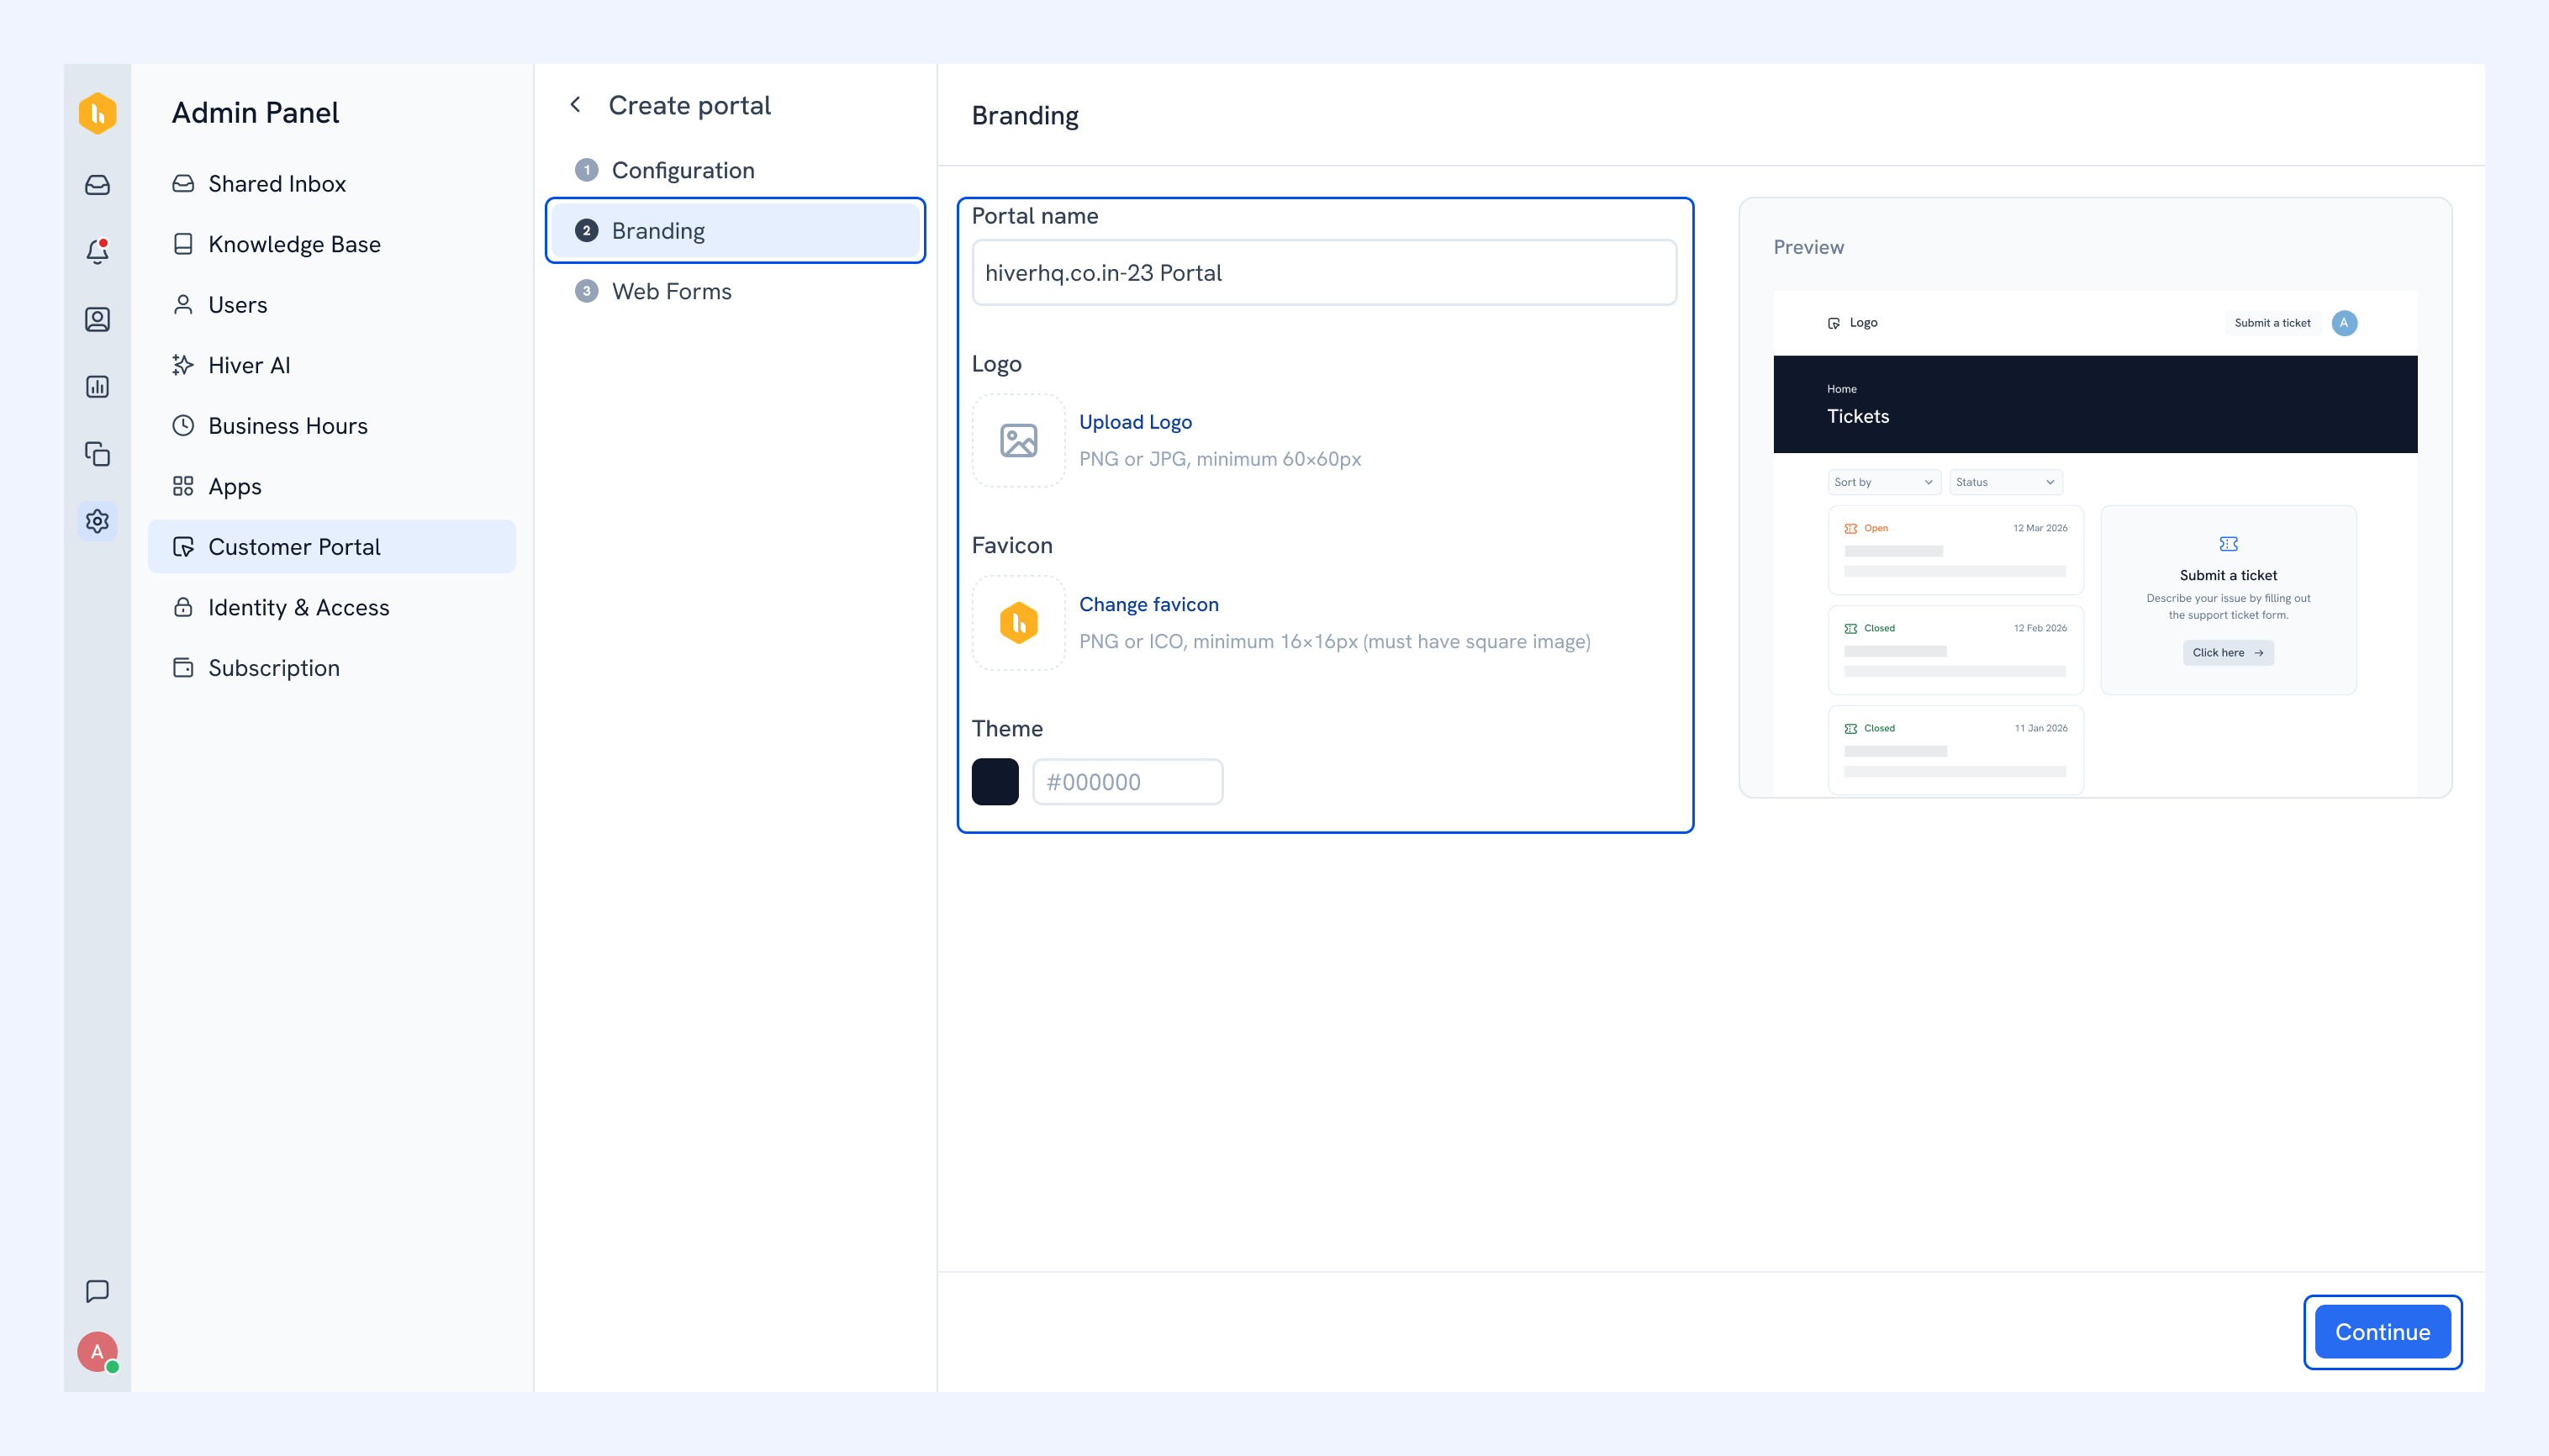
3. Next, customize your portal’s look and feel:
- Set the portal name
- Upload a logo (60x60px minimum)
- Add a favicon (16x16px square minimum)
- Pick a primary color (used in the portal banner and buttons)
The preview on the right updates as you make changes.
Once done, click Continue.
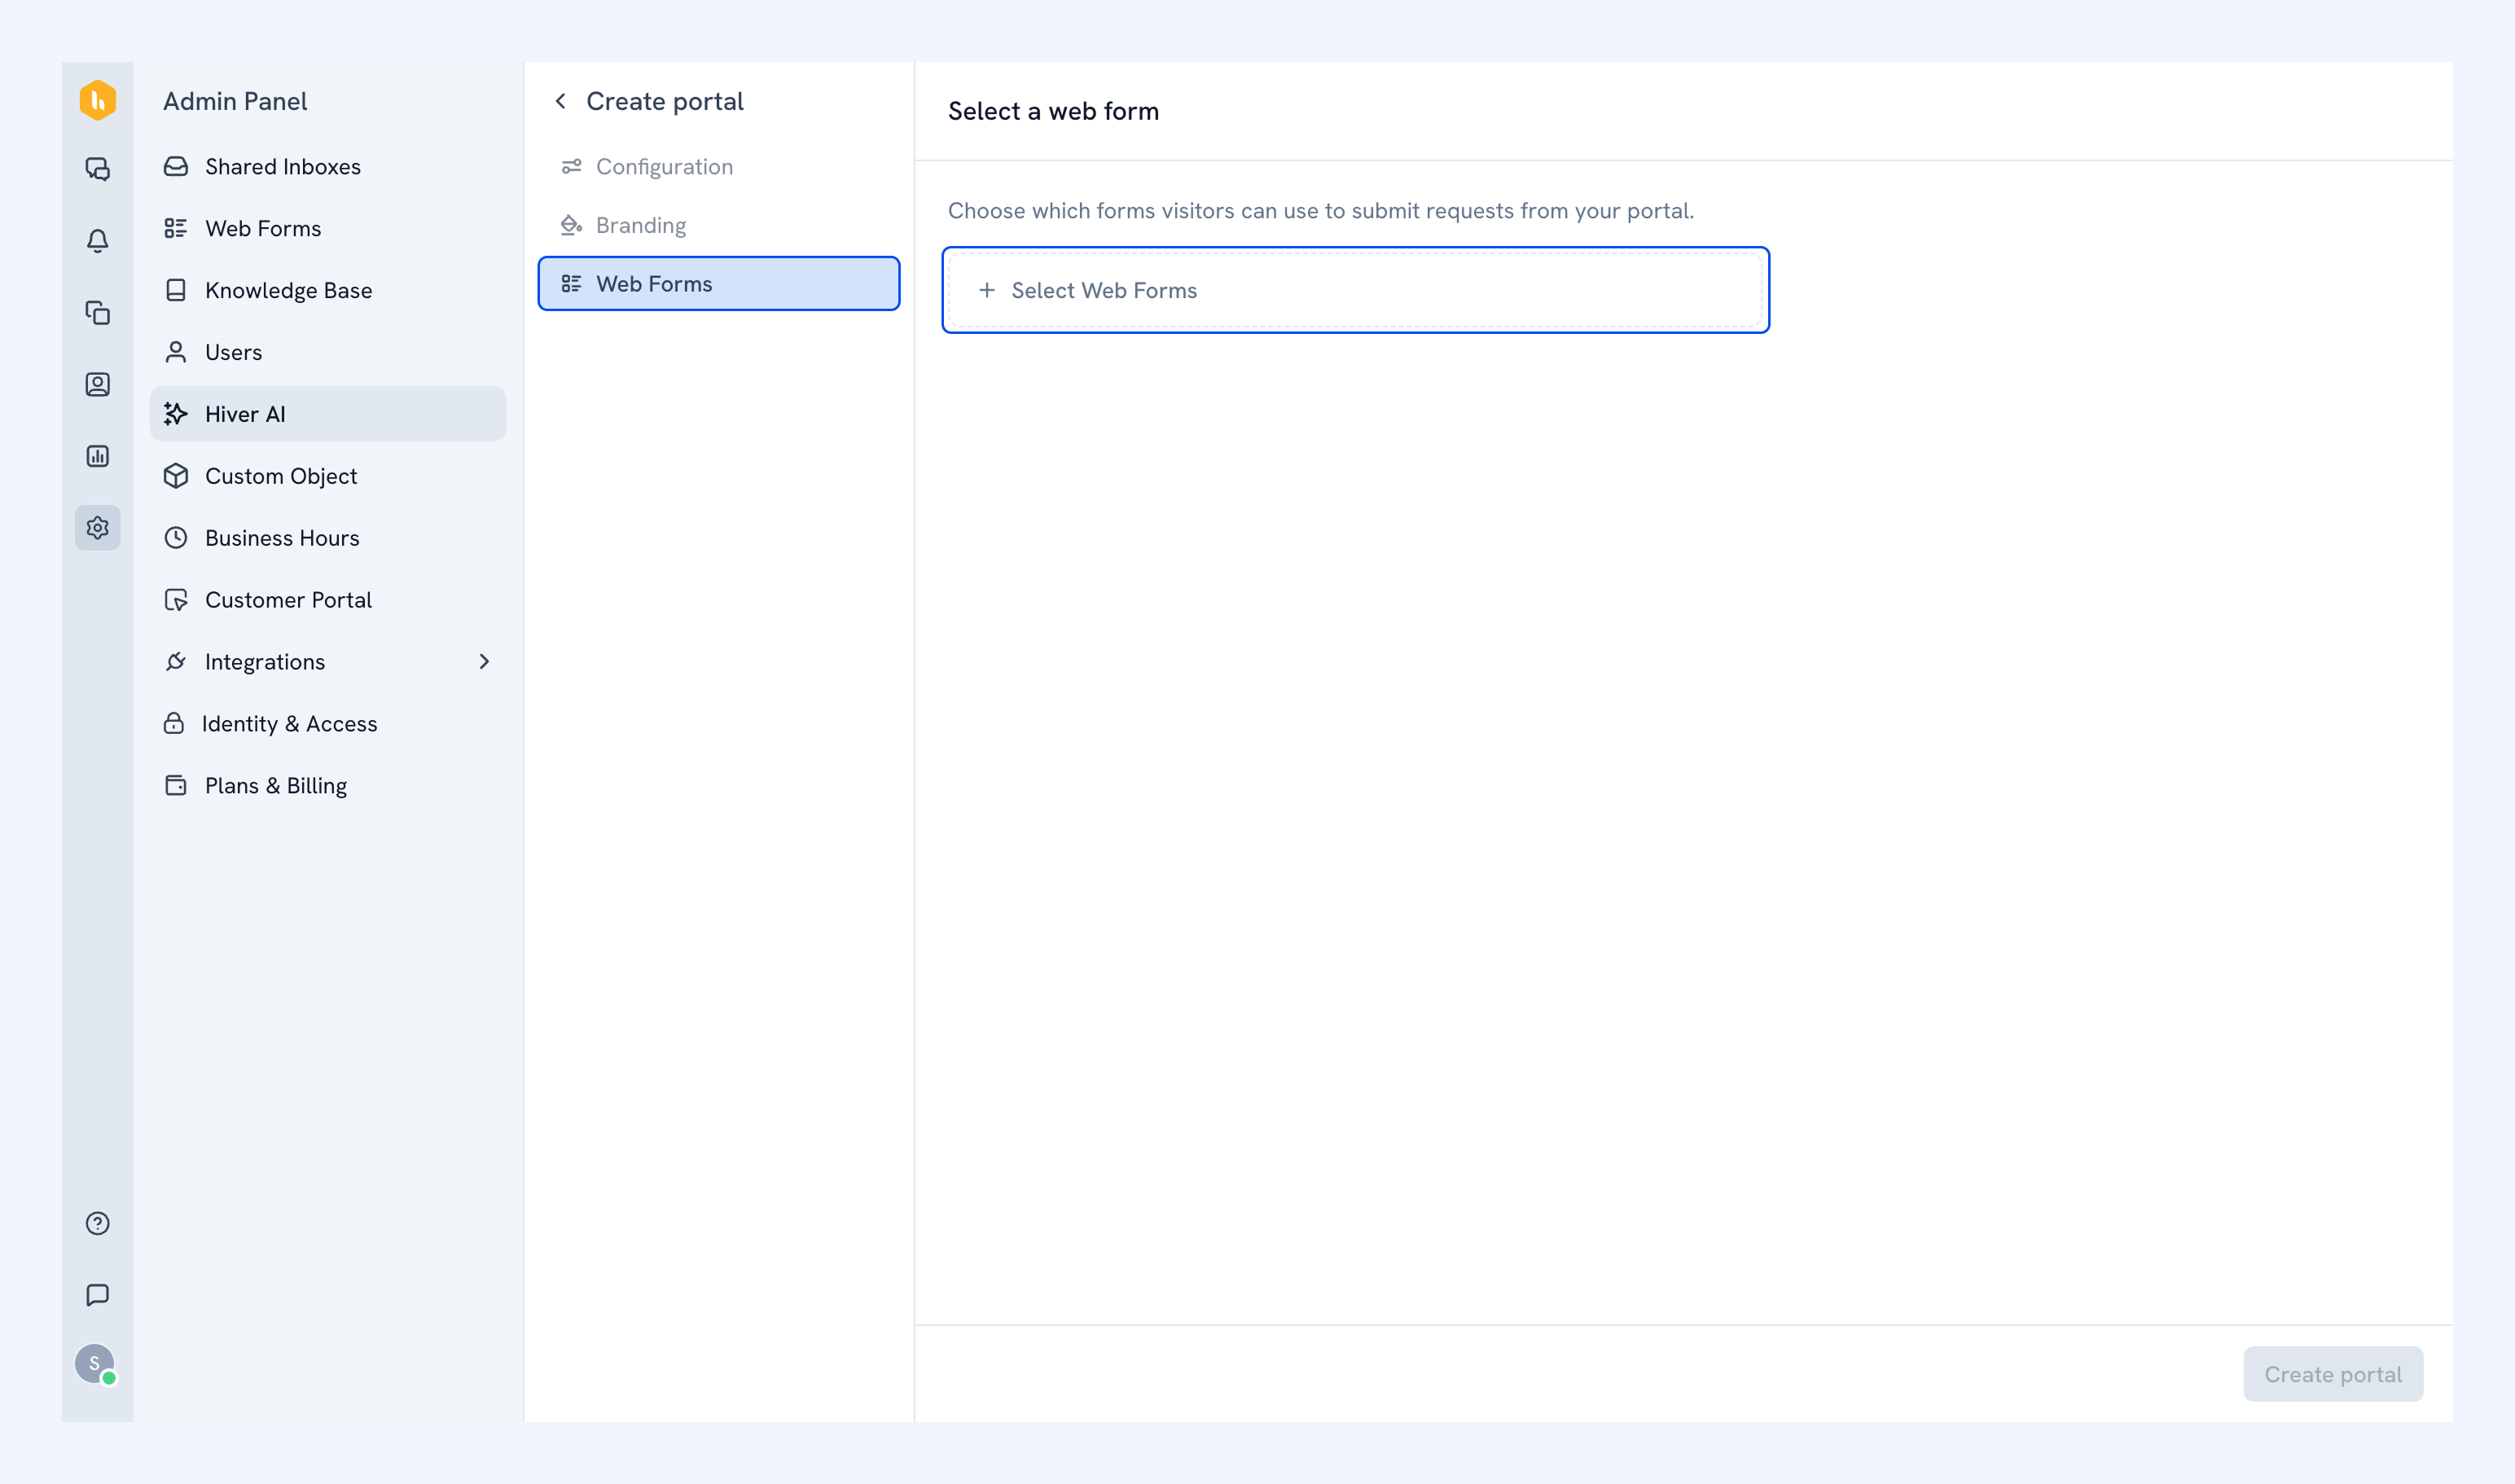
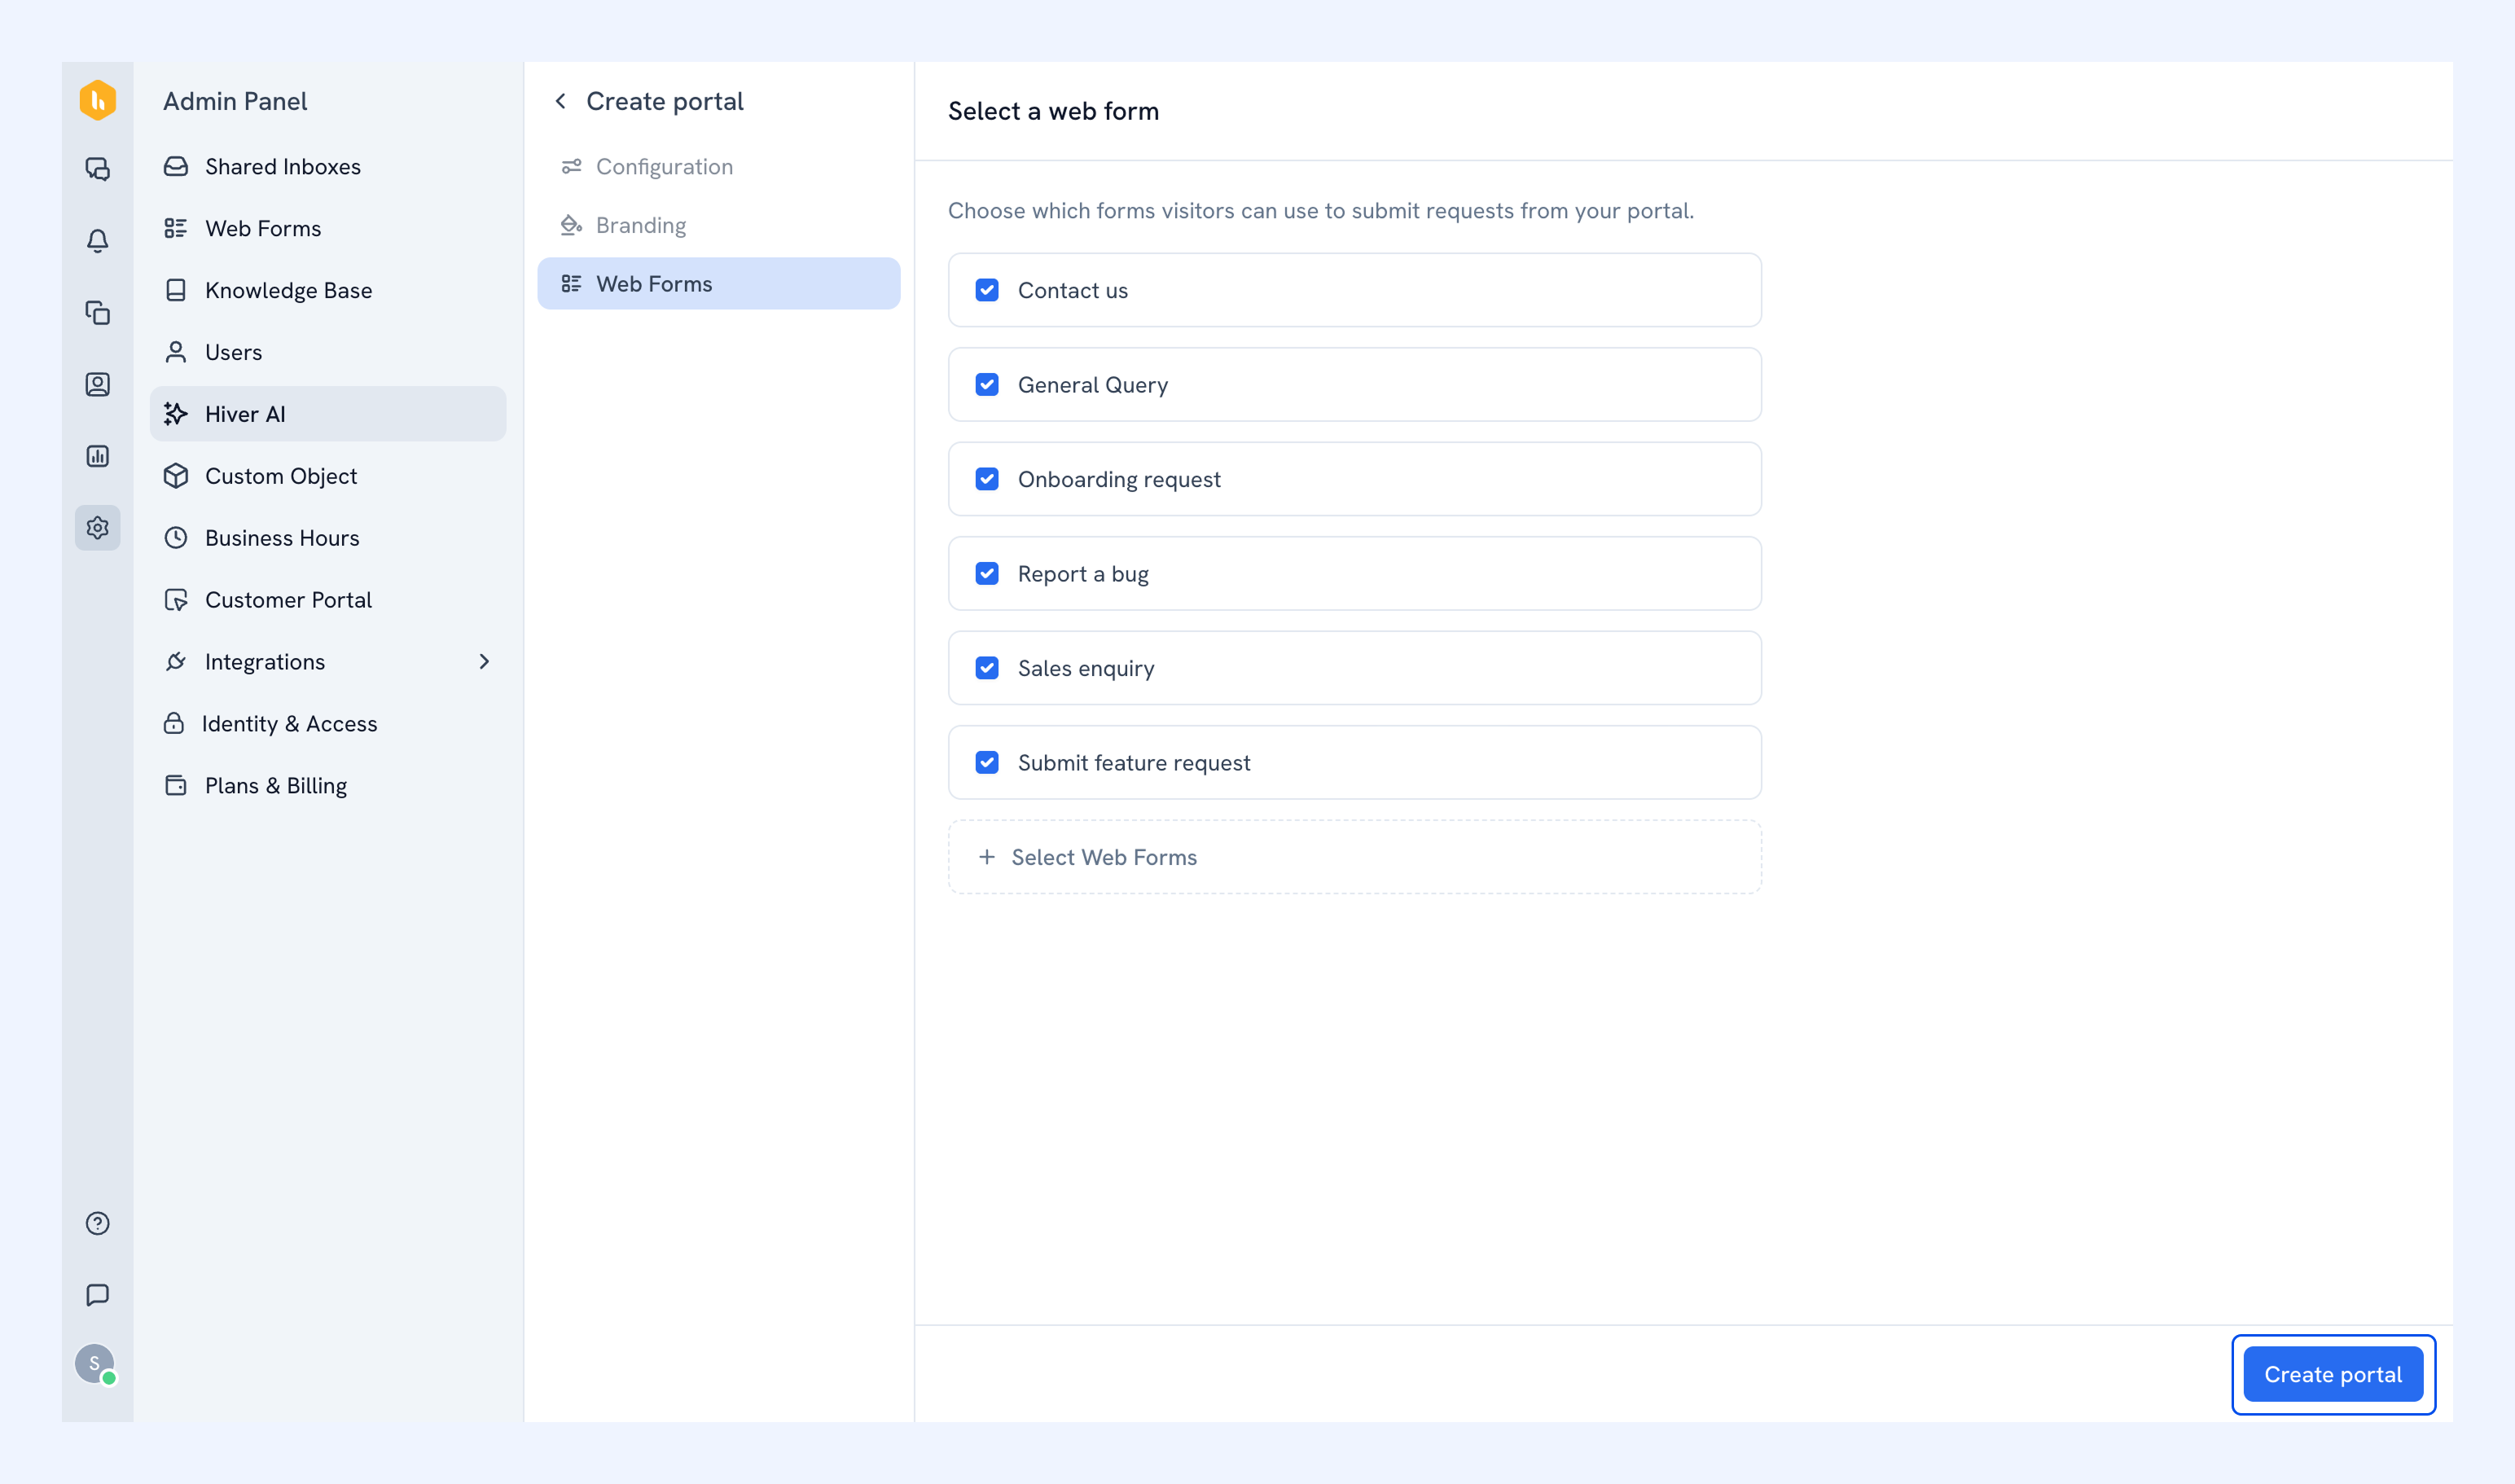
4. Lastly, choose the Web Forms you want customers to access on the portal. You can link multiple Web Forms to a single portal. Customers can switch between them when submitting a request.
Note: Submissions are sent to the Shared Inbox the Web Form is connected to.
To add Web Forms:
- Click Select Web Form.
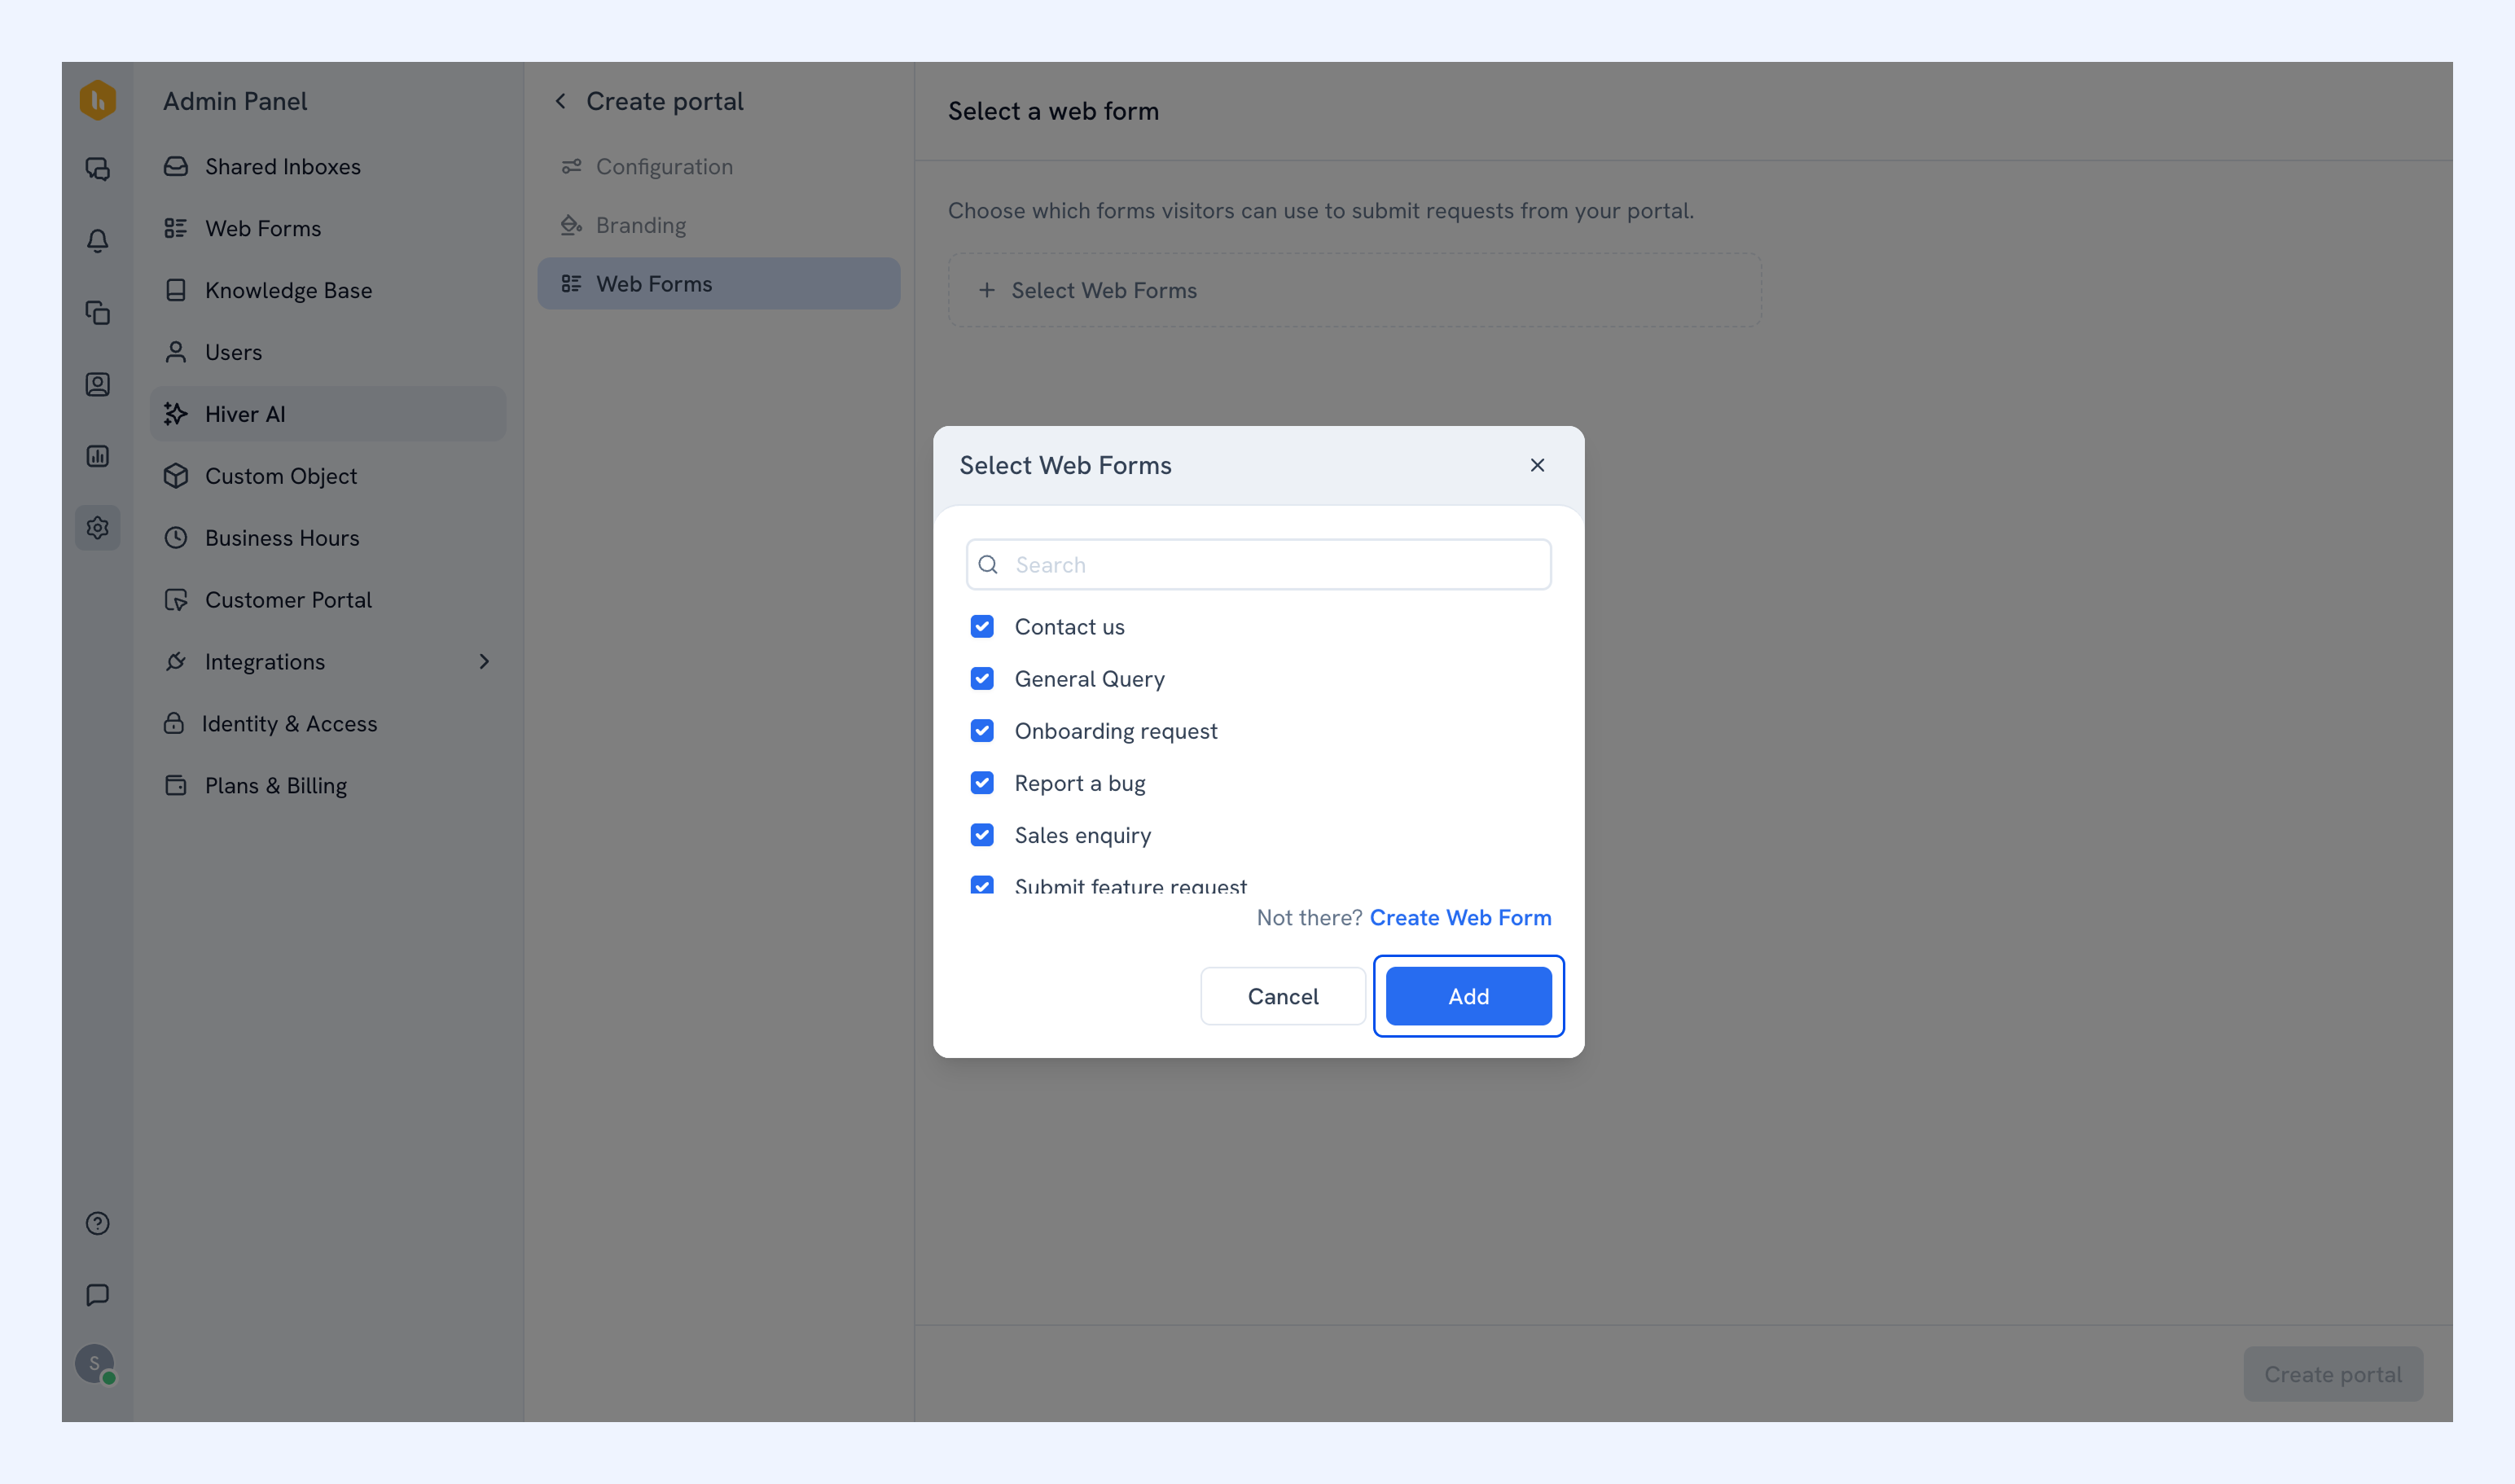
- Choose the ones you want to use, and click Add.
- If you need a Web Form that doesn't exist yet, click Create Web Form to build a new one.
5. Click Create portal to confirm your selection and launch your Customer Portal.
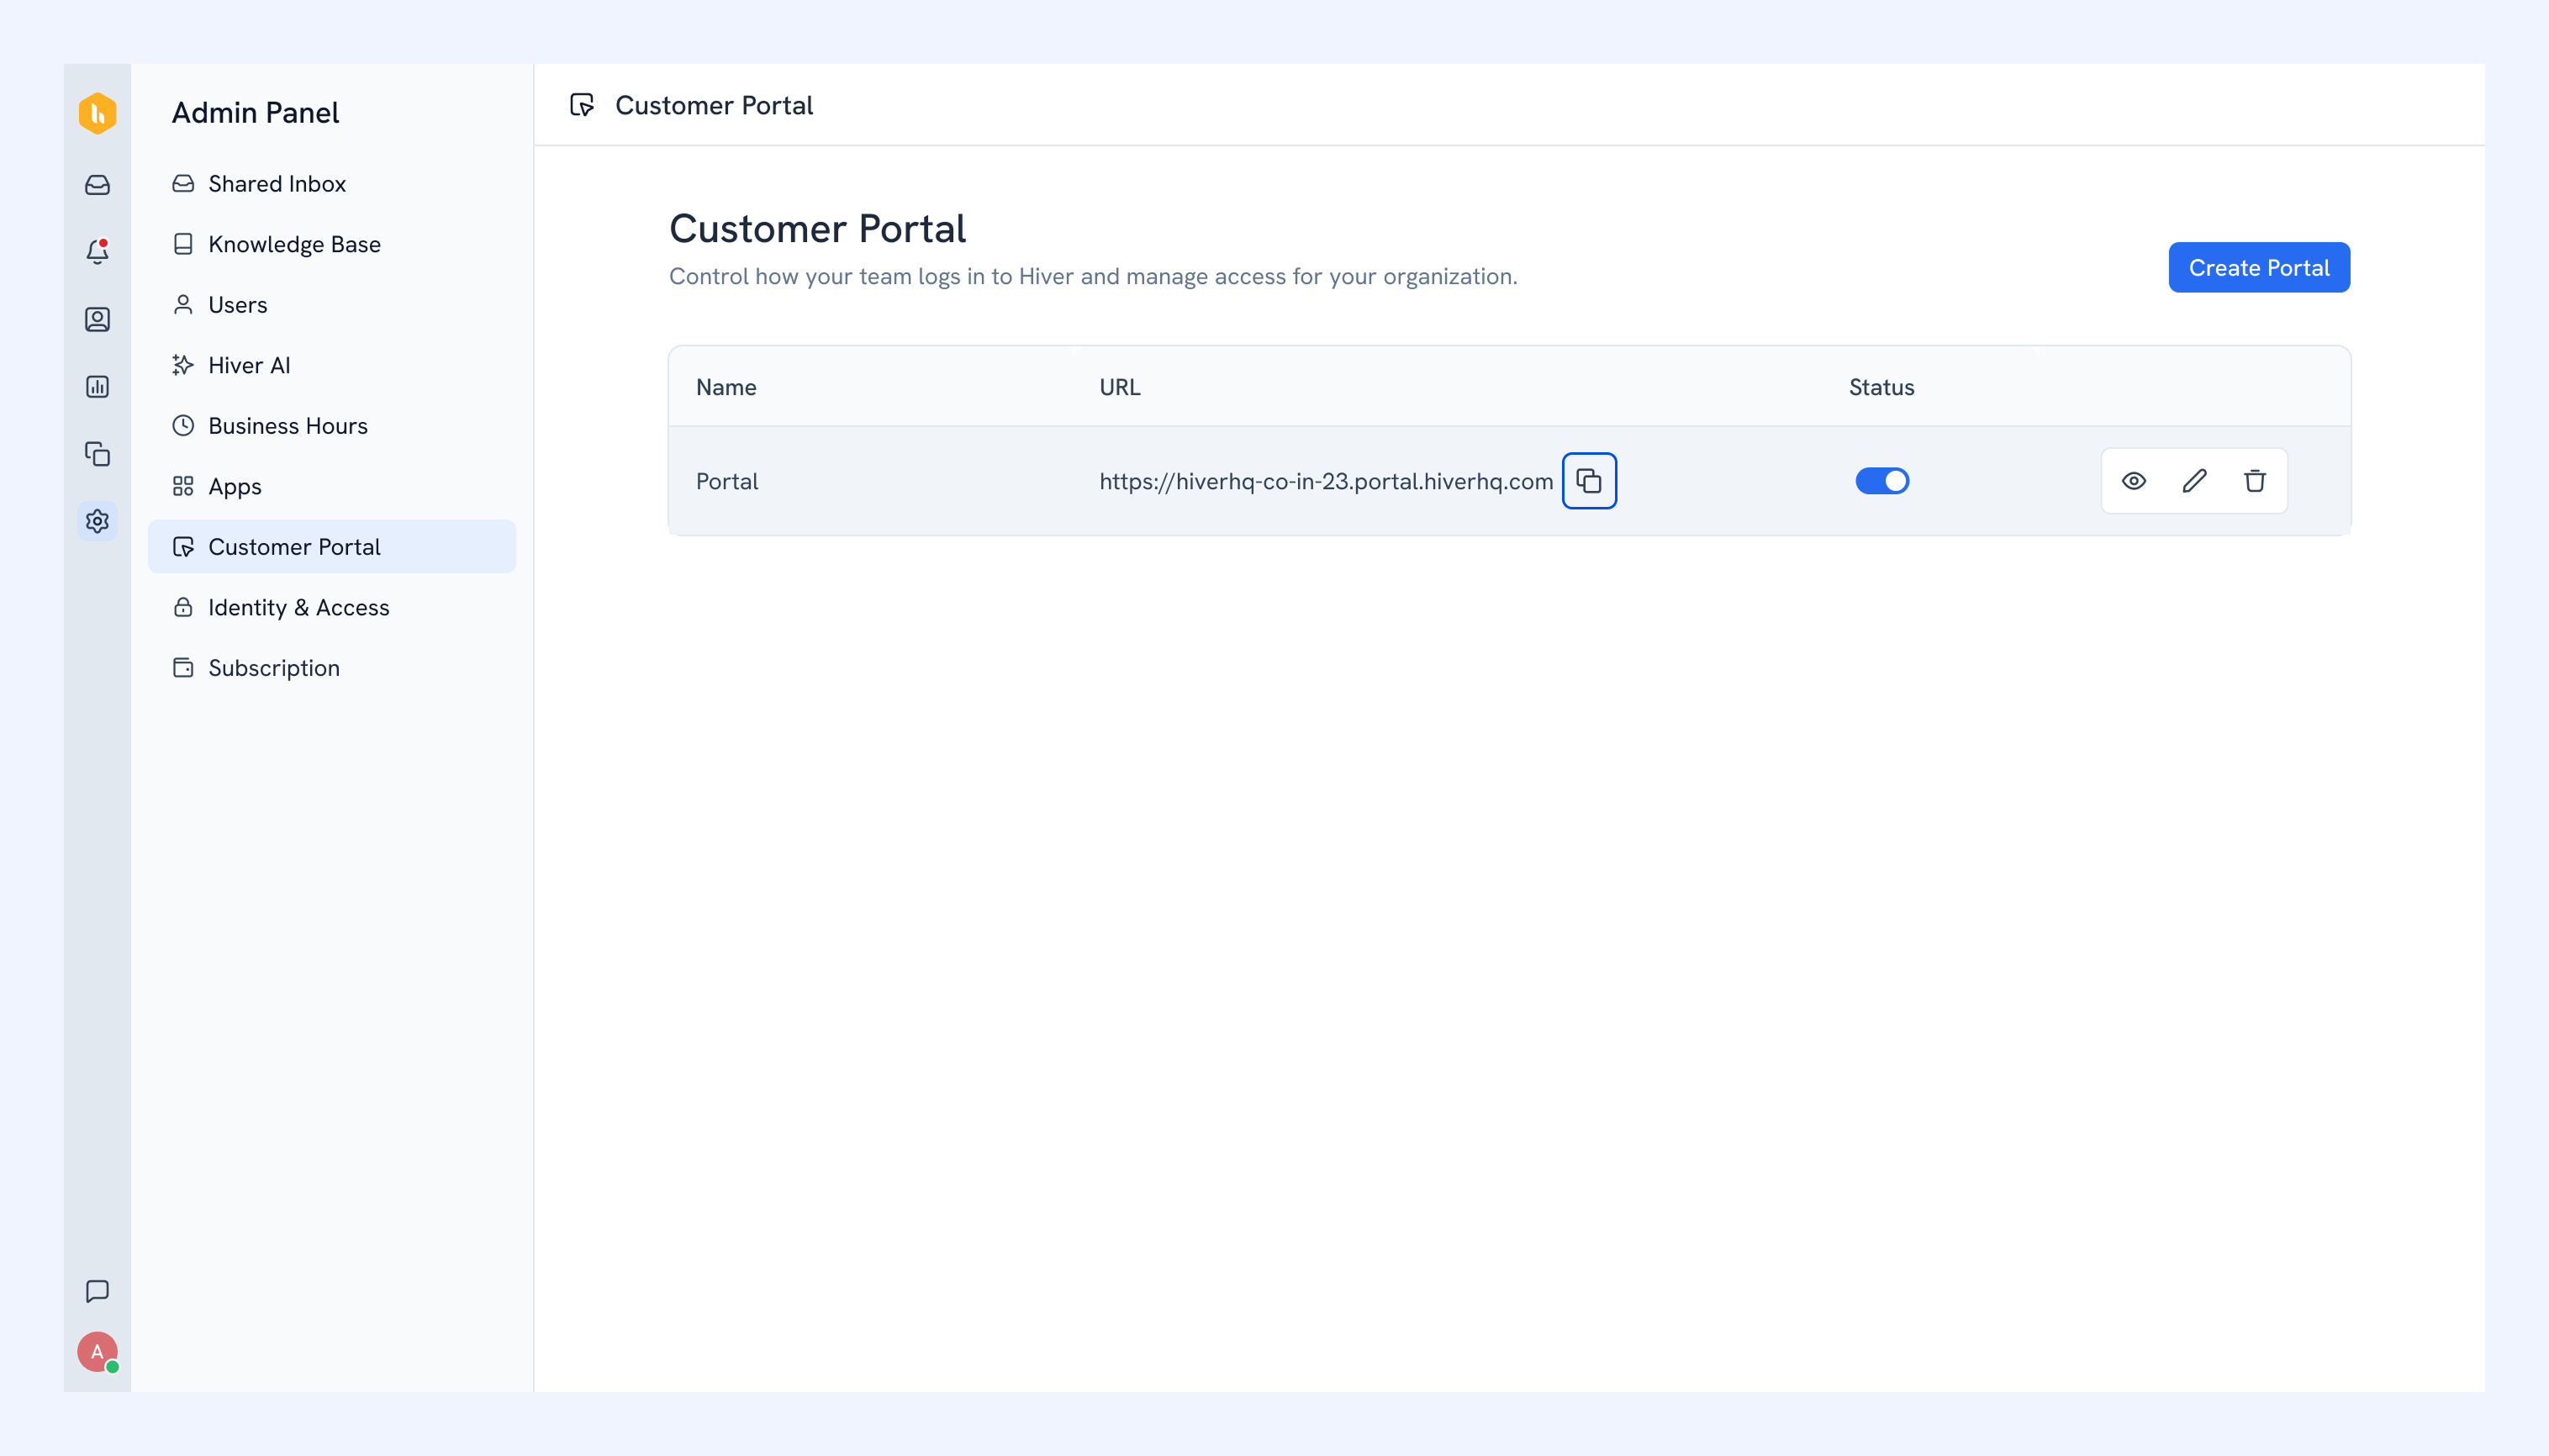
Your portal is live and ready to share with customers.
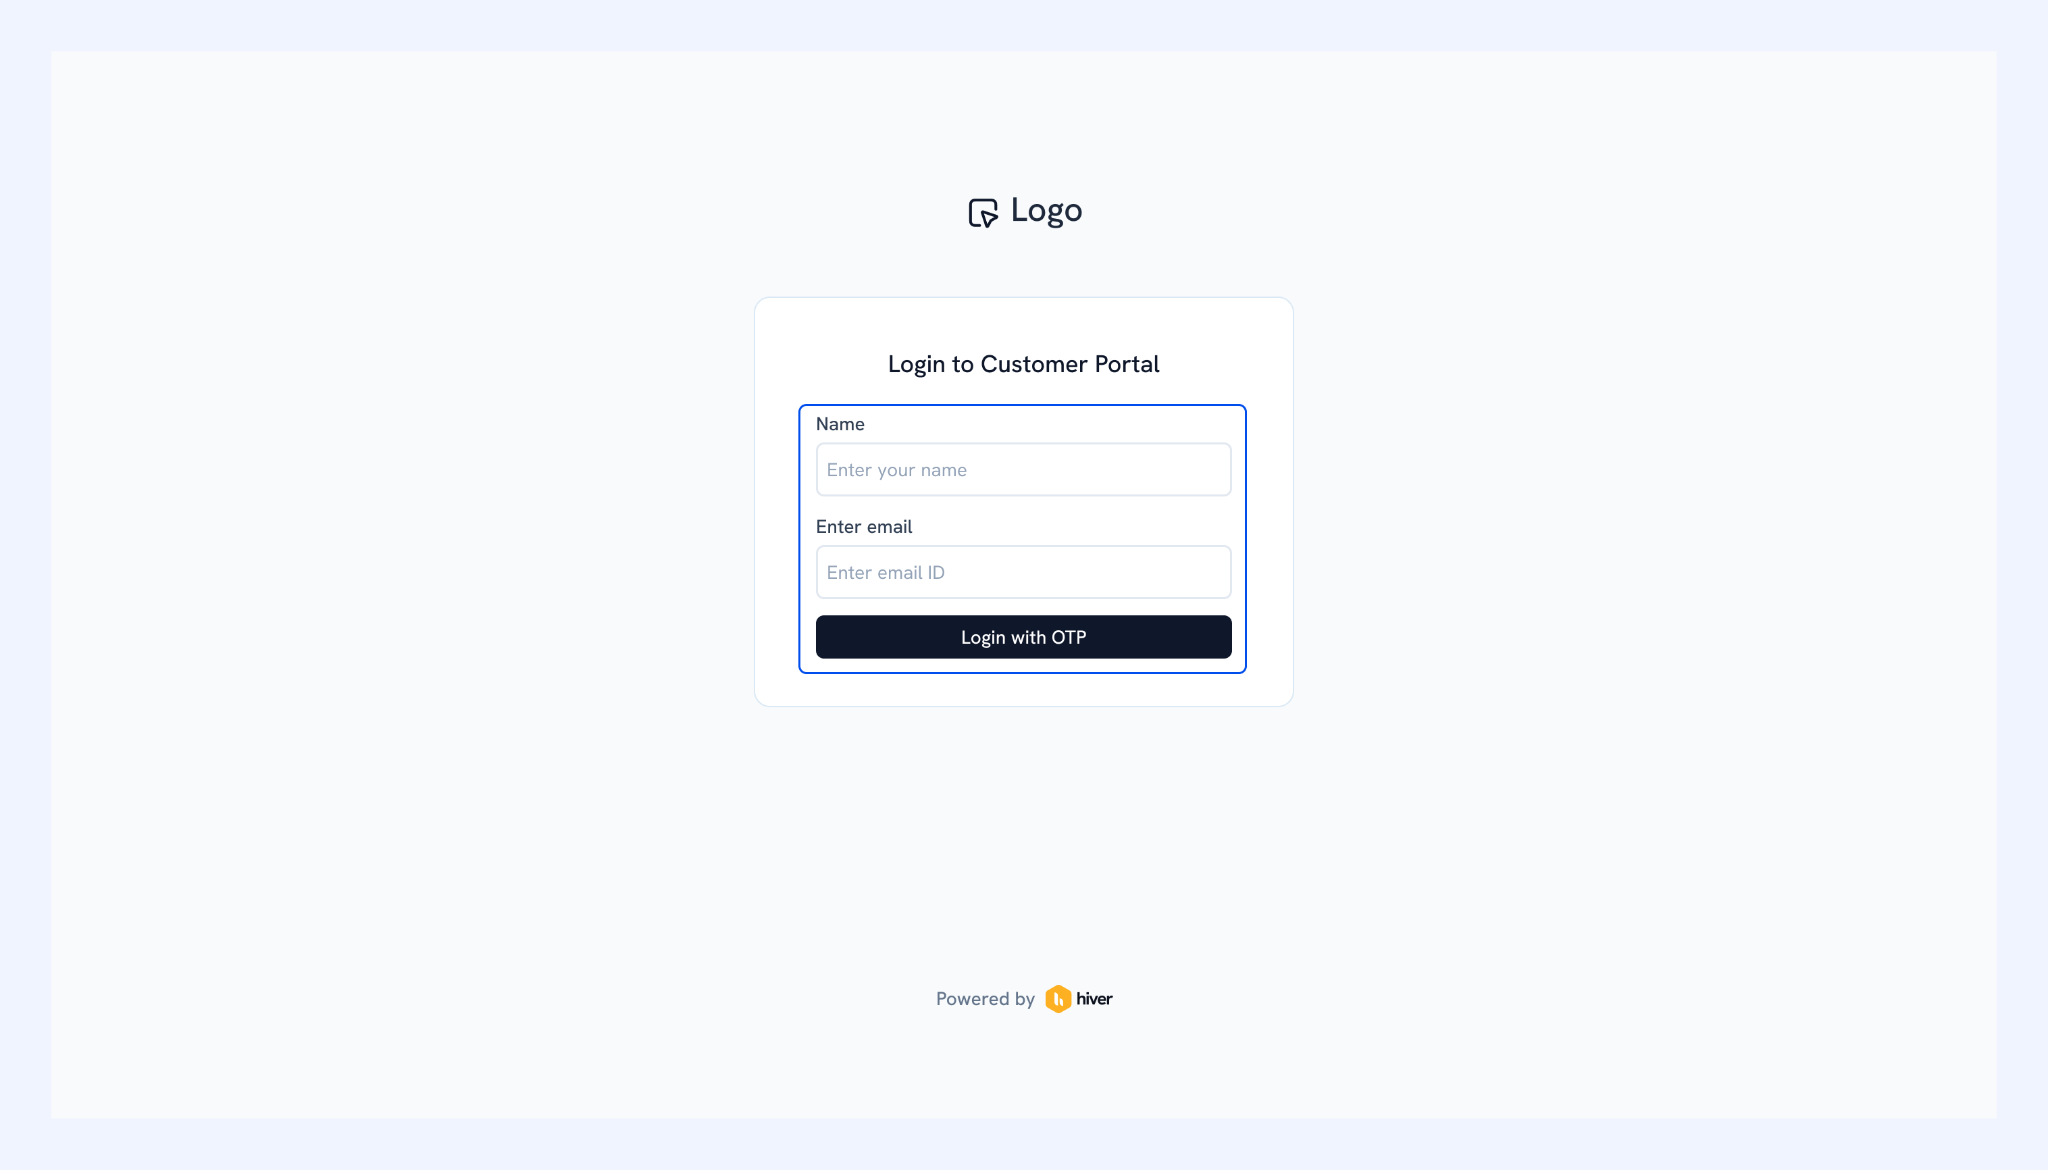
What your customers see in the portal
When customers visit the portal URL, they can log in with an email-based OTP.
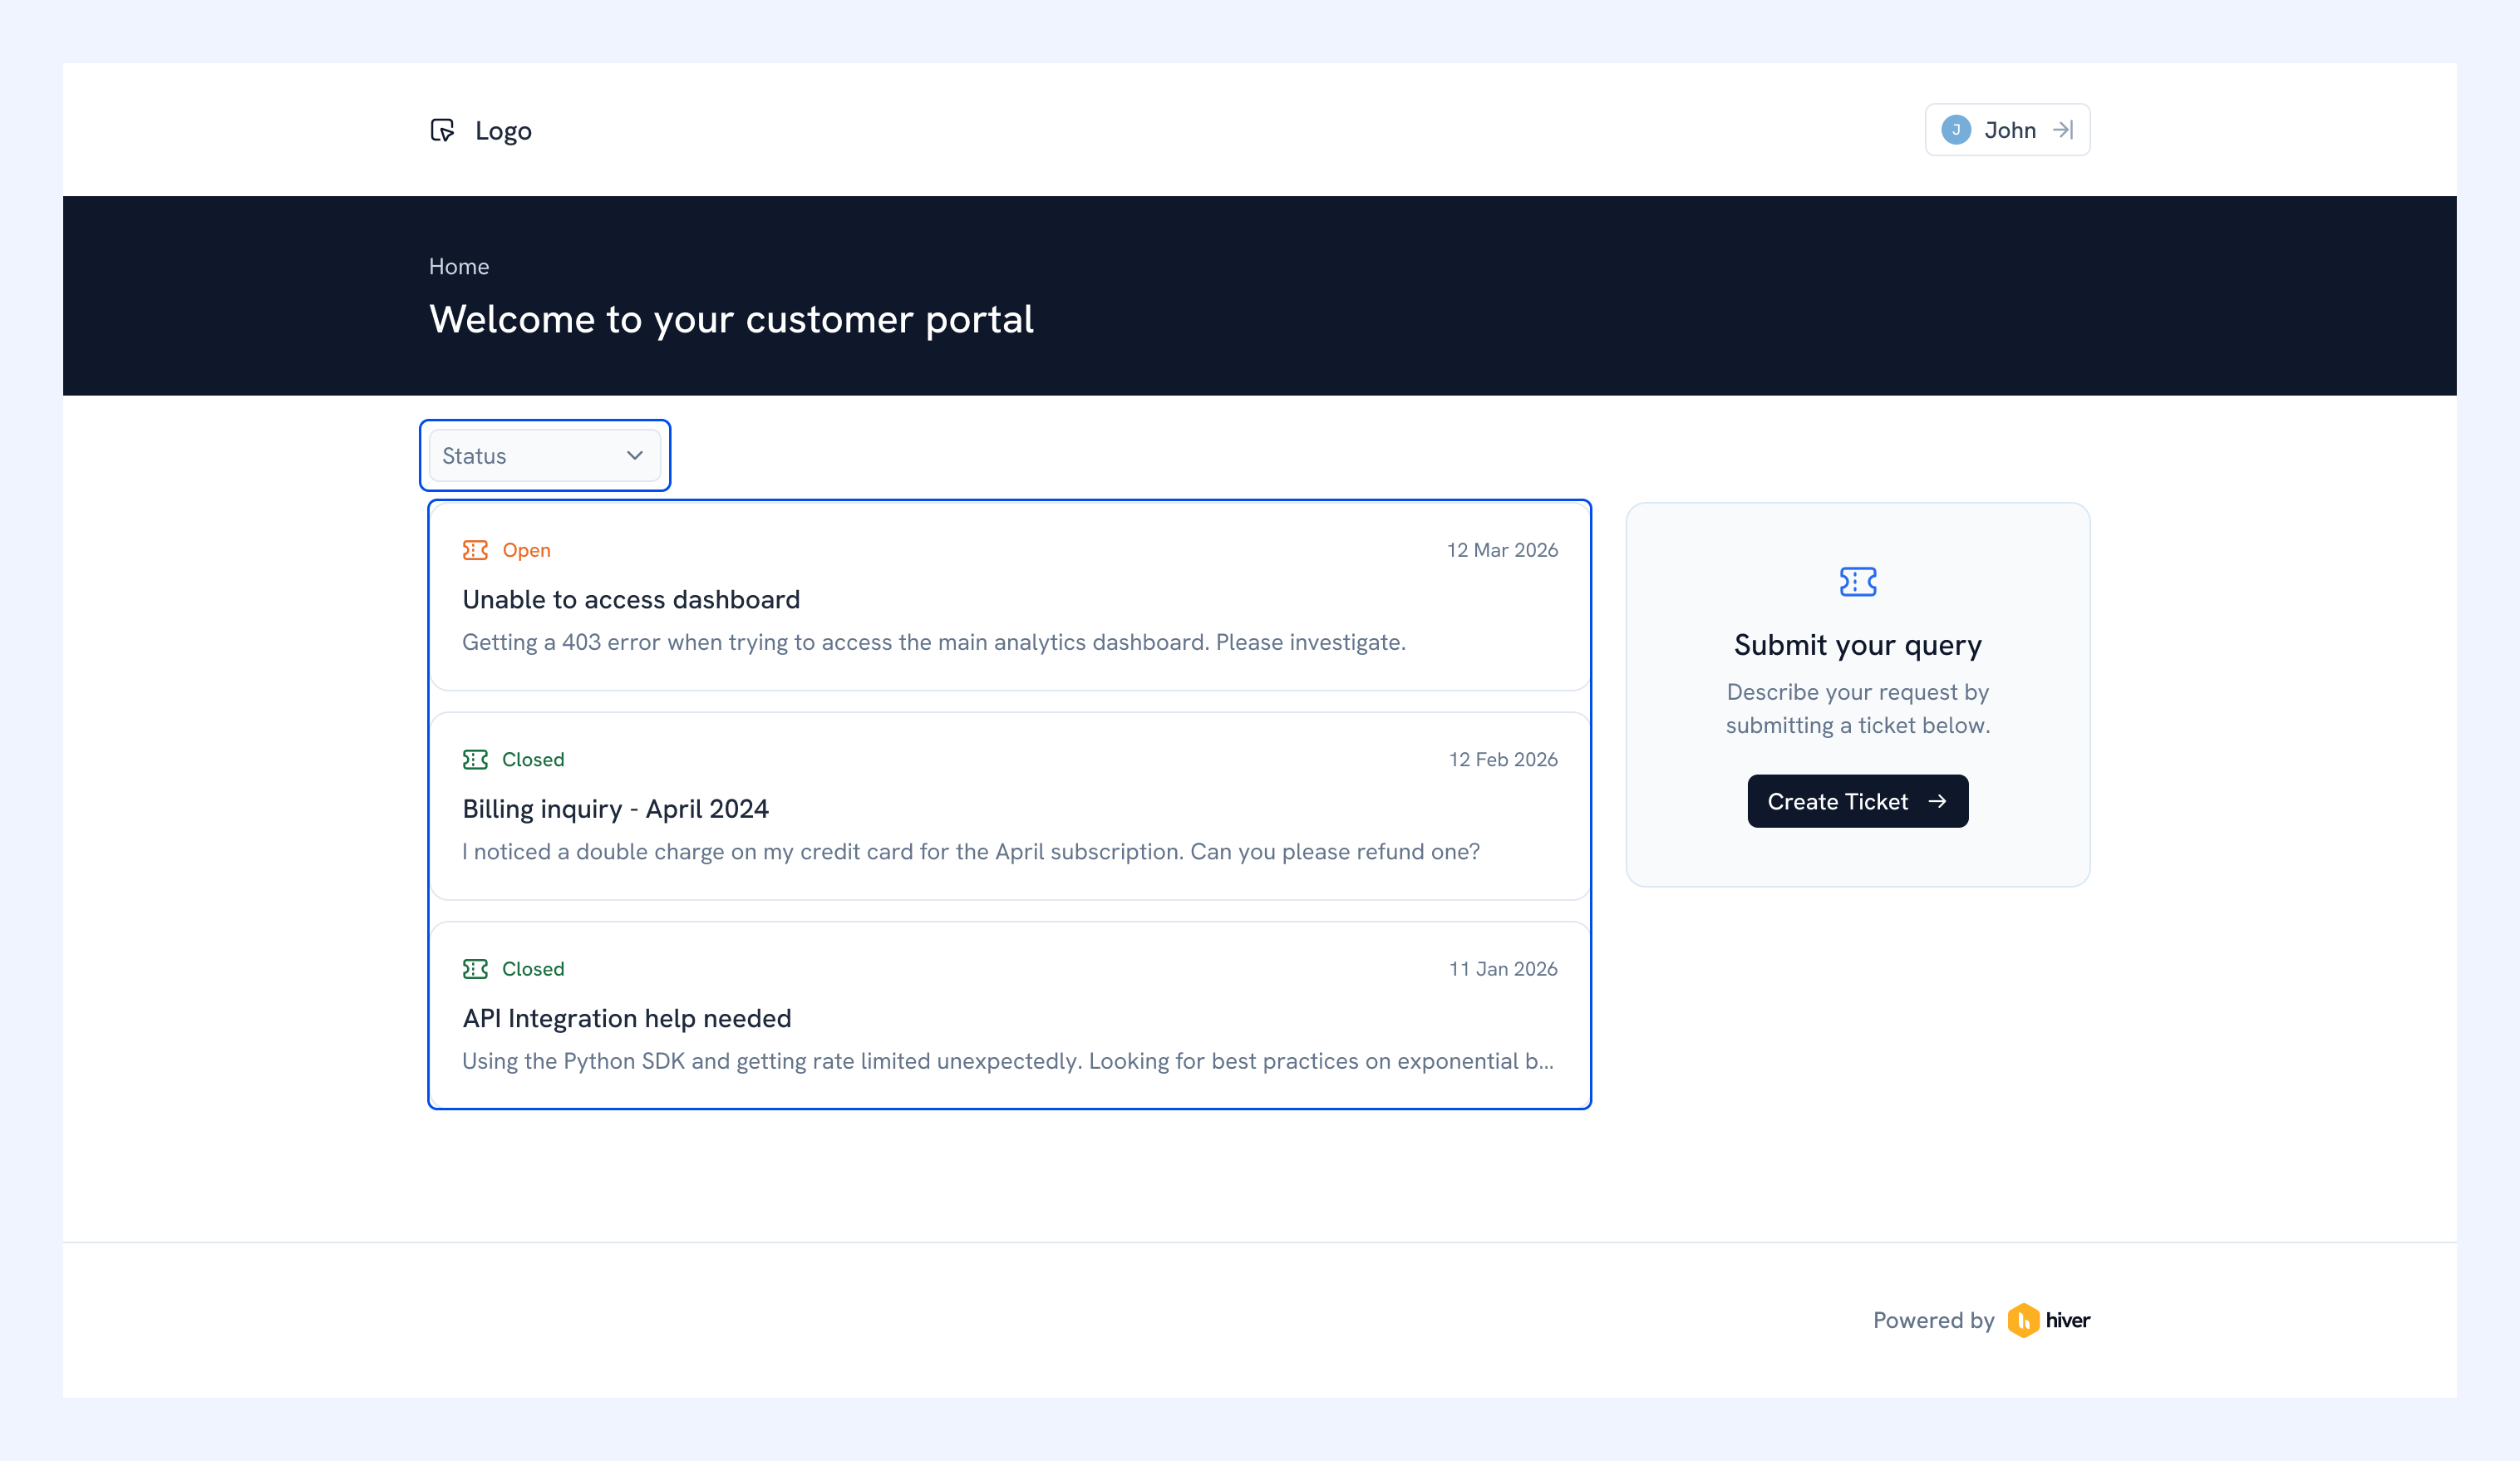
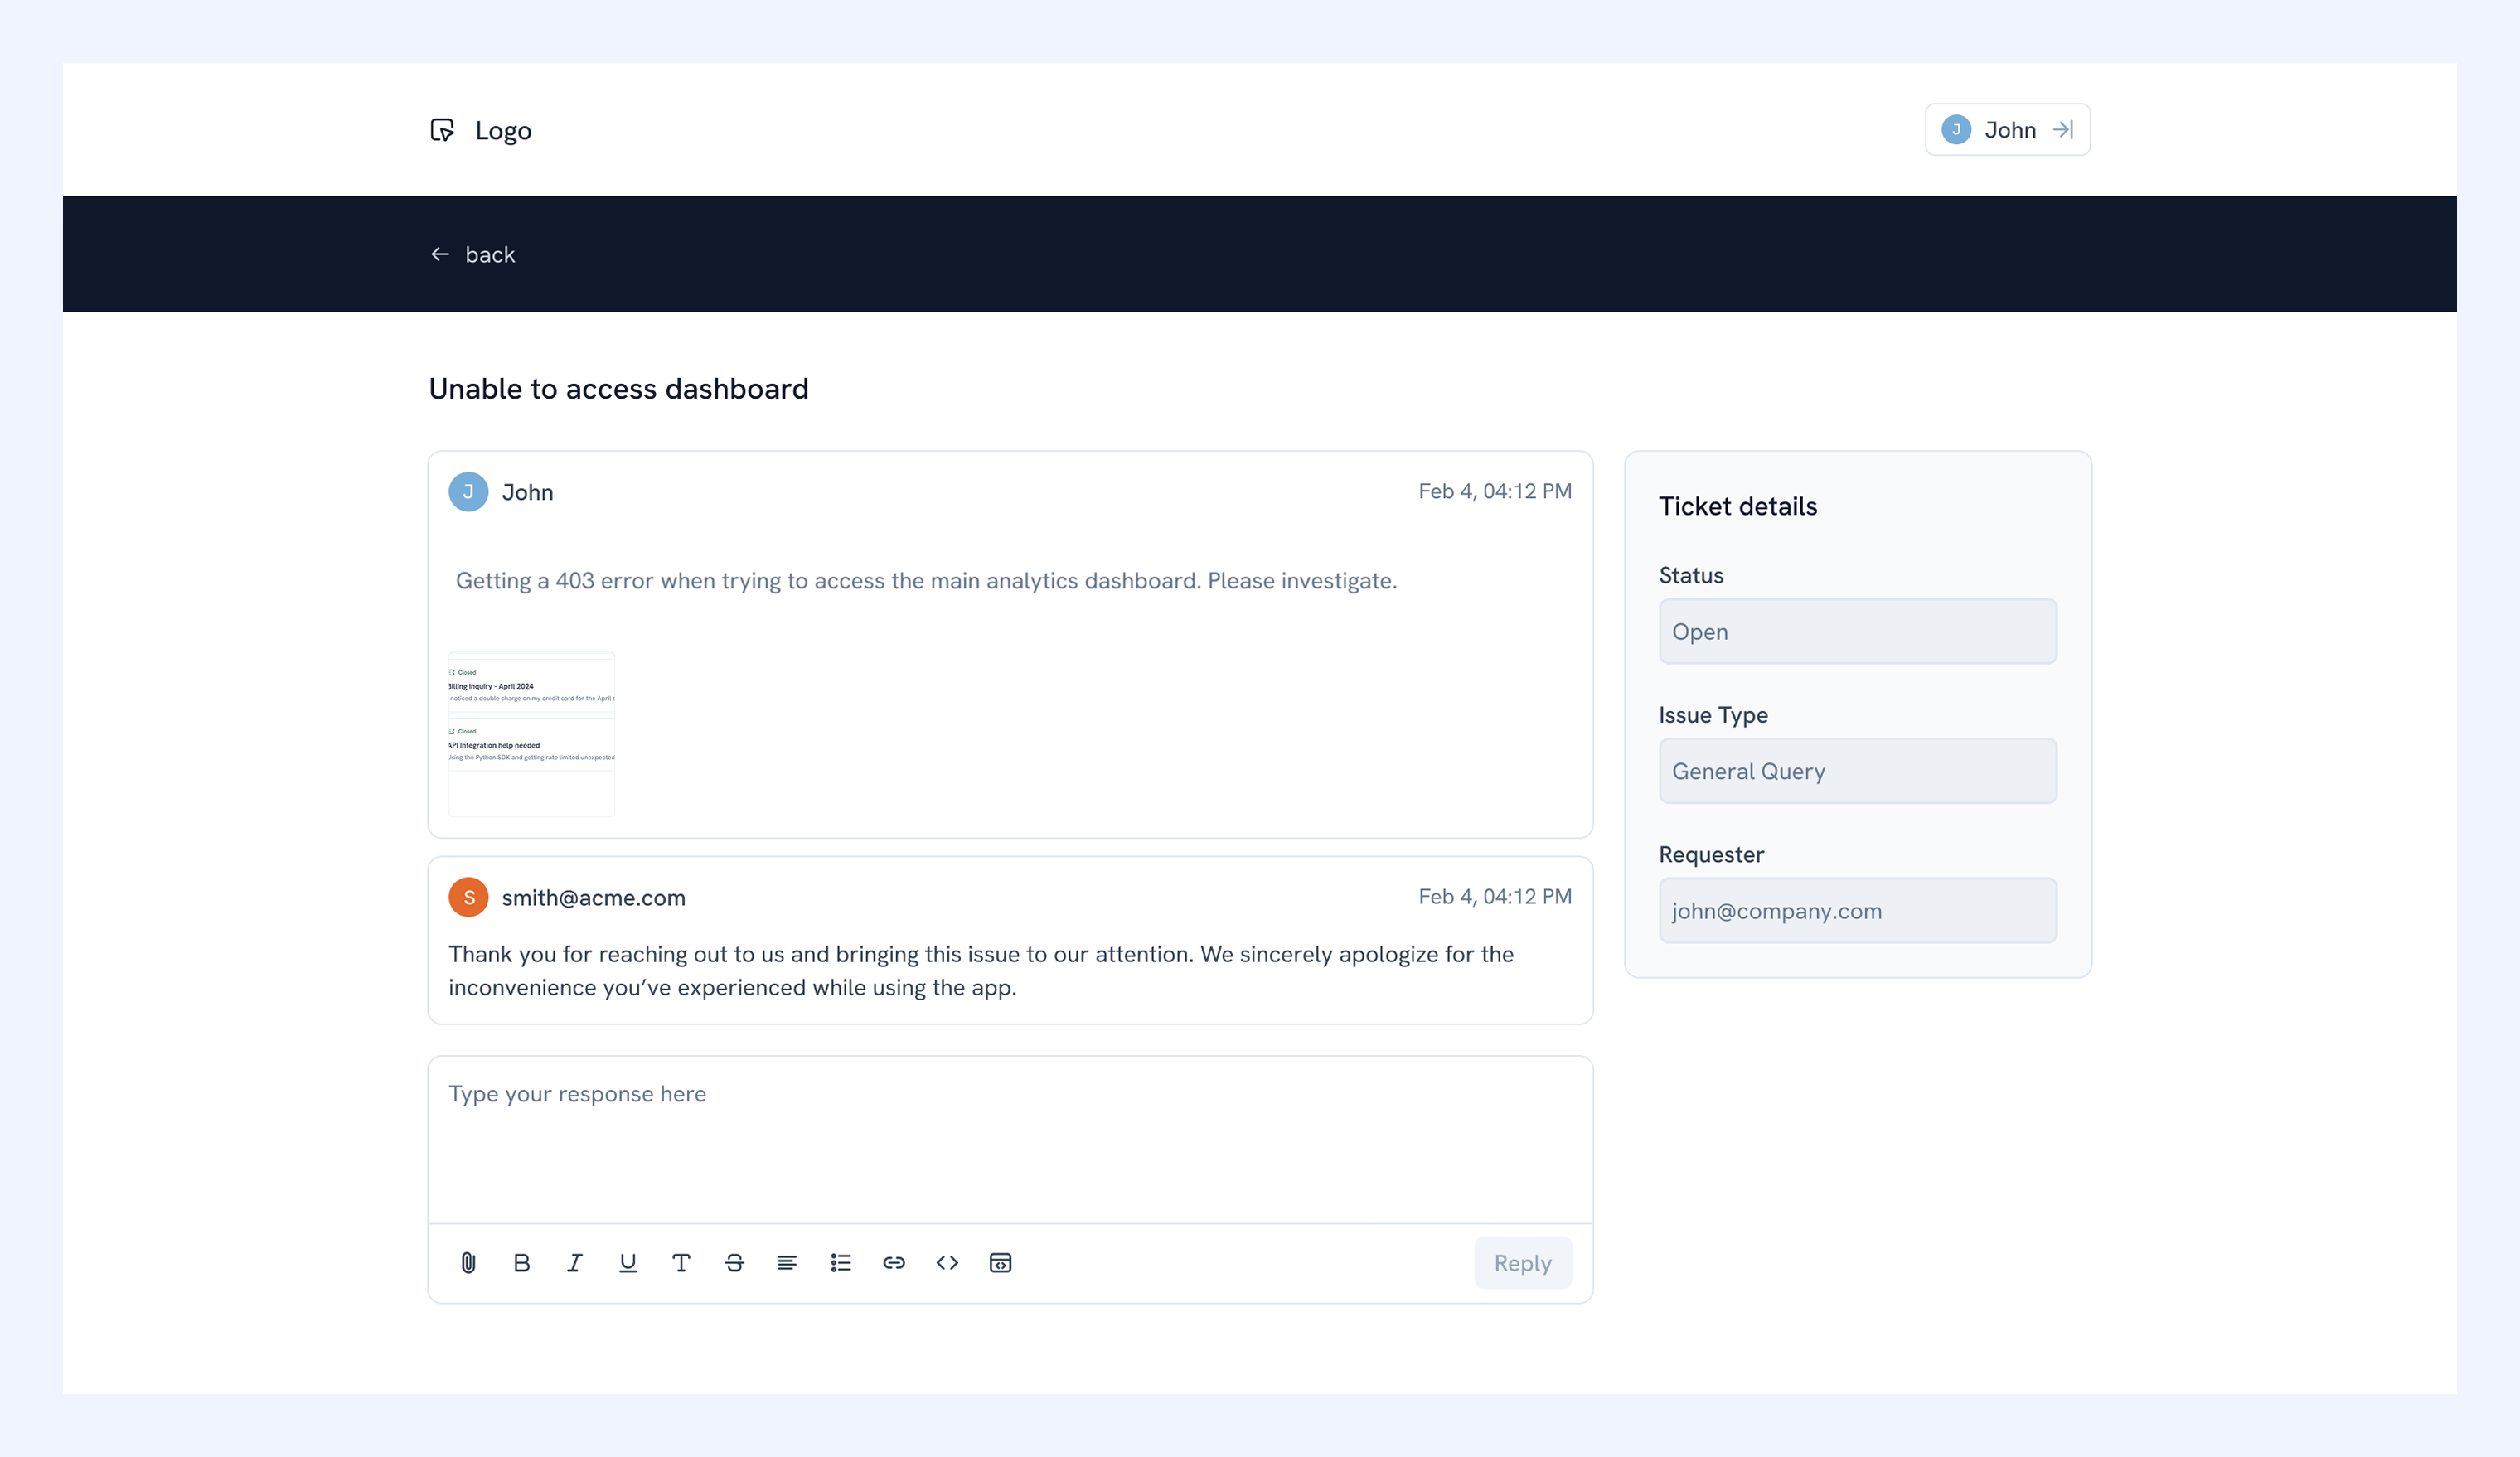
From the home page, customers can submit a new request using any Web Form linked, and view all the requests they have raised. They can also filter requests by status to find what they're looking for.
When a customer opens a request, they can see all the messages on it and reply directly to your team.
Managing your Customer Portal
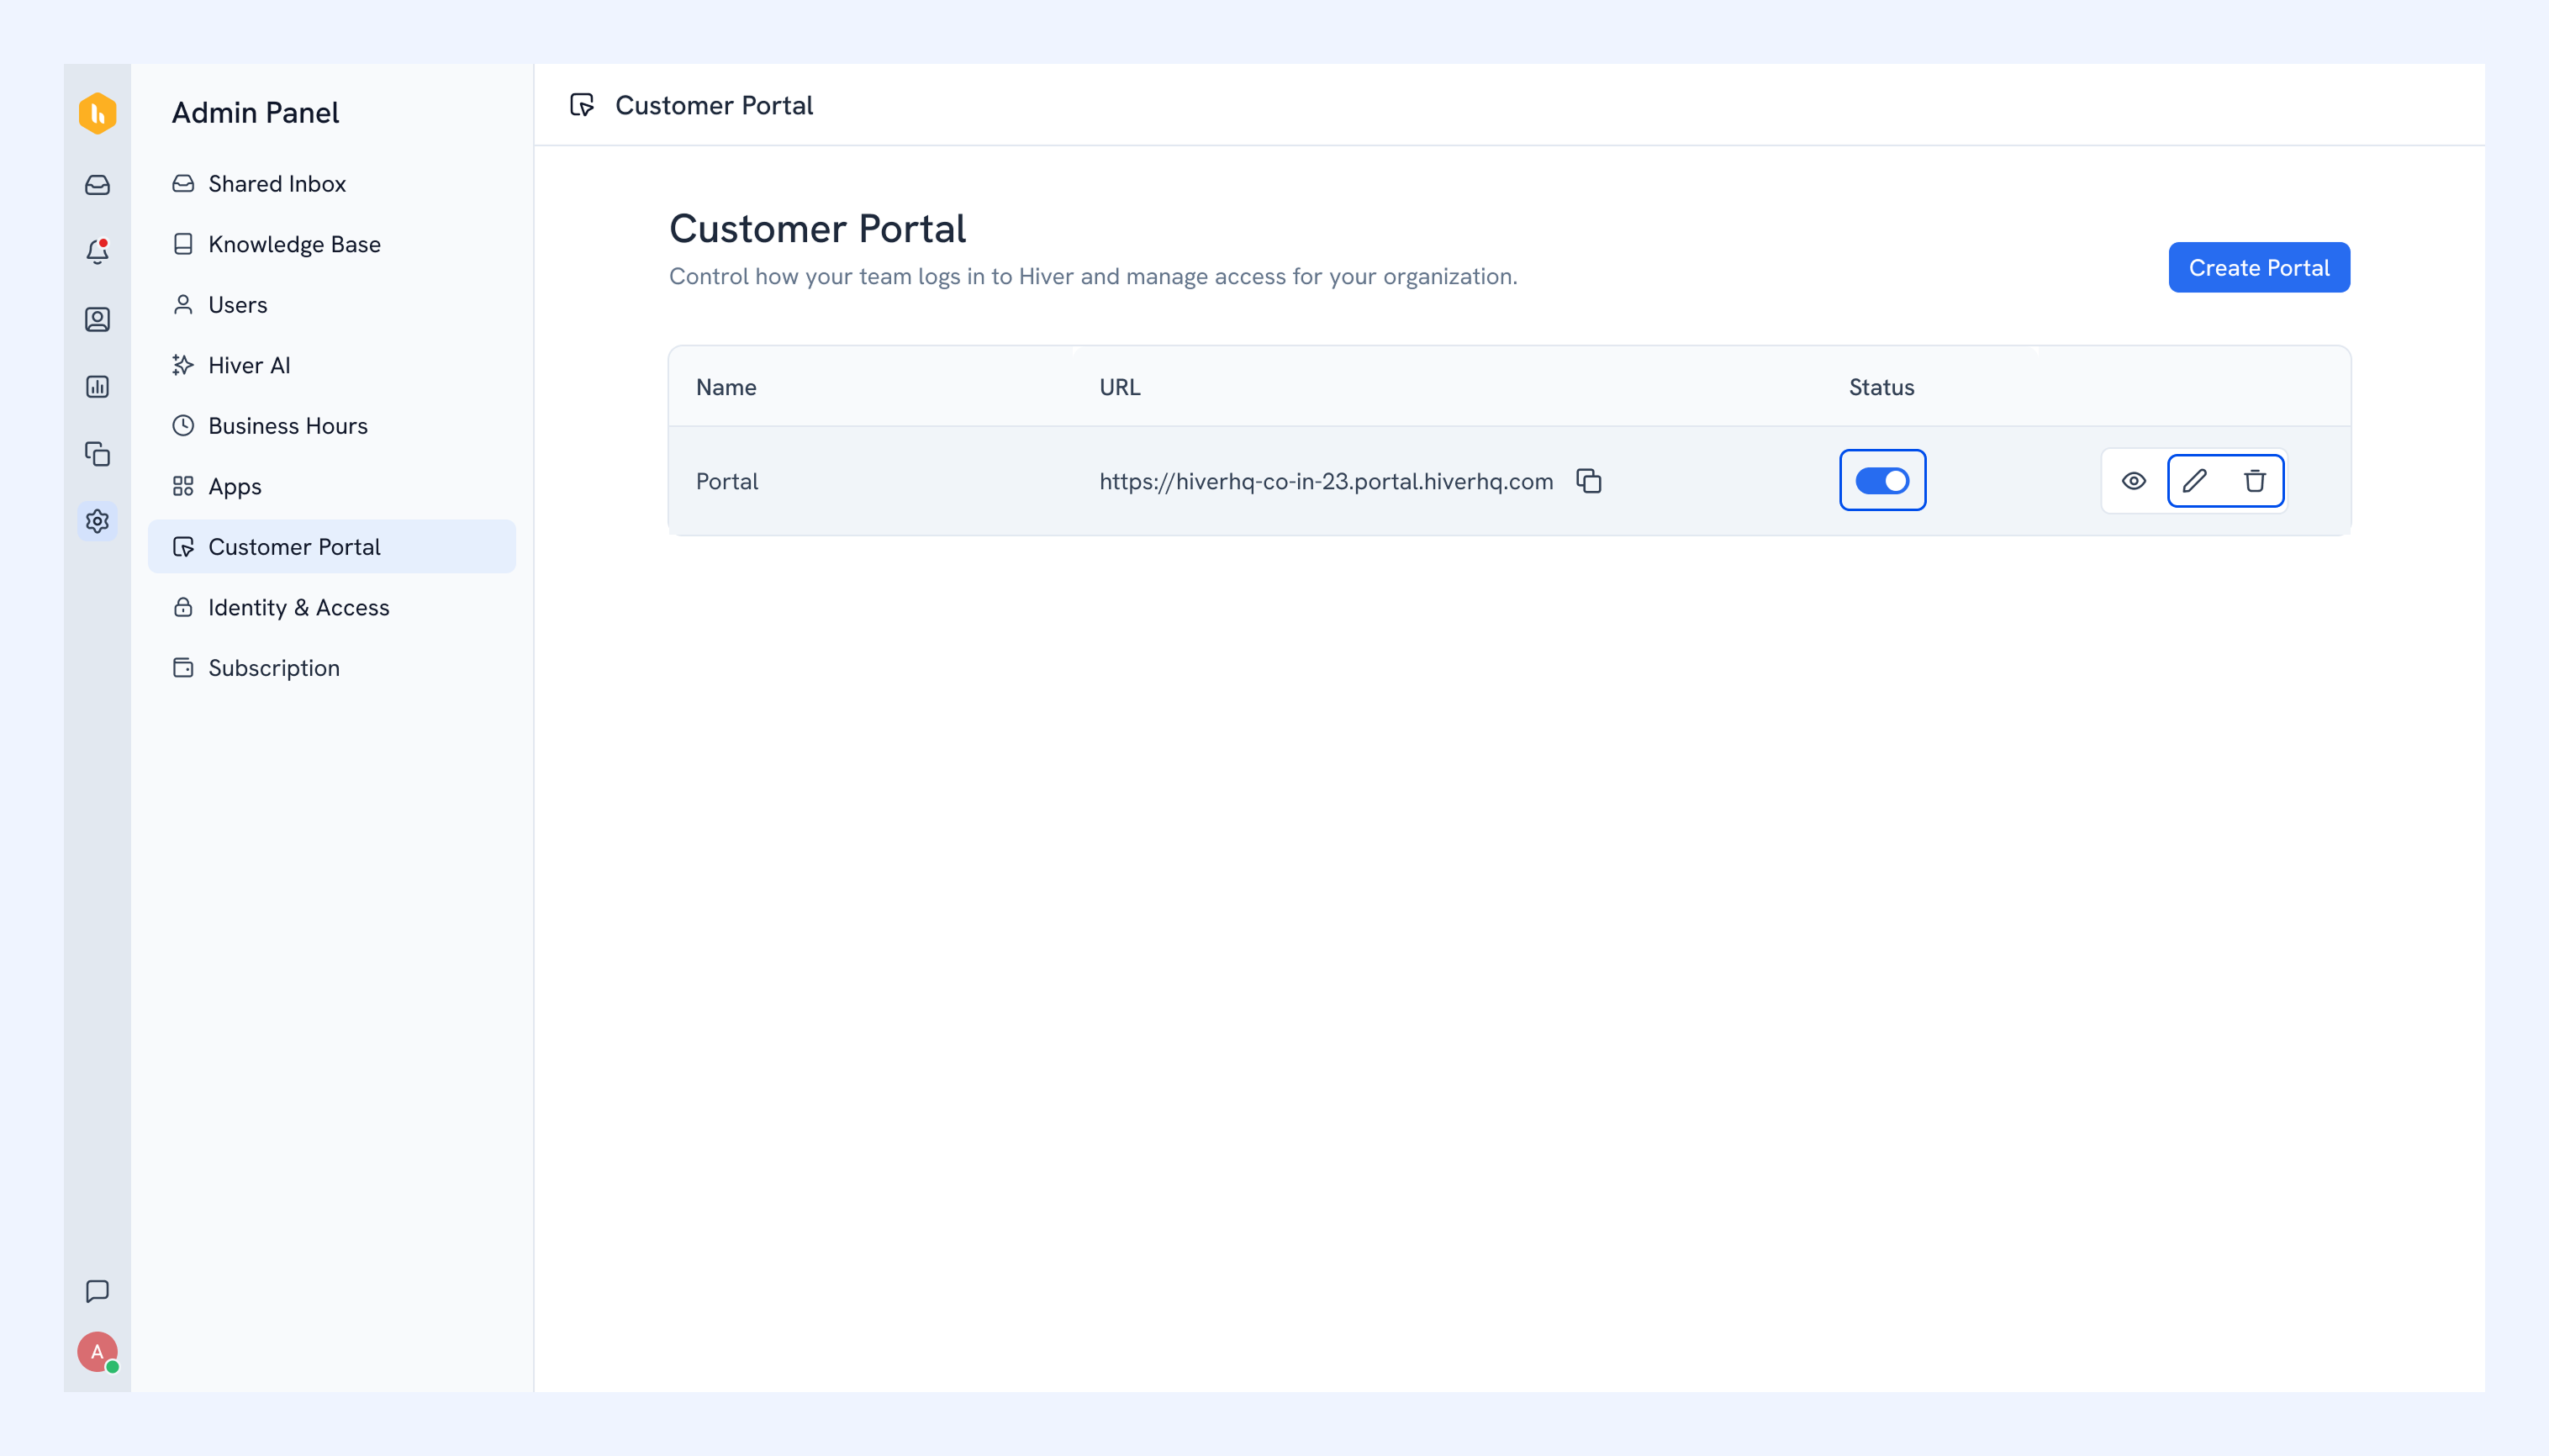
You can edit, disable, or delete a portal anytime from the Customer Portal list. Hover over a portal to see the available actions.
Note: Deleting a portal is permanent and can’t be undone.
FAQs
Can I create multiple Customer Portals?
Yes, you can create and manage multiple portals. This is useful if you want separate portals for different brands, products, or customer segments.
Can I edit a portal after creating it?
Yes, you can update the branding and linked Web Forms at any time. However, you can't change the portal URL once it's created.
What happens to existing Tickets if I disable a portal?
Existing Tickets remain in their Shared Inbox and stay accessible to your team. Customers won't be able to access the portal URL until you re-enable it. Once re-enabled, customers can pick up their conversations where they left off.
Can I delete a Web Form linked to a Customer Portal?
You can't delete a Web Form while it's linked to a Customer Portal. To delete the Web Form, unlink it from the portal first.
Can customers see Tickets created by an agent on their behalf?
Yes. Customers can see all Tickets where their email is the contact, whether the Ticket was submitted through the portal or created by an agent.