Creating Web Forms
Web Forms help you standardize how customer requests are collected and tracked in Hiver.
You can create Web Forms for common request types such as bug reports, feature requests, onboarding help, or any other workflow where your team needs specific information upfront.
Each submission automatically becomes a Ticket in the connected Shared Inbox, so your team can assign ownership, collaborate internally, track status, and respond to the customer from one place.
This guide covers how to create Web Forms, connect them to Shared Inboxes, and manage form submissions.
Prerequisites
Before you start creating Web Forms, make sure you have:
- Admin permissions in Hiver Omni
- At least one active Email Inbox that can receive Web Form submissions.
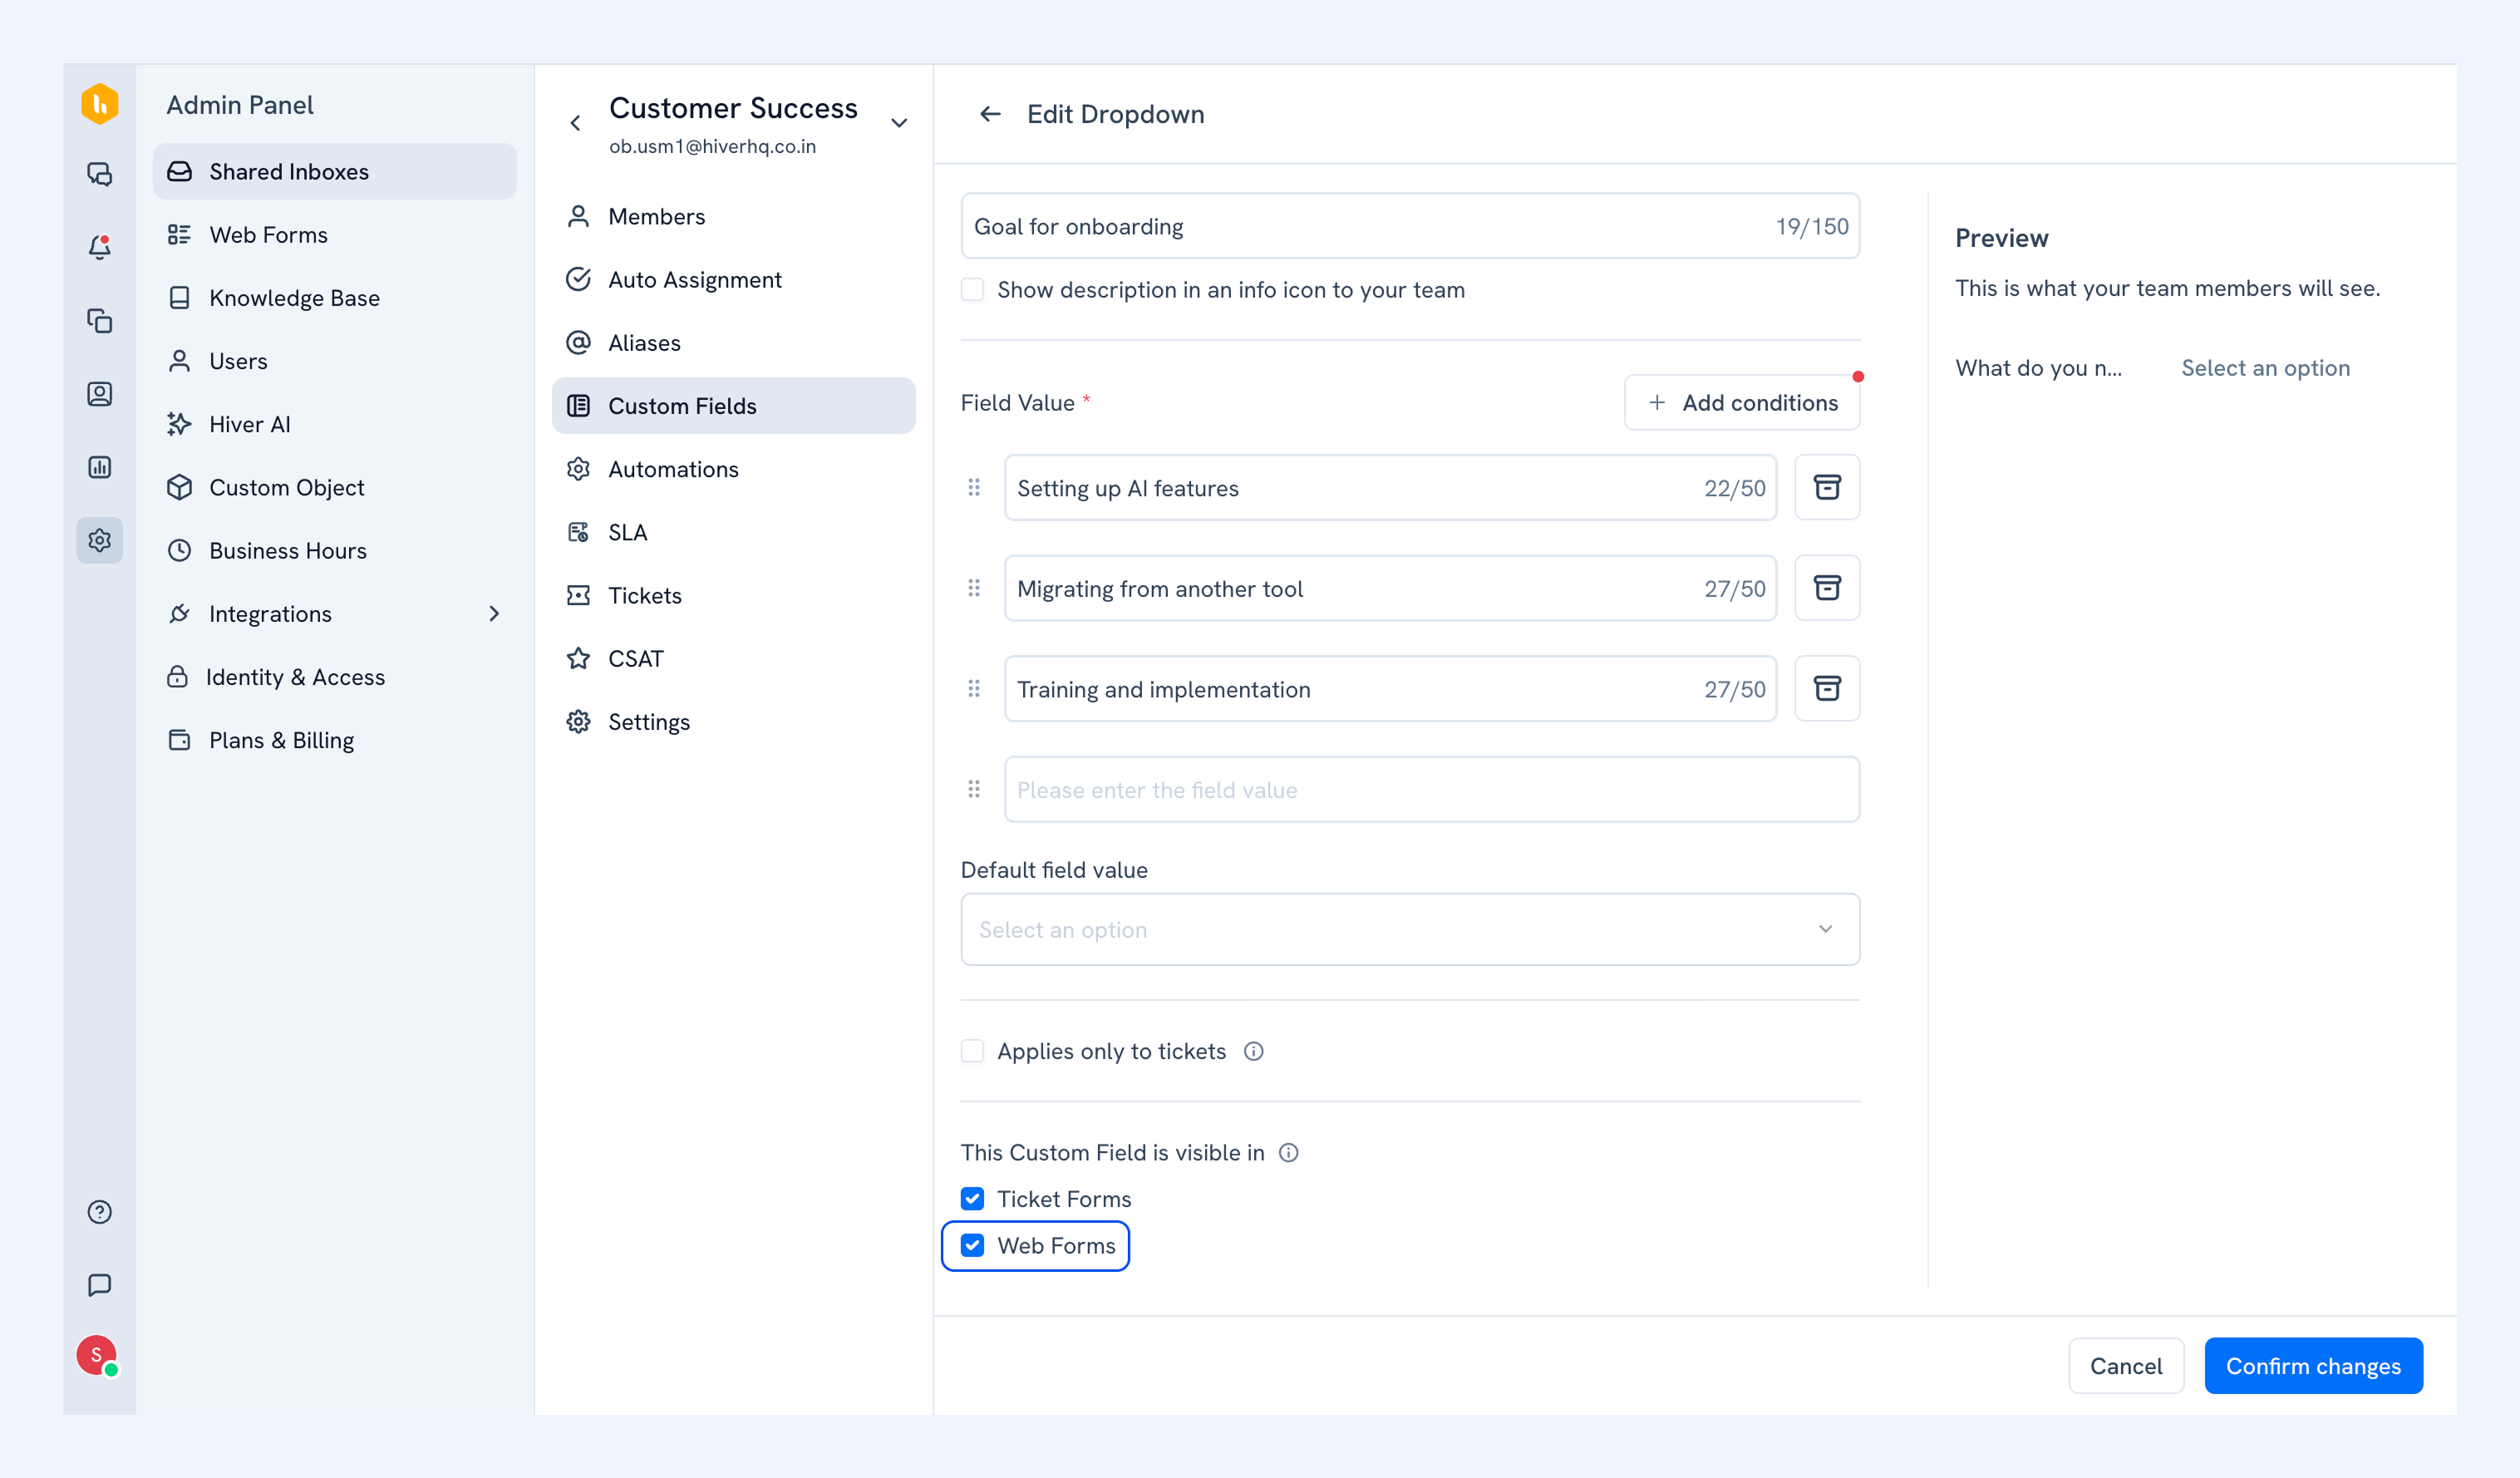
- To use a Custom Field in a Web Form, select Web Forms under This Custom Field is visible in settings.
Note: Web Forms are built using Custom Fields from the connected Email Inbox.
Creating a Web Form
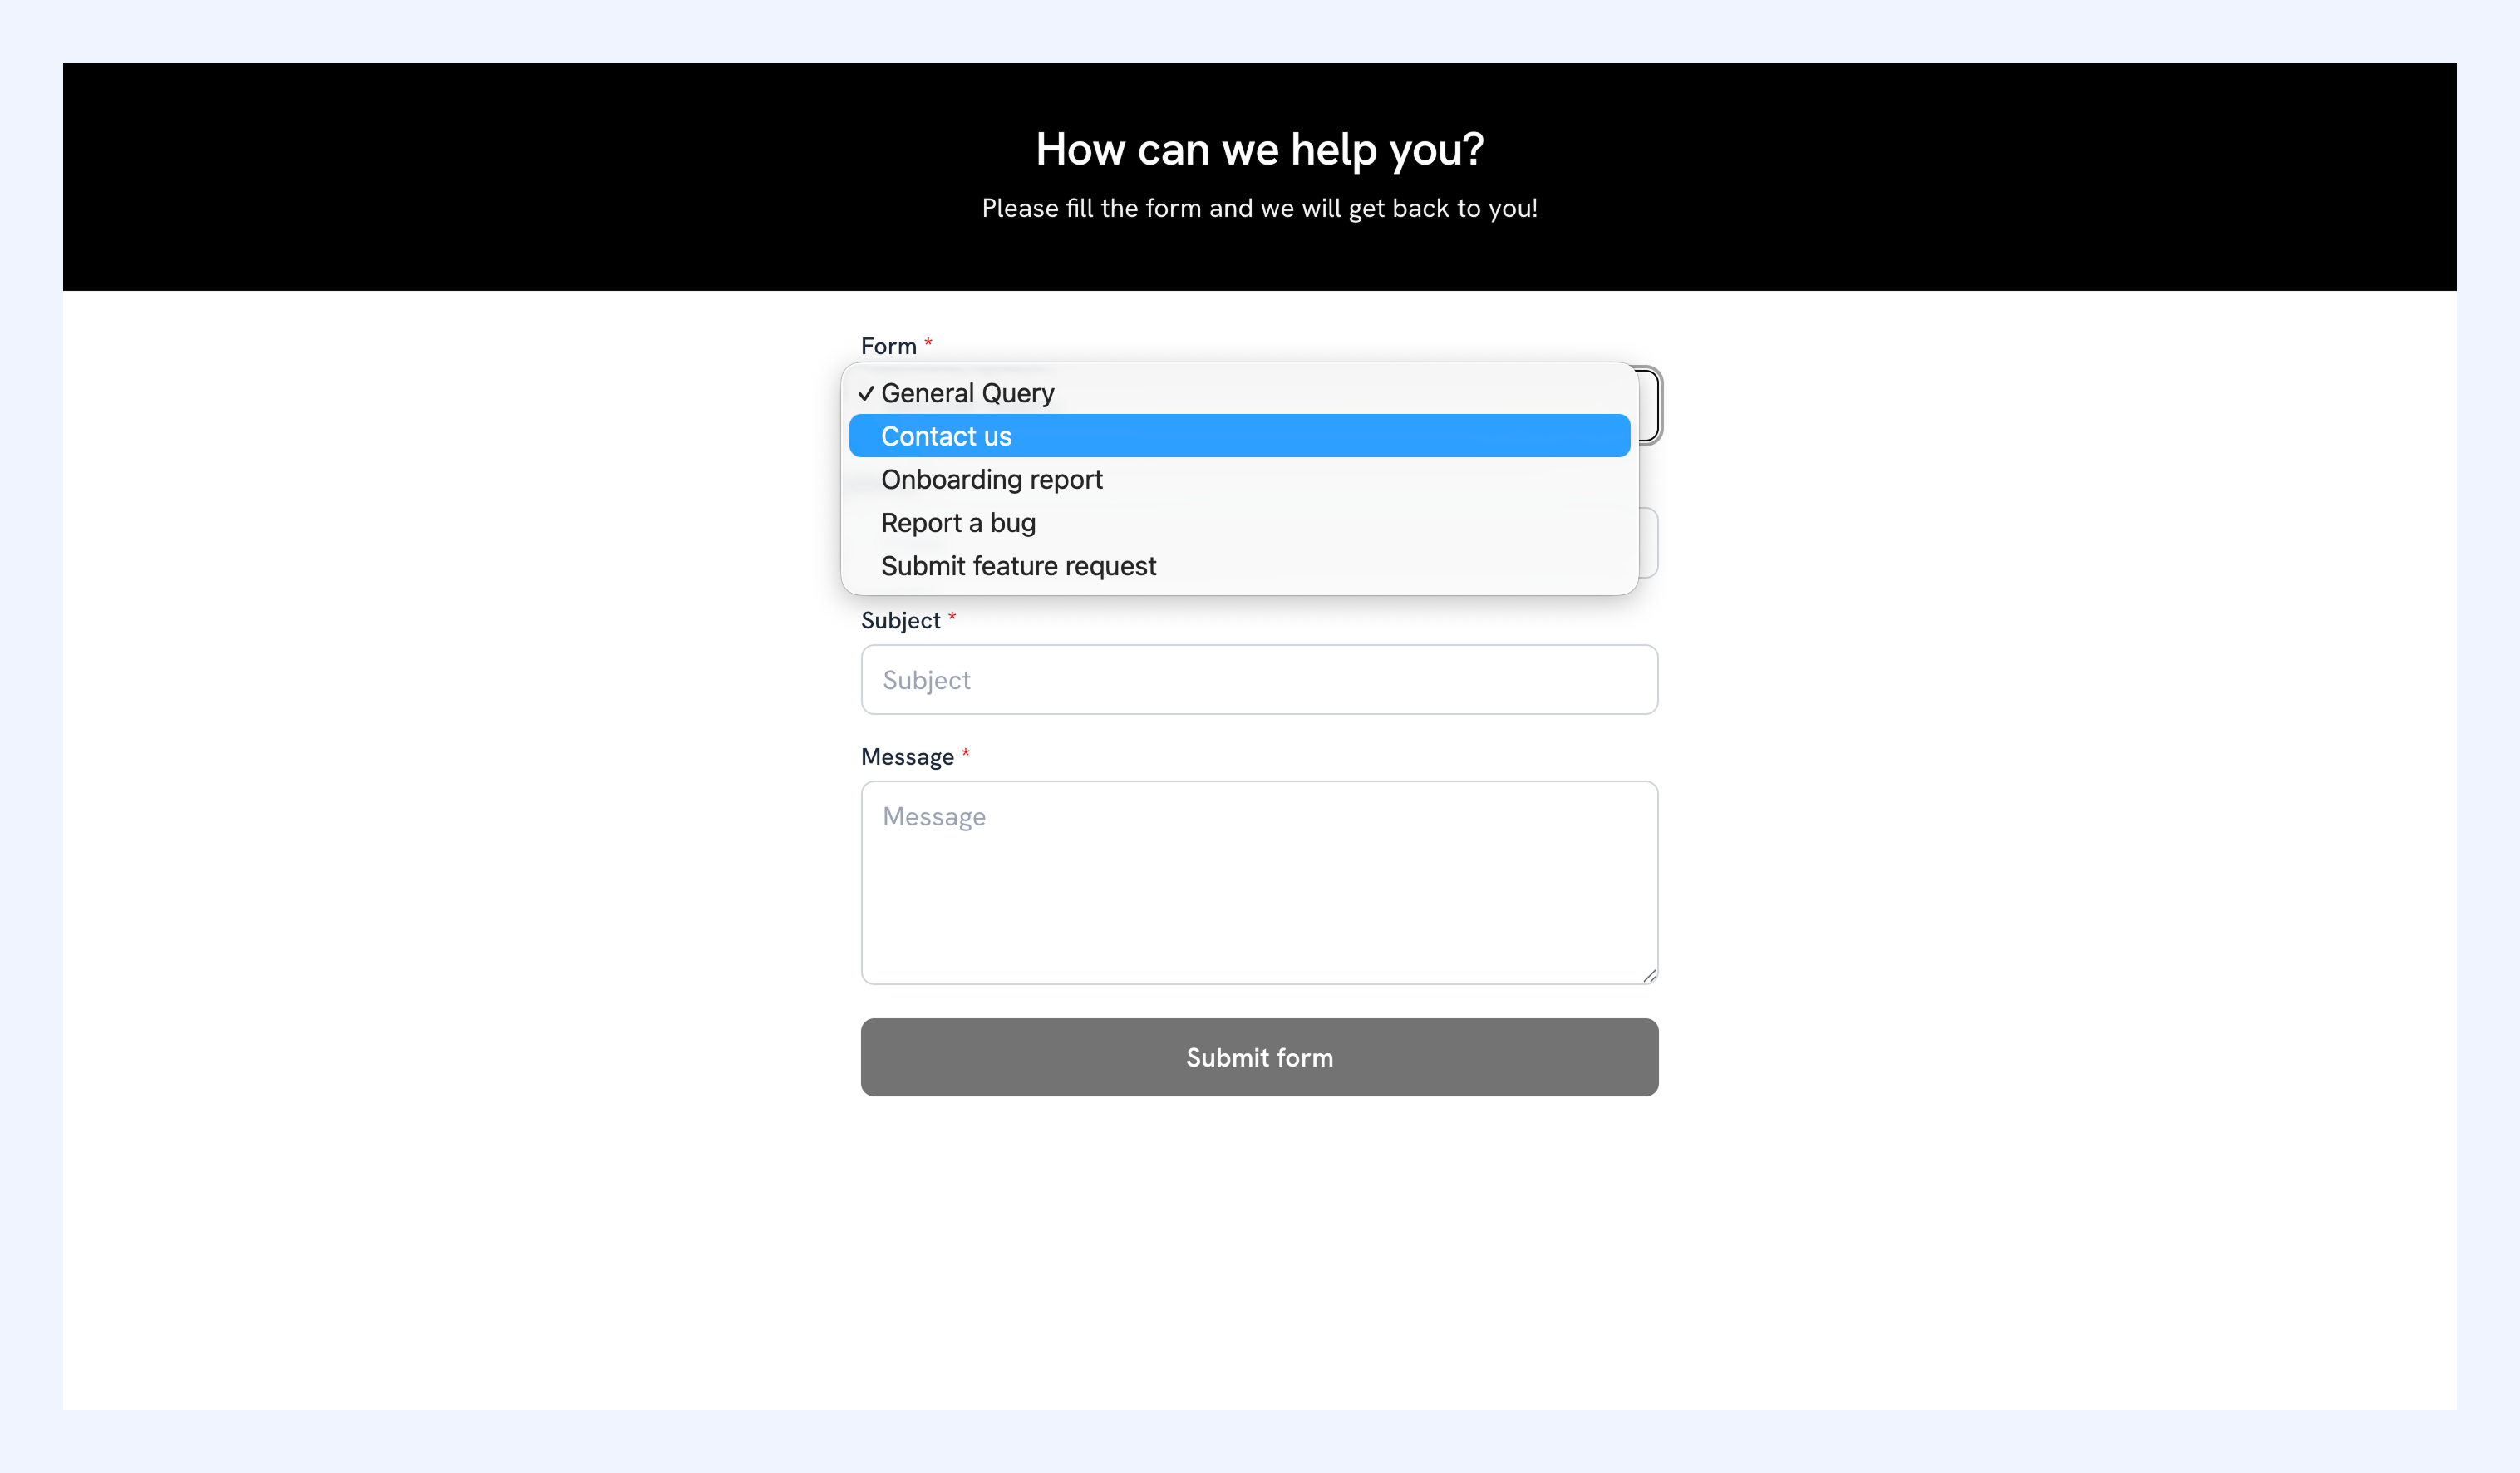
You can create dedicated Web Forms for different request types such as bug reports, feature requests, and onboarding demos. Your team can then share the relevant form with customers based on their request.
To create a Web Form,
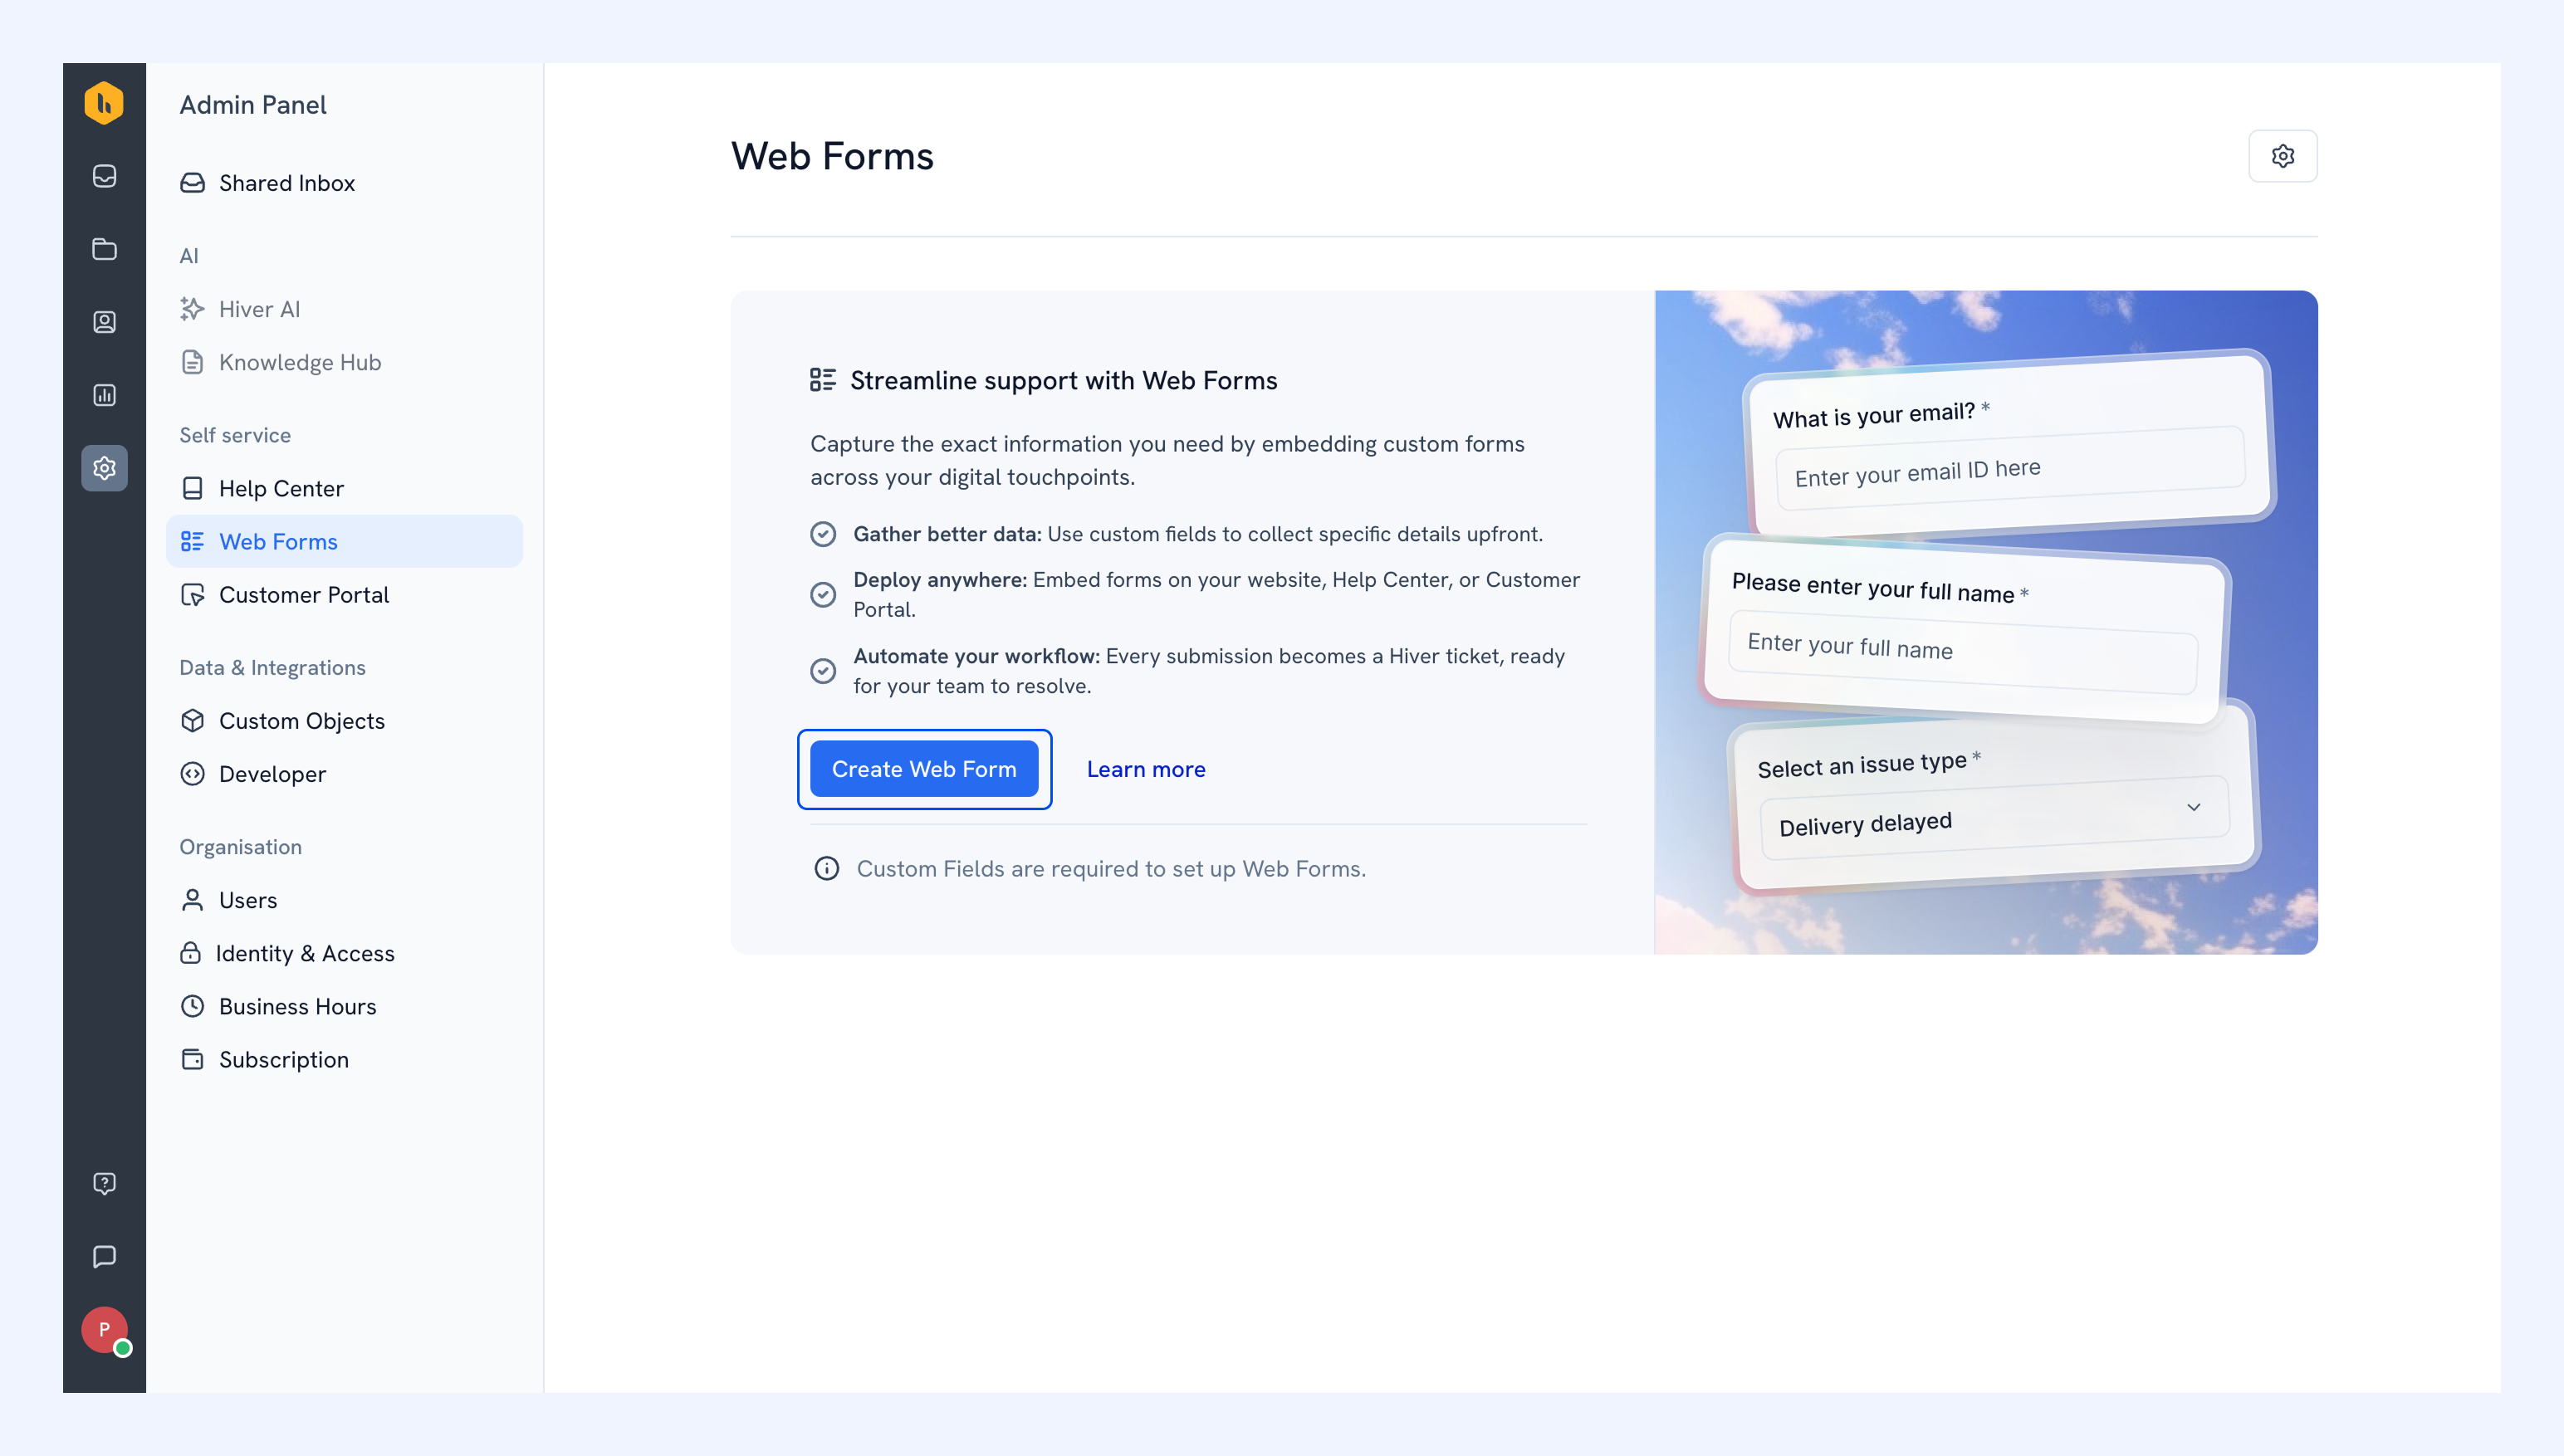
1. Go to Admin Panel → Web Forms, and click Create Web Form.
2. Add the basic details for your form:
- Give your form a name. The form name will also be visible to visitors.
- Select the Email Inbox where submissions should be received
Note: Once you select an inbox, you can’t update it later.
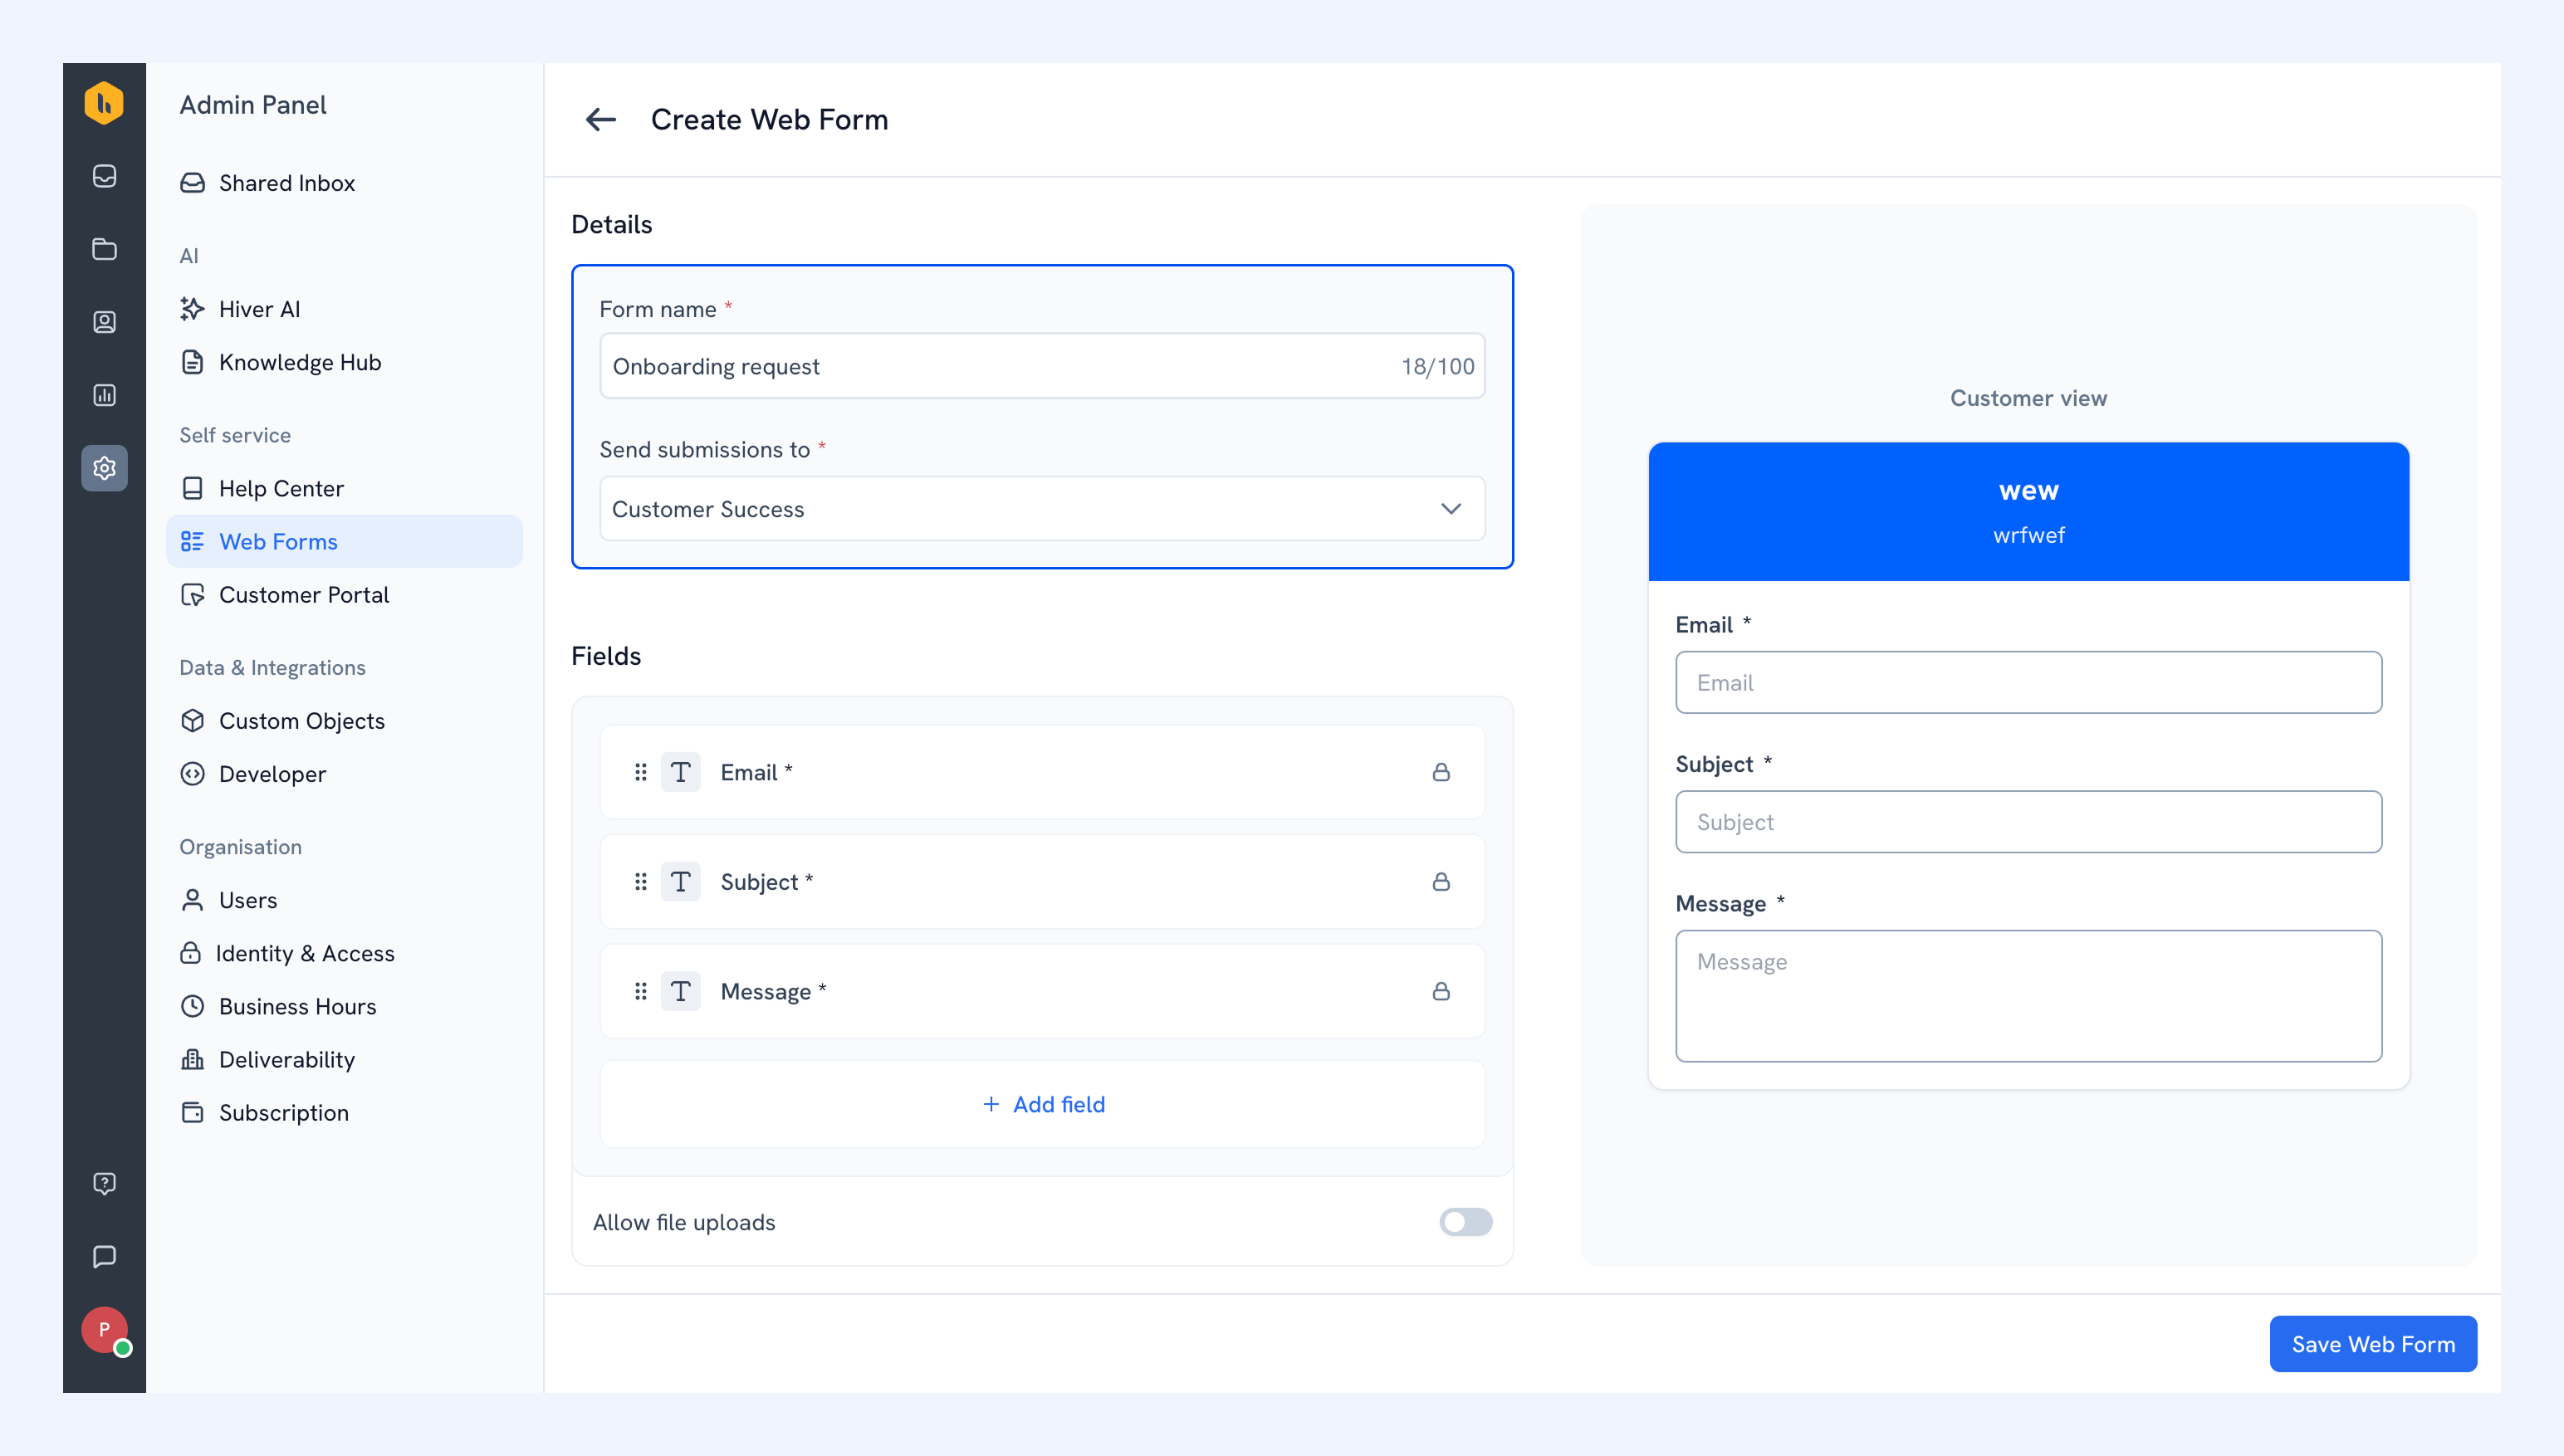
3. Next, add fields to your form:
- Click Add field.
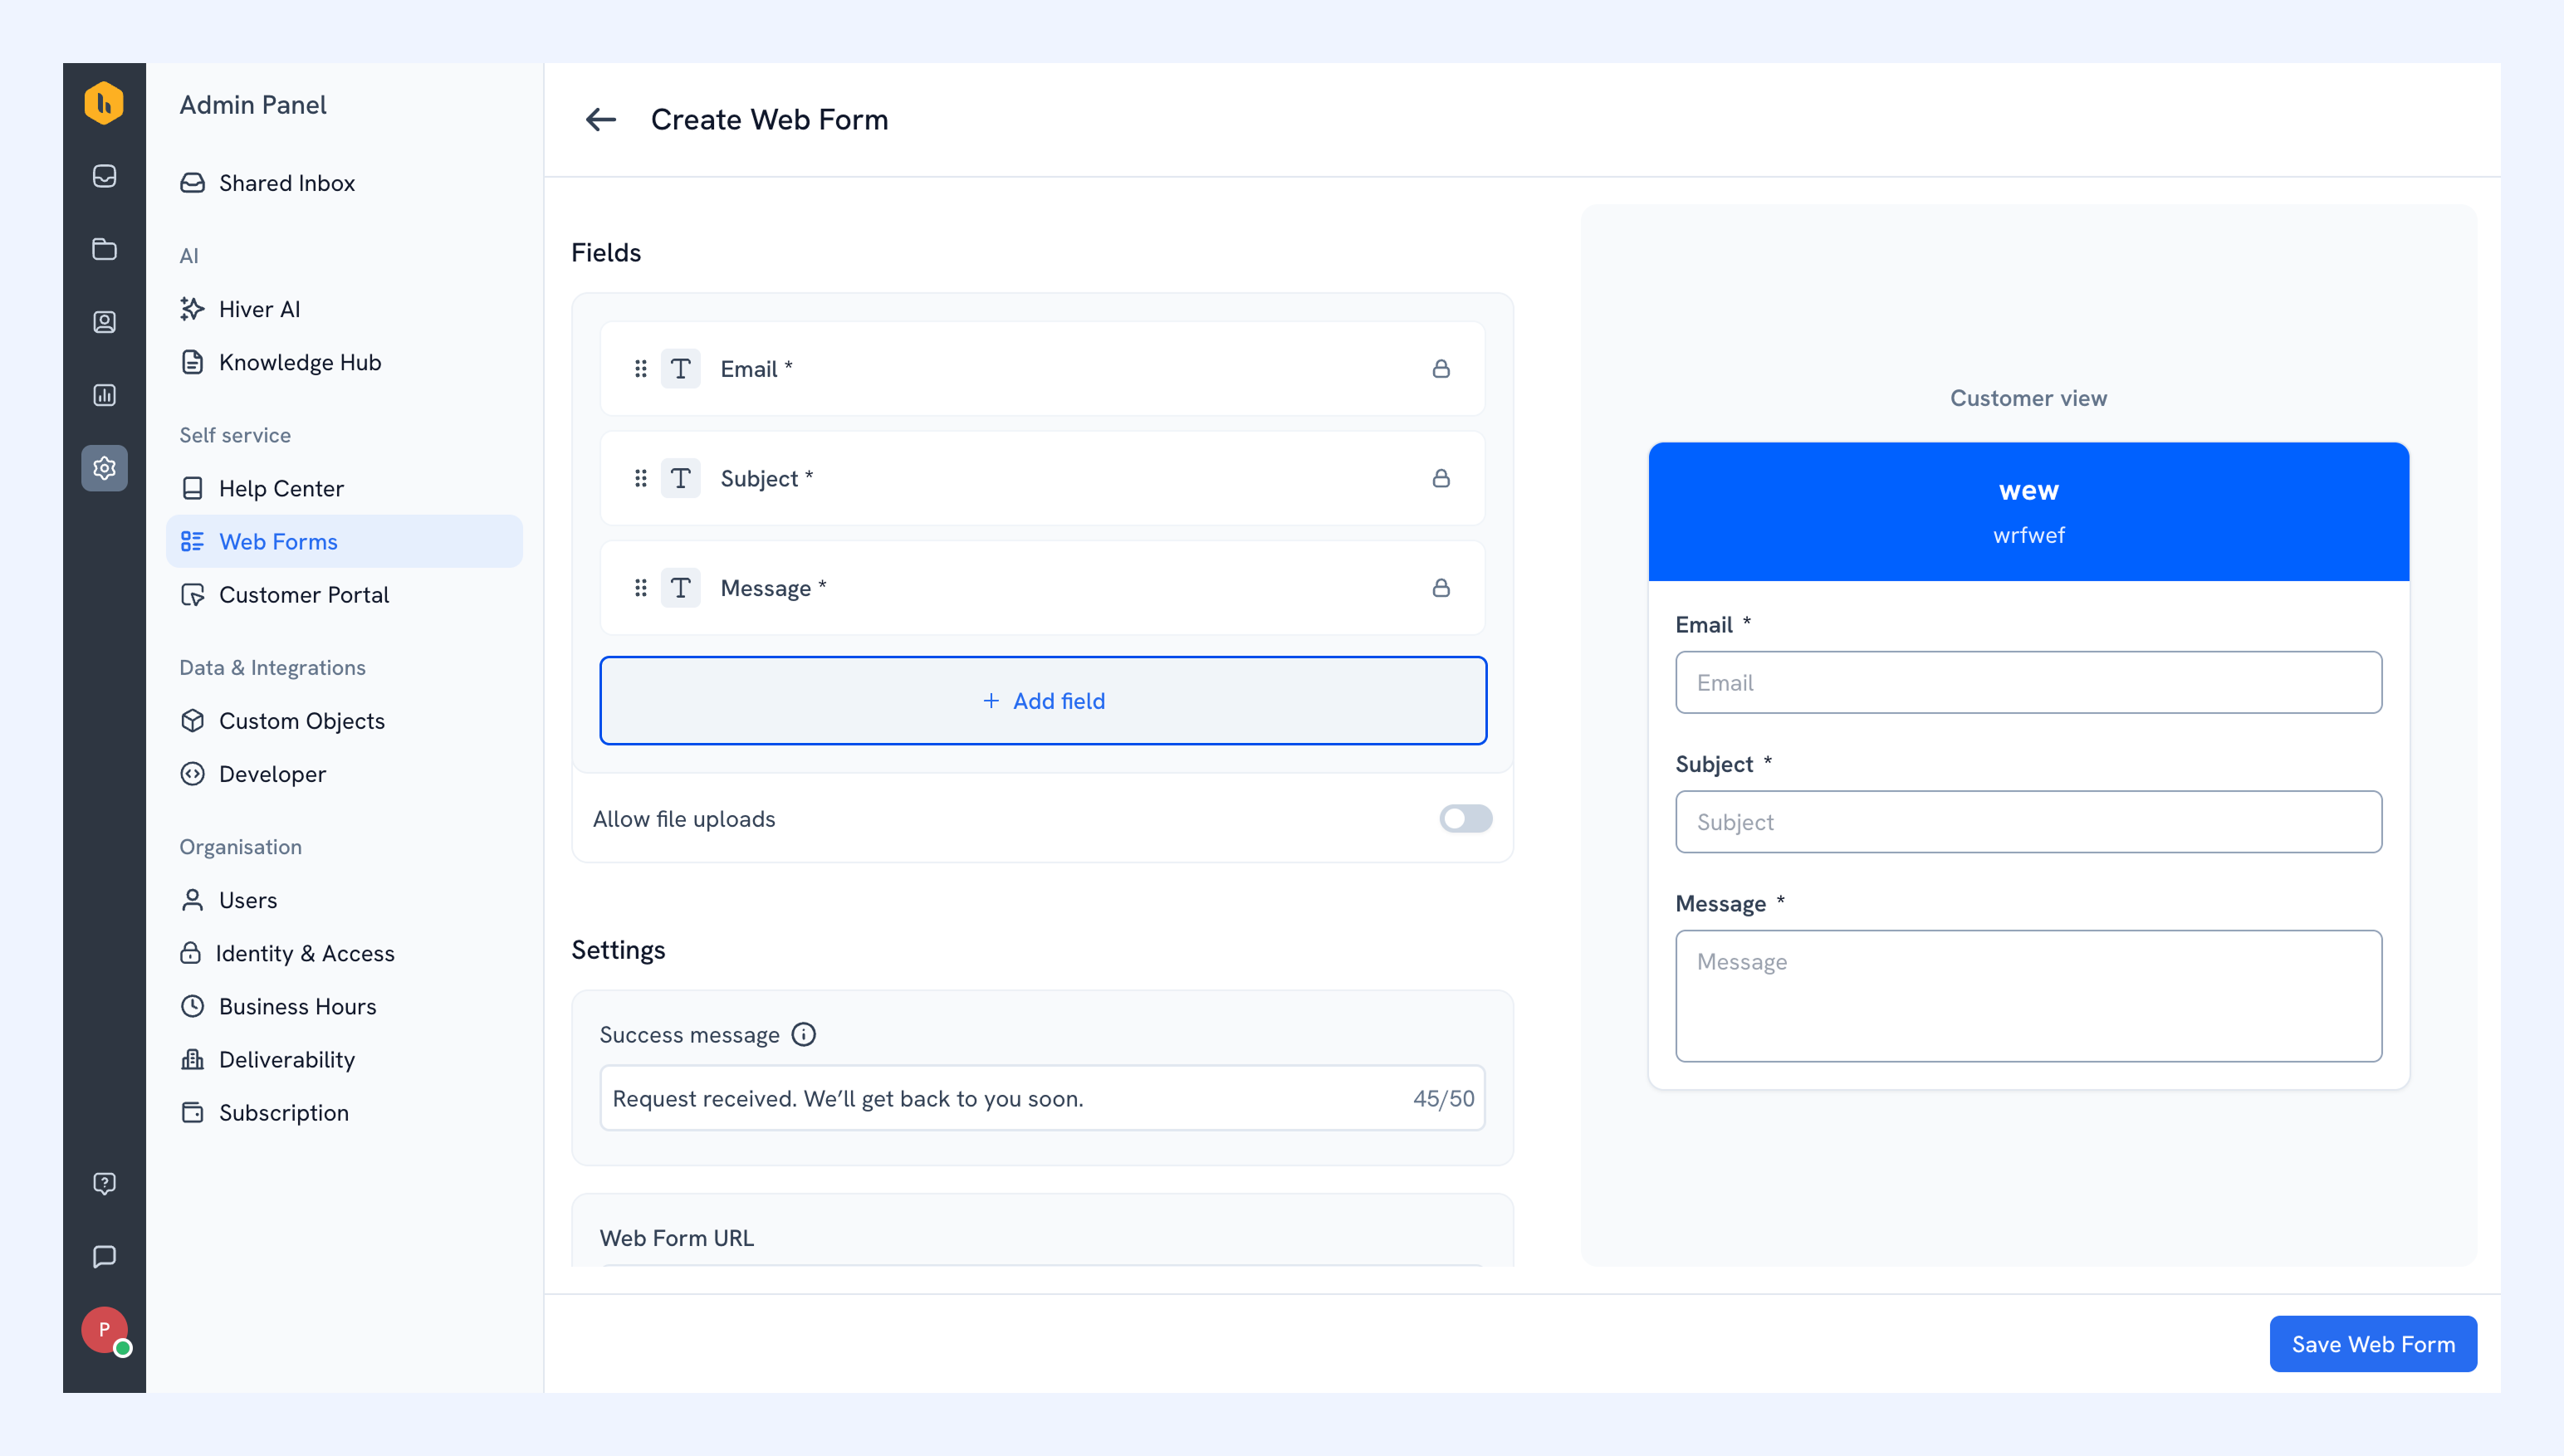
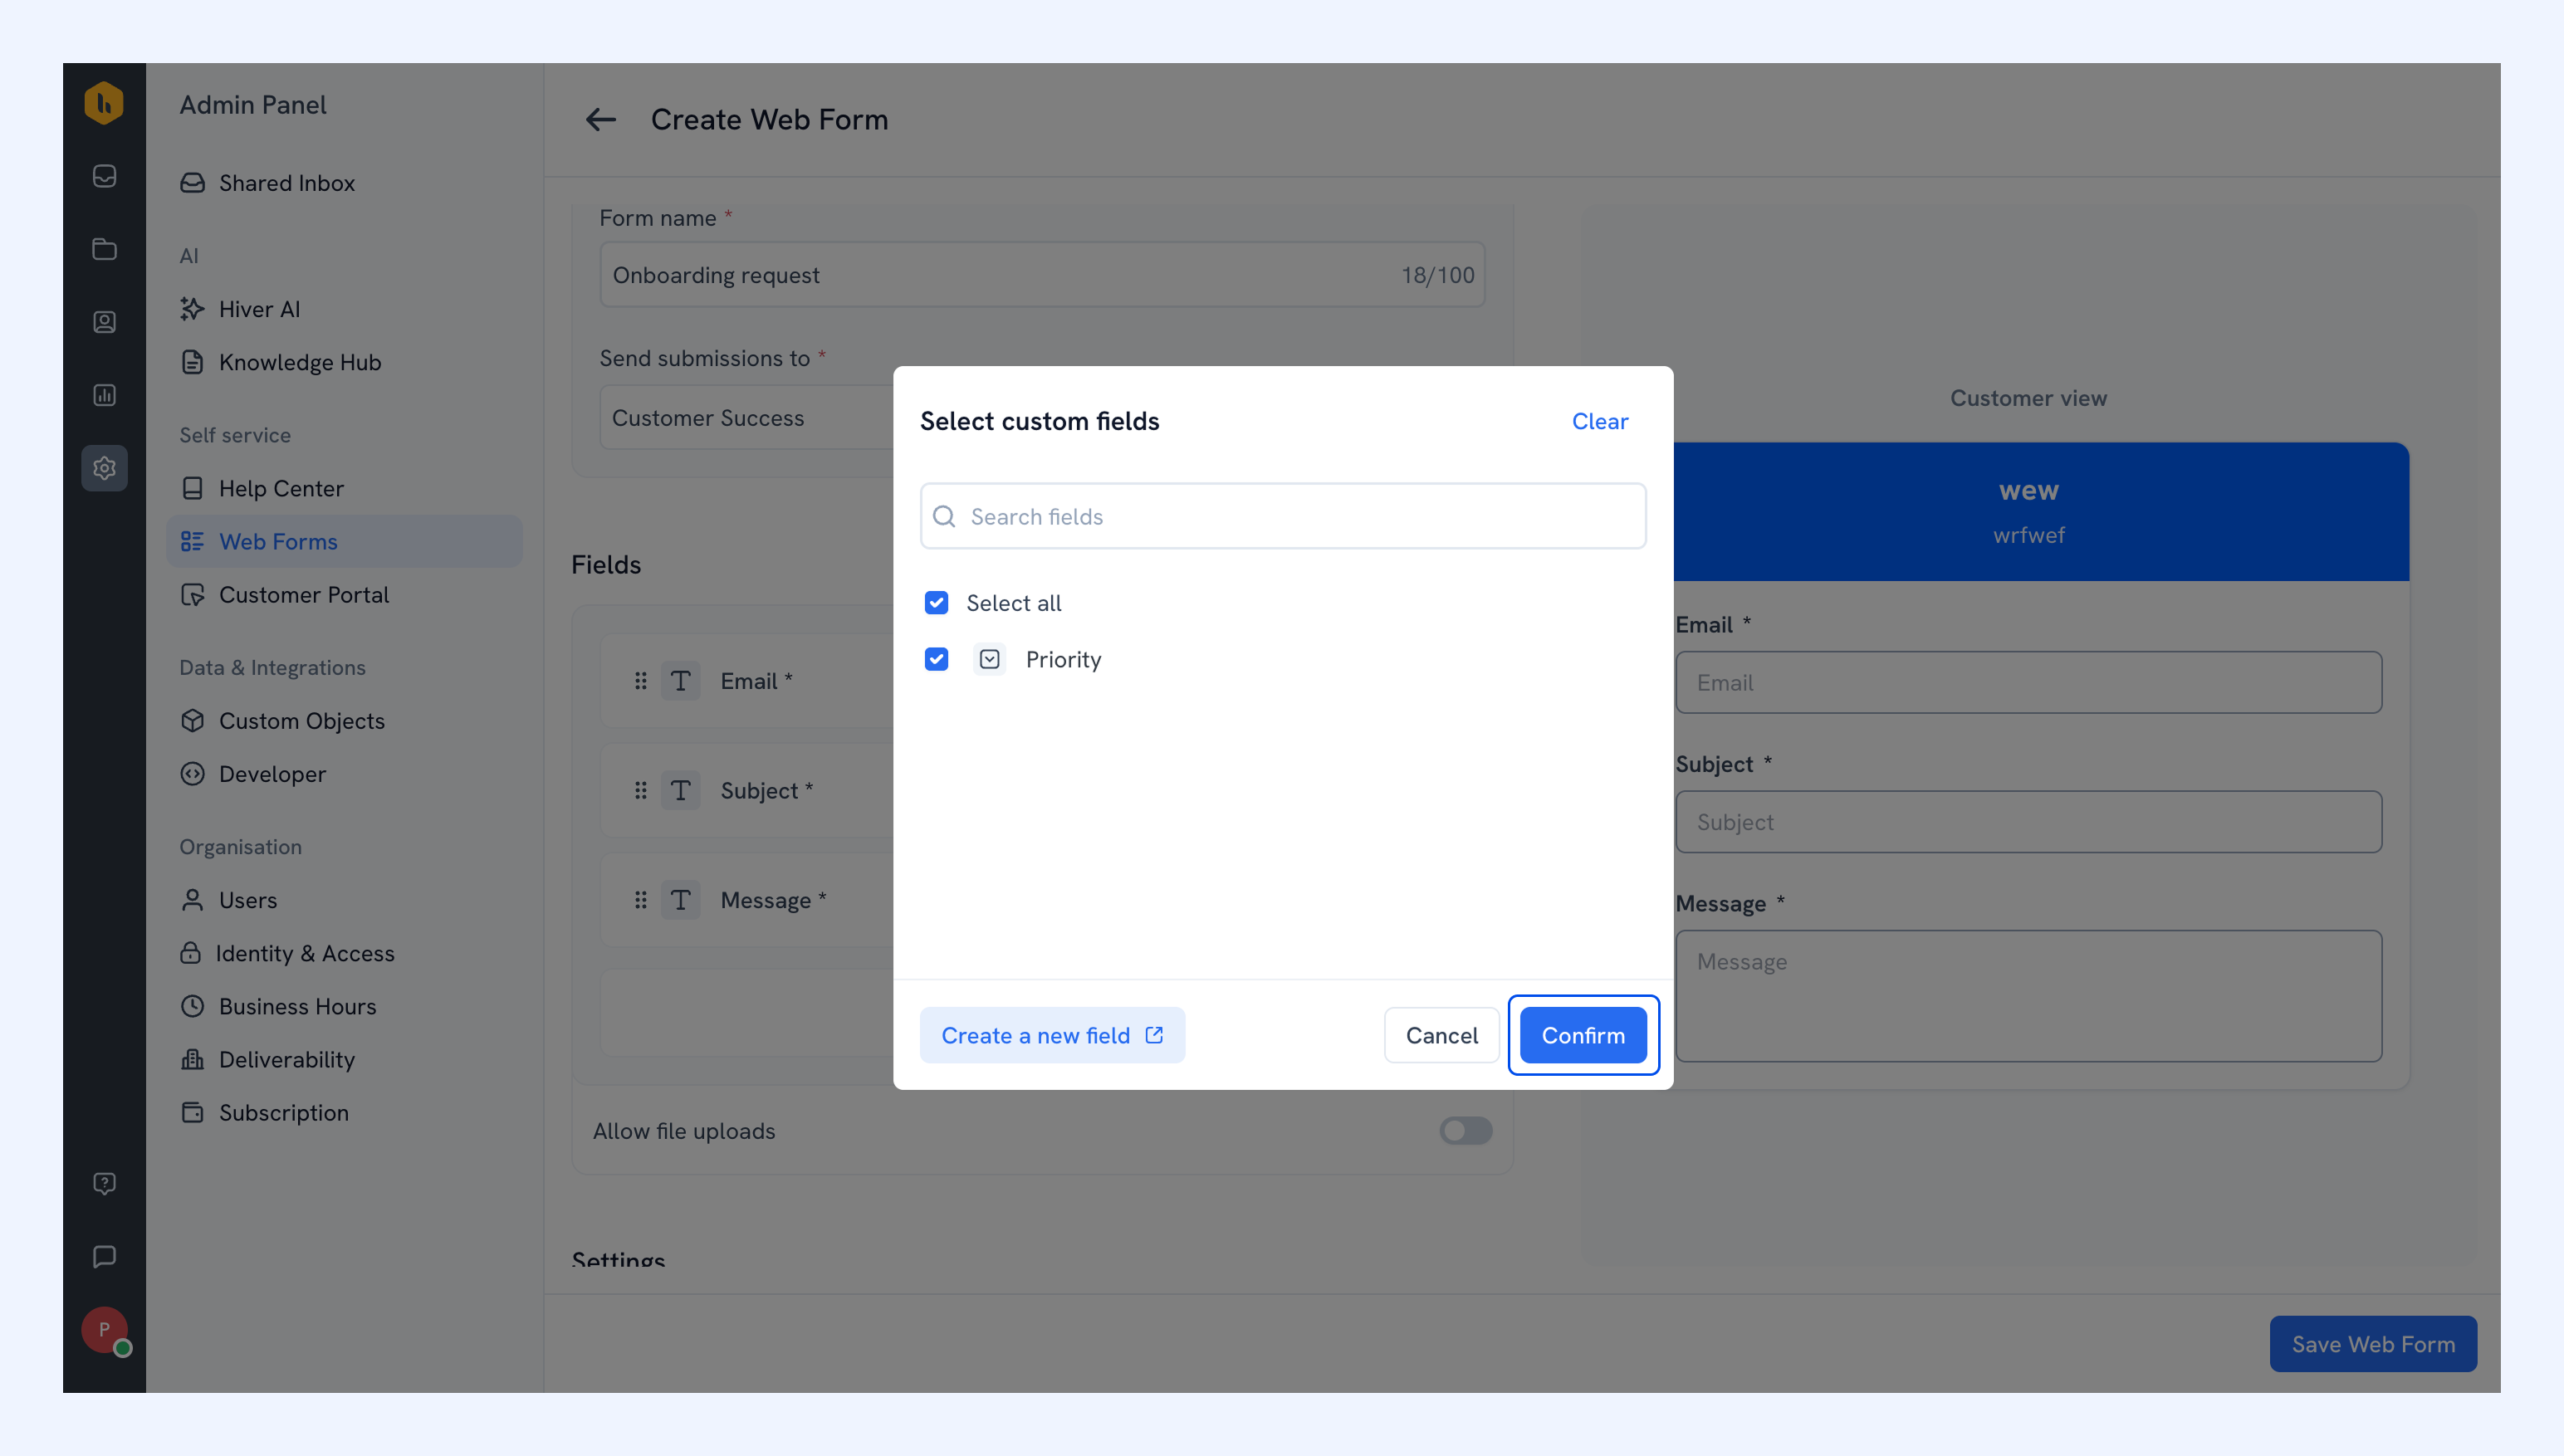
- Choose the Custom Fields you want to include and click Confirm.
- If the field you need doesn't exist yet, click Create new field to create one.
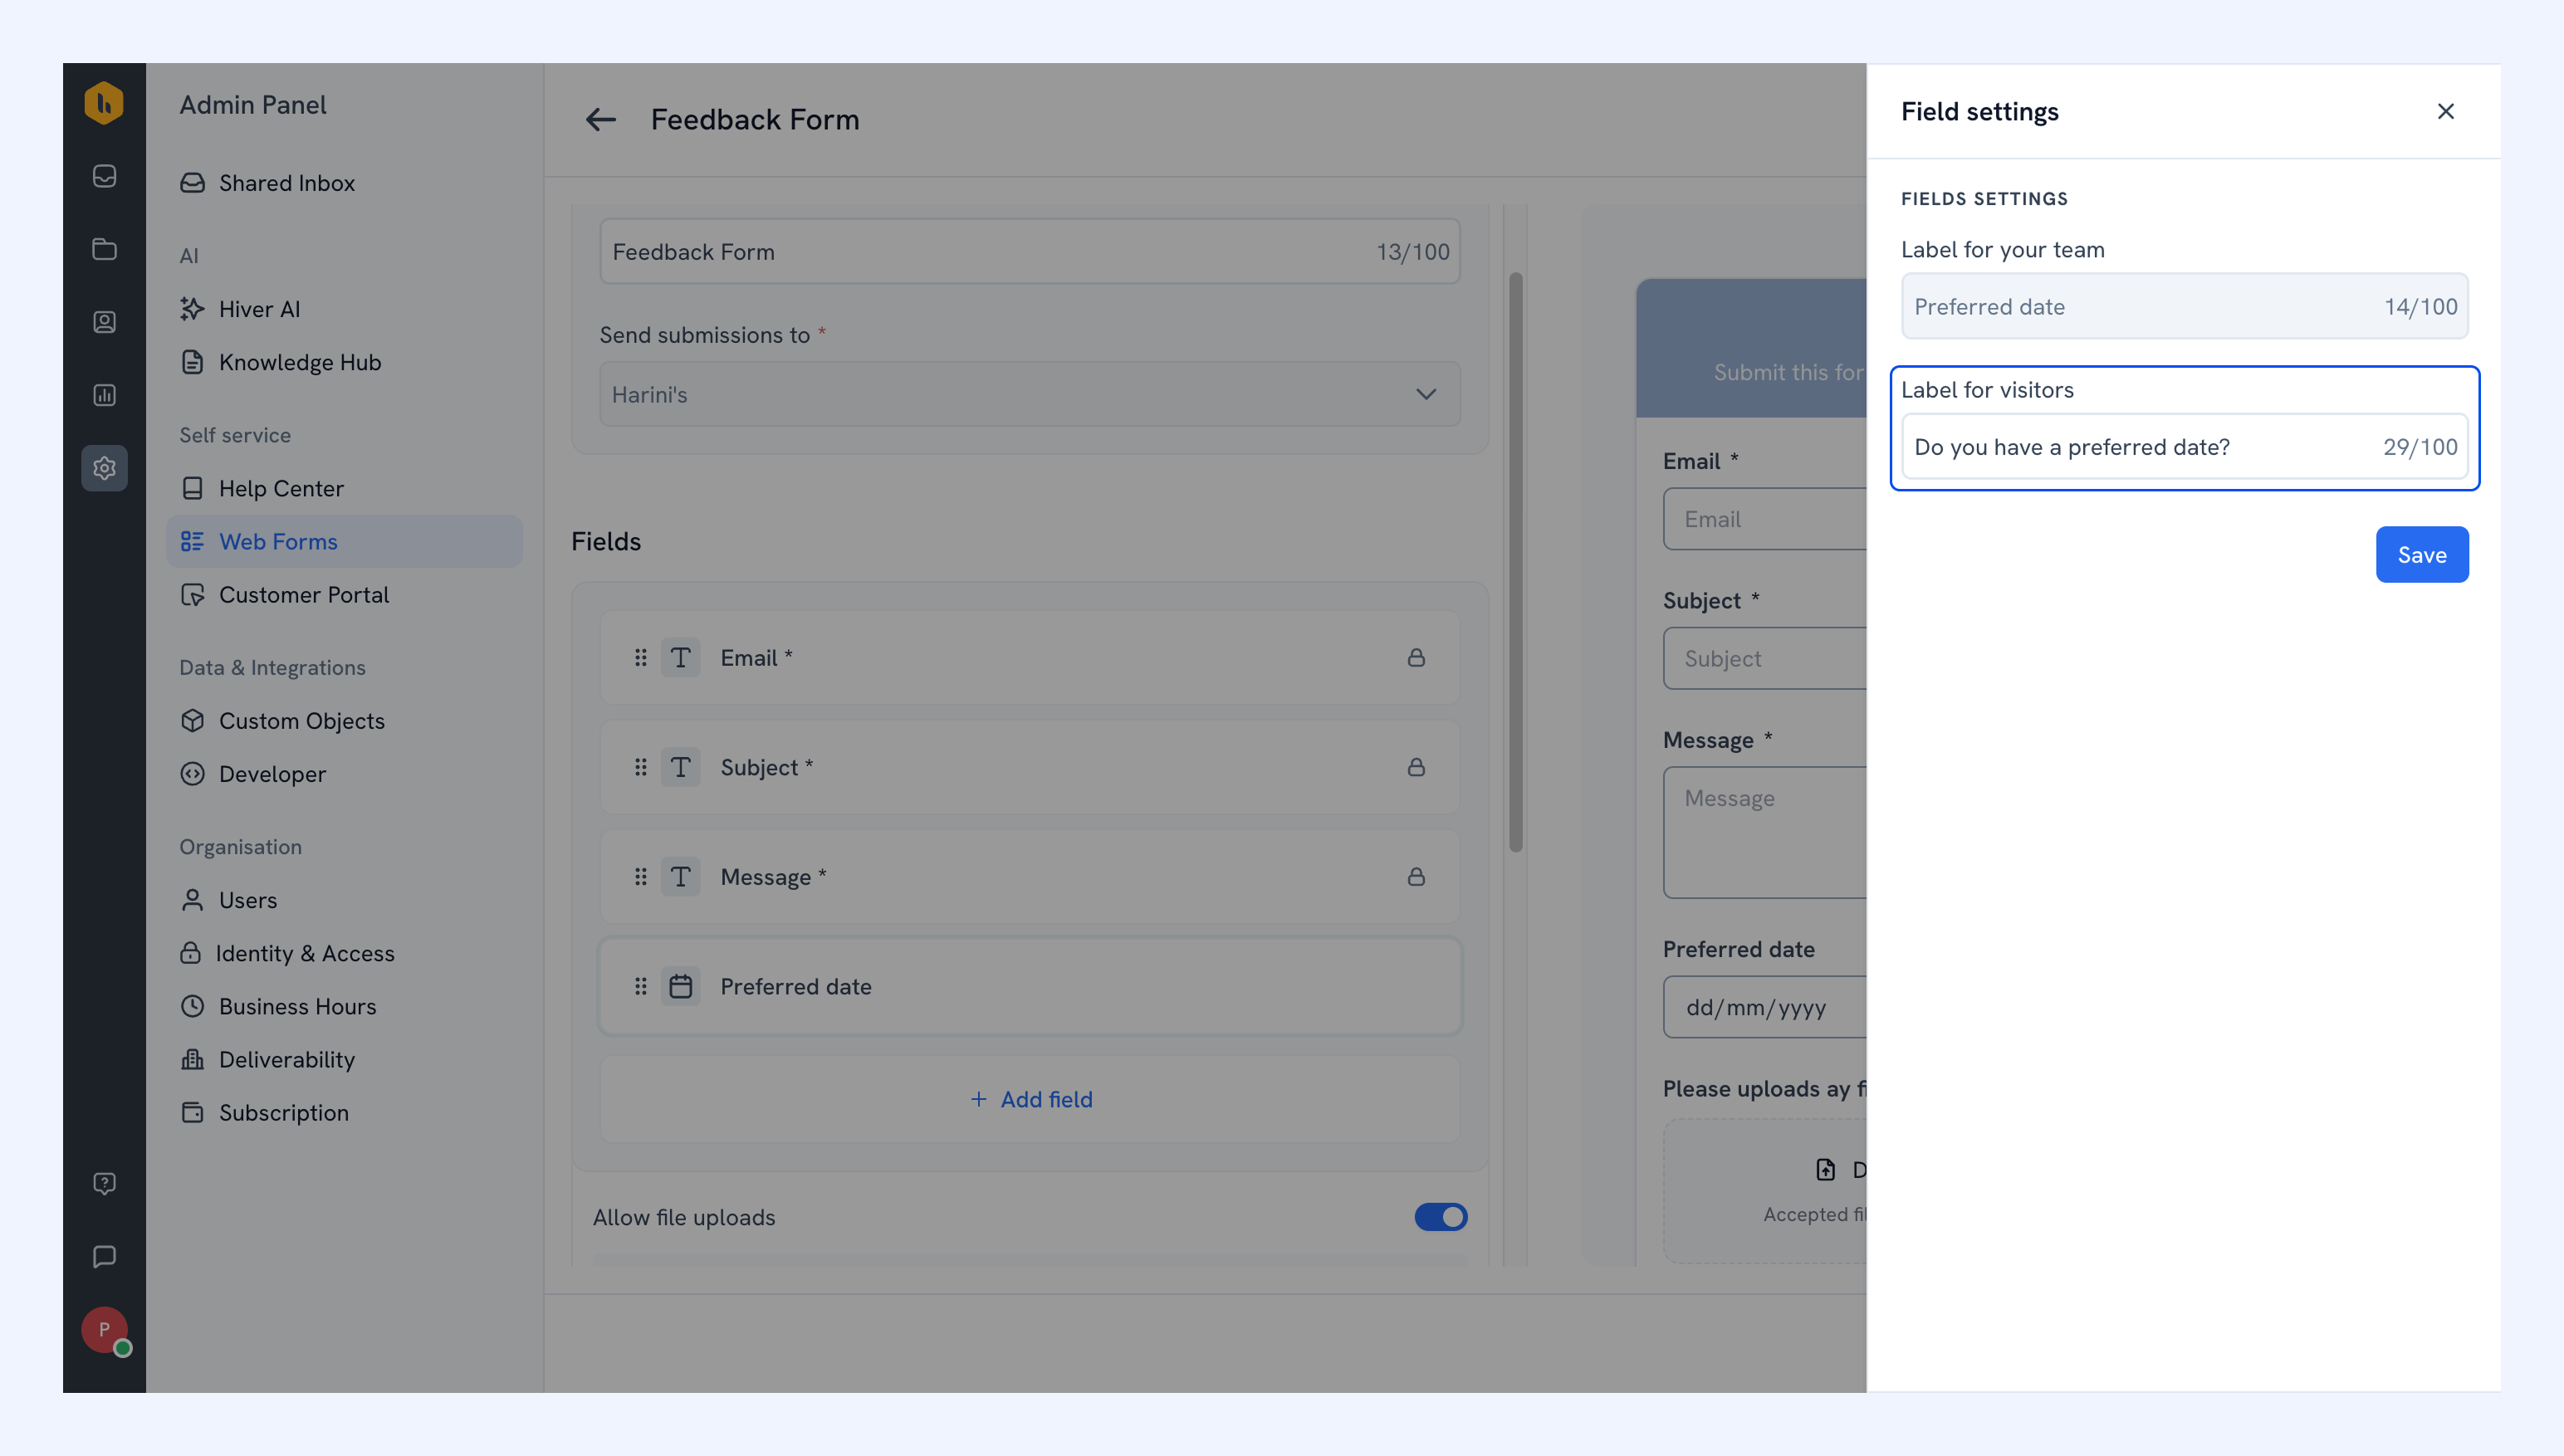
You can customize how field names appear to visitors. For example, “Preferred date” can be written more conversationally as “Do you have a preferred date?” on the Web Form.
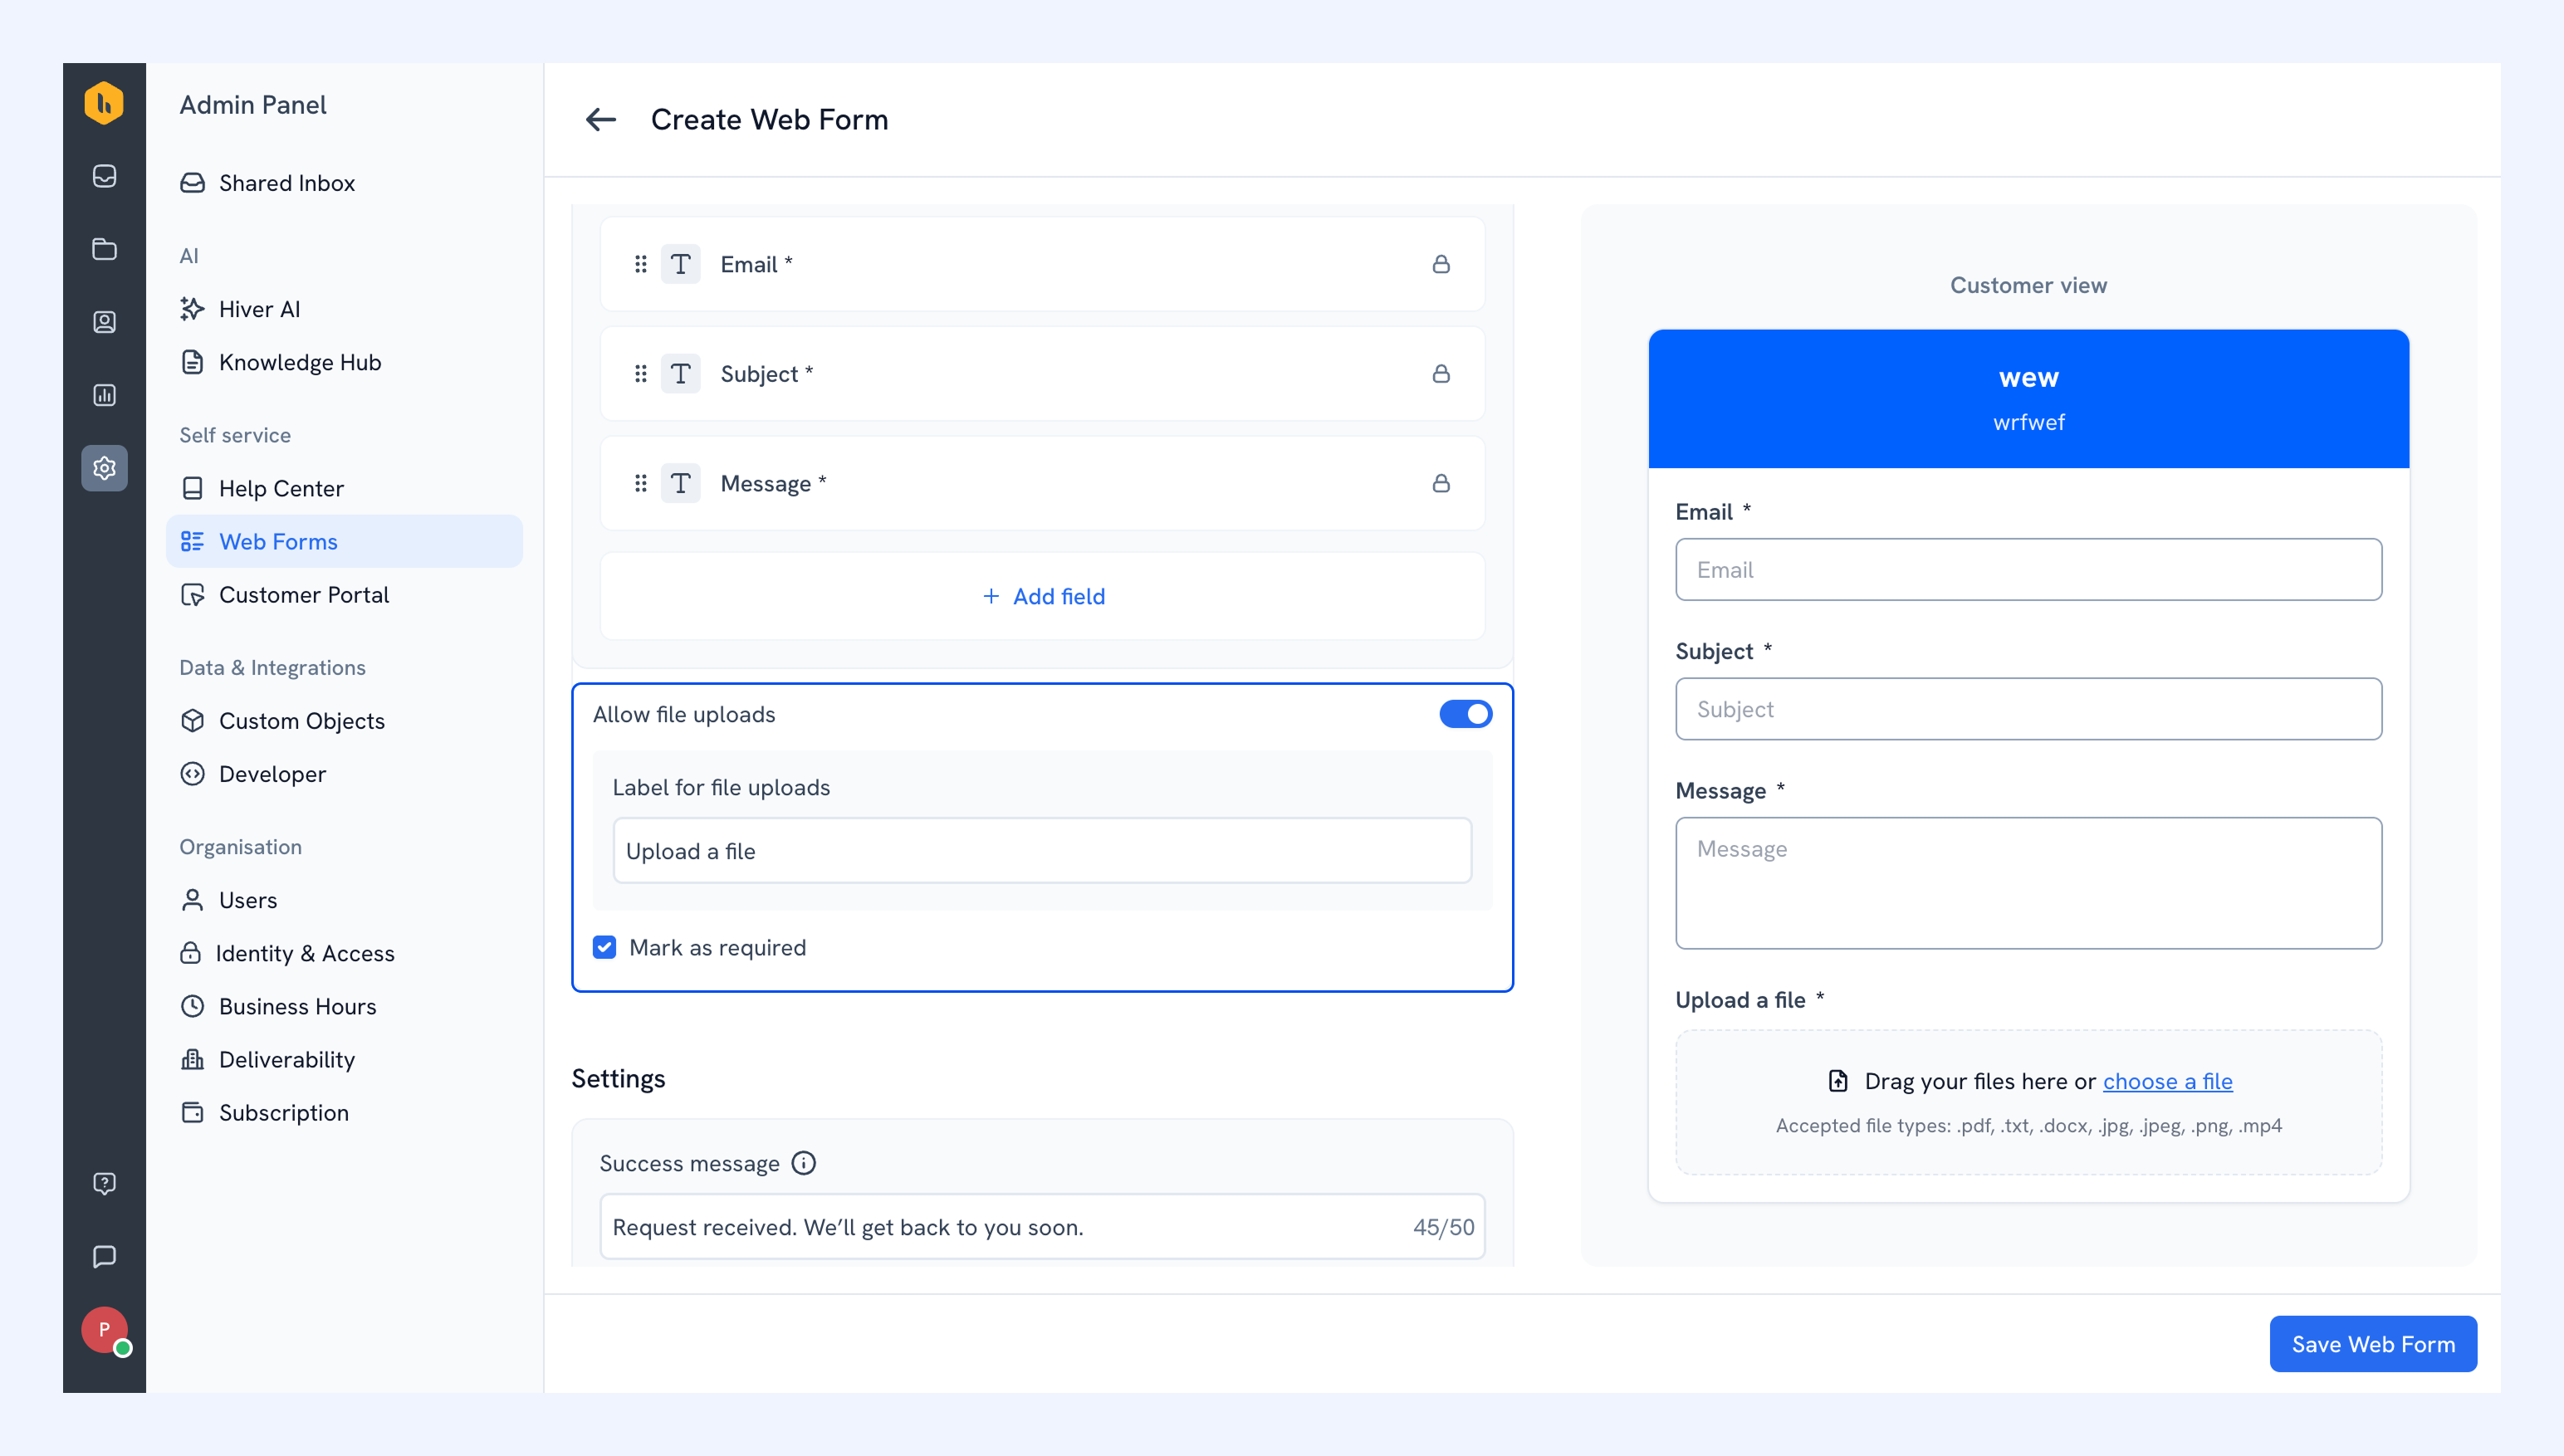
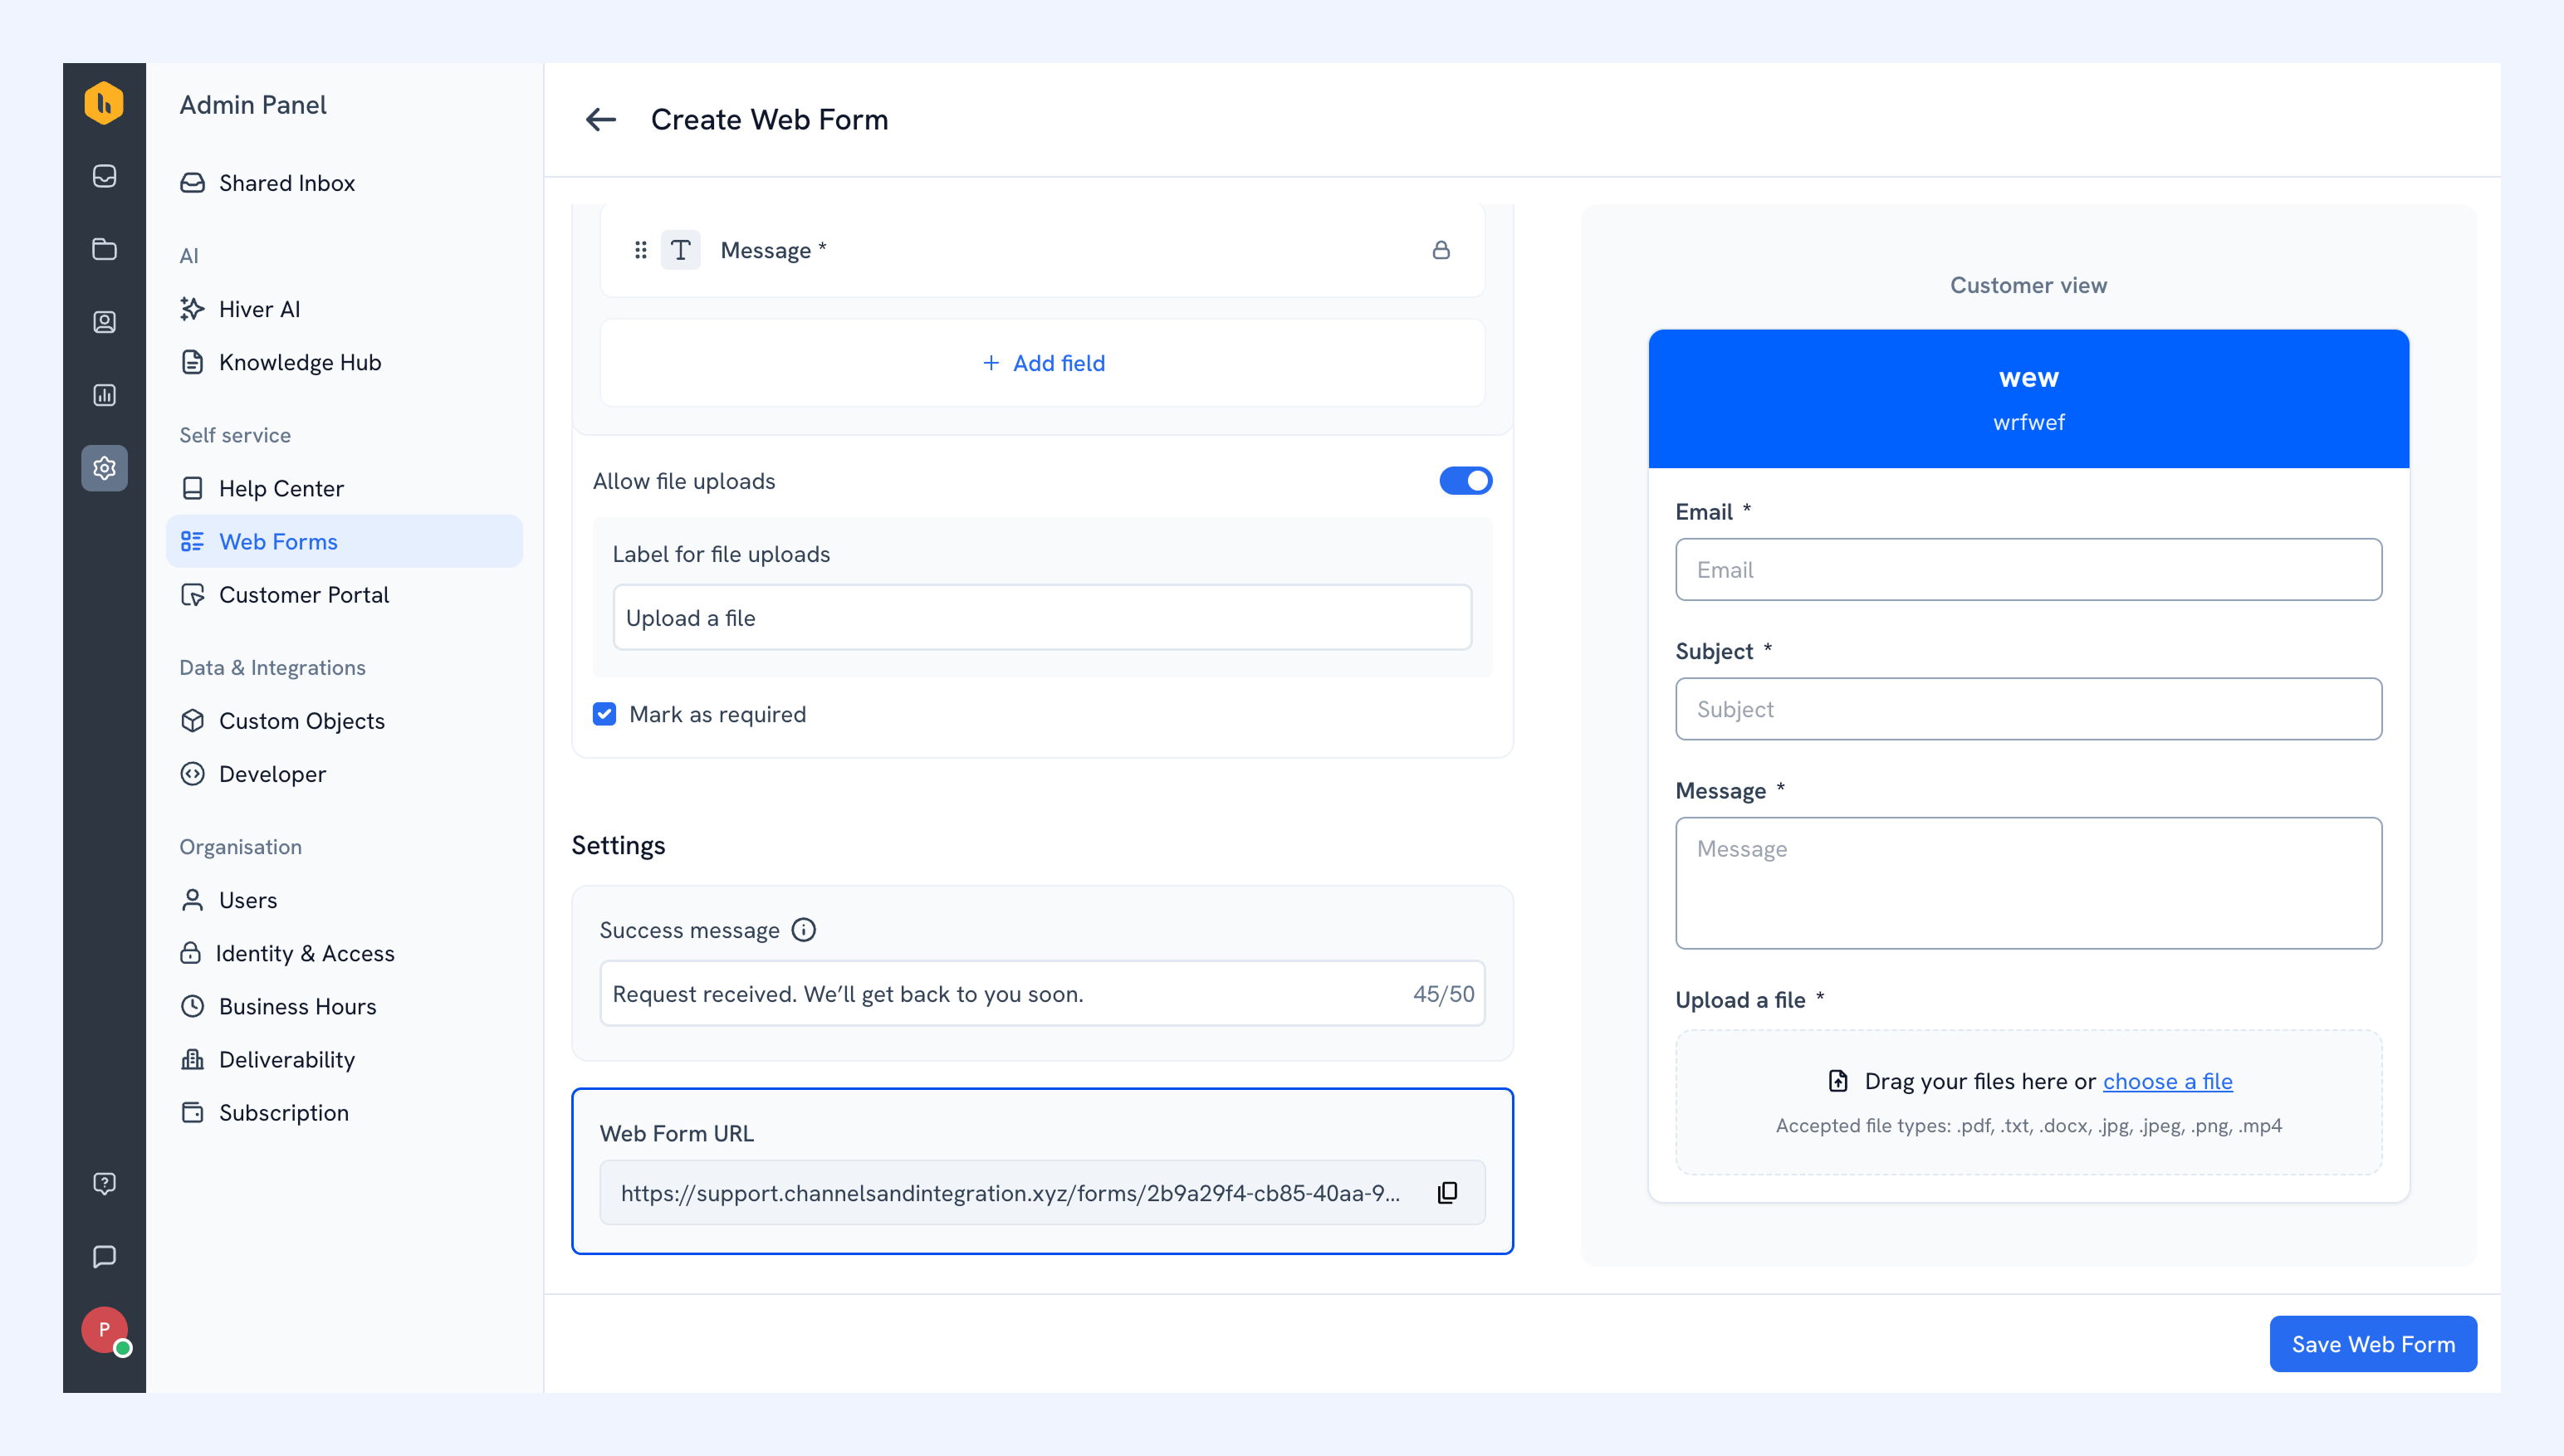
4. If you want visitors to attach files with their request, turn on Allow file uploads.
- Set a Label for file uploads. This is the text visitors see above the upload area.
- Select Make file uploads mandatory if visitors must attach a file to submit the form.
Note:
- Visitors can attach up to 20 files per submission.
- Supported file types: .pdf, .txt, .docx, .jpg, .jpeg, .png, and .mp4.
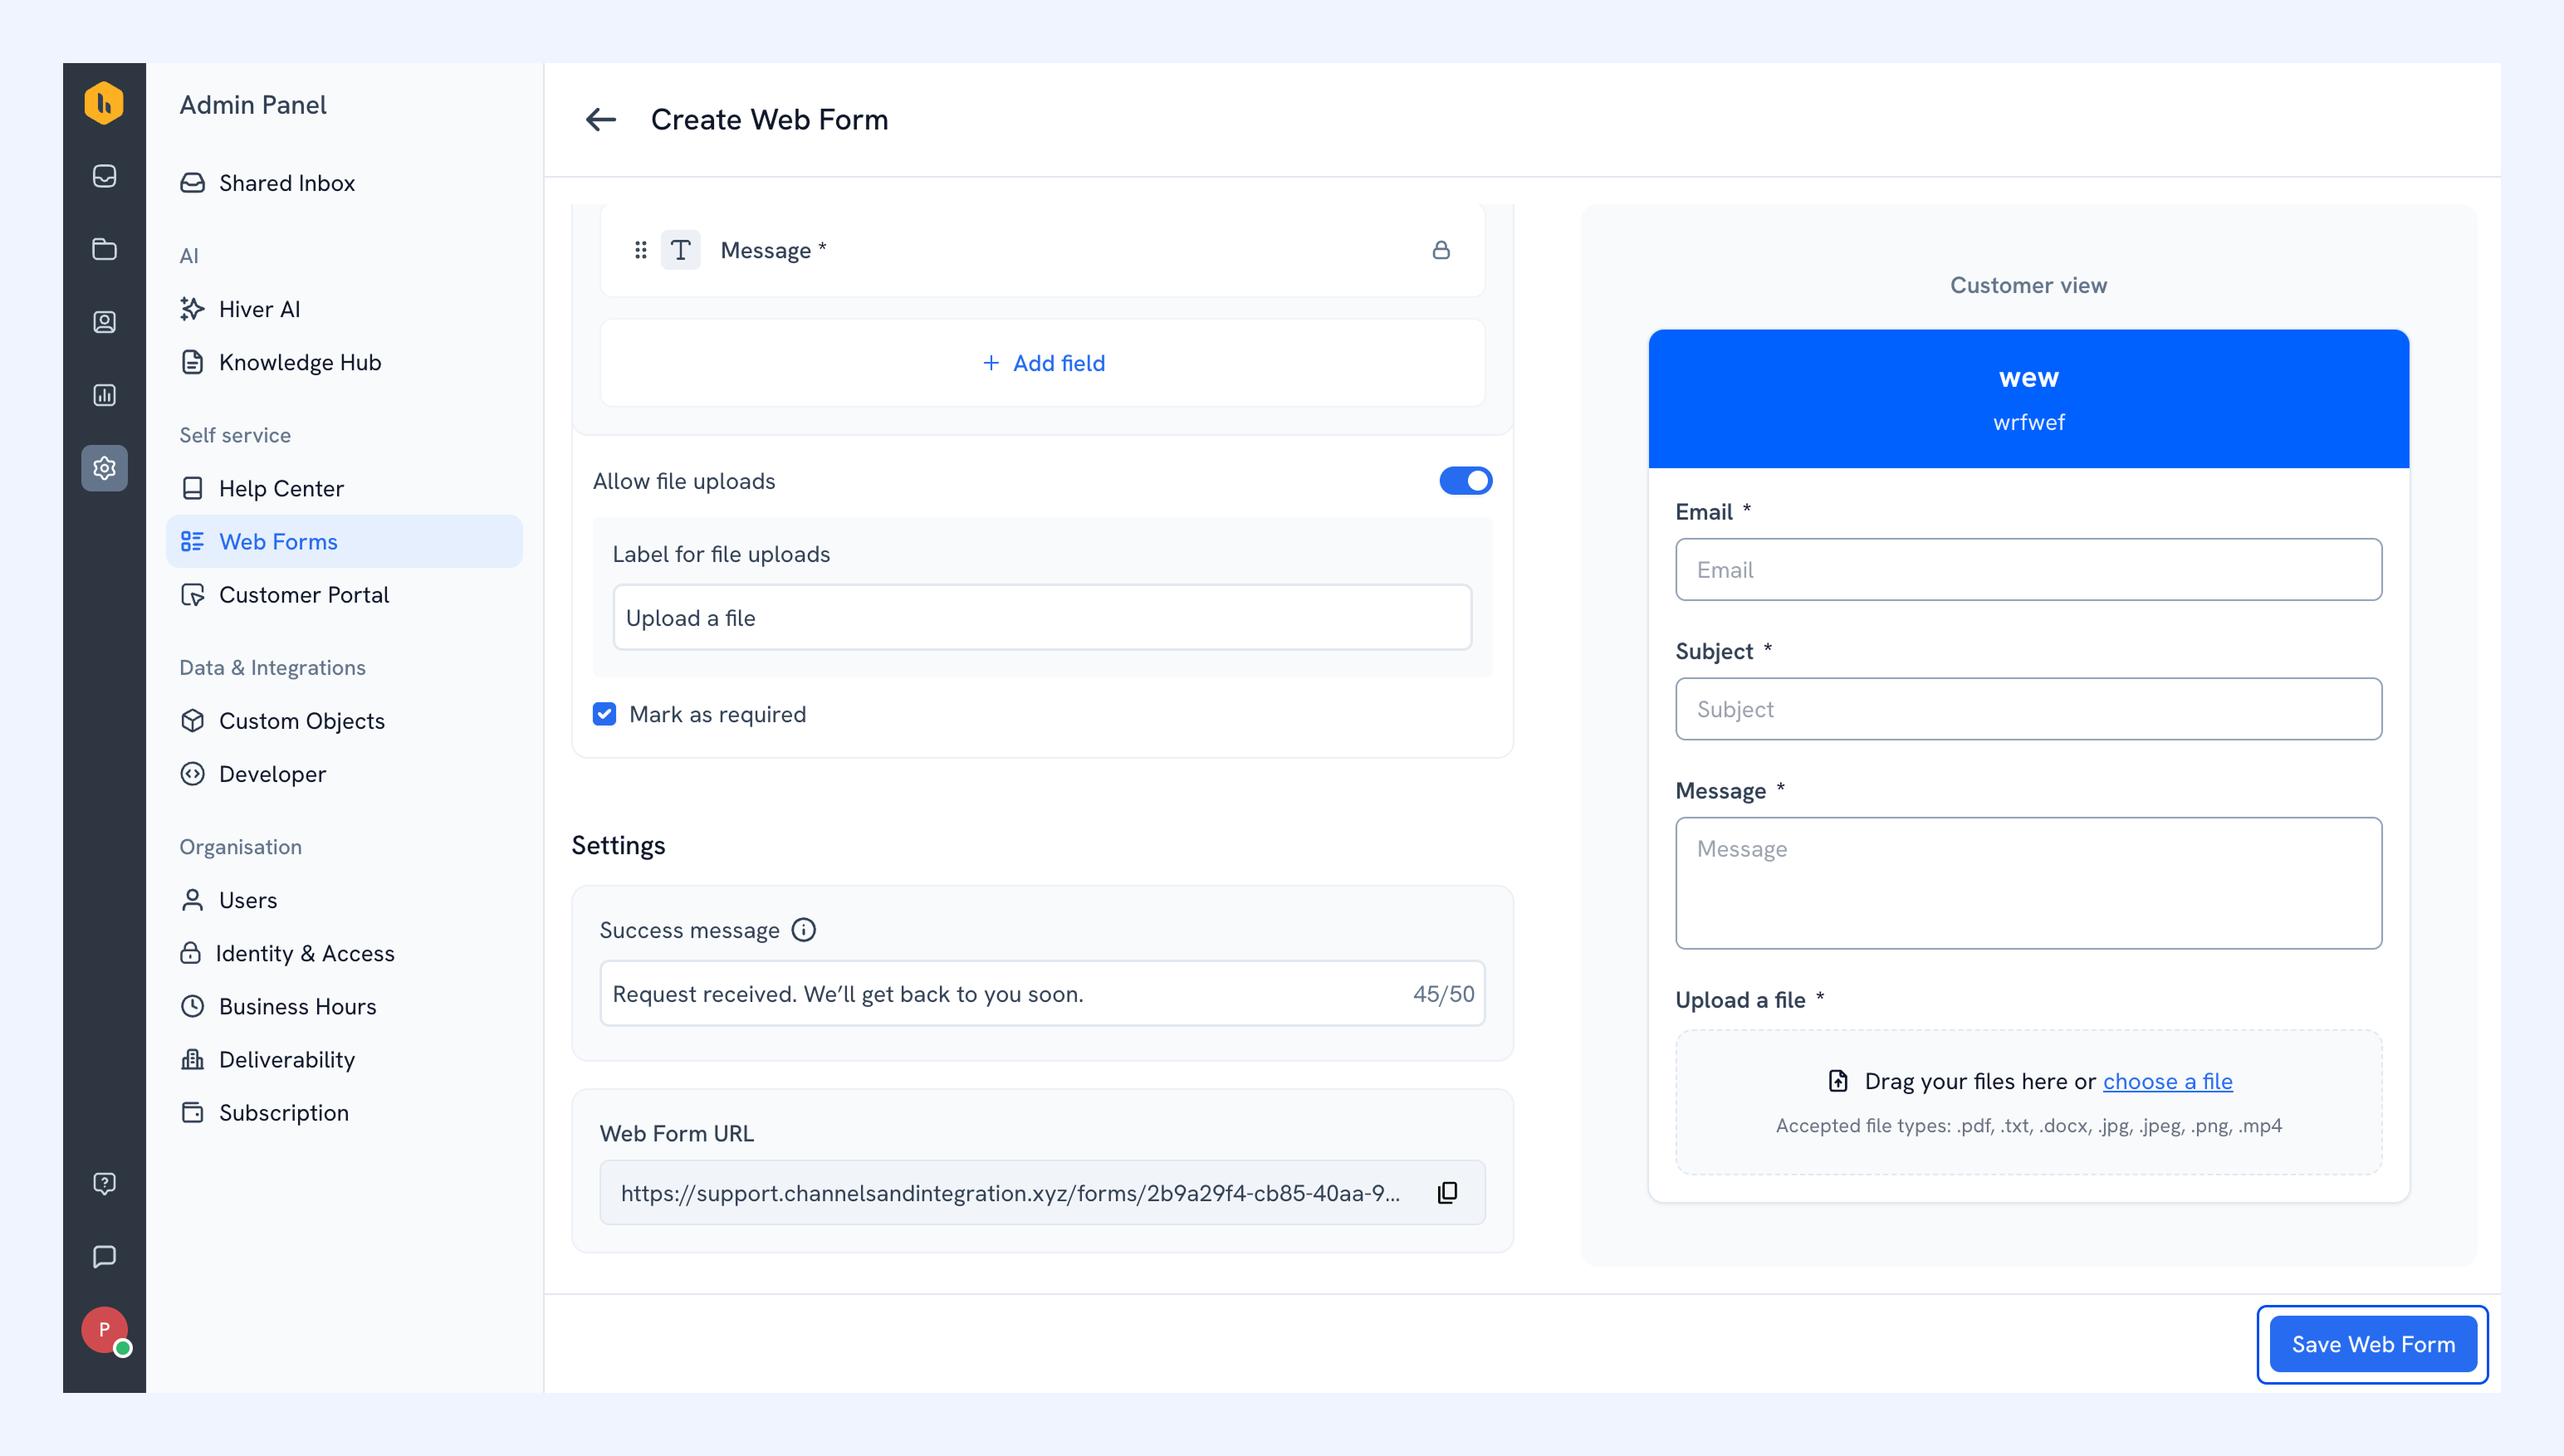
5. Lastly, add a success message to show after a visitor submits the form. (e.g. Request received. We’ll get back to you soon).
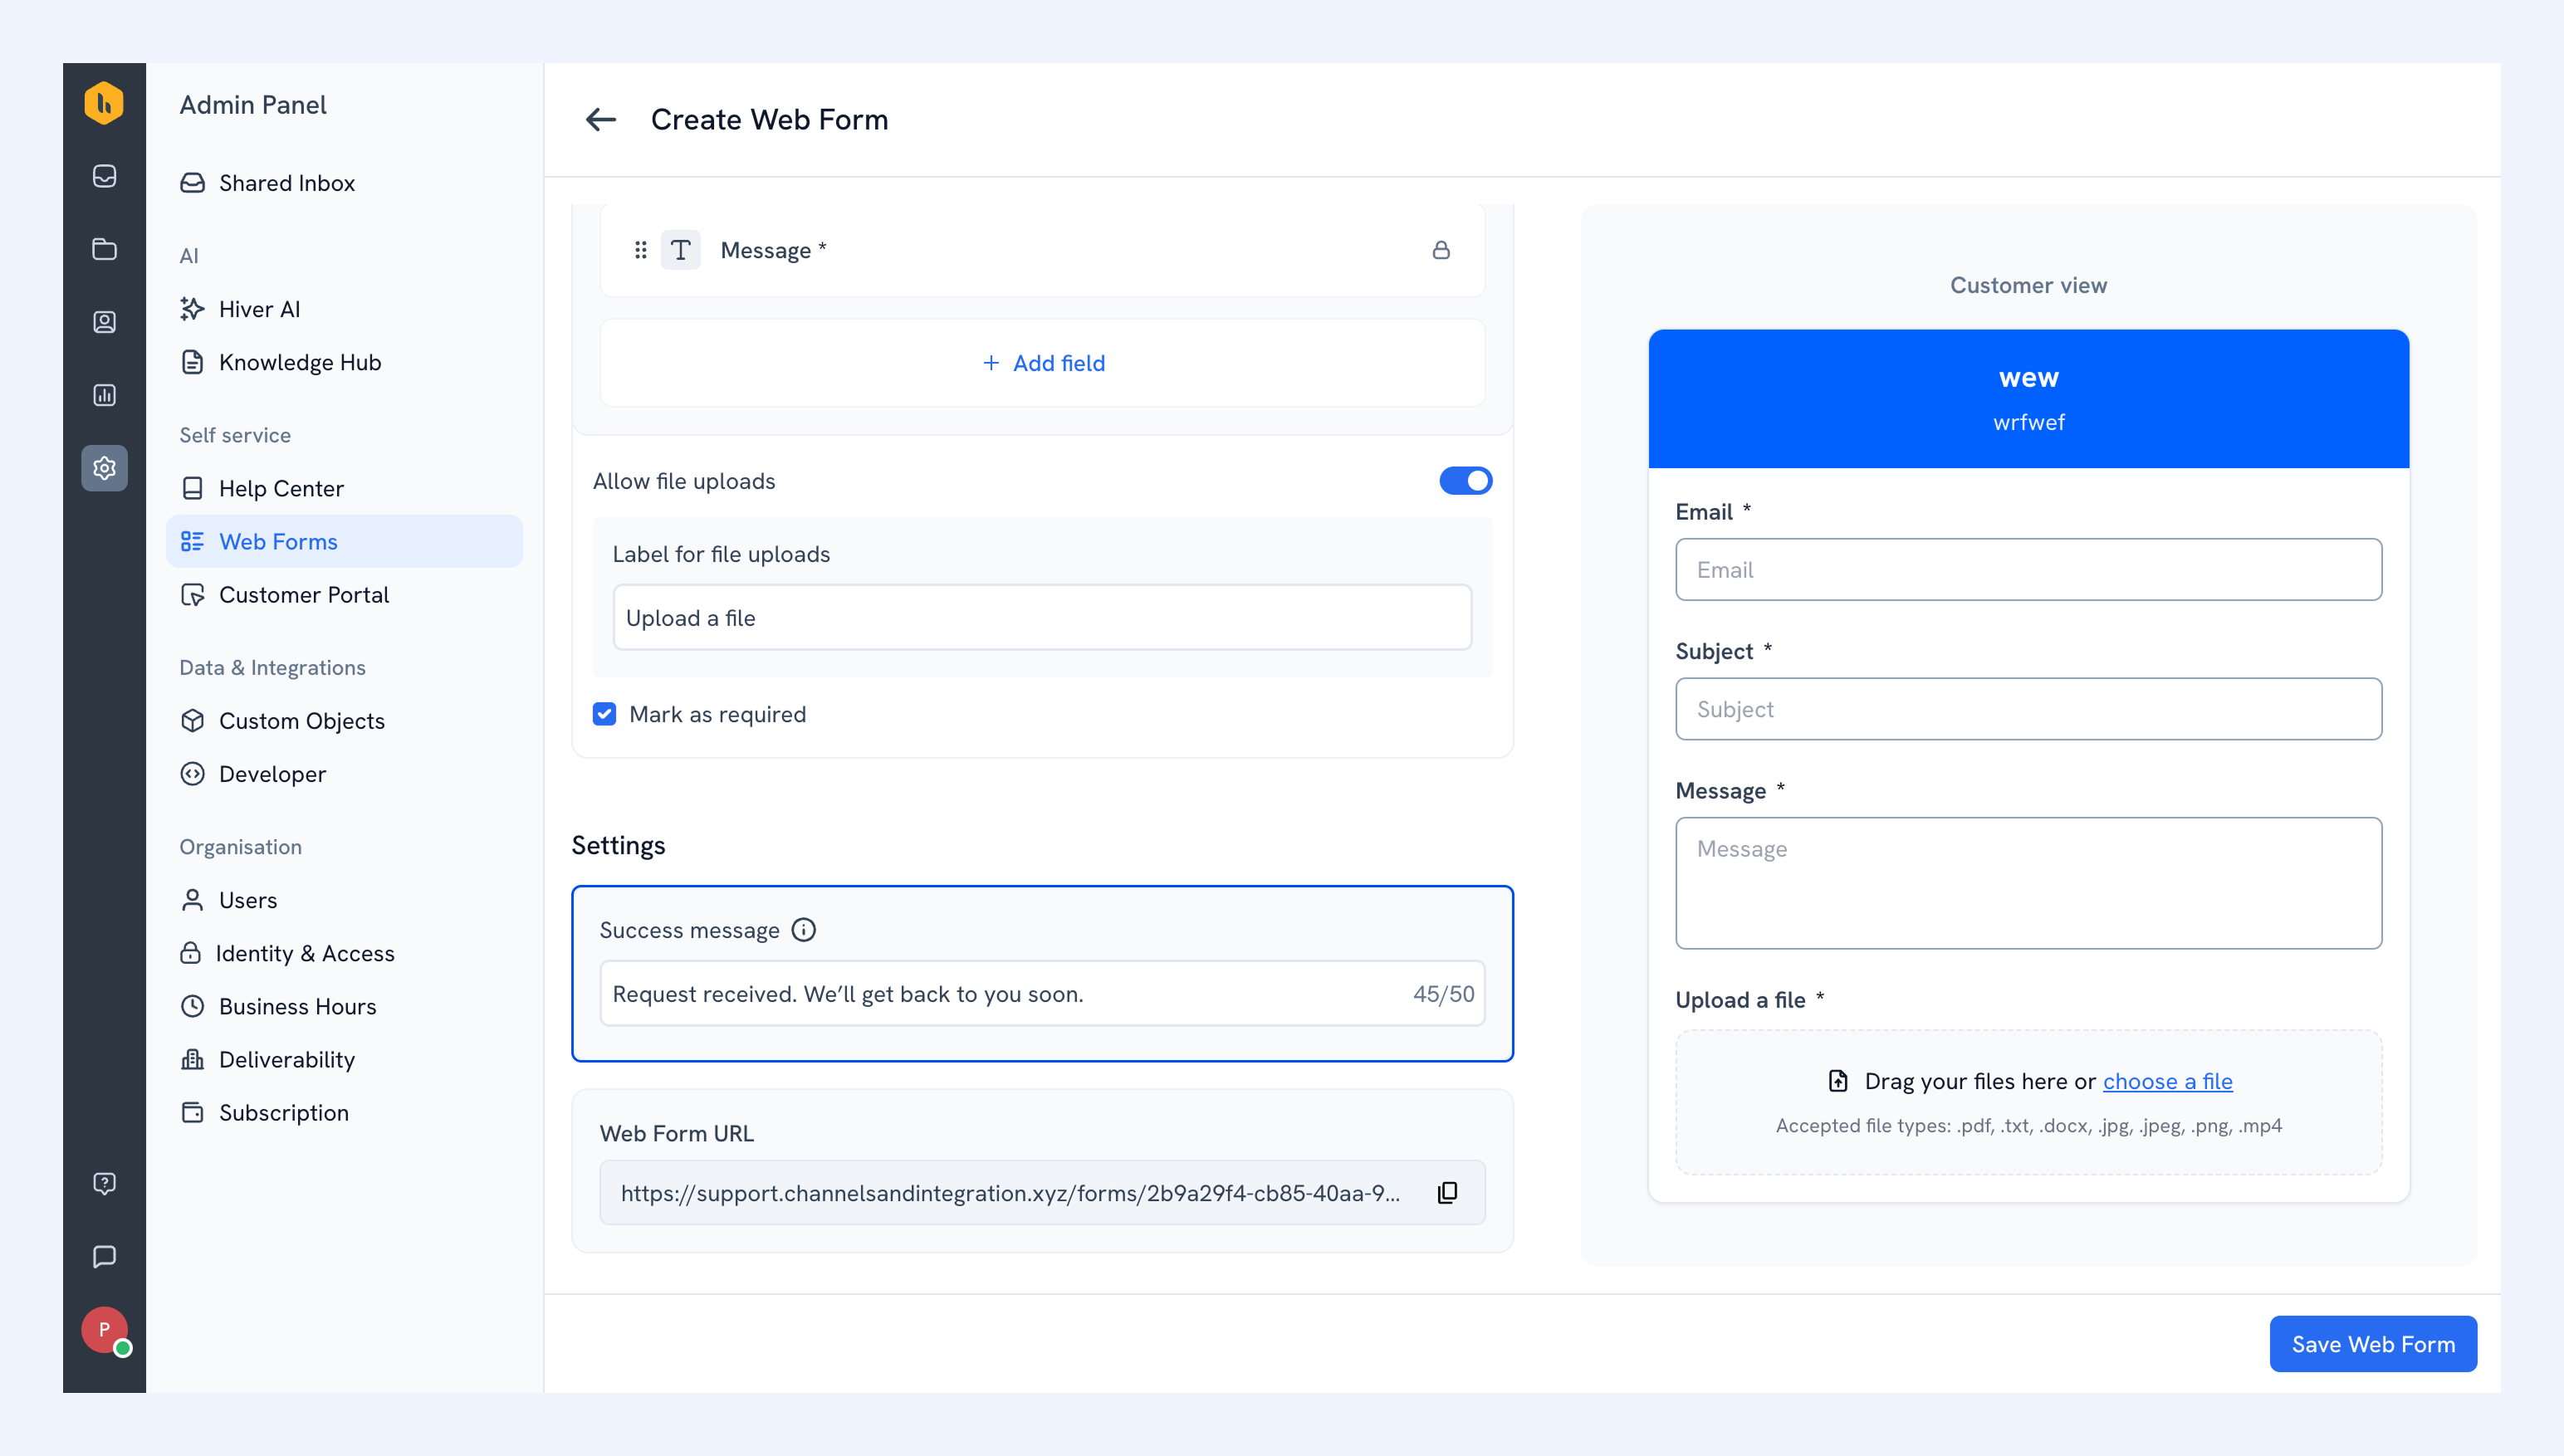
6. Once done, click Save Web Form.
Customizing Web Form settings
General settings
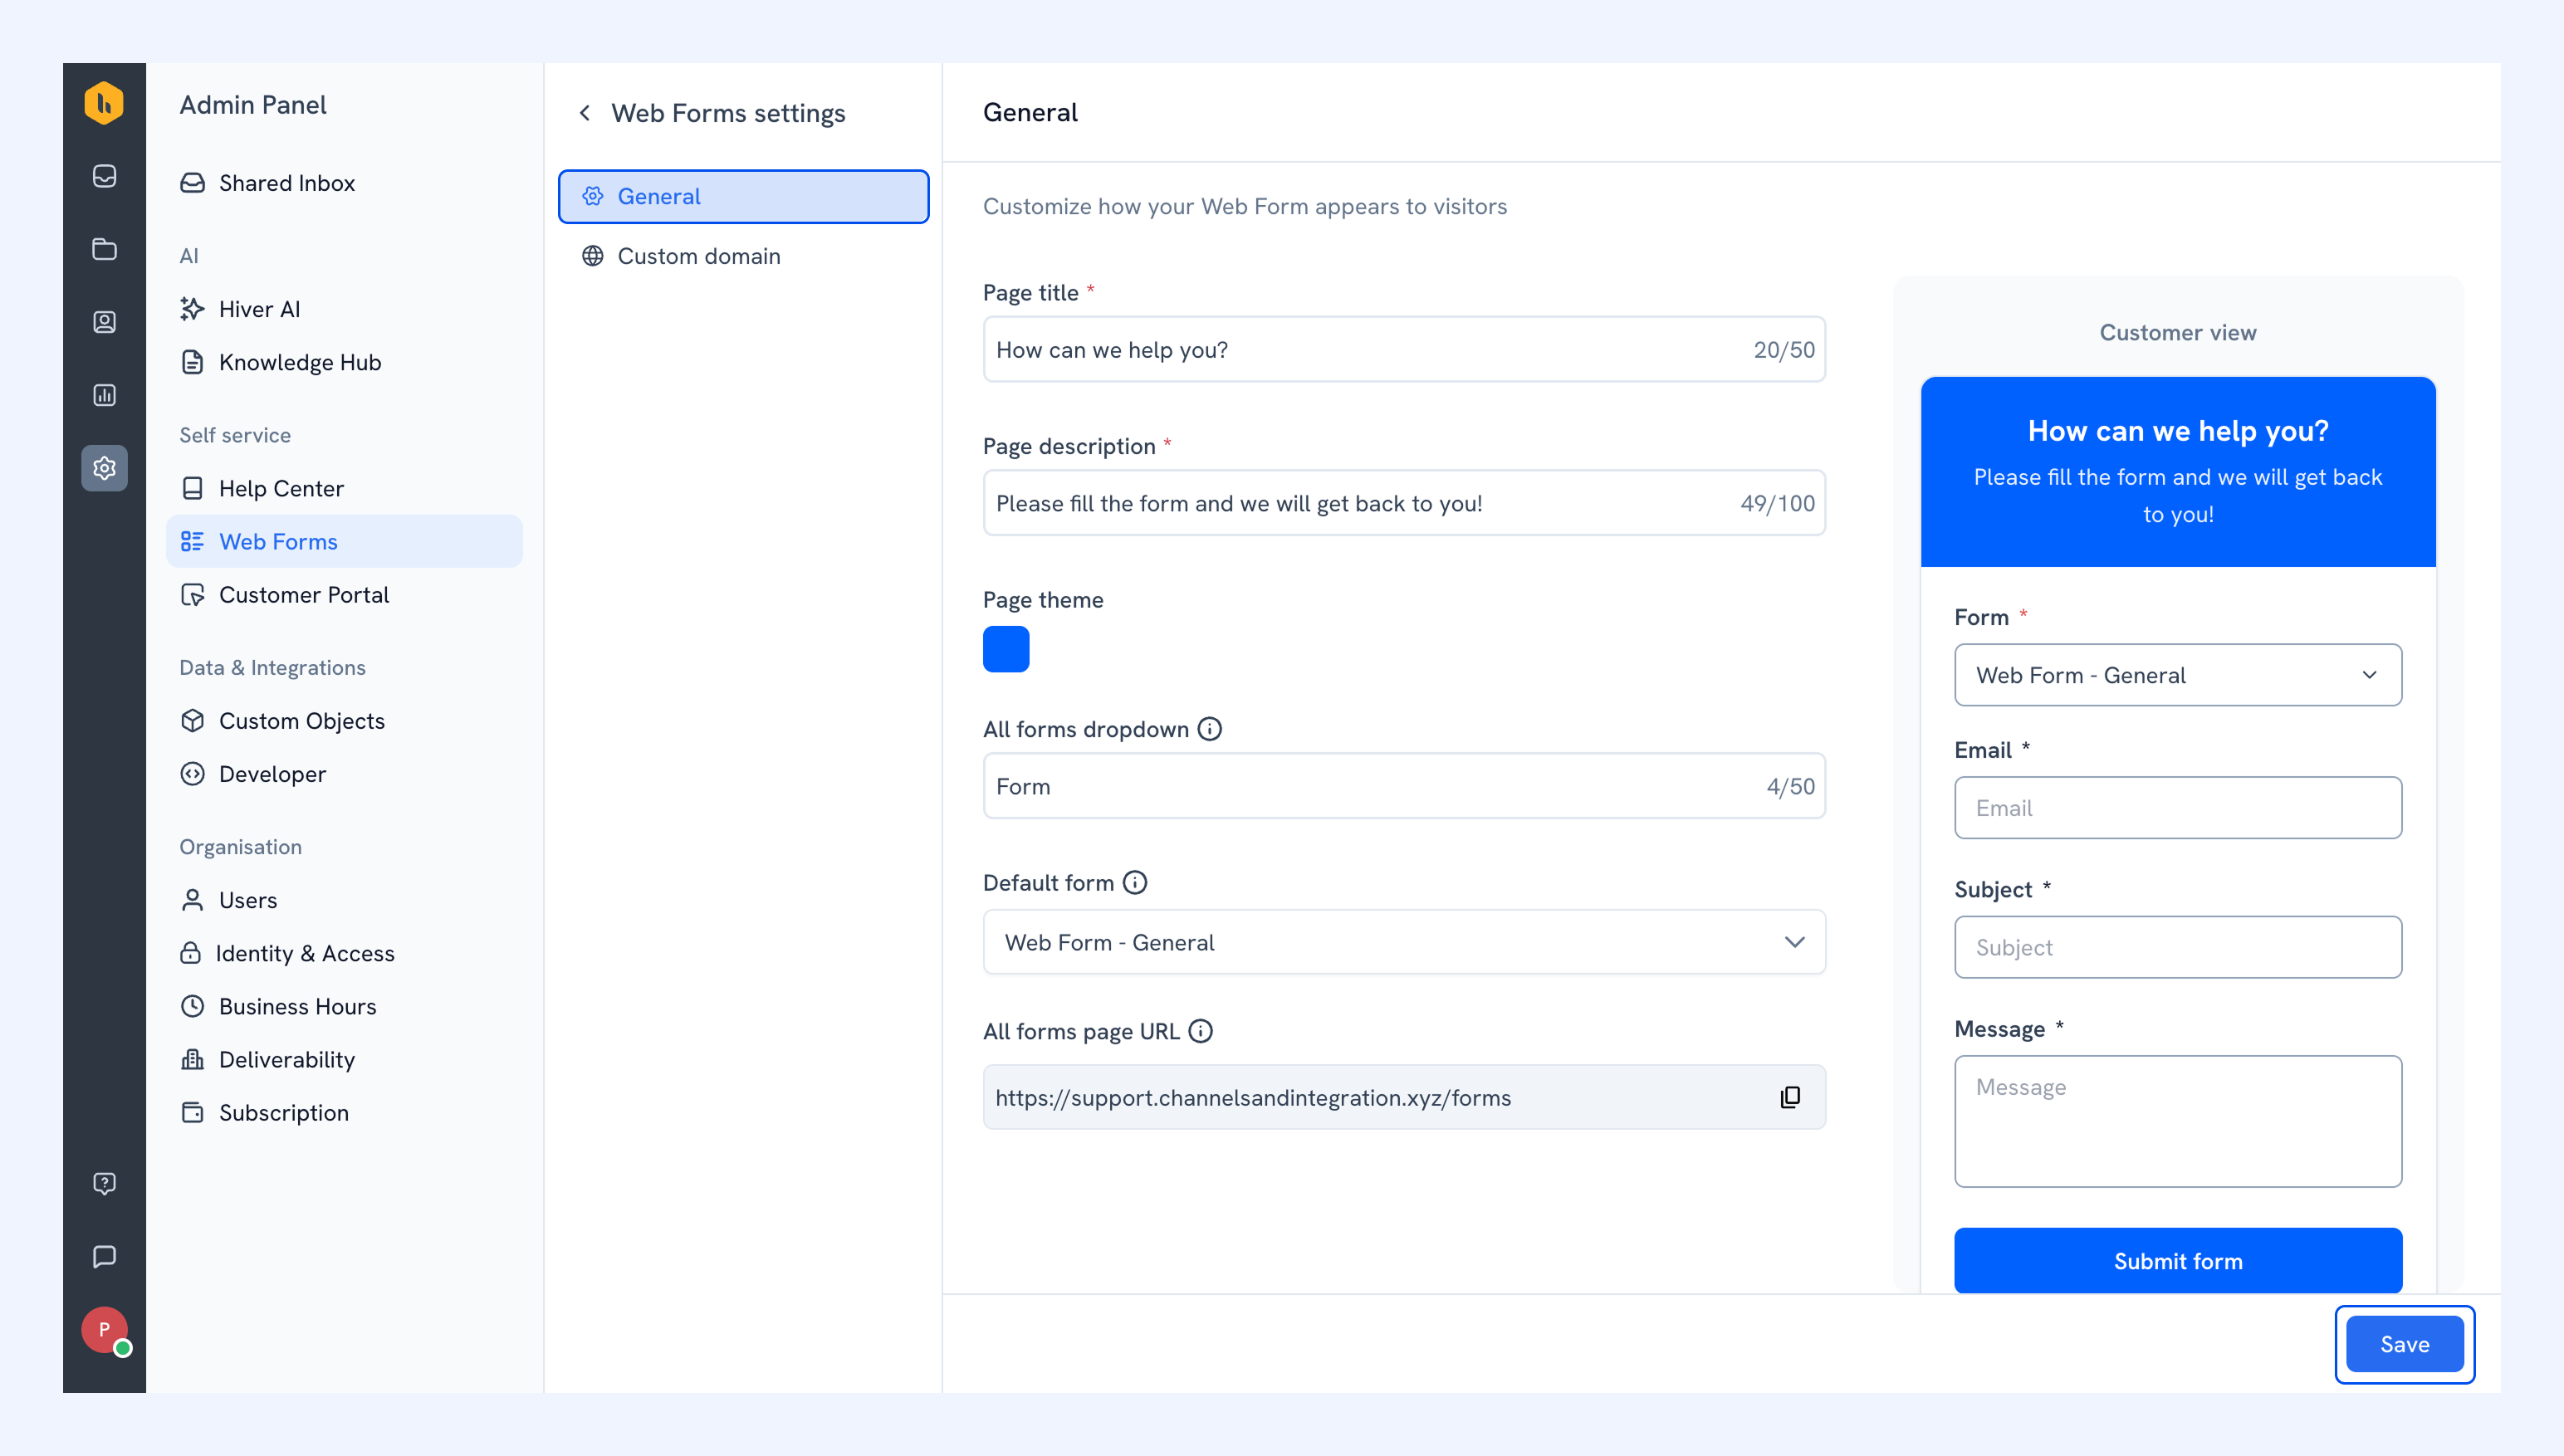
You can customize how your Web Forms and All forms page appear to visitors. The All forms page gives customers a single place to choose the type of request they want to submit.
- Page title: Title shown across each Web Form and the All forms page.
- Page description: Description shown below the title on each Web Form and the All forms page.
- Page theme: Select the color used for the form banner and buttons.
- All forms dropdown: Define the label shown for the dropdown that lets visitors switch between available Web Forms on the All forms page.
- Default form: The Web Form that will be pre-selected on the All forms page. You can only set one default form at a time.
- All forms page link: The link to the page containing all your Web Forms.
Once you’re done, click Save.
Custom domain settings
By default, your Web Forms are hosted on a URL provided by Hiver. You can also host them on your own domain, so your links stay consistent with your brand when you share them.
Note:
- Custom domain for Web Forms is currently in an early access program. To enable it for your account, reach out to us at support@hiverhq.com.
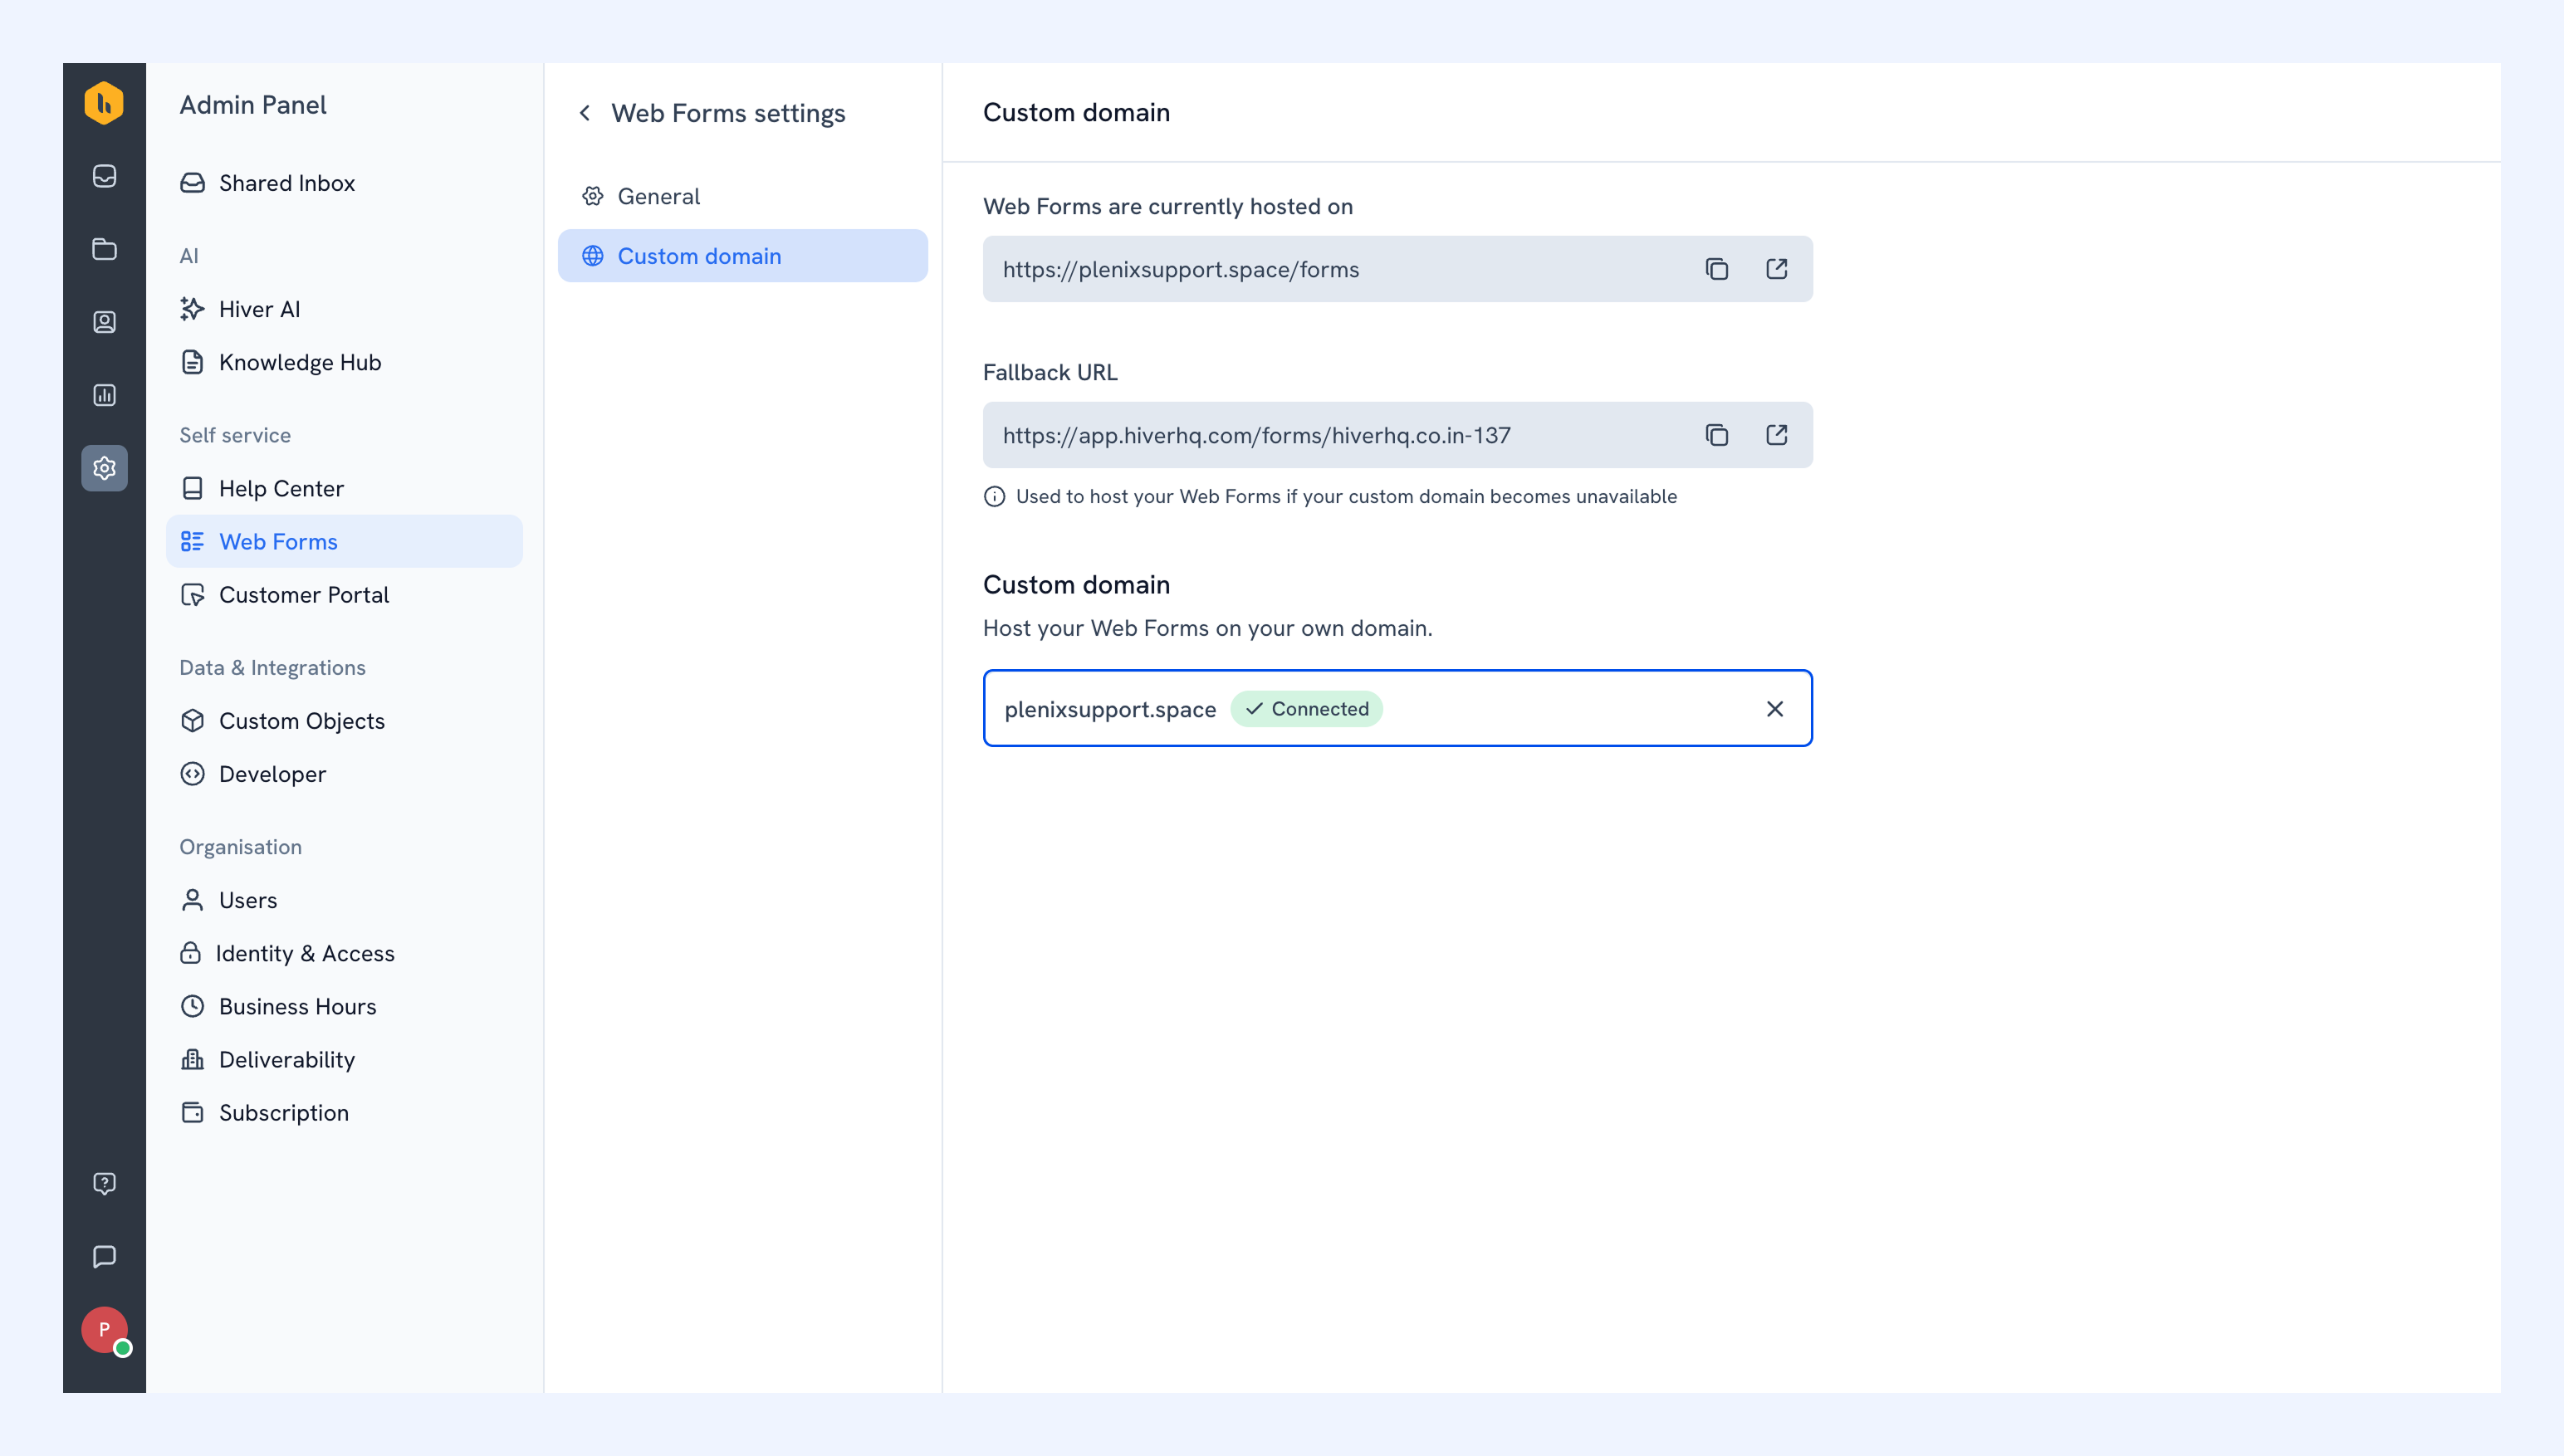
- Your Hiver URL will continue to remain active and will be used if your custom domain is unavailable.
If you've already set up a custom domain for your Customer Portal, you can use the same domain for your Web Forms. You won't need to add the DNS records or verify the domain again.
To add a new custom domain:
1. Enter the domain you want to use, then click Get DNS records.
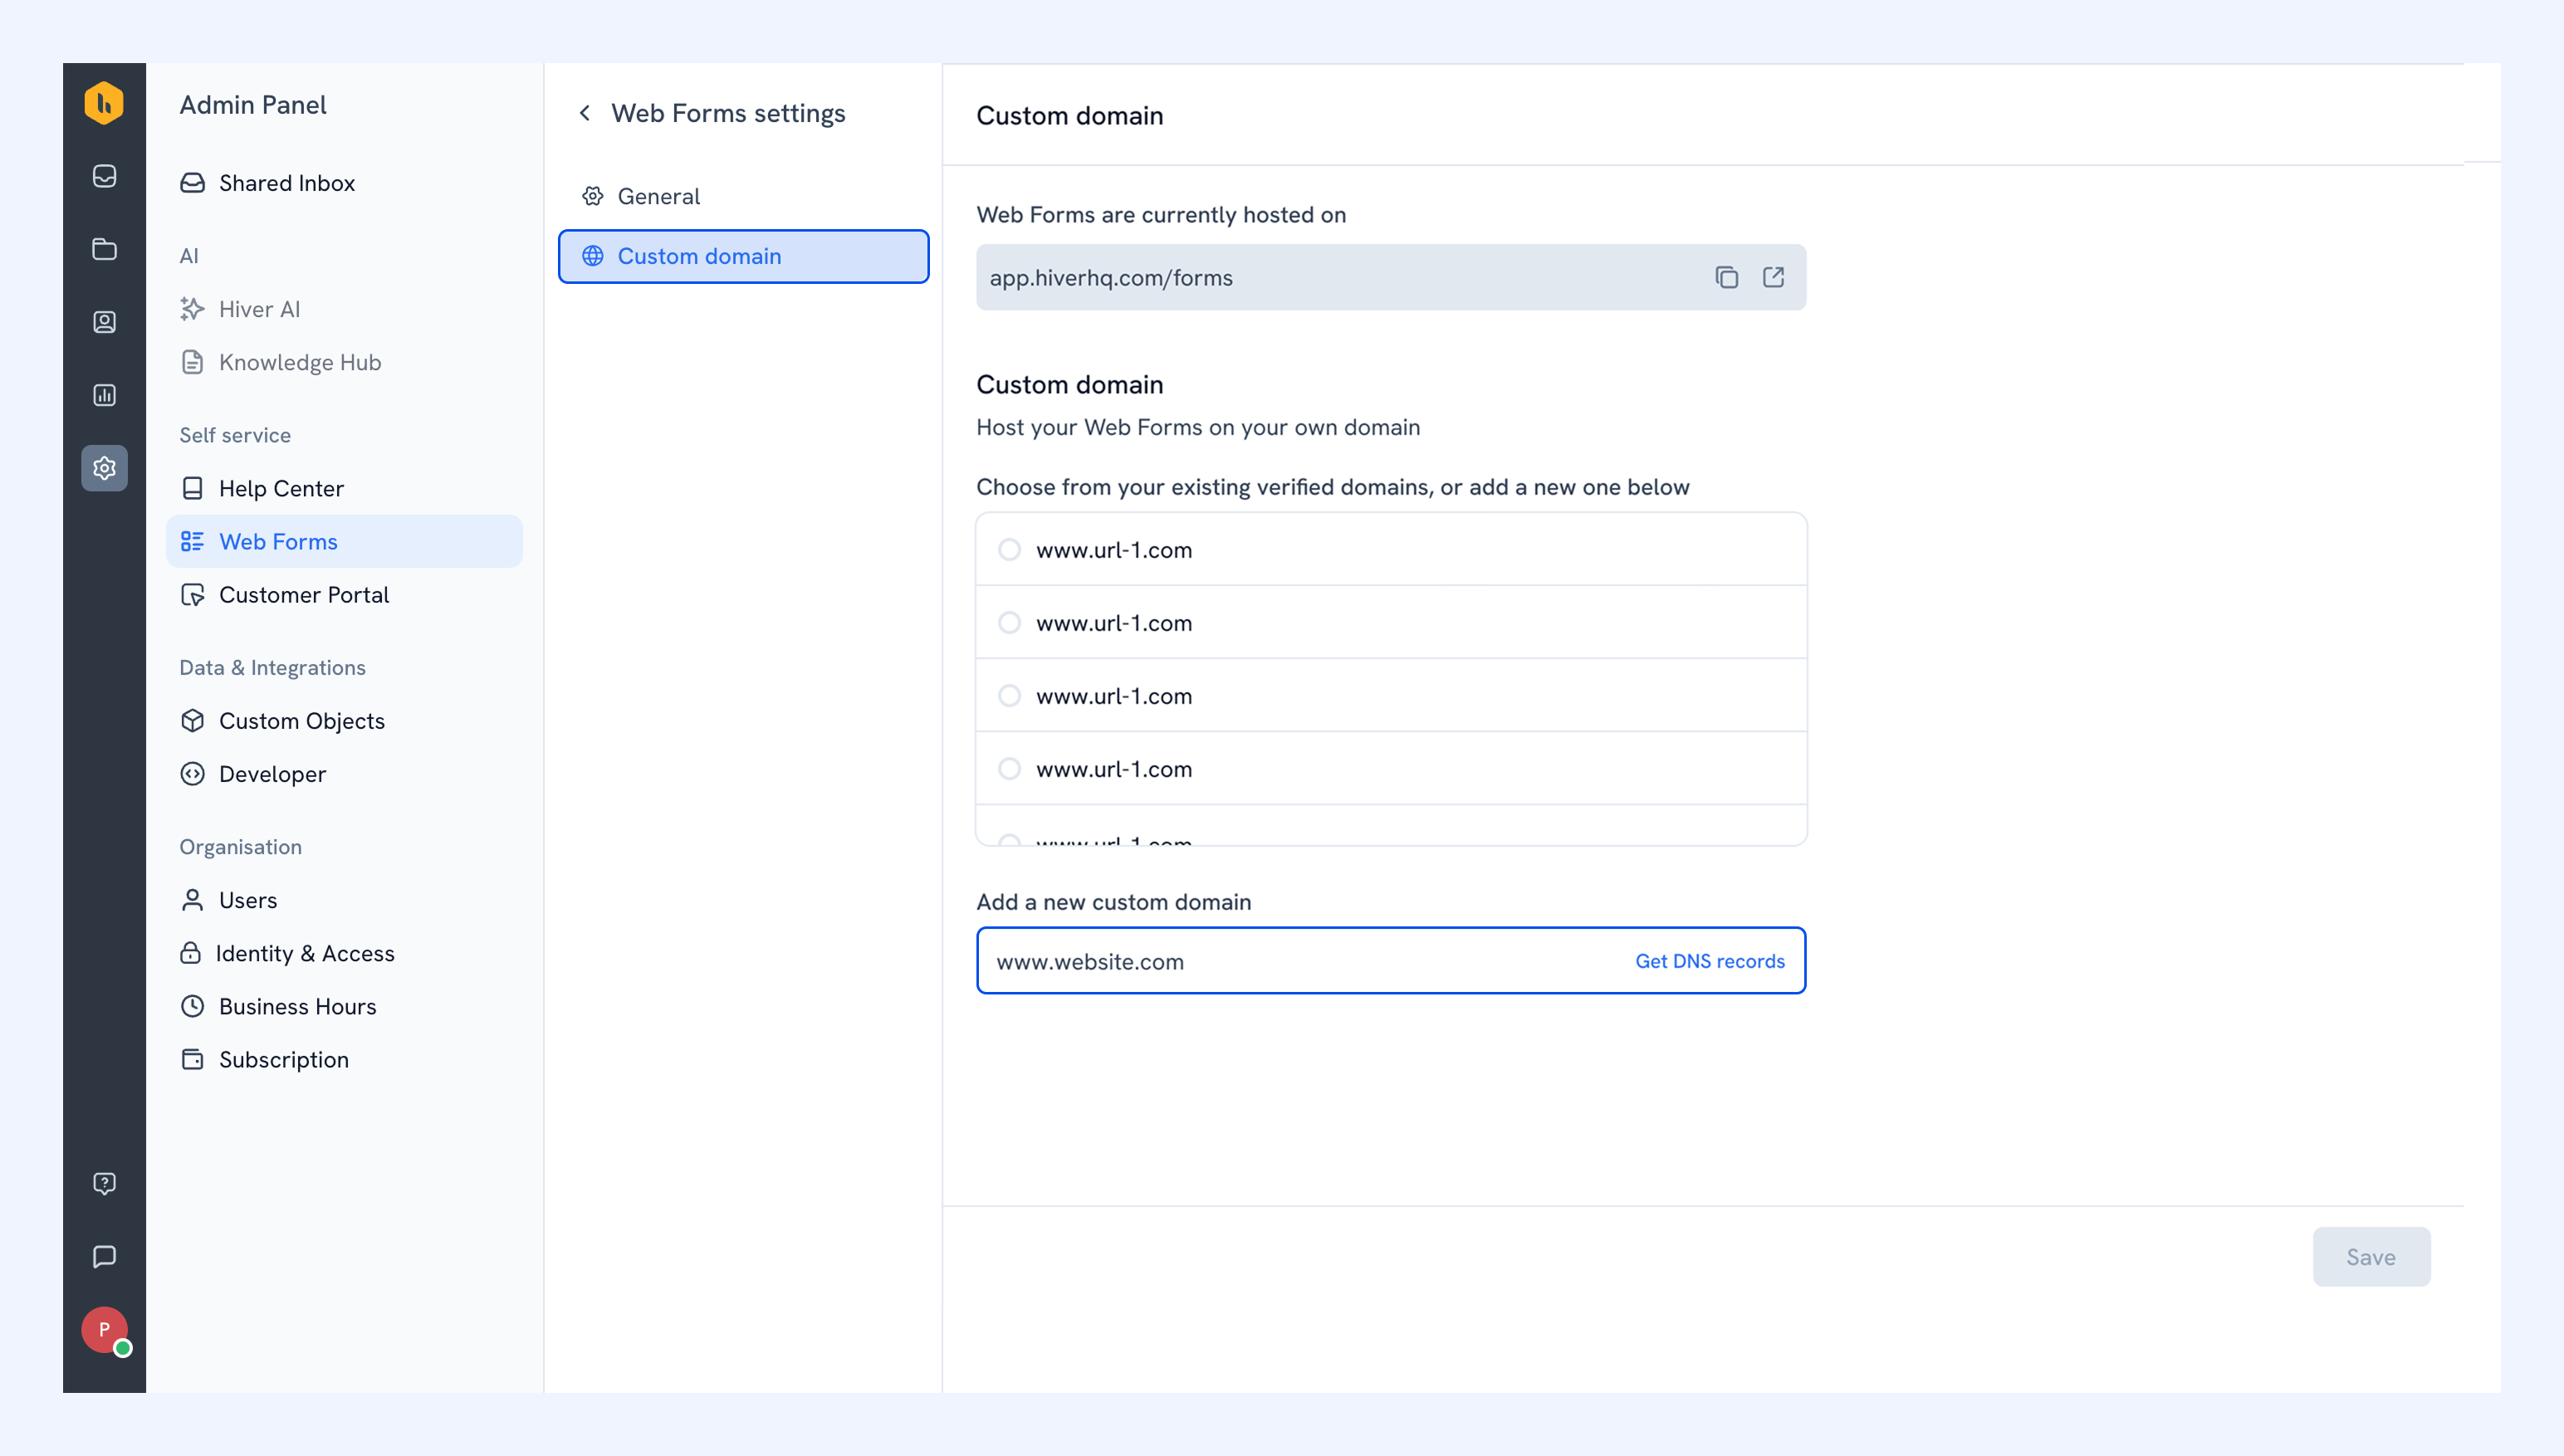
2. Copy the CNAME and Value records, and add them to your domain provider's DNS settings.
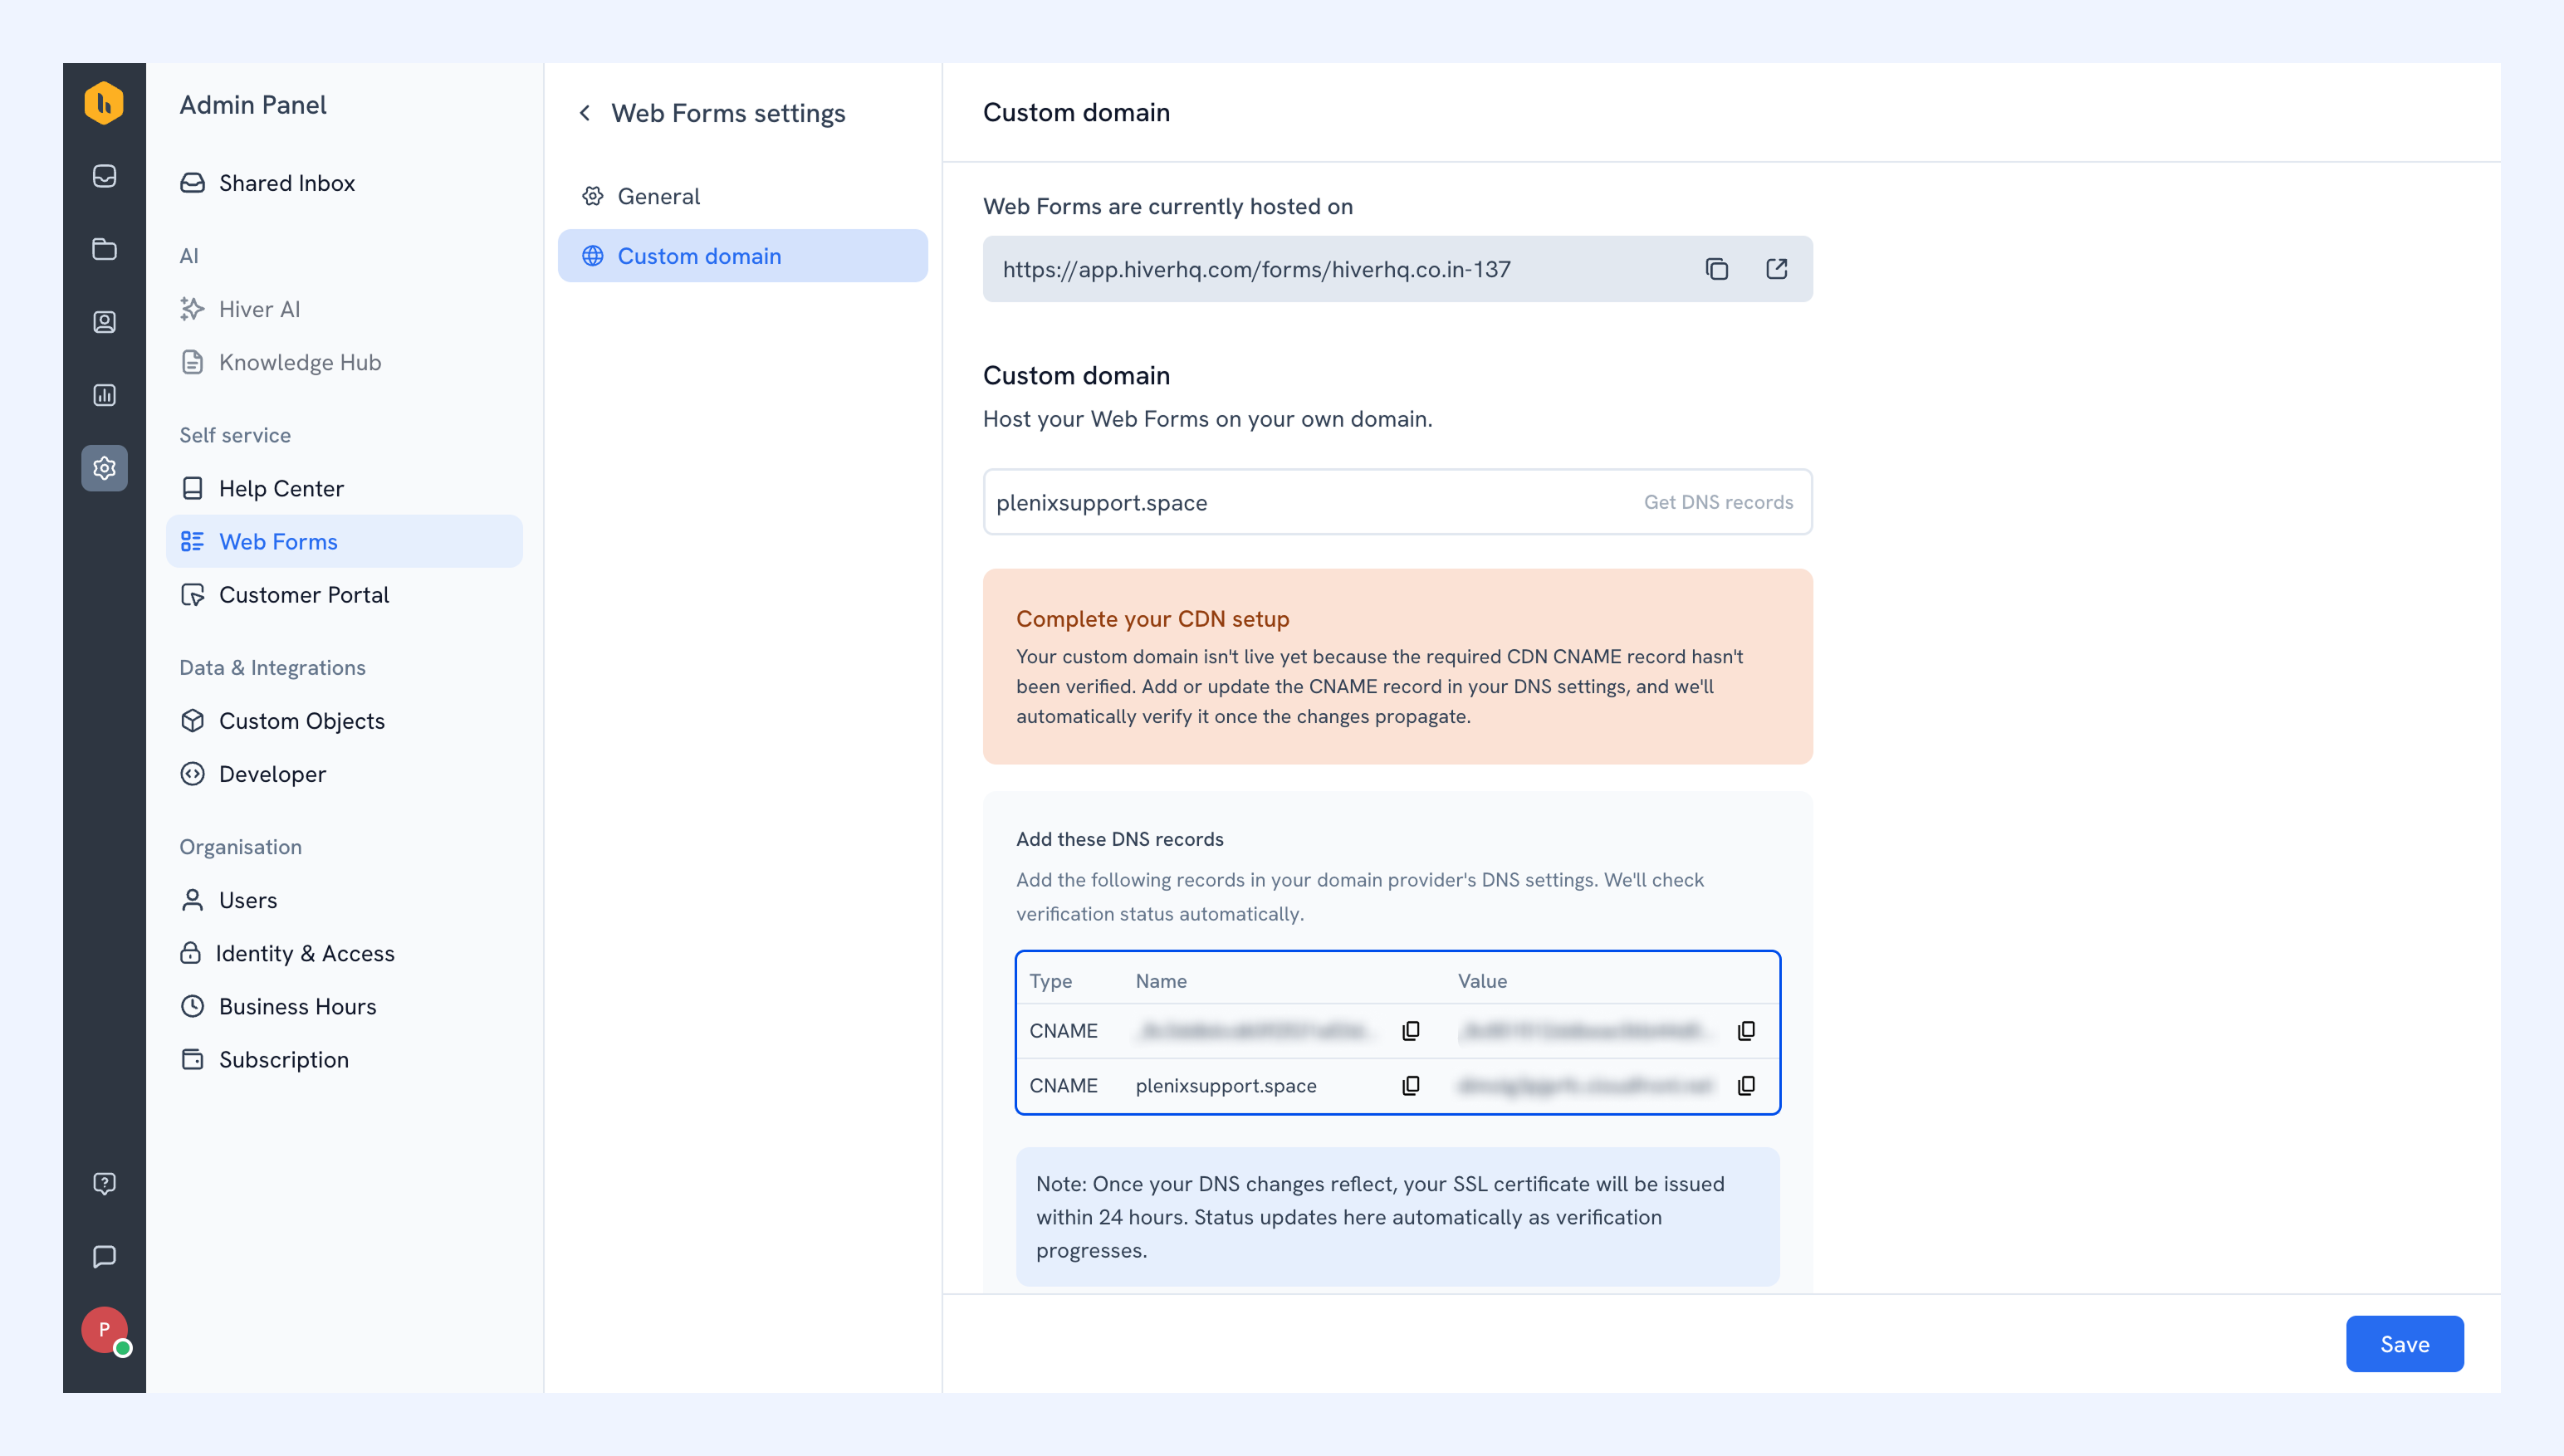
Once the records are in place, Hiver detects them and verifies your domain automatically.
Note:
- Your Web Forms keep using the Hiver URL until your custom domain is verified. Once it's verified, Web Forms switch to your custom domain automatically.
- Hiver issues your SSL certificate within 24 hours once your DNS changes take effect.
Once verification is complete, your domain shows as Connected, and your Web Forms load on your custom domain.
Sharing a Web Form
Once you’ve created your Web Form, you can copy the link to it from the settings and:
- Add it to your website (for example, a “Contact us” page or button)
- Share it directly with customers
Embed a Web Form on your website
You can embed a Web Form directly on your website, product, or mobile app using a code snippet. The form appears on the page, so visitors can submit a request without leaving your site.
Note: This feature is currently in an early access program. To enable it for your account, reach out to us at support@hiverhq.com.
After you create a Web Form, you can copy the code snippet, or send it to your developer.
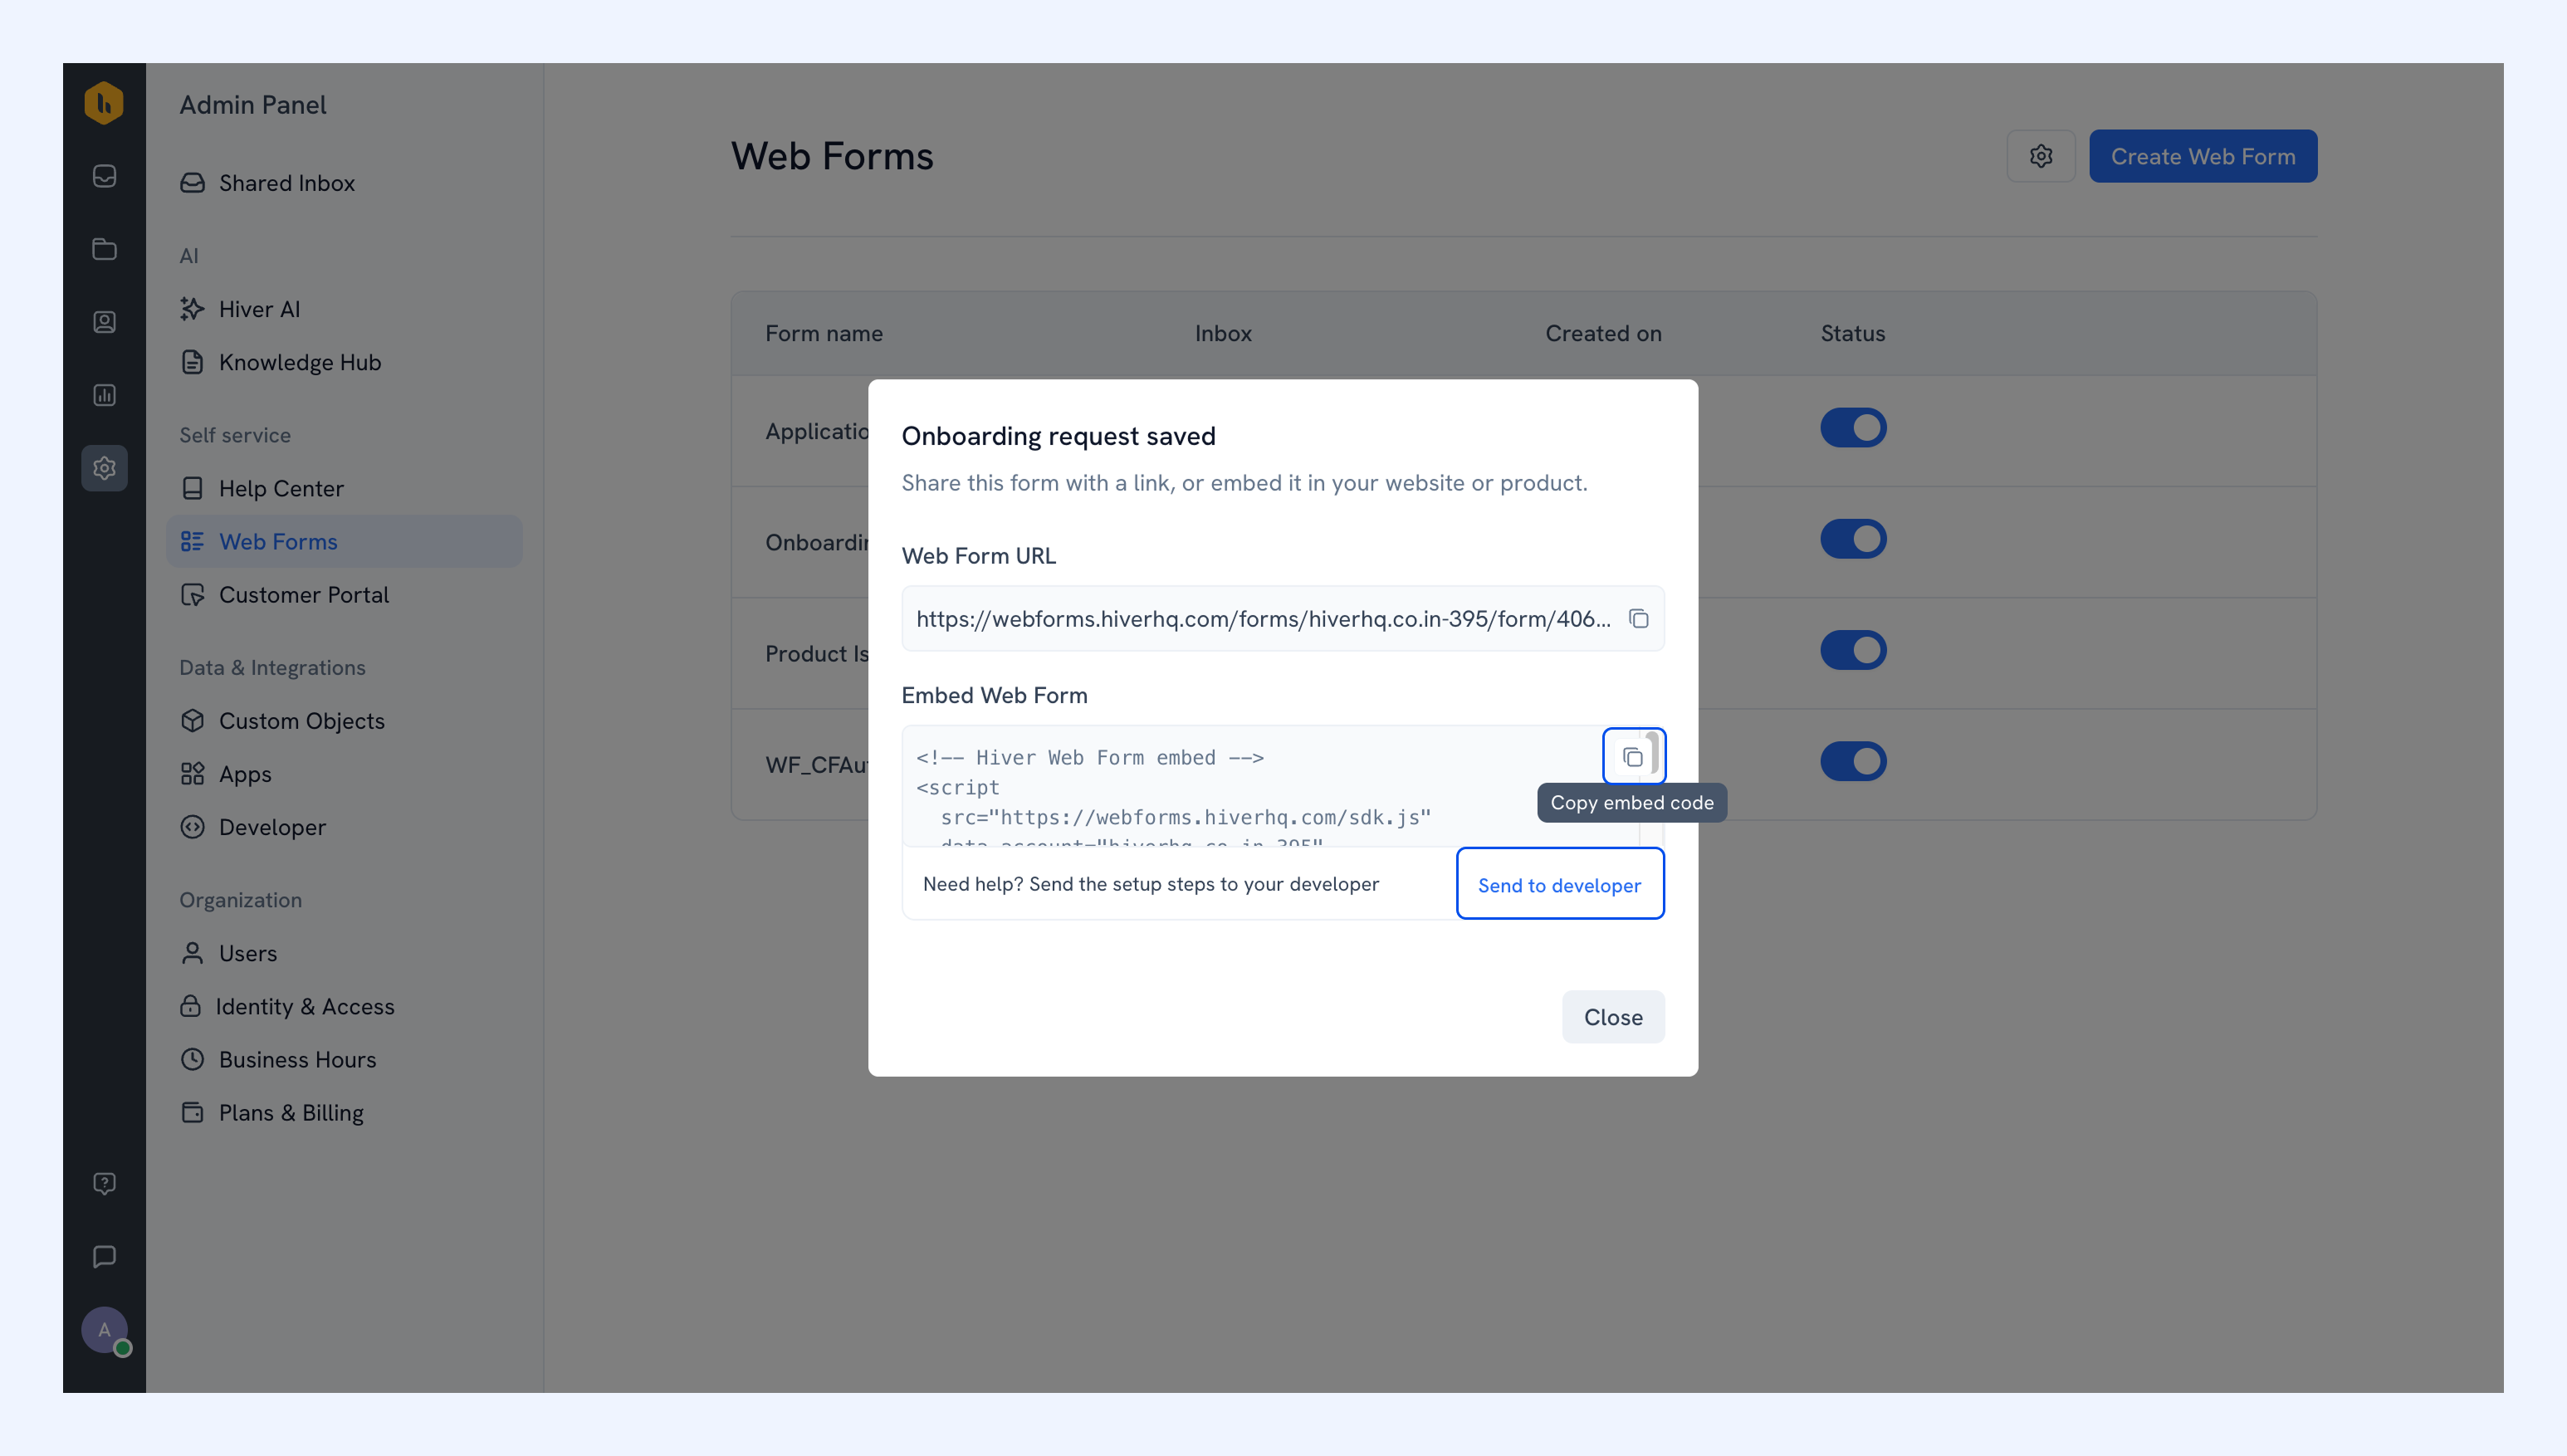
To send it to your developer, add their email and an optional note, then click Send instructions.
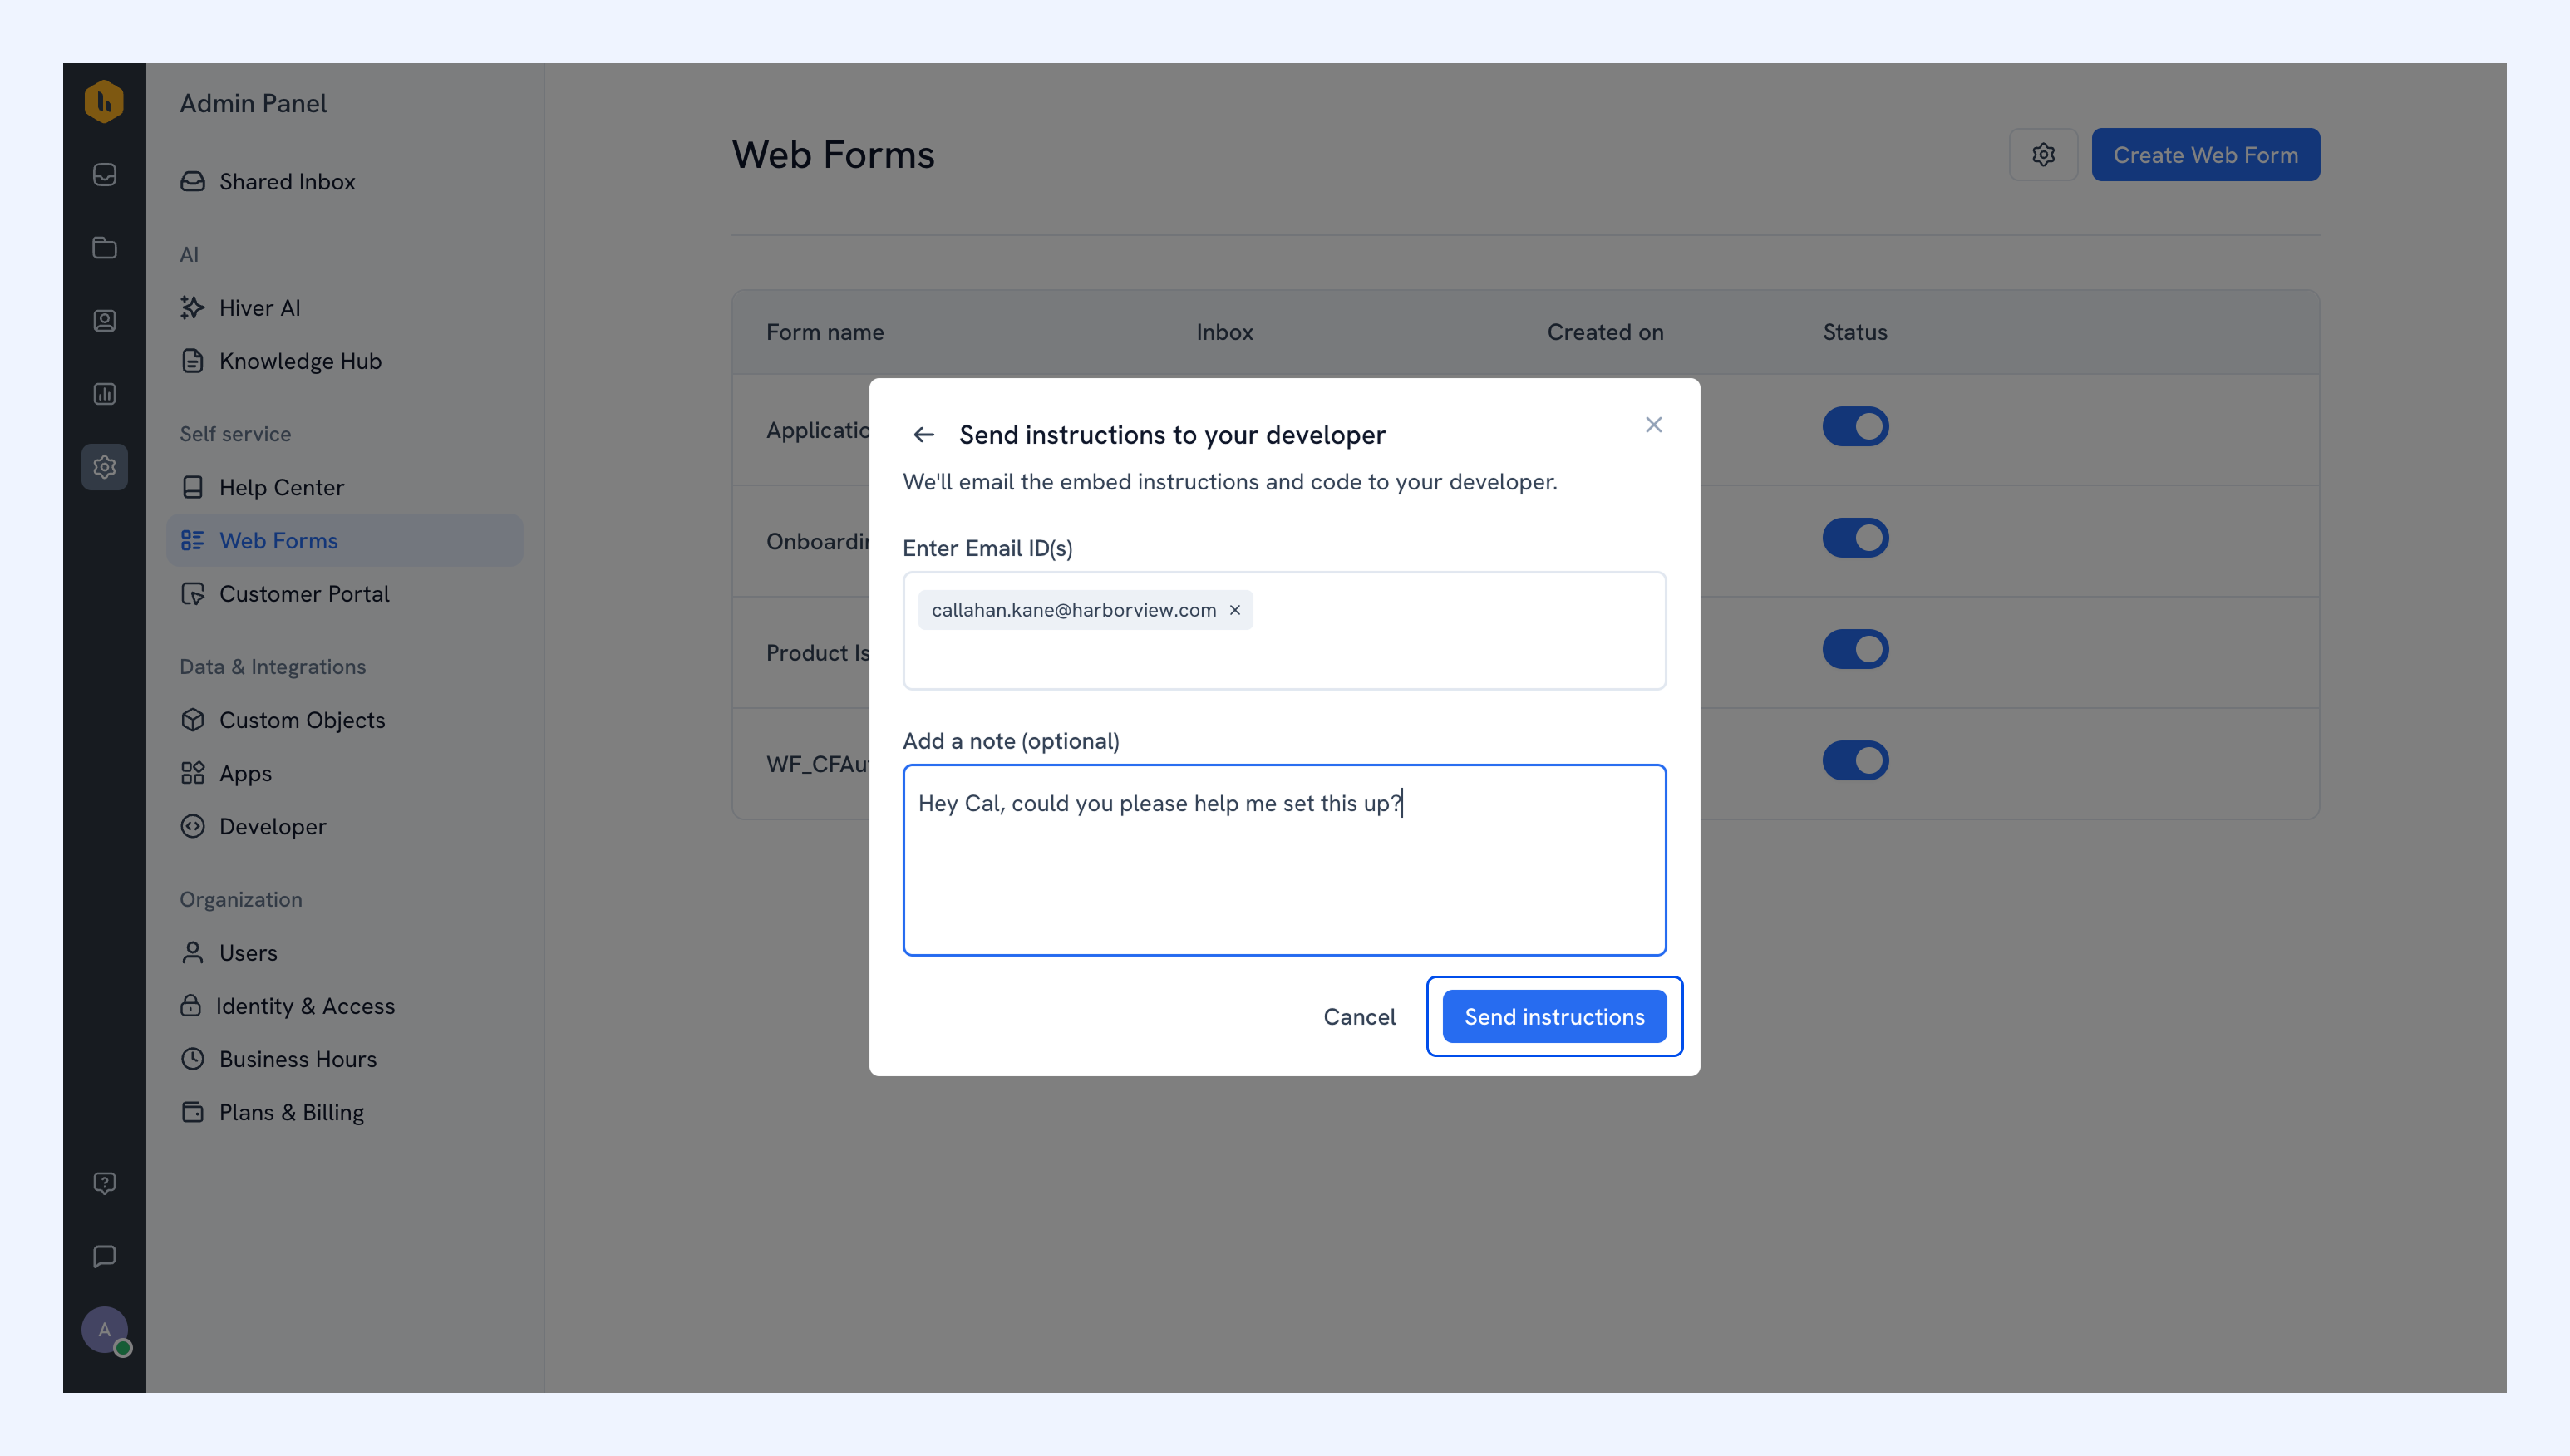
You can set the snippet to control how the form appears:
- Display: Open the form as a pop-up modal or full screen.
- Position: Place the pop-up at the bottom left or bottom right.
- Size: Set the form's width and height.
- Trigger: Open the form when a visitor clicks a button, with a button label and placement you choose.
Pre-fill details for signed-in visitors
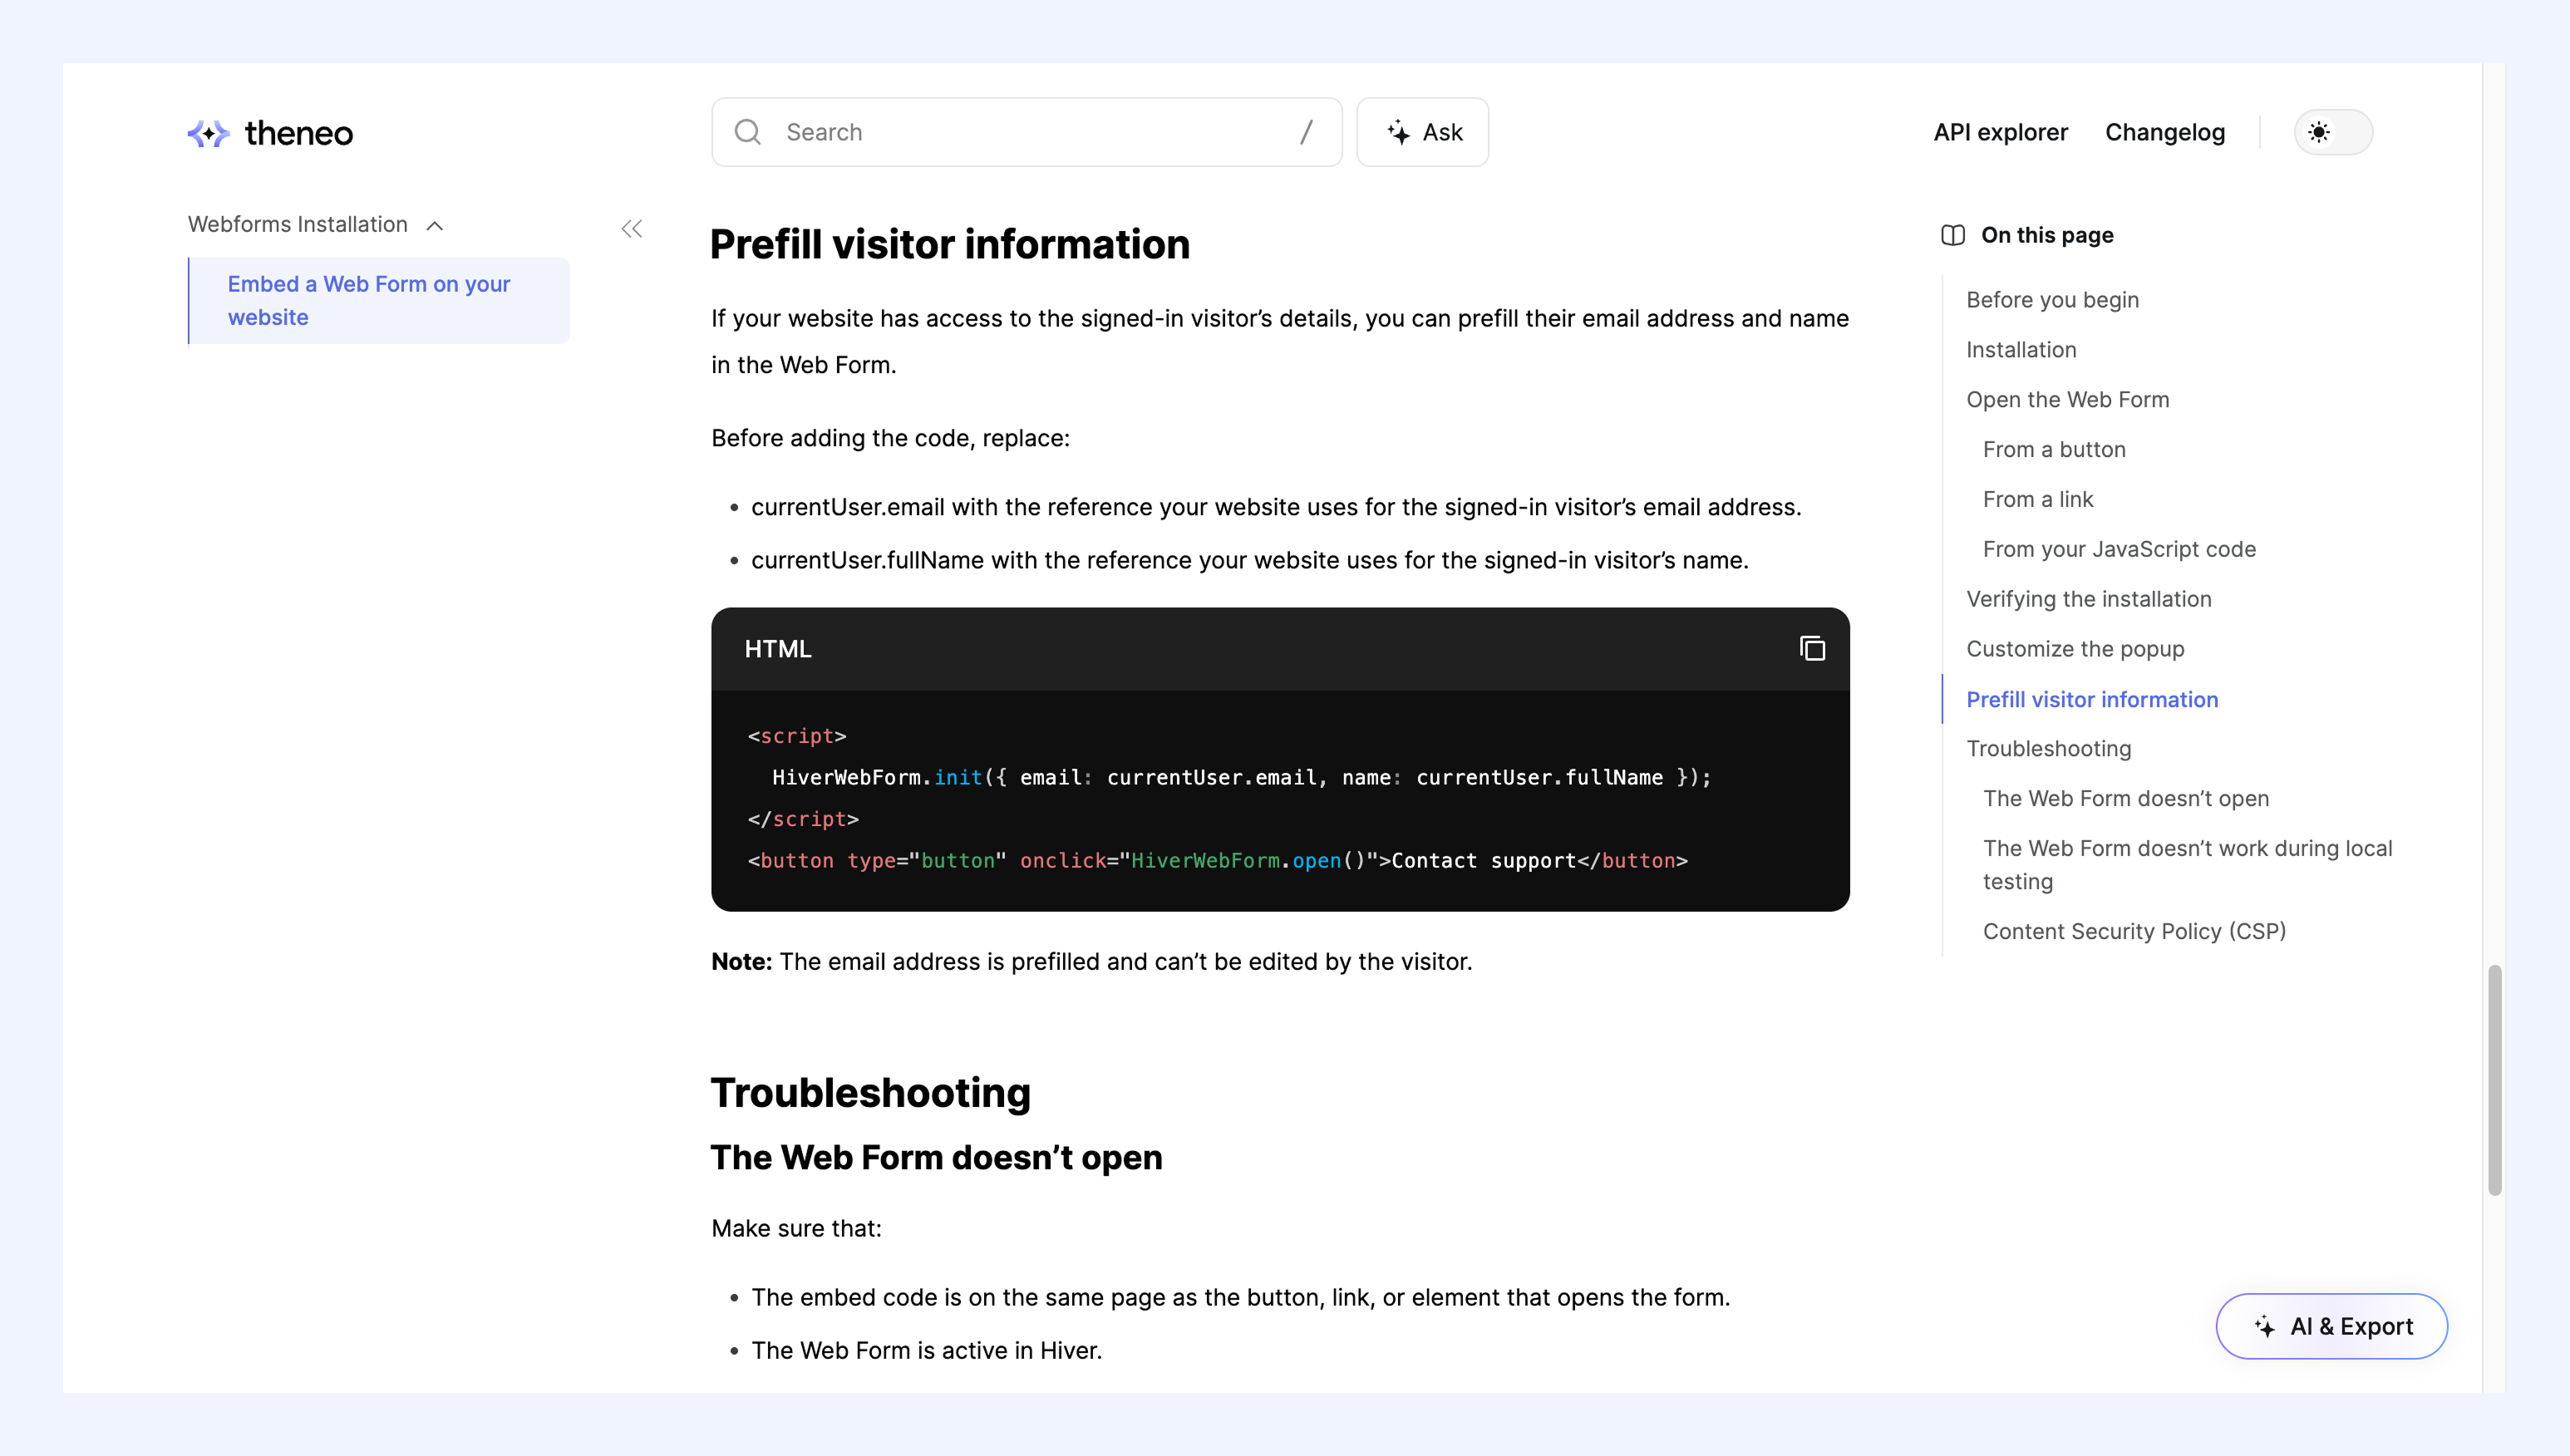
If visitors are already signed in to your website, your developers can set the snippet to fill in their details, like name and email, automatically.
Learn more about passing visitor details in the embed code.
Tracking Web Form submissions
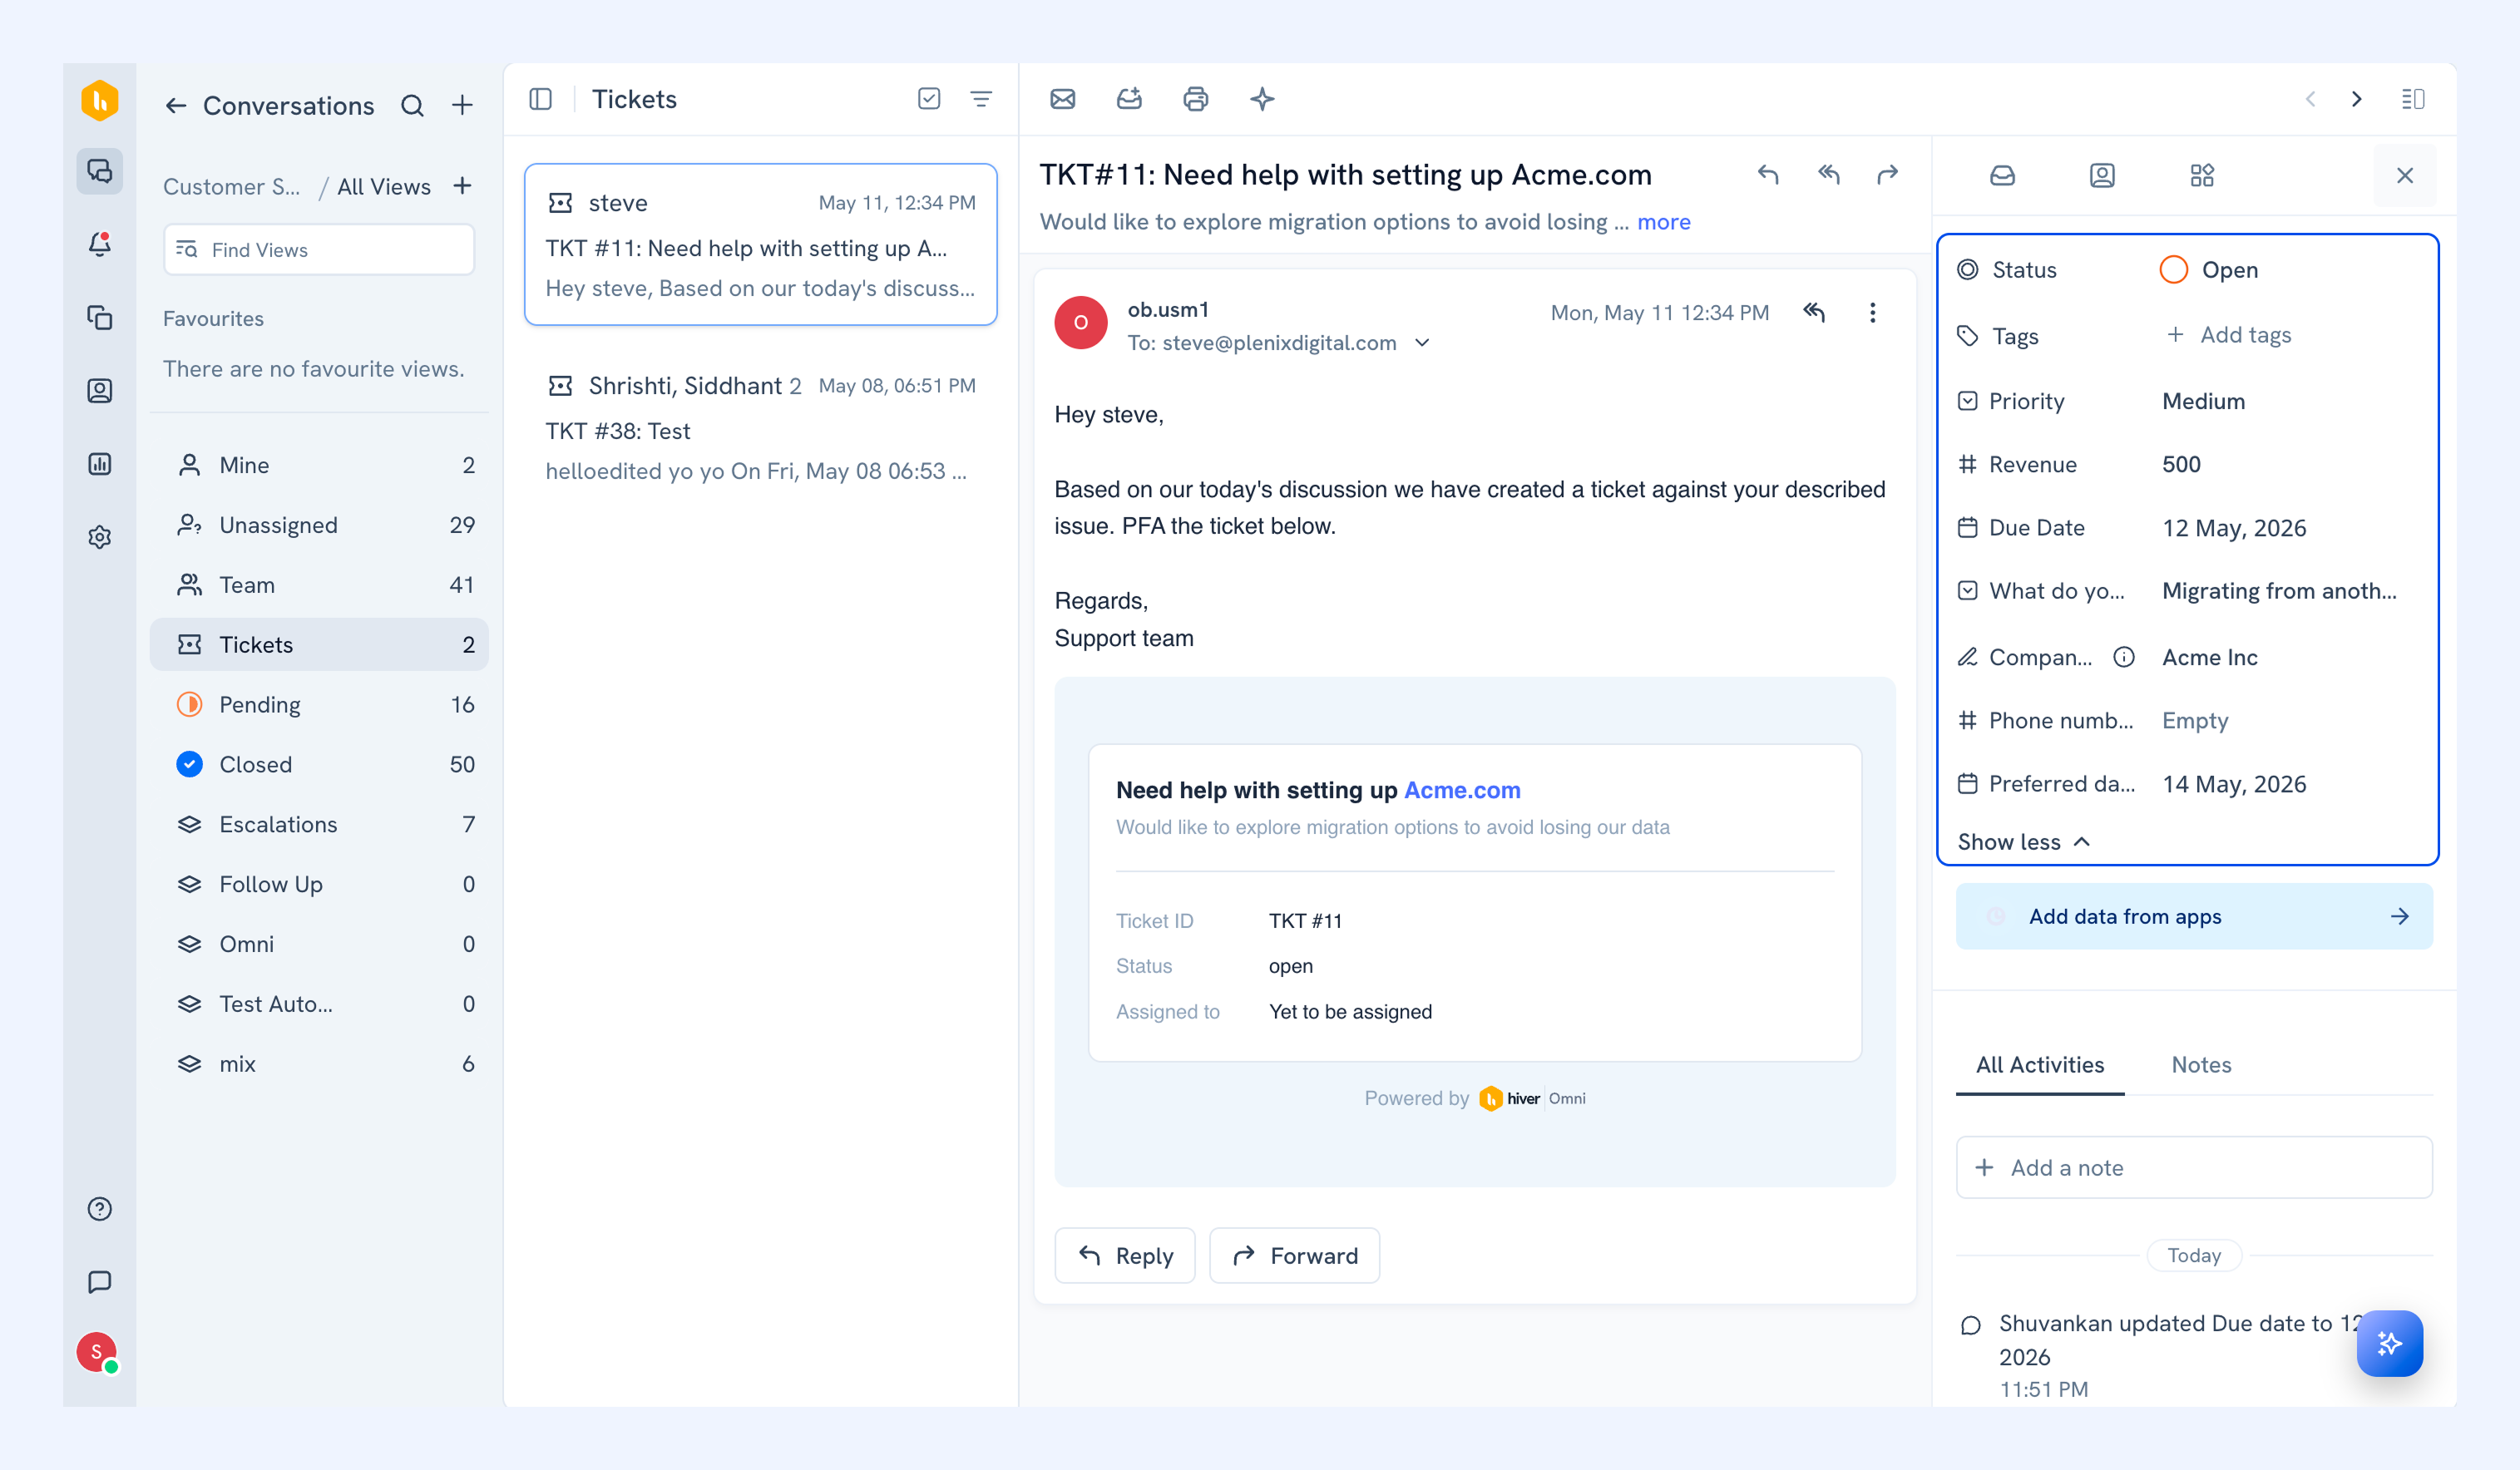
Each submission is created as a Ticket in the selected Email Inbox. Your team can then:
- Review and respond to the Ticket
- Assign Tickets to teammates
- Track progress and resolution
For example, if a customer submits a bug report through your Web Form, the submission is automatically created as a Ticket in your Support Inbox with all the required details already included. Your team can assign the Ticket to the right teammate, collaborate internally, track updates, and respond to the customer without switching tools.
Similarly, onboarding assistance requests can be routed to the Customer Success team, where they can help customers get started faster.
FAQs
Can I create multiple Web Forms?
Yes, you can create multiple forms and connect each one to an Email Inbox.
Can I edit a Web Form after creating it?
Yes, you can update fields, settings, and content at any time. However, you cannot update the connected Email Inbox.
What happens to submissions if I change a form?
Changes made to a Web Form will apply to new submissions. Existing submissions and related Tickets are not affected.
What file types can visitors upload?
Visitors can upload .pdf, .txt, .docx, .jpg, .jpeg, .png, and .mp4 files.