Creating Custom Fields
Custom Fields in Hiver let you add specific details to every email conversation in your Shared Inbox. This makes it easier to track key information and manage emails based on your business needs.
For instance, if your team handles order-related queries, you can create a field called Order ID. Every time an order email comes in, your team enters the ID in that field and can later filter or report on it.
Custom Fields are especially useful when you need to:
- Capture business-specific details like priority, ticket type, or internal owner.
- Keep your inbox organized with sortable, searchable data.
- Run reports and spot trends based on consistent data across conversations.
Setting up your custom field
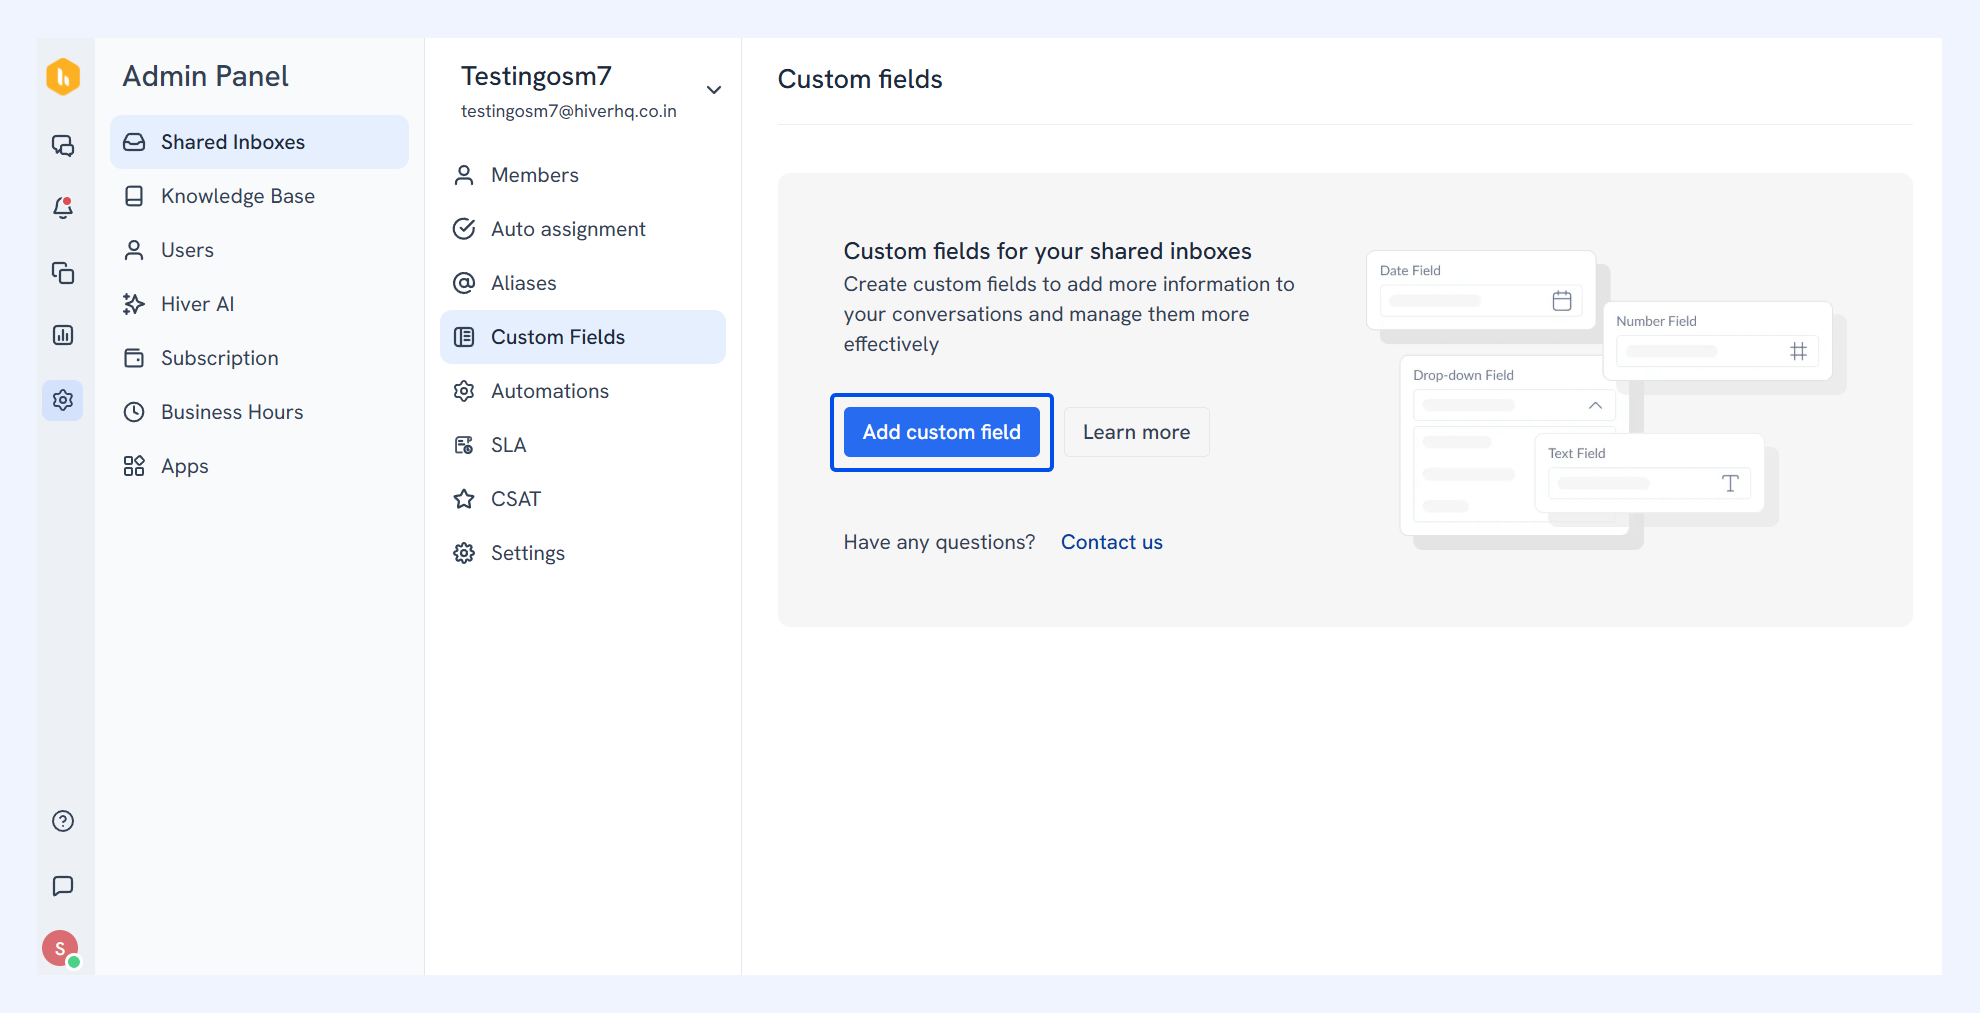
- Go to Admin Panel → Shared Inboxes → select an inbox → Custom Fields → Add Custom Fields.
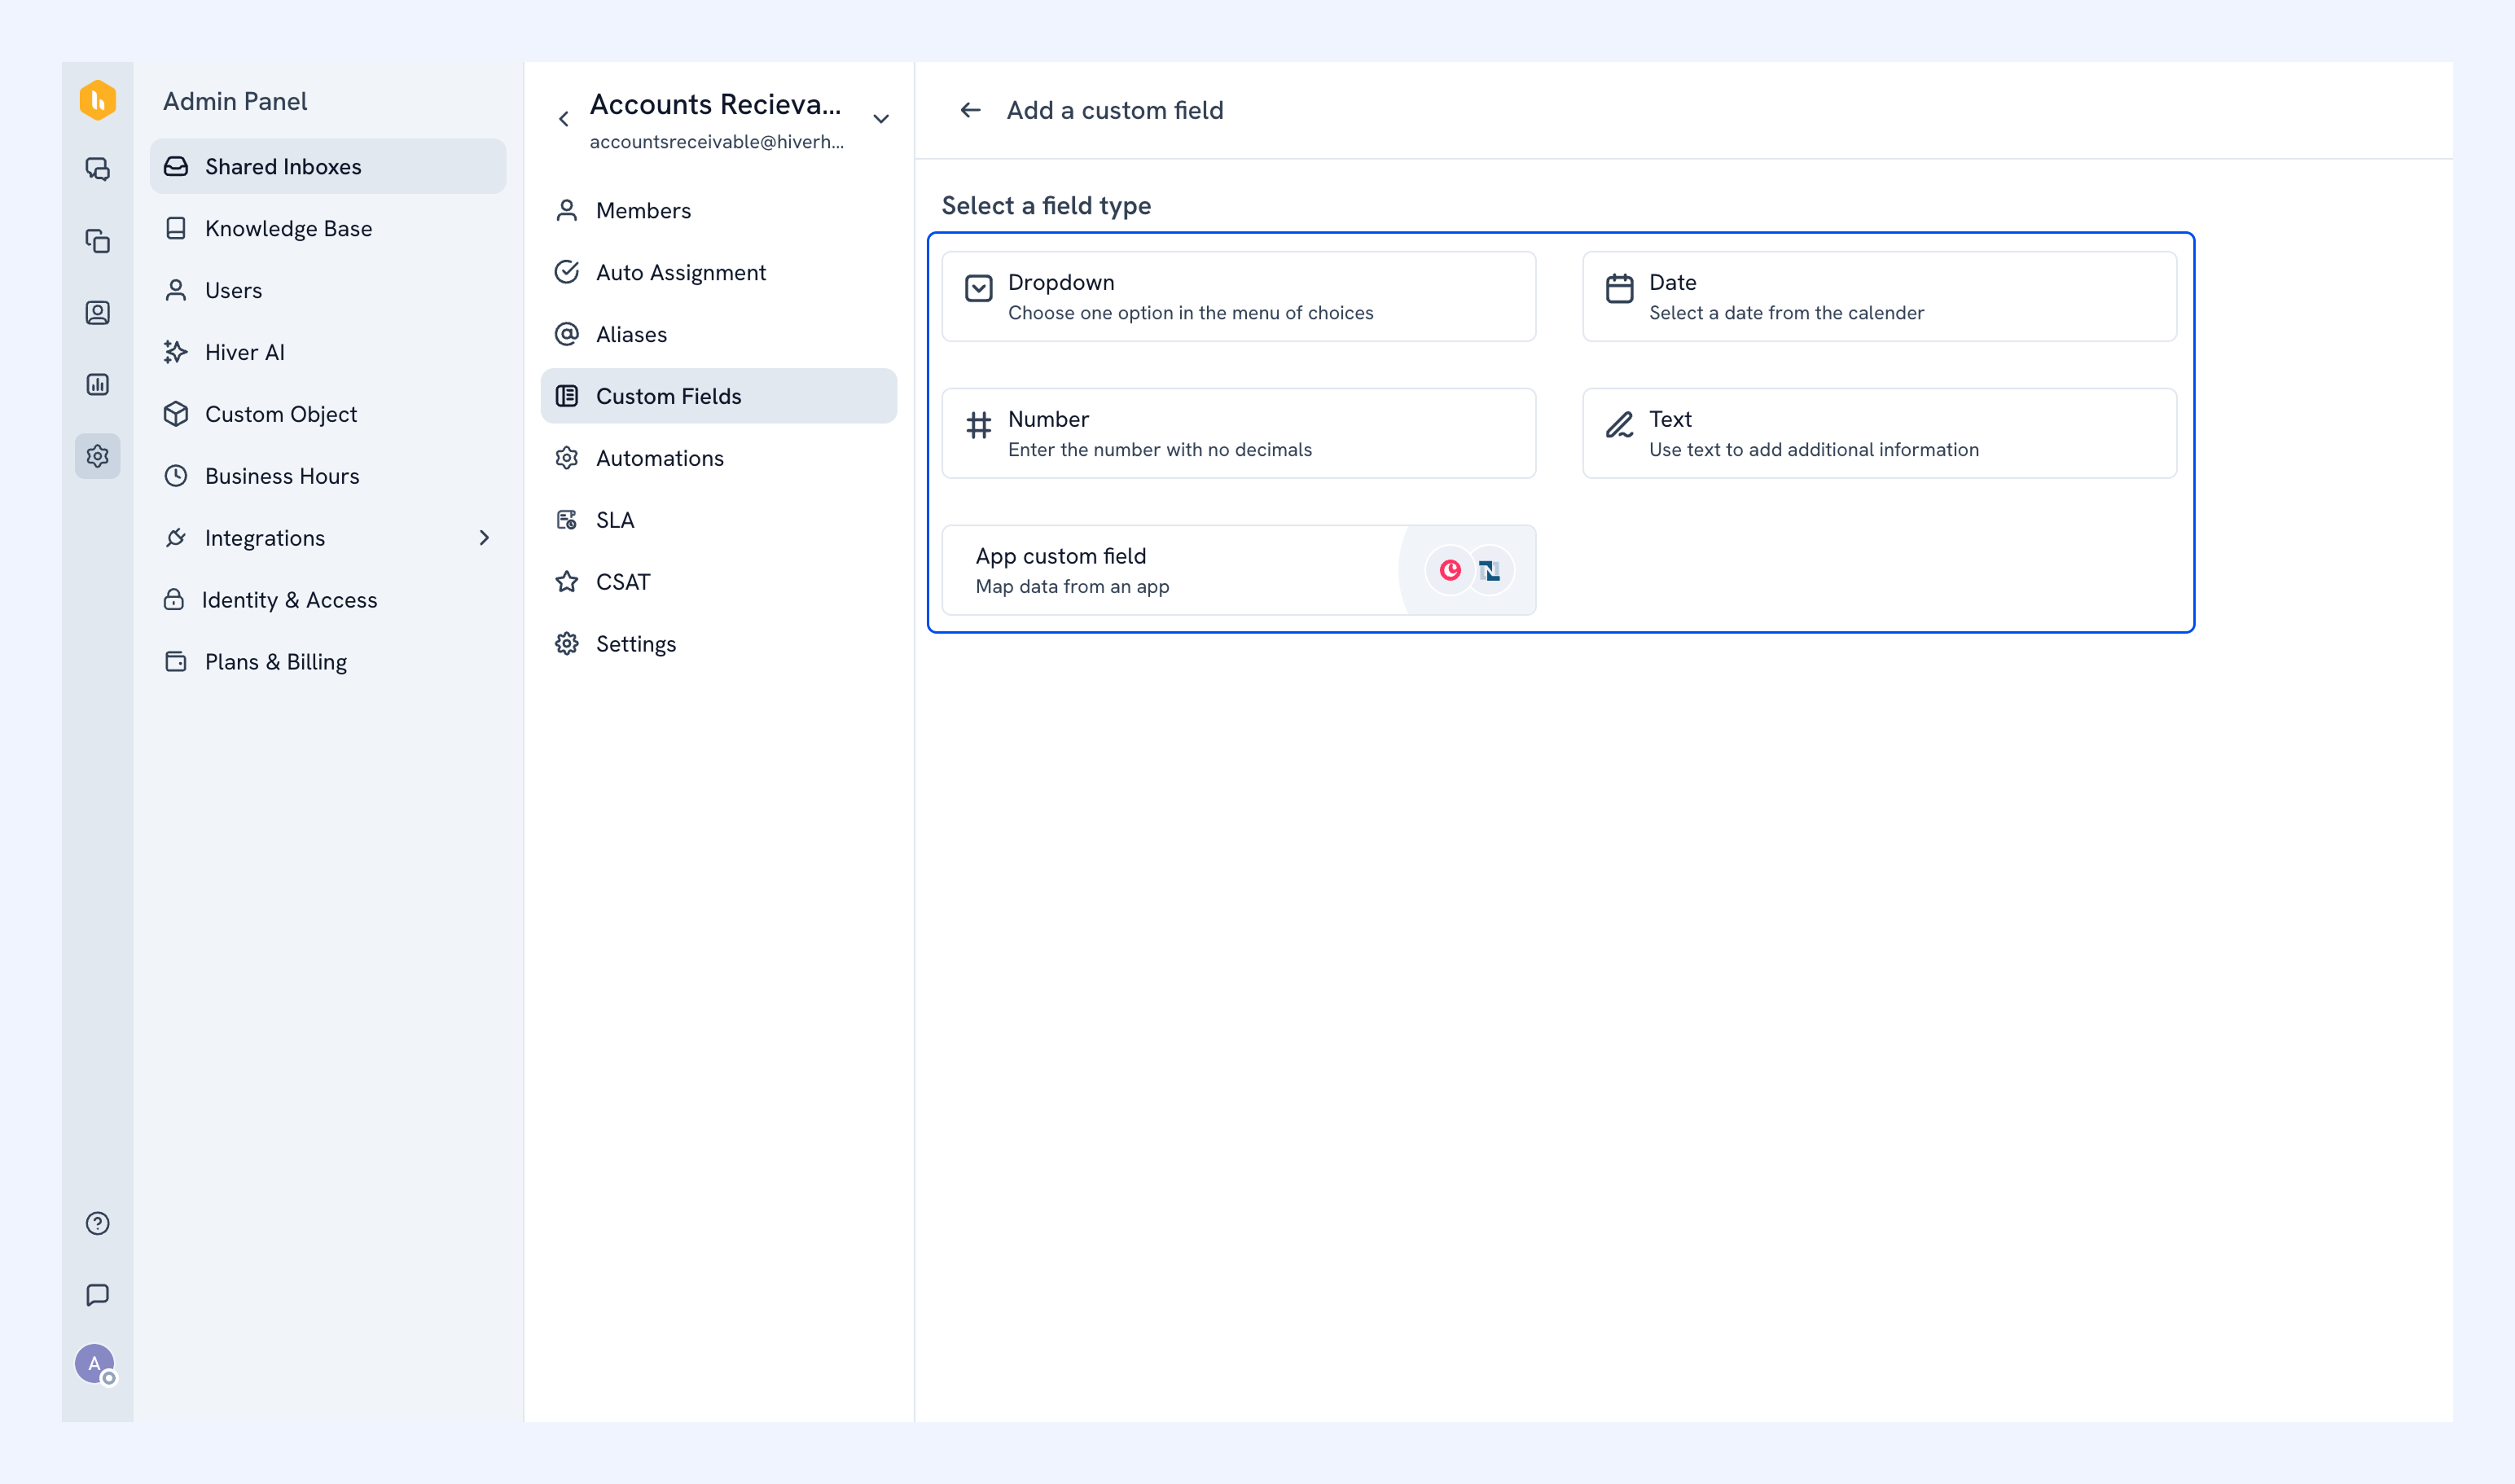
- Select the field type based on the information you need.
- Dropdown: Create a predefined list of options where users can select one value. For example, a dropdown named Priority with options like High, Medium, and Low.
- Field name: Give your field a unique name
- Description: Add optional context for your team
- Options: Add choices the user can choose from
- Default value: Set which option should appear by default
- Date: Add a date picker for deadlines, follow-ups, or other time-based tracking.
- Number: Allow only numeric values (useful for IDs, account numbers, invoice numbers).
- Text: Add single or multi-line text (ideal for notes, feedback, or detailed inputs).
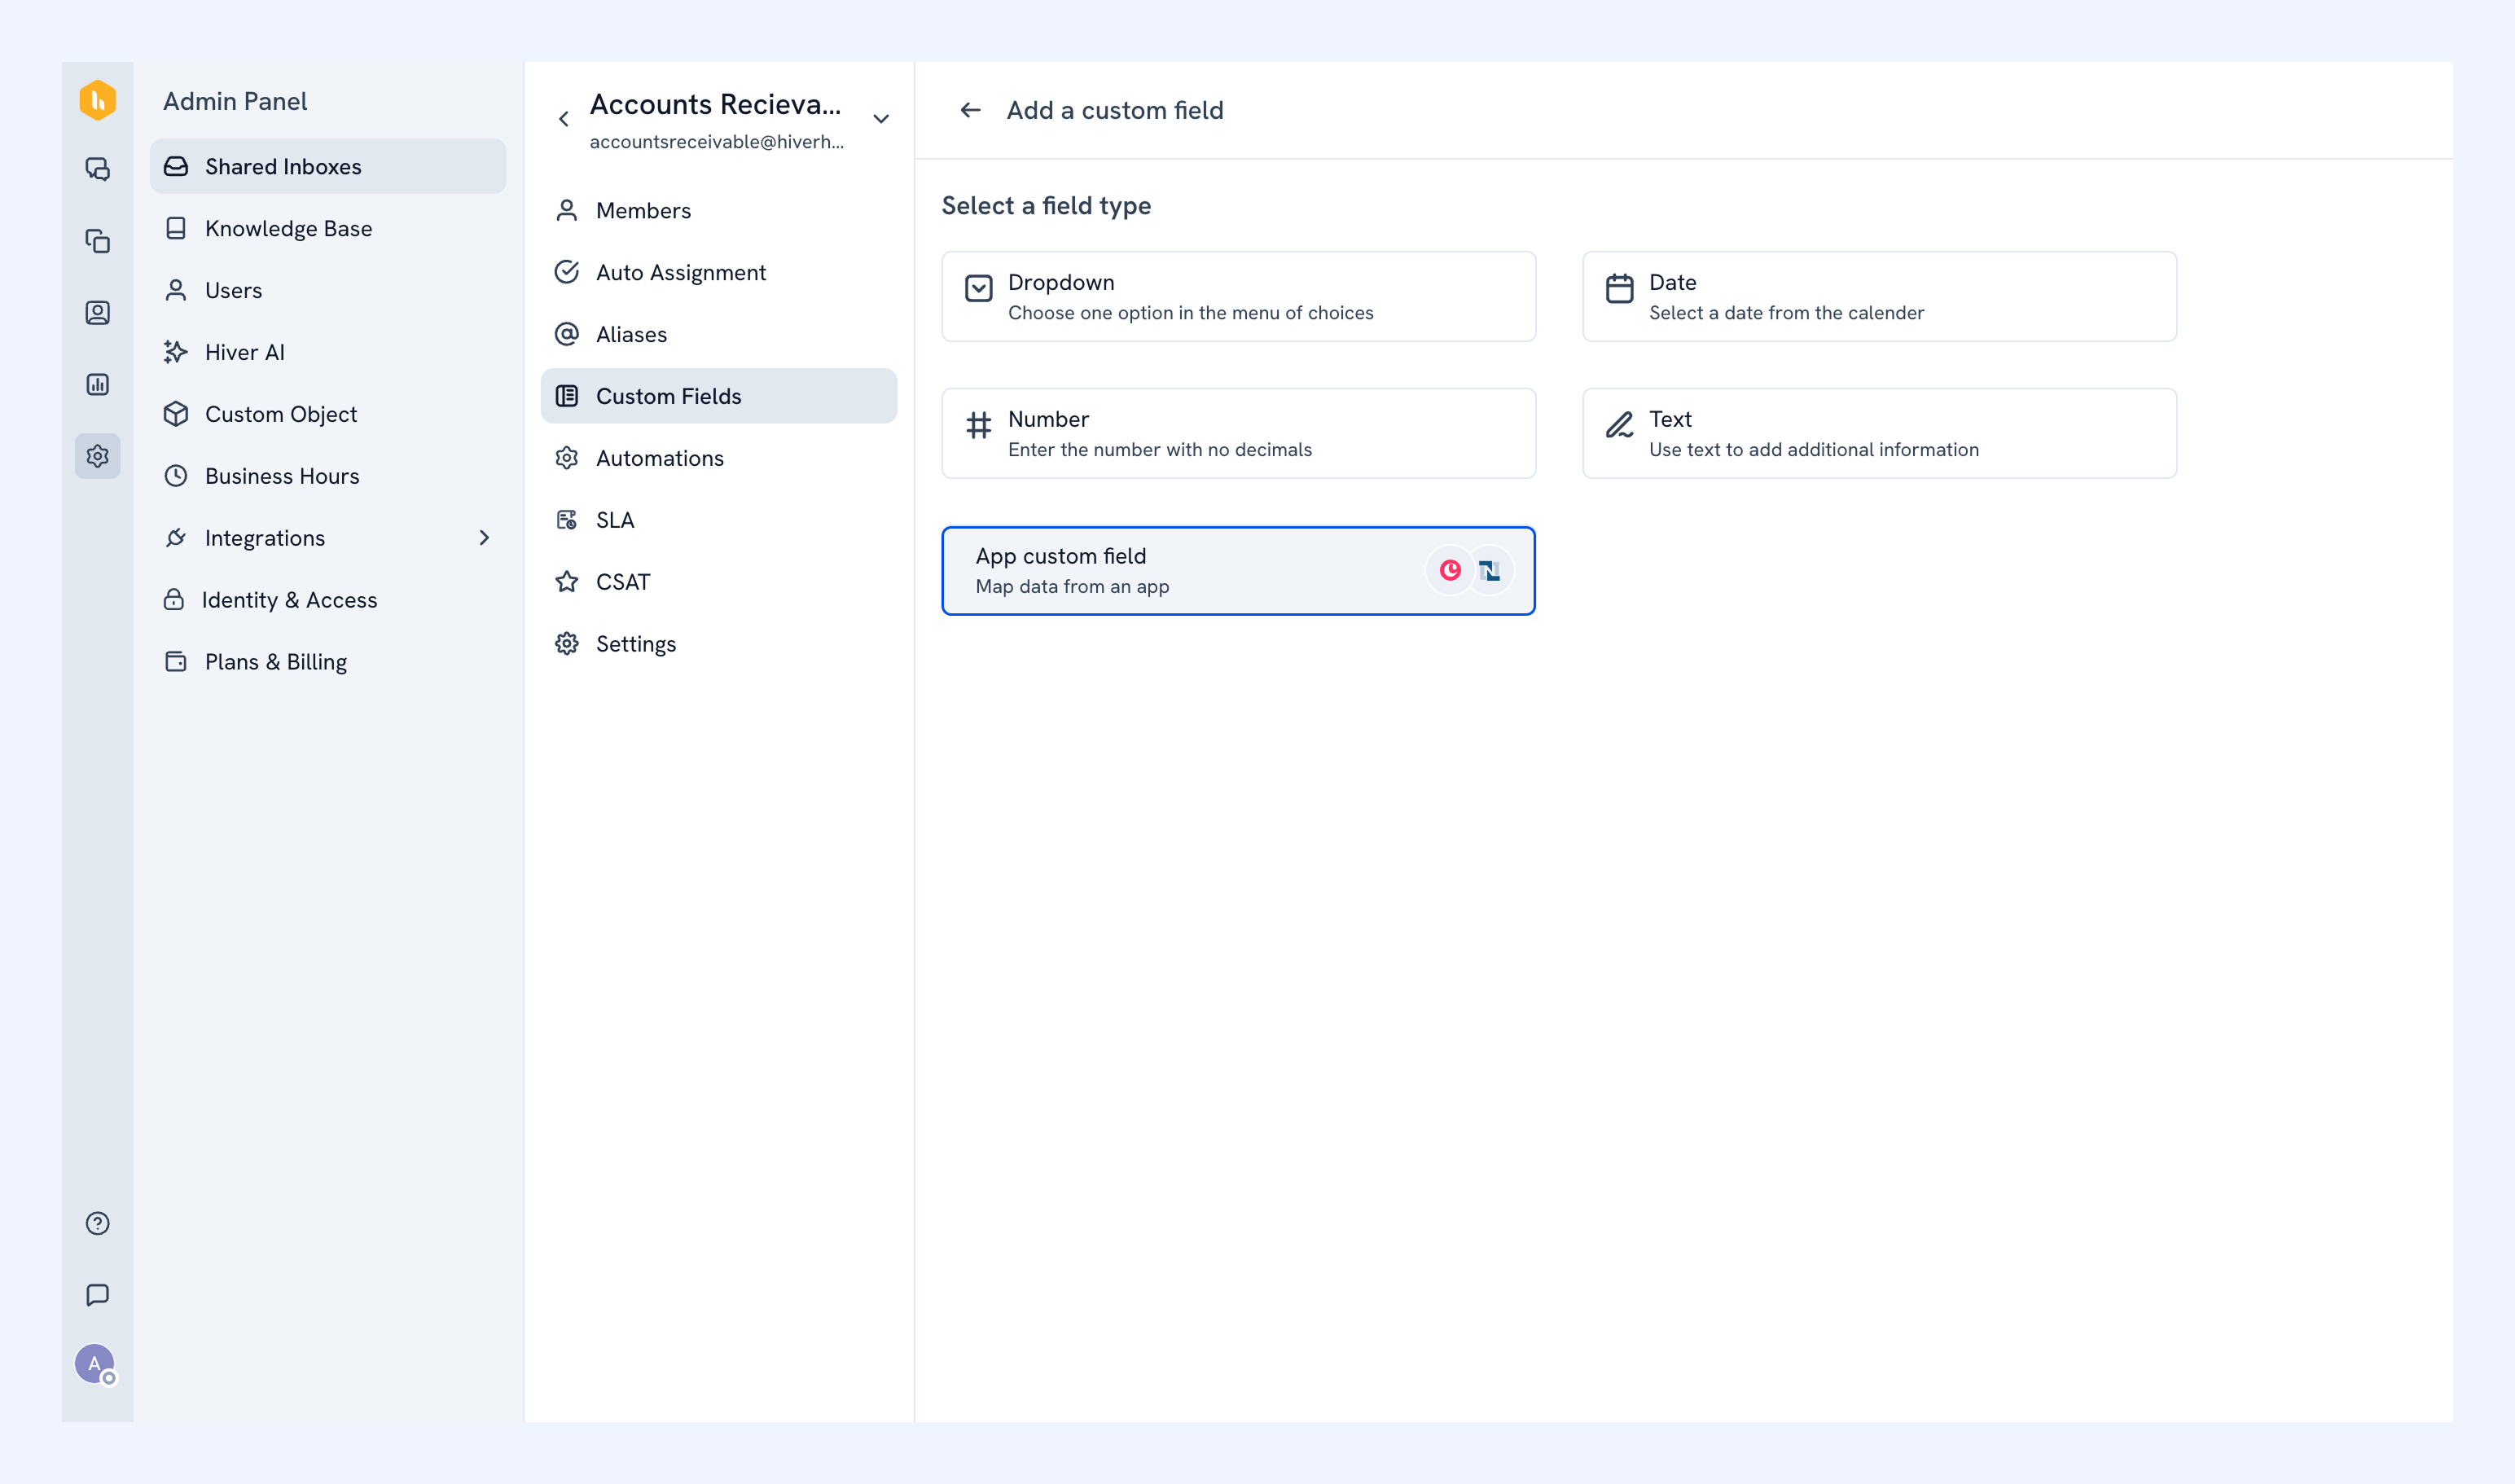
- App custom field: Display data from a connected app next to your conversations. This is useful to access customer details from your CRM right inside Hiver.
- Dropdown: Create a predefined list of options where users can select one value. For example, a dropdown named Priority with options like High, Medium, and Low.
Note: App custom fields is currently in an early access program. To enable it for your account, reach out to us at support@hiverhq.com.
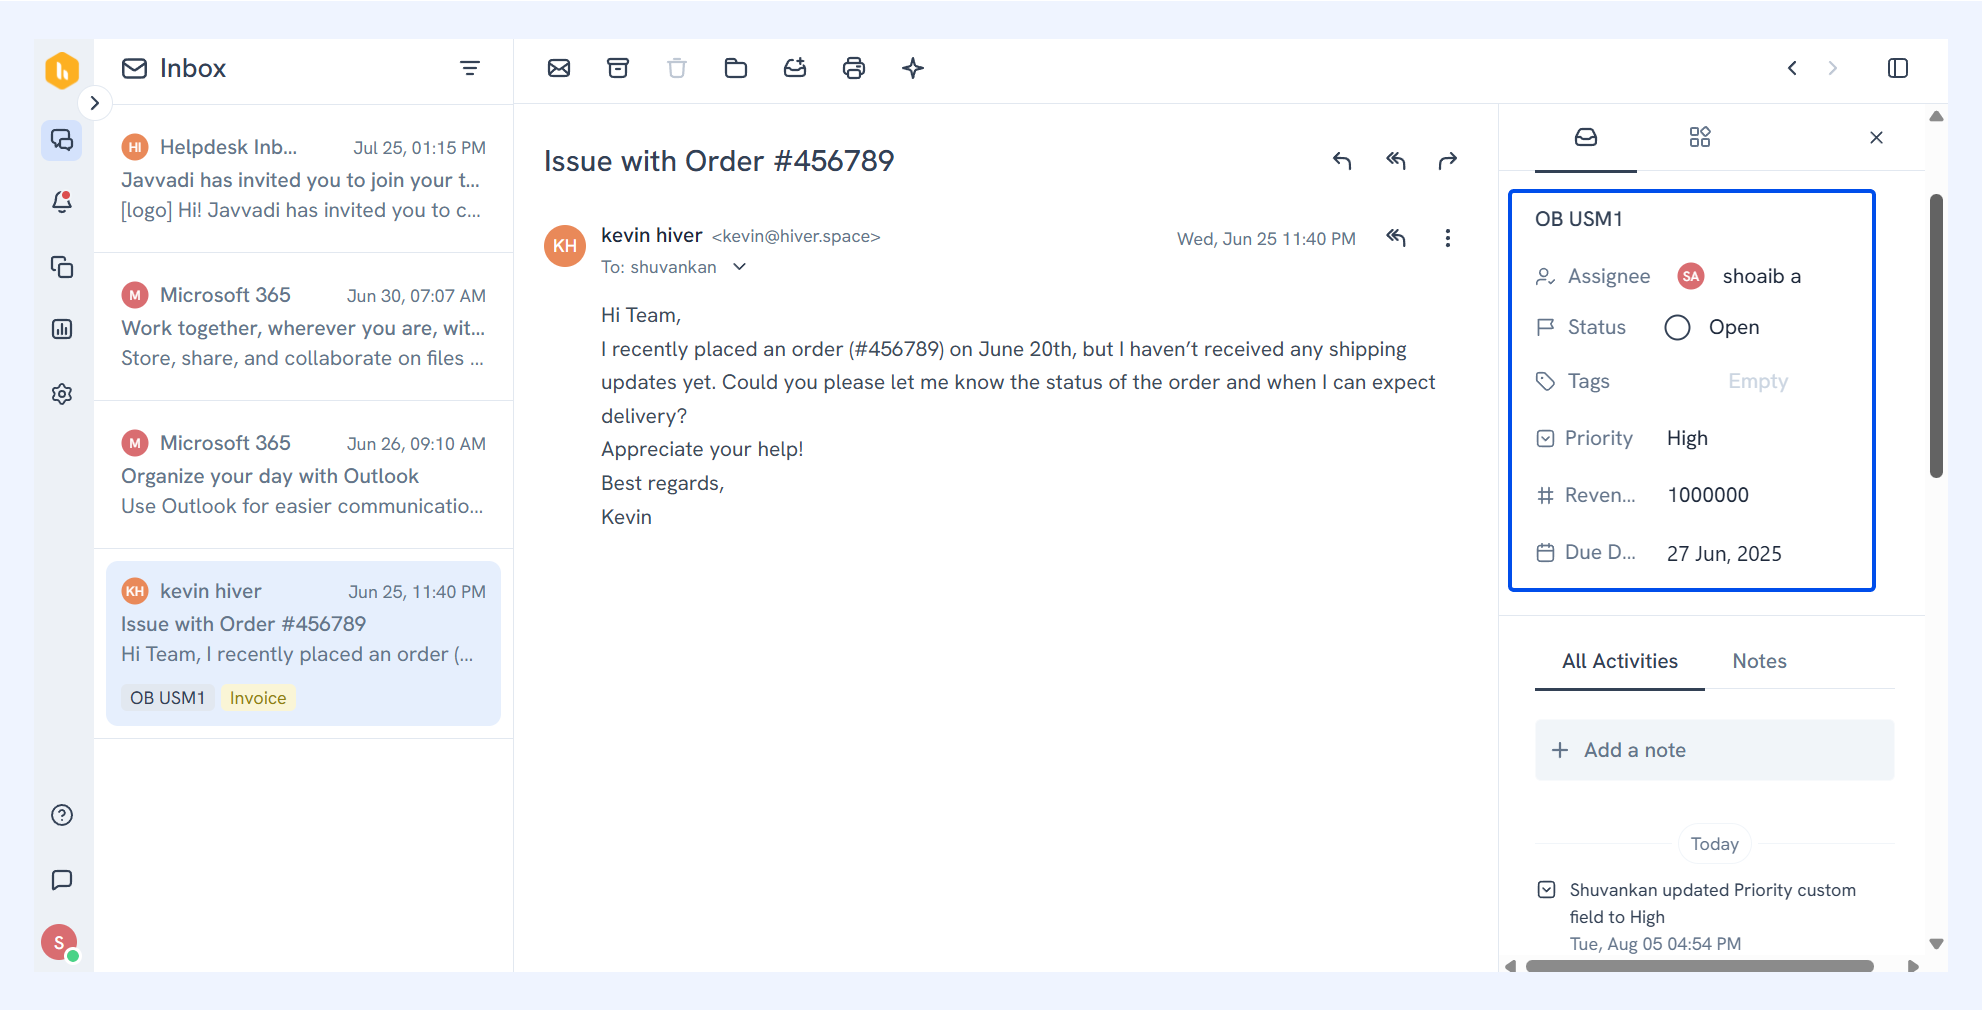
Once created, Custom Fields appear in the right panel of each conversation for your team.
Setting up an app custom field
You can set up app custom fields for Salesforce, Copper, HubSpot, and NetSuite. To set up app custom fields:
1. Get started by selecting App custom field.
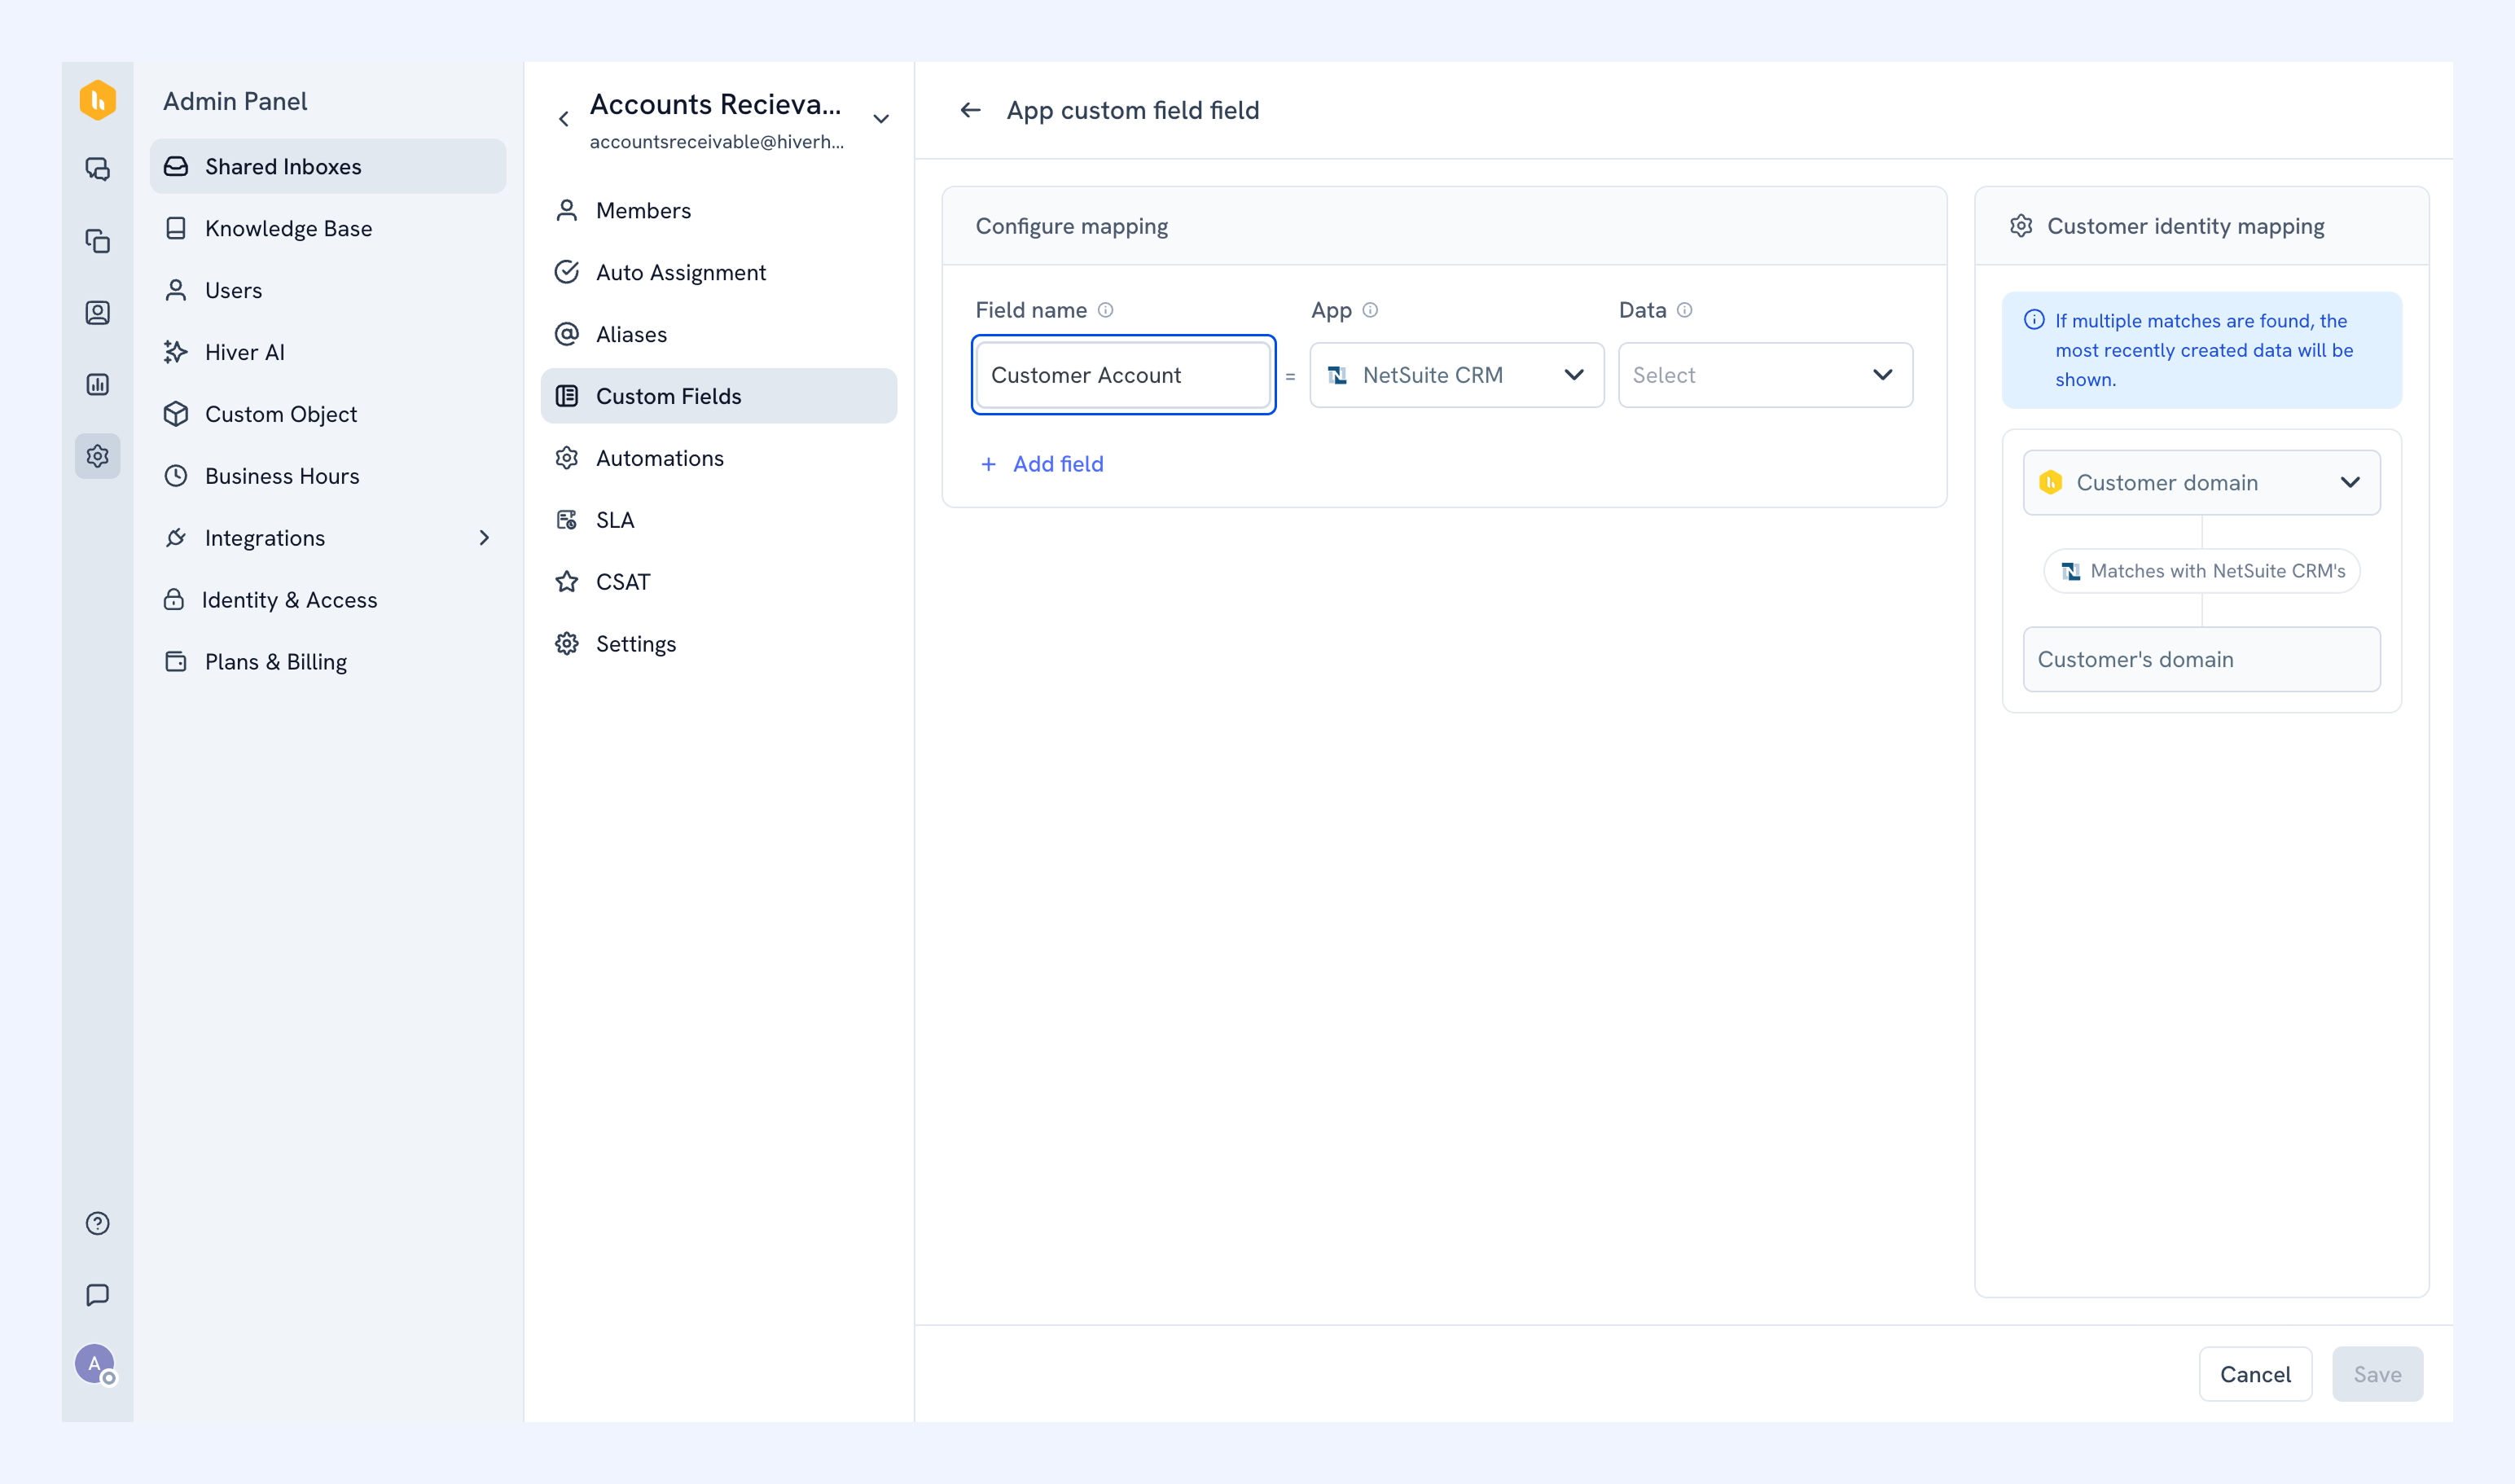
2. In Field name, add a name for your app custom field. Your team will see this label in the right panel in Hiver Omni.
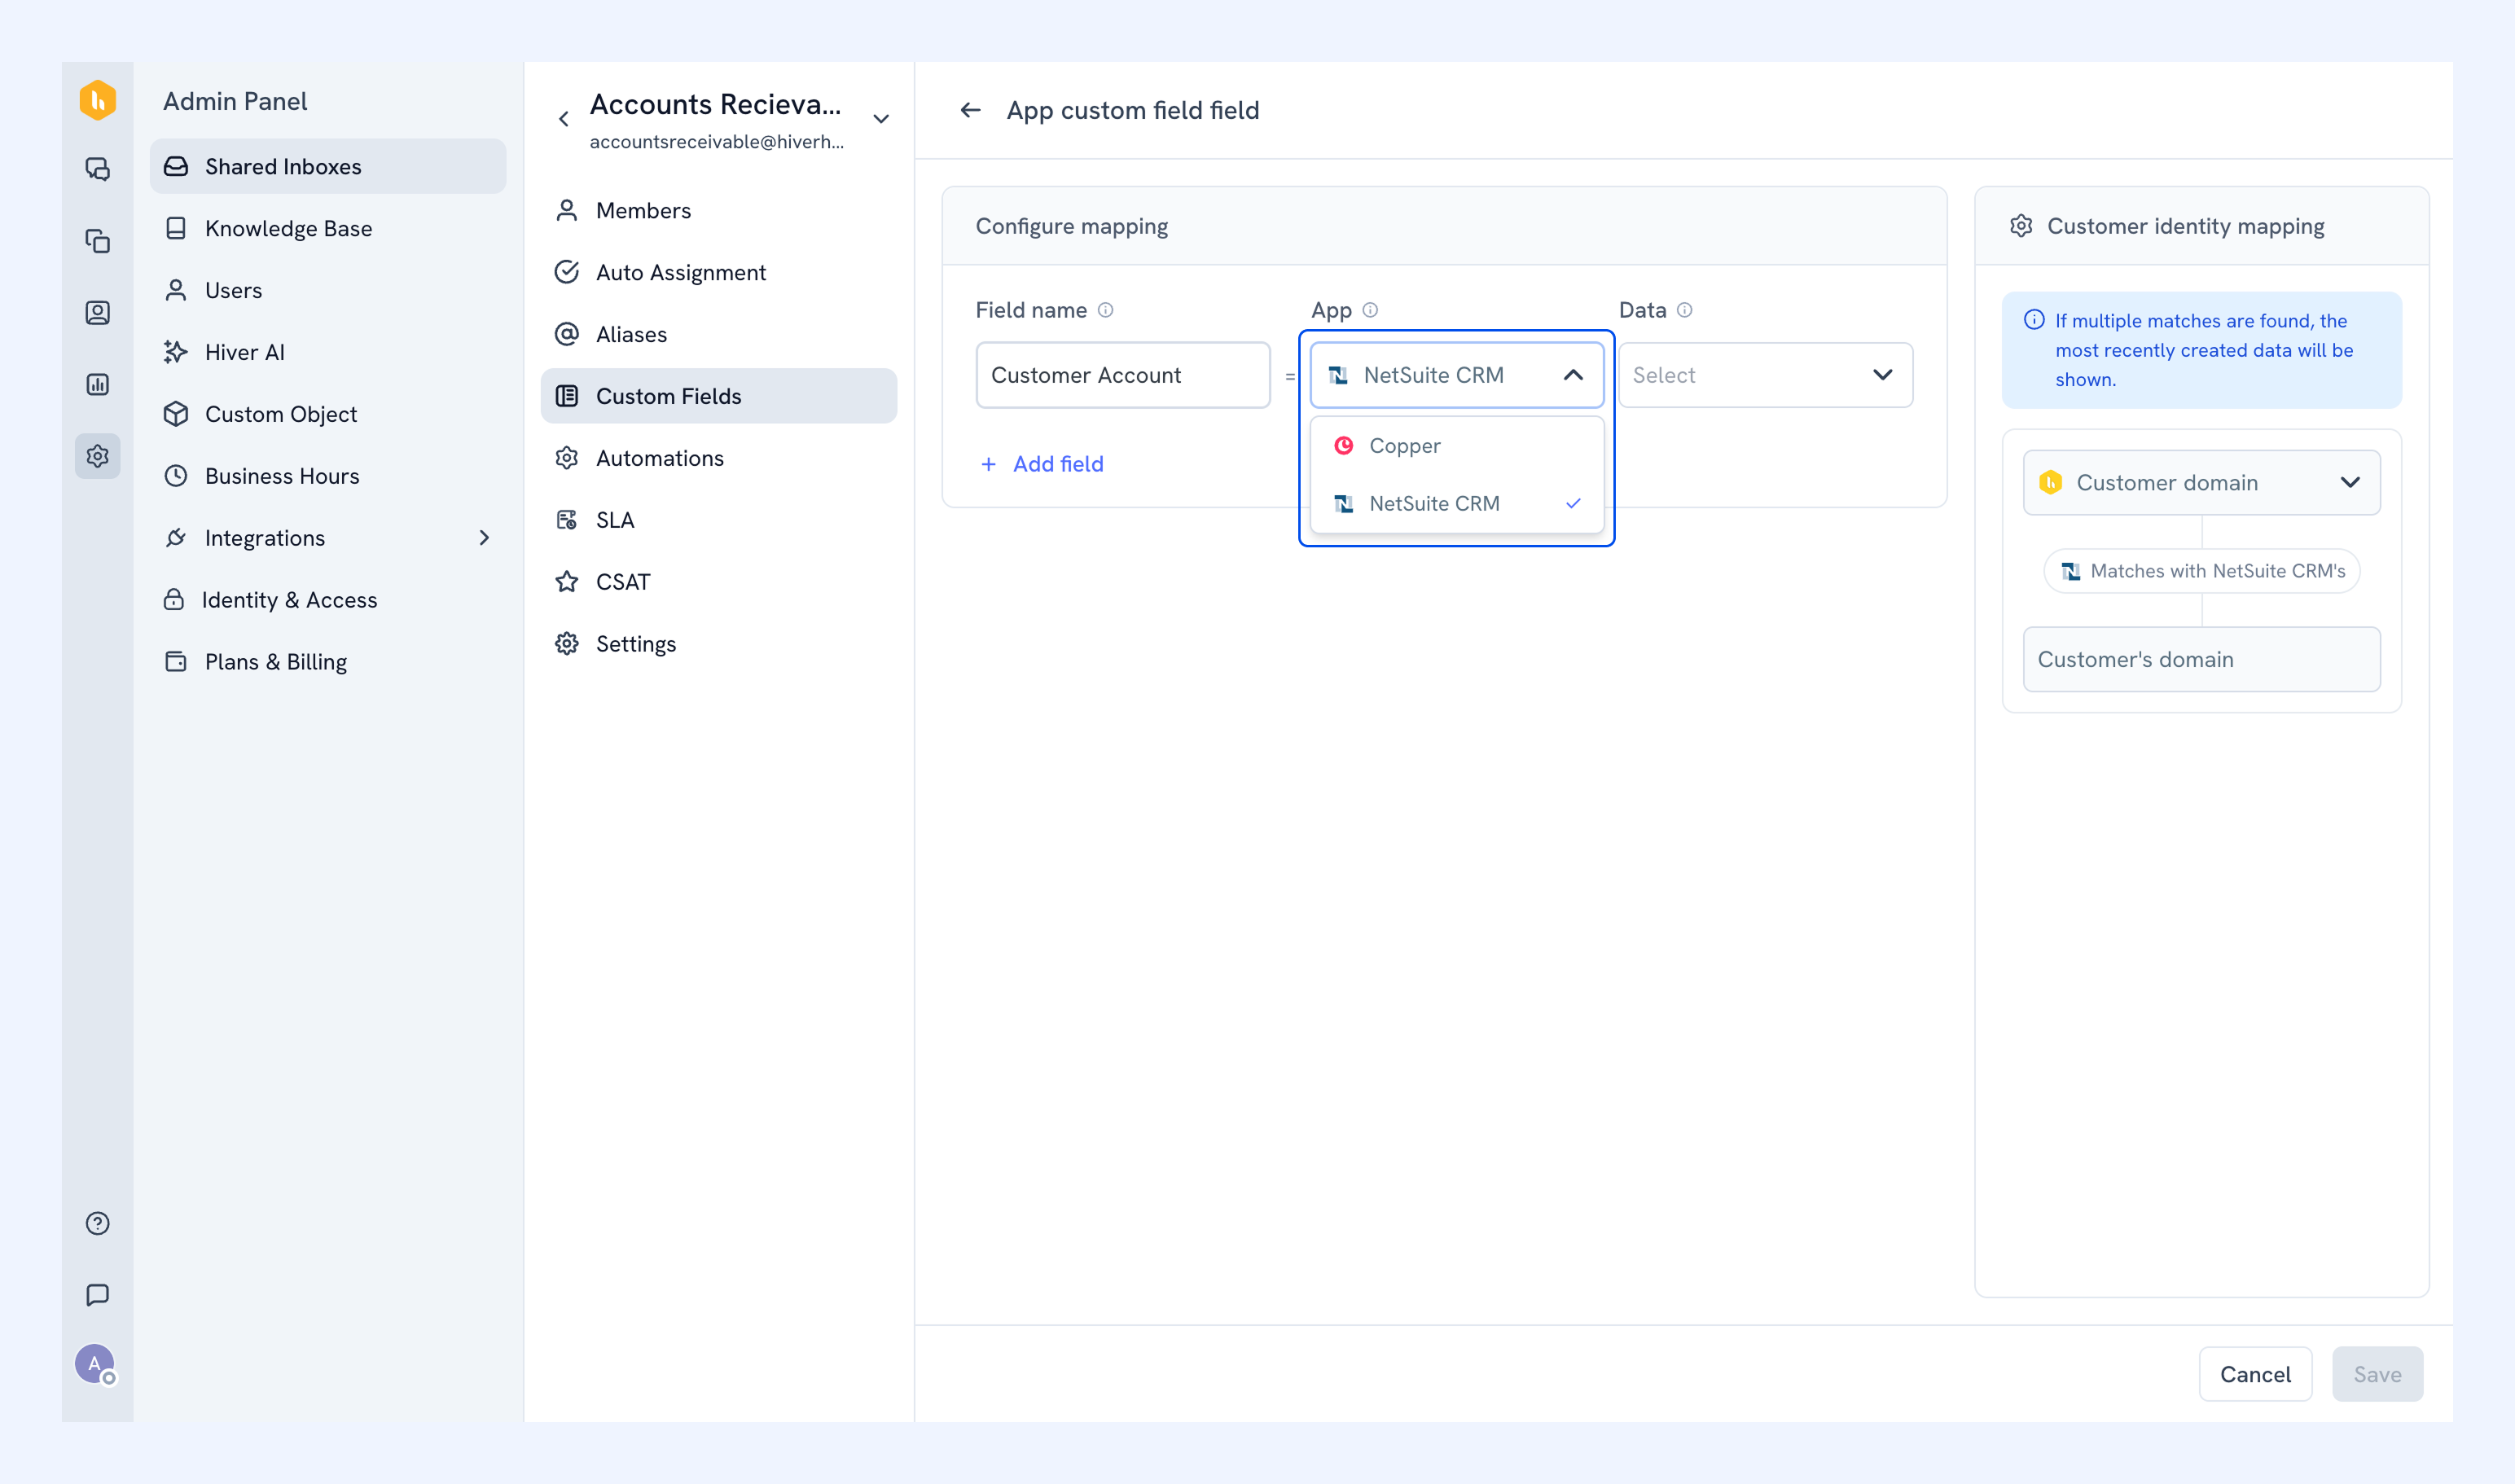
3. From the App dropdown, pick where the data should come from: Salesforce, Copper, HubSpot, or NetSuite CRM.
4. In the Data dropdown, select the specific detail to display, such as Account Number, Balance, or Billing Address.
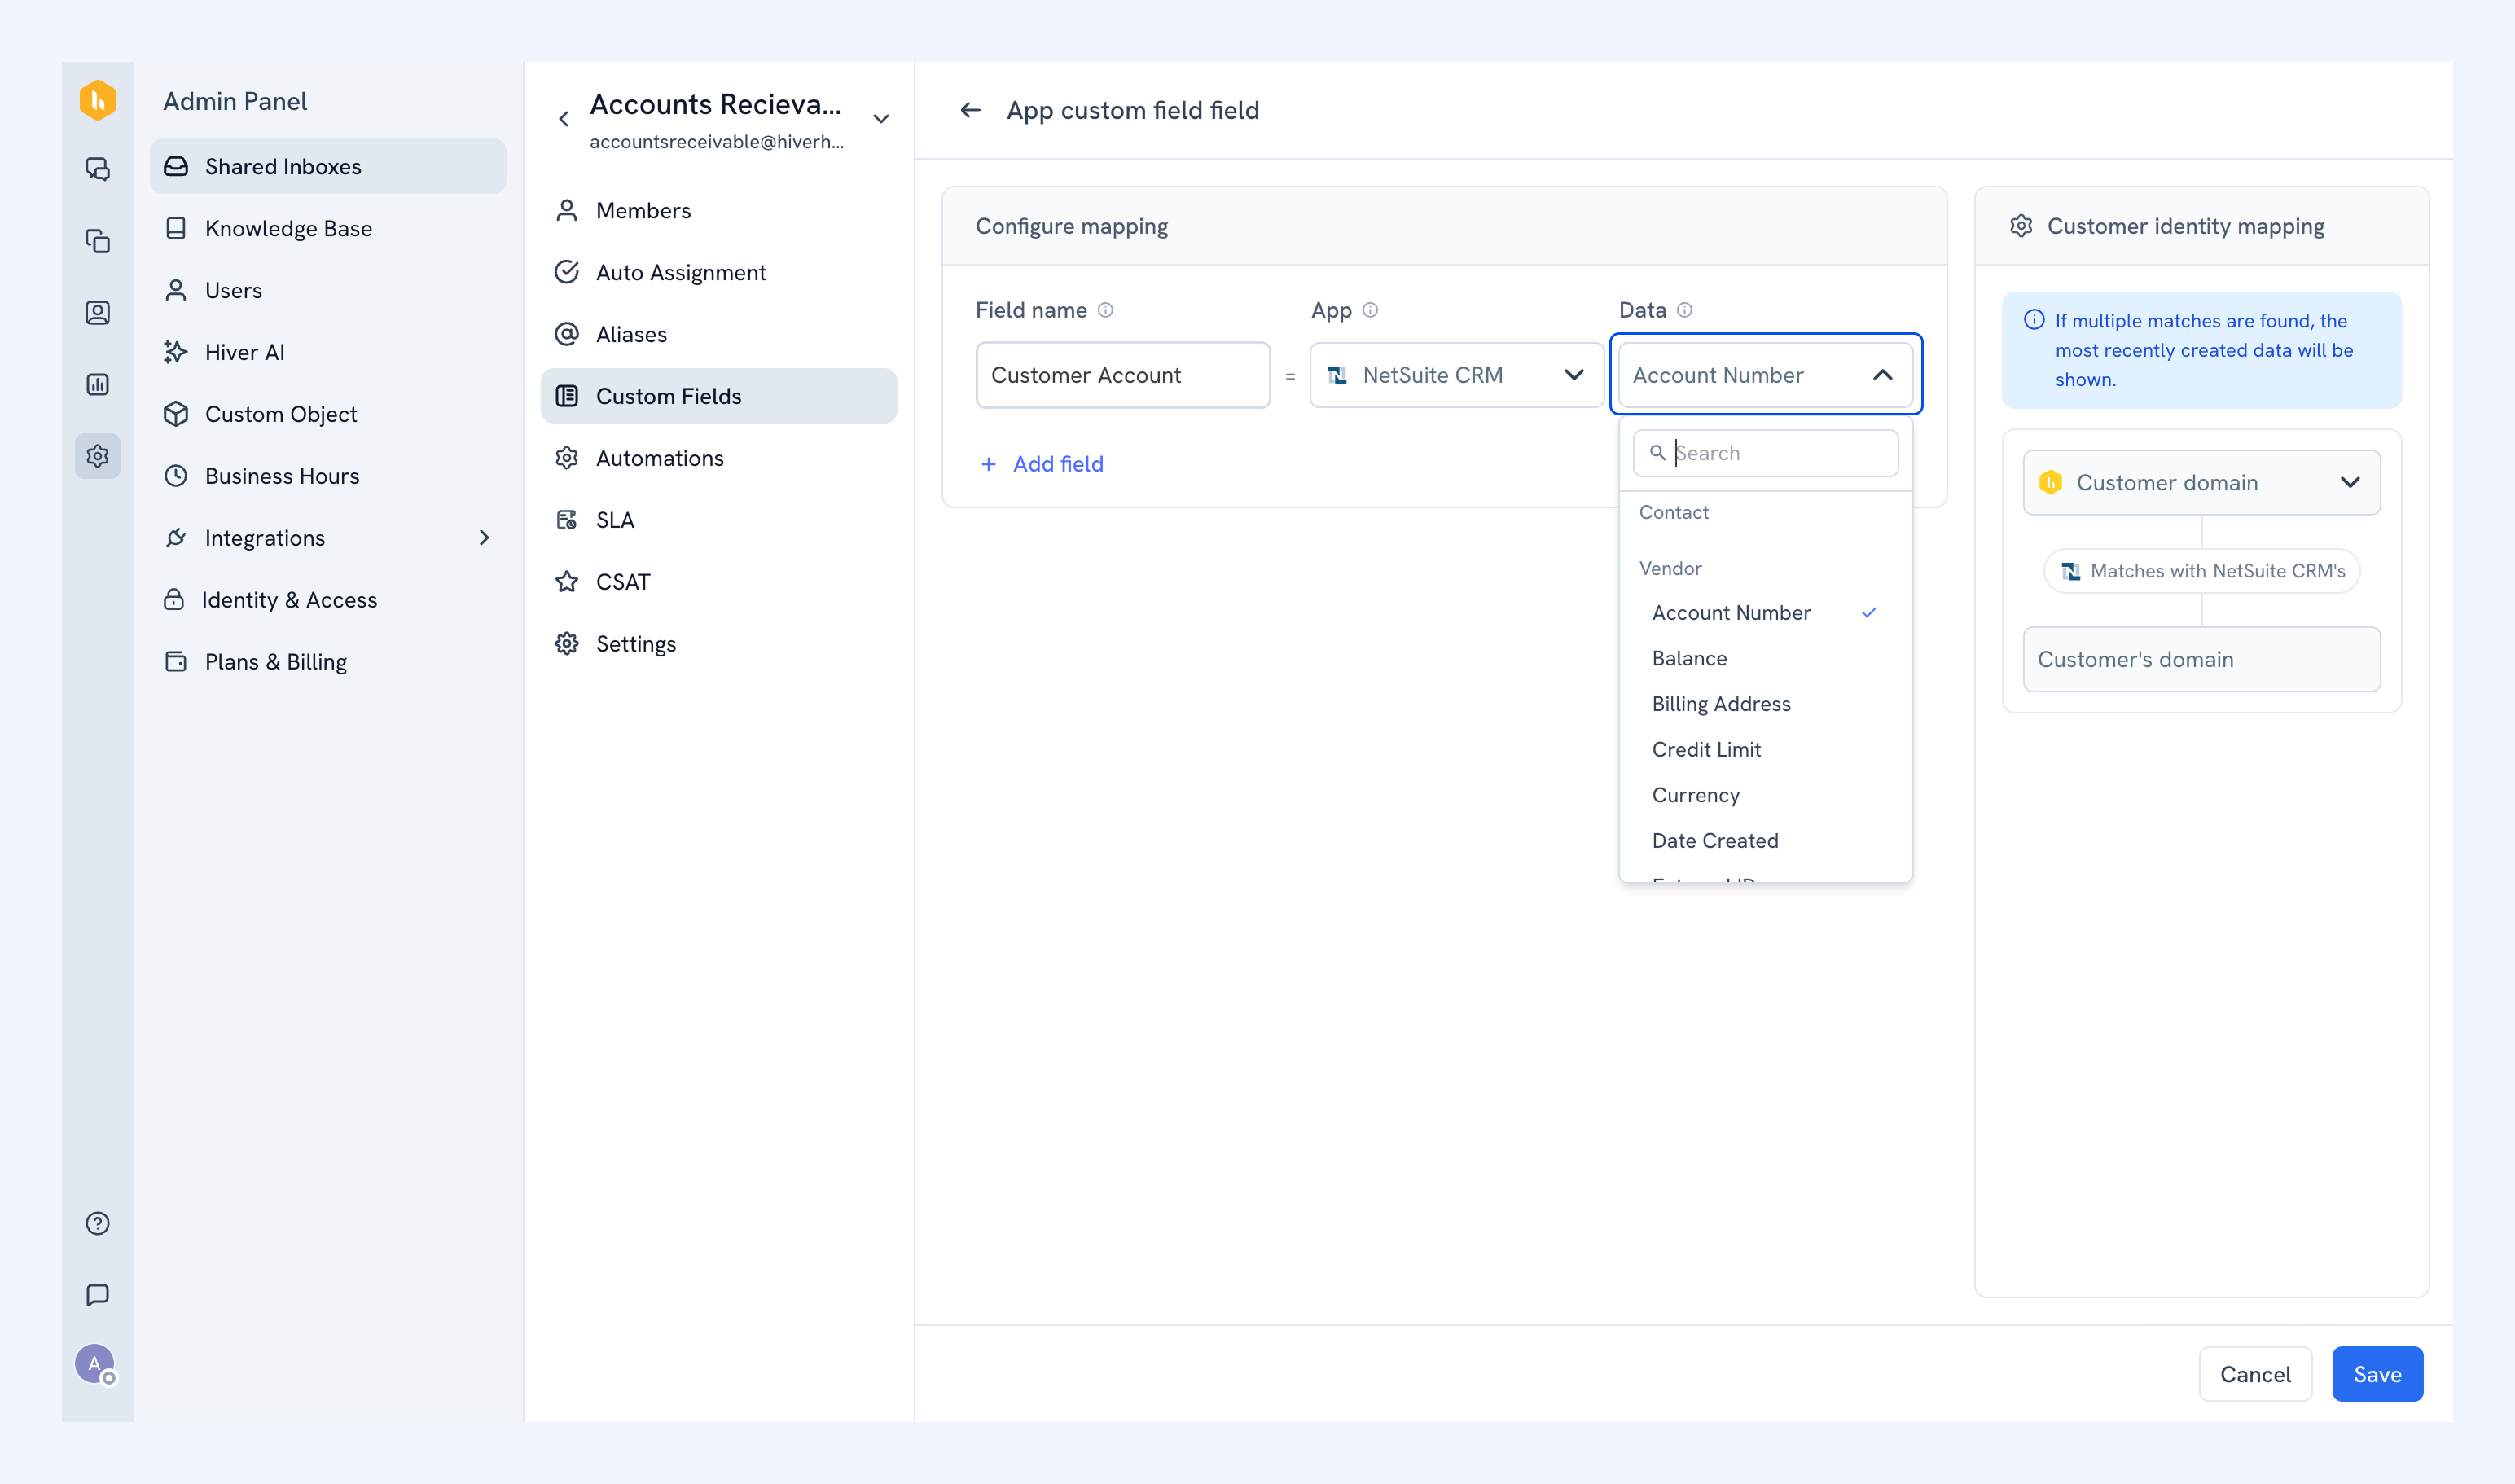
5. You can also customize Customer identity mapping to tell Hiver how to find the right record in your connected app. Pick Customer email or Customer domain and map it to the matching field in the app. Hiver uses that pairing to identify the customer and pull in their details.
Note: If more than one record matches, Hiver shows the most recently created one.
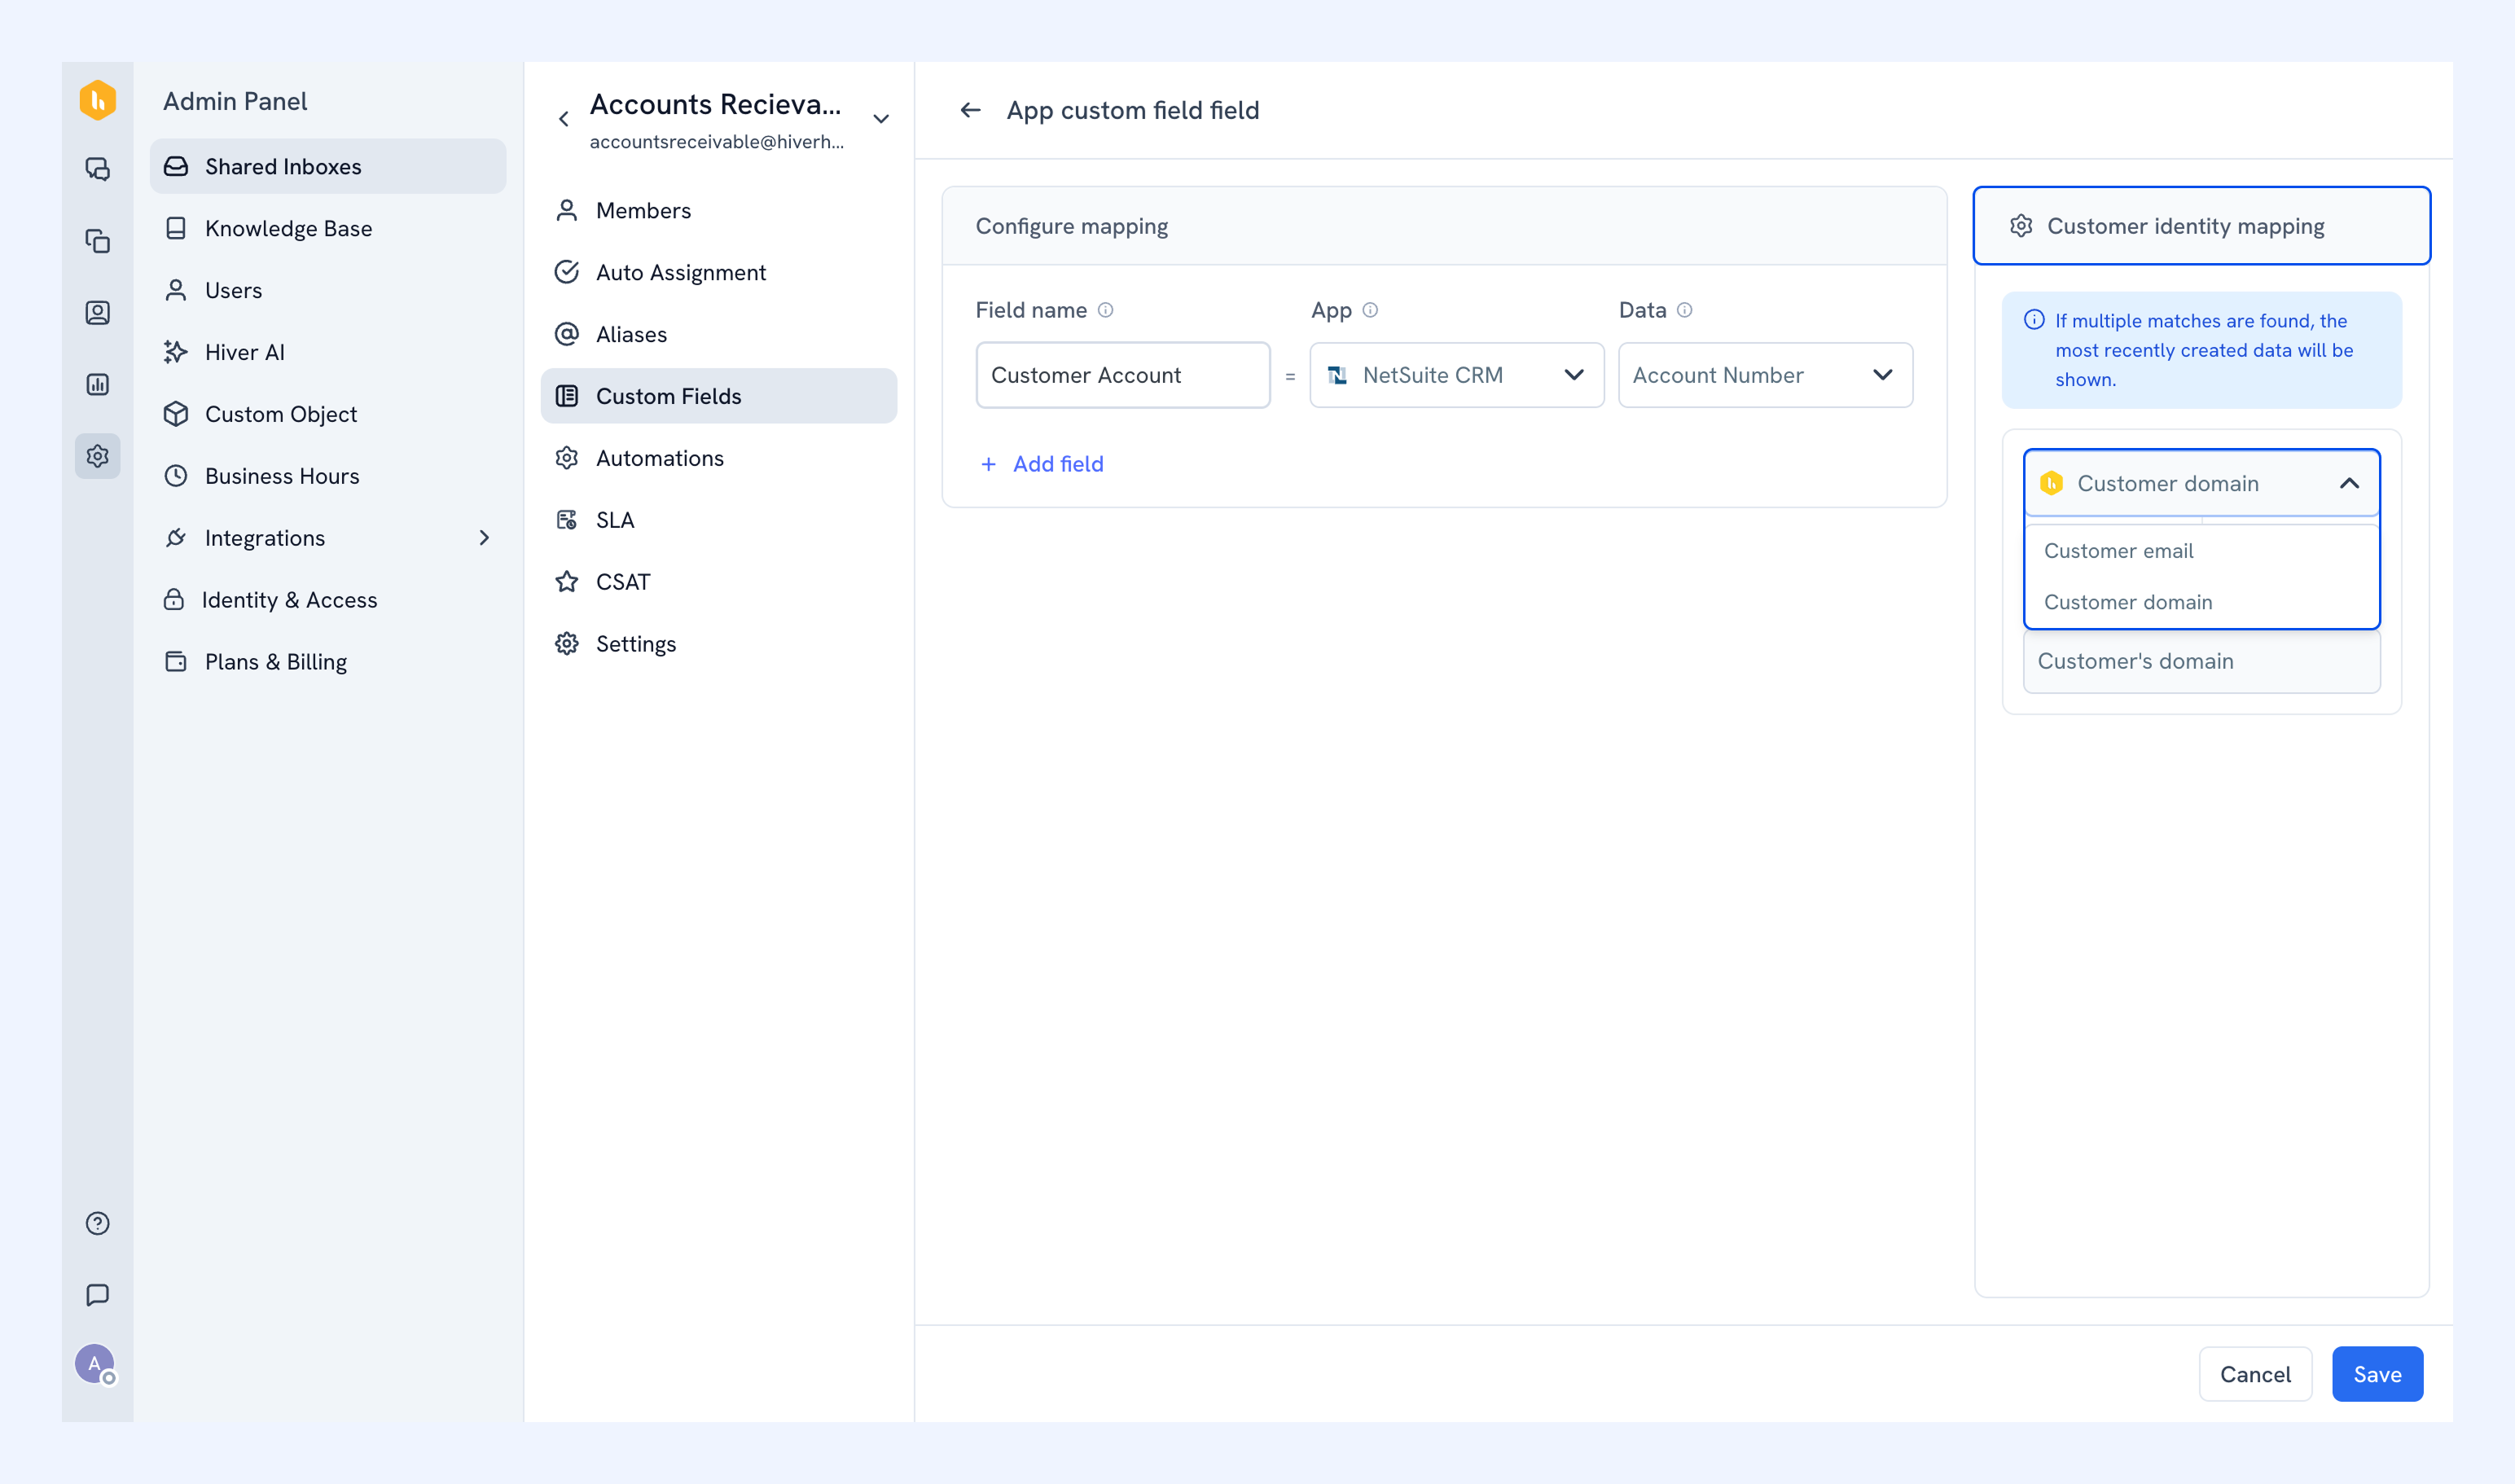
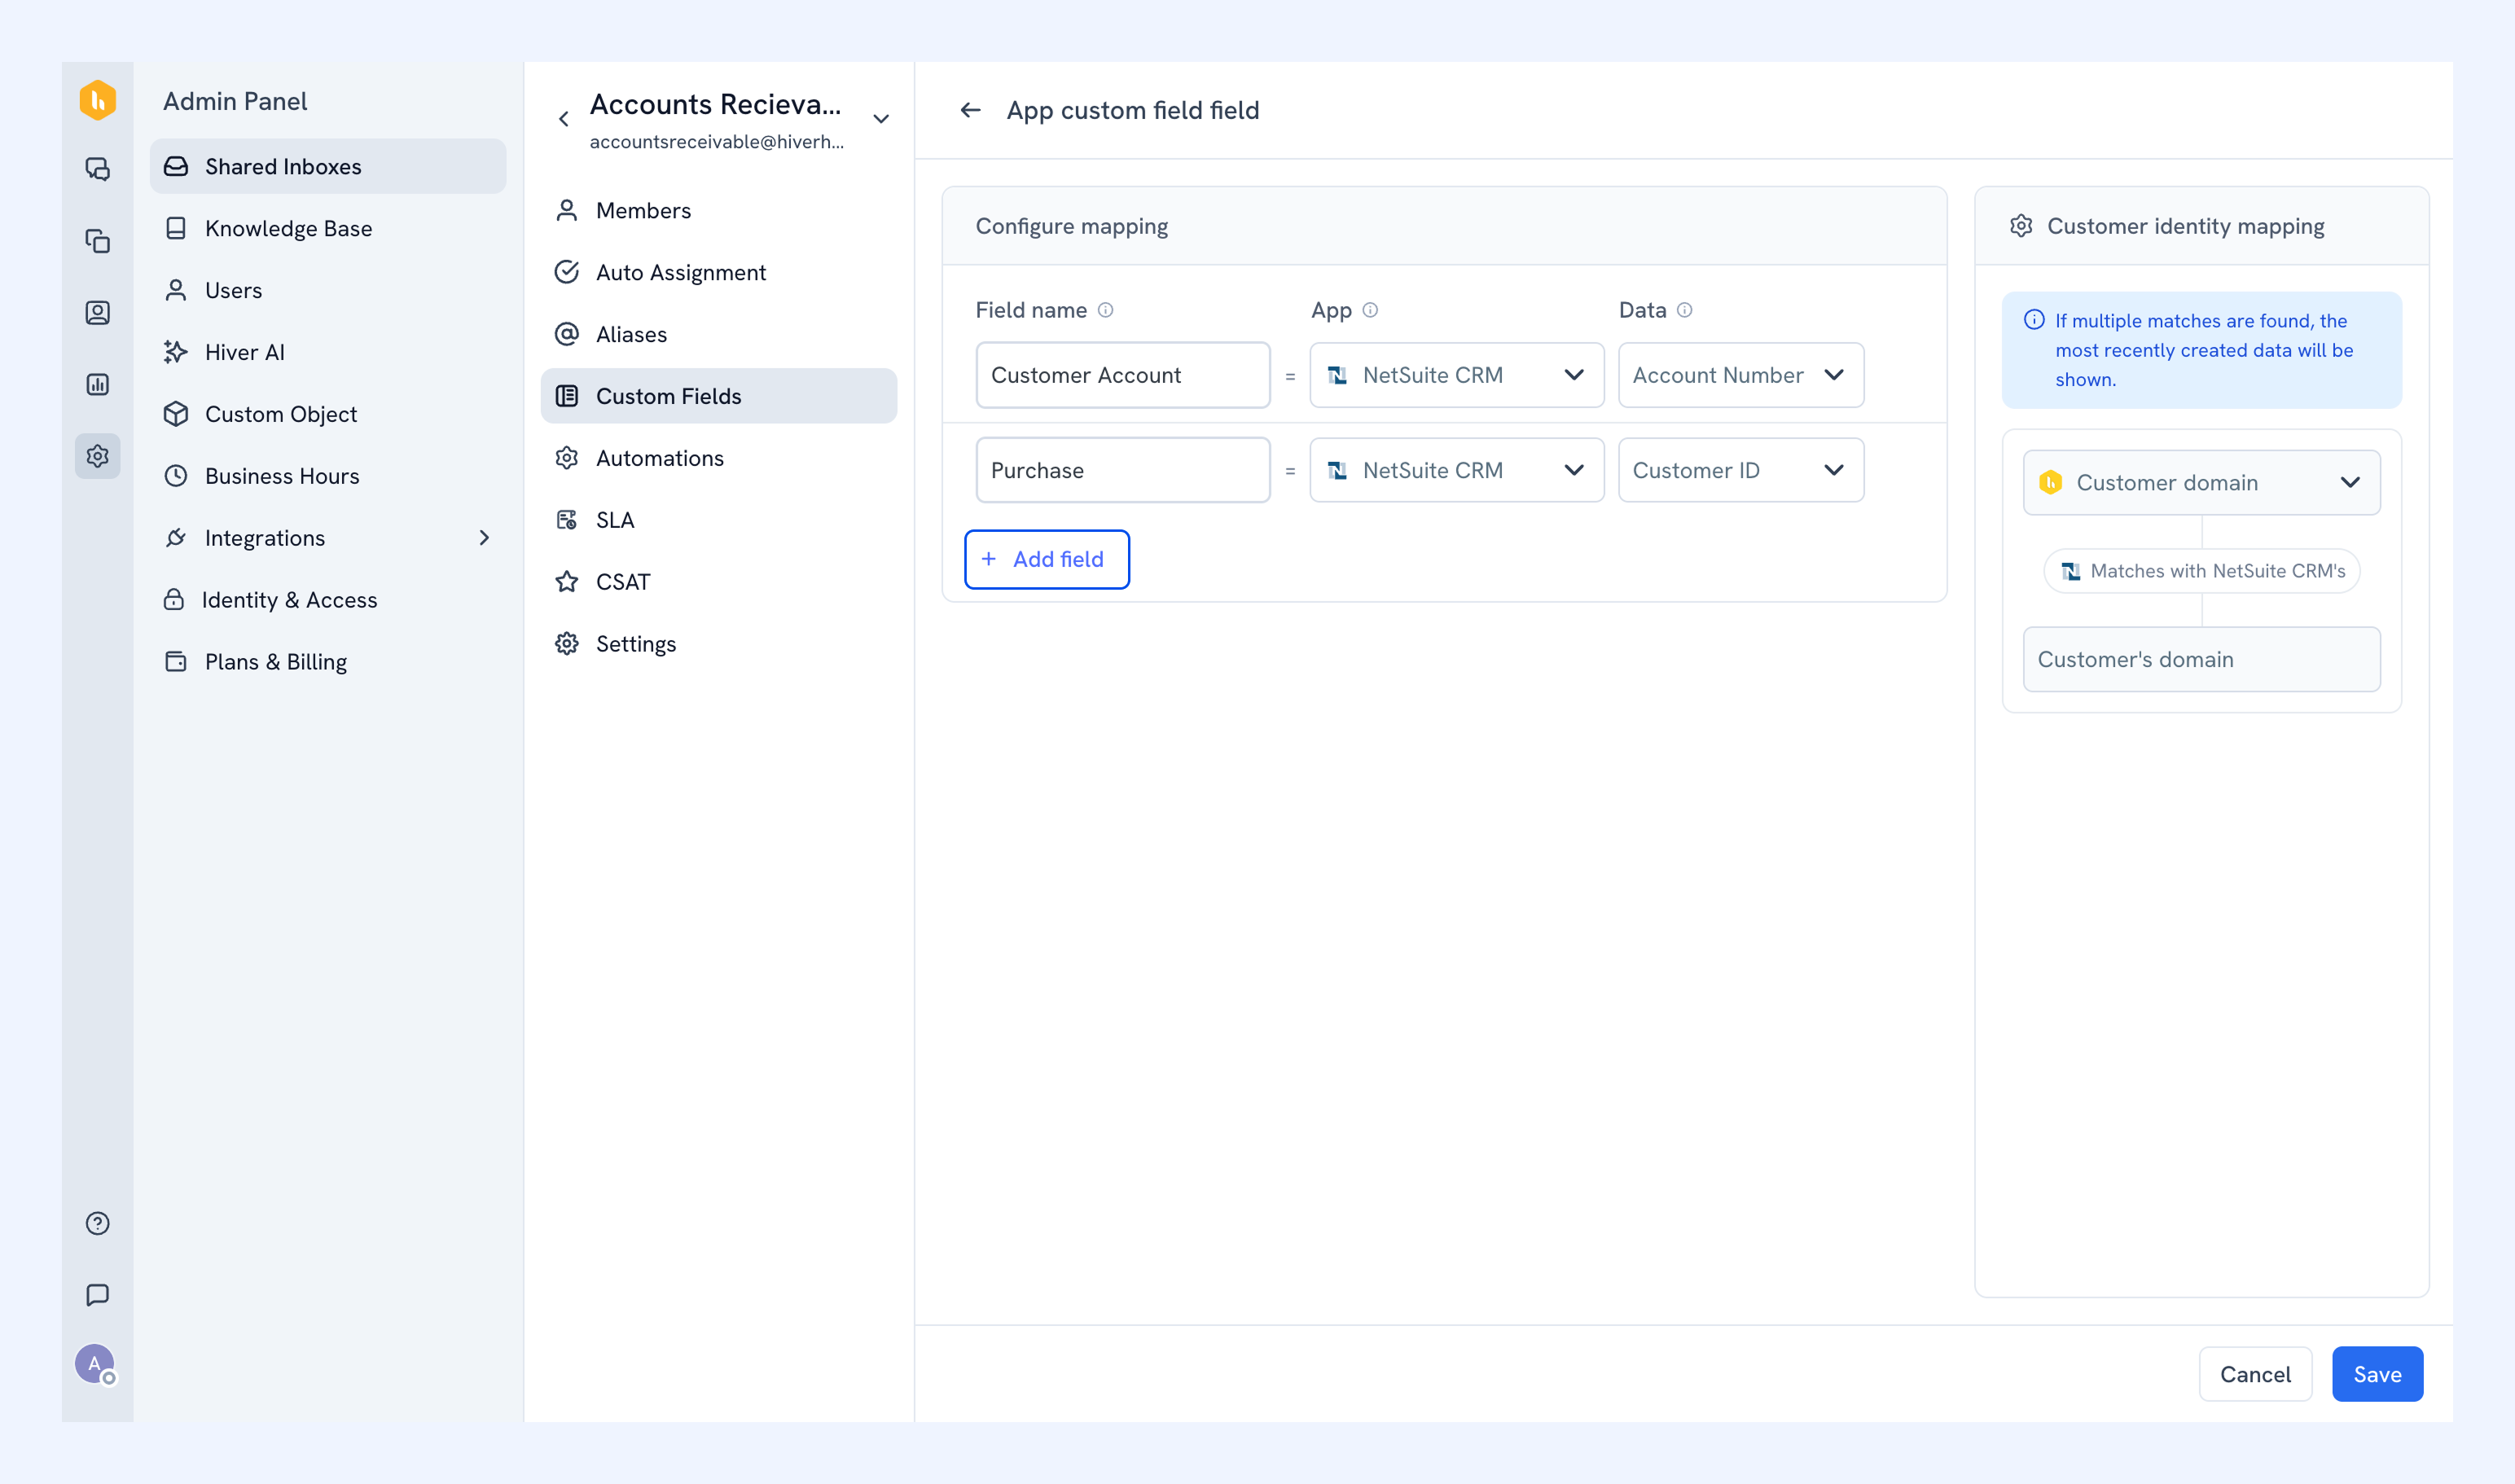
To pull another data point from your app, click + Add field and map another field.
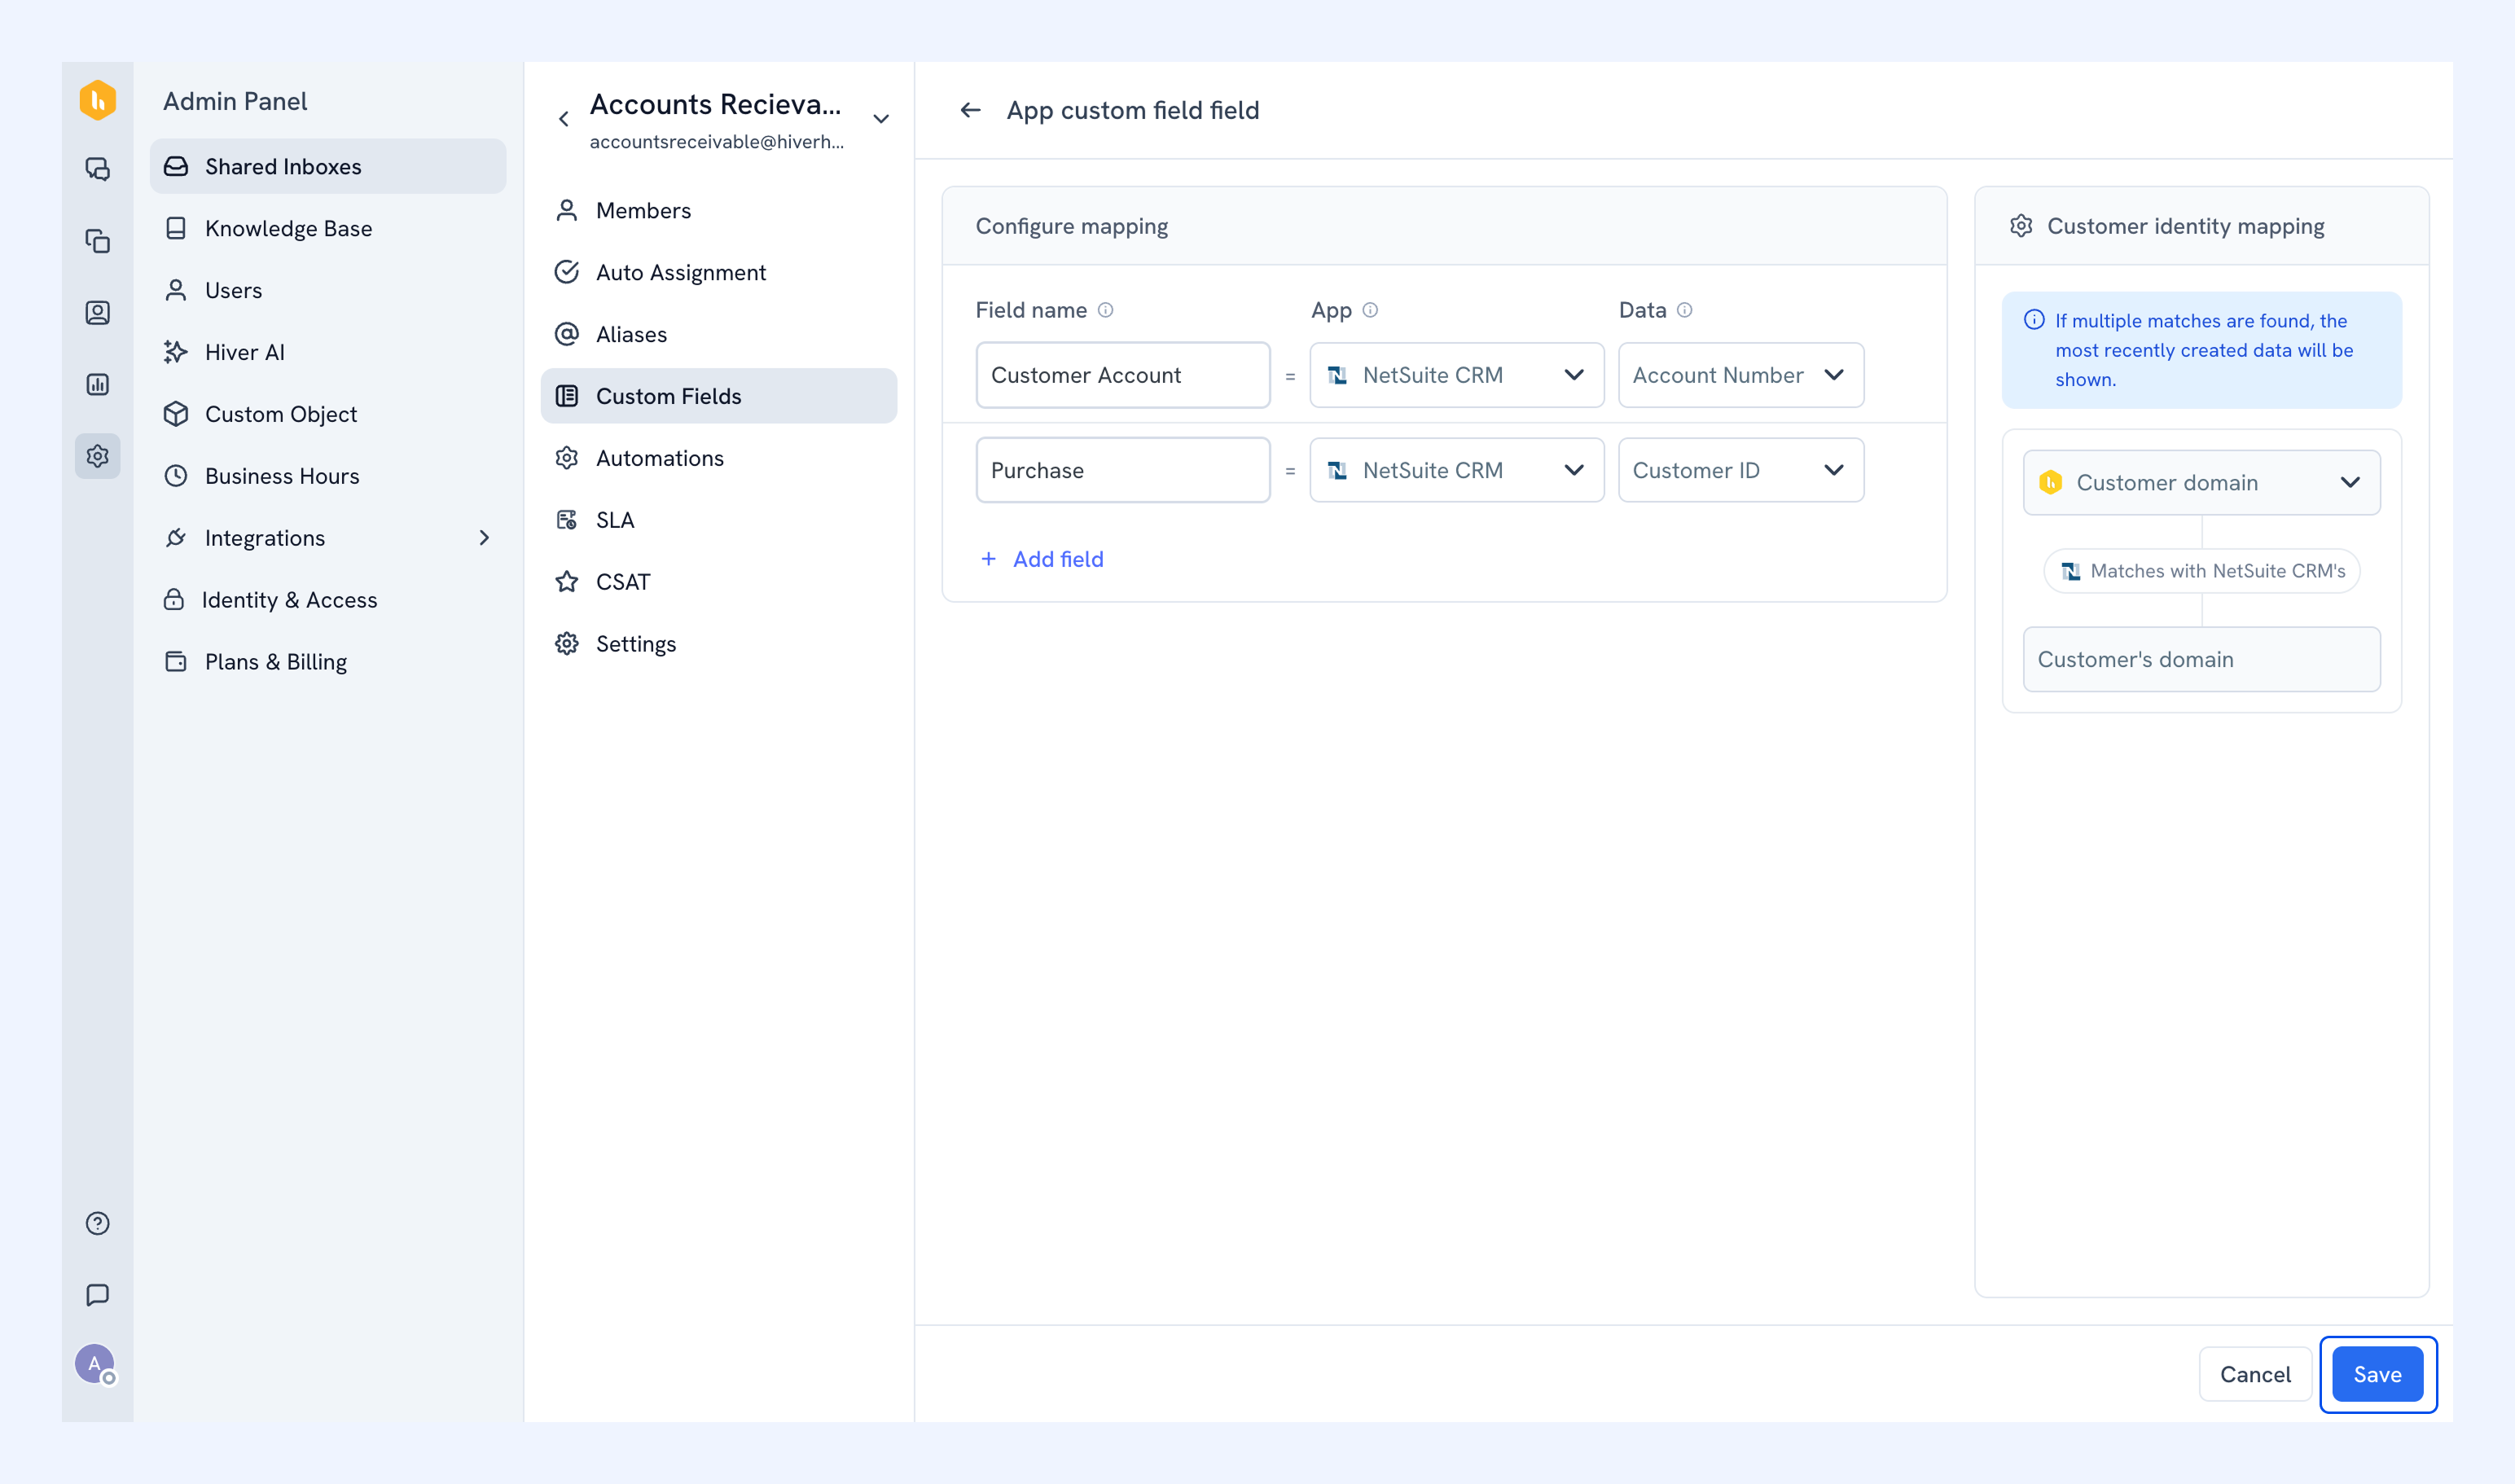
6. Click Save.
Managing Custom Fields
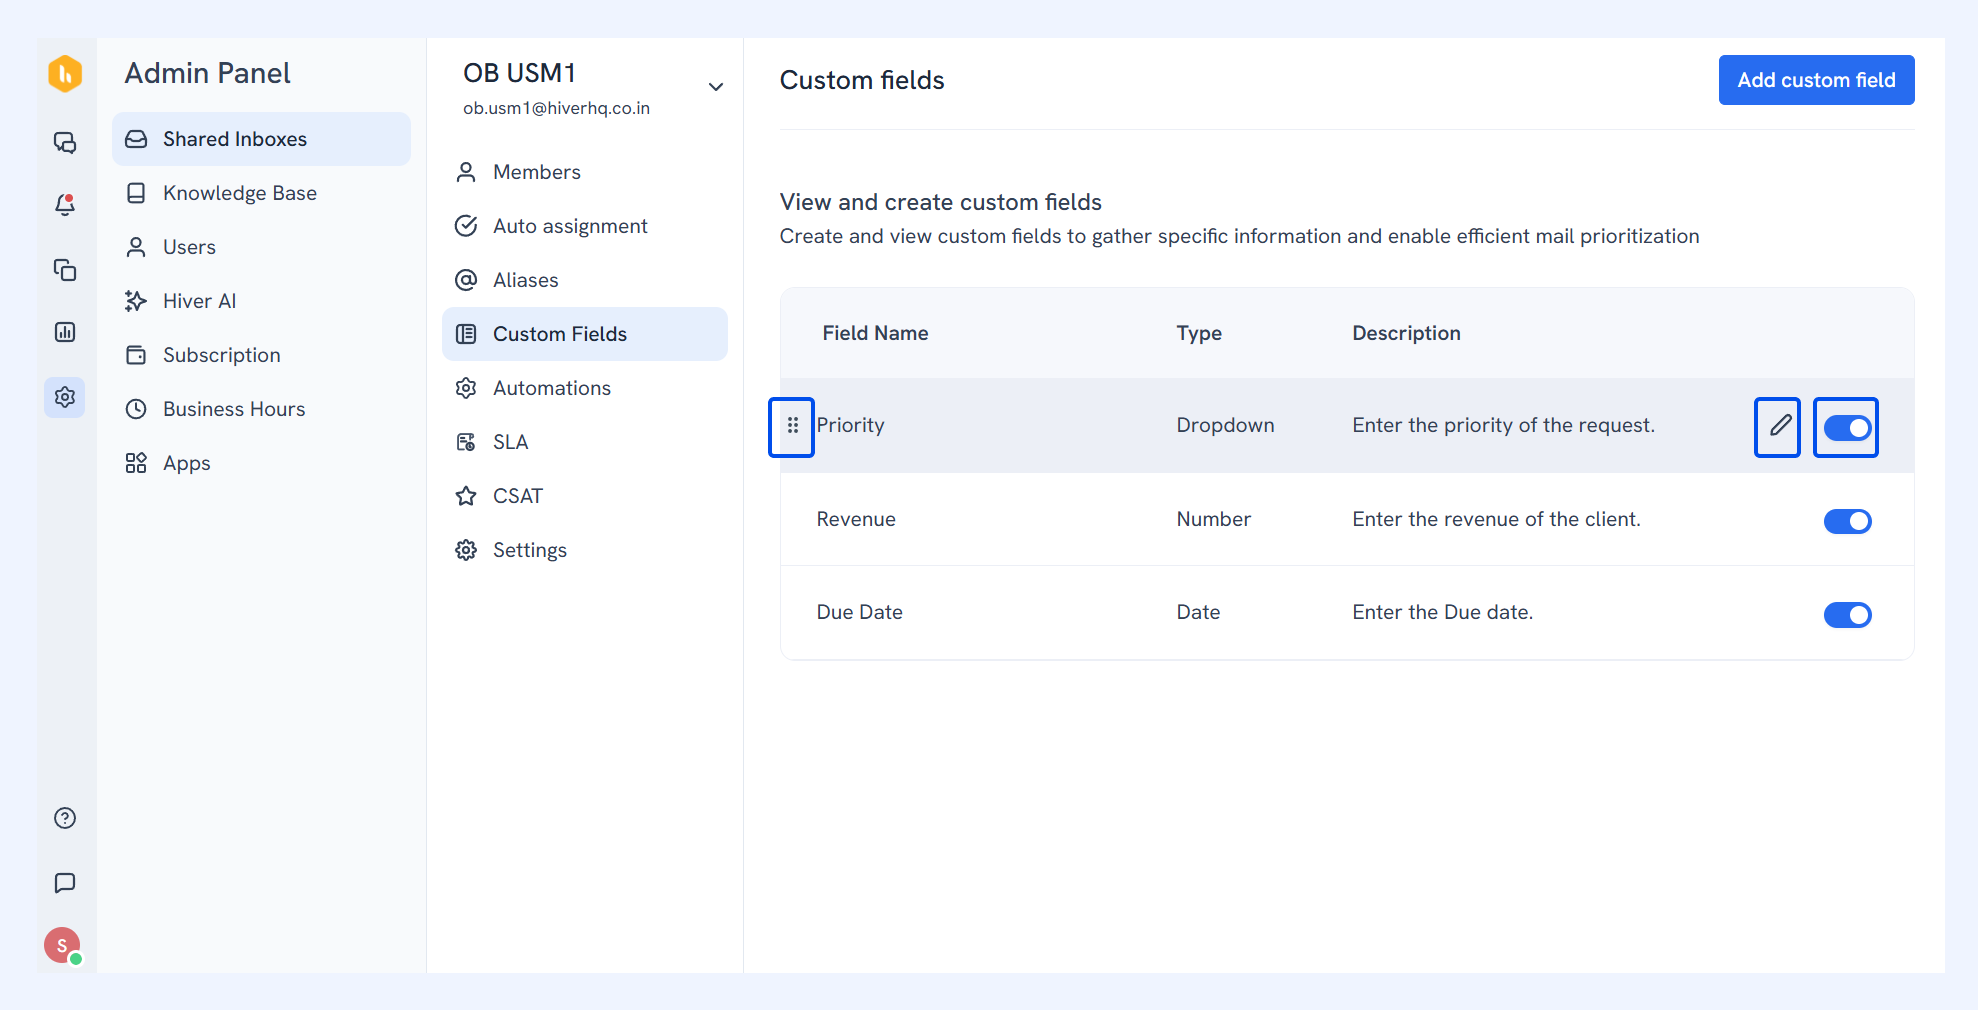
Once you’ve created Custom Fields, you can easily make changes using the same path: Admin Panel → Shared Inboxes → Select an inbox → Custom Fields.
Hover over any field to see these options:
- Reorder (four-dot icon): Drag and drop fields to set the order. This order determines how fields appear in conversations for your team.
- Edit (pencil icon): Update the field’s name or description. Save your changes to apply them immediately.
- Disable (toggle): Turn a field off if it’s no longer needed. Disabled fields won’t appear in conversations but can be re-enabled later.
Note: Deleting a custom field will break any automations that use it. Review and update your automations before making any changes to avoid workflow disruptions.
Getting insights from custom field data
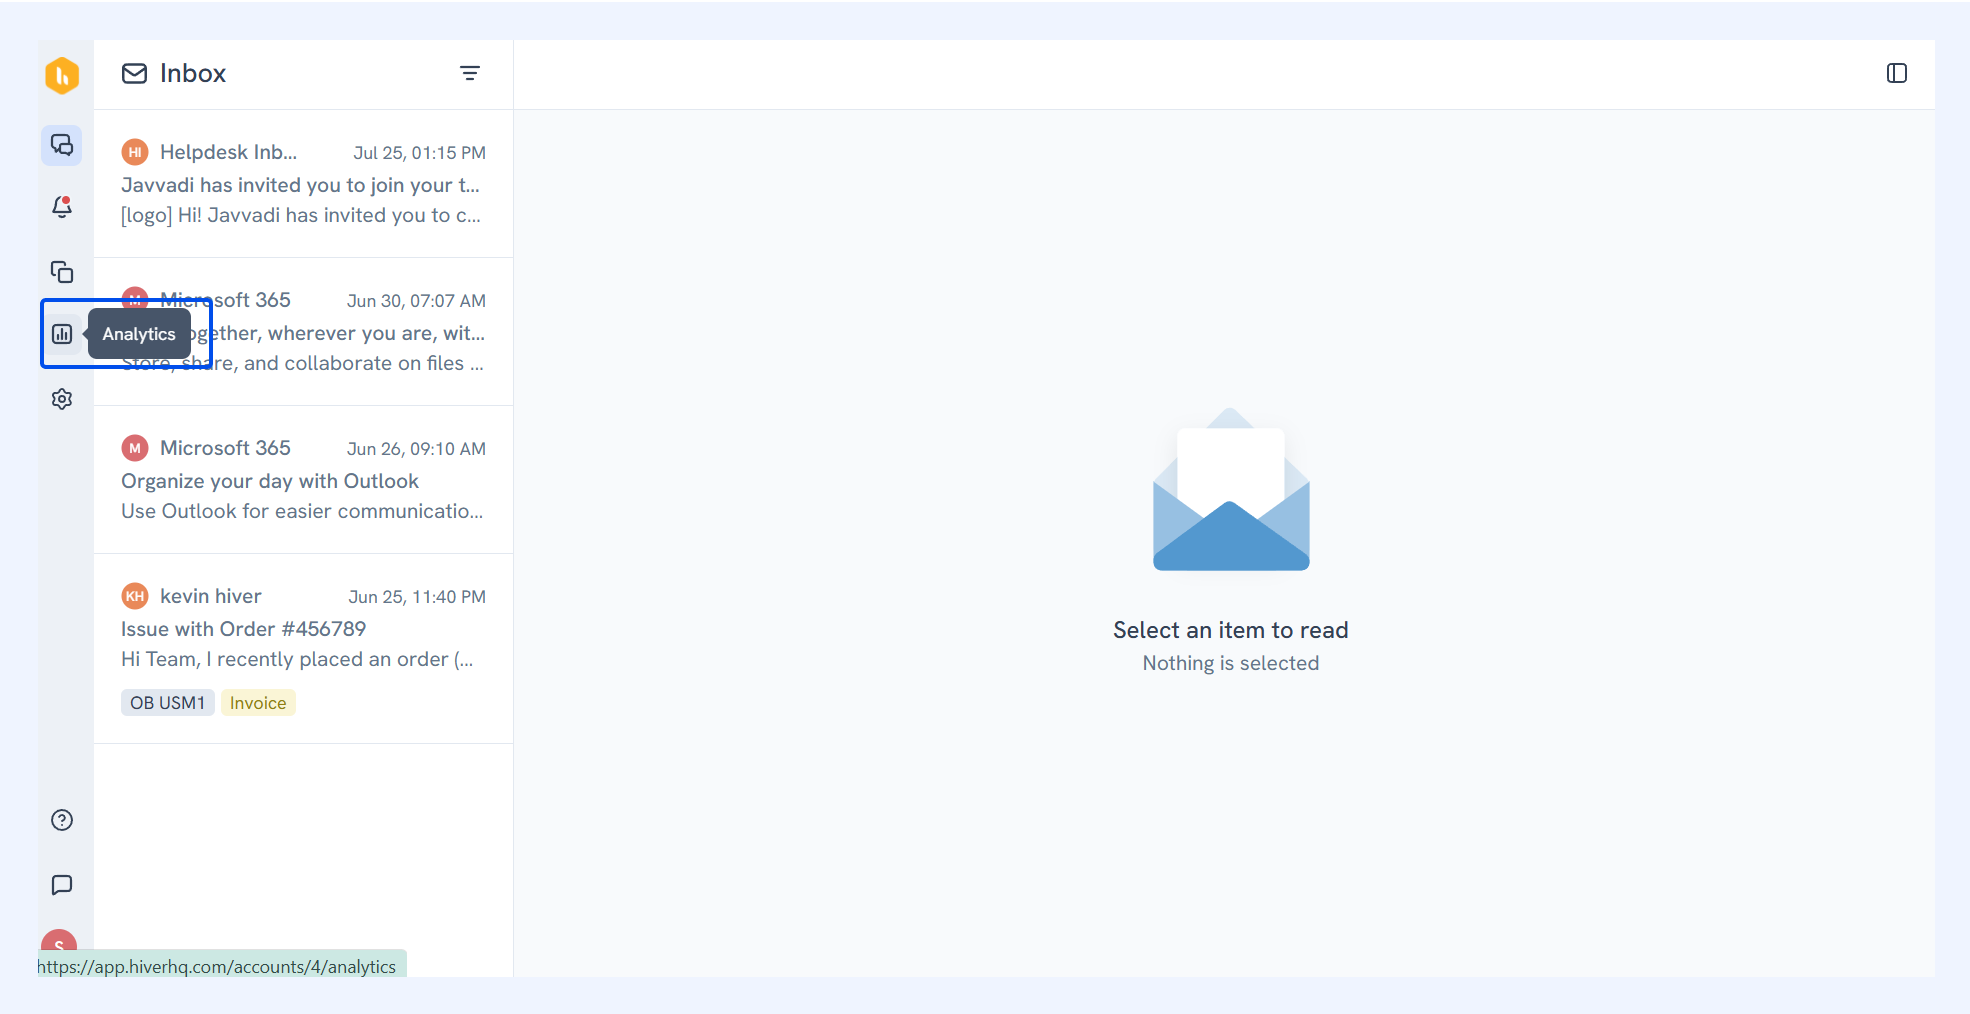
Once you’ve started using Custom Fields, select Analytics from the navigation bar to track trends, measure performance, and generate reports from the data collected.
Analyze conversations with Custom Fields
You can group conversations by Custom Field values to identify trends. This works for active, new, or resolved conversations.
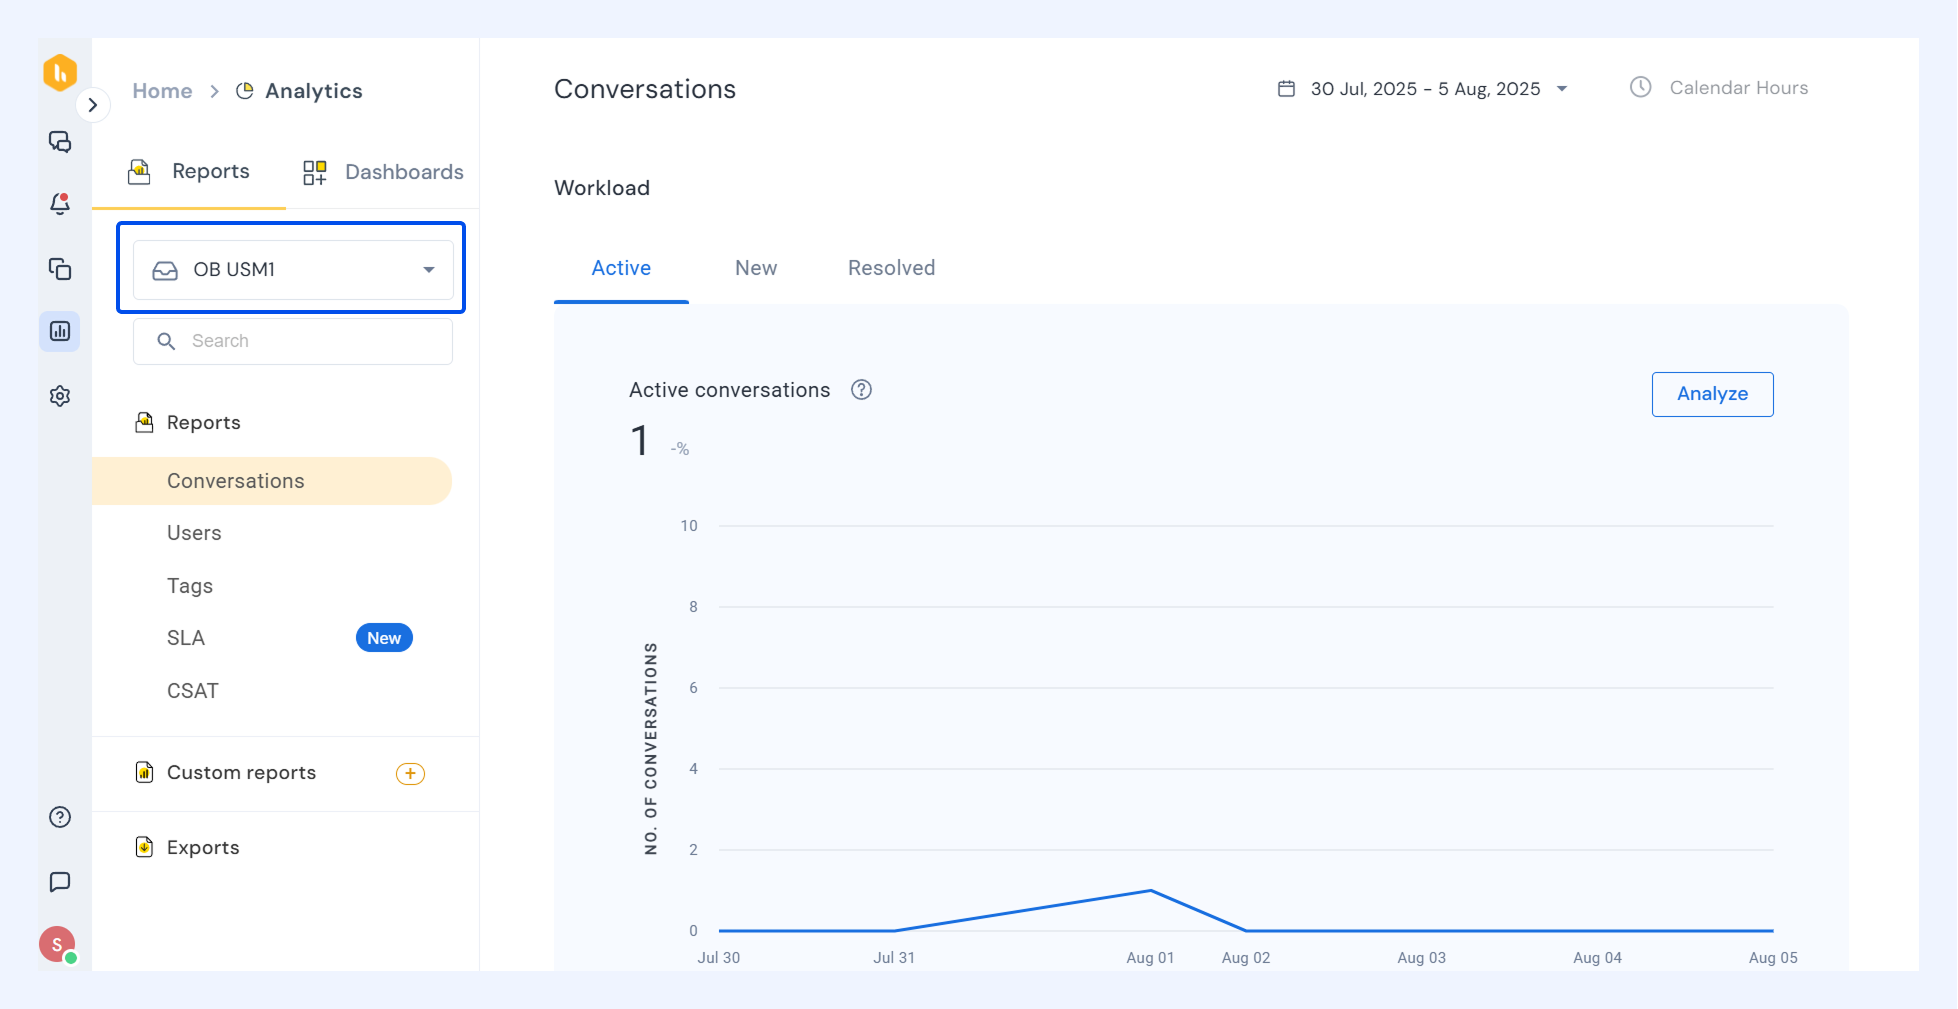
- Go to Analytics → Shared Inbox → Conversation reports
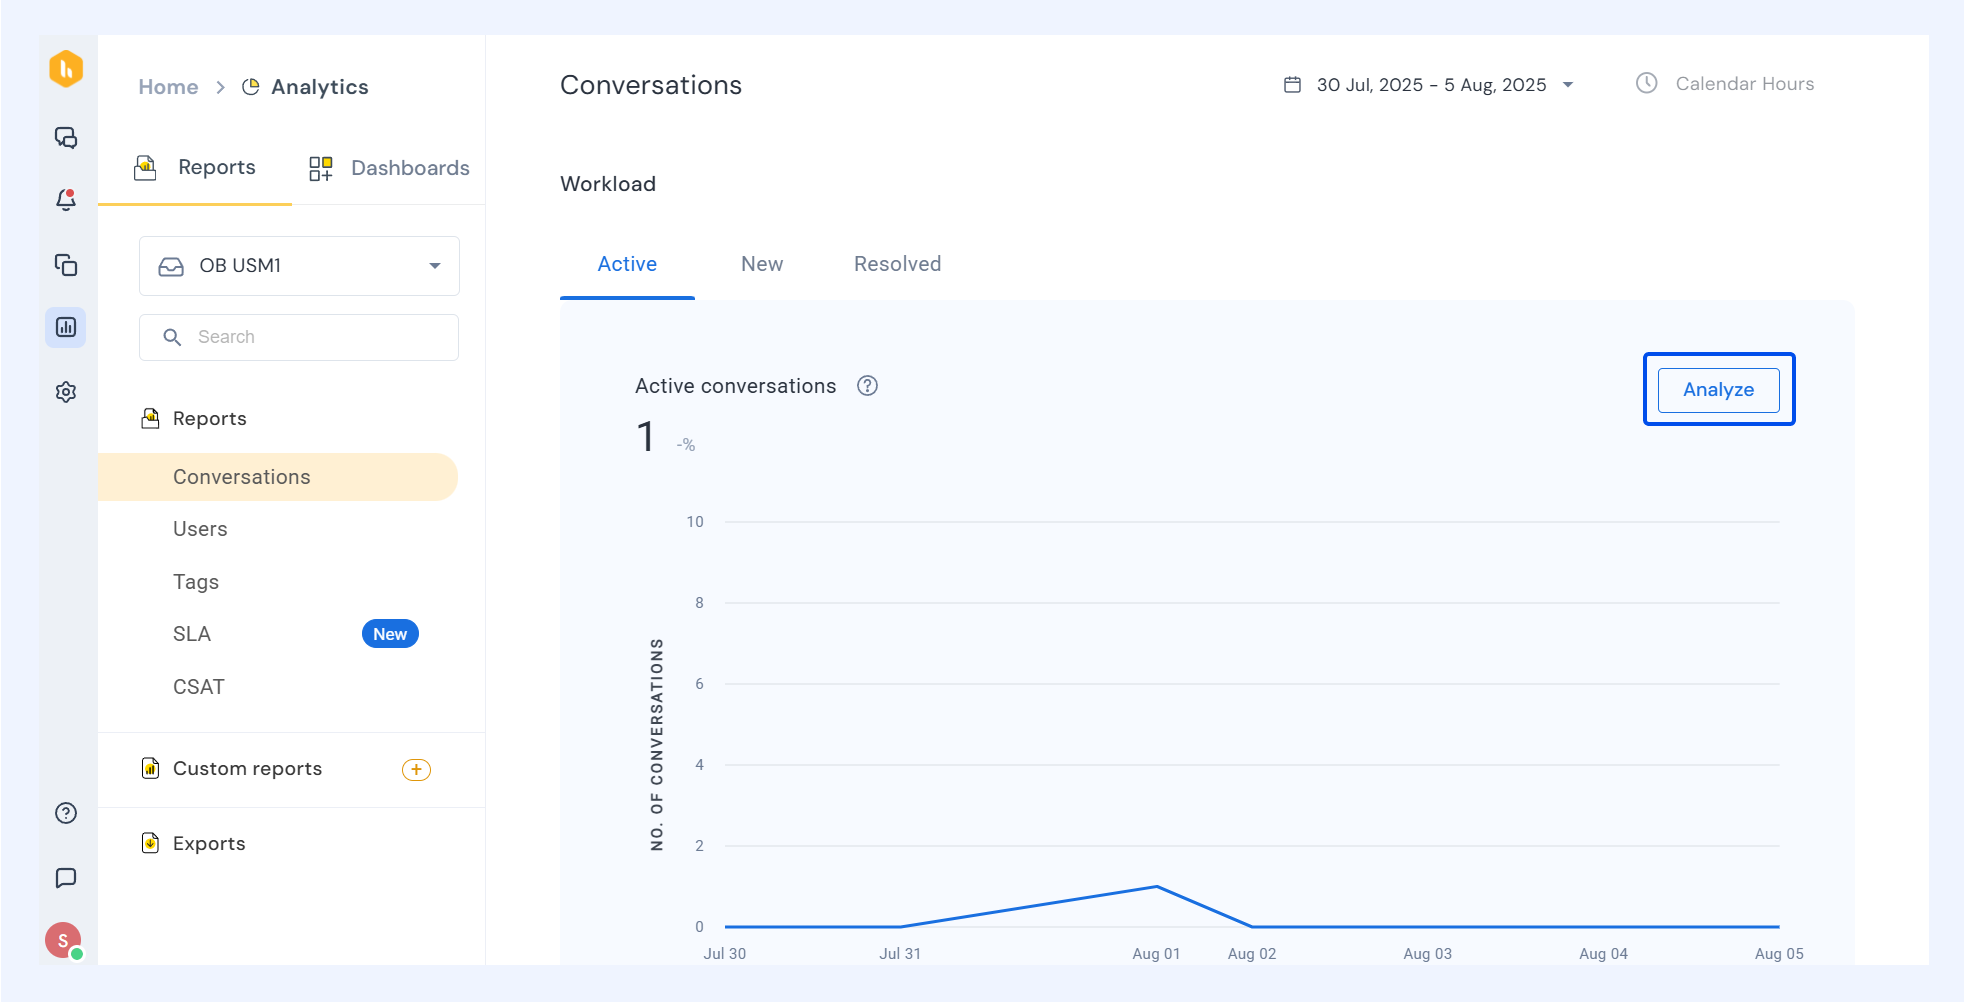
- Select Analyze in the report to view your conversation analytics.
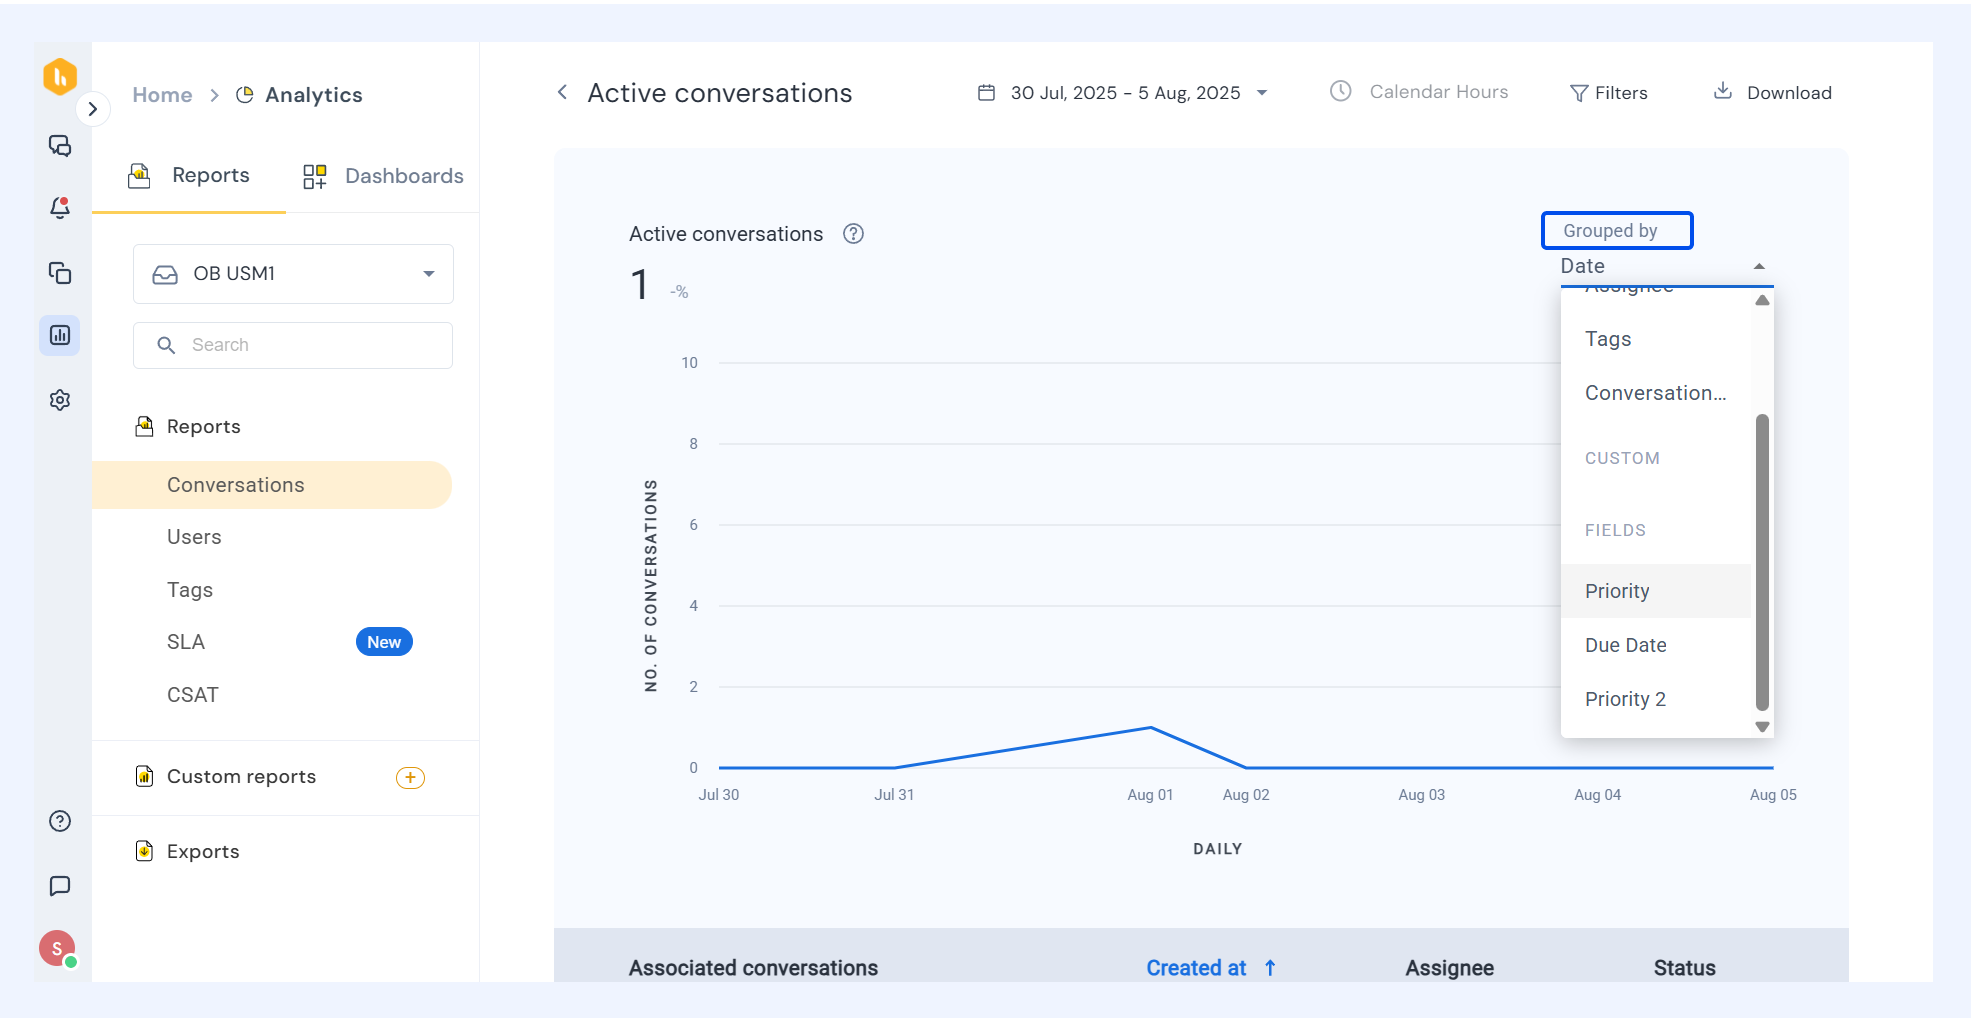
- Under Grouped by, choose a custom field from the dropdown.
For example, if you select the Priority field, conversations will be grouped into High, Medium, and Low.
Build your own reports with Custom Fields
Custom reports help you track metrics that matter to your workflow.
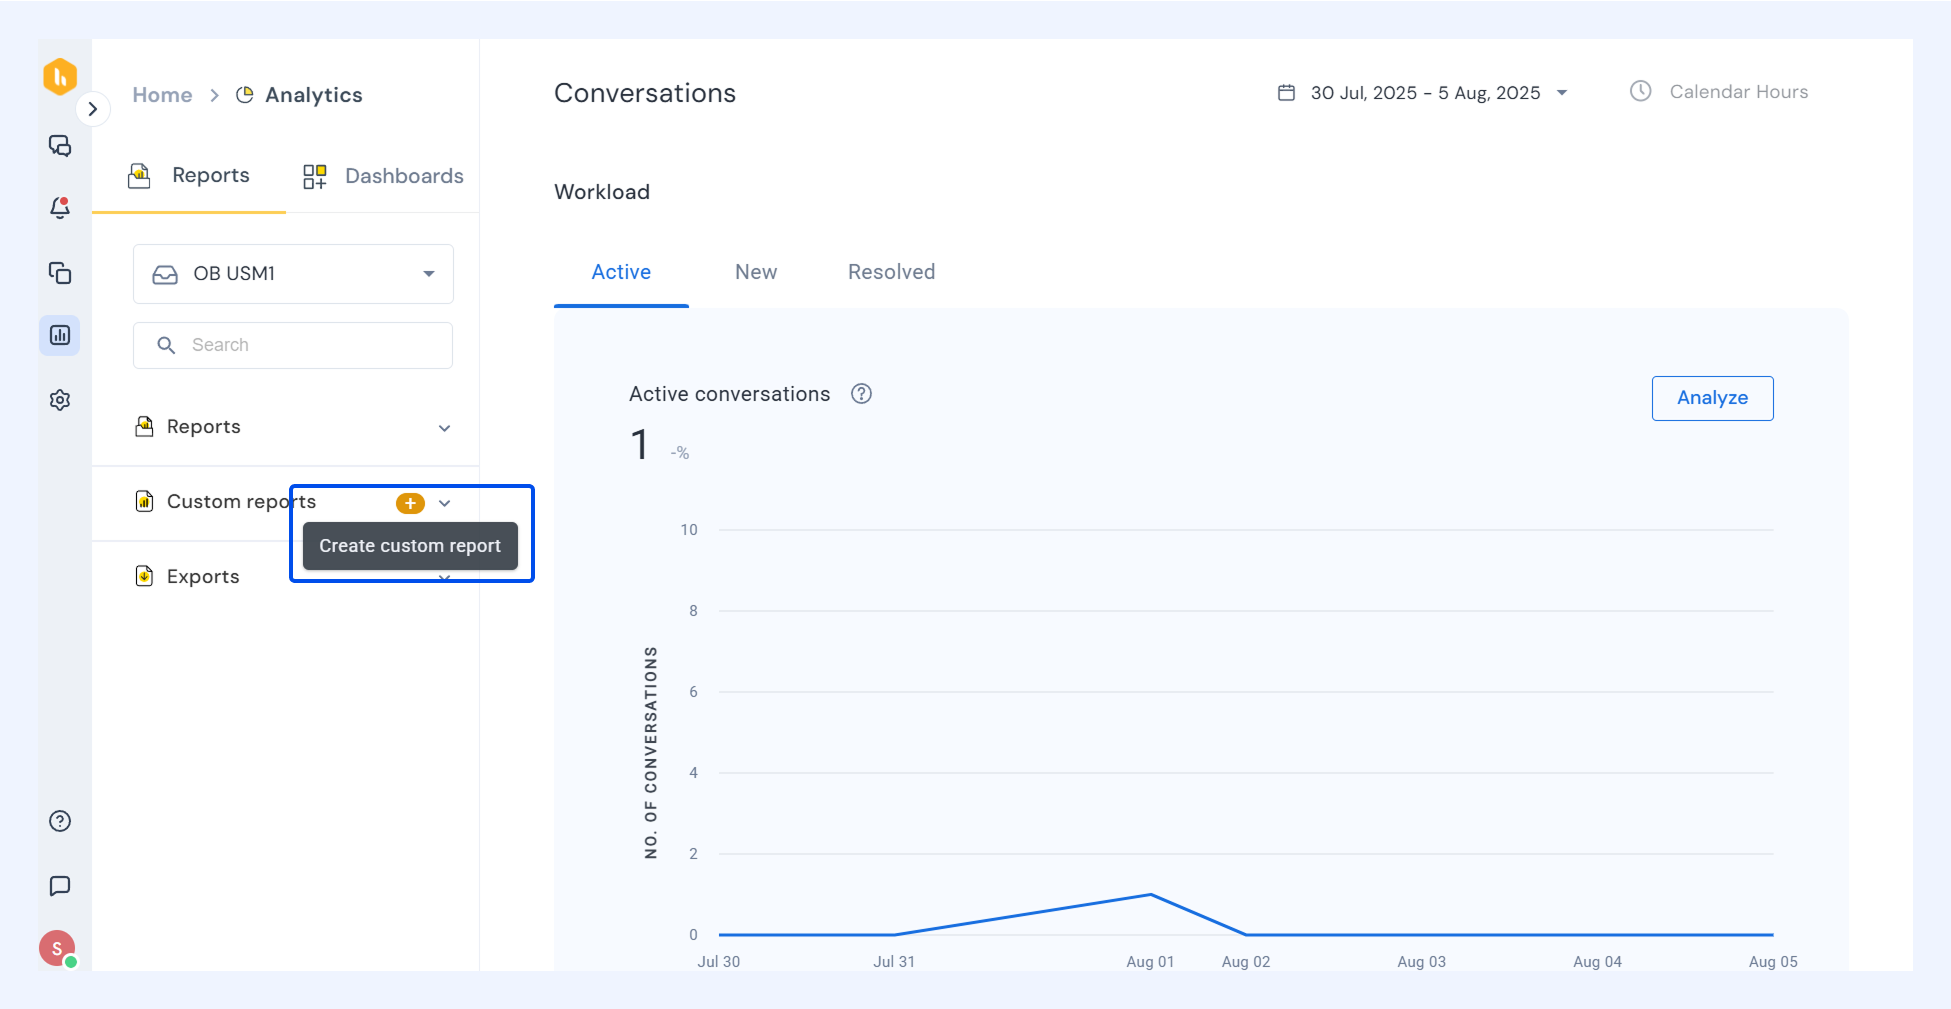
- On the left panel, click the (+) sign to create a custom report.
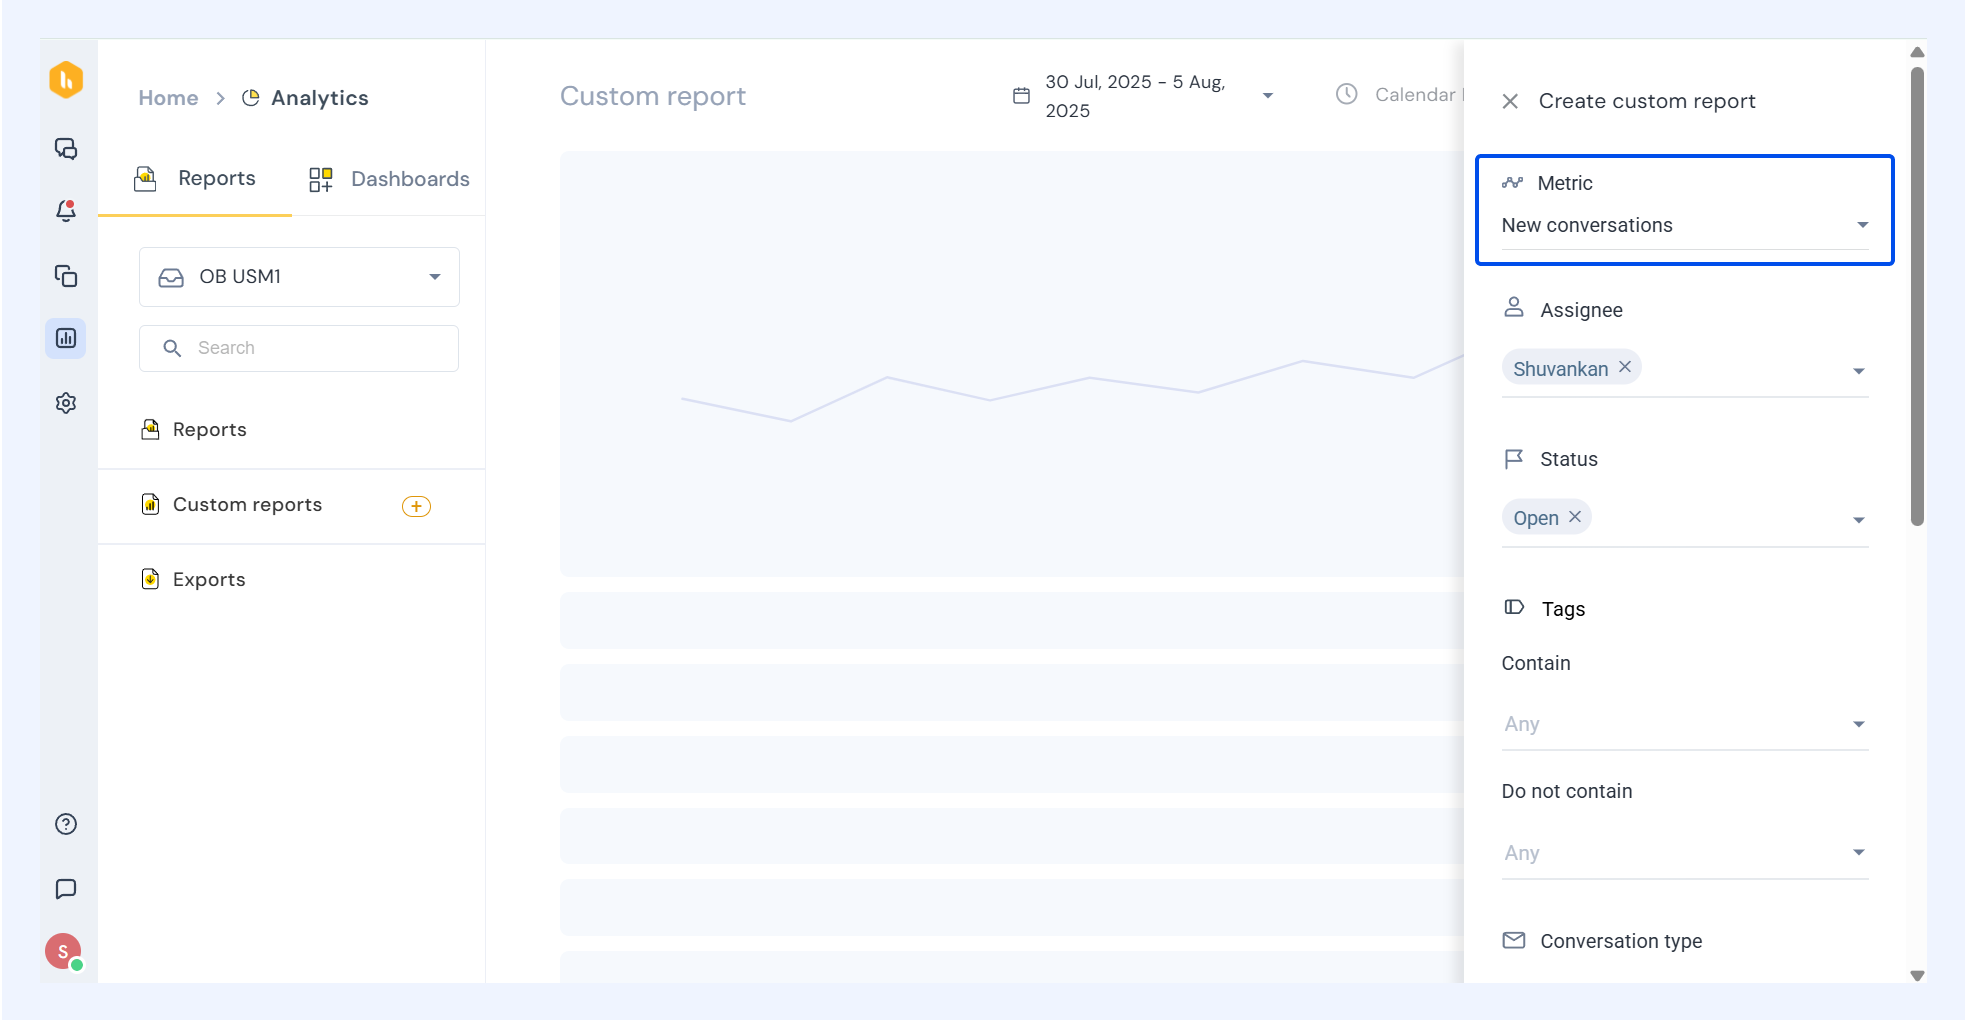
- Choose a metric and select the Custom Field you want a report on. Add more filters as needed.
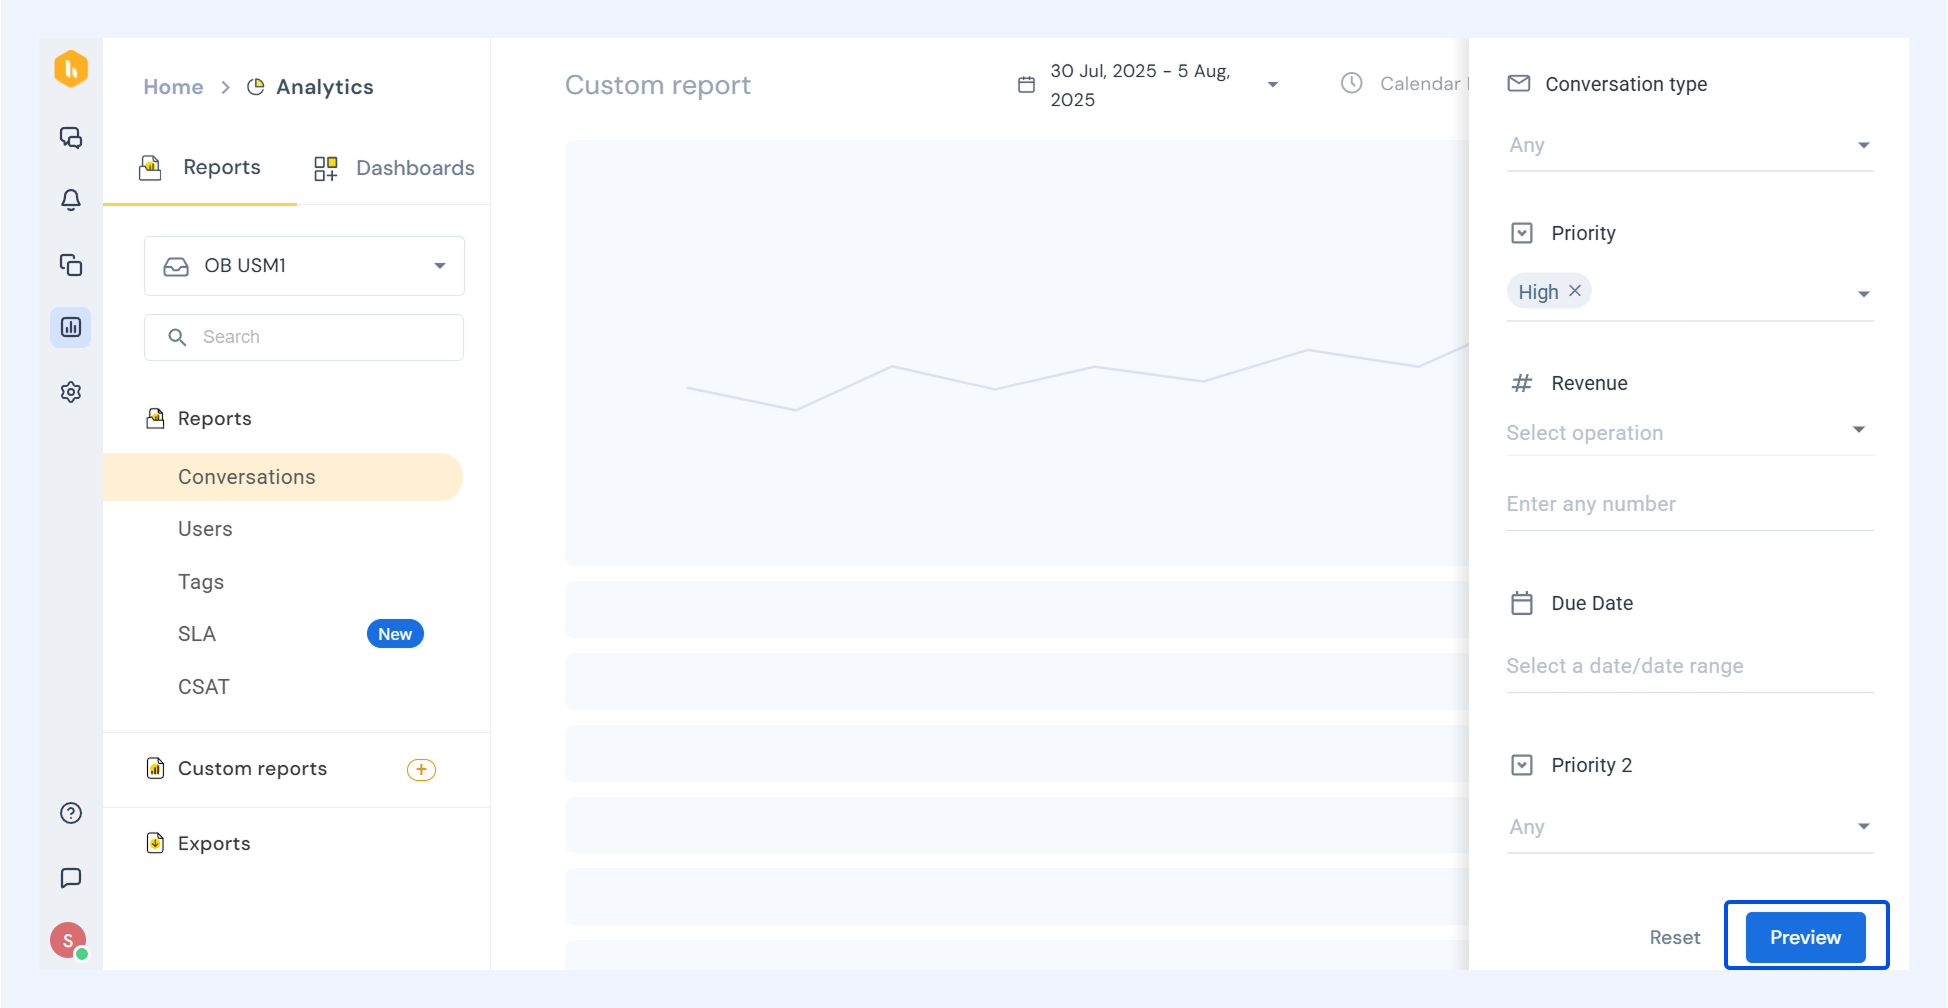
- Click Preview to review your report.
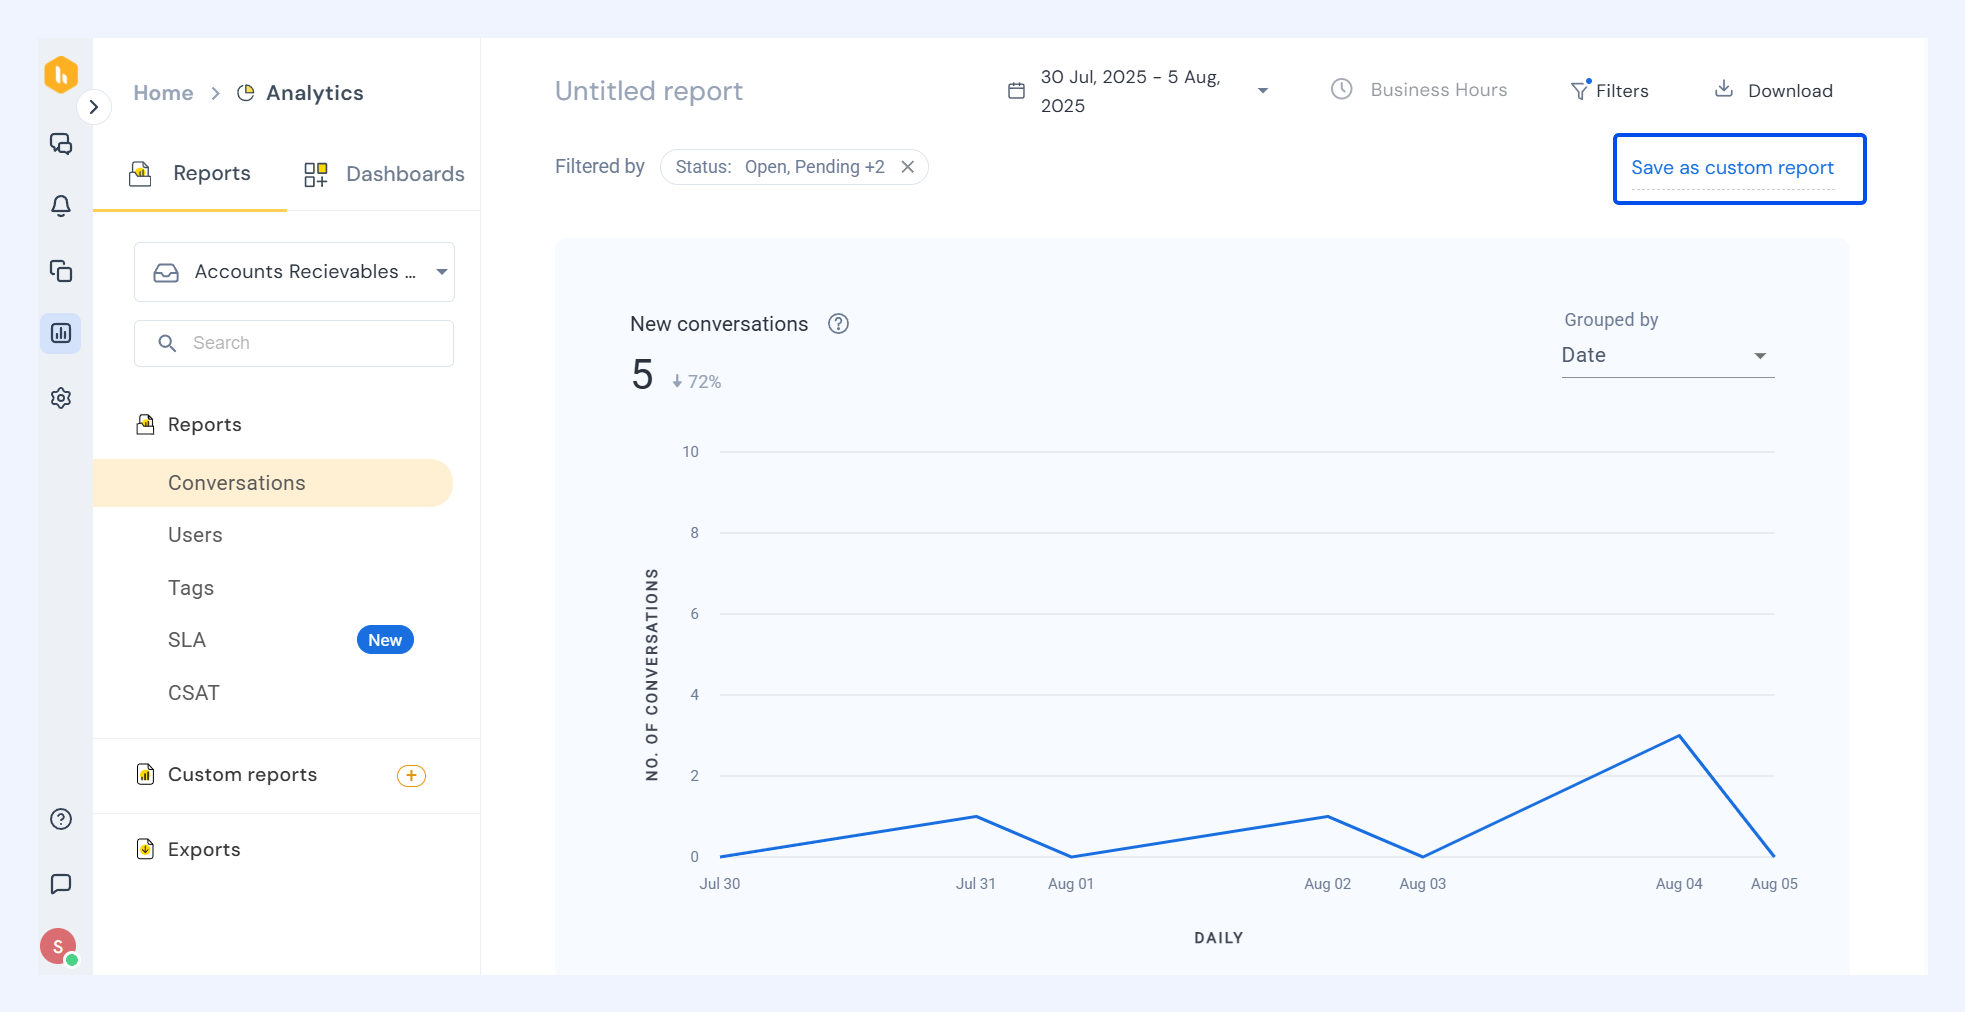
- If everything looks good, click Save as custom report.
Export your Custom Fields data
Sometimes you need your data outside of Hiver, maybe for a monthly report or to perform advanced analysis.
- Click Exports and select New export.
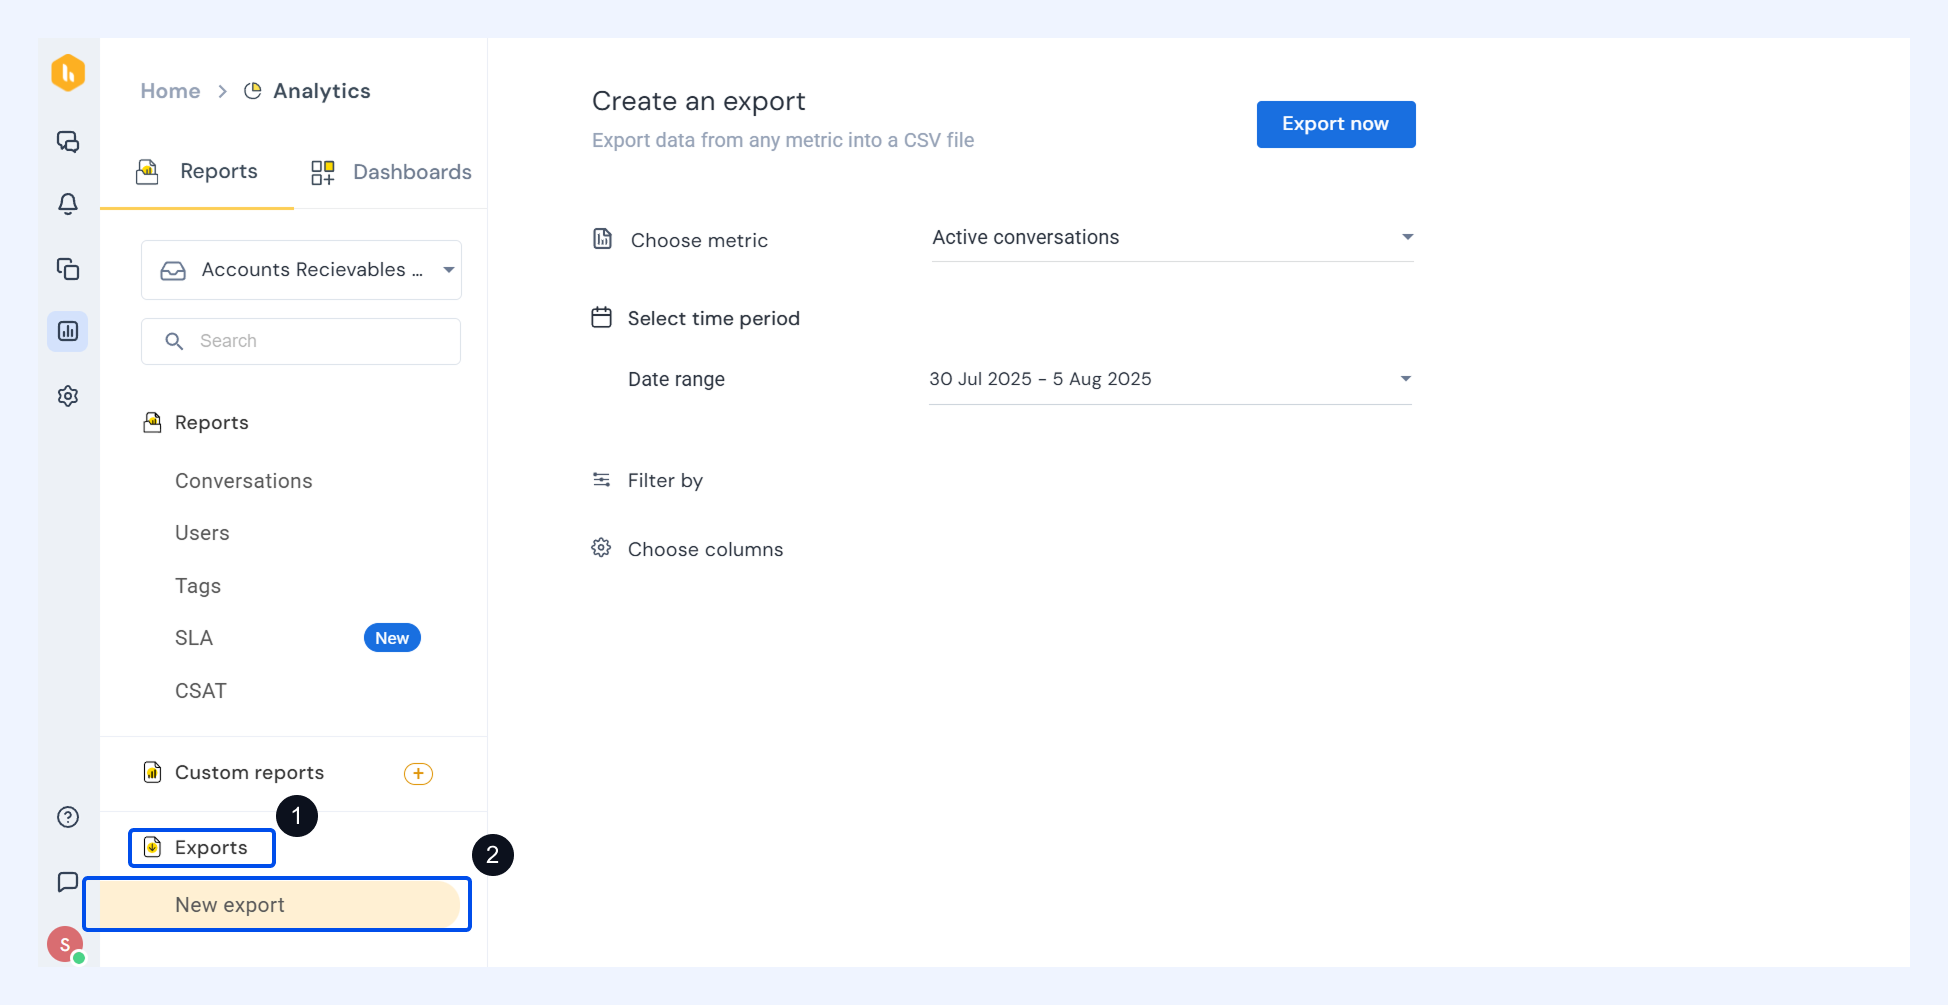
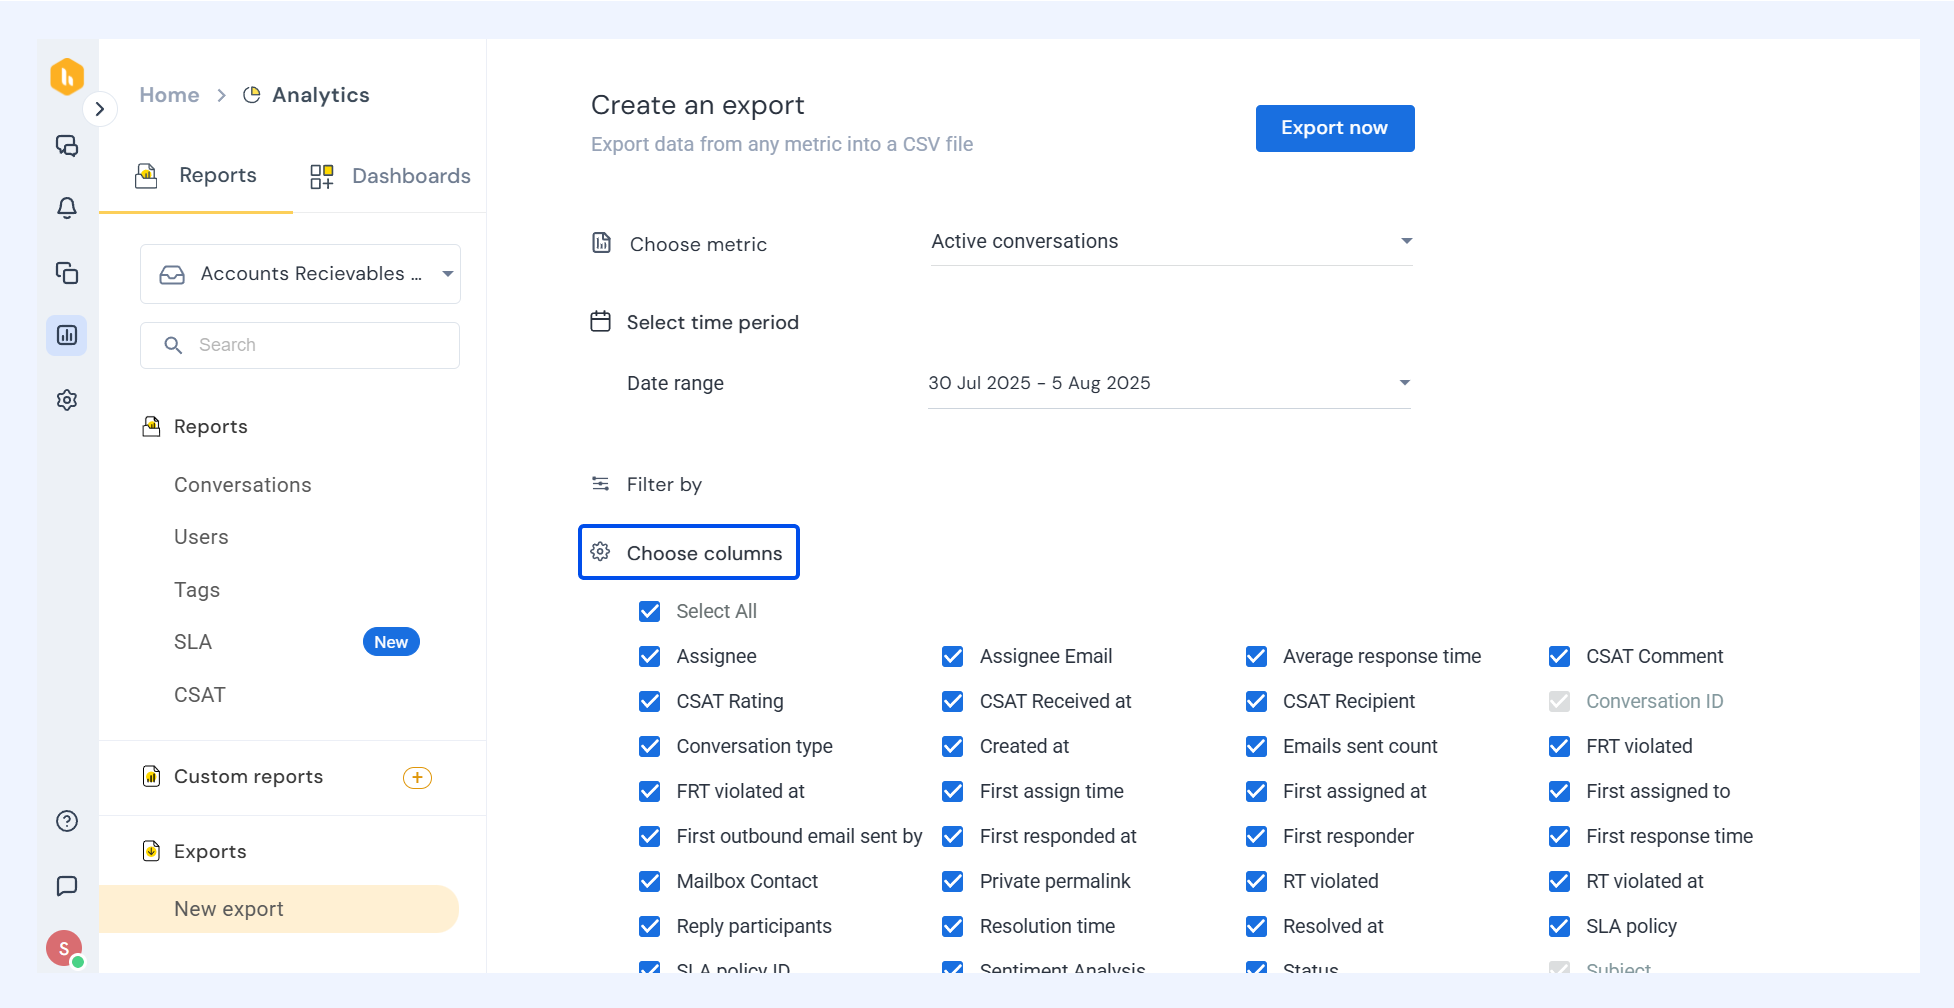
- Select metrics, date range, and custom fields from Choose columns, then click Export now to download your data as a CSV file.