Shopify integration with Hiver
Shopify is an e-commerce platform that helps businesses manage online stores, orders, and customer relationships. Integrating Shopify with Hiver Omni gives your support team direct access to customer and order information while handling emails.
This integration allows you to:
- Access customer details and order history alongside emails.
- Respond to inquiries with complete purchase context.
- Reduce time spent switching between platforms.
Prerequisites
You will need need:
- Admin access to both Hiver and Shopify.
- Permission to create custom apps in Shopify.
- Your Shopify store URL.
Connect Shopify to Hiver Omni
Before you create your Shopify app, you need to get the Redirect URL from Hiver first.
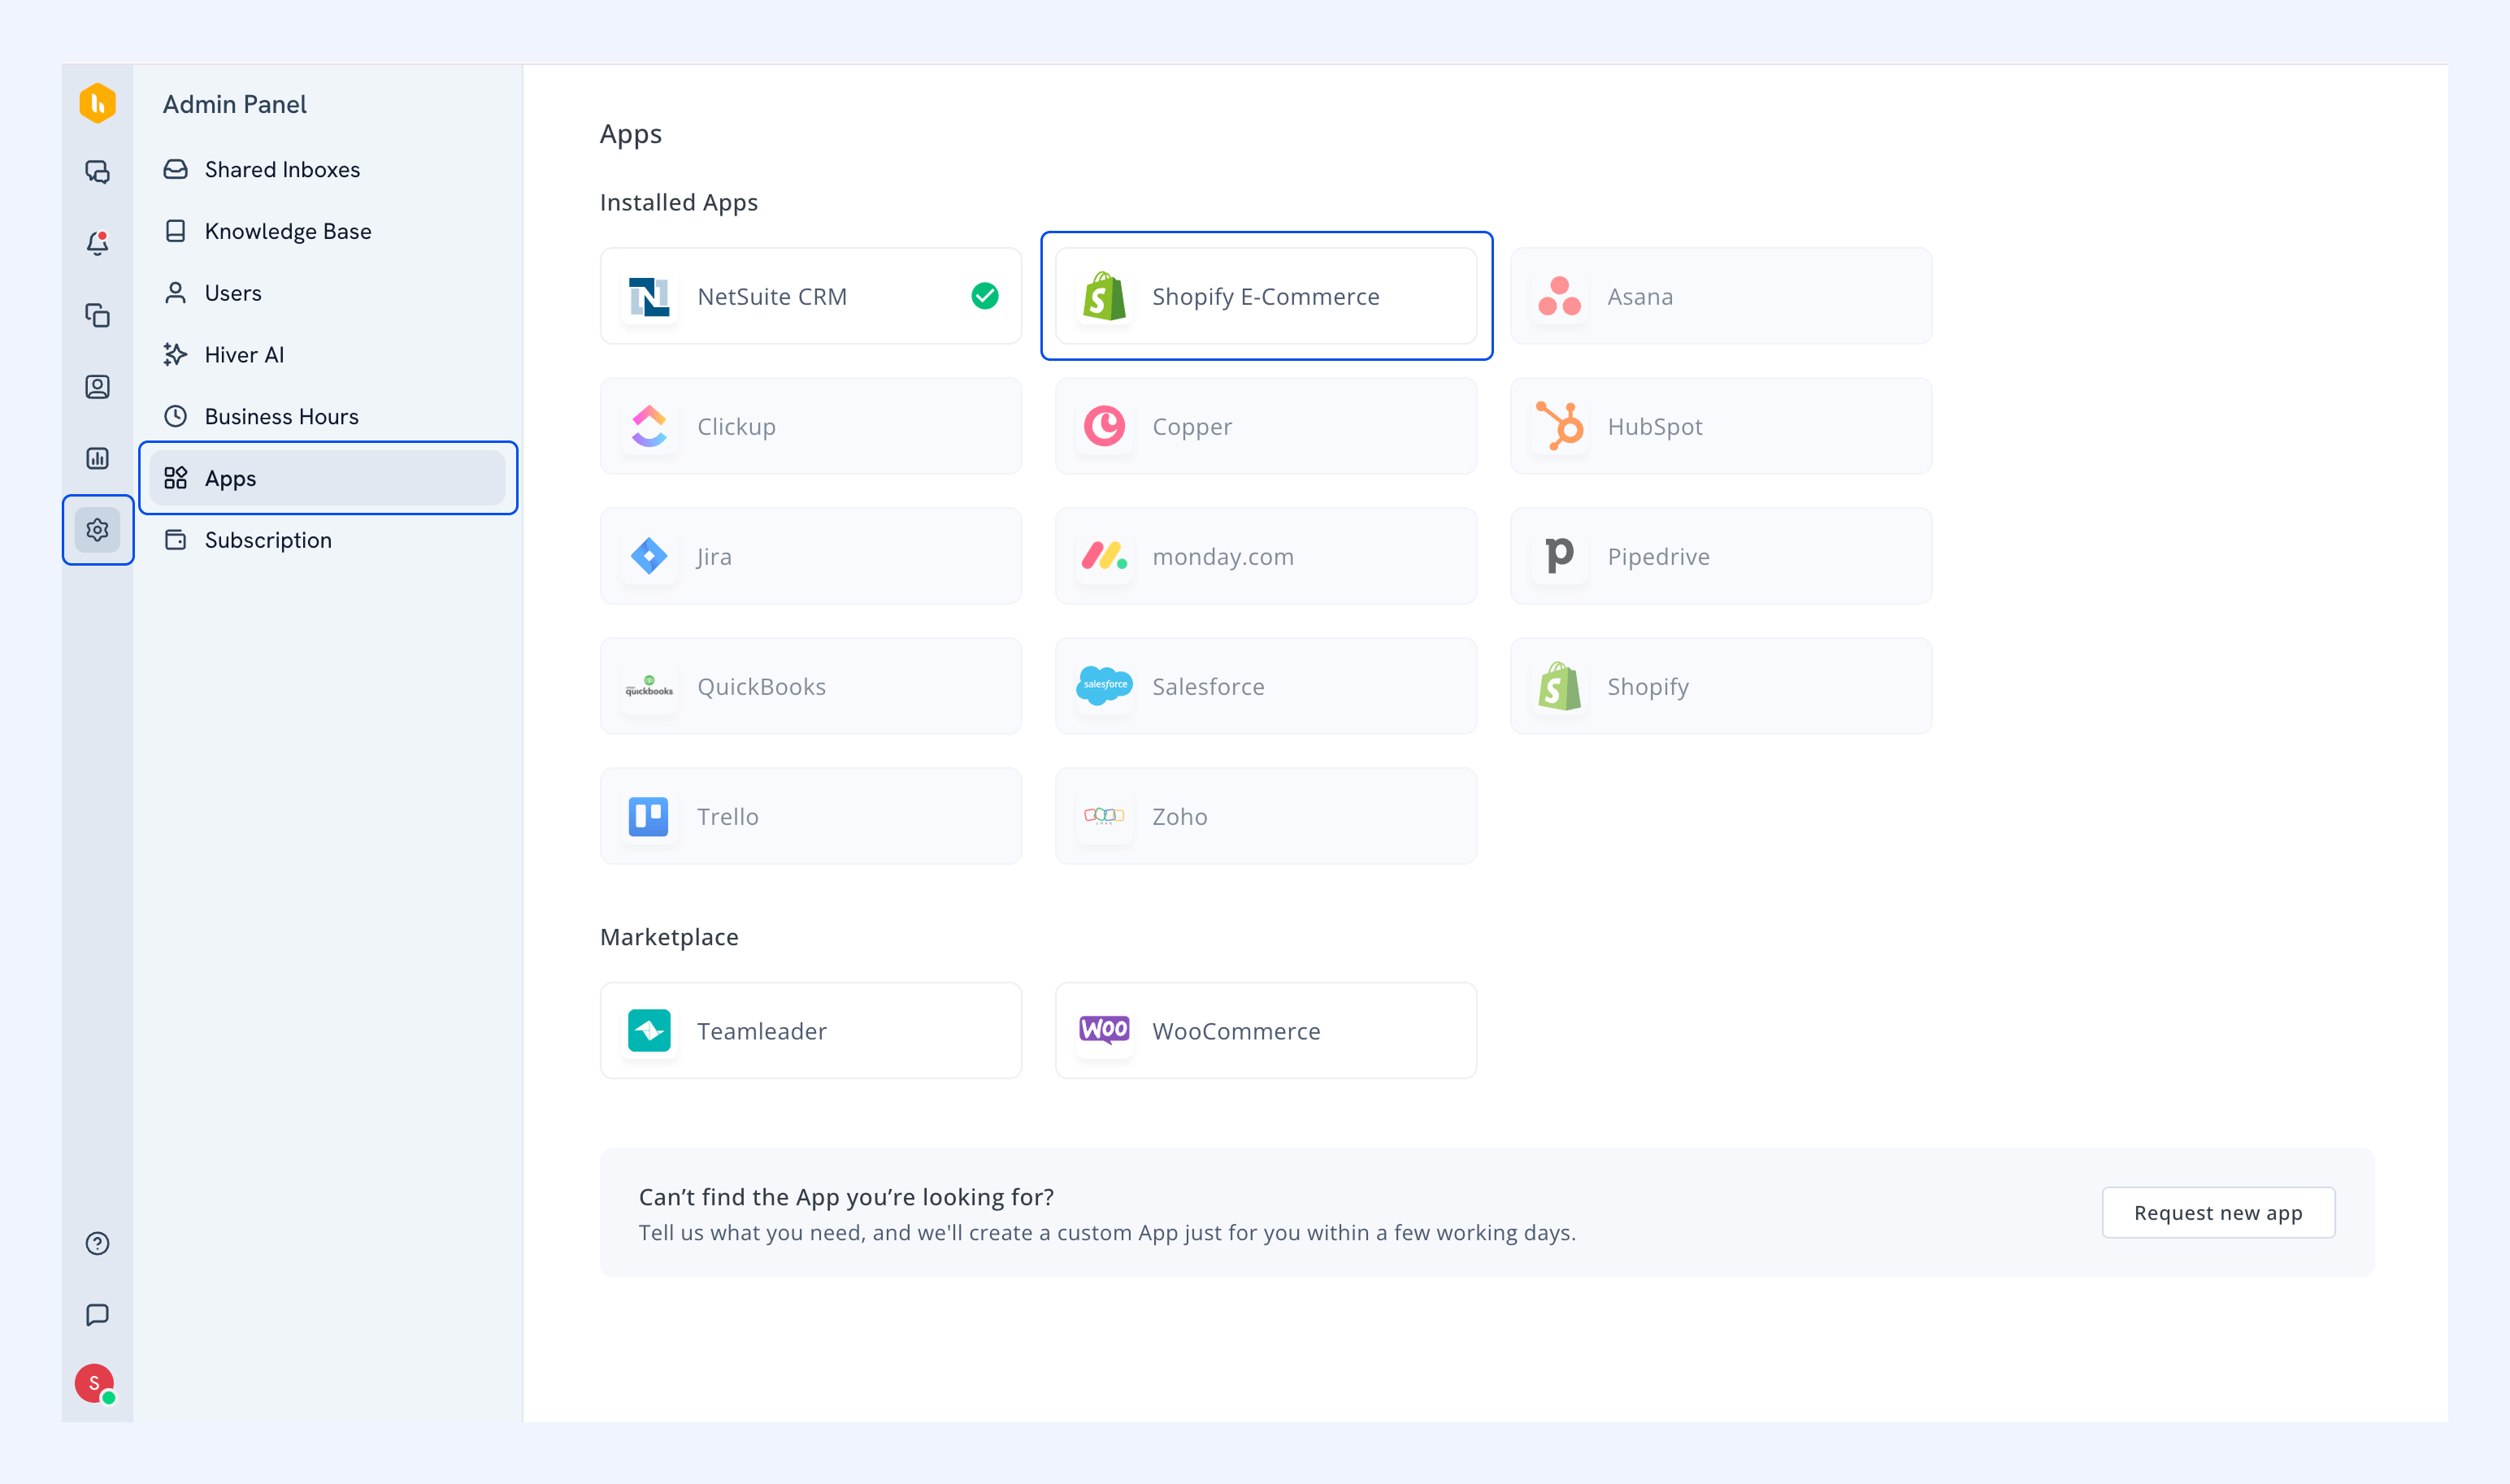
1. In Hiver, navigate to Admin Panel → Apps.
2. Find and select Shopify.
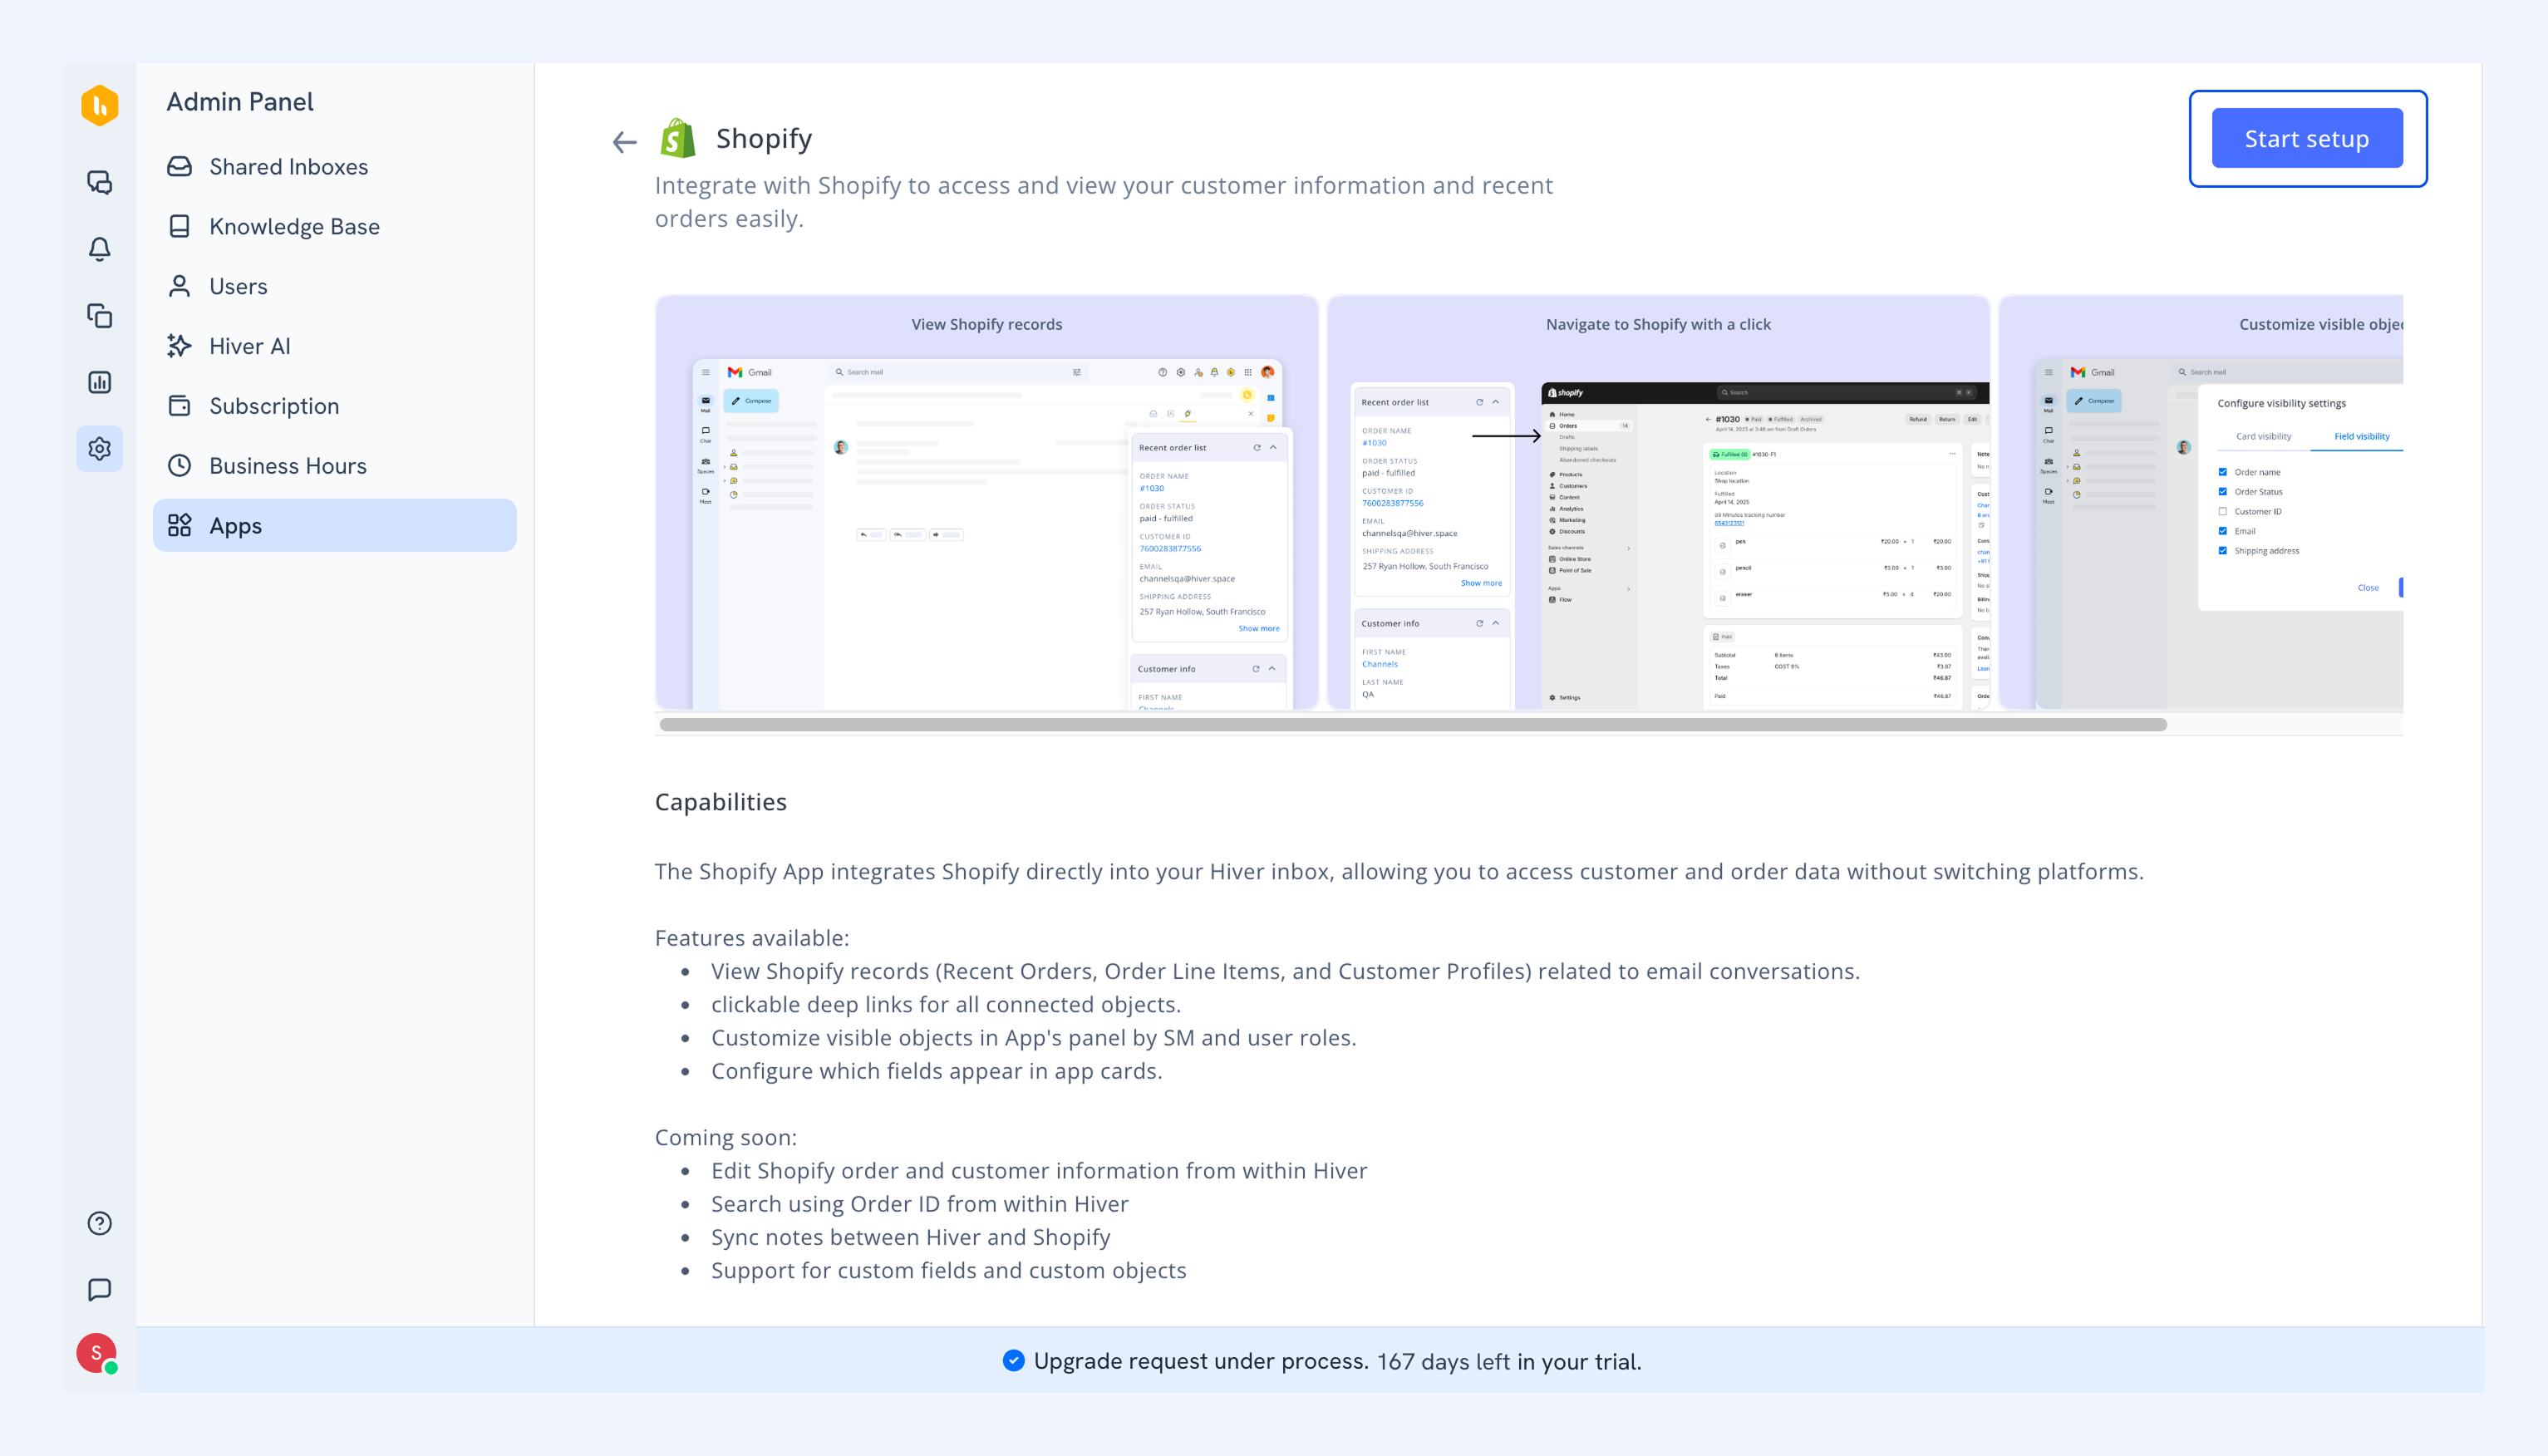
3. Review the capabilities of the integration and click Start setup.
4. From the setup screen, copy the Redirect URL.
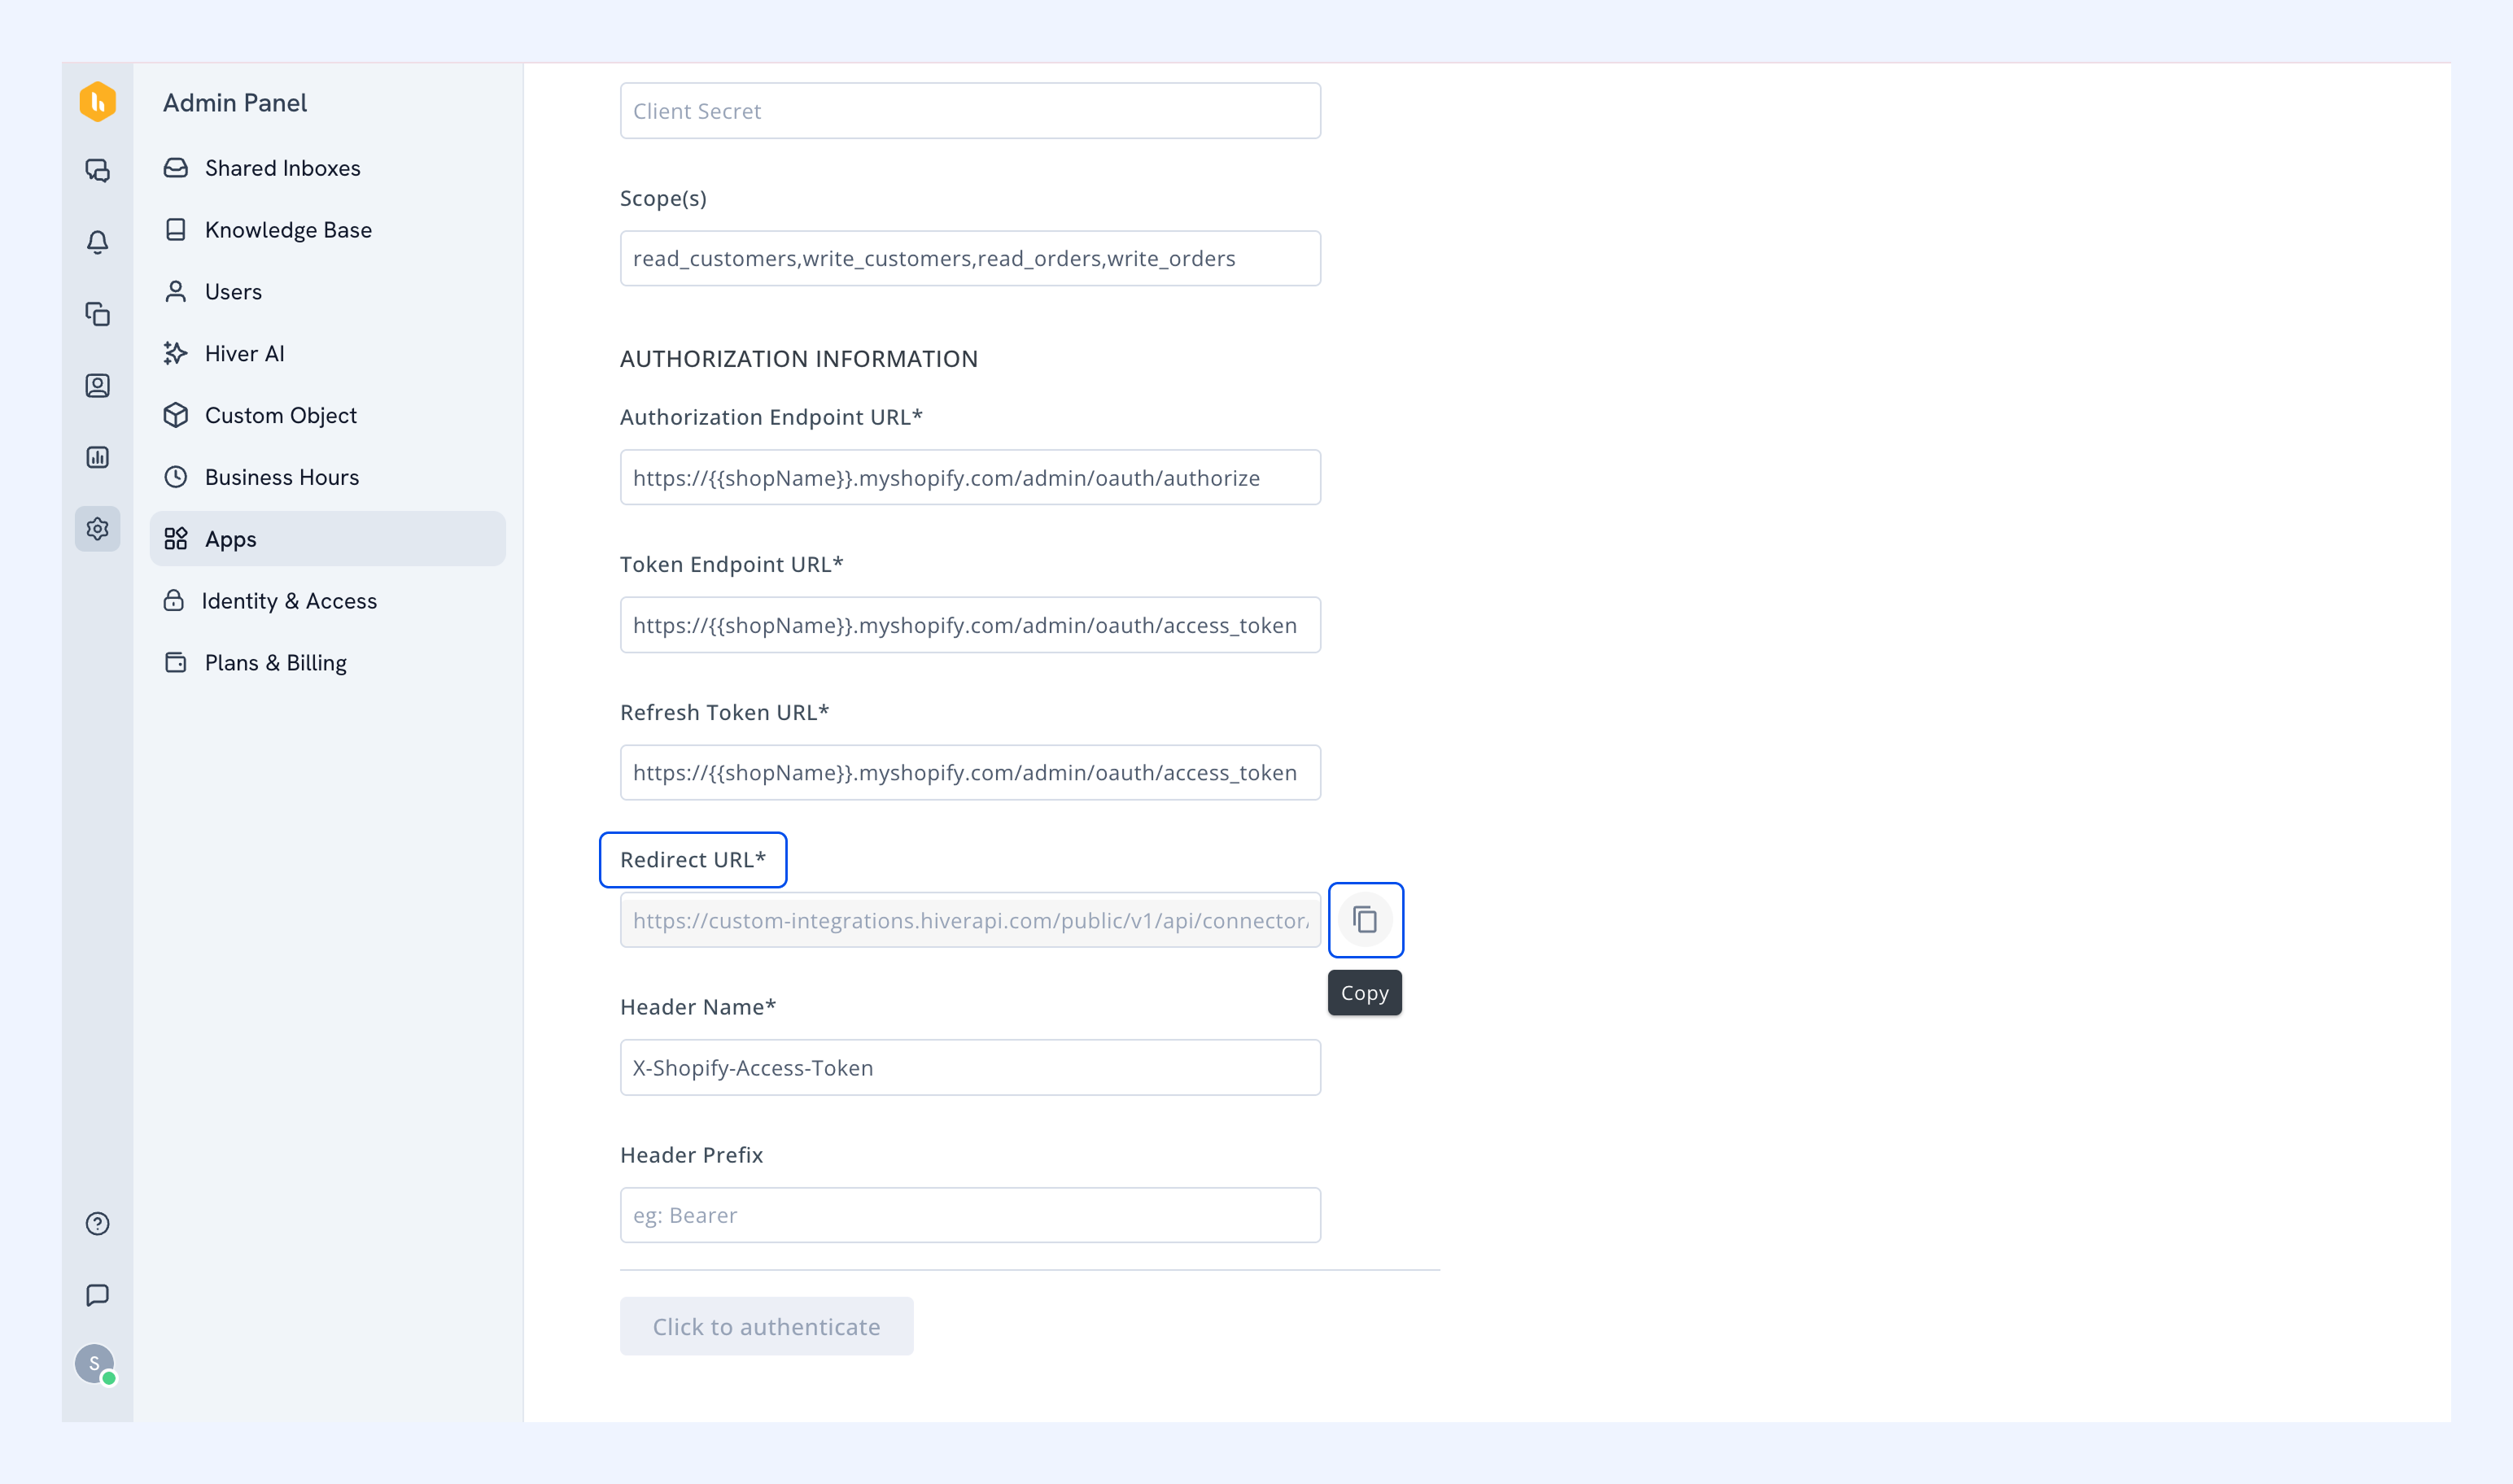
Note: Keep this URL handy, you'll need to paste it into your Shopify app configuration in the next section.
Set up a custom app in Shopify
To connect Shopify with Hiver, you’ll first create a custom app in your Shopify store. This app provides the API token and permissions required for the integration.
Step 1: Access the Shopify Dev Dashboard
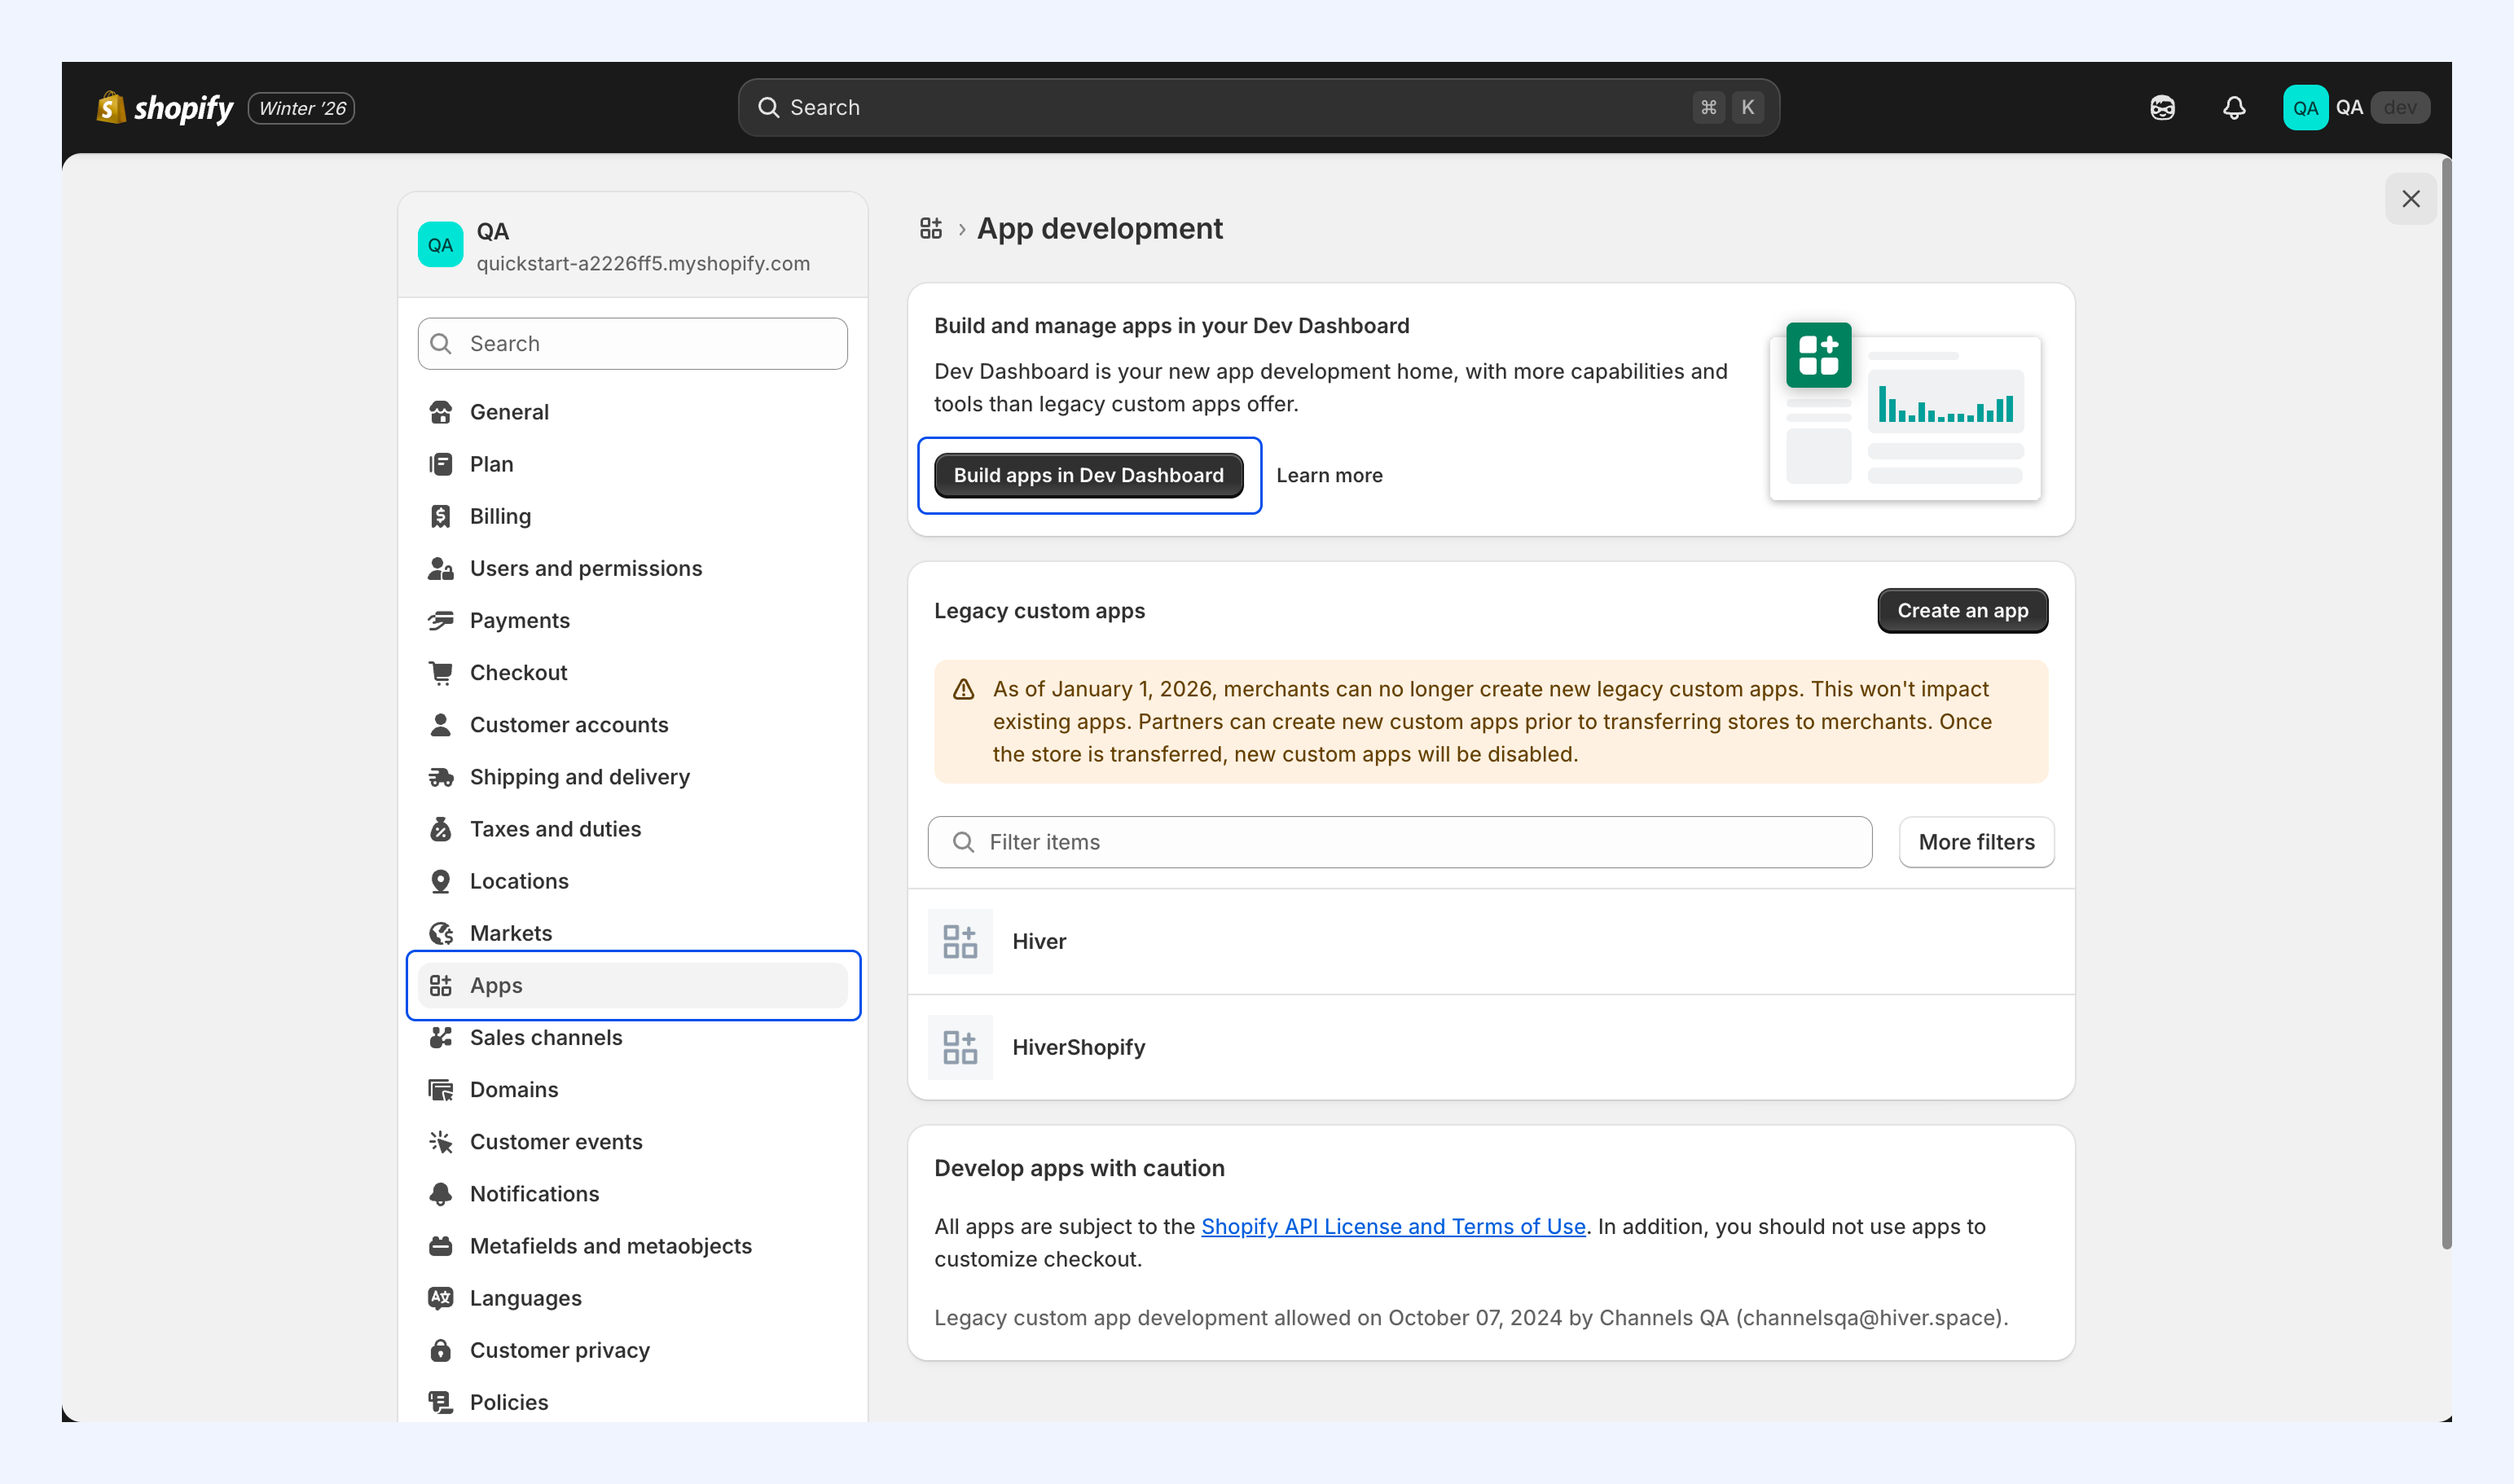
Go to https://dev.shopify.com/dashboard and sign in with your Shopify credentials.
Alternatively, you can access the developer dashboard from Apps → Build apps in Dev Dashboard in your Shopify admin.
Step 2: Create a new app
1. In the Dev Dashboard, click Create app.
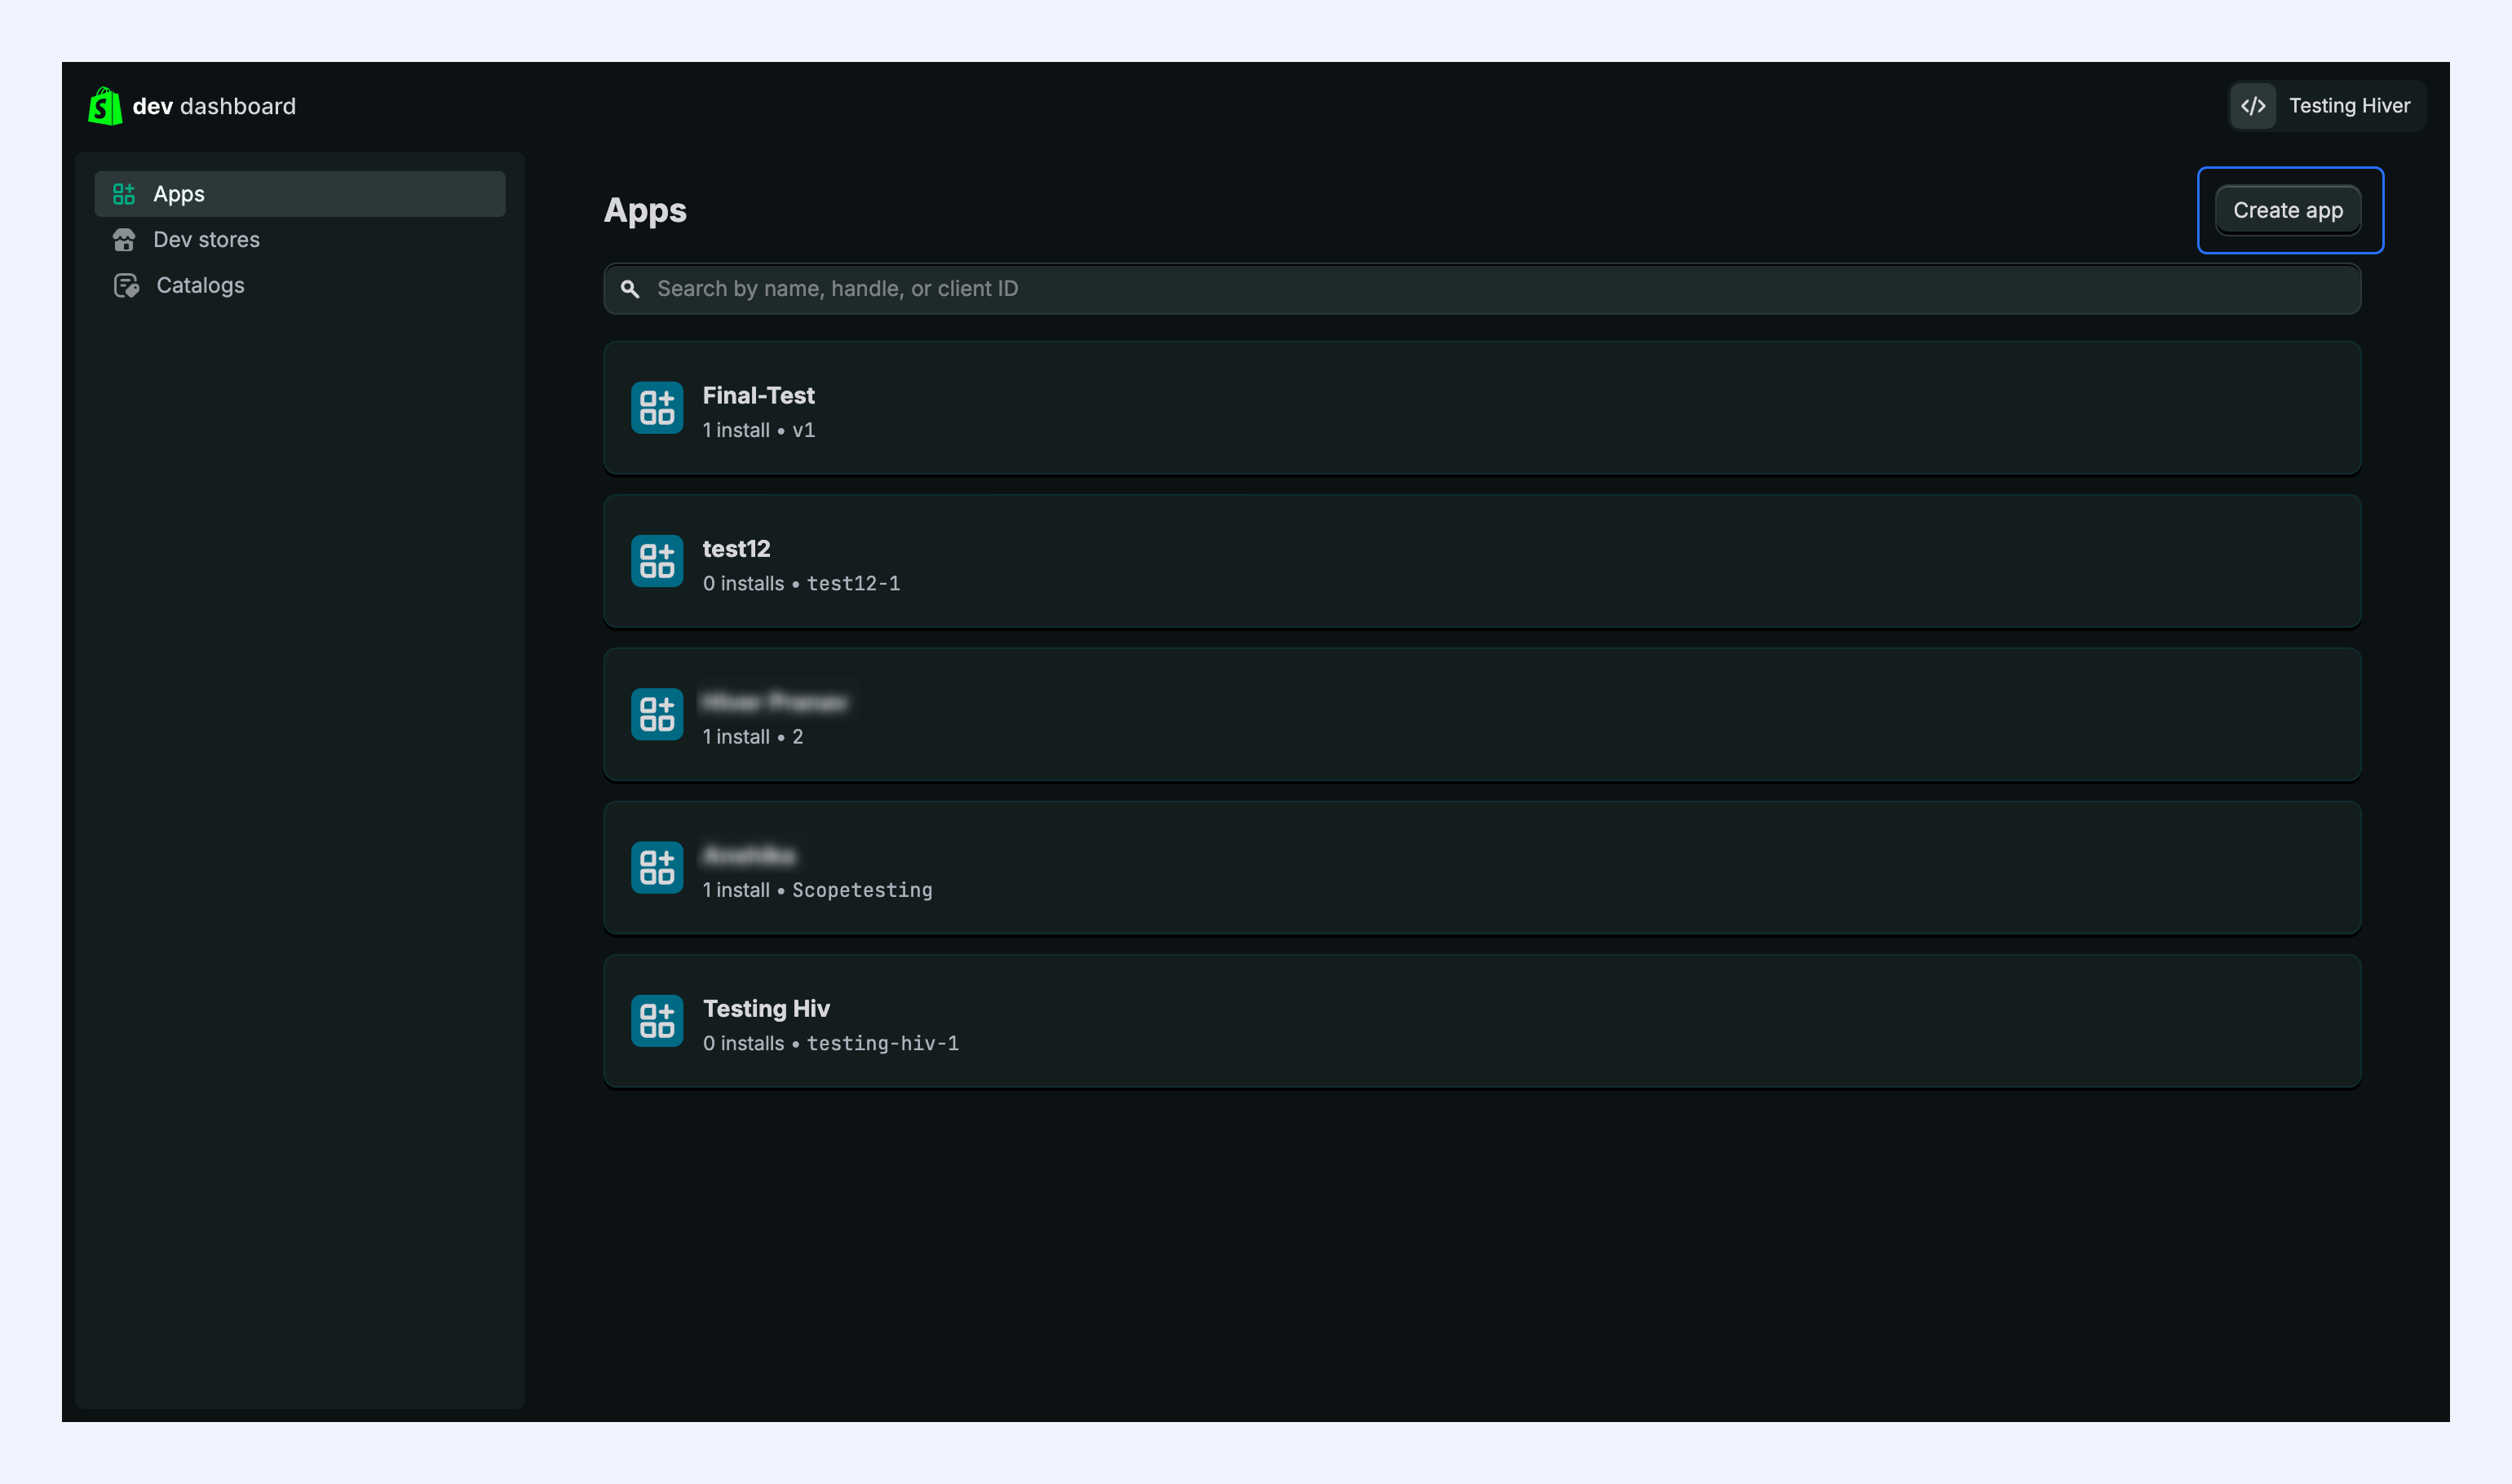
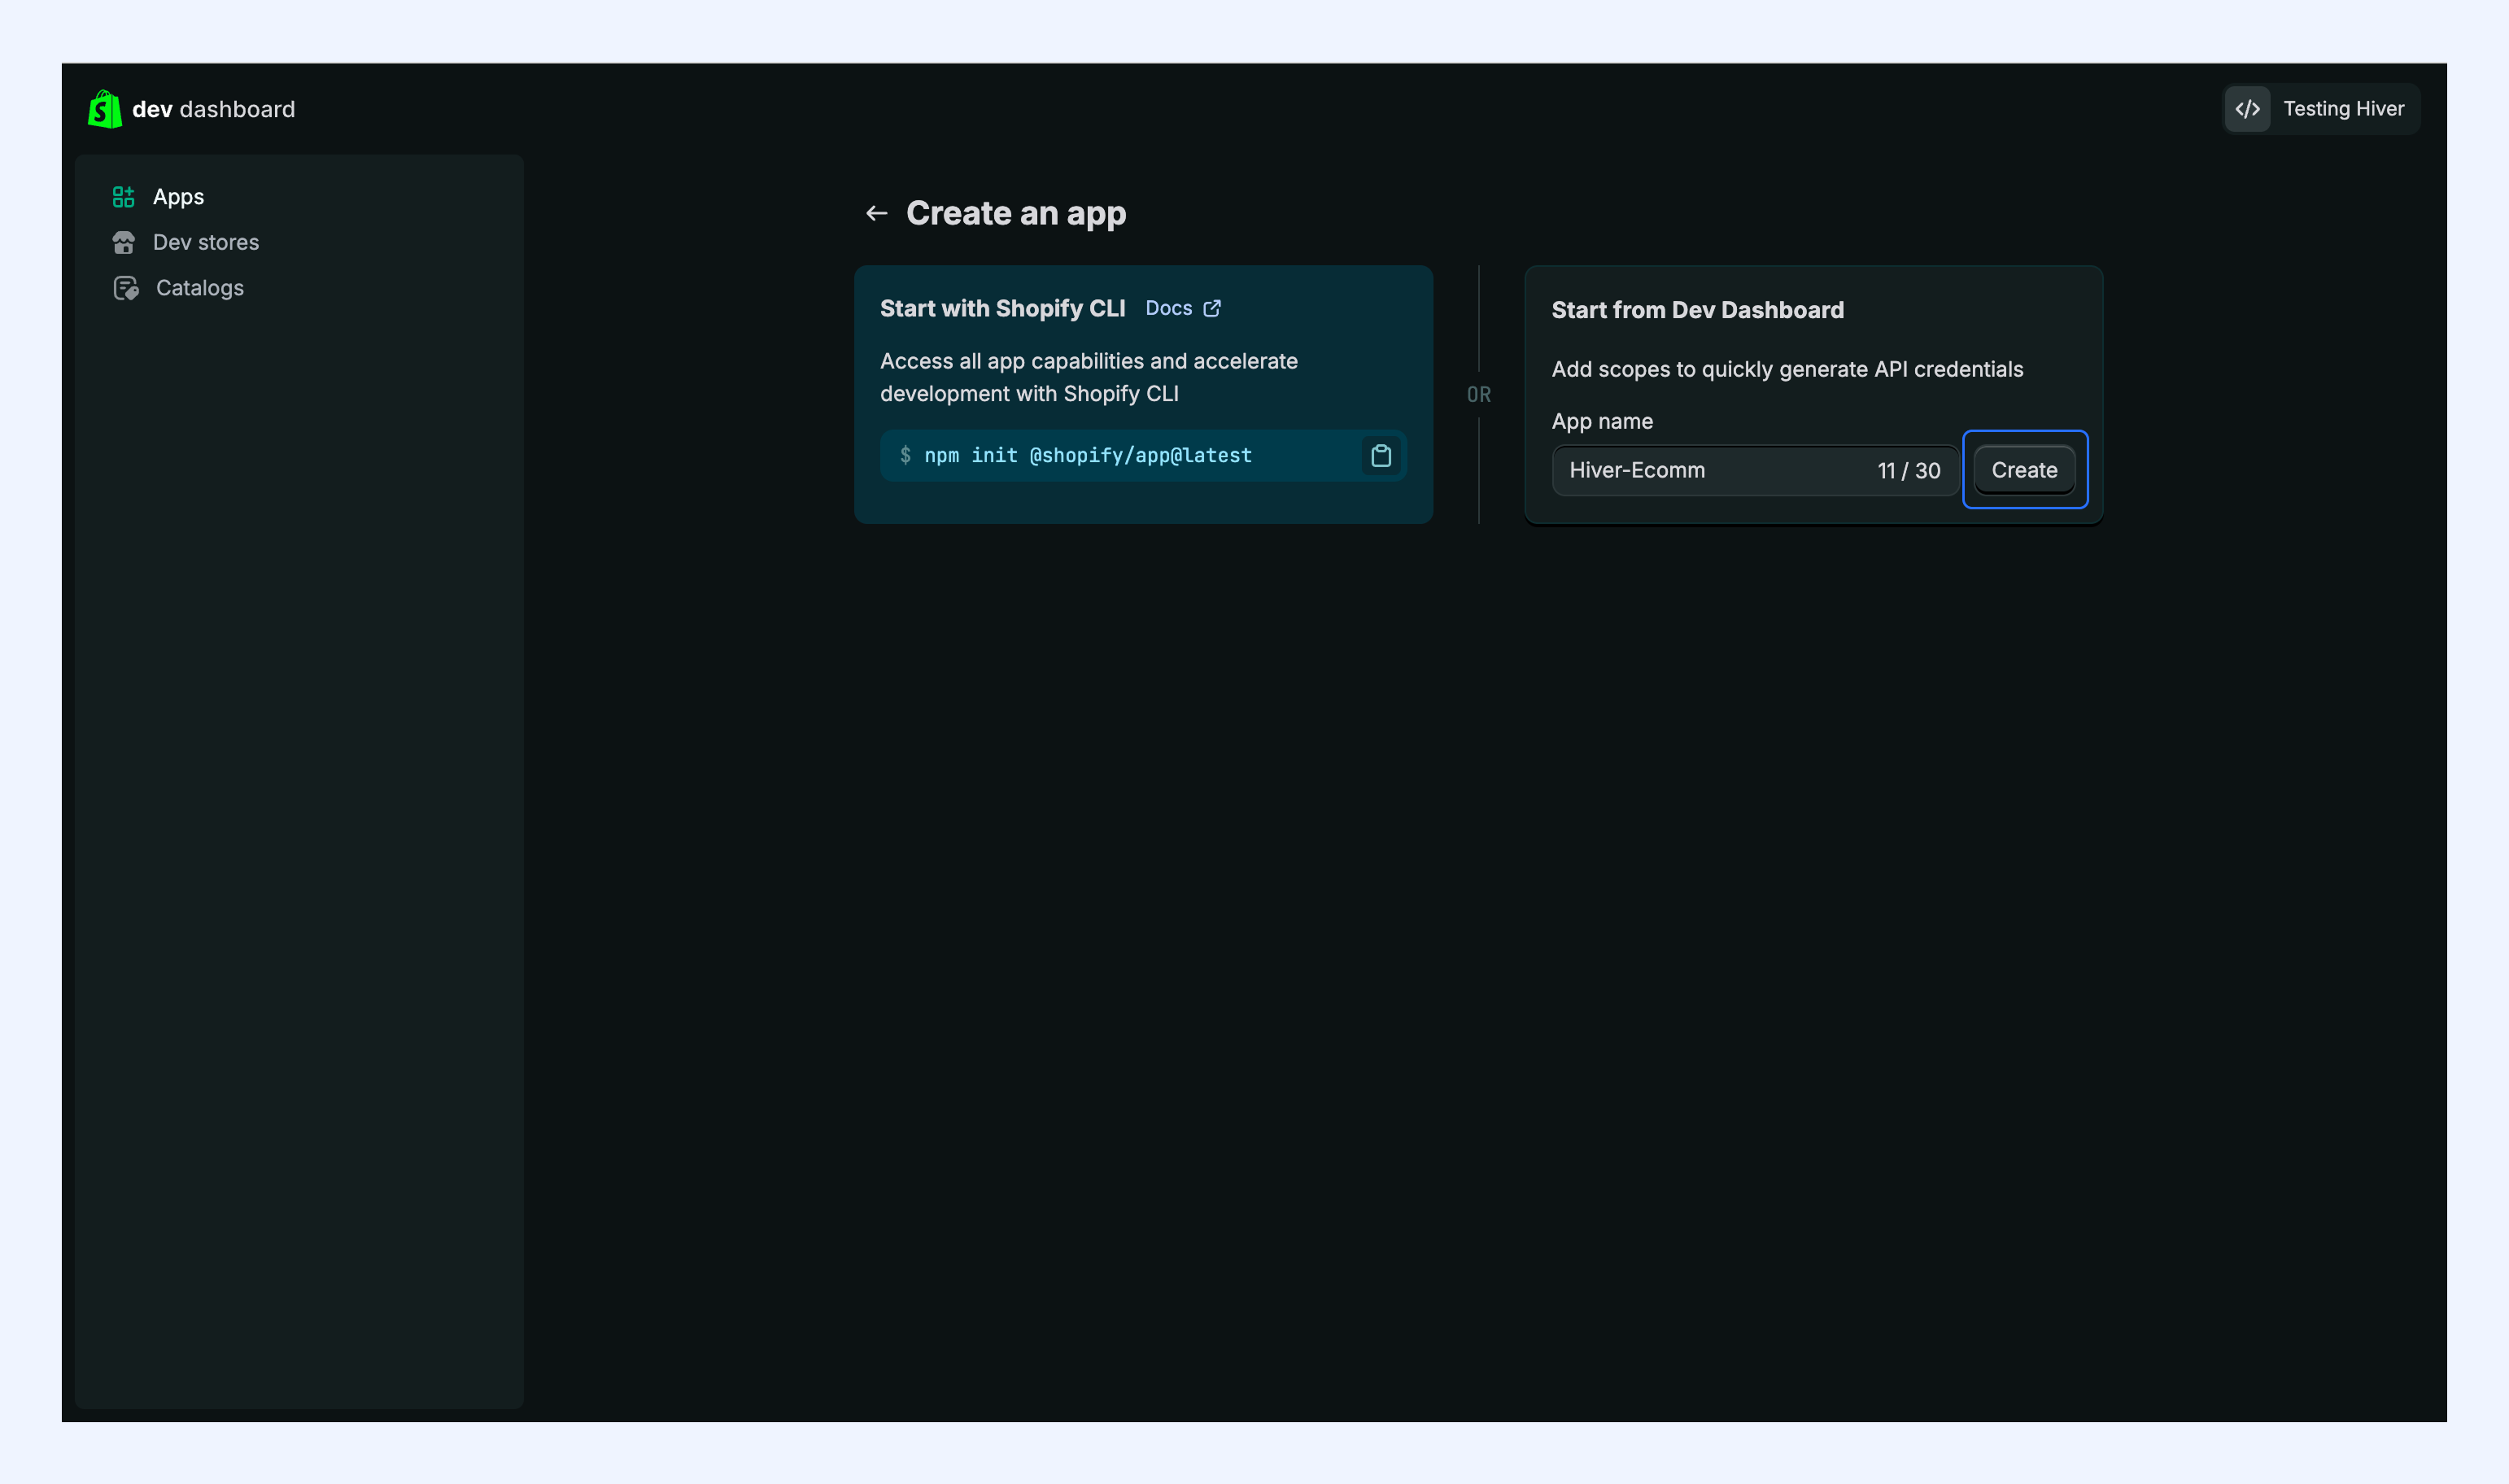
2. Choose Start from Dev Dashboard for custom app creation.
3. Enter a name for your app and click Create app.
Step 3: Configure API permissions
1. In the app Access section, click Select scopes.
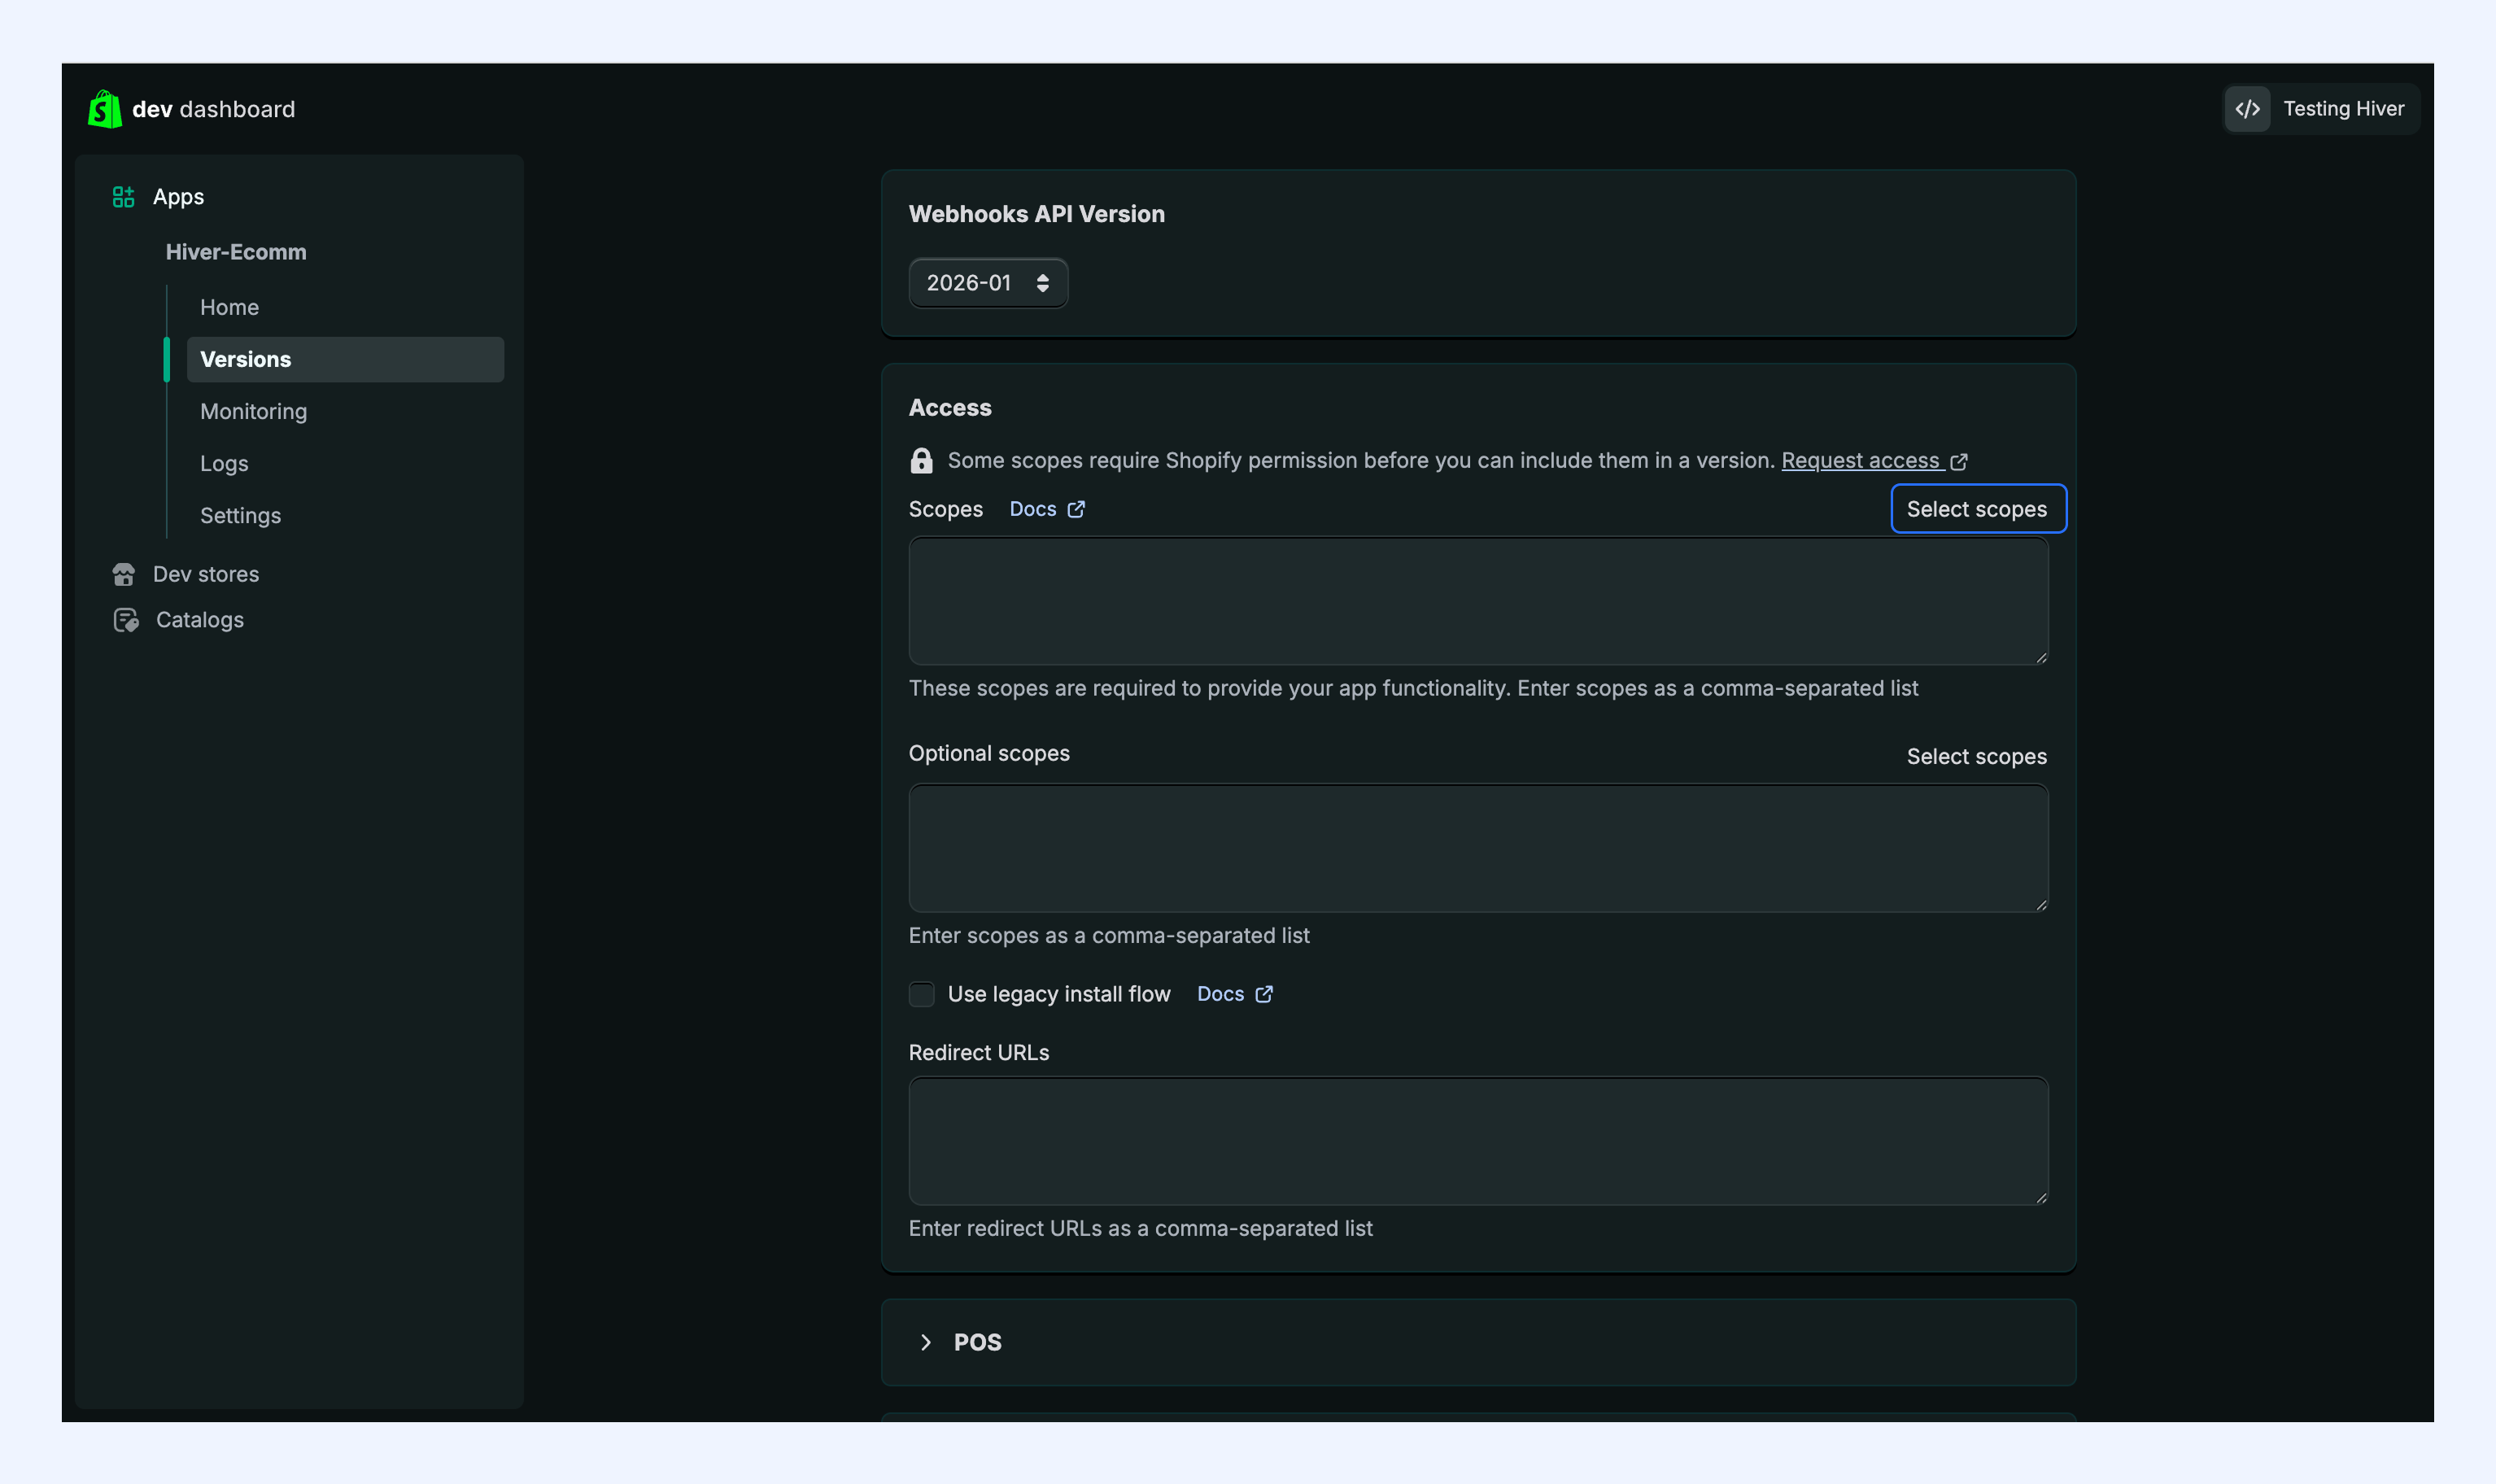
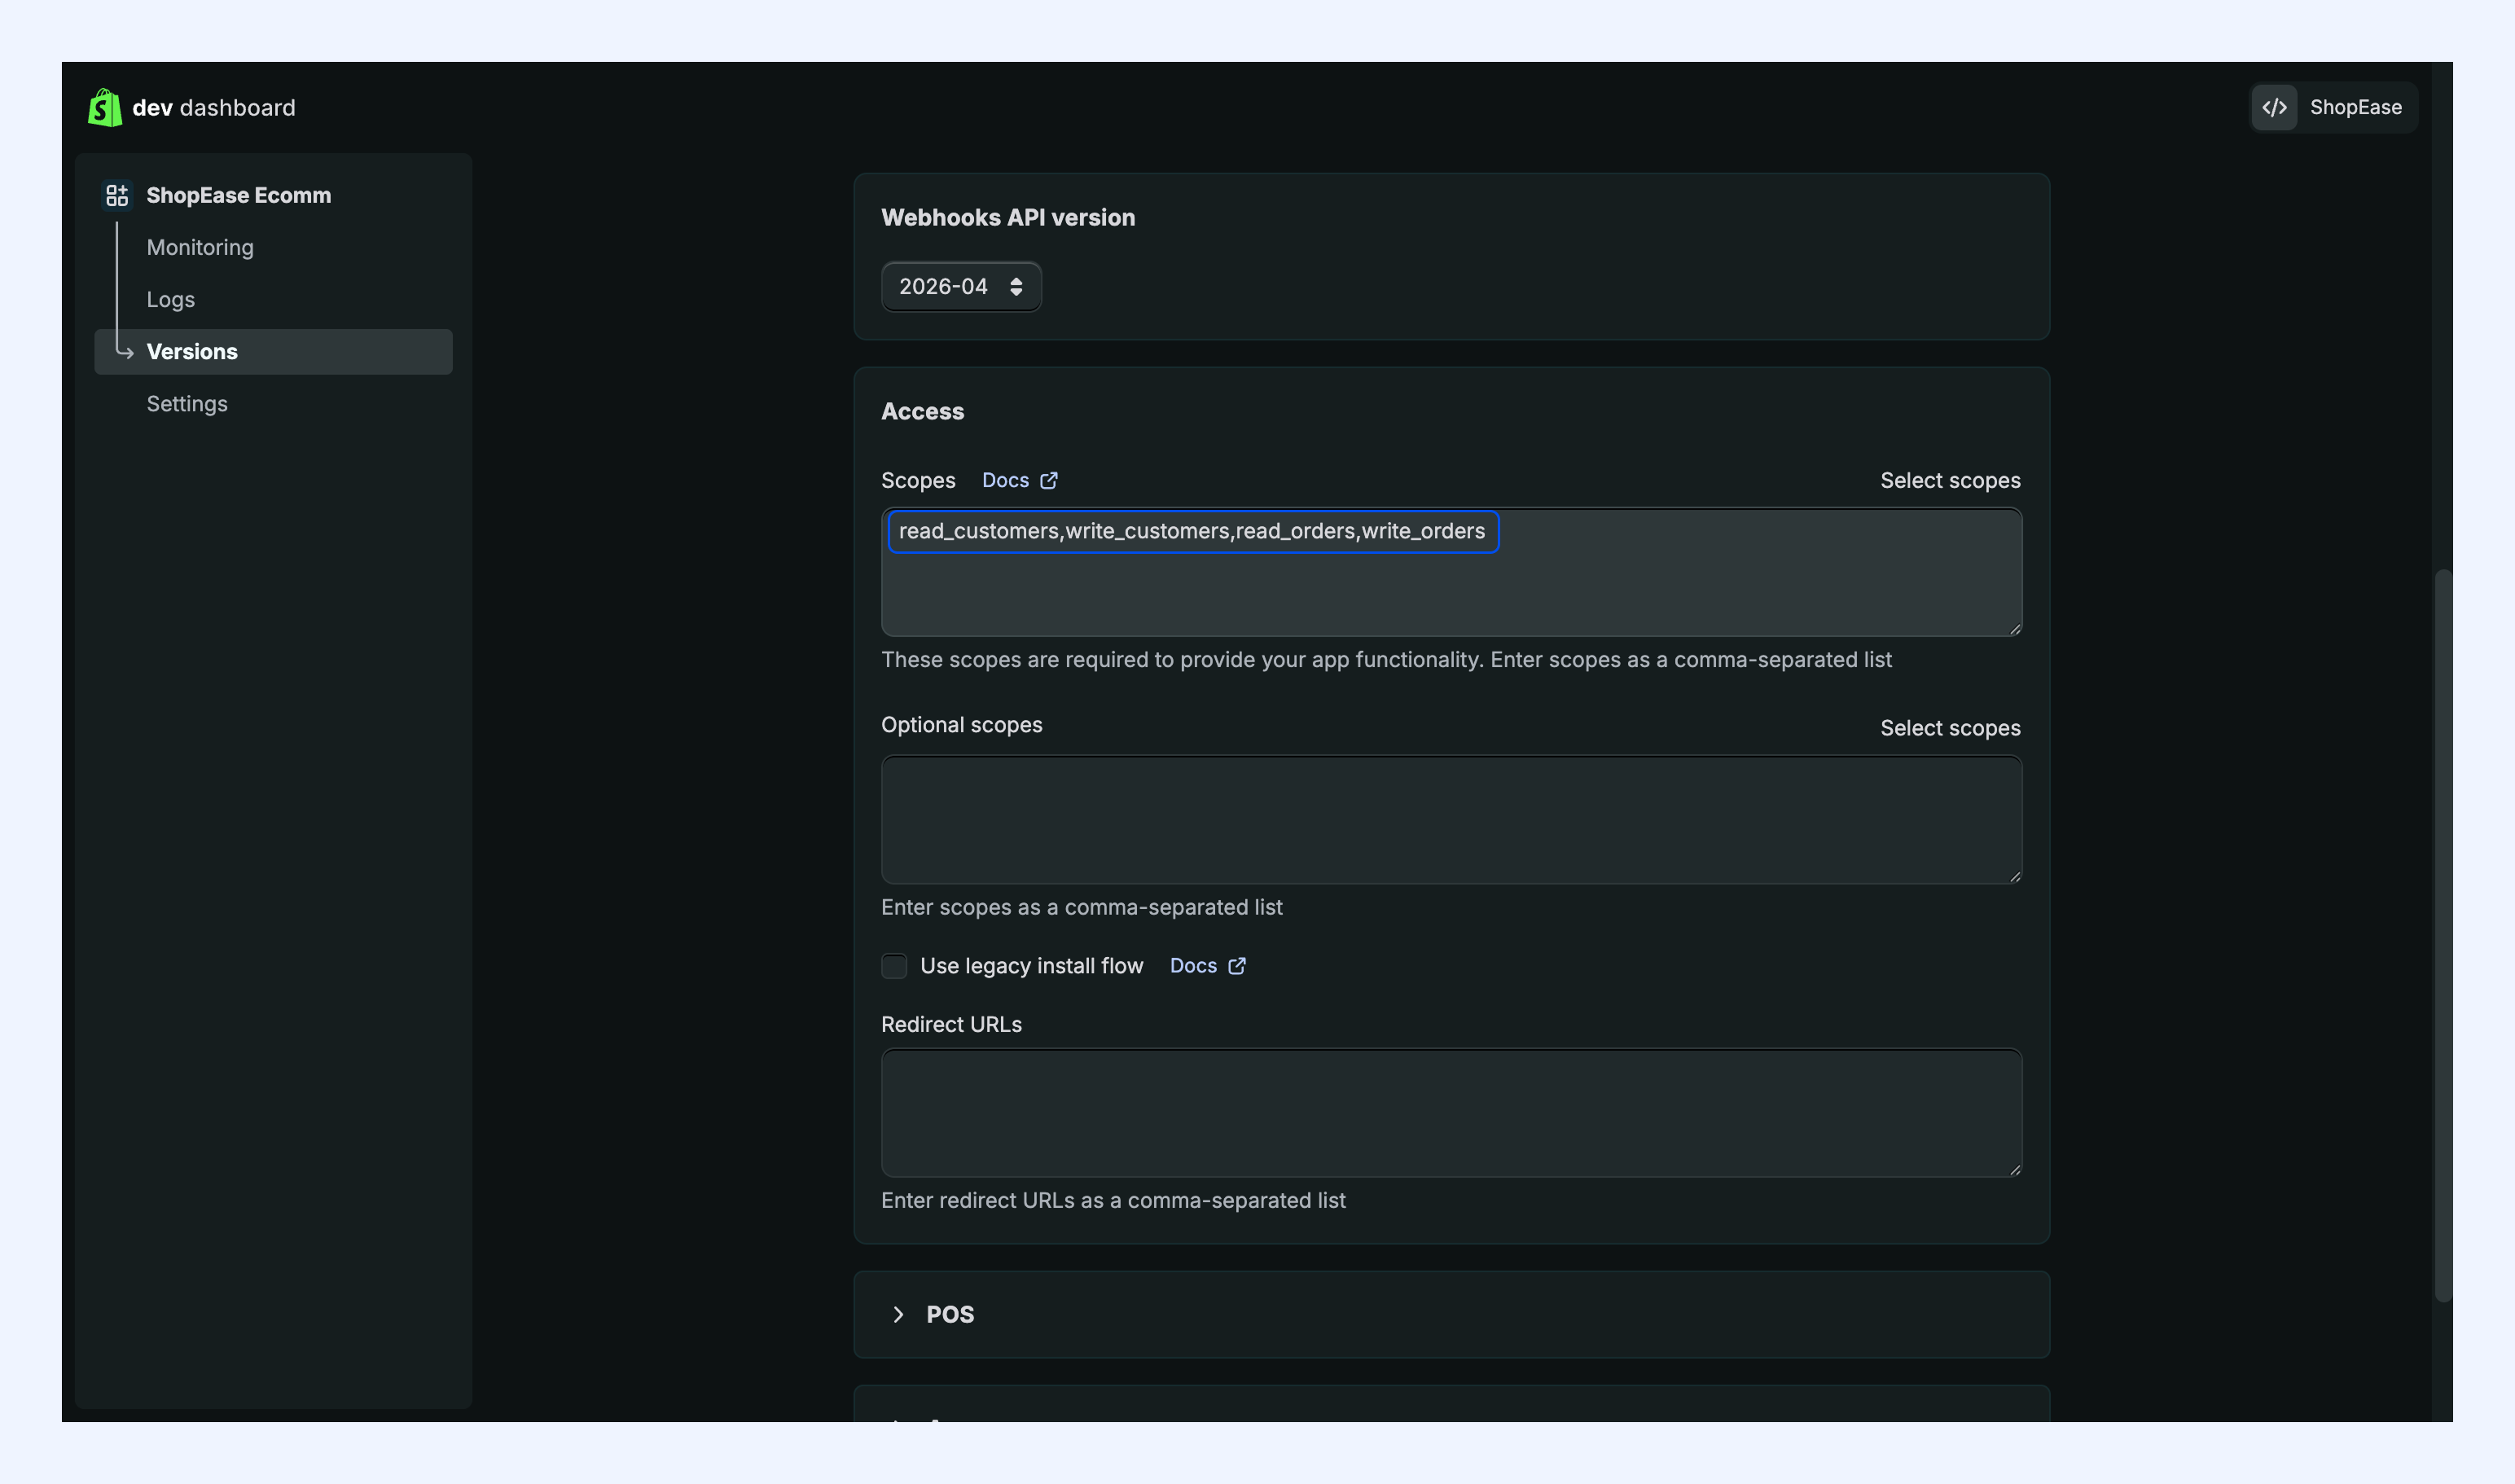
2. Select the following scopes:
- read_orders
- write_orders
- read_customers
- write_customers
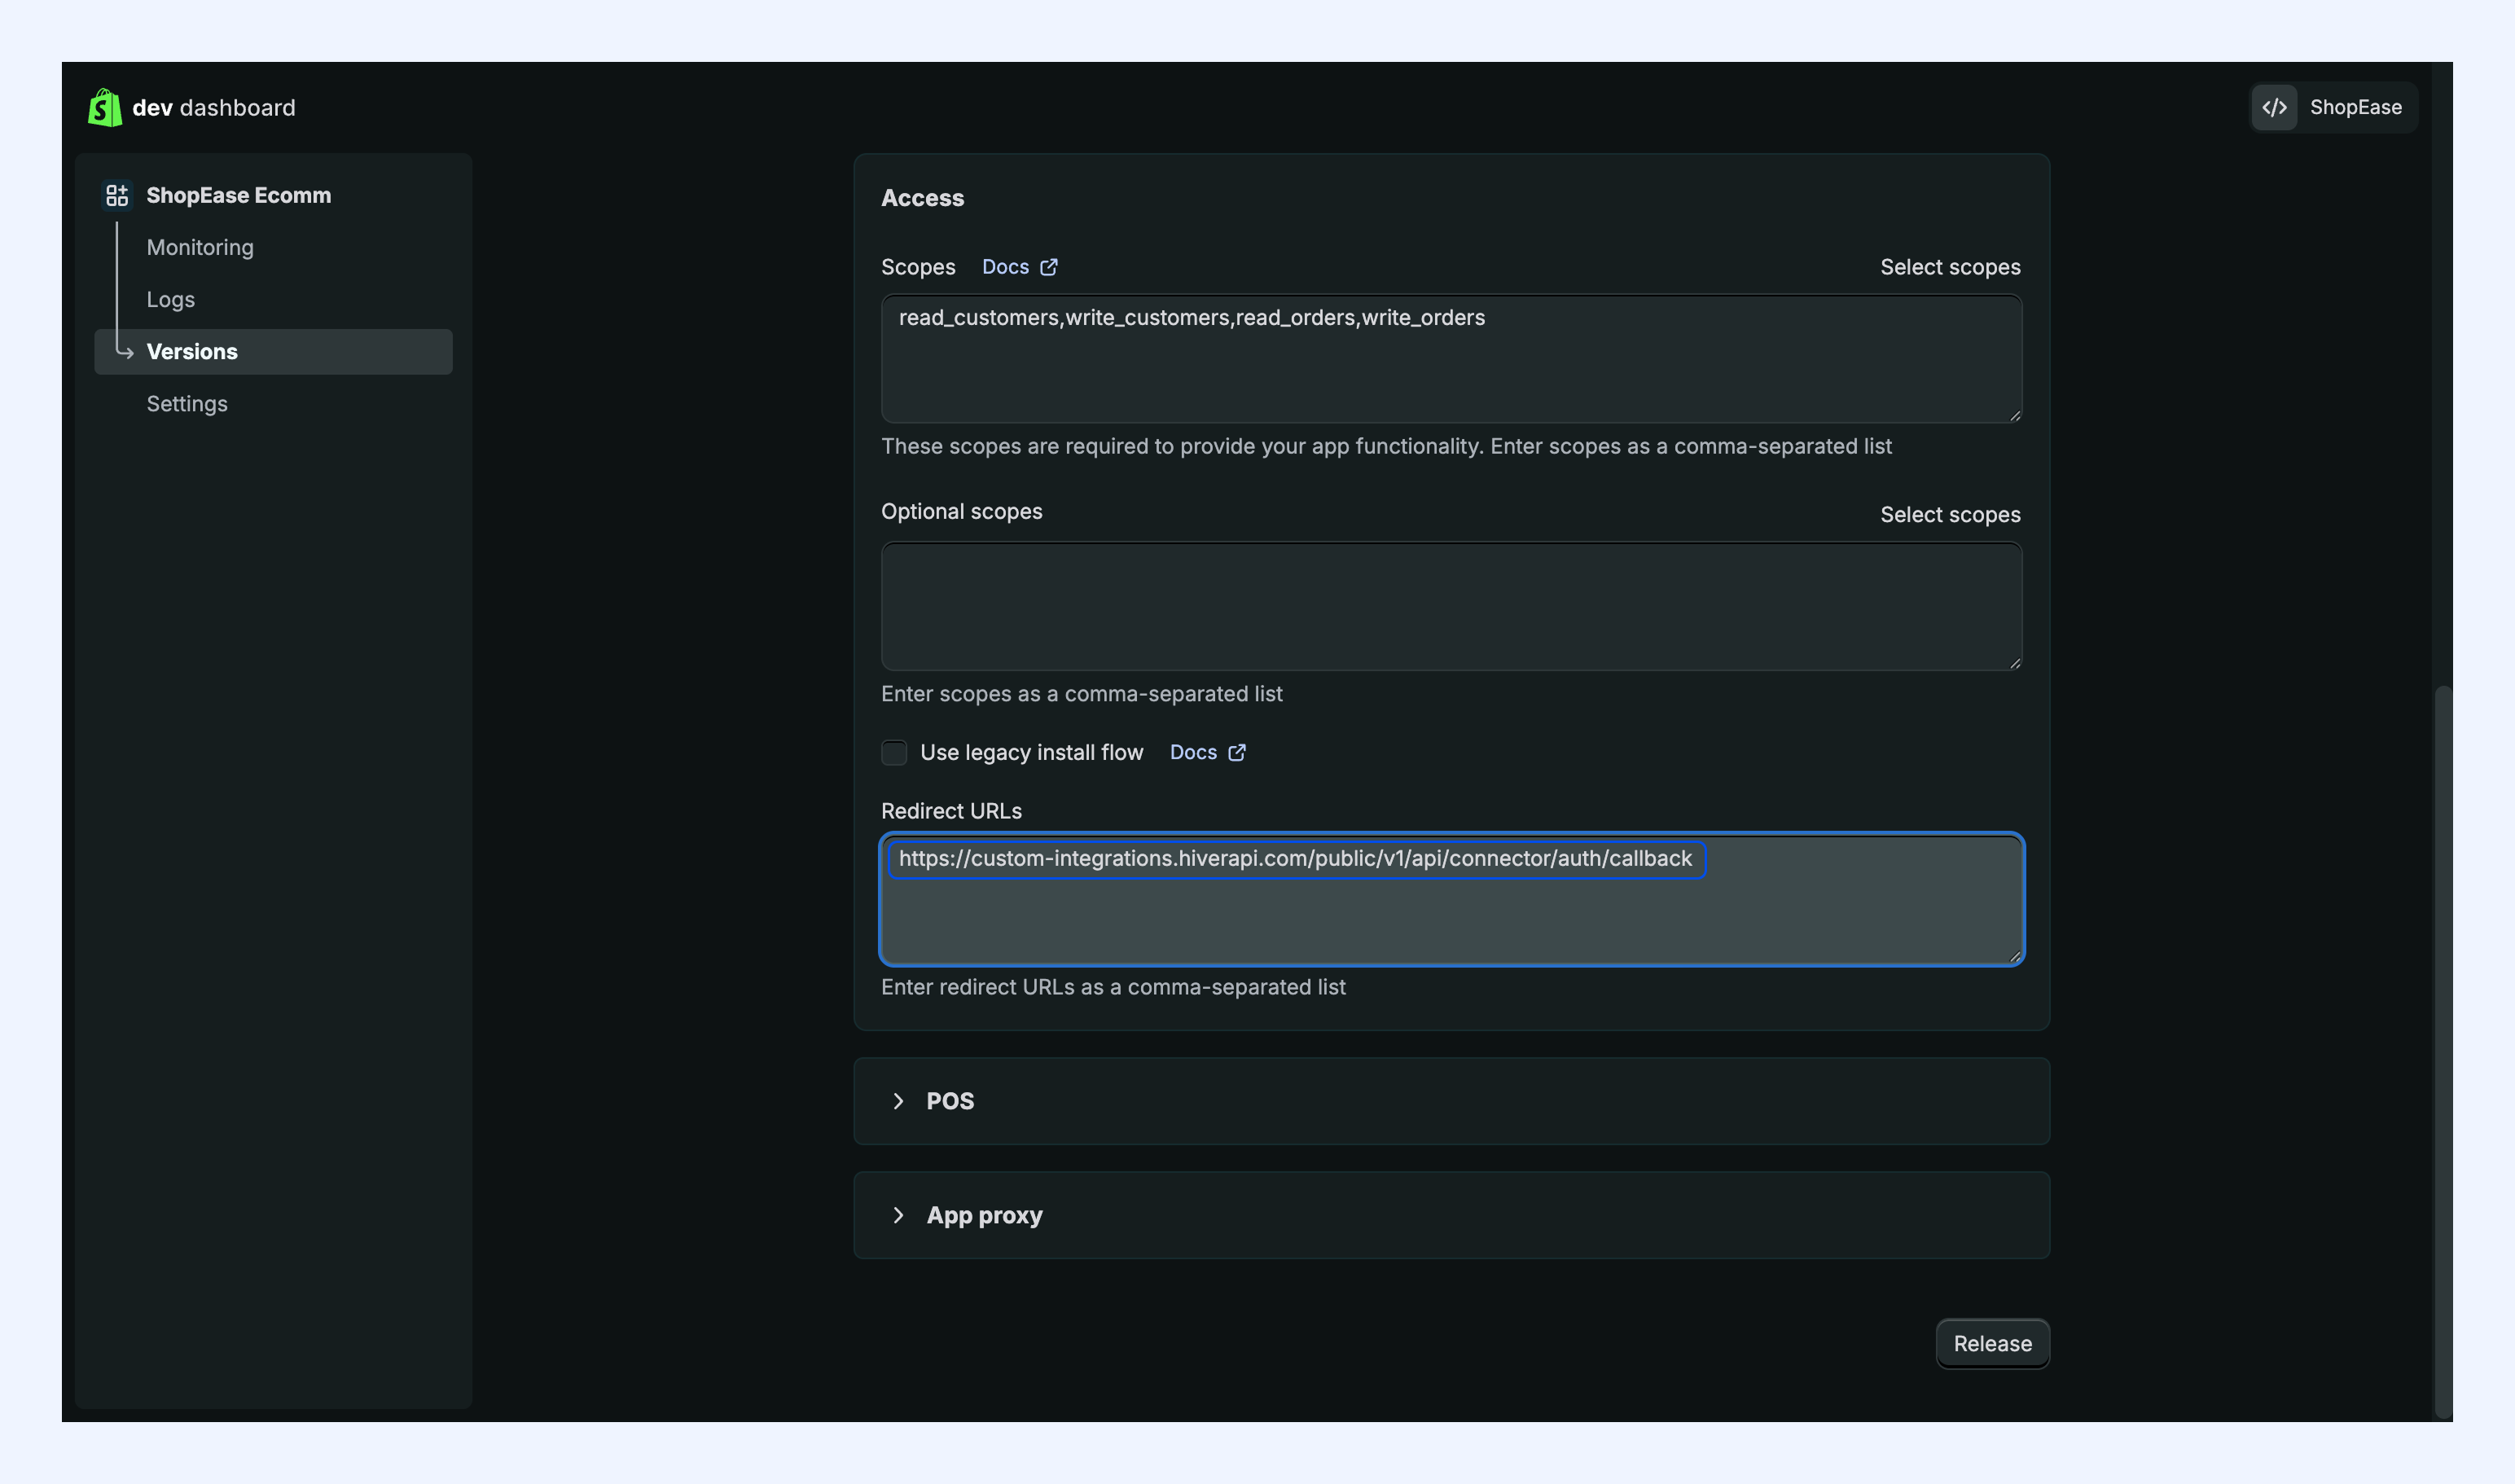
Step 4: Set Redirect URL
1. Paste the Redirect URL you copied from Hiver into the Redirect URLs field in your Shopify app configuration.
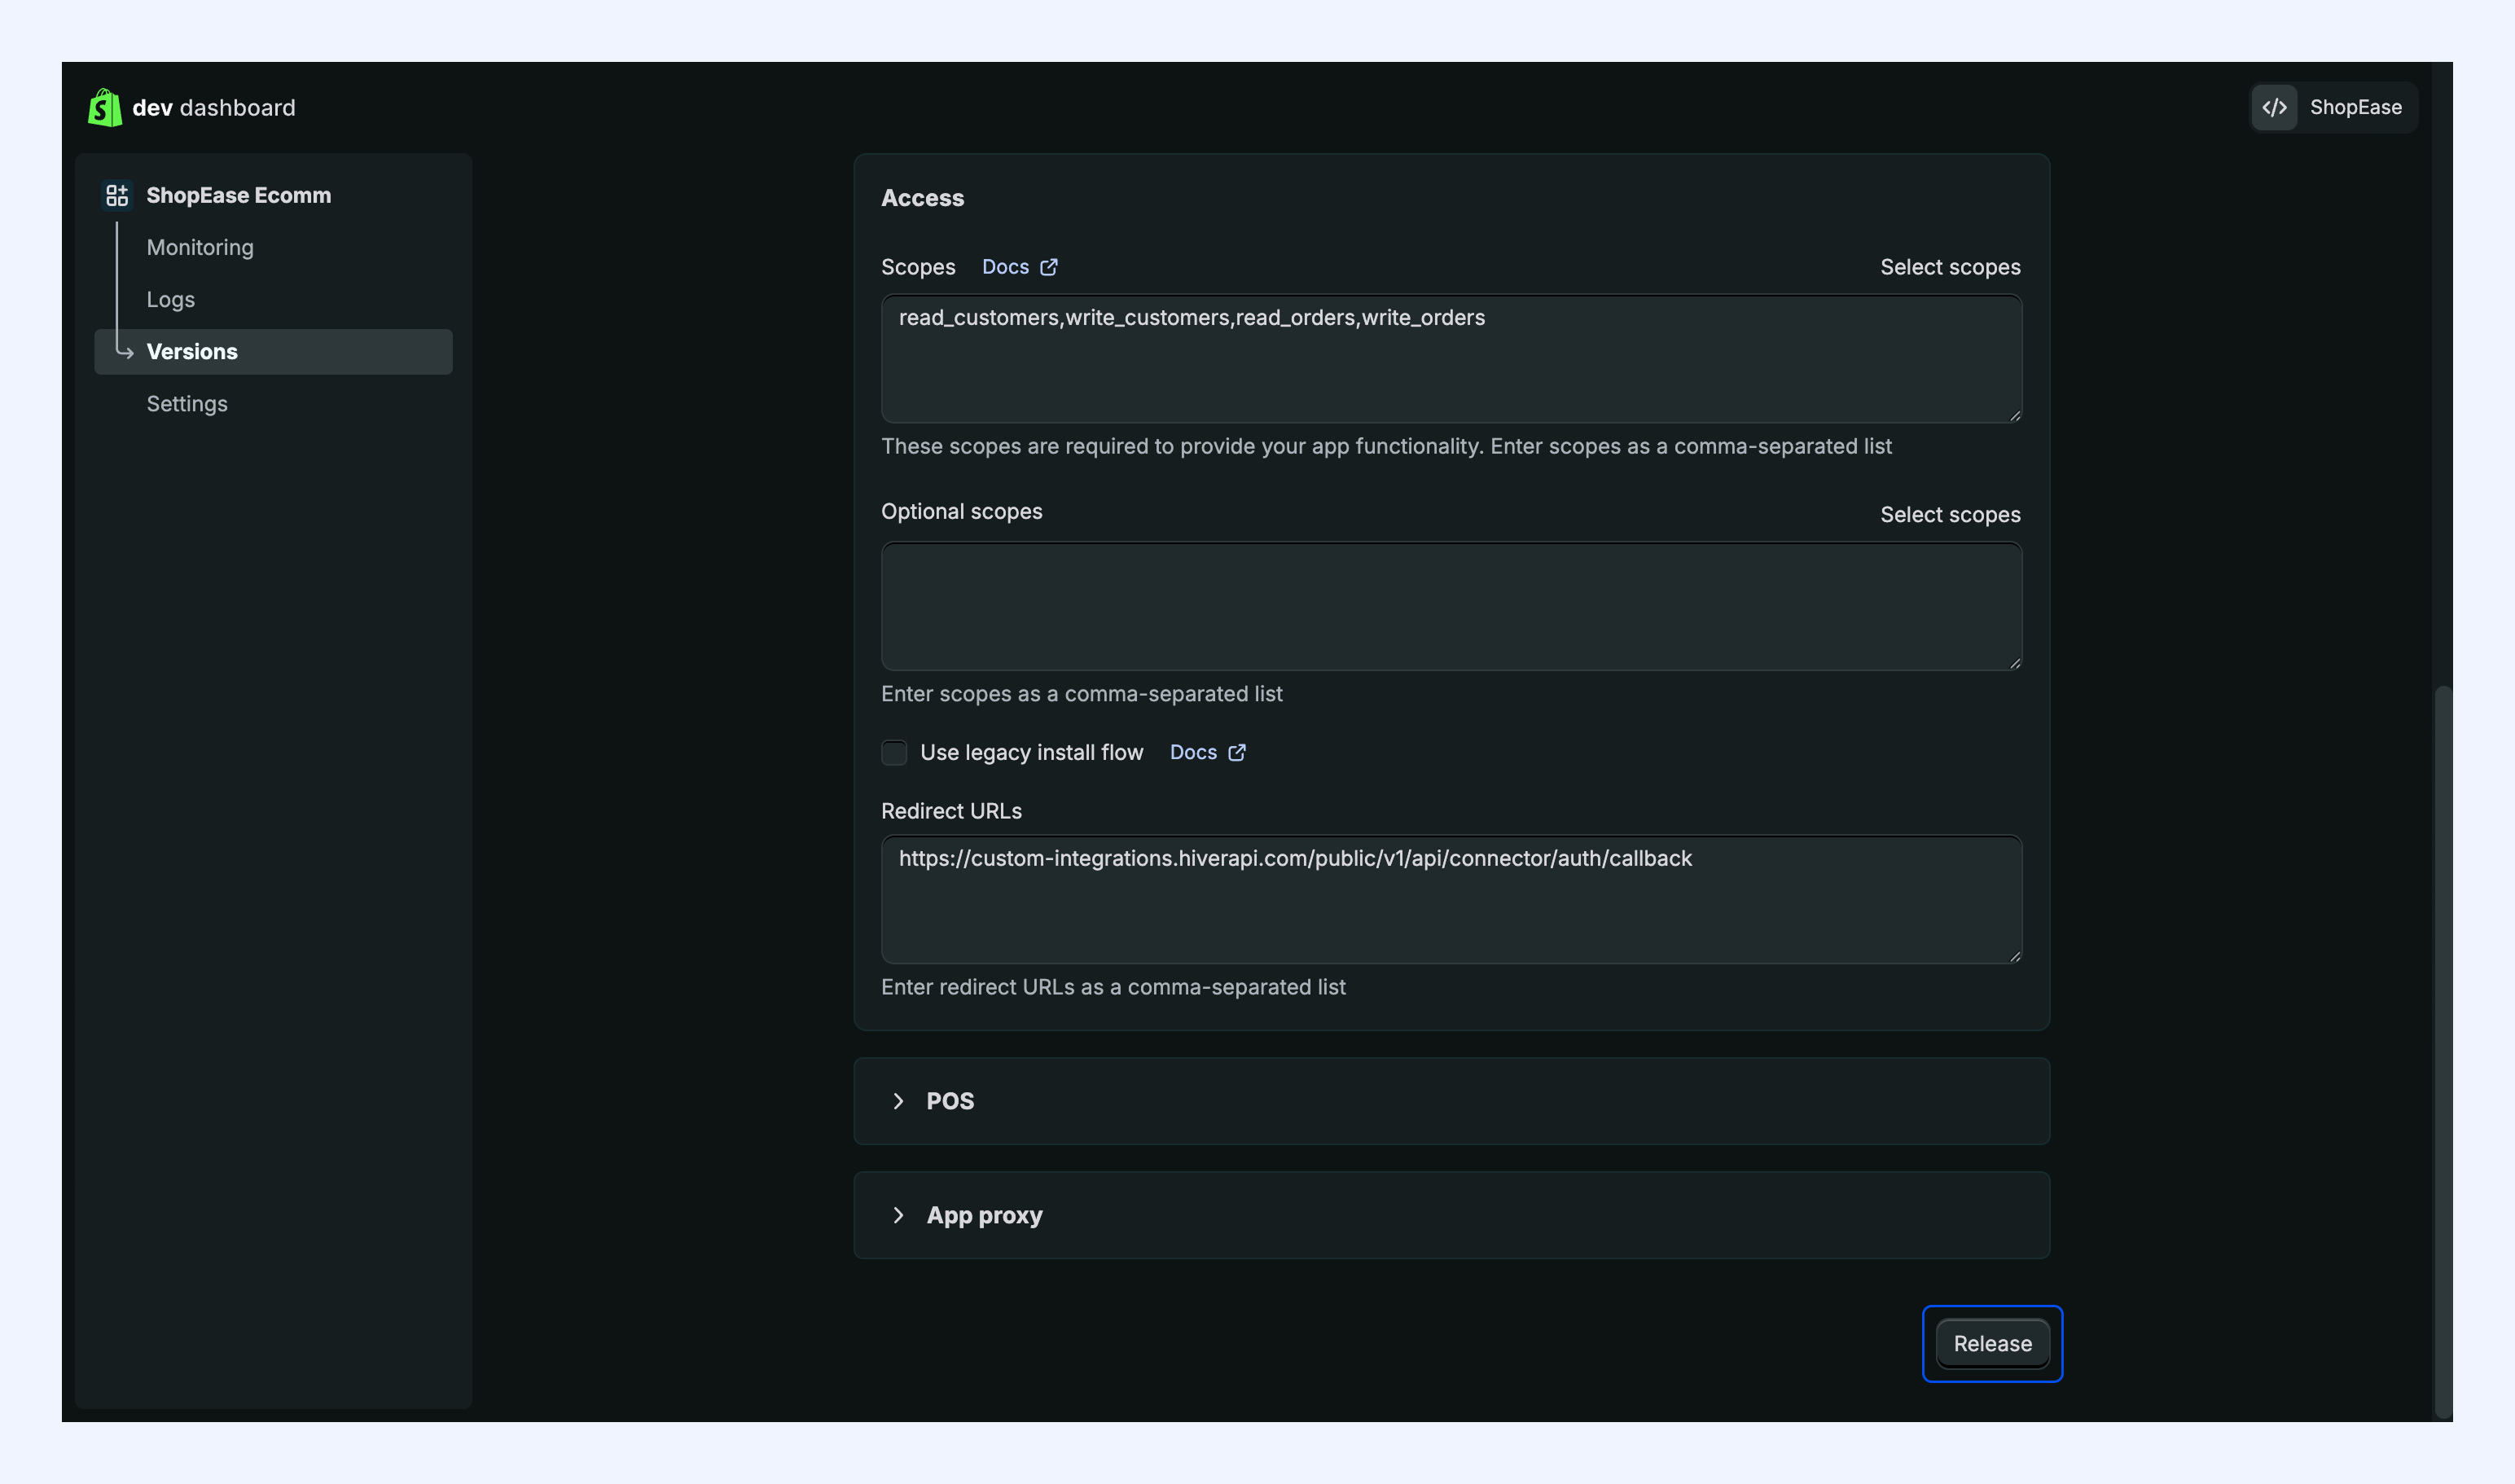
Step 5: Release your app version
1. Click Release.
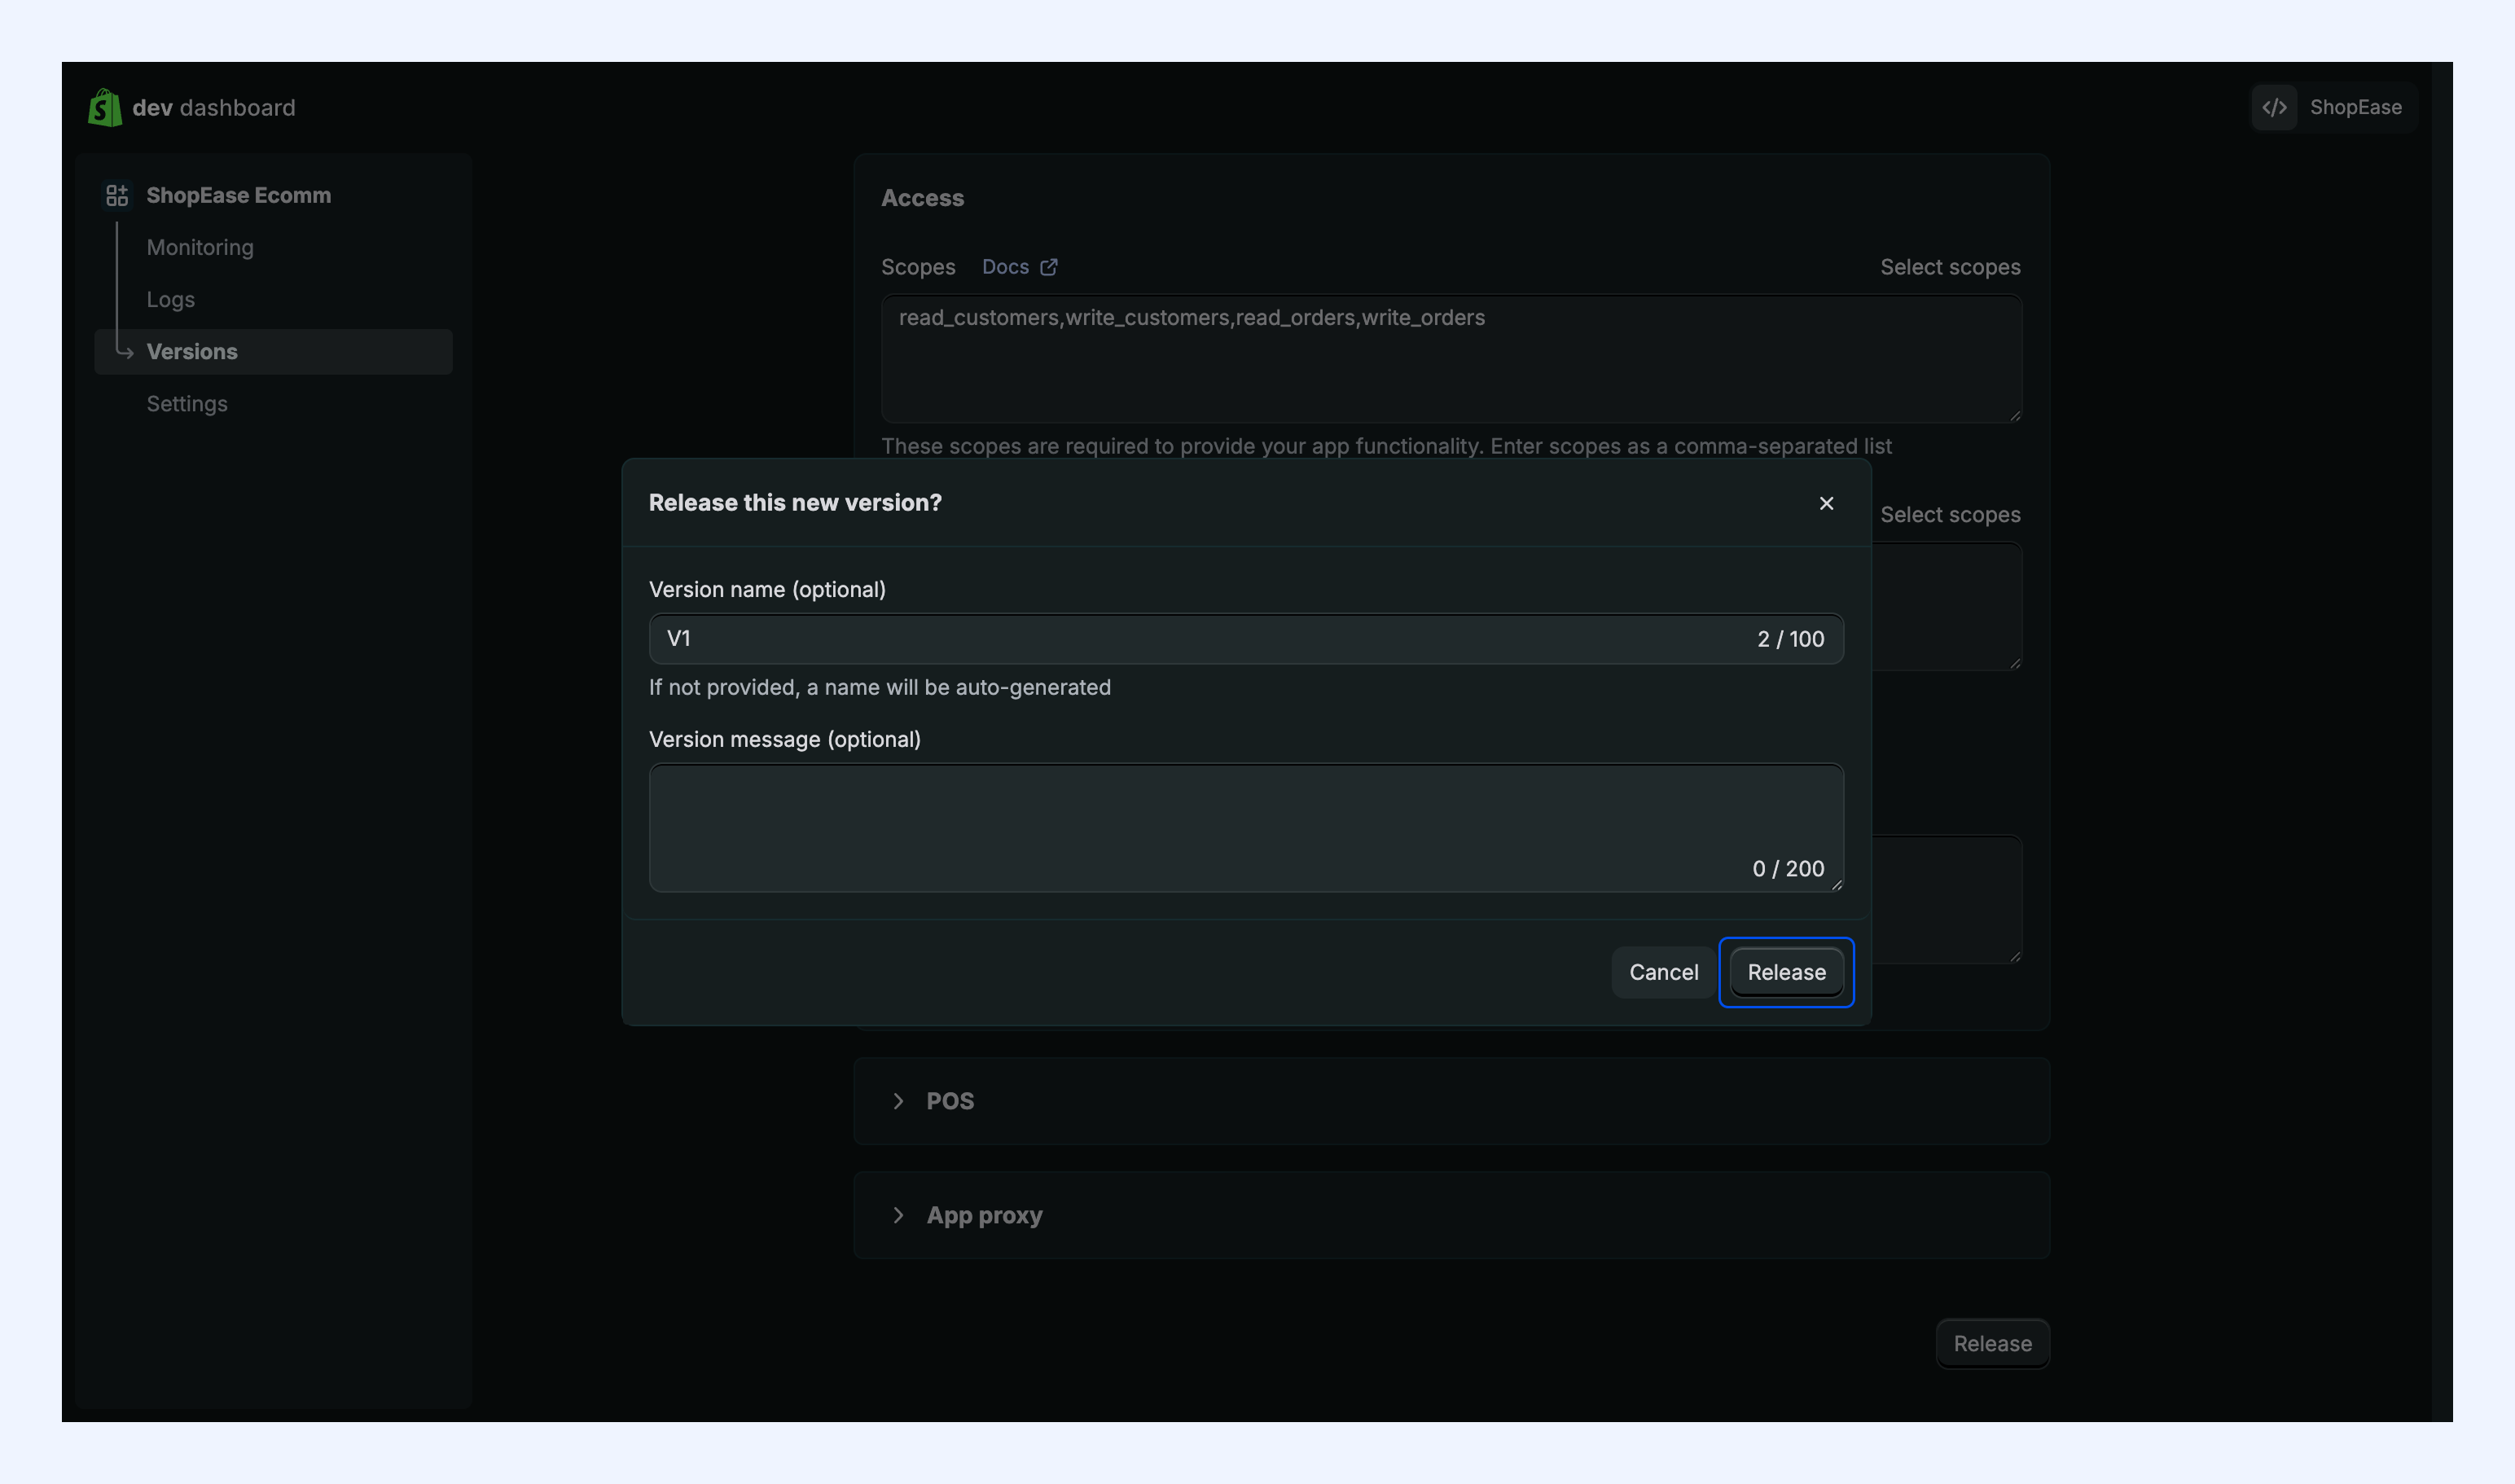
2. Provide a version name.
3. Optionally add a version message describing changes or notes.
4. Click Release to finalize this version.
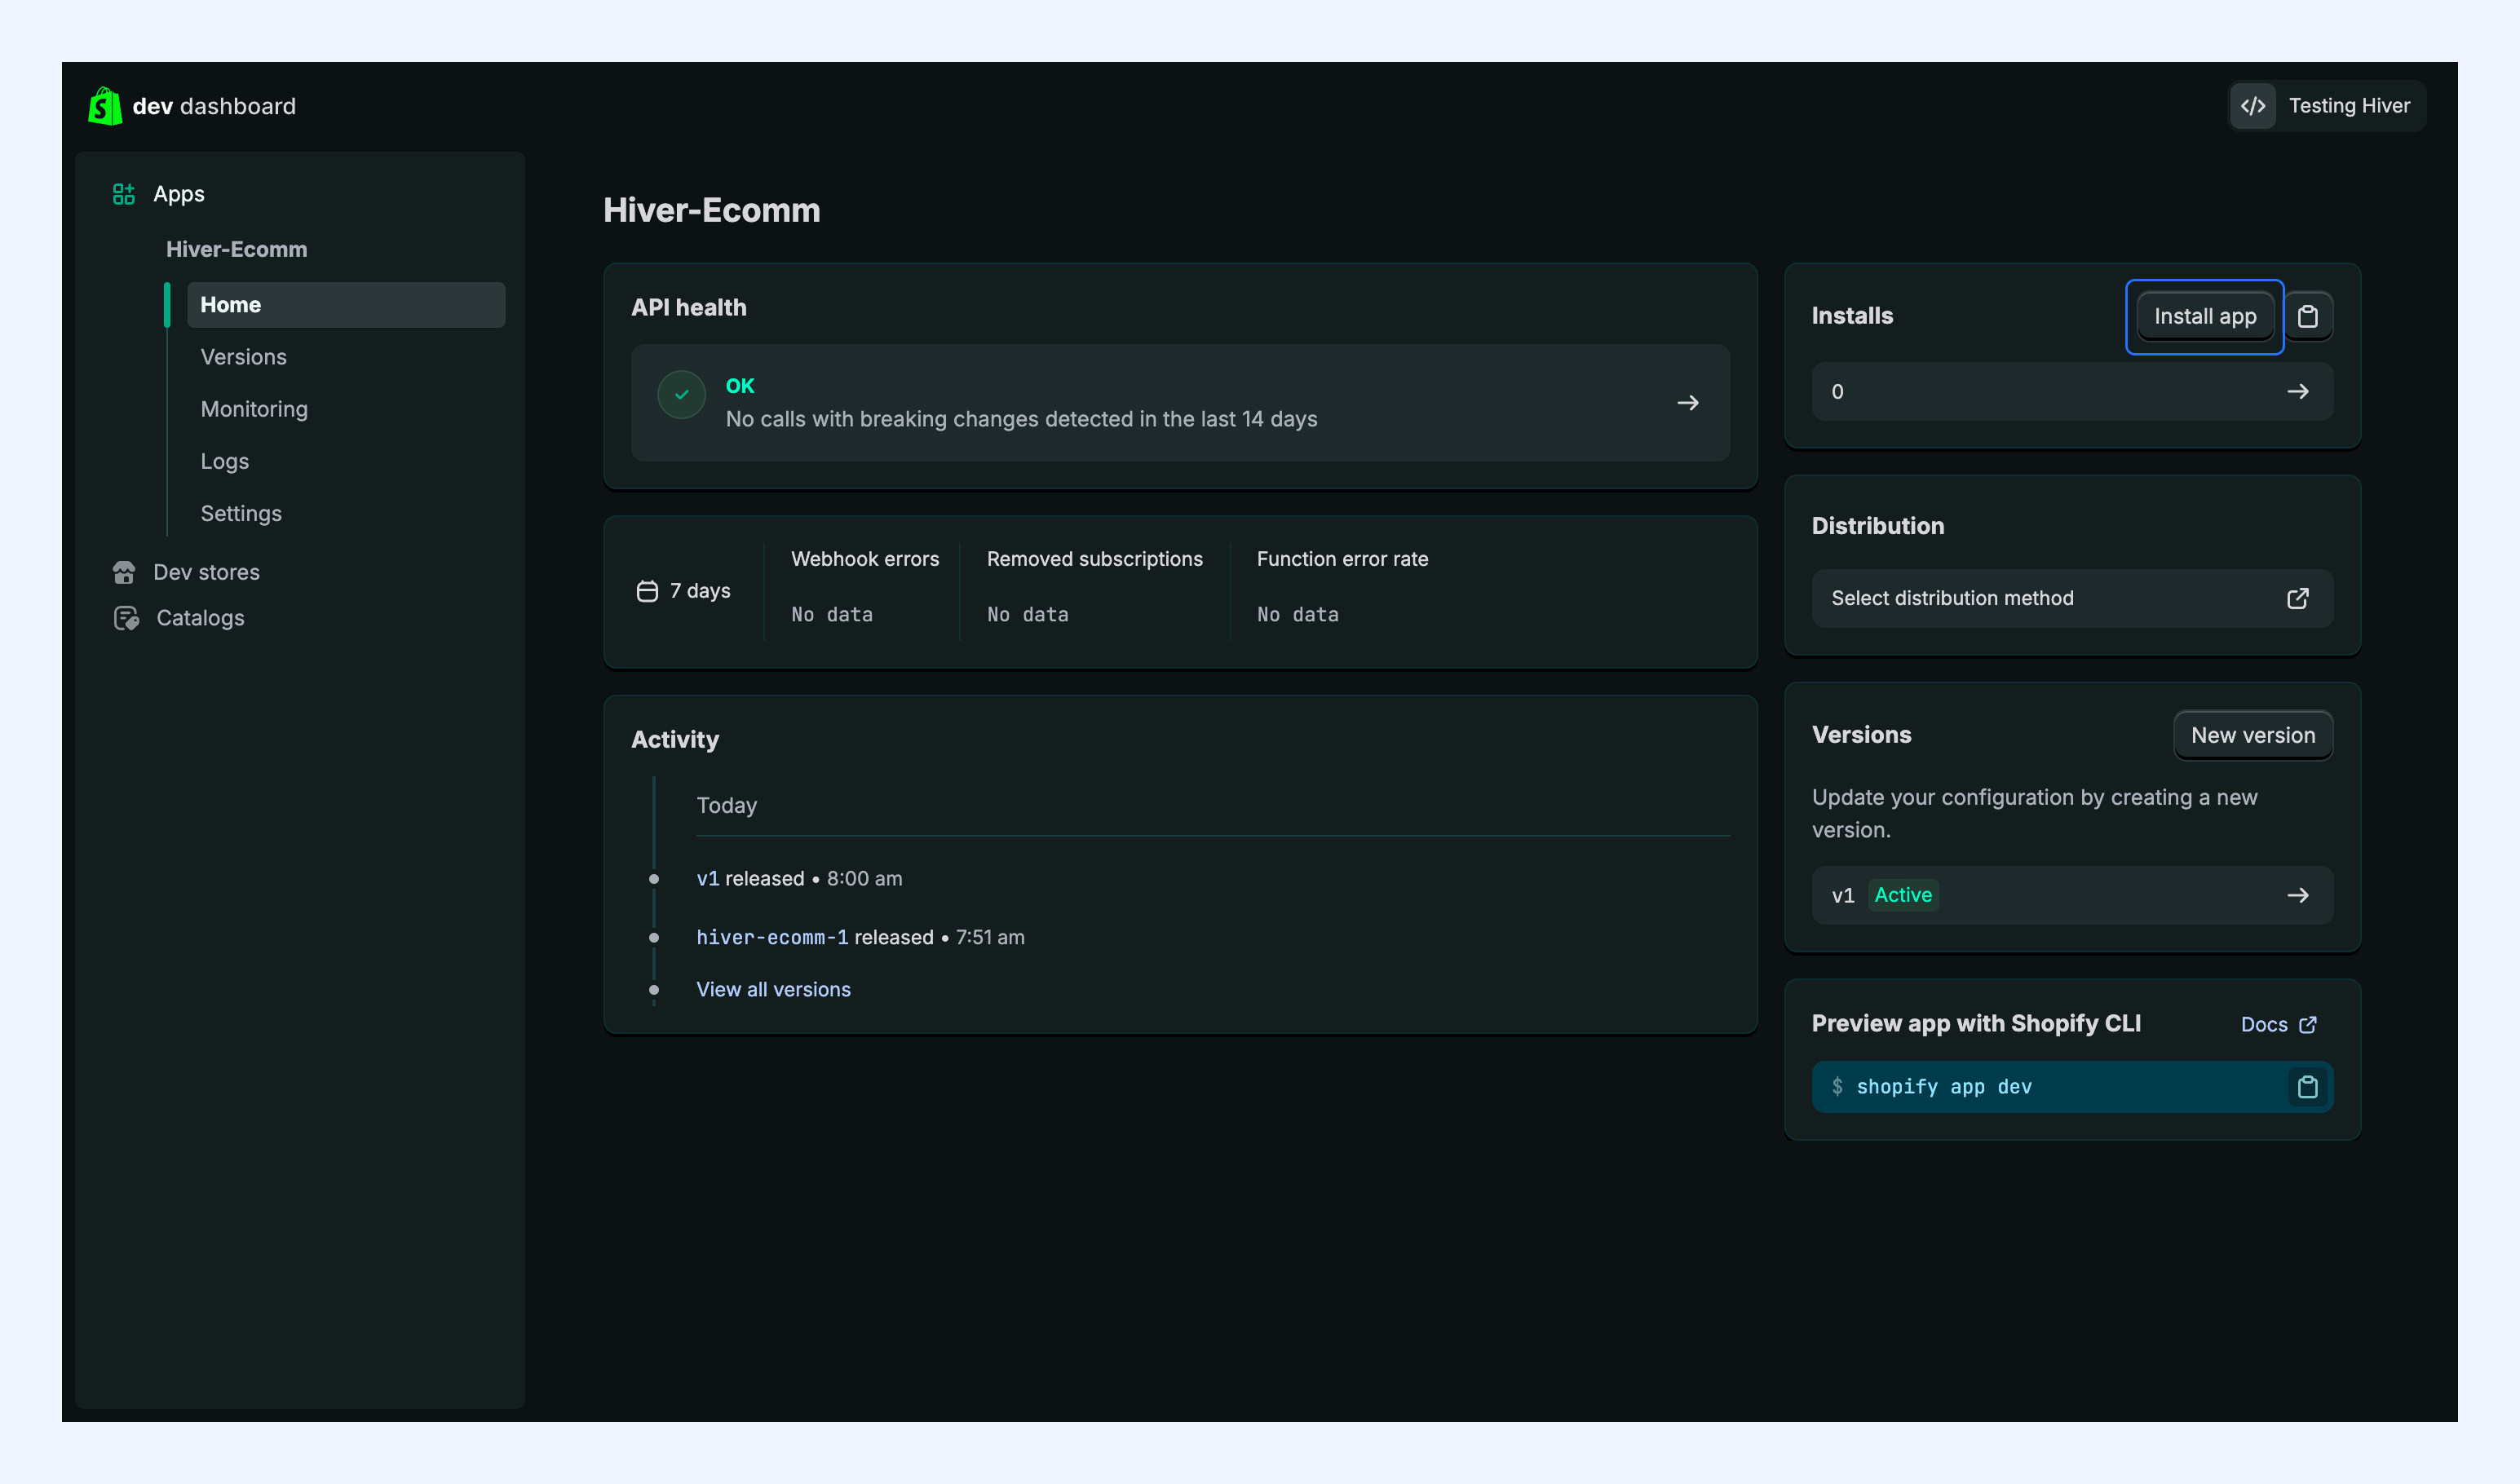
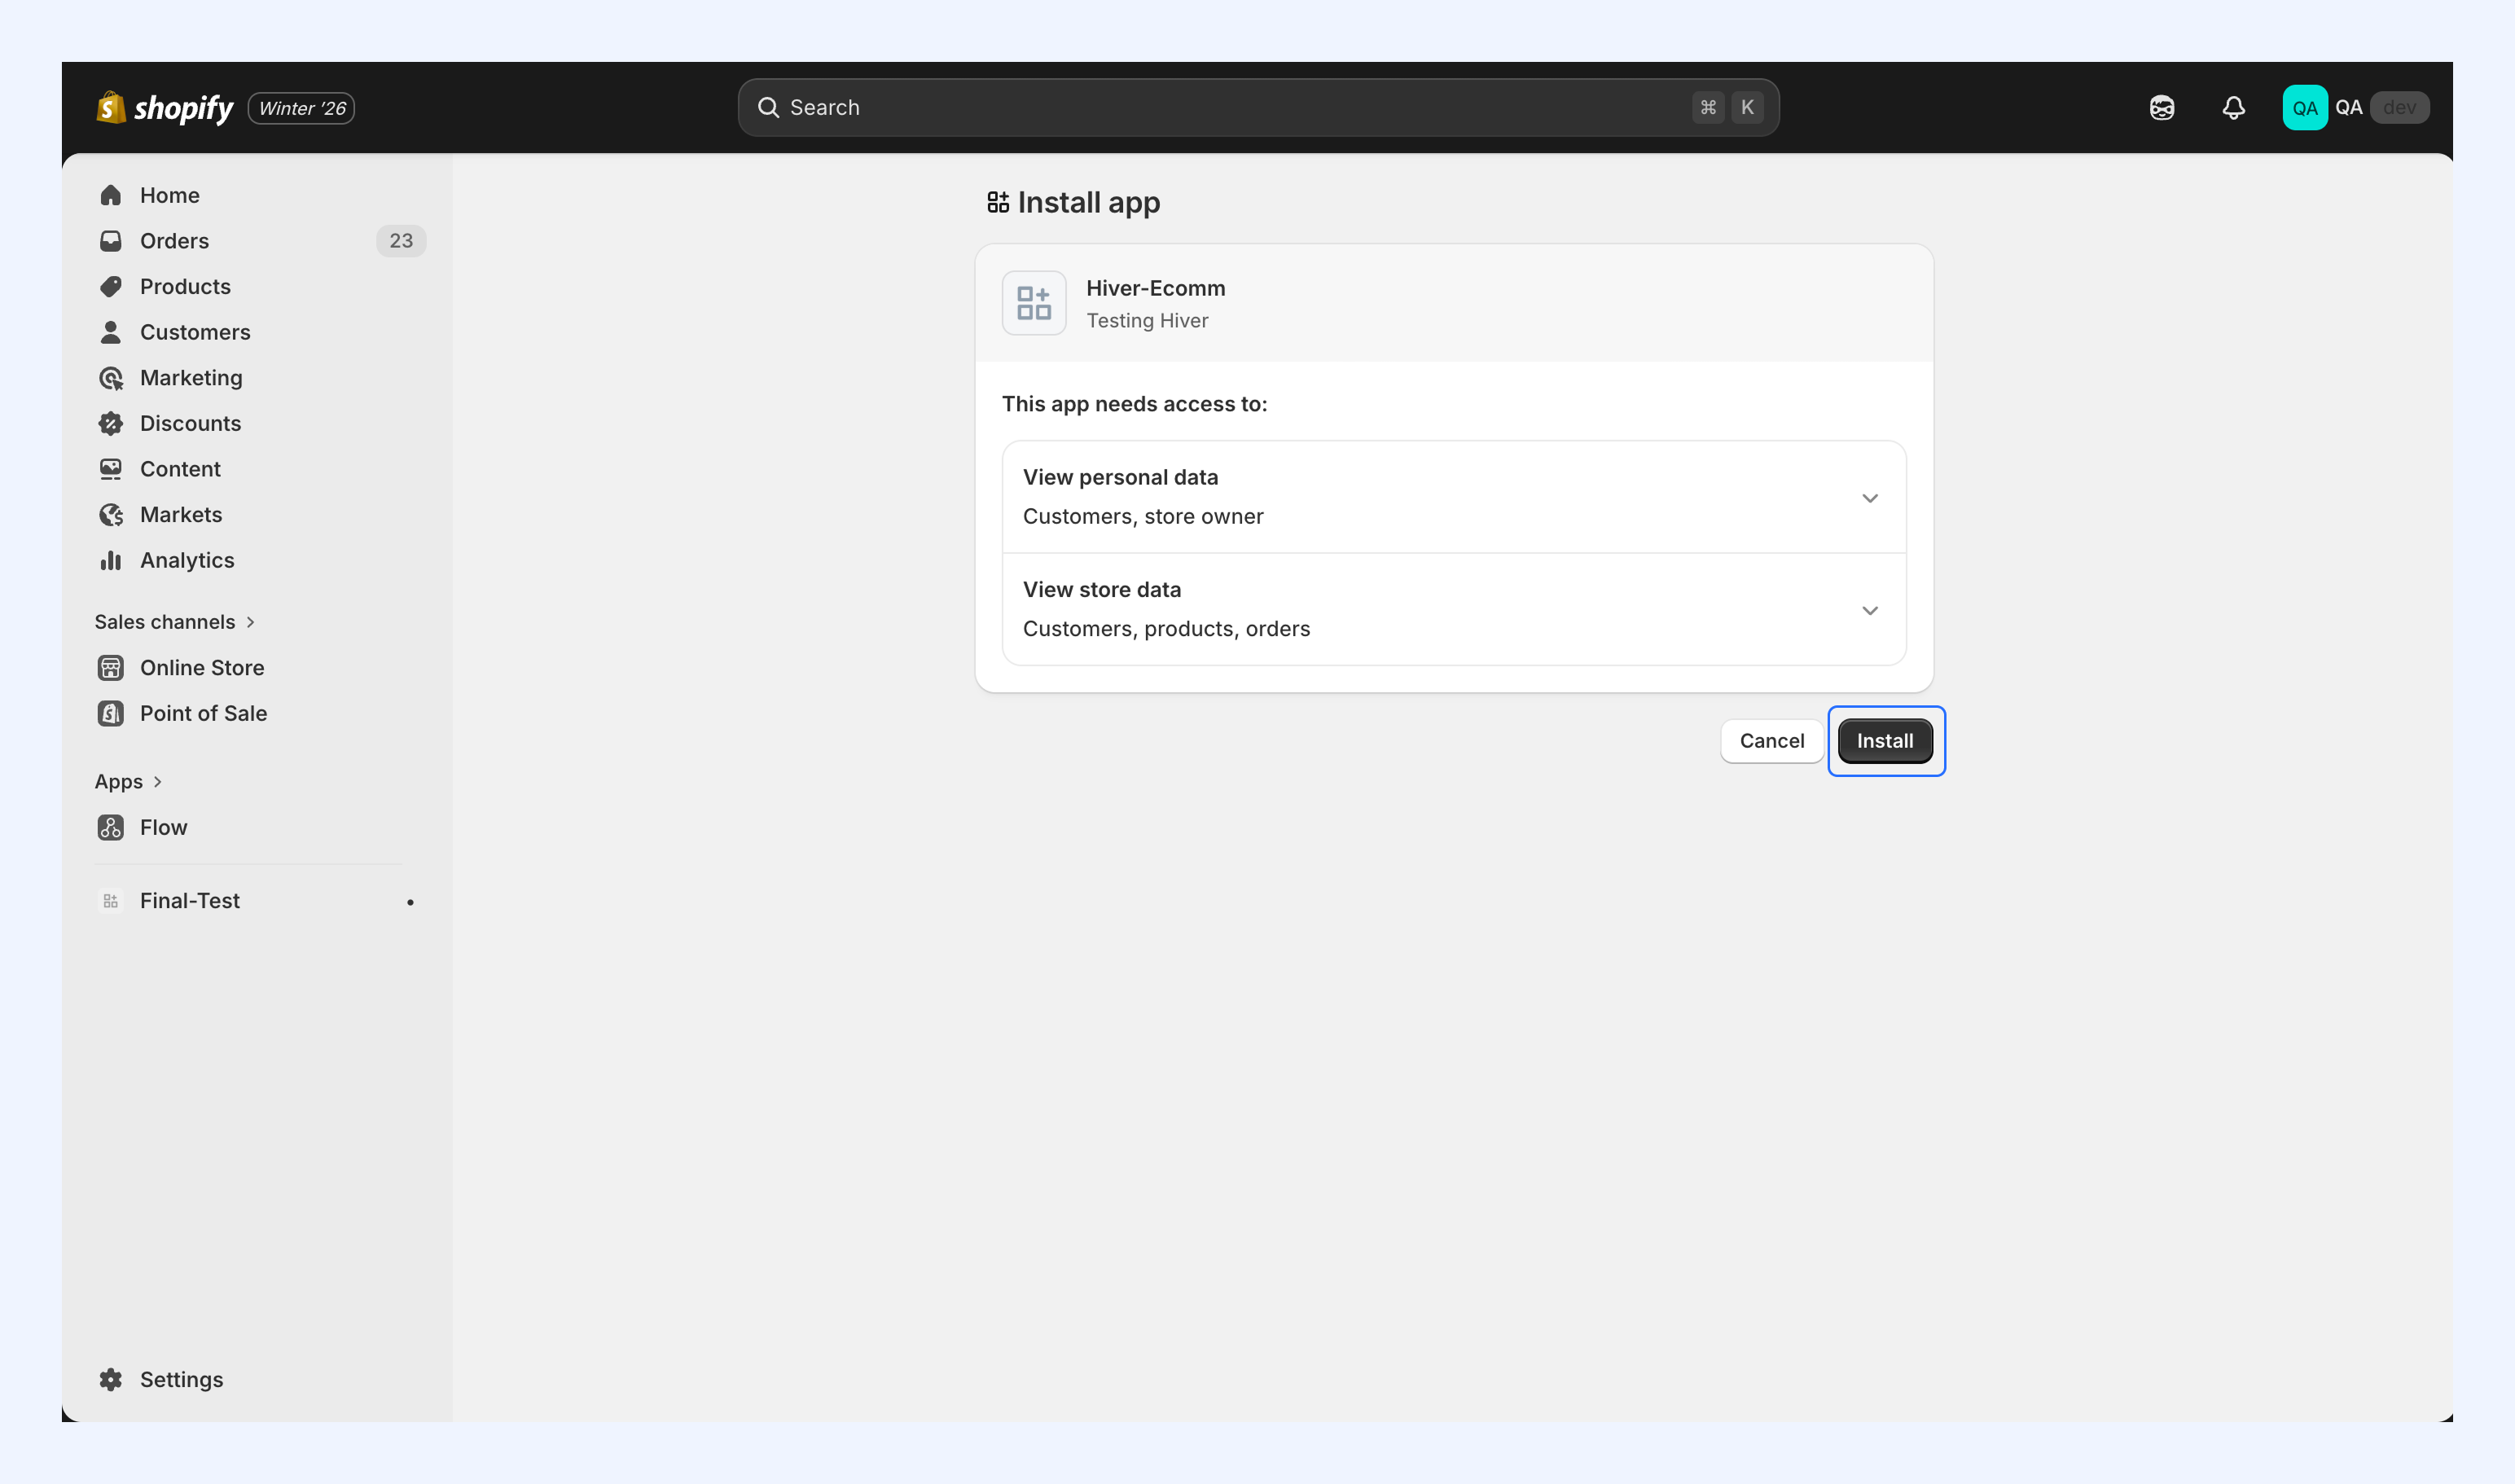
Step 6: Install the app
1. Navigate back to the Home section of your app.
2. Click Install app to install it in your Shopify account.
3. In the new tab that opens, you’ll be asked to select a Shopify store to install the app.

4. Review the app’s scopes and click Install.
Step 7: Get your API credentials
1. Go to Shopify Dev Dashboard → Settings.
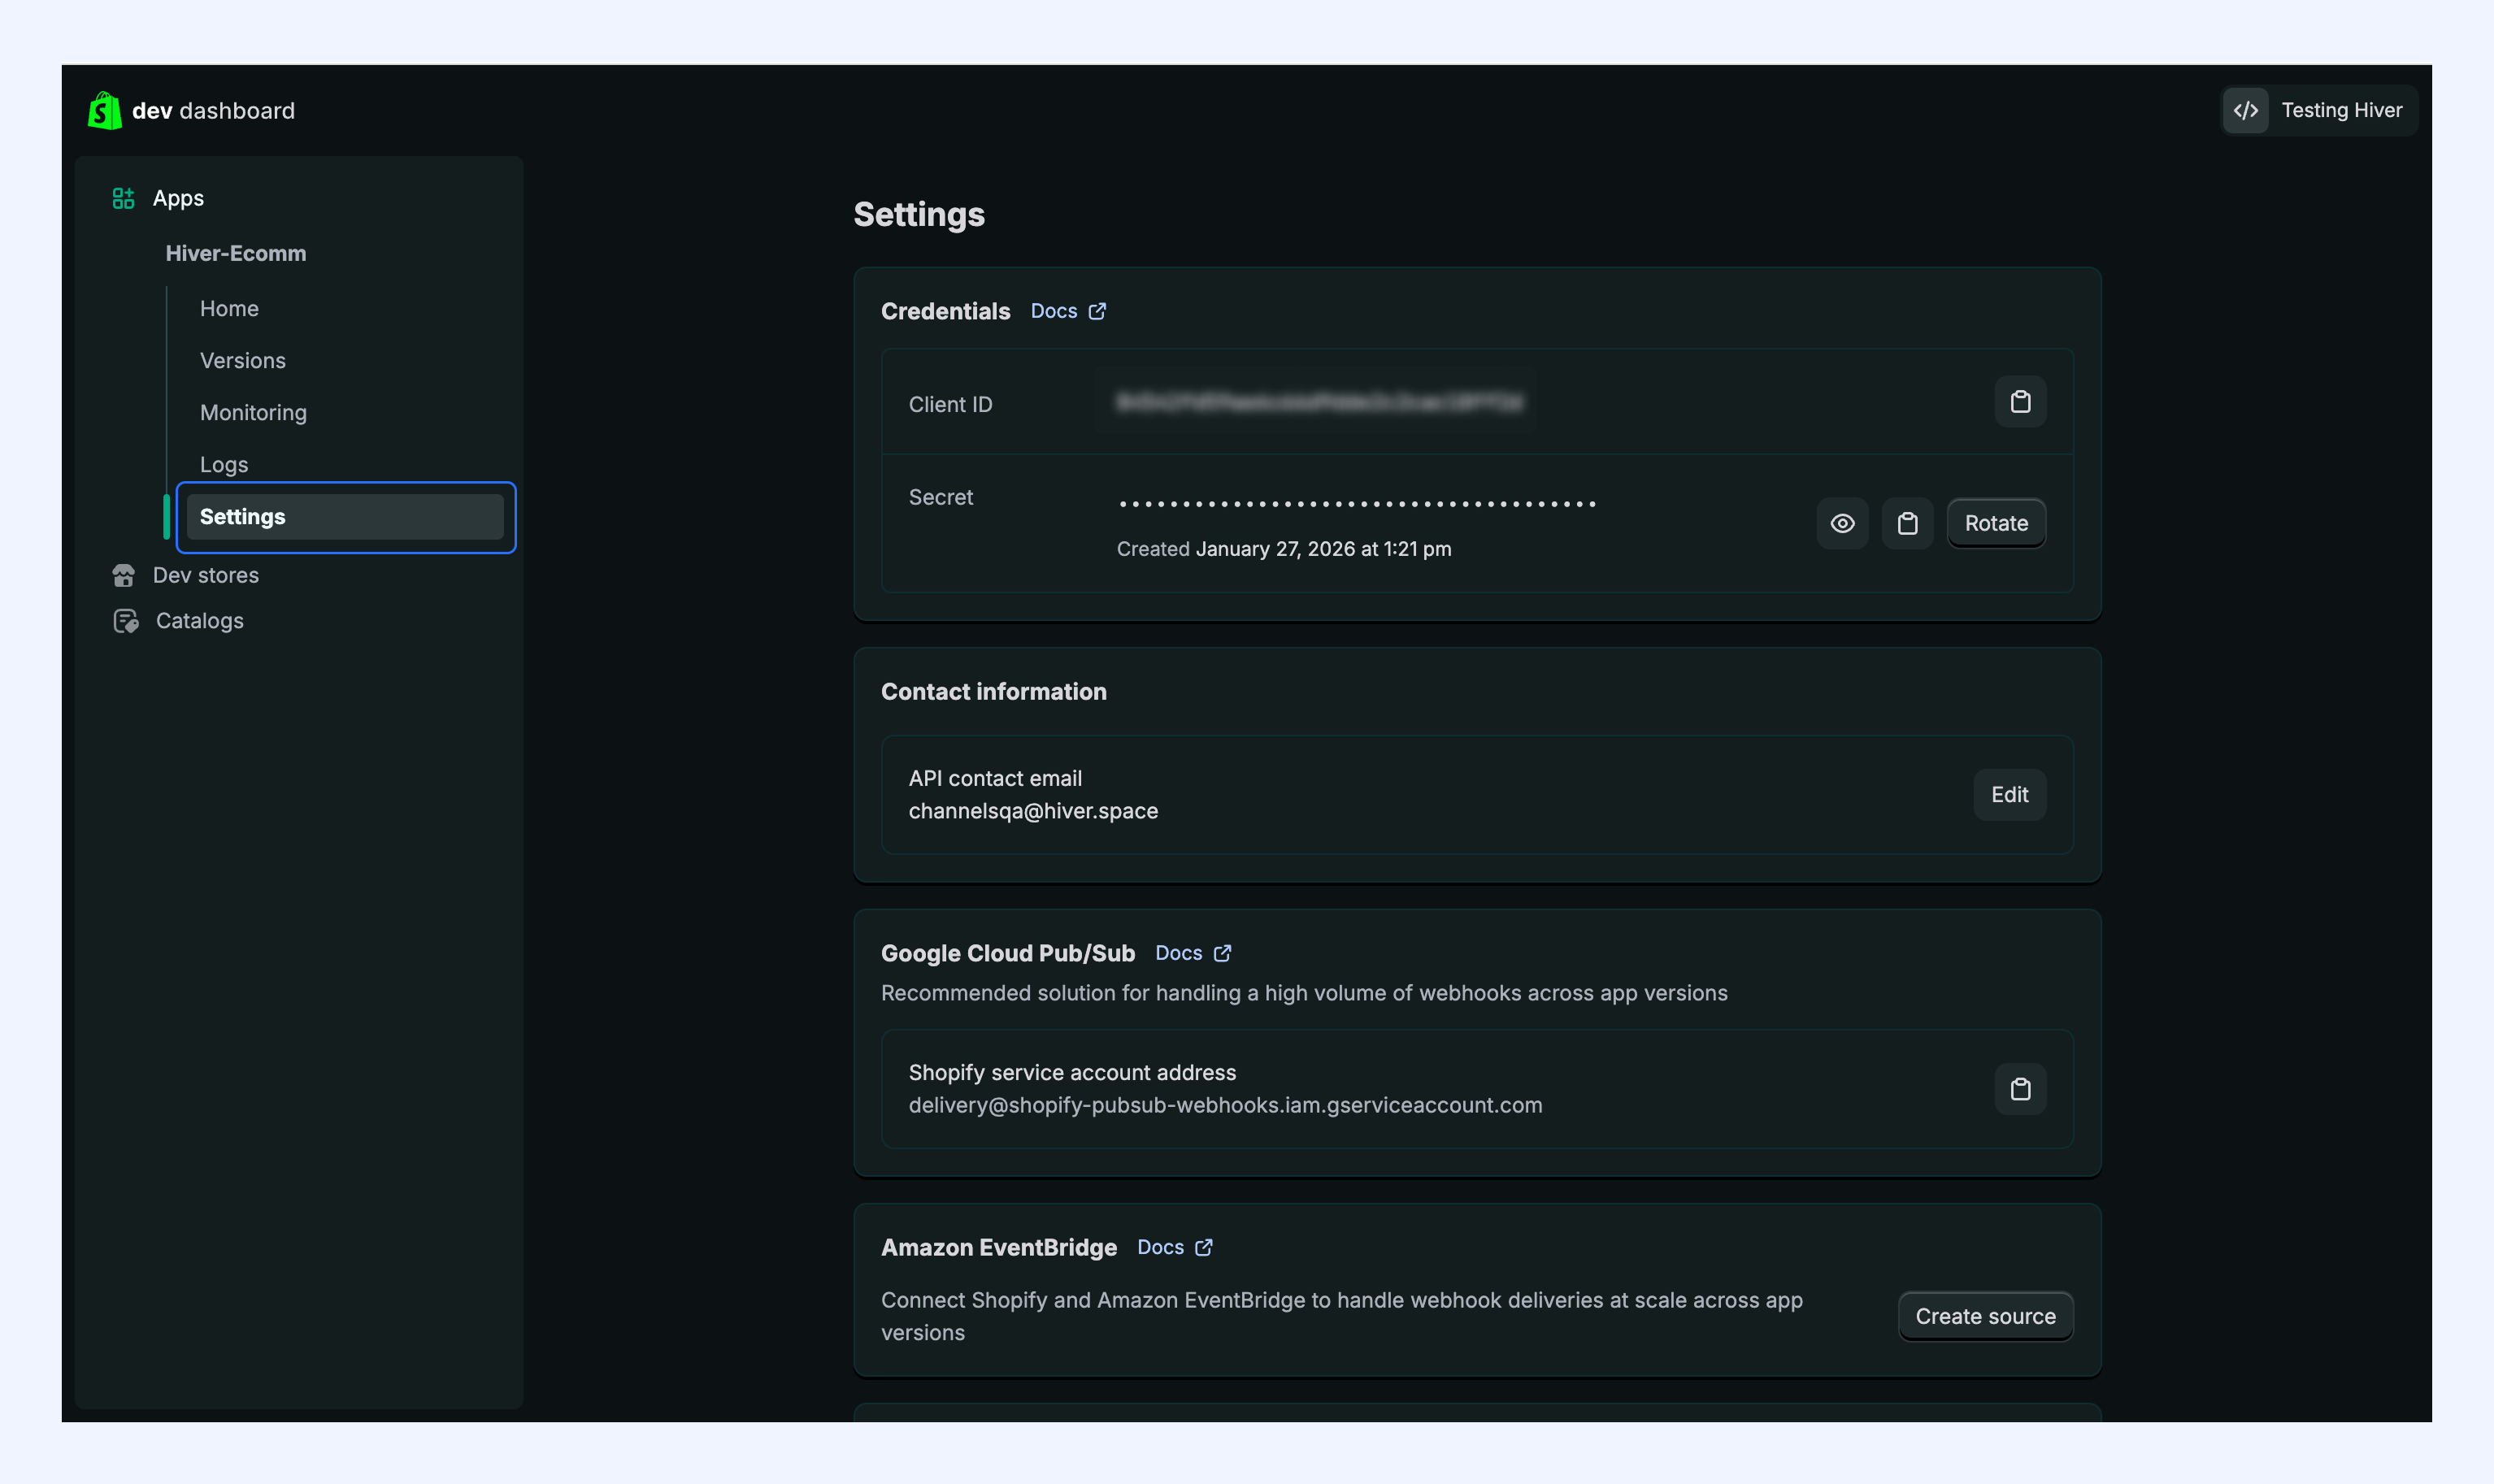
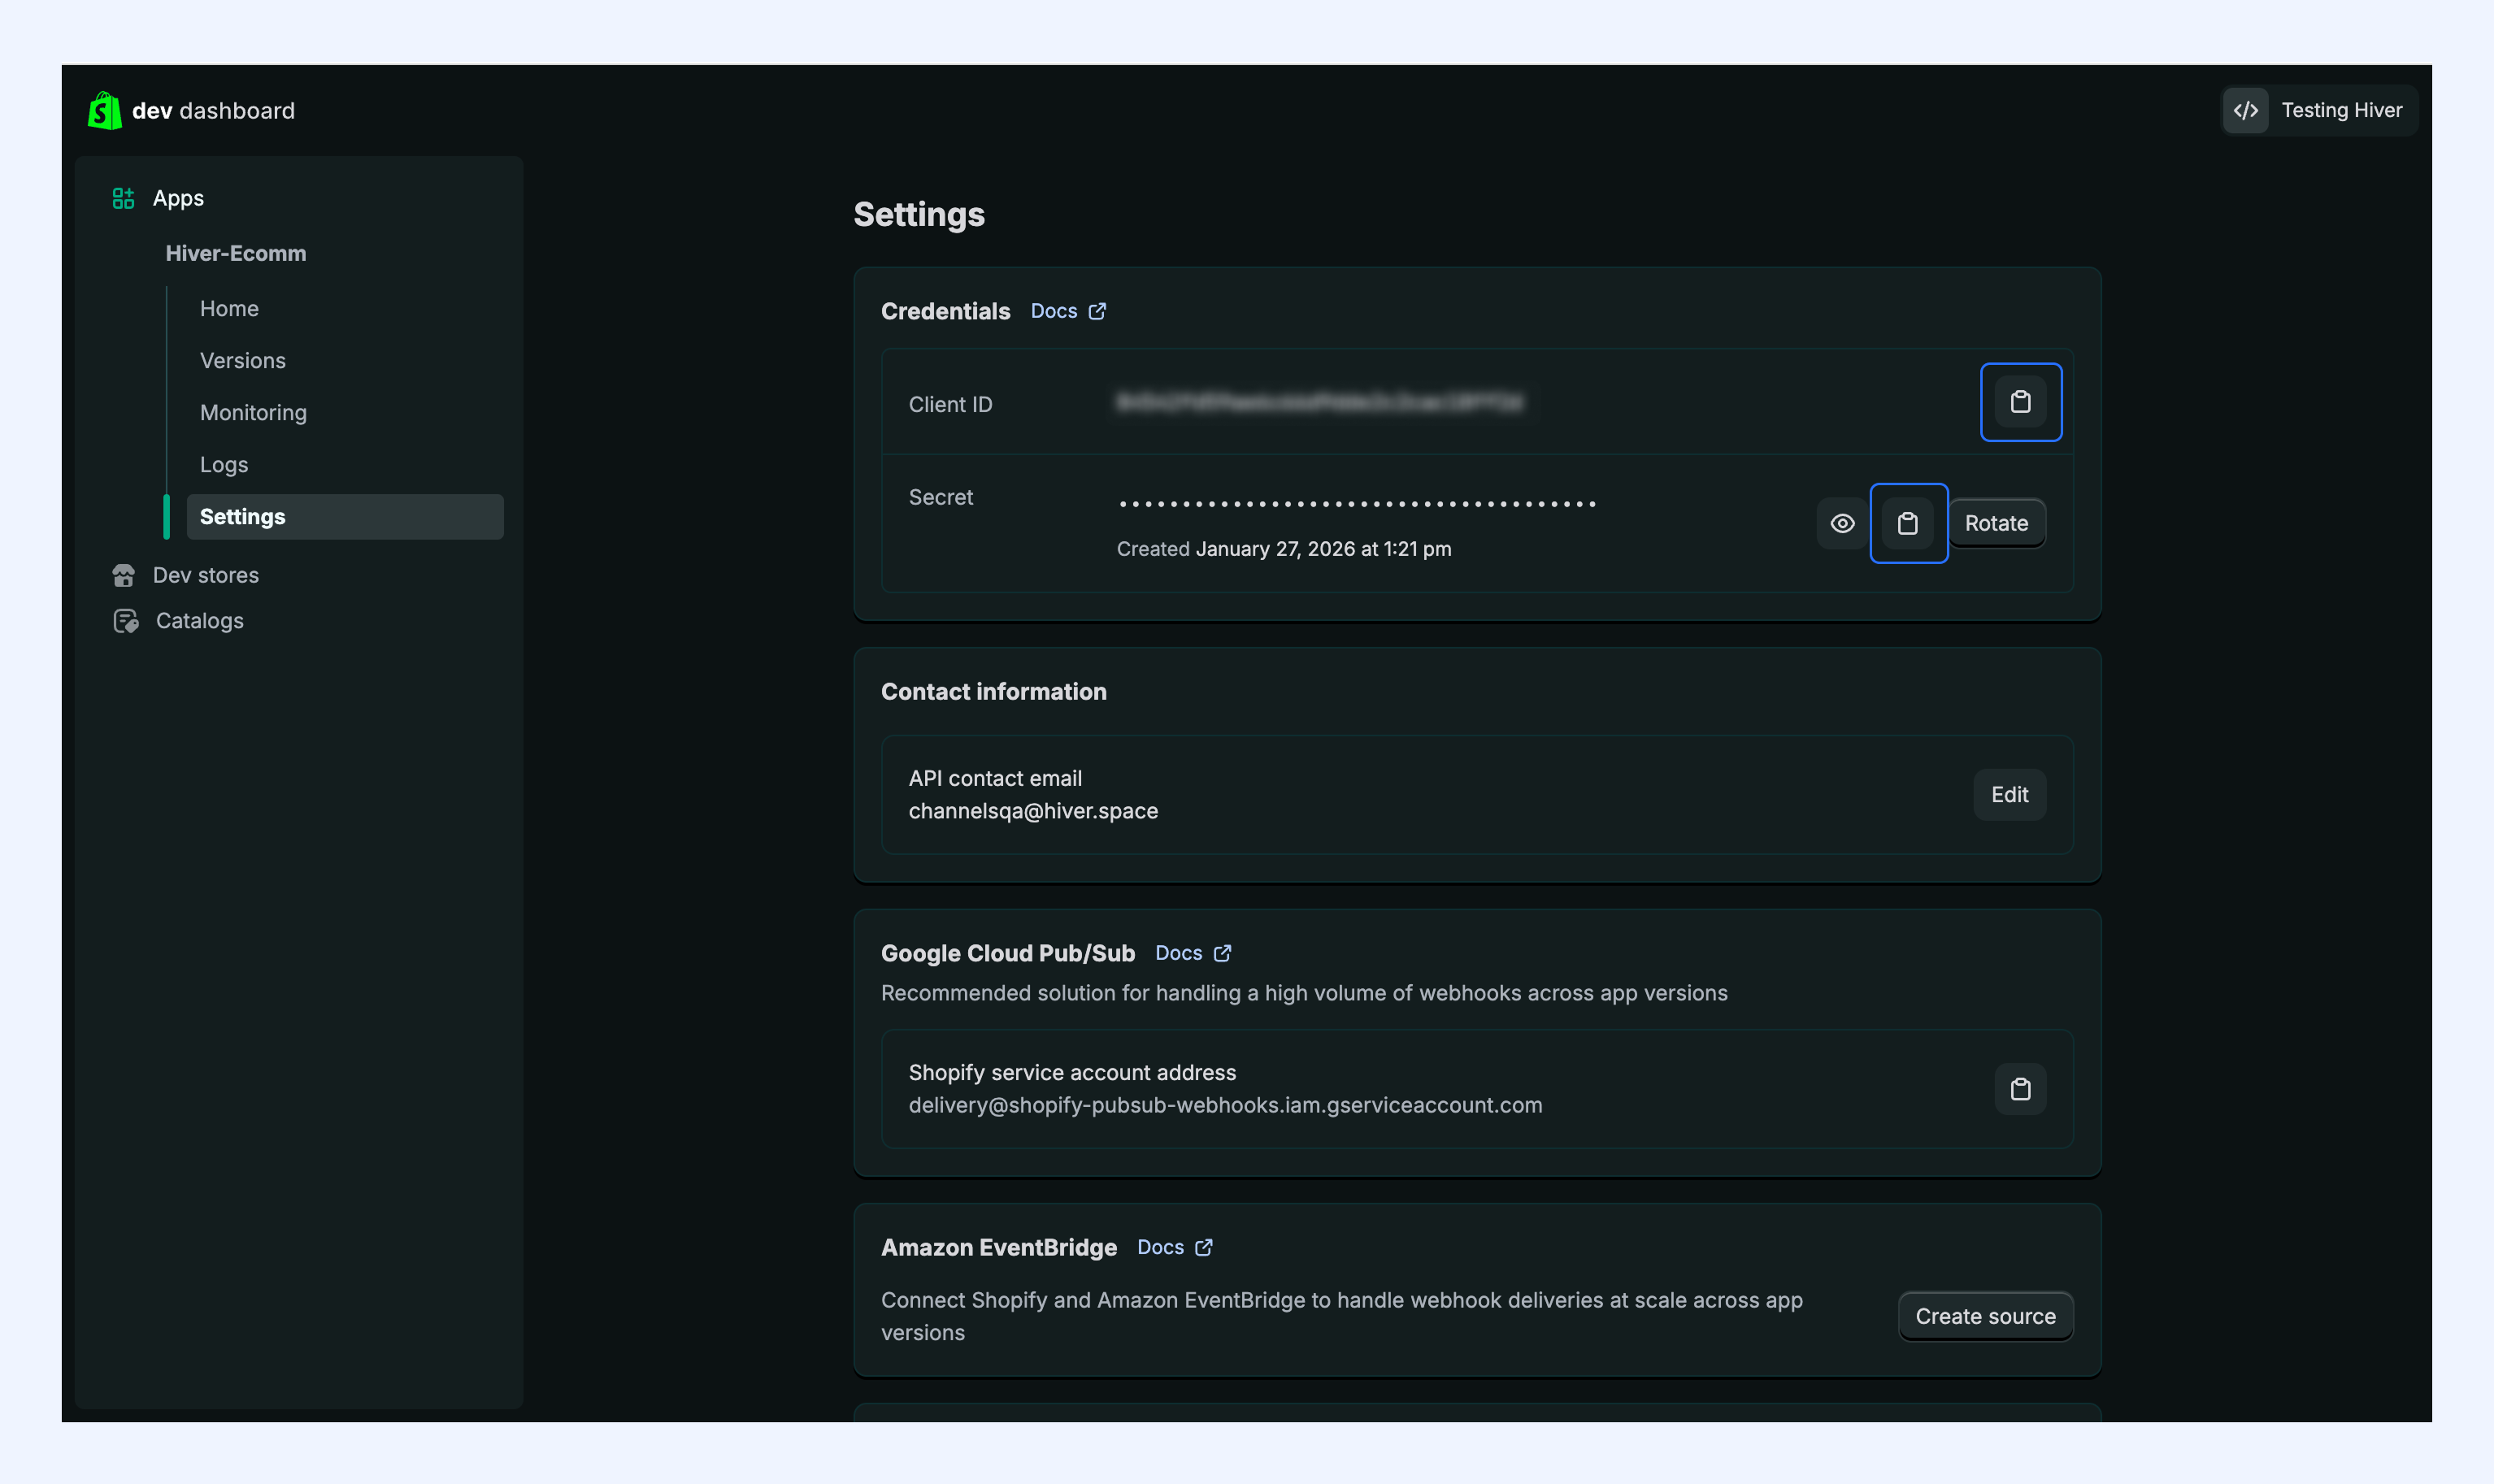
2. Copy both Client ID and Secret credentials, and store them safely.
Complete Hiver authentication
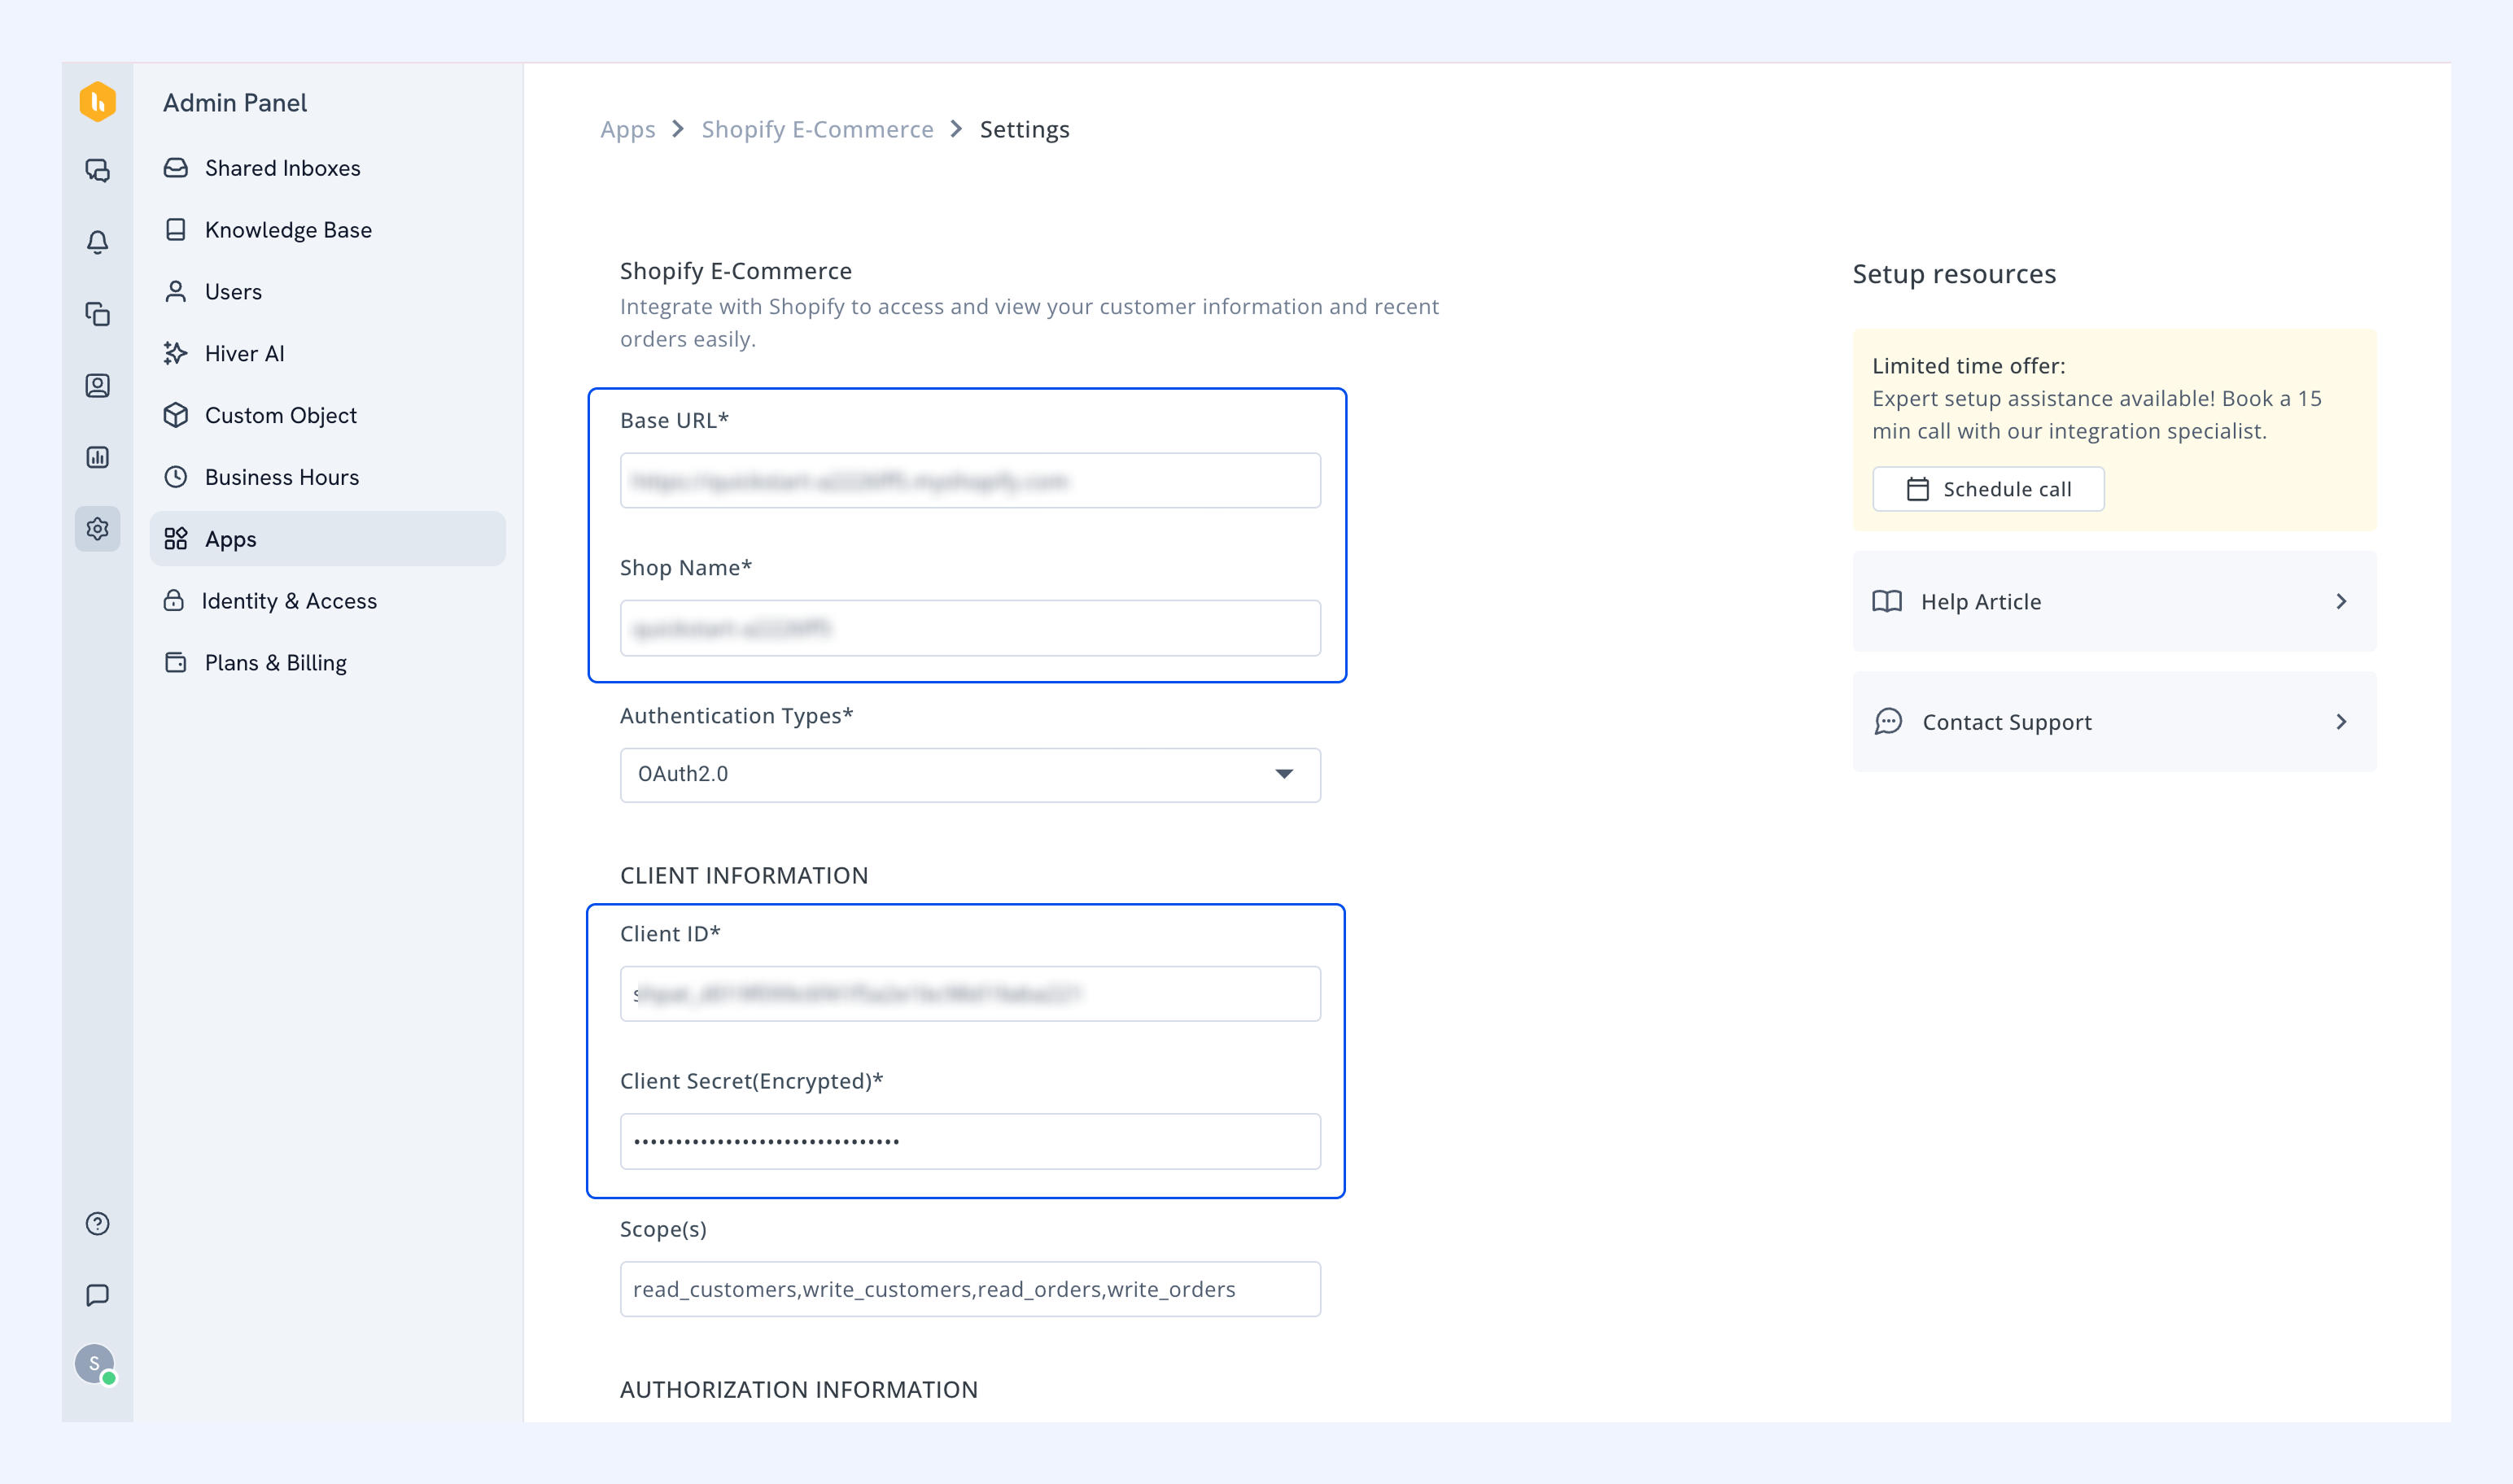
Step 1: Enter authentication details in Hiver
Return to the Hiver setup screen and fill in these details with the information you saved from Shopify:
- Base URL: Your Shopify store URL.
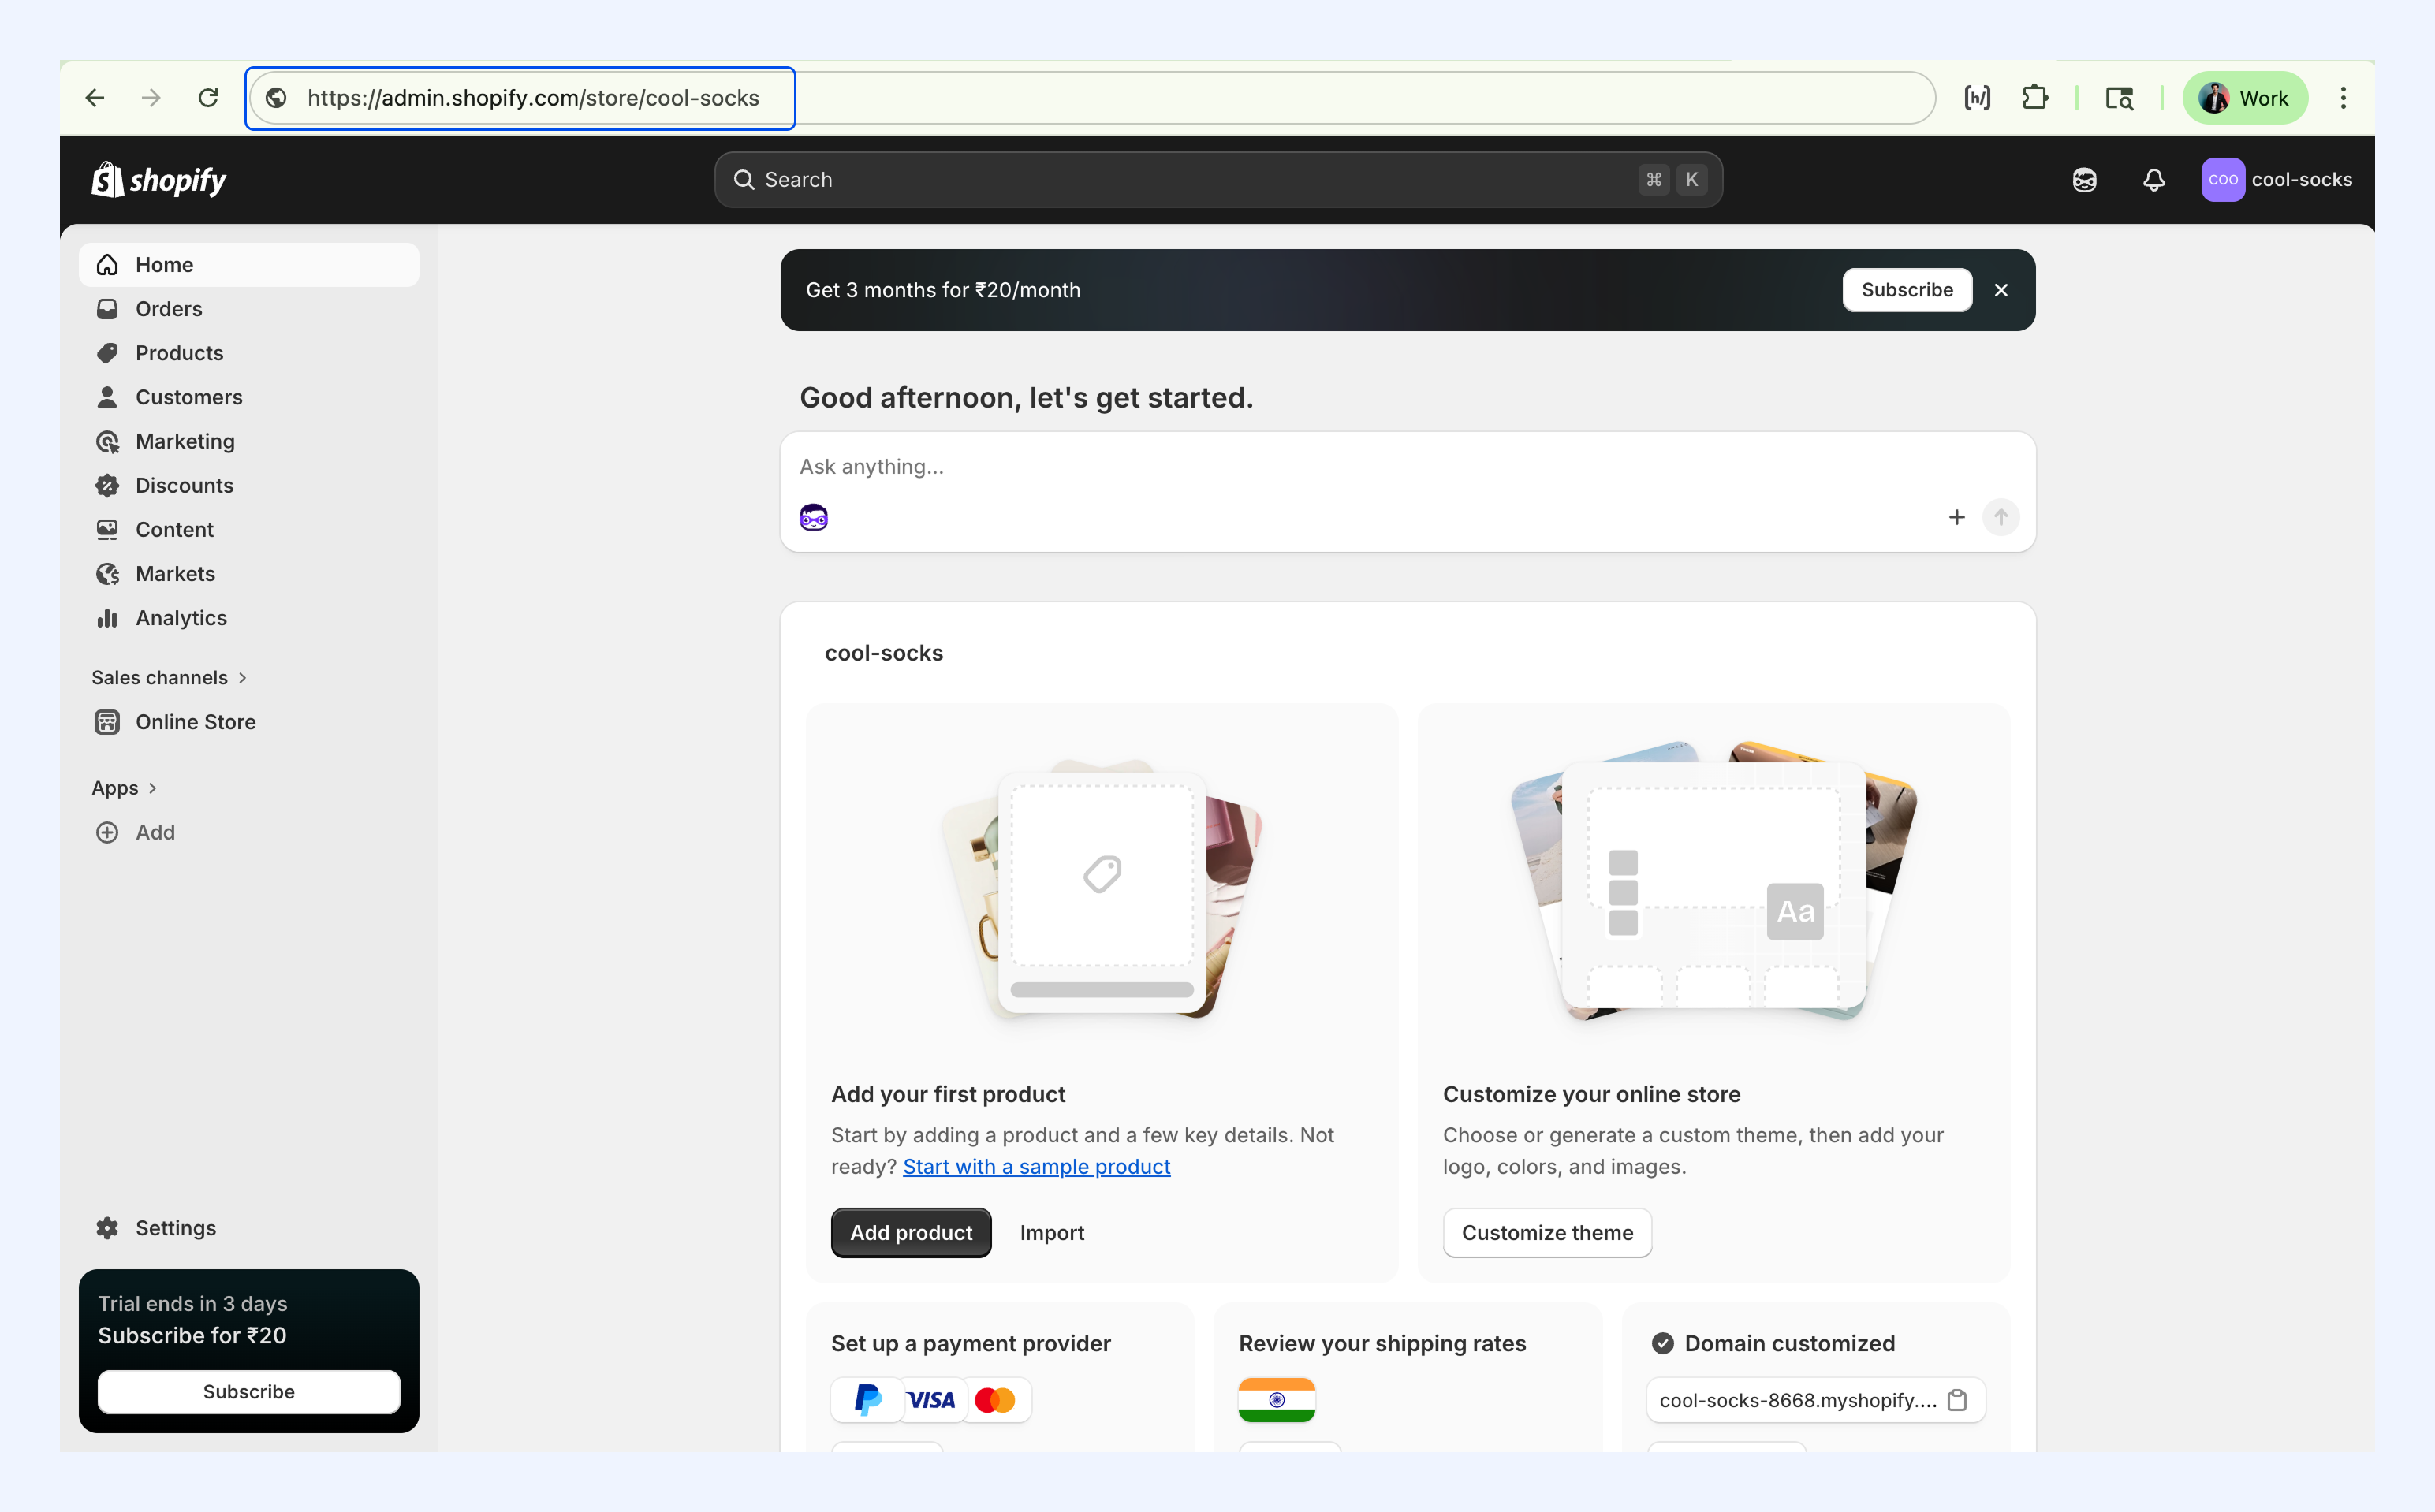
- Shop Name: Found at the end of your Shopify admin URL (For example, in https://admin.shopify.com/store/cool-socks, your shop name is cool-socks).
- Client ID: Paste the Client ID you copied from Shopify.
- Client Secret: Paste the Client Secret you copied from Shopify.
You can leave the remaining fields as they are.
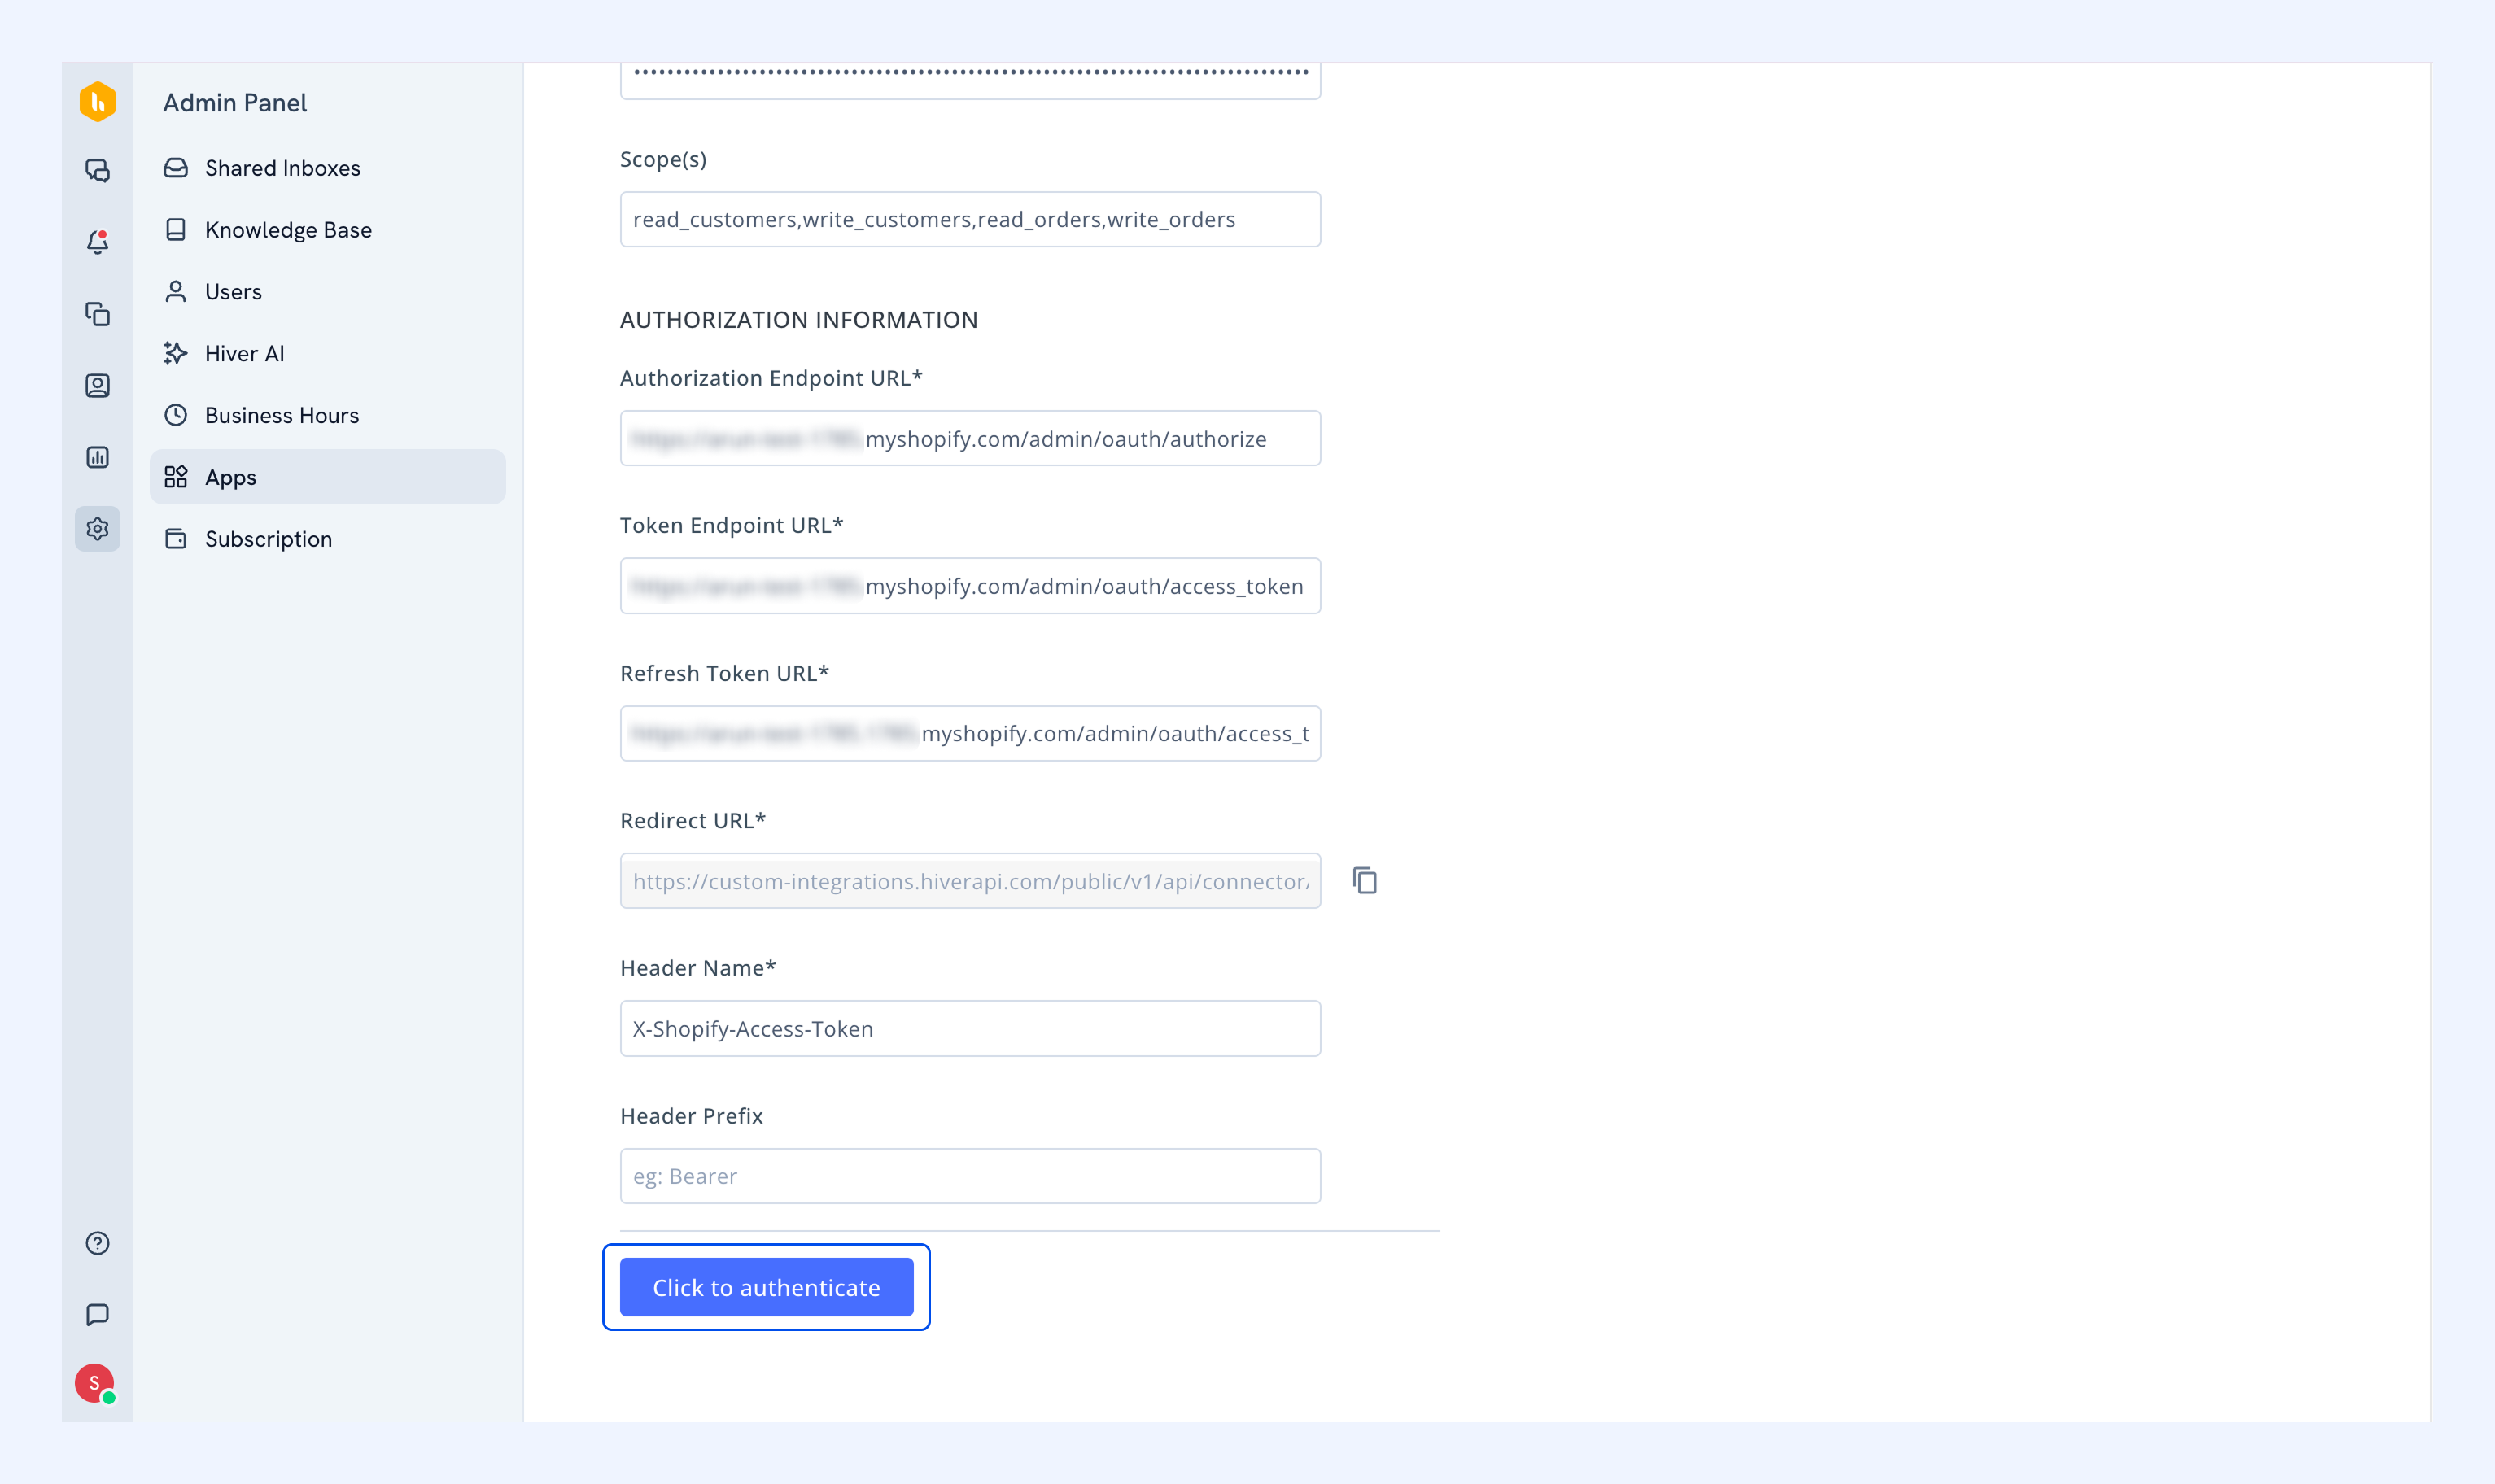
Step 2: Authenticate the integration
1. Select Click to authenticate.
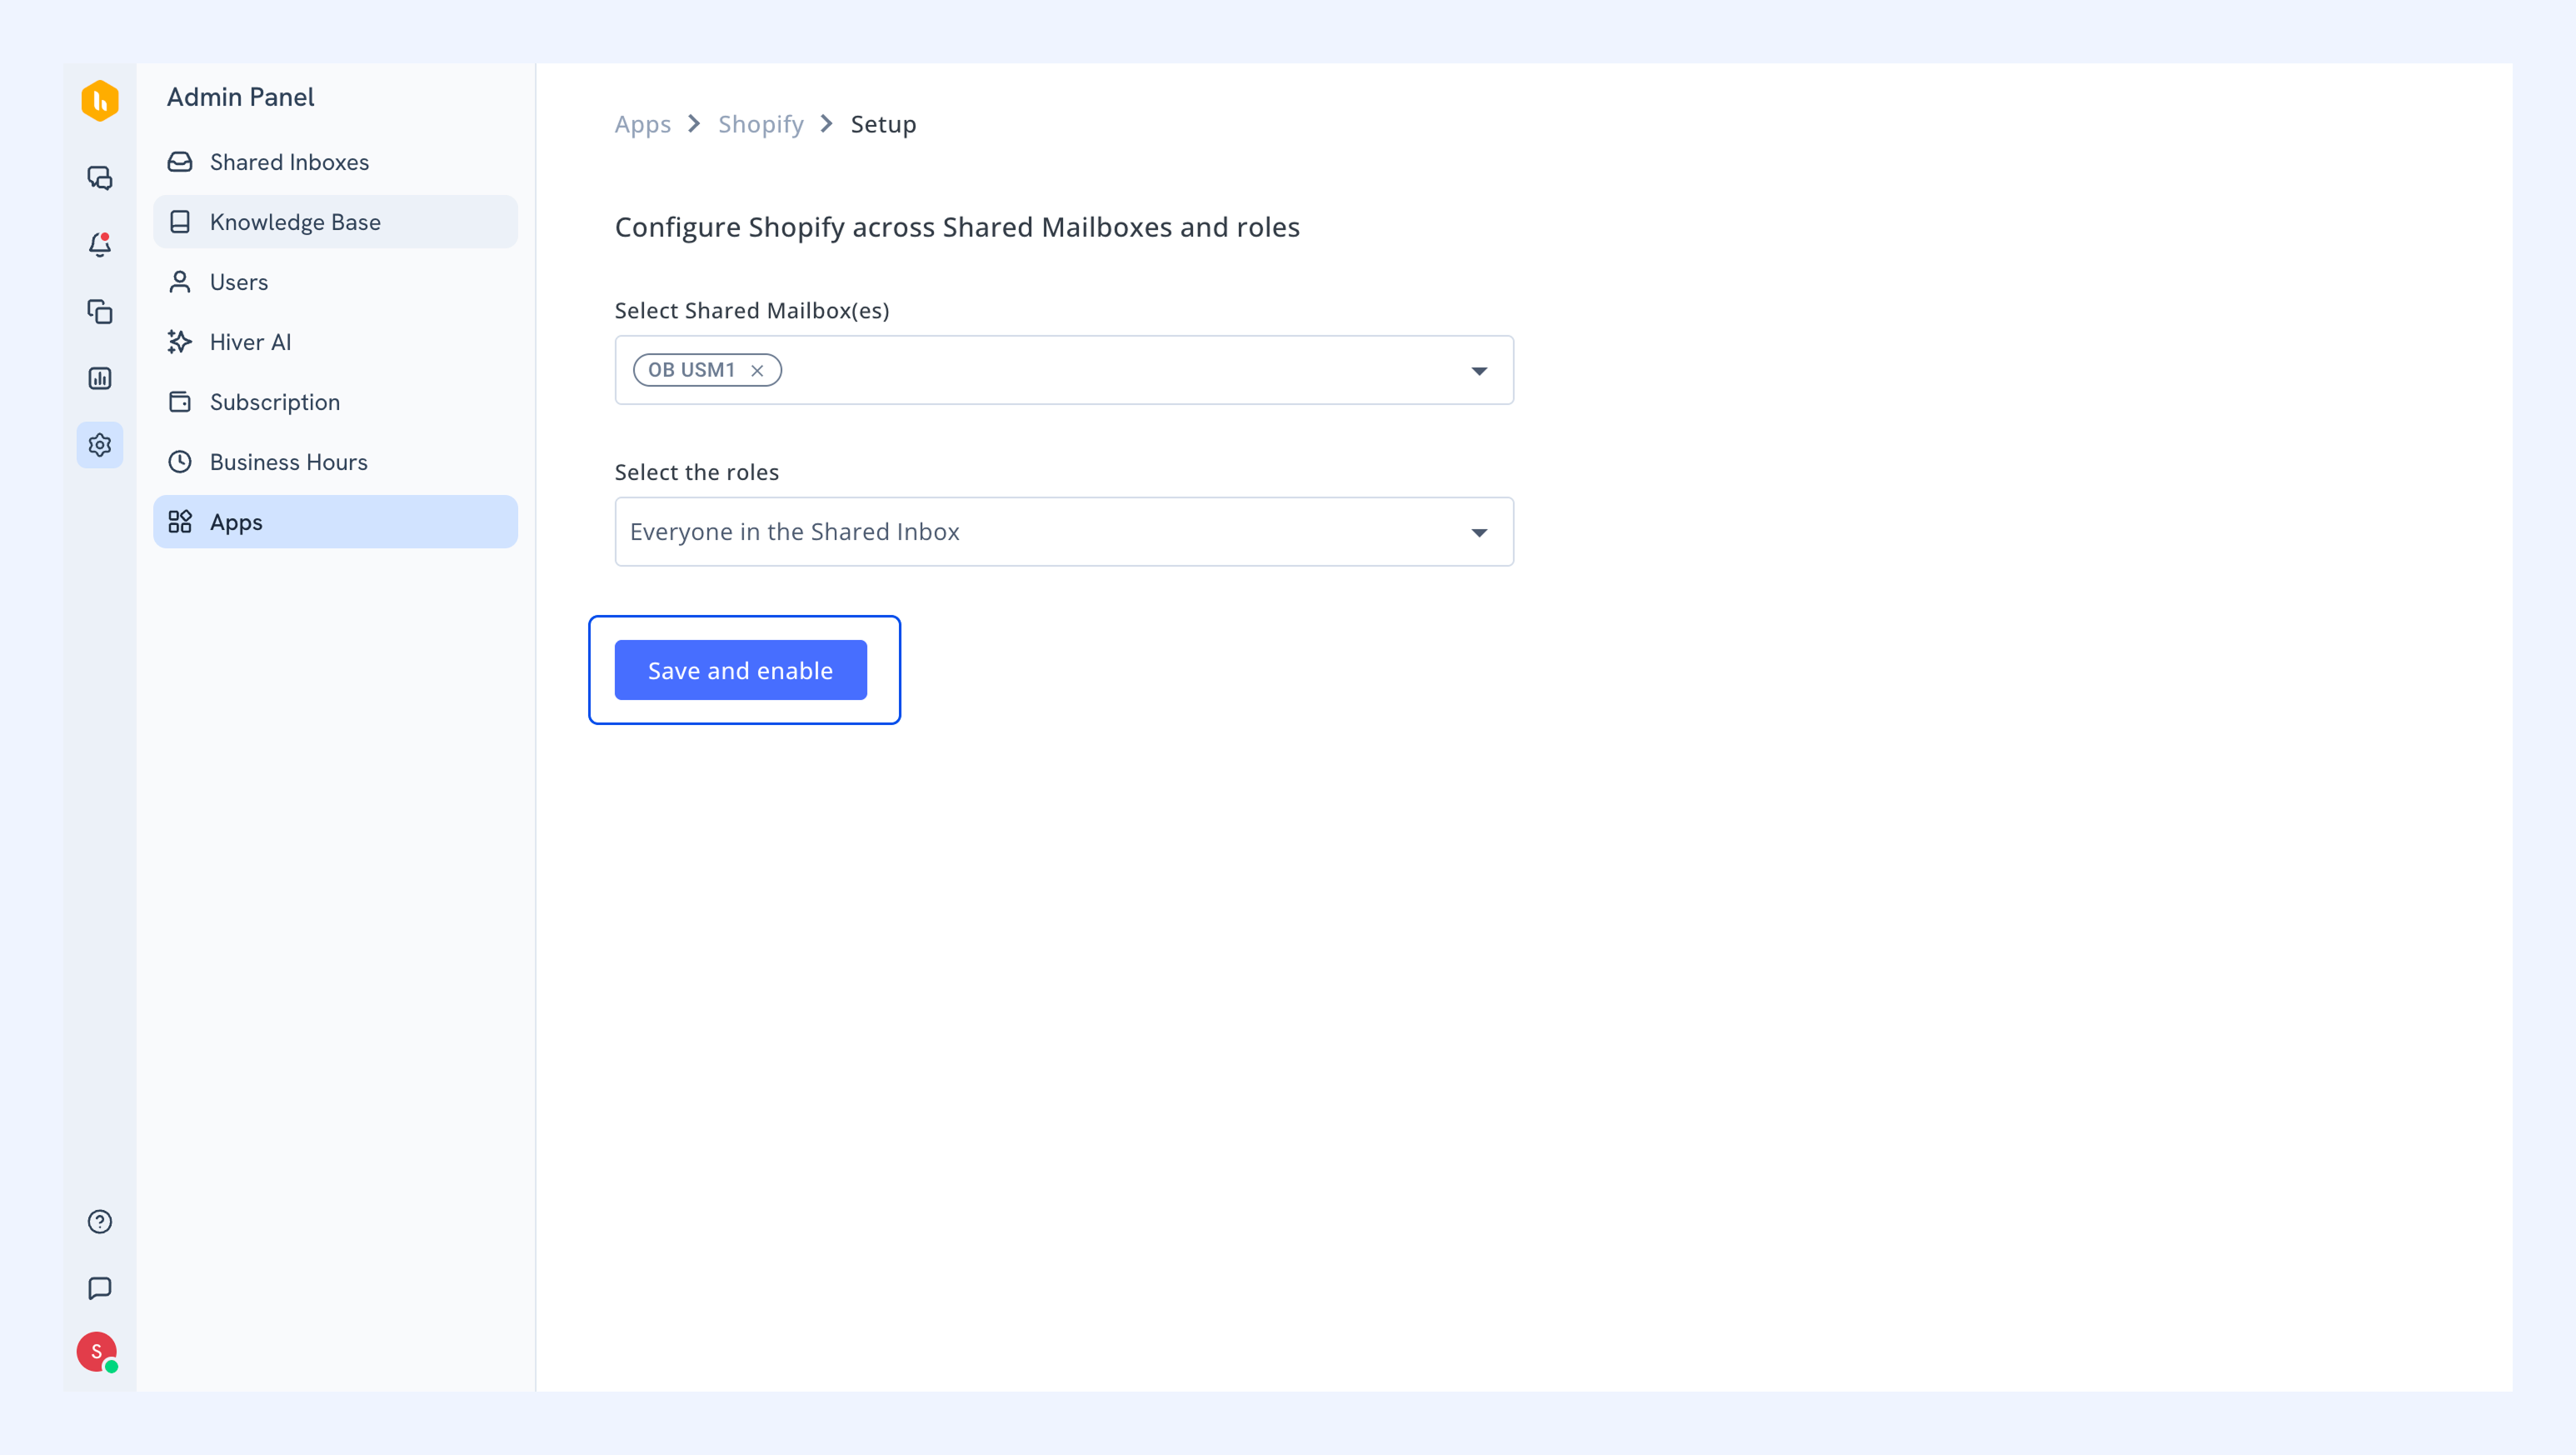
2. Select which Shared Inboxes can access Shopify data and which roles (Admins or Everyone in the Shared Inbox) should have access to Shopify information.
3. Click Save and enable.
Step 4: Configure visibility settings
After enabling the app, you'll need to set up which information appears for your team.
1. Go back to the Apps screen and click on Shopify E-Commerce.
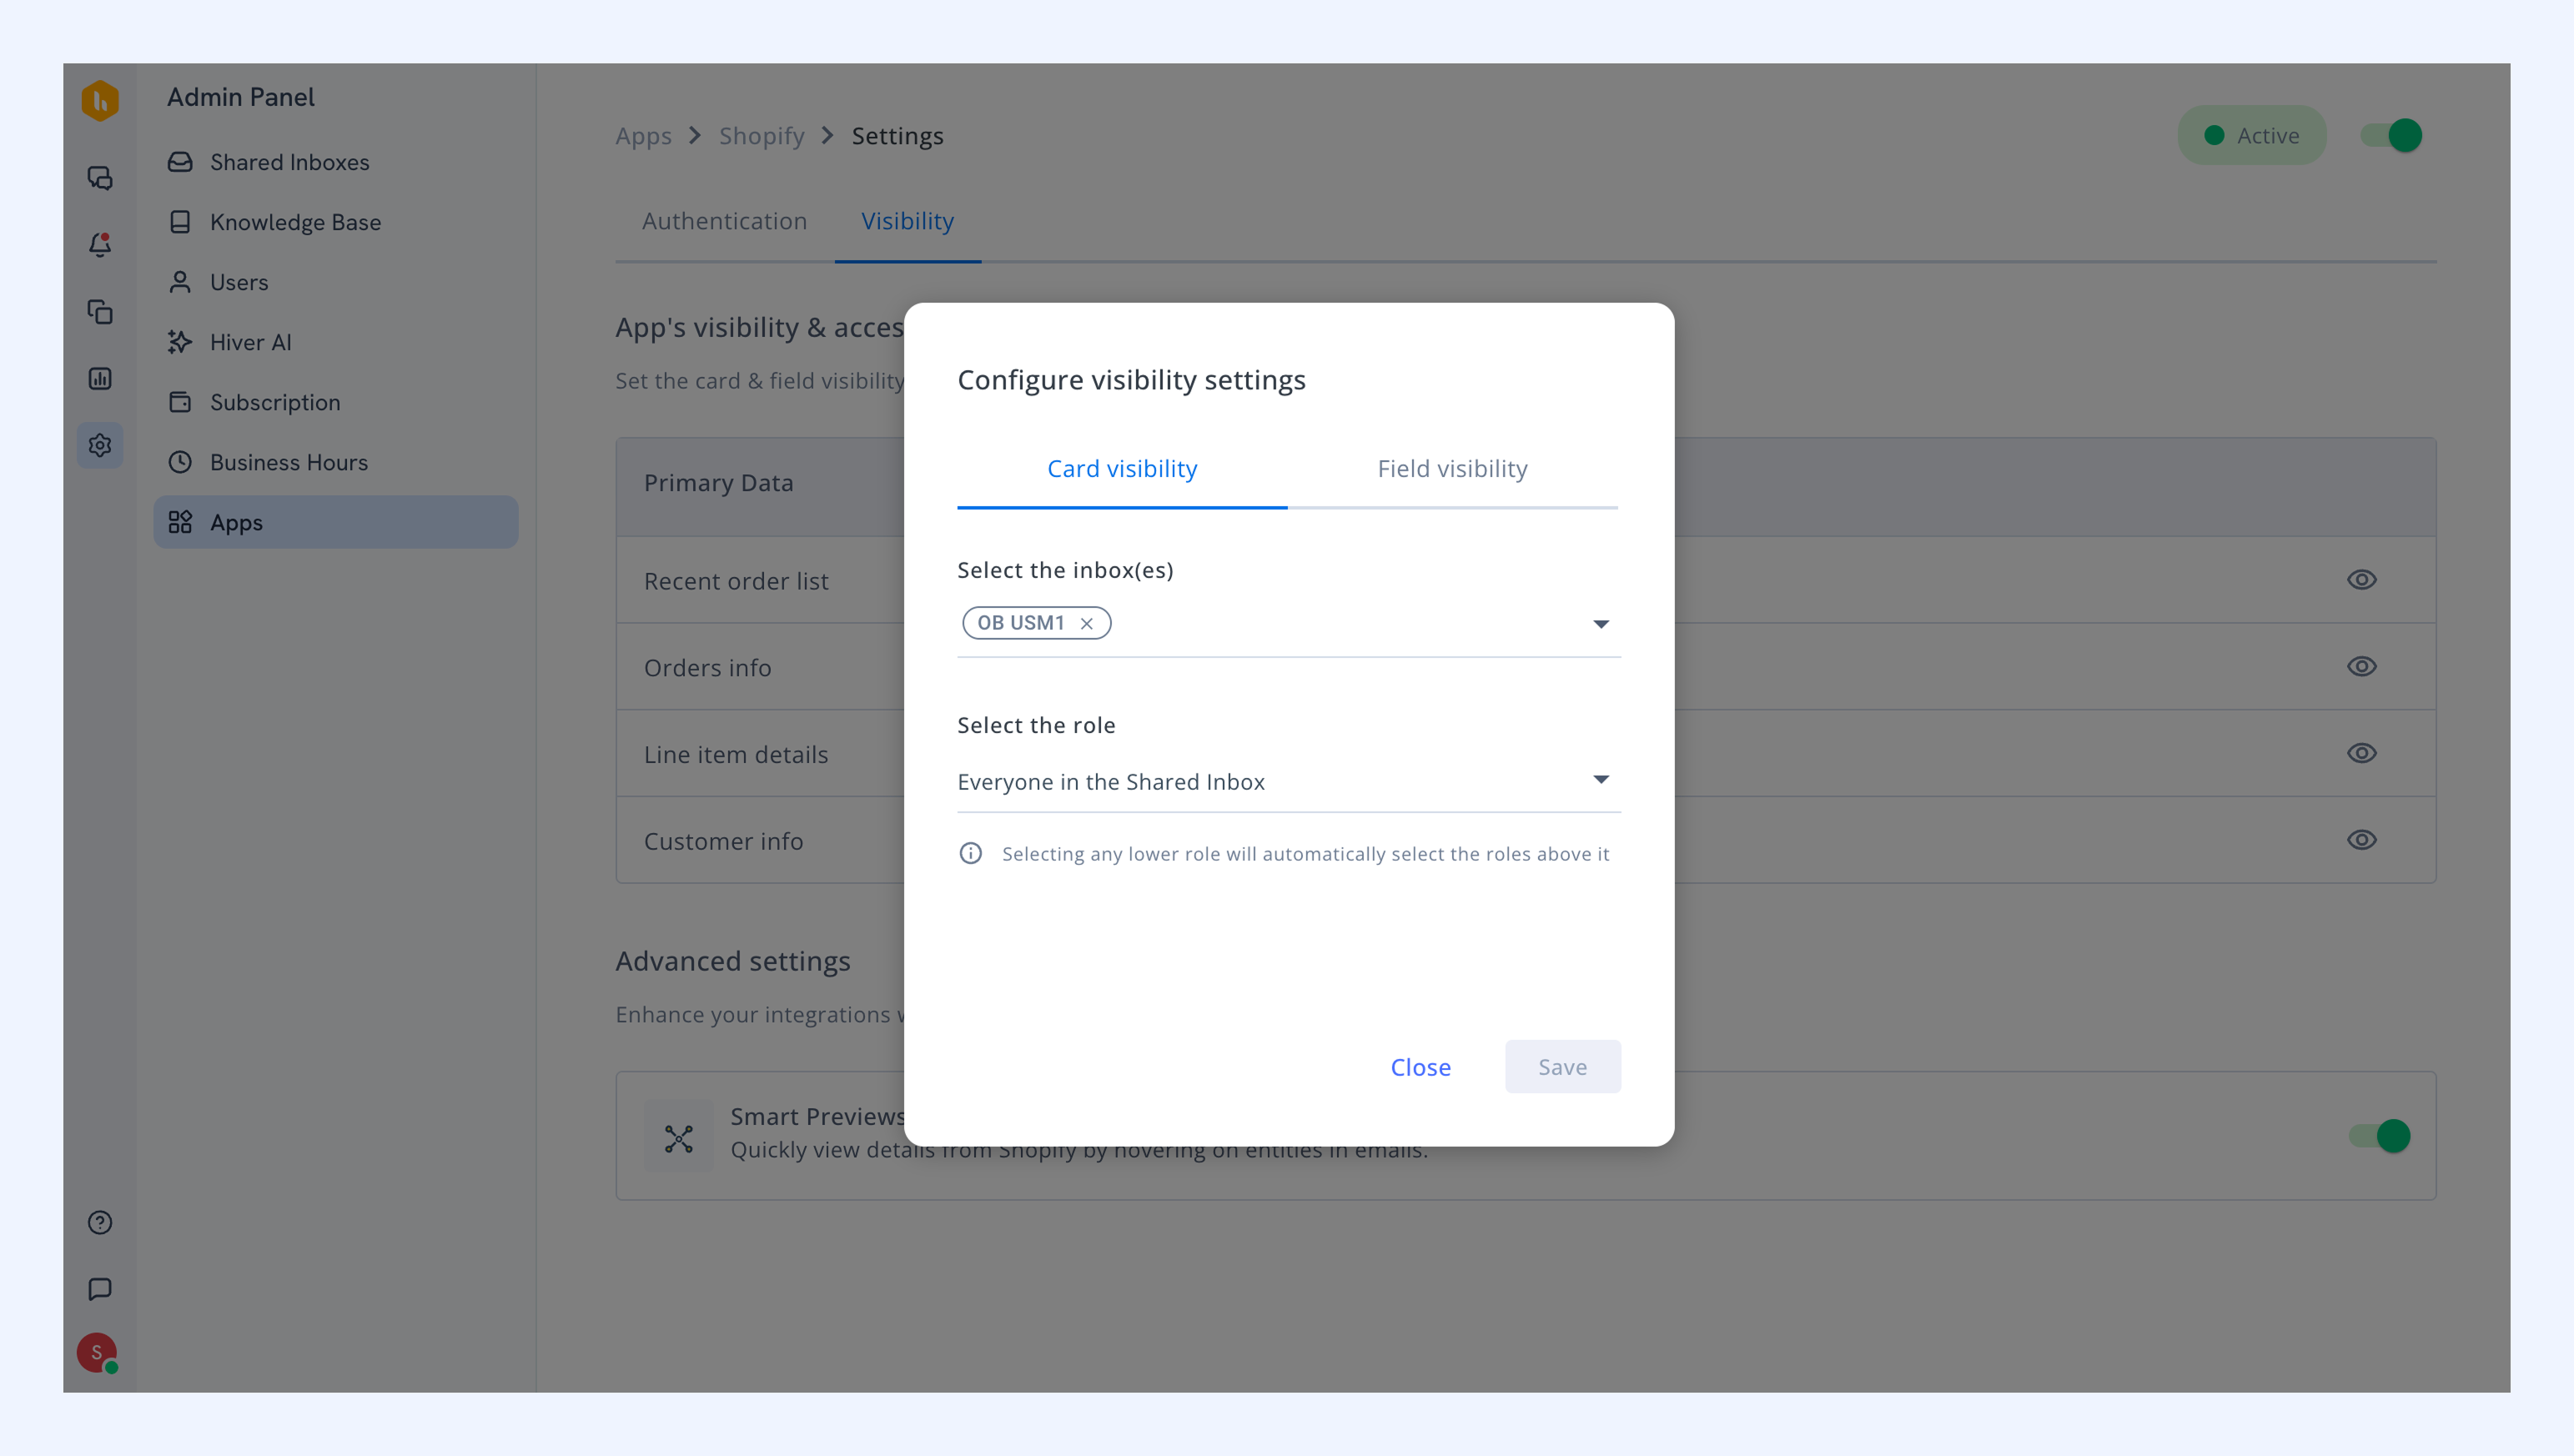
2. Click the eye icon to configure visibility settings.
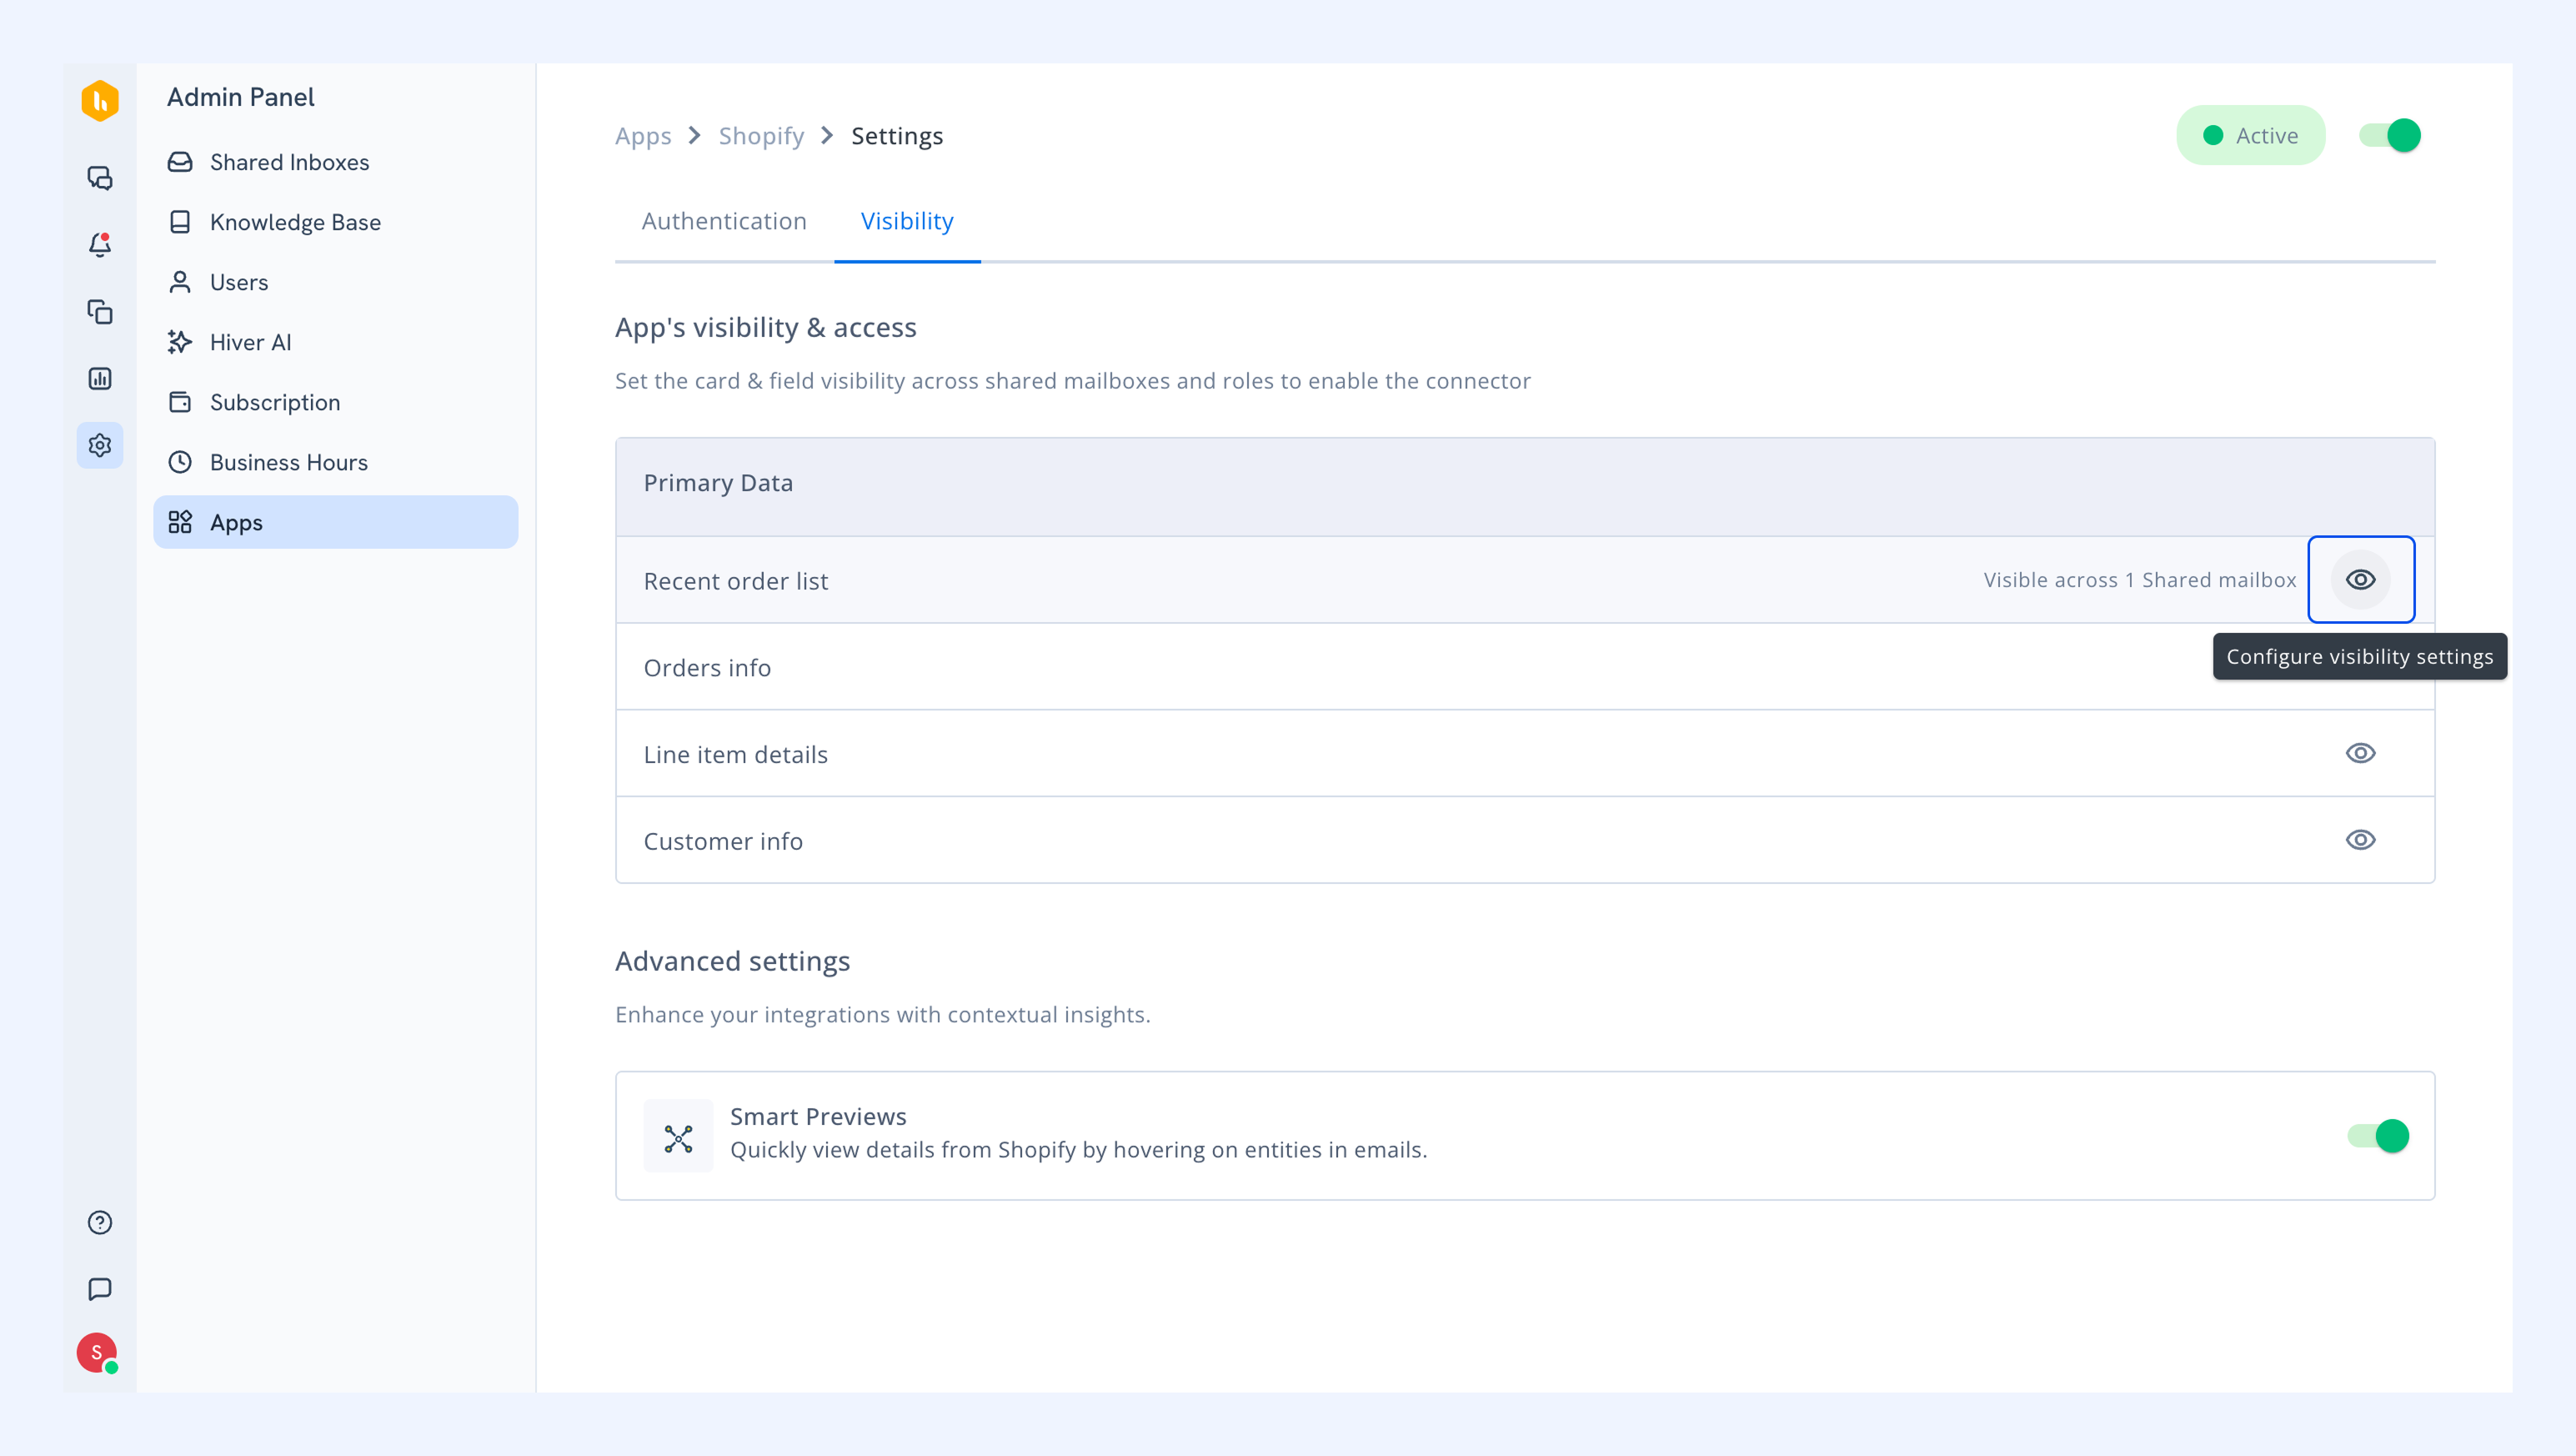
3. In Card visibility, select which Shared Inboxes and roles should see Shopify information cards.
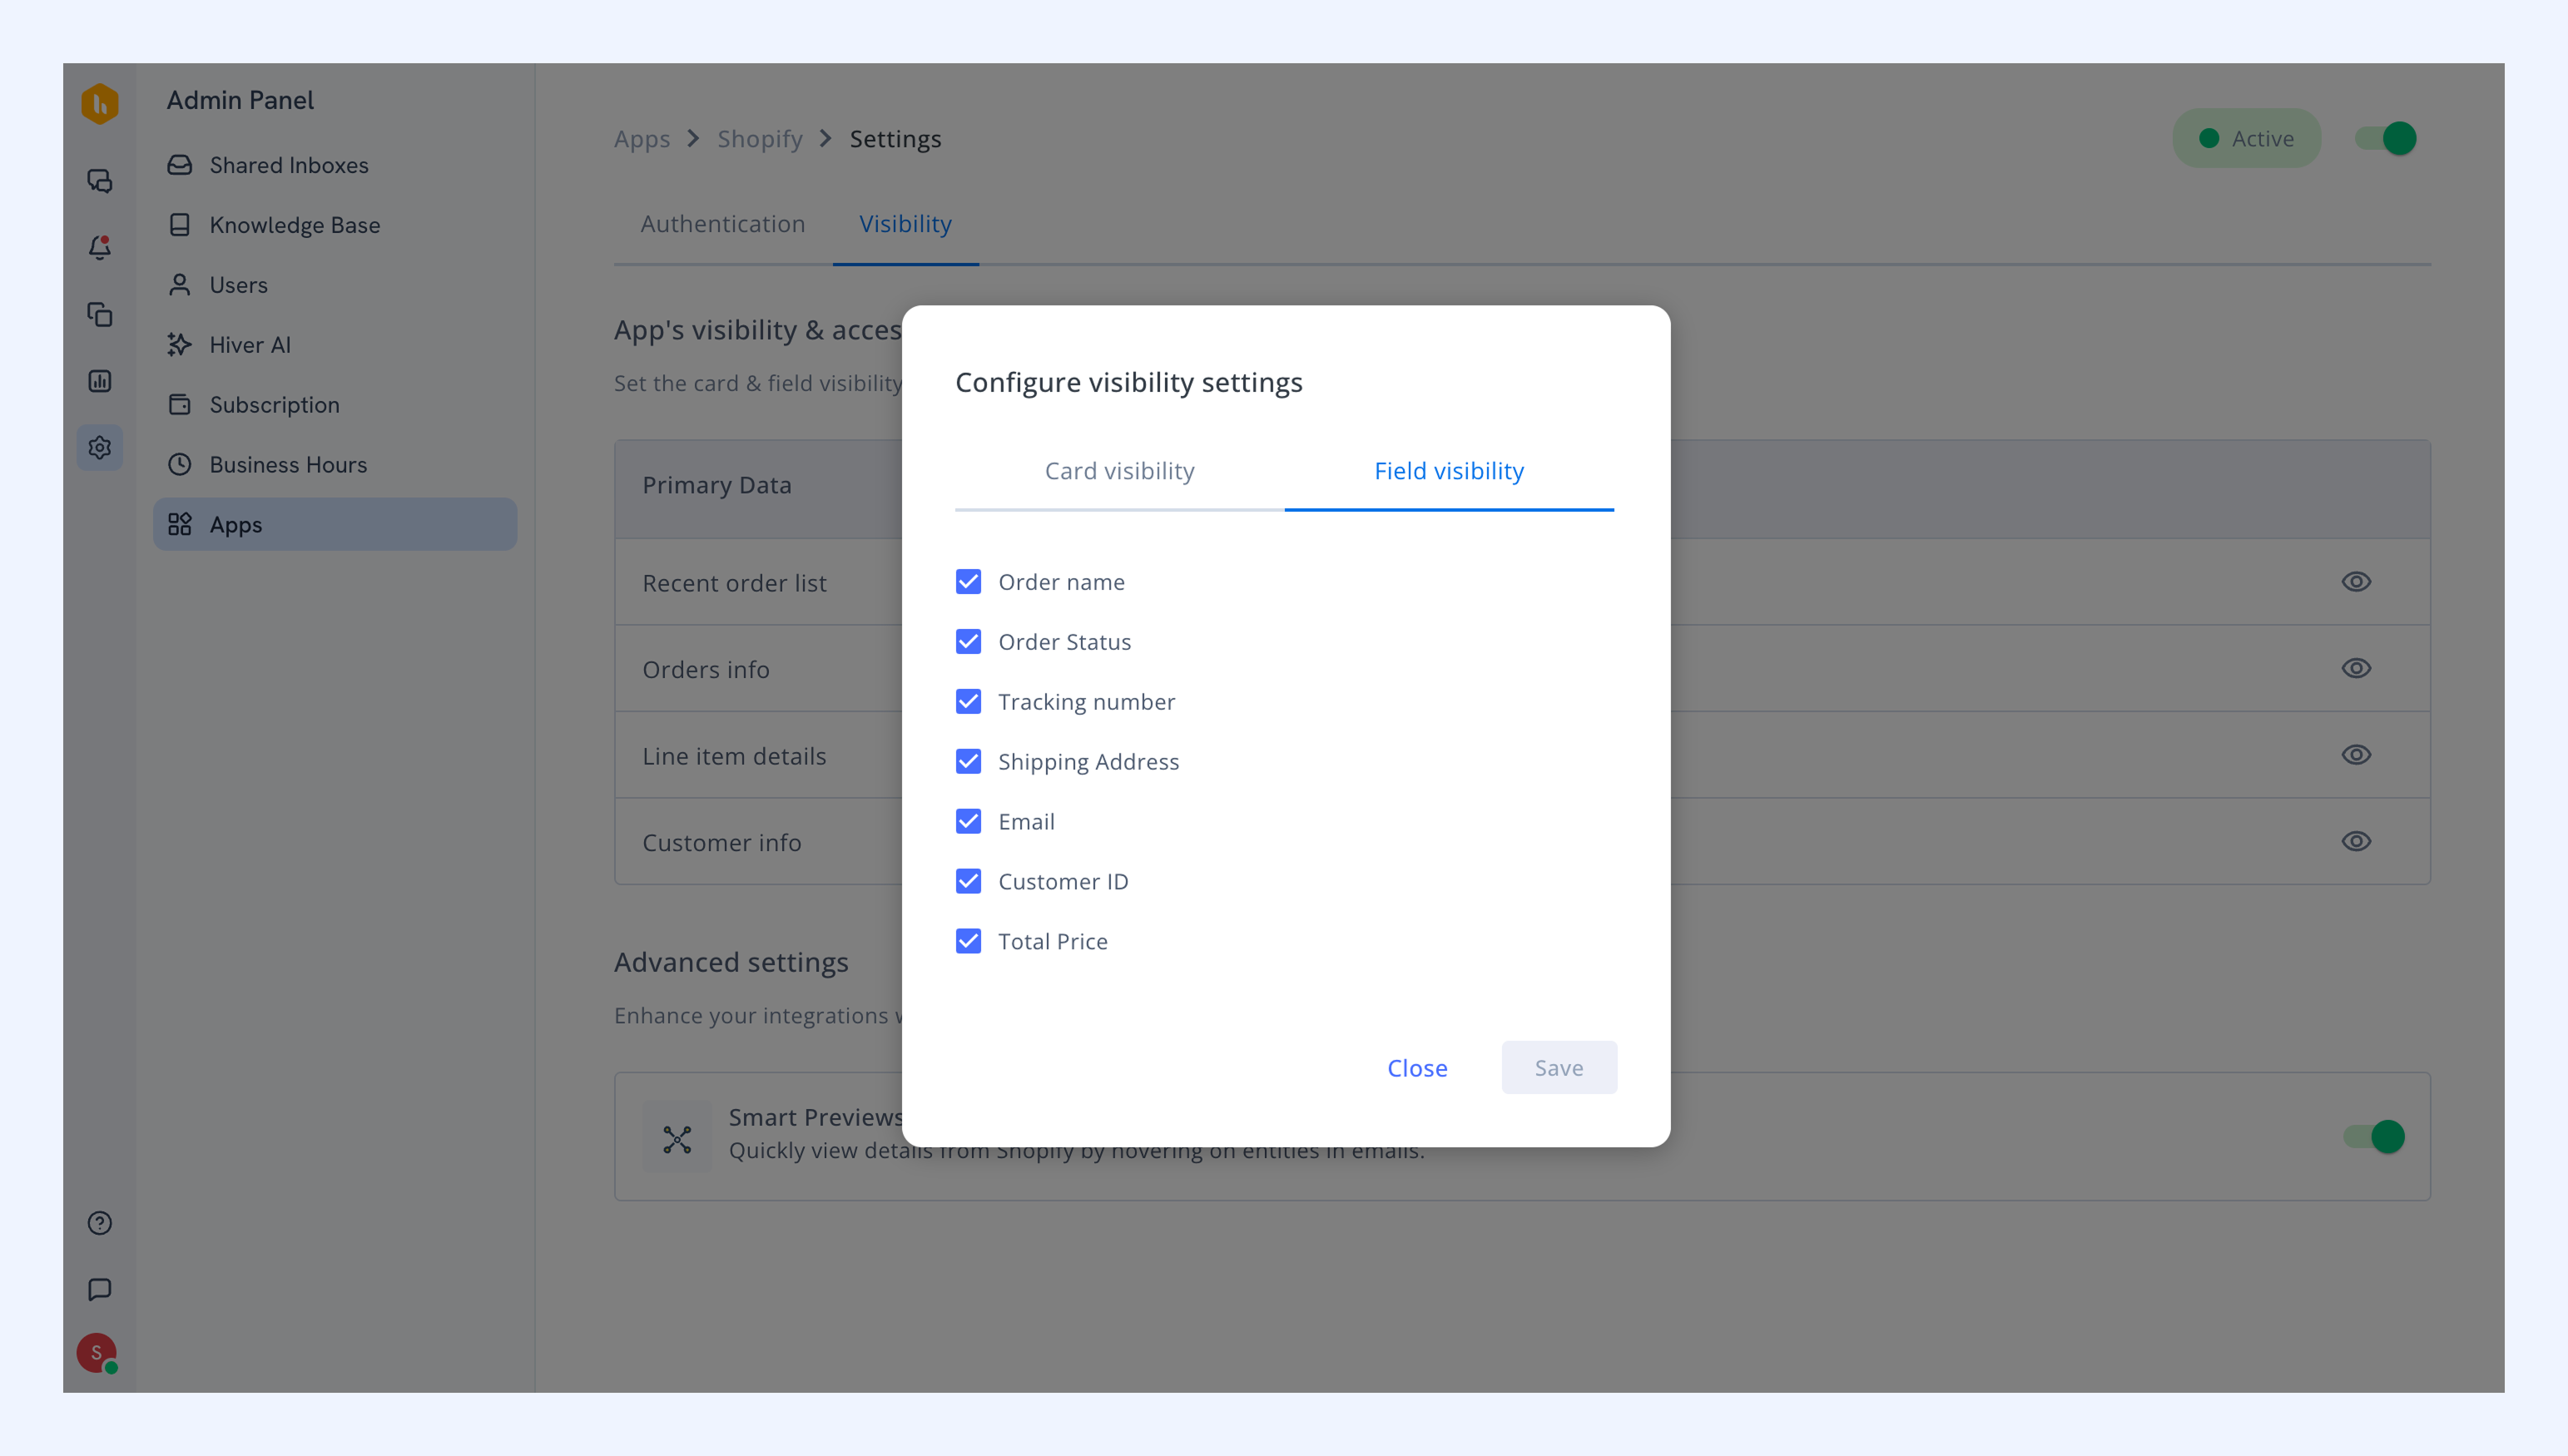
4. In Field visibility, choose which specific fields your team should see.
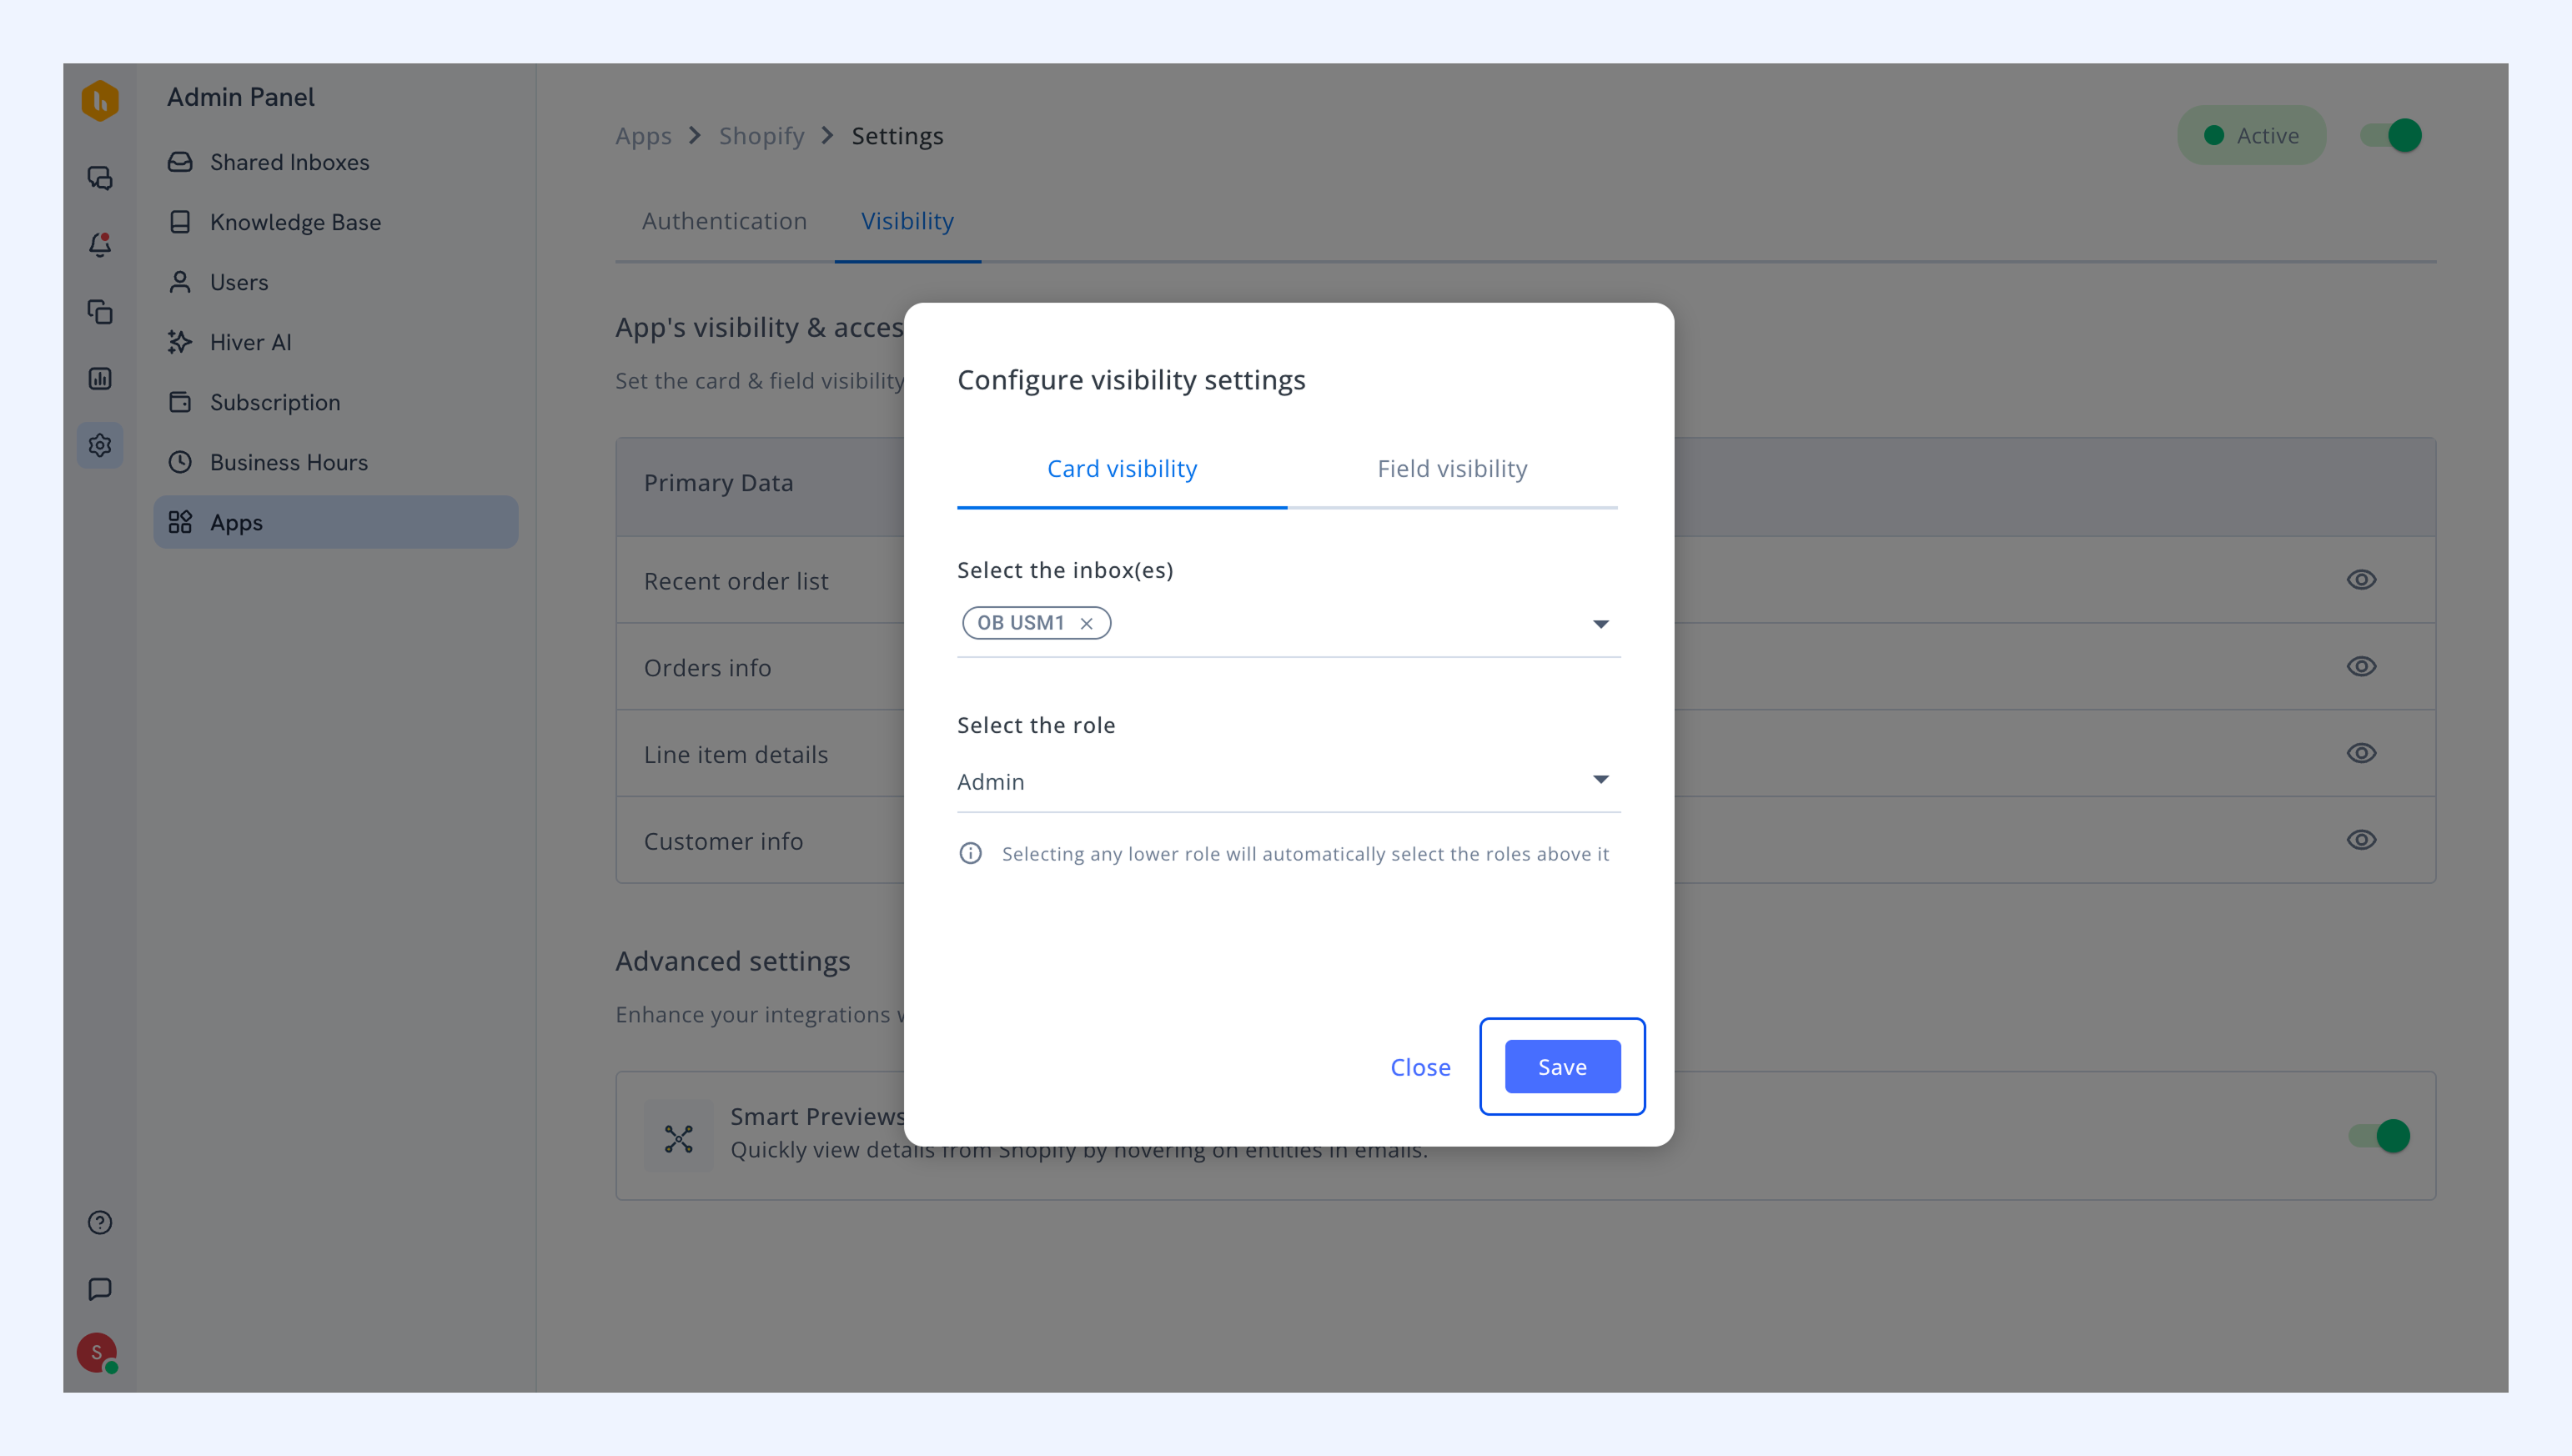
5. Click Save.
Connecting another Shopify store
If your team supports more than one Shopify store, you can connect each store to Hiver separately.
Note: Each store needs its own custom app in Shopify, so create the custom app for the new store before you start.
1. Go to Admin Panel → Apps and select Shopify.
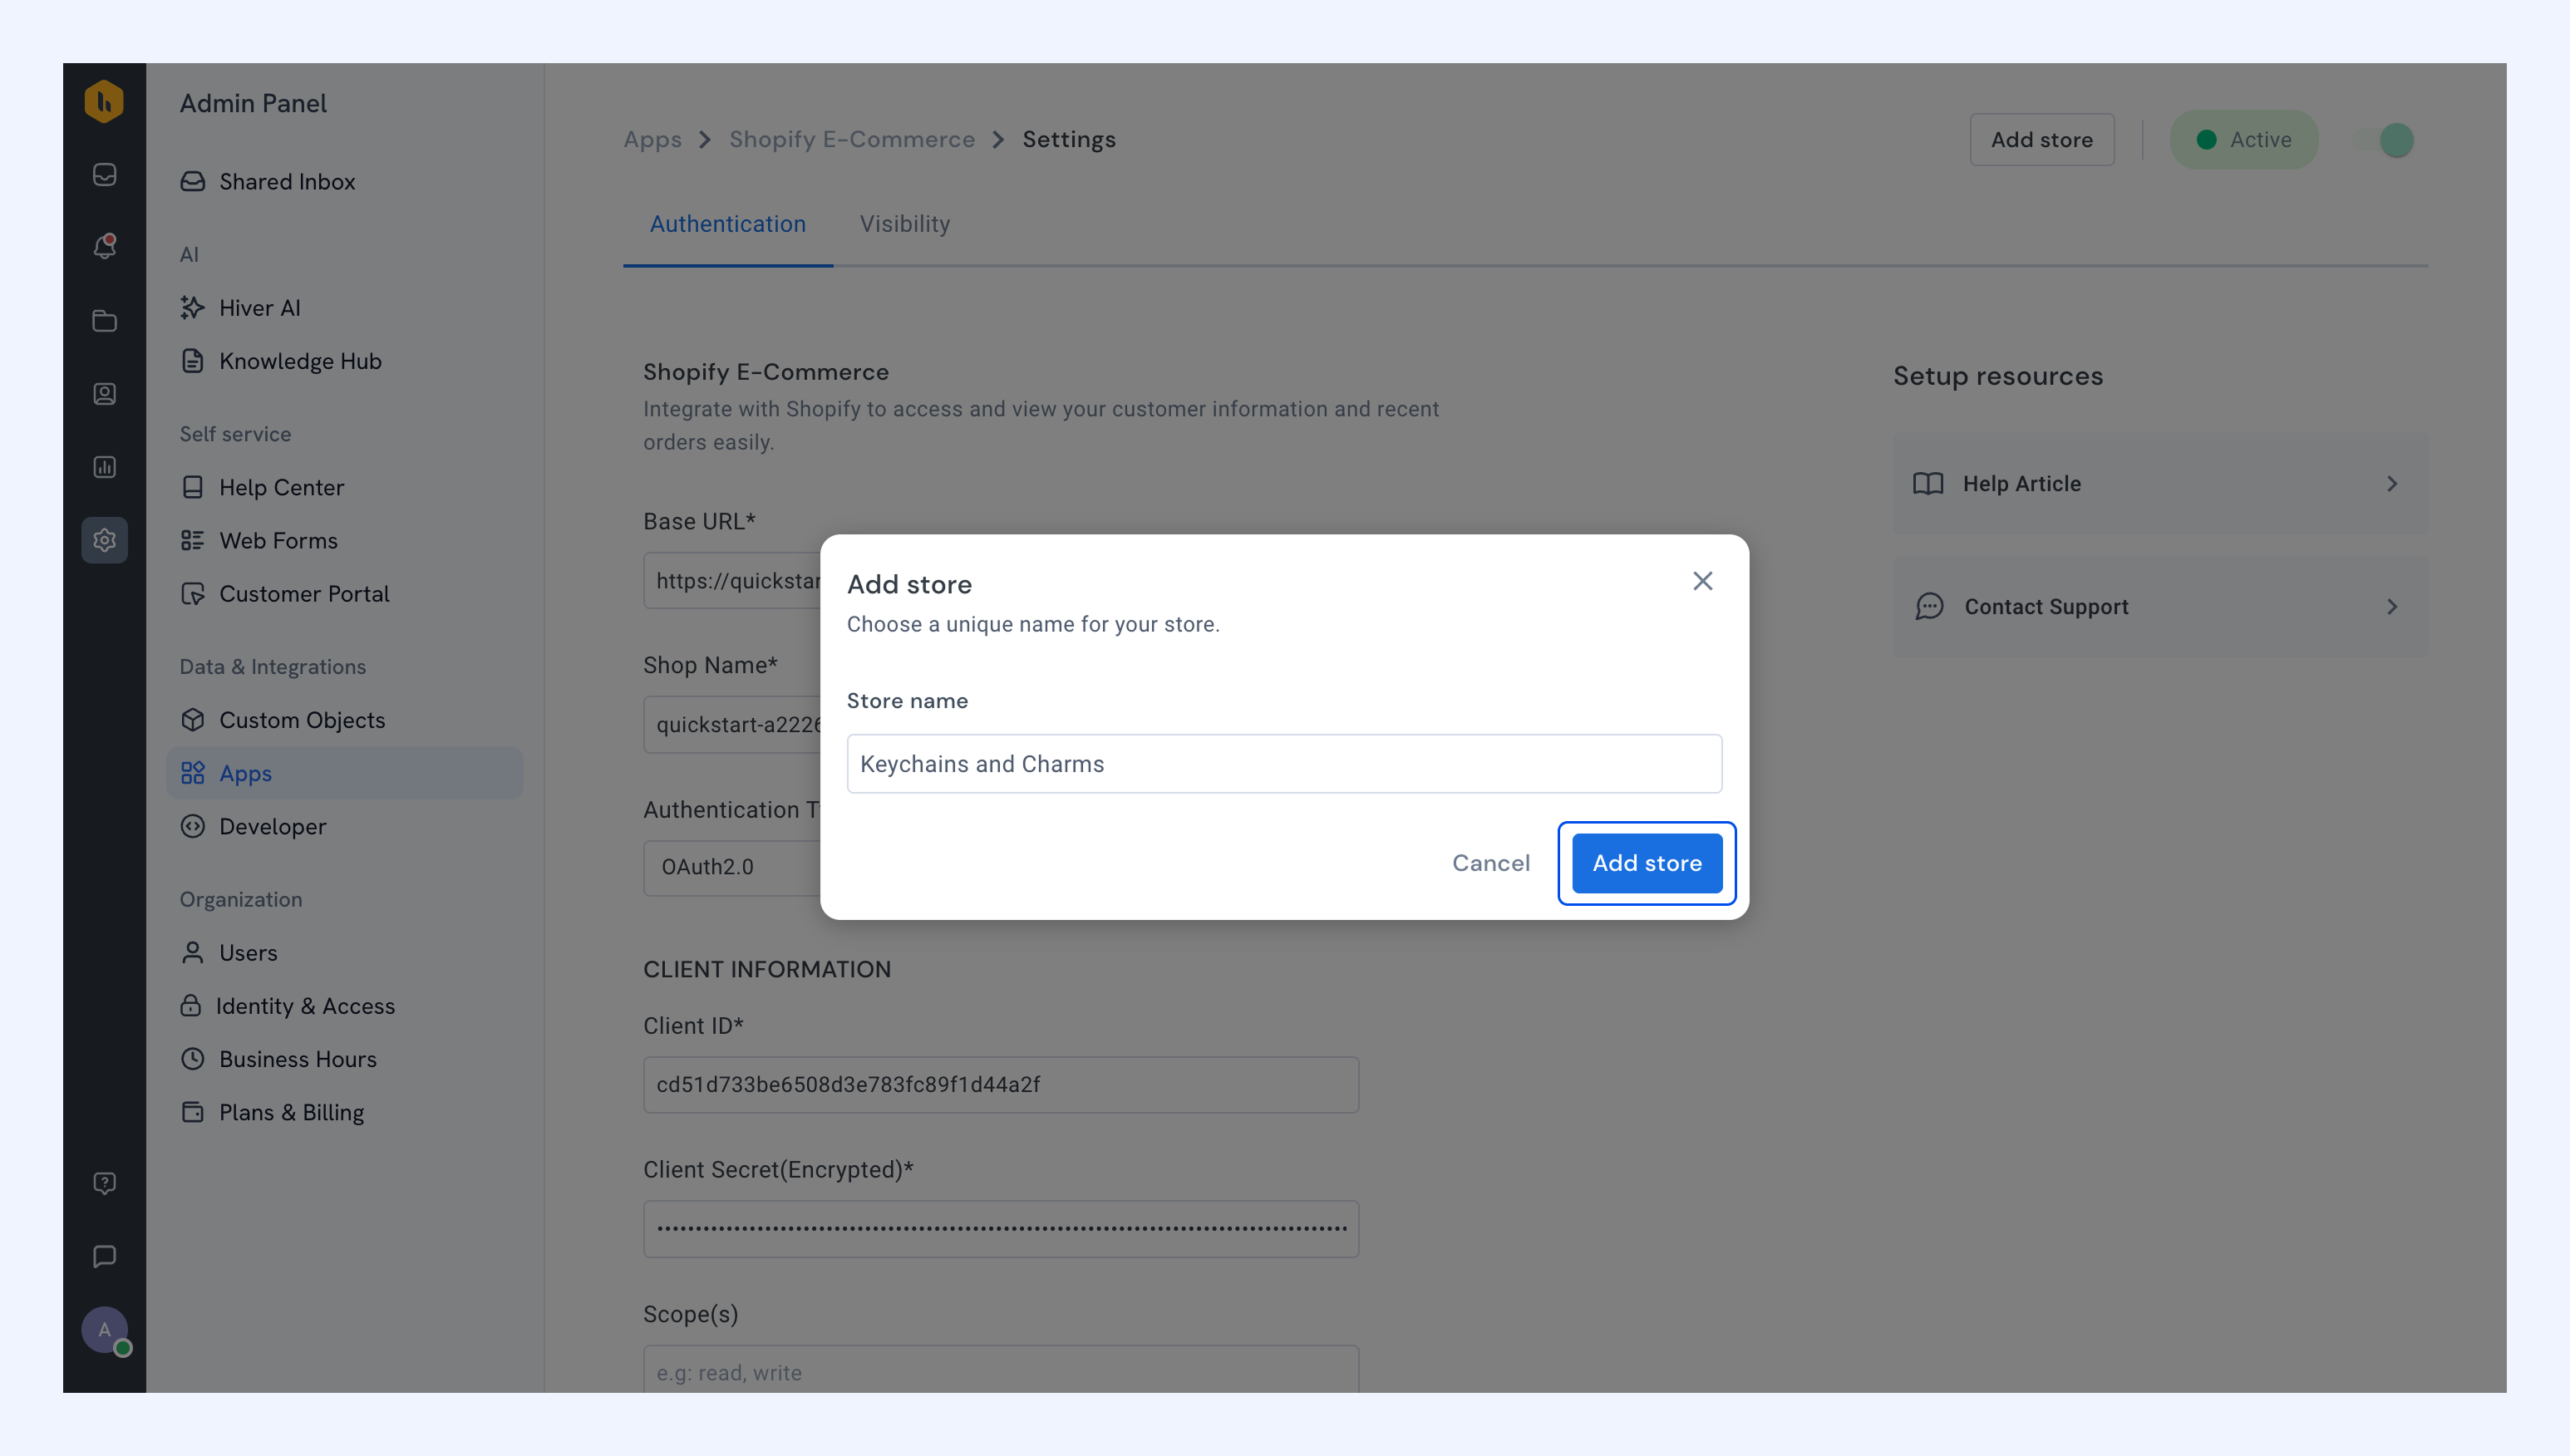
2. Click Add store.
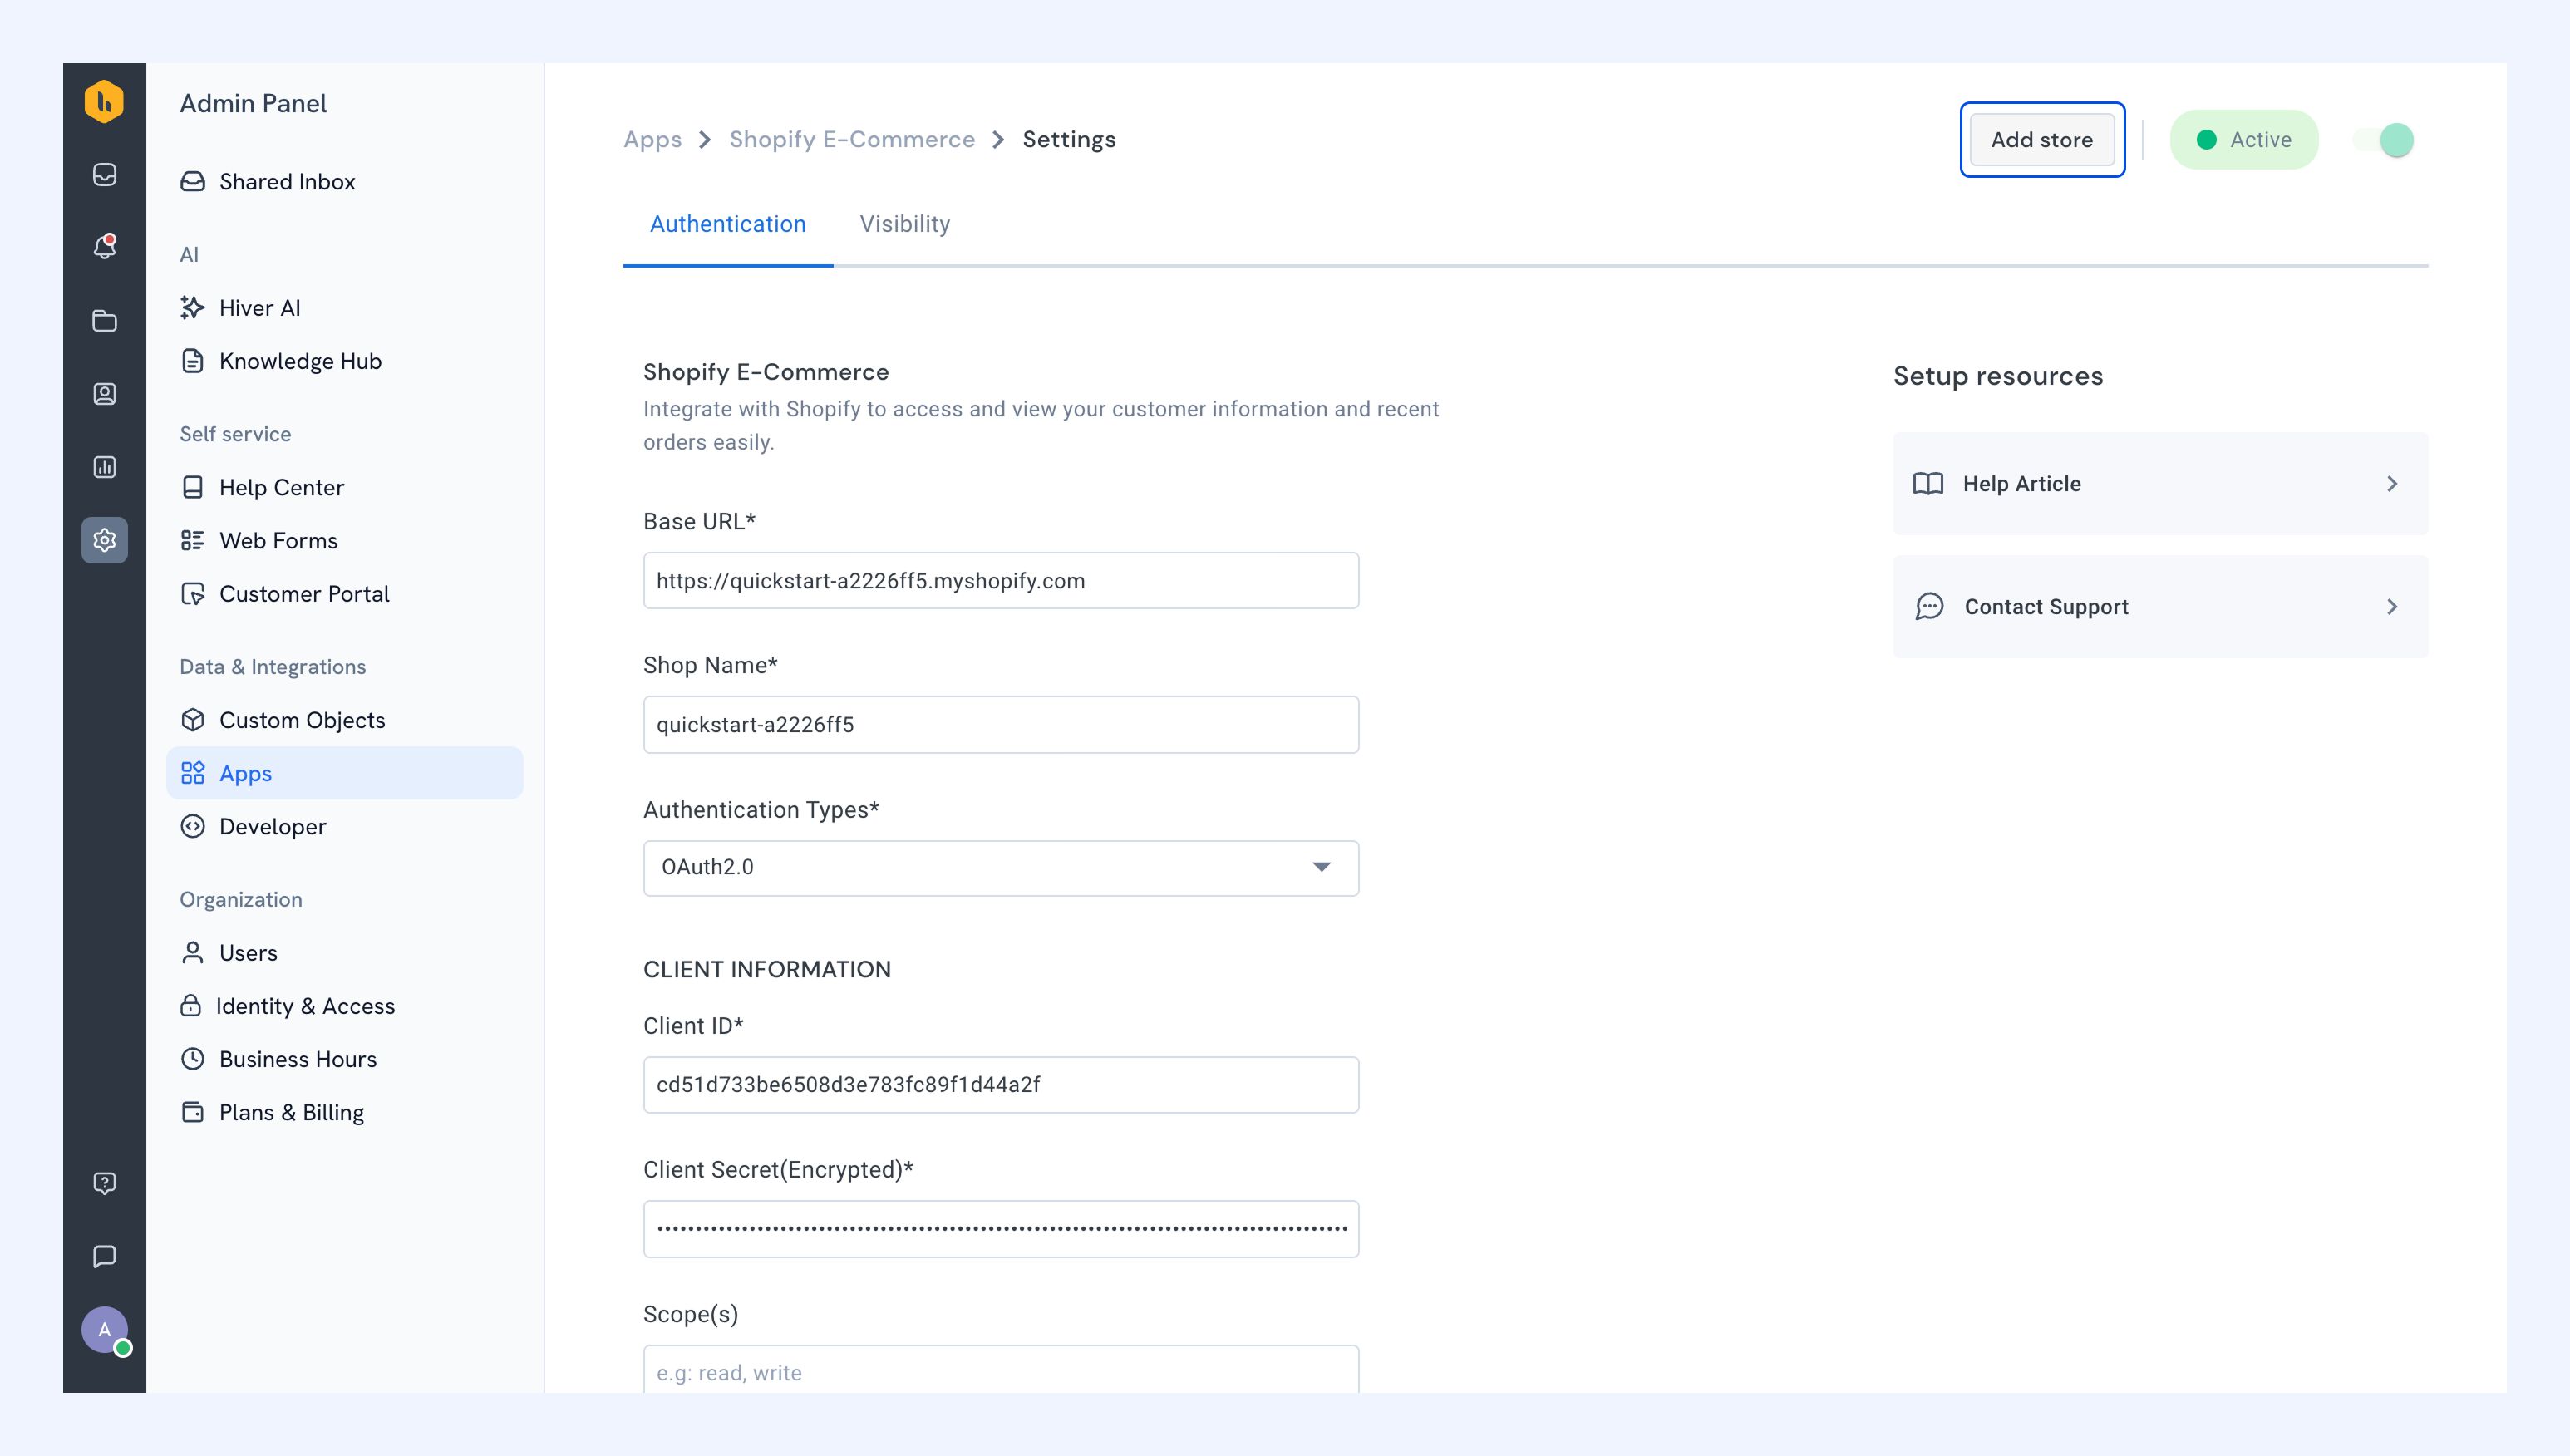
3. Enter a unique name for the store, then click Add store.
4. Go back to Apps and click on the new store to open its settings.
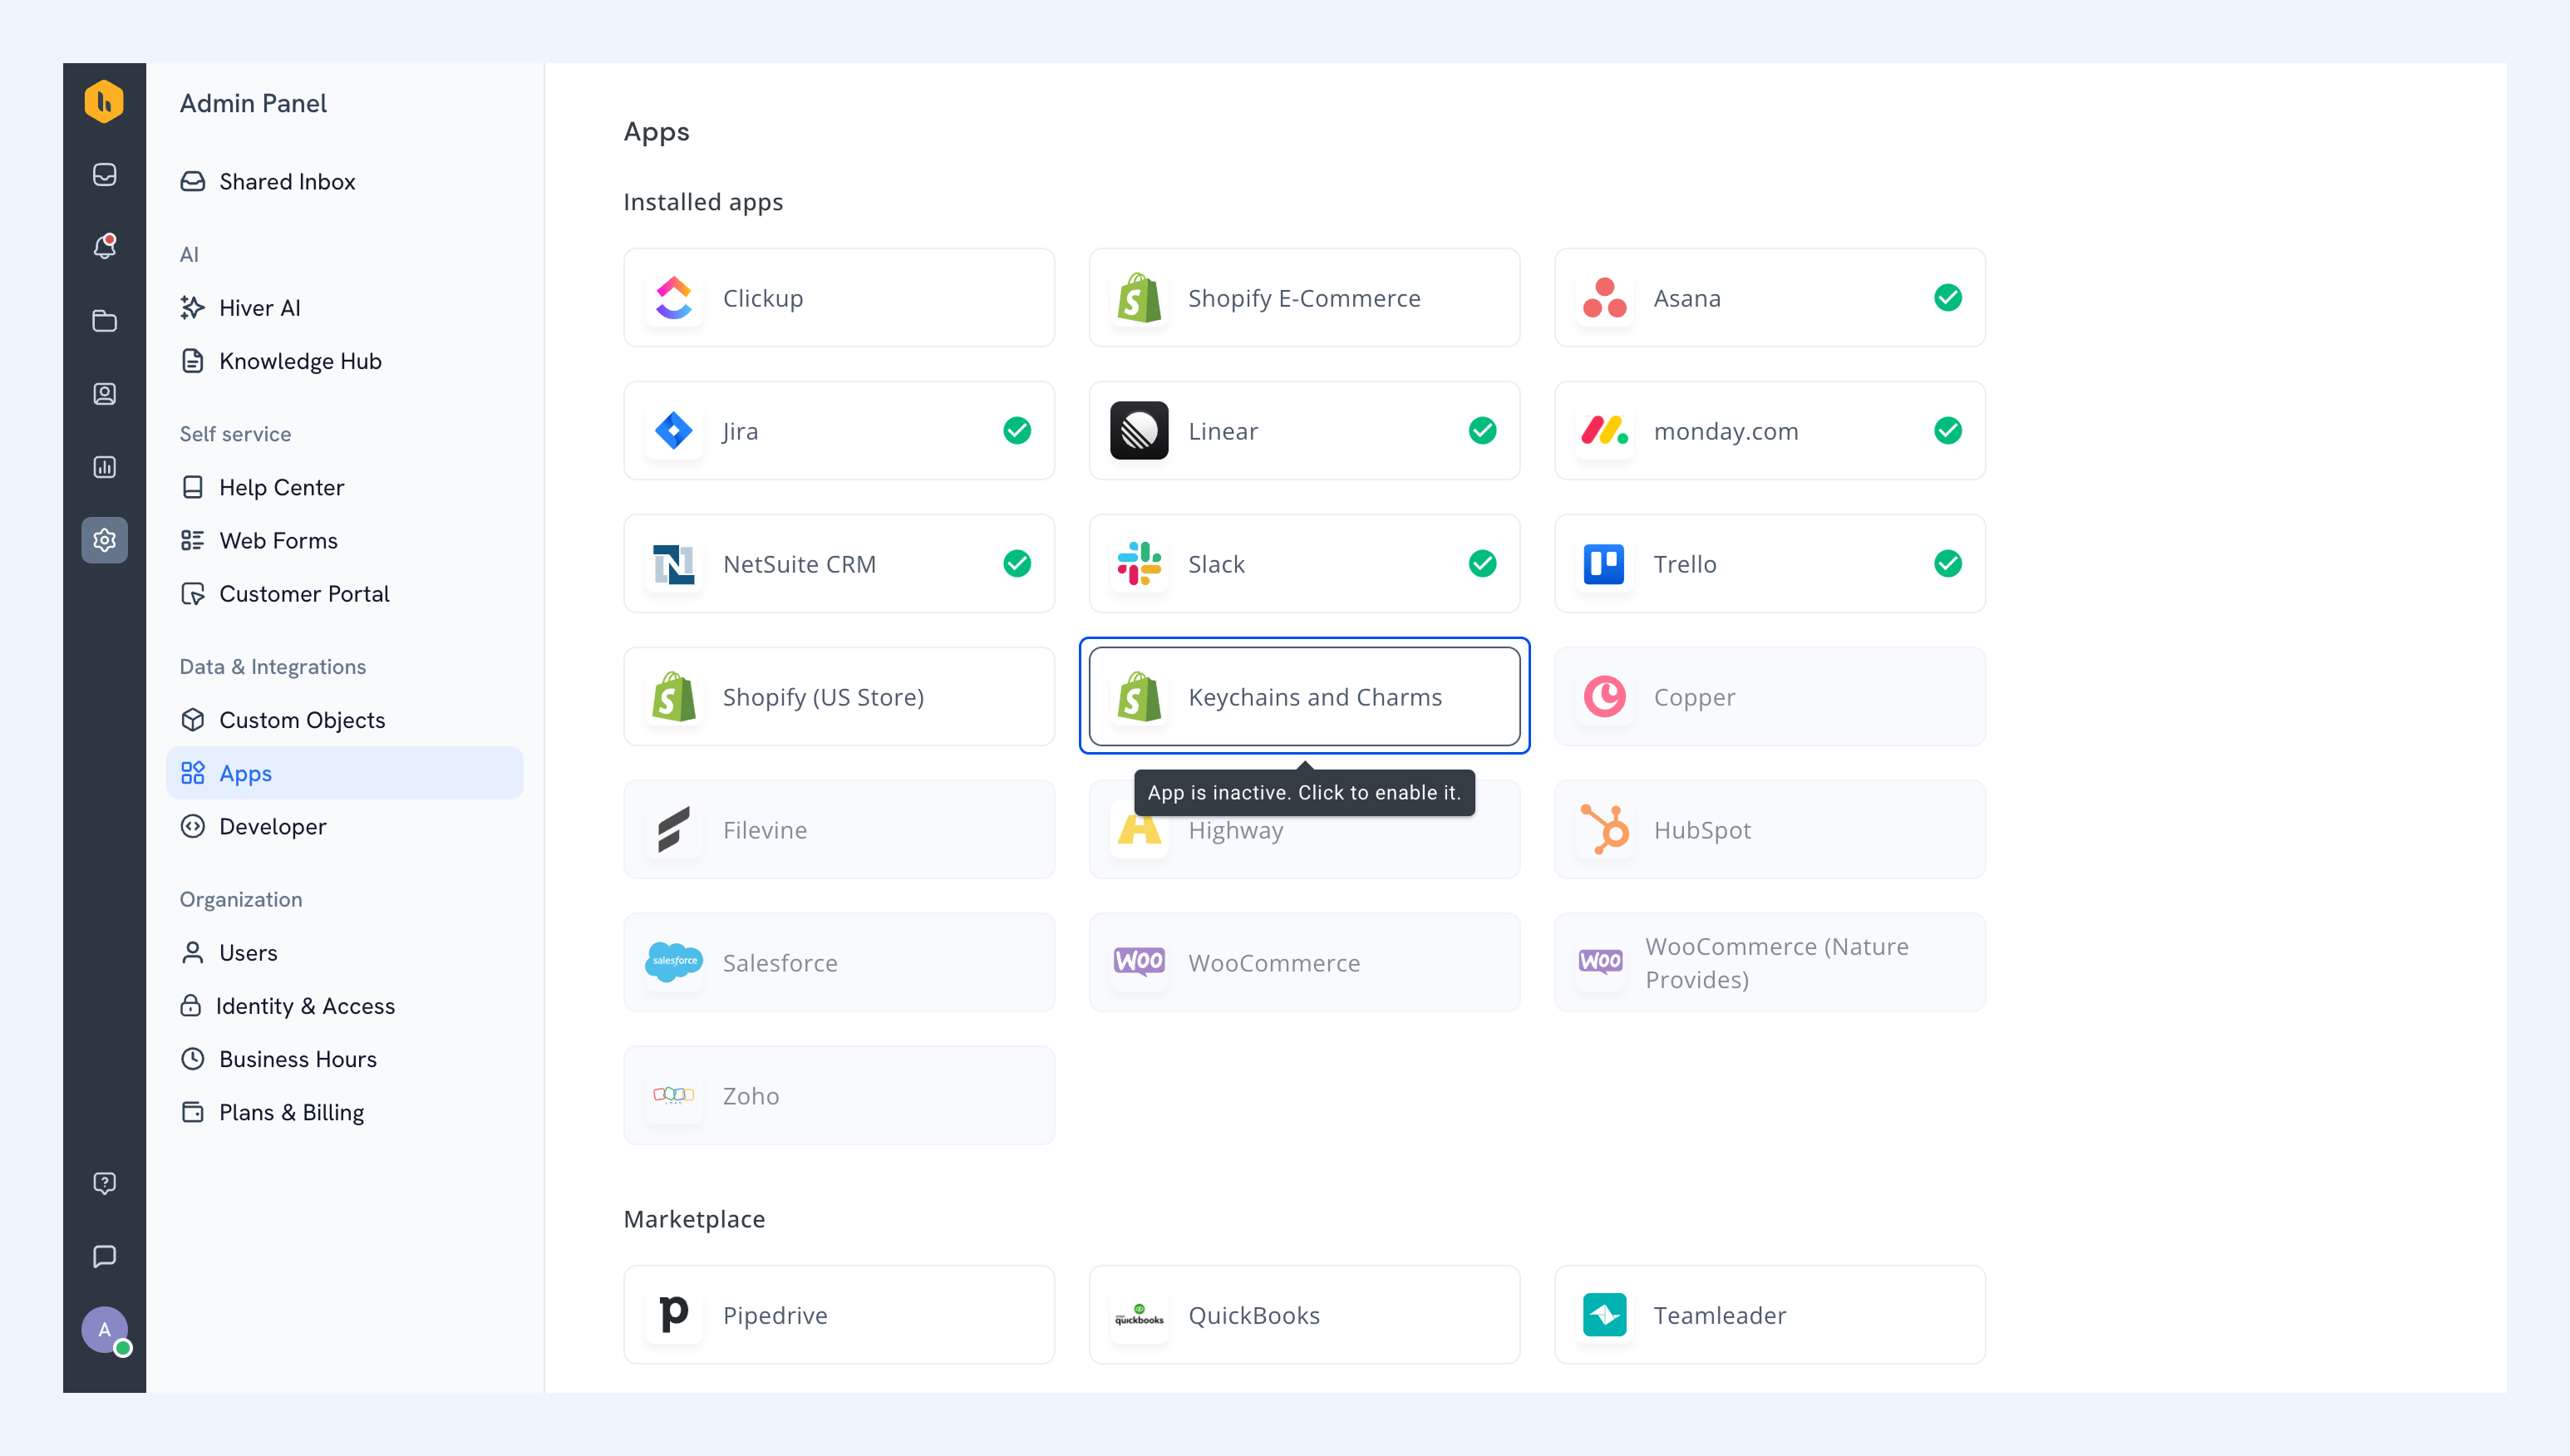
5. From here you can fill in the Base URL, Shop Name, Client ID, and Client Secret to authenticate the store. Next, you can choose which Shared Inboxes and roles can access the store from Visibility.
The new Shopify store is now connected alongside the ones you've already added, and it's available to the Shared Inboxes and roles you selected.
Note: Each Shopify store is a separate app in Hiver with its own authentication and visibility settings, so you can make different stores available to different Shared Inboxes.
Using the Shopify integration
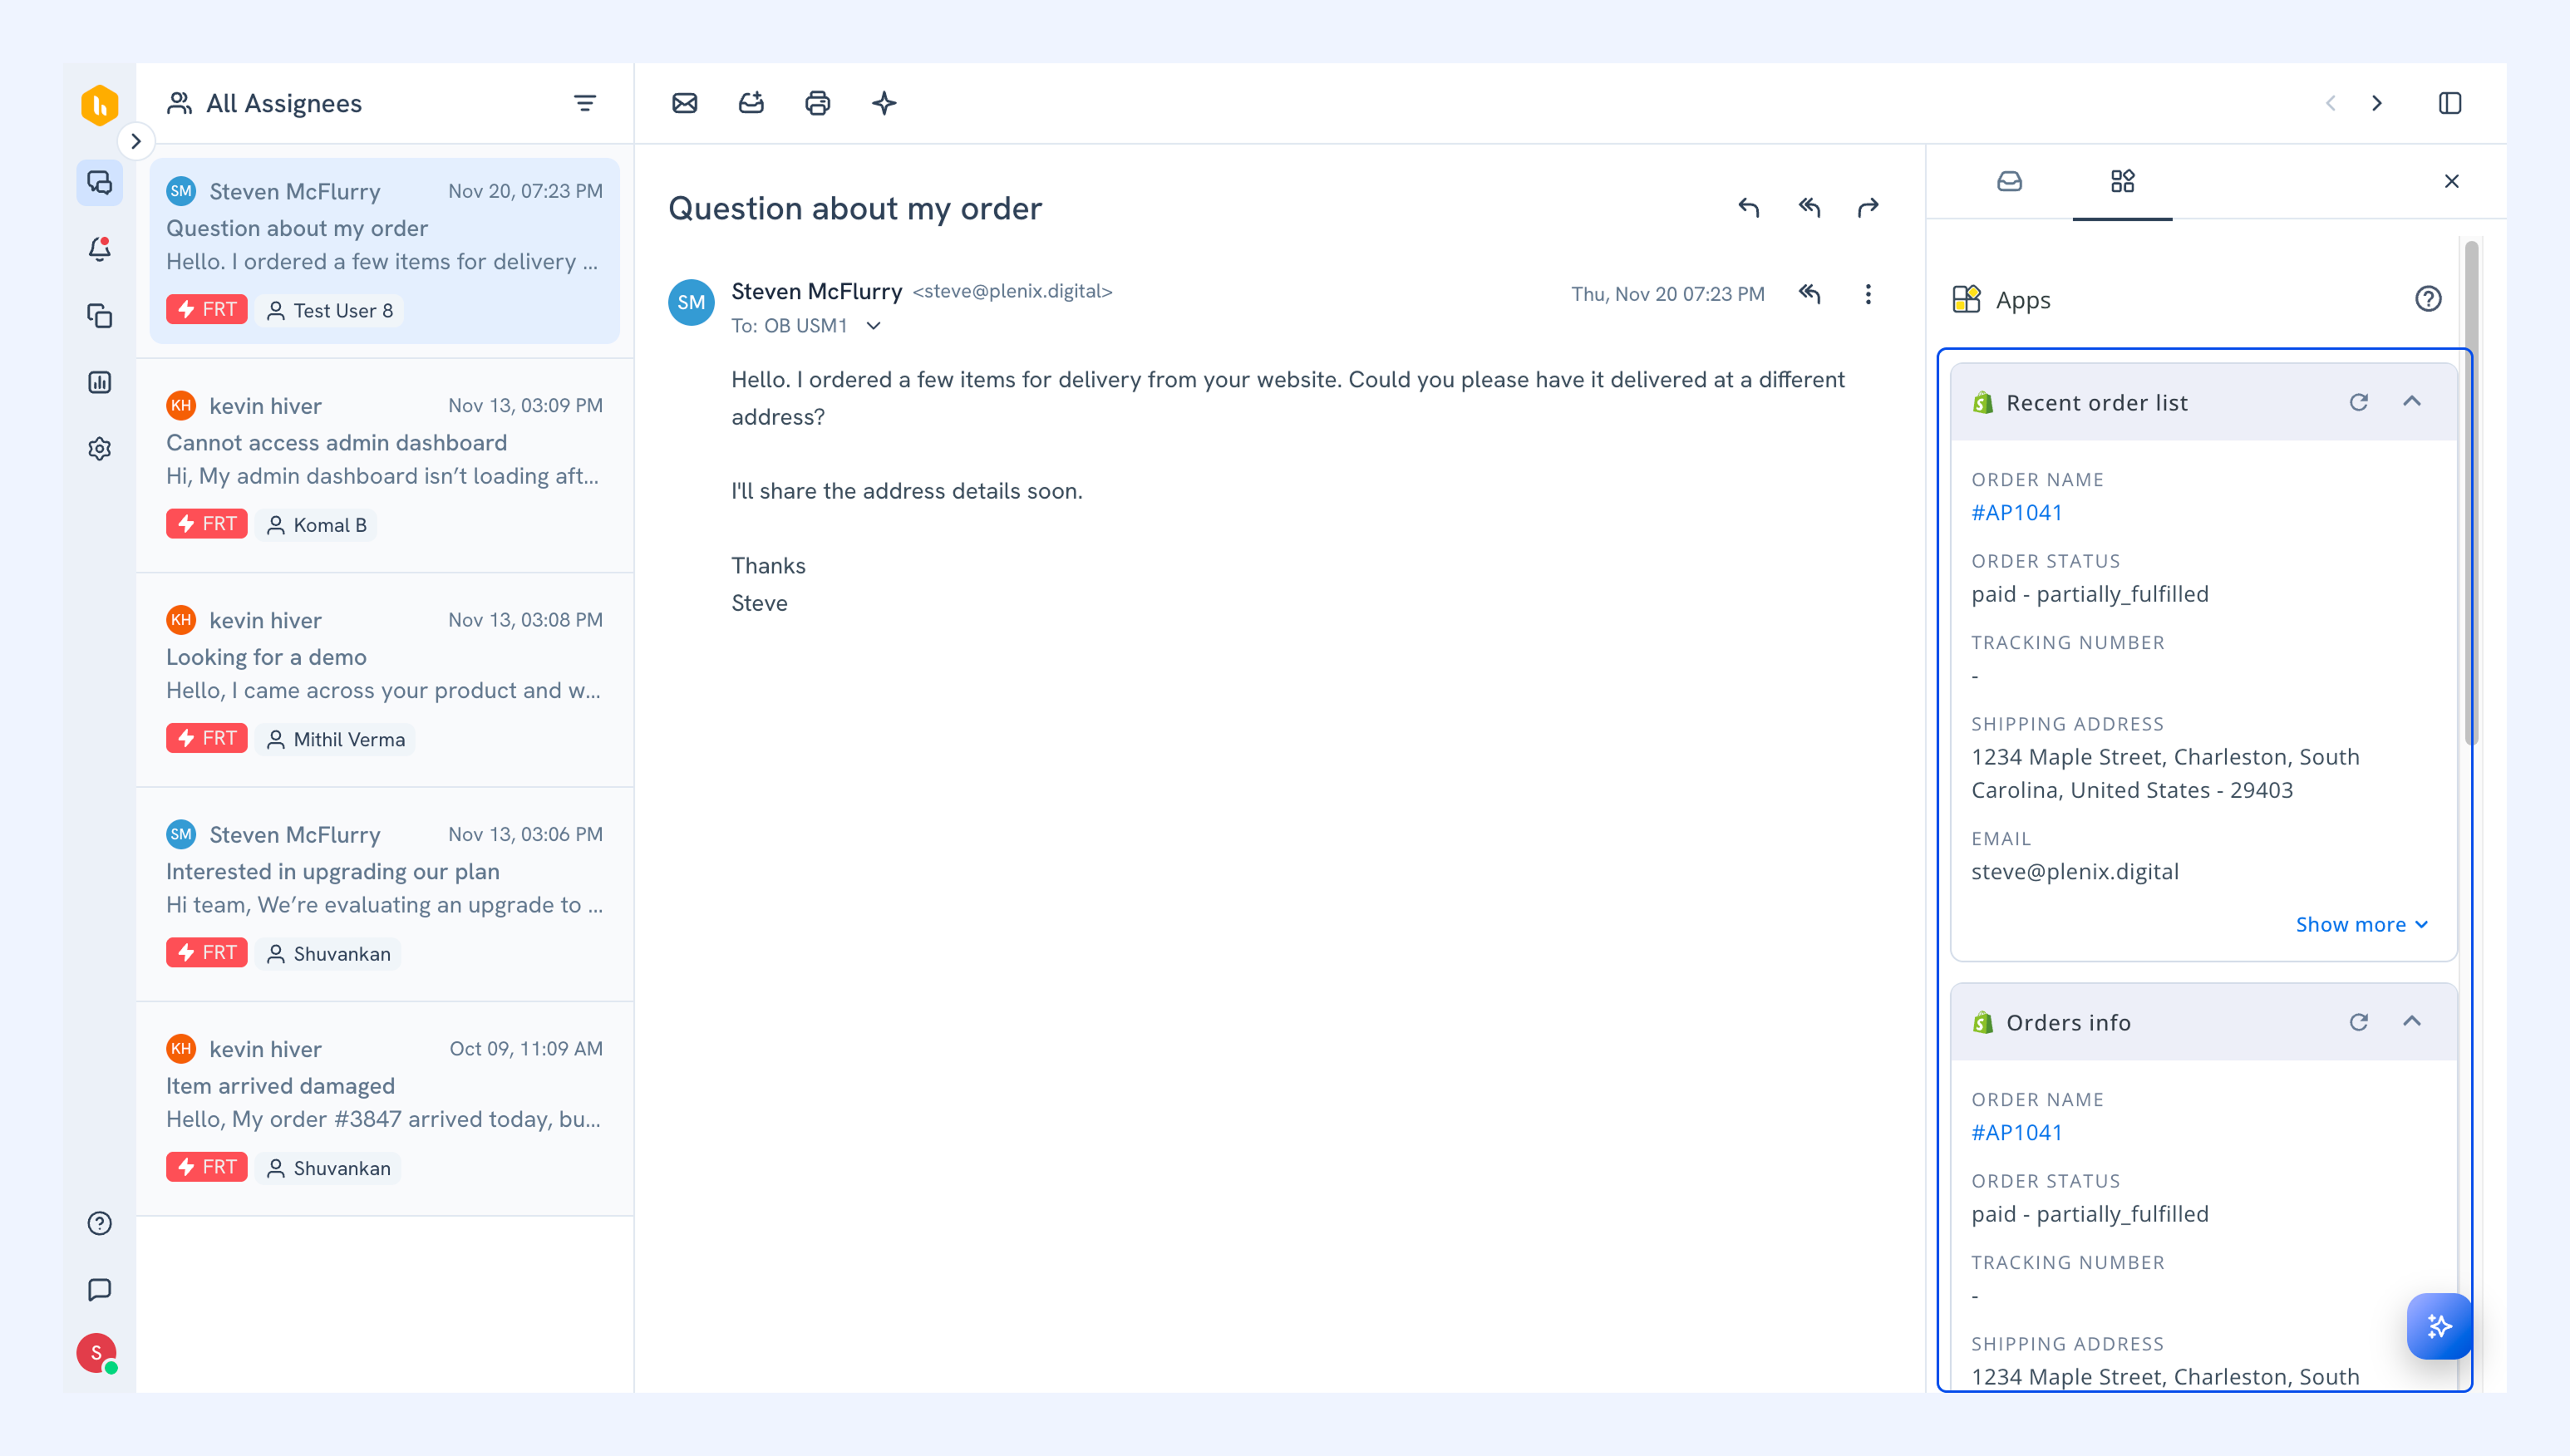
Once setup is complete, your team can access Shopify information directly within Hiver in the Apps tab.
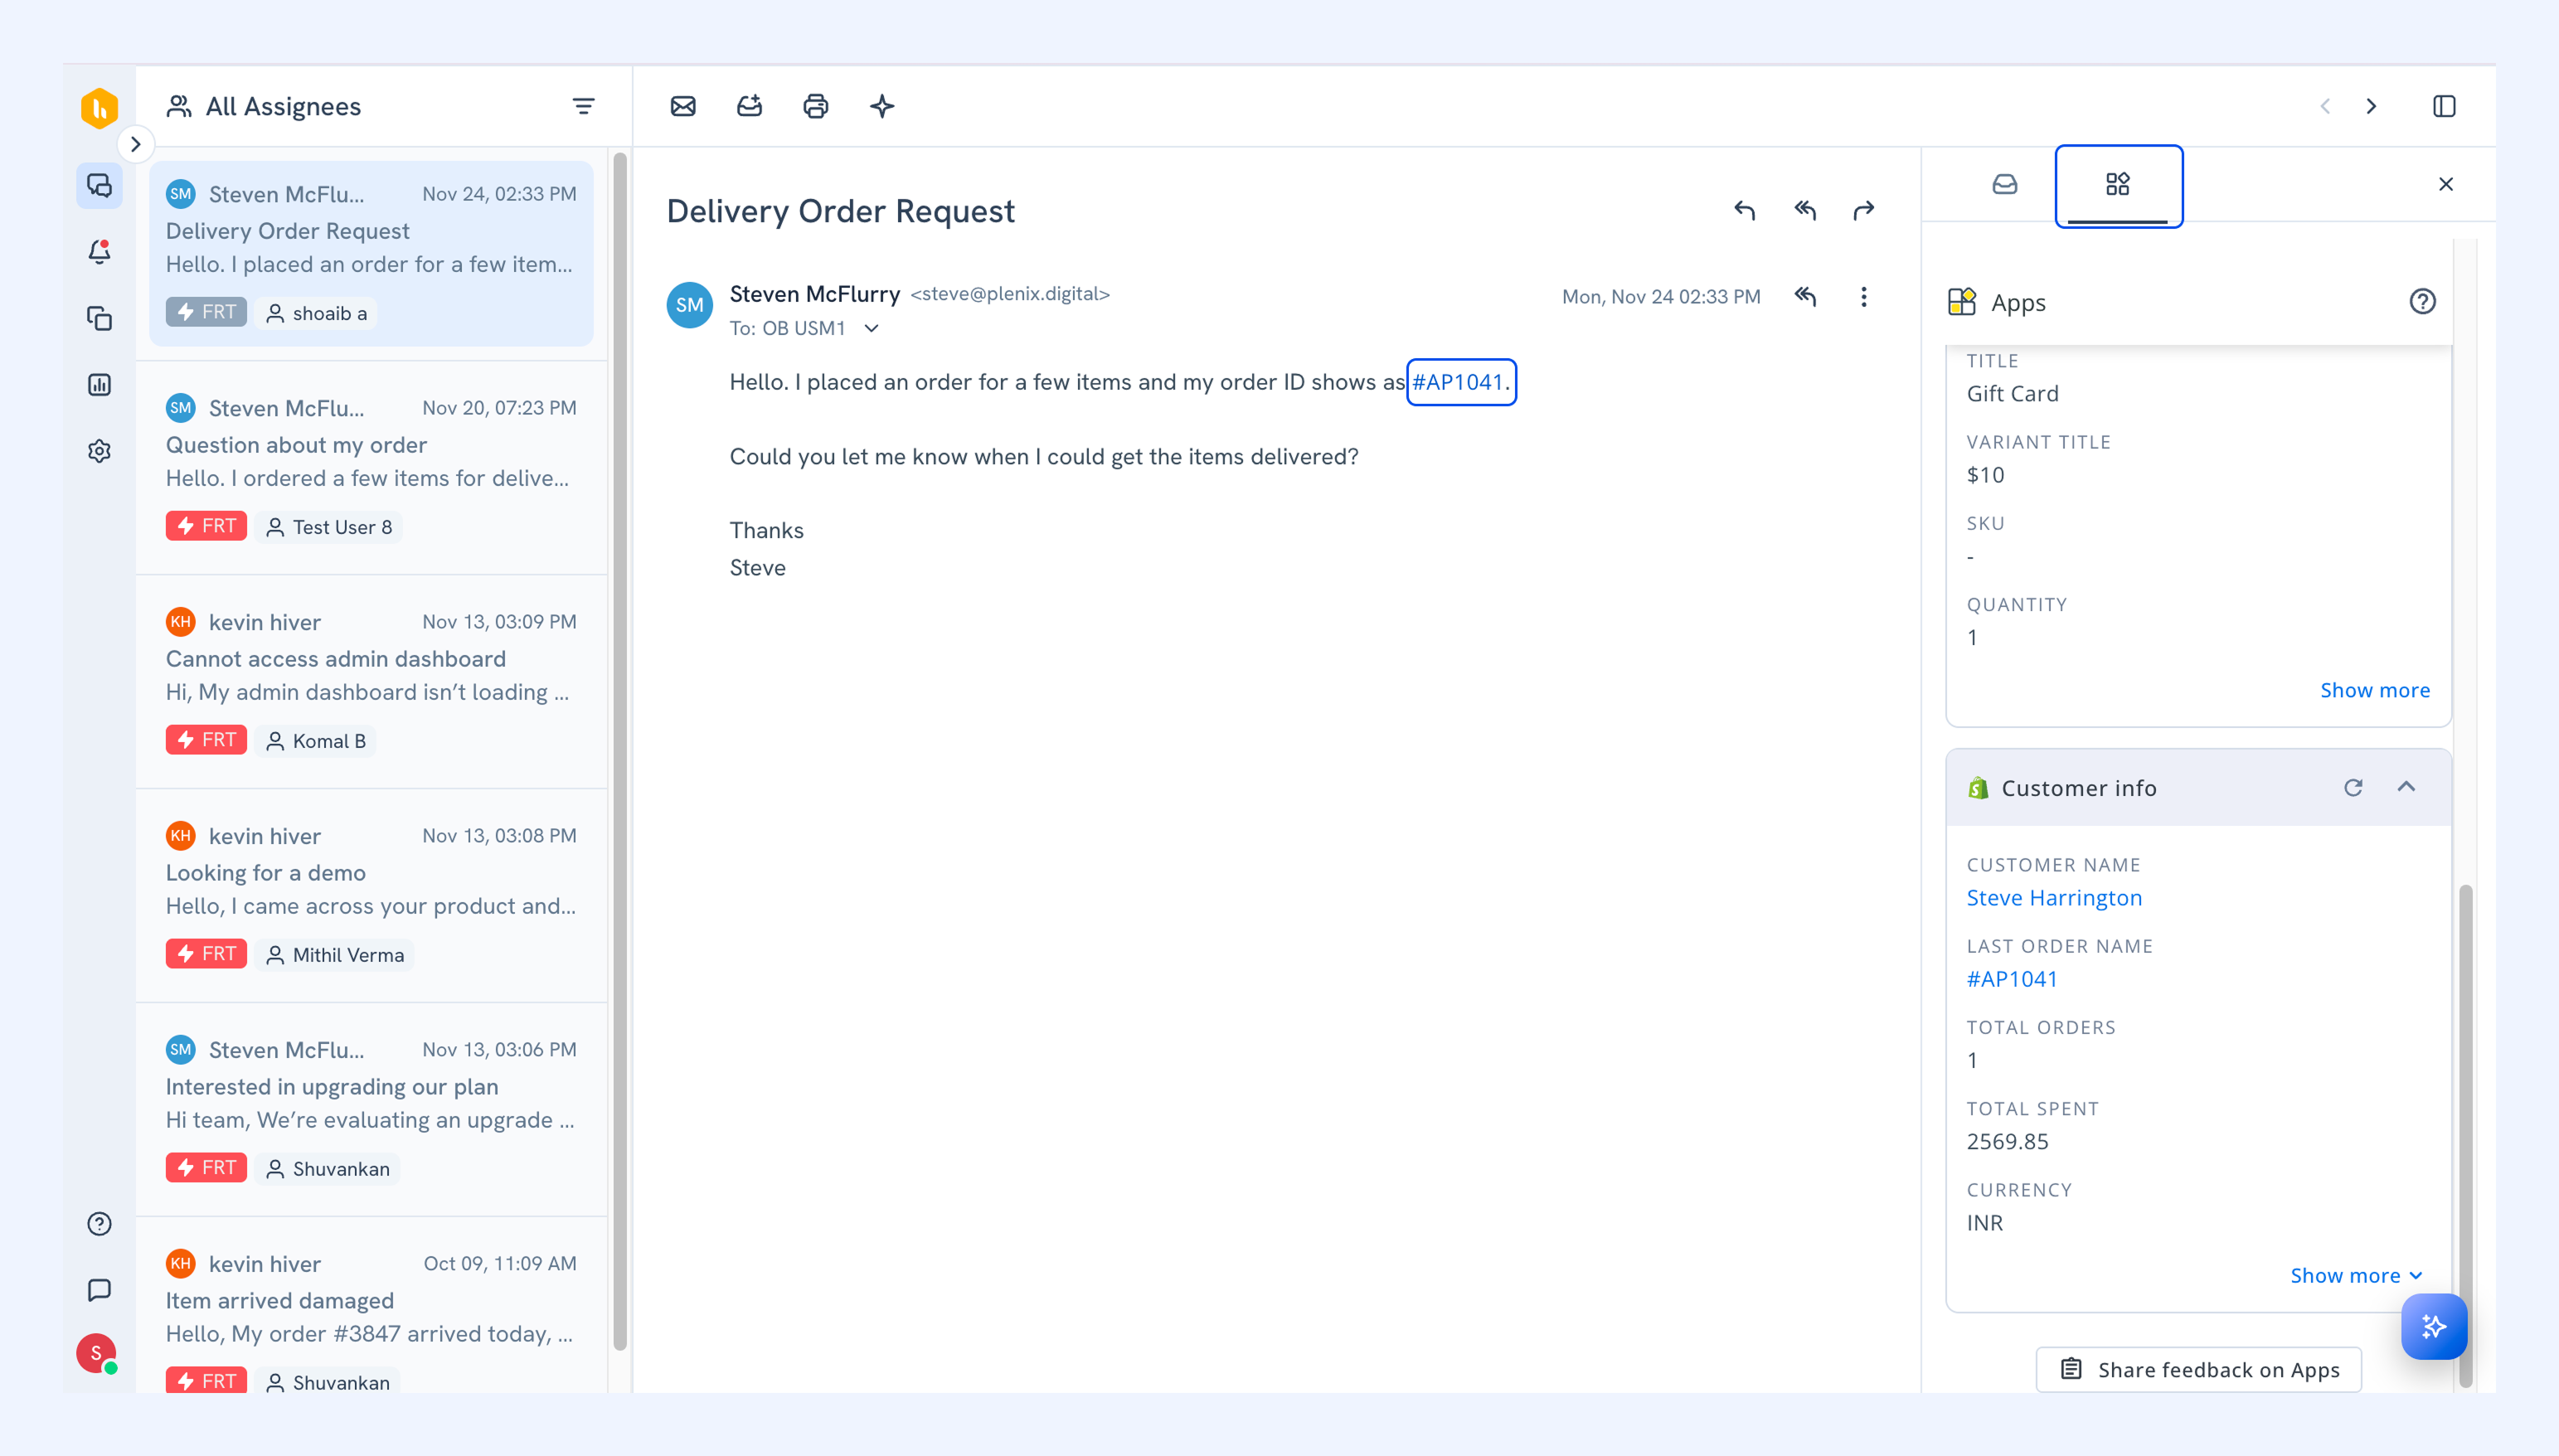
View customer and order details in the Apps section as configured.
Related articles
Jira integration in Hiver Omni