Inviting teammates to Hiver and assigning roles and permissions
When working with Shared Inboxes in Hiver Omni, you can add teammates and assign specific roles to control what each person can access and modify. This ensures your team operates with the right level of access while maintaining organized workflows.
Prerequisites to know
Your plan determines how many users you can add and which roles are available:
| Plan | Number of users | Roles and permissions |
| Growth | 10 users | Two default roles (Member, Admin) |
| Pro | Unlimited | Two default roles (Member, Admin) + Three roles (Member, Admin, Shared Inbox Admin) |
| Elite | Unlimited | Two default roles (Member, Admin) + Three roles (Member, Admin, Shared Inbox Admin) + Advanced and custom roles
|
Note: Team members in Hiver are referred to as Users.
How to add users to Hiver Omni
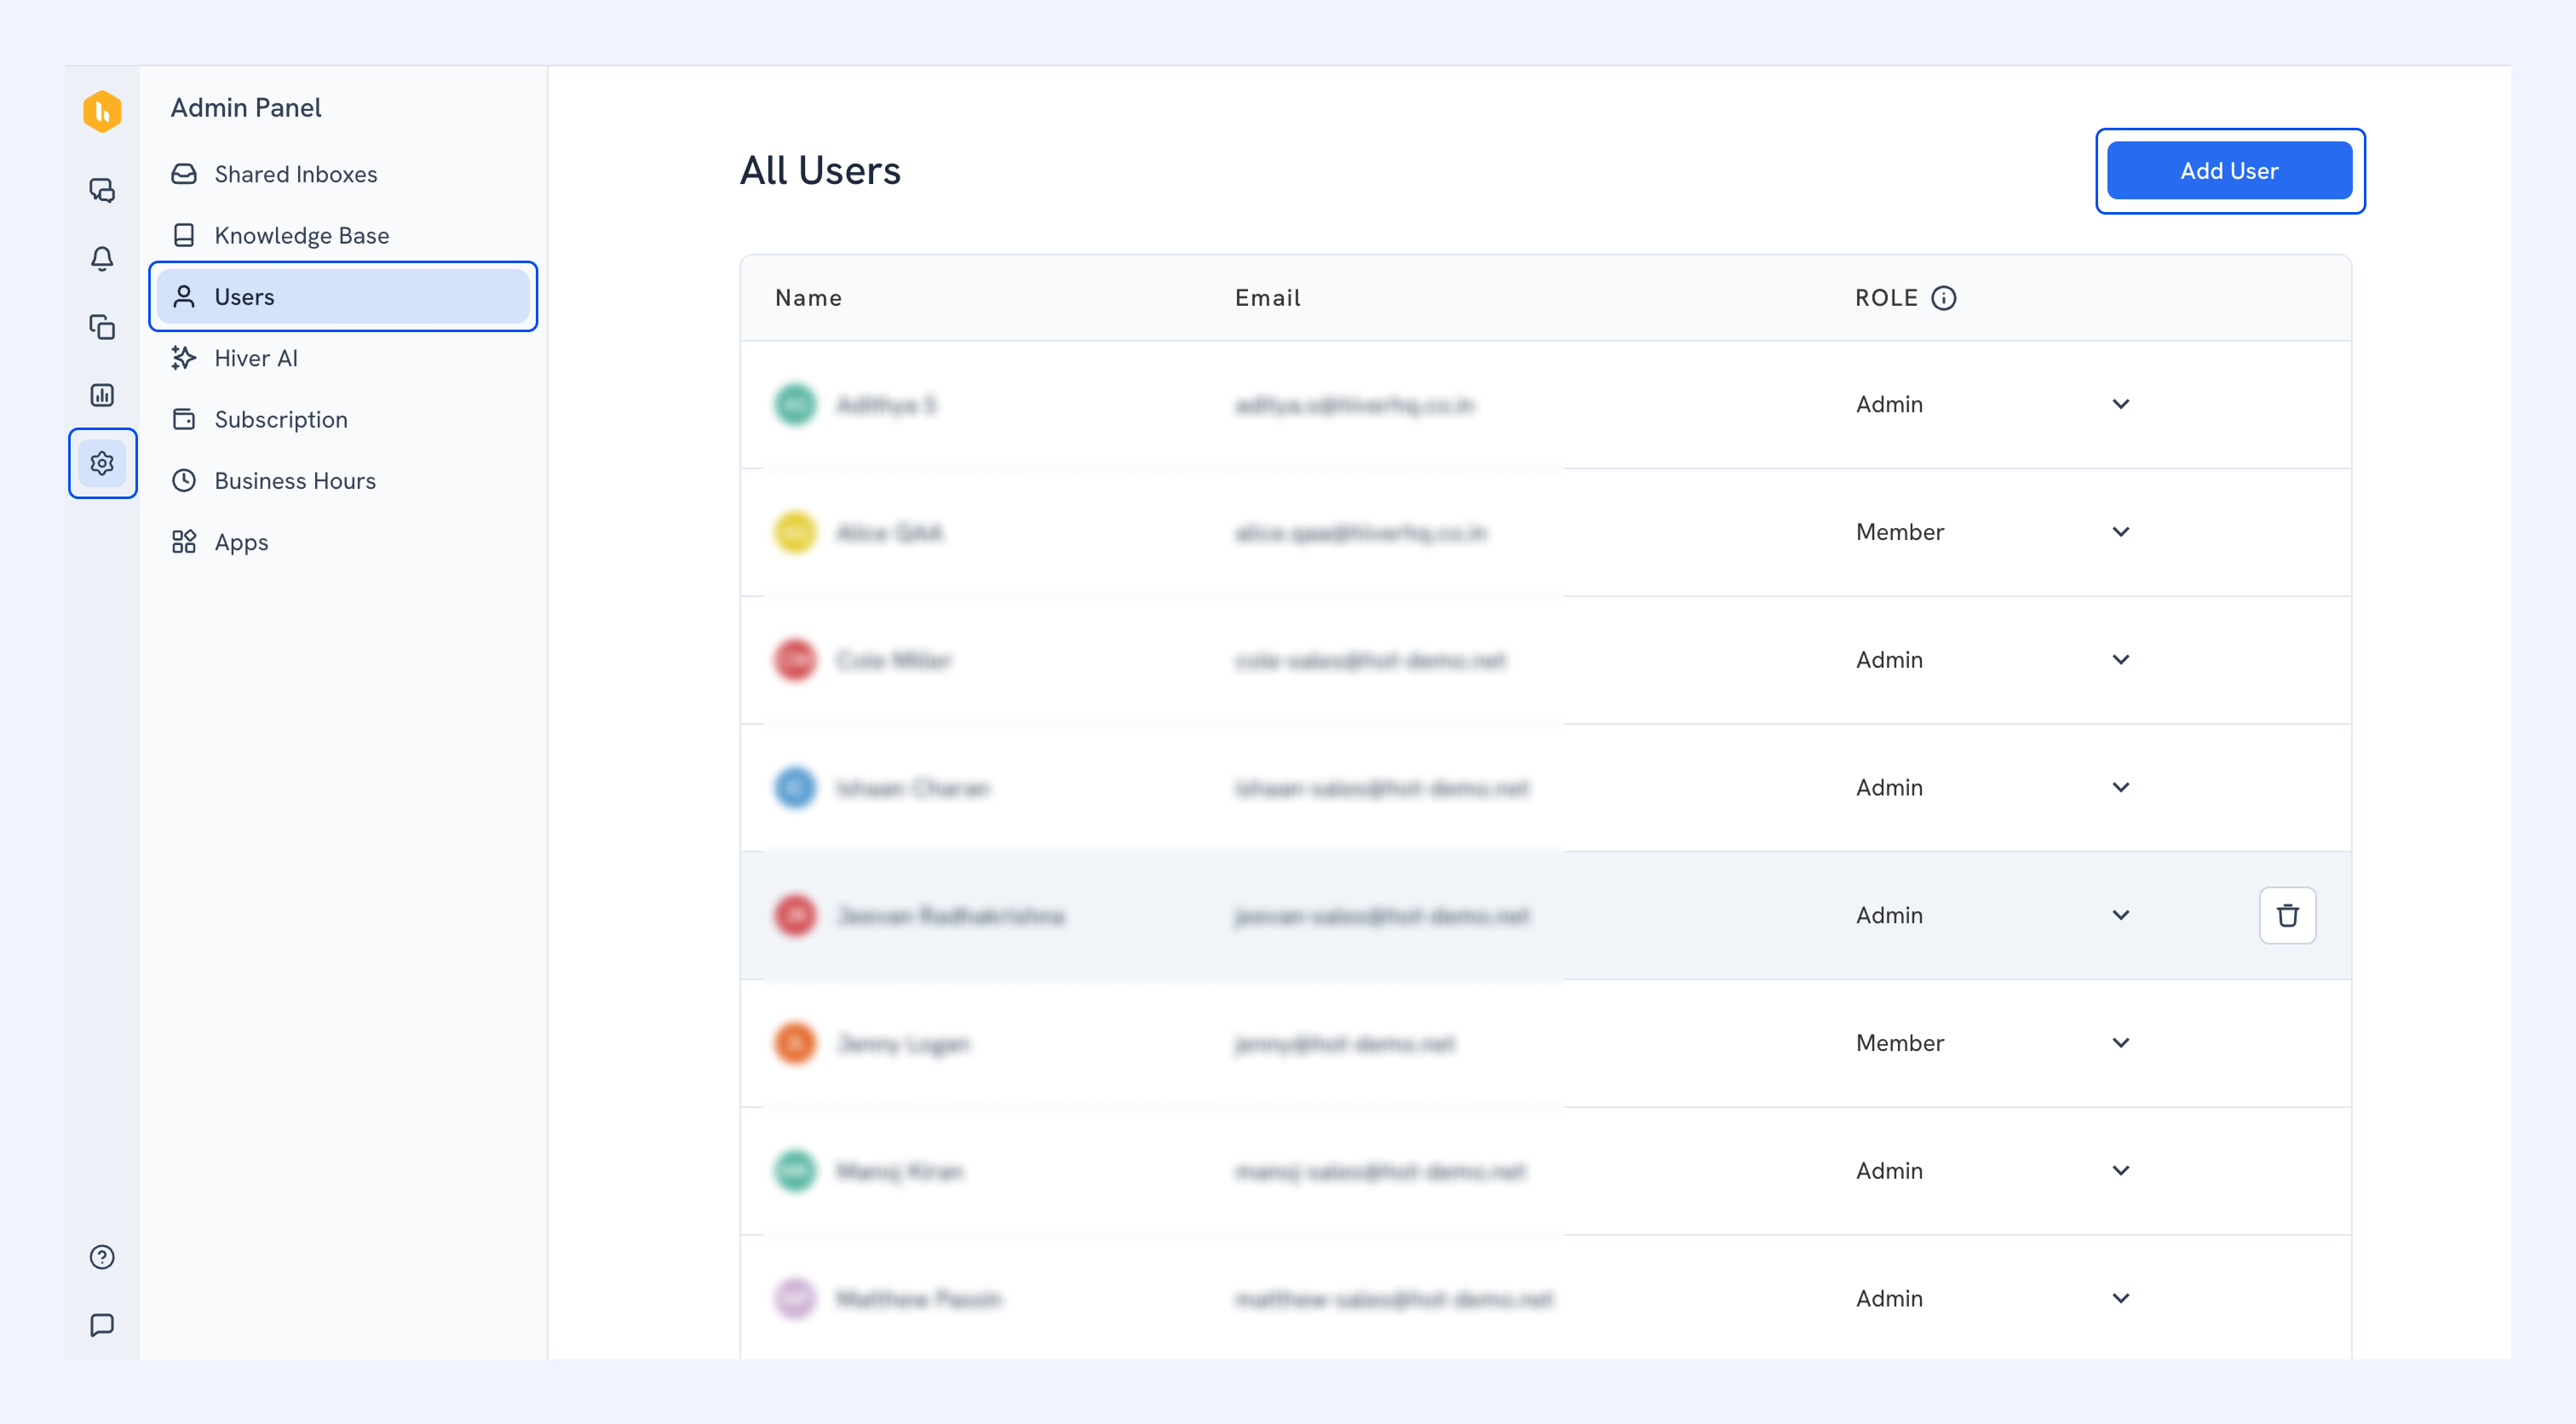
- Click the Admin Panel icon at the bottom of the left sidebar.
- Select Users.
- Click Add User.
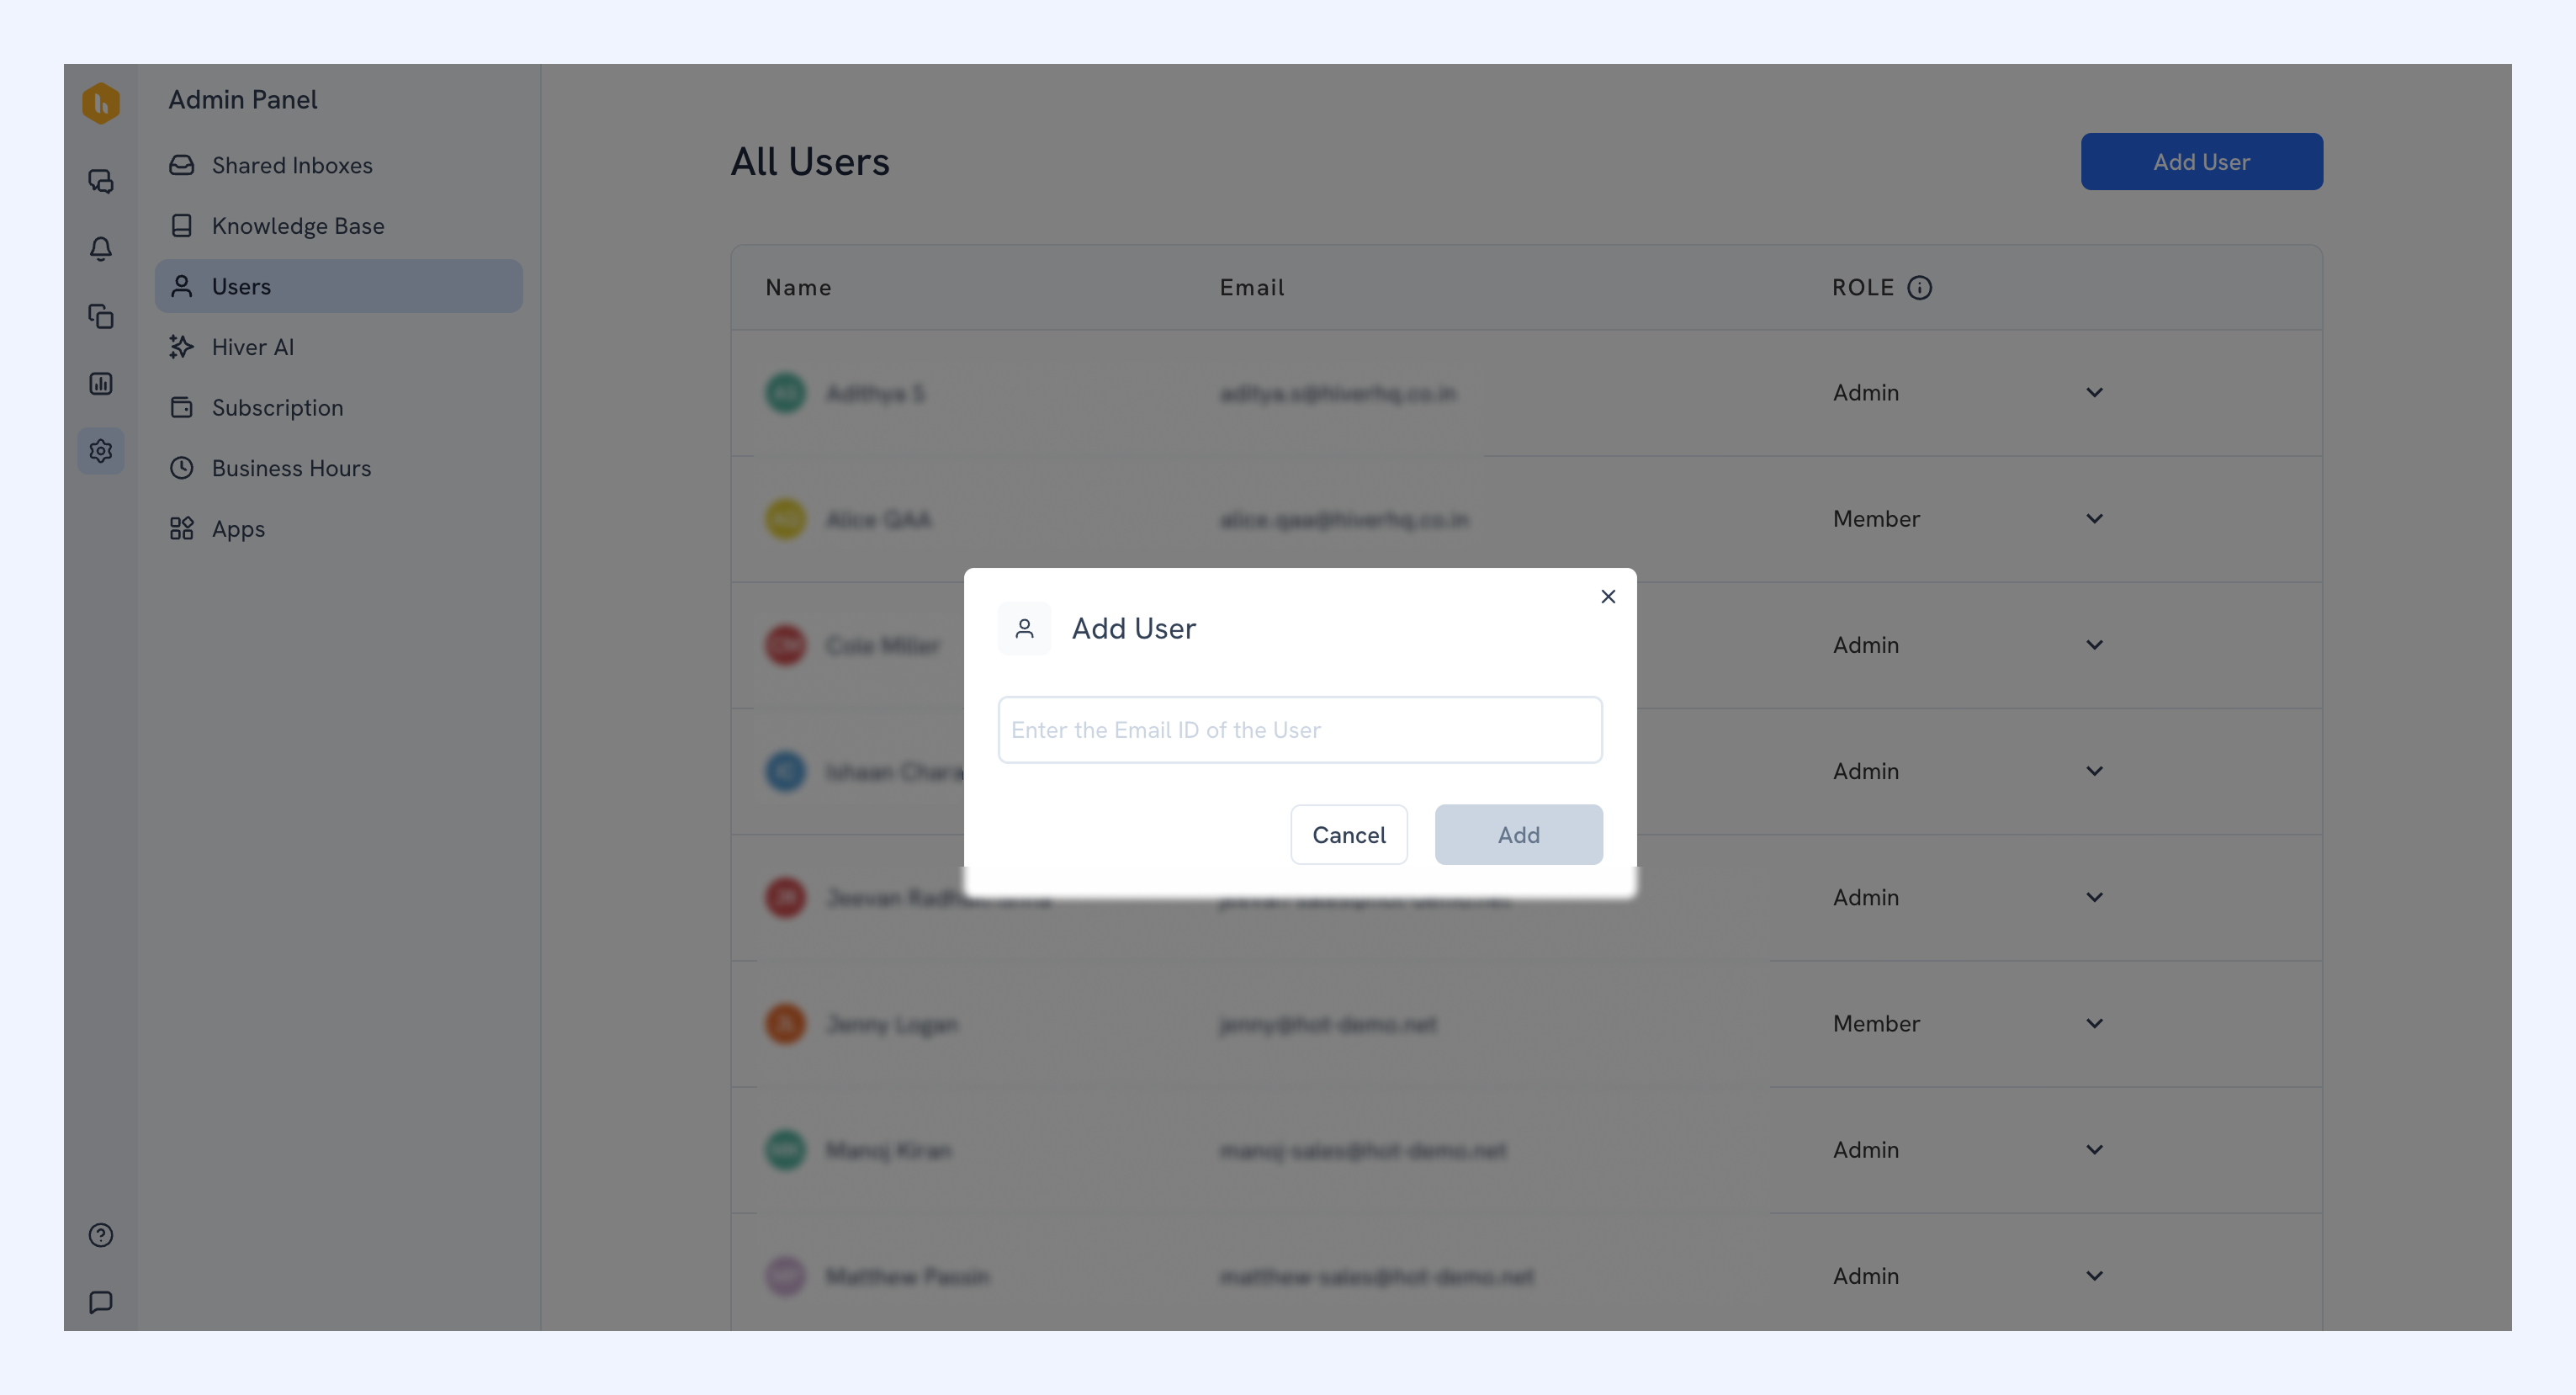
- Enter the user's email address in the popup that appears.
- Click Add to send the invitation.
- The invited user will receive an email with instructions to join your Hiver account.
Understanding roles and permissions
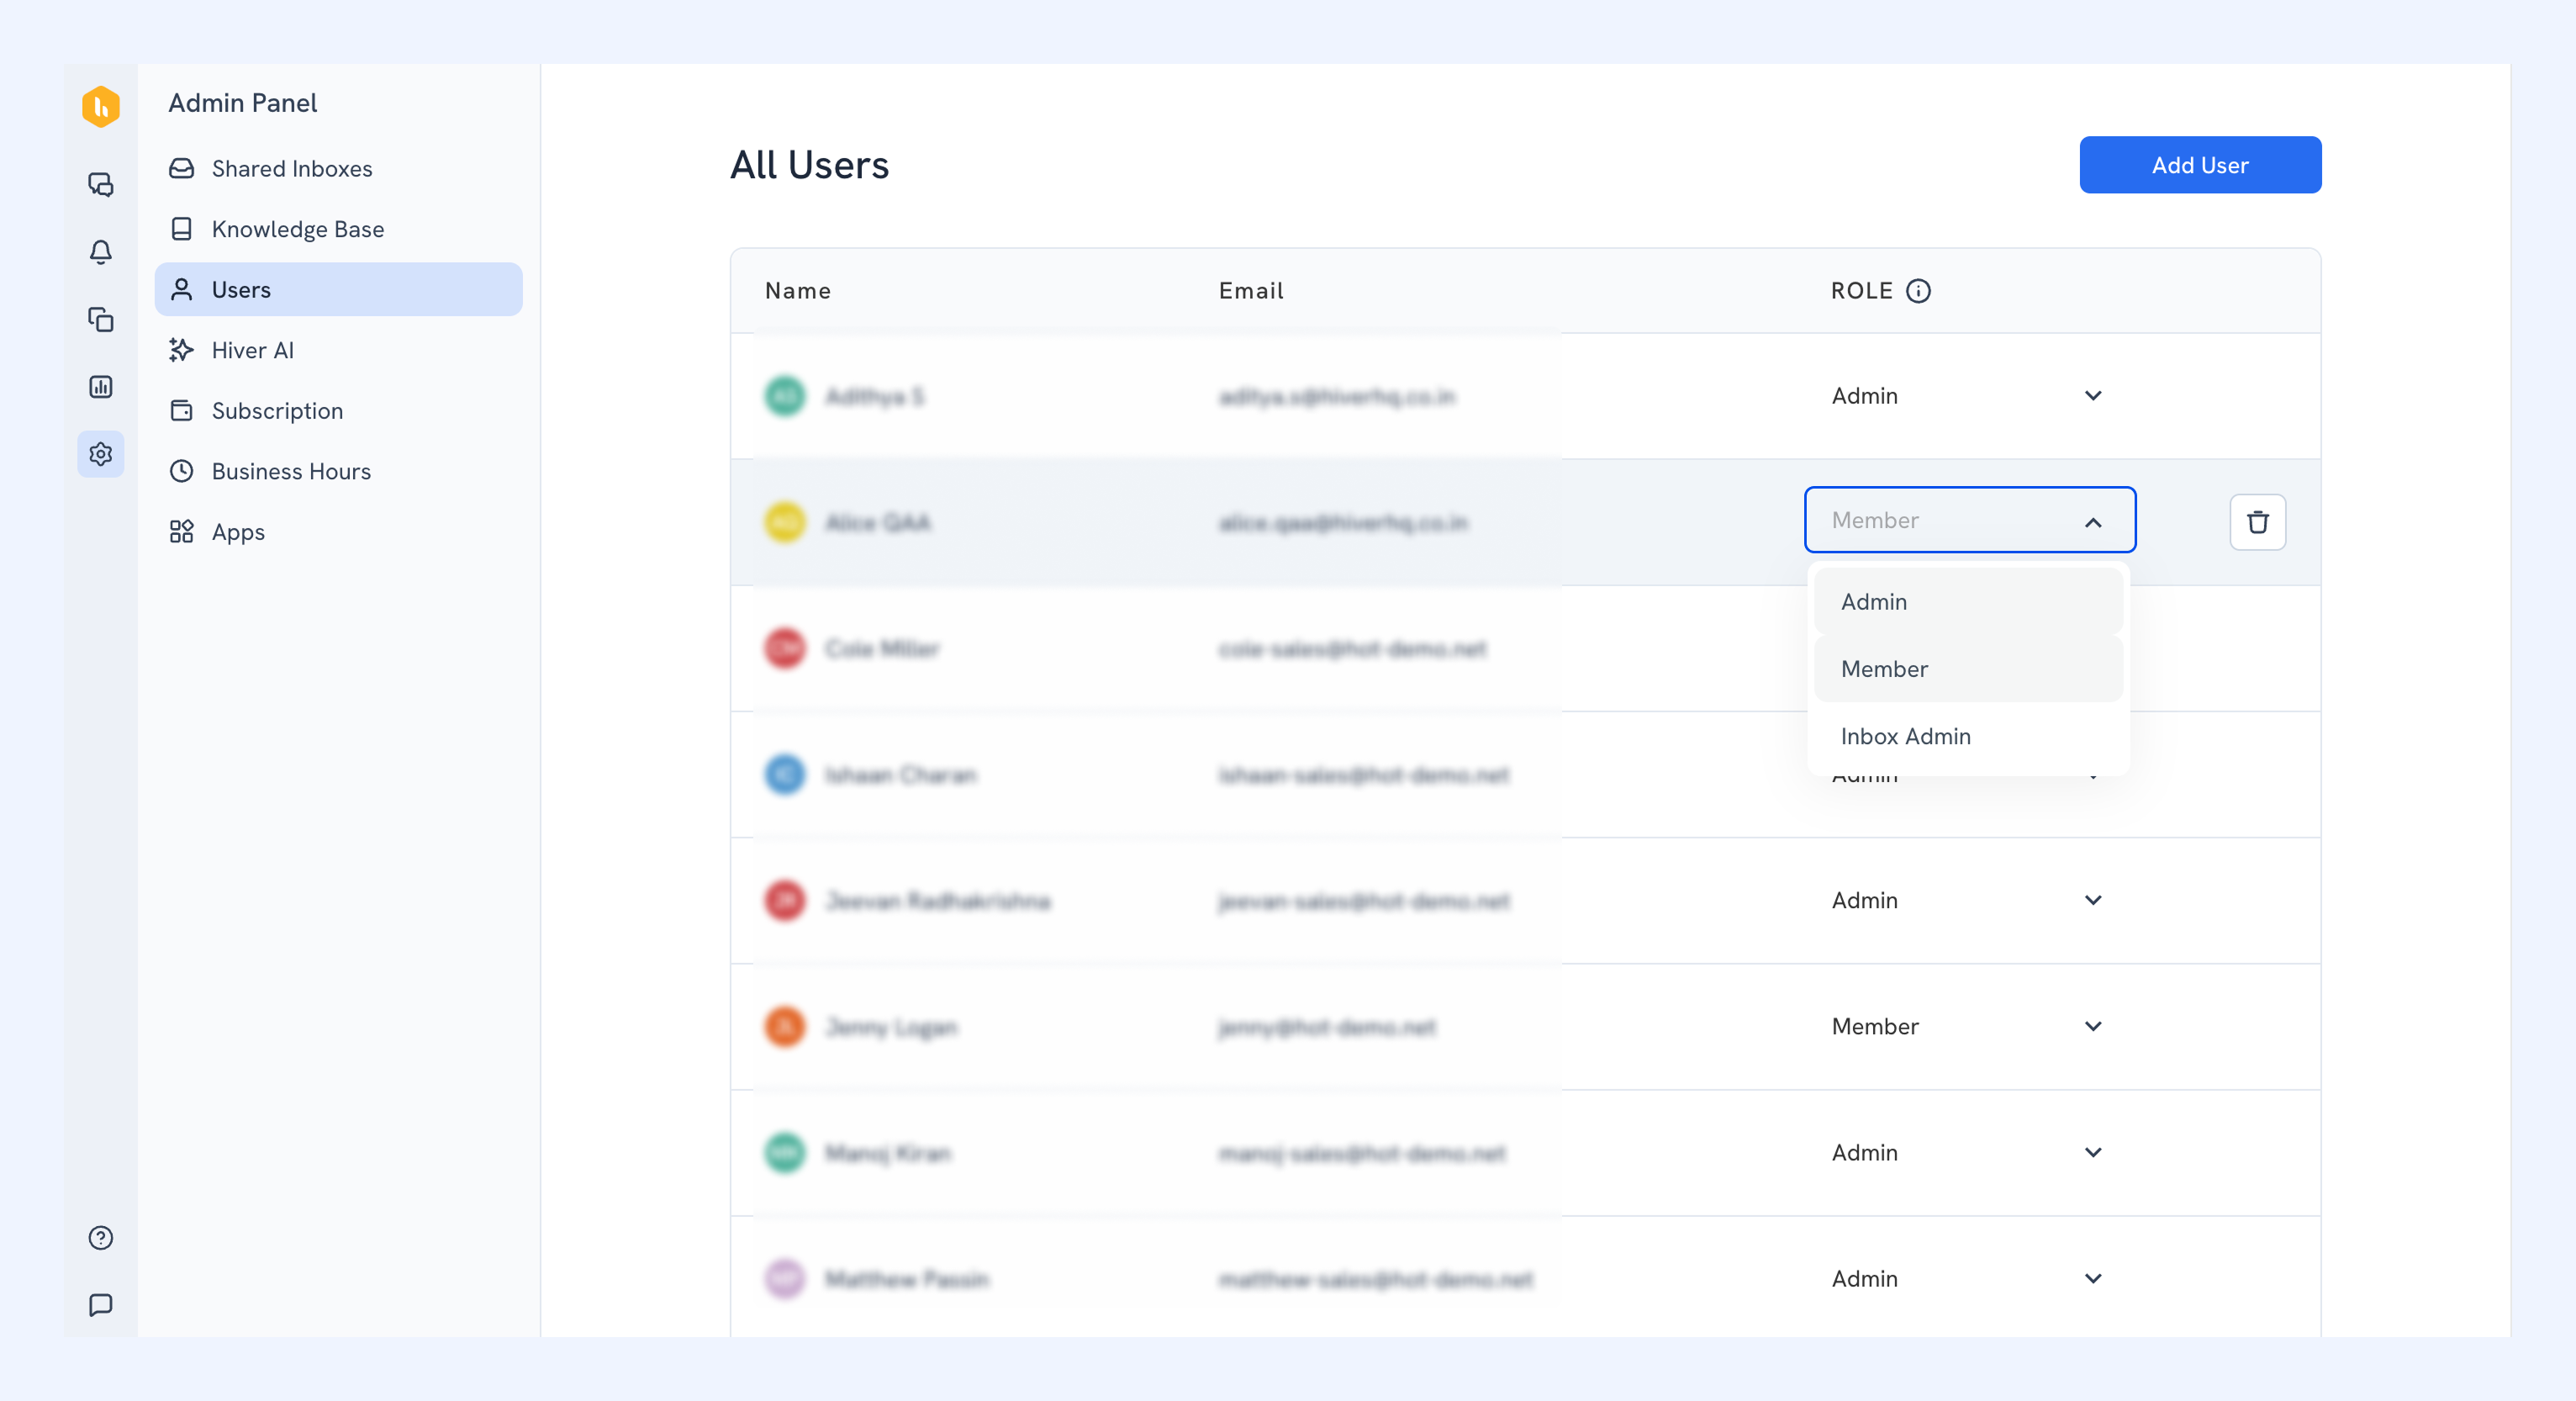
Every user is assigned a role that defines what they can do in Hiver Omni. Hiver offers the following three roles by default
Member
Can access and manage conversations in their Shared Inboxes but have no admin privileges. This is the default role for new users.
Admin
Manages account settings, including adding/deleting users and Shared Inboxes. Can
only access conversations of Shared Inboxes they are part of.
Inbox Admin
Can manage only their assigned Shared Inboxes, modify settings, and view Analytics but cannot add/remove account users. If someone is an Inbox Admin, they have that role in every Shared Inbox they access.
Role assignment rules
- Only Admins can assign or modify roles.
- Each user has one role that applies across all their inboxes.
- You cannot assign different roles to the same user in different inboxes.
How to manage existing users
To update roles or remove users from your account:
1. Open the Admin Panel and navigate to Users.
2. Find the user you want to modify.
3. Click the role dropdown next to their name to change their role.
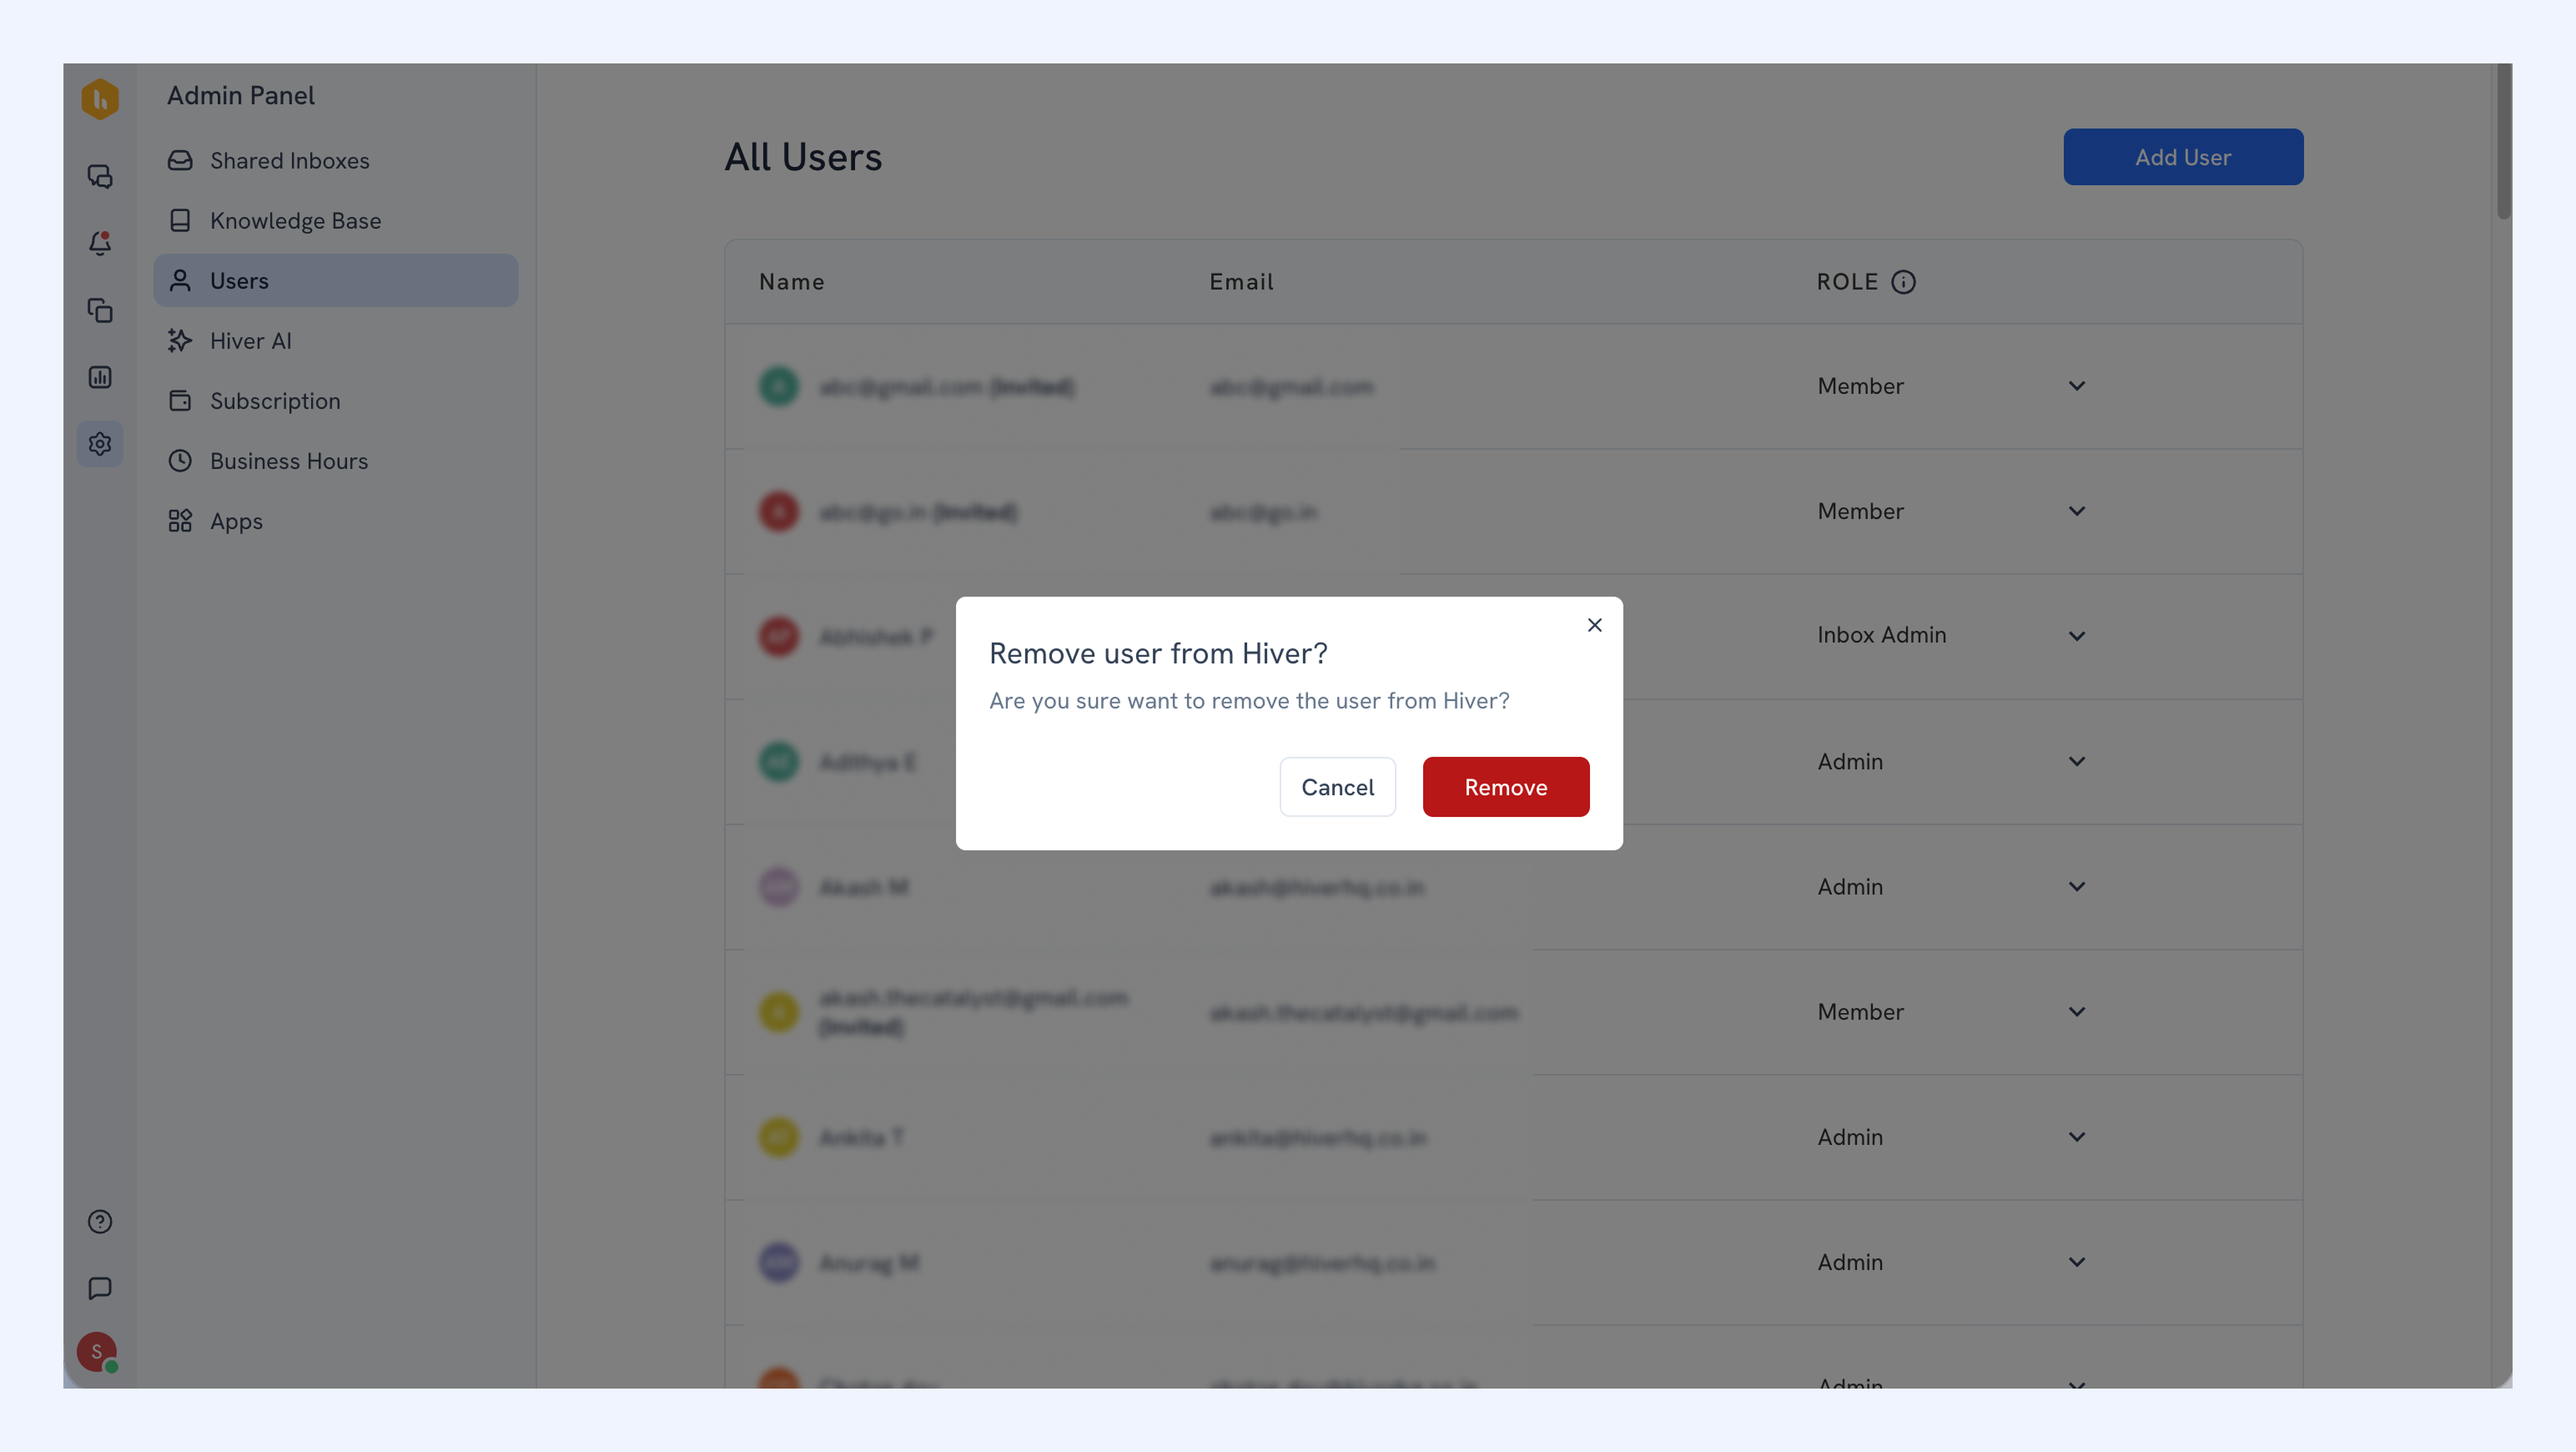
4. To remove a user, click on the bin icon next to their name.
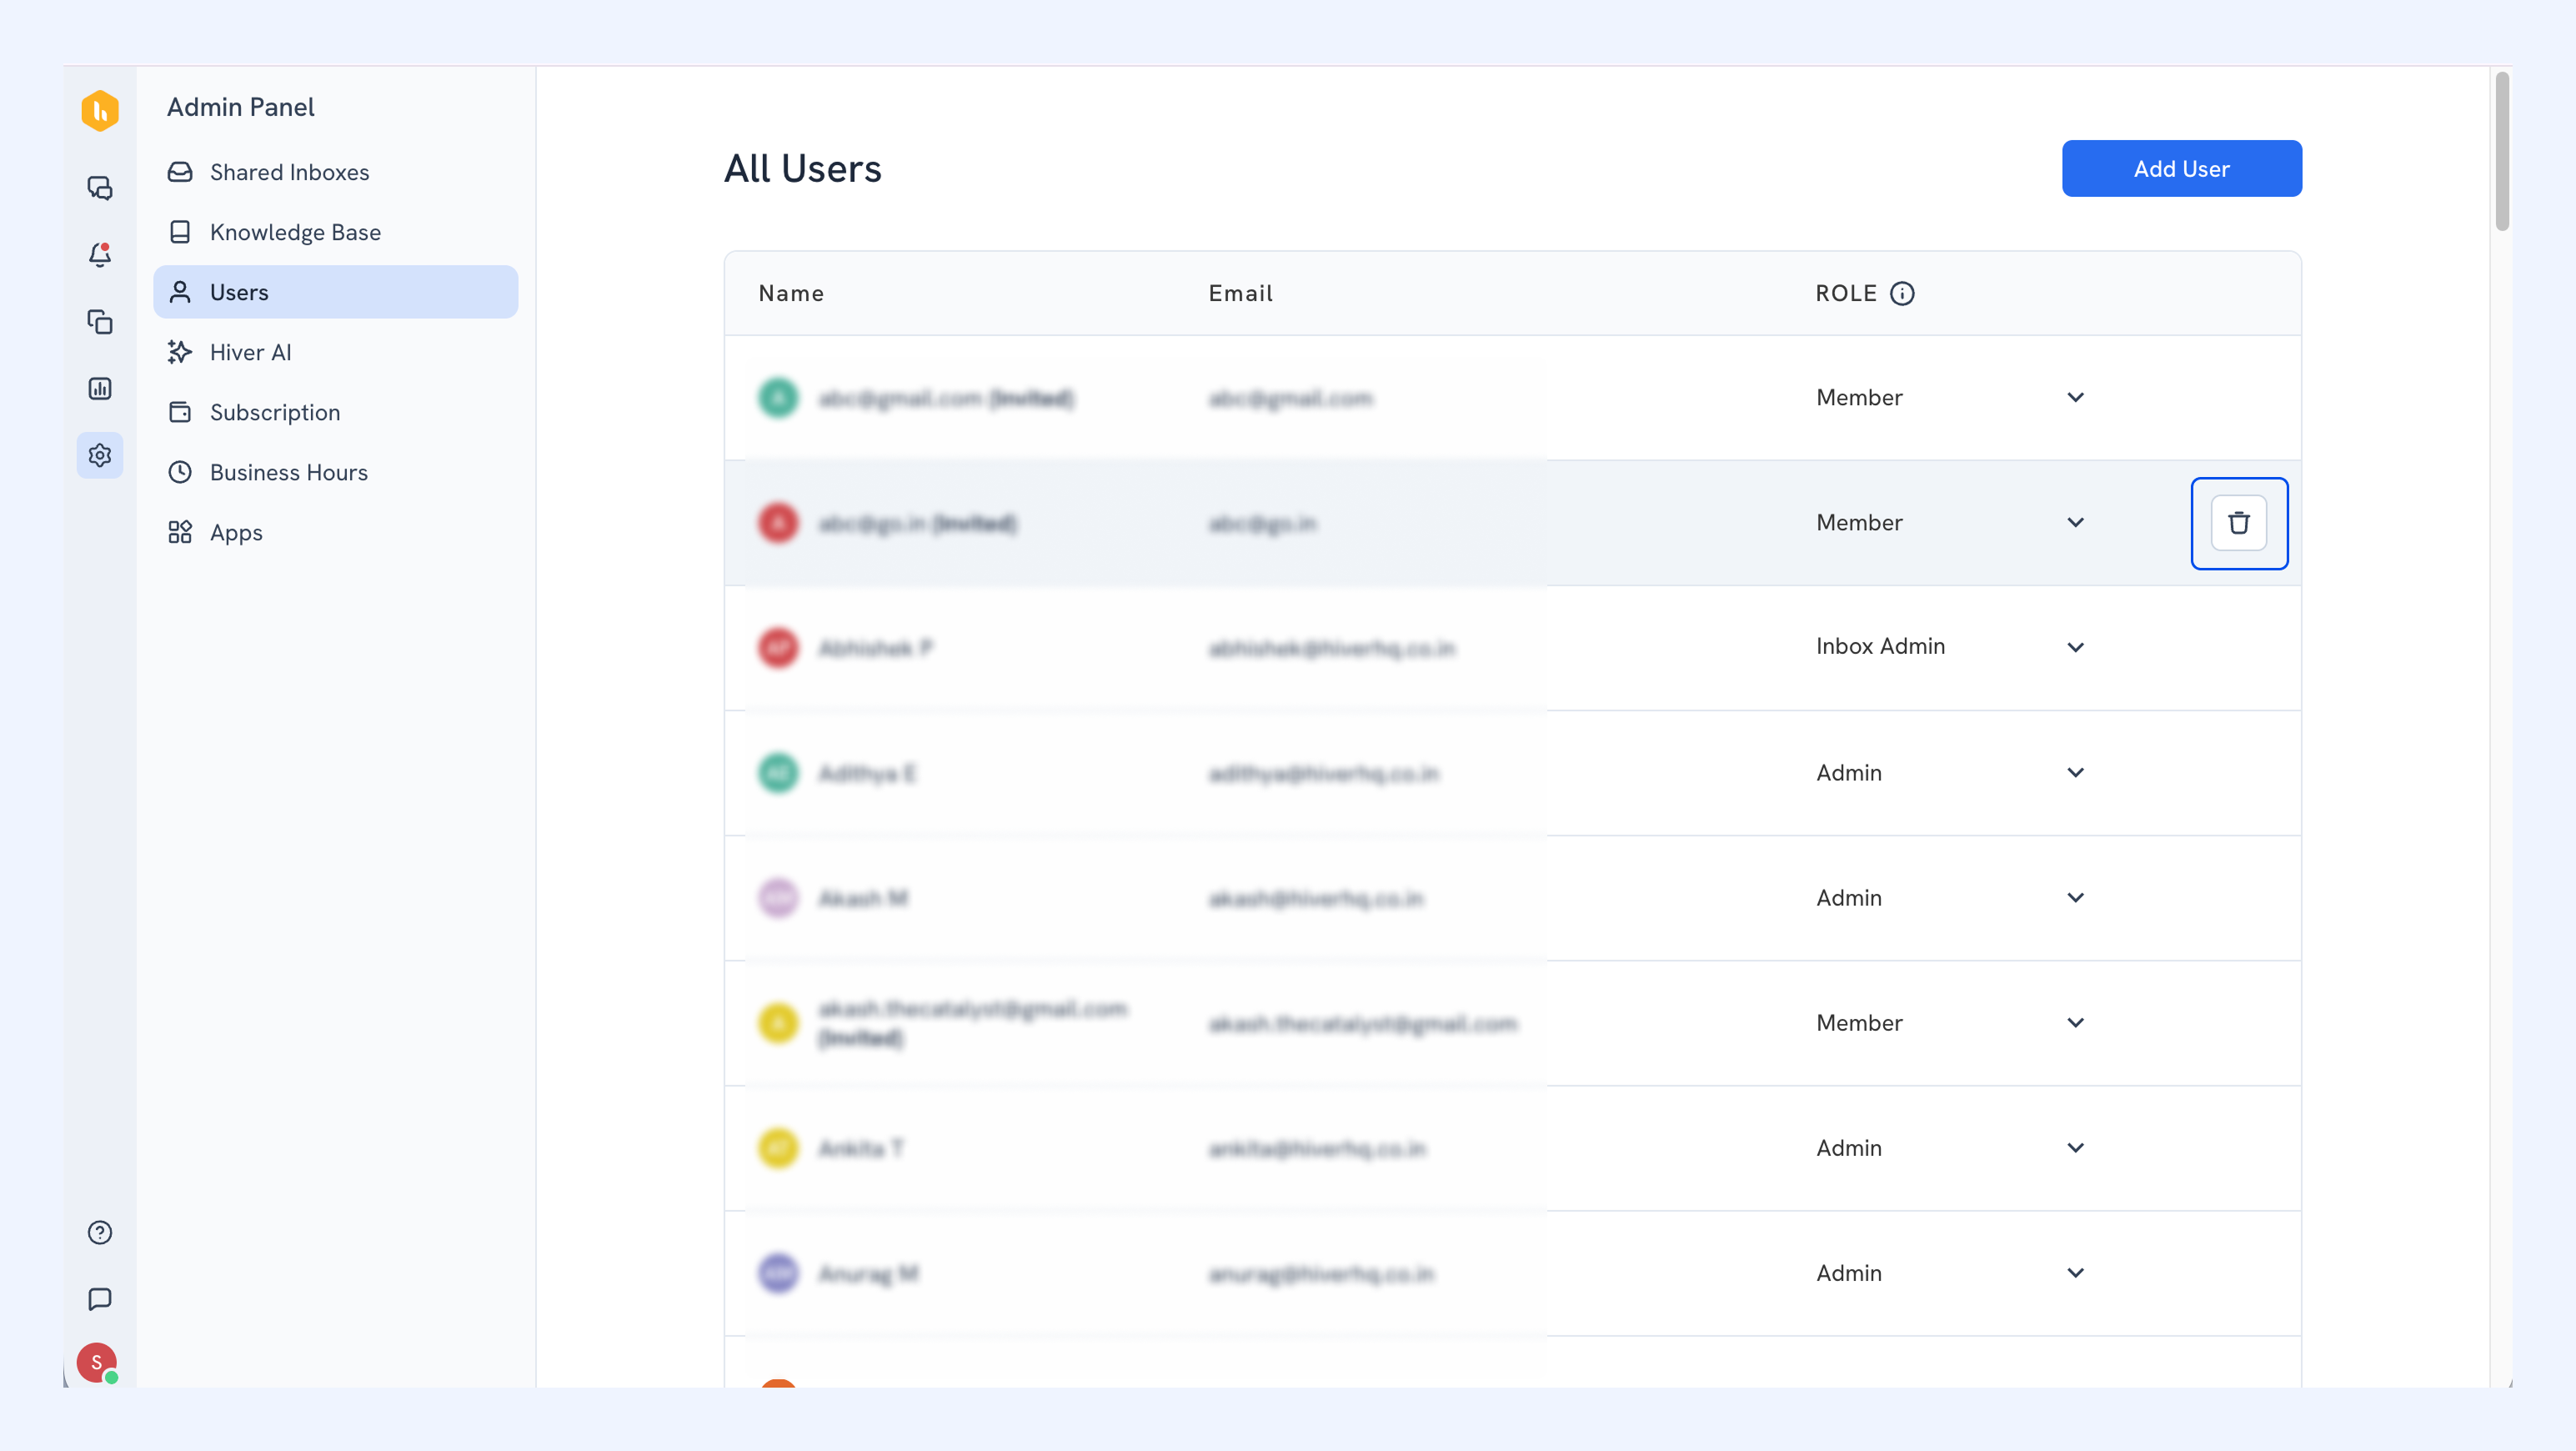
5. Confirm the removal in the dialog box.
How to add users to a Shared Inbox
To see the users in a specific inbox:
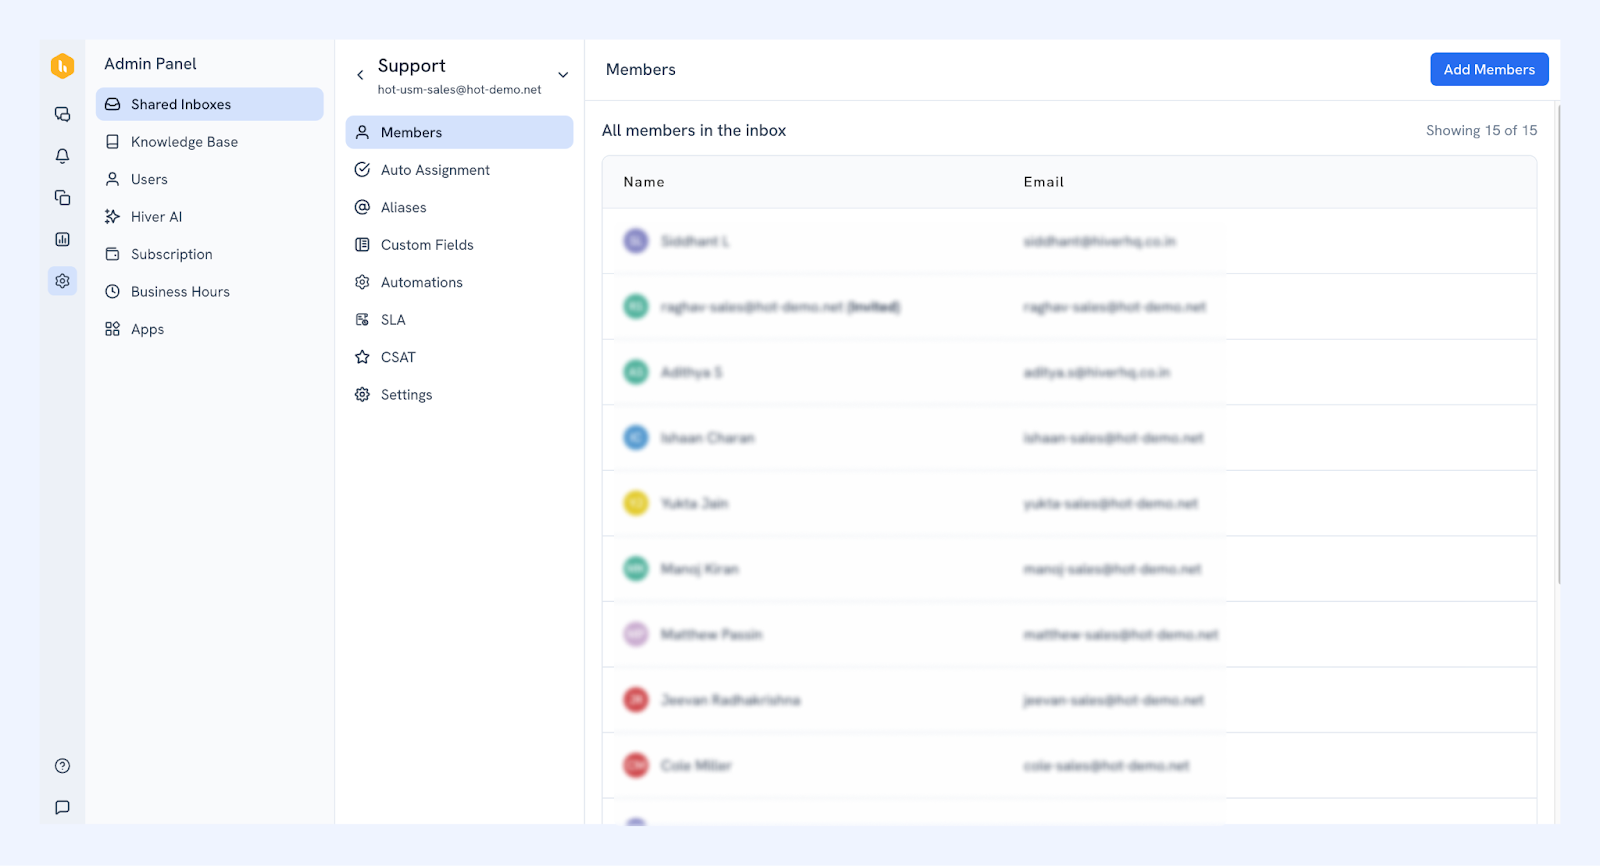
1. Go to Admin Panel → Shared Inboxes → Select an inbox.
2. Click Members to view all users with access.
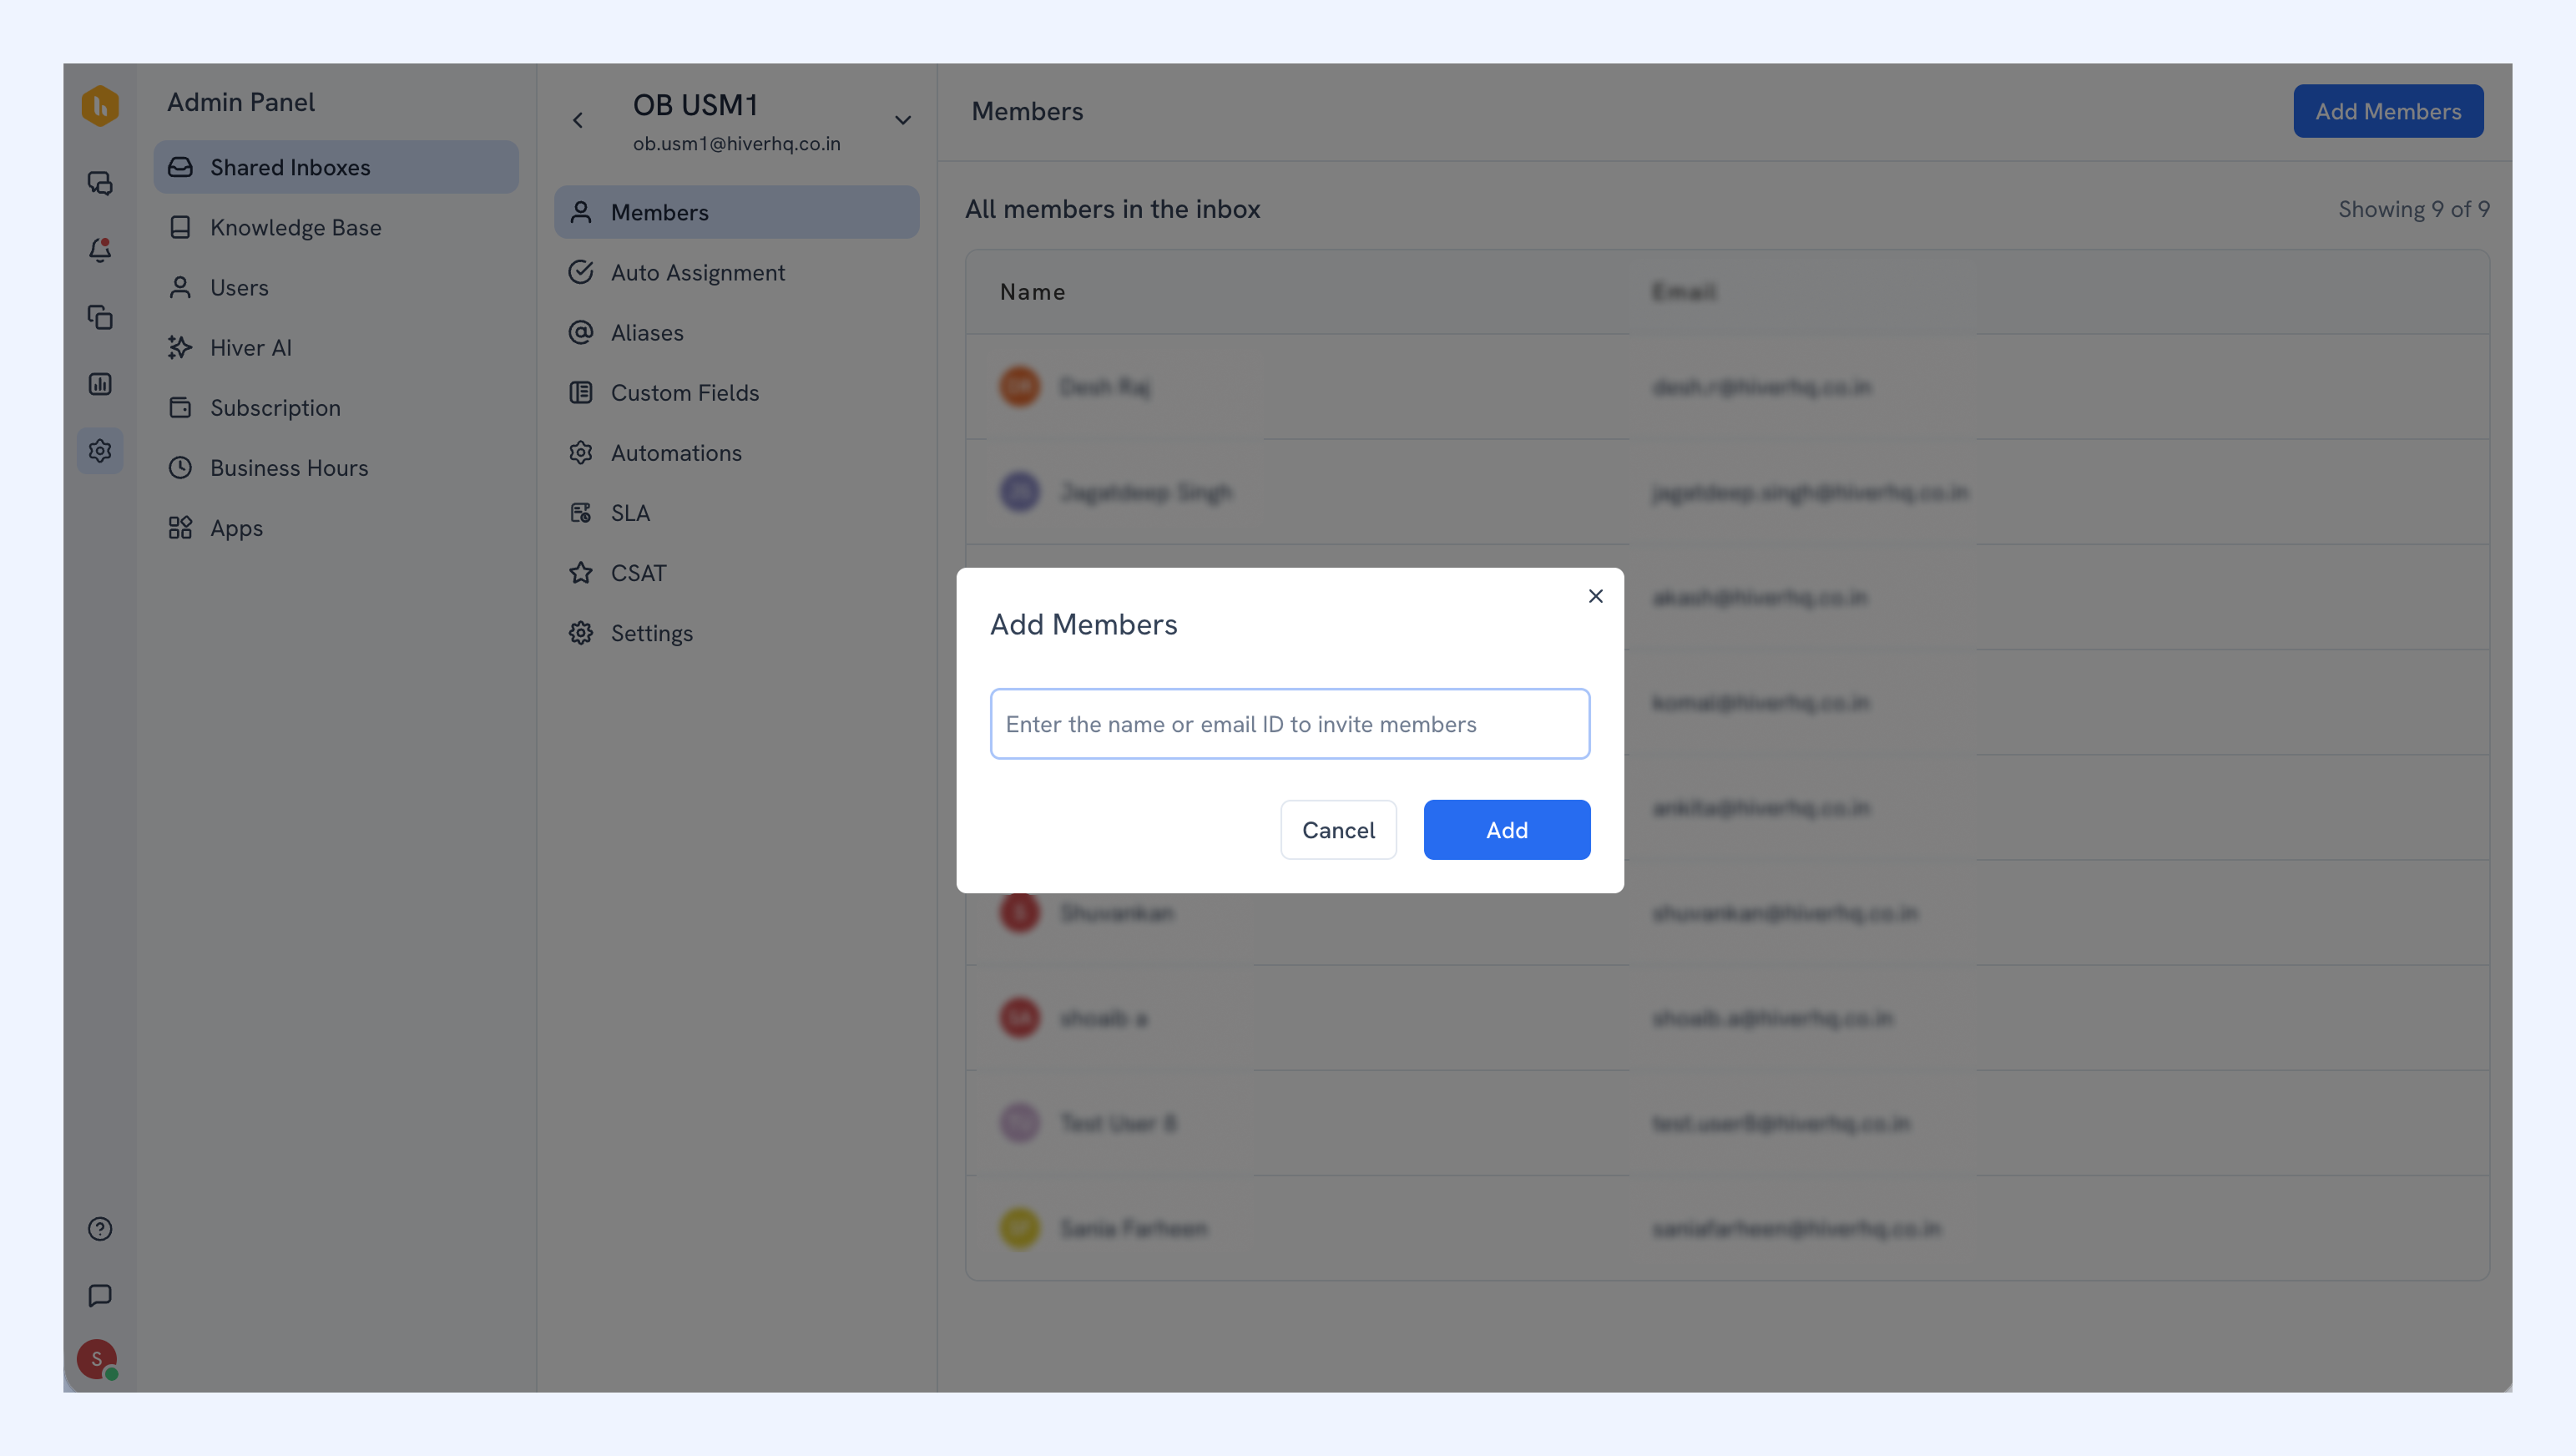
3. Click Add Members.
4. Enter the name or email address of the user.
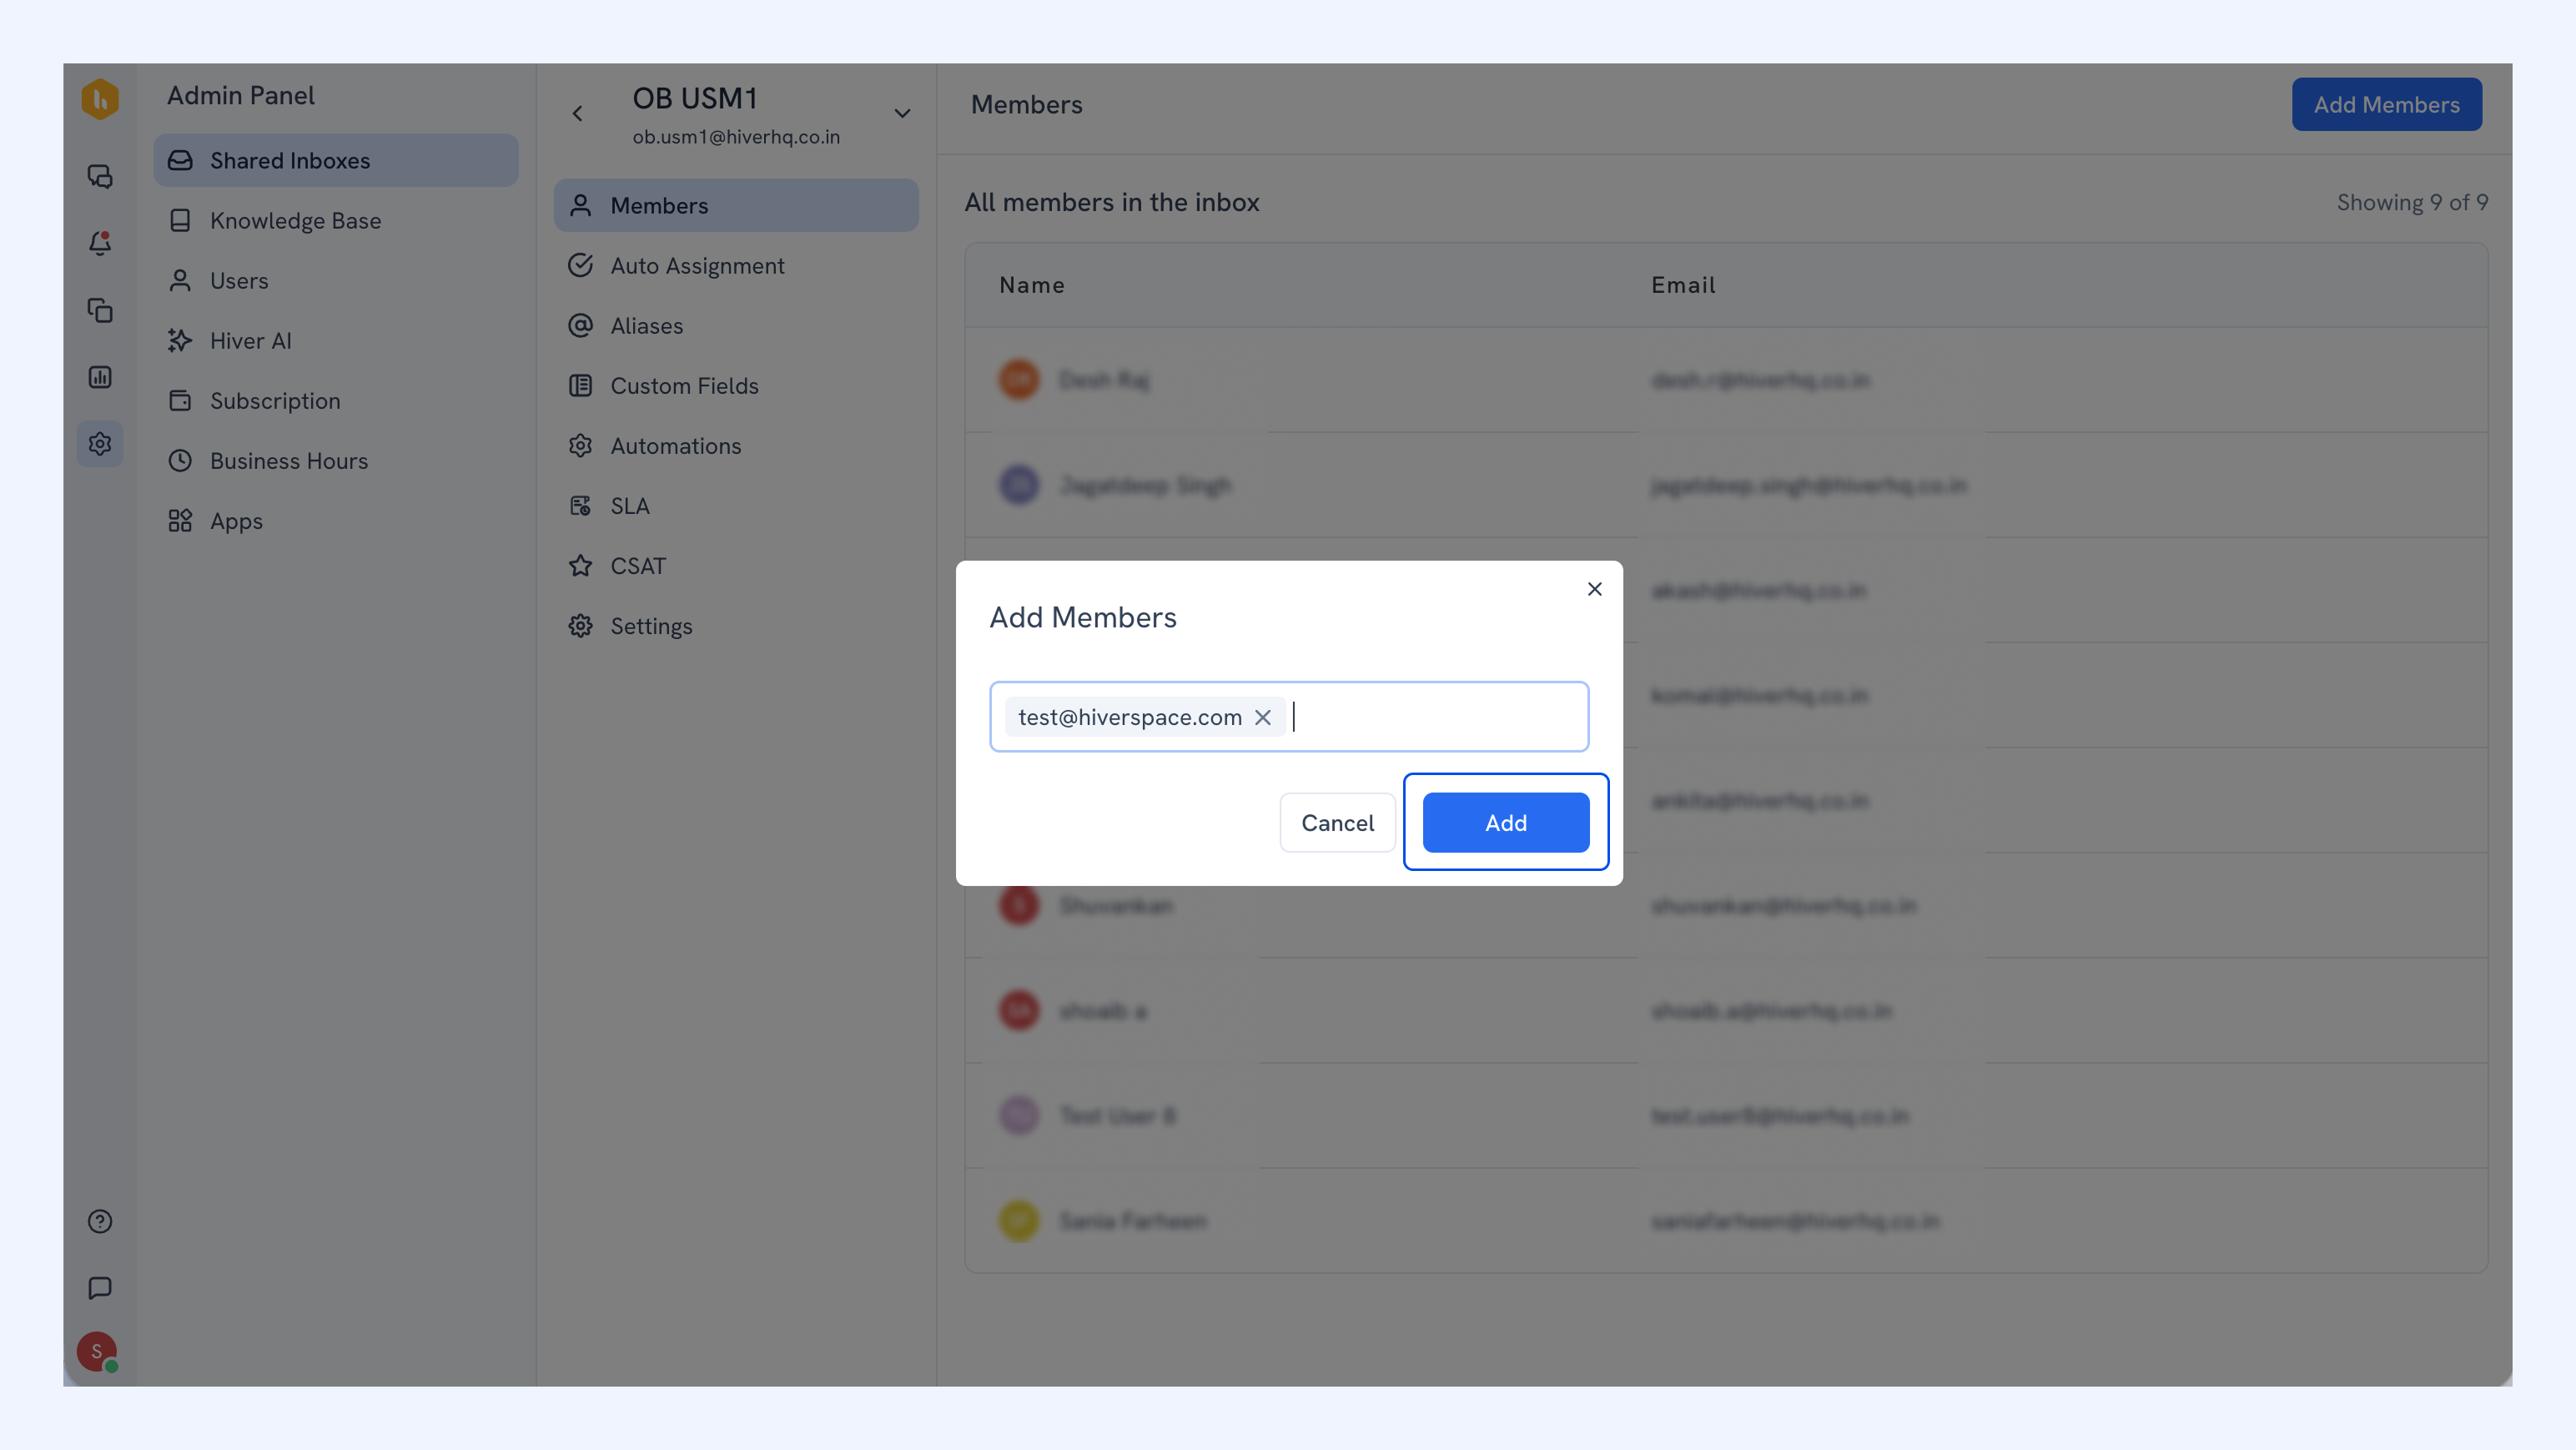
5. Click Add to send the invitation.
Next steps
Manage emails in Hiver Shared Inbox
Using Automations in Hiver Omni