Creating SLA Policies in Hiver
A service-level agreement (SLA) defines the response and resolution times your team commits to for customer queries. In Hiver, SLA policies help you automate and track these commitments, ensuring customers receive timely support and your team operates with clarity and focus.
By configuring SLA policies in Hiver, you can:
- Ensure timely support: Automatically set response and resolution targets so every customer query is acknowledged and resolved within defined timeframes.
- Improve team focus: Help agents and managers prioritize conversations based on upcoming deadlines instead of guesswork.
- Drive accountability: Track SLA compliance through detailed SLA reports to identify bottlenecks, measure team performance, and improve response efficiency.
- Build trust and transparency: Give both customers and your team a clear understanding of what to expect, reducing friction and escalations.
Availability and prerequisite
SLA is available only on Pro and Elite plans.
Key capabilities of SLA policies in Hiver
SLAs keep your team aligned on conversations to maintain a high quality of customer service. Here are the features available with Hiver SLA:
- Reminders for upcoming breaches keep your team alert before deadlines pass.
- SLA deadlines are visible on conversations and Gmail list views for quick checks.
- Separate tracking for First Response Time, Next Response Time, and Resolution Time at each stage.
- Default views for Overdue and Due-soon conversations eliminate manual searches.
- Manual SLA removal on specific conversations when exceptions occur.
- Automatic SLA updates when conversations get escalated or reassigned.
- Set custom SLA policies using tag combinations to match different workflows and priorities.
Creating SLA policies
SLAs vary across teams, so Hiver applies them at the Shared Inbox level. Each team can create its own SLA rules within its respective inboxes.
Here’s how to get started:
1. Select Hiver settings → Admin Panel → Shared Inboxes and choose the inbox you want to set up SLAs for.
2. Go to SLA and click Create SLA policy.
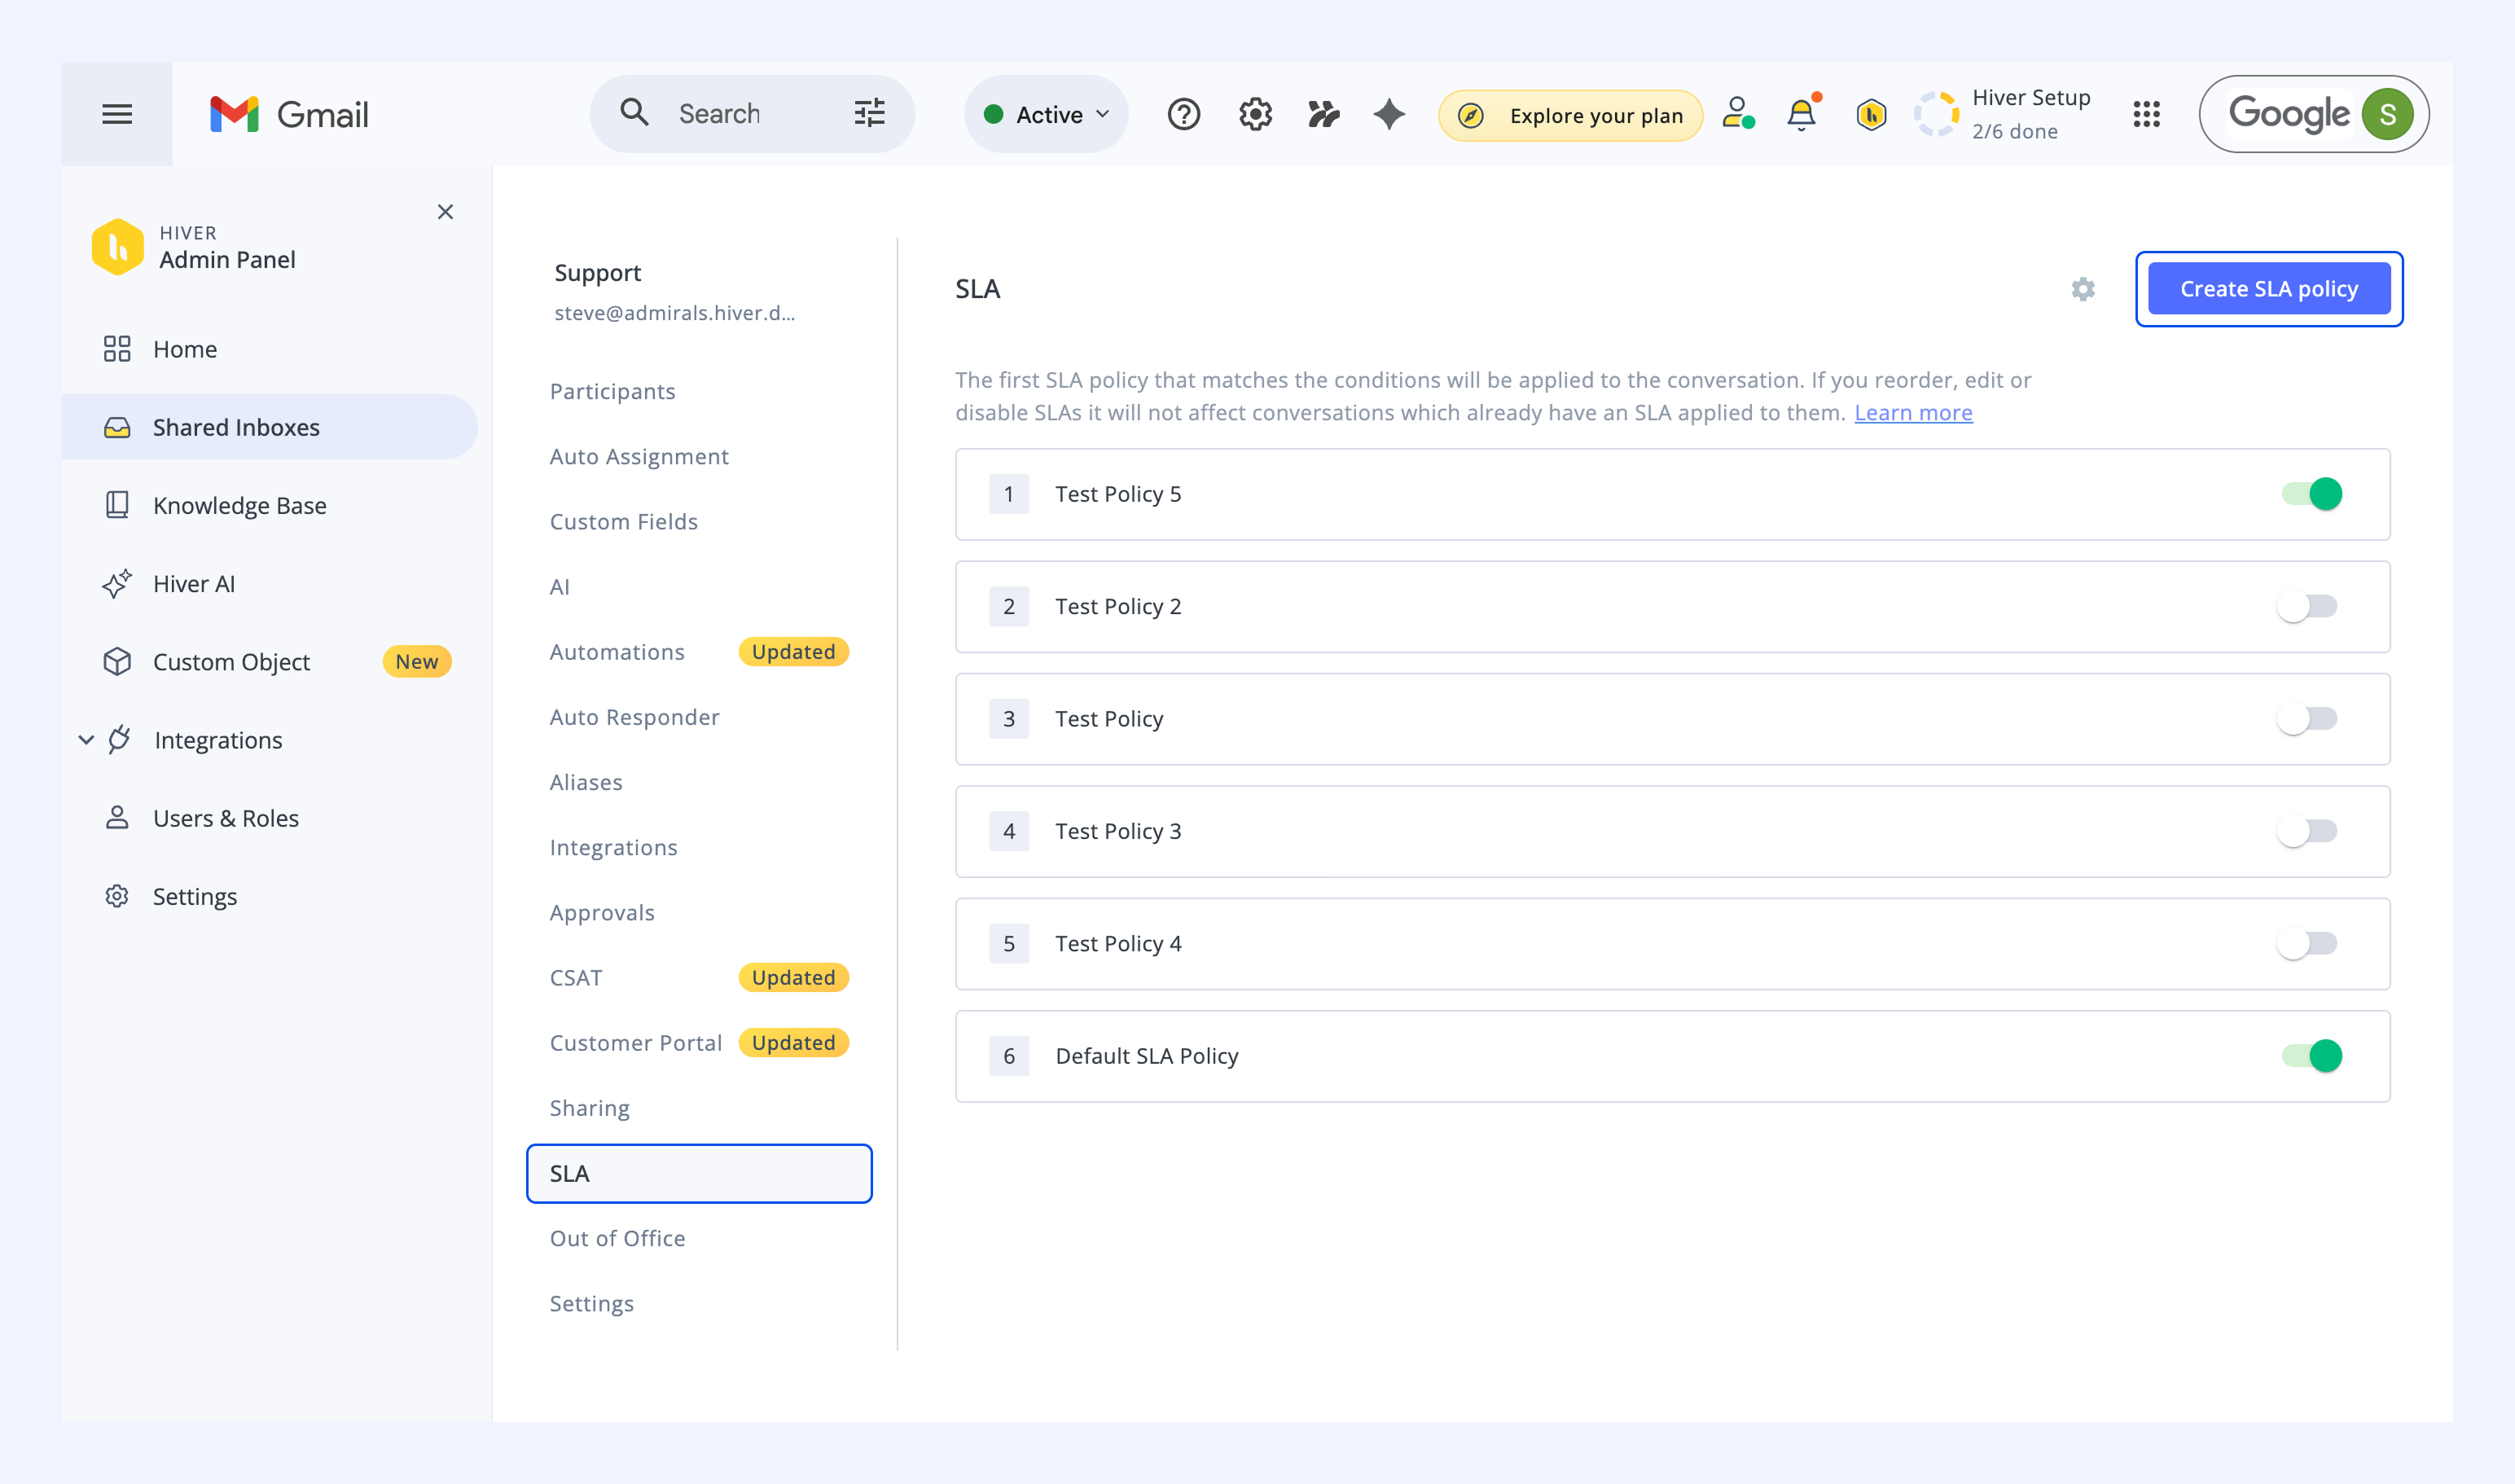
3. Fill in the relevant information to create your SLA policy.
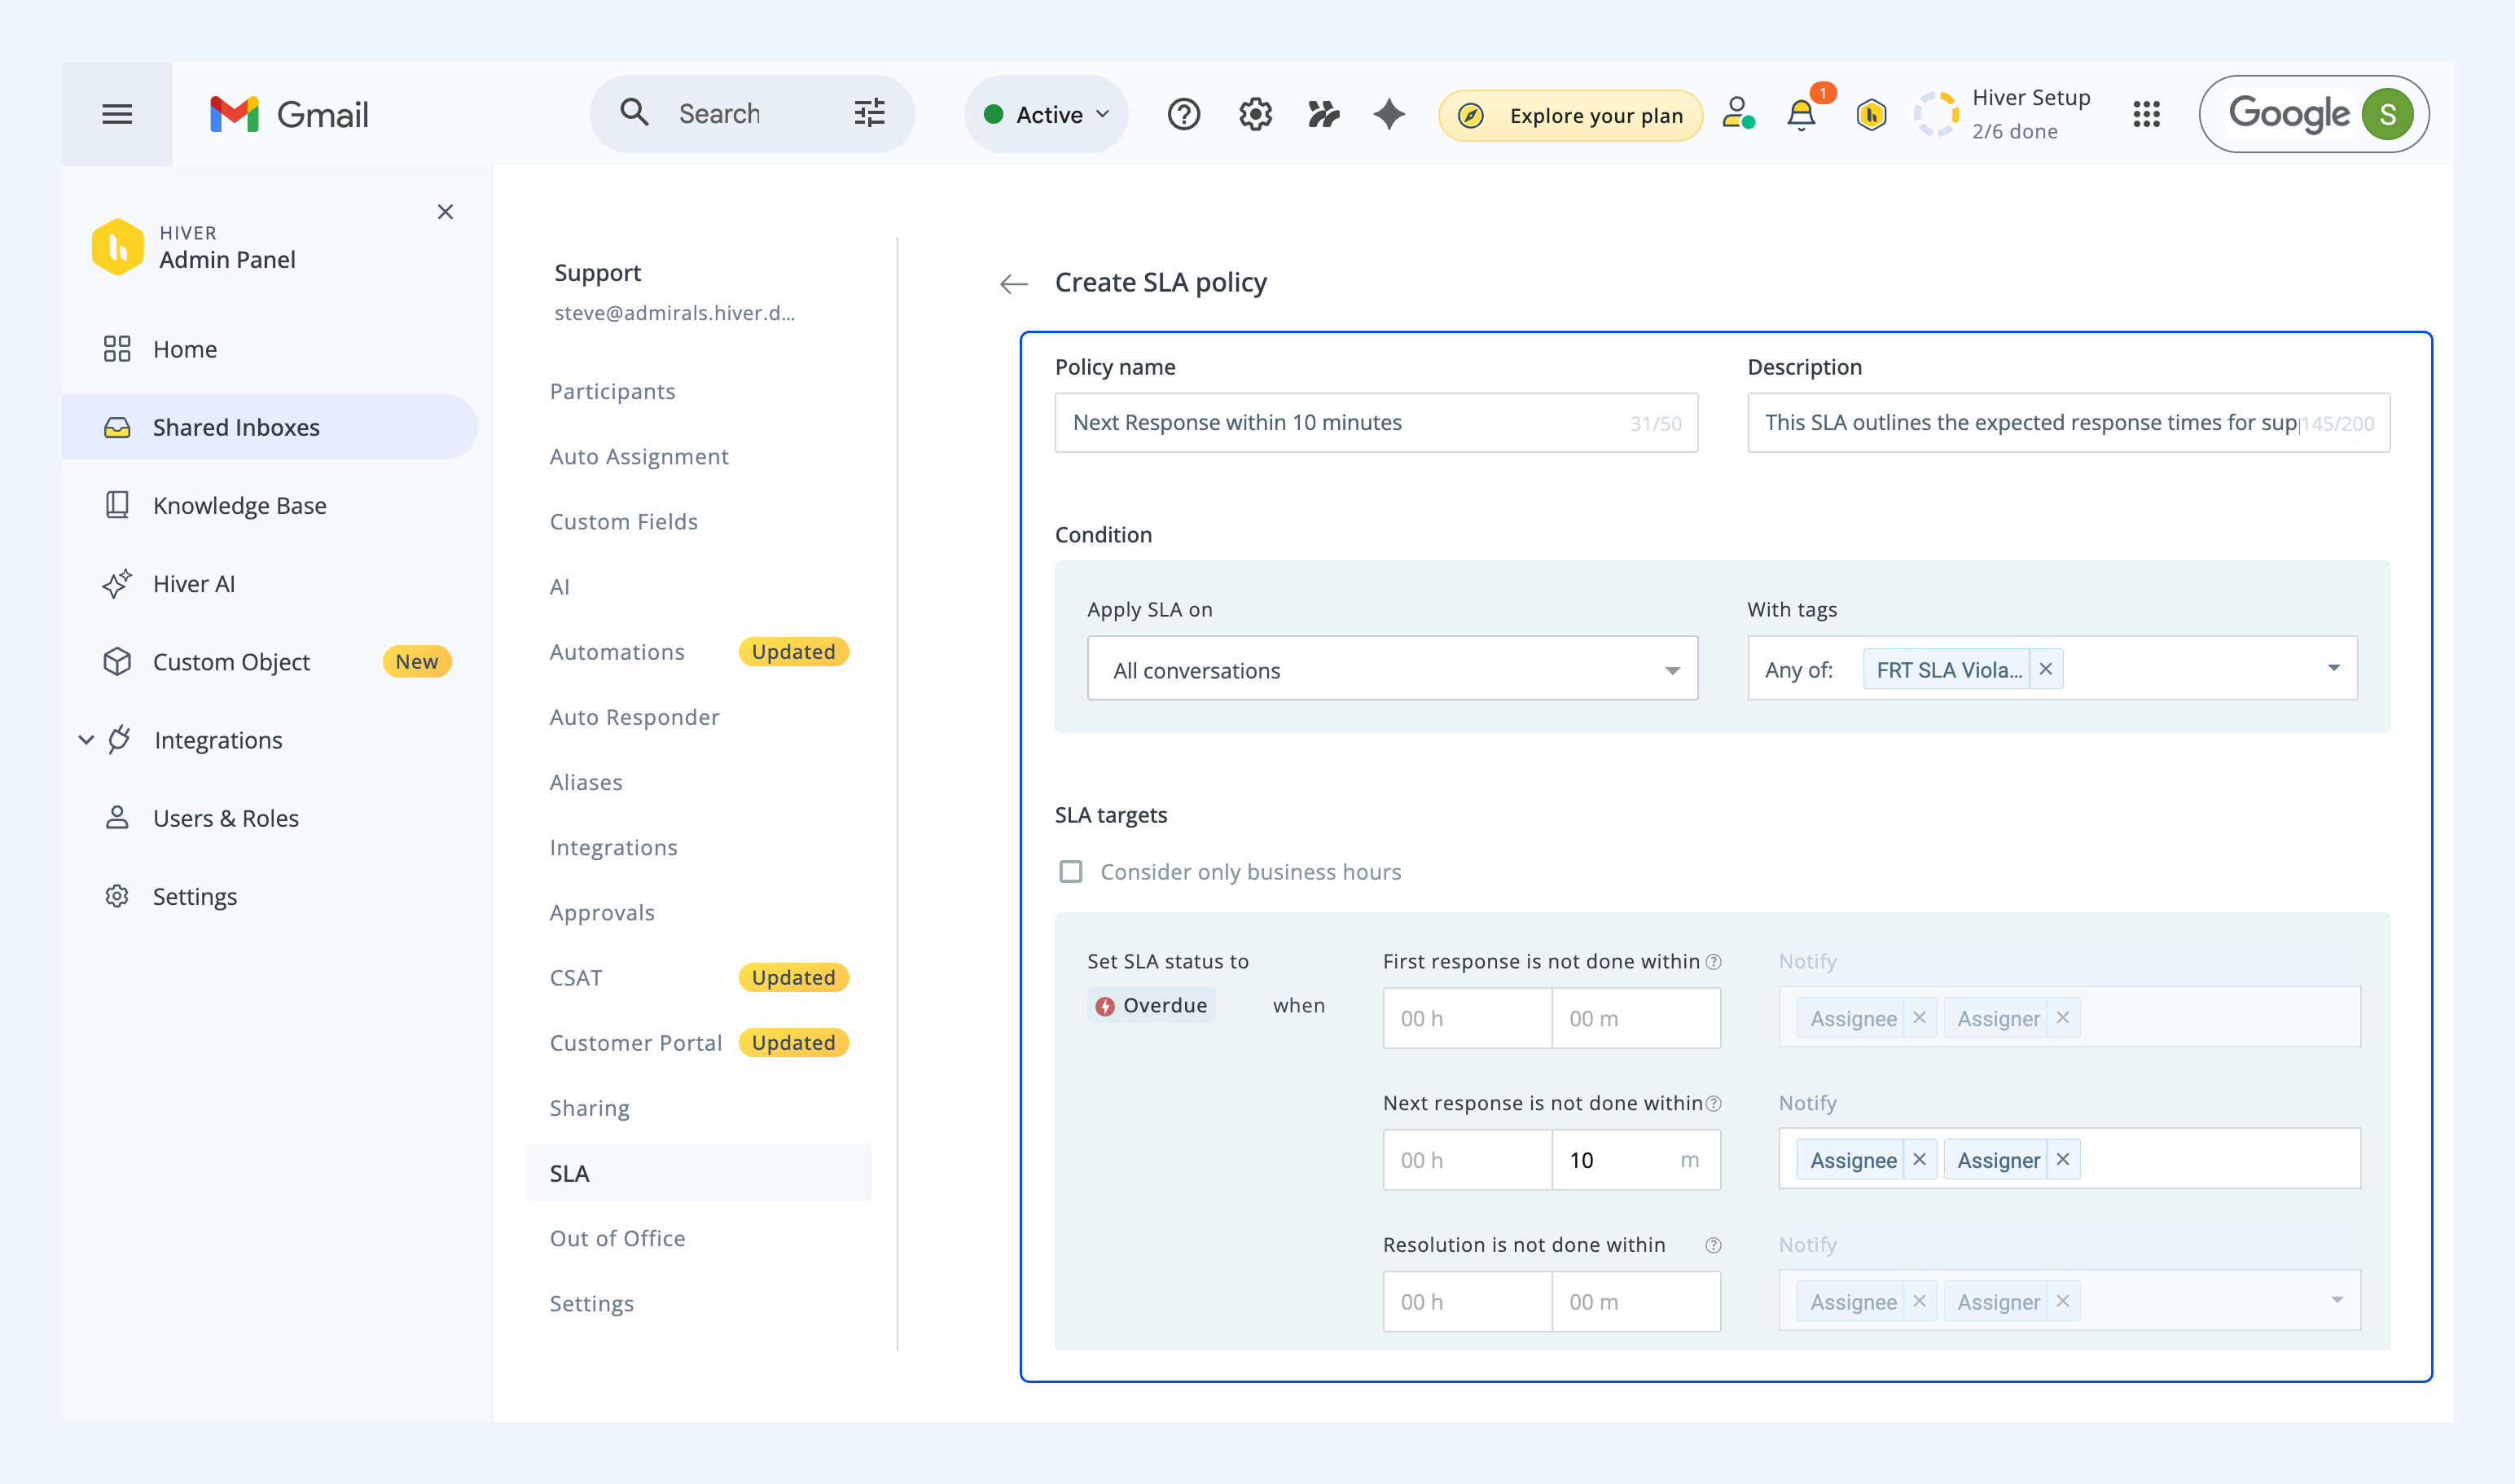
4. Fill in the following details:
- Policy name: Enter a name for the policy (50-character limit).
- Description (optional): Describe the purpose of the policy.
- Condition: Choose which types of conversations the policy should apply to. Inbound, outbound, conversations manually added to the Shared Inbox, or all conversations.
- With tags (optional): Add tags to apply this policy to conversations of a specific category or workflow.
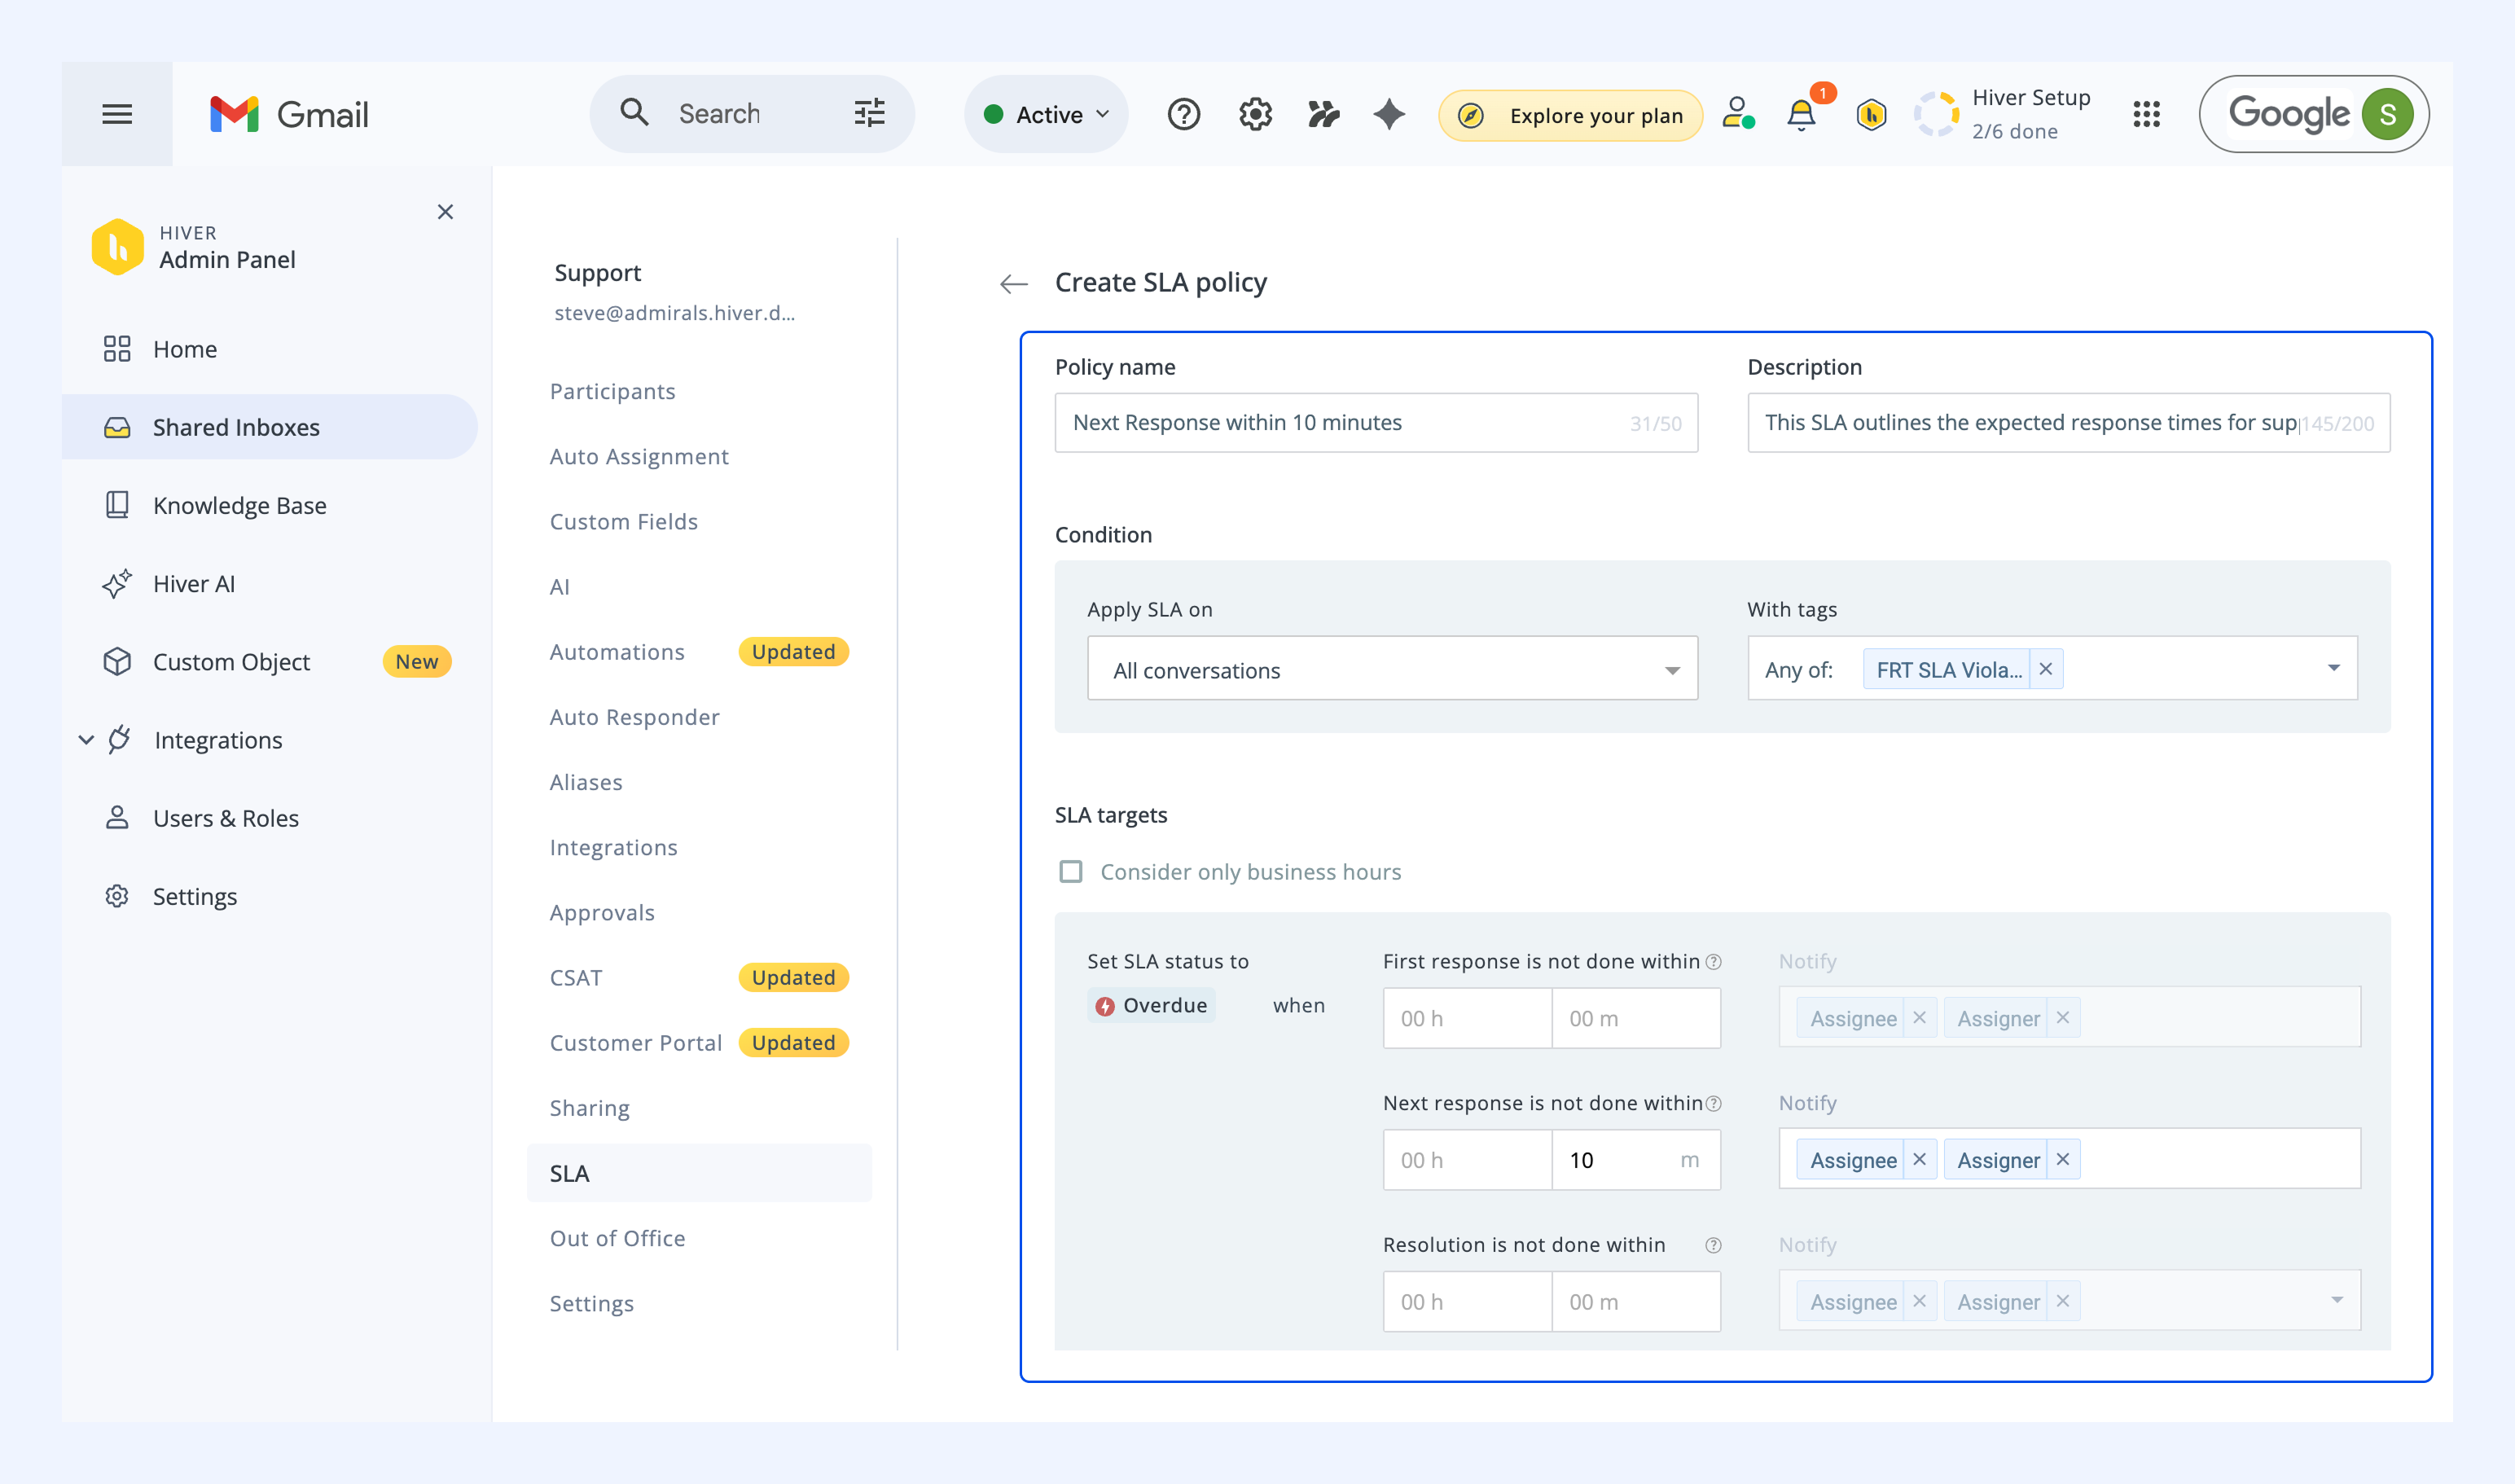
5. Under SLA targets, define one or more of the following targets:
- First response is not done within: The time within which an agent must send the first reply to a conversation.
- Next response is not done within: The time within which an agent must reply to subsequent messages in an ongoing conversation. This applies only to new messages that come in after the agent has already sent the first response.
- Resolution is not done within: The time within which a conversation must be marked as closed.
6. You can also restart the resolution timer when a customer replies to a closed conversation. Select For closed conversations, restart the resolution timer if the customer replies after and set how long a conversation must remain closed before a customer reply starts a new resolution timer.
For example, set this to 7 days to start a fresh timer when a customer replies more than 7 days after the conversation was closed.
7. If you have a Business Hour Template mapped to your Shared Inbox and want the SLA to run only within defined working hours, toggle on Consider only business hours.
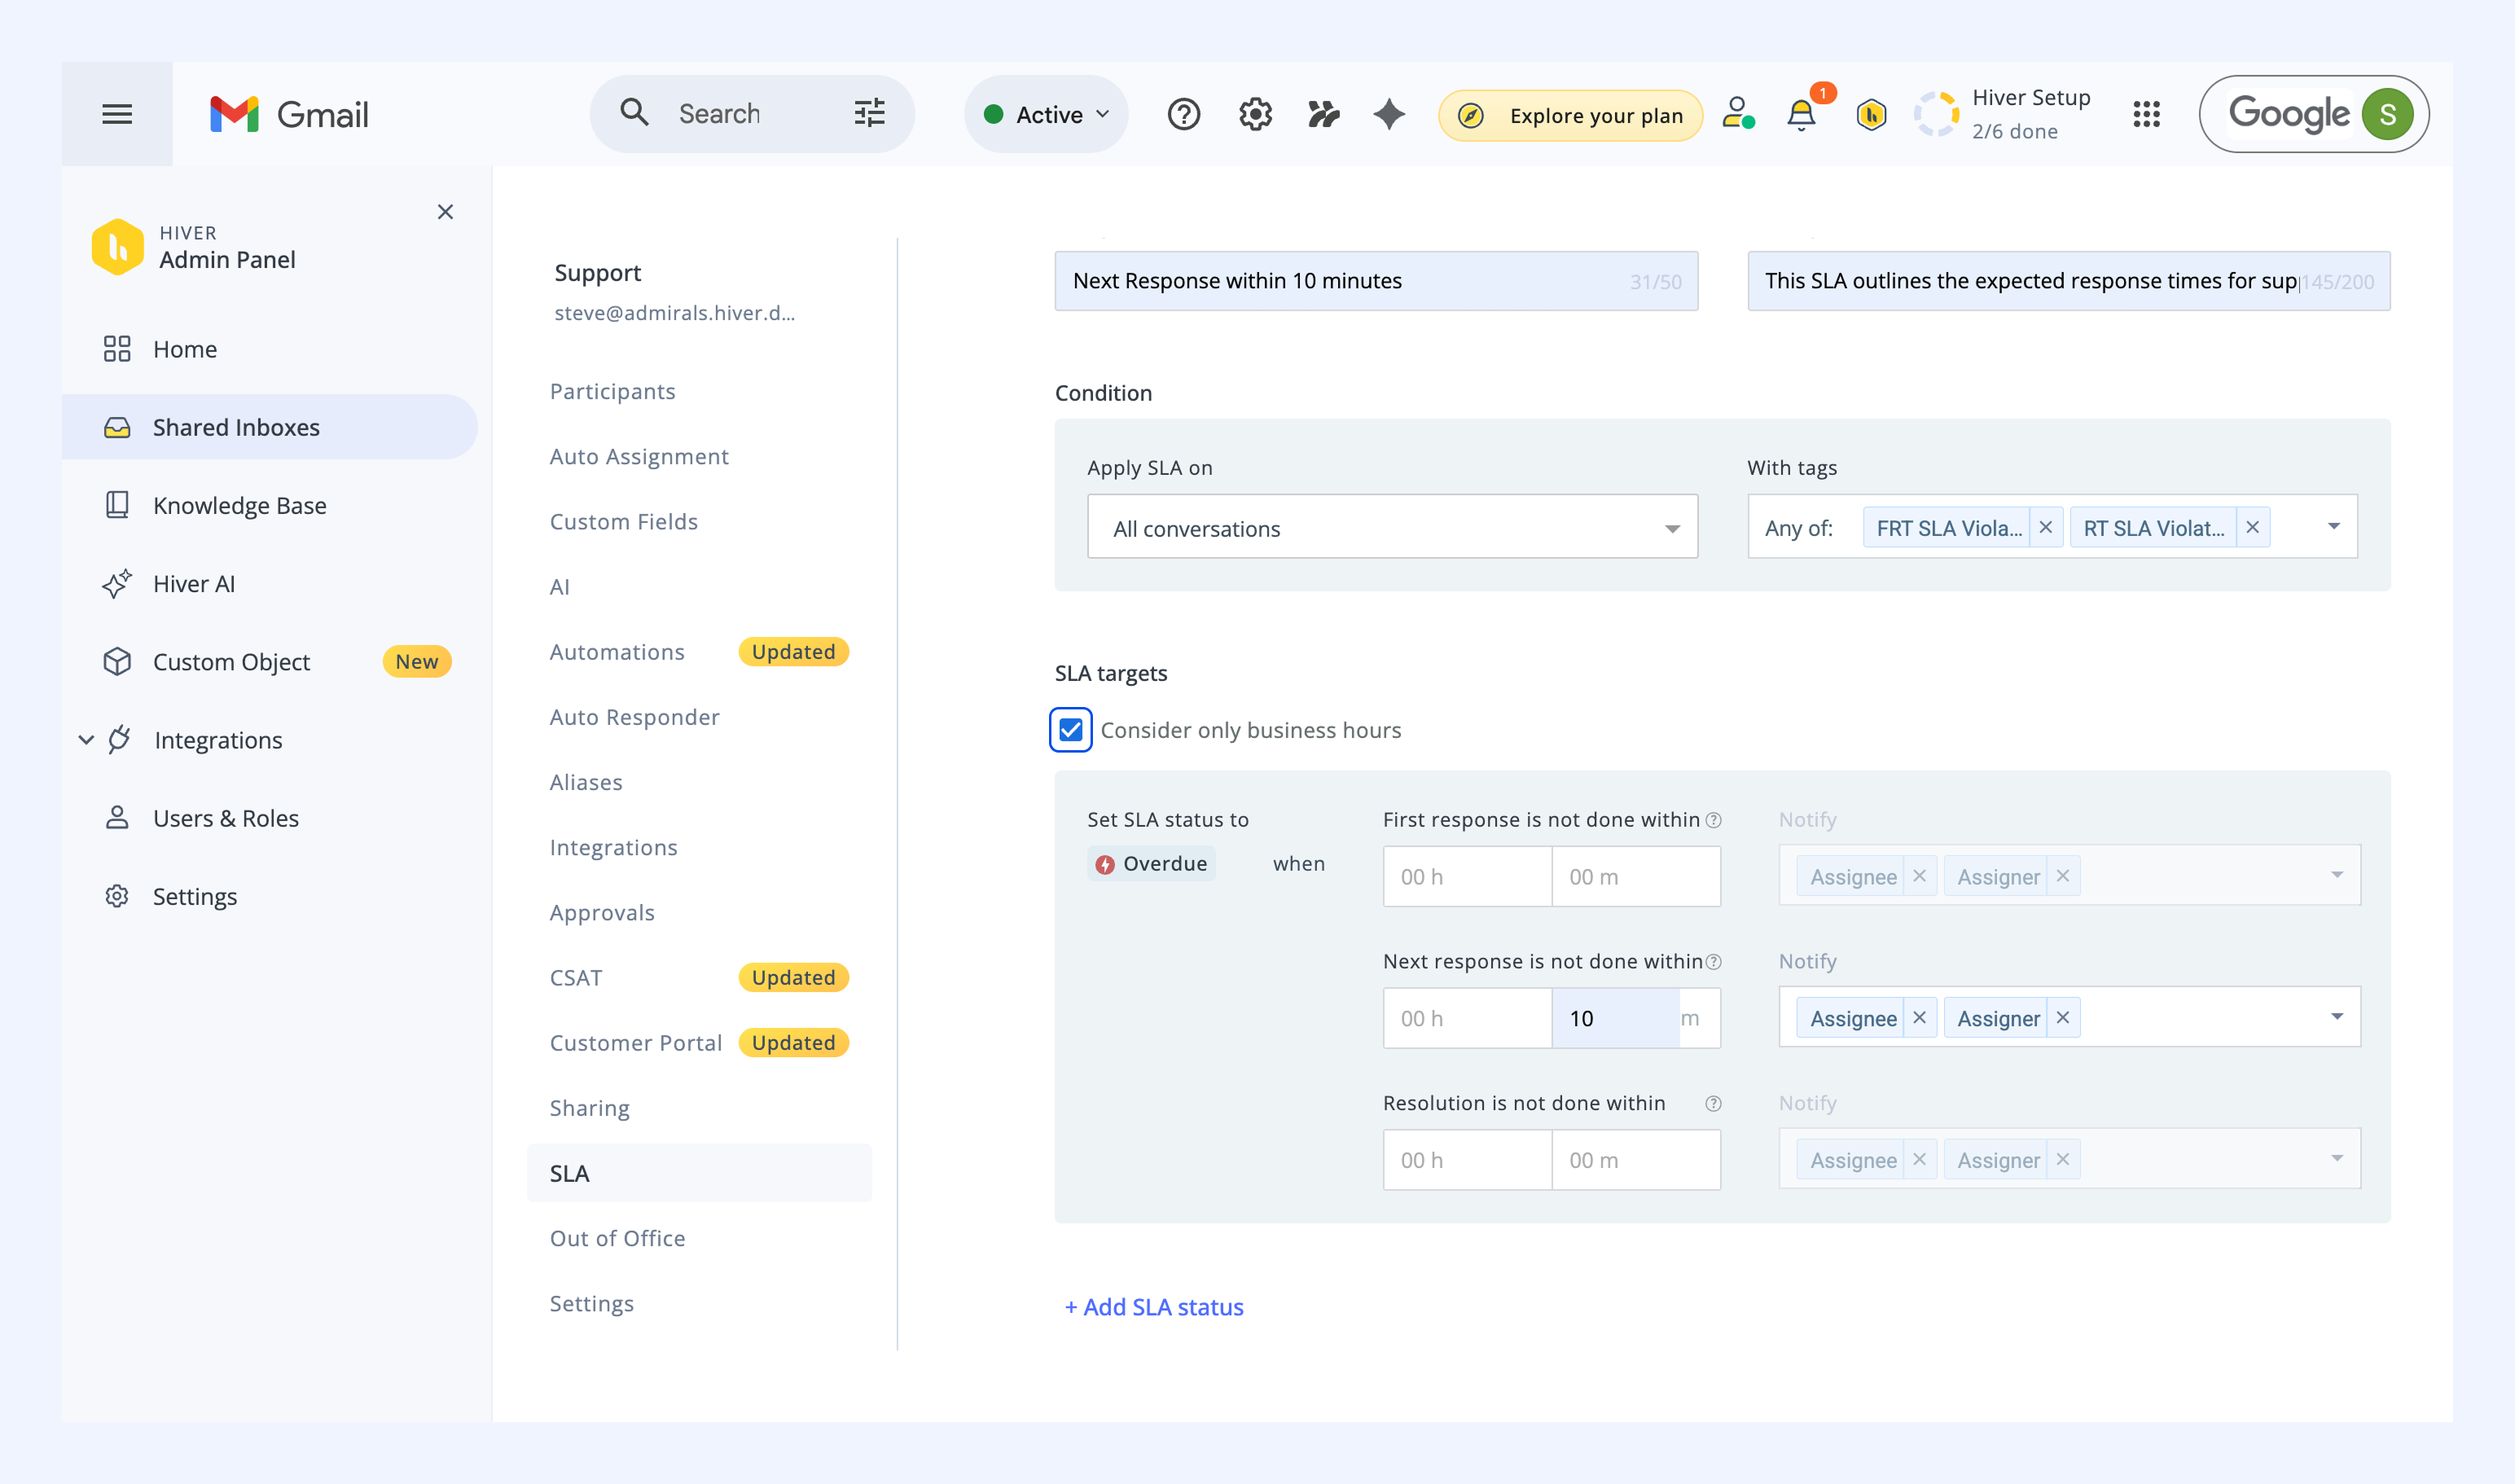
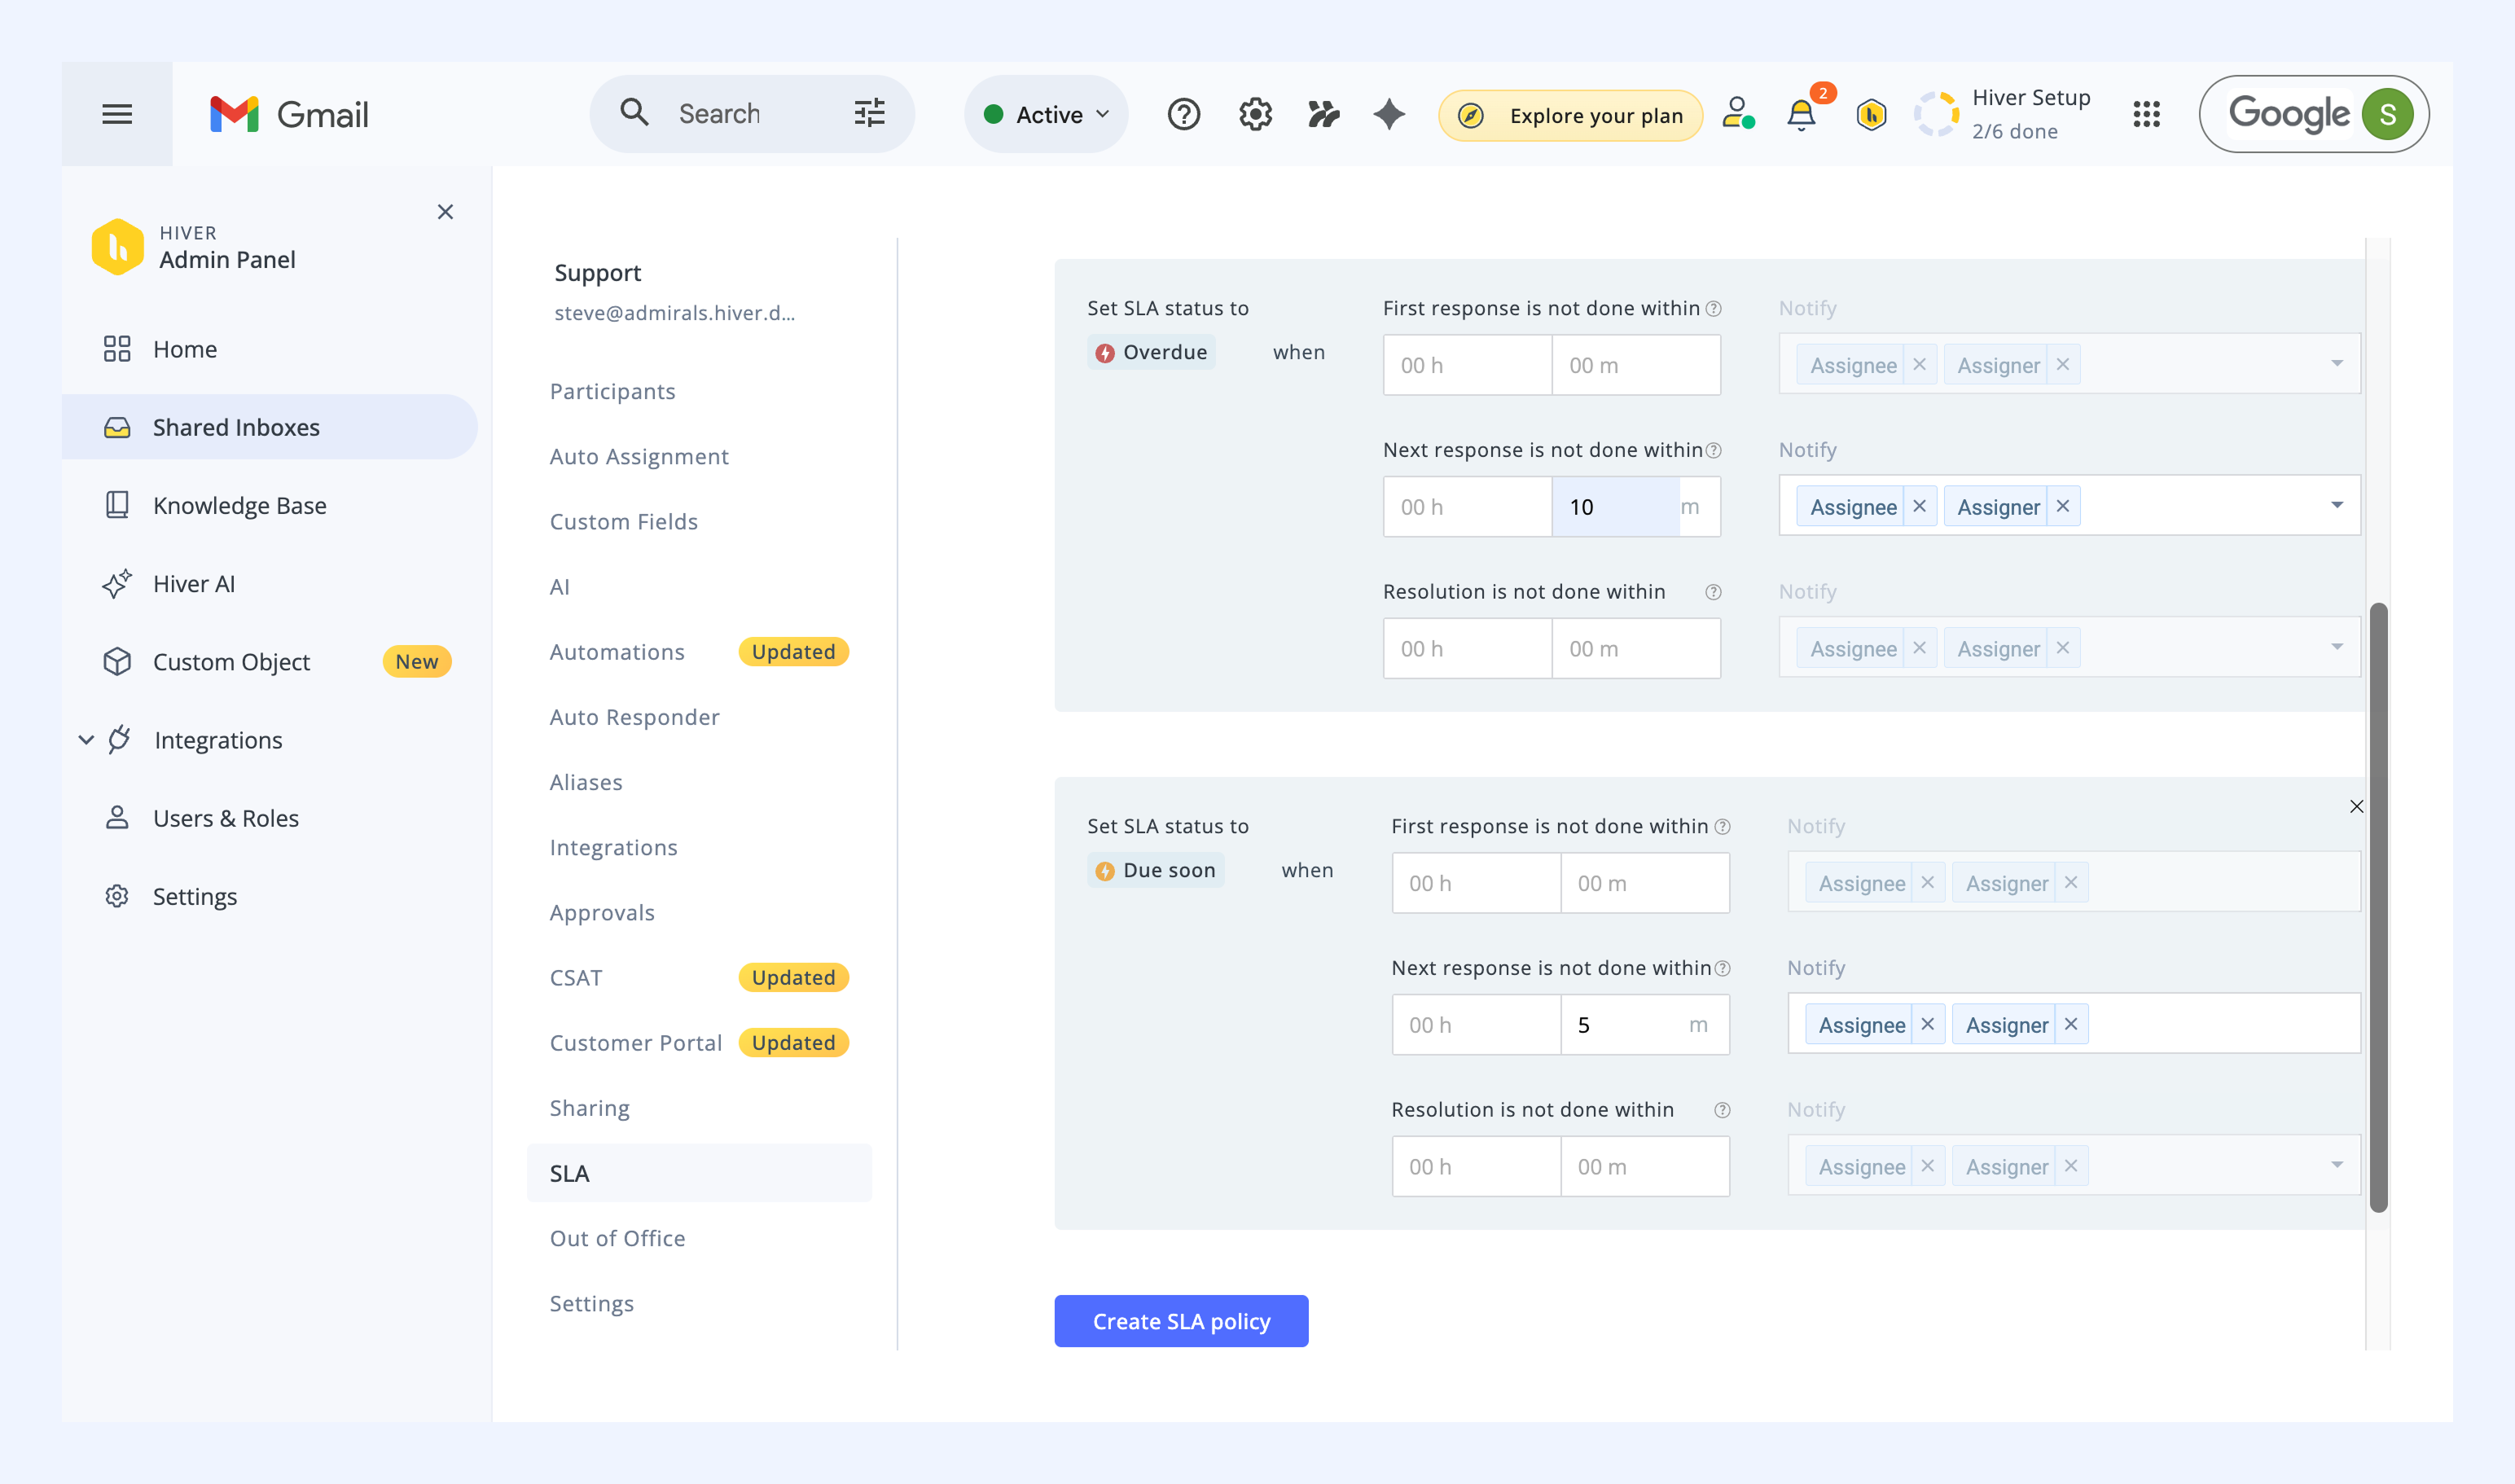
8. To set up alerts for approaching deadlines, click Add SLA status:
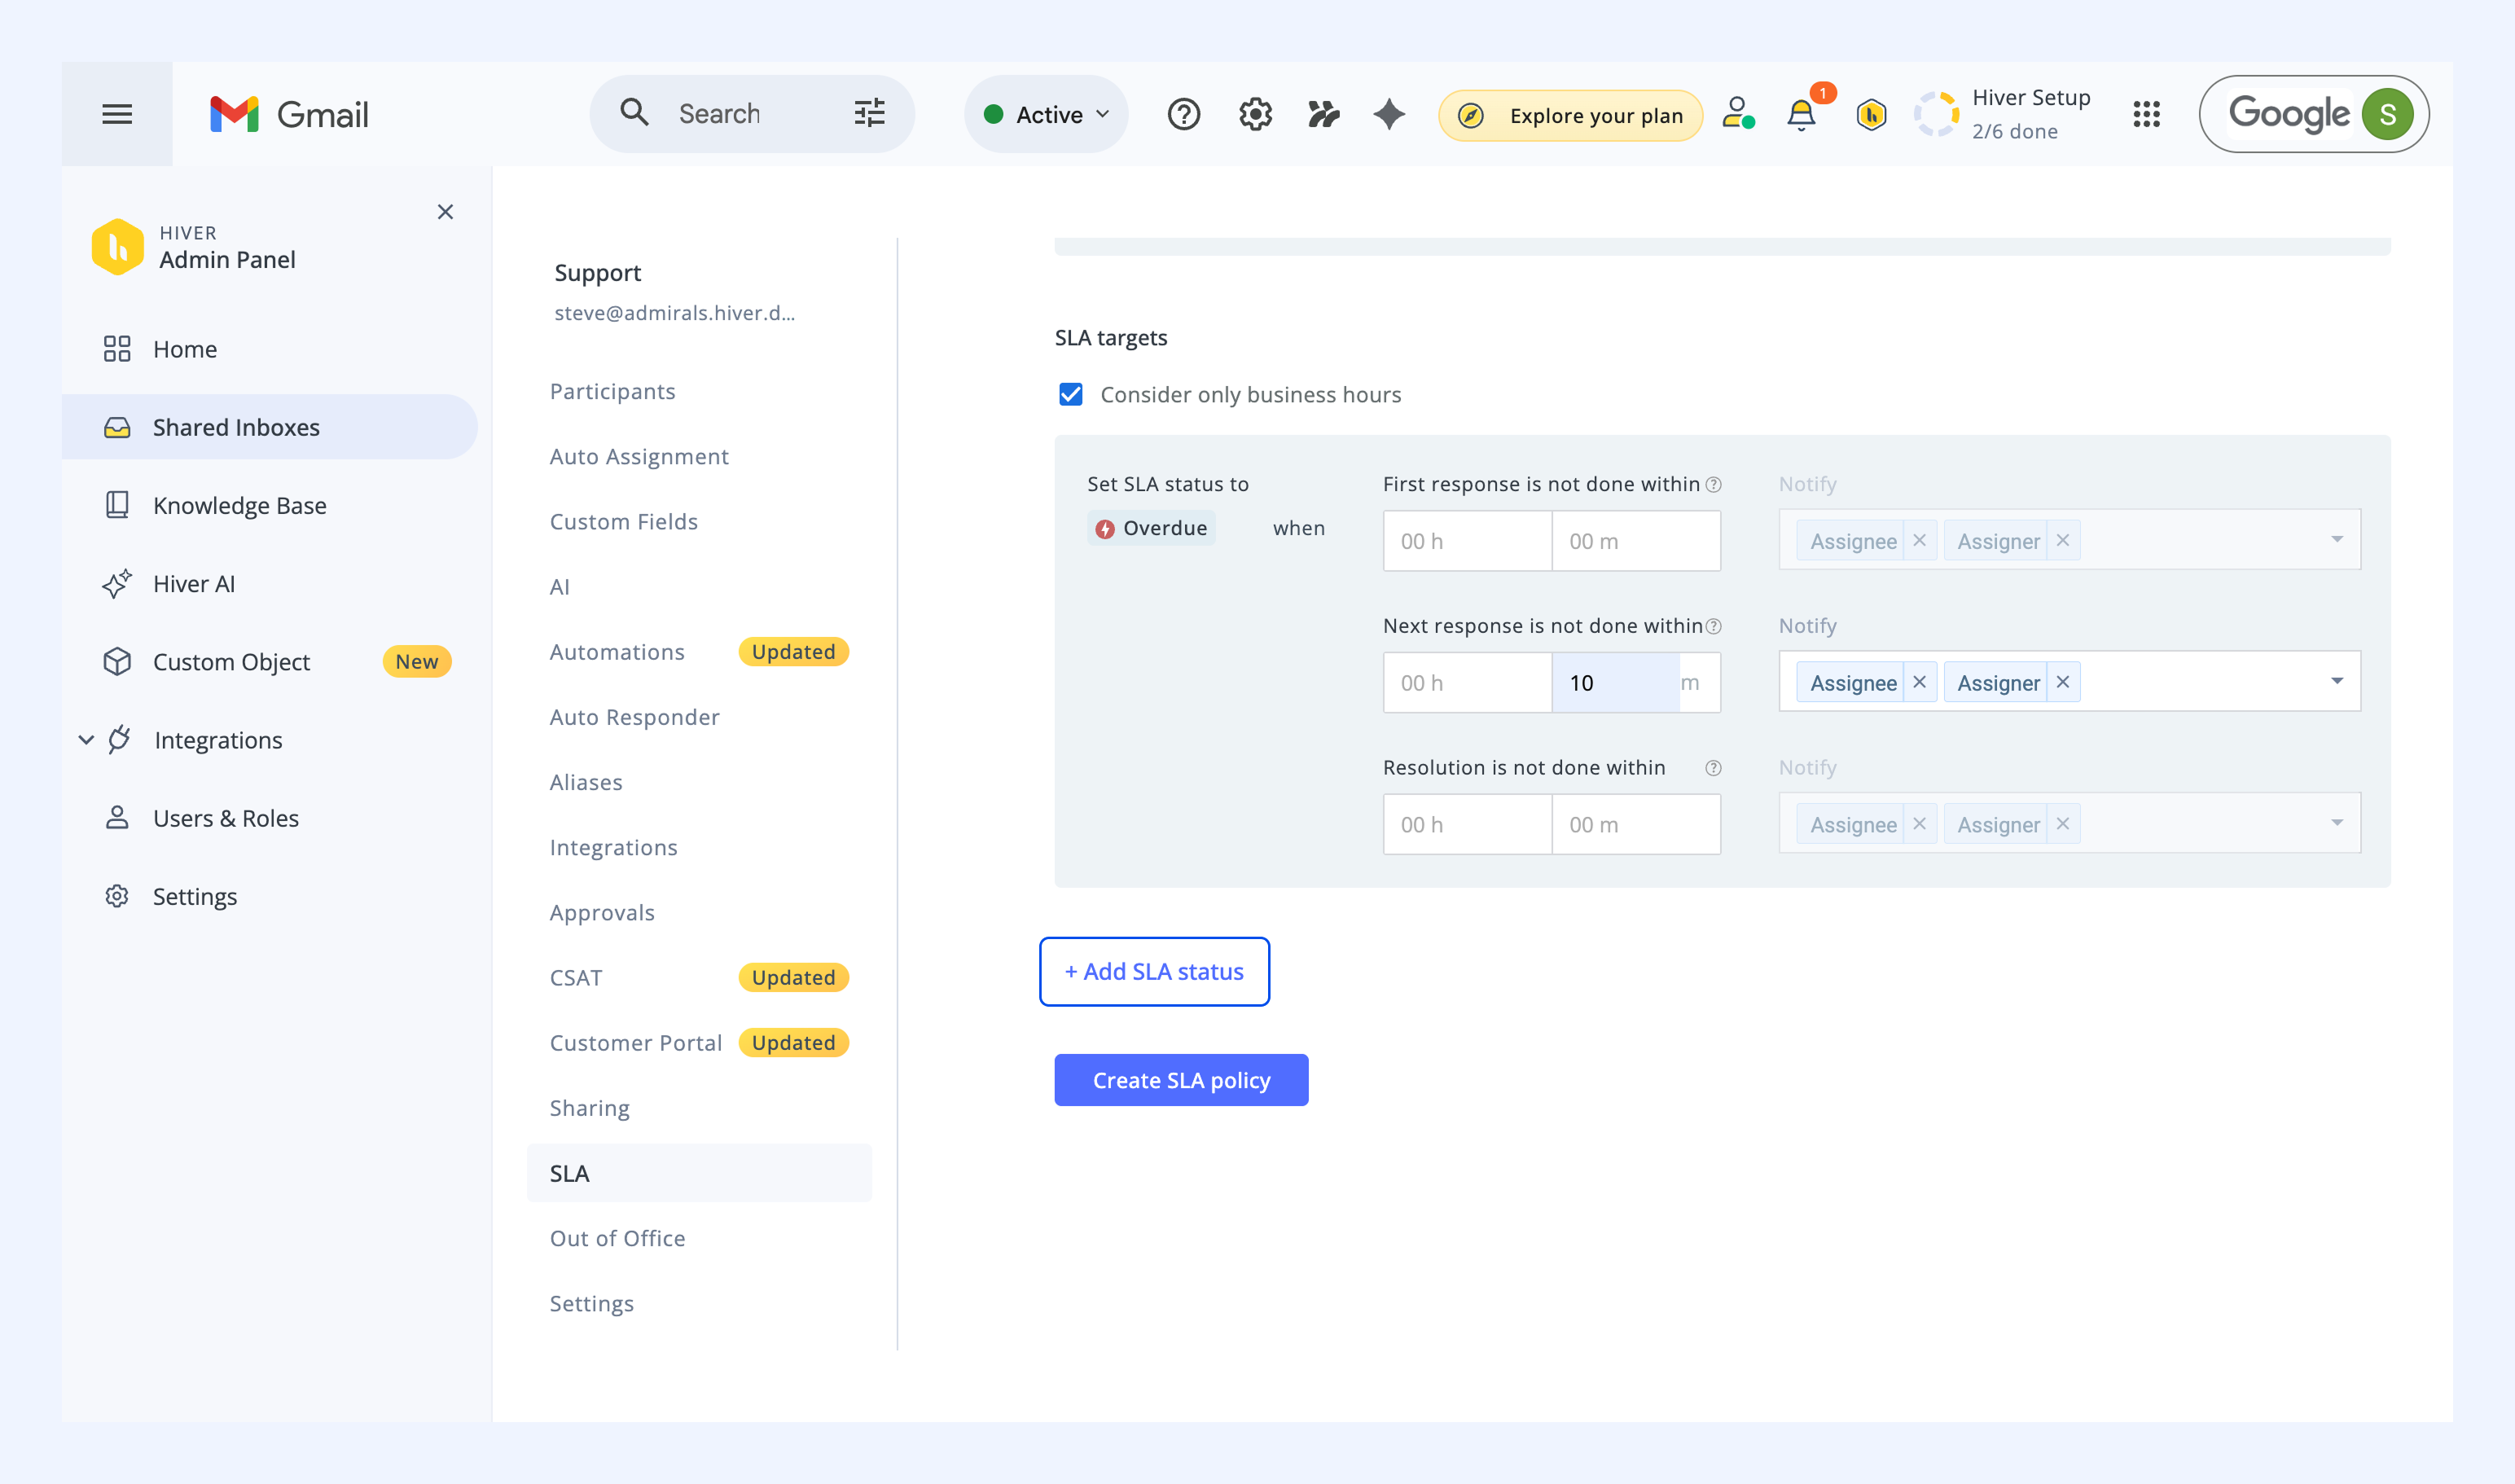
- Specify when and whom to notify before the SLA is breached. You can configure separate notifications for Due soon and Overdue states.
9. Click Create SLA policy to activate it.
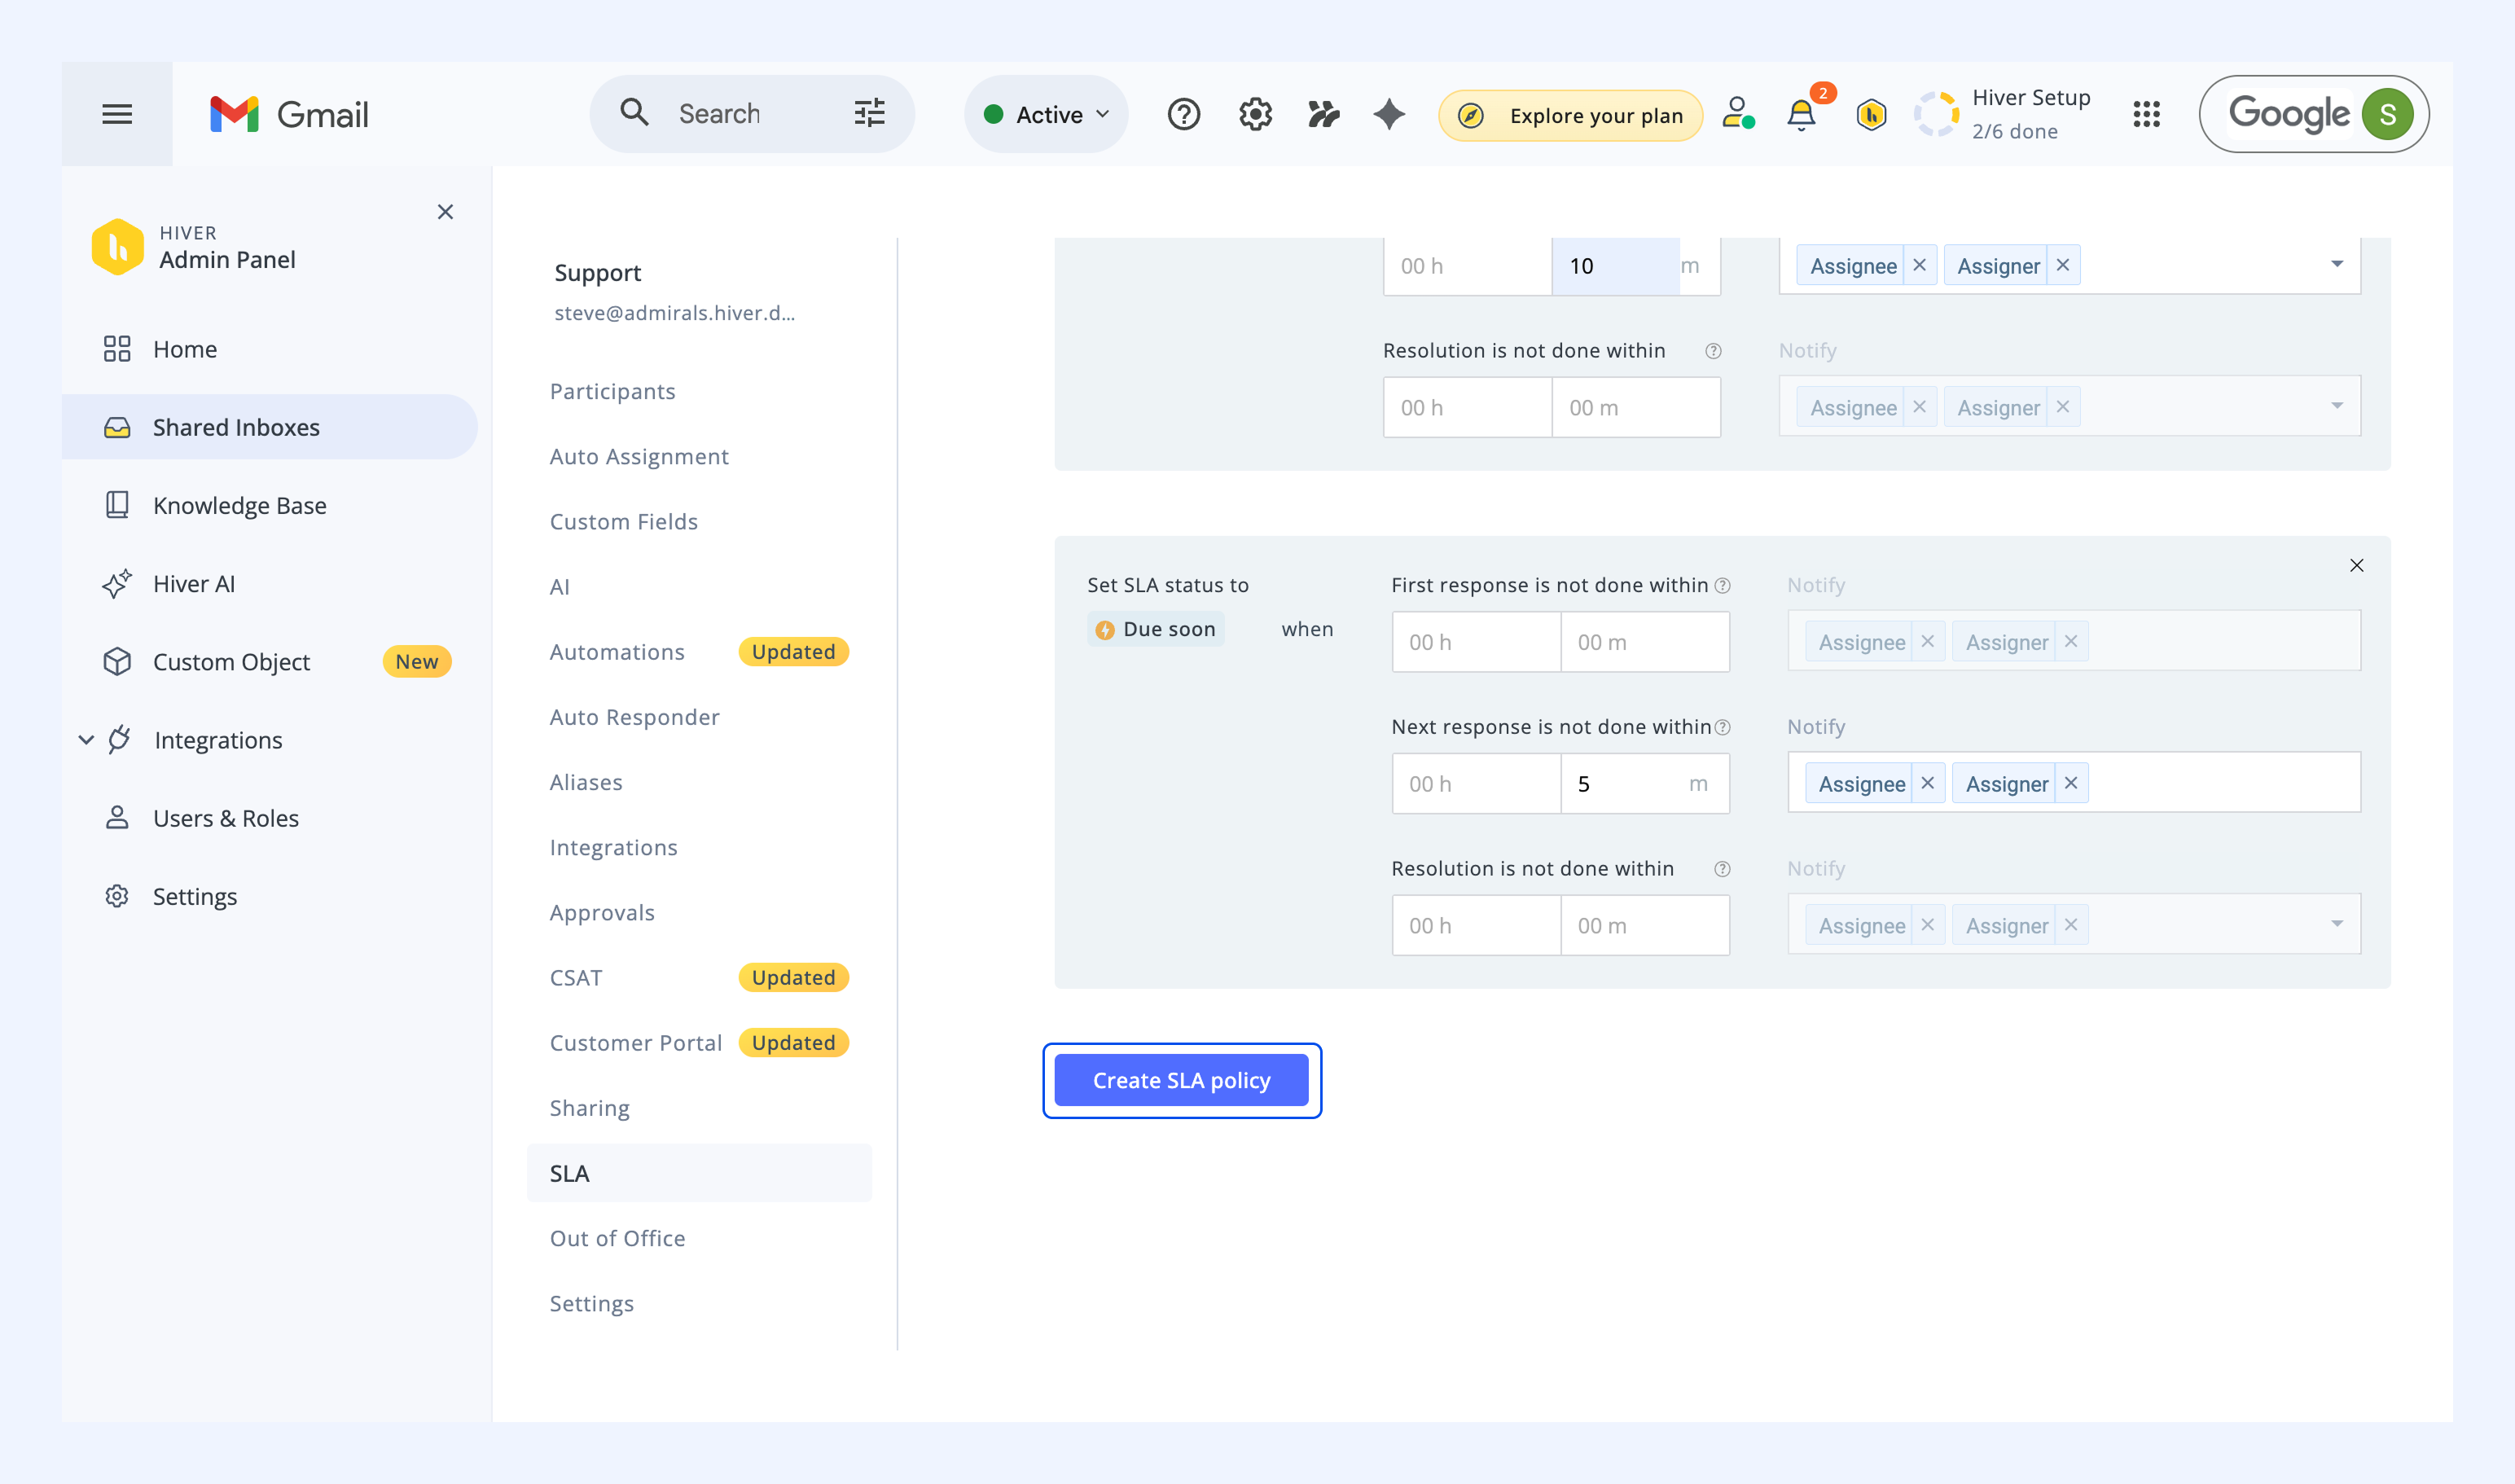
Your policy is now active and will apply to conversations in this inbox based on the conditions you set.
Note:
- All conversations that have passed the SLA deadline will have an Overdue status. All Shared Inbox members can see SLA status on conversations and in list view.
- Each target runs independently. A conversation can show as FRT Overdue, NRT Overdue, or RT Overdue based on which target it missed.
All conversations with an approaching SLA deadline will have a Due soon status.
How SLAs work in Hiver
One SLA policy per conversation
Each conversation can have only one SLA policy mapped to it at any time.
Note: When Apply SLA on tag changes is enabled, you can only apply up to 10 different SLA policies to a conversation. After the 10th change, additional tag updates will not cause the SLA to be re-evaluated.
Policy ranking determines which SLA applies
When a conversation matches multiple policies, the highest-ranked policy takes priority. Learn more about ordering SLA policies.
Evaluation of SLAs
You have two options for when the system checks which policy to apply:
- When the conversation is created (default): The system evaluates policies only when a conversation is received.
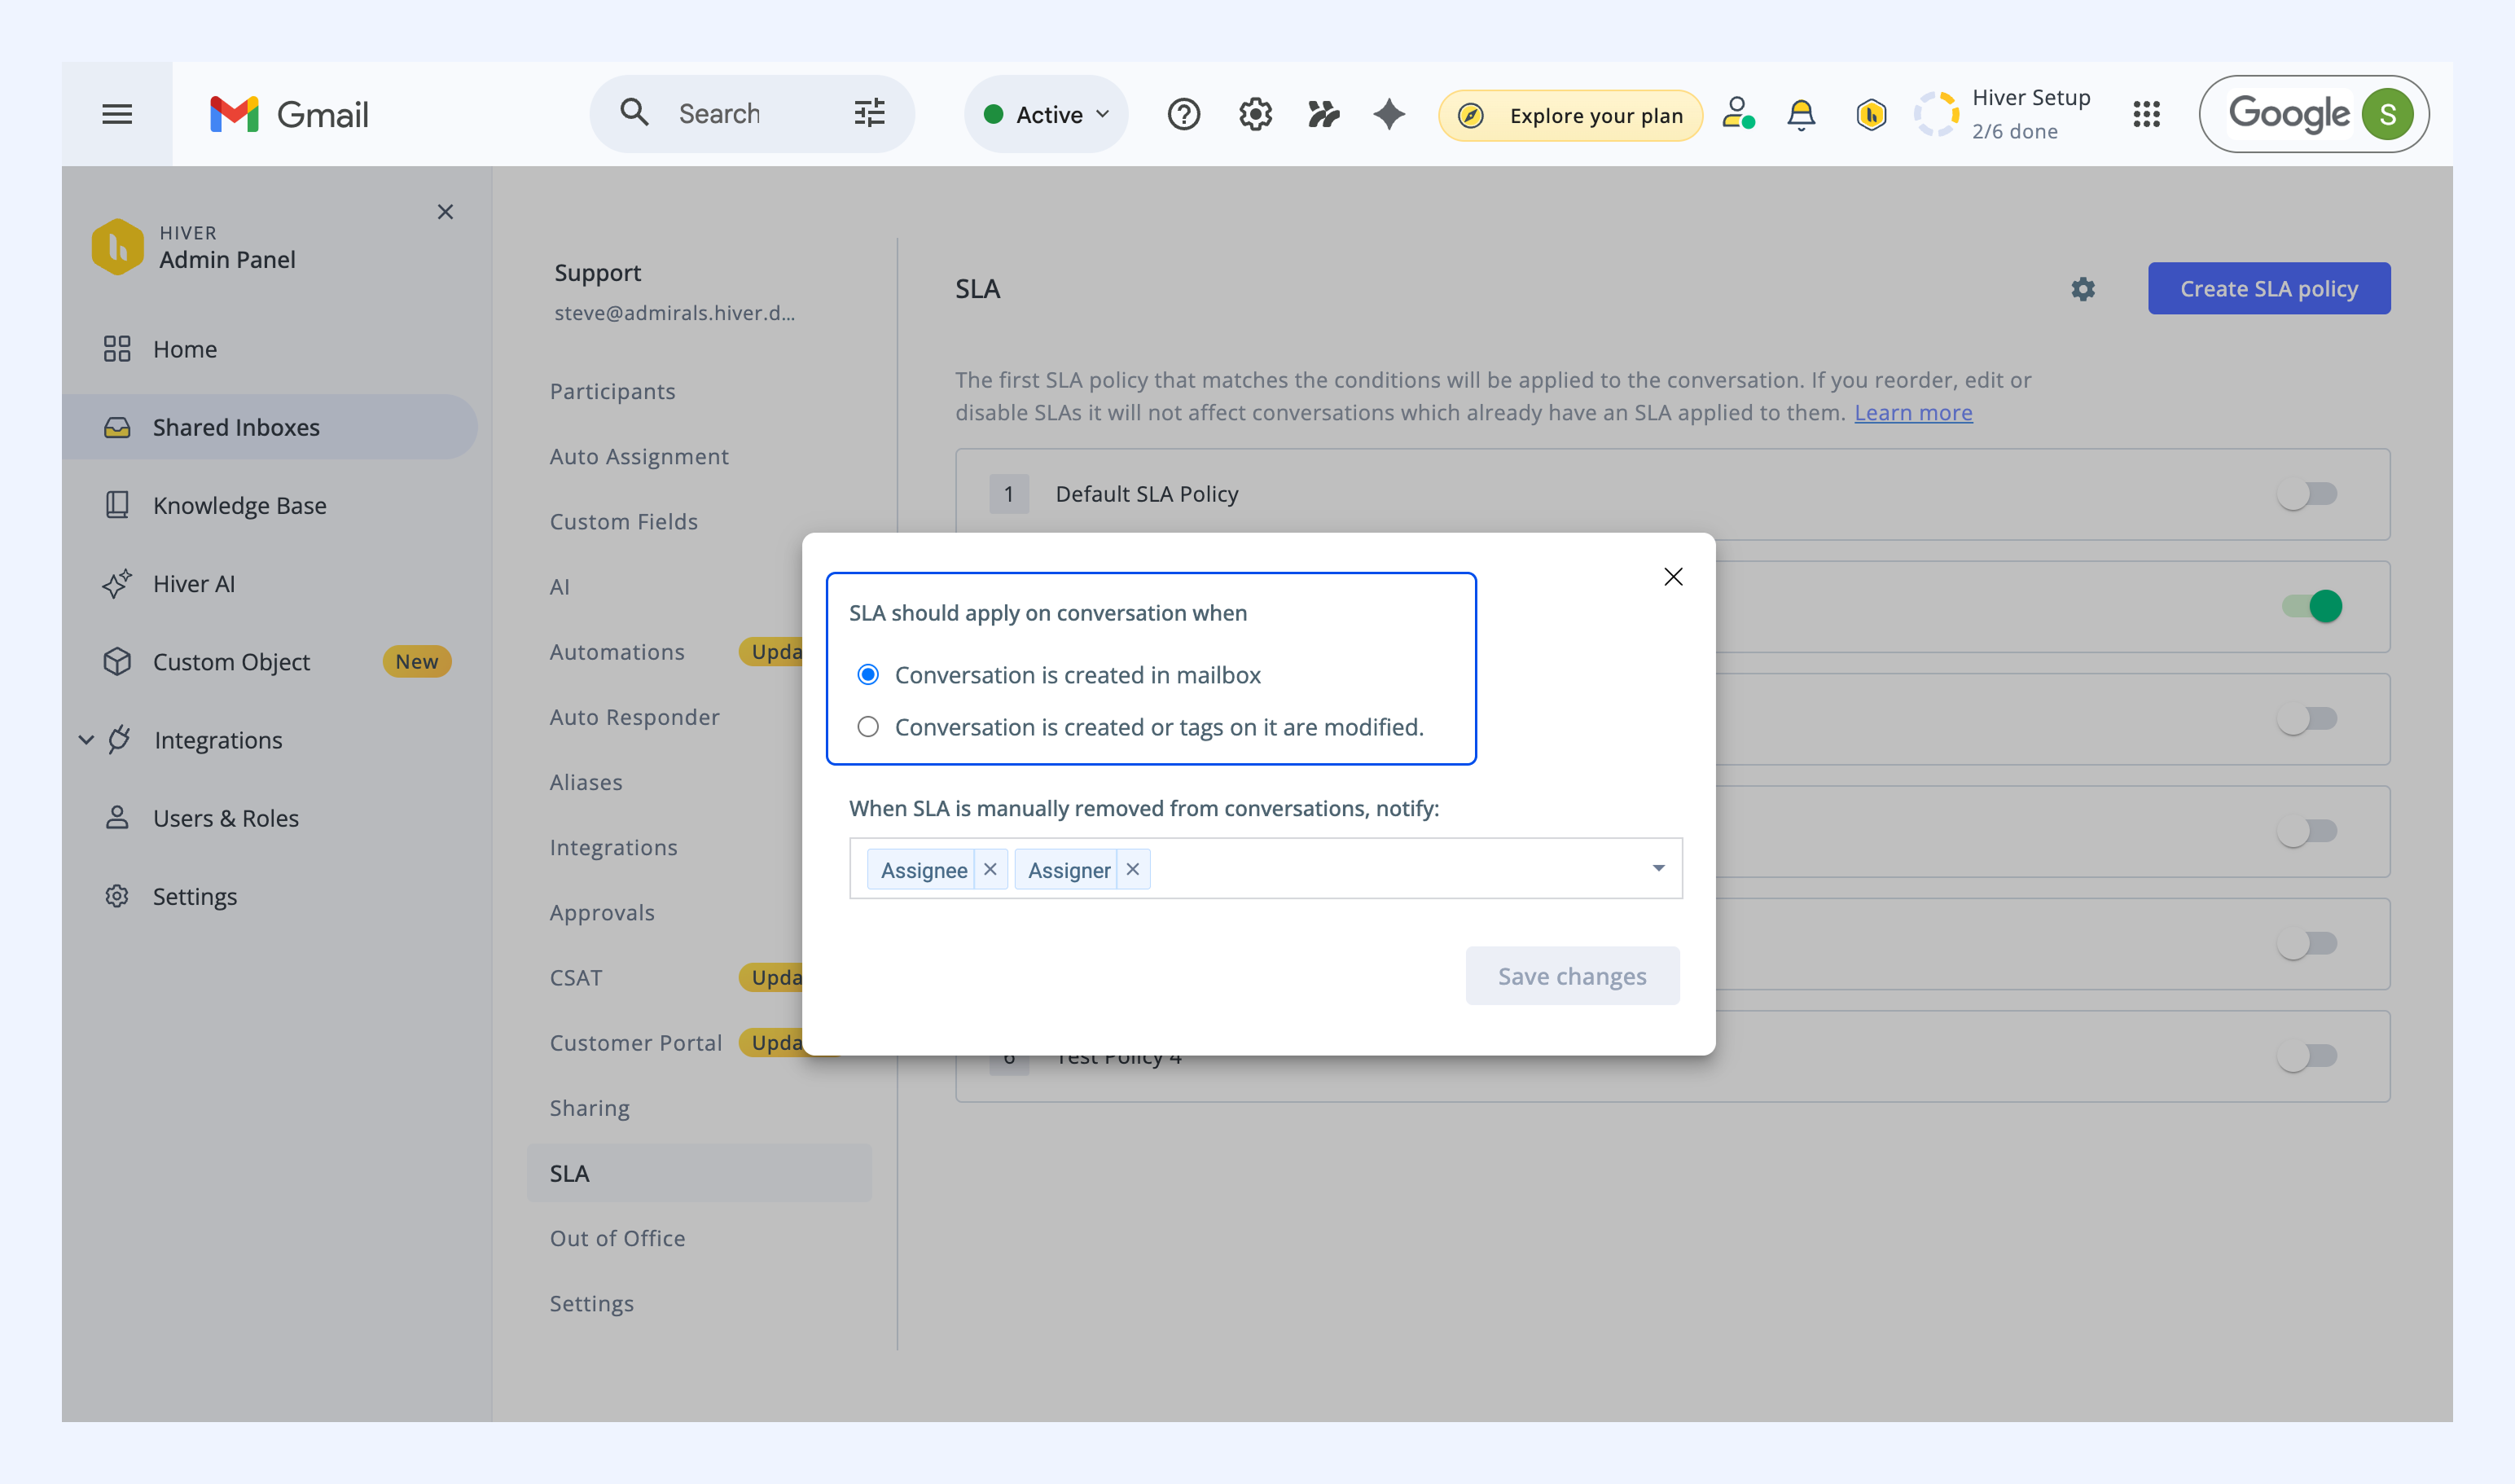
- When the conversation is created or tags are modified: The system re-evaluates whenever tags are added or removed. Use this when conversations frequently get reprioritized based on customer responses.
In SLA, click the settings icon to enable any one of these options.
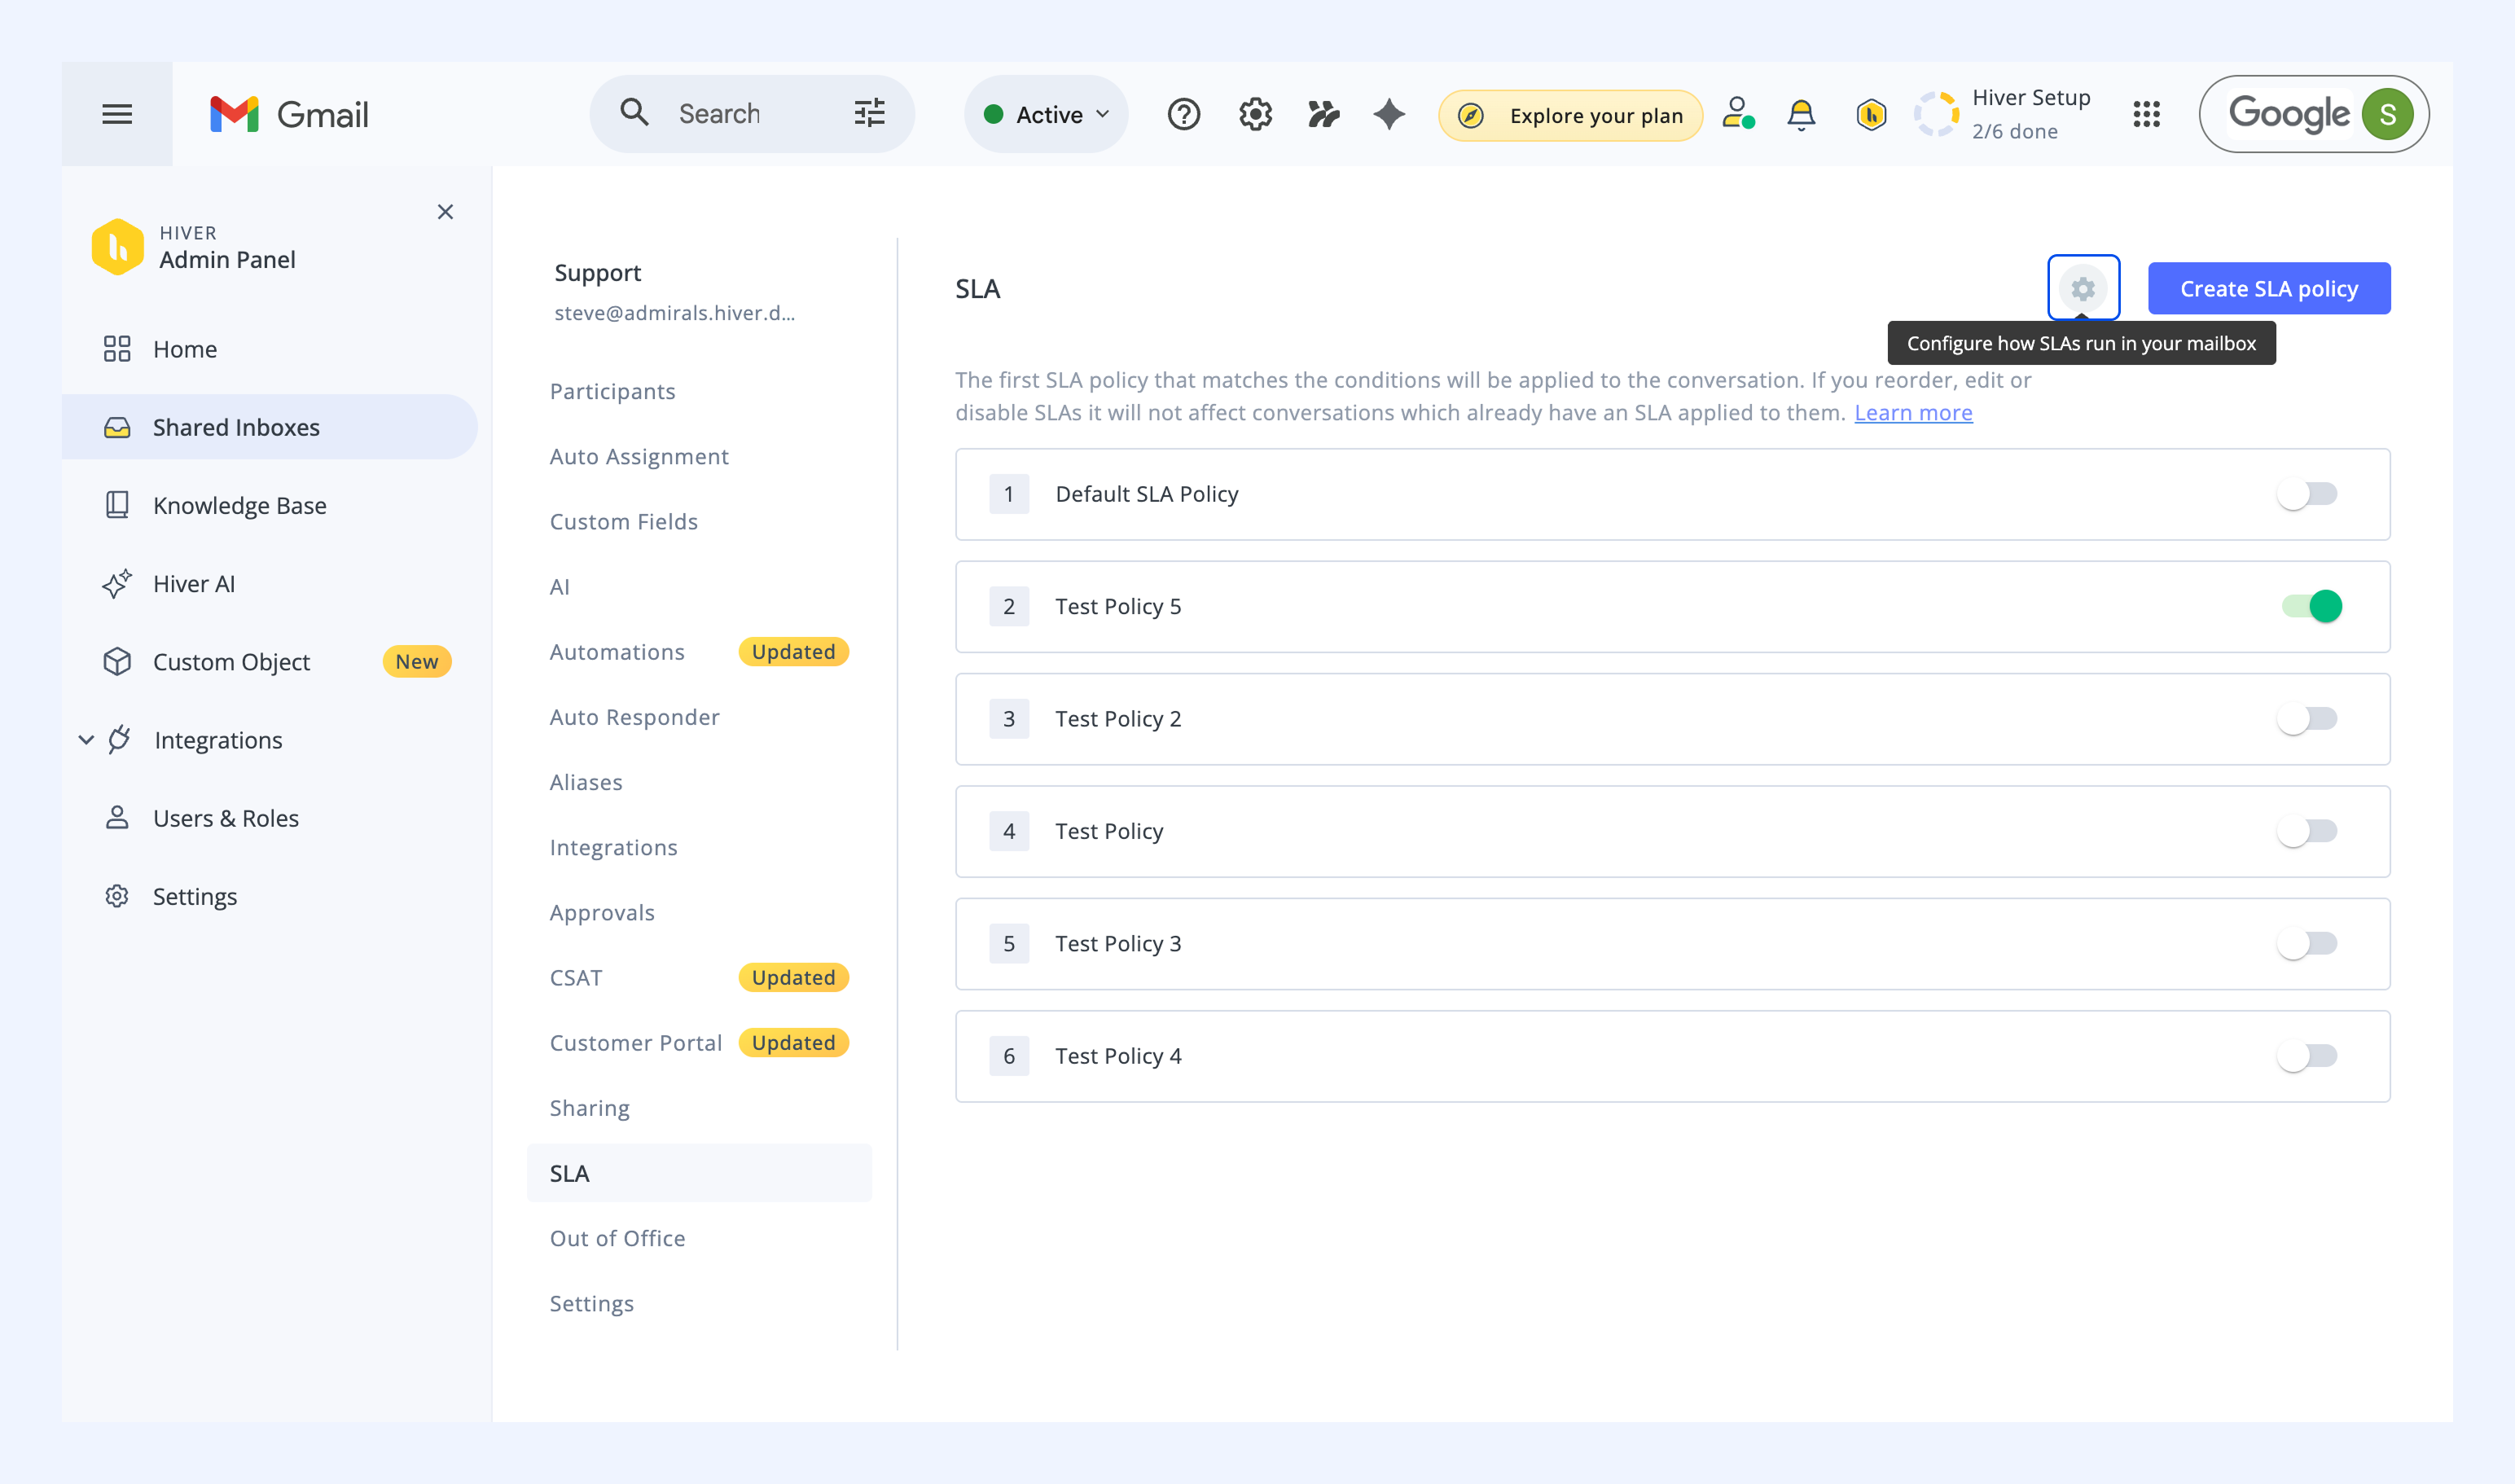
If you enable tag-based re-evaluation, it applies to open and pending conversations, whether they already have an SLA or not. It does not apply to closed conversations or when tags are deleted from the inbox.
Remove SLAs manually to handle exceptions
Spam emails and auto-replies can distort your resolution metrics if they remain open with active SLAs. To avoid this, you can manually remove SLAs from a specific conversation.
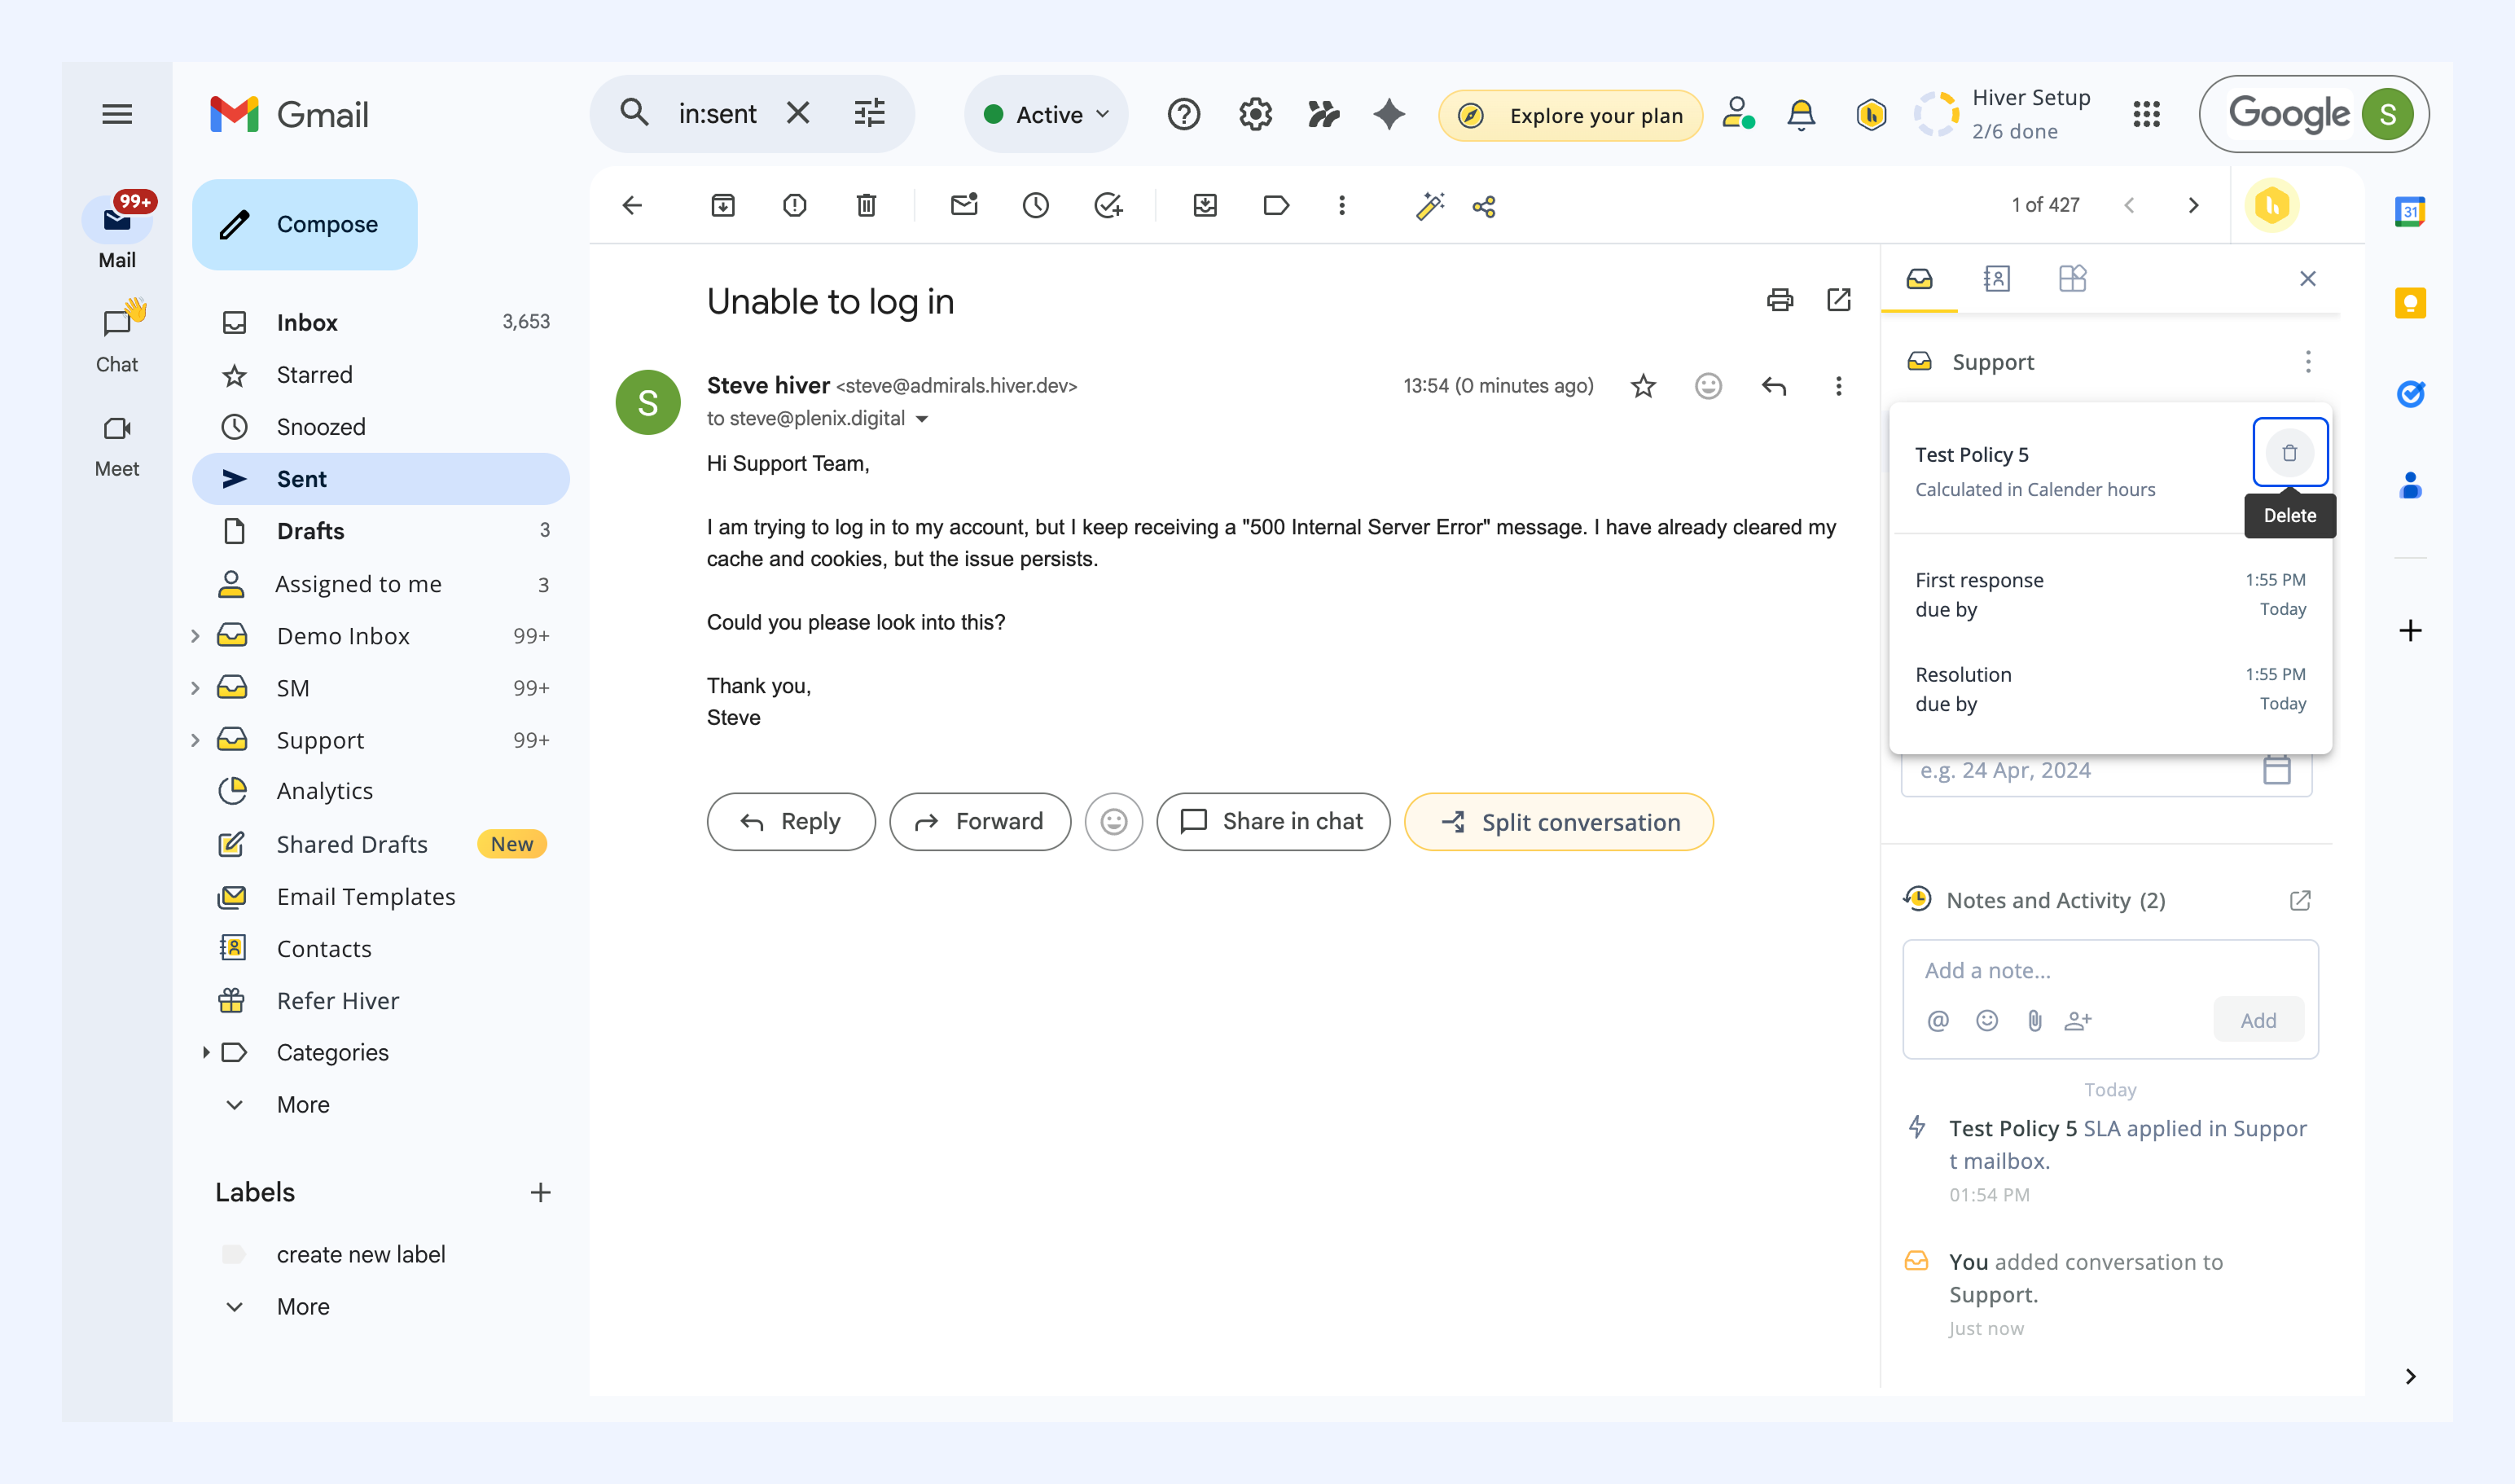
Note: Only Inbox Admins and Admins can remove SLAs from a conversation.
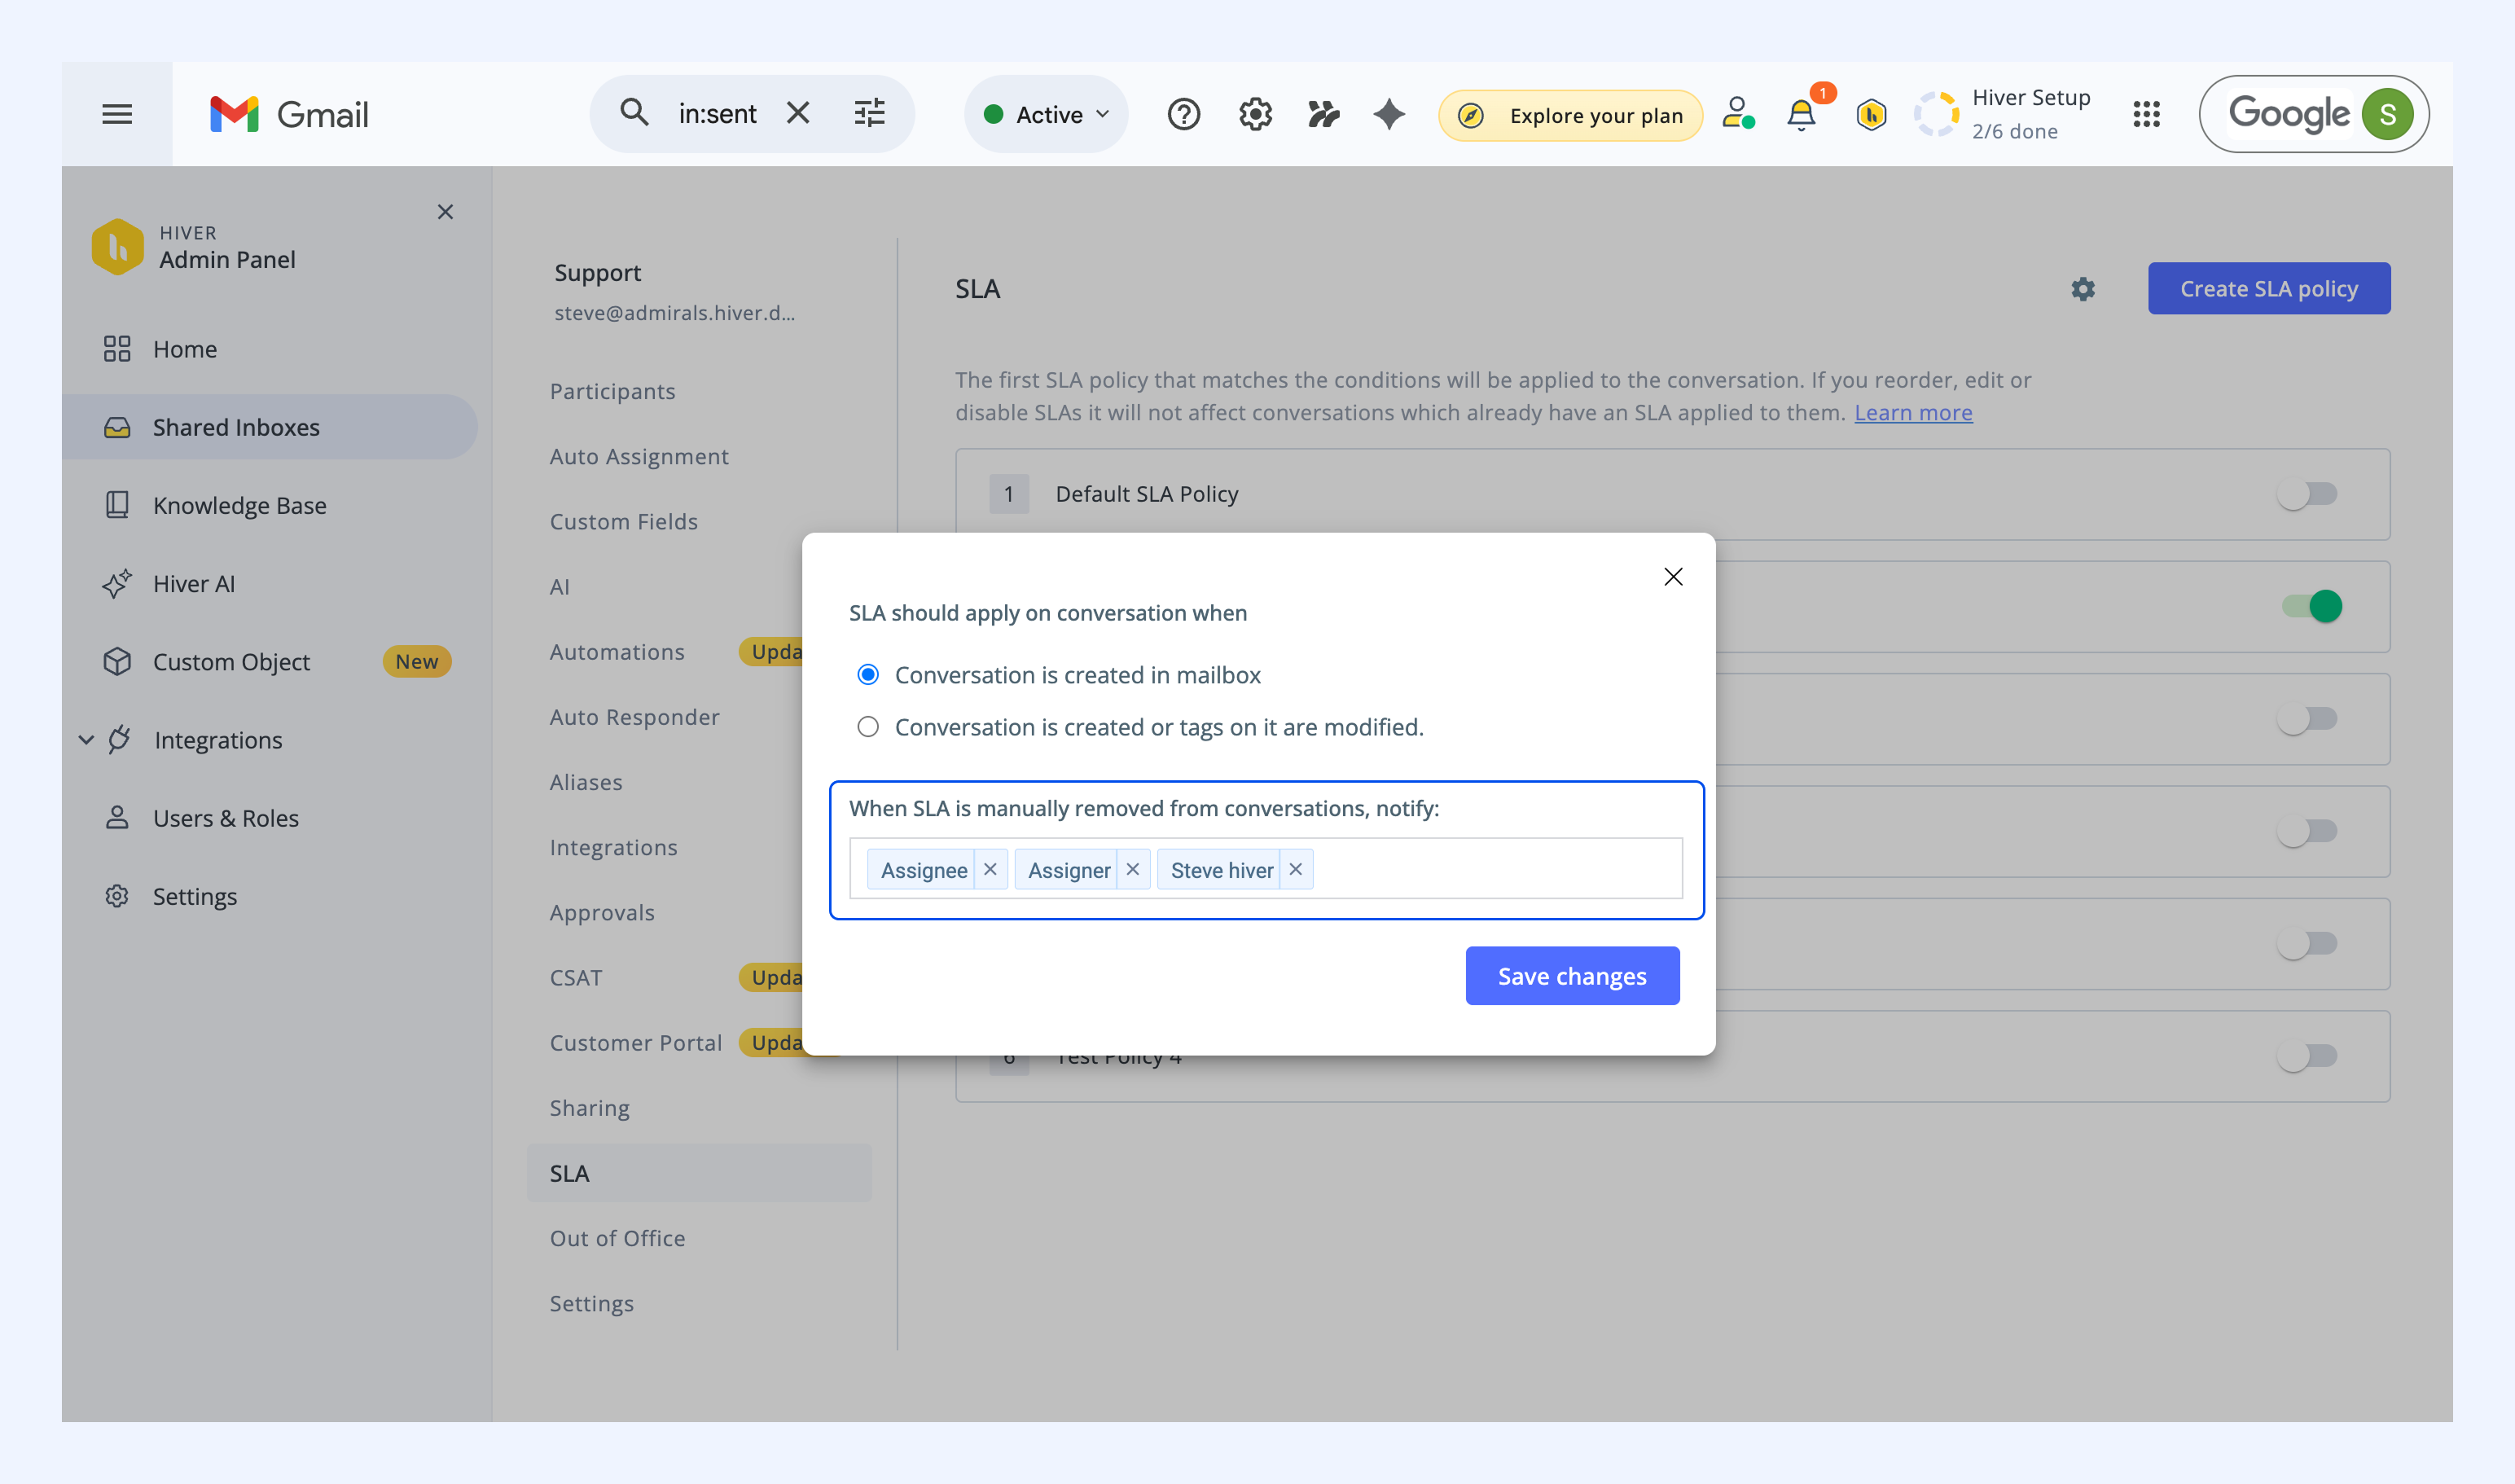
To notify teammates when an SLA is manually removed, click the settings icon in SLA. By default, the assignee and assigner are notified.
Policy changes don't affect existing conversations
When you reorder, edit, or disable policies, the changes only apply to new conversations. Your existing conversations continue running on the policy settings that were active when the SLA was first applied.