Linear app for Hiver
Connect Linear with Hiver to turn customer-reported bugs, technical issues, and feature requests into Linear issues for your engineering and product teams. Support teams can keep each issue tied to the conversation, follow its progress, and update the customer without switching to Linear for context.
With the app, your team can:
- View, create, link, and update Linear issues directly from customer conversations.
- Pre-fill fields that rarely change so your team can create issues faster.
- Give engineering and product teams access to the related customer context from Hiver.
- Automatically create issues or log customer emails as comments in Linear using Hiver Automations.
This guide covers how admins can set up the app and how team members can create, link, and manage Linear issues from customer conversations.
Prerequisites
Before setting up the Linear app, make sure you have:
- Admin access in Hiver.
- A Linear account with access to the workspace you want to connect.
Setting up the Linear app
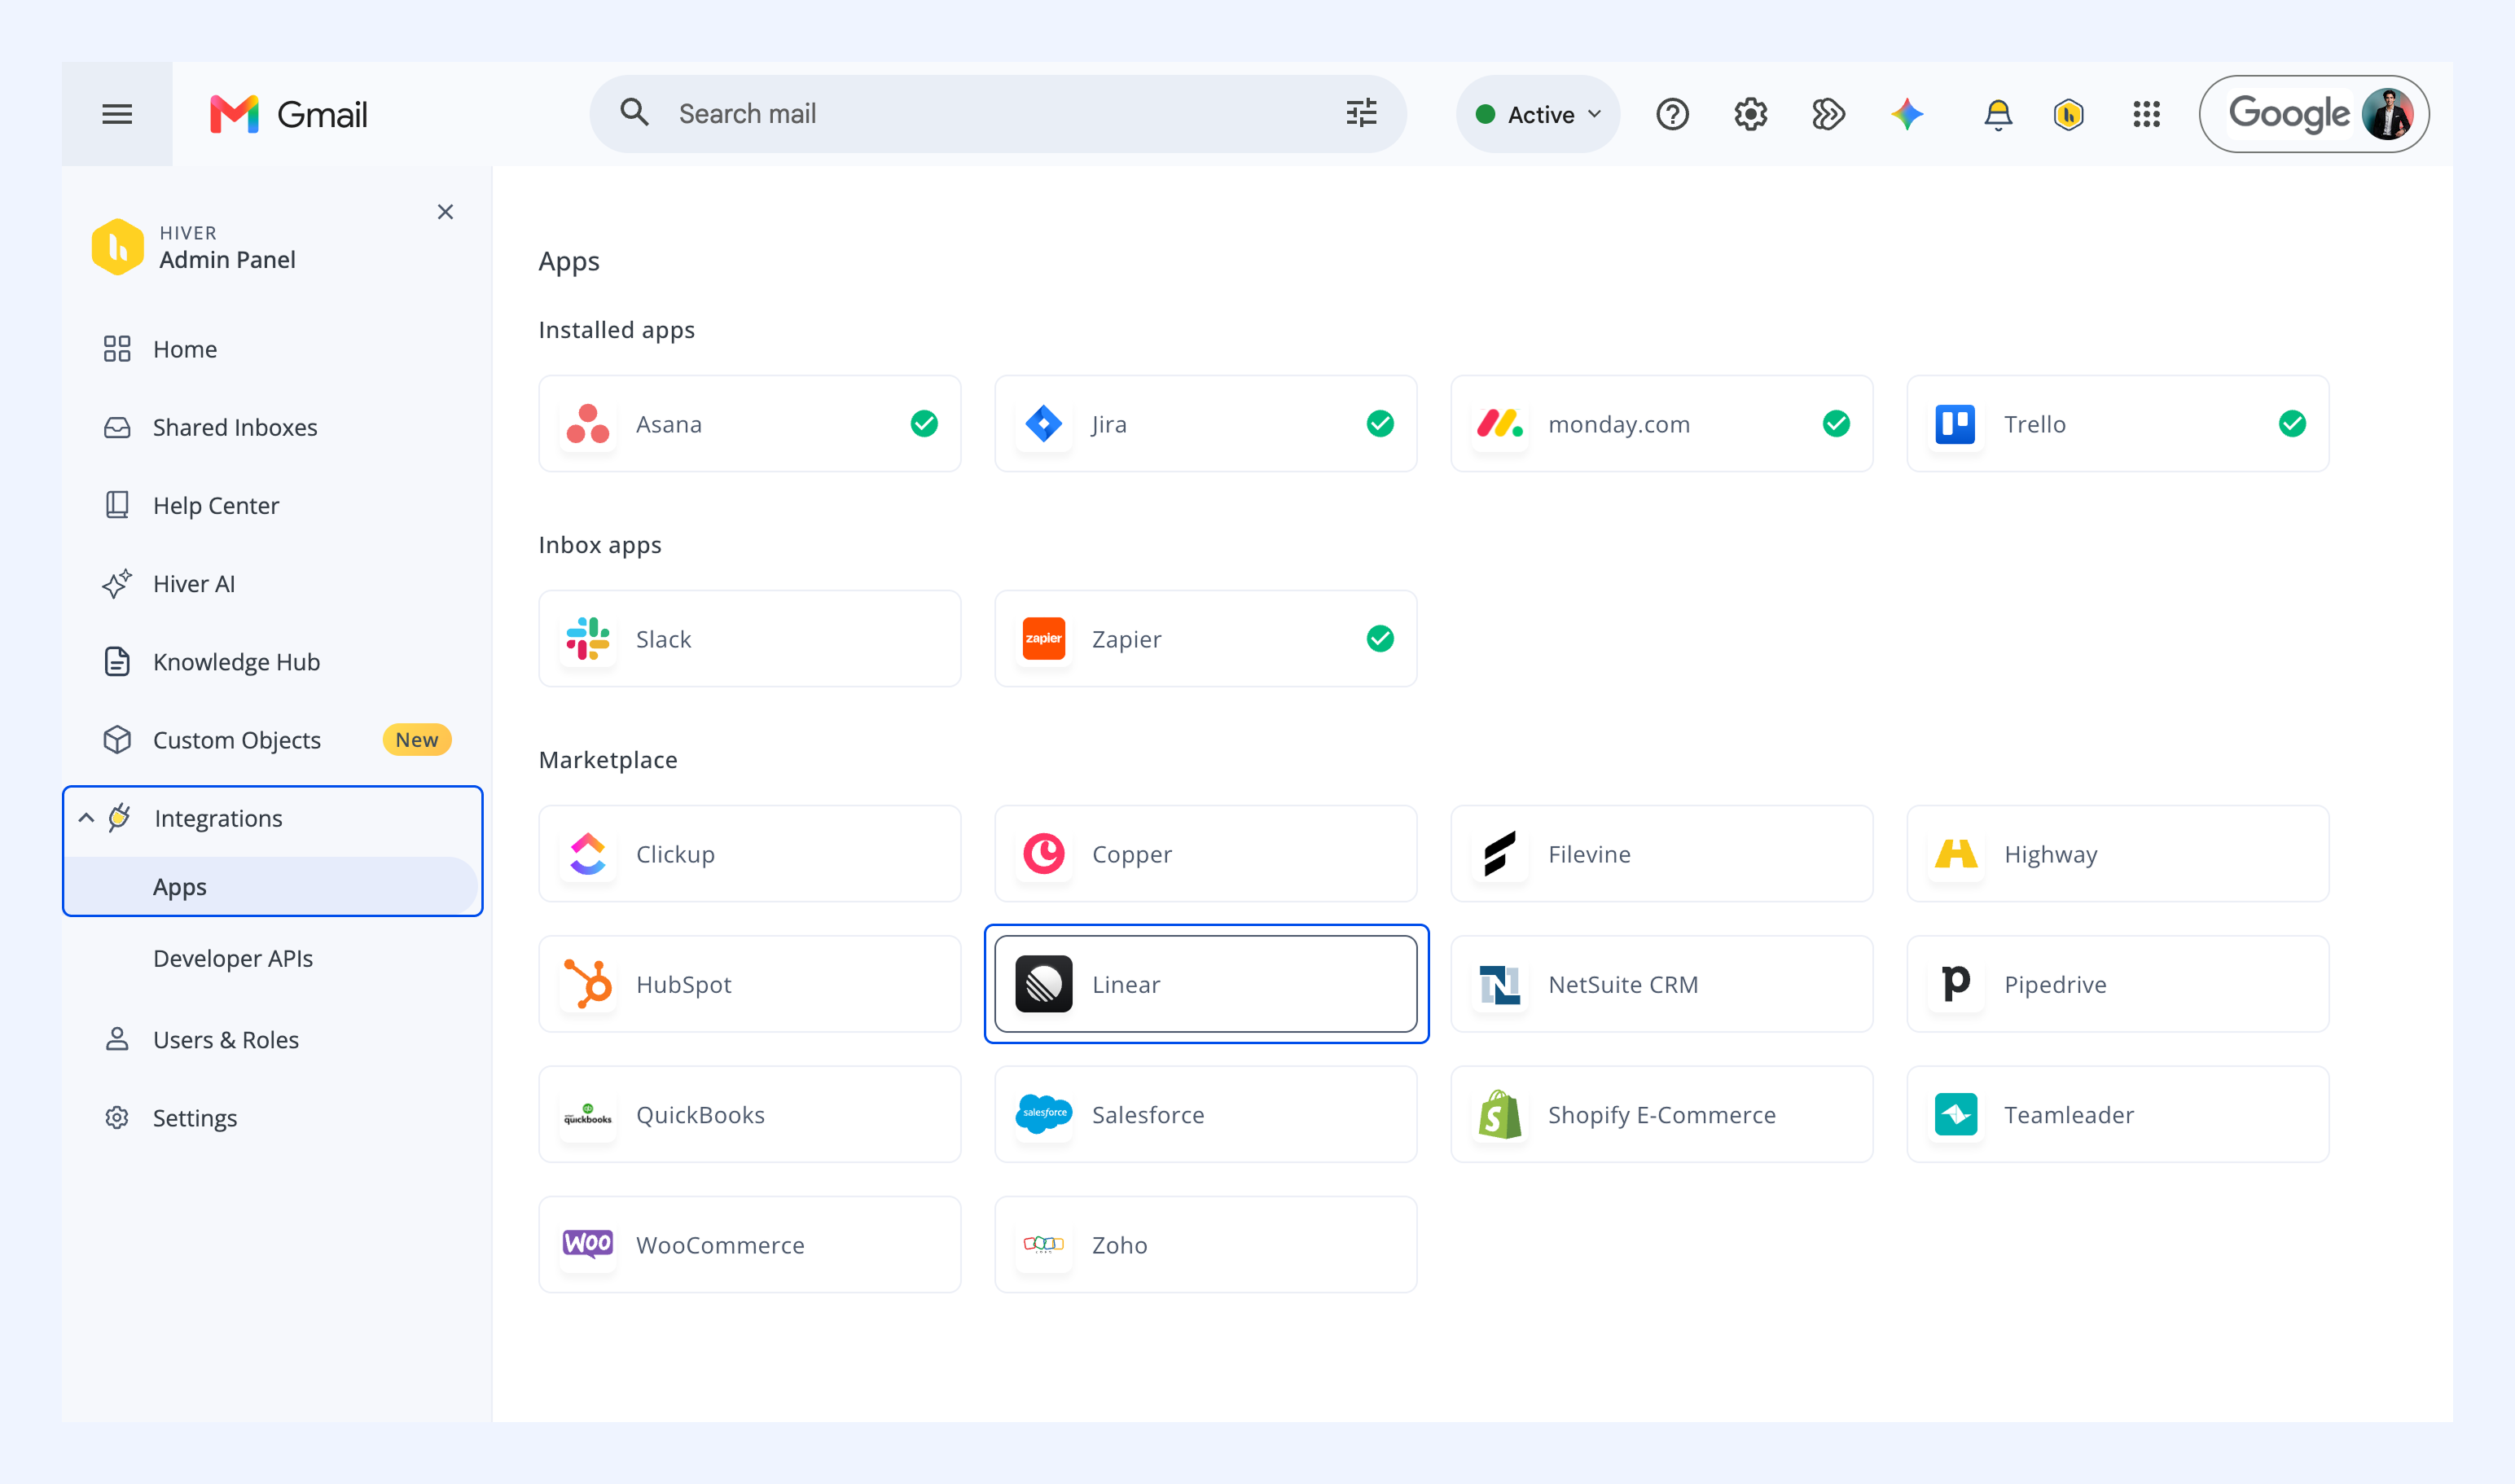
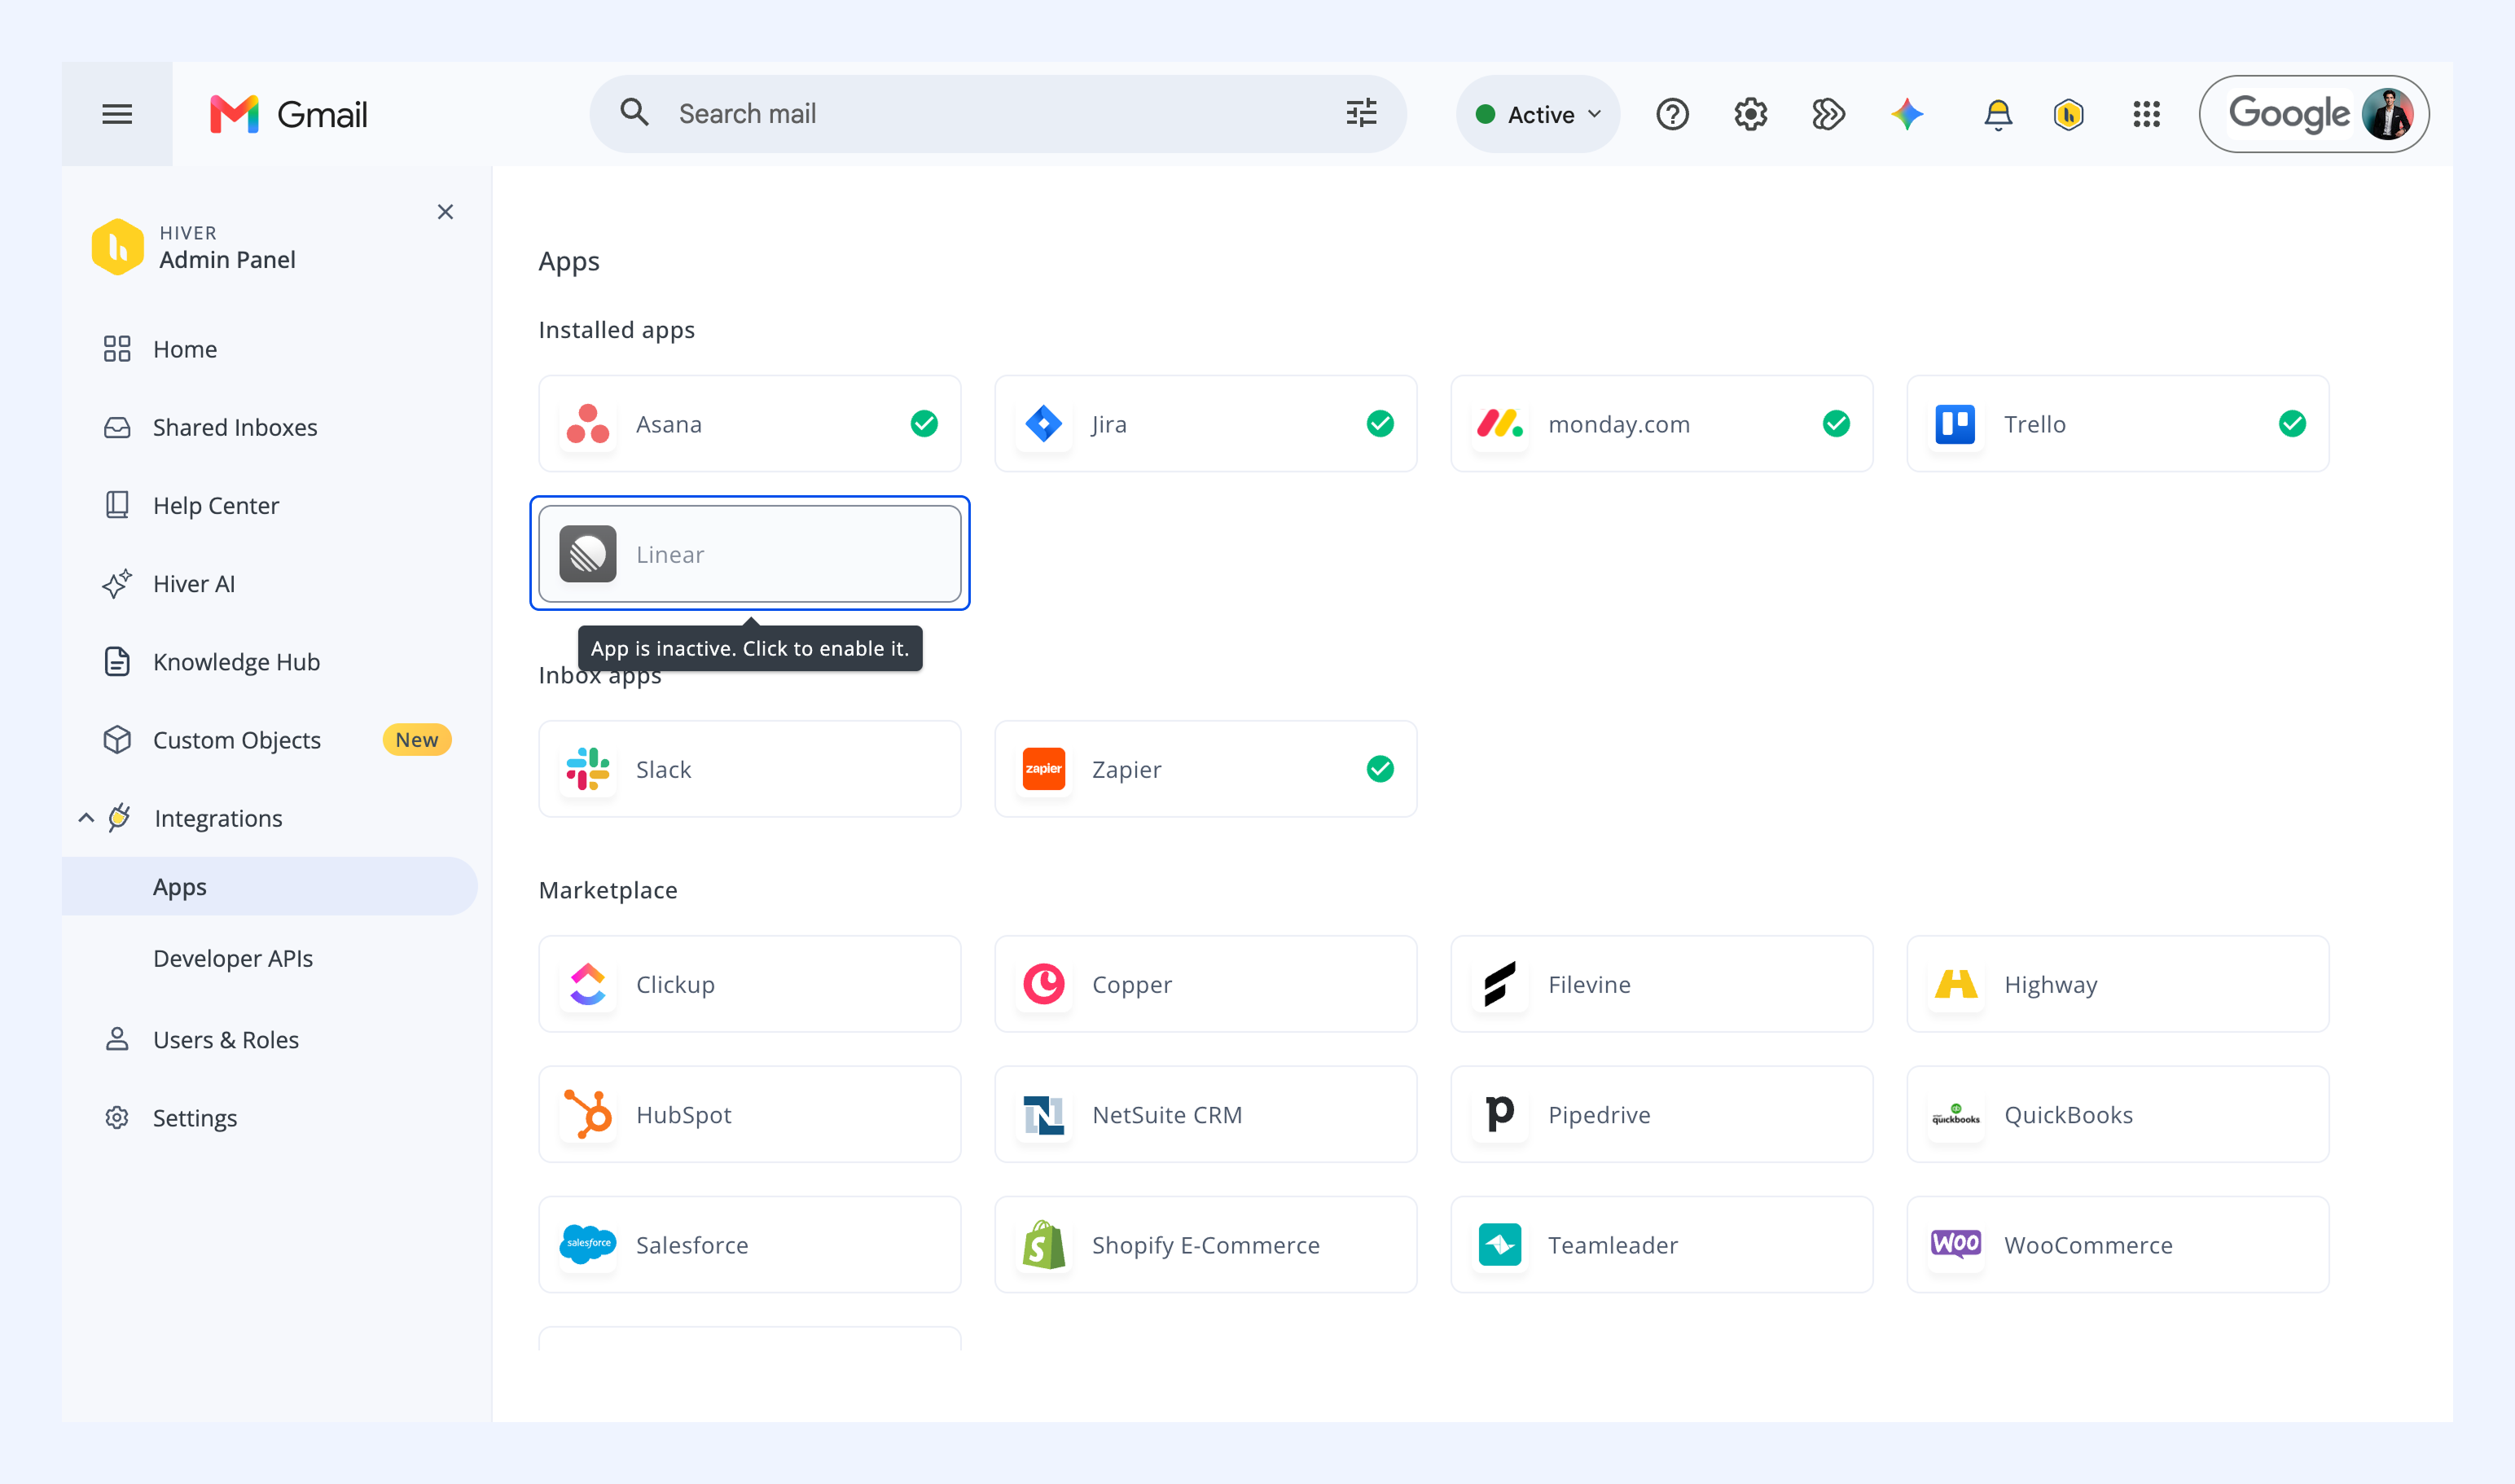
1. Go to Admin Panel → Integrations → Apps.
2. Find and select Linear.
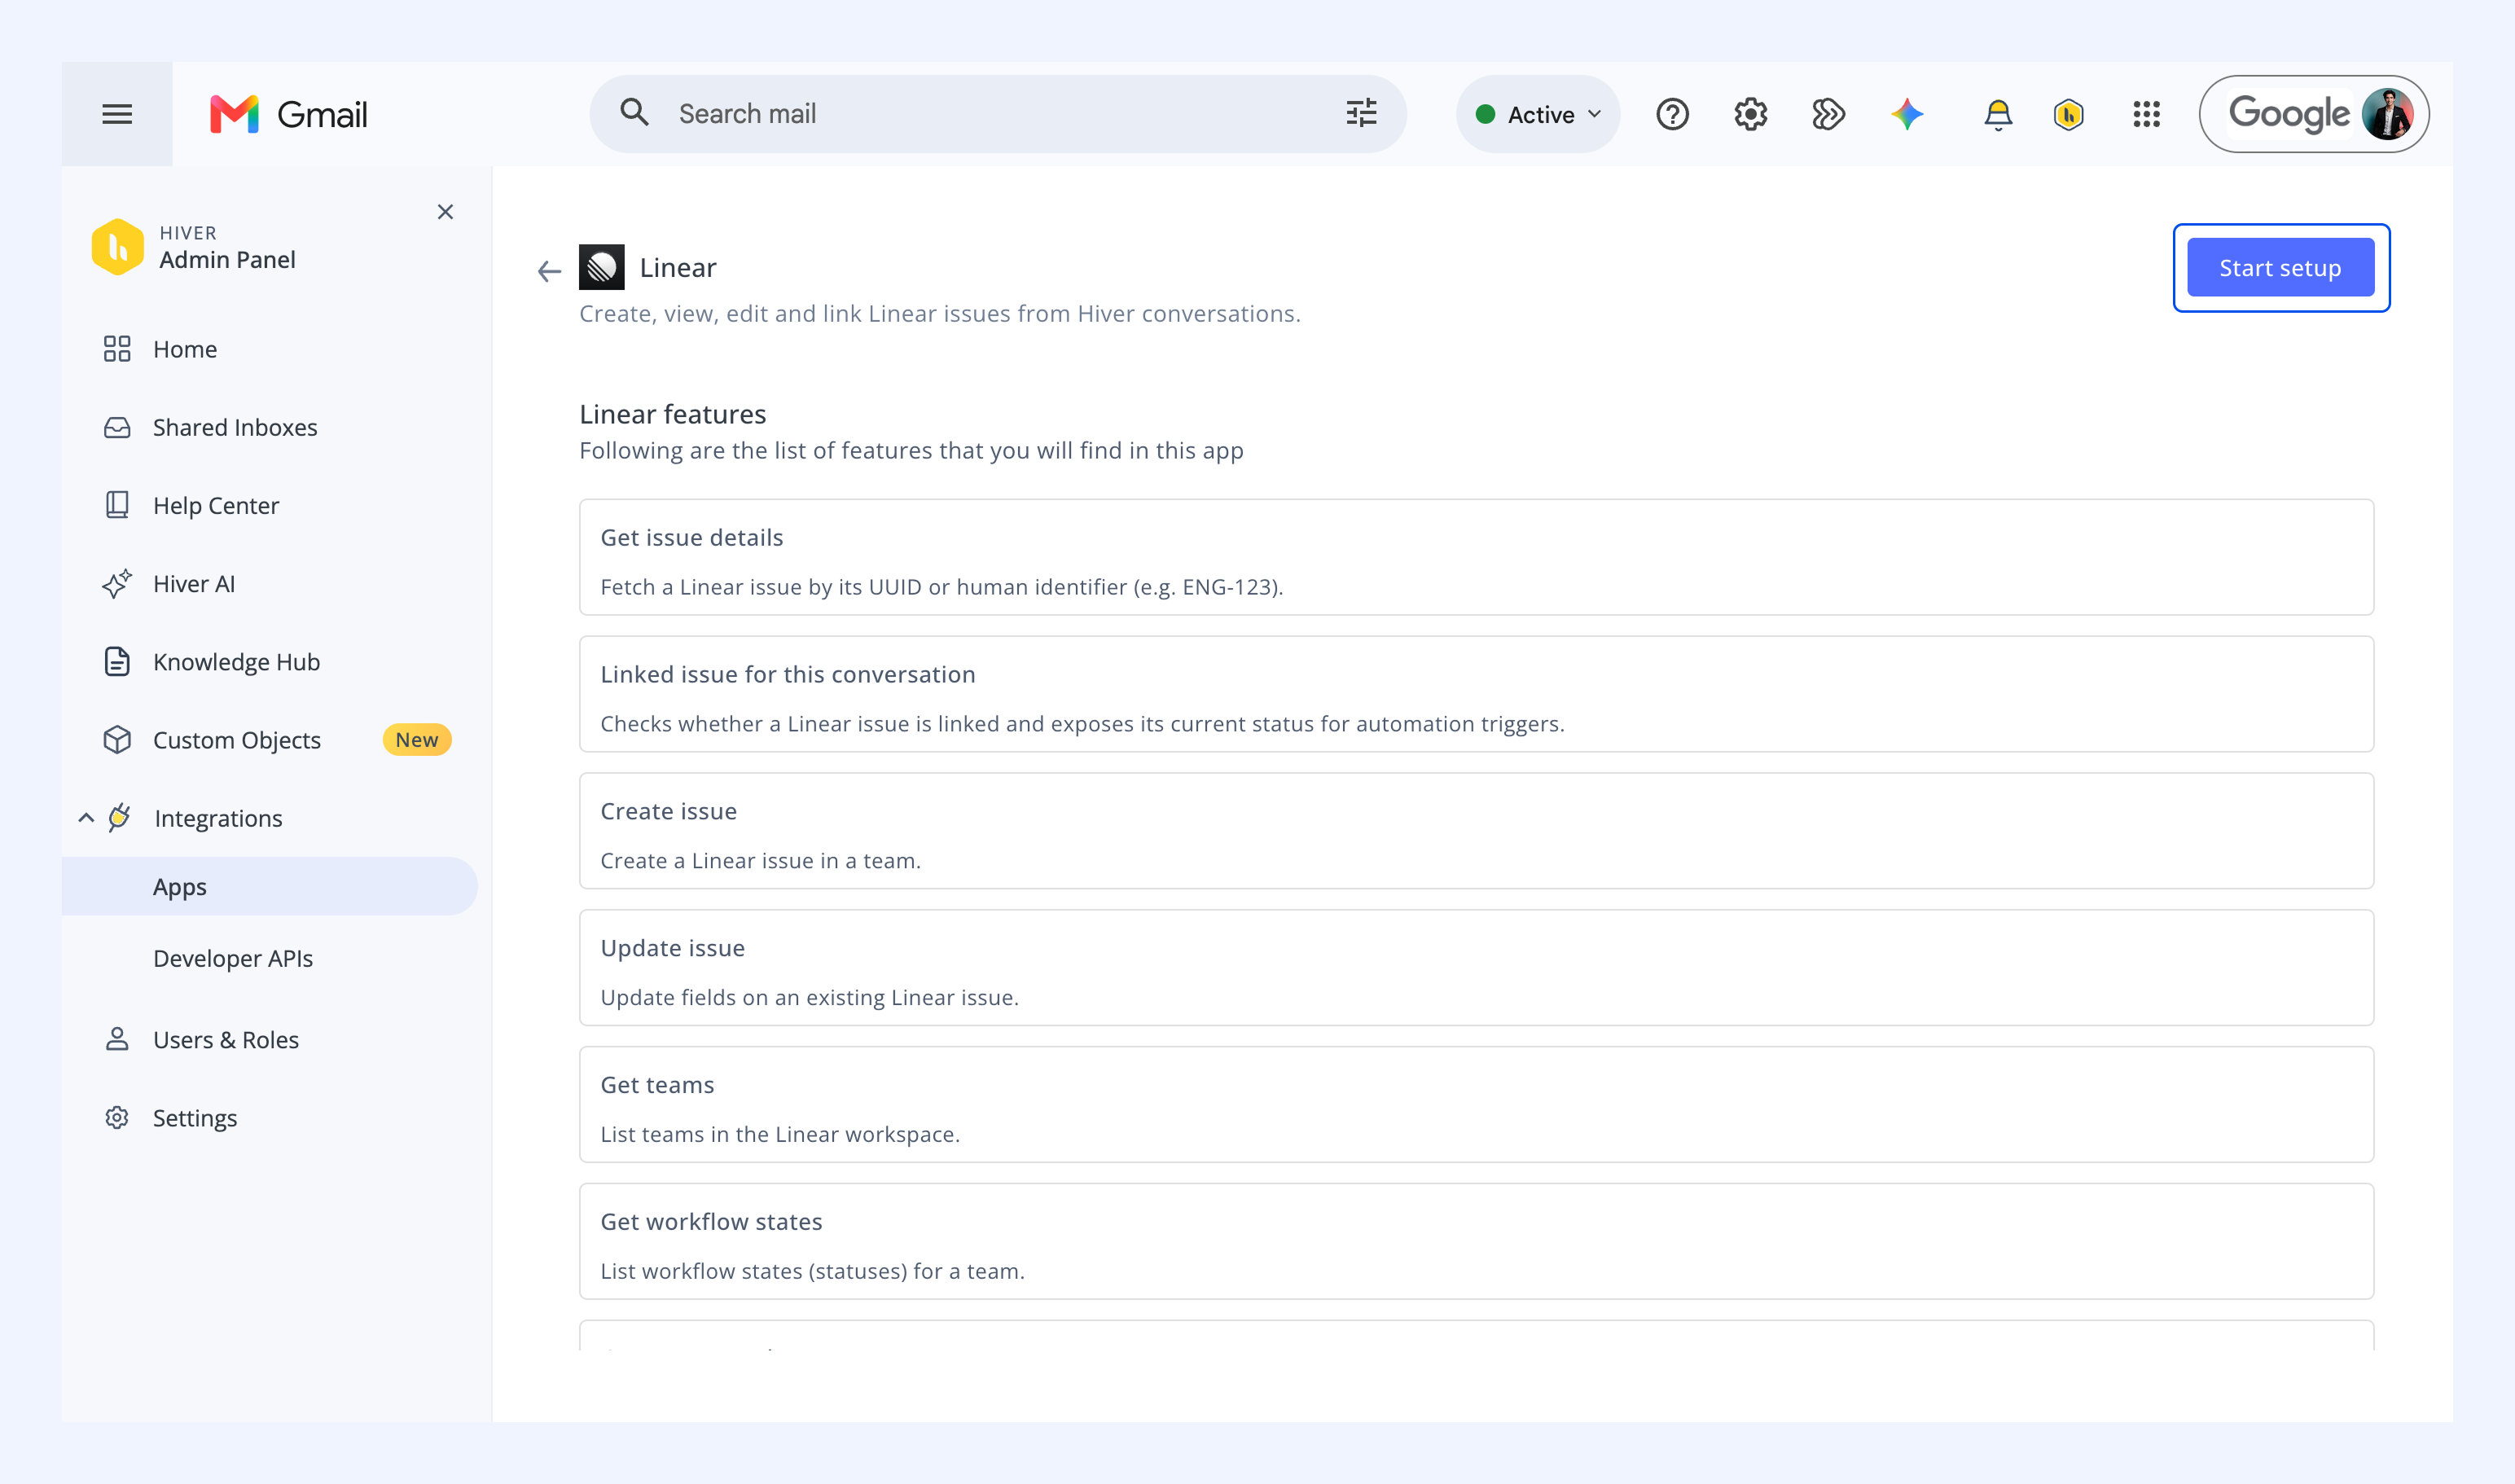
3. Review the app capabilities and click Start setup.
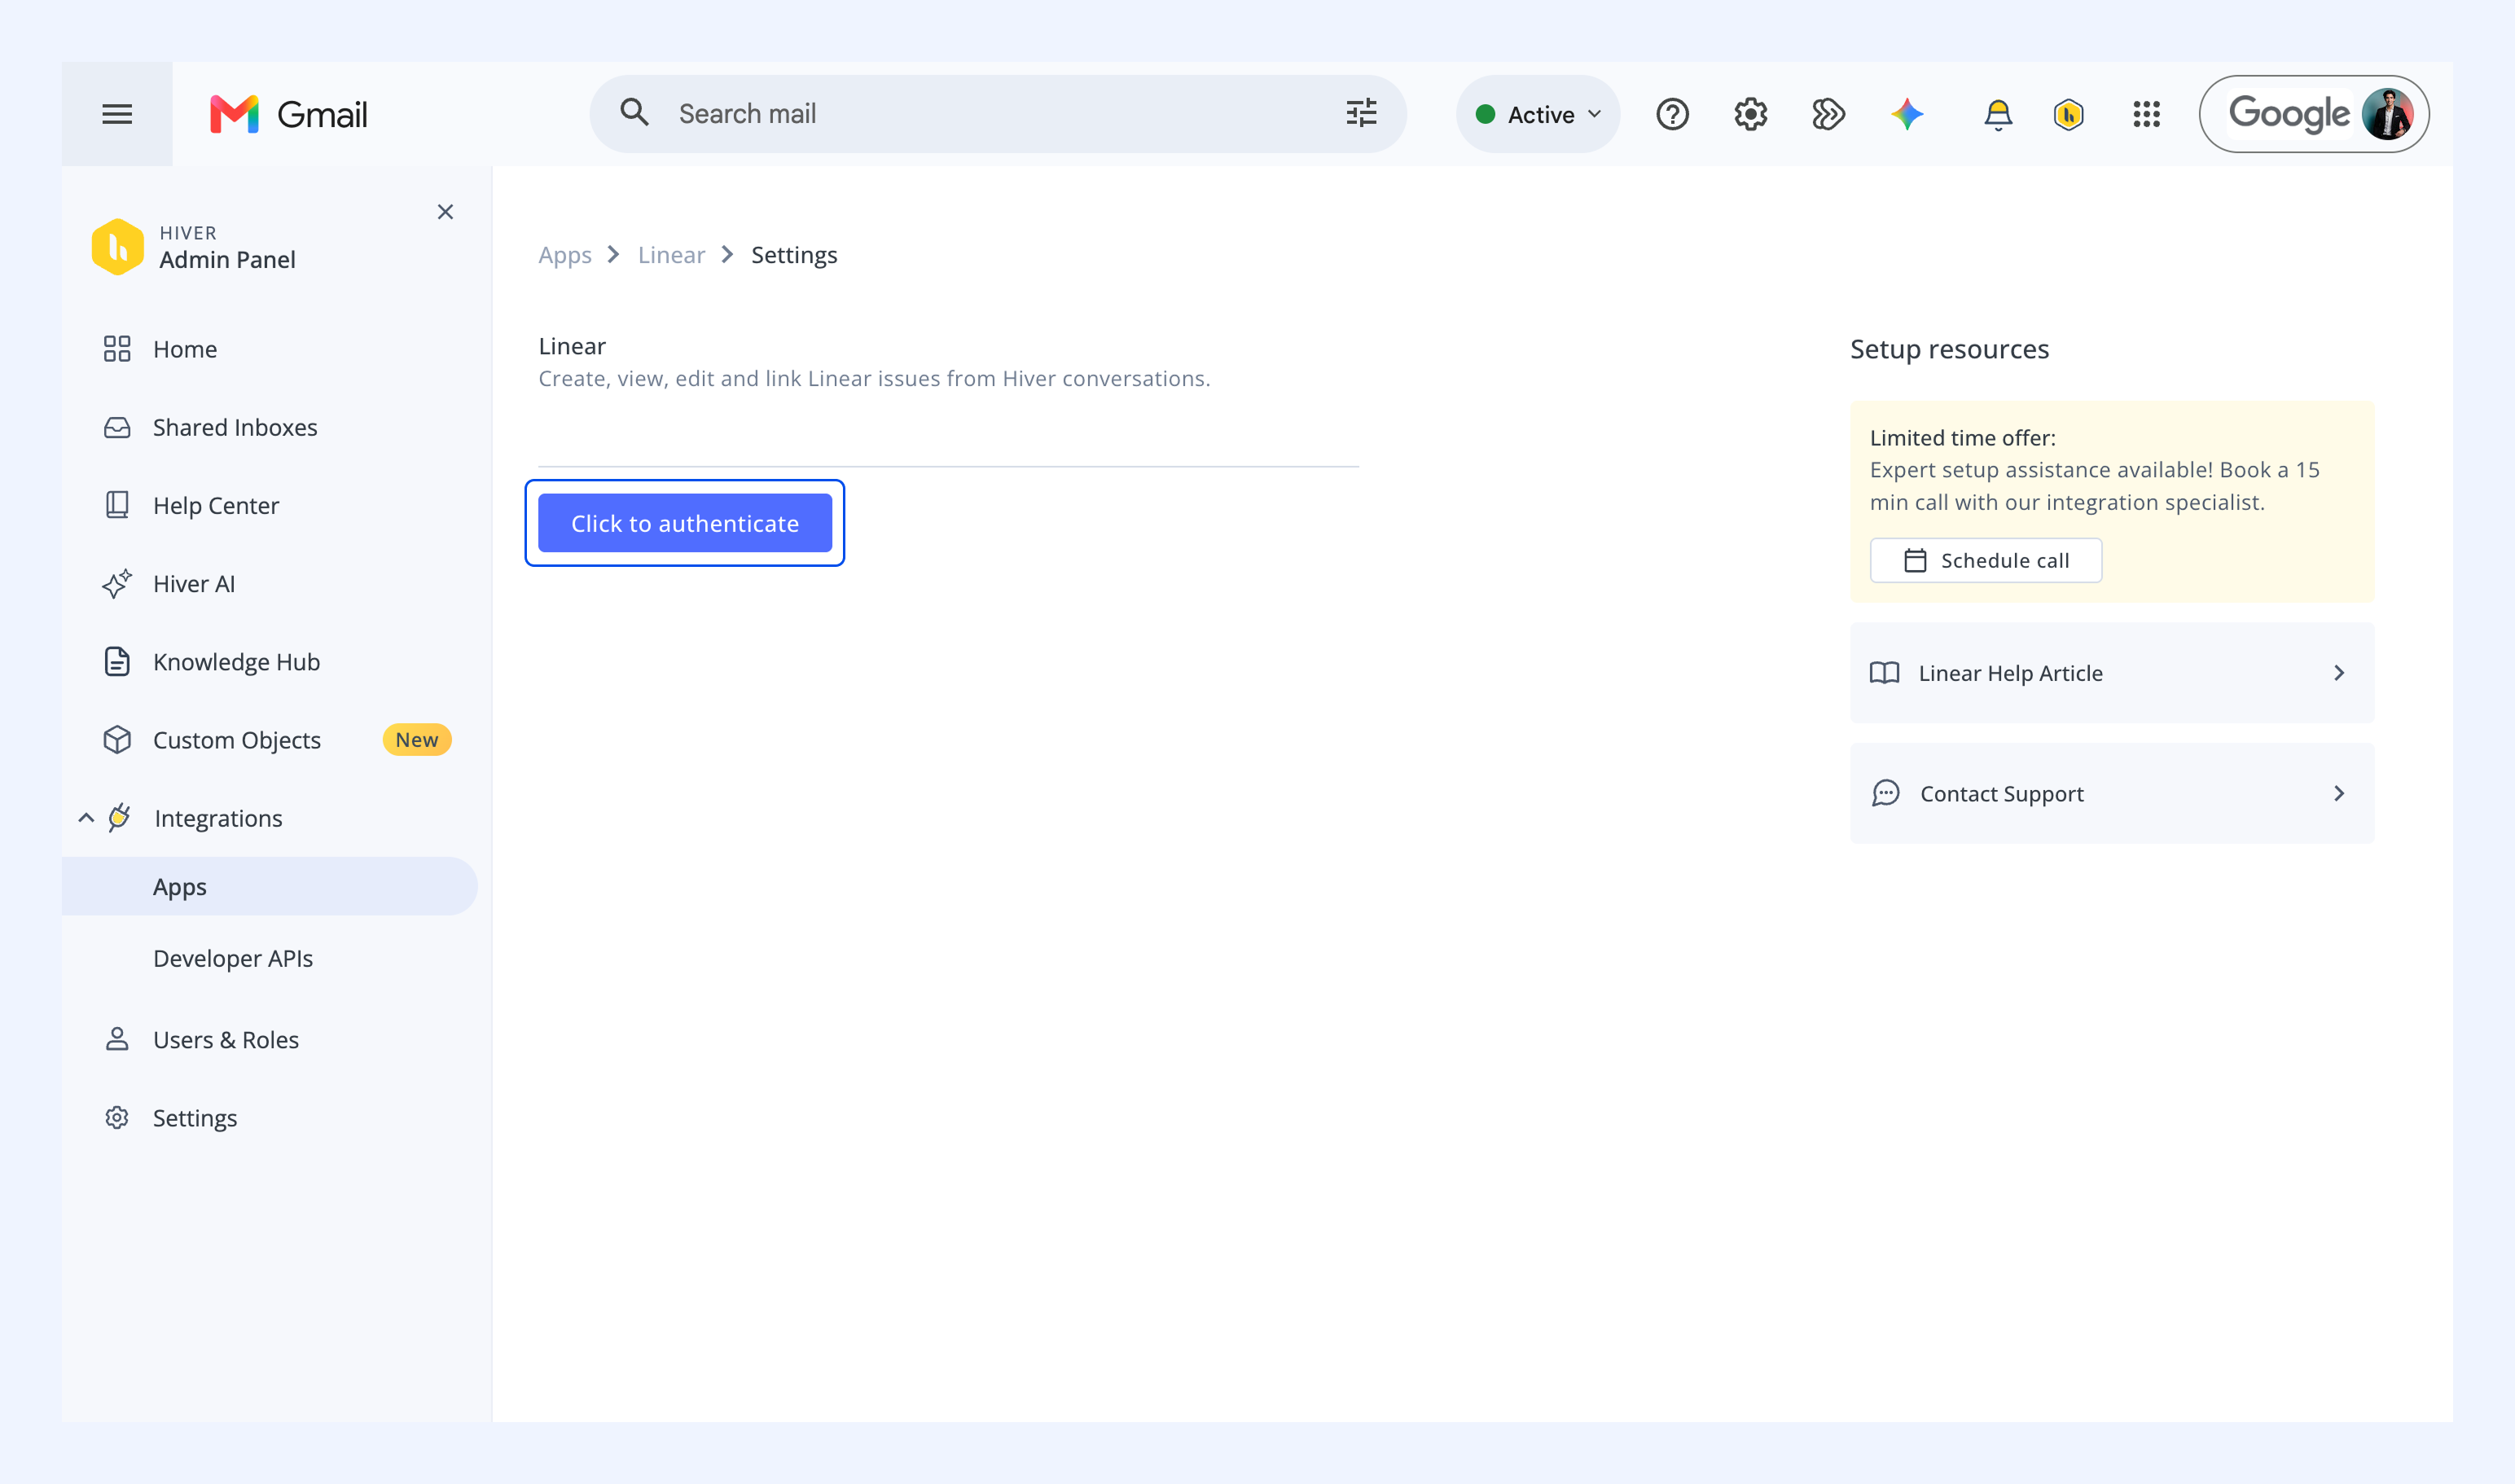
4. Select Click to authenticate.
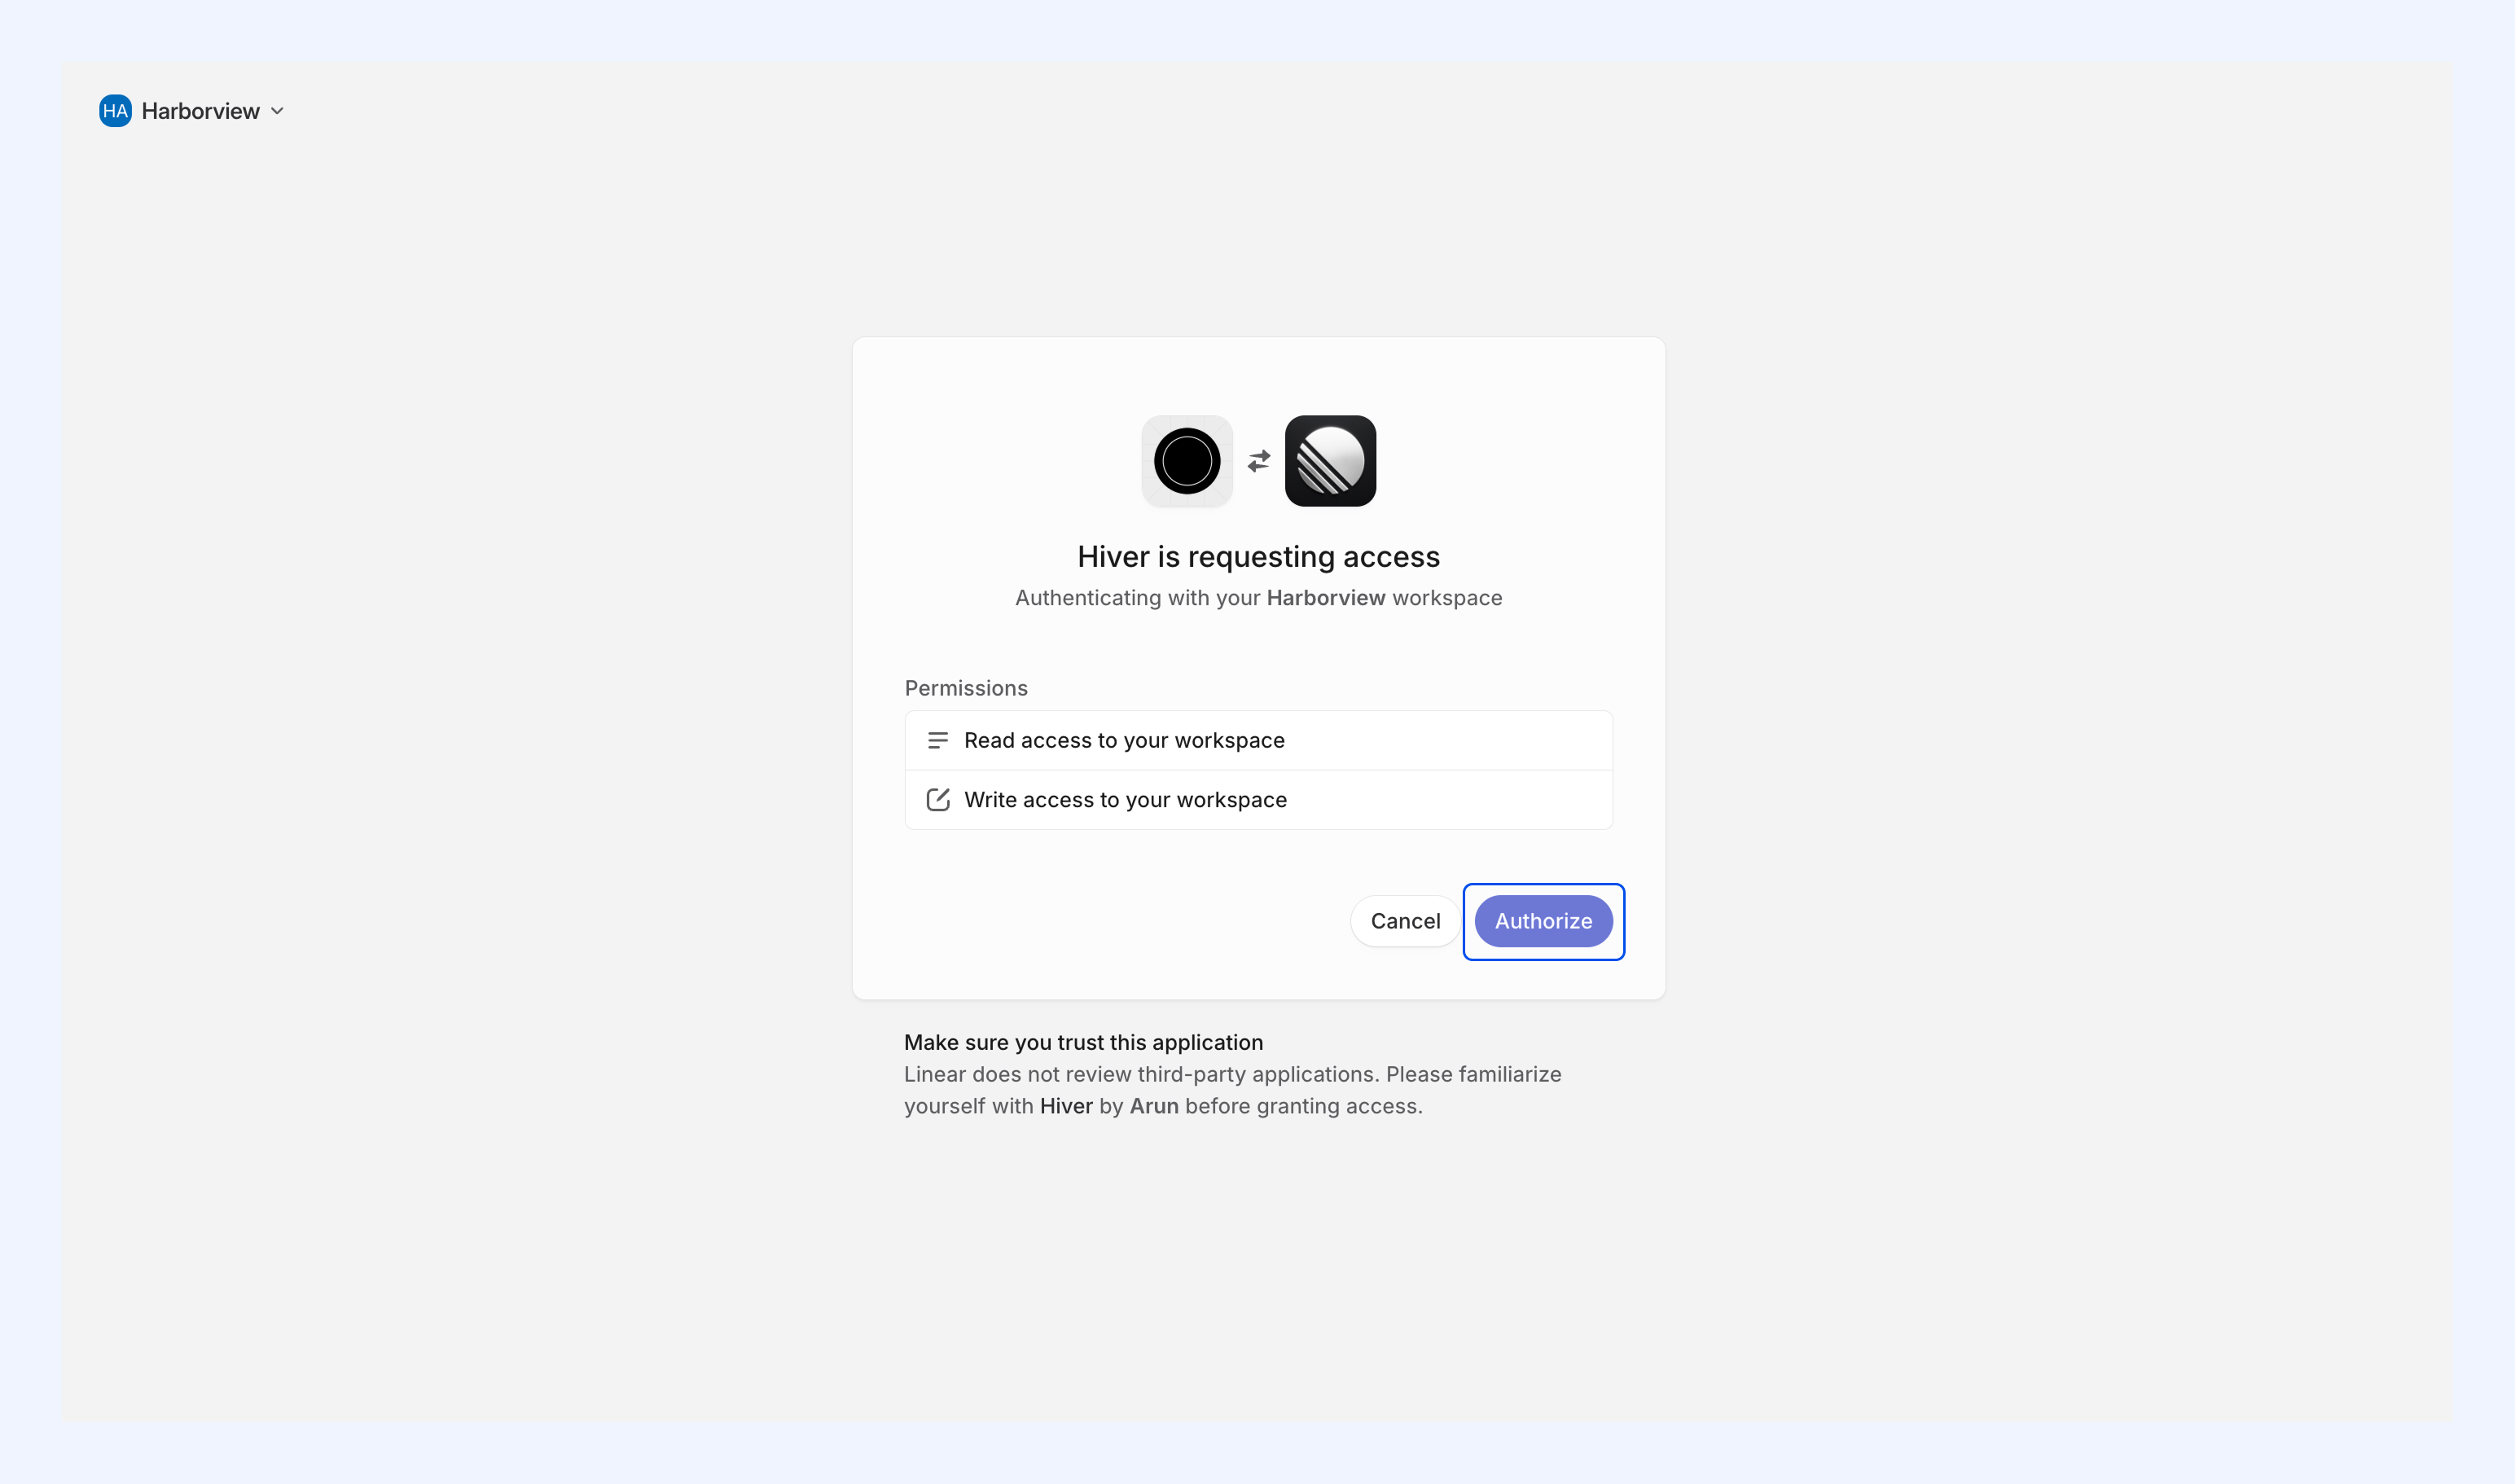
5. In the new tab that opens, sign in to your Linear workspace.
6. Review the requested read and write access, and click Authorize.
Once you're authorized, return to Hiver and select Linear to continue setup.
Choose who can see the Linear app
1. Go to Visibility and click the Configure visibility settings icon.
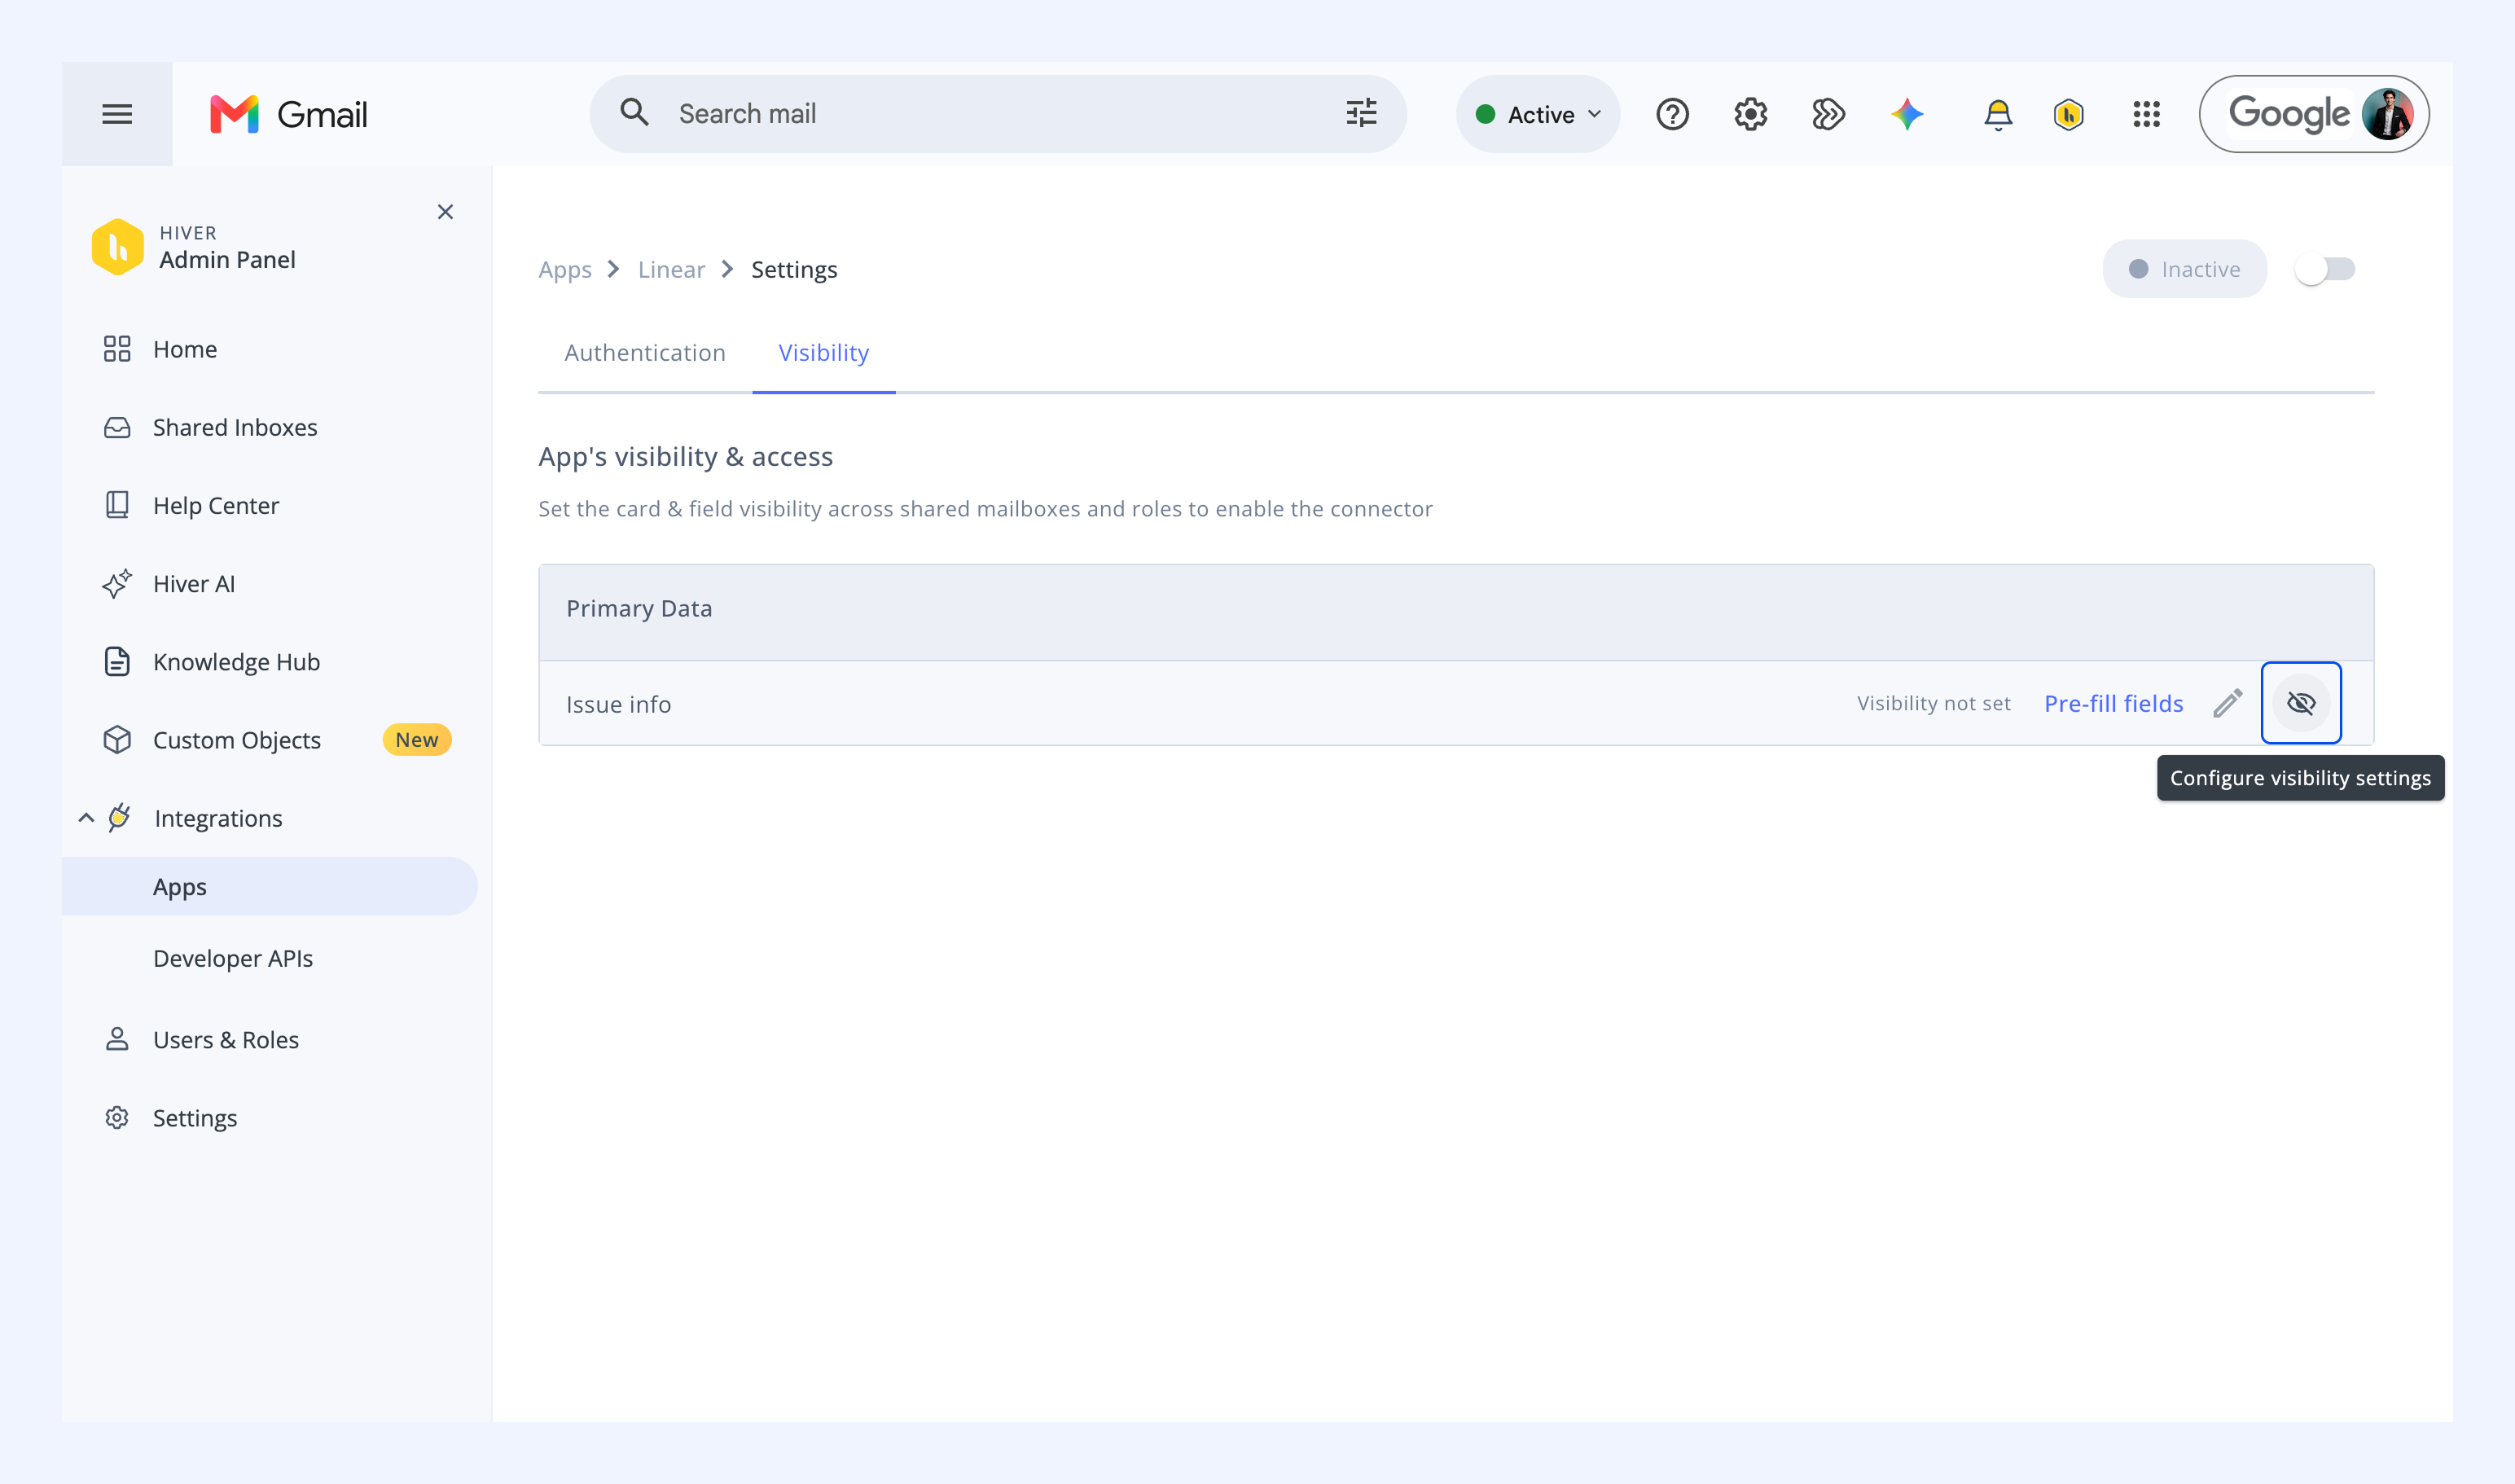
2. Select the Shared Inboxes where you want Linear data to appear.
3. Select the roles that should see the Linear card.
4. Click Save.
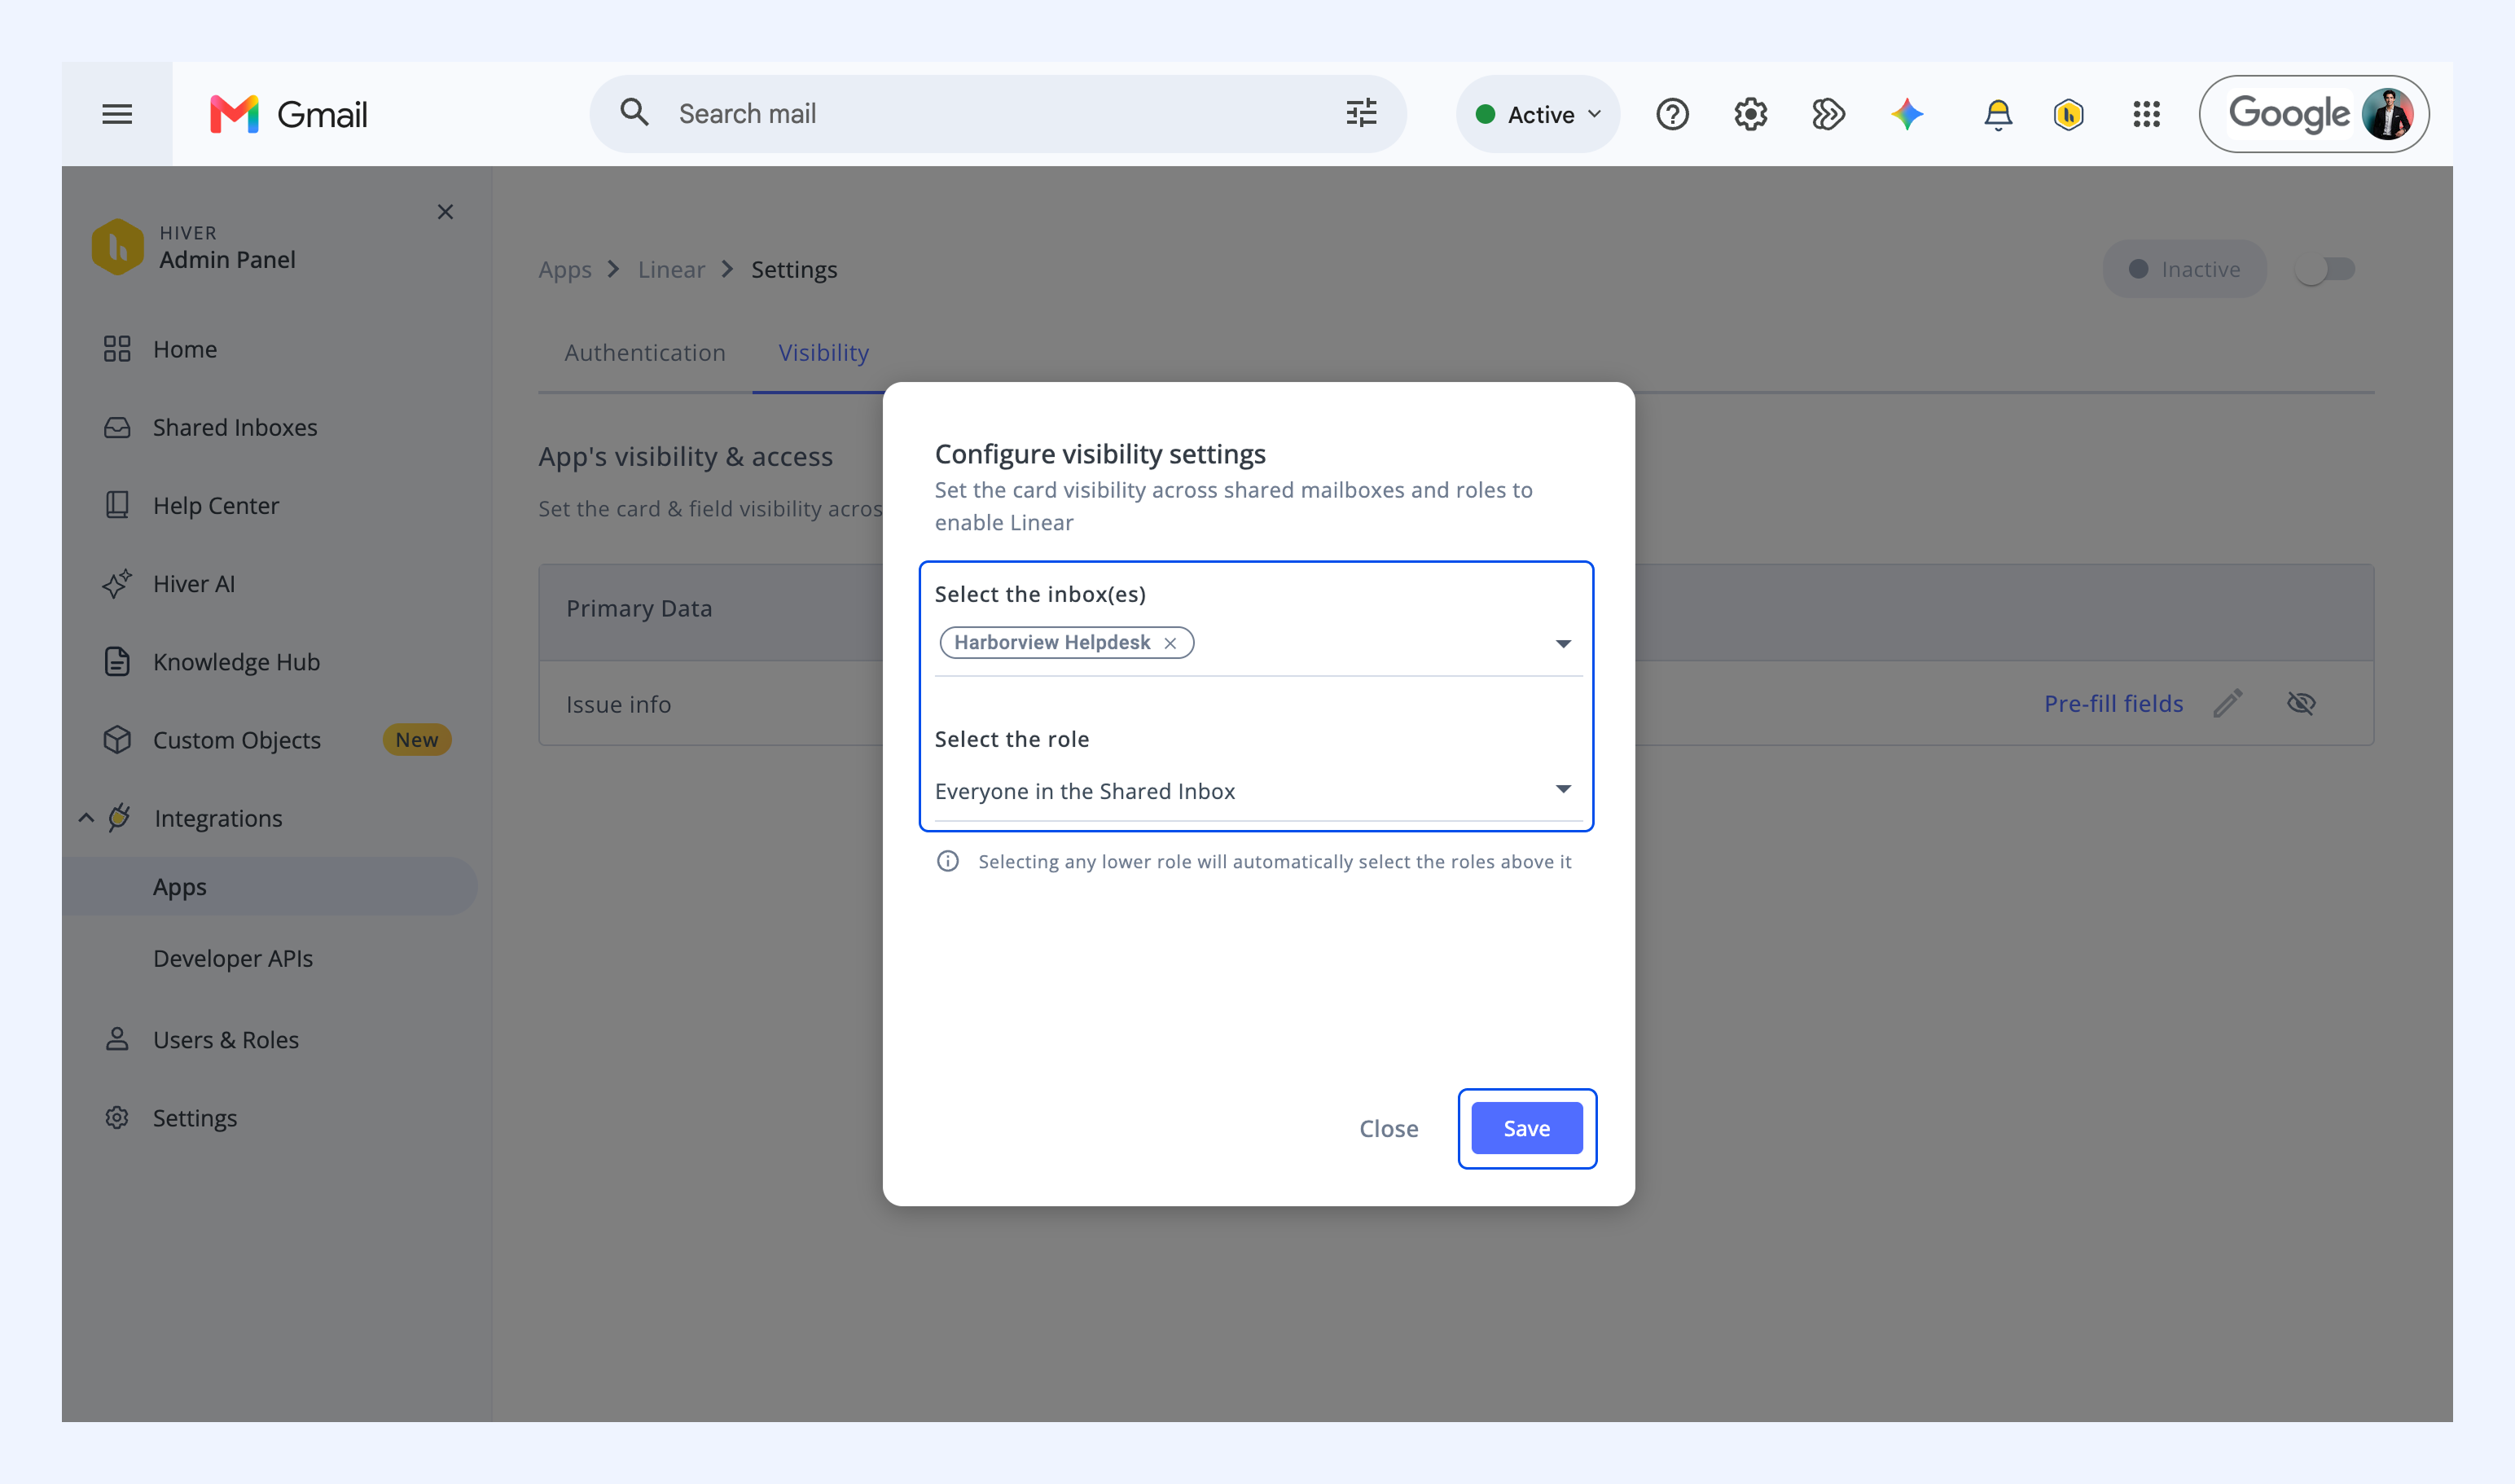
Choose what data should be visible in Hiver
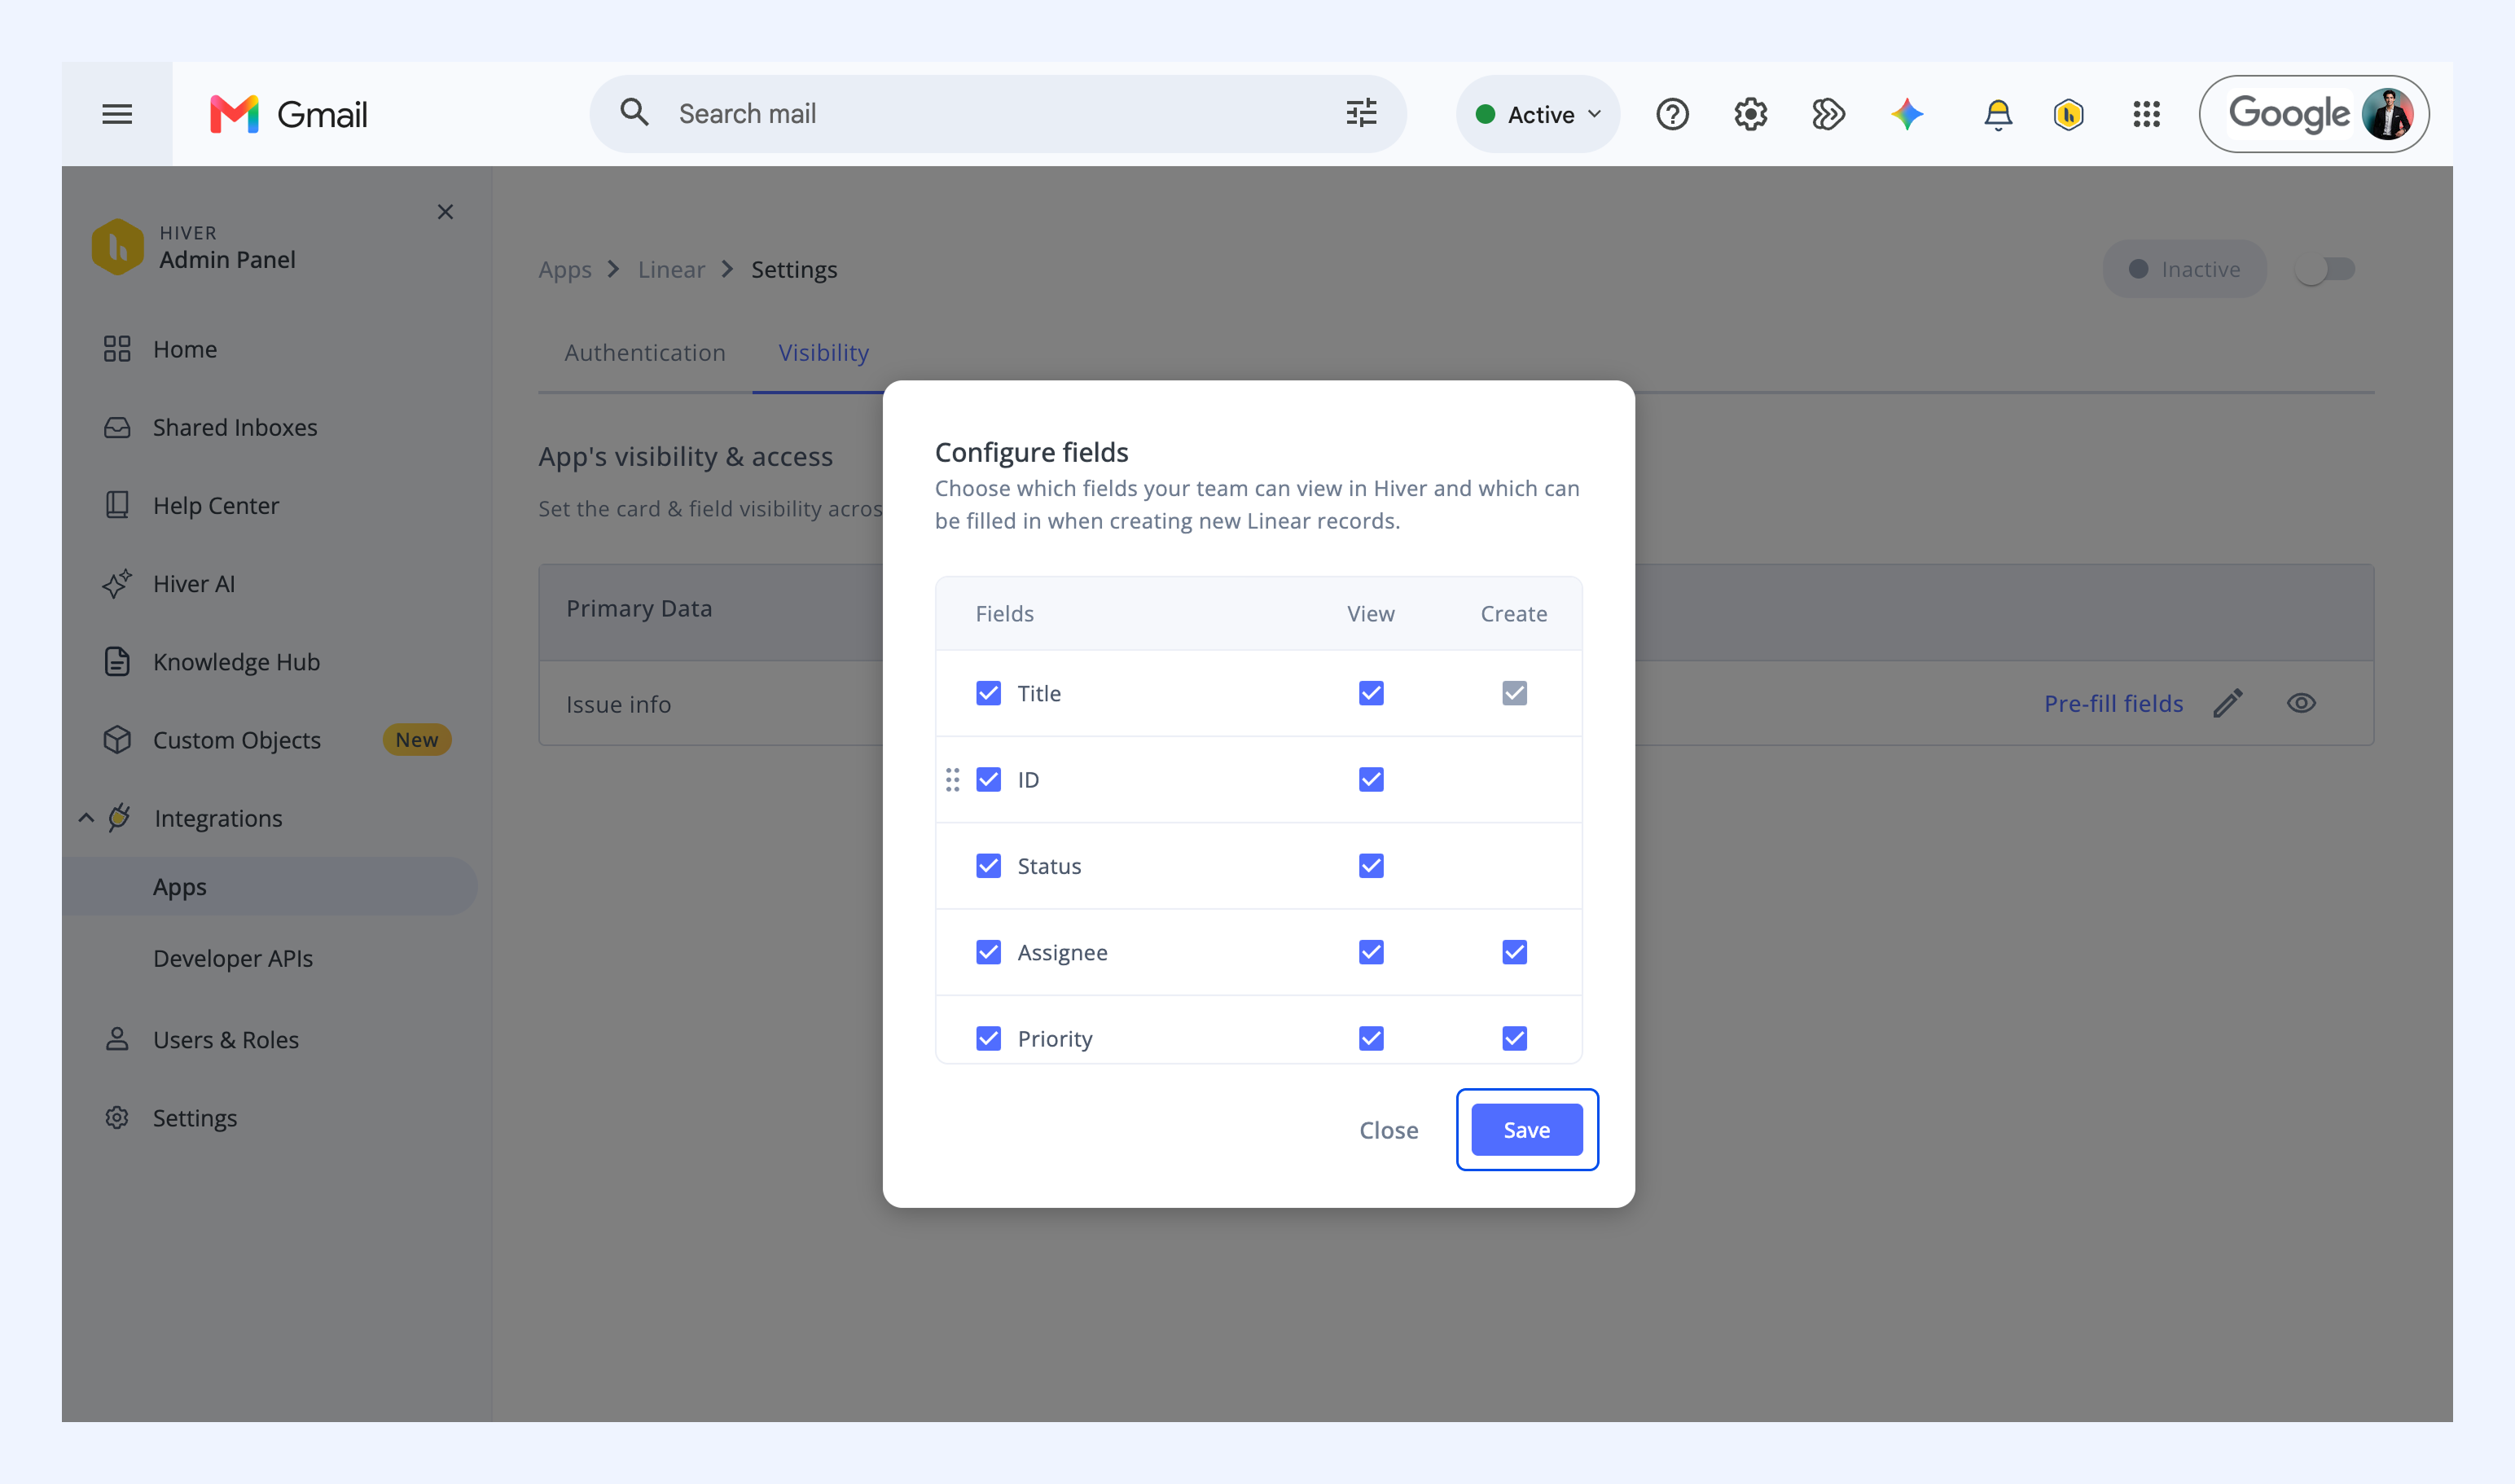
Next, choose which fields your team can see in Hiver and which fields they can fill in when creating Linear issues.
Note: Linear uses labels instead of custom fields. You can configure them as a field here.
1. Click the Configure fields icon.
2. For each field, select:
- View to show the field on the right panel in Hiver.
- Create to make the field available when creating Linear issues from Hiver.
Click Save once done.
Pre-fill Linear fields
Set default values for Linear fields that don't usually change across issues. These values are filled in automatically and can be edited before the issue is created. To do this:
1. Click Pre-fill fields.
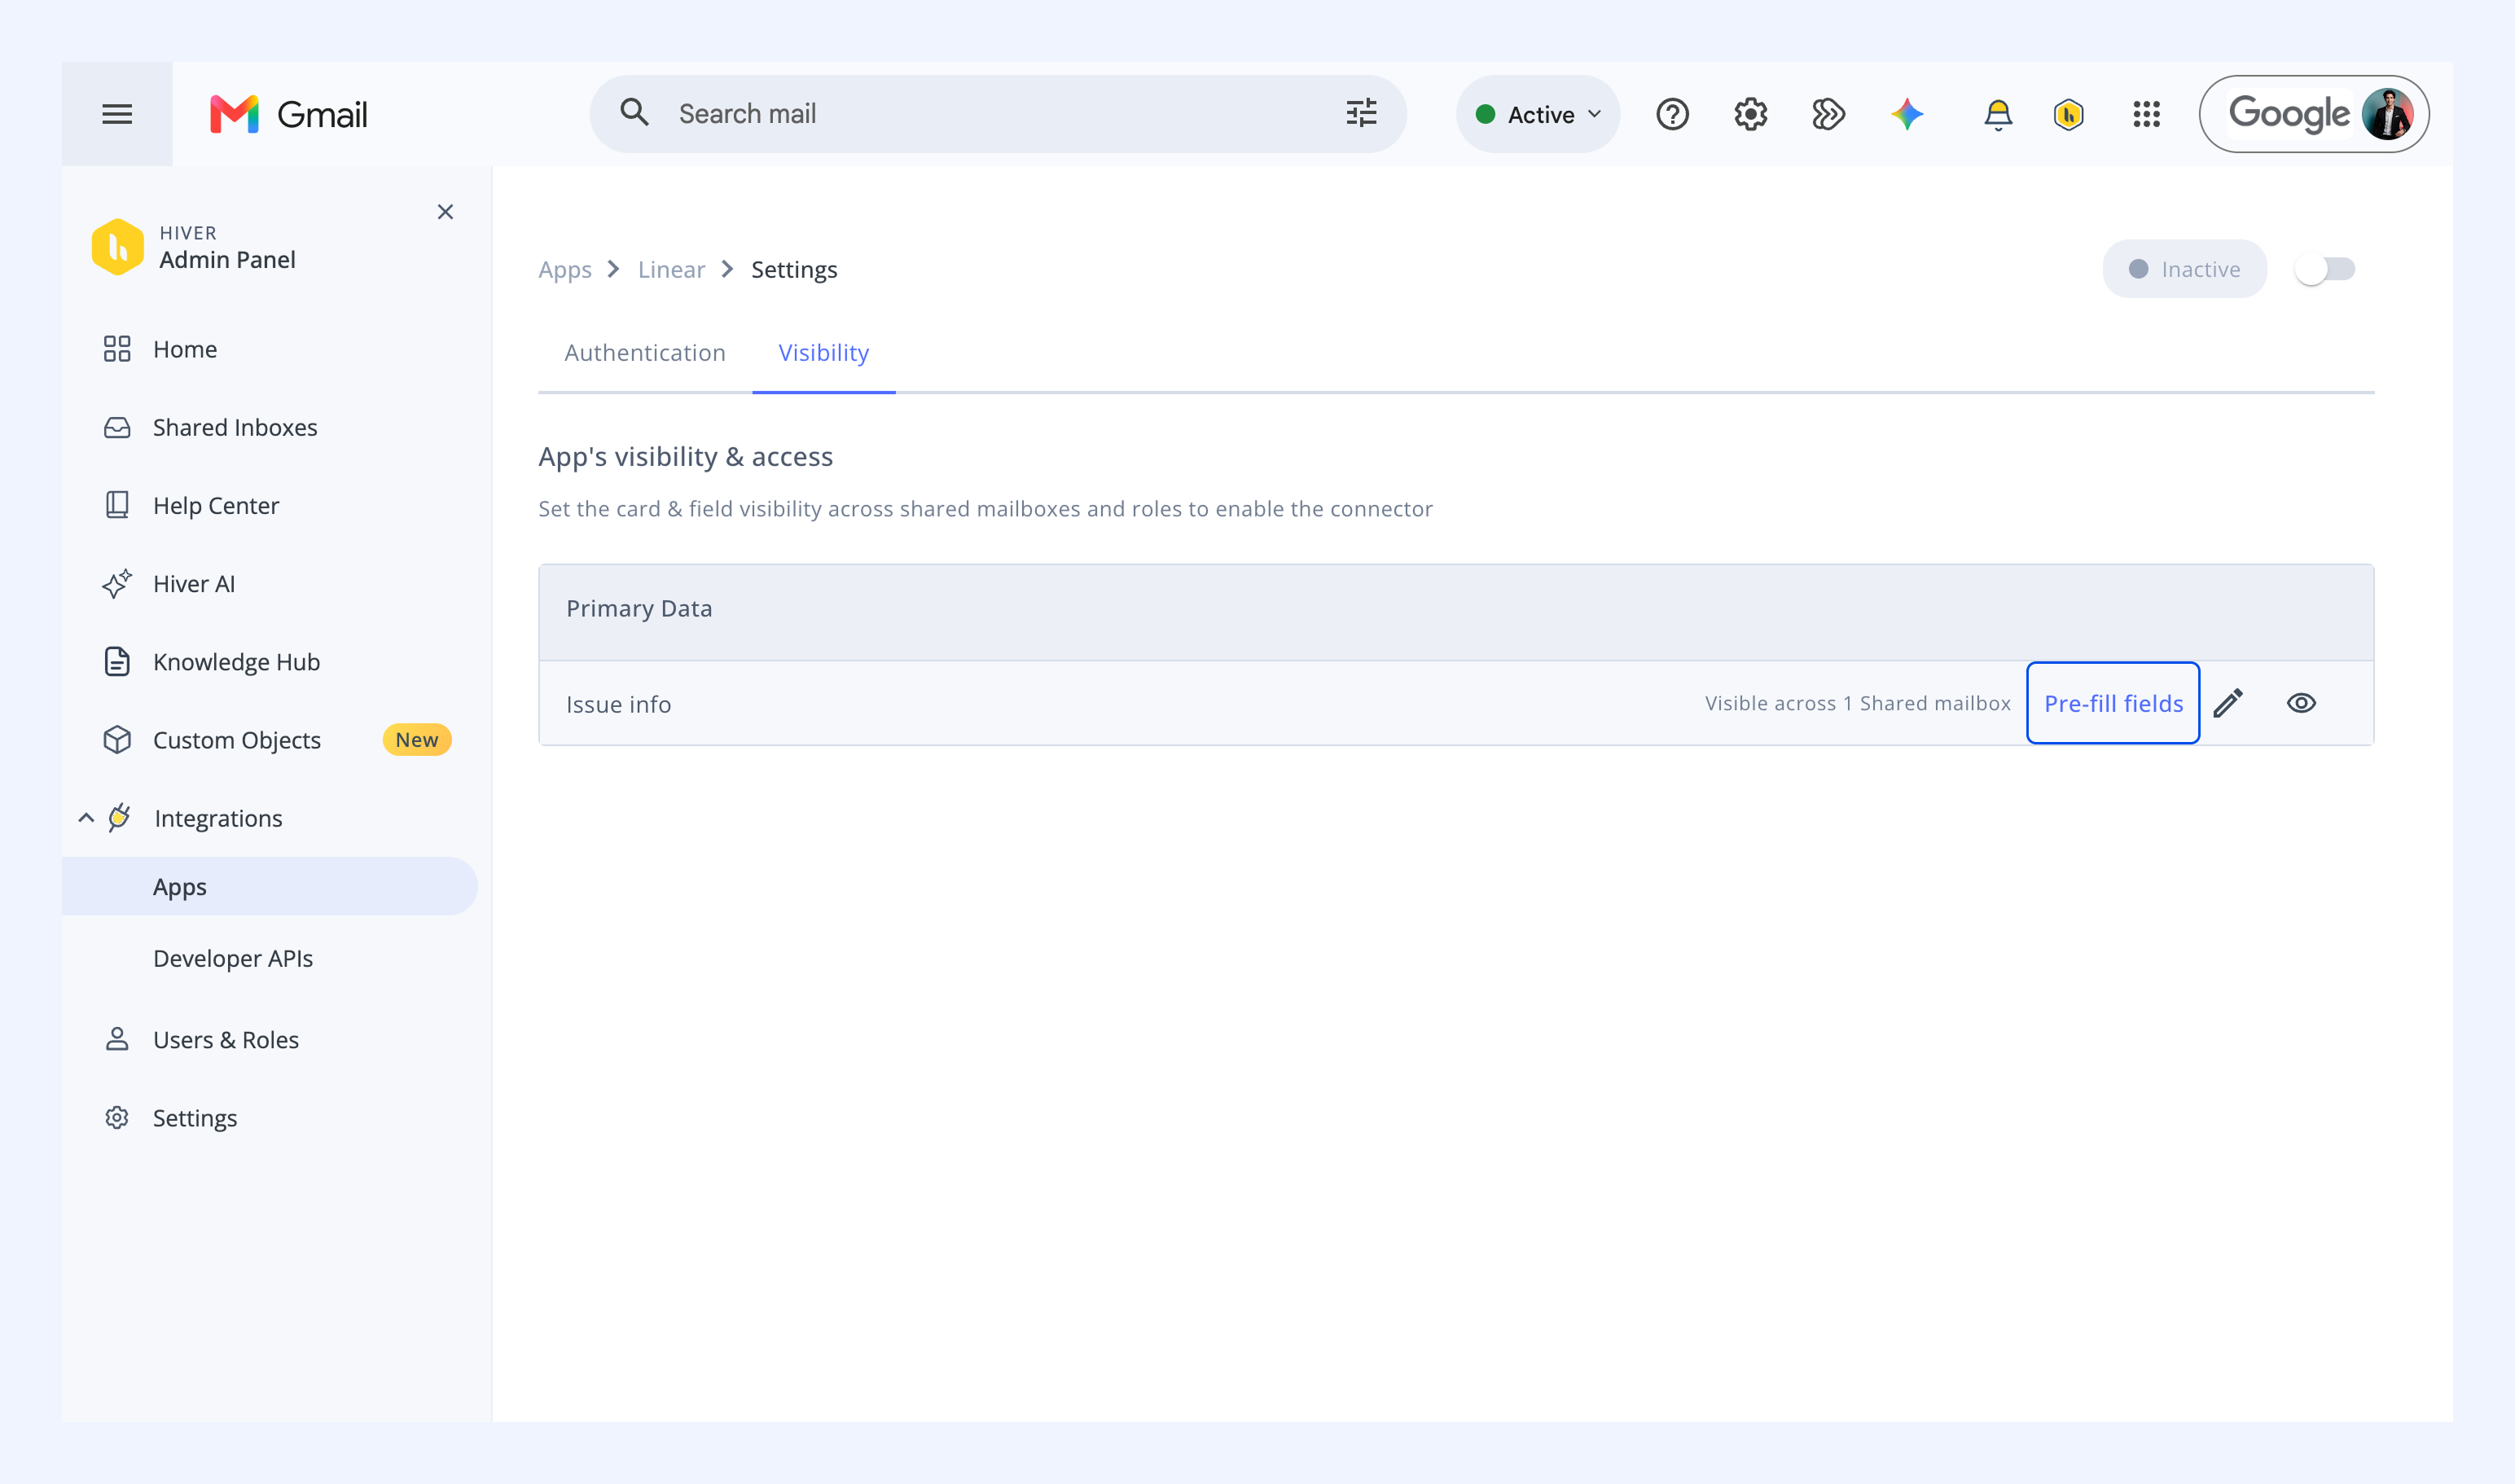
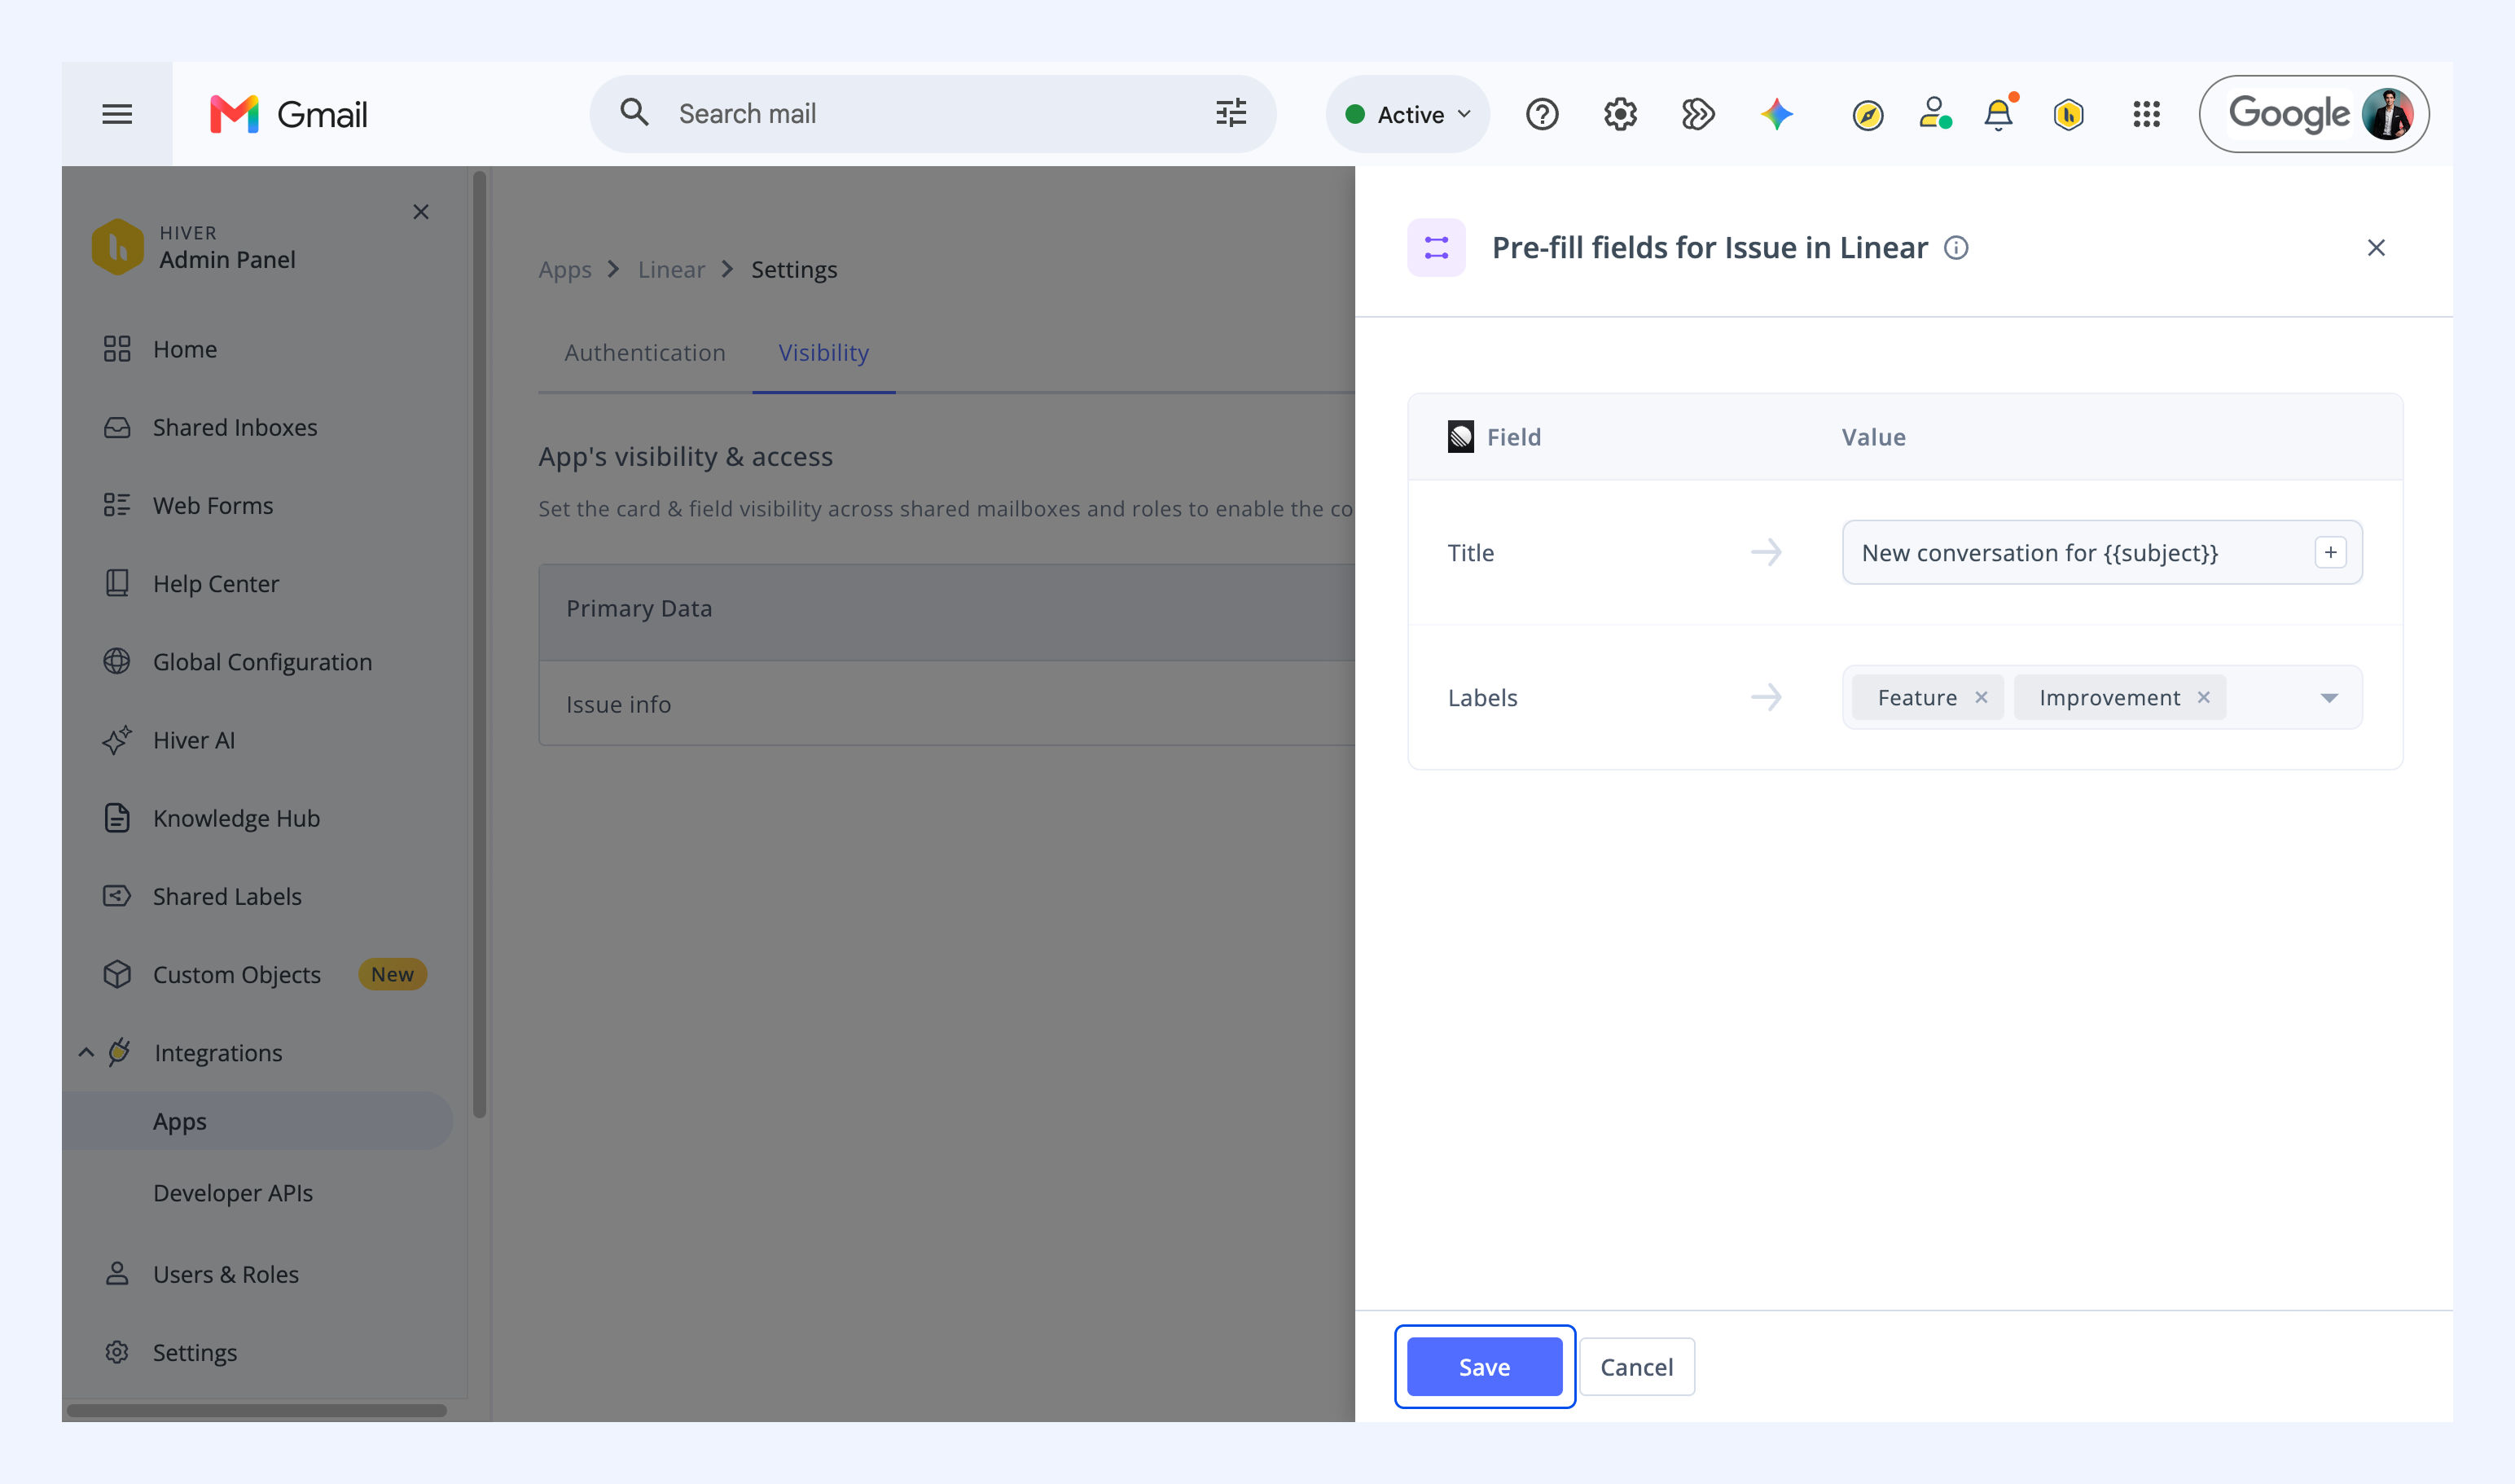
2. For each field, enter a value. You can add your own text or Hiver variables like {{subject}}, {{private_permalink}}, {{email_body}}, and {{conversation_summary}}.
3. Click Save.
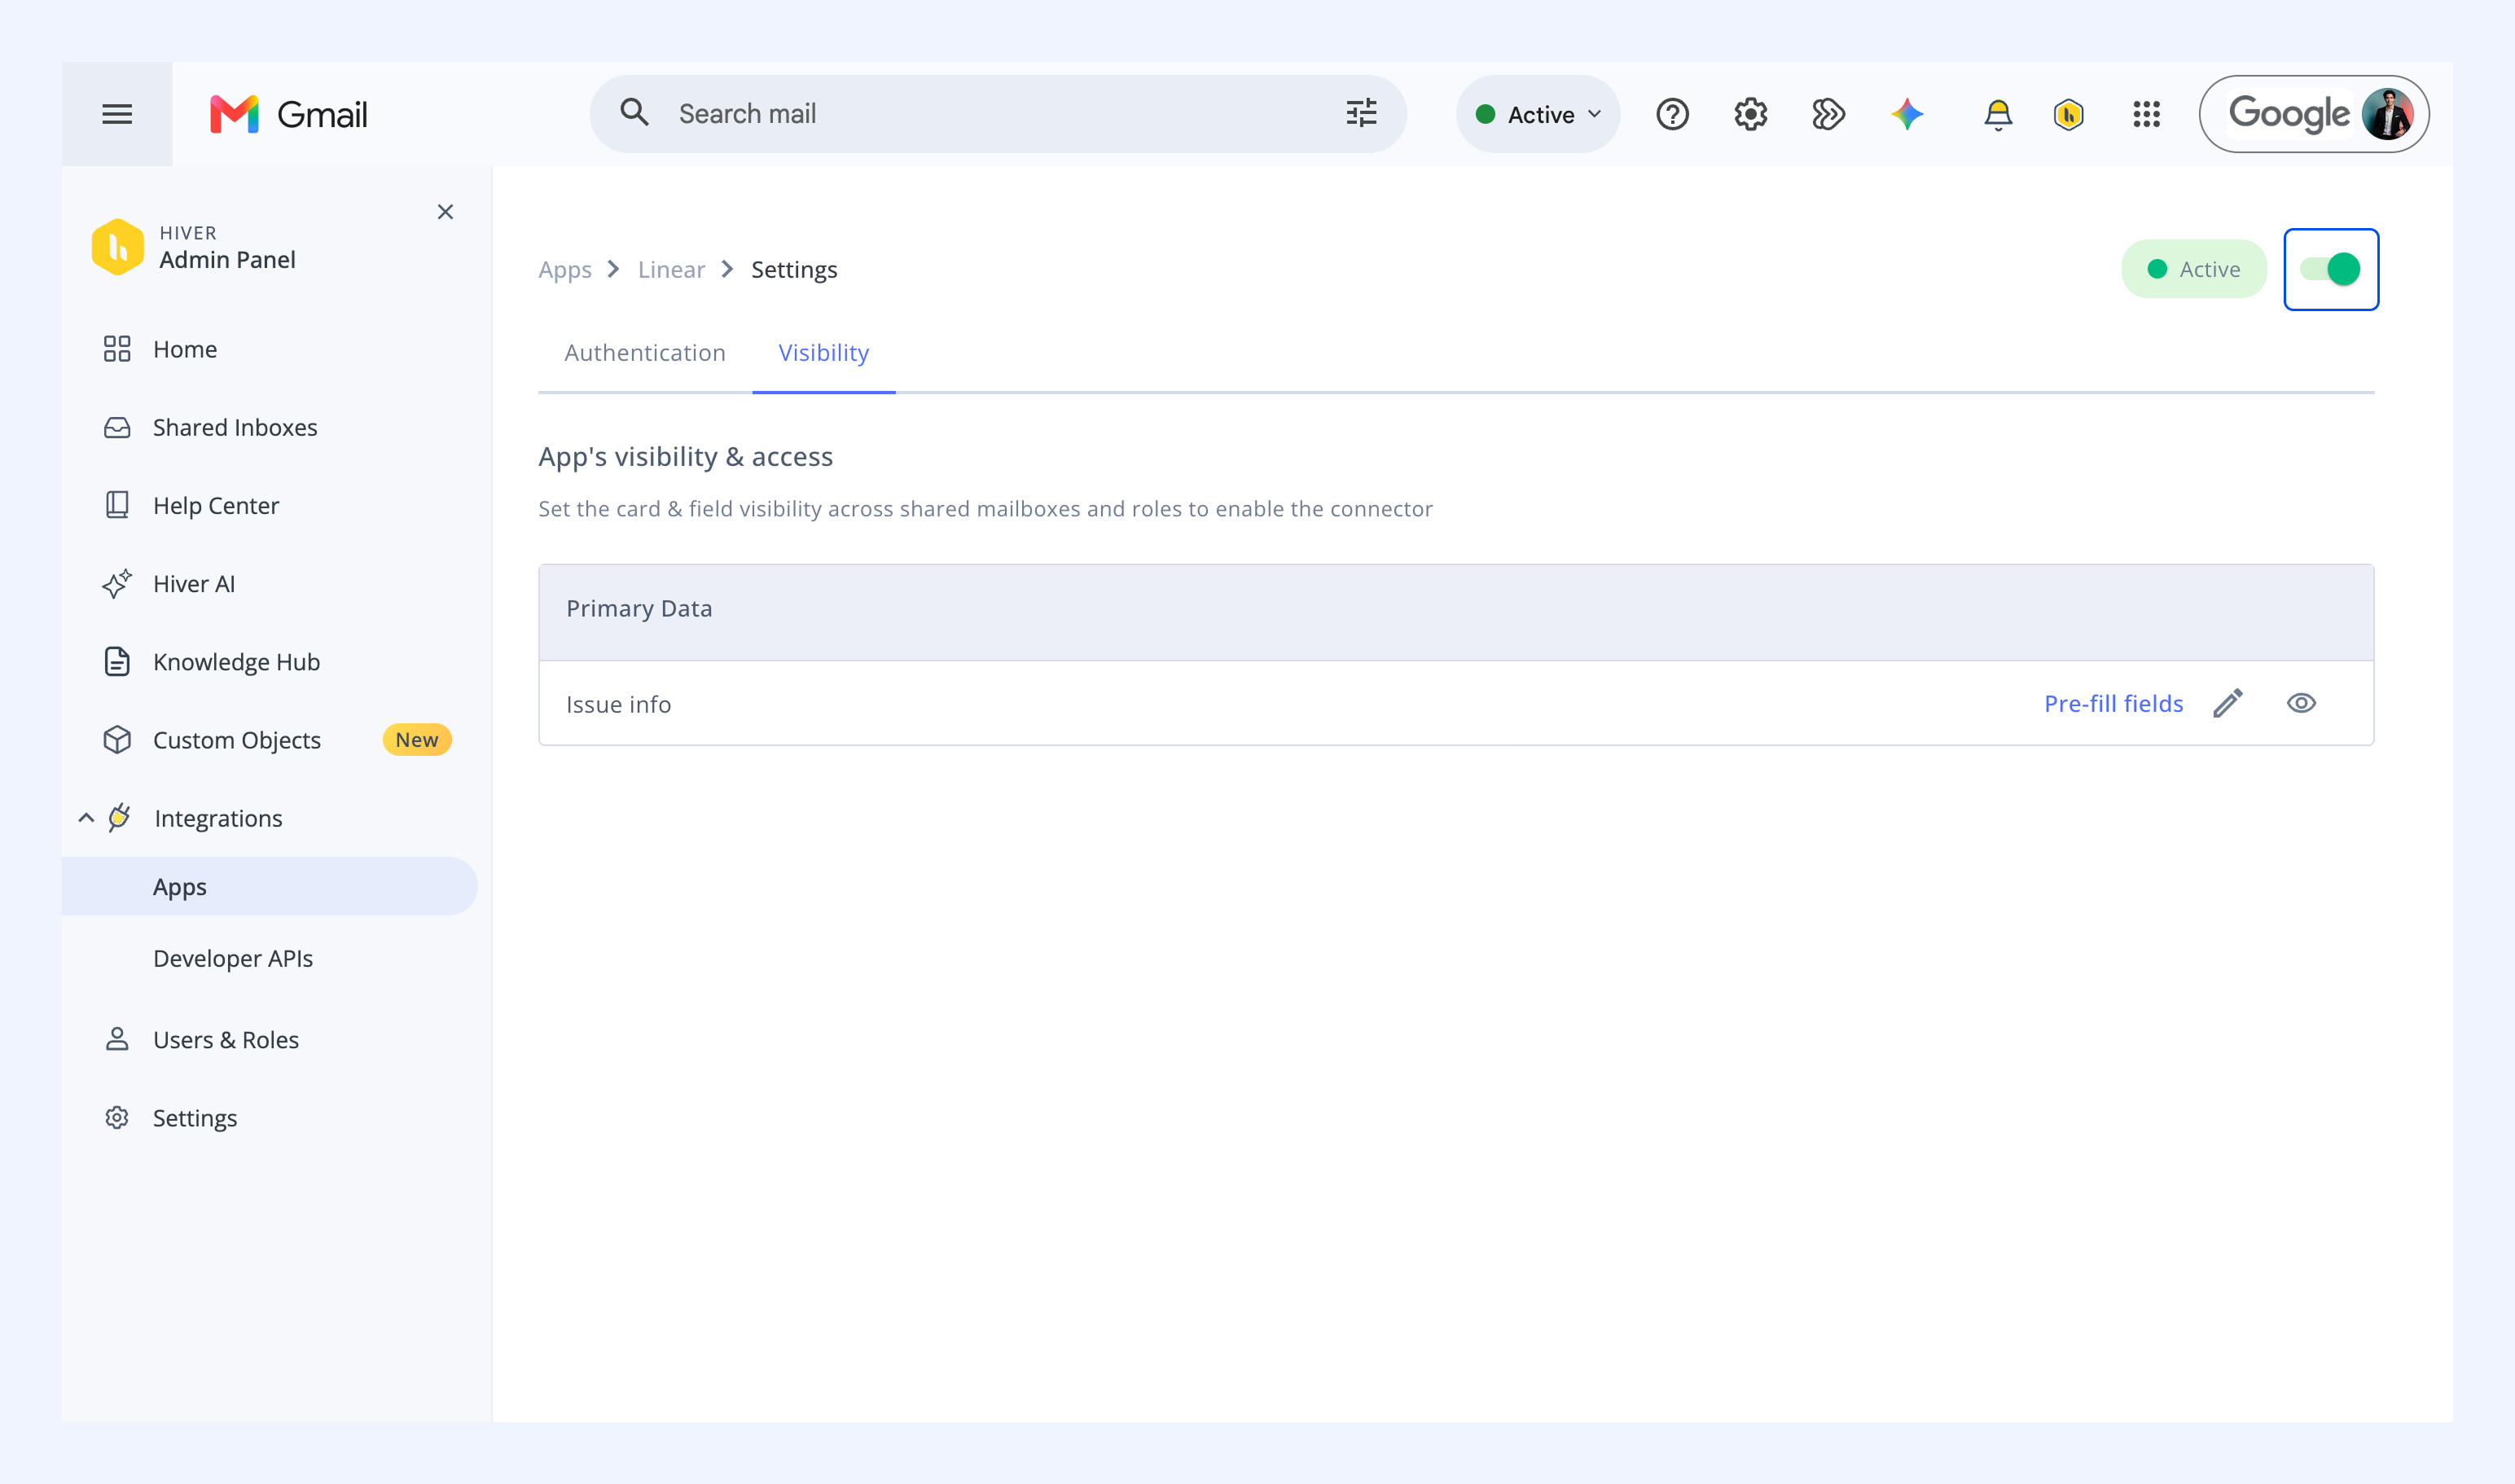
Enabling the Liner app
After you choose who can see Linear and what data is visible, turn on the Linear app toggle. The app becomes available in the selected Shared Inboxes for users with the selected roles.
Using the Linear app
1. Create a Linear issue
When a customer request needs work from your engineering or product team, you can create a Linear issue directly from the conversation. Hiver links the issue to the conversation so your team can track progress without losing the customer context.
To create an issue:
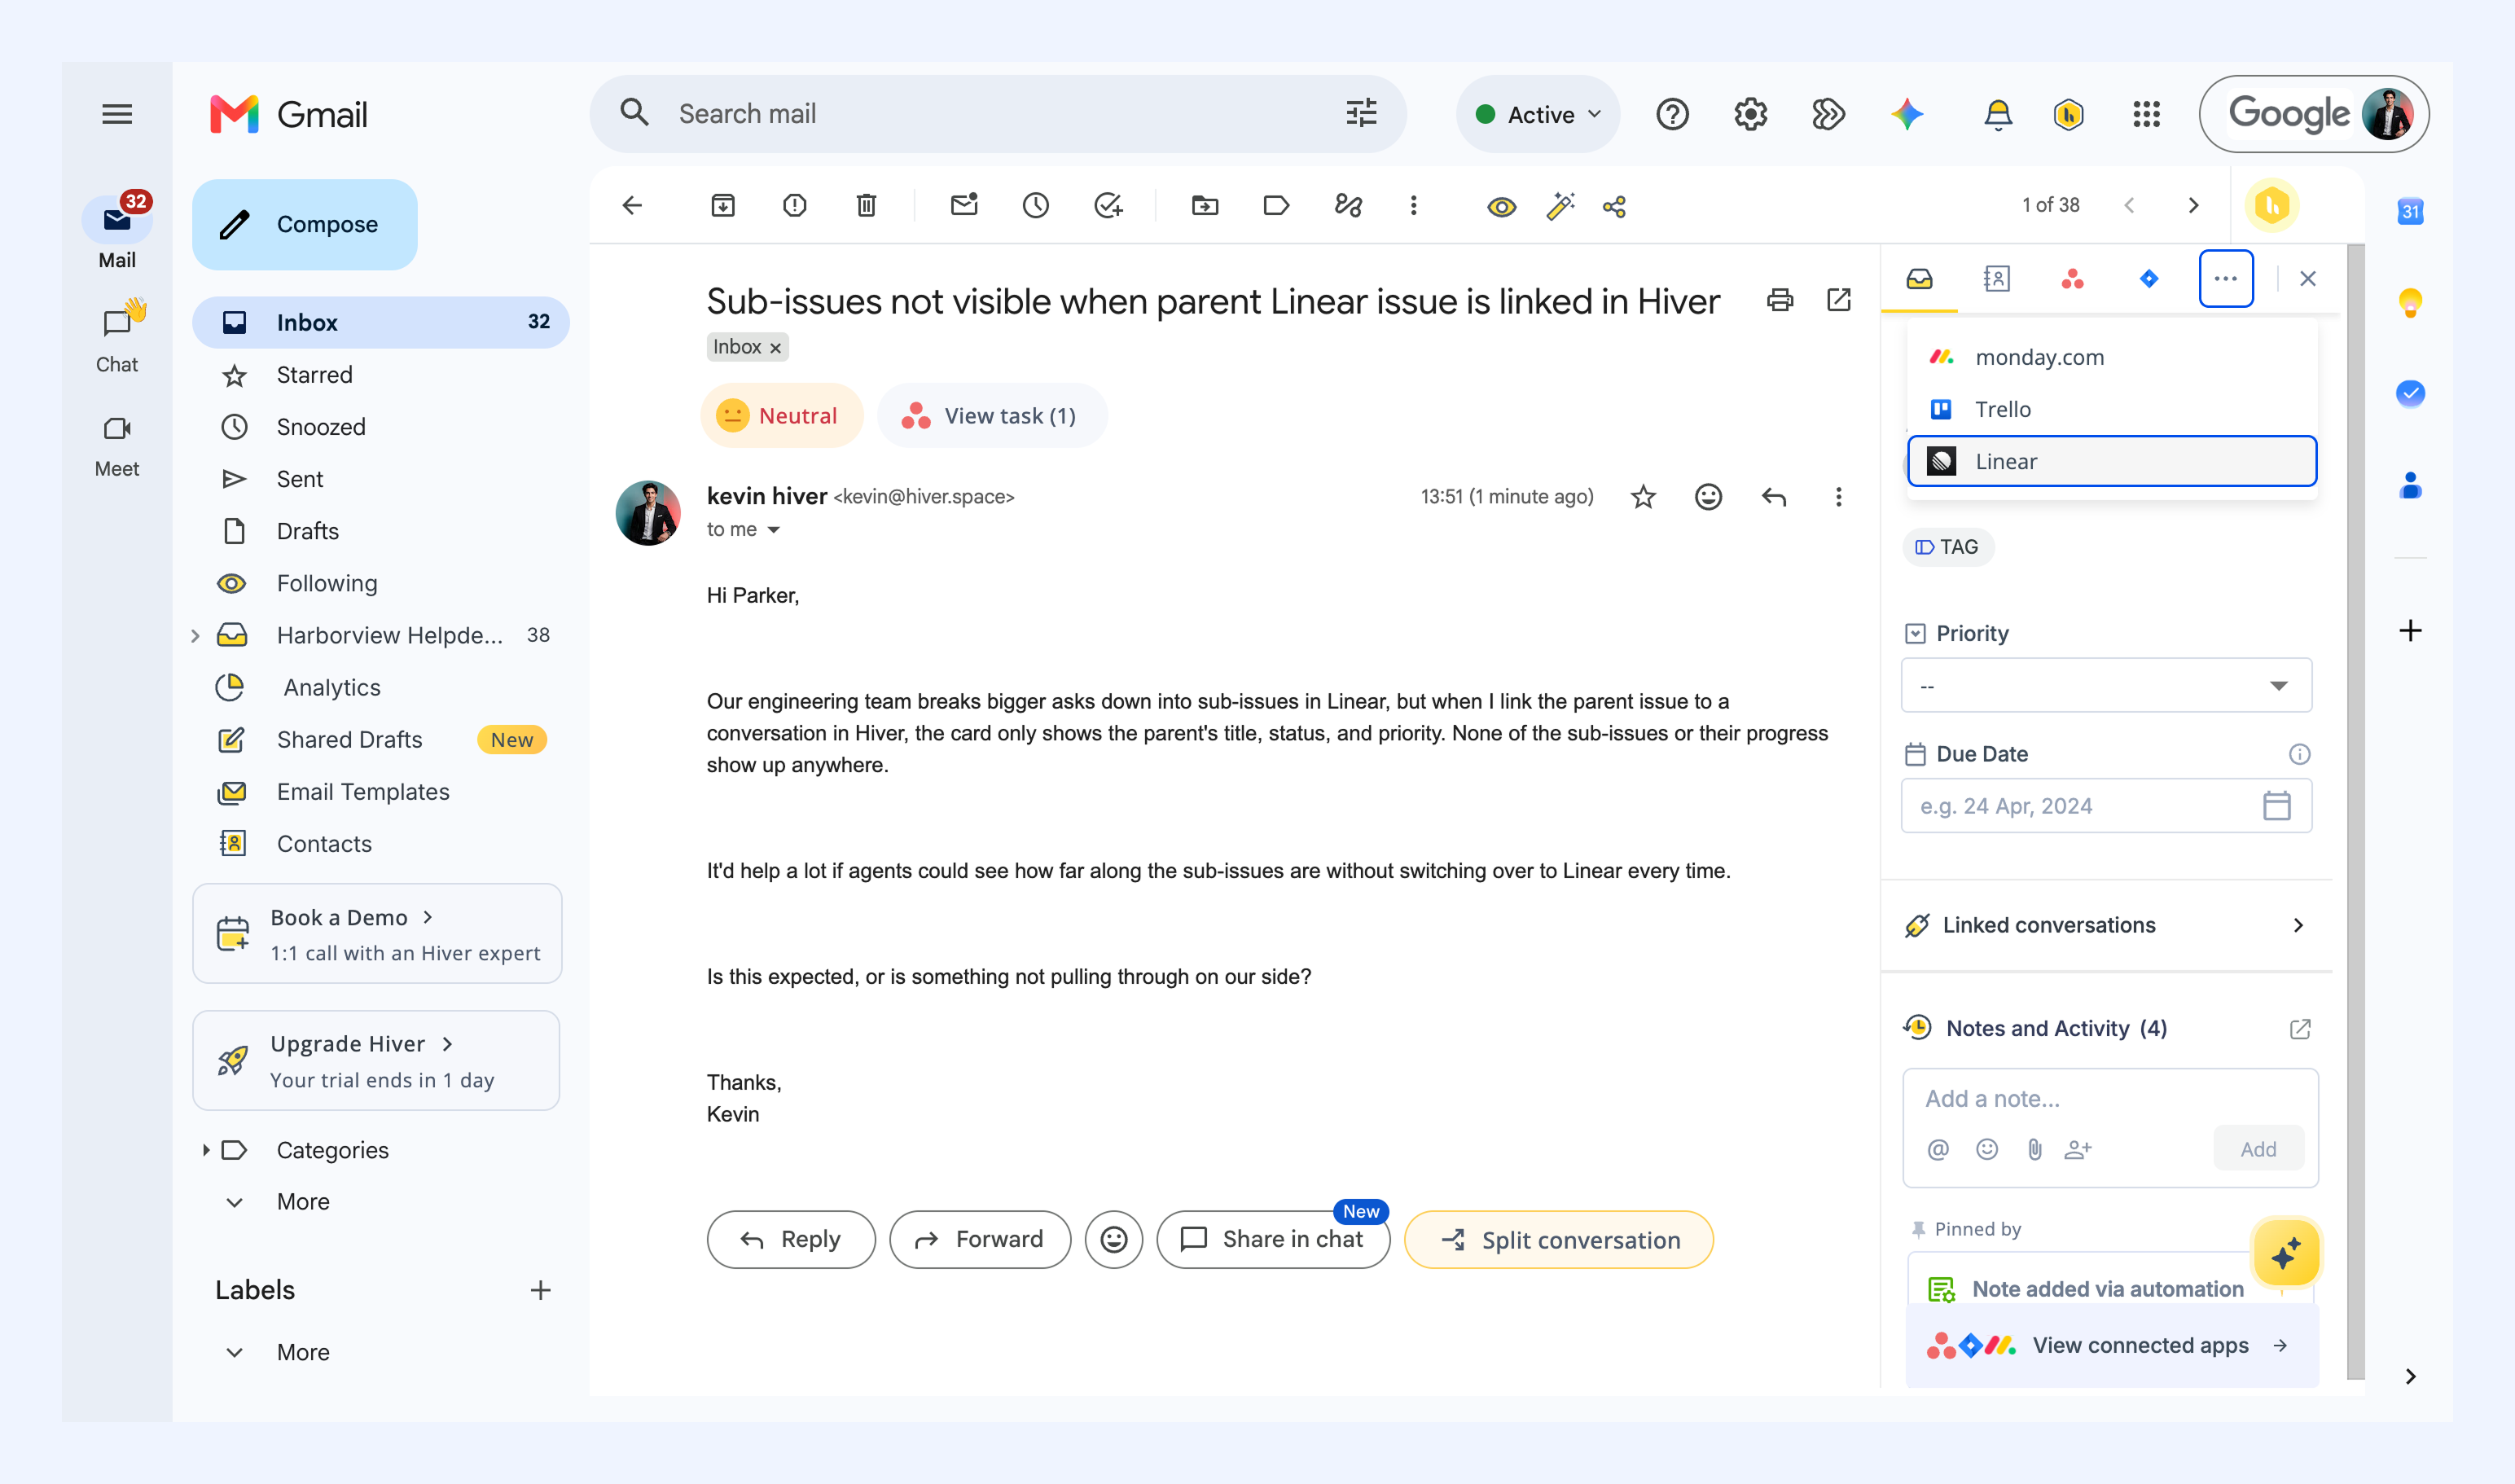
1. Open Linear from the right panel. If you don't see it, click the three-dot menu and select Linear.
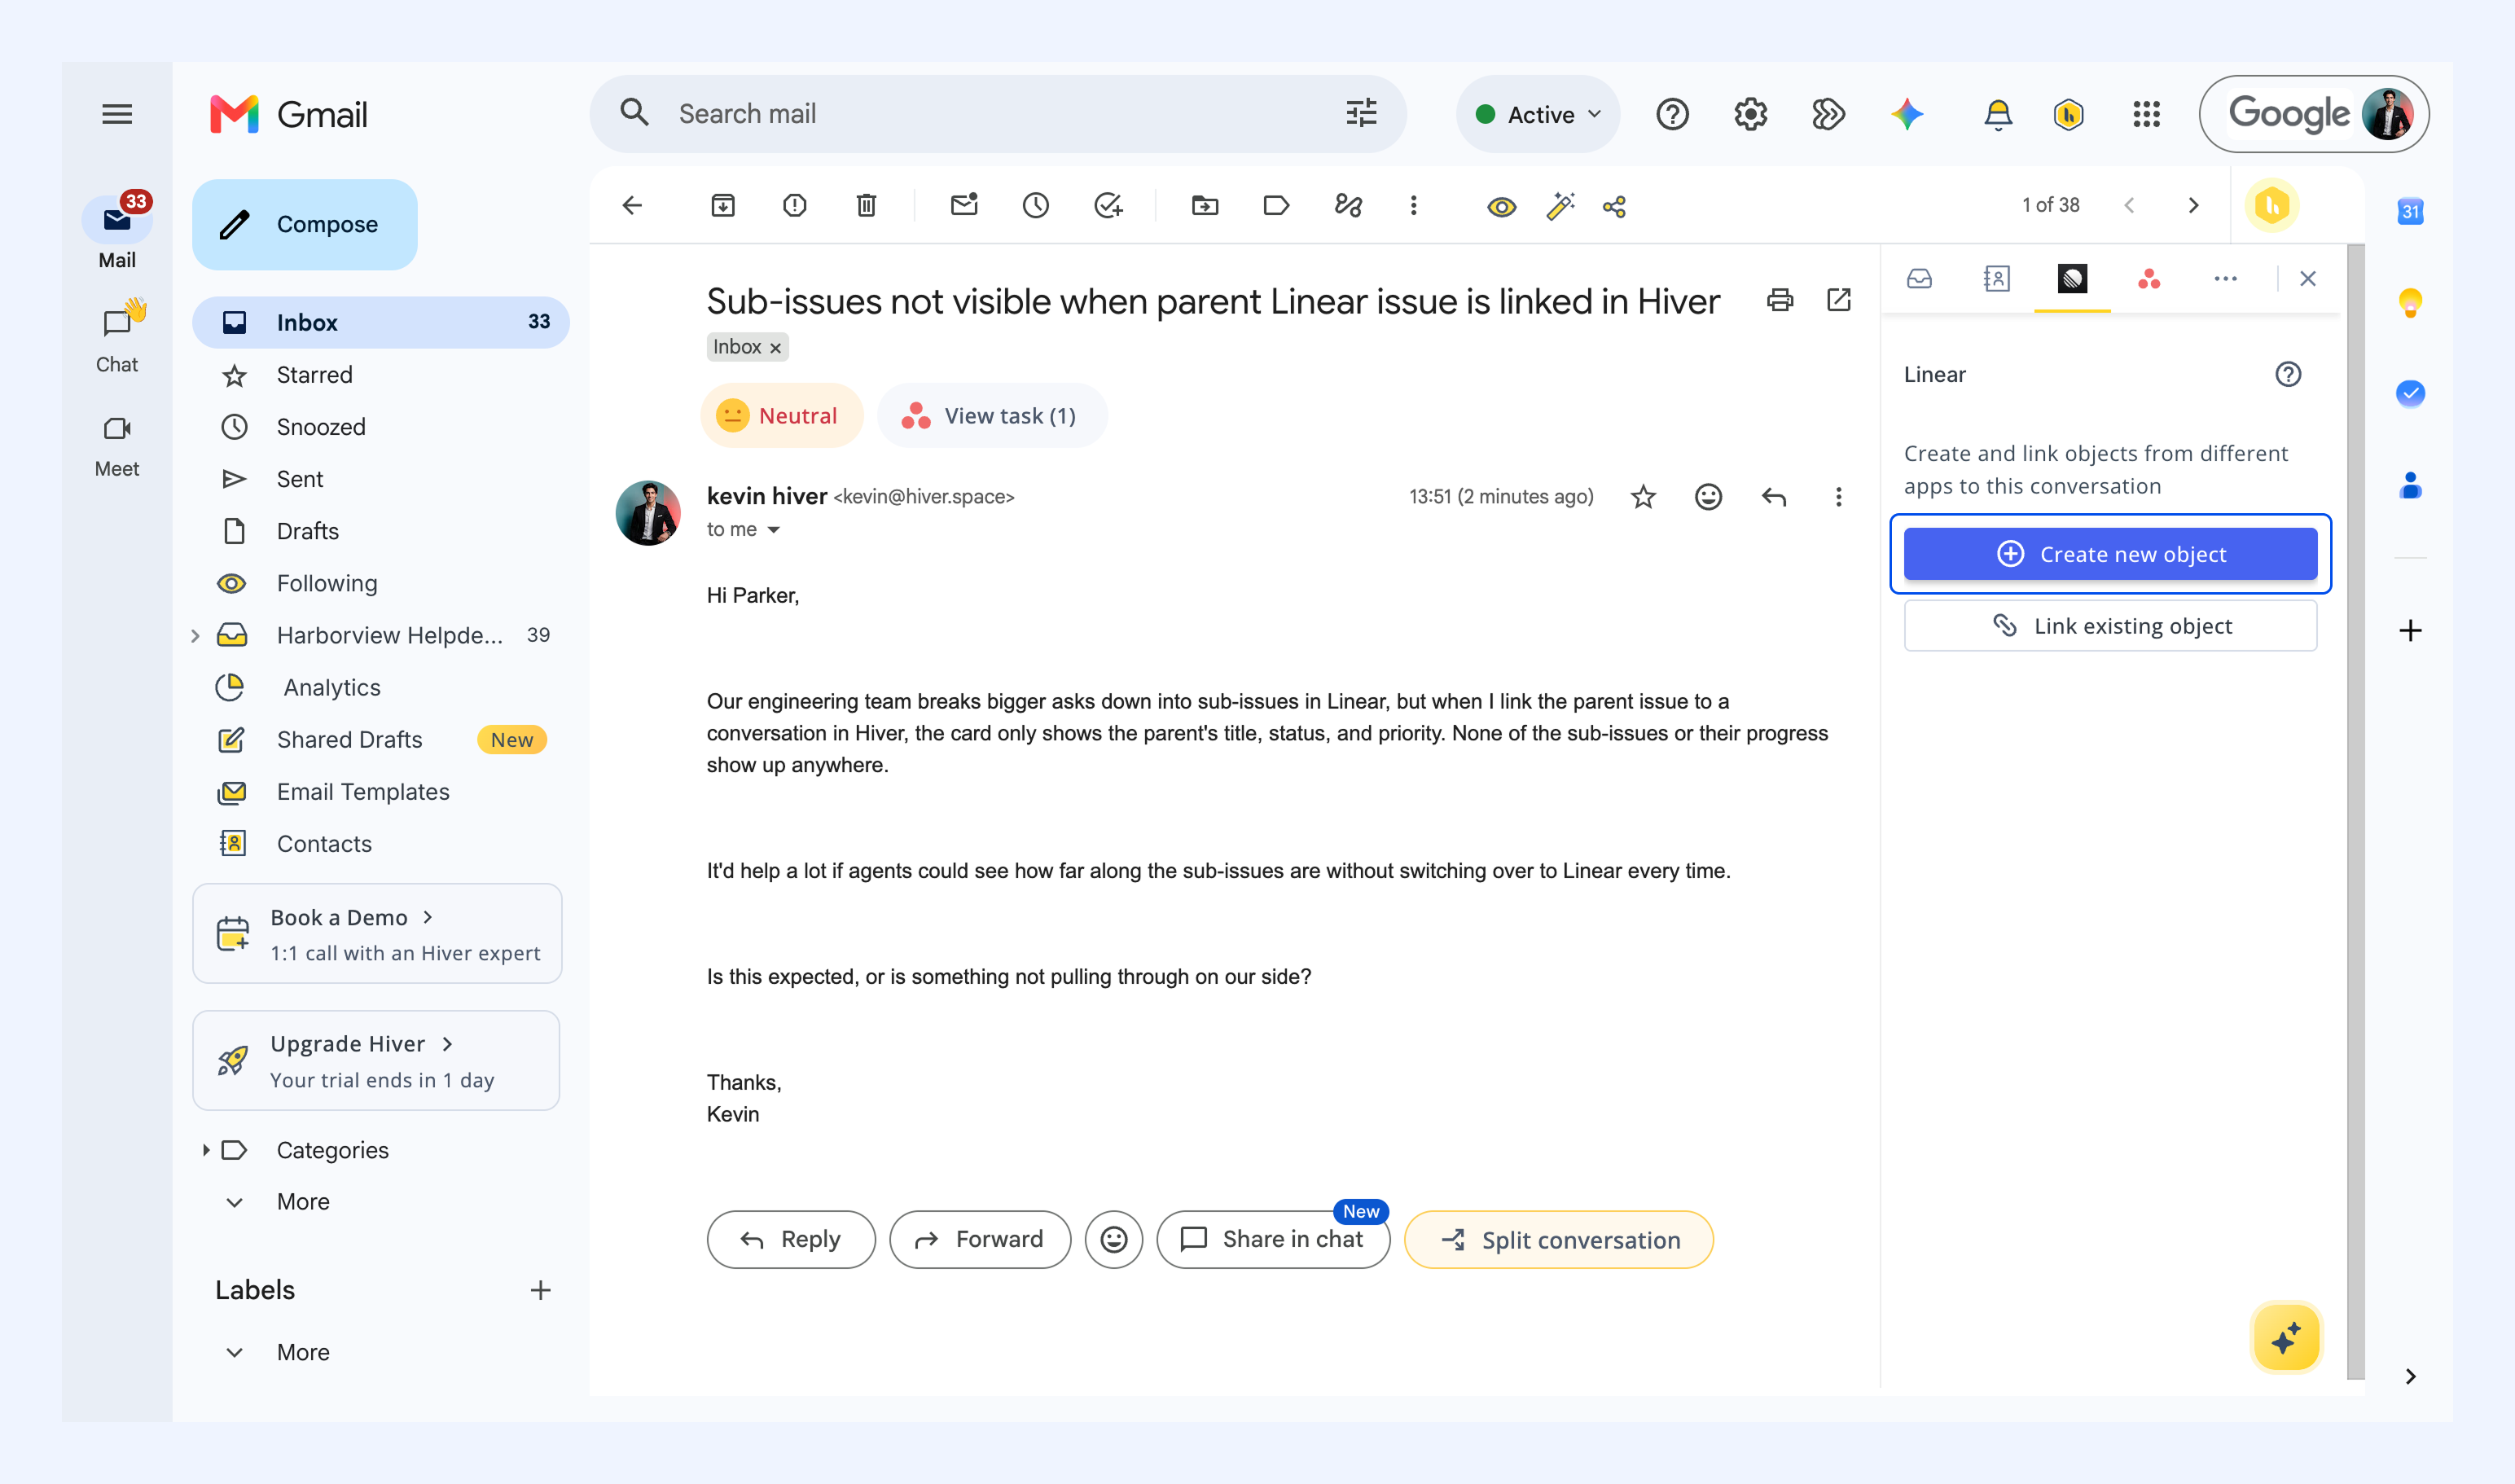
2. Click Create new object.
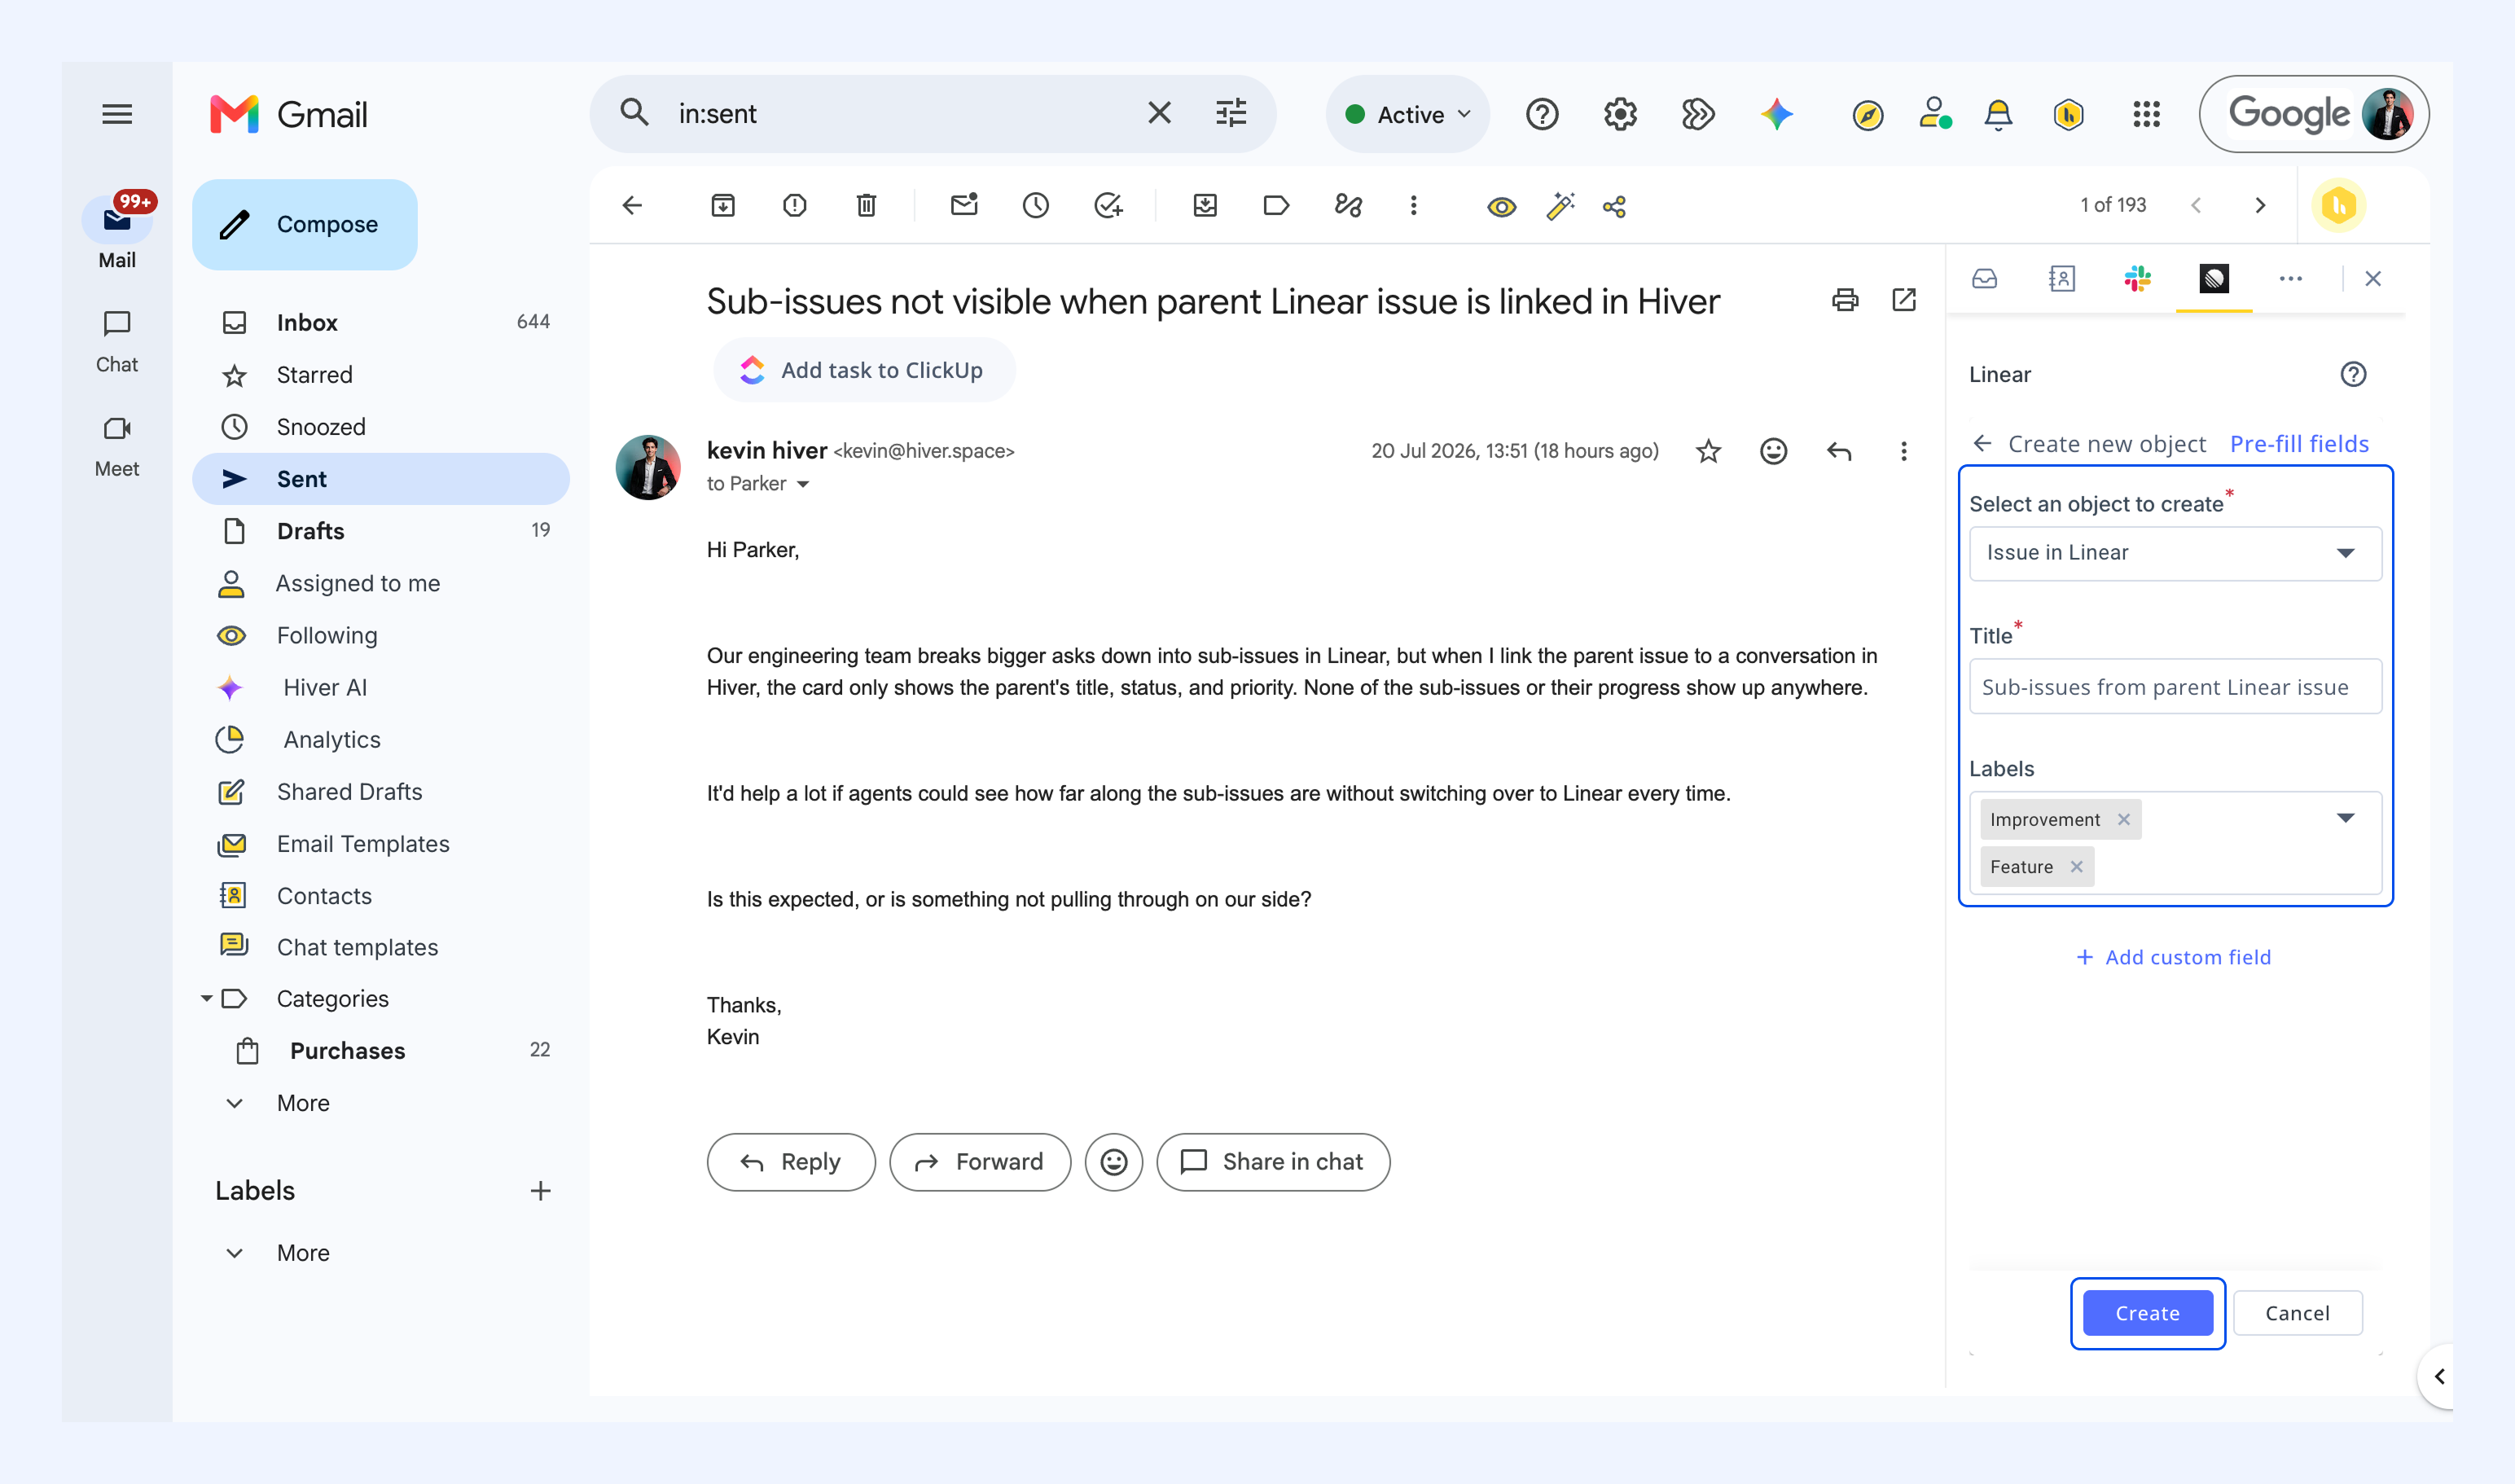
3. Enter the issue details, such as the title and labels. To include more fields.
Note:
- If your admin has set up pre-filled fields, some values may already be filled in. You can edit them before creating the issue.
- Only fields enabled under Configure fields in the Visibility tab will appear in the form.
4. Click Create.
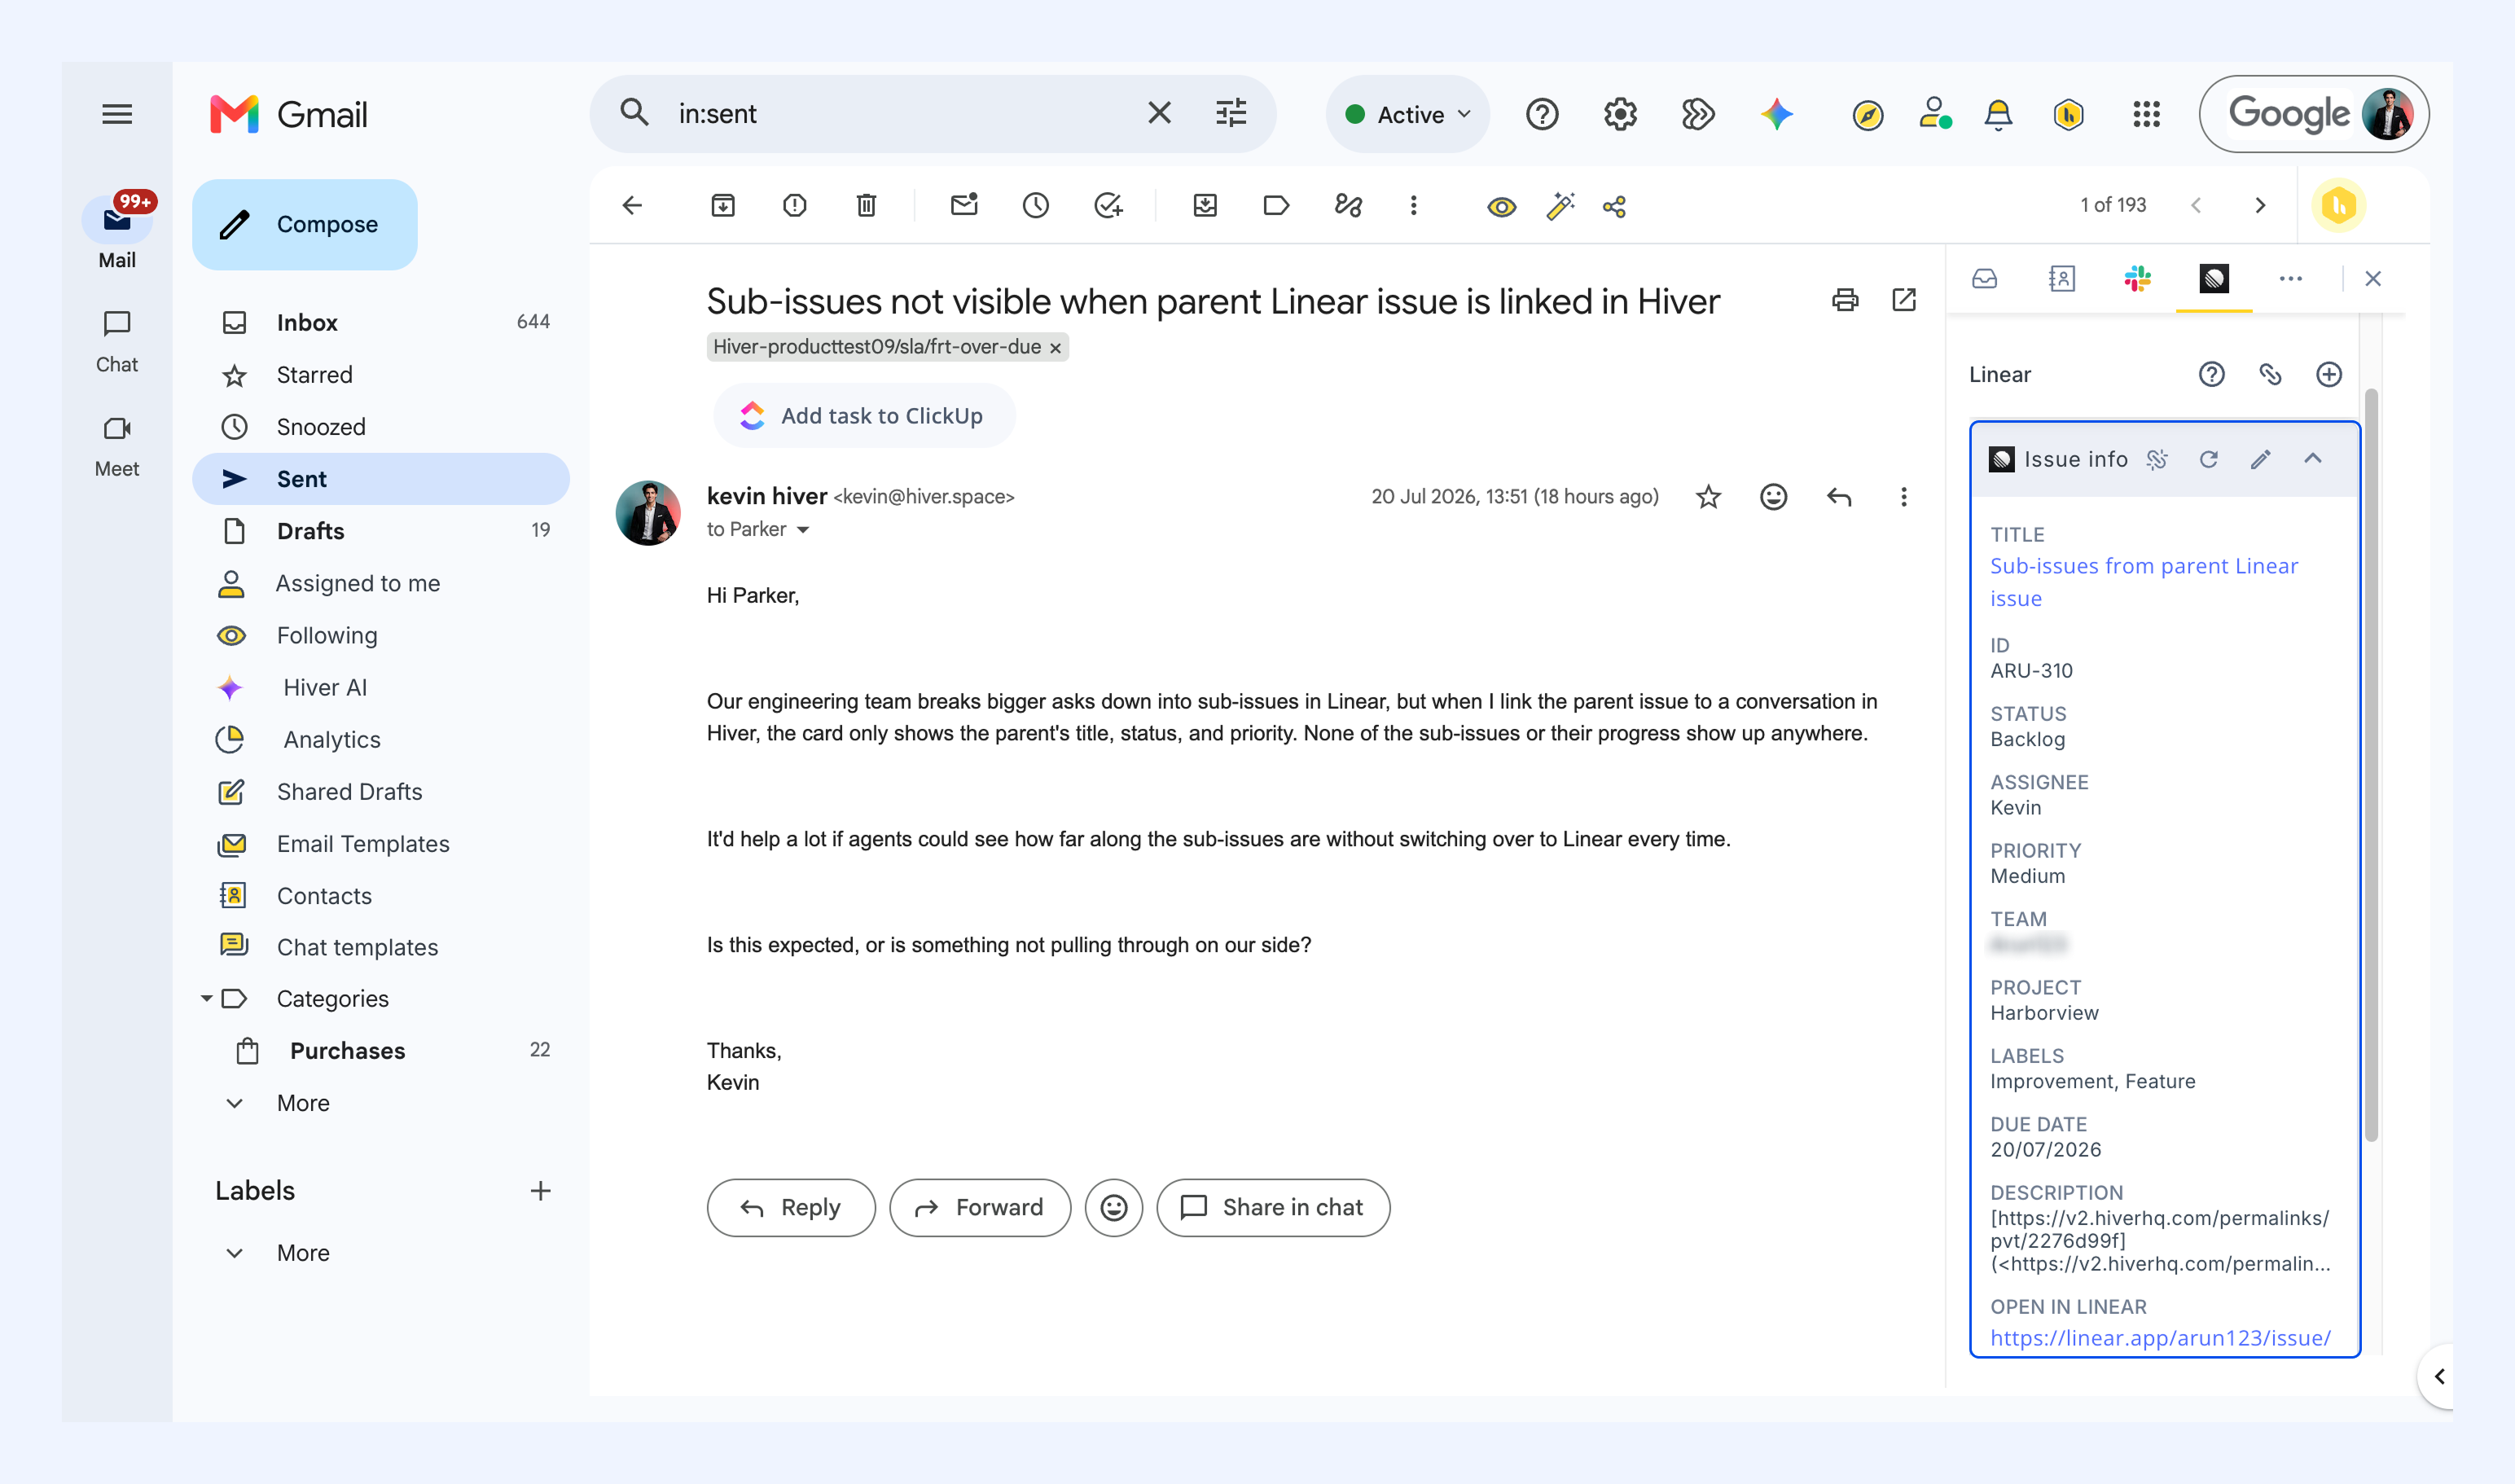
The issue is created and appears in the right panel. From the linked card in Hiver, use the link to open the task directly in Linear.
2. Update a linked Linear issue
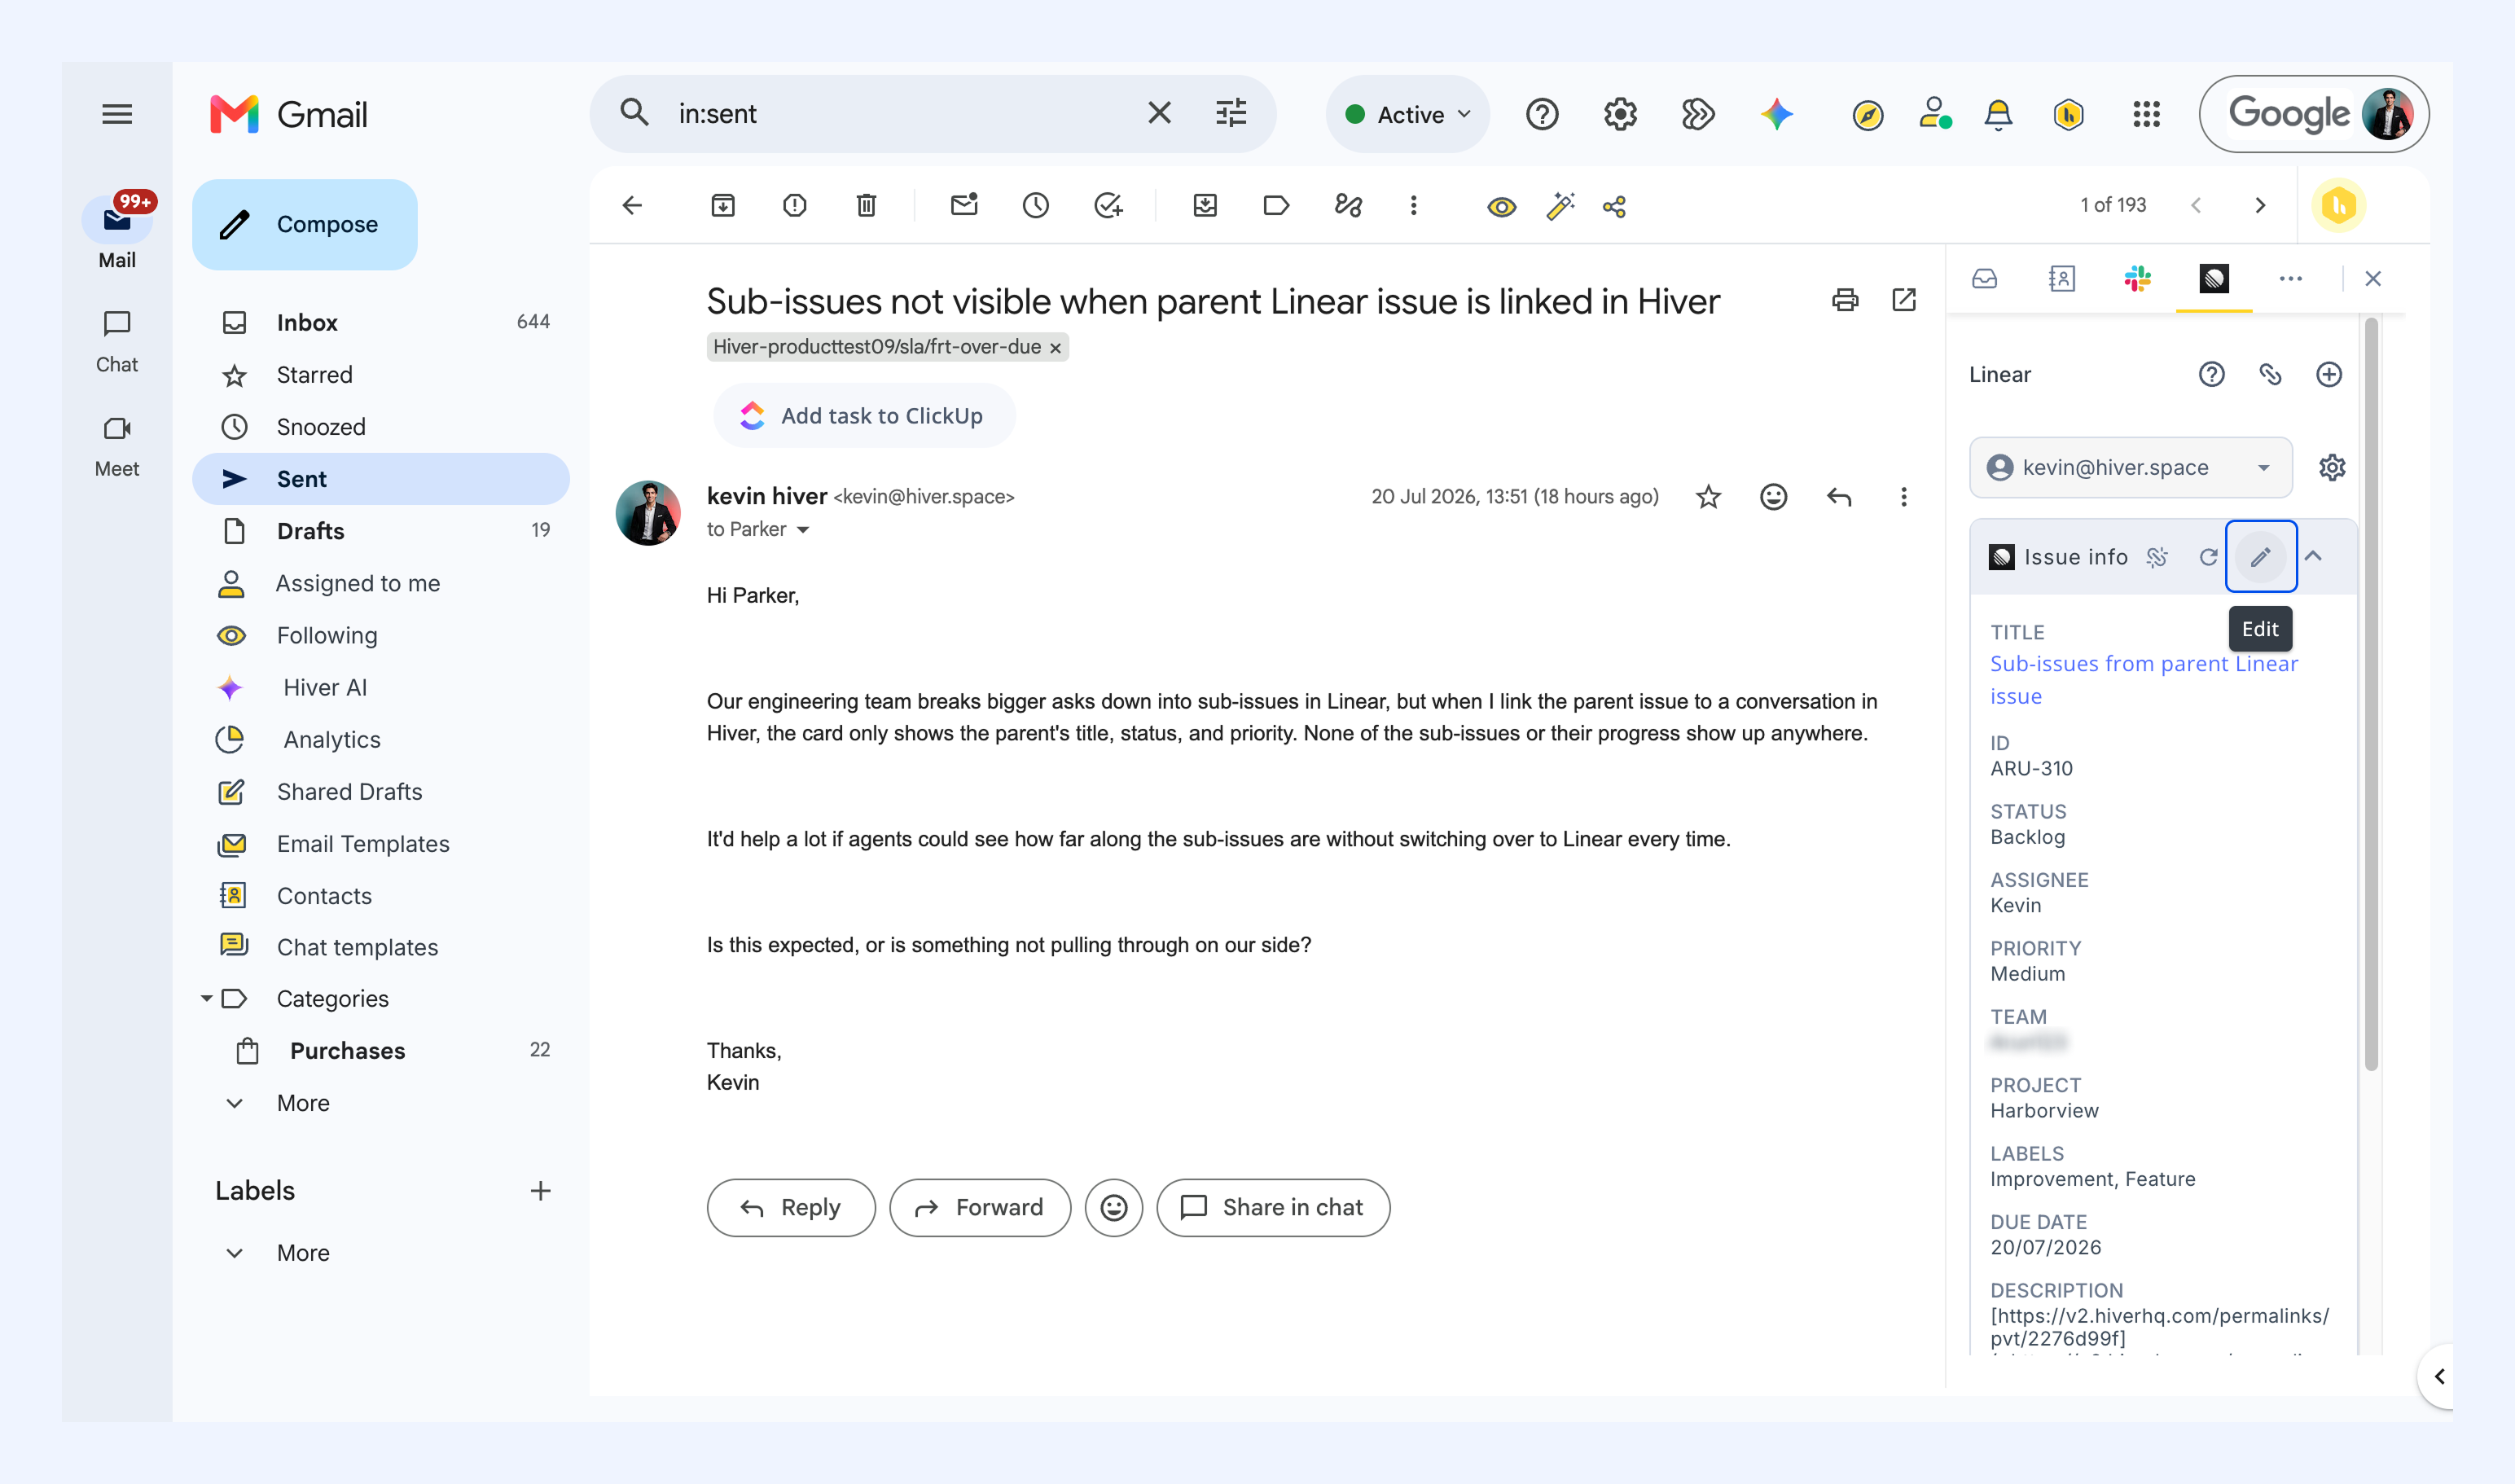
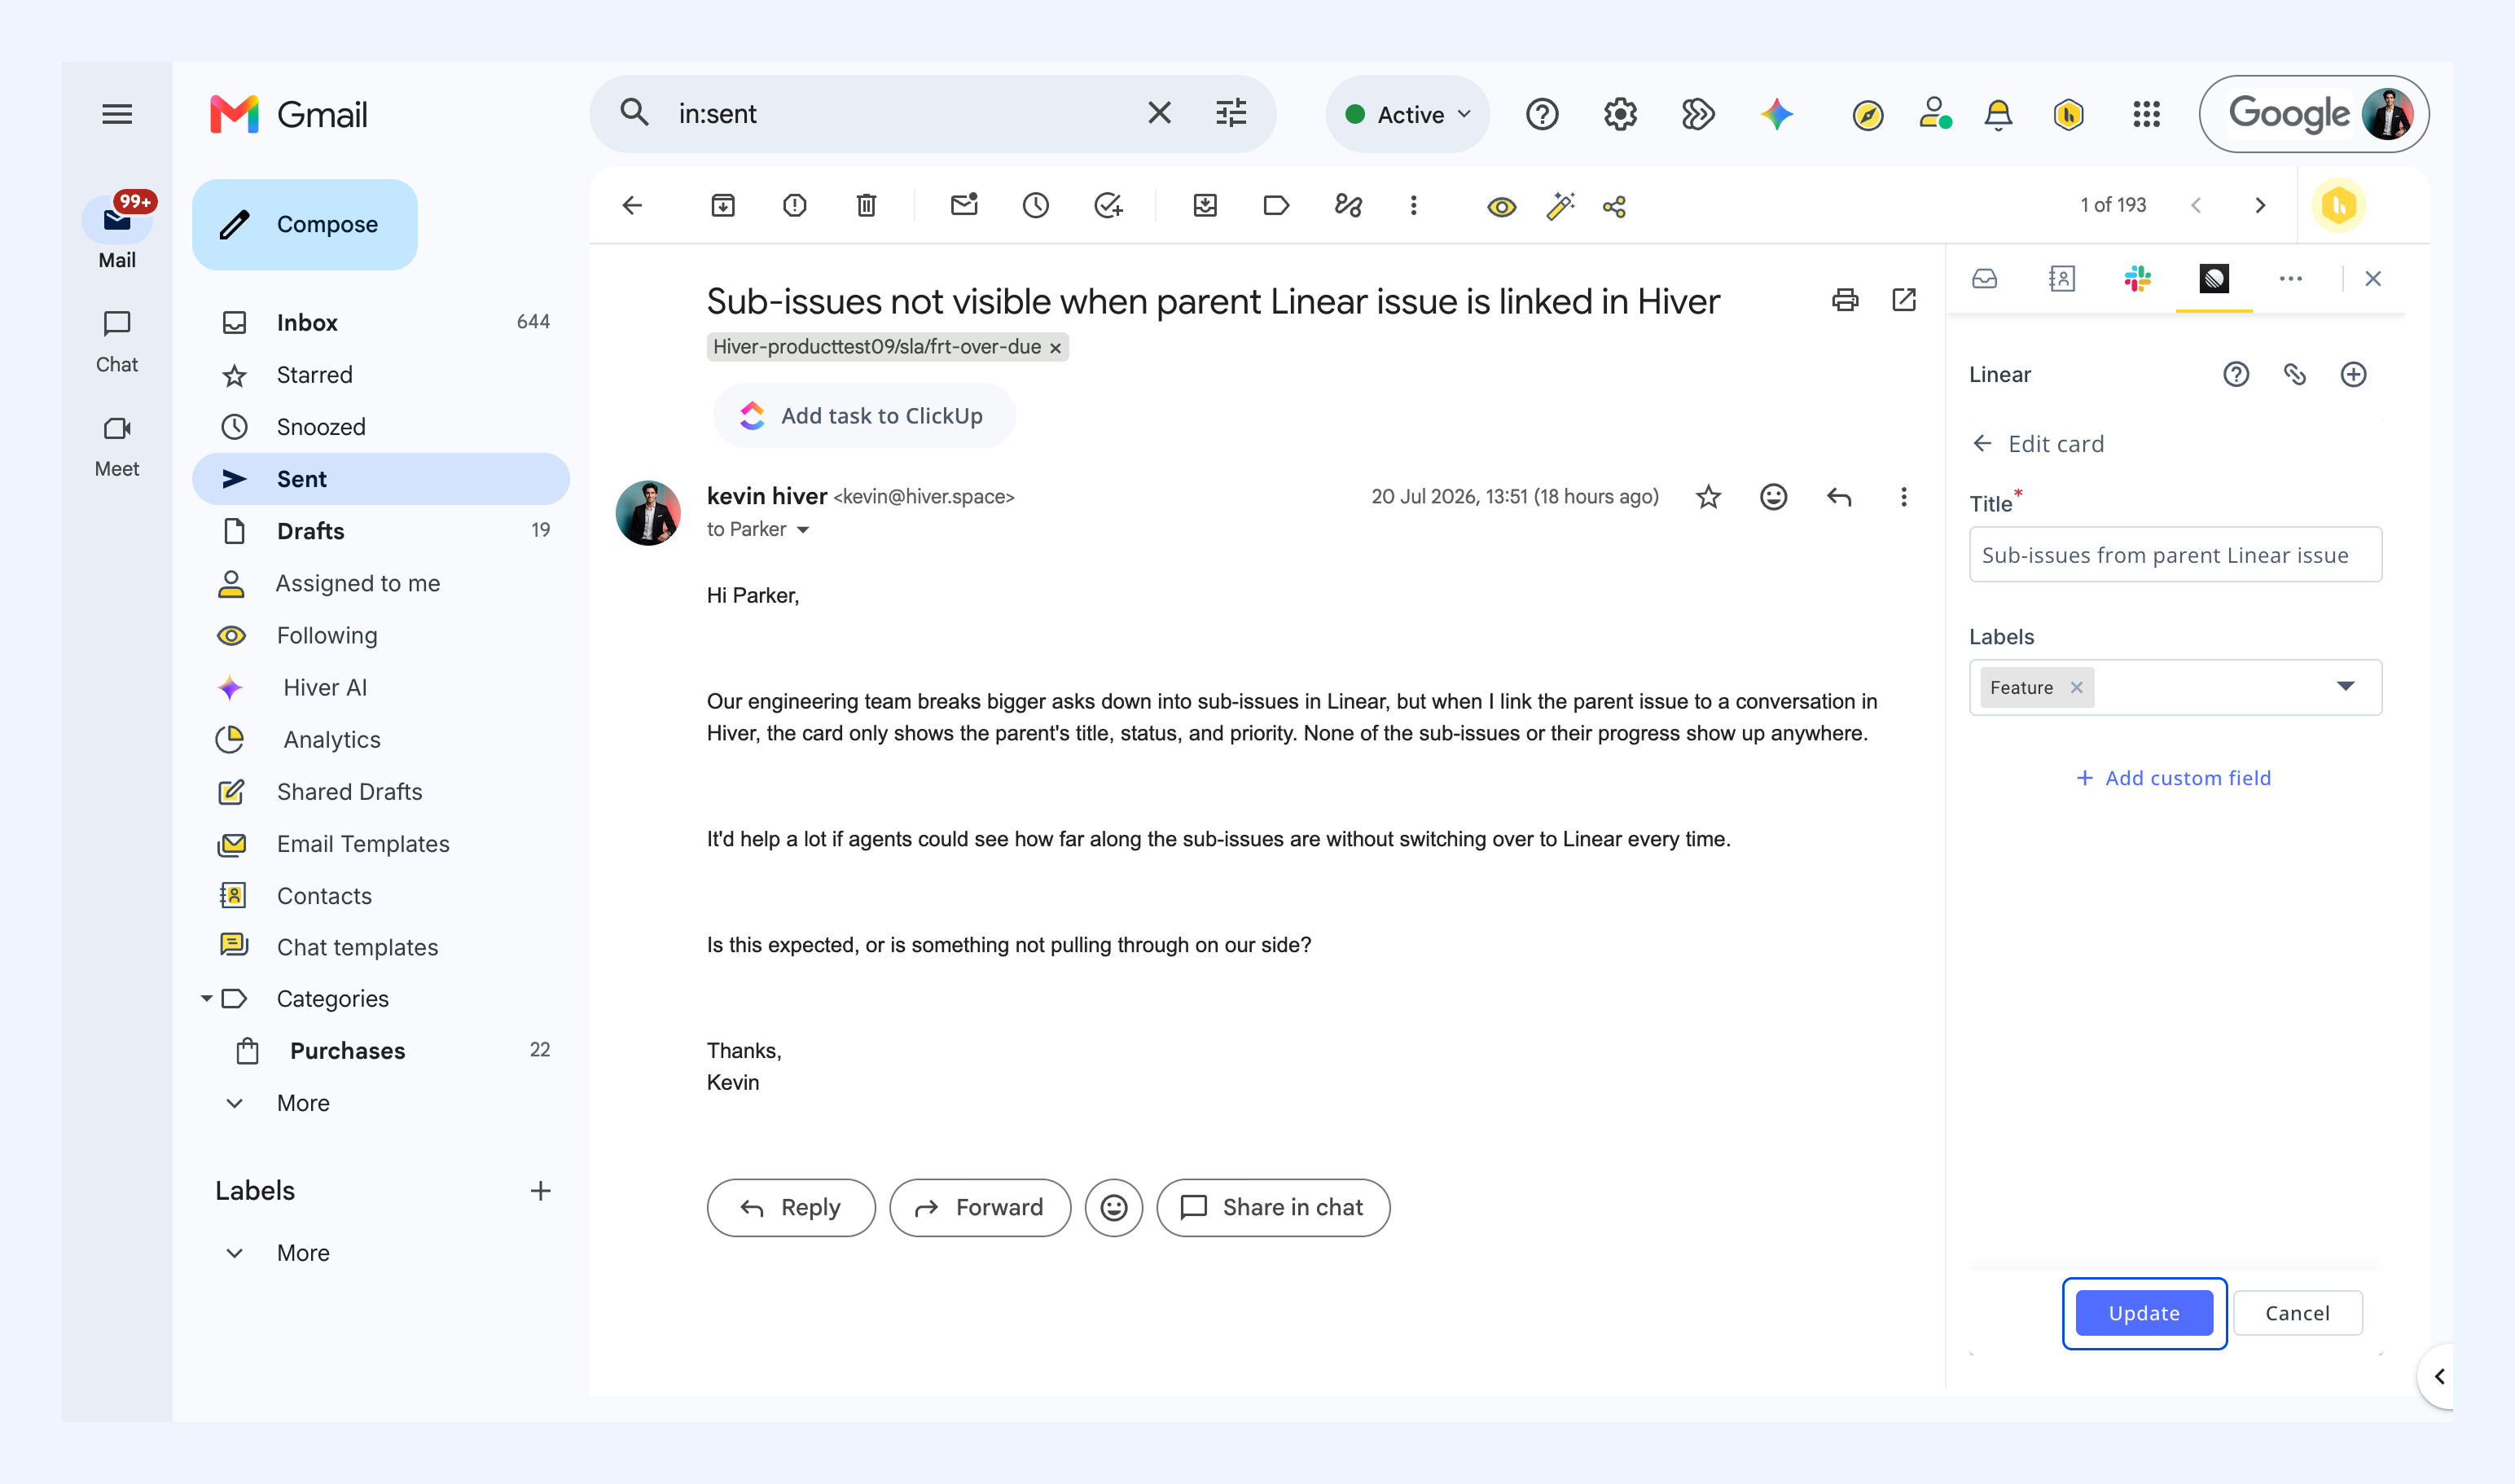
Once an issue is linked to a conversation, its details appear in the Linear card in the right panel. You can check its progress and update fields such as the status, assignee, and priority without leaving Hiver.
To update an issue:
1. Click the Edit icon.
2. Change the required fields and click Update to save them to Linear.
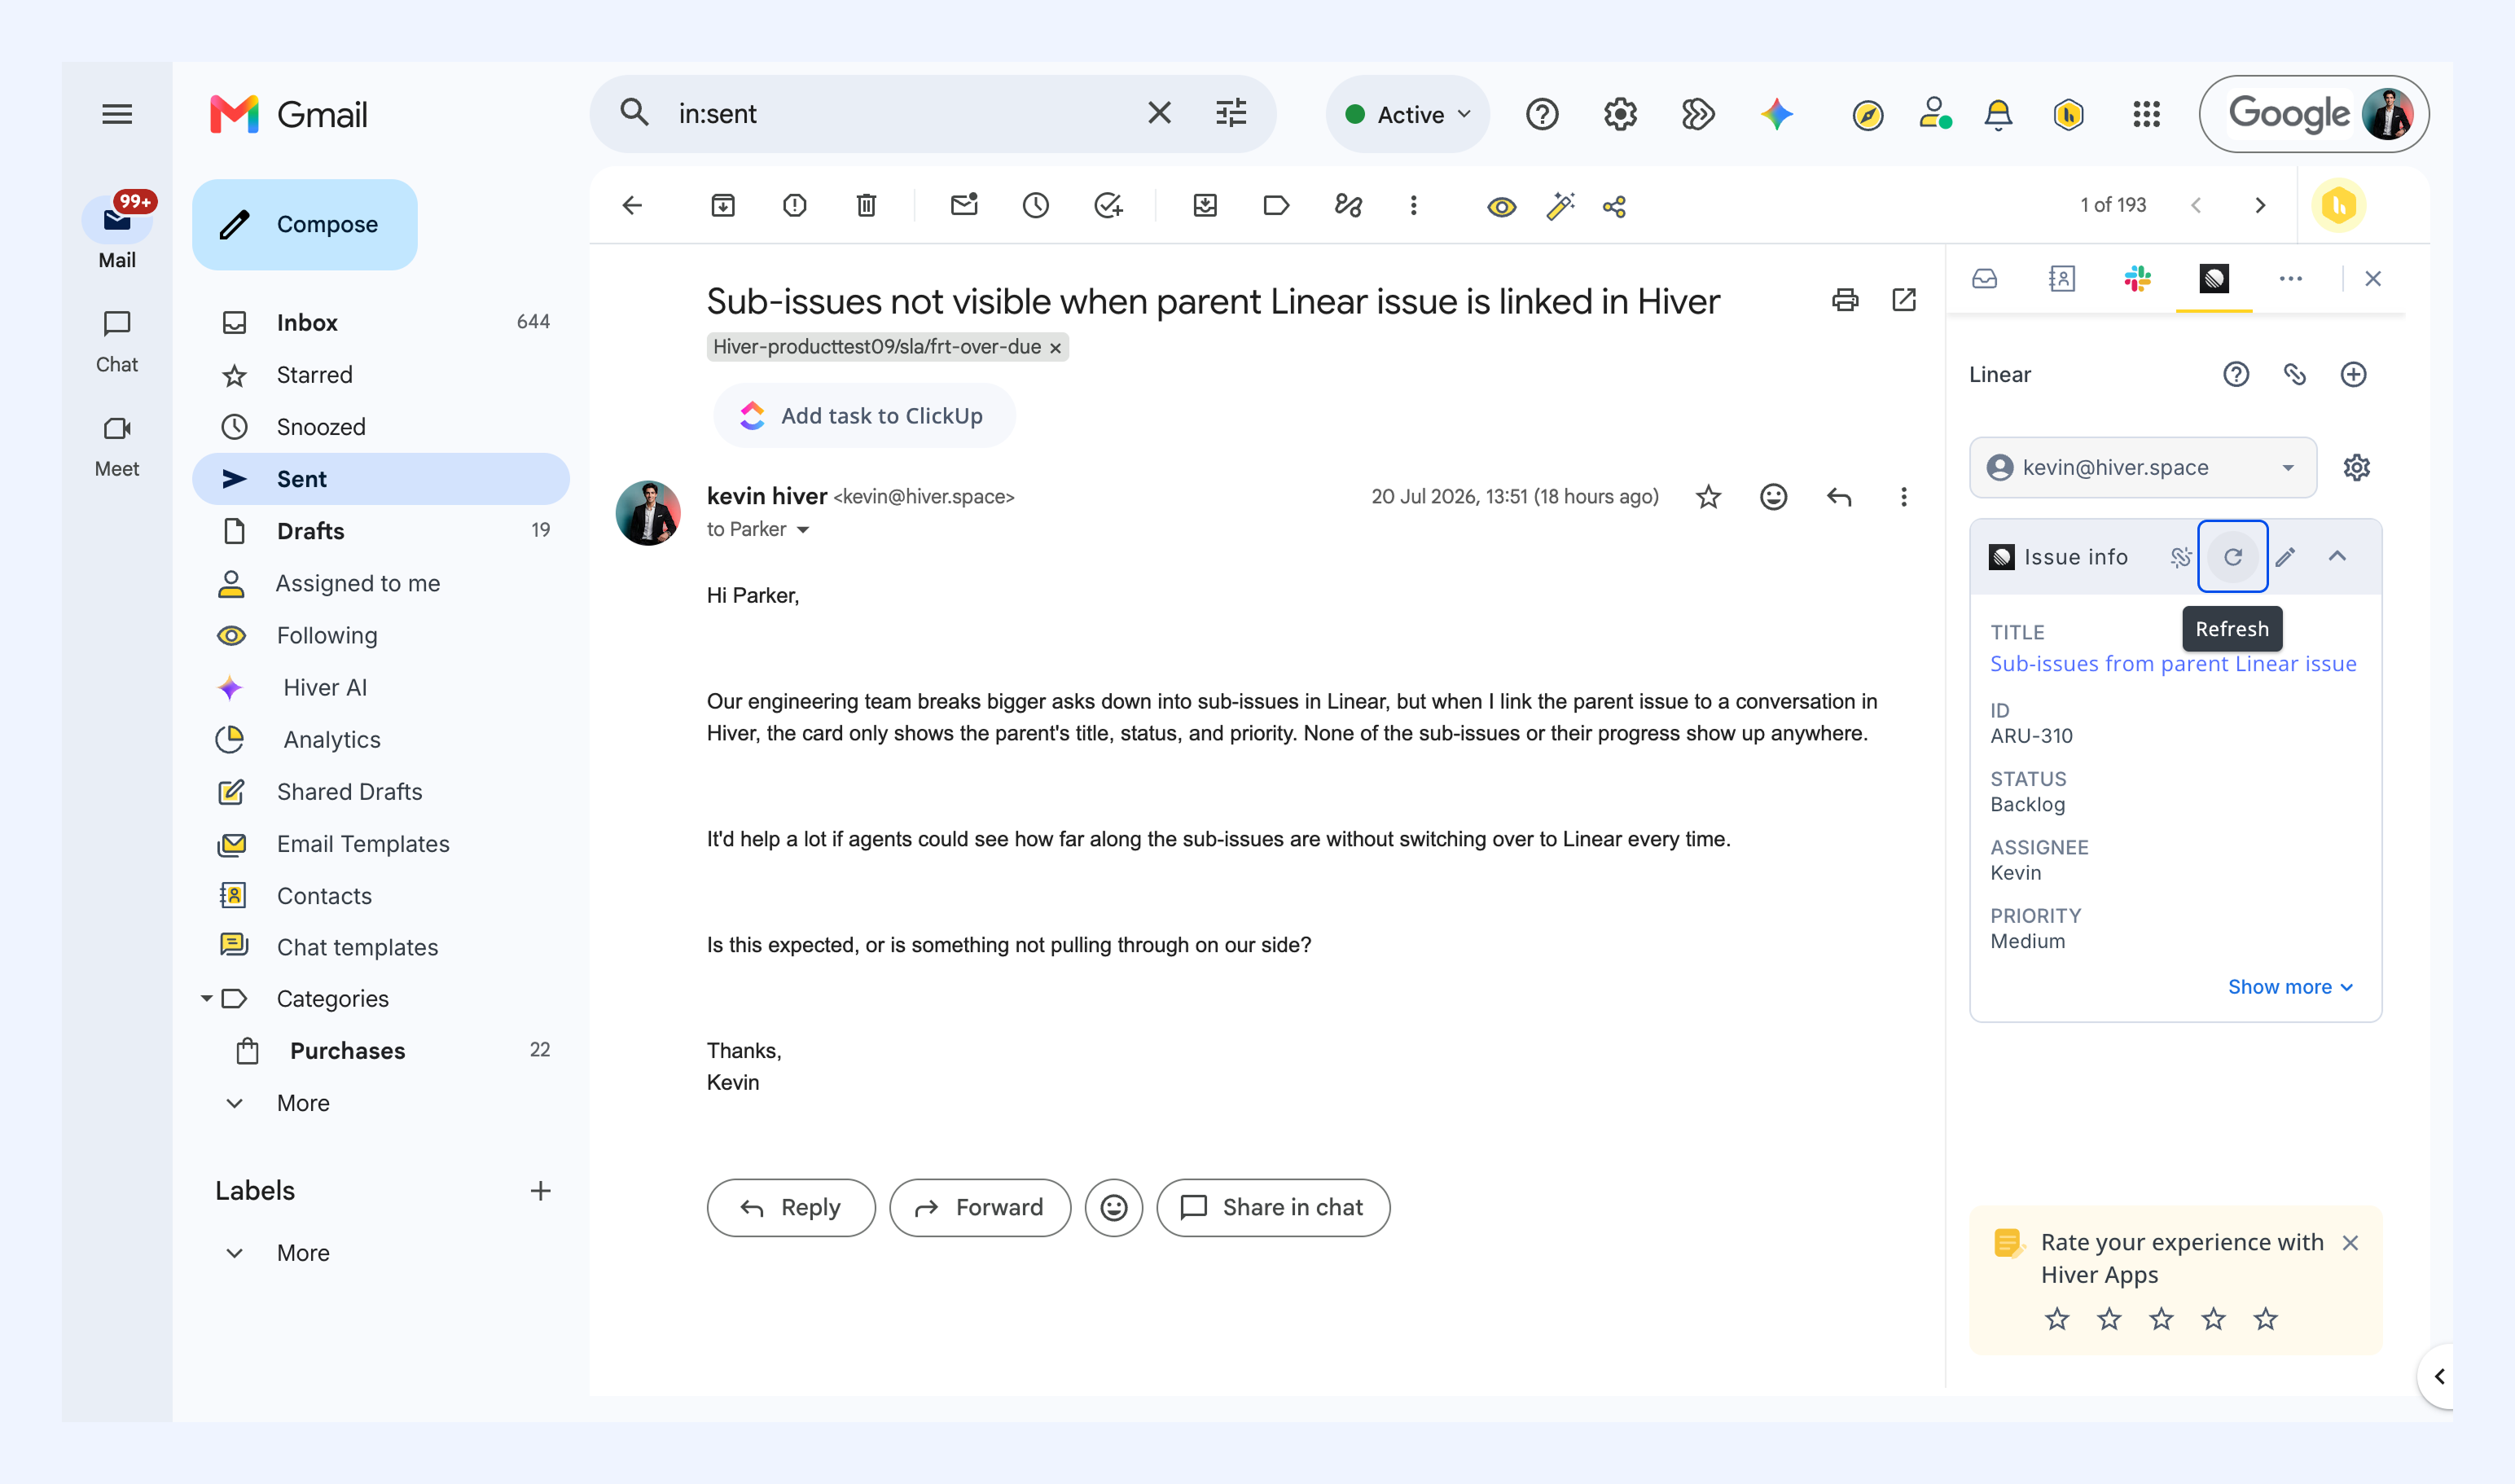
3. Refresh issue details in Hiver
When an issue is updated in Linear, click the refresh icon in the Linear card to load its latest details in Hiver.
4. Link an existing Linear issue
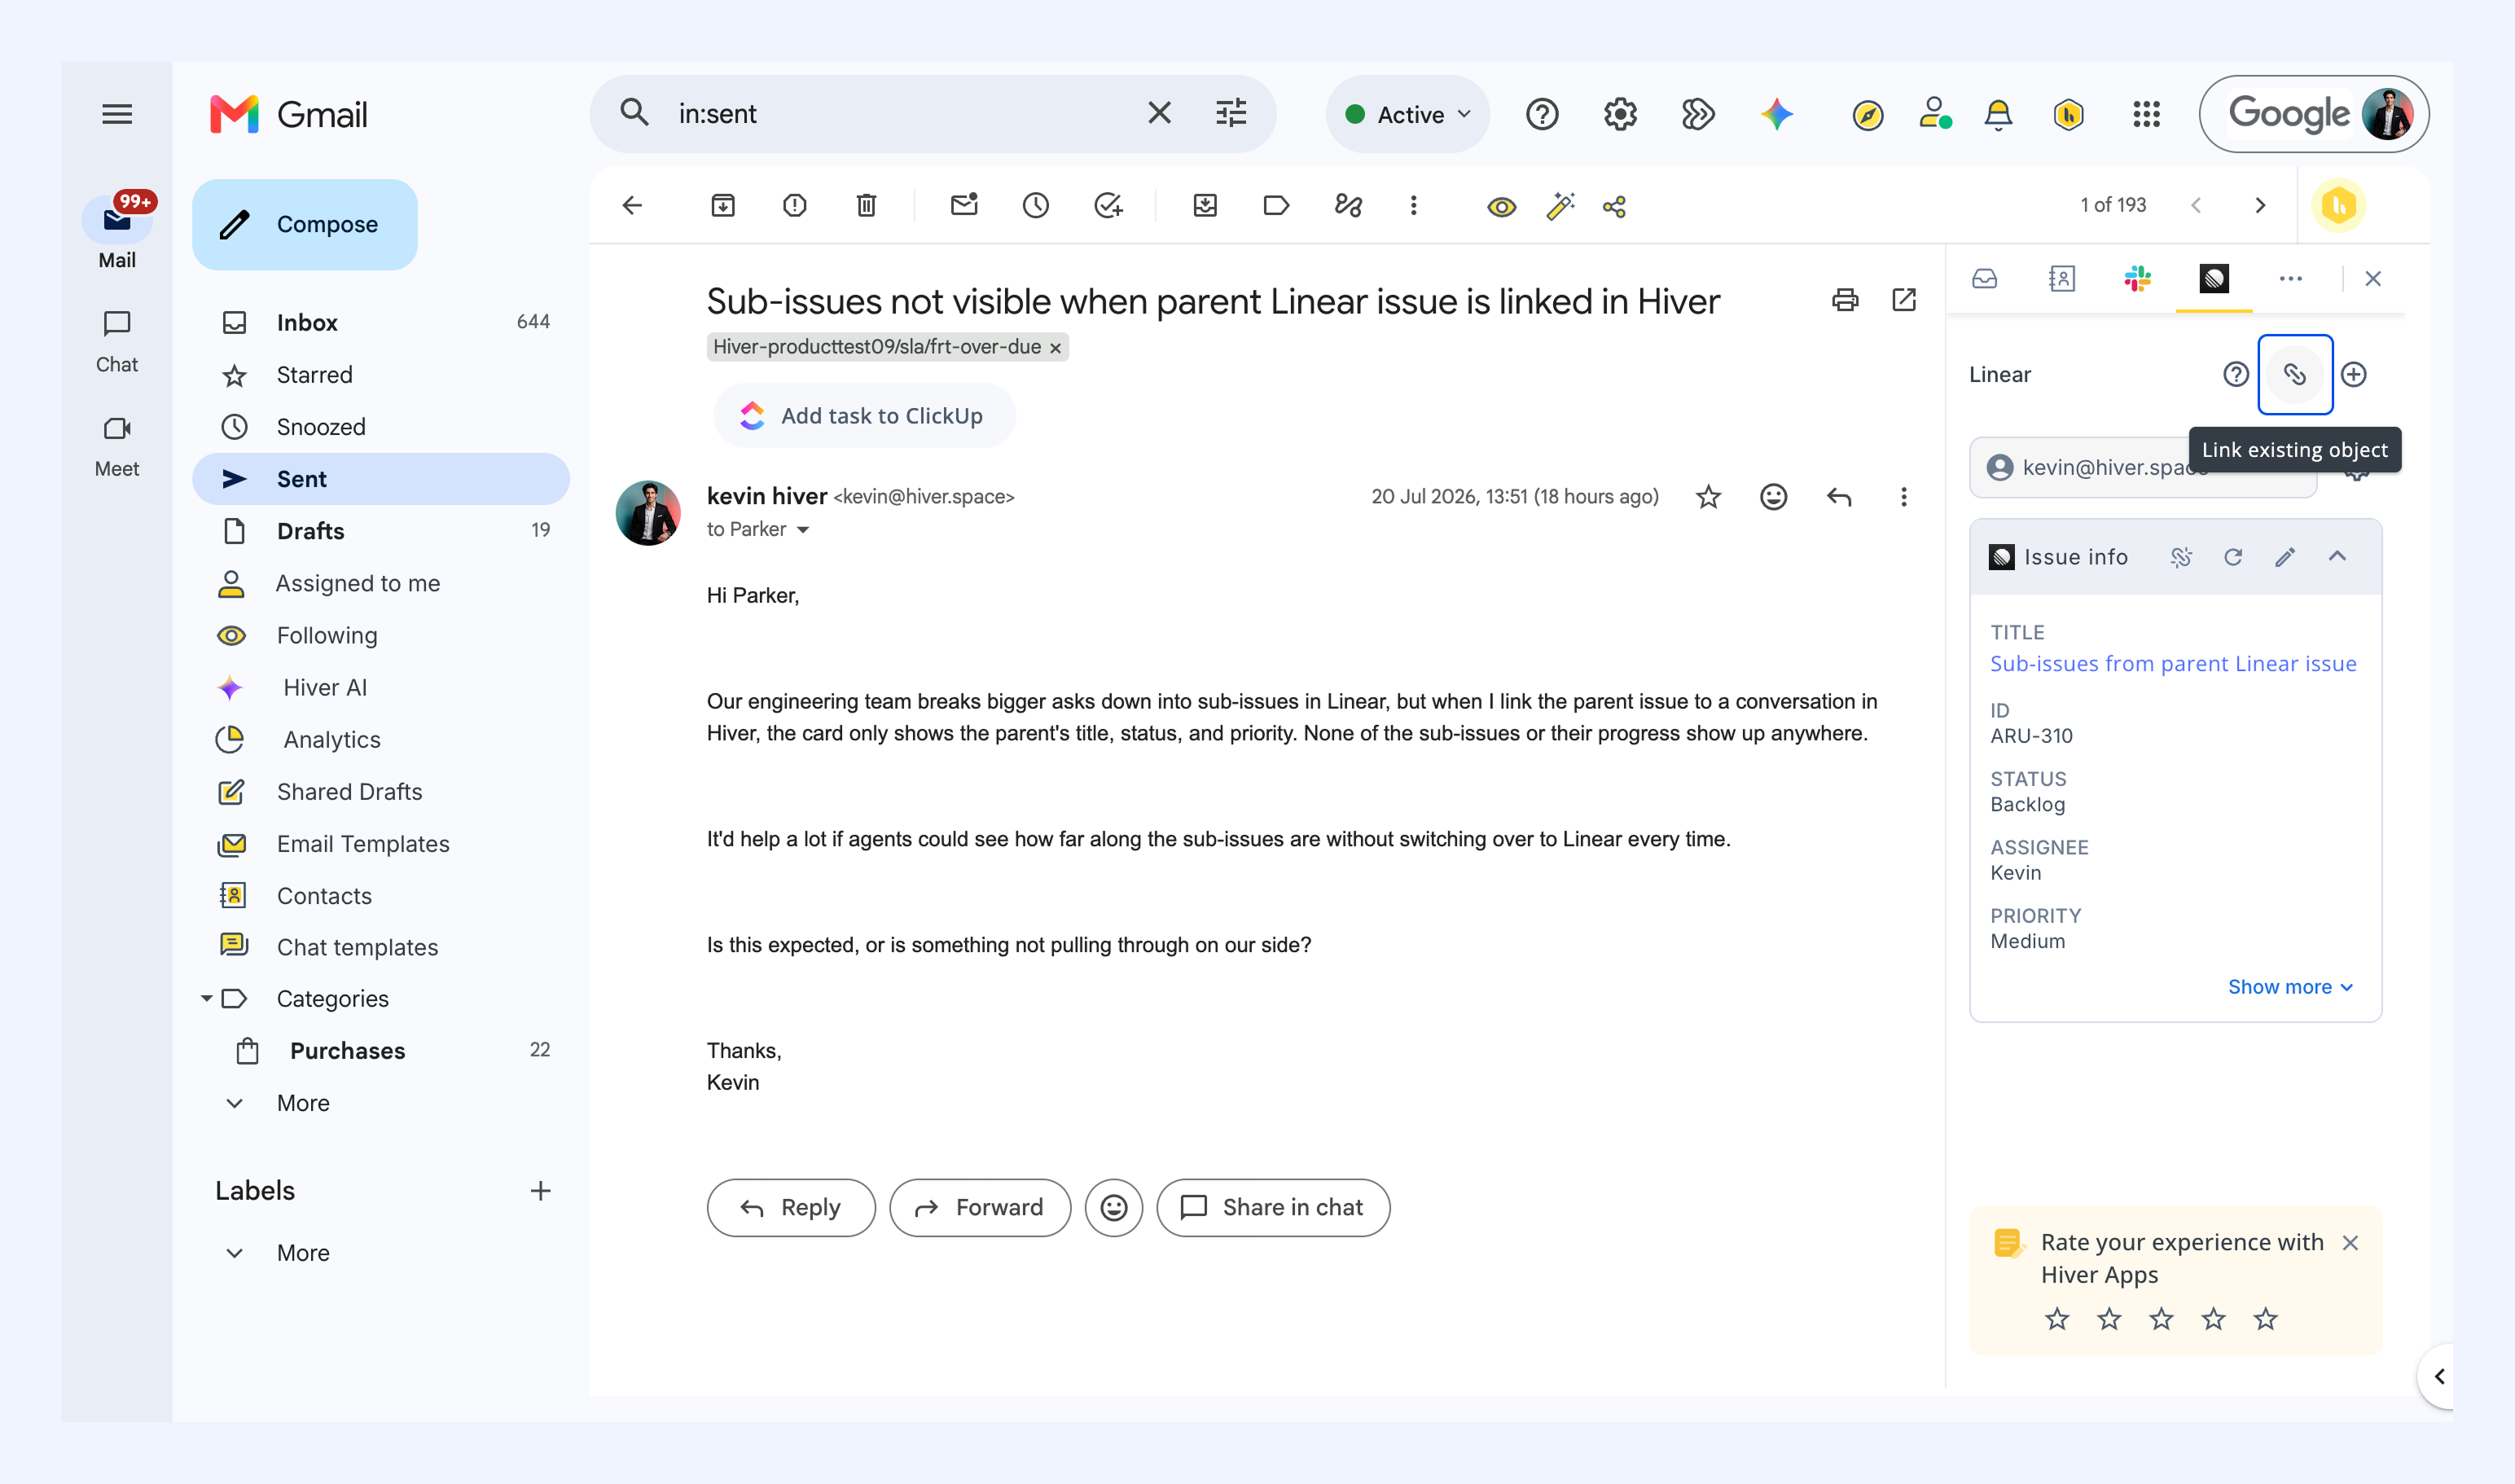
If a customer request is already being tracked in Linear, link the existing issue instead of creating a new one. To link a conversation to an existing issue:
1. Click the Link existing object icon.
2. Select Issue in Linear.
3. Enter the issue's URL or ID under Object ID/Link, and click Show preview to verify the issue details.
4. Click Link.
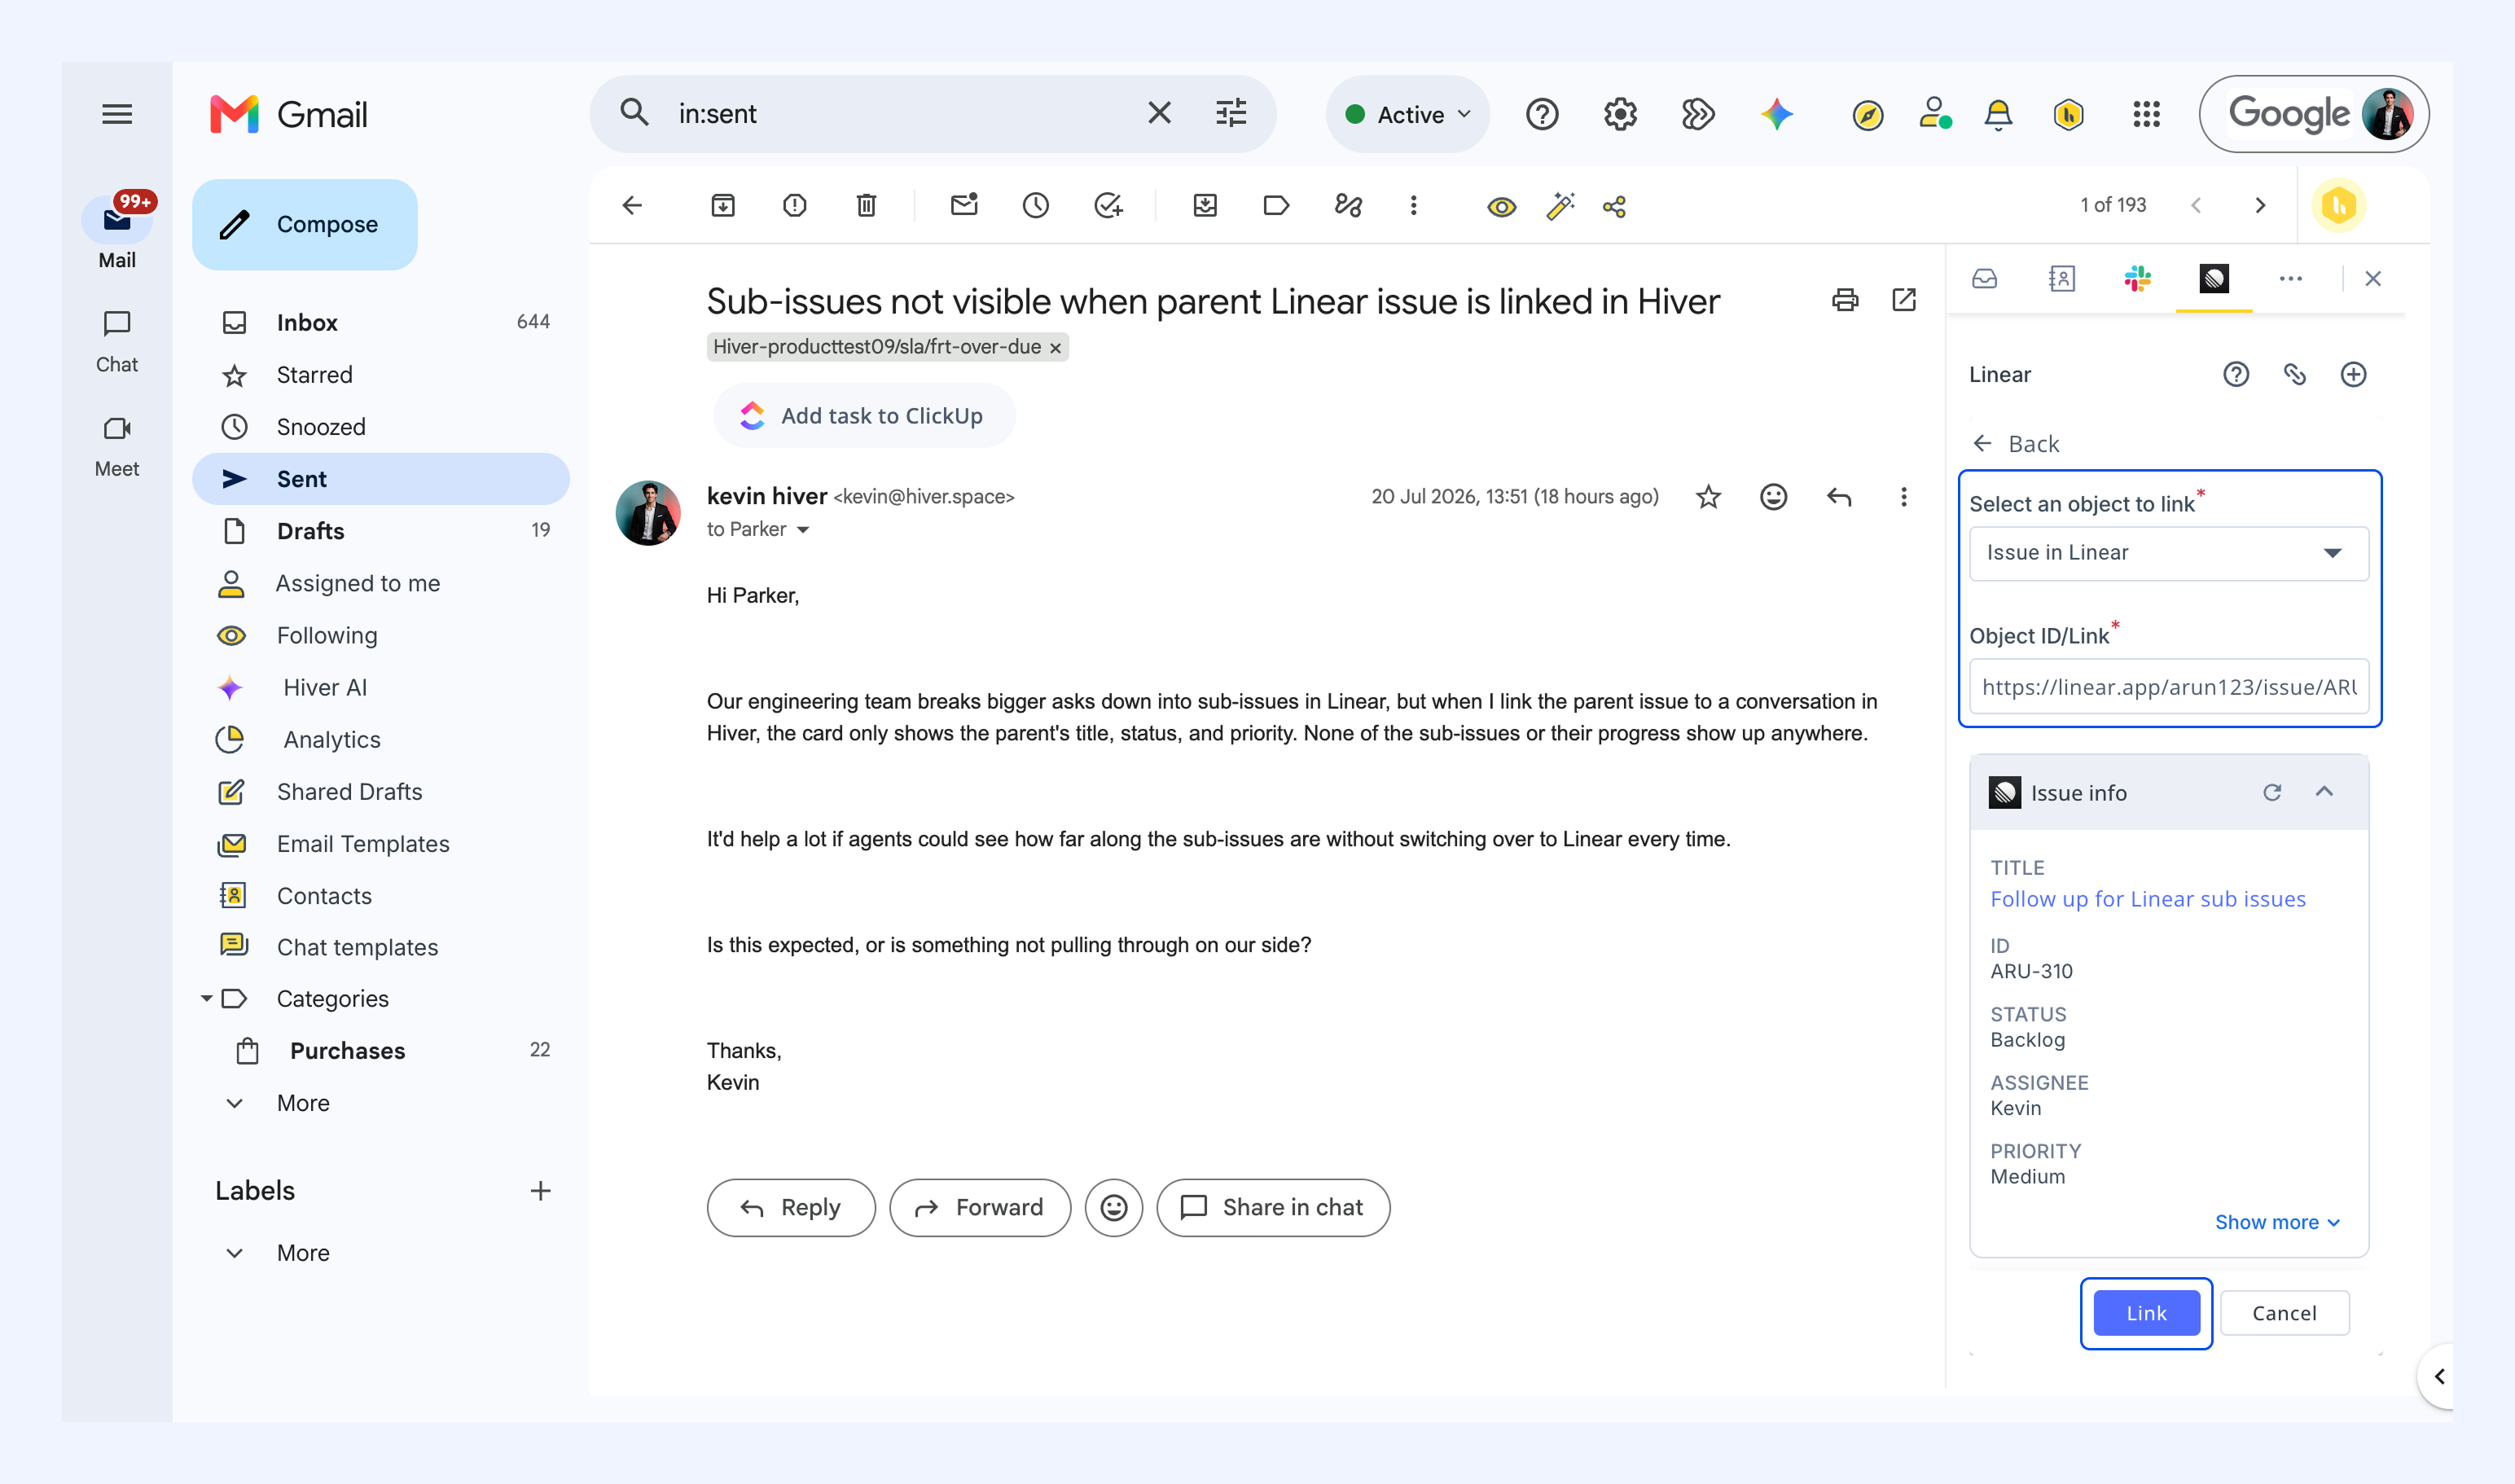
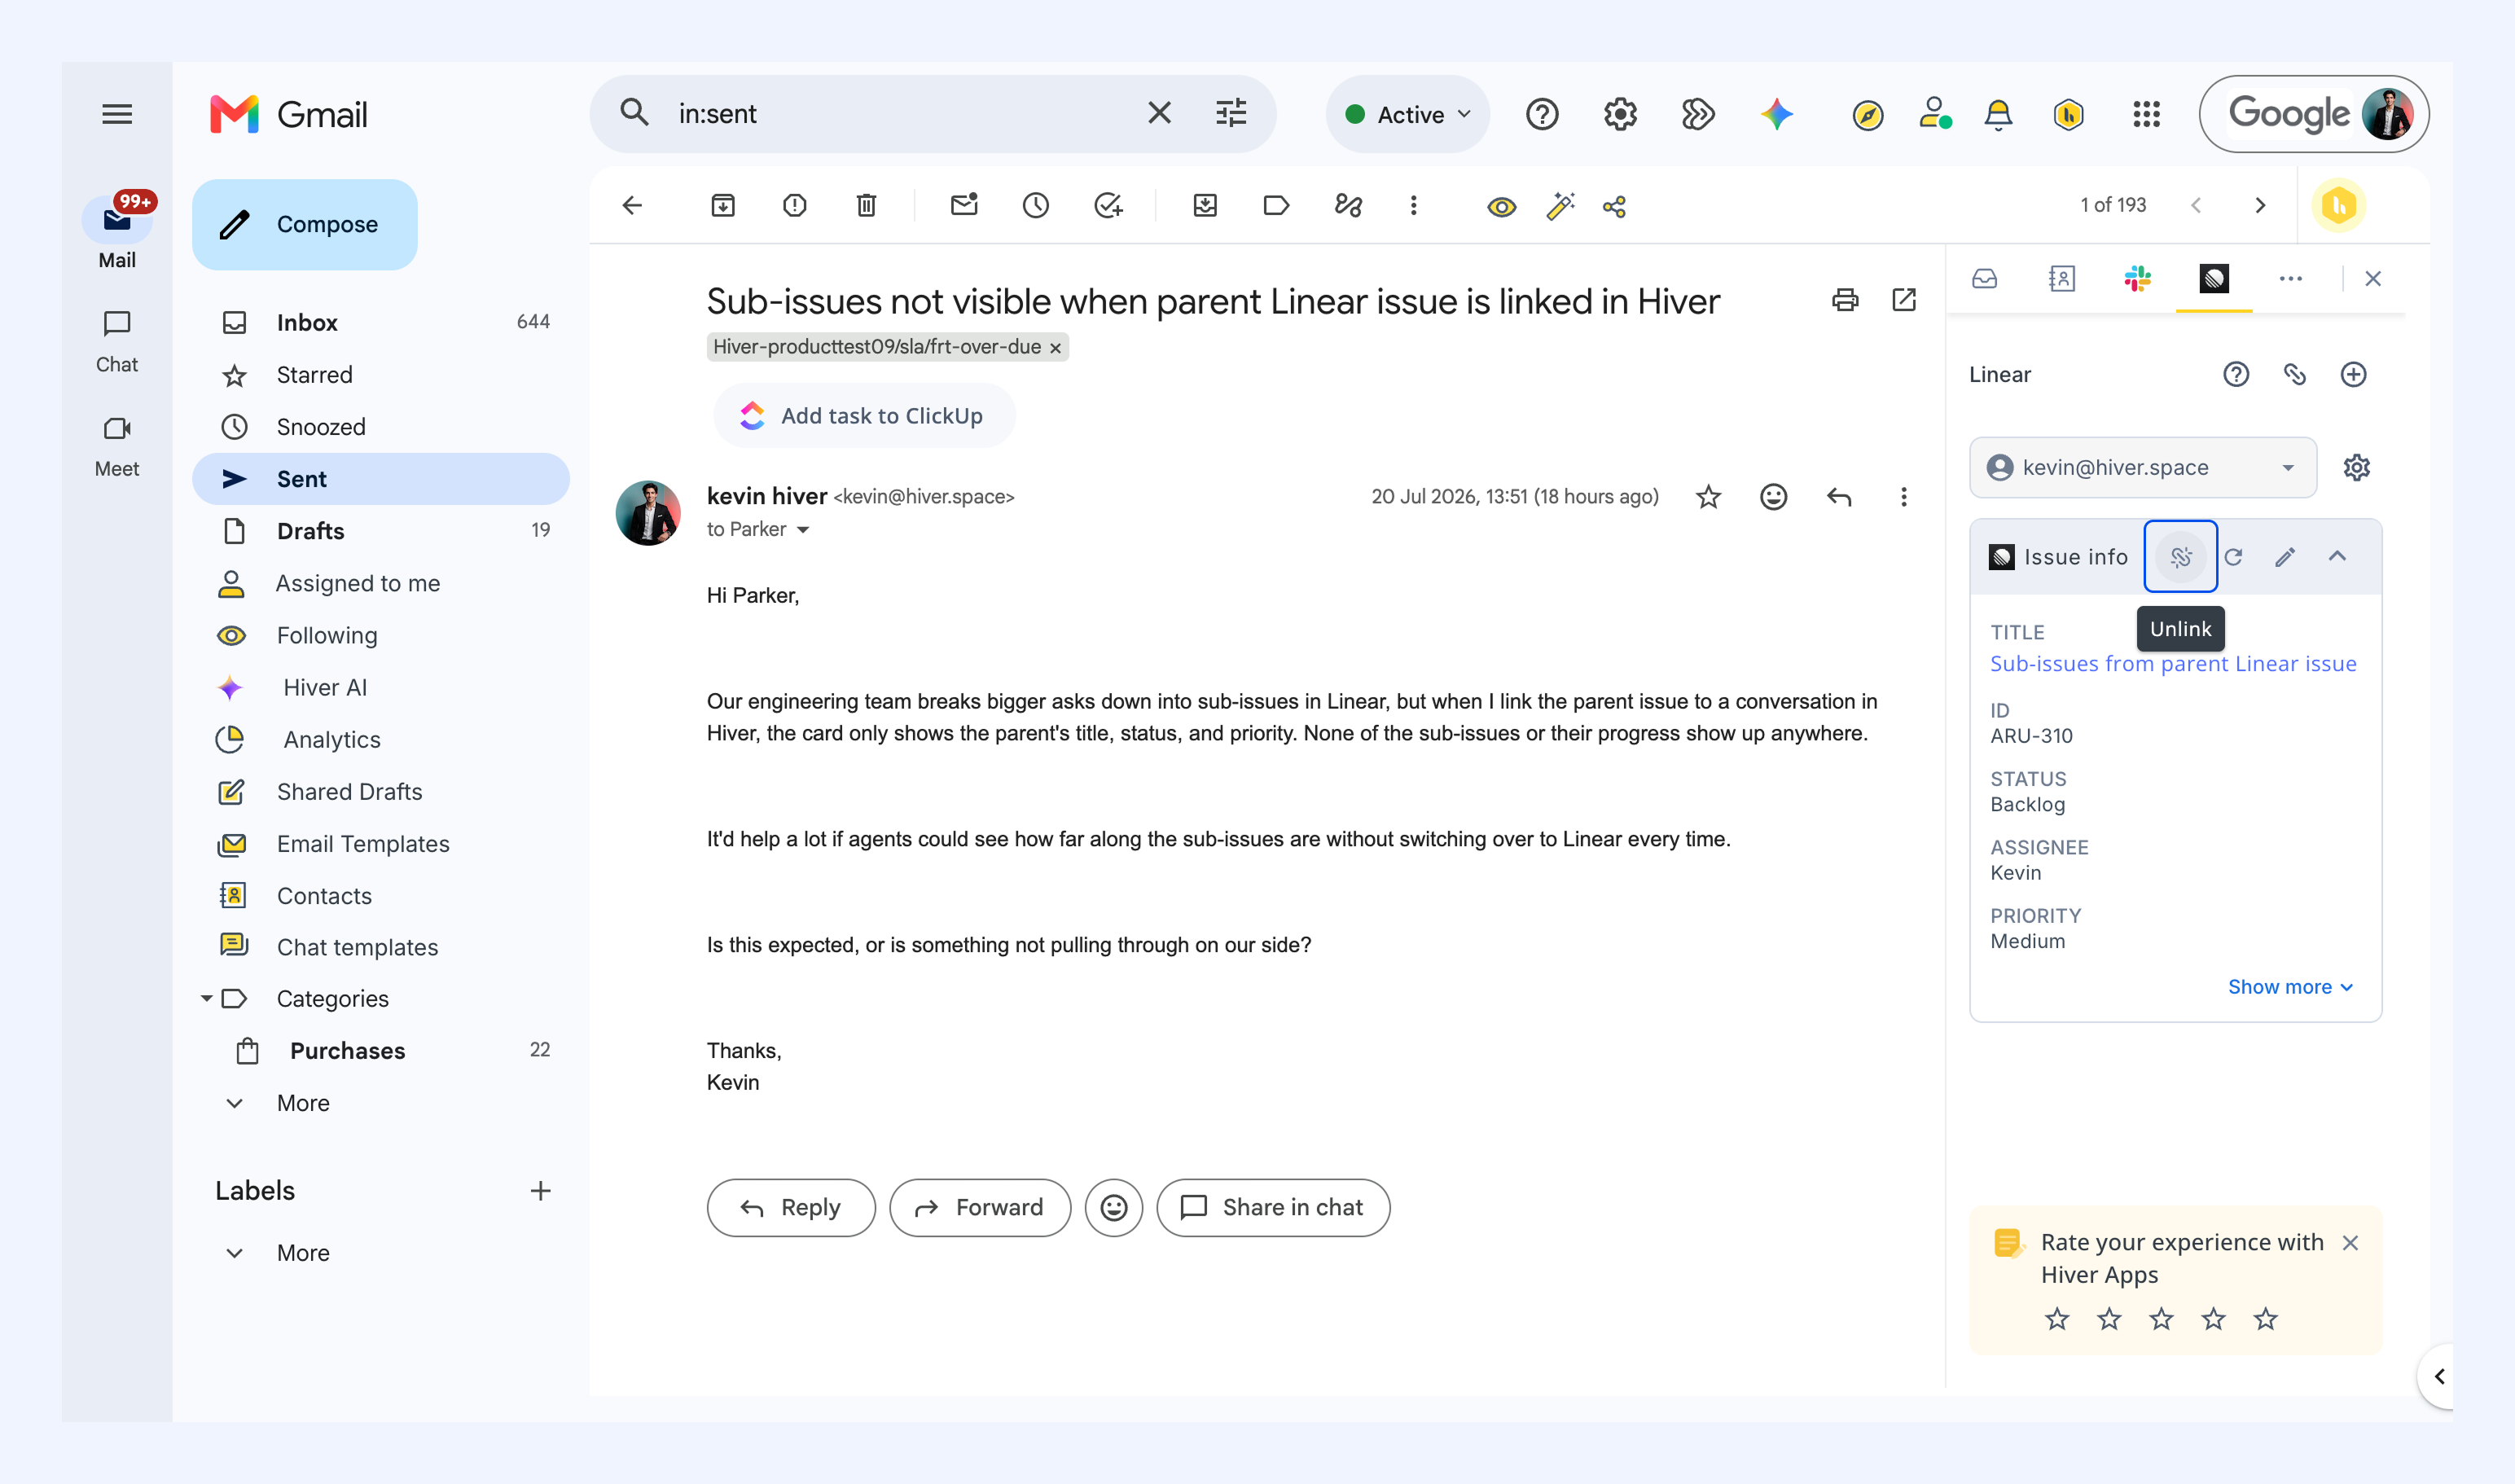
The linked issue appears in the right panel, where your team can view and update it from the conversation.
To unlink an issue from a conversation, click the Unlink icon and confirm.
Note: Unlinking removes the connection between the Linear issue and the Hiver conversation. It doesn't delete or change the item in Linear.
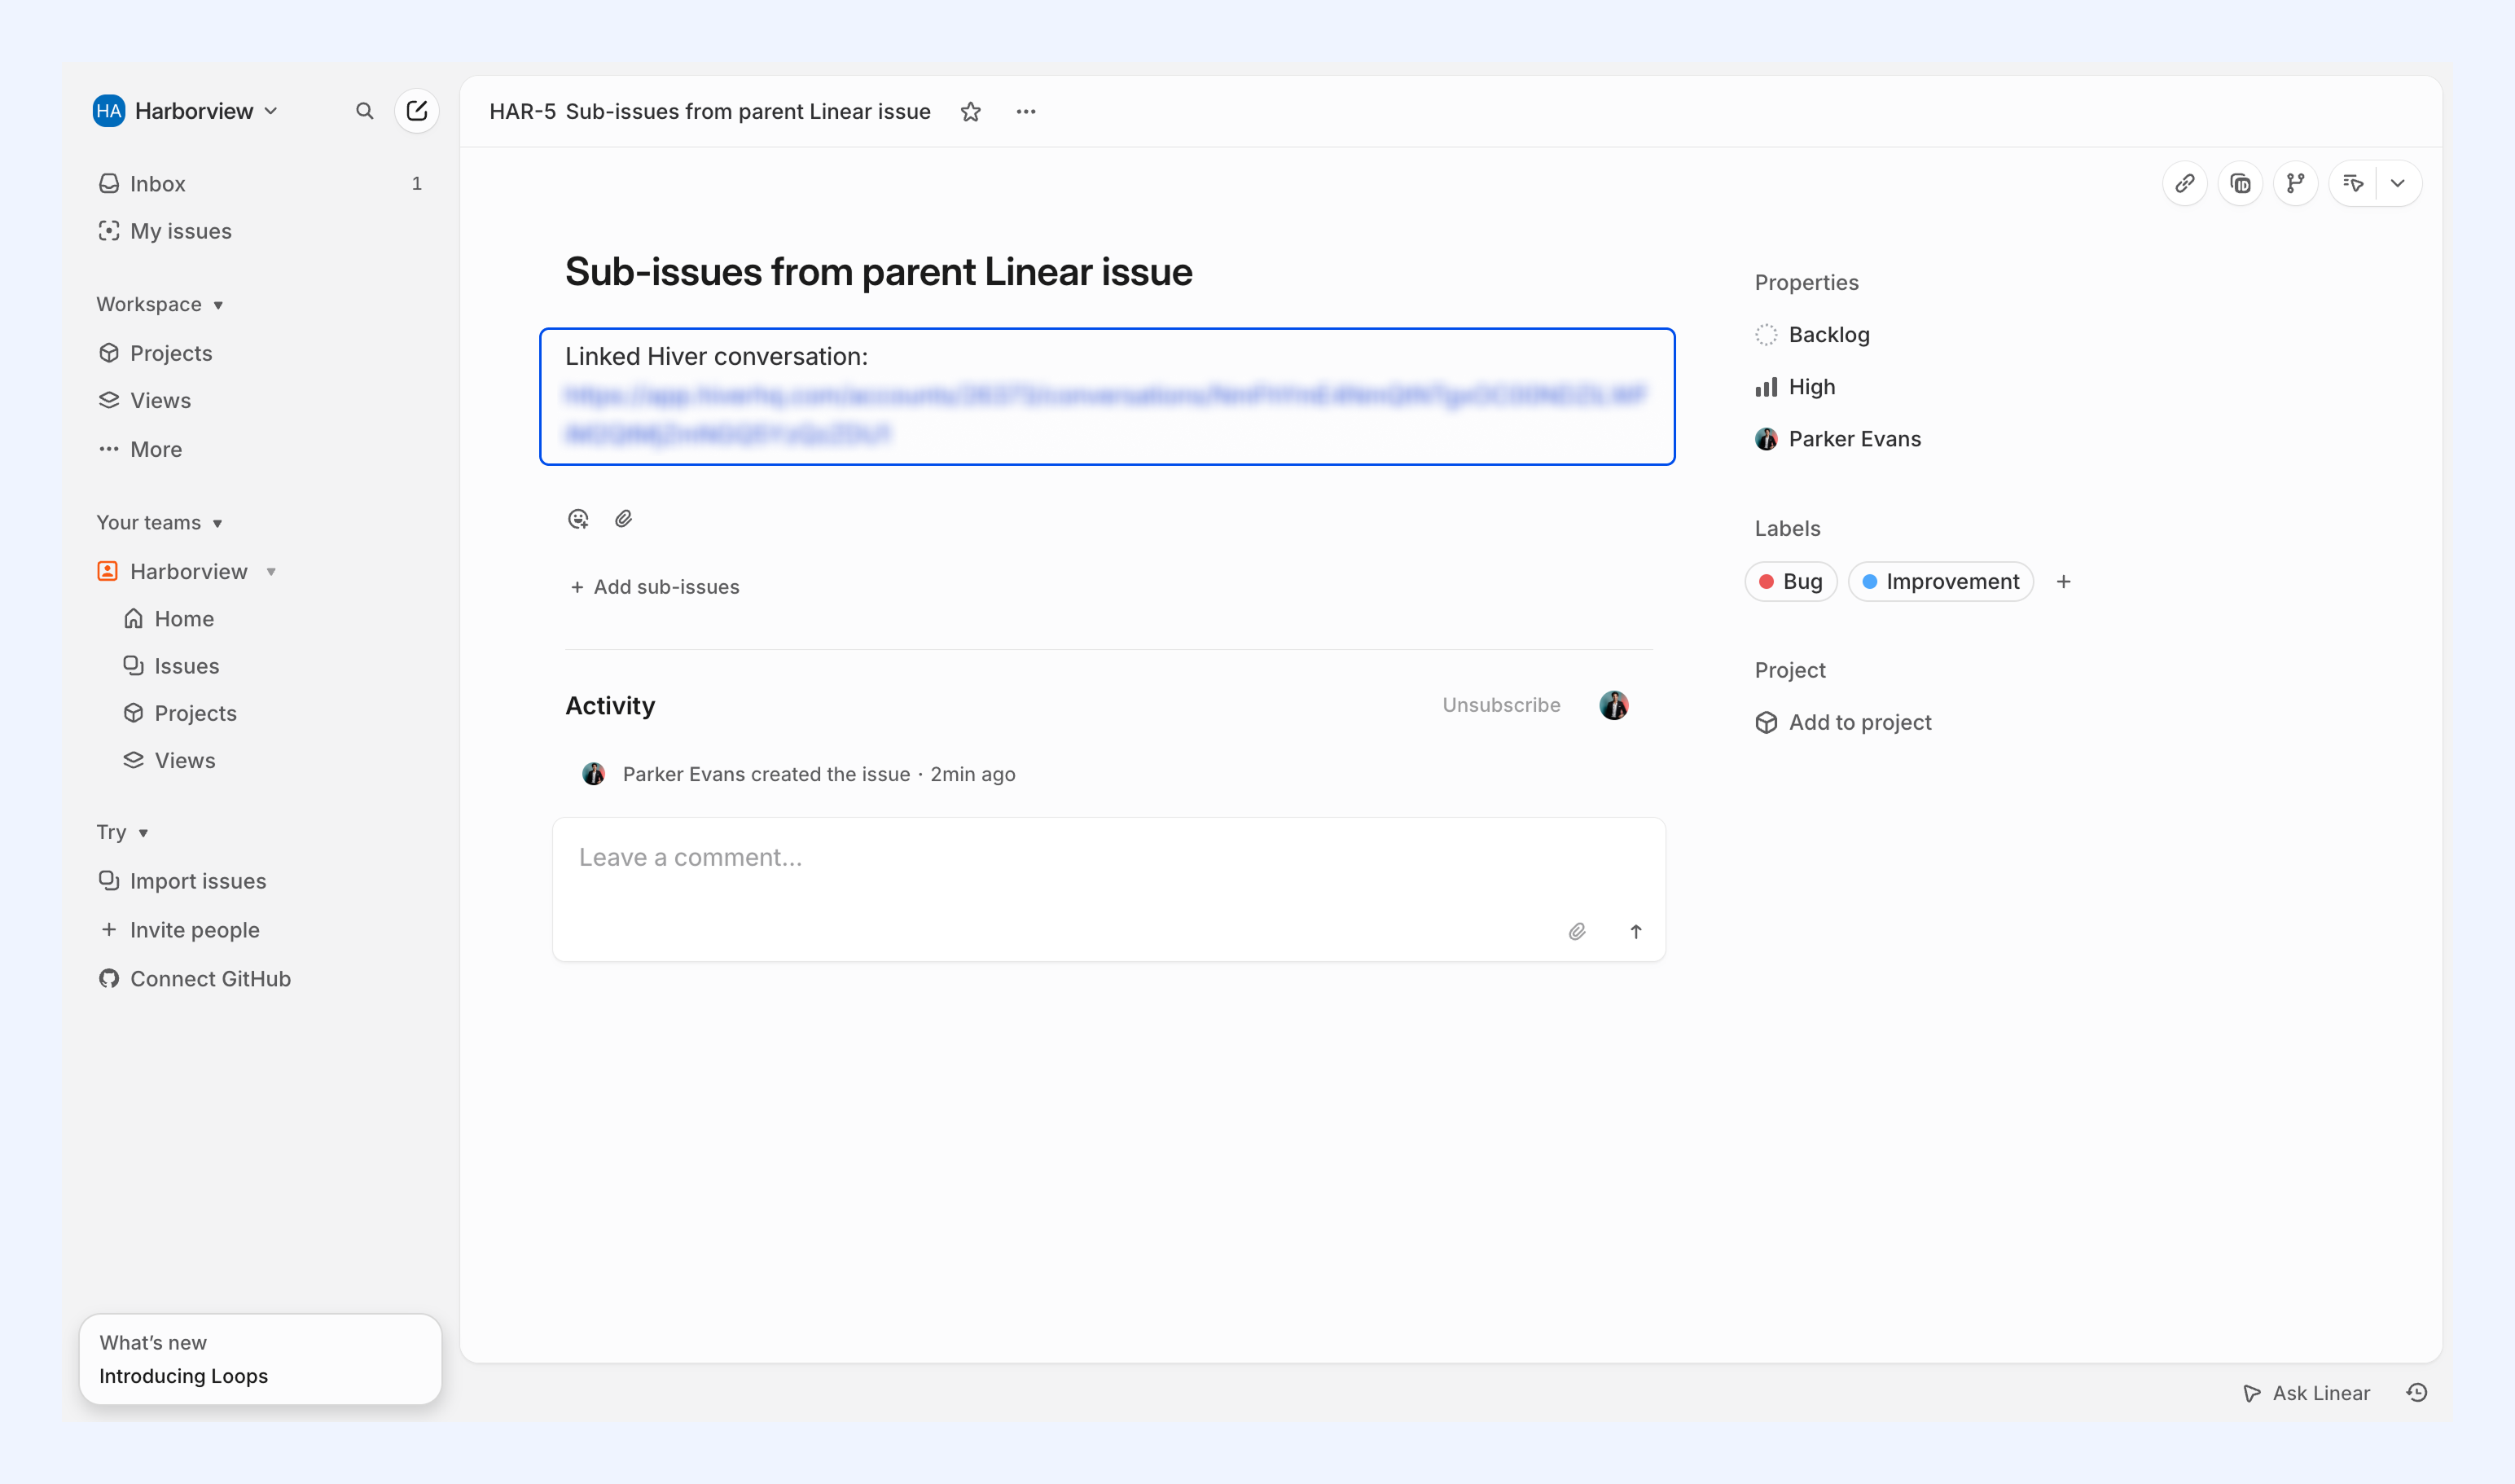
5. View the related Hiver conversation from Linear
When a Linear issue is created or linked from Hiver, Hiver adds a link to the related conversation in the issue's Description field in Linear. This link can be used to access the customer conversation in Hiver for faster context.
Note: To open the conversation, a Linear user needs to be signed in to Hiver.
Automating Linear actions from Hiver
You can automate actions like creating an issue or logging a customer email, for conversations that meet the trigger and conditions you define. For example, you can create a Linear issue whenever a conversation is tagged as a bug or requires engineering follow-up.
You can choose from two Linear actions:
1. Issue in Linear: Creates a new issue in Linear.
2. Log email as comment on Linear: Adds the email as a comment on a Linear issue.
To set up a Linear Automation:
1. Create an Automation with the trigger and conditions you need.
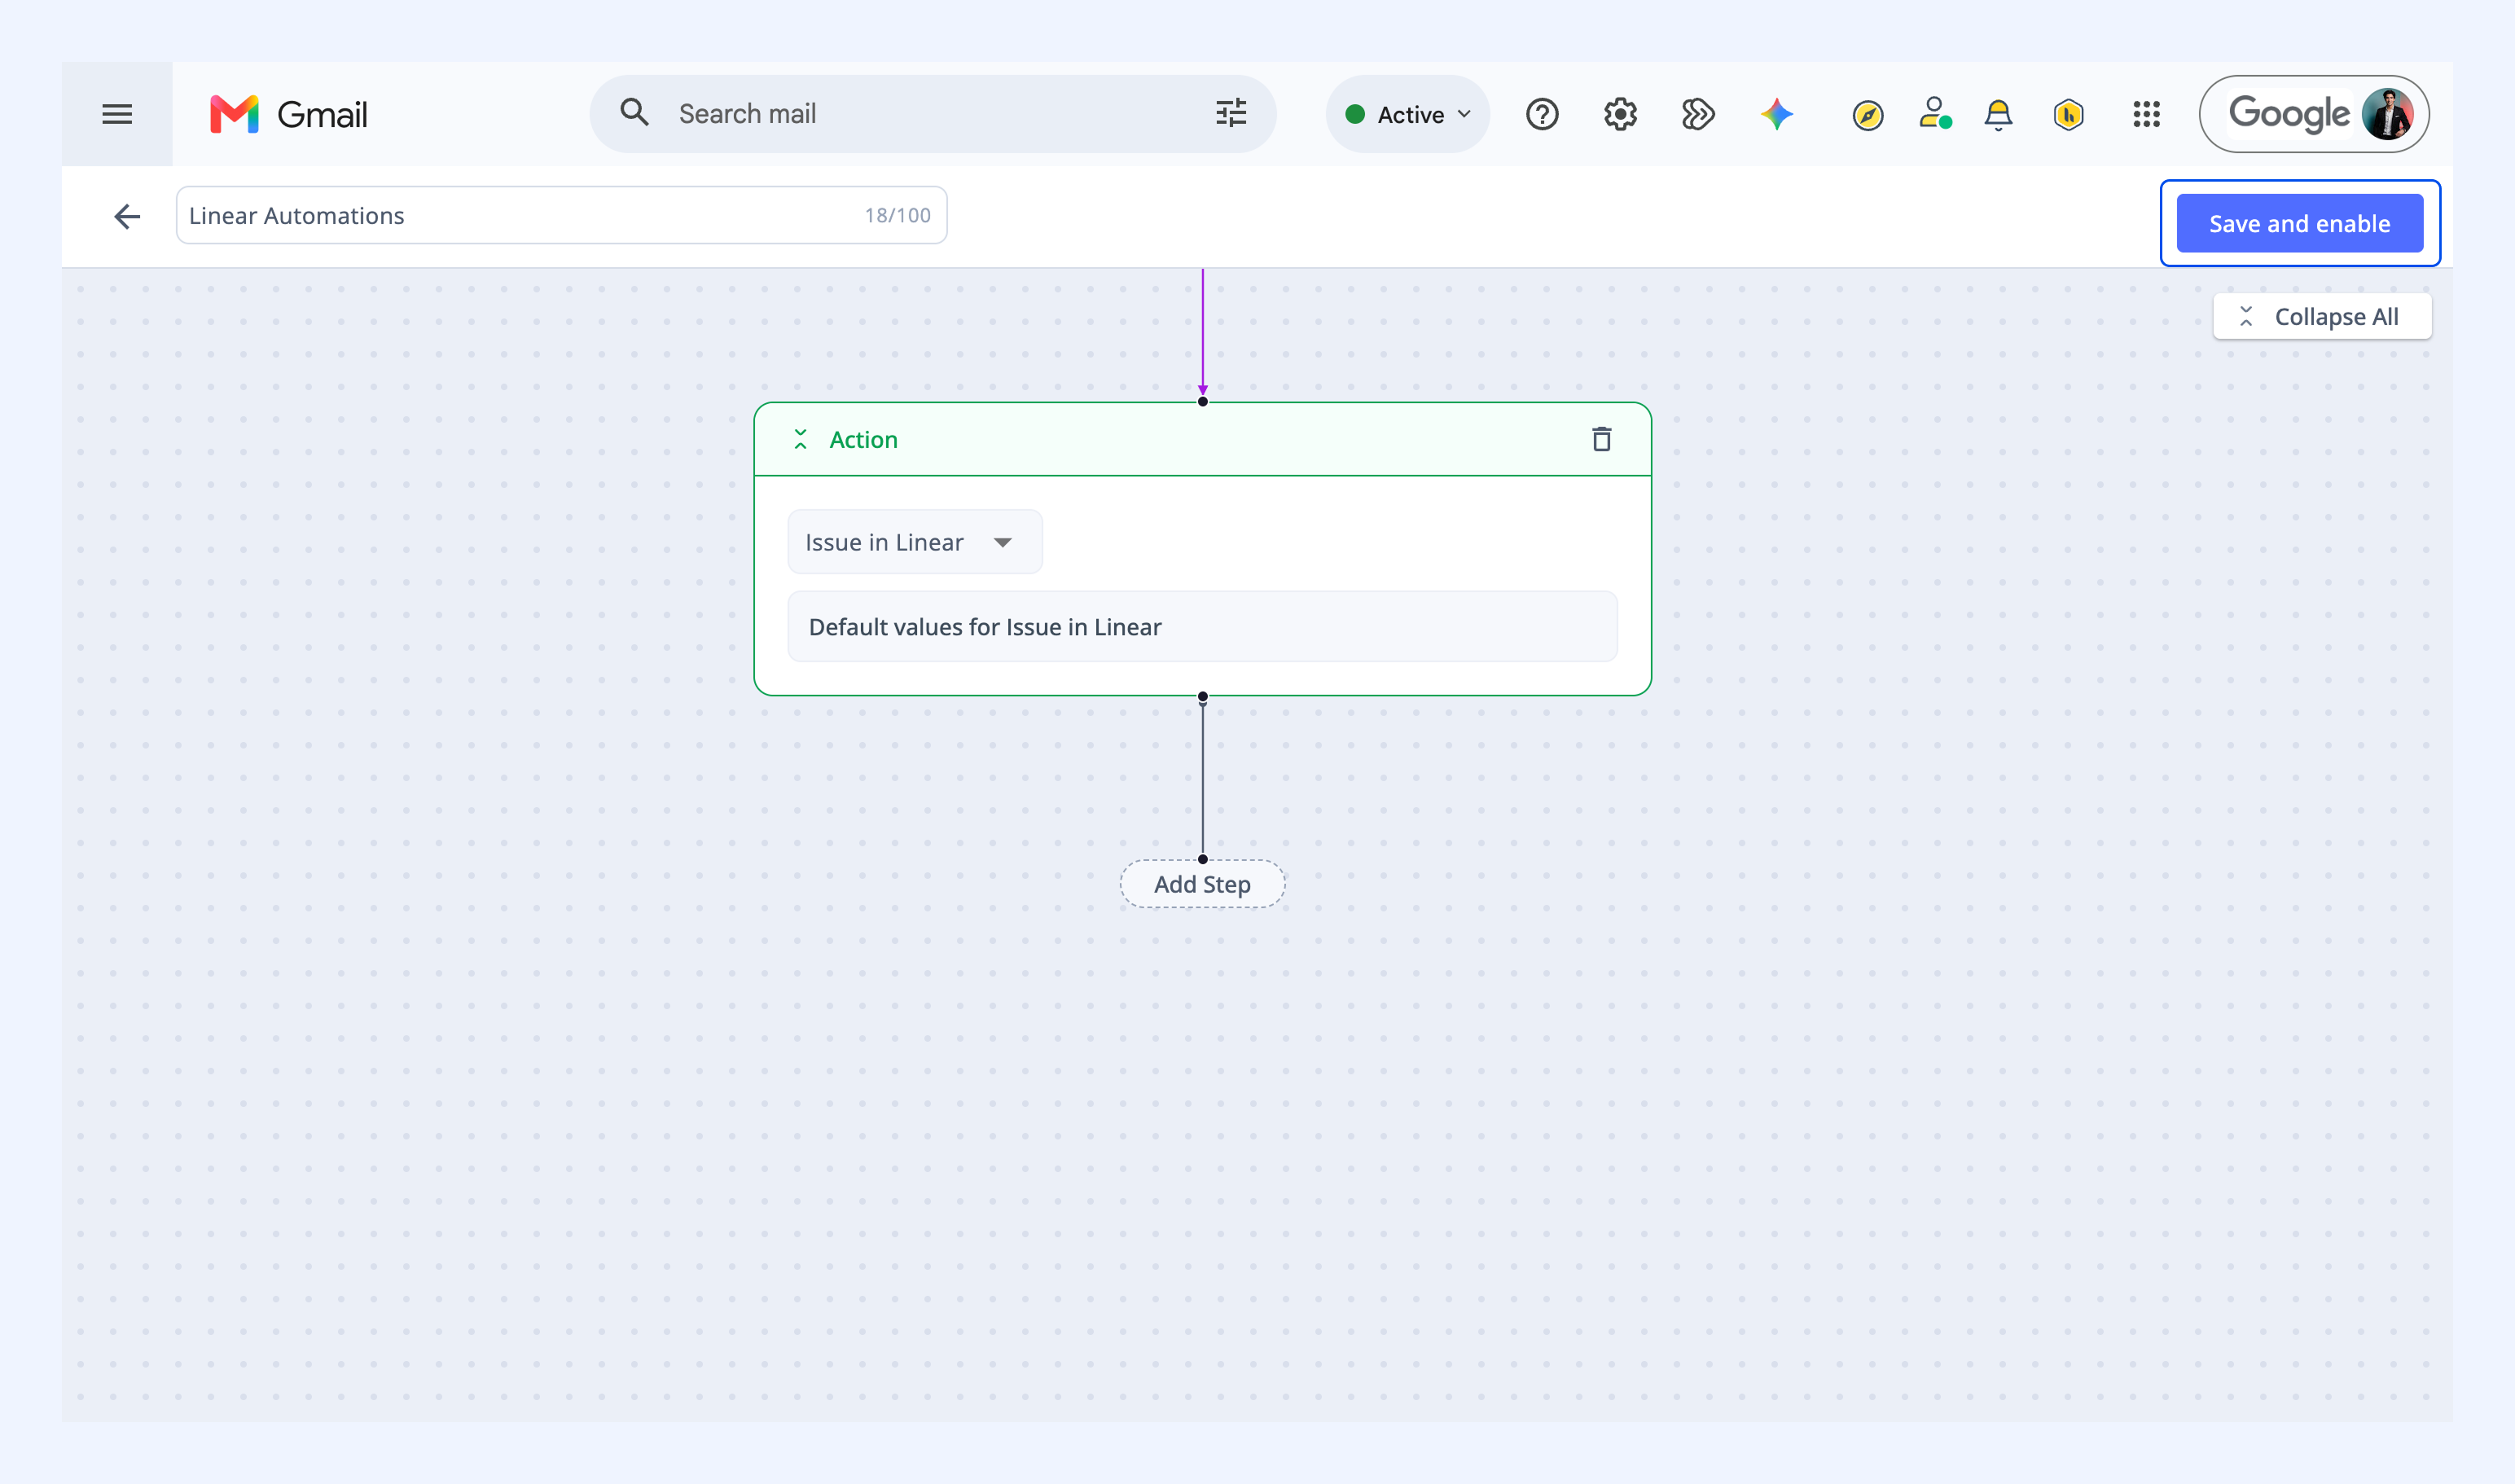
2. Add an action, choose Linear from the Apps list, and select the action you want.
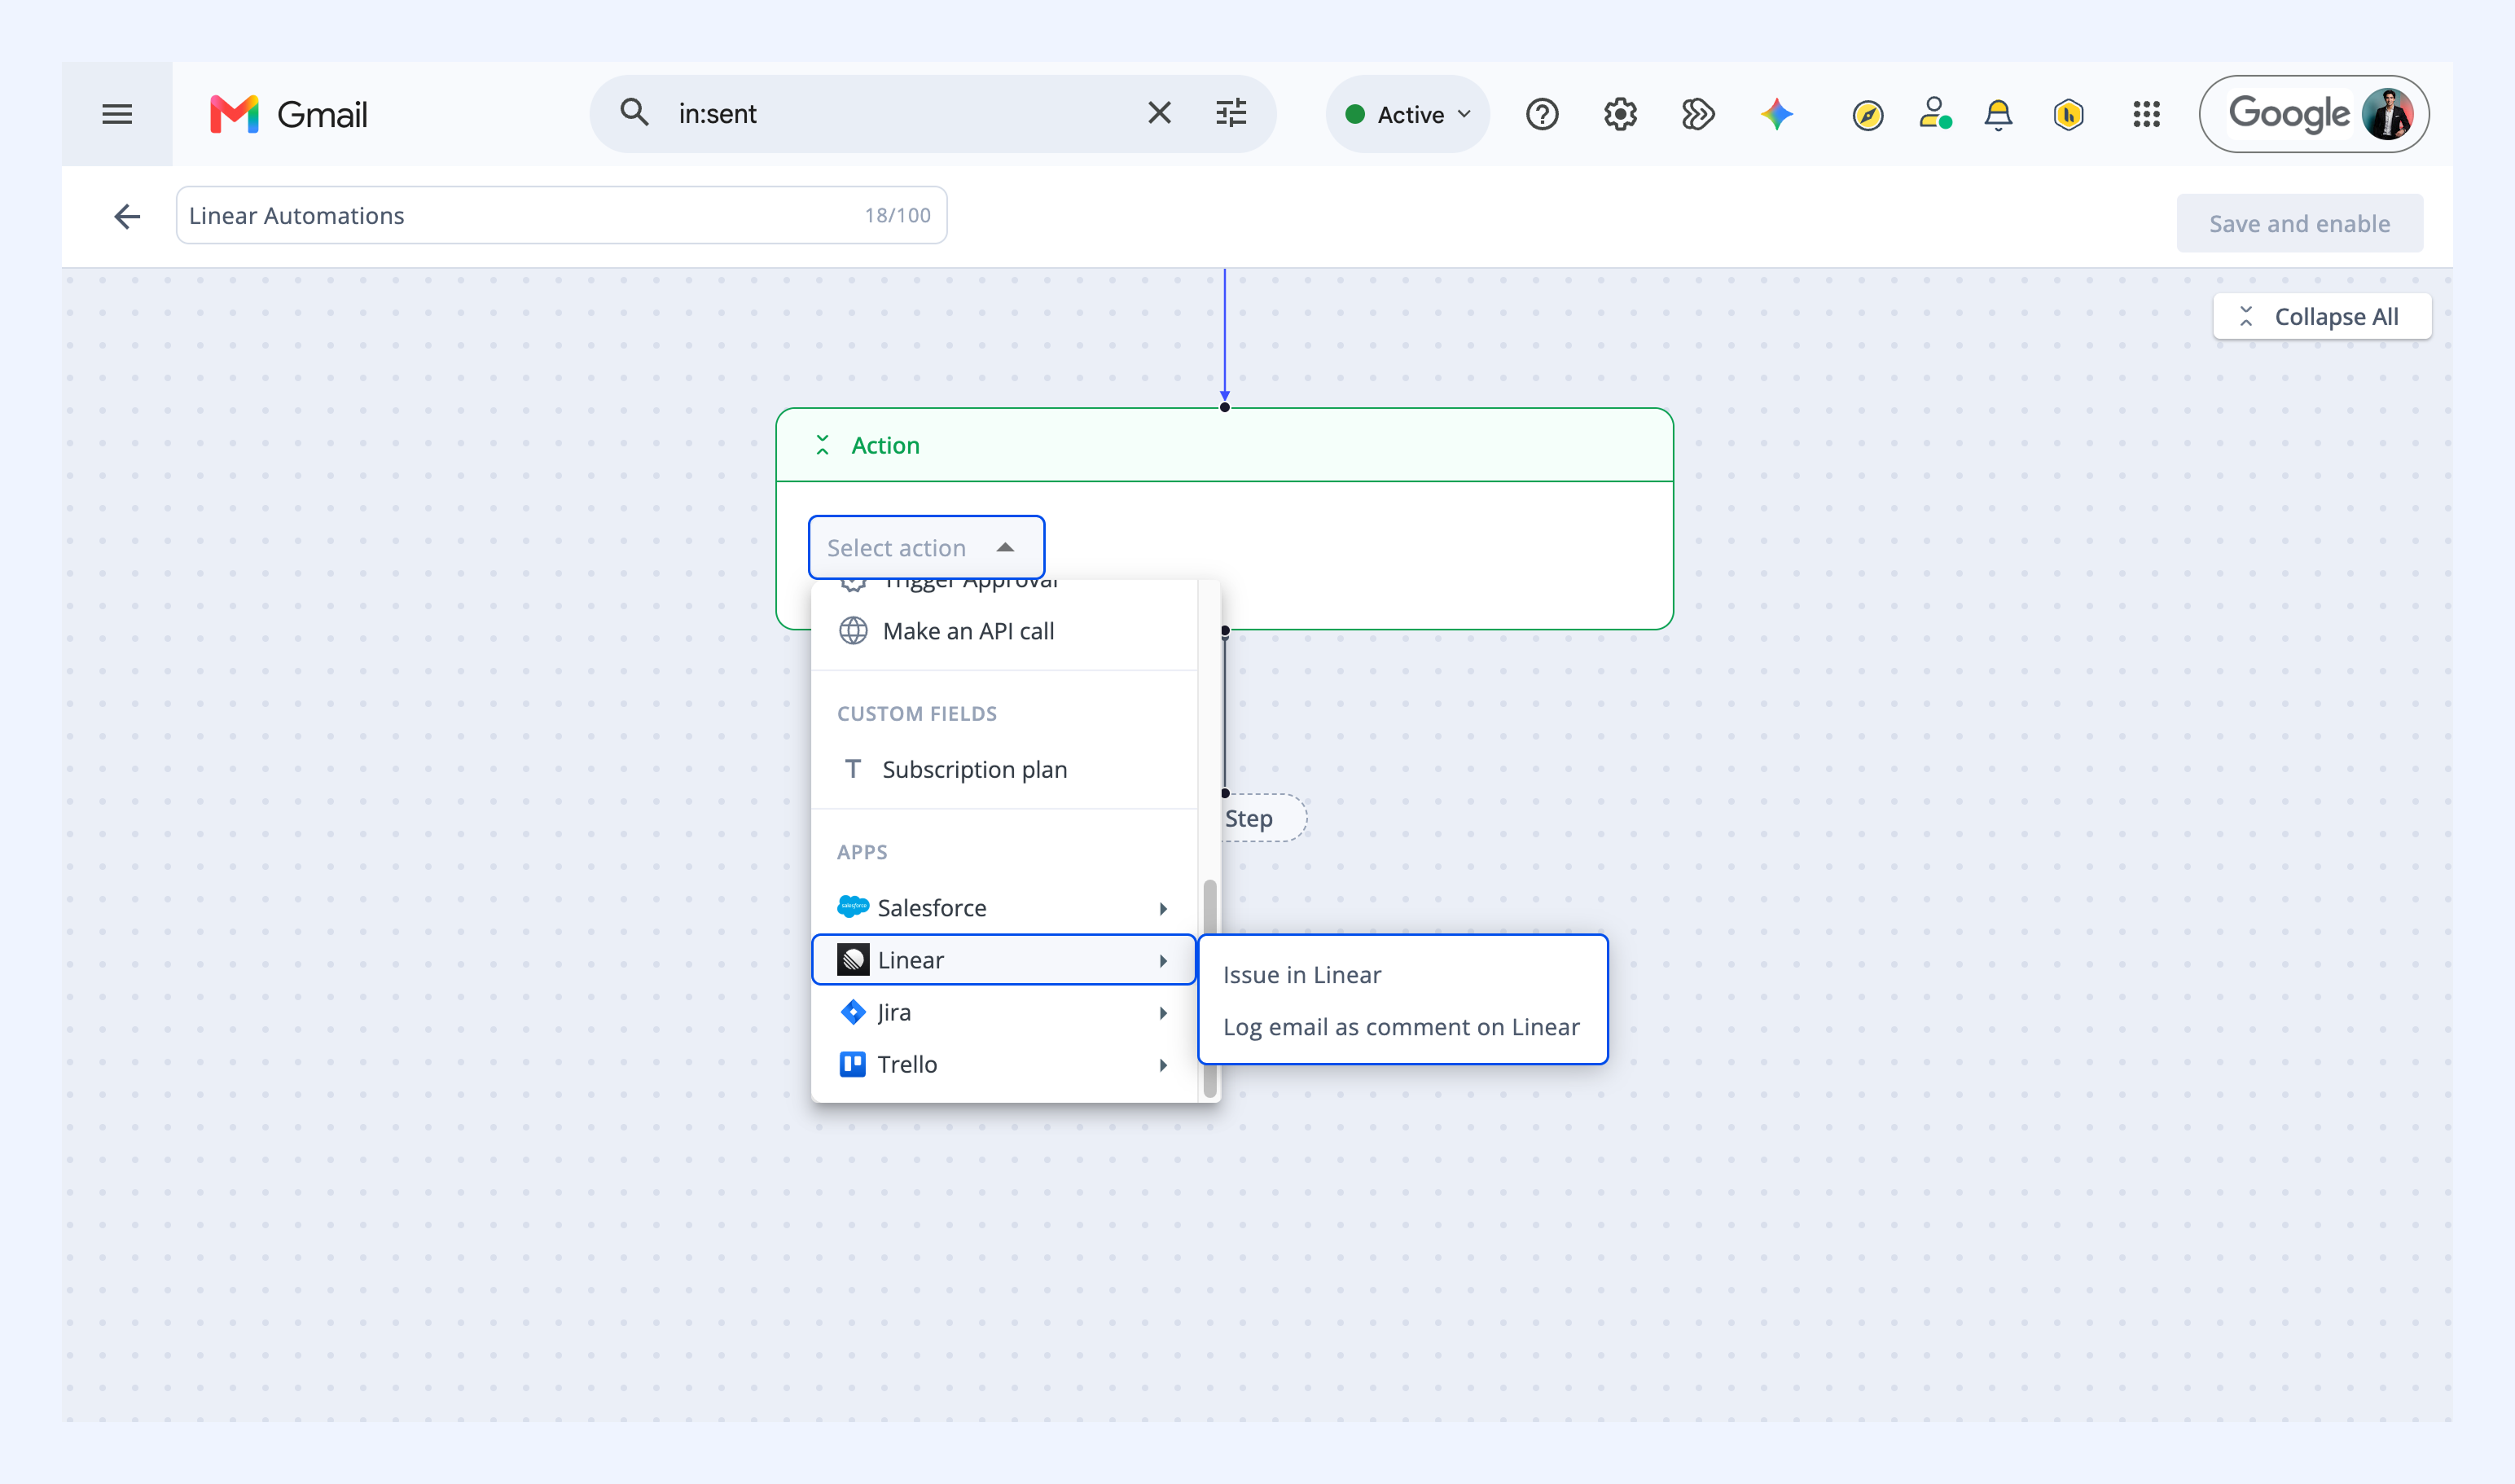
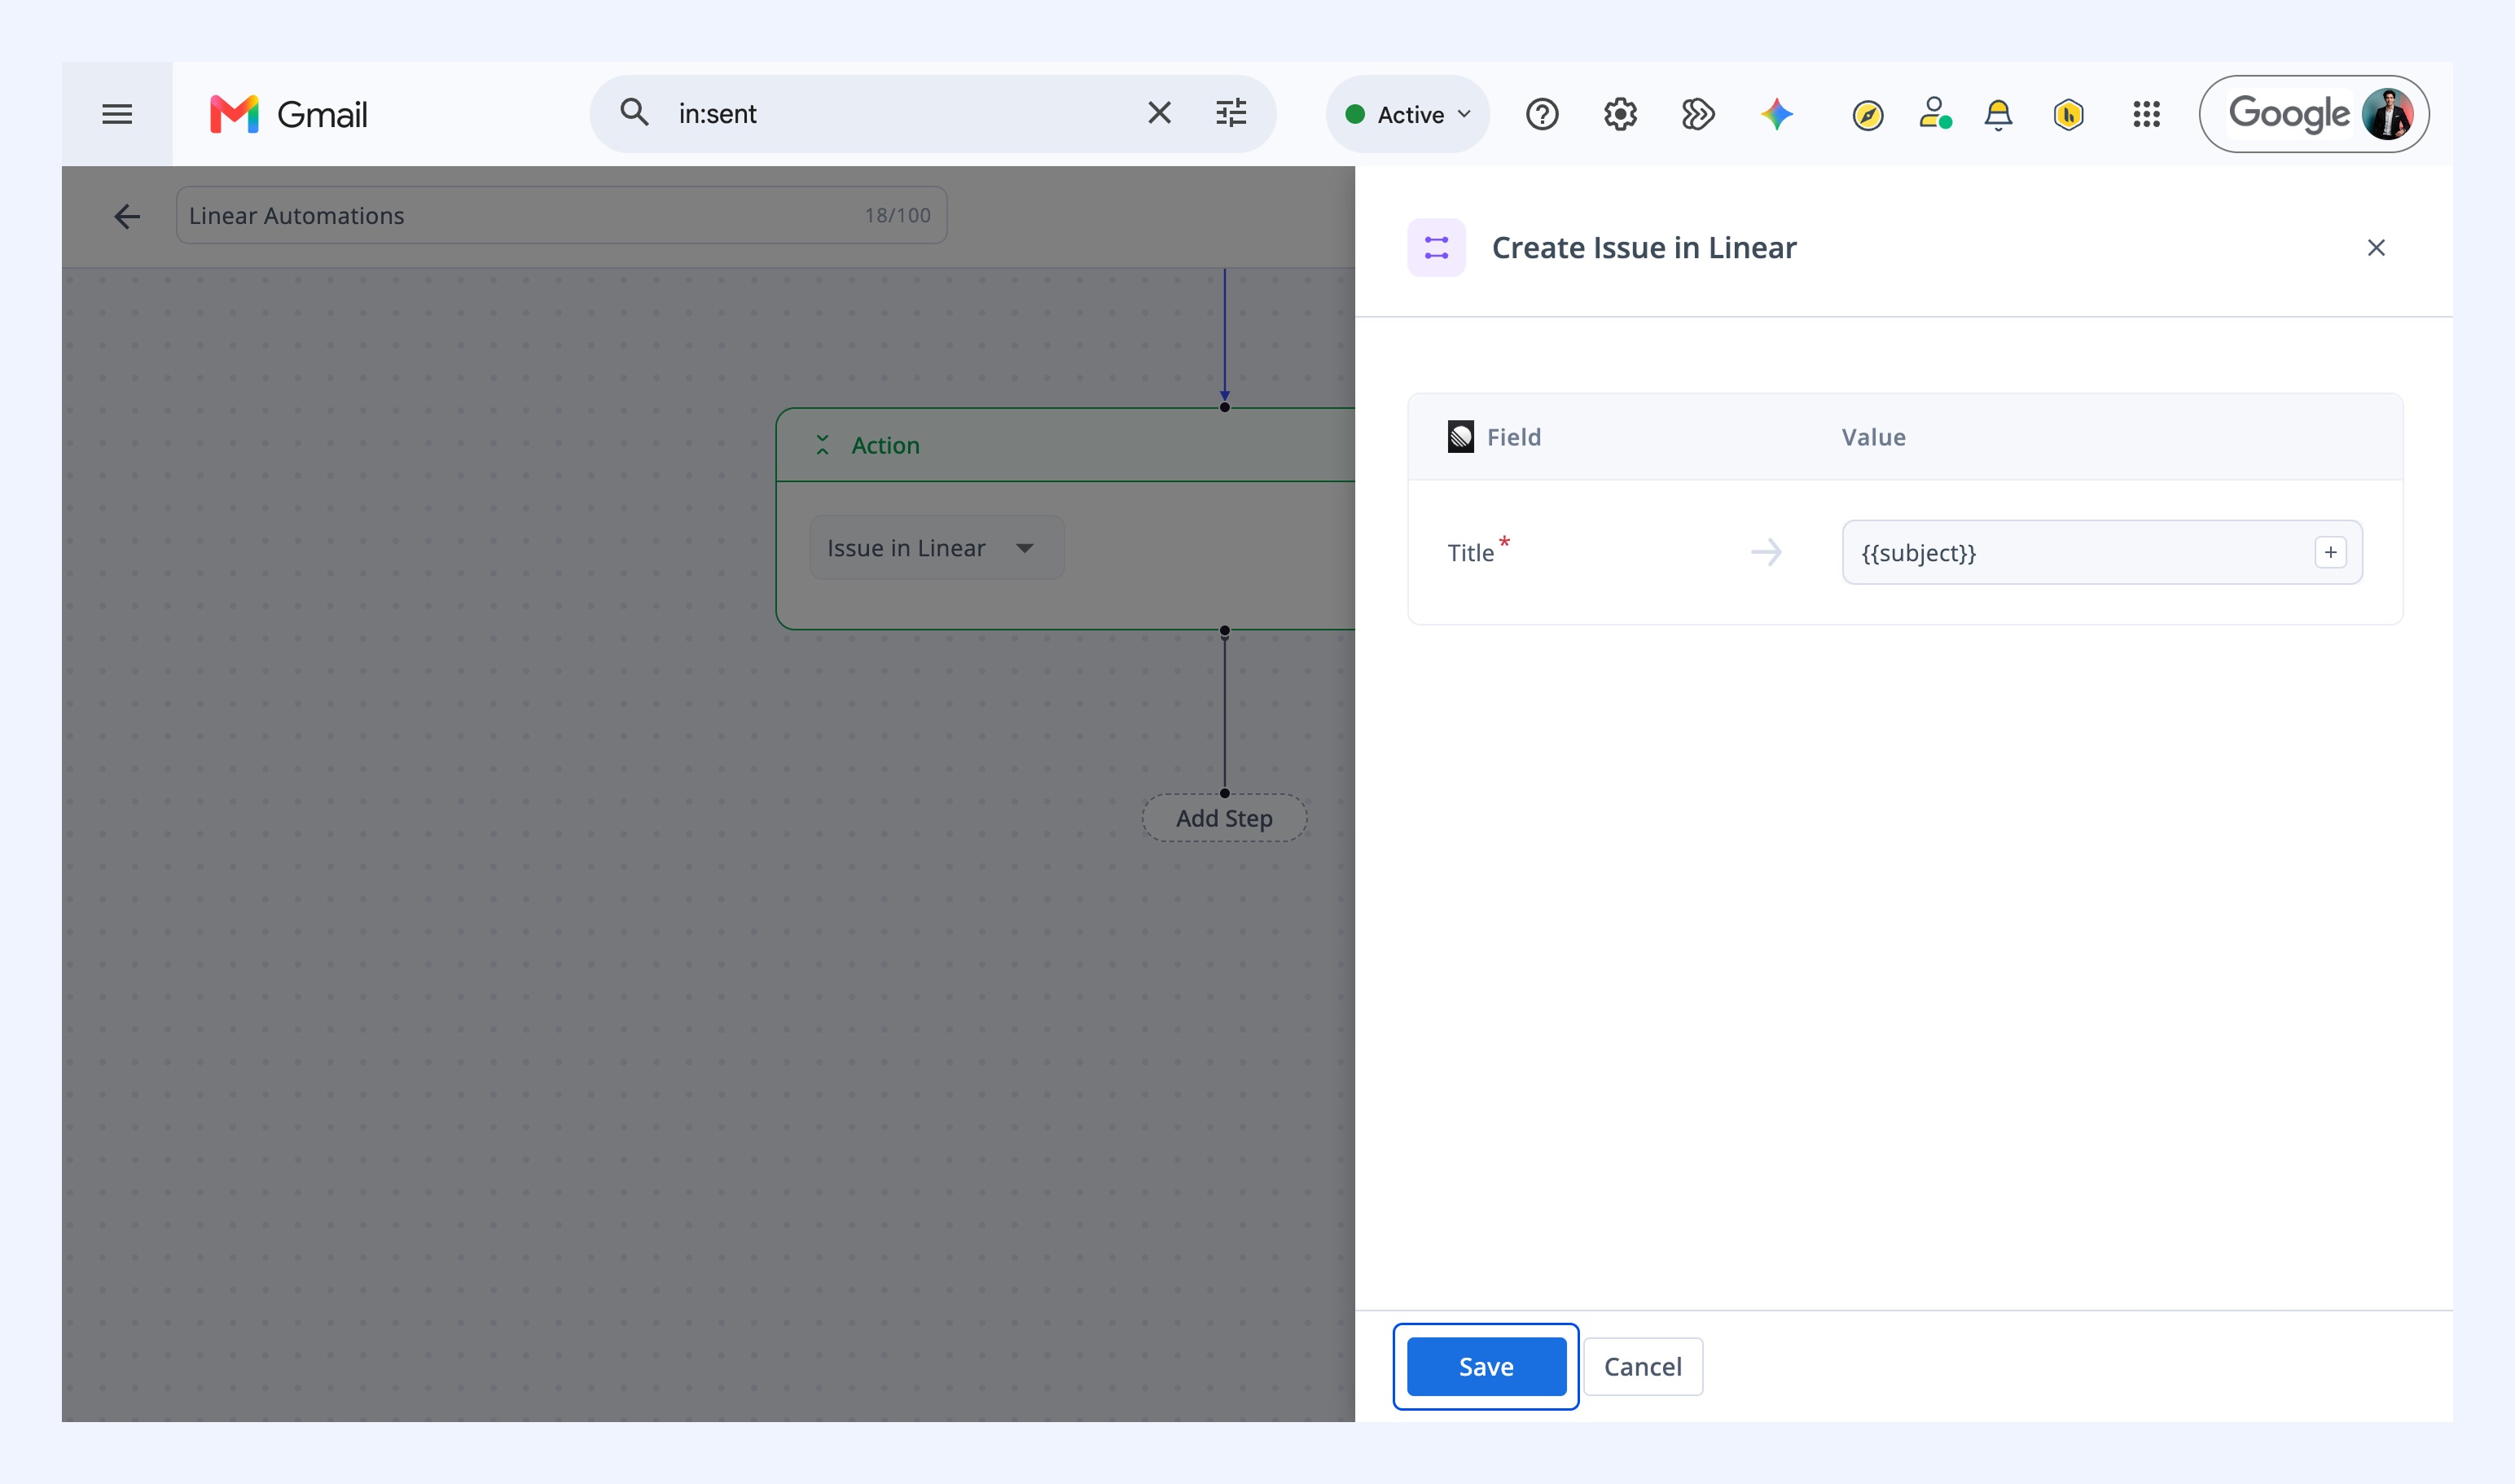
3. If you select Issue in Linear, you can set the default values Hiver should apply to every issue this Automation creates. For each field, enter a value using your own text or Hiver variables like {{subject}}.
4. Click Save and enable to activate the Automation.
Next steps
Automate end-to-end workflows using API calls in Automations