Getting started with Skills
Skills let you teach Hiver AI how your team handles a specific request, and then run that process automatically on matching conversations in a Shared Inbox.
With Skills, you can:
- Turn a repeatable process into steps Hiver AI runs on every matching conversation.
- Look up answers from your Knowledge Hub before replying.
- Read PDF and image attachments on a conversation to pull out details the Skill needs.
- Require a member to approve an action before it happens.
- Update records in a connected app like HubSpot as part of handling a conversation.
This article explains how to create a Skill, test it, and enable it on a Shared Inbox.
Before you begin
Make sure you have admin access in Hiver.
Creating a Skill
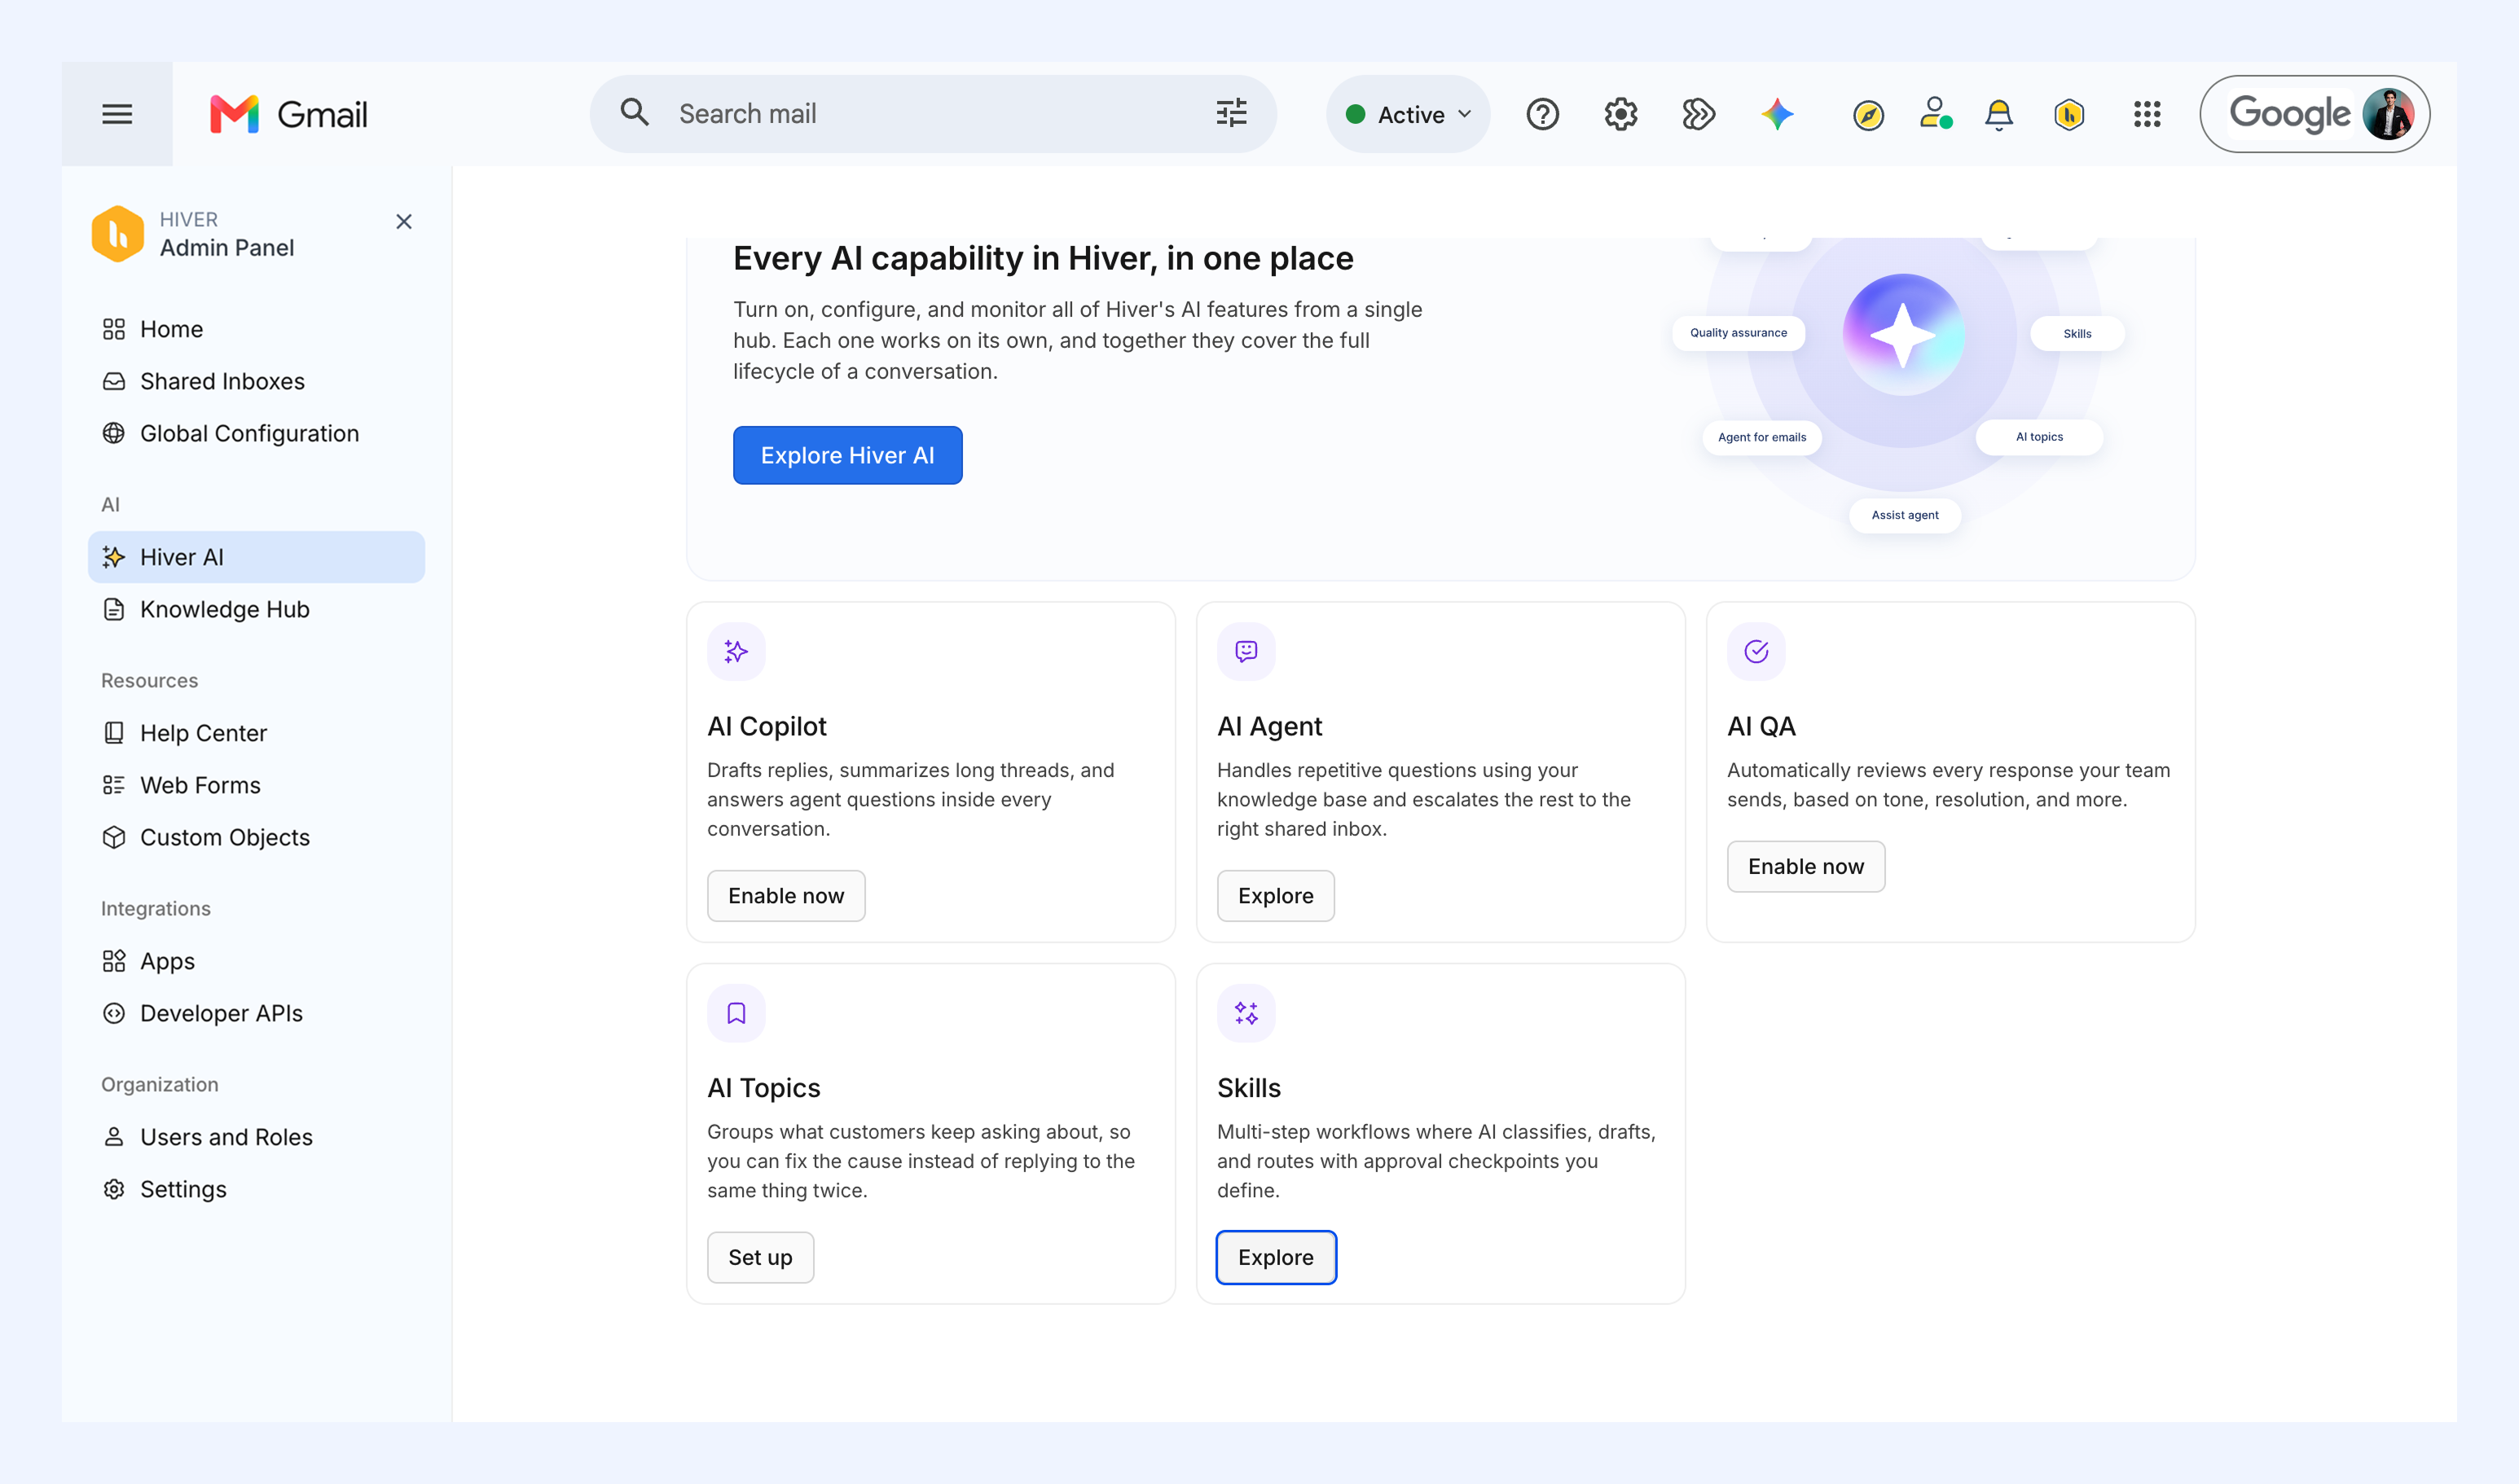
1. Go to Admin Panel → Hiver AI, click Explore under Skills.
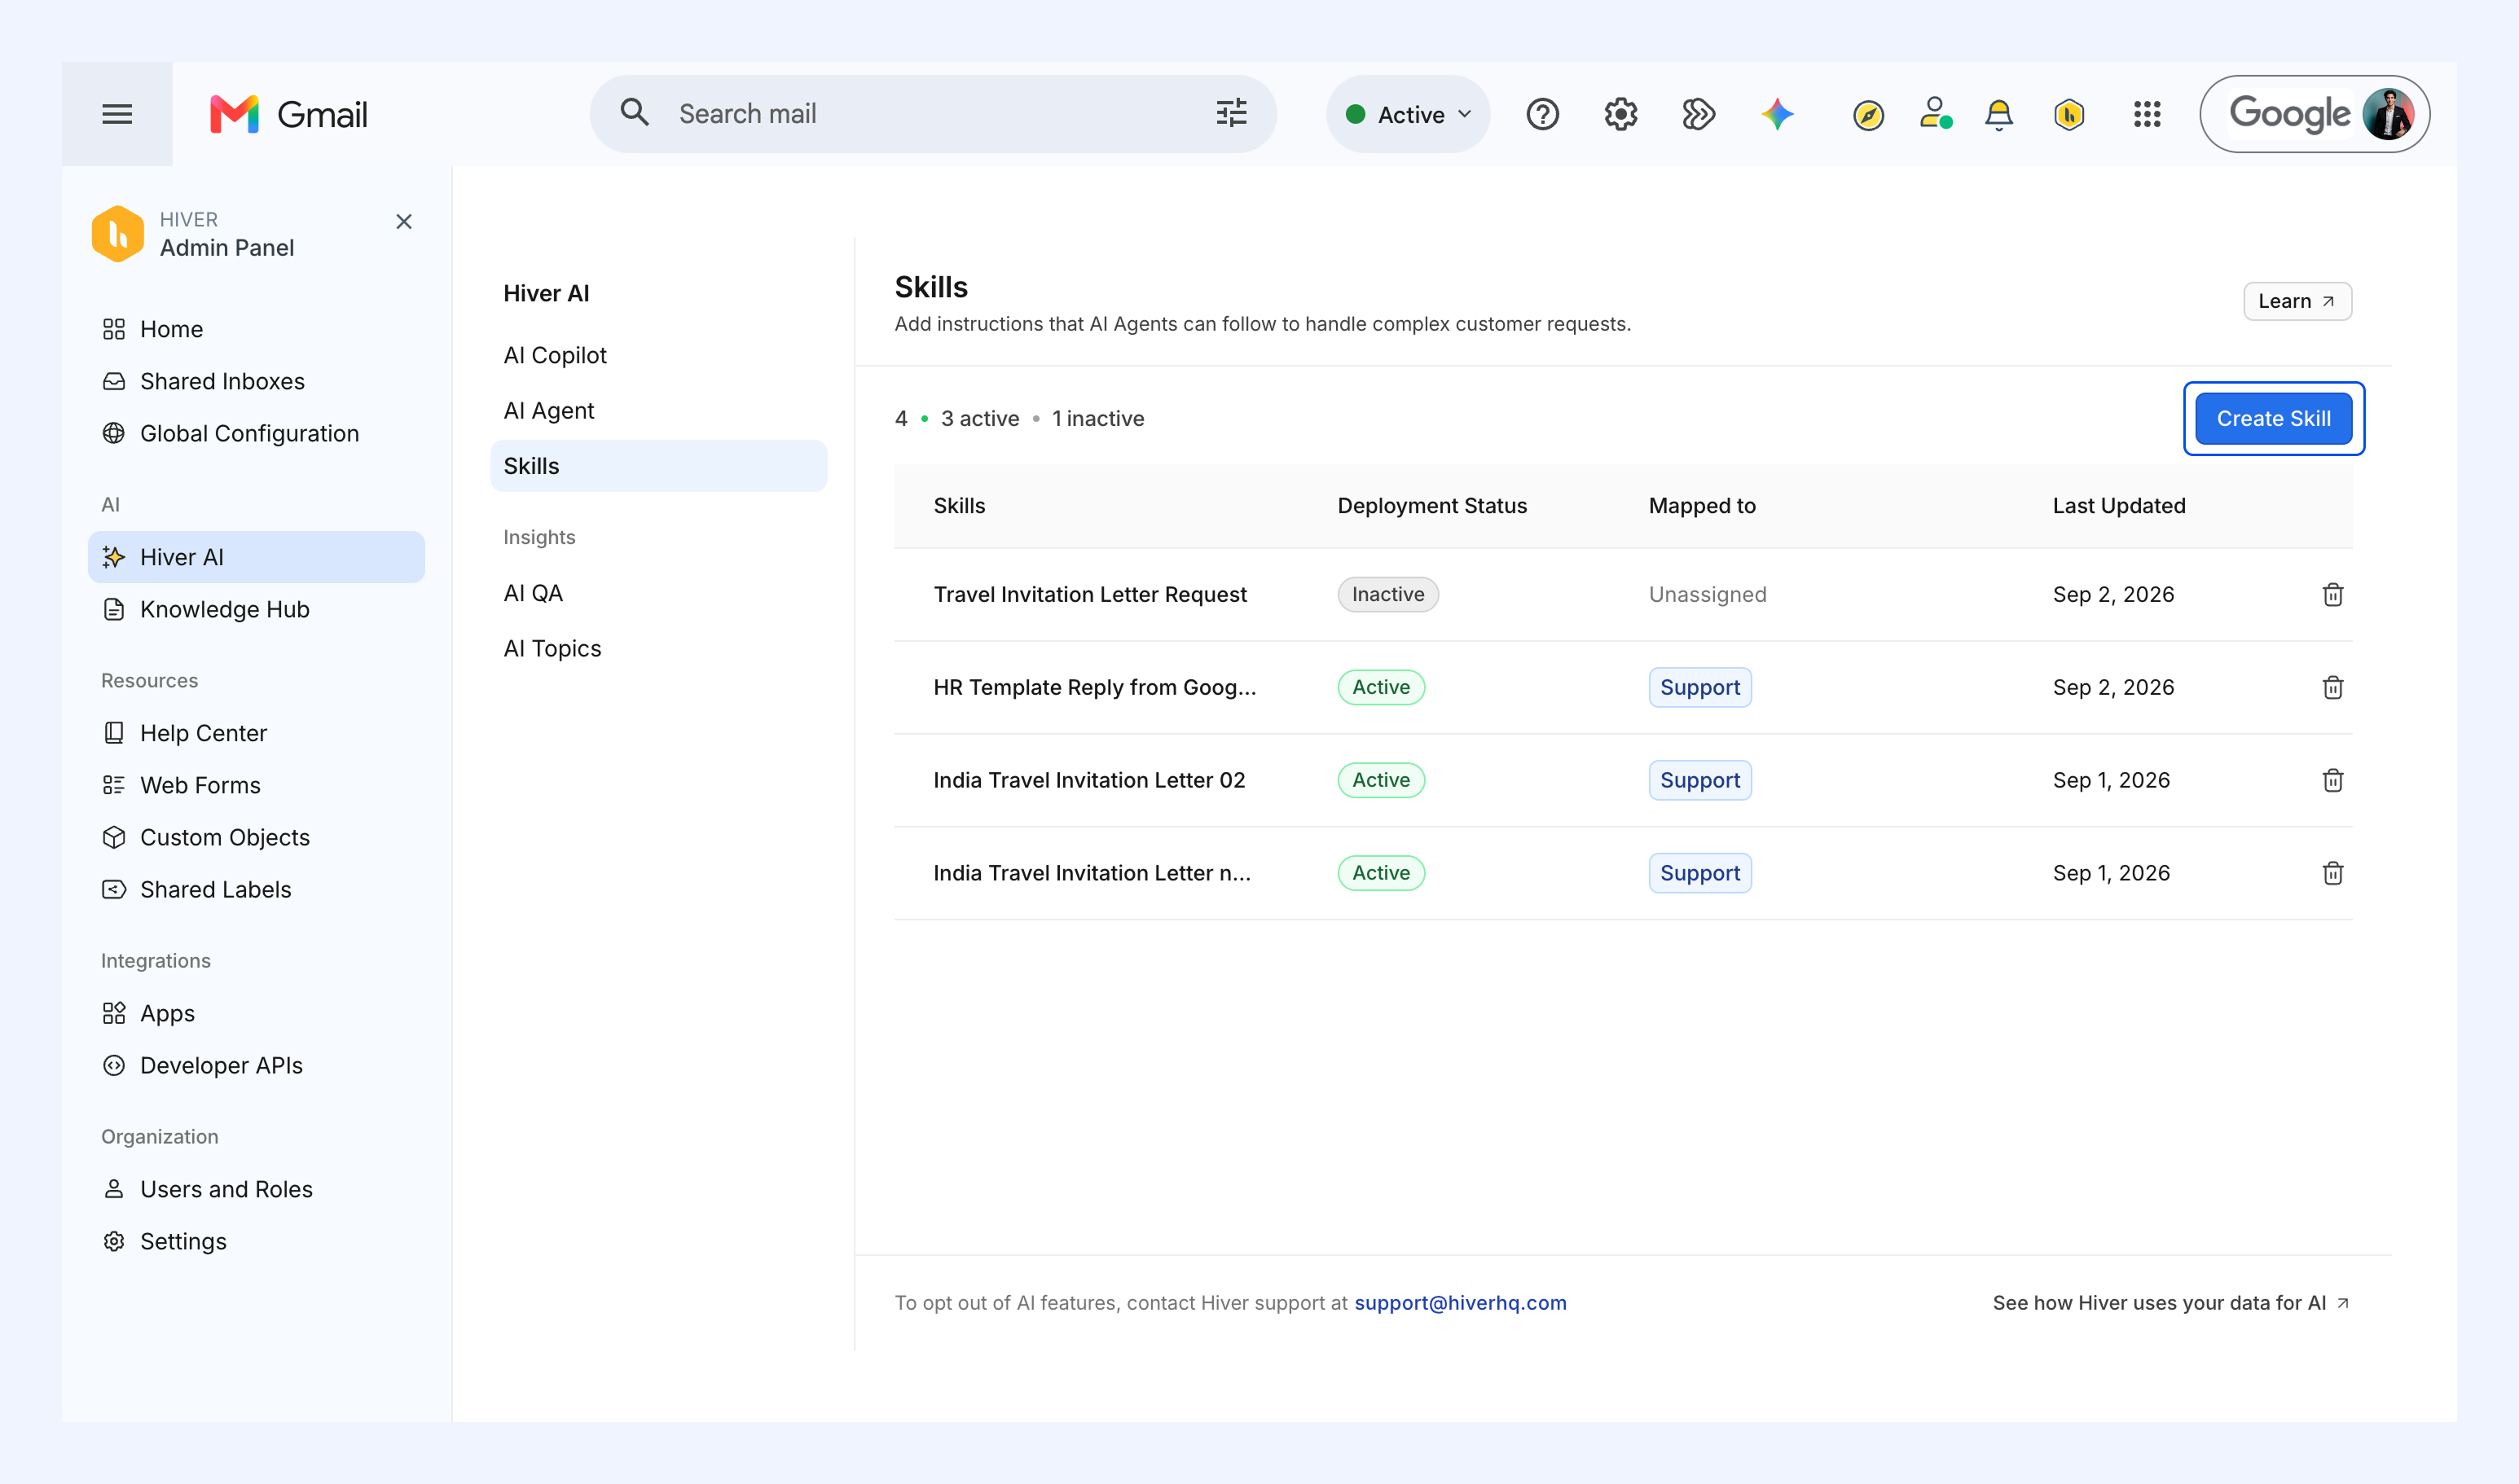
2. Click Create Skill.
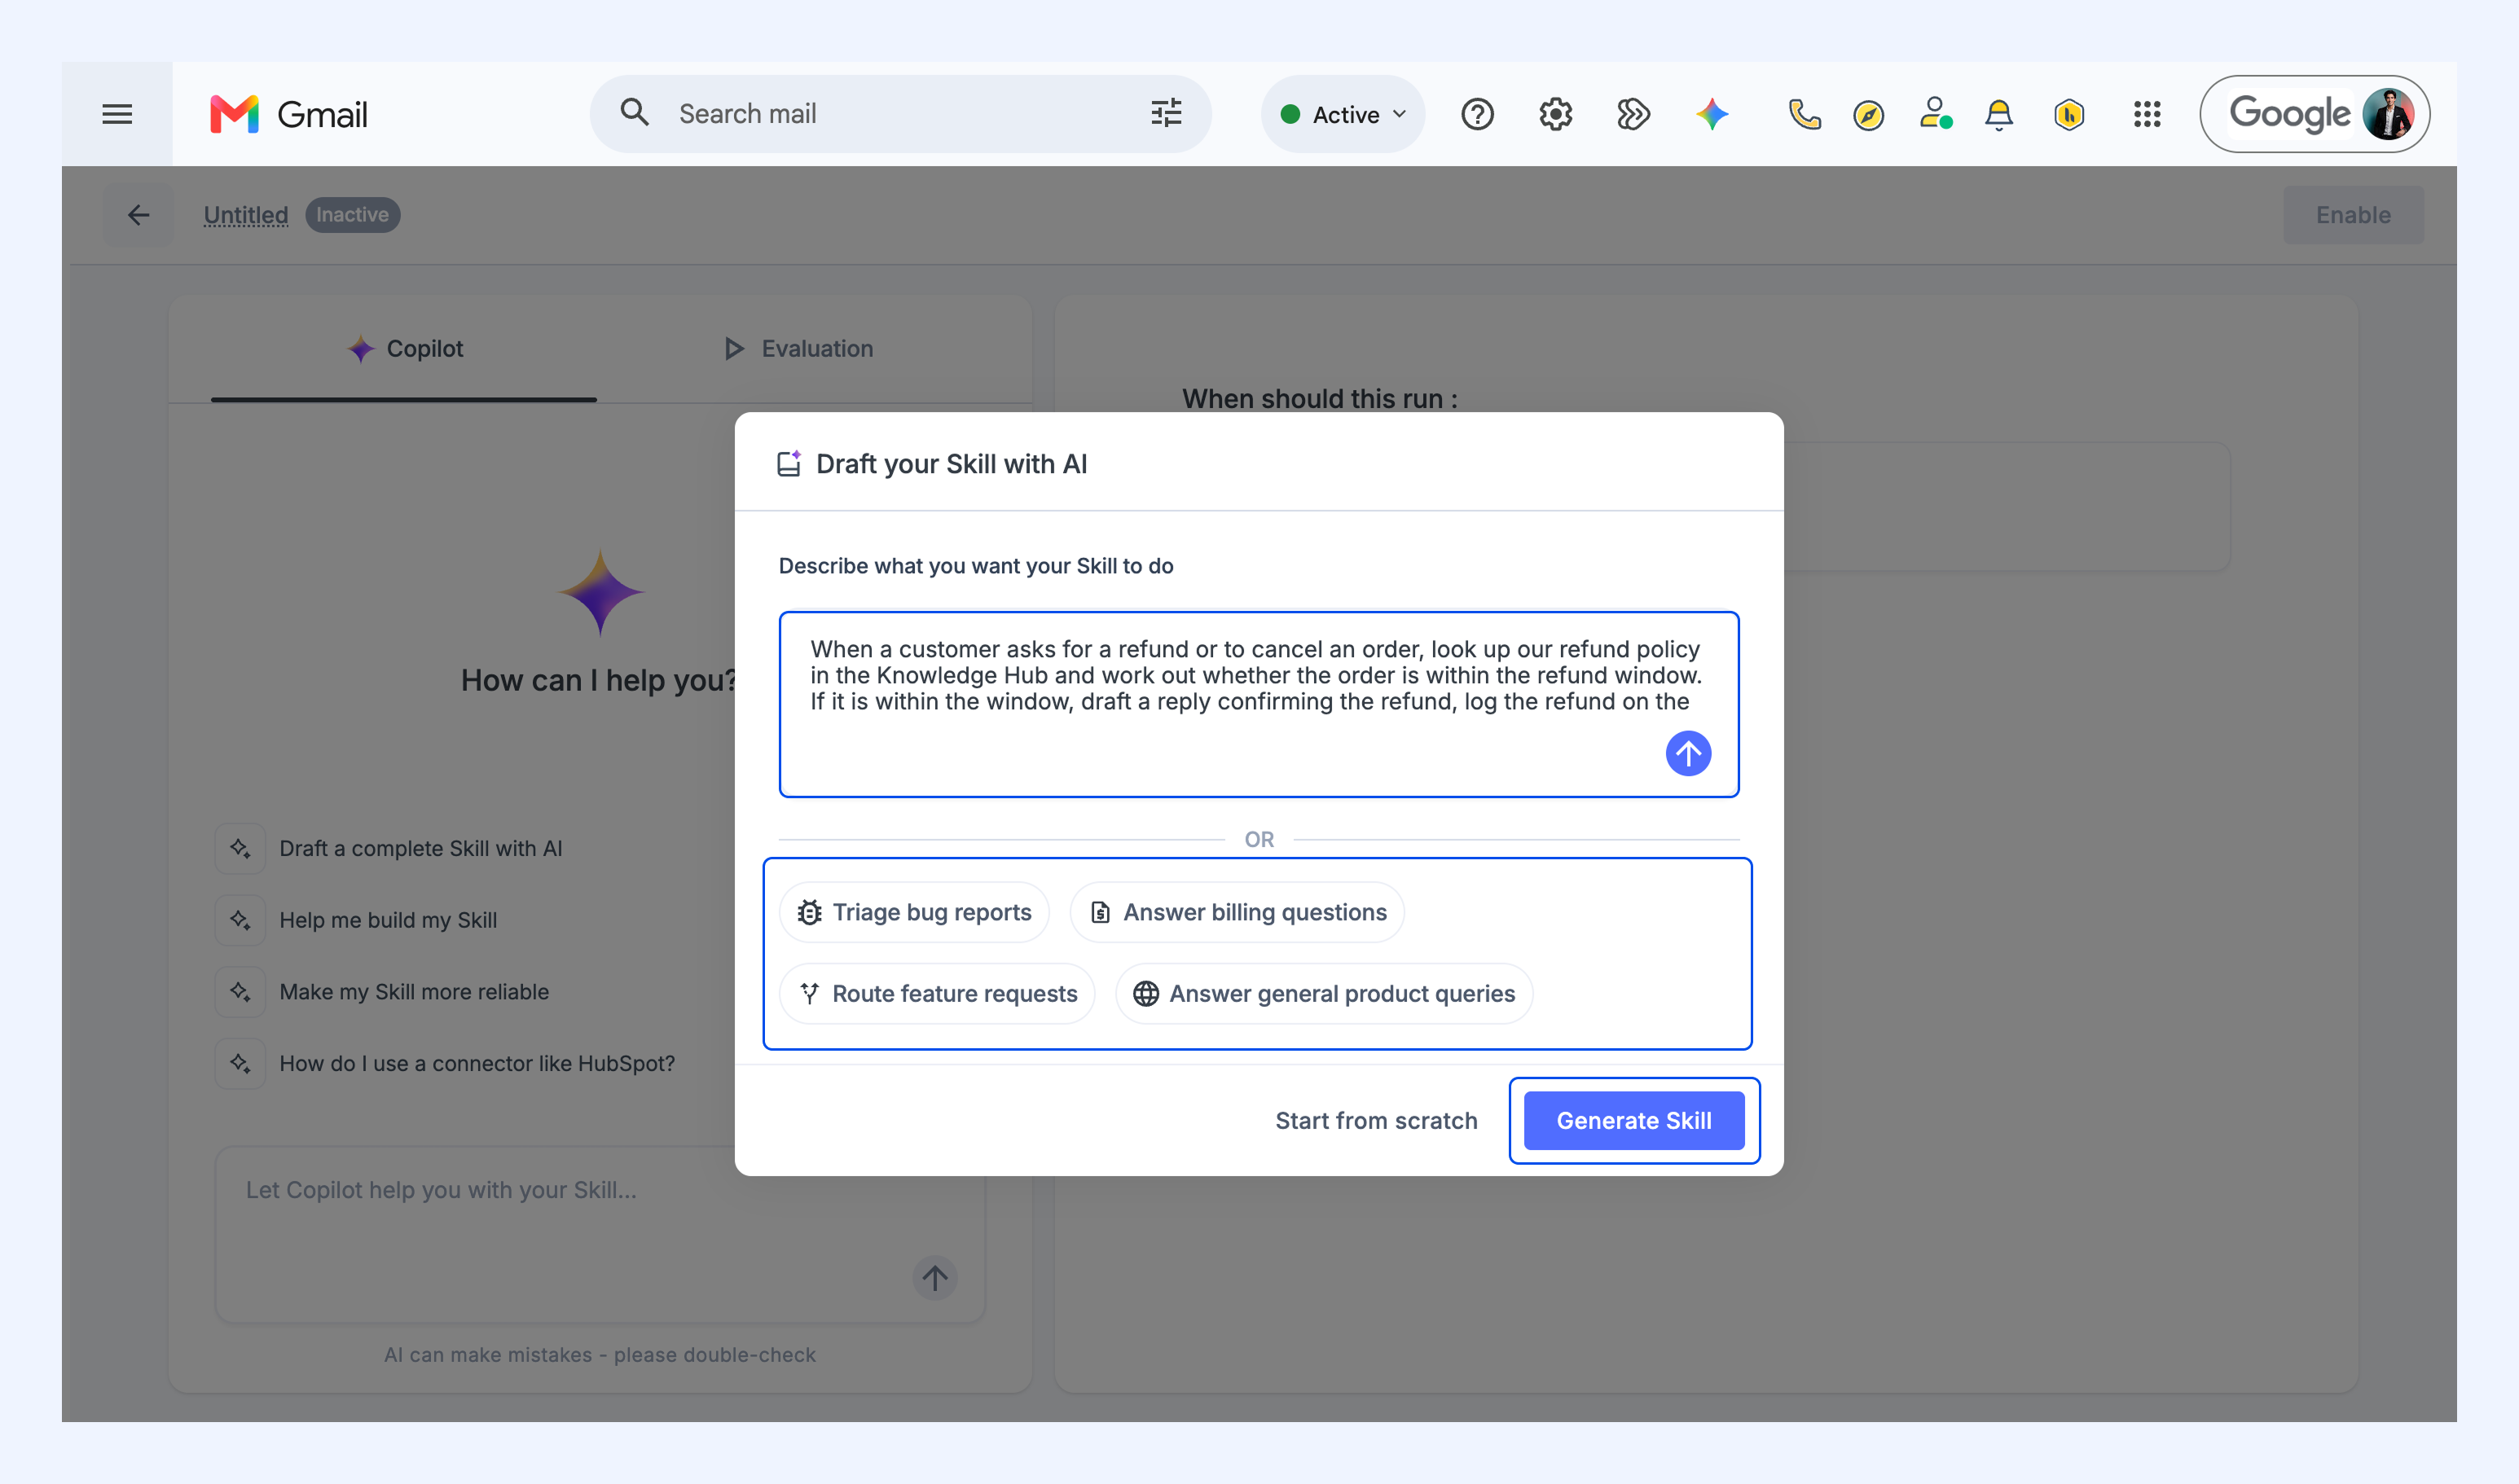
3. Describe what you want the Skill to do, then click Generate Skill. You can also start from one of the suggested examples.
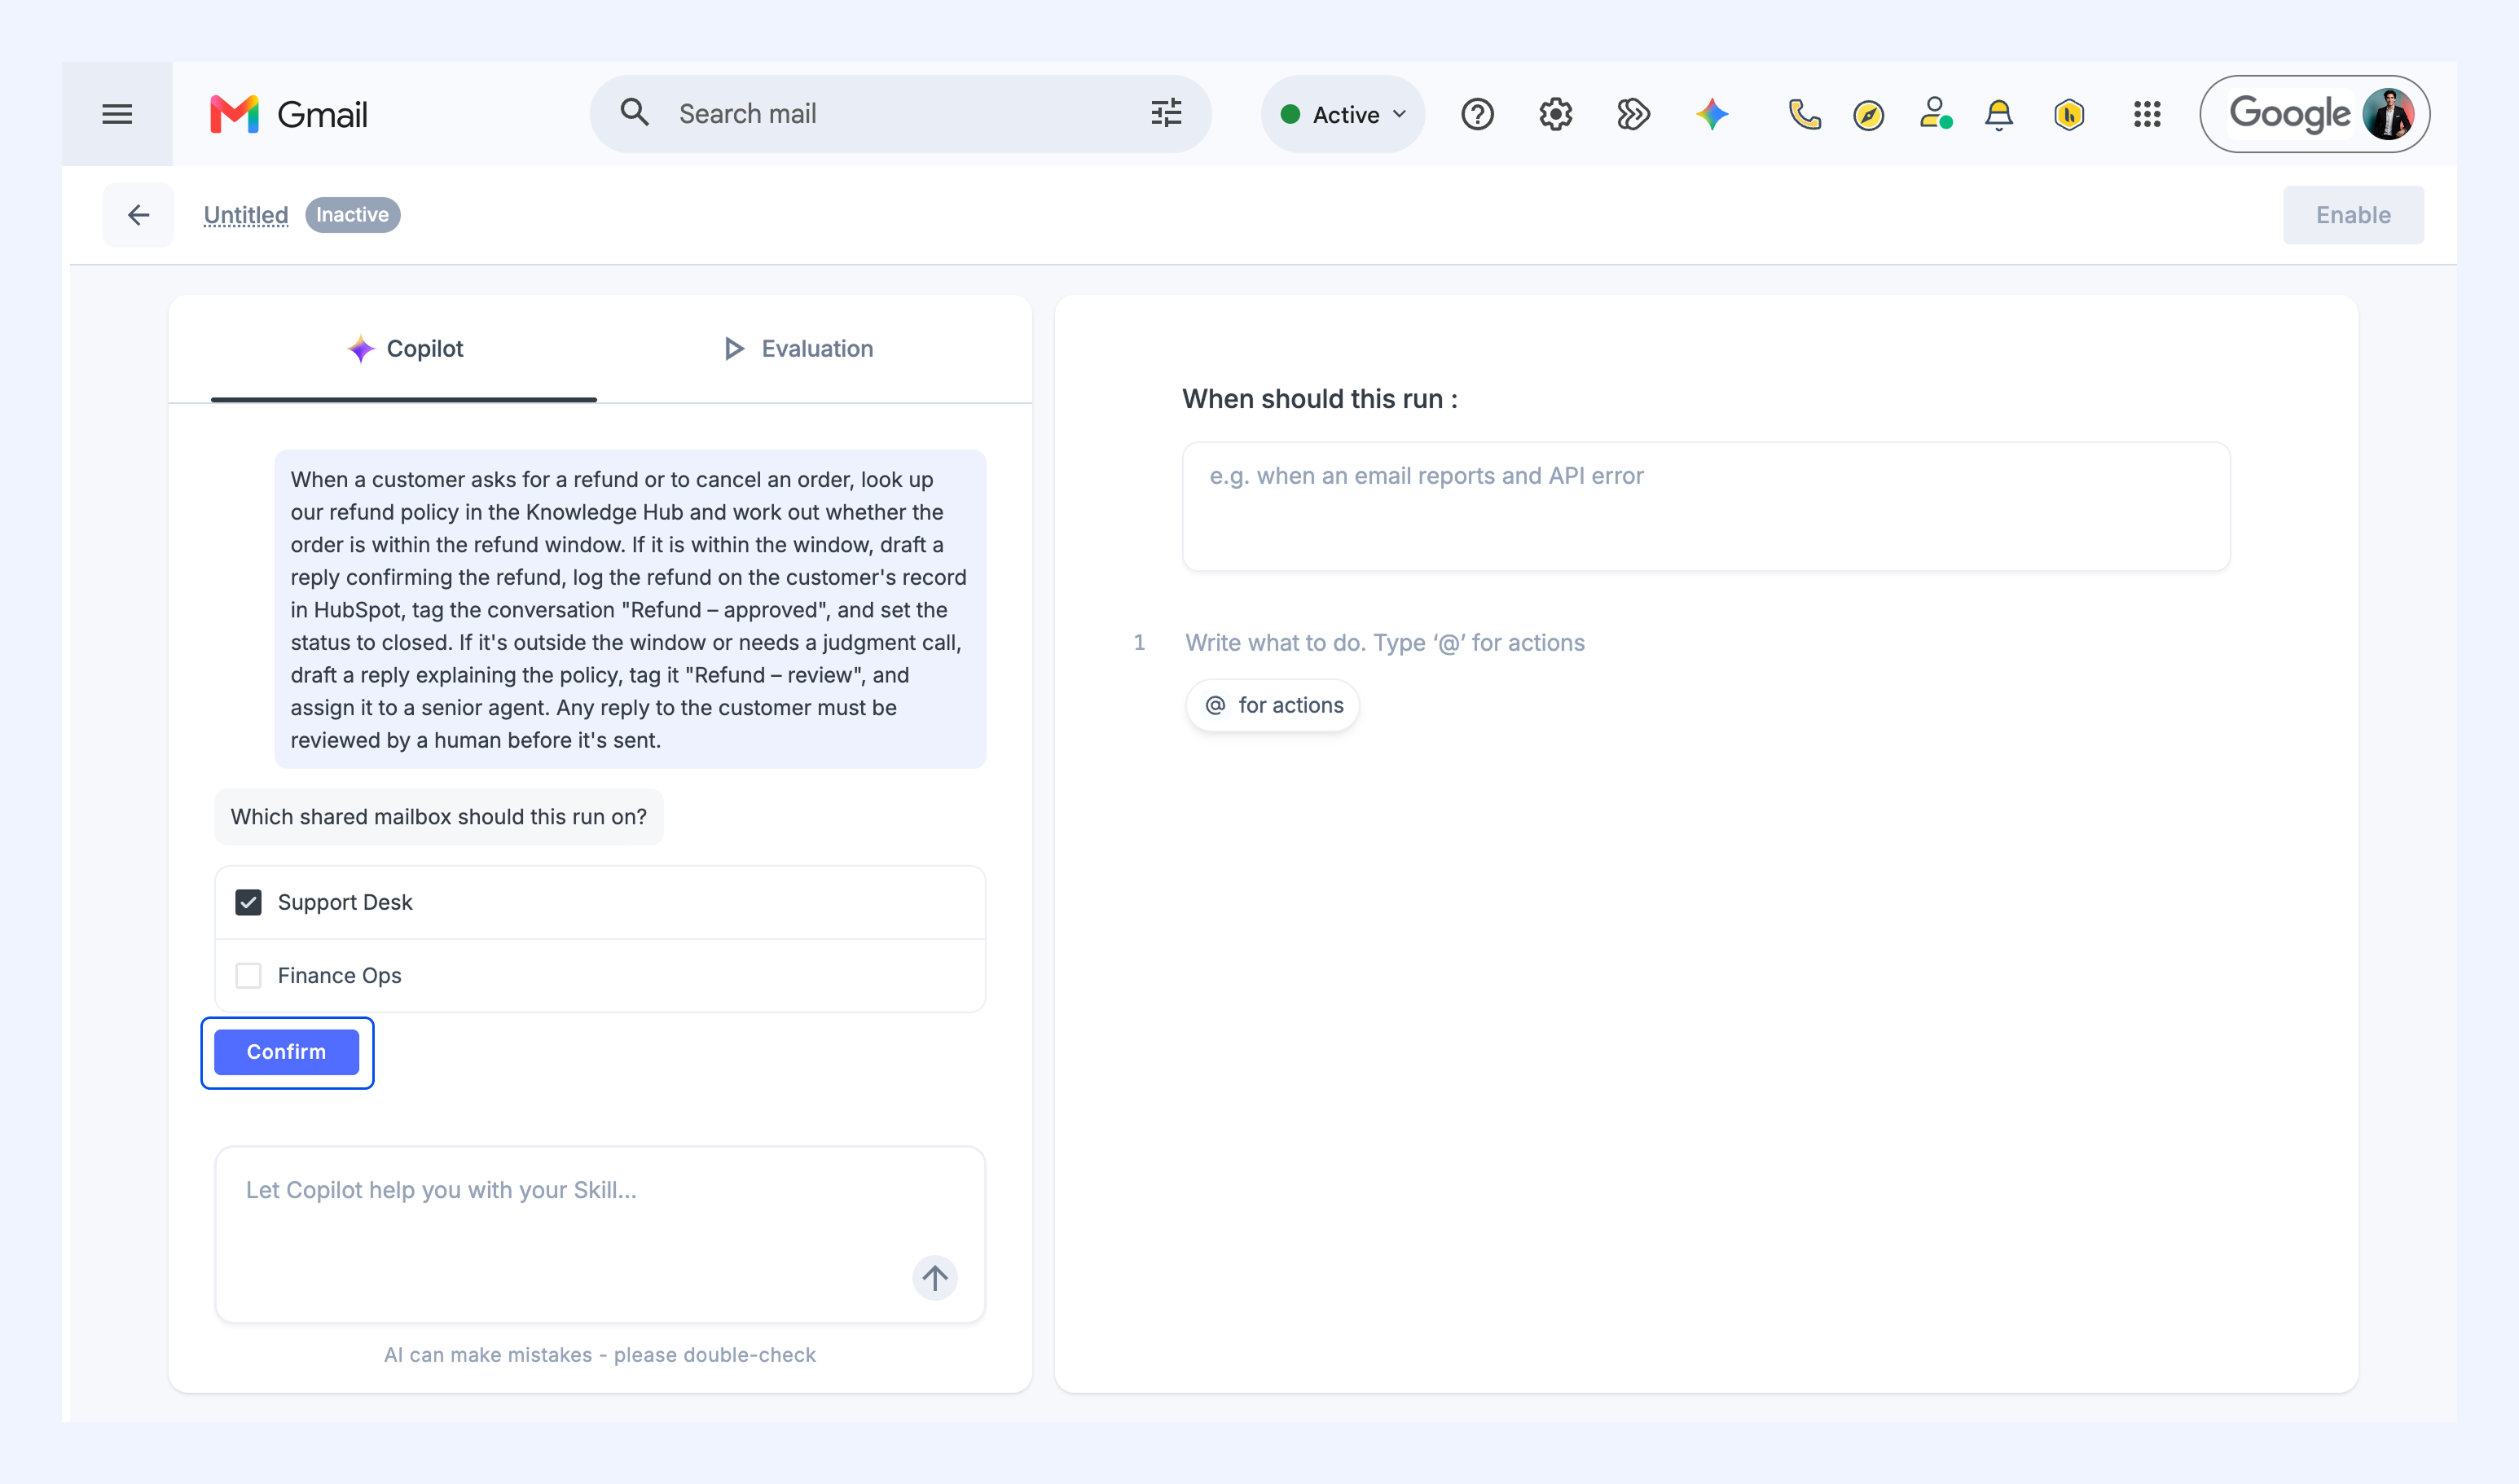
4. Answer the questions Hiver asks to fill in the details, and click Confirm for each. For example, it may ask which Shared Inbox the Skill runs on, or who to assign a conversation to.
5. Review the draft, then click Apply.
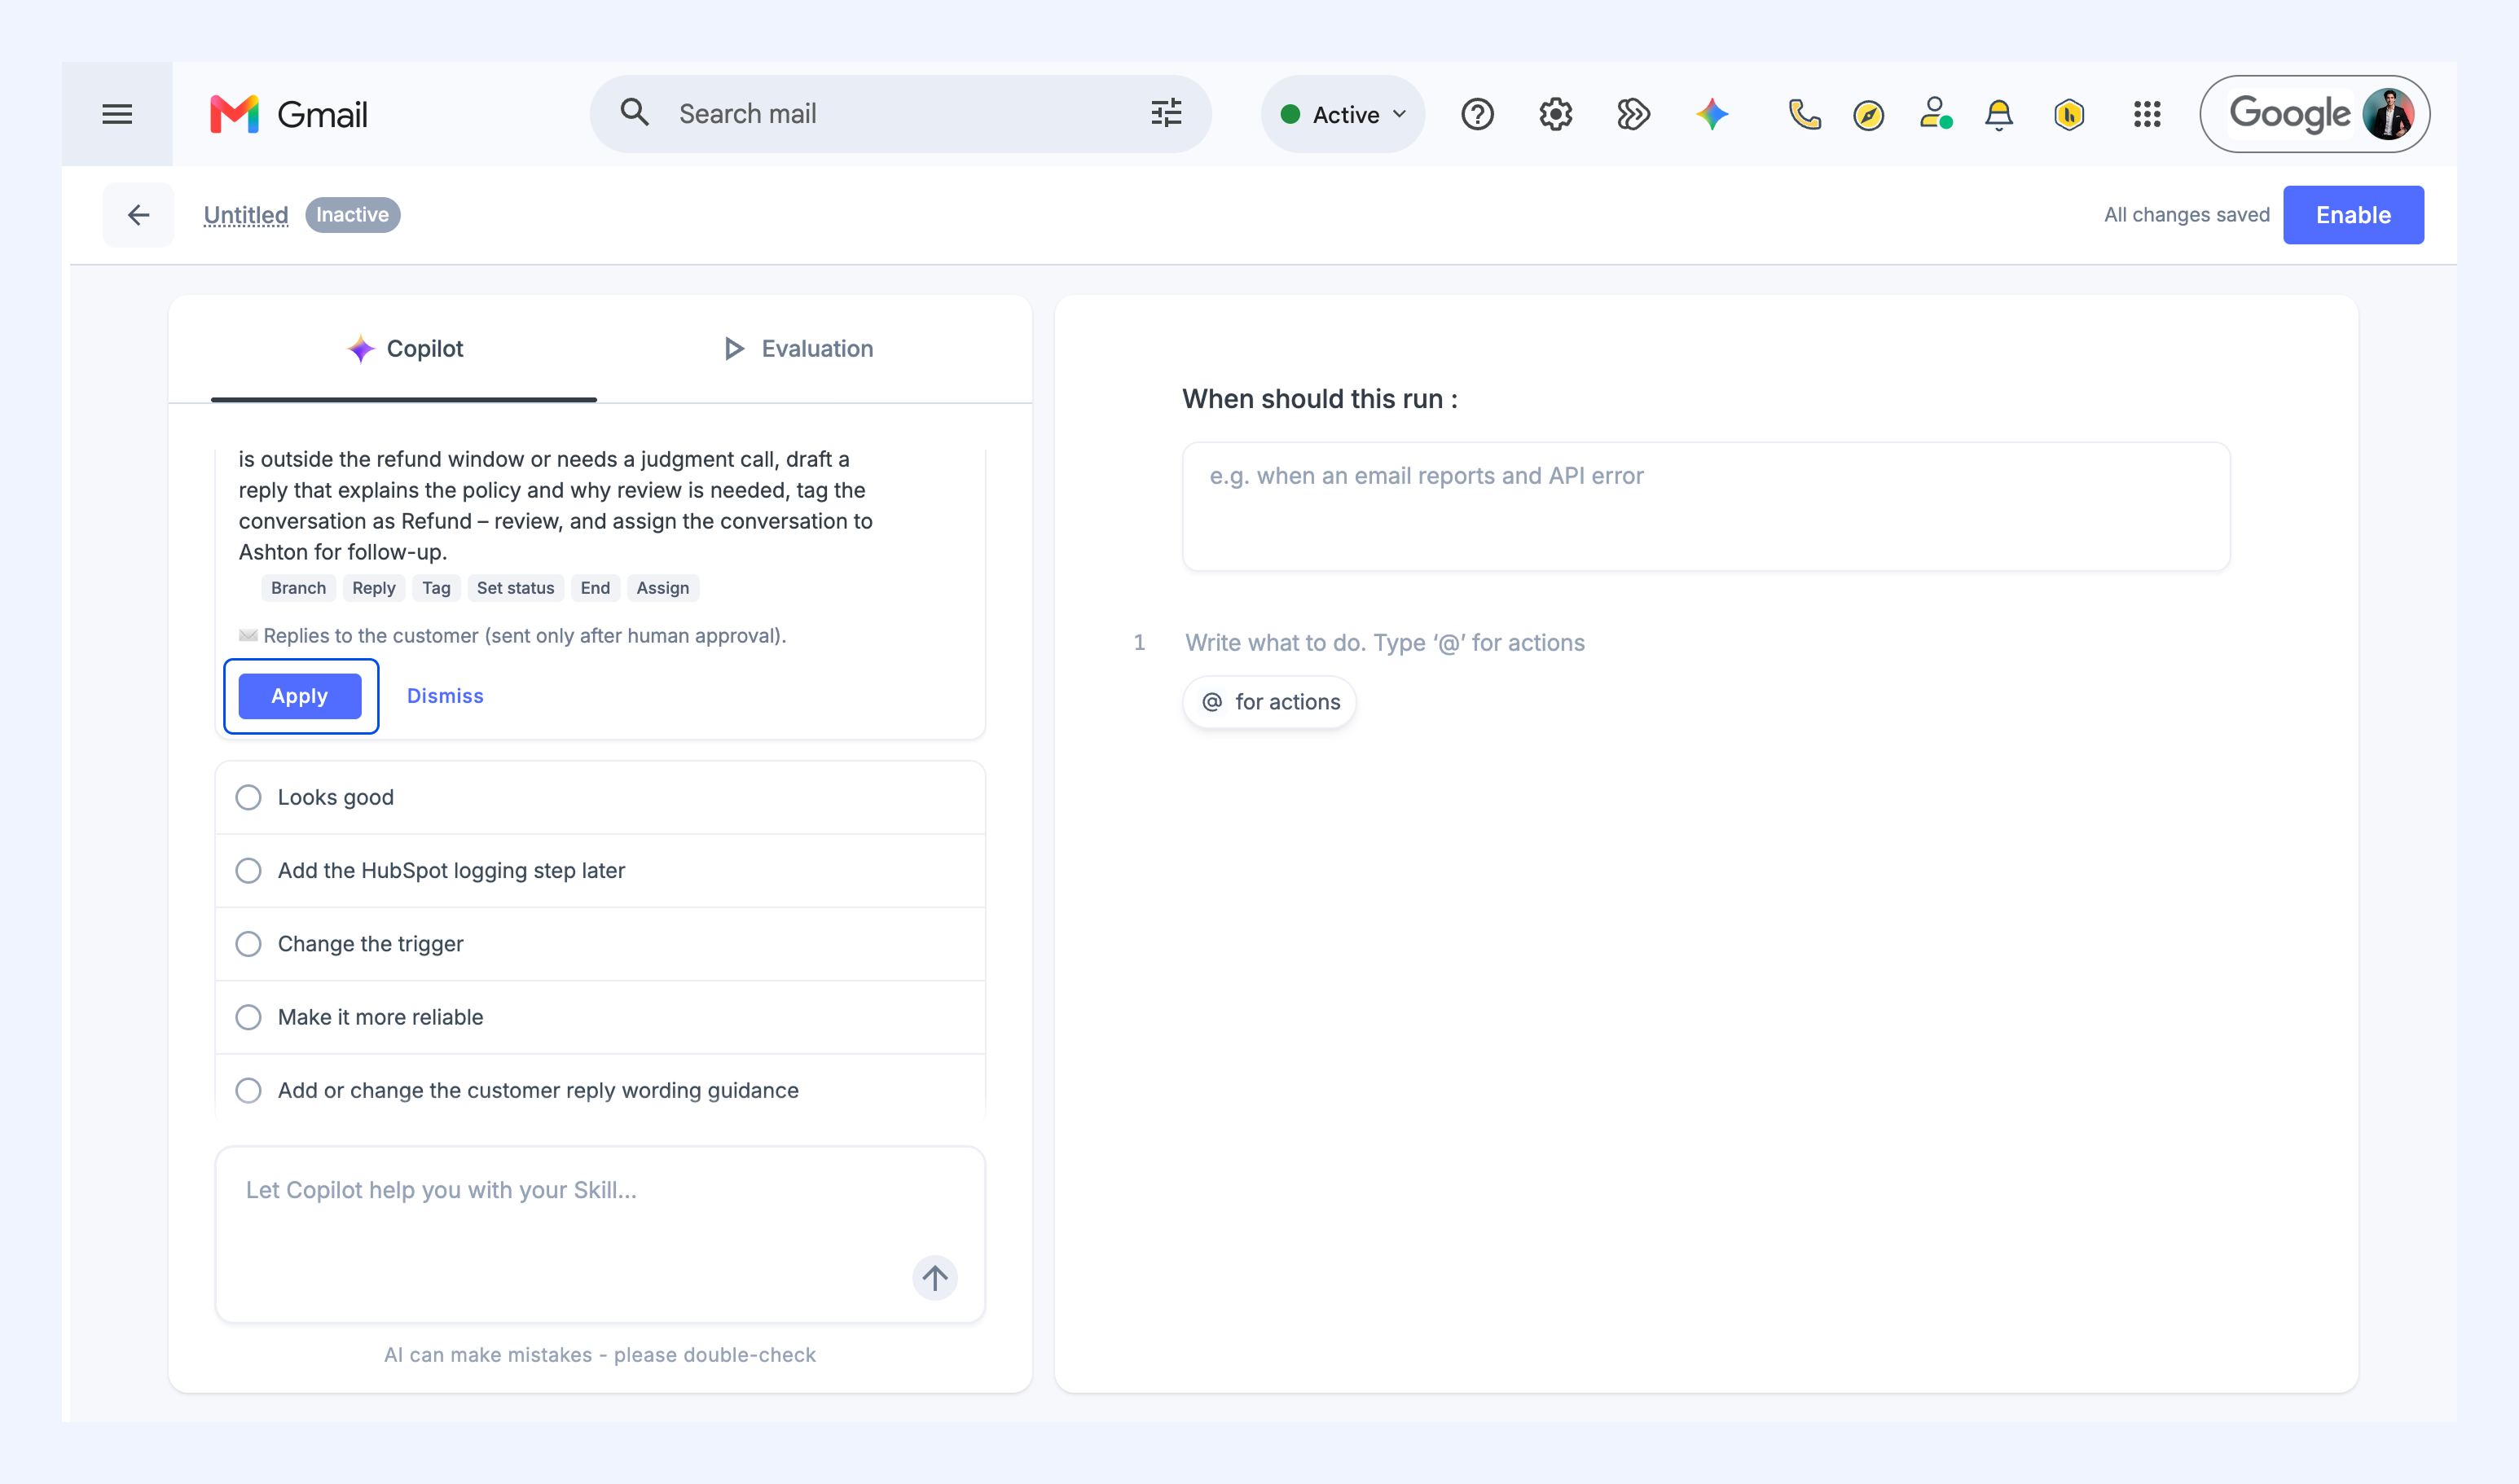
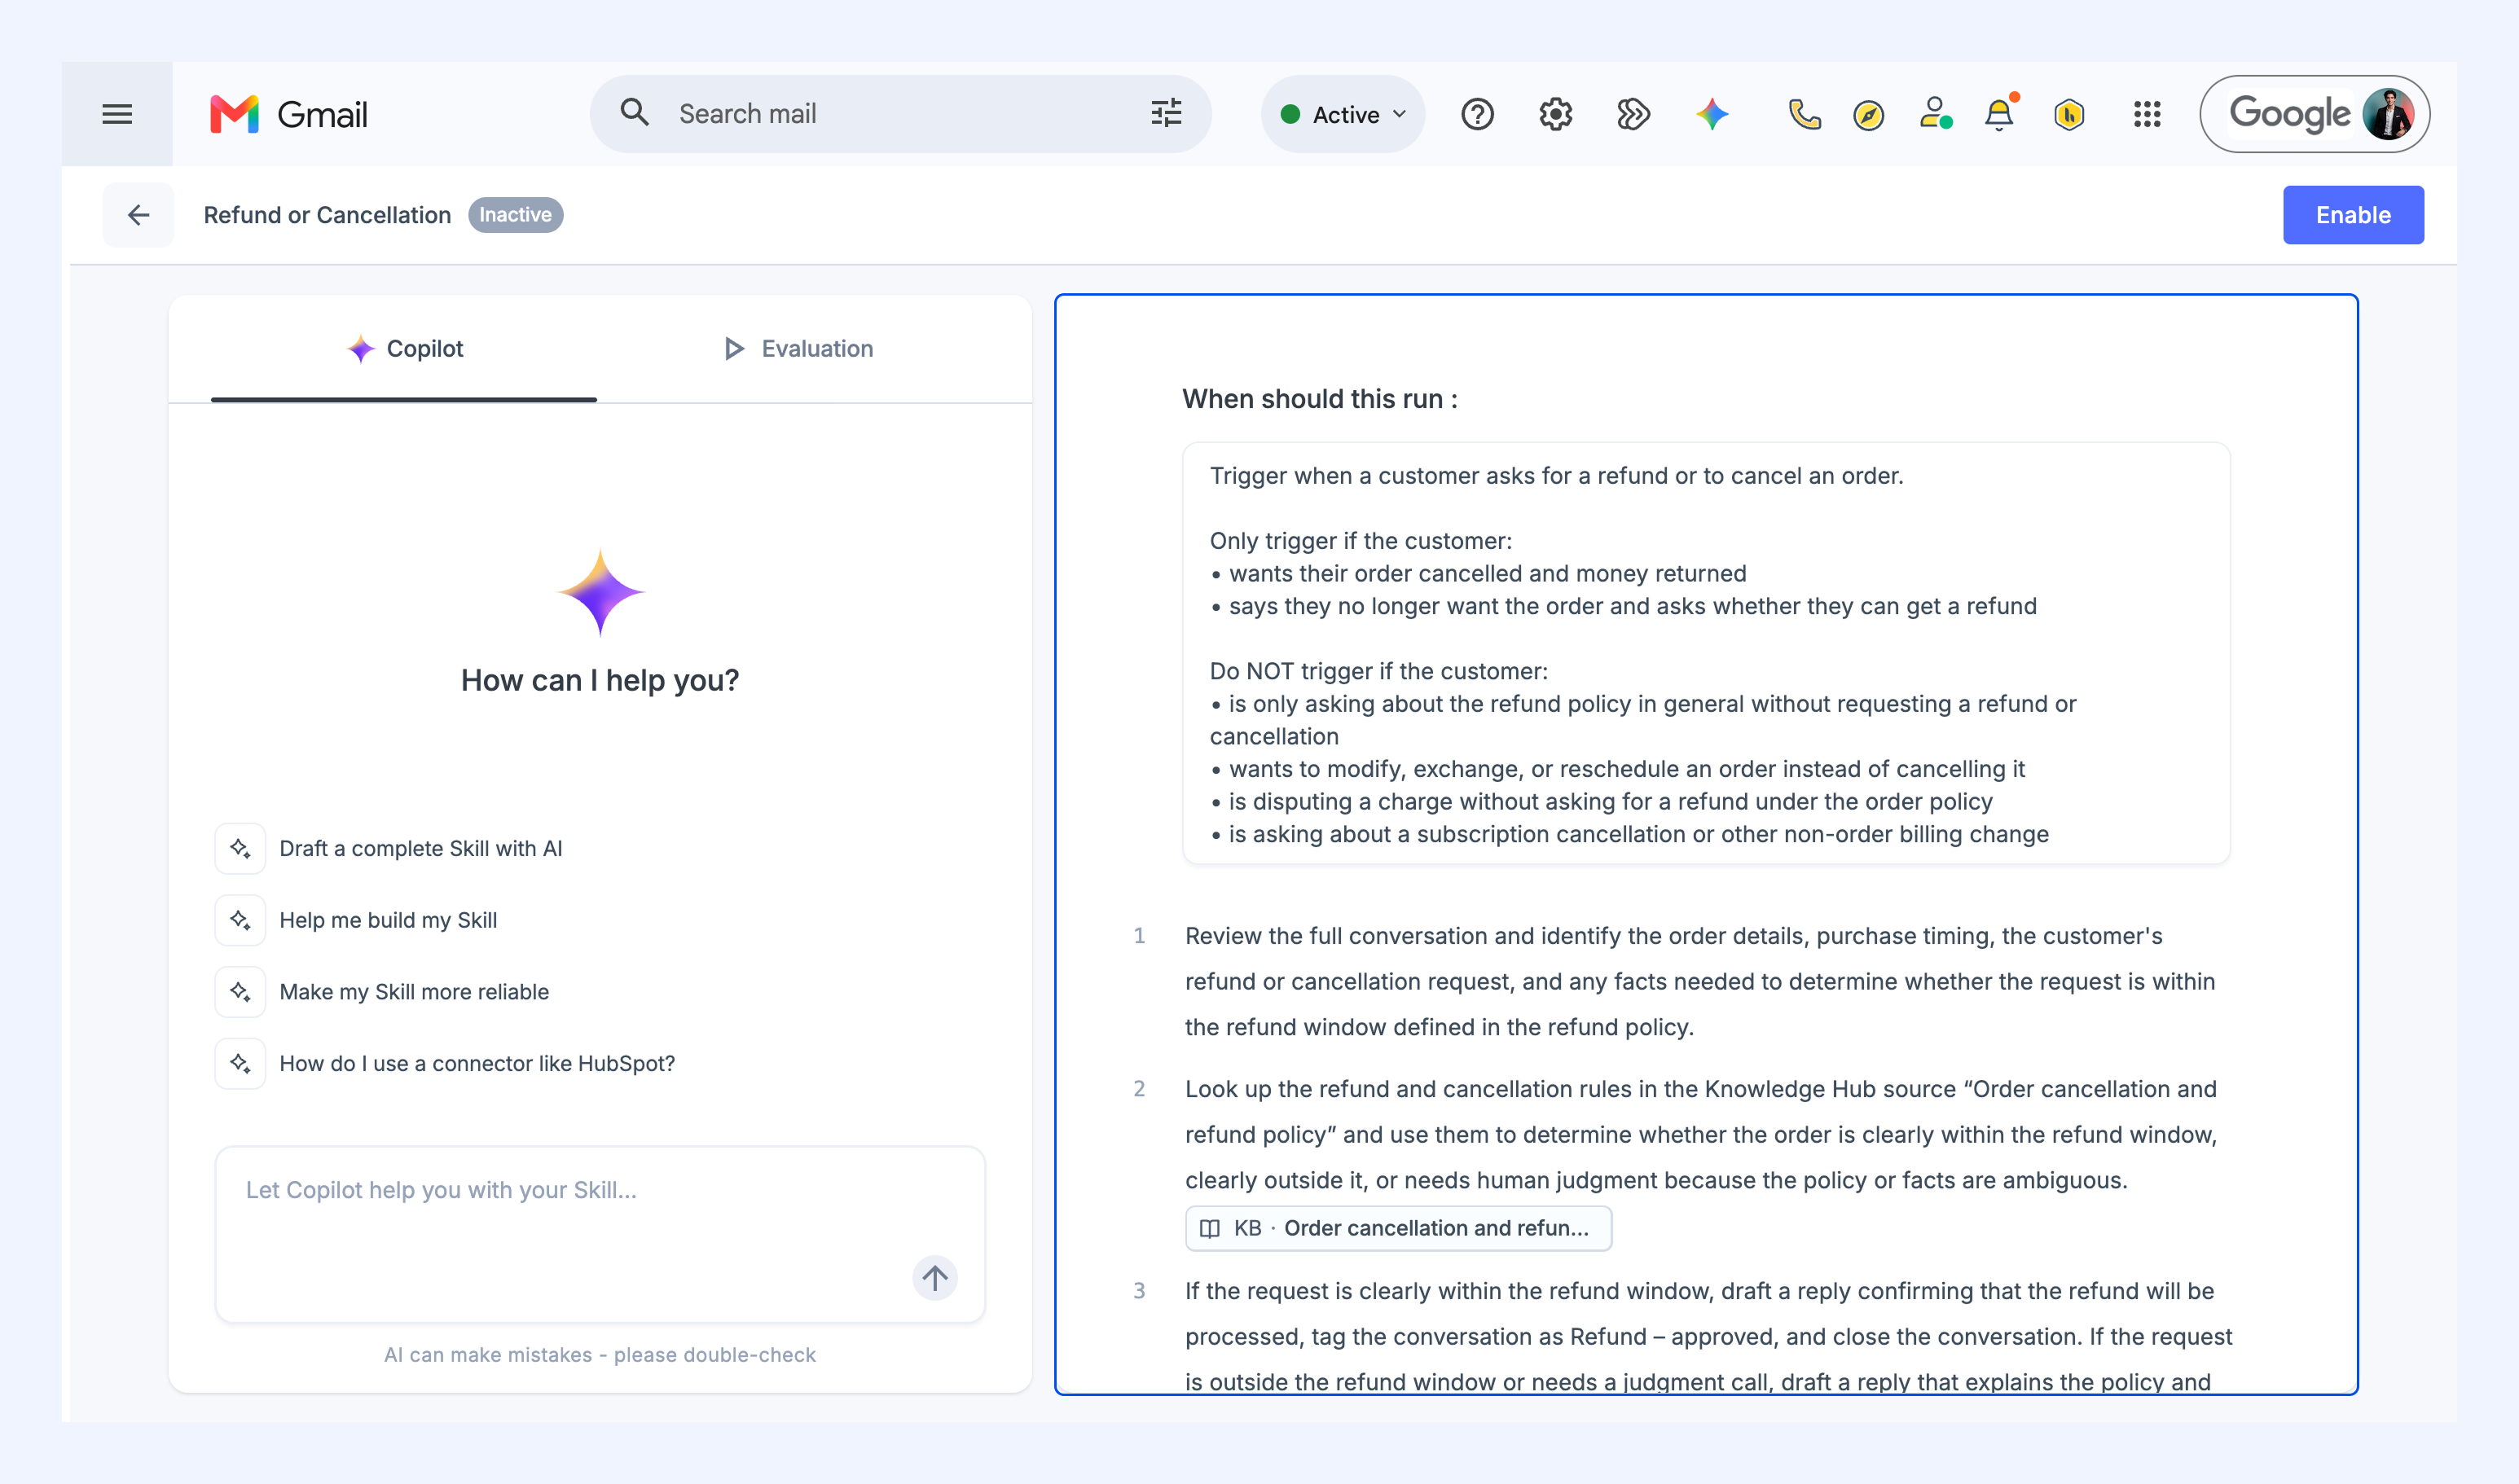
6. A Skill has two parts you can edit before it goes live:
- Trigger: What starts the Skill.
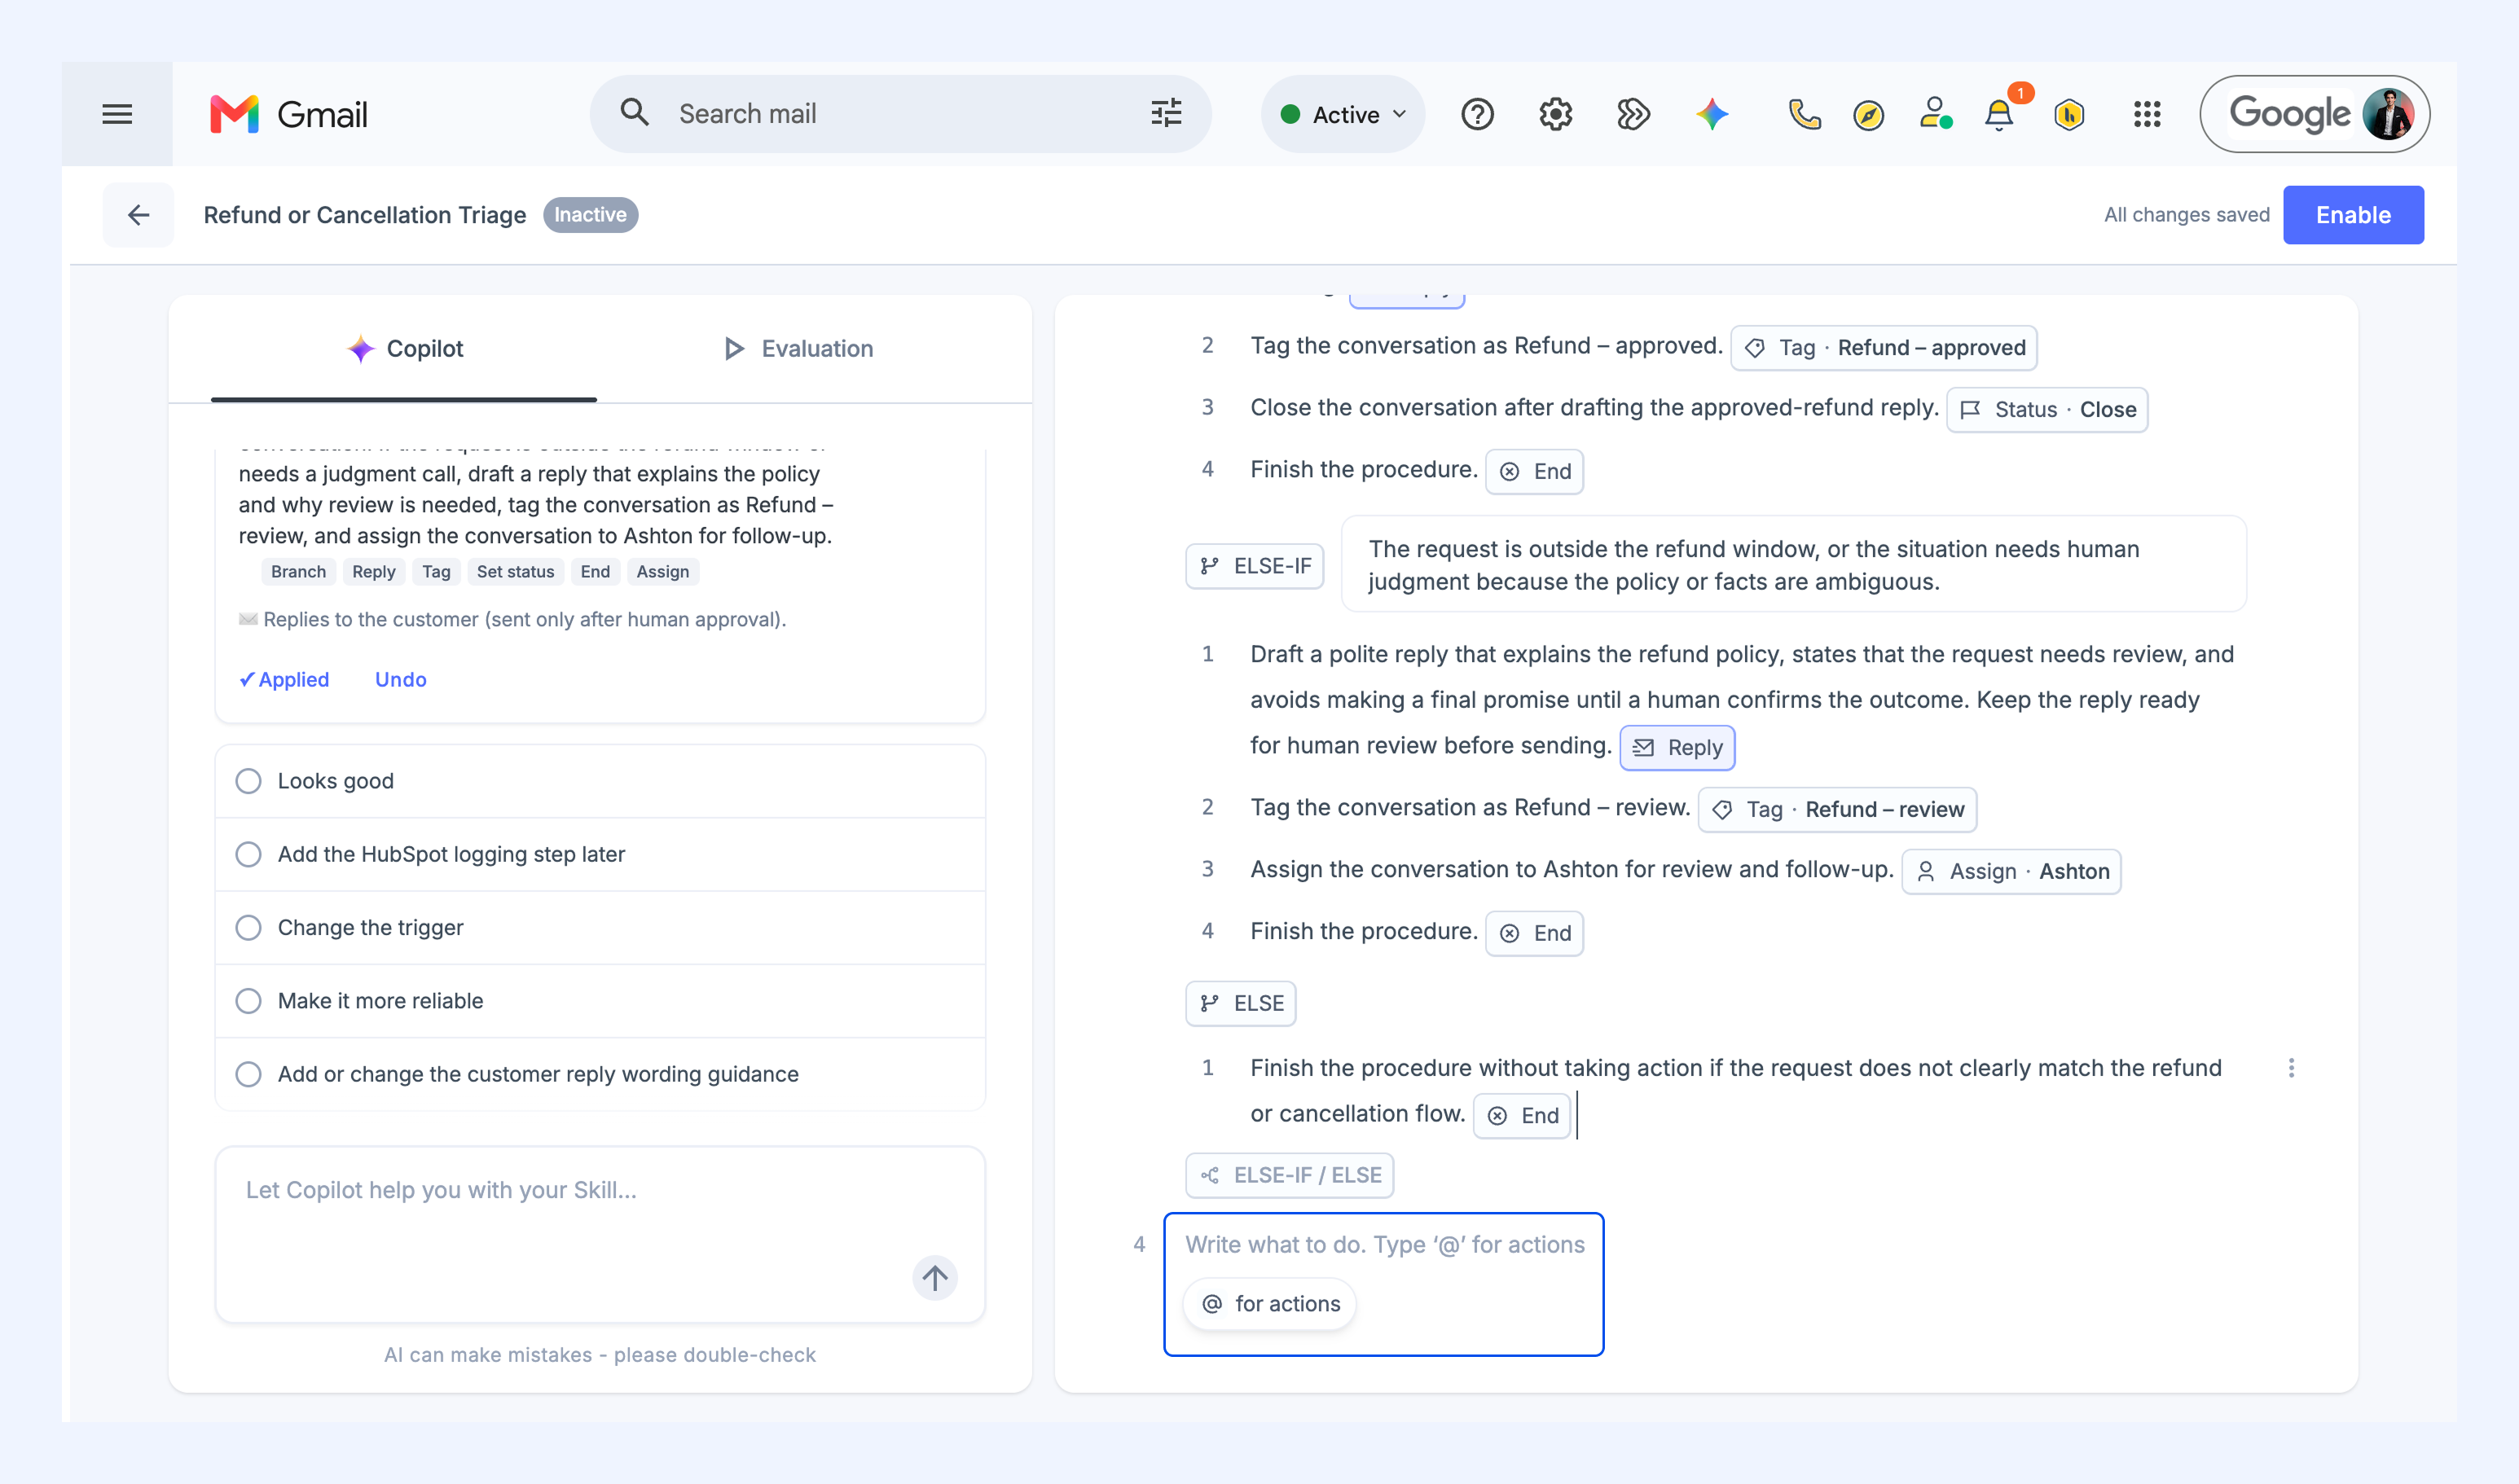
- Steps: What the Skill does in response.
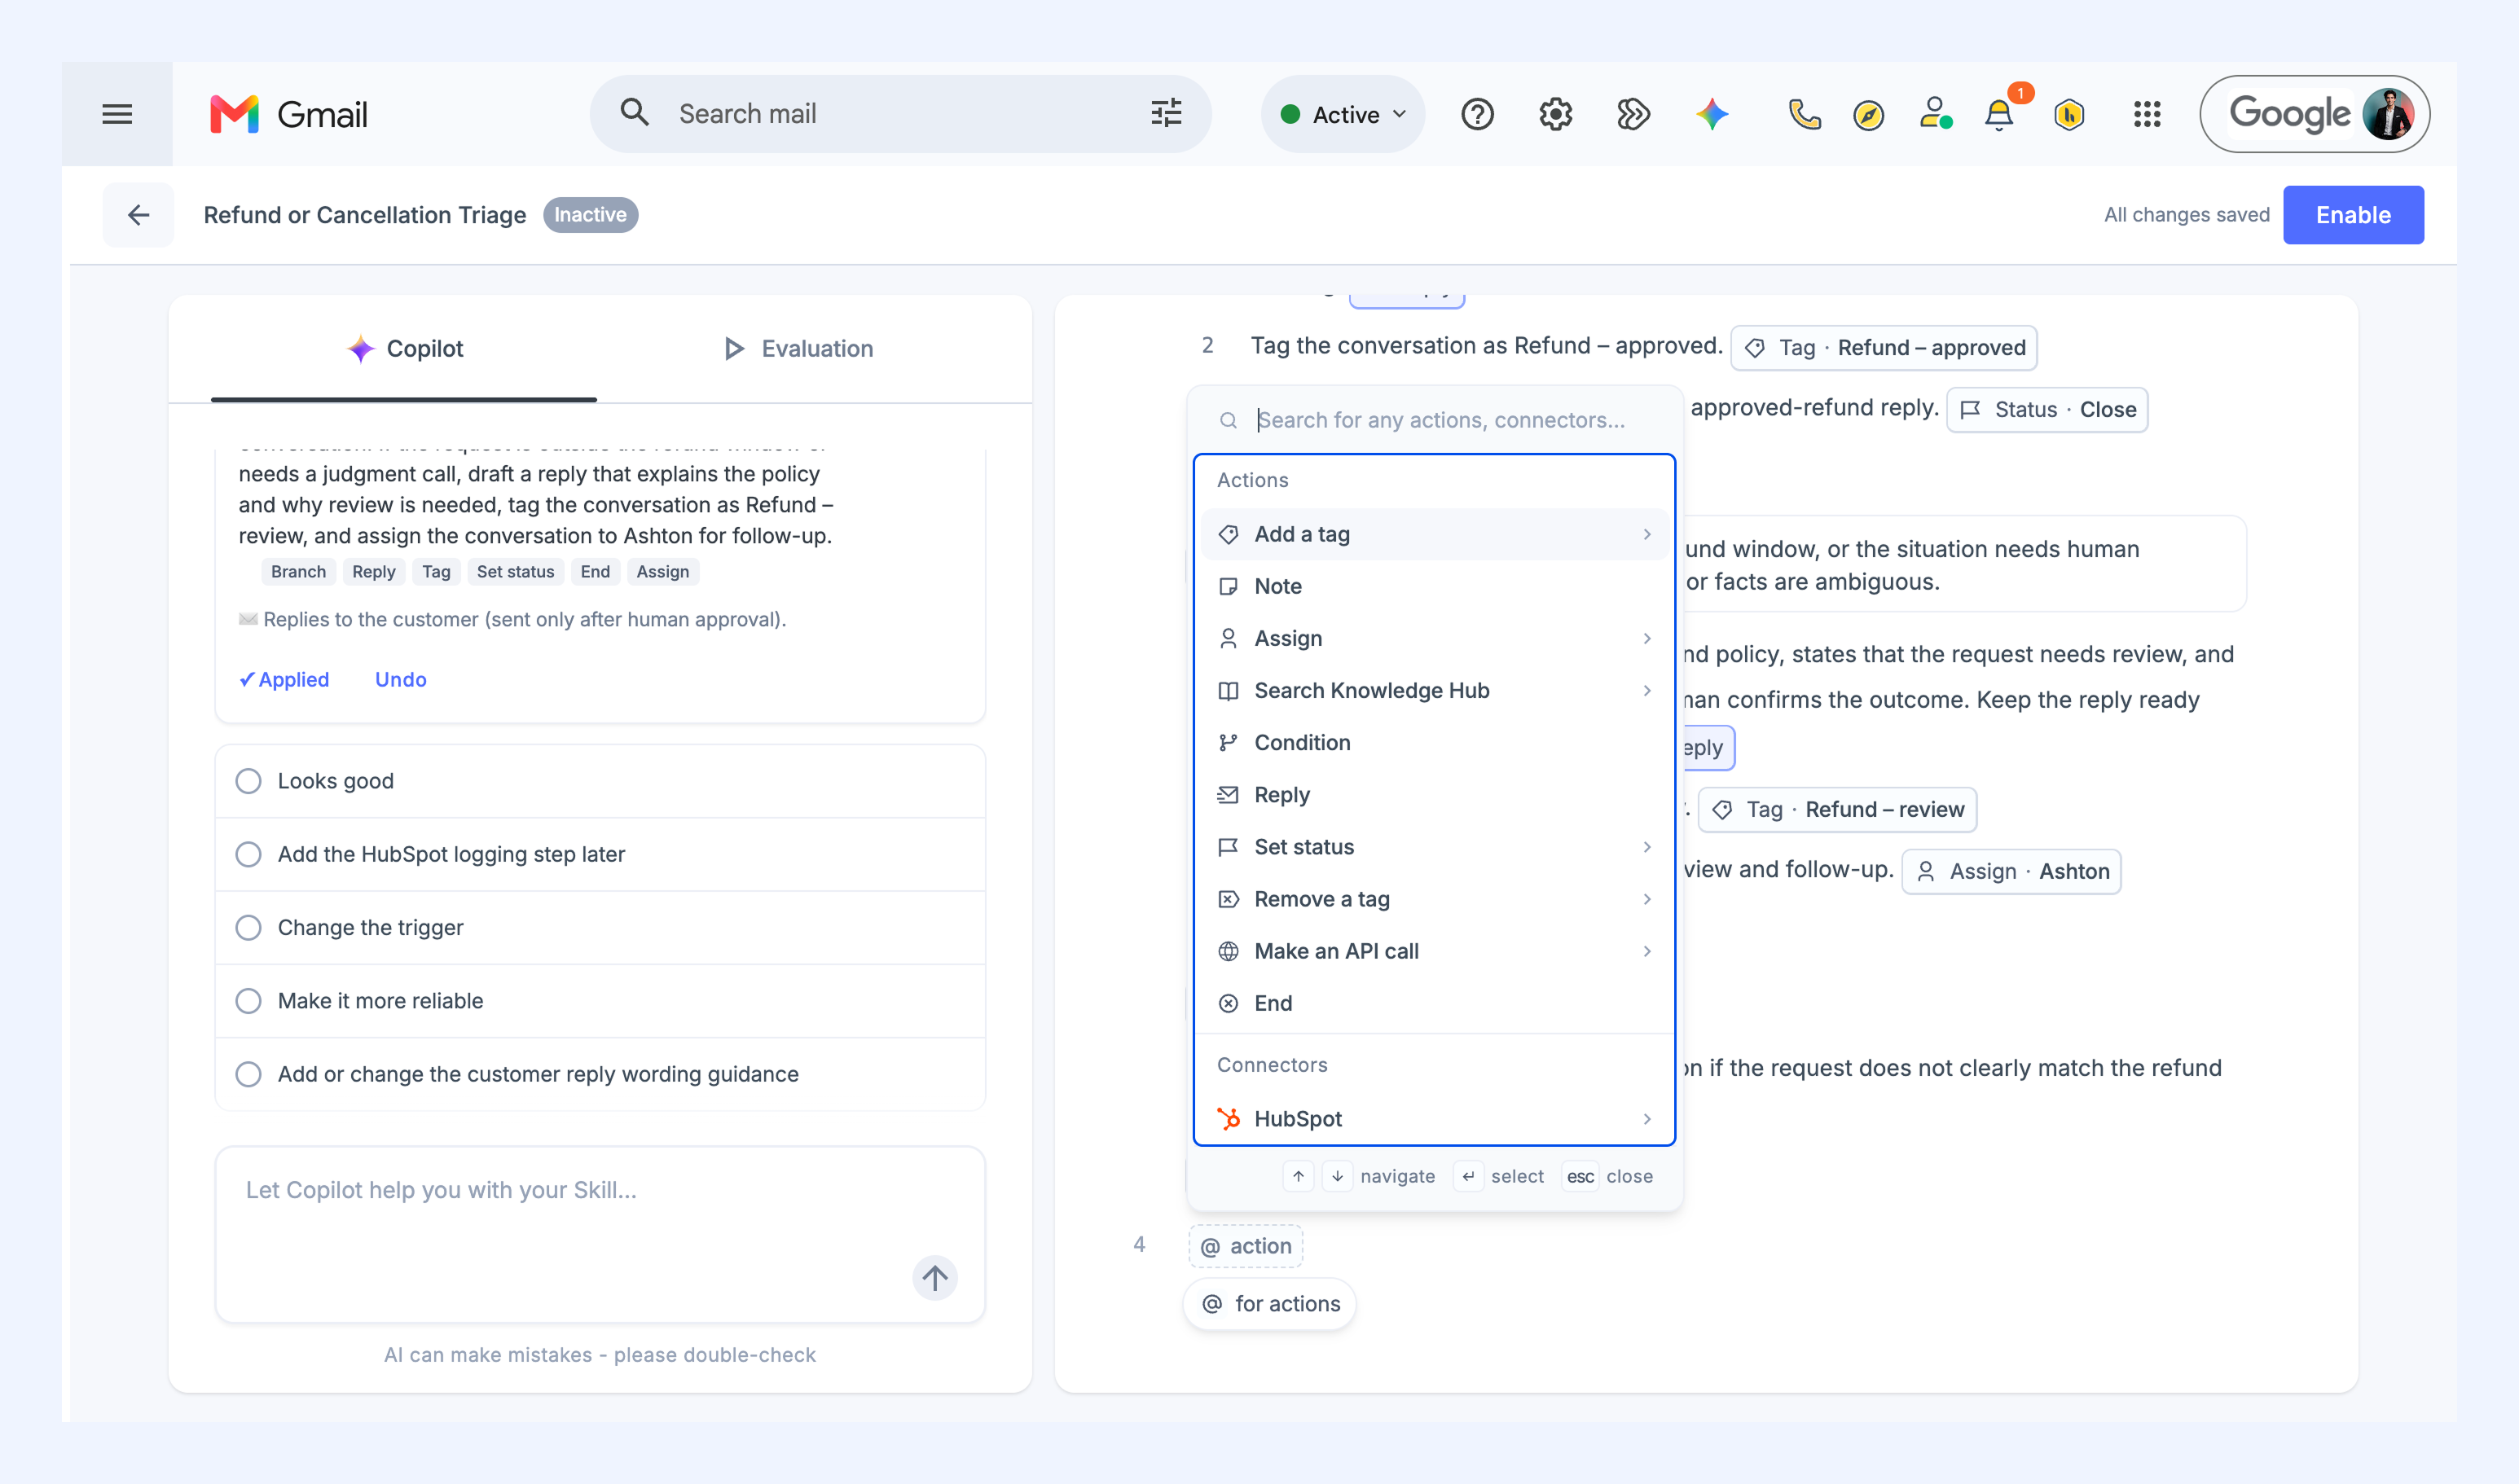
Available actions
To add an action for the Skill, click for actions, then choose one from the list.
Action | What it does |
| Add a tag | Applies a tag. |
| Remove a tag | Removes a tag. |
| Note | Adds an internal note. |
| Assign | Assigns the conversation to a member. |
| Search Knowledge Hub | Looks up your configured knowledge sources to inform the next step. |
| Condition | Chooses which path the Skill takes. |
| Reply | Composes and sends a reply. |
| Set status | Changes the conversation status. |
| Make an API call | Calls an external system over the web. |
| HubSpot | Syncs customer, company, and ticket data with Hiver. |
| End | Stops the Skill for the conversation. |
Testing a Skill
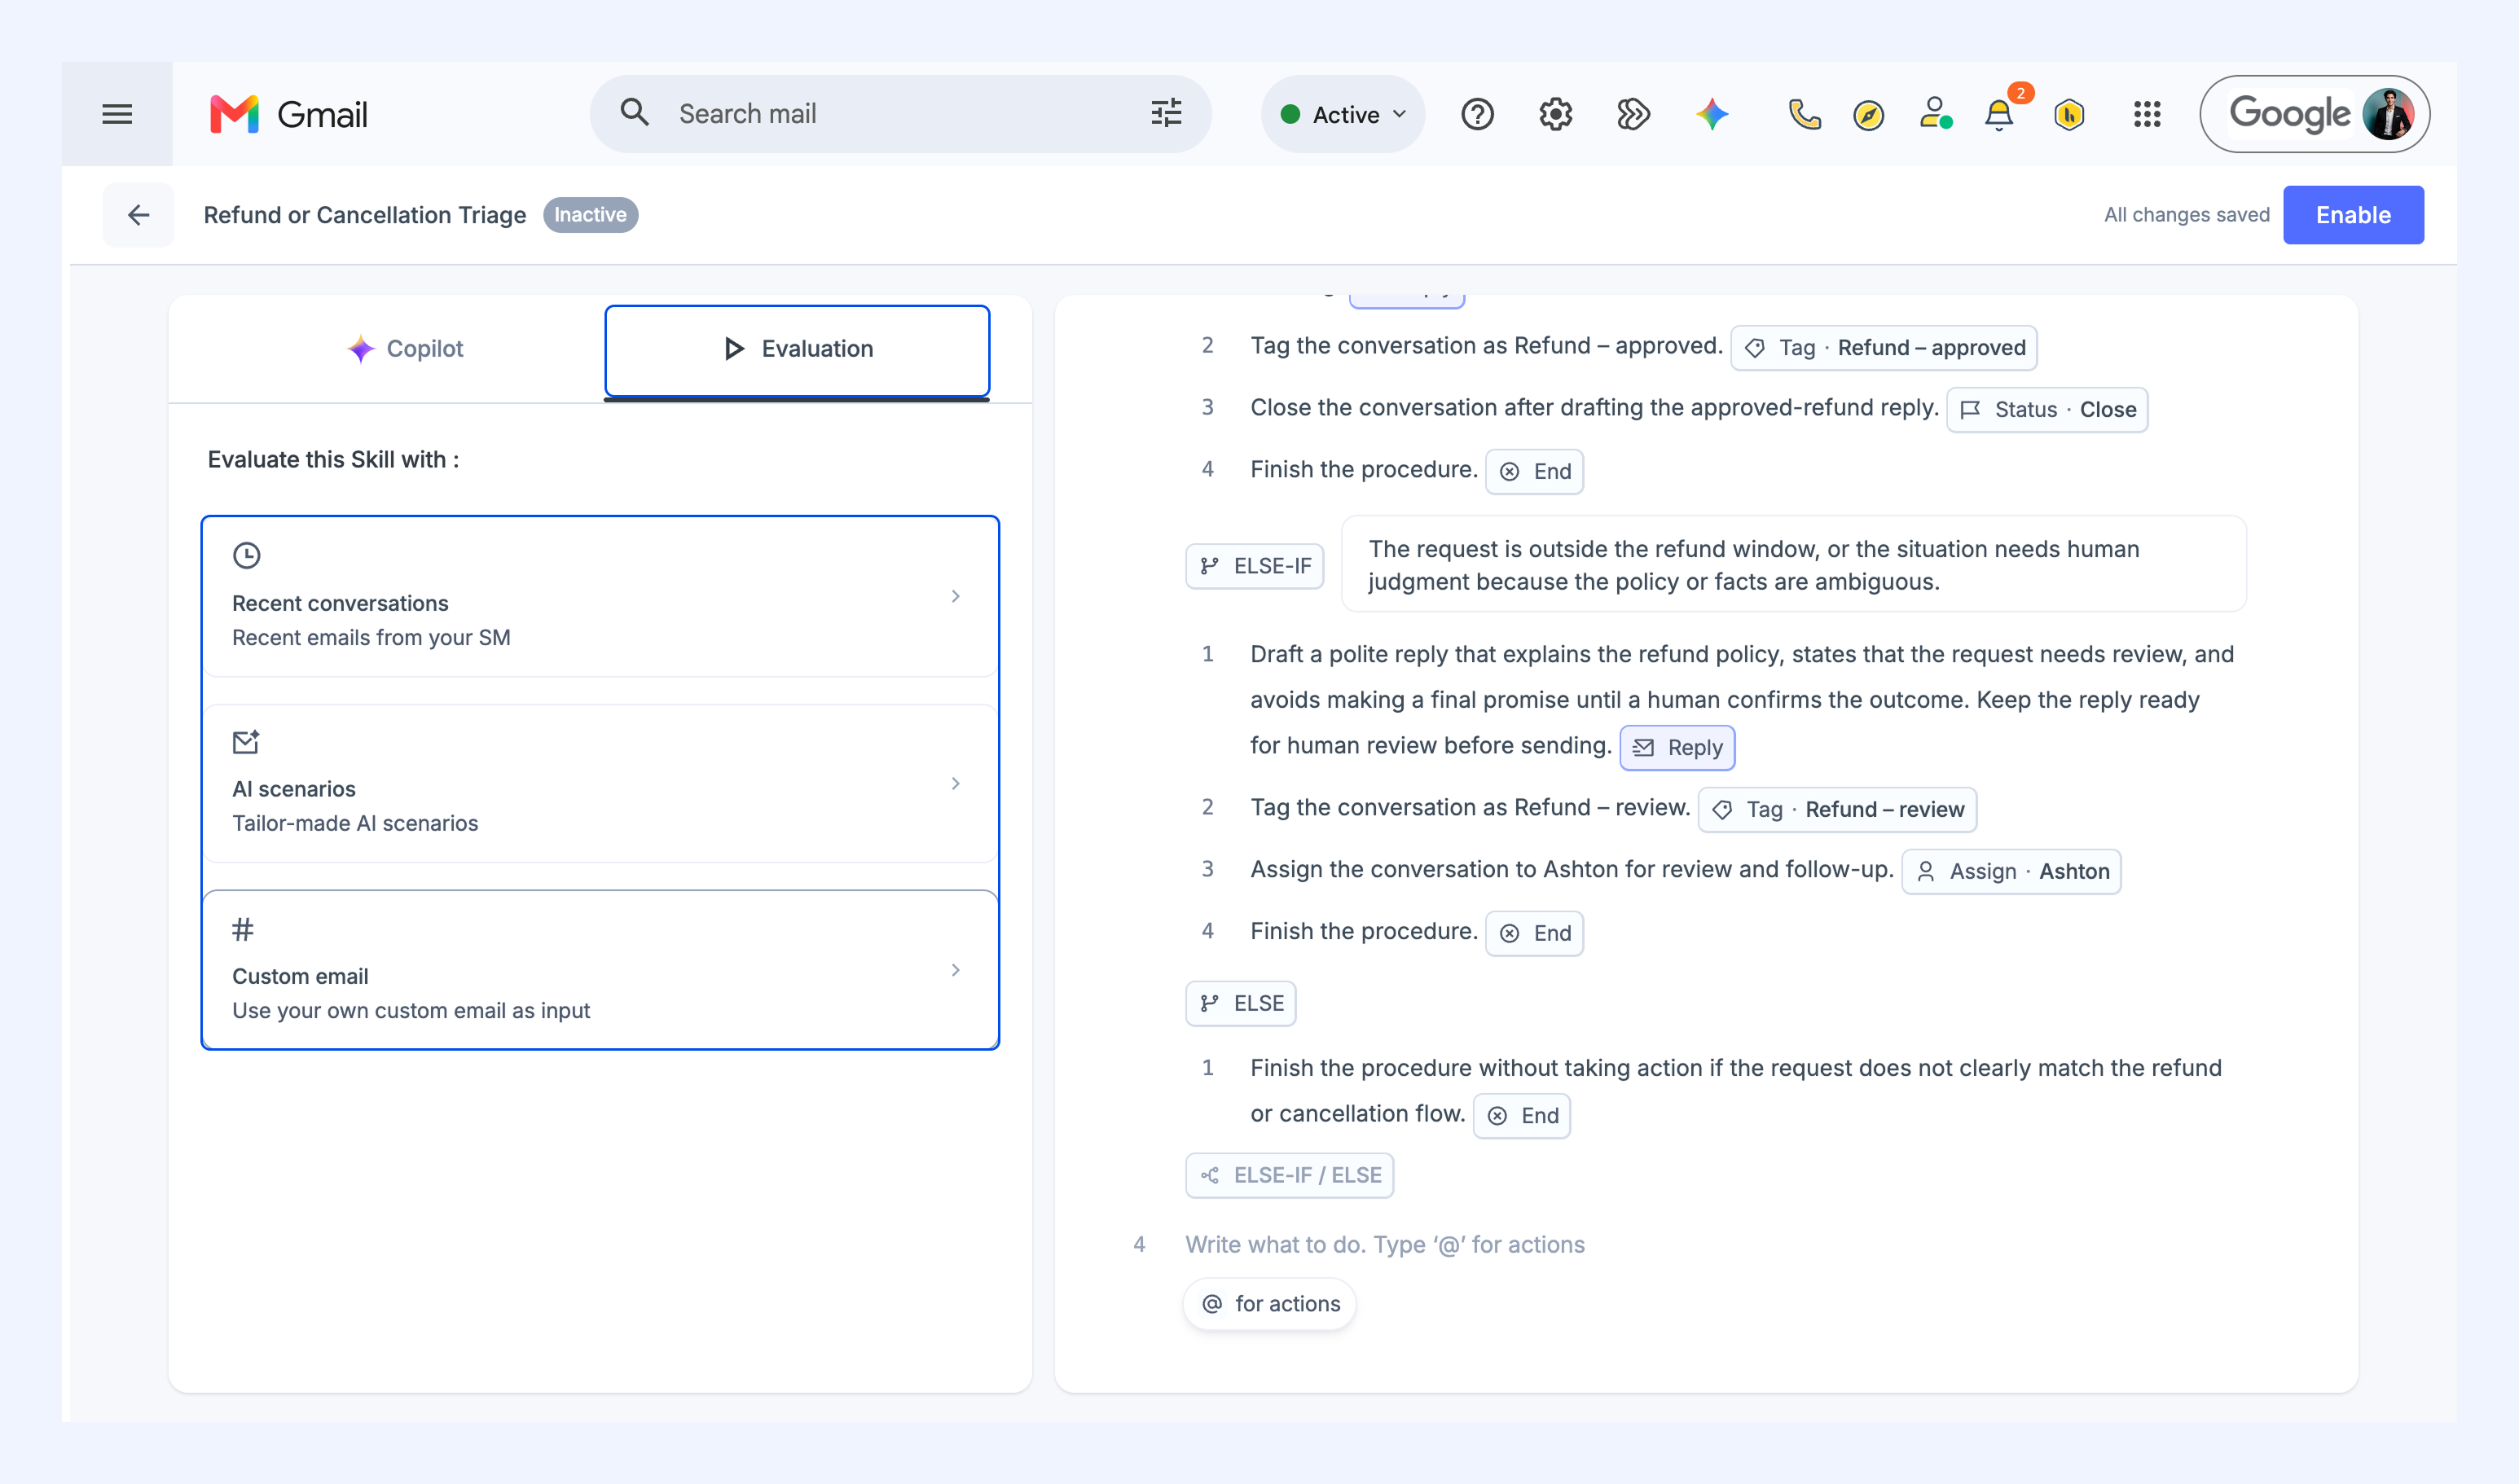
To evaluate a Skill on a conversation, go to Evaluation and choose an option:
- A recent conversation from your Shared Inbox
- A conversation Hiver generates for you
- An email you write yourself
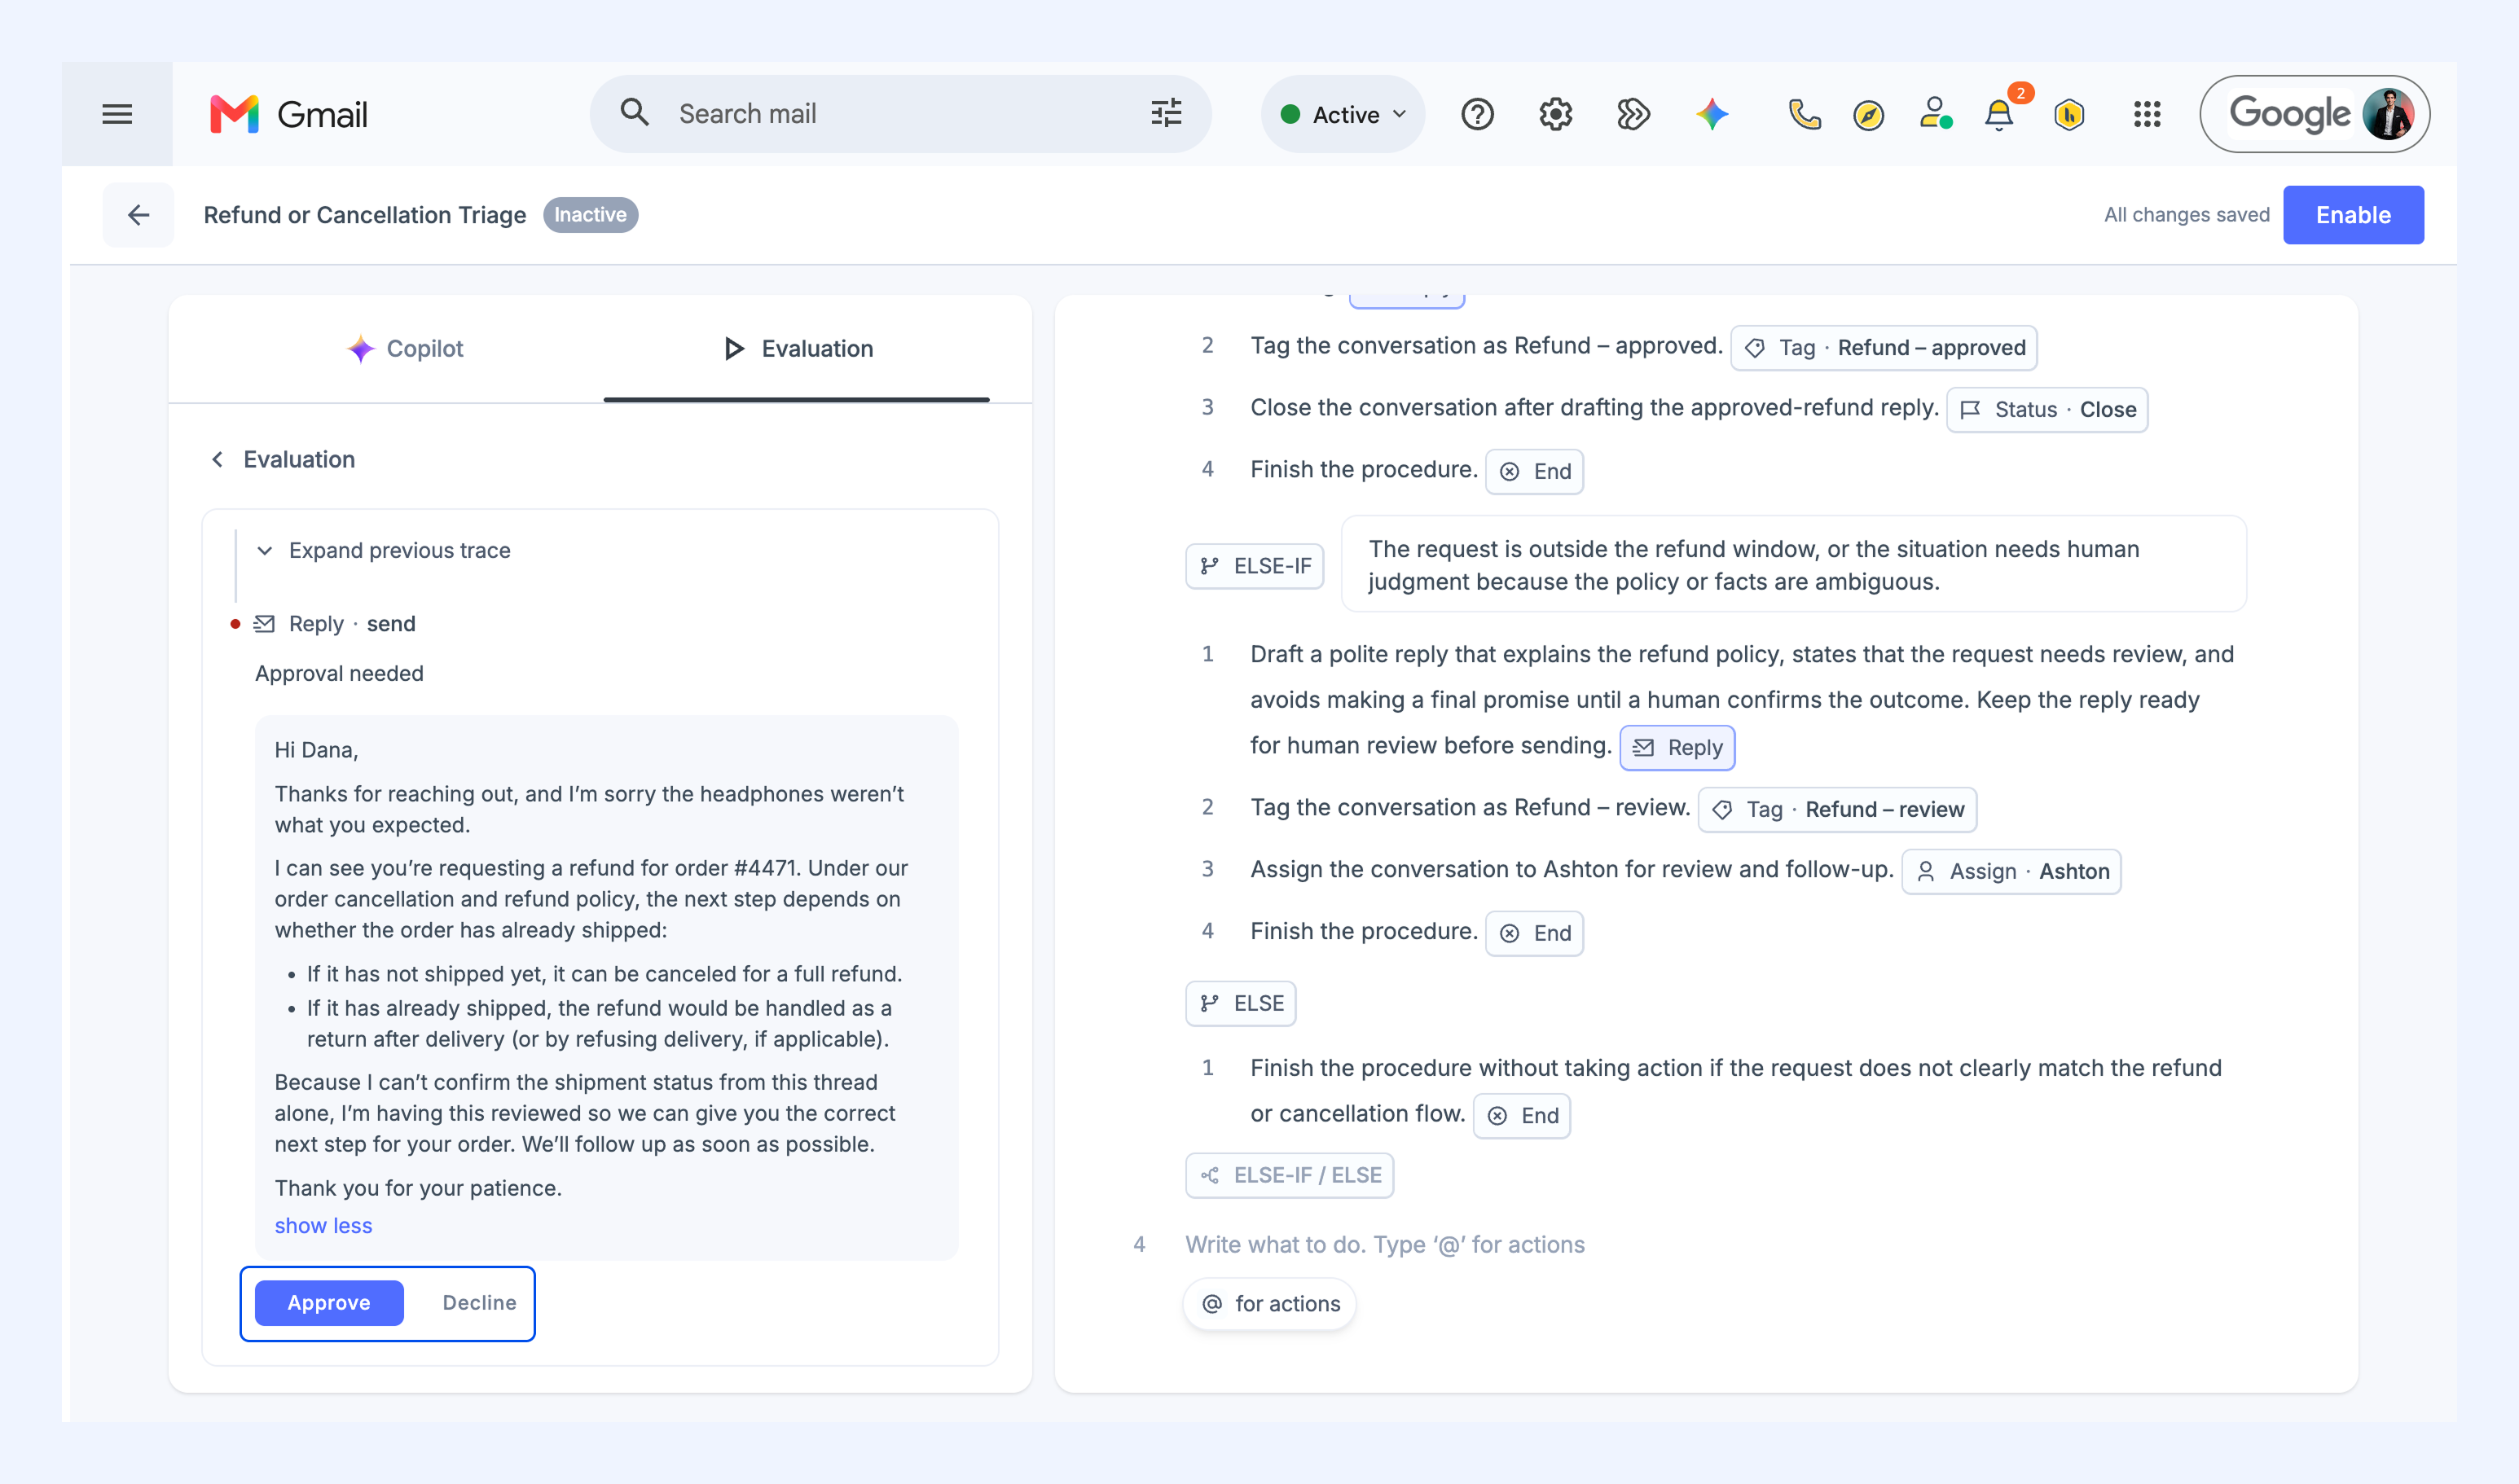
Hiver shows what the Skill decided. If an action needs approval, the run pauses so you can approve or edit it first.
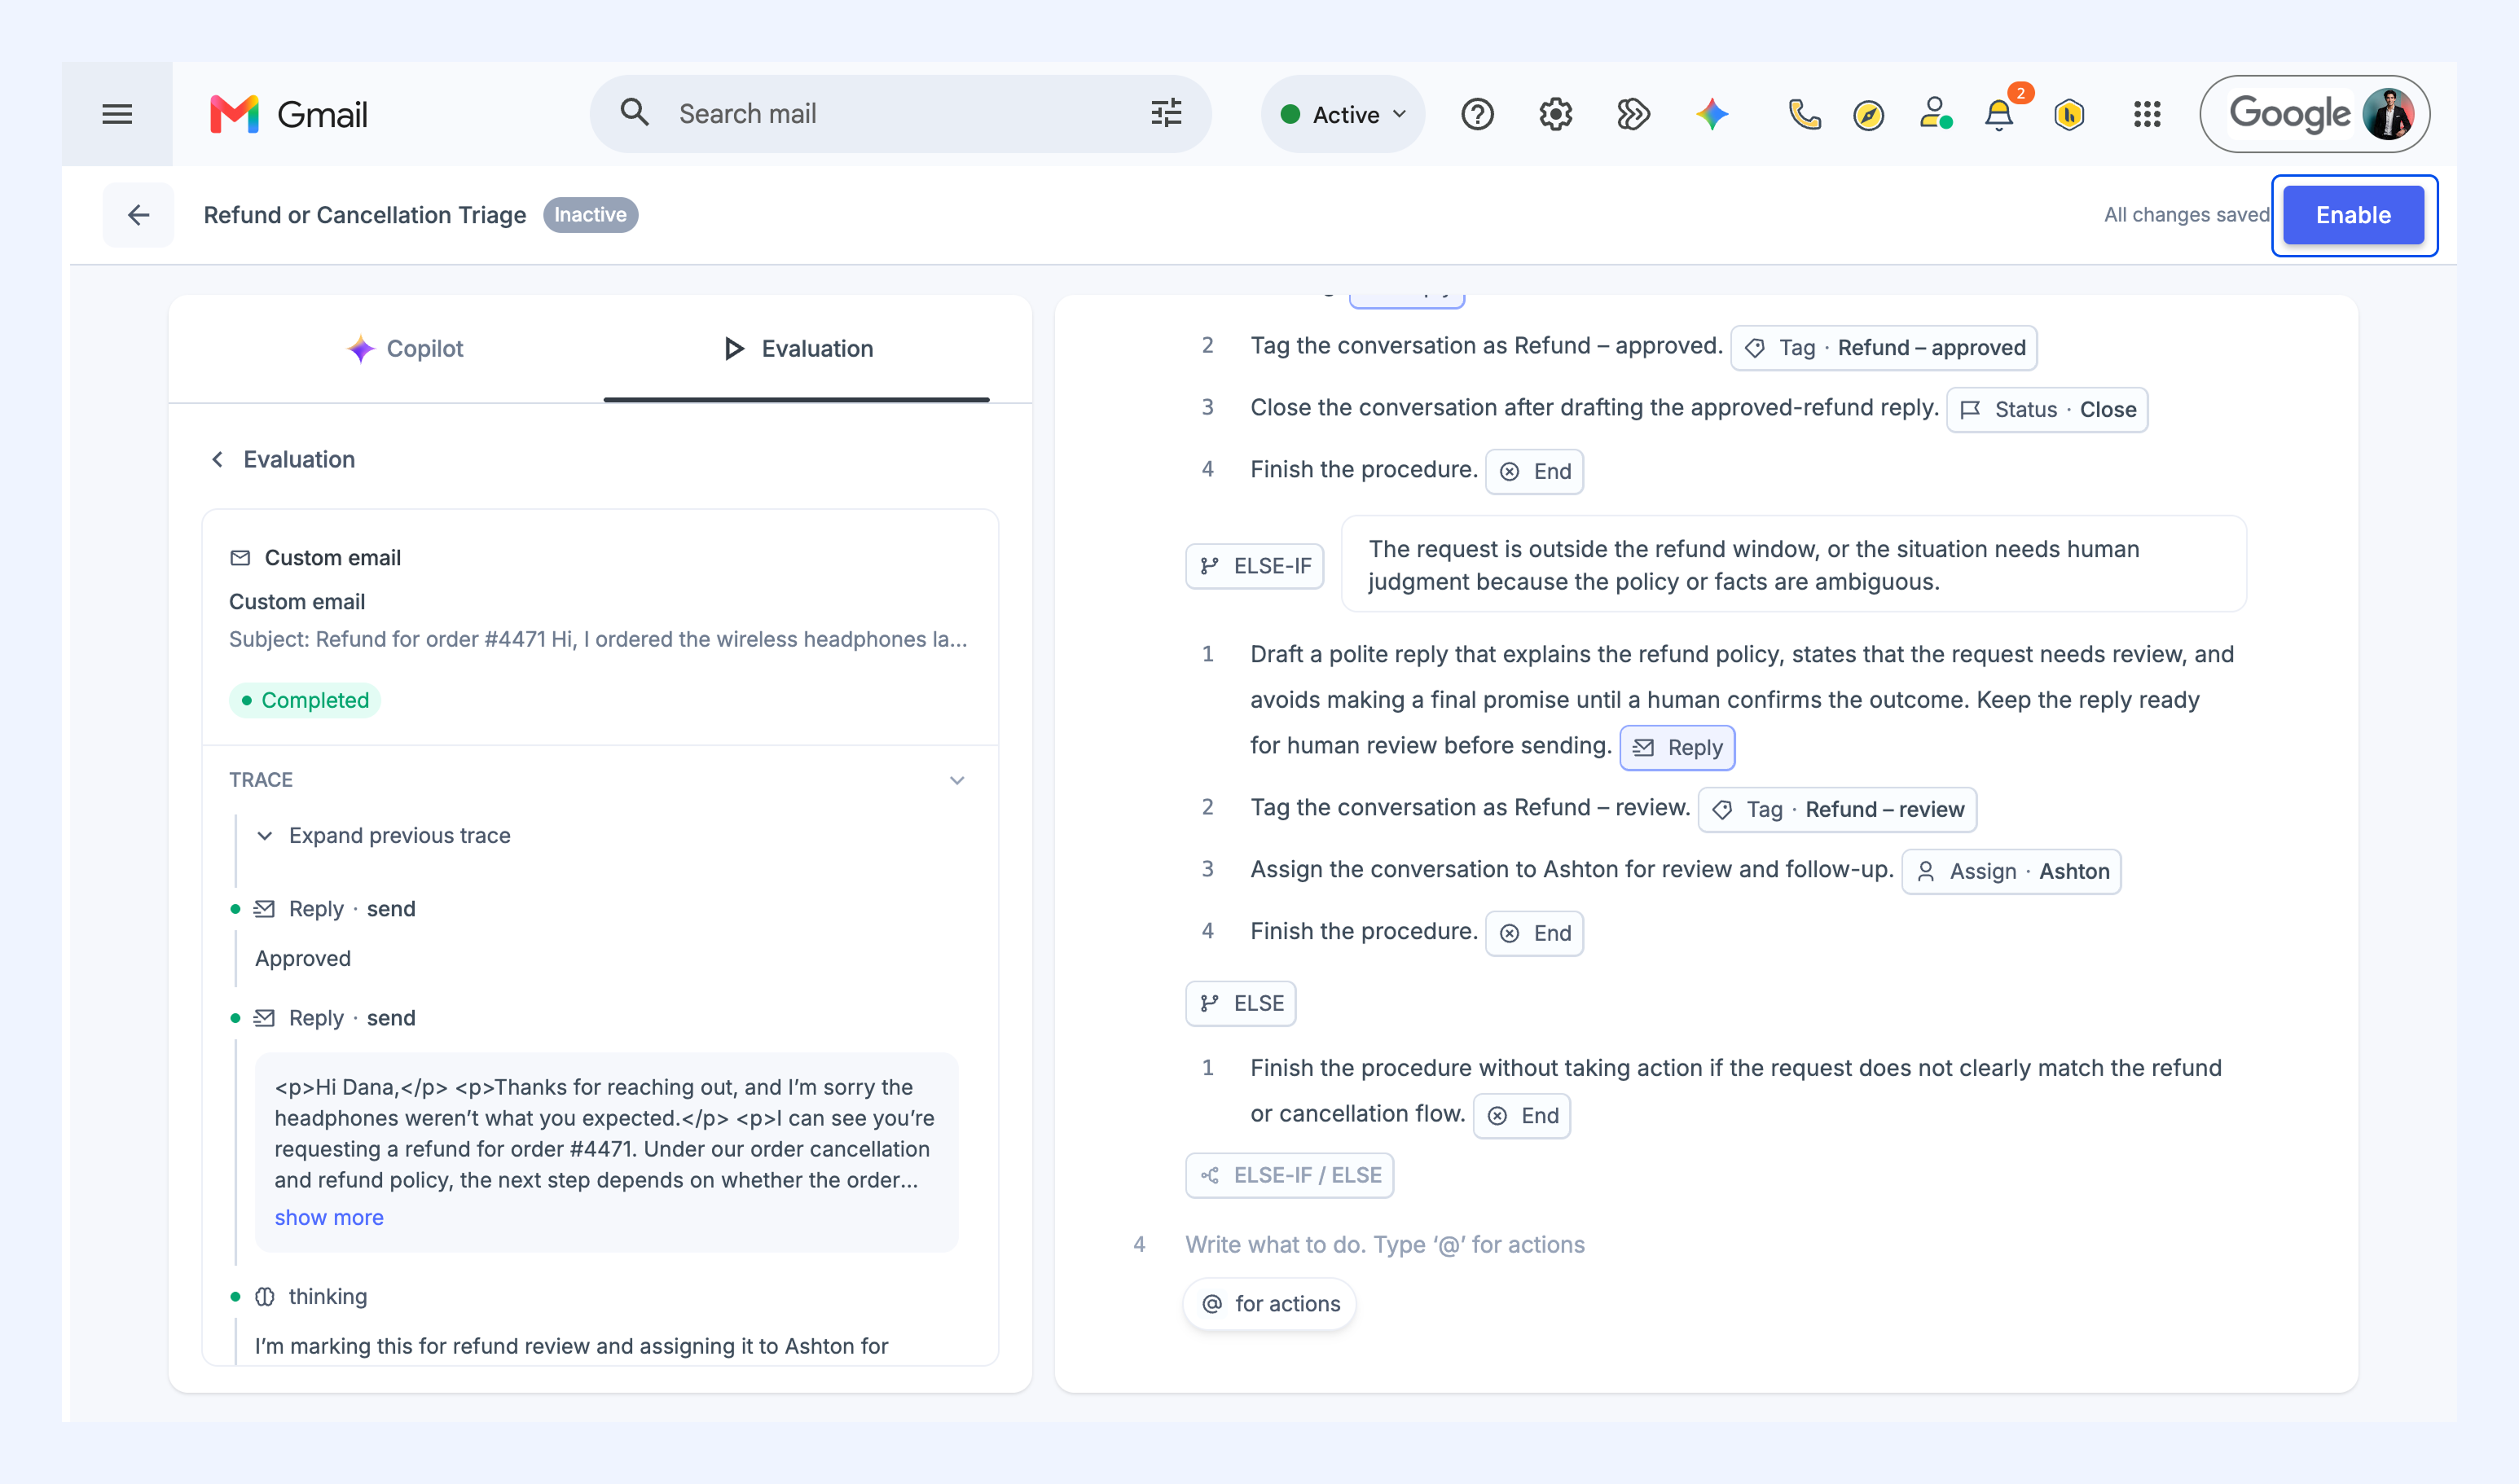
Enabling a Skill
1. Click Enable.
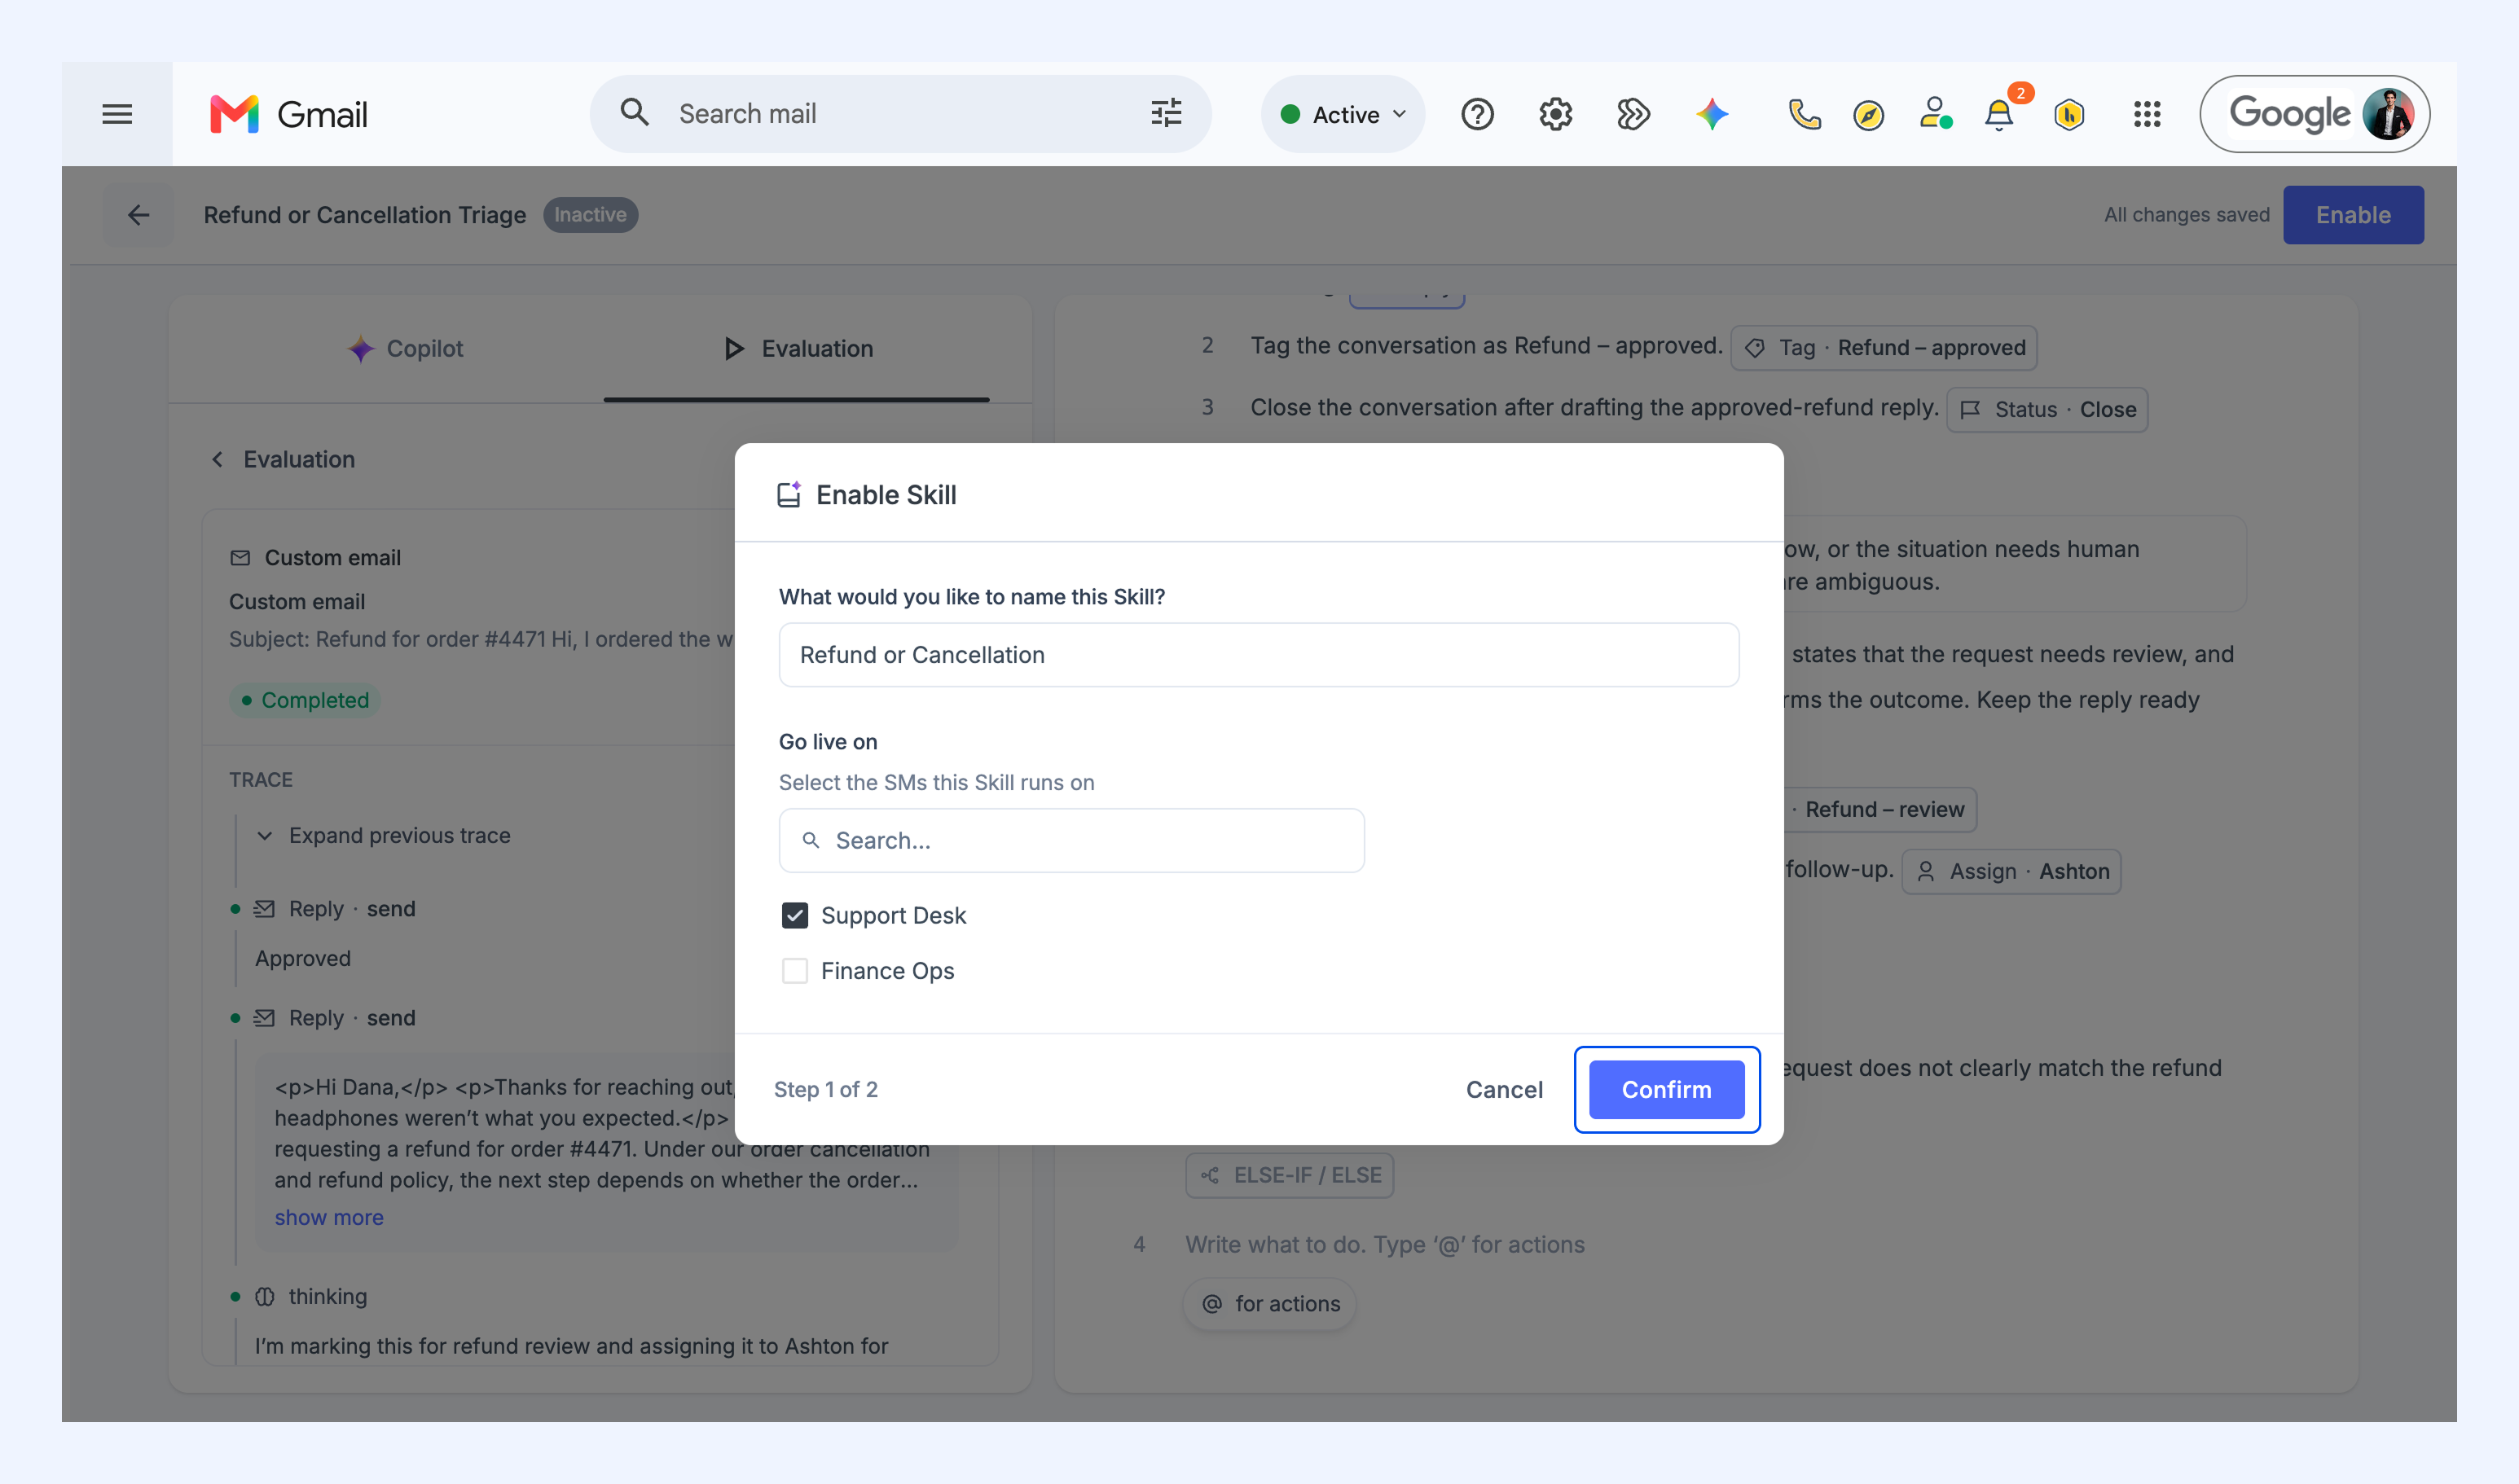
2. Name the Skill and select the Shared Inboxes it should run on, then click Confirm.
3. Review the checks and validations, then click Enable.
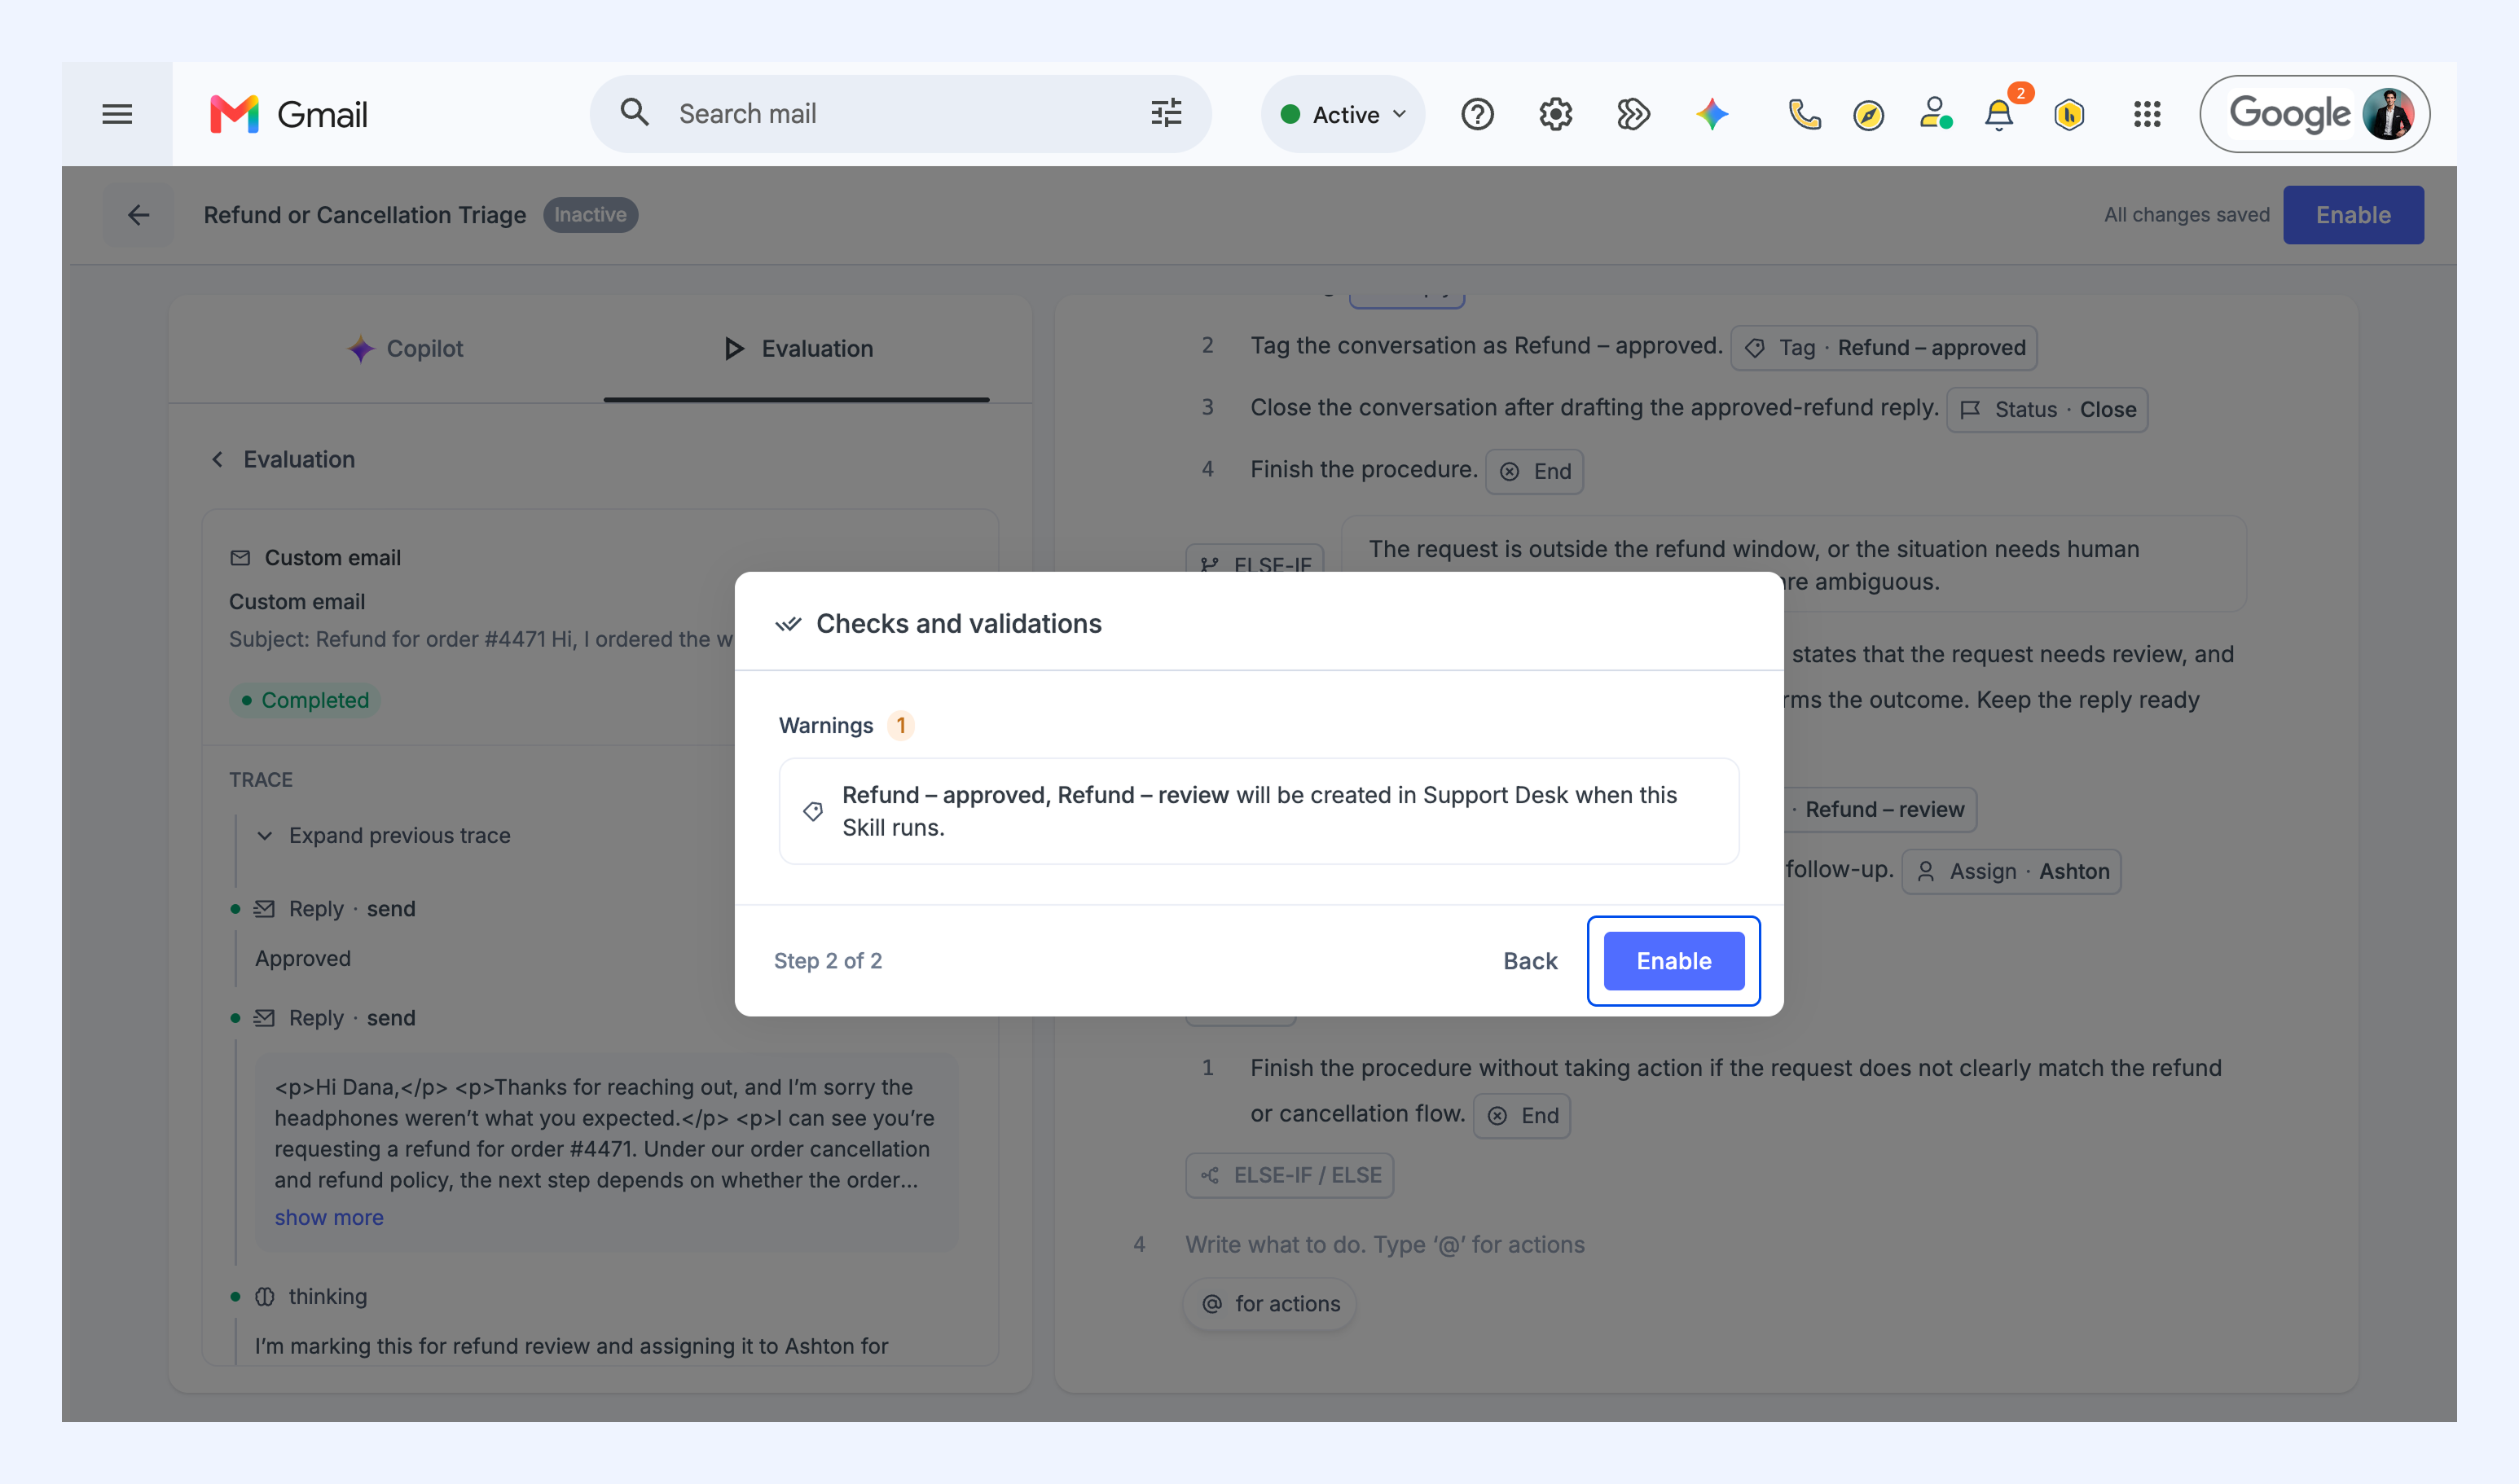
Your Skill is now live and runs on new conversations in the Shared Inboxes you selected.
Reviewing Skill runs
Every time a Skill acts on a conversation, Hiver records it as a run. You can review a Skill’s runs to check whether it’s handling the right conversations and taking the actions you expect. You can also find runs that failed and the replies waiting for approval.
The Skills list shows how often each Skill has run and when it last ran.
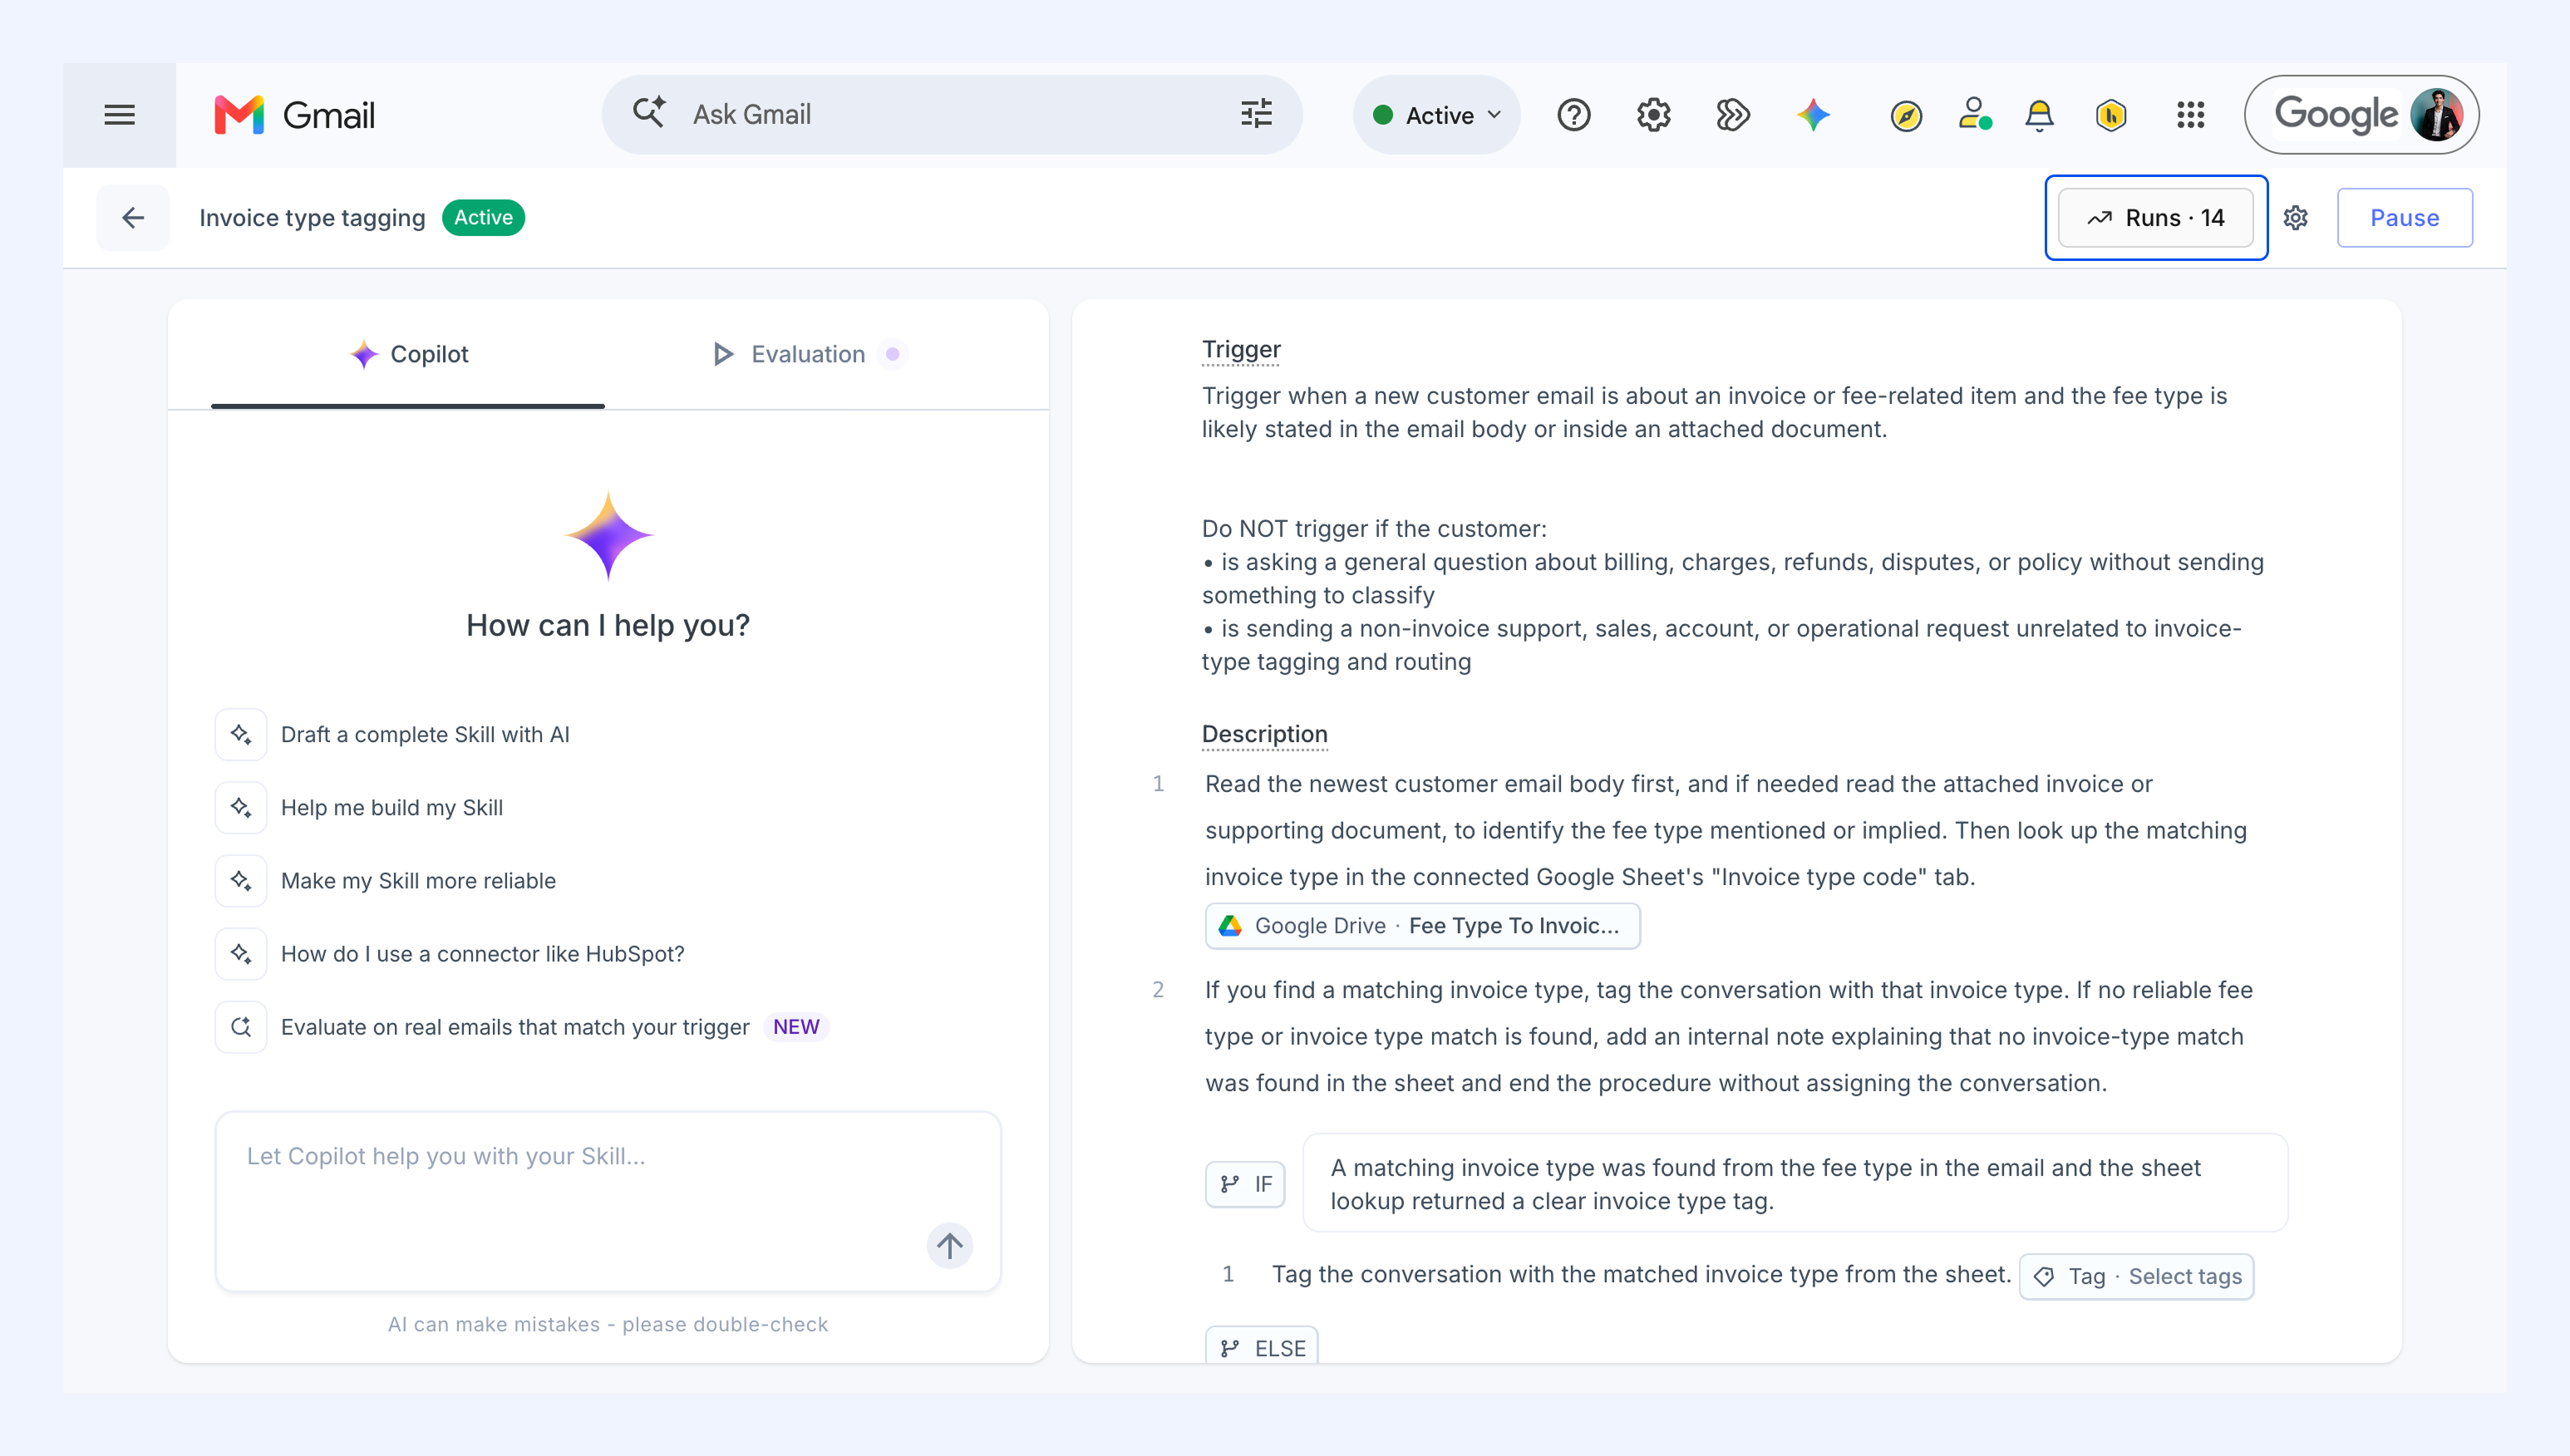
To review a Skill’s runs:
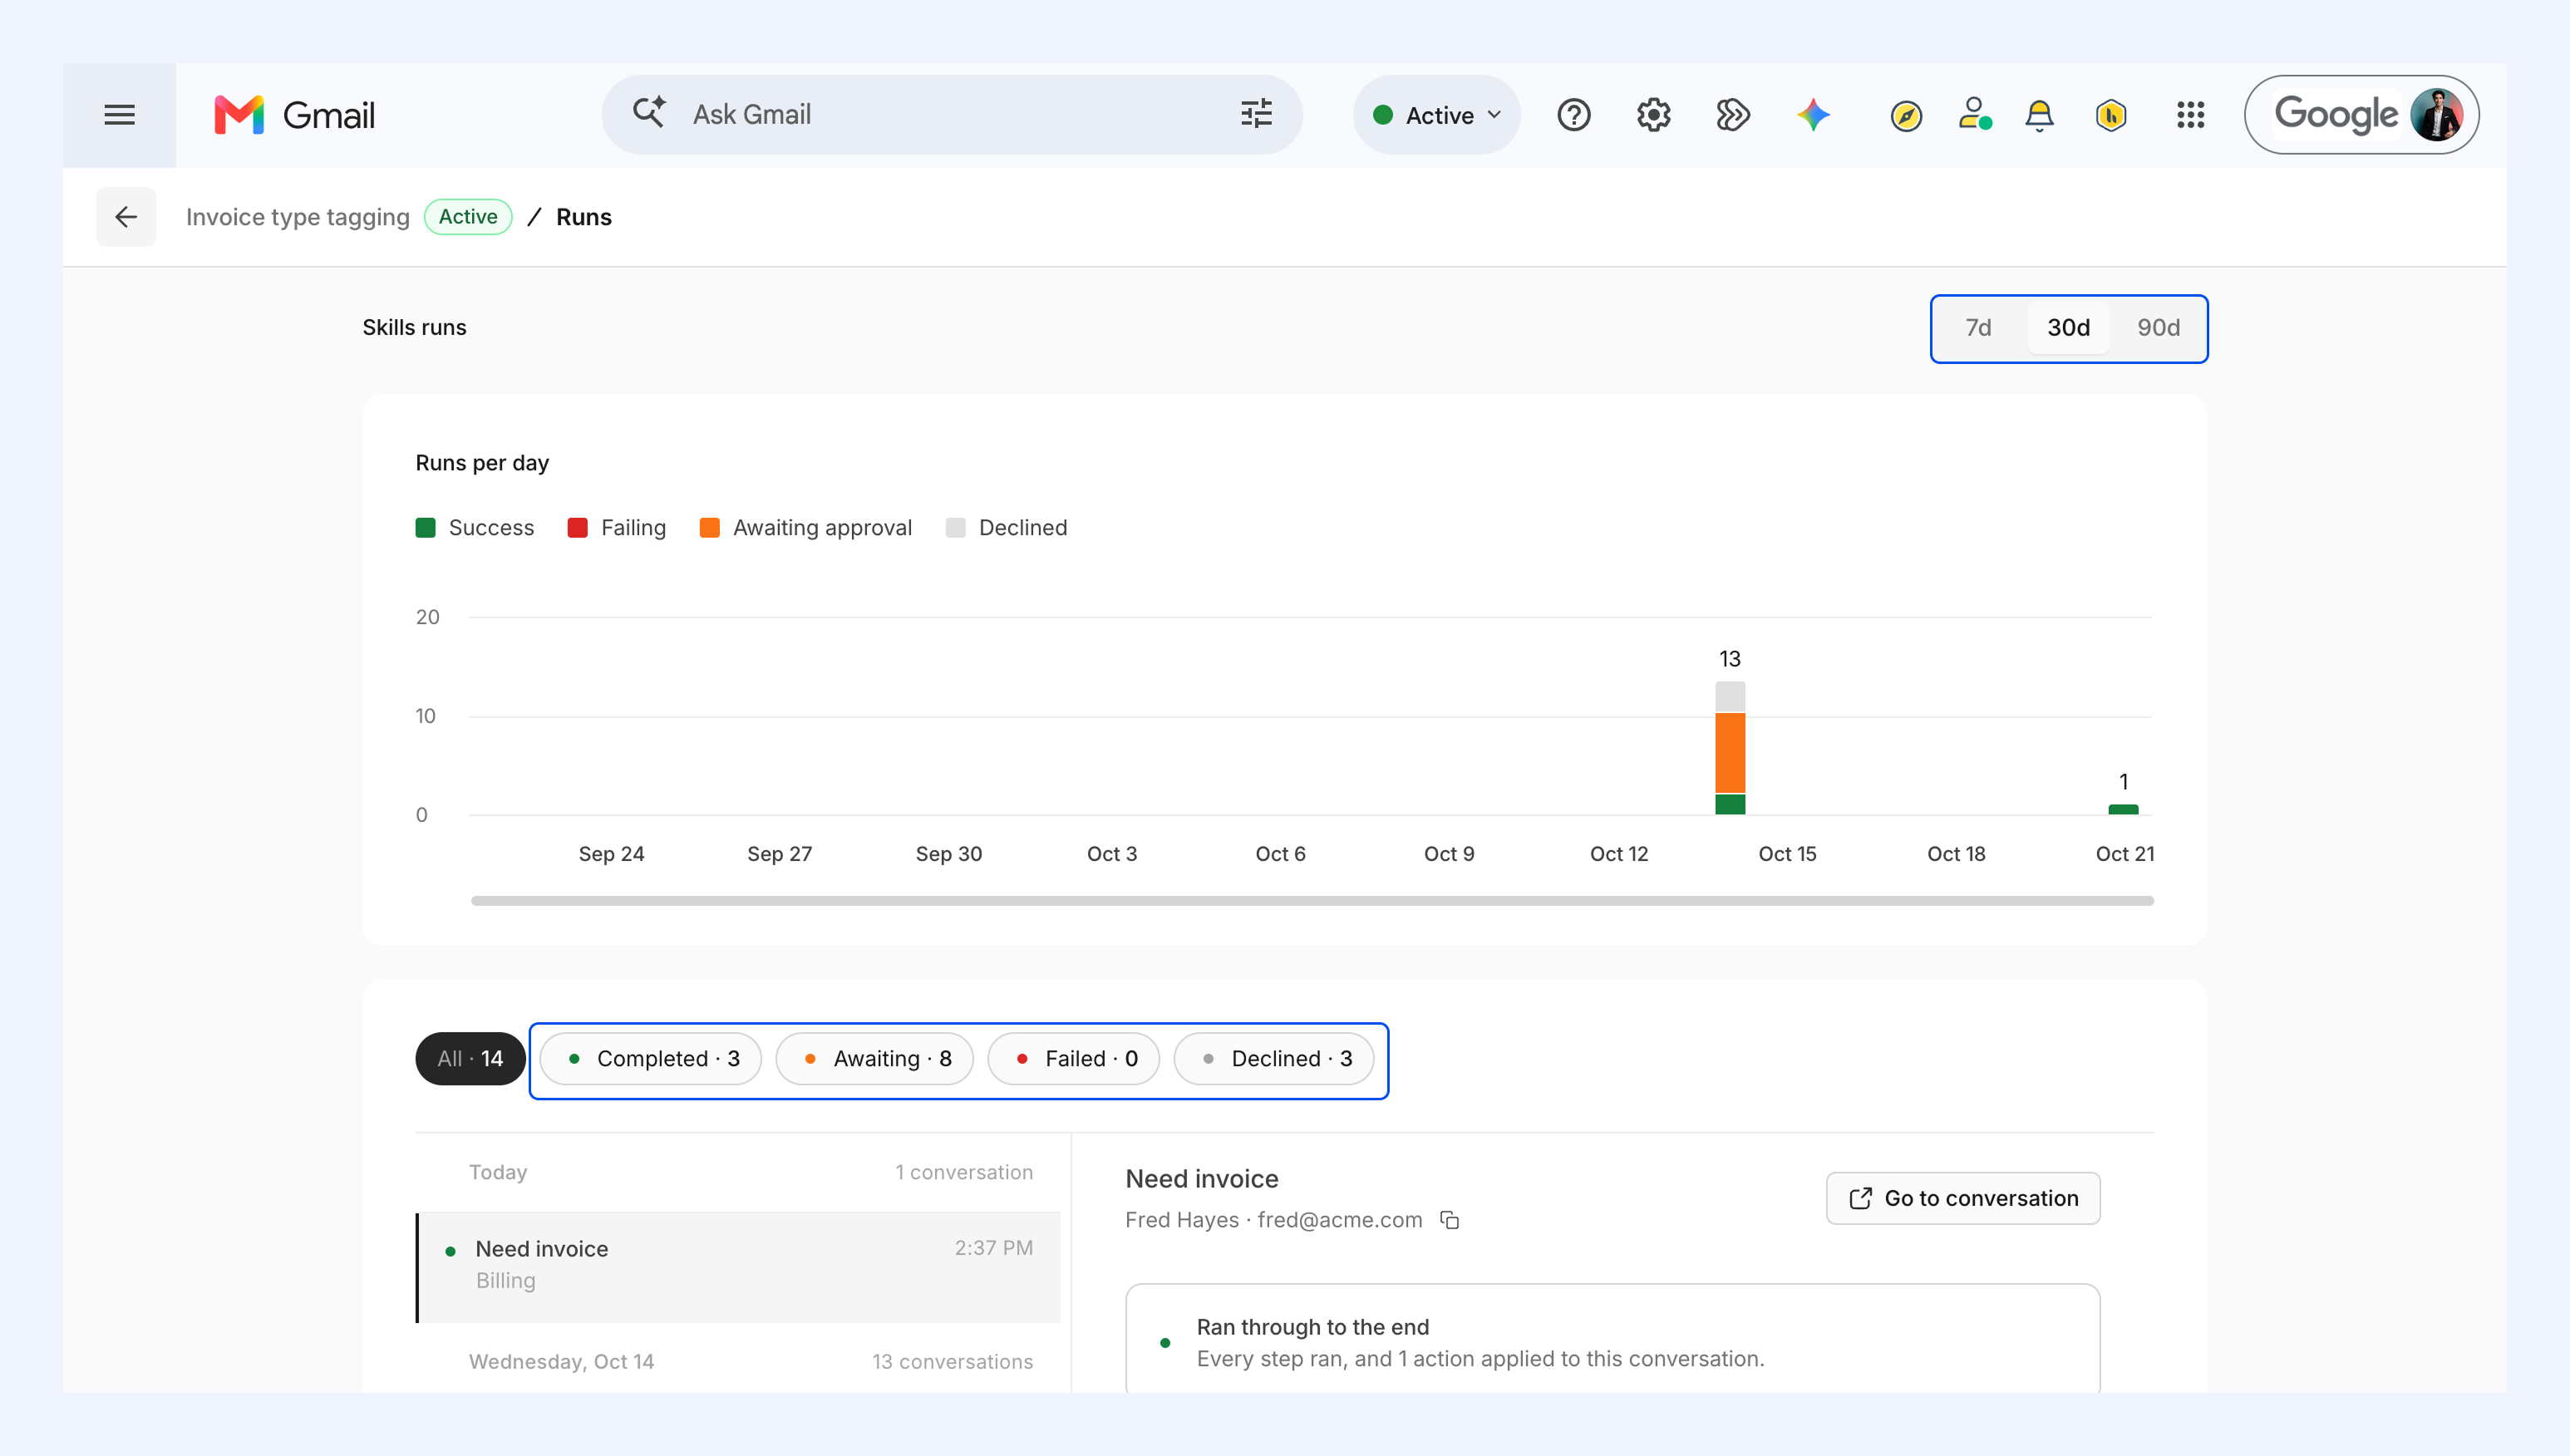
1. Open the Skill and click Runs. Choose the last 7, 30, or 90 days to see its daily activity and how those runs ended.
2. Filter runs by:
- Completed: The Skill ran every step and applied its actions.
- Awaiting: The Skill took an action that needs approval.
- Failed: The Skill didn’t complete because one of its steps ran into an error.
- Declined: A member declined an action that needed approval.
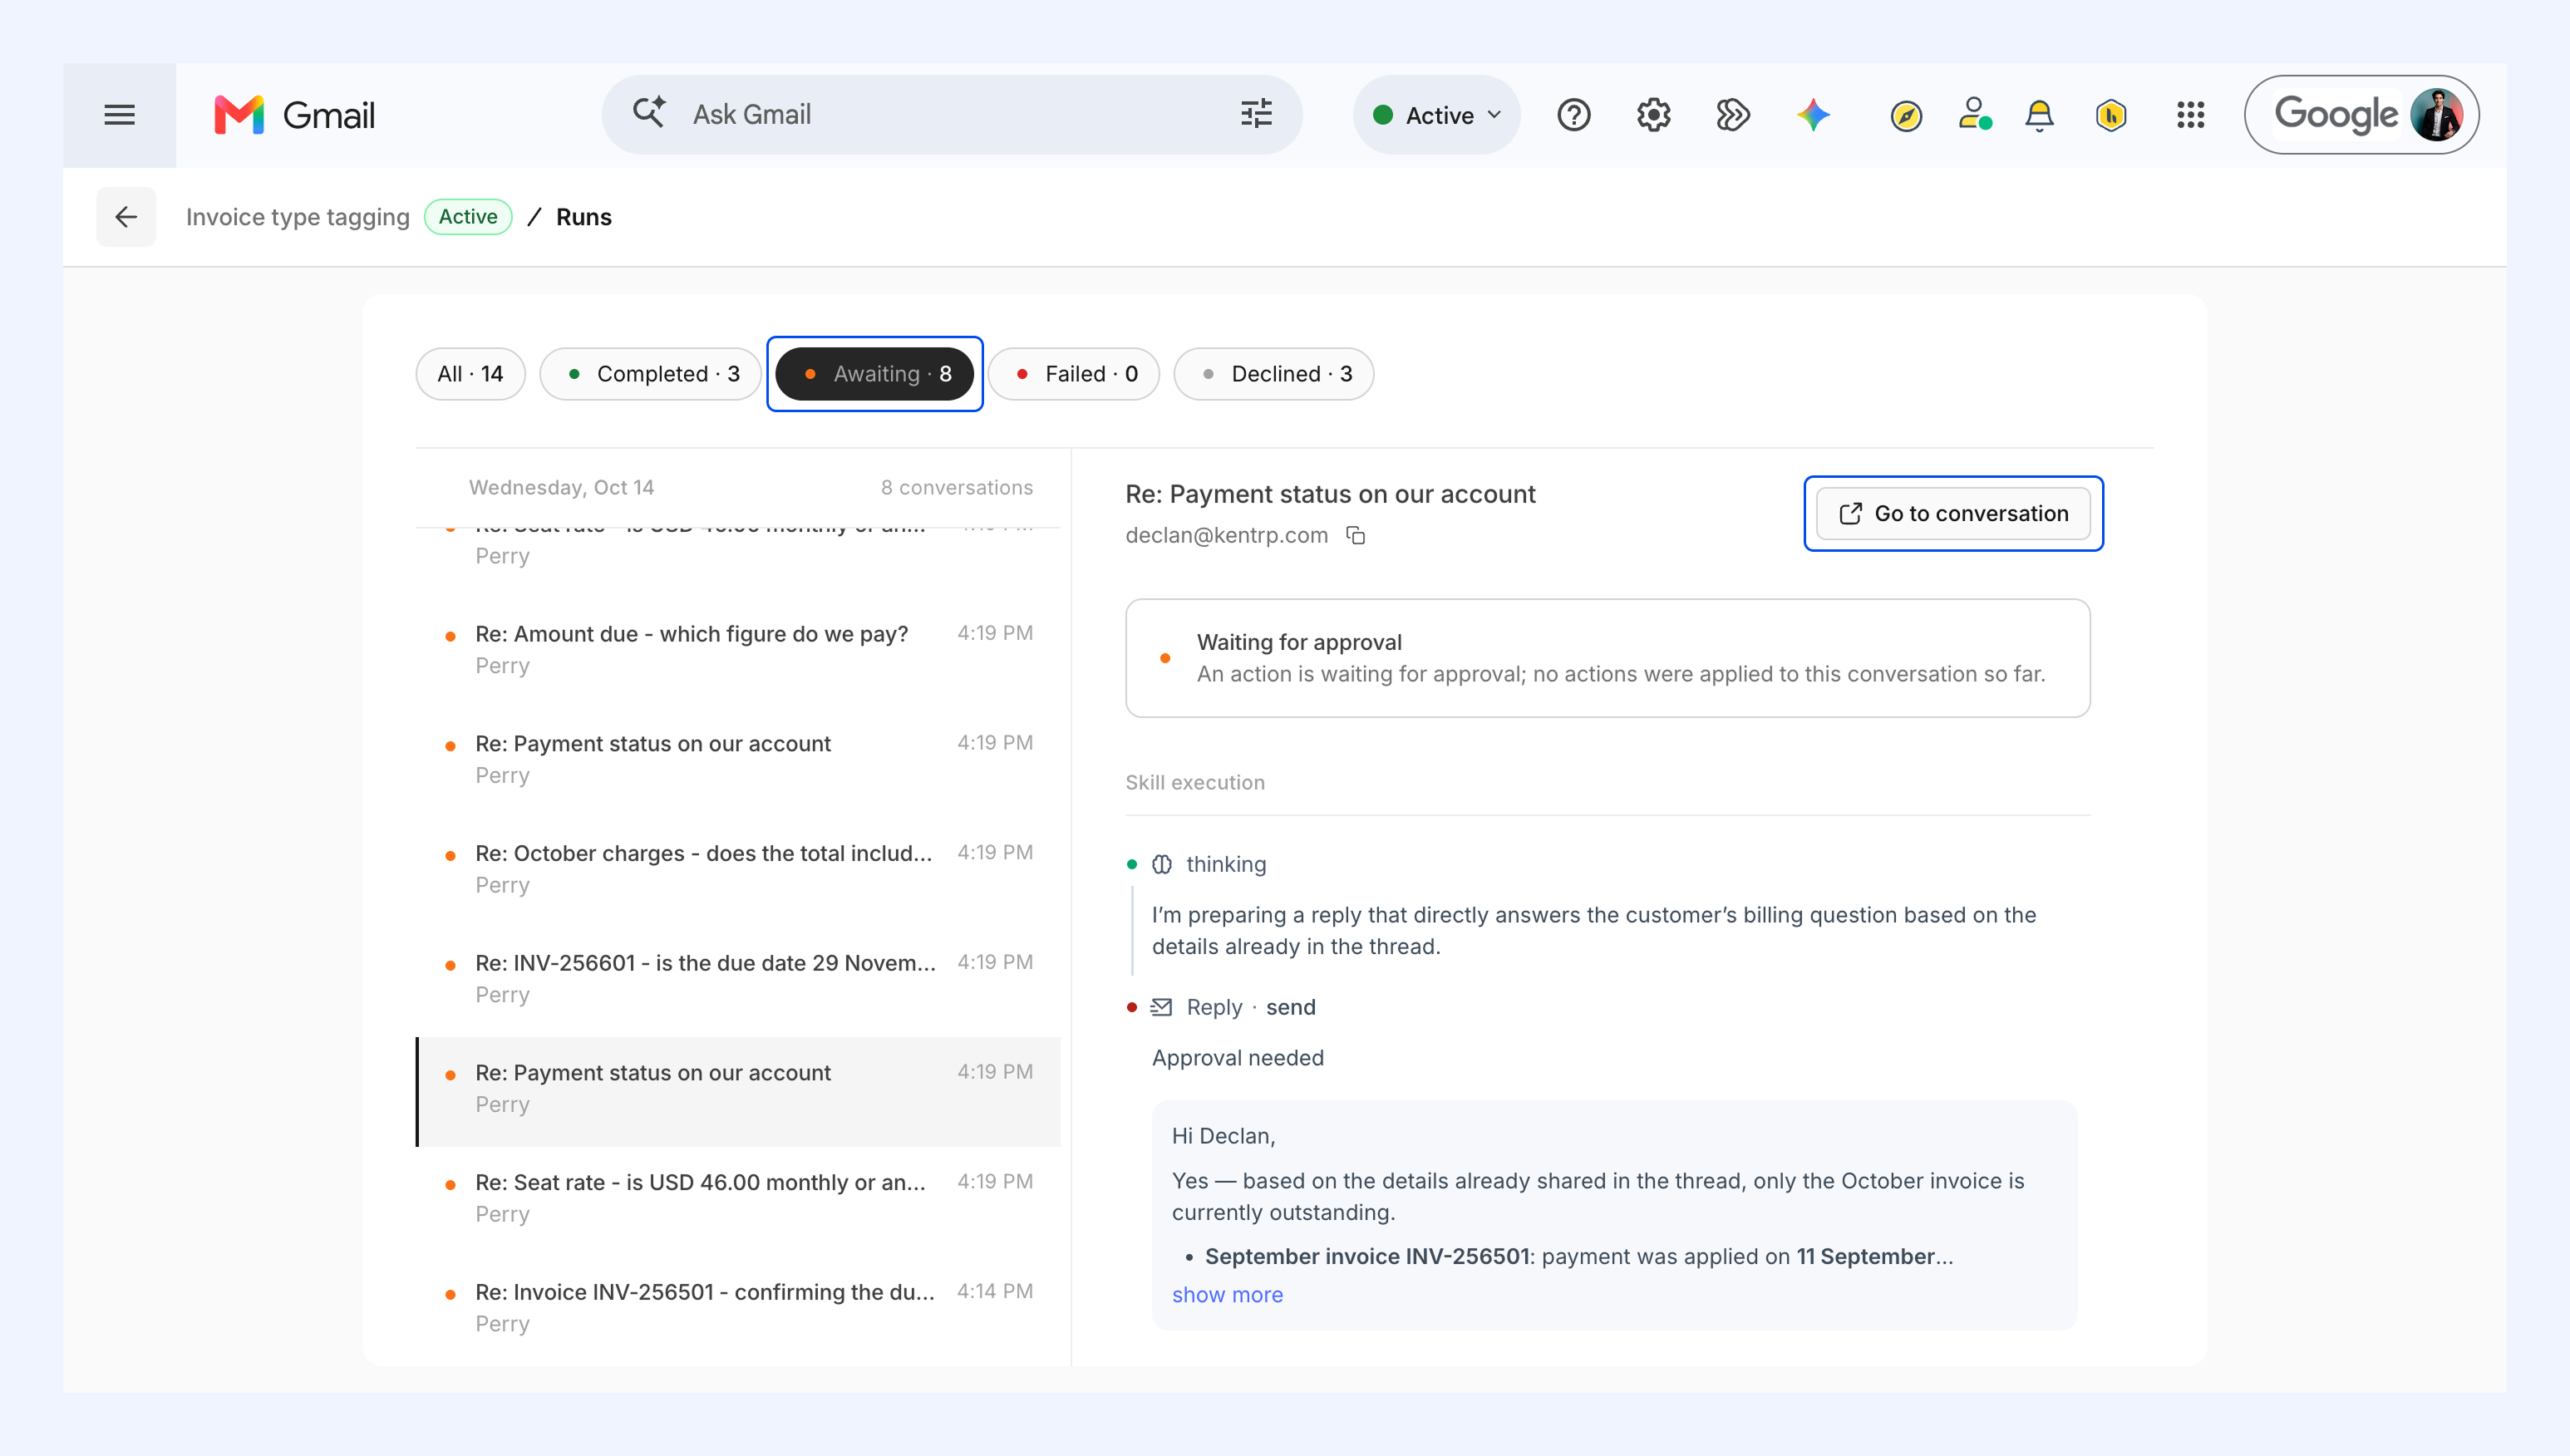
3. Select a run to see the conversation it ran on and each step the Skill took.
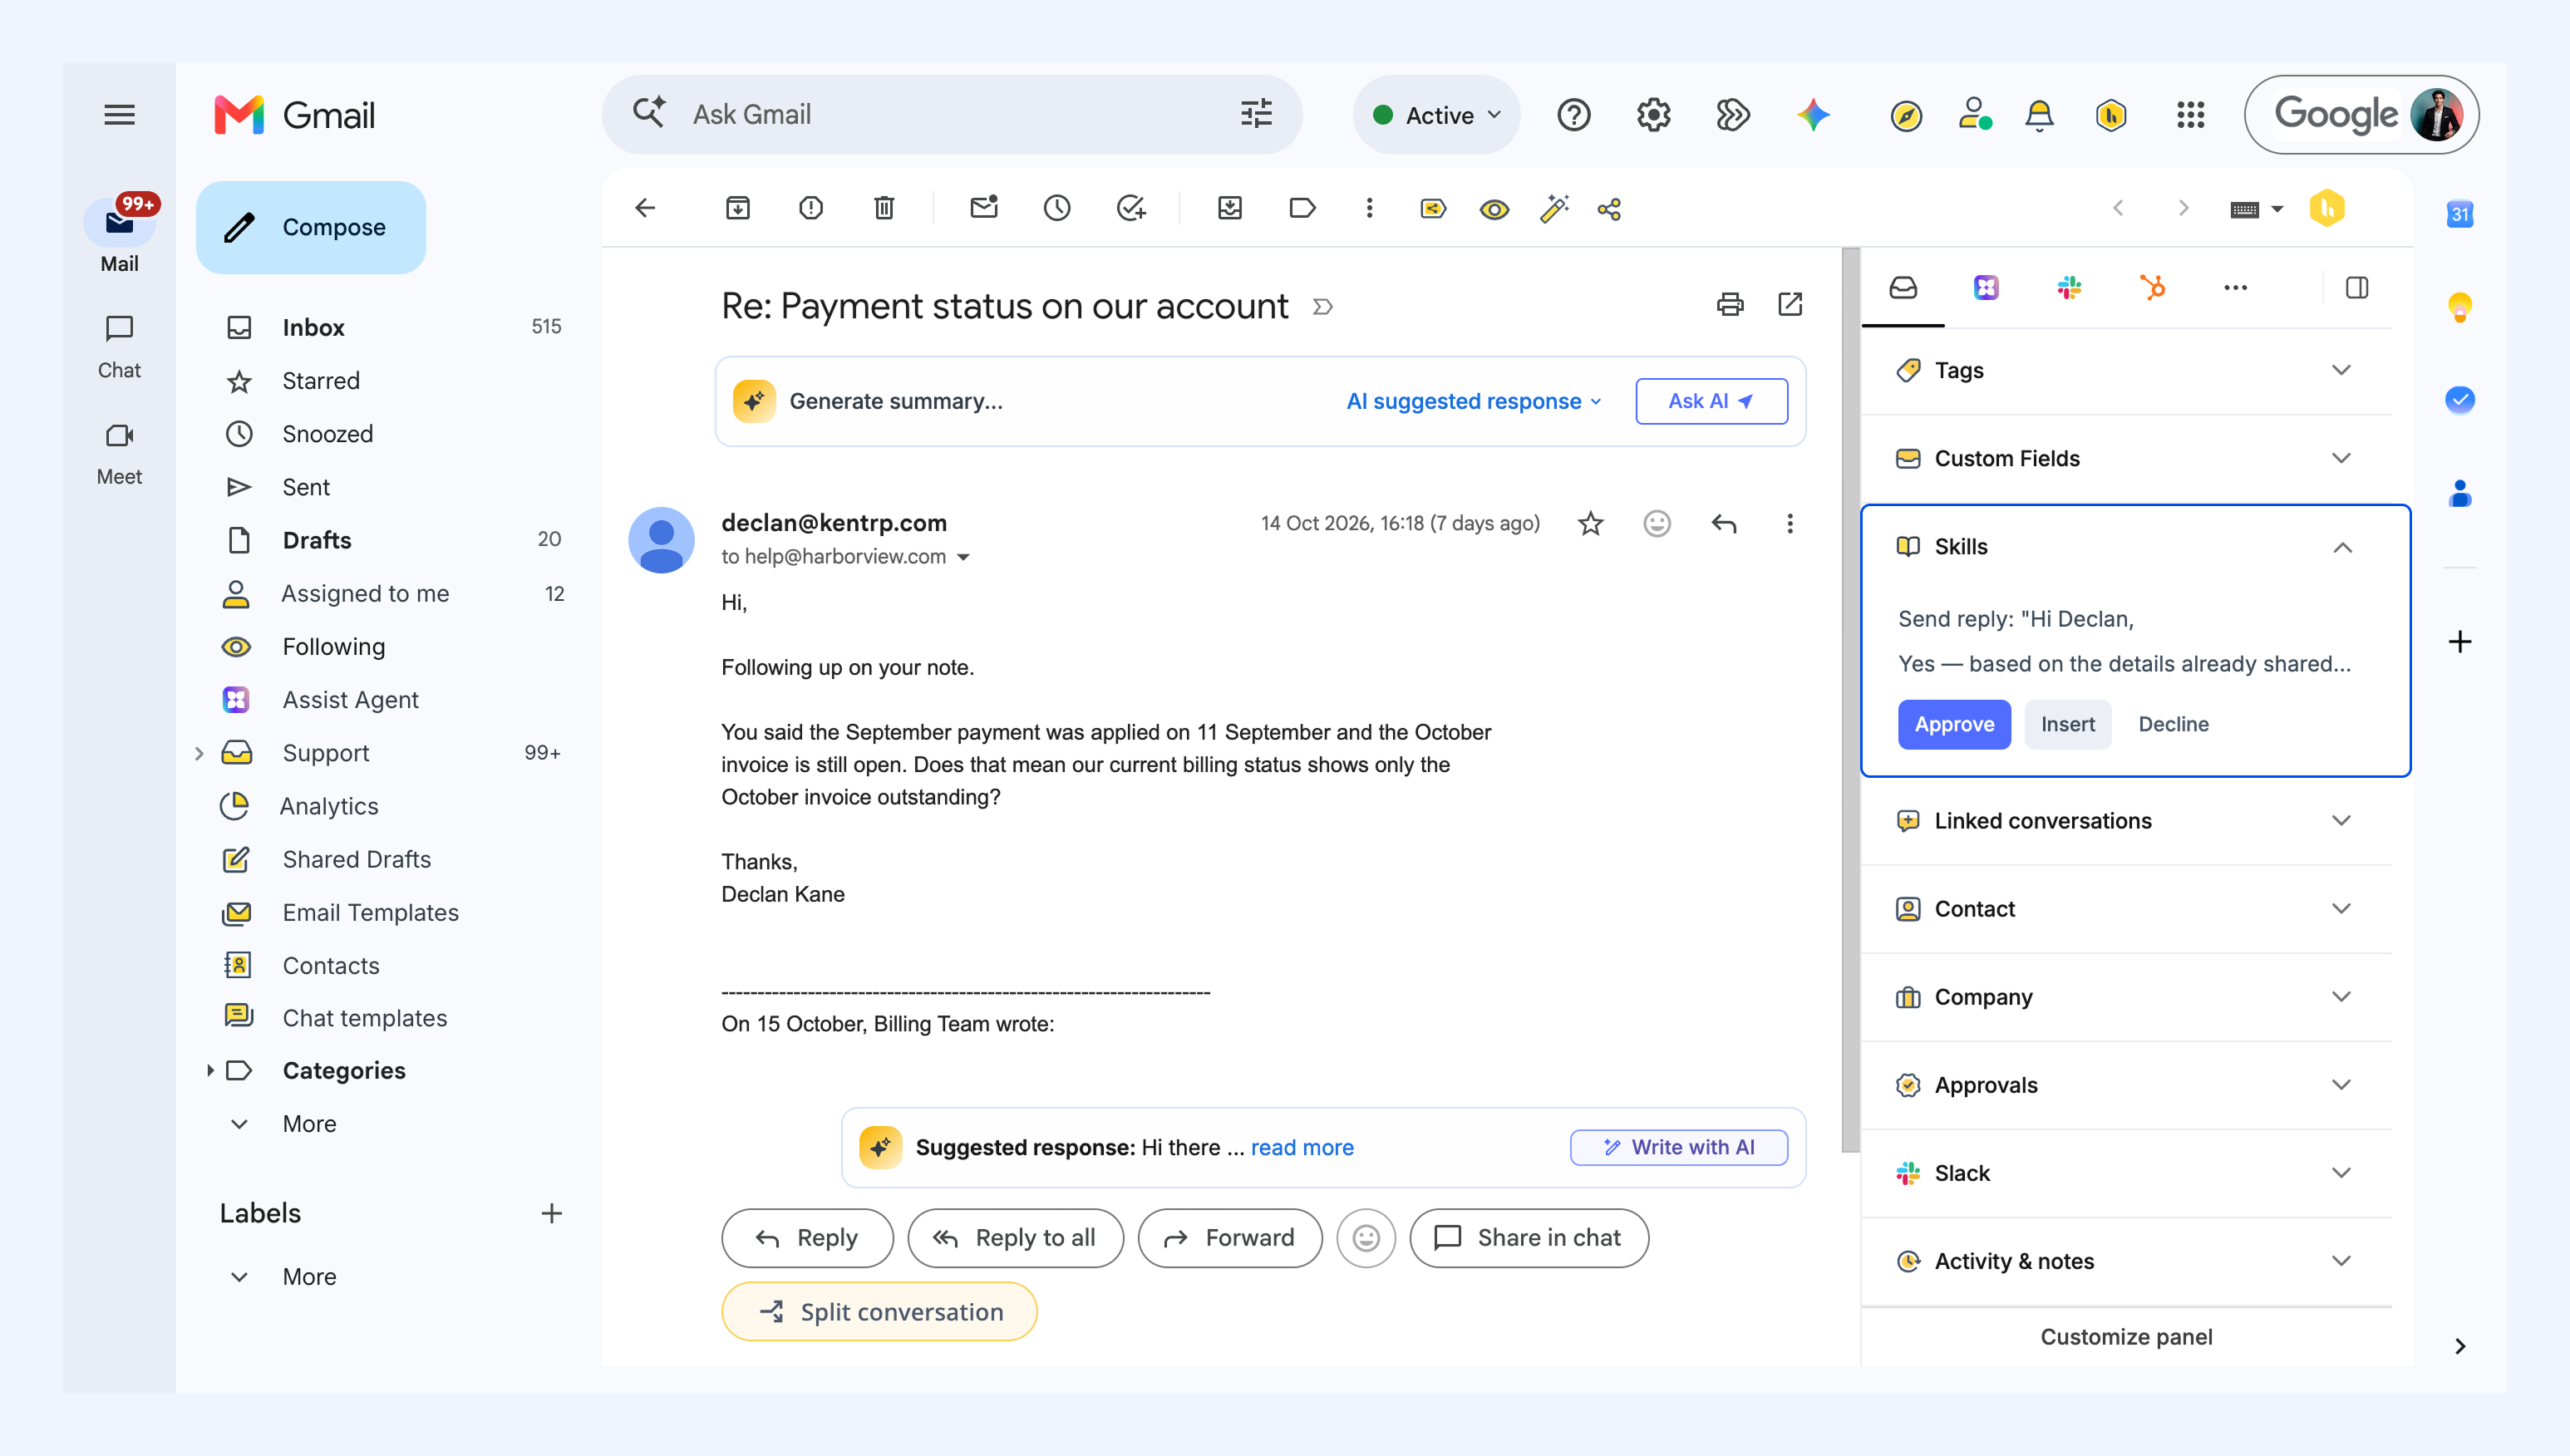
4. To review a reply waiting for approval, filter by Awaiting, select a run, and click Go to conversation.
You can expand the Skills section in the right panel to find and review the pending reply. Approval happens within the conversation.
Managing Skills
After a Skill is live, you can manage it at any time:
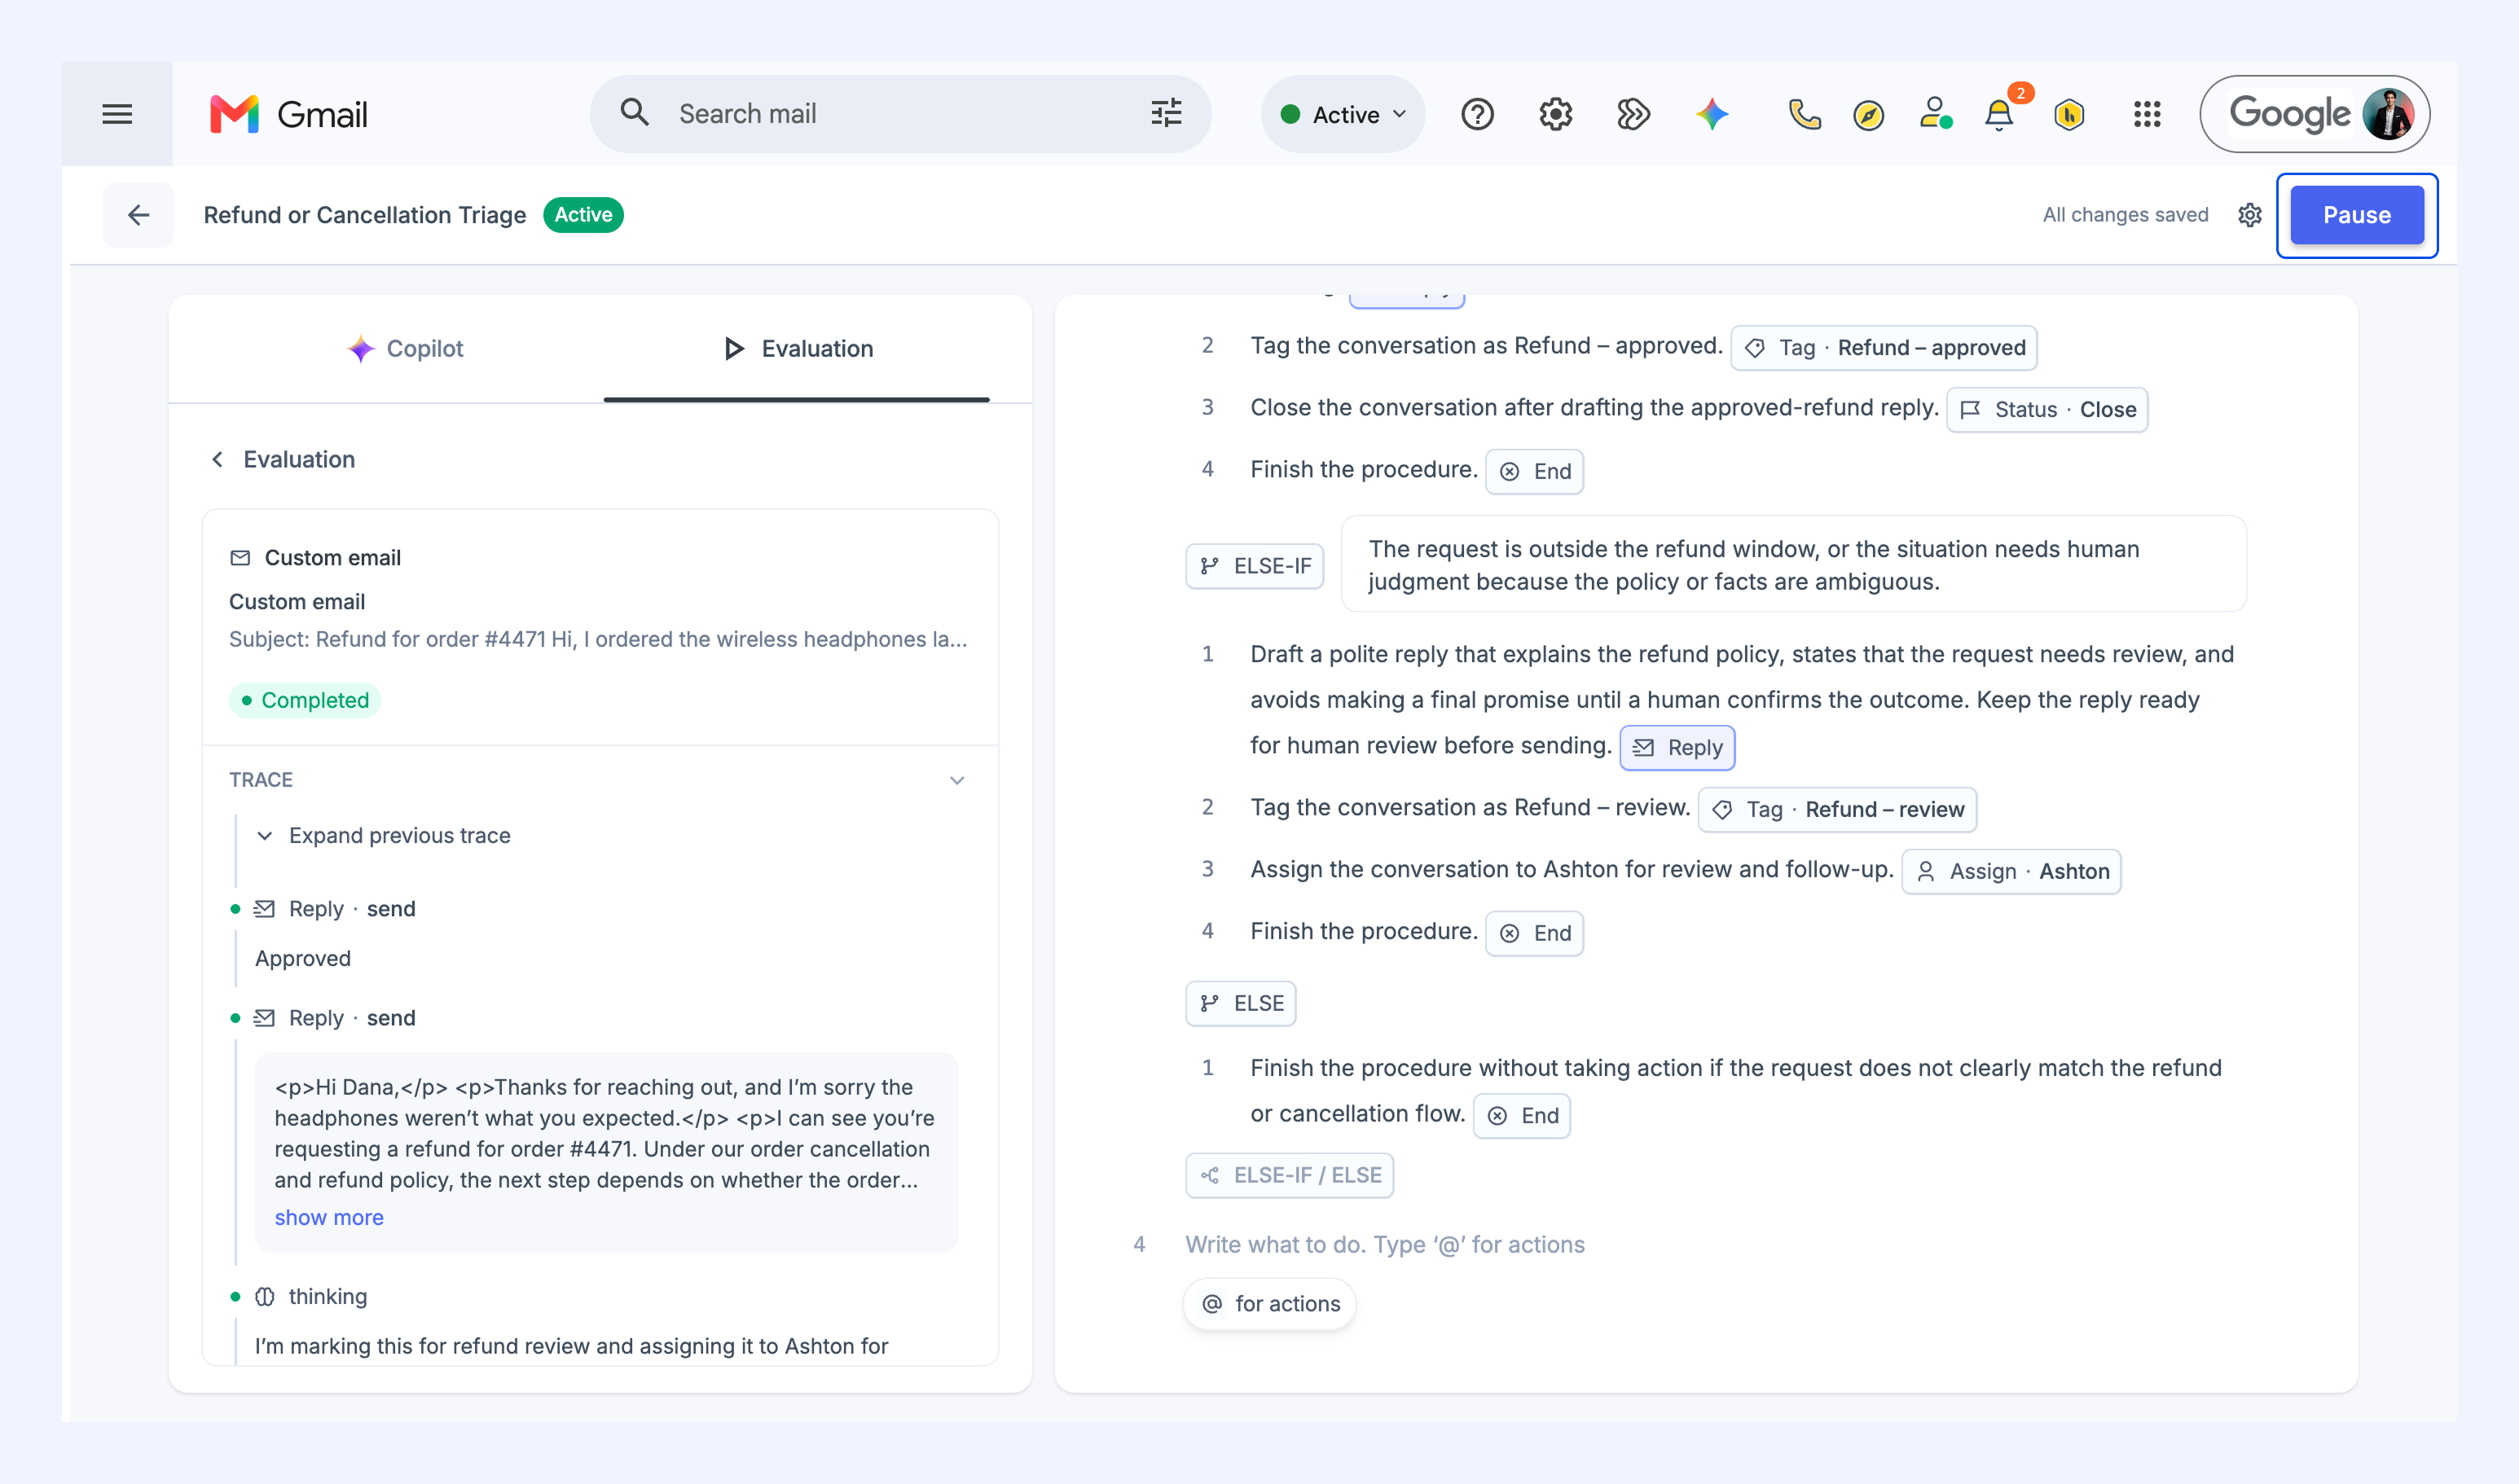
- Pause: Click Pause to stop the Skill from running, then enable it again whenever you're ready.
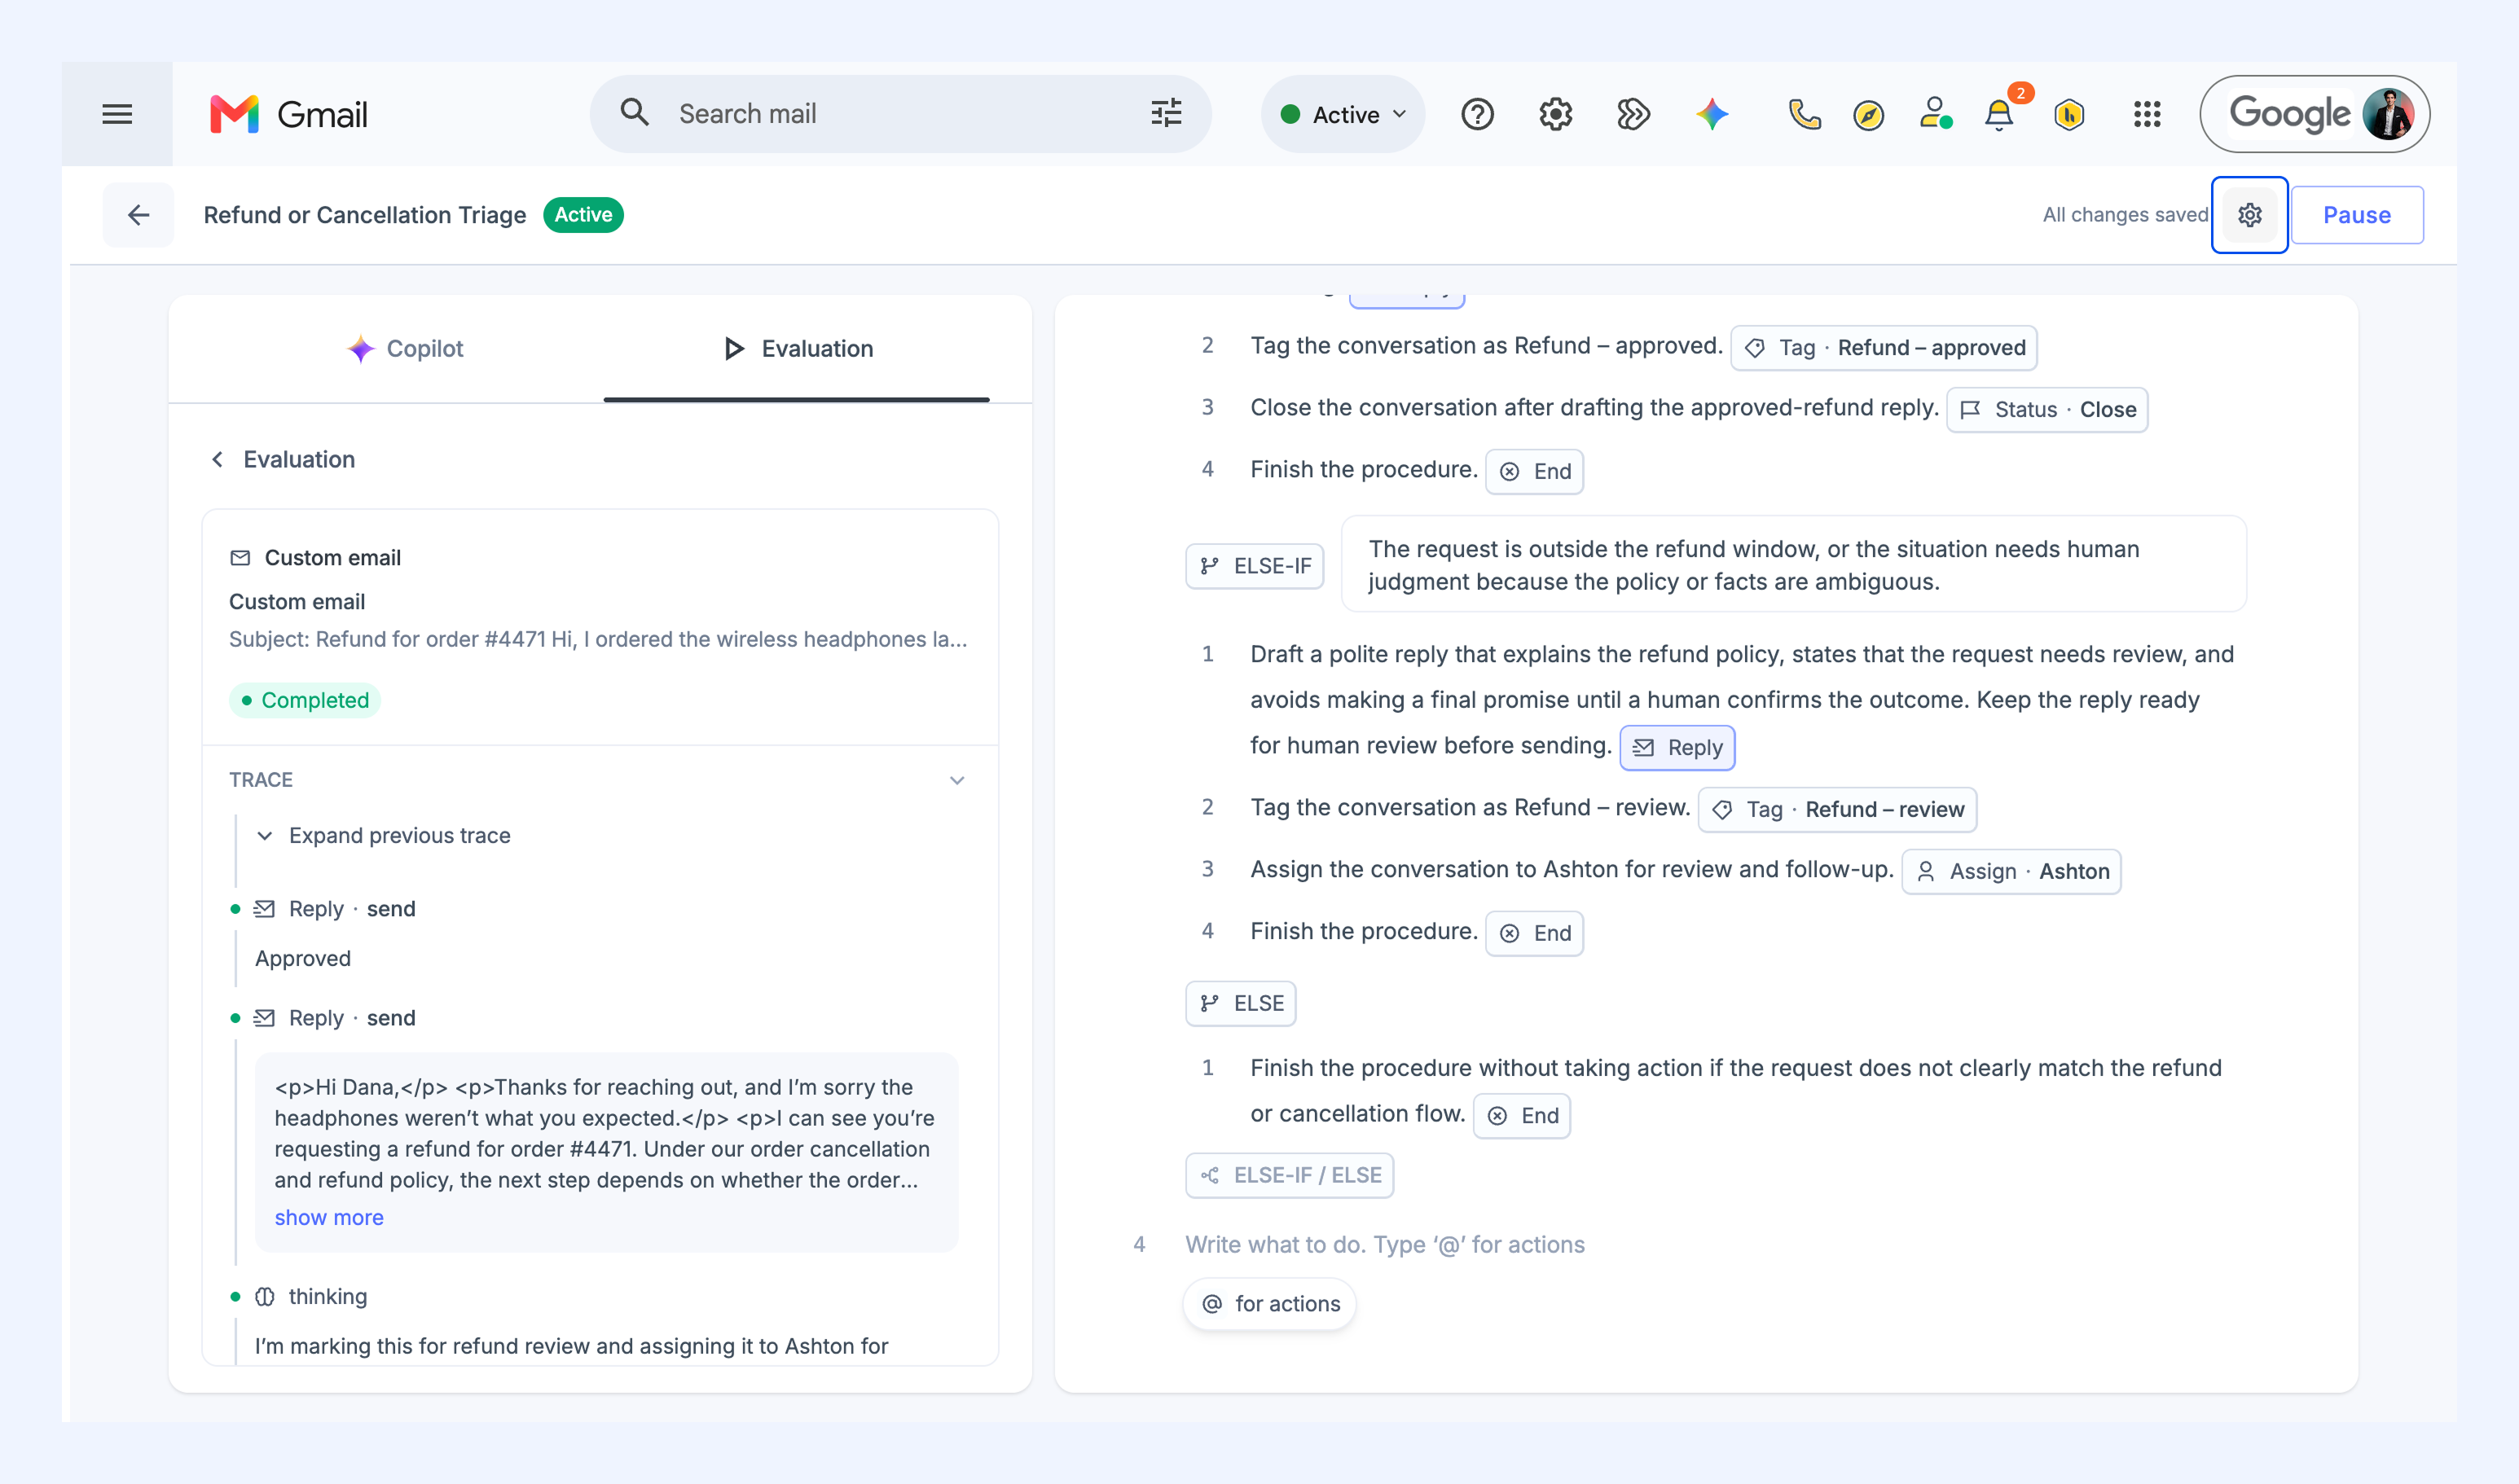
- Edit: Click the settings icon to rename the Skill or change which Shared Inboxes it runs on.
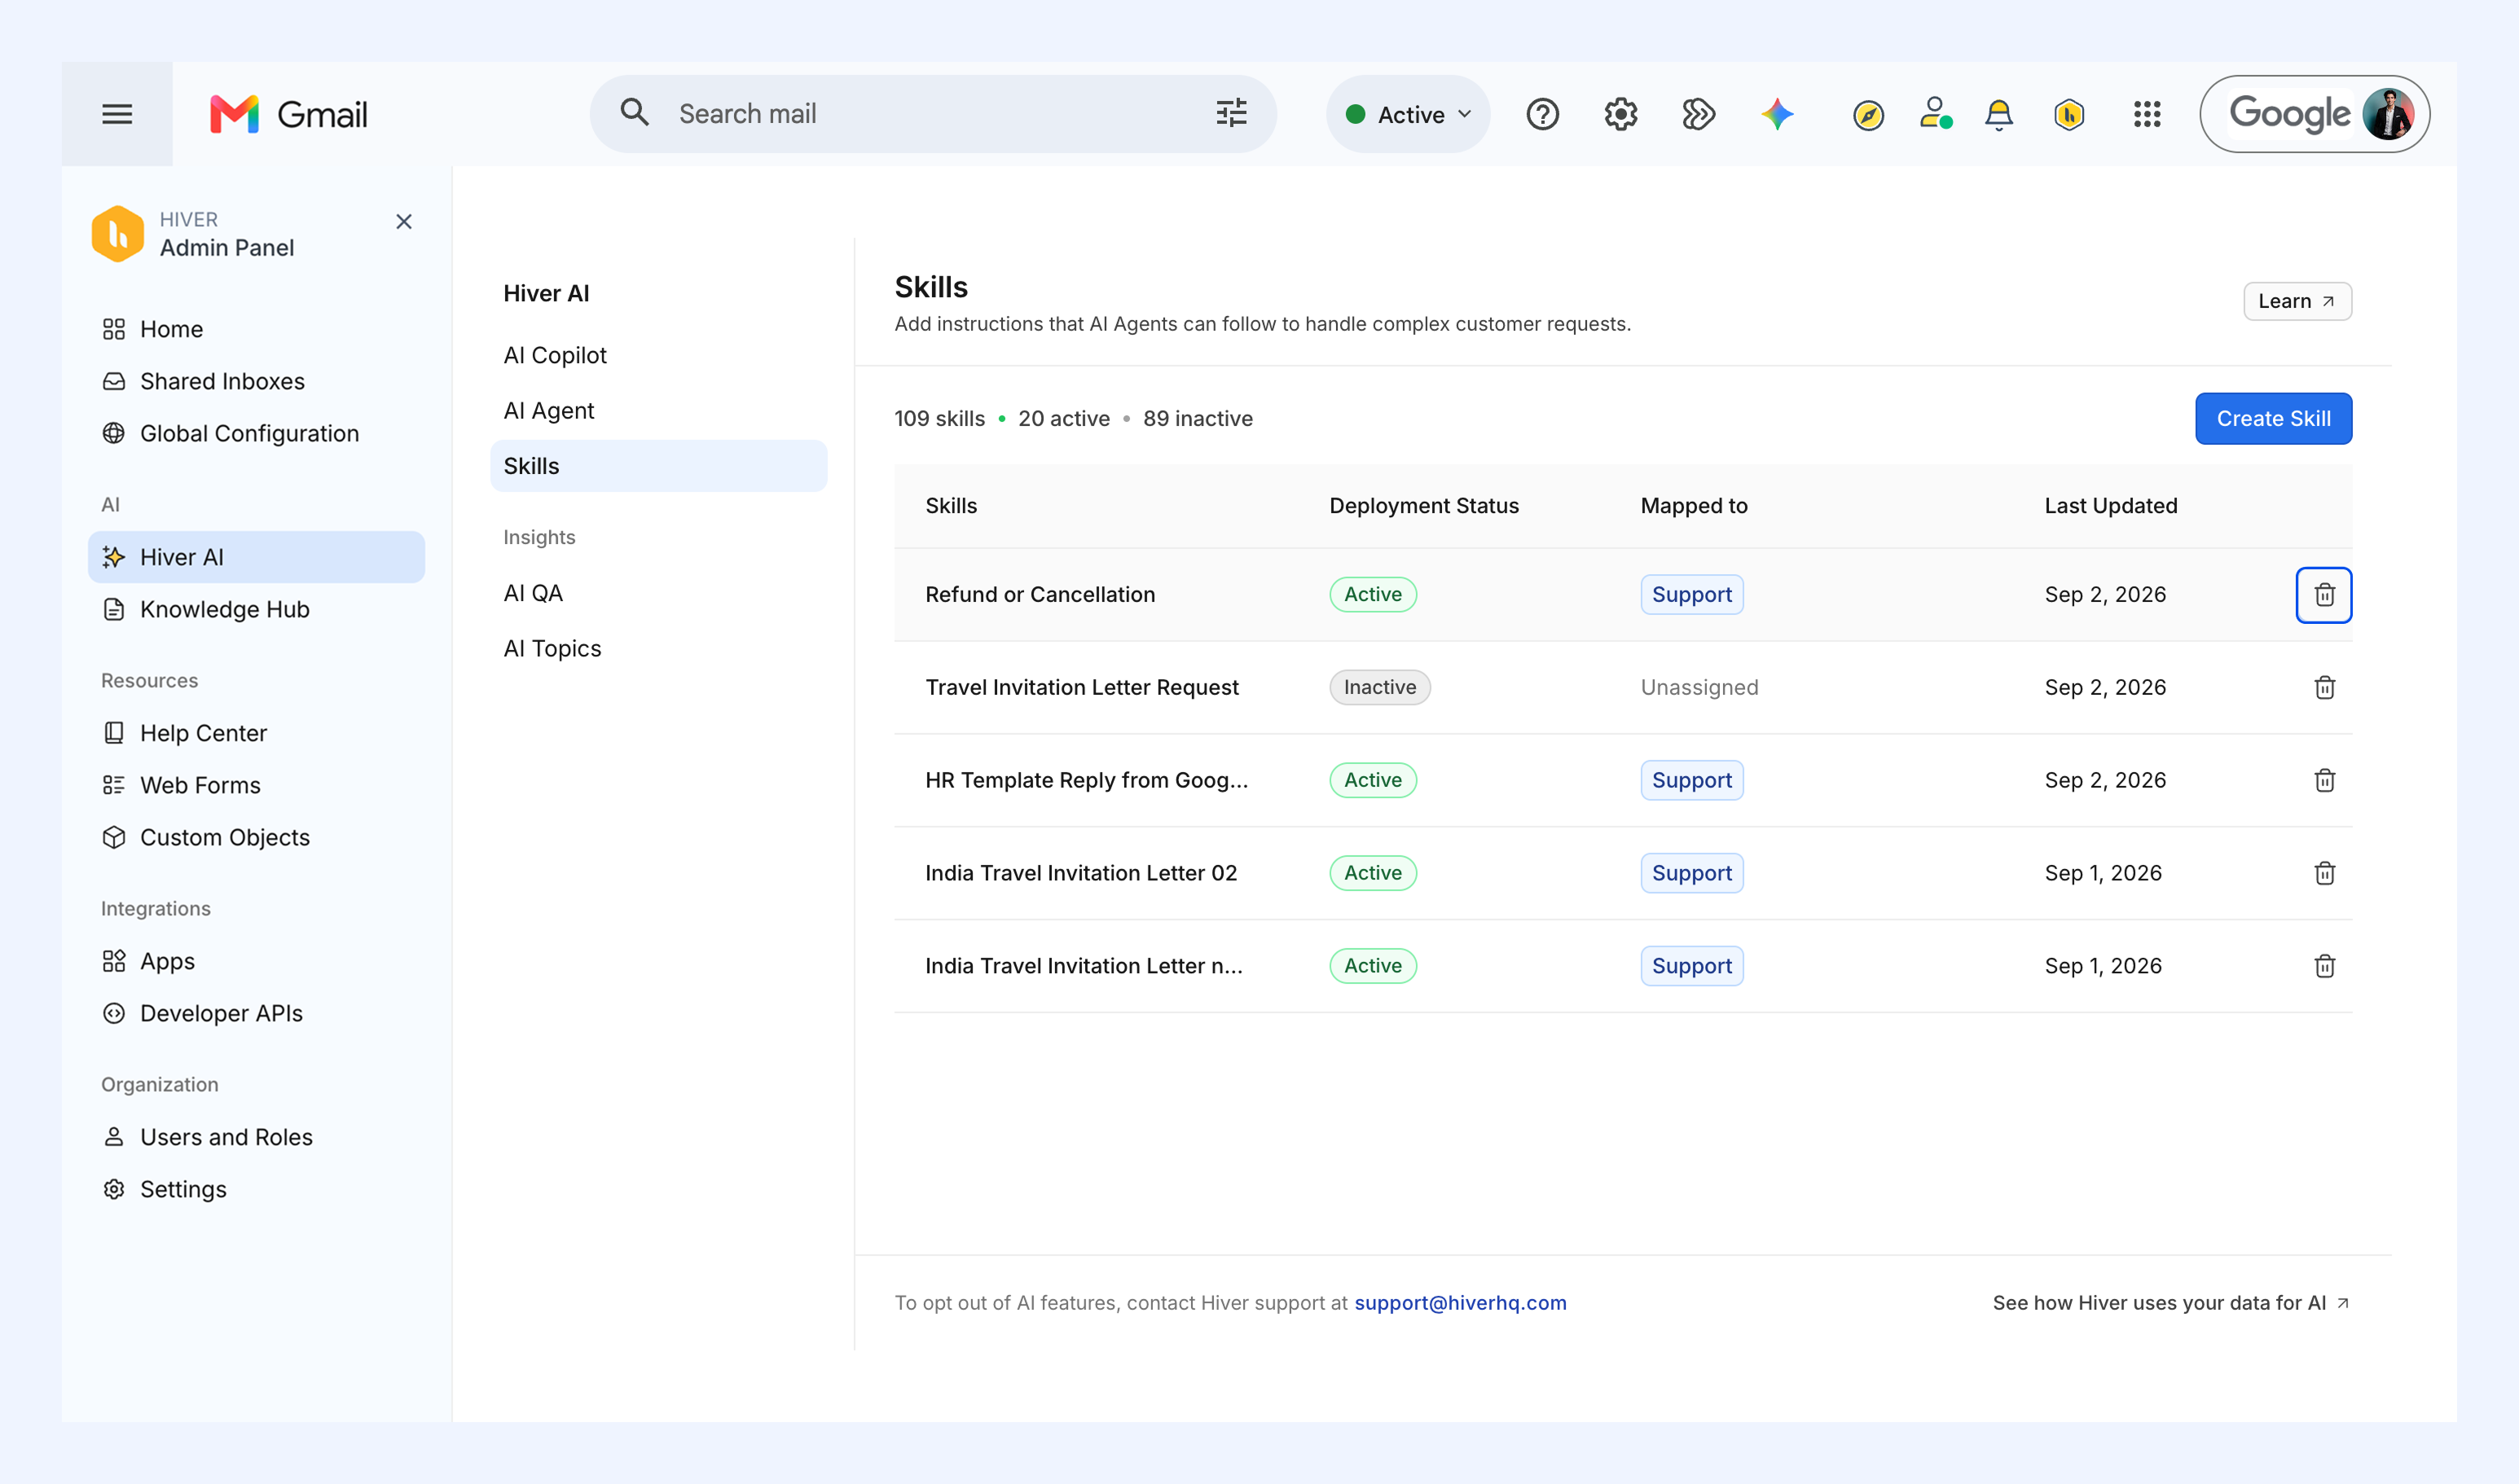
- Delete: Hover over the Skill, click the delete icon, and confirm.
FAQs
When should I use a Skill instead of an Automation?
Automations follow fixed rules, where a set condition always leads to the same action. Use a Skill when the task needs judgment instead, like reading what a customer wants, deciding between paths, or drafting a reply.
Which apps can a Skill connect to?
A Skill connects to HubSpot natively. For any other app, use the Make an API call action.
Does a Skill work on channels other than email?
No. Skills run only on email conversations in a Shared Inbox.
Can I run a Skill manually on a conversation?
No. A Skill runs automatically whenever a new conversation matches its trigger.
What happens to later replies in the same conversation?
Once a conversation matches a Skill, every later reply on that thread stays with the same Skill.
Can a skill read email attachments?
Yes. A Skill reads the text in an attached PDF or image, scanned documents included.