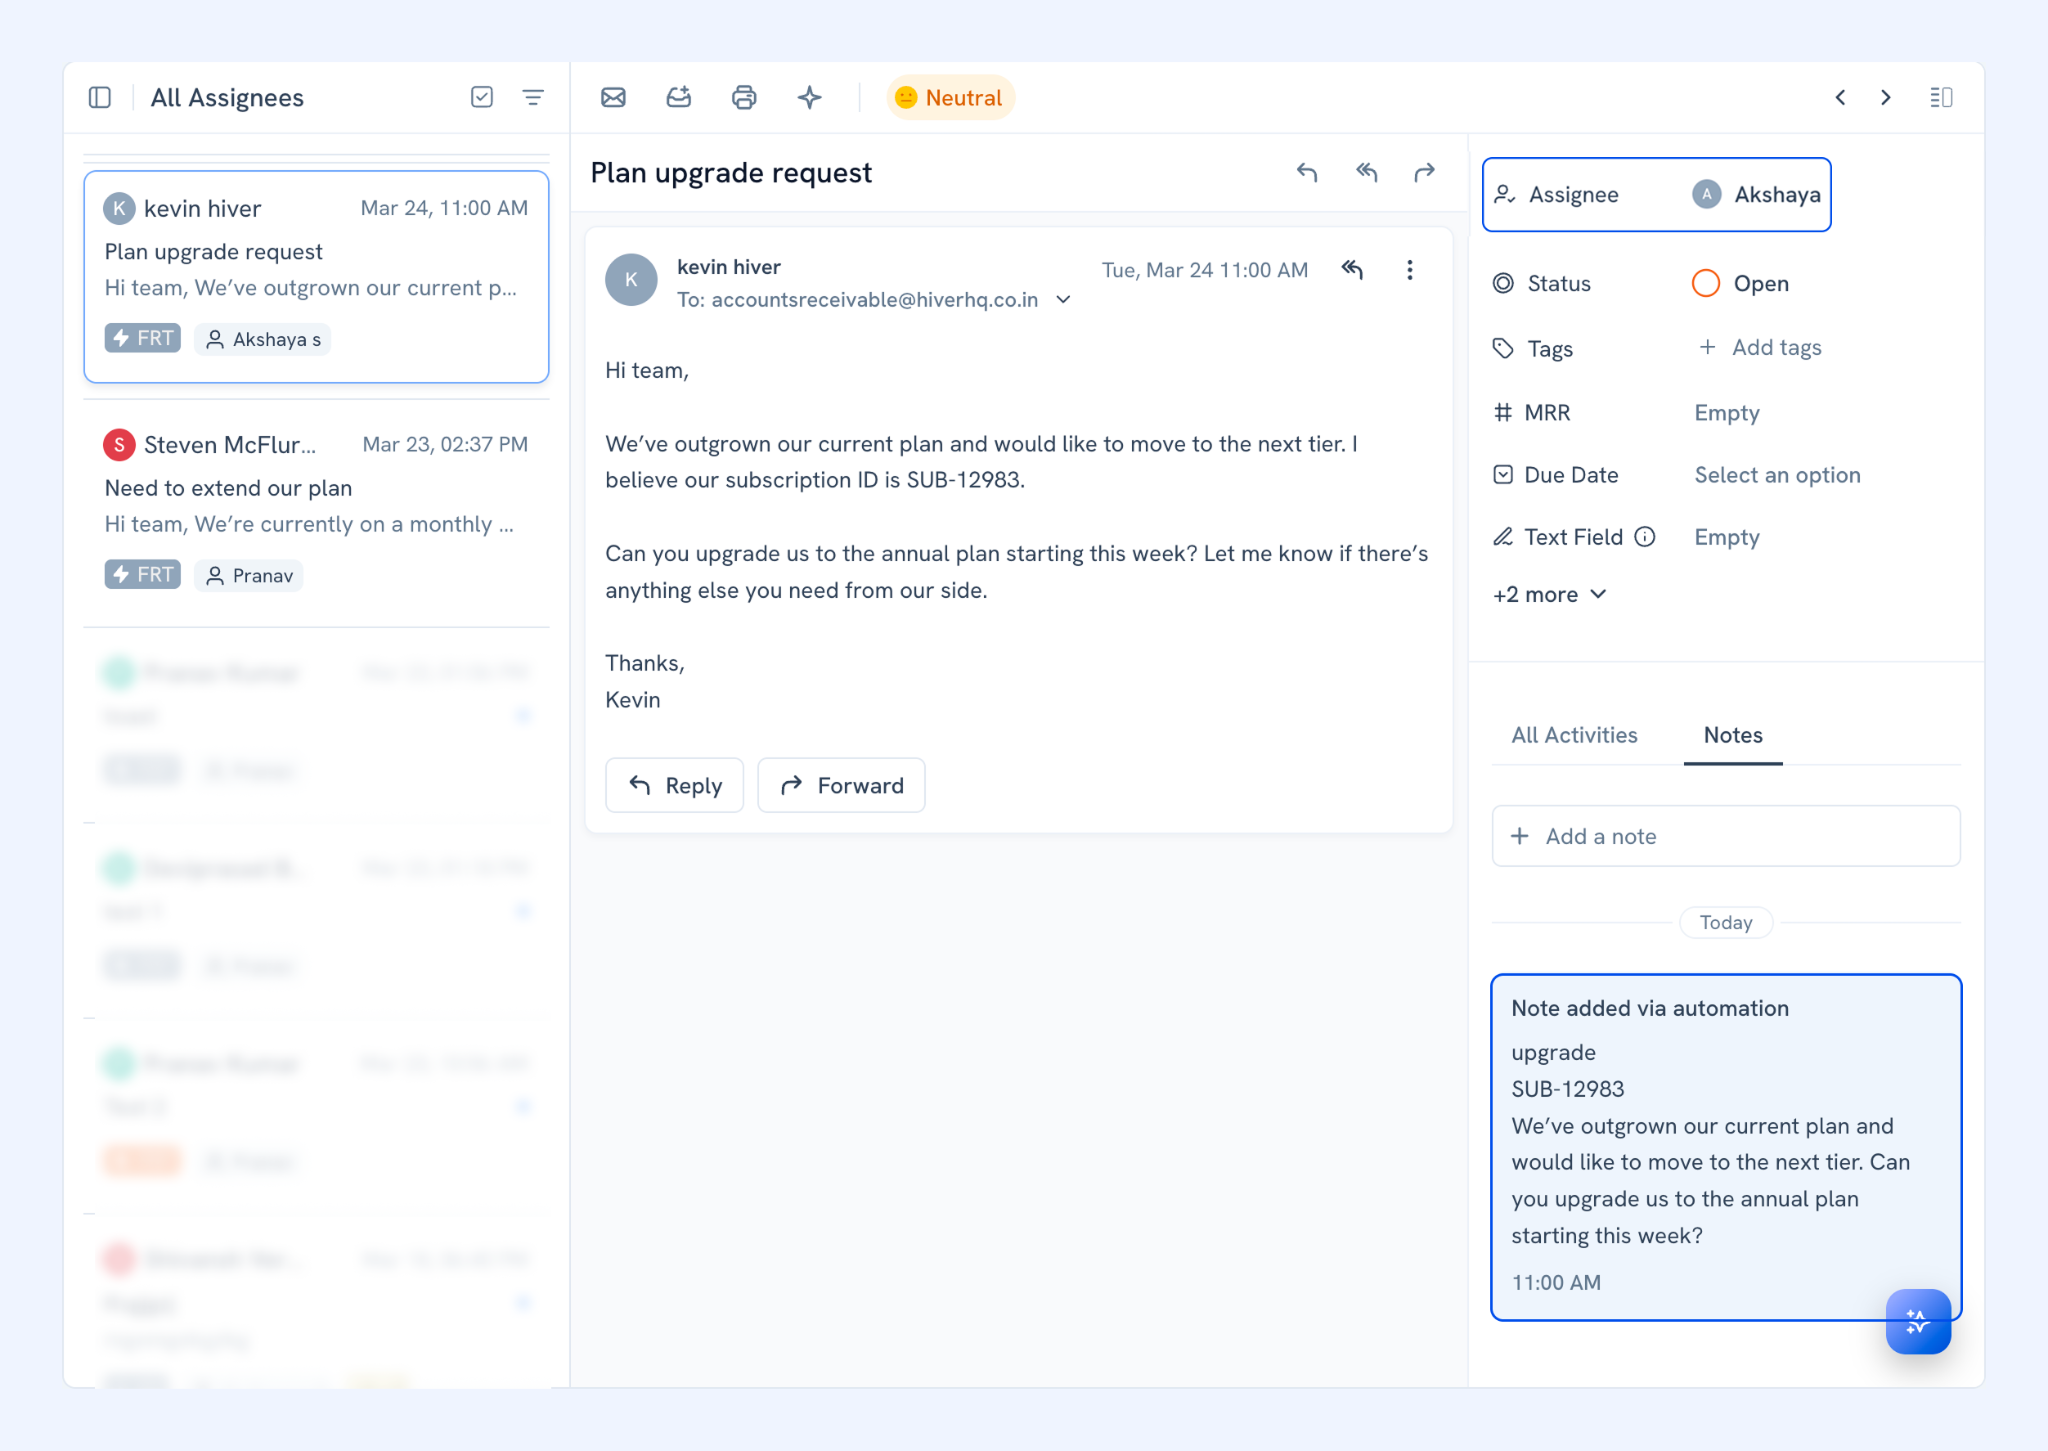
Using AI Tasks
With AI Tasks in Hiver Omni, you can automatically identify important information, requests, and customer intent from conversations and use that to power support workflows. For example, you can use AI Tasks in Automations to:
- Detect feature requests and share them with product teams
- Escalate urgent issues or bug reports in a Slack channel
- Summarize long conversations before handoffs
- Capture order IDs, account details, or subscription plans and use them to fetch information from other tools
- Categorize conversations based on issue type, customer intent, or sentiment
This helps teams reduce repetitive work, respond faster, and ensure important customer context doesn’t get missed. Use this guide to learn how to create an AI Task in Hiver Omni.
Prerequisites
- AI Tasks is available on Pro and Elite plans.
- You must have Admin permissions to create and manage AI Tasks.
Steps to create an AI Task
Let’s say you want to automate how you handle subscription-related requests. If a conversation includes a request to change a plan (for example, extend, upgrade, or cancel), you want to:
- Identify a subscription-related request
- Route the conversation to the billing team
- Extract key details like subscription ID and requested action
- Add those details to a note for follow-up
Let’s explore how you can use AI Tasks to automate this complete process.
Step 1: Open inbox settings
Go to Admin Panel → Shared Inboxes, then select the inbox where you want to set up the AI Task.
Step 2: Create a new automation
Navigate to Automations → Create Automation → Create from scratch.
Step 3: Name the automation and set a trigger
Enter a name for your automation and choose a trigger. For this example, select New inbound conversation is received.
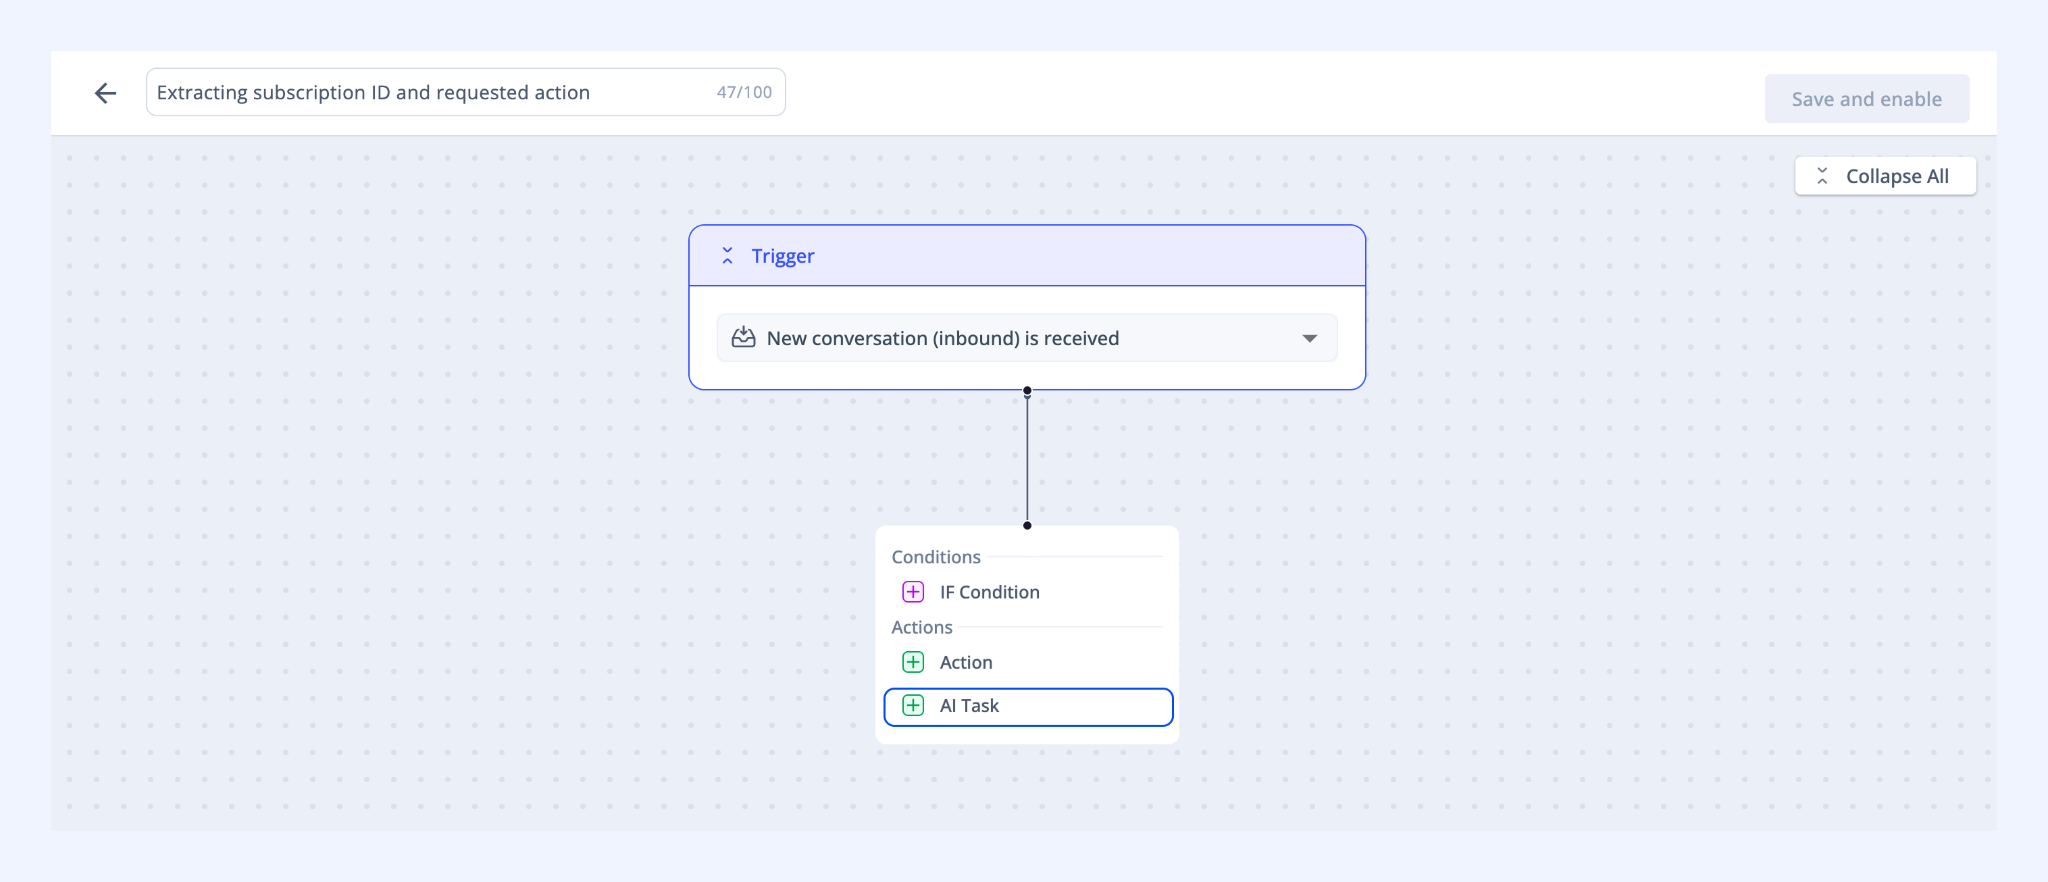
Step 4: Add an AI Task
Click Add step, then under Actions, select AI Task.
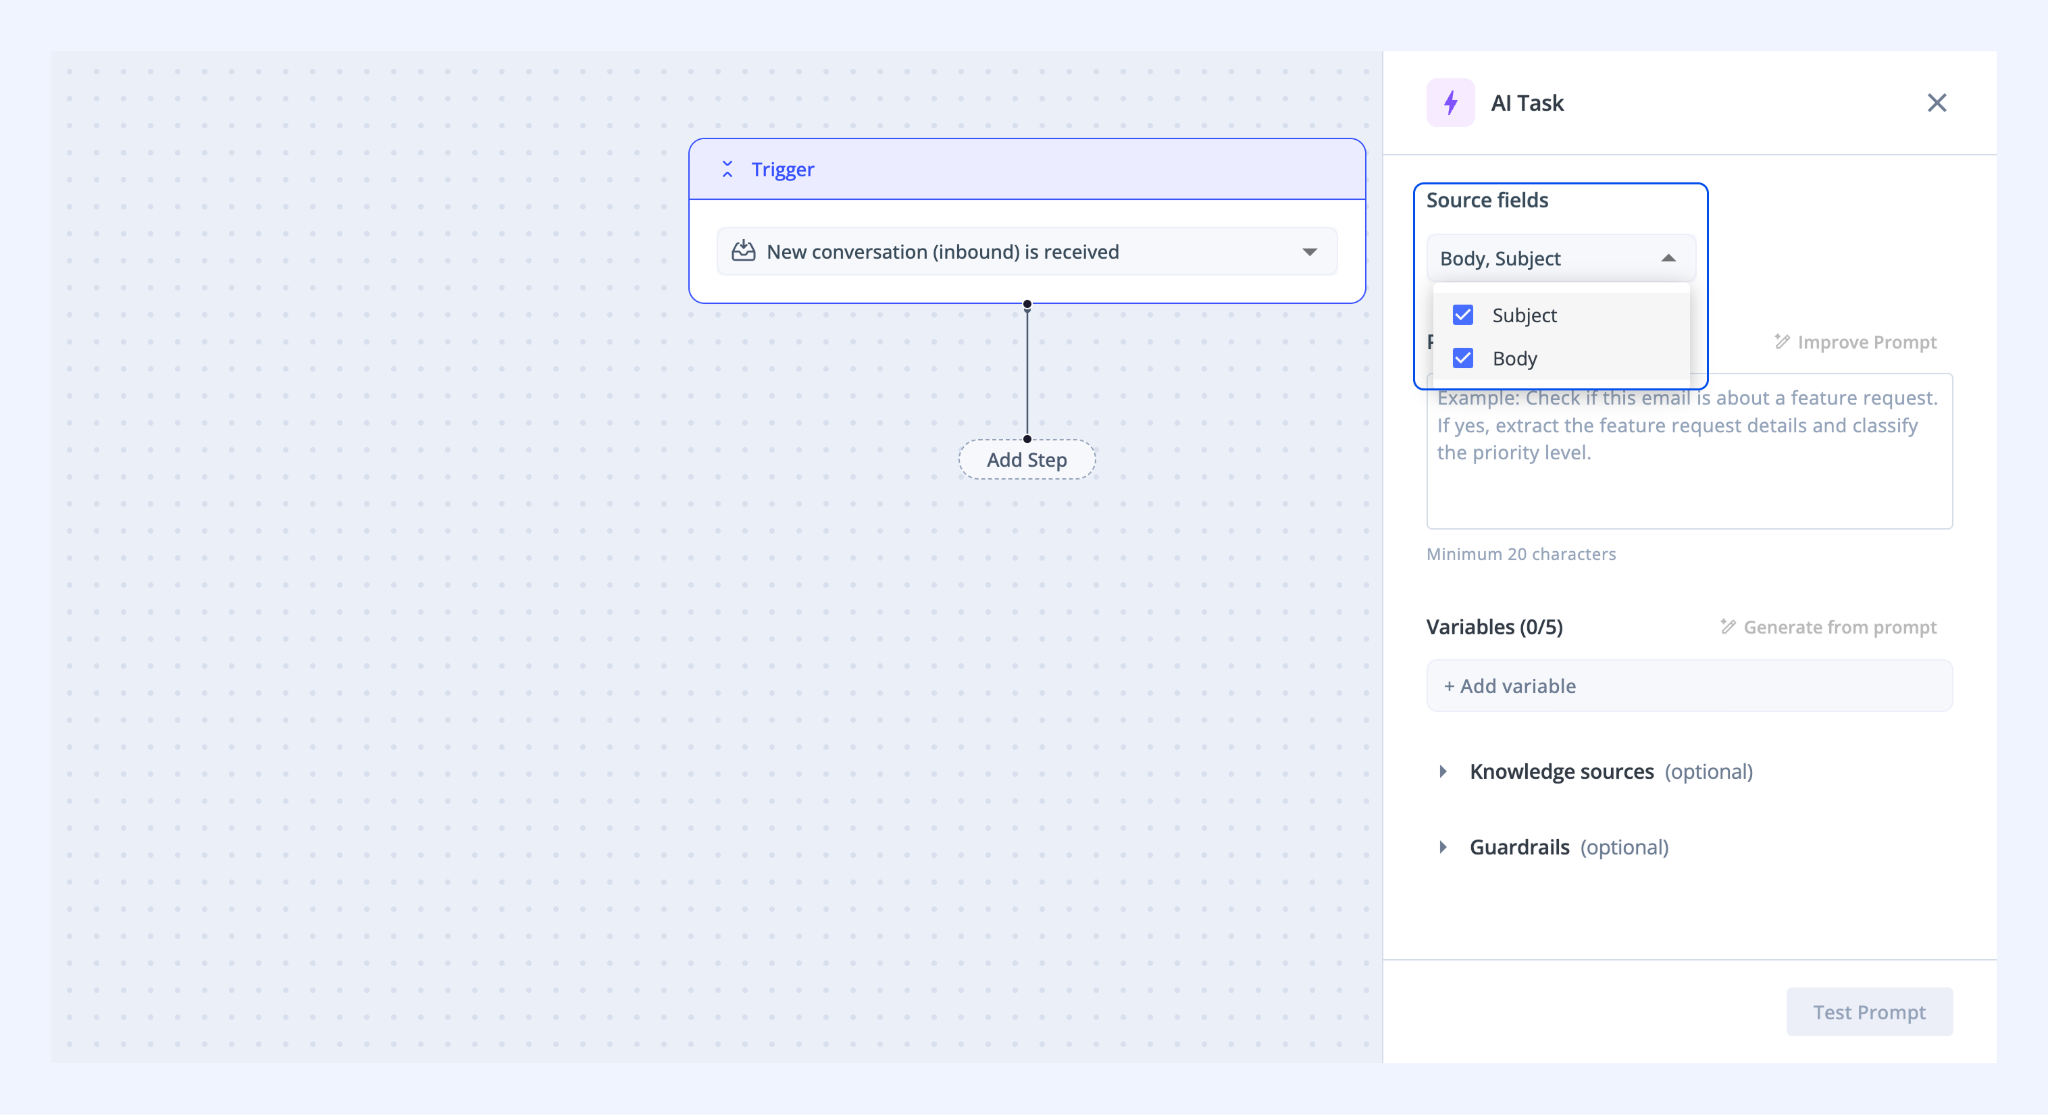
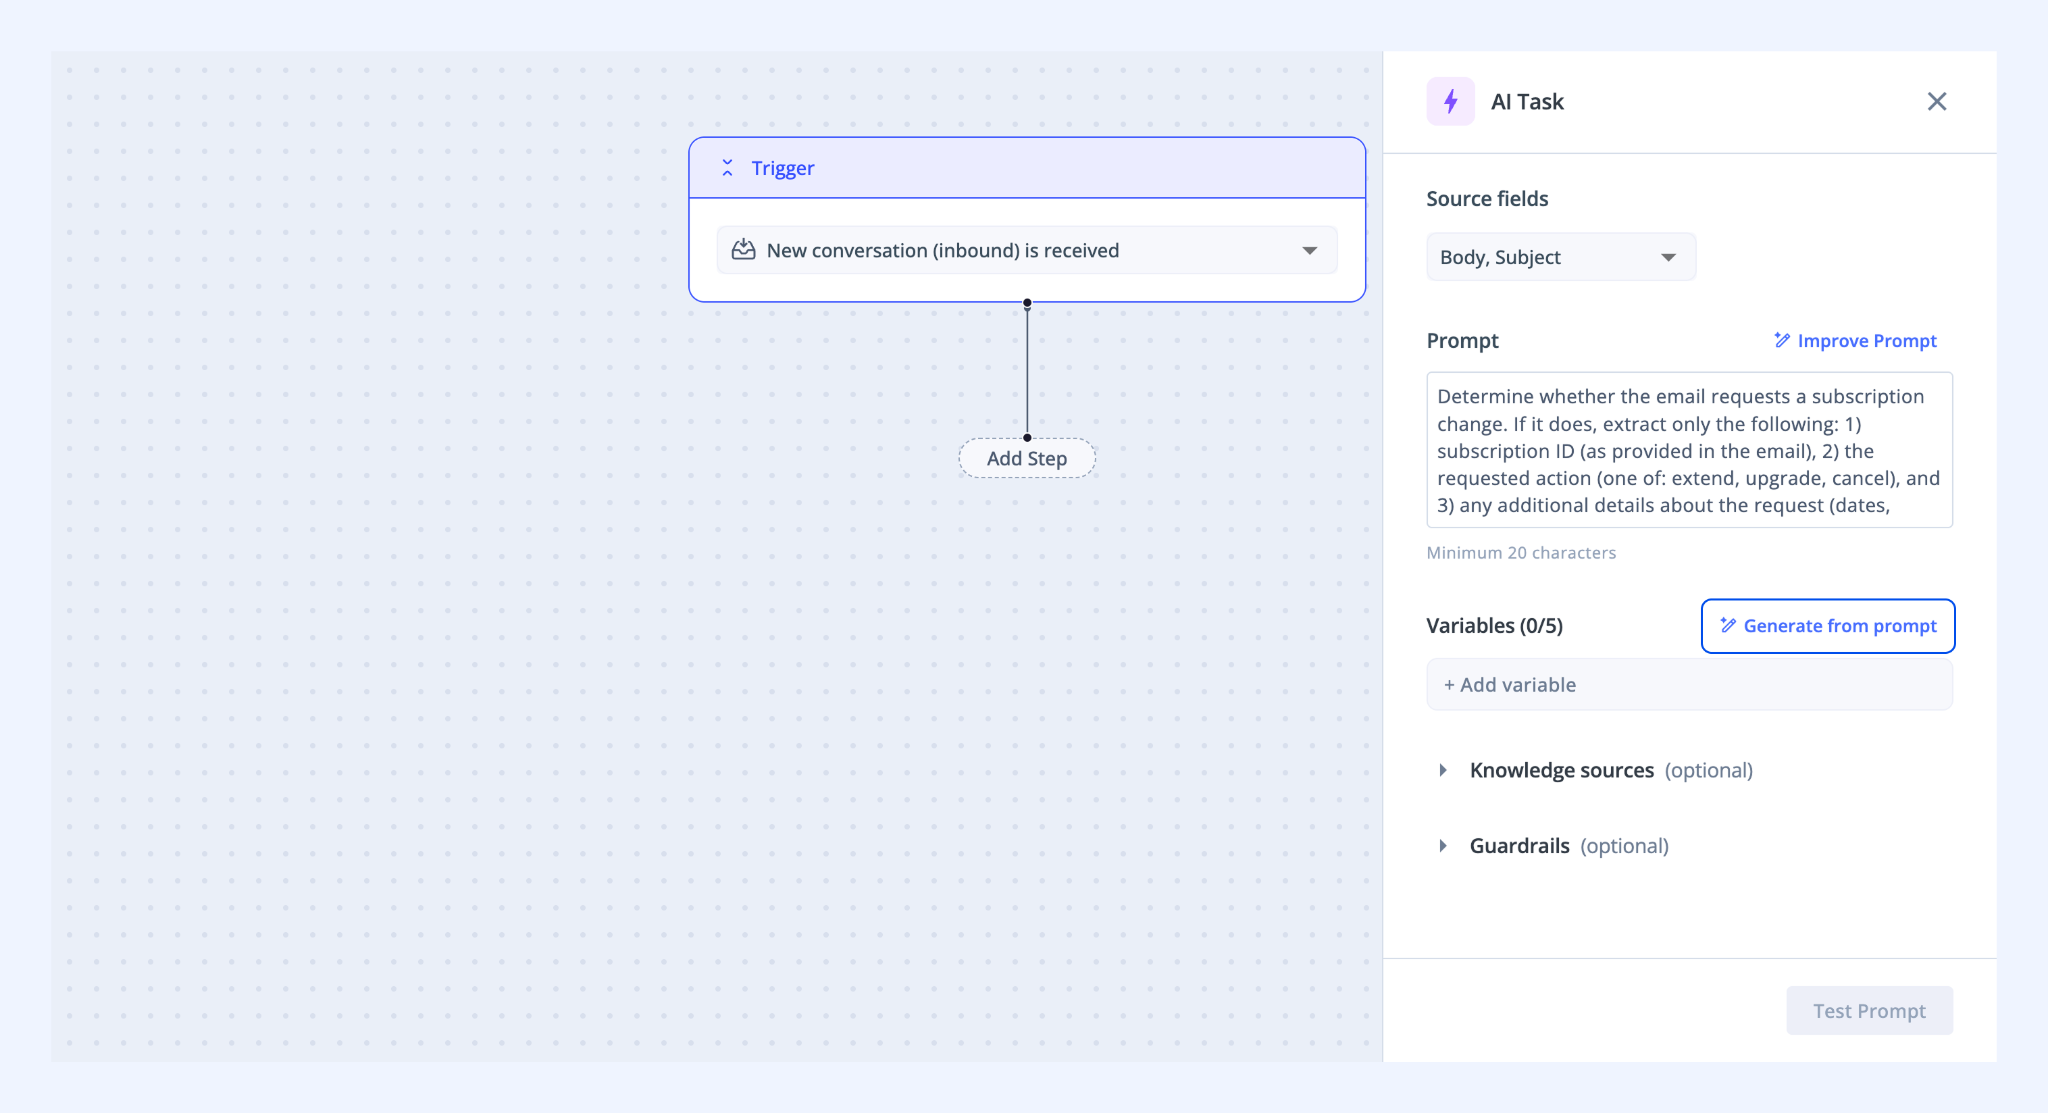
Step 5: Choose what AI Task should analyze
In Source fields, select the part of the conversation the AI should analyze. By default, subject and body are selected.
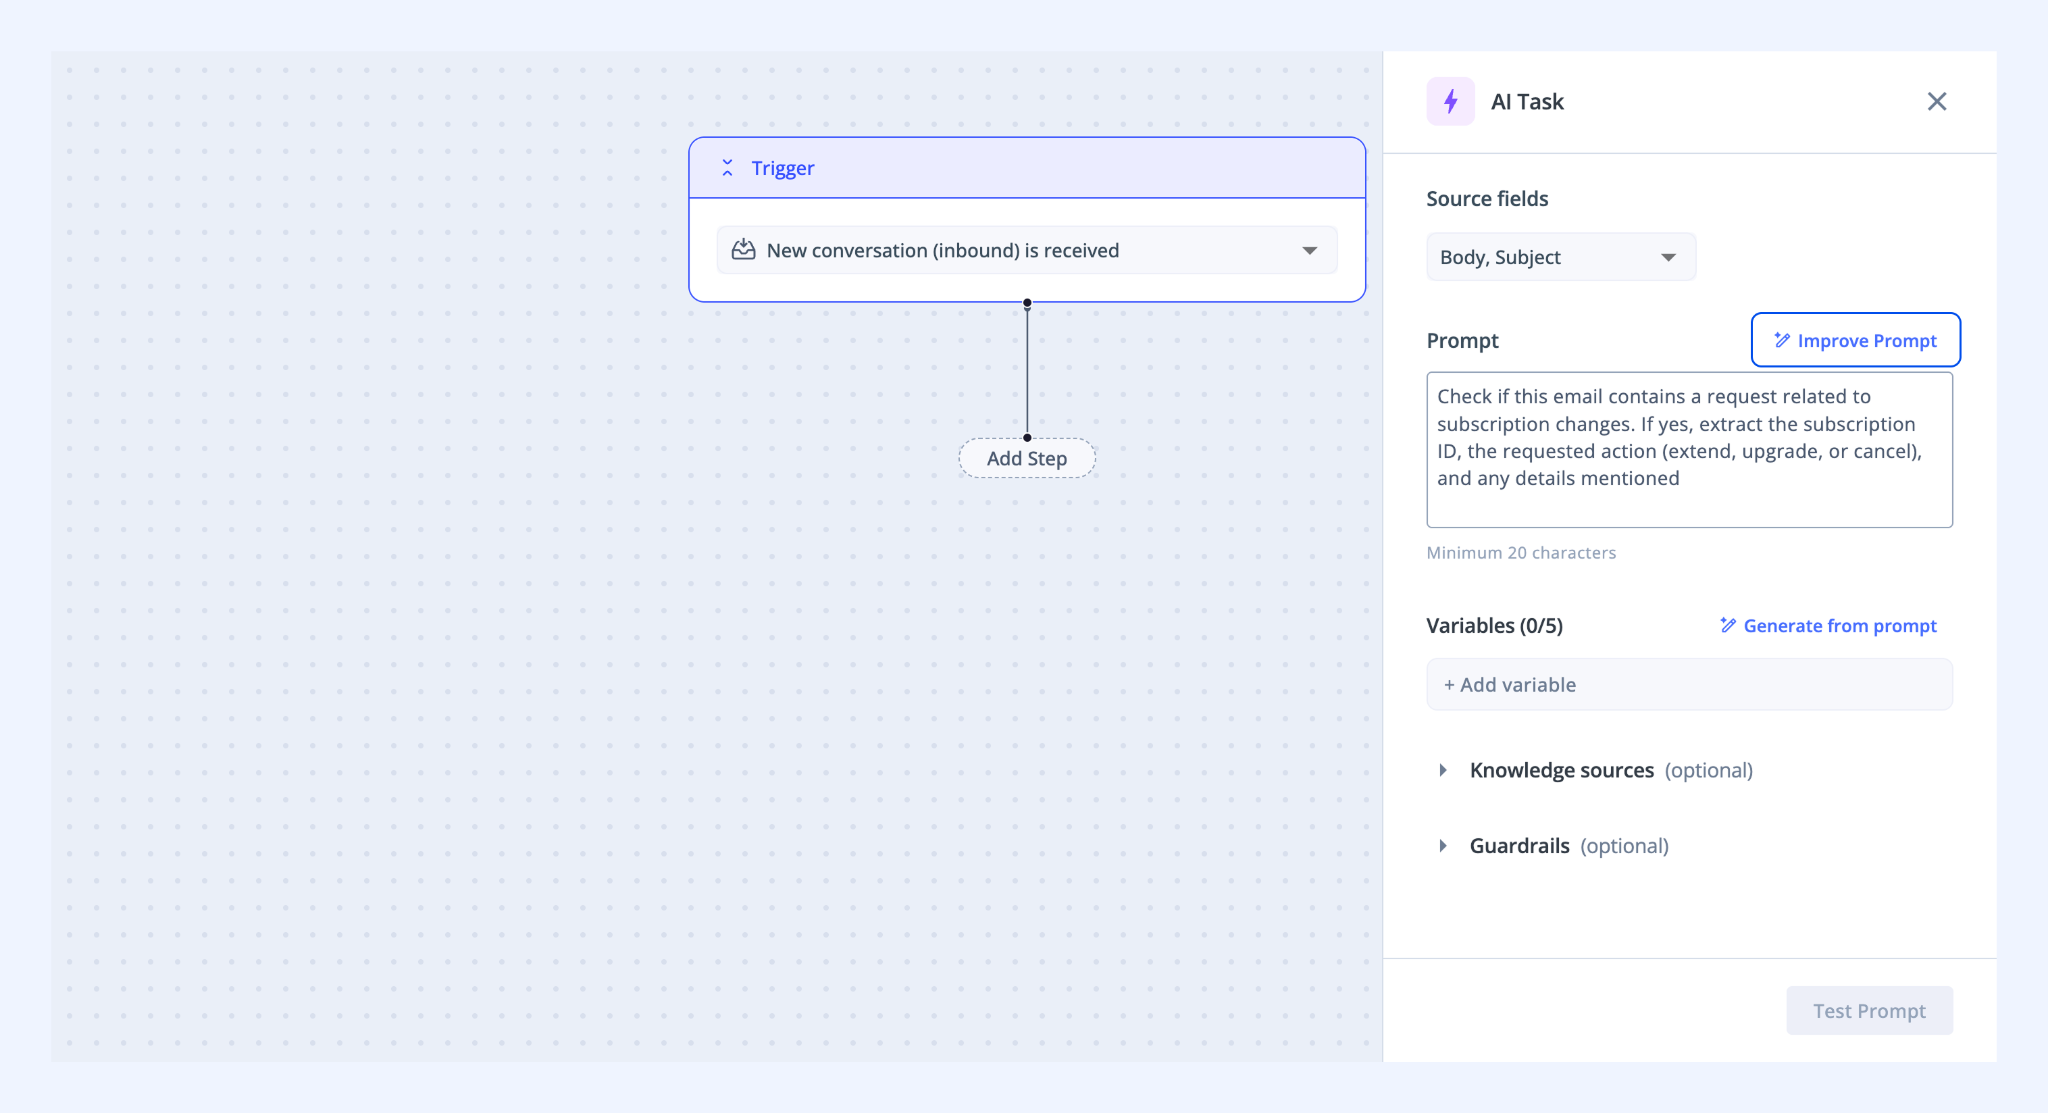
Step 6: Write your prompt
Describe what you want the AI to do. For example:
“Check if this email contains a request related to subscription changes. If yes, extract the subscription ID, the requested action (extend, upgrade, or cancel), and any details mentioned.”
Click Improve Prompt to refine your instructions.
Step 7: Generate variables
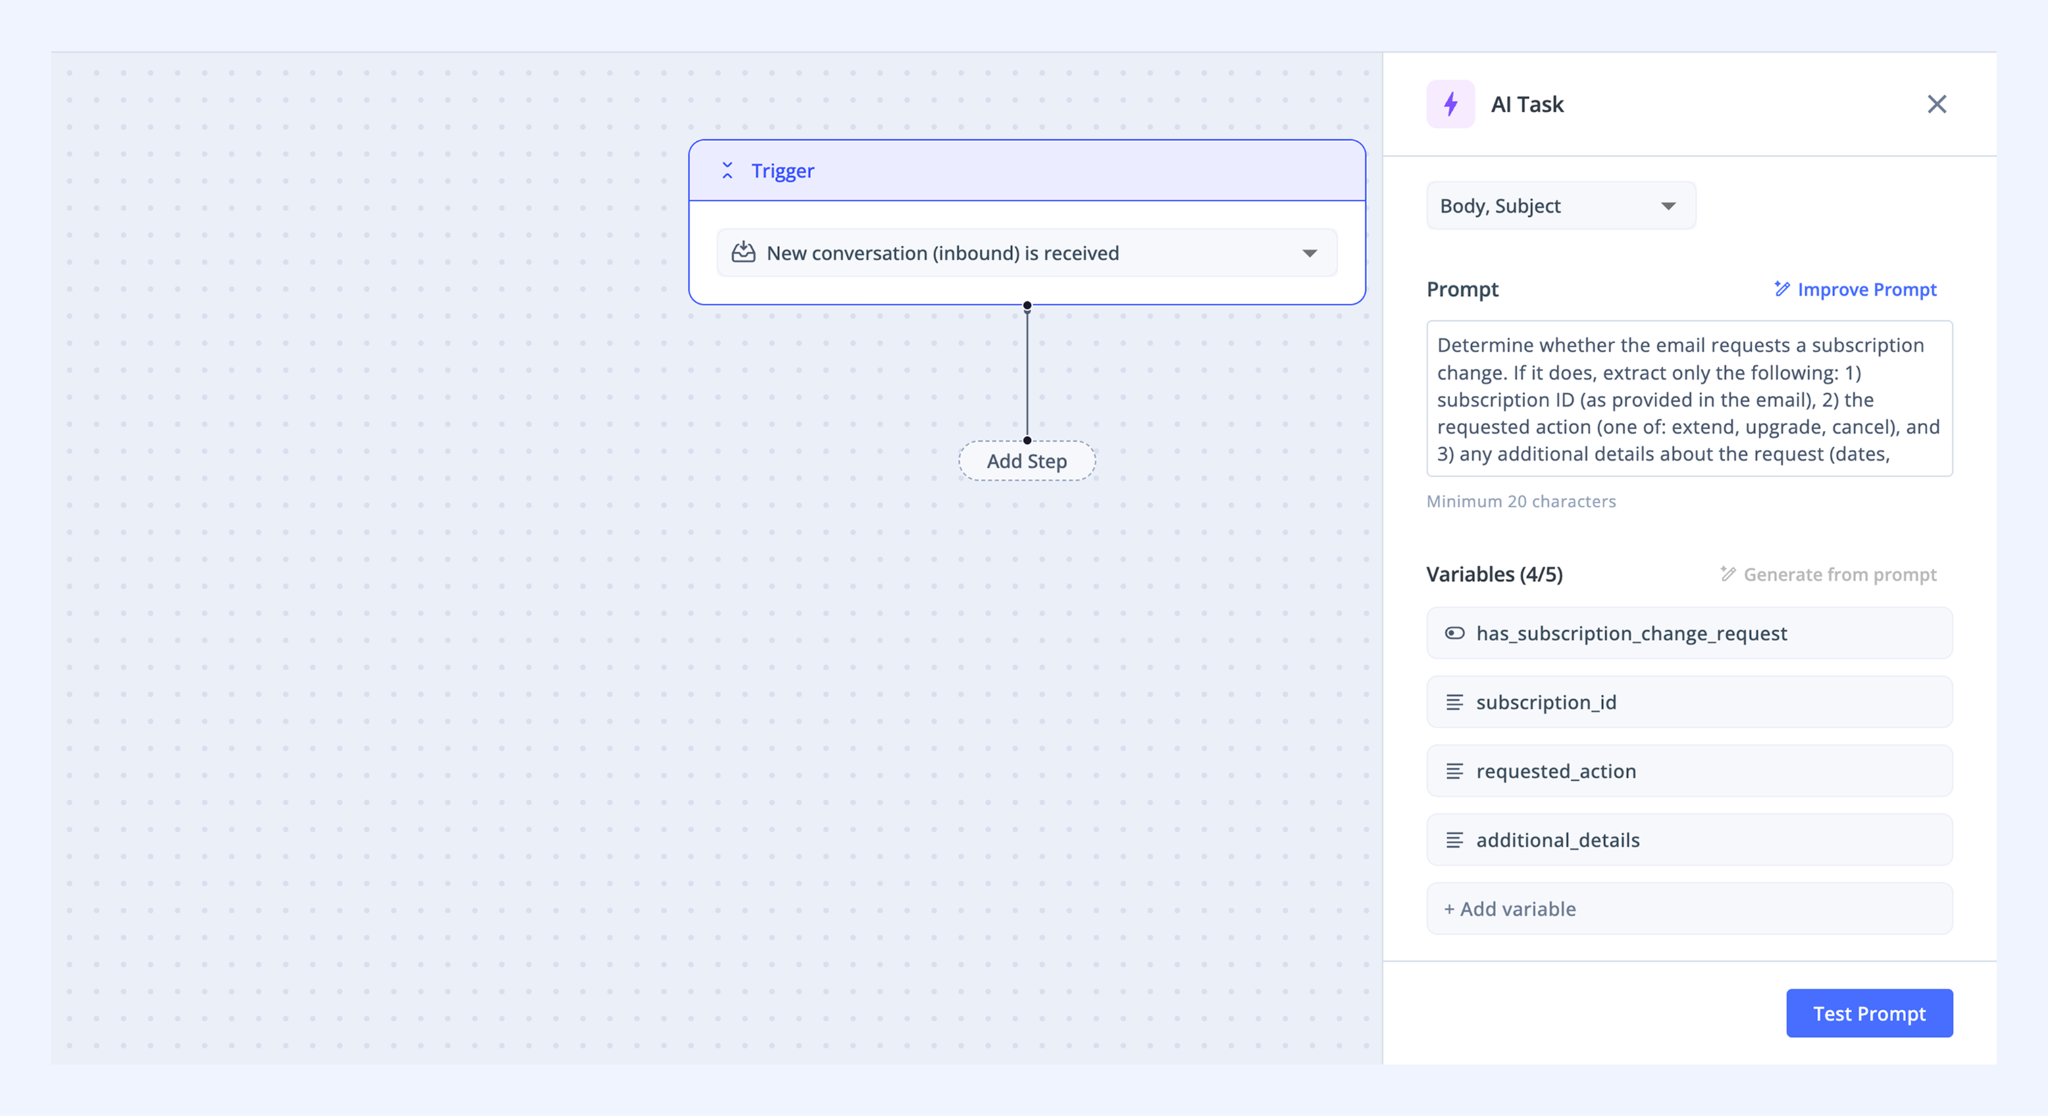
Click Generate from prompt. Hiver AI will analyze your prompt and create variables for storing the extracted data (for example, subscription_id or requested_action) so you can use them in later steps of your automation.
Step 8: Review and refine
Check the suggested variables. If needed, update your prompt and click Generate from prompt again.
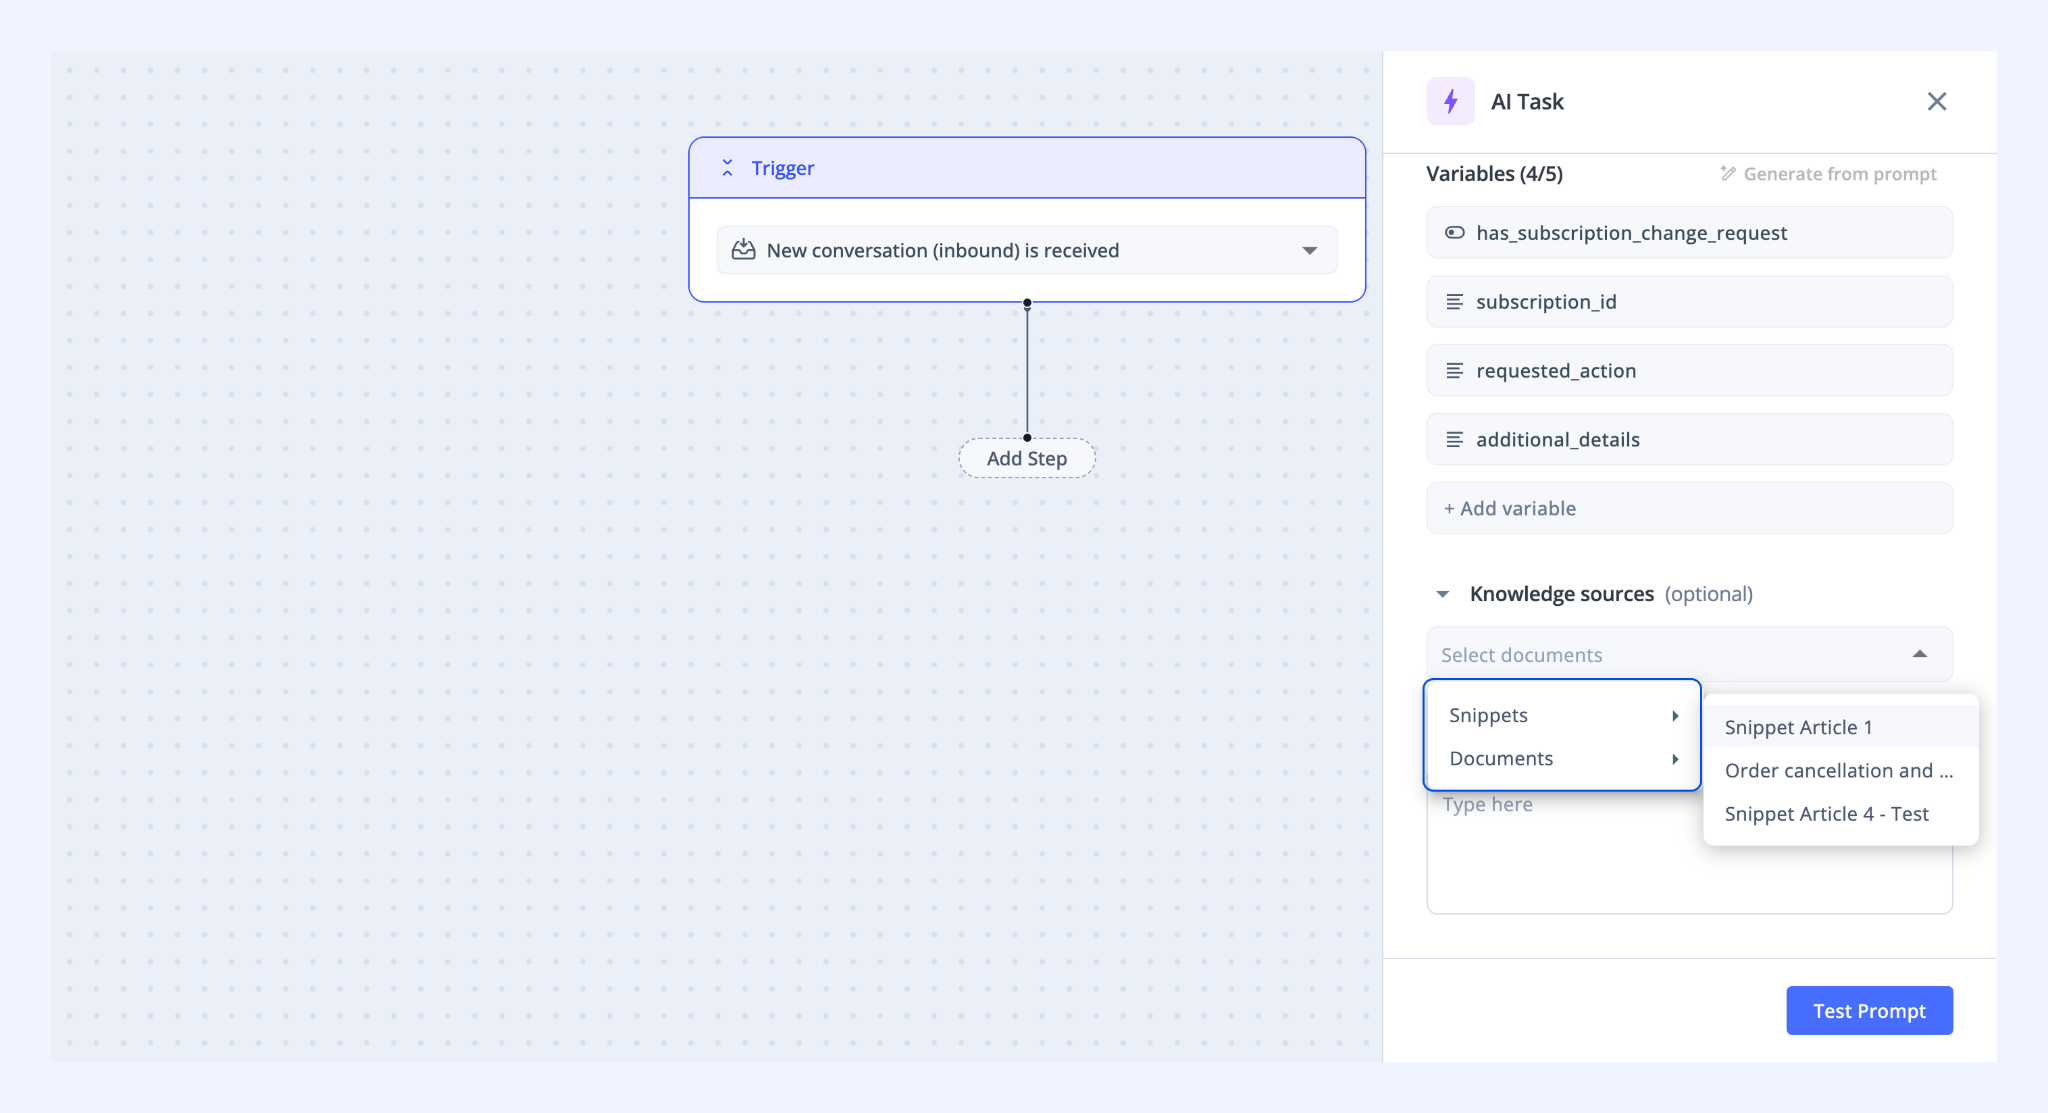
Step 9: (Optional) Improve accuracy with additional controls
Upload snippets or custom documents that AI can reference while running the task. This helps ensure outputs stay aligned with your approved content. Use this when:
- The task depends on internal policies or workflows, for example plan information, subscription values, currency conversion table, and refund and discount policy
- You want consistent, grounded outputs
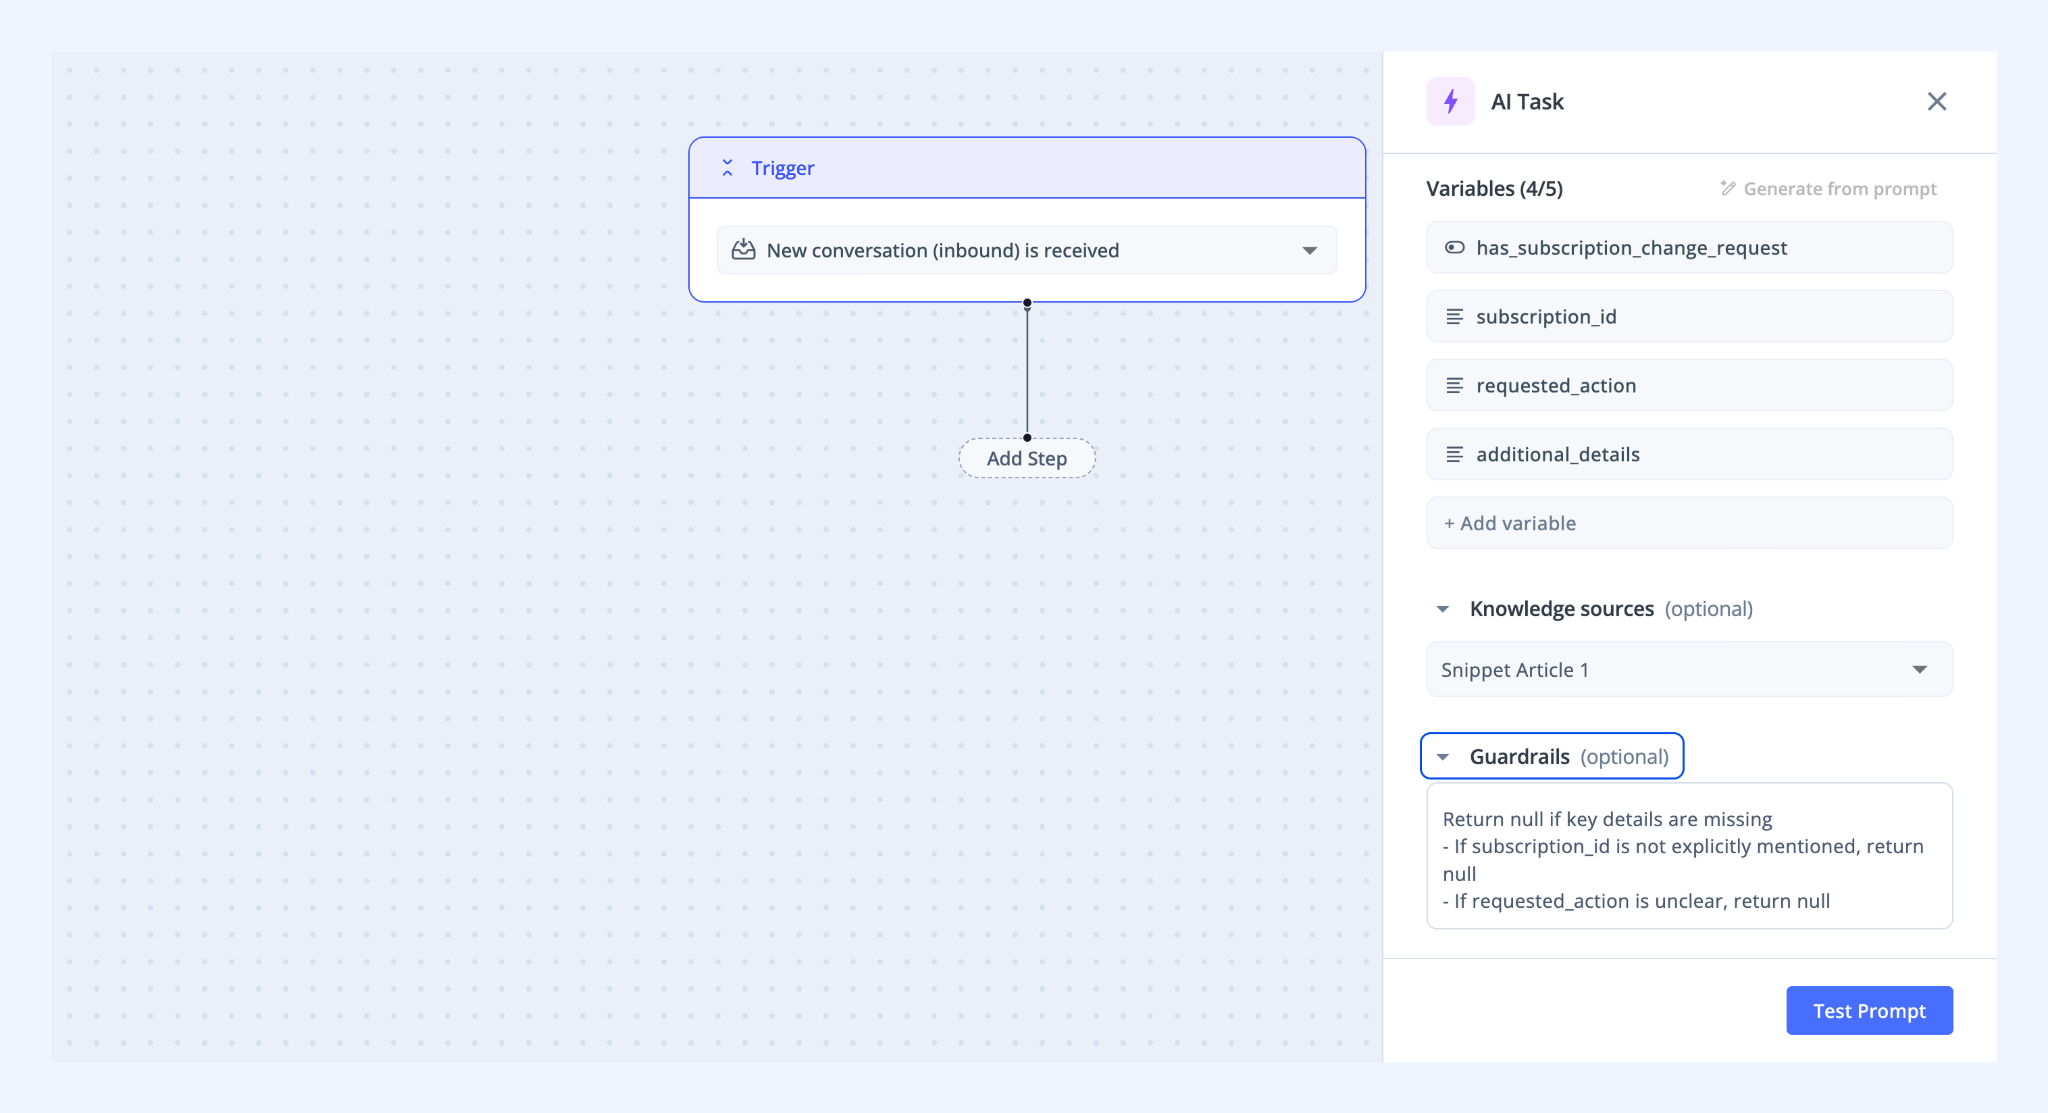
ii) Guardrails
Define rules that AI must follow when extracting data. For example:
- Restrict outputs to specific values
- Return null if information is missing
- Only extract data when confidence meets a threshold
You can use guardrails when:
- Accuracy is critical
- You want to prevent assumptions
Step 10: Test the AI Task
Click Test prompt and select a recent conversation.
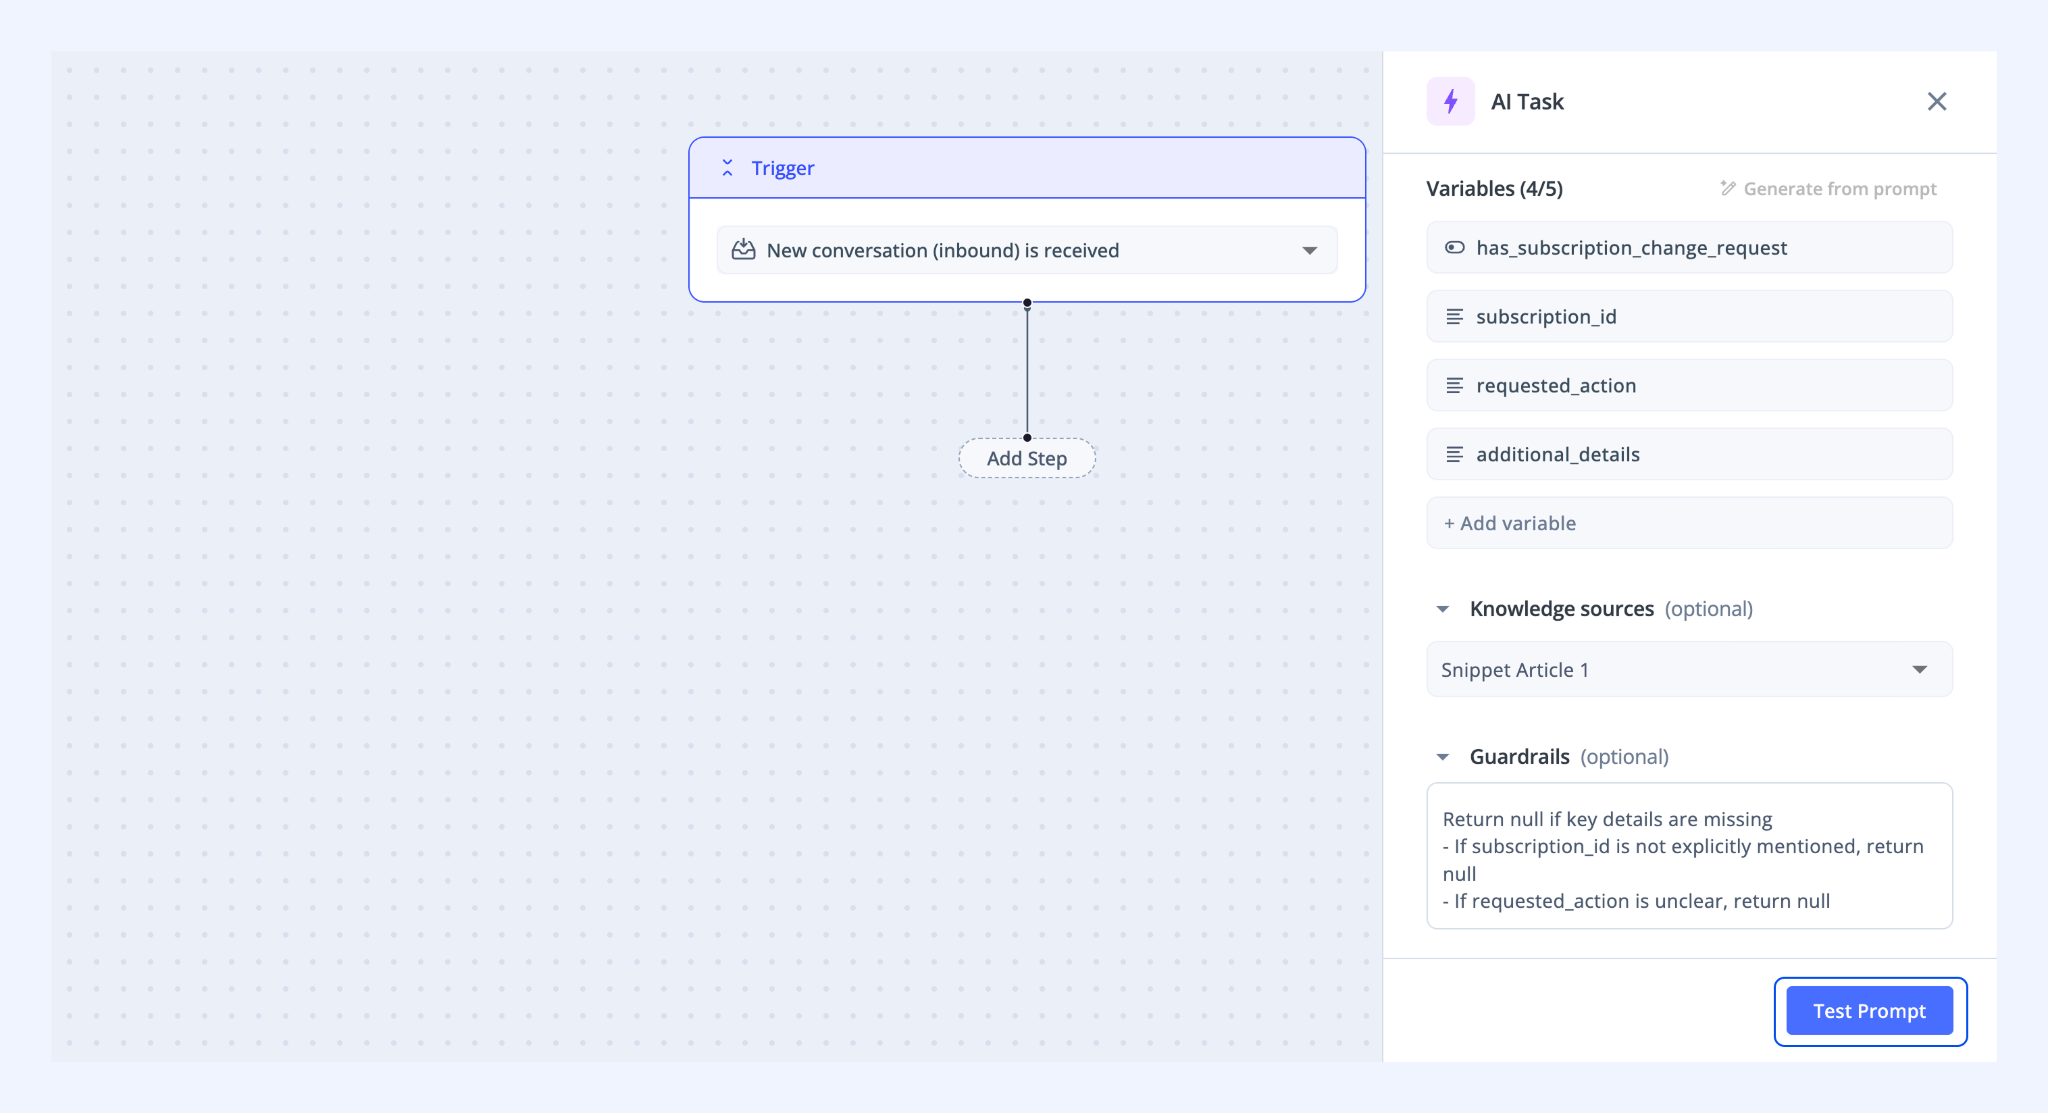
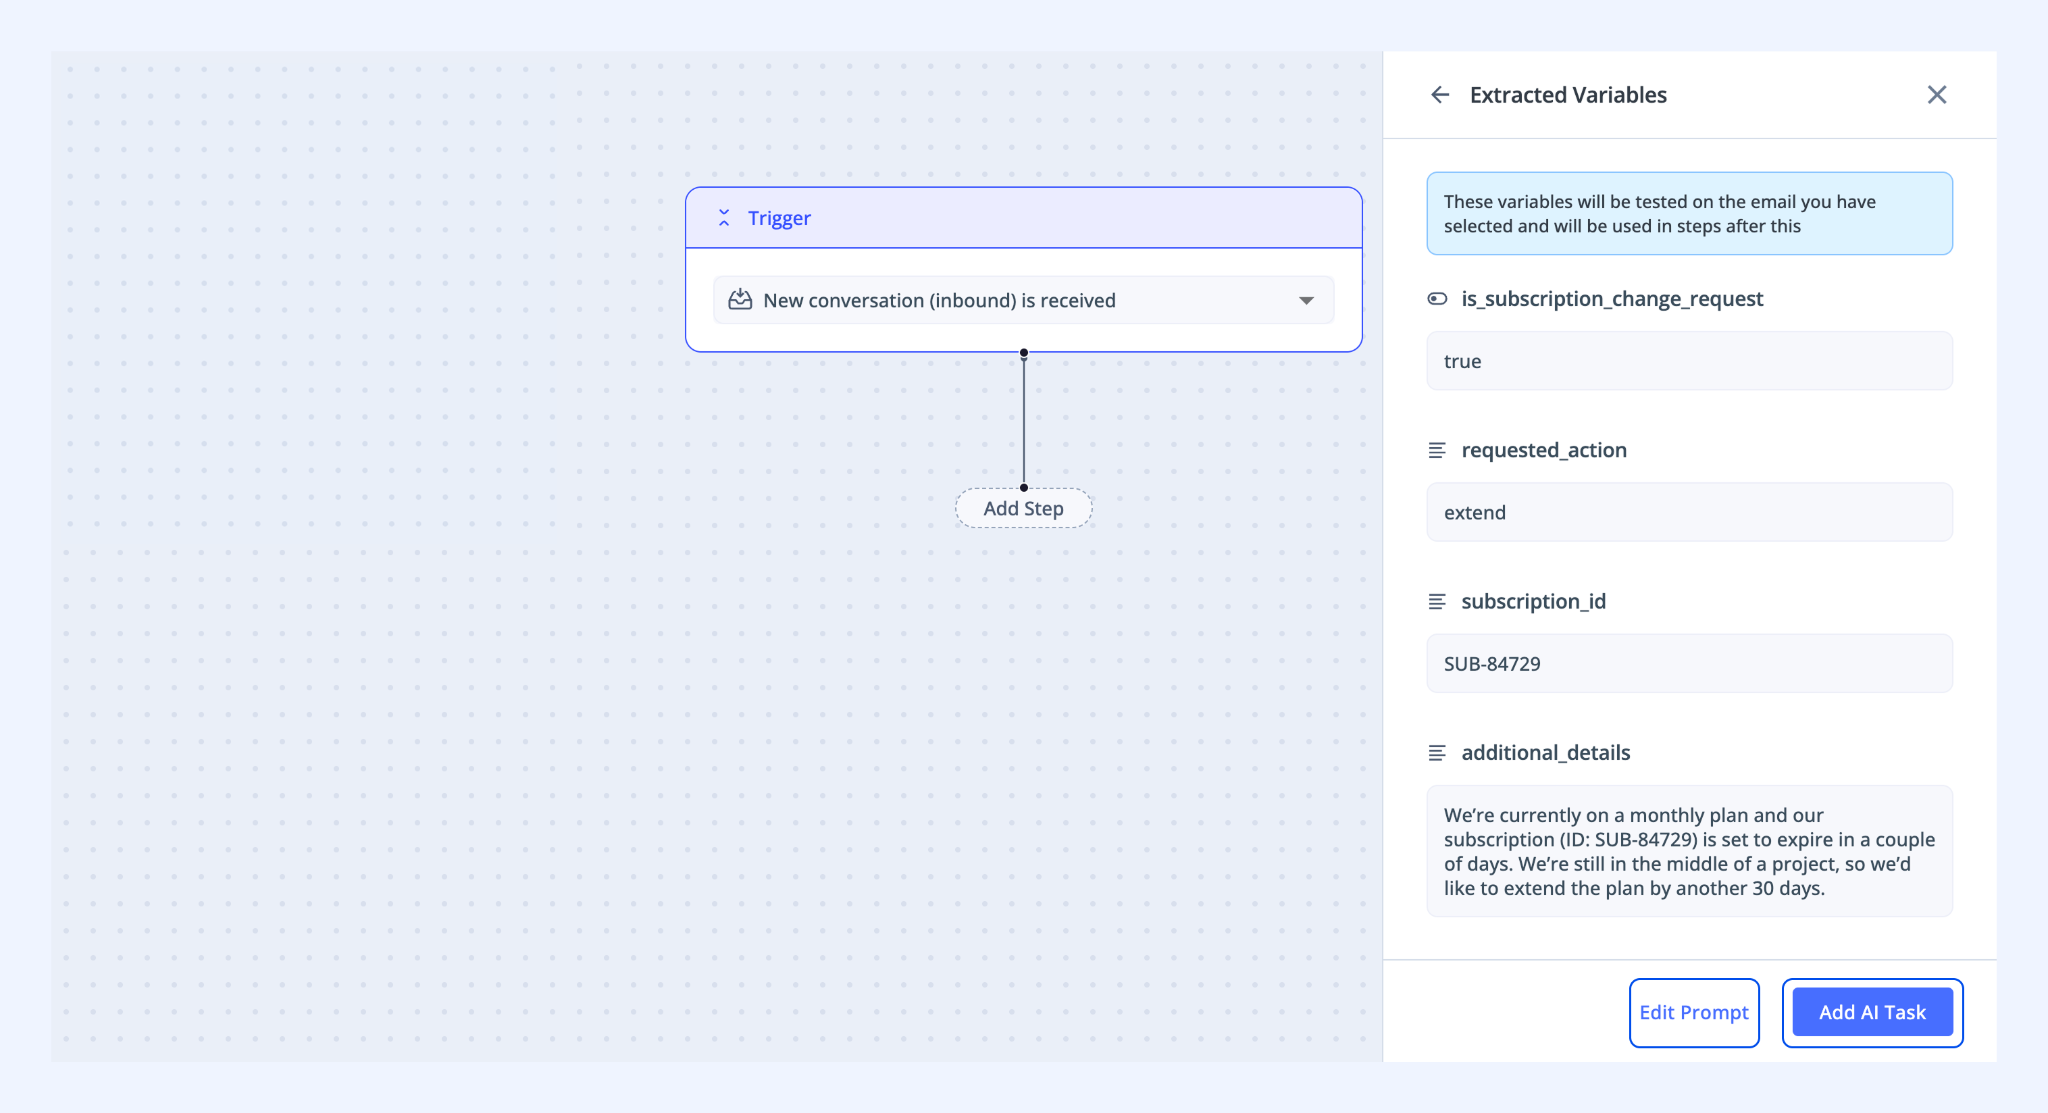
Review the conversation and click Confirm. Hiver AI will process the conversation and display the extracted output.
- If the results look correct, click Add AI Task
- If not, click Edit prompt, refine your instructions, and test again
Step 11: Add a condition
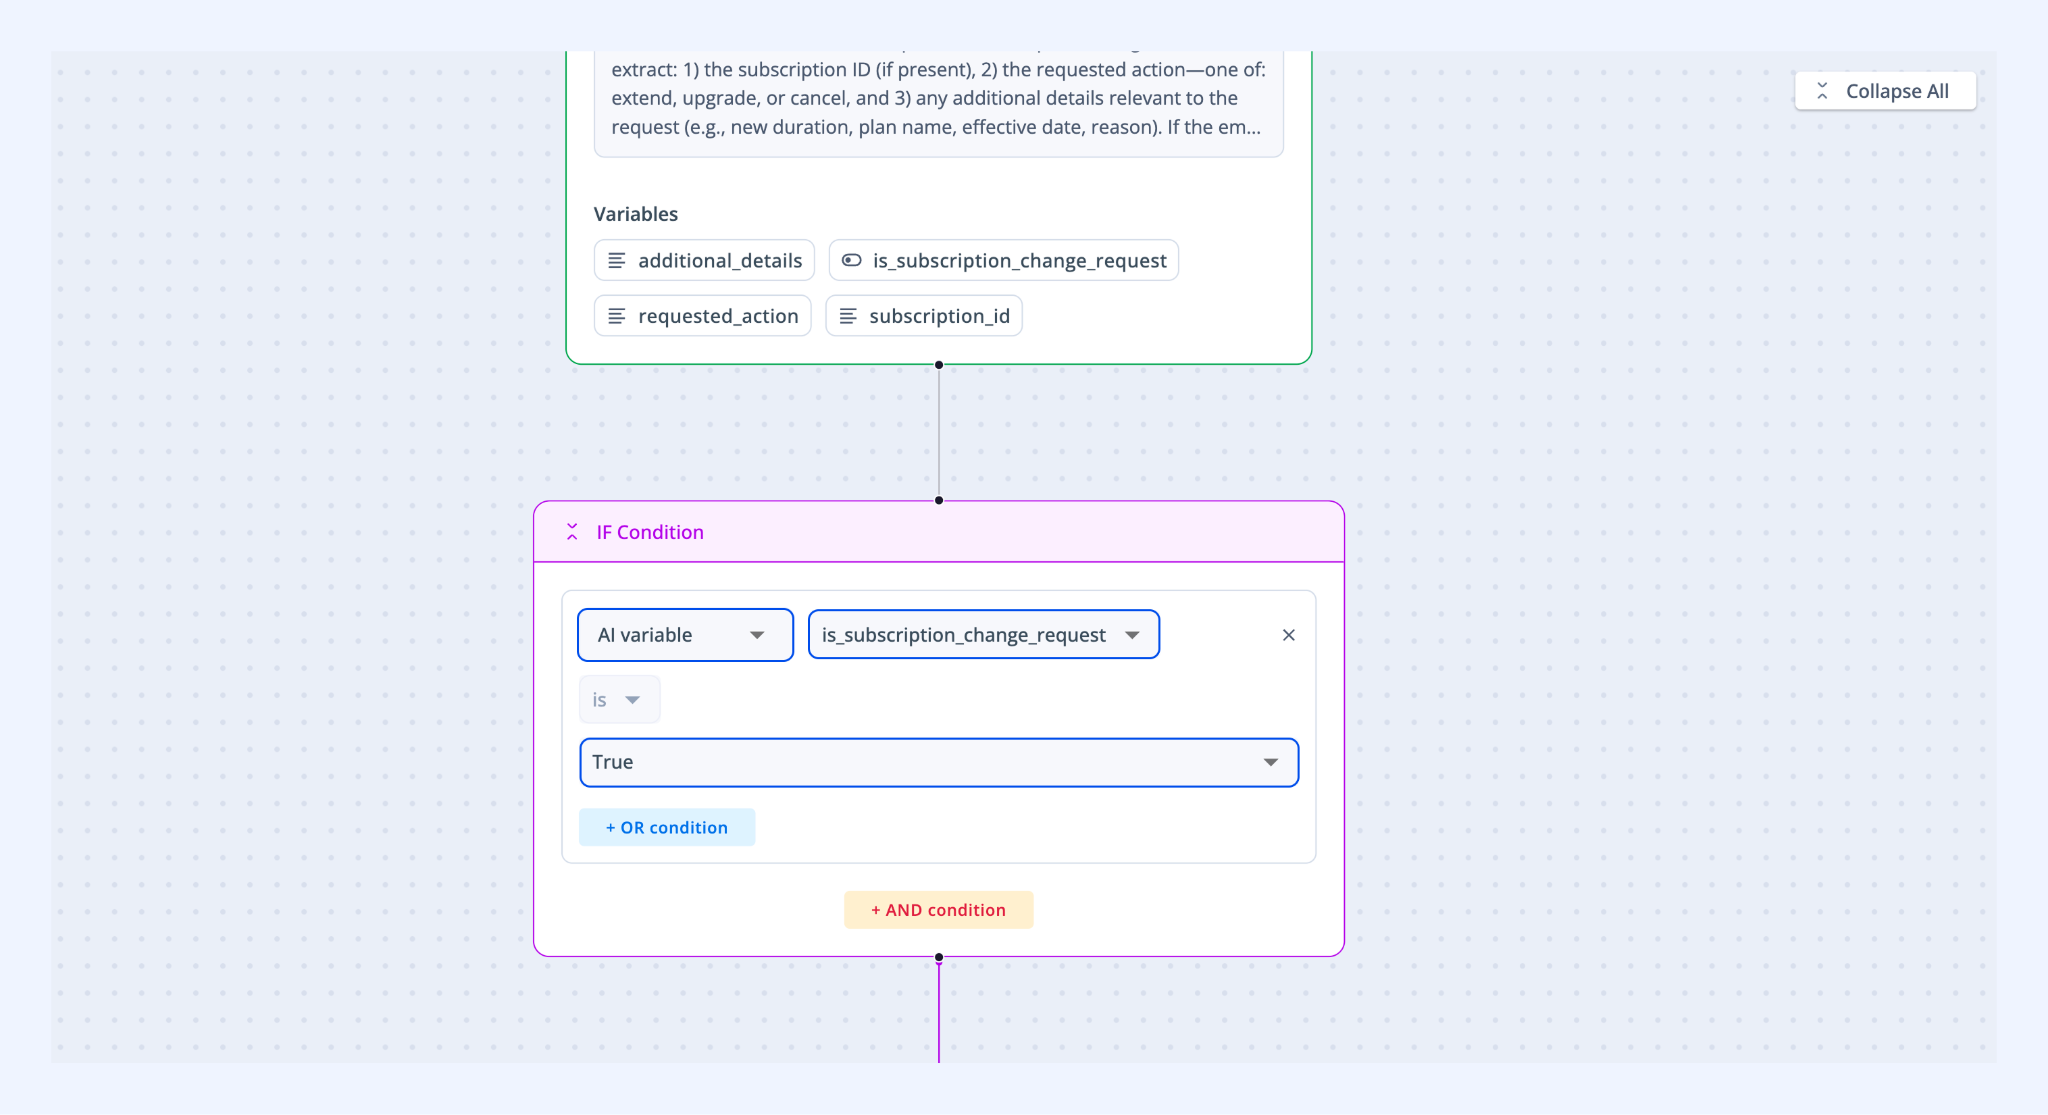
After creating the AI Task, you can use the generated AI variable is_subscription_change_request to filter conversations containing relevant requests and control the next steps.
Add an IF condition and select the AI variable is_subscription_change_request. Set the condition to True.
Step 12: Add next steps
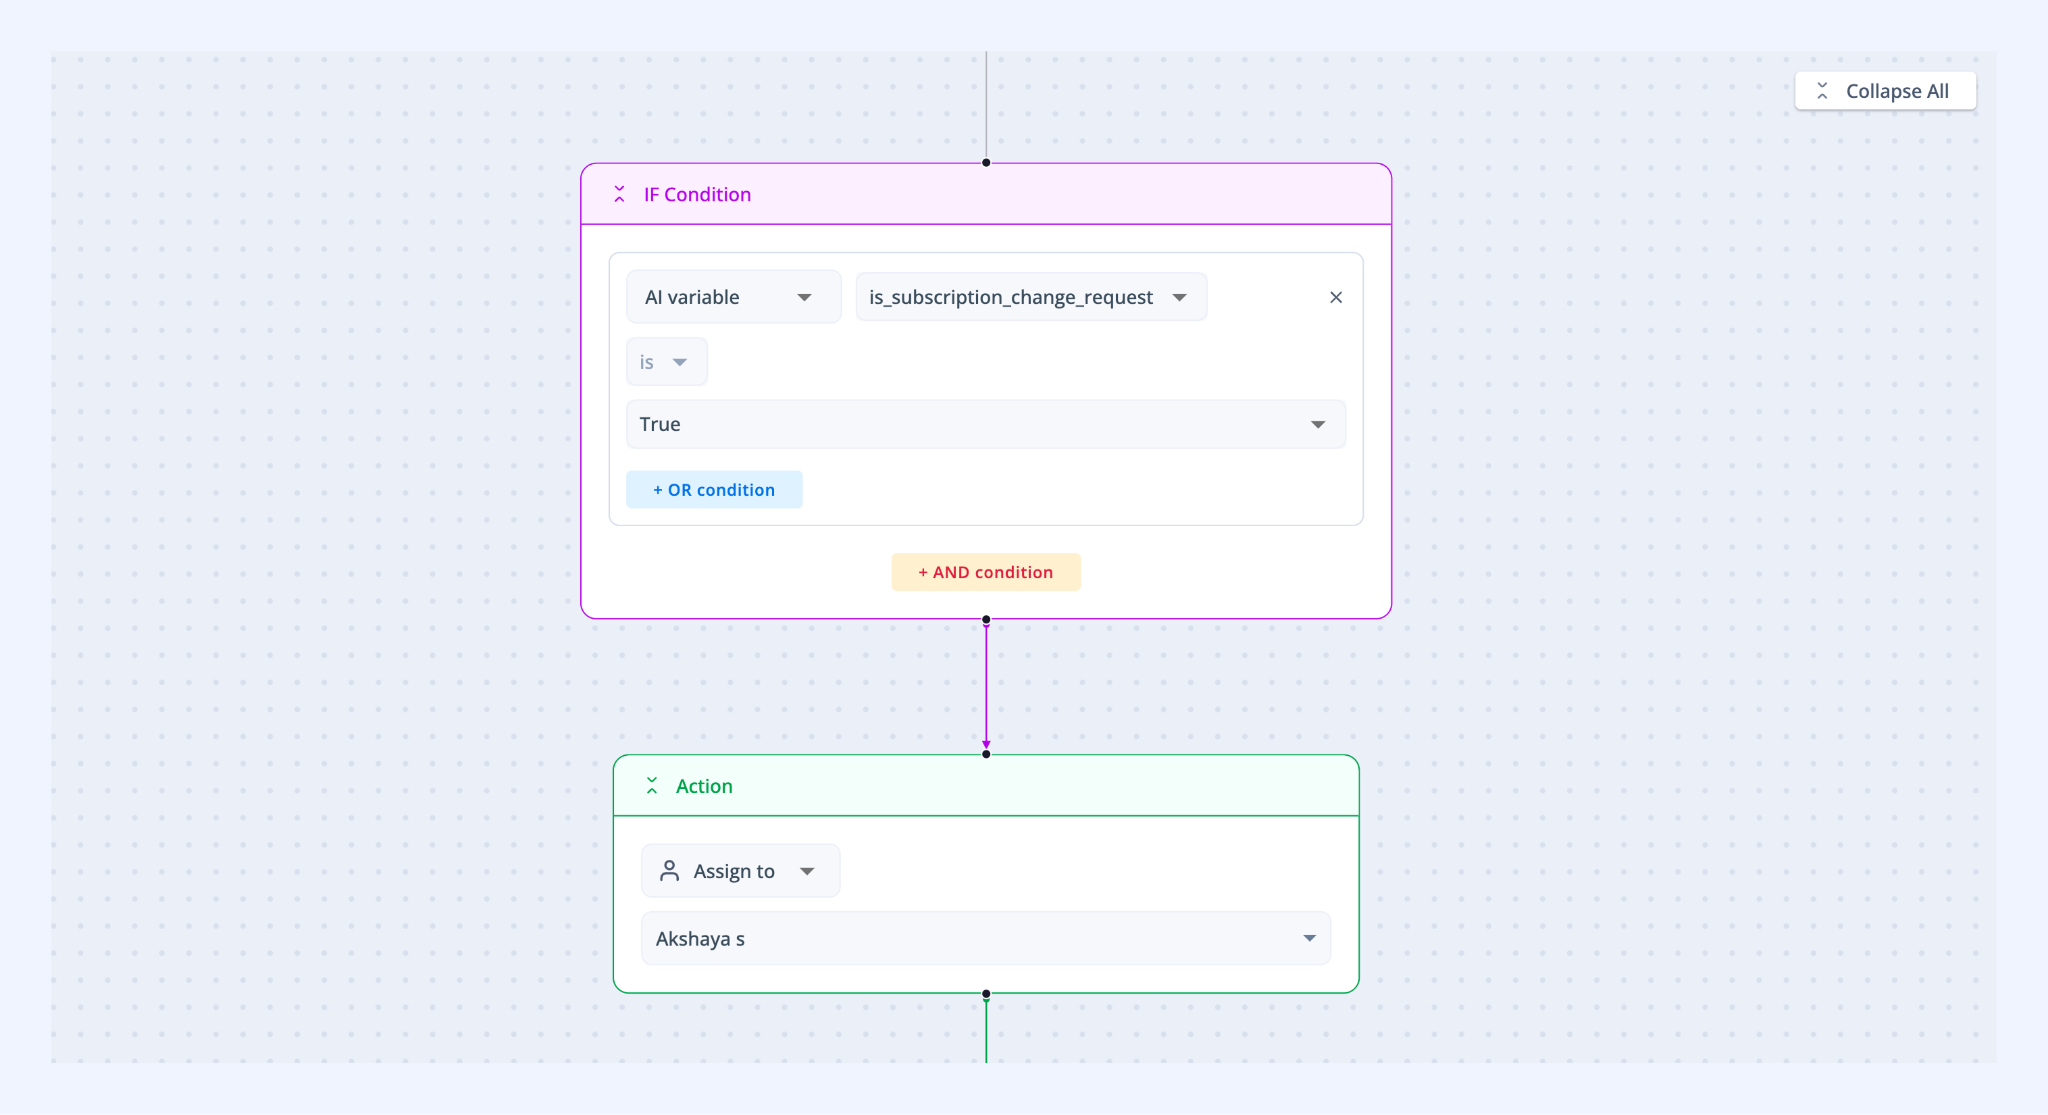
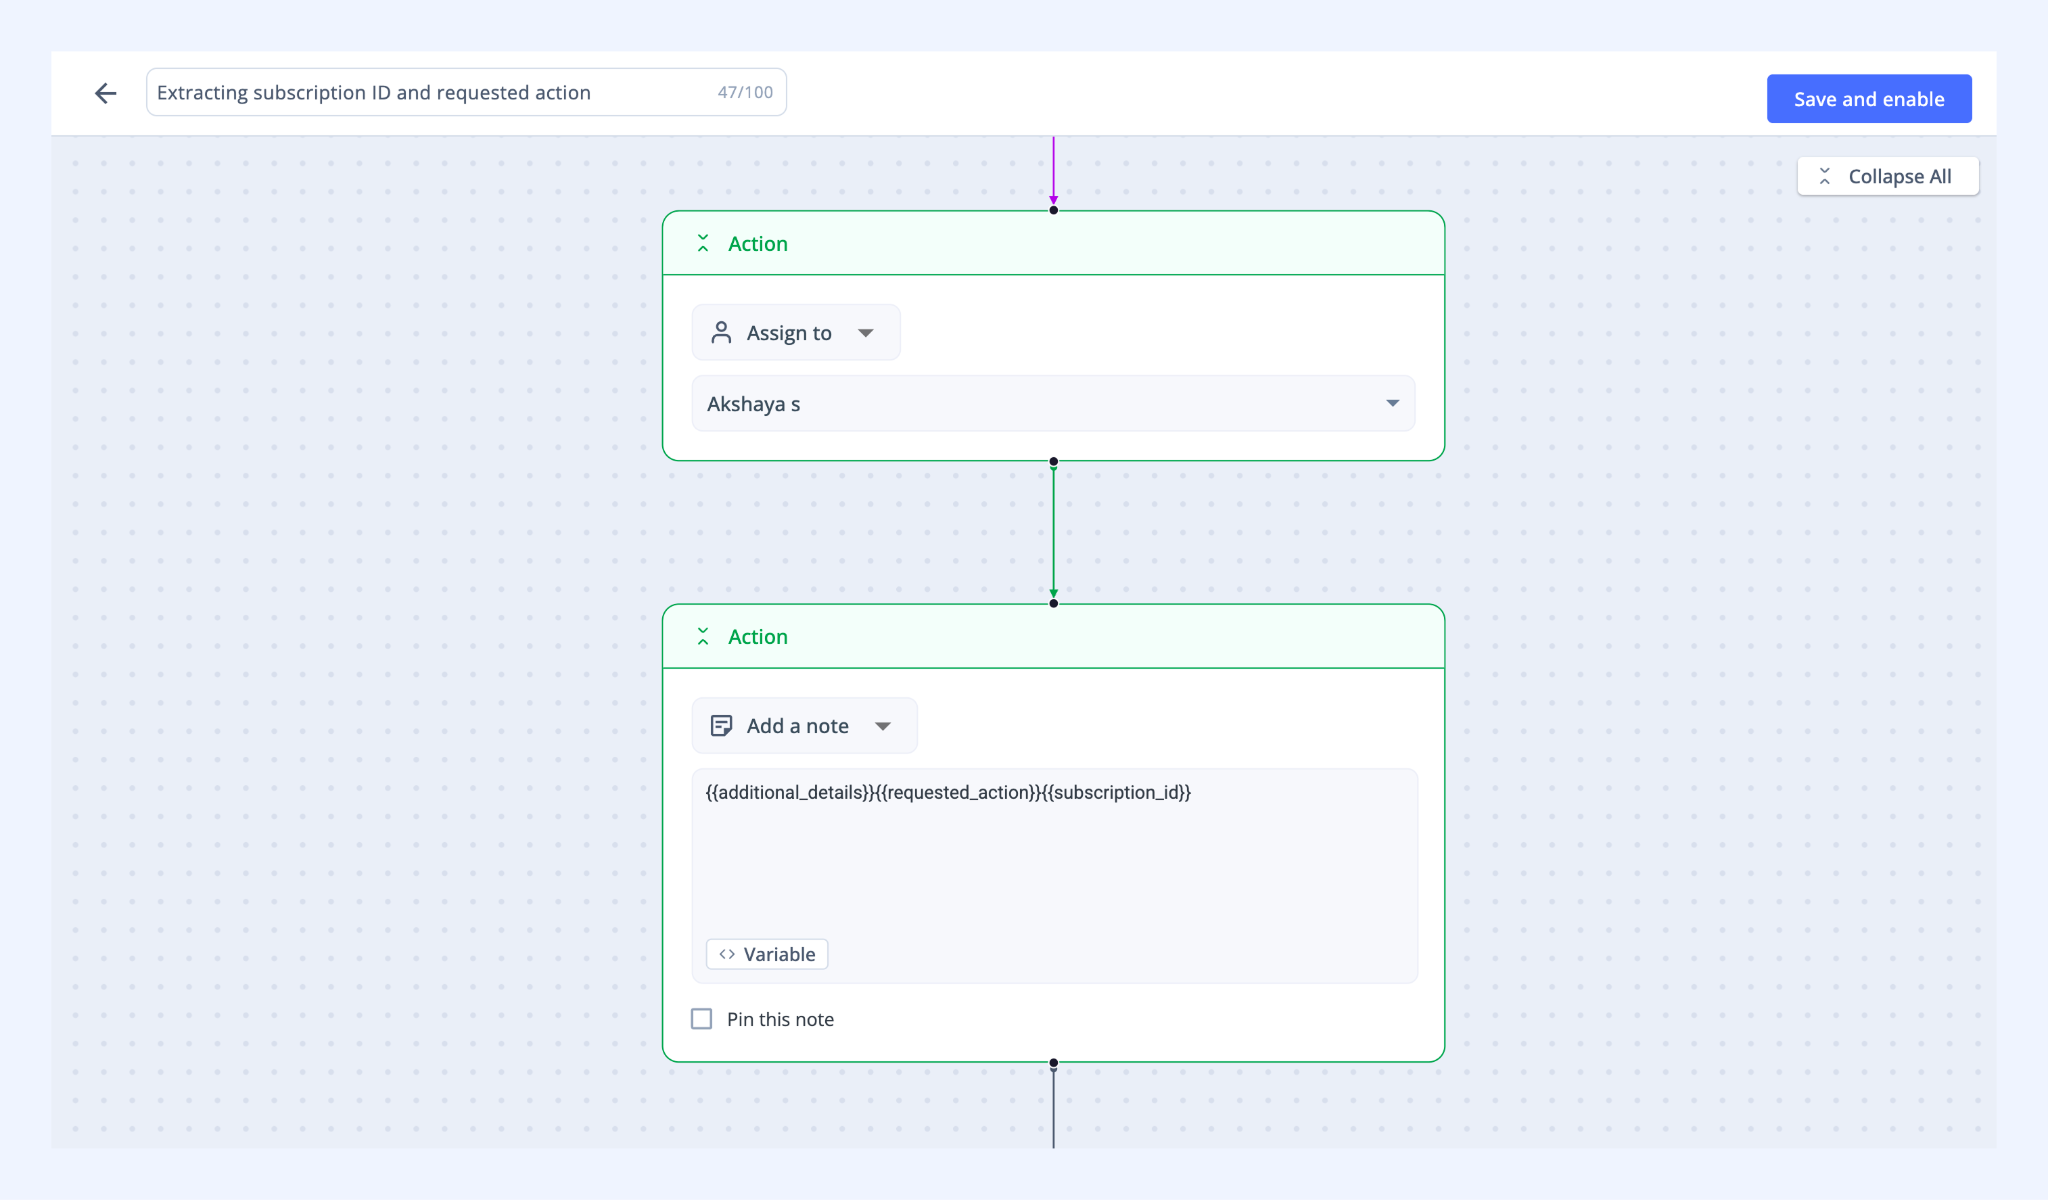
i) Assign conversation
Add an action to assign the conversation to a member from your billing team. You can do this by clicking Add step → Action, and selecting a member.
This helps ensure subscription-related requests are handled by the right people without manual triaging.
ii) Add extracted details to a note
Click Add step → Action, then select Add a note.
In the note editor:
- Click <> Variable, and insert the AI variables generated earlier (such as subscription_id, requested_action, or additional_details)
- Alternatively, you can also type the AI variables in curly braces {{}}
This adds structured context directly to the conversation, so the assigned member can quickly understand the request without having to read the entire thread.
You can also use these variables in other actions. For example, you can send the extracted data to your internal systems or third-party tools using the Make an API call action to trigger follow-up workflows.
Step 13: Publish the automation
Click Save and Enable to activate your workflow.
What happens next
For incoming conversations that match your trigger, your automating will:
- Detect whether the conversation includes a subscription-related request using AI Task
- Extract relevant information from the conversation as AI Variables
- Assign the conversation to the appropriate team member
- Add a note with the extracted details