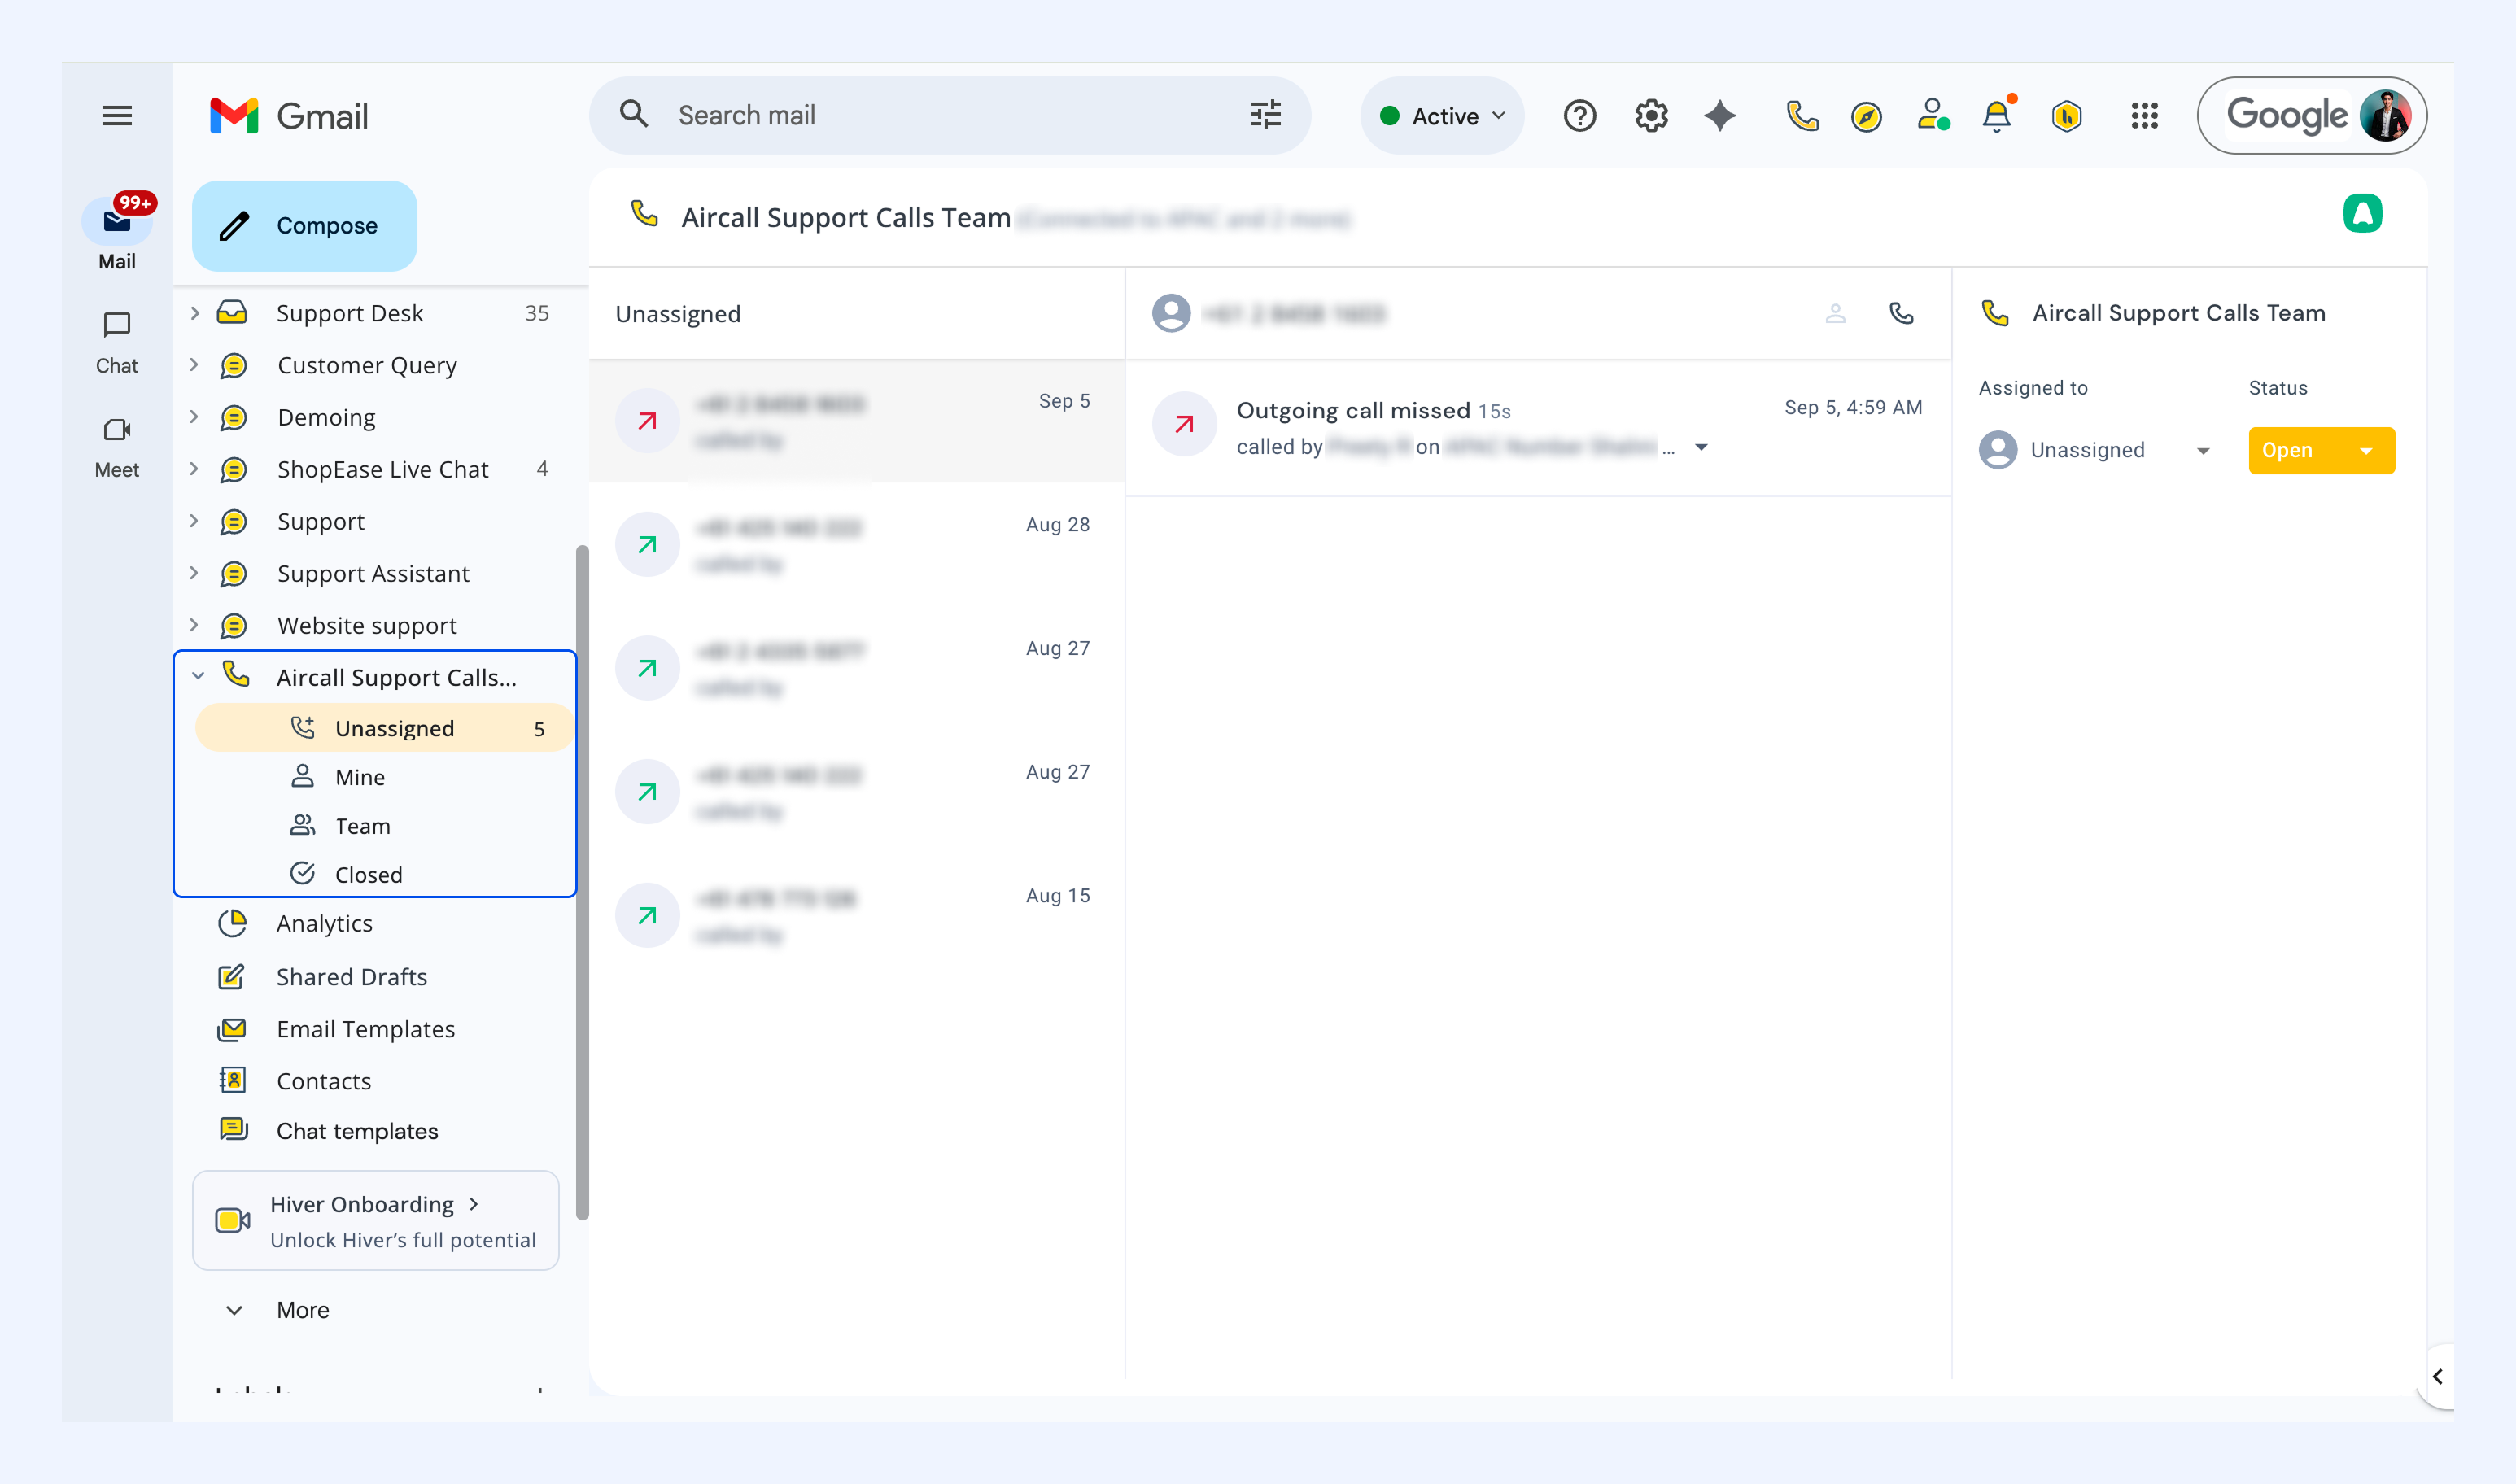
Setting up a Voice Inbox with Aircall in Hiver
Call support is one of the quickest ways for customers to reach your team, especially when issues are complex and difficult to describe over email or chat. To help you manage these interactions without leaving Gmail, Hiver supports Voice Inboxes, powered by an integration with Aircall, a leading cloud-based call center platform.
A Voice Inbox in Hiver is linked to your Aircall account. Once connected, Hiver automatically logs calls from the Aircall numbers you select, allowing your team to track, manage, and collaborate on call conversations directly from Gmail, just like any other shared inbox.
Note: Voice Inbox is a legacy feature and is only available to customers who signed up before May 18, 2026.
Prerequisites
Before you start, make sure:
- You have an active Aircall subscription.
- Your Hiver admin is also an admin in Aircall.
Create a Voice Inbox
Hiver connects to Aircall during setup so it can log calls from the numbers you select. After setup, all future calls to those numbers sync automatically.
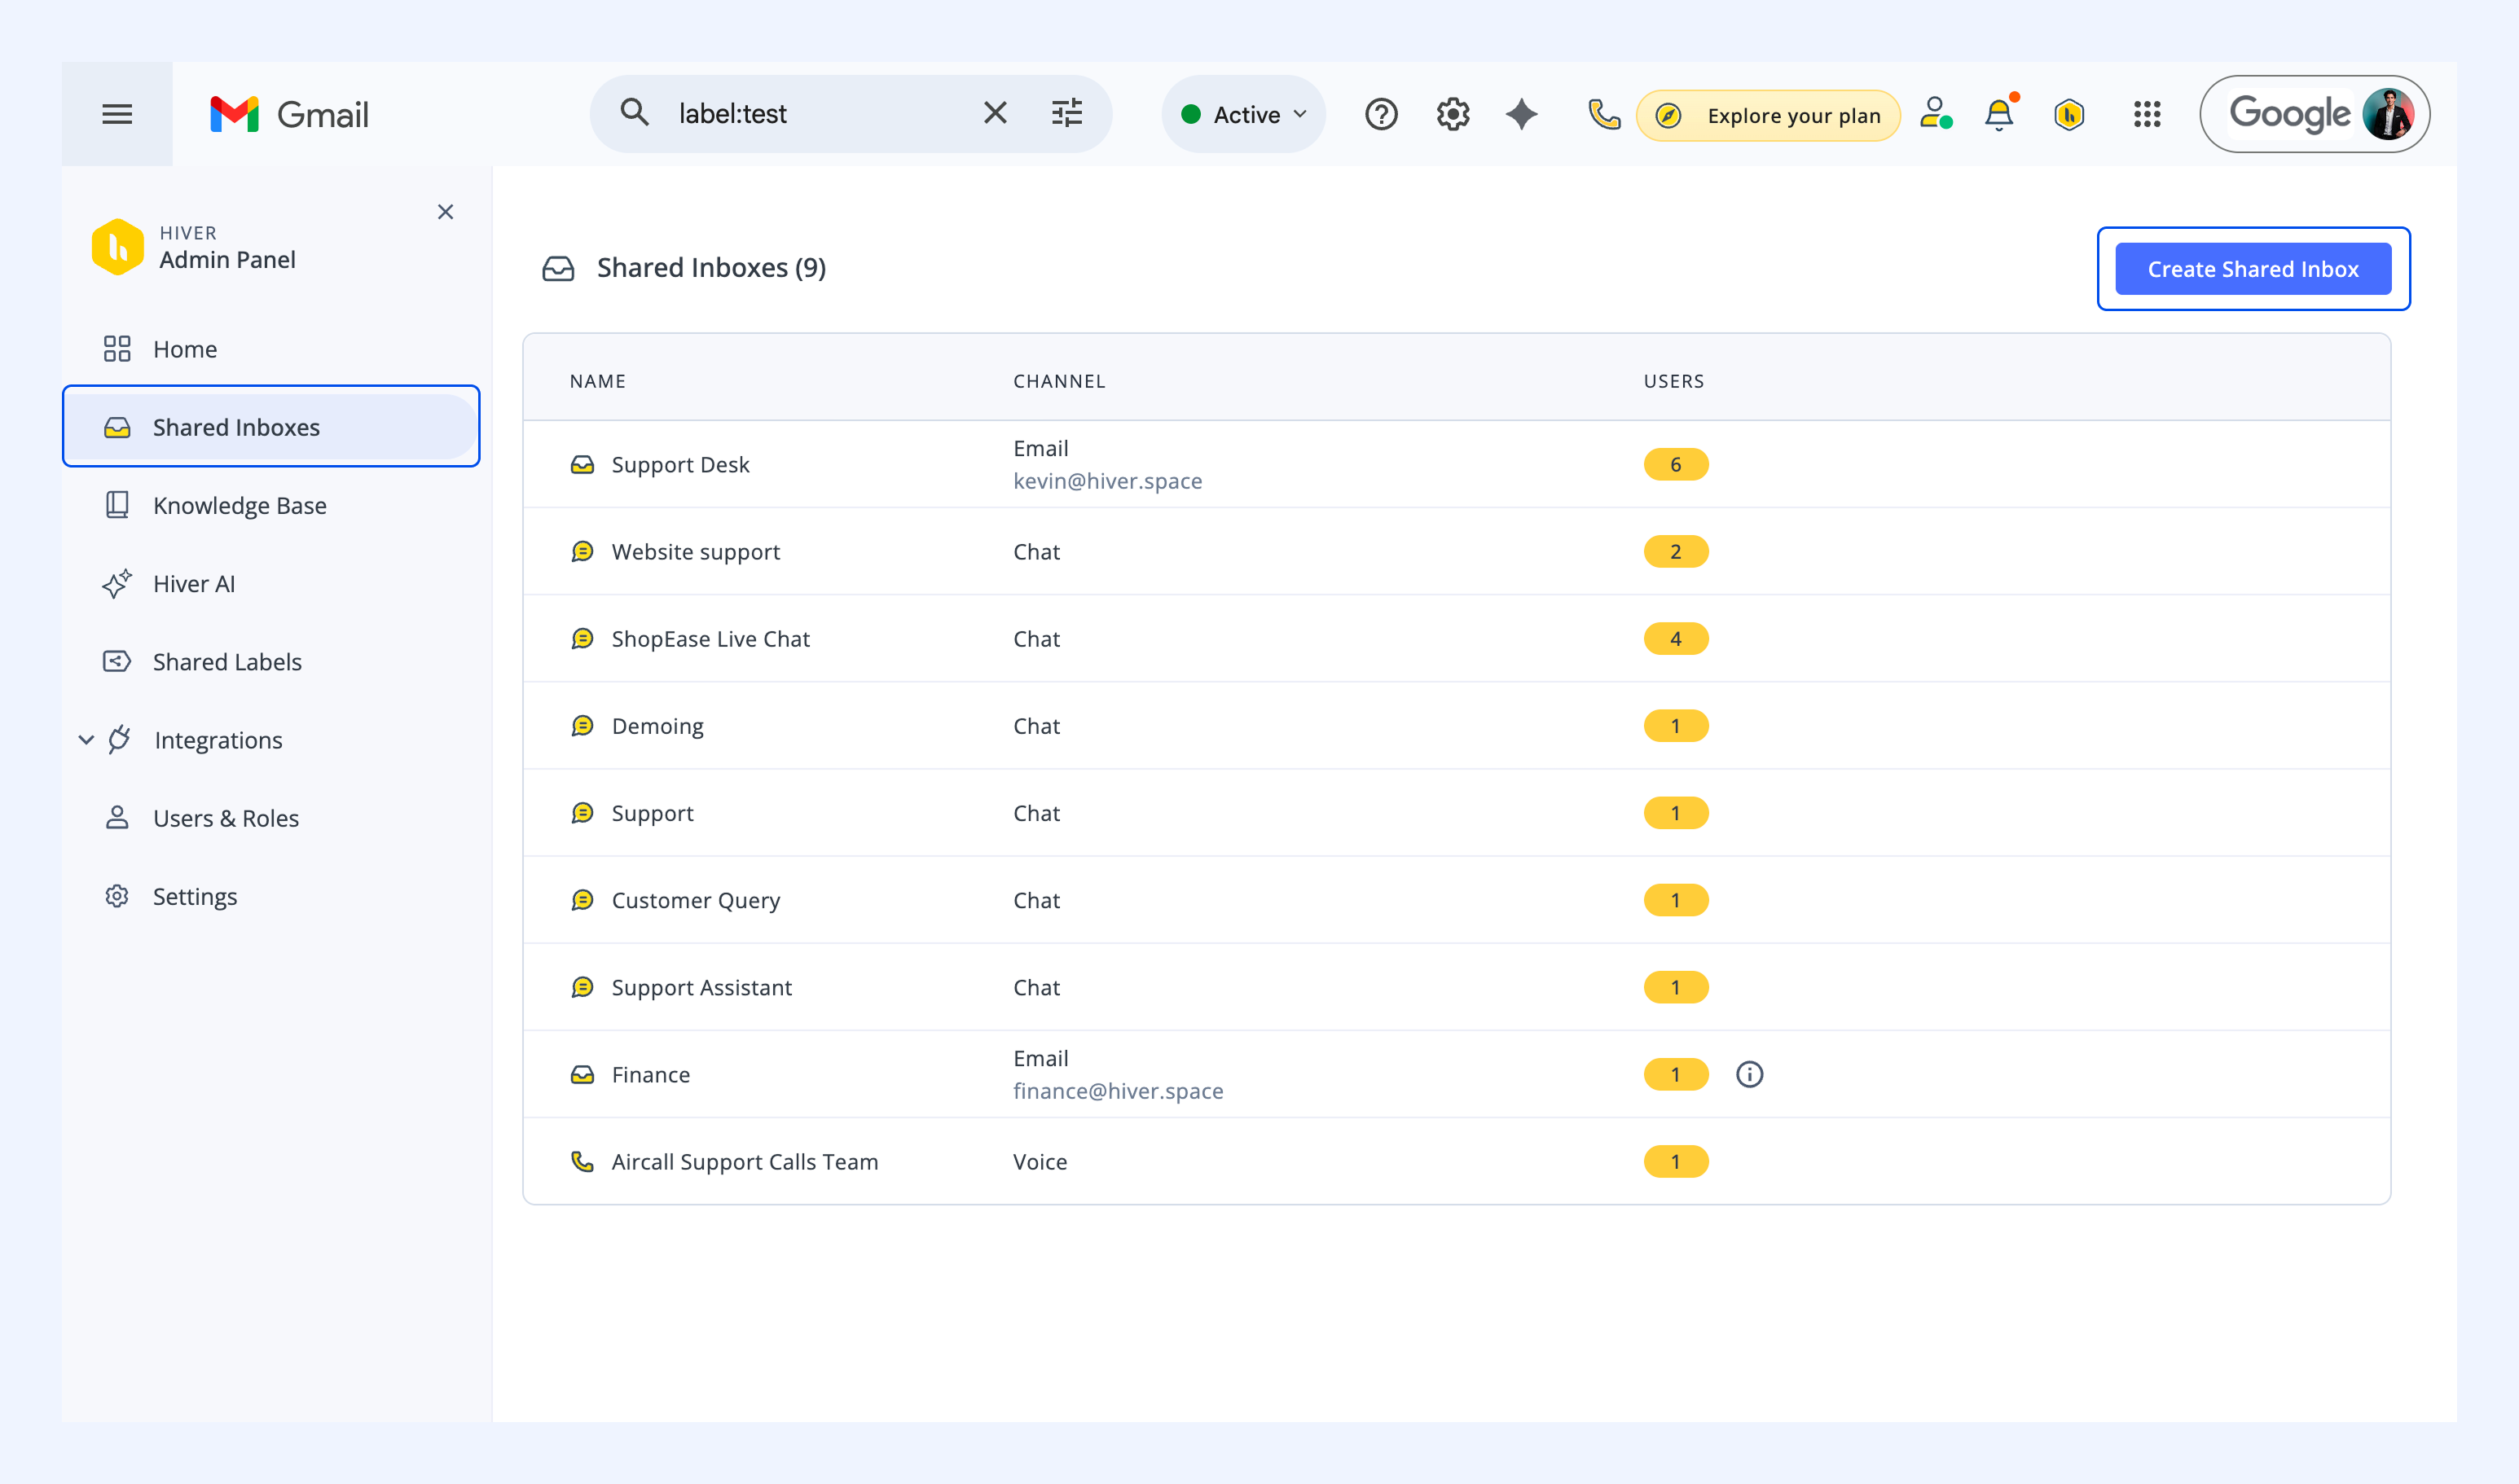
1. In Hiver Admin panel, go to Shared Inboxes and click Create Shared Inbox.
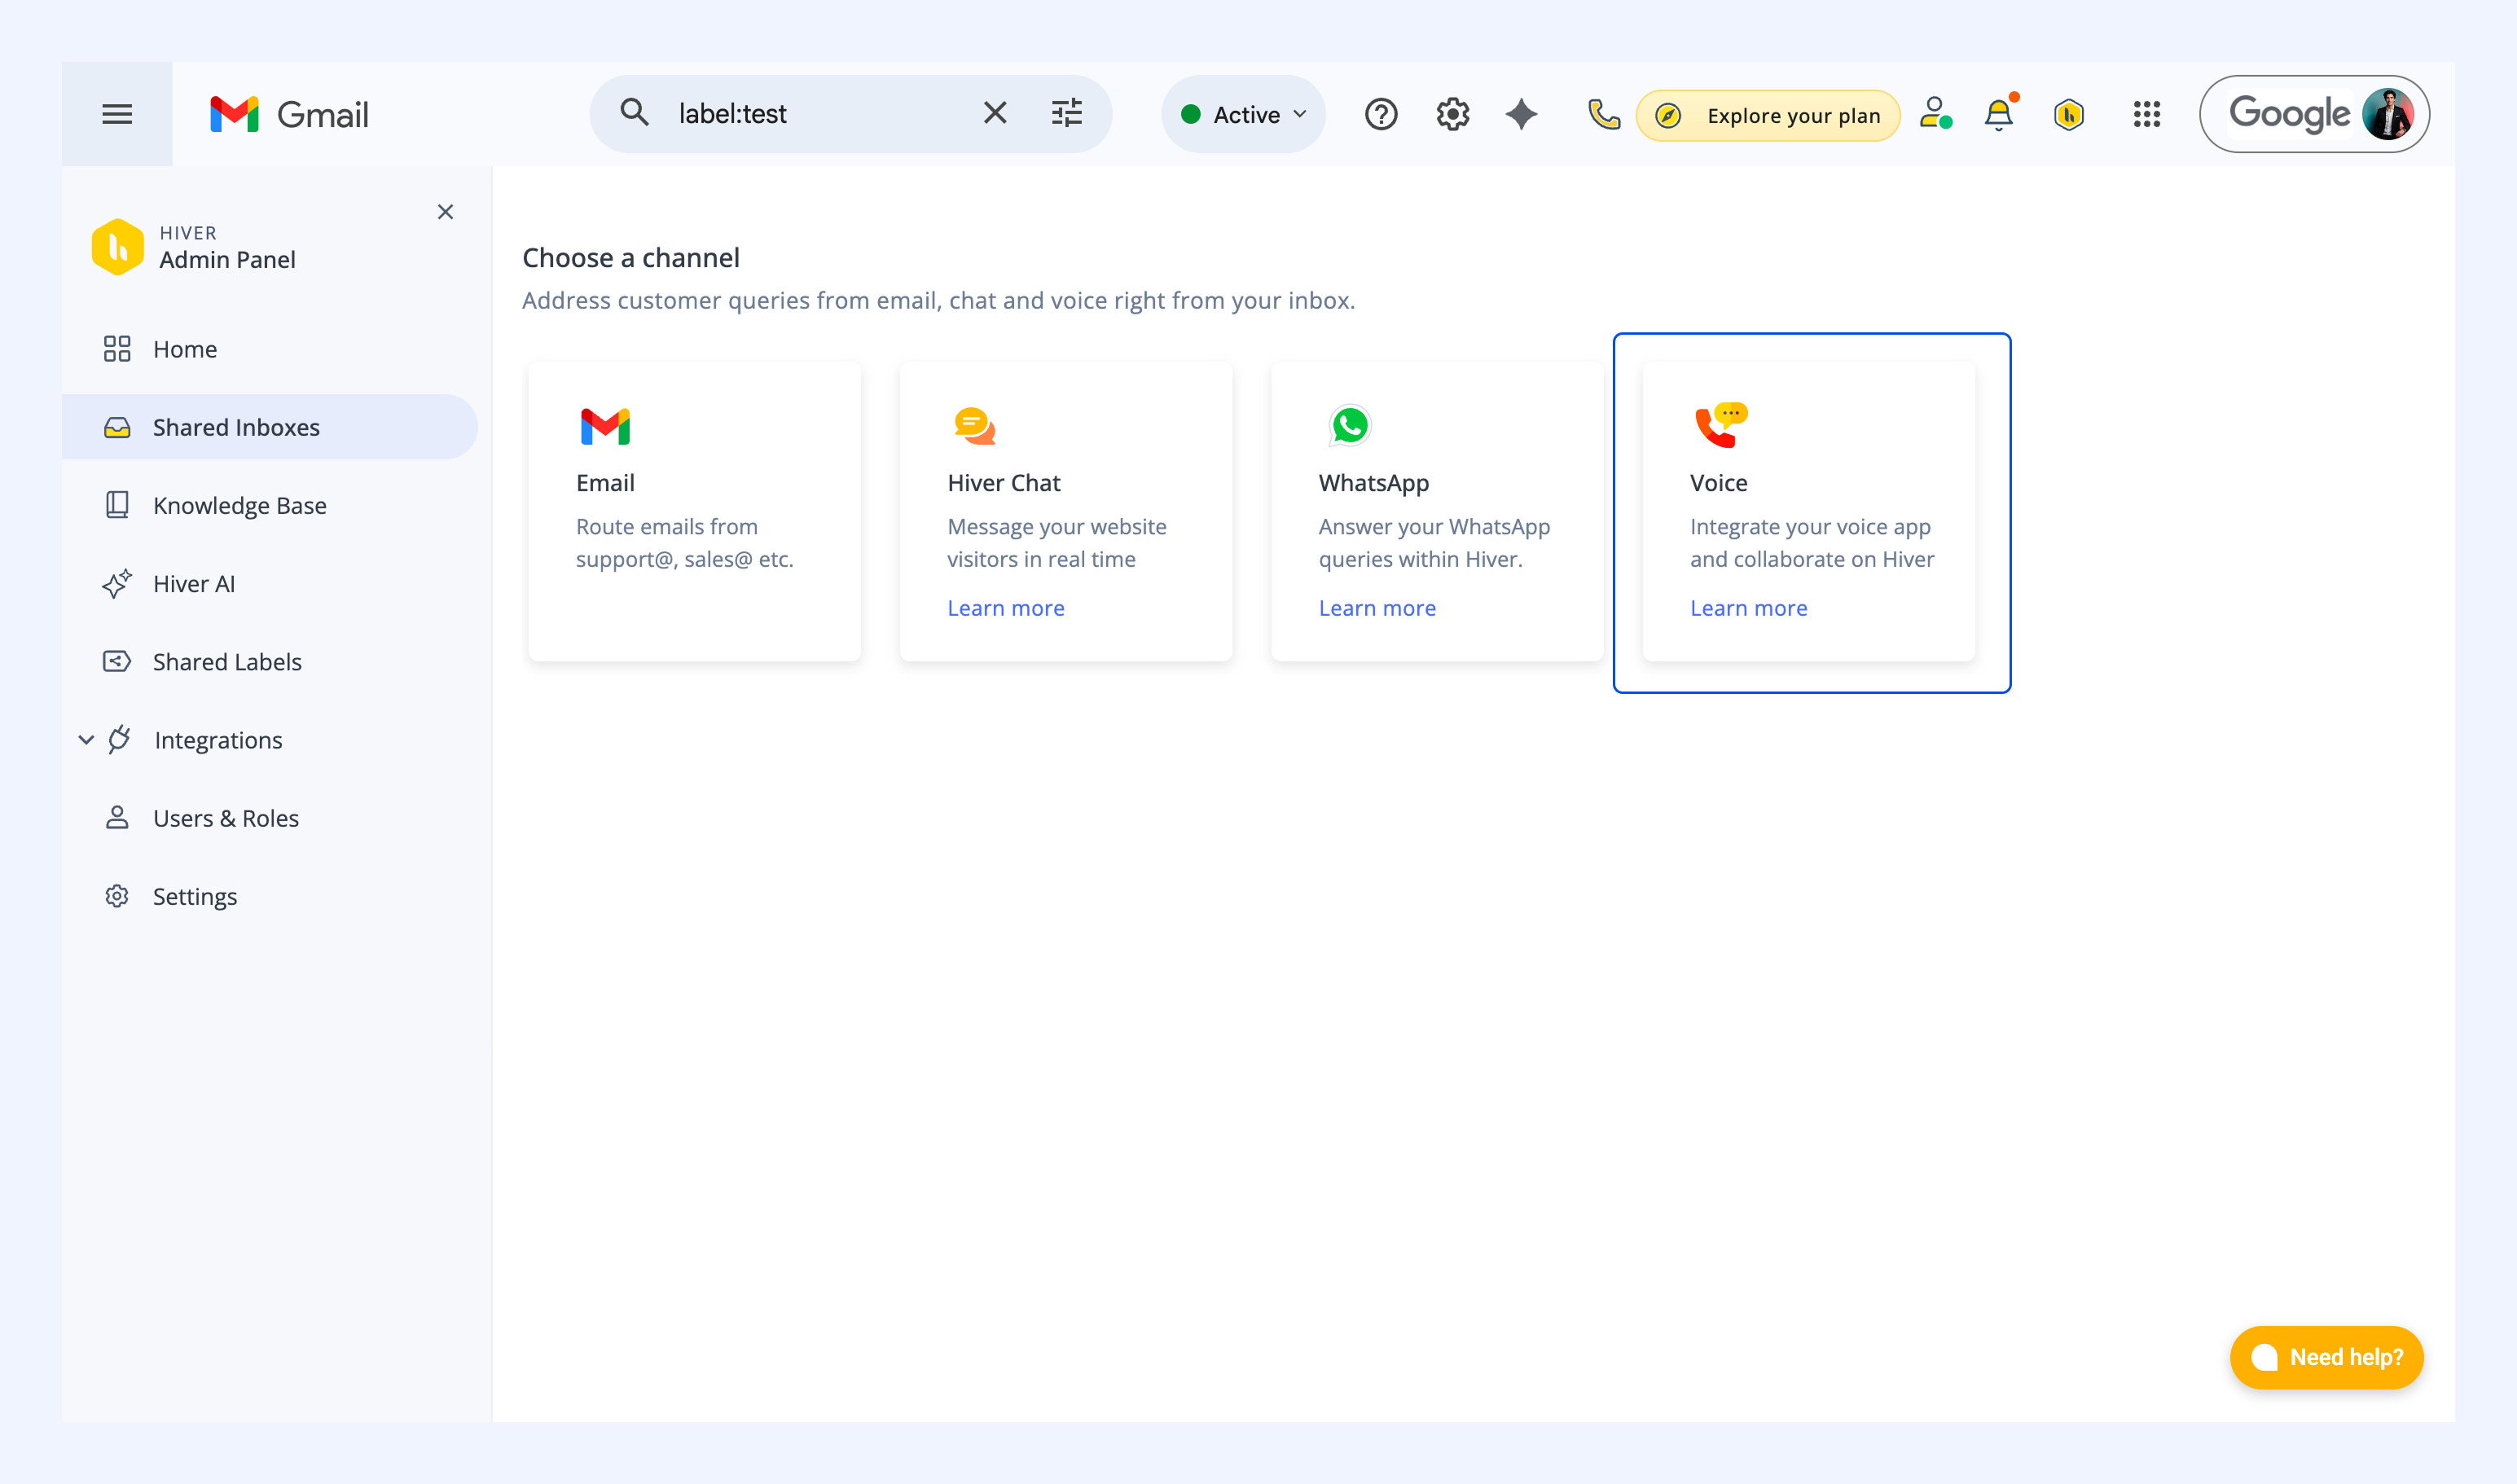
2. Choose Voice as the channel.
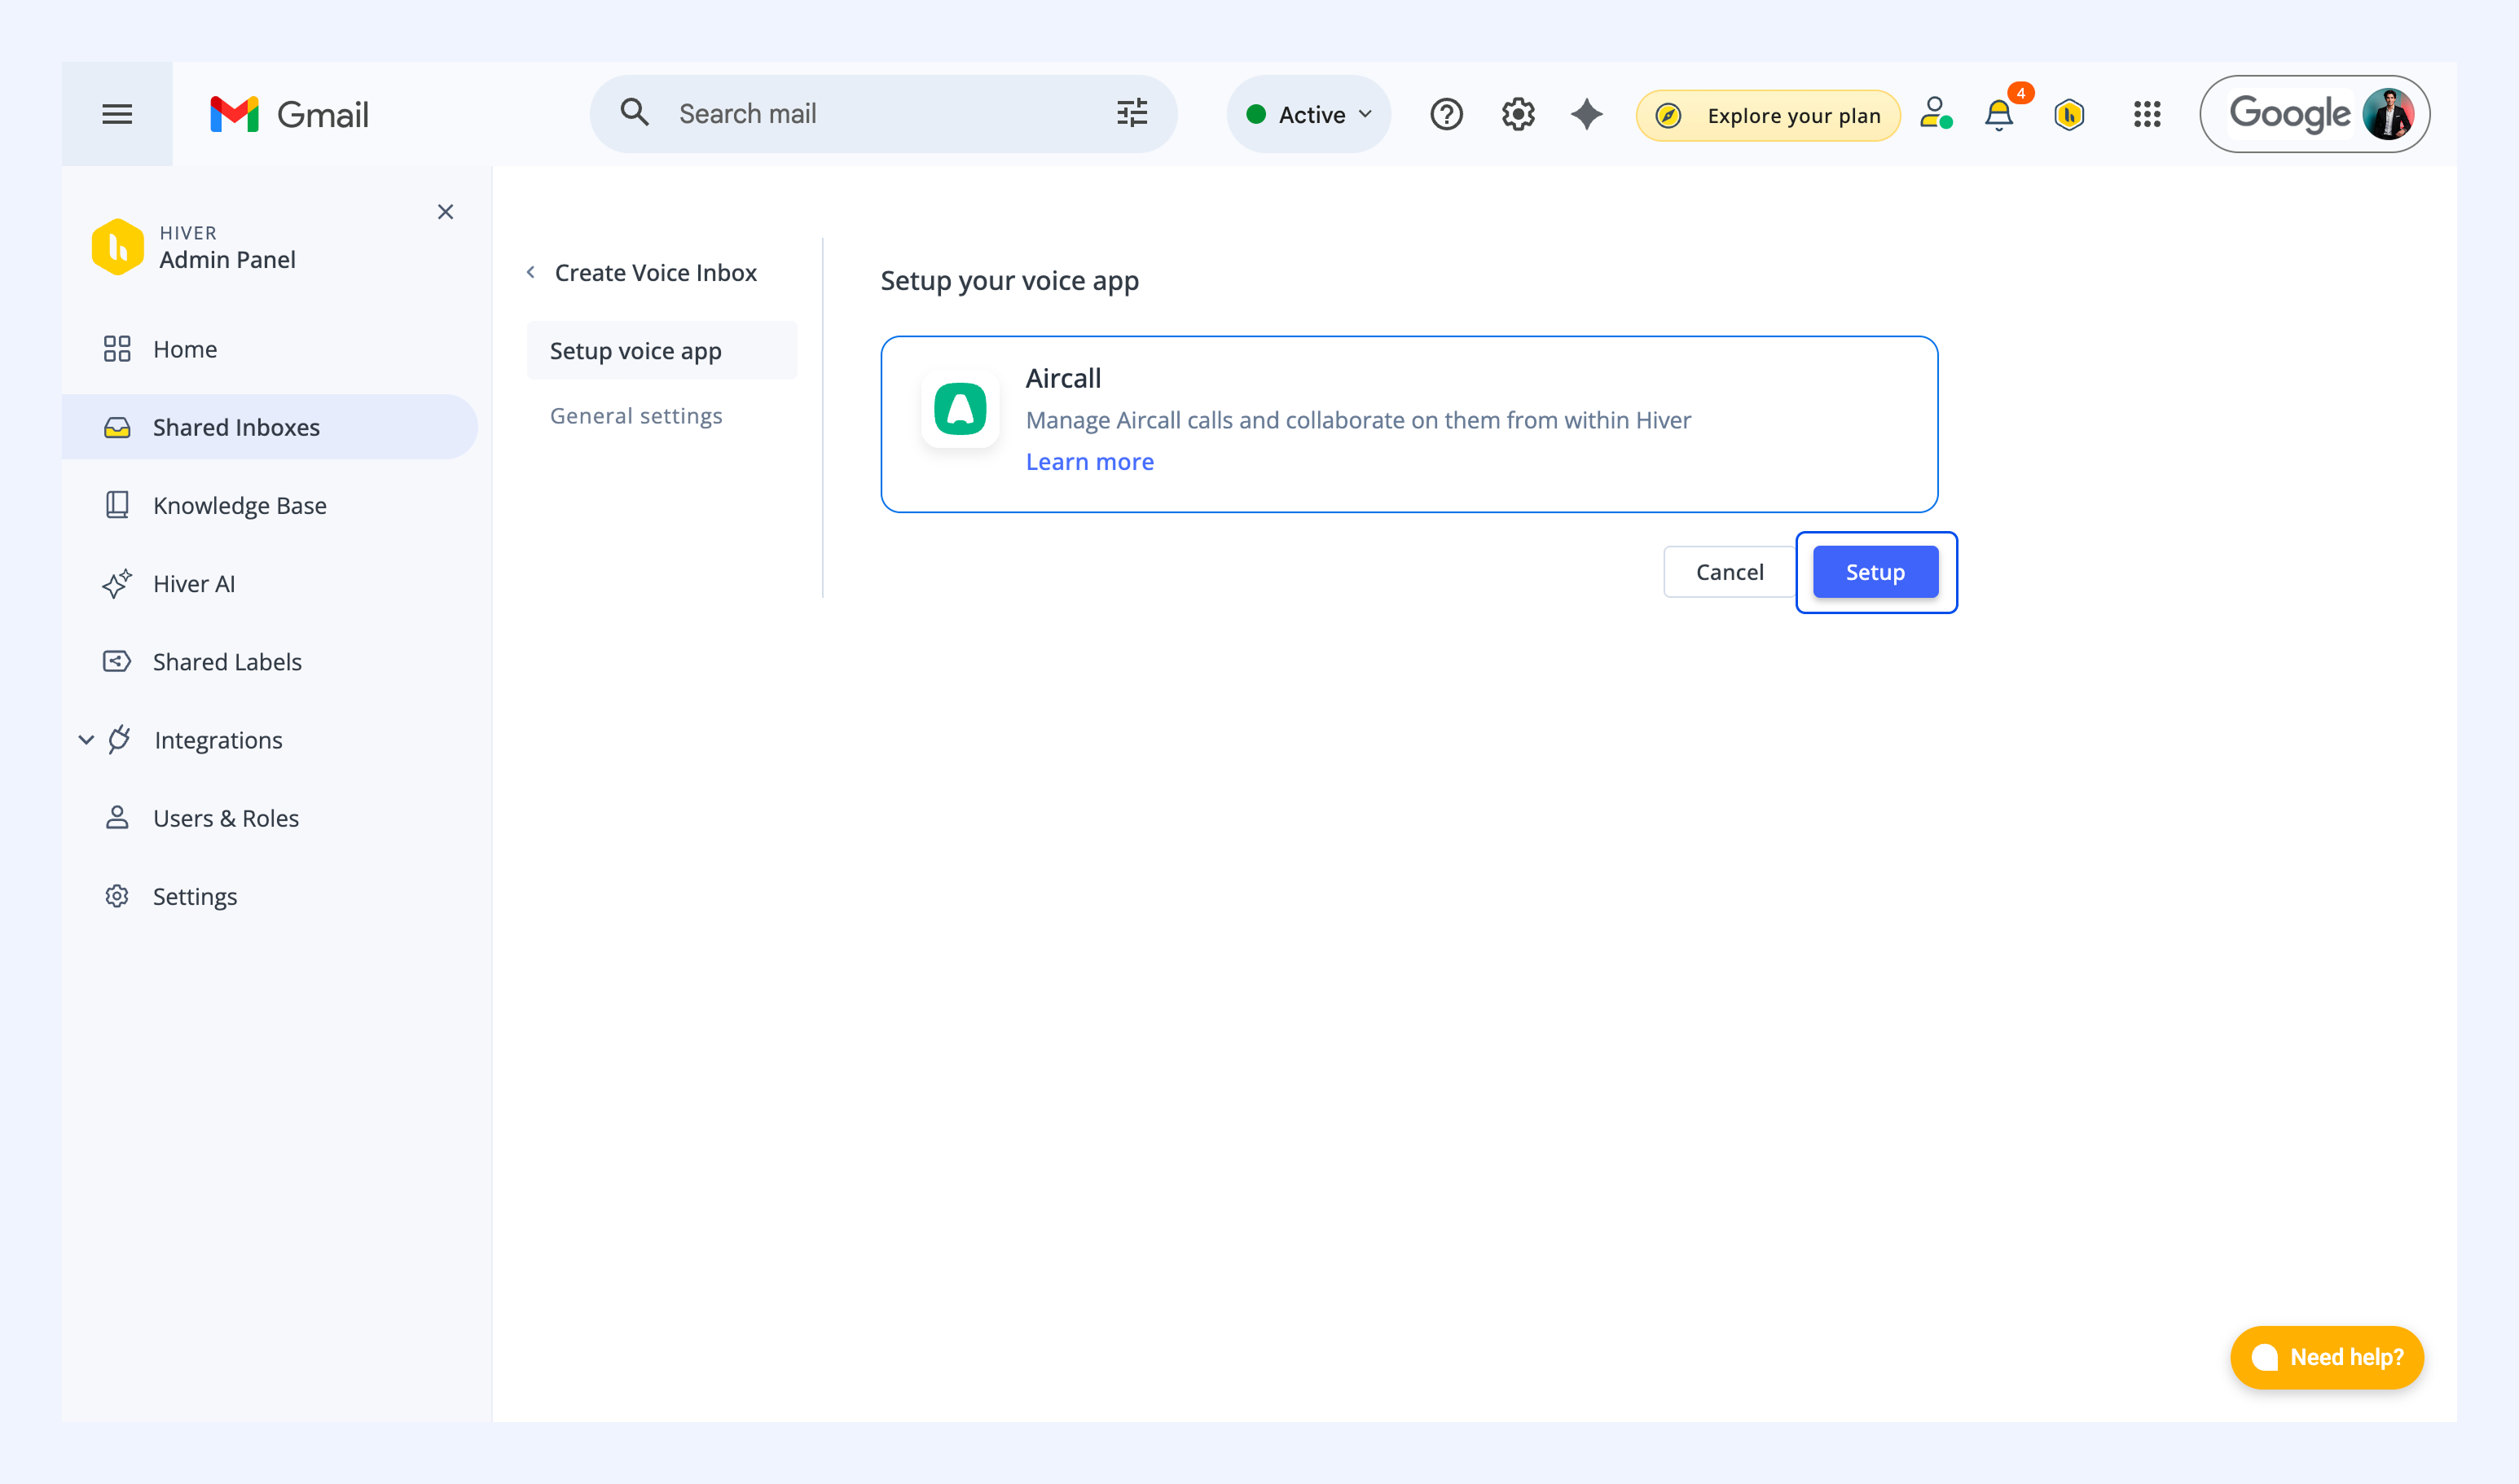
3. On the setup screen, click Setup next to Aircall.
4. In the Aicall tab that opens:
- Sign in to your Aircall account.
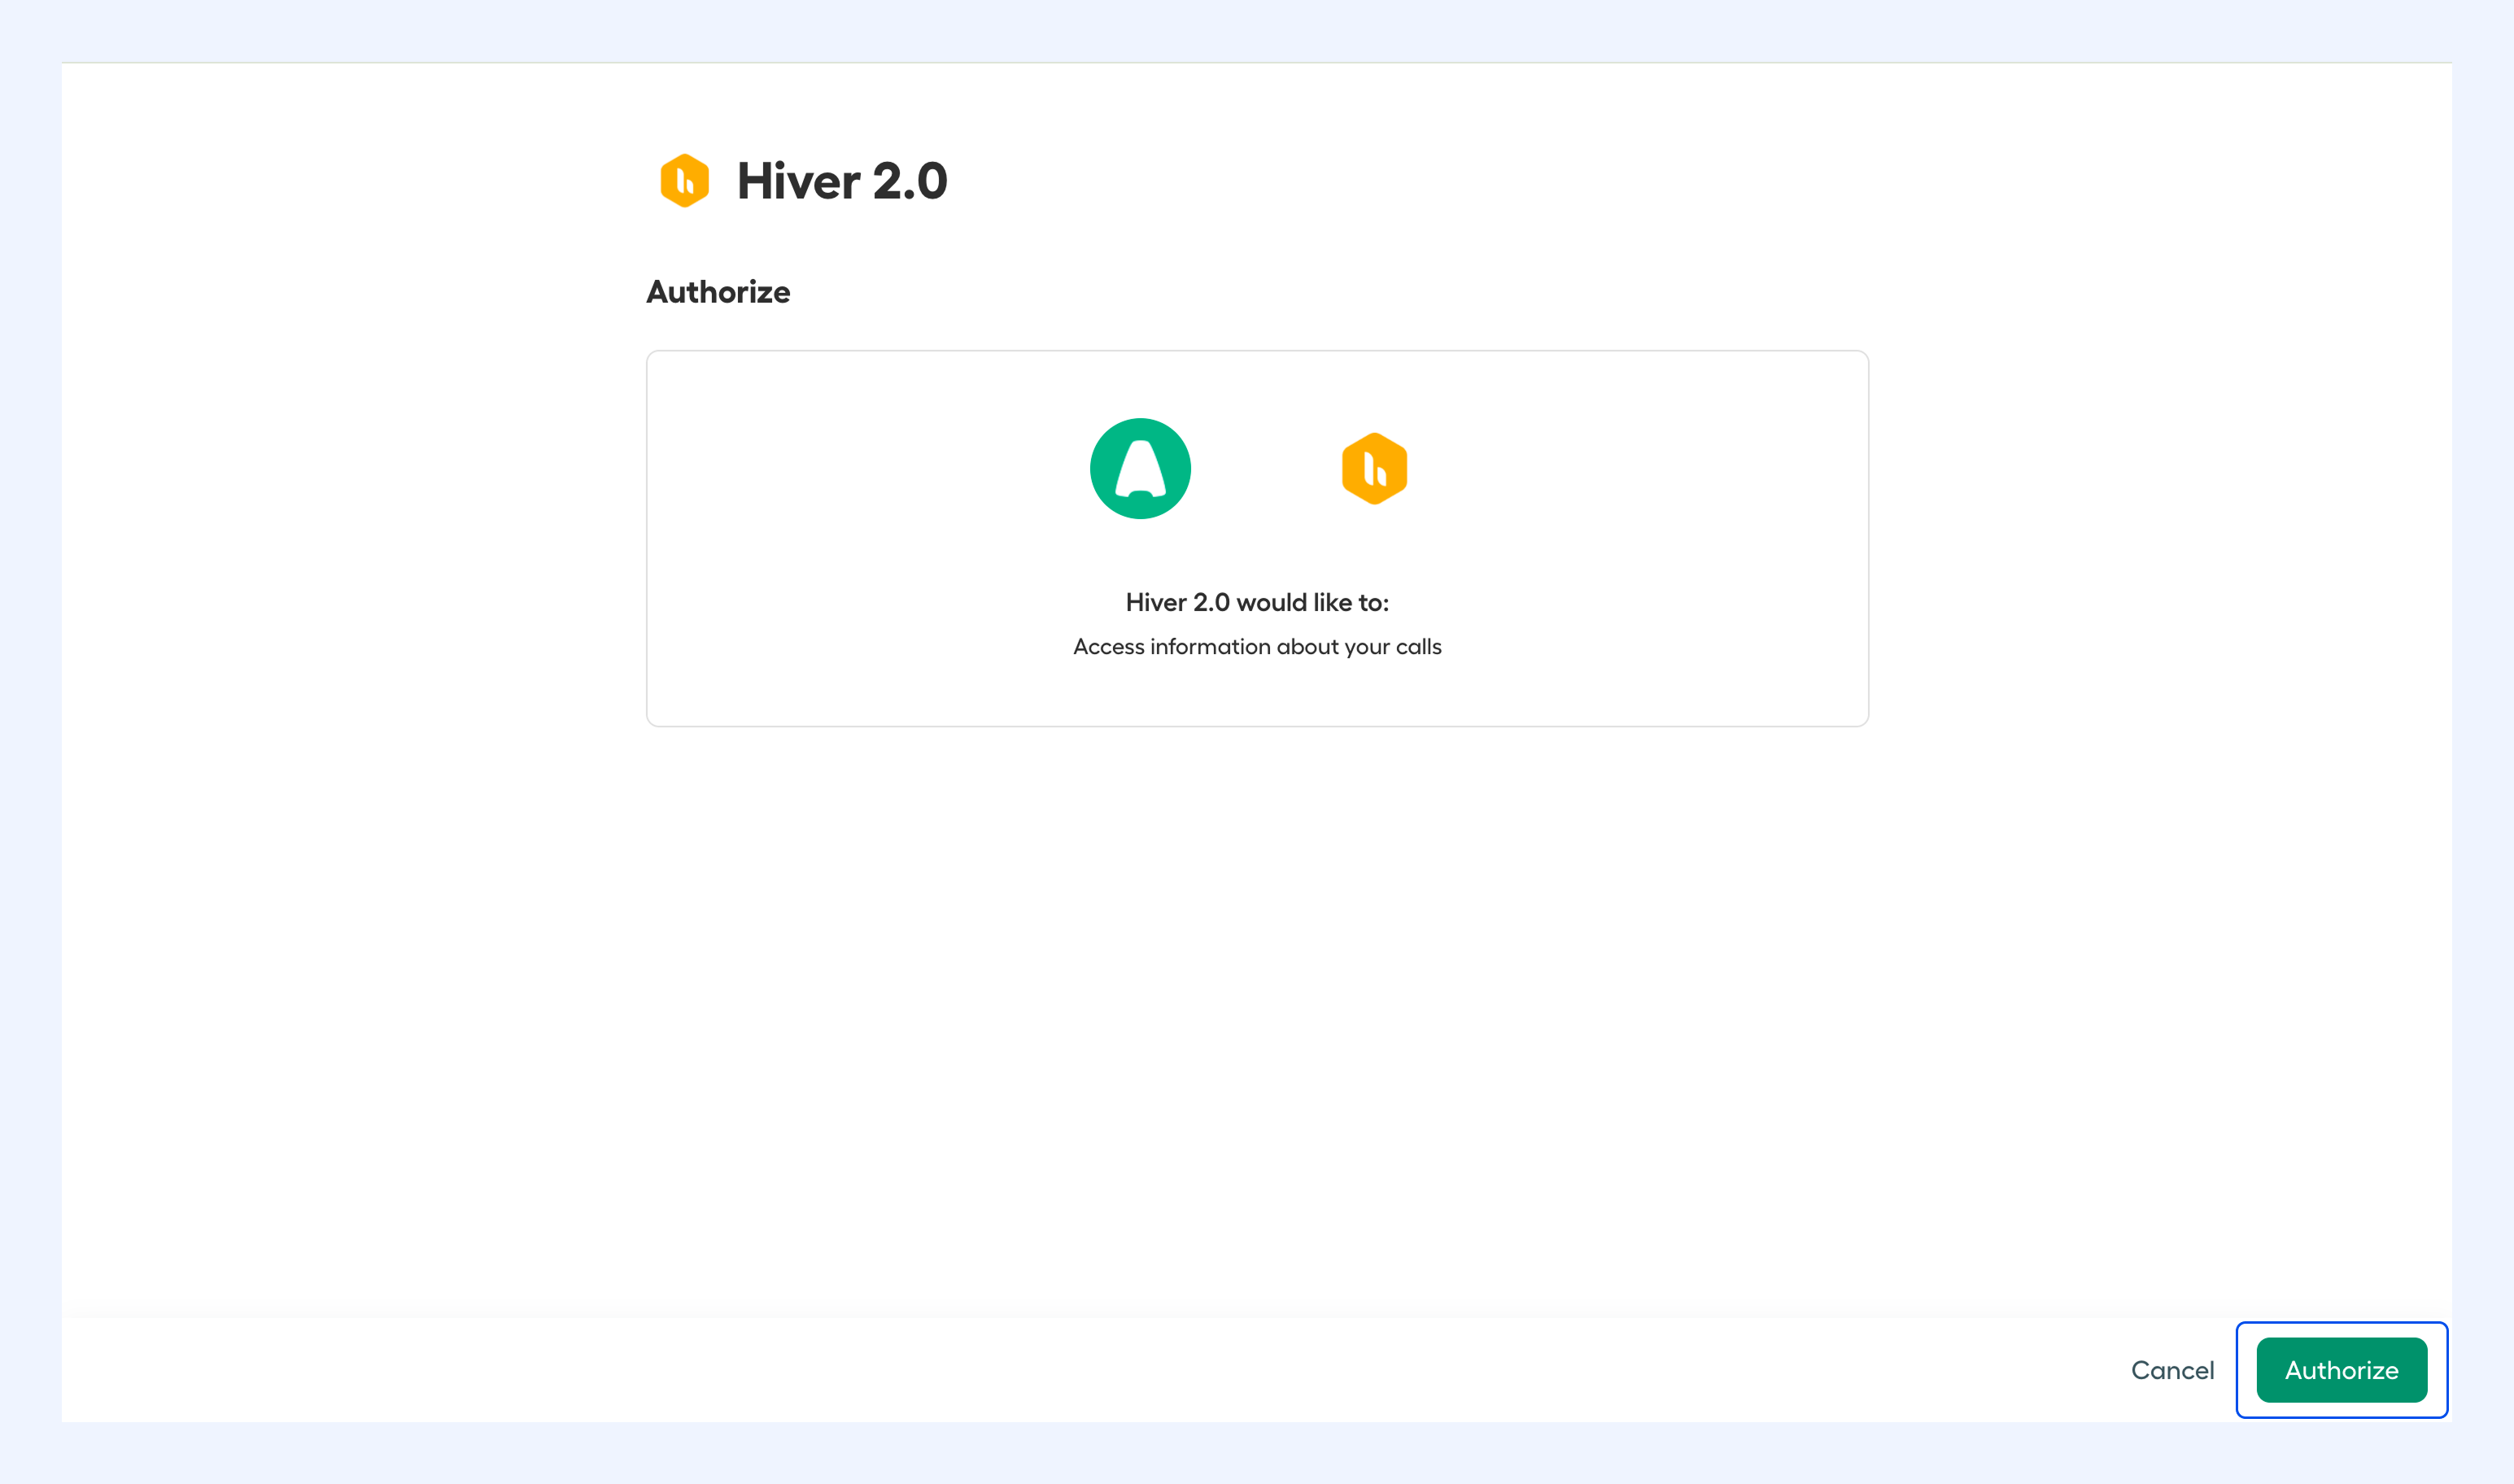
- Click Authorize to let Hiver read call data.
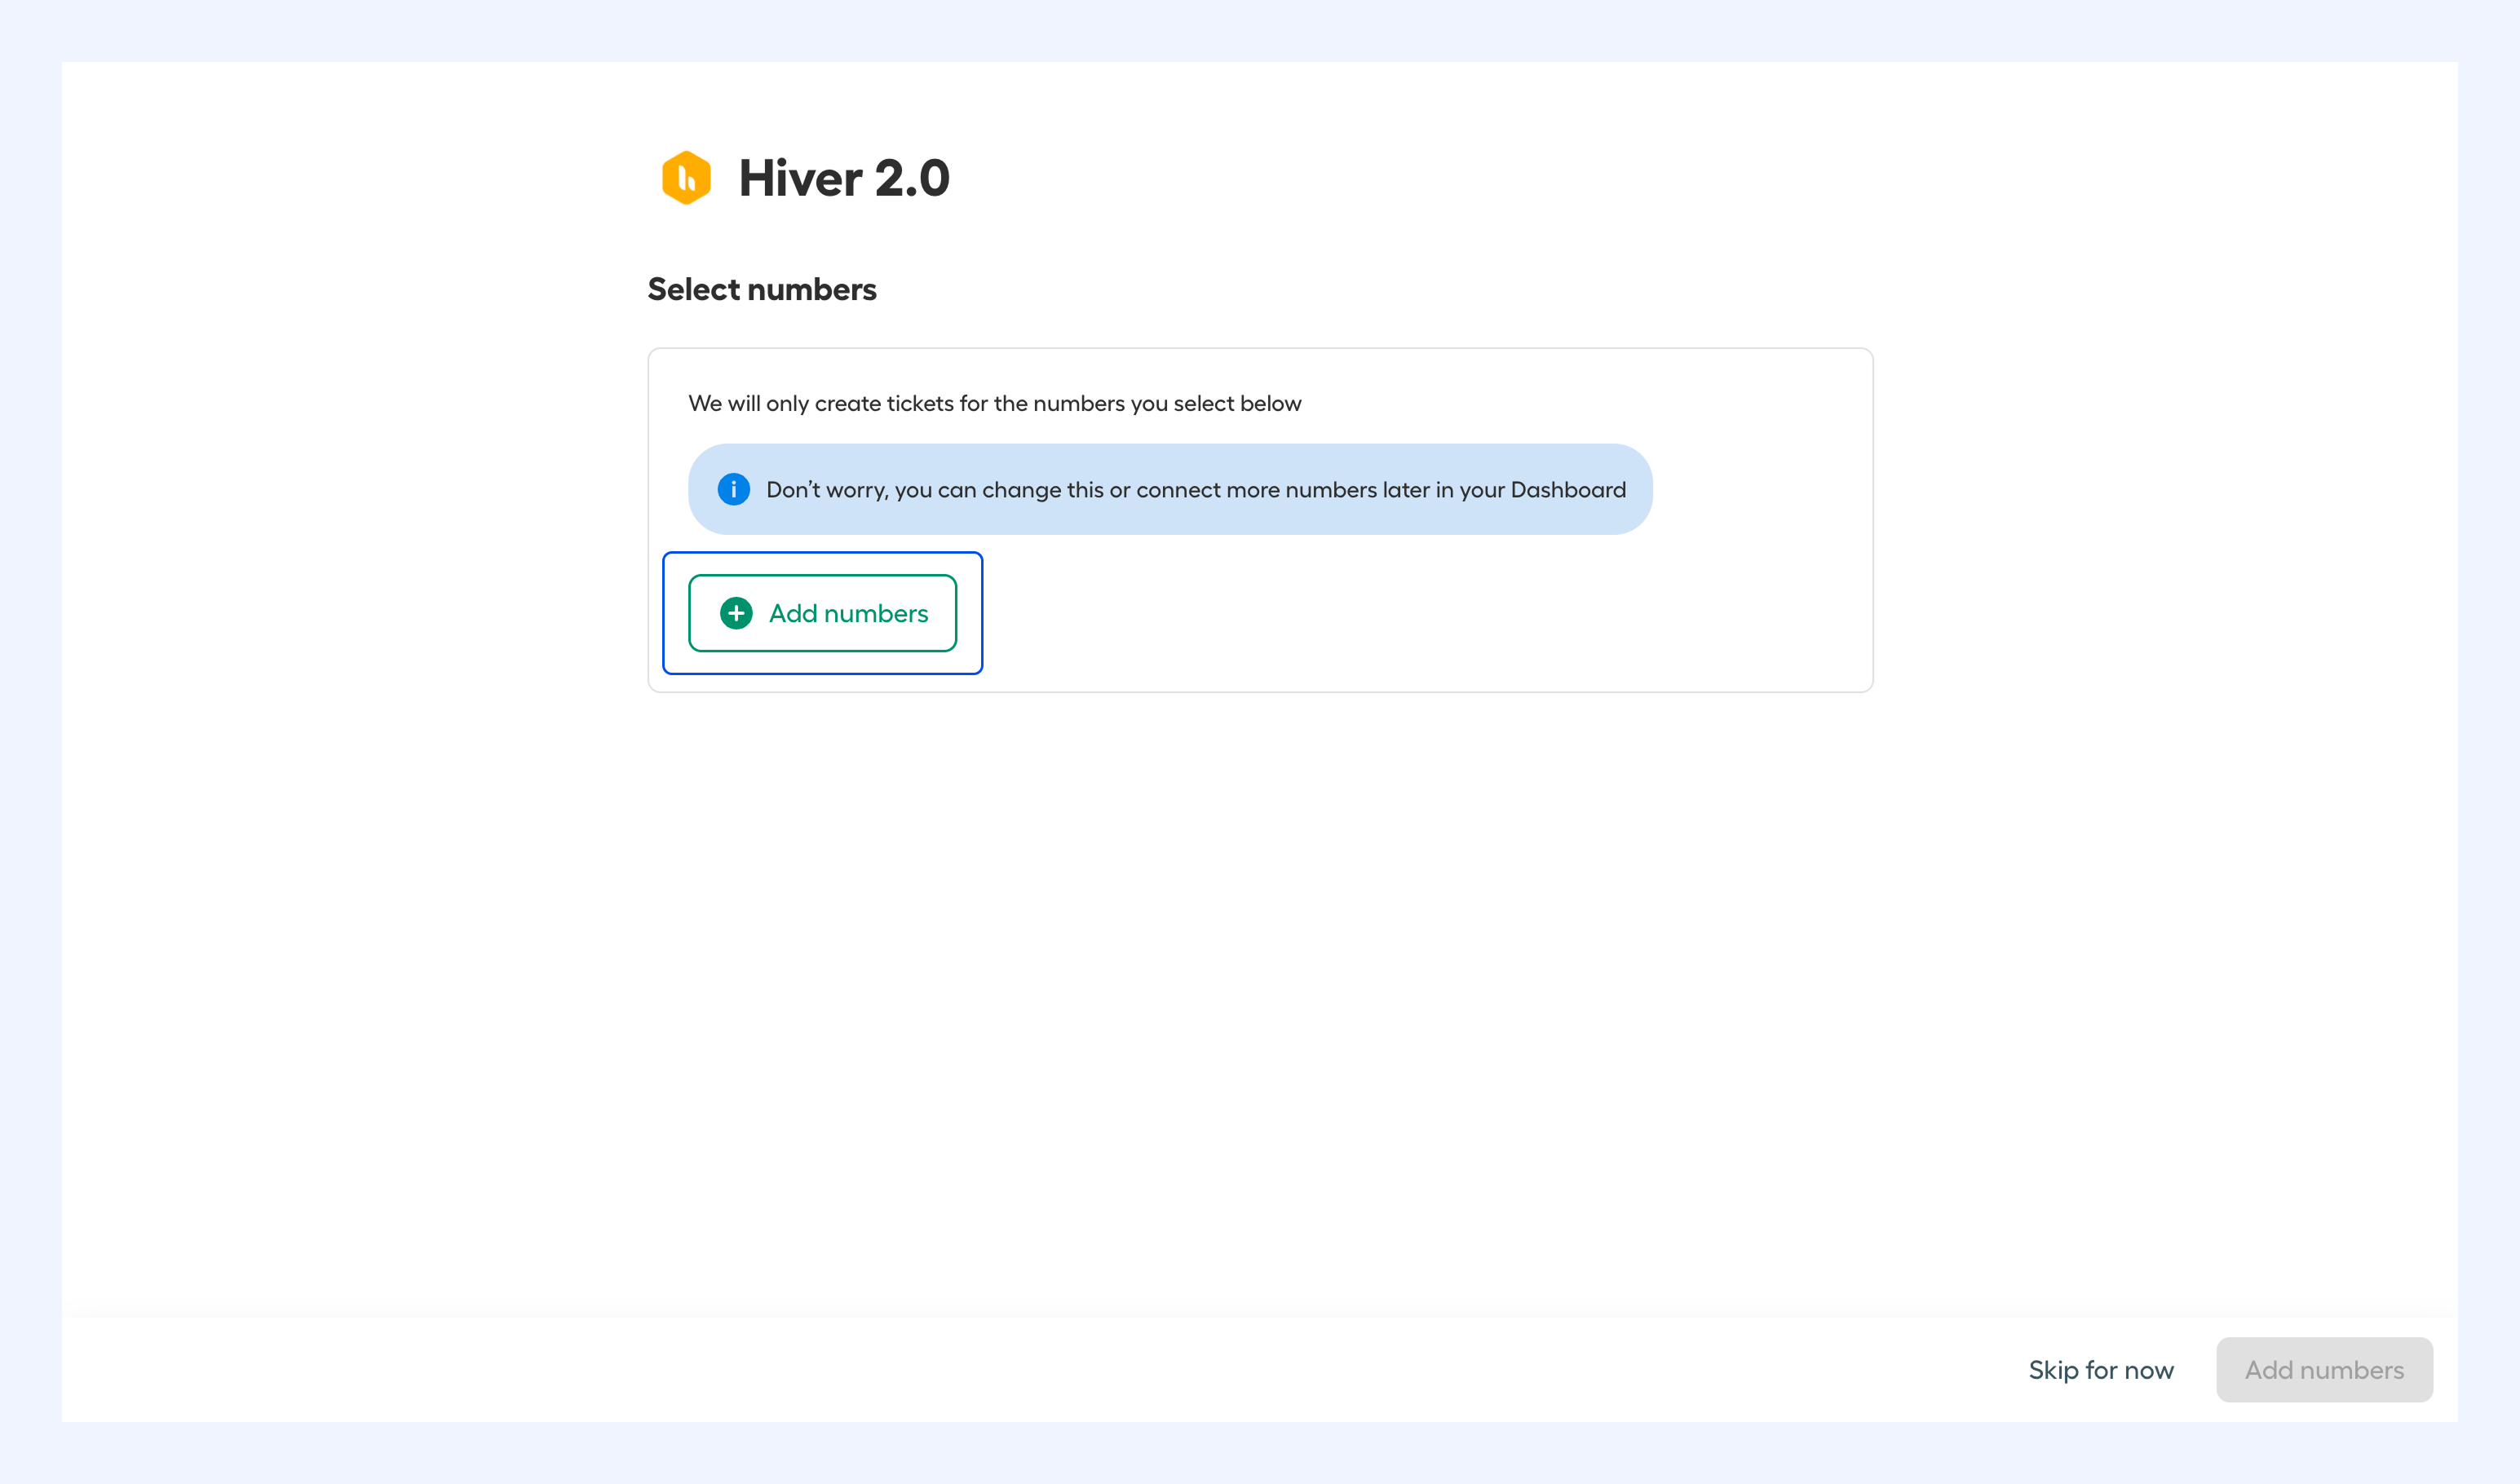
5. After authorization, click Add numbers.
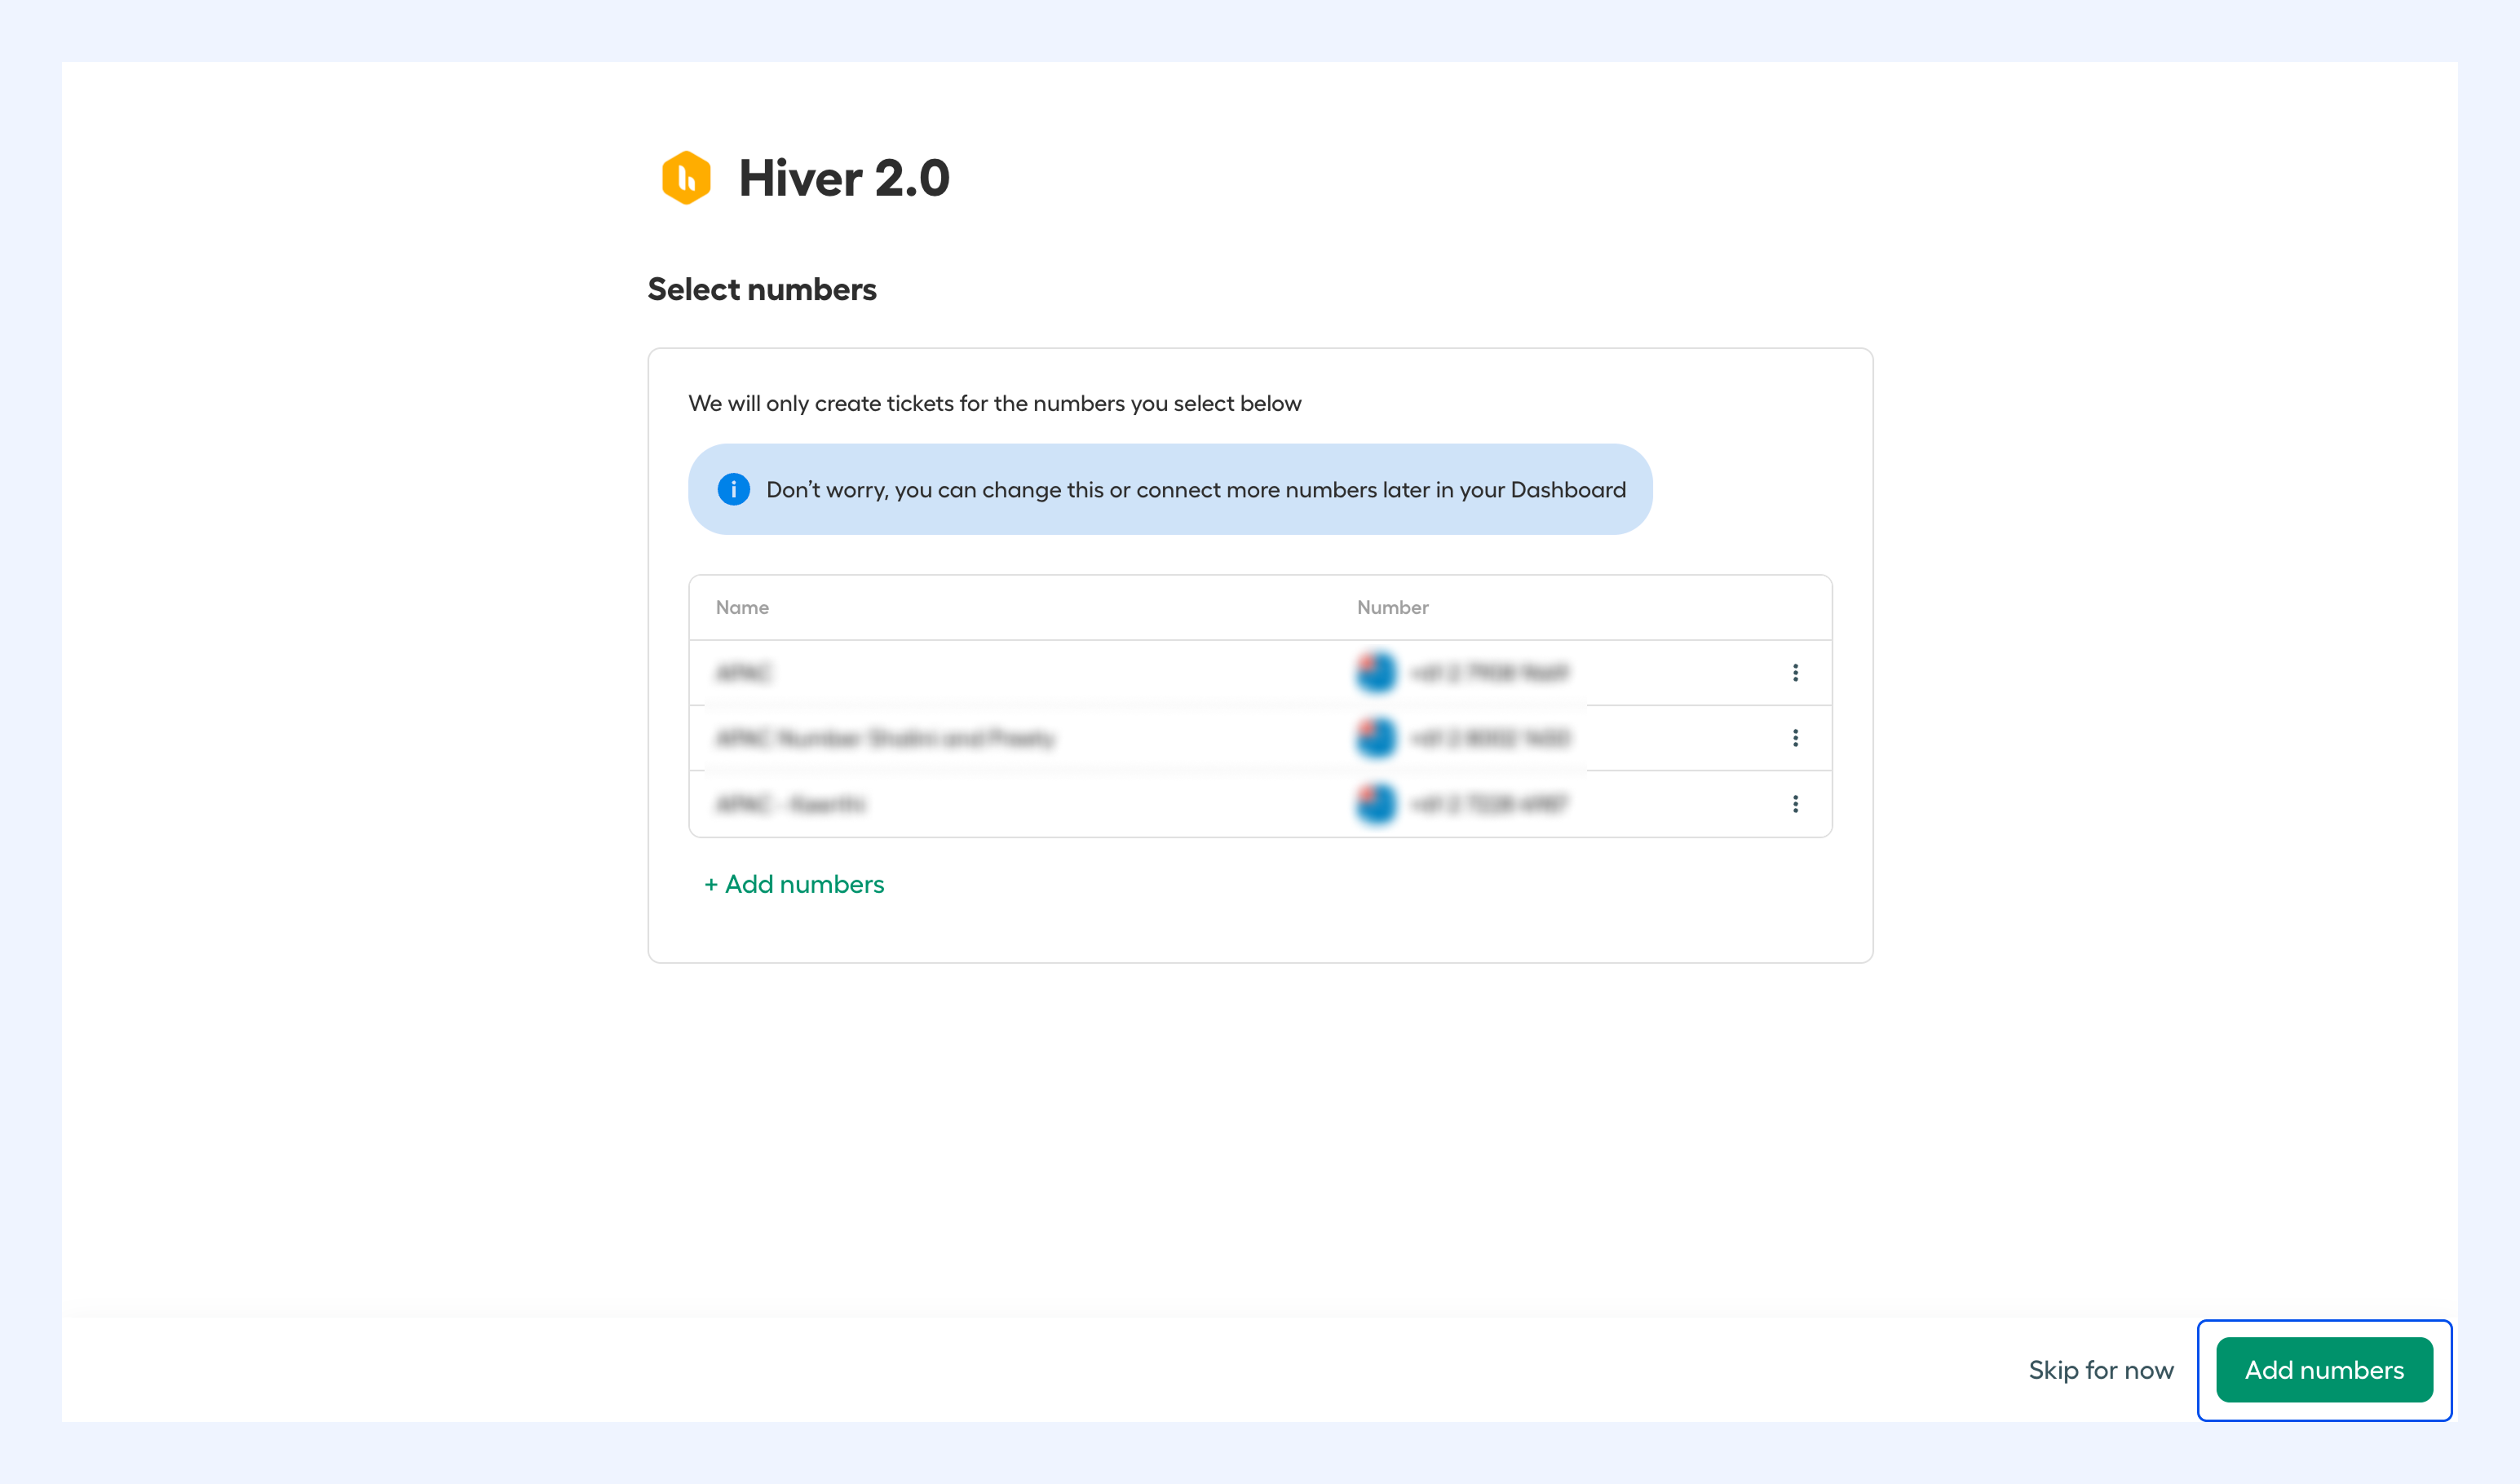
6. Select the Aircall numbers whose calls you want to log in Hiver, and click Add numbers again to confirm.
7. Return to Hiver to complete setup:
- Enter a Voice inbox name.
- Add the Users who will work in this inbox.
- Click Create Inbox.
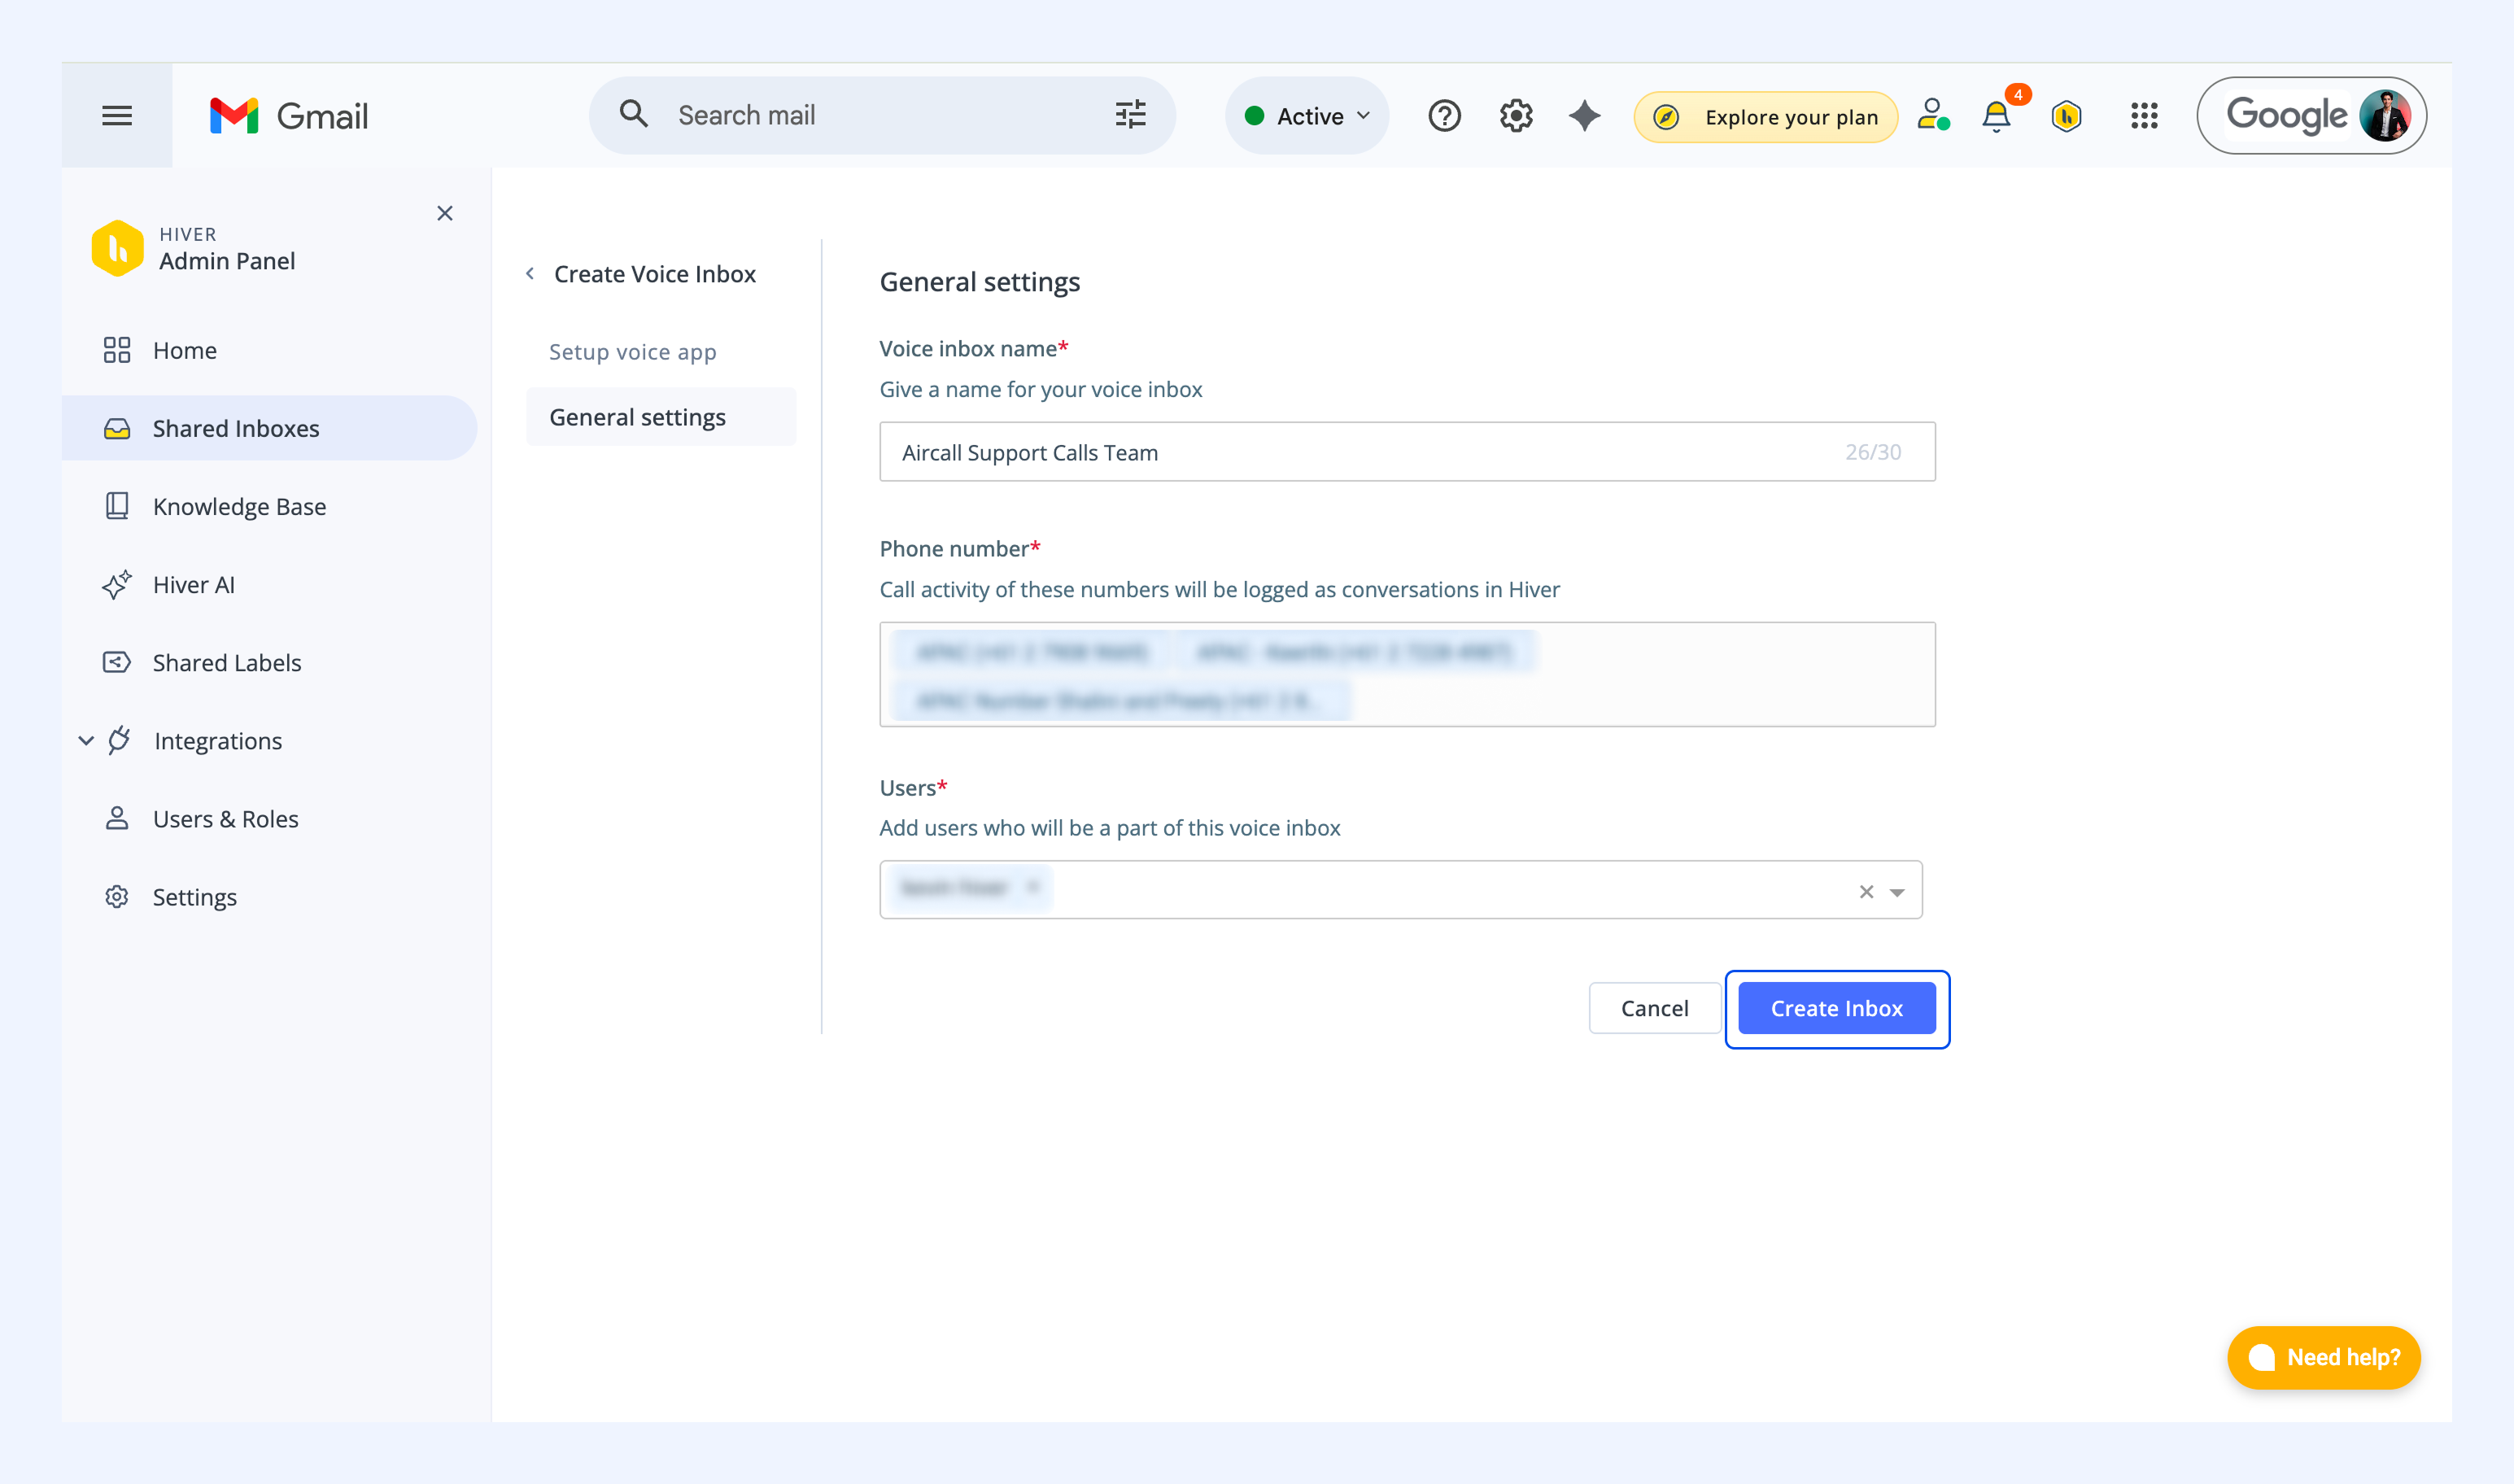
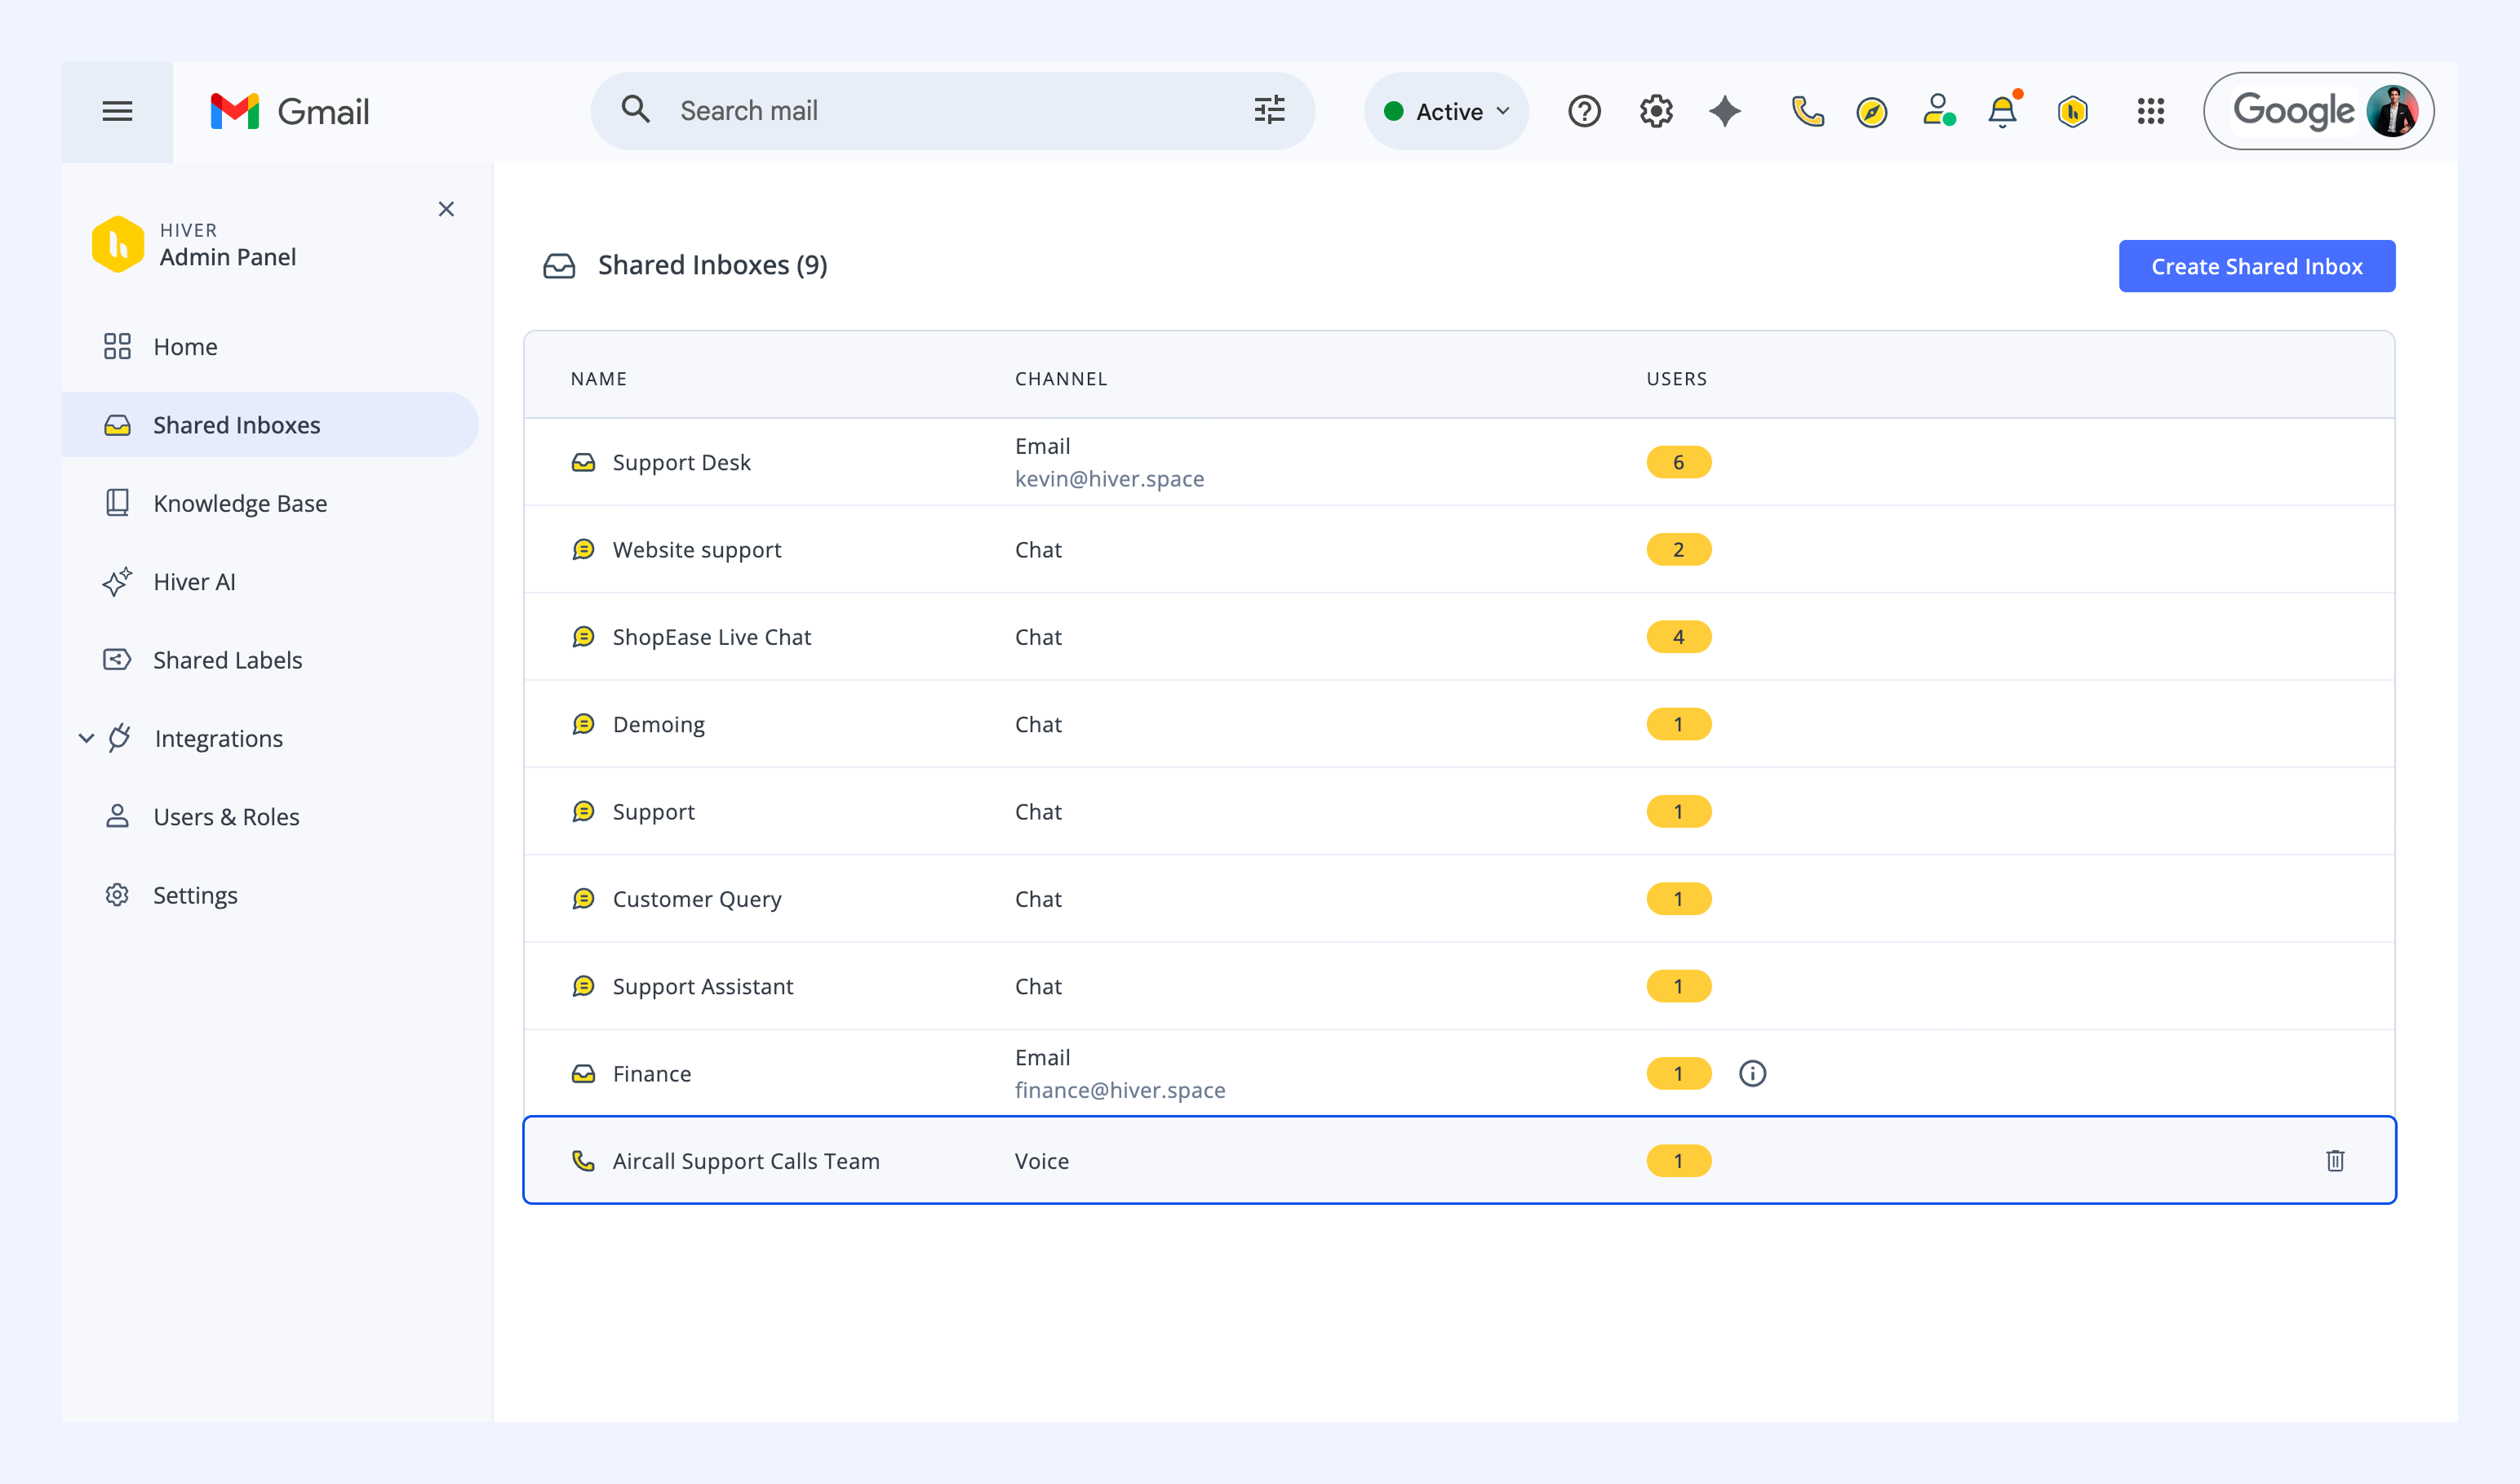
The new Voice Inbox now appears in your Shared Inboxes list.
Use the Aircall dialer in Hiver
The Aircall dialer allows your team to make and receive calls directly in Gmail.
1. Click the Aircall phone icon (yellow call icon) to open the dialer.
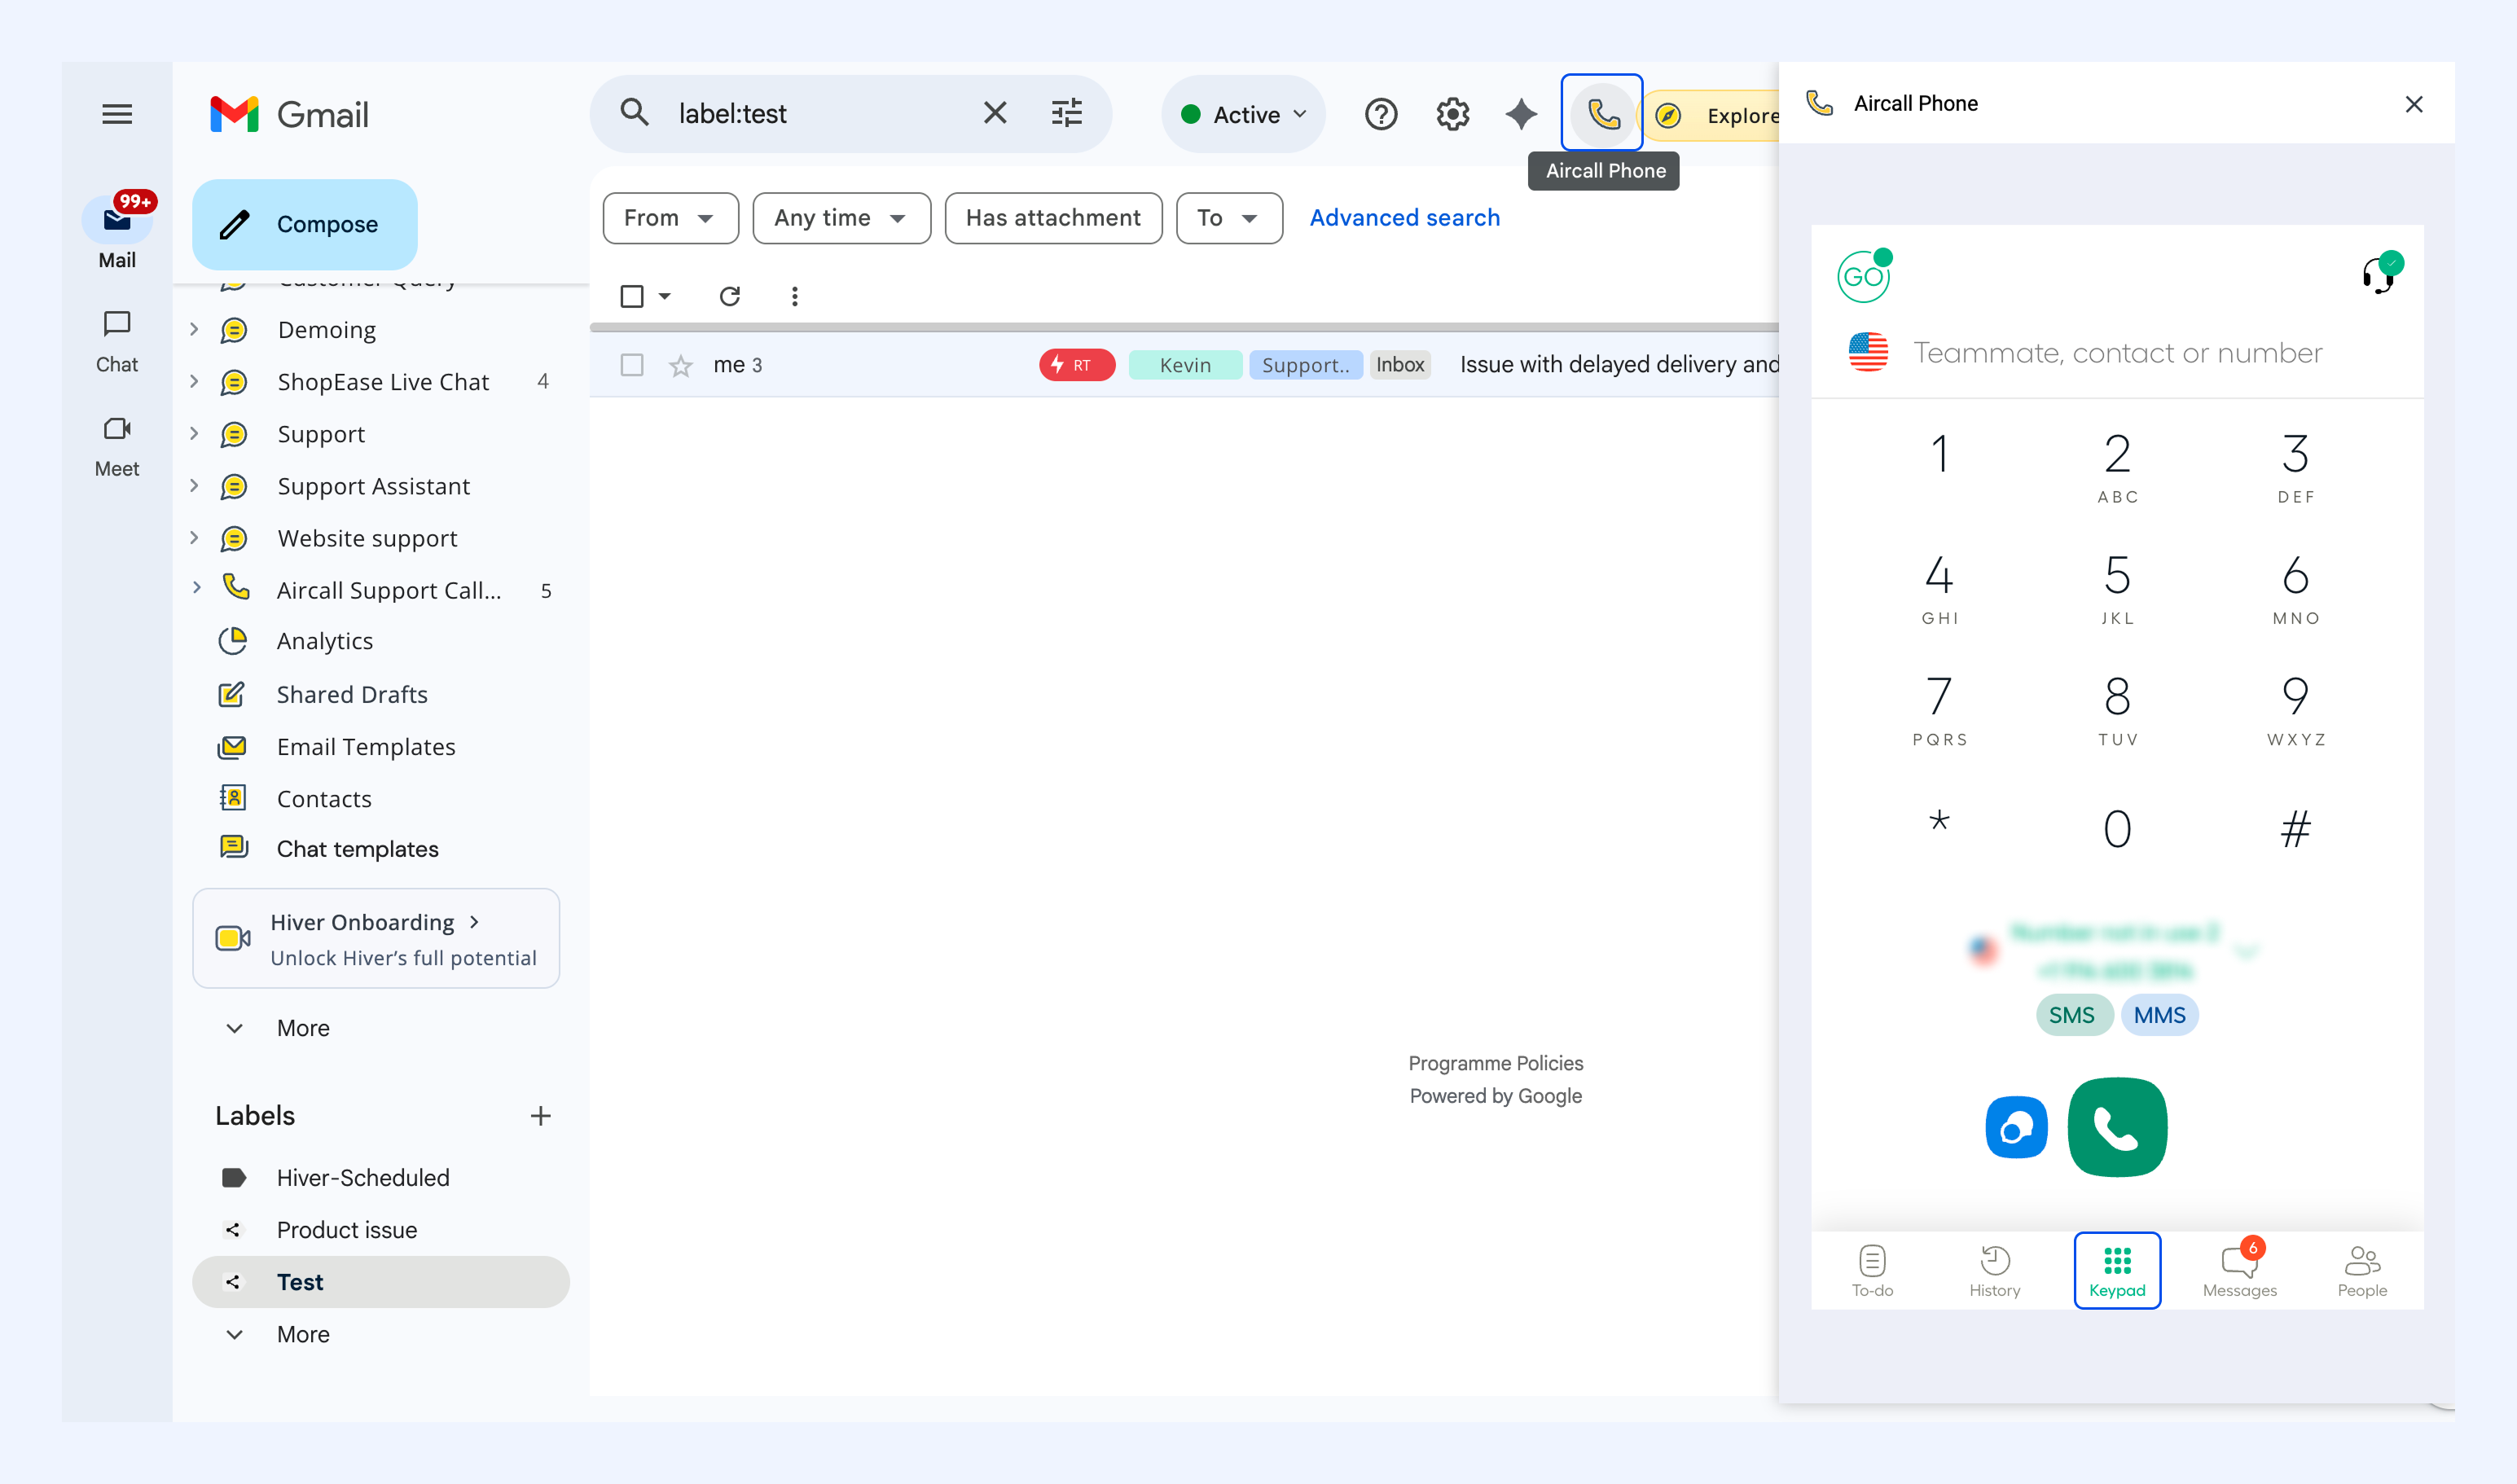
2. Make or receive the call. When it ends, the call appears in the Unassigned view.