Creating Web Forms
Web Forms help you collect the details you need from customers in a structured format before you start working on a request.
You can create a Web Form for any request type you handle often, like bug reports, feature requests, or onboarding help, and share it with customers directly or embed in your website.
Every submission lands in the Shared Inbox you connect the form to, with those details already filled in. You can assign it, collaborate with teammates, track its progress, and reply to the customer, all in one place.
This guide covers how to create Web Forms, manage them, and customize how they appear to visitors.
Prerequisites
Before you create a Web Form, make sure you have:
- Admin access in Hiver.
- At least one Shared Inbox where submissions can be received.
Note:
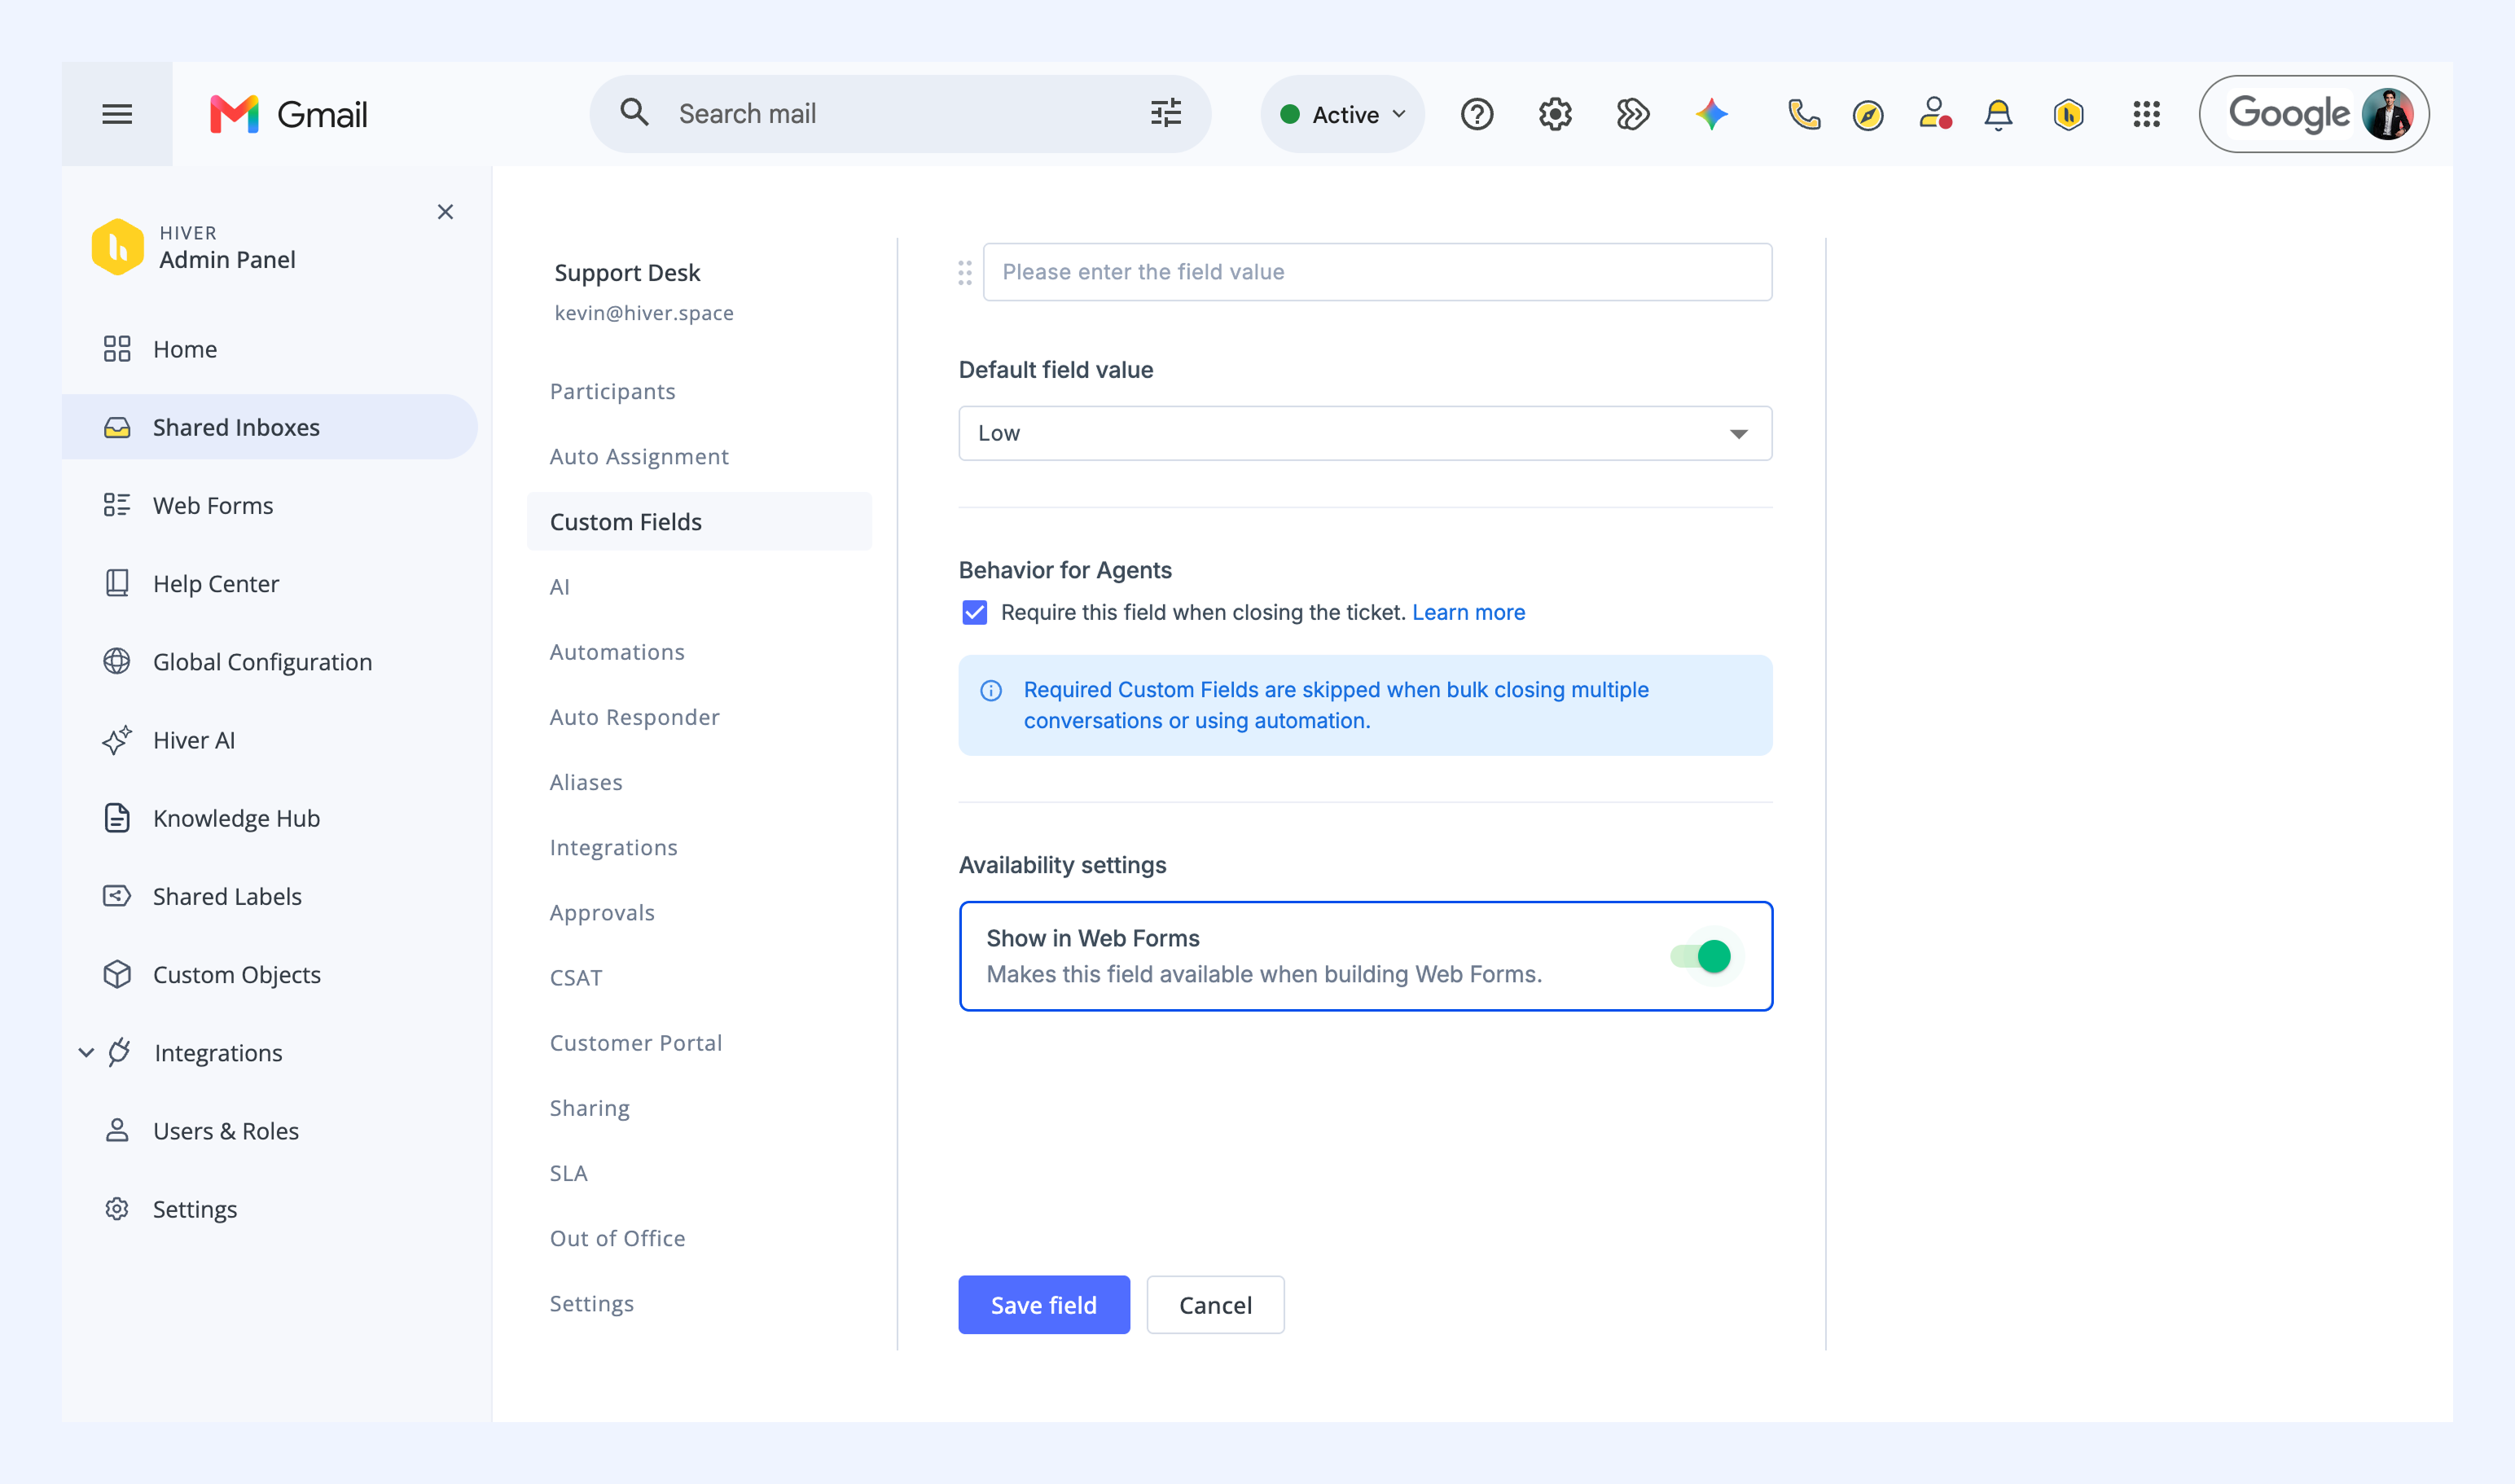
- Web Forms collect details using Custom Fields from the connected Shared Inbox. You can create the fields in advance, or create them while building the form.
- To use a Custom Field in a Web Form, toggle on Show in Web Forms under Custom Fields in Shared Inbox settings.
Creating a Web Form
To create a Web Form:
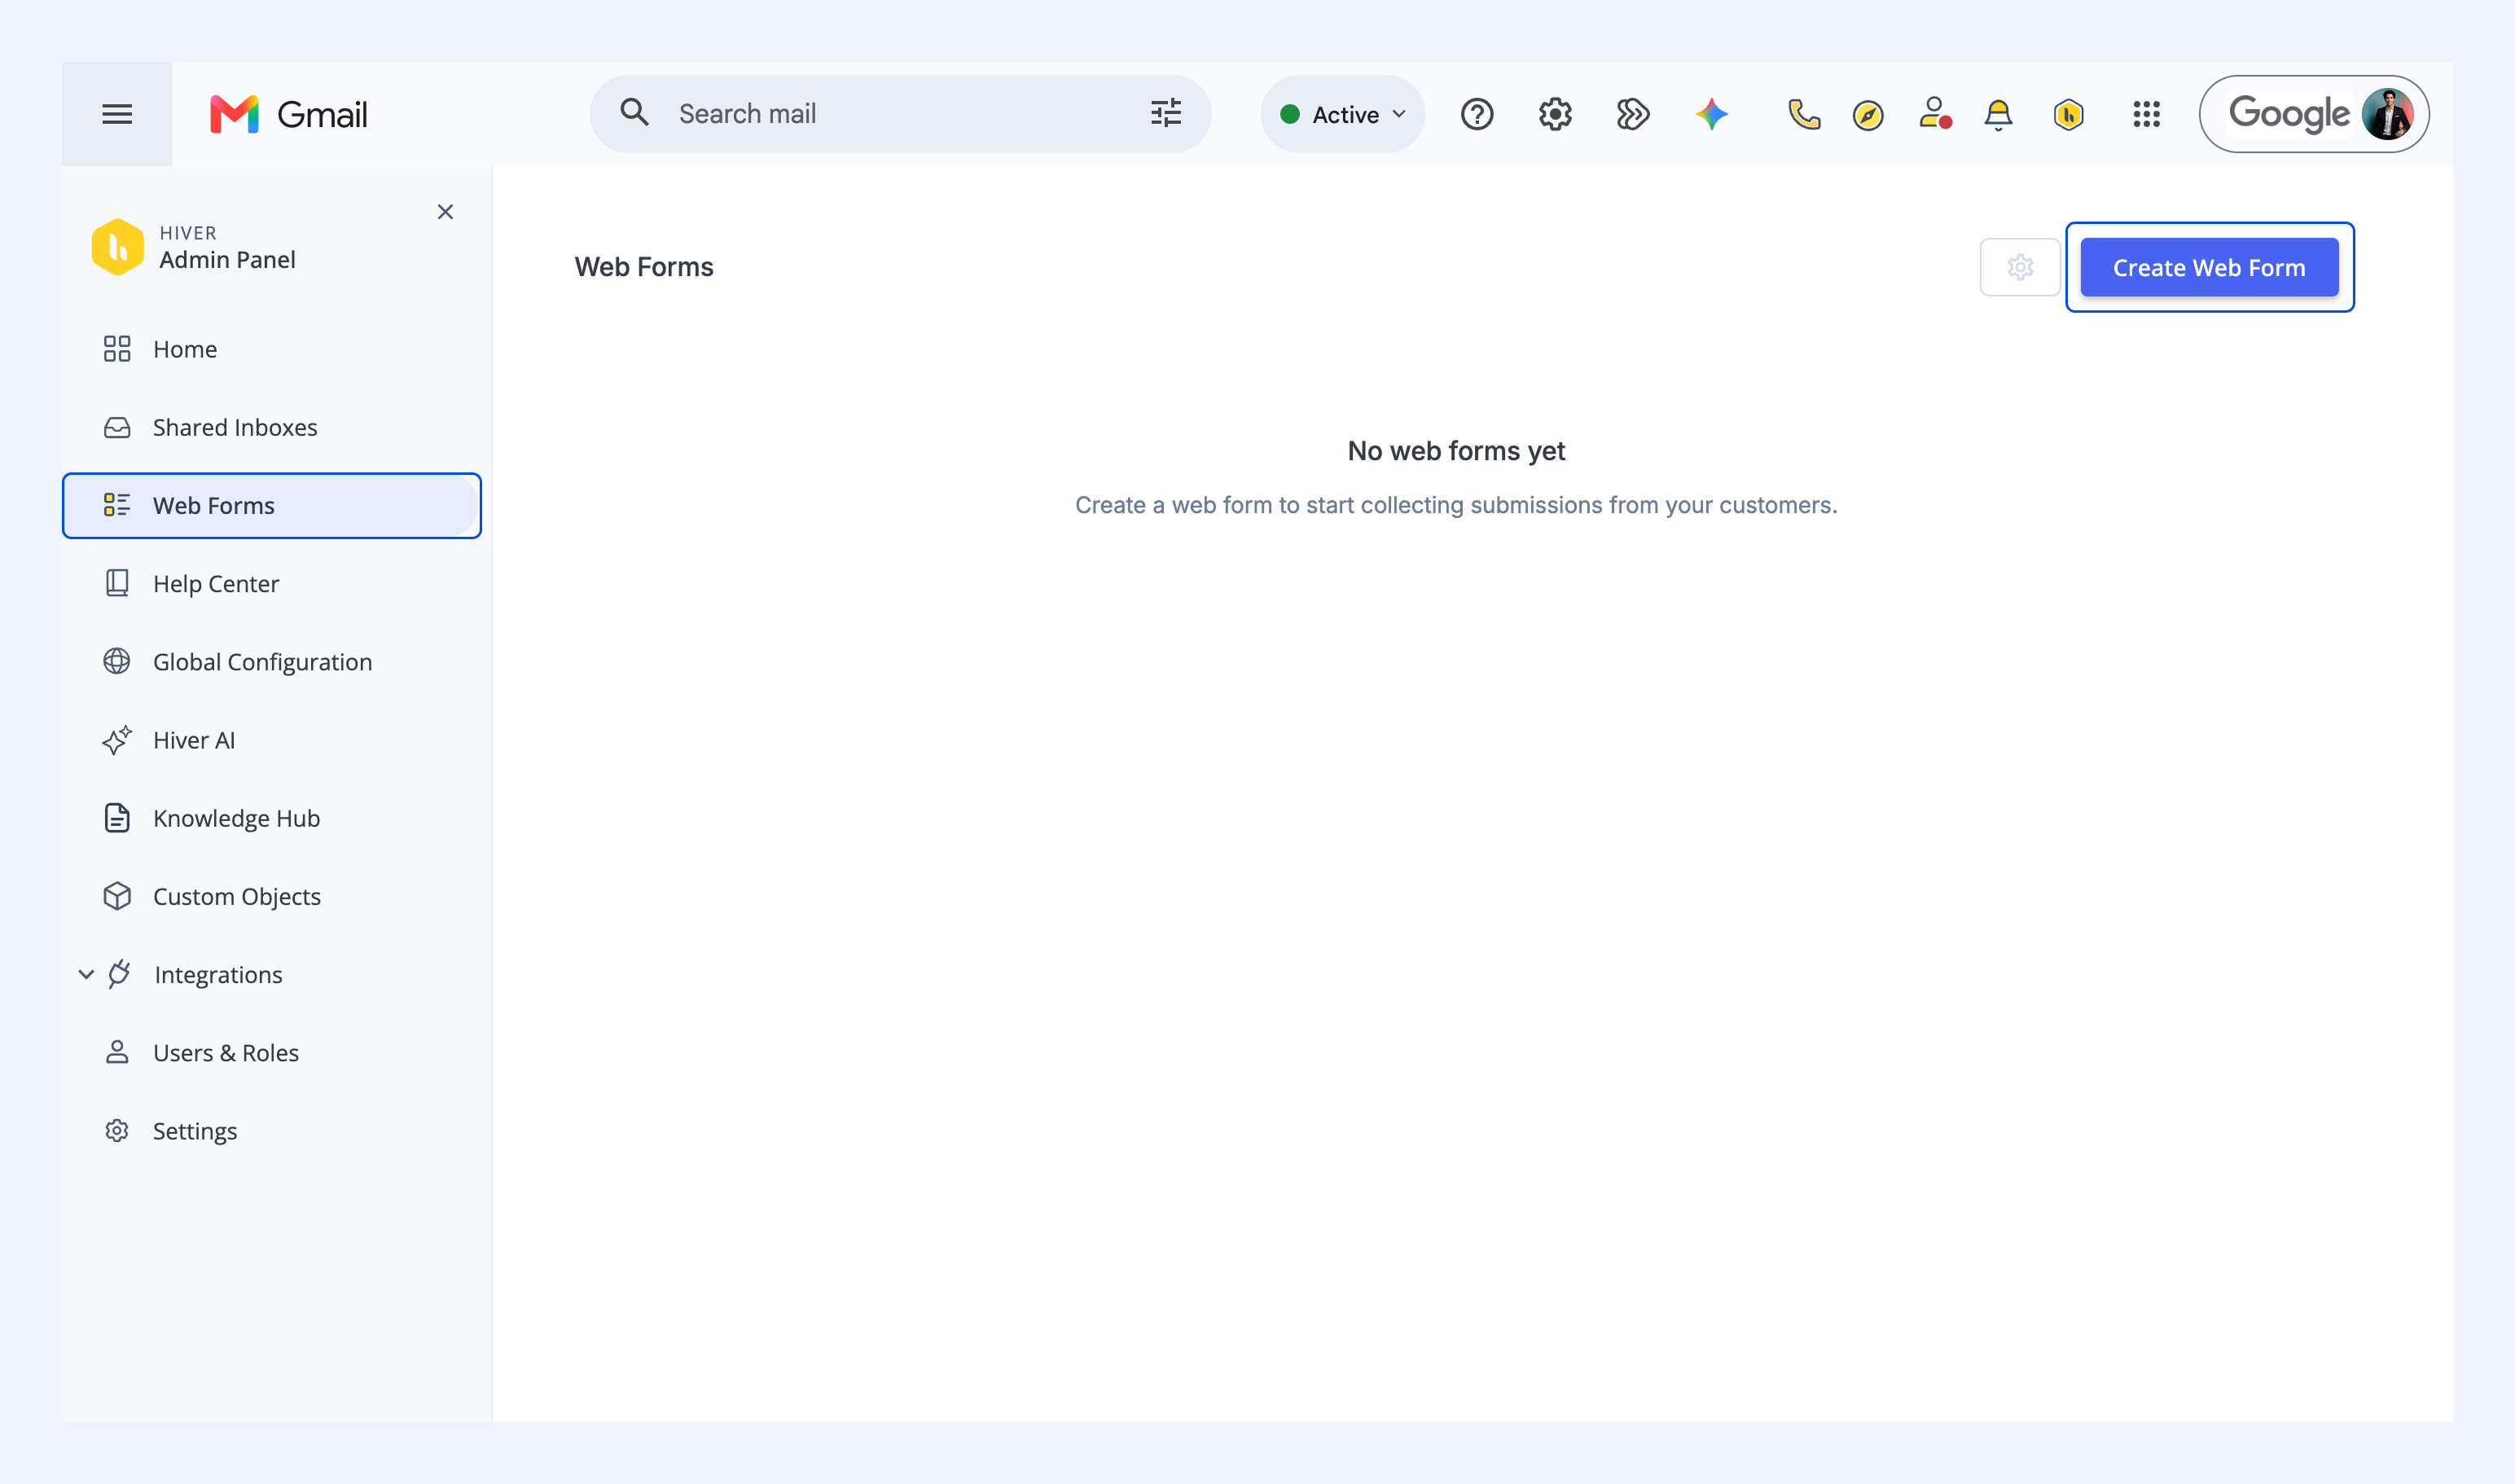
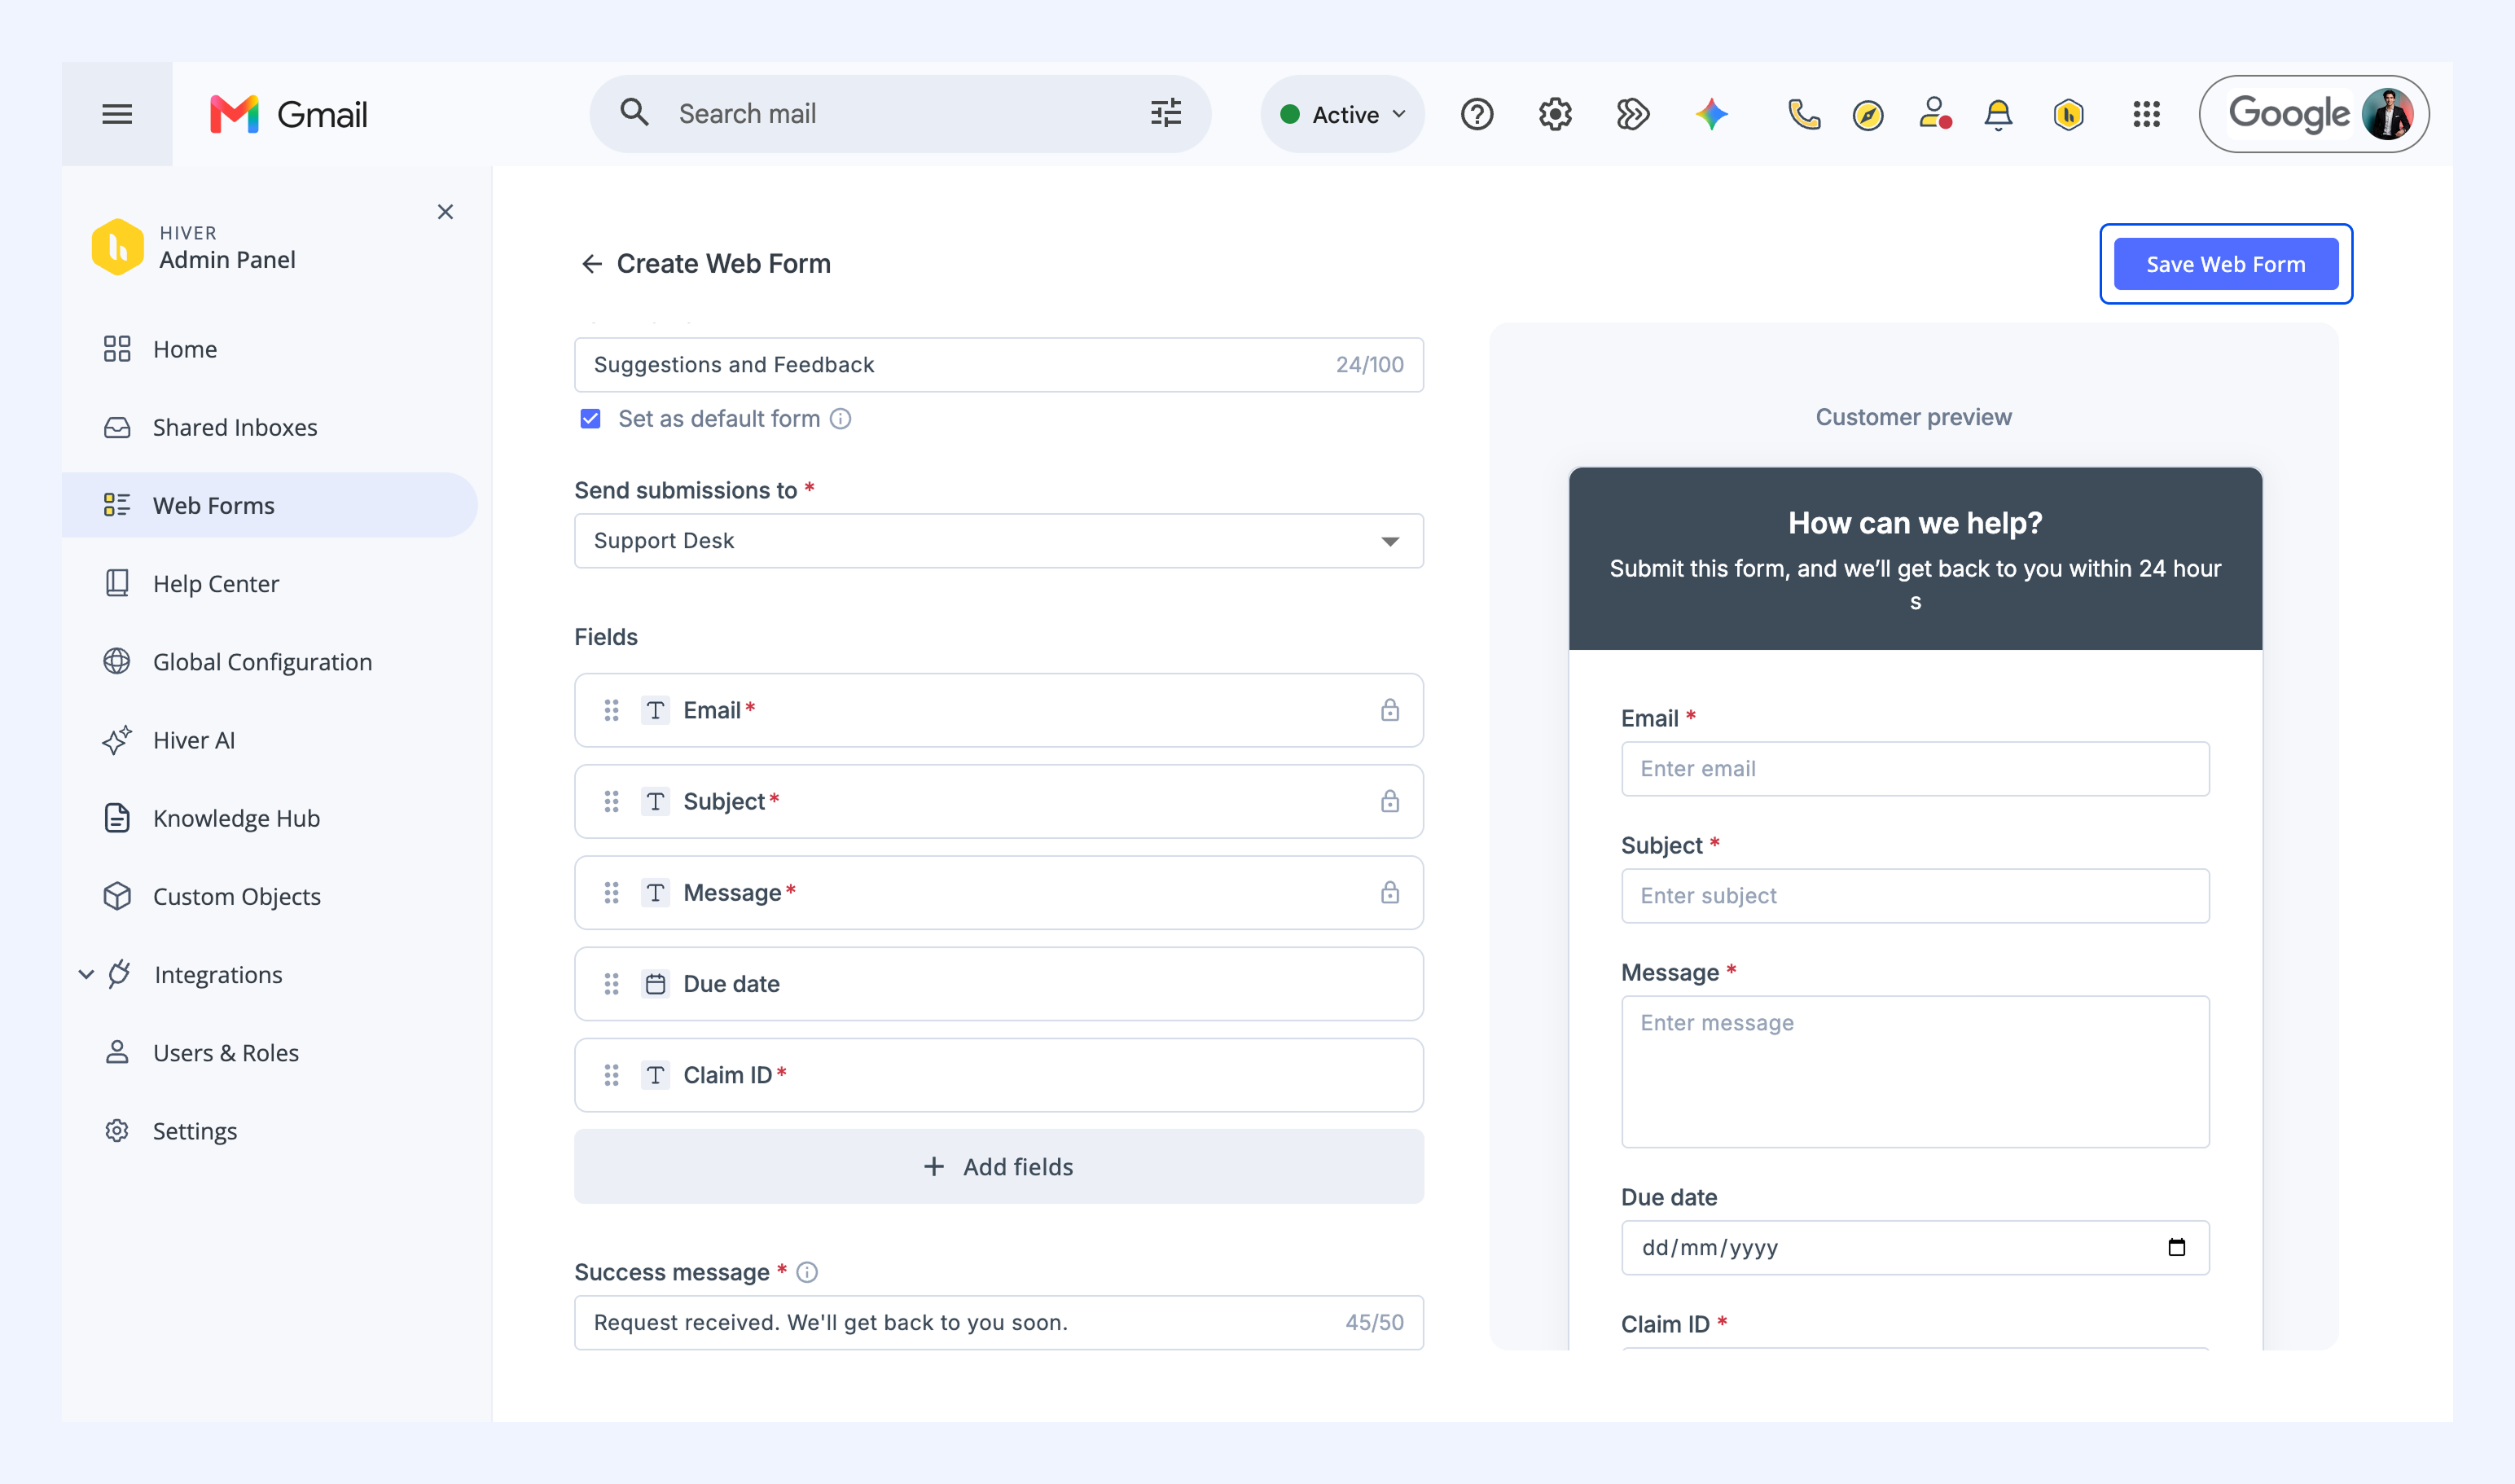
1. Go to Admin Panel → Web Forms, and click Create Web Form.
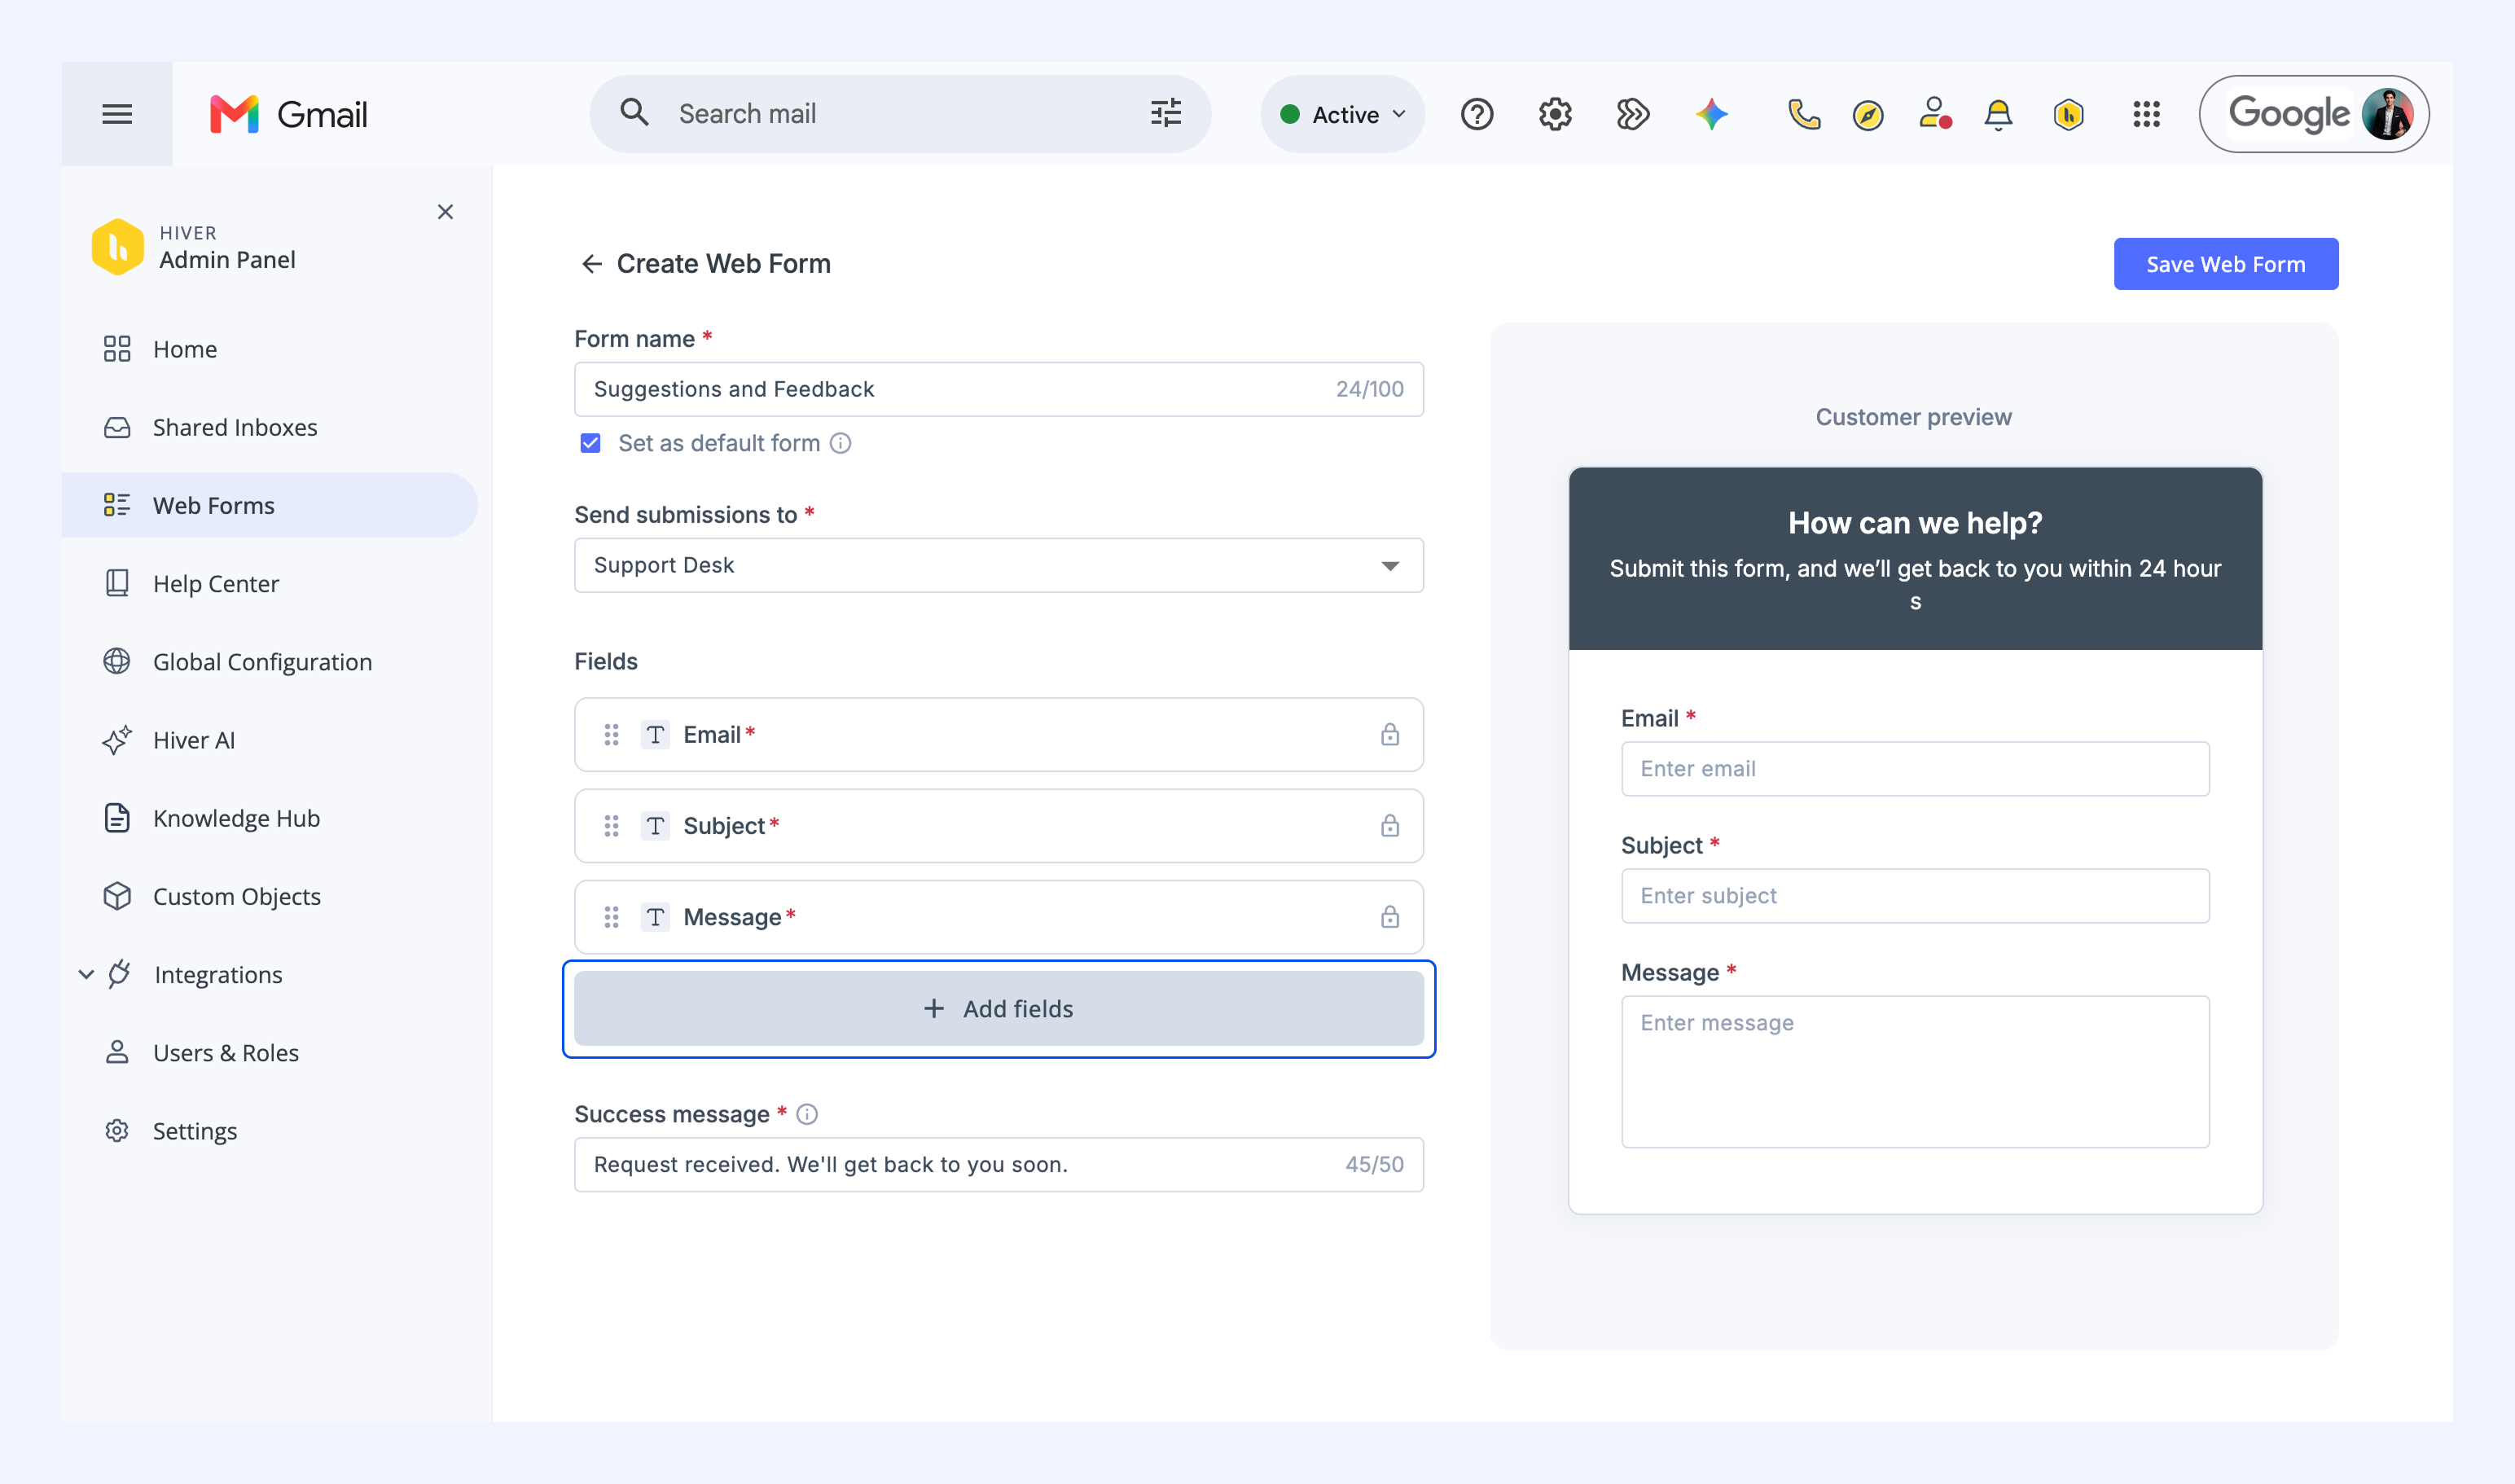
2. Enter a Form name. Visitors can see this name, so keep it specific, like Report a bug or Feature request.
3. If you want this to be the default form on the All forms page, select Set as default form. The All forms page gathers all your forms at one link, so visitors can choose the type of request they want to submit.
4. Under Send submissions to, choose the Shared Inbox where you want to receive submissions.
Note: You can't change the connected Shared Inbox once the form is saved.
5. Add your fields. Fields for email, subject, and message are added by default. To collect more details:
- Click Add fields.
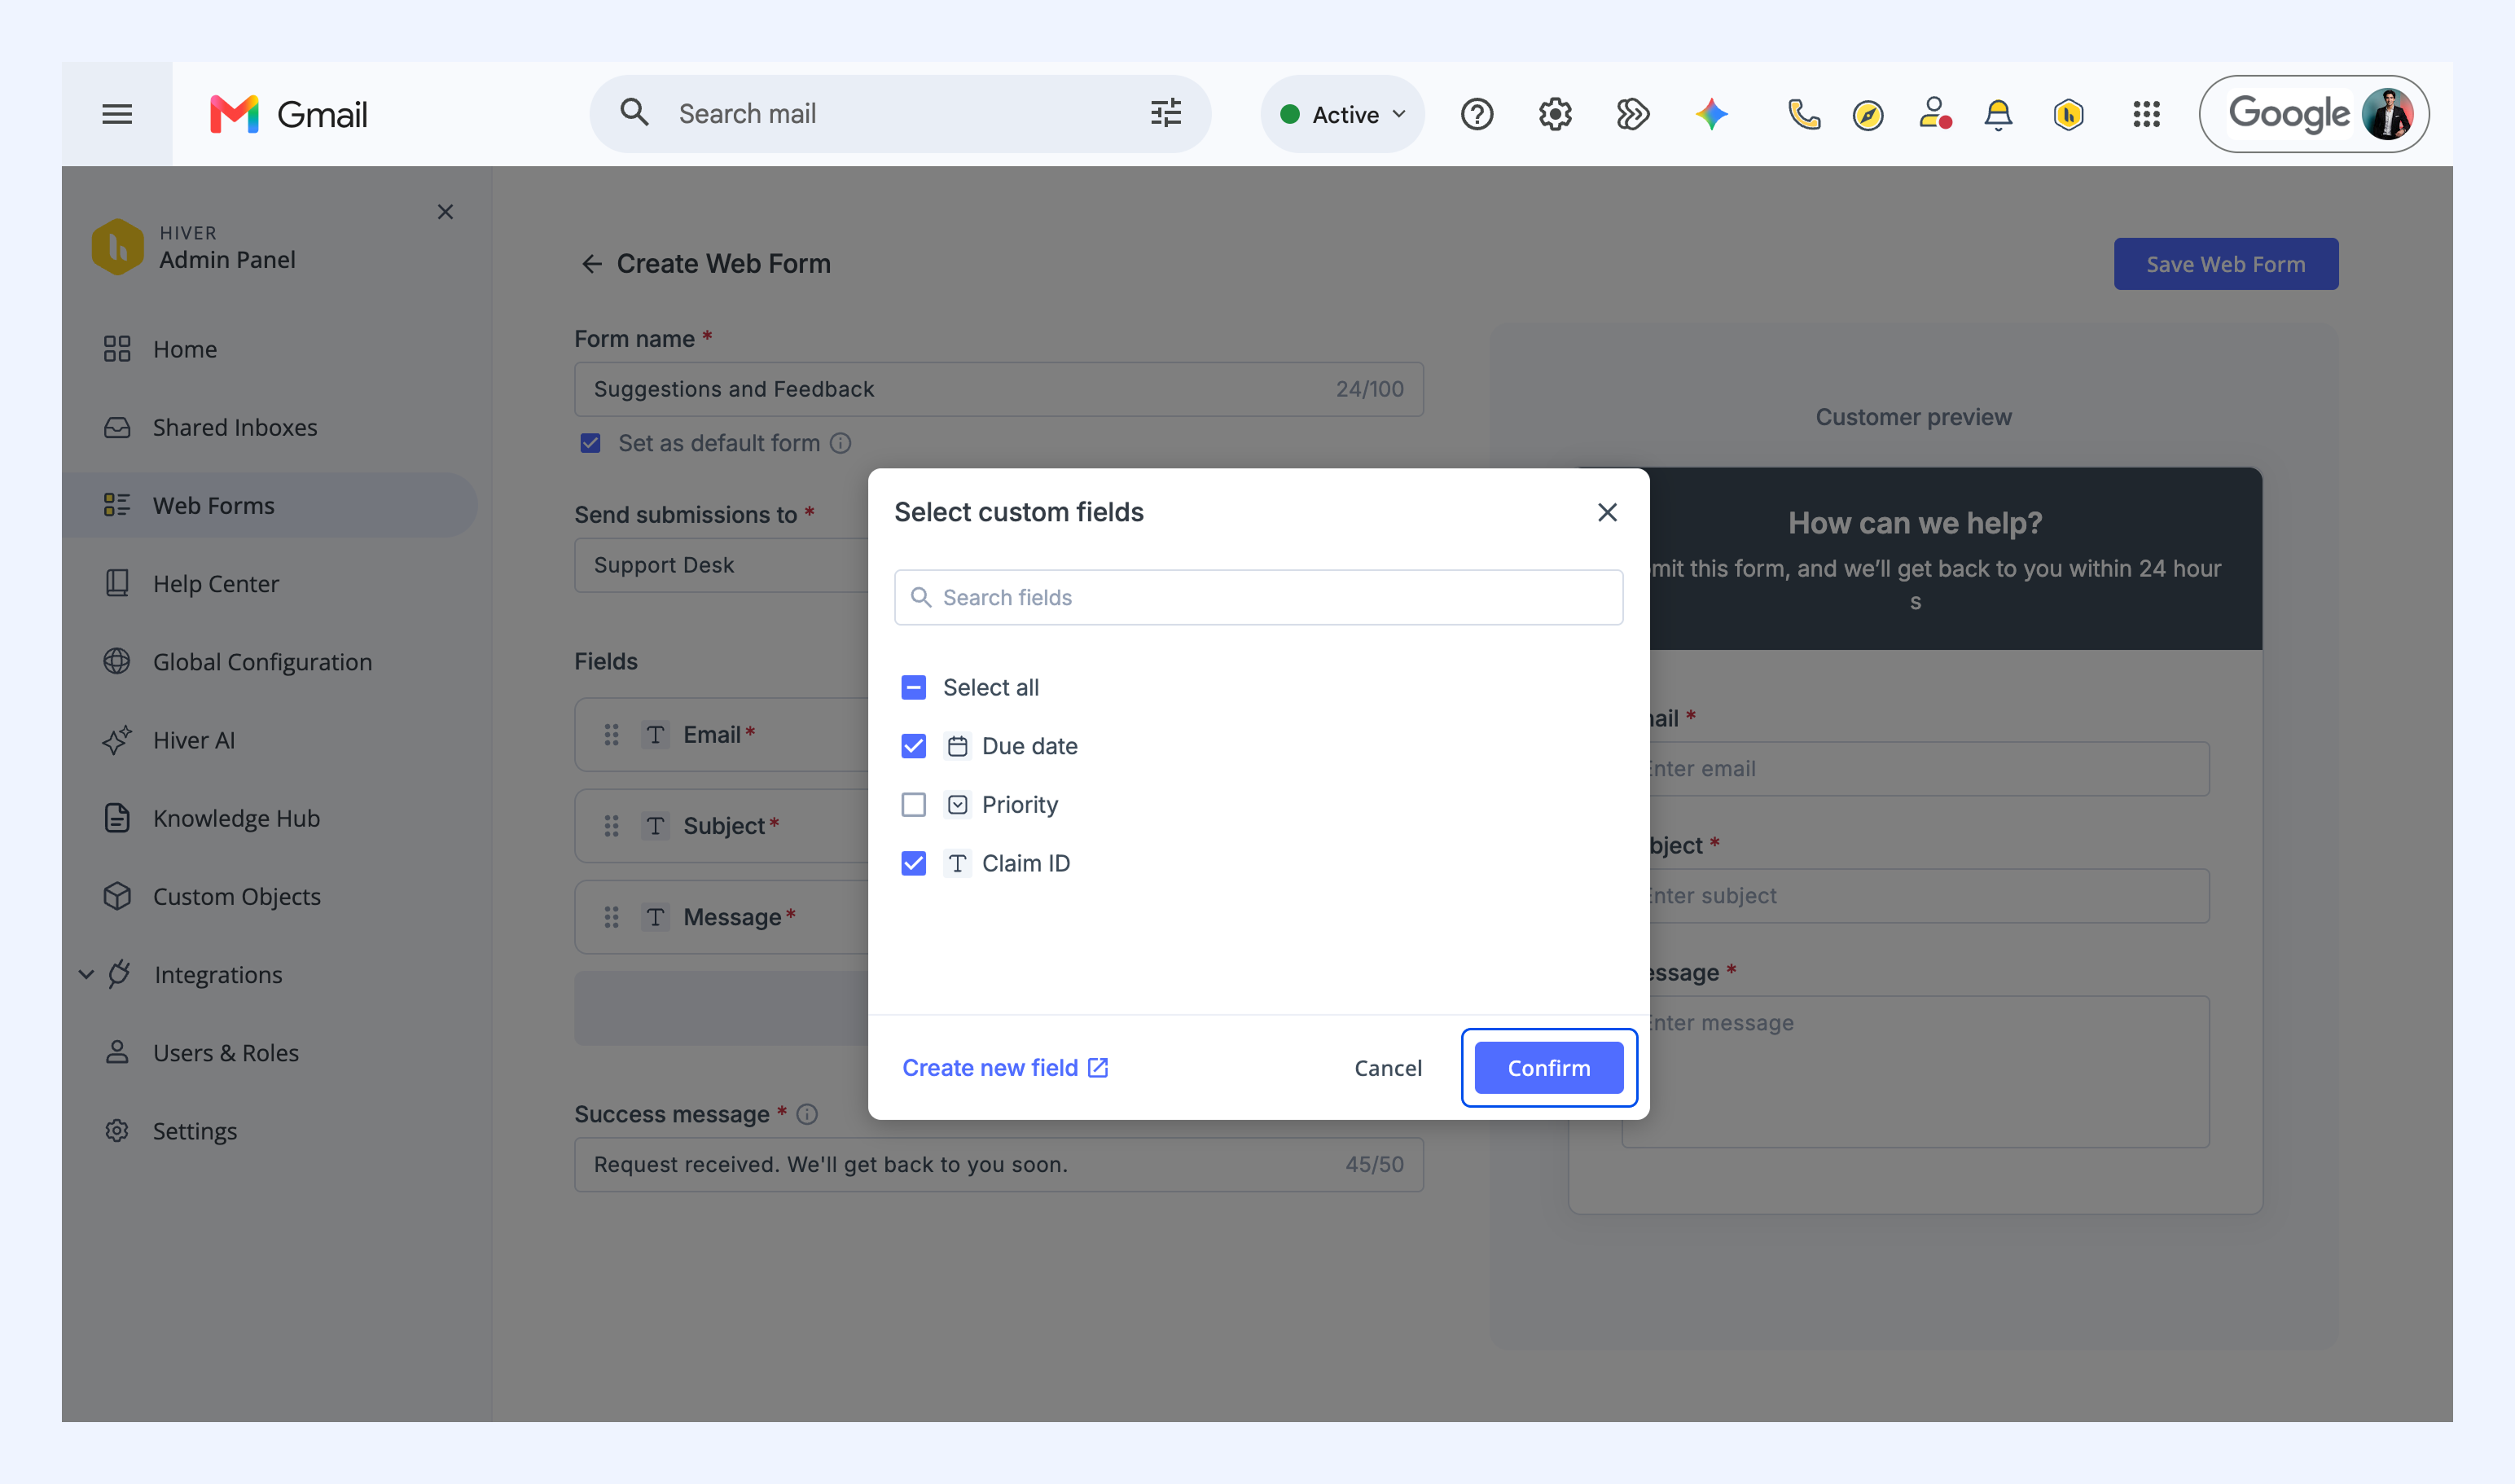
- Select the Custom Fields you want, and click Confirm.
Note: If a field you need isn’t created yet, click Create new field and add one.
6. To let visitors attach files, like screenshots or documents, turn on Allow attachments and enter a Field label. Visitors can upload up to 10 files, 9 MB in total.
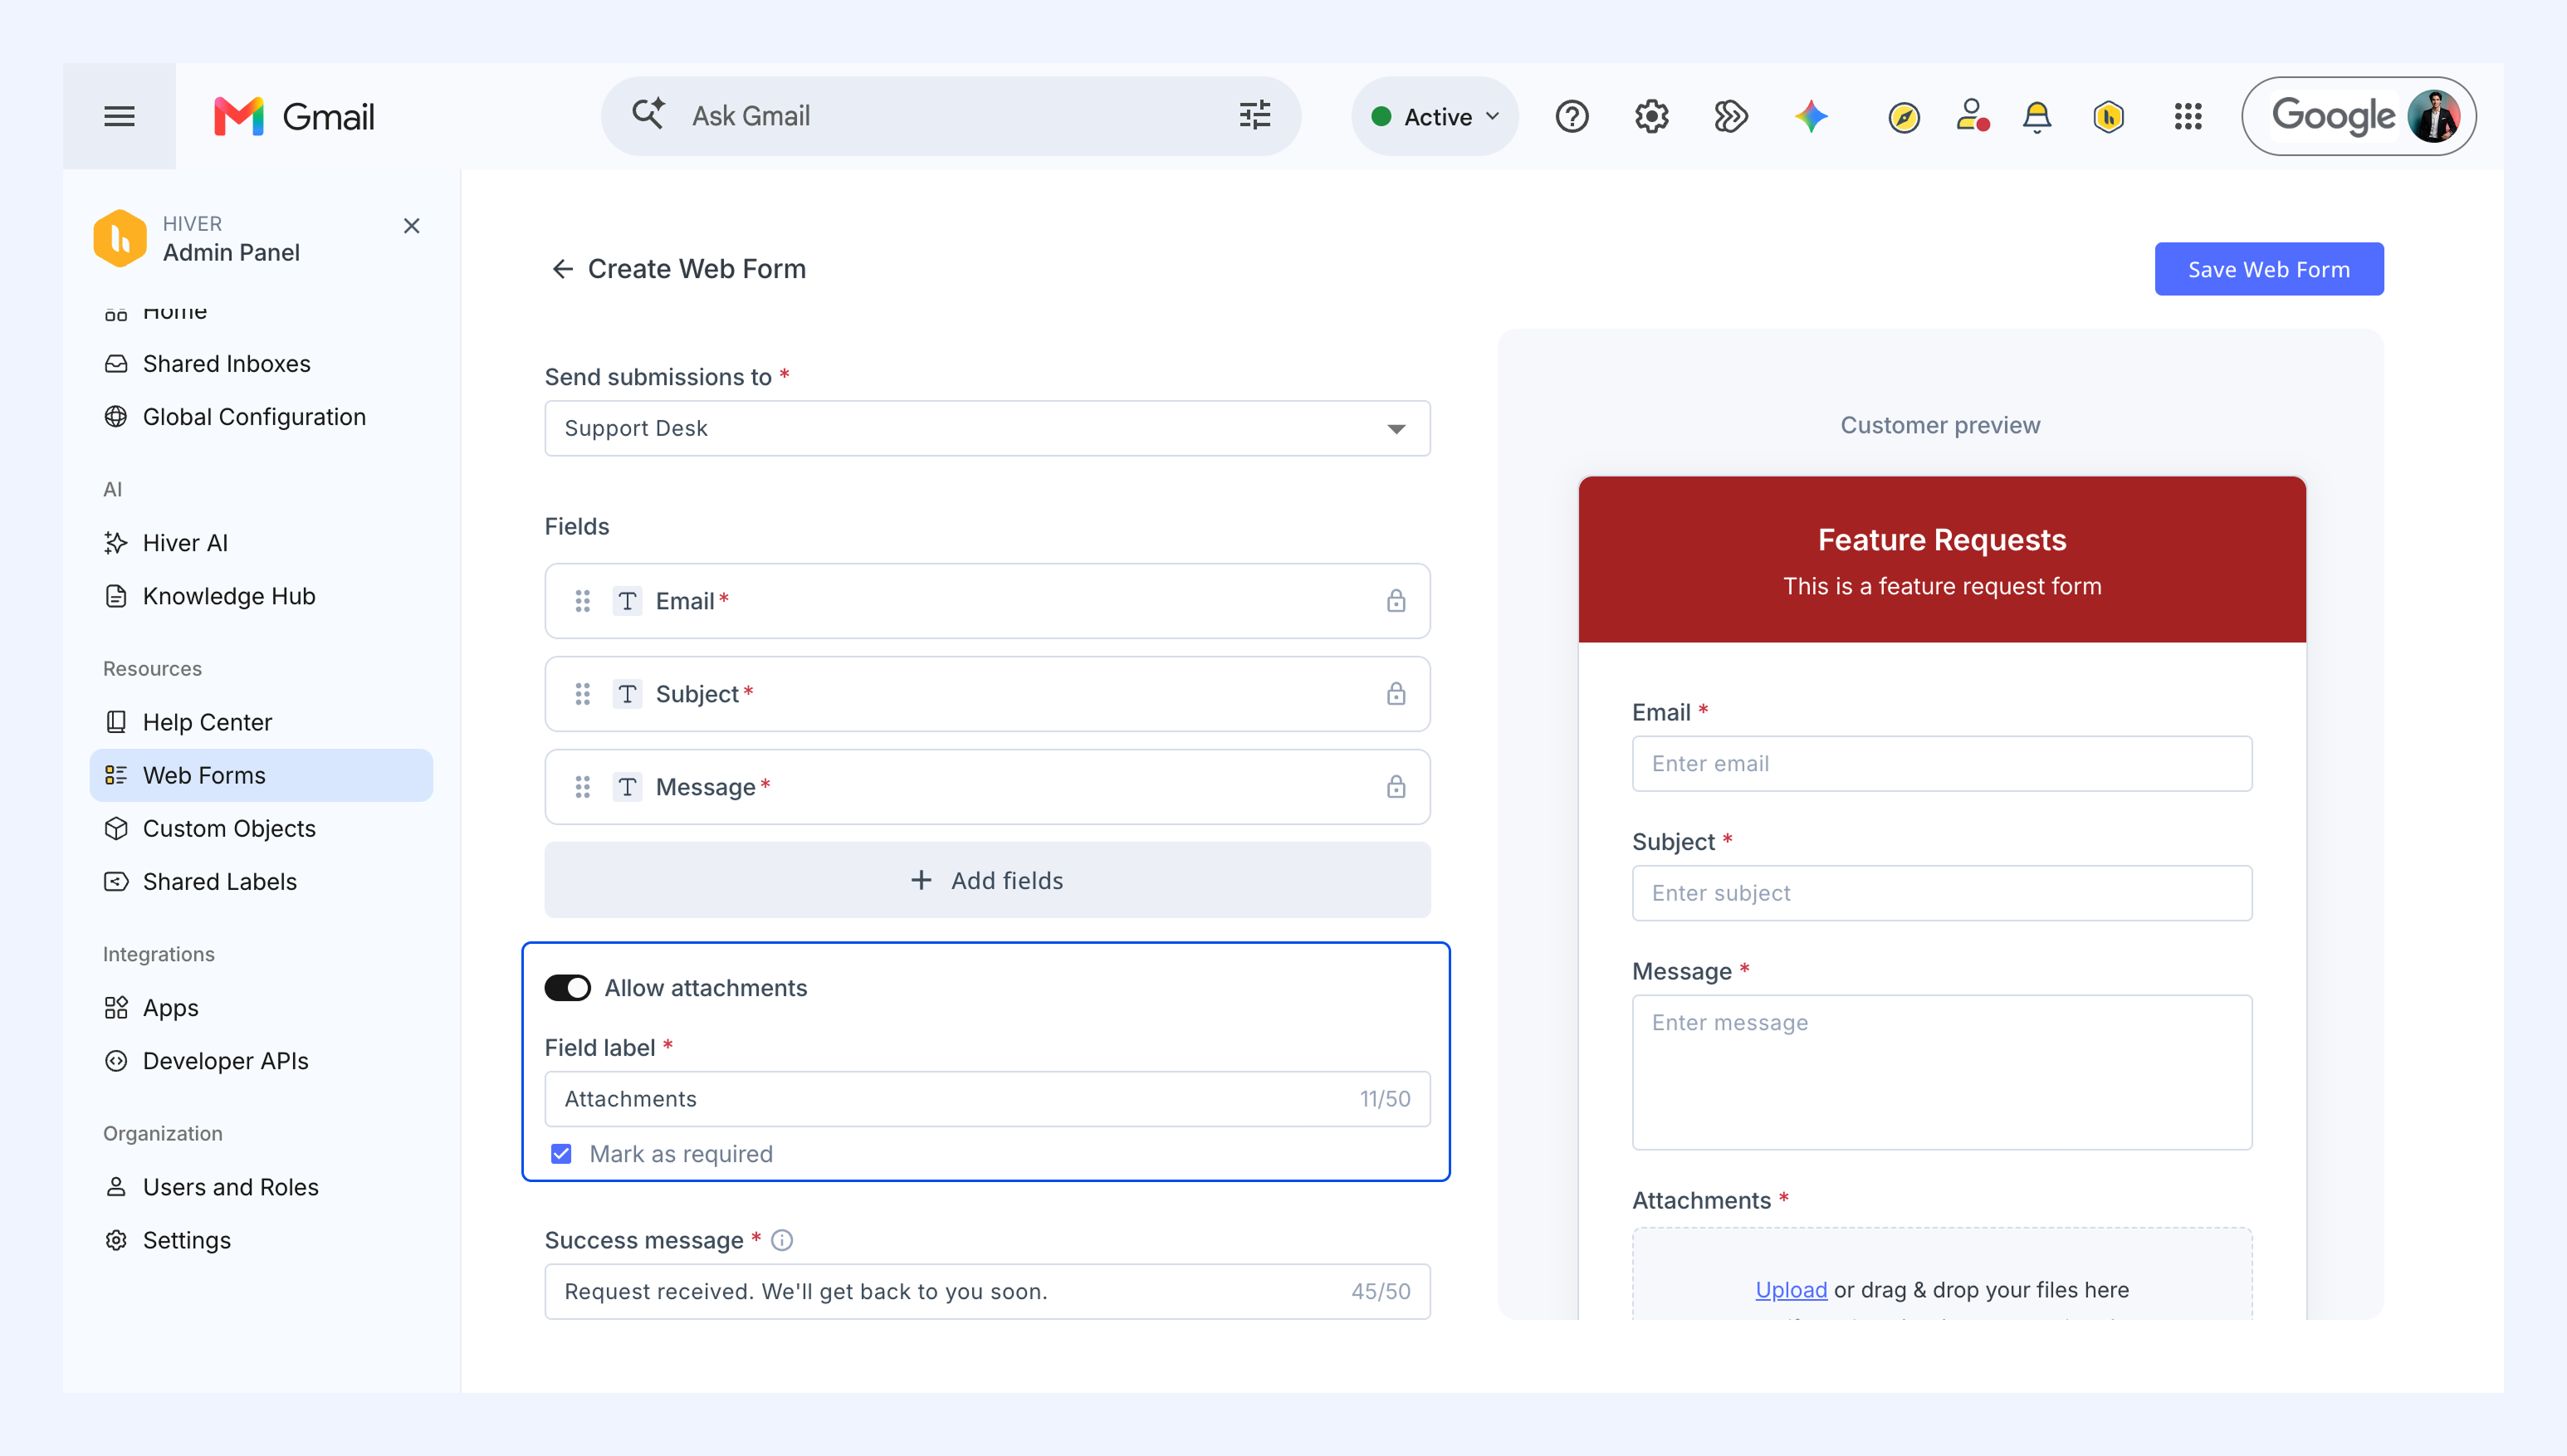
7. Add a Success message that visitors will see after they submit the form.
8. Click Save Web Form.
Managing your Web Forms
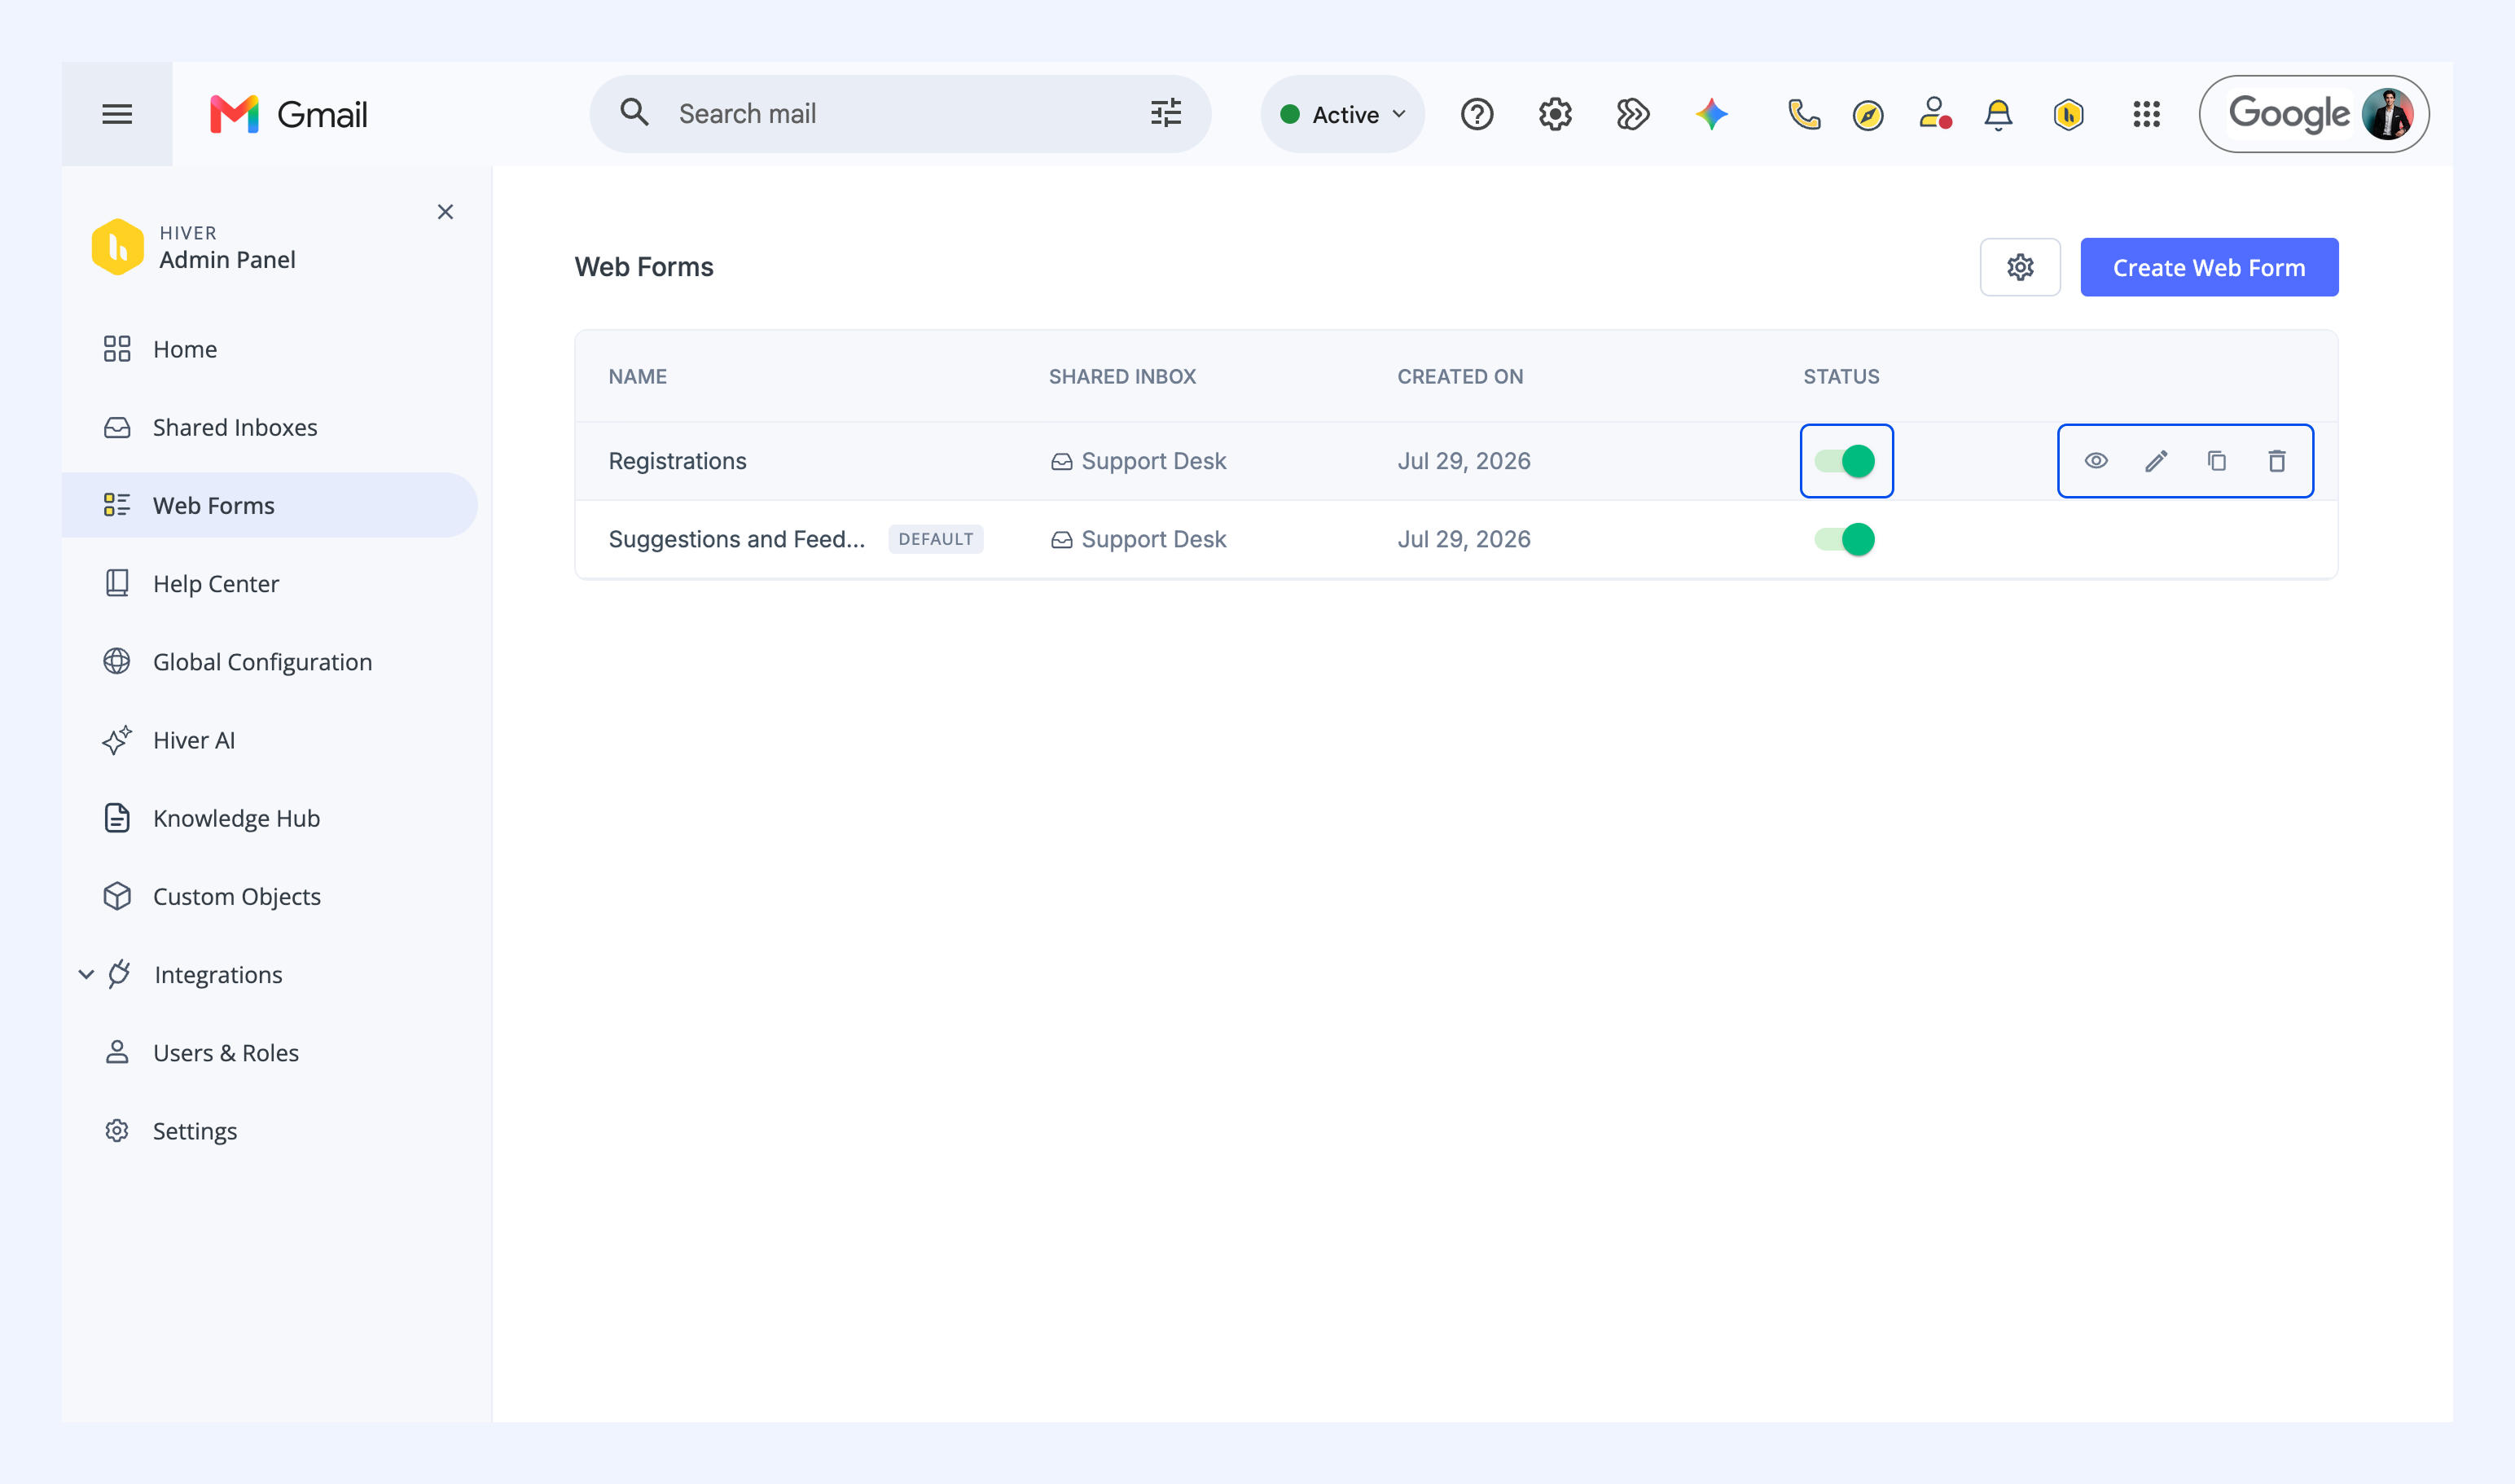
All your forms appear in the list under Admin Panel → Web Forms.
- Enable the forms you want to use with the Status toggle. A form must be toggled on to accept submissions.
- Hover over a form to Preview, Edit, Copy URL, and Delete it.
Customizing Web Form settings
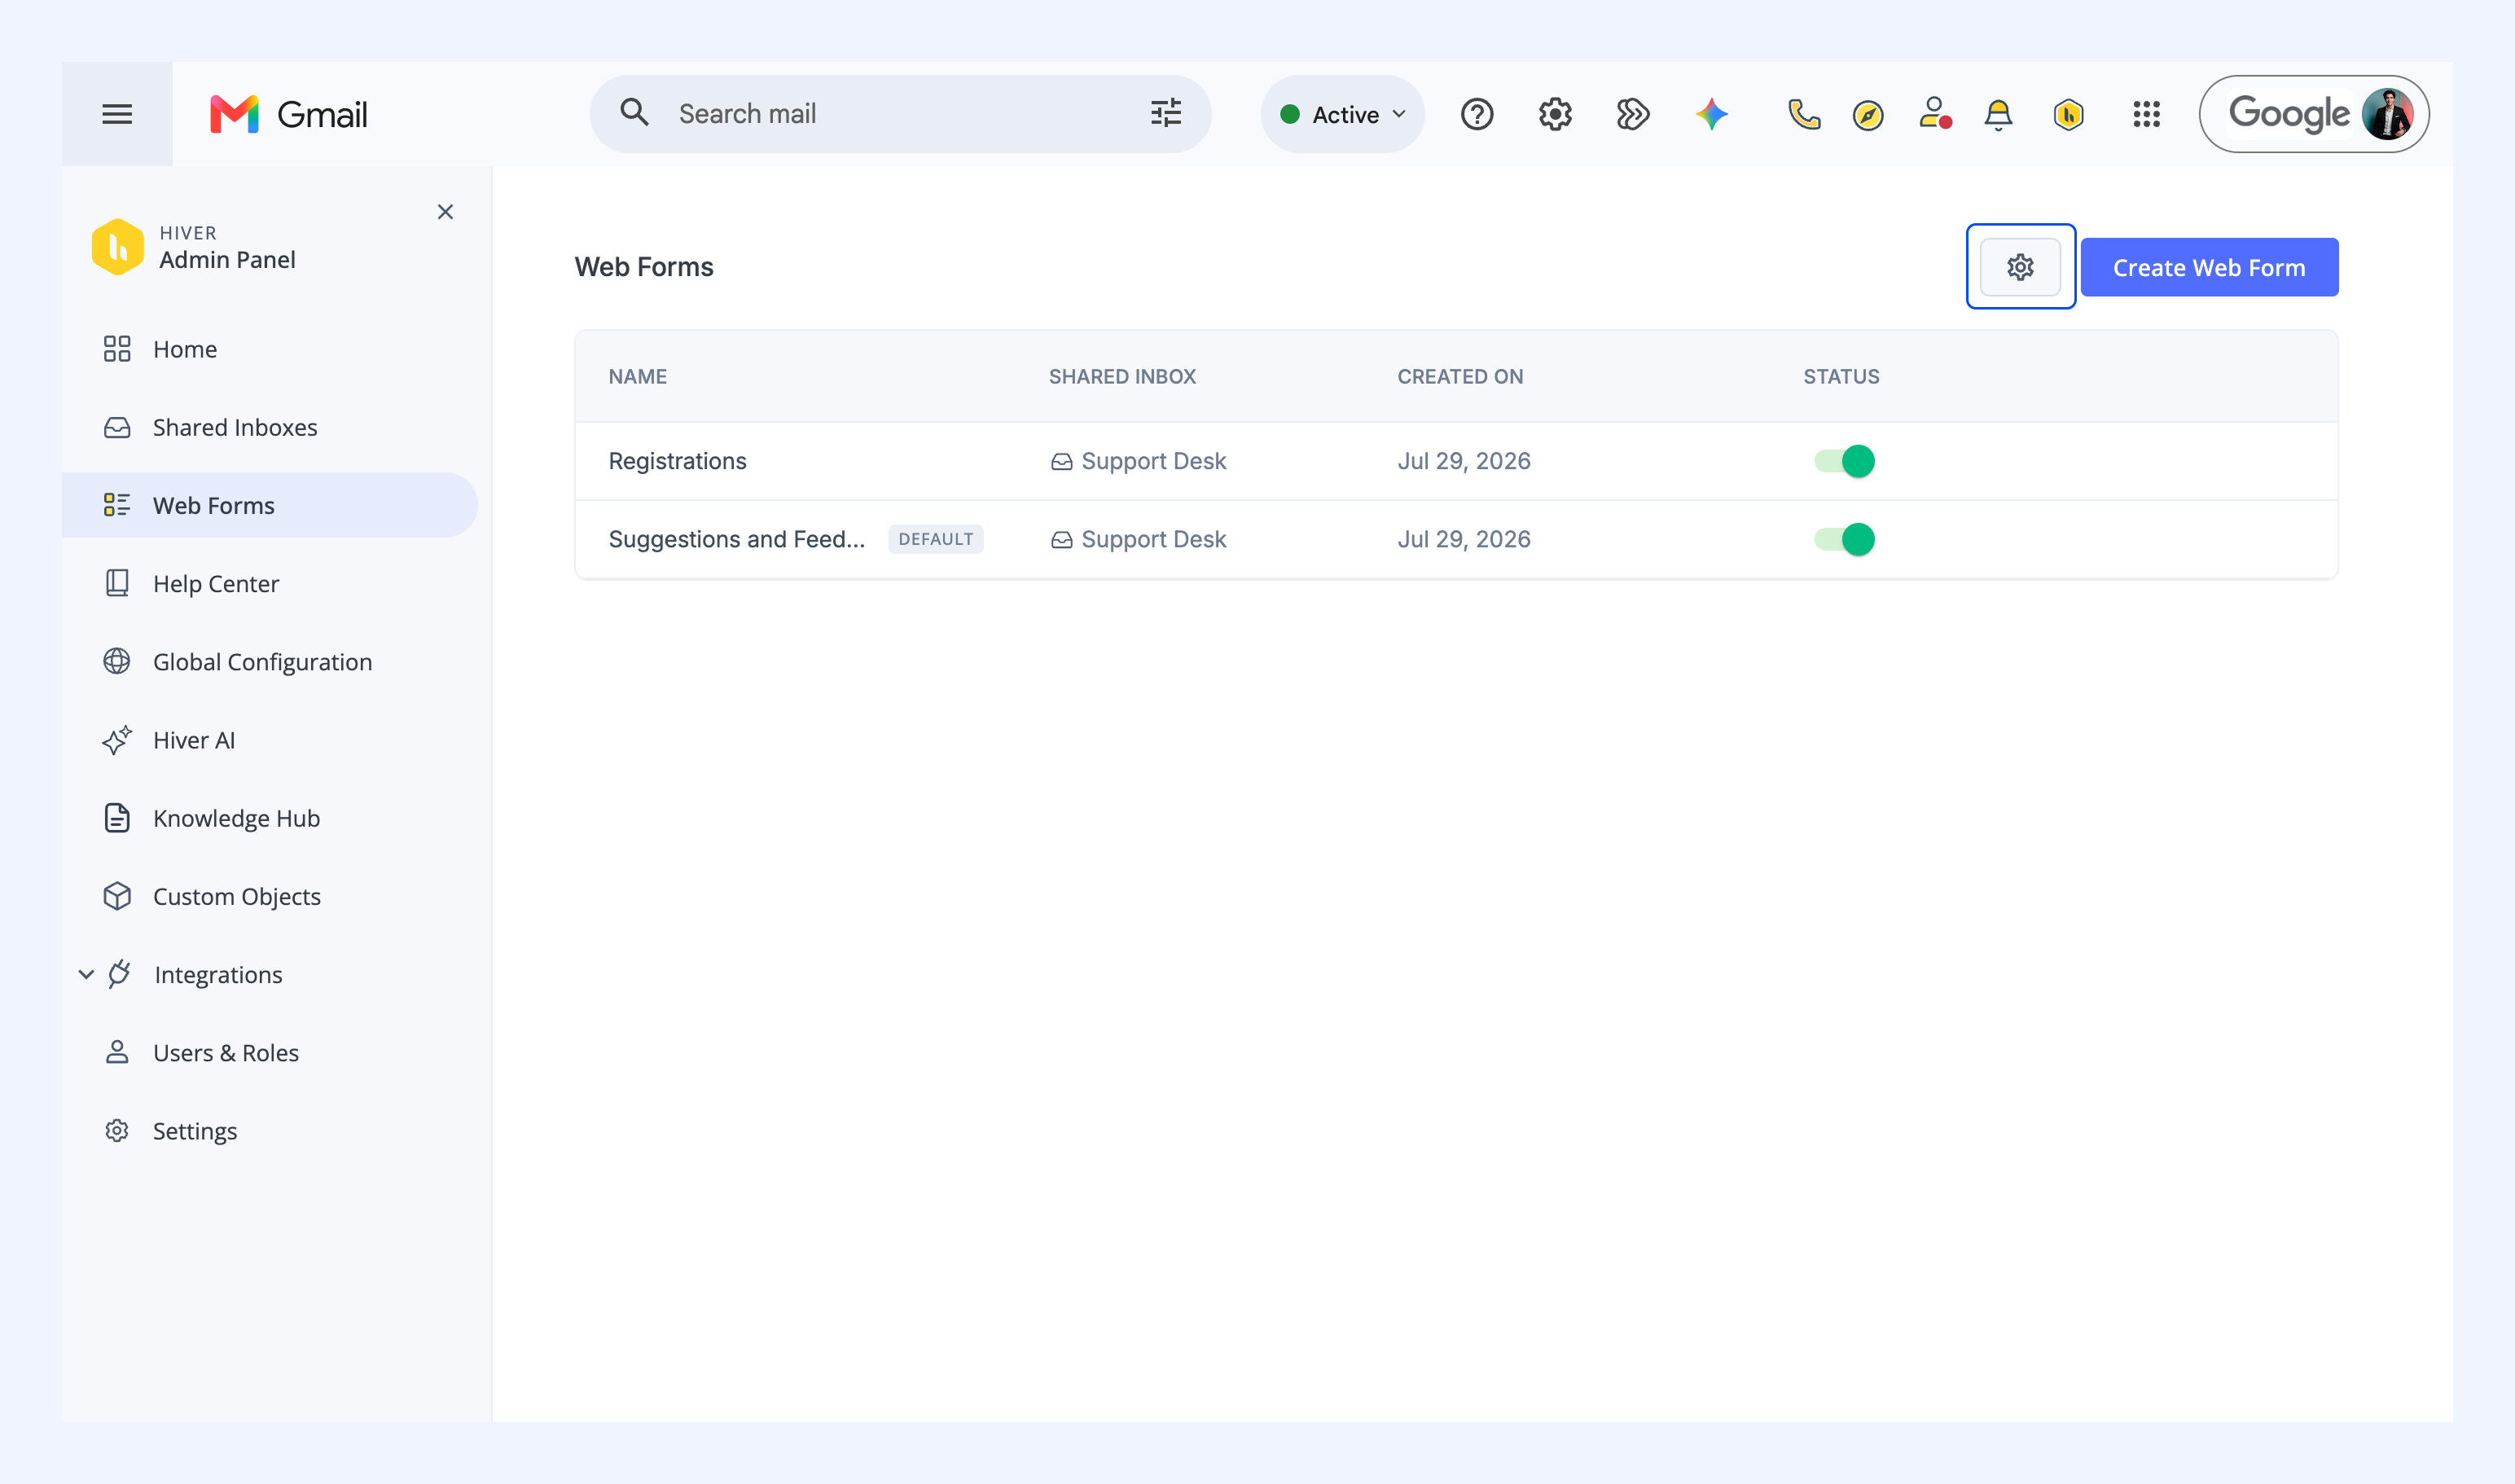
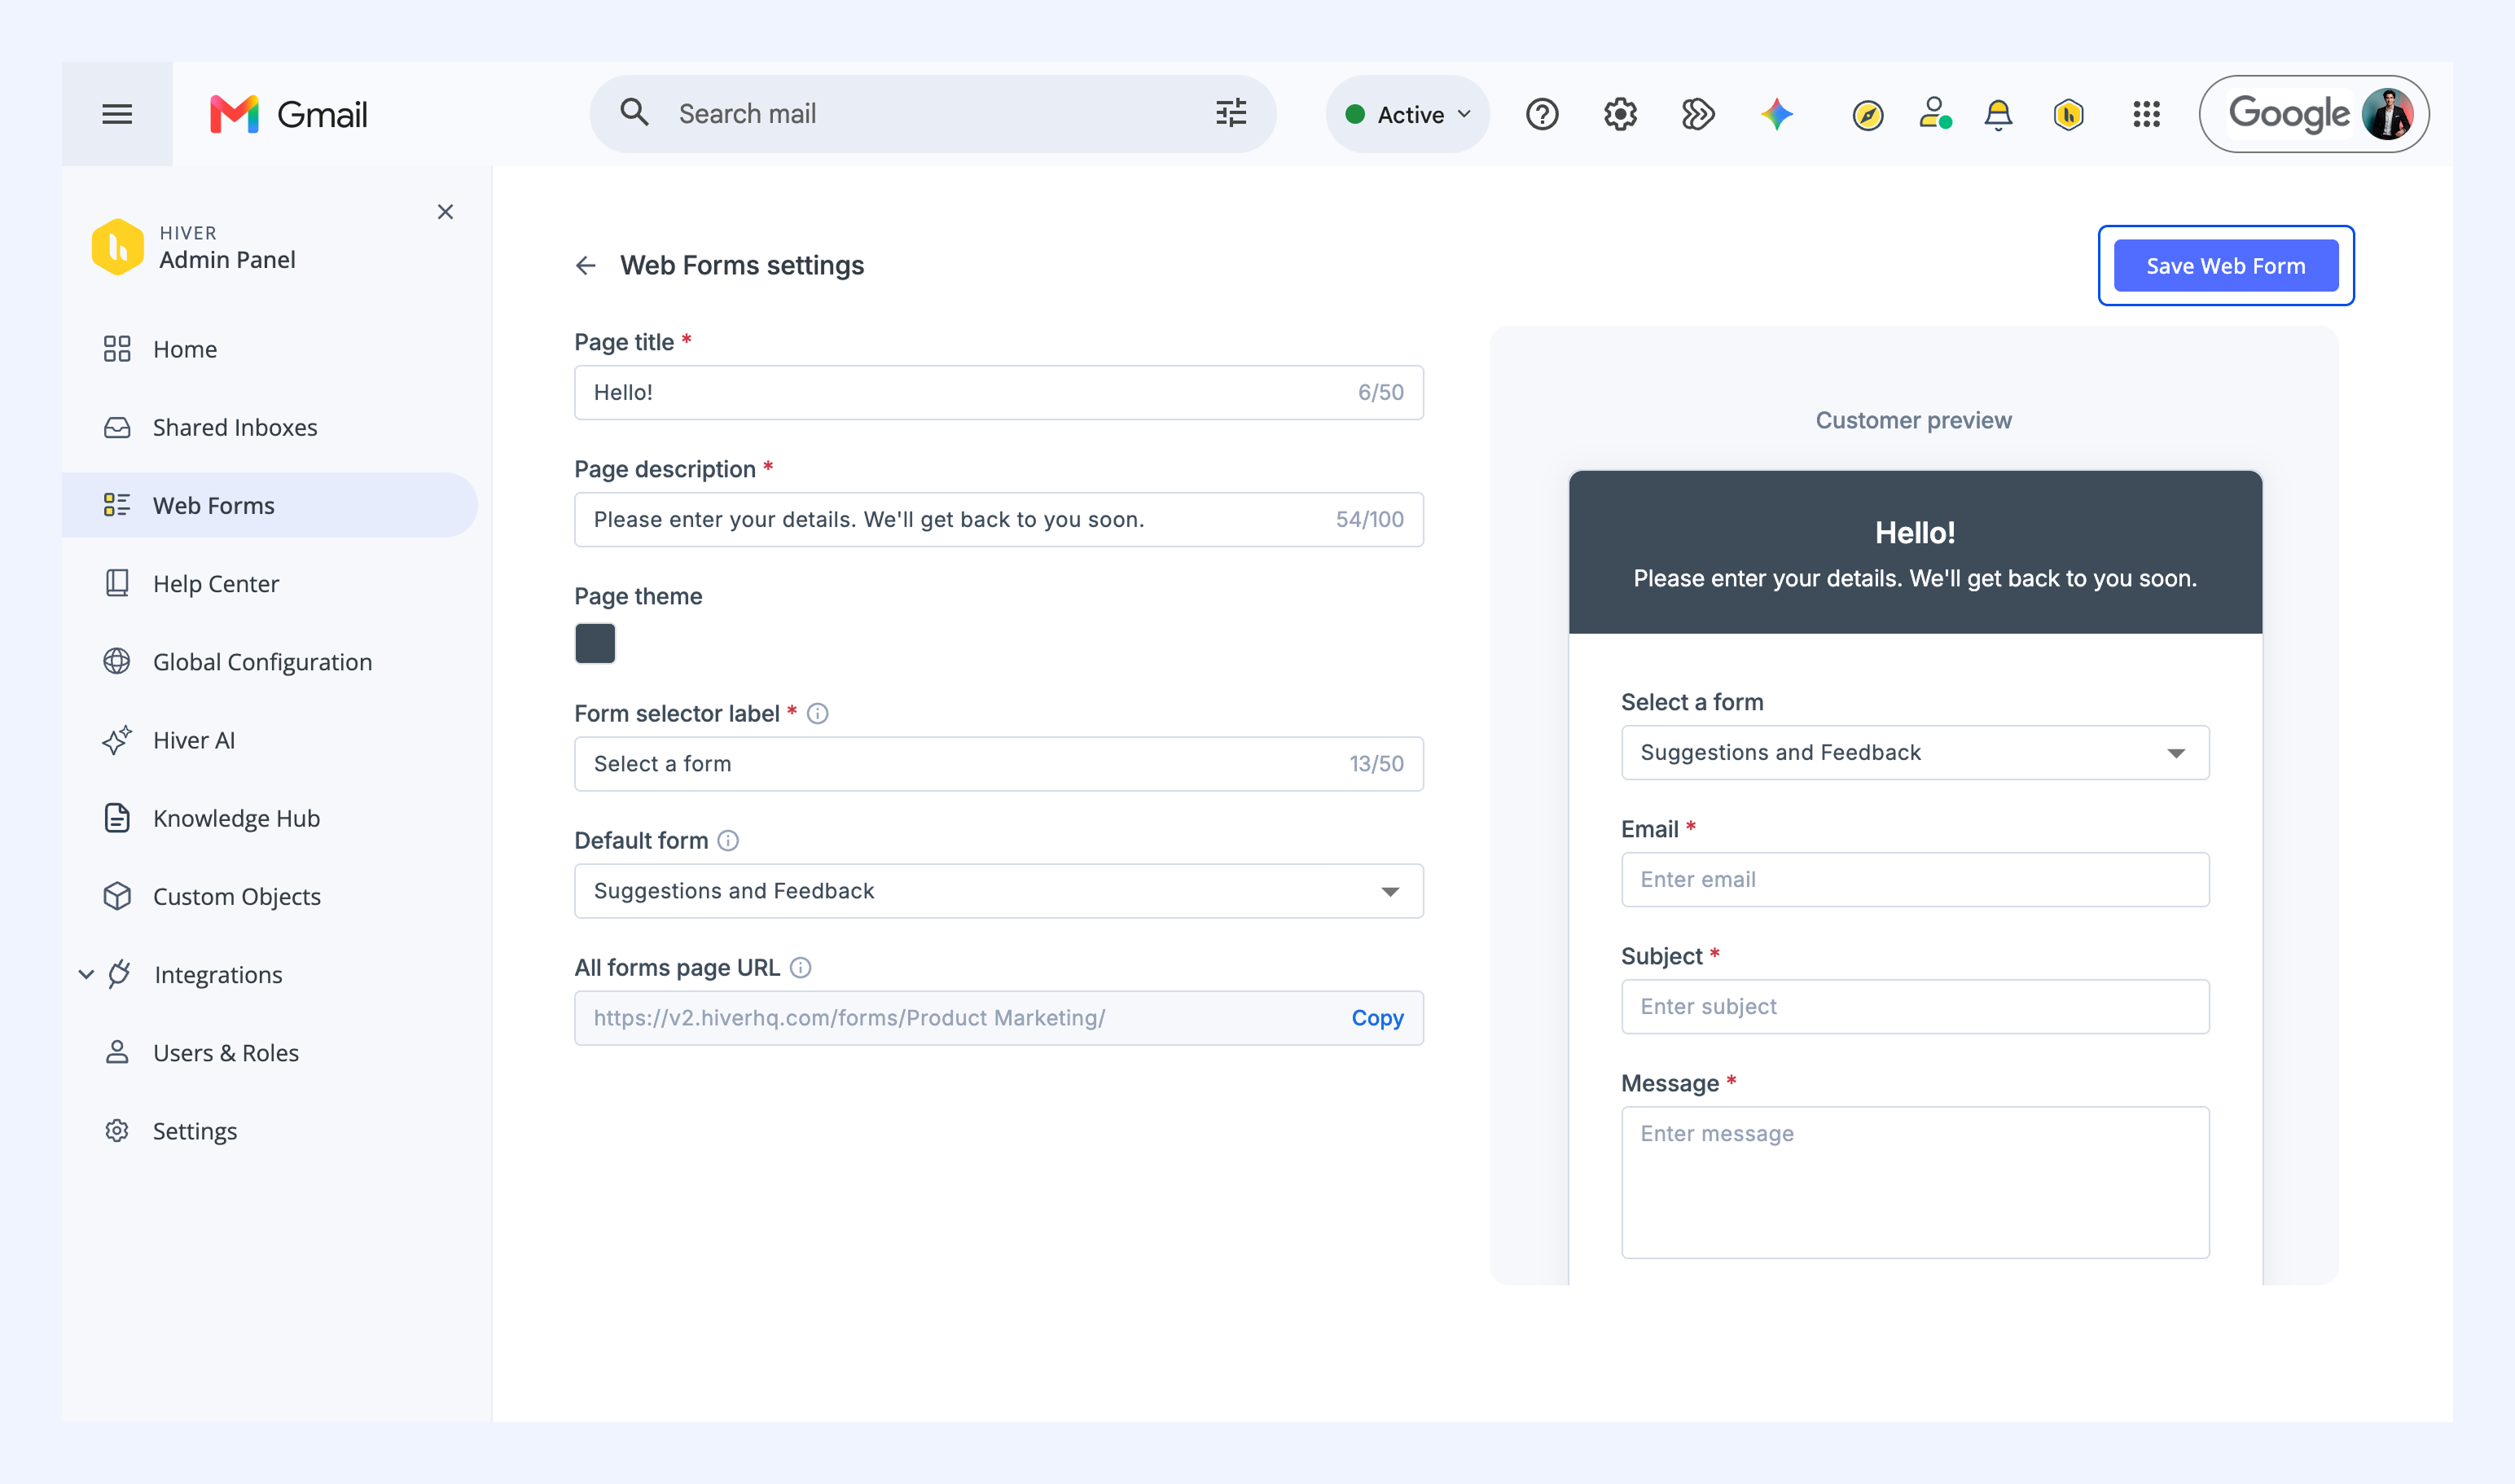
Web Form settings control how your forms and the All forms page appear to visitors. To open the settings, click the gear icon. You can customize:
- Page title: The title shown on the banner of each Web Form and the All forms page.
- Page description: The text shown below the page title on the banner.
- Page theme: The color used for the form banner and buttons.
- Form selector label: The label for the dropdown visitors use to switch between forms on the All forms page.
- Default form: The form pre-selected when a visitor opens the All forms page. You can set only one default form at a time.
- All forms page URL: The link to the page hosting all your forms.
Once you're done, click Save Web Form.
Sharing a Web Form
Once your form is ready, you can share it in two ways:
- Form URL: Hover over the form in the Web Forms list and click the copy icon. Add the link to your website, like a Contact us page, or send it directly to customers.
- All forms page URL: Available in Web Form settings. This link opens all your forms in one place, so visitors can pick the request type that fits.
Tracking Web Form submissions
Every submission arrives in the Shared Inbox connected to the form, along with any files the visitor attached. You can assign it, track its status, and reply to the customer from the same place.
FAQs
Can I create multiple Web Forms?
Yes. You can create as many forms as you need and connect each one to a Shared Inbox.
Can I edit a Web Form after creating it?
Yes. You can update fields, settings, and content at any time. However, you can't change the connected Shared Inbox.
What happens to existing submissions if I change a form?
Changes apply only to new submissions. Existing submissions aren't affected.