Copper Integration with Hiver
Copper is a CRM platform built for Google Workspace that helps teams manage customer relationships and sales pipelines. The Copper integration lets you view opportunity, company, and contact details from Copper directly in Hiver. Your team can access relevant records directly from email conversations, making your interactions faster and more efficient.
Why should you integrate Copper with Hiver
When you connect Copper with Hiver, it helps your team:
- View opportunity records in context: See Copper opportunity details directly in Hiver's right panel while reading customer emails, so you understand deal status before responding.
- Access company information instantly: Pull up complete company profiles and client records without leaving your inbox, including account history and past interactions.
- Create and edit records on the spot: Add new contacts, companies, or opportunities and update existing data directly from your inbox.
- Search and log emails efficiently: Find any Copper record using Hiver's right panel and save important email threads to your CRM instantly.
- Create new records from Hiver: Add new opportunities, companies, or information about people directly to Copper without switching tabs.
Supported capabilities
With the Copper-Hiver integration, you can:
- View opportunity details: See opportunity name, monetary value and unit, and converted value and unit, and more to track sales progress at a glance.
- Access company information: Pull up company name, phone number, website, domain, and more without leaving your inbox.
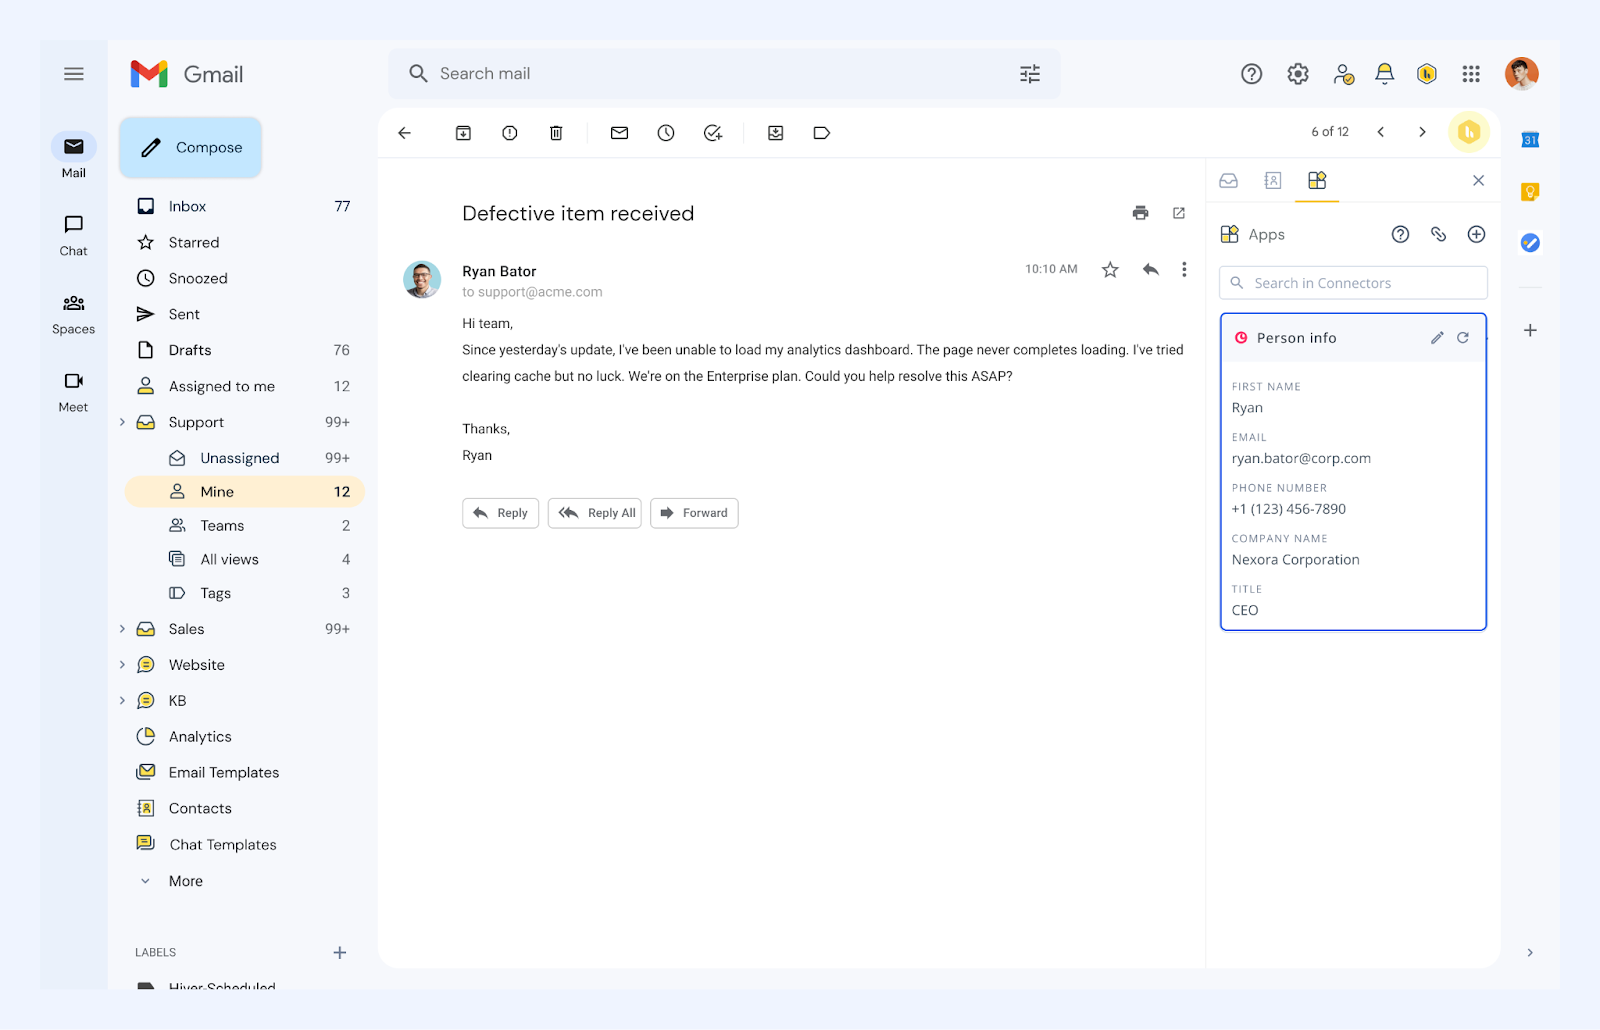
- View person (contact) details: Check name, email, phone, company, title, and owner information right alongside your email thread.
Prerequisites
Before setting up the Copper integration, make sure you have:
- A Copper administrator account with API key generation permissions
- Admin access in Hiver
Setting up the Hiver and Copper integration
Step 1: Generate an API key in Copper
- Log in to your Copper account as an administrator.
- Navigate to Settings → Integrations → API Keys.
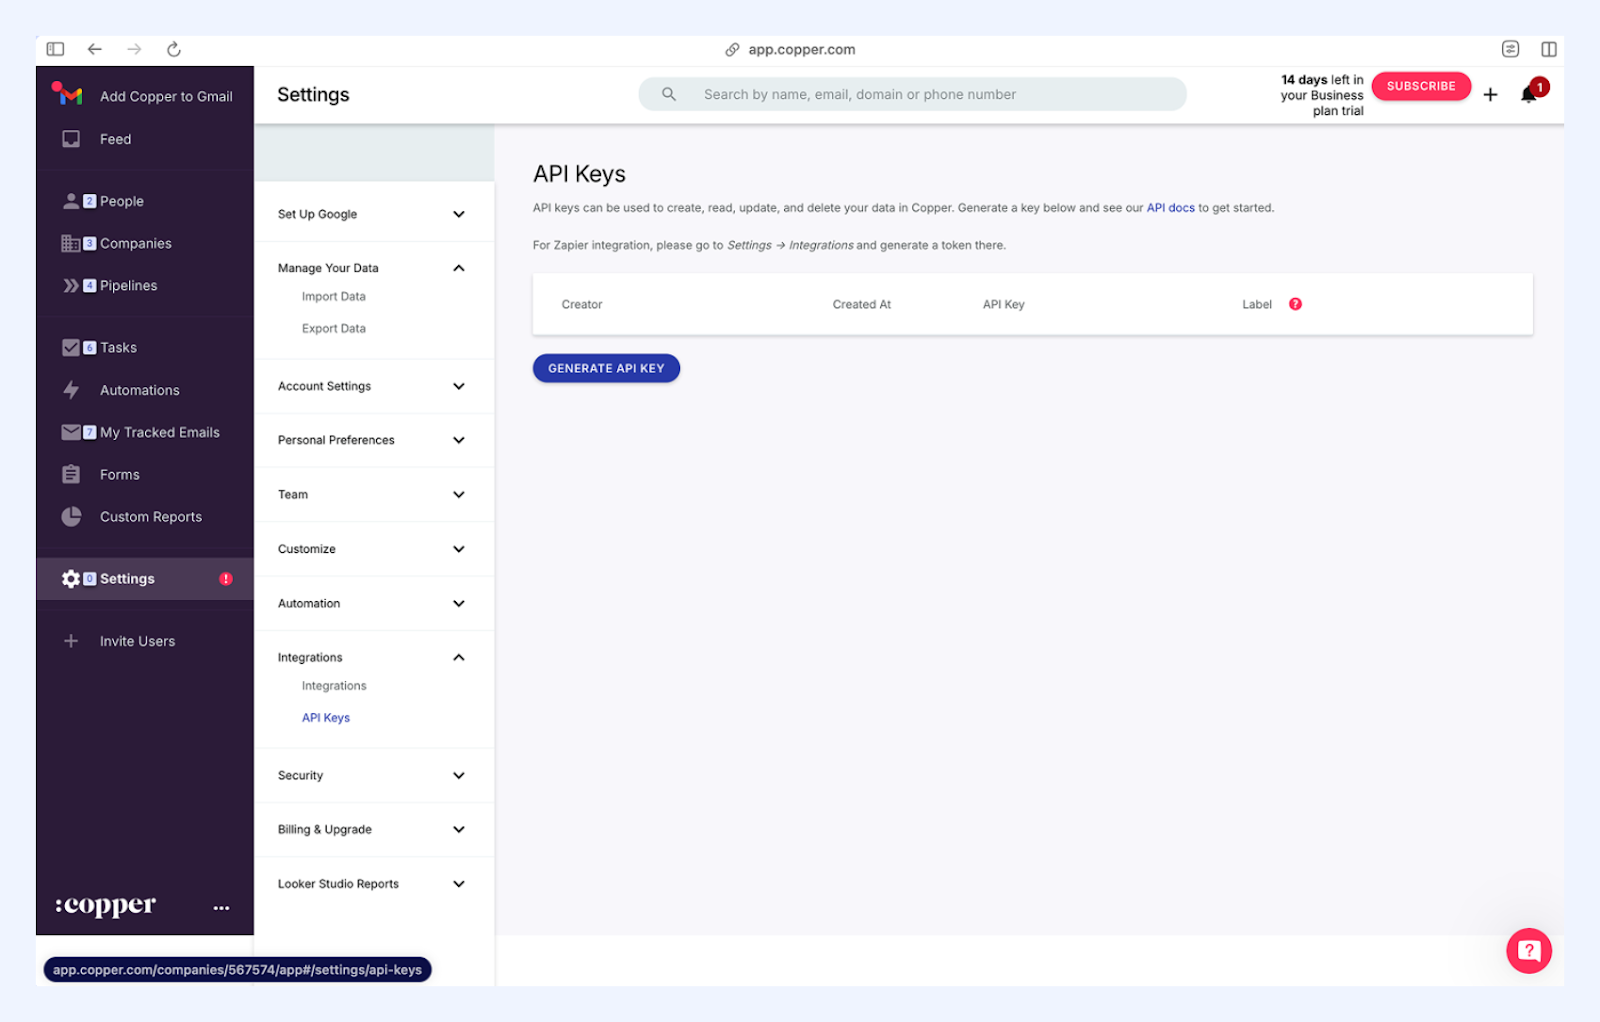
- Click Generate API Key.
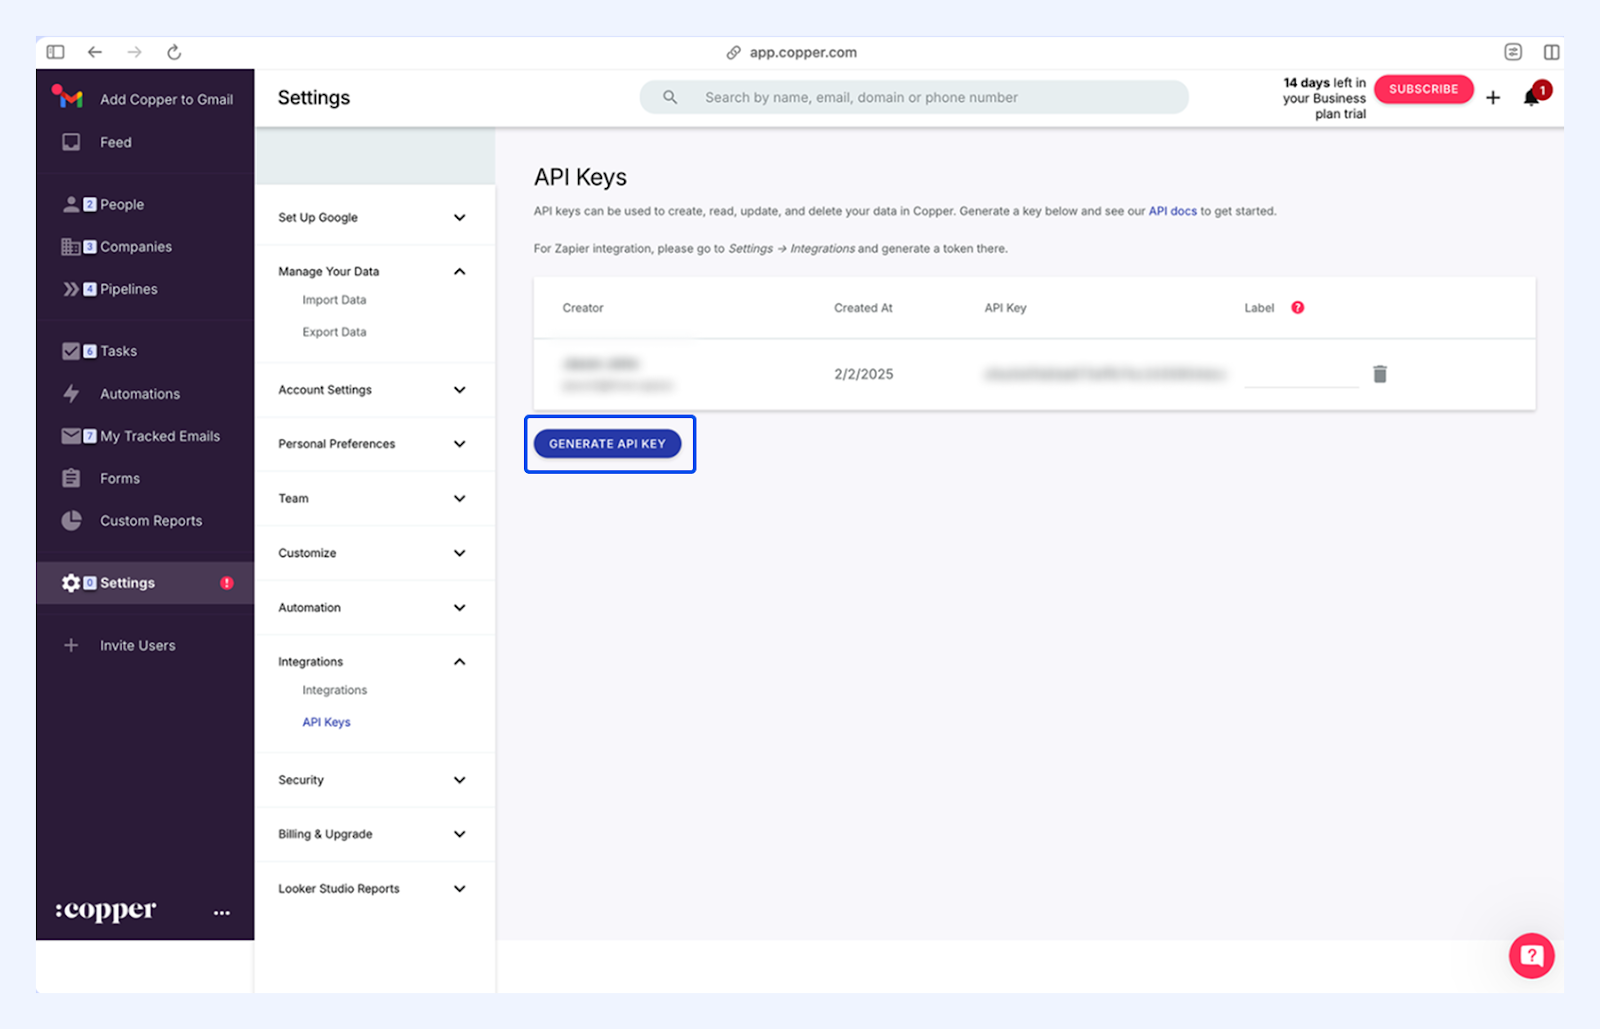
- Save the generated API key securely, as you'll need it for the Hiver setup.
Step 2: Configuring the app in Hiver
Once you have your API key, complete the setup in Hiver:
- Navigate to the Hiver settings → Admin Panel → Integrations → Apps.
- Click Copper from the Marketplace section.
- Review the capabilities of the app and click Start setup to get started.
- Enter the following Copper credentials:
- Copper account ID (found in your Copper URL when logged in)
- API key
- Your Copper account email
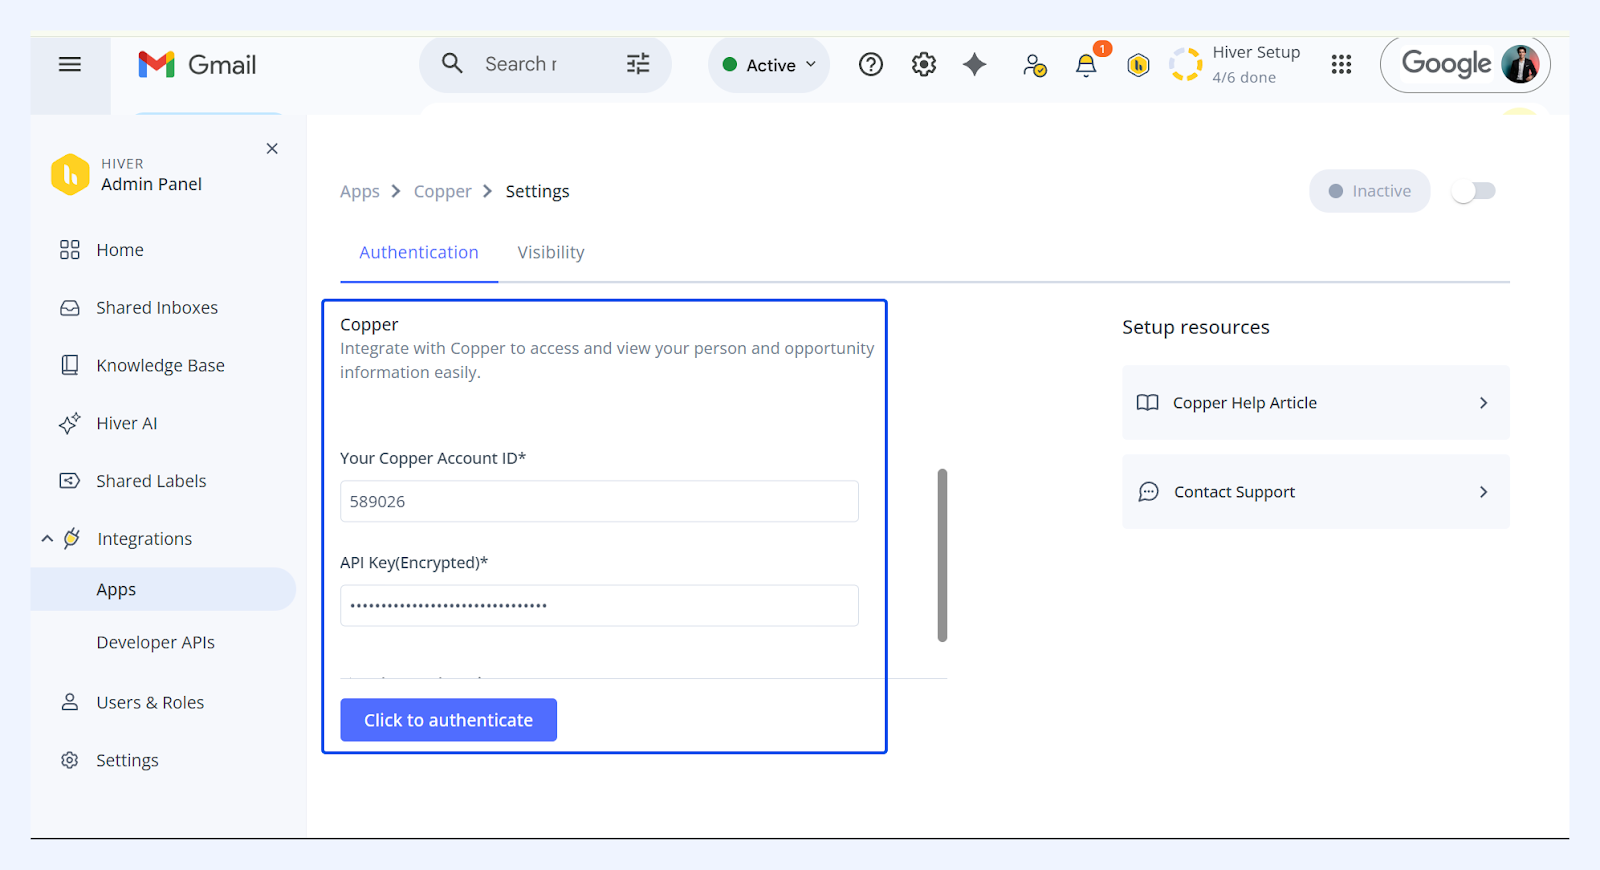
- Select Click to authenticate option to establish the connection.
Step 3: Enable the app for specific Hiver Shared Inboxes
After connecting, you can set up visibility permissions for specific Shared Inboxes and user roles to ensure only authorized team members have access to Copper data.
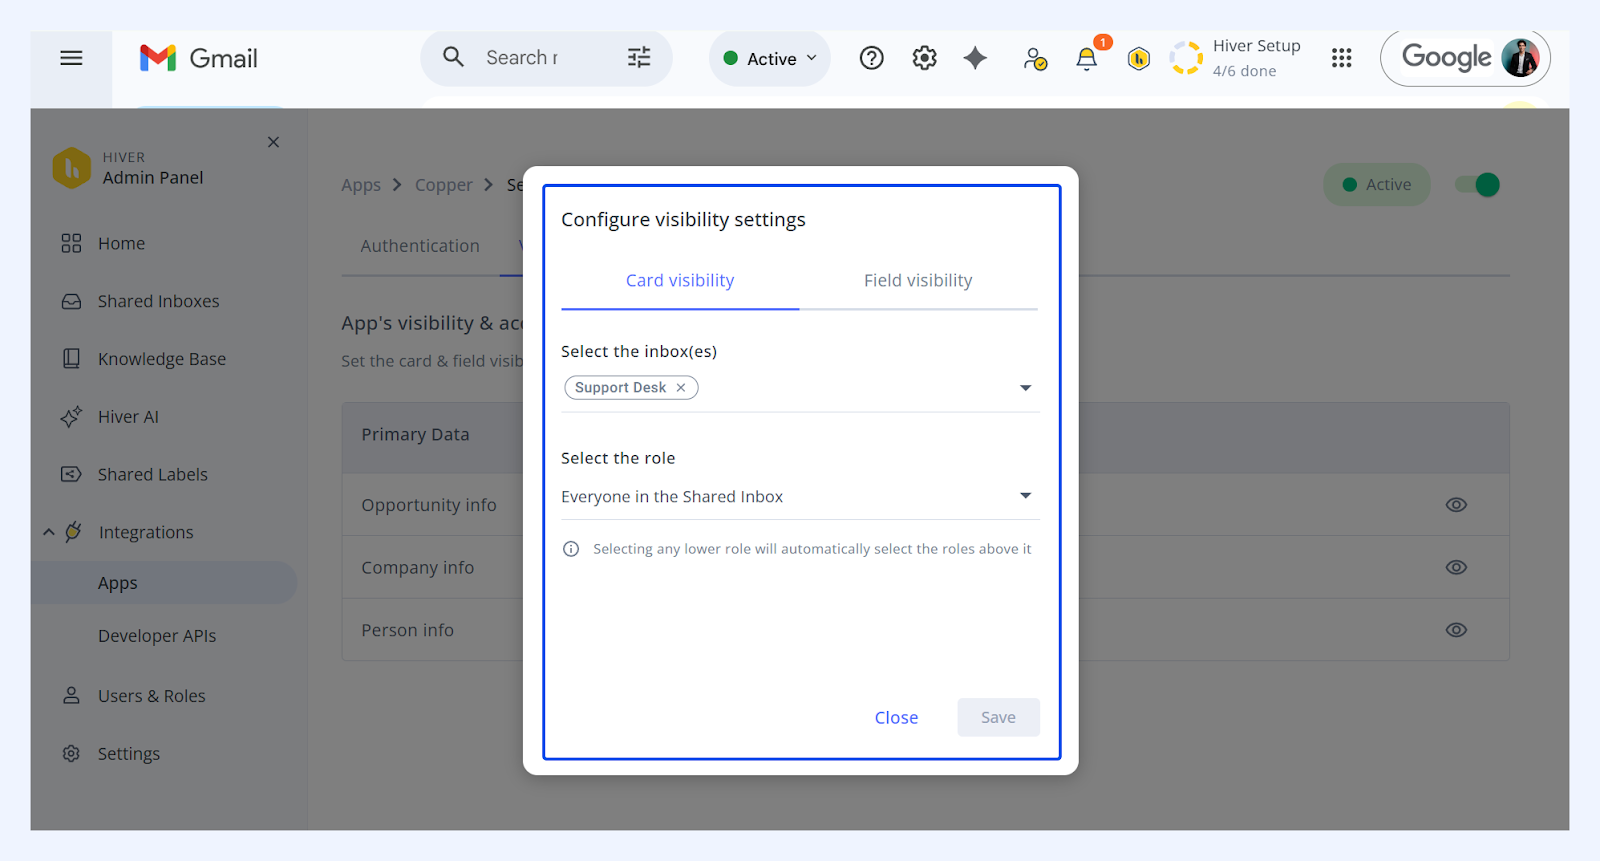
- Click the Visibility tab. You'll see three card options: Opportunity info, Company info, and Person info.
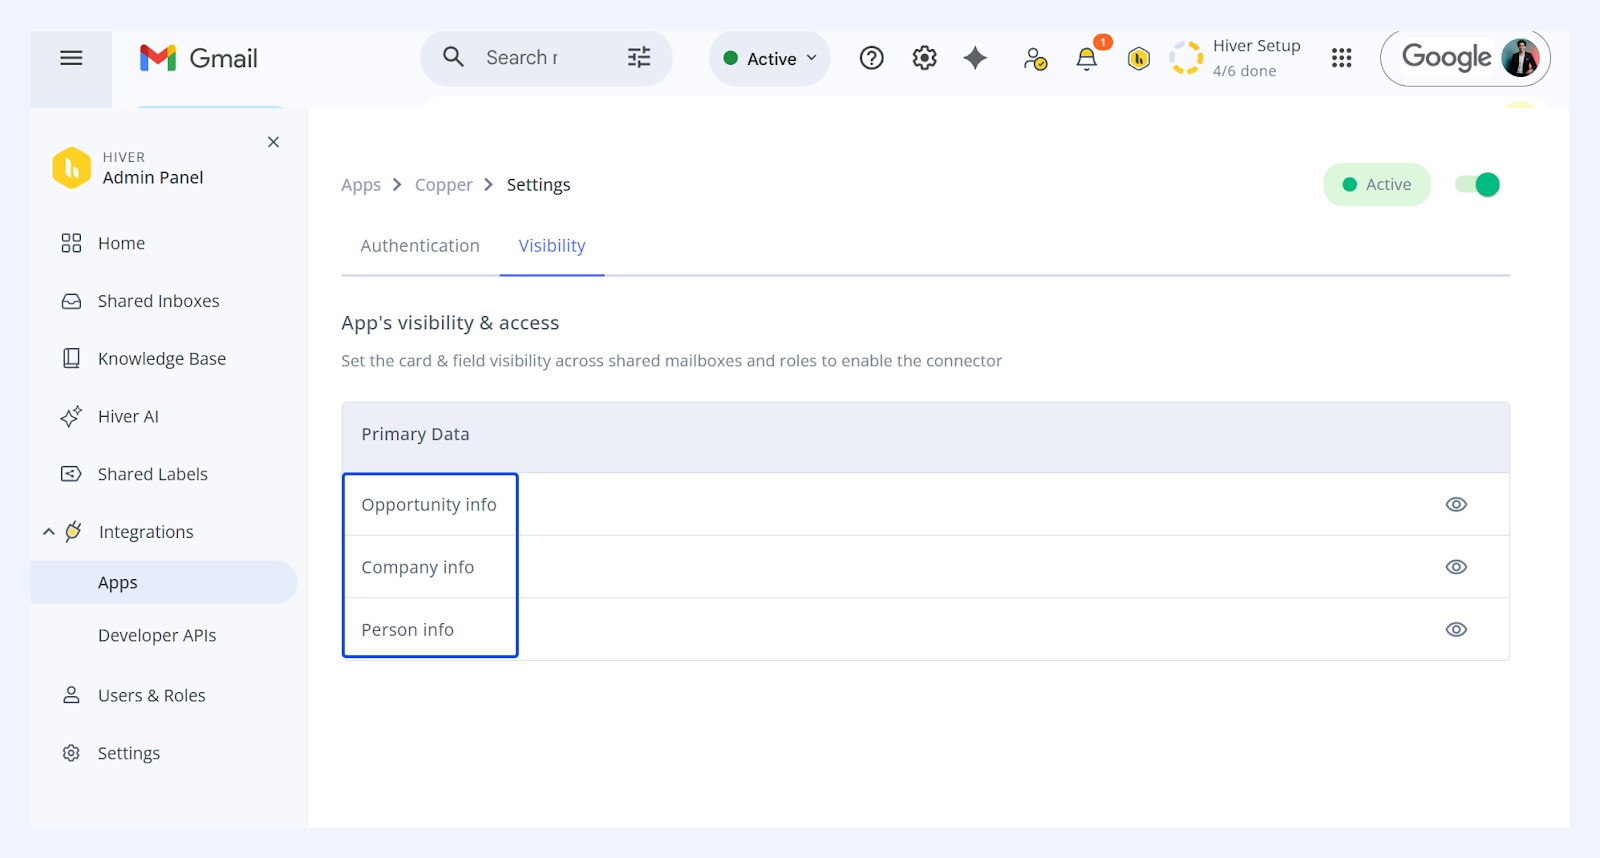
- For each card, click the Configure visibility settings (eye icon) on the right to decide what info should be accessible:
- Under Card visibility, choose which Shared Inboxes and user roles can access the Copper app.
- Under Field visibility, select which Copper fields should appear in Hiver.
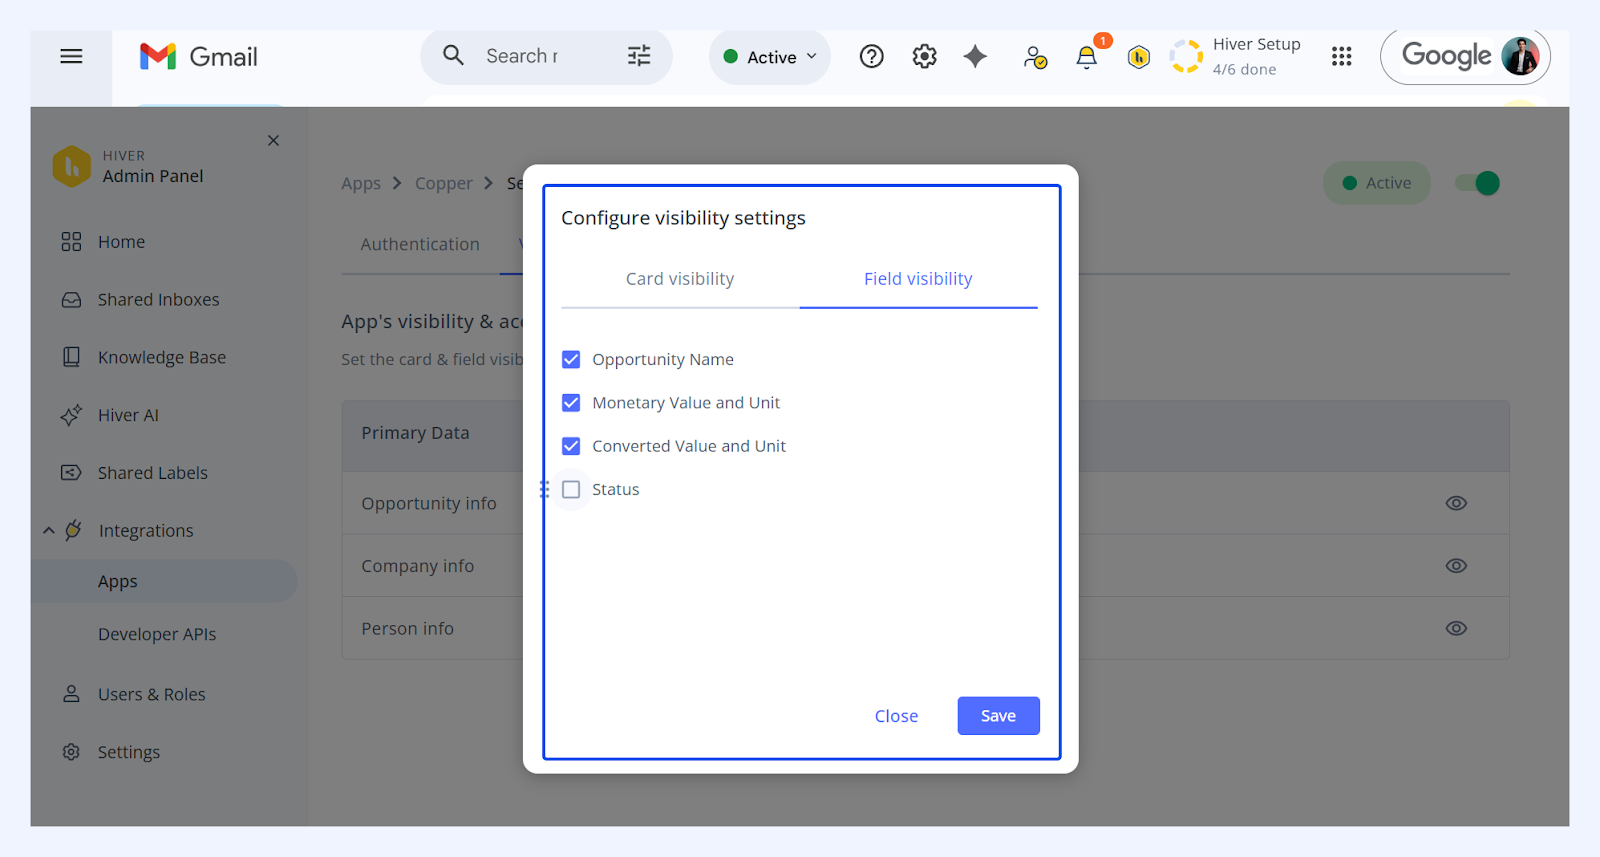
- Click Save after configuring each card.
Using the Copper integration in Hiver
After setup, you'll see the relevant Copper data appear in Hiver's right panel under the Apps tab with cards showing Opportunity, Company, and Person details as configured.
Next steps
ClickUp Integration with Hiver