Pipedrive Integration with Hiver
Pipedrive is a popular sales CRM designed to help teams manage leads, track deals, and automate sales workflows. It gives businesses a clear view of their pipelines and helps them focus on the activities that drive revenue.
When your support team handles inquiries from prospects or existing customers, they need instant access to deal context, company information, and contact history. The Pipedrive-Hiver integration brings your sales data directly into your inbox, so your team can view and create Pipedrive records without leaving Gmail, and respond faster with better context.
Why integrate Pipedrive with Hiver
The Pipedrive-Hiver integration enables your team to:
- Access CRM details instantly: View key Pipedrive records like deals, contacts, and organization right inside Gmail without switching tabs.
- Respond smarter and faster: With Pipedrive insights available within Hiver, agents can tailor replies, prioritize key accounts, and close deals more efficiently.
- Improve collaboration and visibility: Teams can view shared deals and contact details in Hiver, helping sales and support teams stay aligned without leaving Gmail.
Supported capabilities
This integration brings your Pipedrive data into Hiver, so you can view, create, and update records without switching platforms:
- Connect in one click: Securely authenticate your Pipedrive account in a single click and start viewing your data in Hiver right away.
- View Pipedrive records: See the deals, contacts, organizations, and projects linked to a conversation, along with details like stage, value, owner, and expected close date.
- Create records: Add new deals, contacts, and organizations to Pipedrive directly from Hiver.
- Edit records: Update existing records as a conversation progresses, so your information in Pipedrive stays up to date.
- Link existing records: Connect a conversation to a deal, contact, or organization already in Pipedrive to keep related context together.
- Open records in Pipedrive: Follow a direct link to any record when you need the full view or want to make detailed updates.
Prerequisites
Before setting up the Pipedrive App, ensure you have:
- Access to your Pipedrive account with administrator privileges
- Admin access in Hiver
Setting up the Hiver and Pipedrive integration
Step 1: Connect your Pipedrive account
1. Go to Hiver settings → Admin Panel → Integrations → Apps.
2. Find Pipedrive from the Marketplace Apps list.
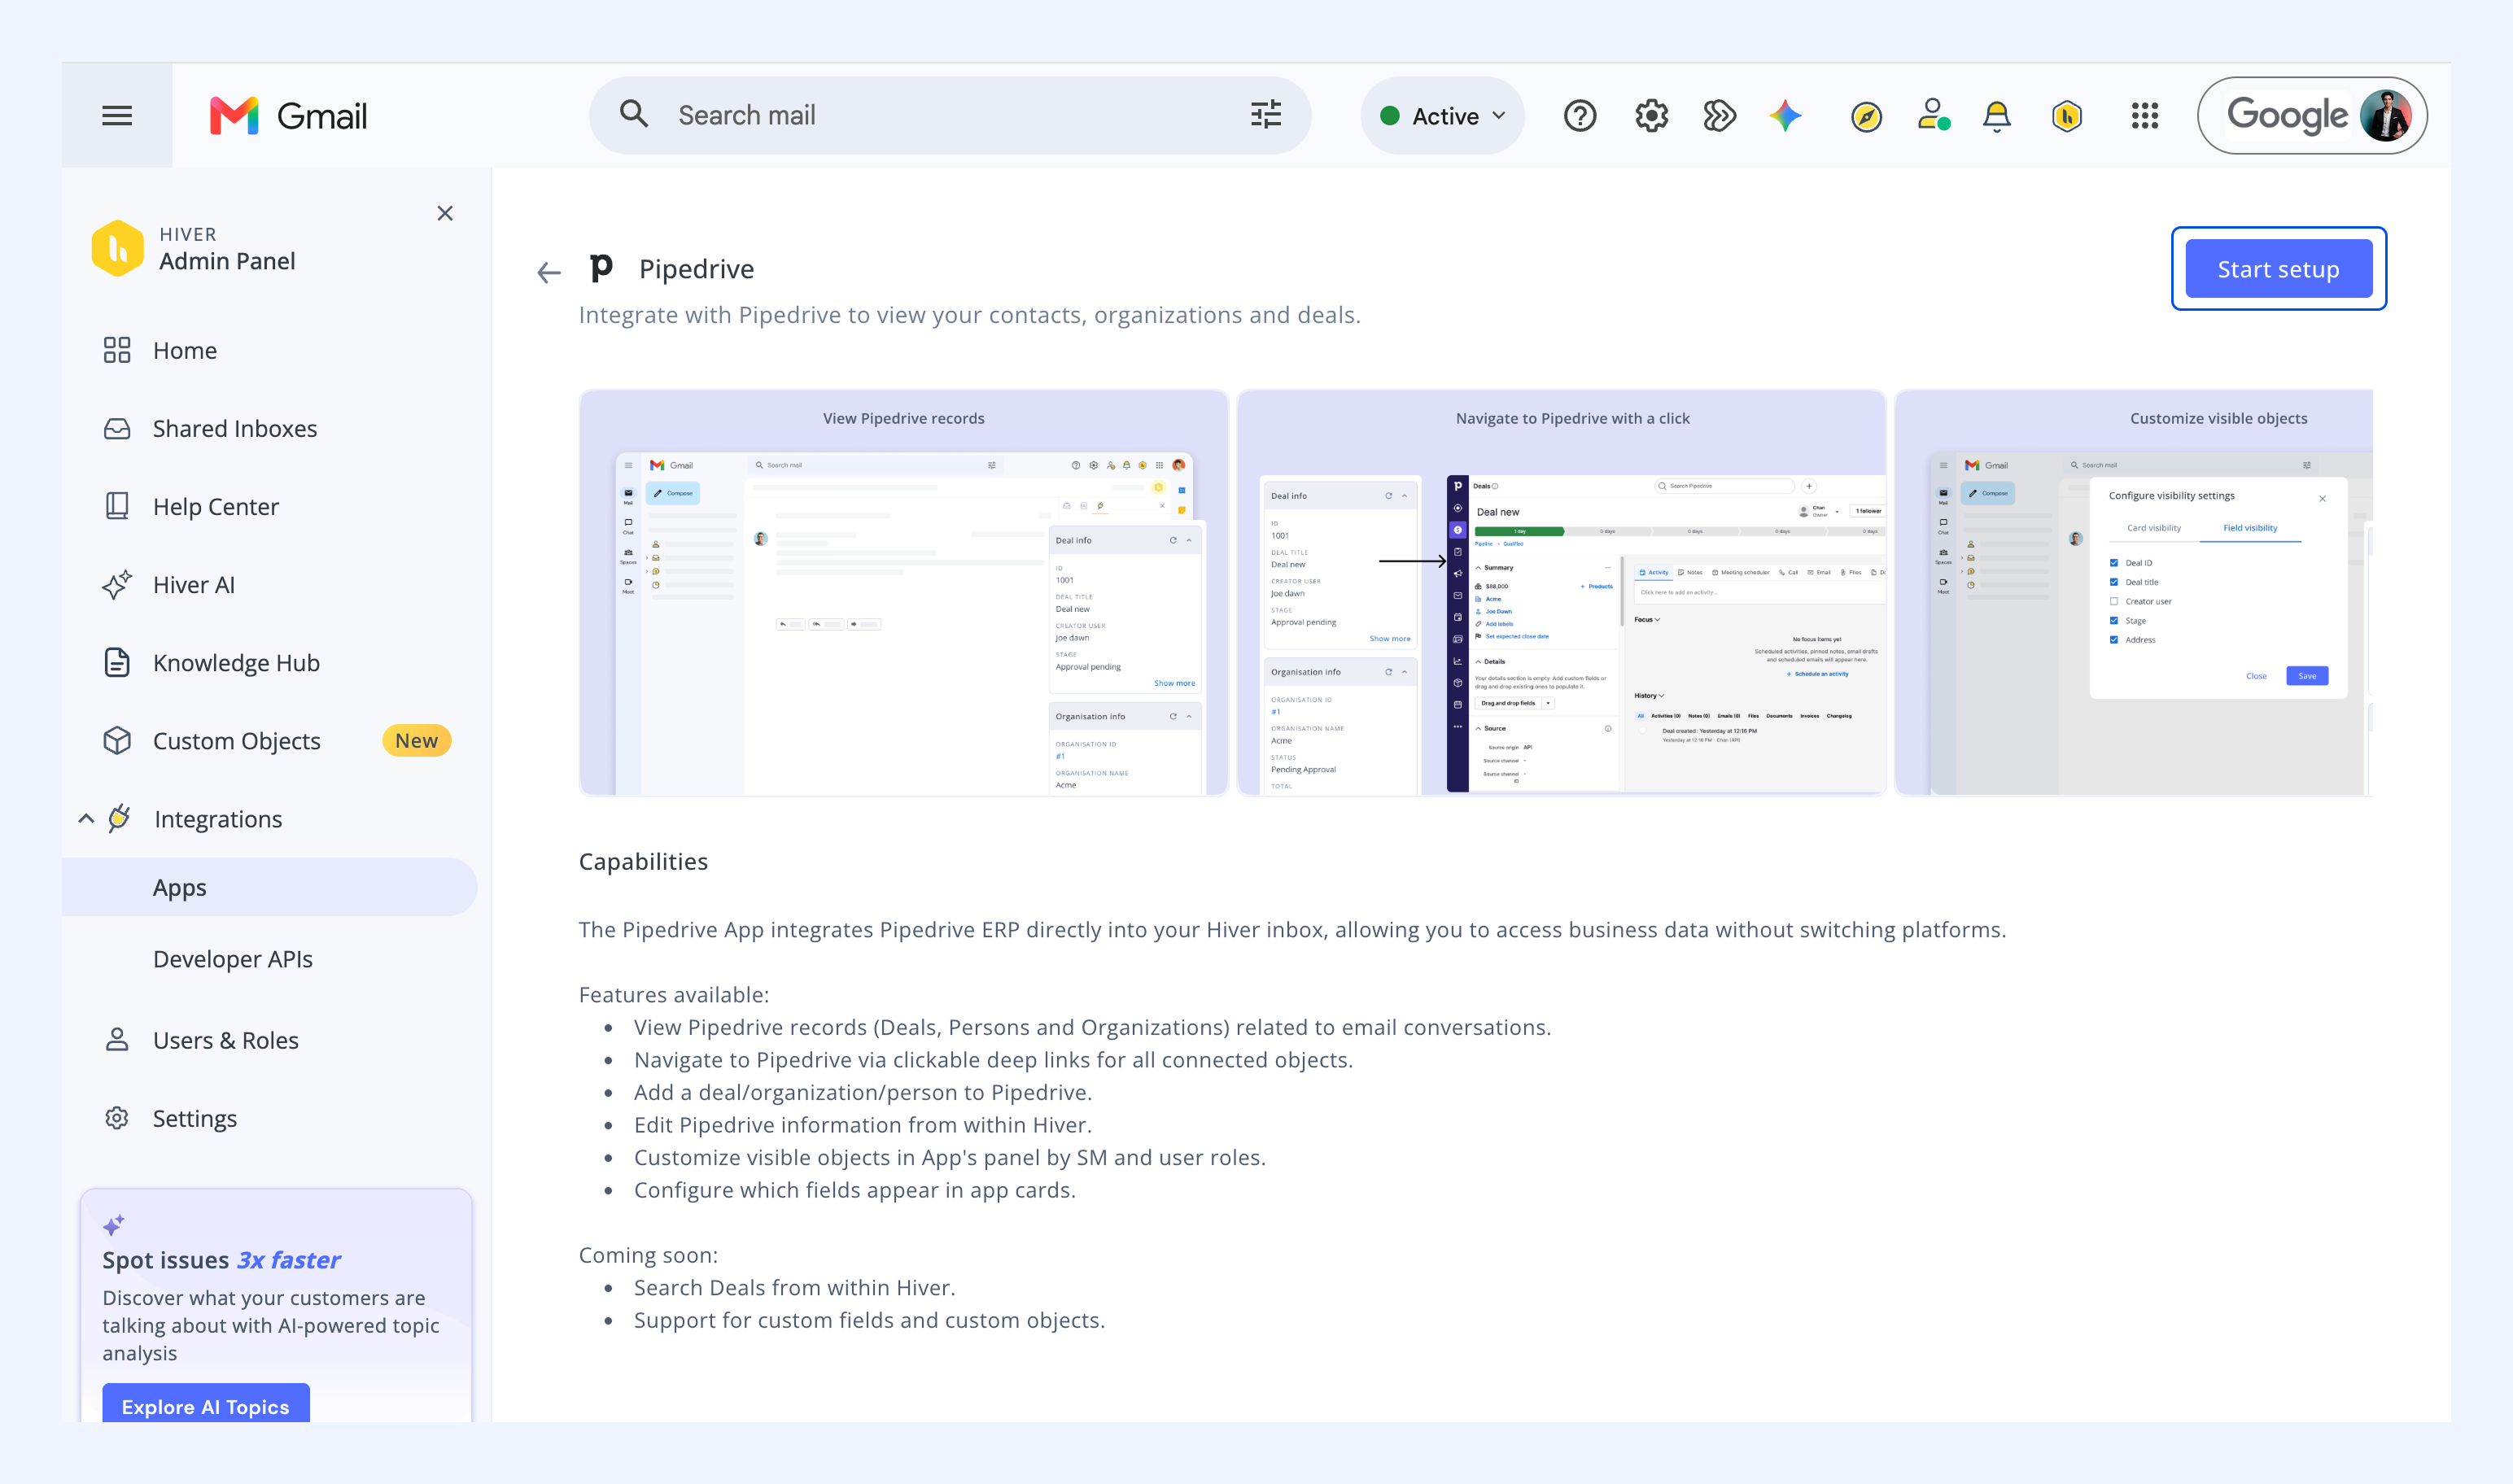
3. Review the capabilities of the app and click Start setup whenever you’re ready.
4. Select Click to authenticate.
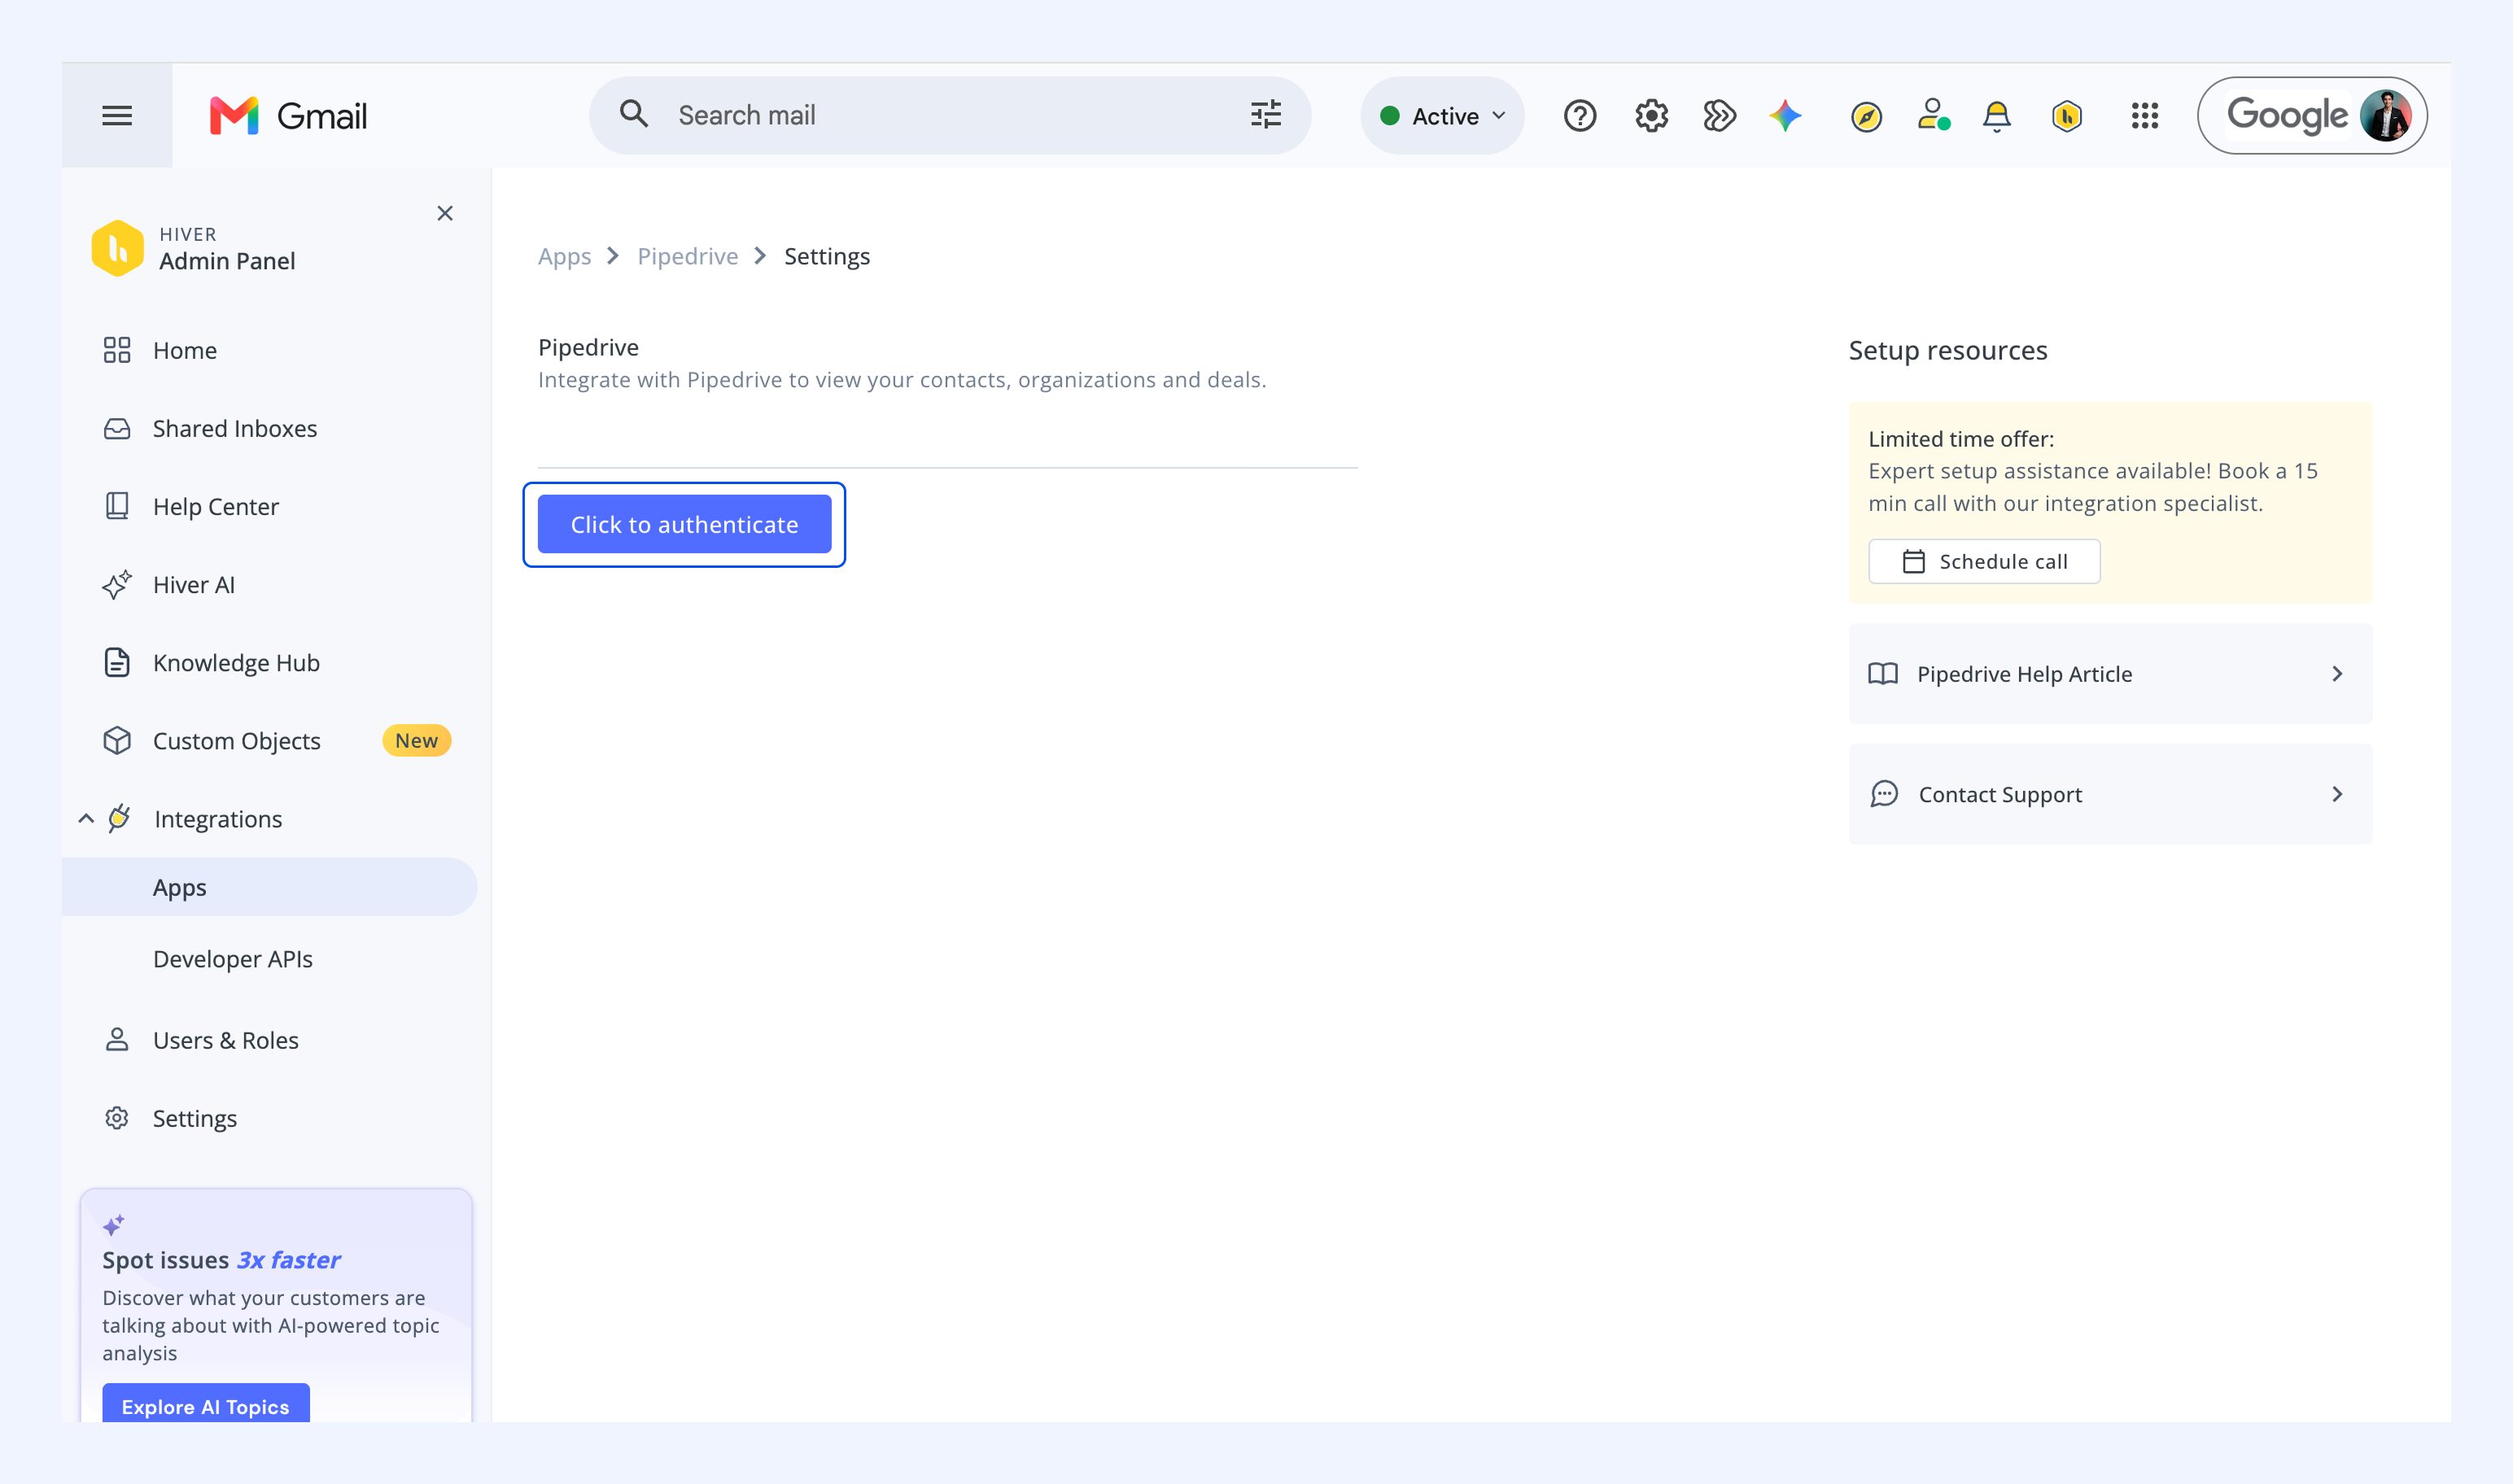
5. A new tab will open where you can sign in to your Pipedrive account.
6. You'll be asked to grant Hiver access. Review the list of permissions, then click Allow and Install.

Step 2: Enable the Pipedrive integration
After authentication, you'll need to turn on Pipedrive integration for your Shared Inboxes.
Select Pipedrive in the listed Apps, navigate to the Visibility tab and turn on the toggle.
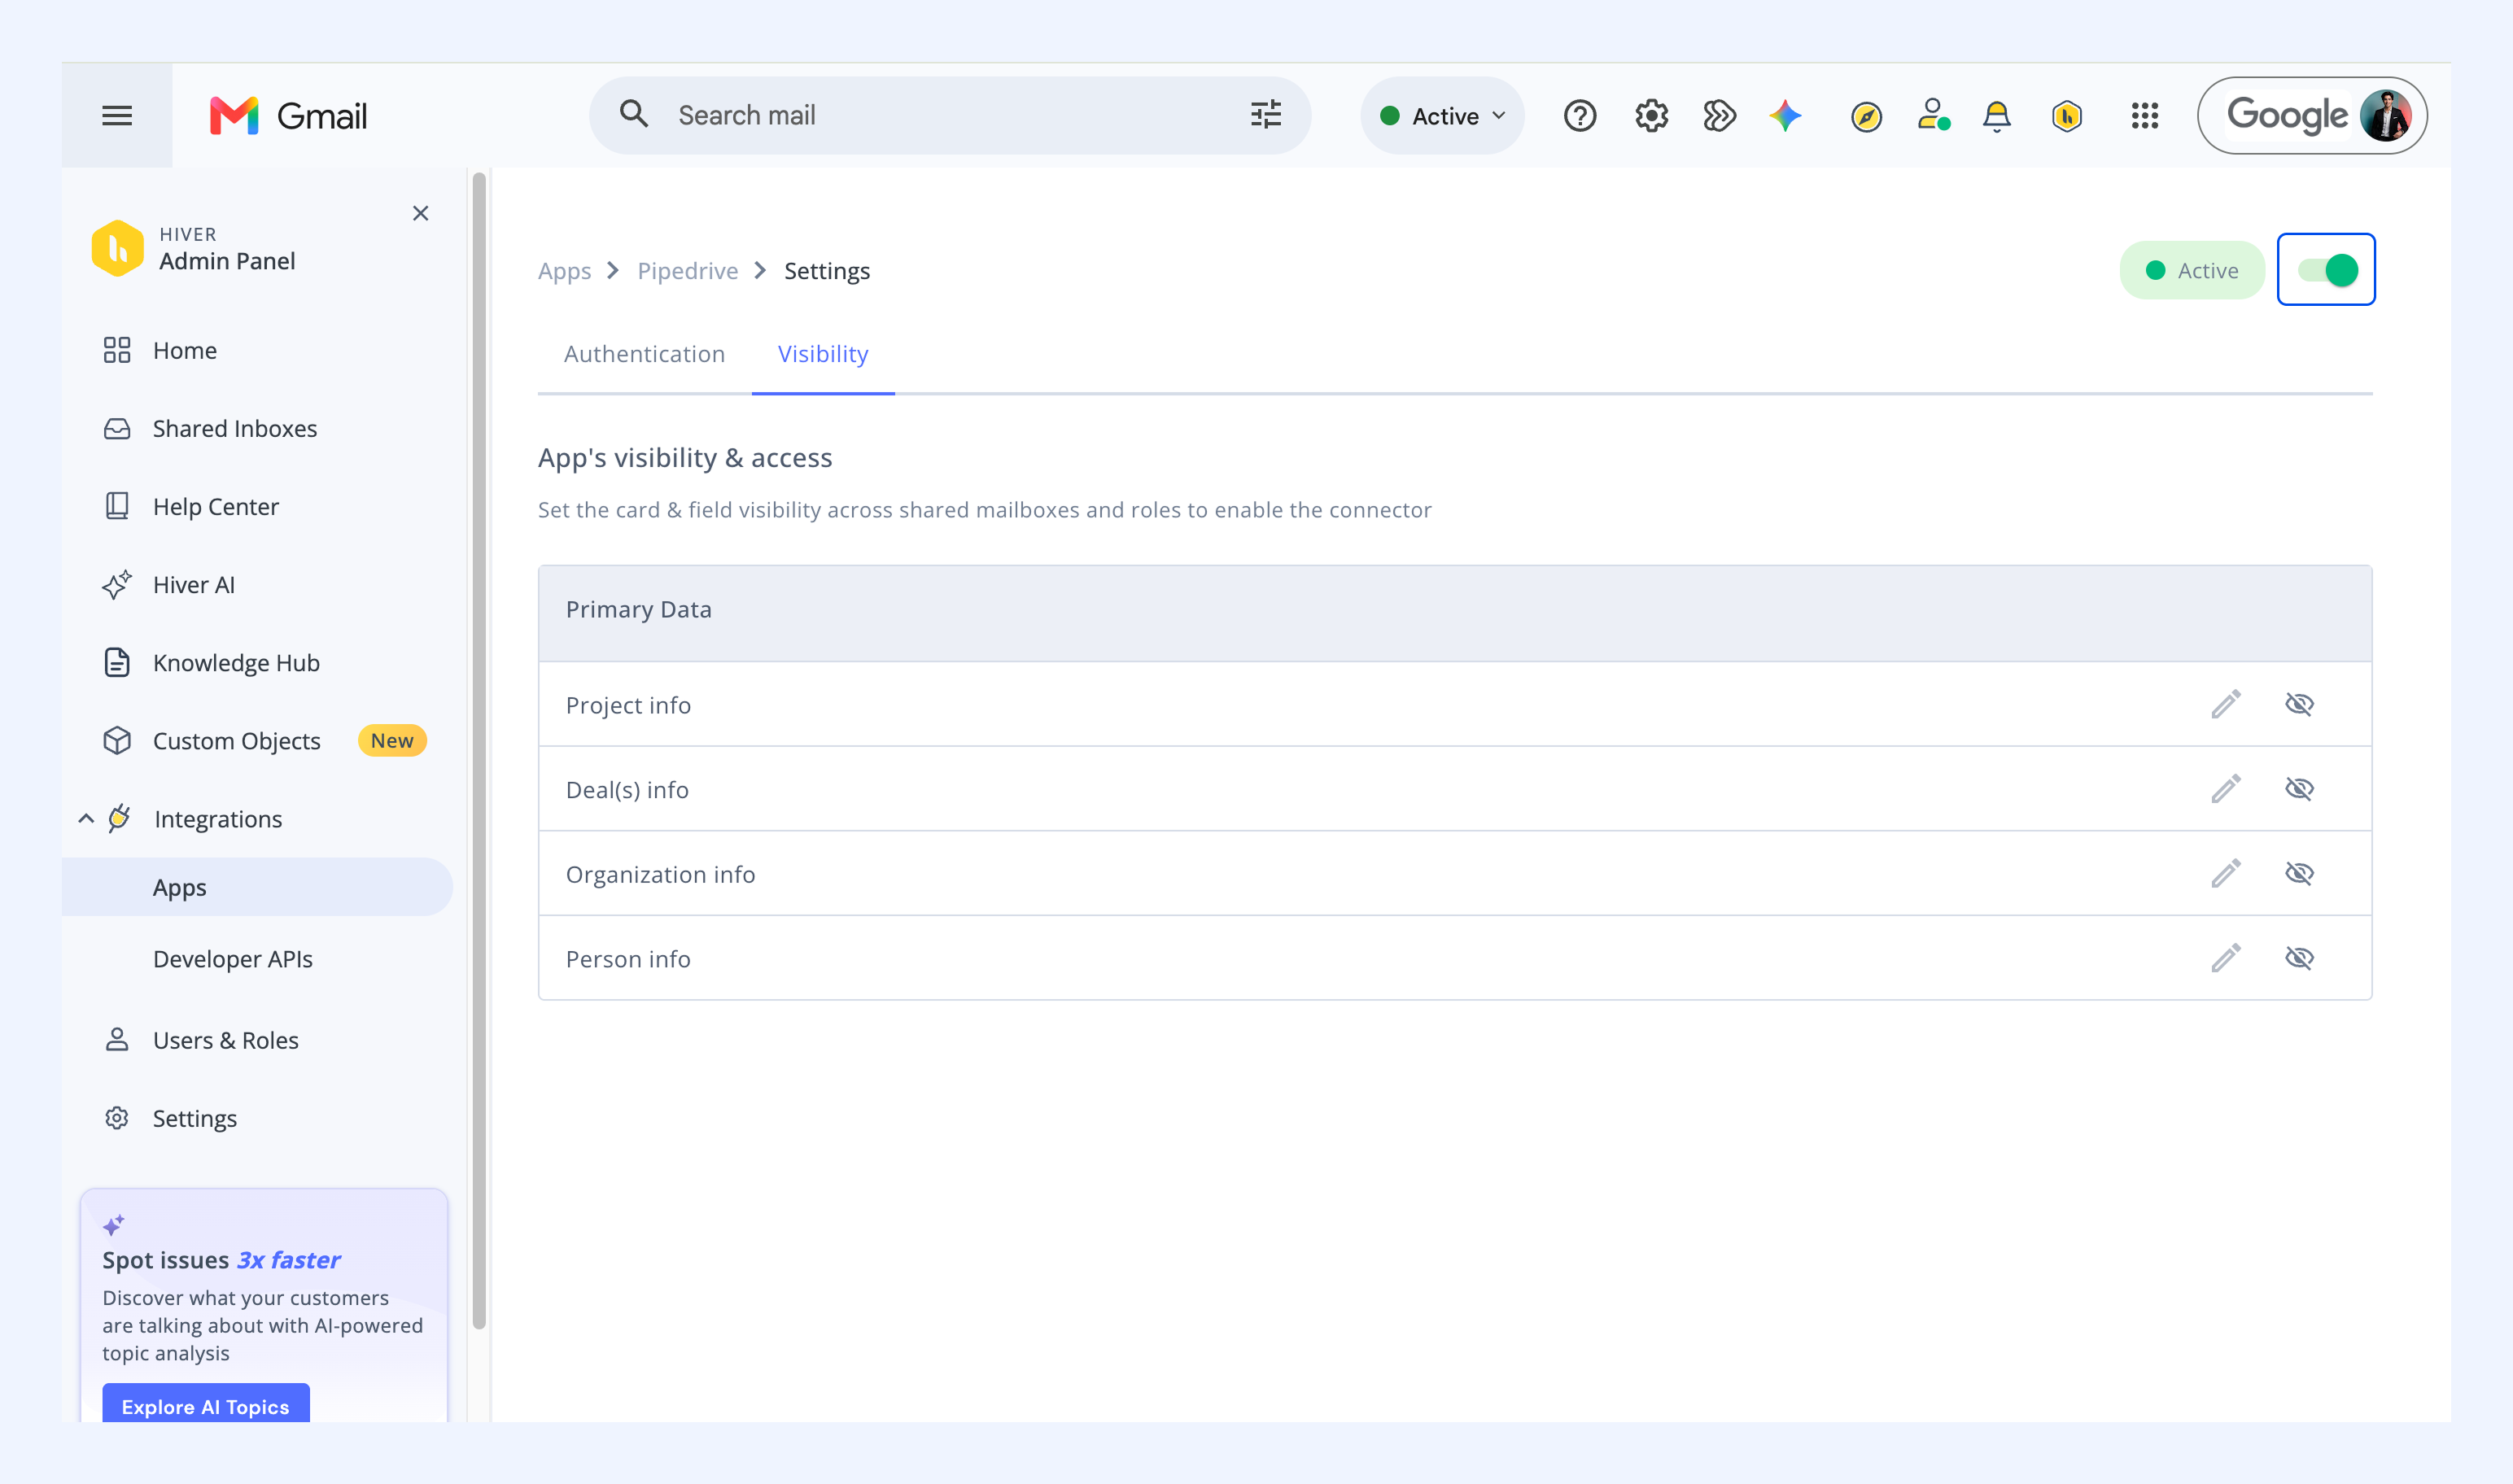
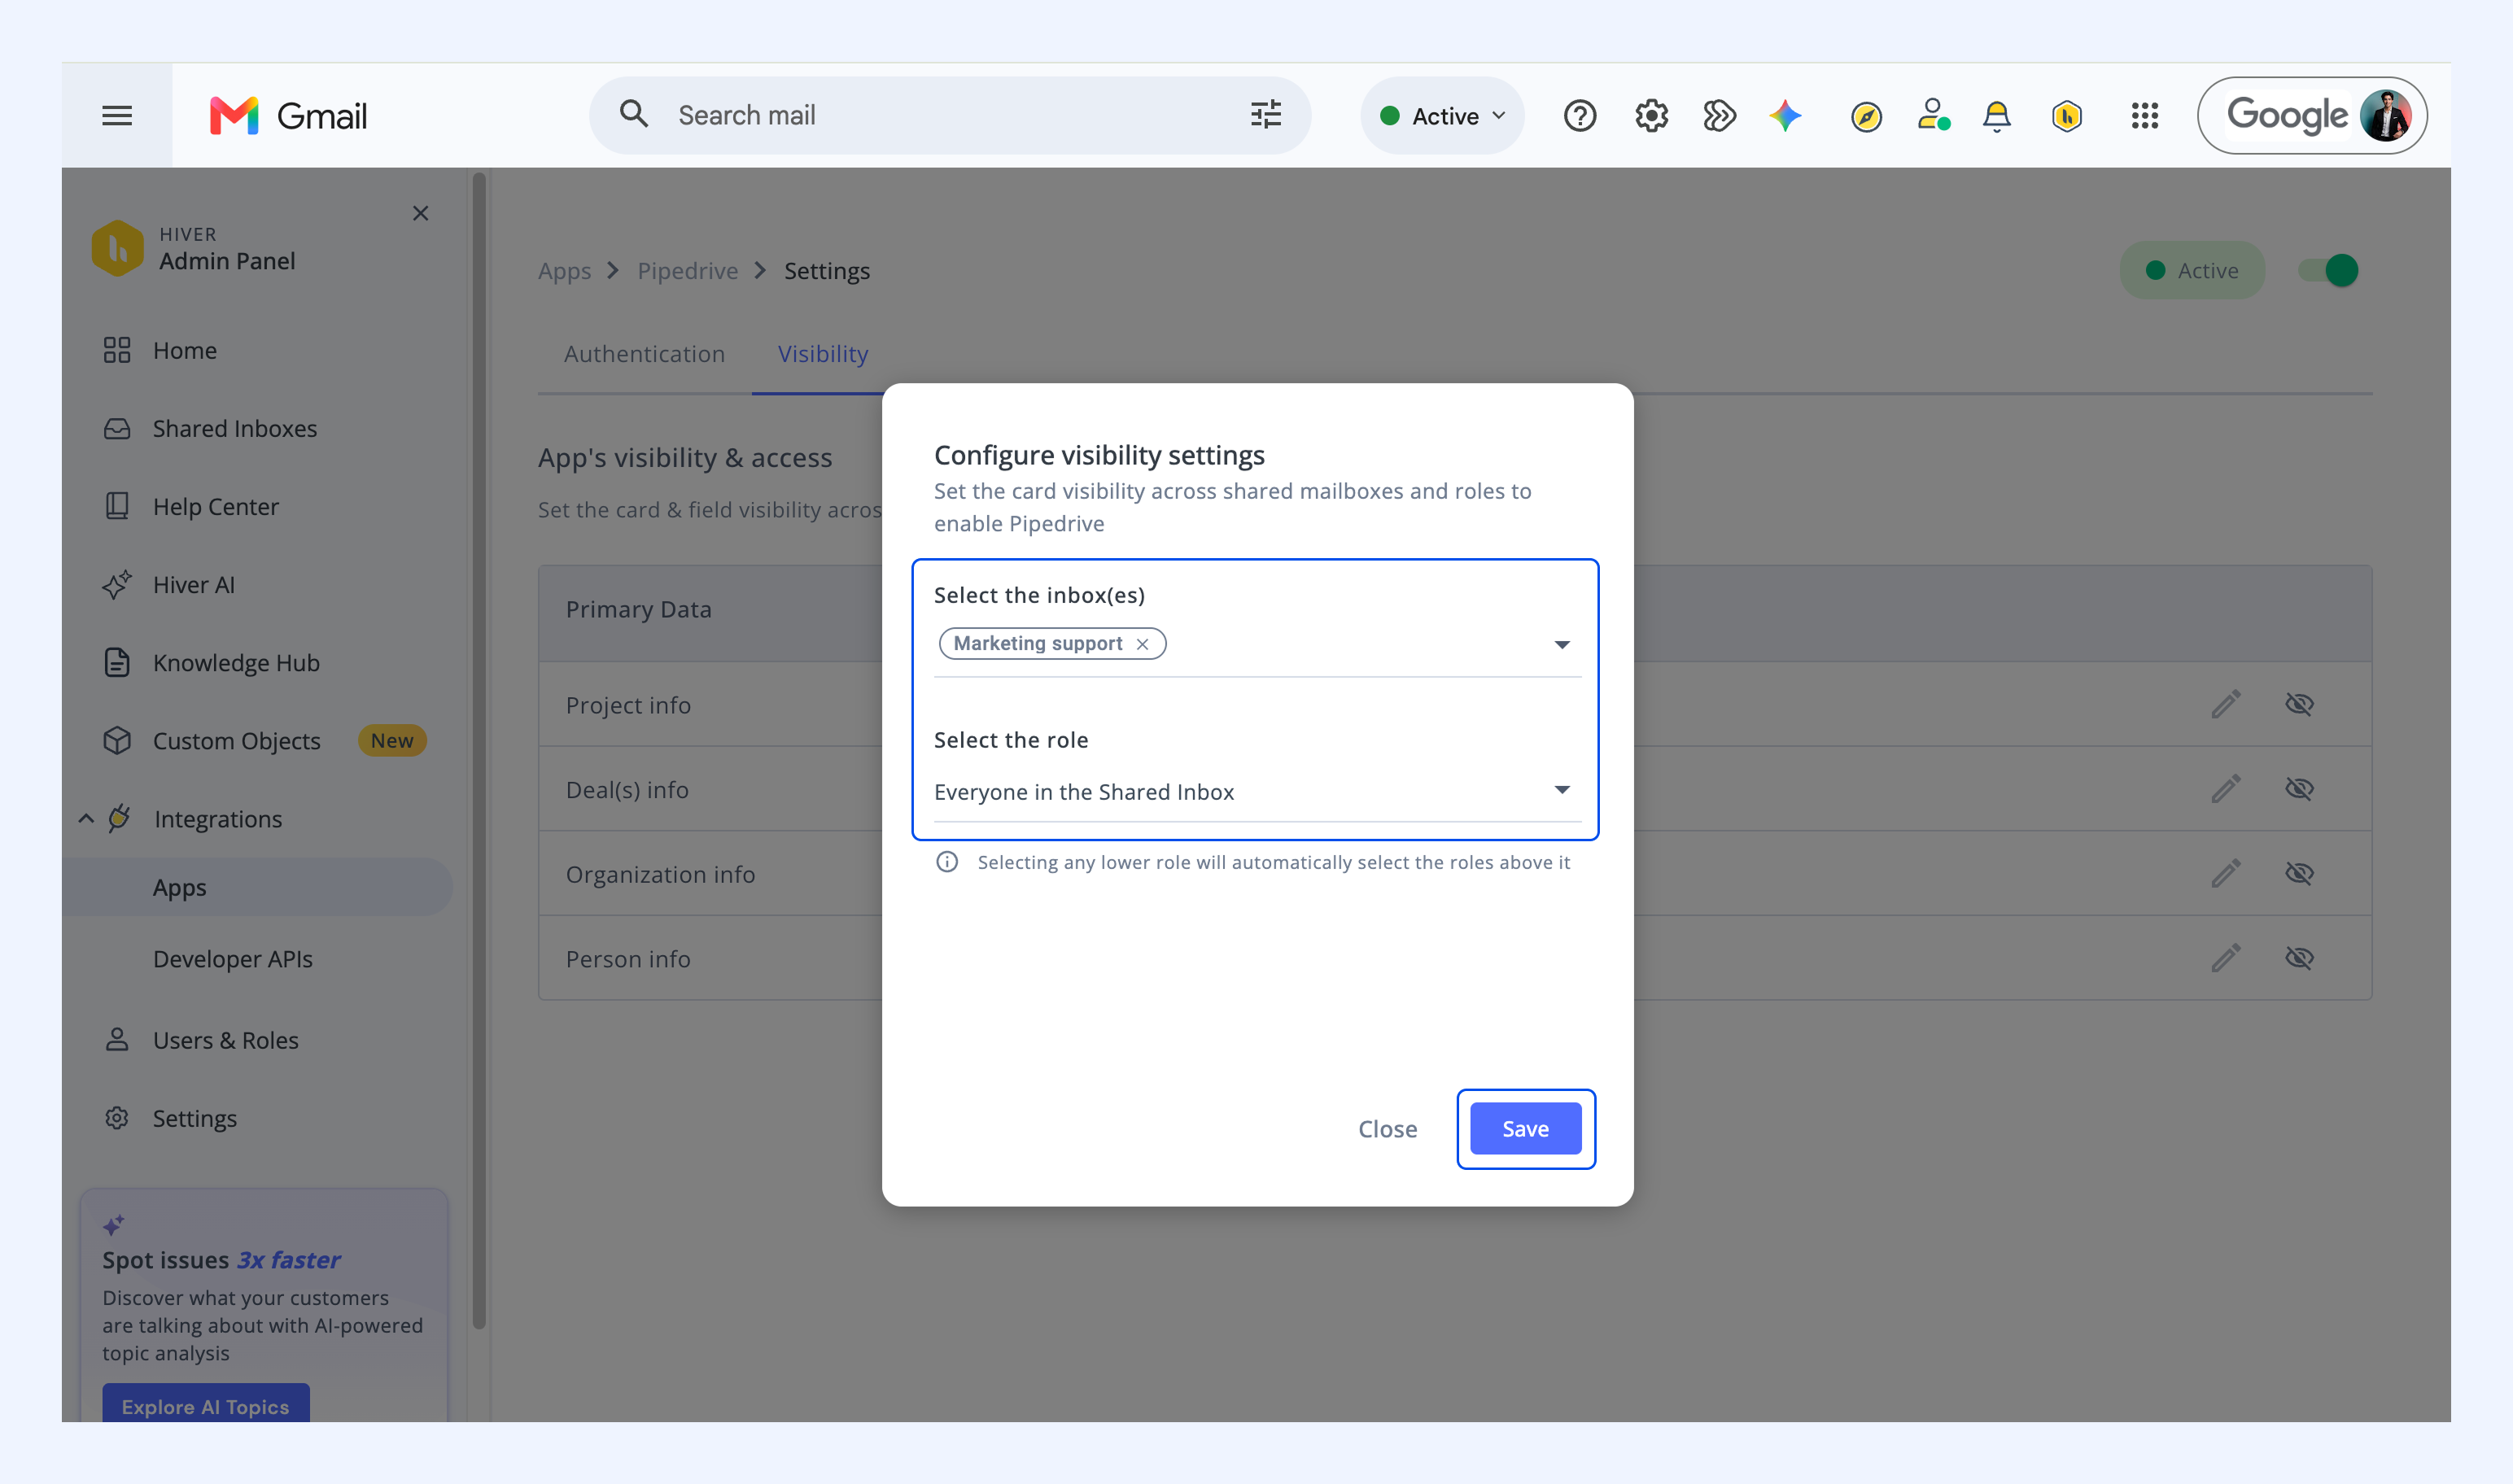
Step 3: Configure visibility settings
After enabling the app, you'll need to set up which information appears for your team.
To configure visibility:
1. Click the Configure visibility settings icon (eye icon).
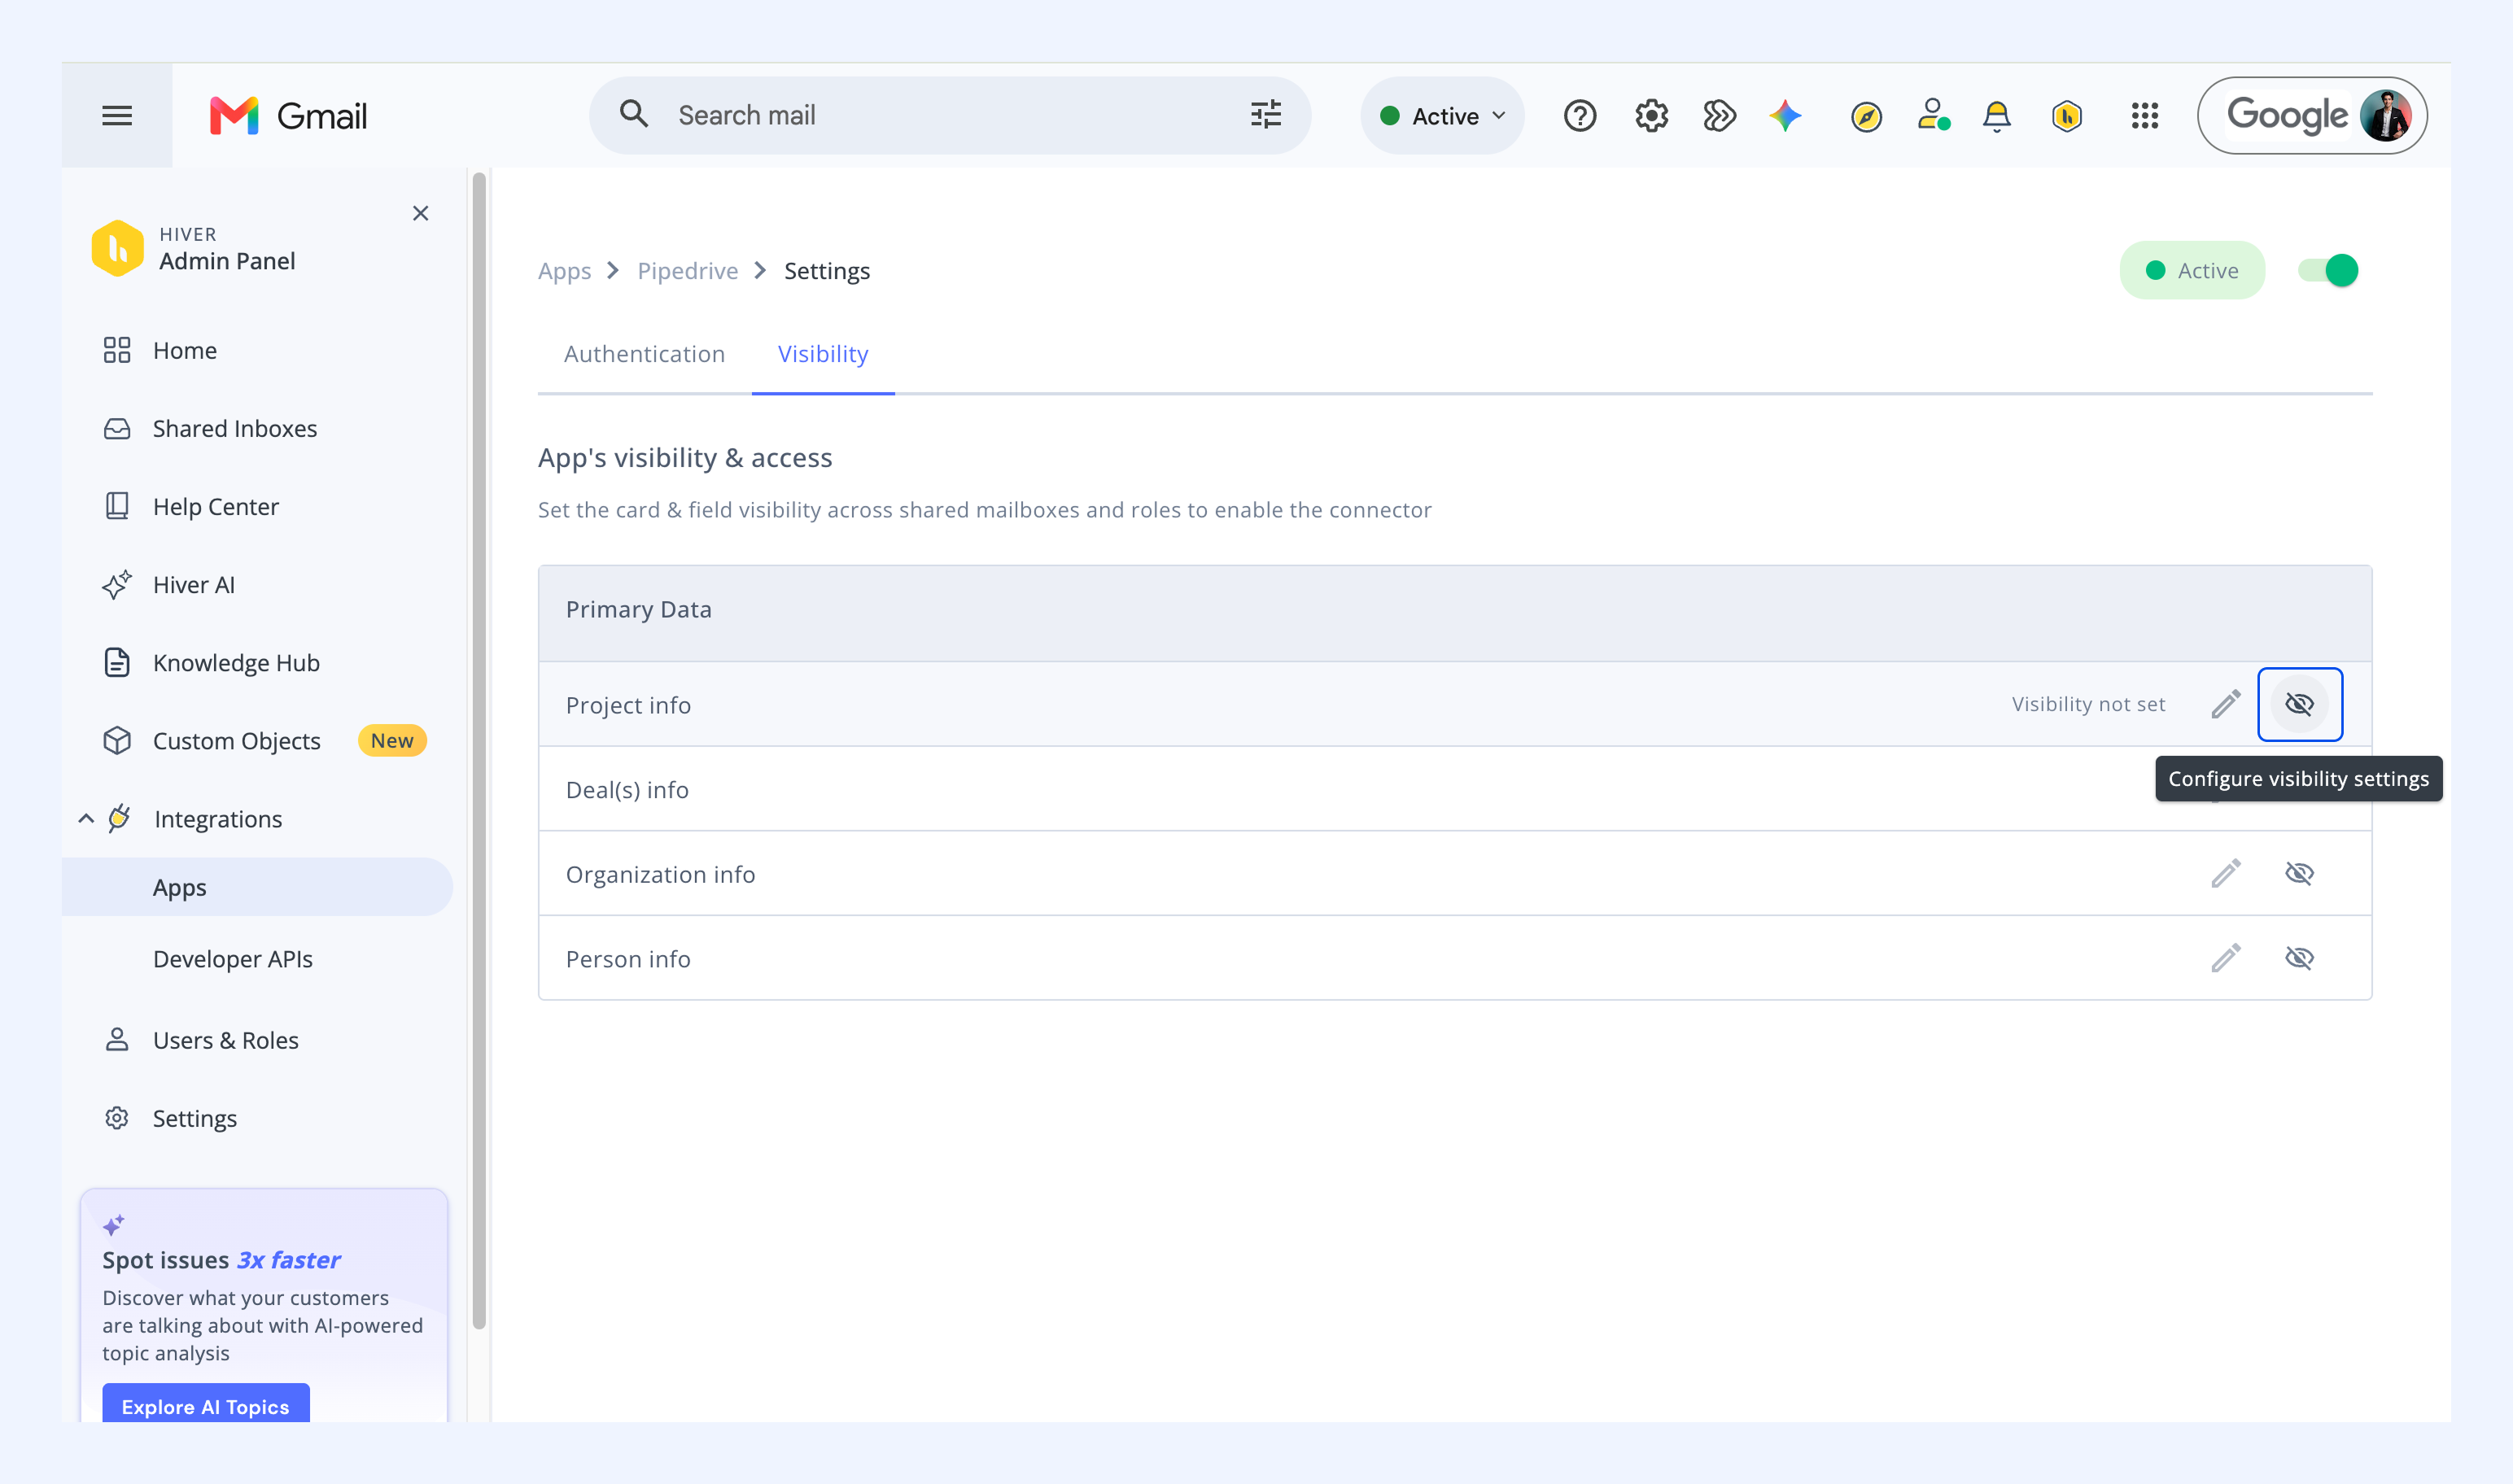
2. Select the Shared Inboxes and user roles that can see the Pipedrive card in the right panel in Hiver.
3. Click Save.
Step 4: Configure fields
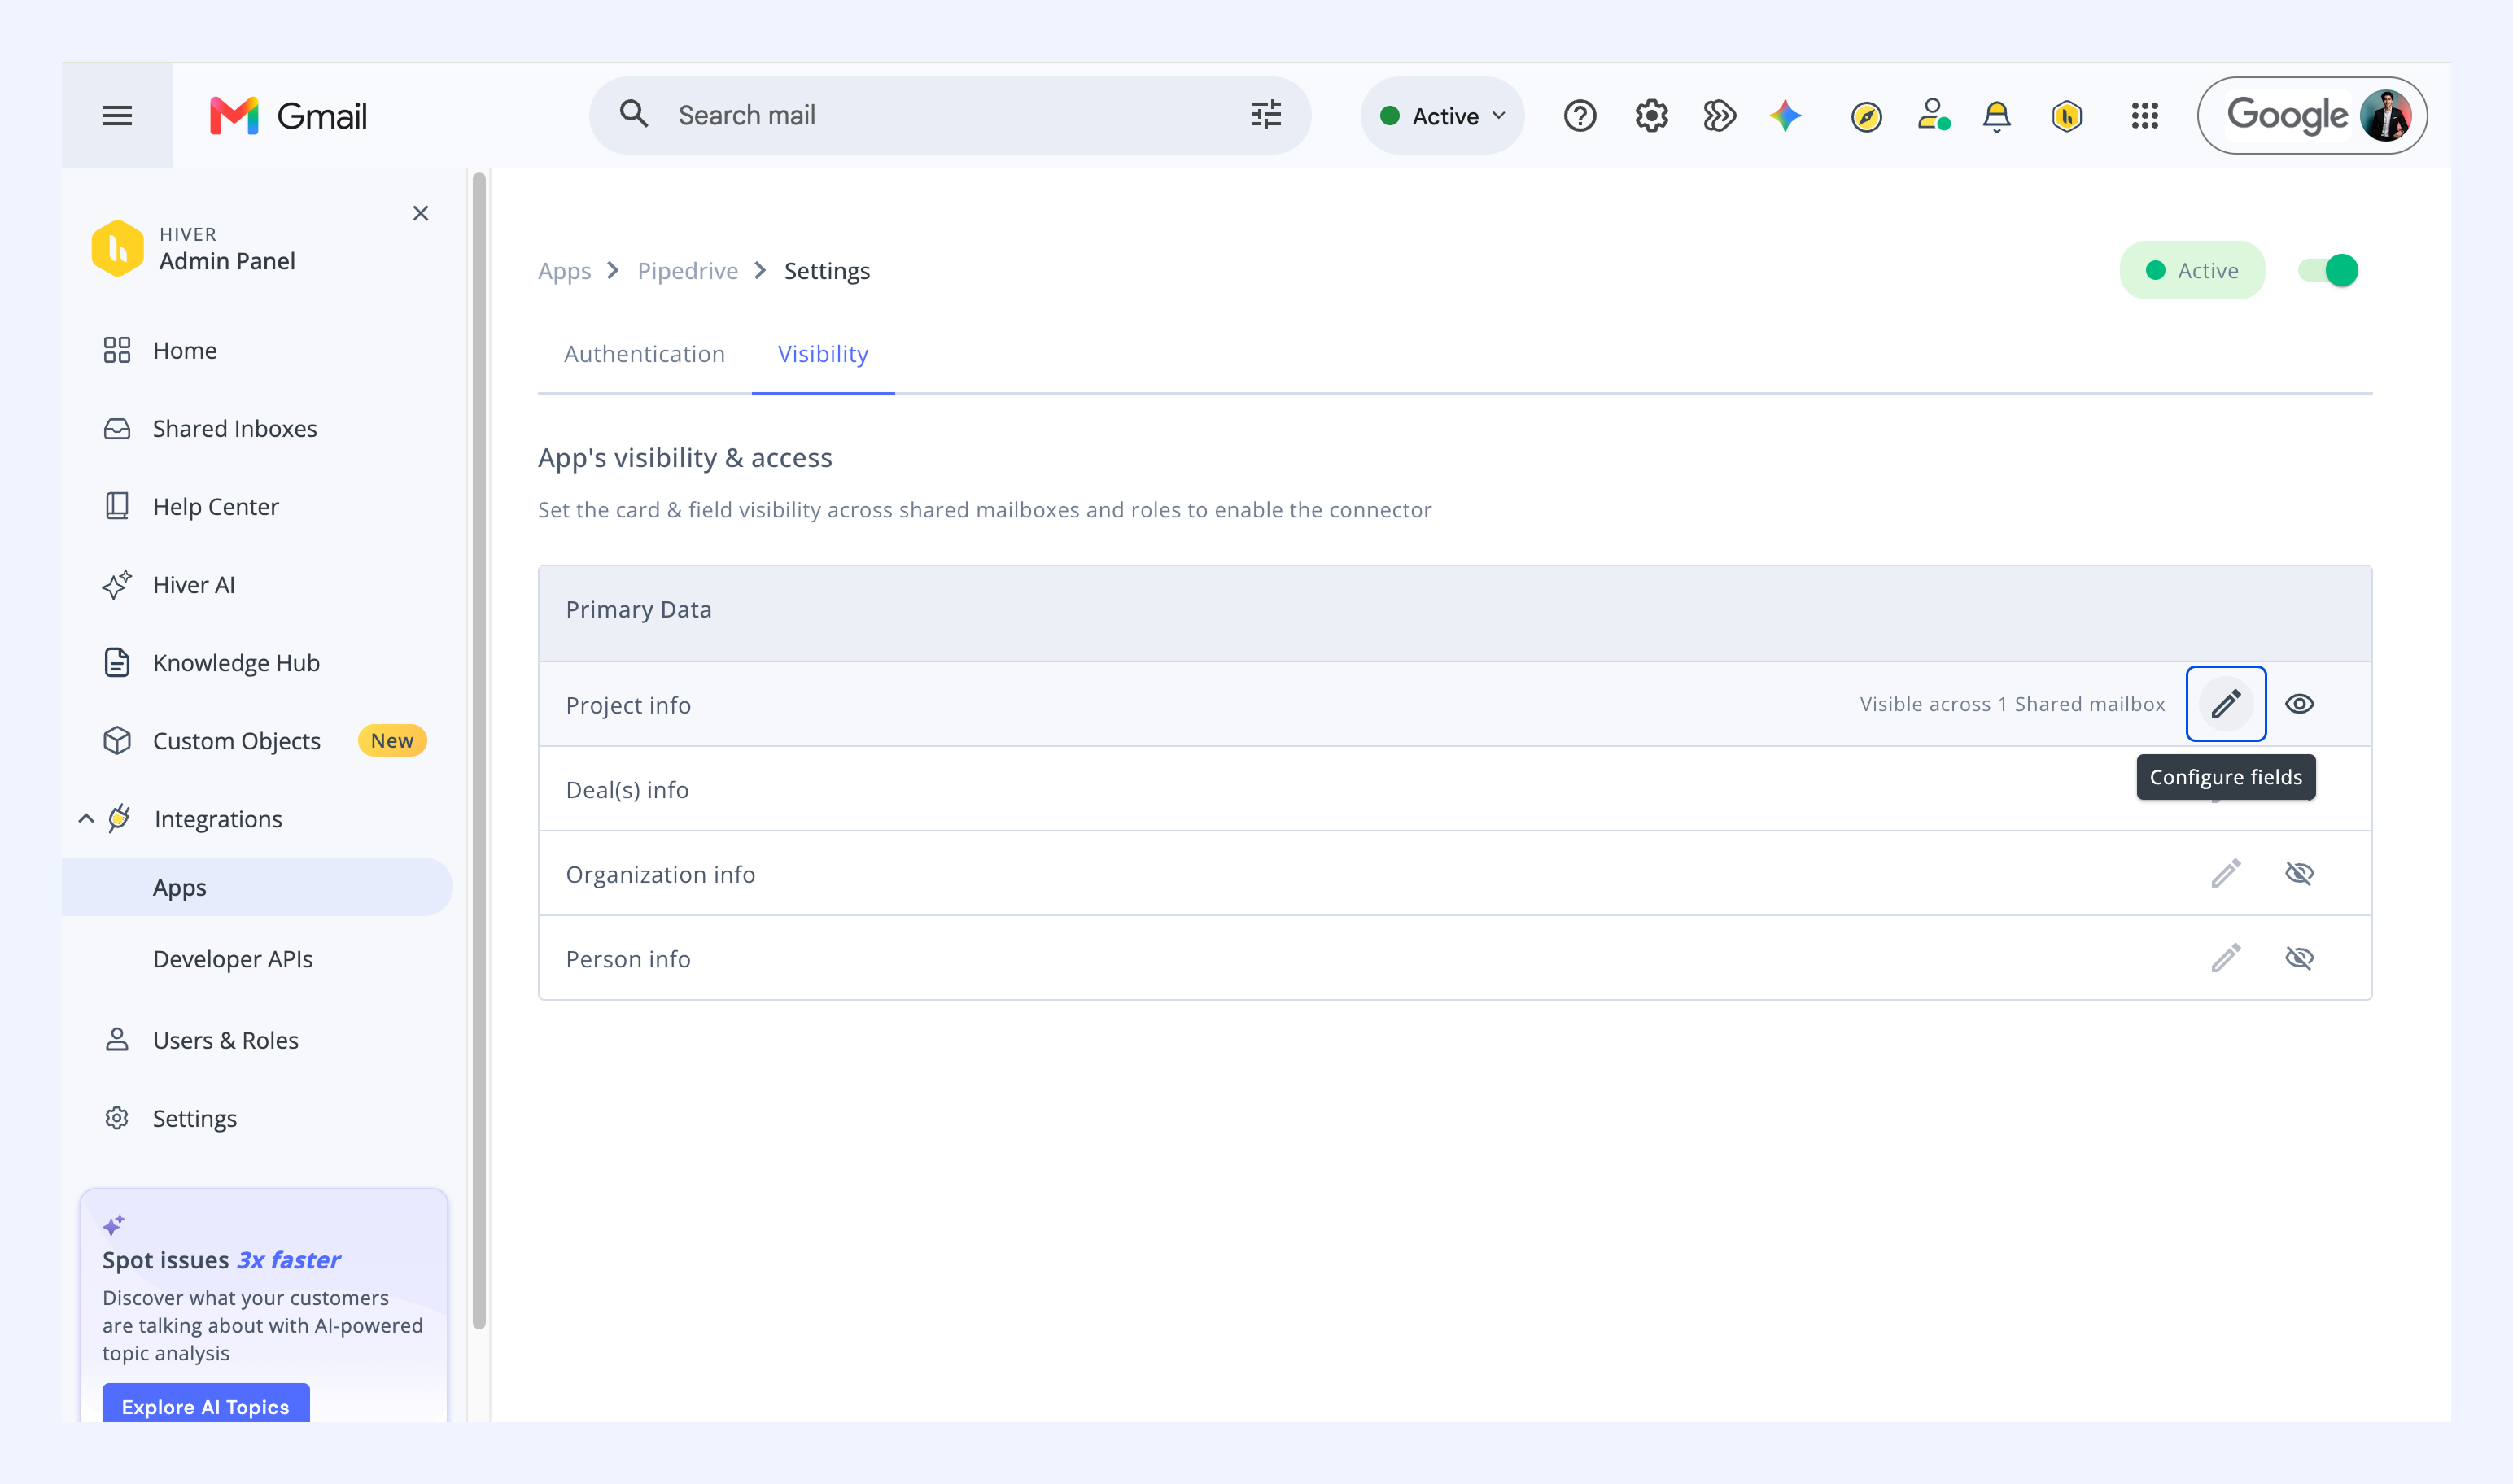
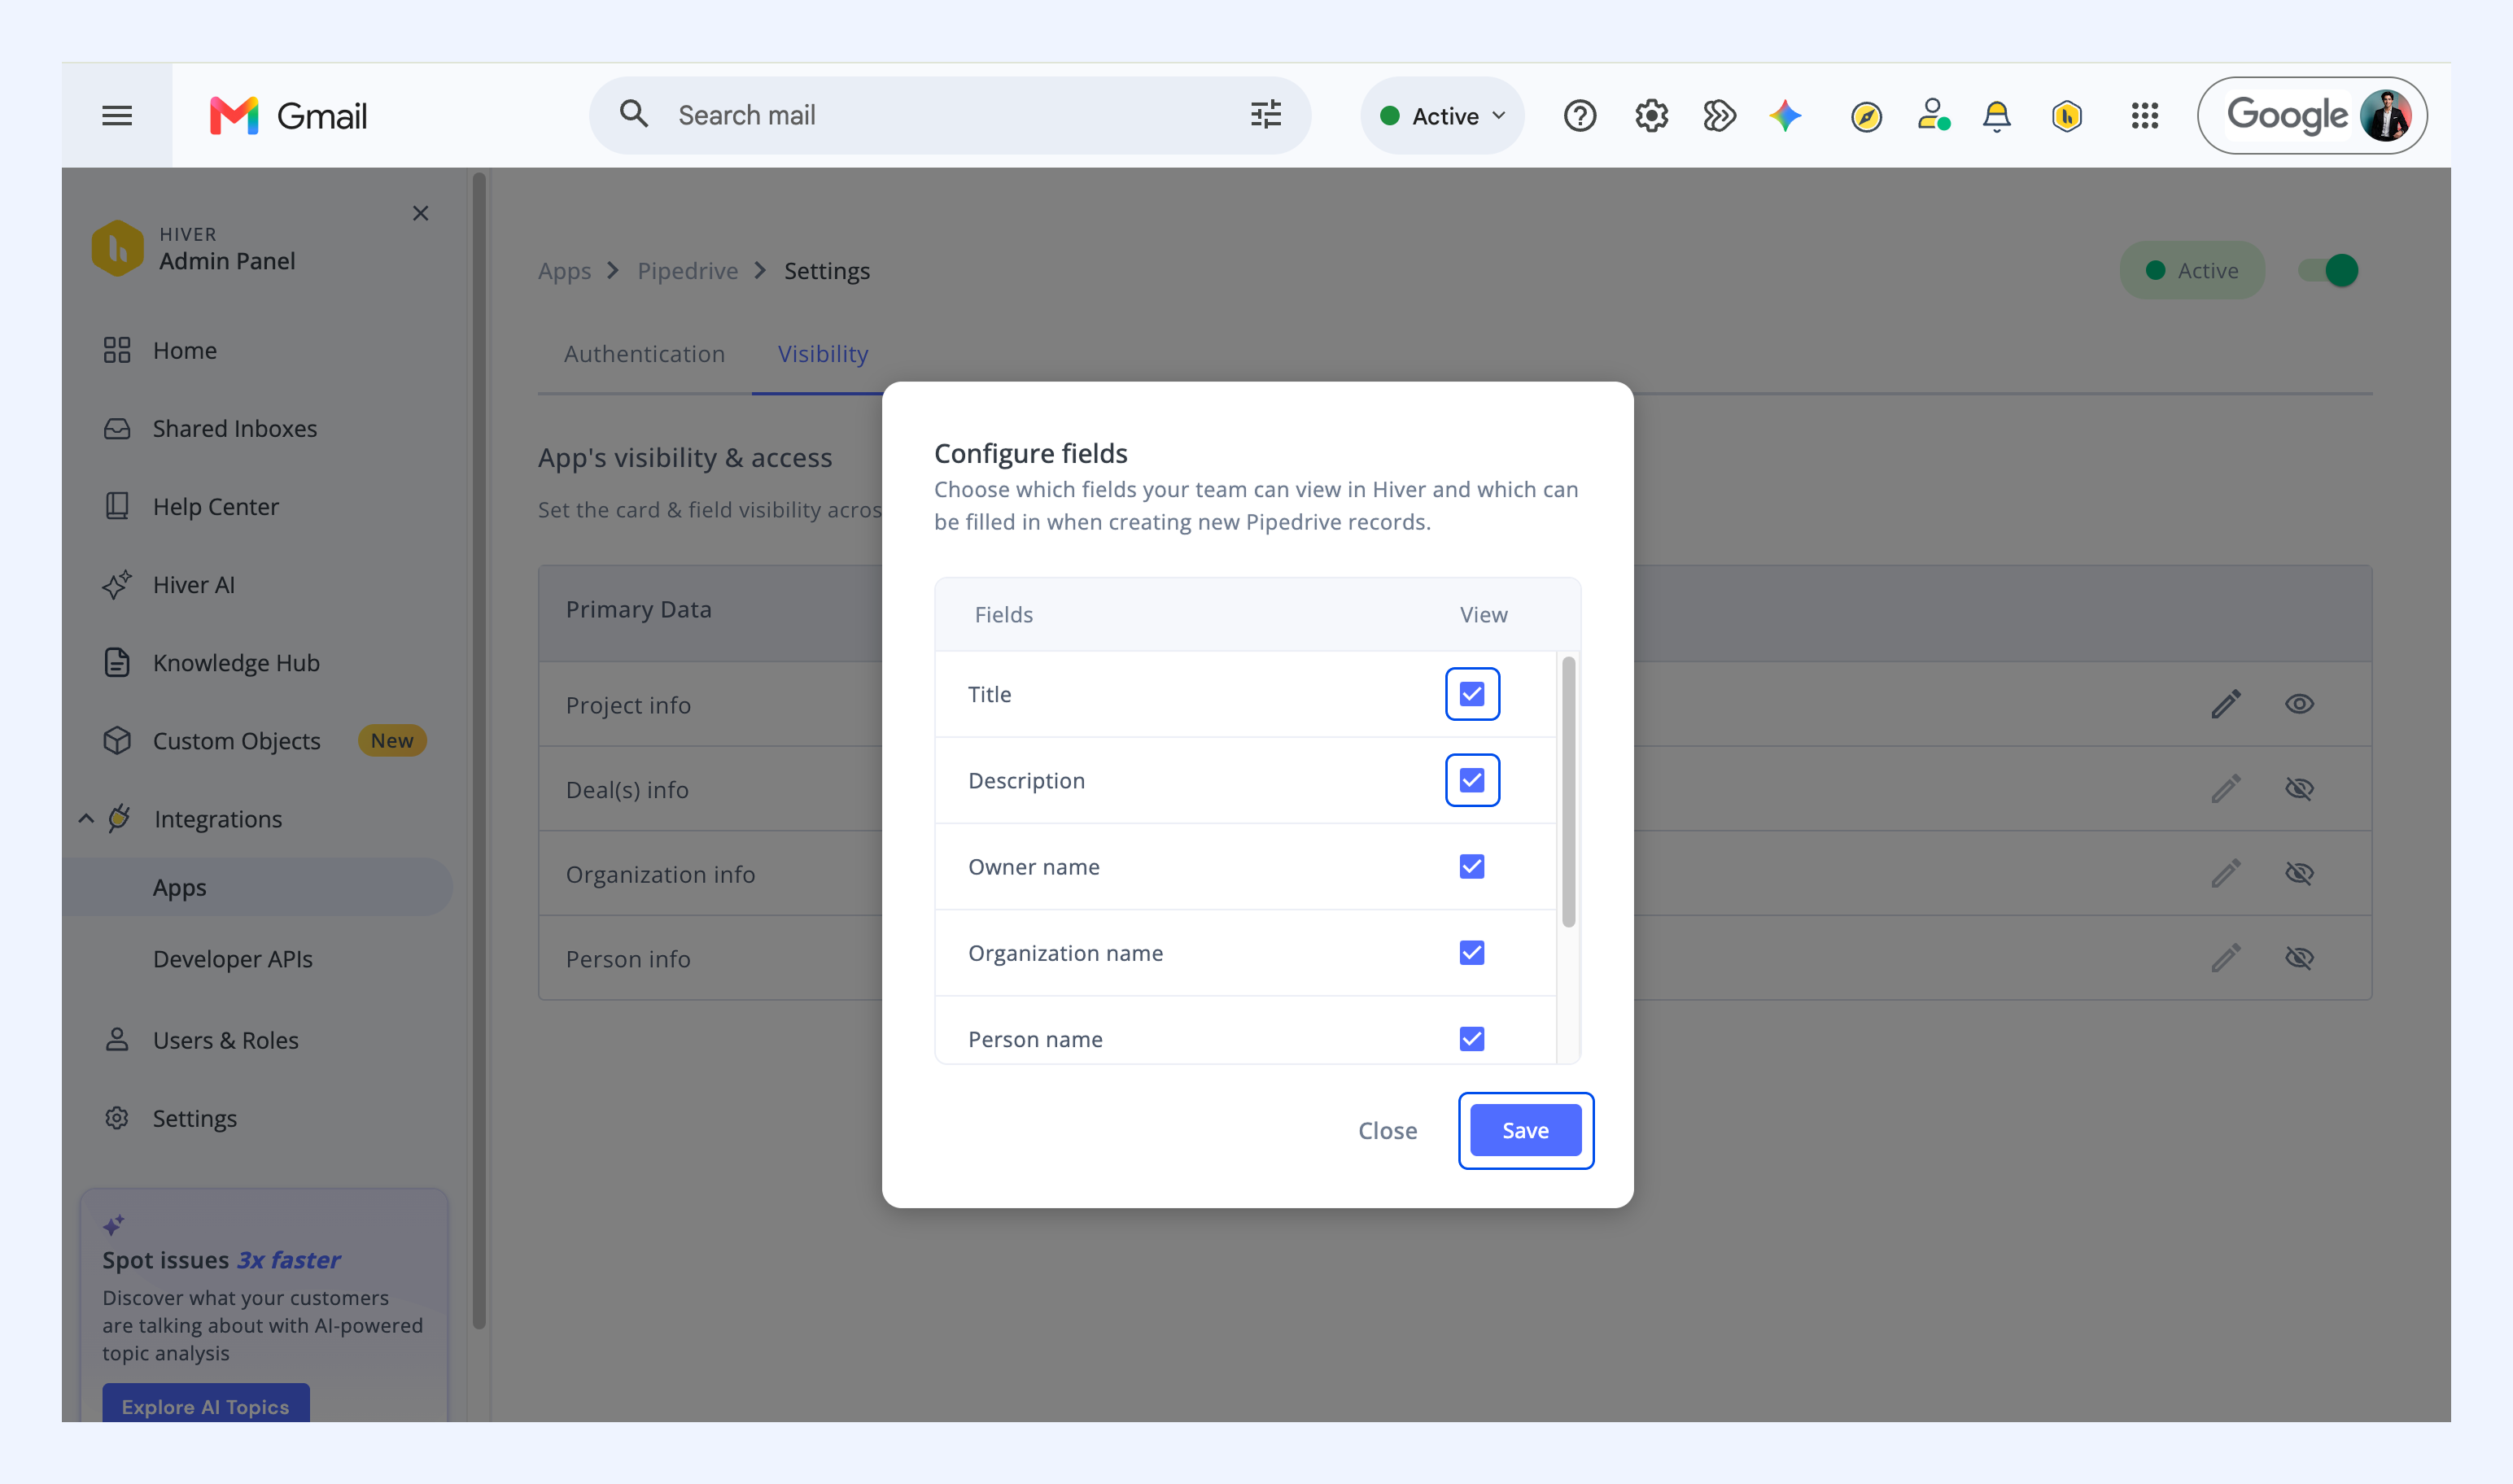
Choose which fields your team can see in Hiver when creating Pipedrive records:
1. Click the Configure fields icon (pencil icon).
2. Choose your fields and click Save.
Using the Pipedrive integration in Hiver
Once enabled, you can view, create, and link Pipedrive records directly from your emails without switching platforms.
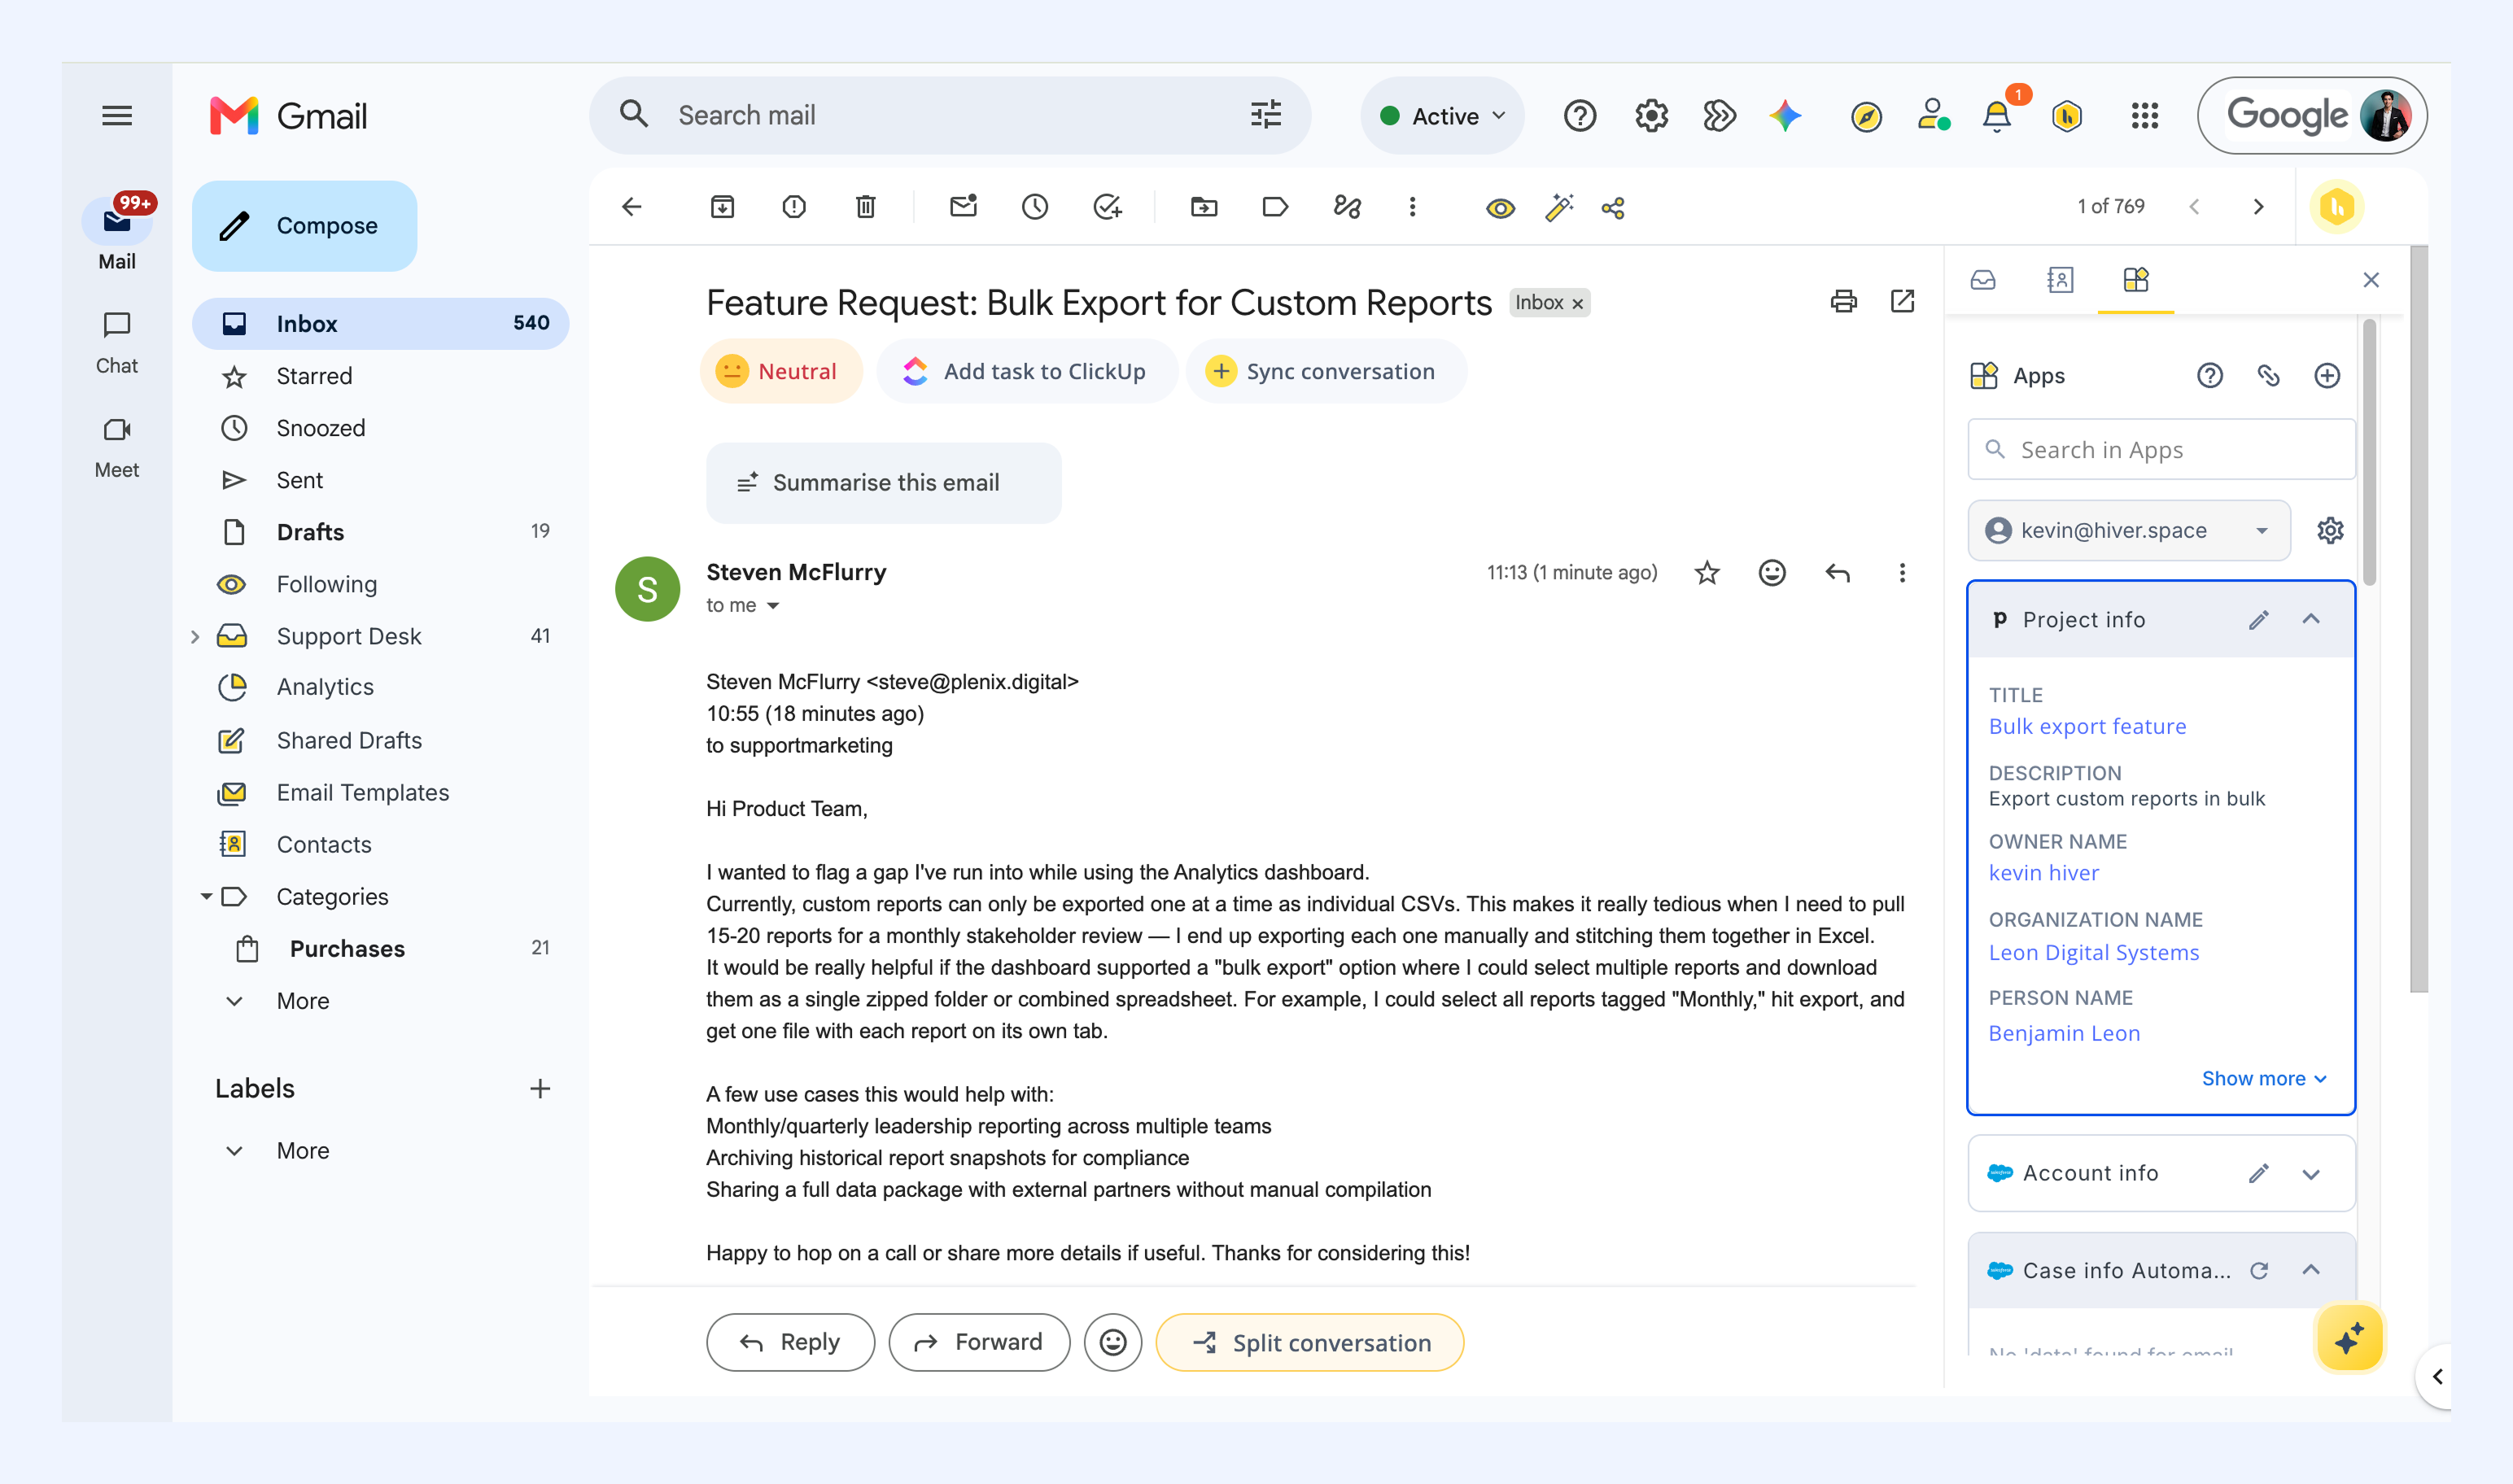
Viewing Pipedrive records
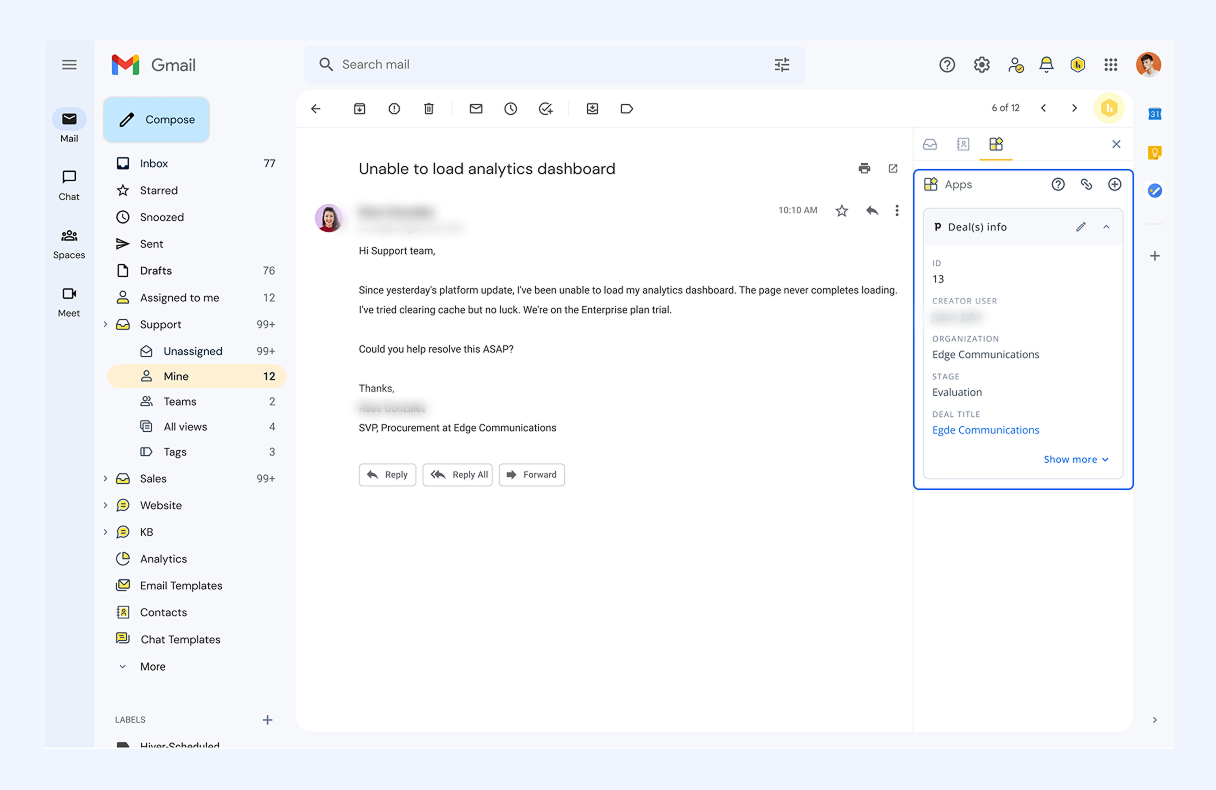
1. Open any conversation and go to the Apps tab.
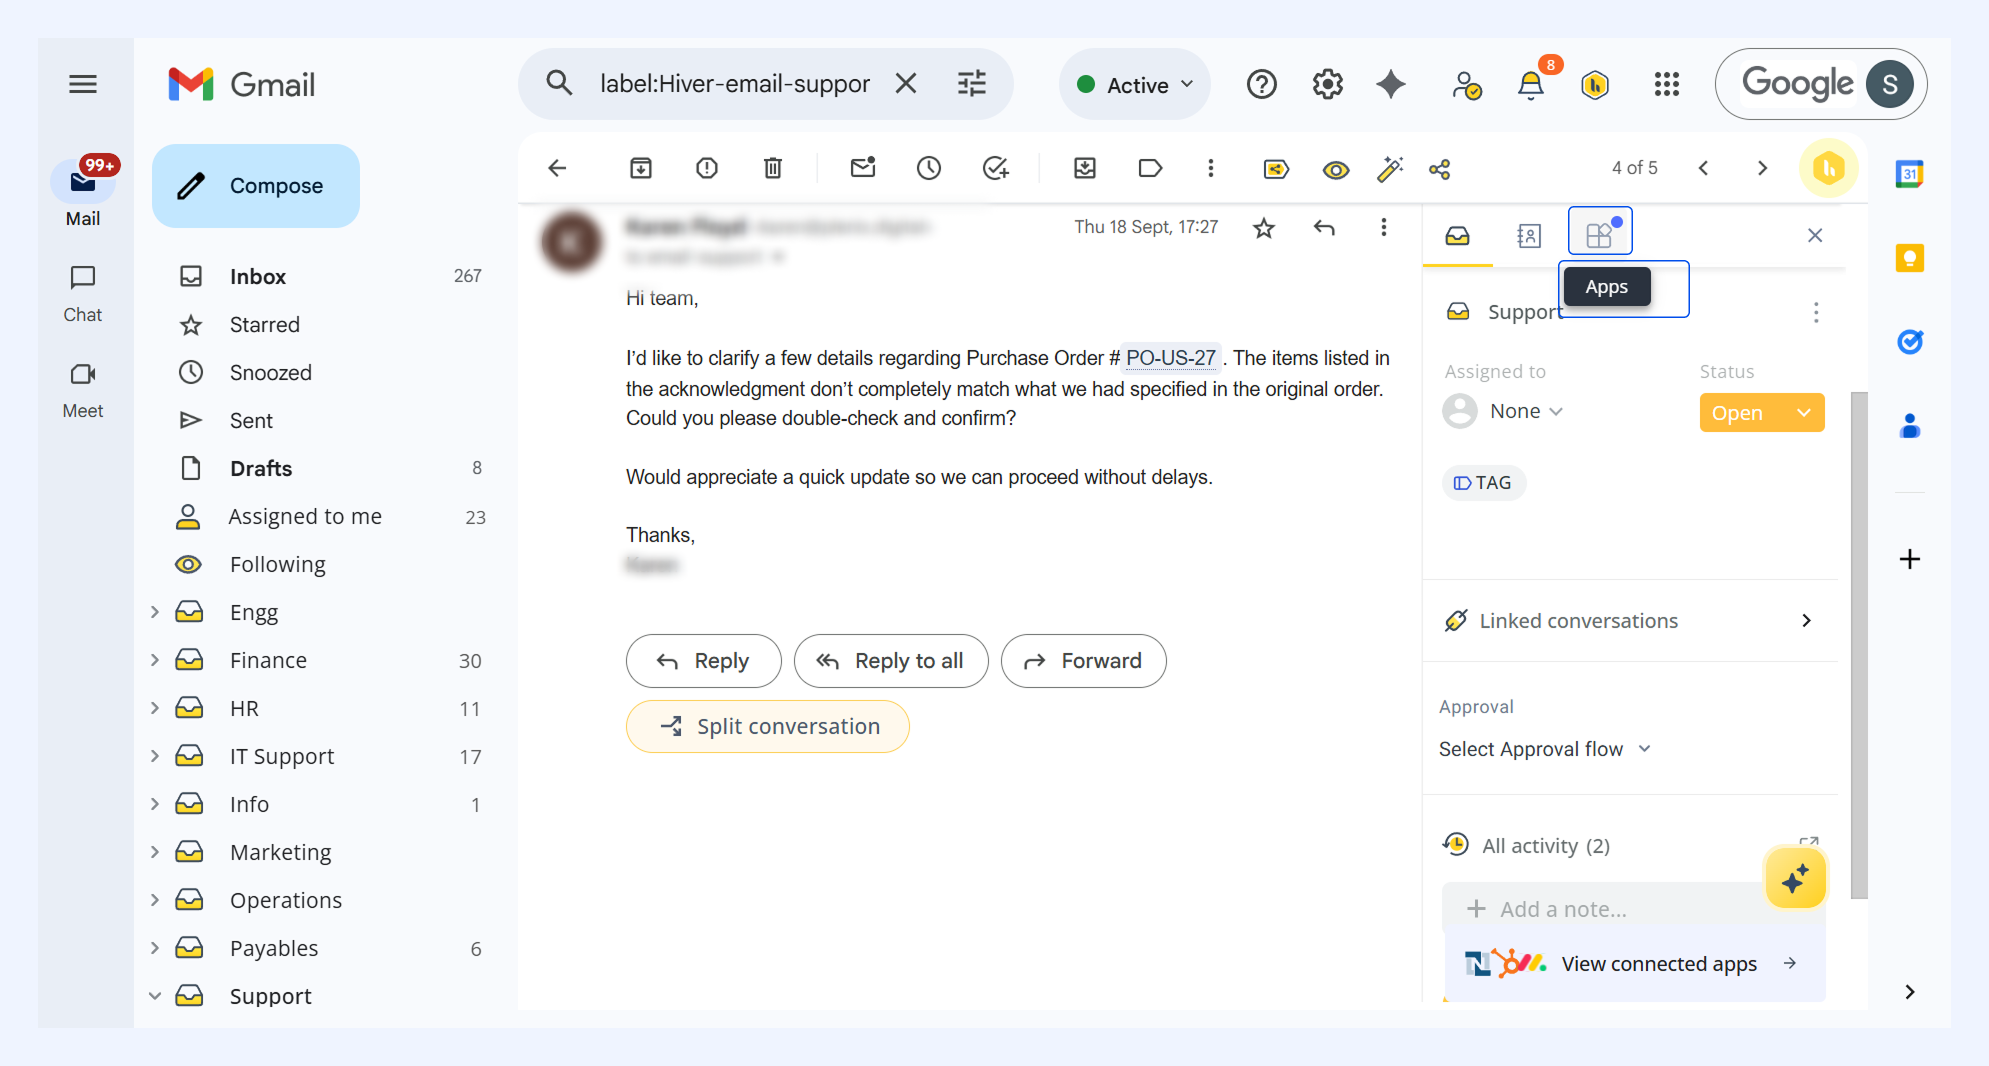
2. Scroll down to find Pipedrive records related to organization, deal, and more. Click on any link to view the full record in Pipedrive for detailed information or additional actions.
Create a new Pipedrive record
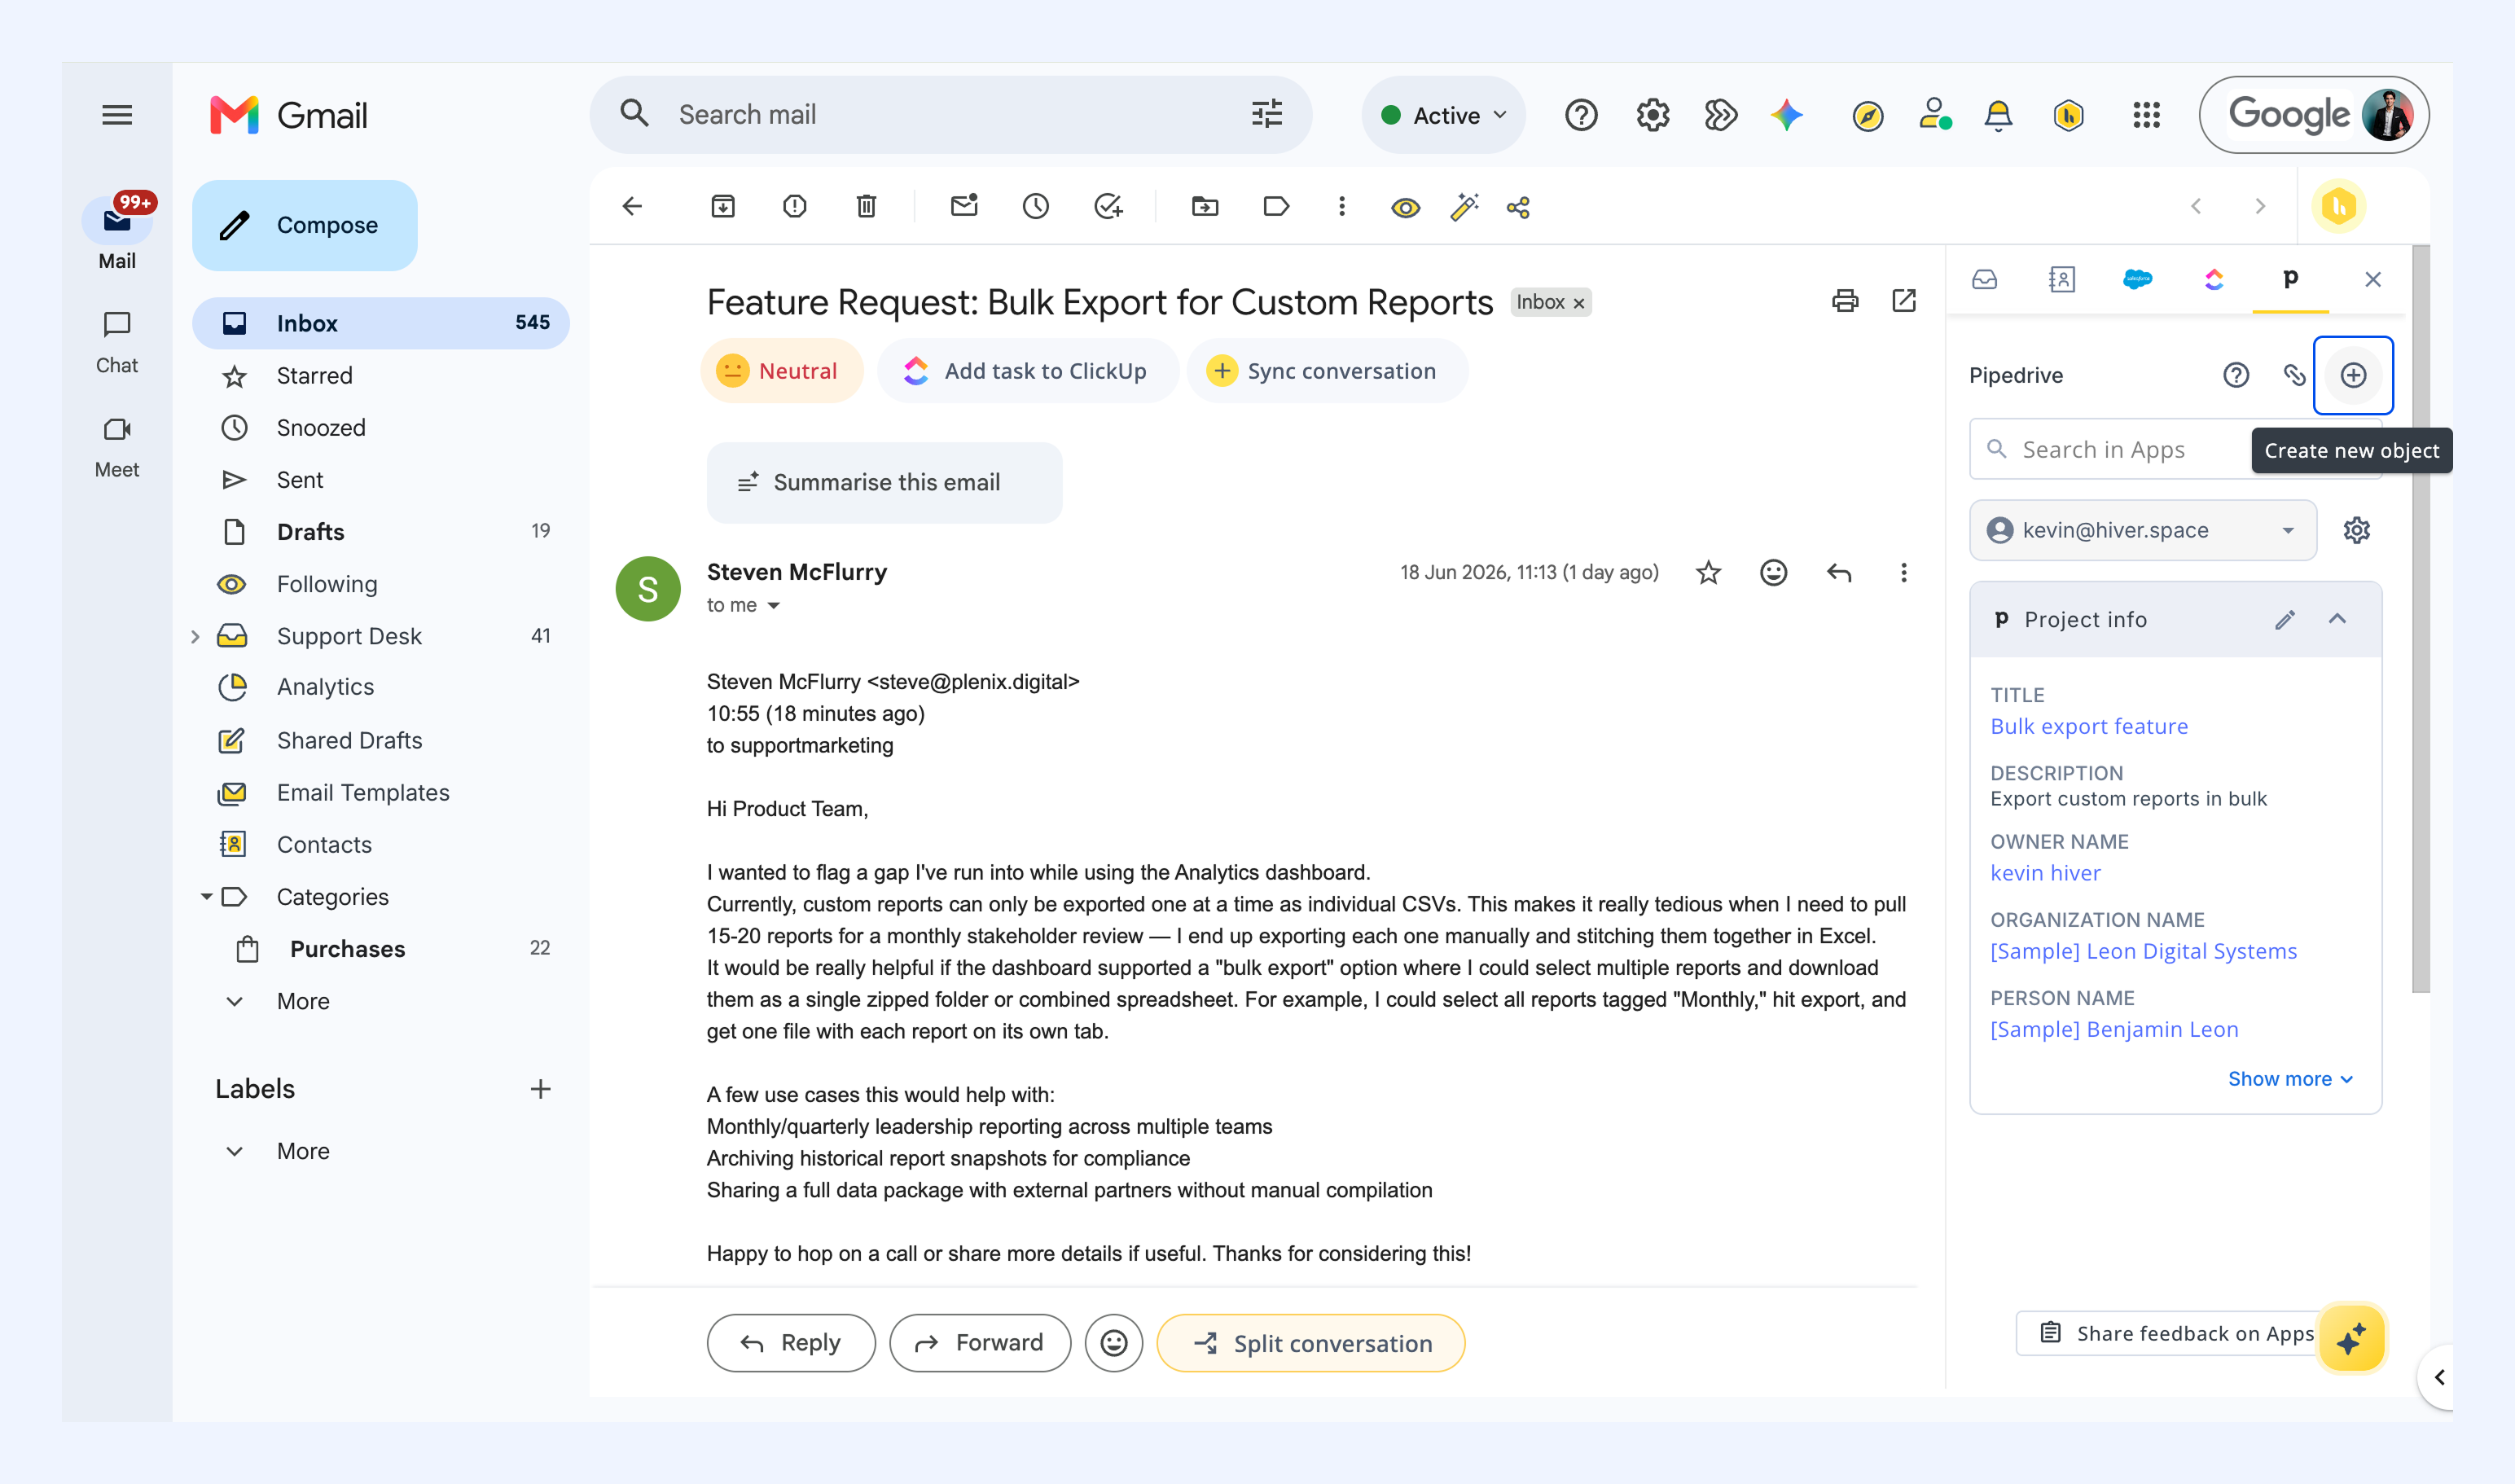
1. Open a conversation and go to the Apps tab.
2. Click Create new object.
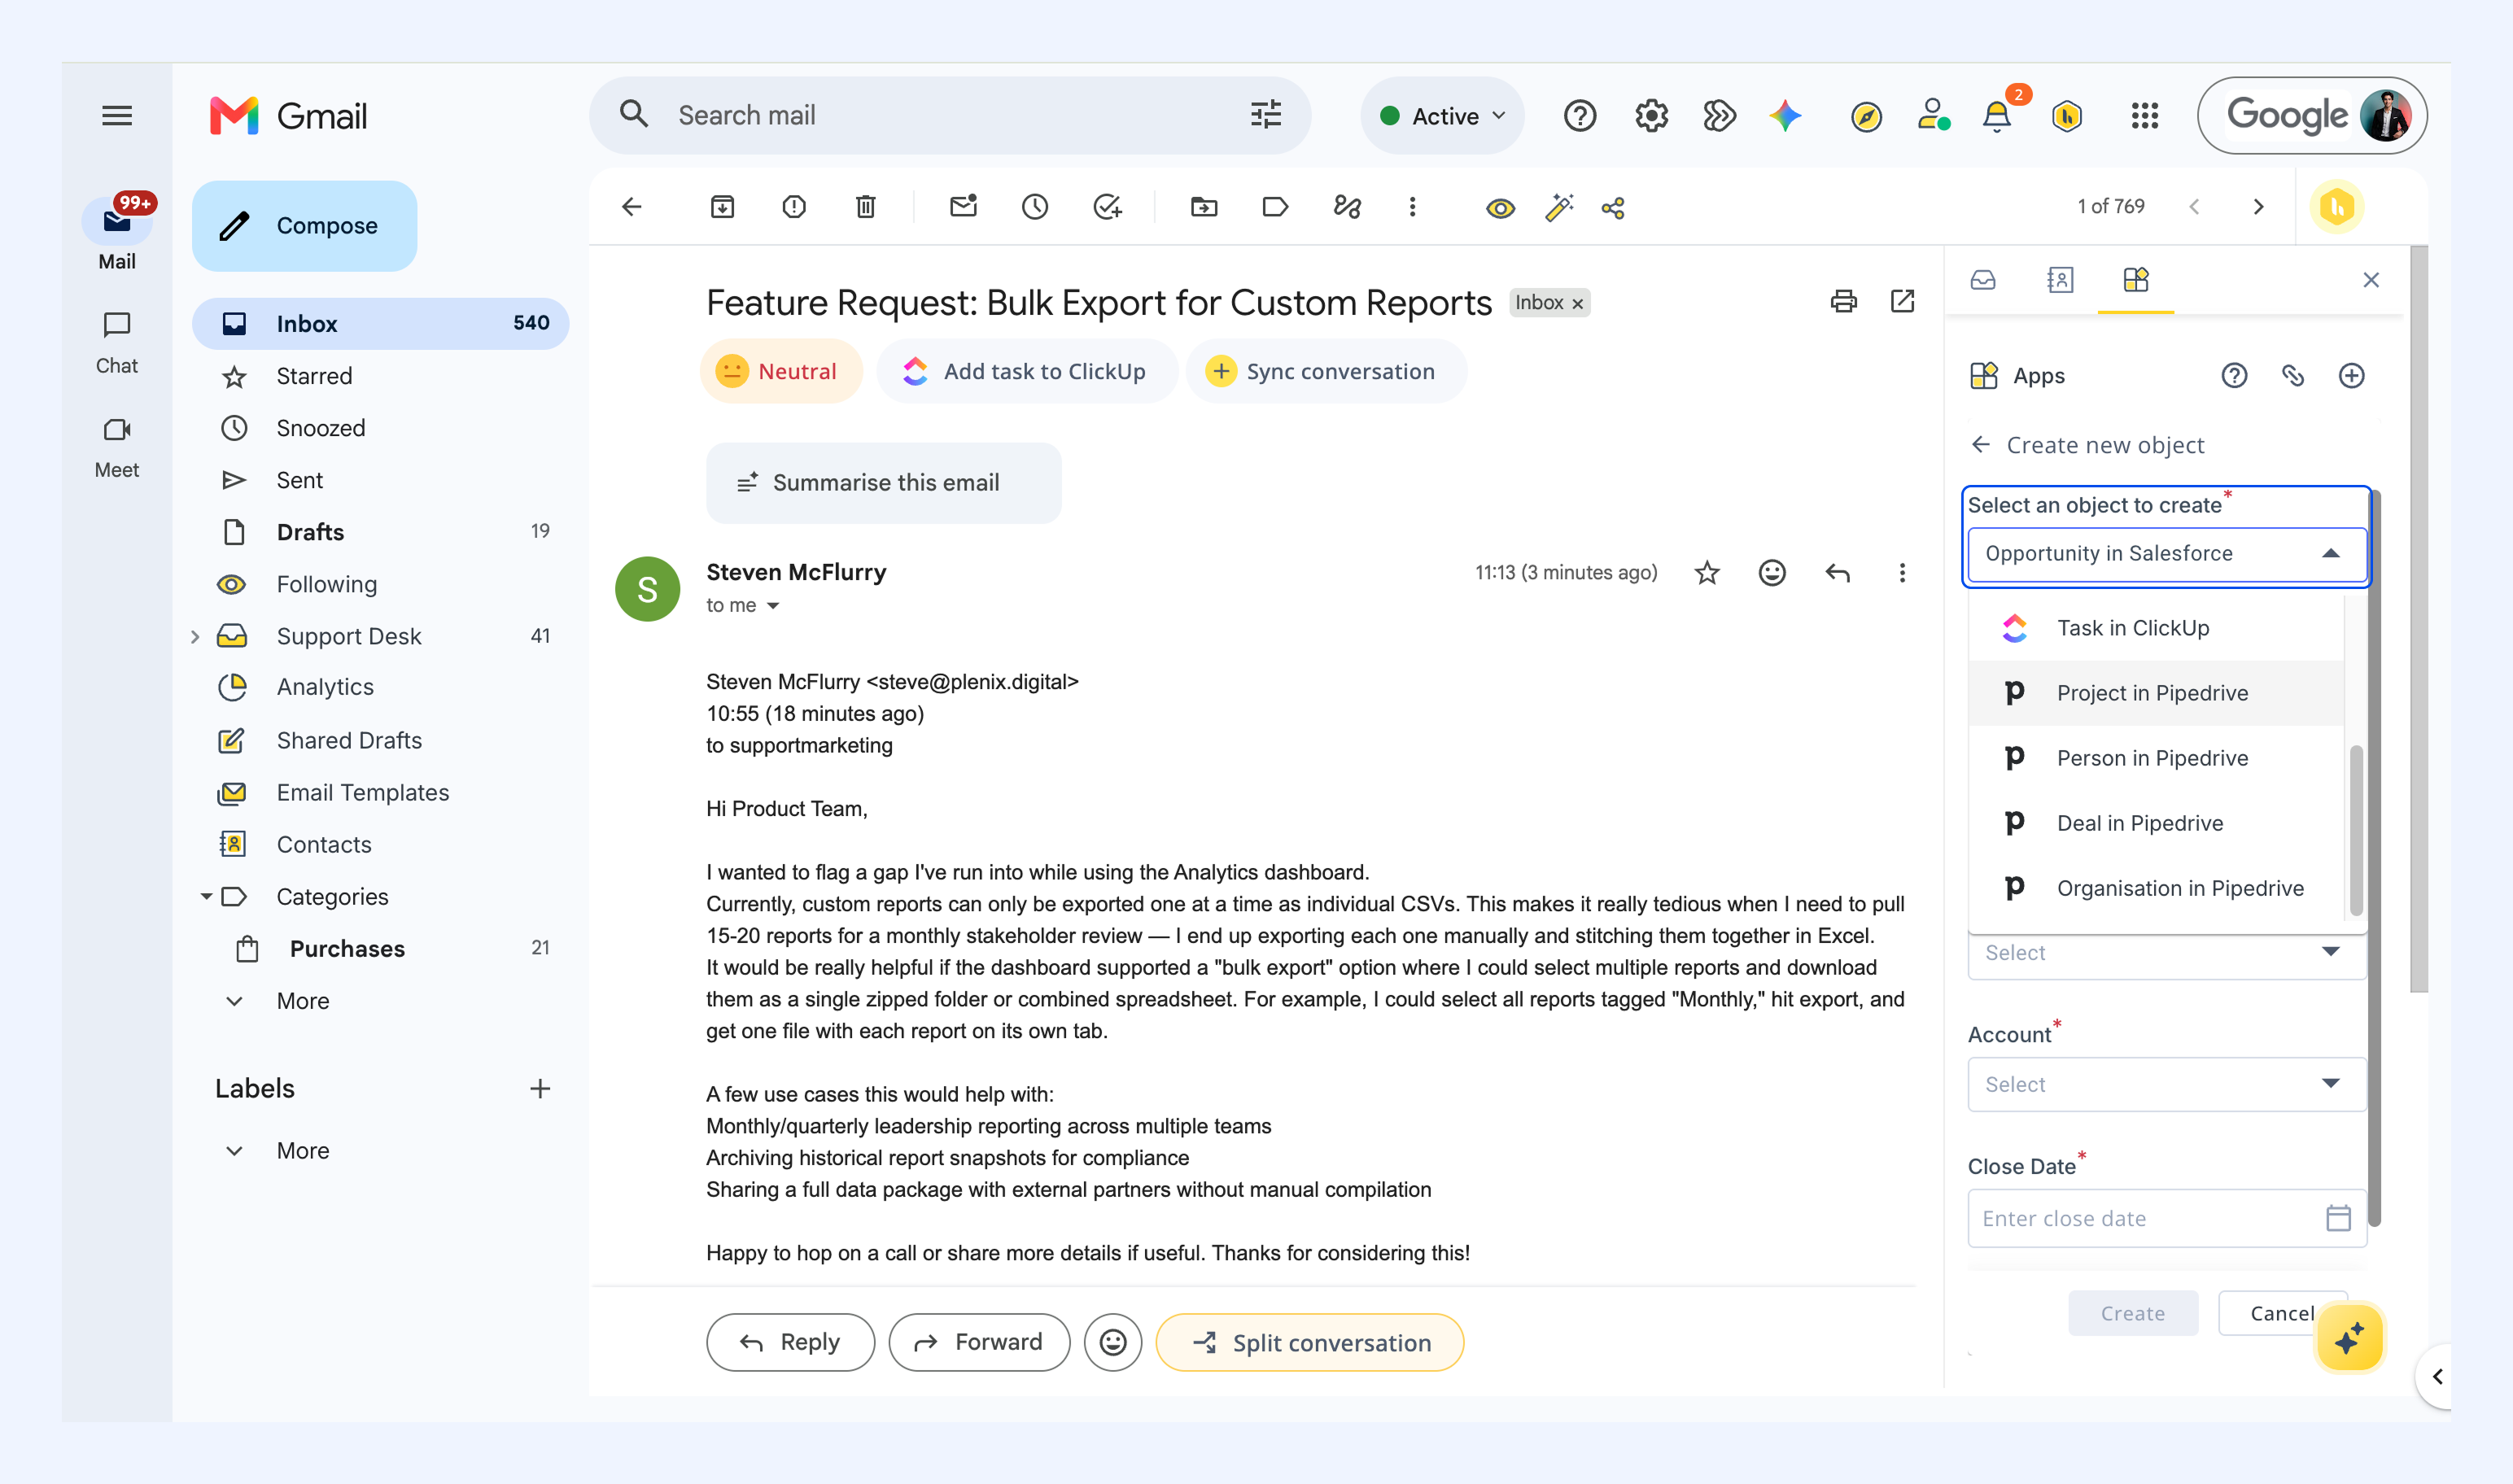
2. Select a Pipedrive record from the dropdown.
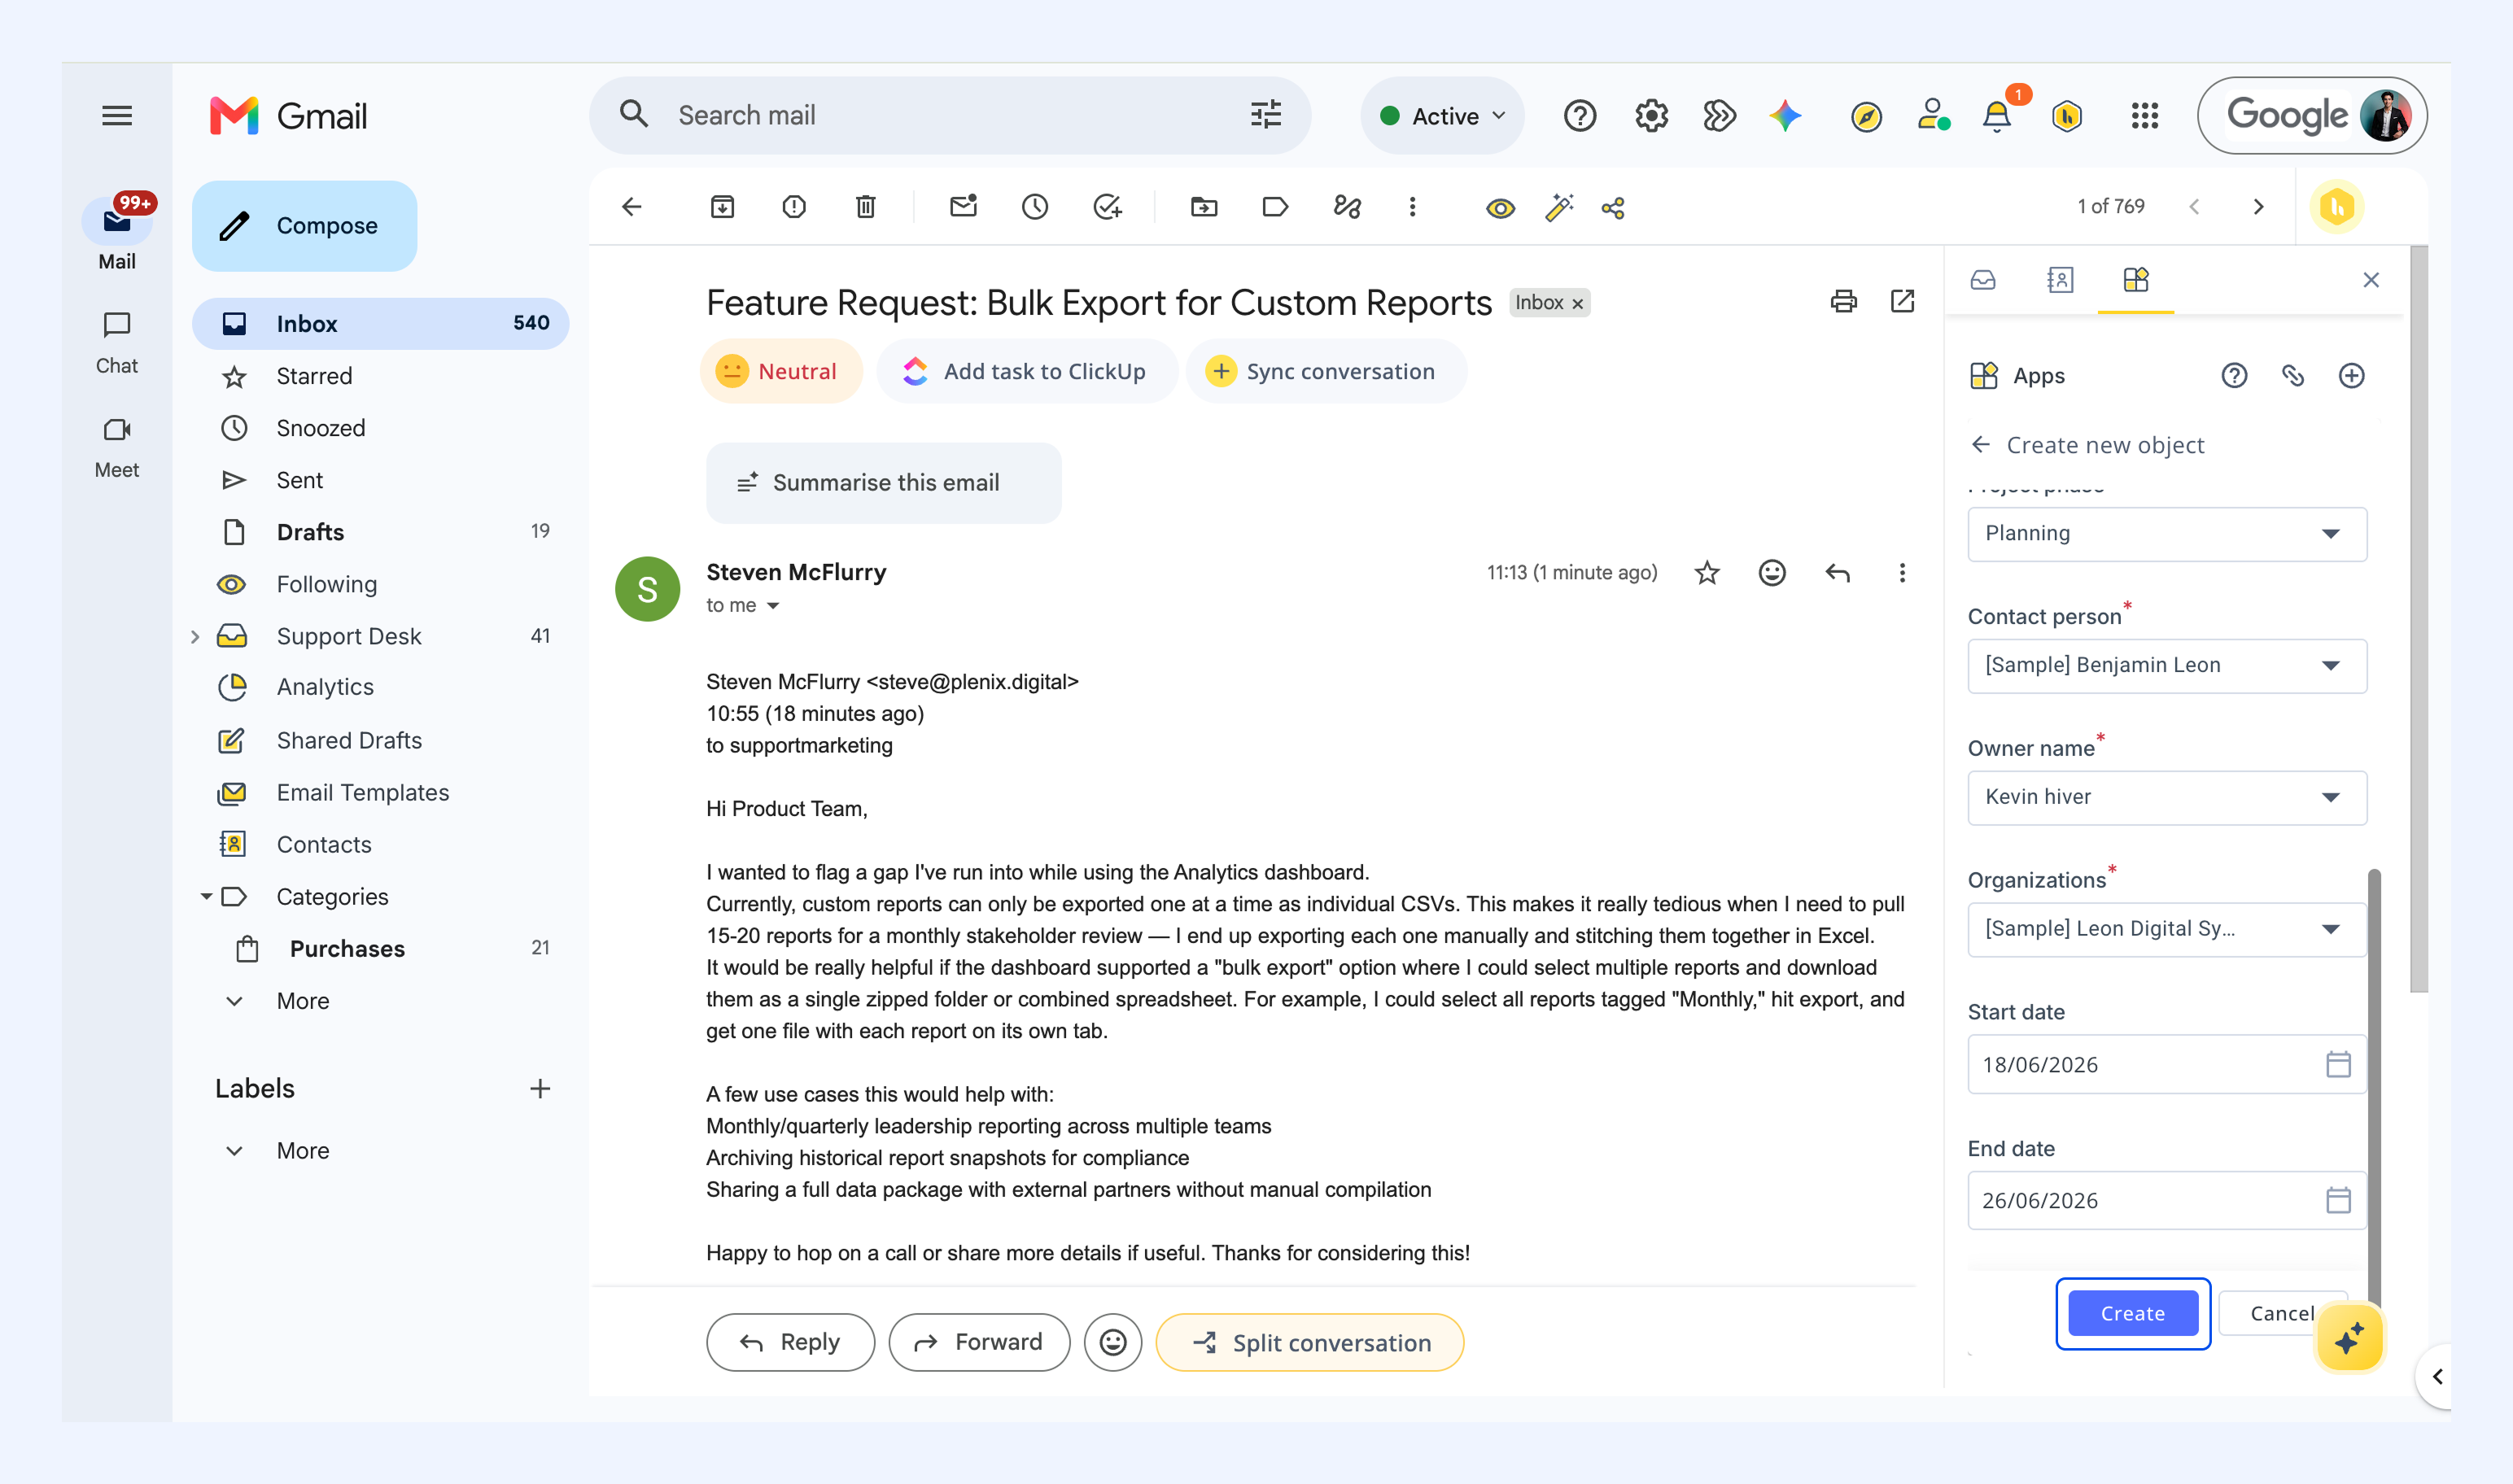
3. Fill in the details and click Create.
Once created, the Pipedrive card appears in the right panel.
Link an existing Pipedrive record
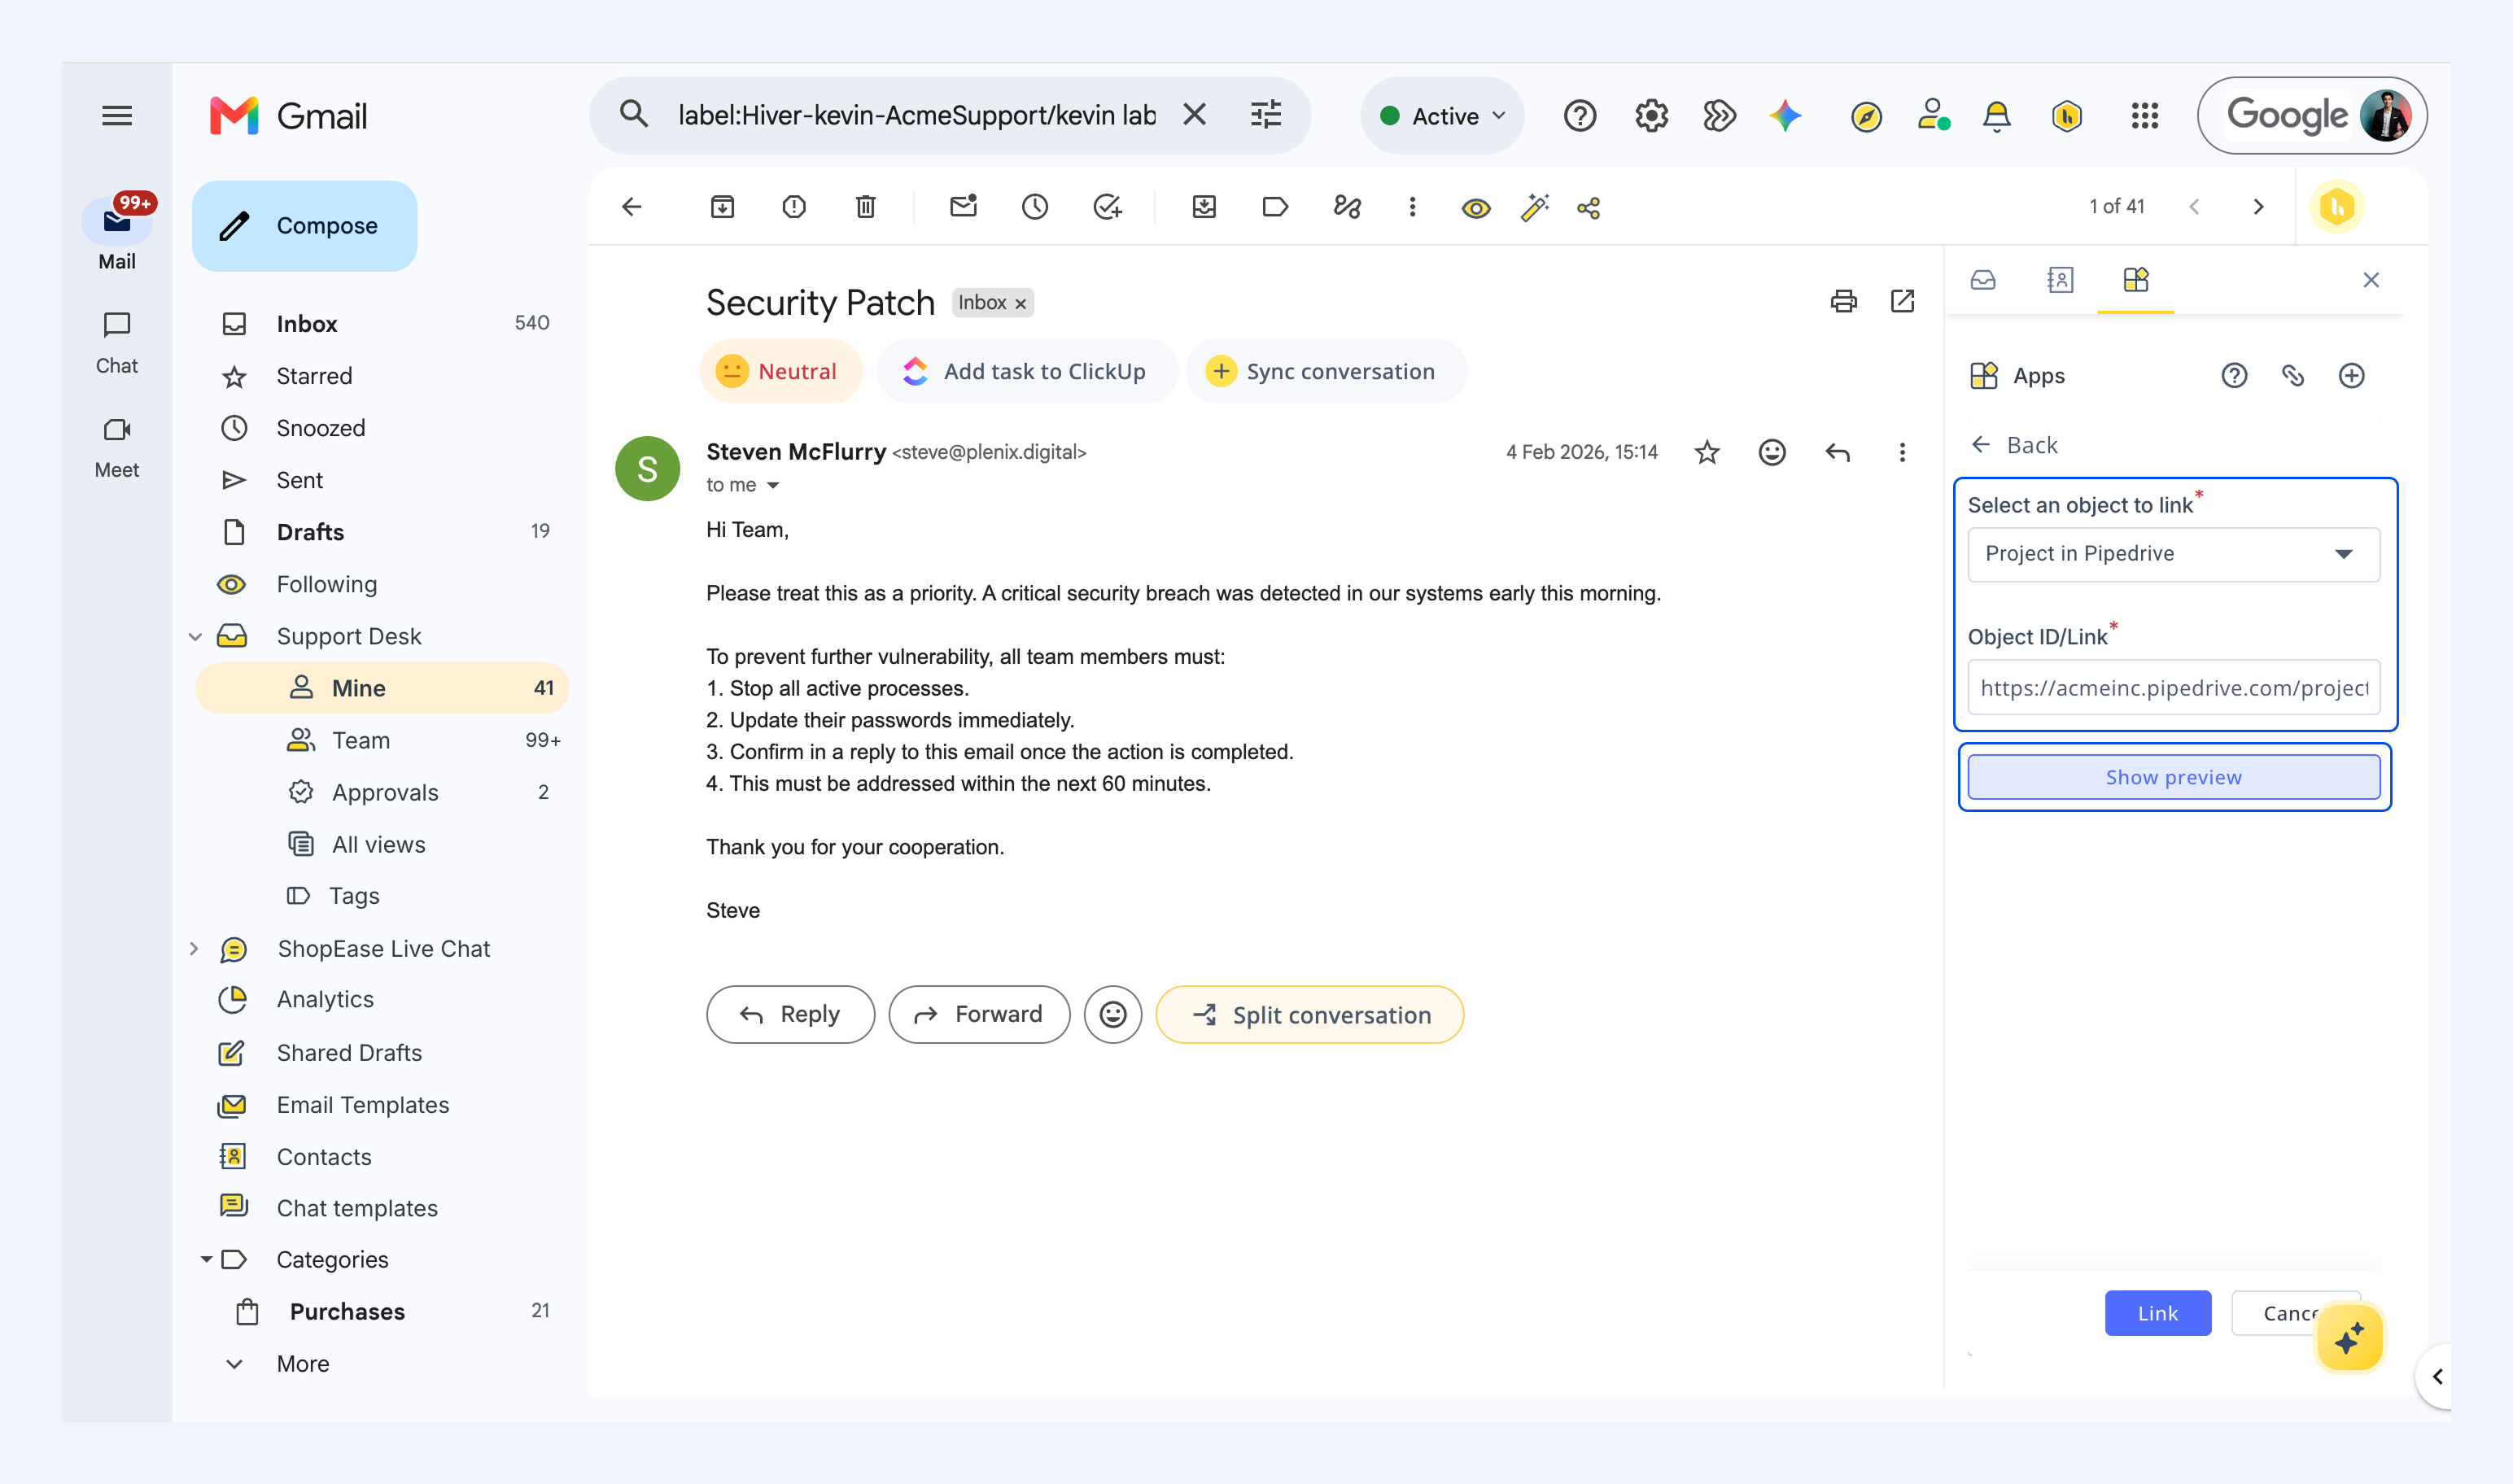
1. Click Link existing object.
2. Choose a record in Pipedrive from the dropdown.
3. Paste the Pipedrive card link in the Object ID/Link field.
4. Click Show preview to verify the card details.
5. Click Link.
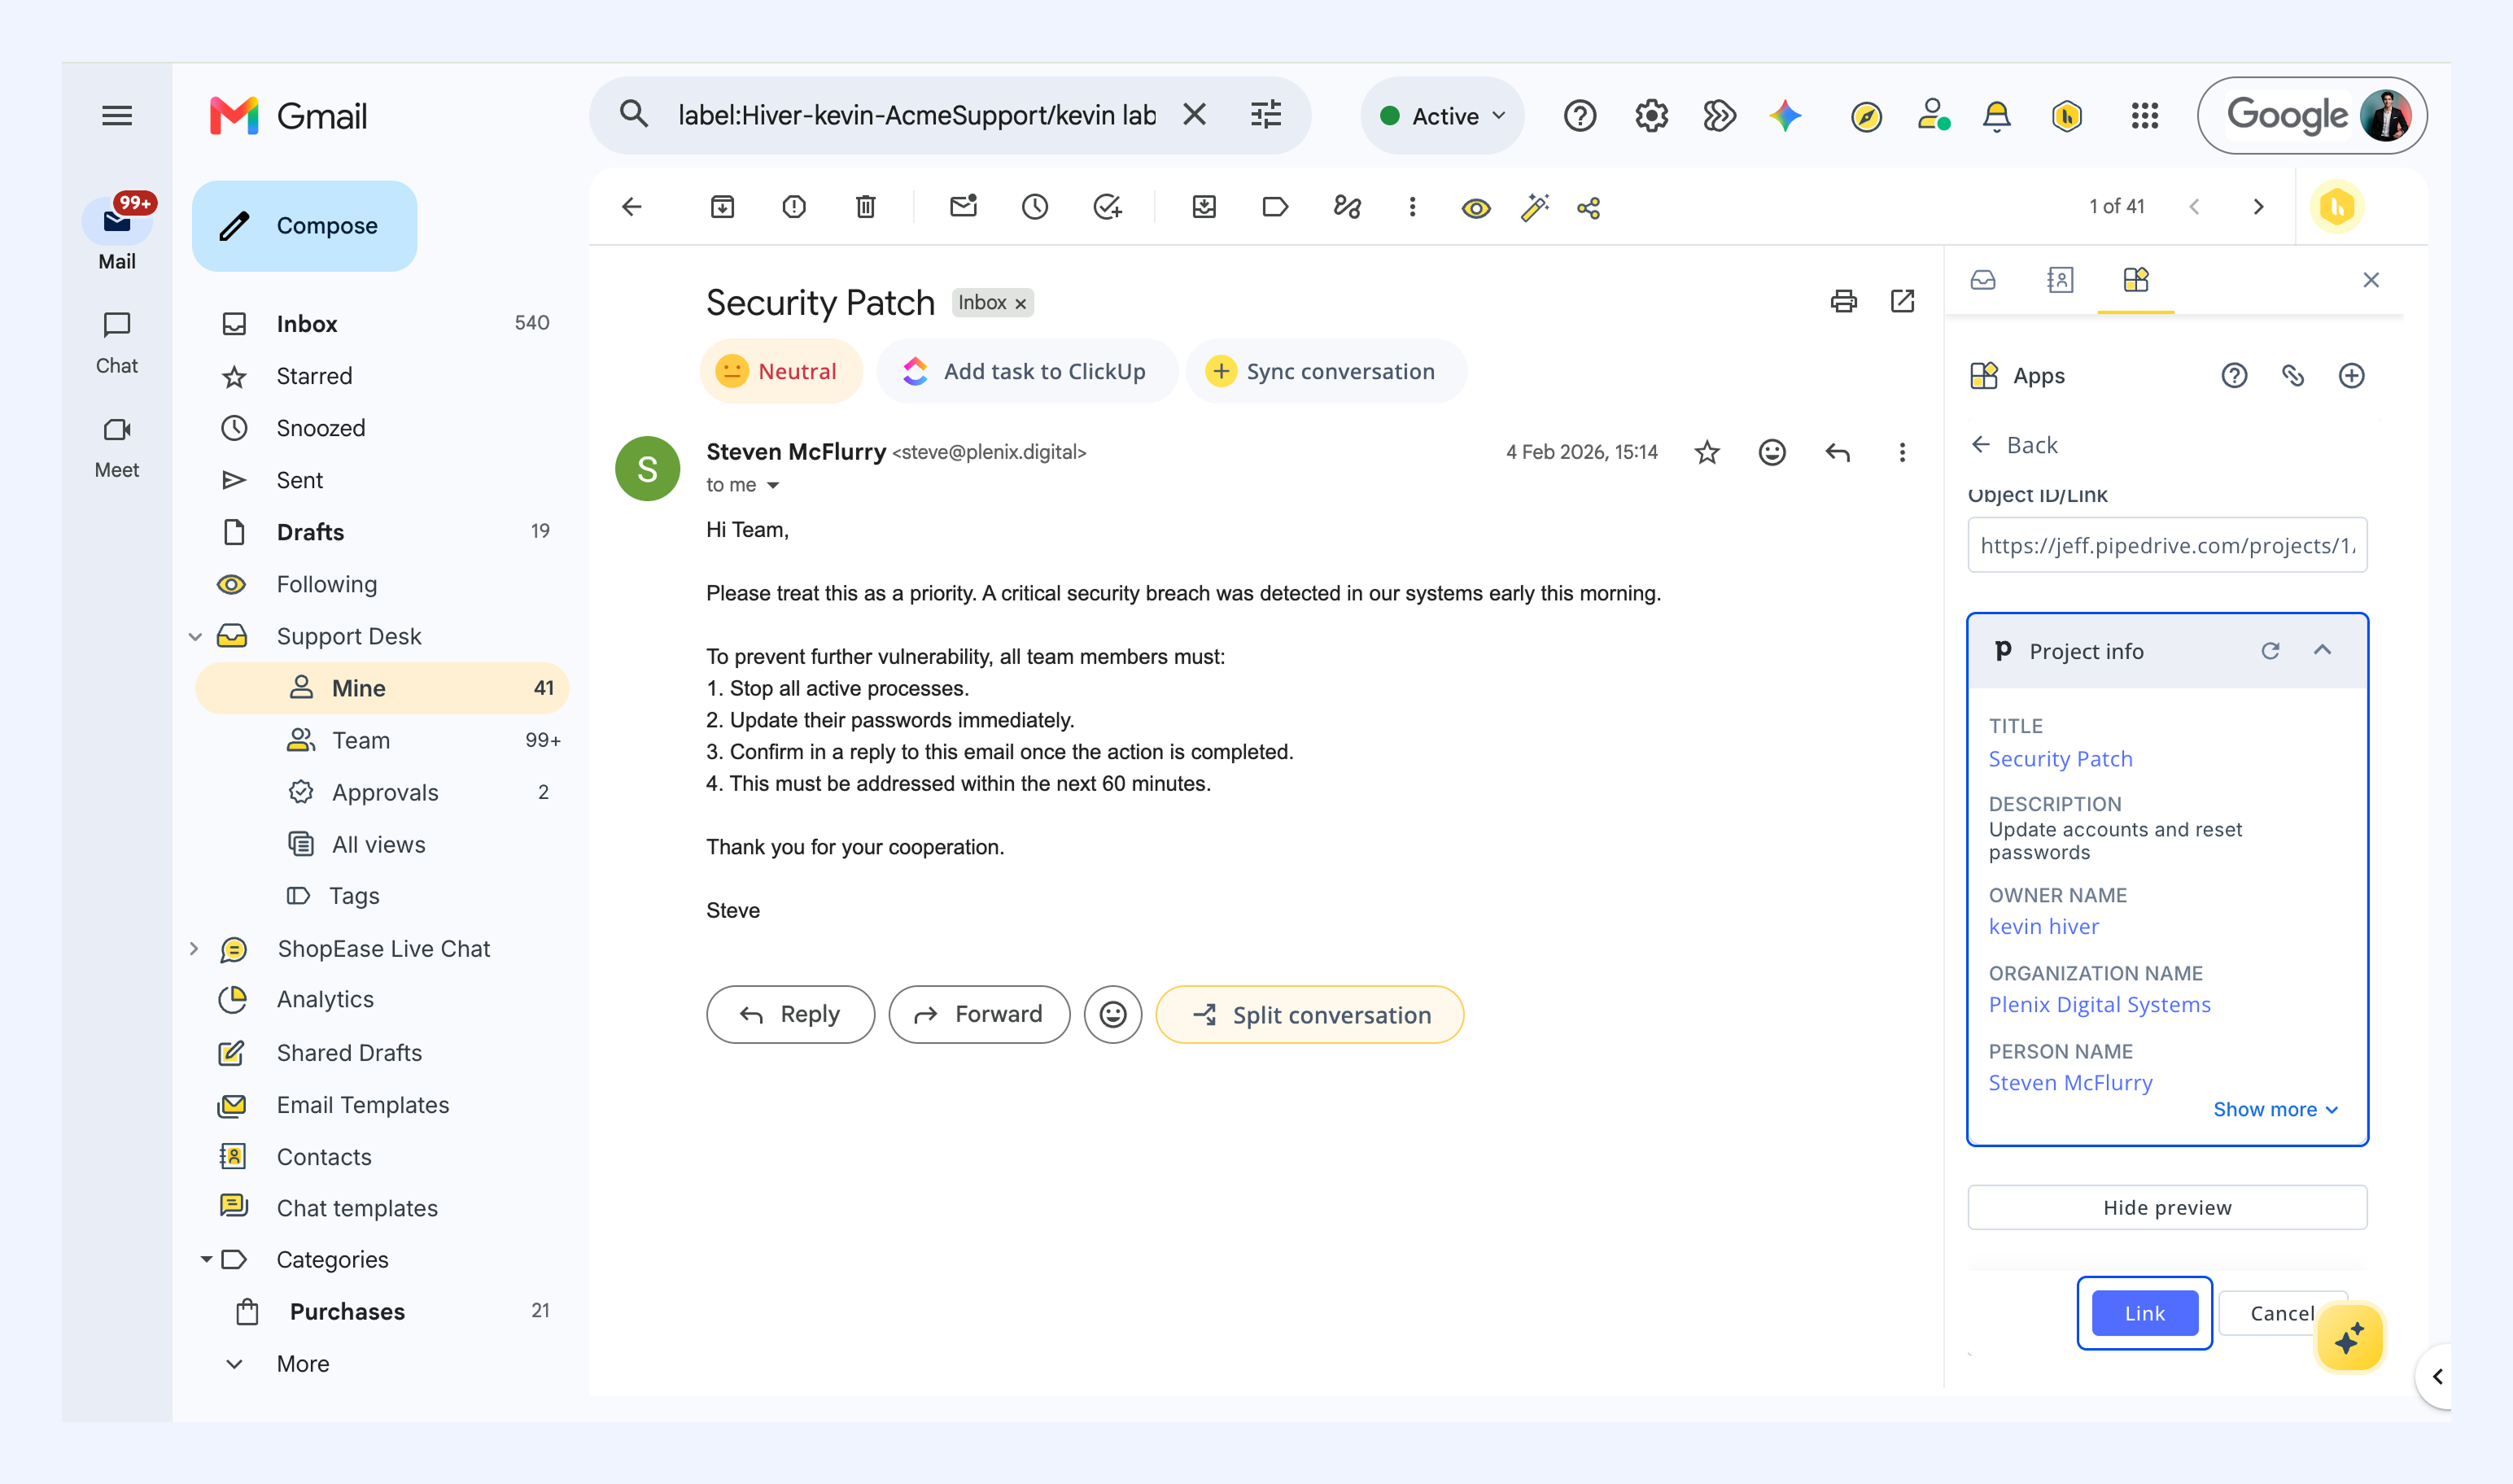
The linked Pipedrive card will now appear in the right panel.