WooCommerce Integration with Hiver
WooCommerce is a customizable, open-source eCommerce platform built on WordPress. With the WooCommerce app for Hiver, teams can view order details and customer information right inside Gmail, making it easier to support customers without switching tabs.
Why integrate WooCommerce with Hiver
- Unified view: Access key customer and order details directly in Hiver’s panel. View recent orders, payment status, and purchase history right beside your email conversations for instant context.
- Faster response times: Resolve queries about order status, refunds, or cancellations quickly by verifying shipping and payment details directly from Gmail.
- Better collaboration: Ensure everyone on your team works with the same, accurate WooCommerce data. Shared Inboxes in Hiver display consistent customer and order information for all team members, reducing back-and-forth and improving response quality.
Supported capabilities
The WooCommerce app for Hiver brings essential customer and order information right into Gmail, helping teams work faster and more efficiently.
- View customer and order information: See key details such as order ID, status, amount, and customer name right beside conversations in the Apps panel.
- Quick access to records: Open direct WooCommerce links from Hiver to view or update detailed order information.
Coming soon: The ability to search WooCommerce orders and customer info within Hiver’s right panel.
Prerequisites
Before setting up the integration, ensure:
- You have Admin access in Hiver
- You have a WooCommerce store with administrator rights
- The WooCommerce plugin is installed and active on your WordPress site
Setting up the Hiver and WooCommerce integration
Step 1: Initiate app setup in Hiver
- Go to Hiver settings → Admin Panel → Integrations → Apps.
- Under Marketplace, choose WooCommerce.
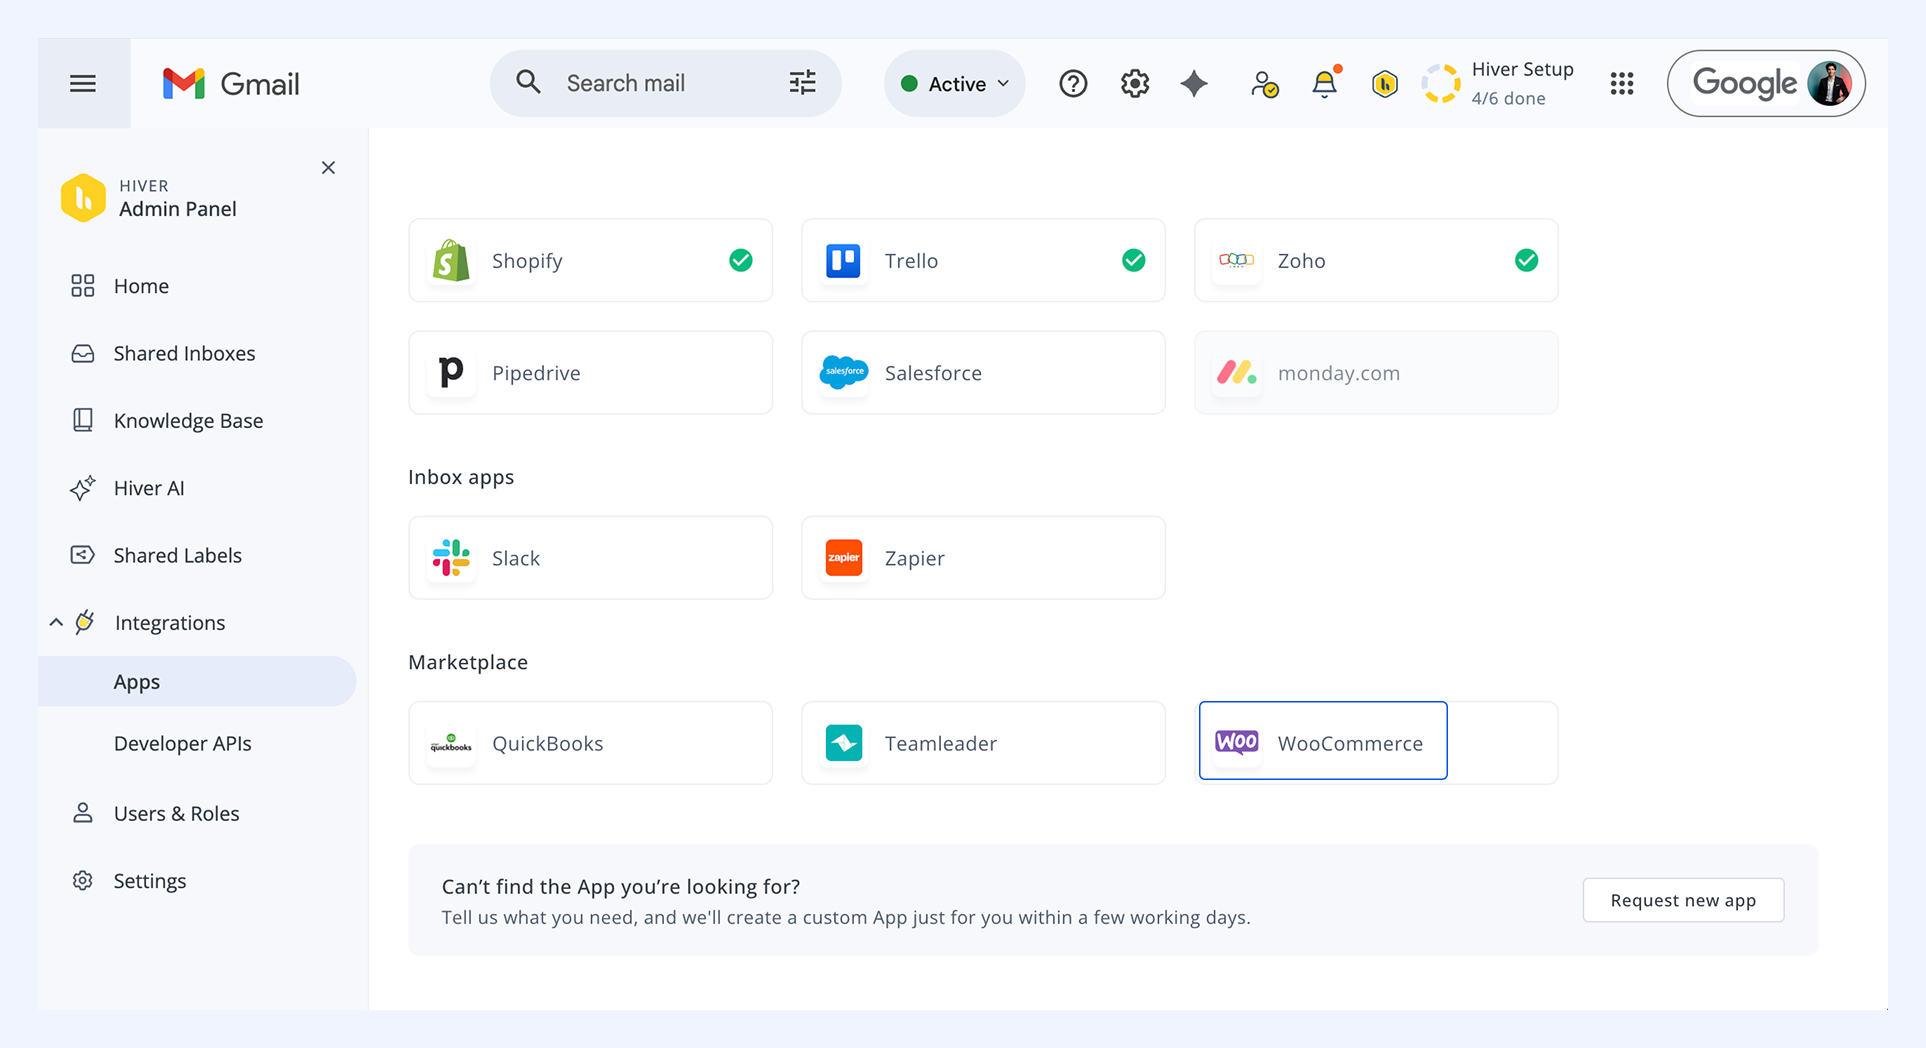
3. View the capabilities of the app and click Start setup.
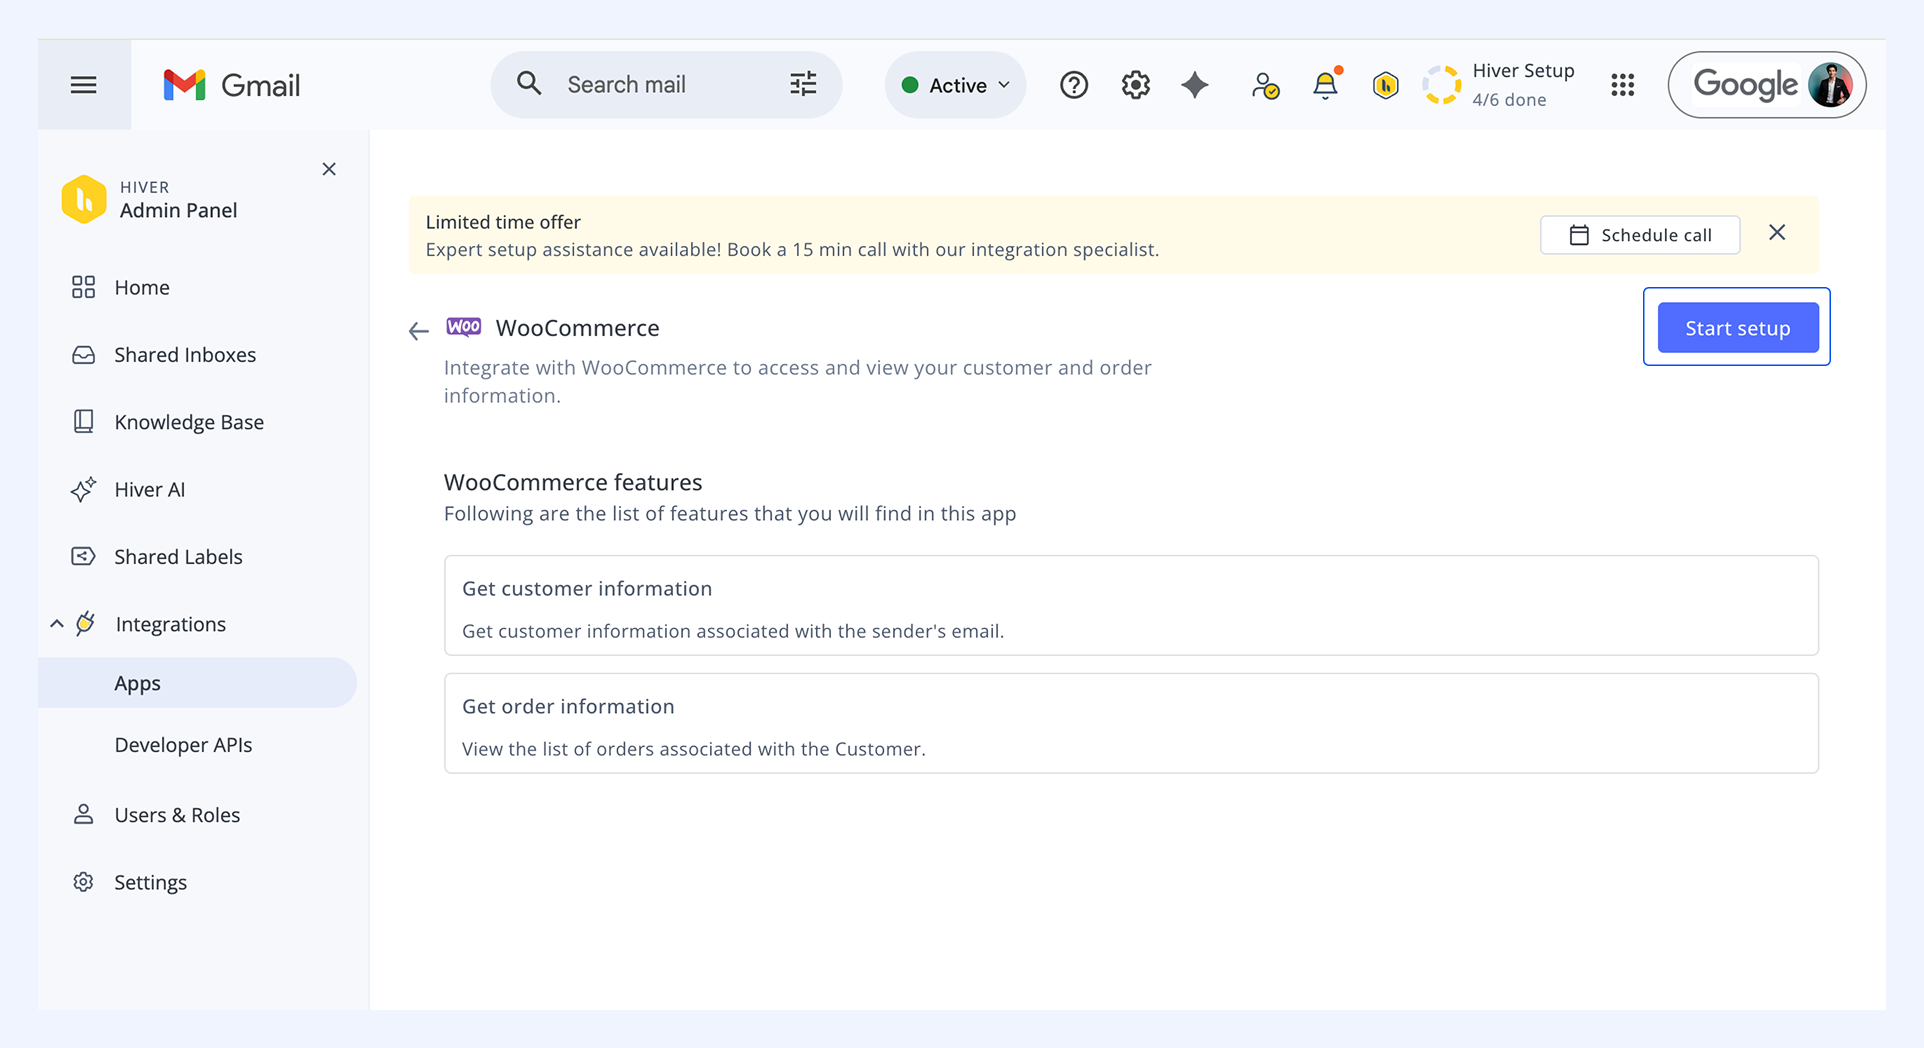
Step 2: Generate API keys in WooCommerce
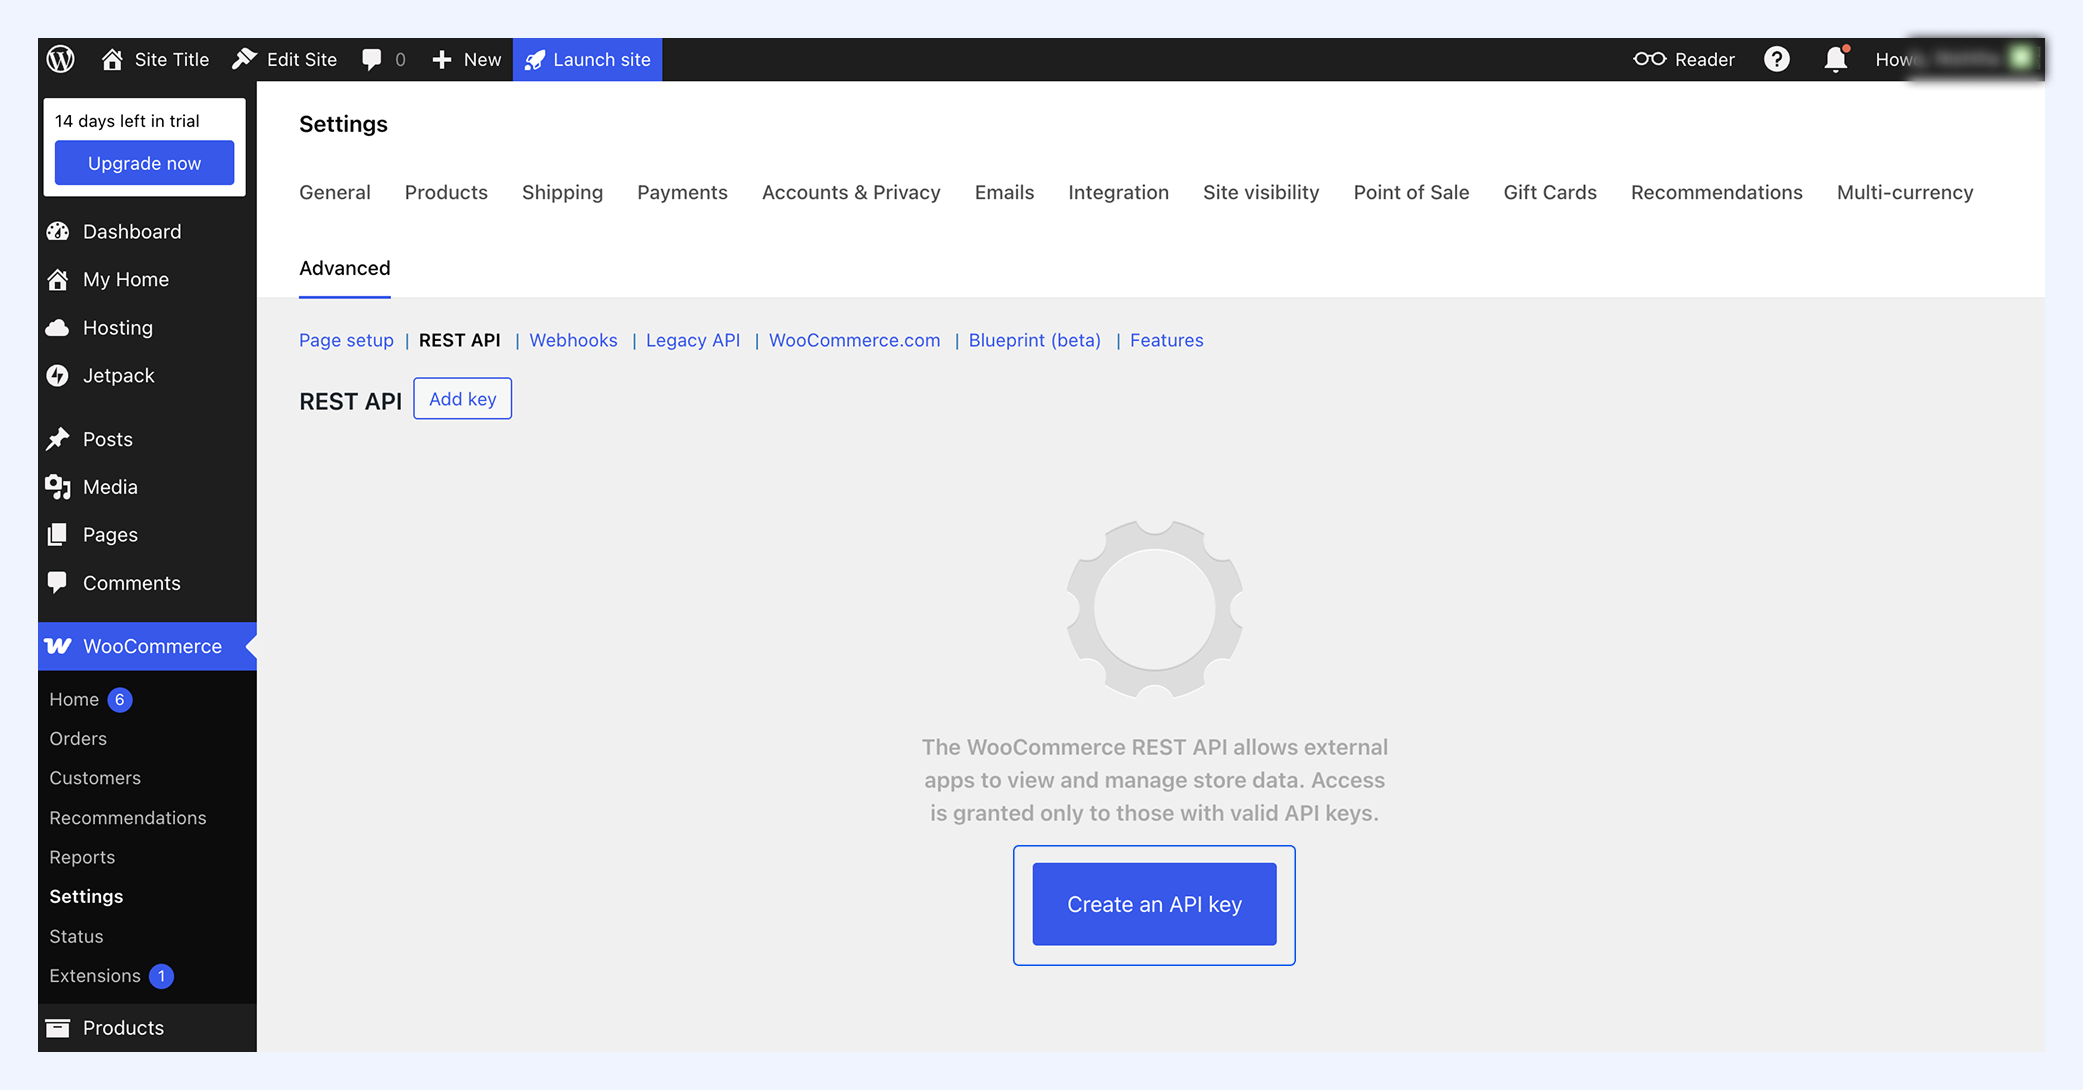
- In your WooCommerce dashboard, go to WooCommerce → Settings, and open the Advanced tab.
- Select the REST API tab and click Create an API key.
3. Fill in the details as follows:
- Description: Hiver Integration
- Permissions: Read/Write
4.Click Generate API Key.
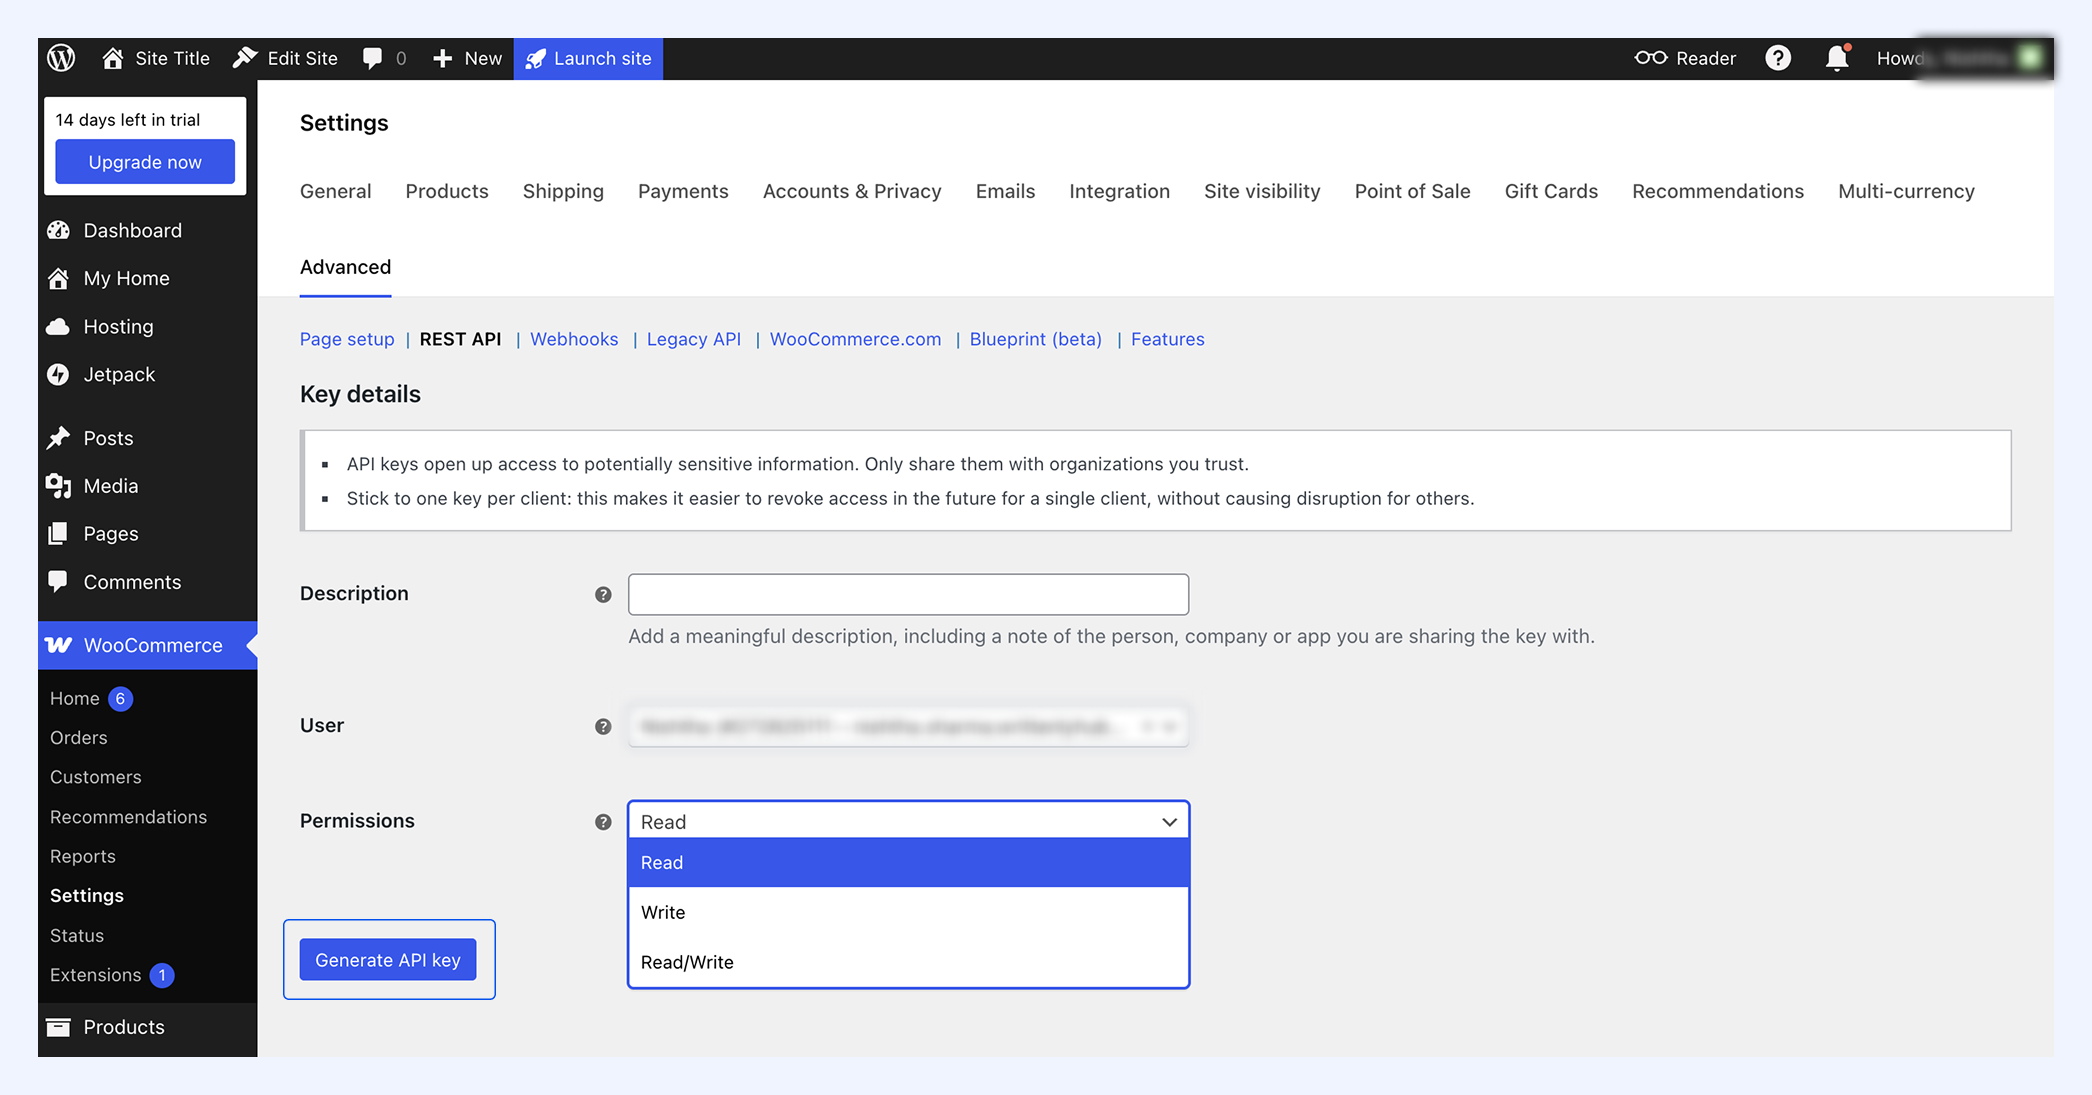
5. Copy the Consumer Key and Consumer Secret and save them securely so you can use them in the next step.
Step 3: Complete the setup in Hiver
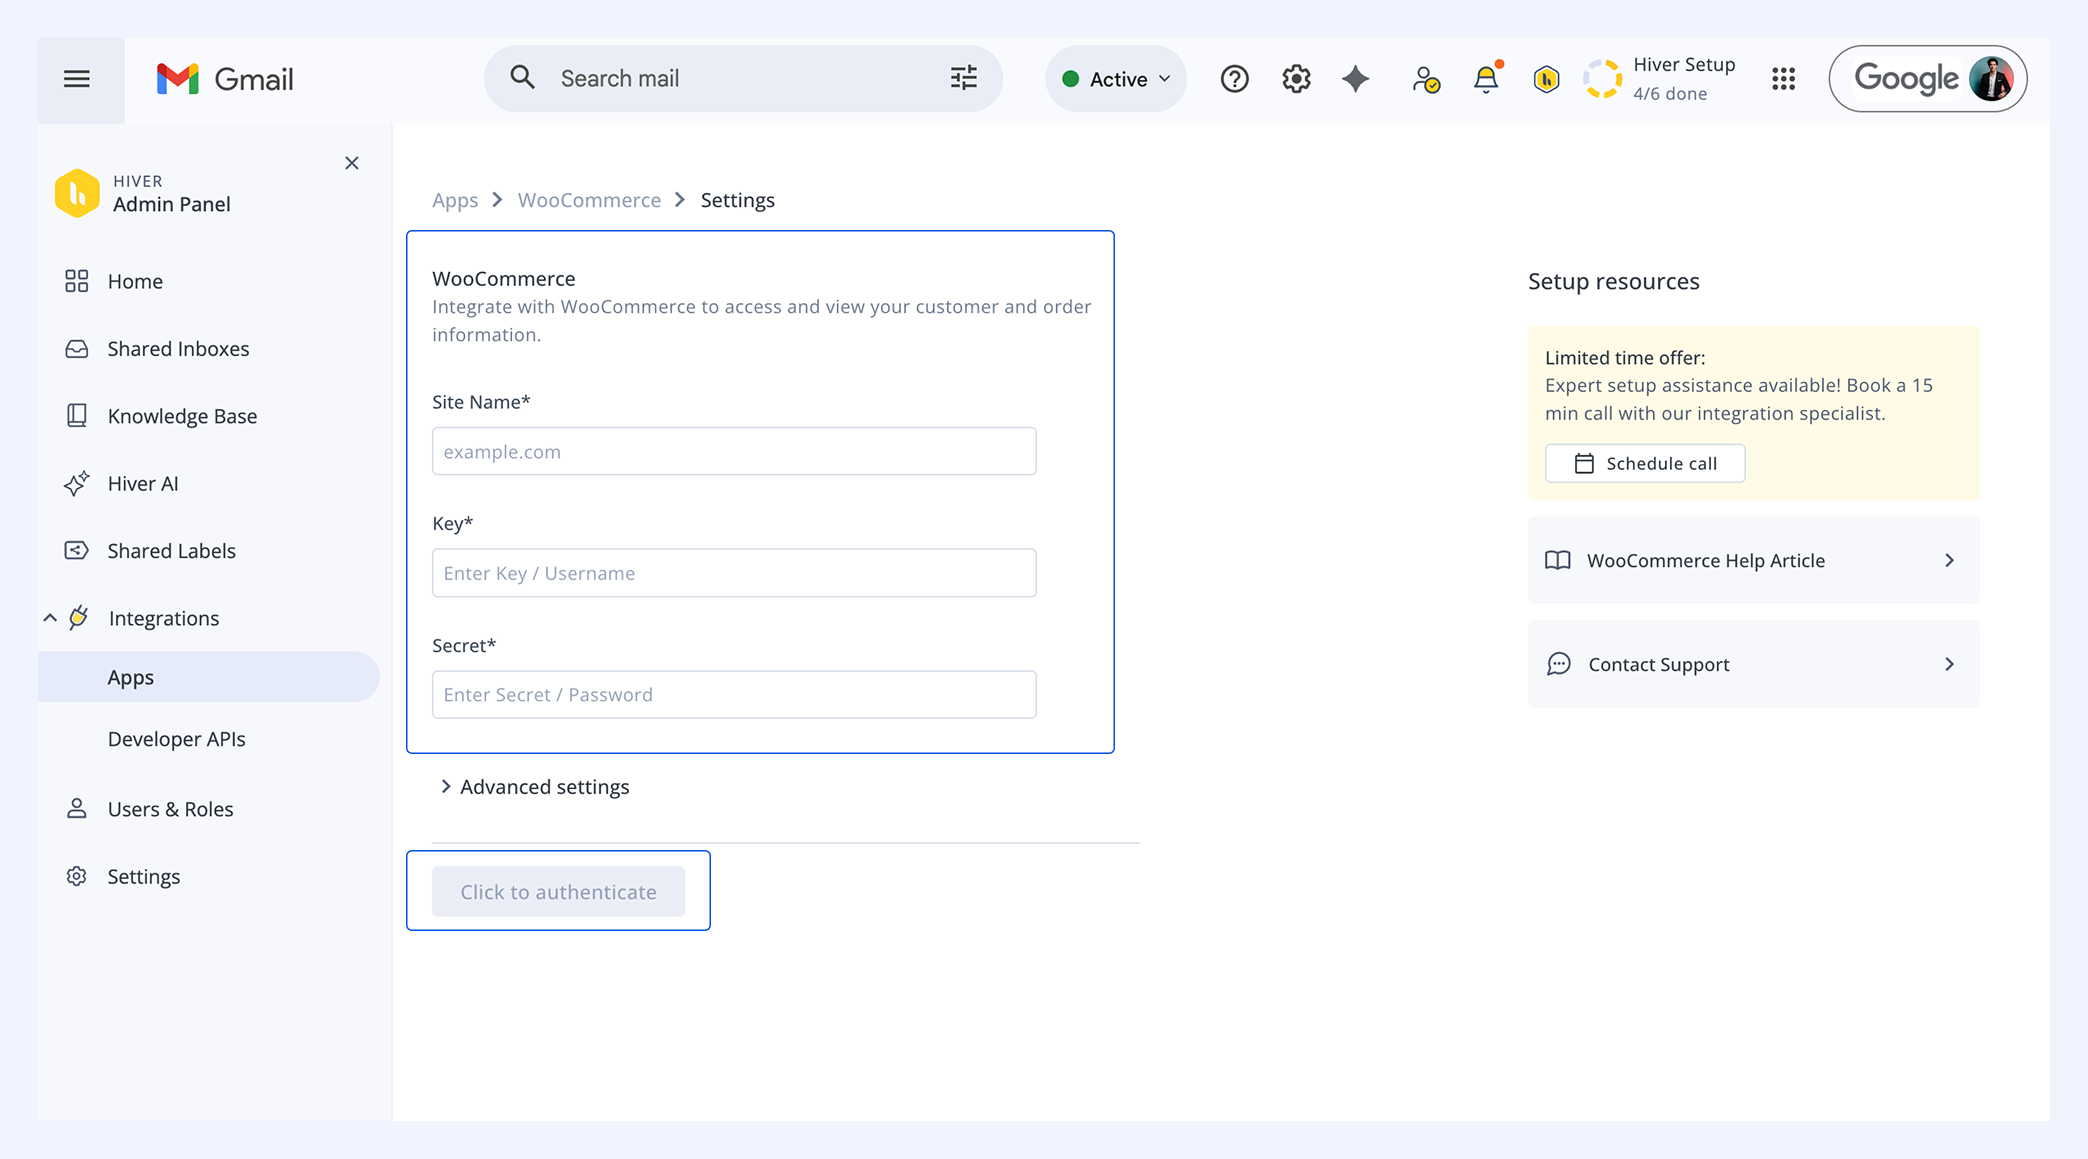
- Return to the WooCommerce App setup page in Hiver.
- Fill in the following details:
- WooCommerce site name
- This is the full URL of your WordPress site where WooCommerce is installed
- The URL must NOT include http:// or https:// (e.g., mystore.com, not https://mystore.com)
- The URL should not have a trailing slash at the end (correct: mystore.com, incorrect: mystore.com/)
- Key (Consumer Key from WooCommerce)
- Secret (Consumer Secret from WooCommerce)
3. Select Click to authenticate to finalize the connection.
Step 4: Enabling and using the integration
After successful authentication:
- Find WooCommerce under the Apps list and enable it using the toggle.
- You’ll see two data cards:
- Customer Info
- Order Info
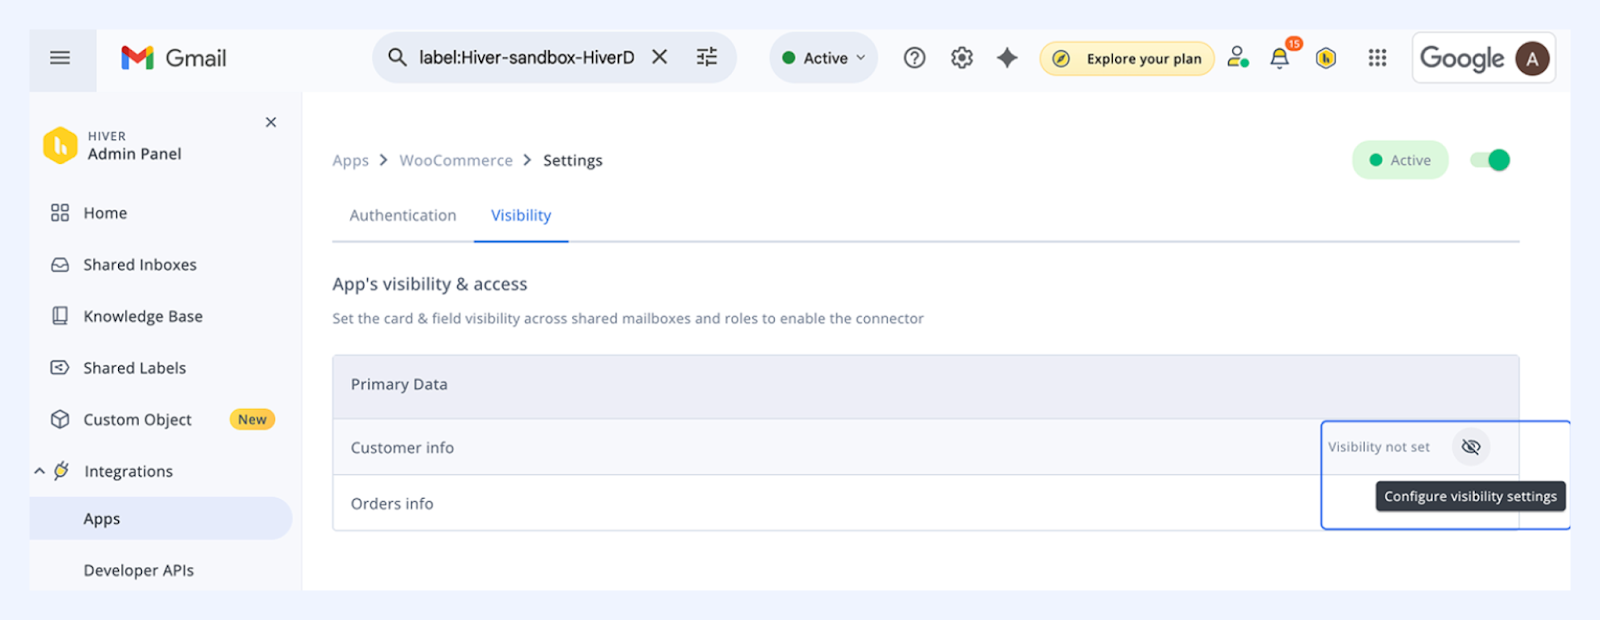
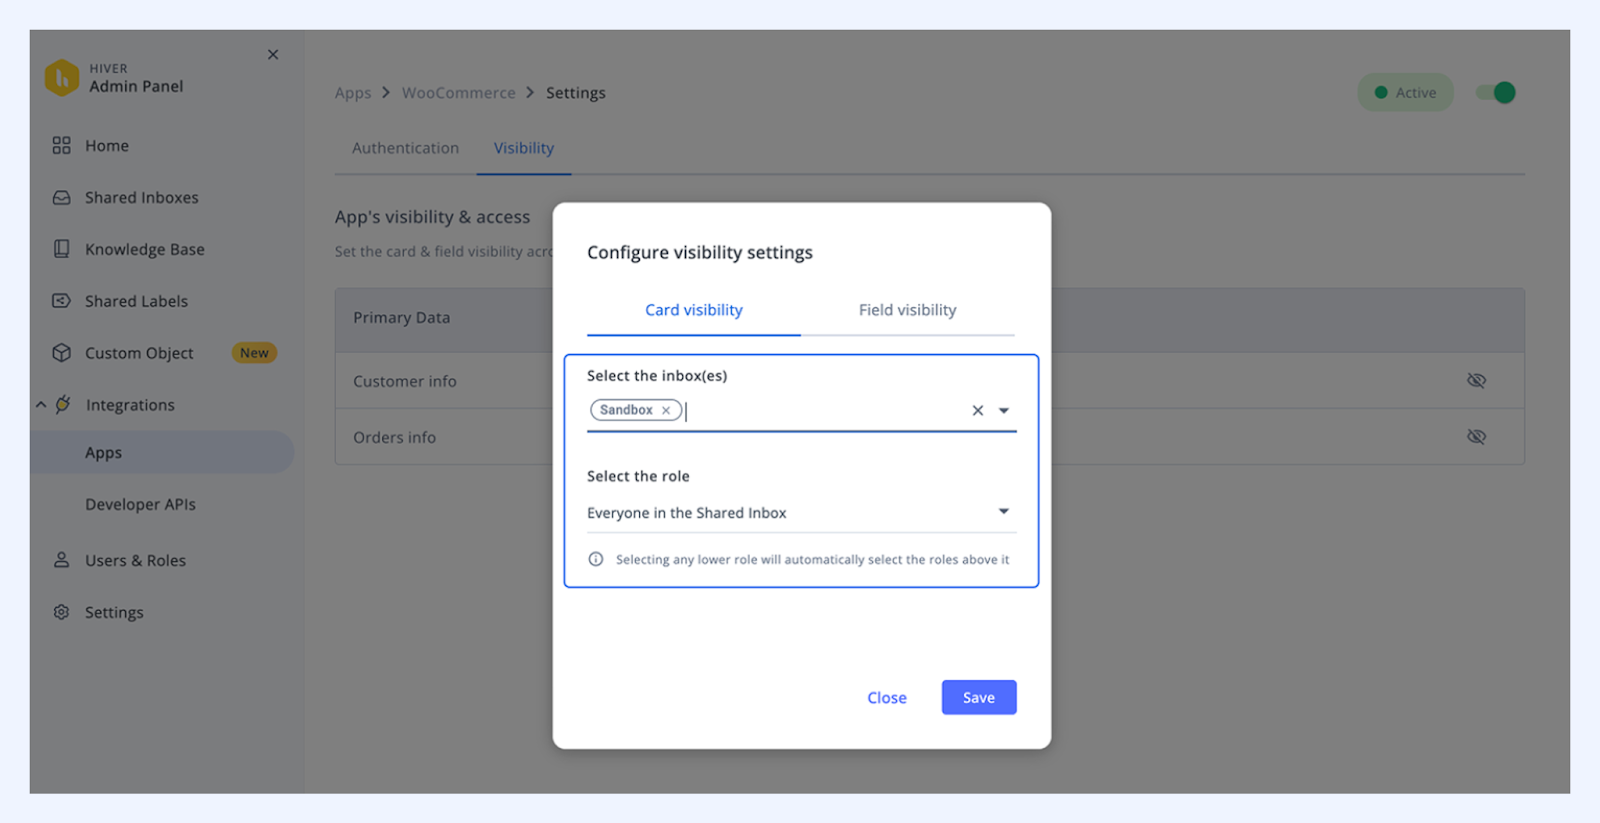
3. Adjust visibility settings:
- In Card visibility, choose the where and for whom the WooCommerce information should be displayed.
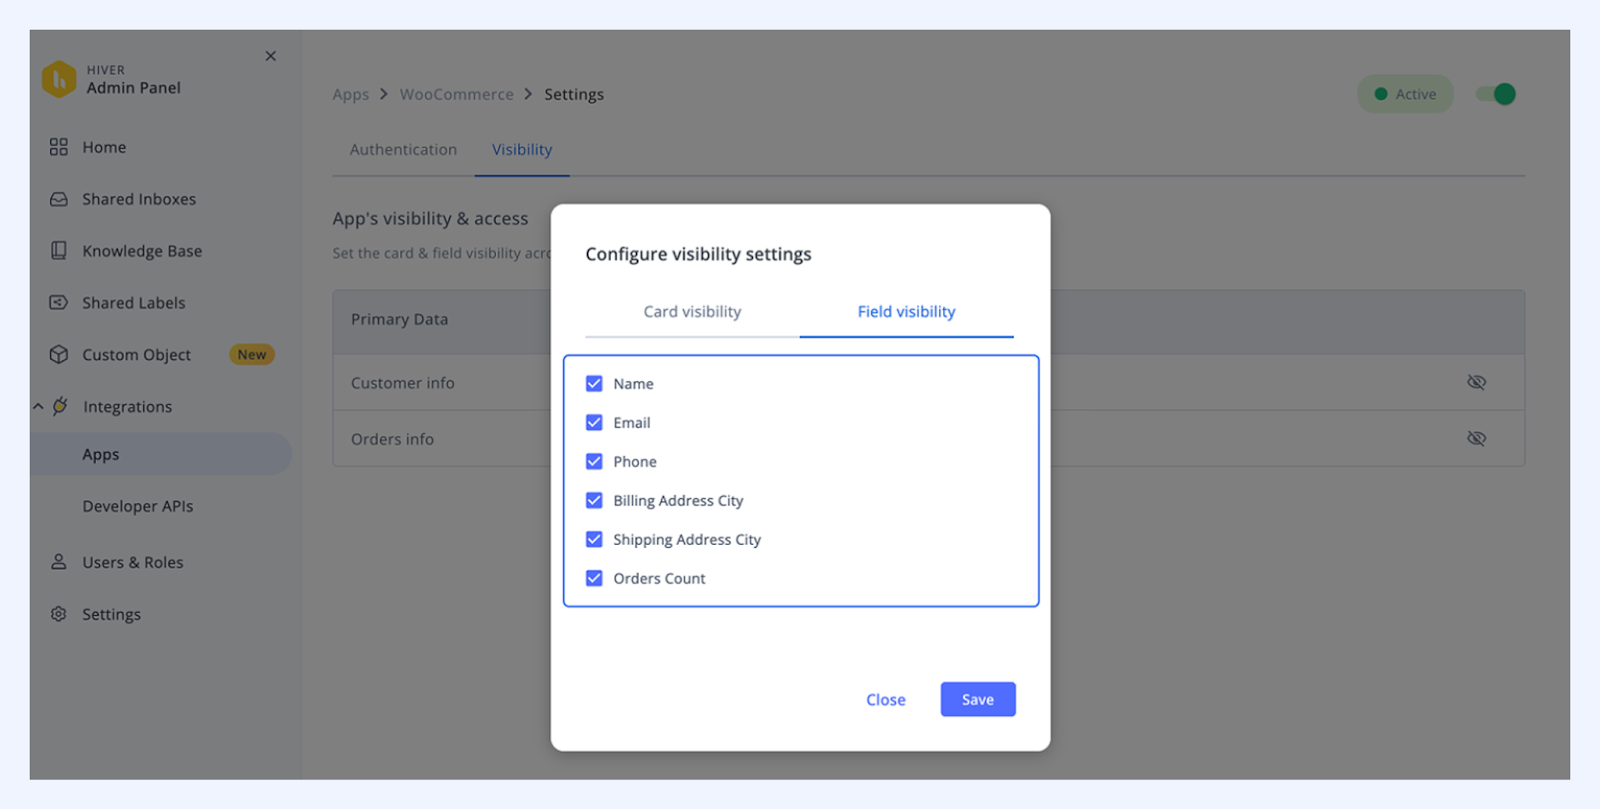
4. In Field visibility, choose which fields to display in each card, then save.
Accessing WooCommerce data in Hiver
Once enabled:
- The Apps tab in Hiver displays Customer Info and Order Info cards.
- Customer data automatically matches the sender’s email address.
- Order details linked to that customer appear in an organized view.
- Use direct links to open the corresponding record in WooCommerce for detailed actions.
Need help?
If you experience issues during setup or usage, contact Hiver Support for 24/7 assistance with configuration, troubleshooting, or customization.