Shopify Integration with Hiver
Shopify is a leading e-commerce platform that powers millions of online stores worldwide, helping businesses manage their online presence, orders, and customer relationships.
While Shopify excels at e-commerce management, customer communications often flow through multiple channels, including email, which is where Hiver’s integration comes in.
Integrating Shopify with Hiver bridges the crucial gap between your e-commerce data and email communications, providing your support team with a unified view of customer interactions. This integration helps your team:
- Get complete customer context: Access customer information, order history, and purchase details right beside your customer emails.
- Improve response quality: Make informed decisions with full context about the customer's shopping history.
- Enhance productivity: Eliminate the need to switch between tools while handling customer communications.
- Streamline workflows: Enable agents to focus on customer interaction rather than hunting for order information.
Supported capabilities
The Shopify-Hiver integration enables your team to:
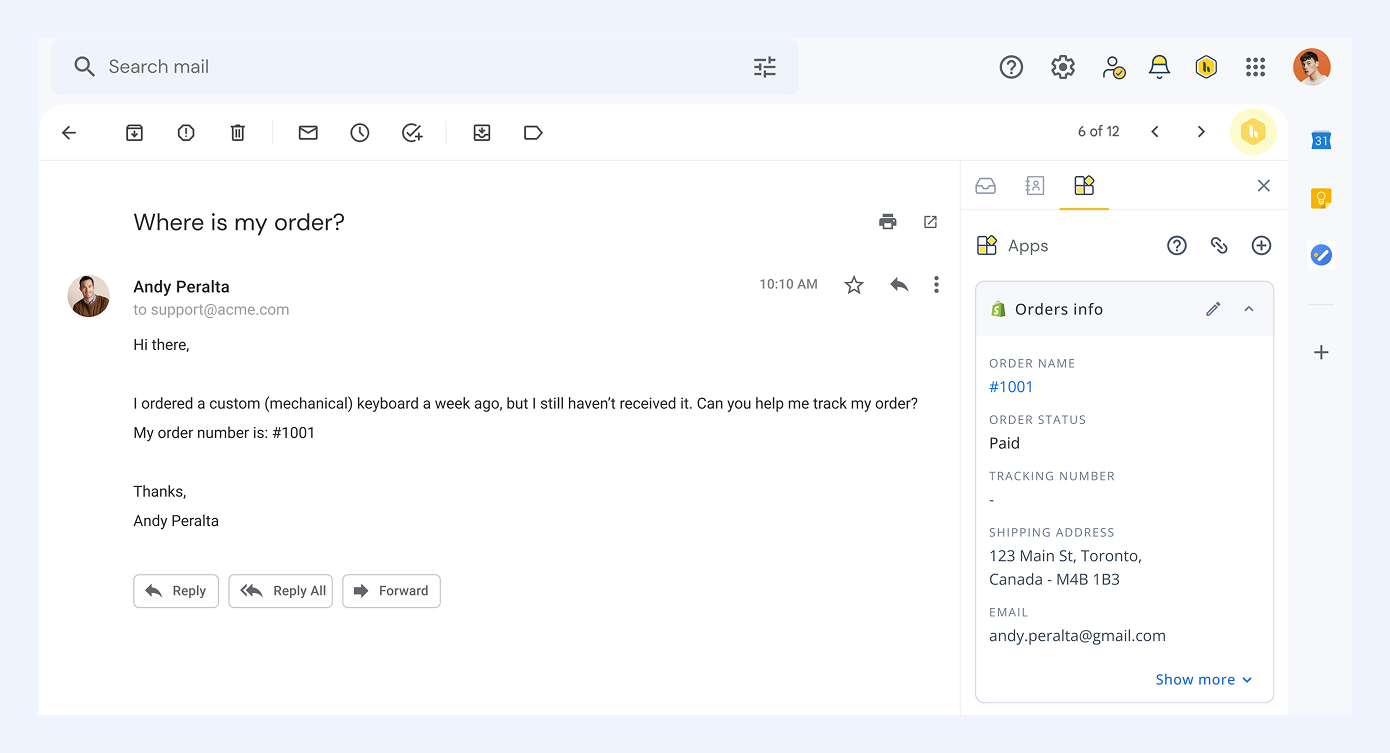
- View the following details from Shopify right beside the relevant customer email in Hiver:
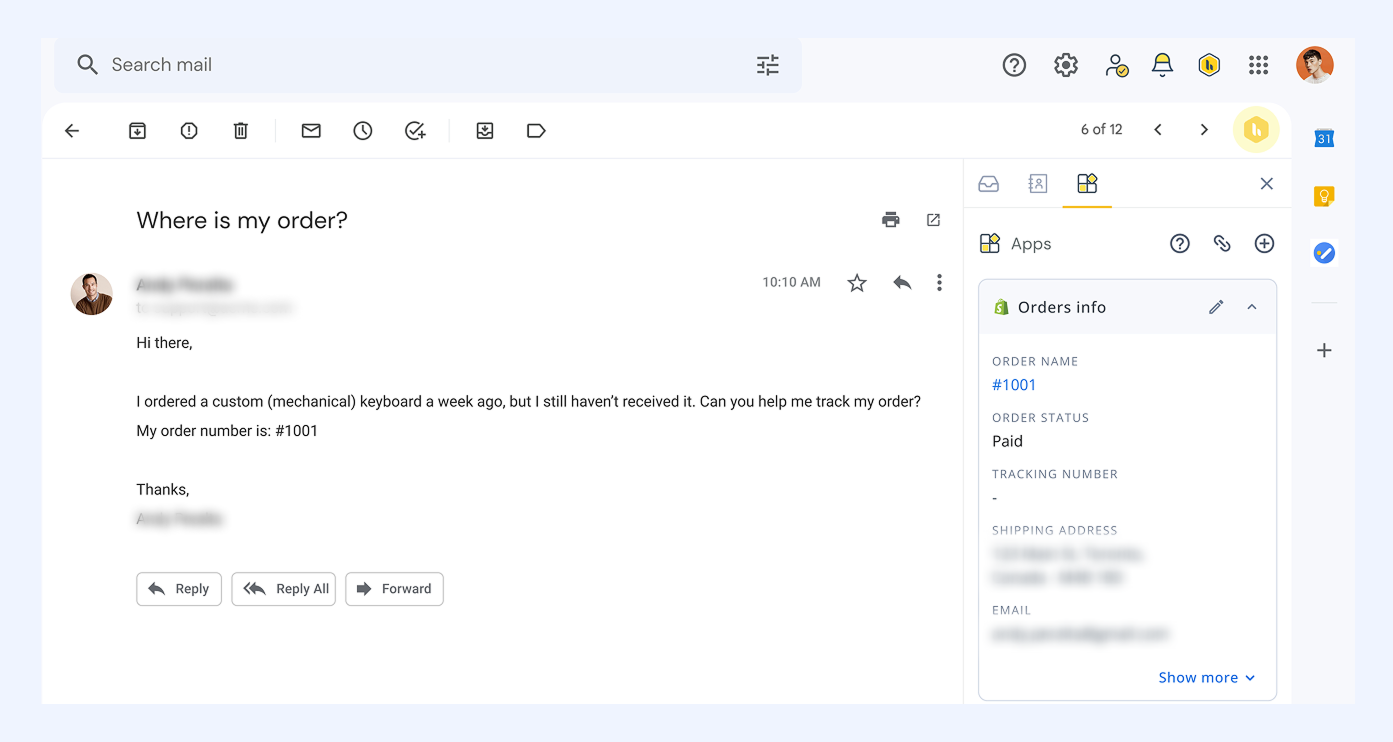
- Orders info including order name, status, tracking number, shipping address, and more.
- Line item details you’ve set up to collect additional customer information.
- Customer info including name, email, last order, total orders, and more.
- Use the direct links in information cards to quickly view the related entity in Shopify.
- Search for Shopify details in Hiver to find what you need quickly.
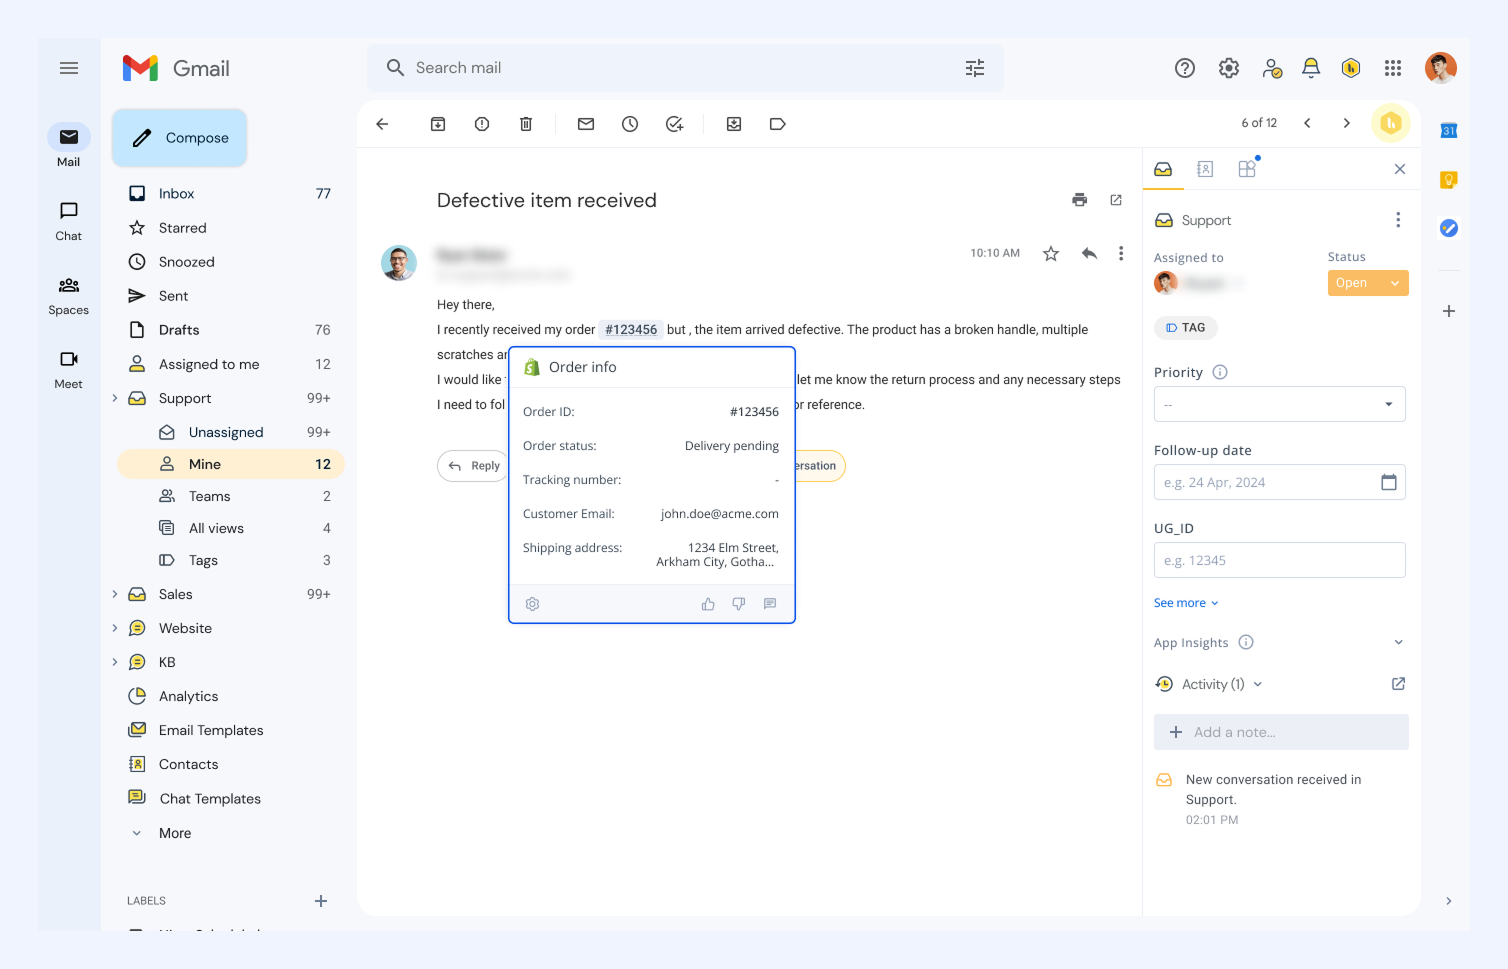
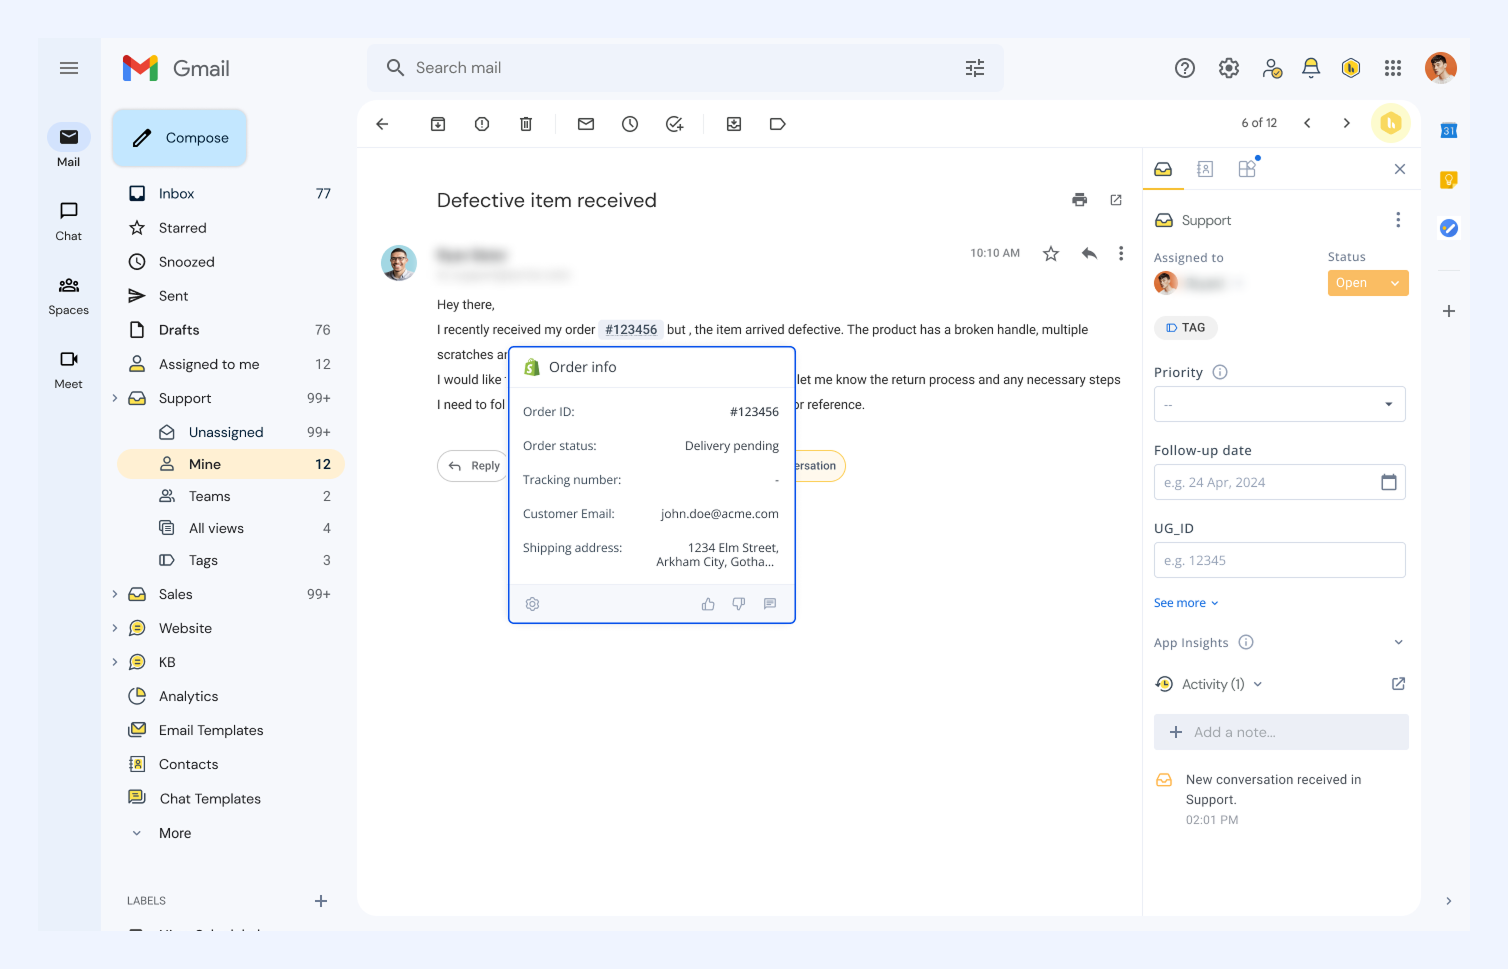
- Hover over order numbers in emails to instantly preview relevant details from Shopify.
Prerequisites for integrating Shopify
Before you begin, make sure you have:
- Administrative access to both Hiver and Shopify
- Permission to create custom apps in Shopify
- A Shopify store URL
Connect Shopify to Hiver
Before you create your Shopify app, you need to get the Redirect URL from Hiver first.
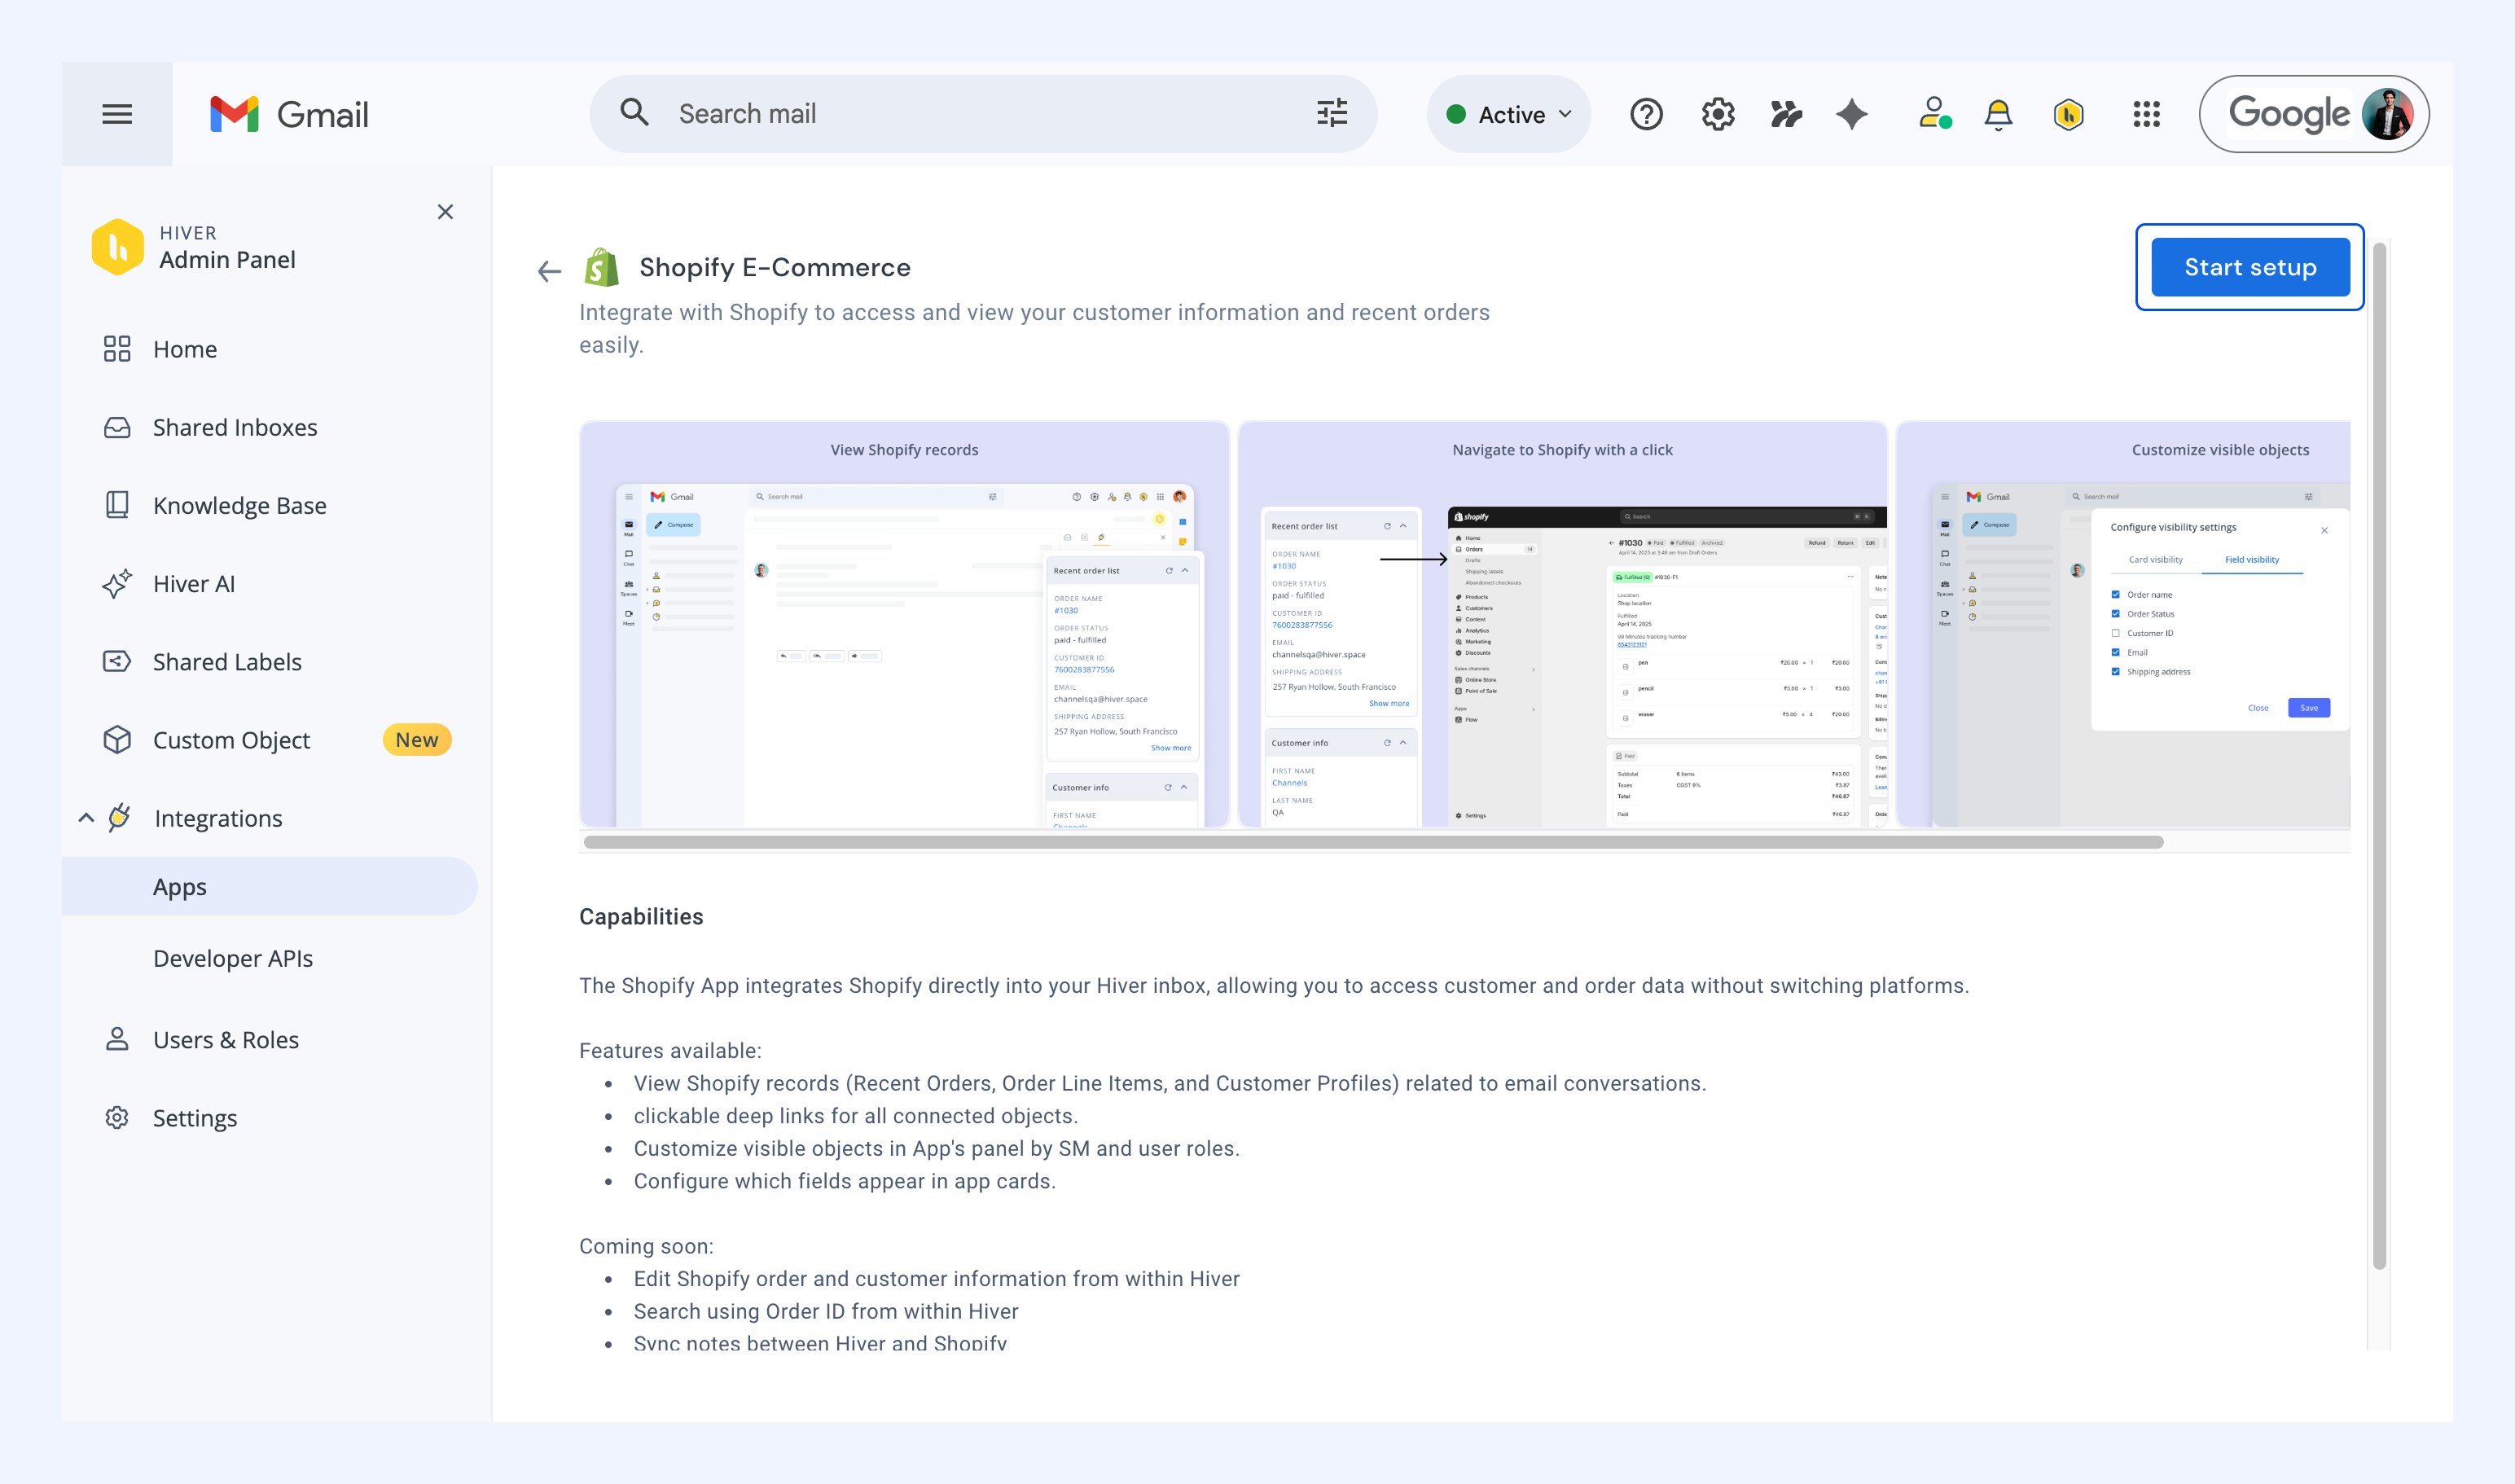
1. In Hiver, navigate to Admin Panel → Integrations → Apps.
2. Find and select Shopify E-Commerce.
Note: You may see the name of the app show up as Shopify.
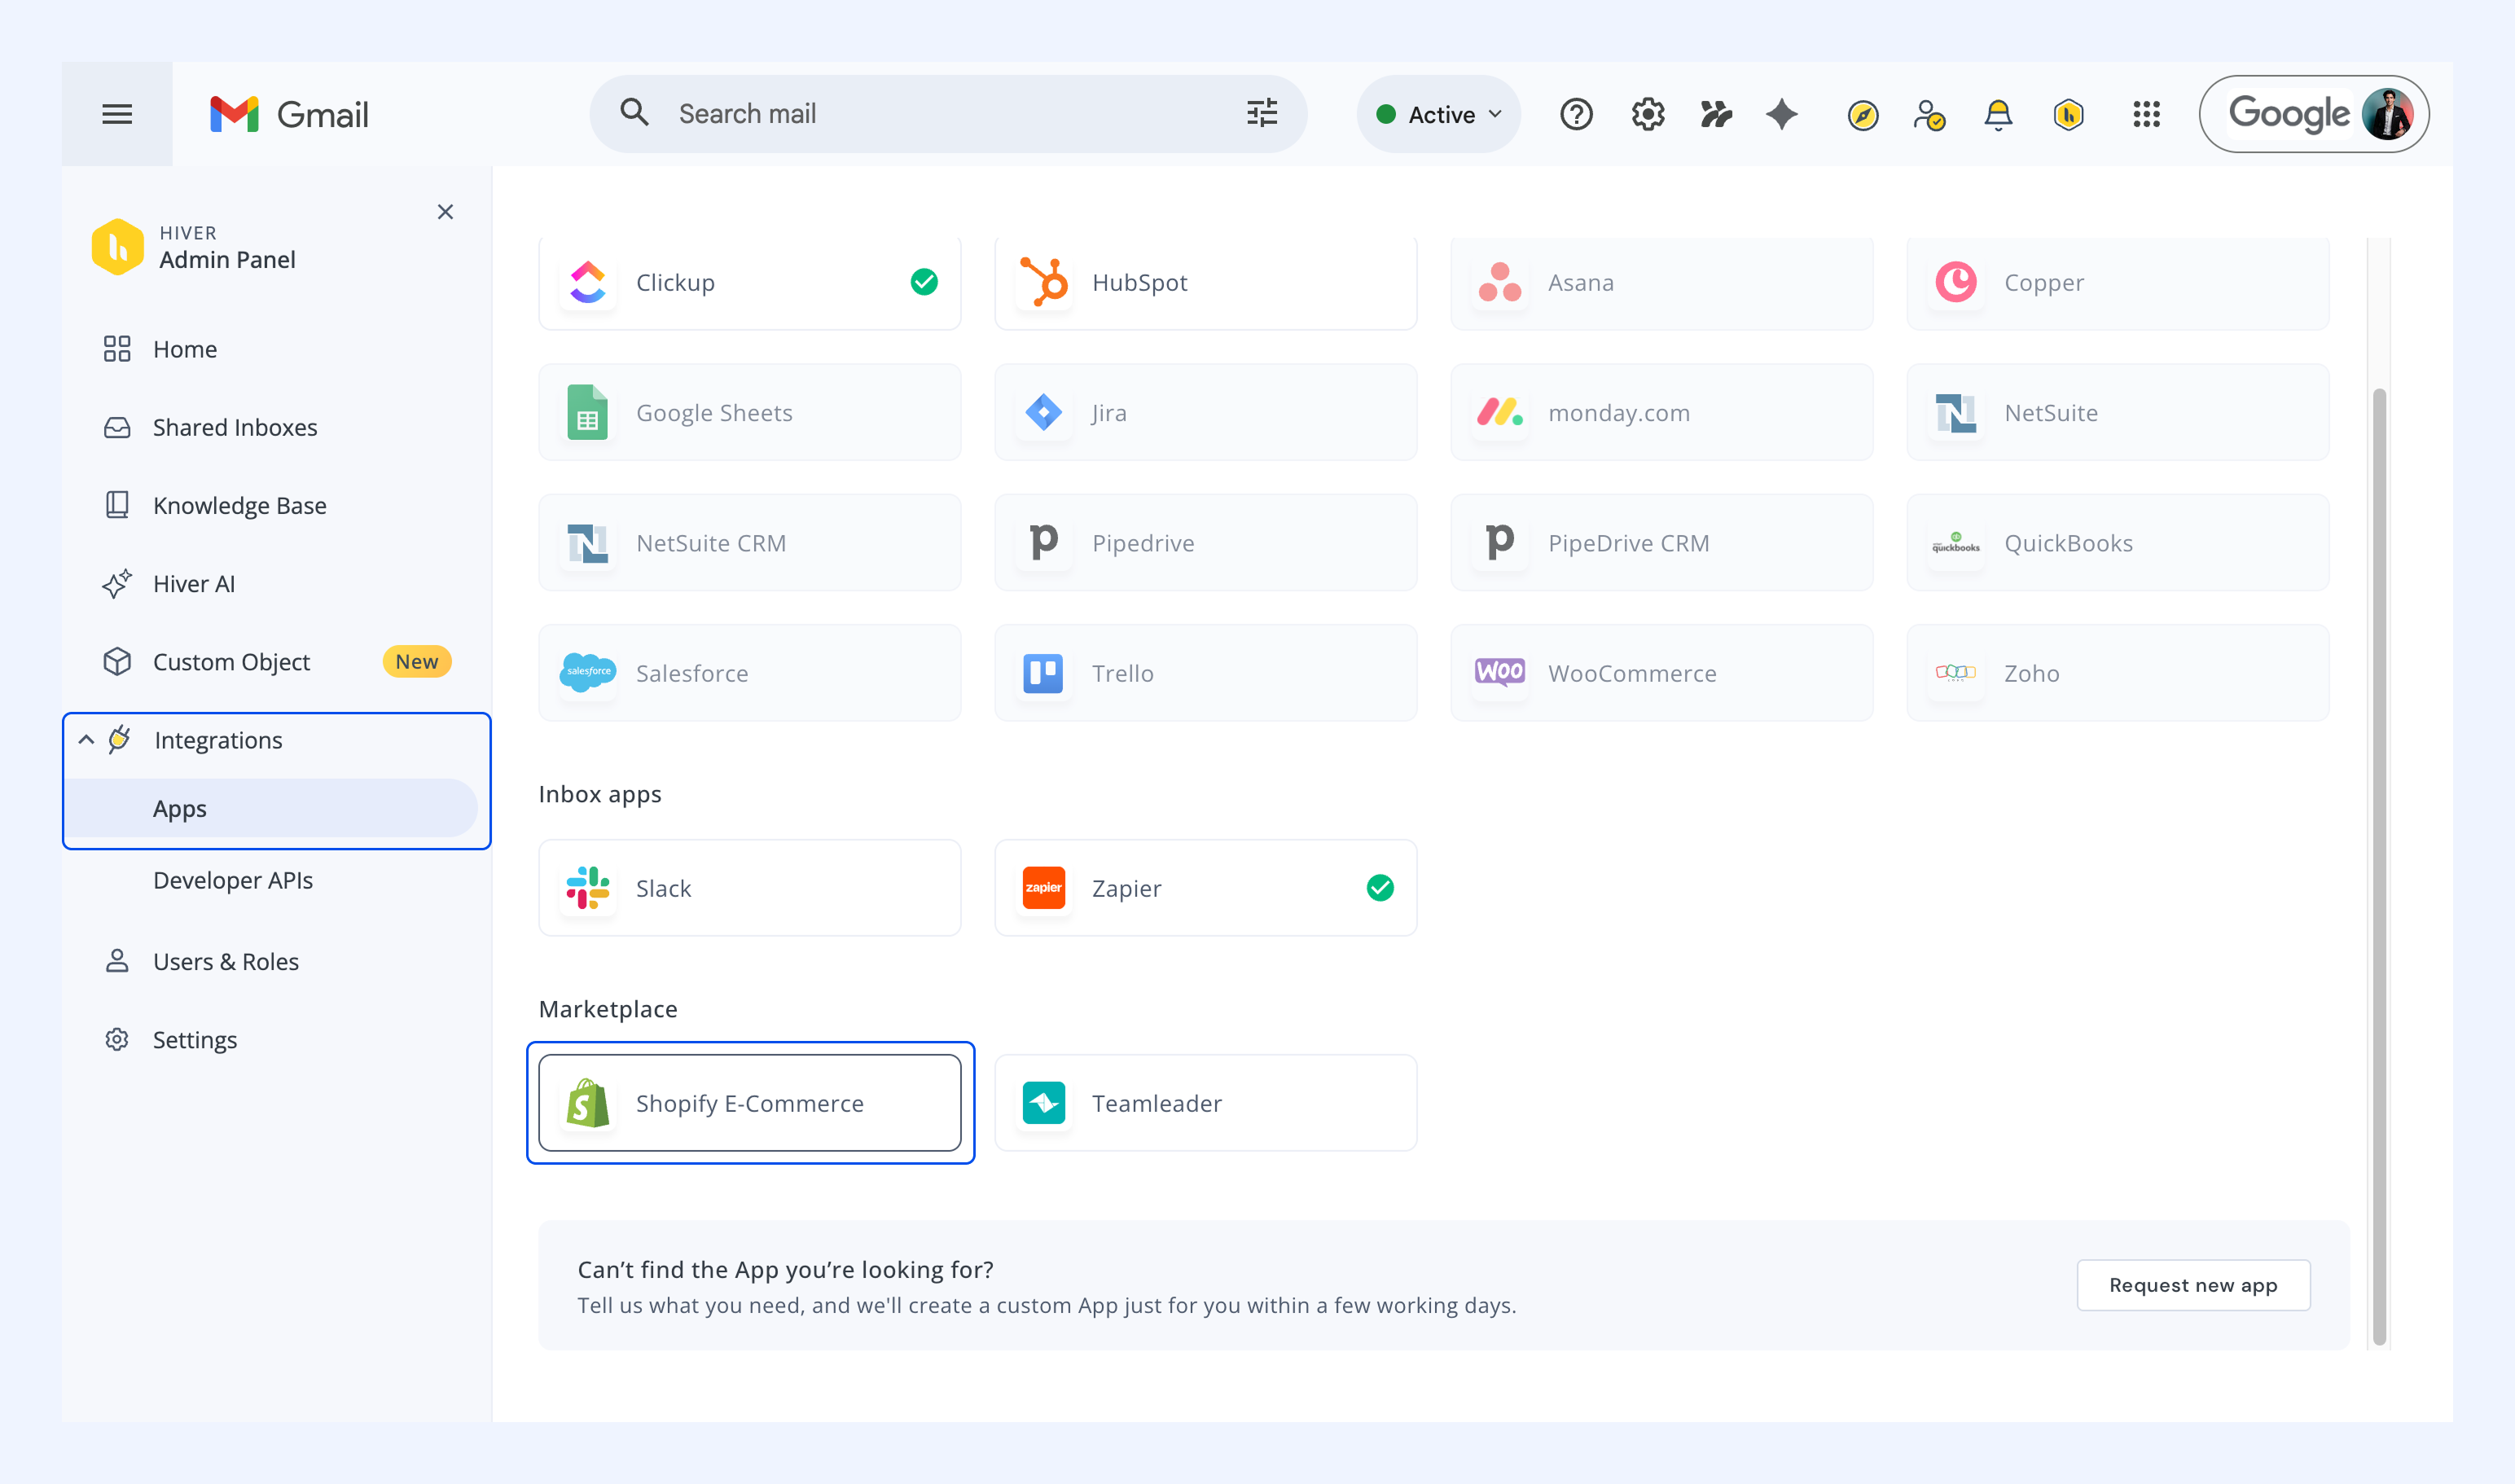
3. Review the capabilities of the integration and click Start setup.
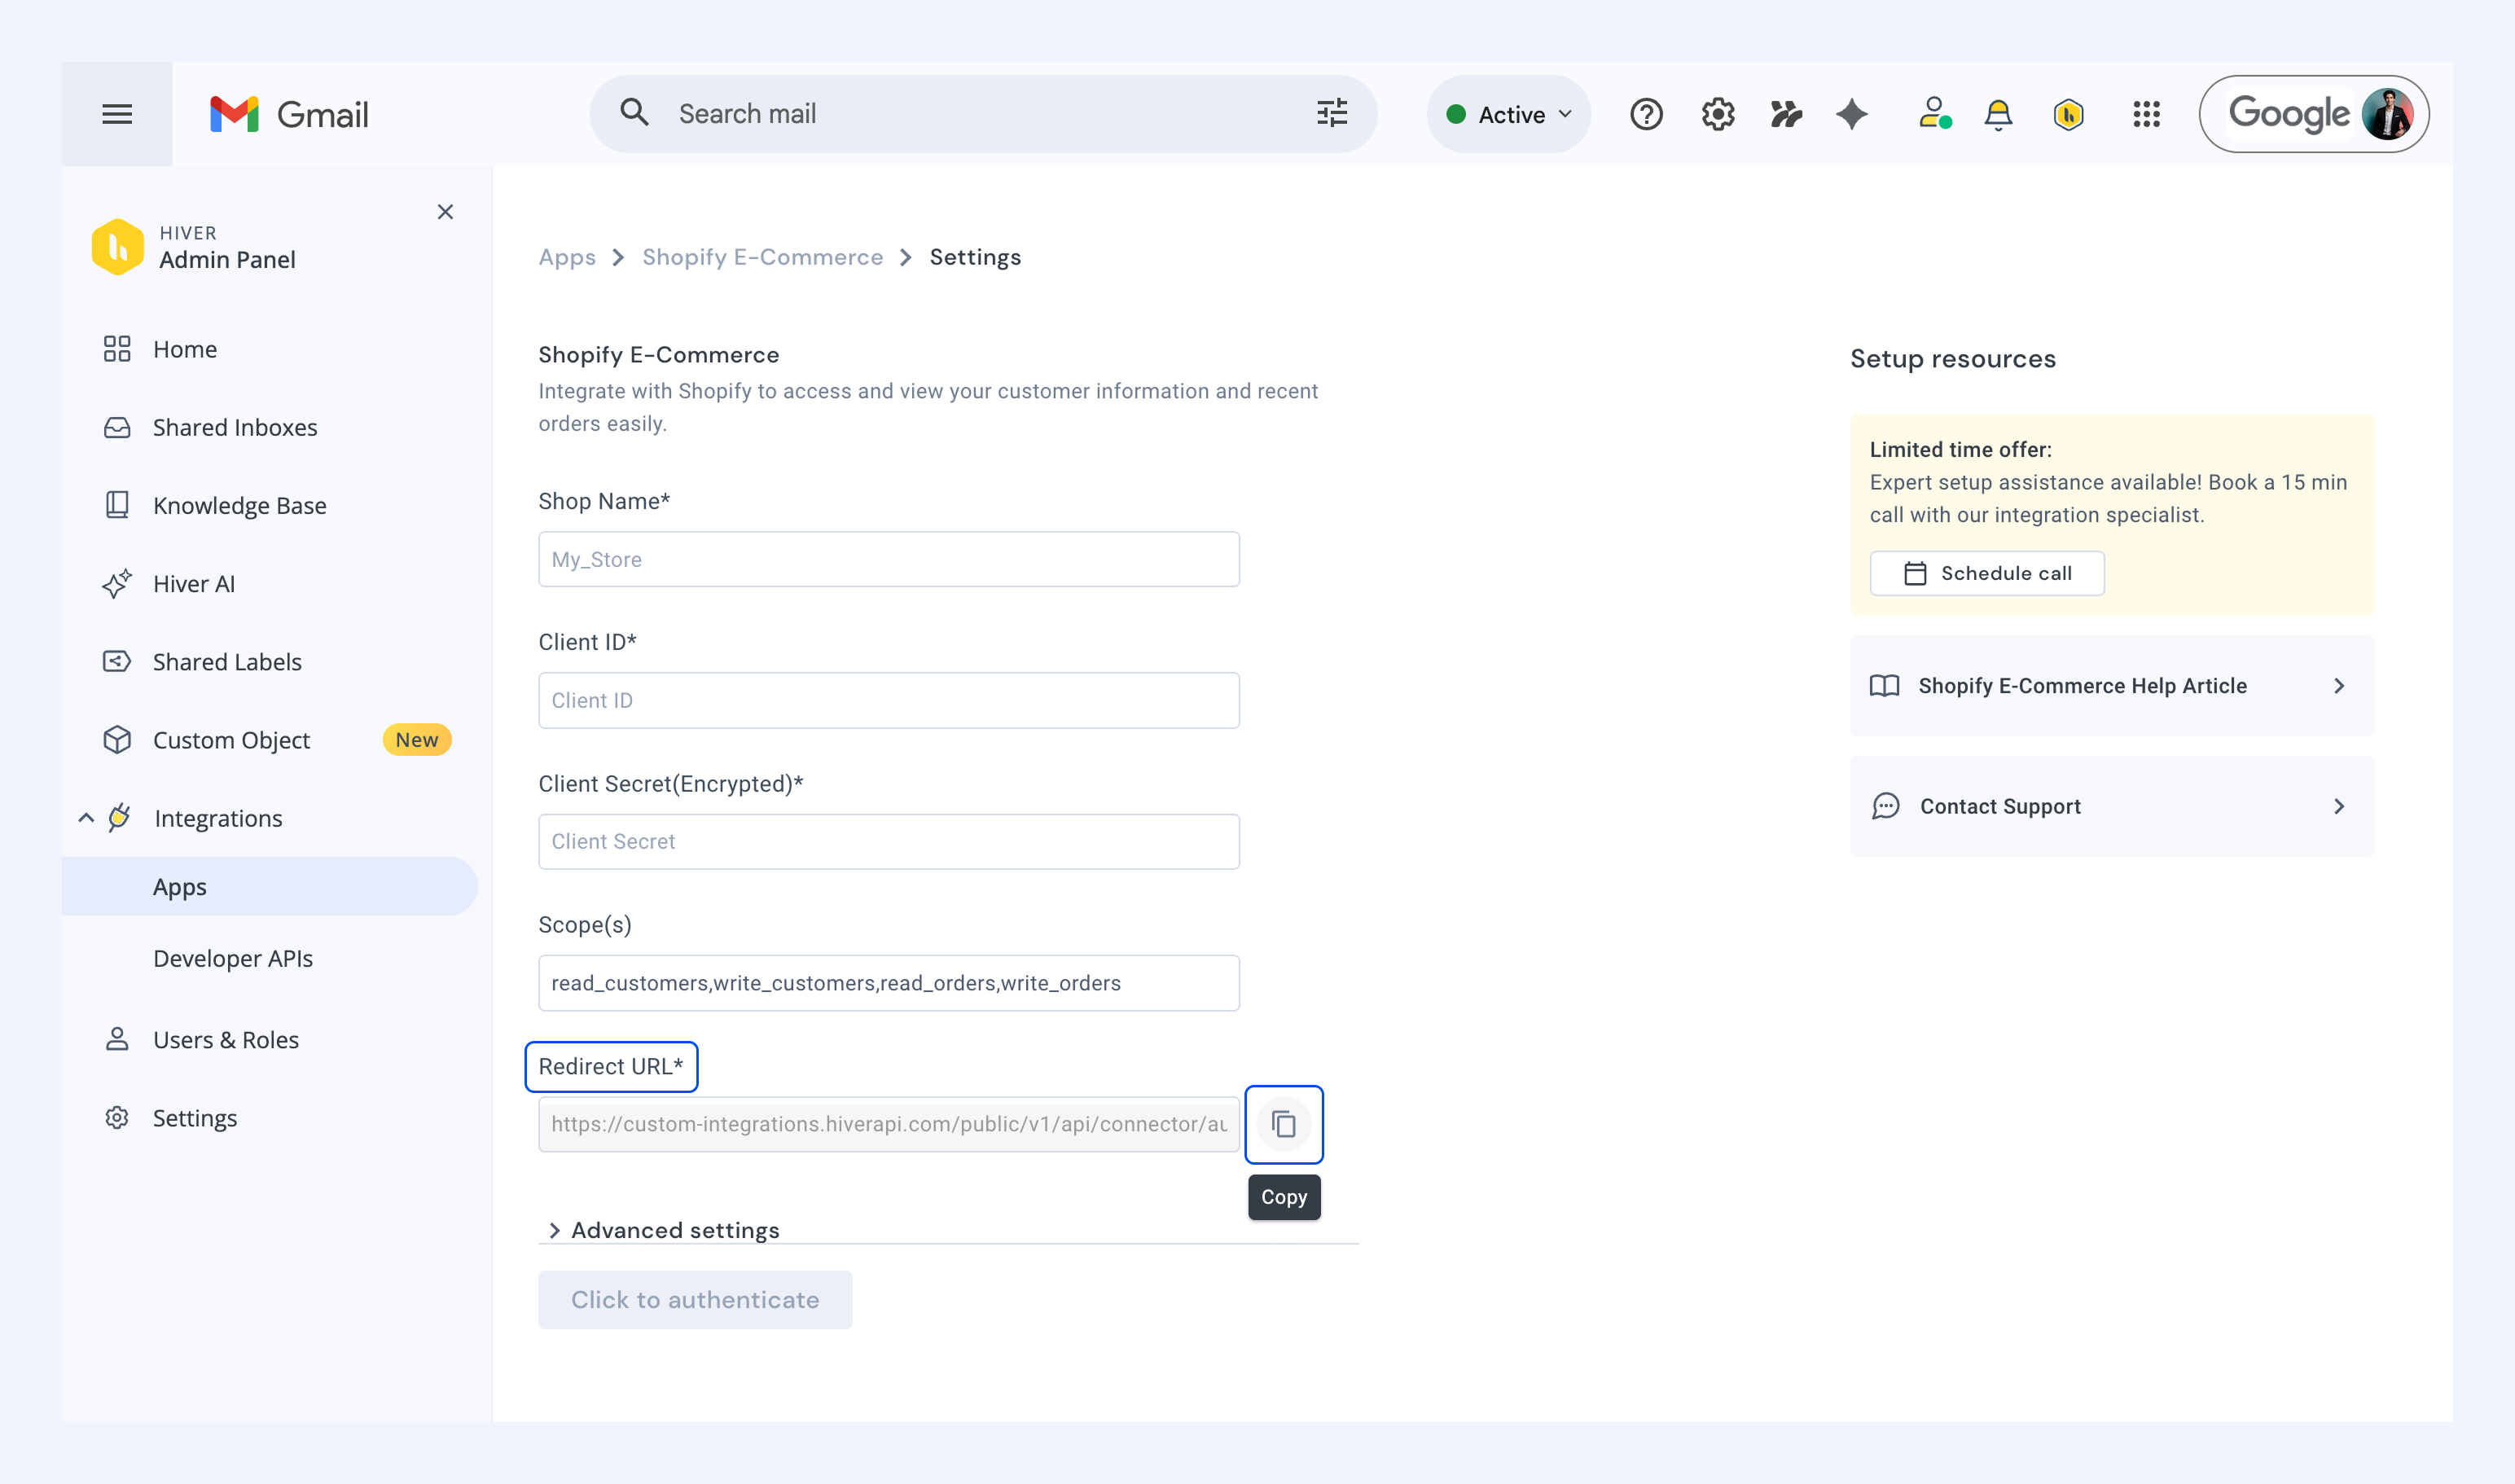
4. On the setup screen, copy the Redirect URL.
Note: Keep this URL handy, you'll need to paste it into your Shopify app configuration in the next section.
Setting up the Integration
Step 1: Create your app
1. Go to https://dev.shopify.com/dashboard and log in using your Shopify account credentials.
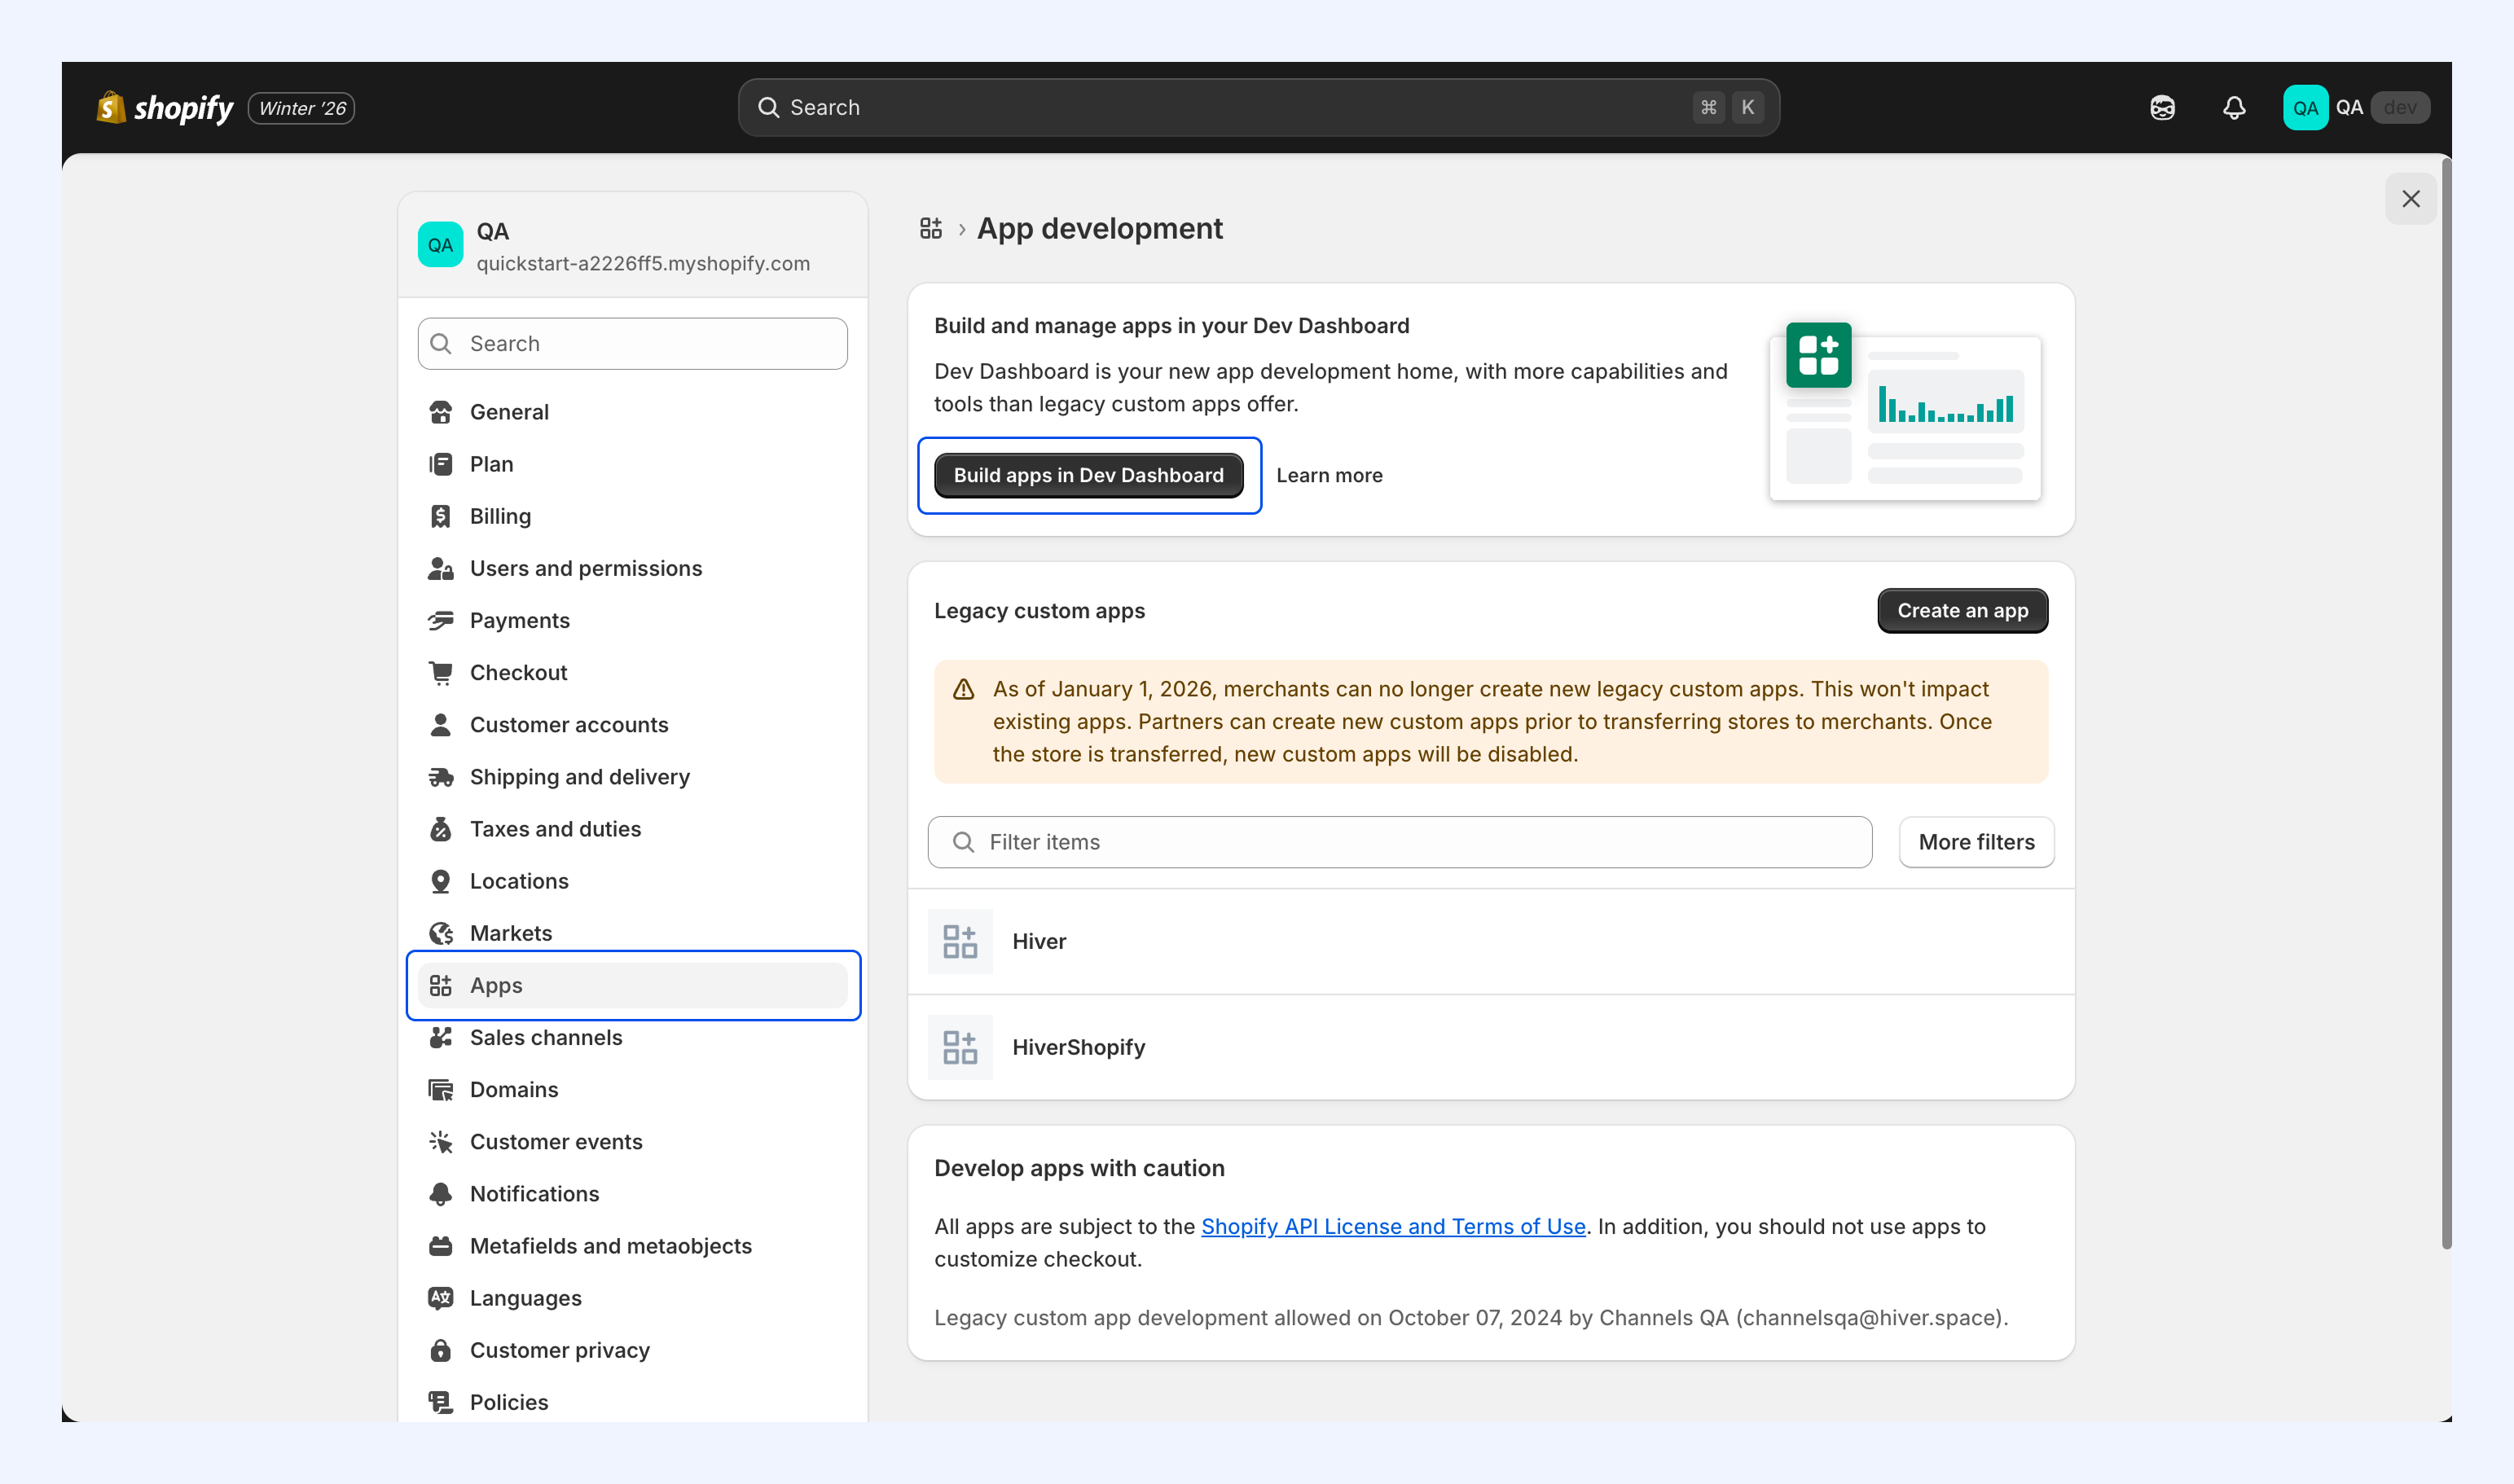
Alternatively, you can access the developer dashboard from Apps → Build apps in Dev Dashboard in your Shopify admin.
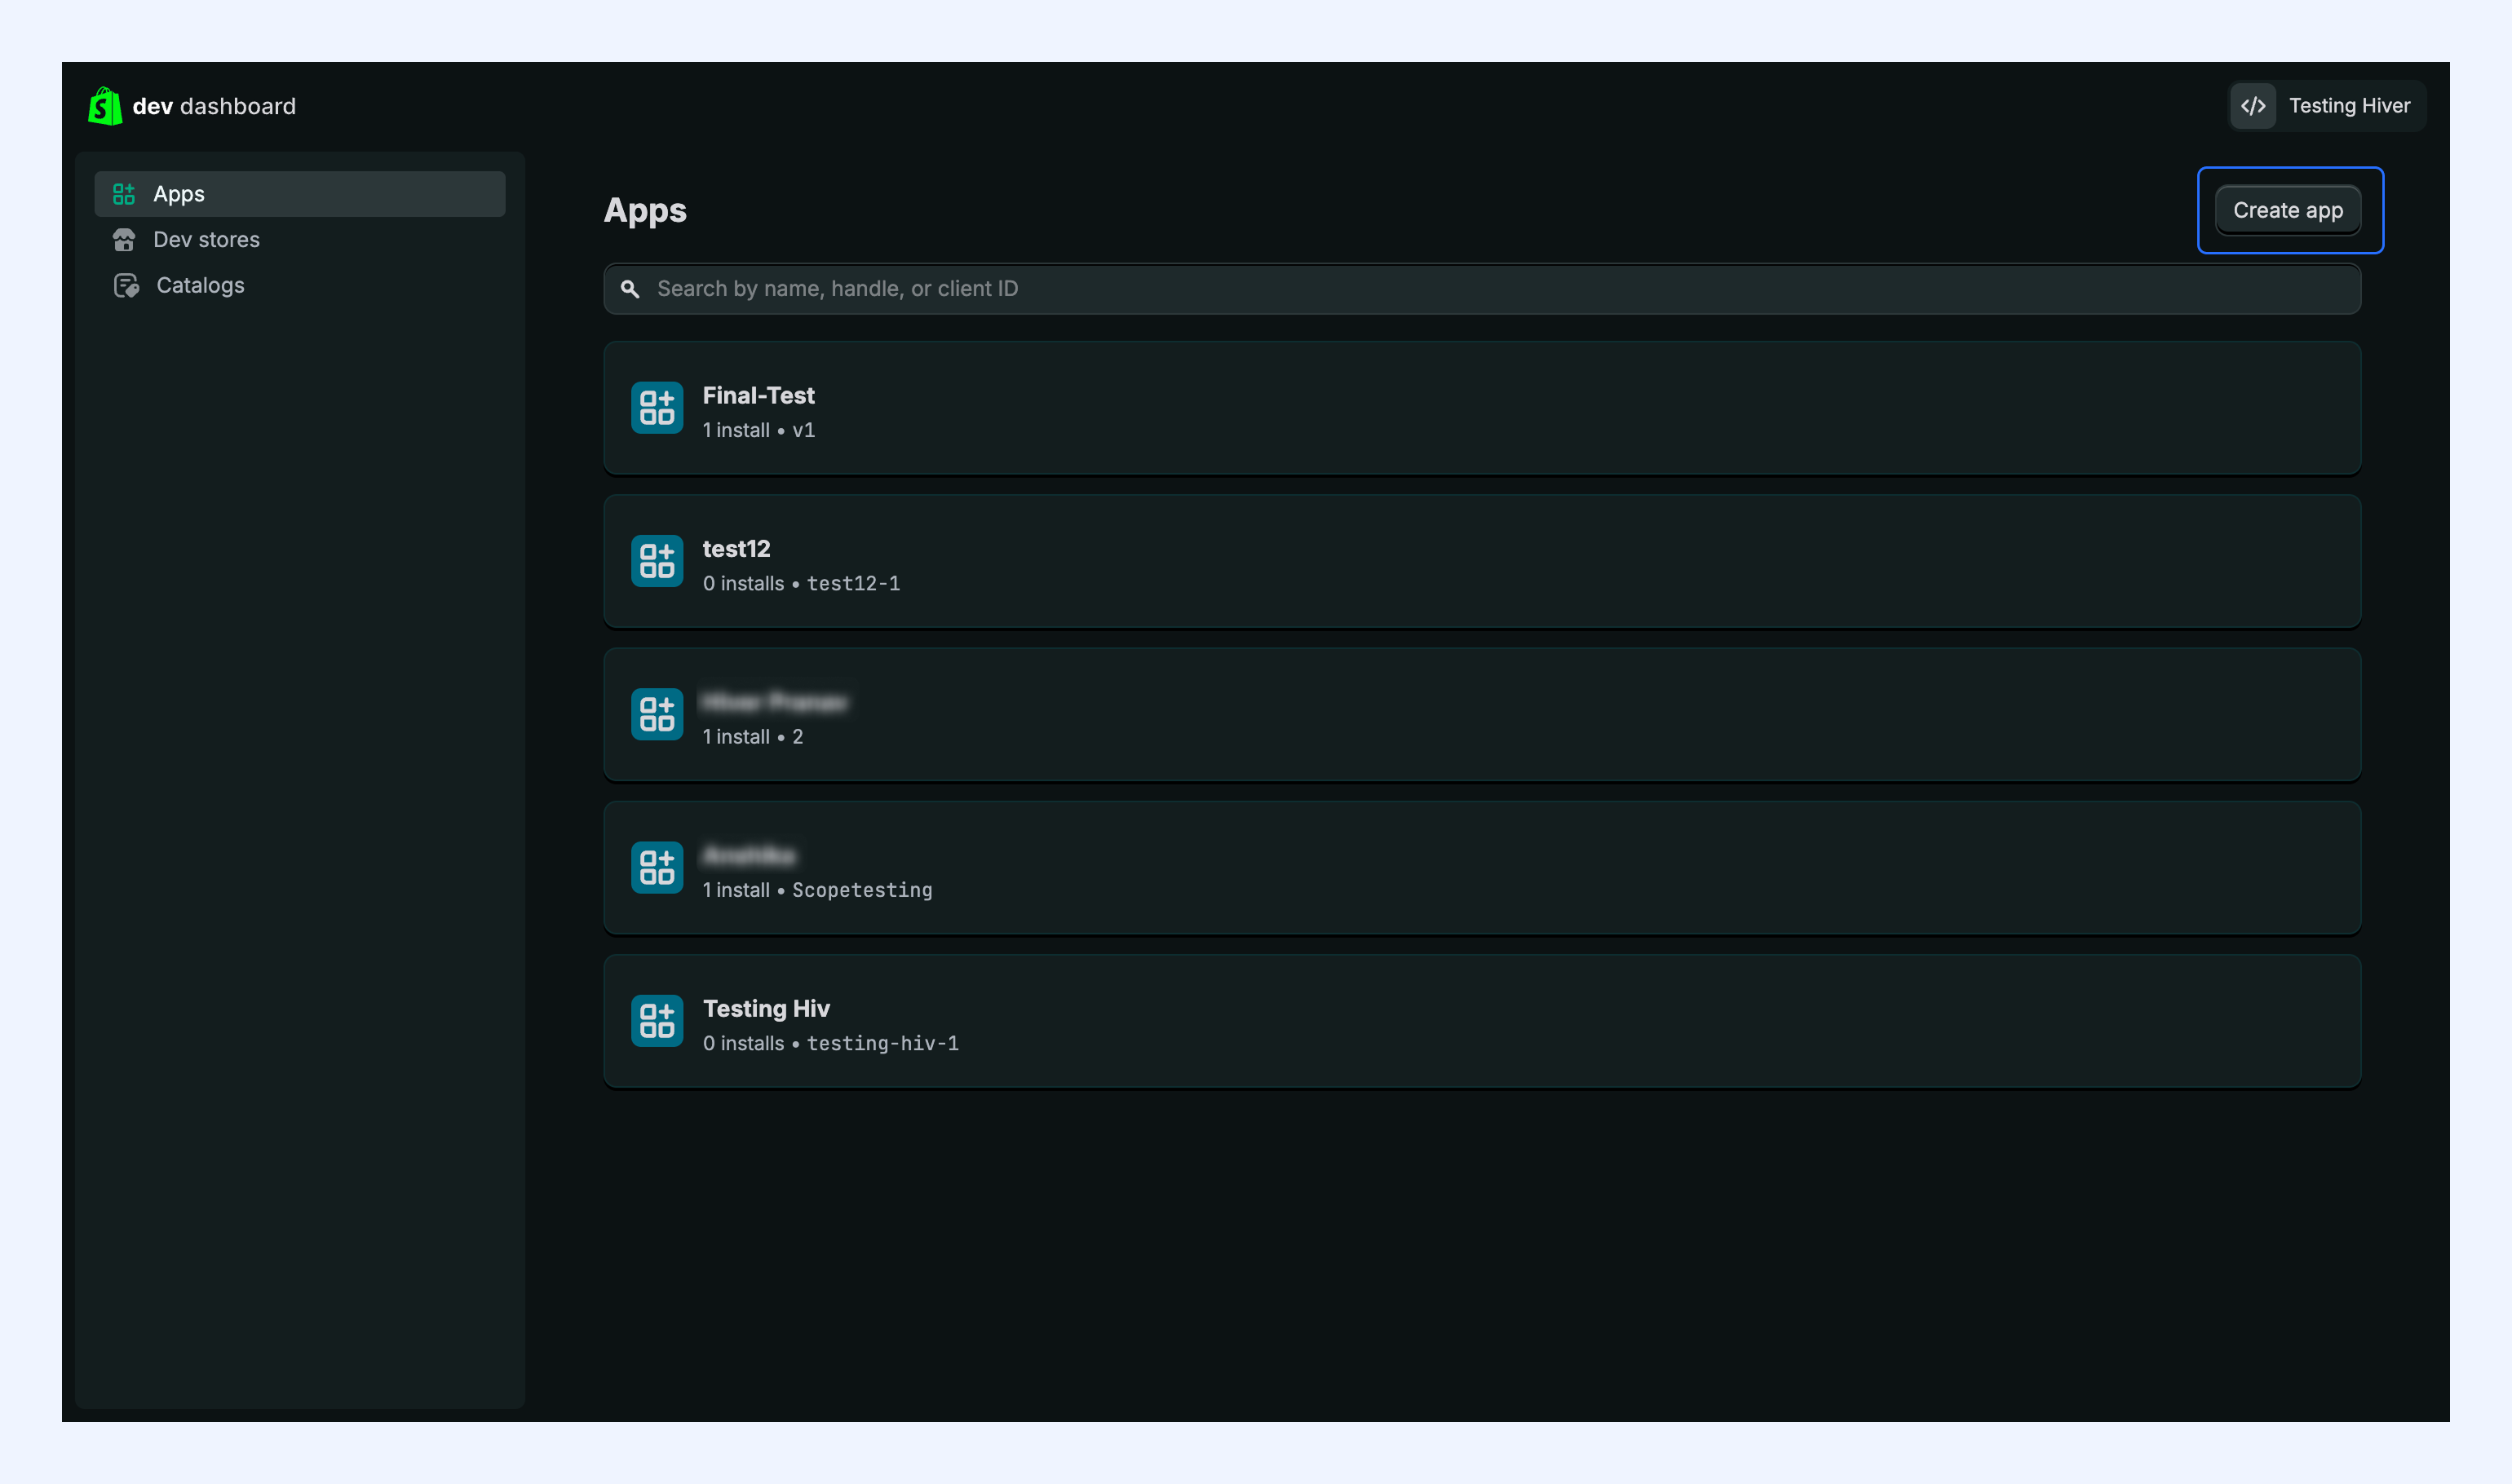
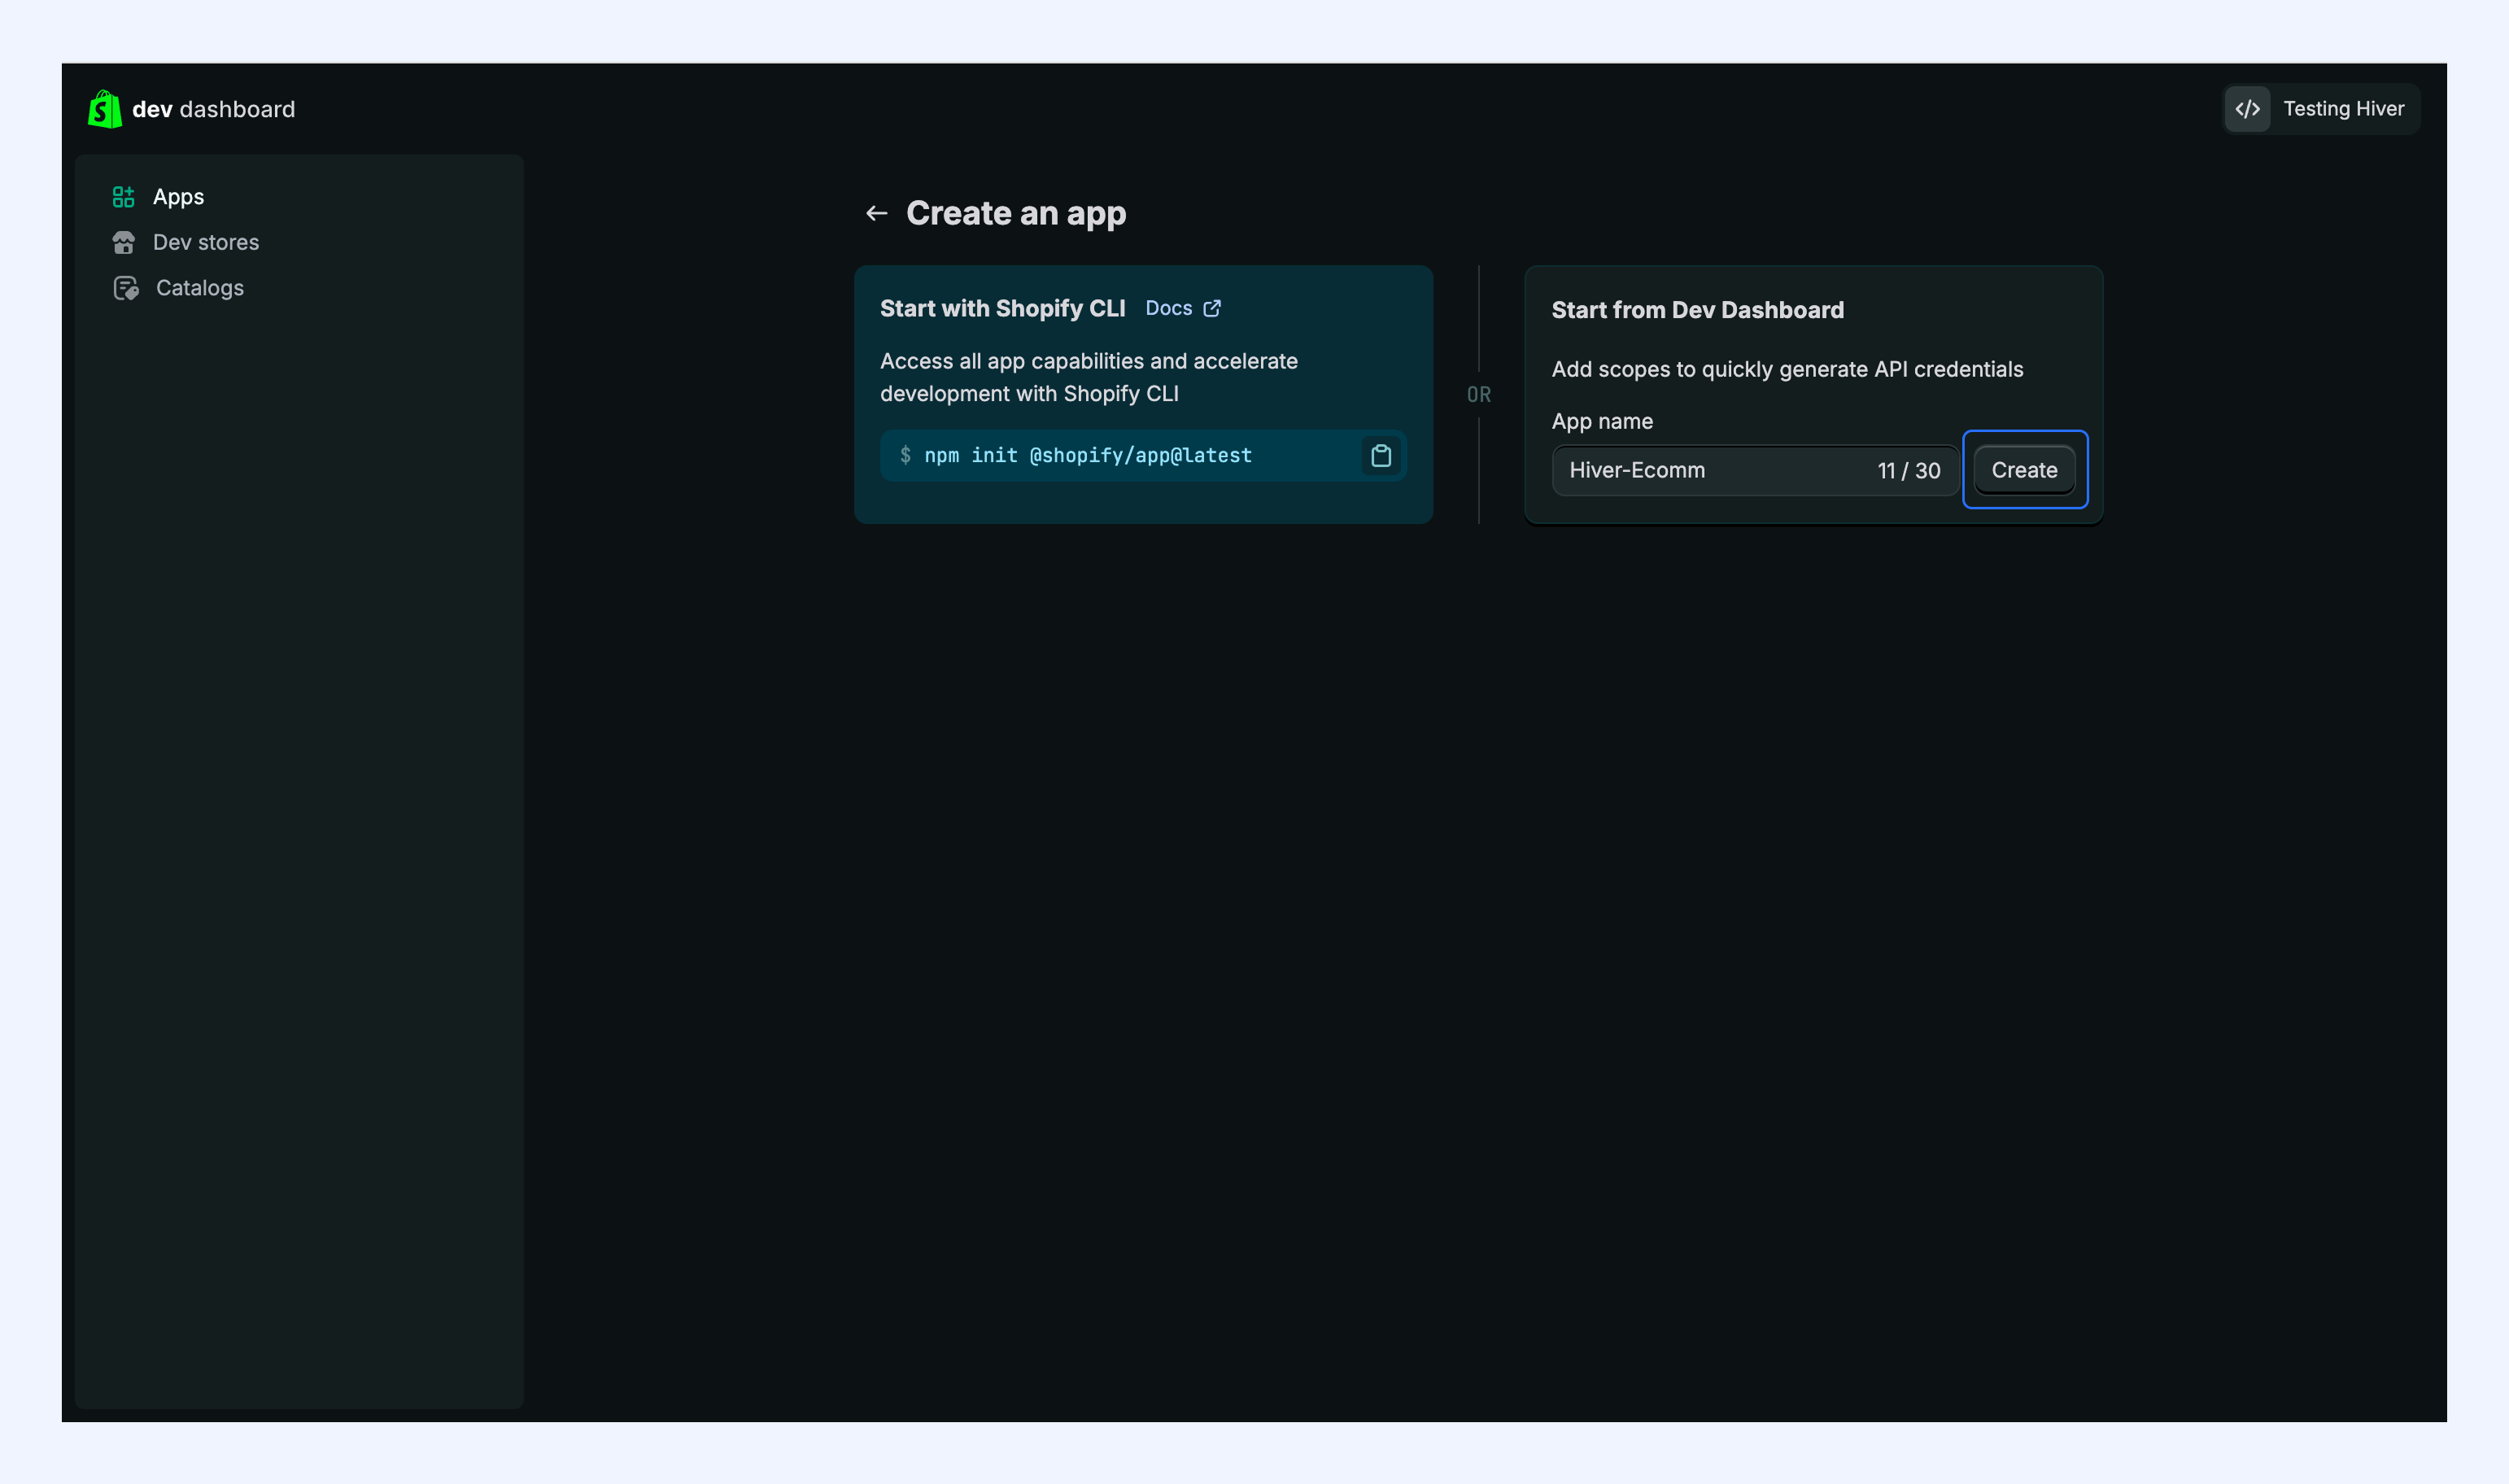
2. Click Create app in the developer dashboard.
3. Select Start from Dev Dashboard.
4. Enter a descriptive name for your application.
5. Click Create.
Step 2. Configure API scopes
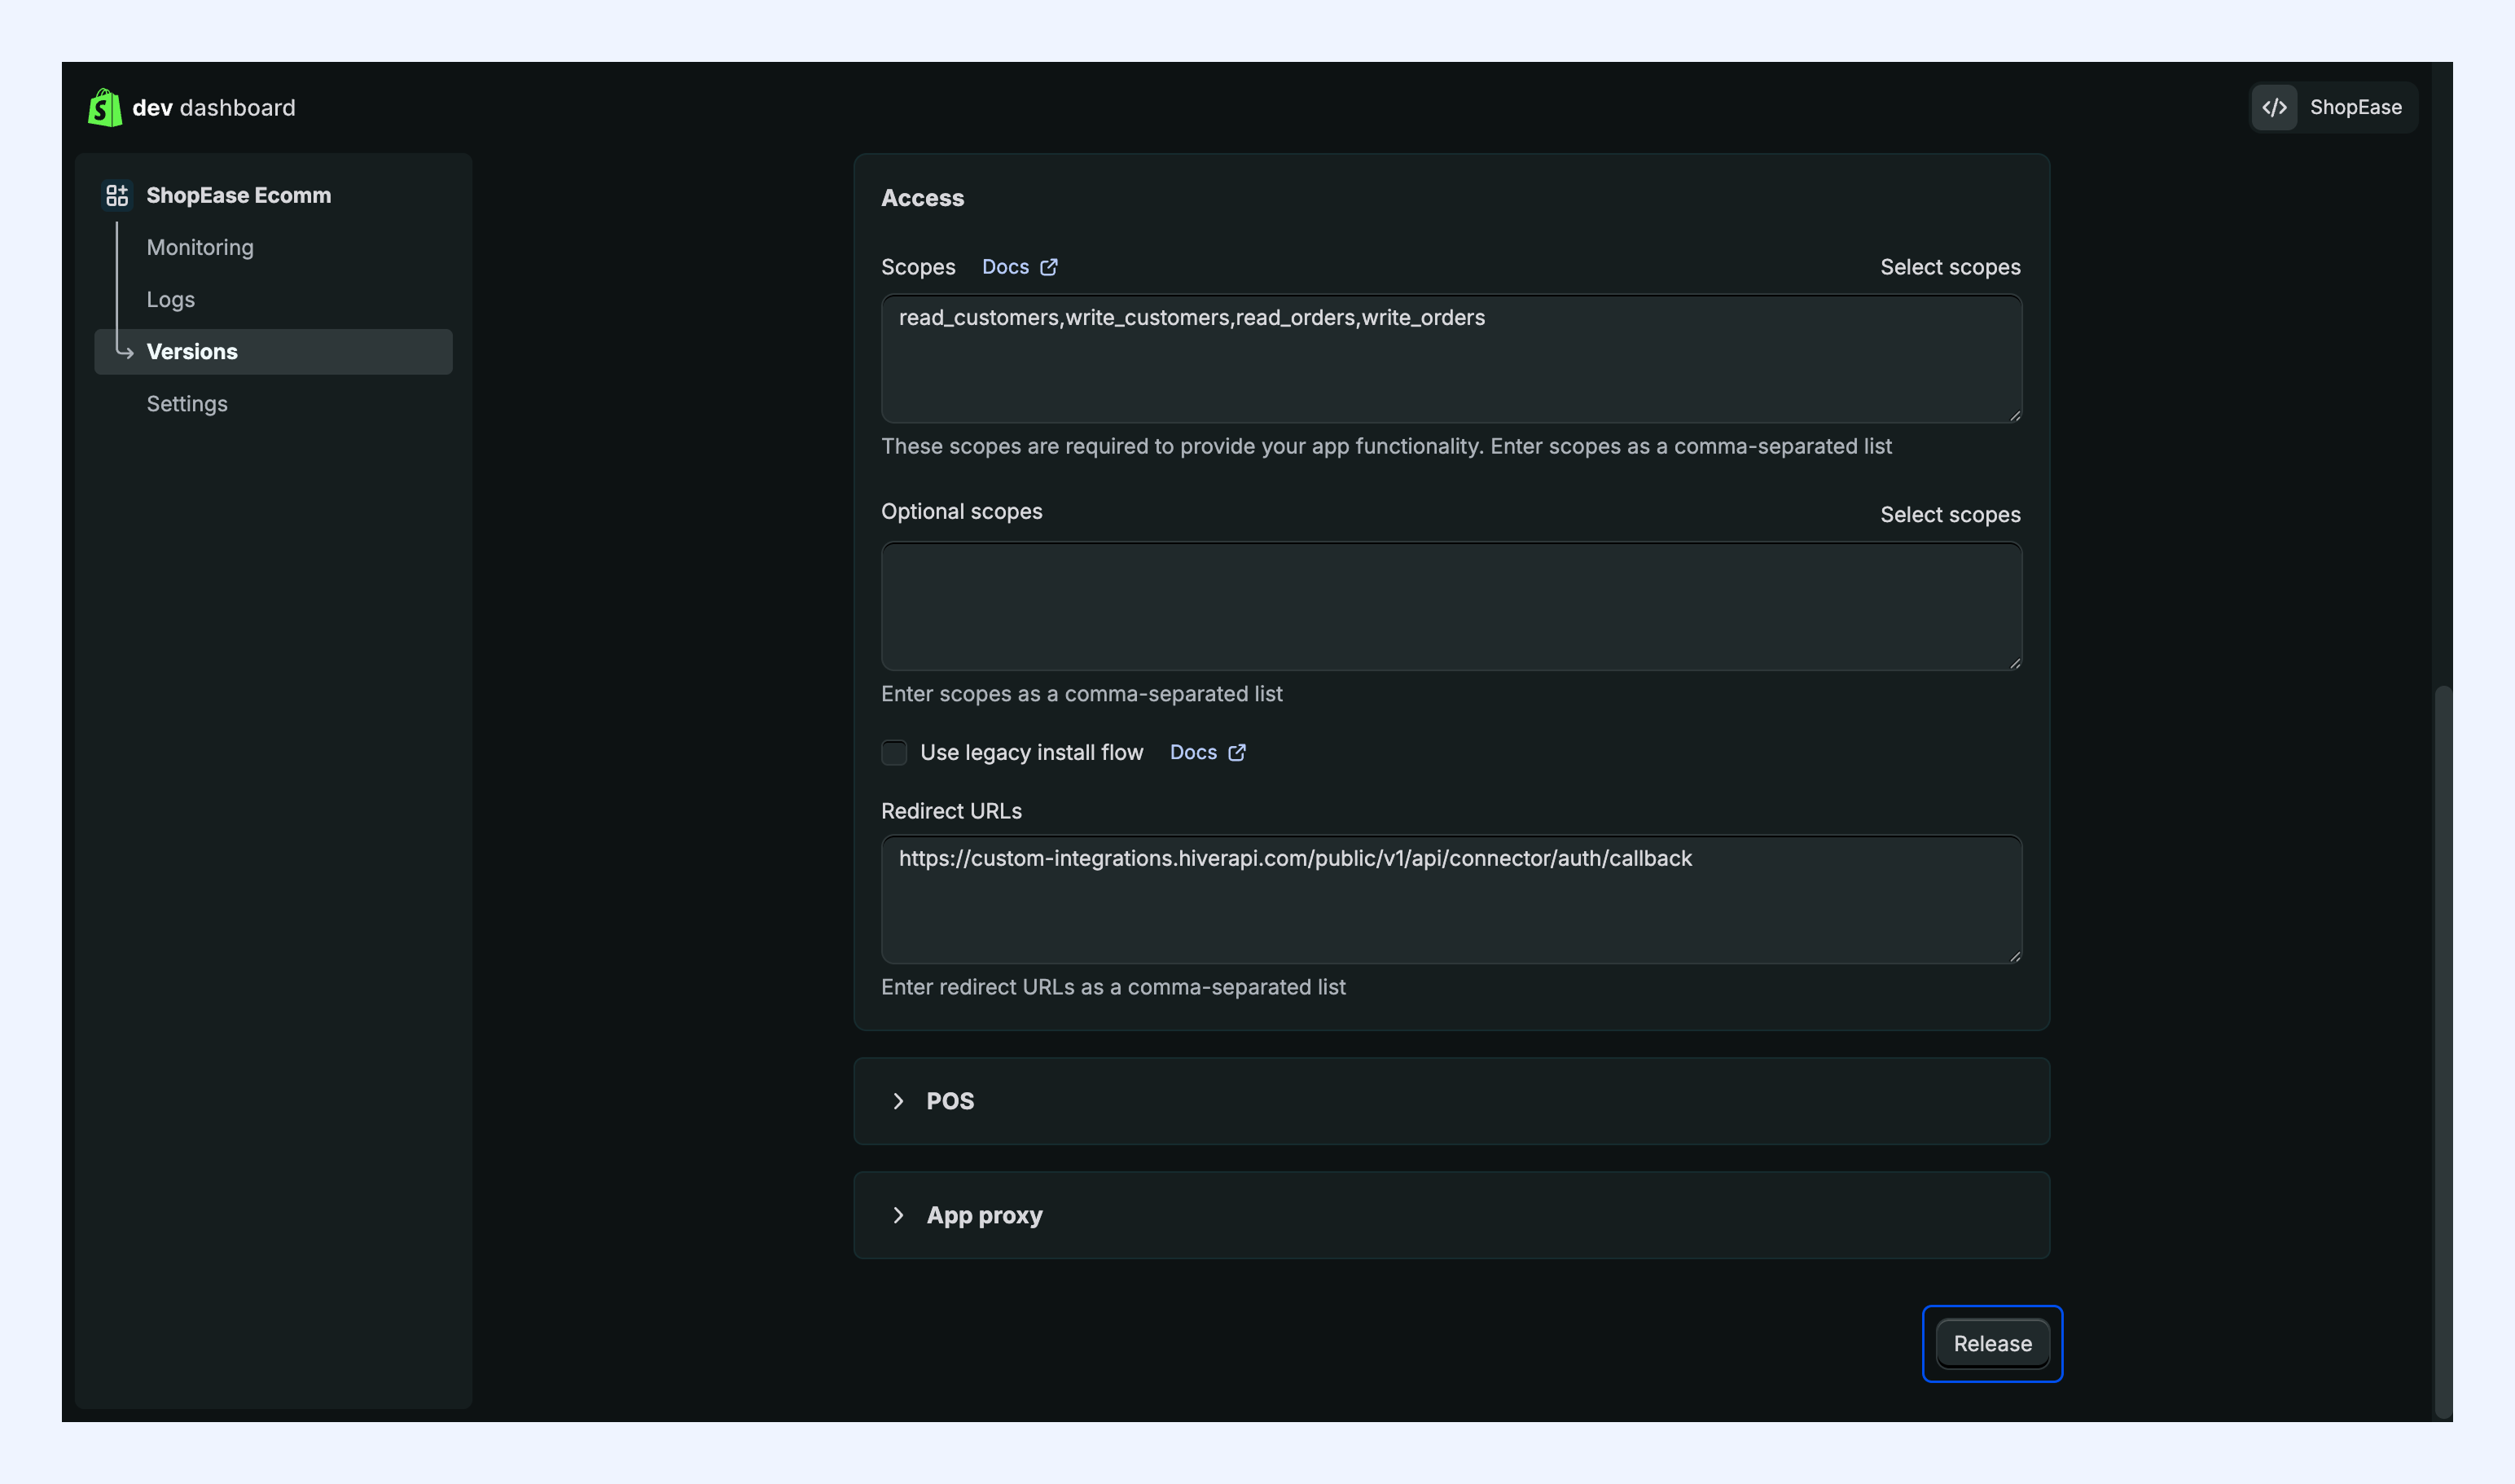
1. In the Access section, click Select scopes.
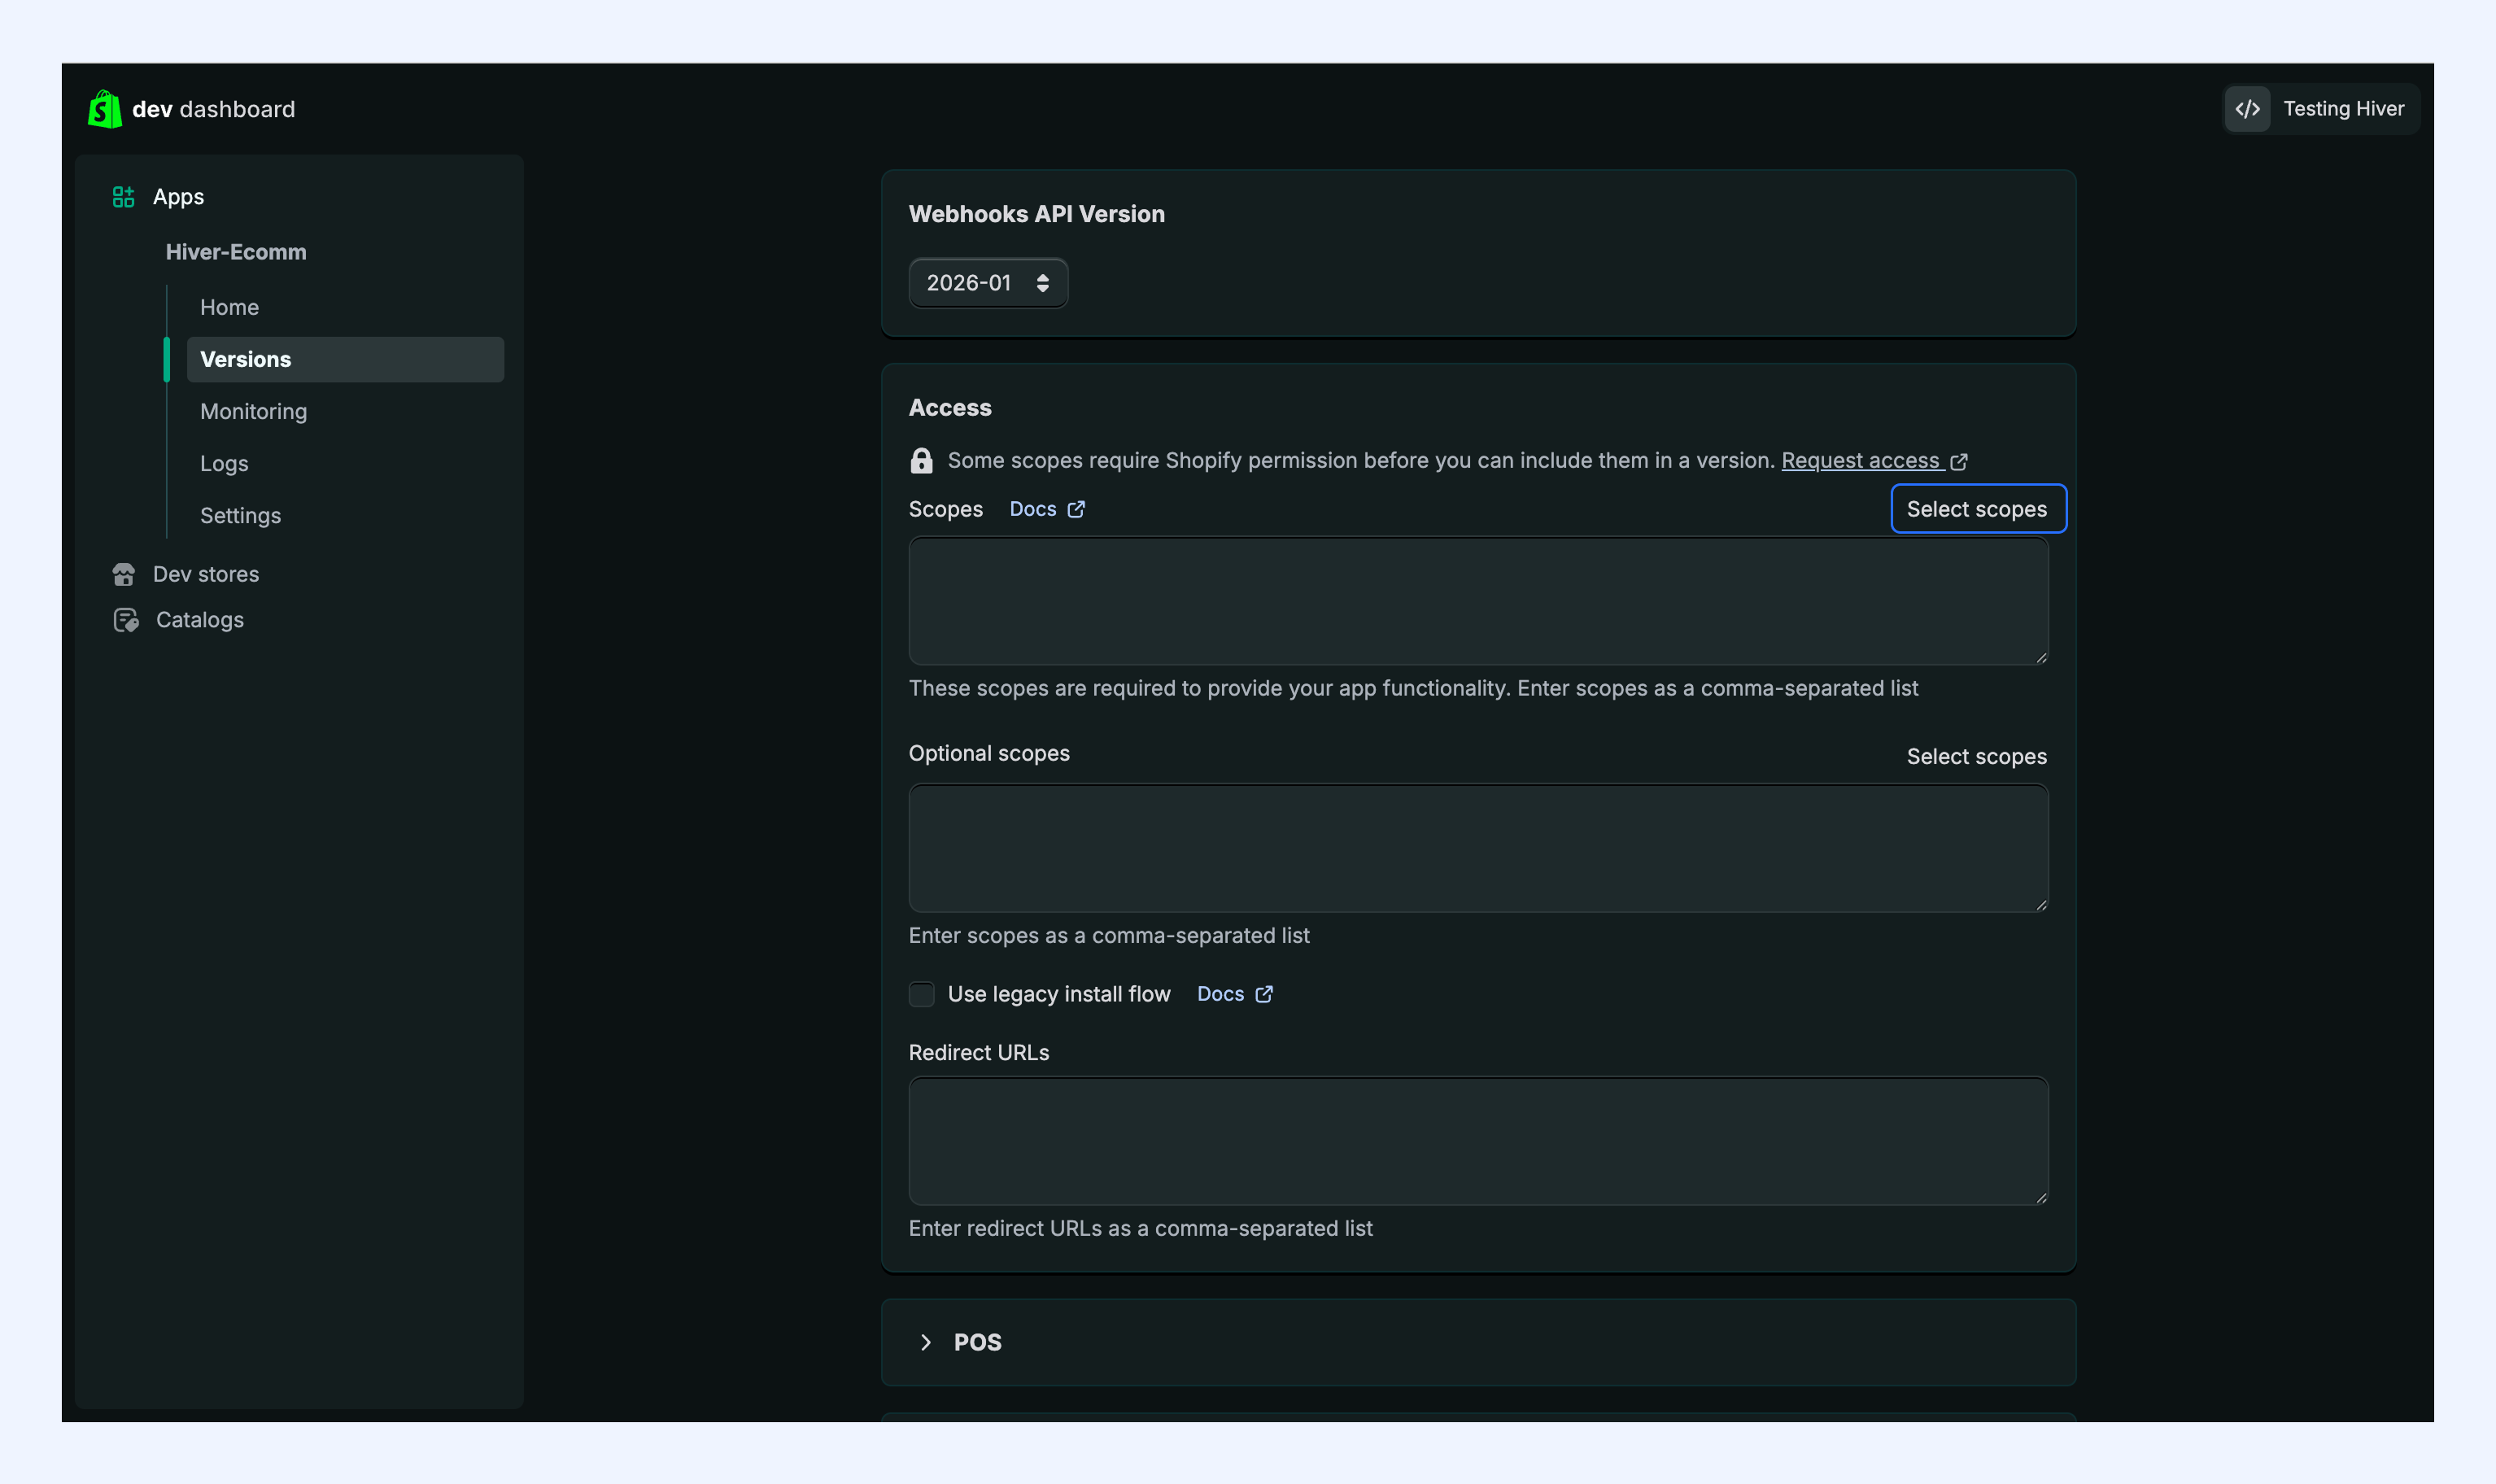
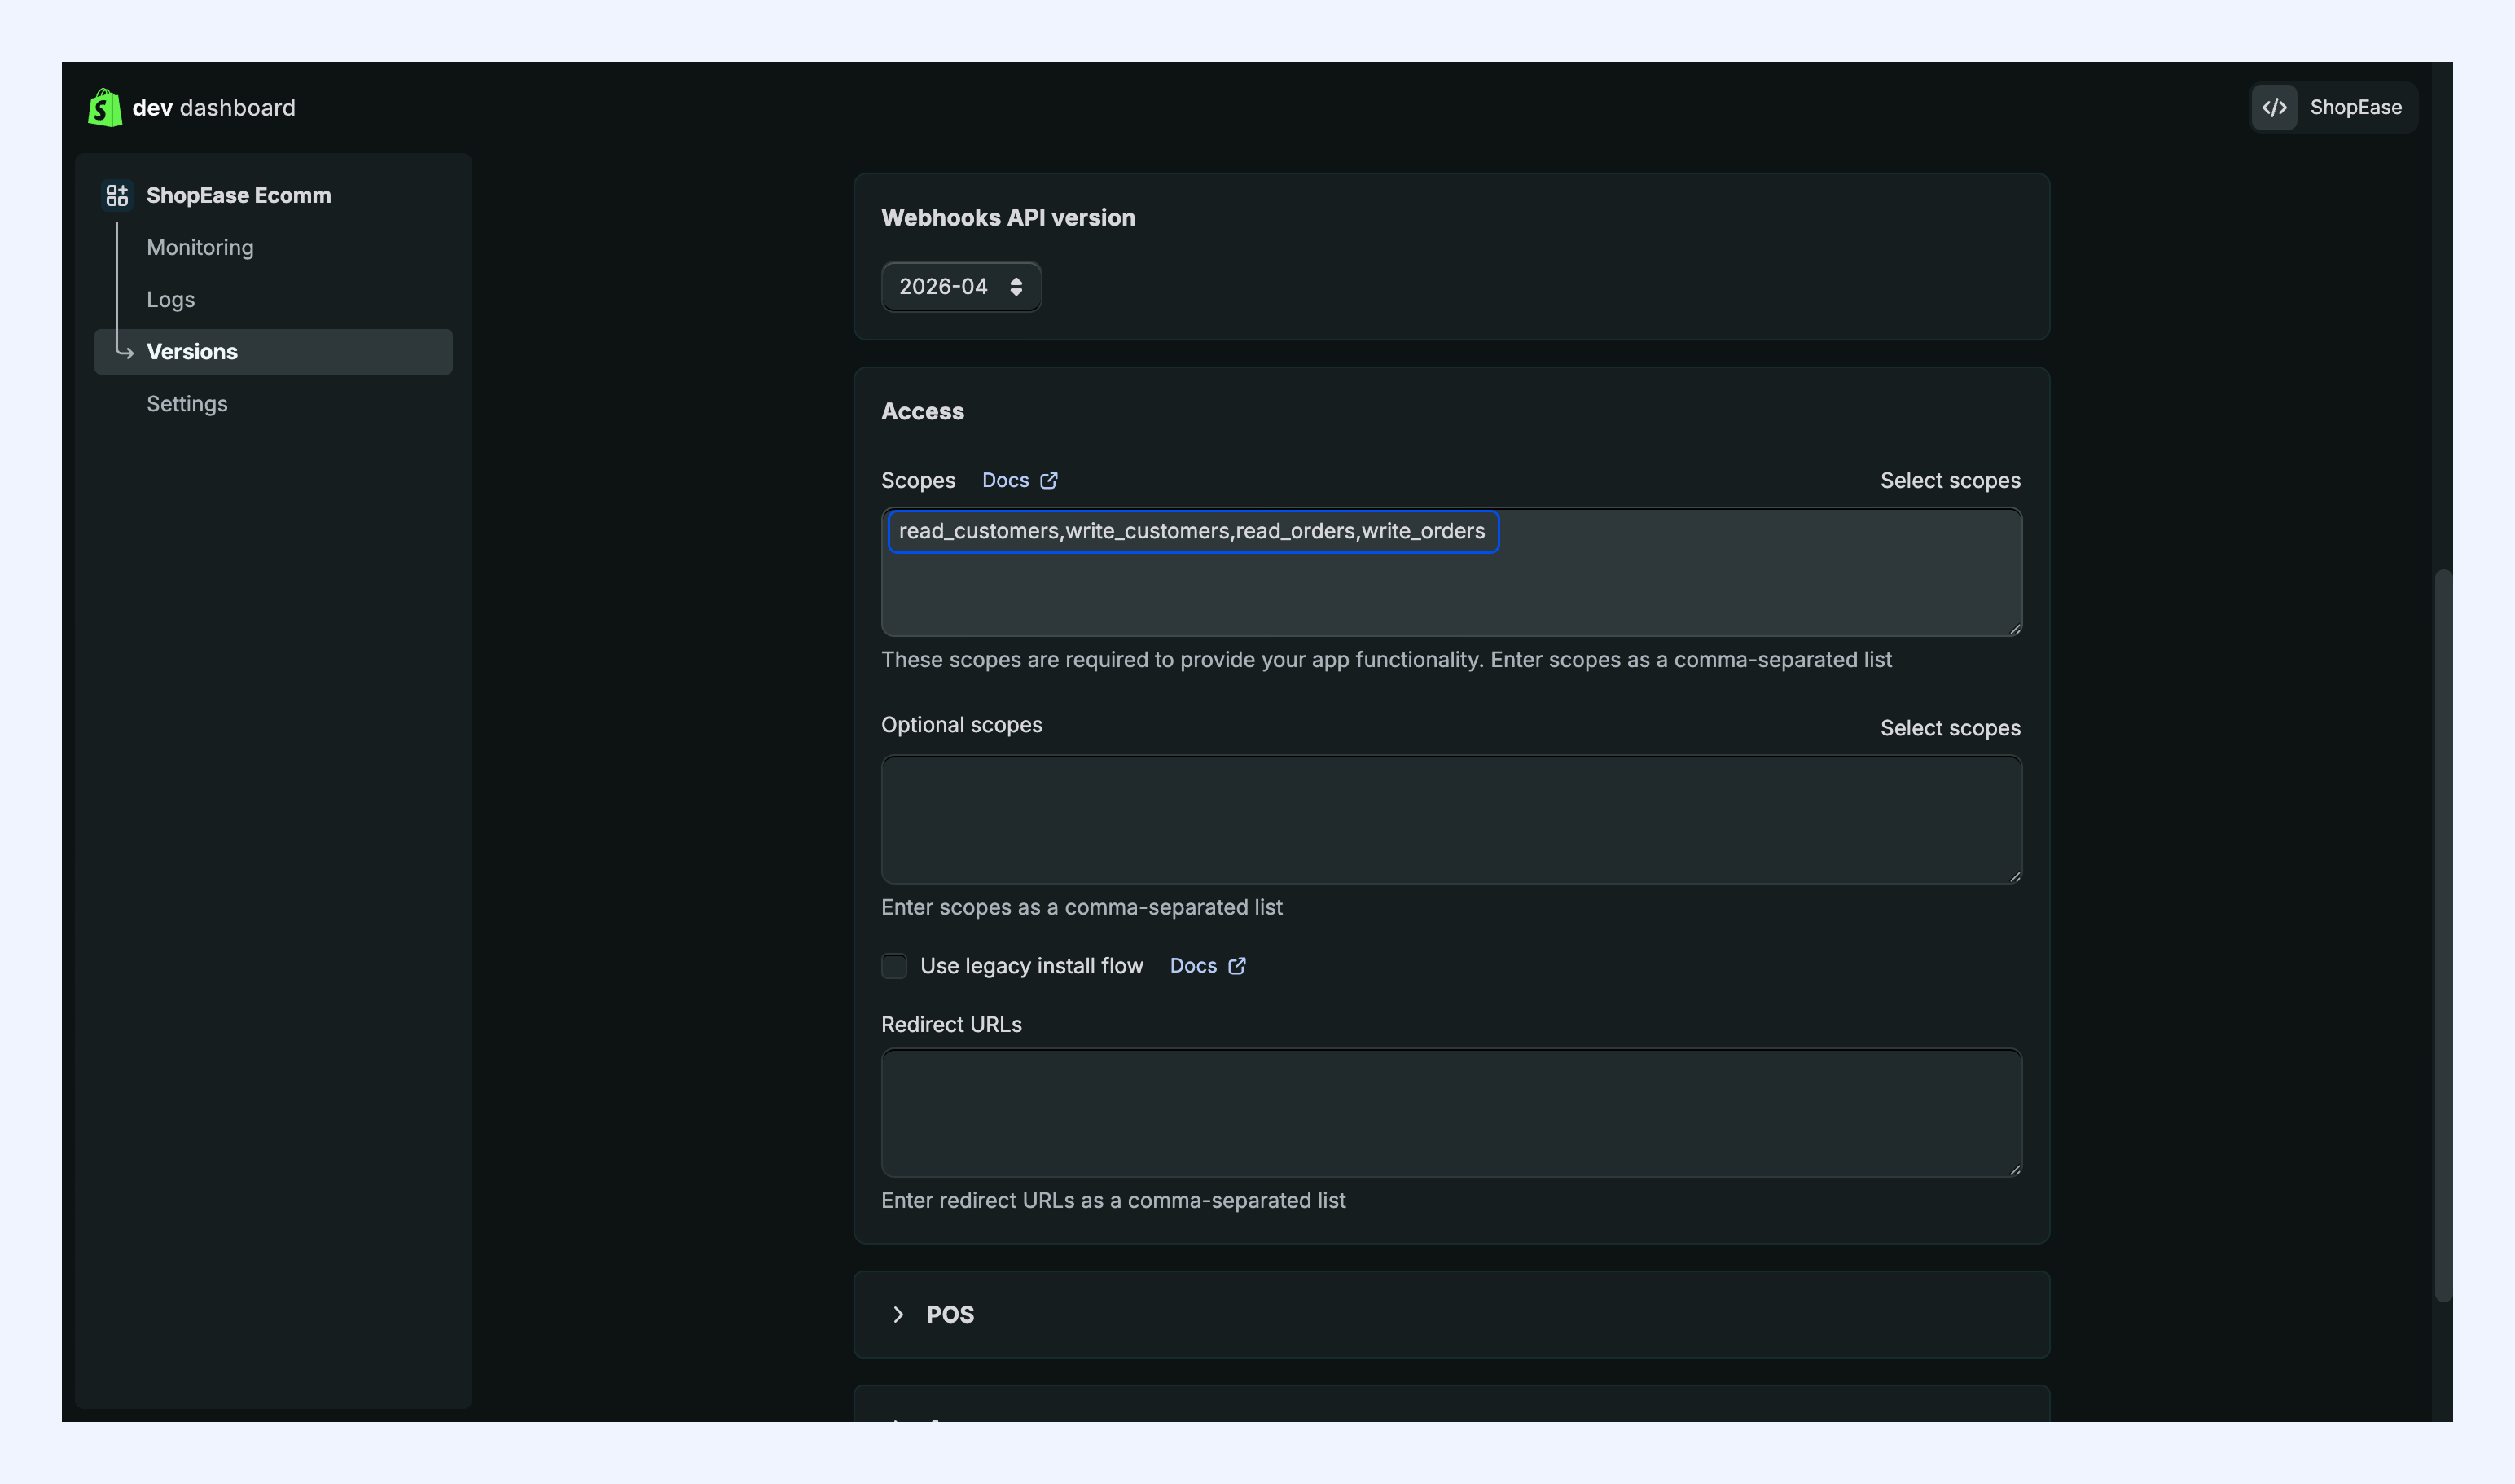
2. Enable the following scopes: read_customers, write_customers, read_orders, write_orders
Step 3: Set Redirect URL
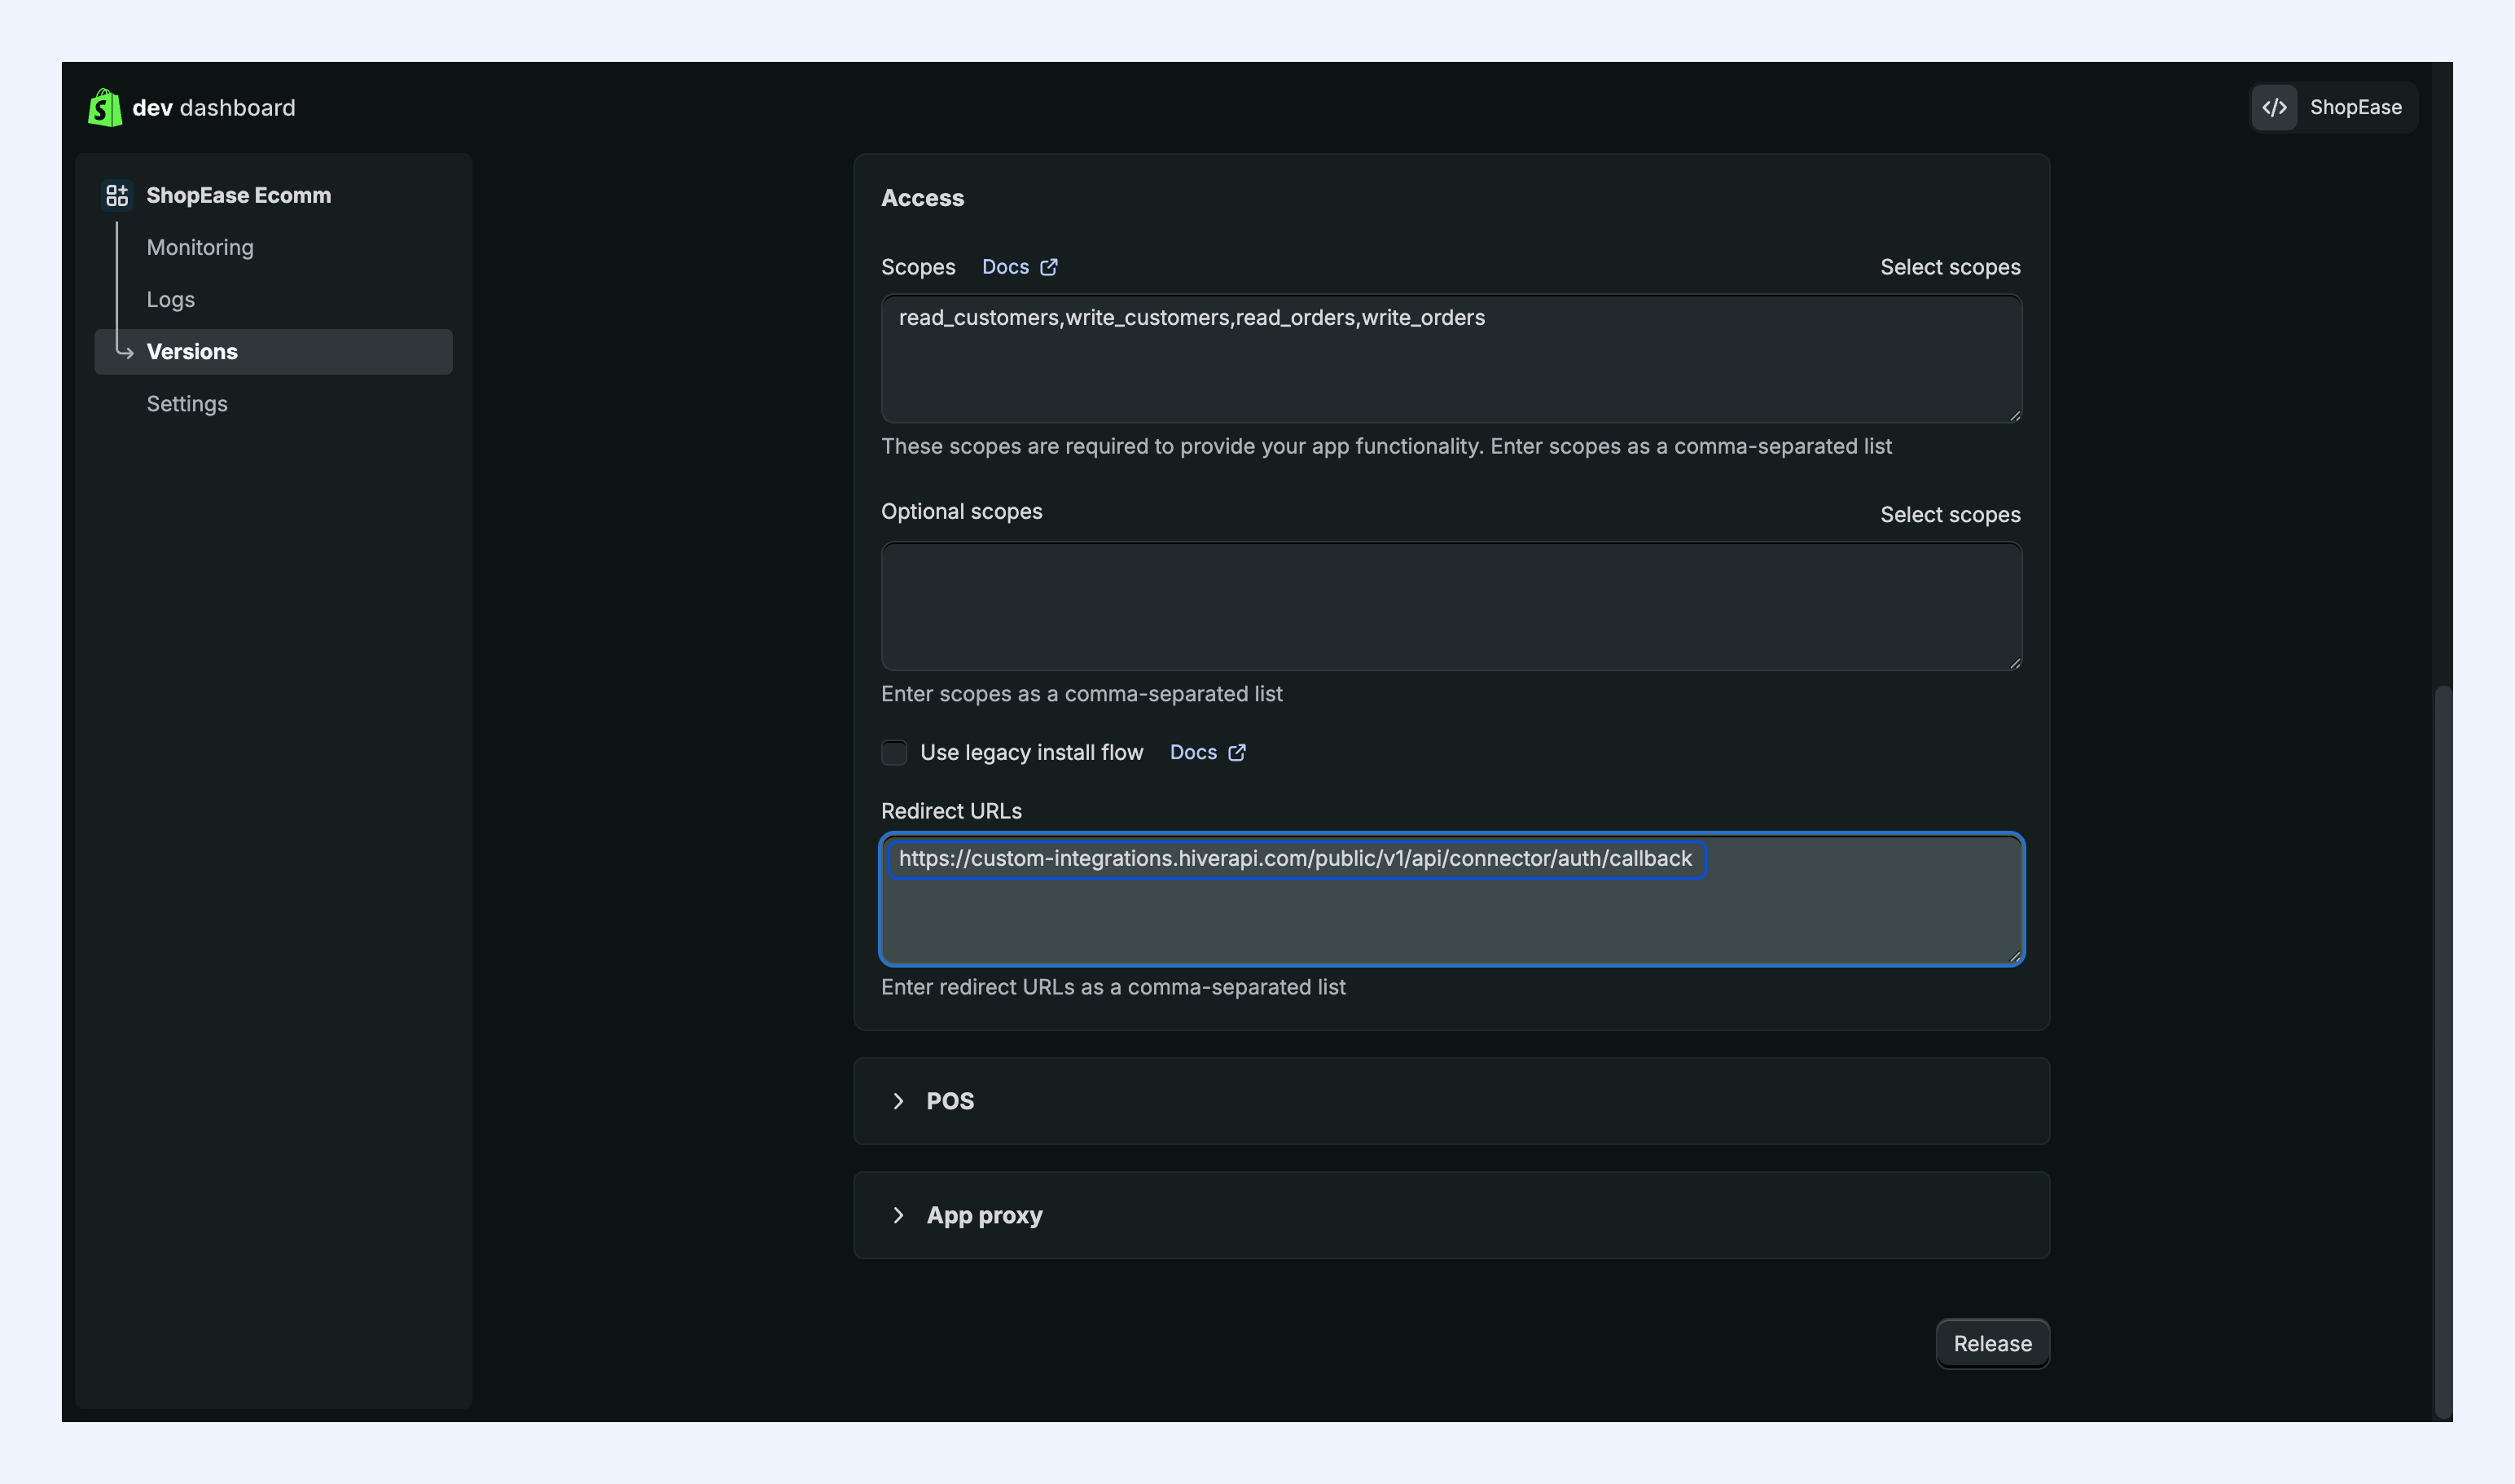
1. Paste the Redirect URL you copied from Hiver into the Redirect URLs field in your Shopify app configuration.
Step 4. Release your app version
1. Click Release.
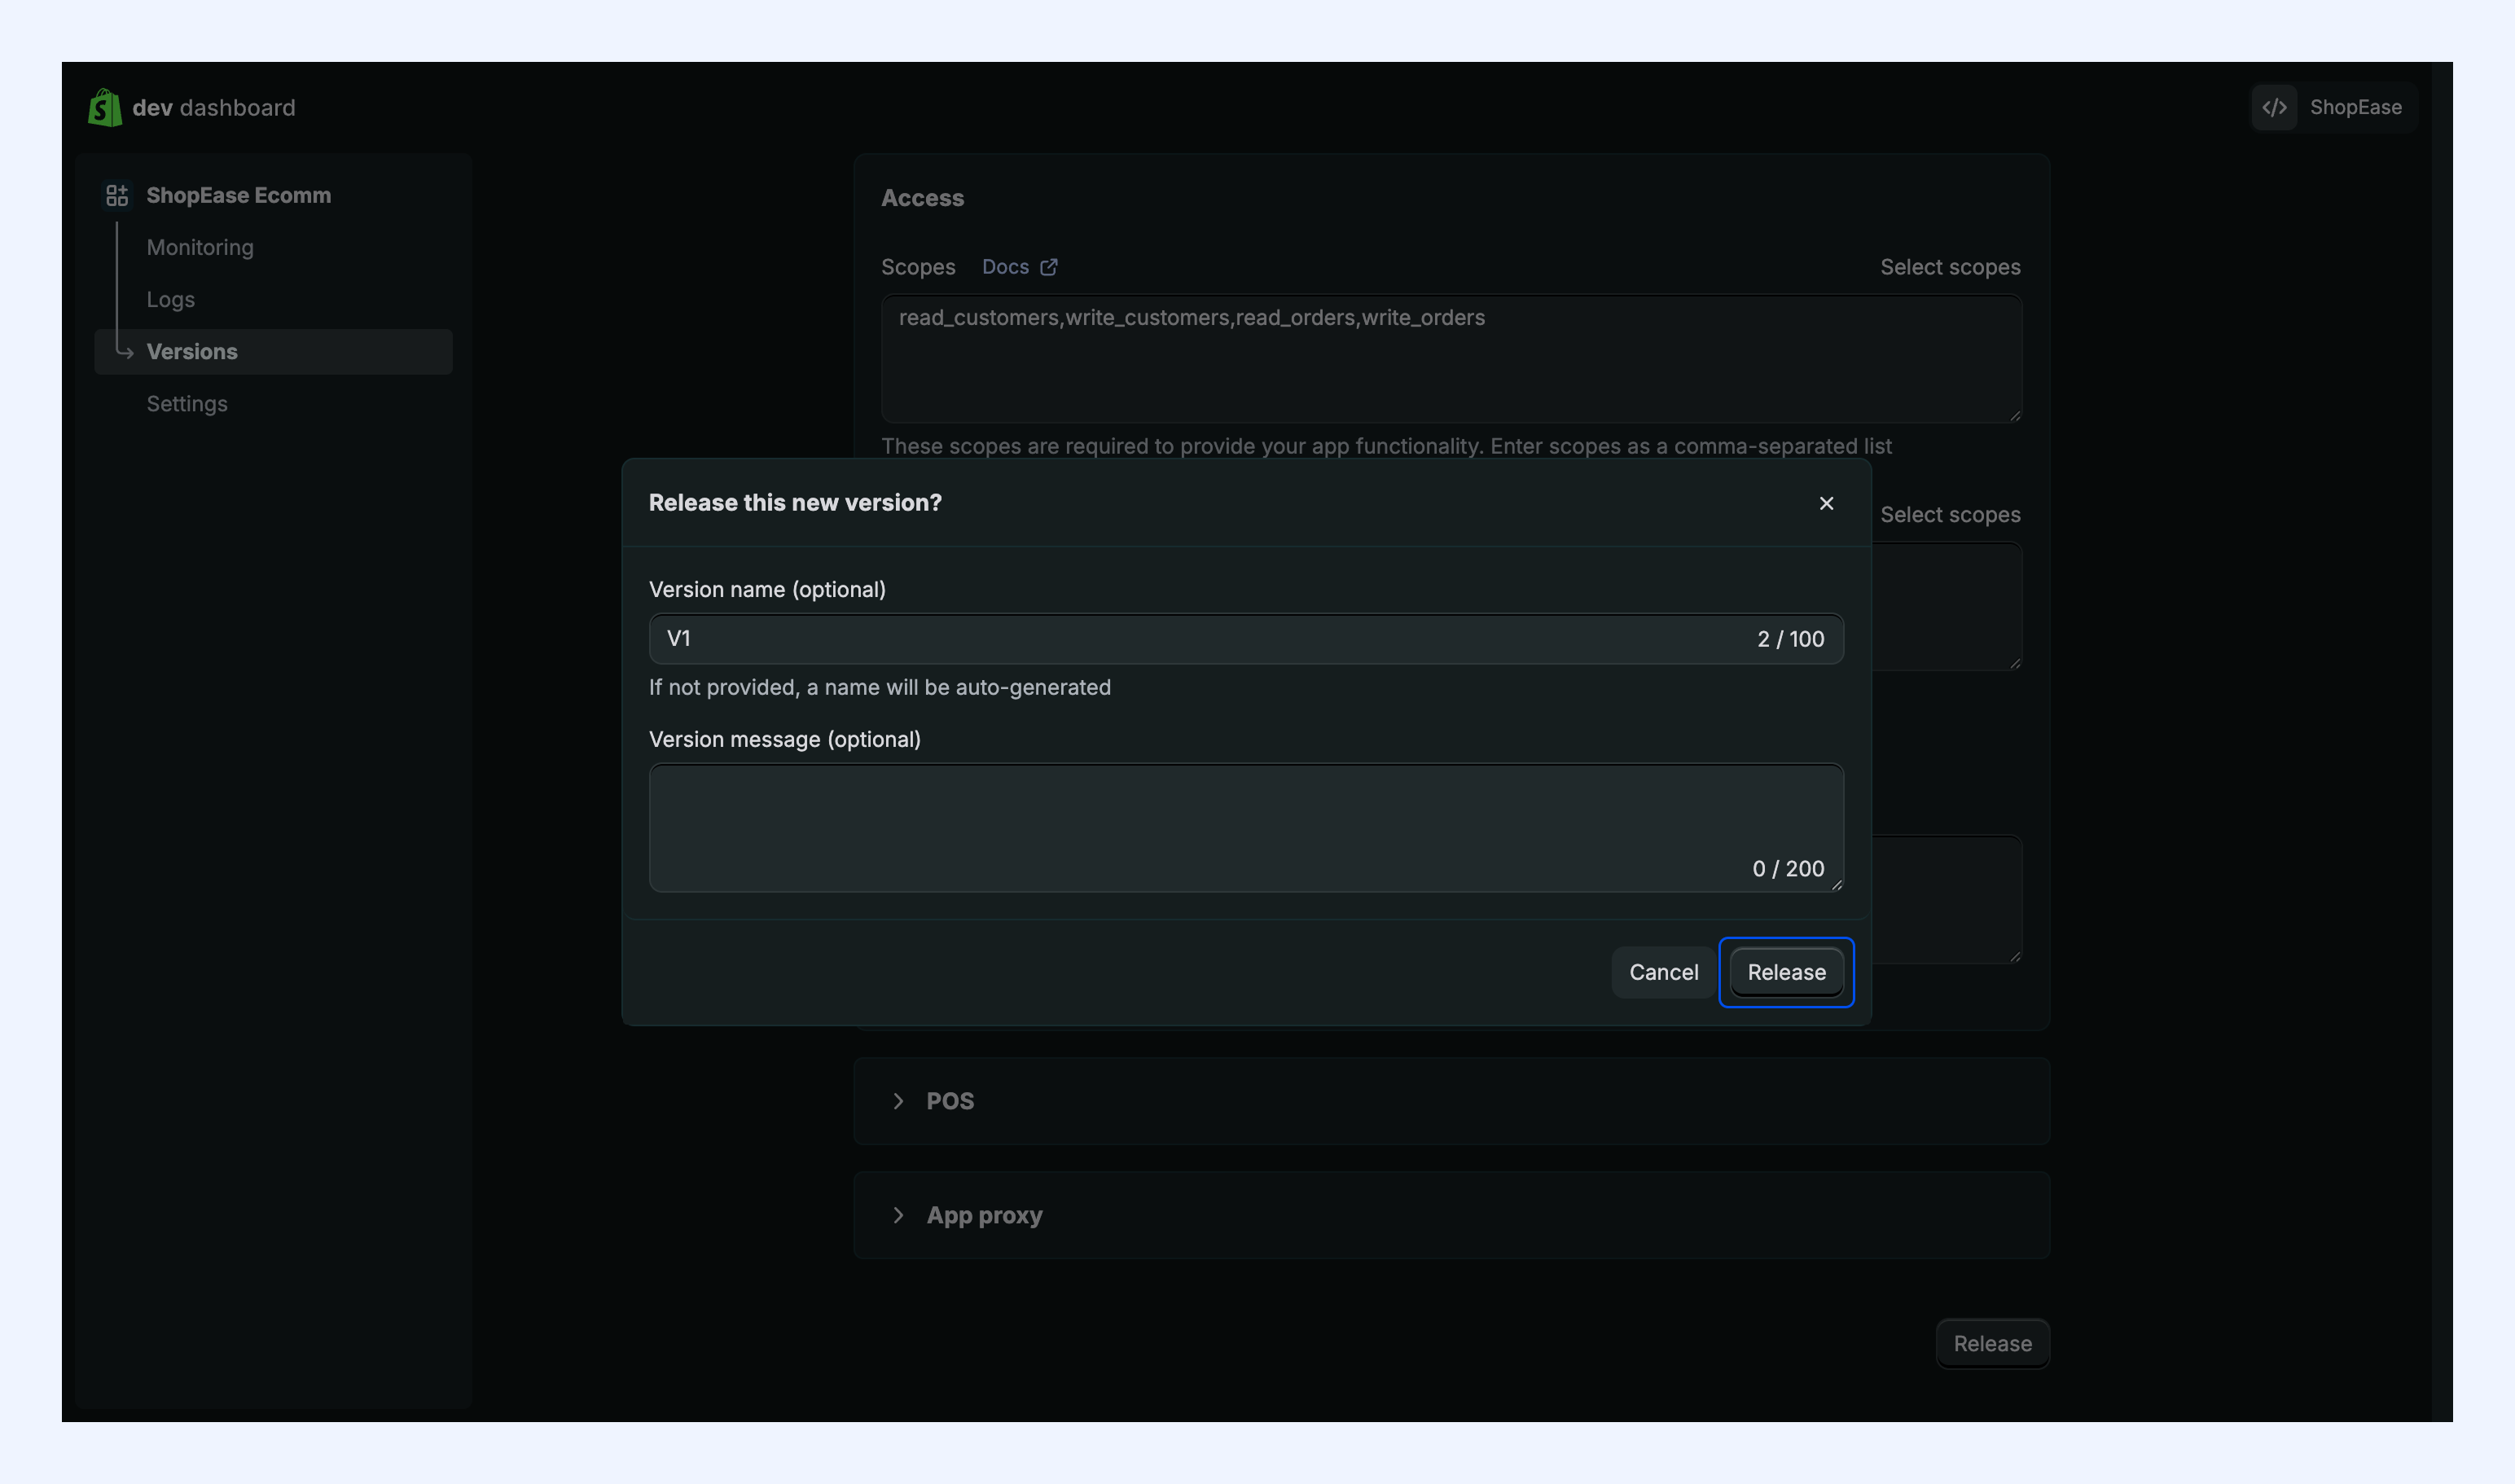
2. Enter a version name (such as Version1 or v1.0).
3. Optionally, add version notes.
4. Click Release to confirm.
Step 5. Install the app
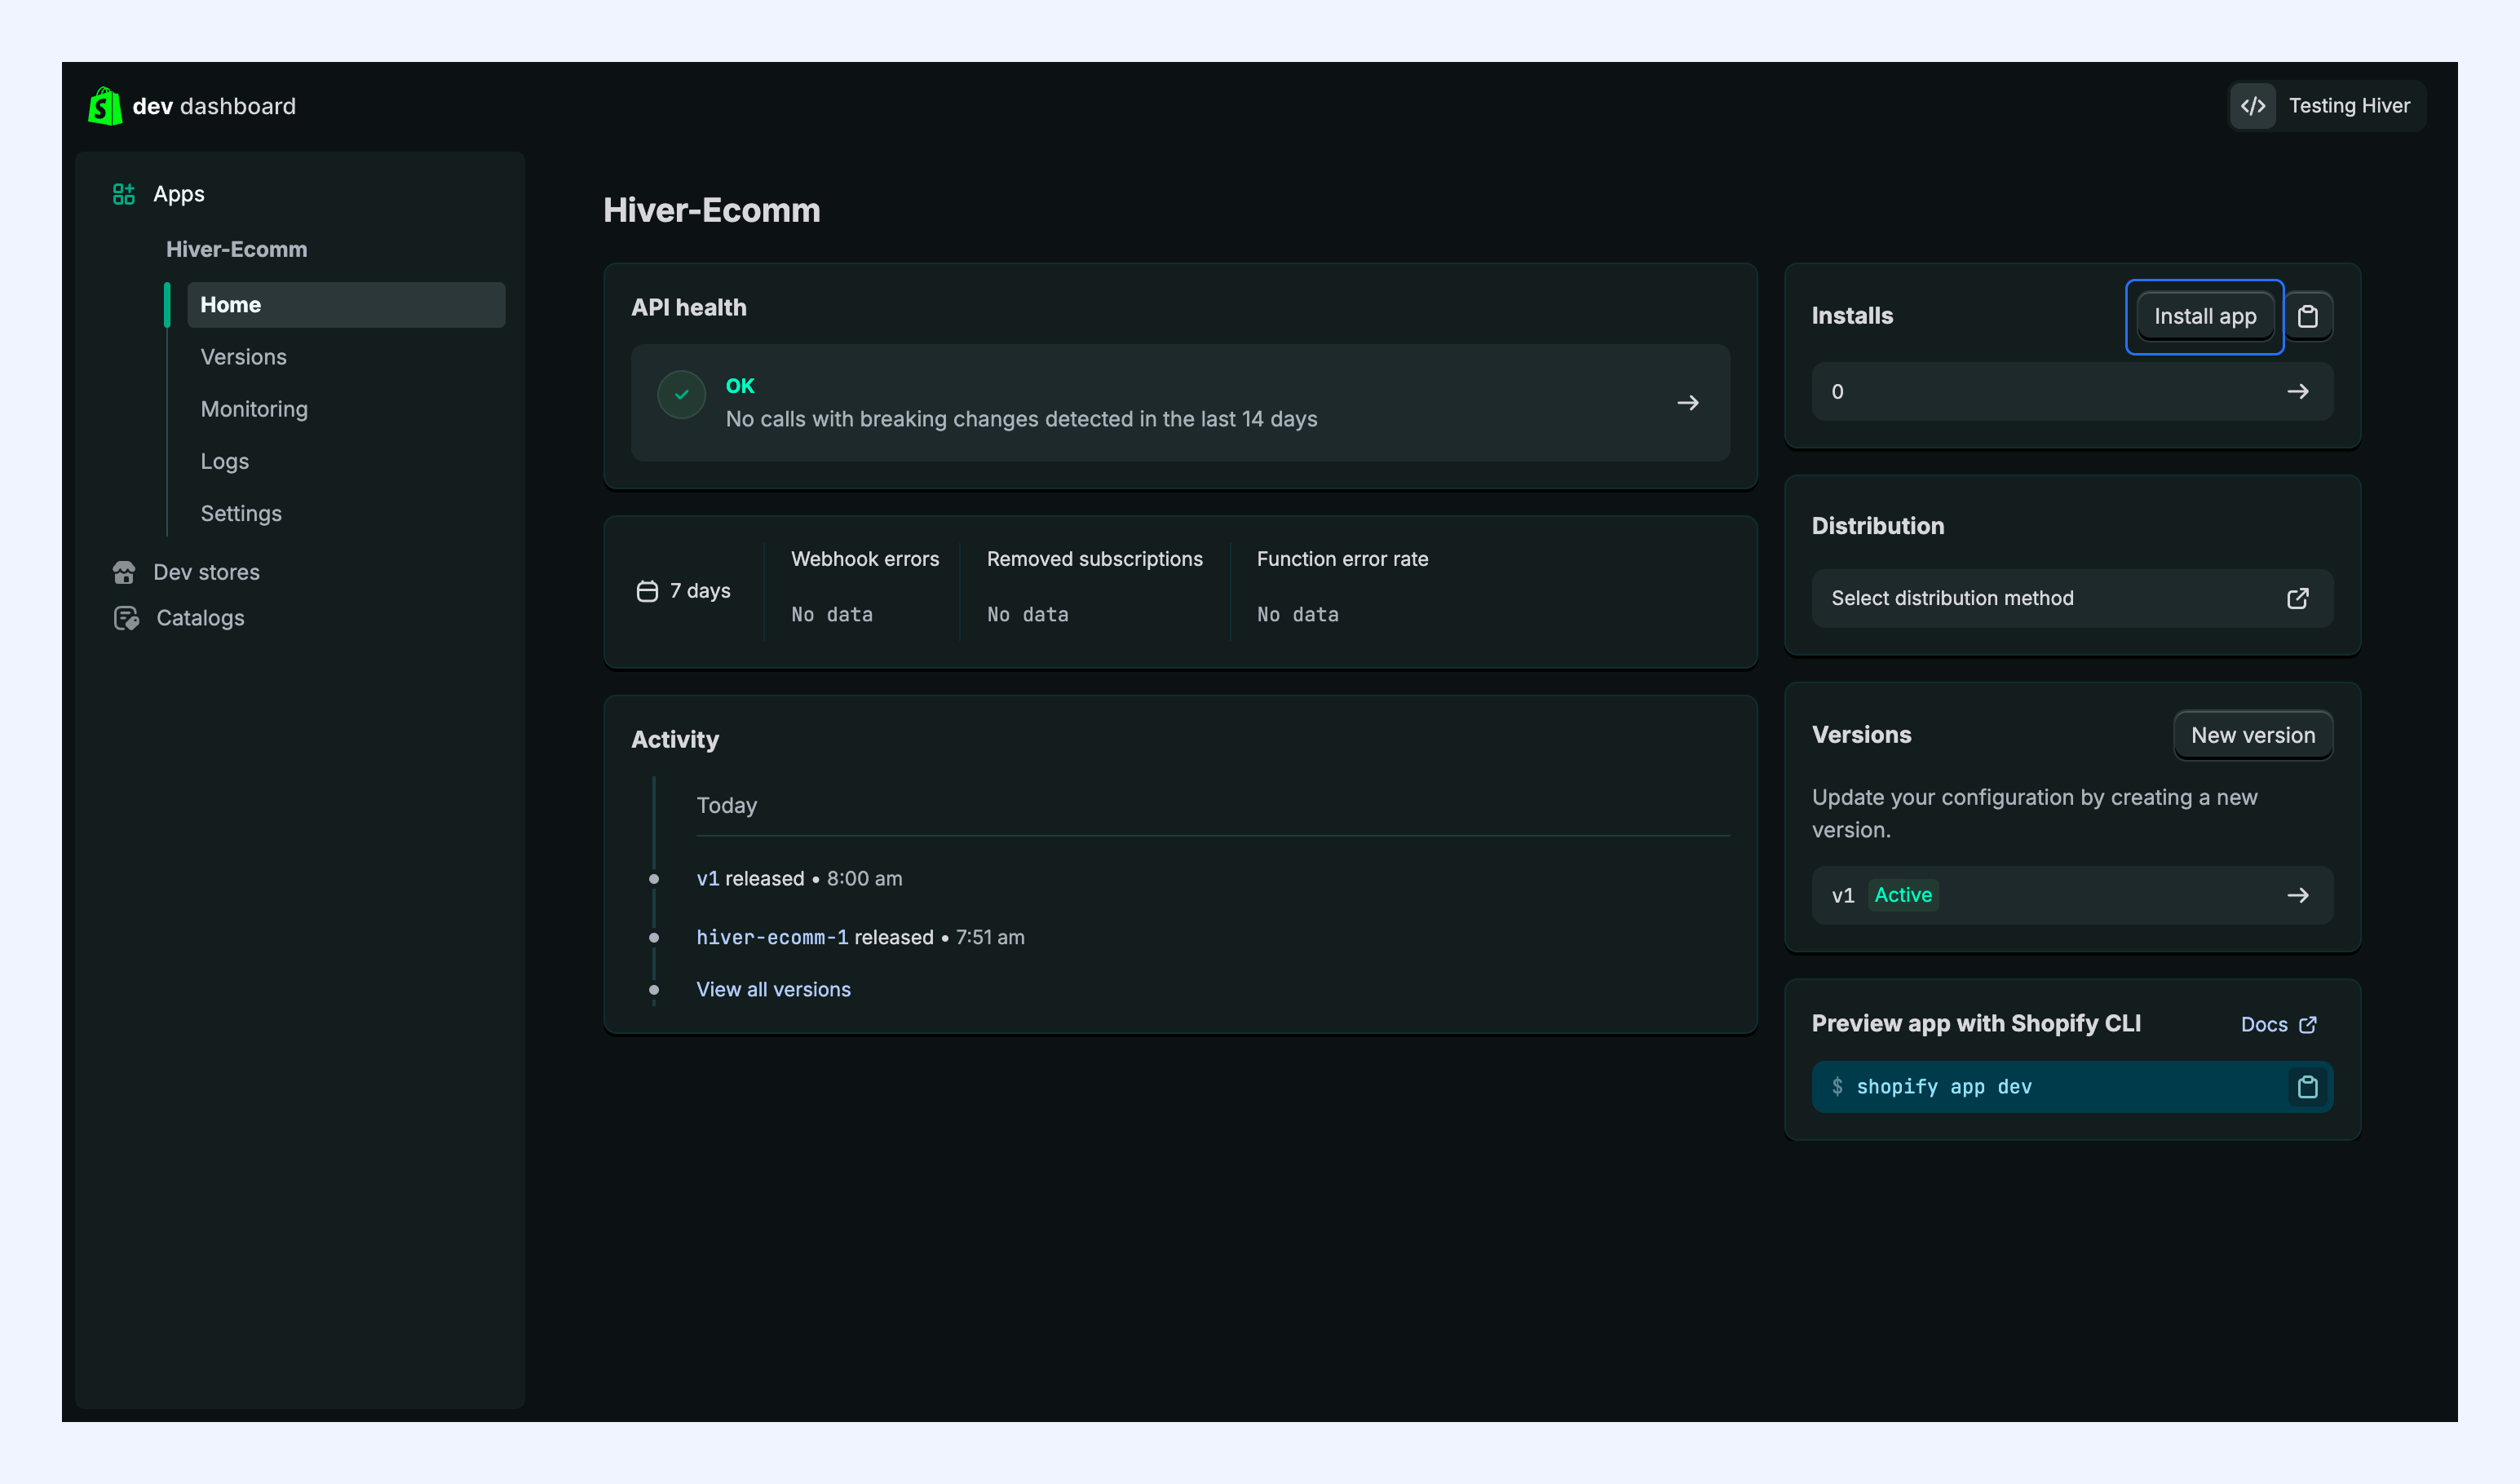
1. Navigate to the Home section in your developer dashboard.
2. Locate your released app.
3. Click Install app to install it in your Shopify account.
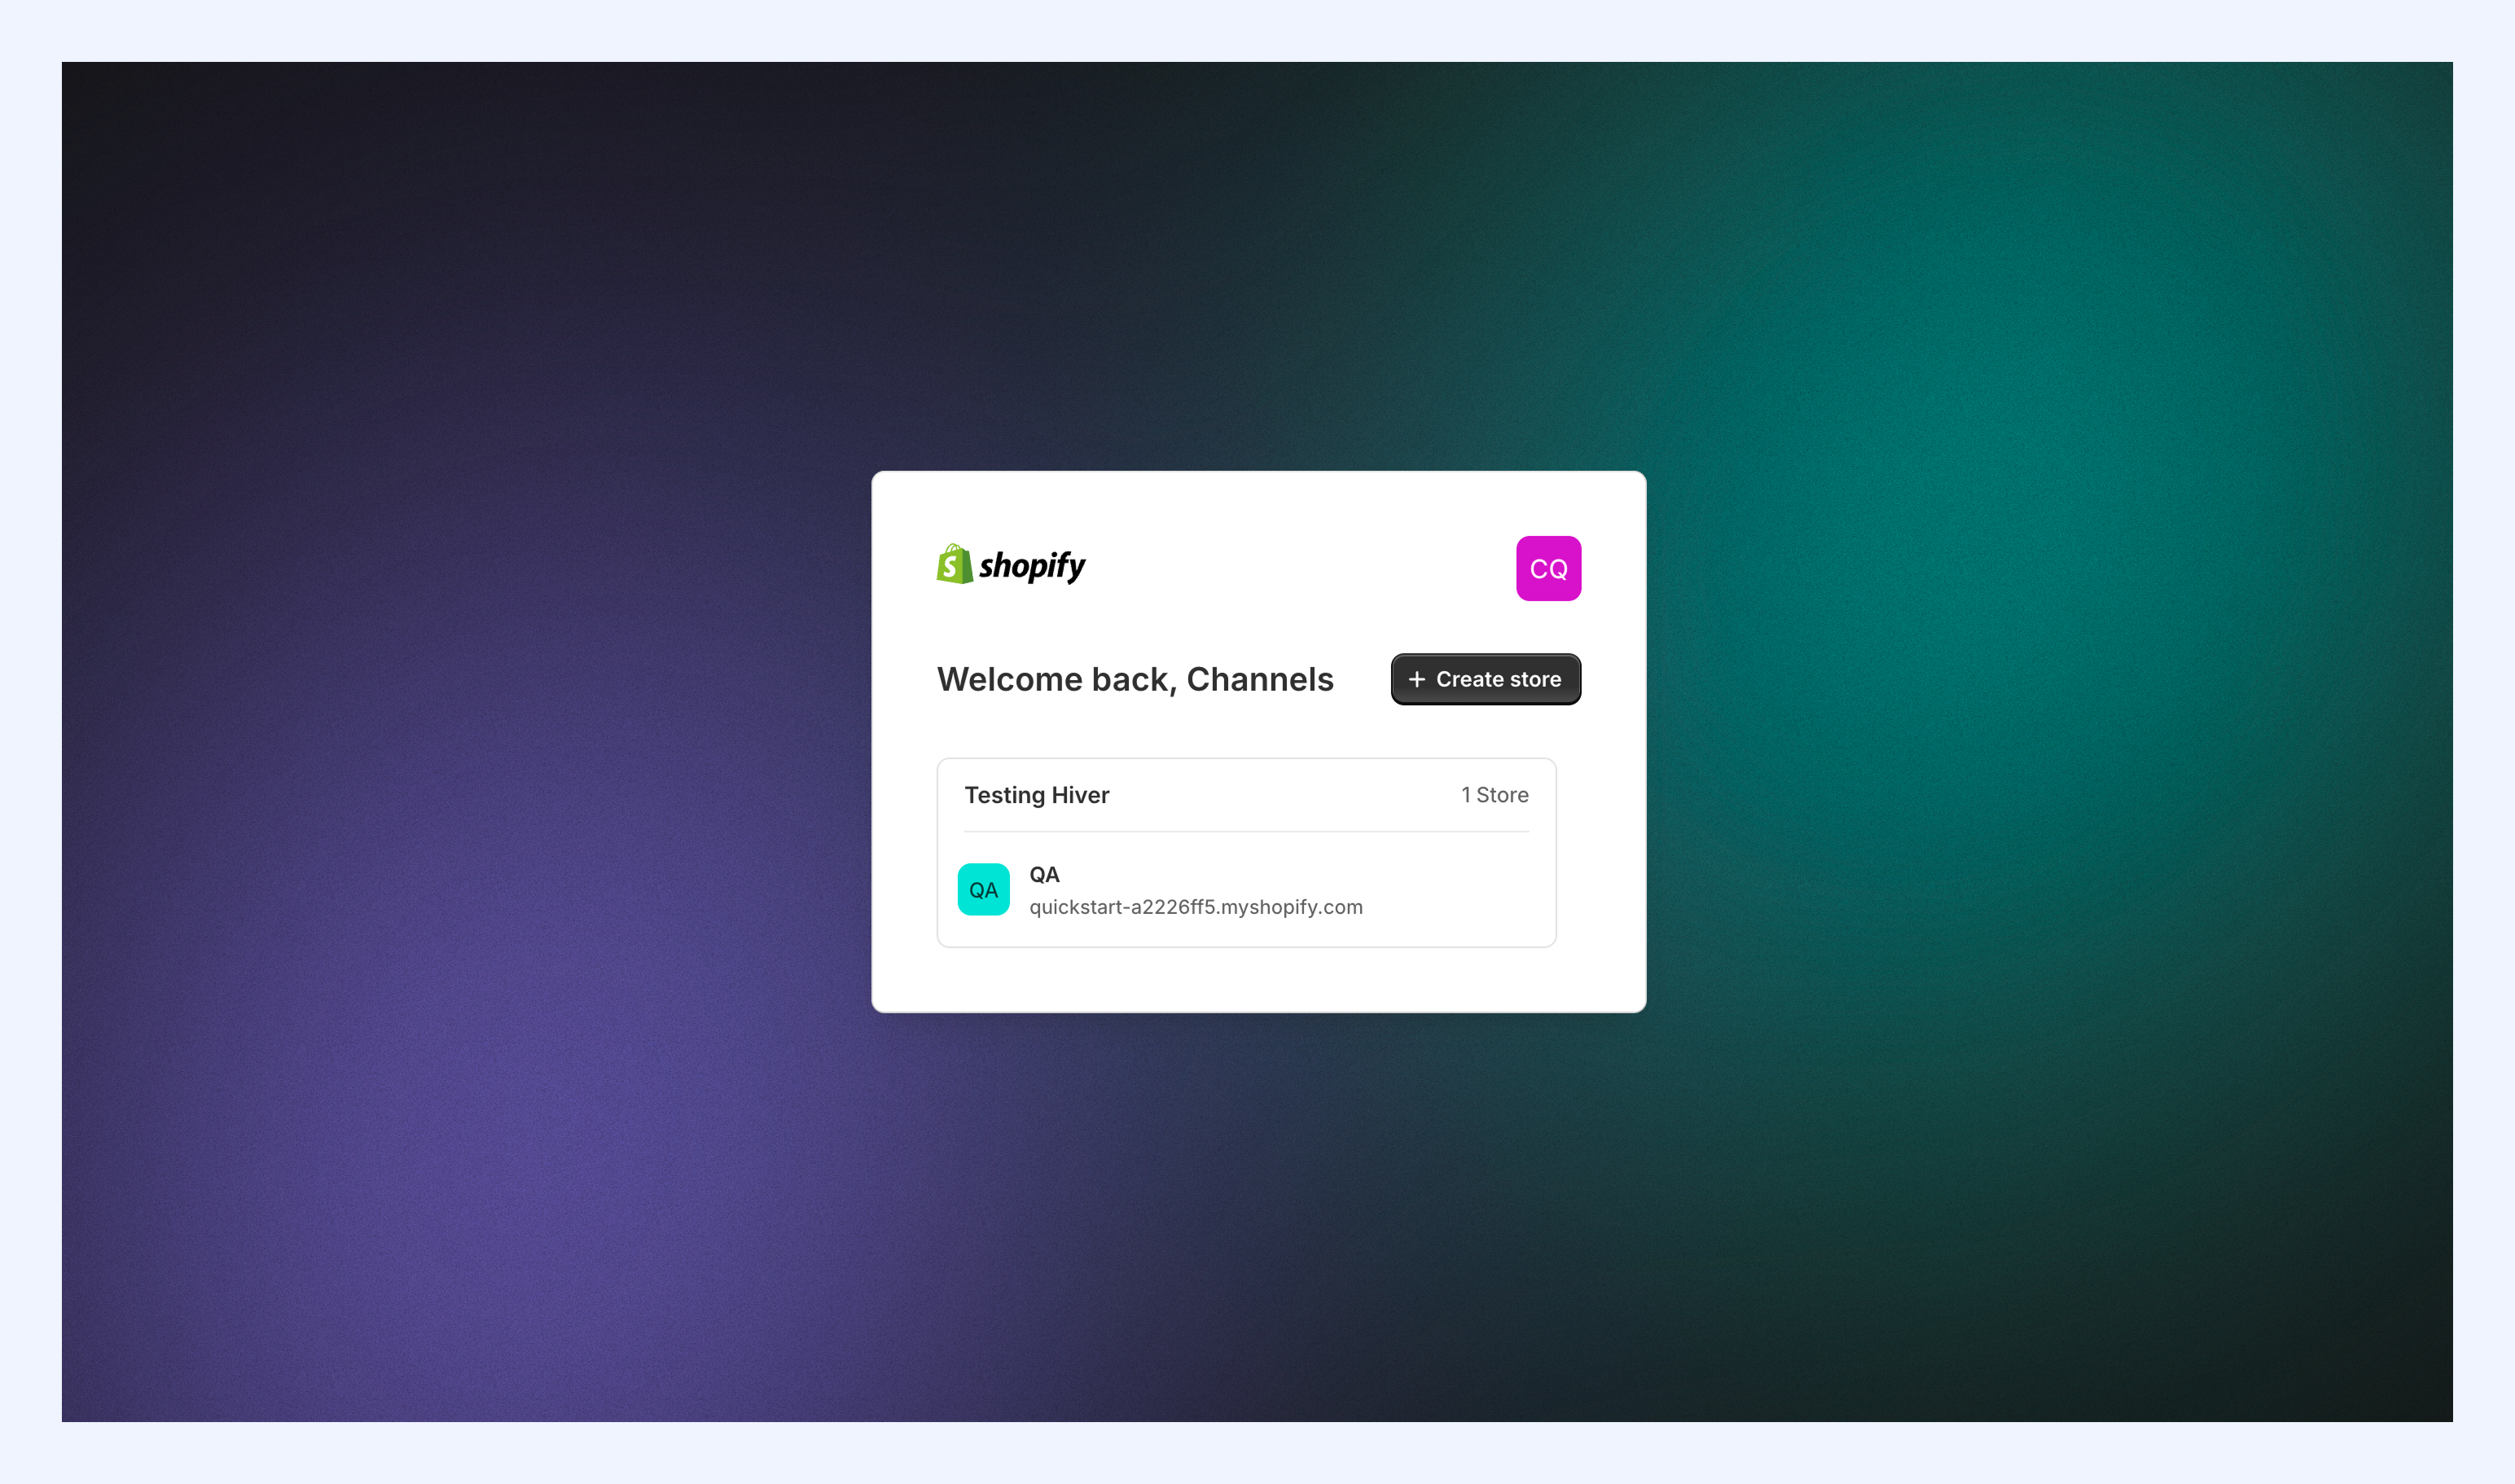
4. In the new tab that opens, you’ll be asked to select a Shopify store to install the app.
5. Review the app’s scopes and click Install.
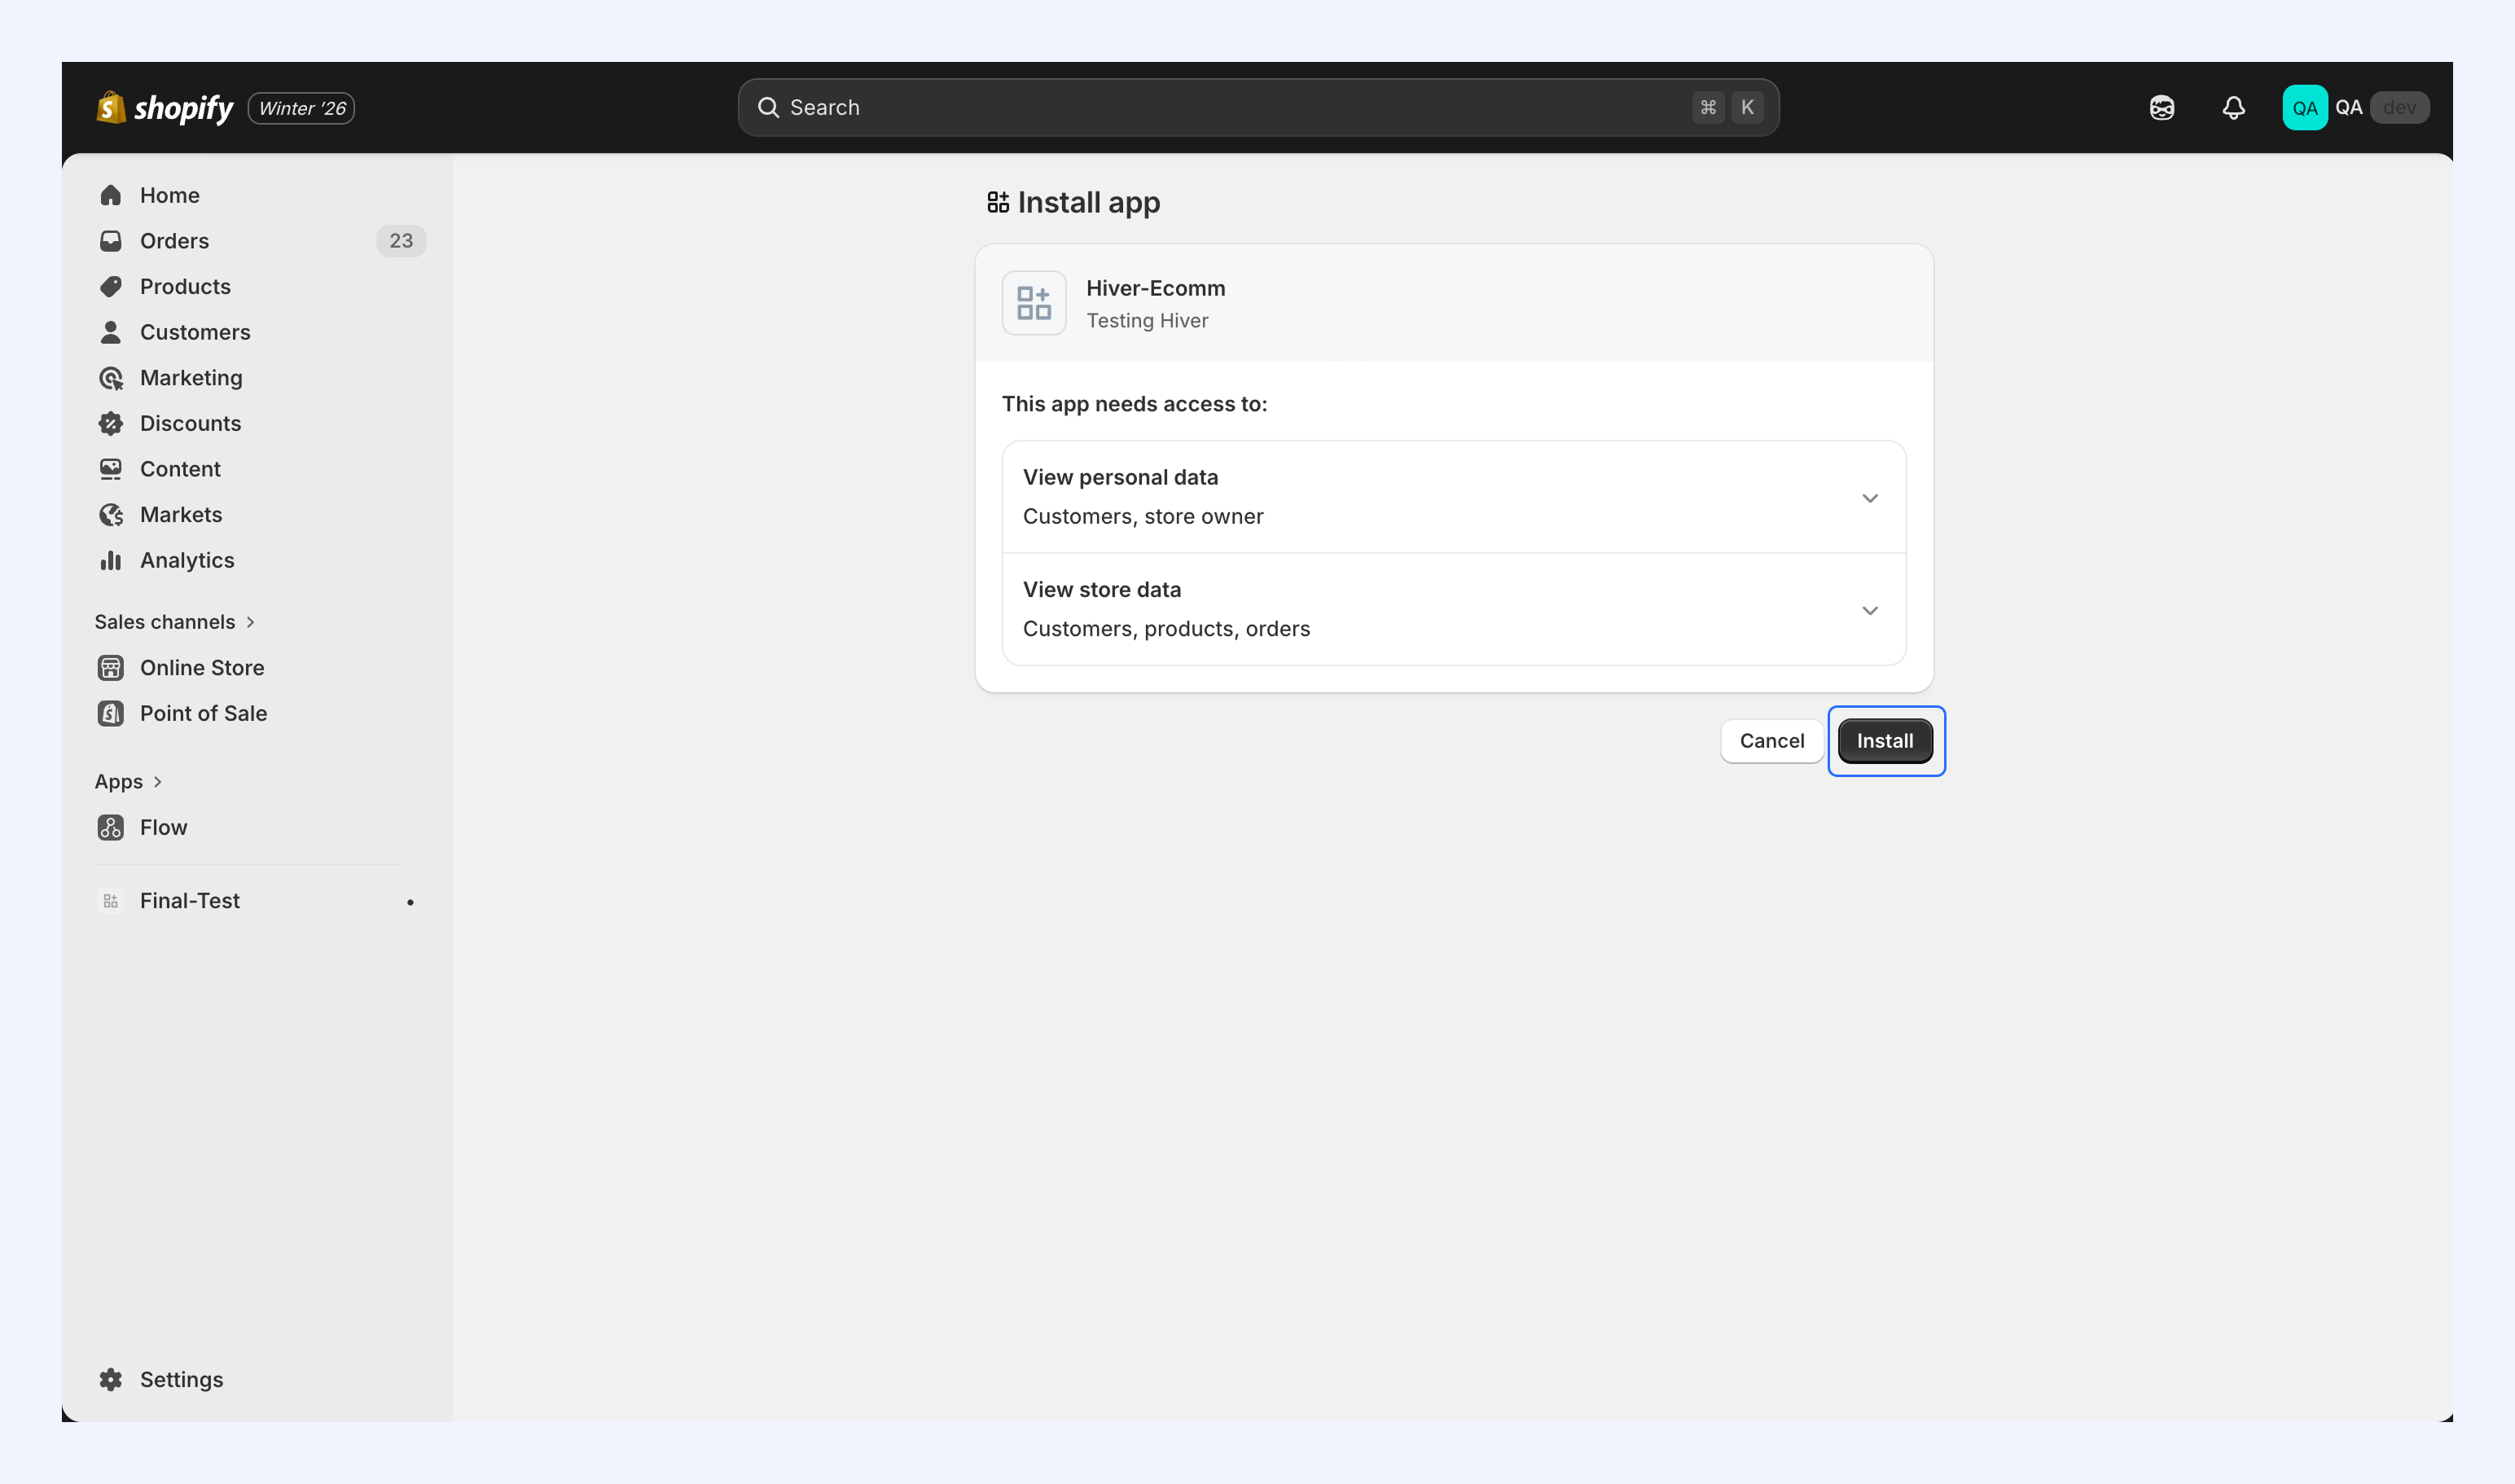
This grants the app permission to access your store data based on the configured scopes.
Step 6. Get your API credentials
1. Go to the Settings tab in your app.
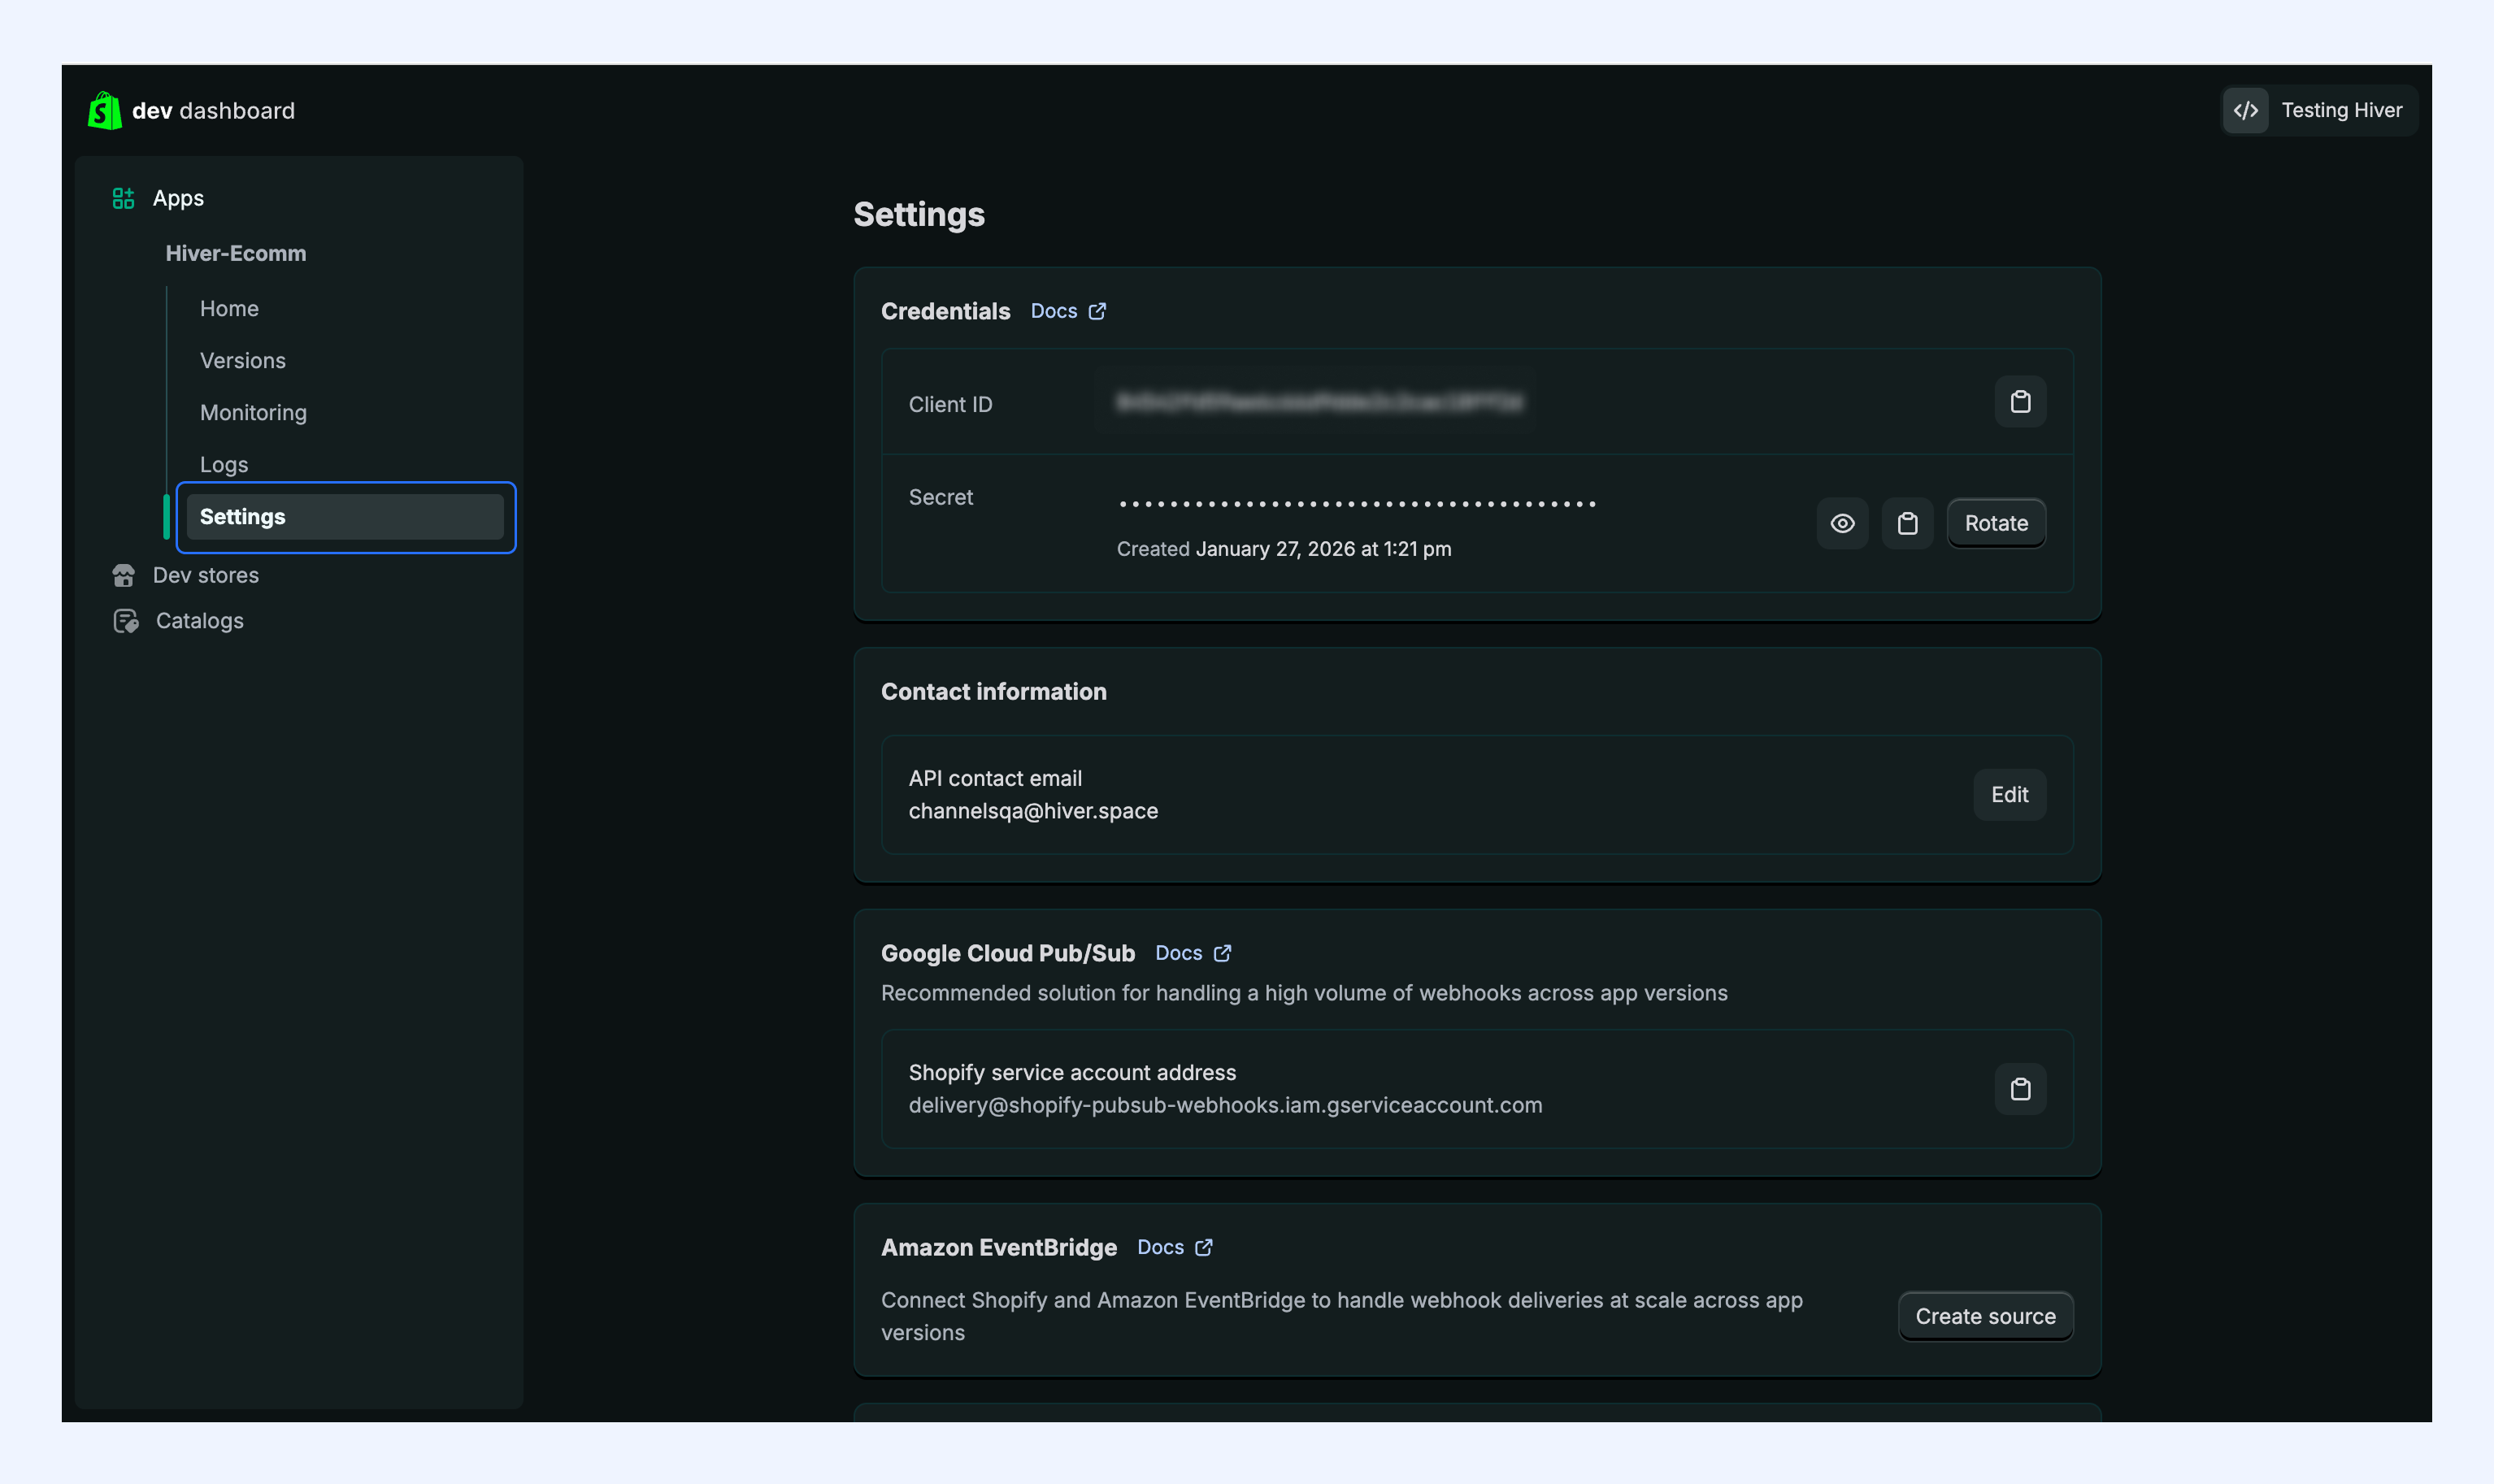
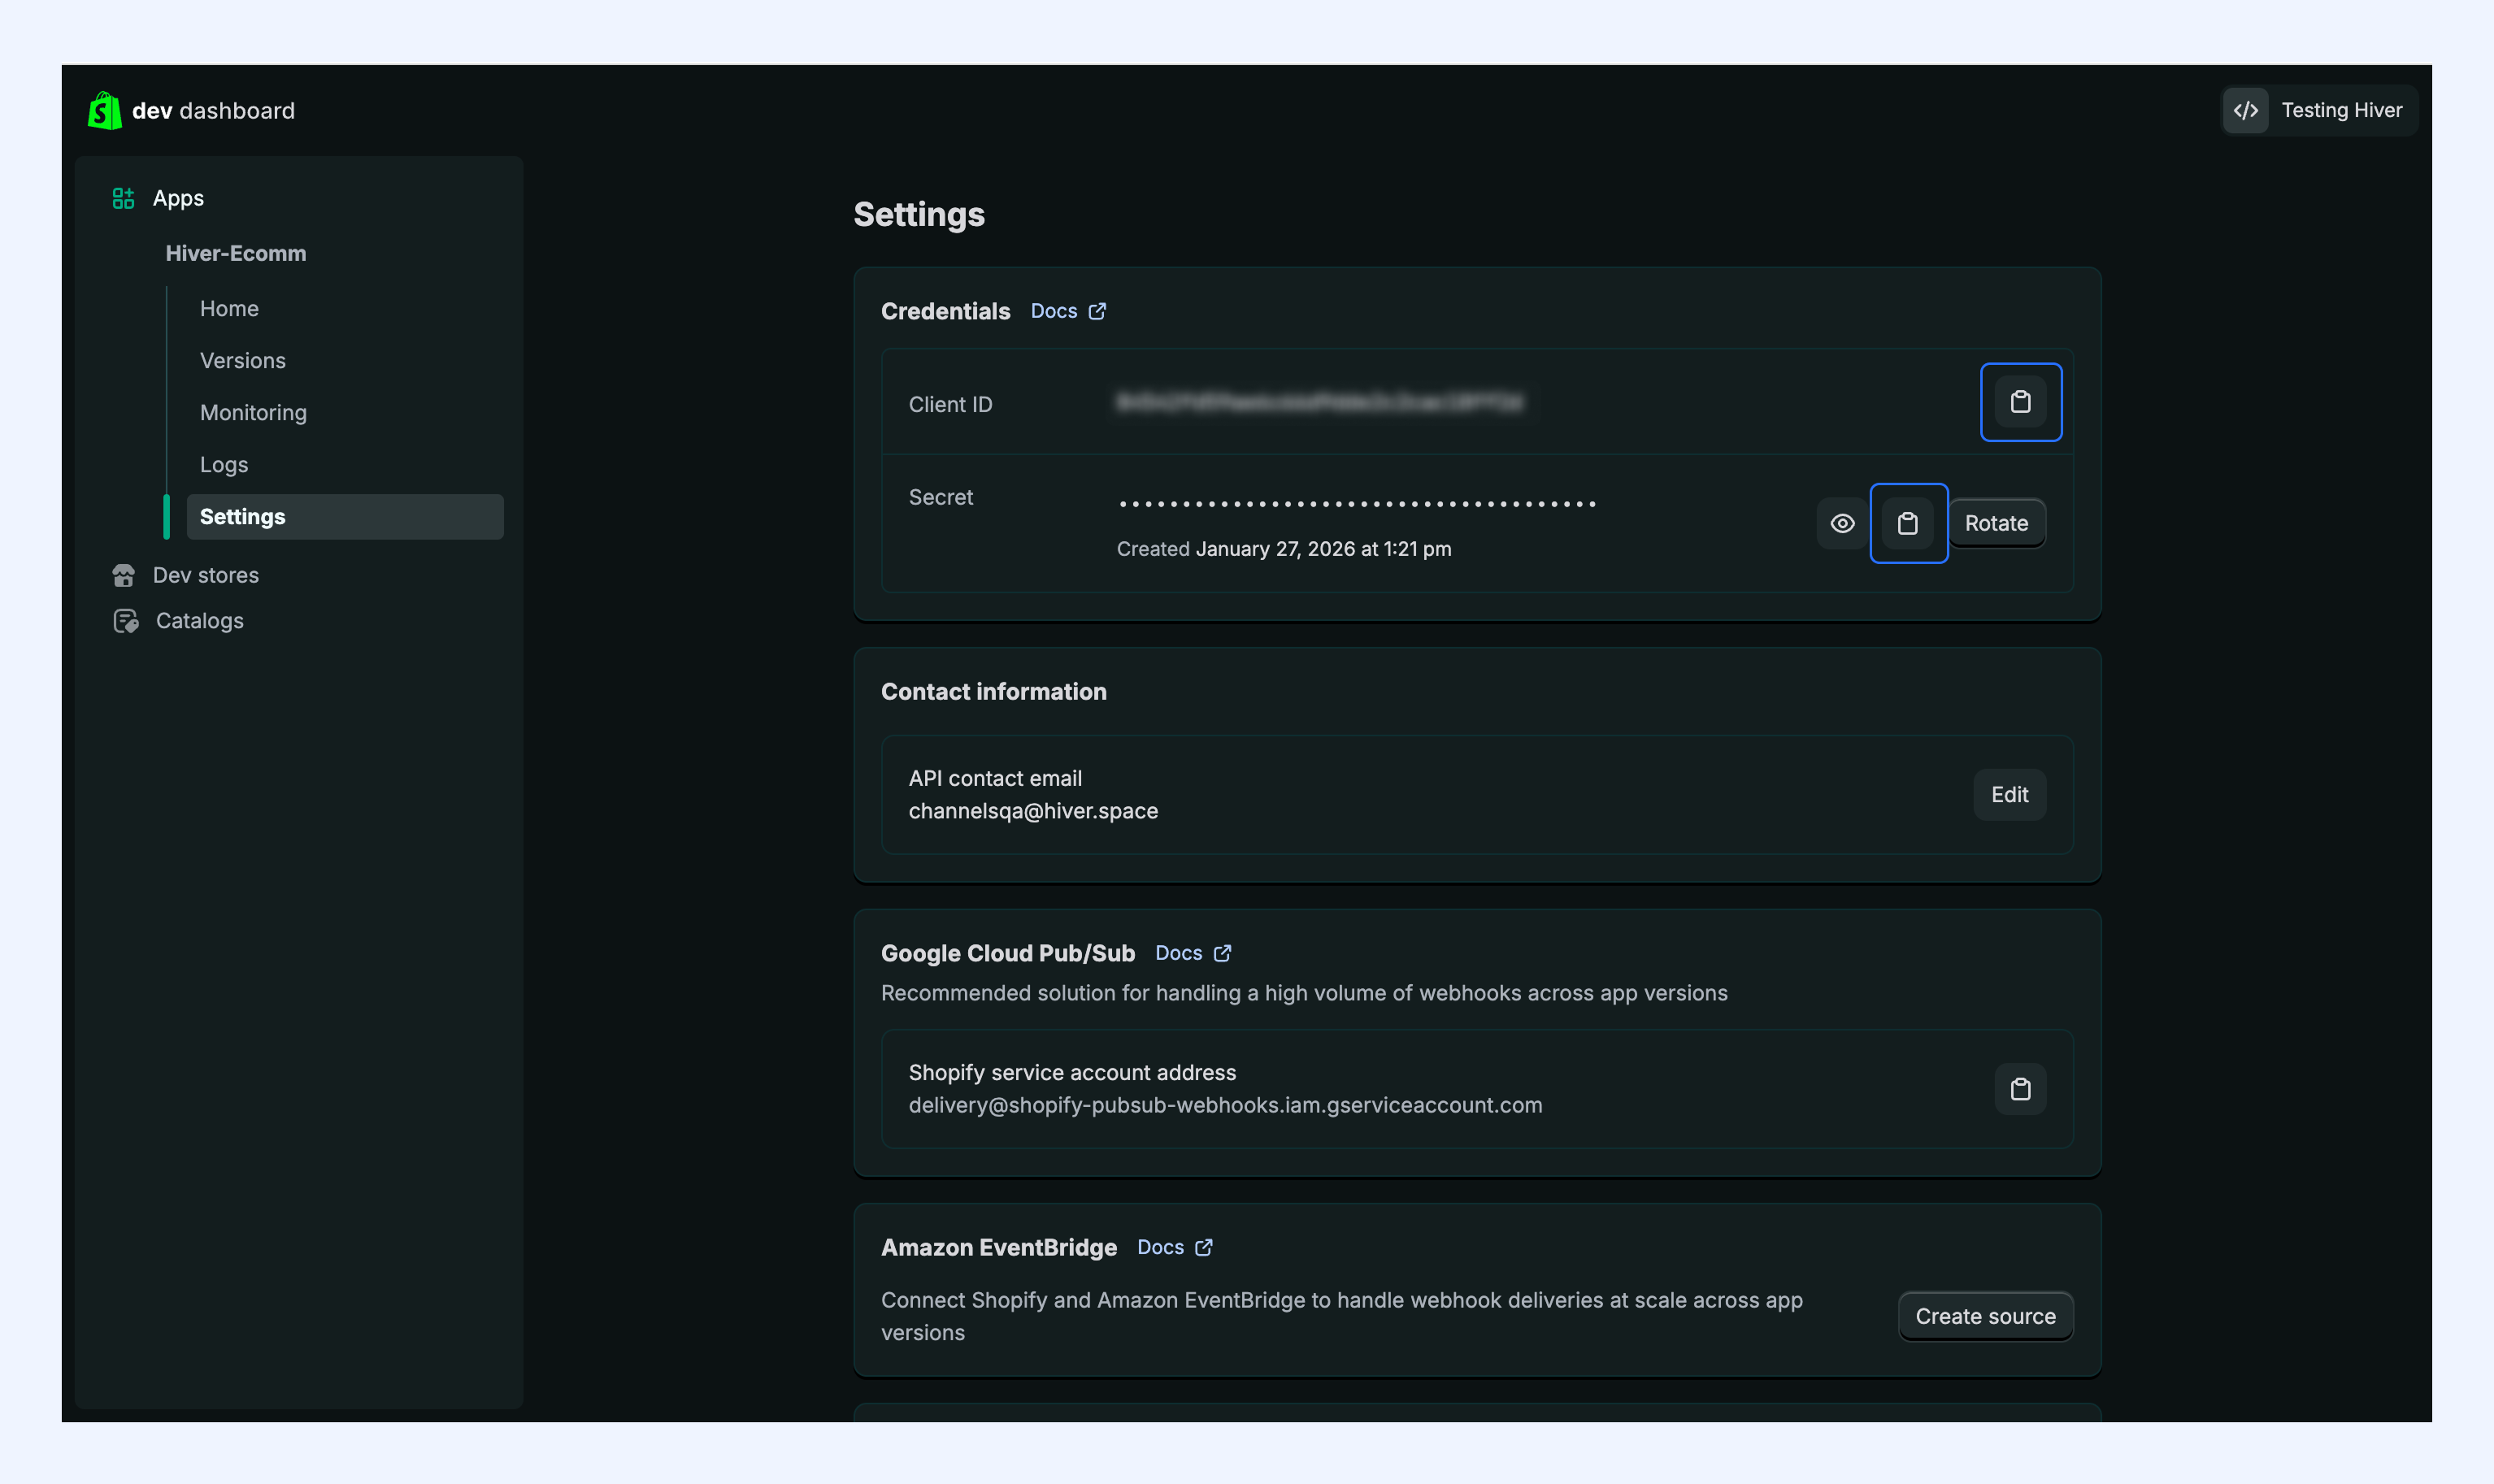
2. Copy both Client ID and Secret credentials, and store these securely.
Complete Hiver authentication
Step 1: Enter authentication details in Hiver
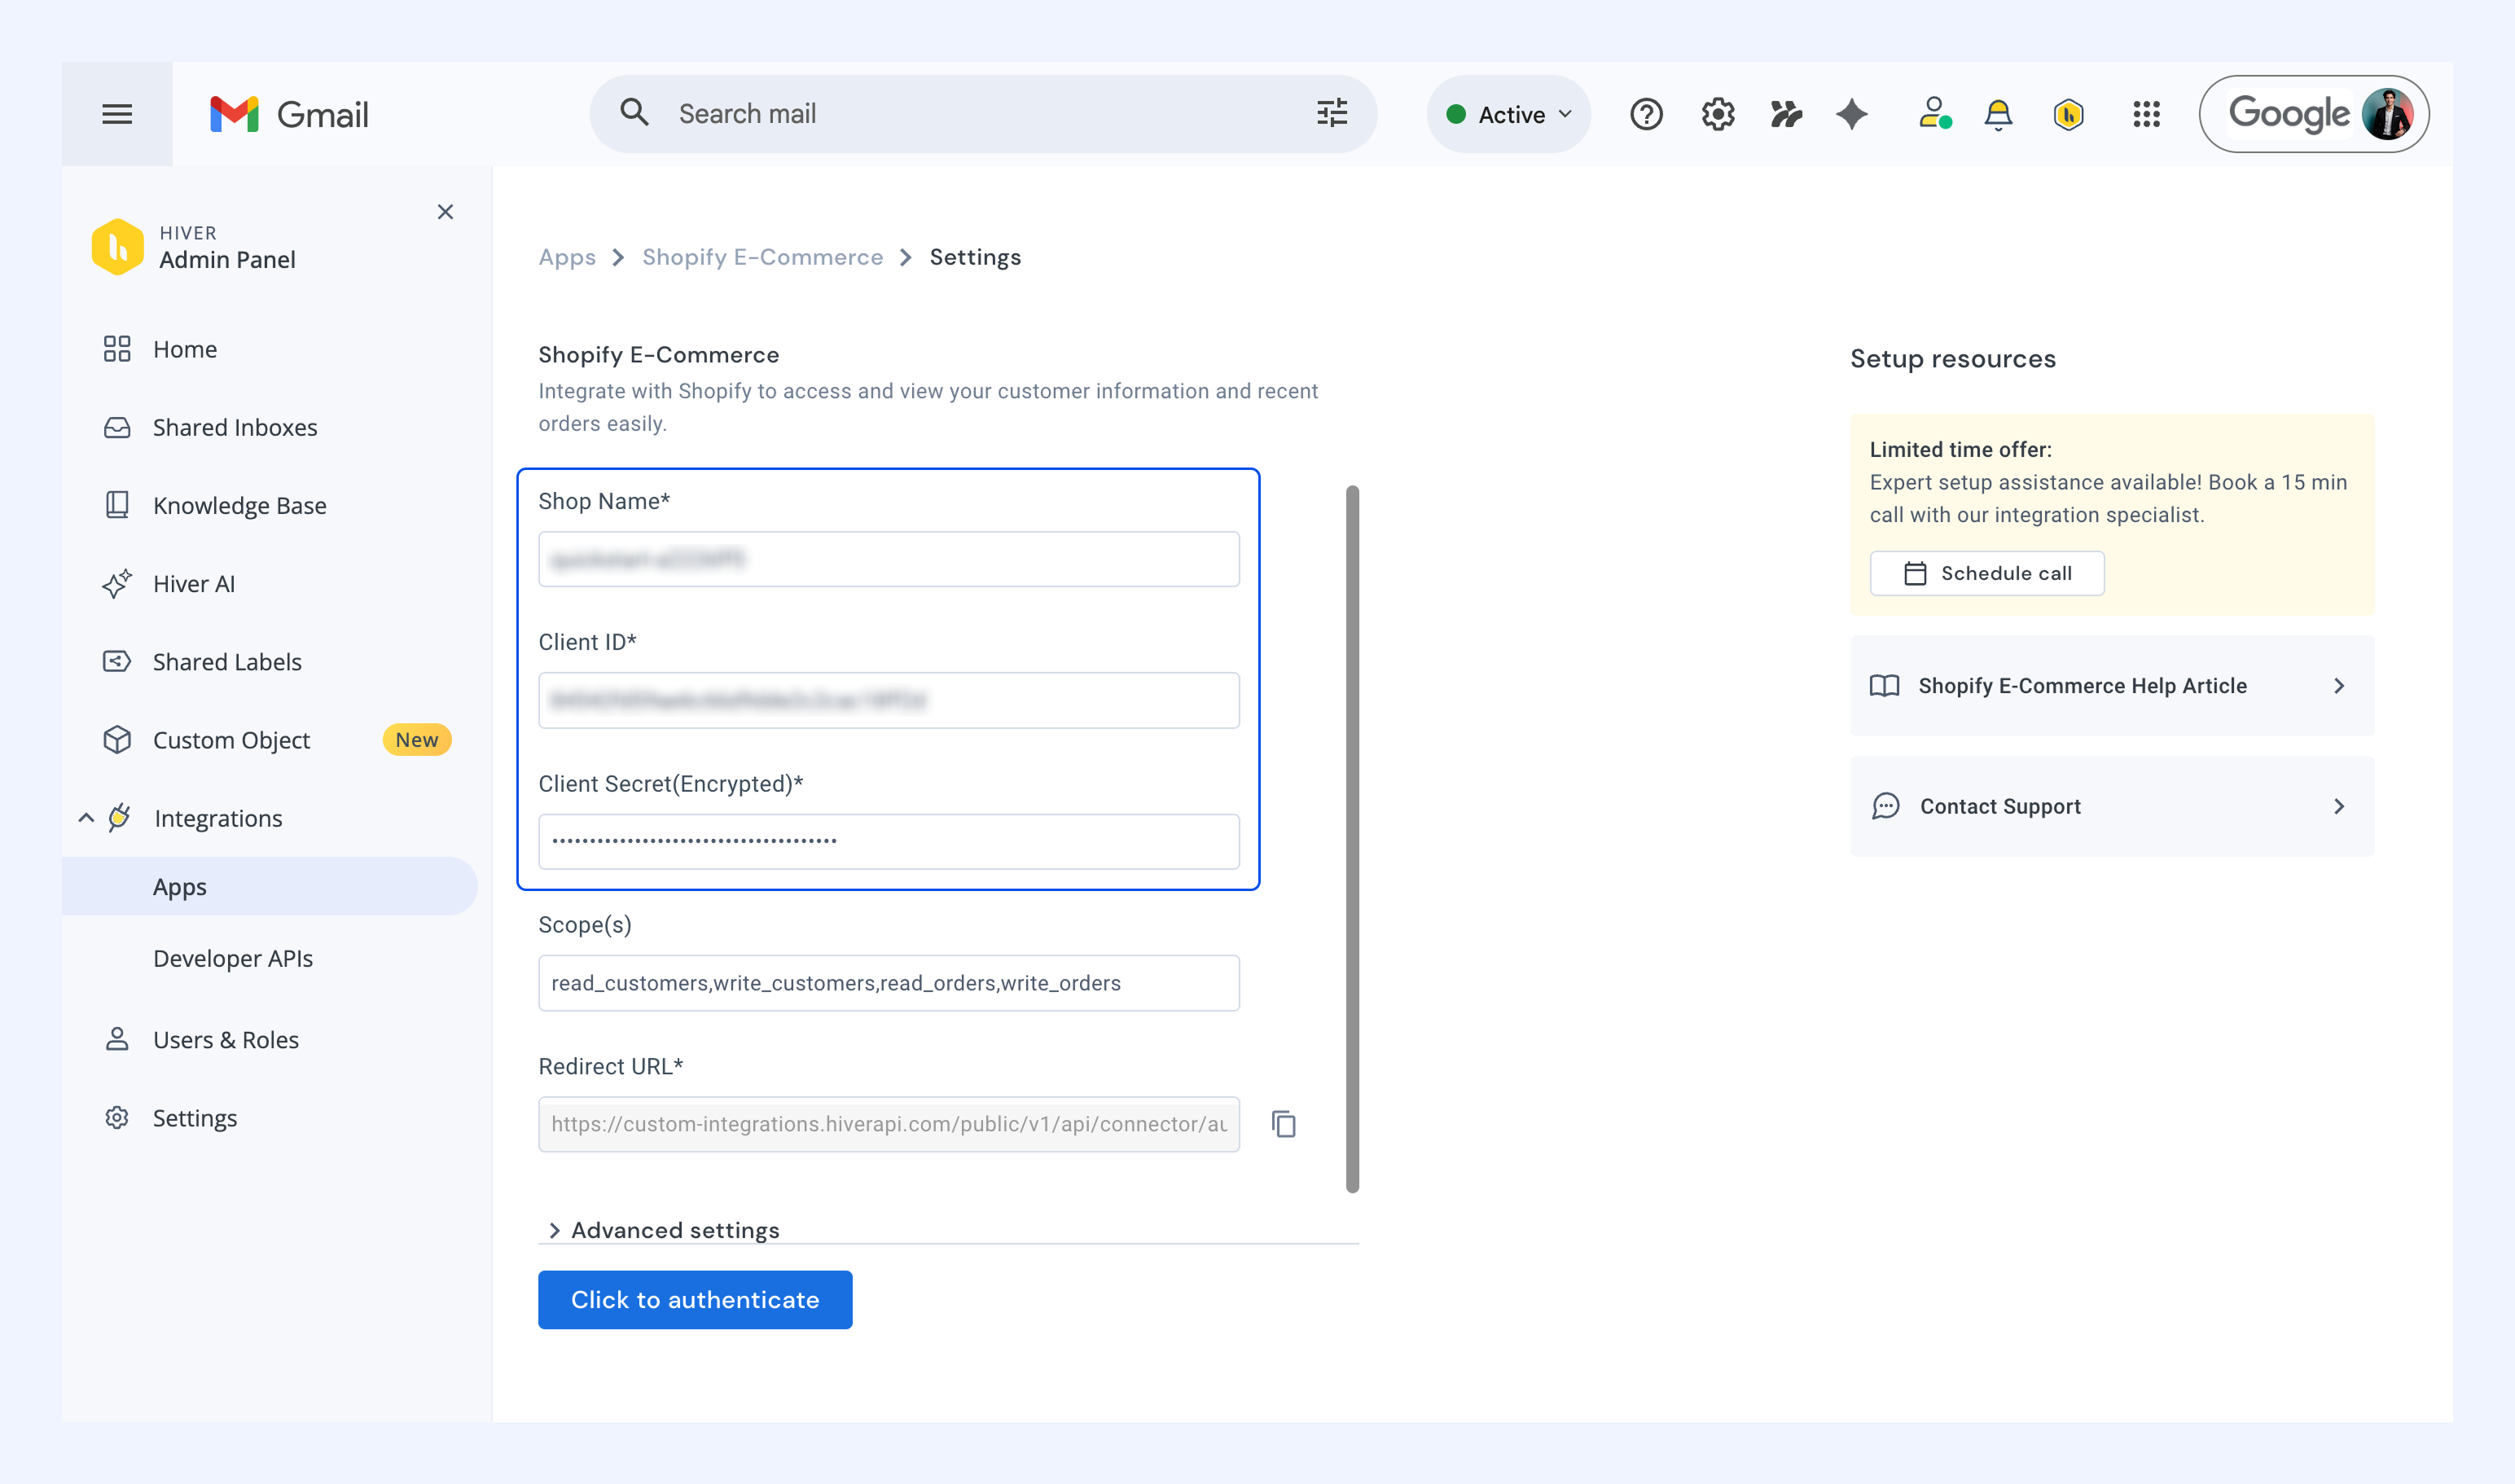
Return to the Hiver setup screen and fill in these details with the information you saved from Shopify:
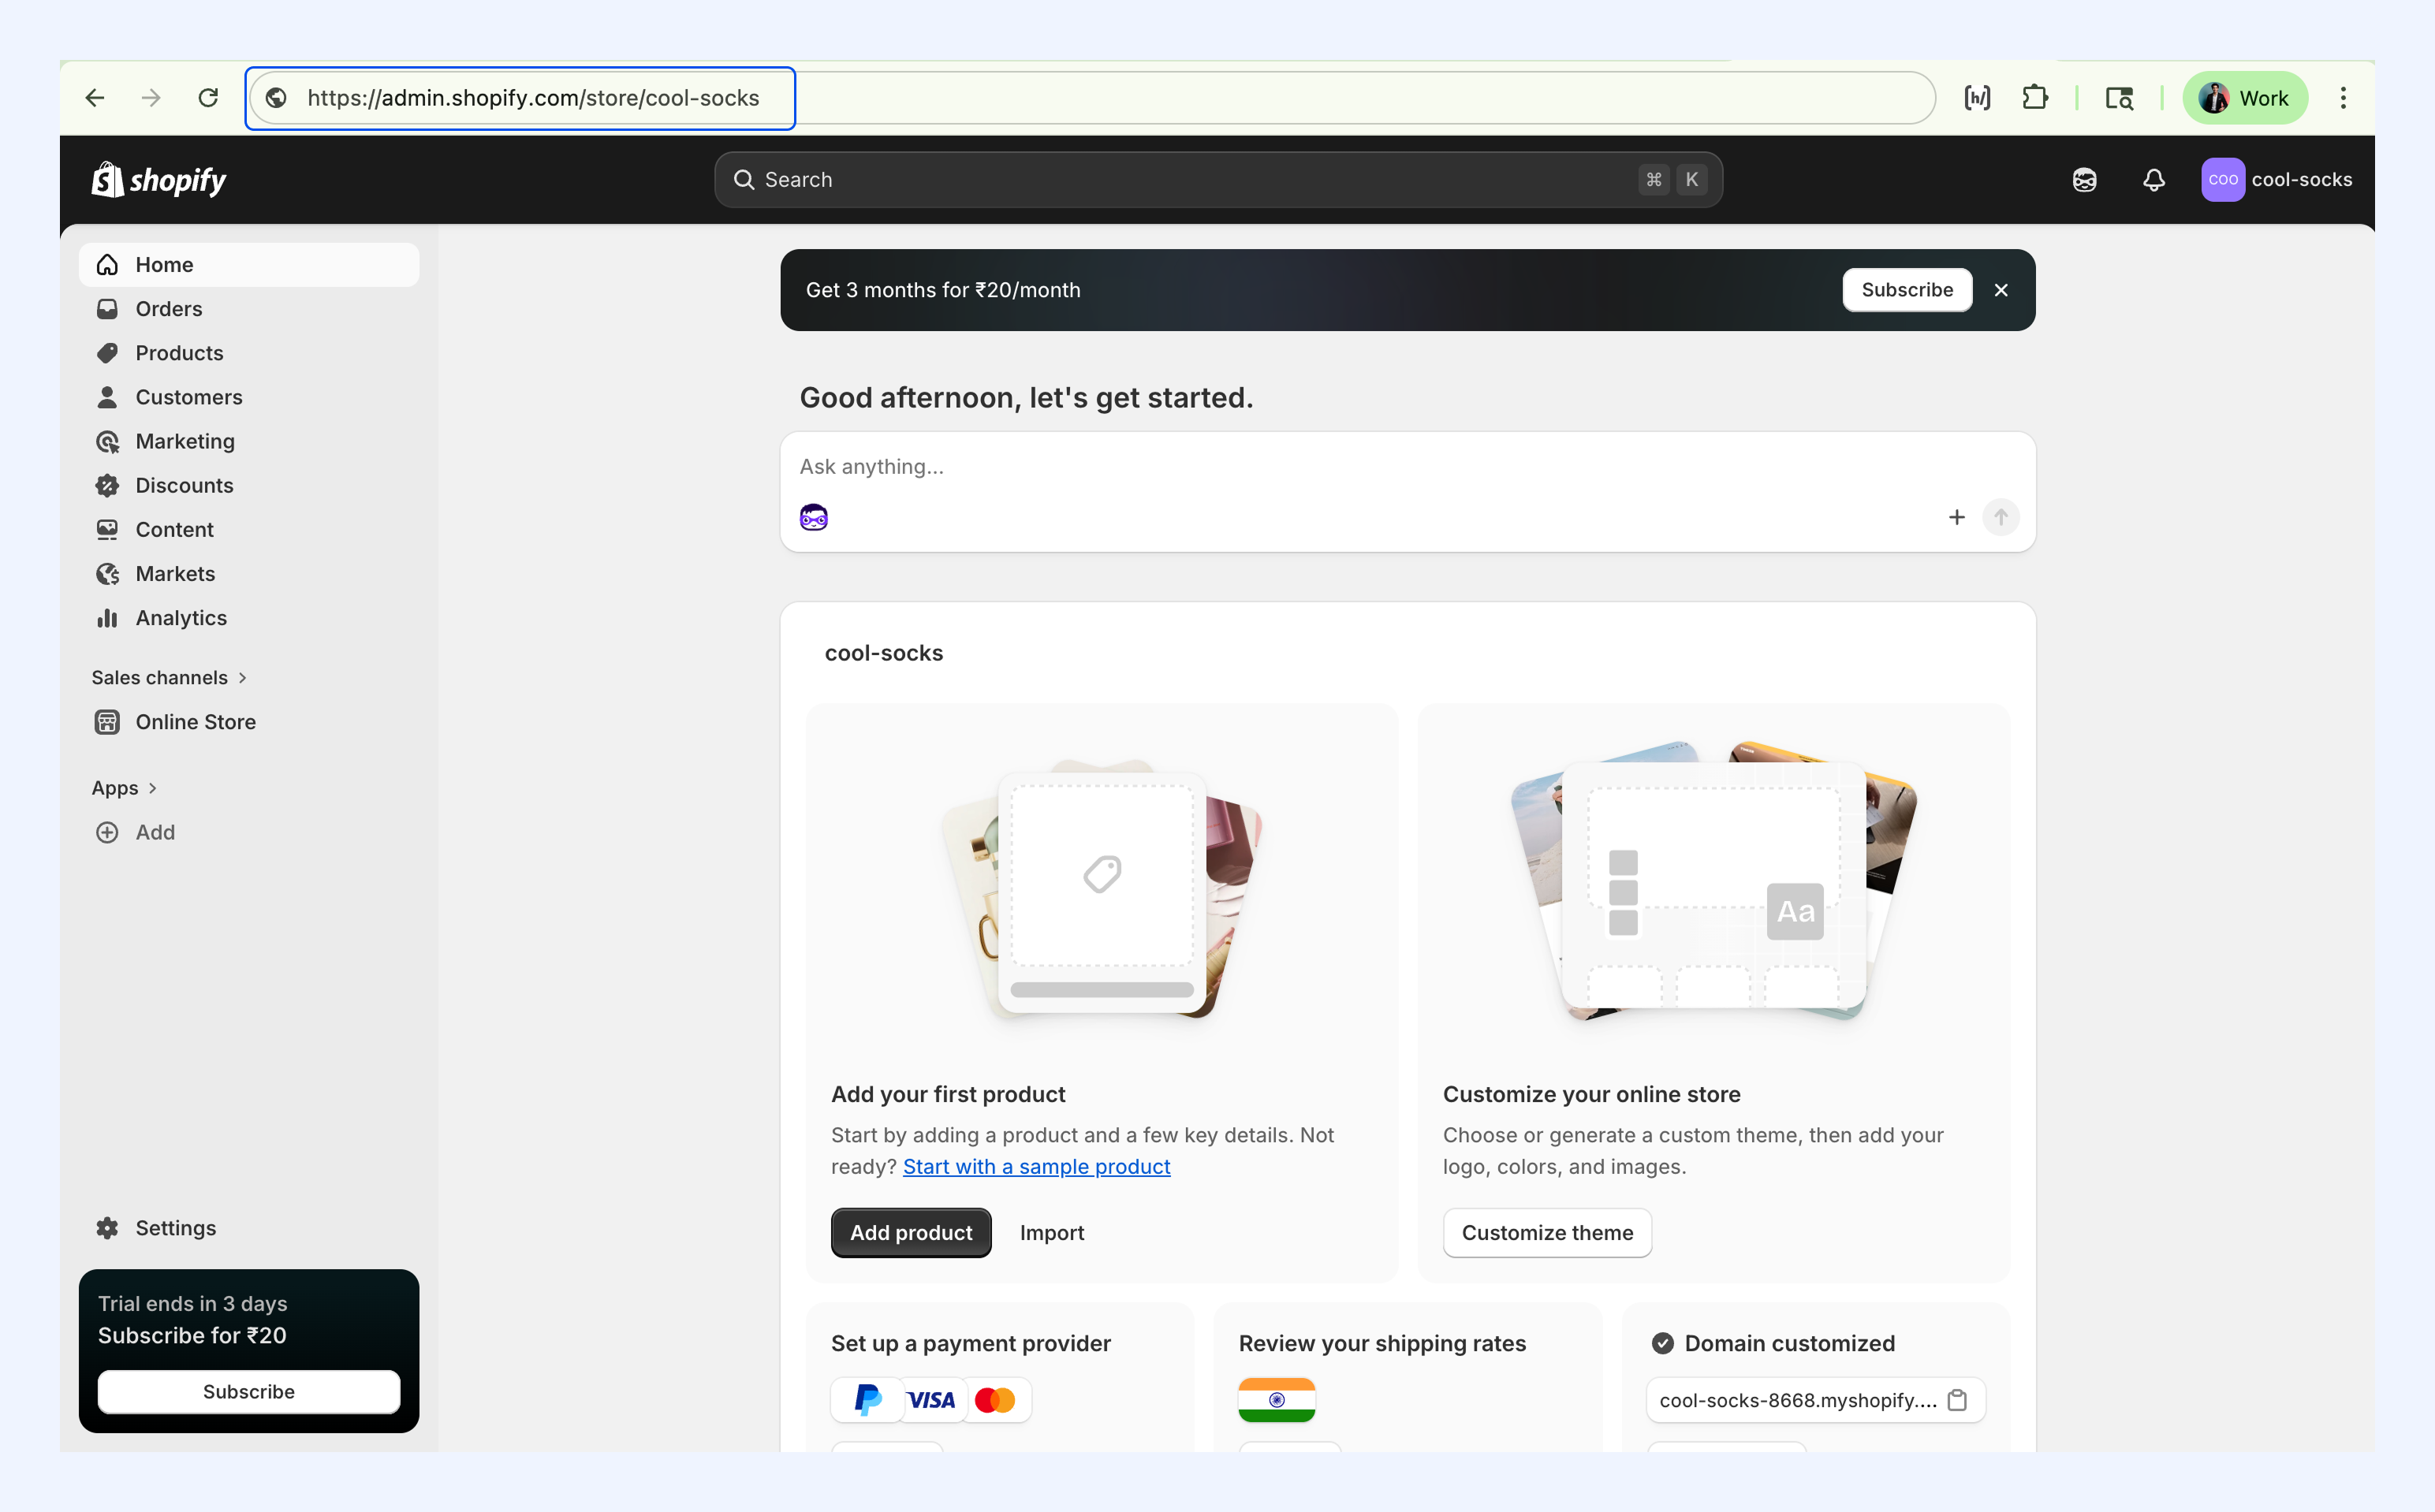
- Shop Name: Found at the end of your Shopify admin URL (For example, in https://admin.shopify.com/store/cool-socks, your shop name is cool-socks).
- Client ID: Paste the Client ID you copied from Shopify.
- Client Secret: Paste the Client Secret you copied from Shopify.
You can leave the remaining fields as they are.
Step 2: Authenticate the integration
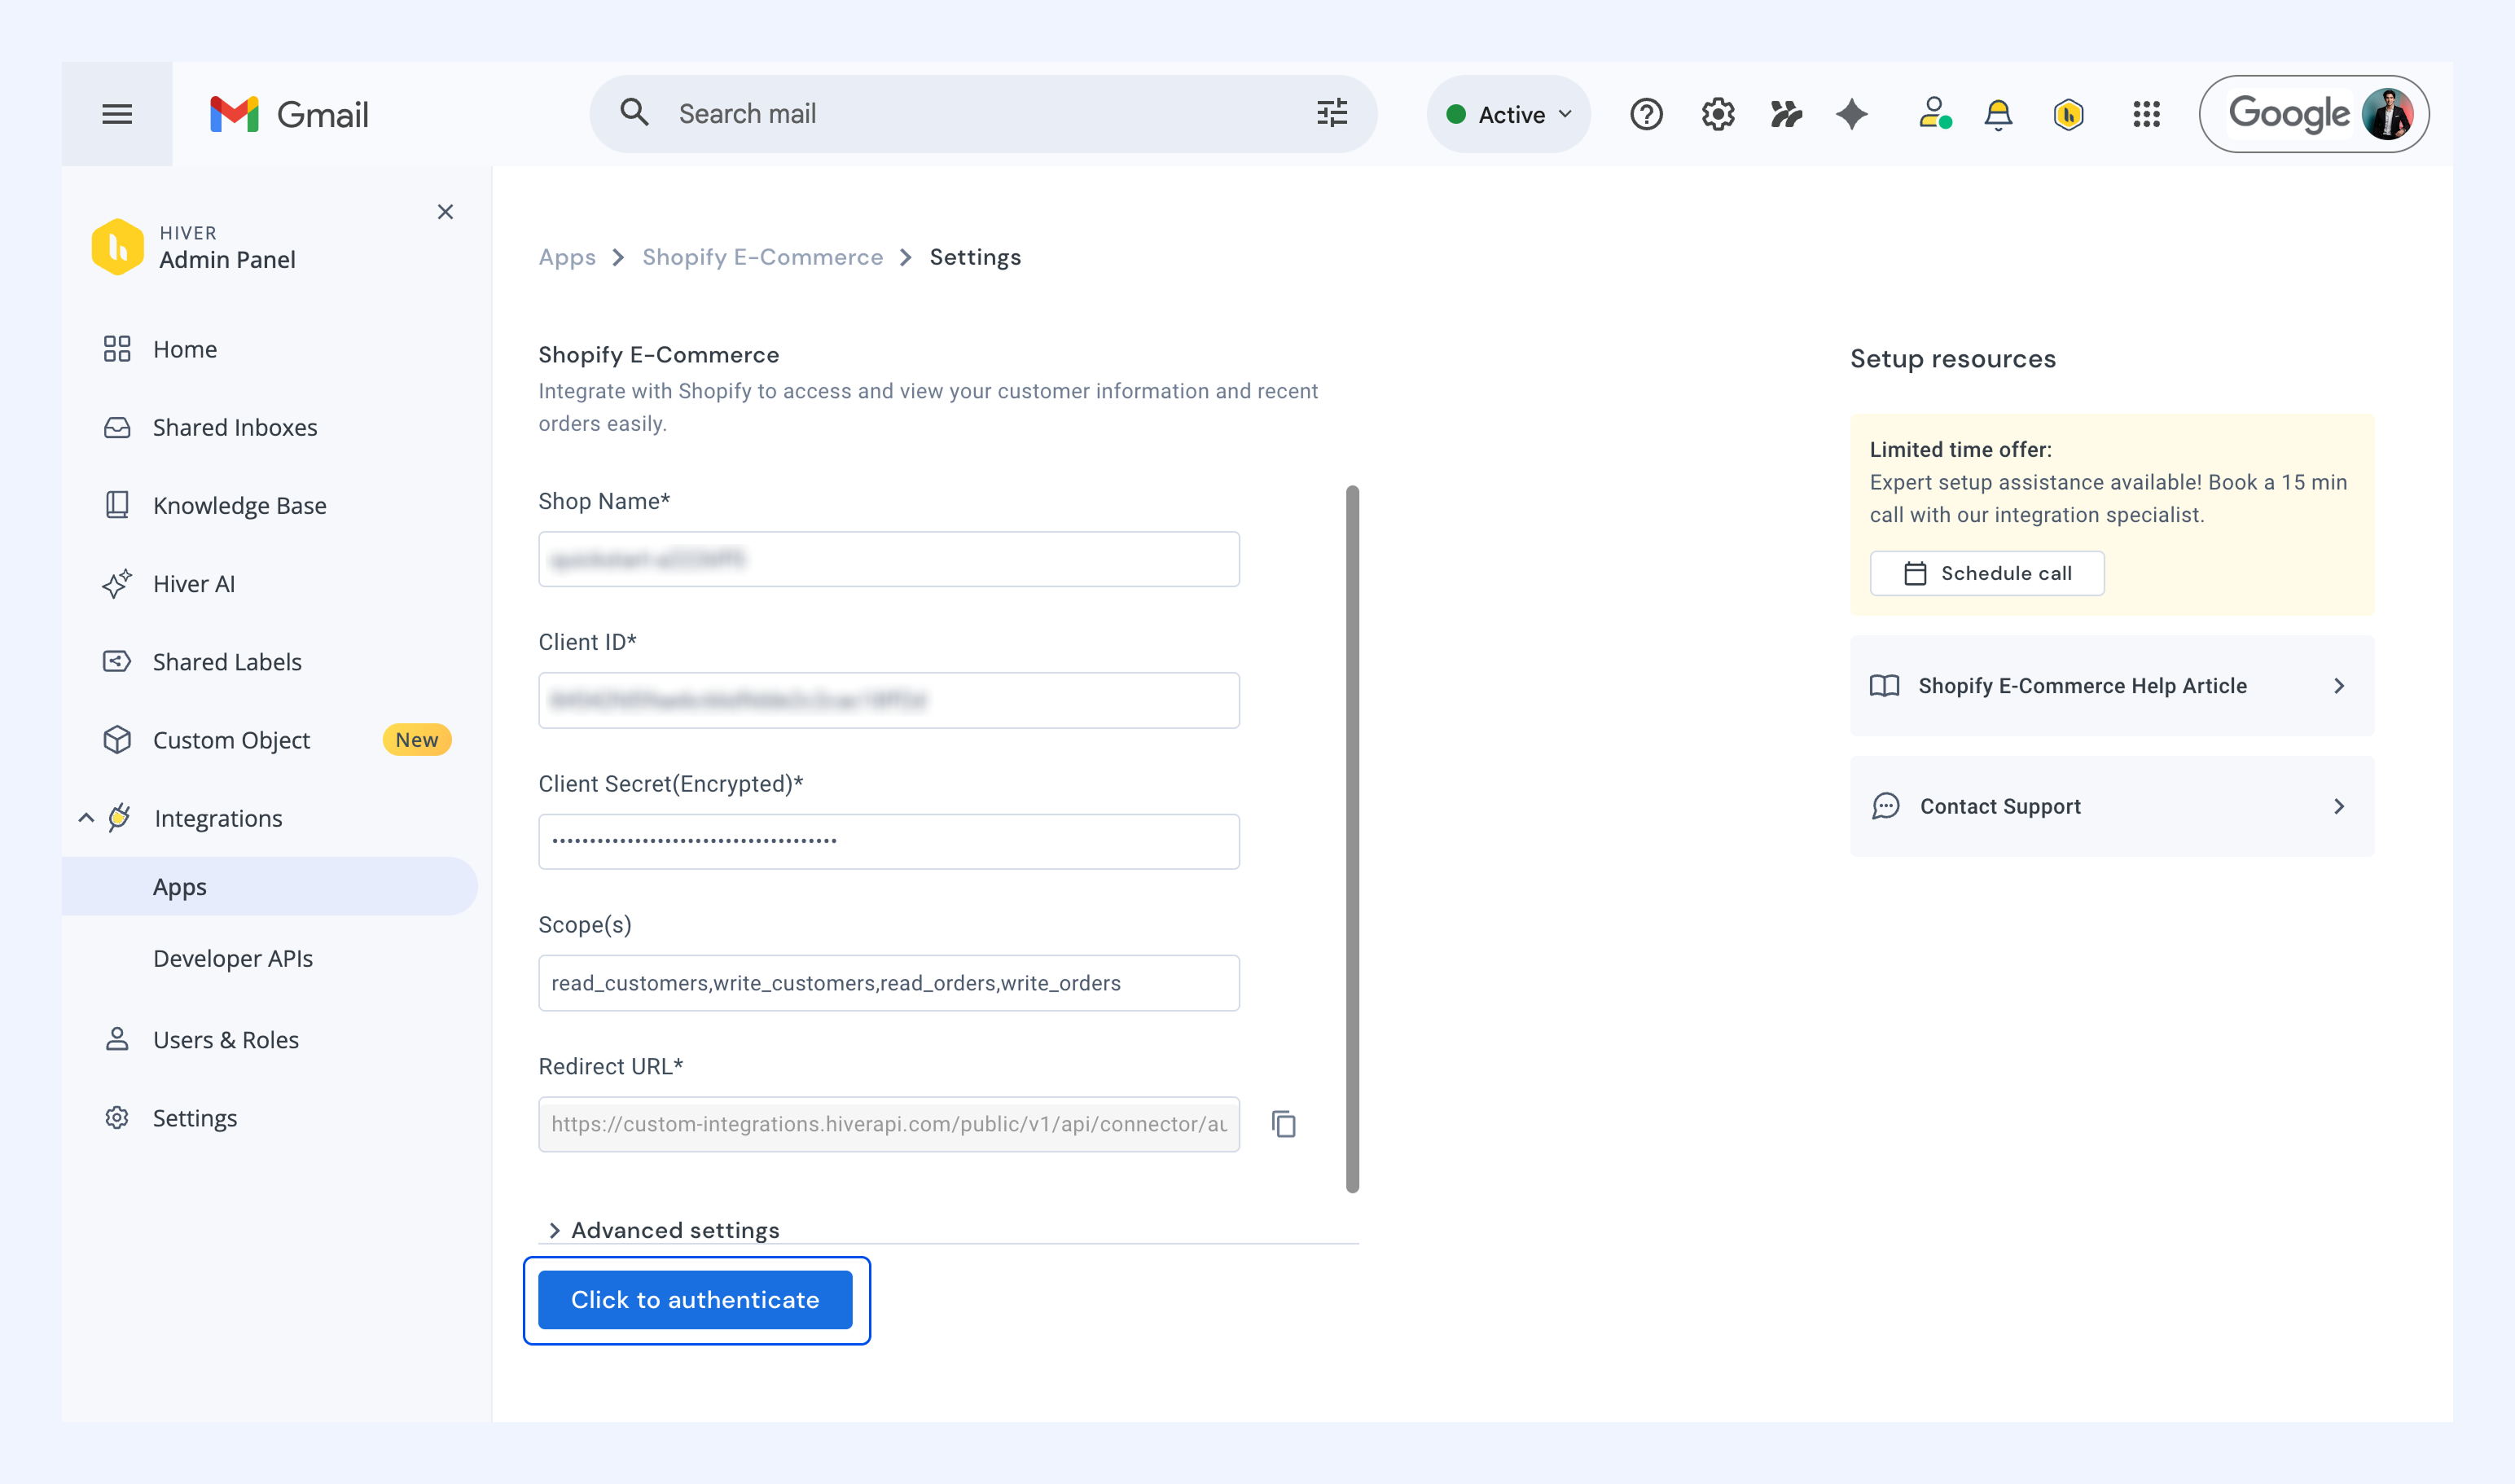
1. Select Click to authenticate.
Choose who can see the Shopify integration
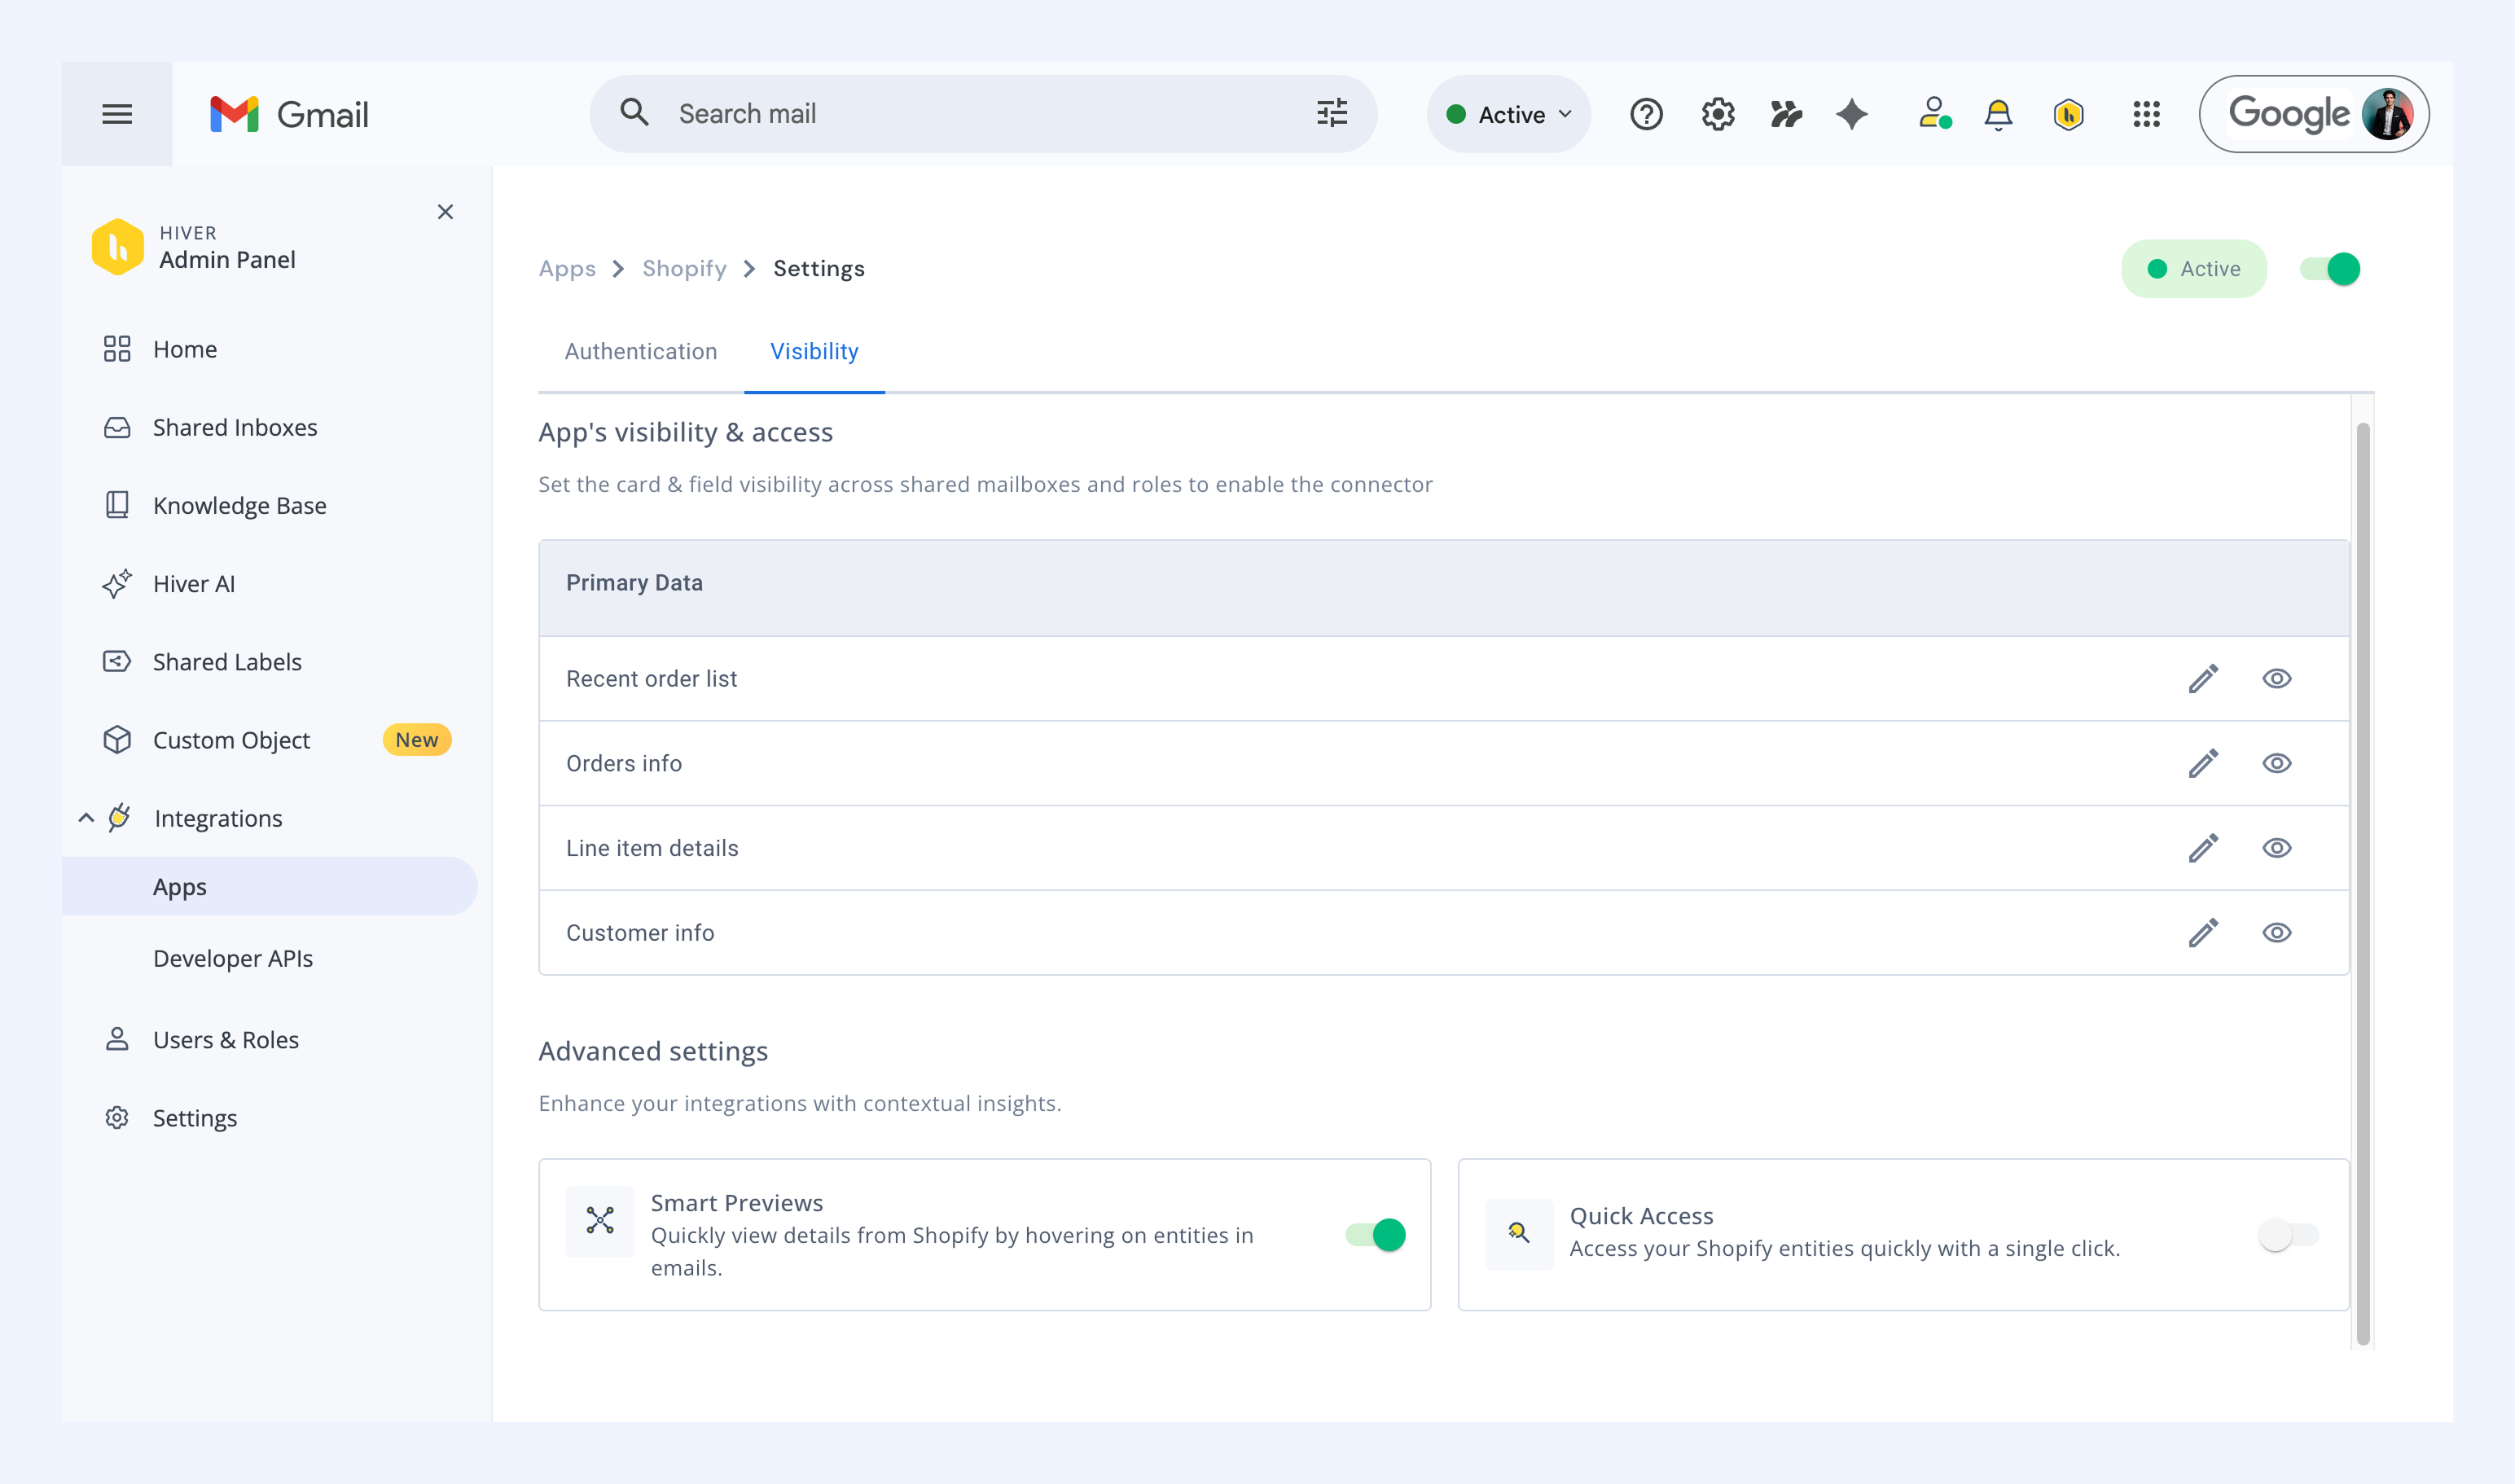
Once the Shopify app is authenticated, you can enable it and customize visibility settings for the information cards that your team can see. This allows you to control which Shared Inboxes and user roles can view information from Shopify.
To configure visibility,
1. Click the Configure visibility settings icon (eye icon).
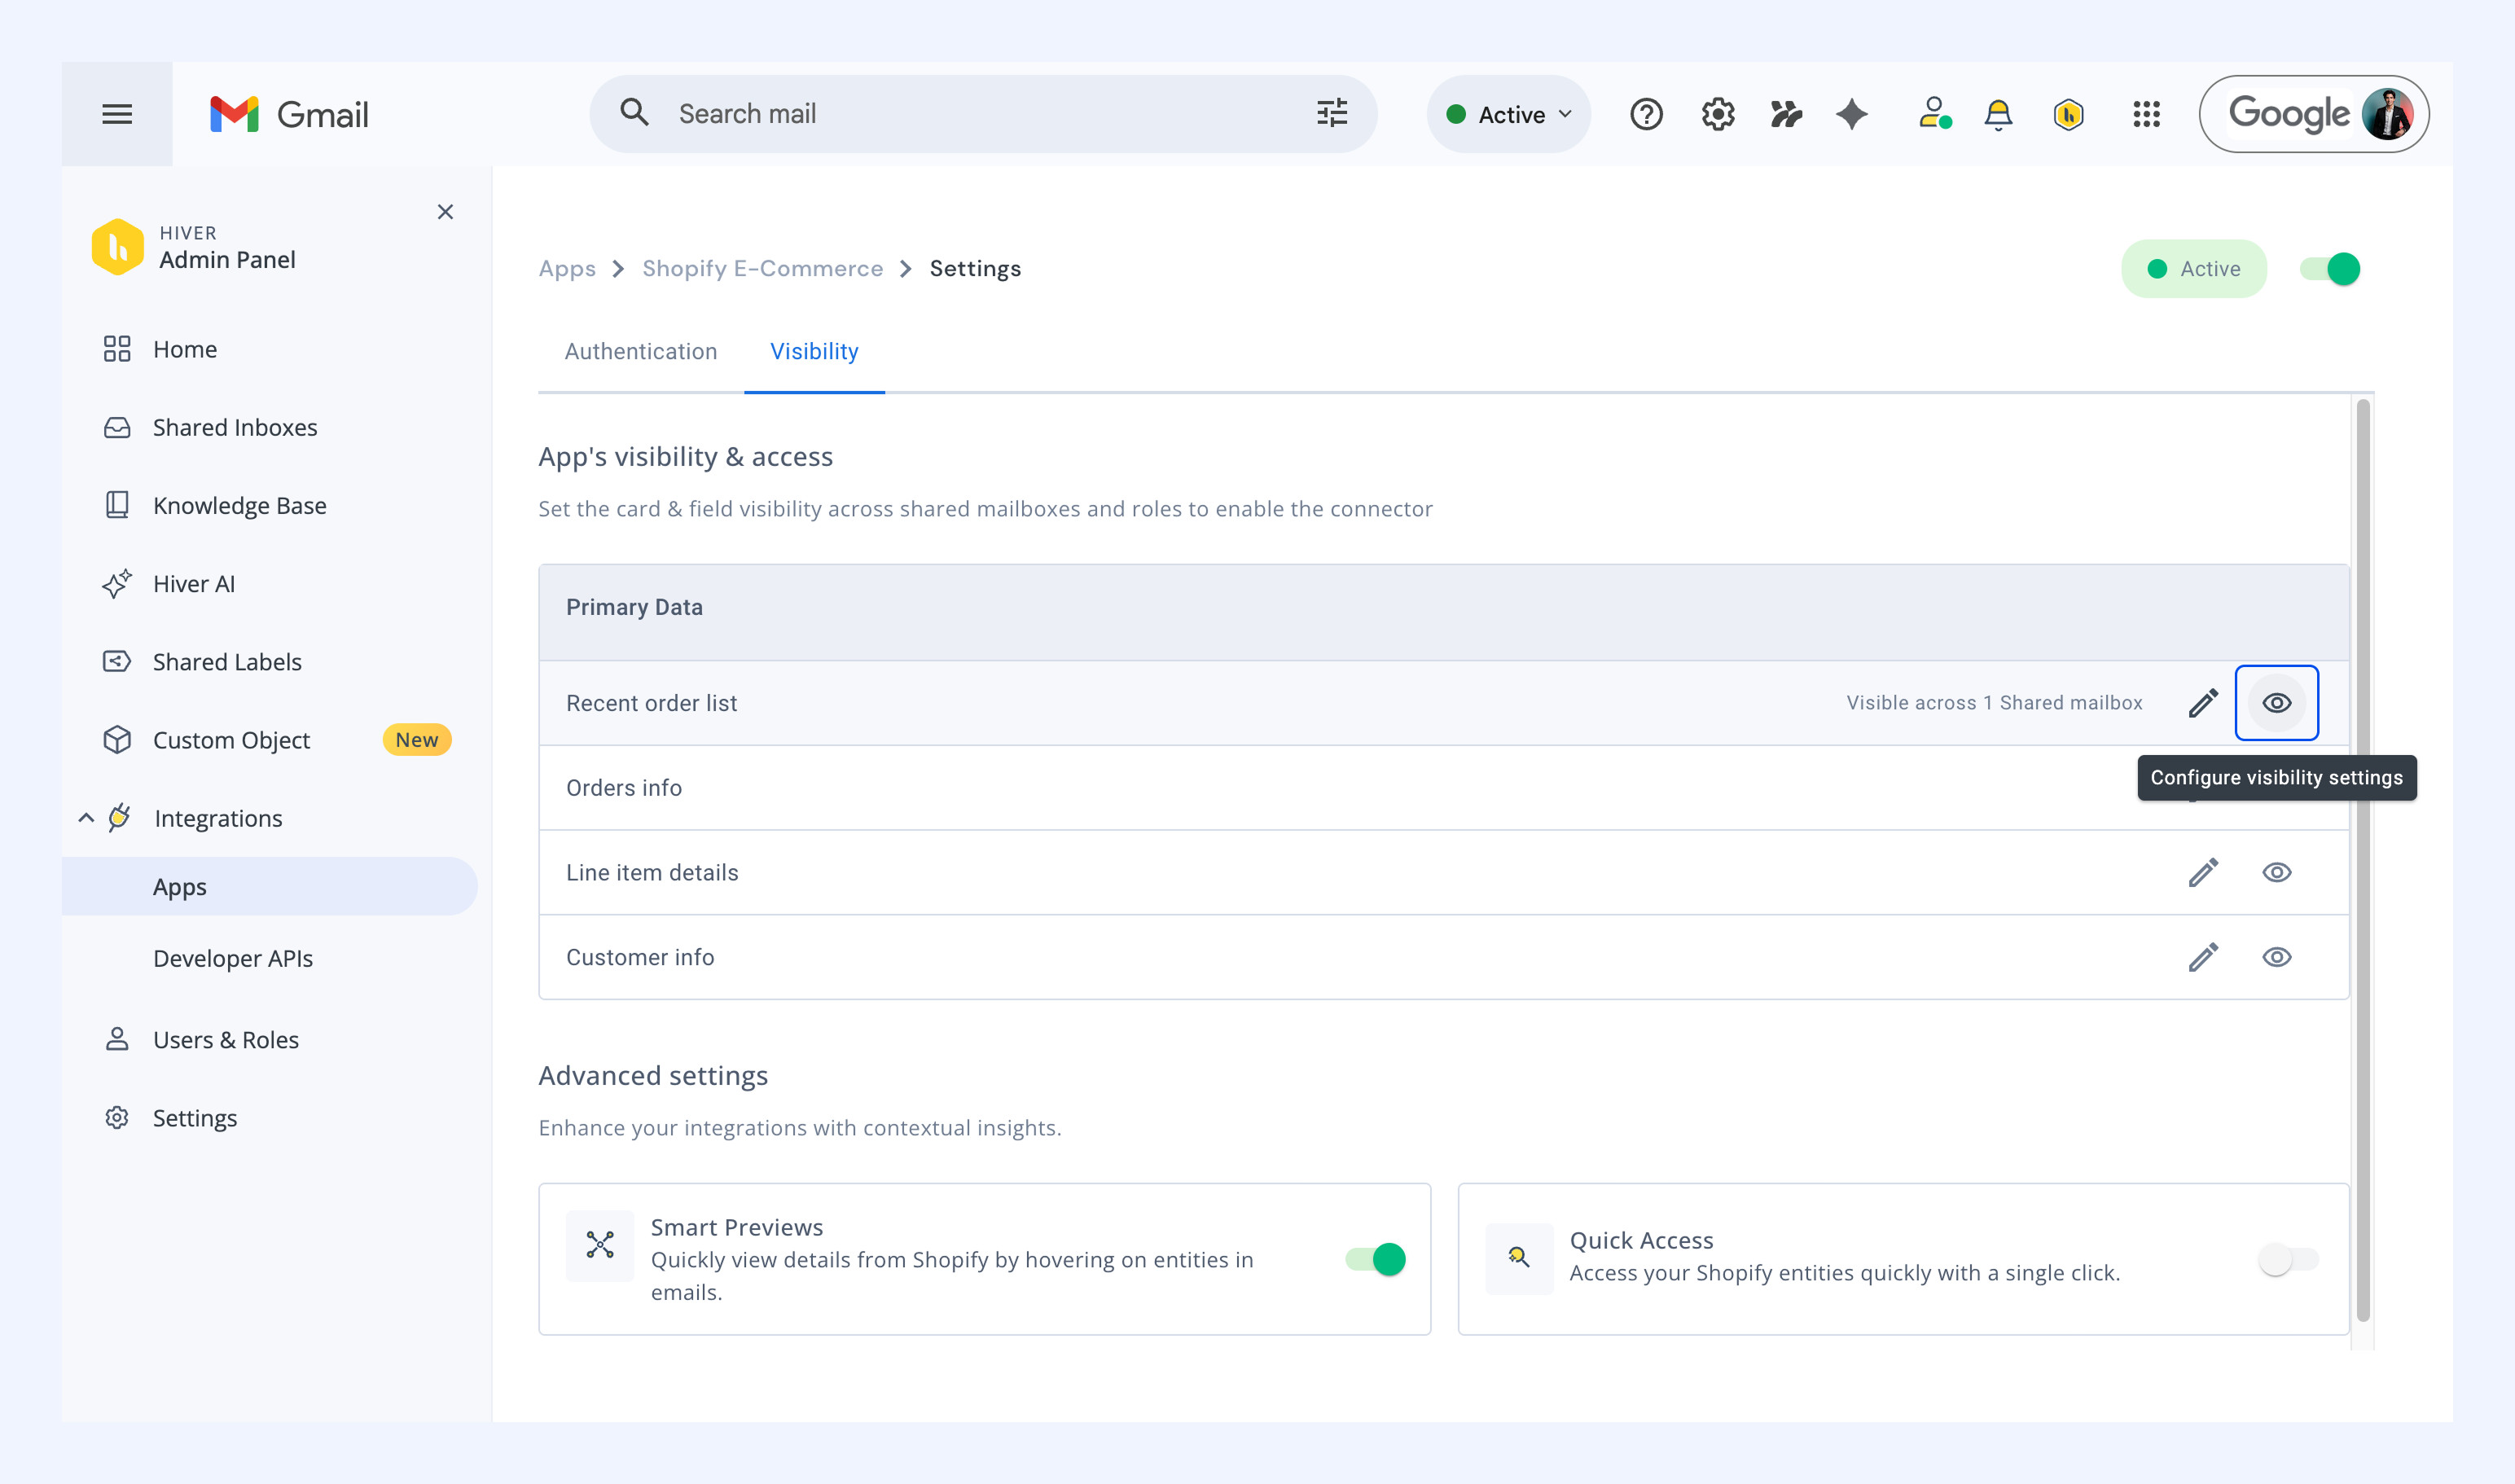
2. Select the Shared Inboxes and user roles that can see the Jira card in the right panel in Hiver.
3. Click Save.
Choose what data should be visible
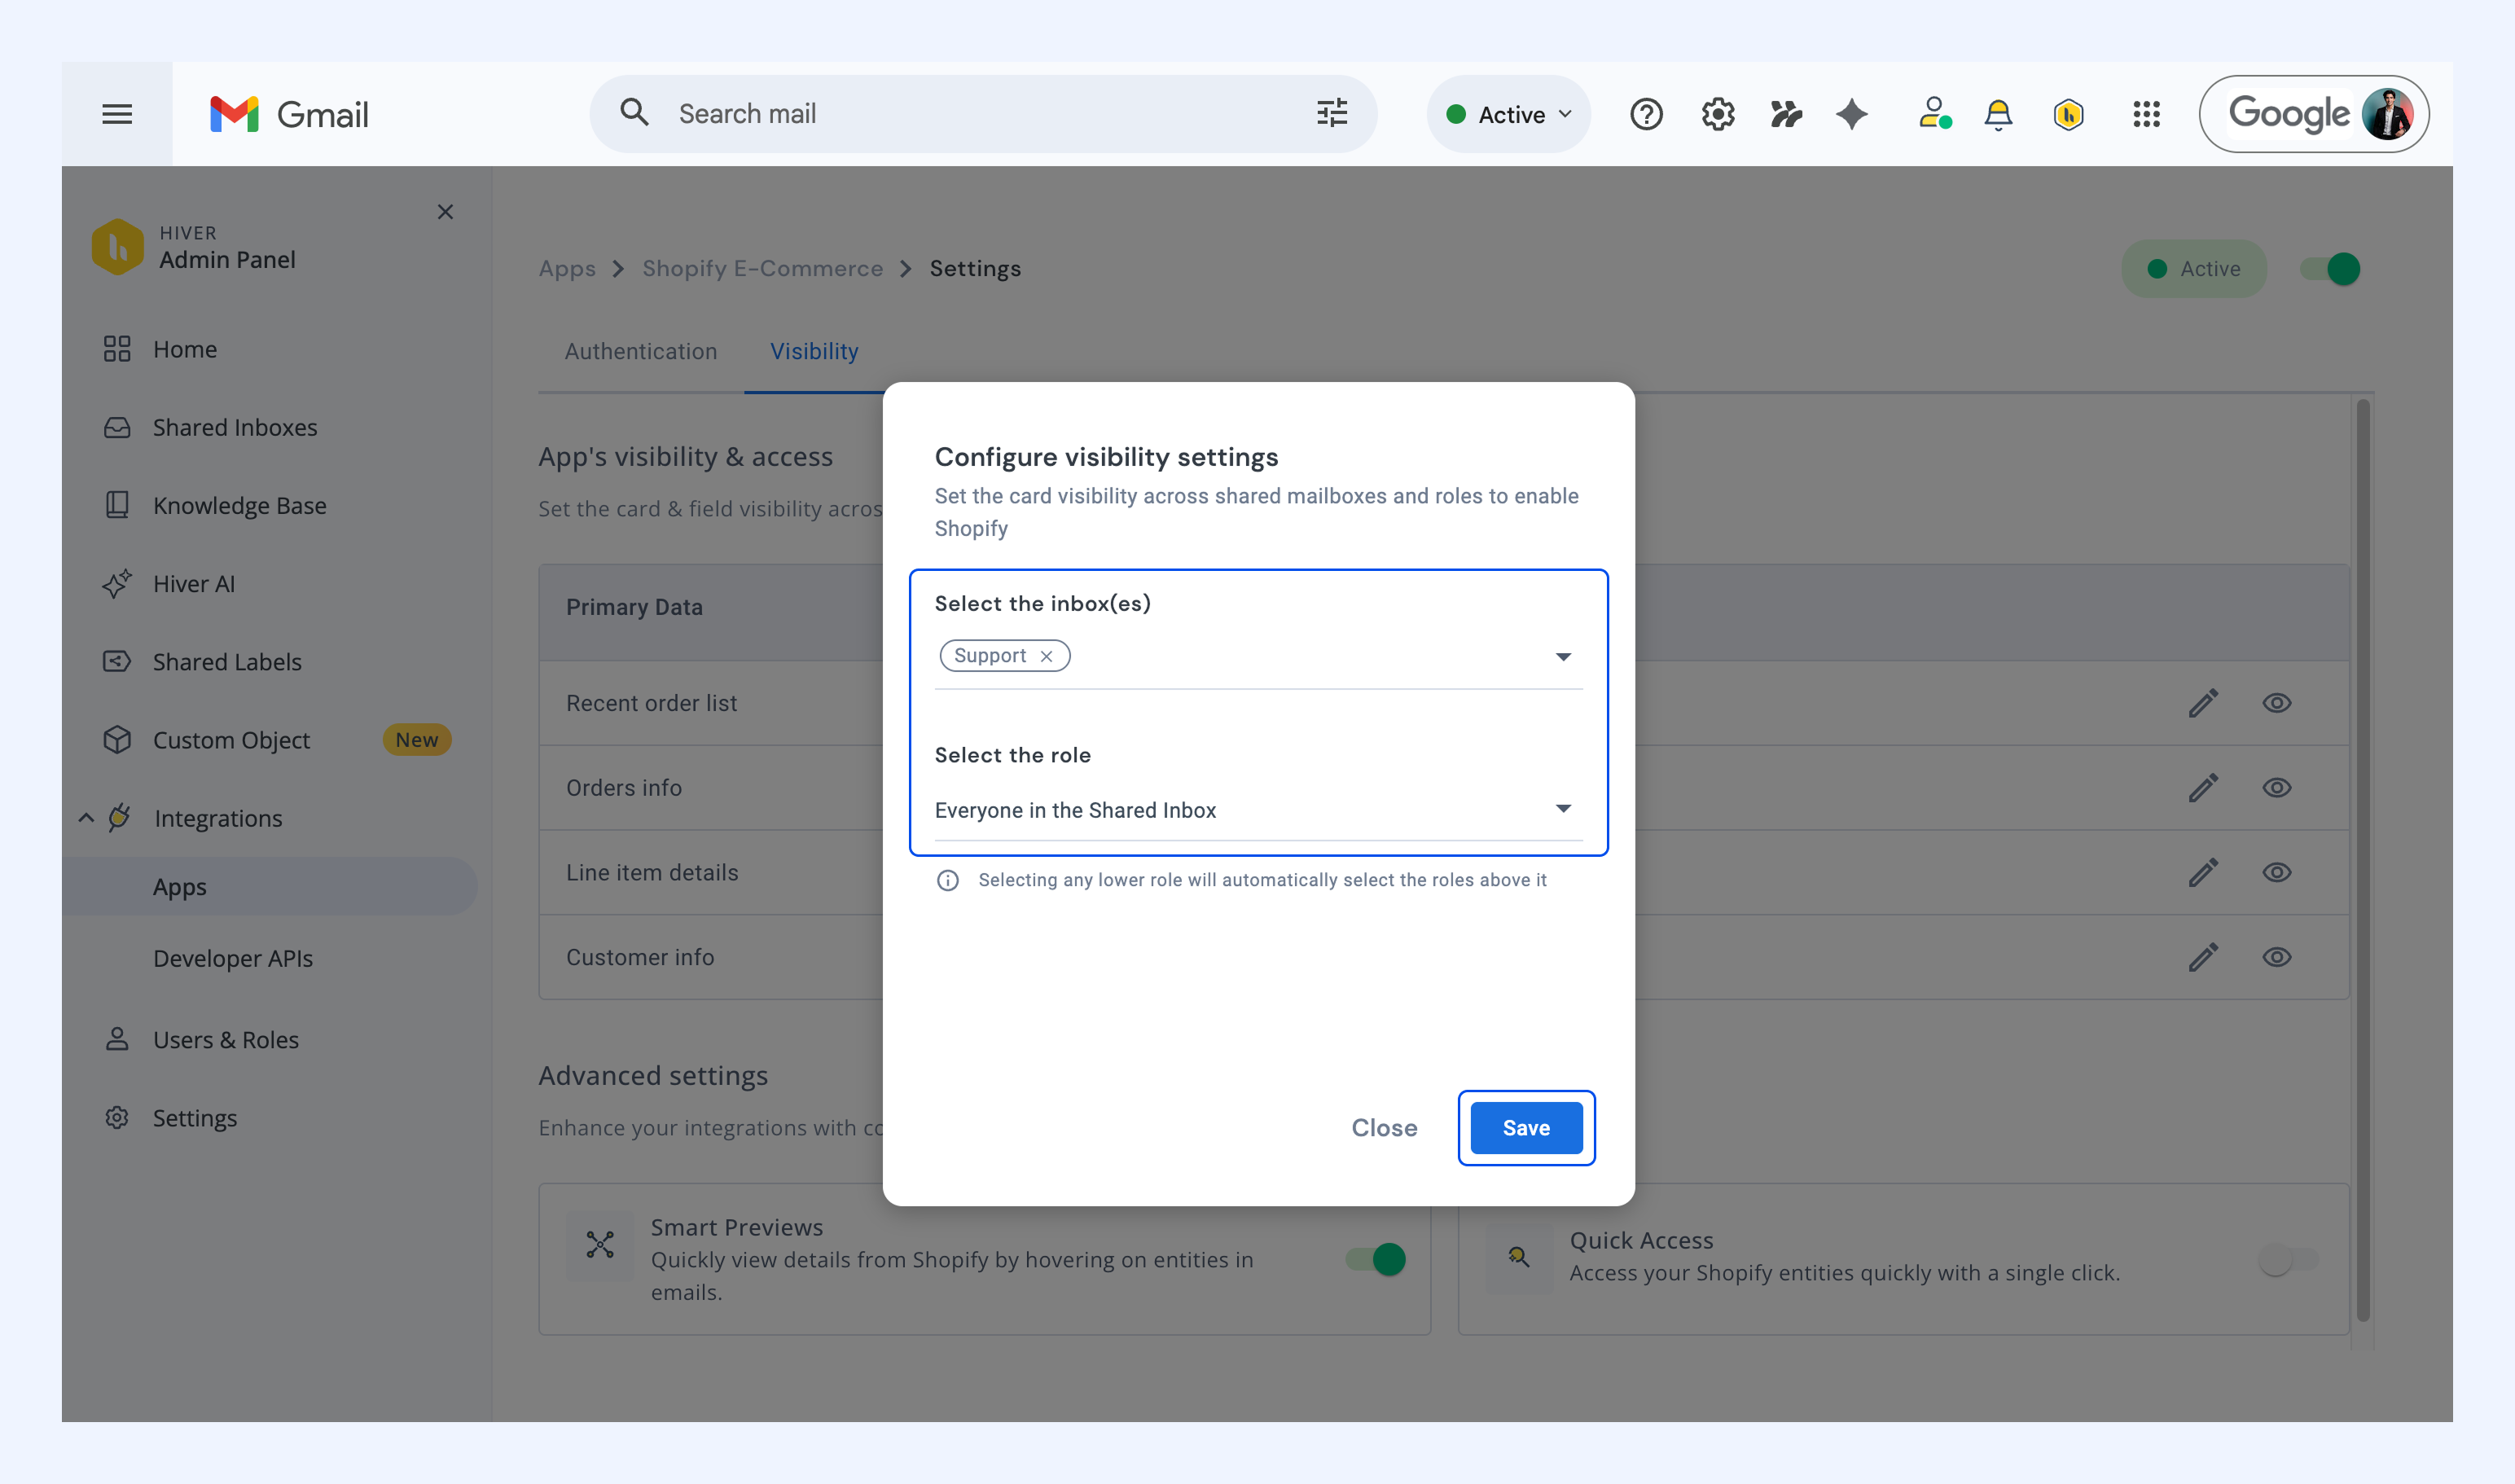
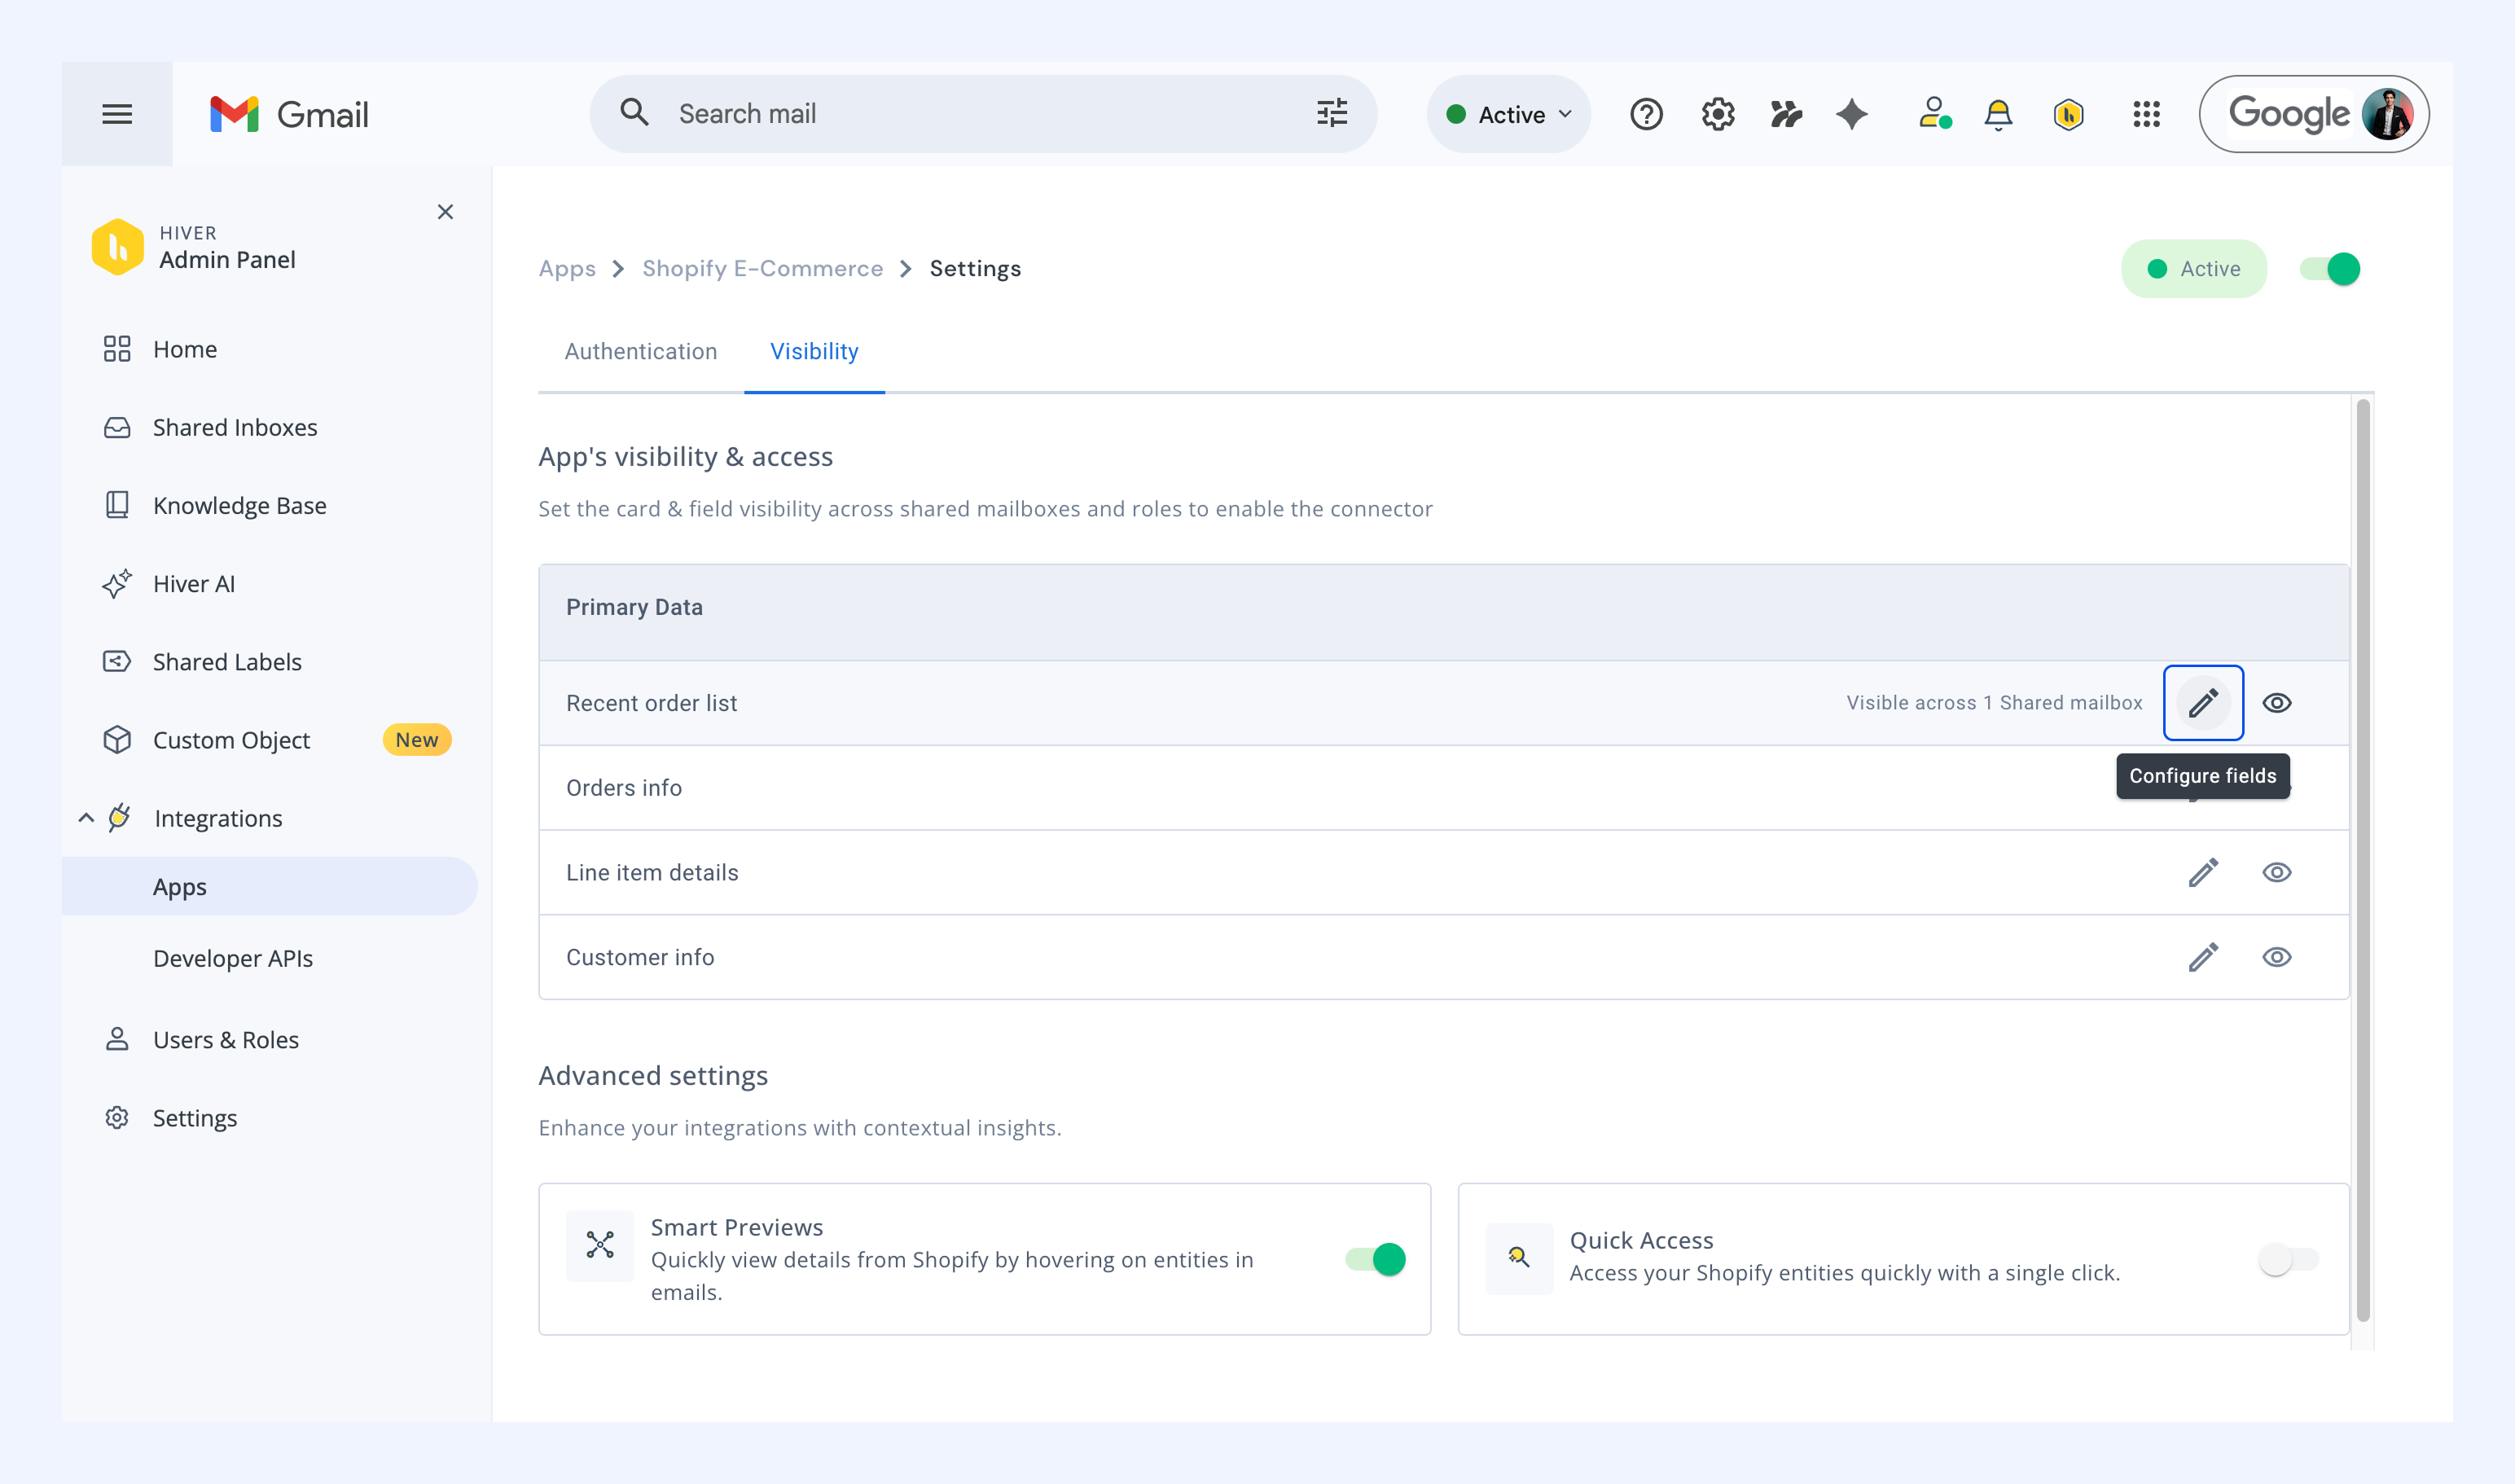
In the Visibility tab, choose which fields your team can see in Hiver when creating Shopify tasks.
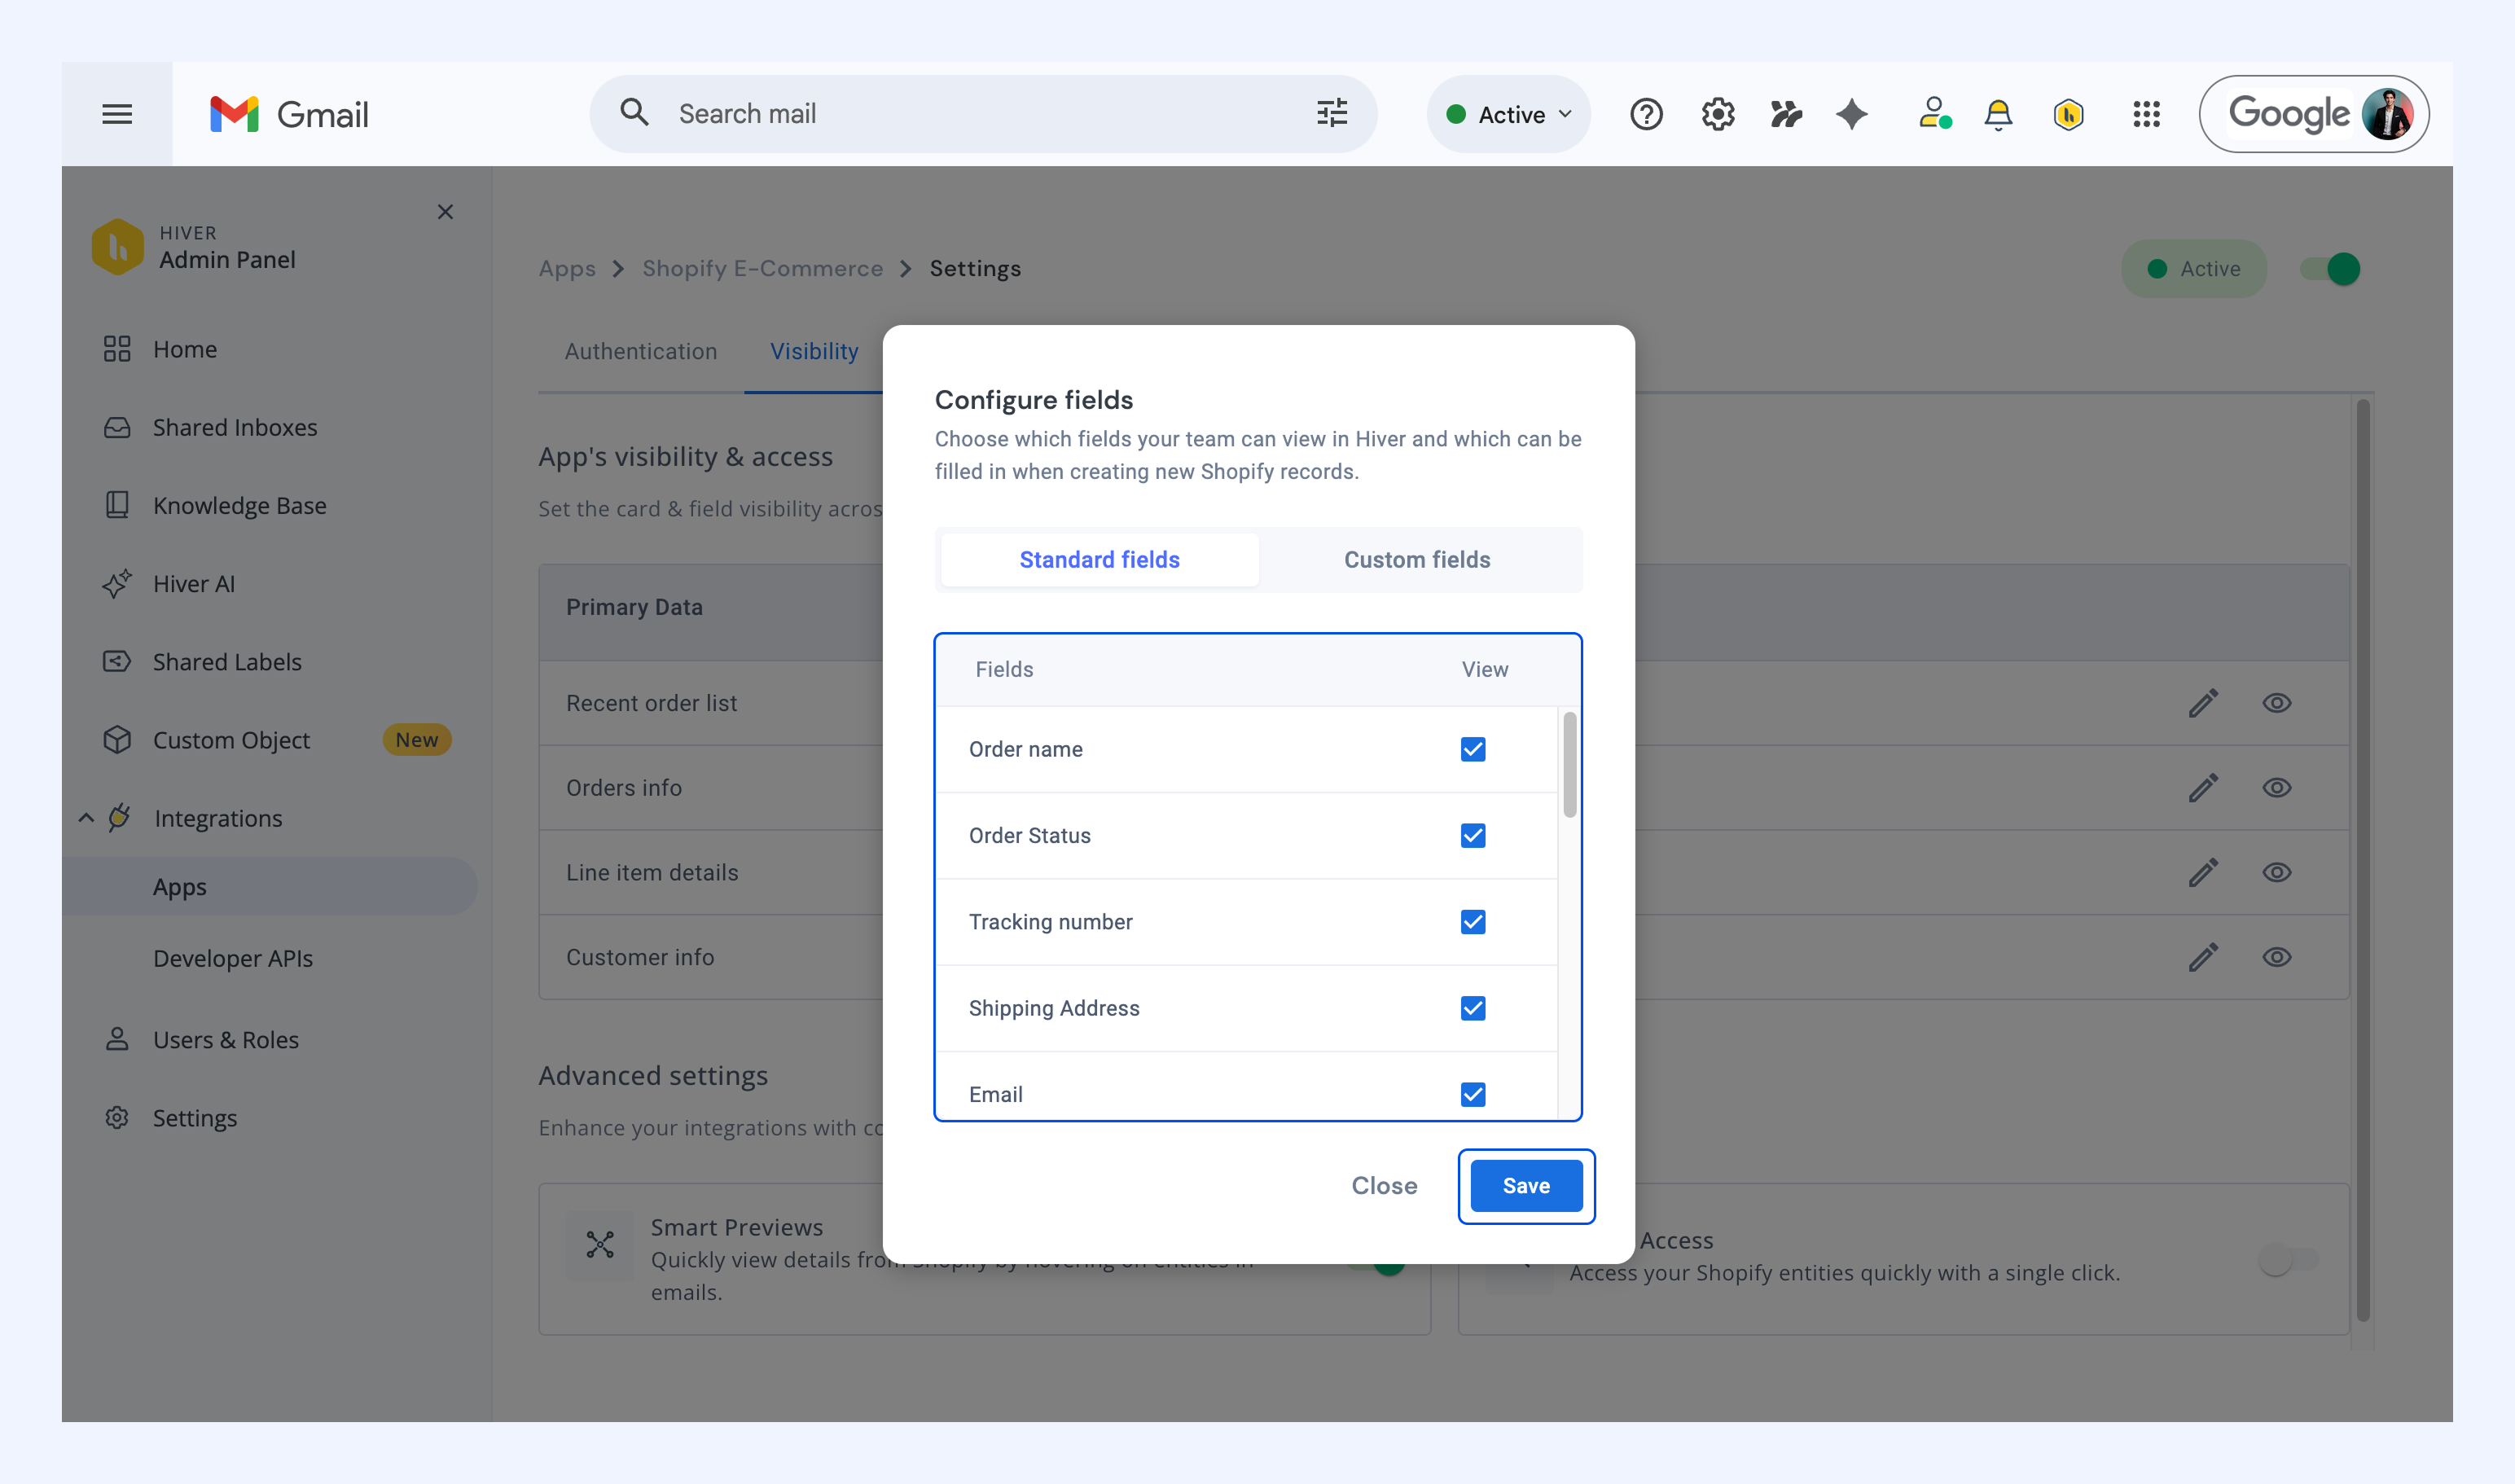
1. Click the Configure fields icon (pencil icon).
2. Choose your fields and click Save.
Managing advanced settings
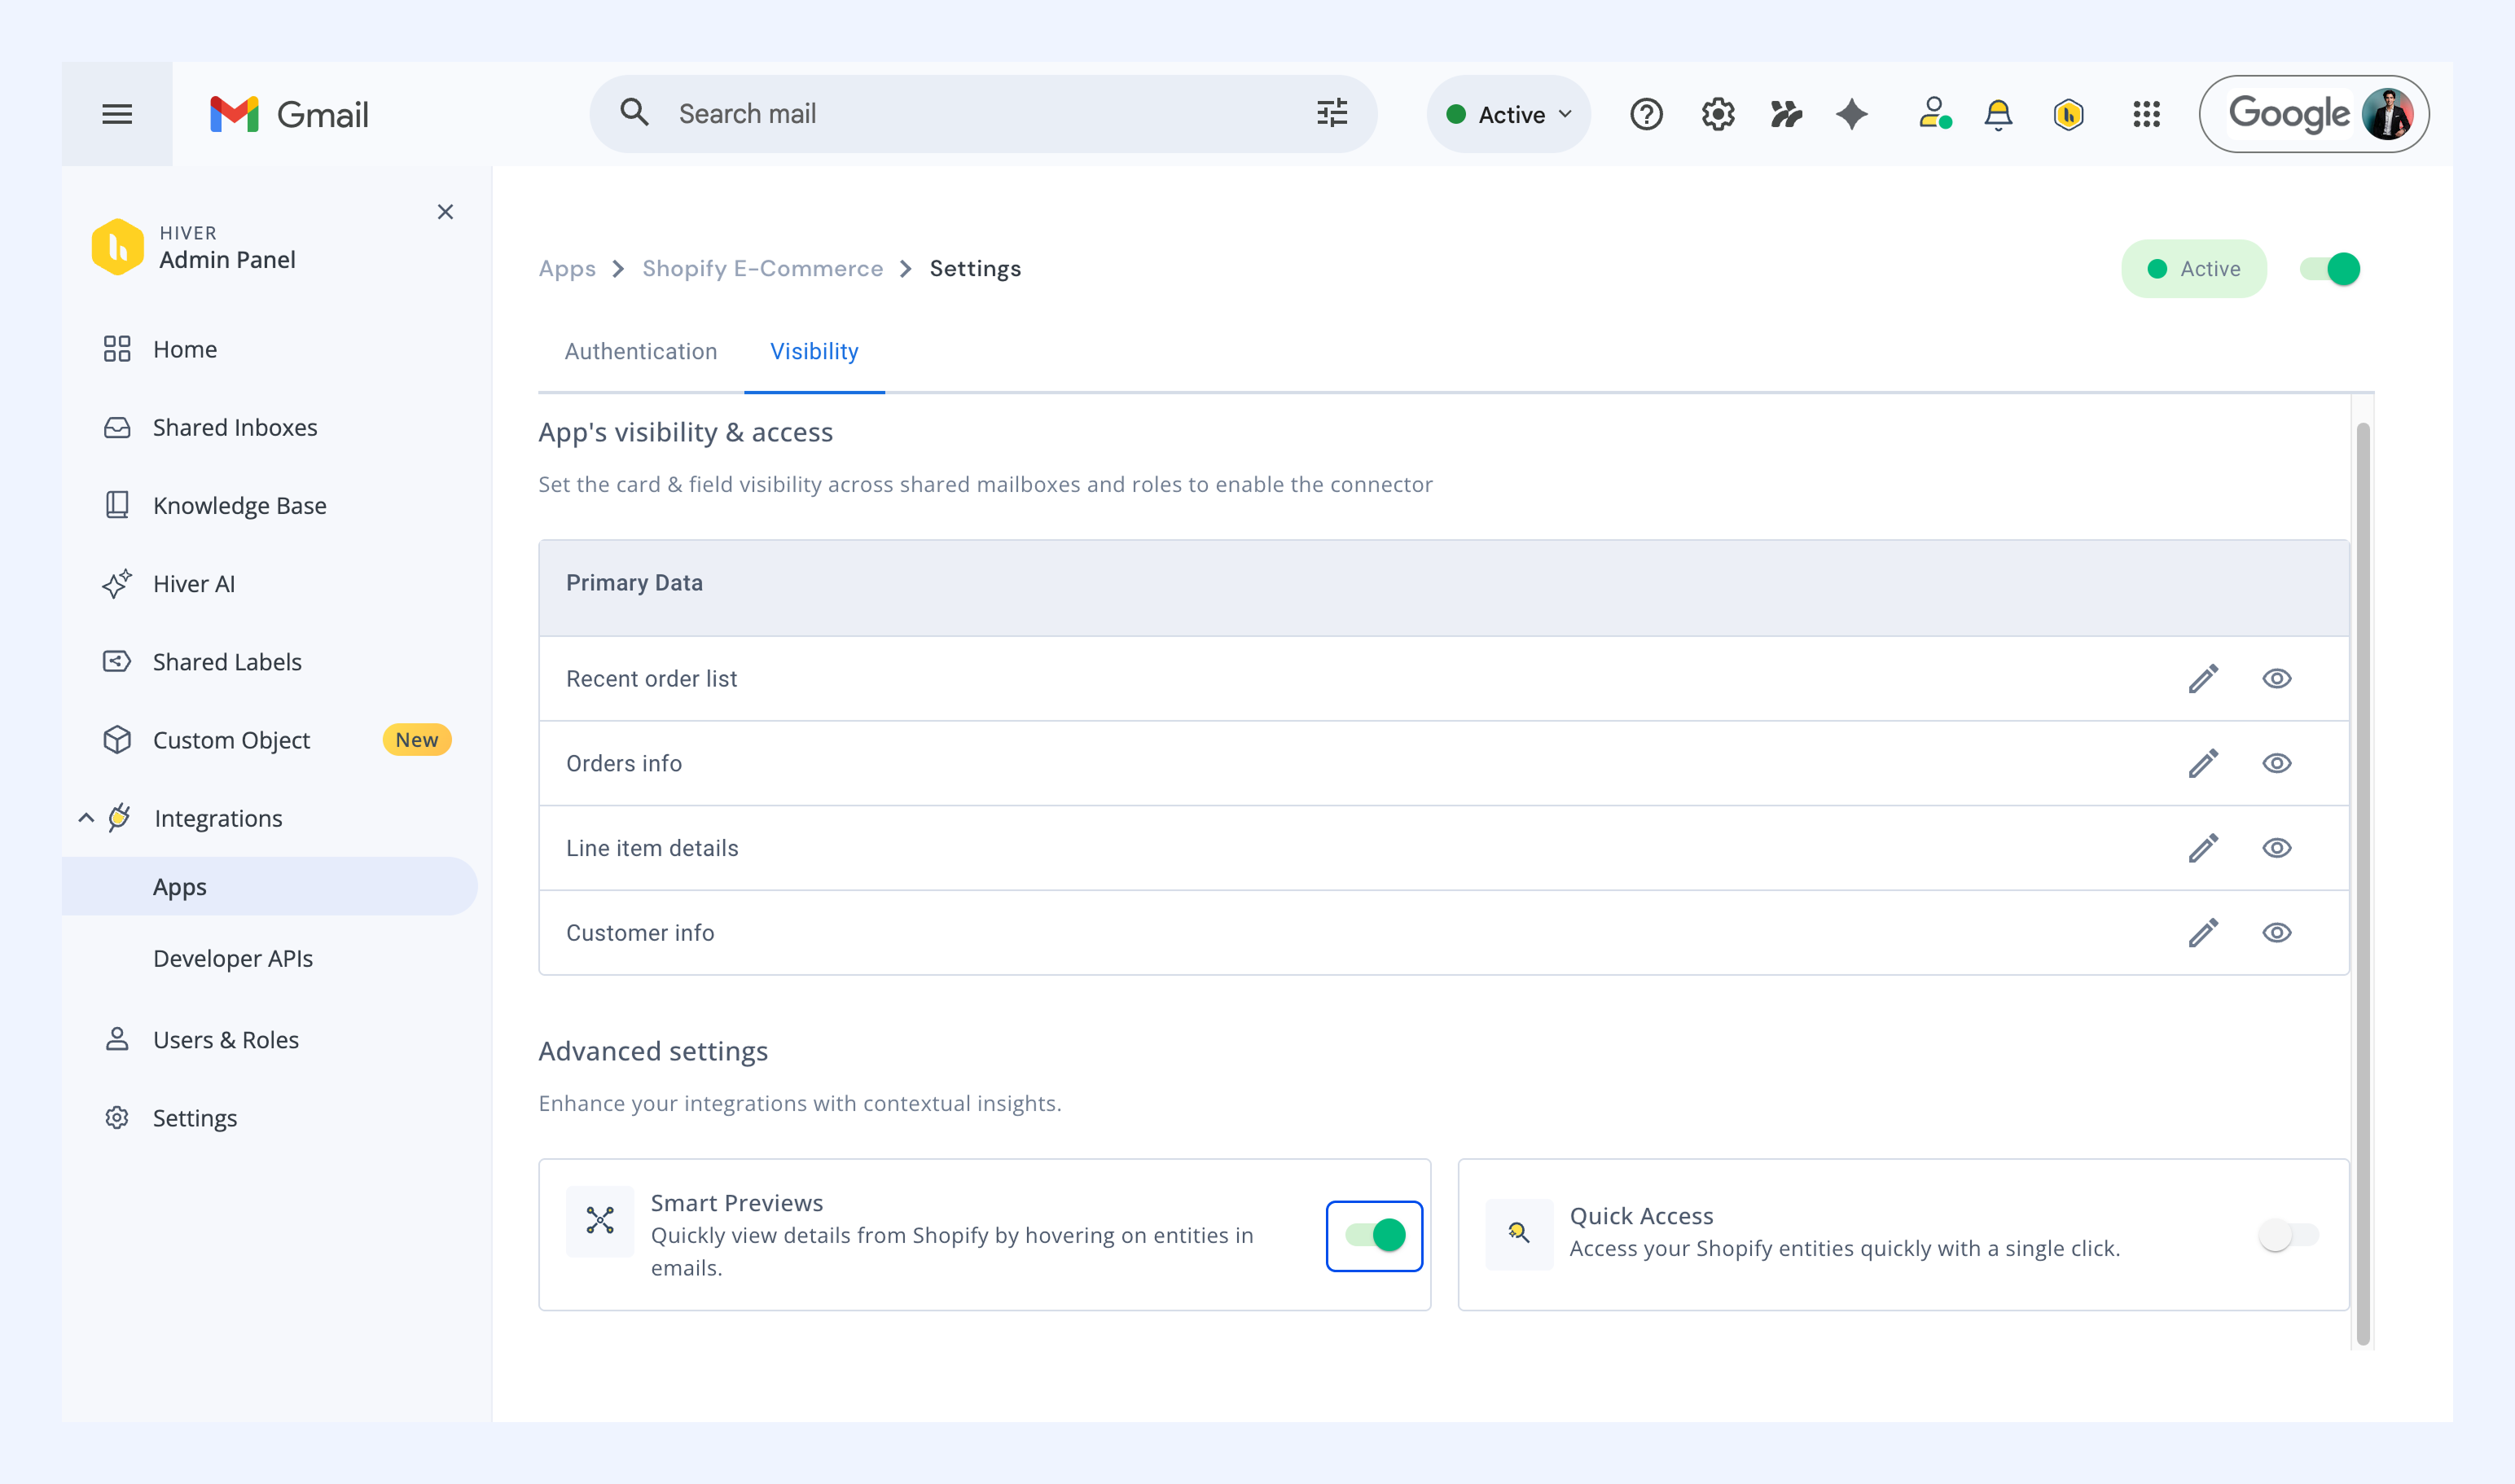
Smart Previews
Smart Previews help your team quickly view Shopify order info by hovering over order IDs in an email. This is enabled by default. To disable, turn the toggle off.
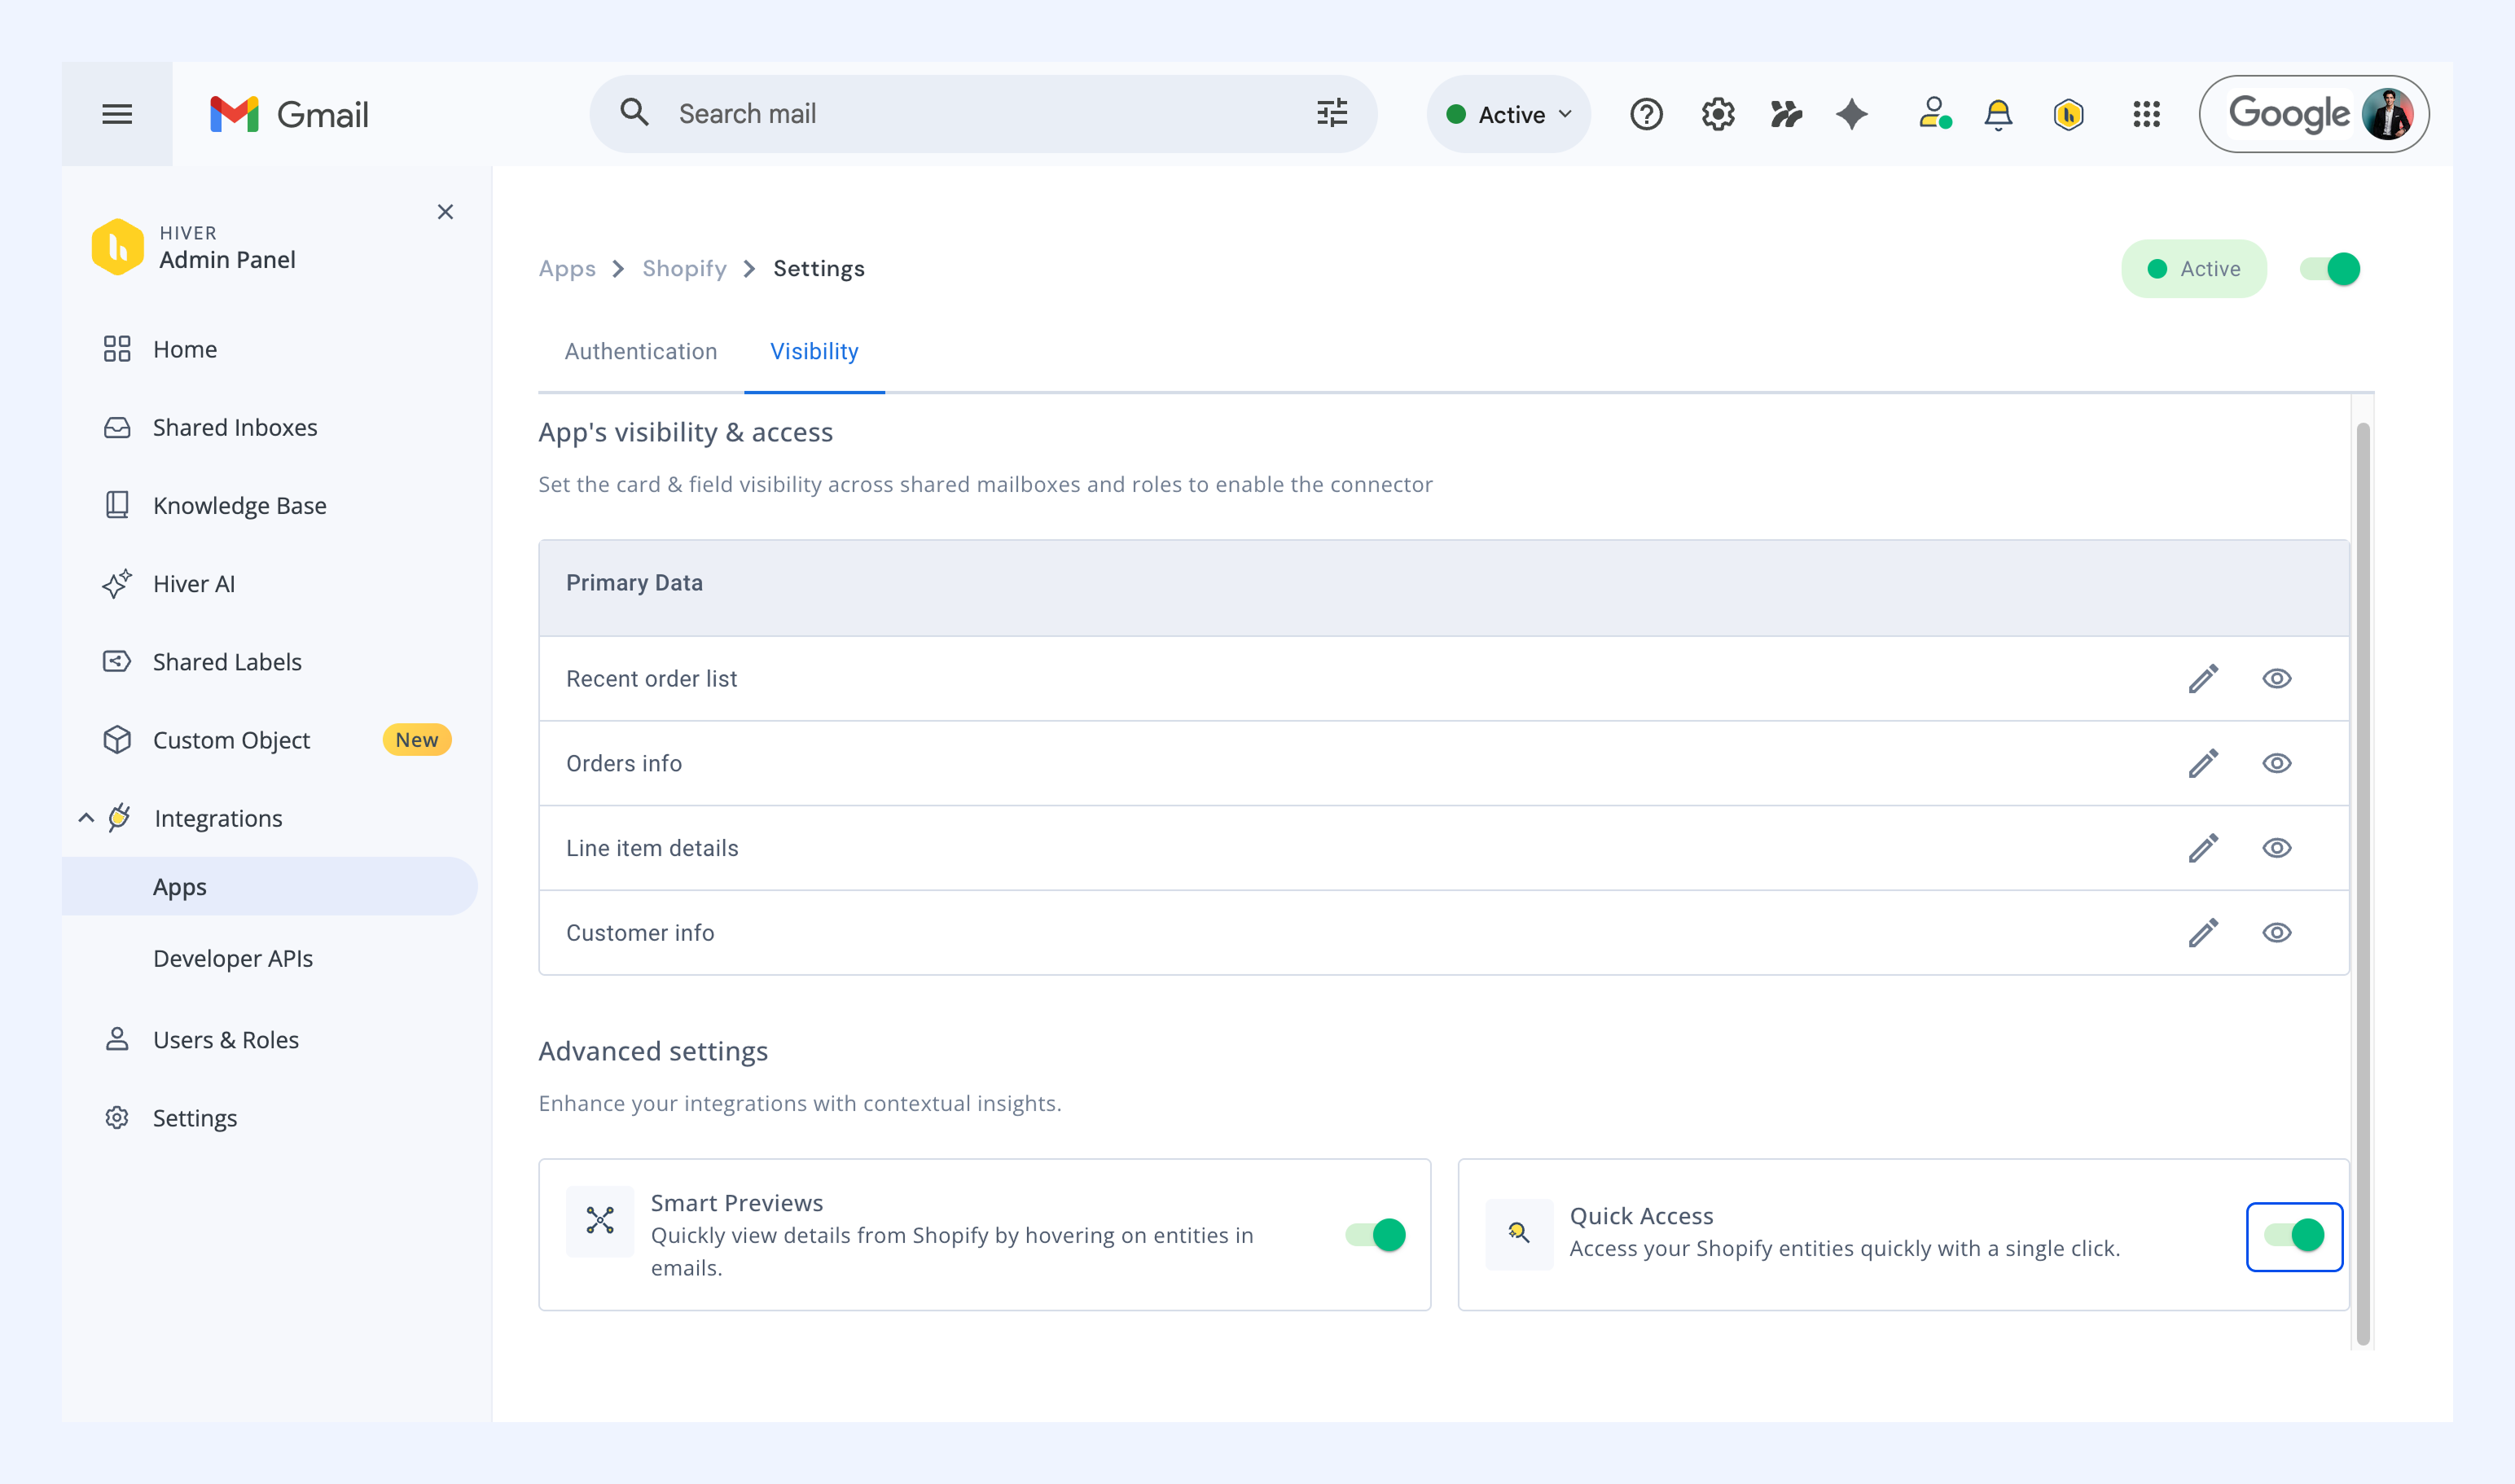
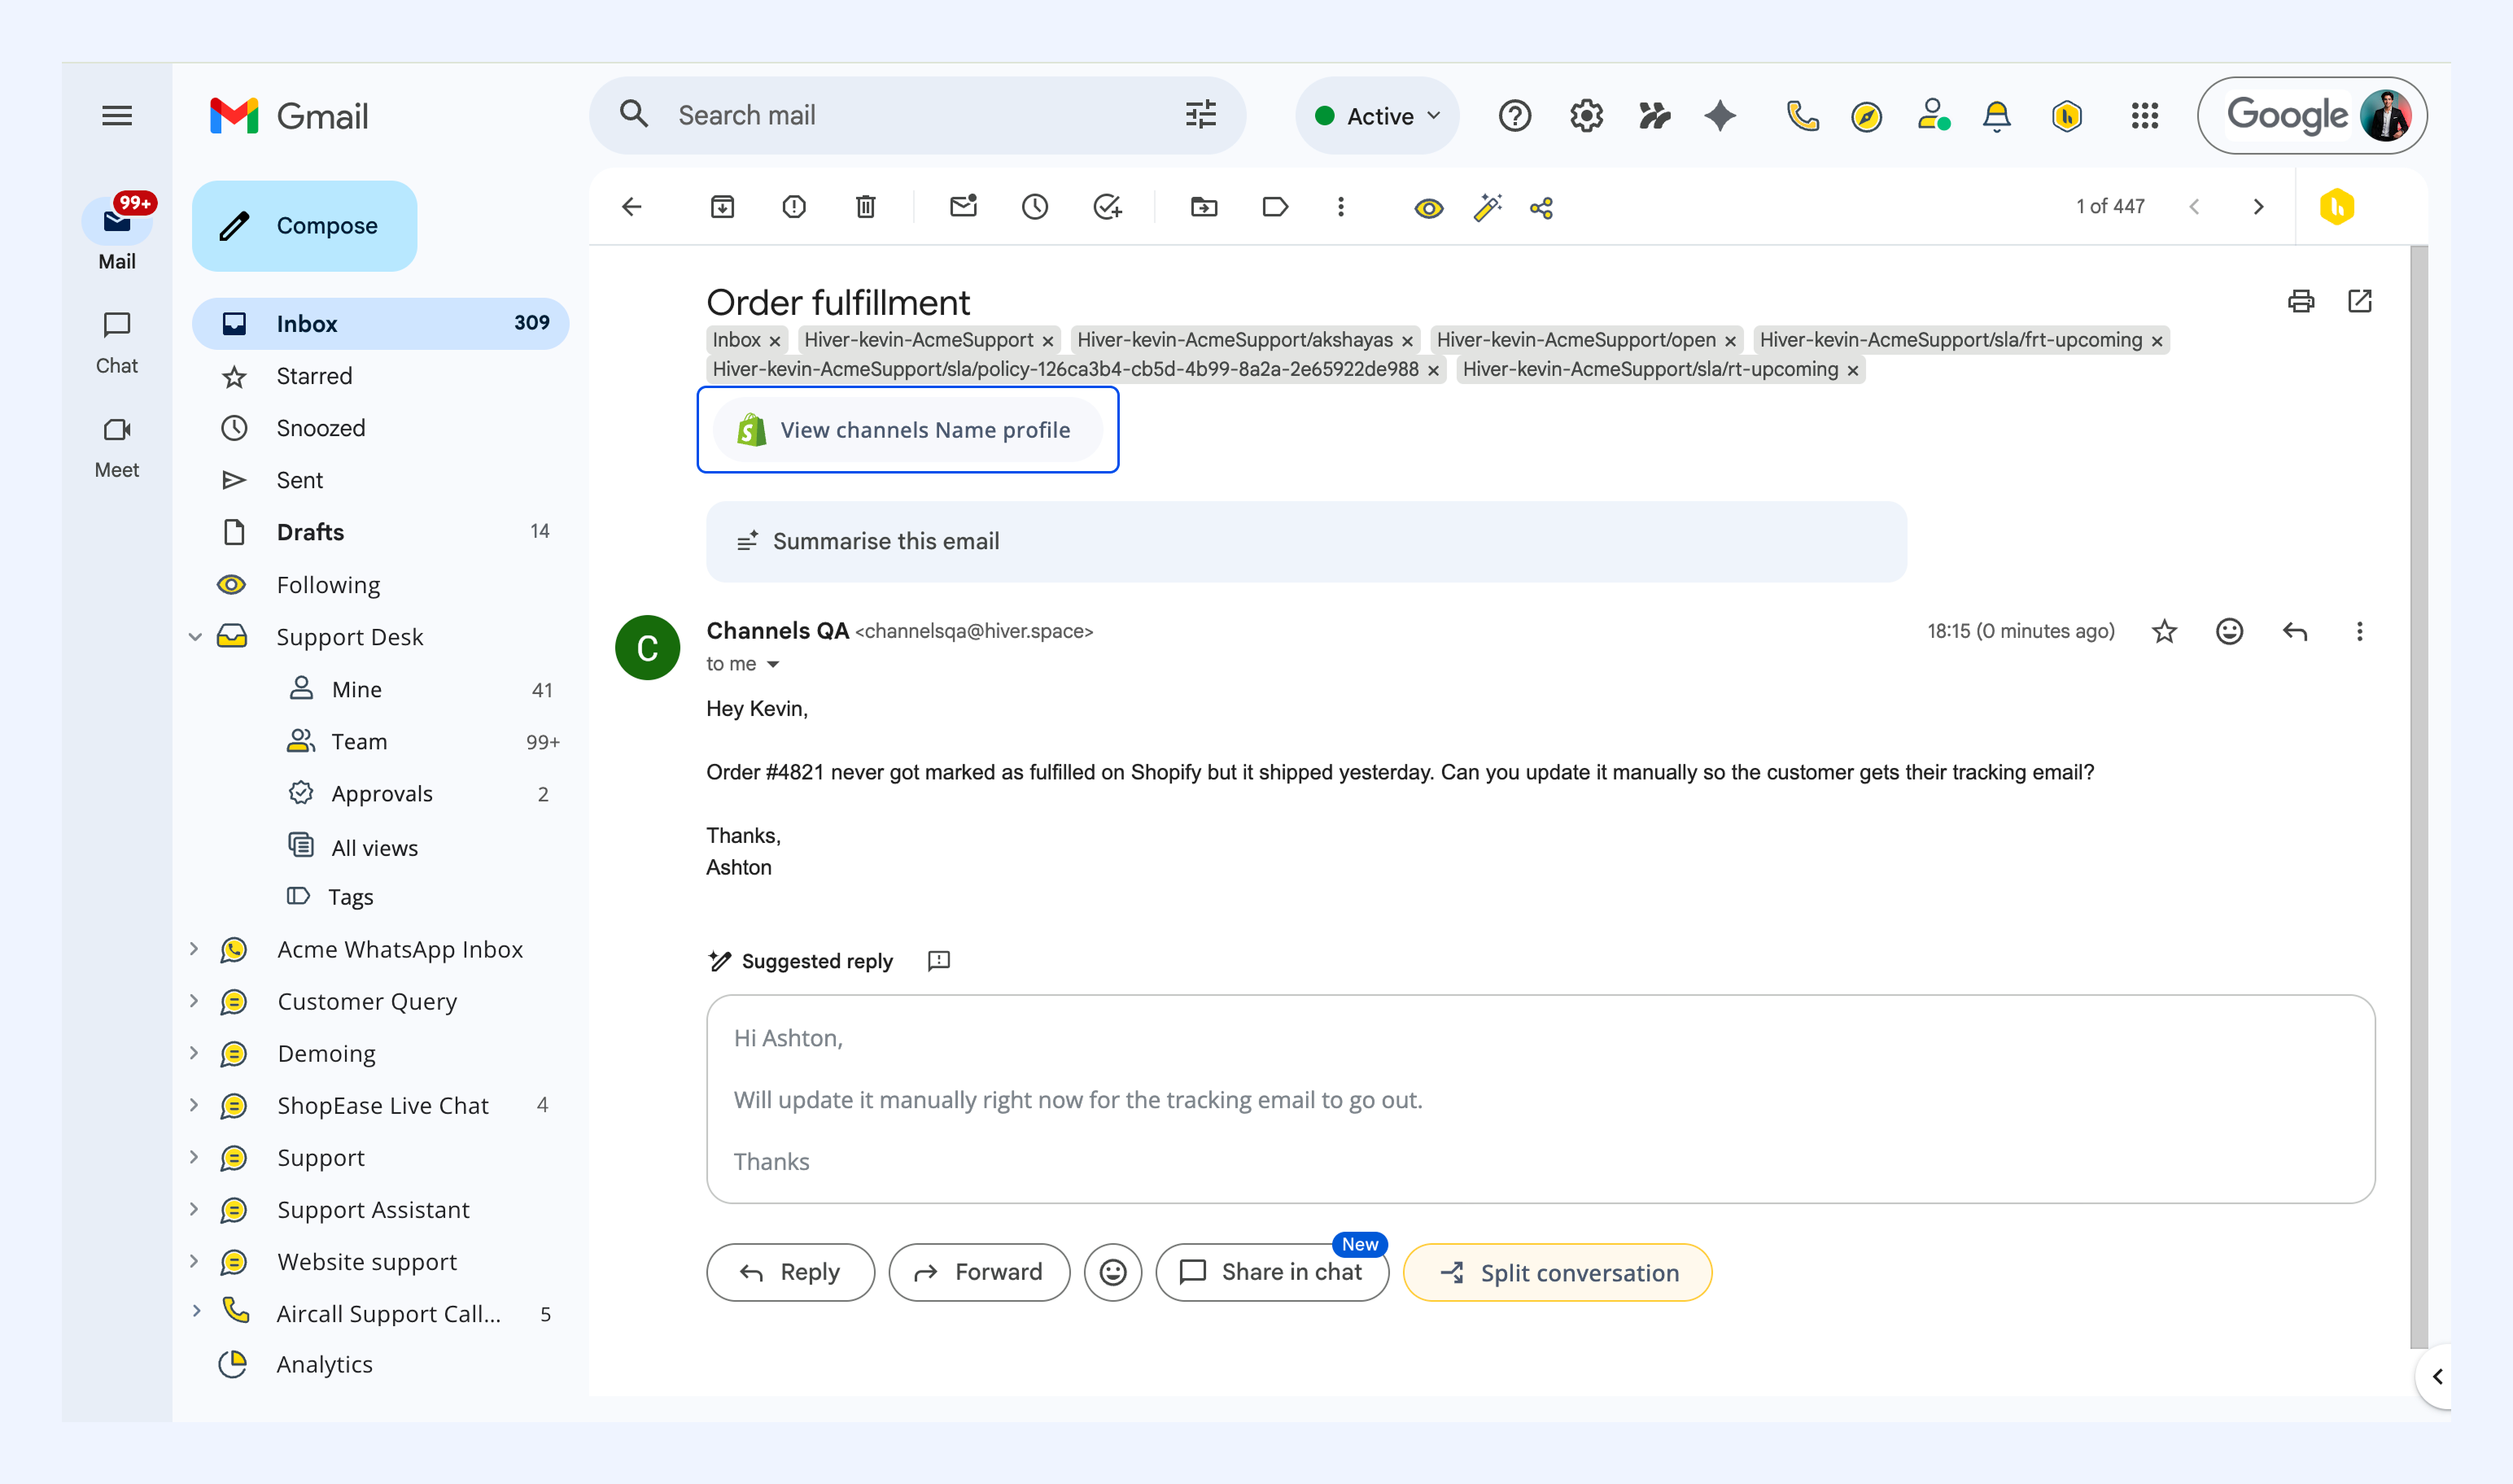
Quick Access
Quick Access shows a button at the top of each customer conversation. Turn the toggle on to enable it.
Note: Quick Access can only be active for one app at a time.
If a Shopify order is already linked to the conversation, the button lets you open that order directly in the Apps tab.
What your agents see after setup
Once setup is complete, agents can view Shopify data directly within Hiver.
Shopify information cards in Hiver
Hiver offers a dedicated ‘Apps’ section in the right panel, making it easy to scan and find details from integrated tools including Shopify.
- View relevant Shopify details beside each customer conversation in Hiver
- Get an organized, real-time view of customer and order records
- Use direct links to view full records in Shopify
Smart Previews in Conversations
- Hover over order IDs in emails to view details instantly
- Get context without leaving Gmail
Additional customization options
If you have multiple Shopify apps, contact Hiver Support at support@hiverhq.com for assistance.
Troubleshooting common issues
If you face issues during setup, verify these details first:
- Accurate Client ID and Client Secret entered
- Field and card visibility settings in Hiver
If problems persist, reach out to support@hiverhq.com.
Related articles
Pipedrive Integration with Hiver
ClickUp Integration with Hiver