Setting up permissions for your Outlook shared mailbox or distribution list
To connect an Outlook shared mailbox or Microsoft 365 group to Hiver Omni, you need a personal Outlook account that is added to the mailbox or group and has the required permissions listed in this guide.
This account acts as the source user in Hiver Omni and is used to:
- Establish the connection between Outlook and Hiver.
- Sync emails from the mailbox or group into Hiver.
This guide walks you setting up the required permissions on an Outlook shared mailbox or a distribution list.
Prerequisites
Before you start:
- You need to be a Microsoft admin to set up these permissions. If you're not, share this article with your Microsoft admin and ask them to follow the steps below.
- Your admin should have already allowed Hiver to connect to your Microsoft account. If not, see Granting access to Hiver as a Microsoft admin.
Setting up Outlook shared mailbox permissions
Hiver needs these permissions to read, manage, and send emails from the shared mailbox:
- Member access
- Read and manage
- Send as
- Send on behalf of
Steps to set up permissions
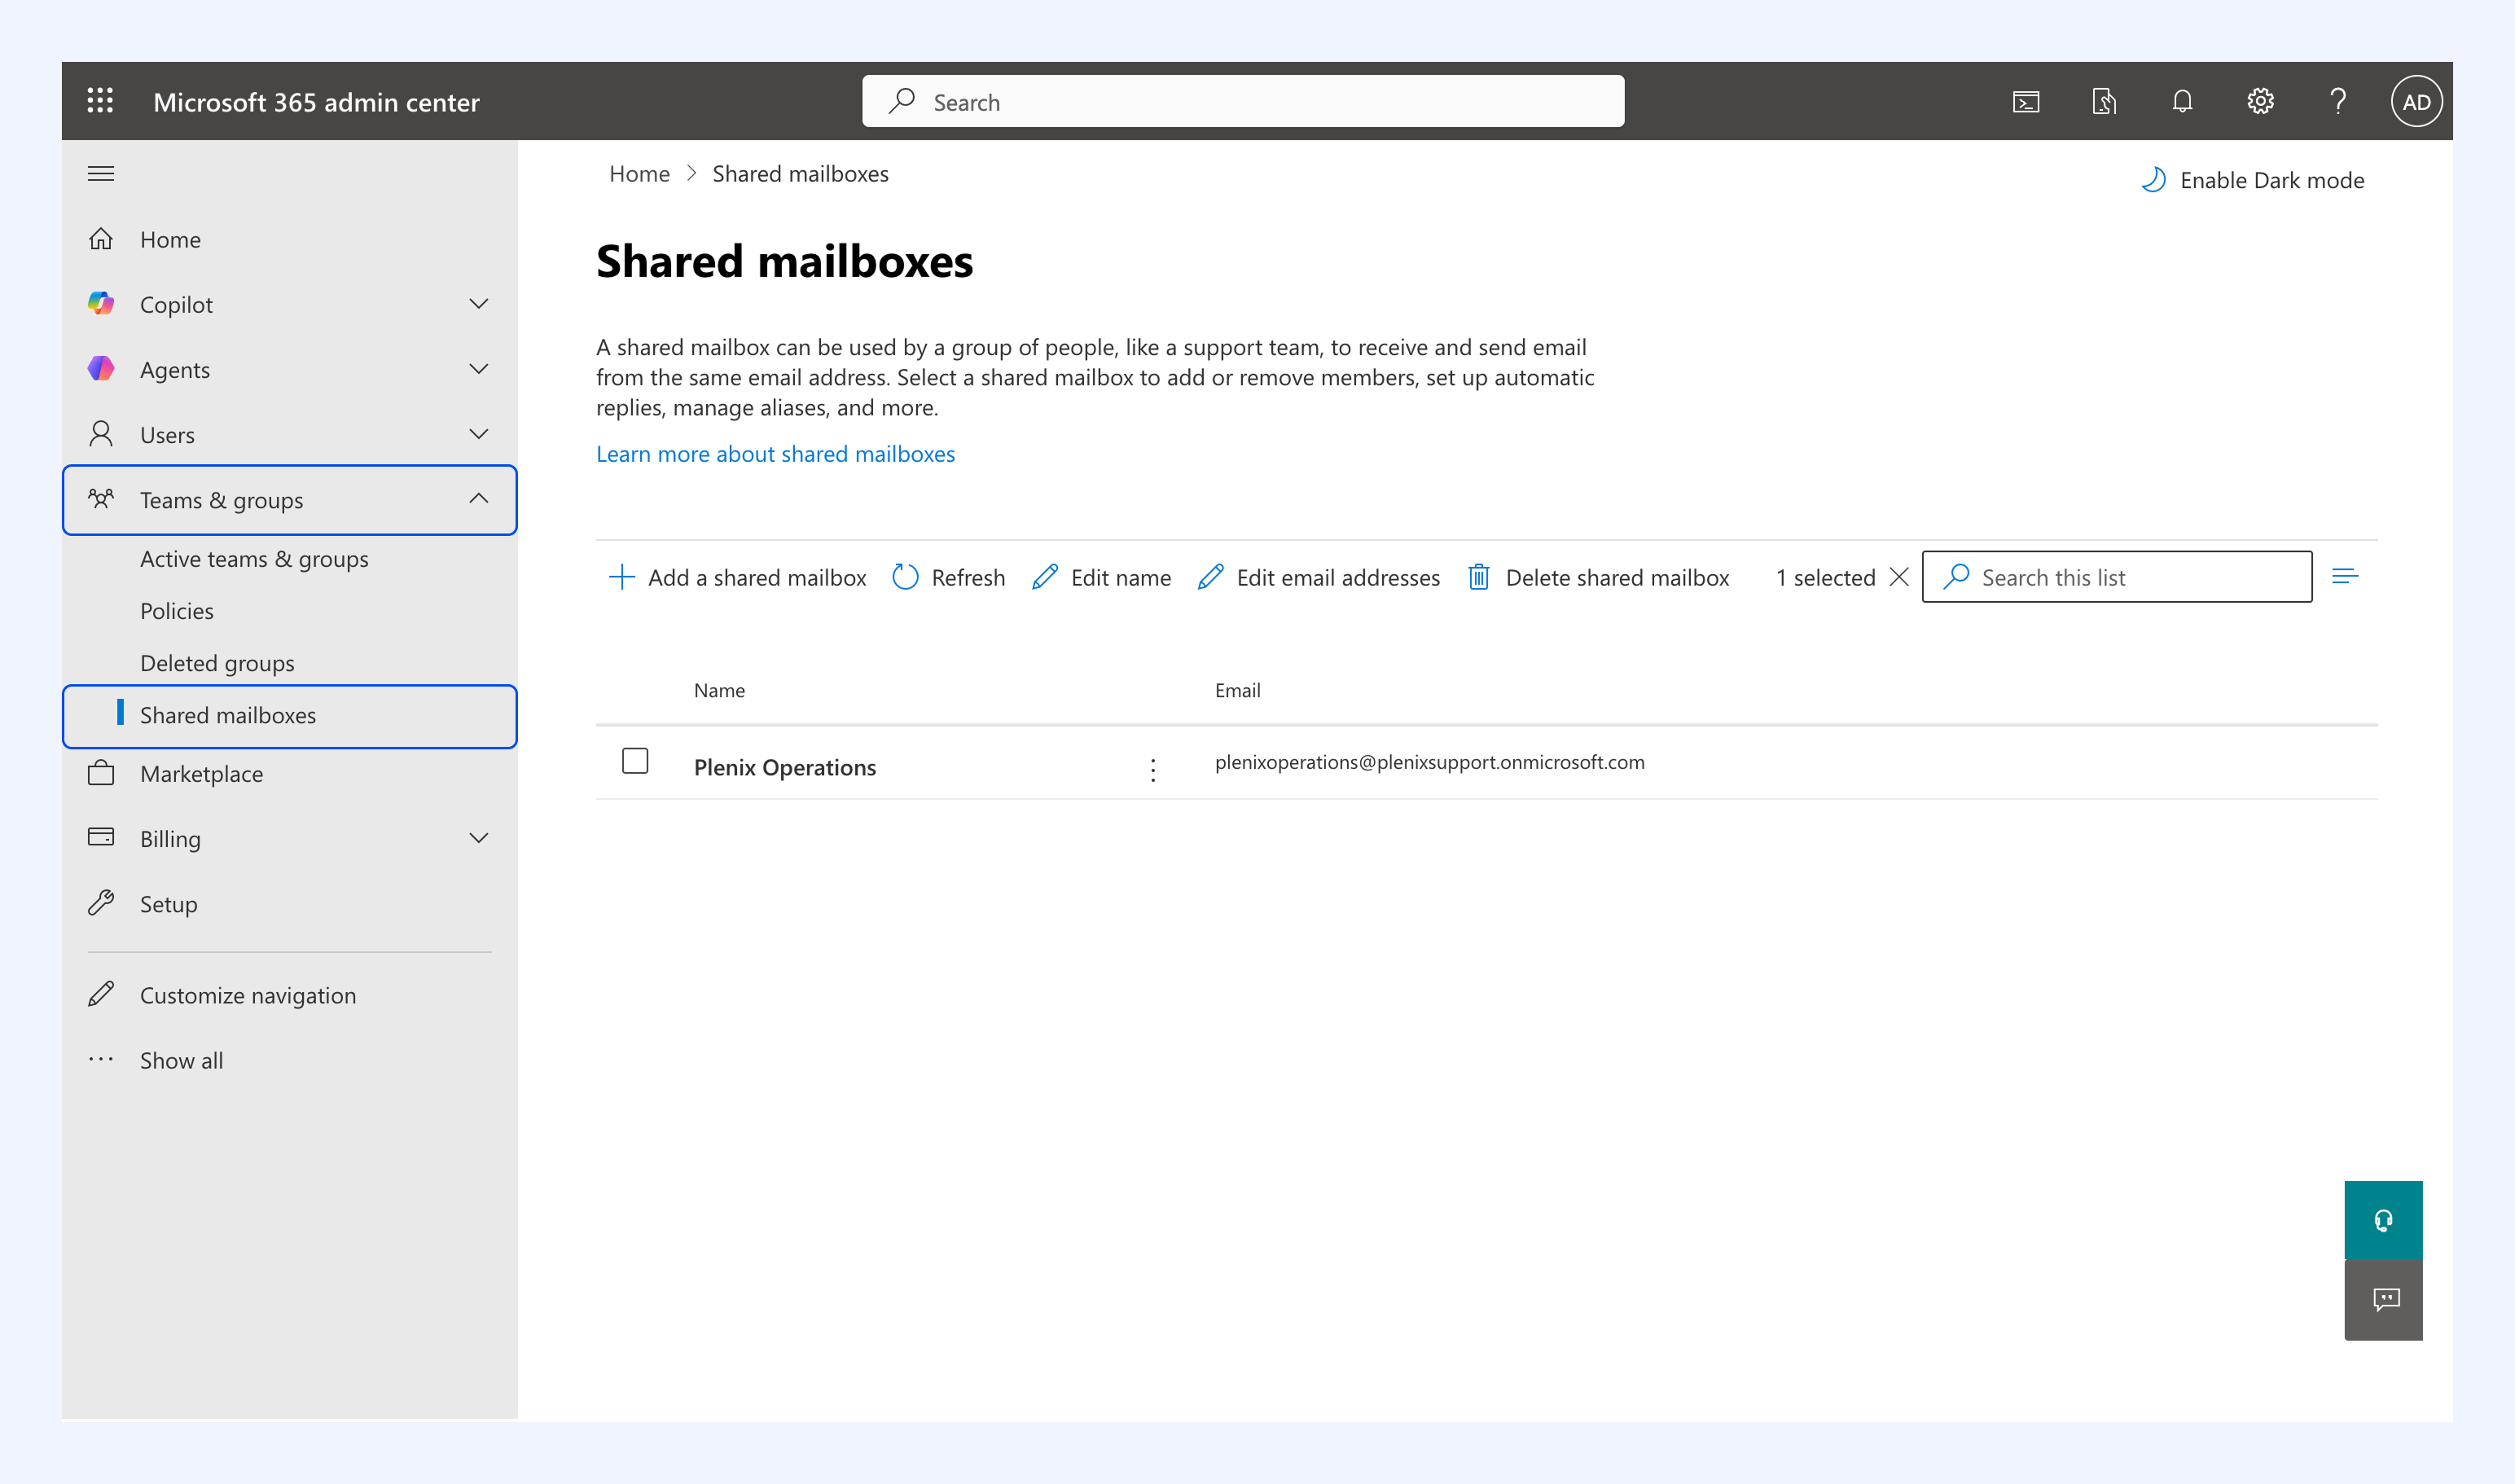
1. In the Microsoft 365 Admin Center, go to Teams & groups → Shared mailboxes and select your shared mailbox.
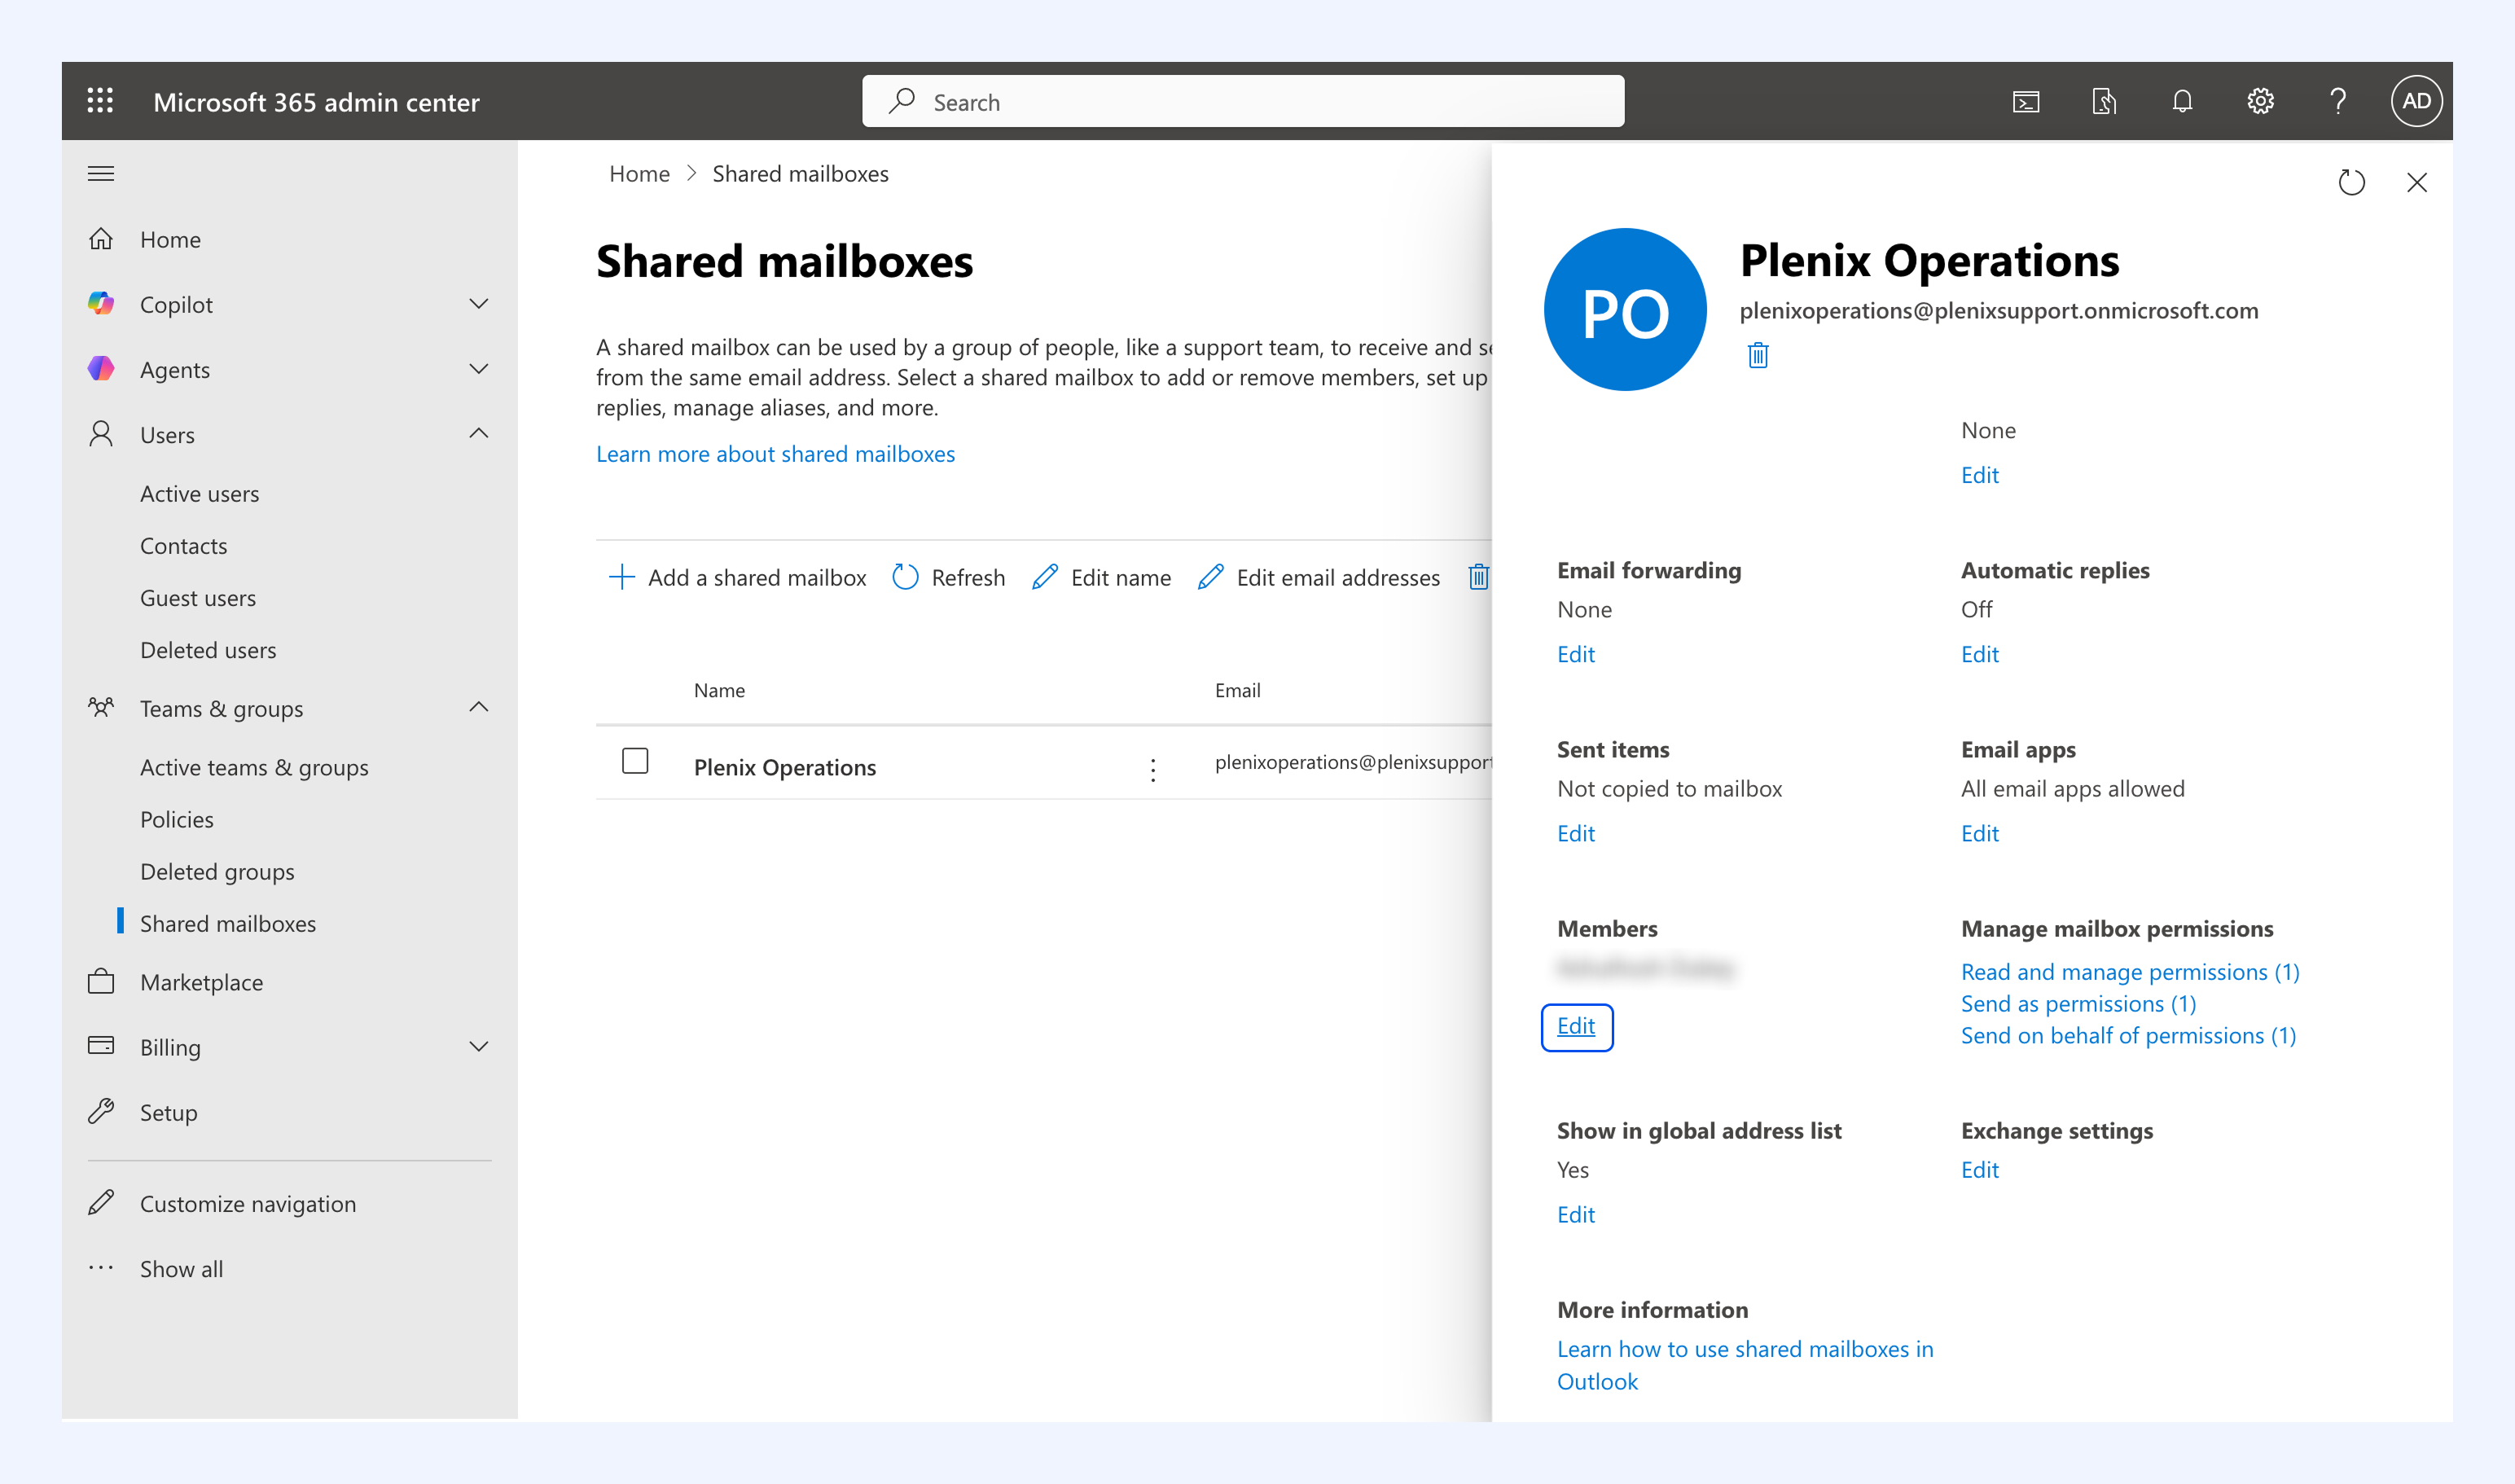
2. Under Members, click Edit.
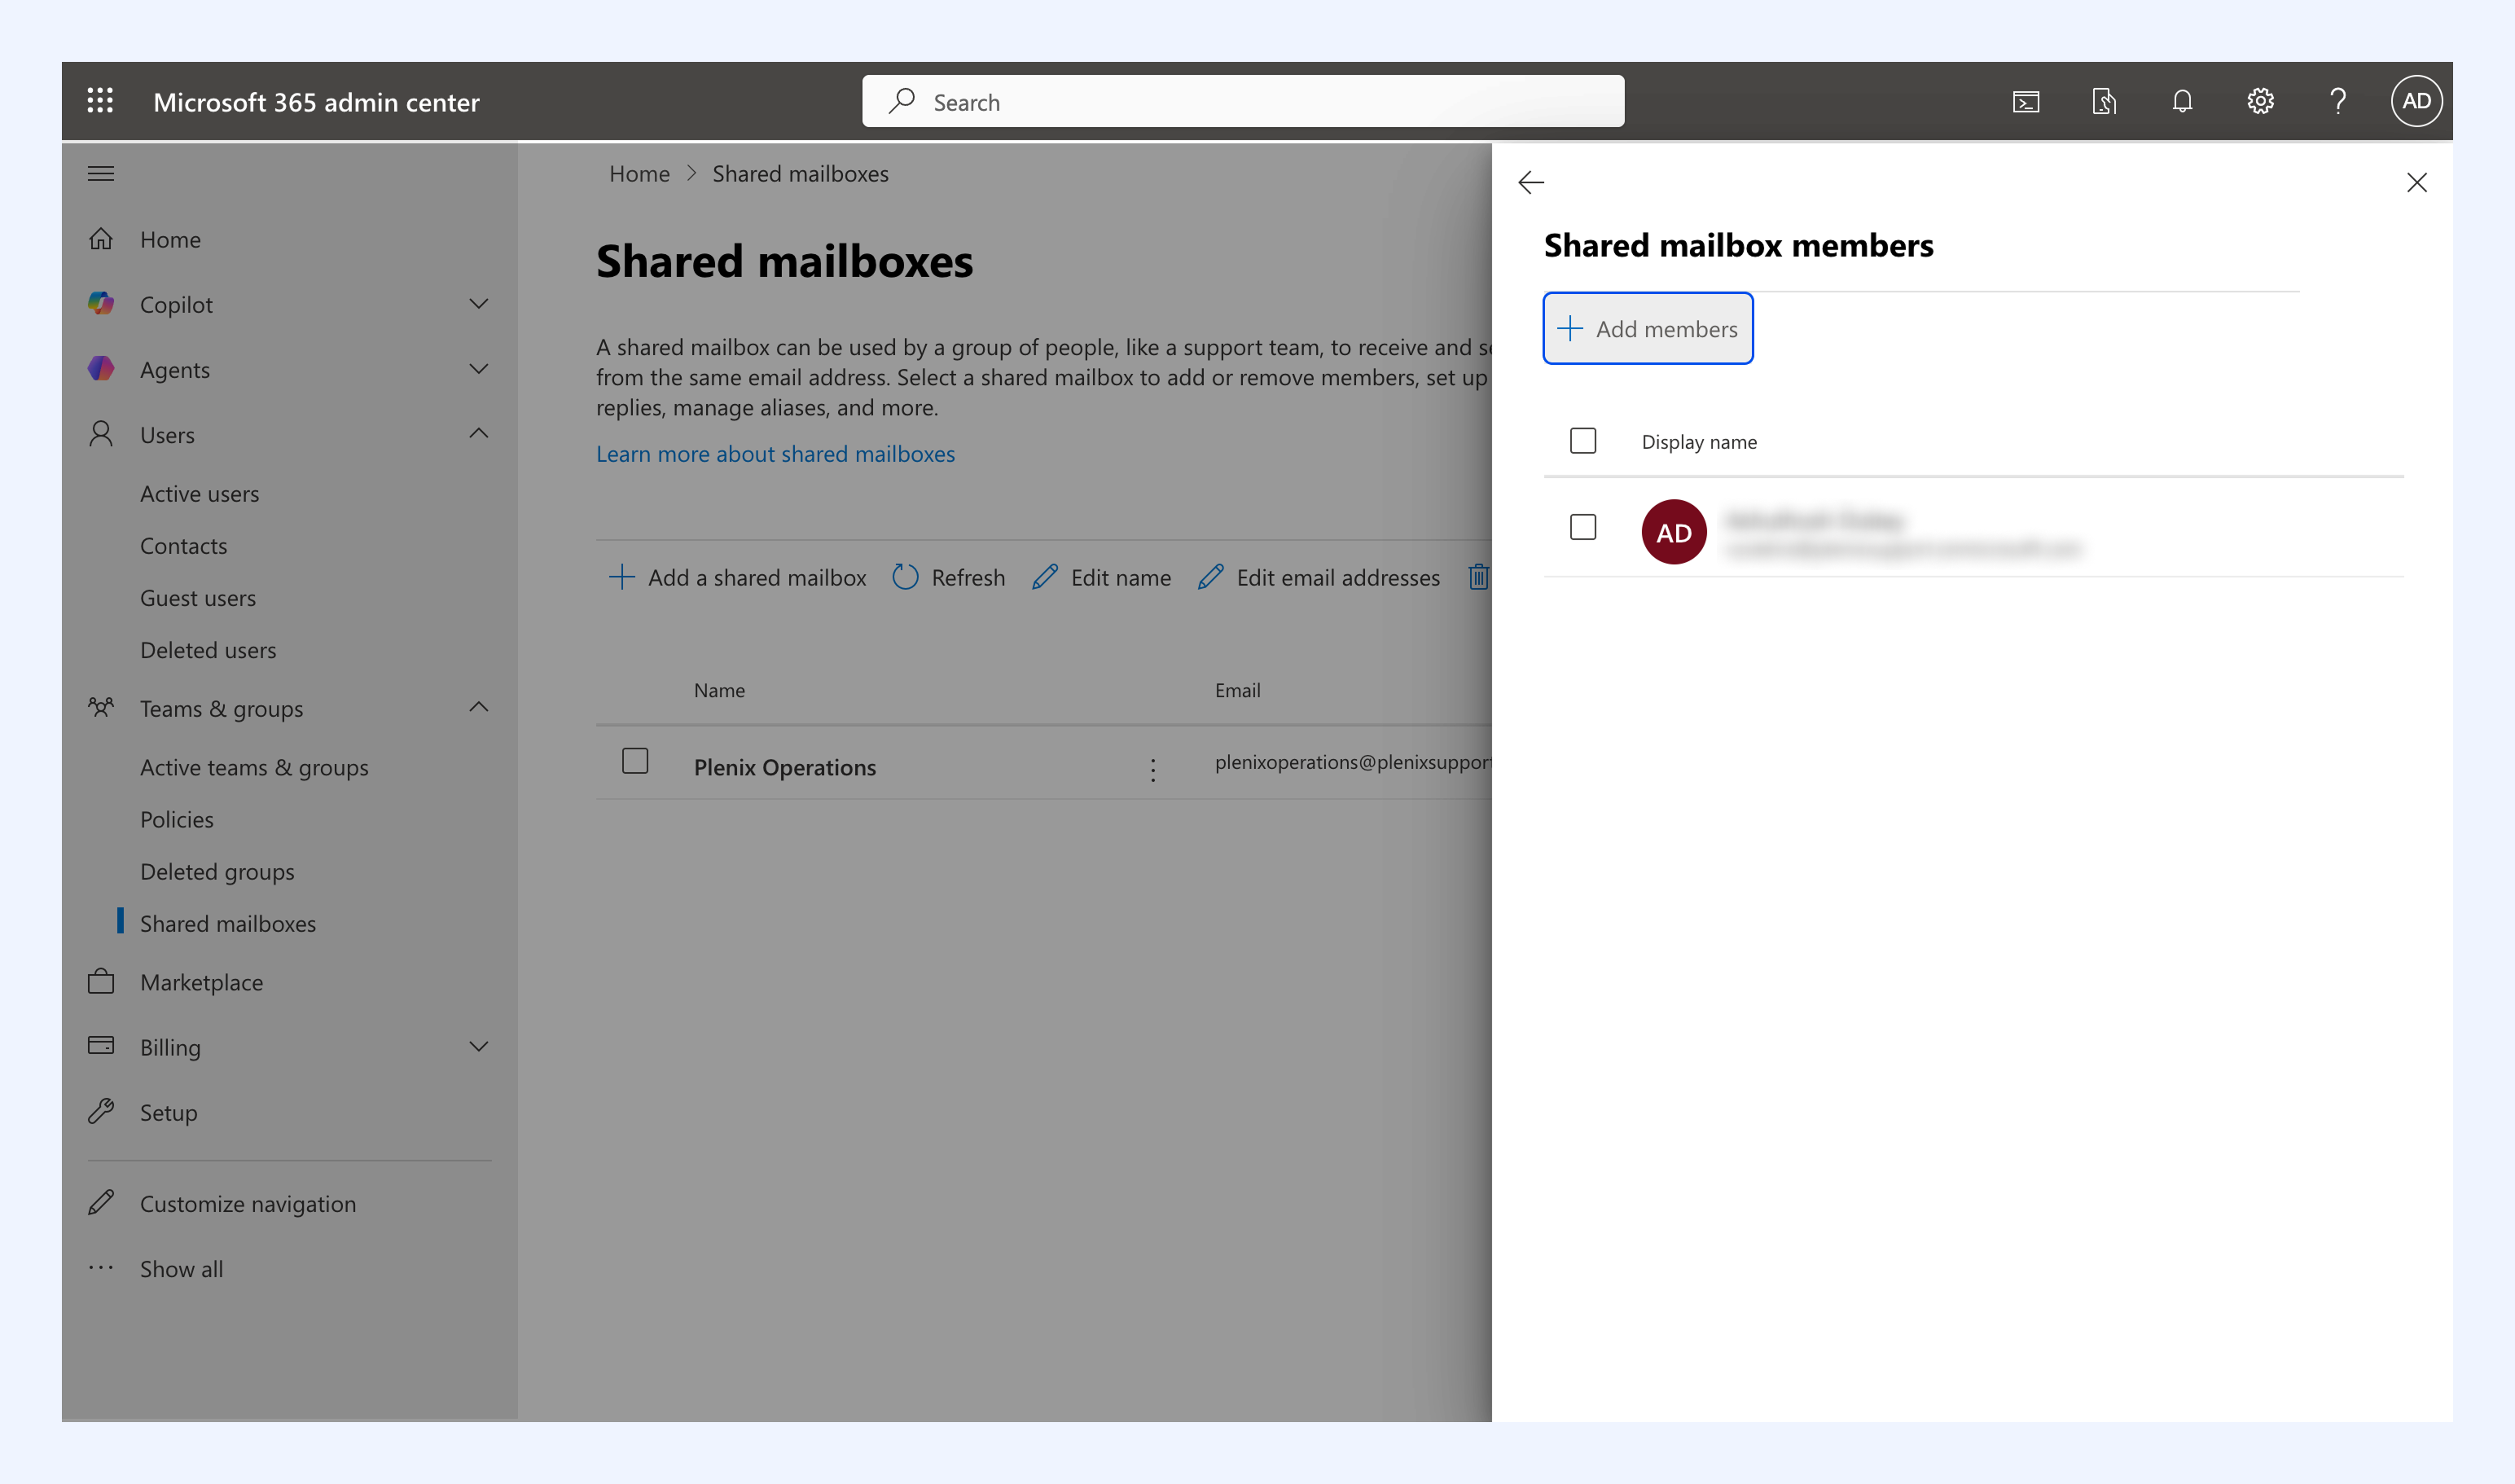
3. Click Add members.
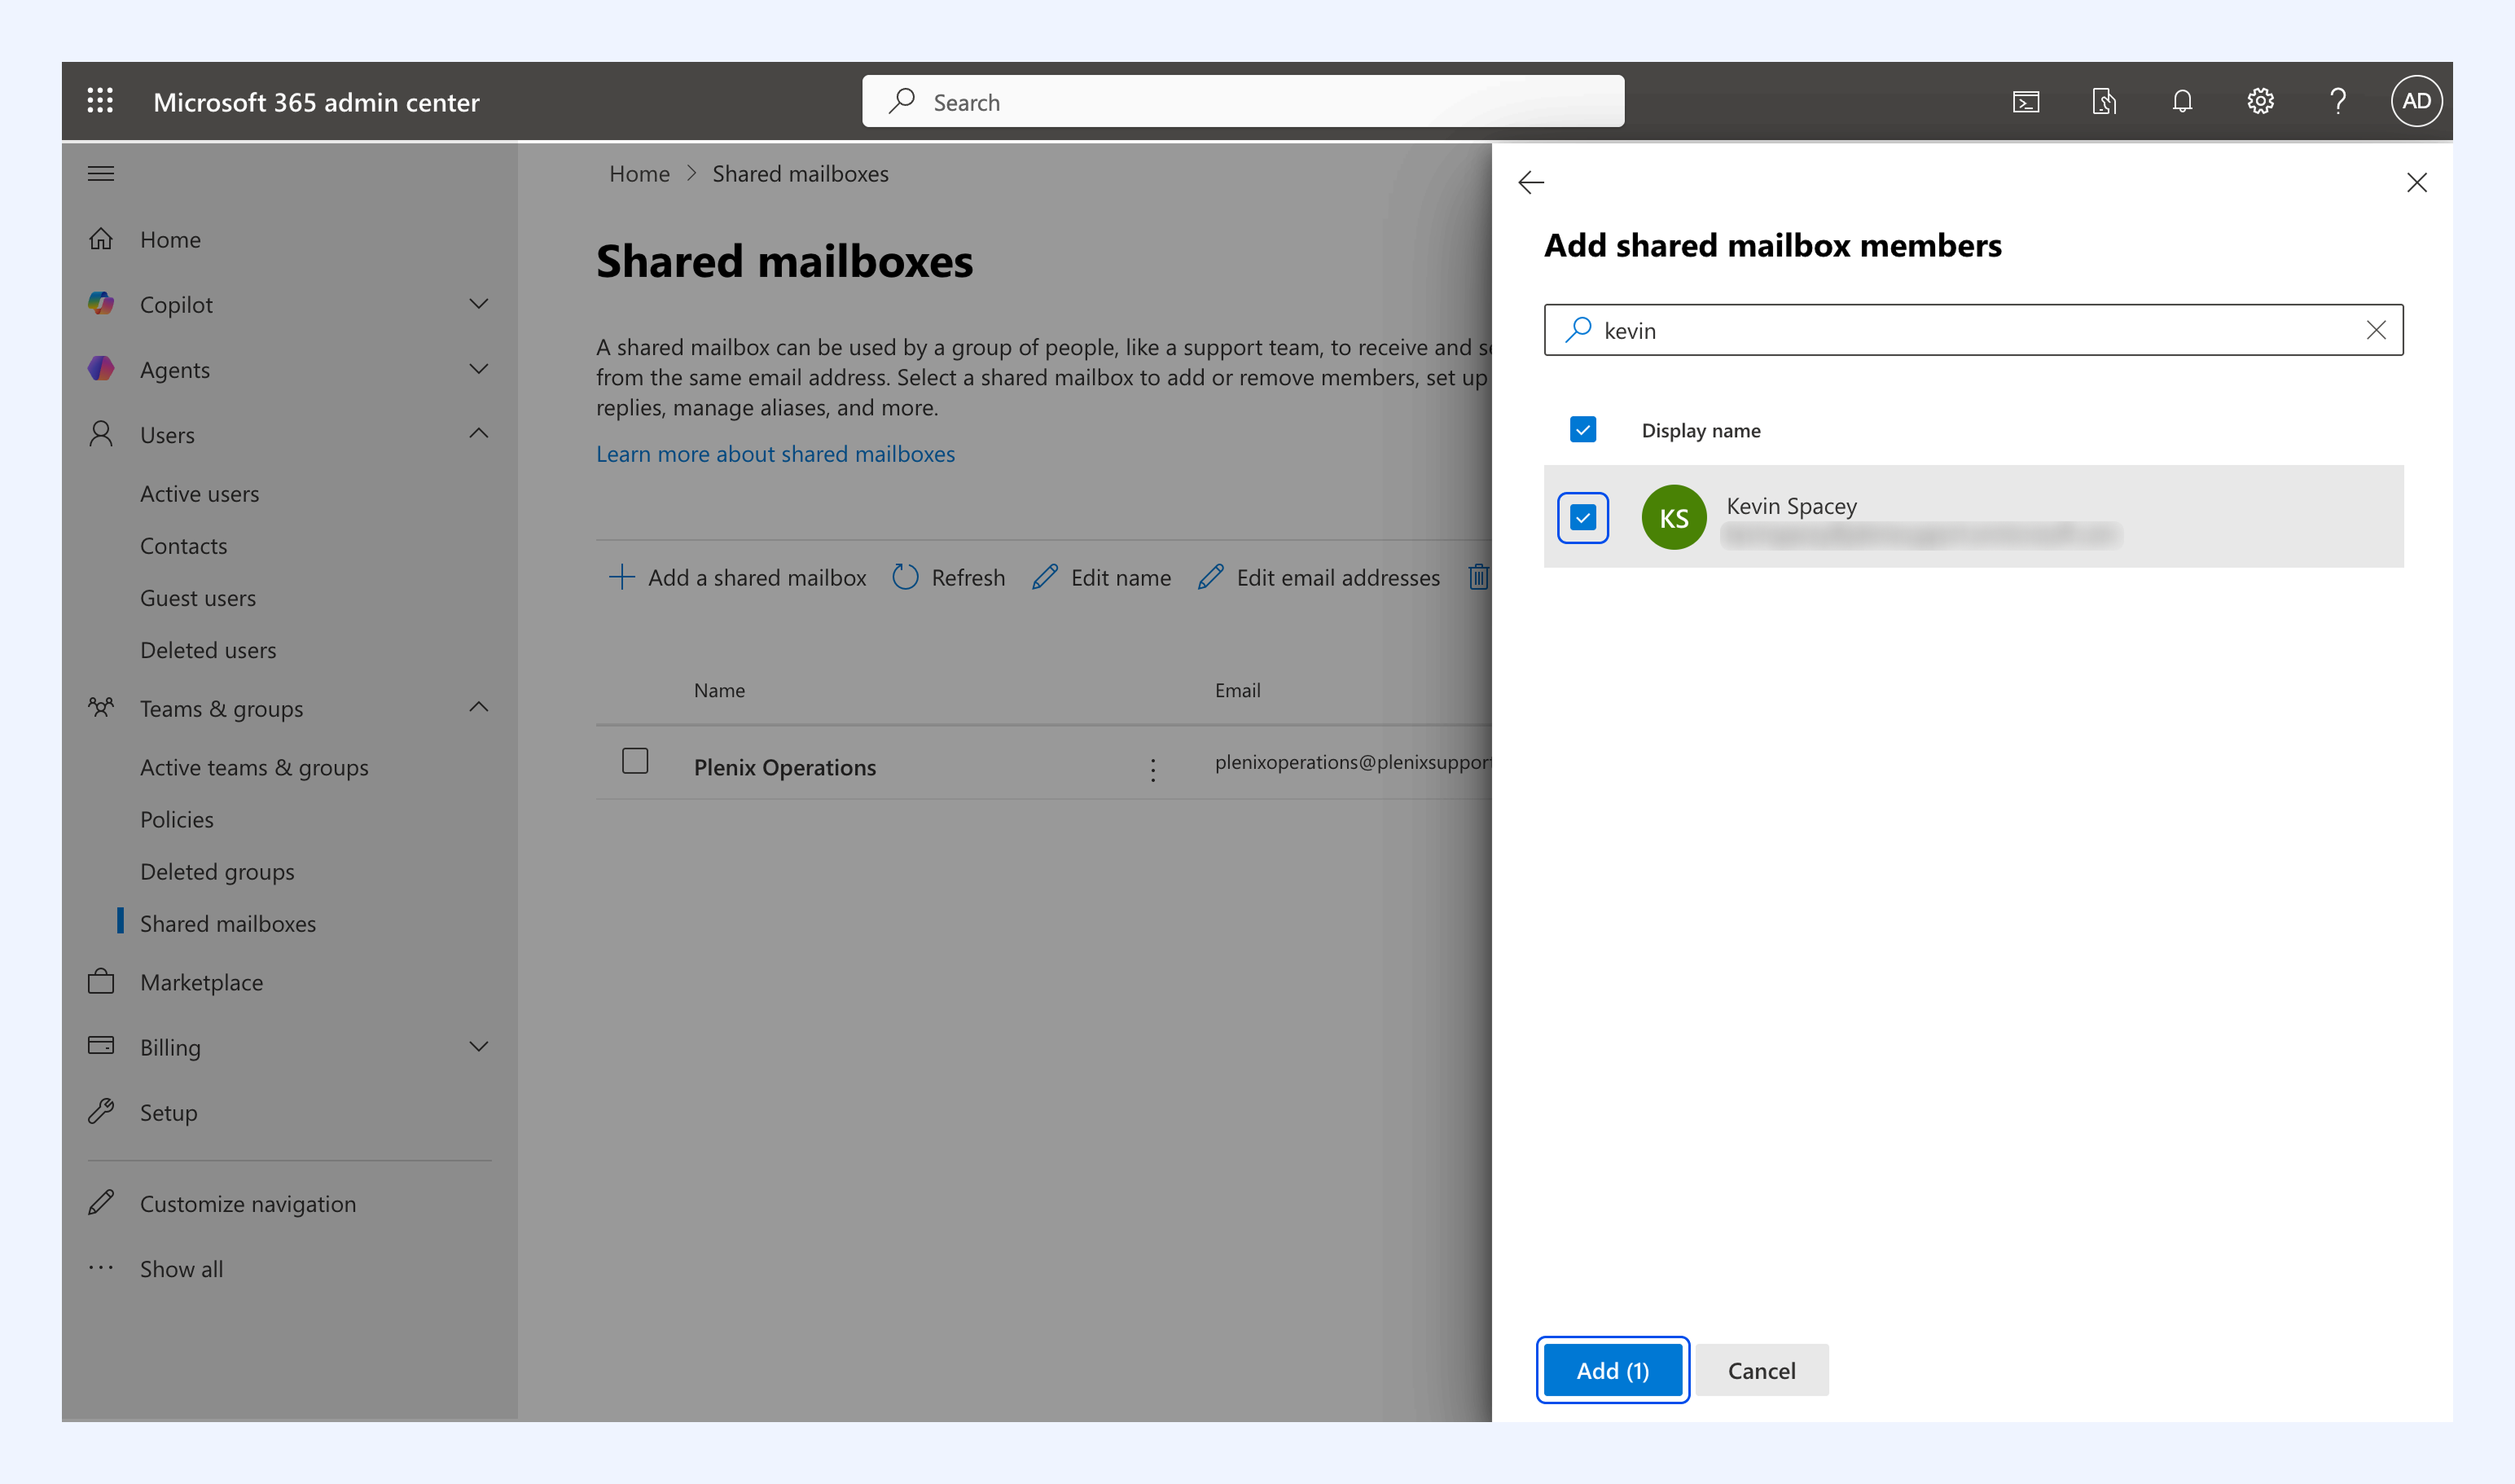
4. Search for your account, select it, and click Add.
5. On the same shared mailbox panel, find Manage mailbox permissions where you’ll see the following permissions:
- Read and manage
- Send as
- Send on behalf of
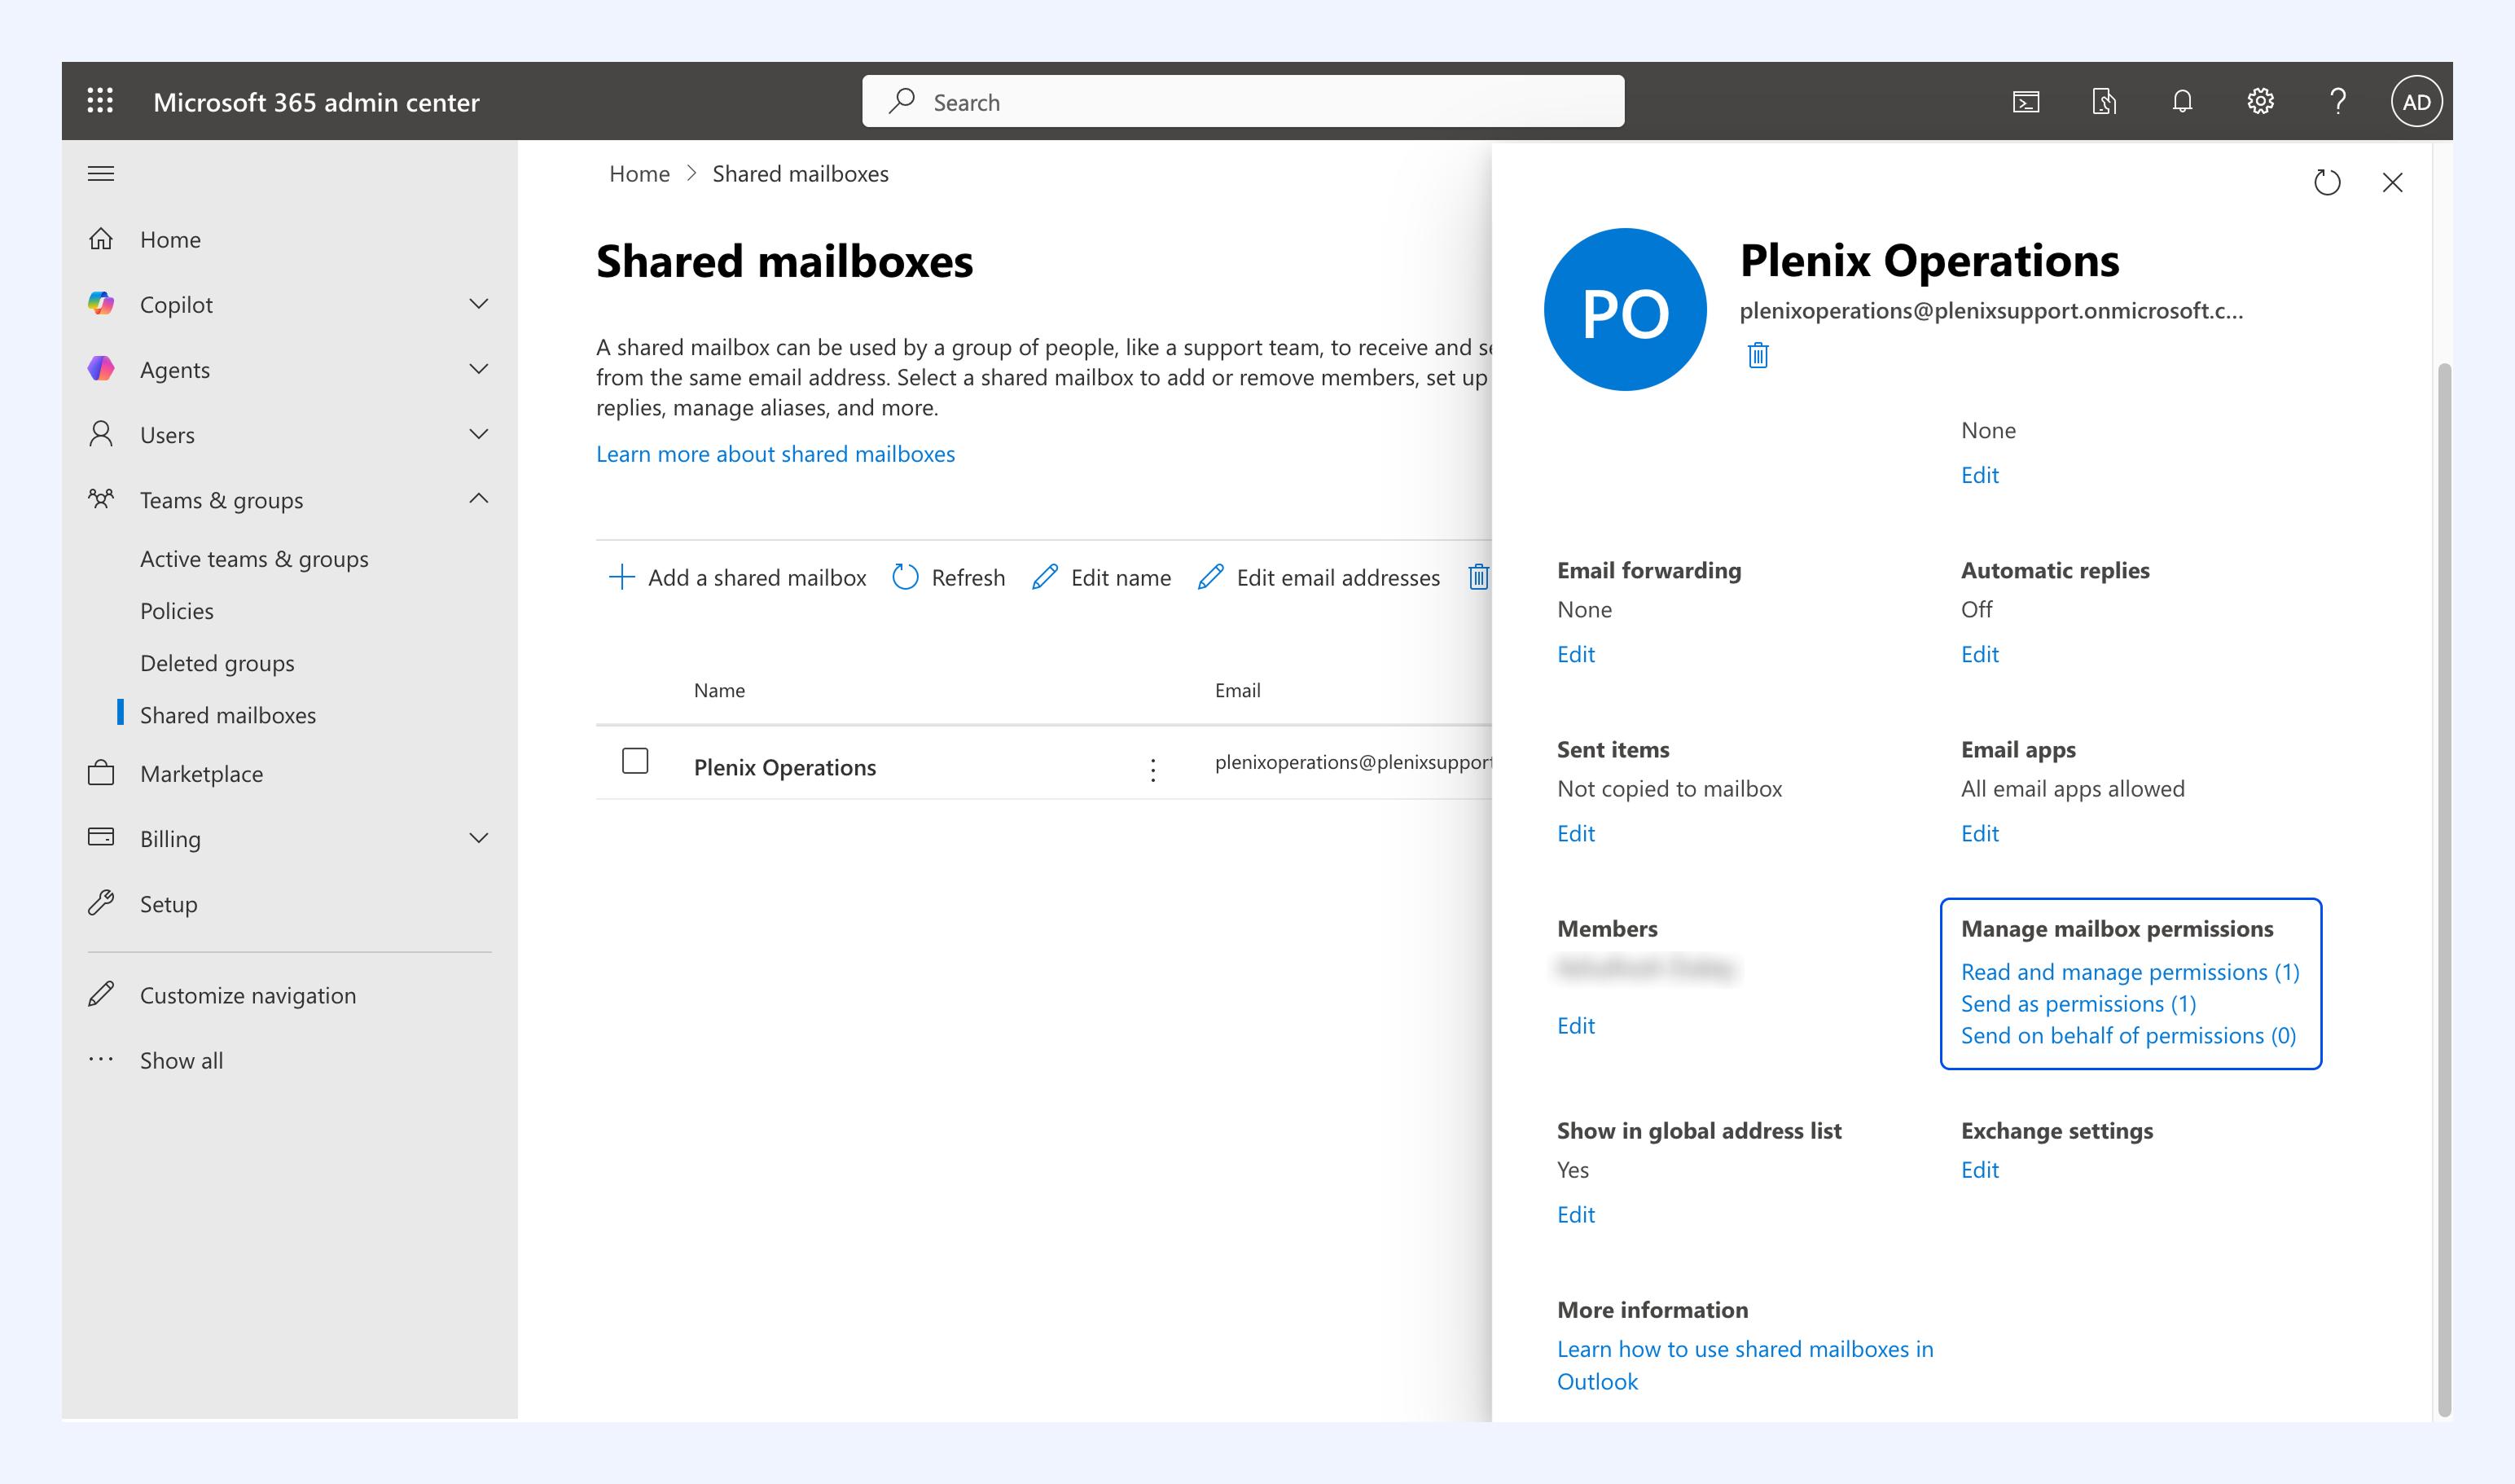
6. You’ll need to add your account to each permission. For each one:
- Select and click Add permission.
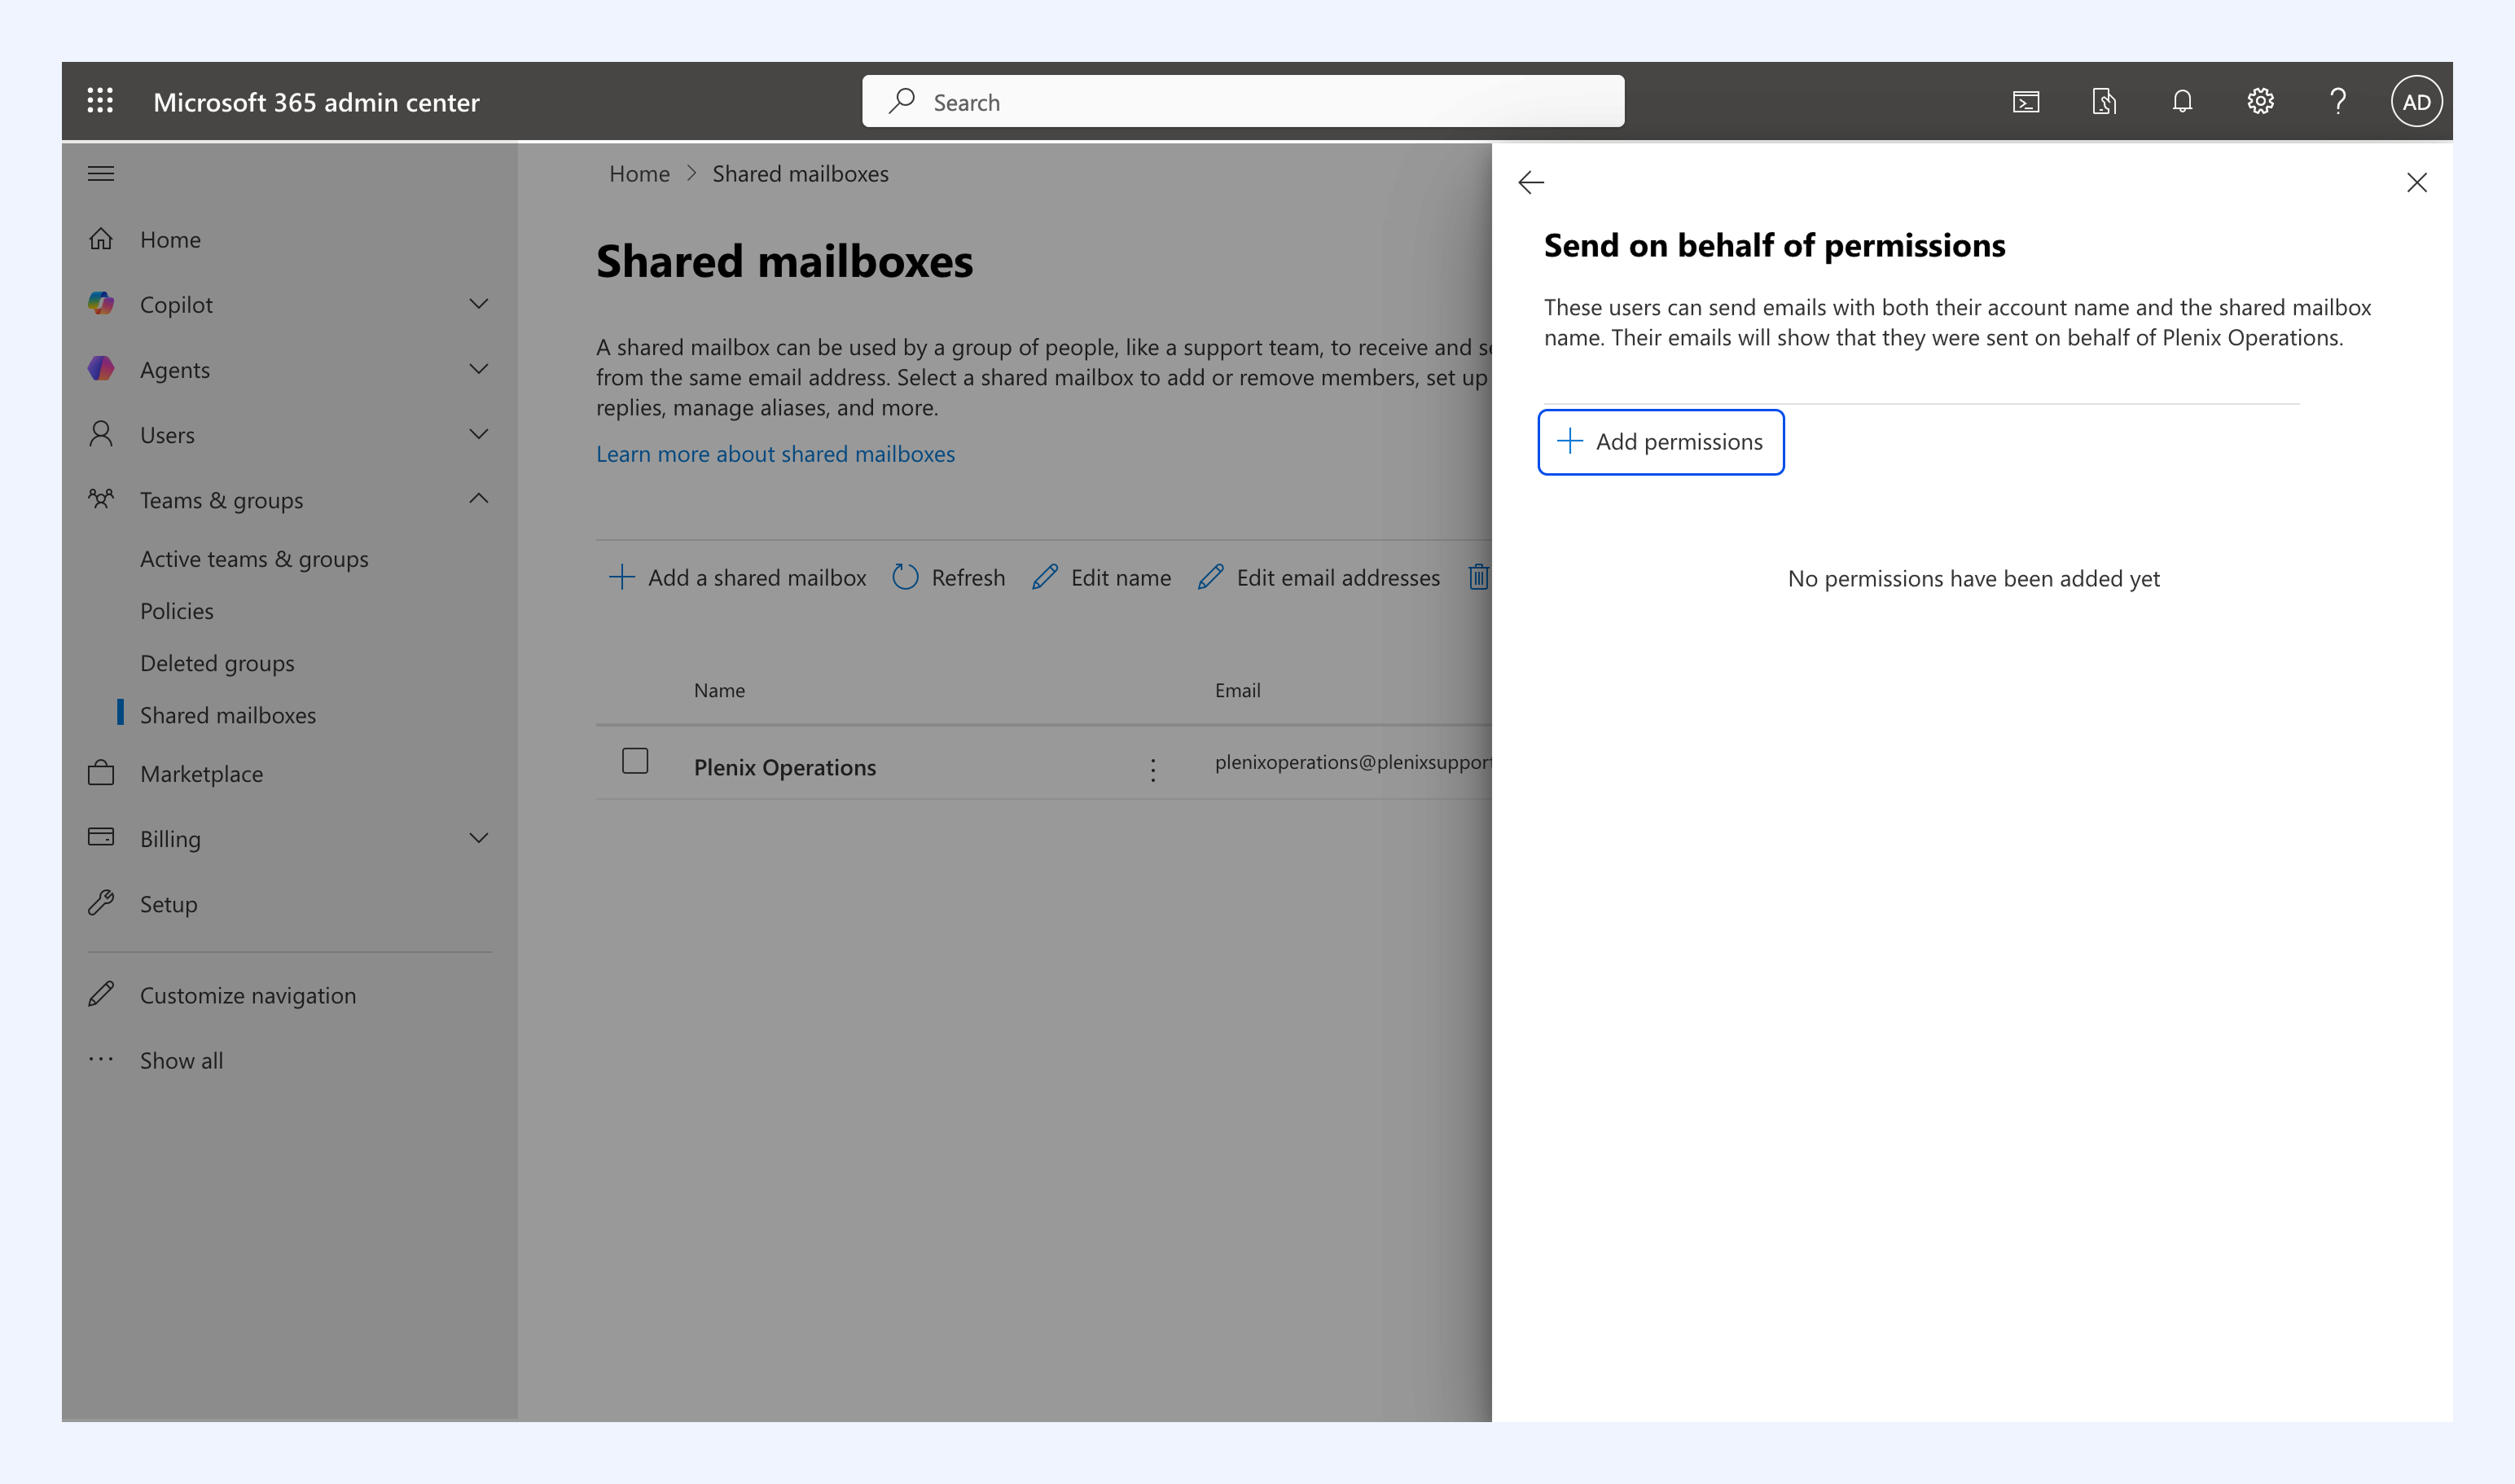
- Select your account and click Add.
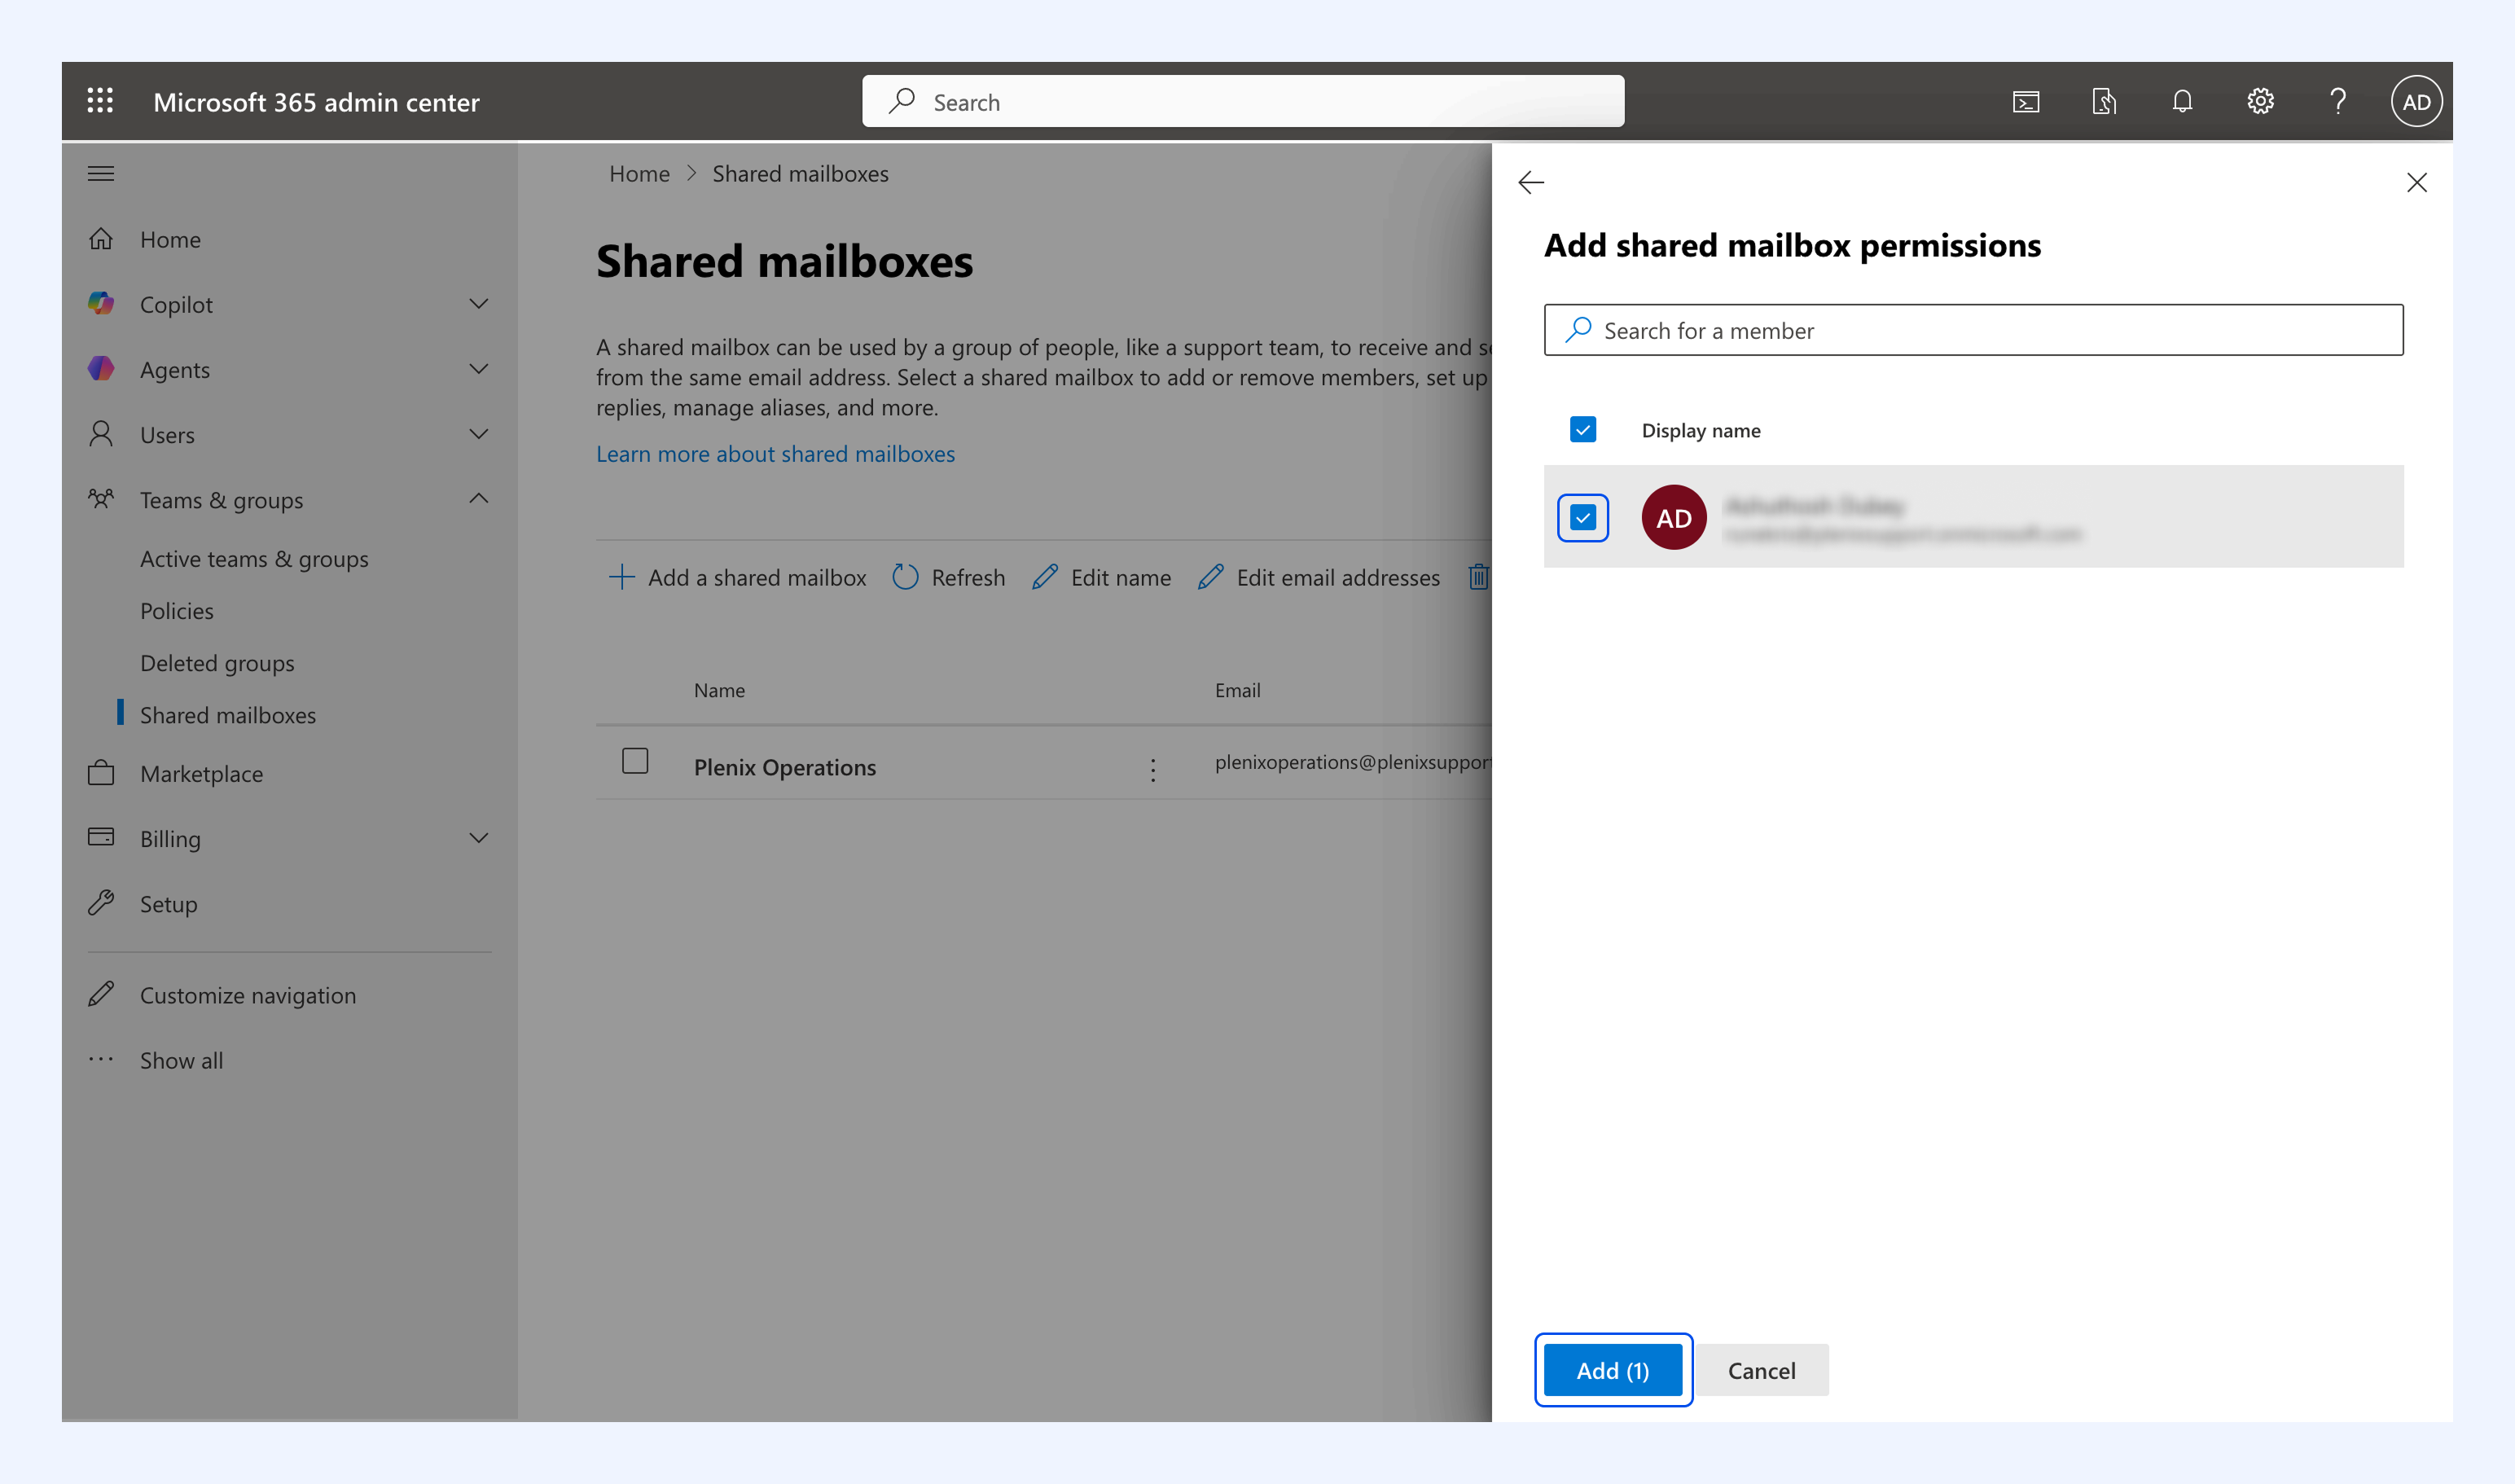
Repeat this process for the remaining two permissions. Once you’re done, you can connect your shared mailbox to Hiver.
Setting up Distribution list or Microsoft 365 group permissions
Hiver needs these permissions to read and send emails from the distribution list or group:
- Member access
- Delegate access
Steps to set up permissions
Step 1: Add yourself as a member
1. In the Microsoft 365 Admin Center, go to Teams & groups → Active teams & groups → Distribution list and click on your group.
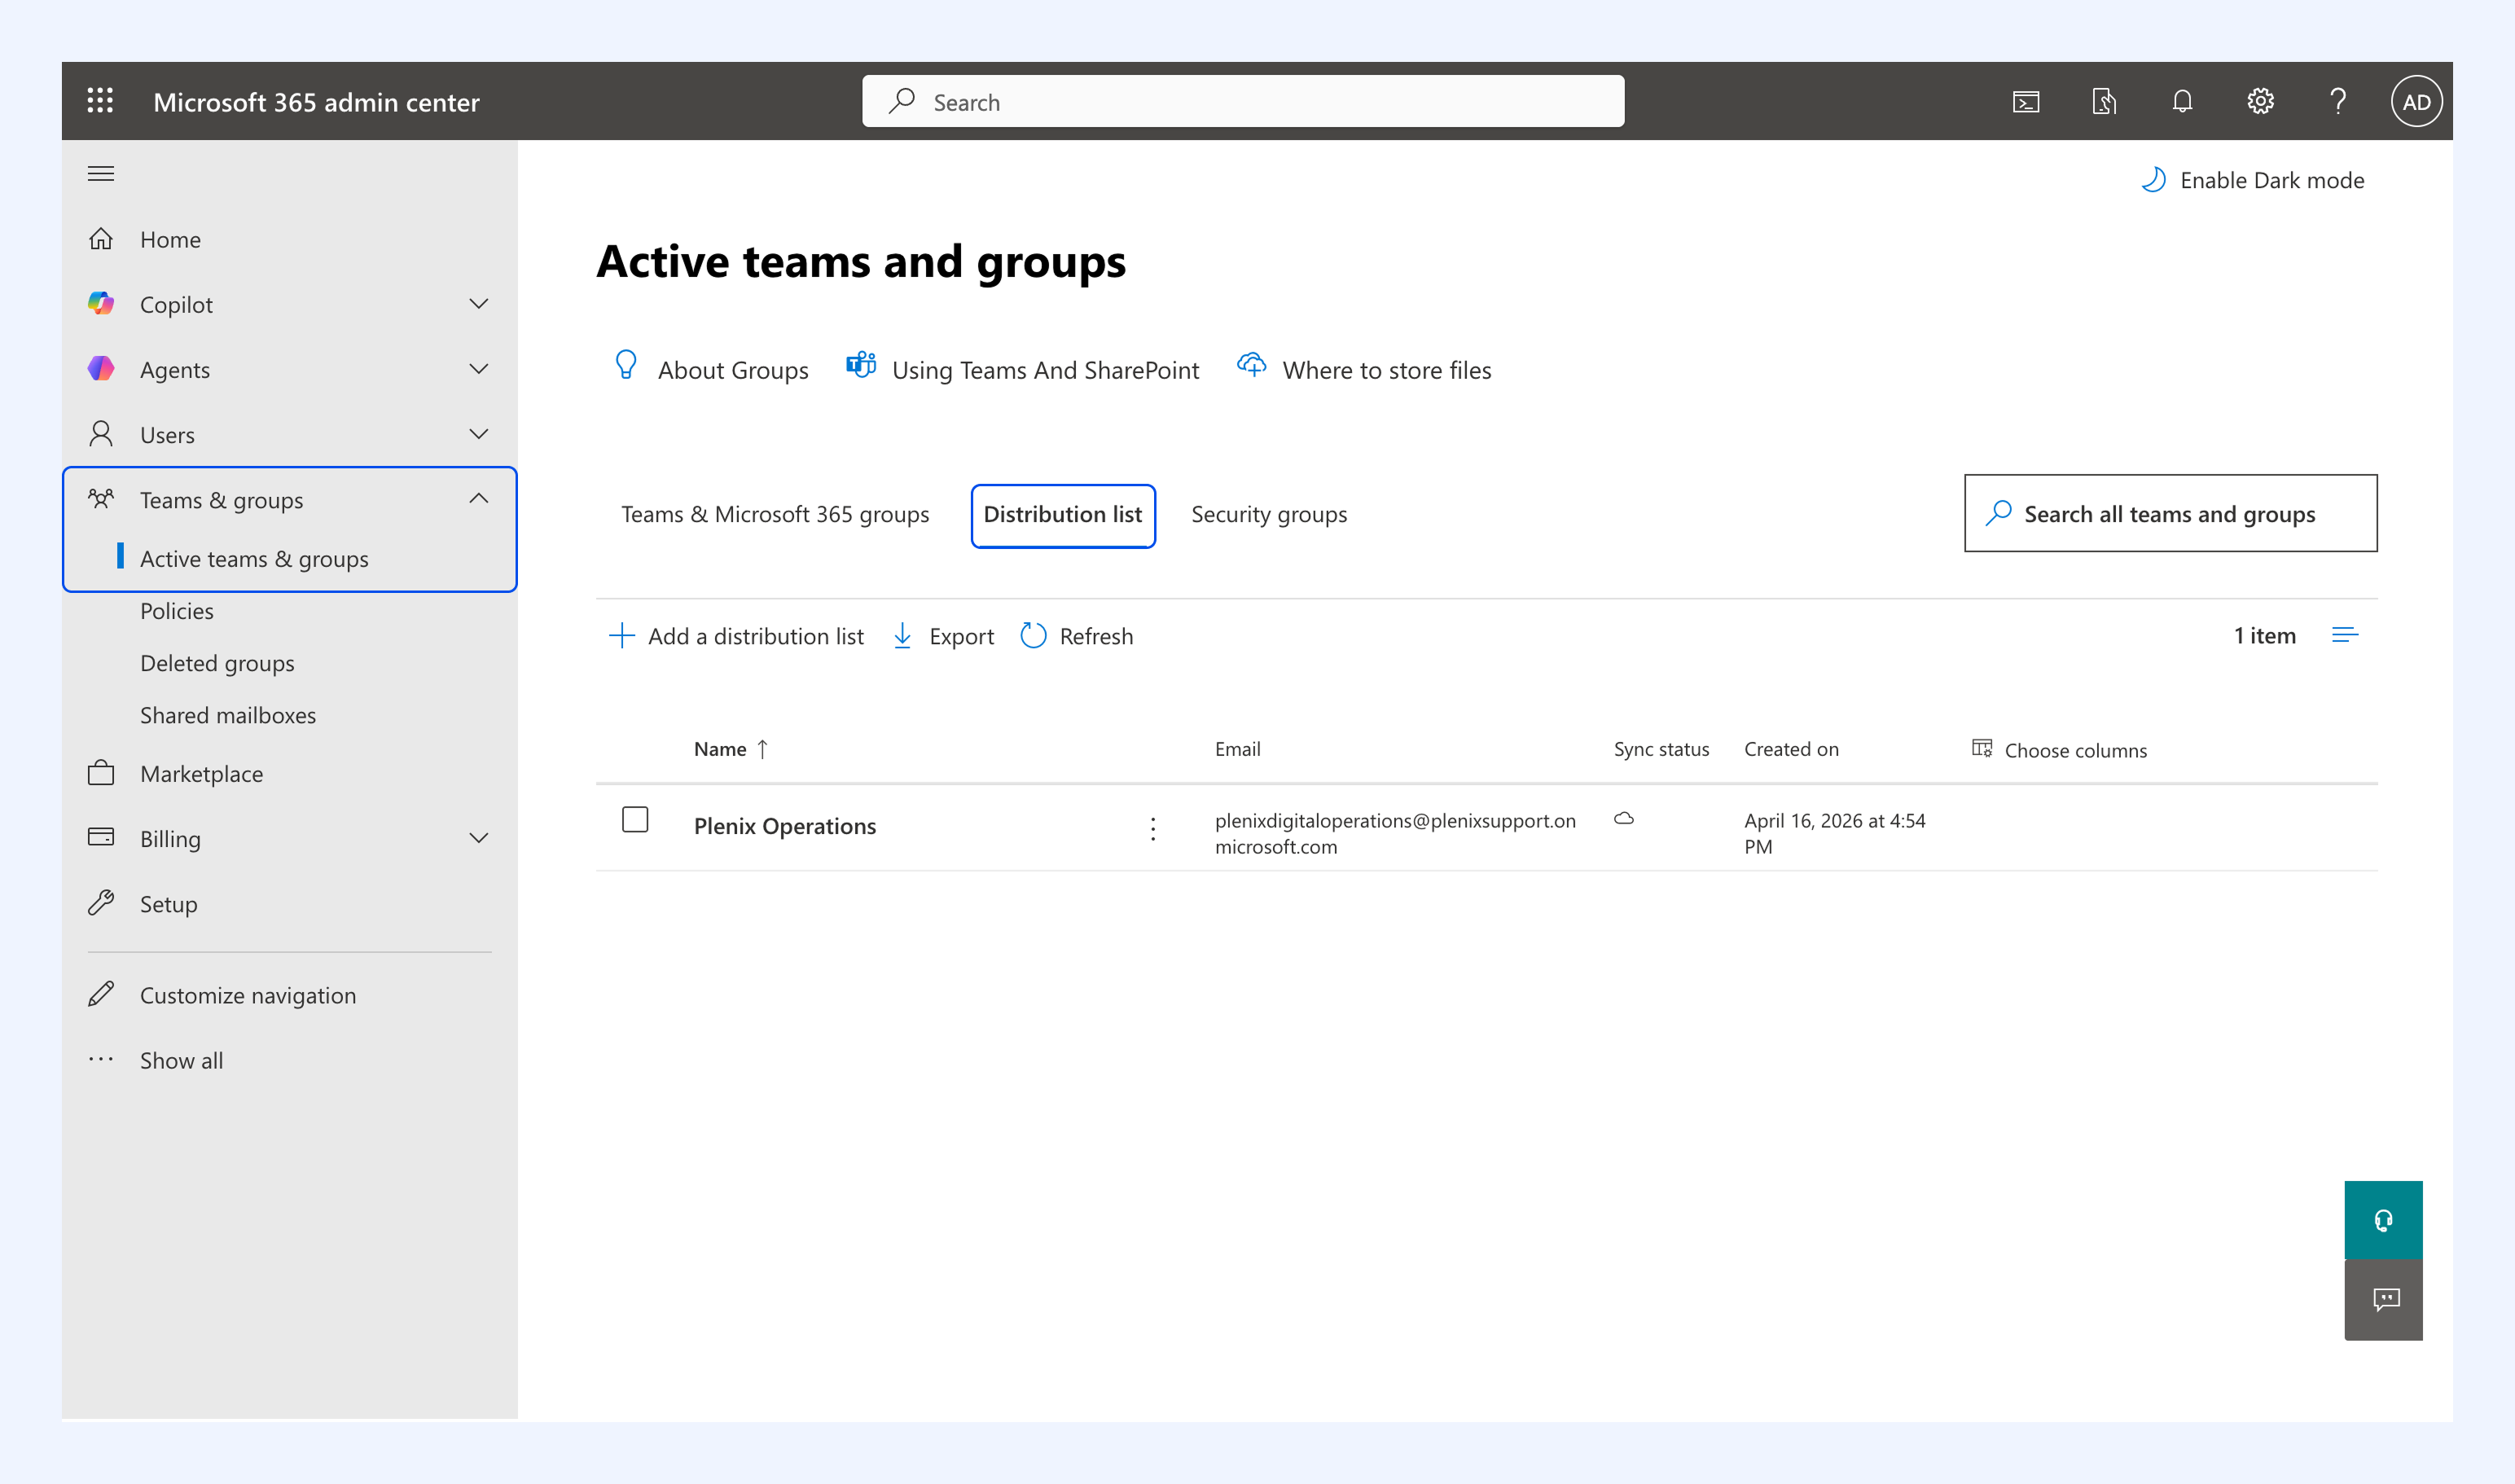
2. Open the Members tab. Check if your account is already listed as a member.
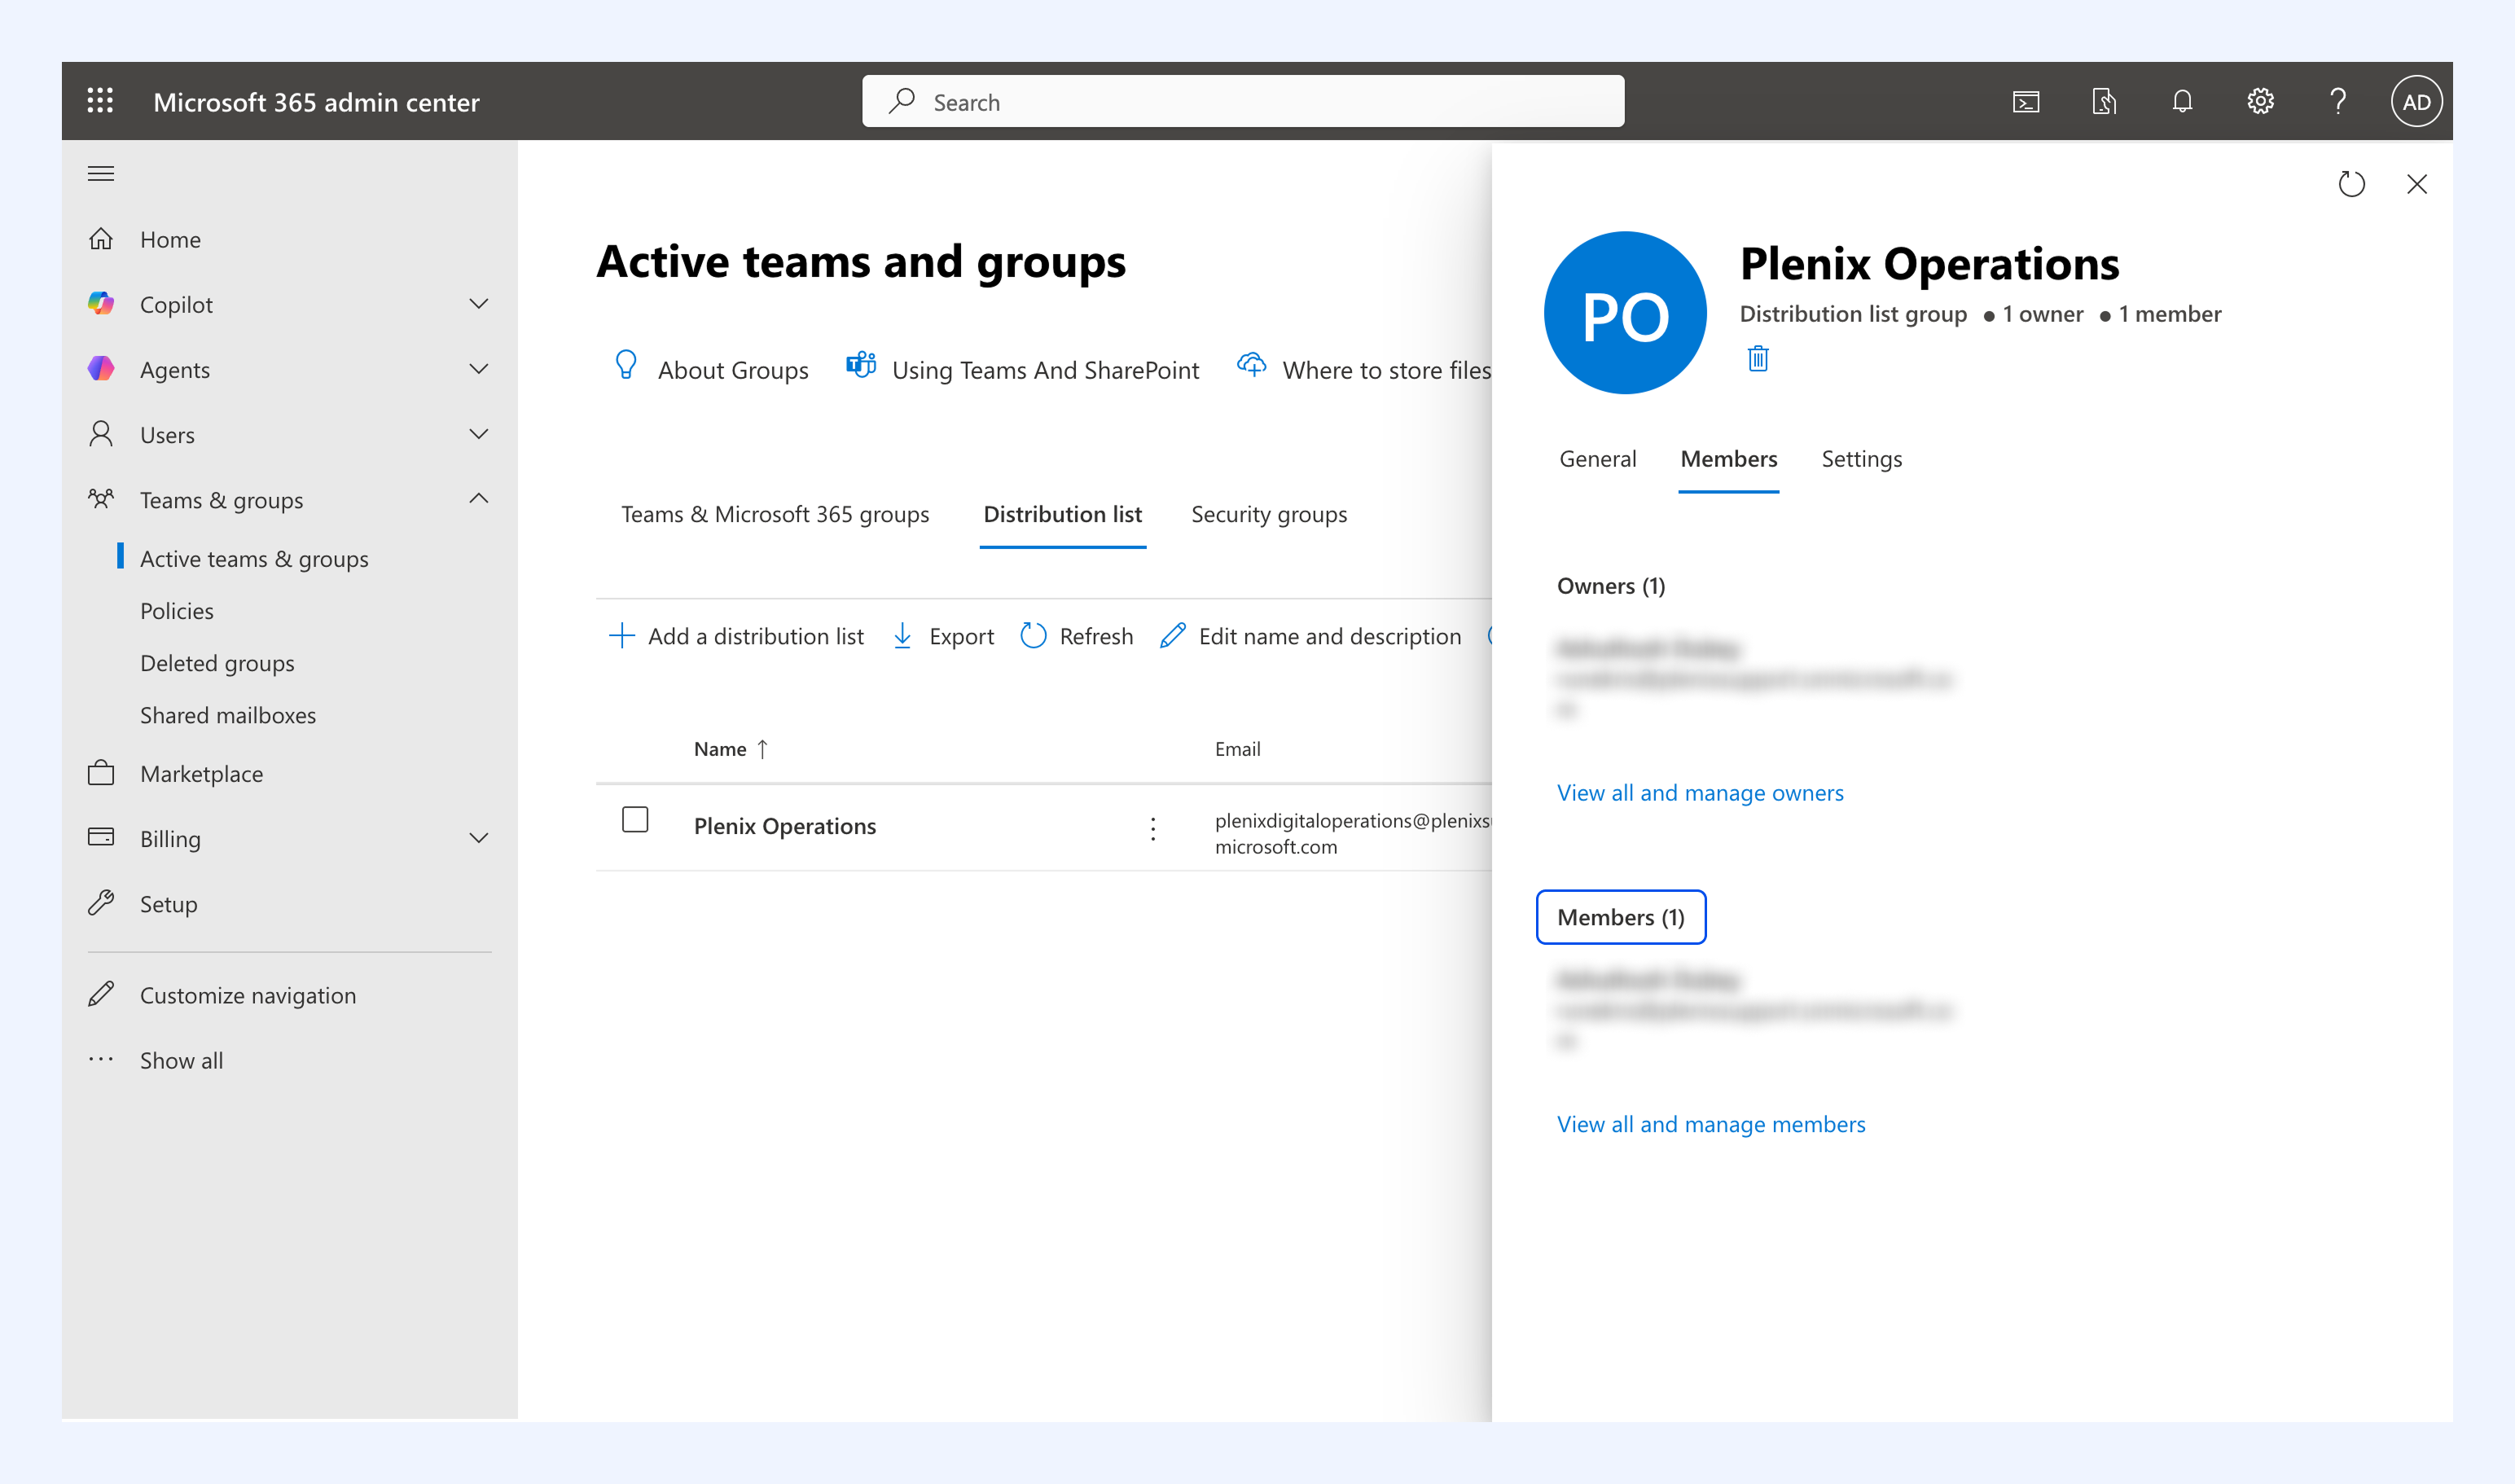
3. If your account is not listed,
- Click View all and manage members.
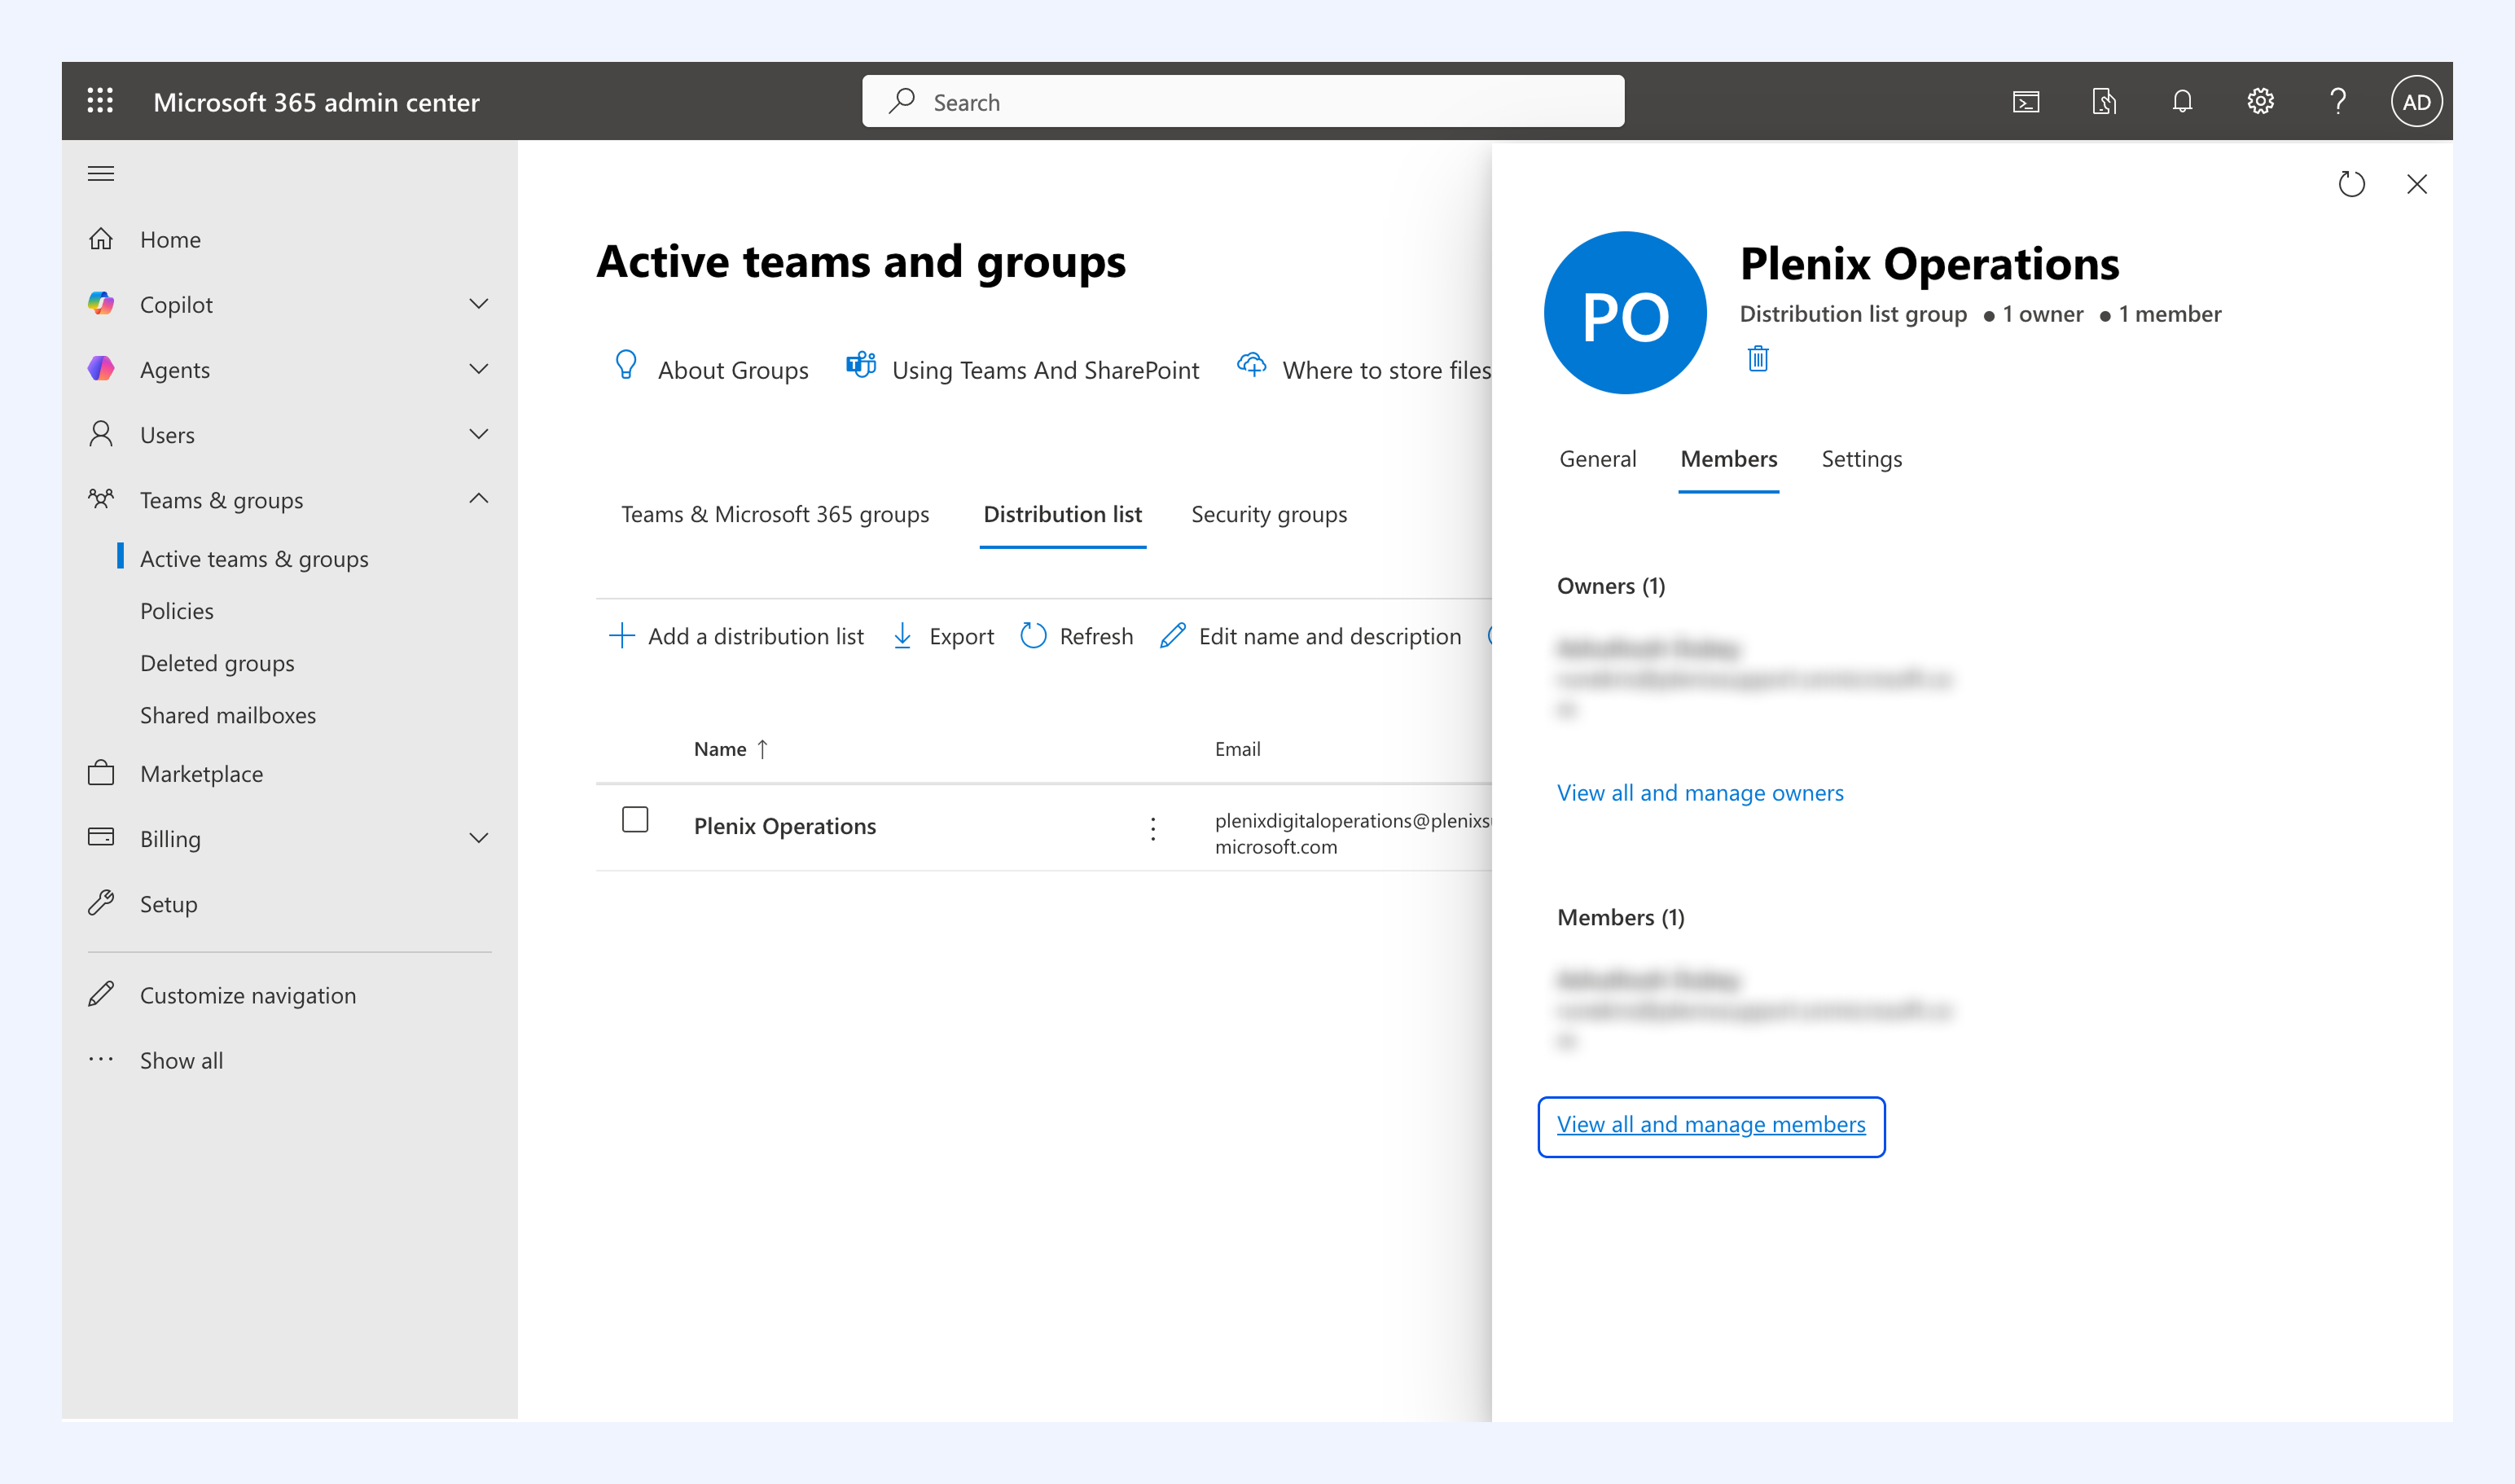
- Click Add members.
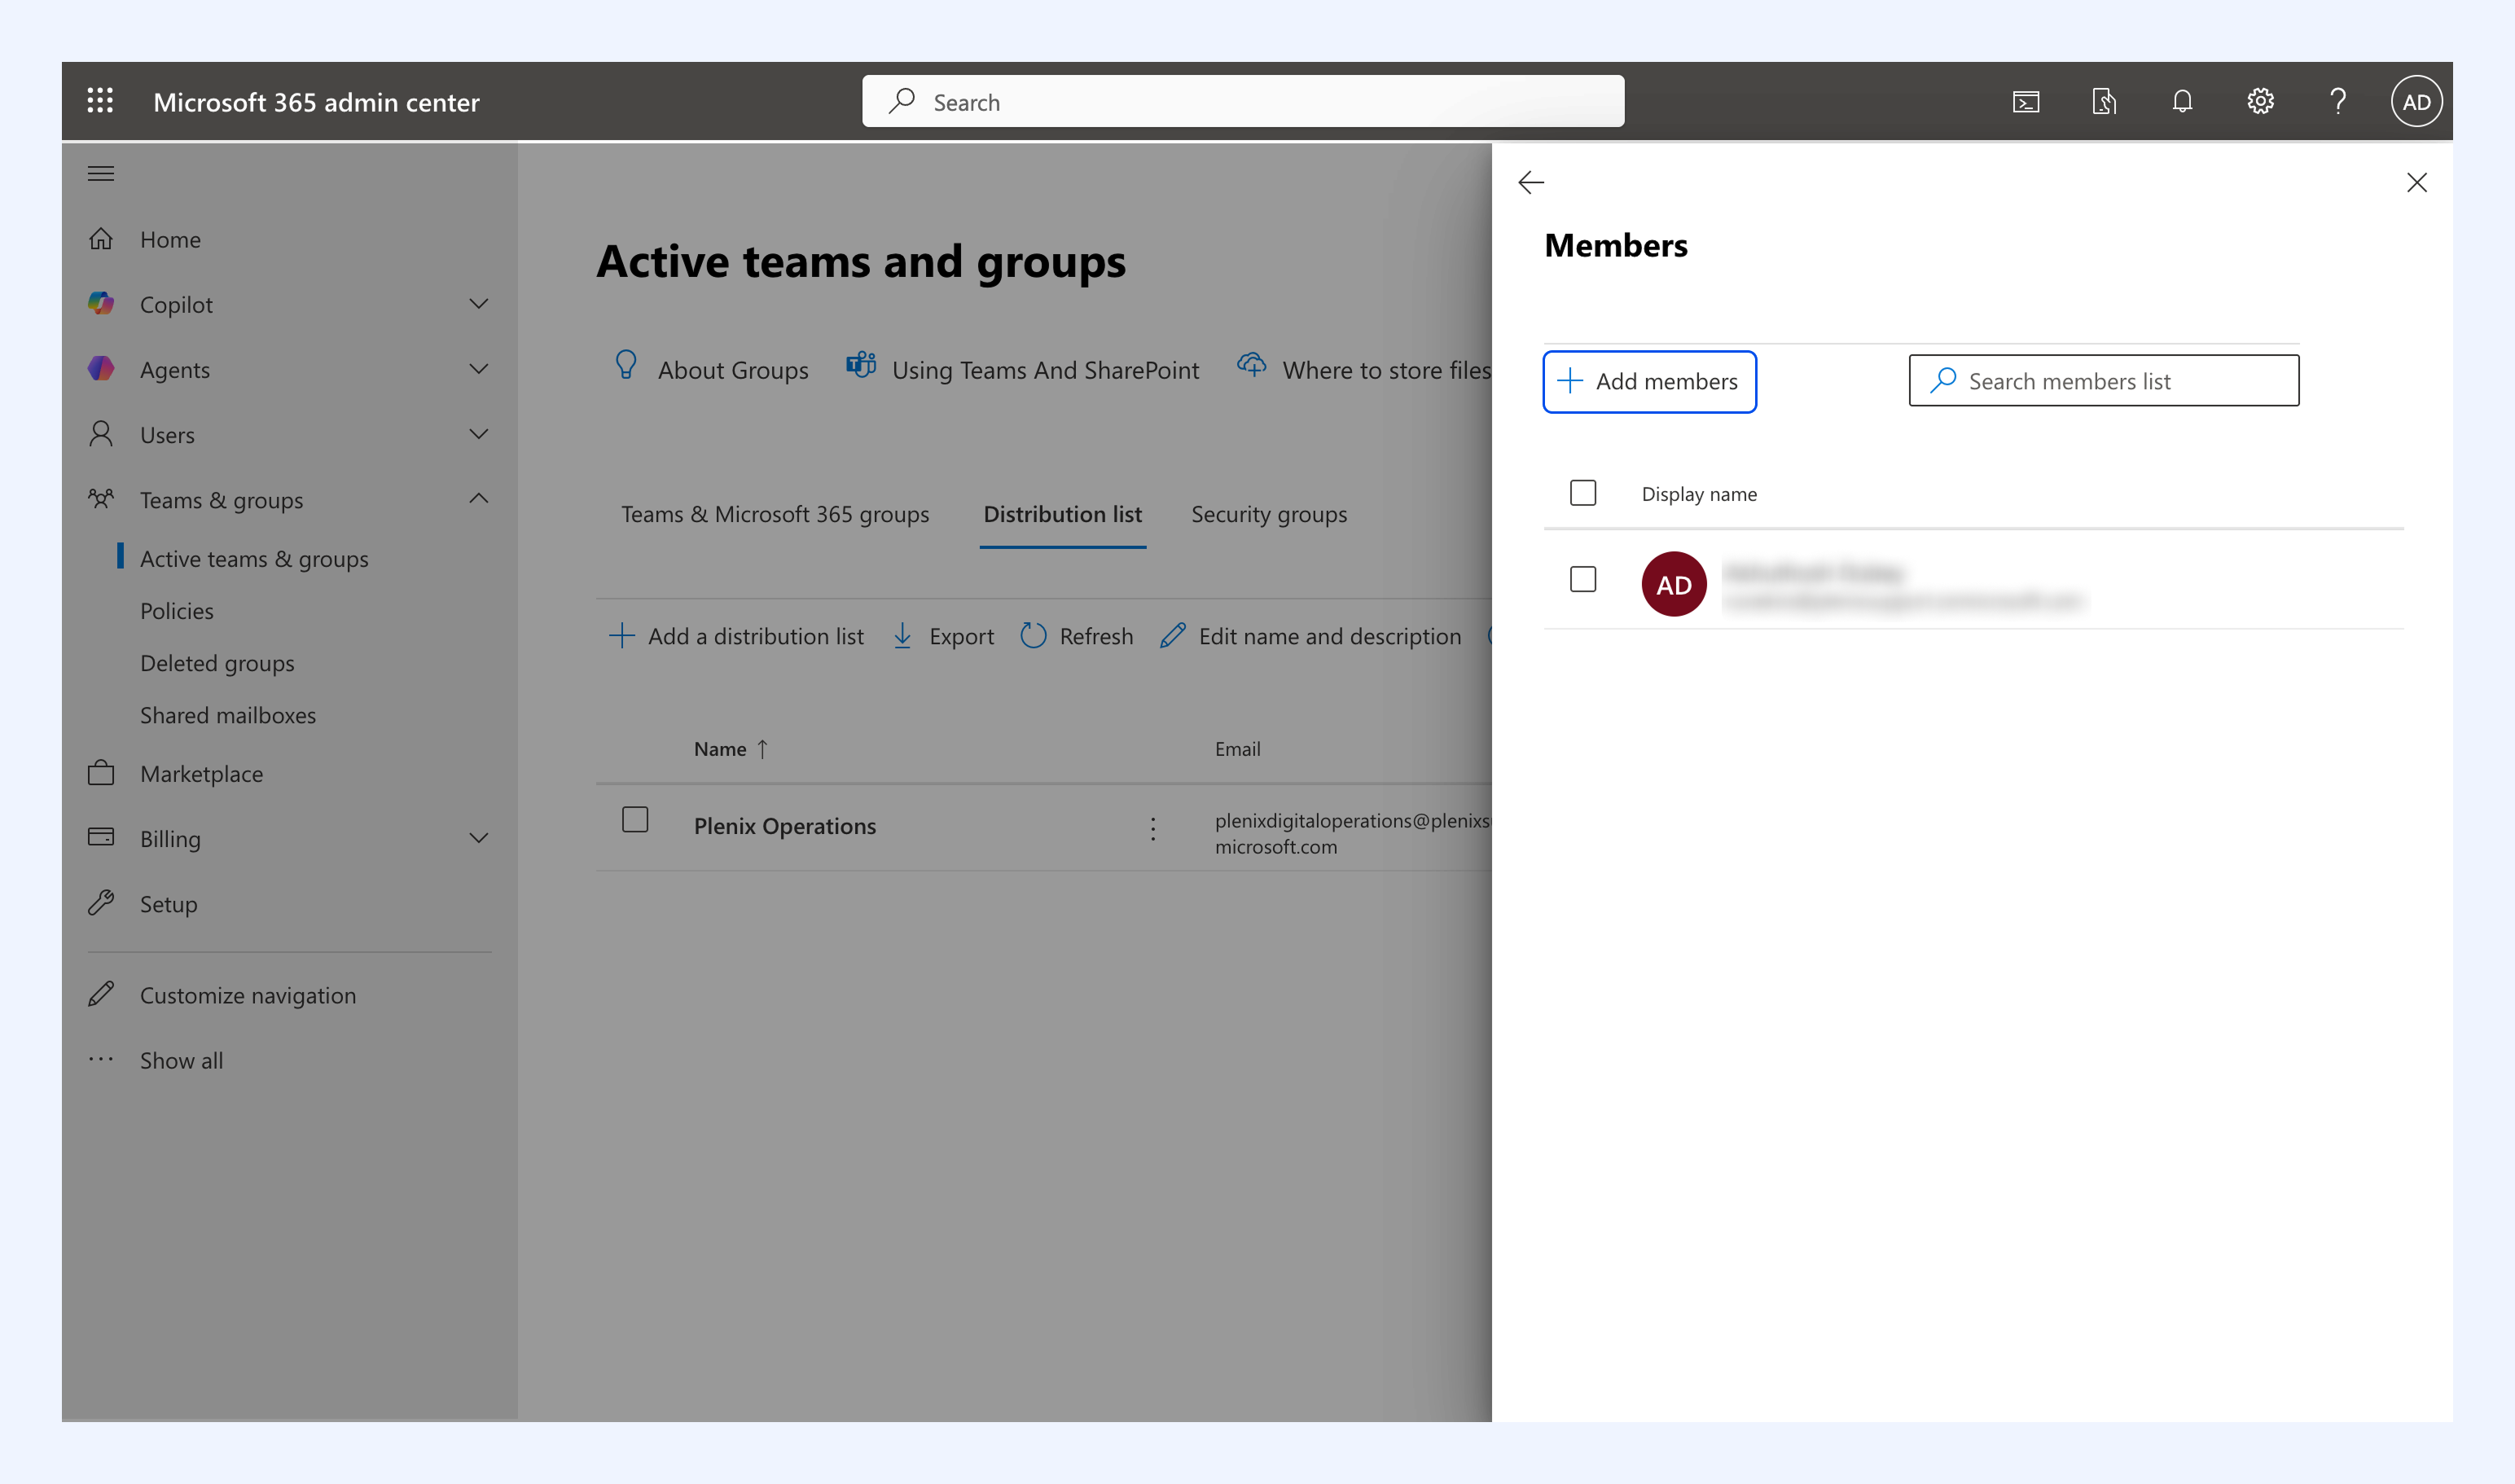
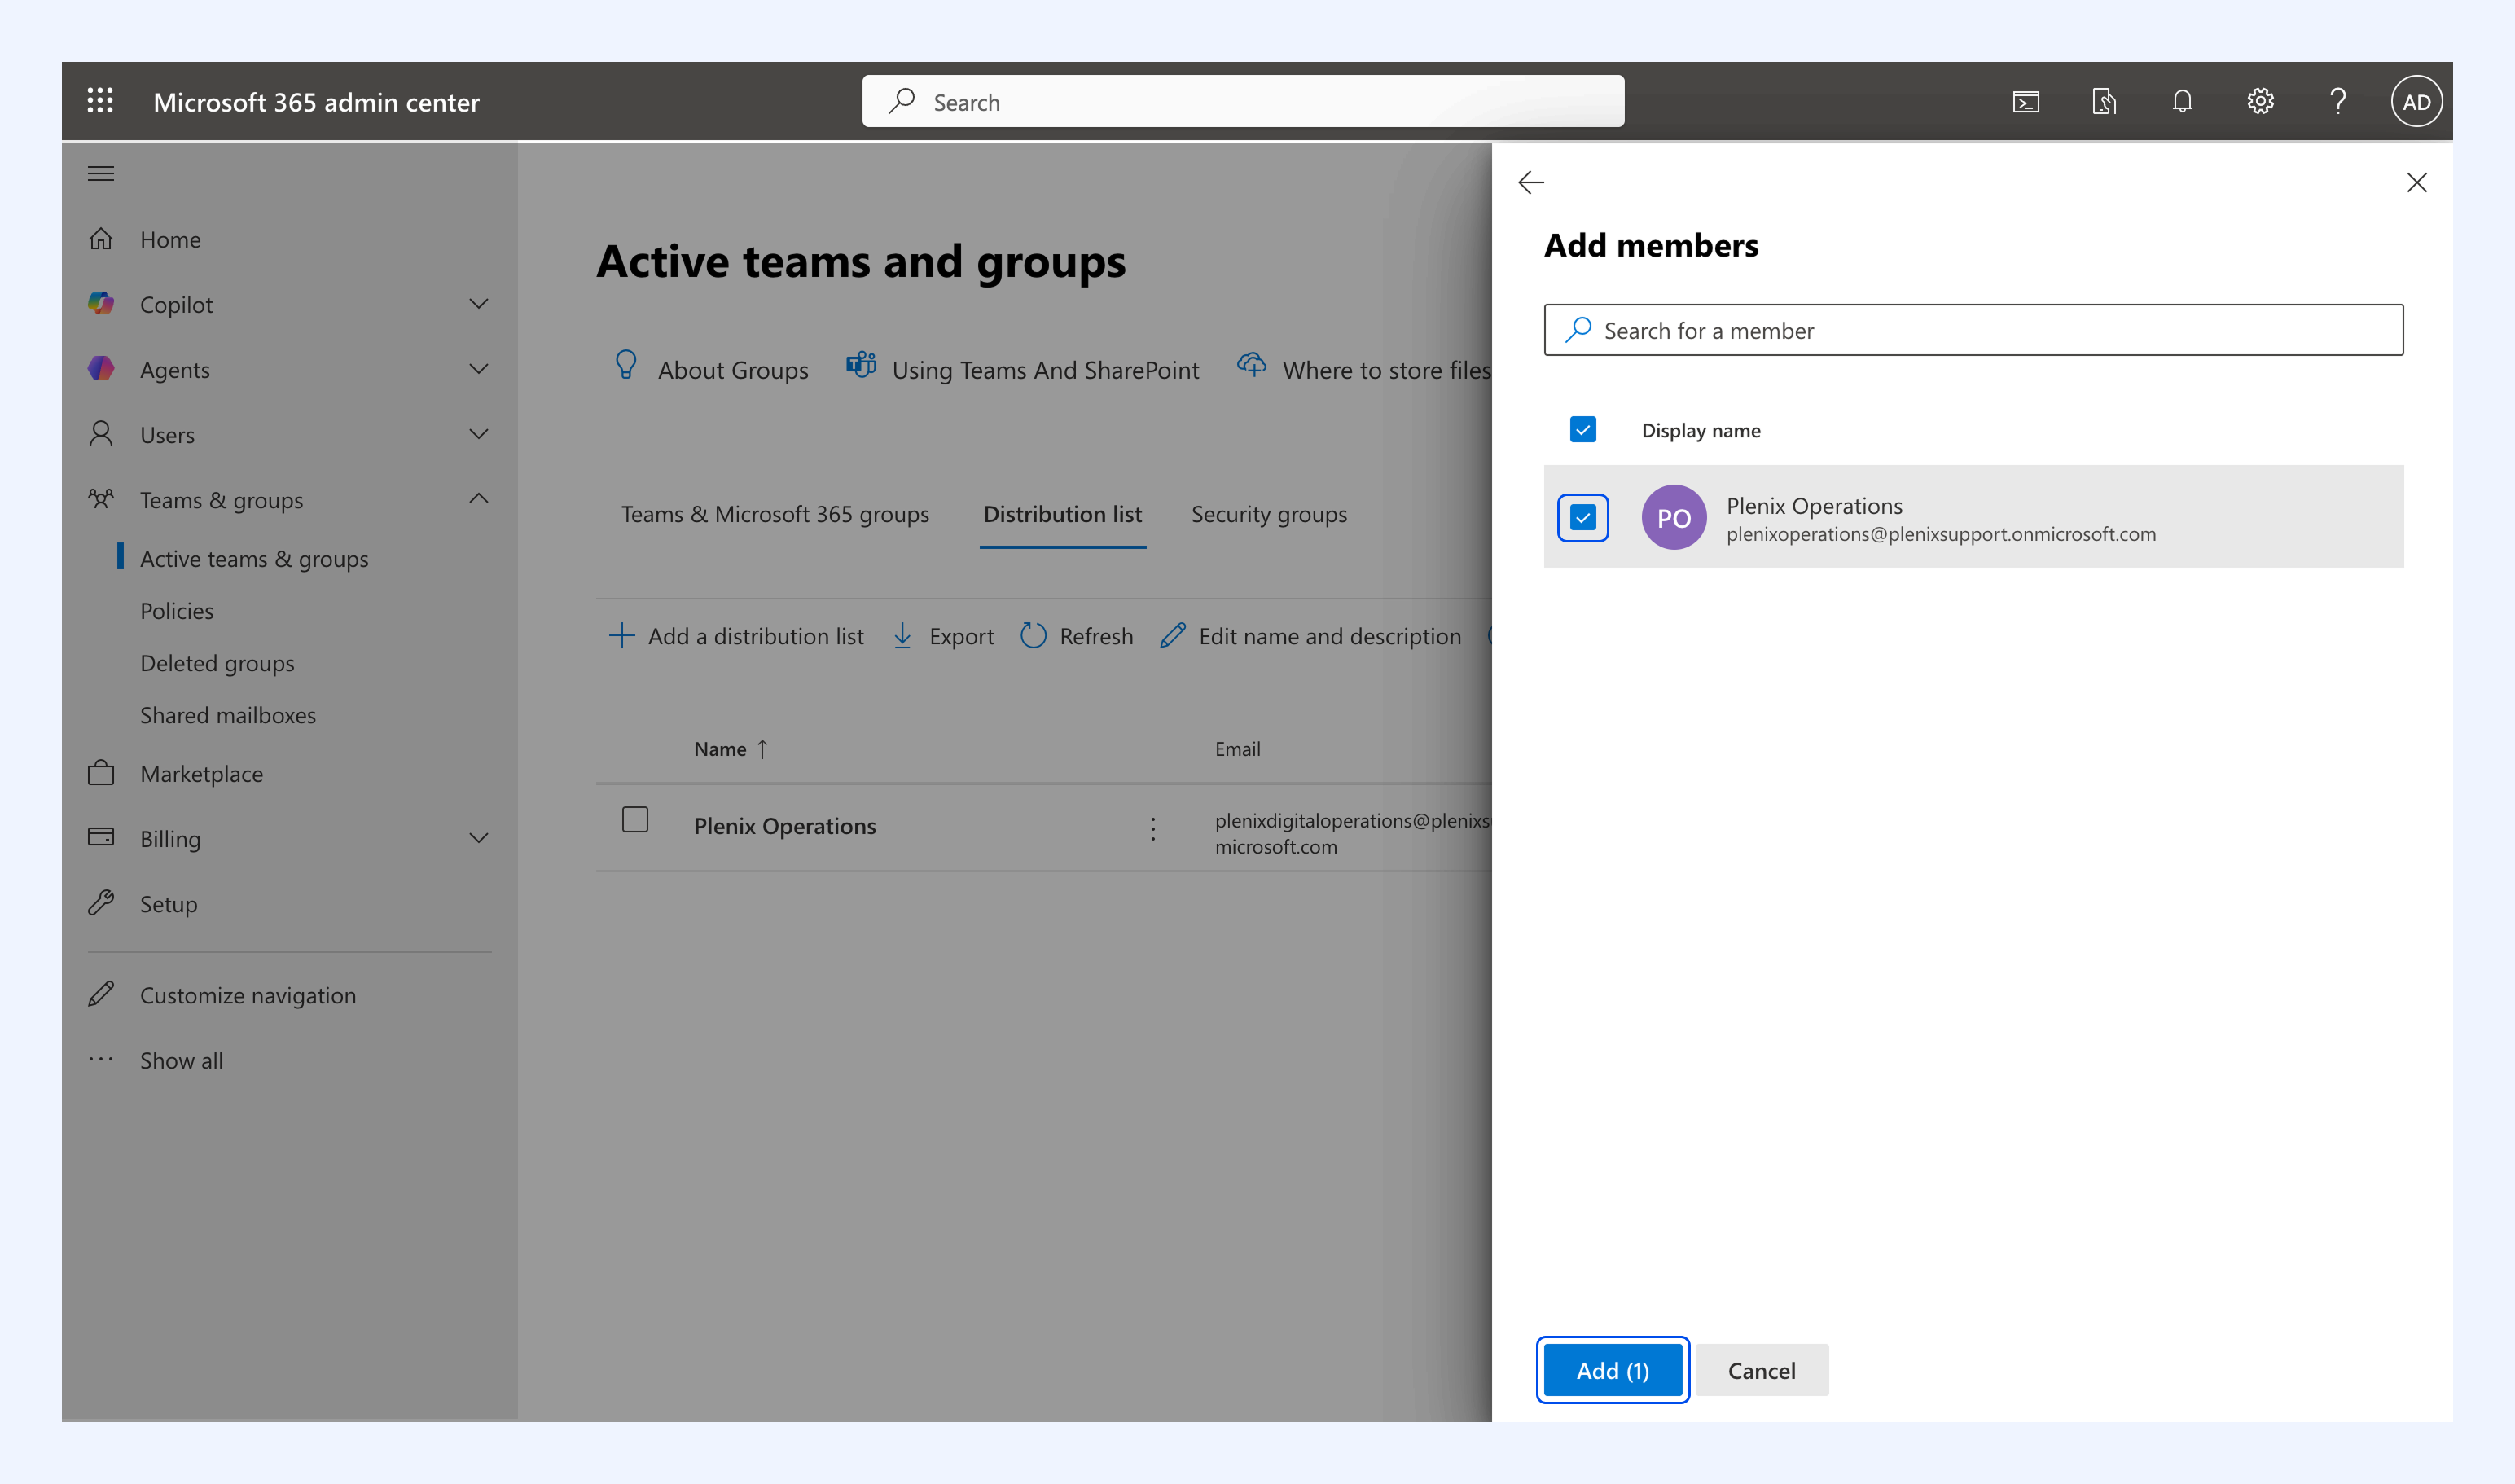
- Search for your account, select it, and click Add.
Step 2: Add your account as a delegate
Delegate access lets the account send emails on behalf of the group. These settings are managed in the Exchange admin center, not the Microsoft 365 Admin Center.
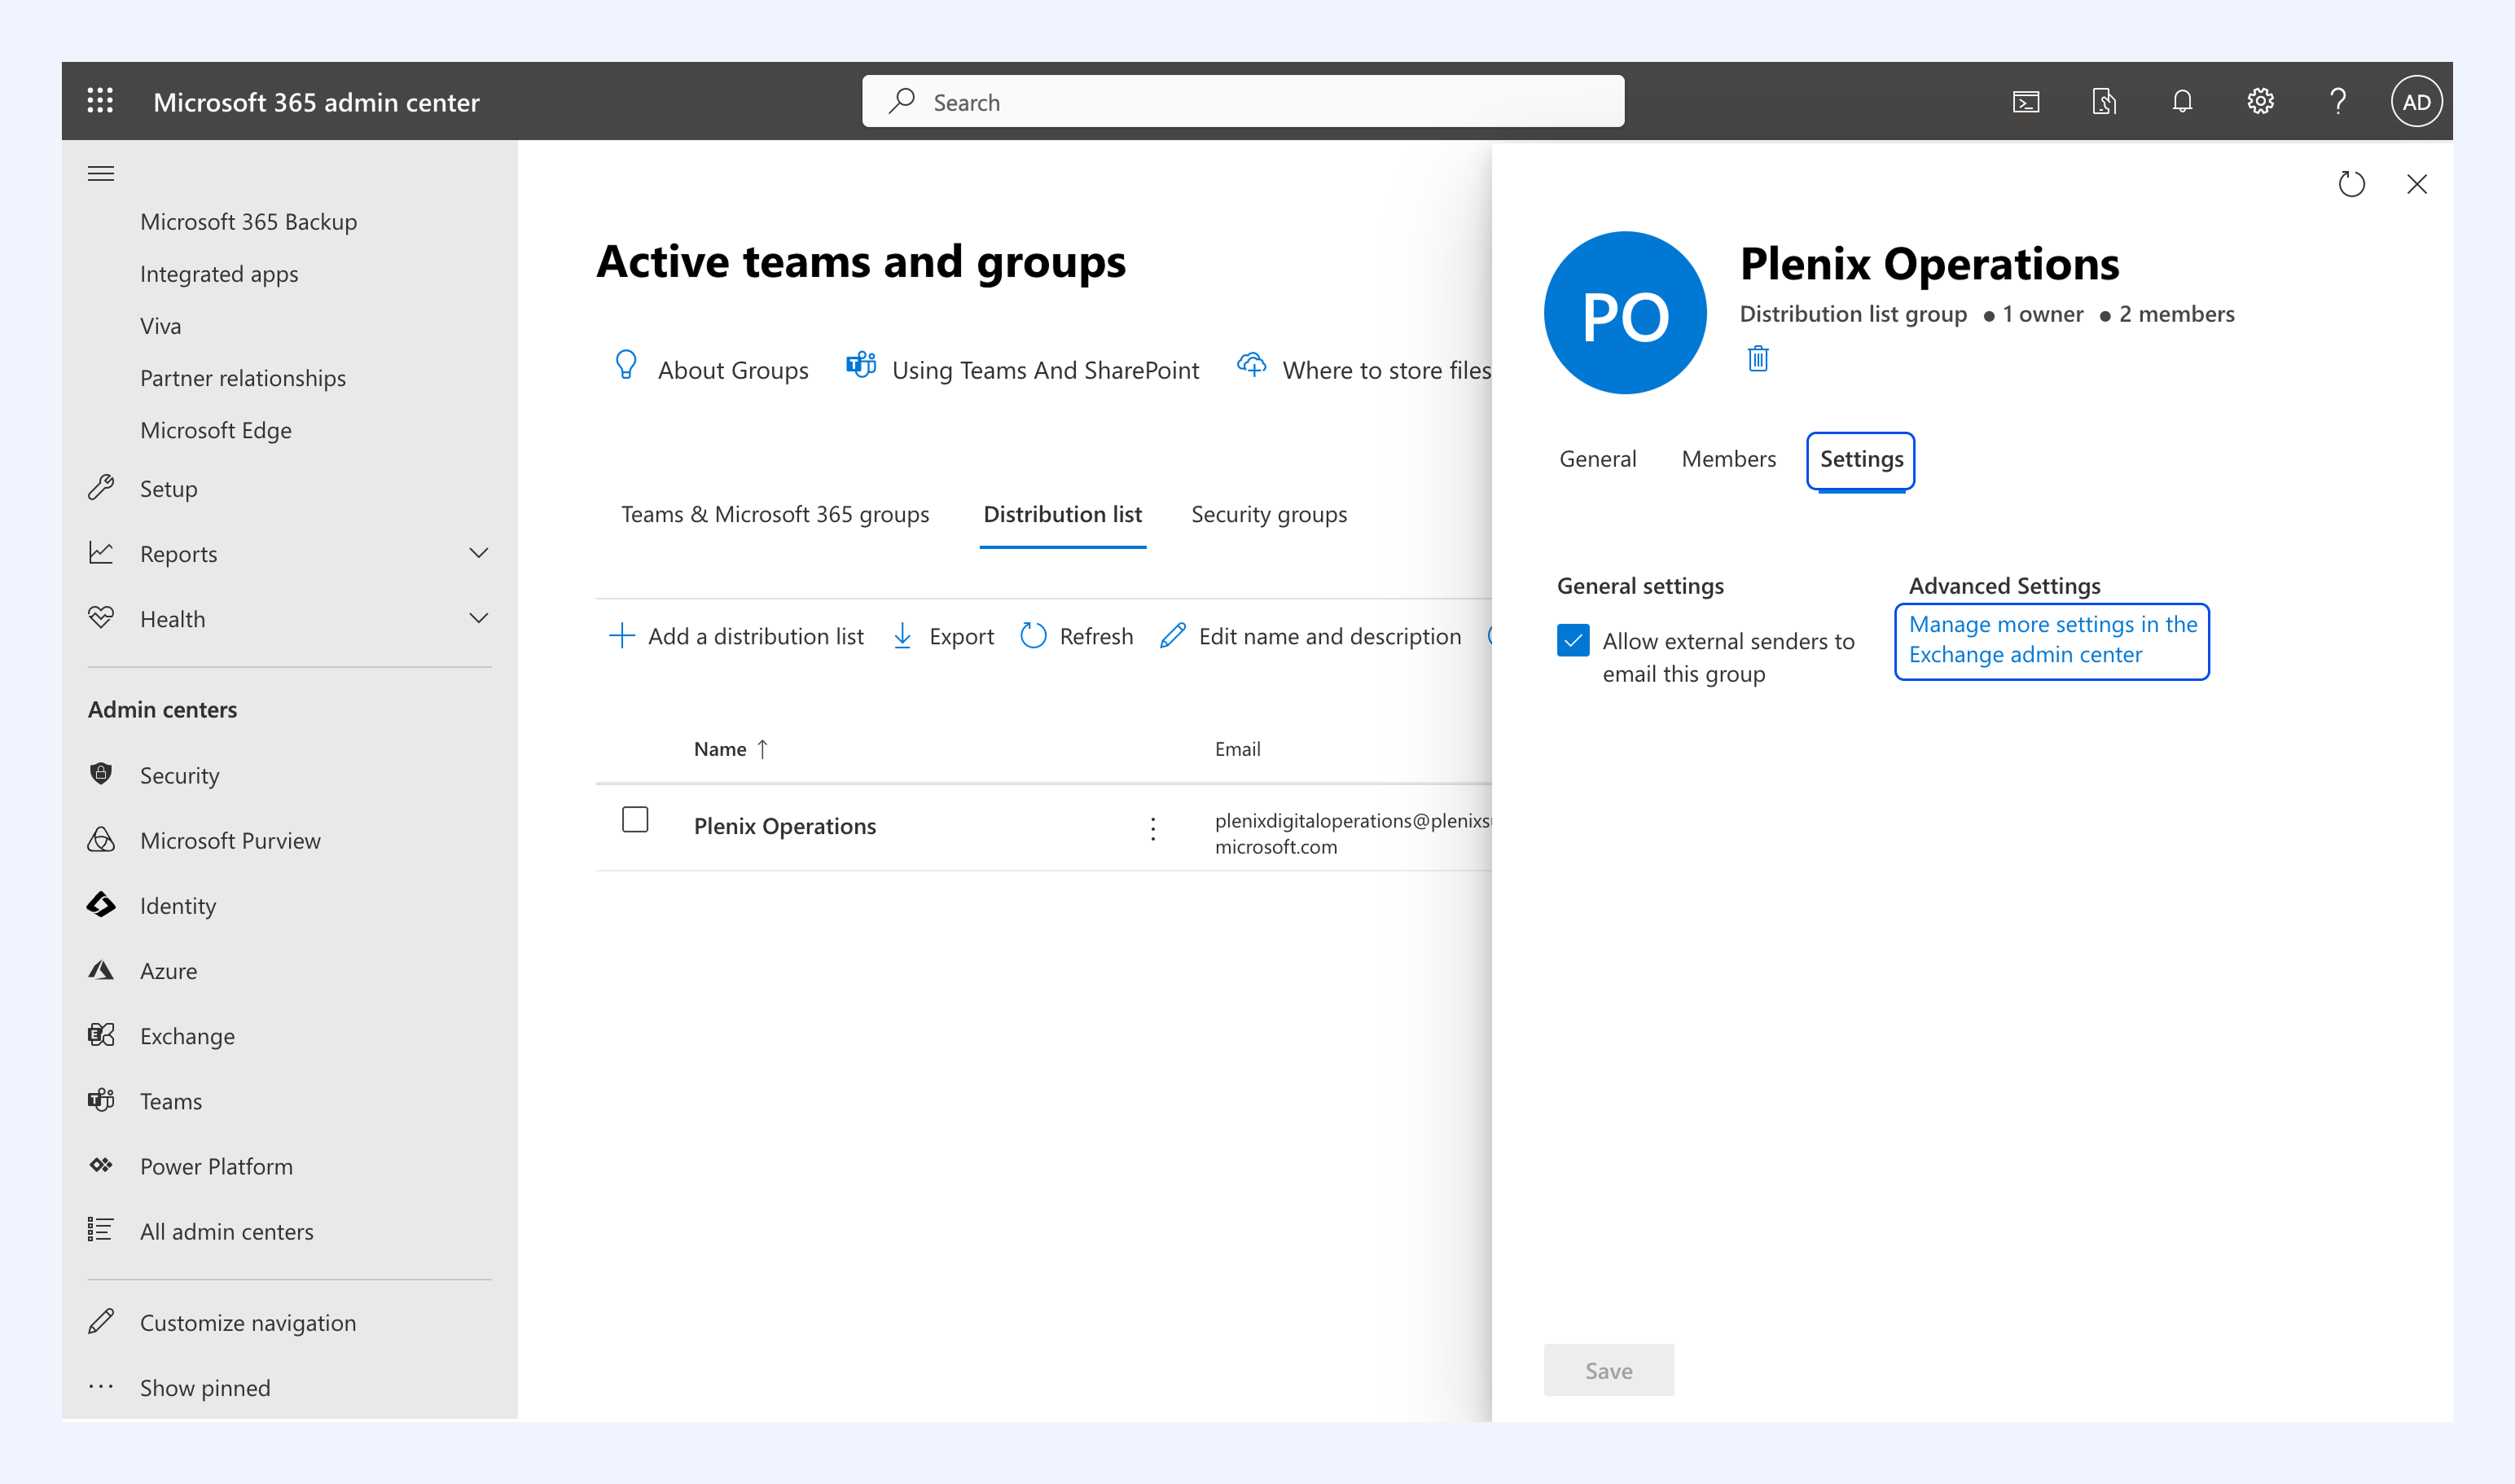
1. Go back to your distribution list, open Settings, and click Manage more settings in the Exchange admin center.
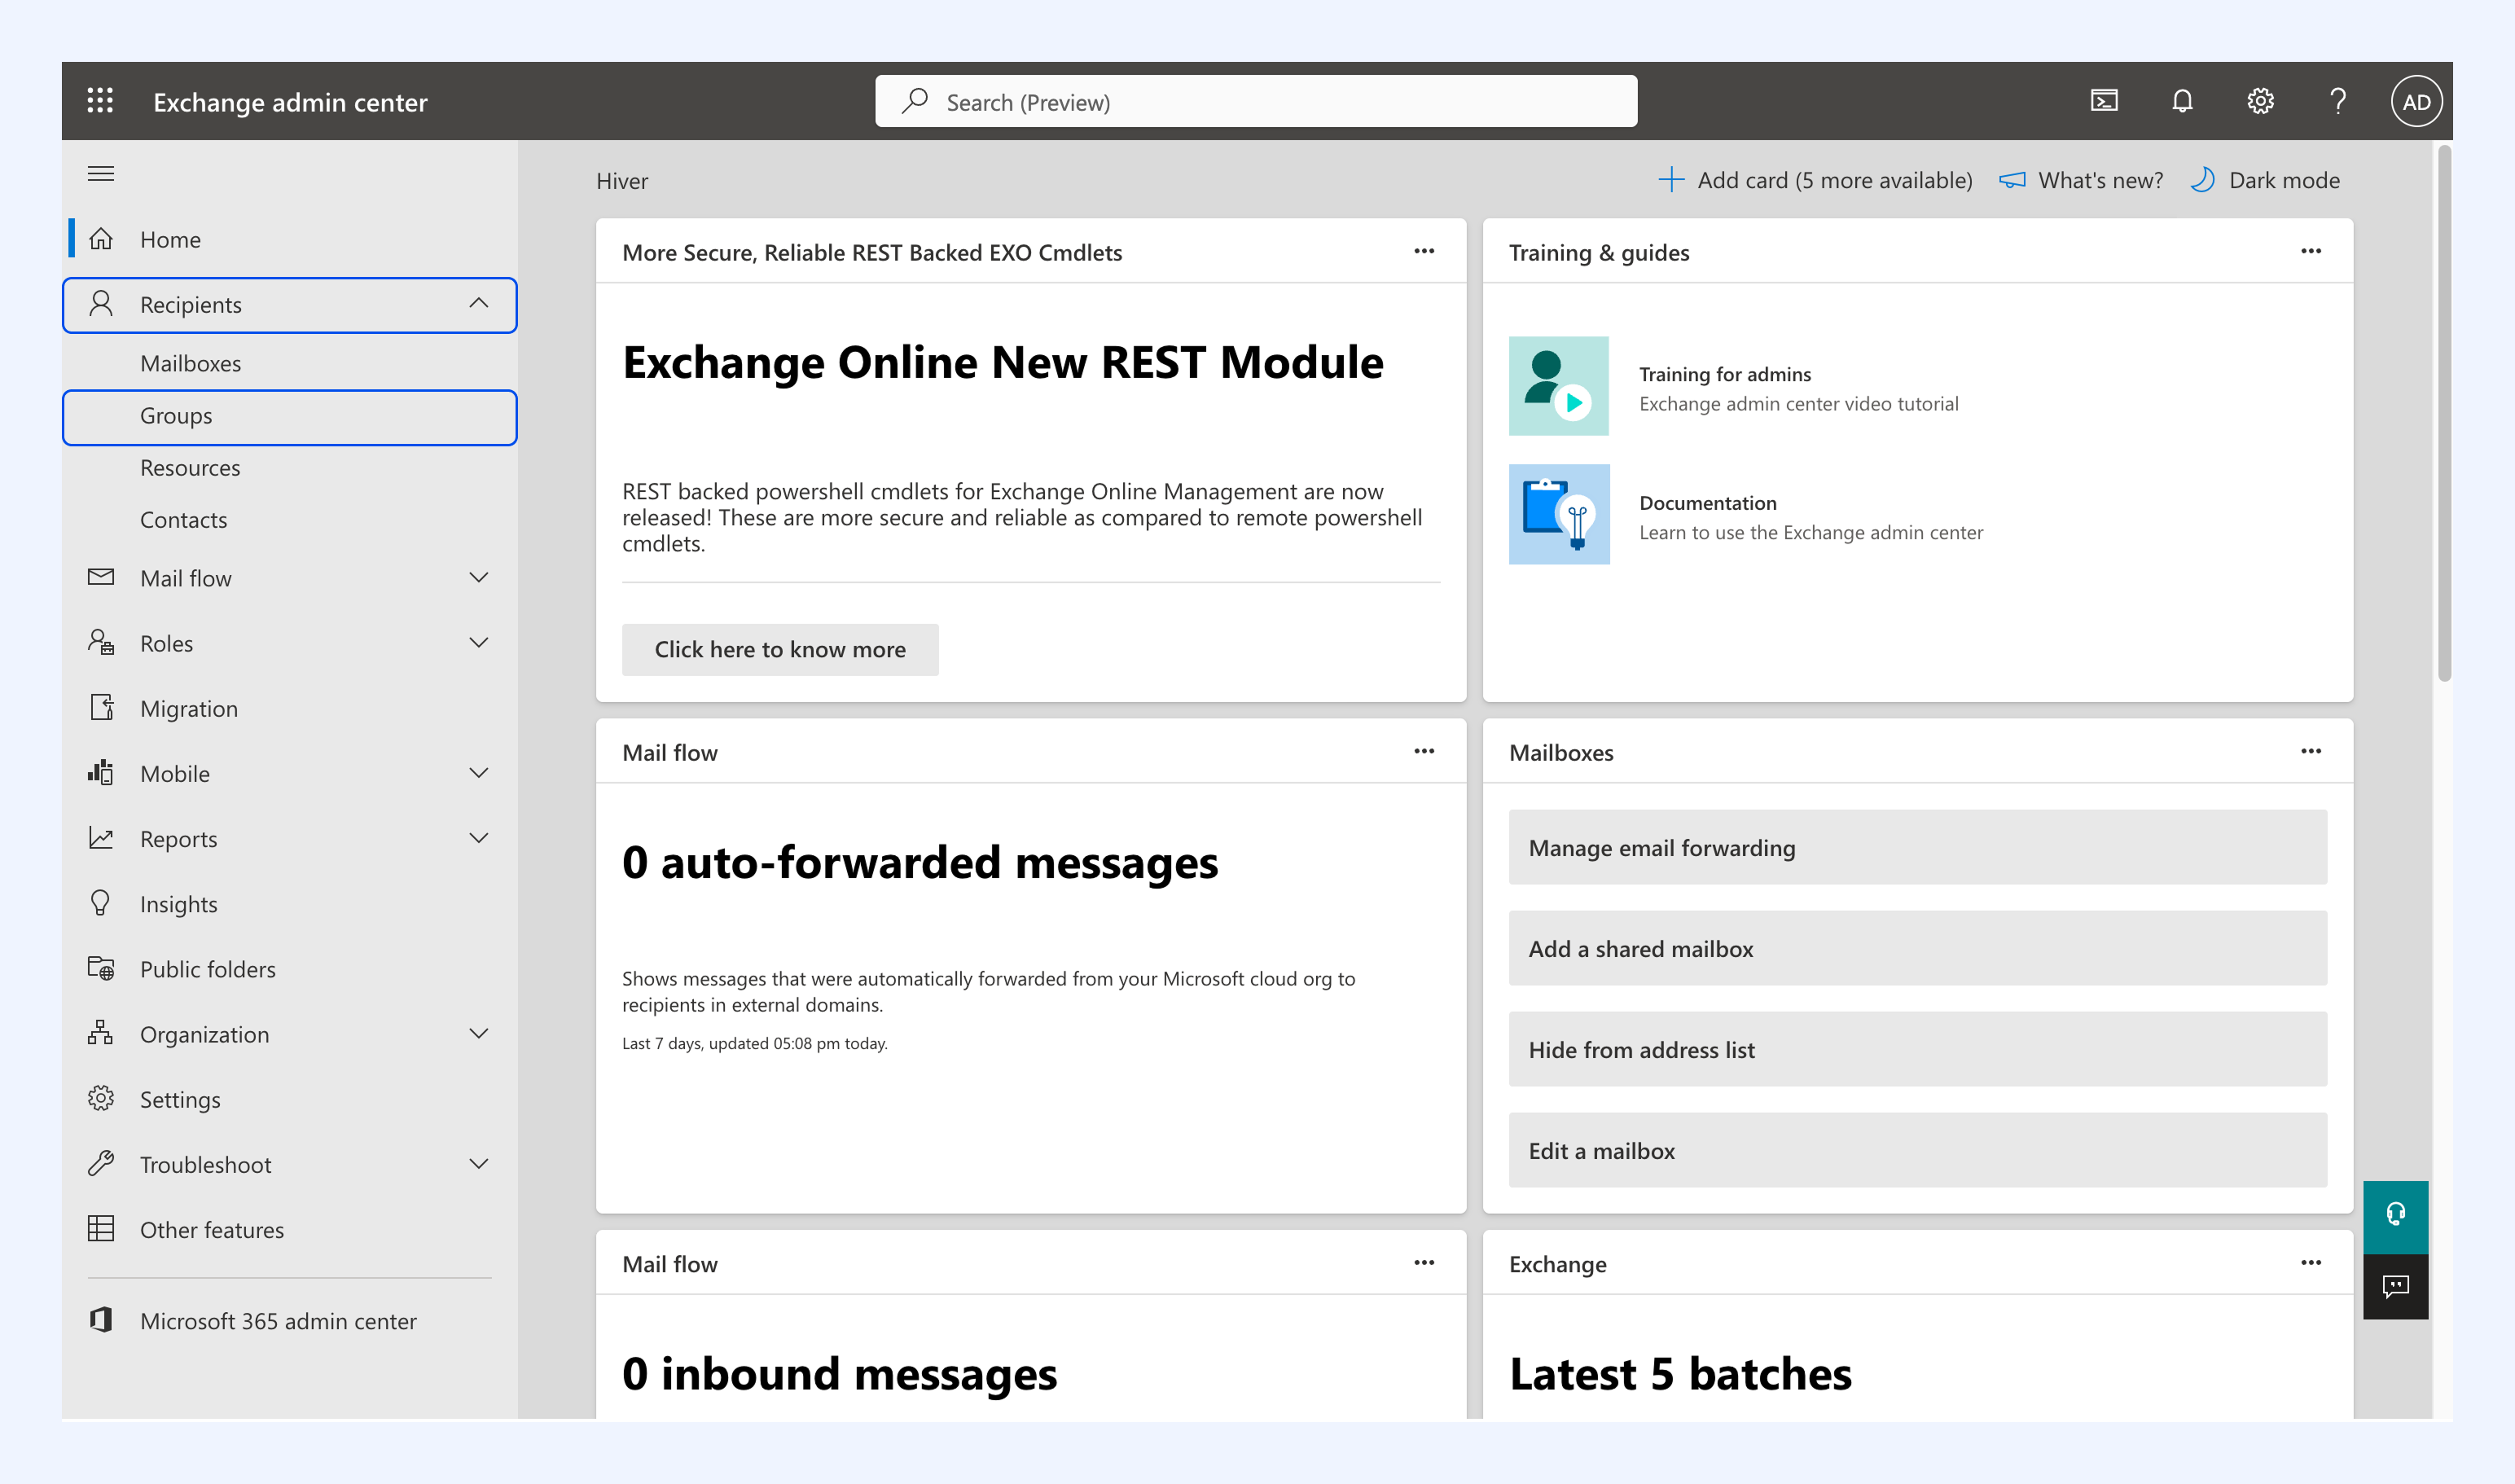
2. In the Exchange admin center, go to Recipients → Groups.
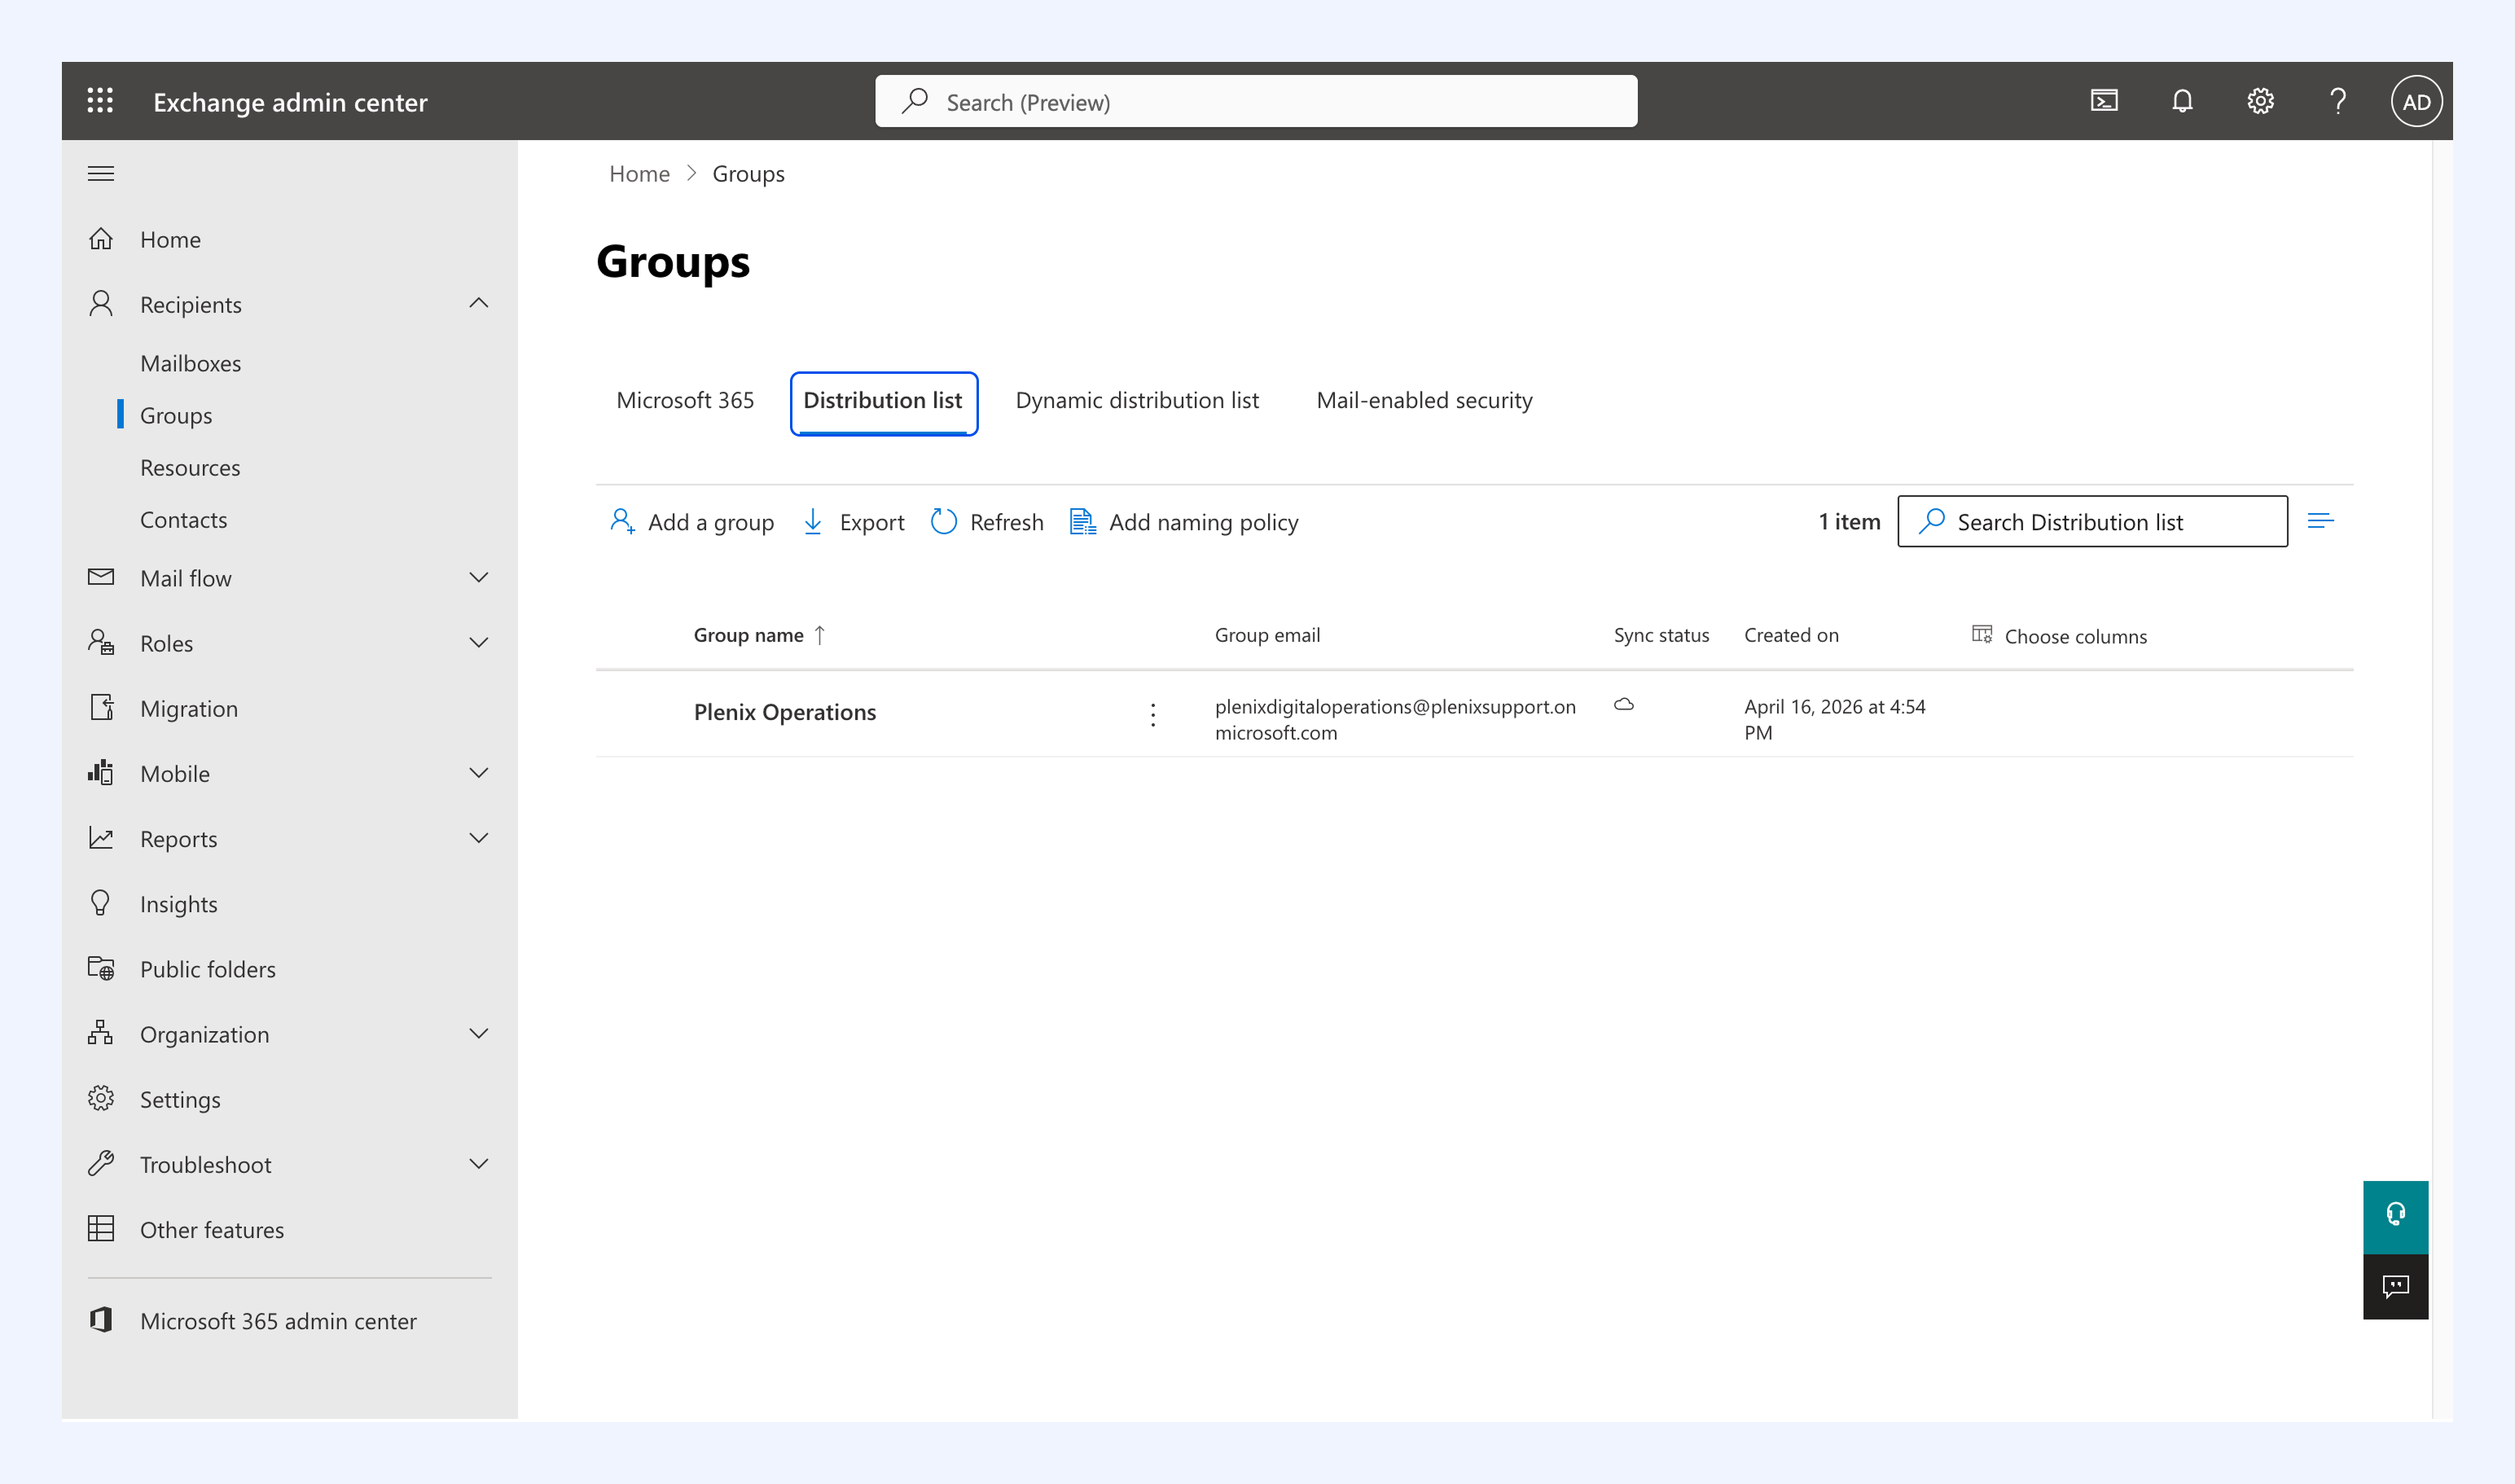
3. Go to Distribution list and select your list.
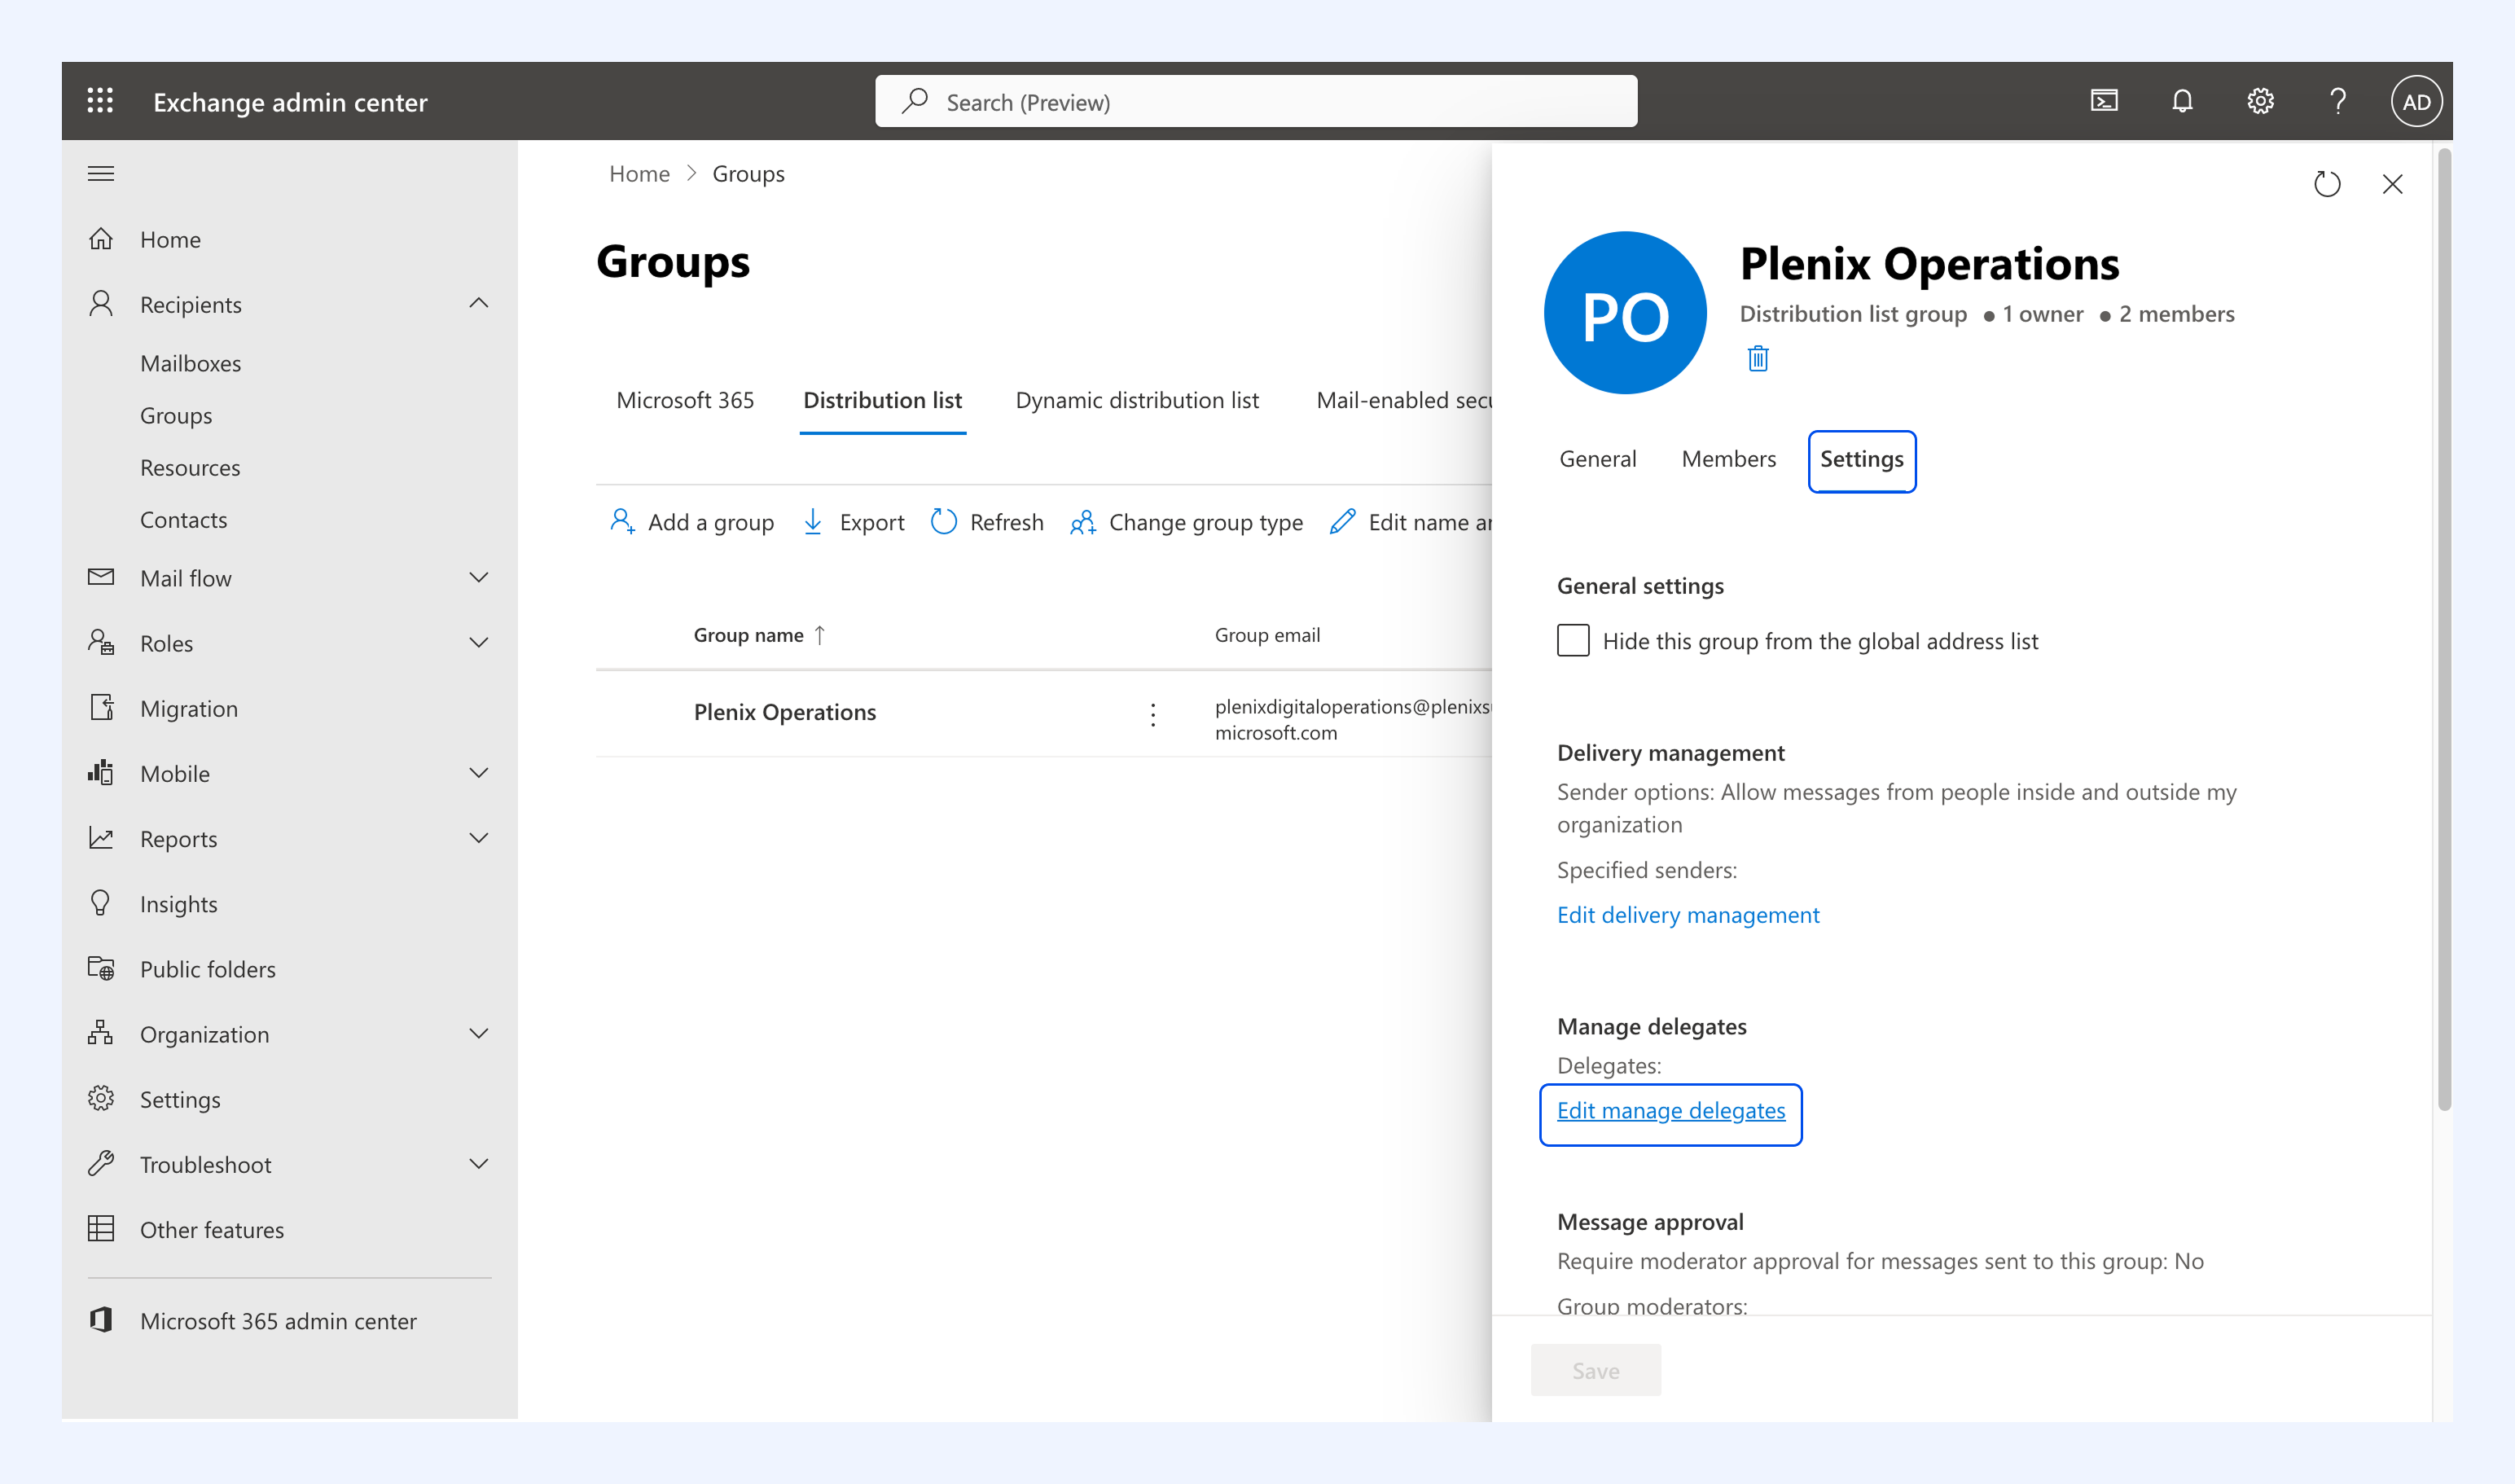
4. Open Settings and click Edit manage delegates.
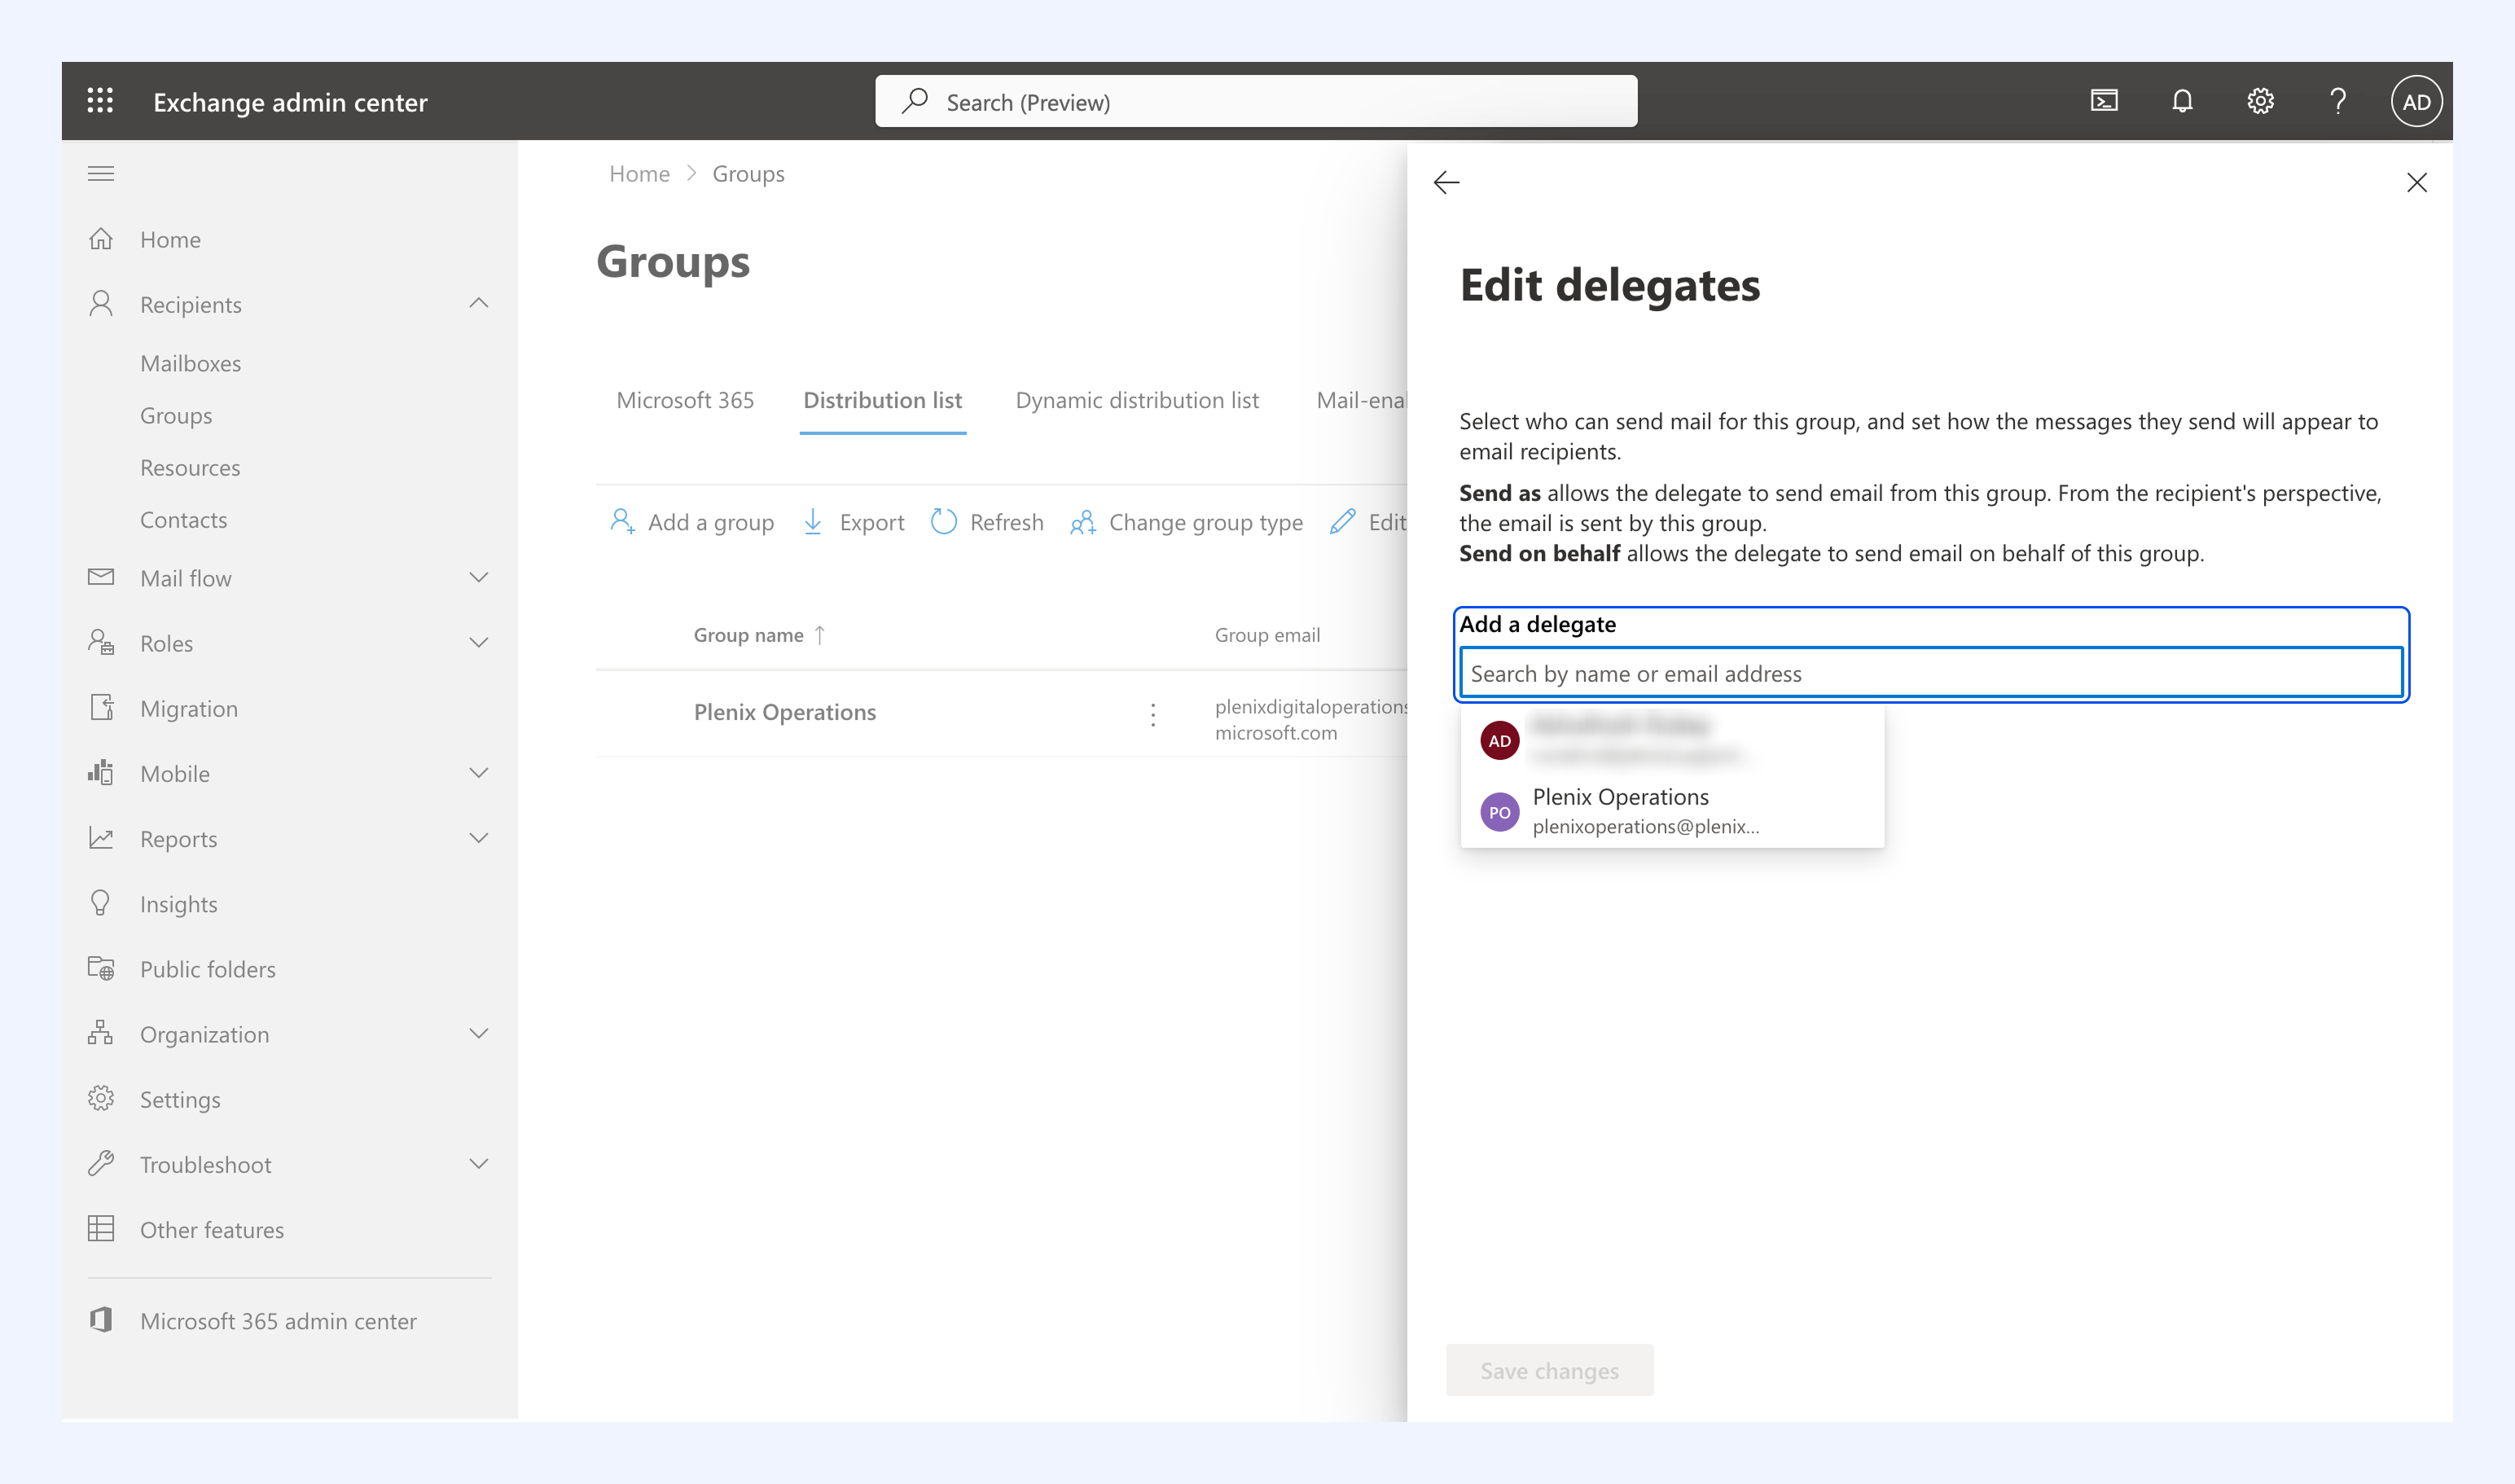
5. In the Add a delegate search bar, find and select your account.
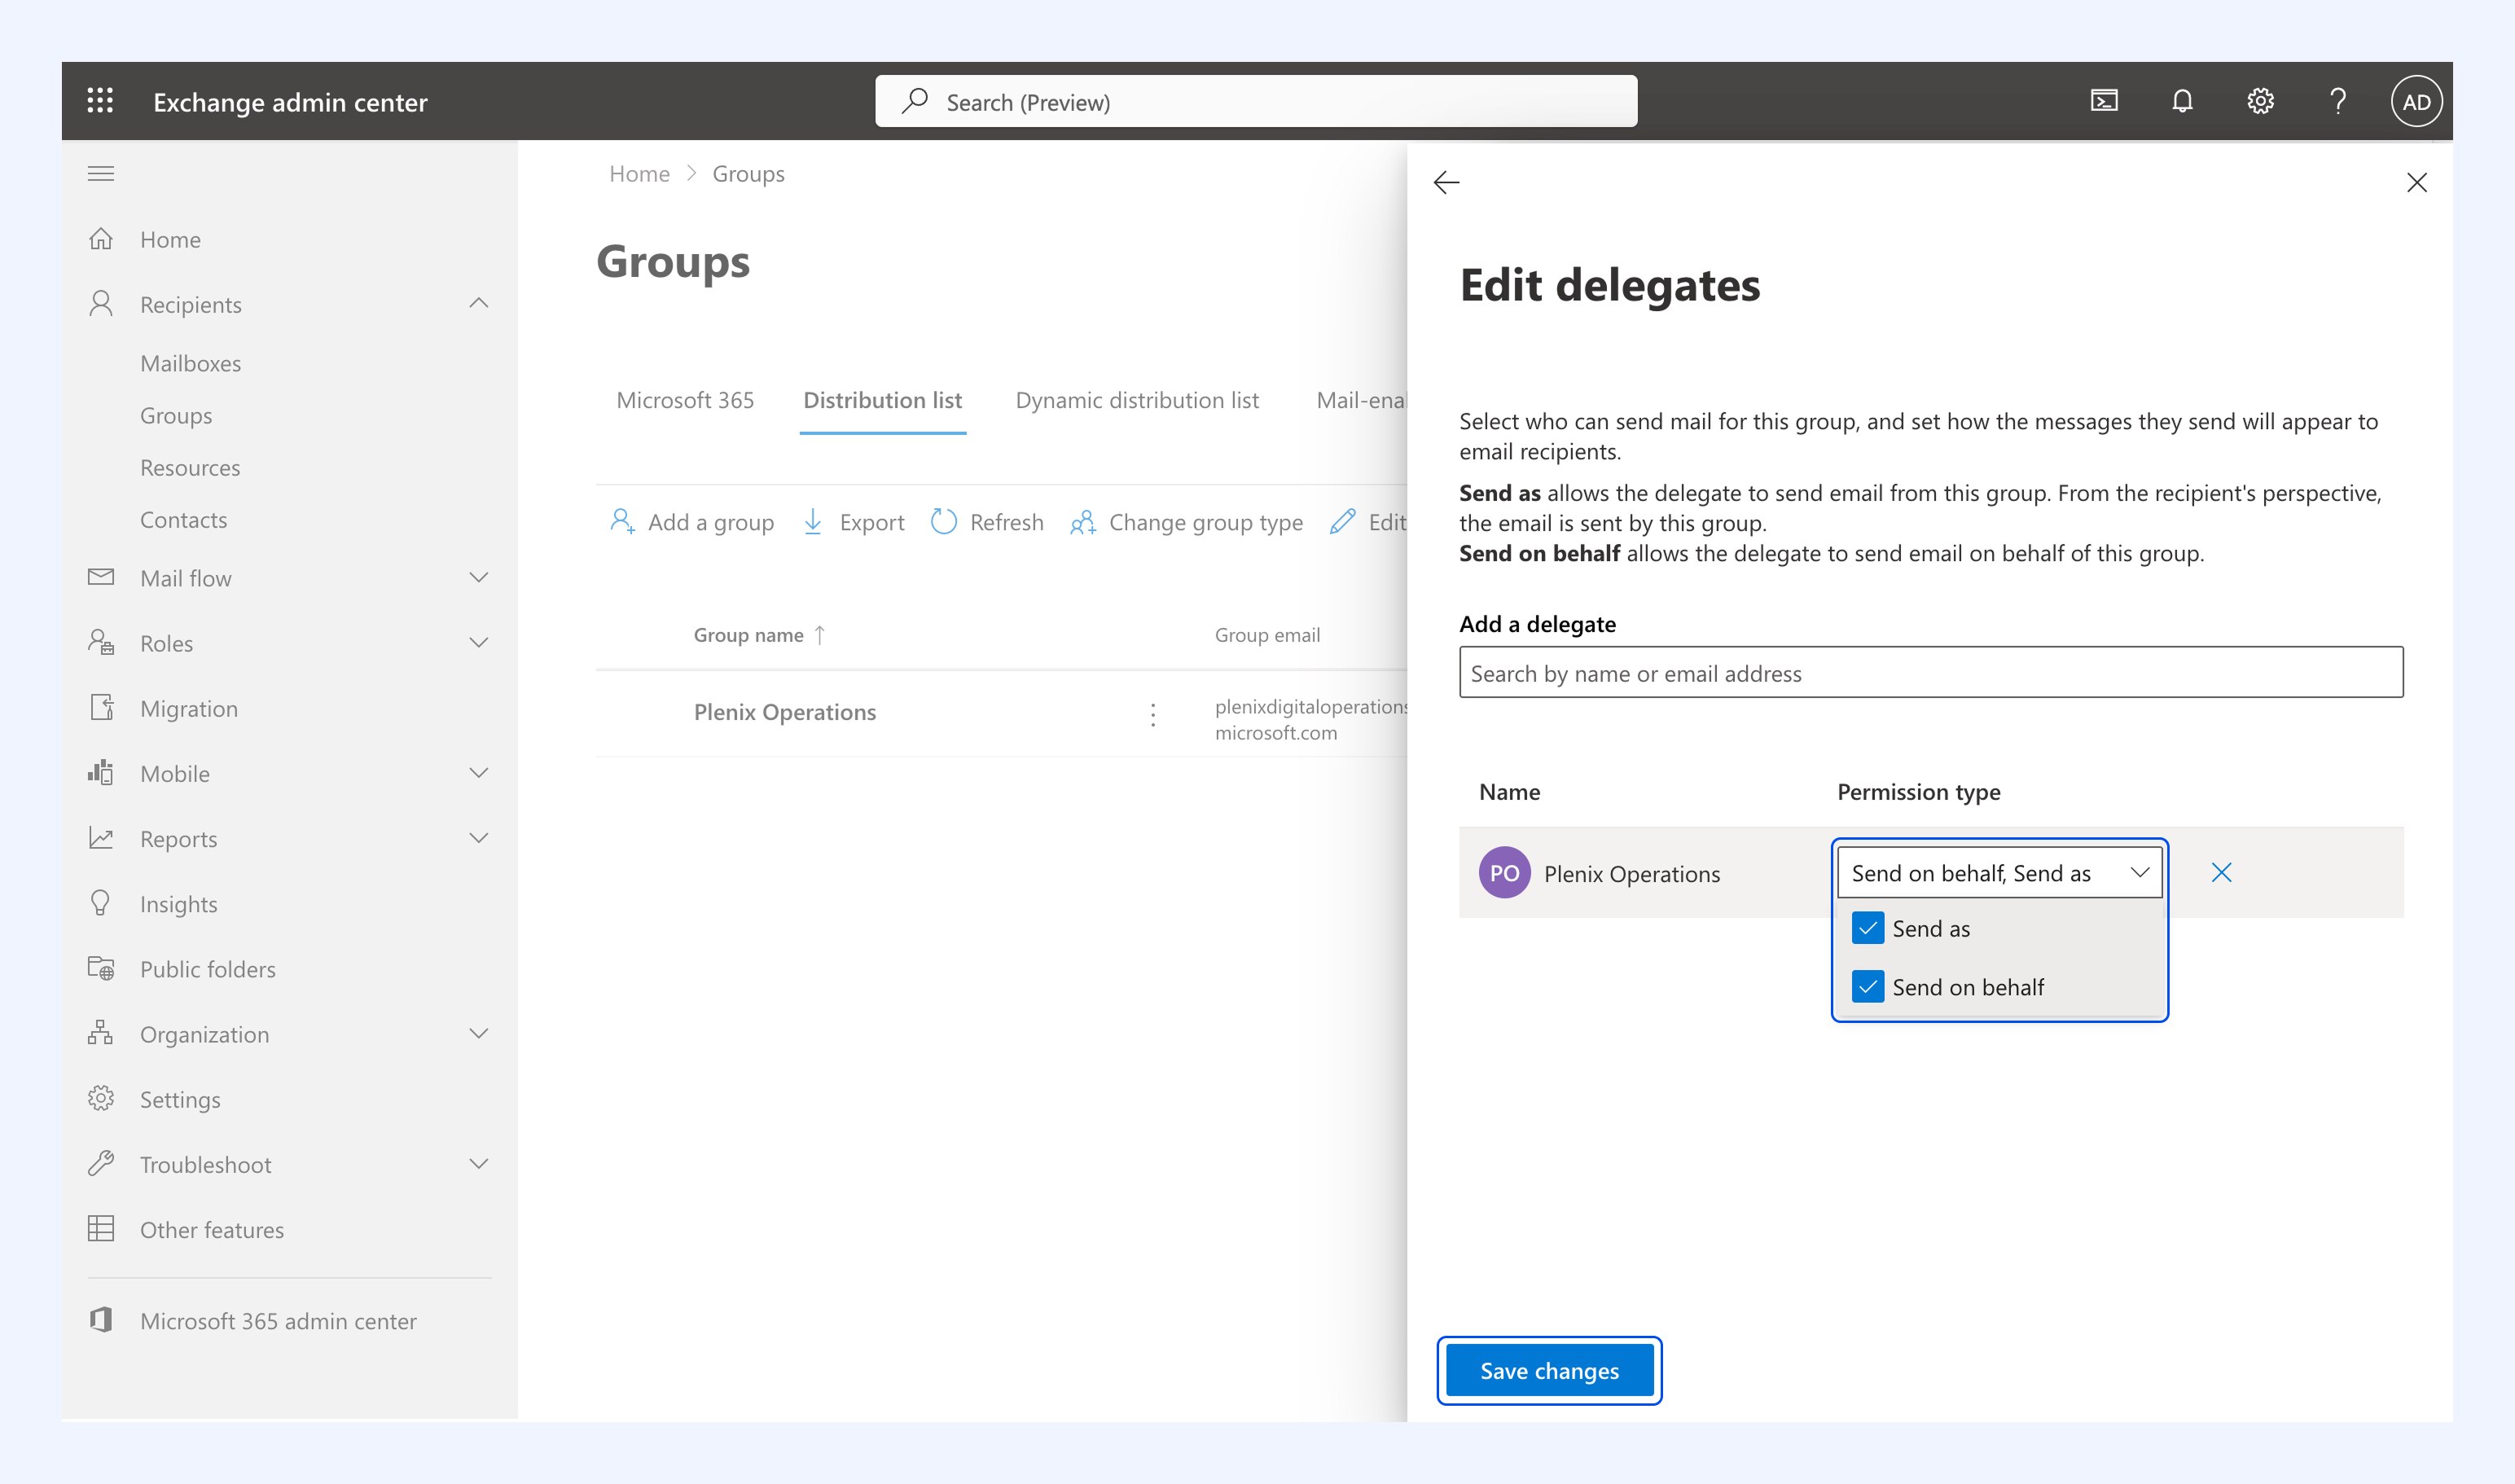
6. Set the permission type to Send as and Send on behalf.
7. Click Save changes.
Note: Before you start setting up Hiver, wait up to 30 minutes for Microsoft to process membership and delegate updates.
Next steps
Follow our guides to create a Shared Inbox in Hiver:
Connect an Outlook shared mailbox
Connect a distribution list or Microsoft 365 group
If you have any questions, contact support at support@hiverhq.com.