Setting Up WhatsApp in Meta Developer Portal
To create a WhatsApp Inbox in Hiver, you first need to configure WhatsApp in Meta's Developer Portal. This article covers creating your WhatsApp app, adding your phone number, and generating the credentials you'll use in Hiver.
Prerequisites
Before you begin, make sure you've completed all the WhatsApp integration prerequisites. You should have a:
- Meta Business Manager account
- Eligible phone number
- Meta Developer account
Overview
This setup has six parts:
1. Create your WhatsApp app.
2. Add and verify your phone number.
3. Find your WhatsApp Business Account ID.
4. Generate your permanent access token.
5. Add a payment method.
6. Find your Phone number ID and register your number.
Create your WhatsApp app
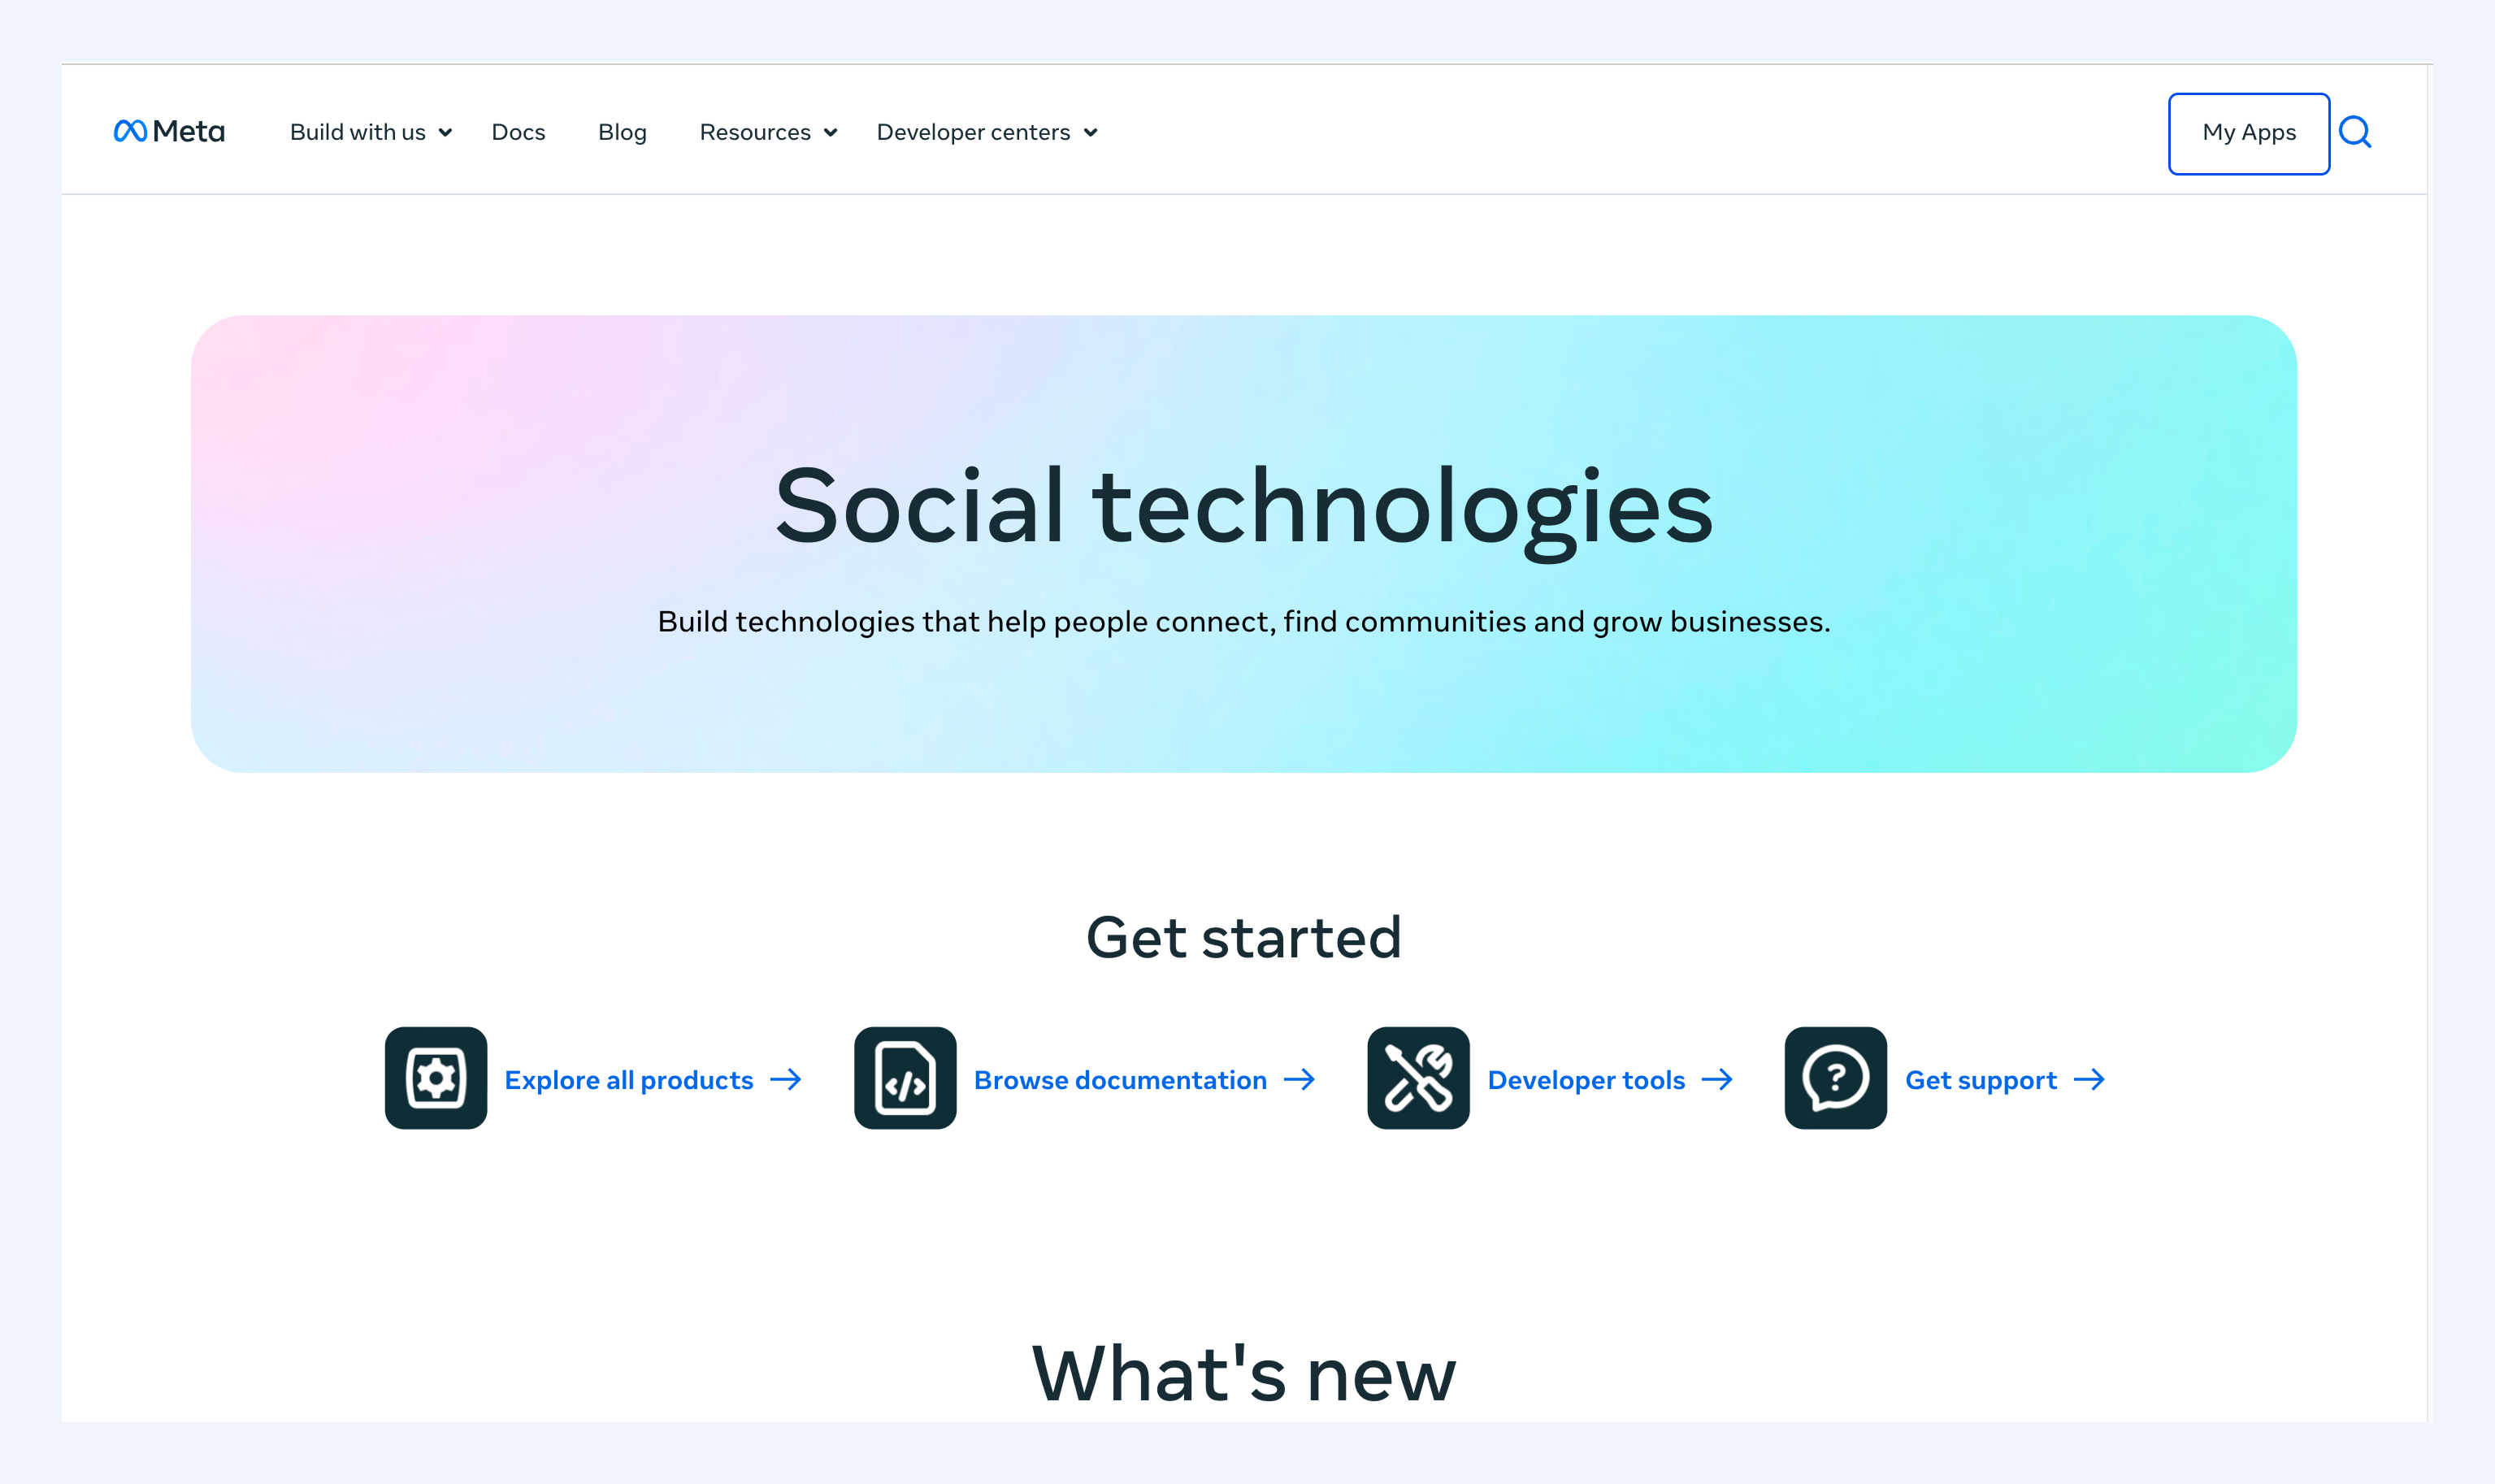
1. Go to developers.facebook.com and log in.
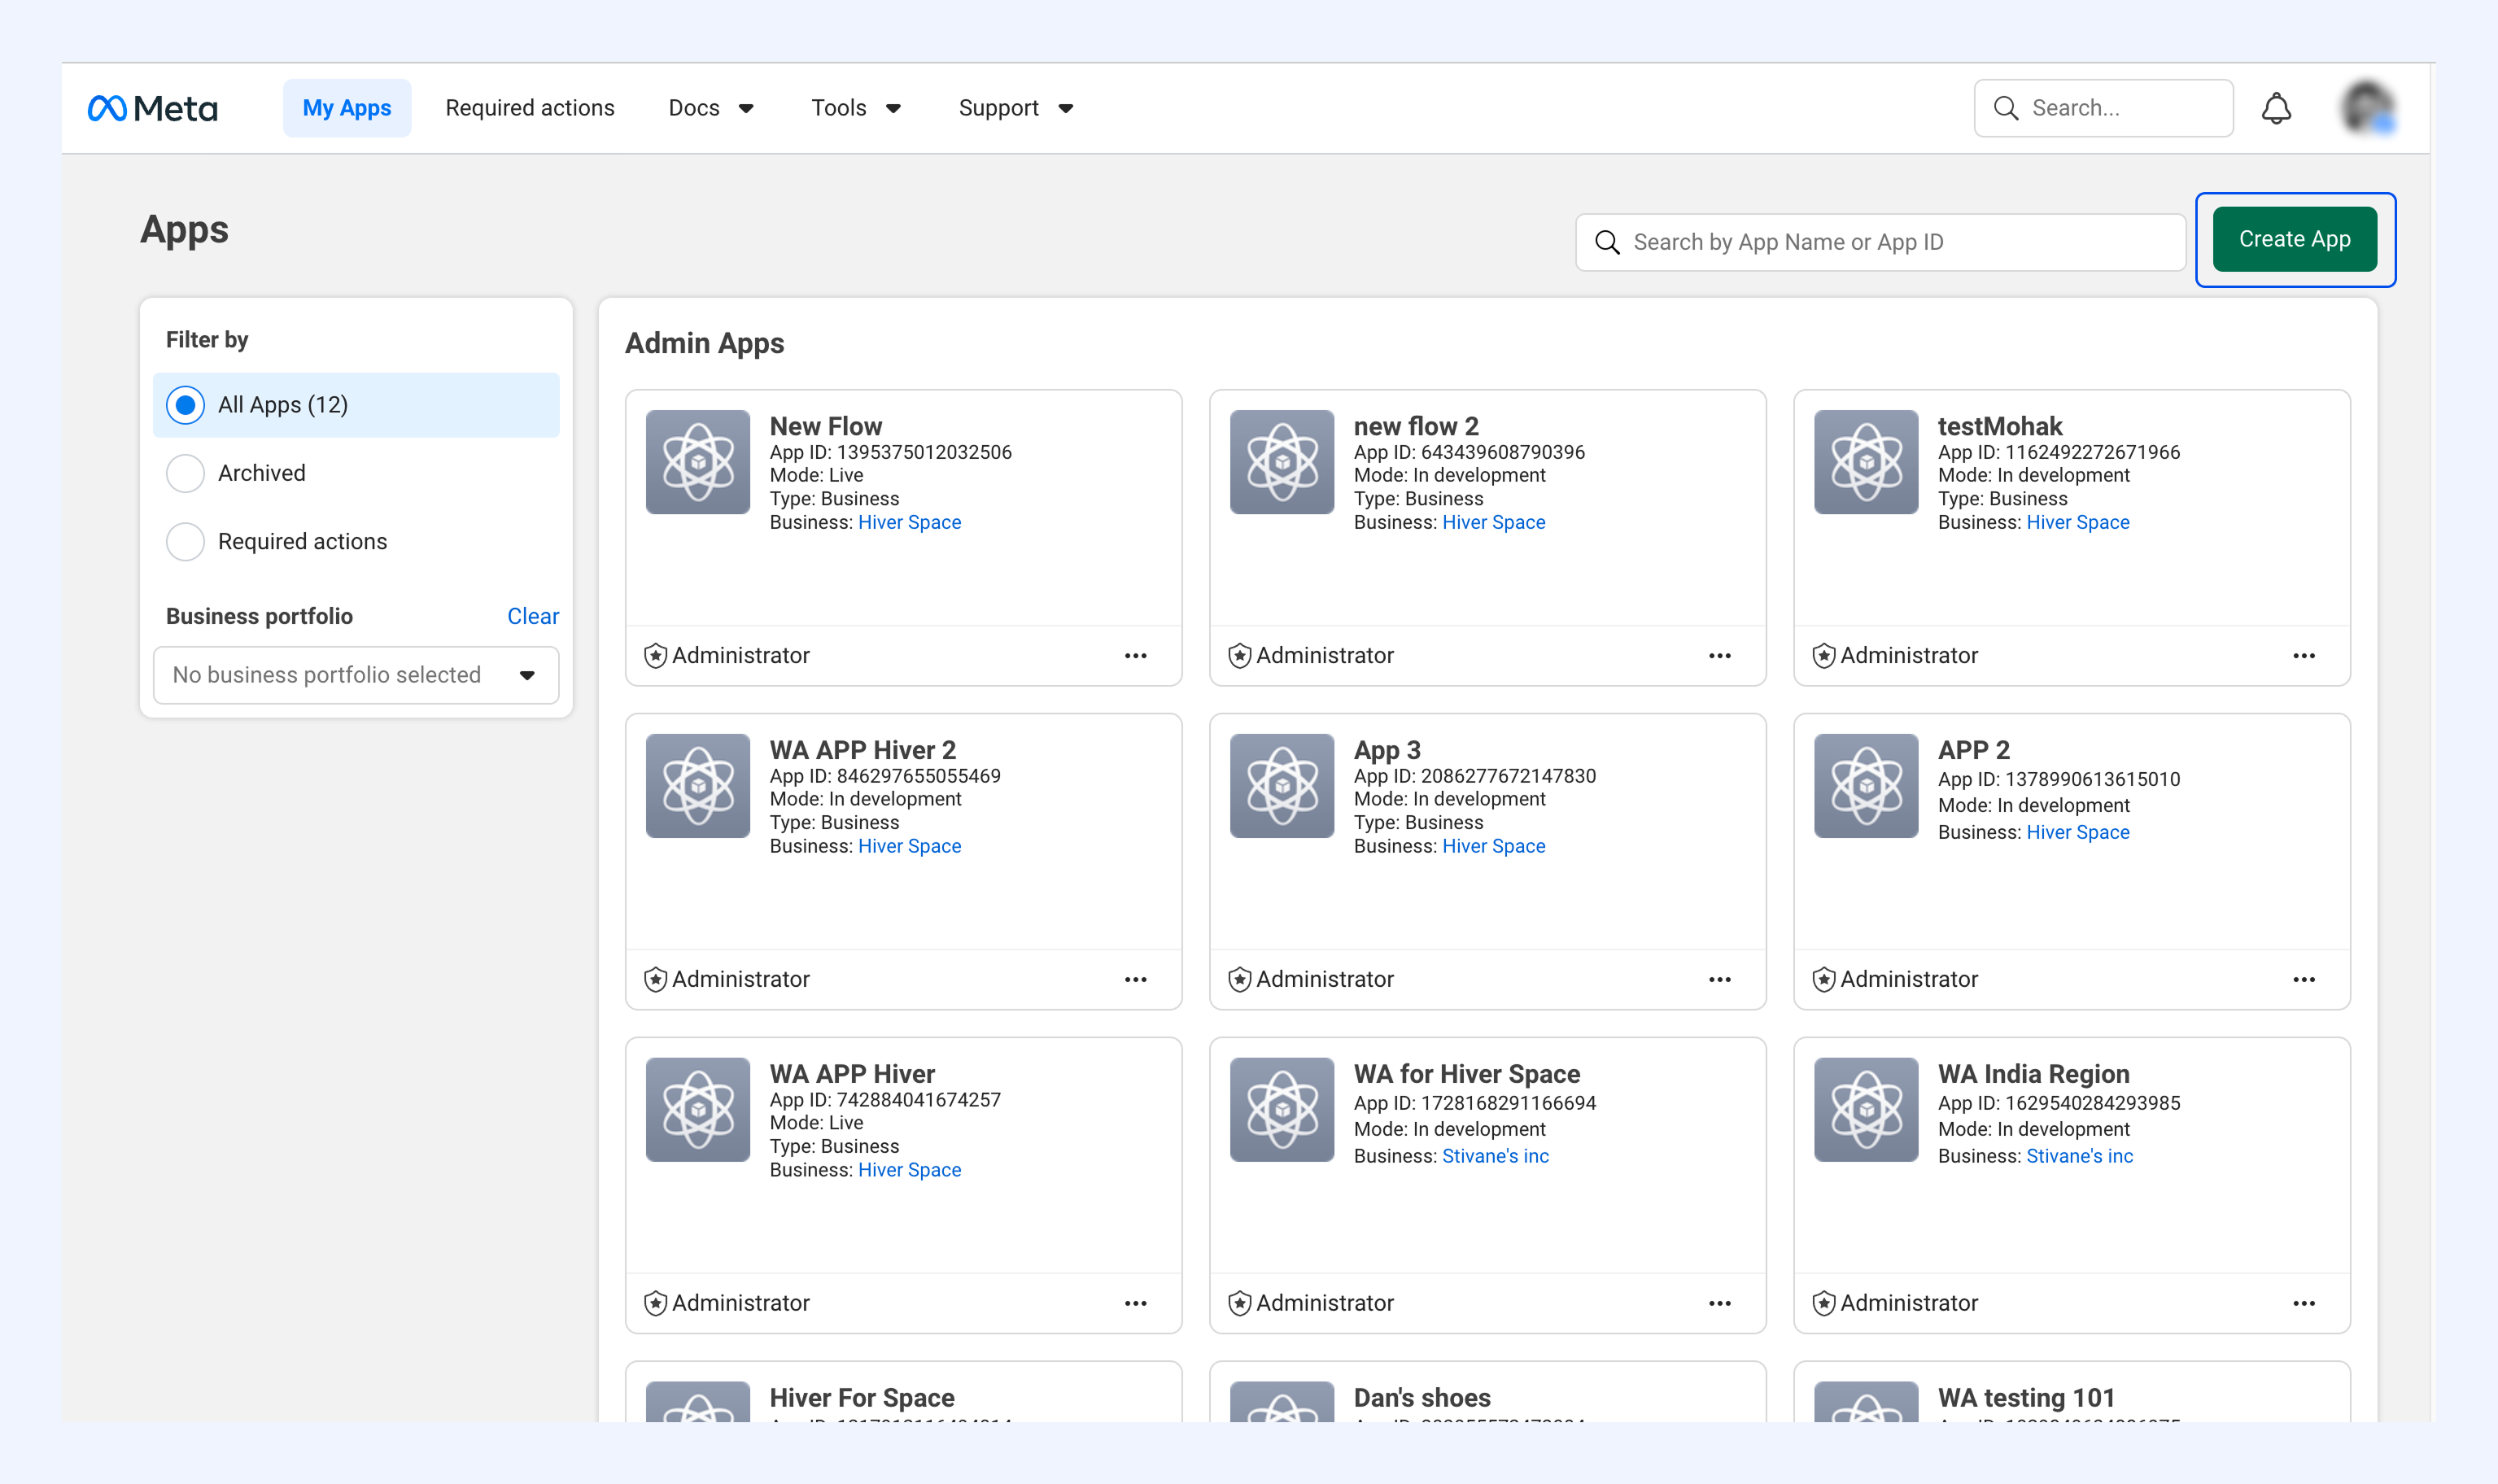
2. Click My Apps.
3. Click Create App.
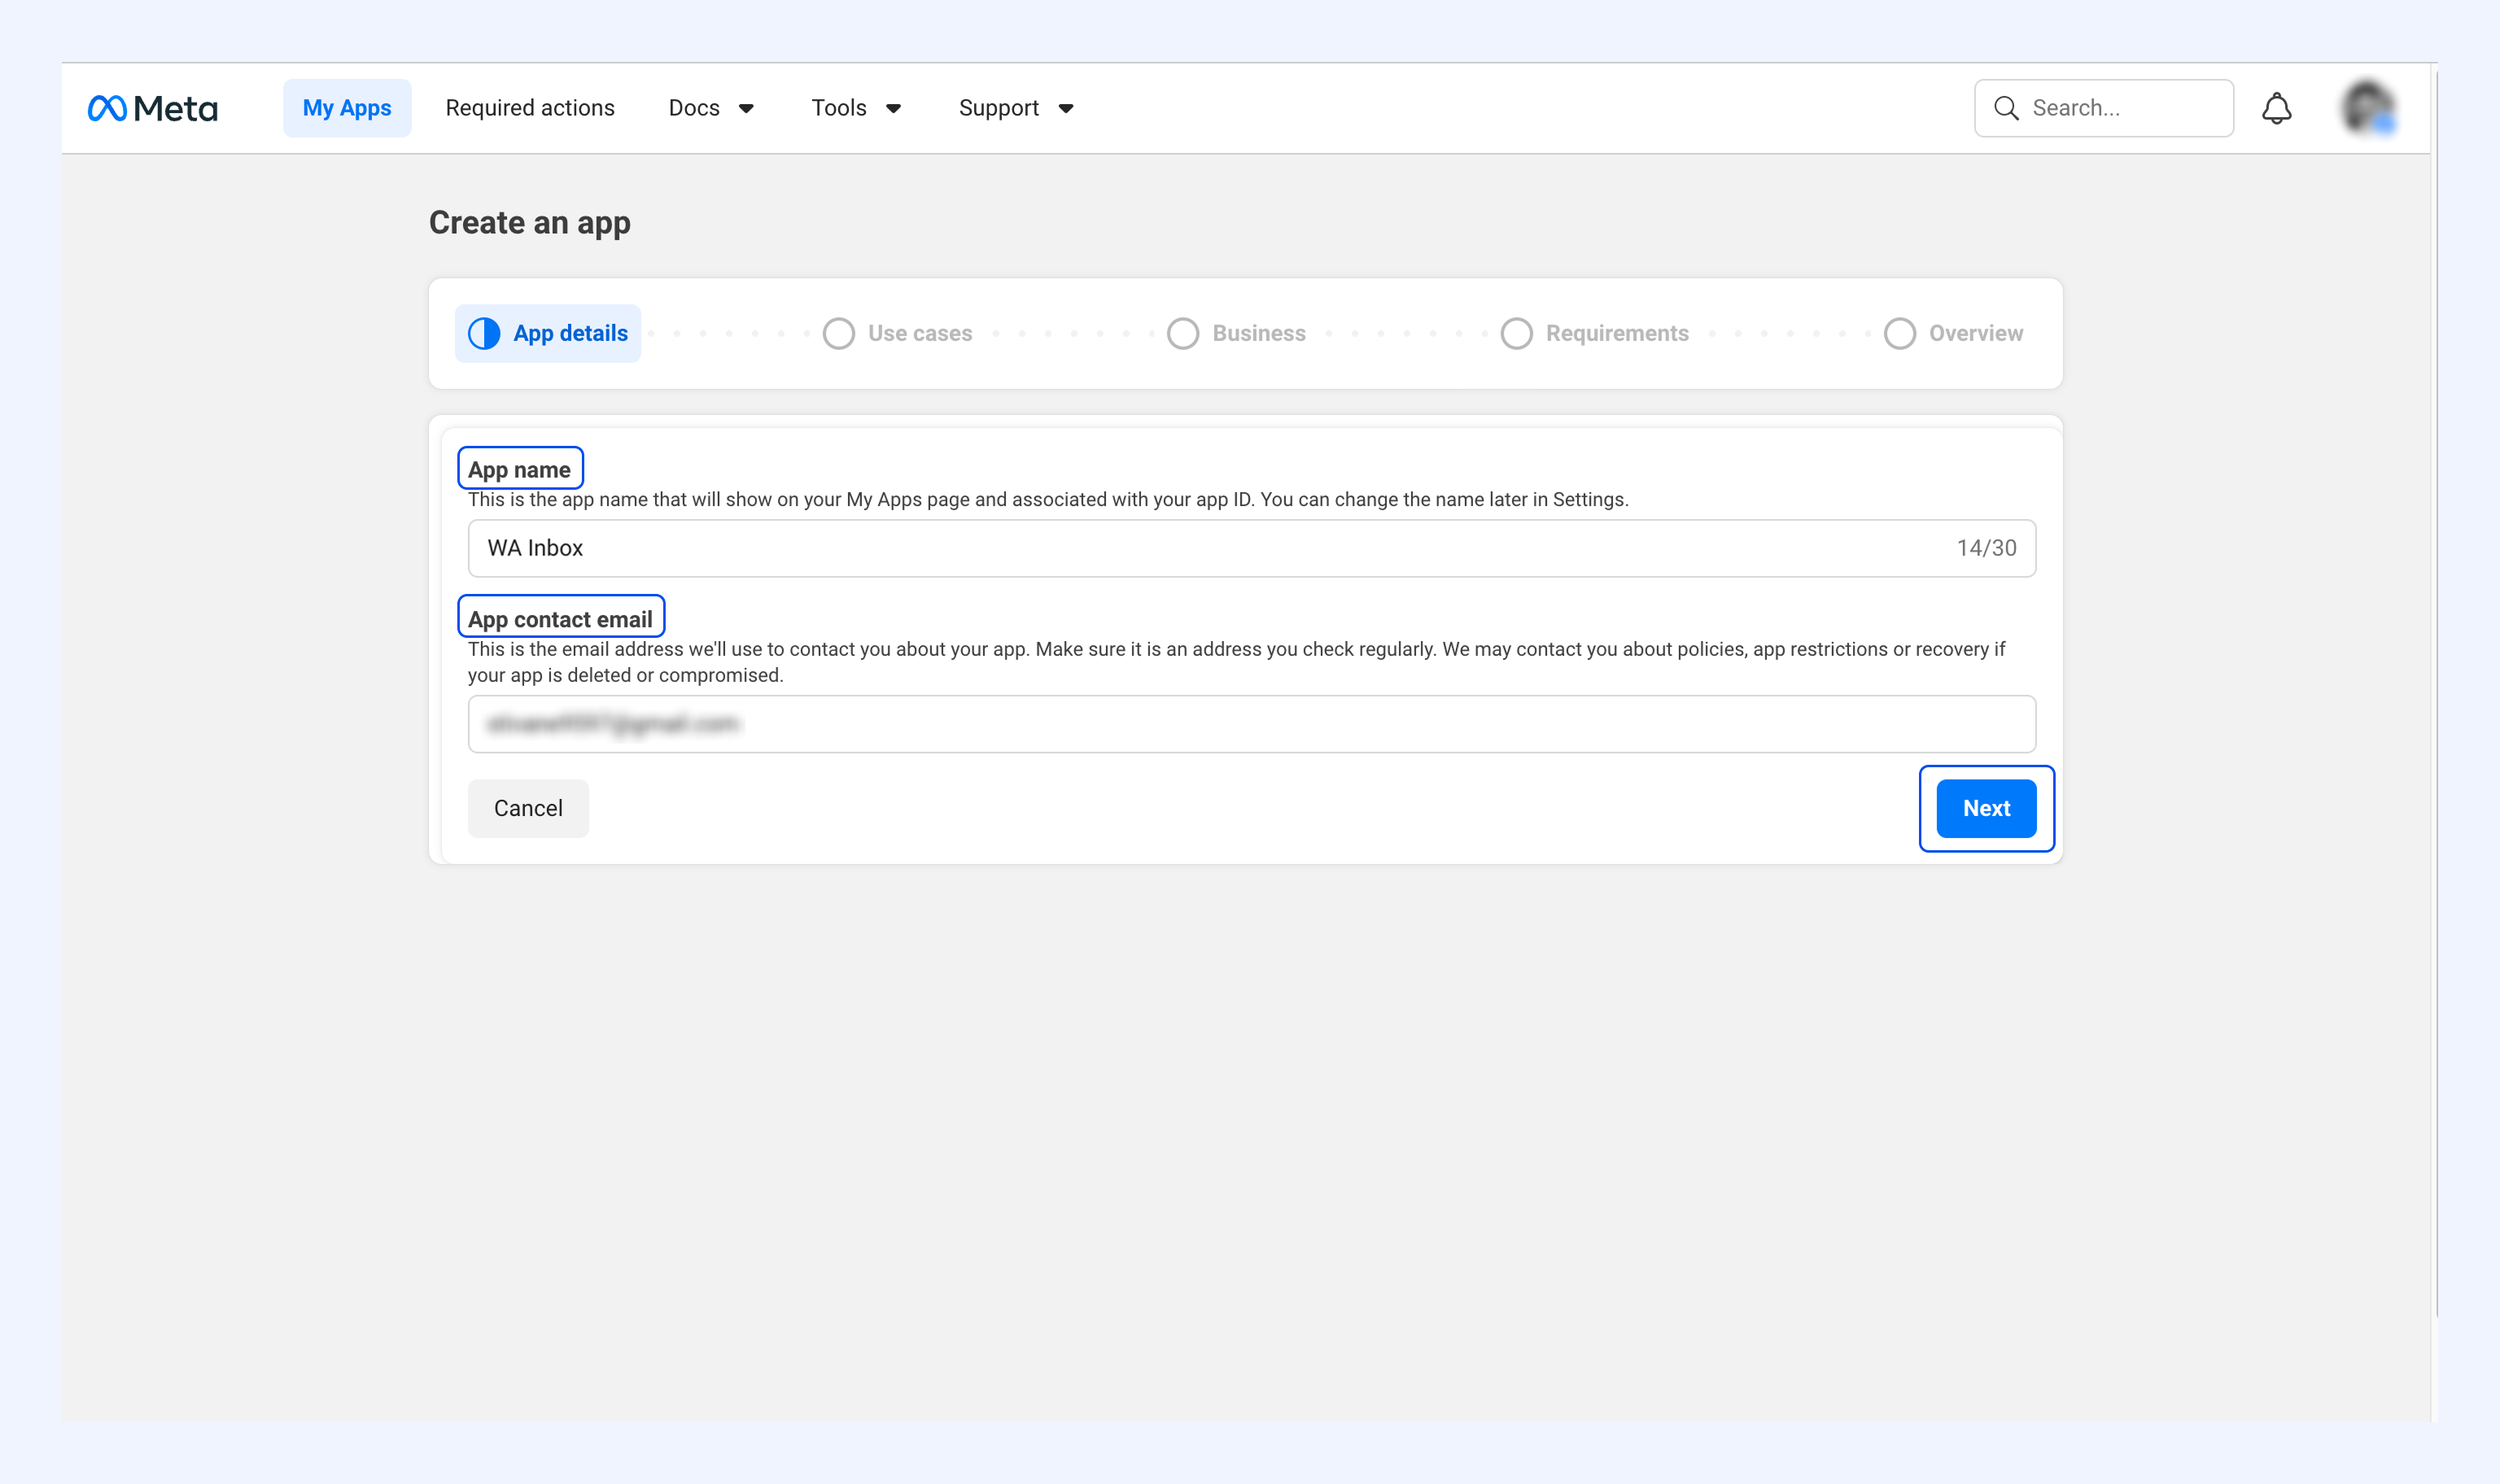
4. Enter your App name and App contact email, then click Next.
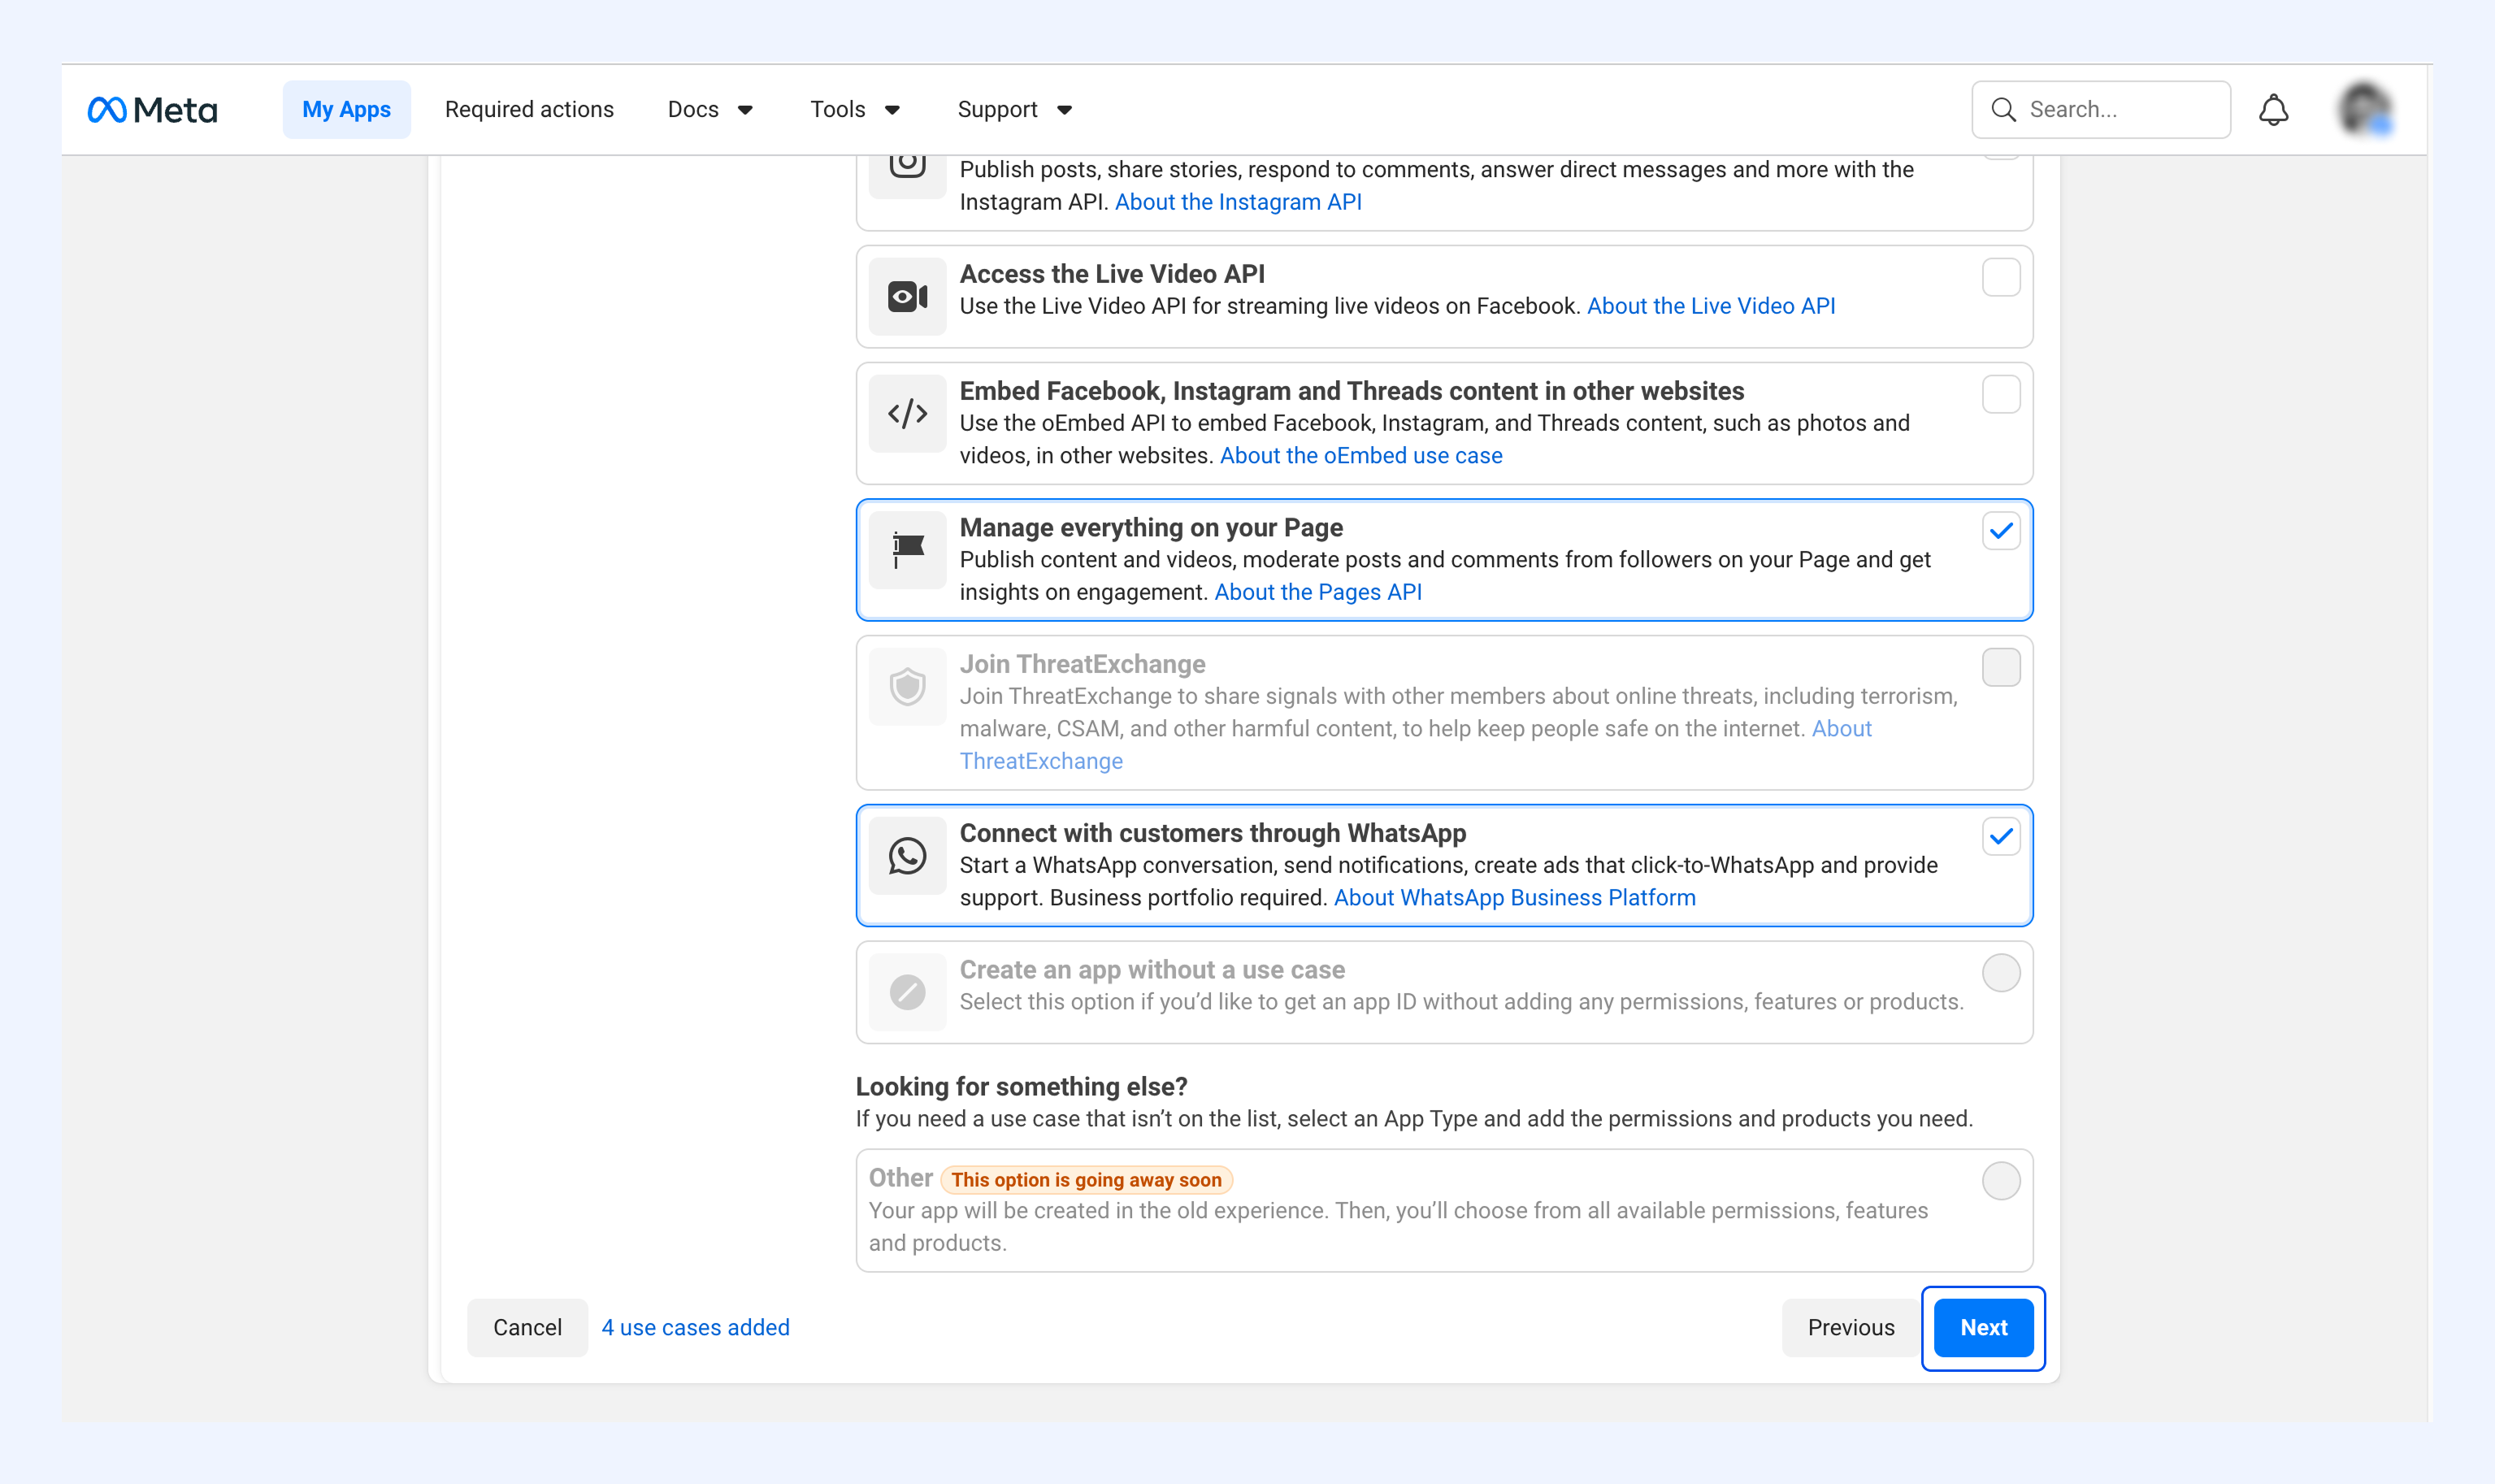
5. Choose the use cases for your app, then click Next.
Note: The Connect with customers through WhatsApp is a required use case for setting up the app.
6. Pick your business portfolio from the dropdown, or create a new one, then click Next.
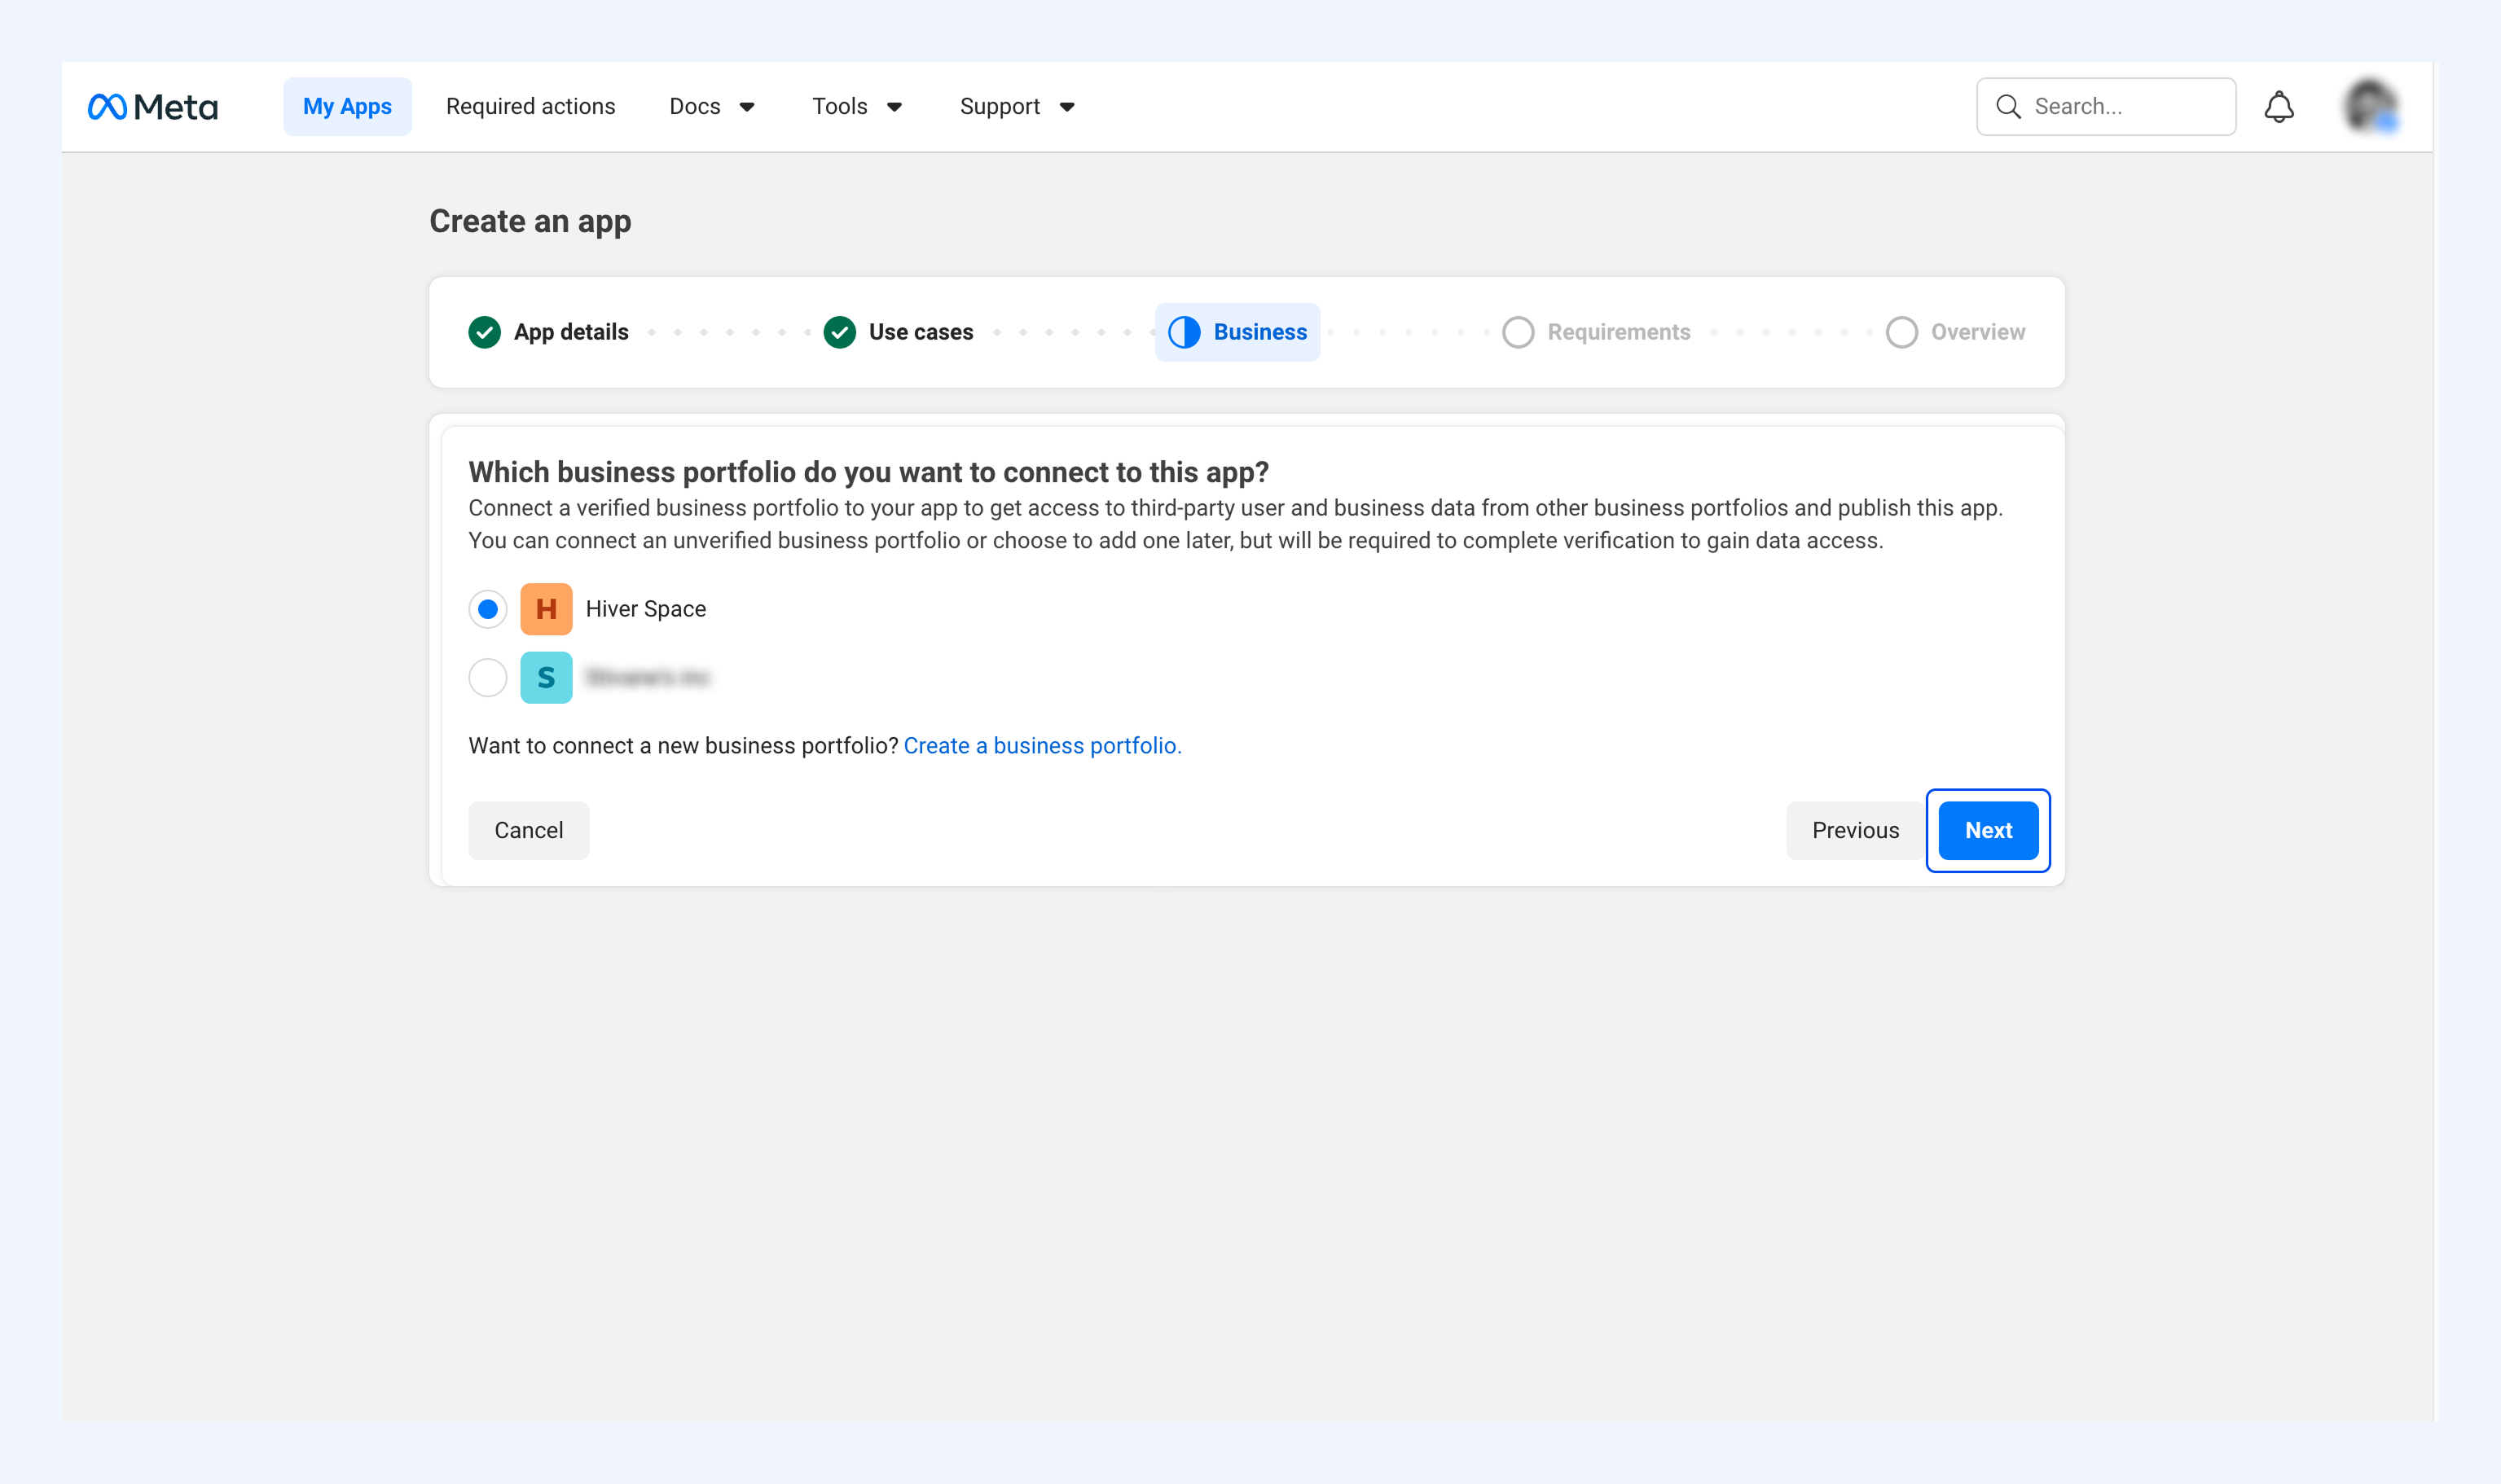
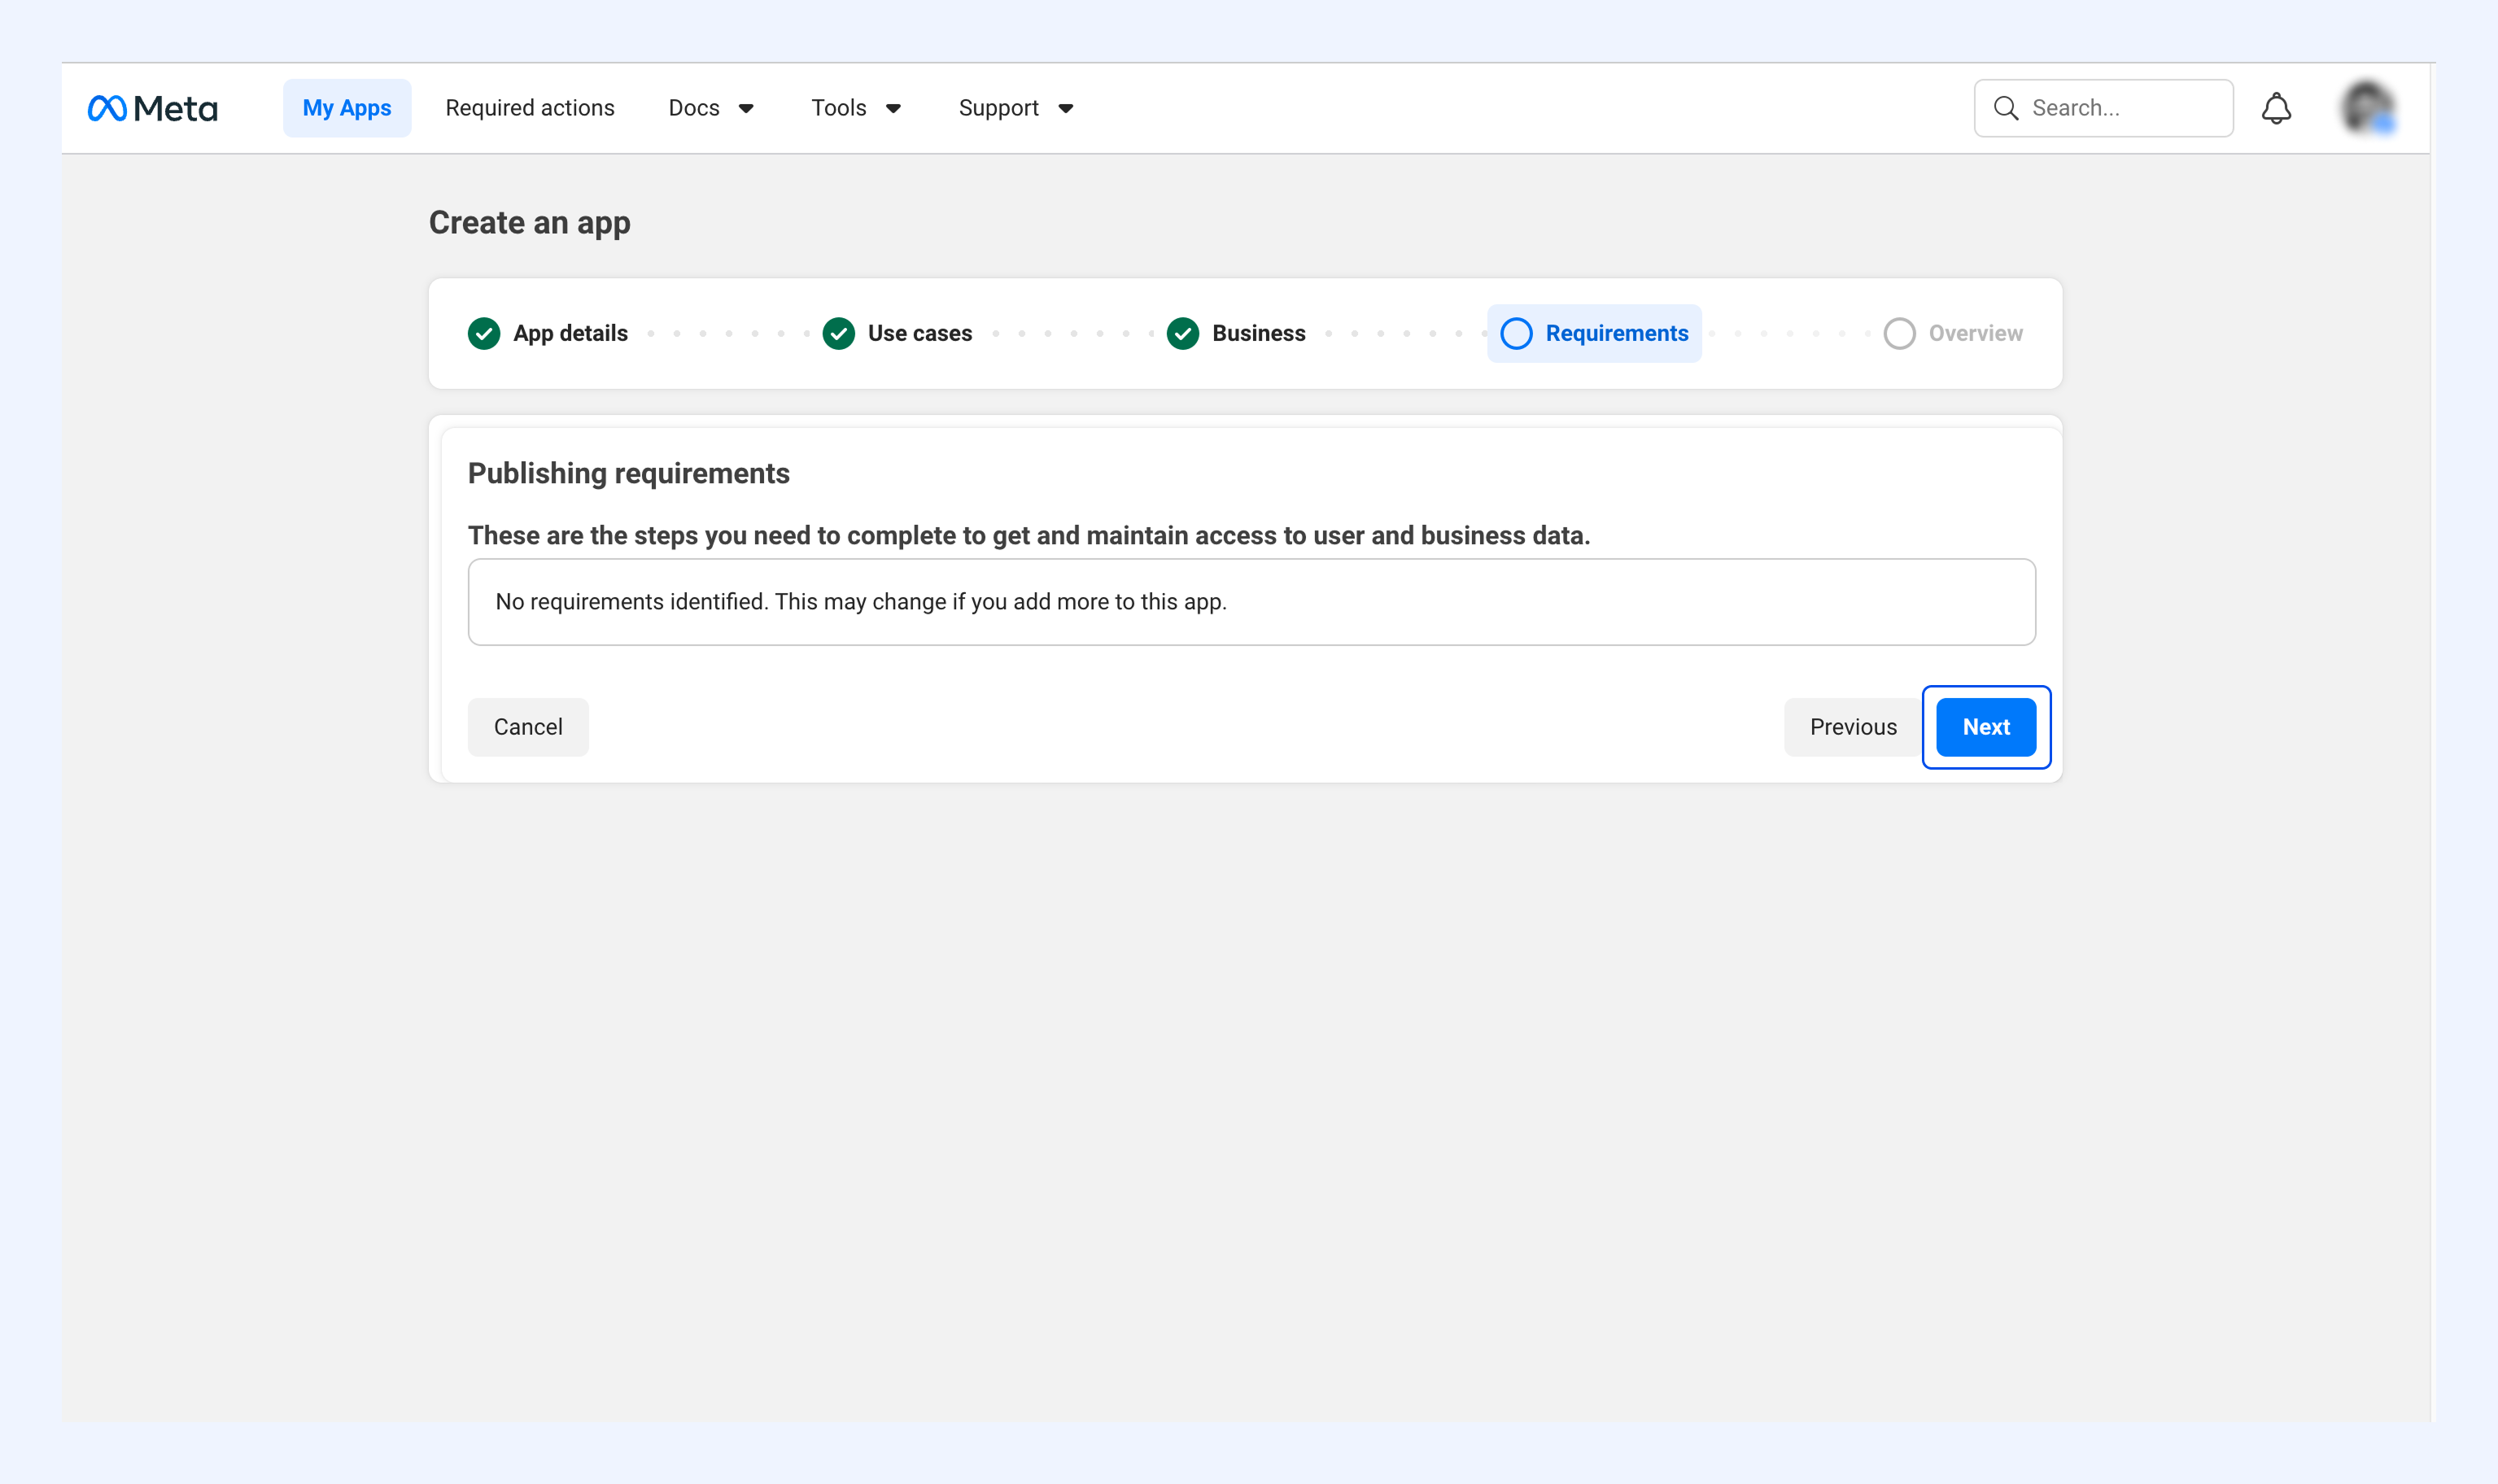
7. Review any publishing requirements and click Next.
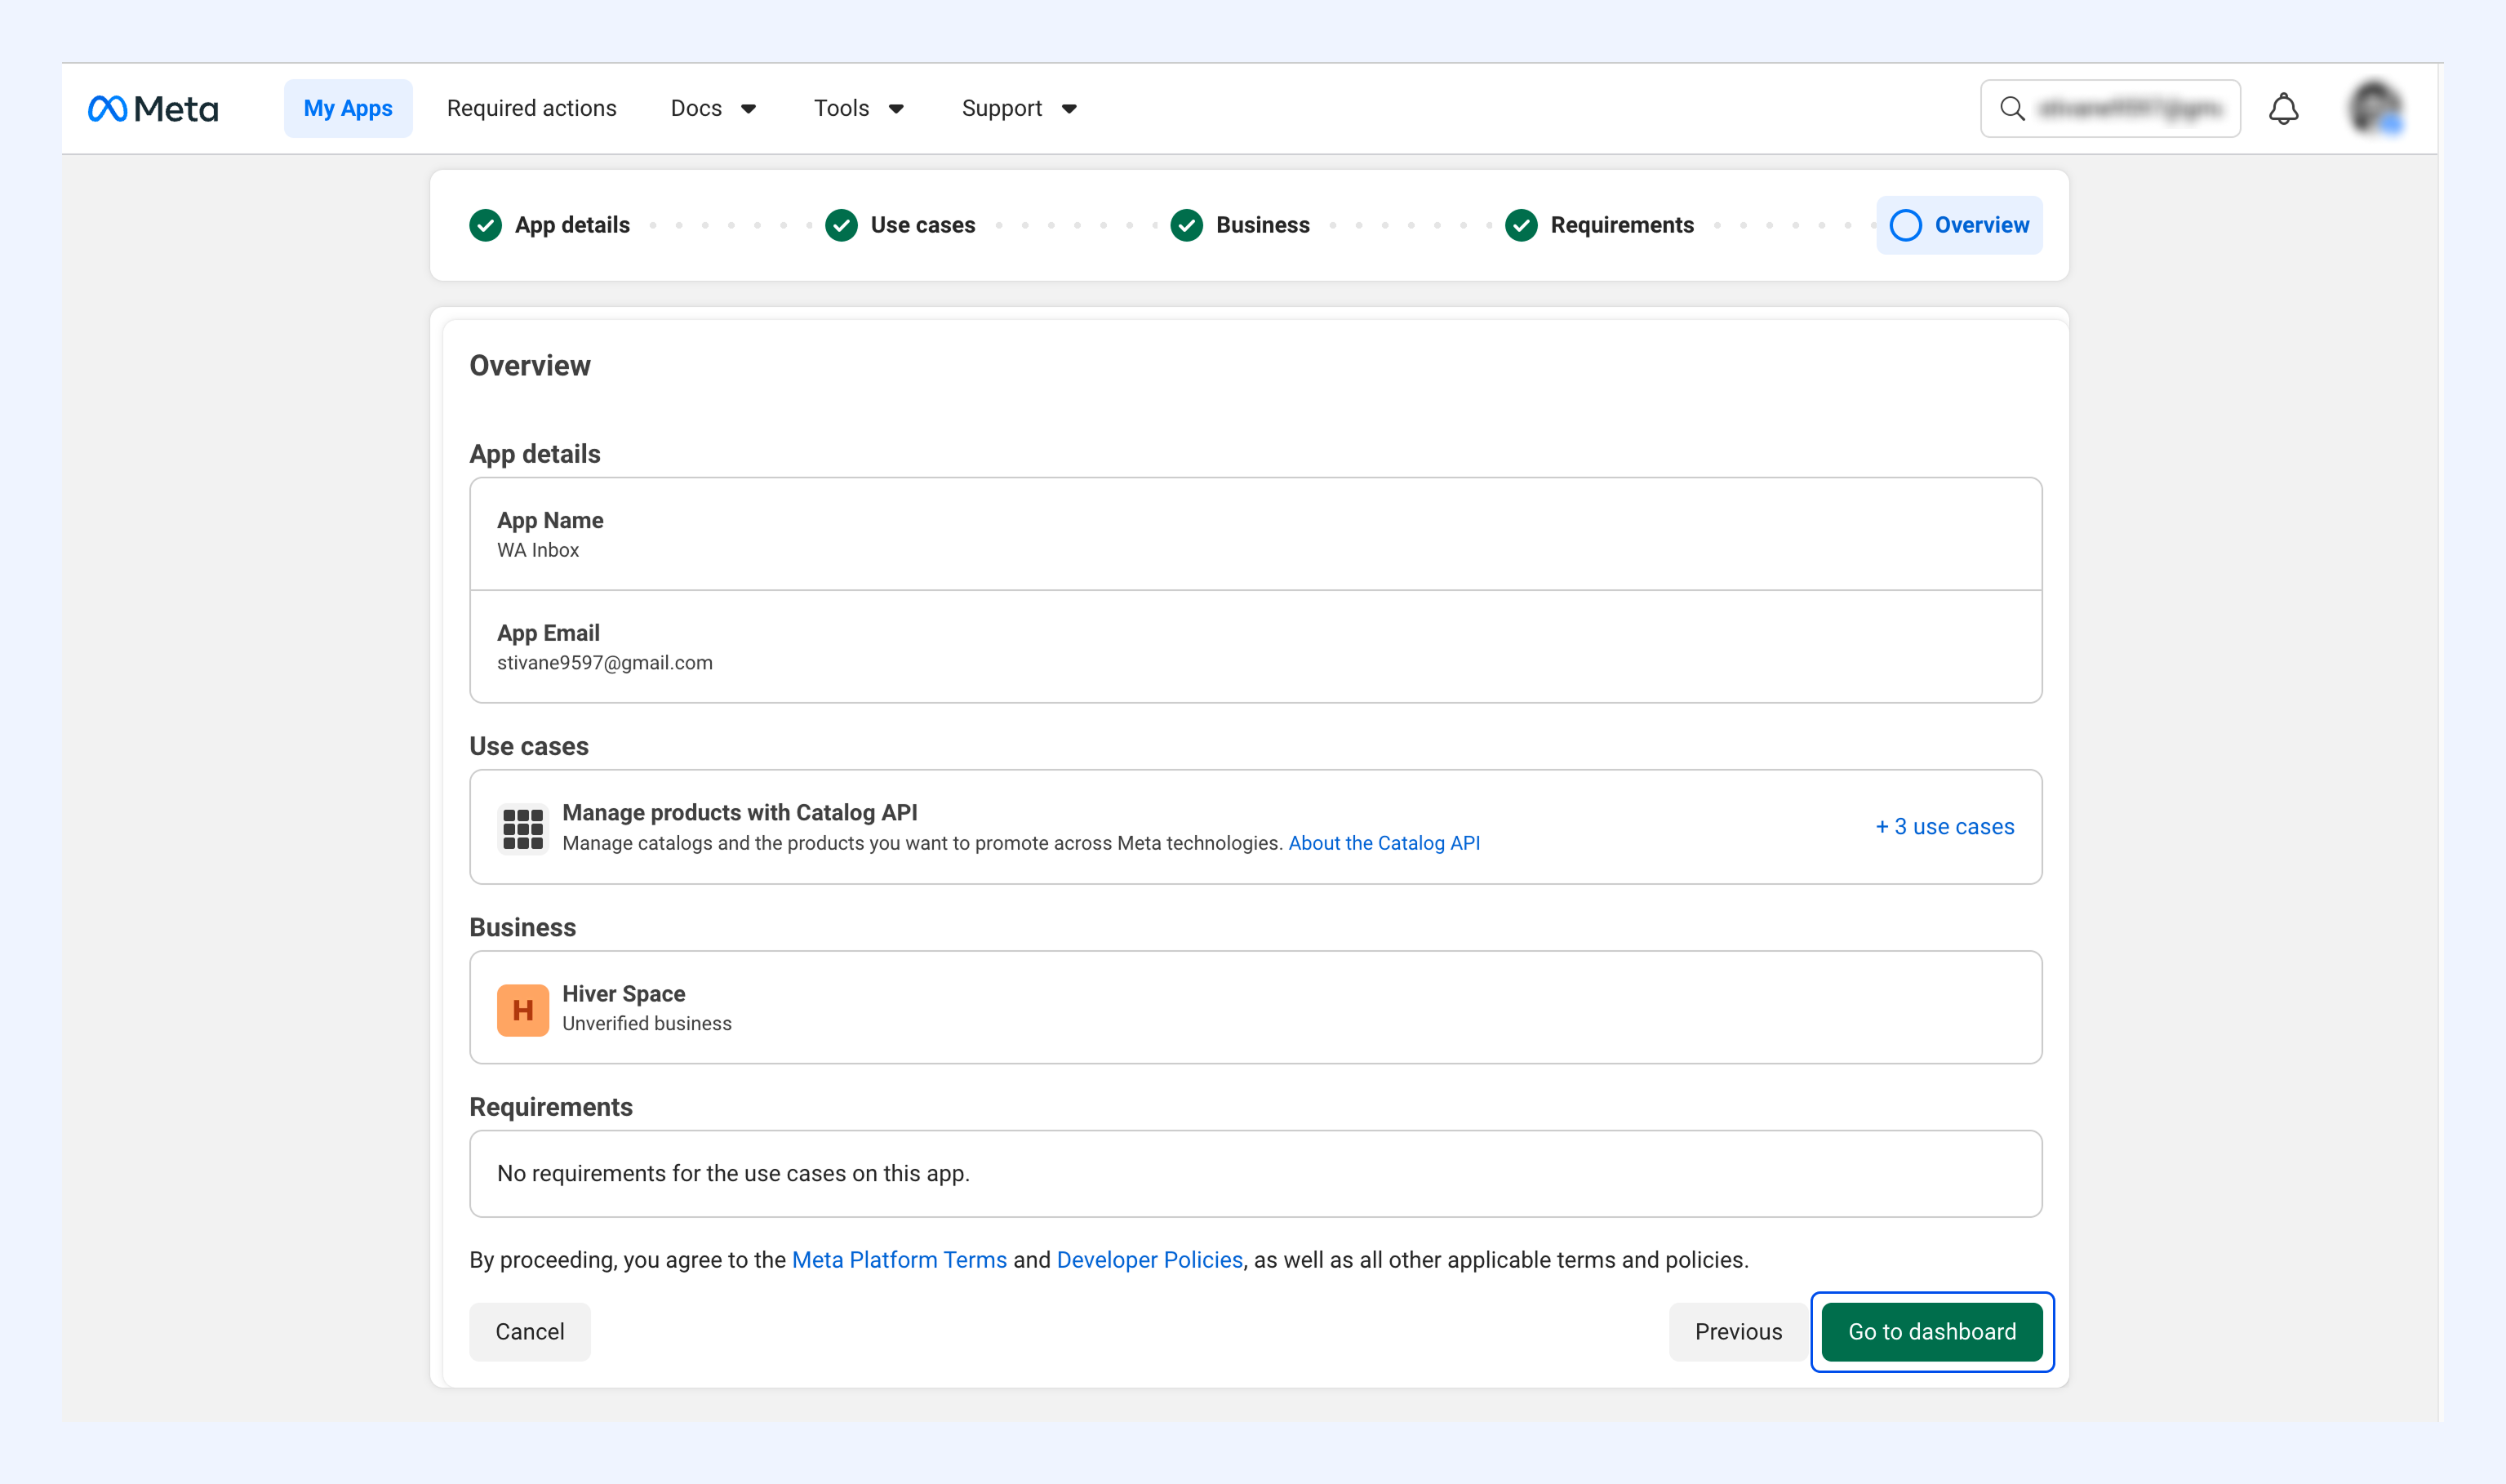
8. Check the app configuration and click Go to Dashboard.
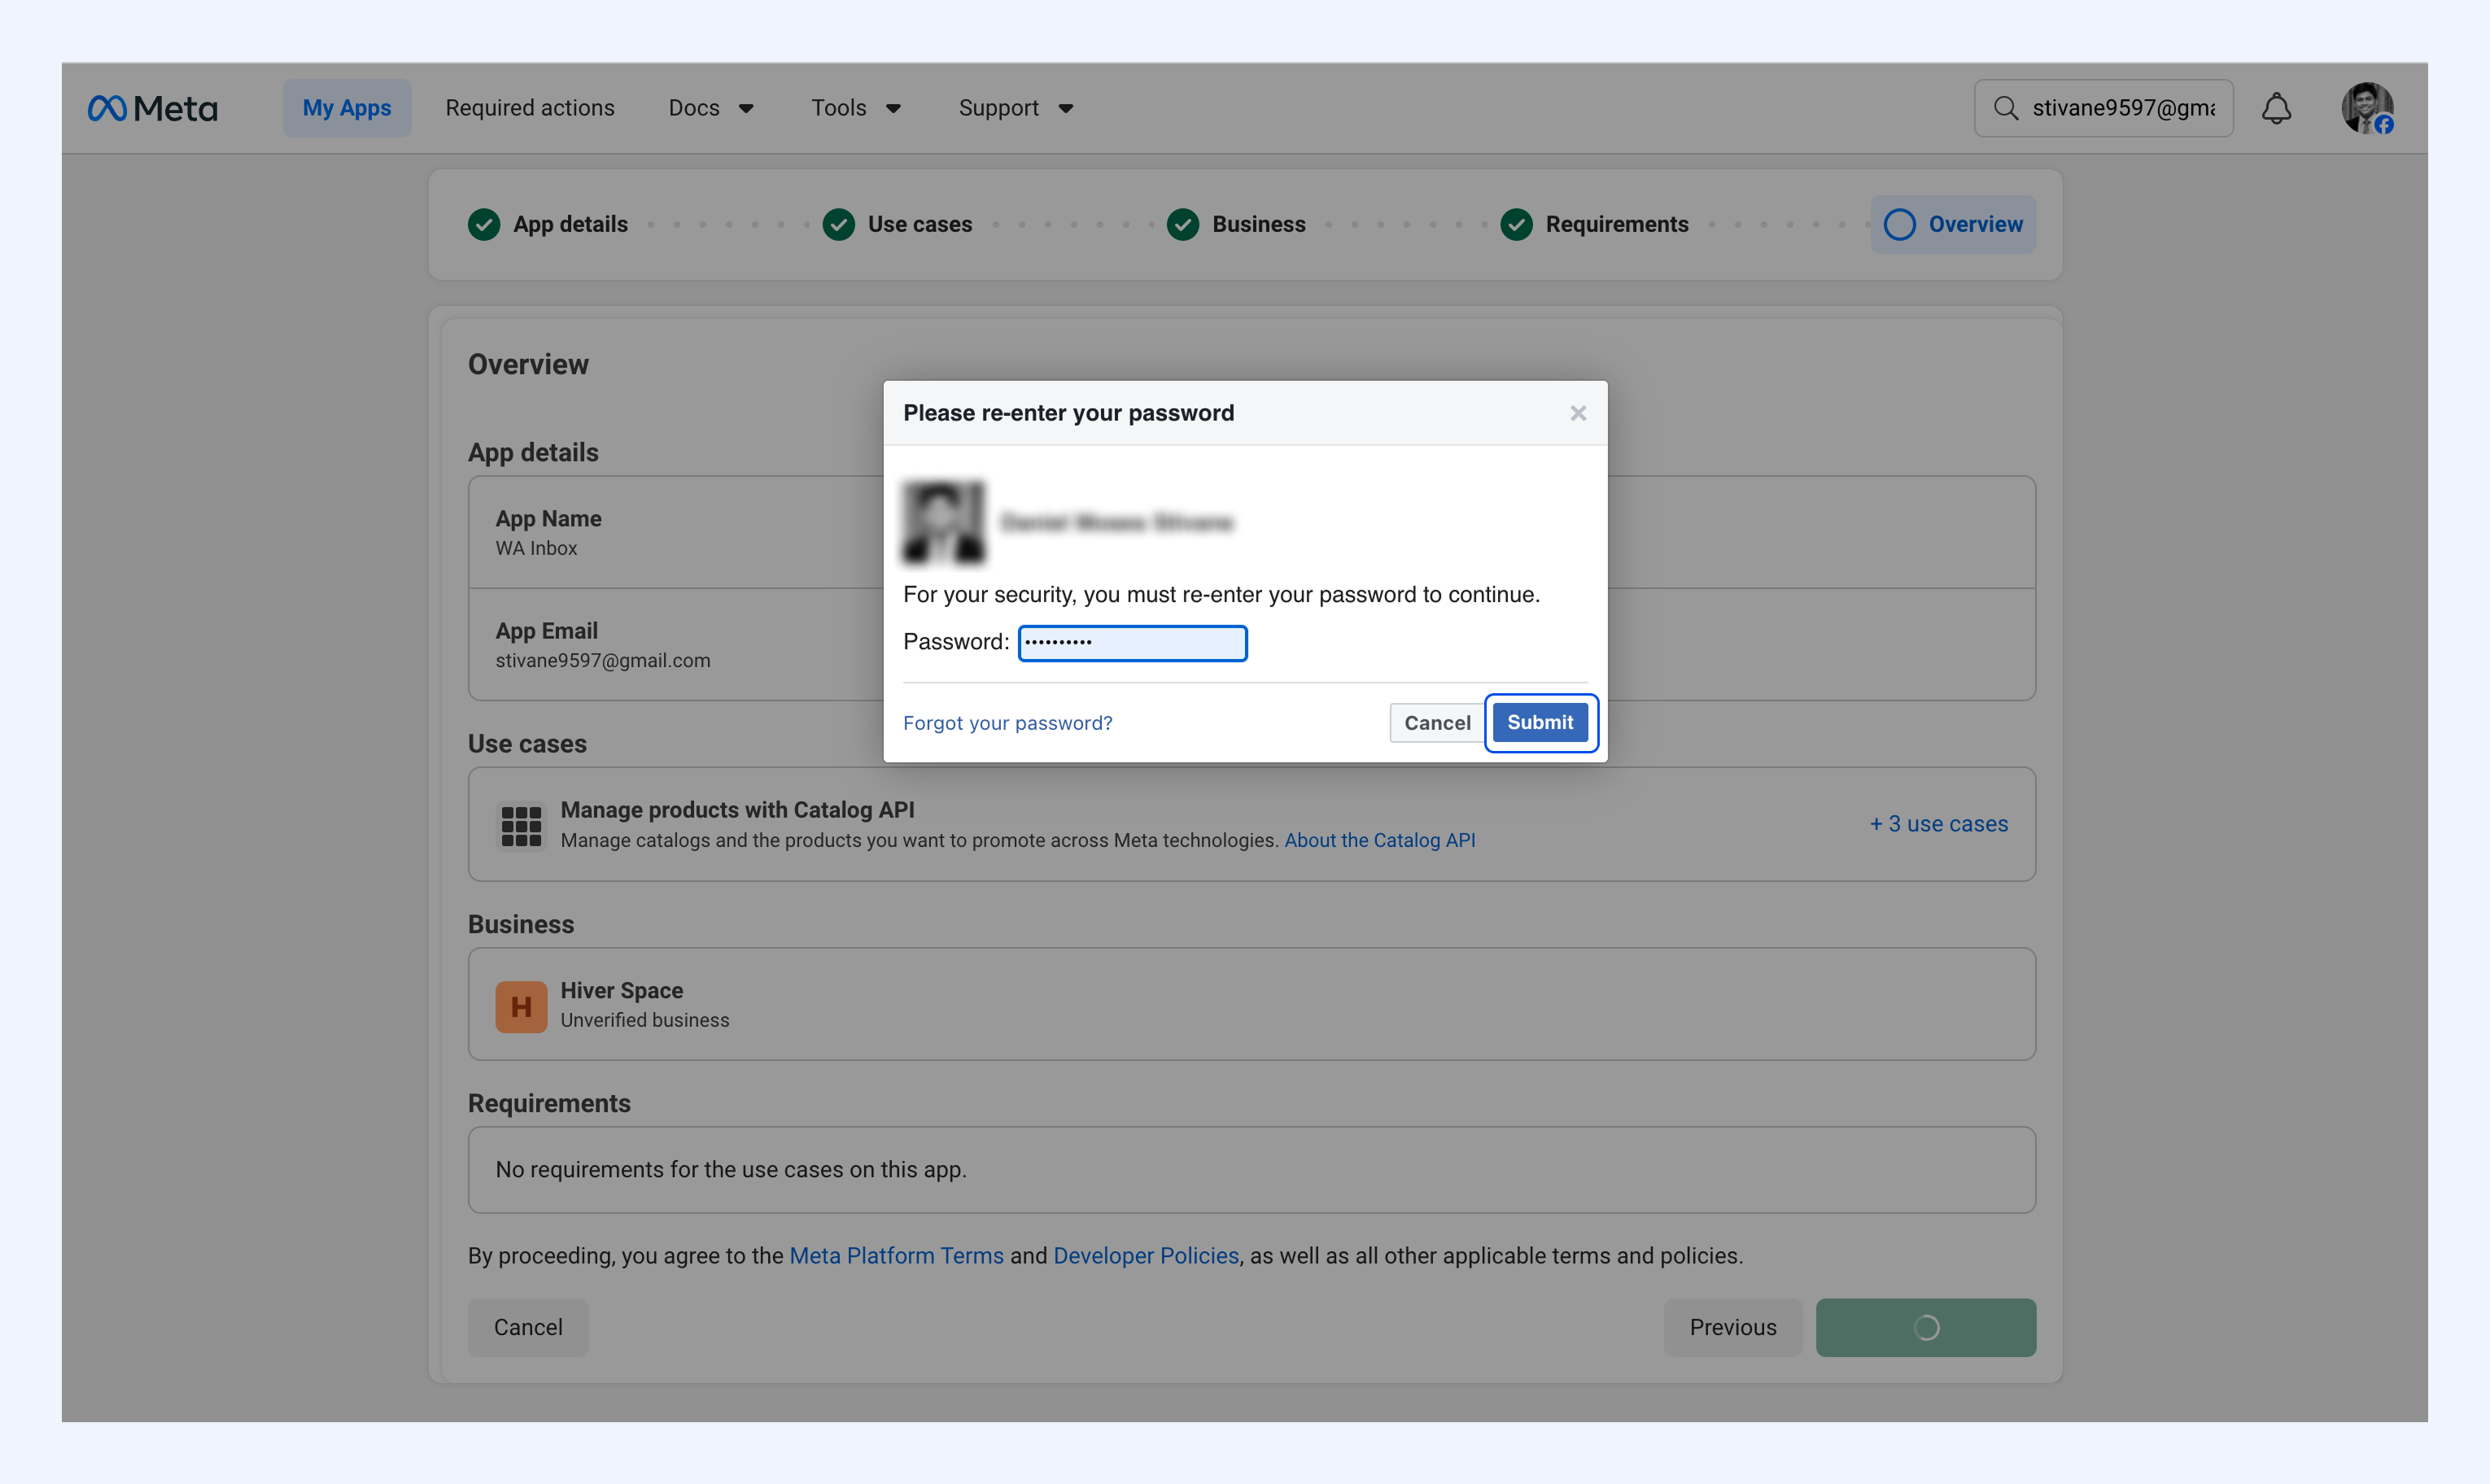
9. Enter your Facebook password when prompted, then click Submit to create the app.
Add and verify your phone number
Add your business phone number
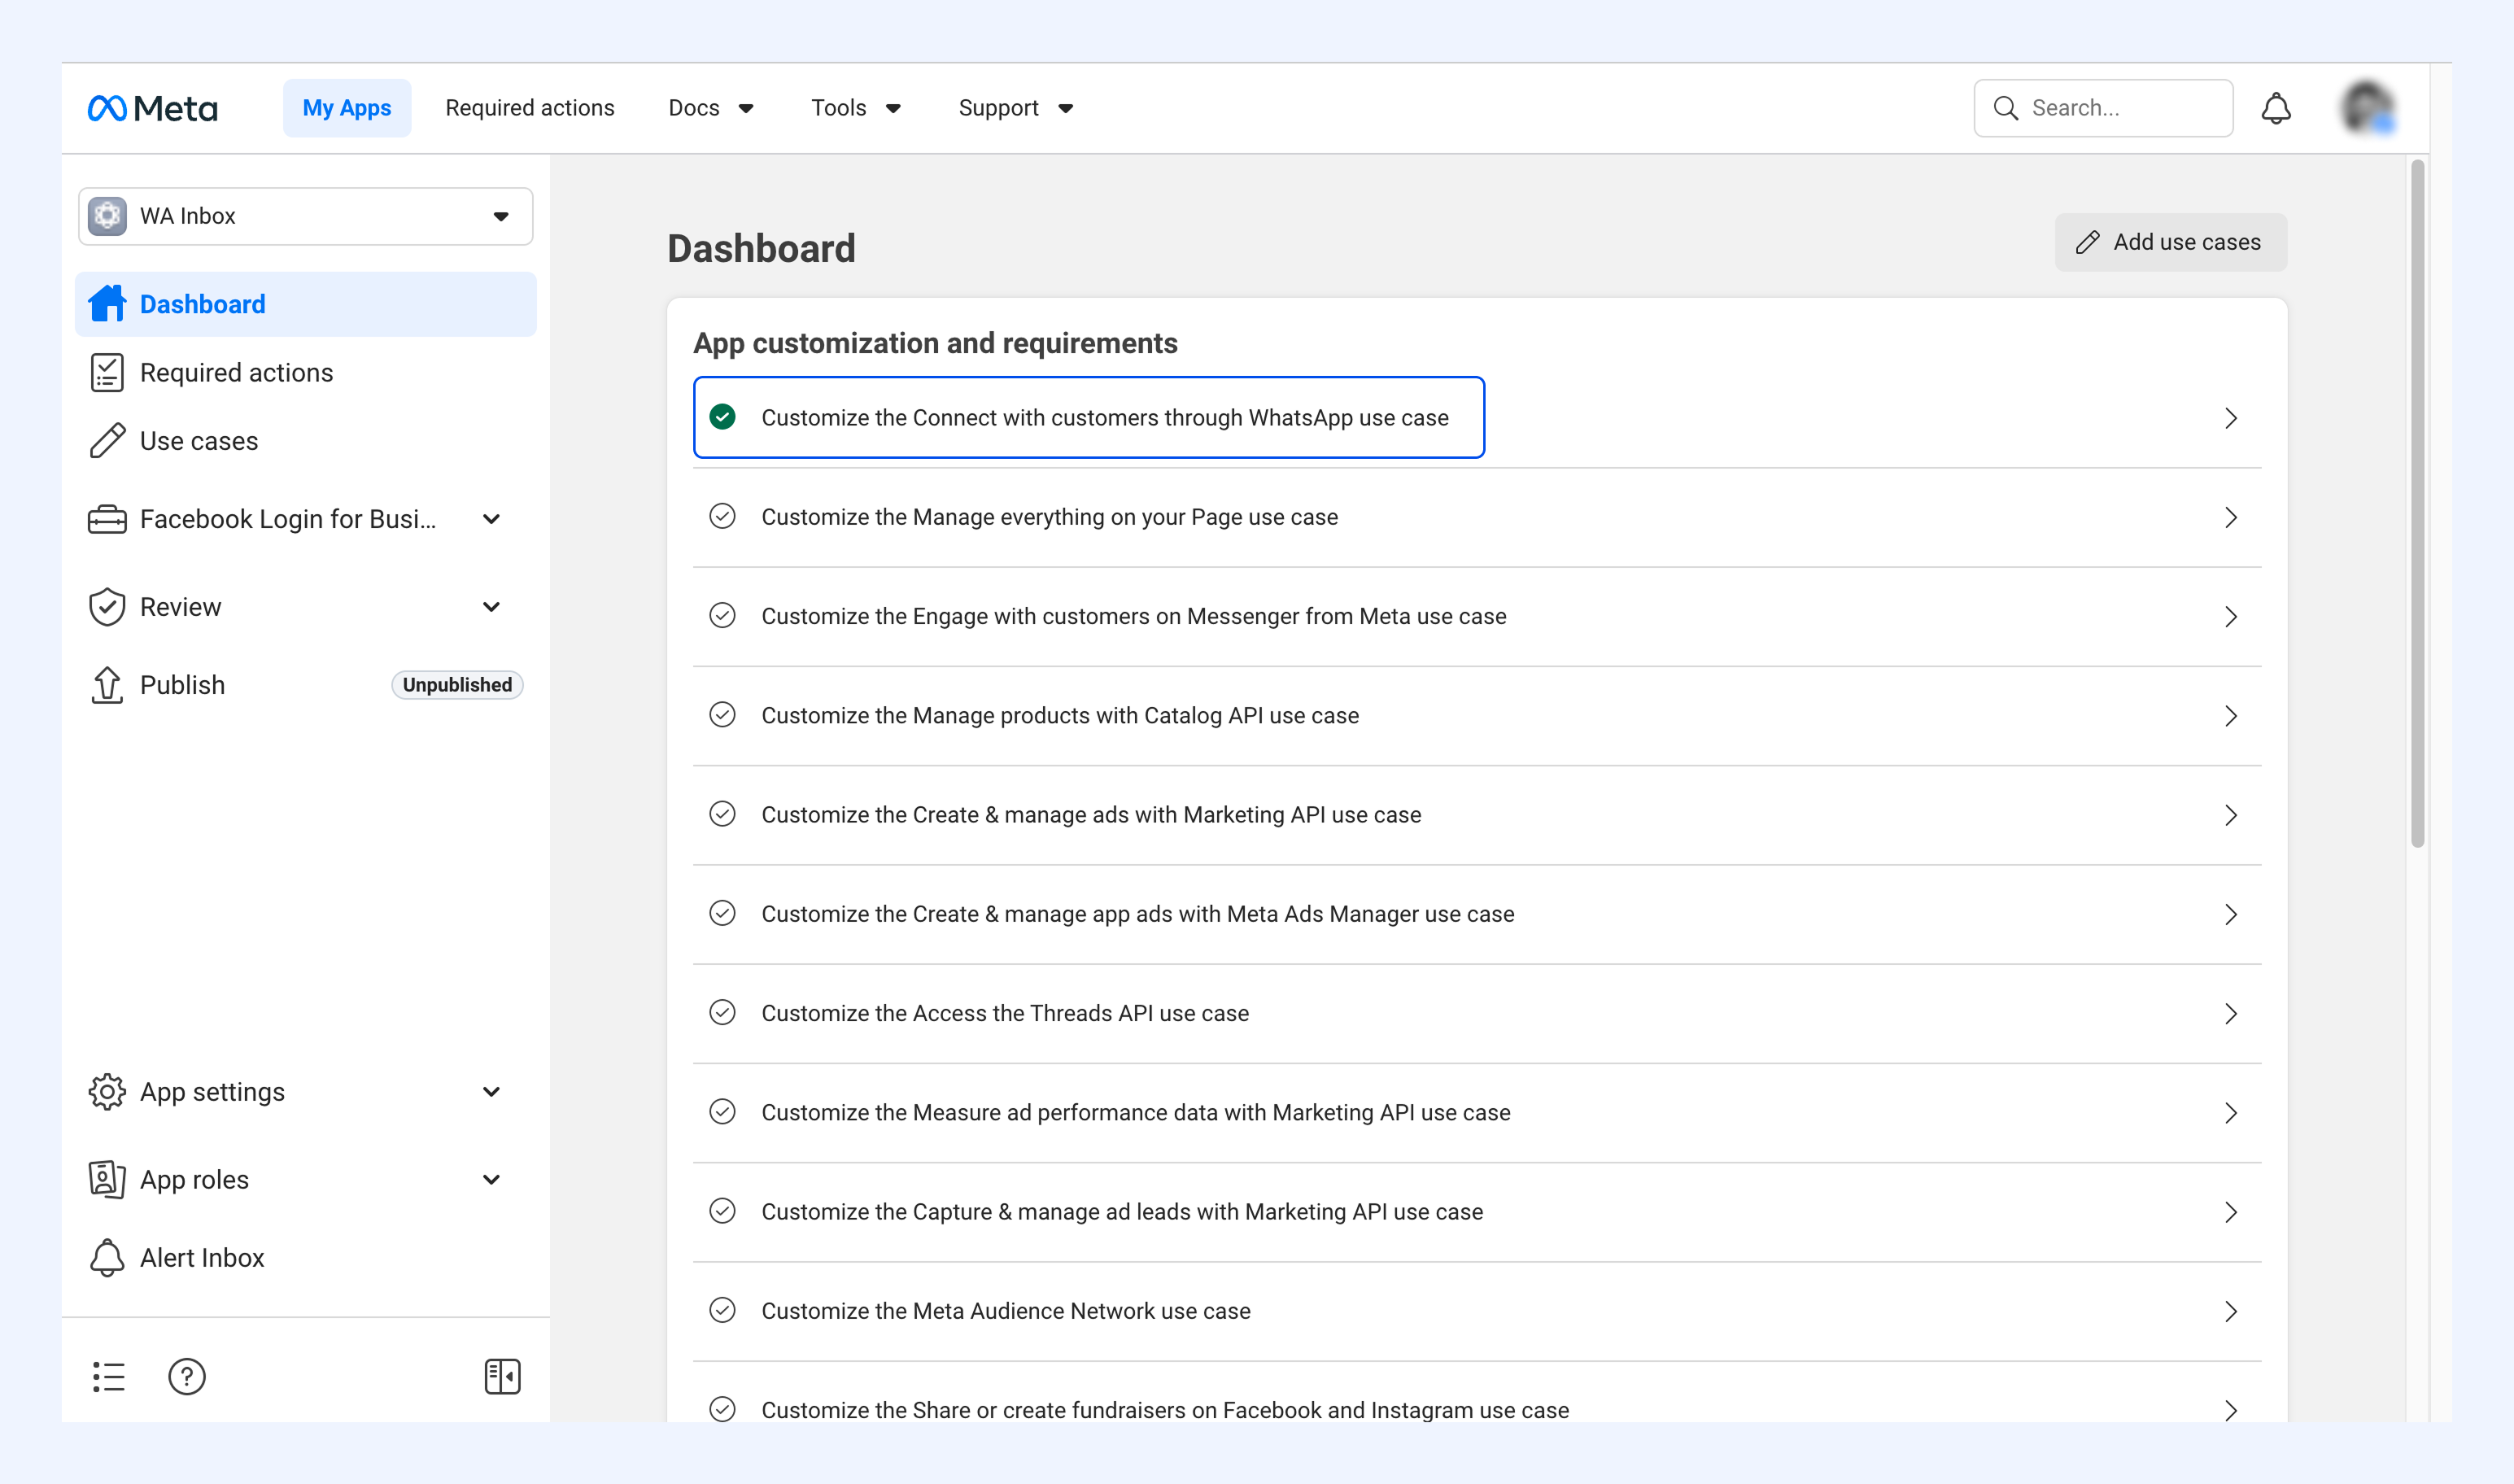
1. In your app Dashboard, open the Connect with customers through WhatsApp use case.
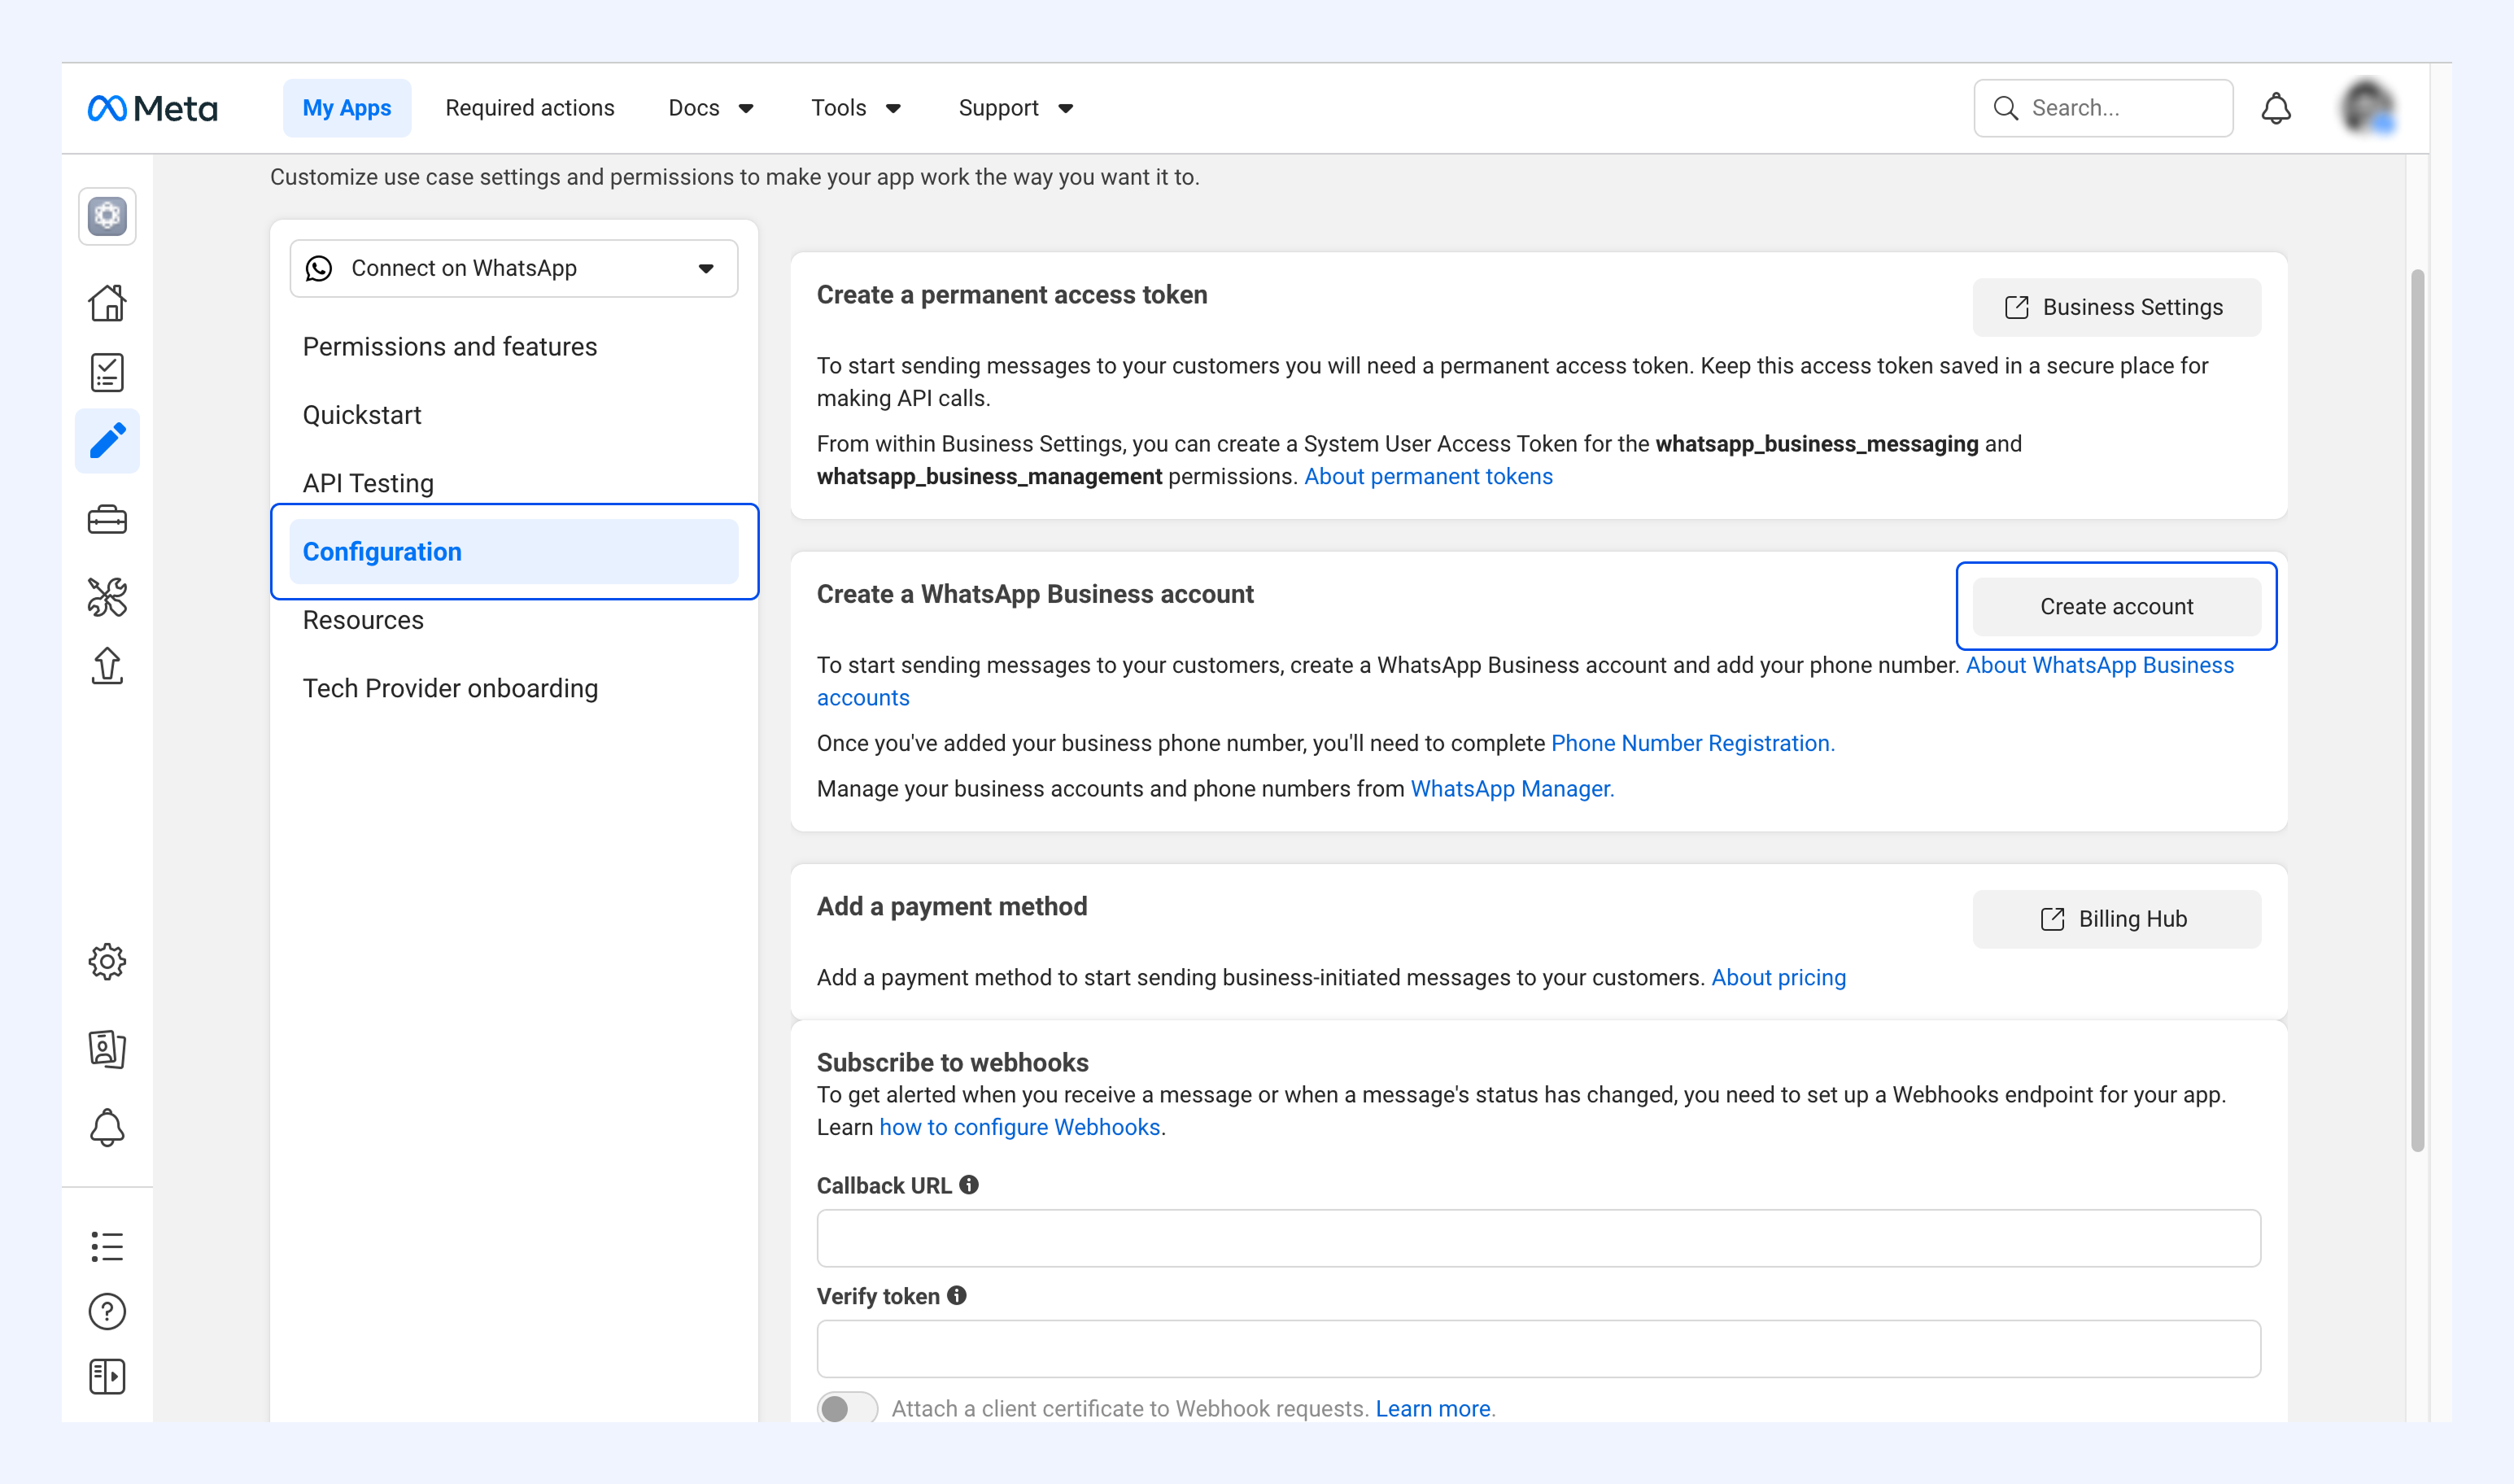
2. Go to Configuration, then click Create account.
3. Enter your Display name, Timezone, Business category, and Business description.
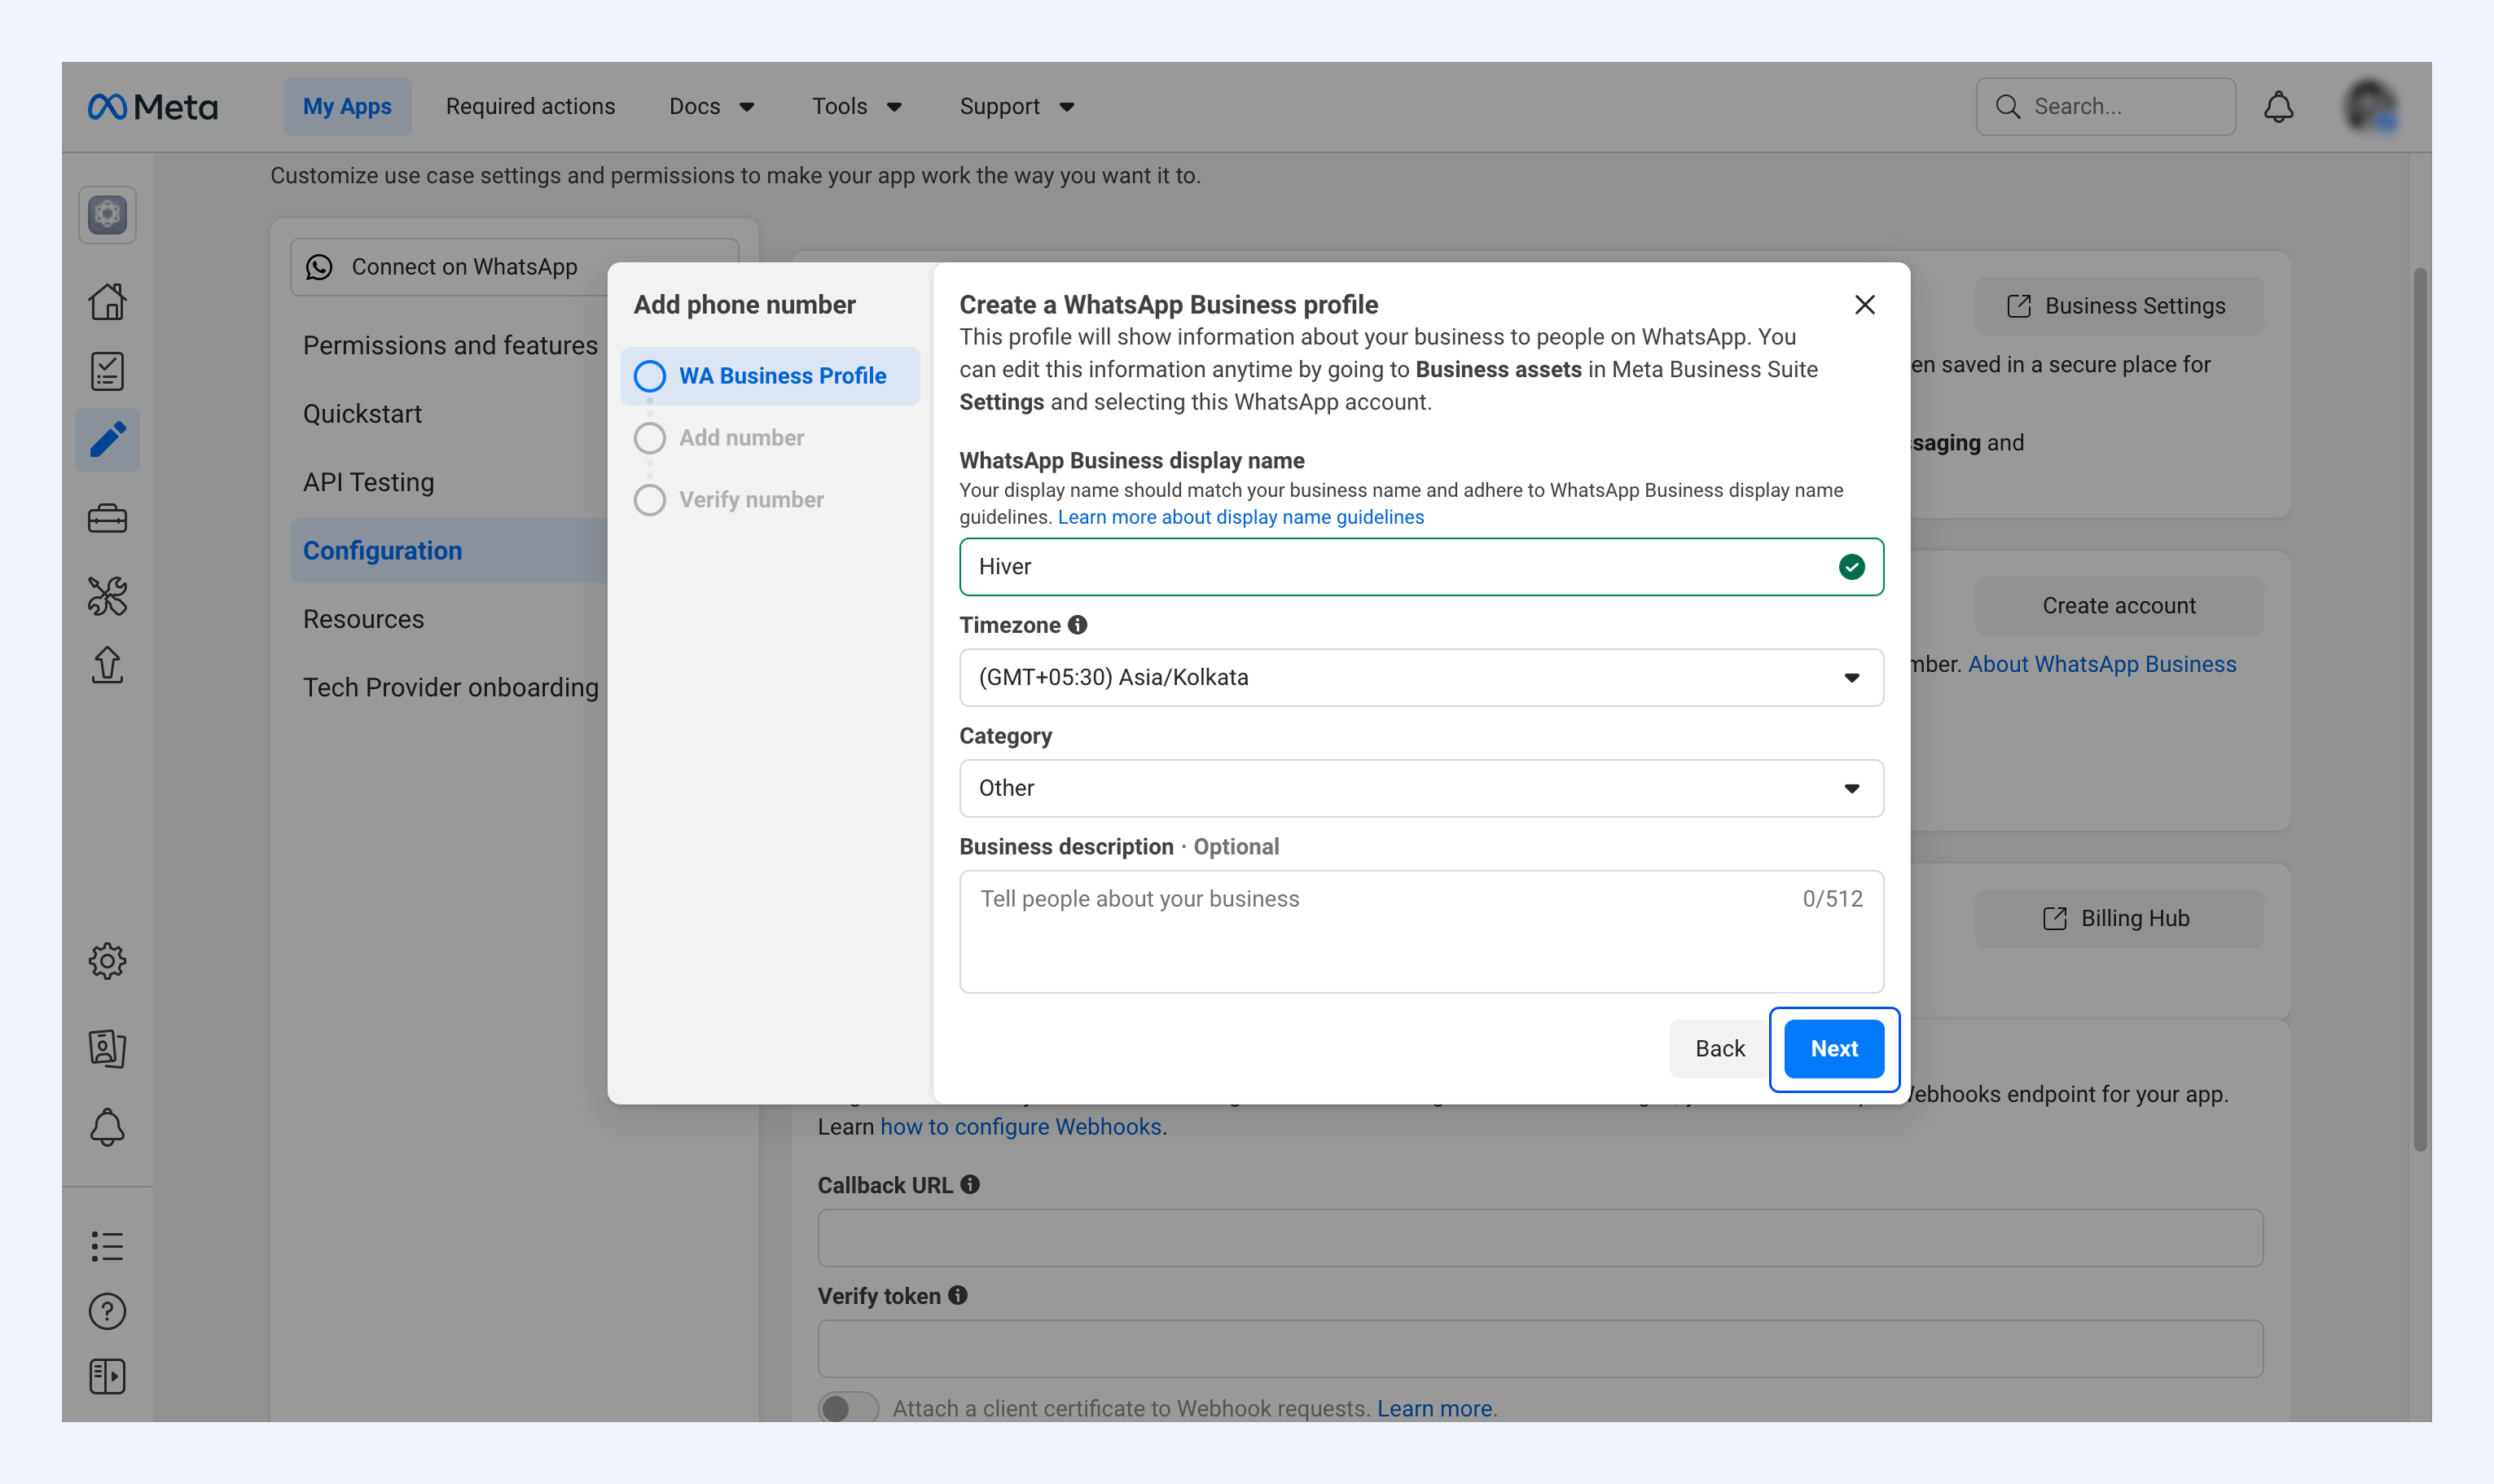
4. Click Next.
Verify your phone number
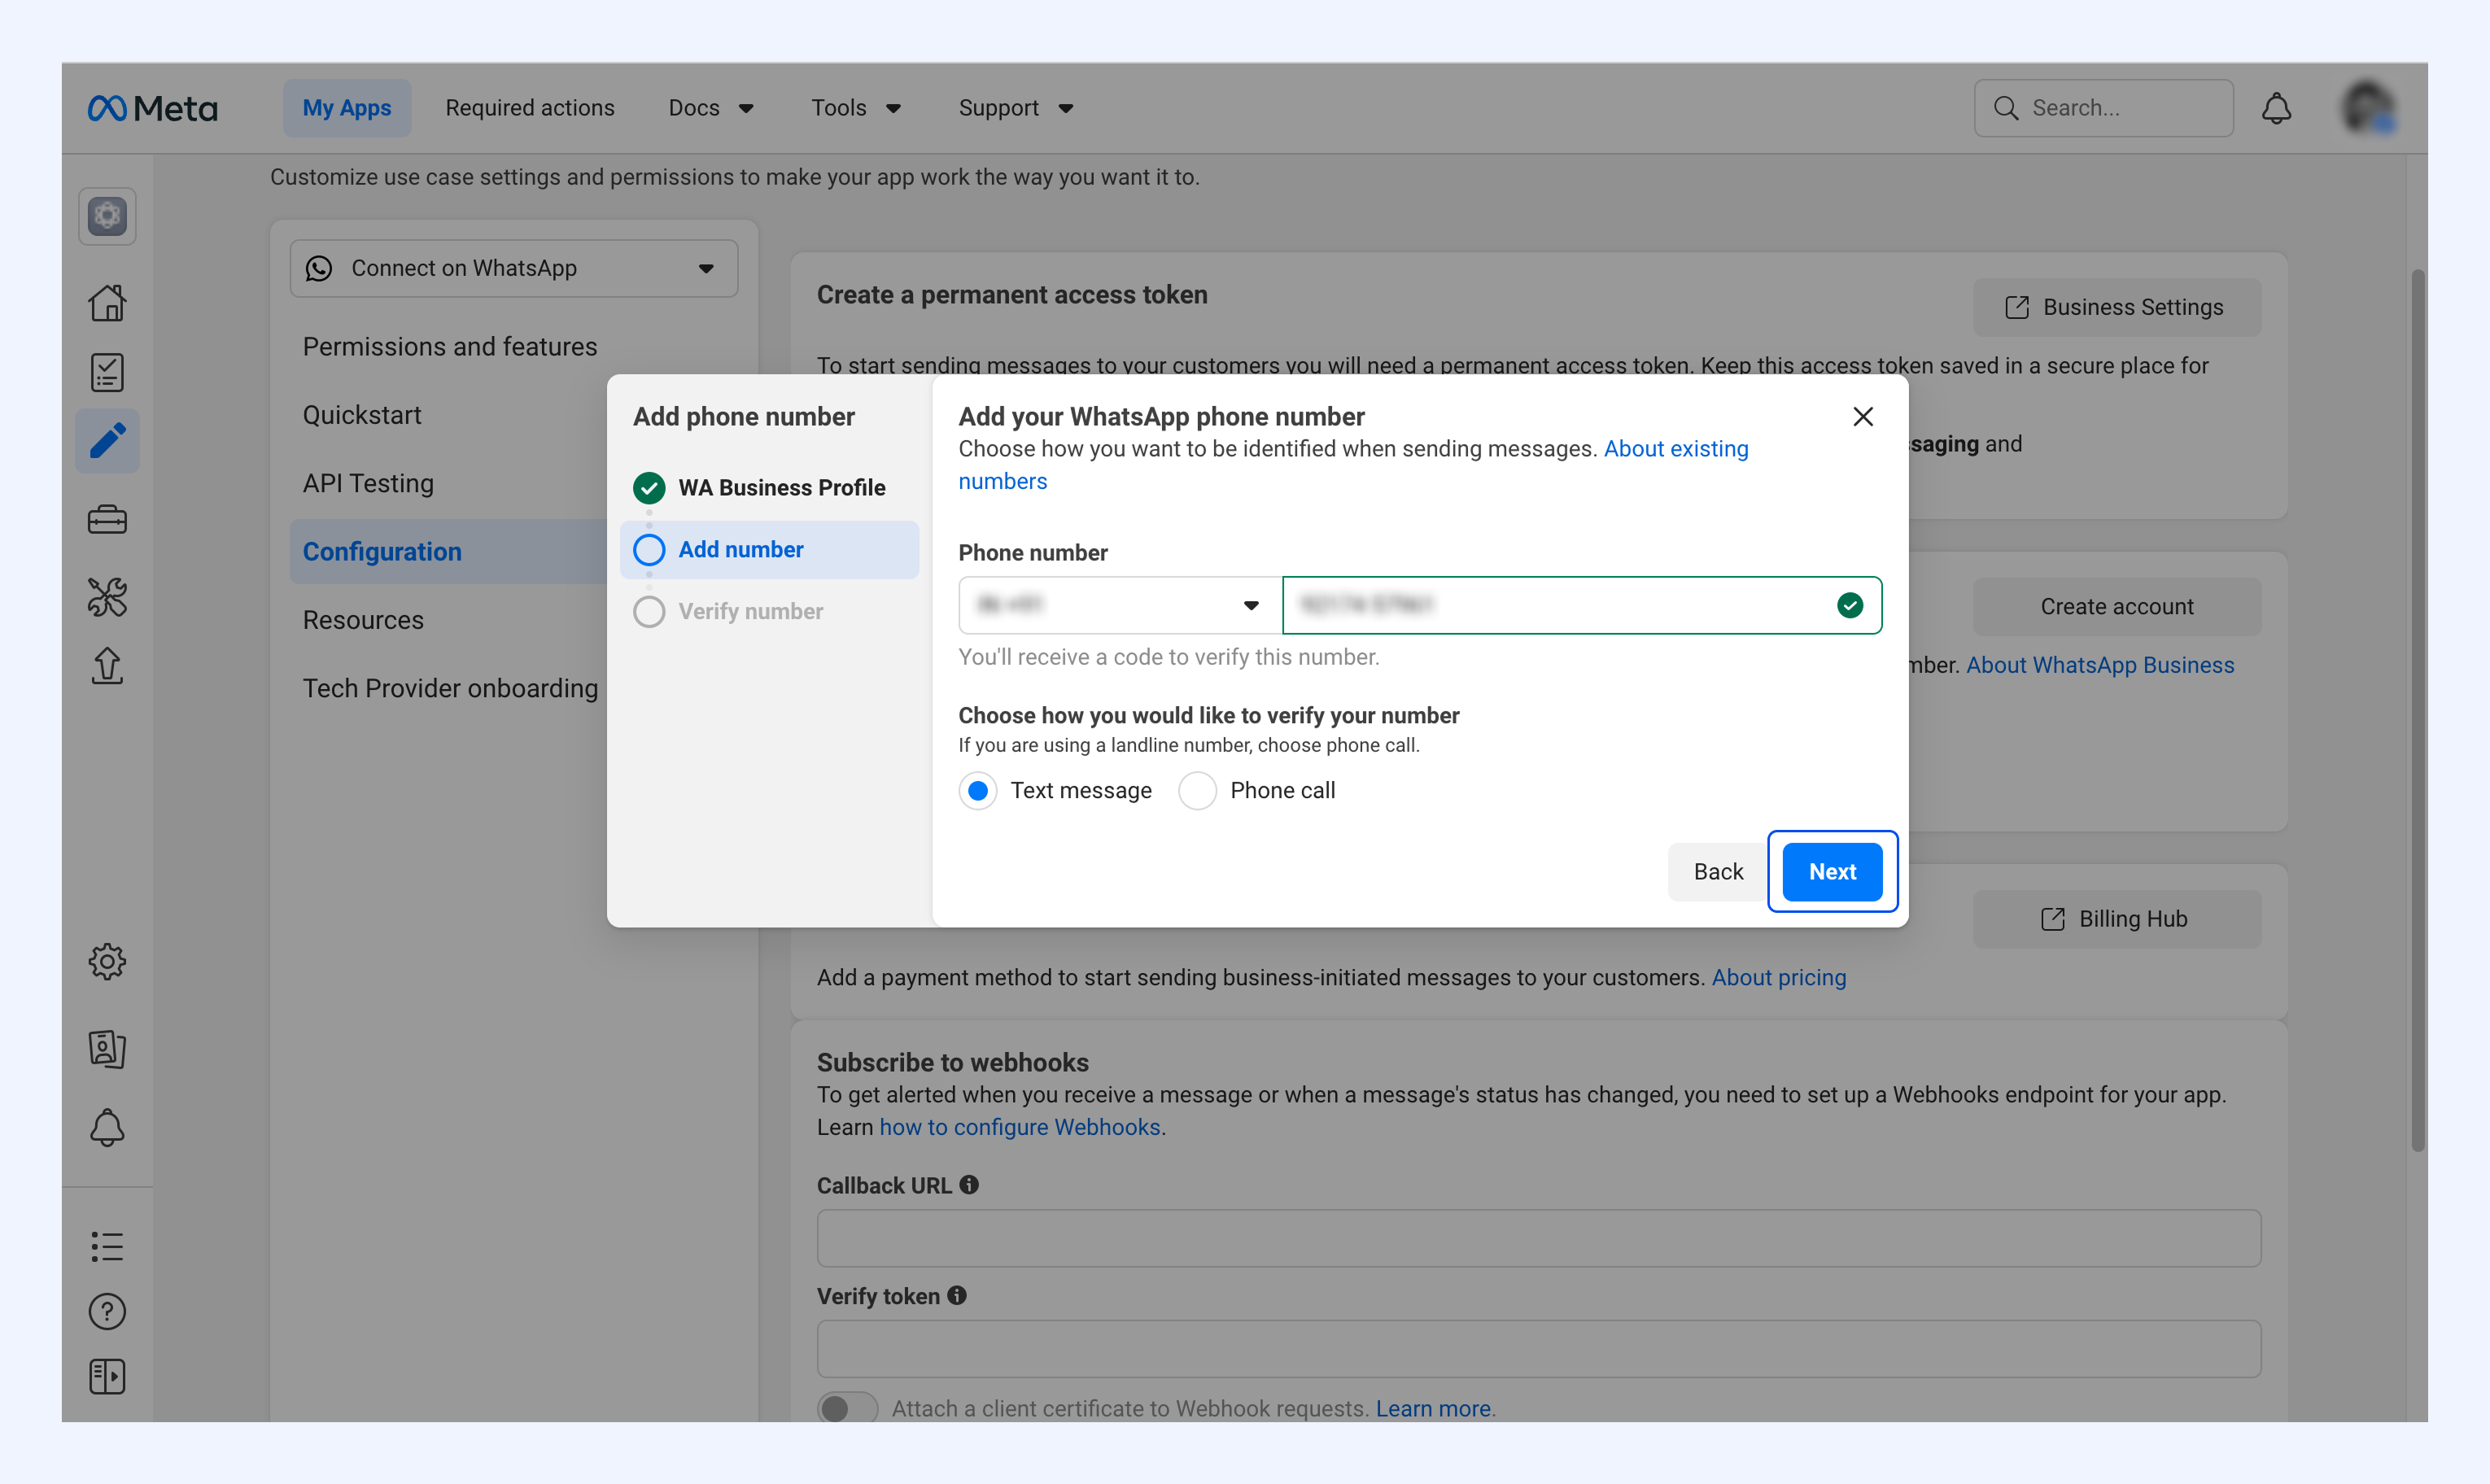
1. Select your country code and enter your phone number.
2. Choose how to get the verification code: text message or phone call.
3. Click Next.
4. Enter the code you received, then click Verify.
Note: Your number now shows as Pending in Meta Business Manager. You'll activate it in the last part of this article.
Find your WhatsApp Business Account ID
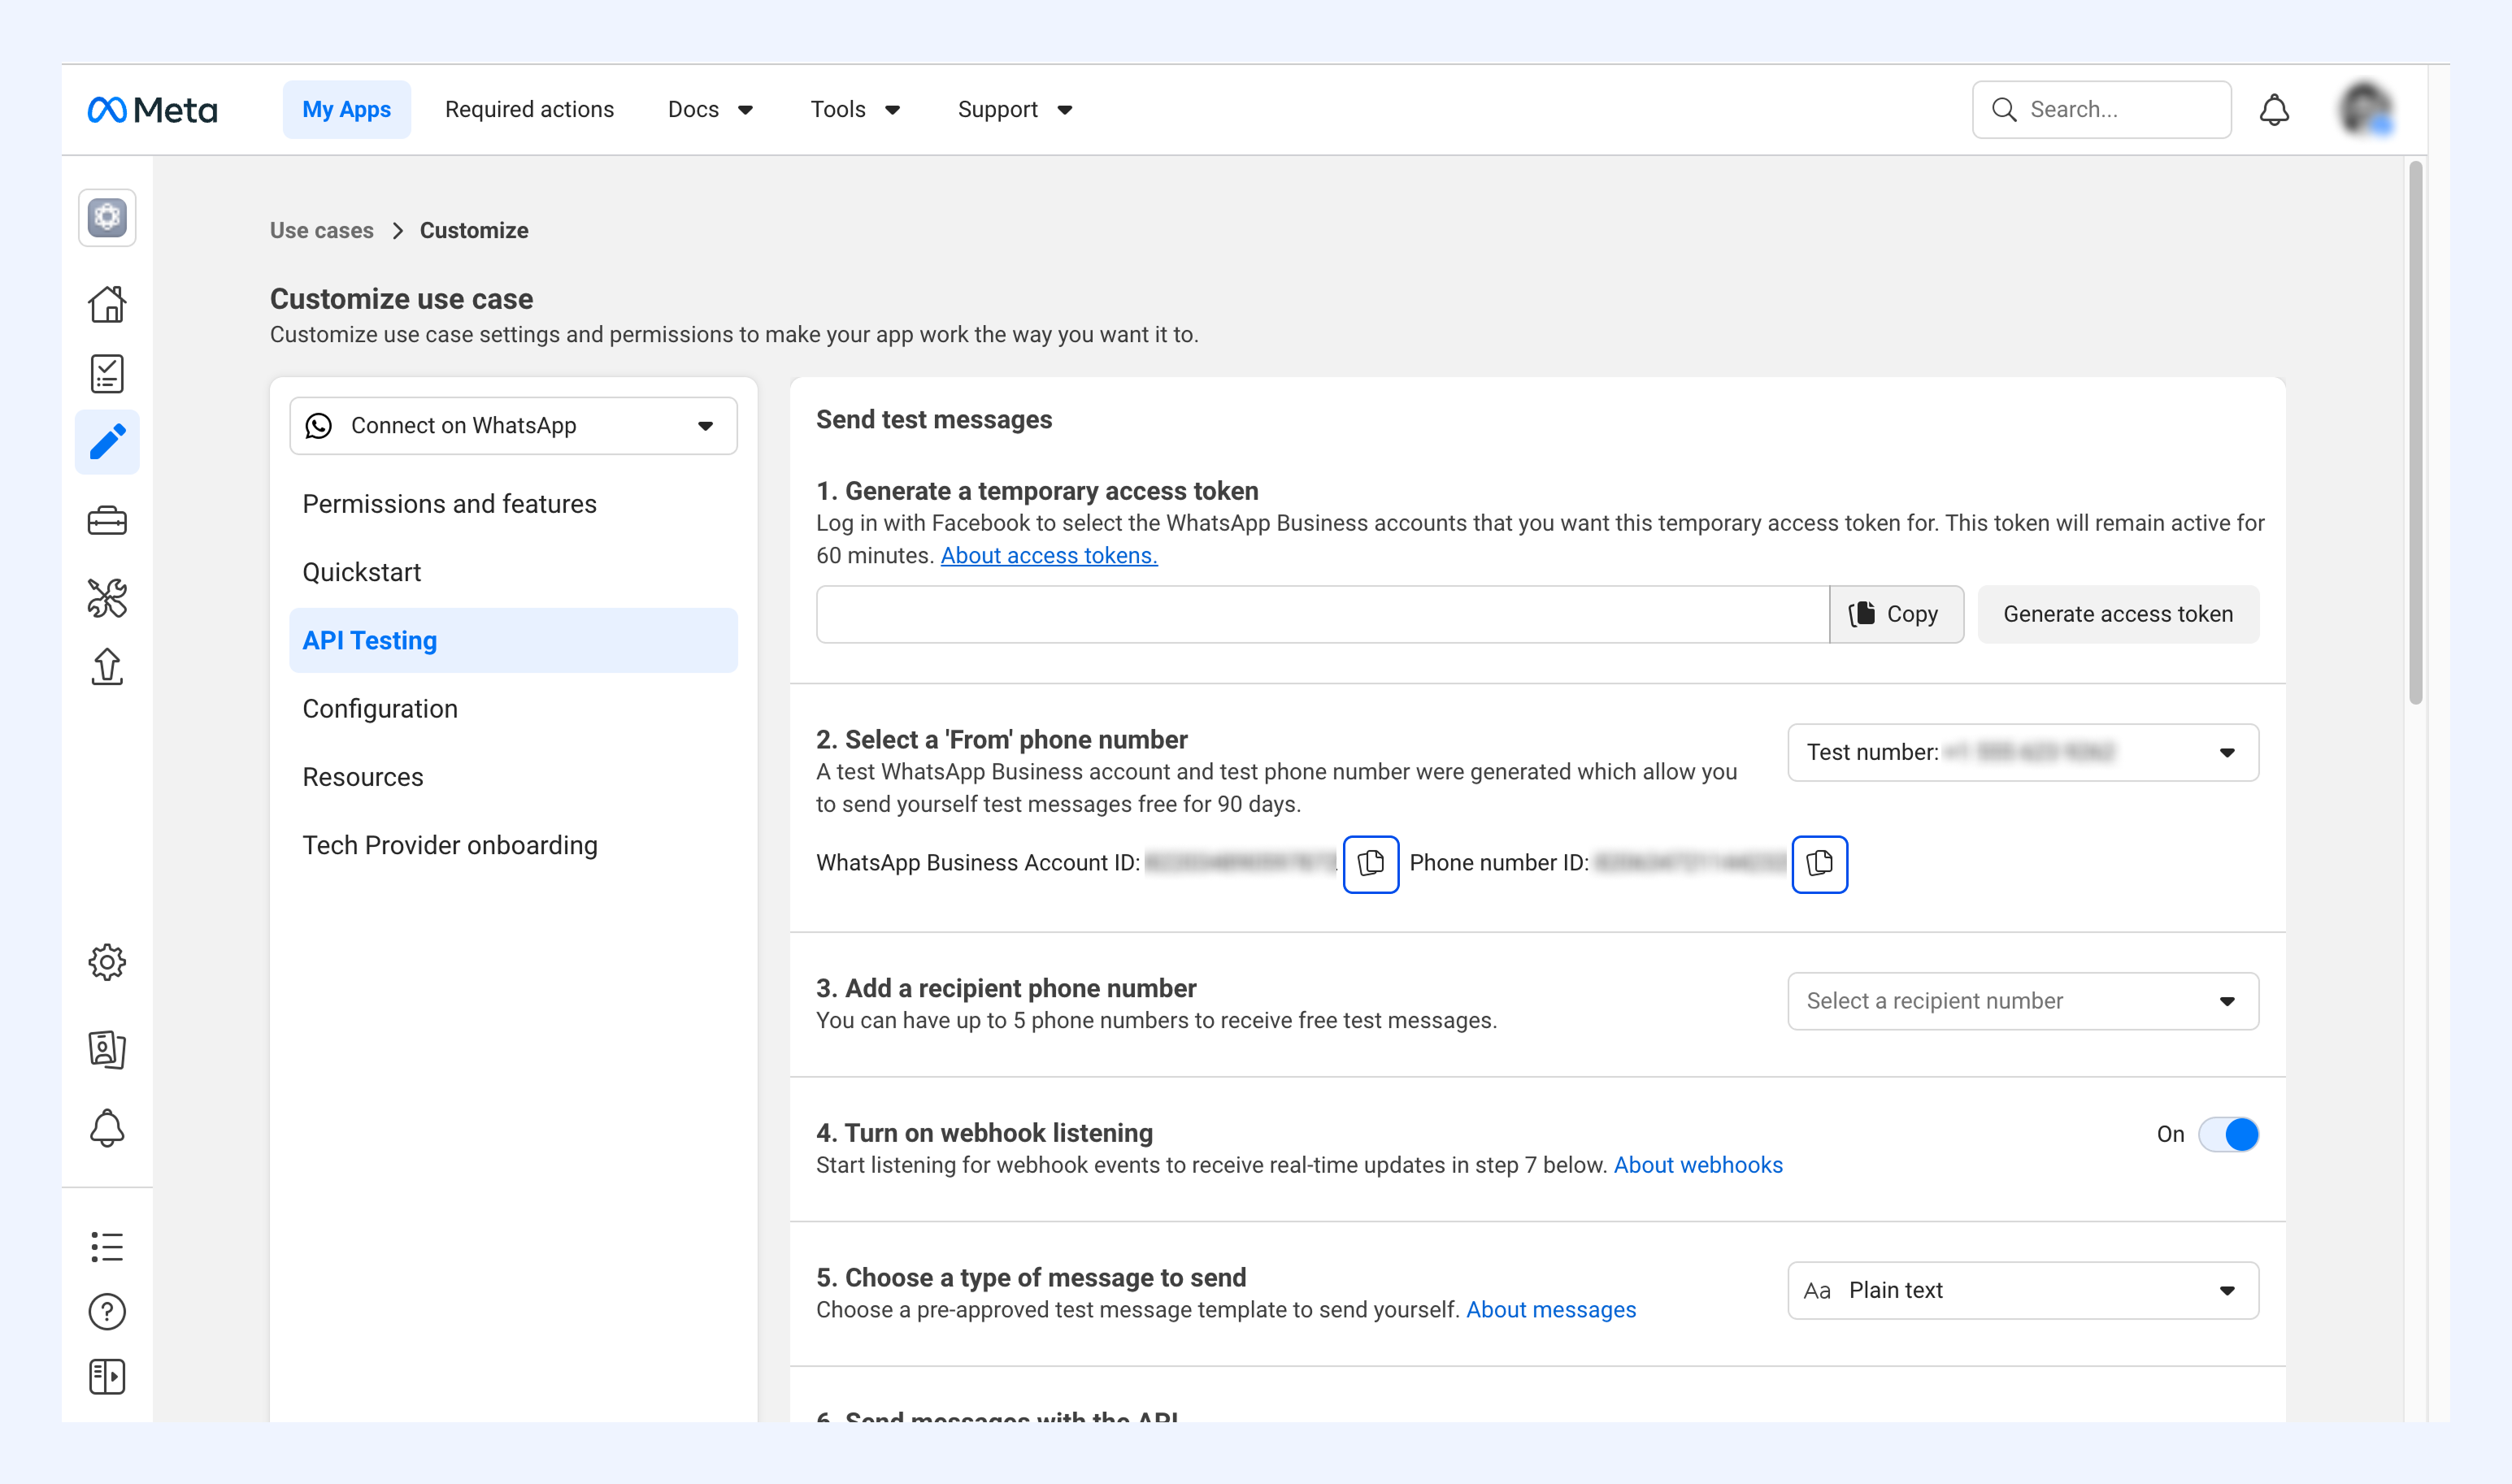
Adding your phone number creates a WhatsApp Business Account. Now copy its ID.
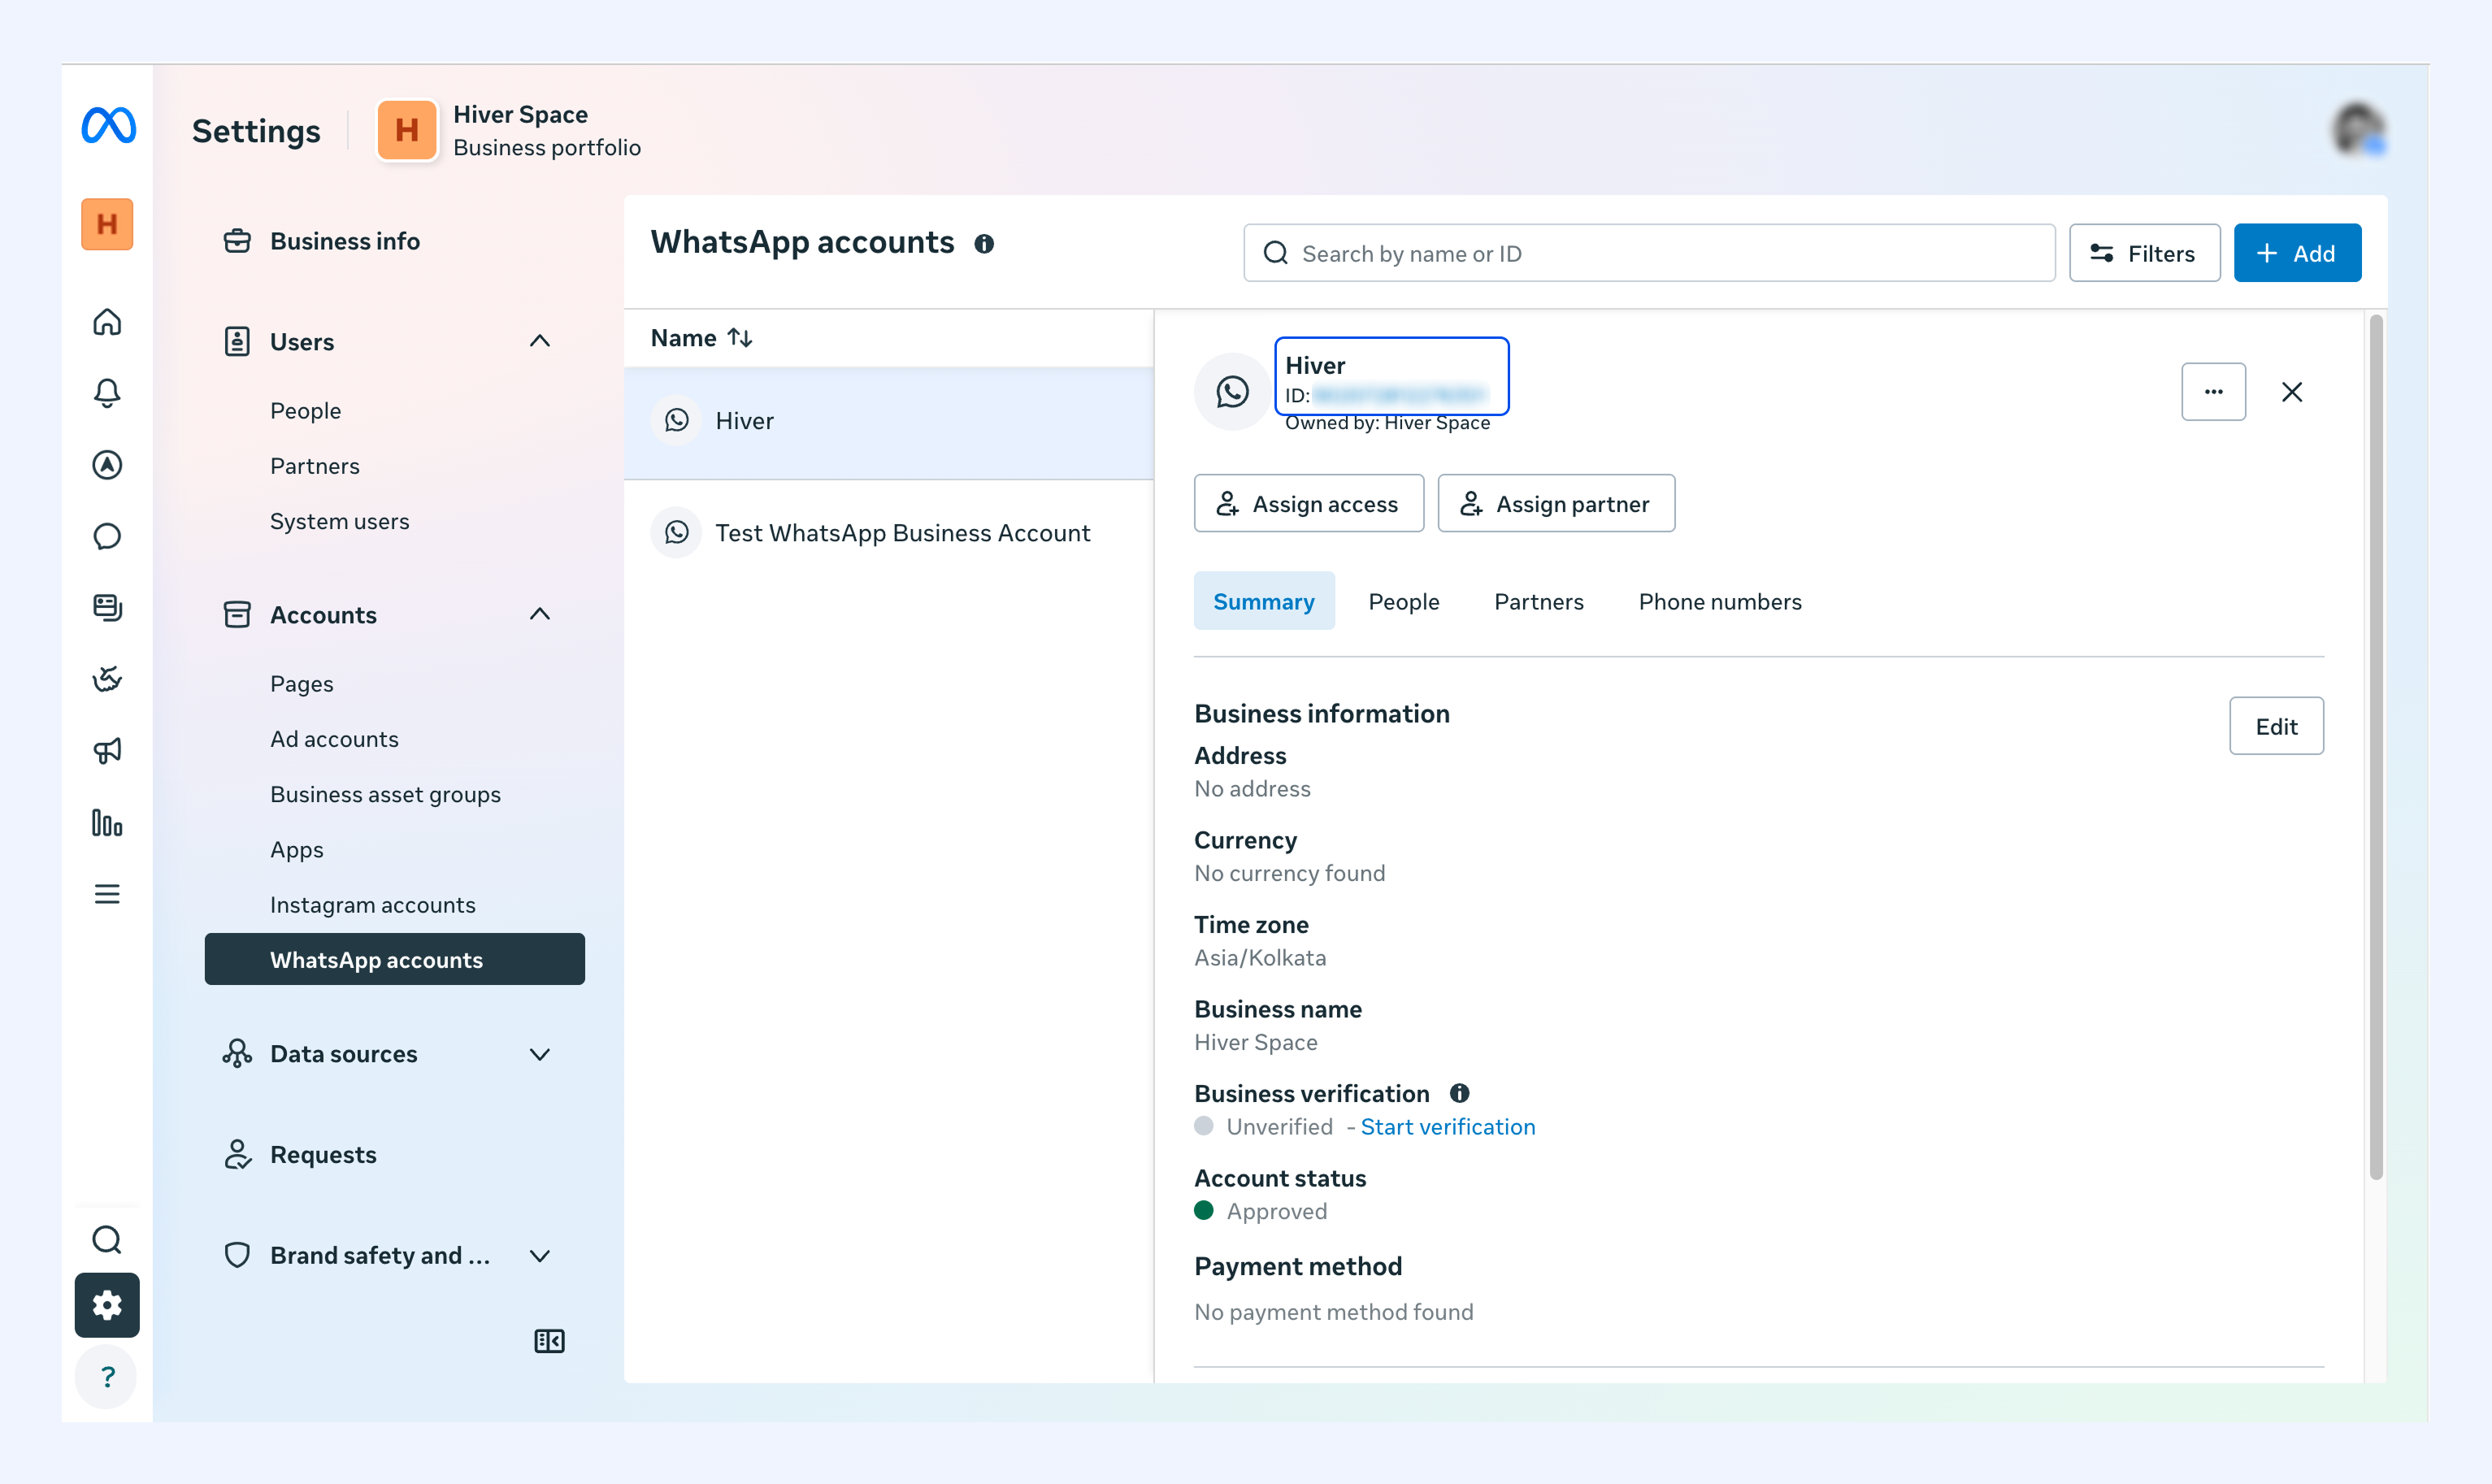
1. In Meta Business Manager, go to Settings → Accounts → WhatsApp Accounts.
2. Select your WhatsApp Business Account.
3. Copy the WhatsApp Business Account ID.
Generate your permanent access token
You'll create a system user, assign your WhatsApp assets to it, and then generate a permanent access token.
Create a system user
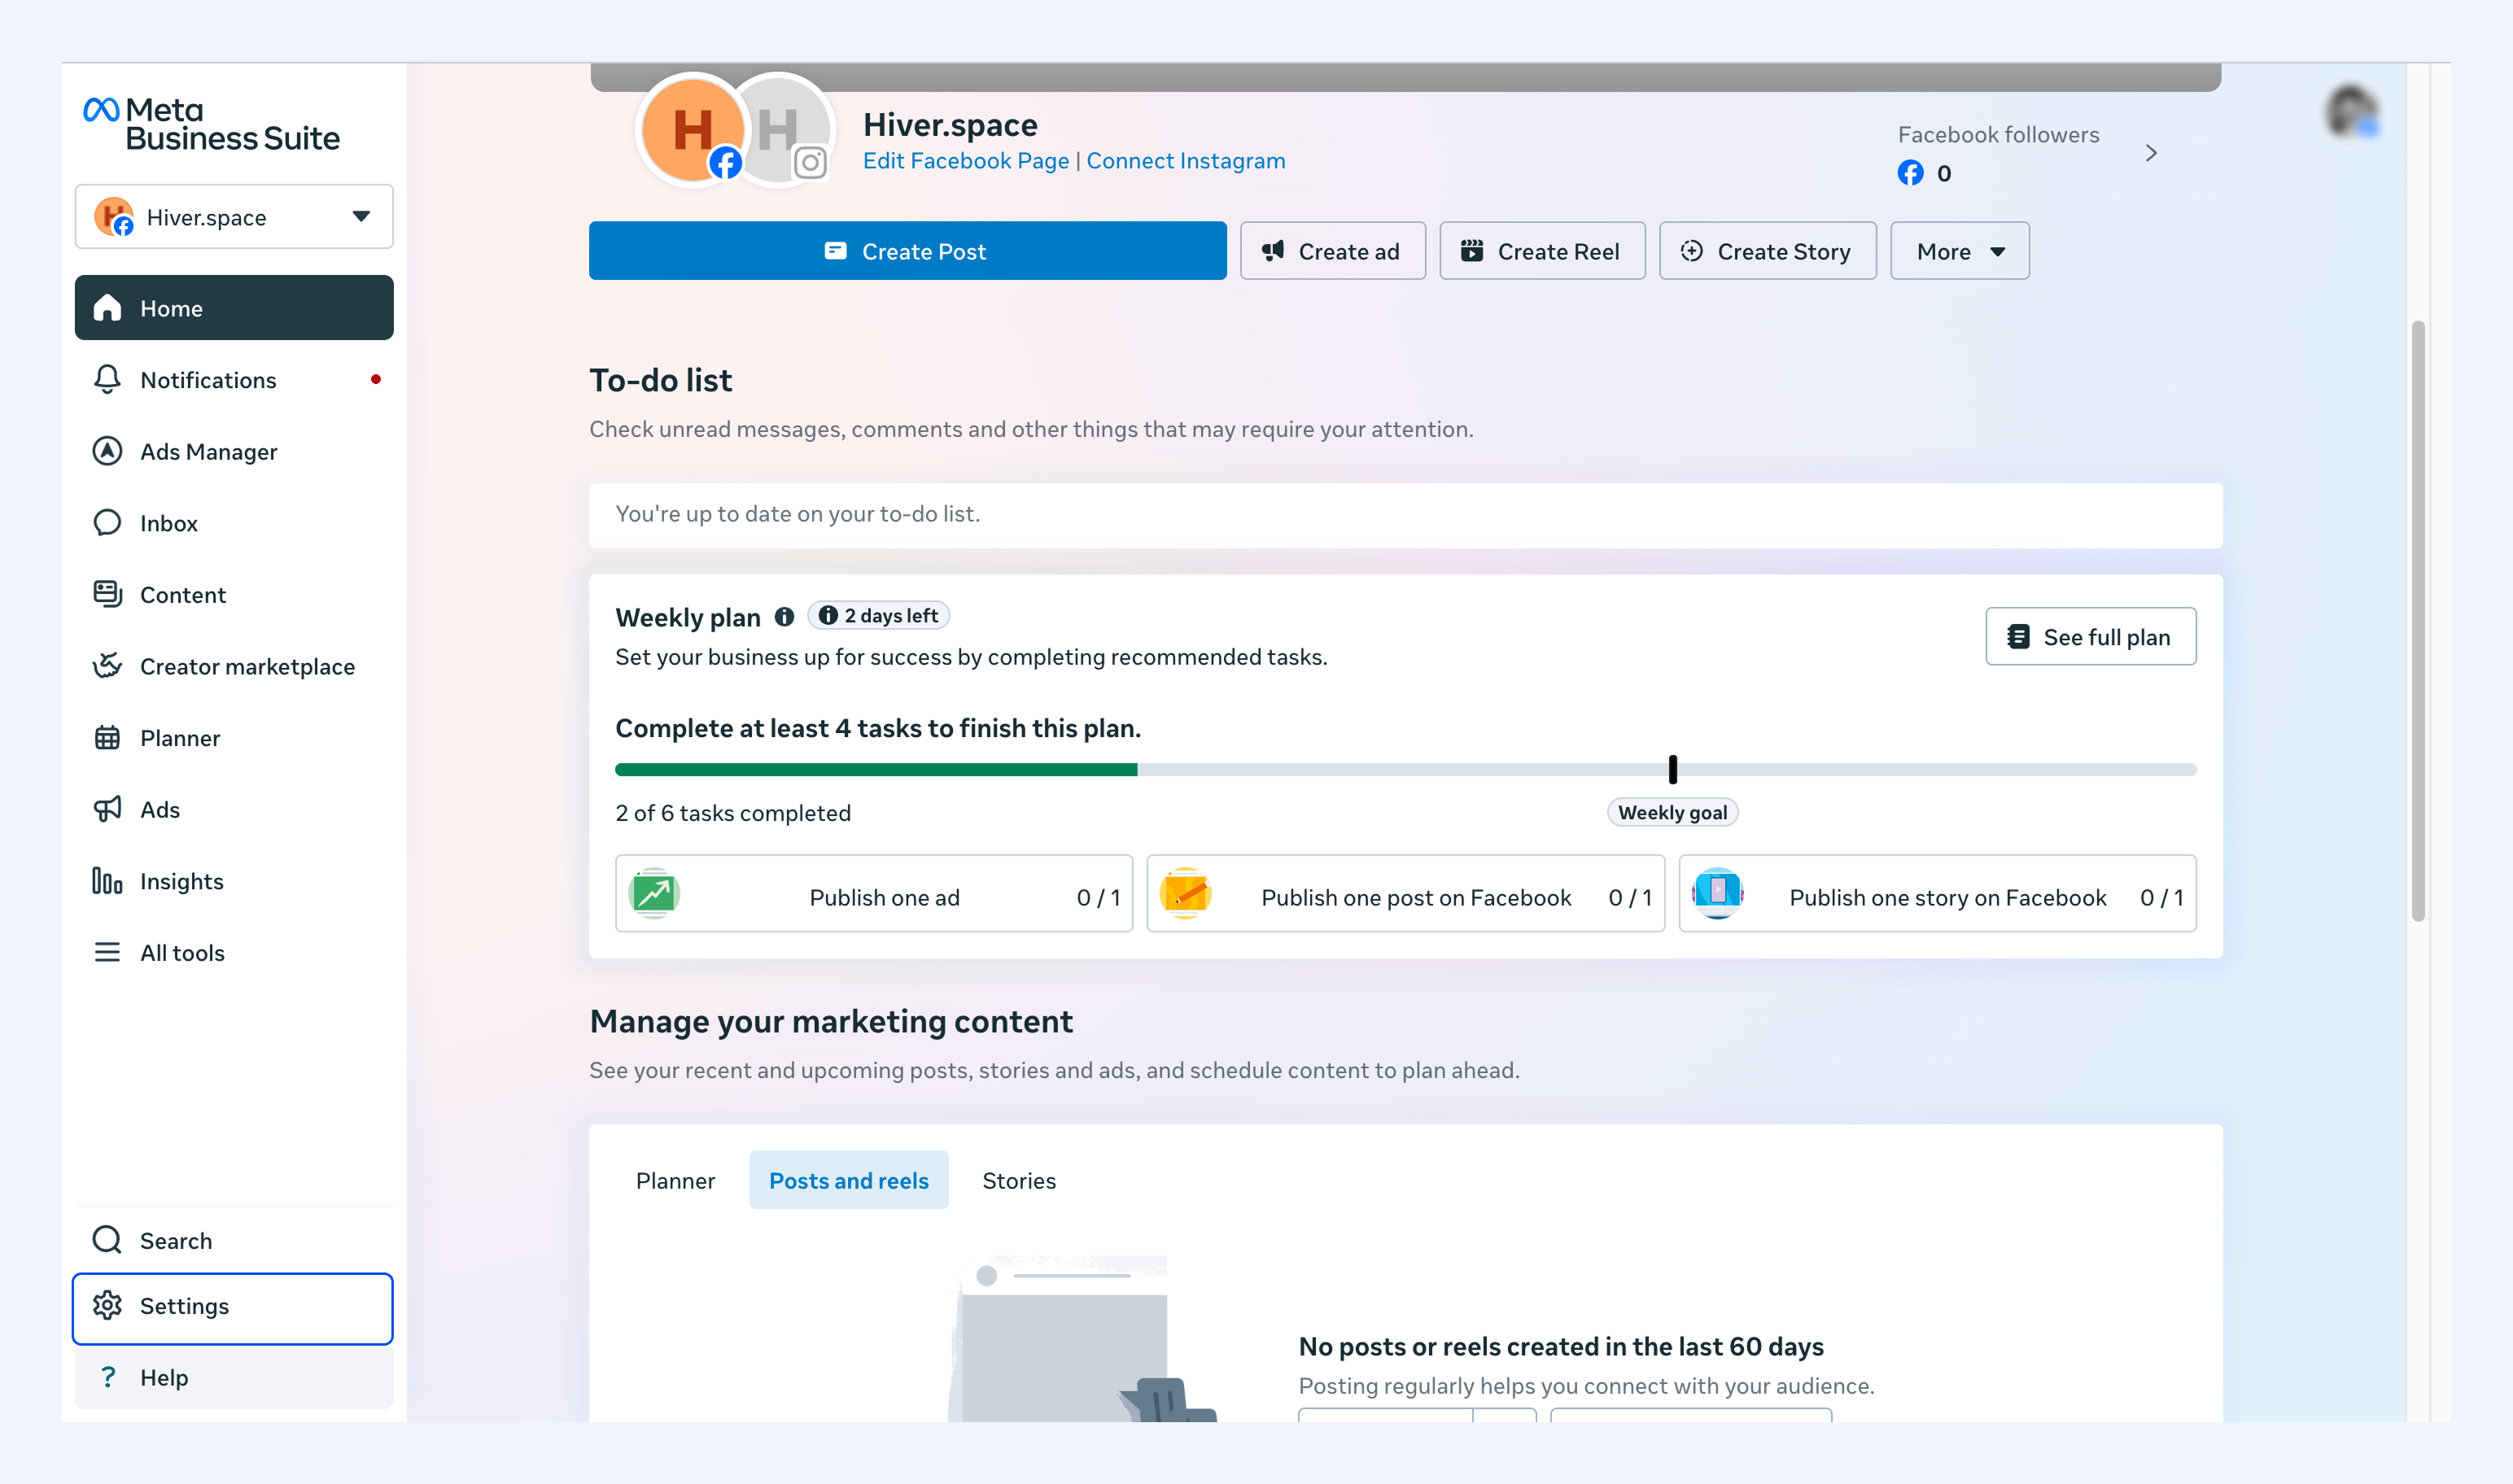
1. Go to business.facebook.com and open Settings.
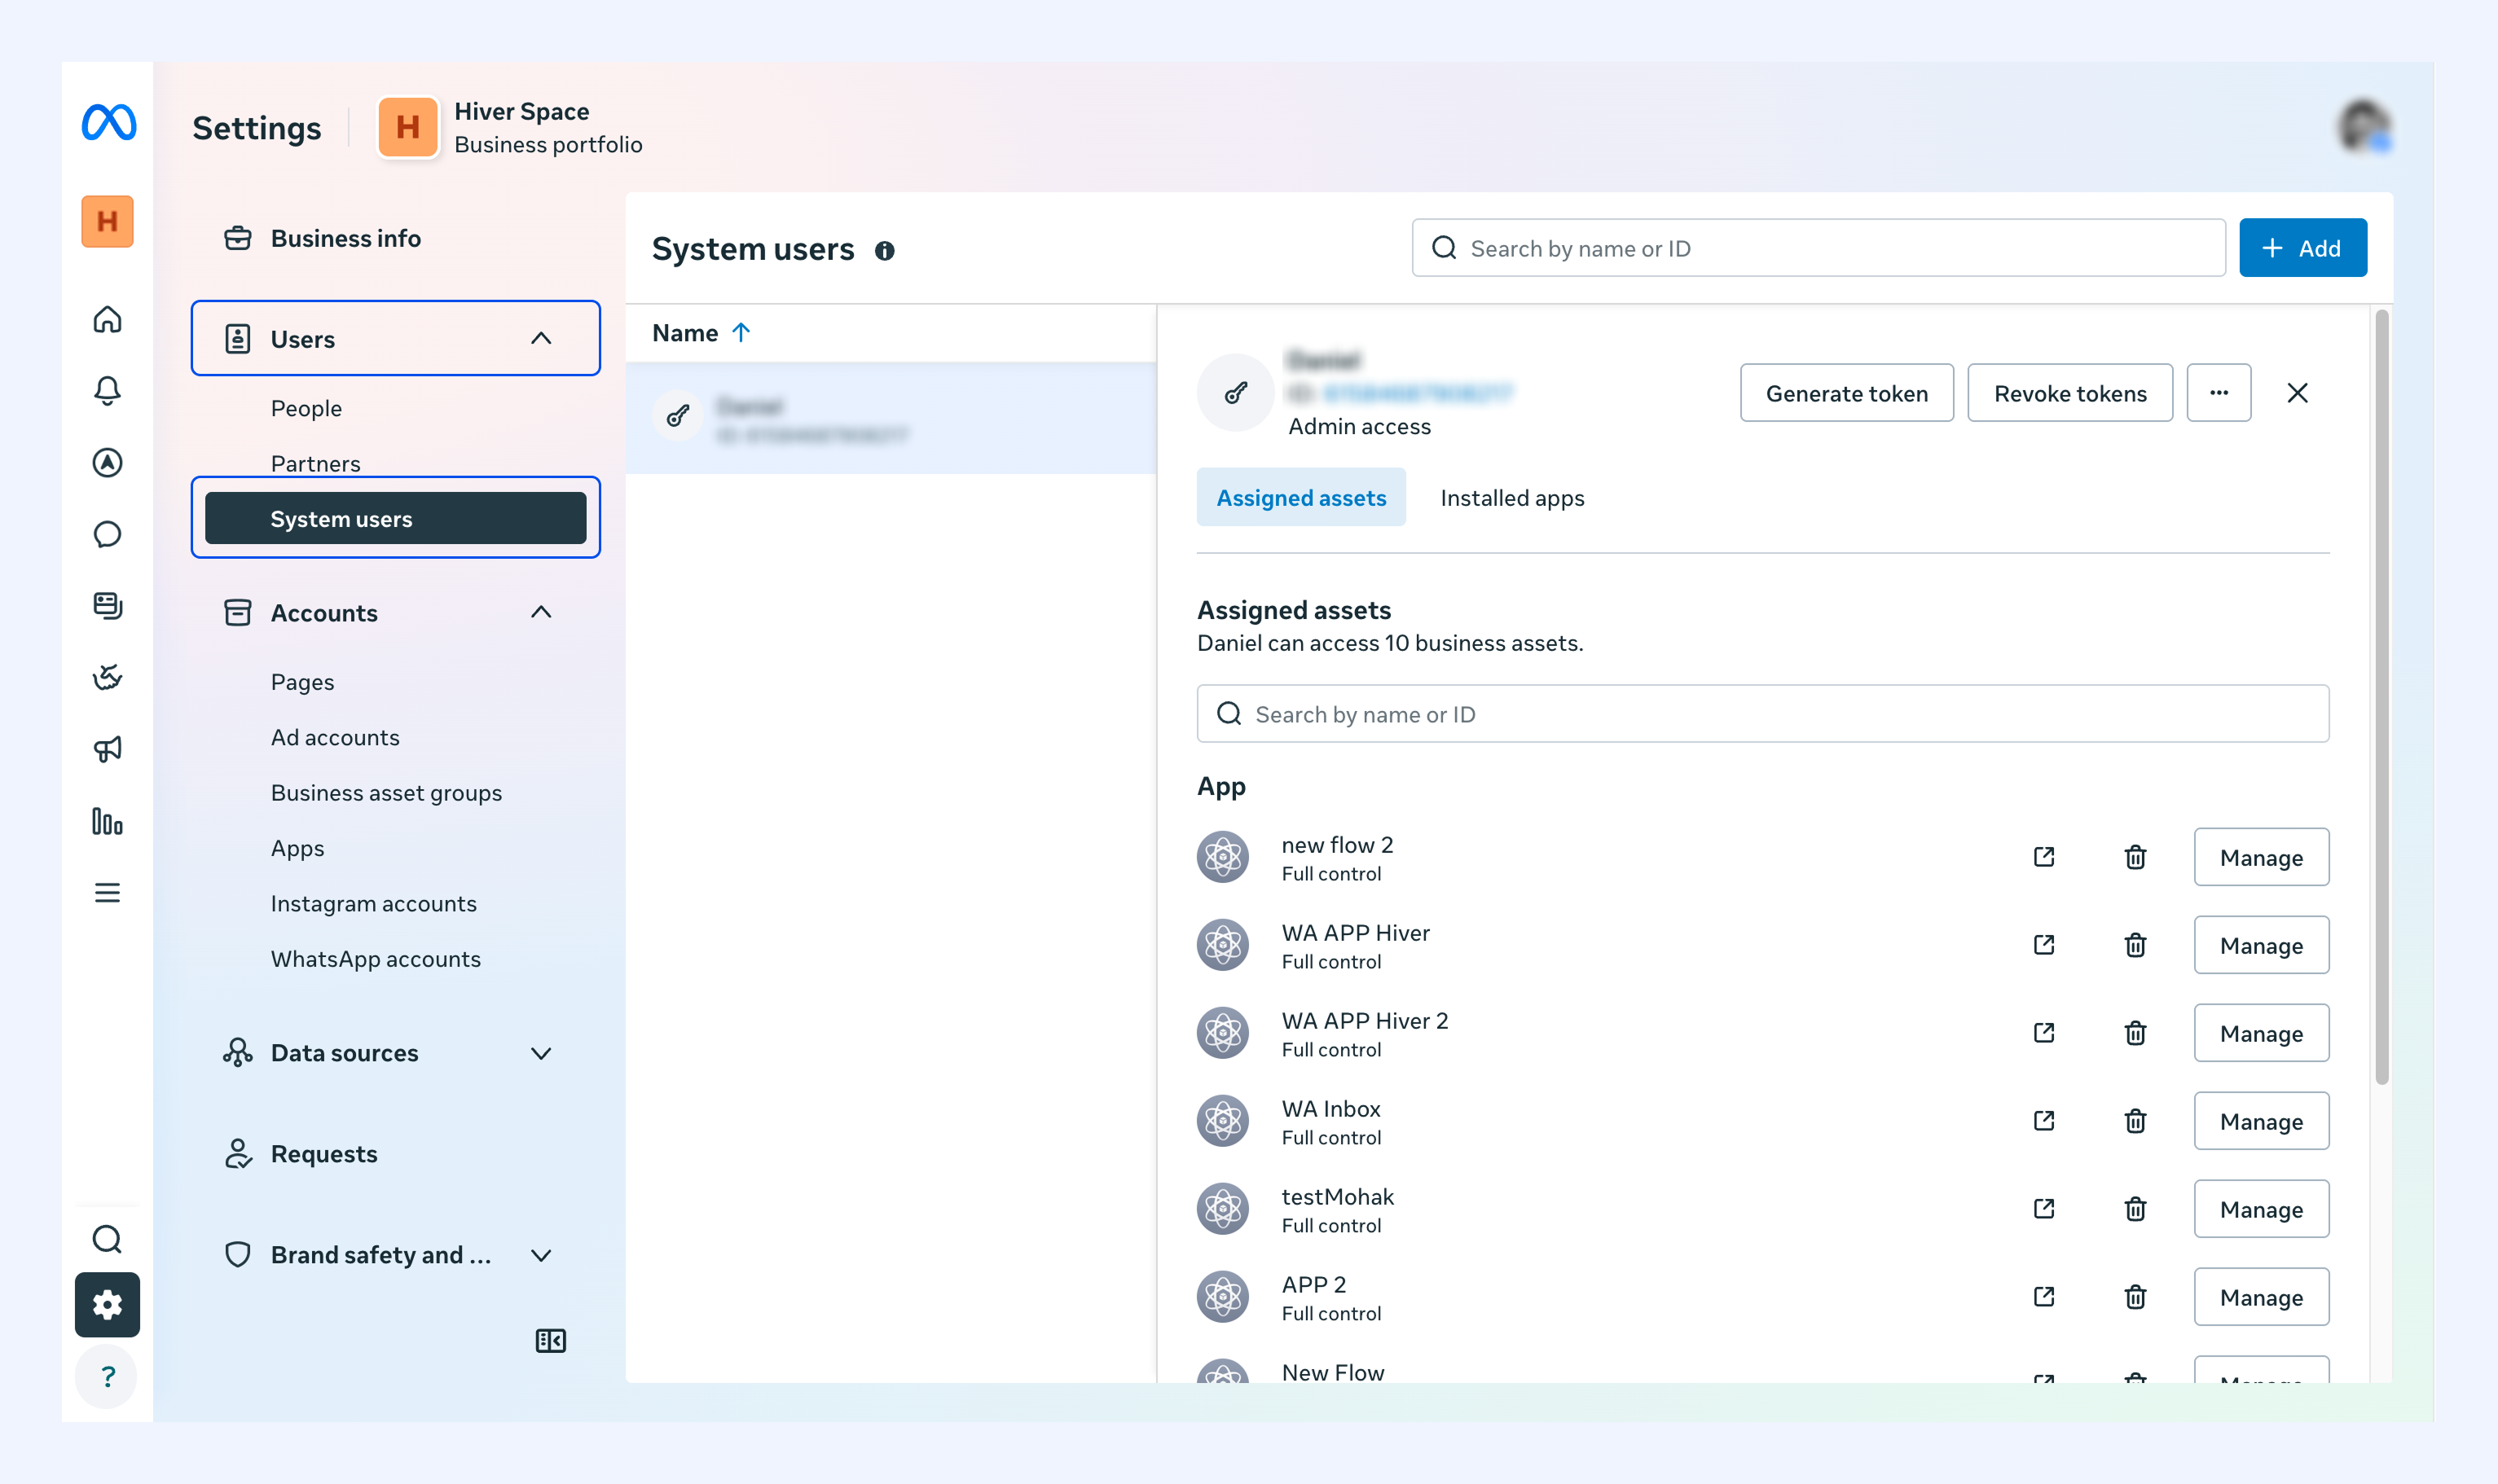
2. In the left sidebar, go to Users → System users.
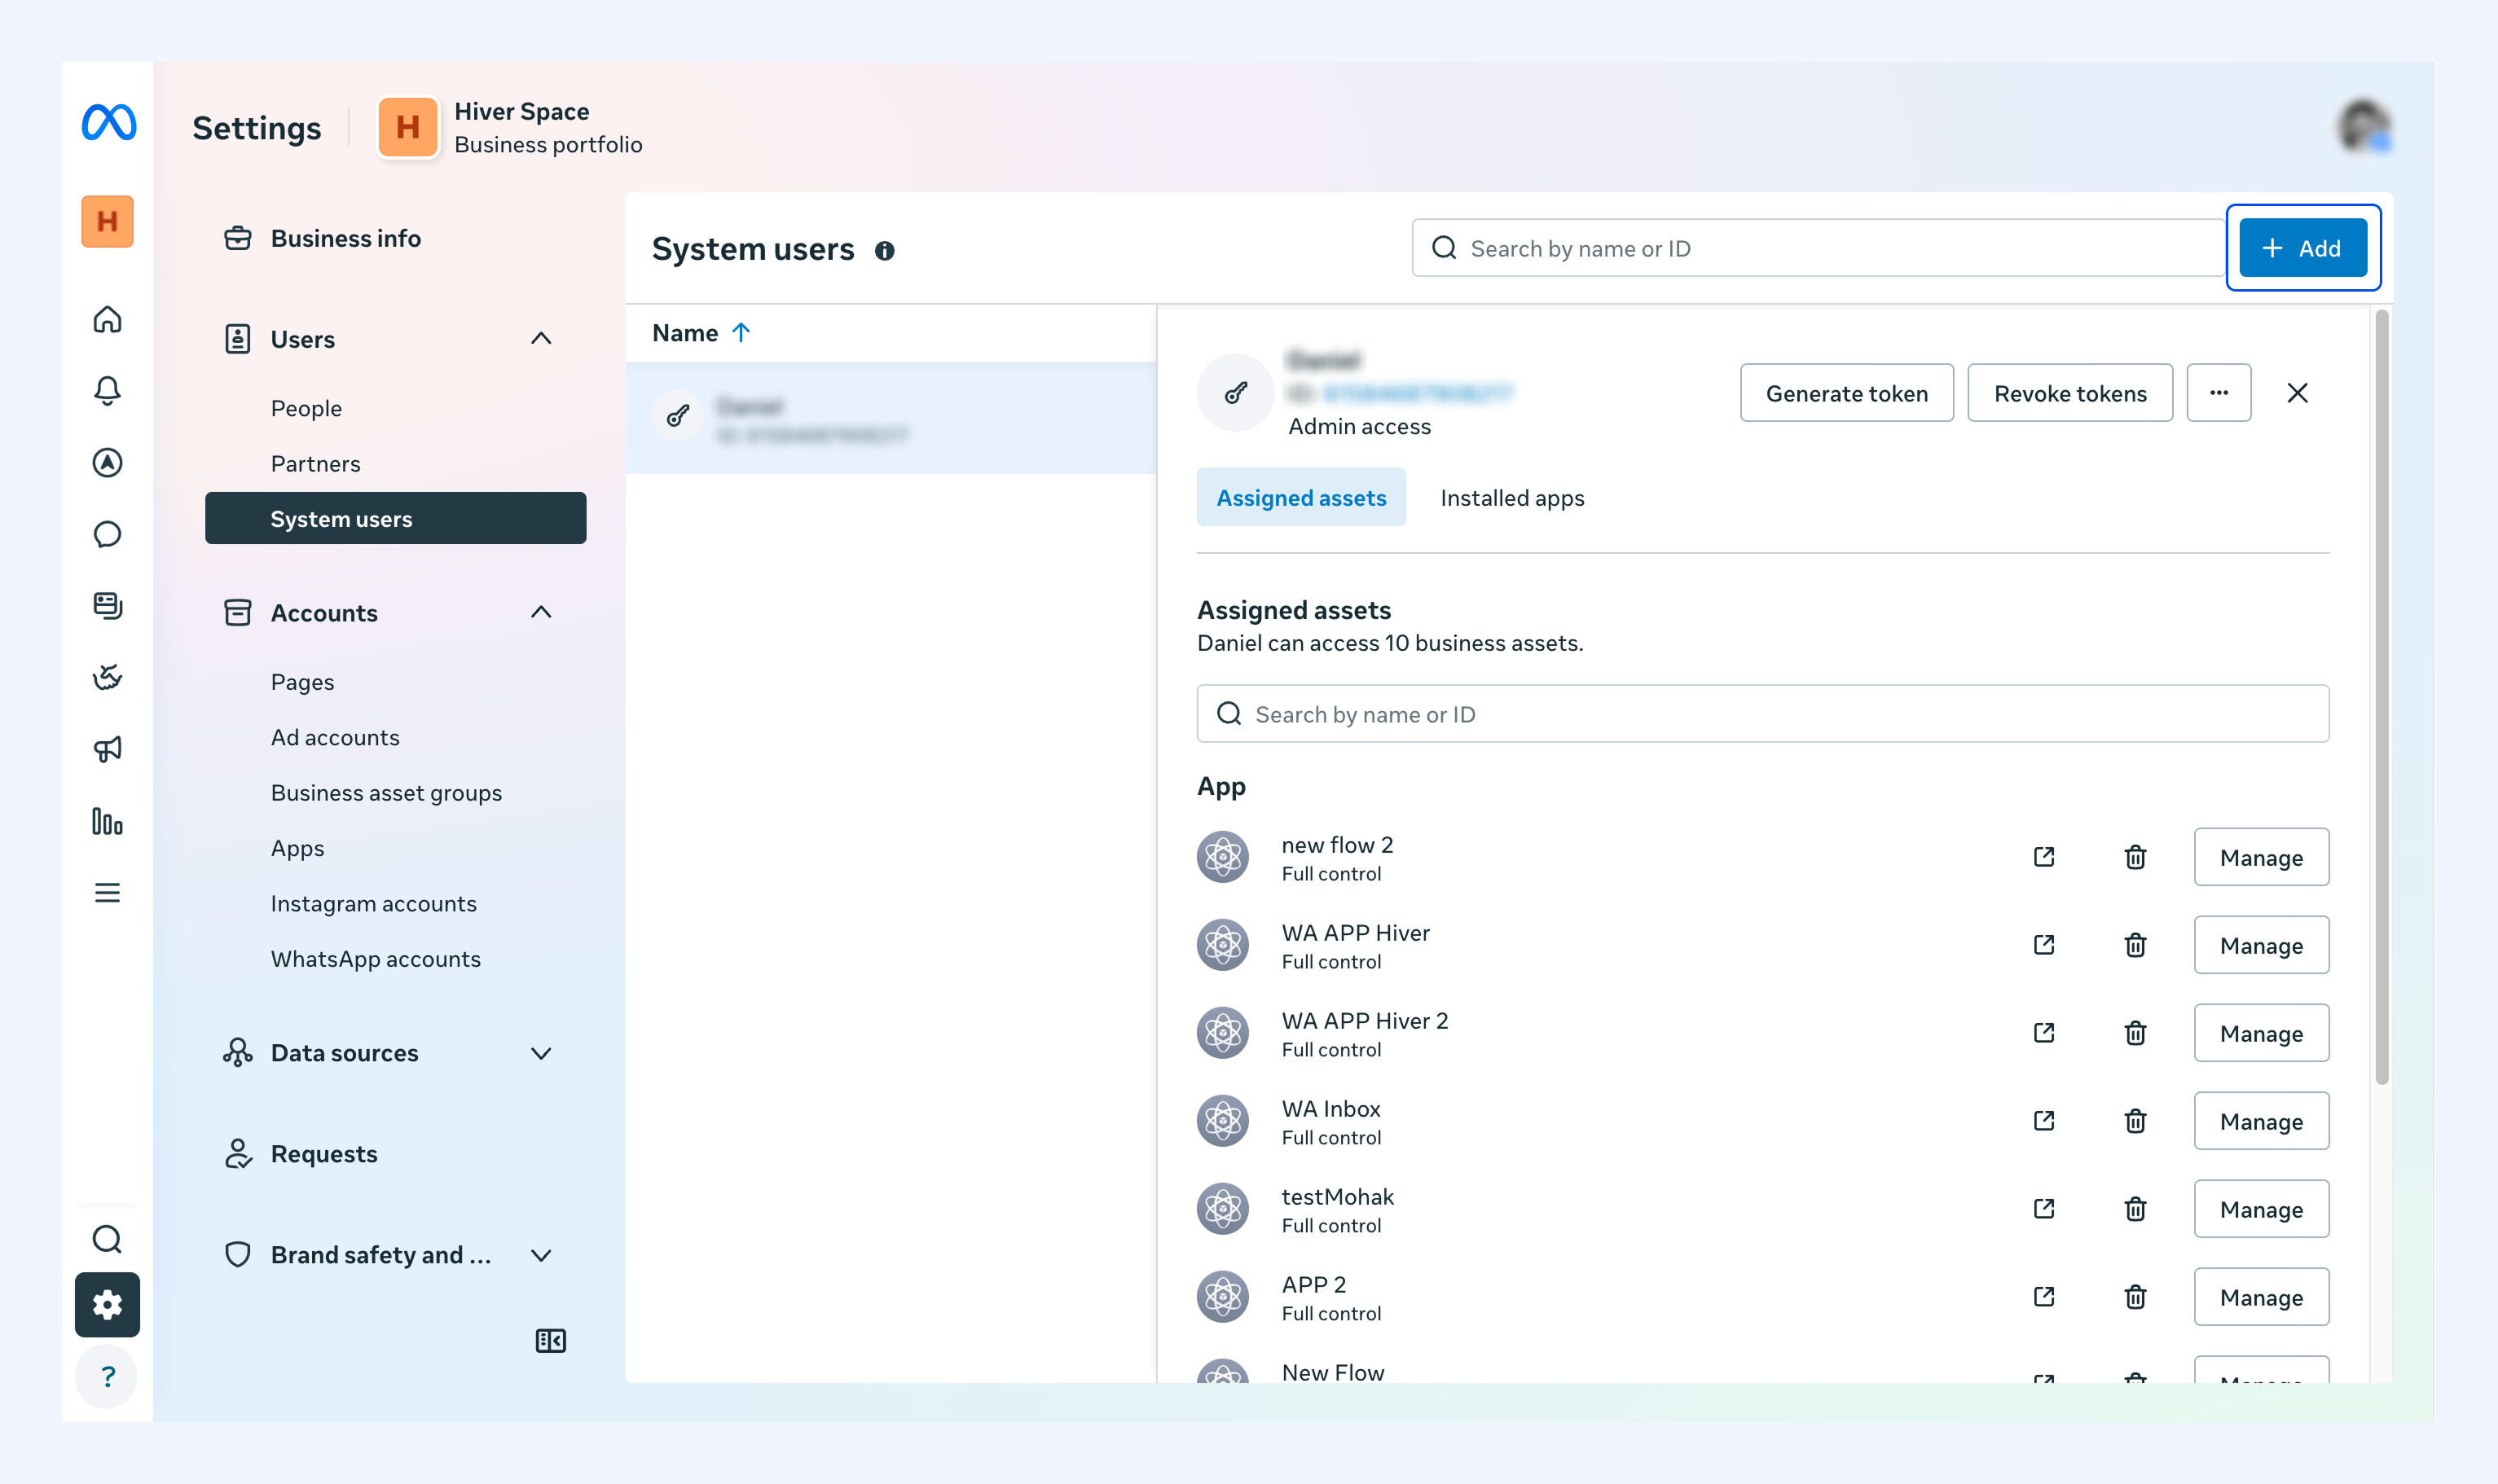
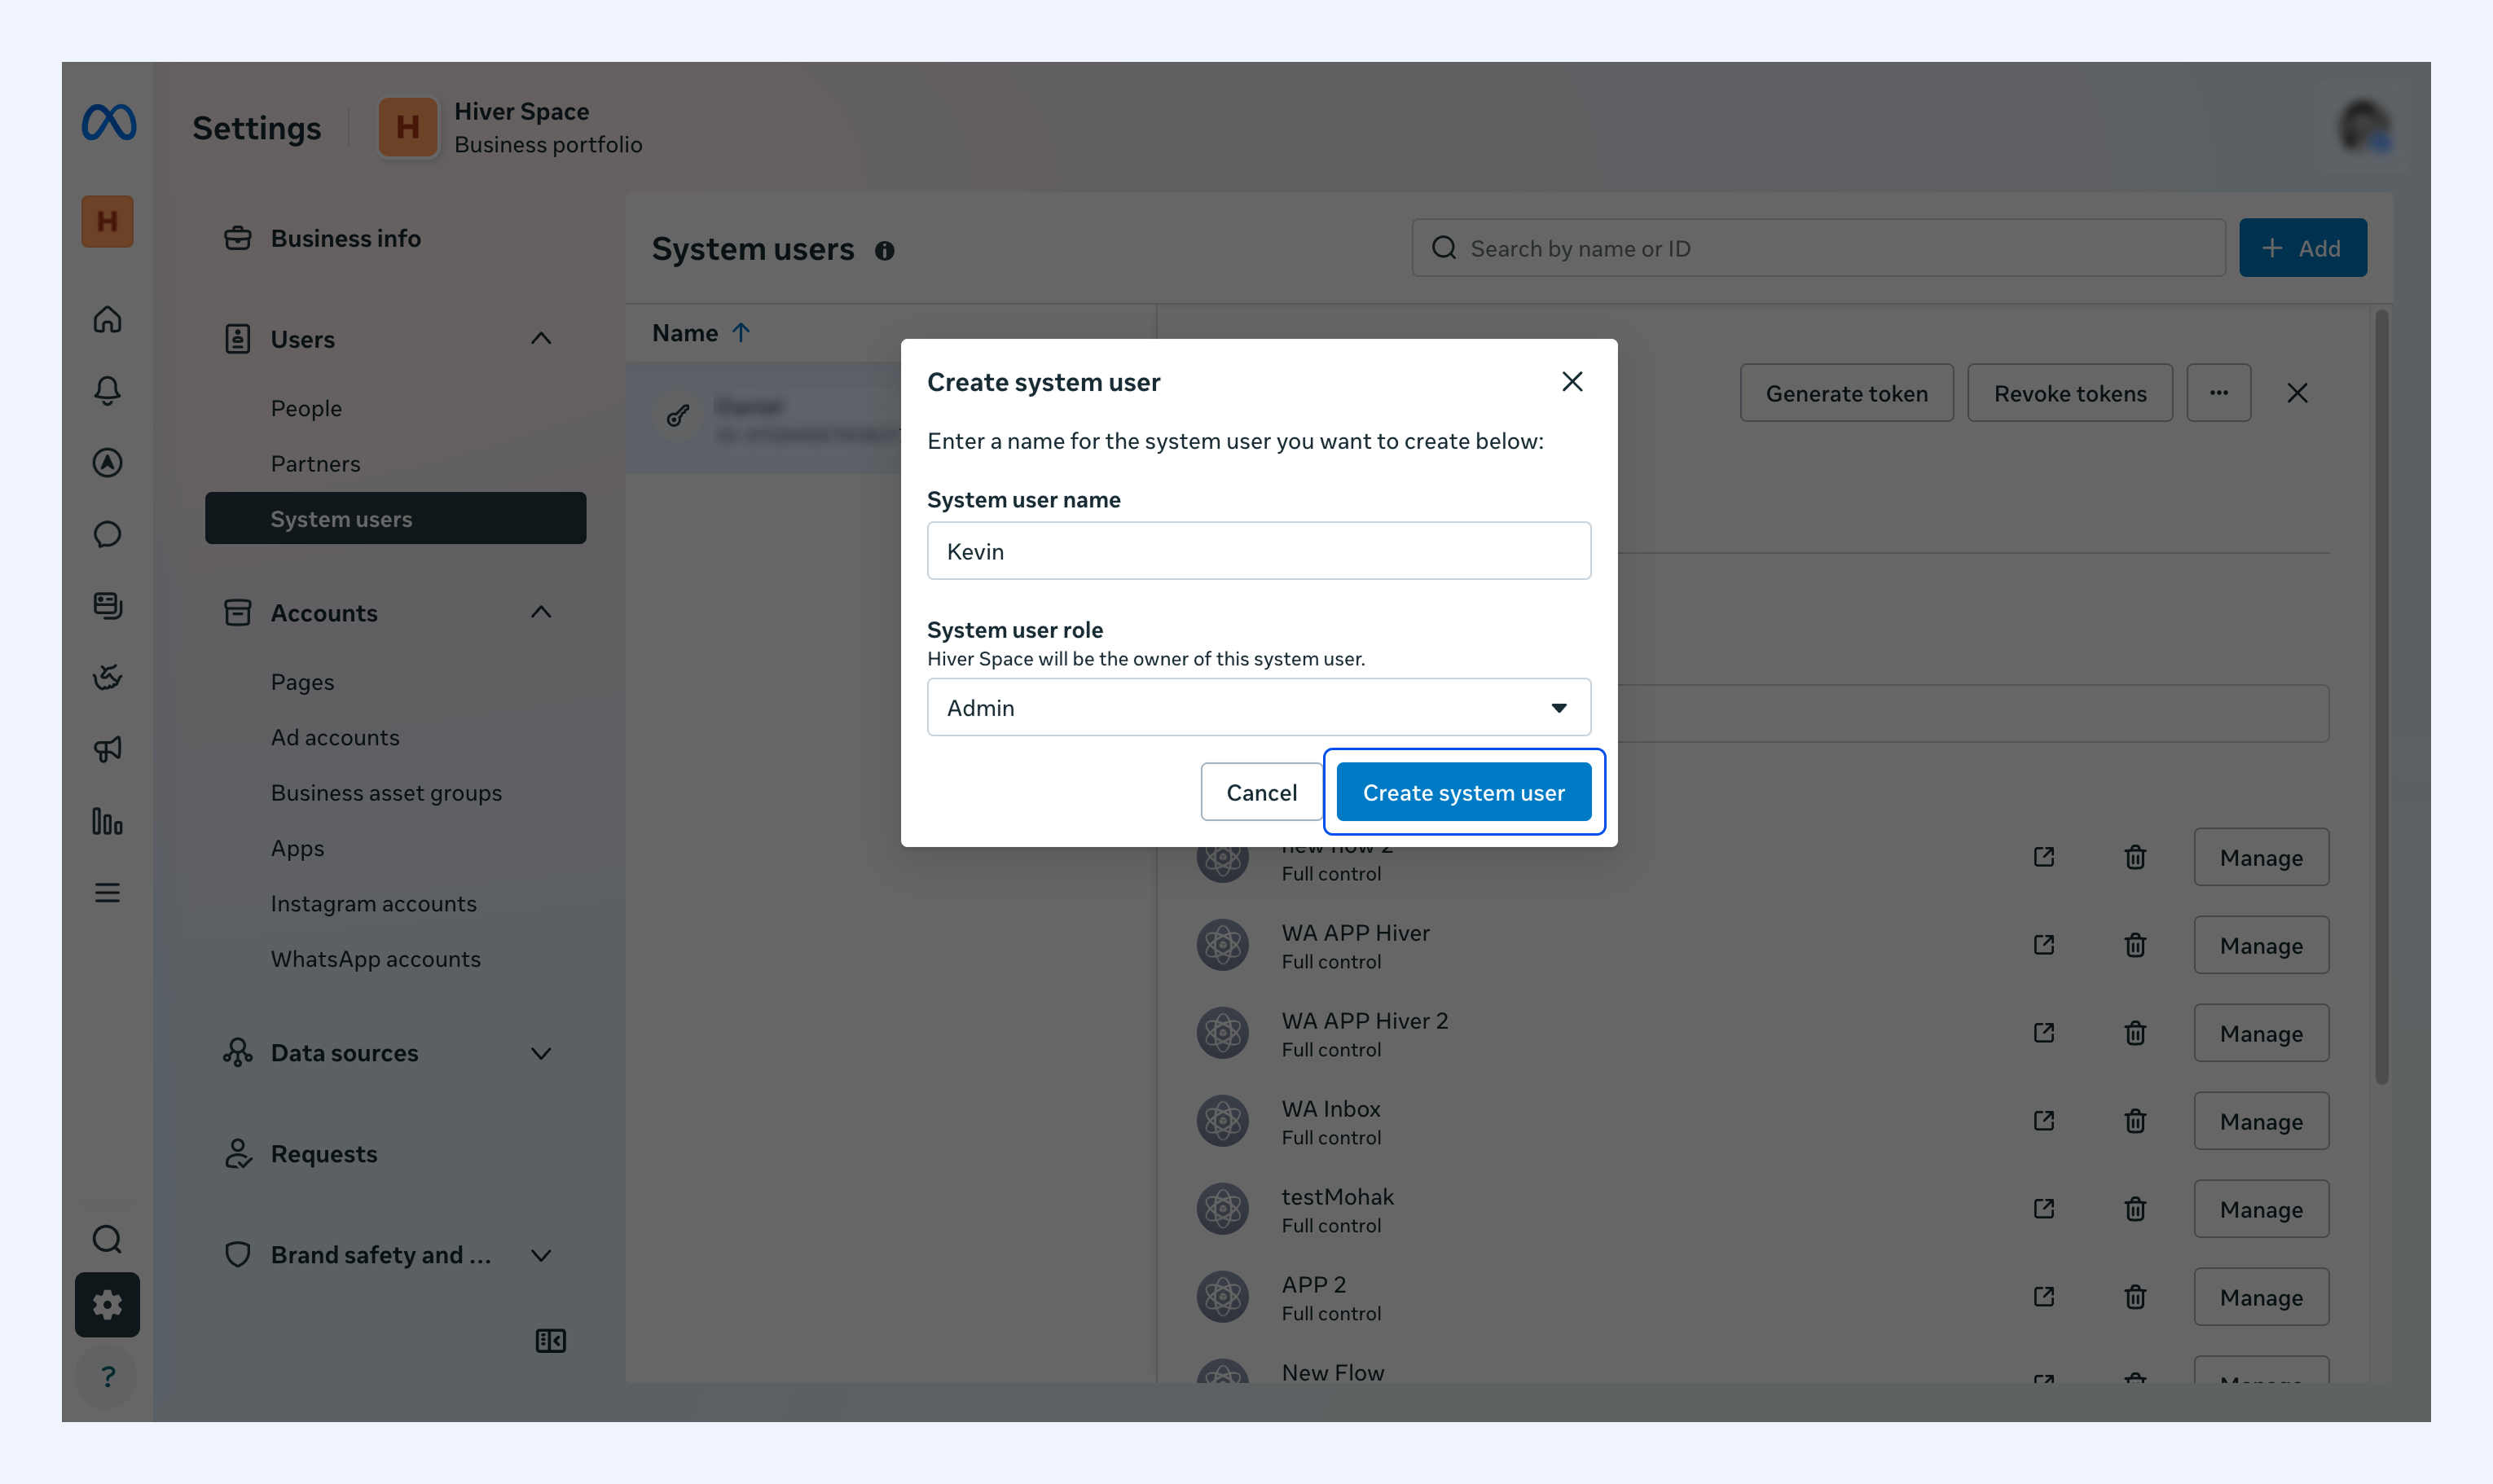
3. Click Add to create a system user.
4. Enter a name and choose Admin from the role dropdown.
5. Click Create system user.
Assign assets to the system user
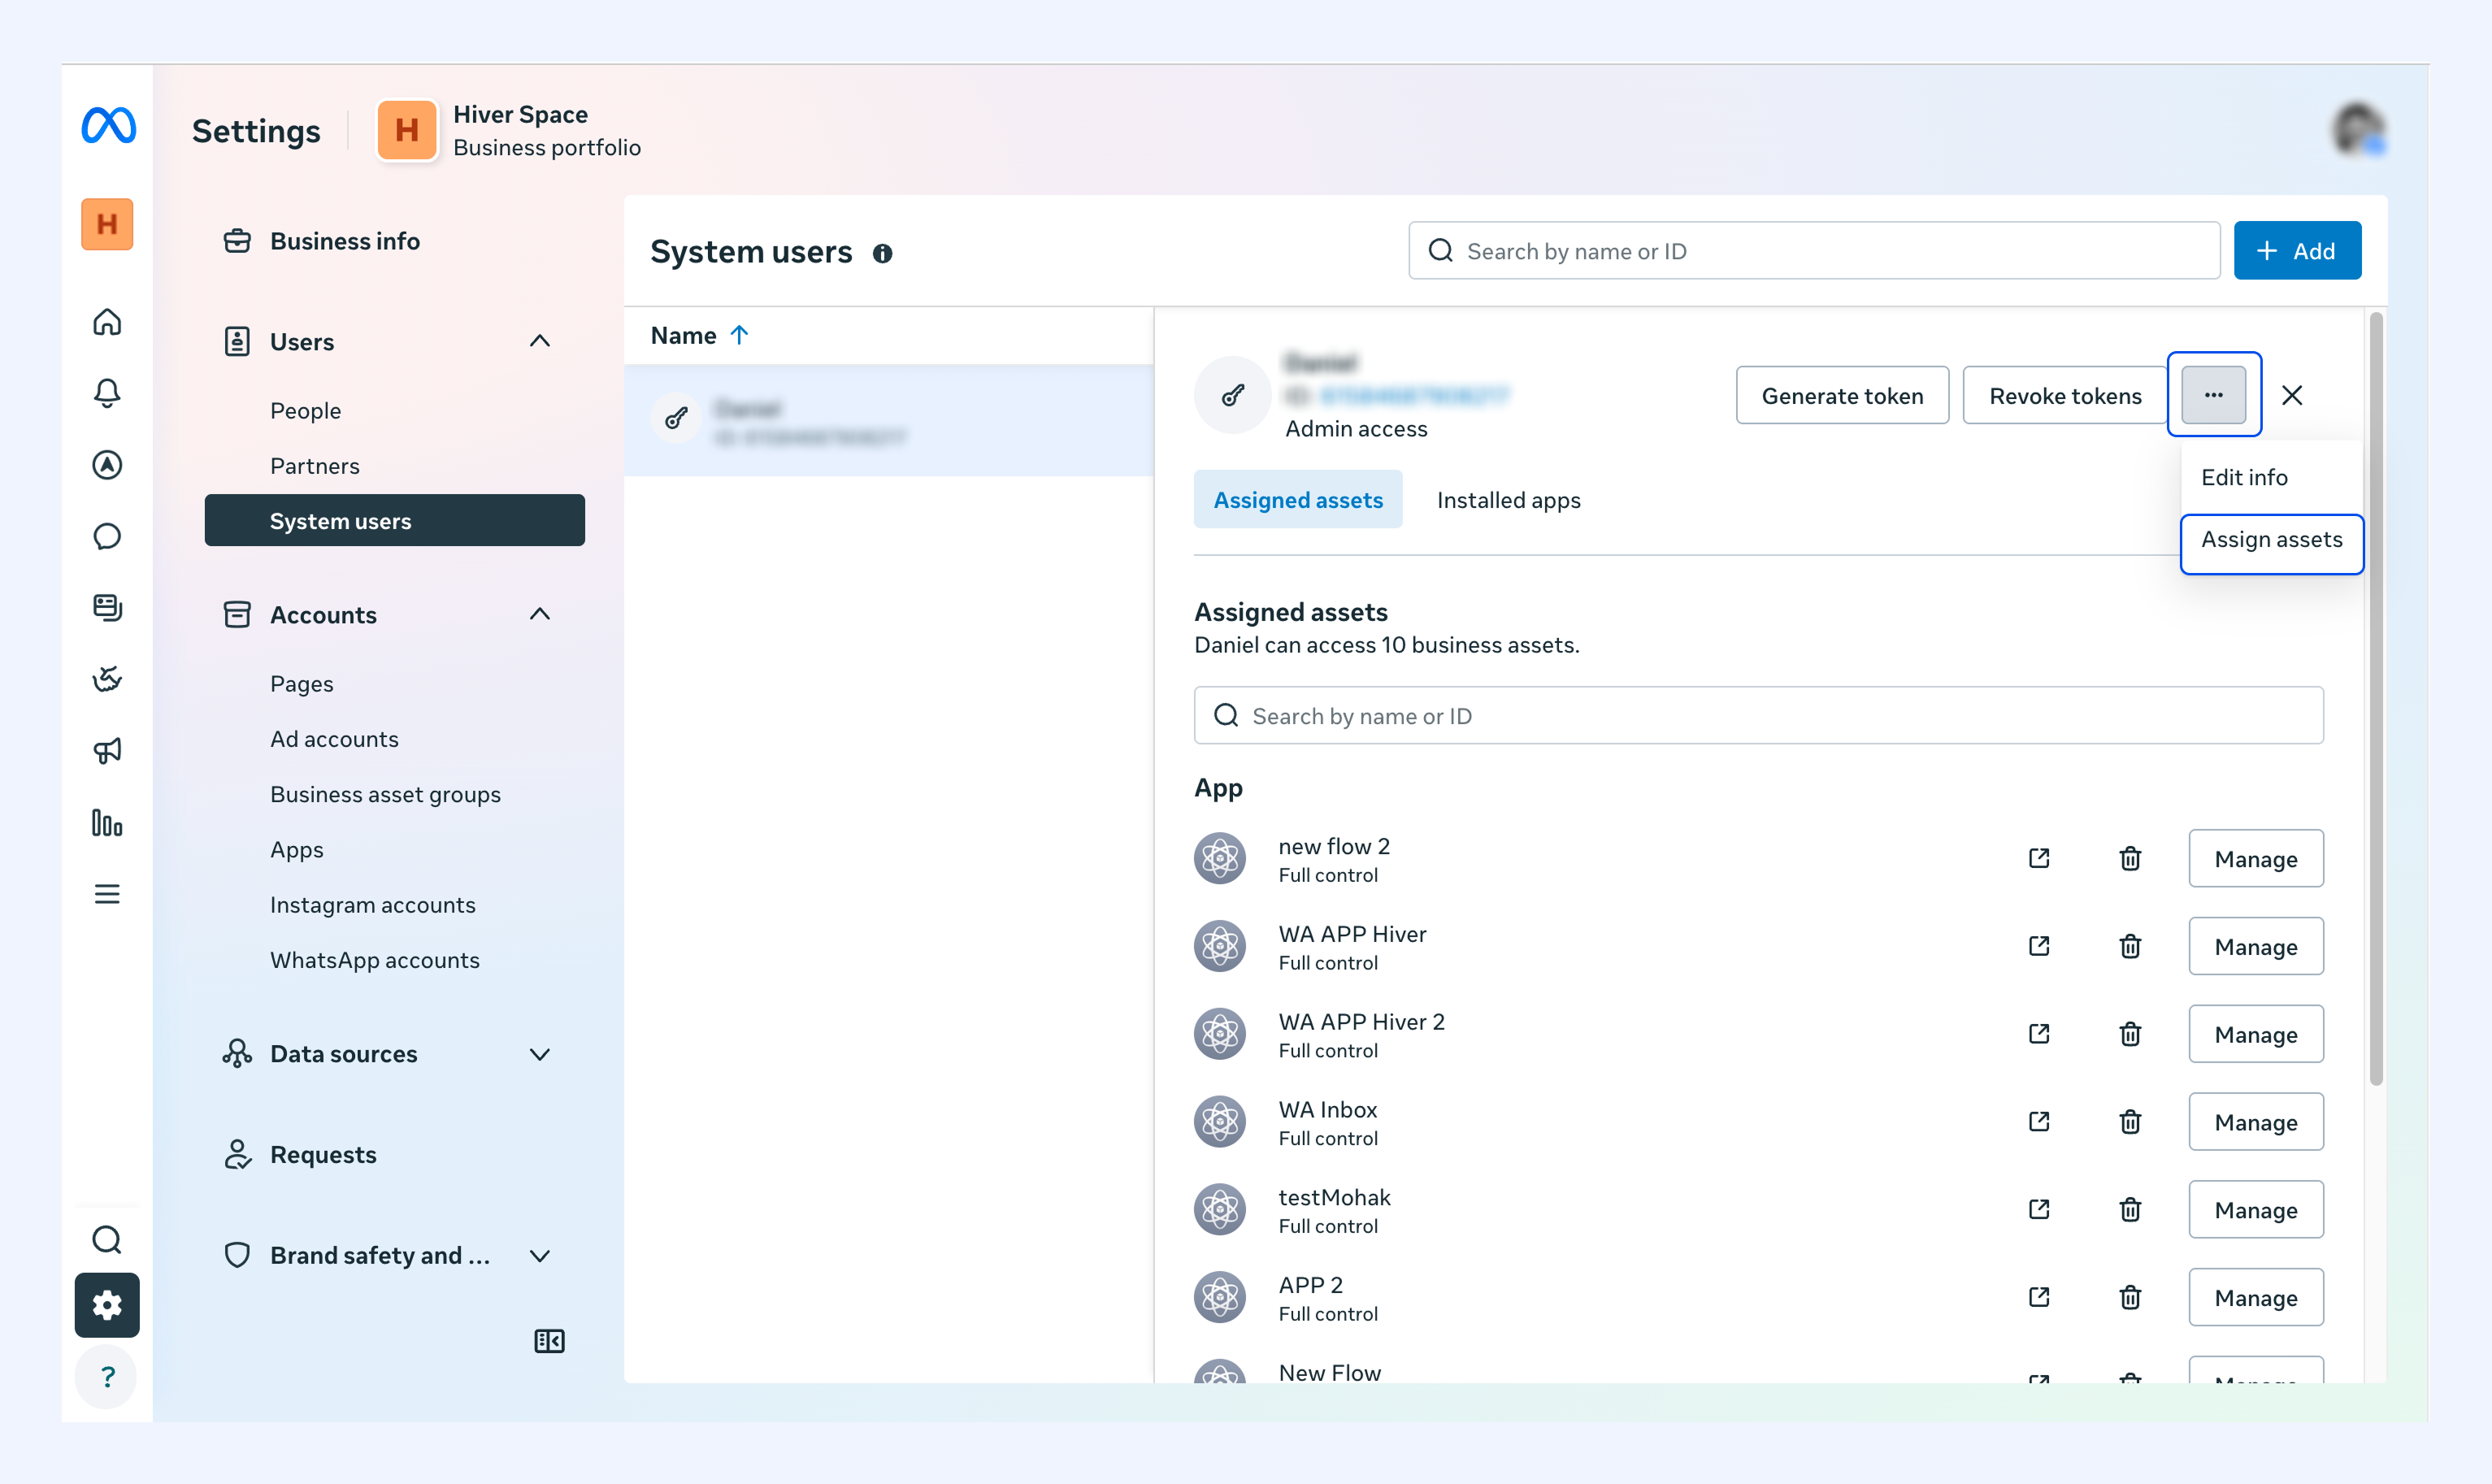
1. Click the system user you just created.
2. Open the three-dot menu and select Assign assets.
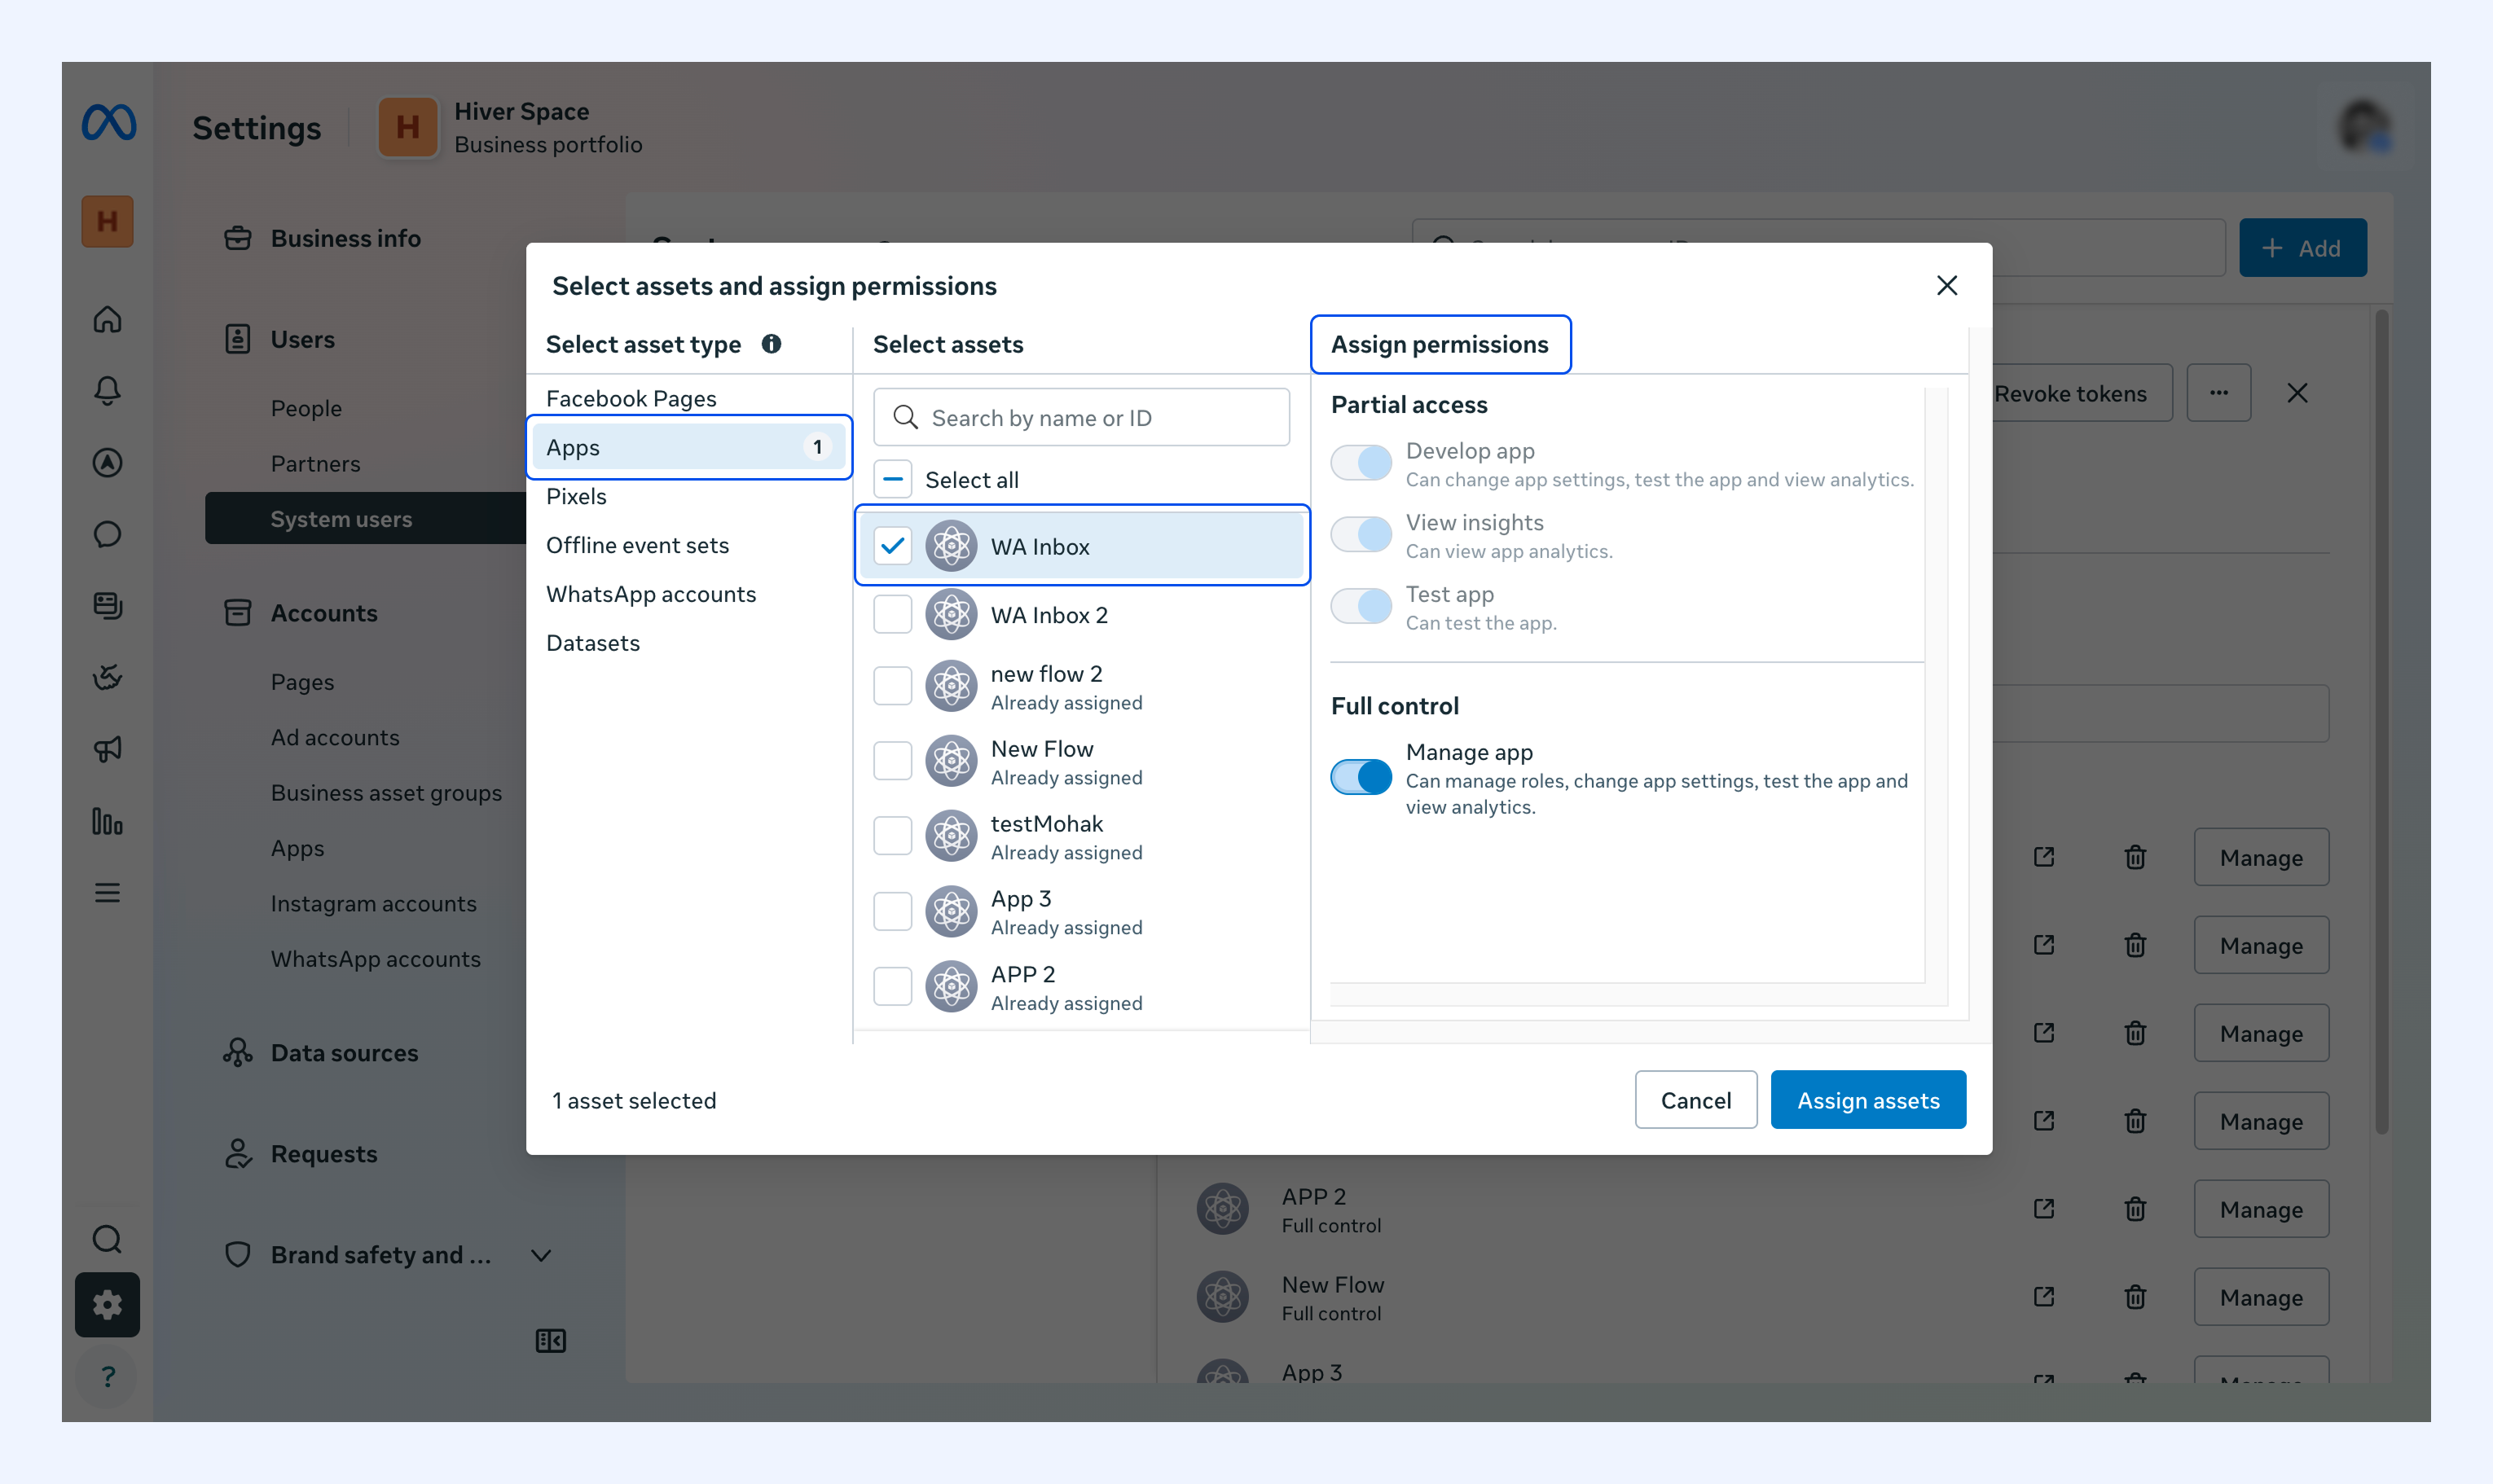
3. In the Apps tab, select your WhatsApp app and toggle on Manage app.
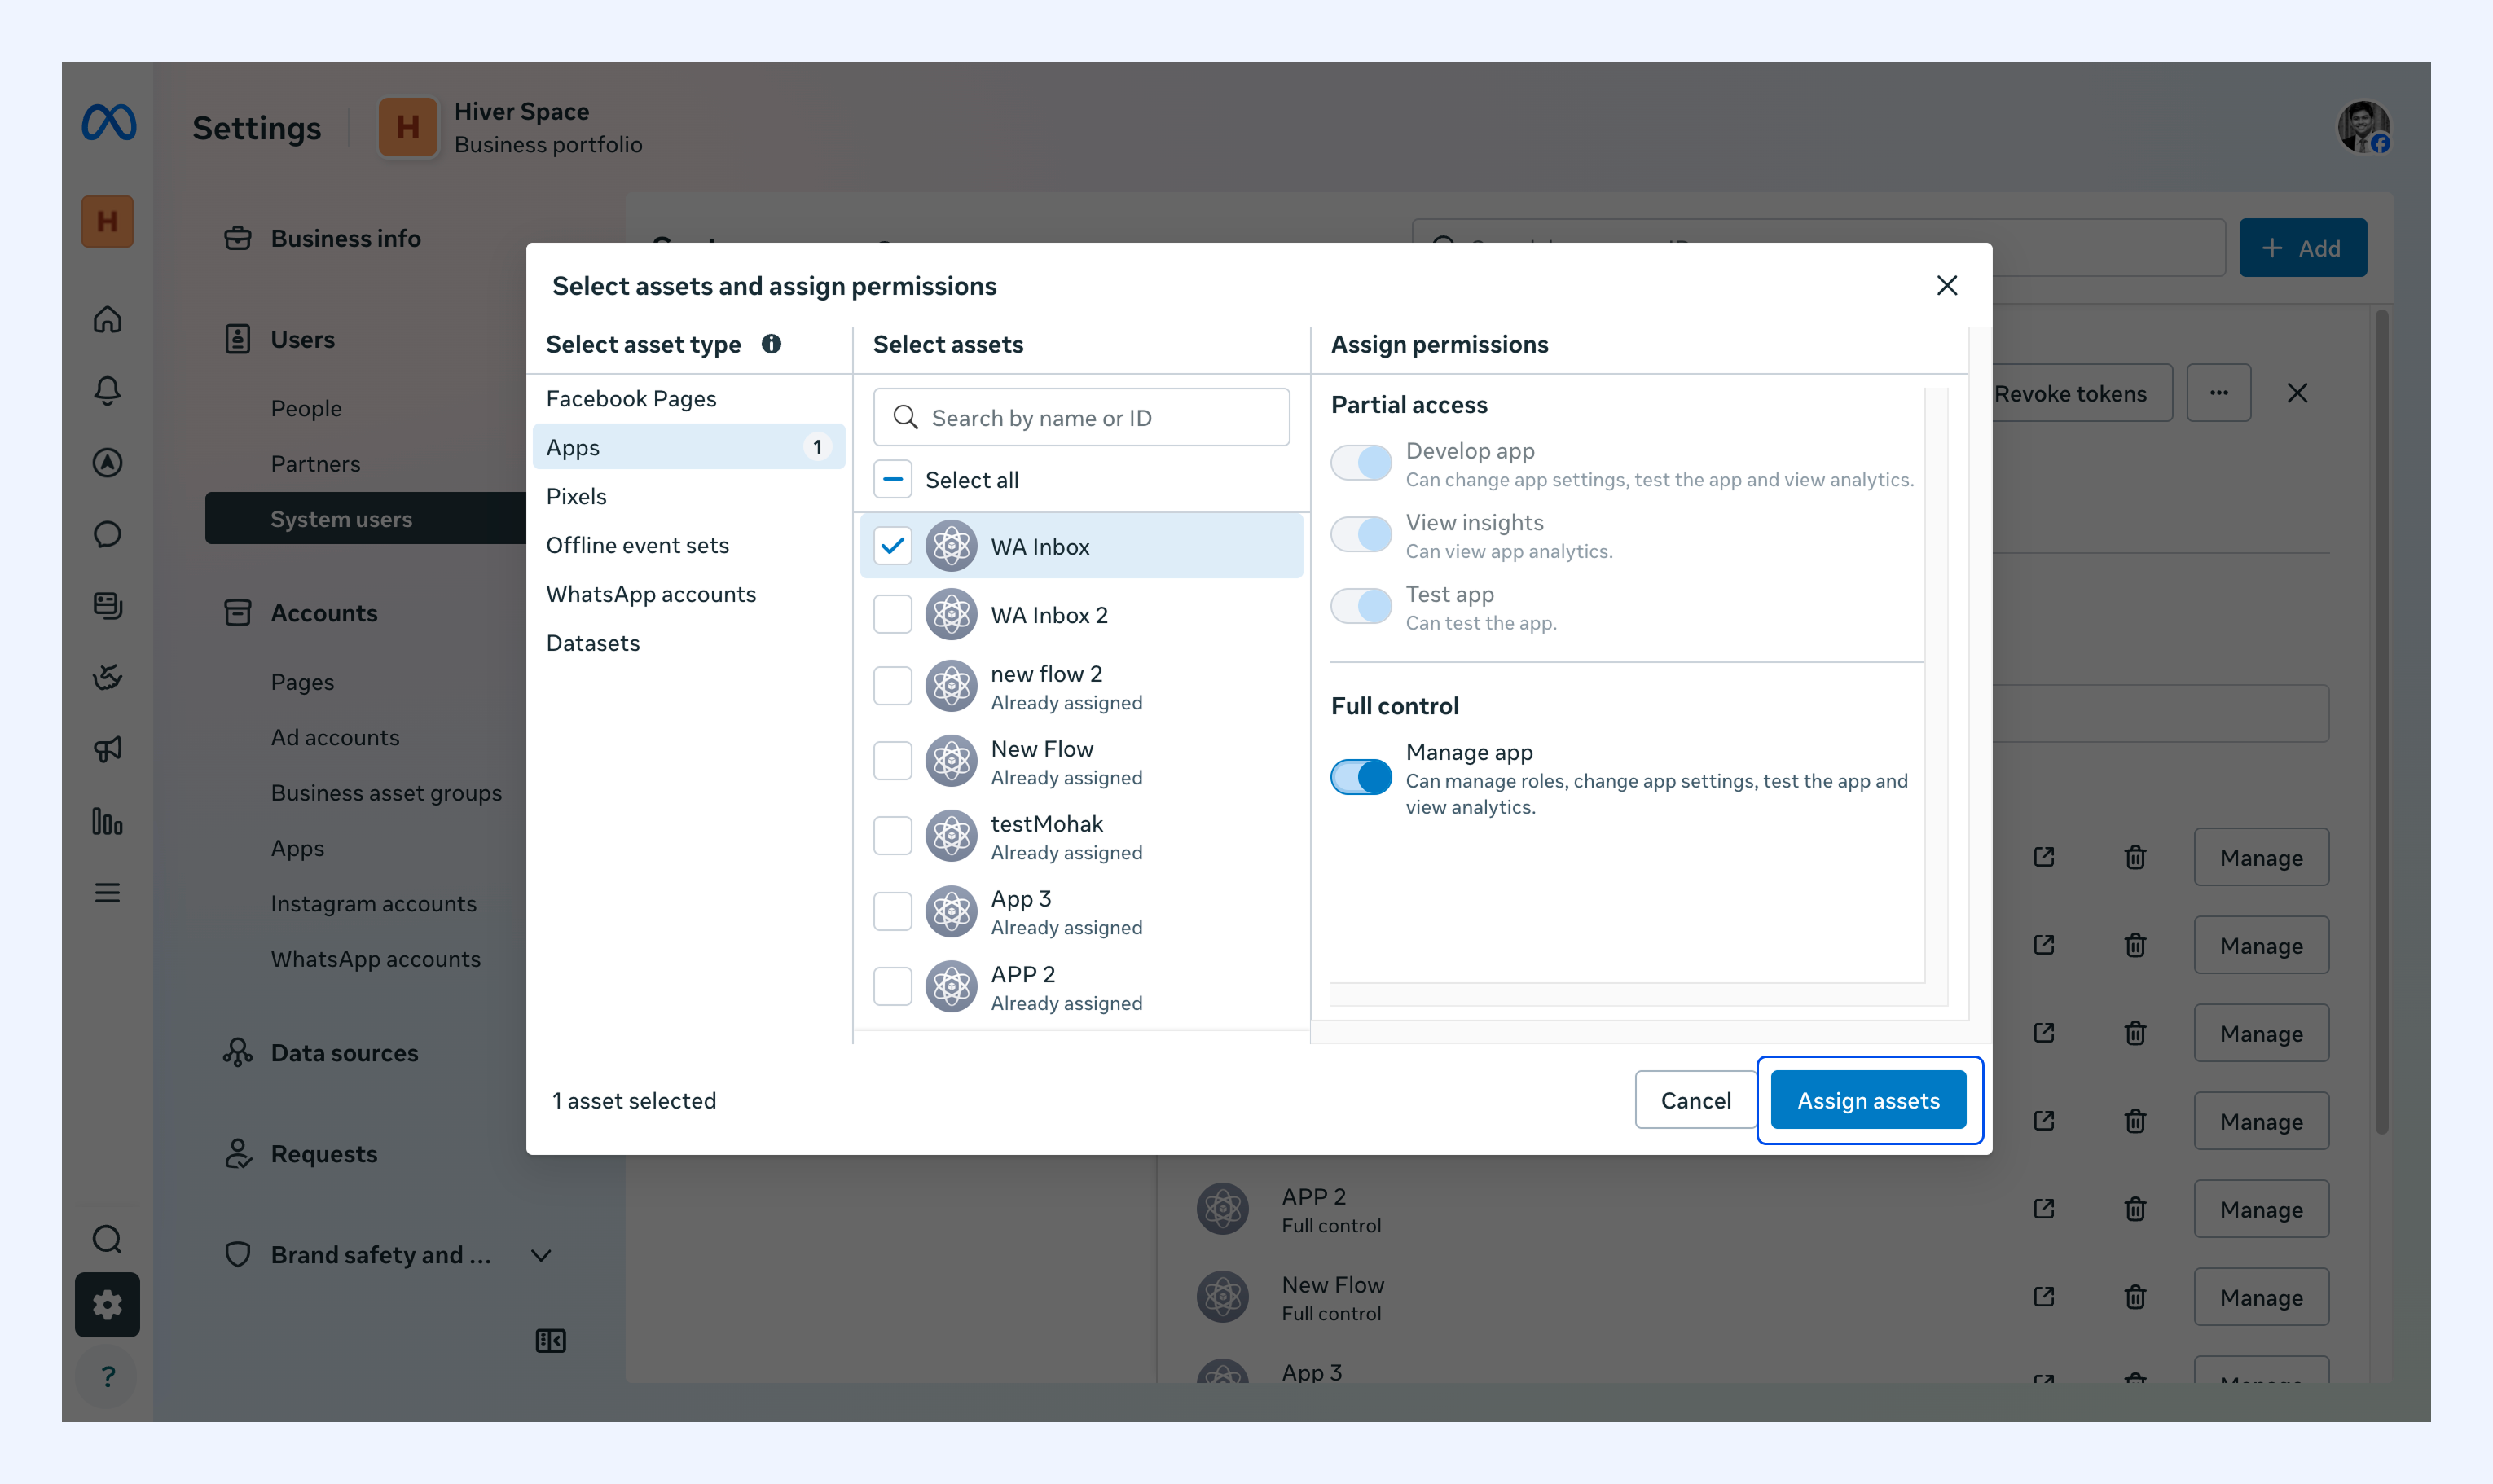
4. Click Assign assets.
5. Open the Assign assets menu again, this time under the WhatsApp accounts tab.
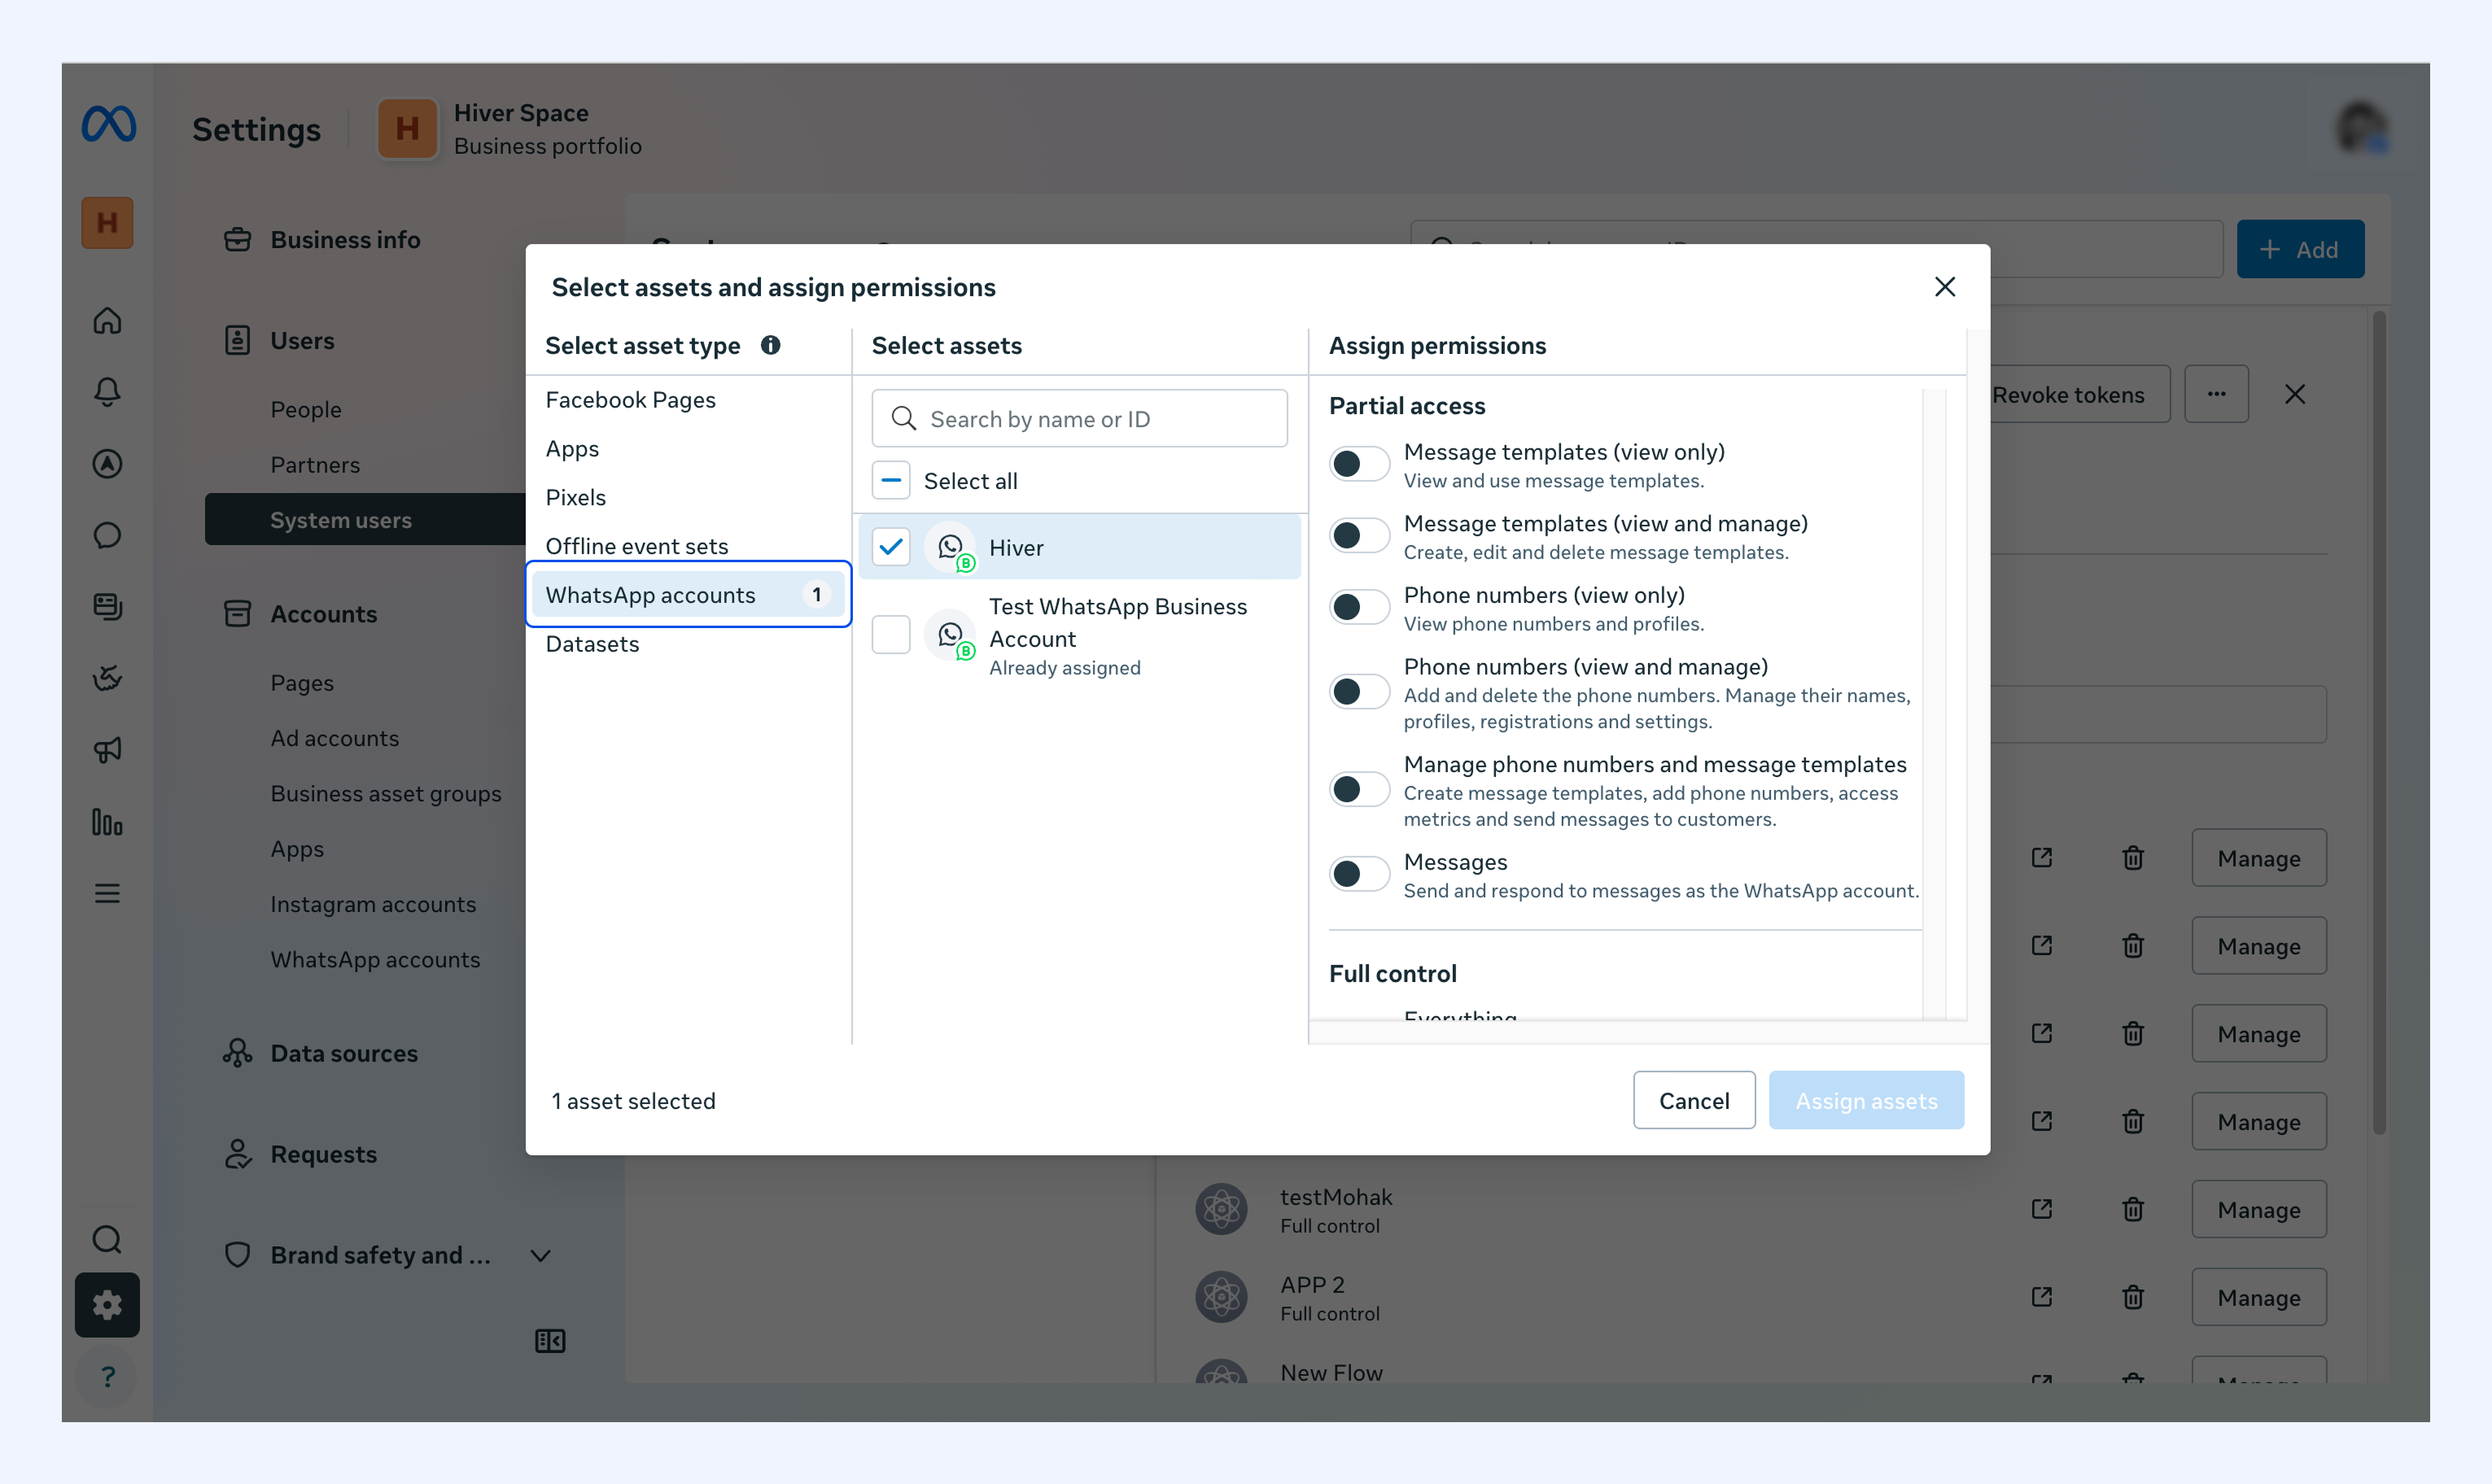
6. Select your WhatsApp Business Account (the one created when you added your phone number).
7. Under Assign permissions, toggle Everything on.
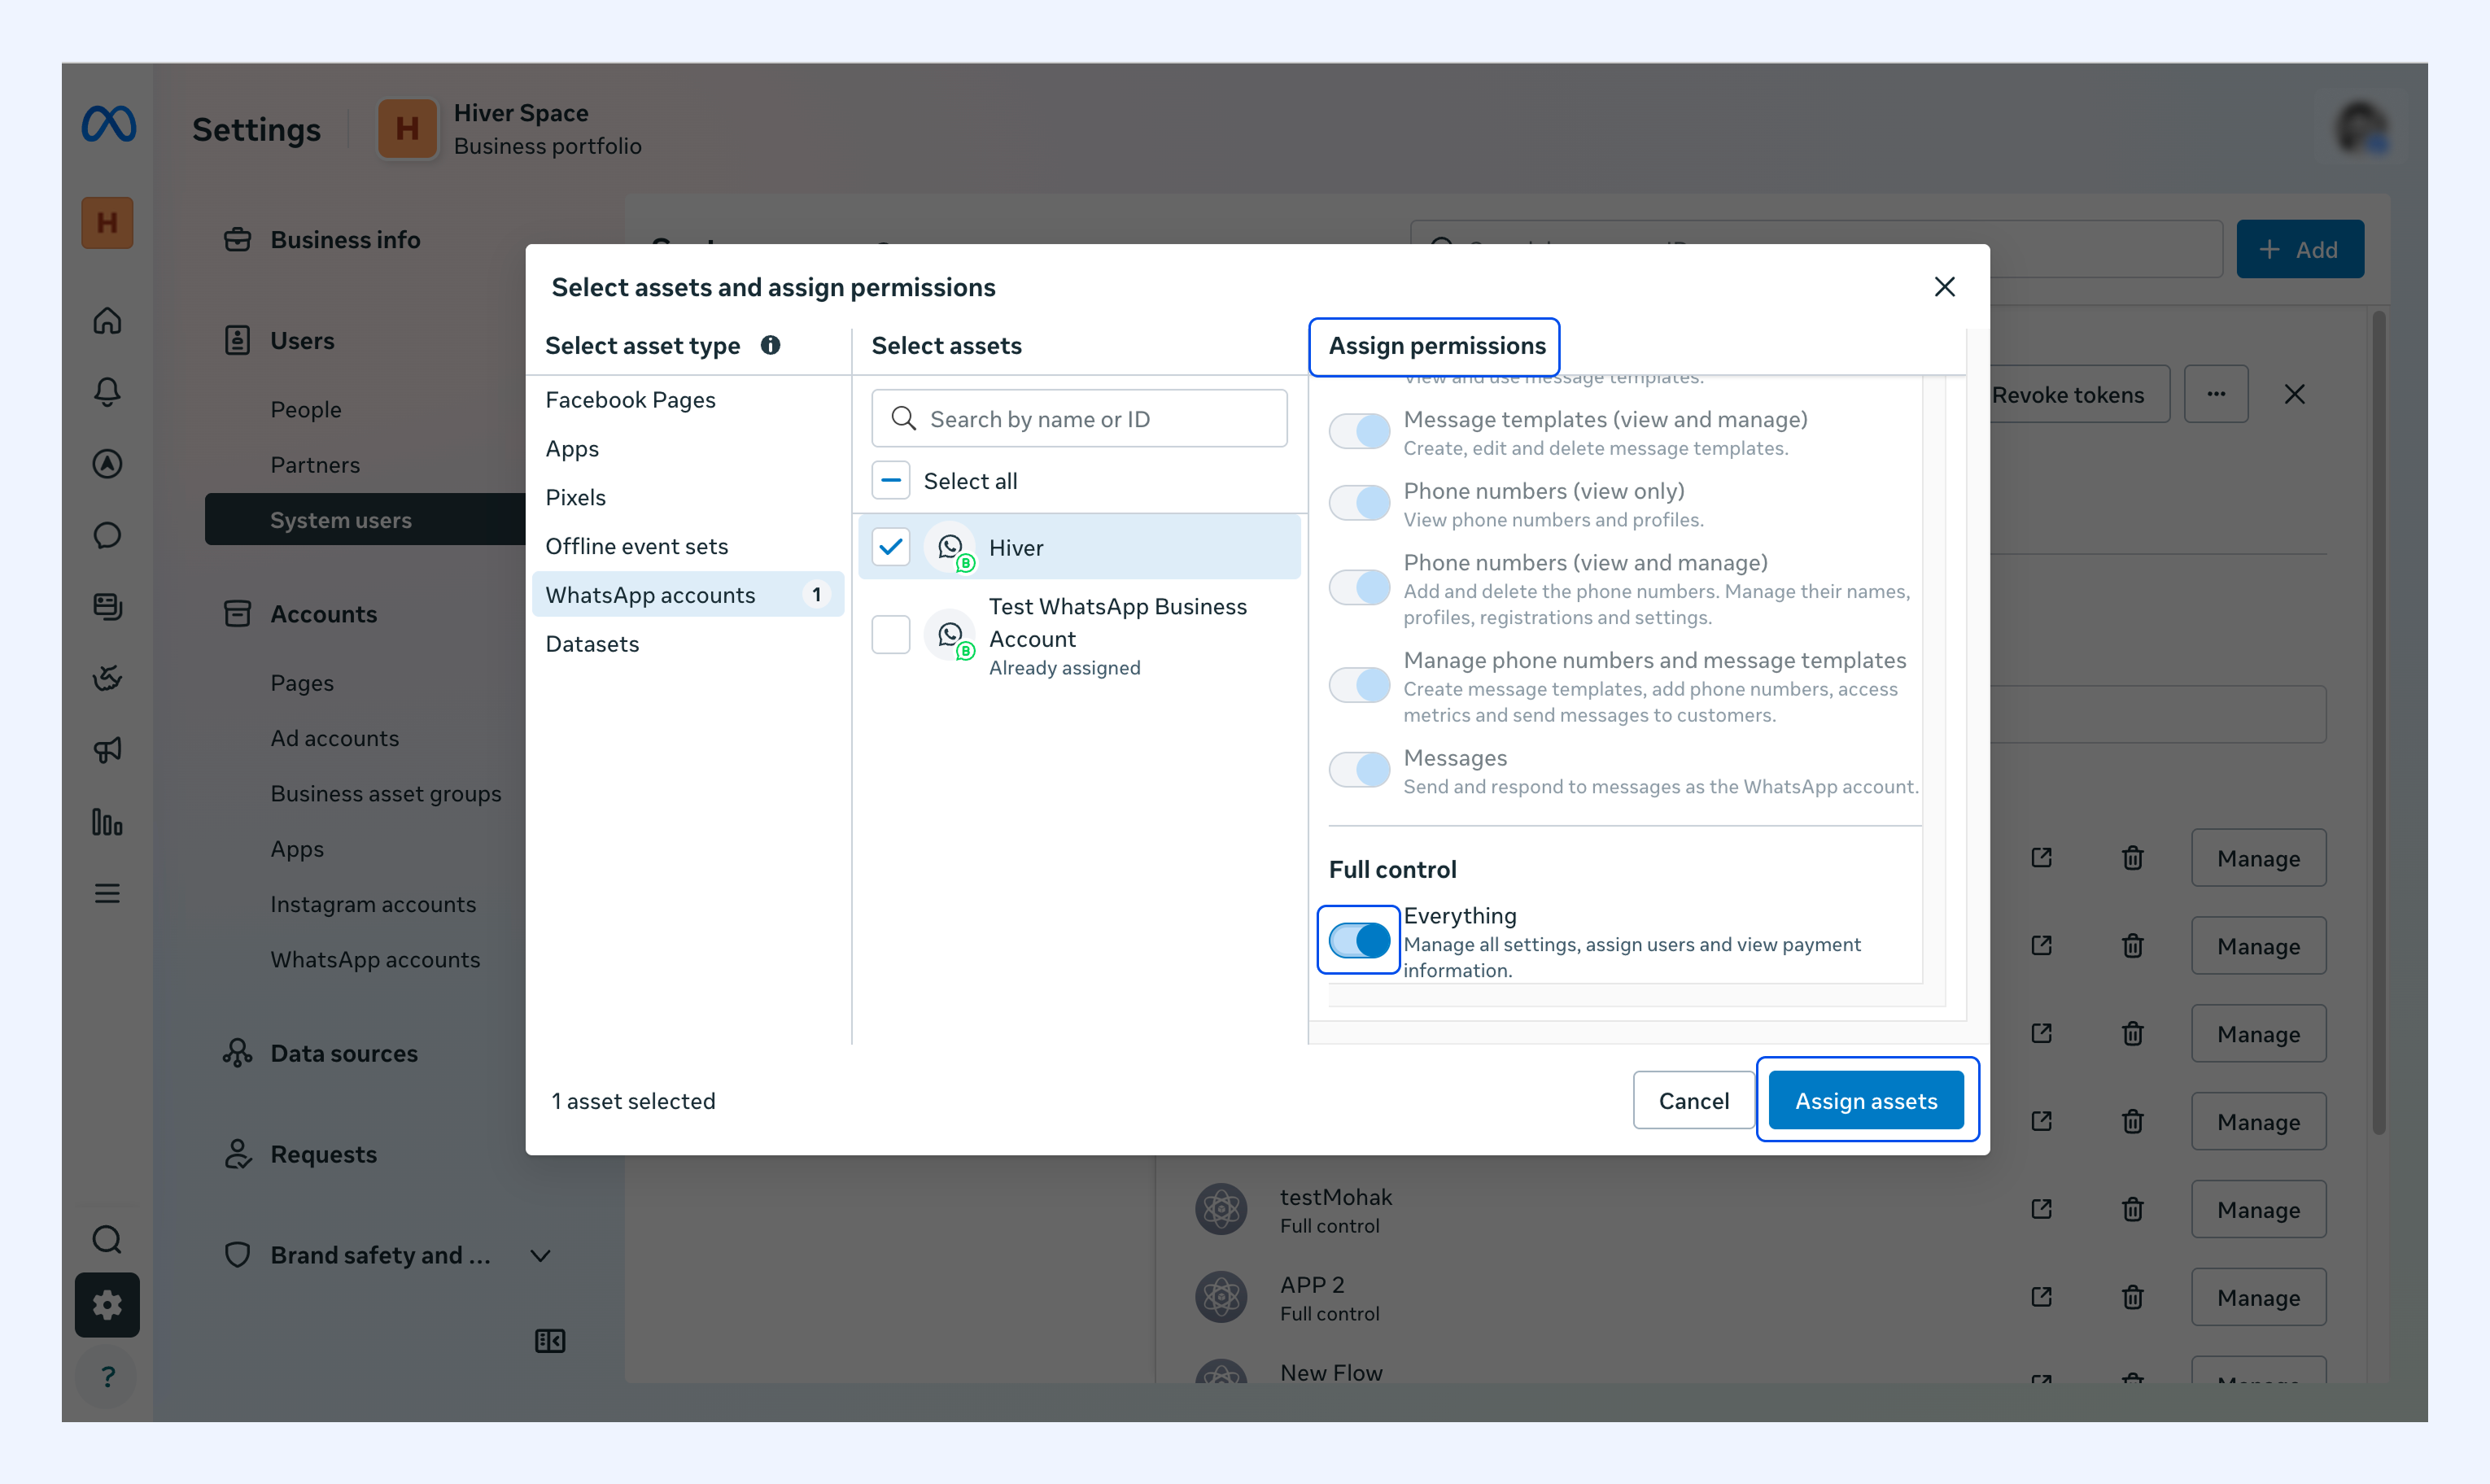
8. Click Assign assets.
Generate the token
1. On the system user page, click Generate token.
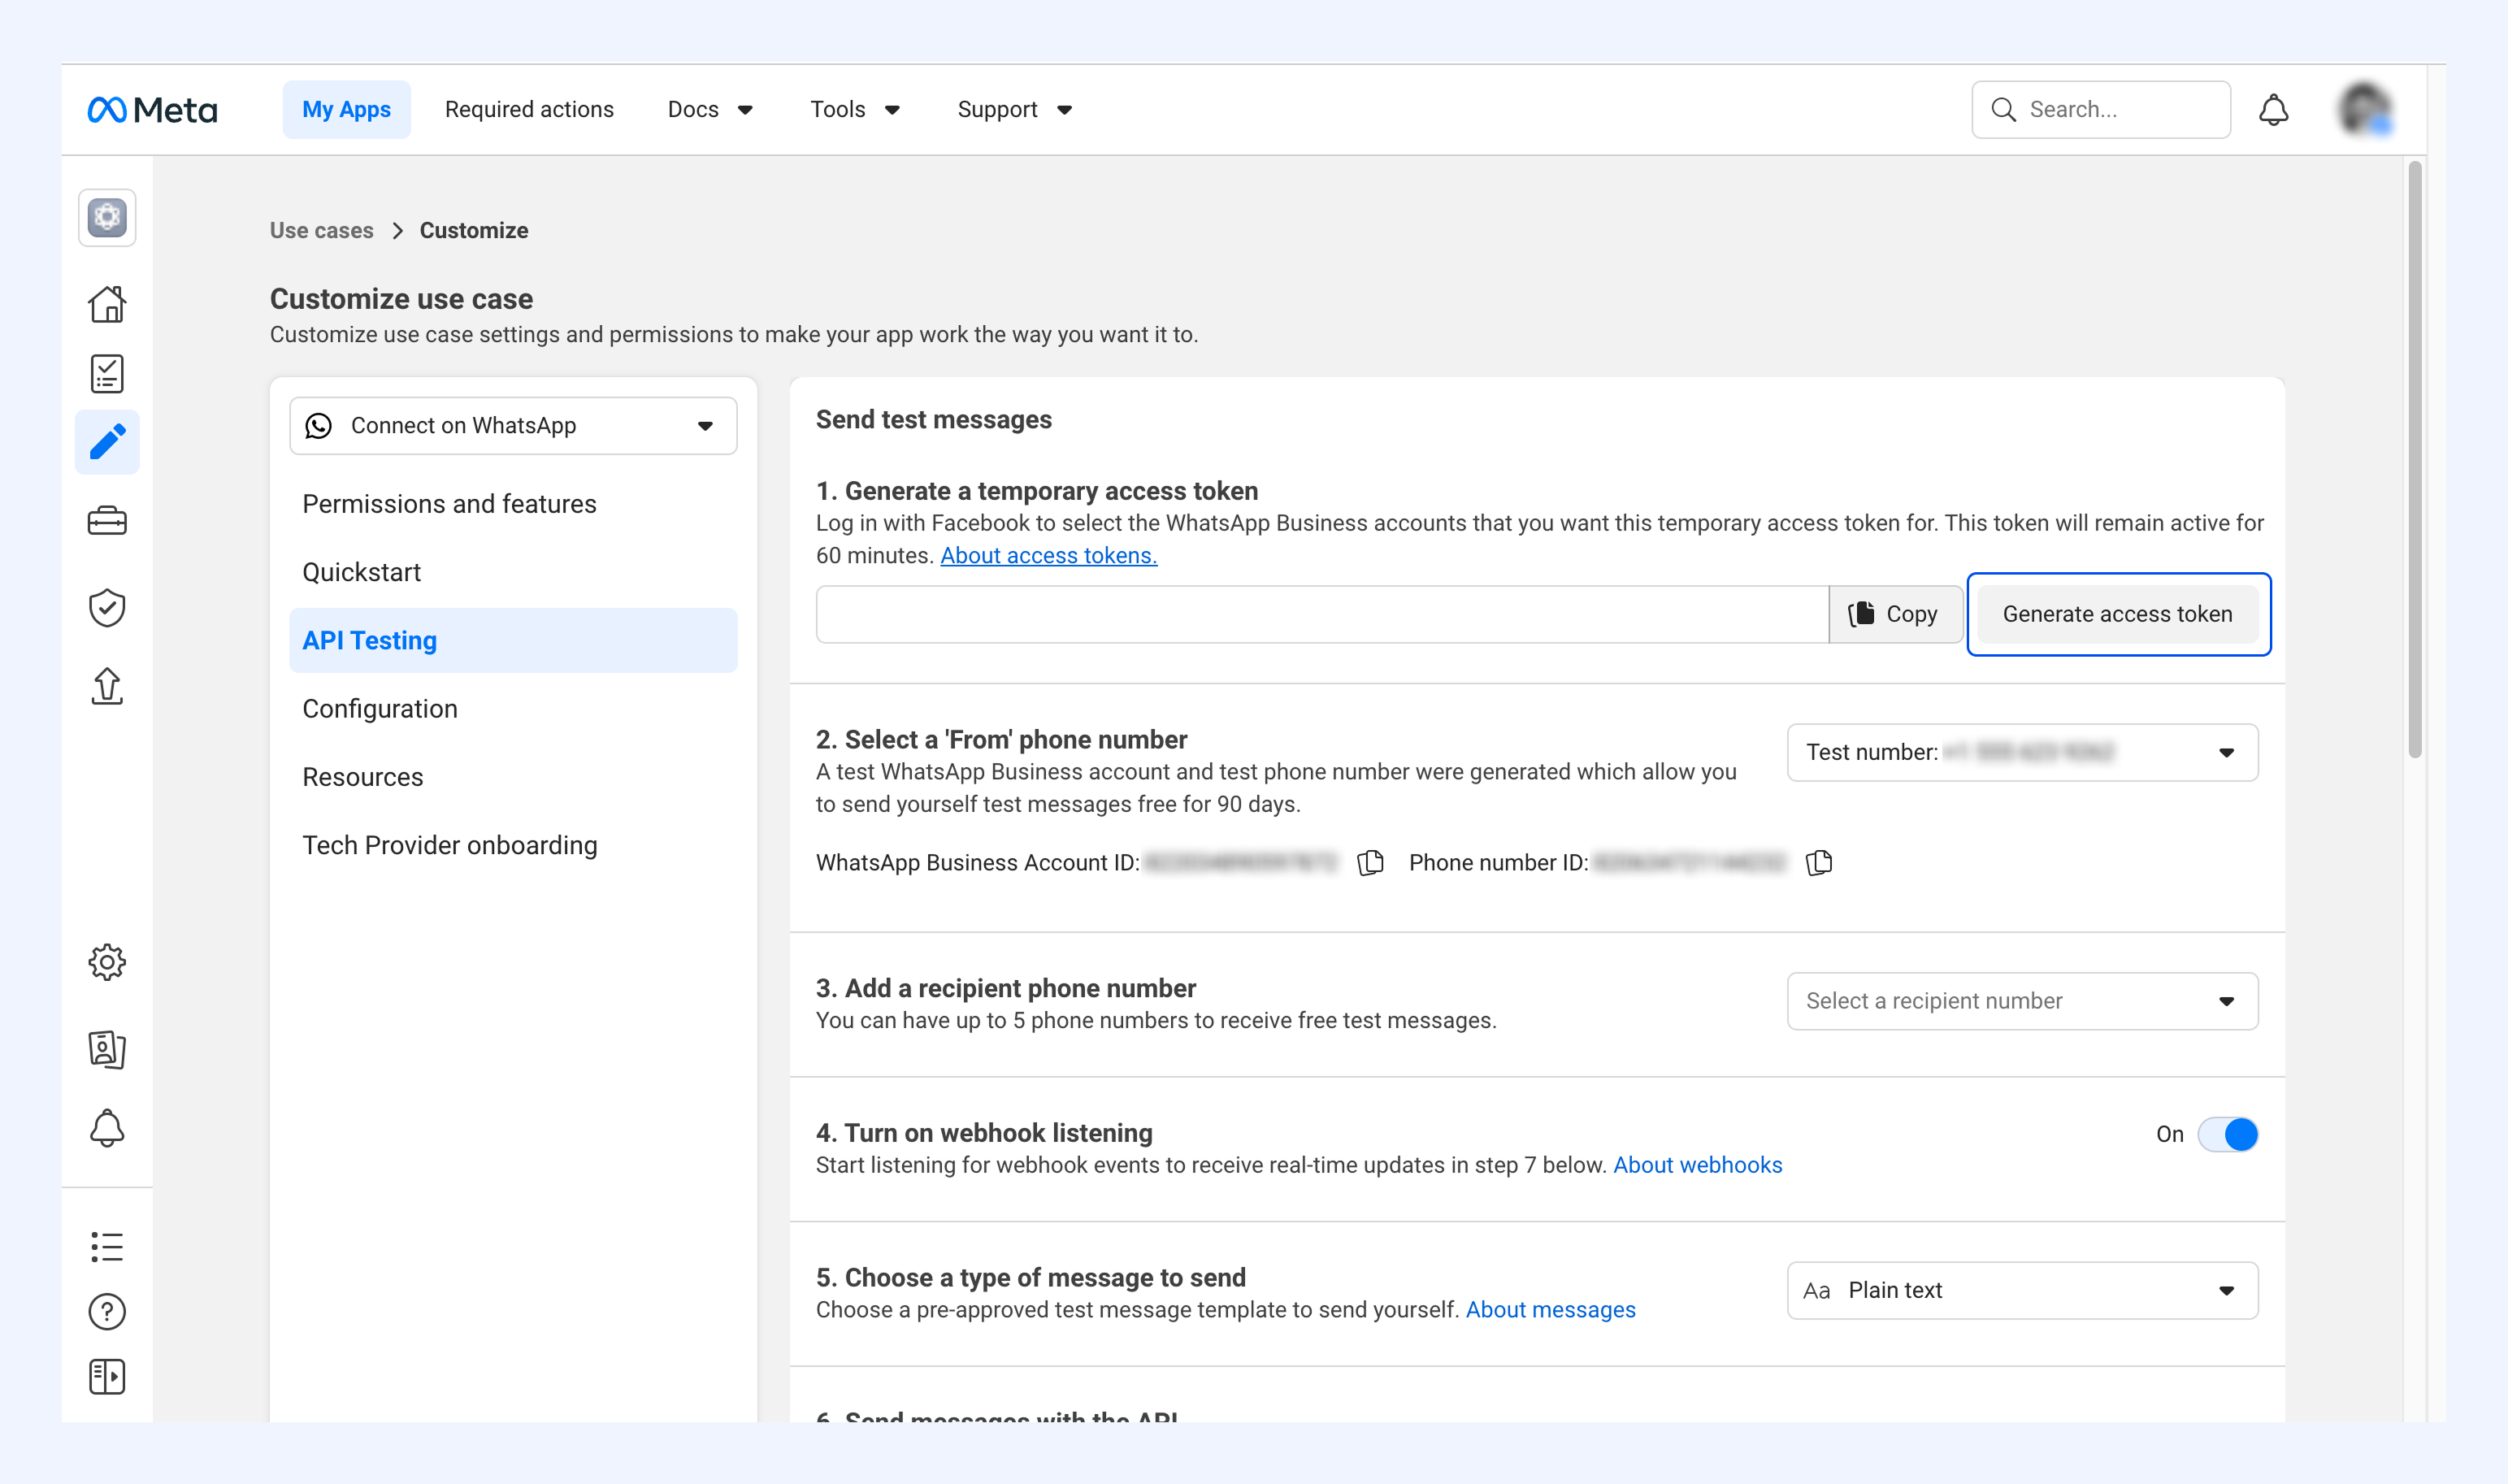
2. From the Select app dropdown, choose your WhatsApp app.
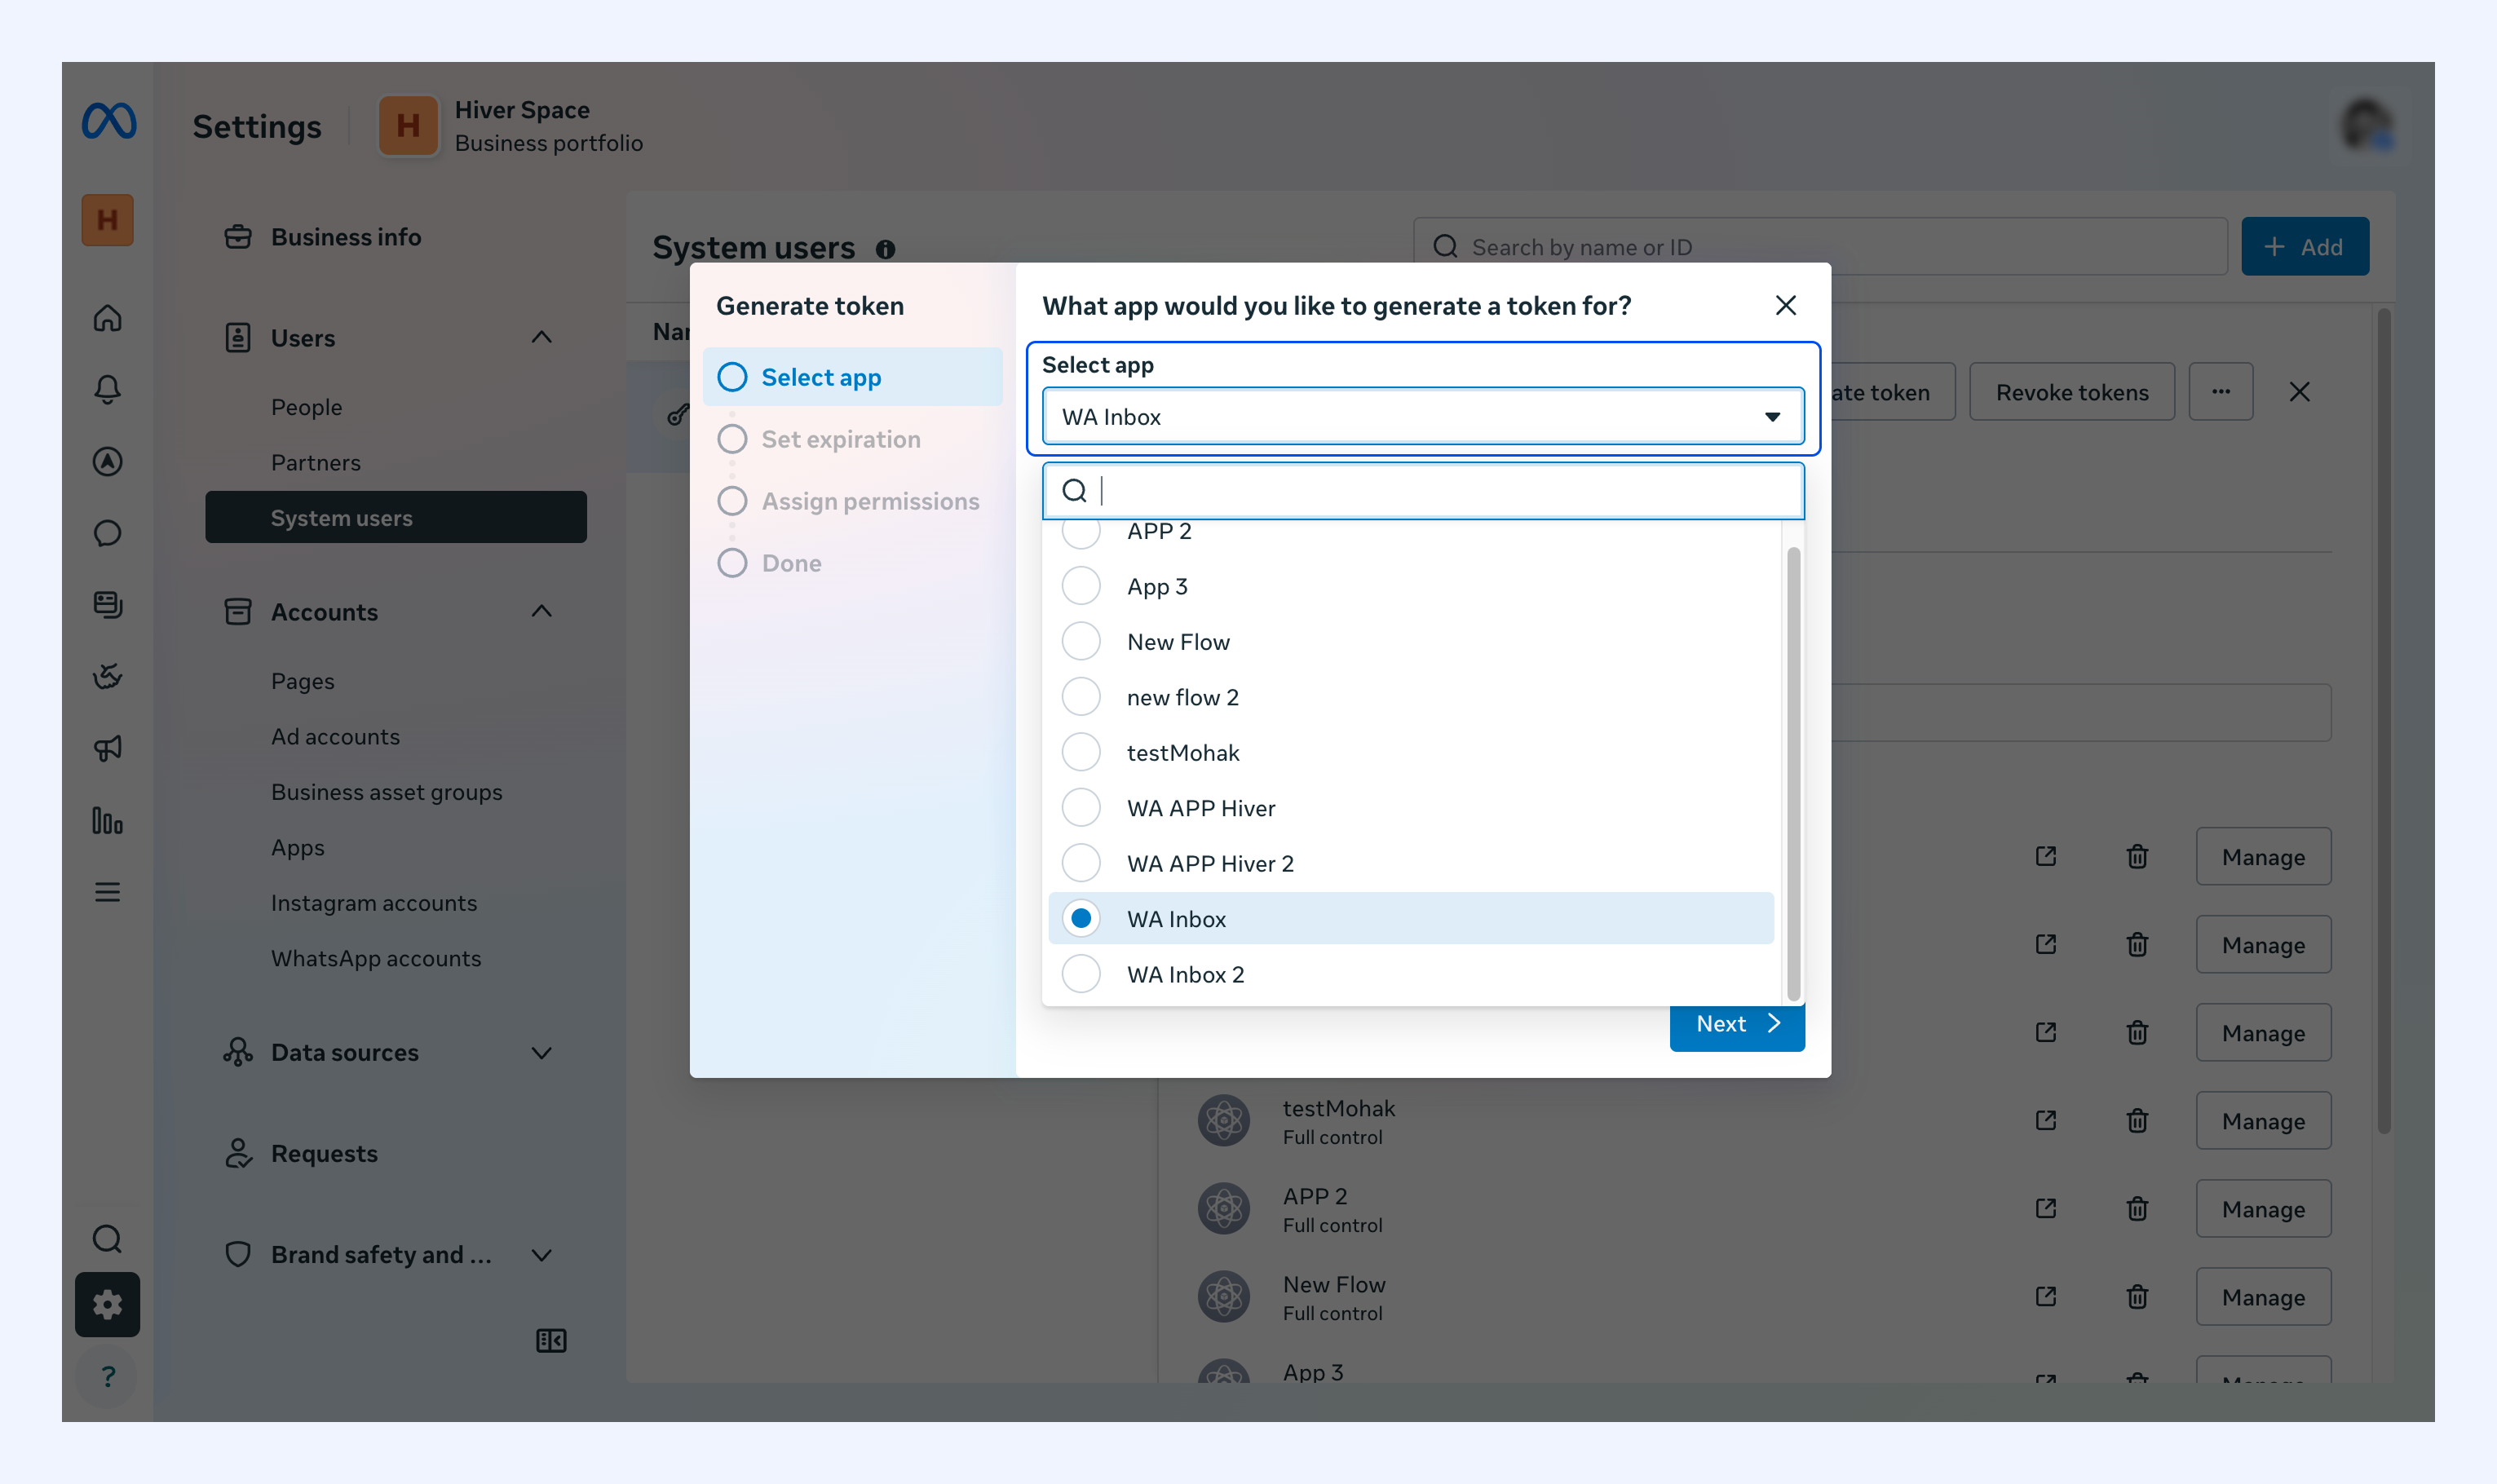
3. Click Next.
4. Set the Token expiry to your preference.
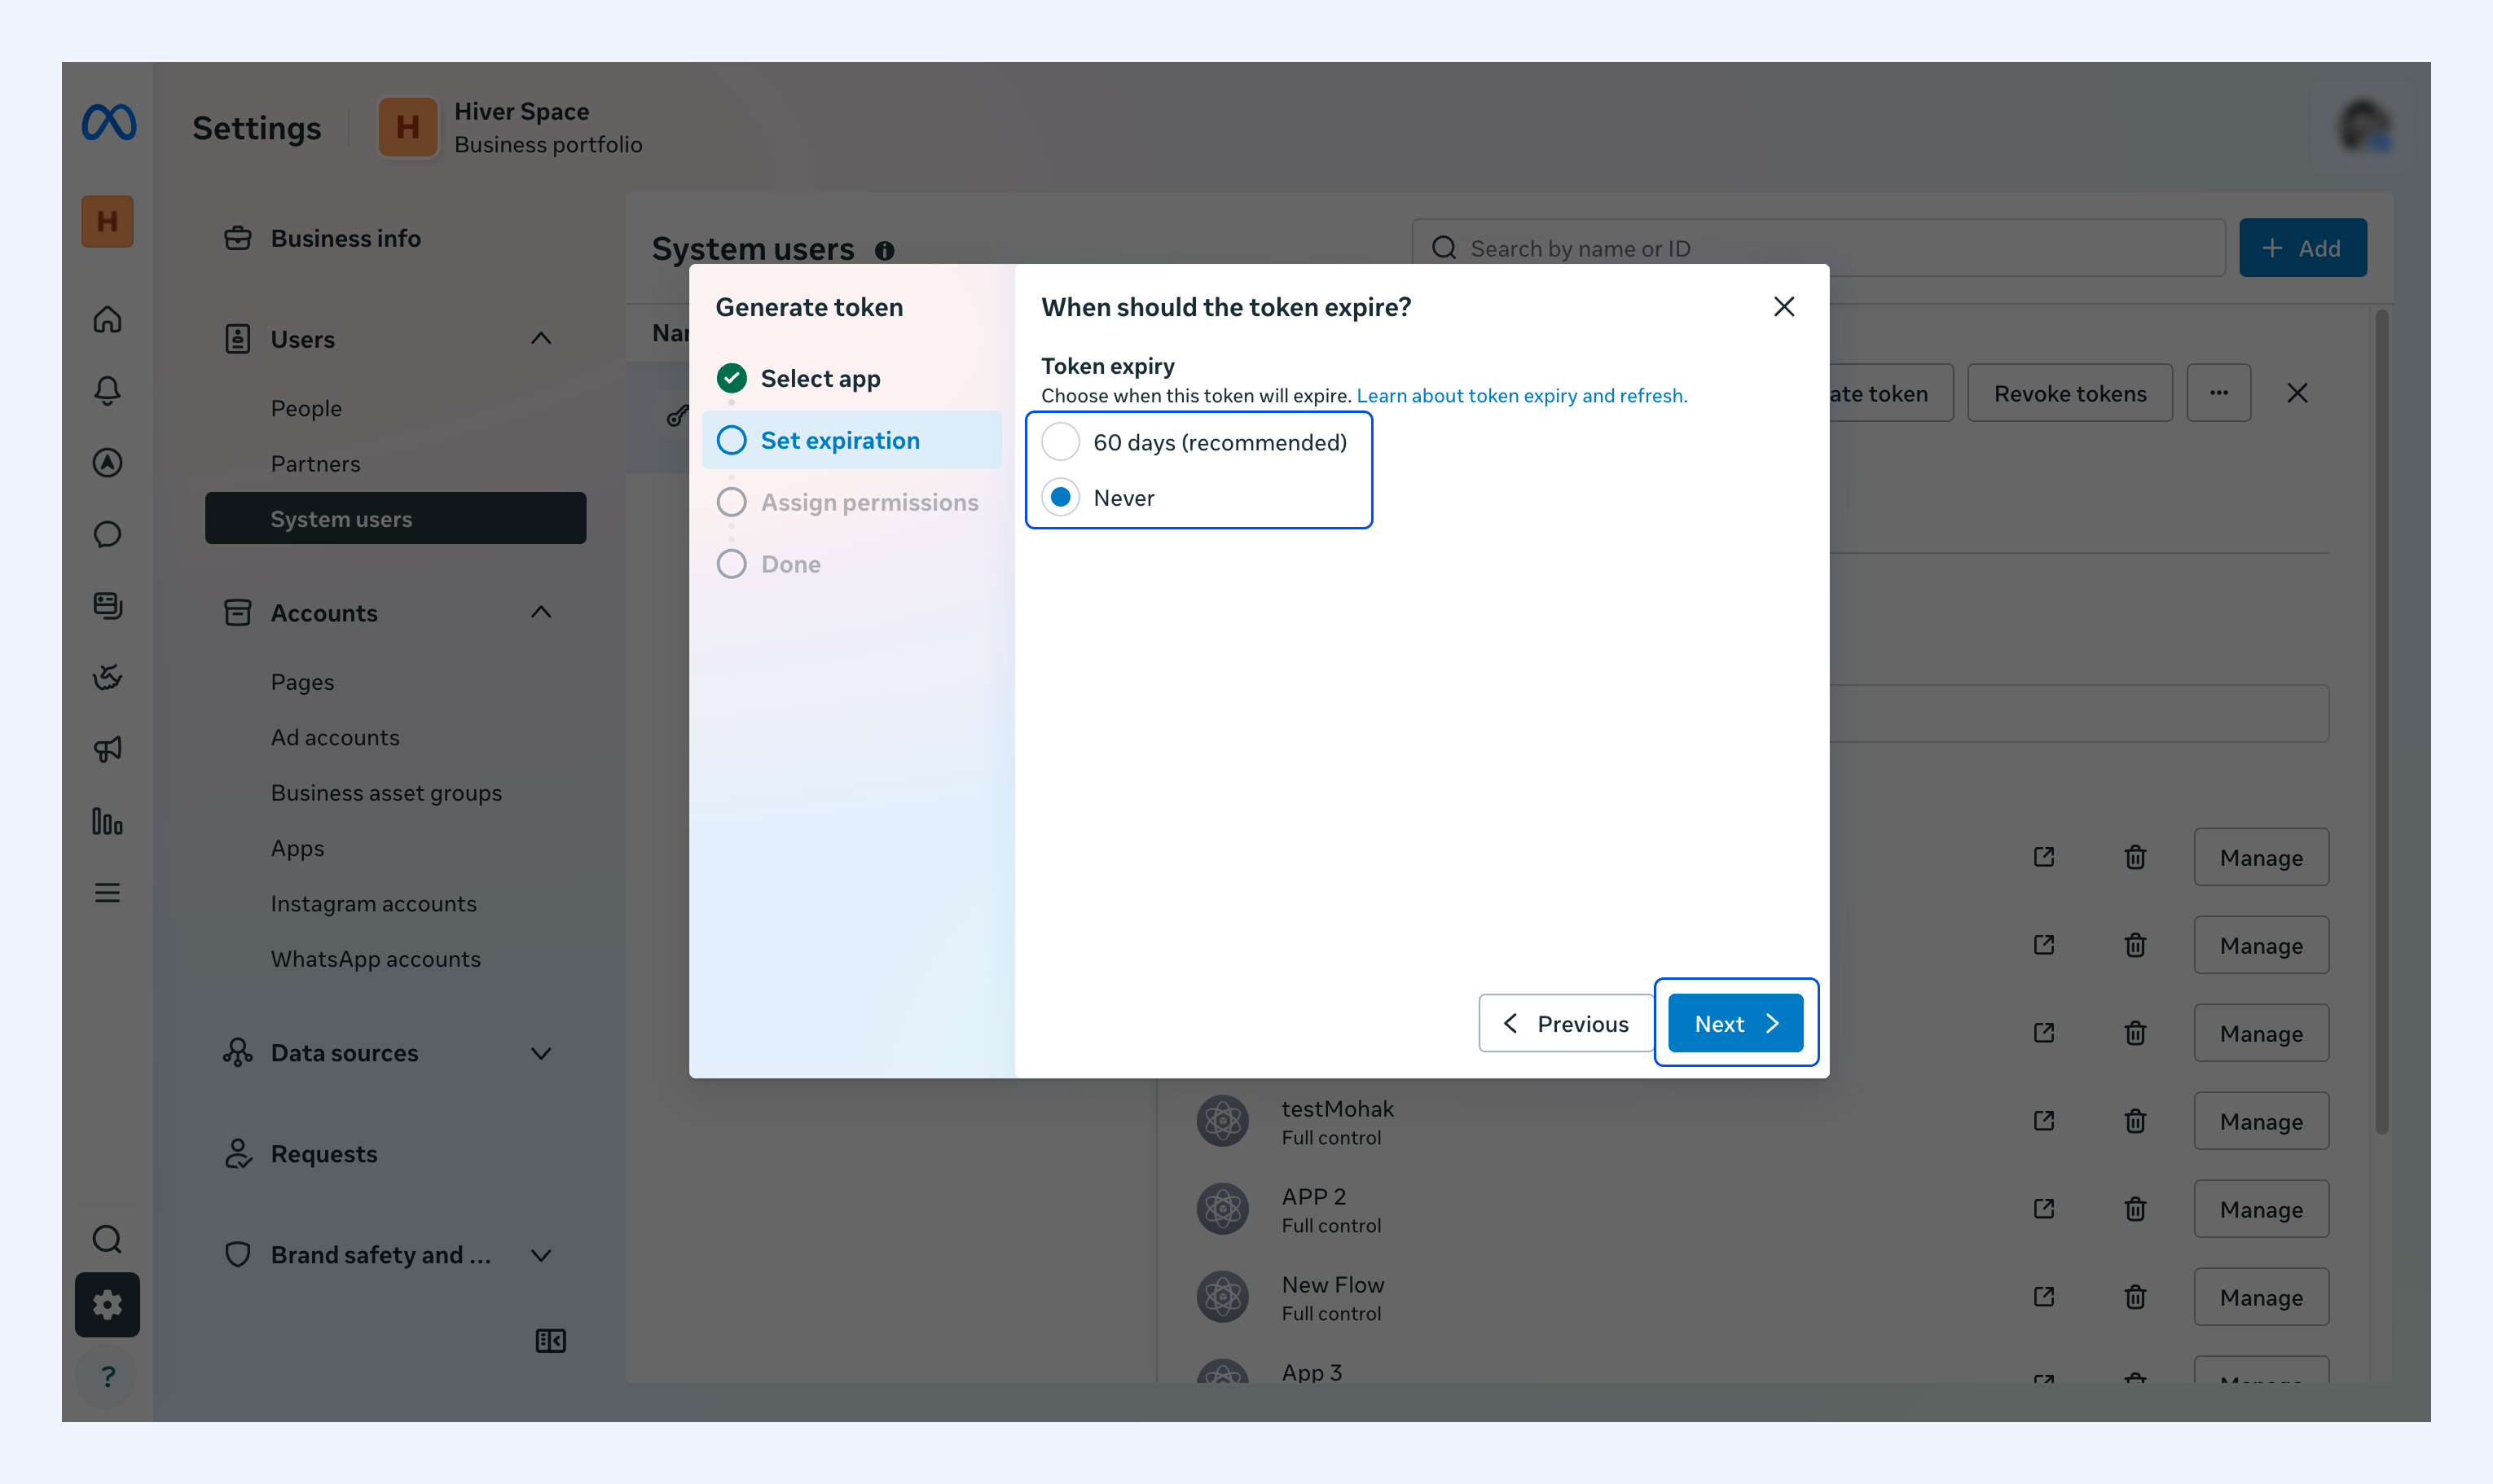
5. Click Next.
6. From the Select permissions dropdown, add these three: whatsapp_business_management, whatsapp_business_messaging, and business_management.
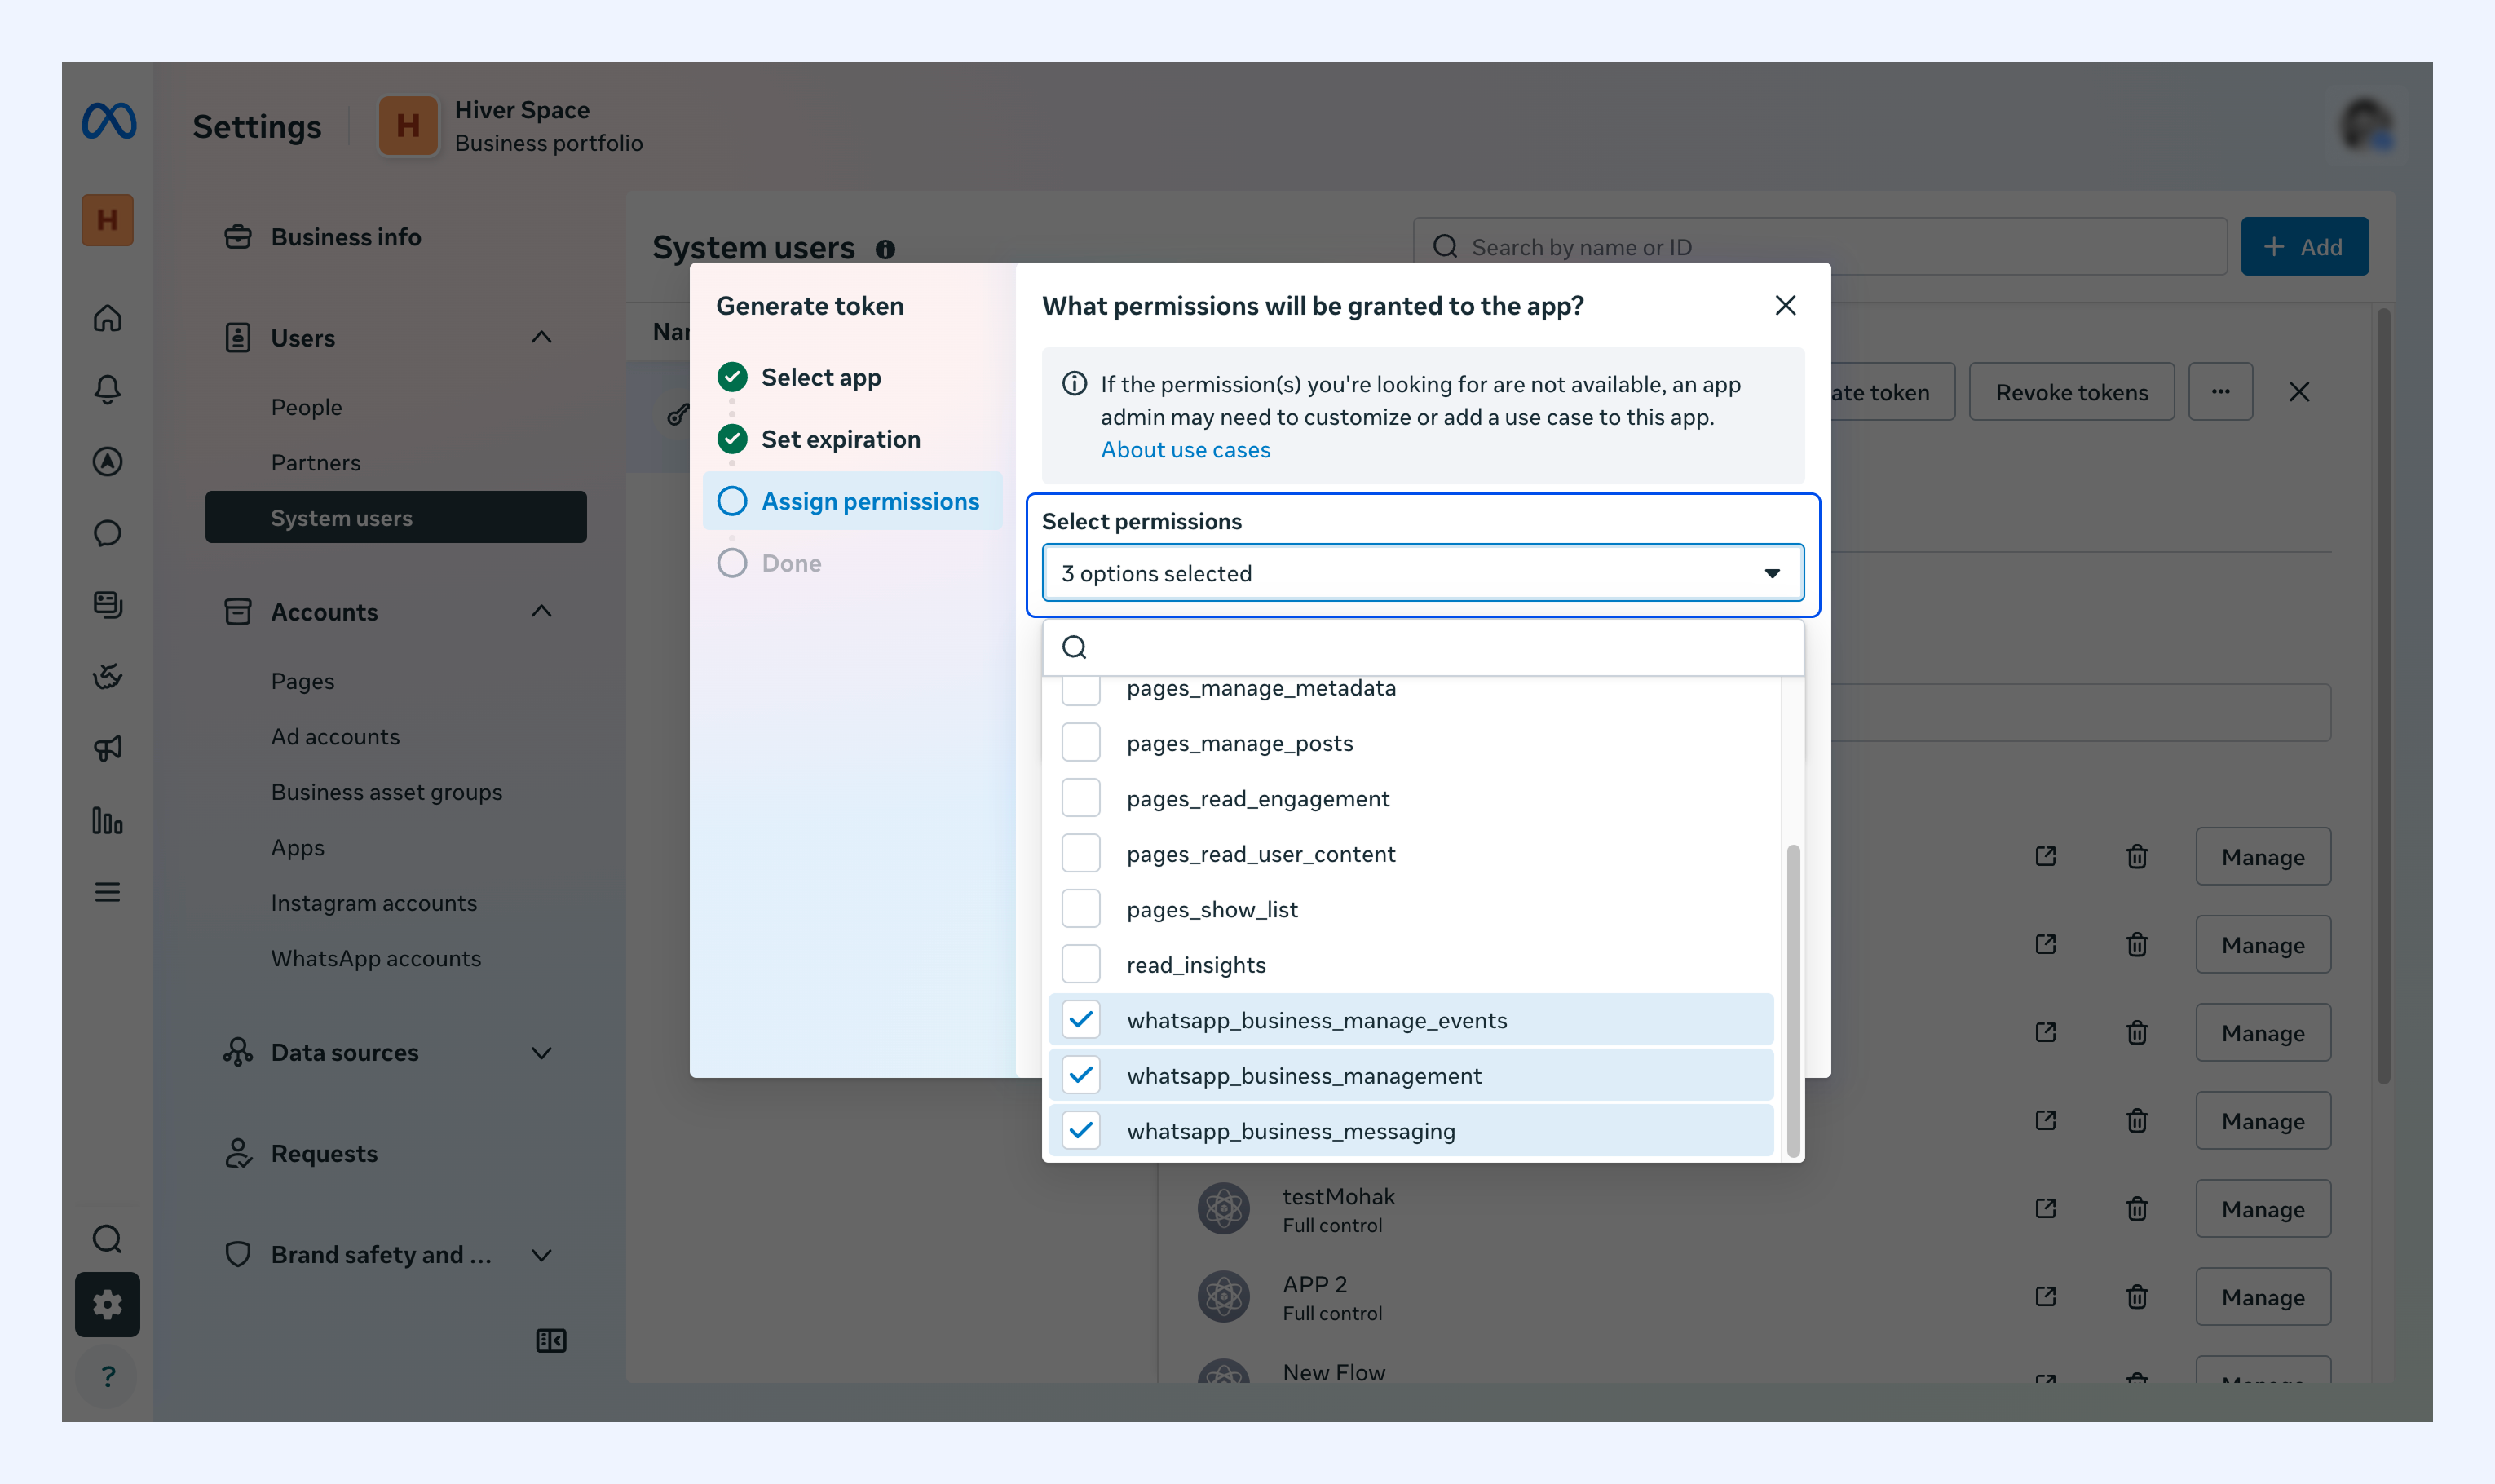
7. Click Continue.
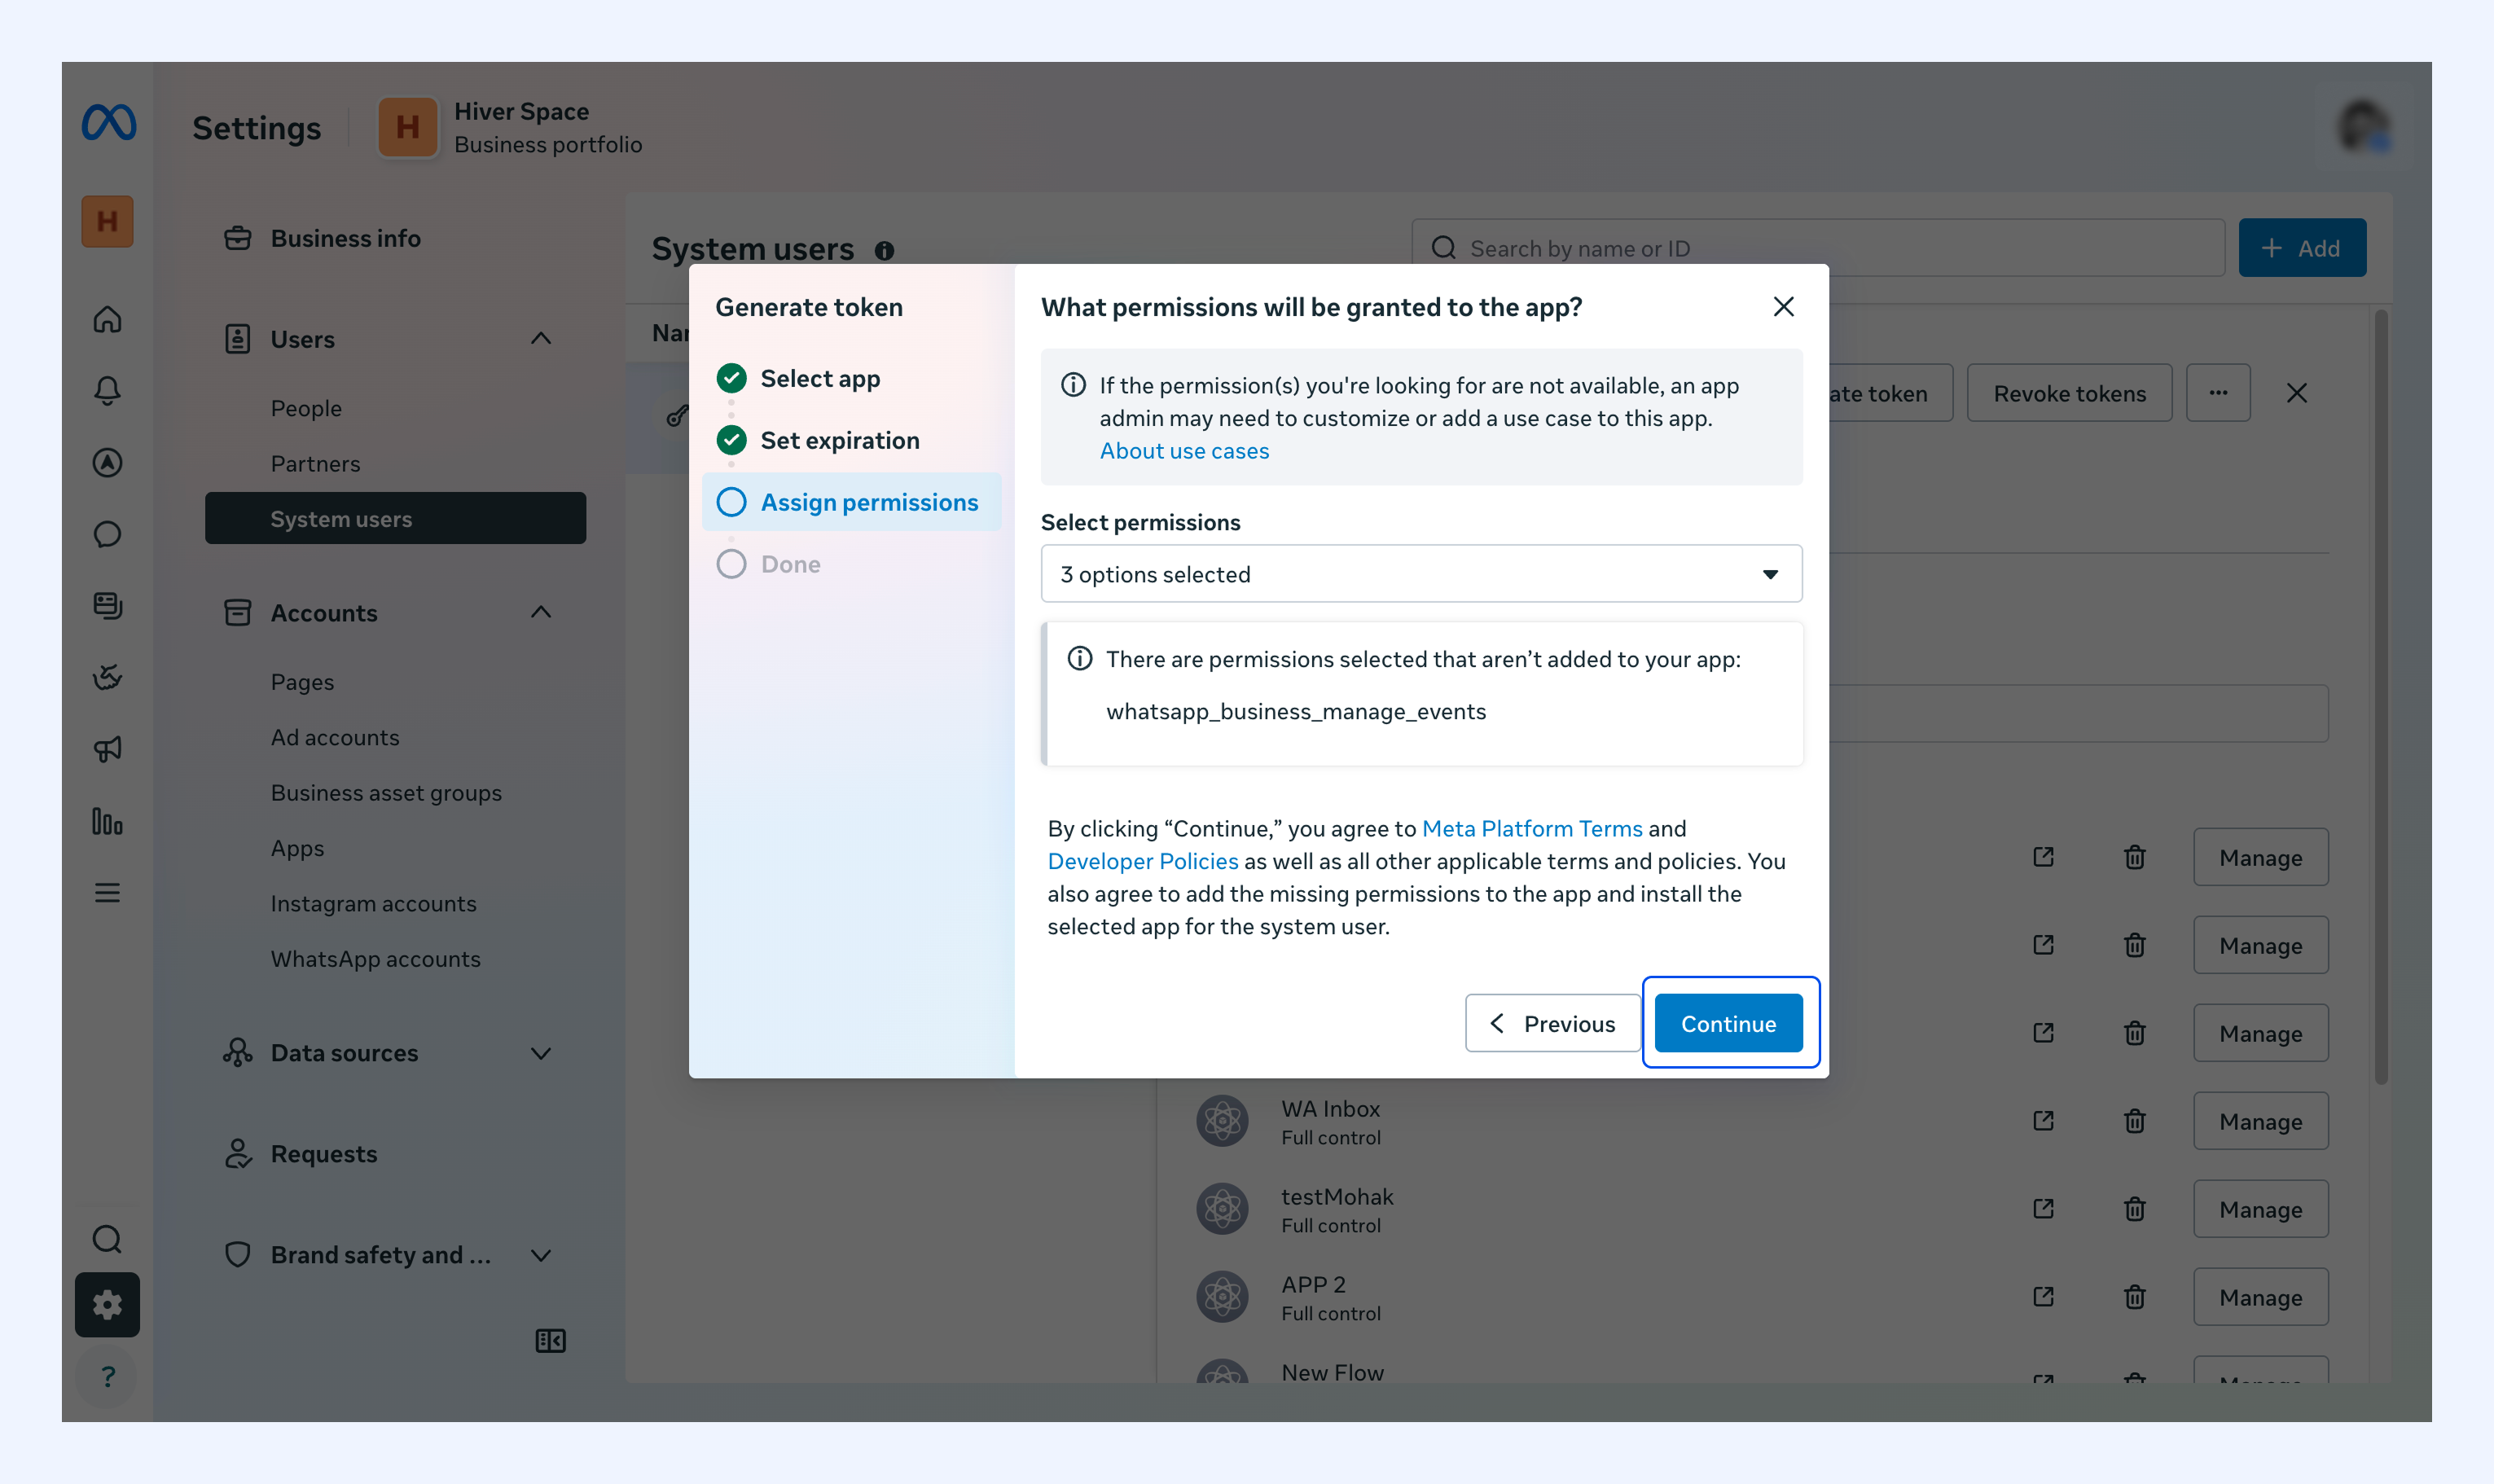
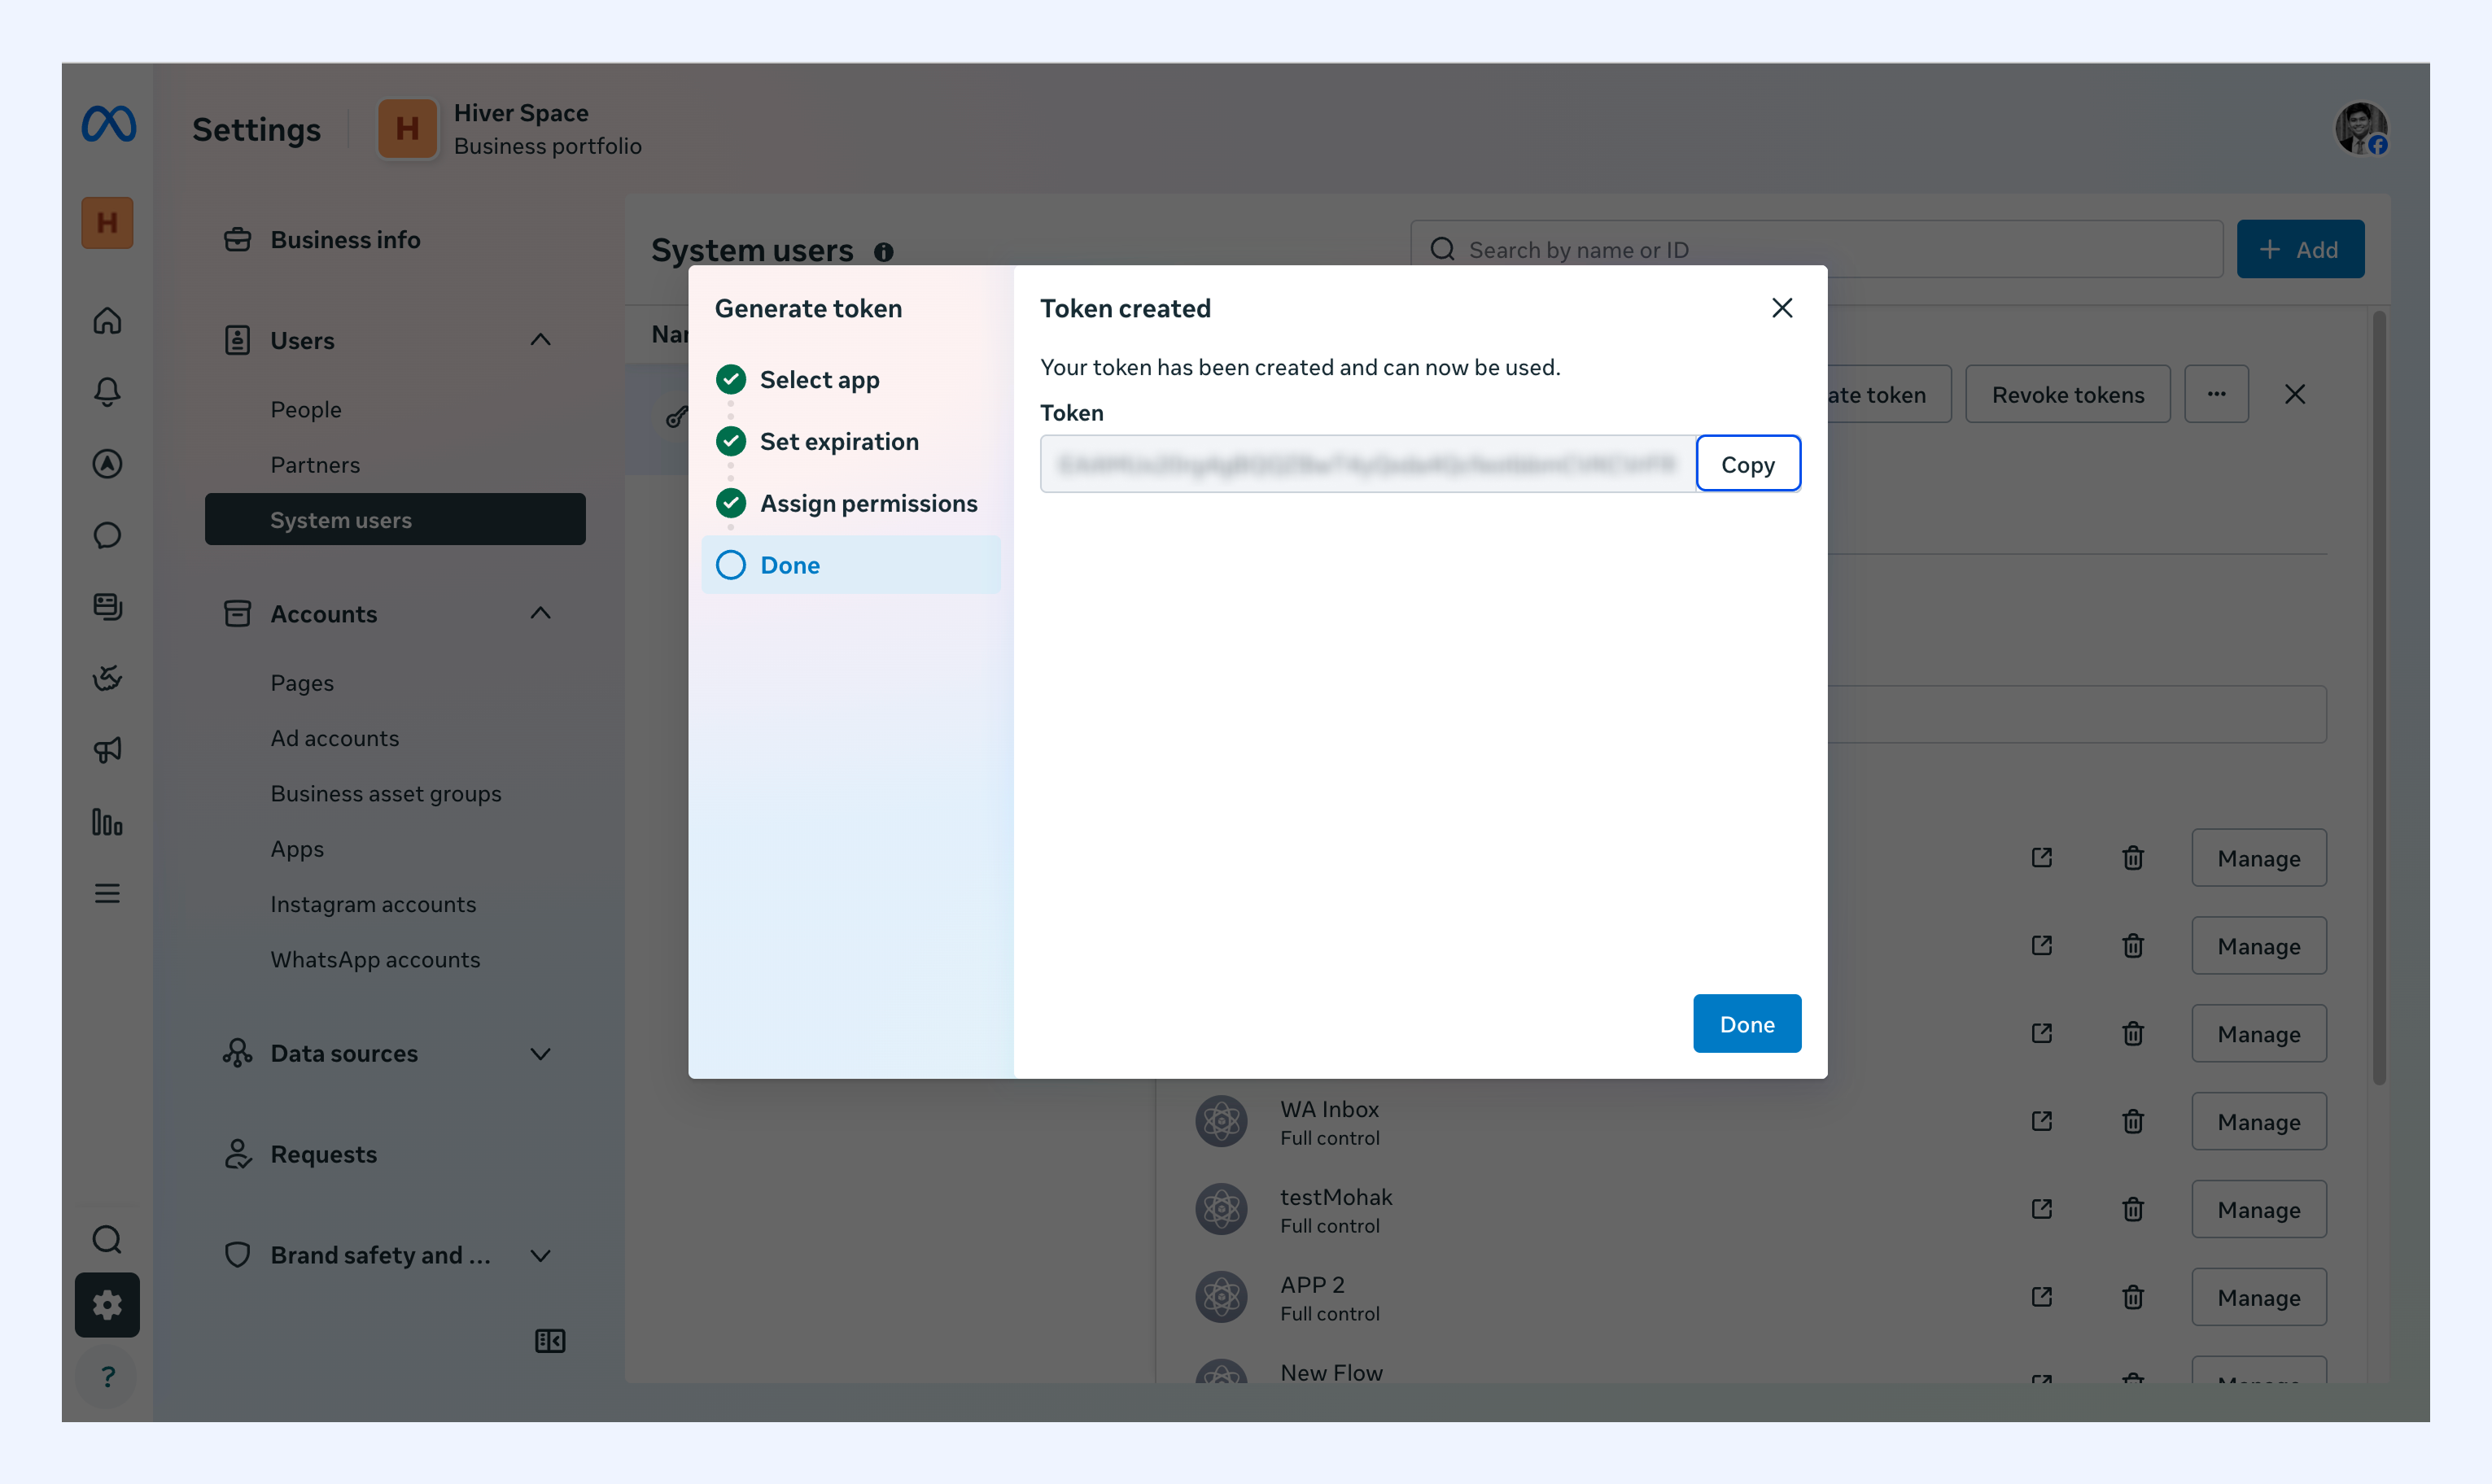
8. Copy the permanent access token and store it somewhere safe. You can only see it once.
Add a payment method
Meta requires a payment method. You won't be charged unless you go past the free tier limits.
1. In Business Manager, go to Settings → Accounts → WhatsApp Accounts.
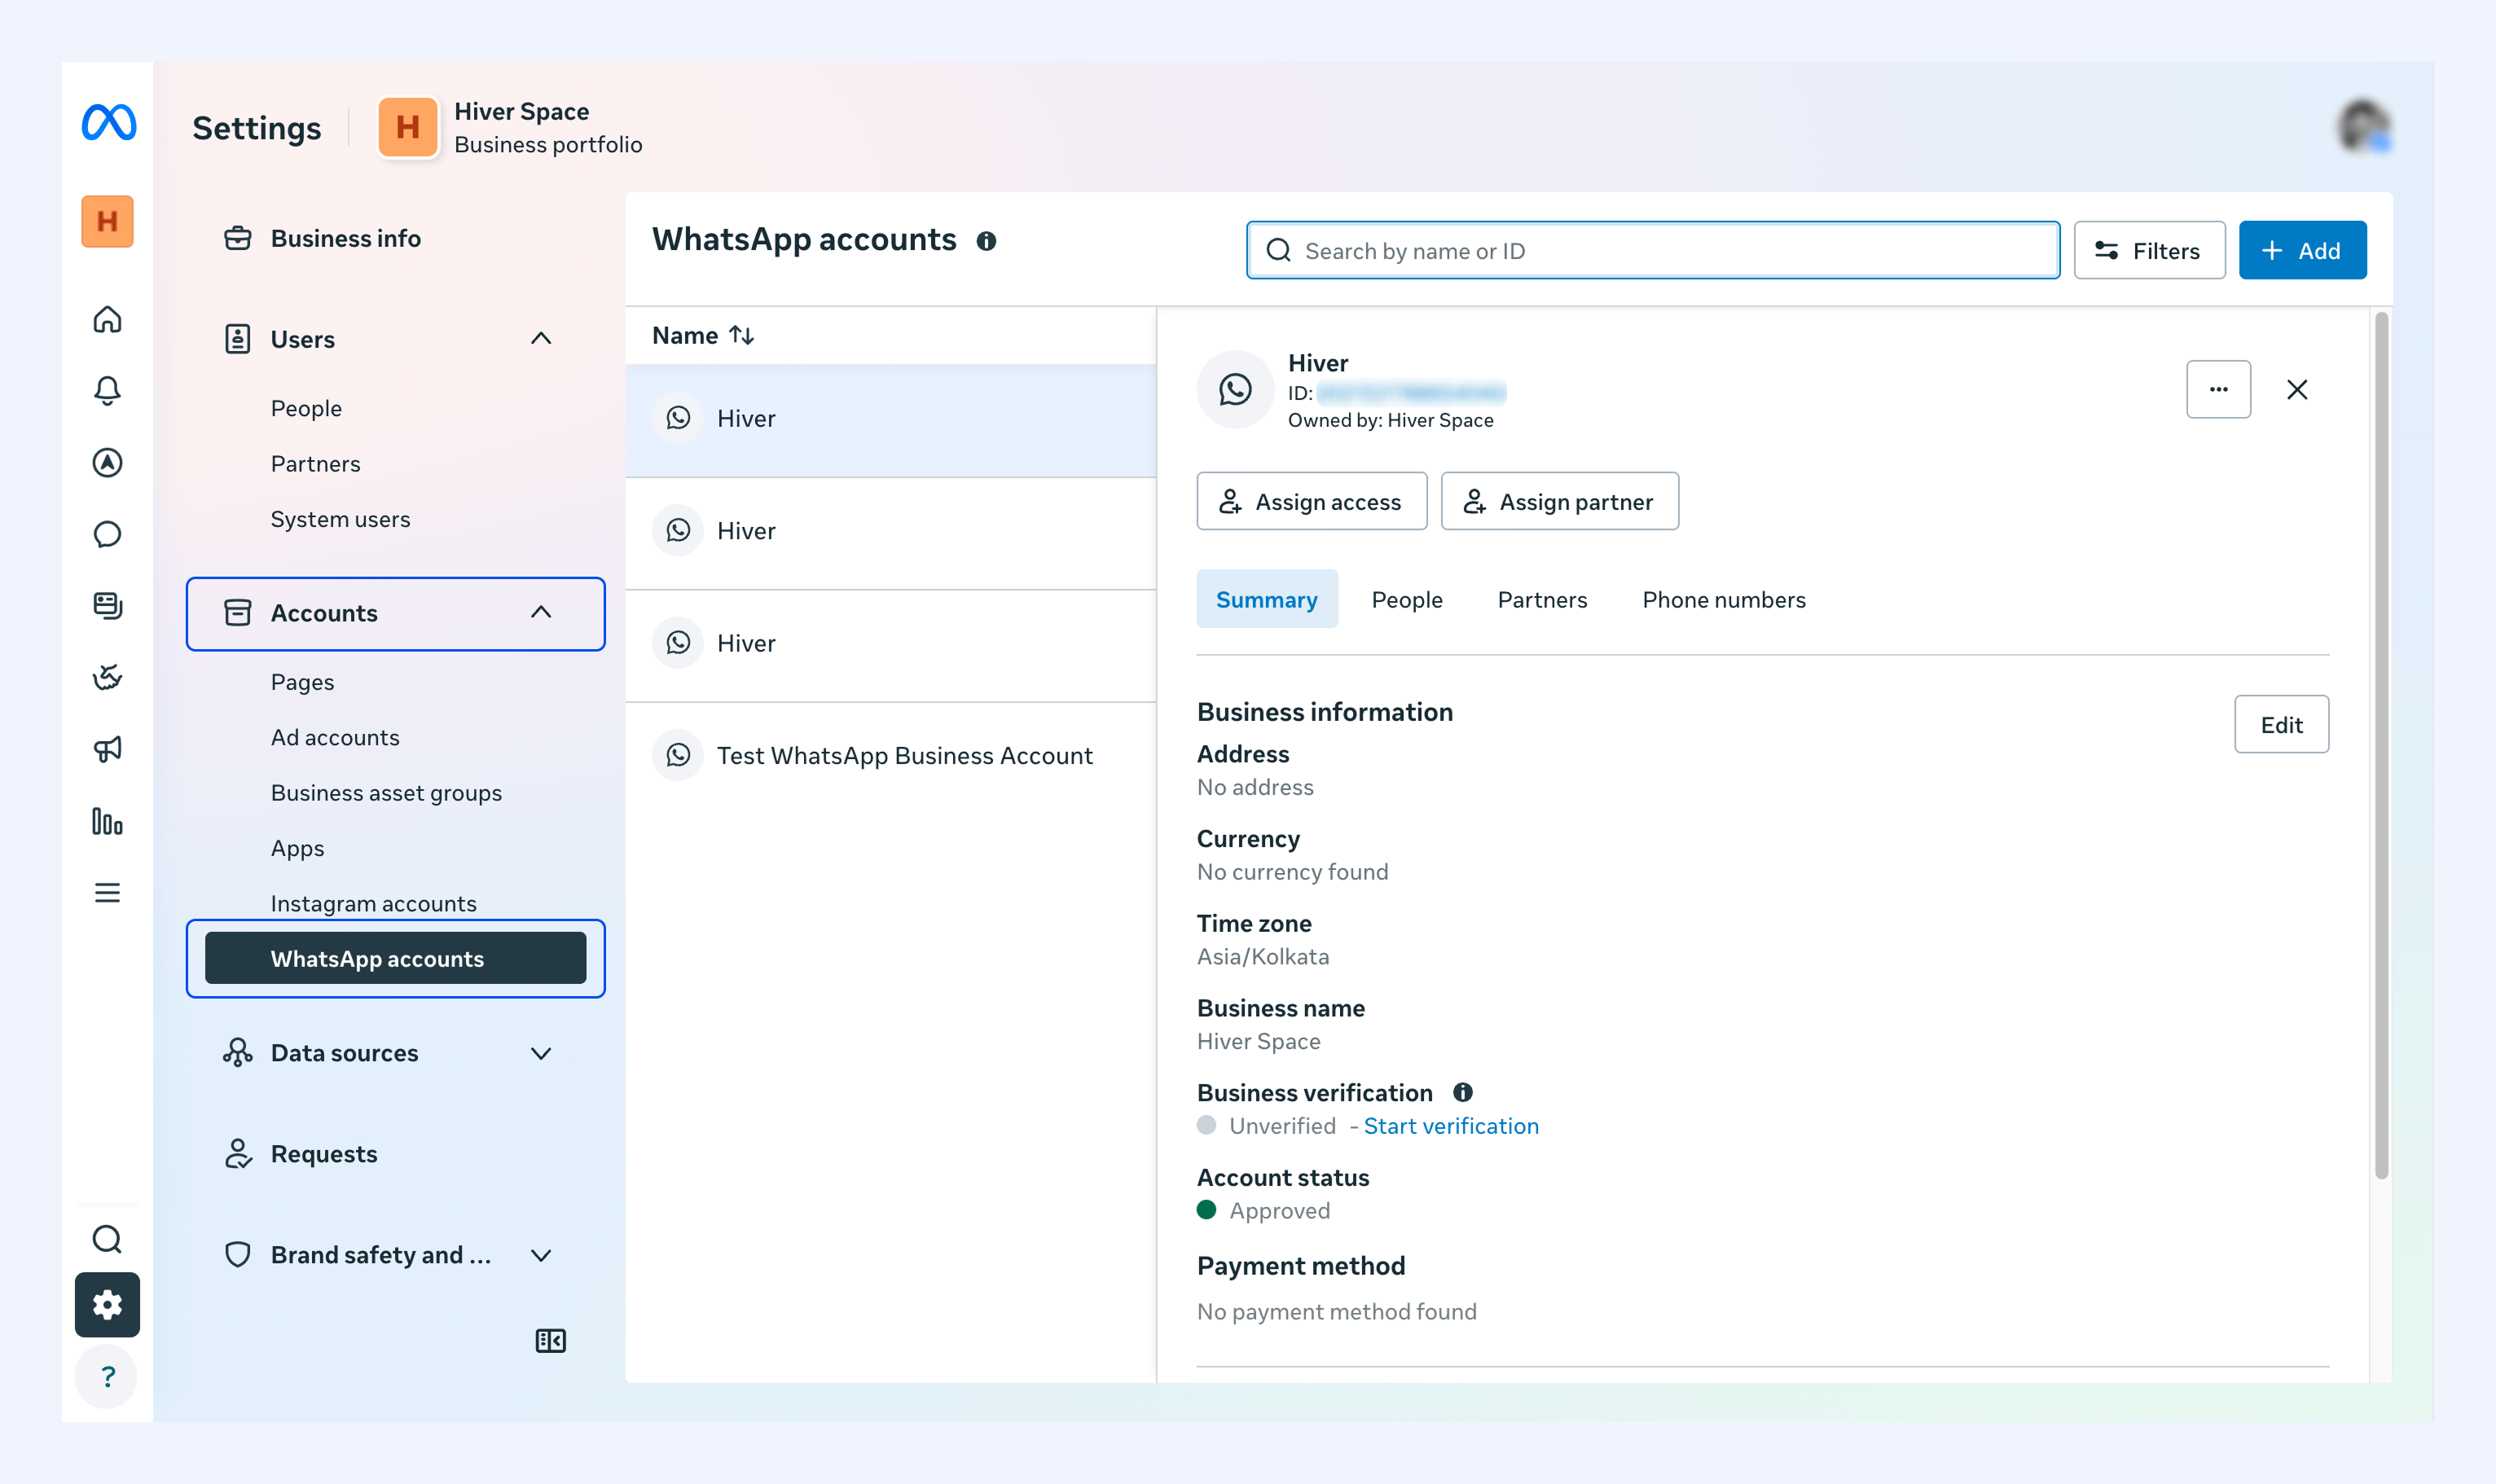
2. Select your WhatsApp Business Account.
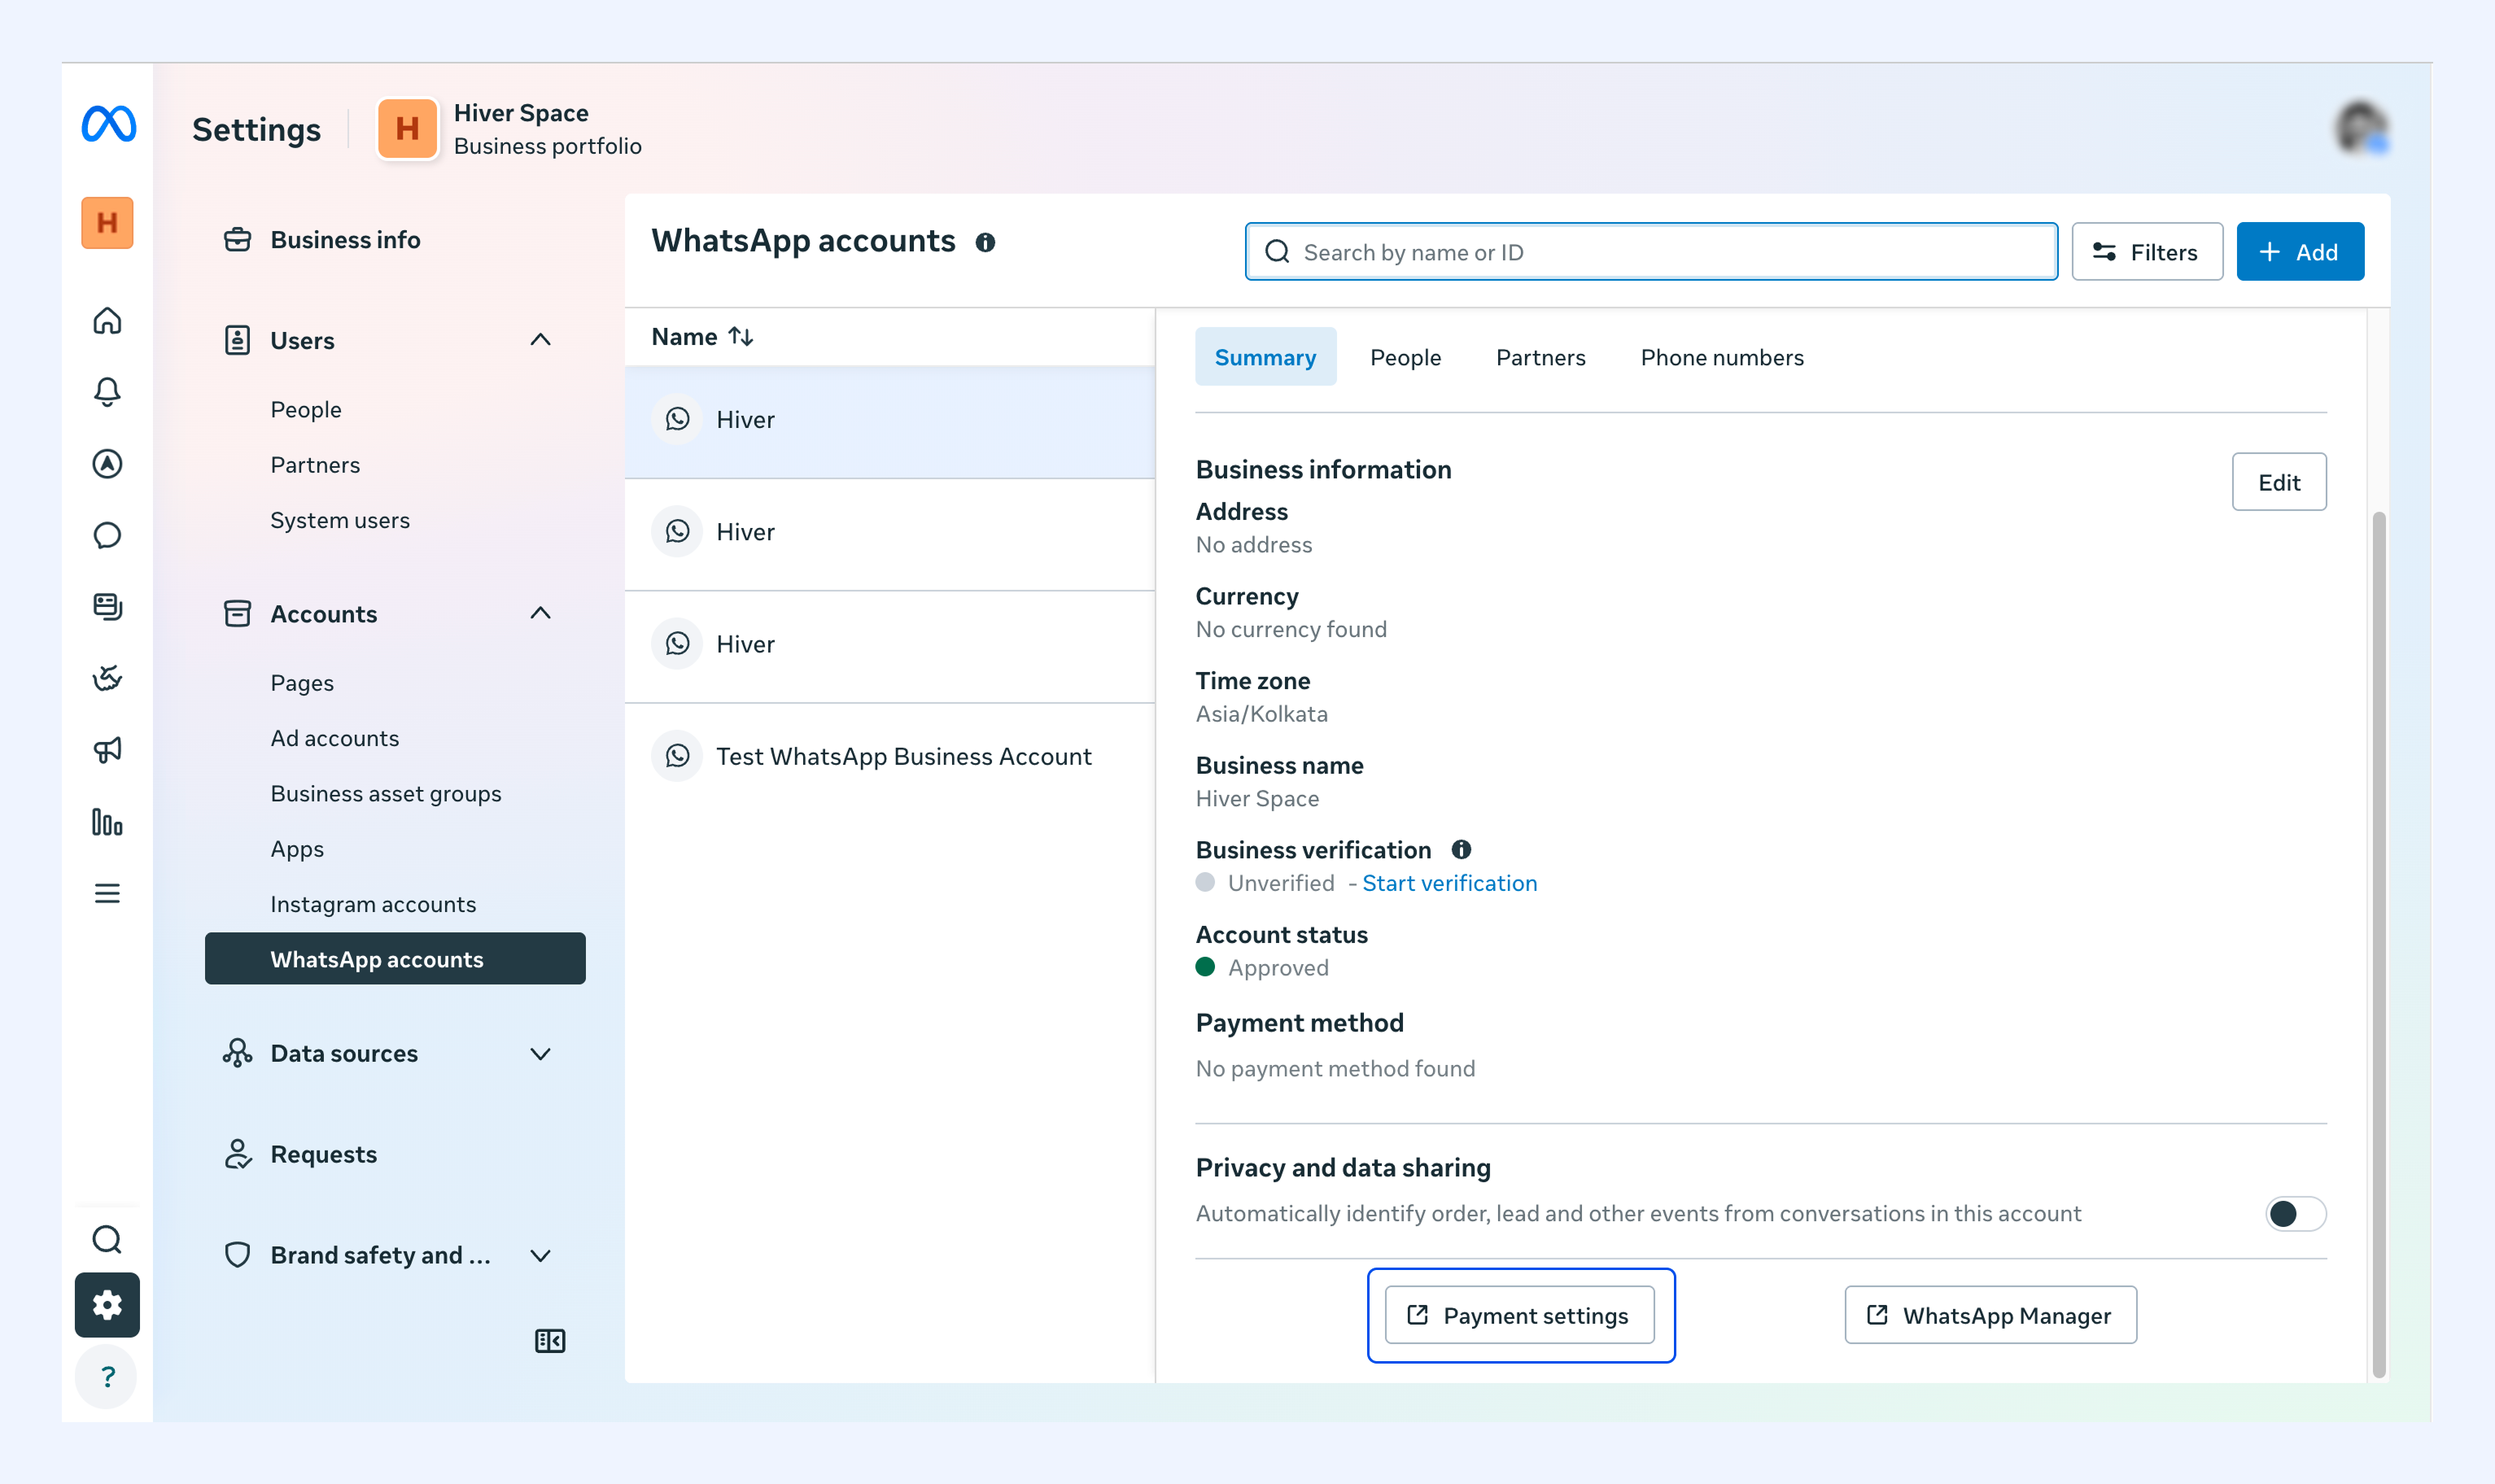
3. Click Payment settings.
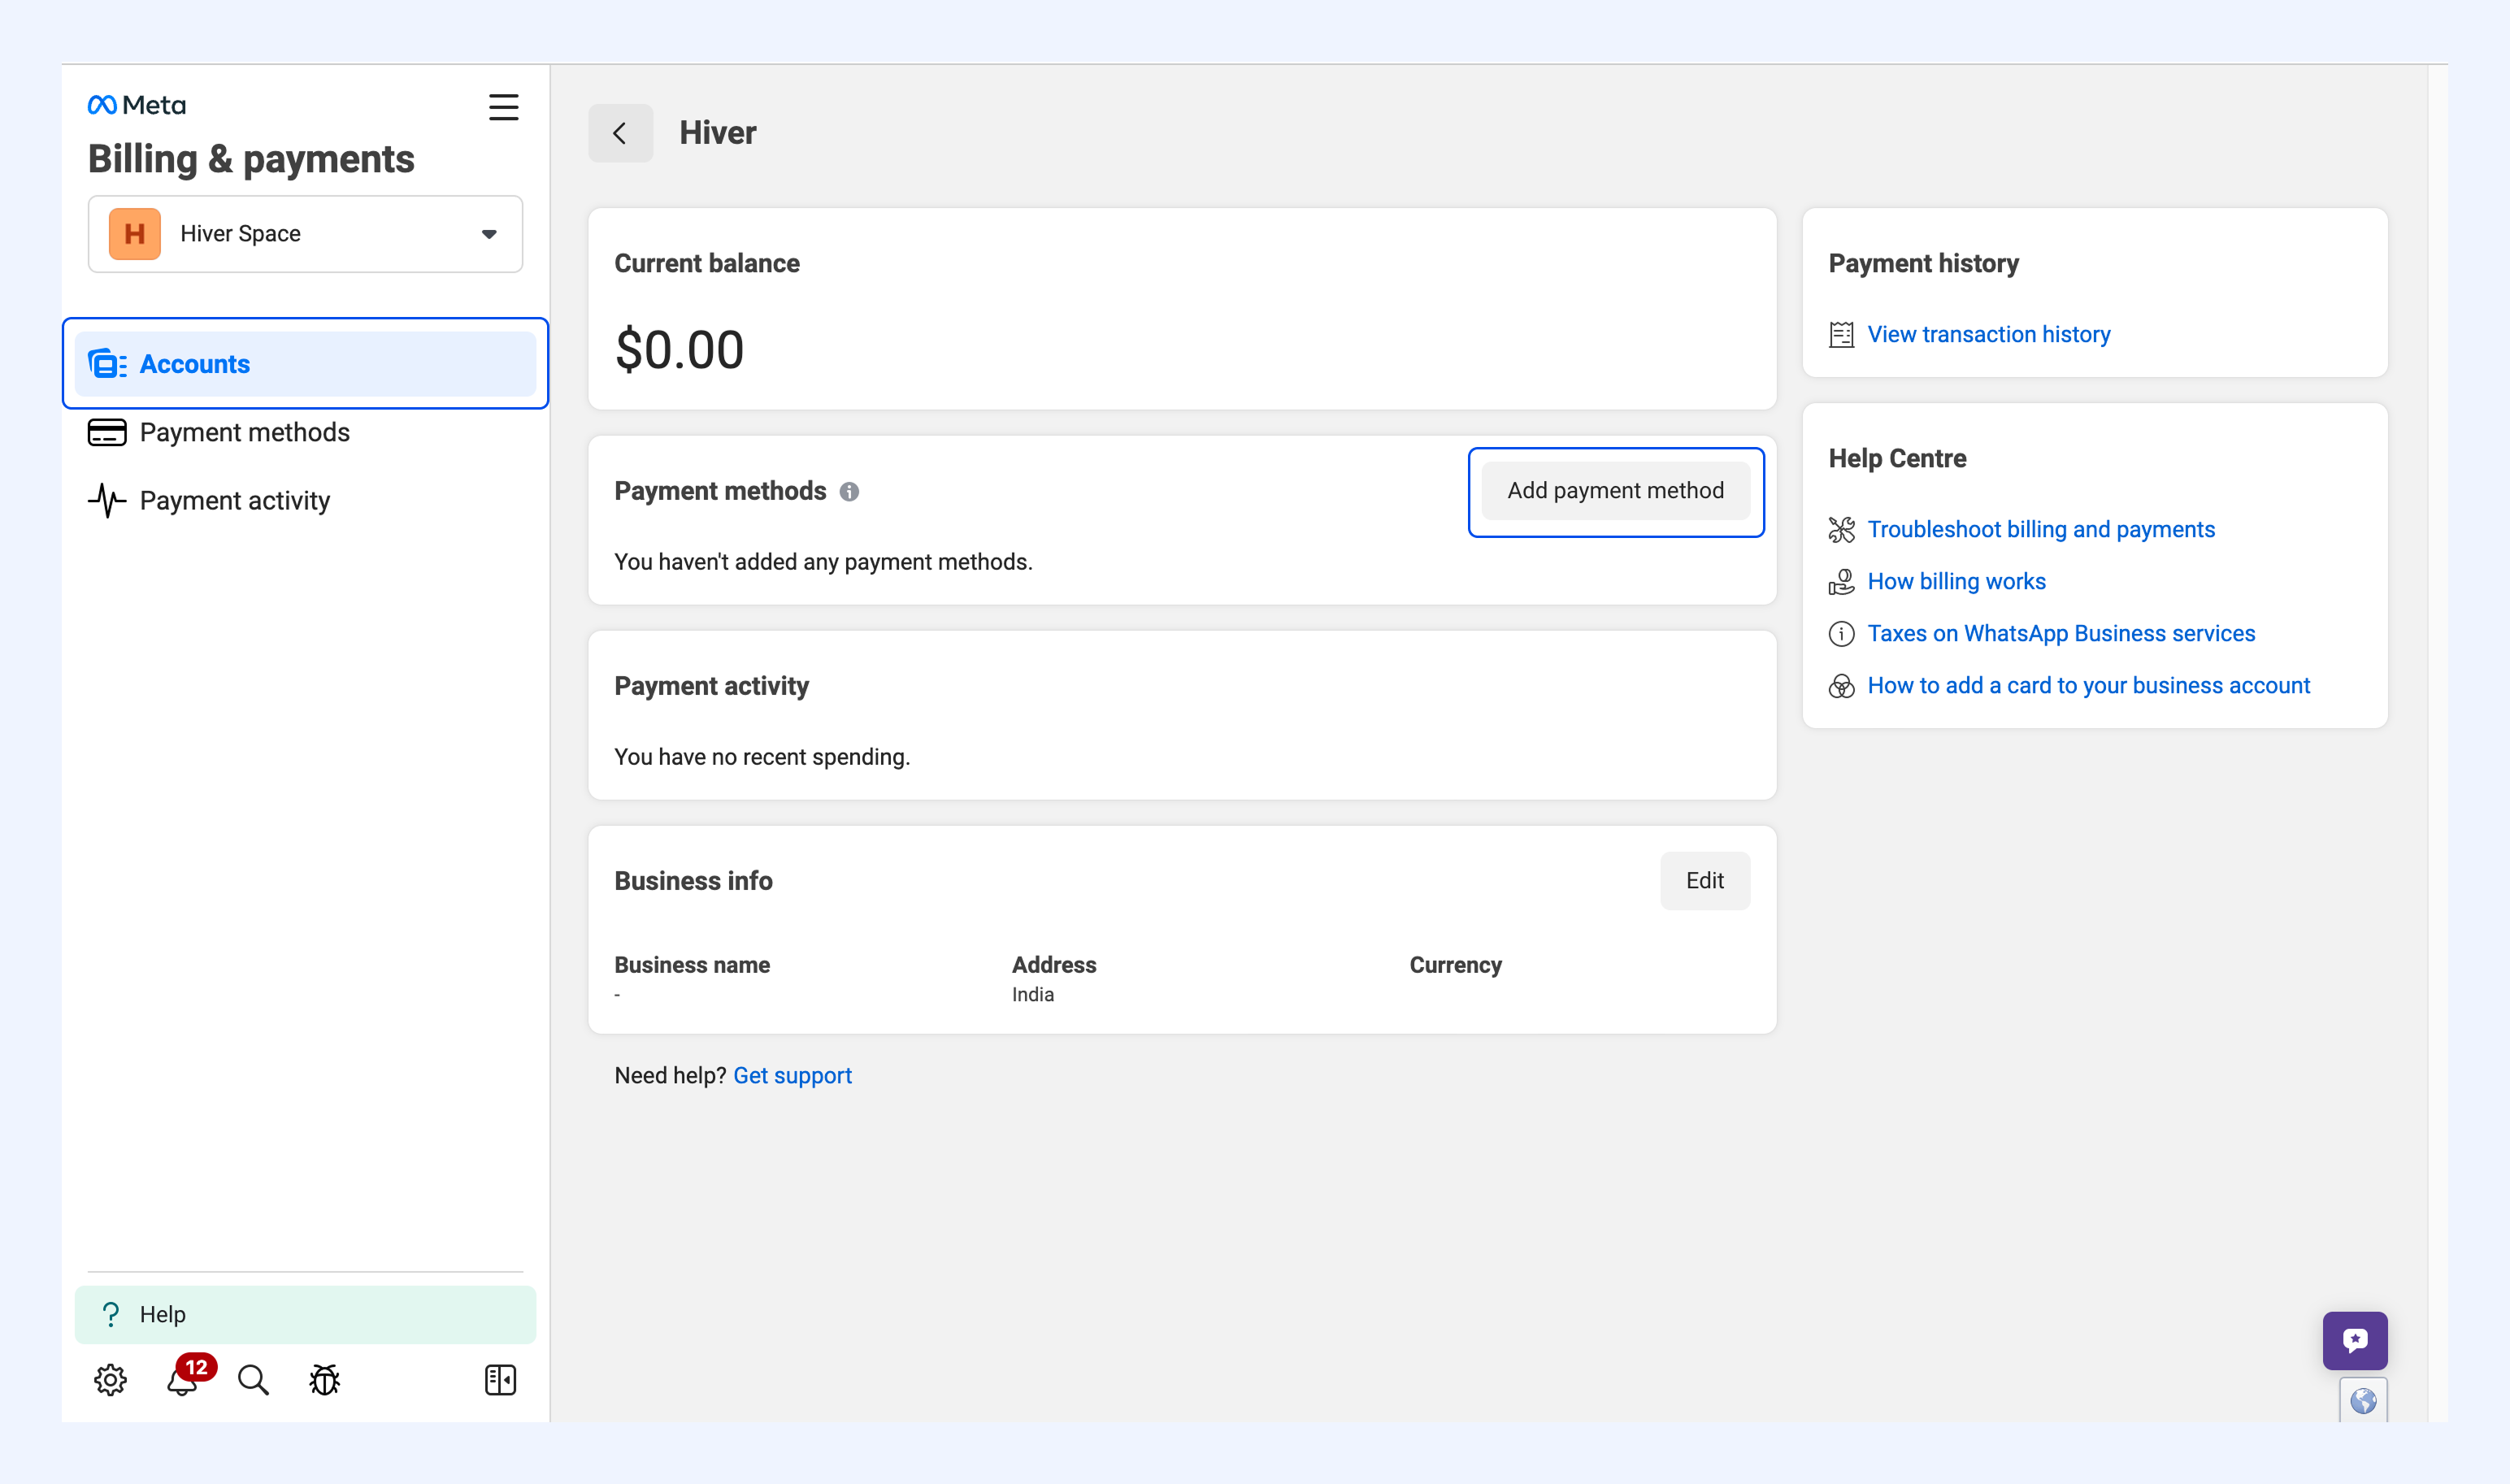
4. In the Accounts tab, click Add payment method.
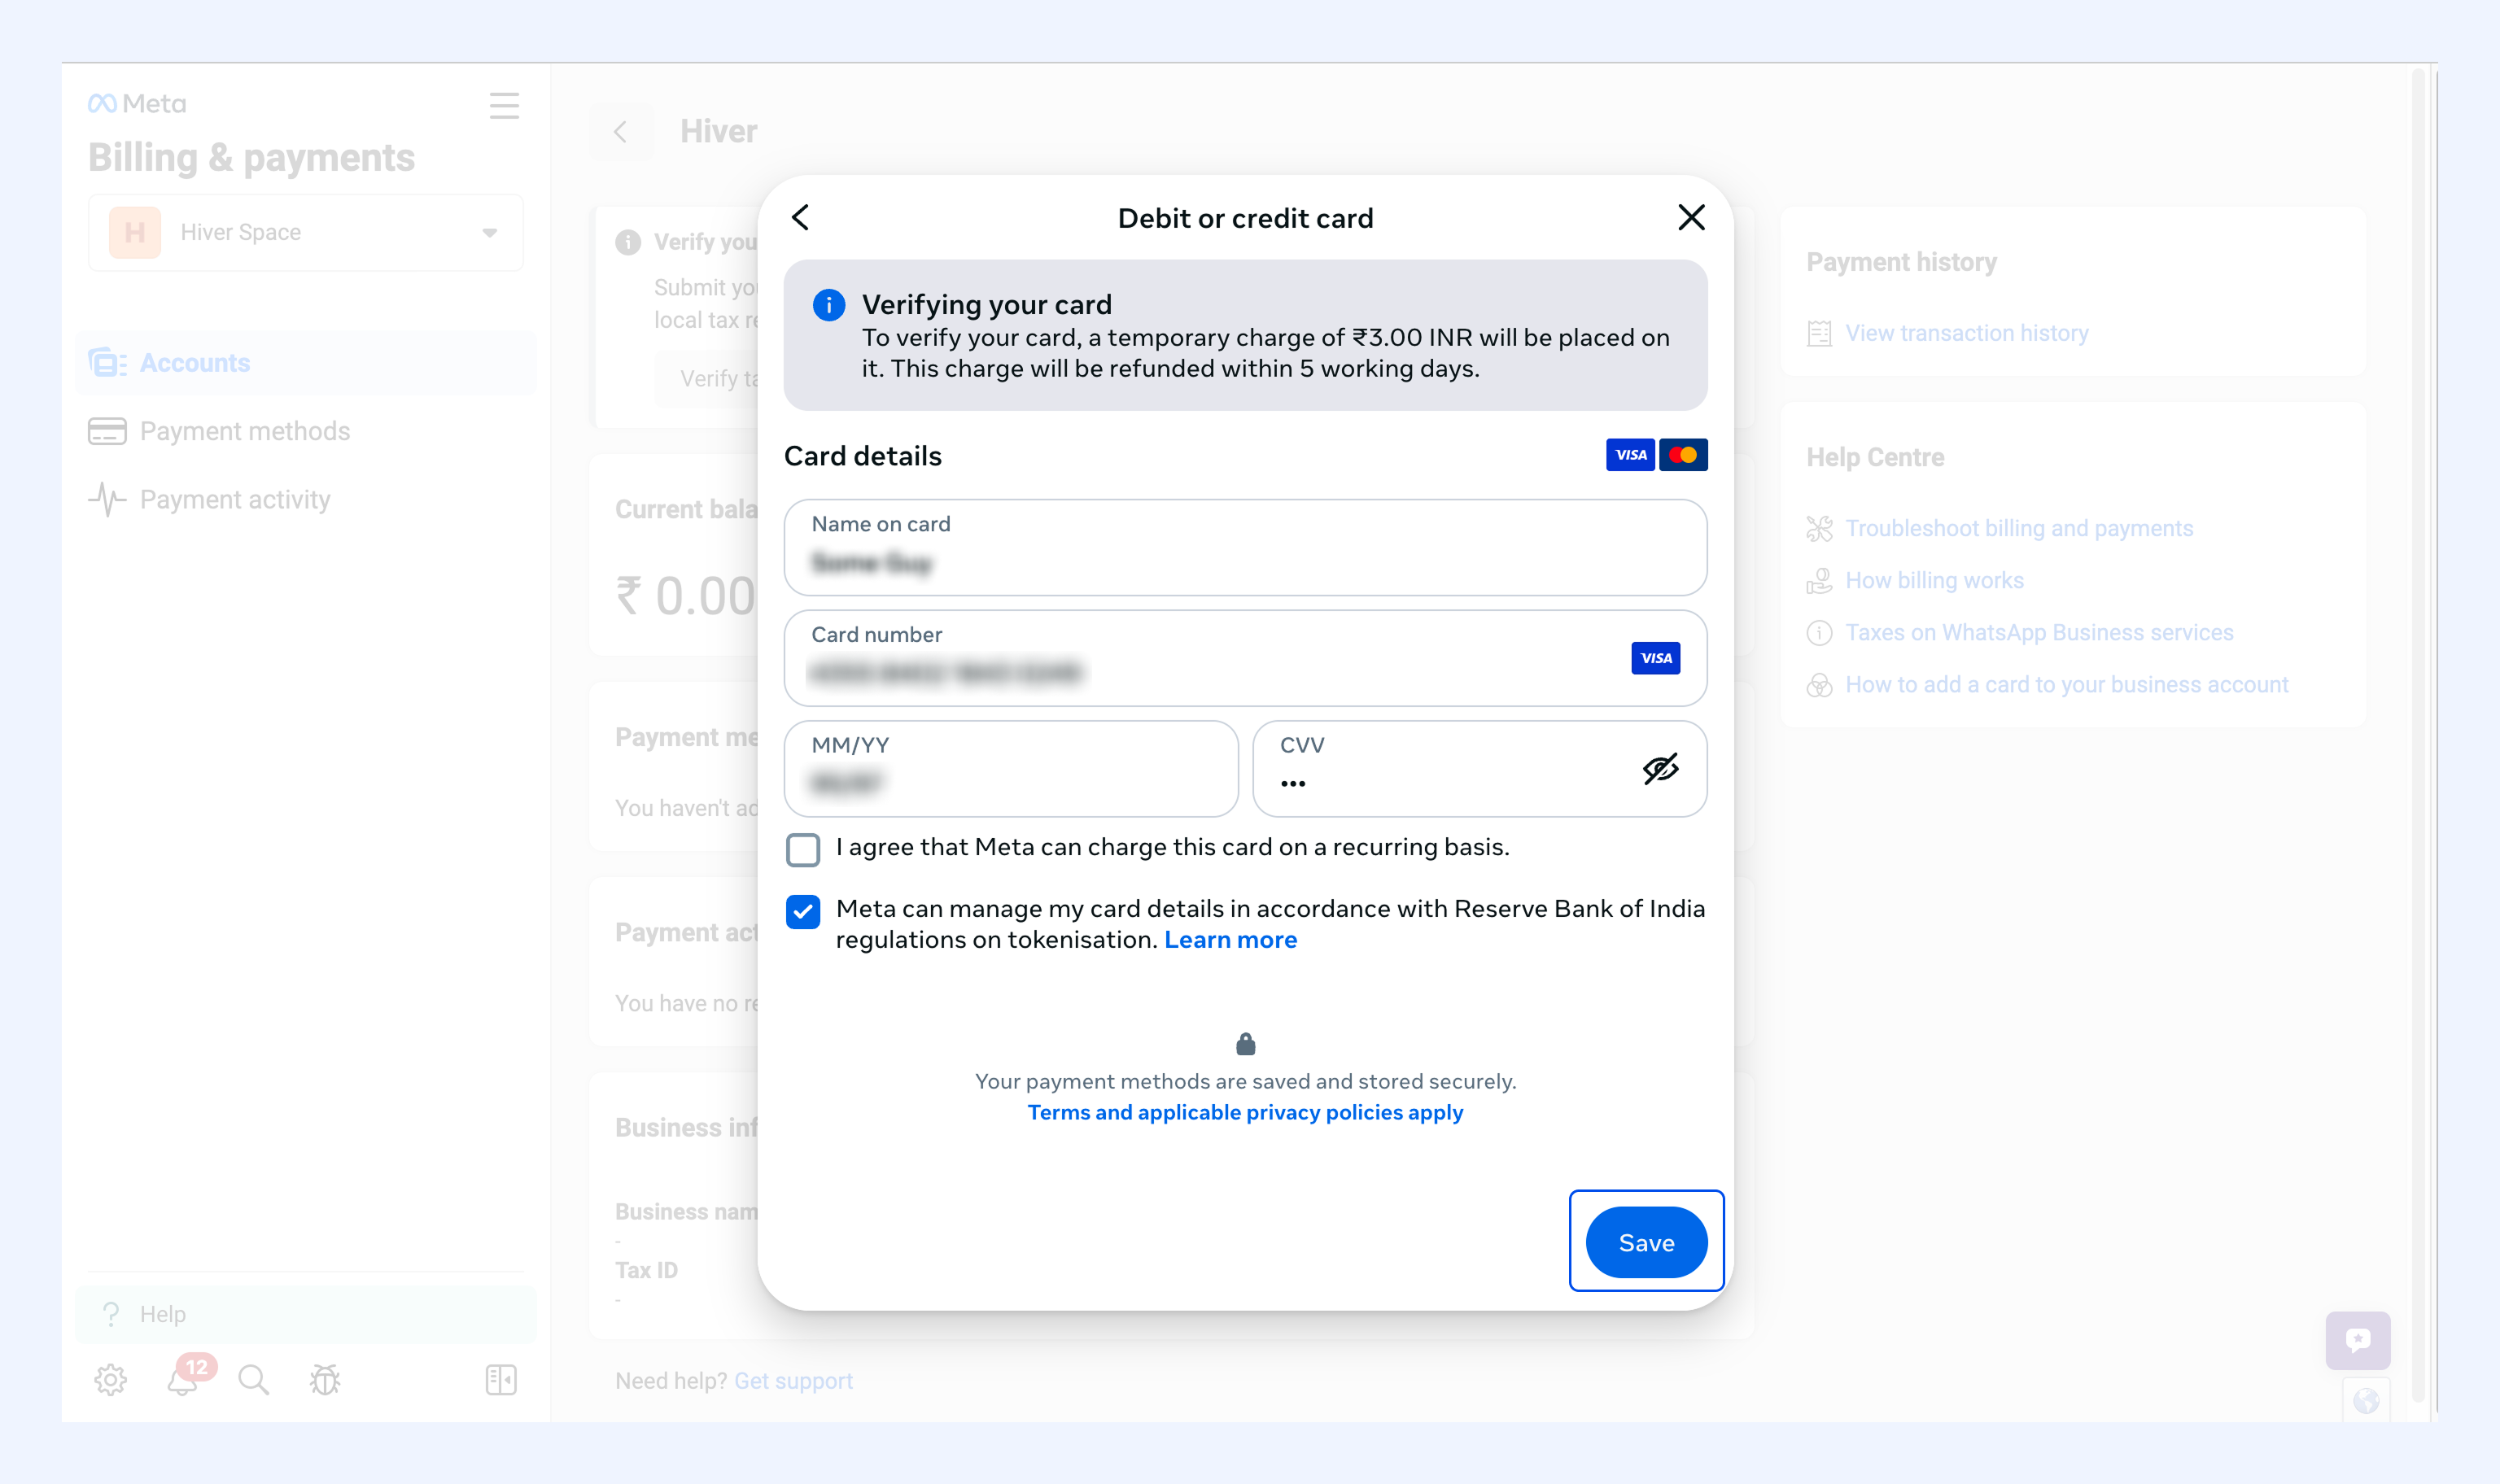
5. Click Add payment method, enter your card details, and click Save.
Find your Phone number ID
Meta needs one more step to activate your number: a couple of requests through Graph API Explorer. Start by getting your Phone number ID.
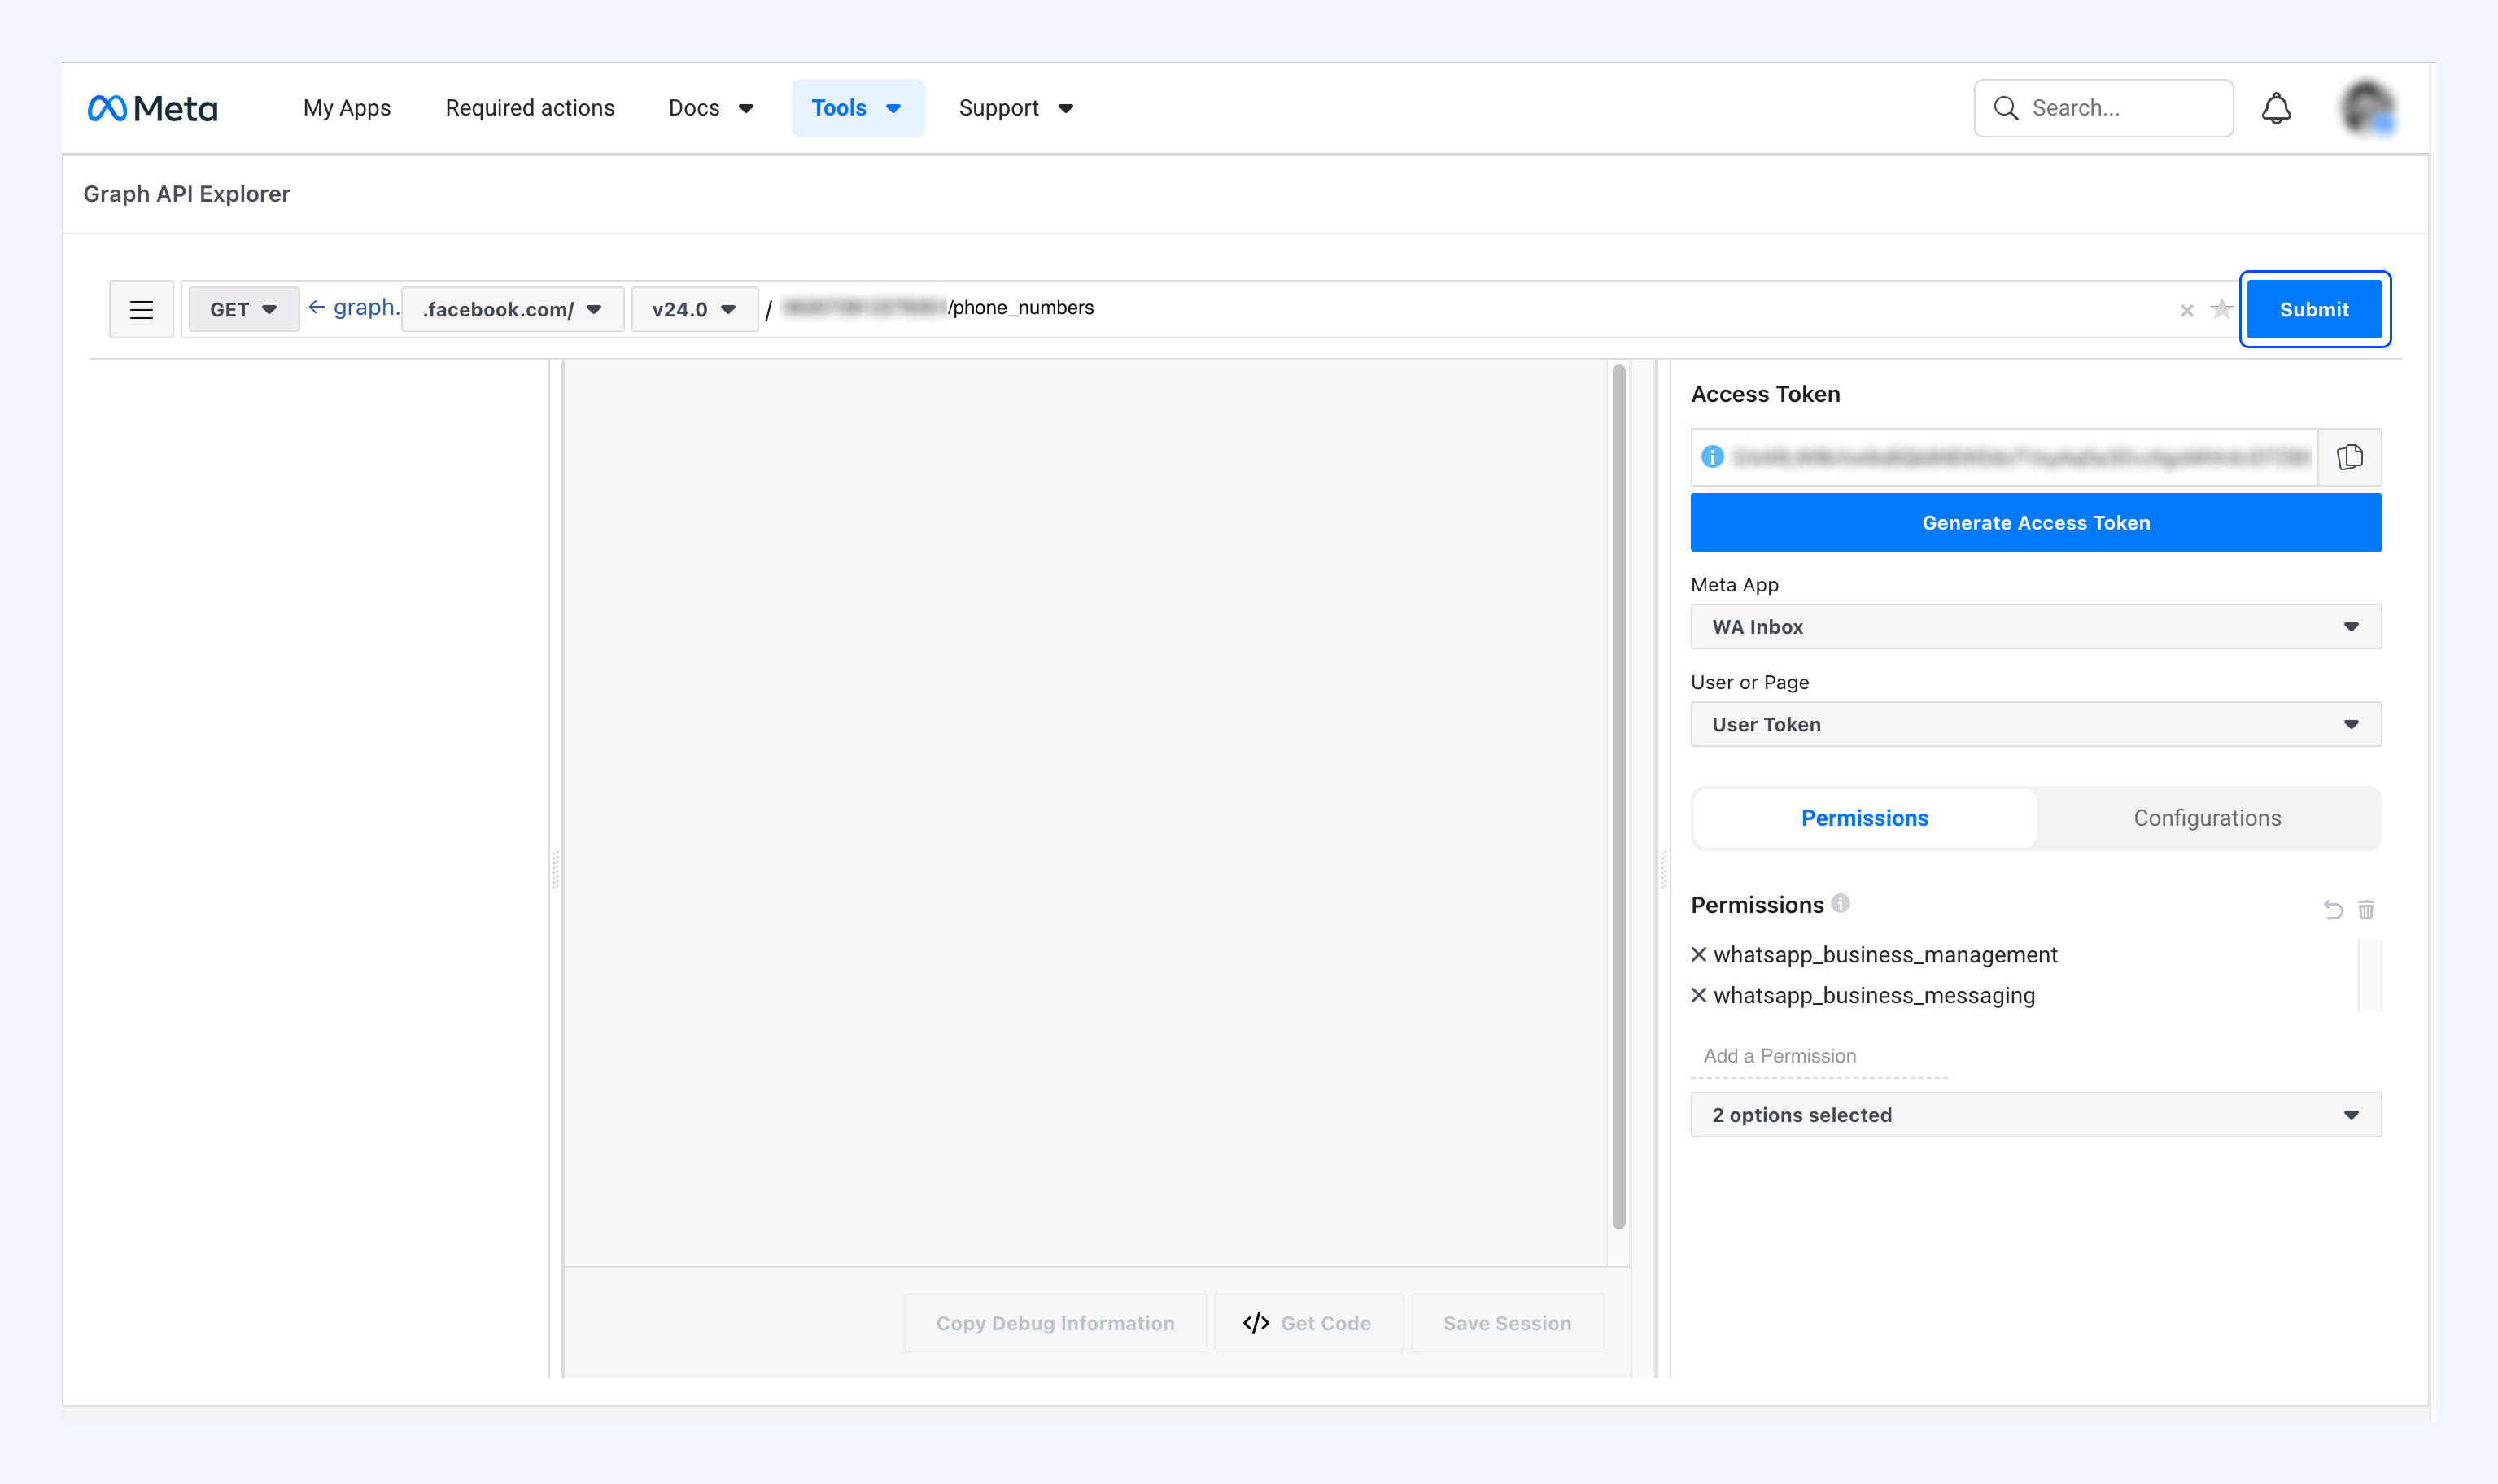
1. Go to Graph API Explorer.
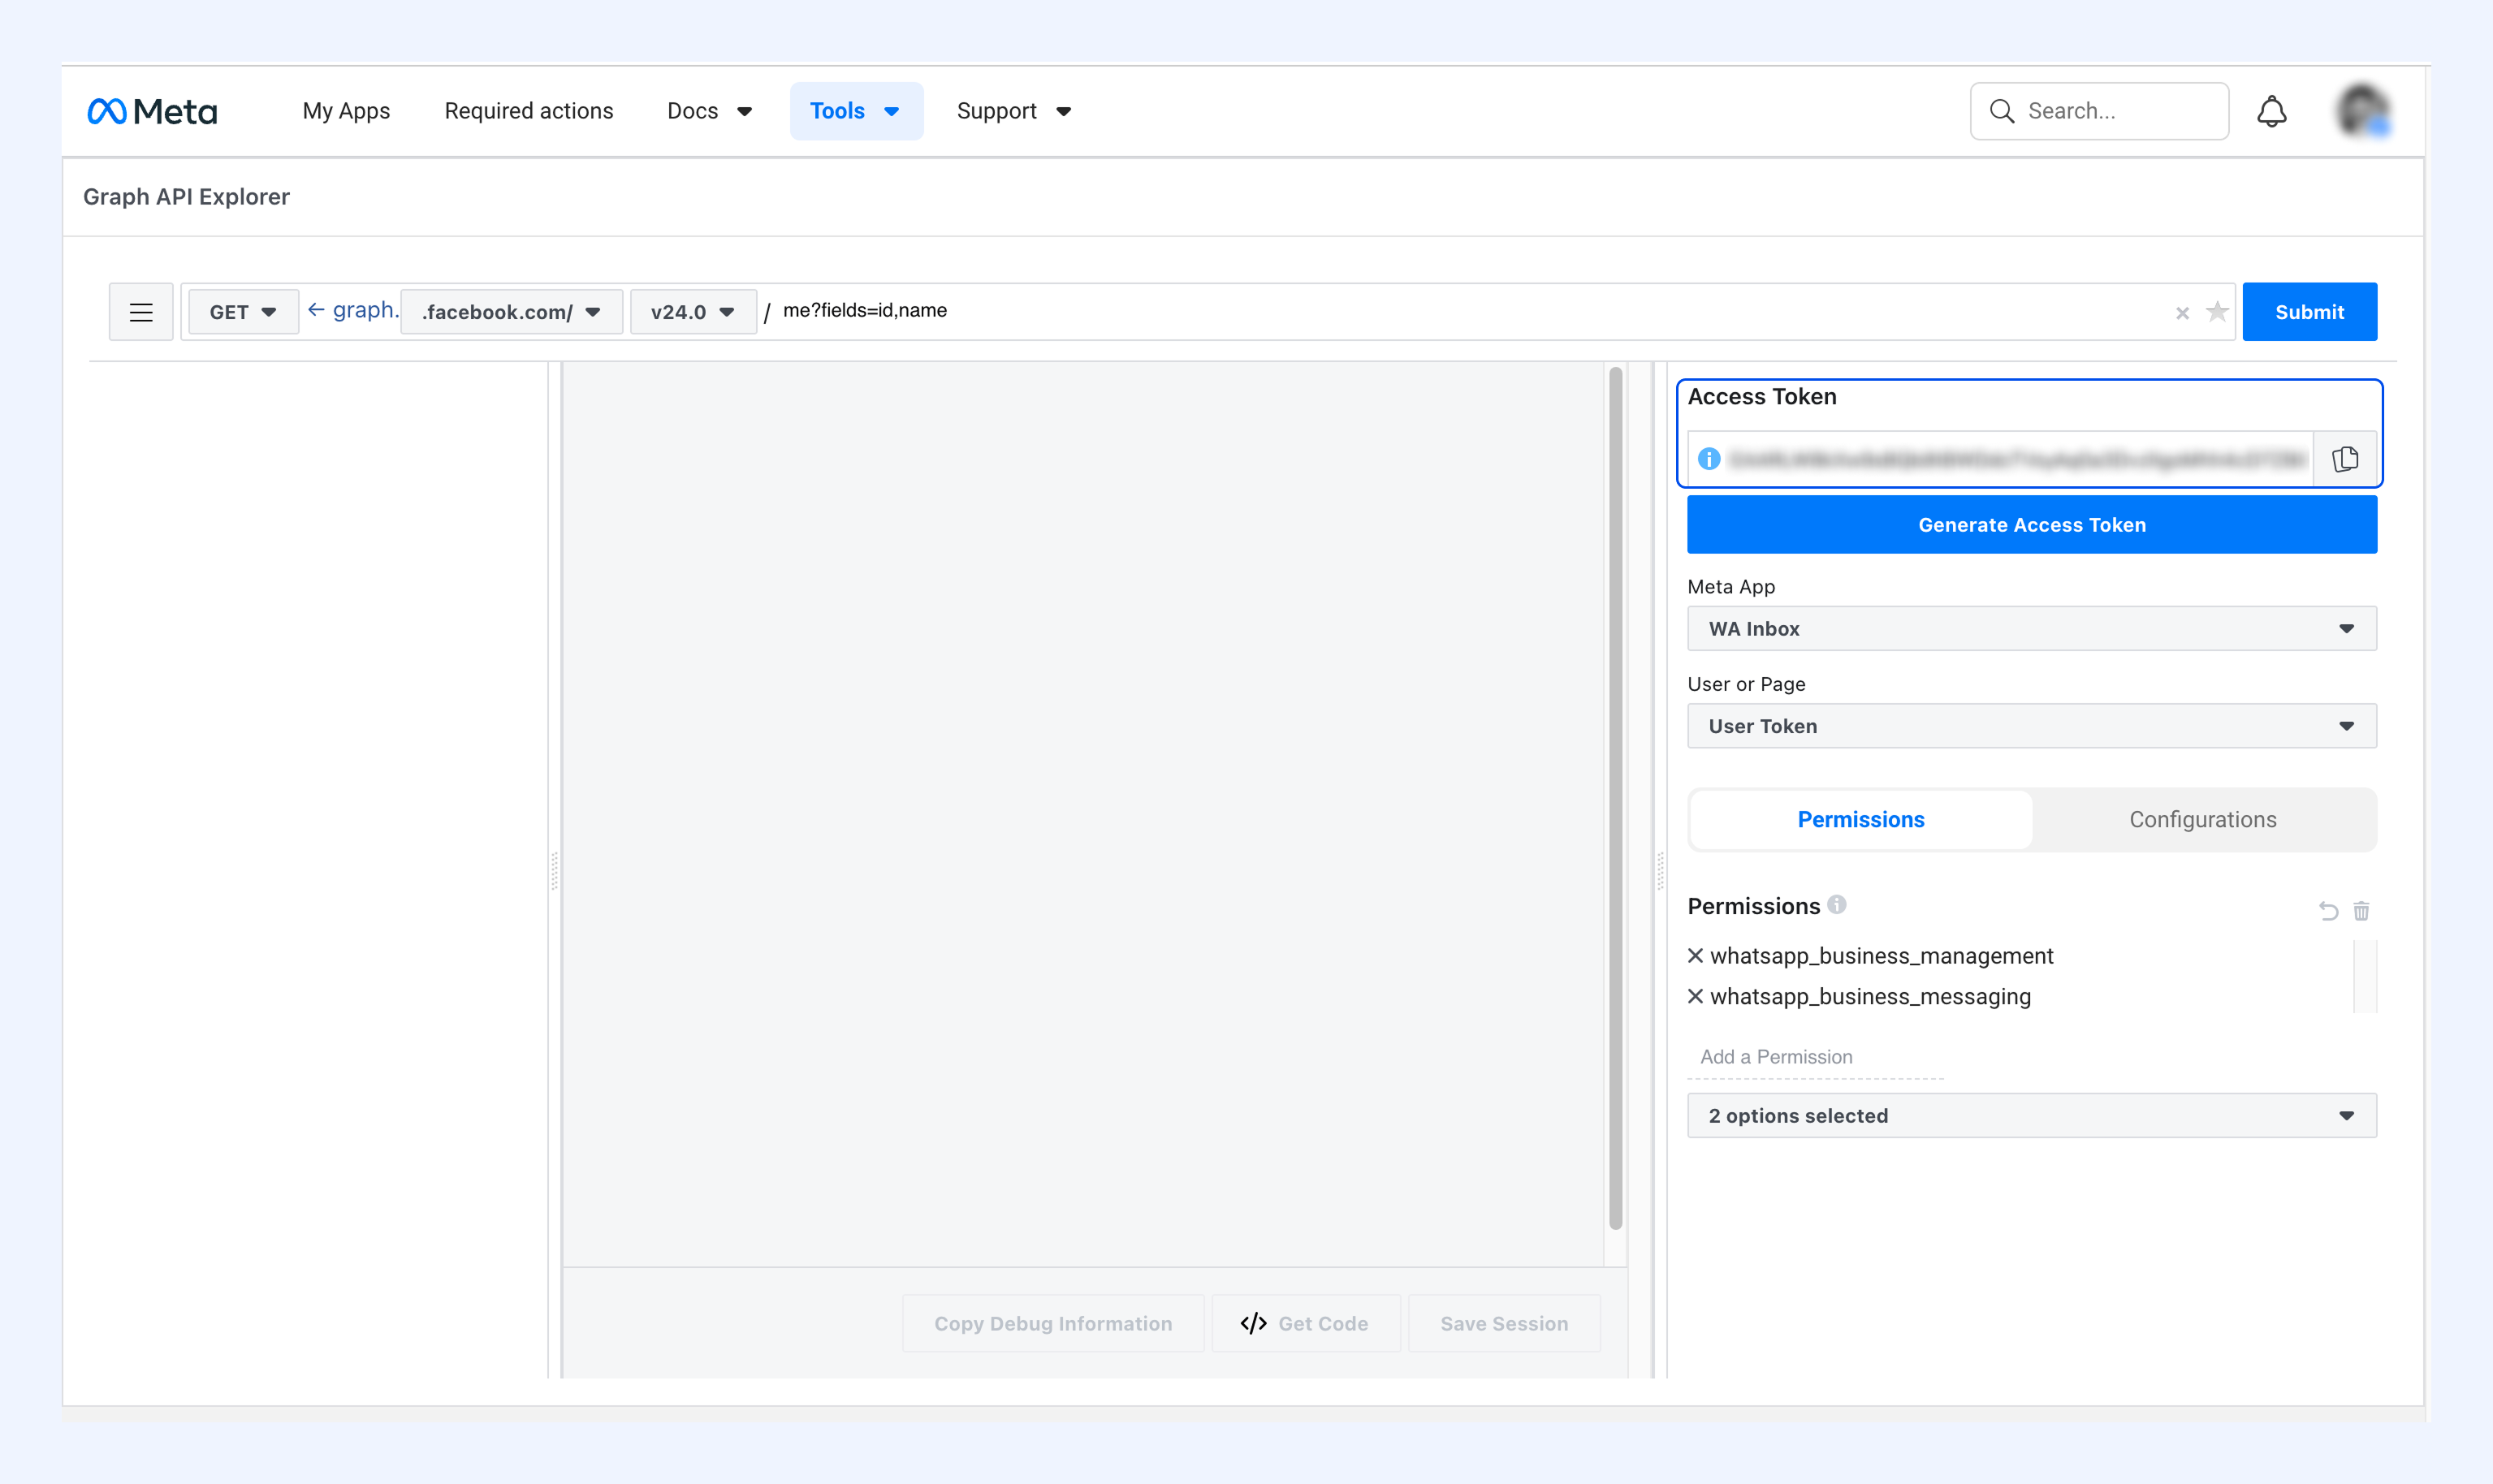
2. In the Access Token field, paste the permanent access token you generated earlier.
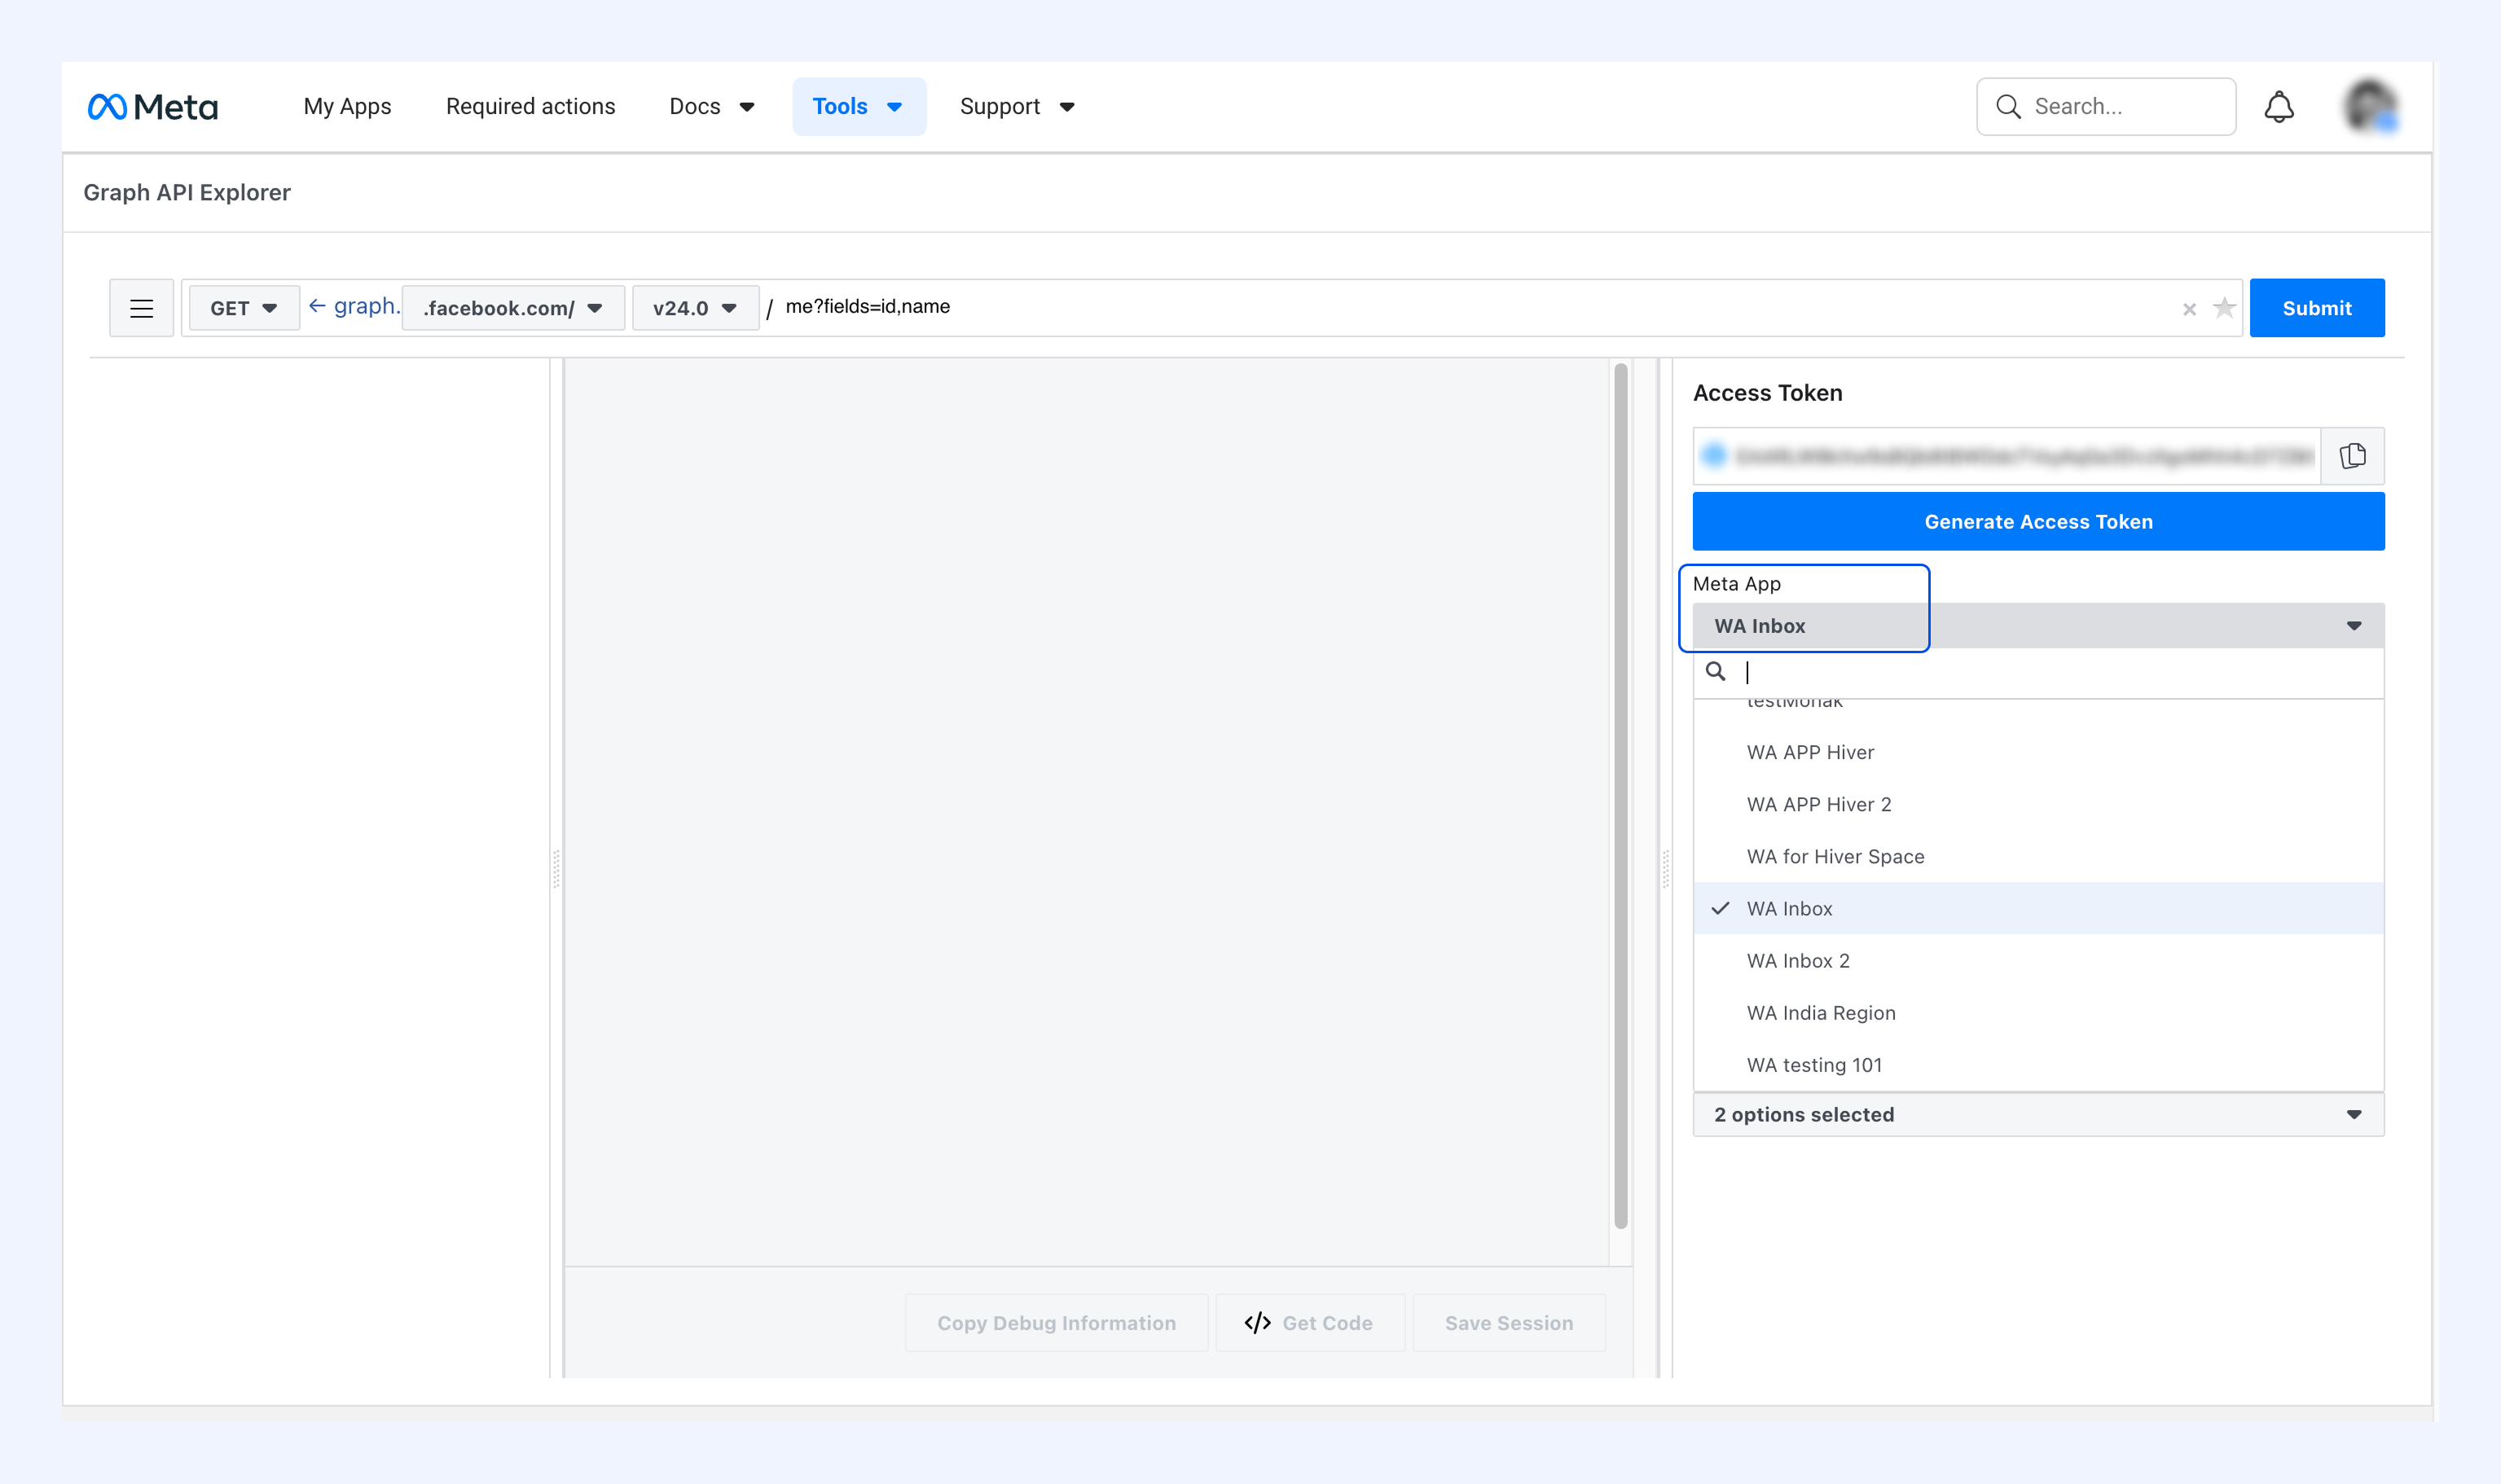
3. Select your app from the Meta App dropdown.
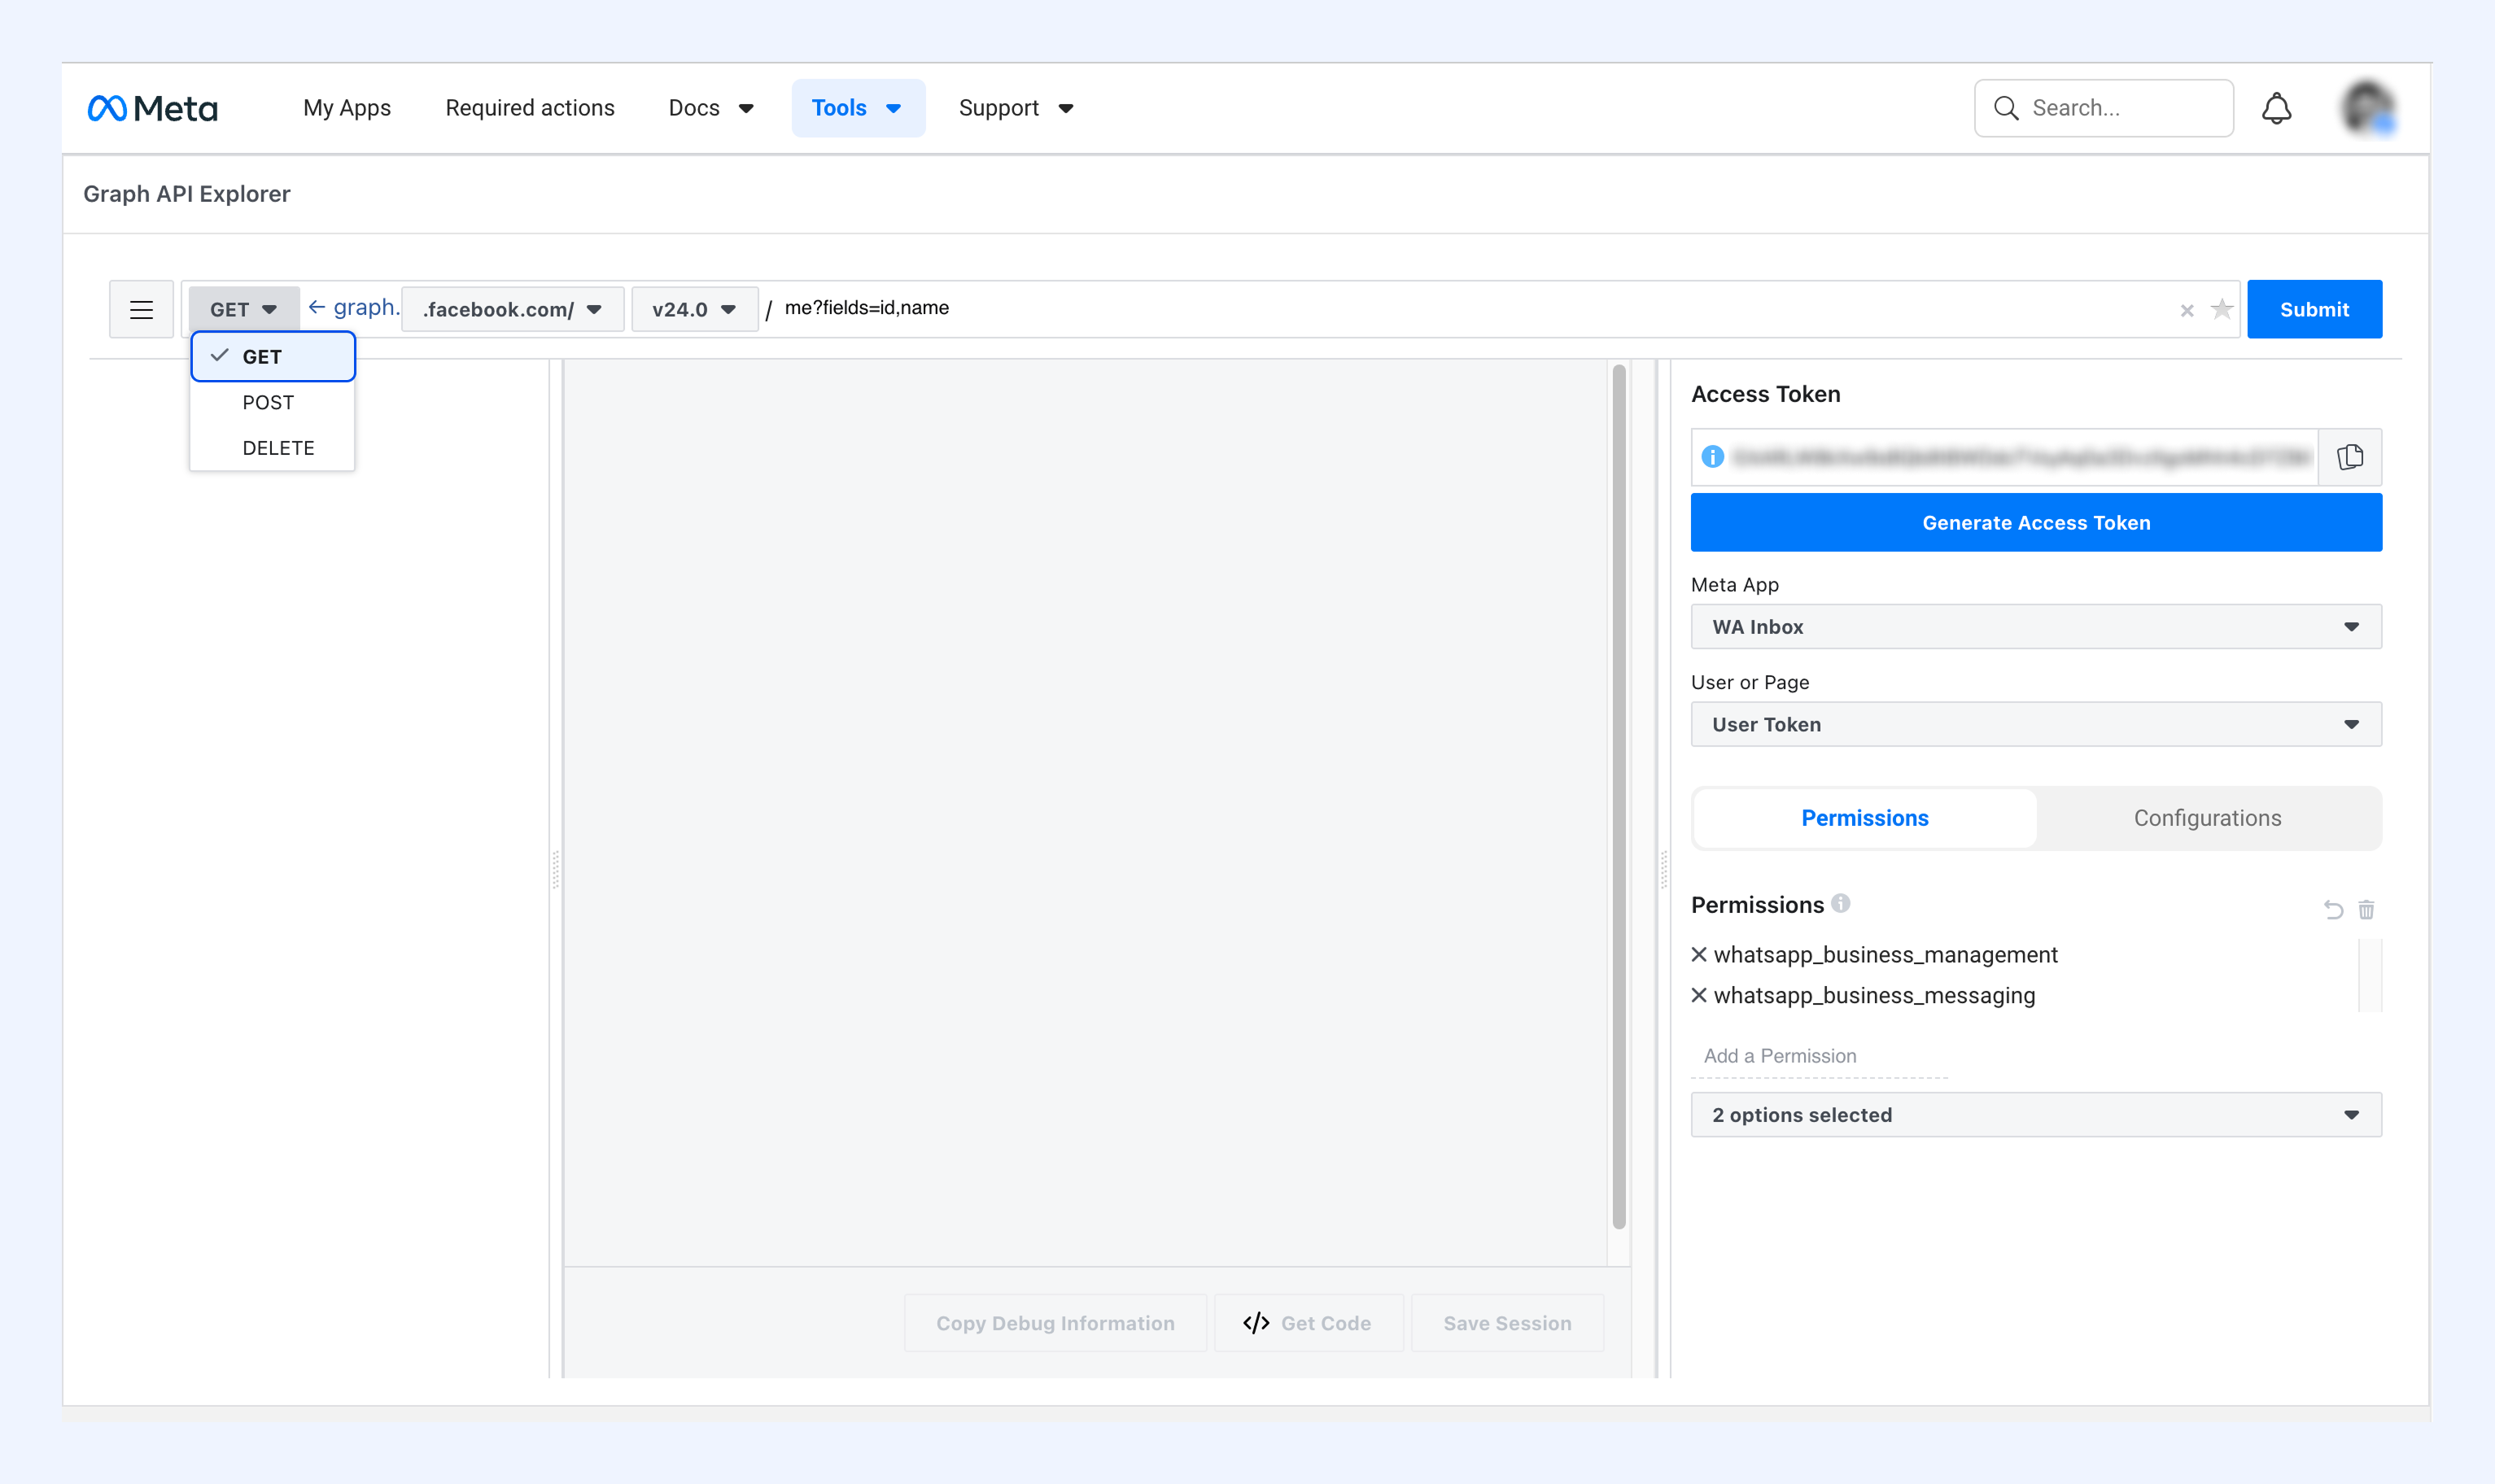
4. Set the request type to GET.
5. Enter the endpoint: {whatsapp-business-account-ID}/phone_numbers
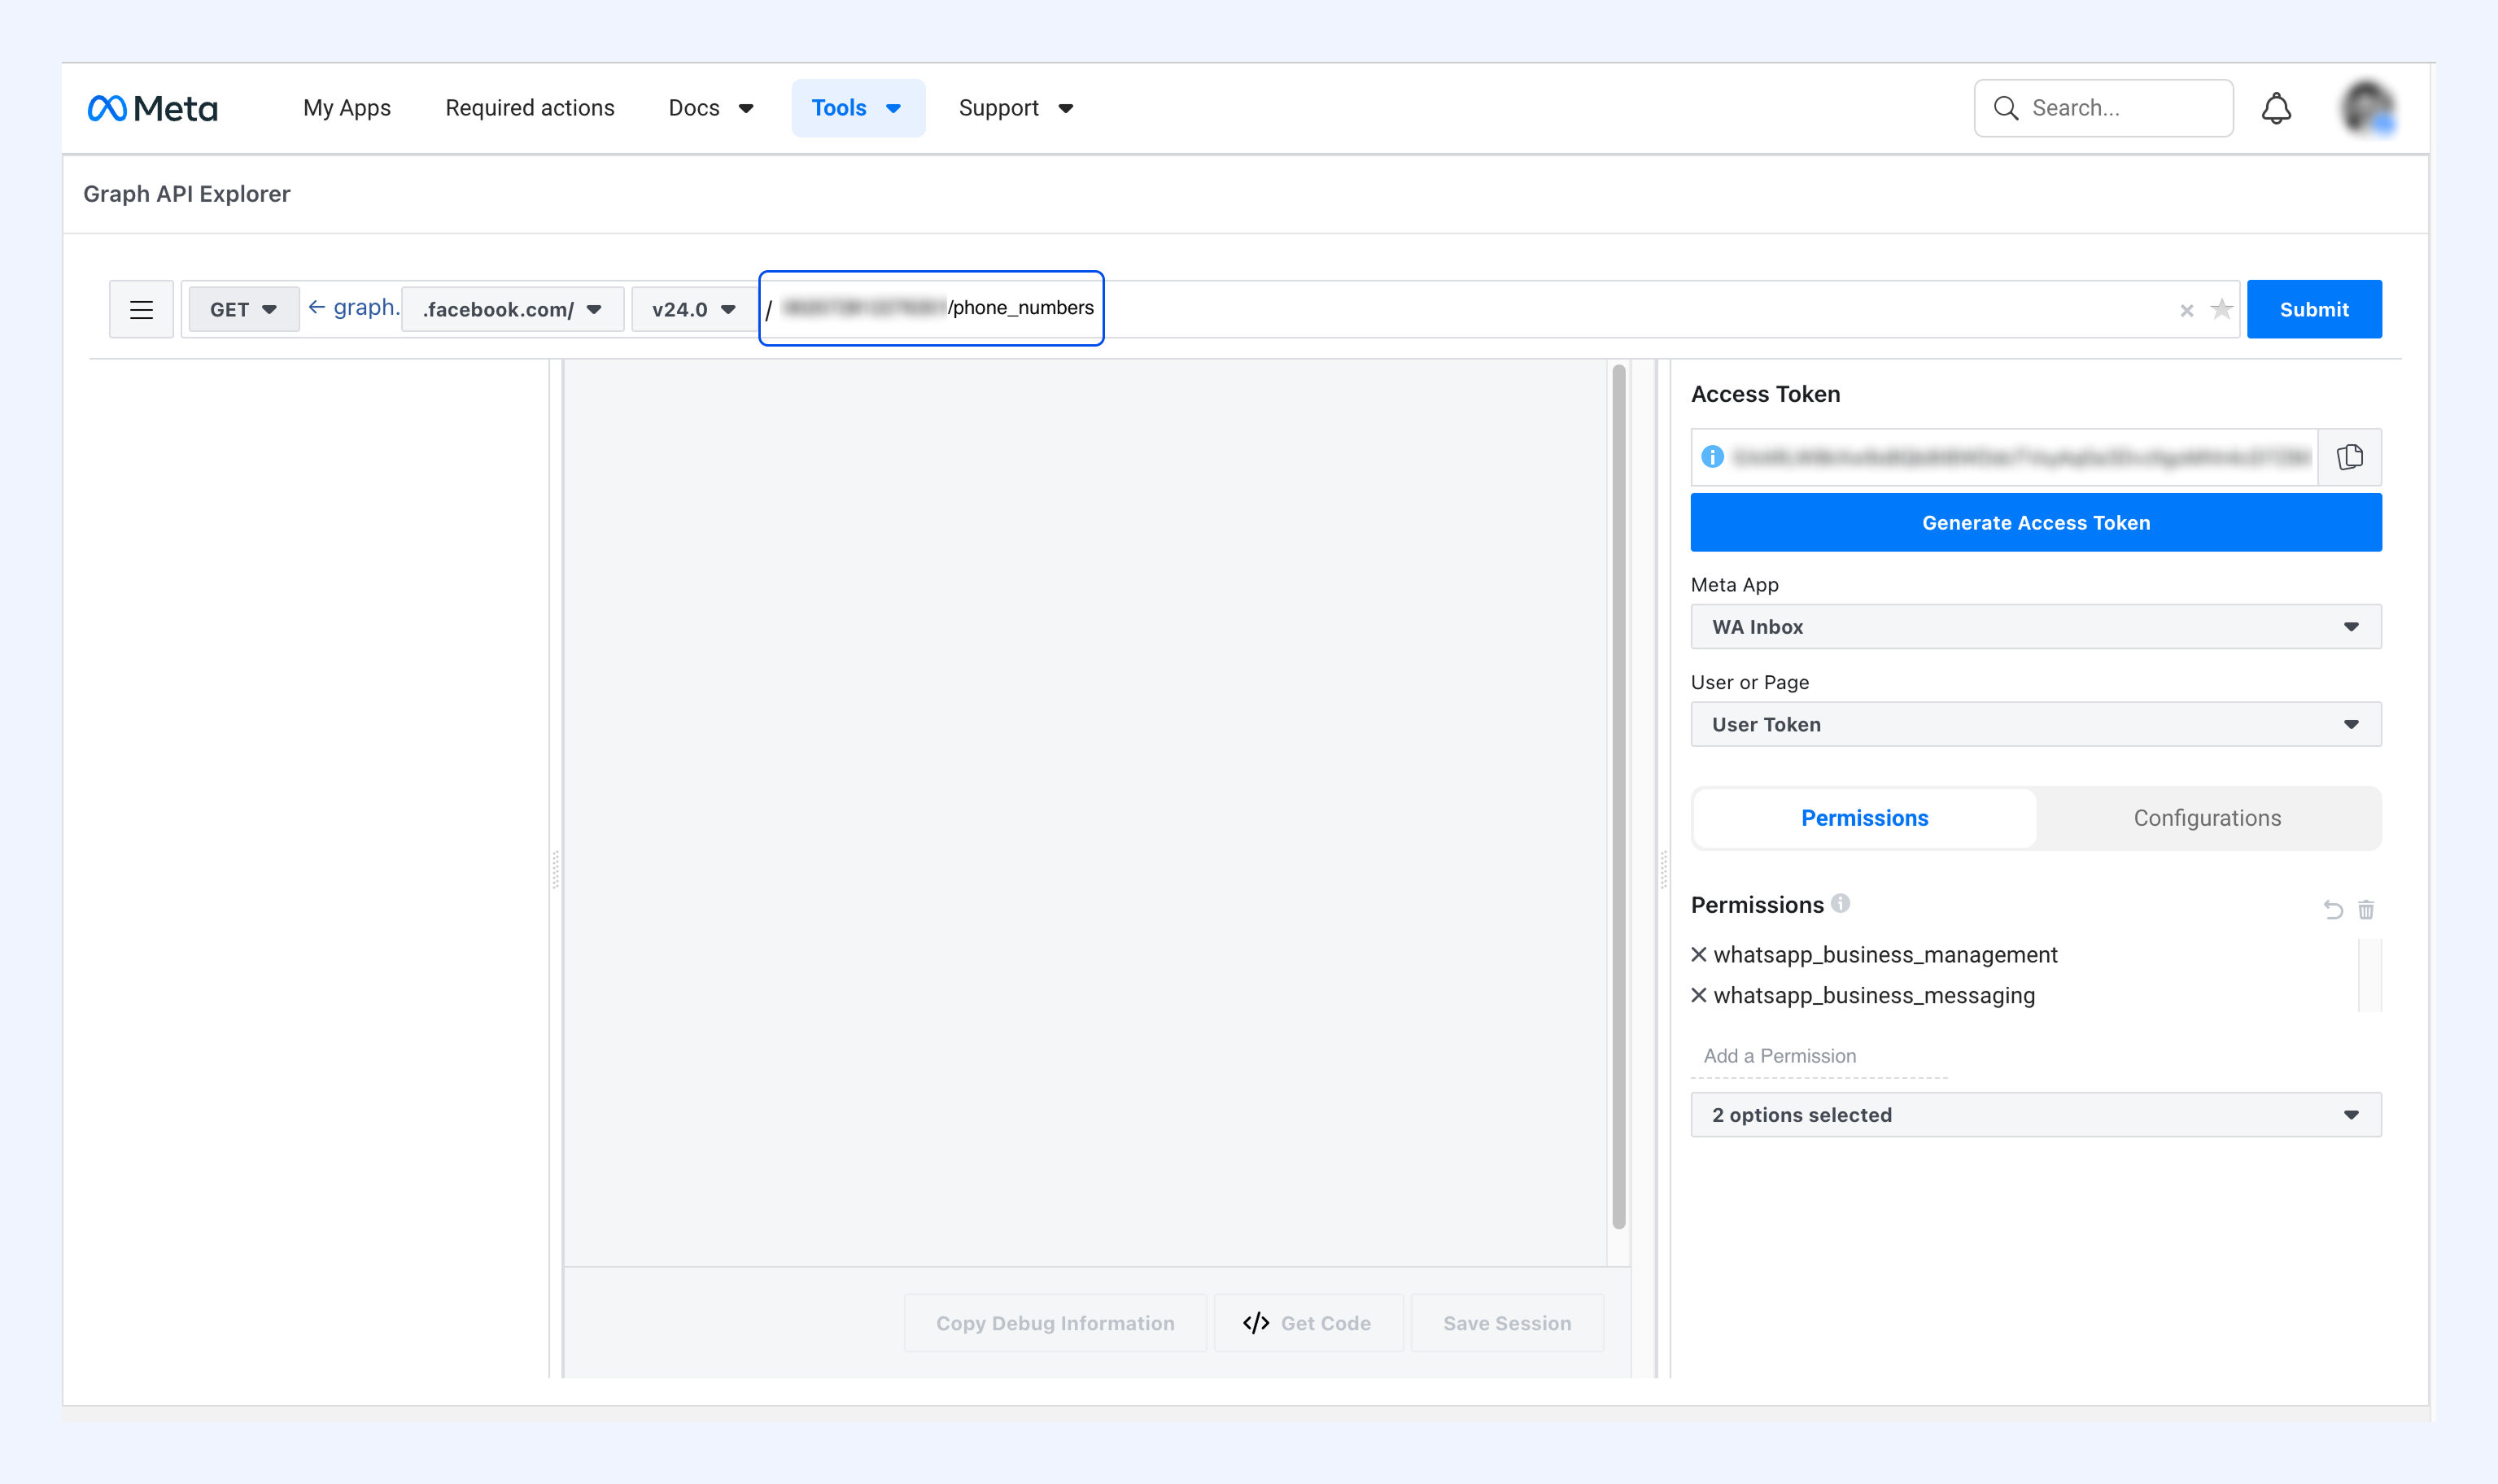
Note: You can copy your WhatsApp Business Account ID from Meta Business Manager → Settings → Accounts → WhatsApp Accounts.
6. Click Submit.
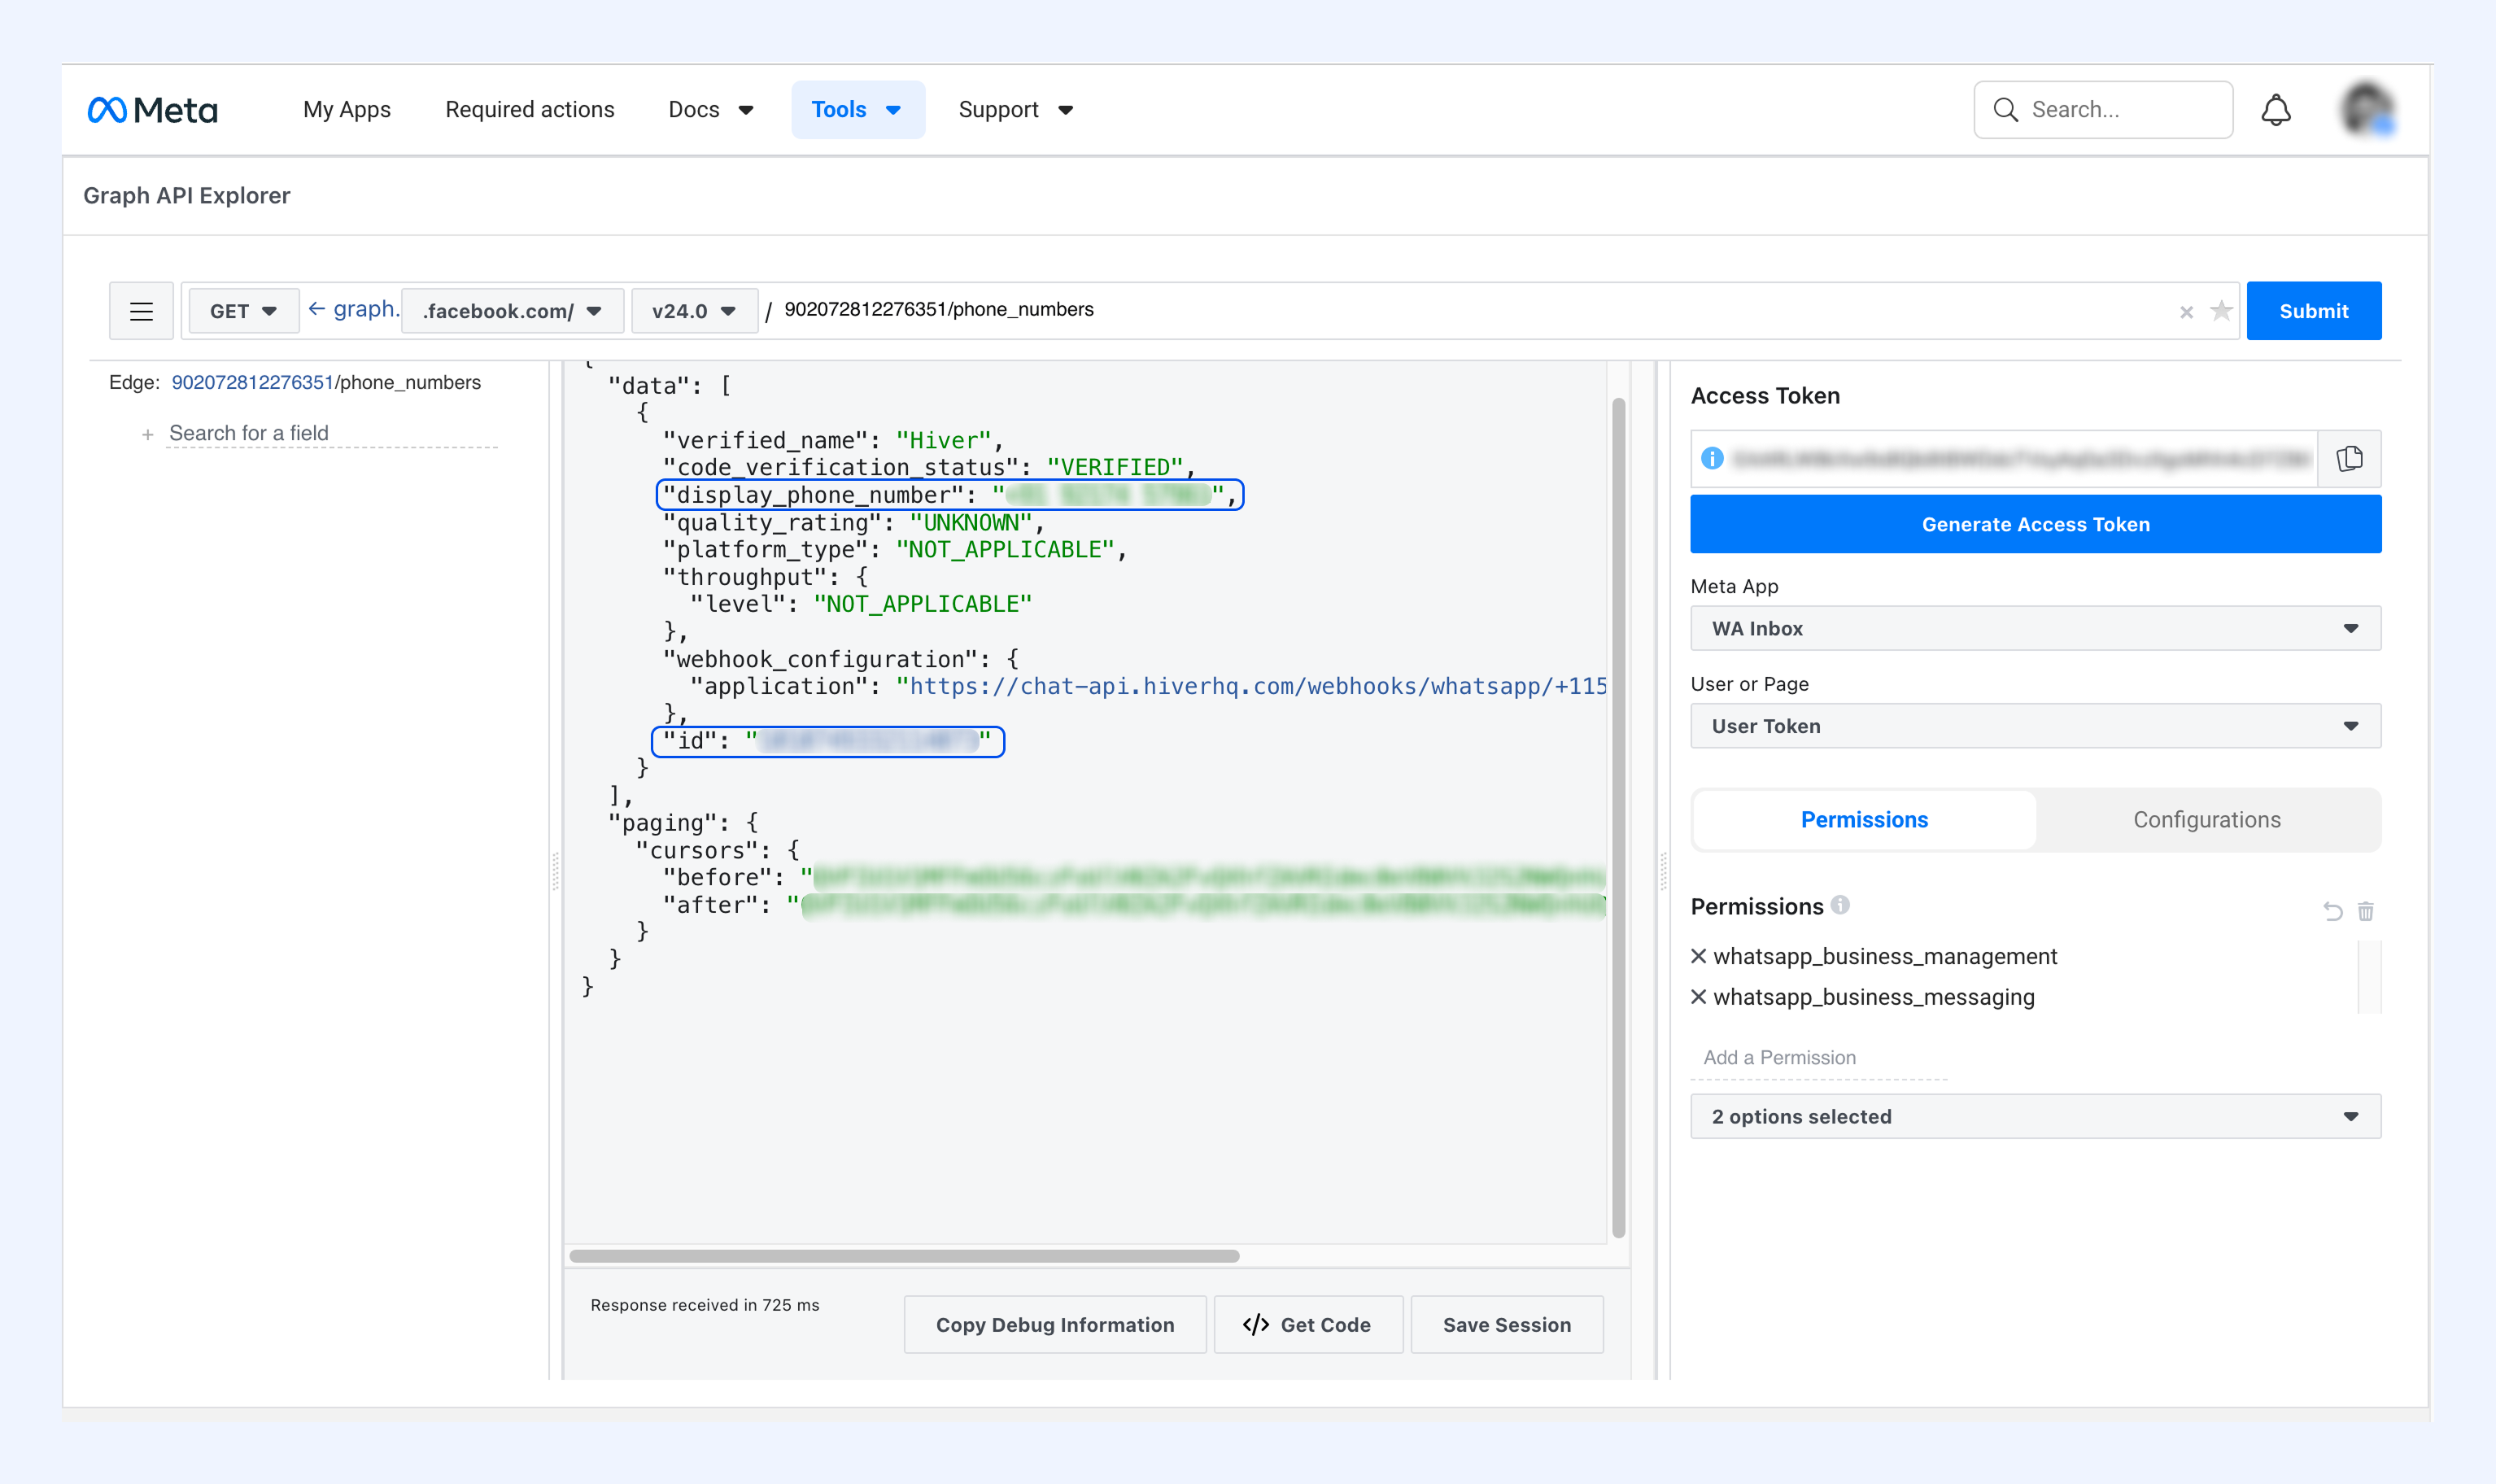
7. In the response, confirm your phone number is correct and copy the Phone number ID (the id field).
Register your number
1. Keep your app and access token as they are.
2. Change the request method to POST.
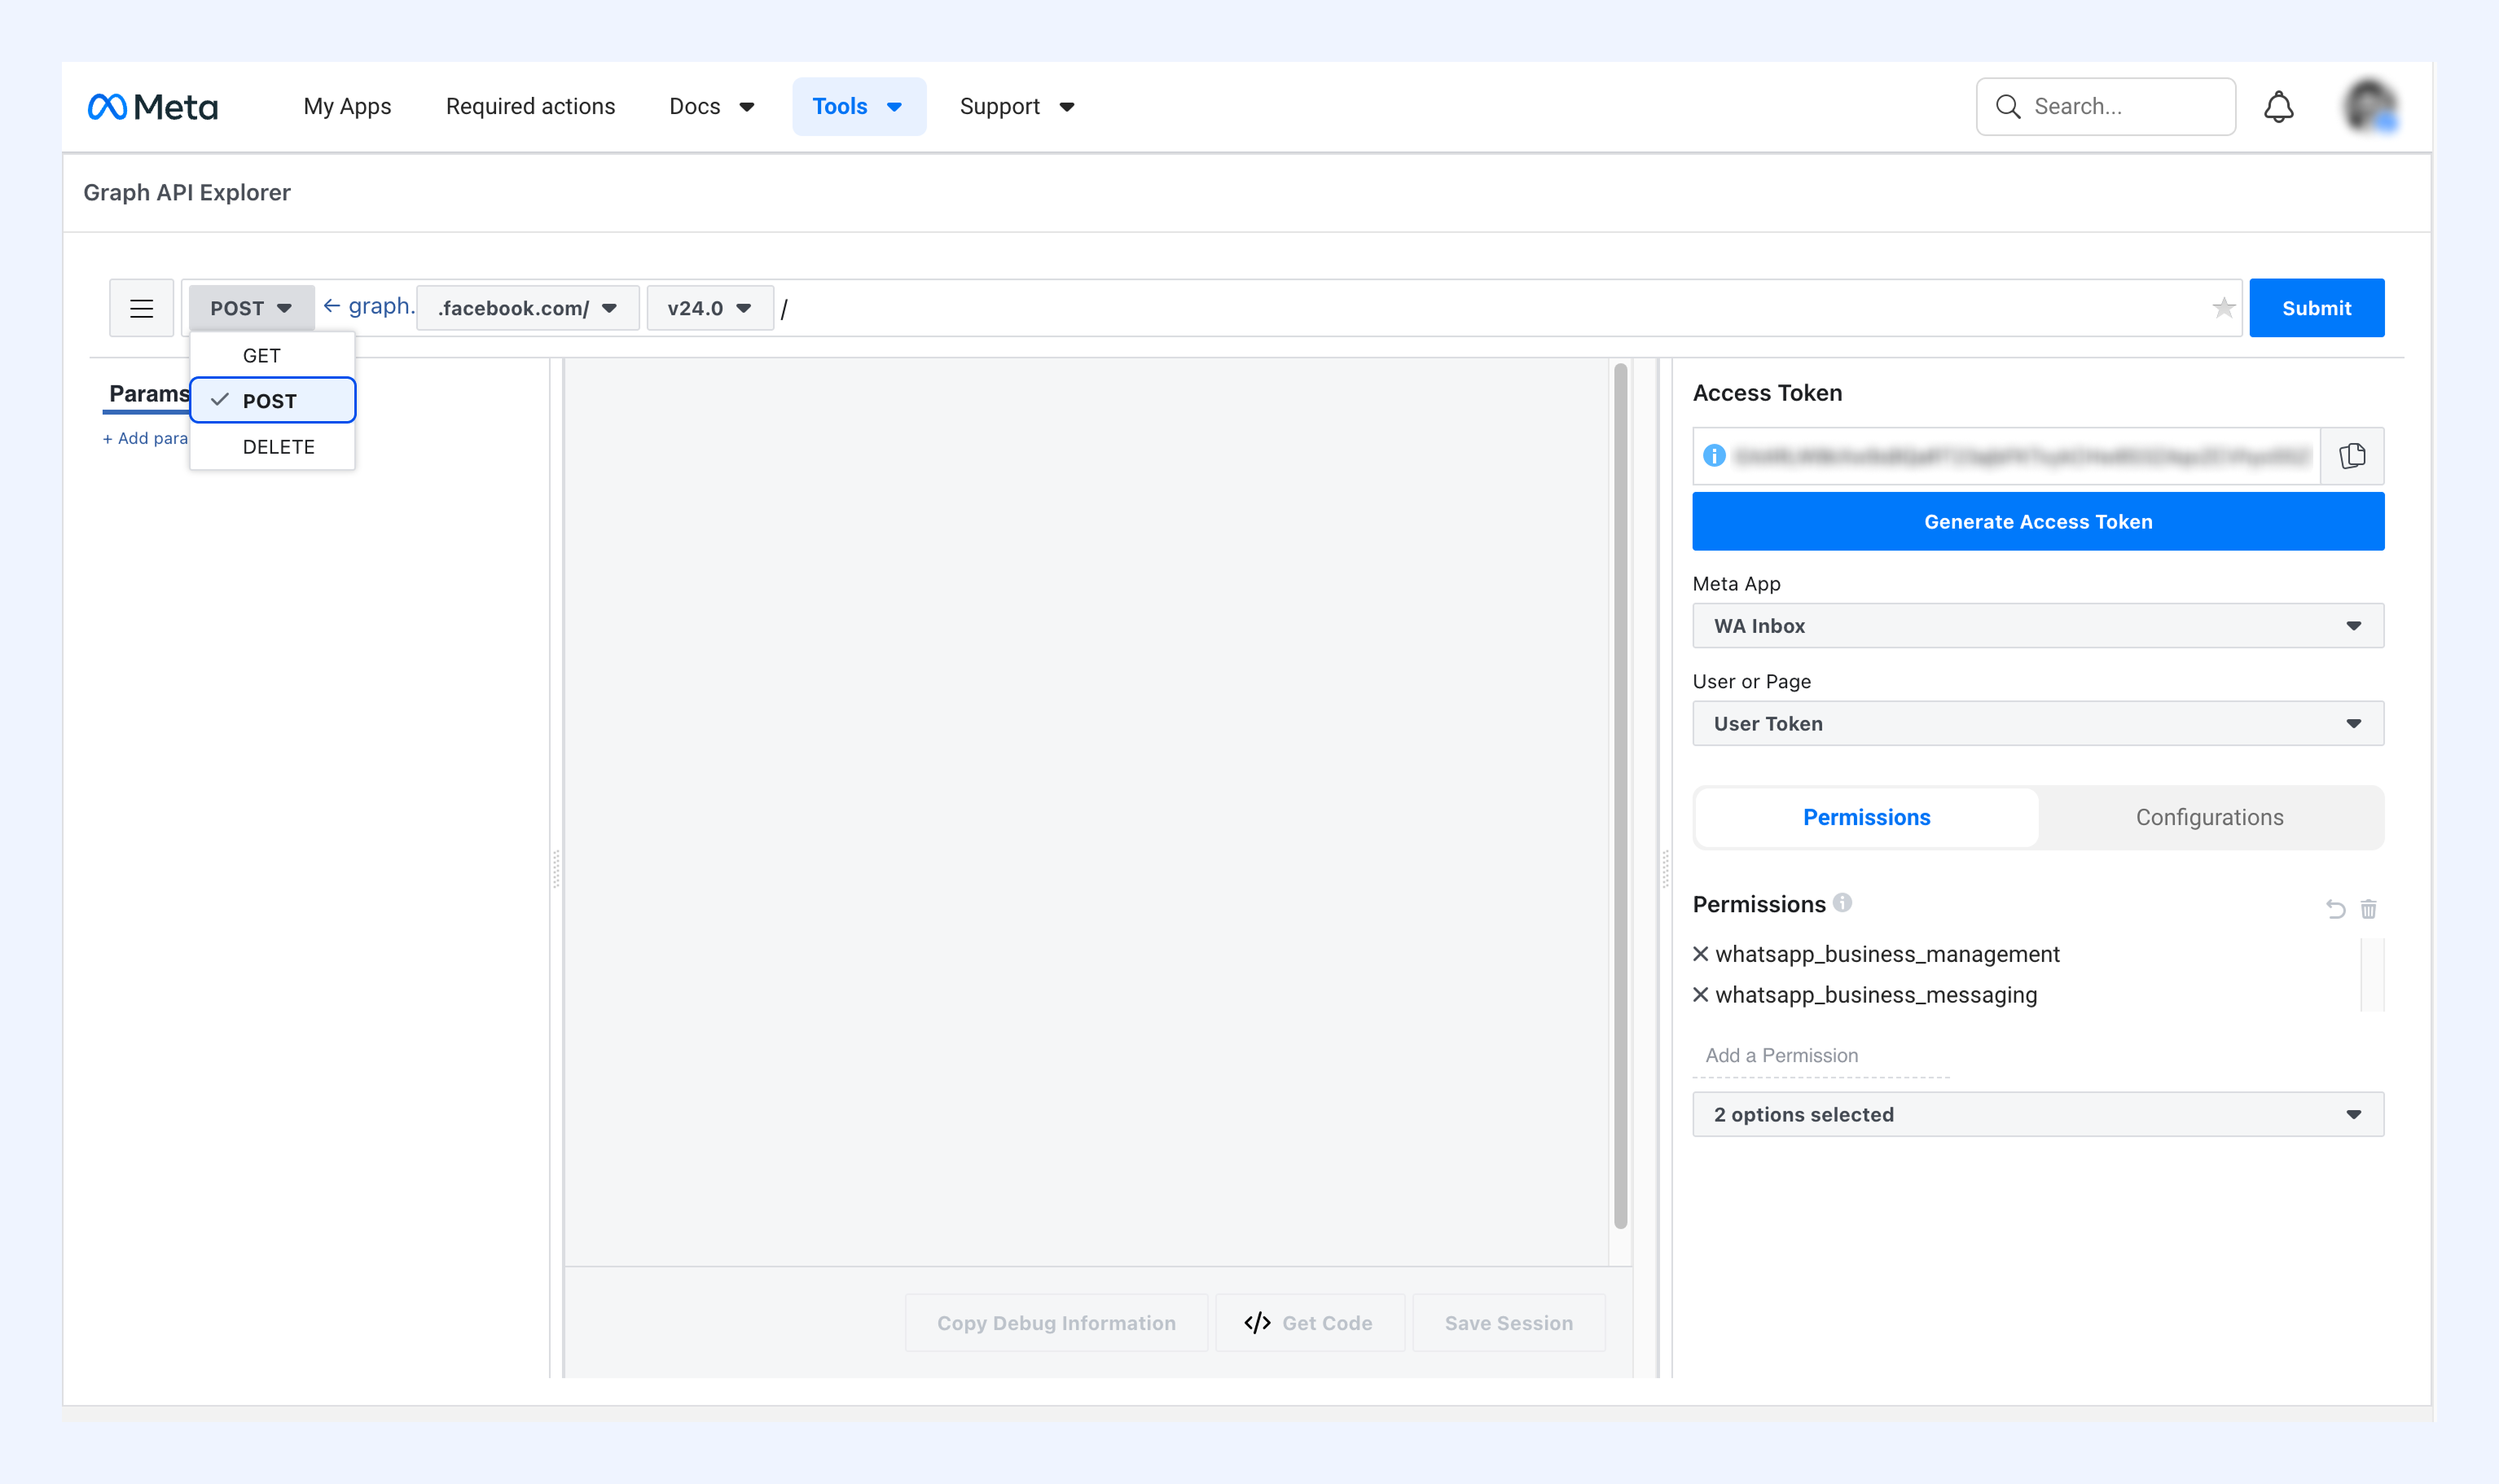
3. Enter the endpoint: {phone-number-ID}/register
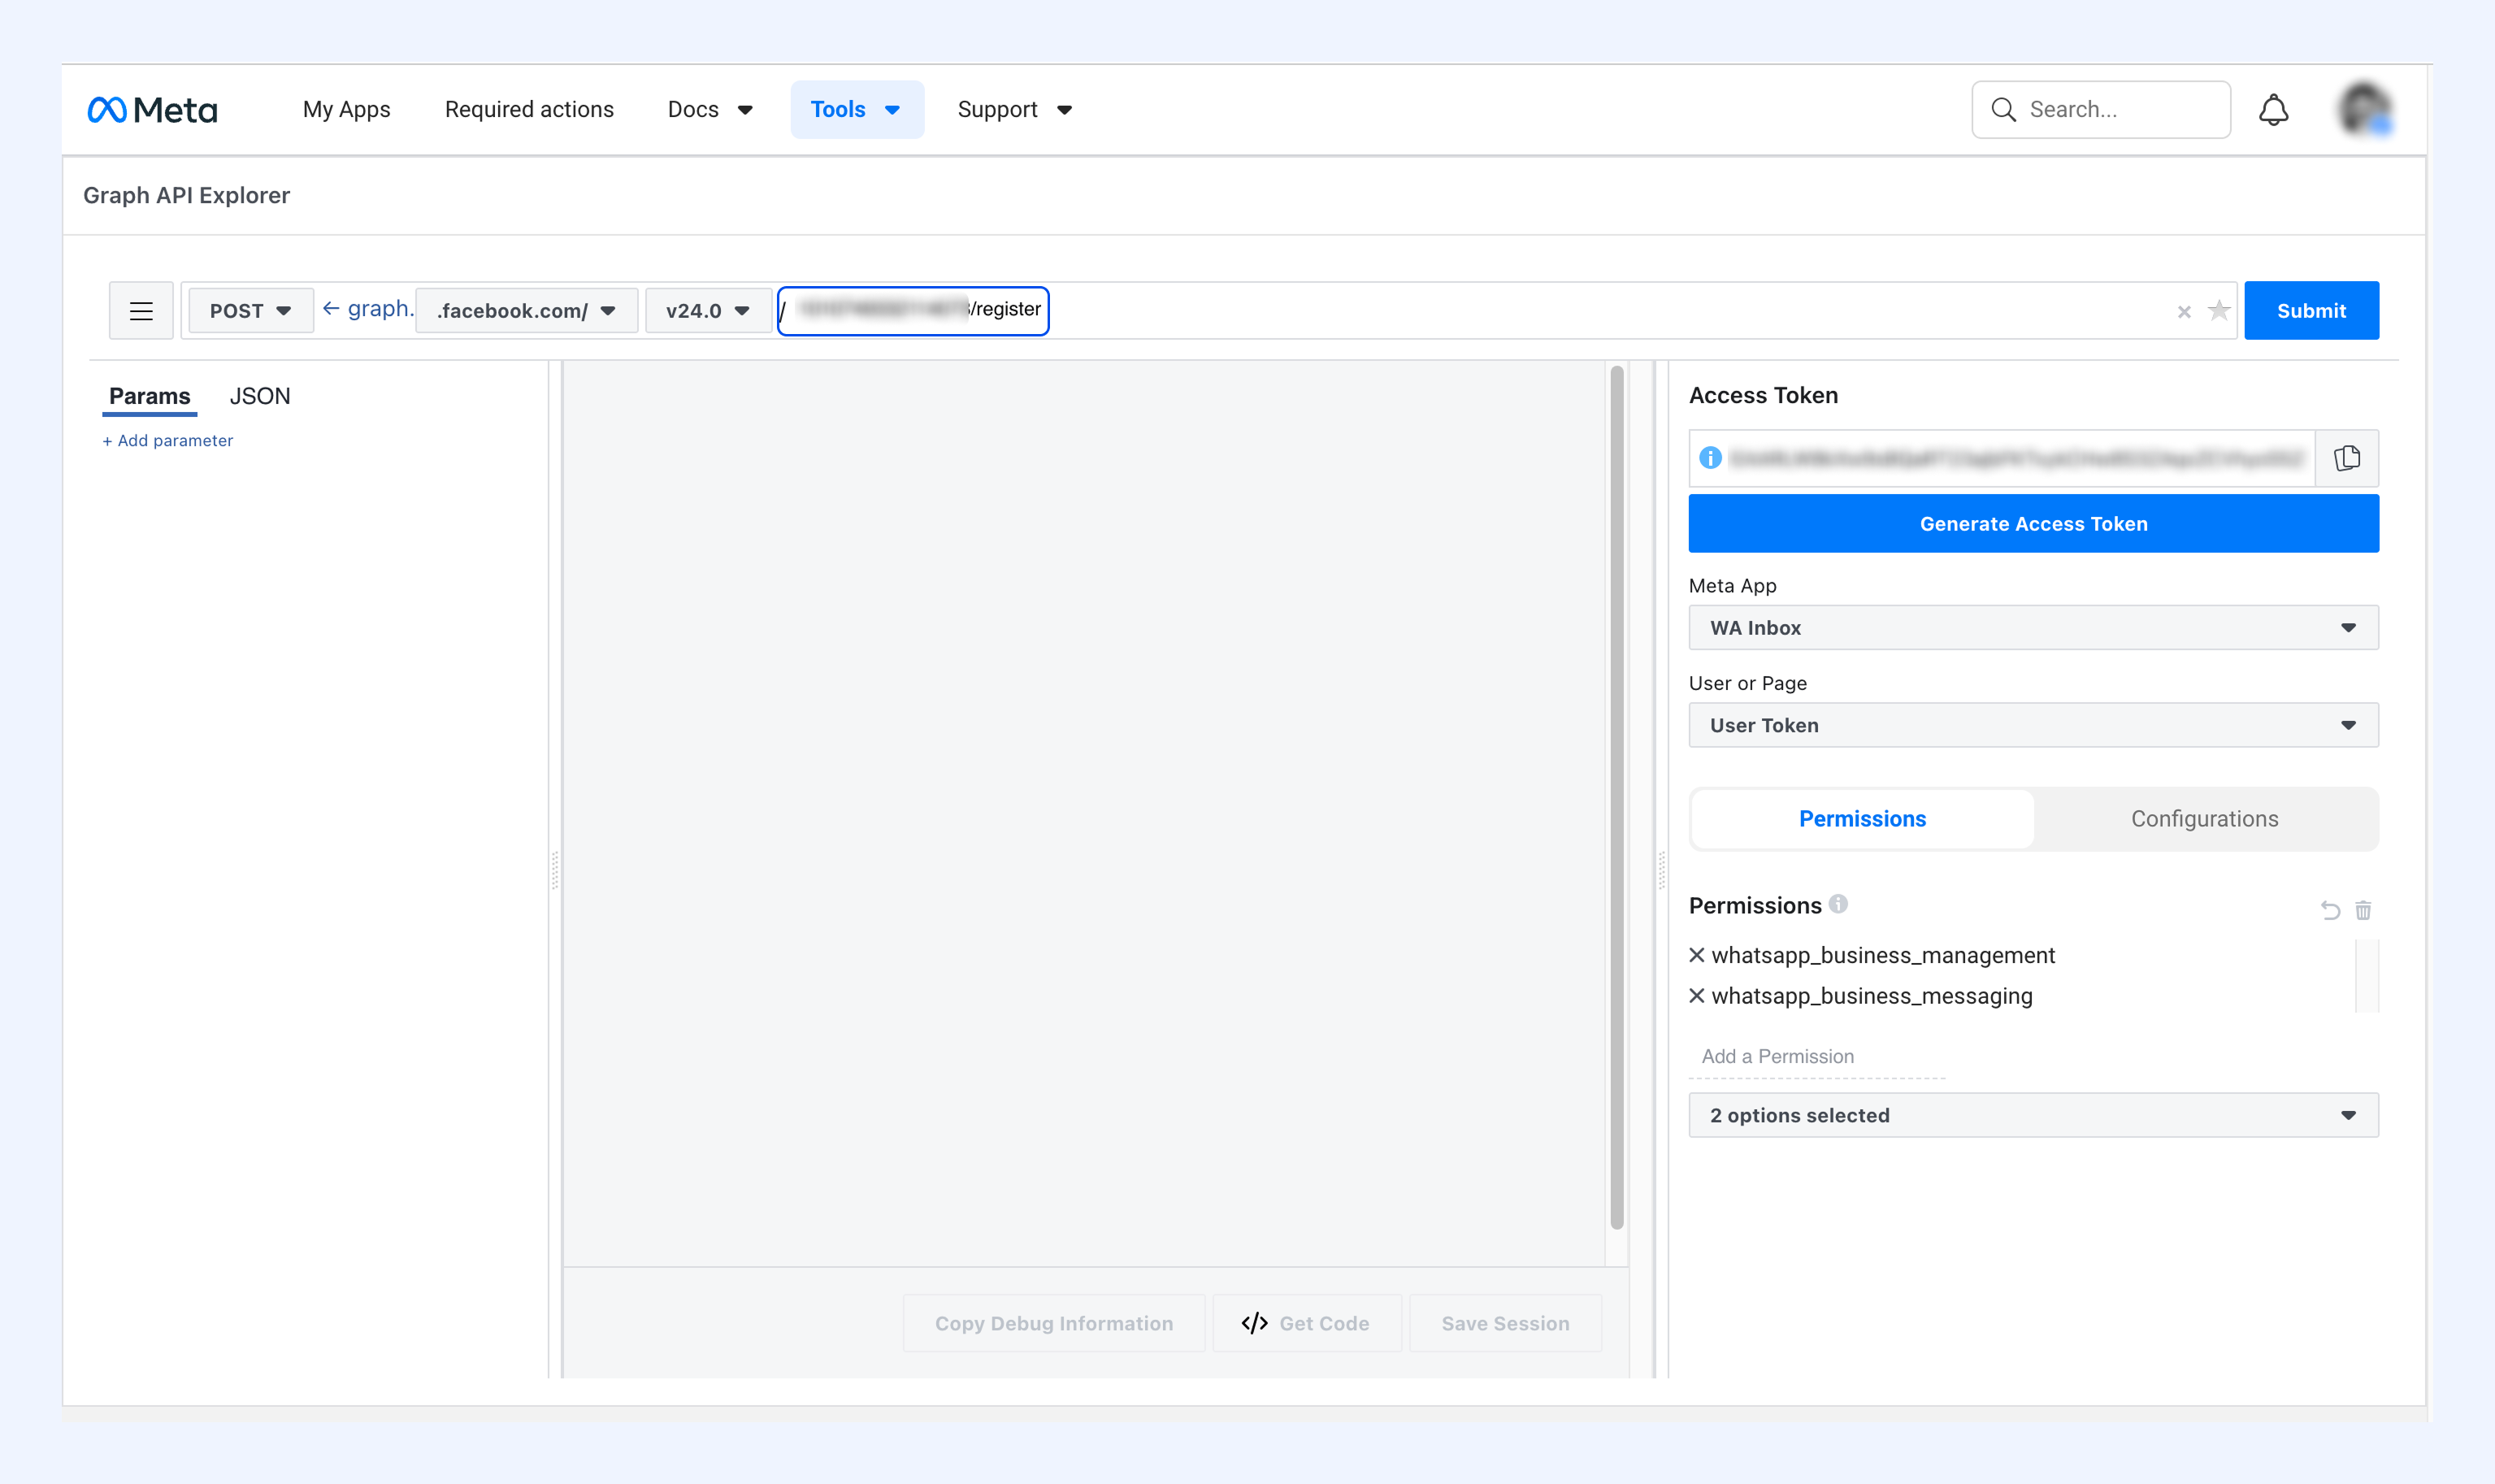
Note: Replace {phone-number-ID} with the ID you just copied.
4. Click JSON and enter this request body:
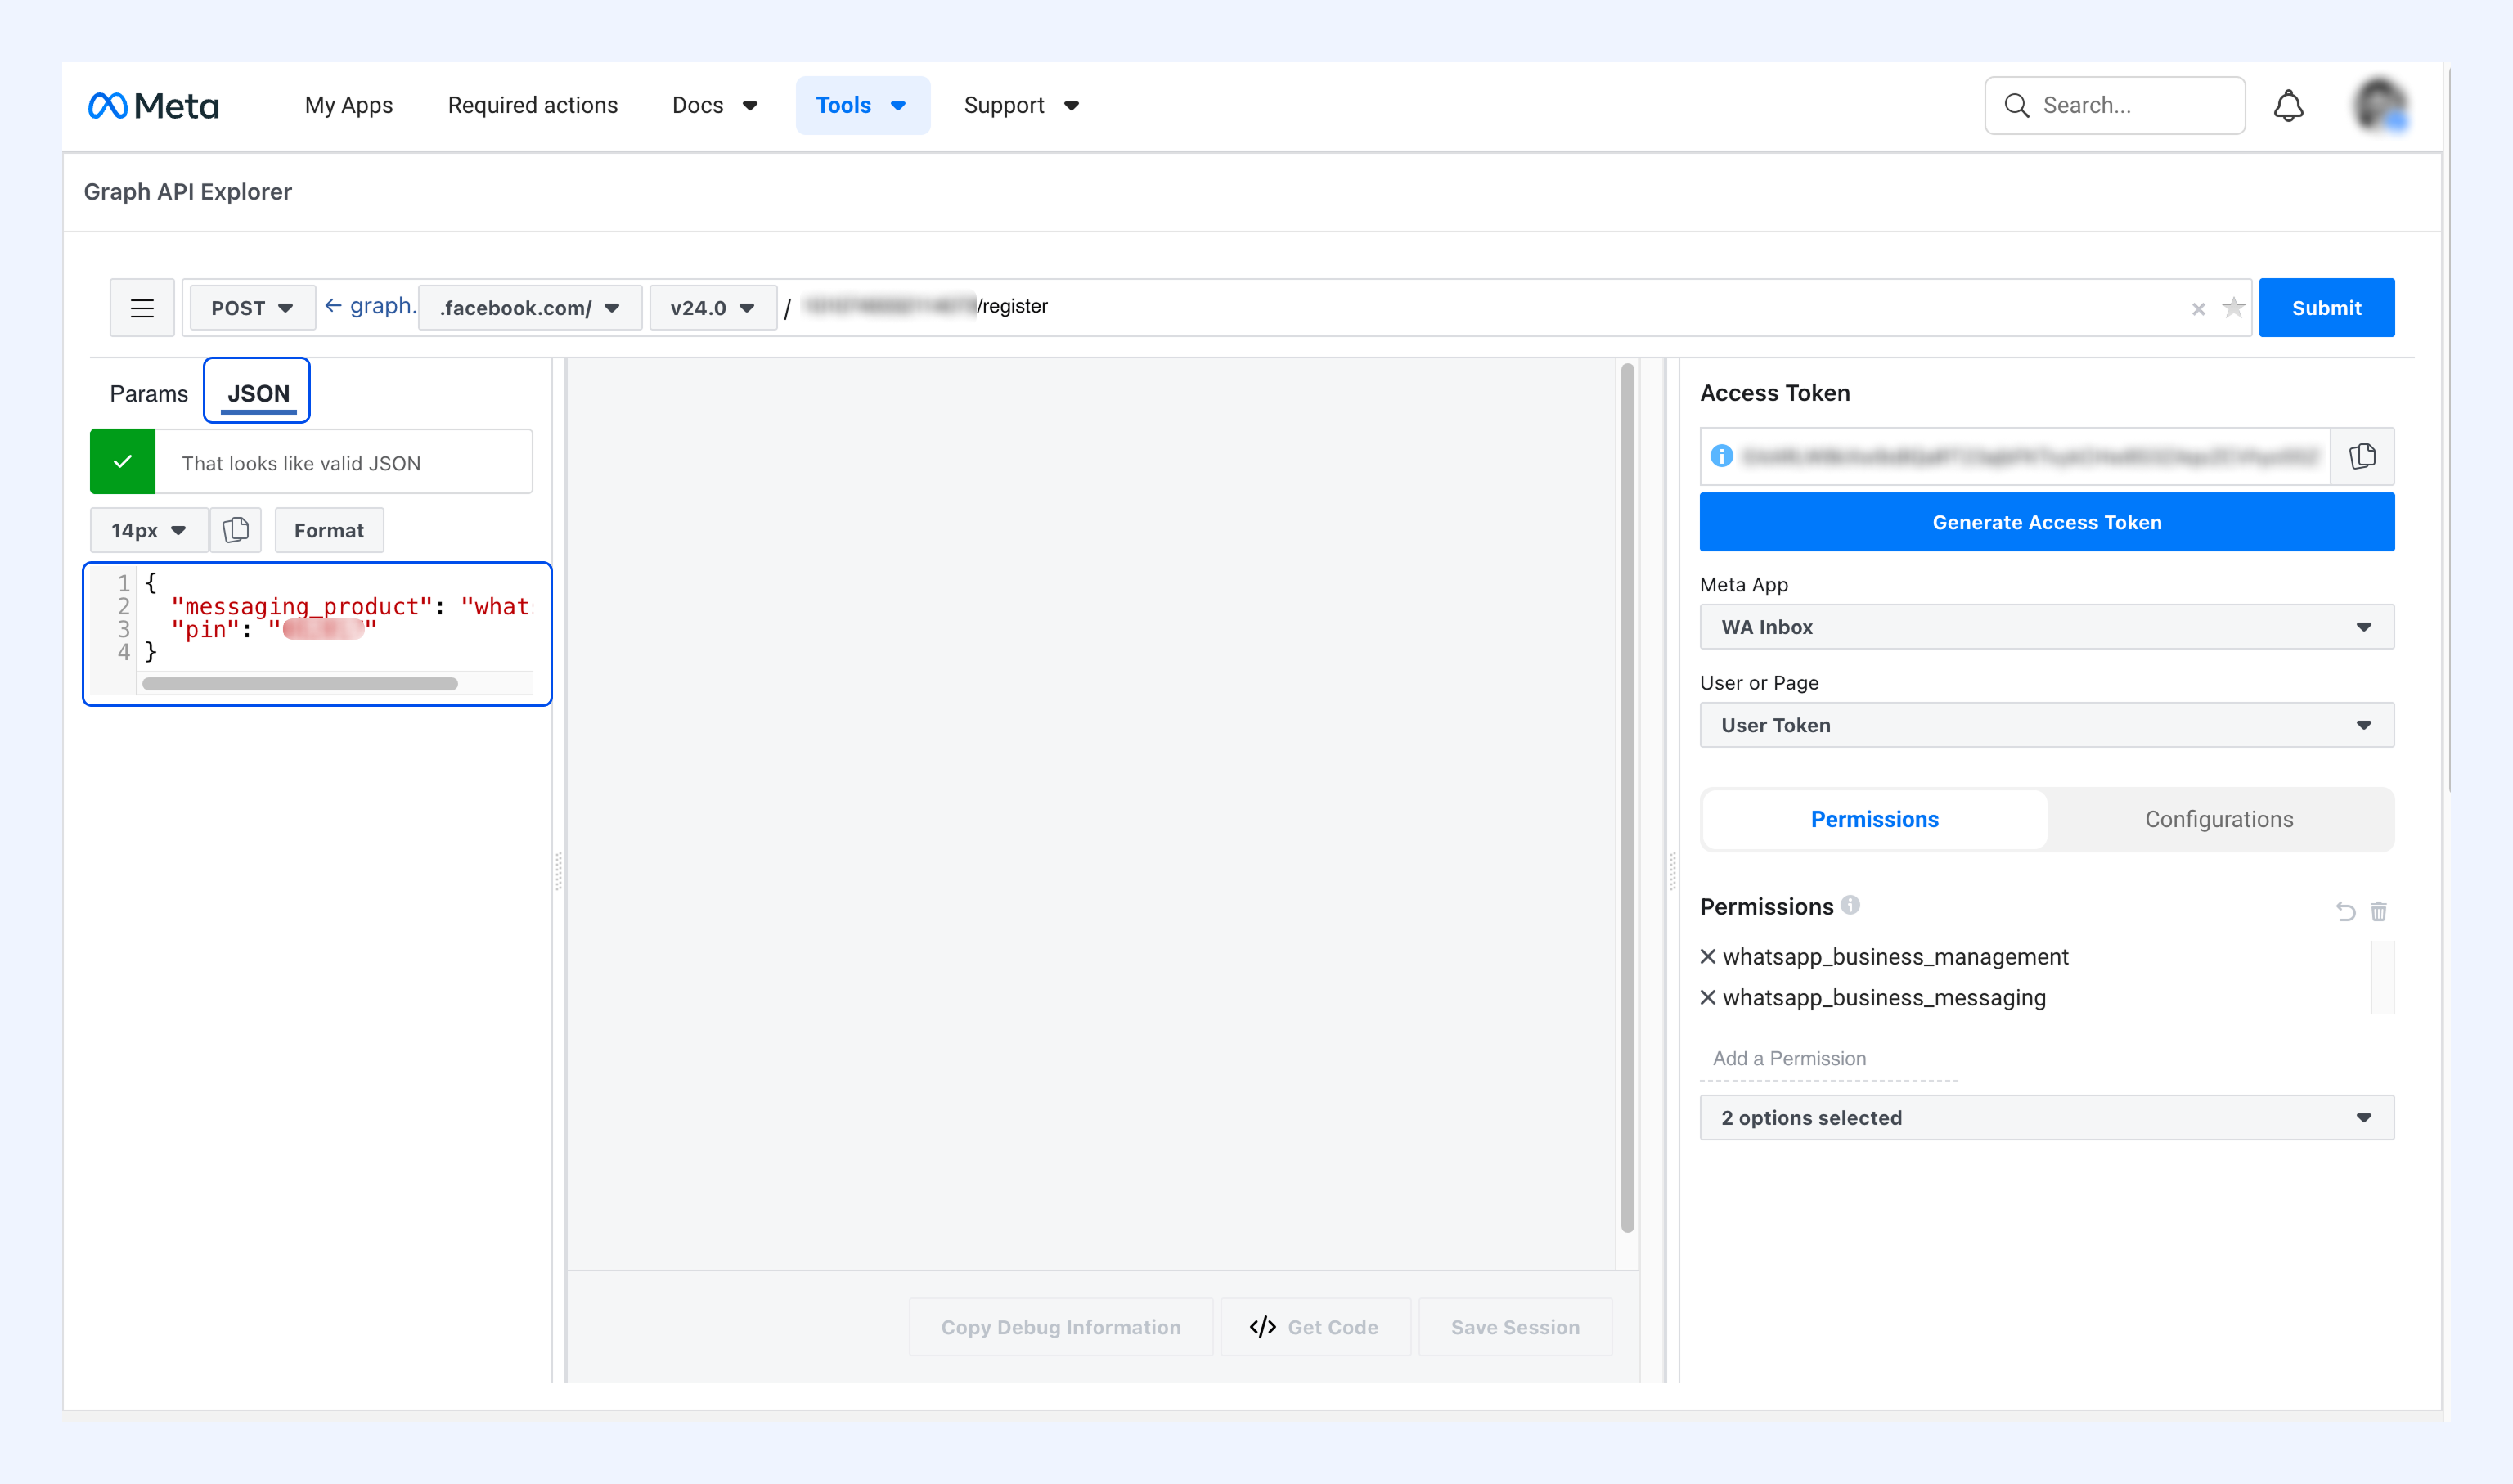
{ 'messaging_product': 'whatsapp', 'pin': '123456' }
Note: Replace 123456 with your own 6-digit PIN. Pick any six digits and save them for later.
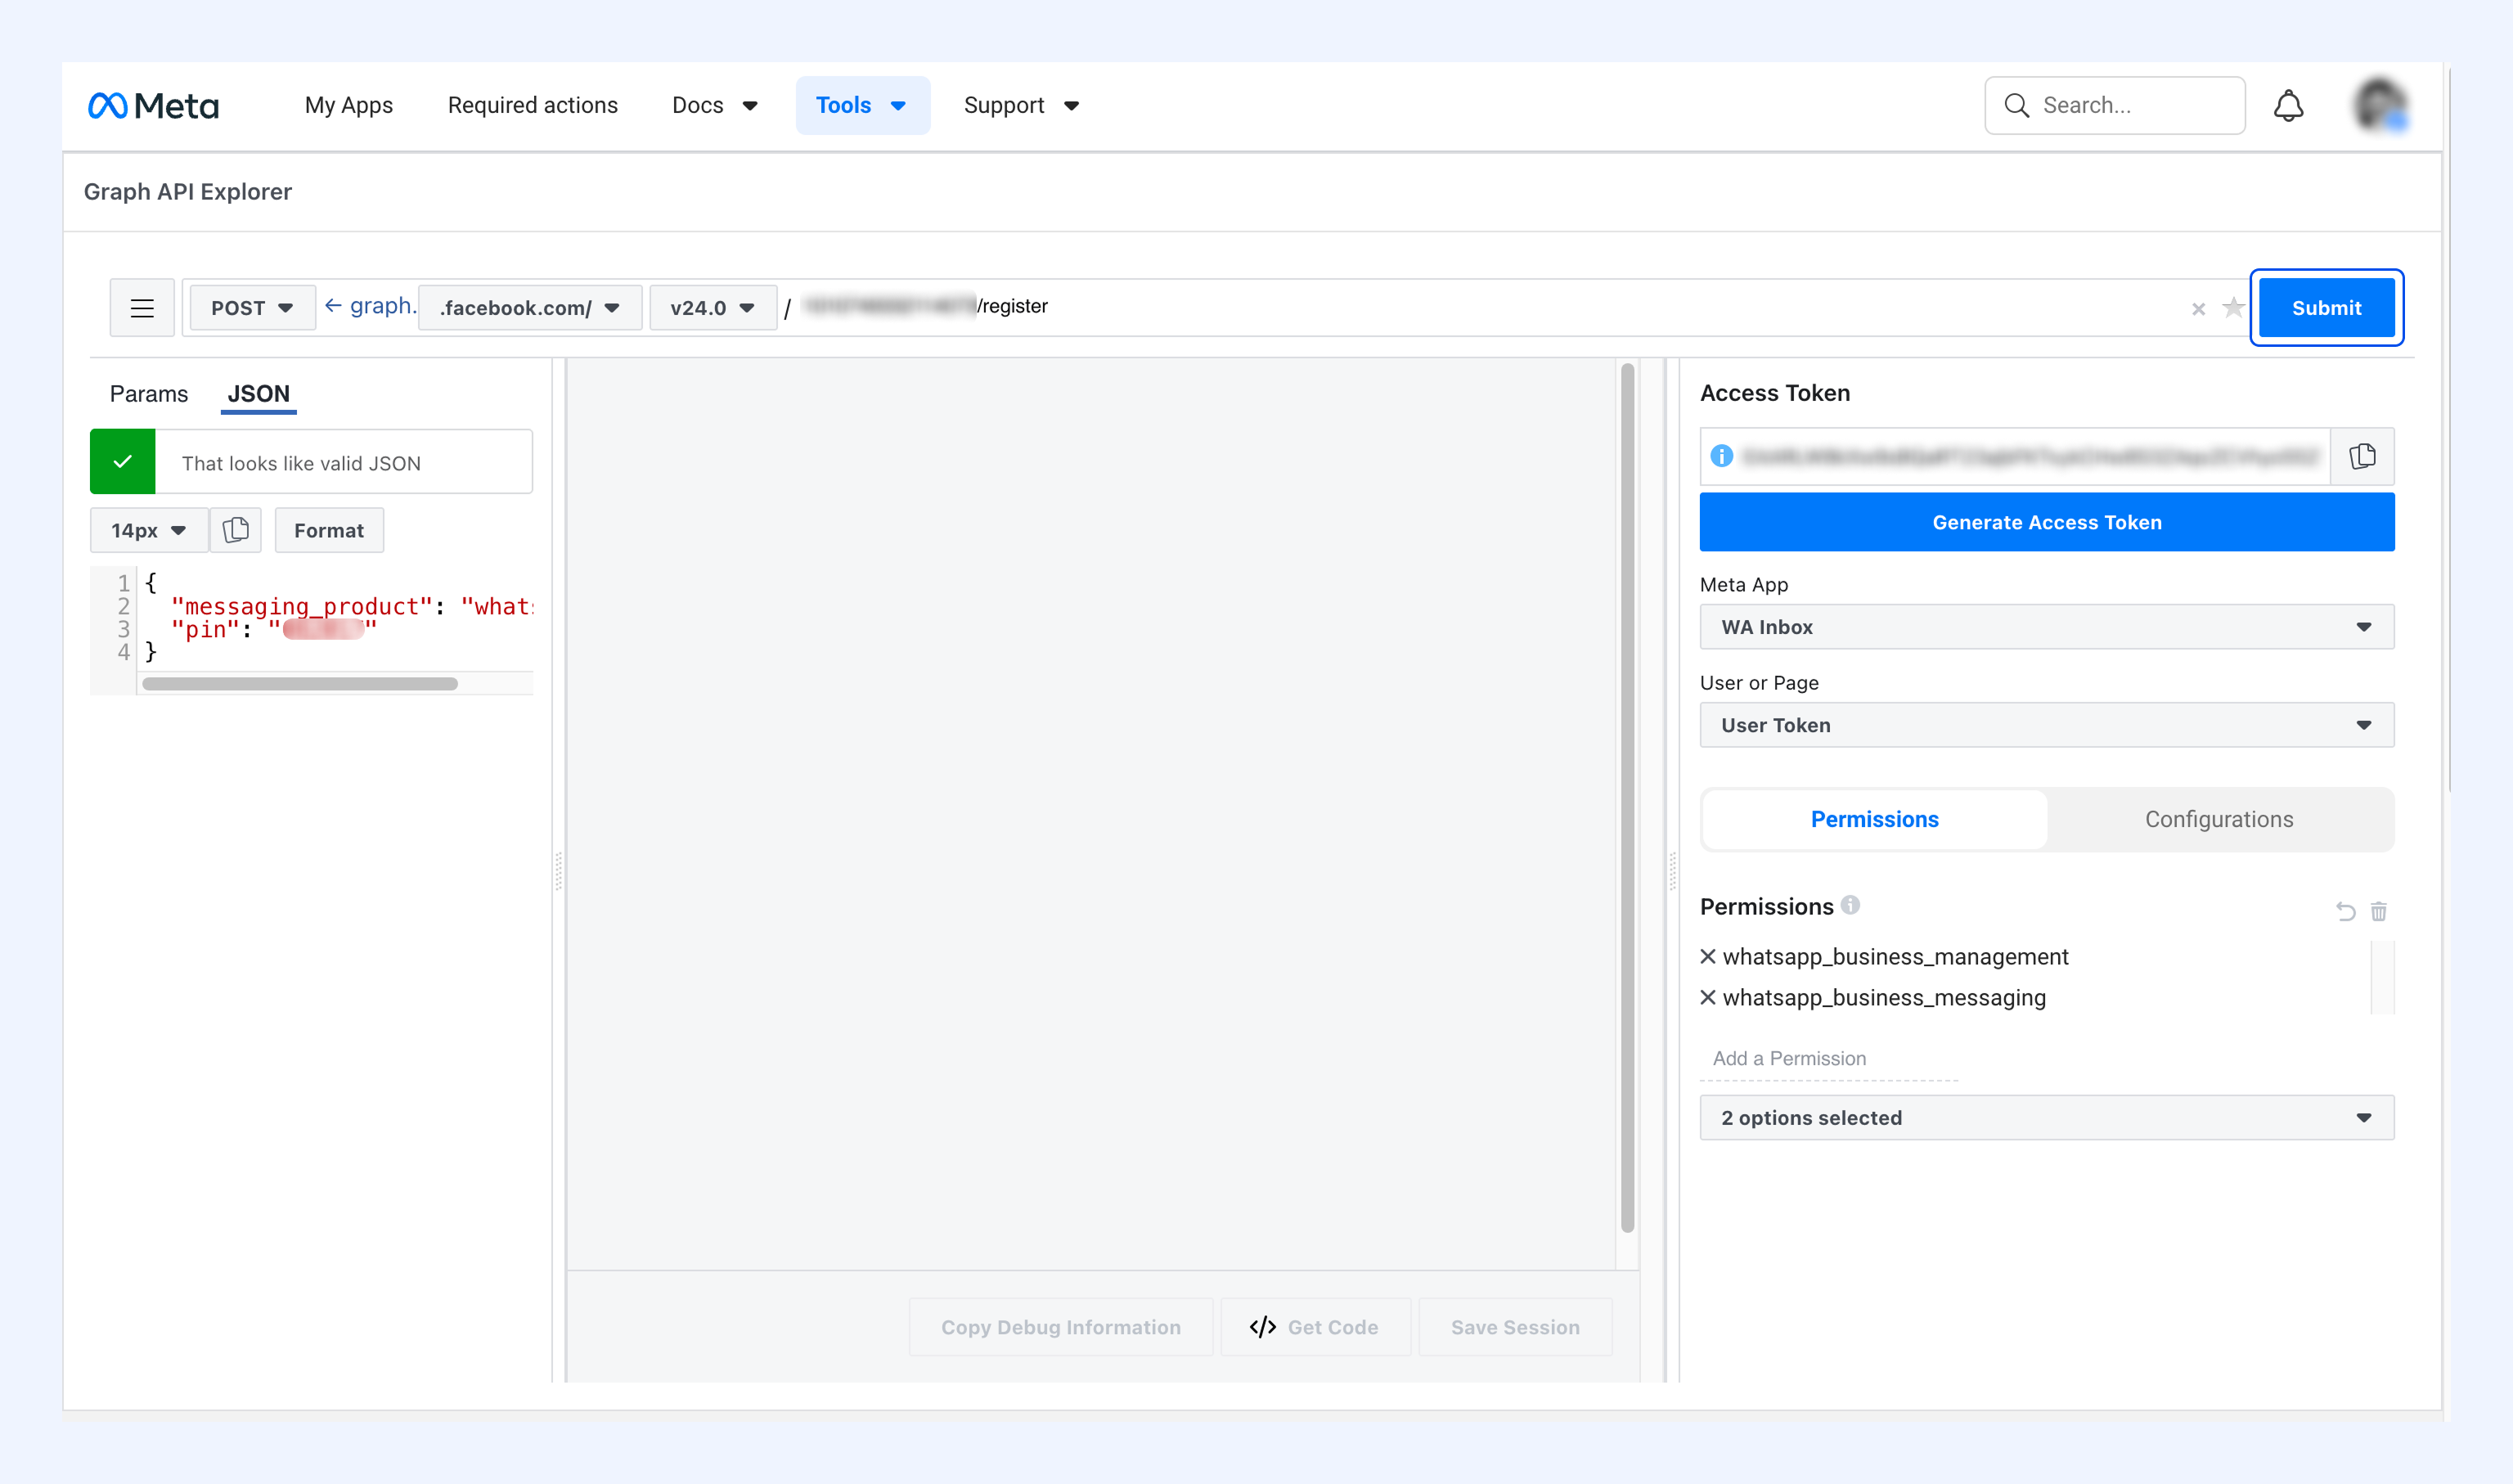
5. Click Submit.
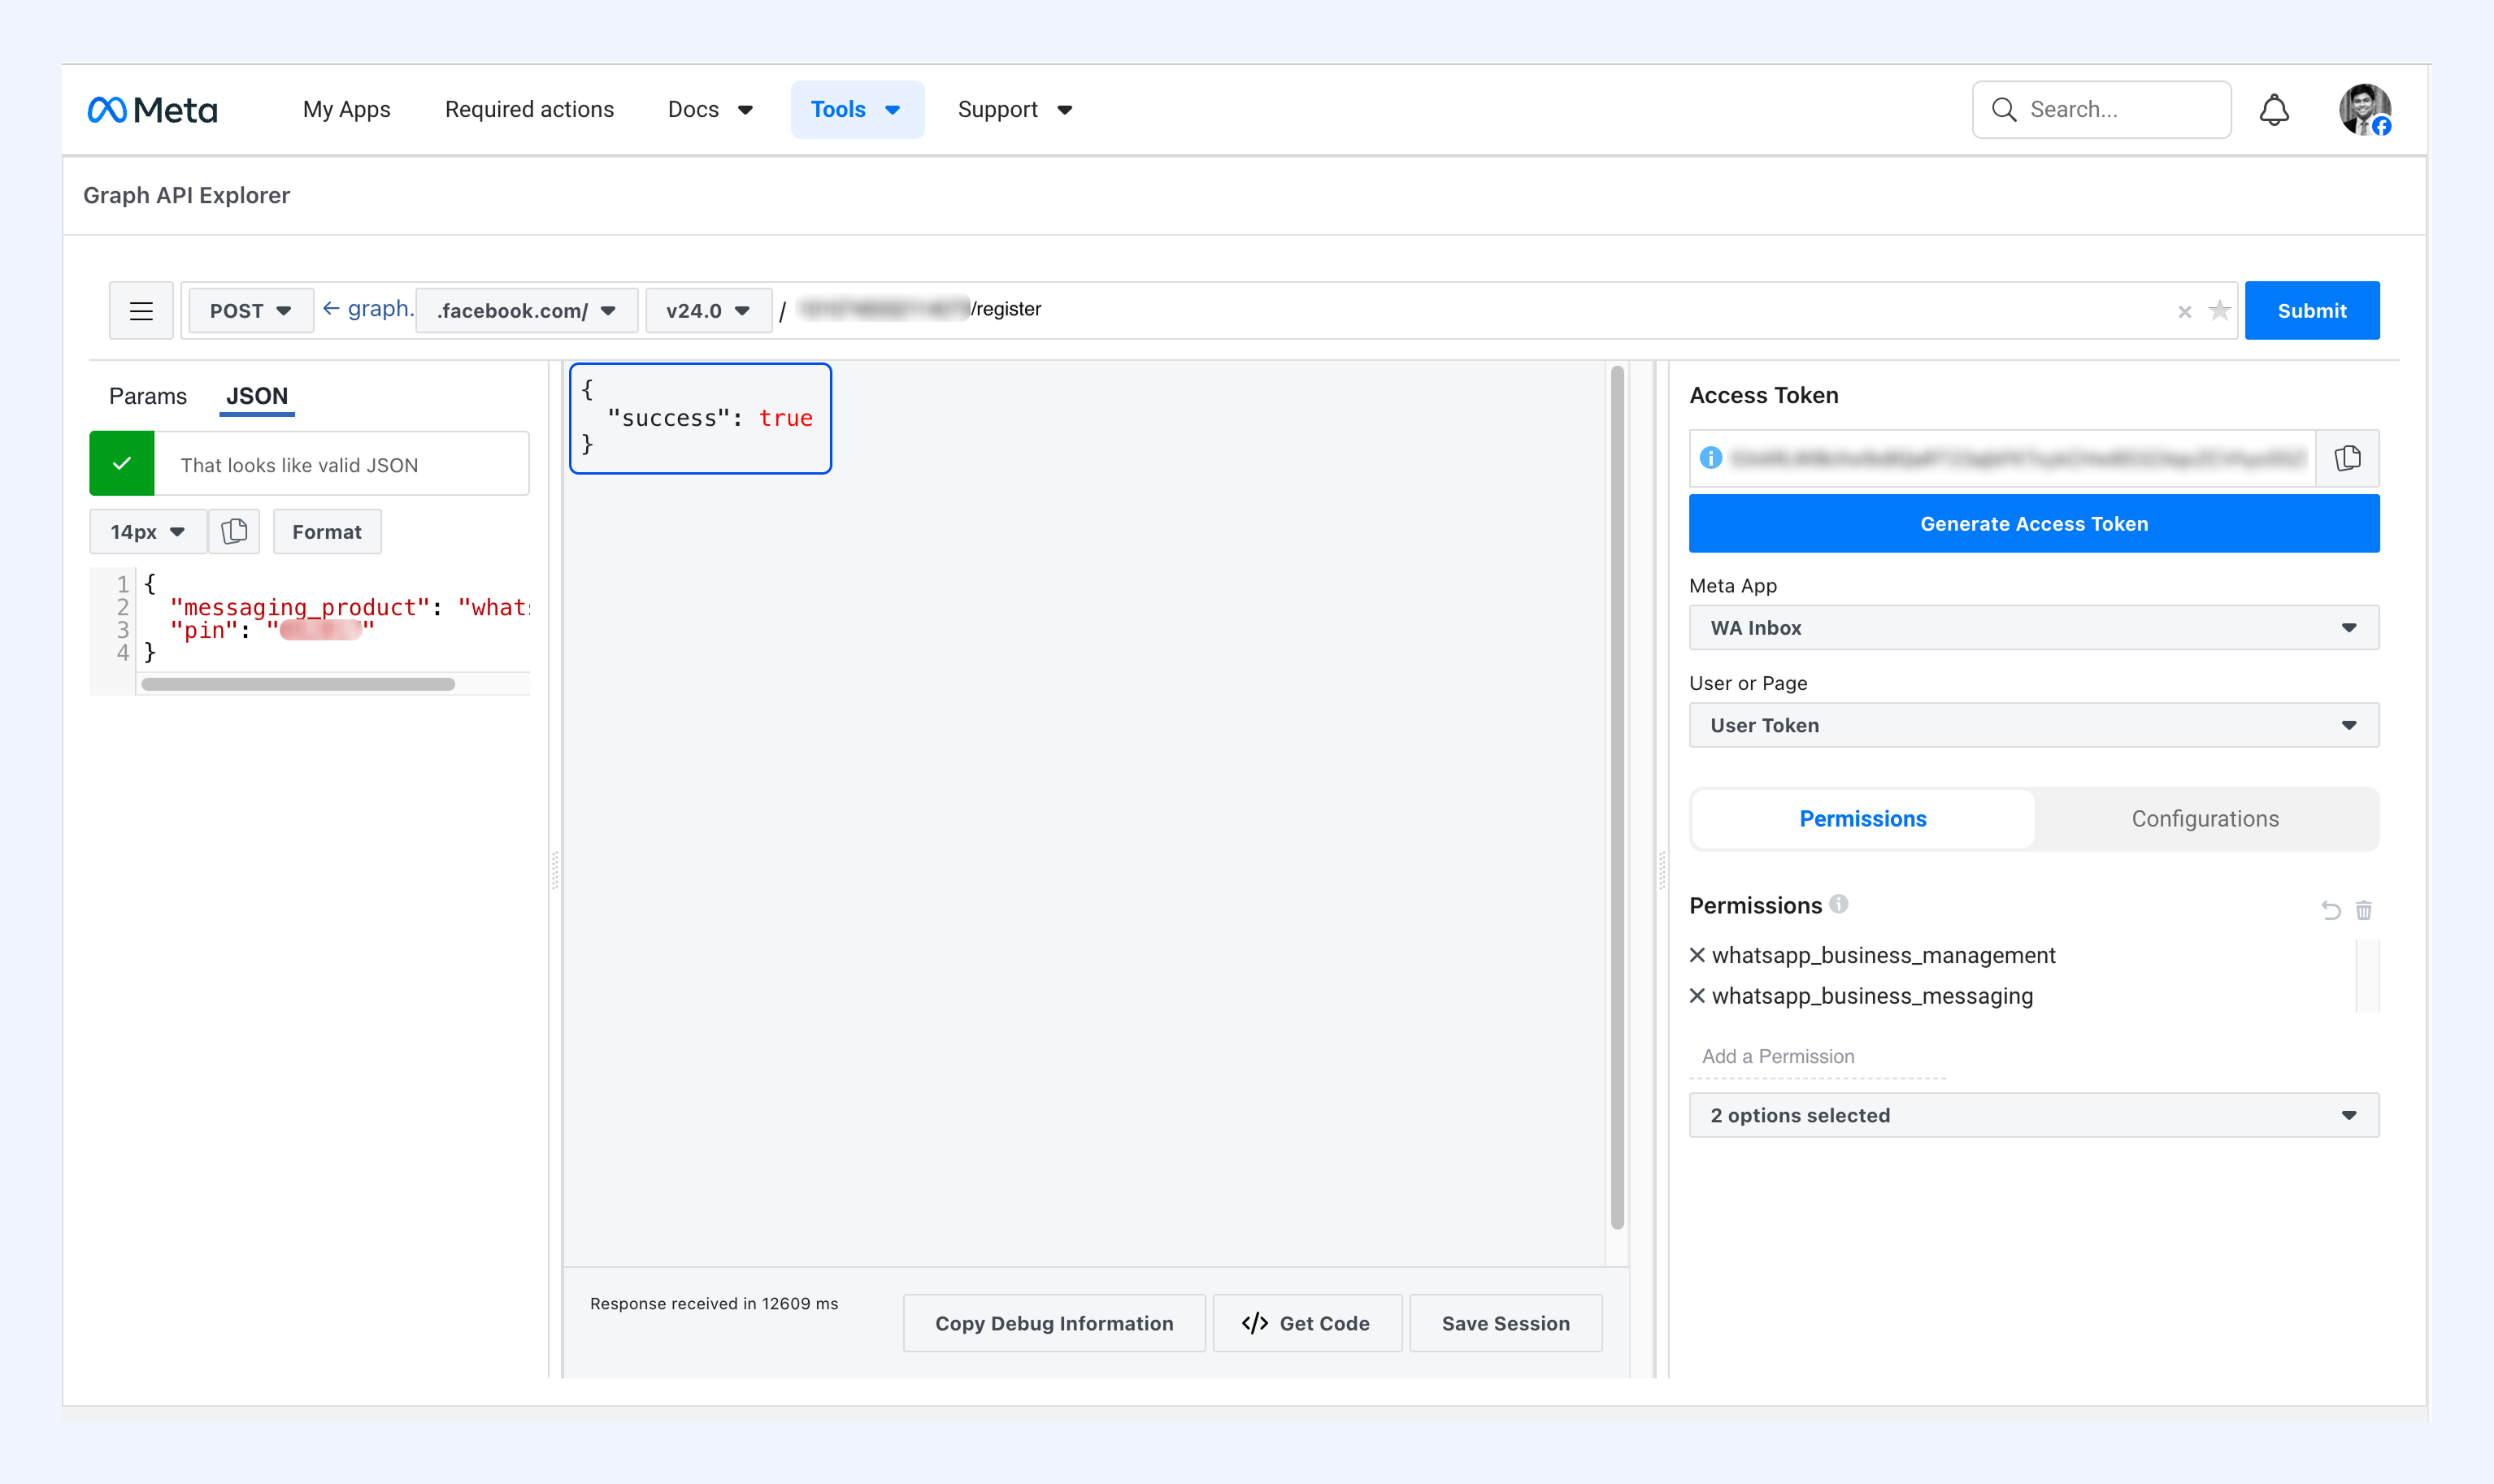
6. You should see the response { 'success': true }.
Verify your phone number status
1. Go to Meta Business Manager → Accounts → WhatsApp Accounts.
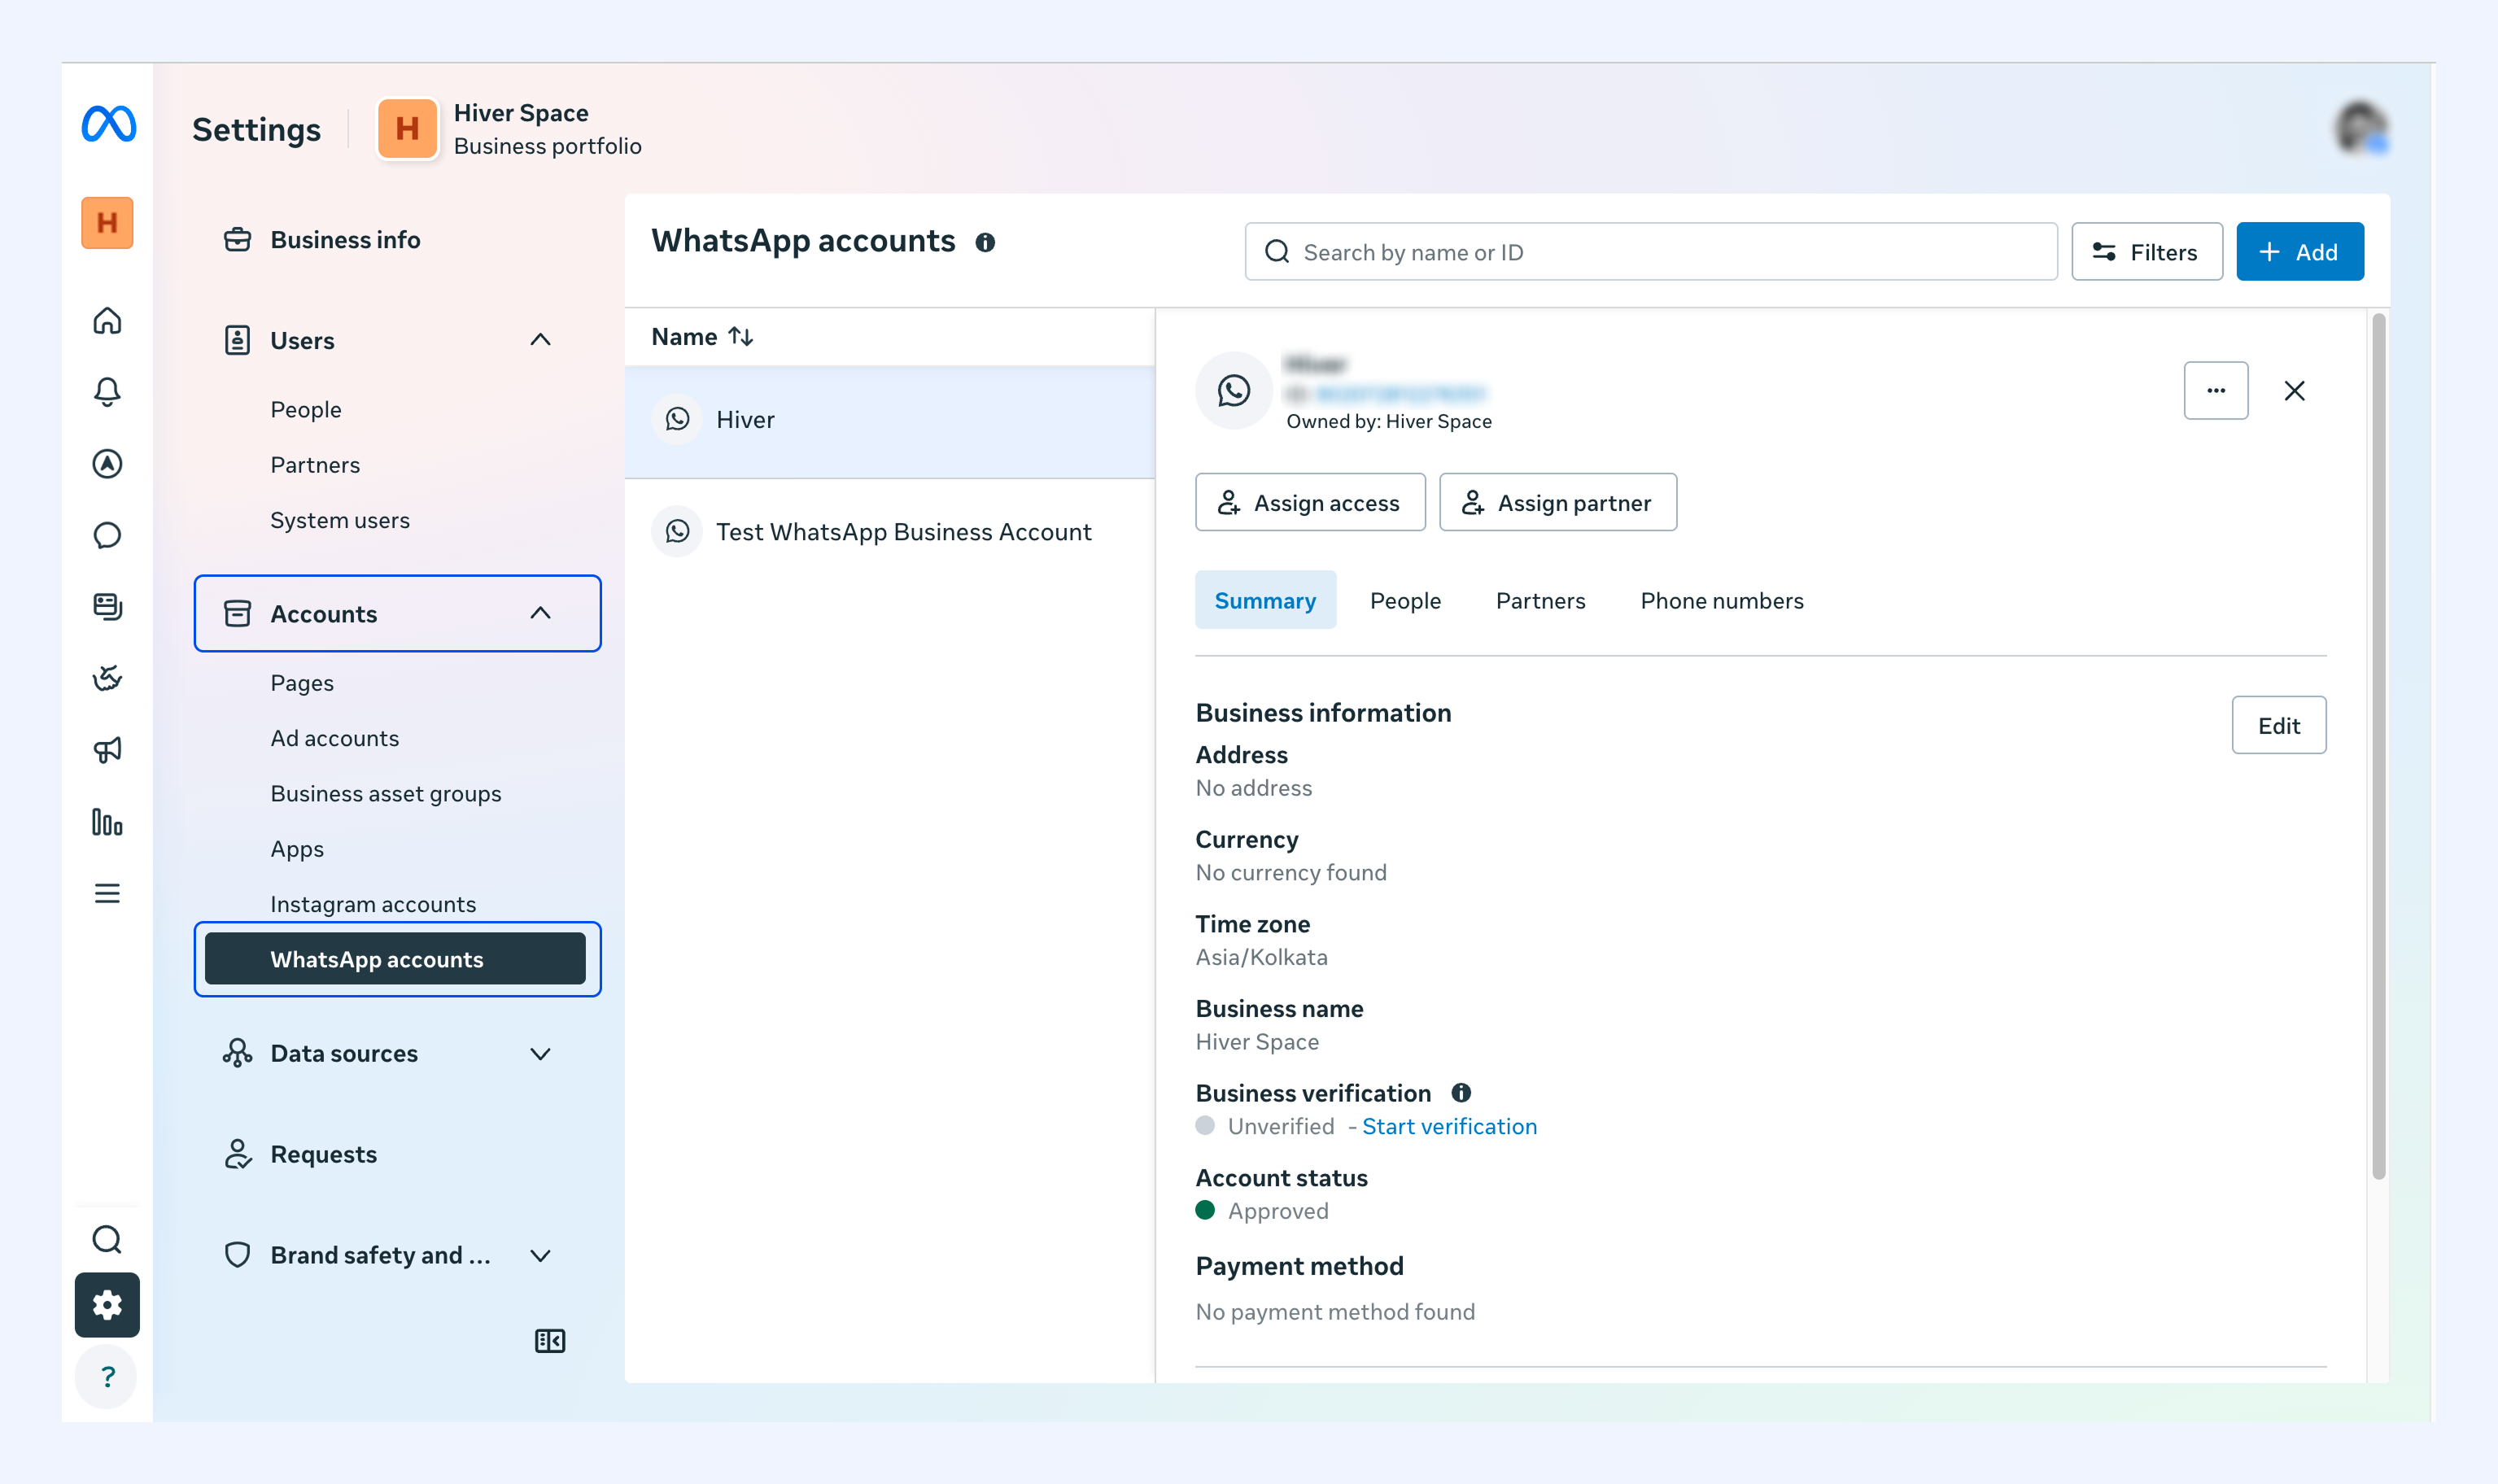
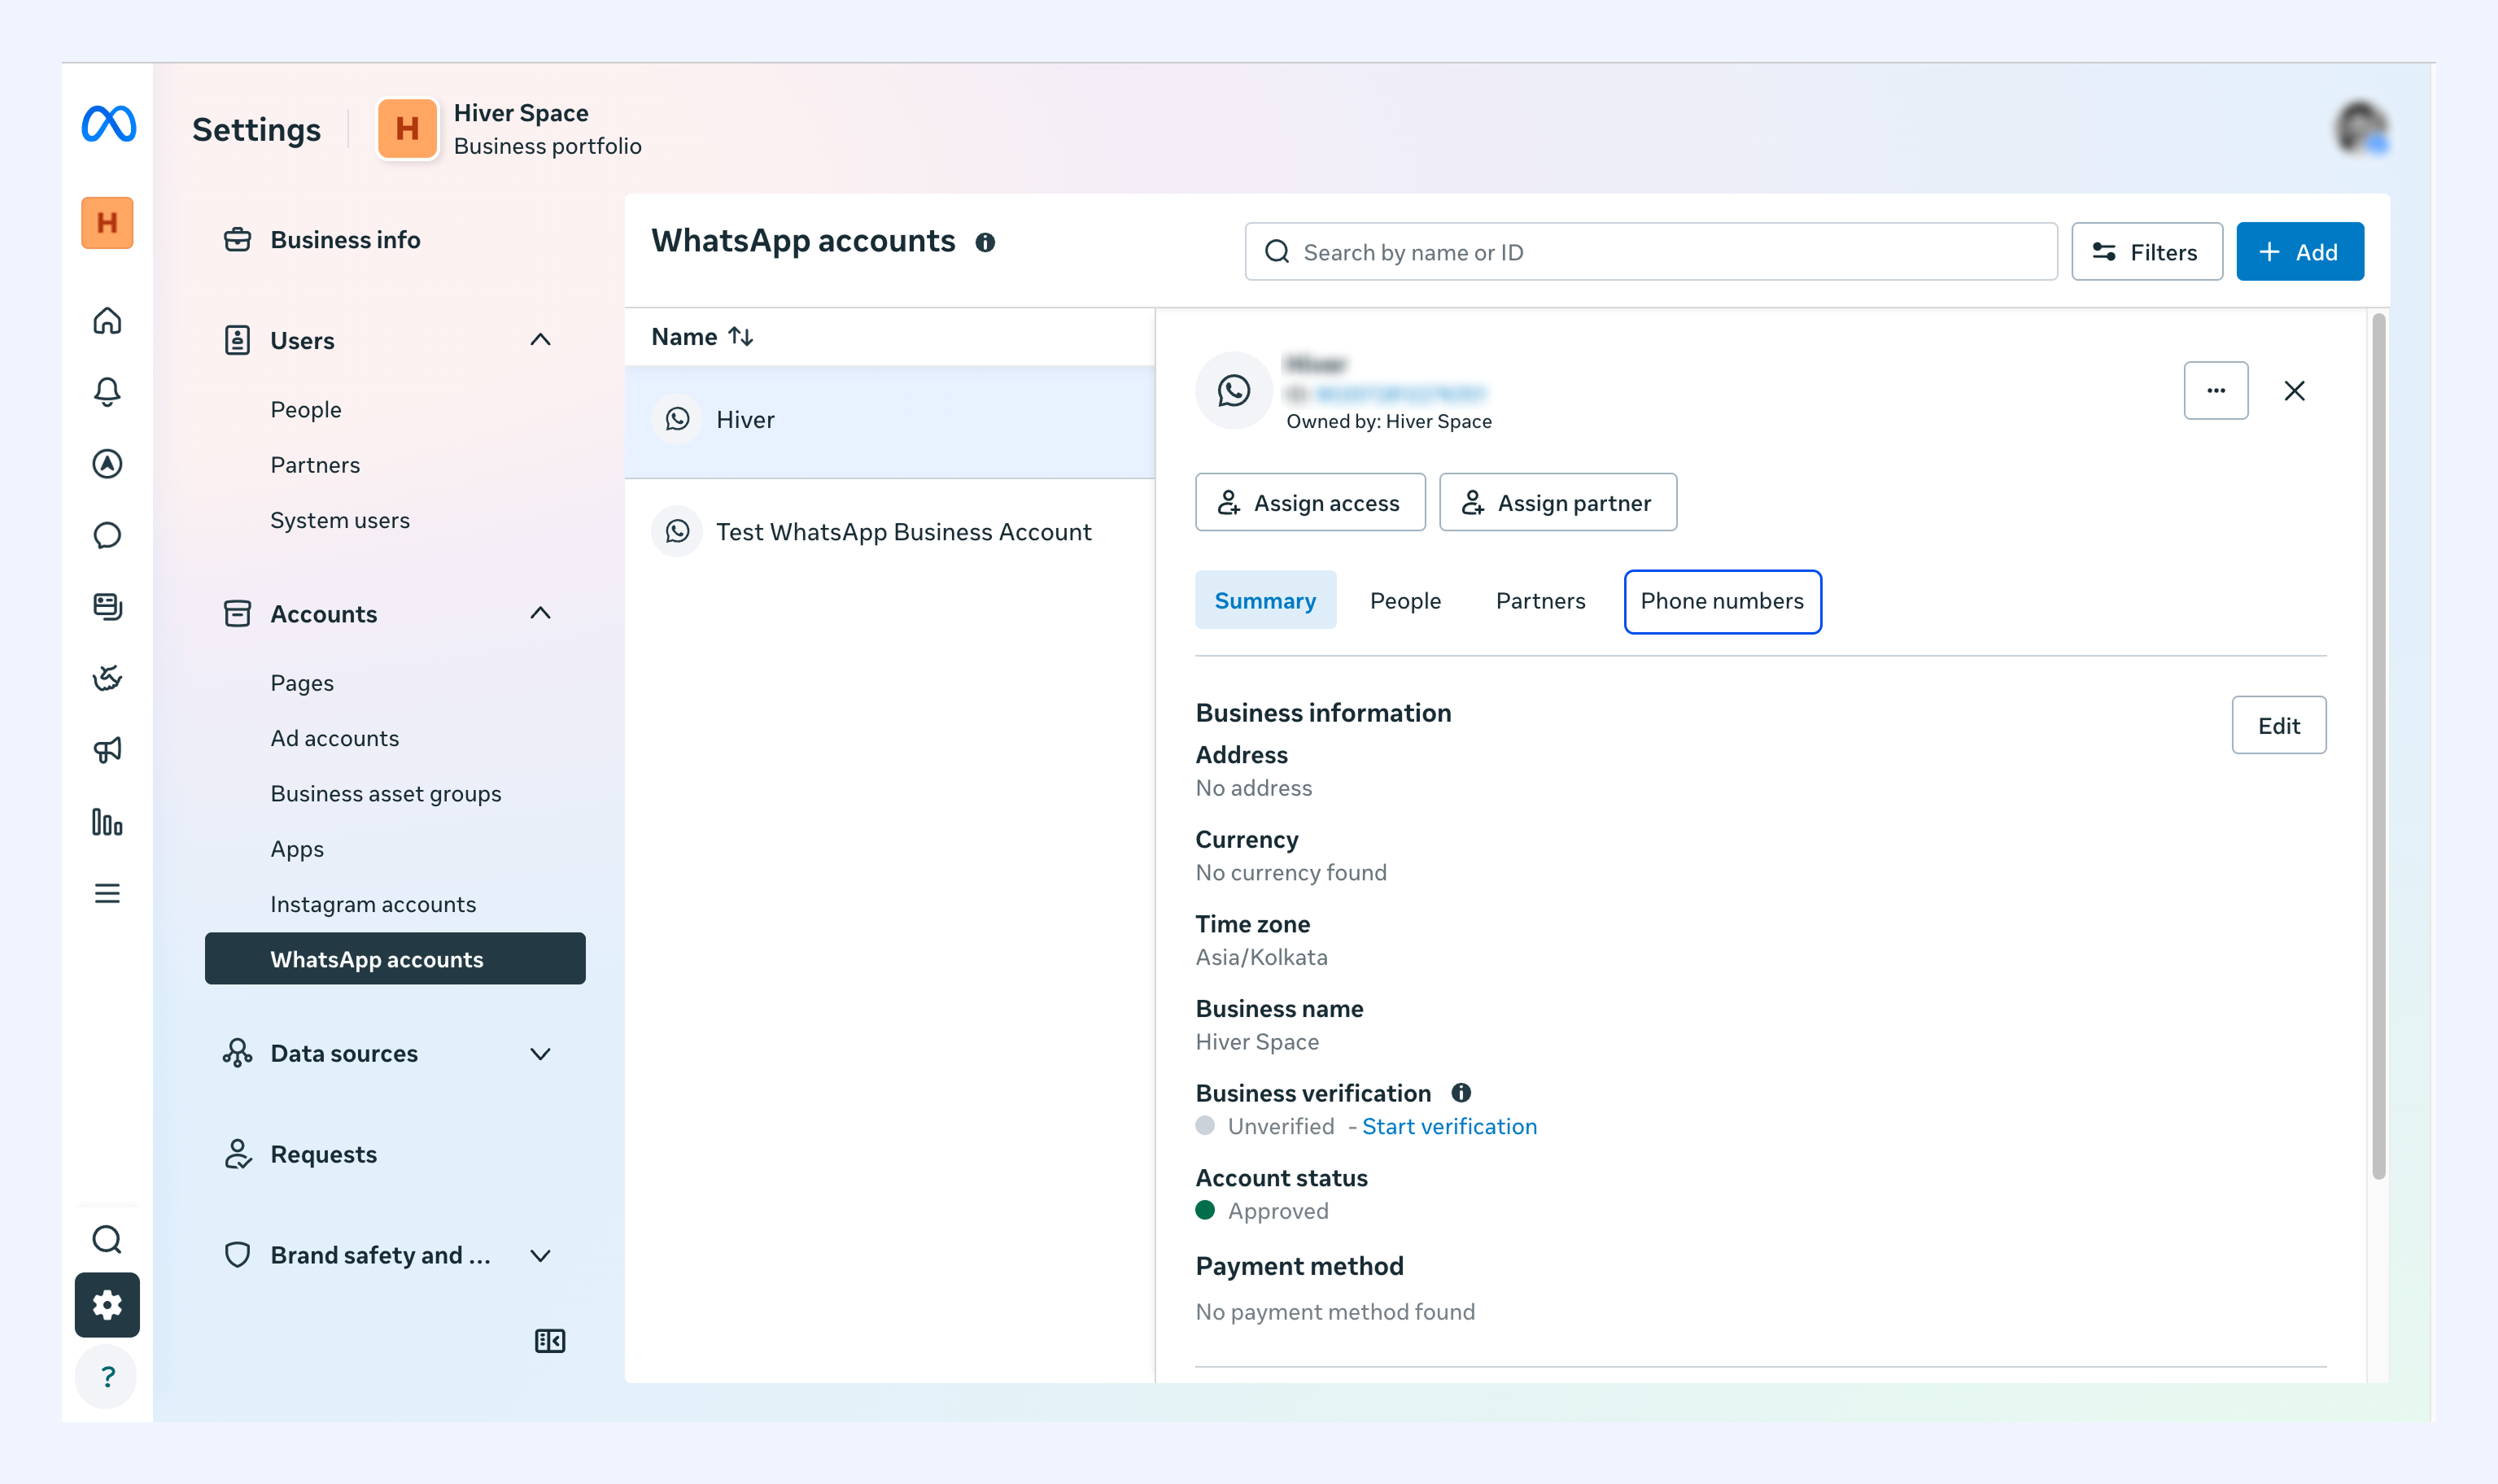
2. Open the Phone Numbers tab.
3. Your phone number should now show its status as Connected.
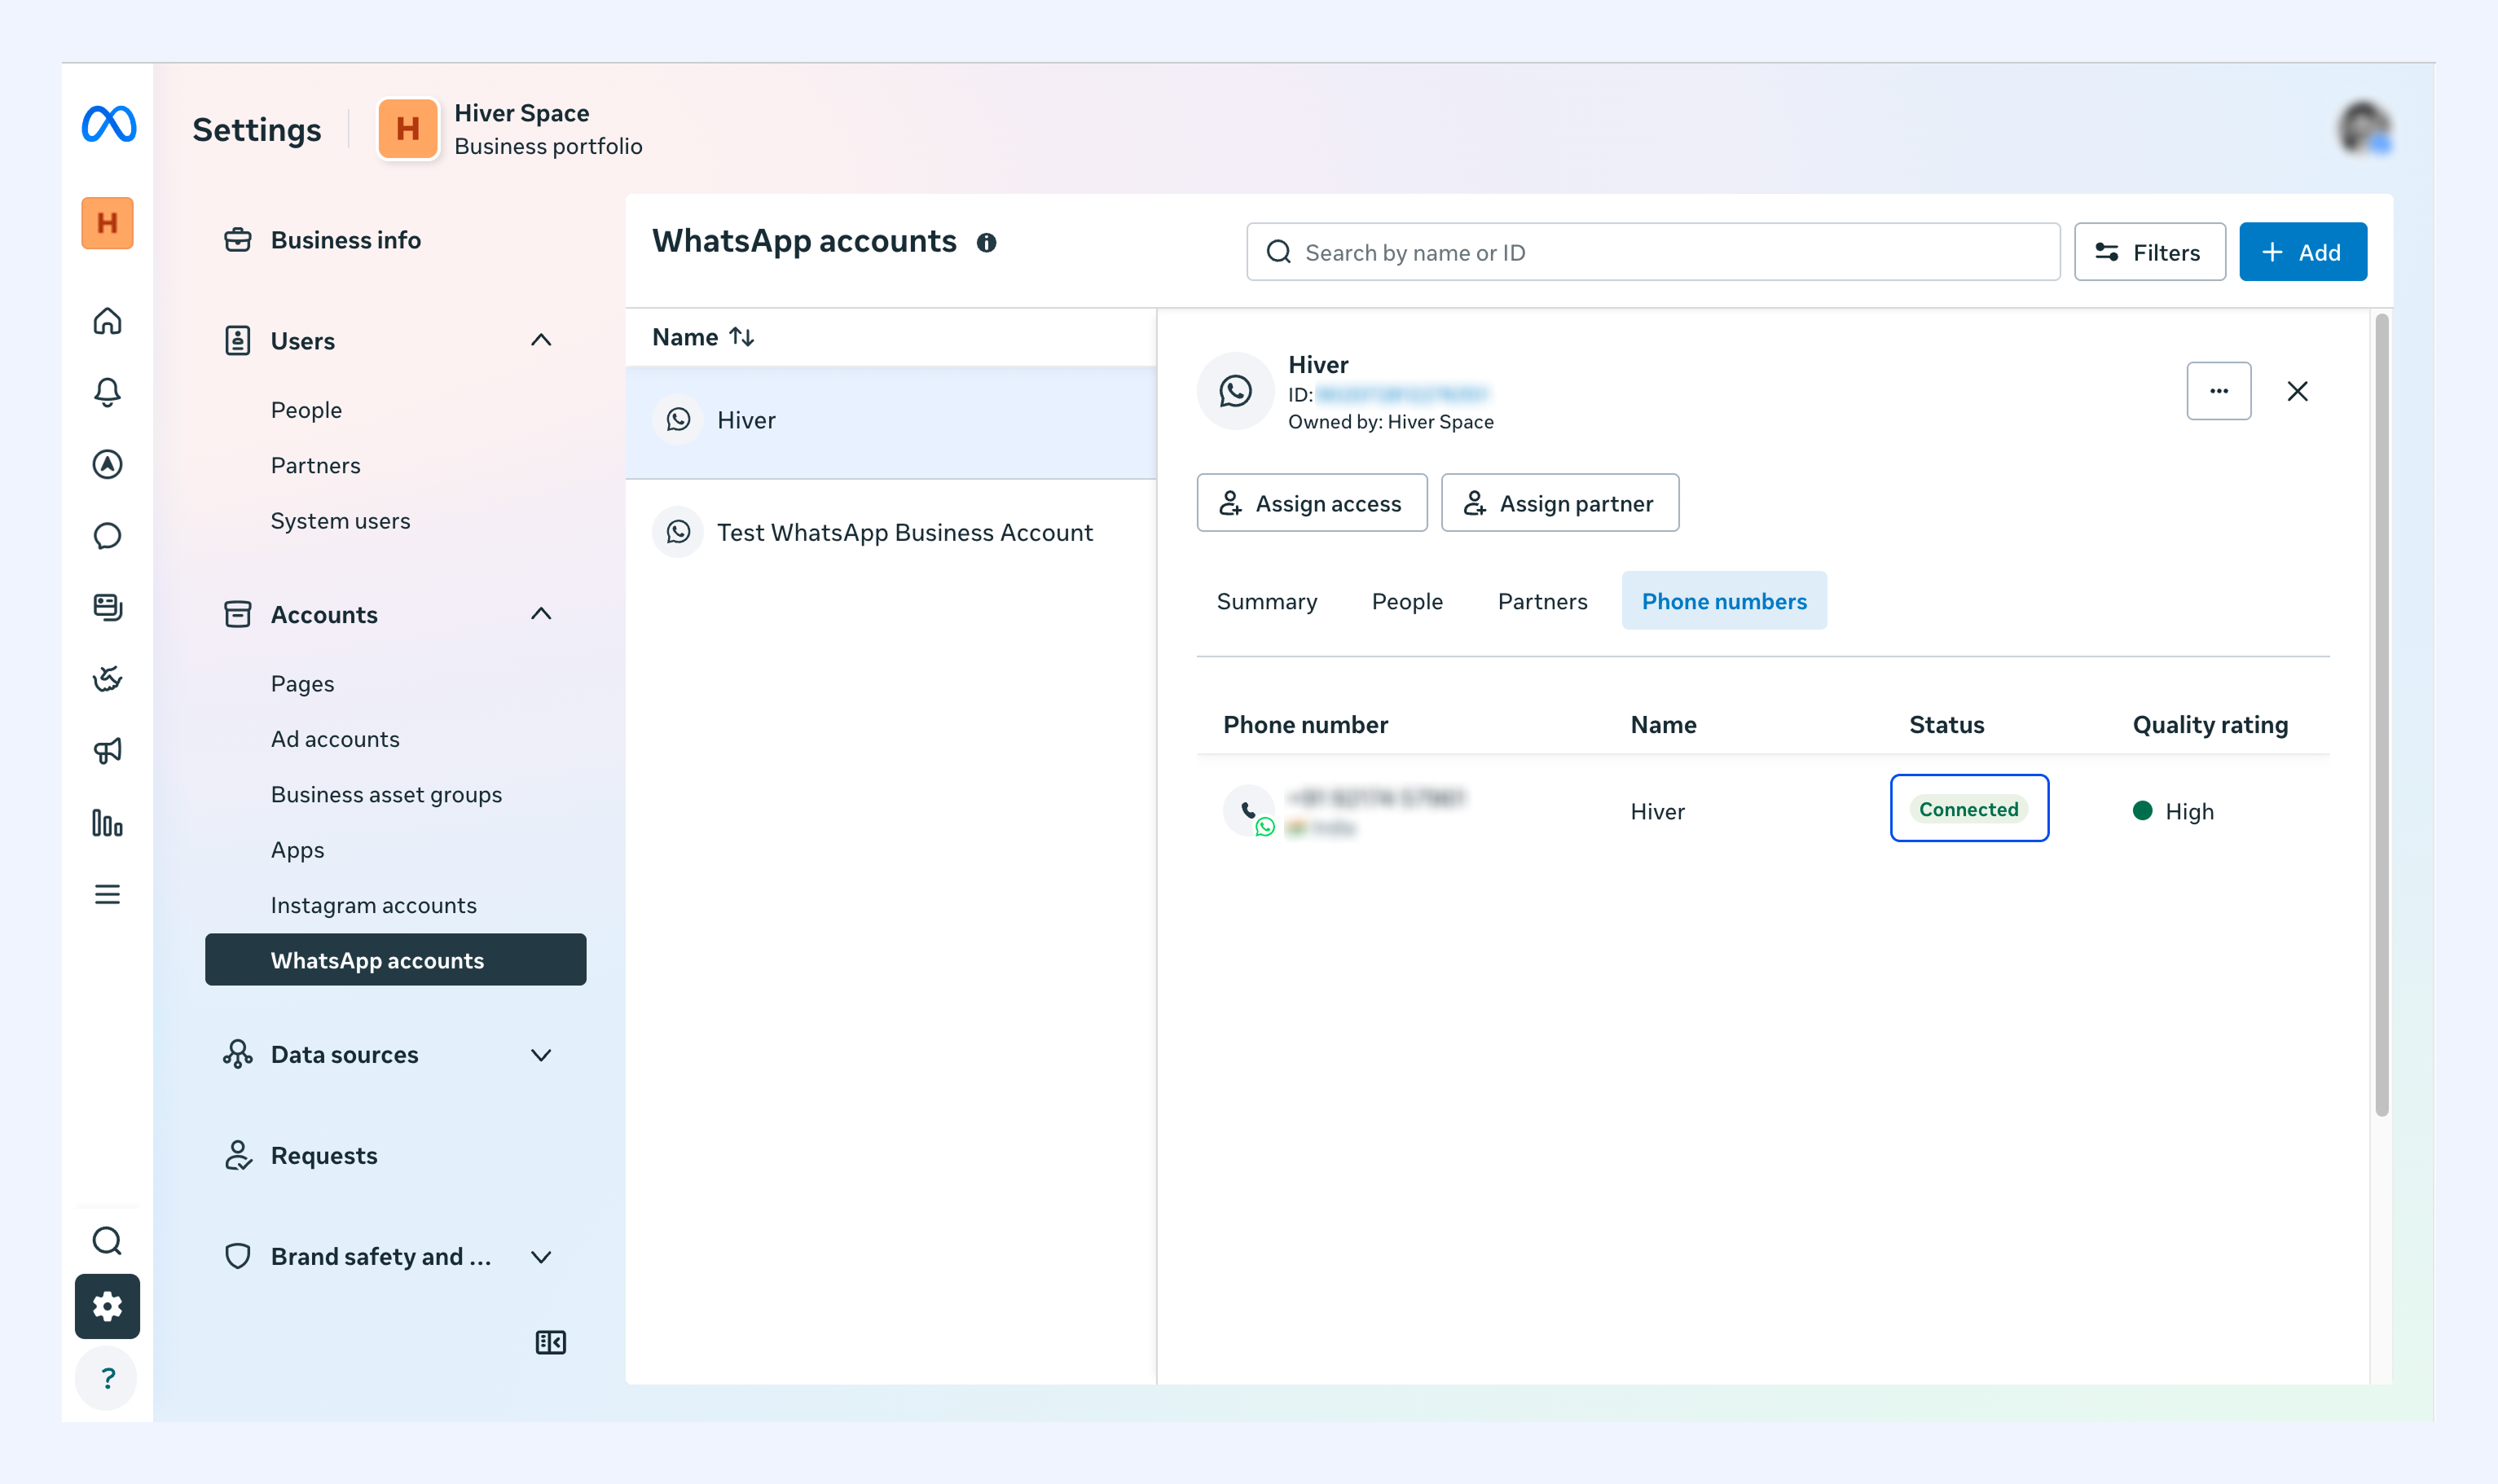
Note: This can take up to 10 minutes to appear in your dashboard.
Next steps
You now have everything you need to create your WhatsApp Inbox in Hiver:
- WhatsApp phone number
- WhatsApp Business Account ID
- Phone number ID
- Permanent access token