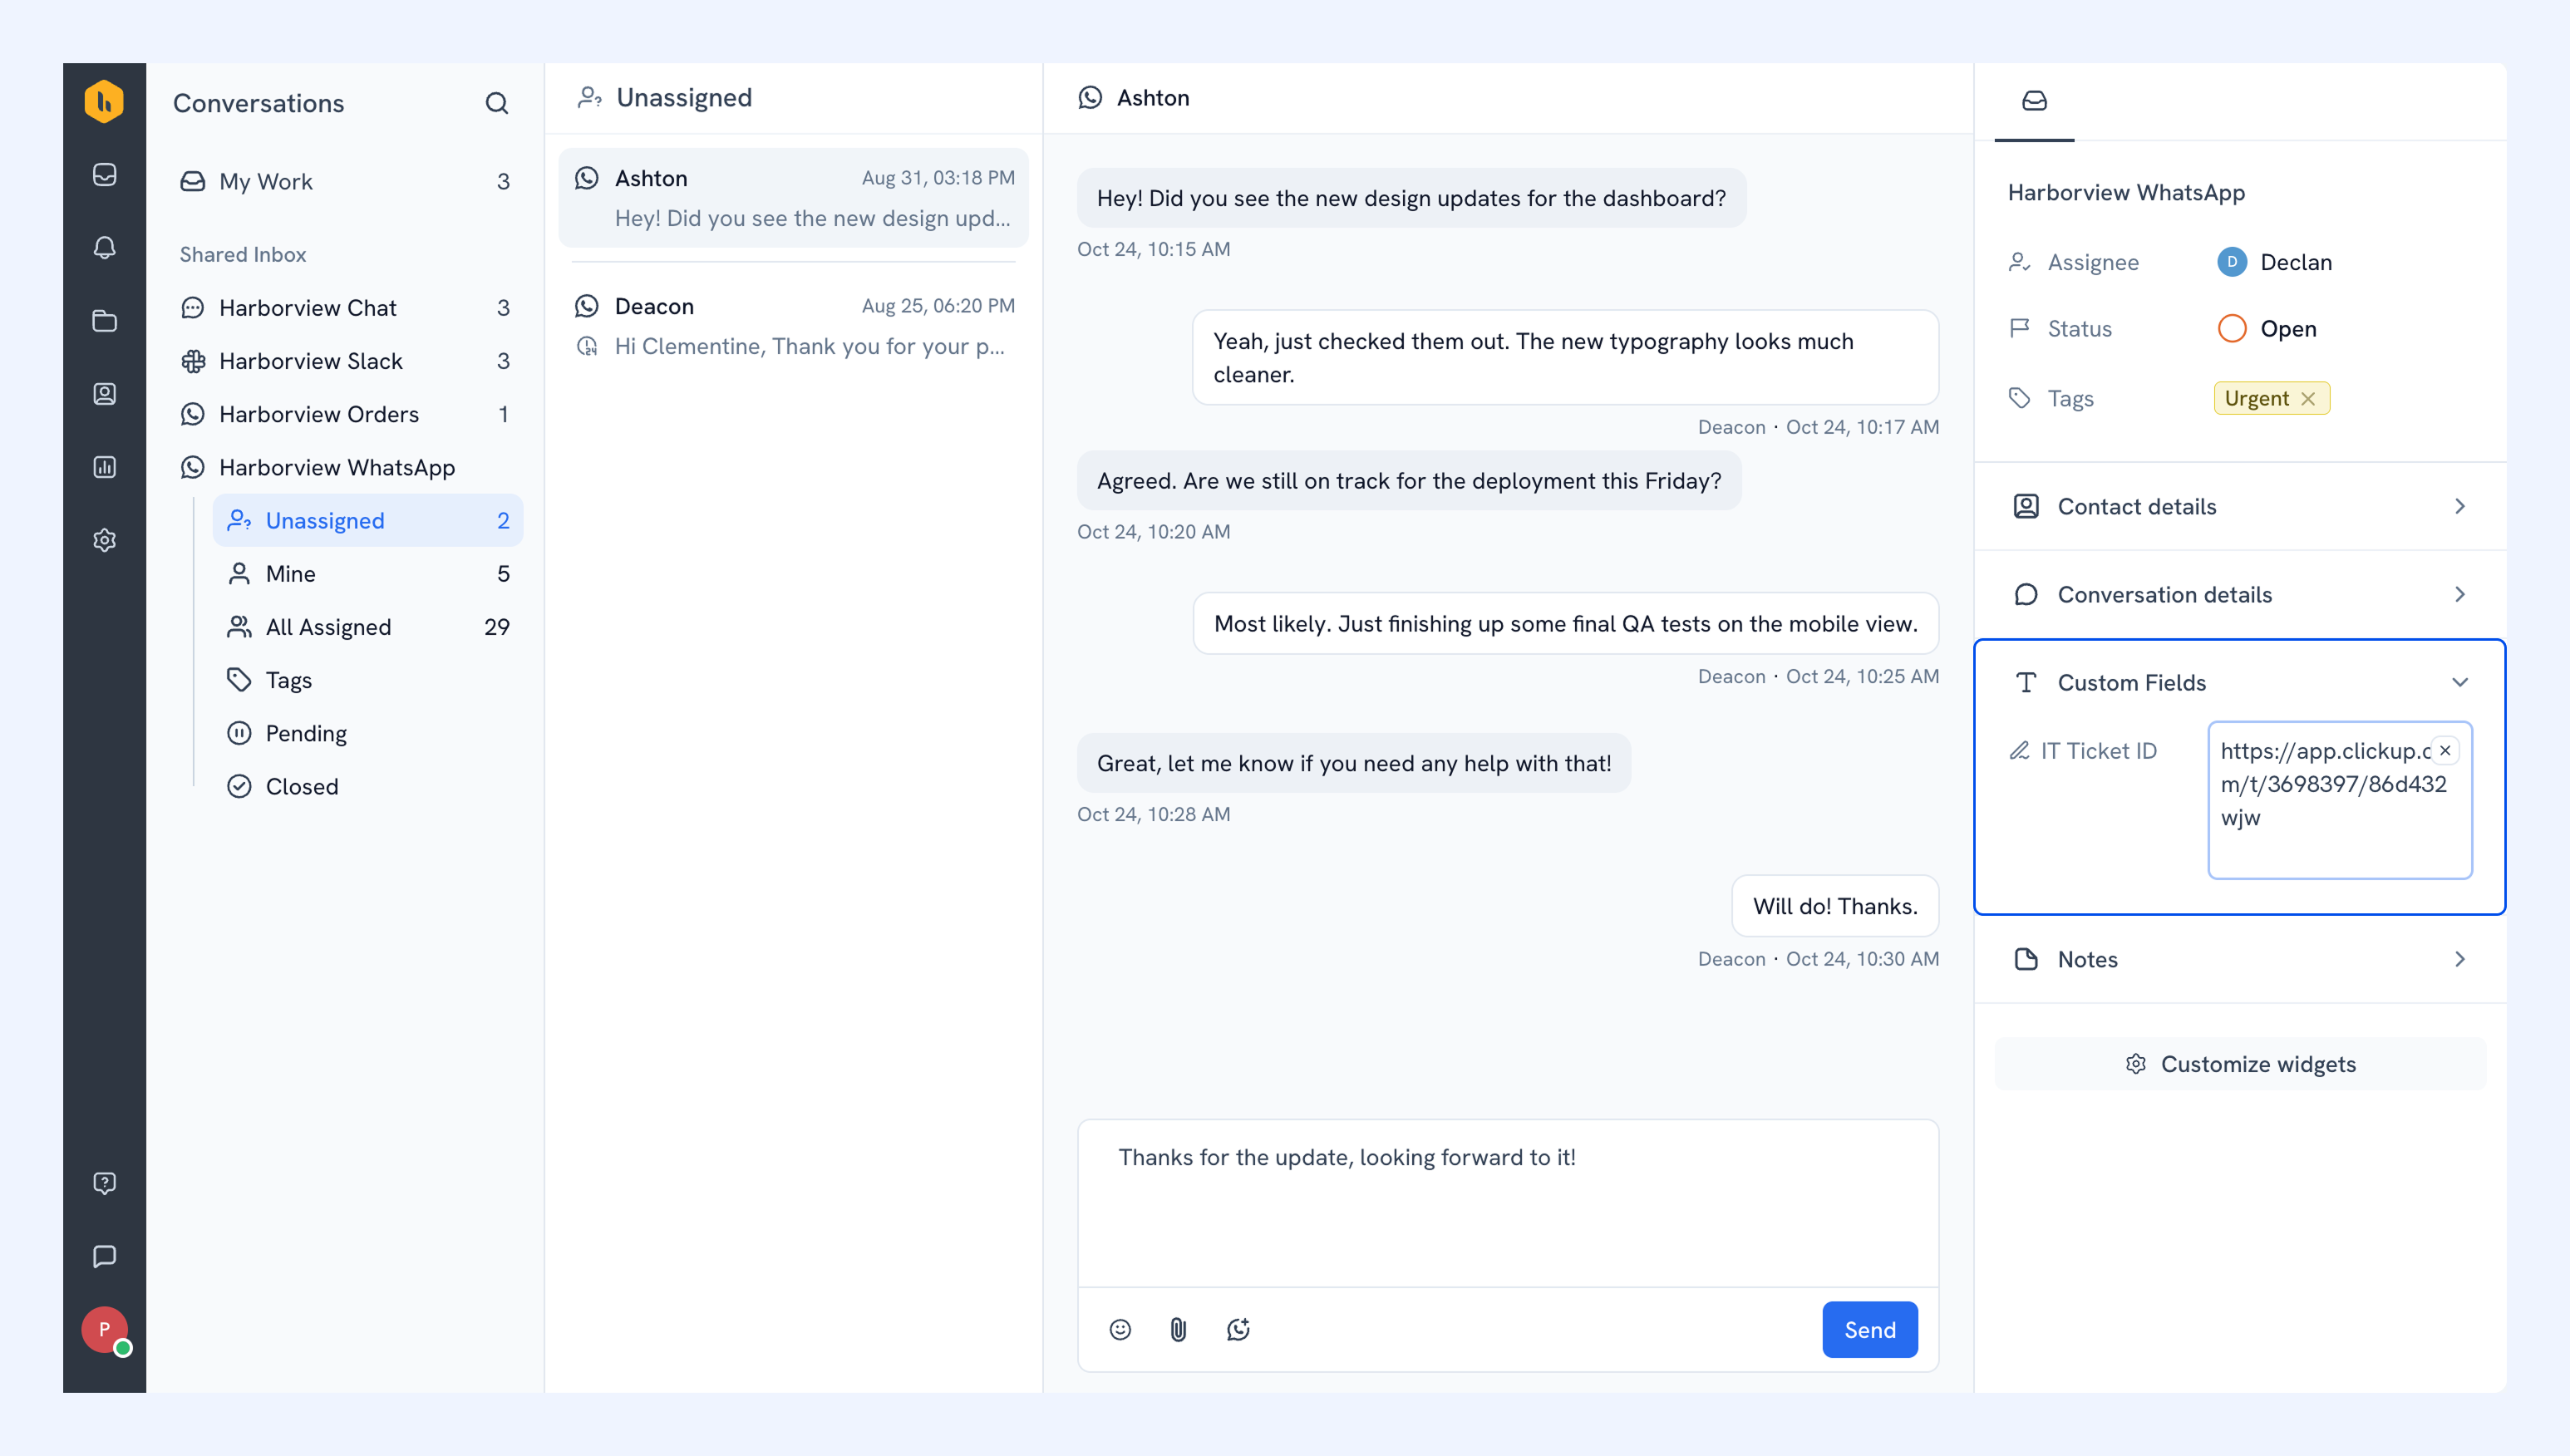
Setting up your WhatsApp Inbox in Hiver
With Hiver's WhatsApp integration, you can manage all your customer conversations from WhatsApp in one place. This article walks you through creating your WhatsApp Inbox and connecting it to your WhatsApp Business Account.
Prerequisites
To create your WhatsApp Inbox in Hiver, you'll need these credentials from Meta:
- WhatsApp phone number
- WhatsApp Business Account ID
- Phone number ID
- Permanent access token
If you don't have these yet, set them up first: WhatsApp Integration Prerequisites and Setting Up WhatsApp in Meta Developer Portal.
Create a WhatsApp Inbox
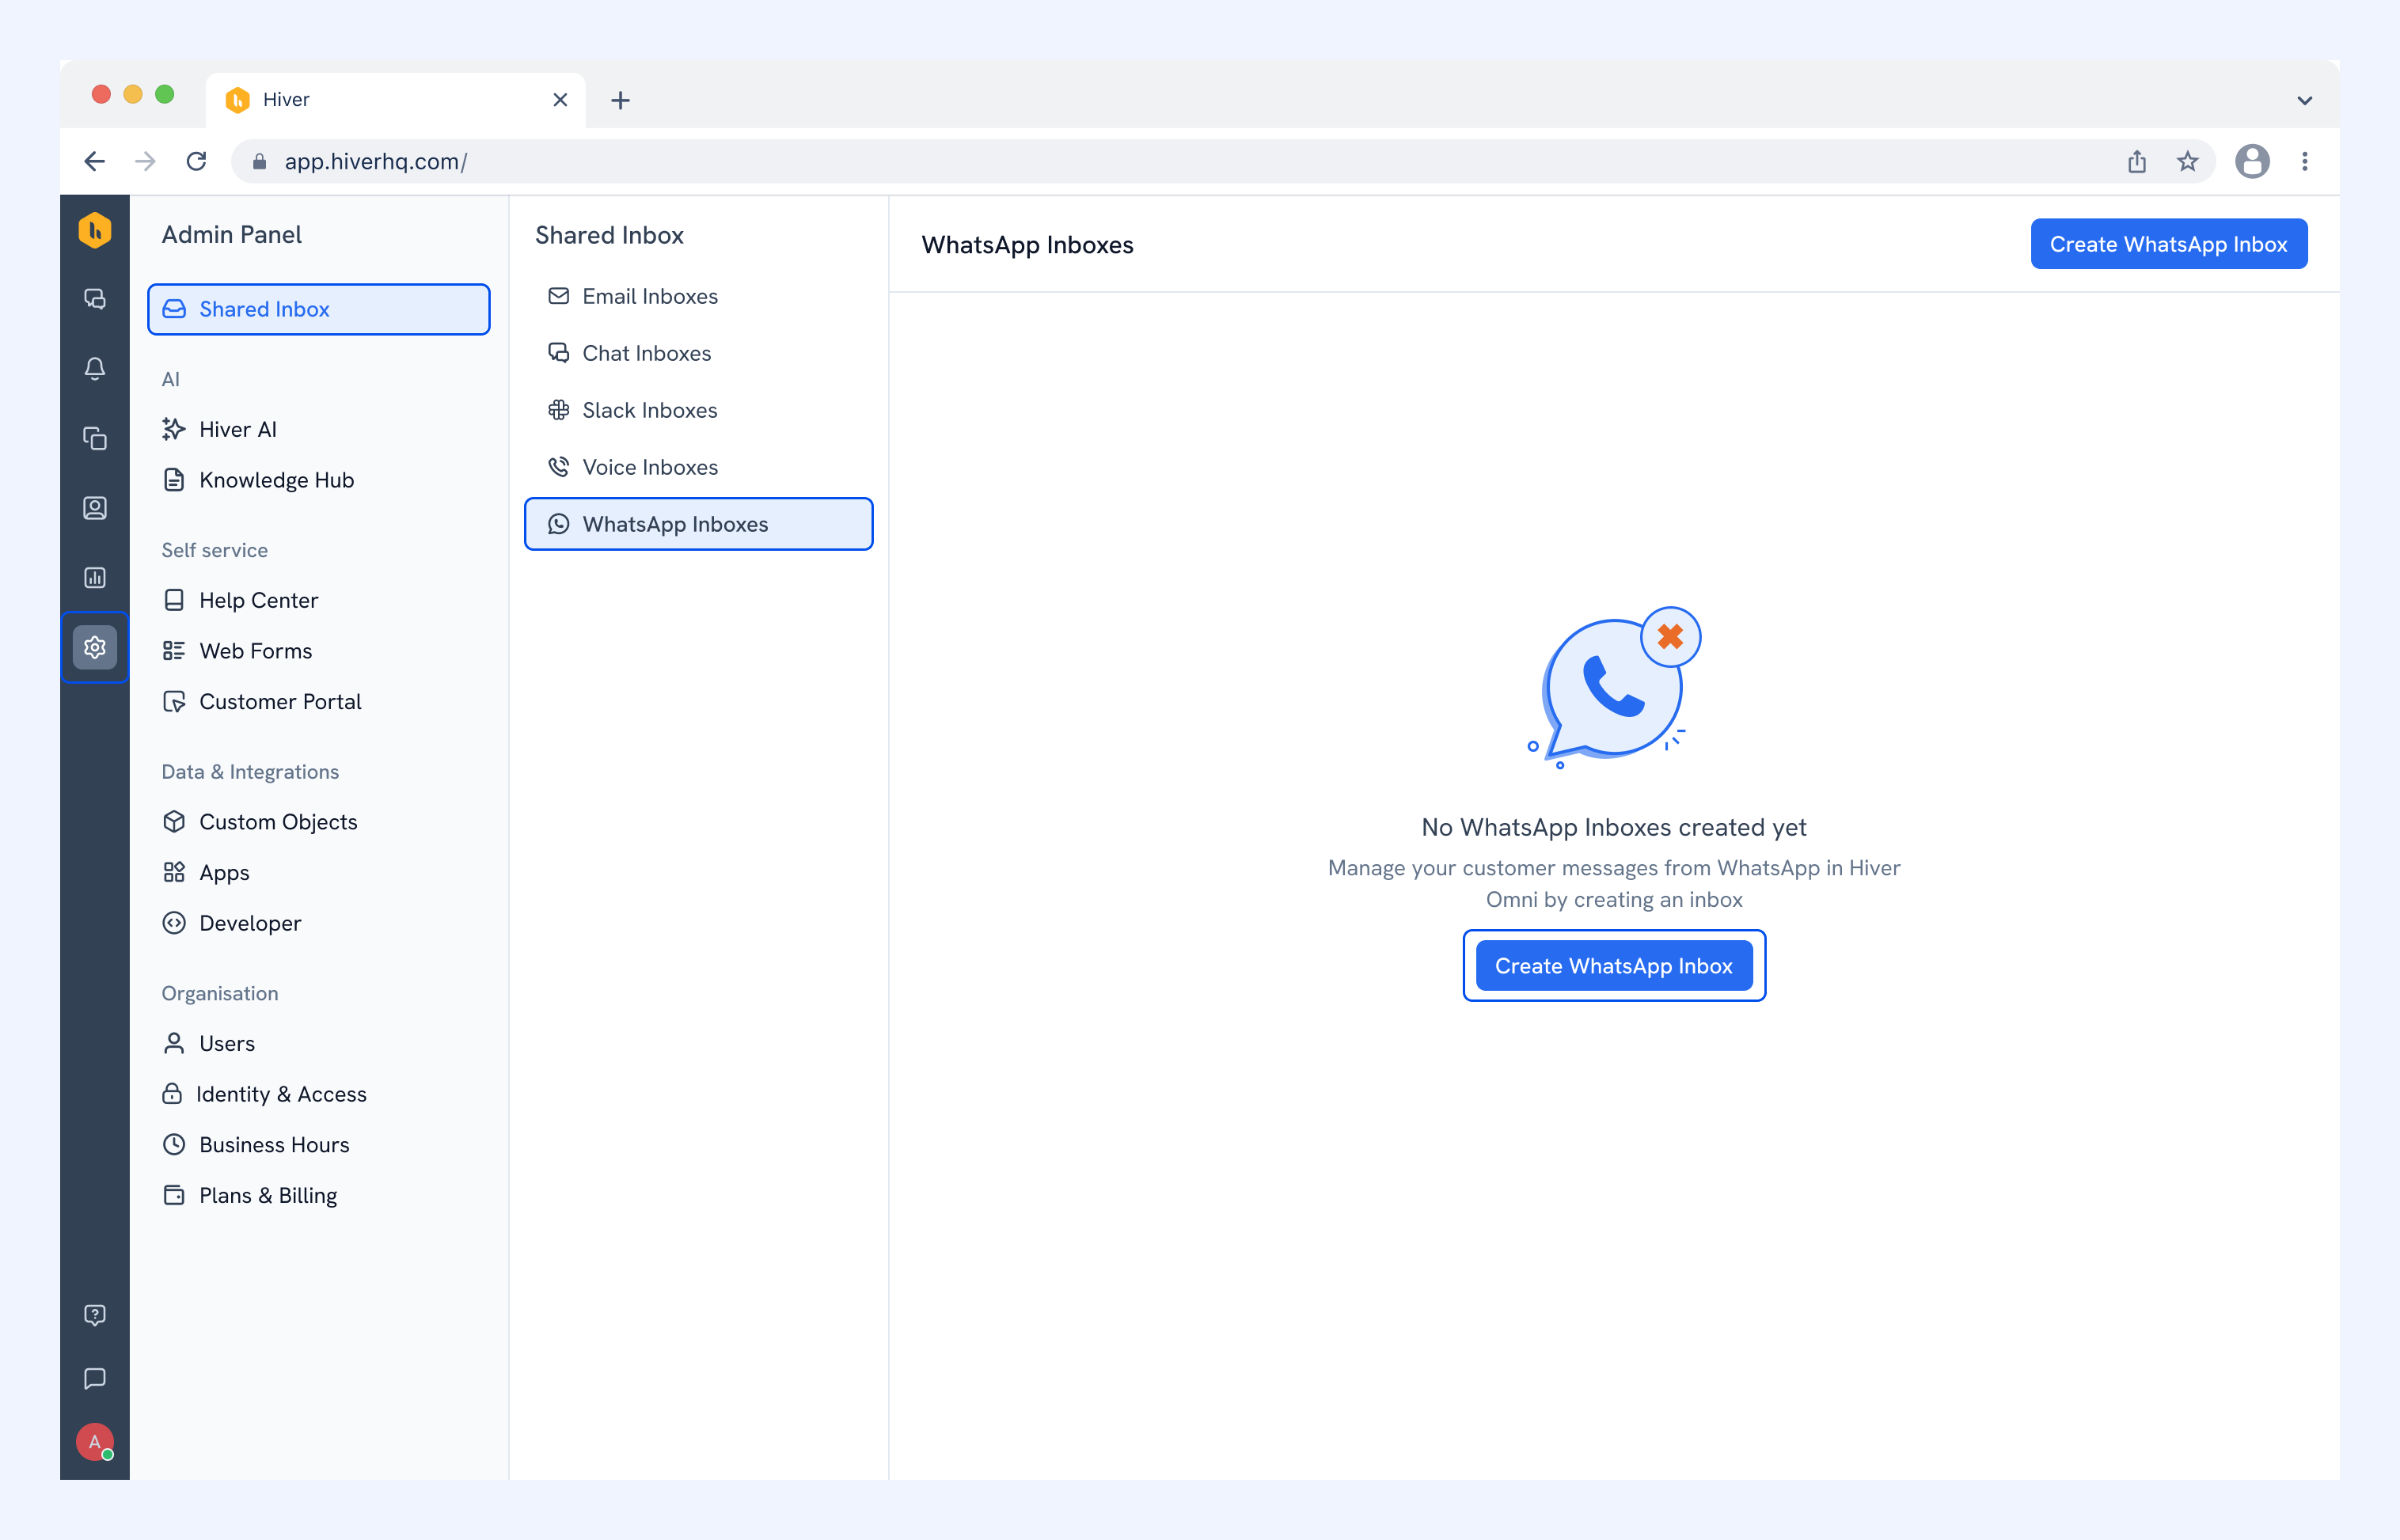
1. Go to Hiver Admin Panel → Shared Inbox → WhatsApp Inboxes.
2. Click Create WhatsApp Inbox.
Step 1: Set up general settings
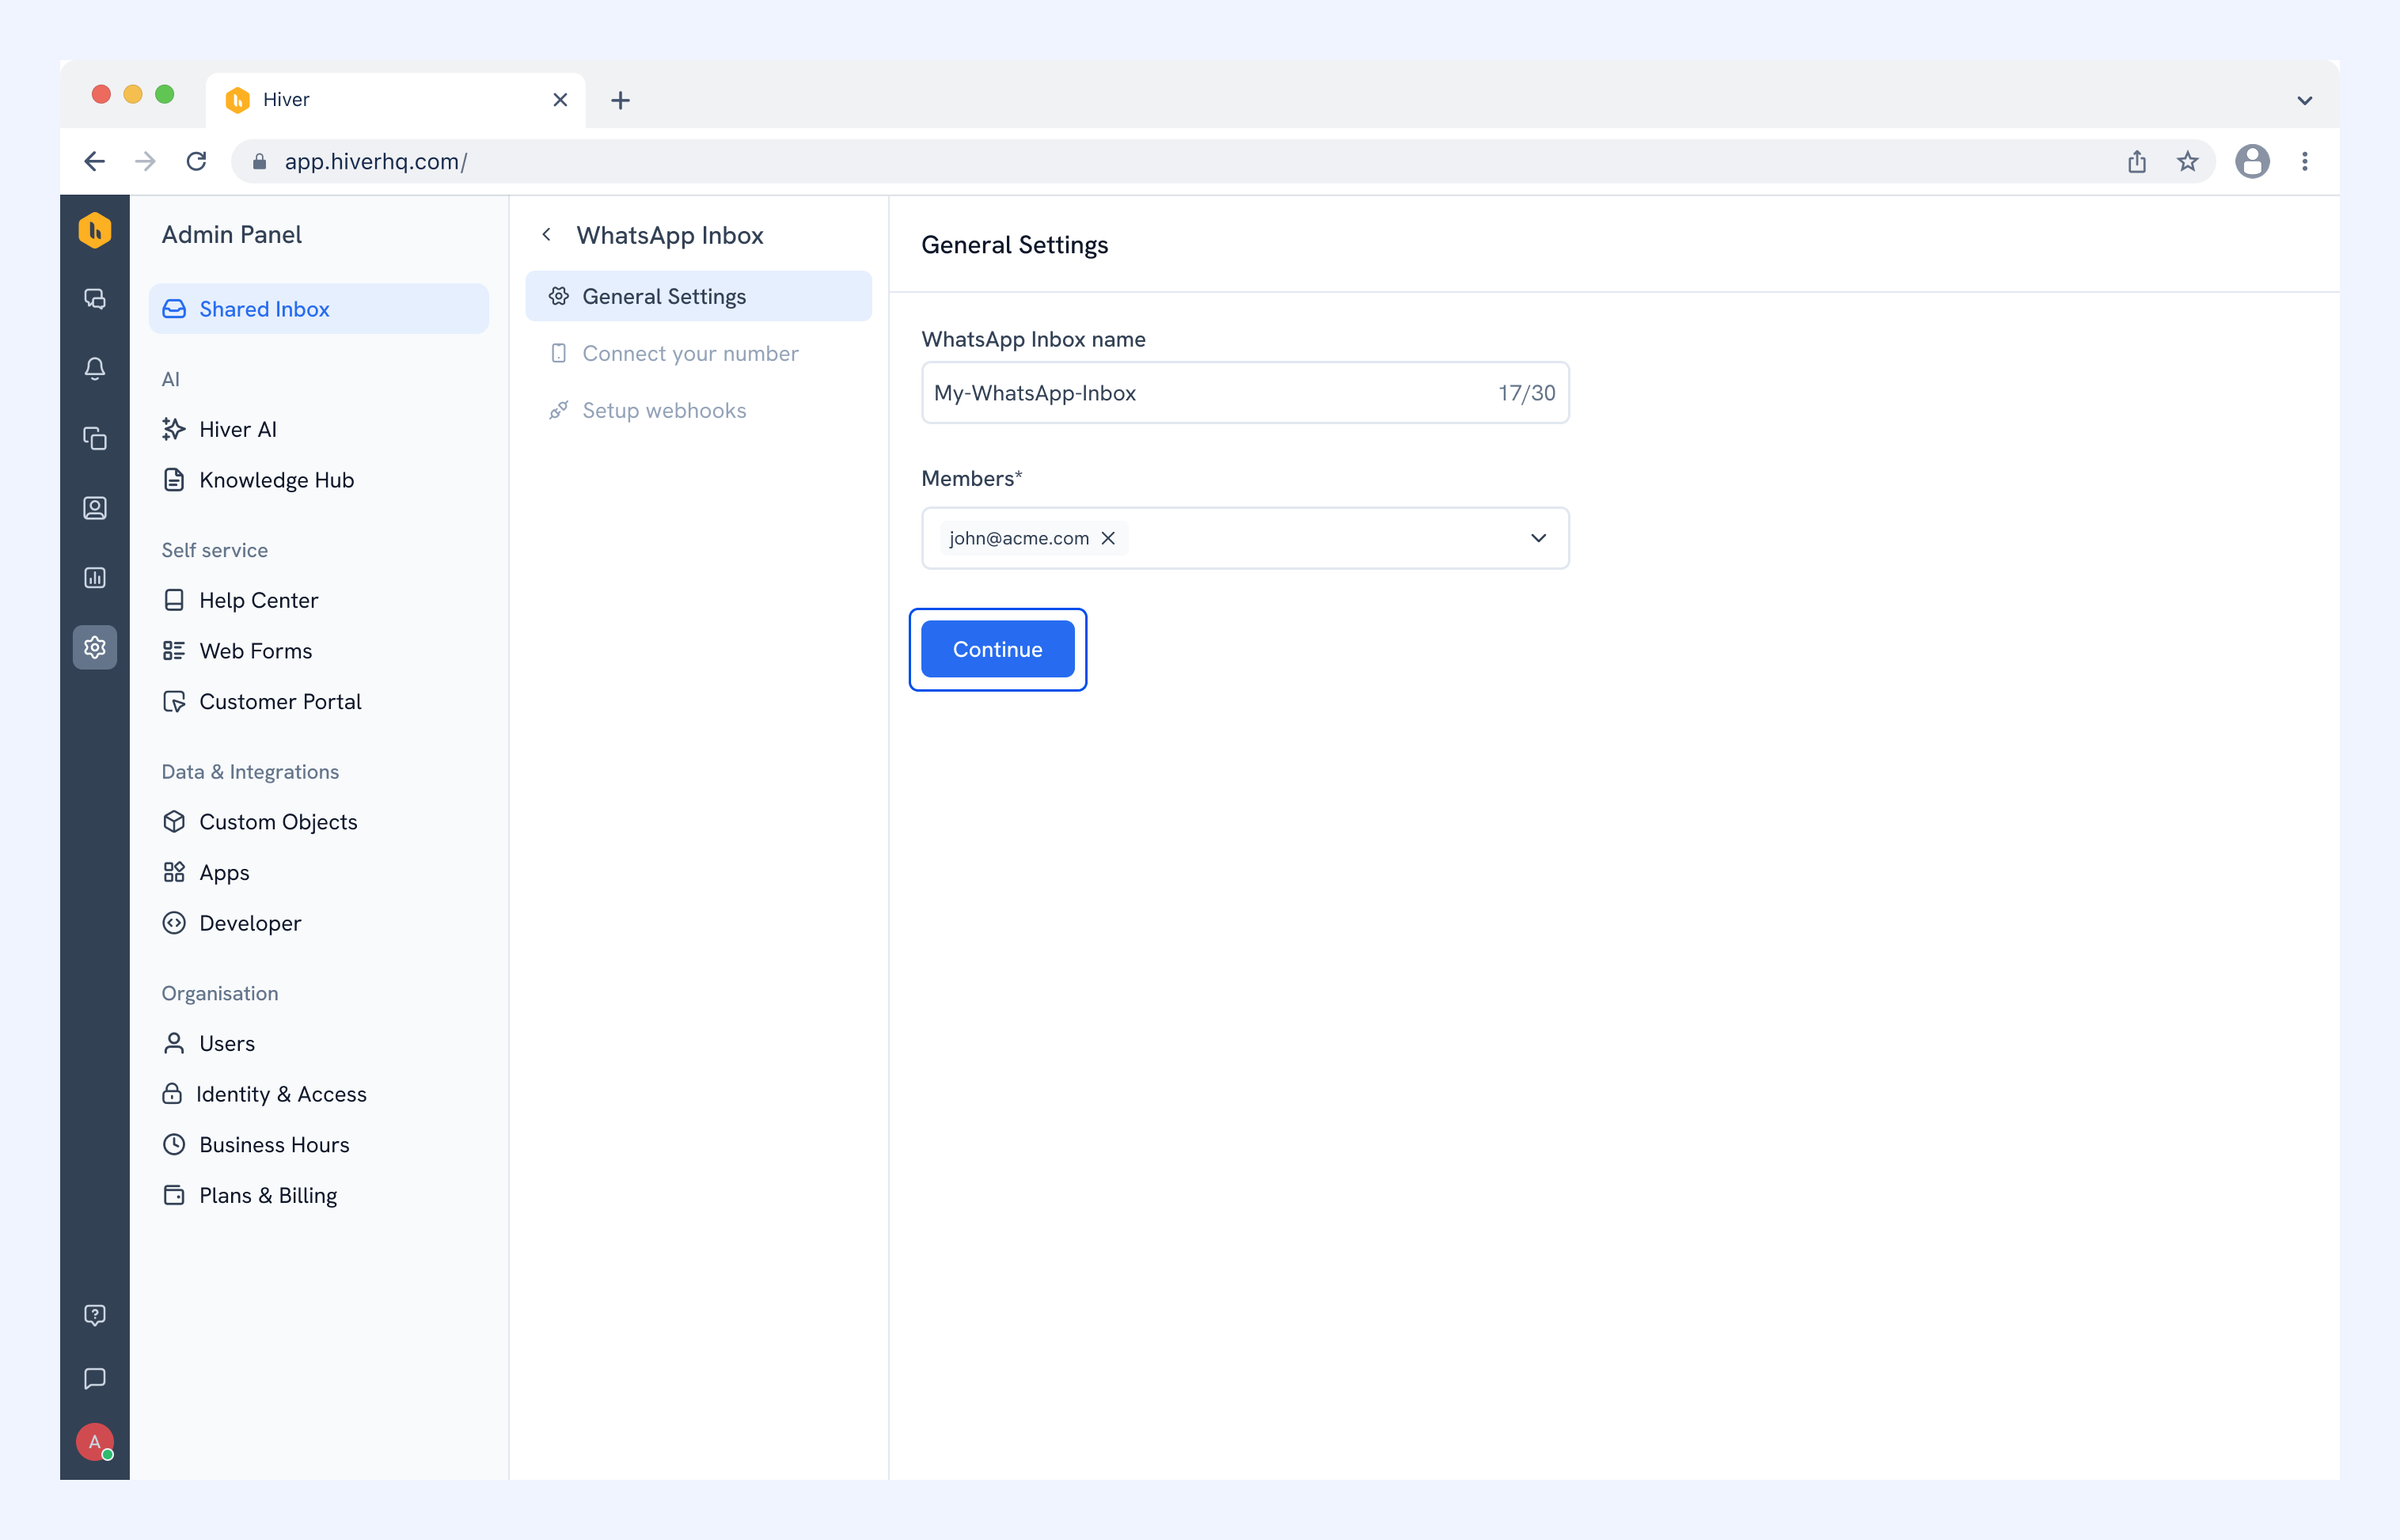
1. Enter an inbox name and add the members who'll handle WhatsApp conversations.
2. Click Continue.
Step 2: Connect your number
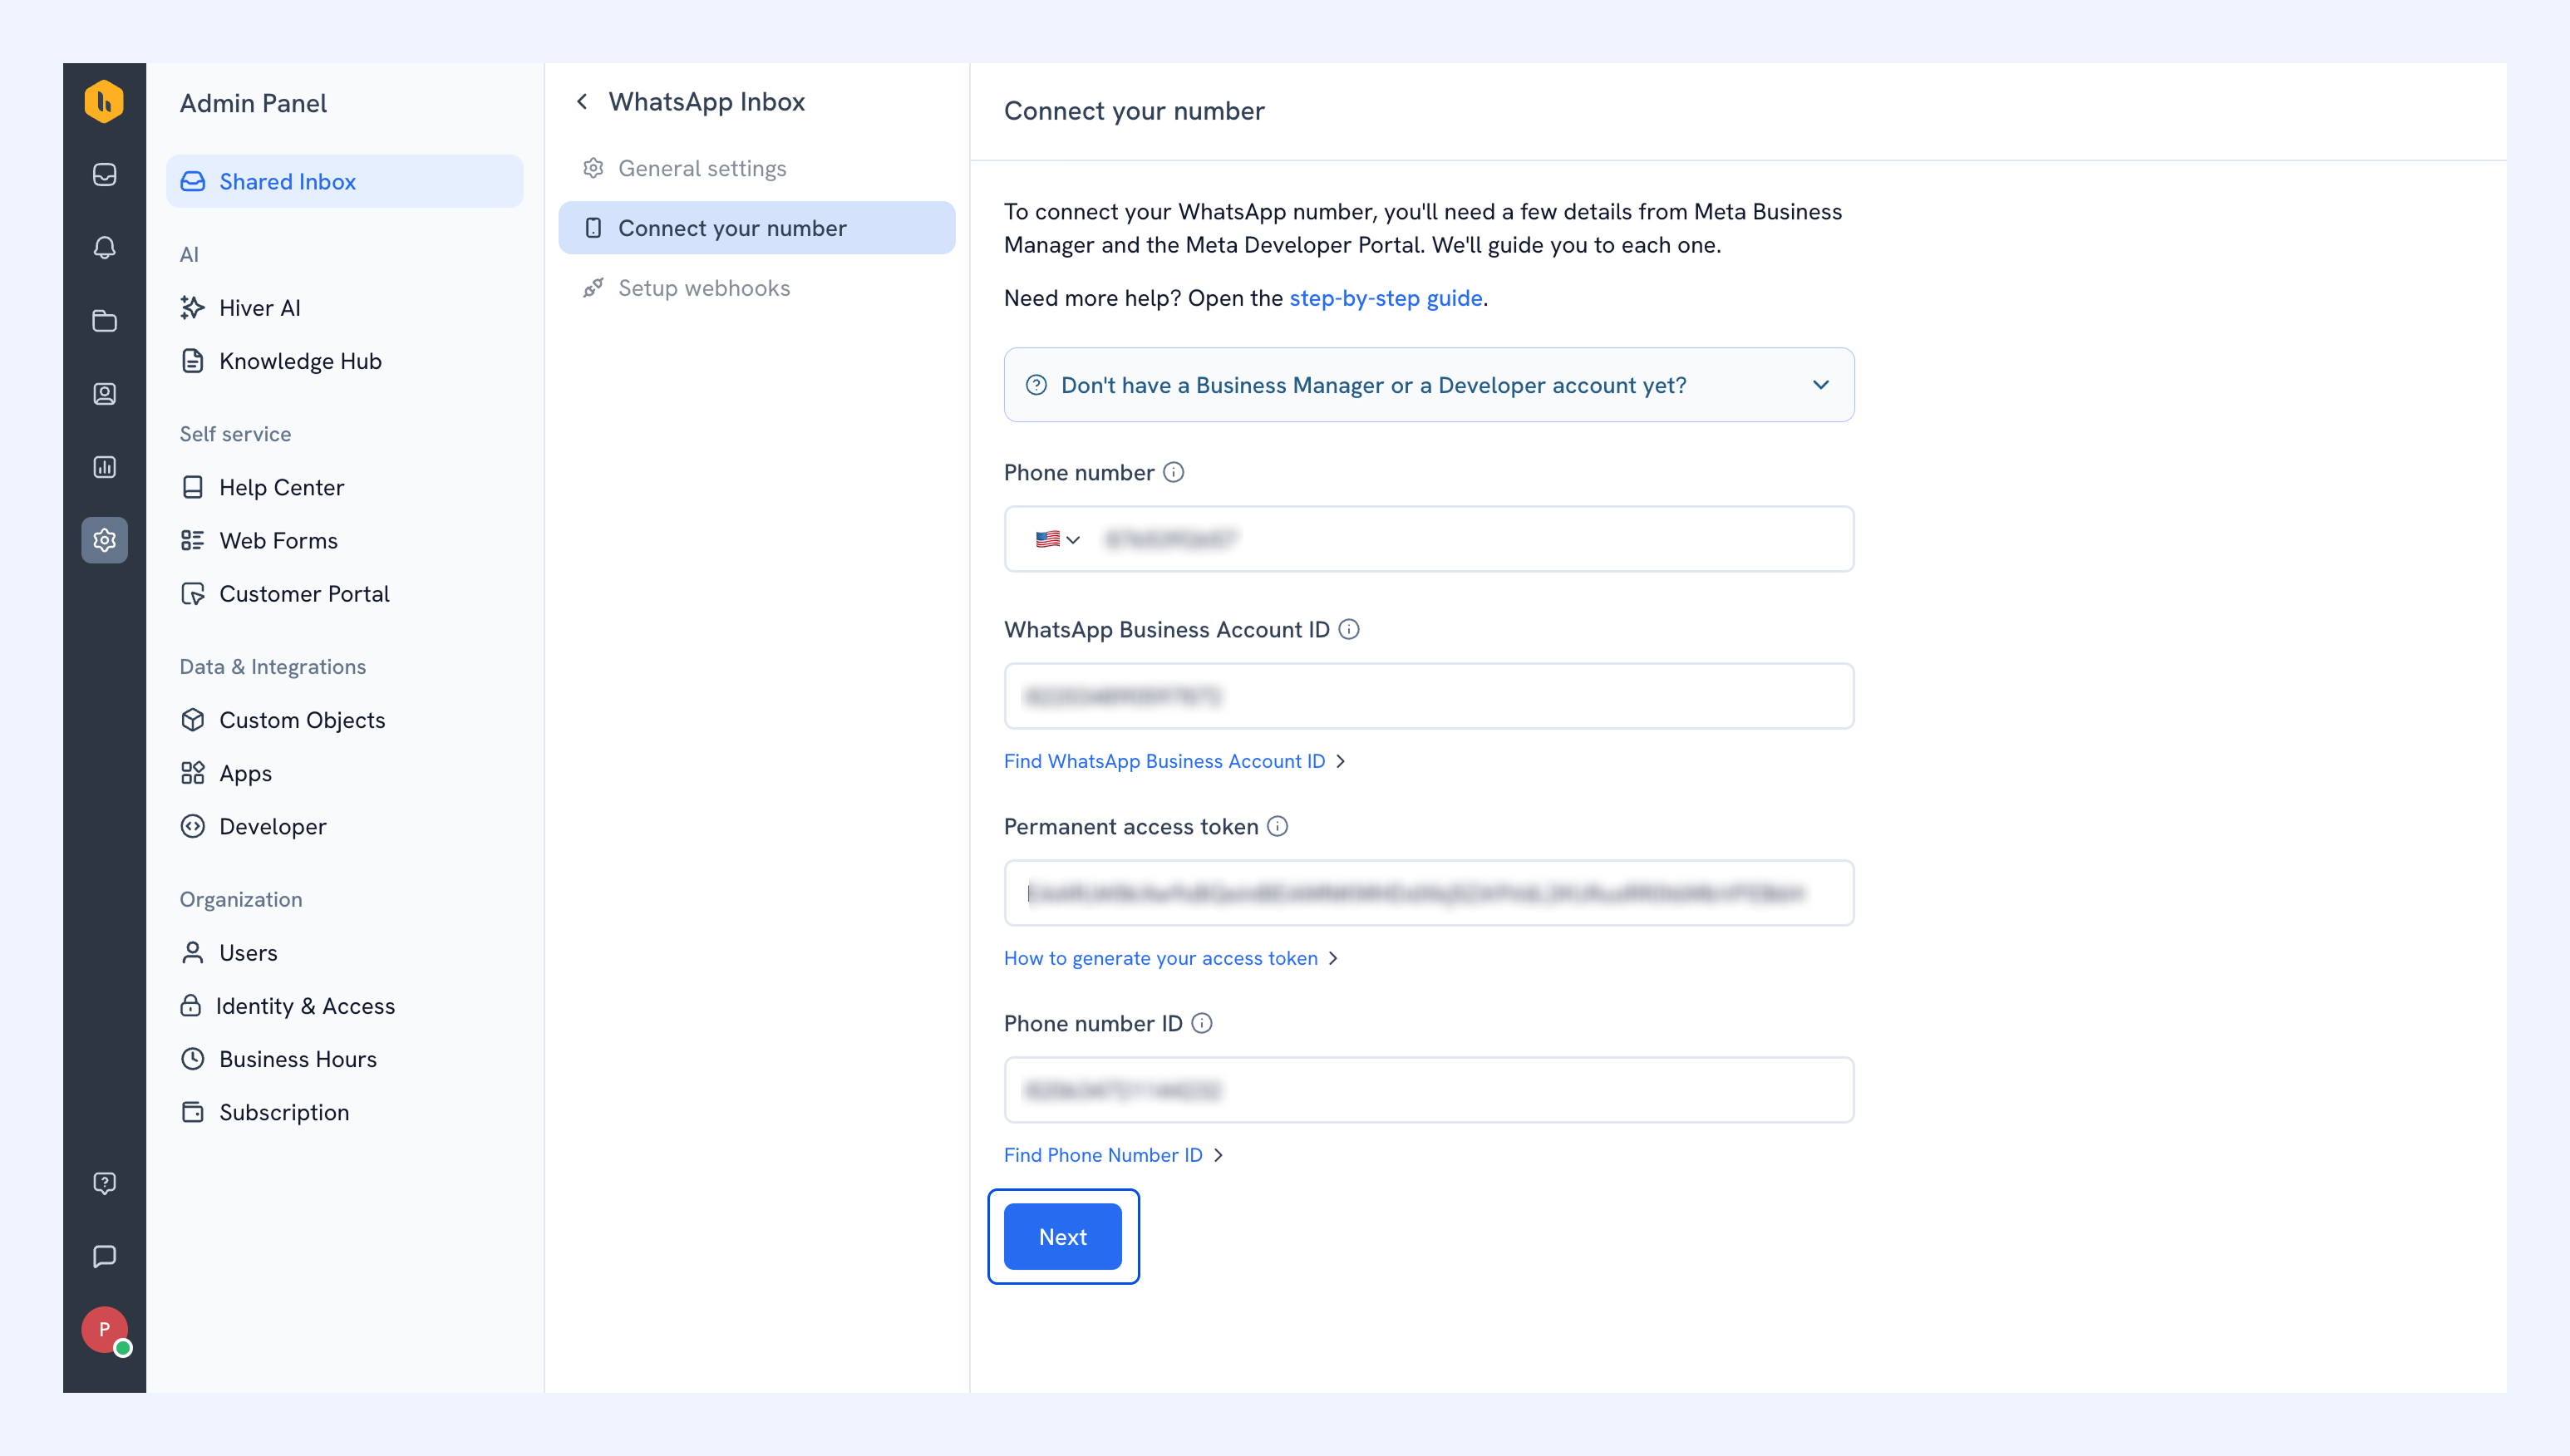
Now enter the credentials you got from Meta's Developer Portal.
1. Enter your WhatsApp phone number (the number where customers will send messages).
2. Enter your WhatsApp Business Account ID.
3. Paste your Permanent access token.
4. Enter your Phone number ID.
5. Click Next.
Step 3: Configure webhooks
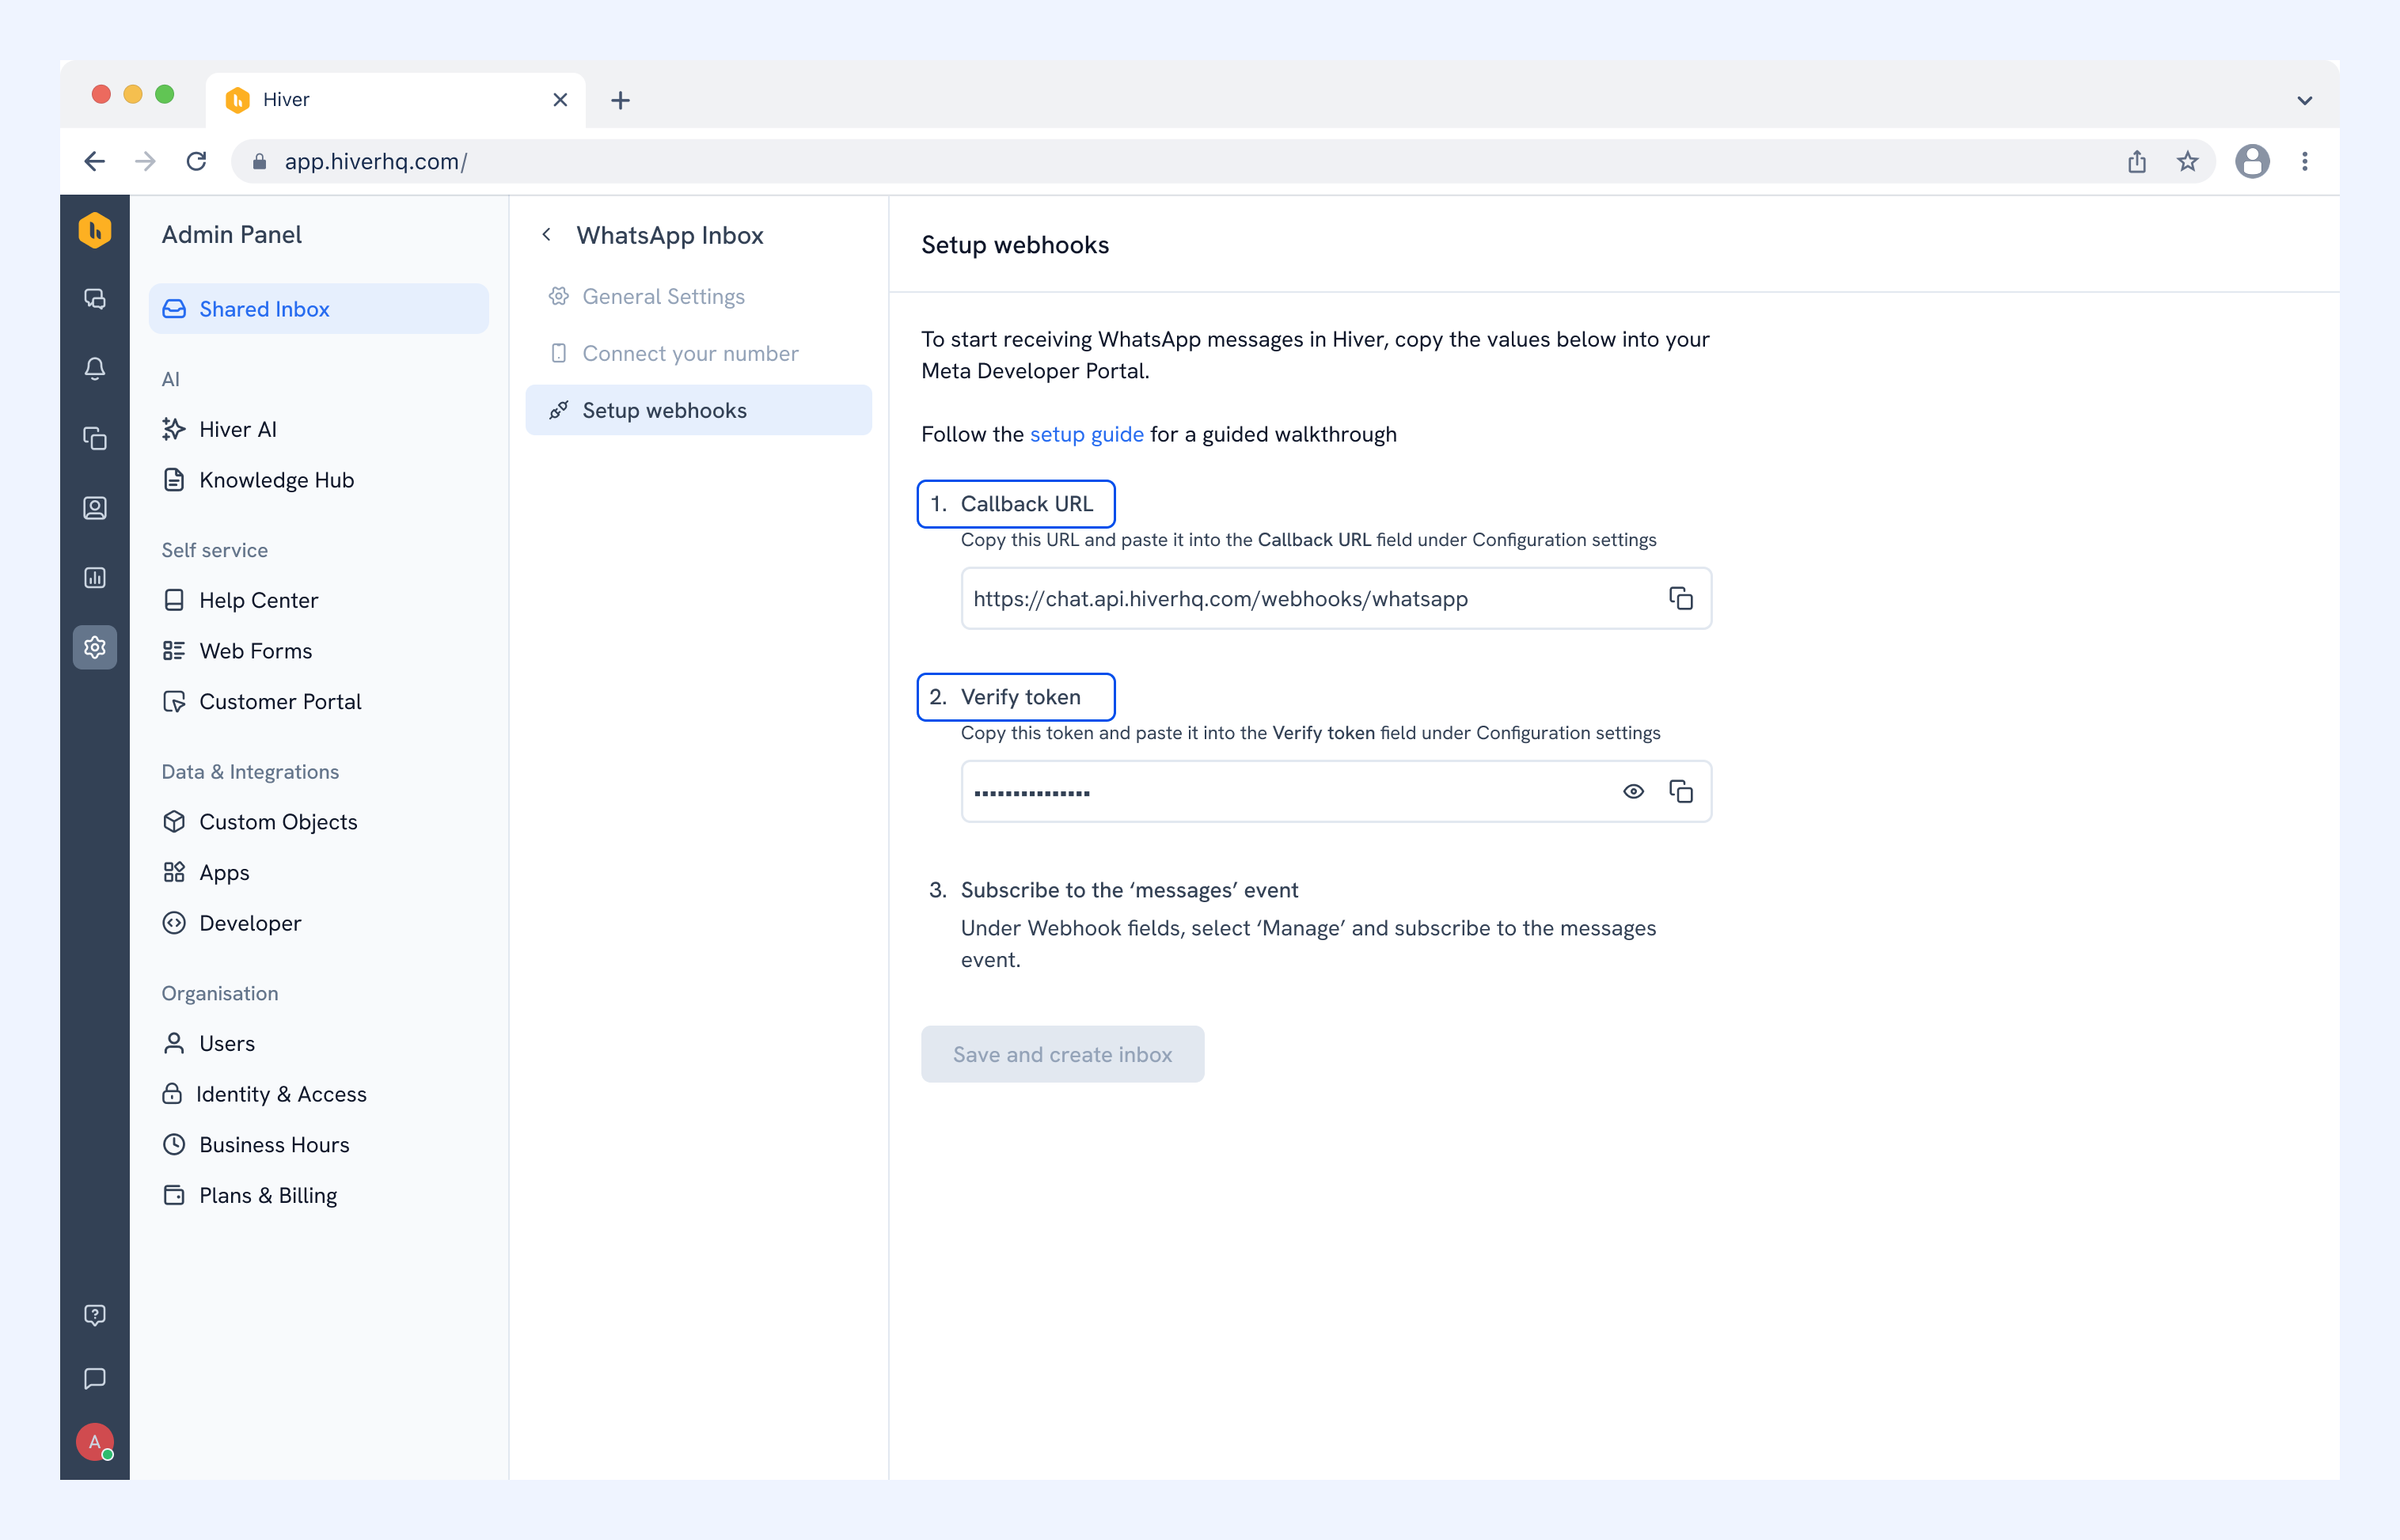
Webhooks let Hiver receive WhatsApp messages in real time. You'll copy two values from Hiver into Meta's Developer Portal.
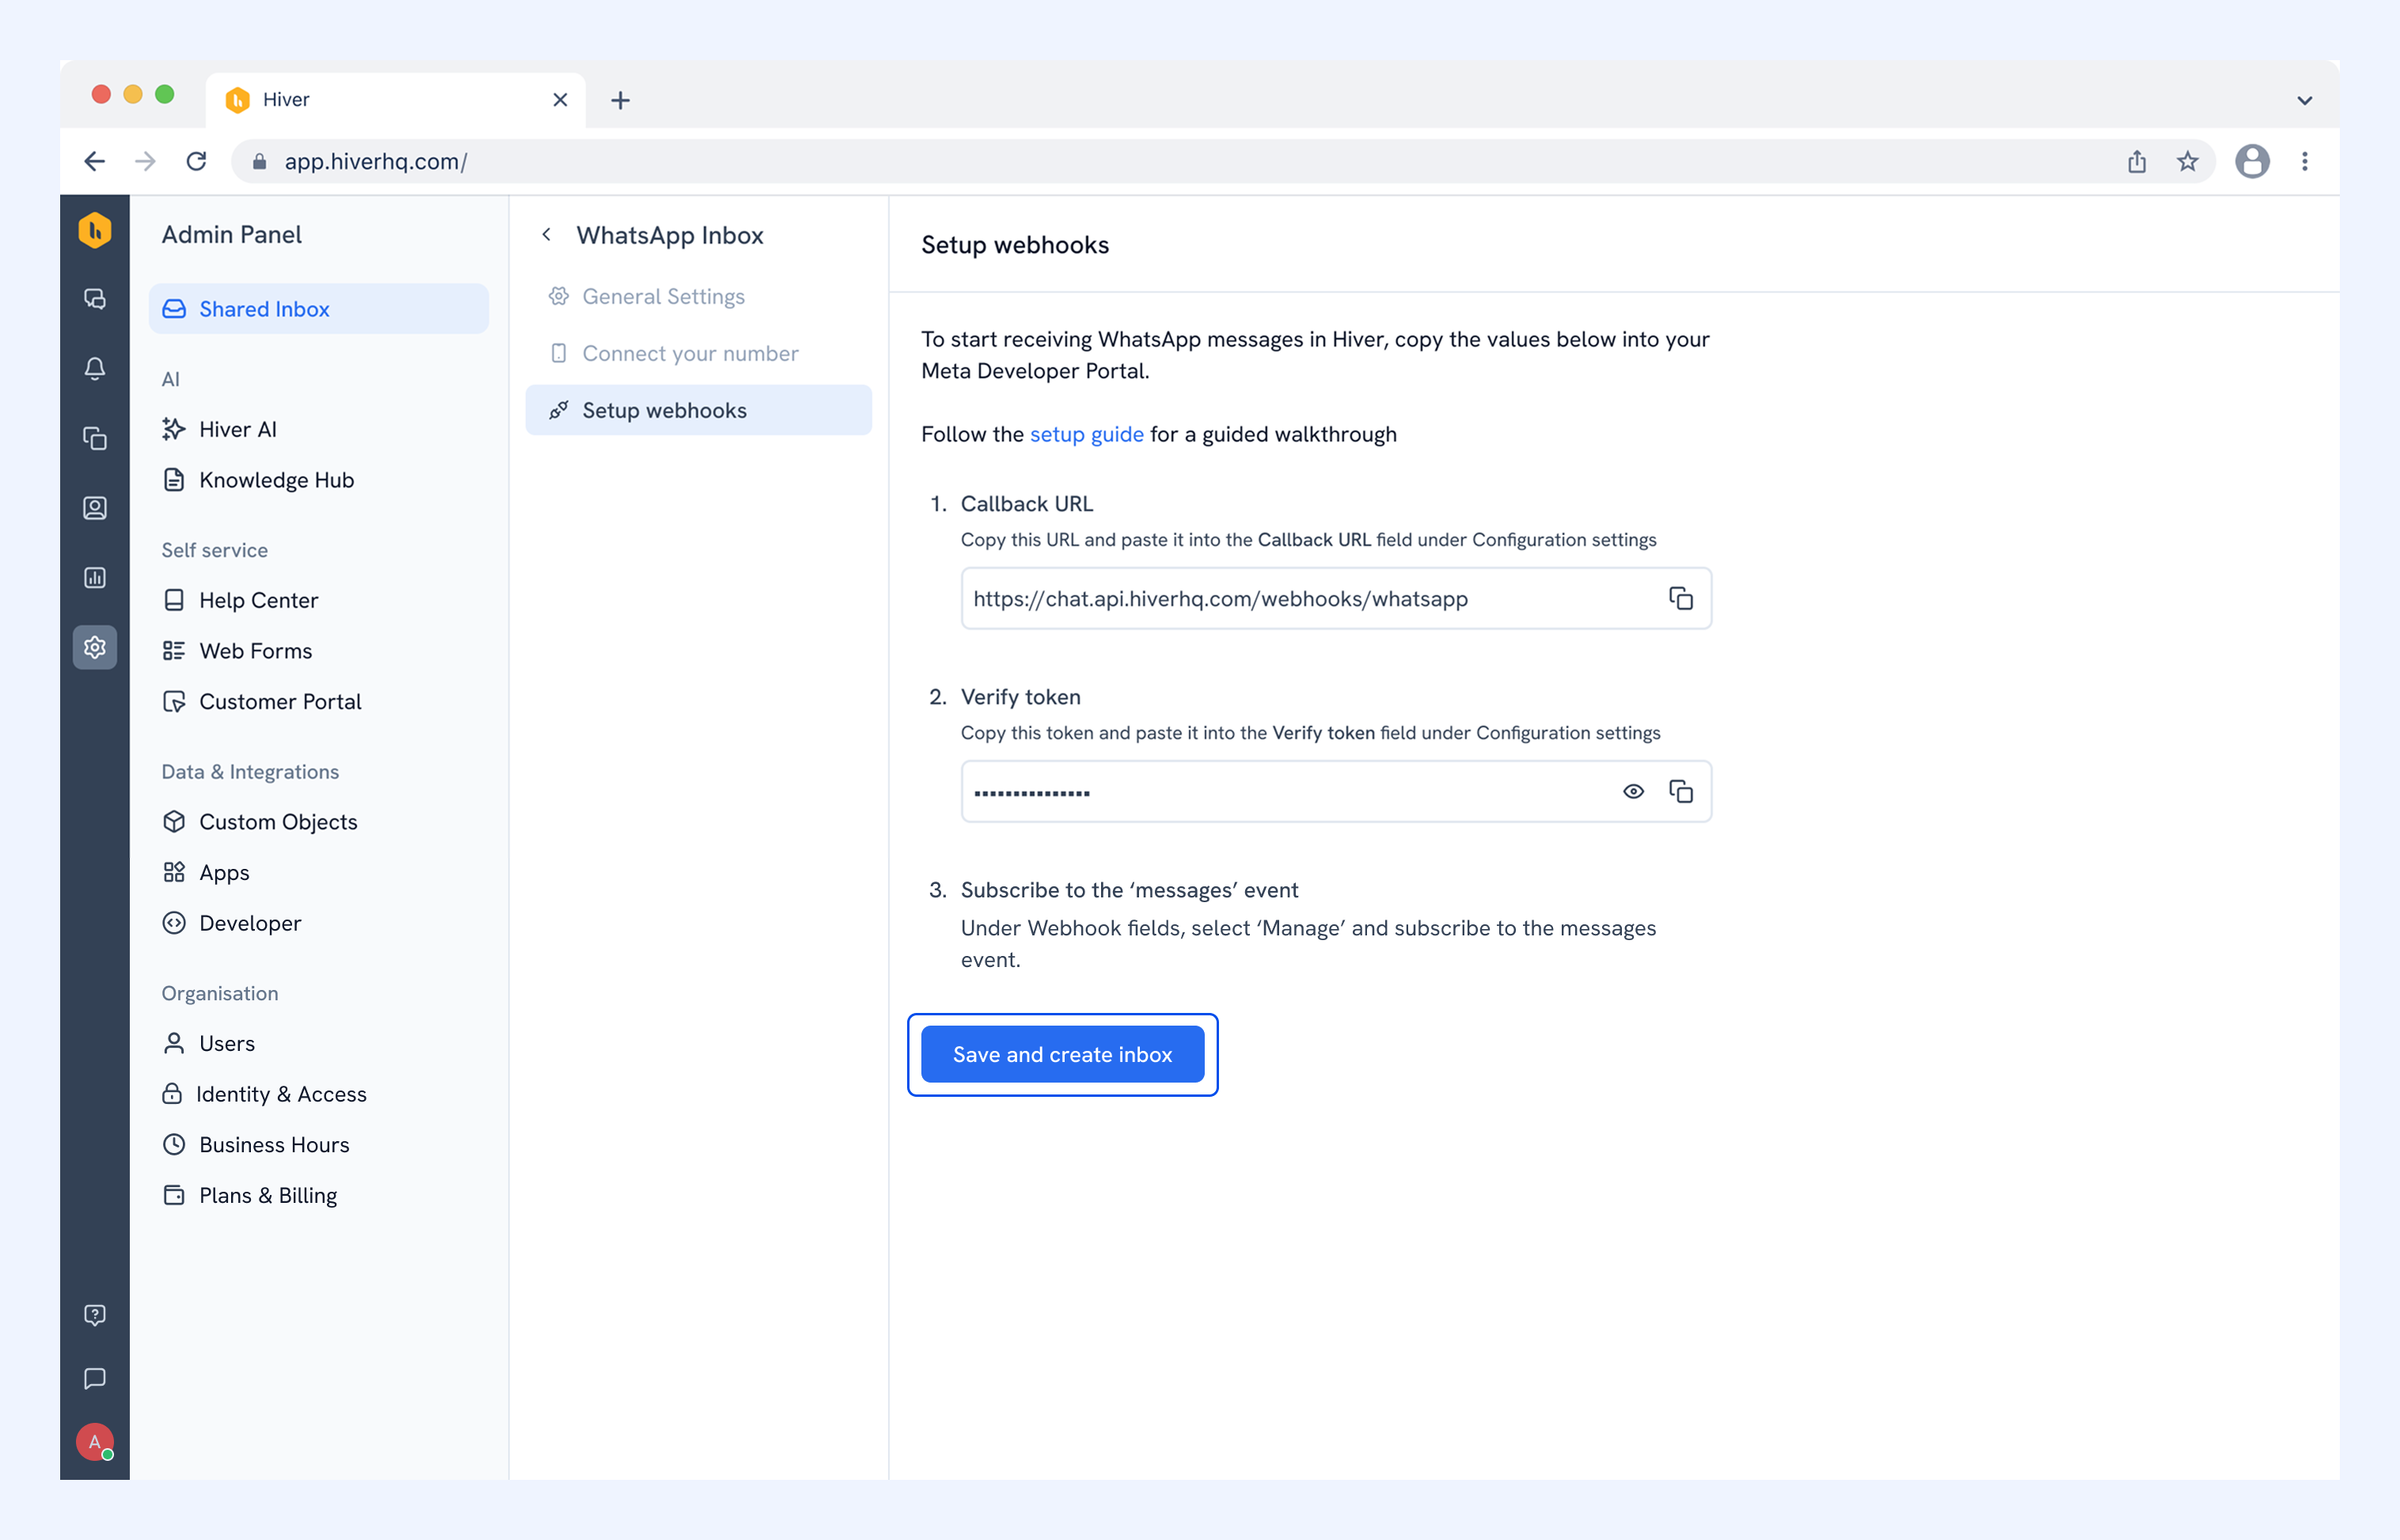
1. On this screen, Hiver shows a Callback URL and a Verify token.
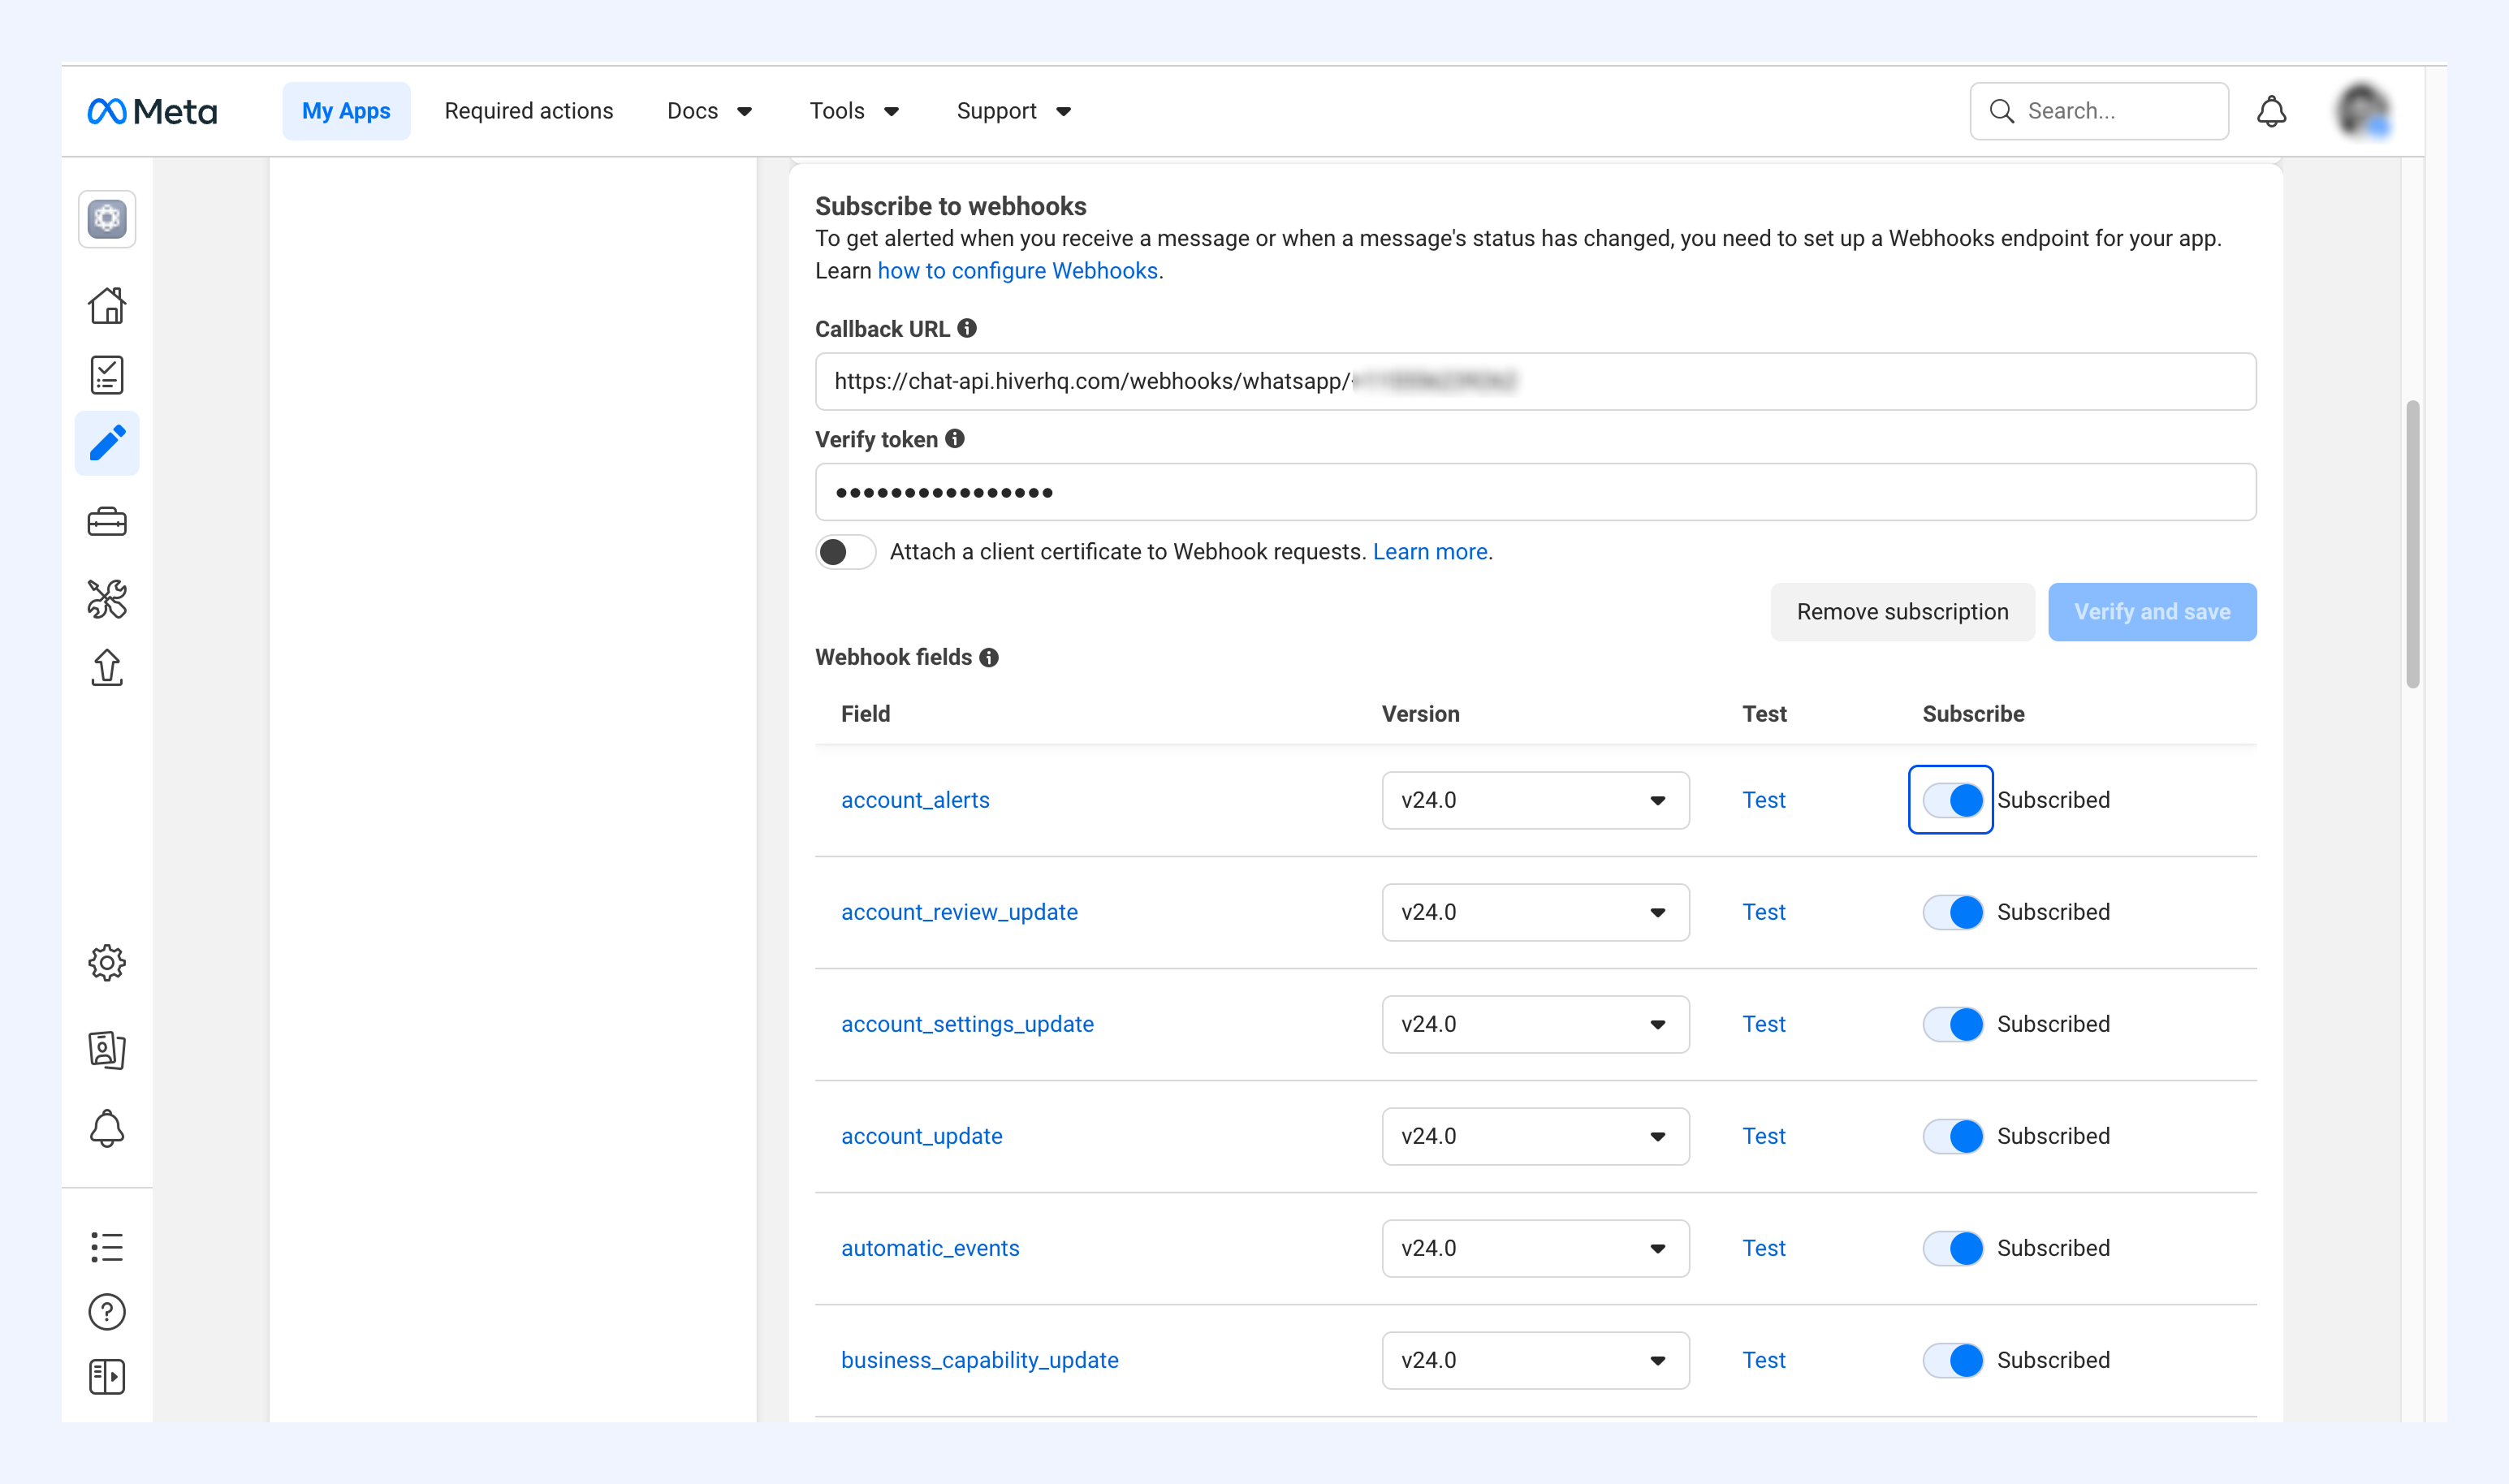
2. In a new tab, open your app in Meta's Developer Portal and go to WhatsApp → Configuration.
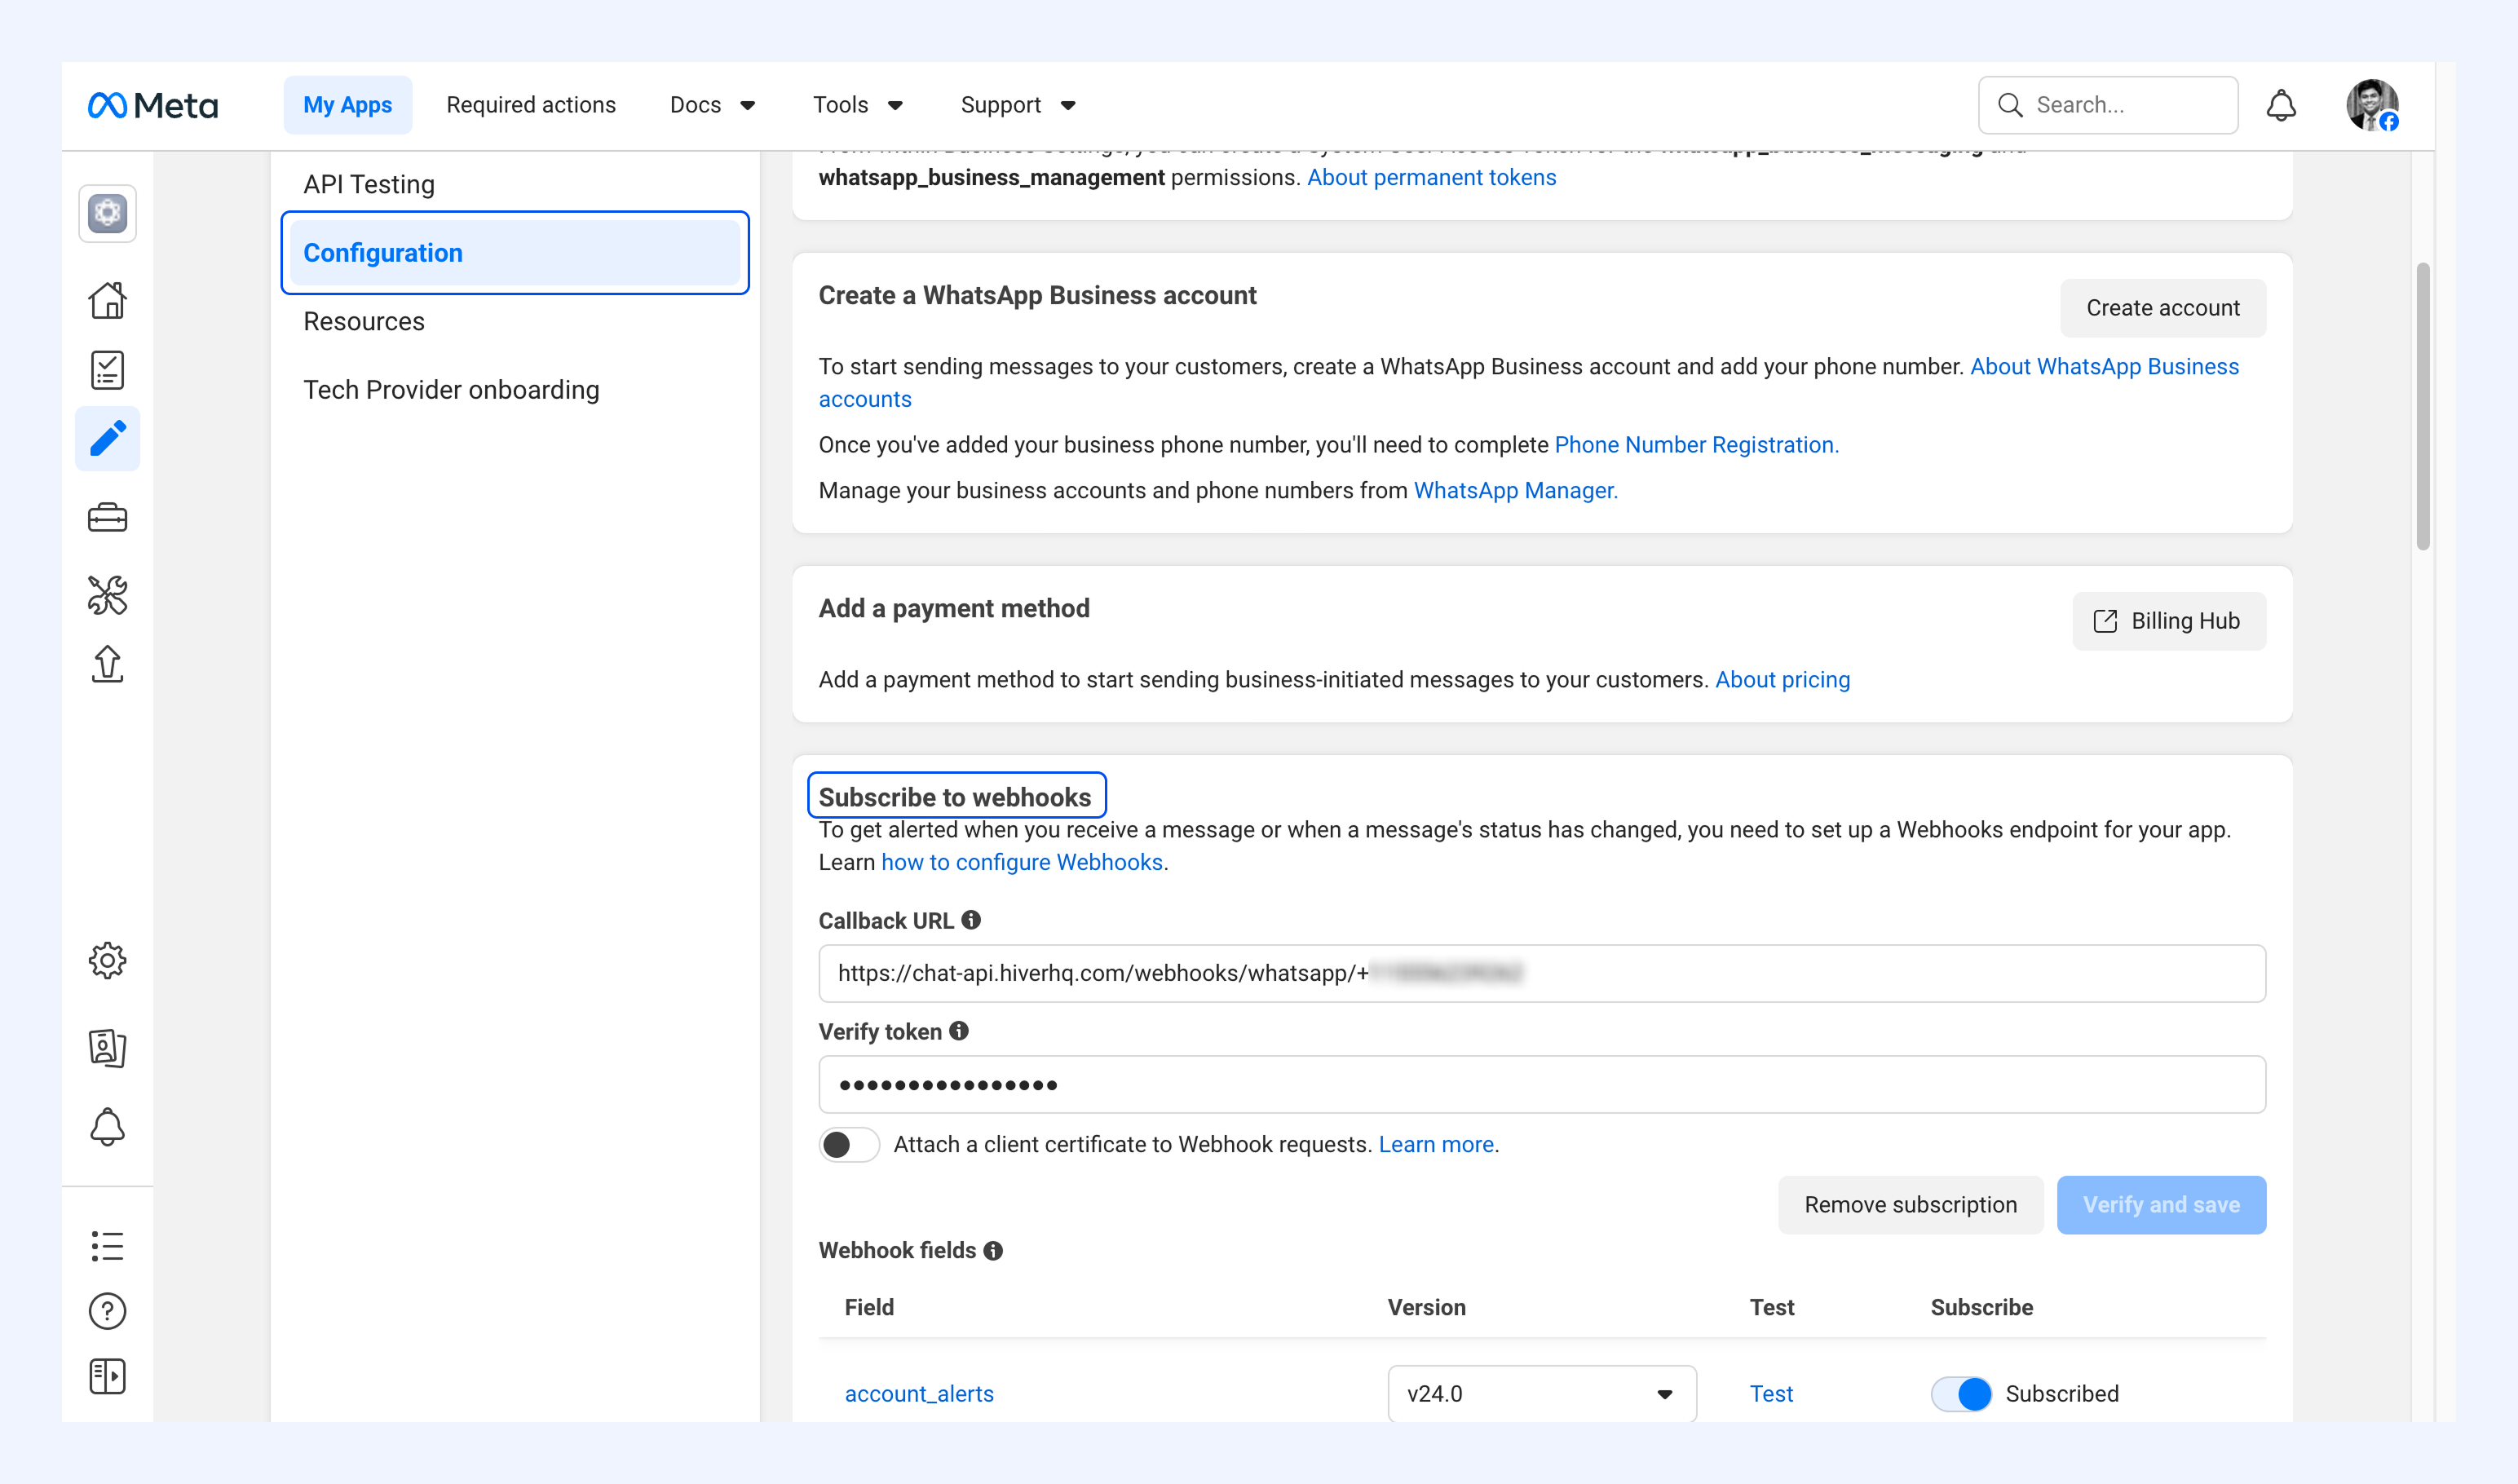
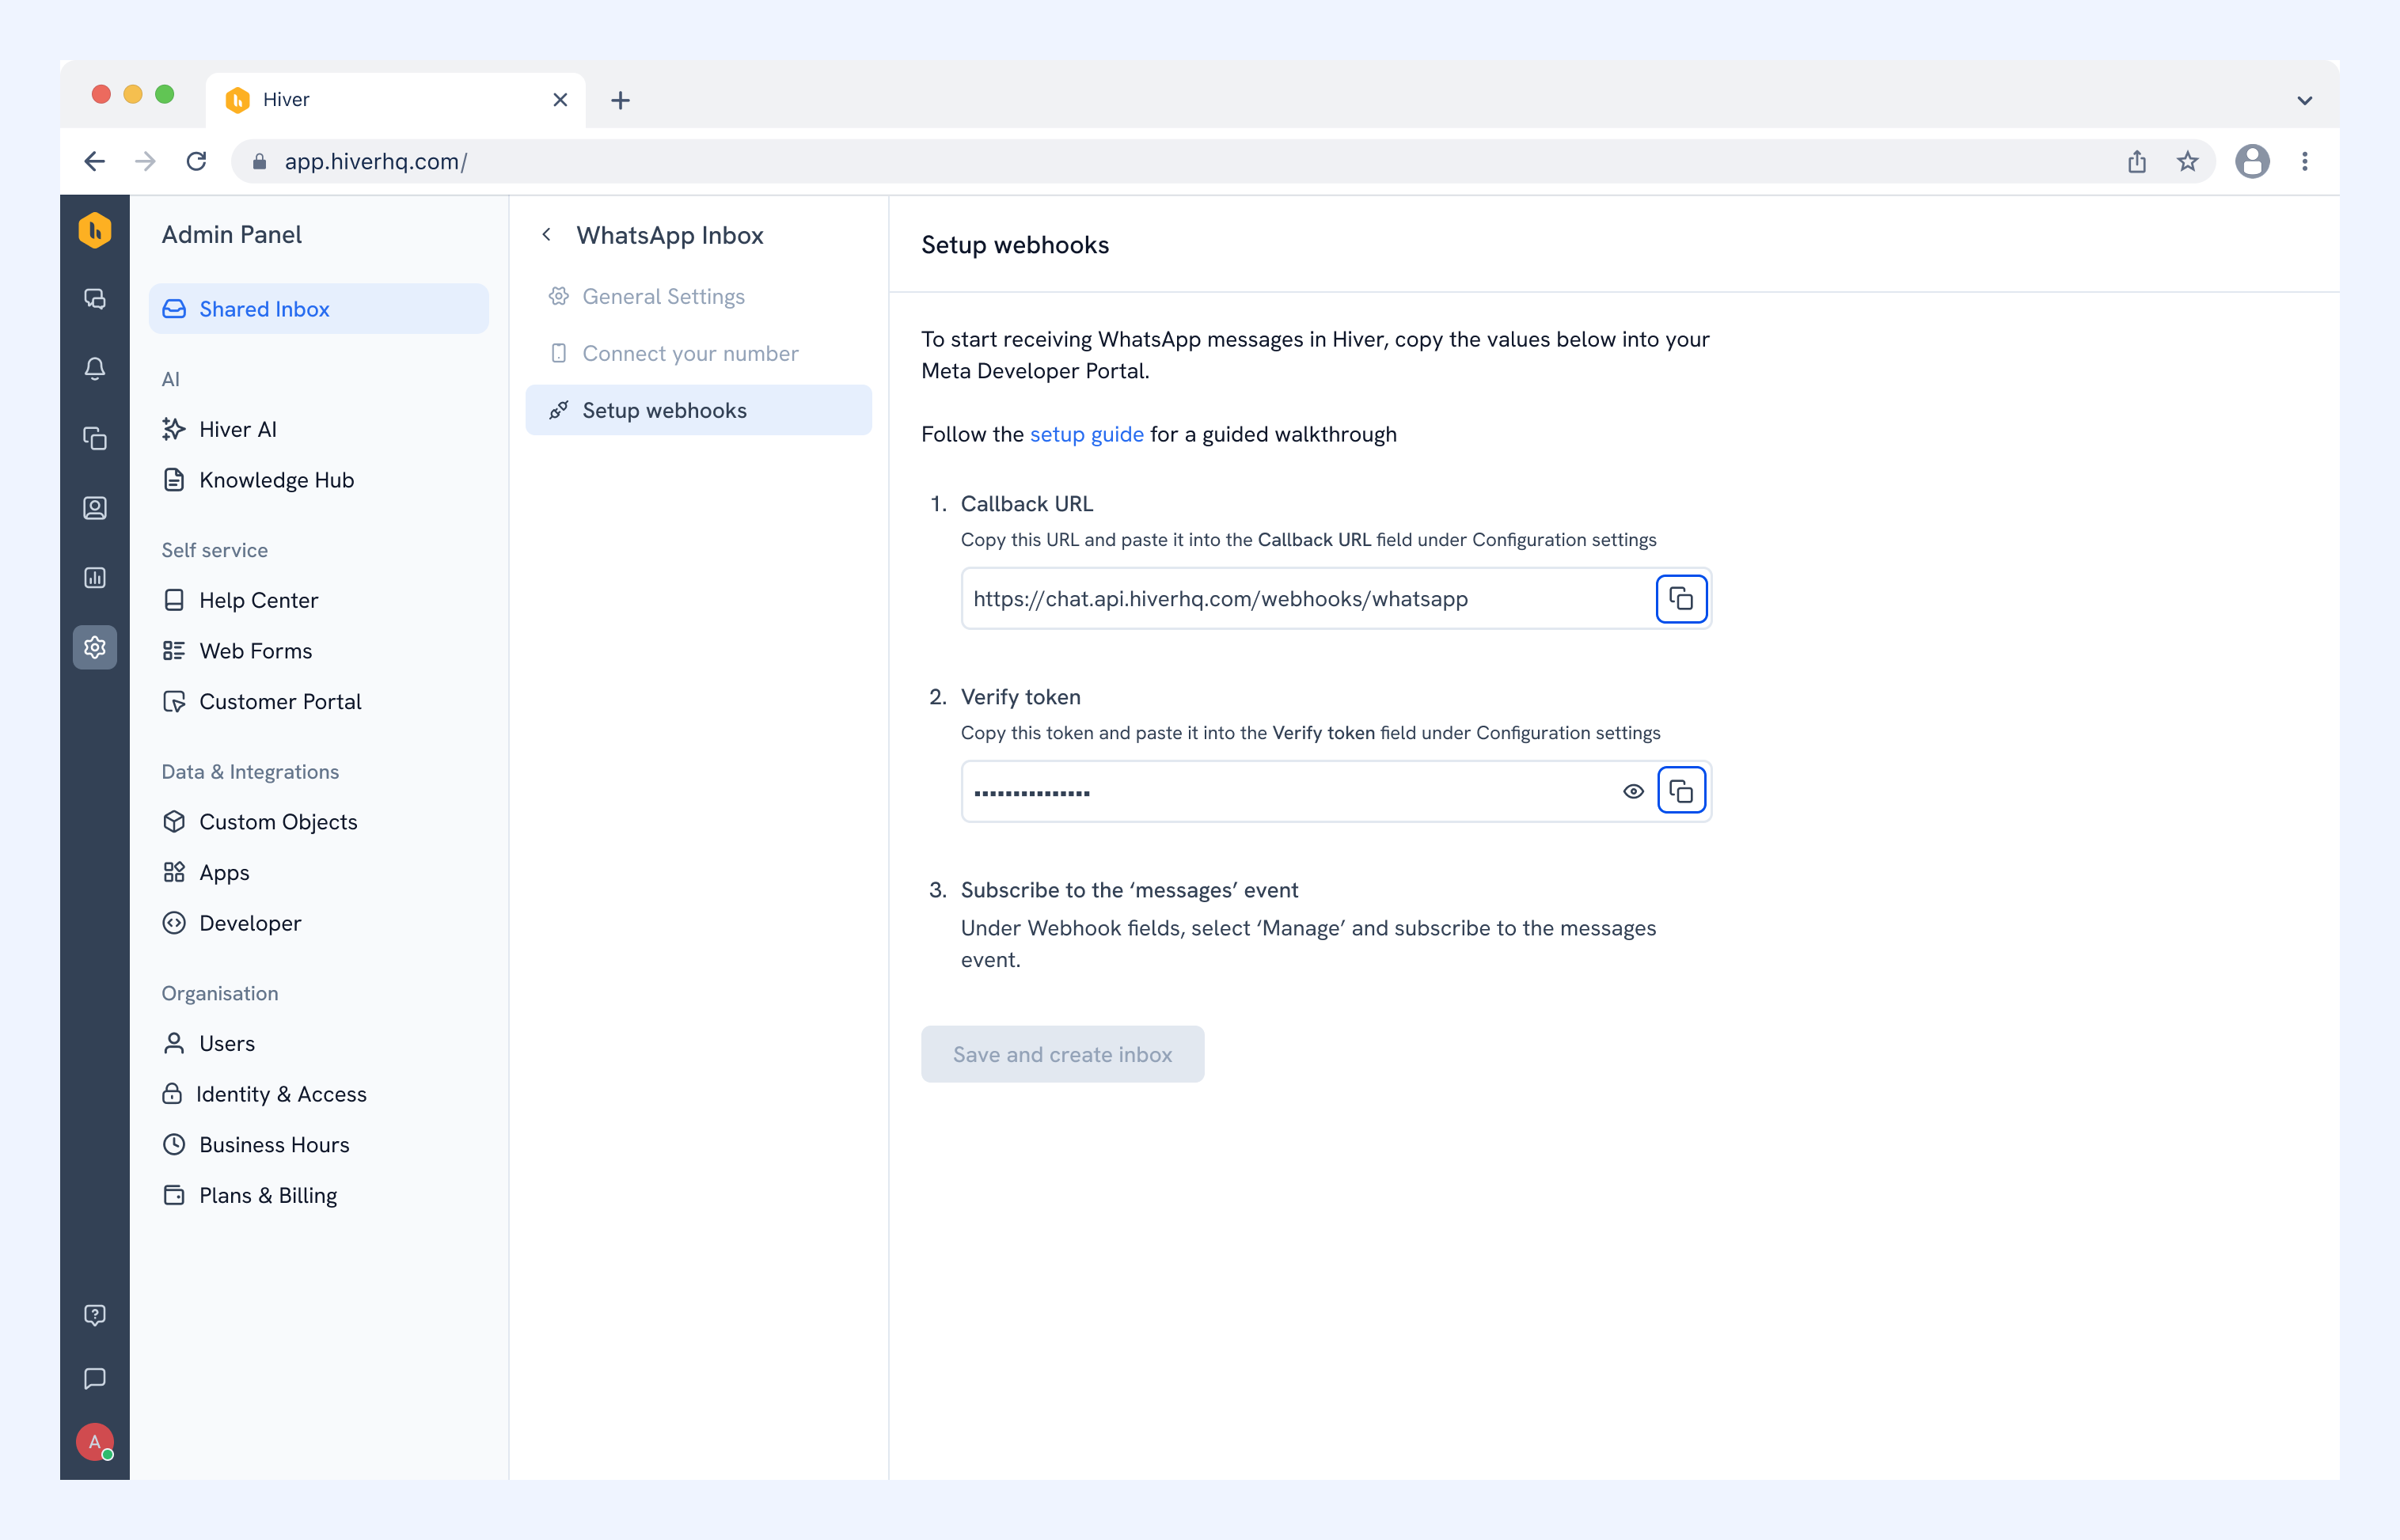
3. Under Subscribe to webhooks, copy and paste the:
- Webhook callback URL from Hiver into the Callback URL field.
- Webhook verify token from Hiver into the Verify token field.
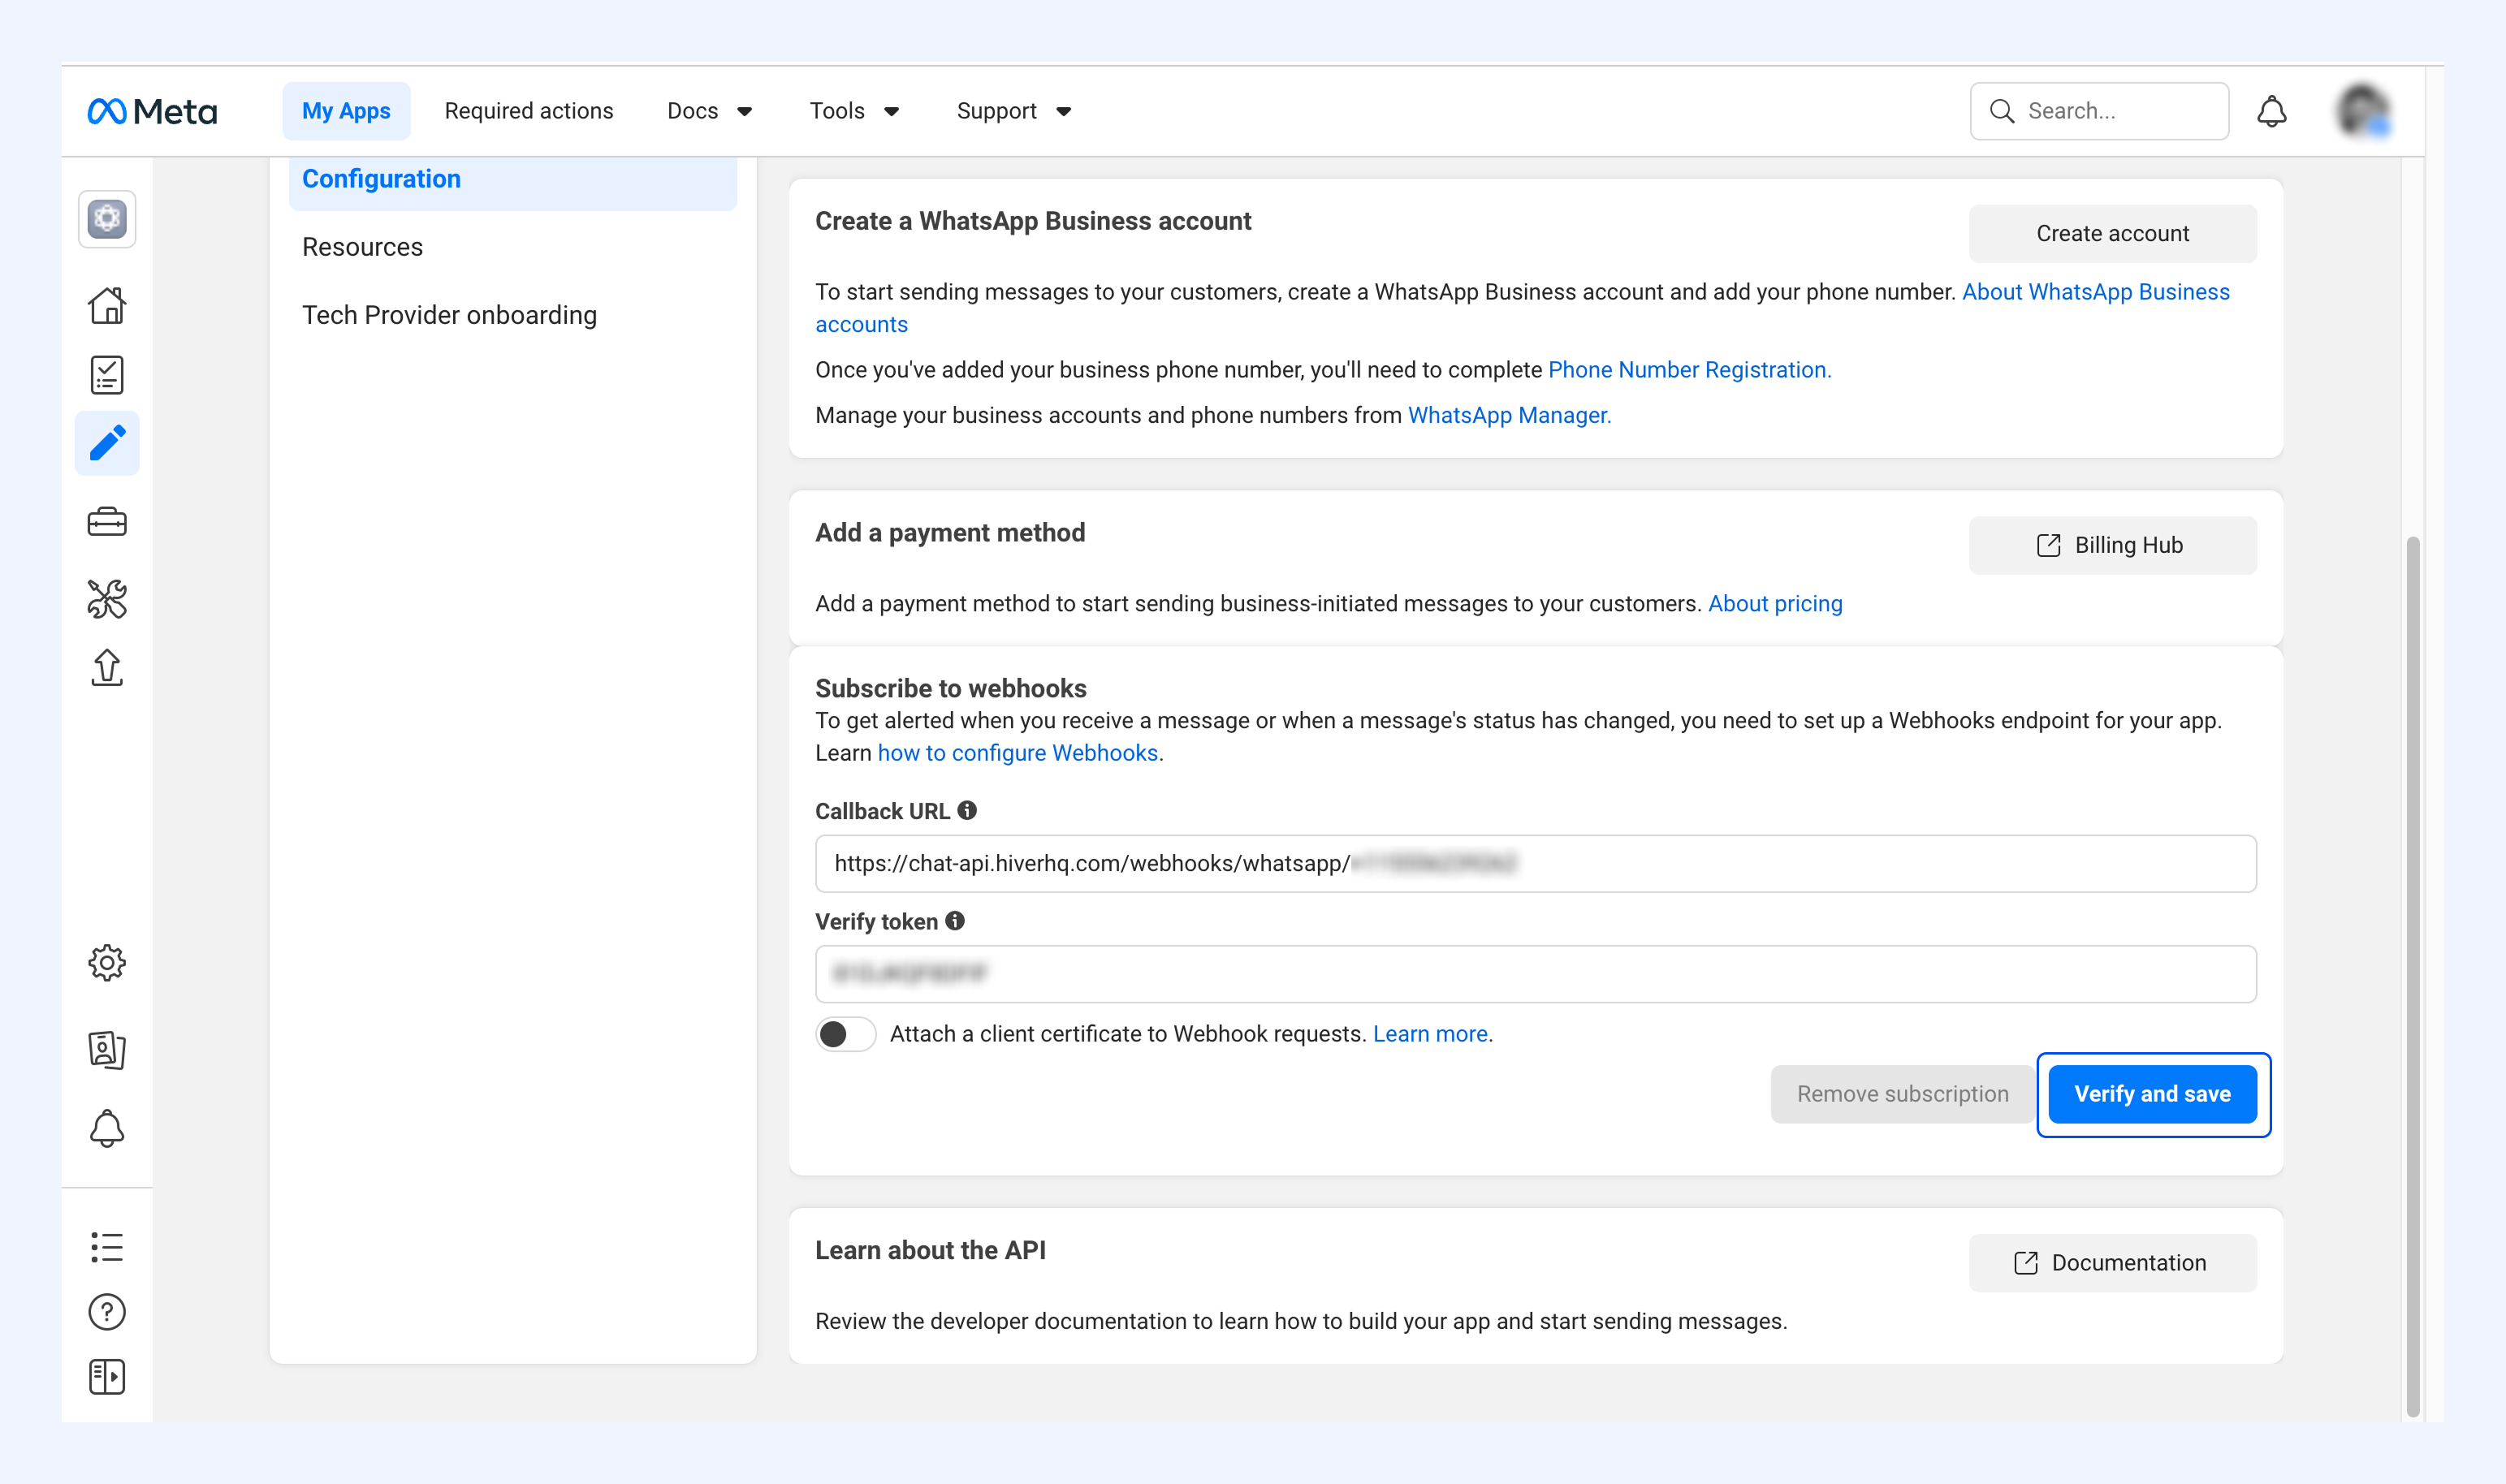
4. Click Verify and Save.
5. In Webhook fields, toggle on the fields you want notifications for.
6. Back in Hiver, click Save and create inbox.
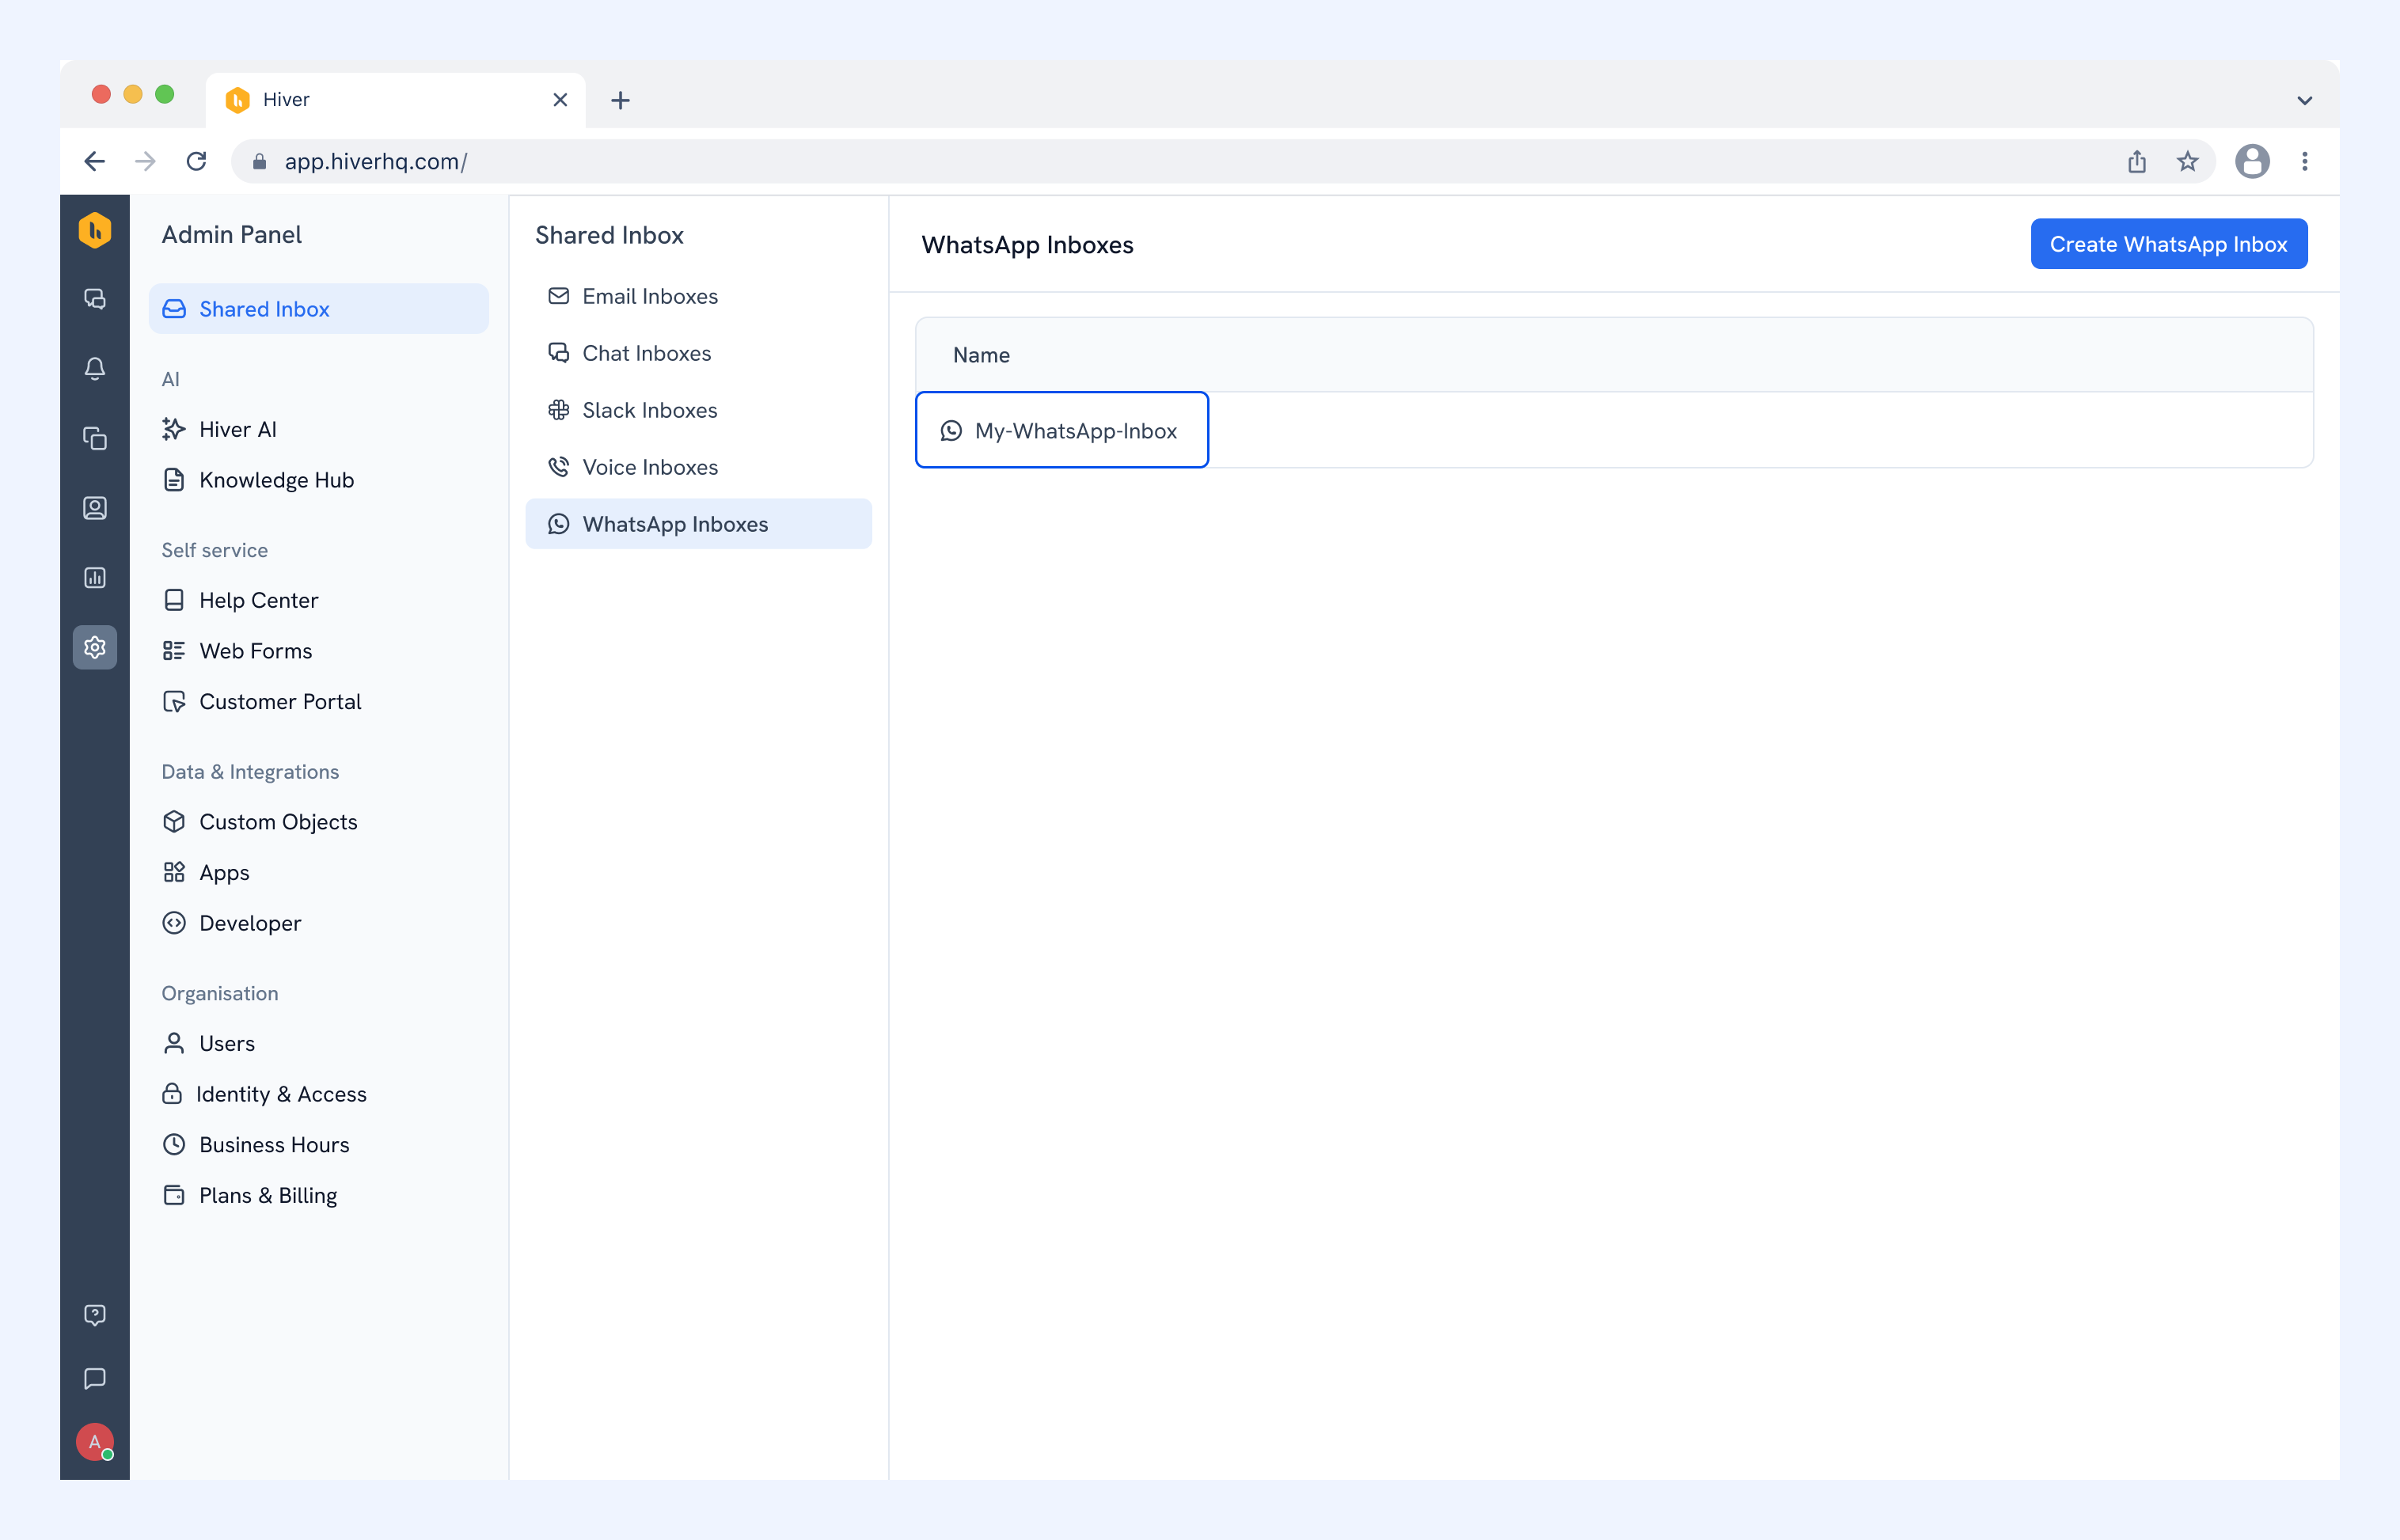
Your WhatsApp Inbox is now created and shows up under Shared Inbox → WhatsApp Inboxes. The members you added can start handling conversations right away.
Managing your WhatsApp Inbox settings
You can update your WhatsApp Inbox anytime from the Admin Panel.
1. Go to Hiver Admin Panel → Shared Inbox → WhatsApp Inboxes.
2. Select your WhatsApp Inbox.
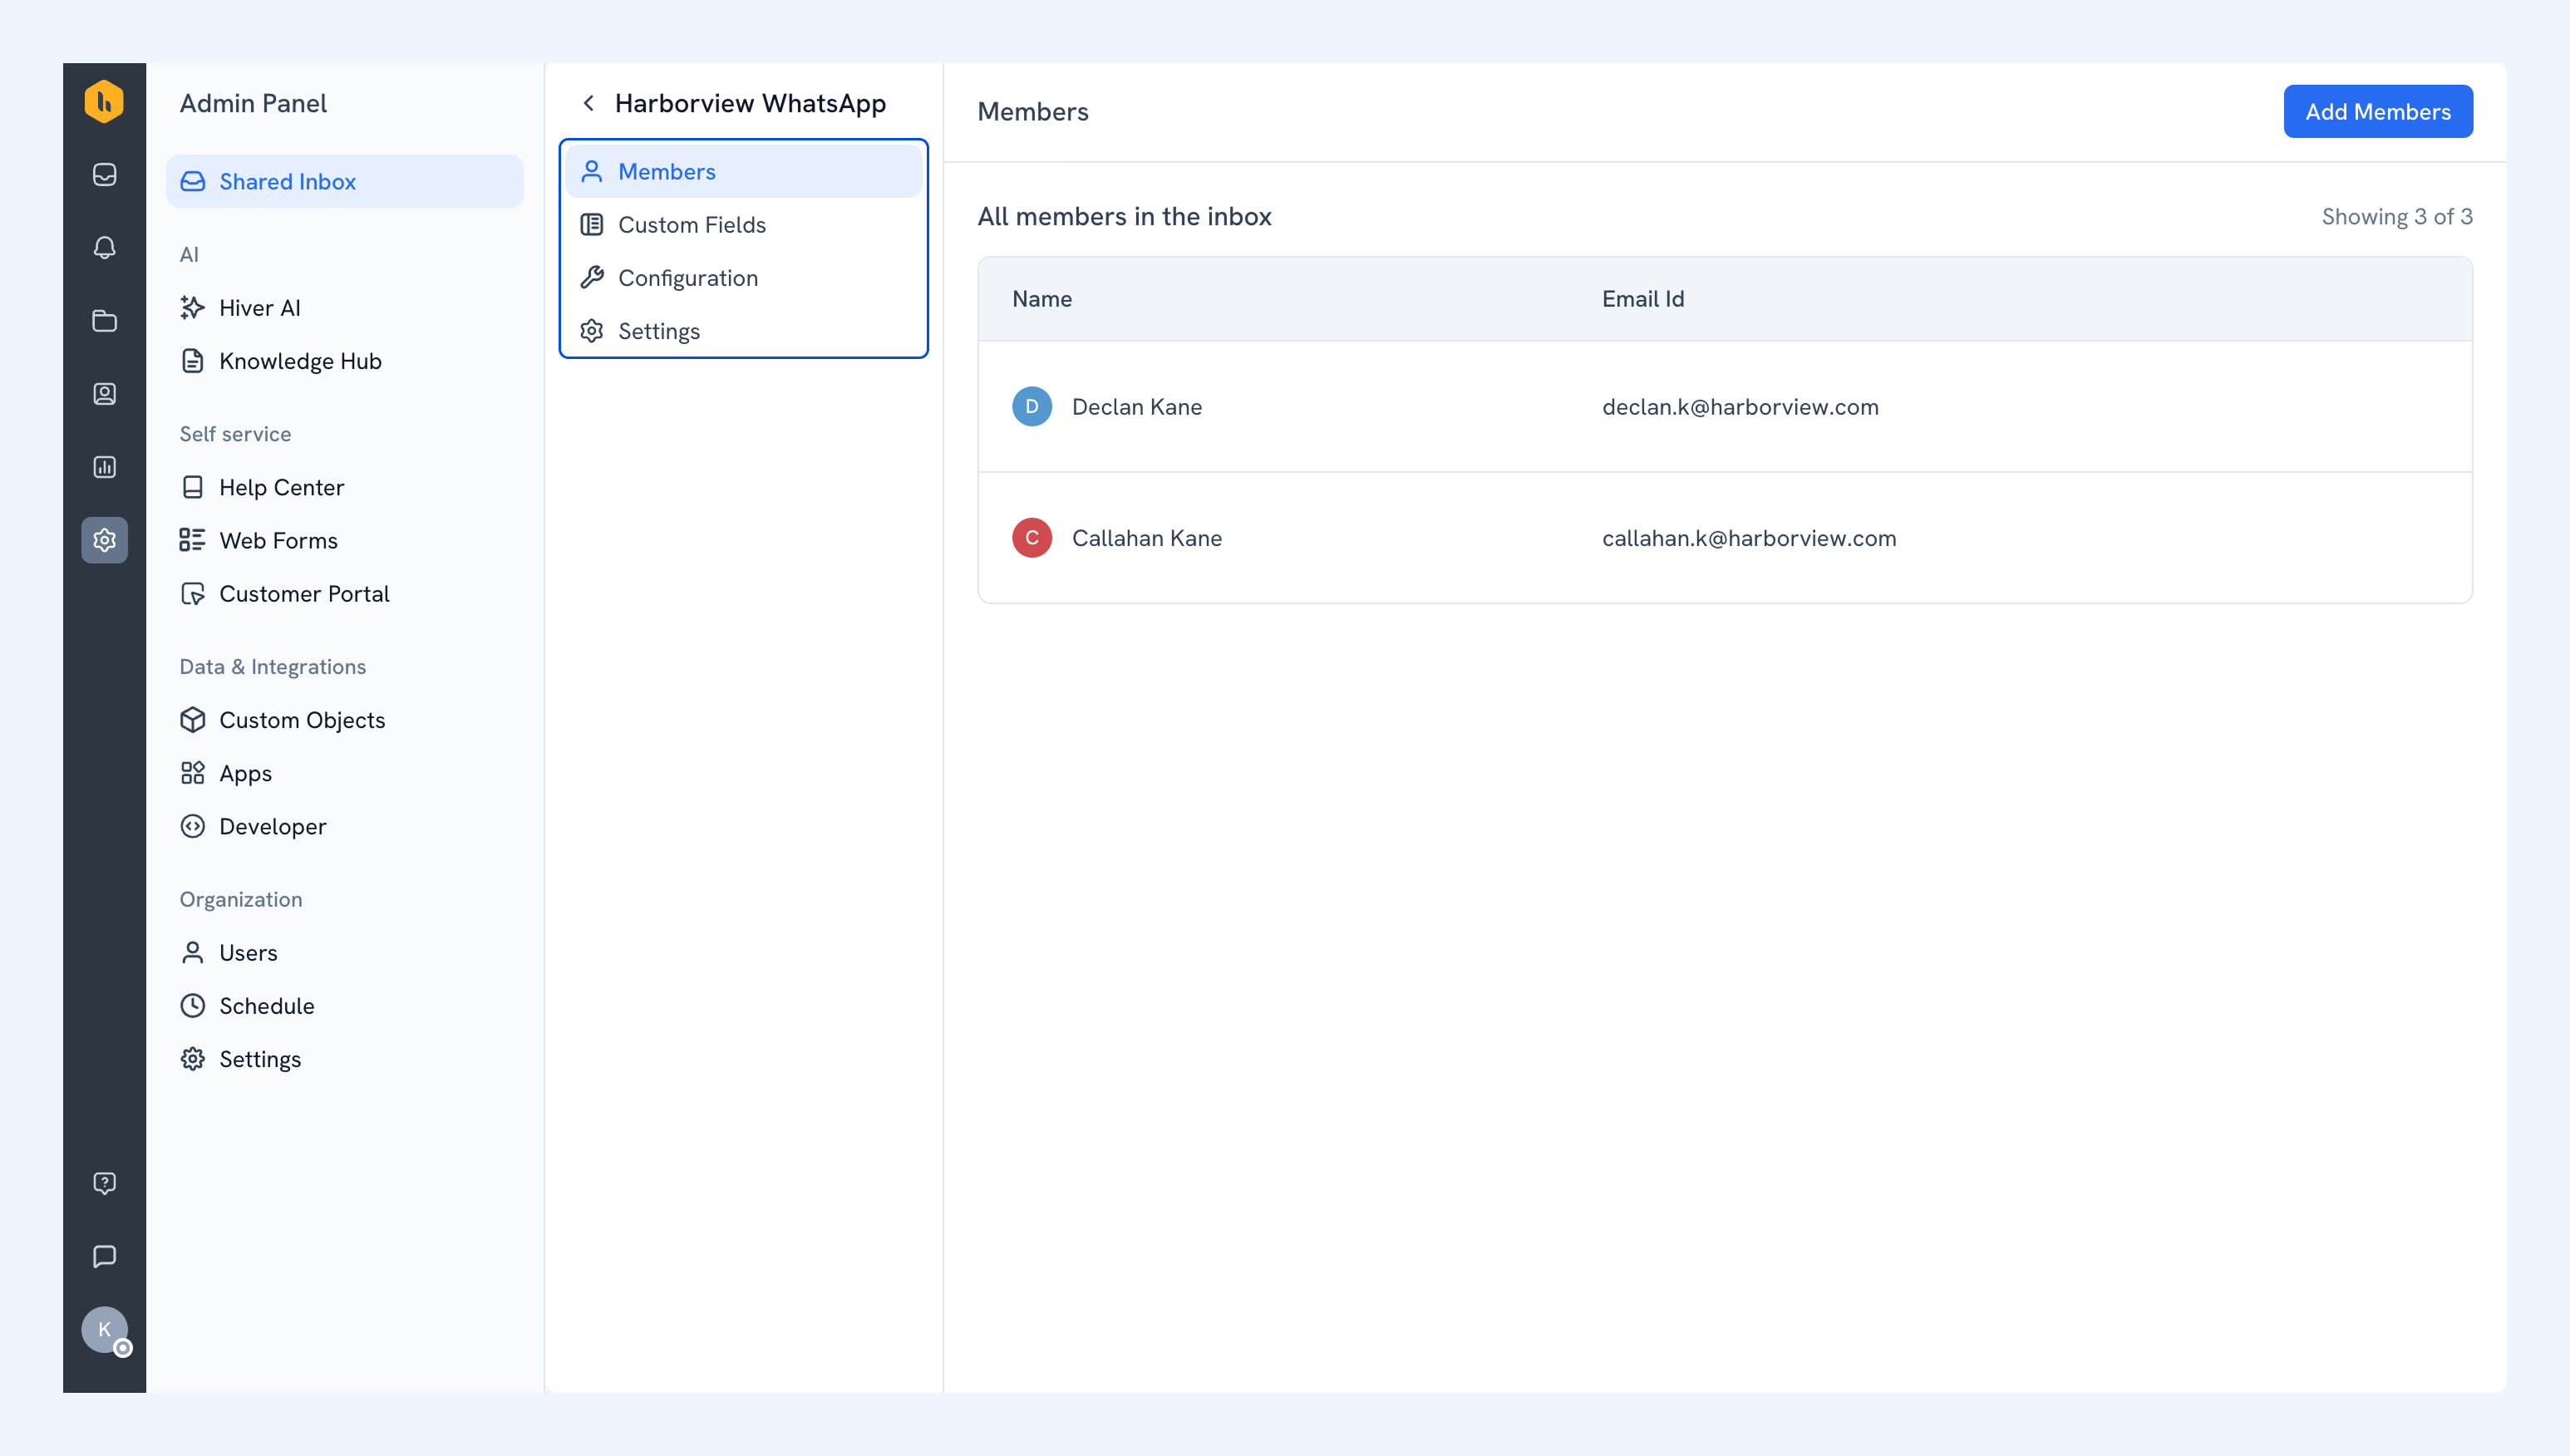
3. Choose the setting you want to update:
- Members: Add or remove the members who handle the inbox.
- Custom Fields: Capture extra details about your WhatsApp conversations.
- Configuration: Update your WhatsApp connection details.
- Settings: Change your inbox name and manage WhatsApp templates.
Custom Fields
Custom Fields let you capture and track additional details about WhatsApp conversations in Hiver Omni.
To set up a custom field:
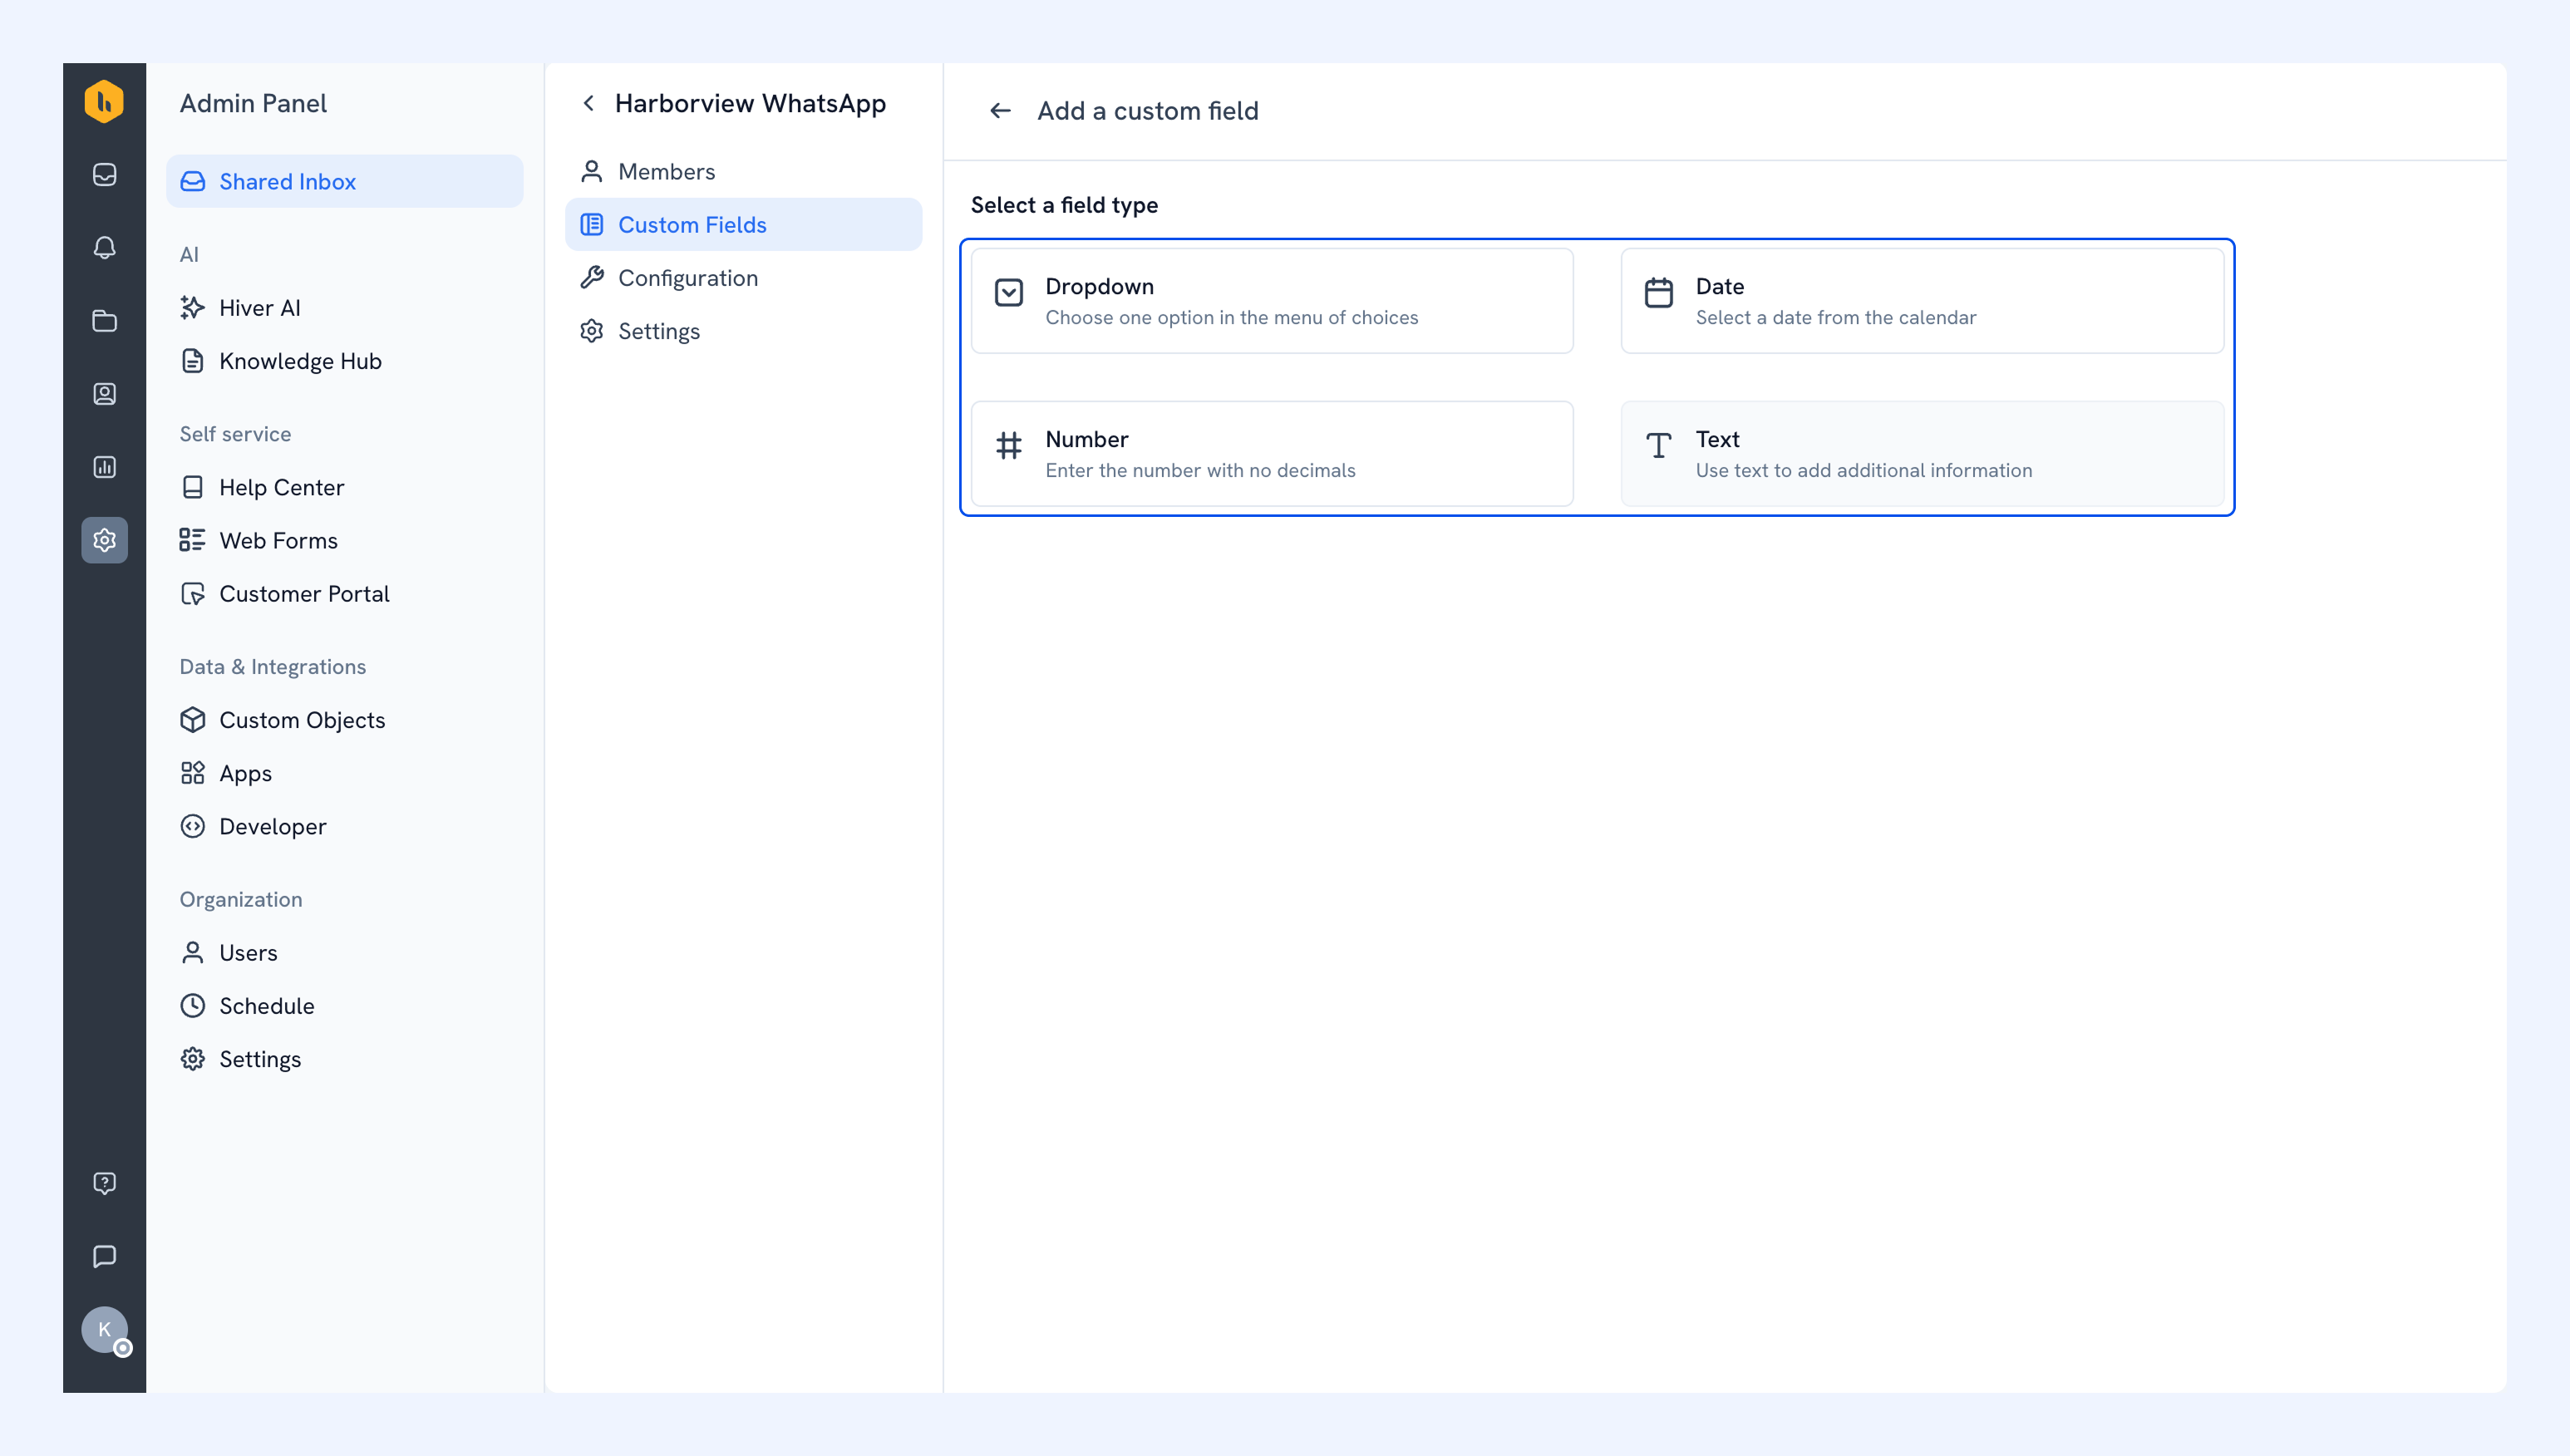
1. Go to Custom Fields and click Add a custom field.
2. Select a field type:
- Dropdown: Create a predefined list of options that your team can select from e.g. Issue type.
- Date: Add a date picker for time-based tracking e.g. Appointment date, Callback date, Delivery date.
- Number: Capture numeric values like Order quantity, Loyalty points.
- Text: Add single or multi-line text e.g. Order ID or Delivery address.
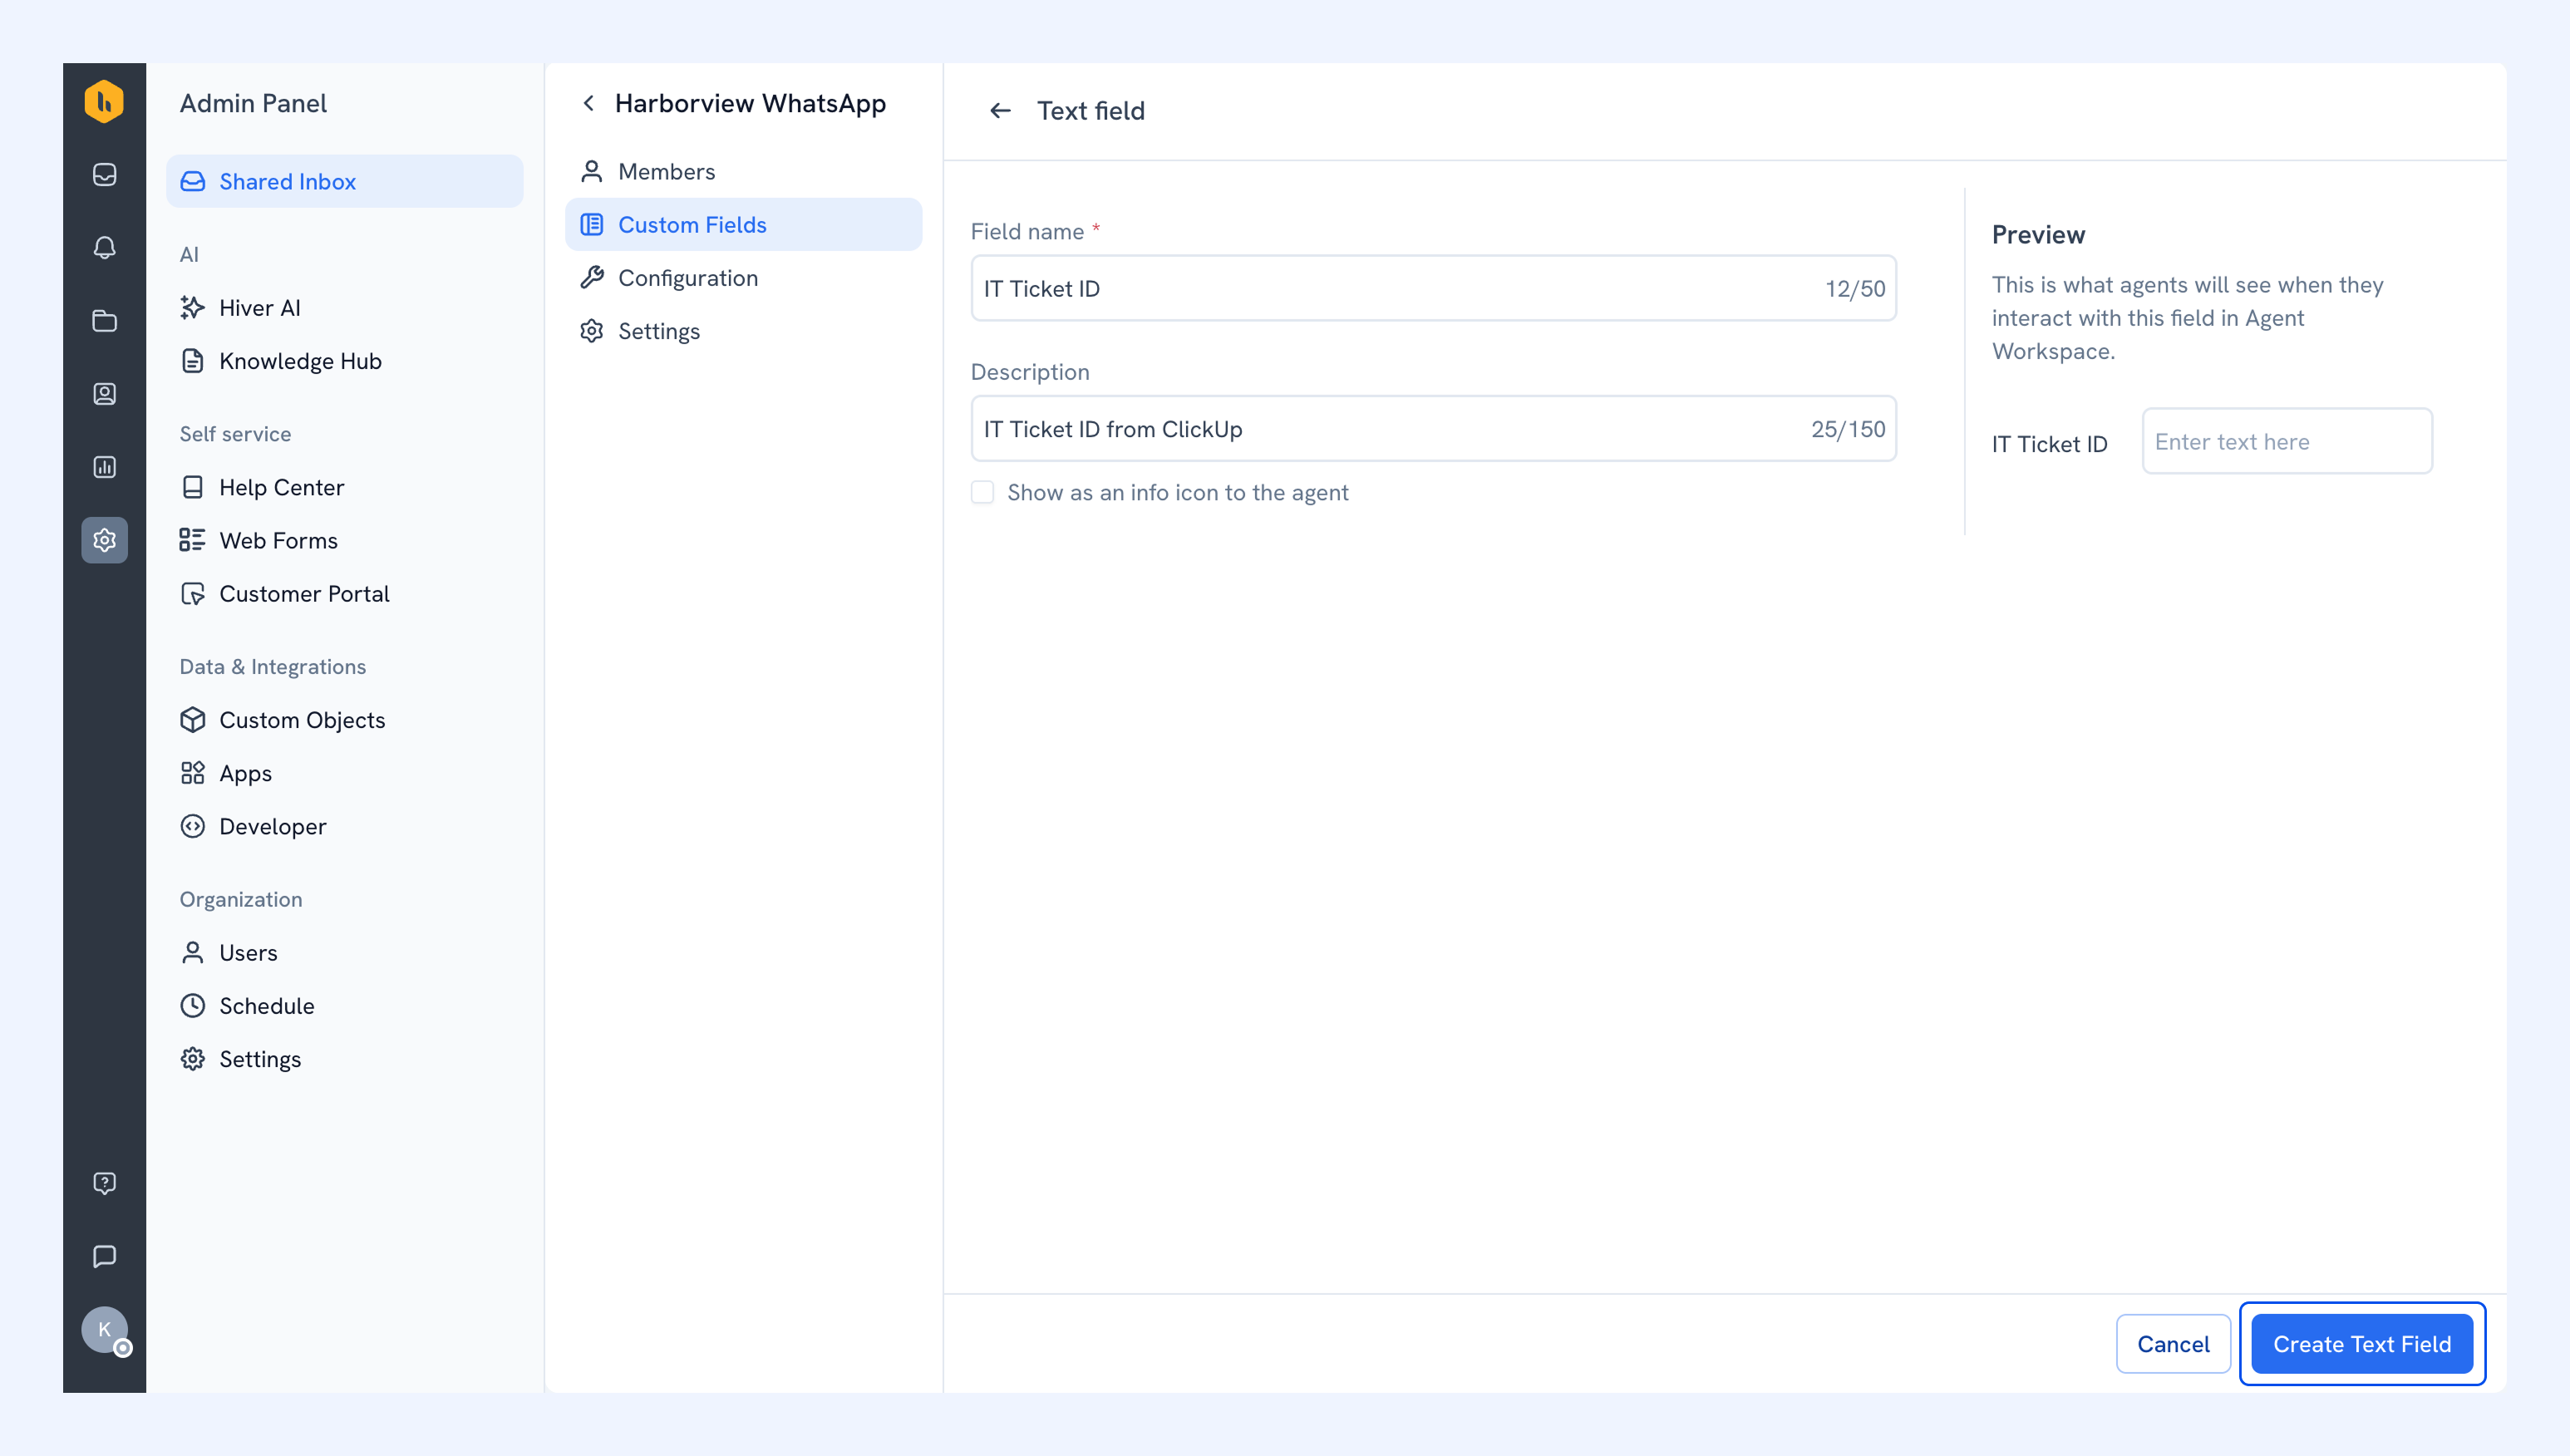
3. Enter the field details, then click Create Field.
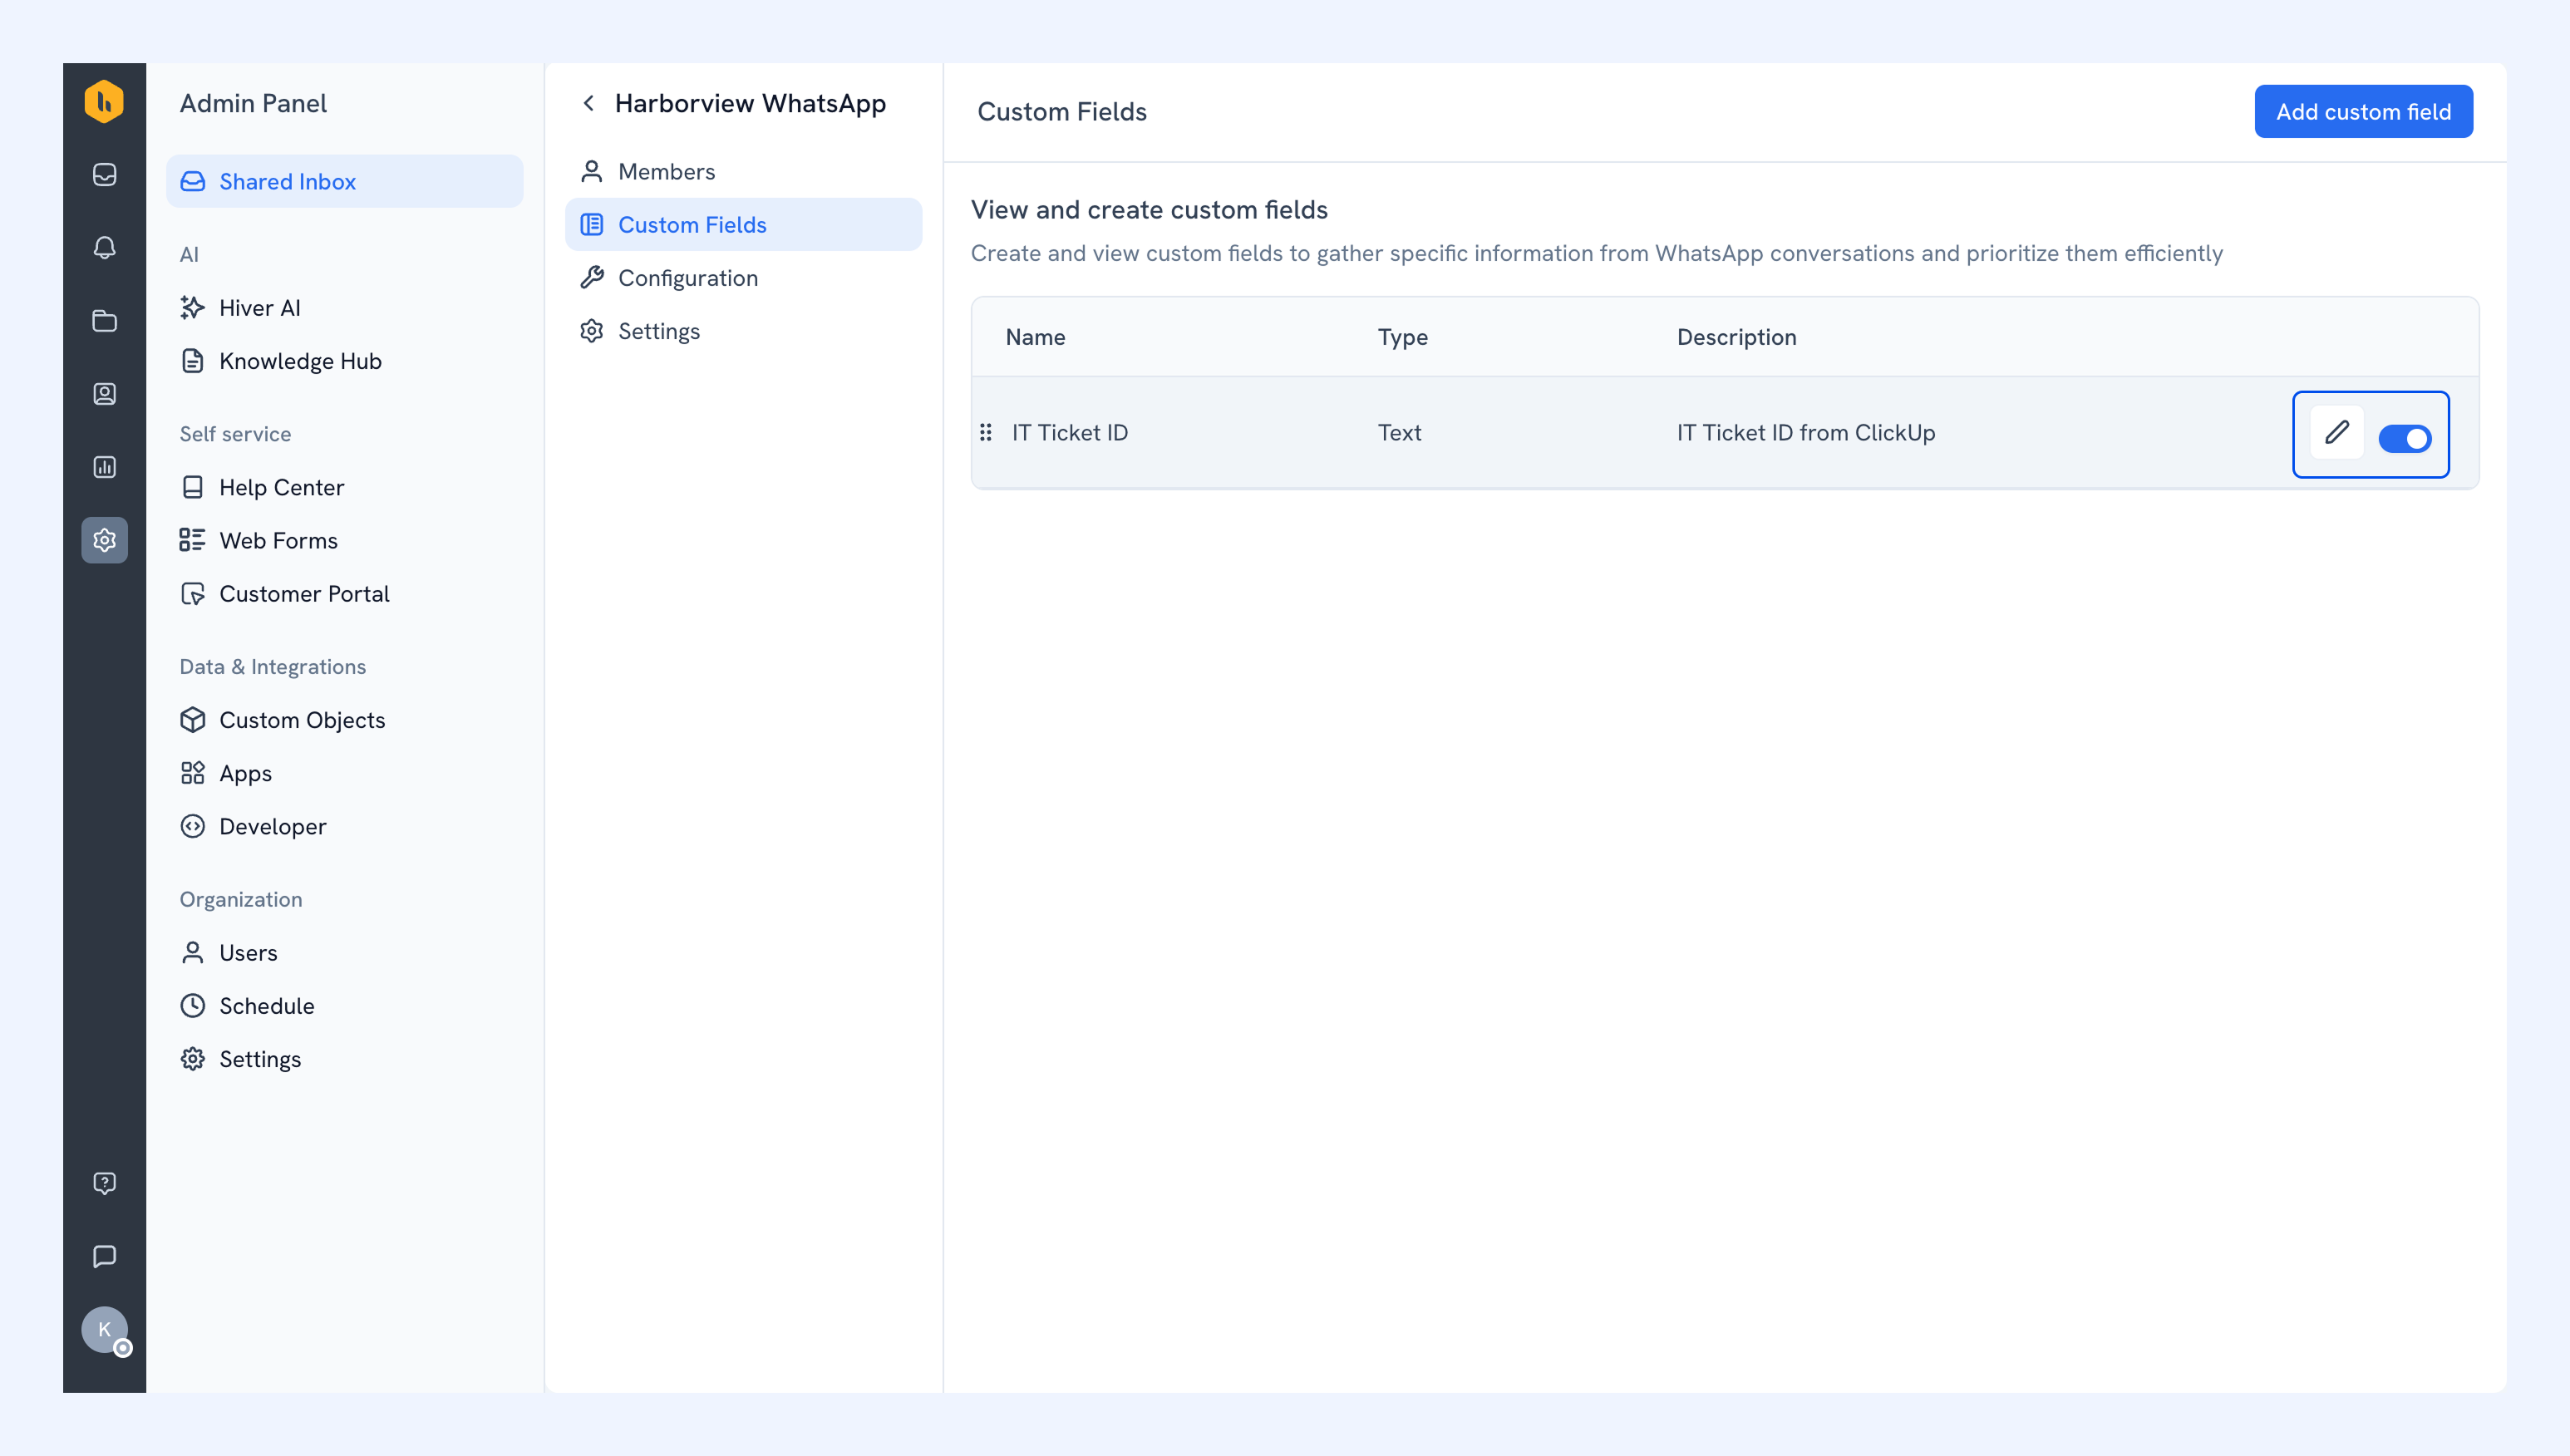
4. Your field now appears in the Custom Fields list. Click the pencil icon to edit it, or use the toggle to turn it off.
Members can now fill in the custom field from the right panel of a WhatsApp conversation.