Creating time-based Automations
Use time-based Automations to control when you want specific actions to run. For example, you can:
- Send a follow-up if a customer doesn’t reply within 24 hours of your last response.
- Notify a team lead if a new conversation remains unassigned for 30 minutes.
- Remind the assignee if a high-priority conversation remains in the same status for too long.
- Assign conversations that come in on a weekend to an on-call team.
How time-based Automations work
You can use time-based conditions in two ways:
Act based on when something happens
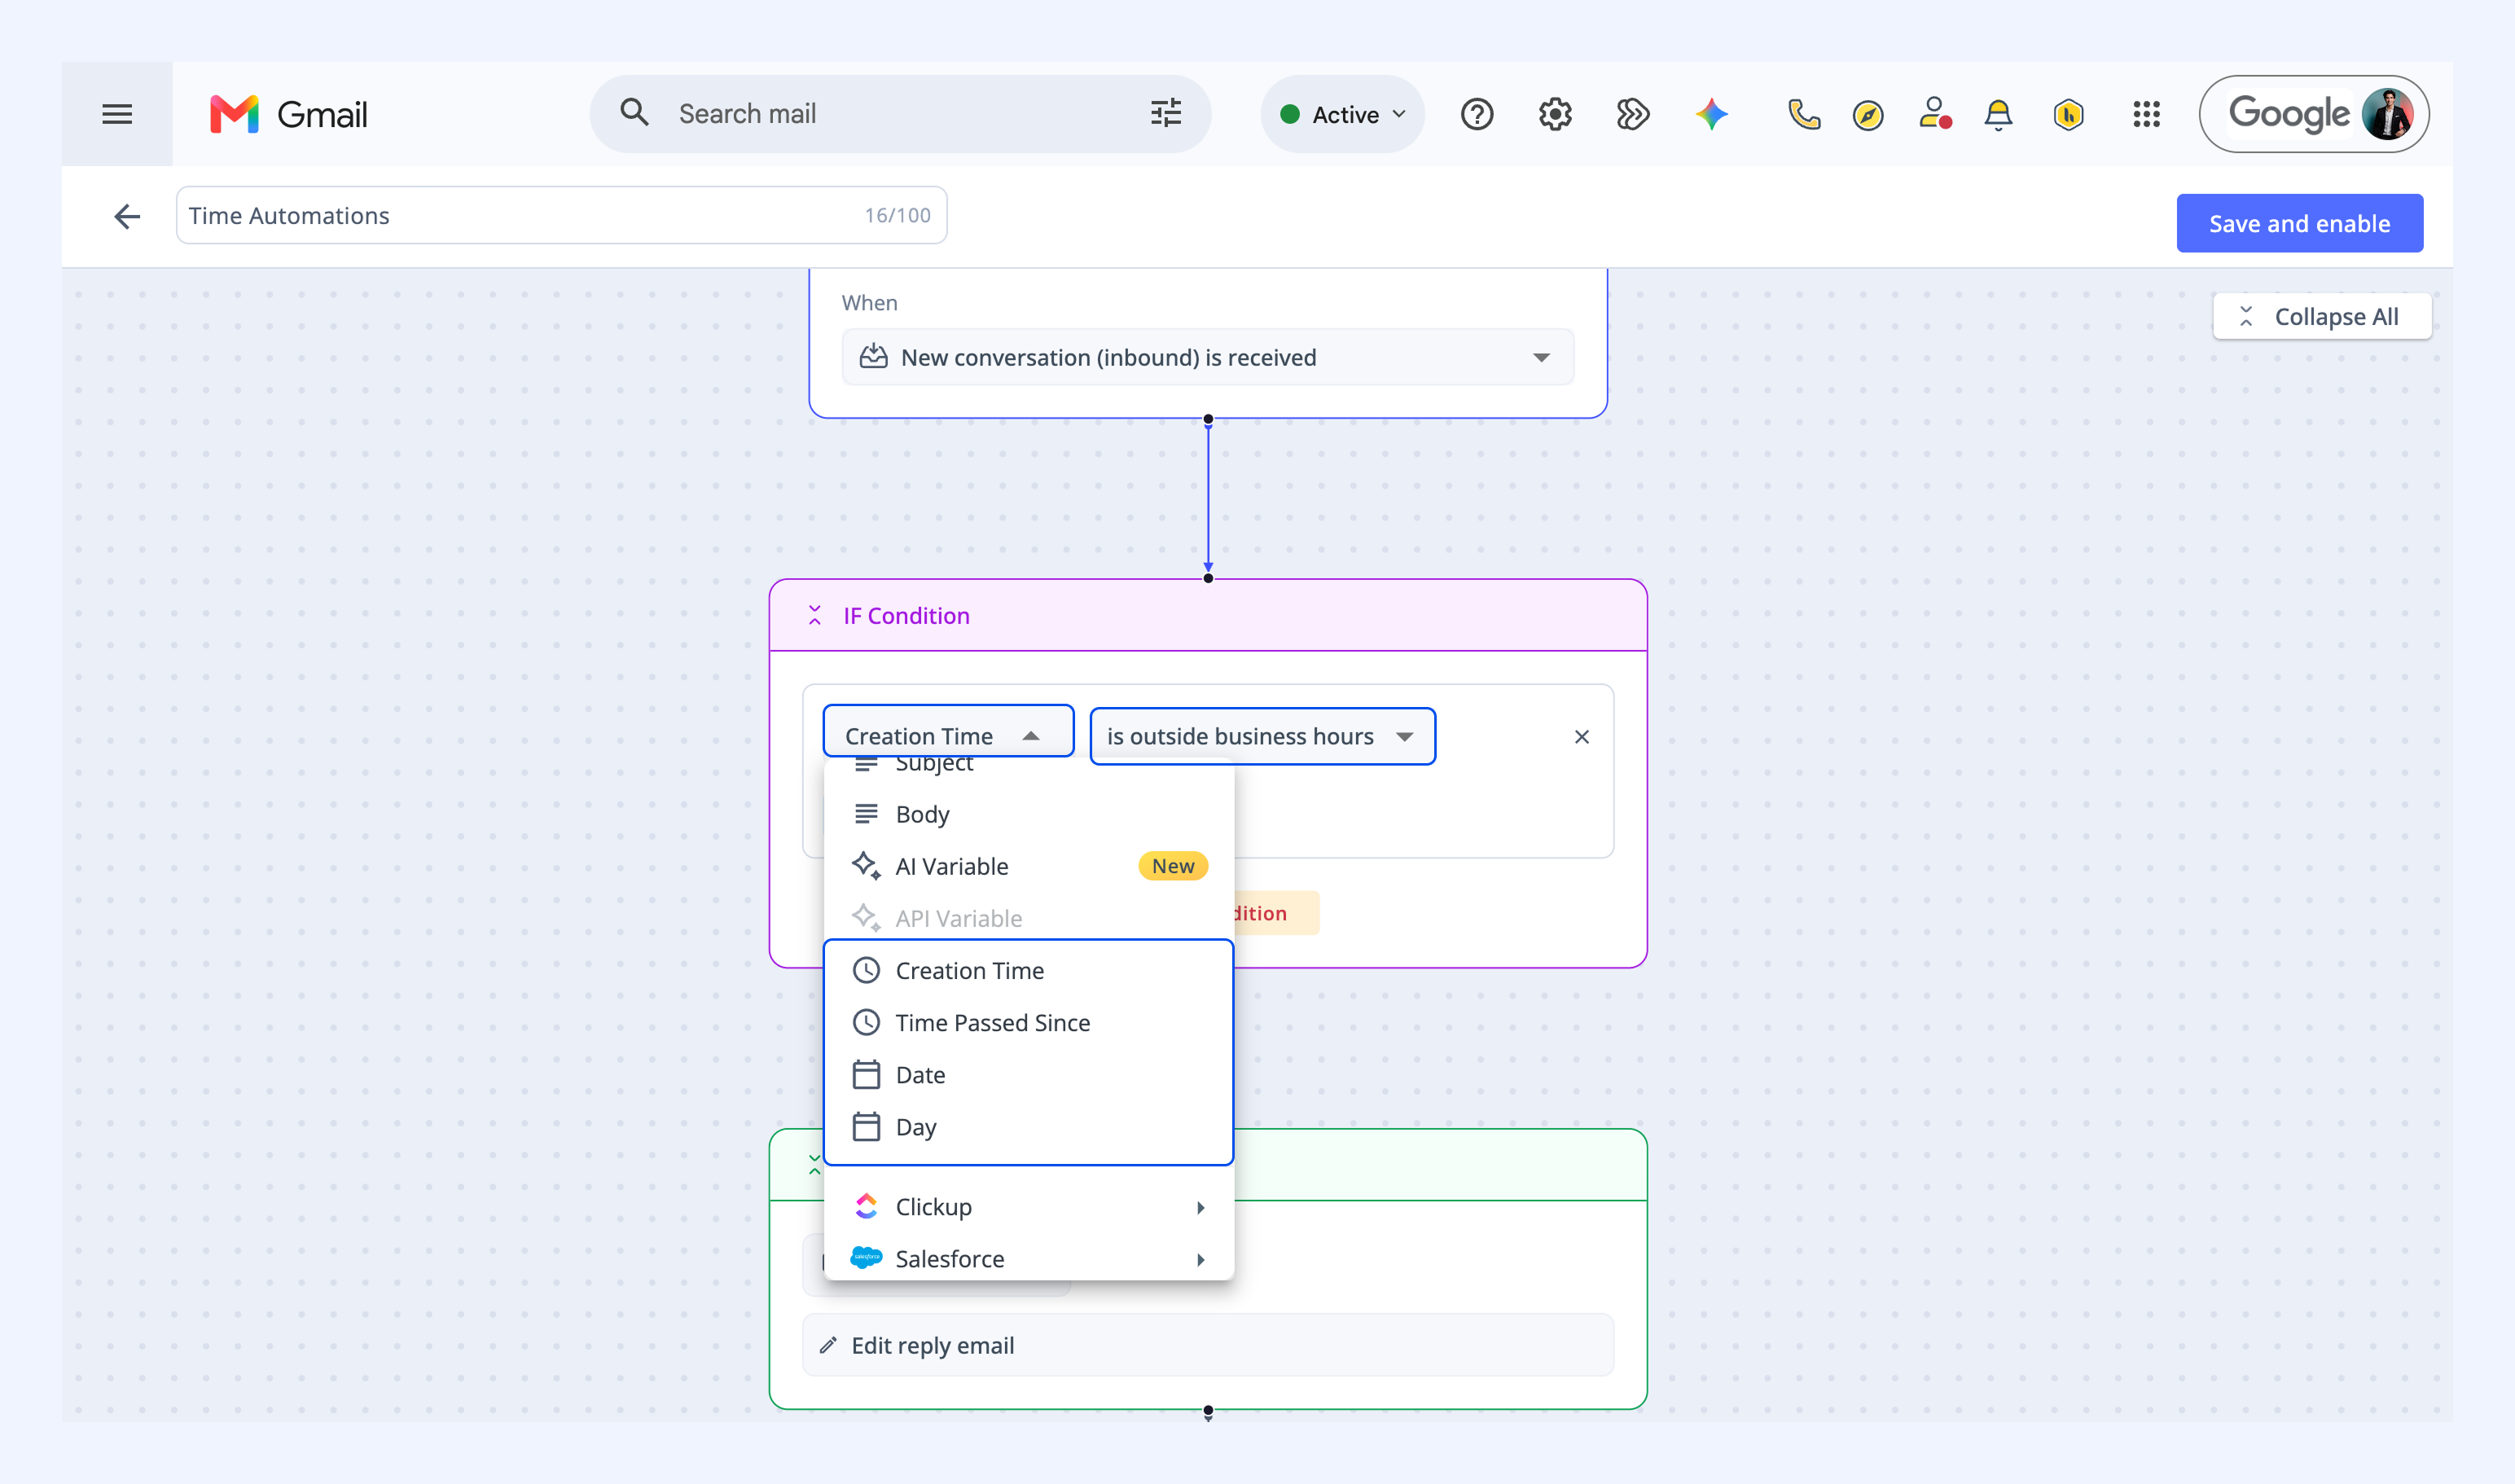
The following conditions check the conversation’s creation time, the current date, or the day of the week and then trigger the action. For example, you can use Creation time → is outside Business Hours to send an auto-reply when a conversation arrives after your team has finished working.
Condition | Operators | Value |
| Creation time | is within, is outside | A time range |
| Creation time | is within business hours, is outside business hours | Uses the Business Hours set for the Shared Inbox |
| Date | is on, is before, is after, is between | A date or date range in DD/MM/YYYY format |
| Day | is any of | One or more days of the week |
Act after a specified period
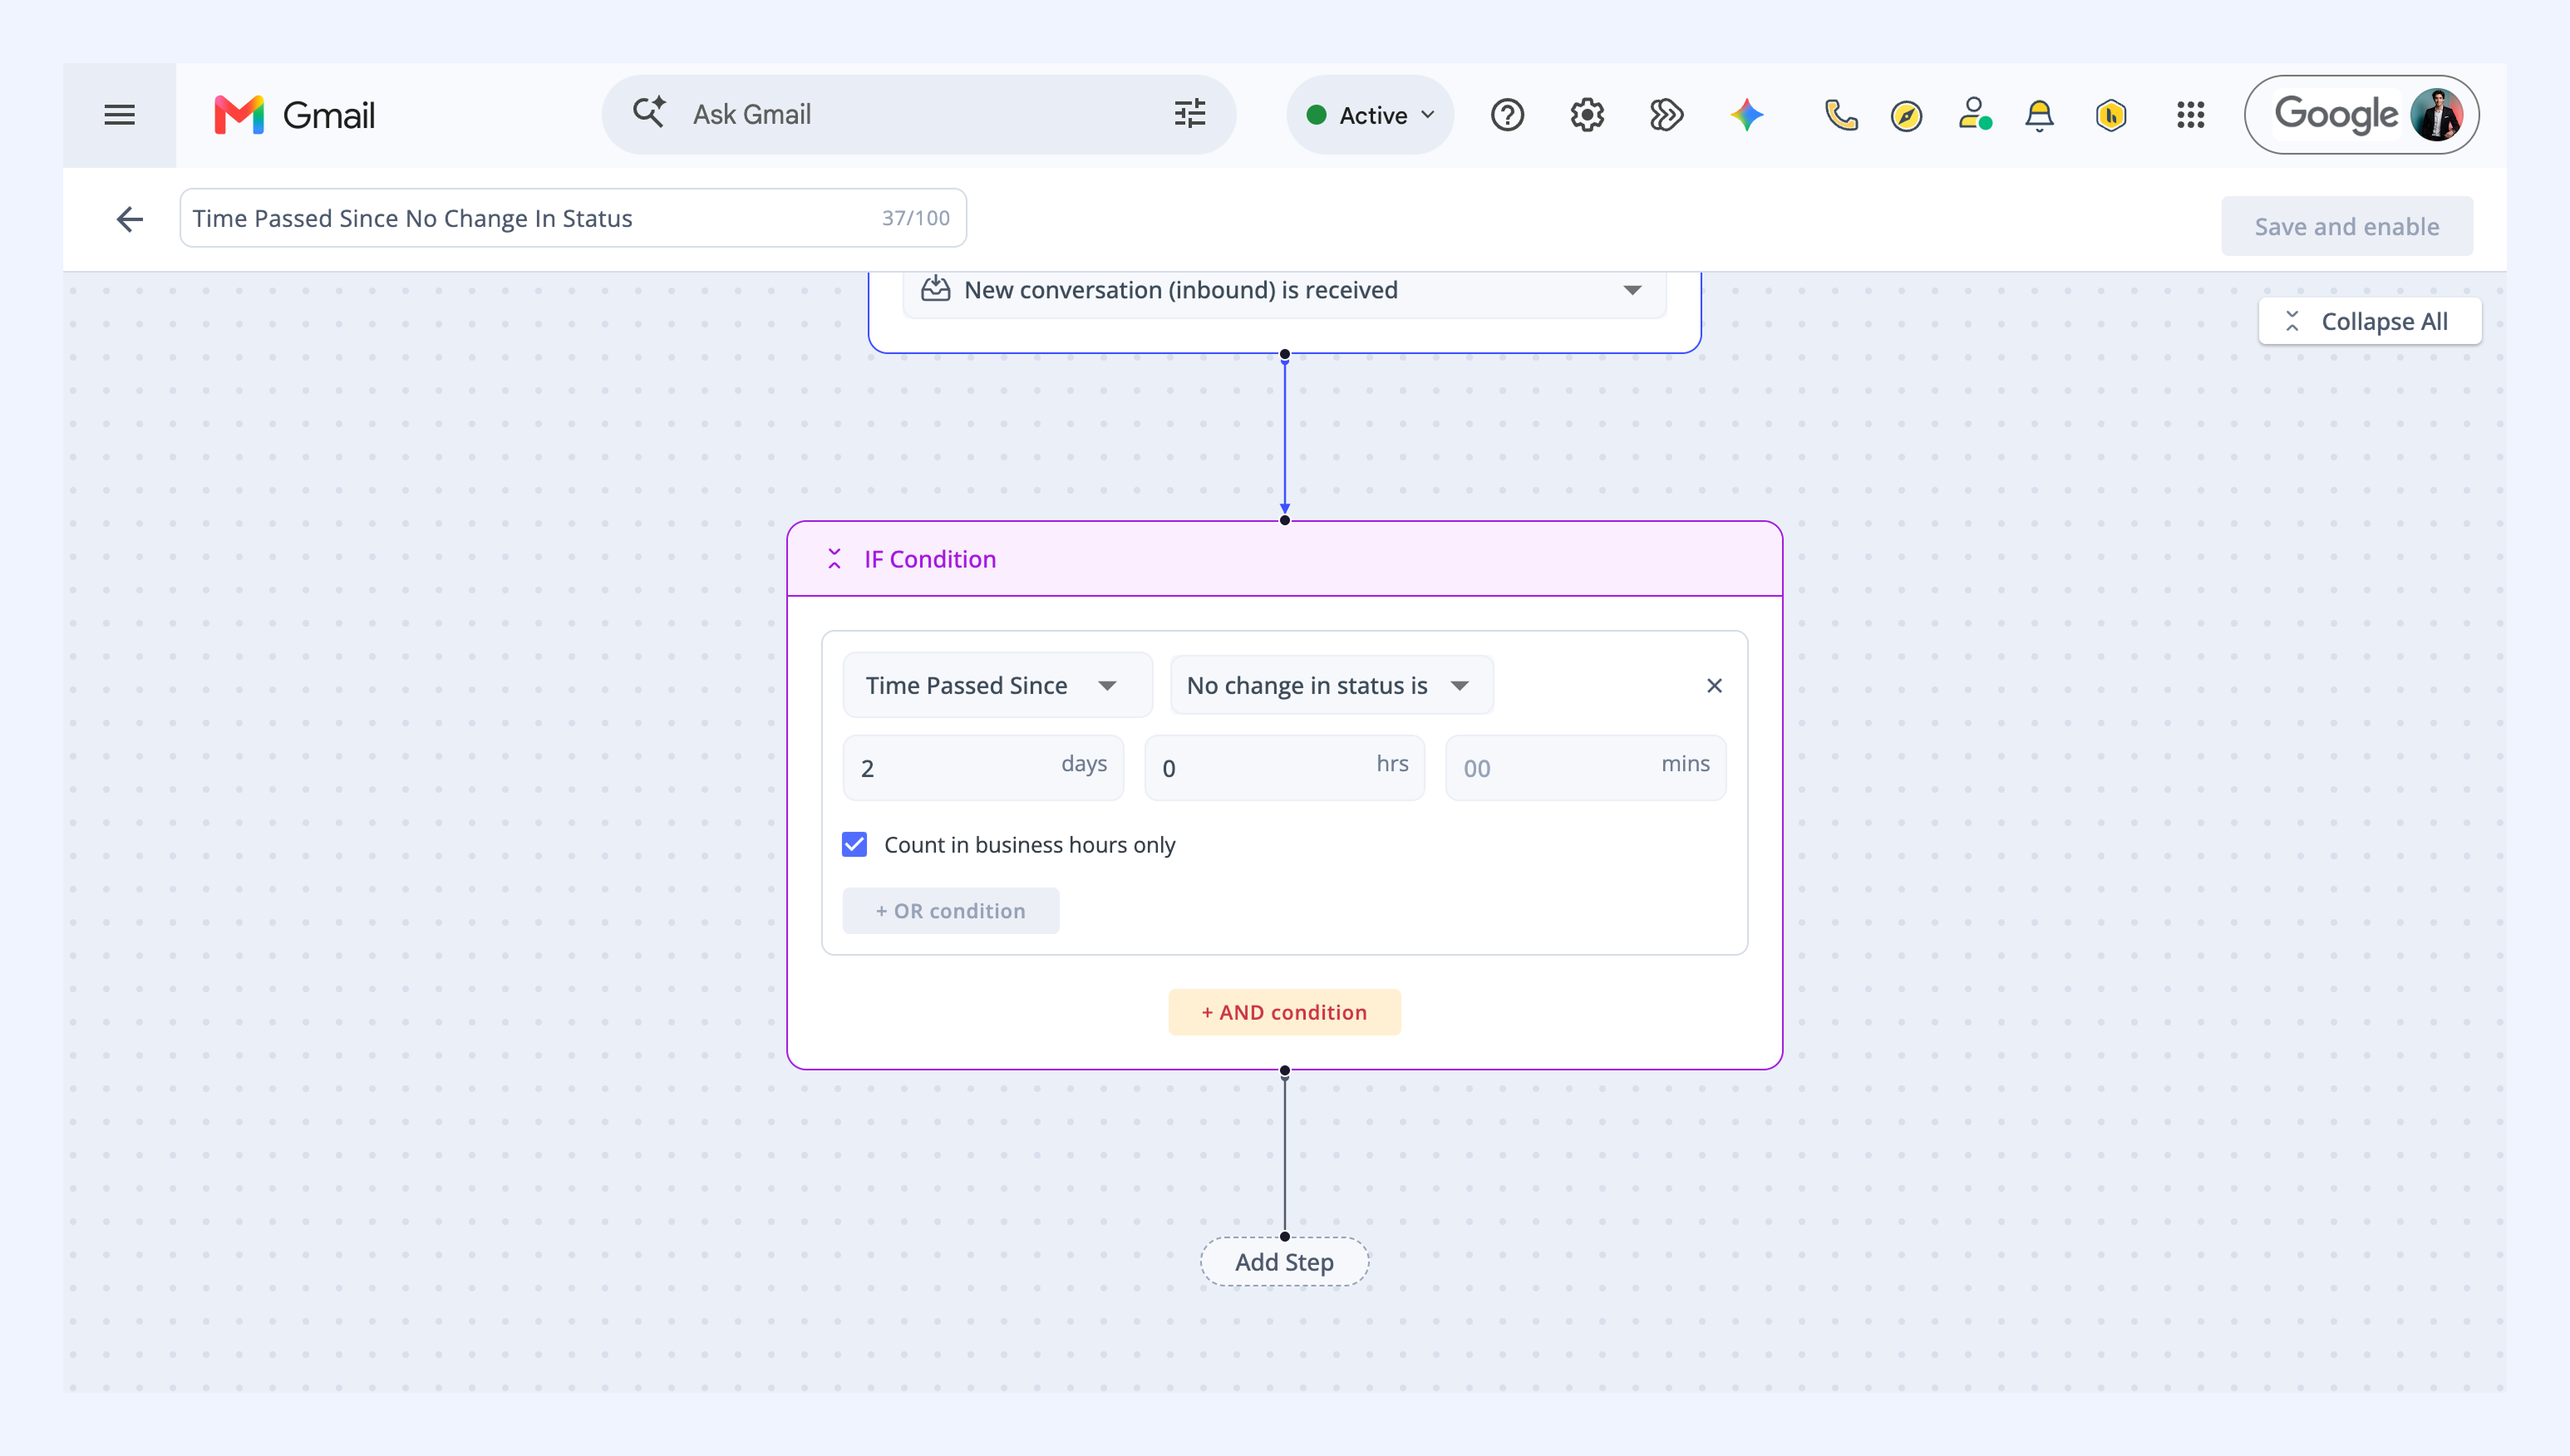
Use Time Passed Since to set how long Hiver waits before running an action. You can set the period in minutes, hours, or days.
Wait for a set period
Select the is operator to run an action after the specified period. For example, when a conversation is closed, wait one day before sending the customer a feedback survey.
Wait to see whether an activity occurs
Use one of the operators below to run an action only if the selected activity doesn’t happen during the specified period after the trigger. For example, after a teammate sends a reply, send a follow-up if the customer hasn’t responded within 24 hours.
Tip: You can select Count in Business Hours only to exclude time outside the Shared Inbox’s Business Hours from the specified period.
Option | Description |
| No external reply received | The customer hasn’t replied within the specified period |
| No change in status | The conversation’s status hasn’t changed within the specified period |
| No change in assignee | The conversation’s assignee hasn’t changed within the specified period |
| No change in tags | The conversation’s tags haven’t changed within the specified period |
Prerequisites
Before you begin, make sure you have Admin permissions in Hiver. If you want to use Business Hours in the automation, make sure Business Hours are set up in the Shared Inbox.
Setting up the automation
1. Go to Admin Panel → Shared Inboxes, and select an inbox.
2. Click Automations → Create Automation and give it a name.
3. From the trigger dropdown, choose a trigger. For example, new conversation (inbound) is received.
4. Click Add step → If Condition.
5. Choose a time-based condition, then set its operator and value.
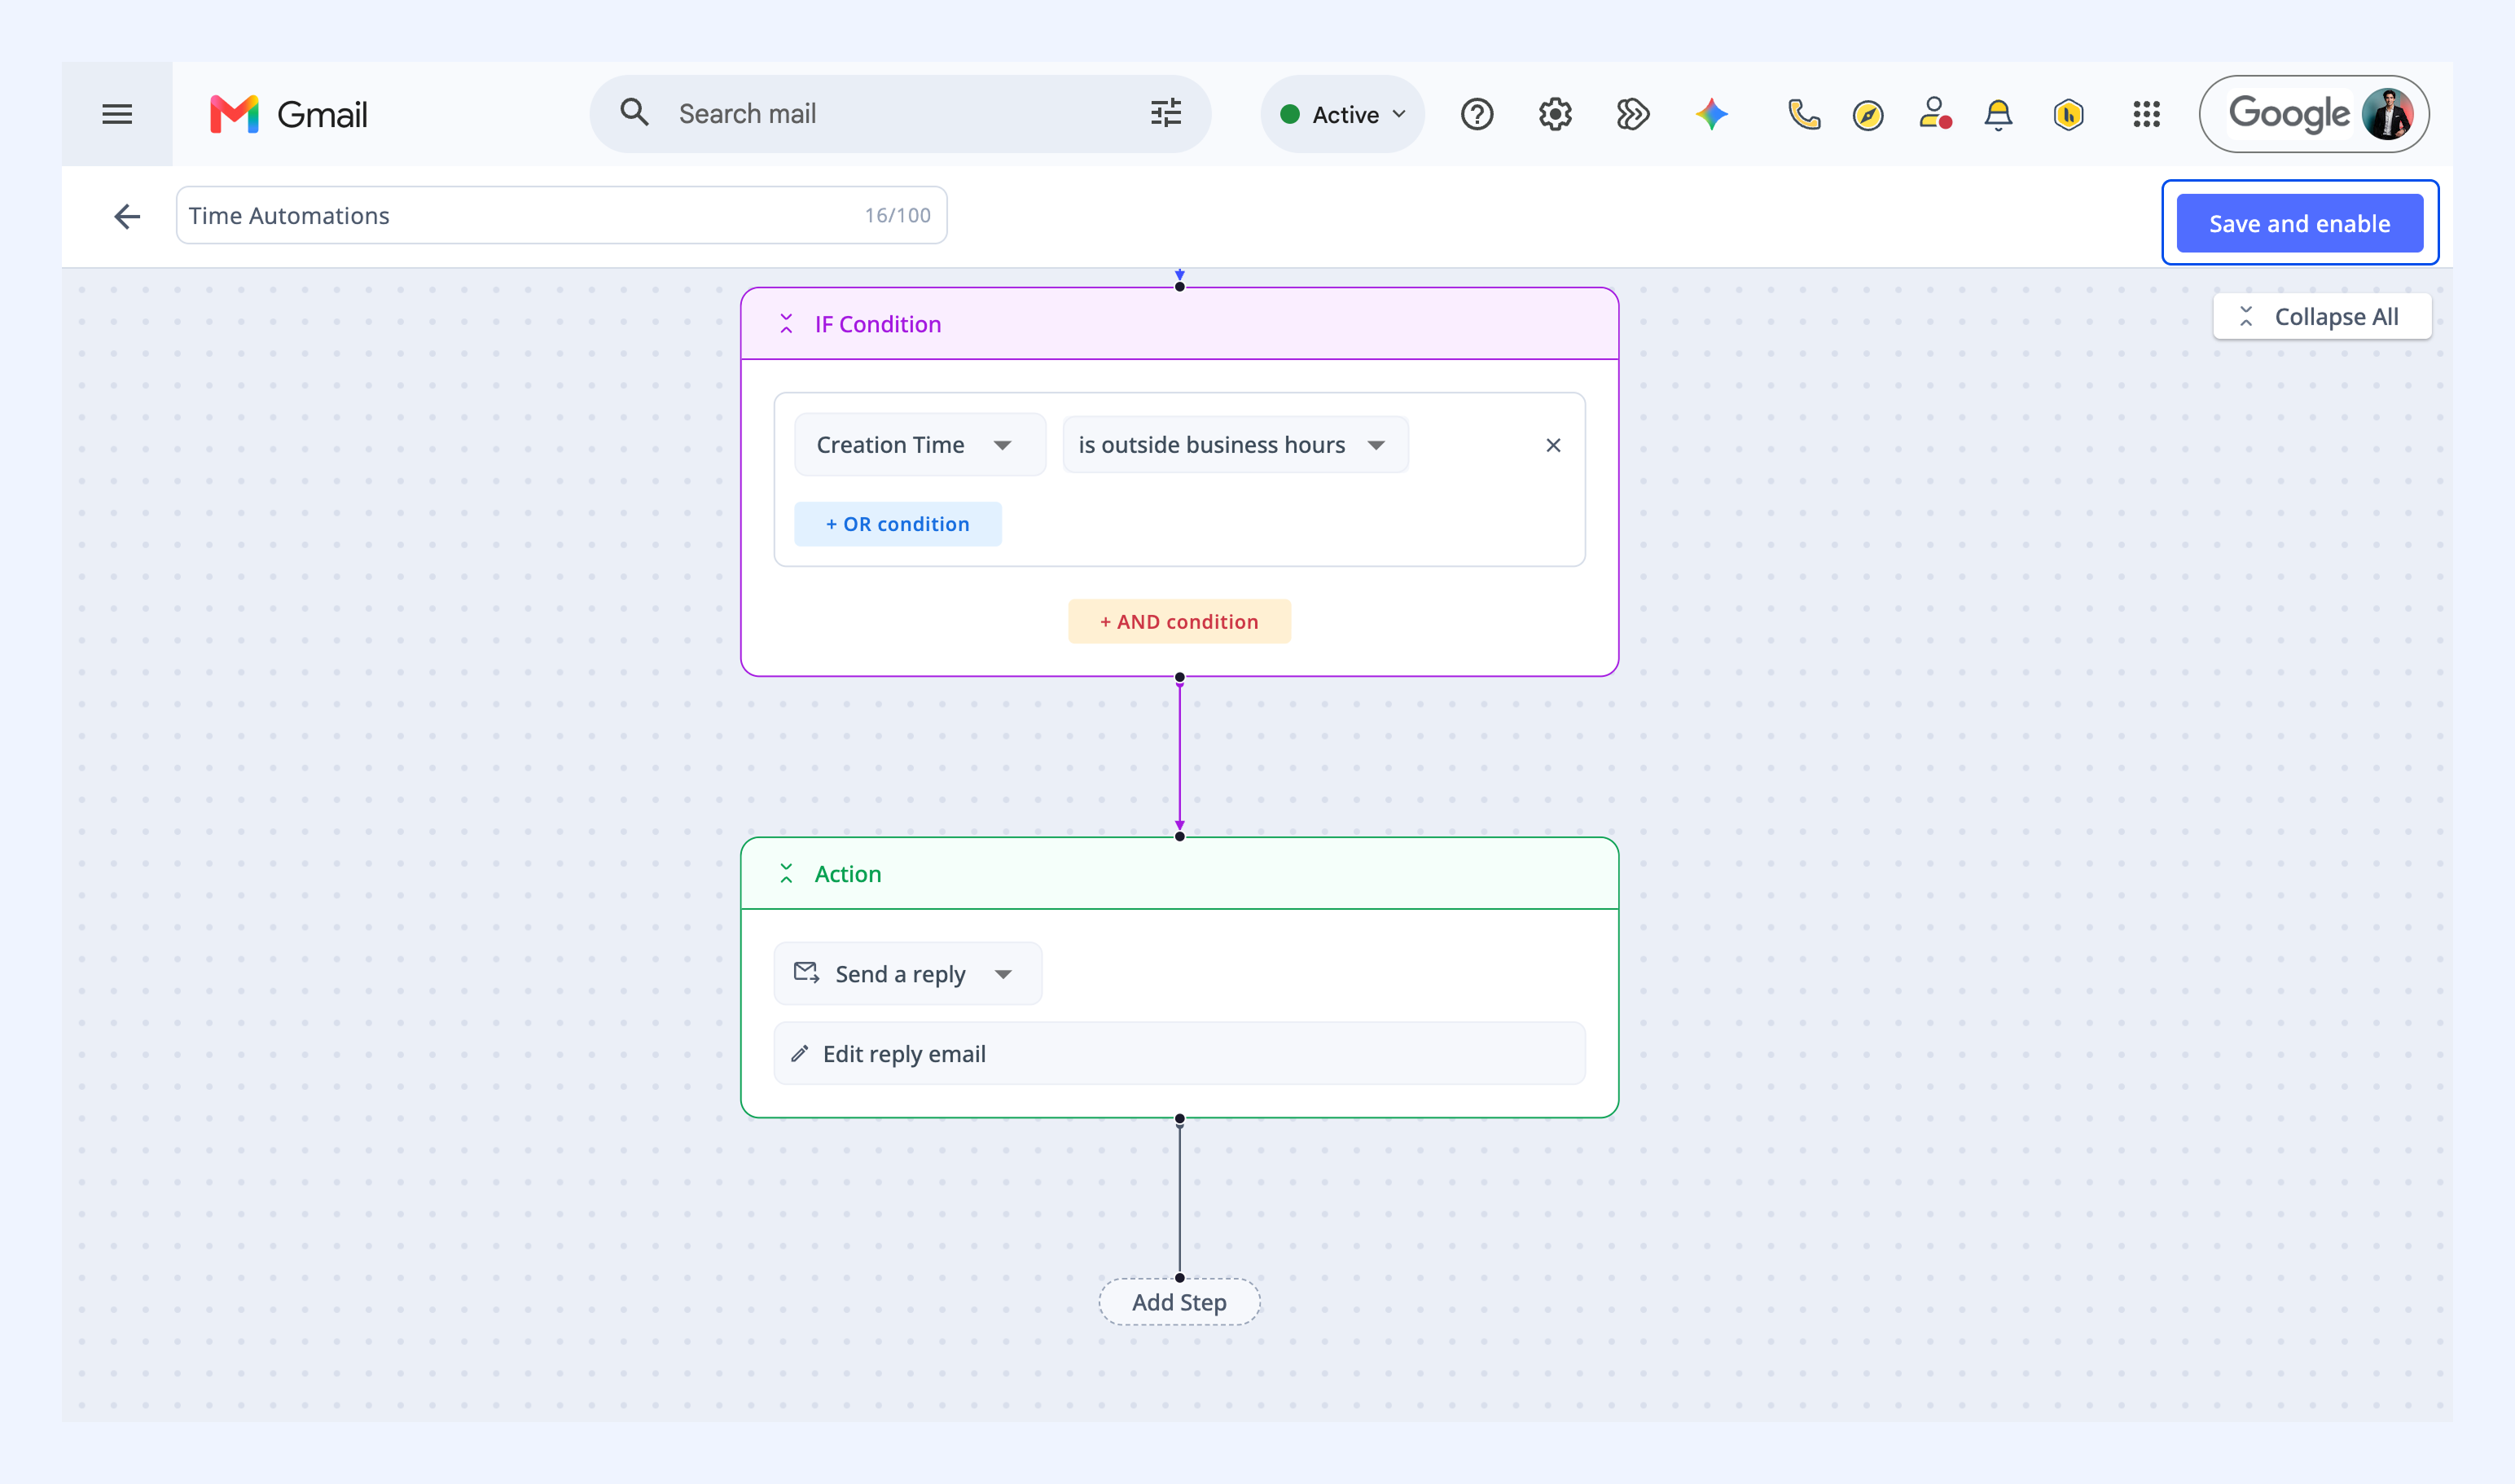
6. Click Add step → Action, and choose an action.
7. Click Save and enable.
Related articles
Set up AI Sentiment automations