Creating AI Sentiment-based Automations
AI Sentiment Analysis analyzes the tone of incoming conversations and labels them positive, negative, or neutral. AI Sentiment automations let you take action whenever these labels are updated.
For example, you can:
- Add a priority tag and assign a conversation to an escalation specialist when its sentiment turns negative.
- Notify a manager when a conversation turns negative so they can step in.
- Add an internal note prompting the assignee to request a CSAT response or testimonial when a customer expresses positive sentiment.
- Send an acknowledgment when a conversation turns negative, letting the customer know their concern is being reviewed.
Prerequisites
Before you begin, make sure:
- AI Sentiment Analysis is enabled for the Shared Inbox.
- You have Admin permissions in Hiver.
Setting up the automation
1. Go to Admin Panel → Shared Inboxes, and select an inbox.
2. Click Automations → Create Automation and give it a name.
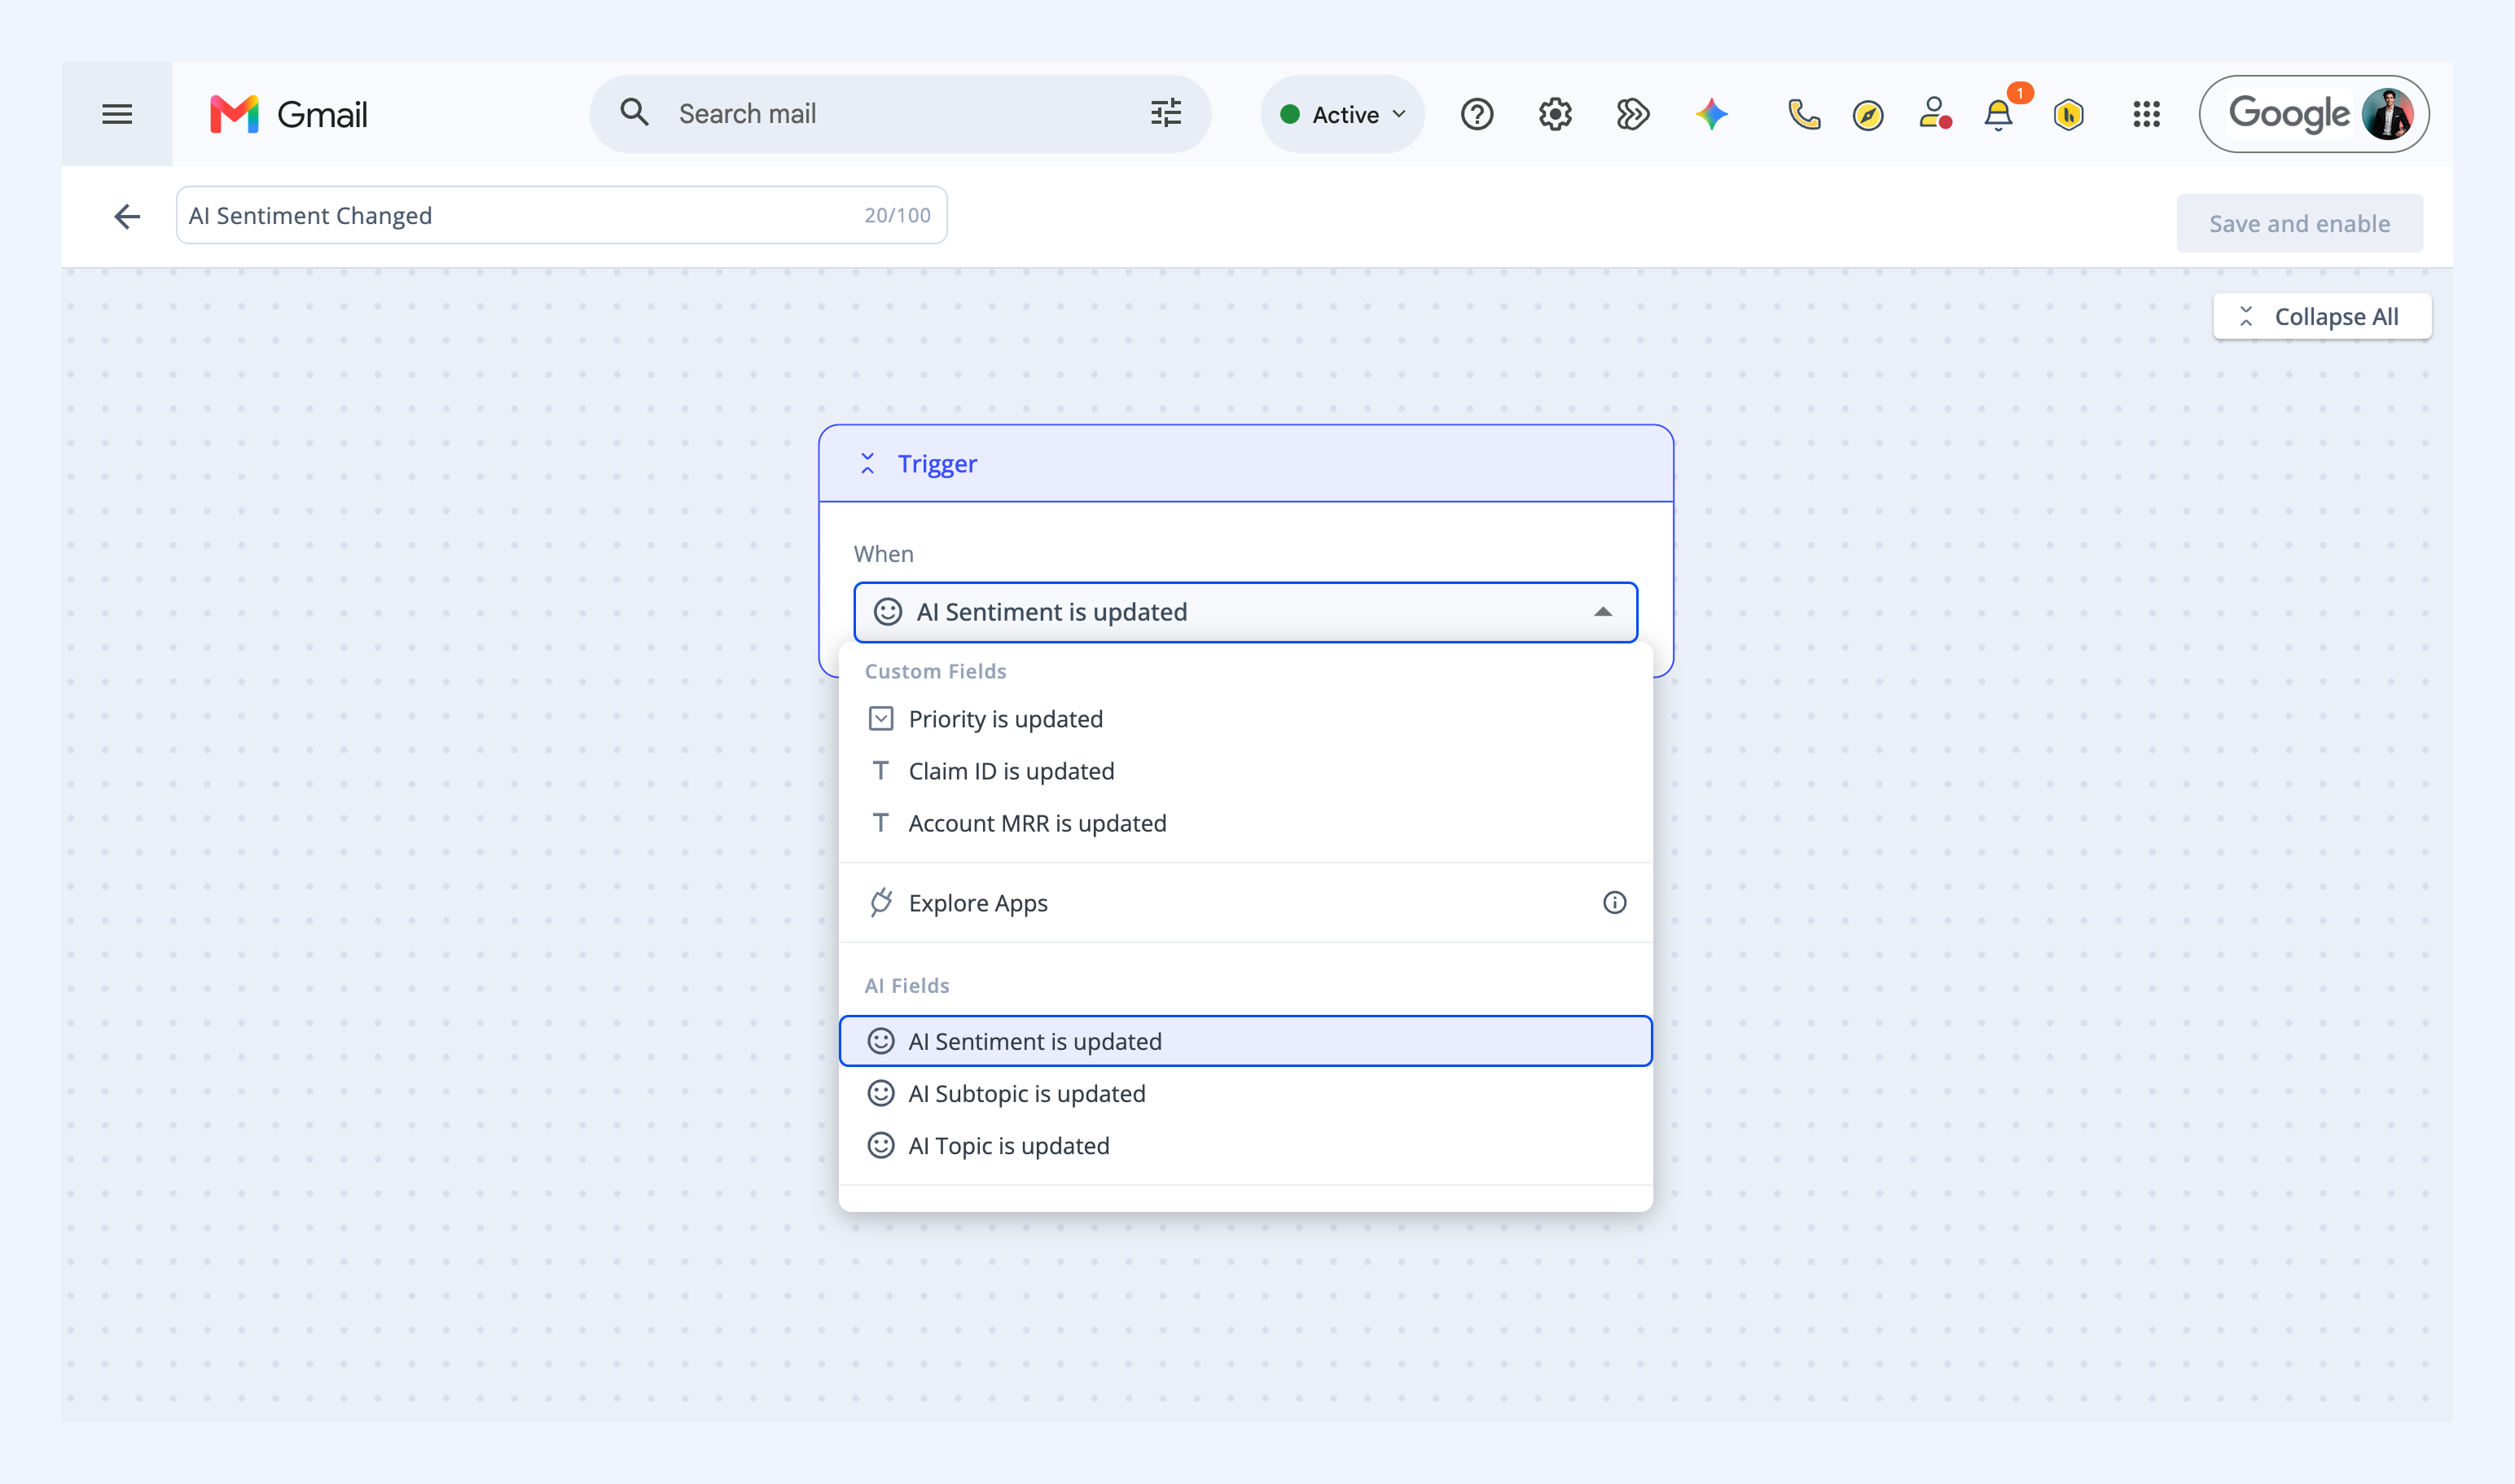
3. From the trigger dropdown, select AI Sentiment is updated.
4. Click Add step → If Condition.
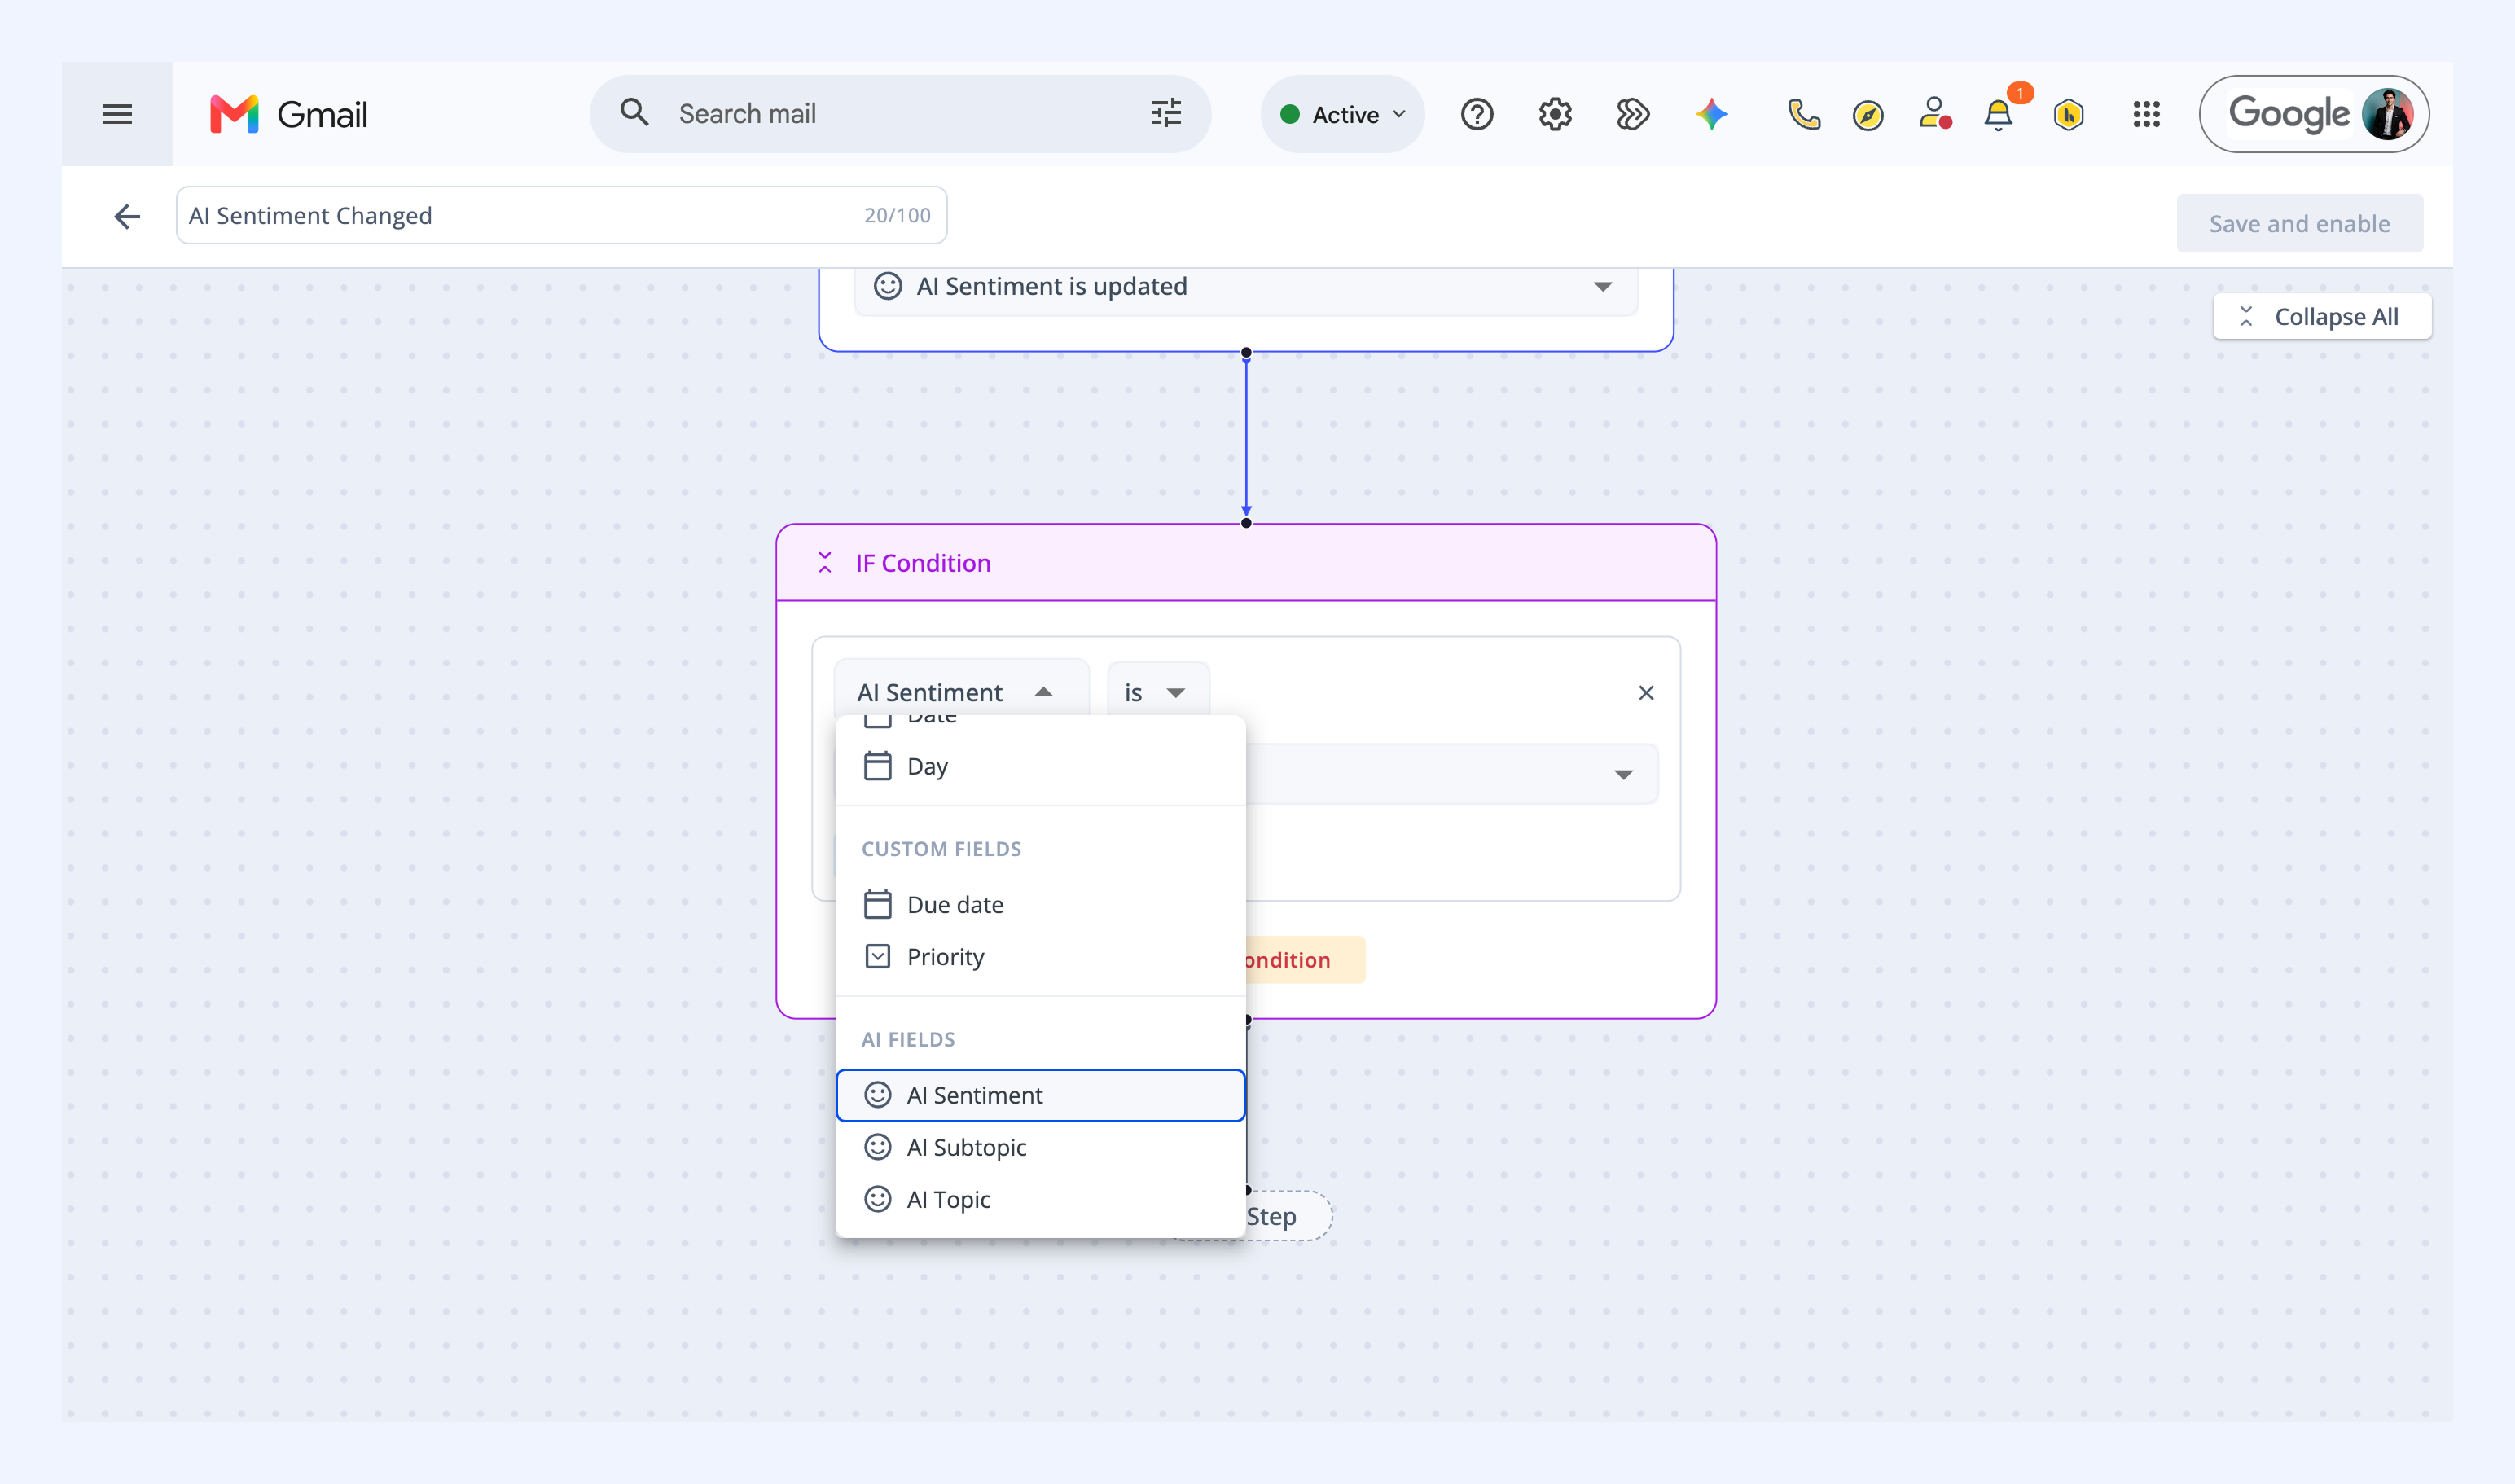
5. Set the condition field to AI Sentiment, then choose an operator and value.
| Operator | Description |
| is | Matches the selected sentiment |
| is not | Does not match the selected sentiment |
| is any of | Matches any of the selected sentiments |
| is empty | Does not have a sentiment value |
Note: The sentiment values available depend on the scale you chose when you enabled AI Sentiment Analysis. A 3-point scale offers Positive, Neutral, and Negative. A 5-point scale adds Very Positive and Very Negative.
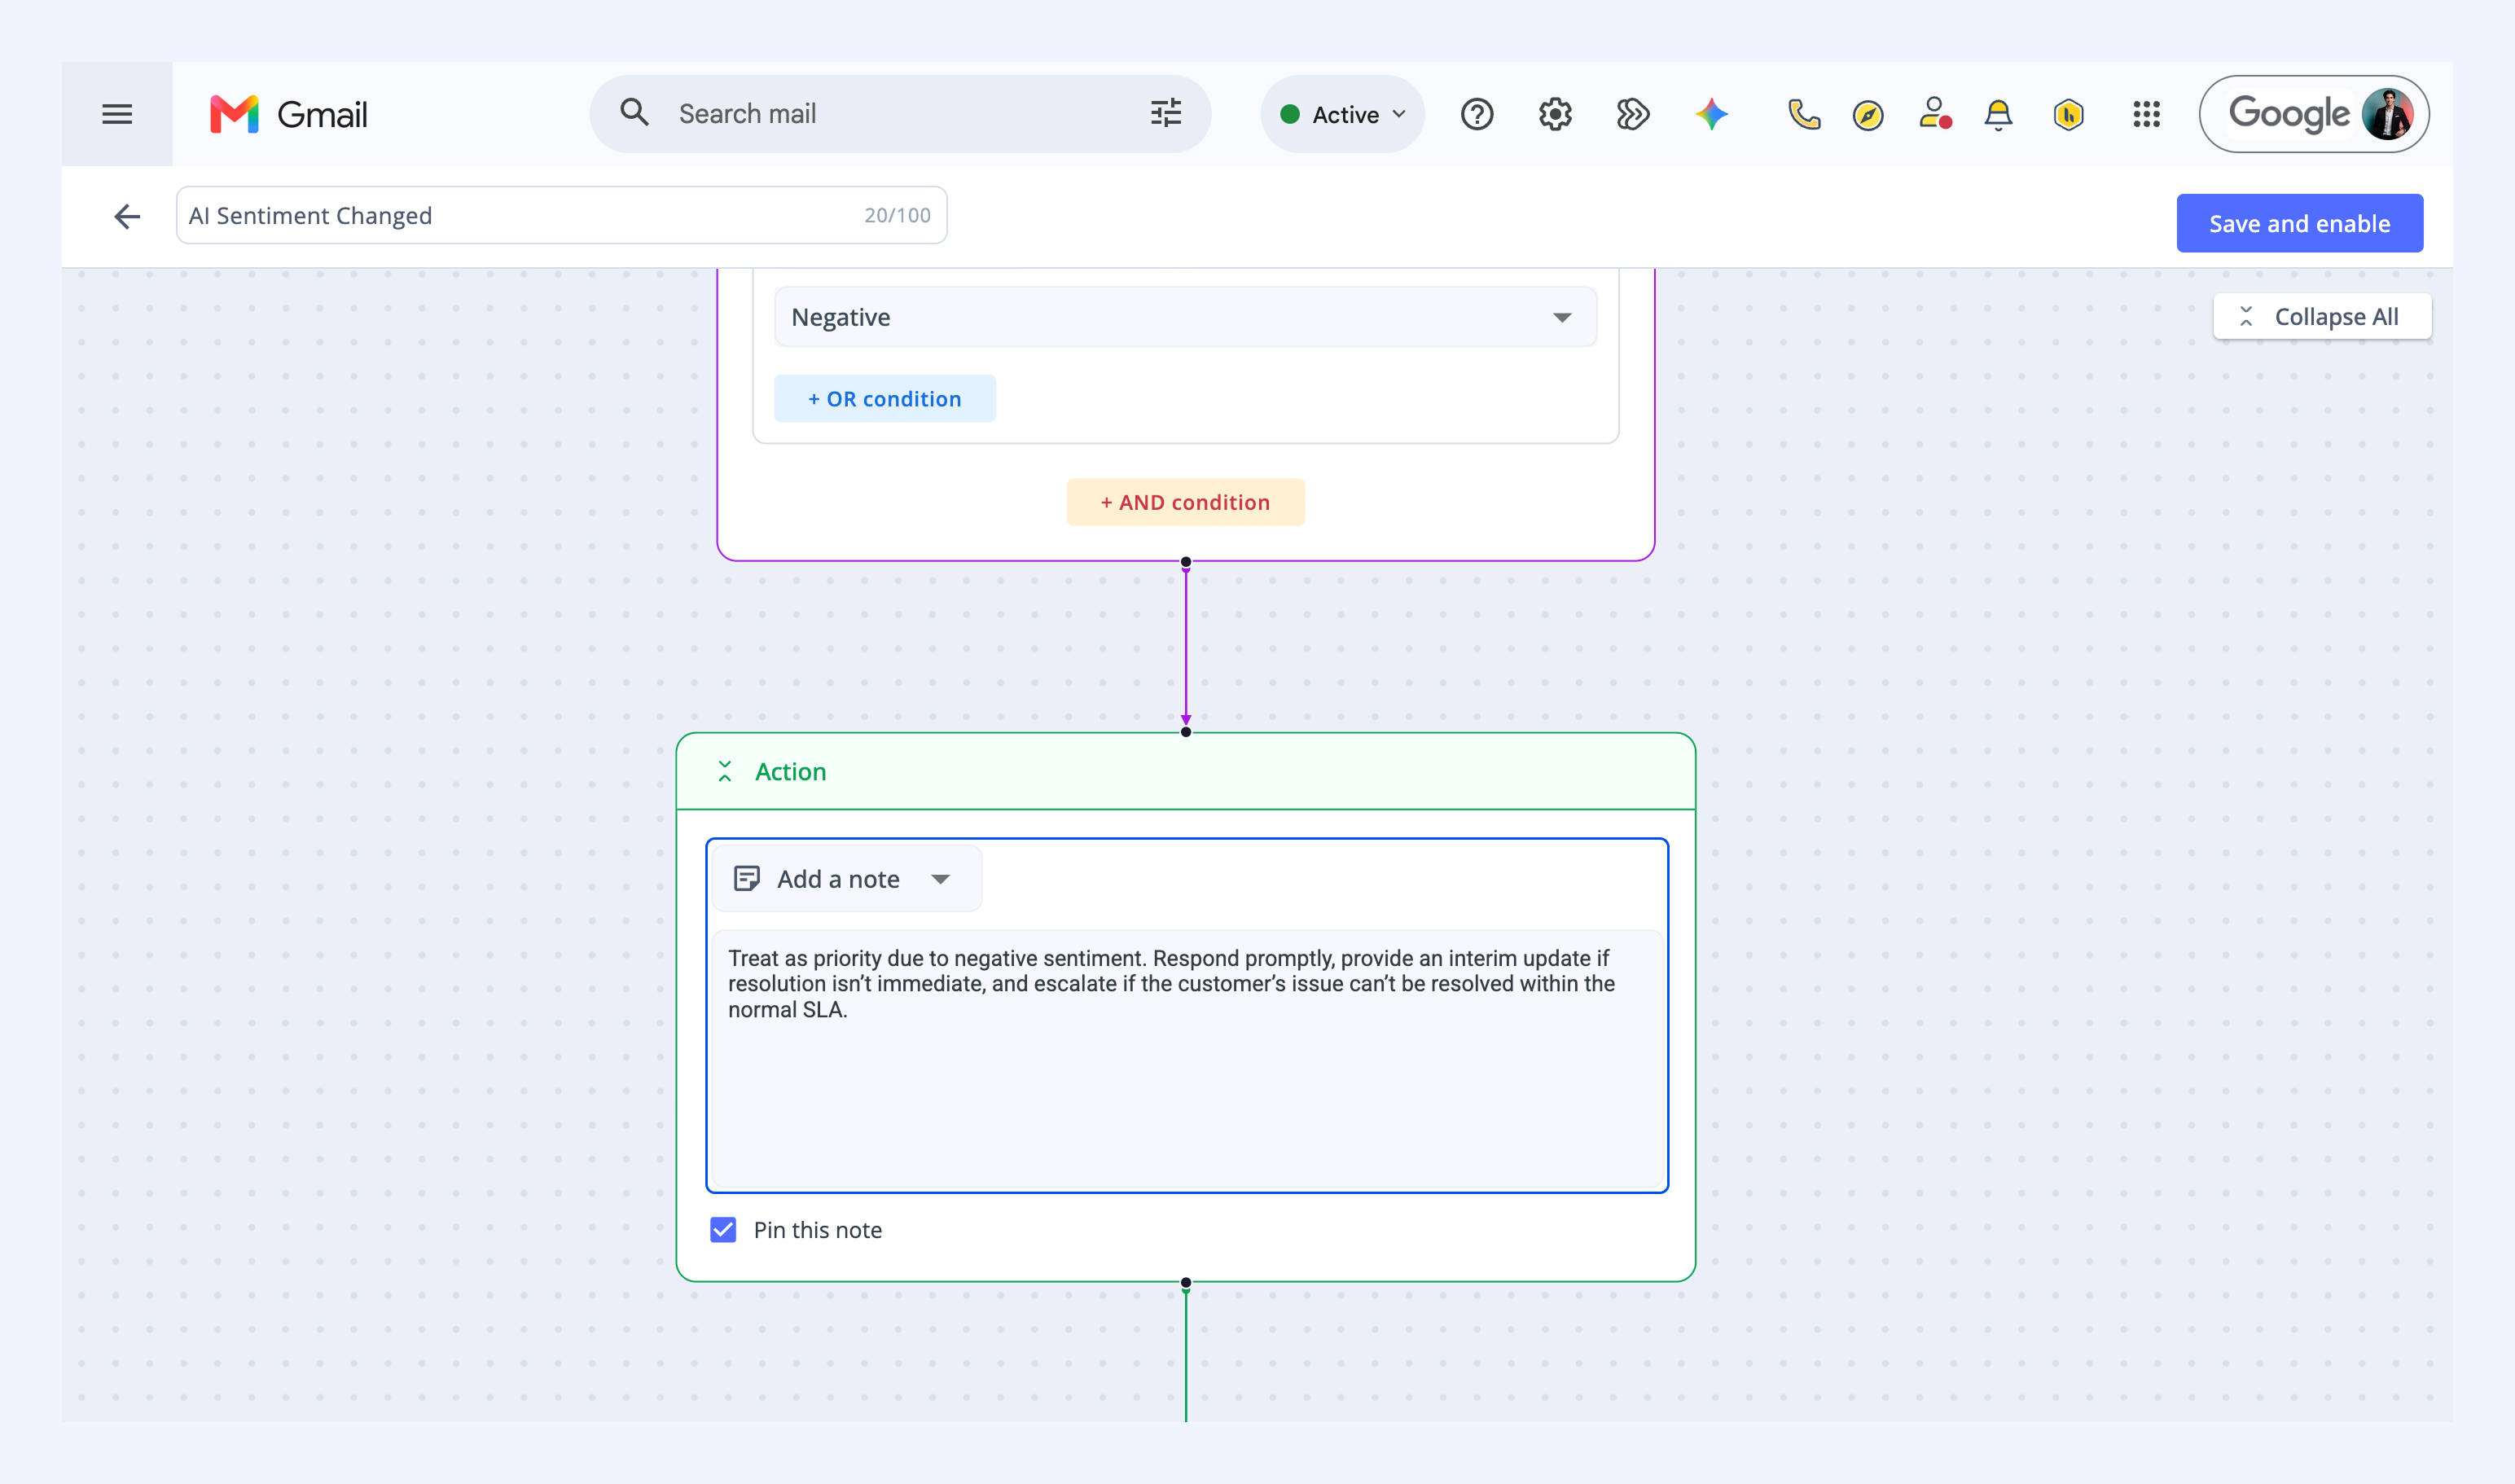
6. Click Add step, then select Action, and choose an action. For example, you can add an internal note, notify a team member, send a reply, etc.
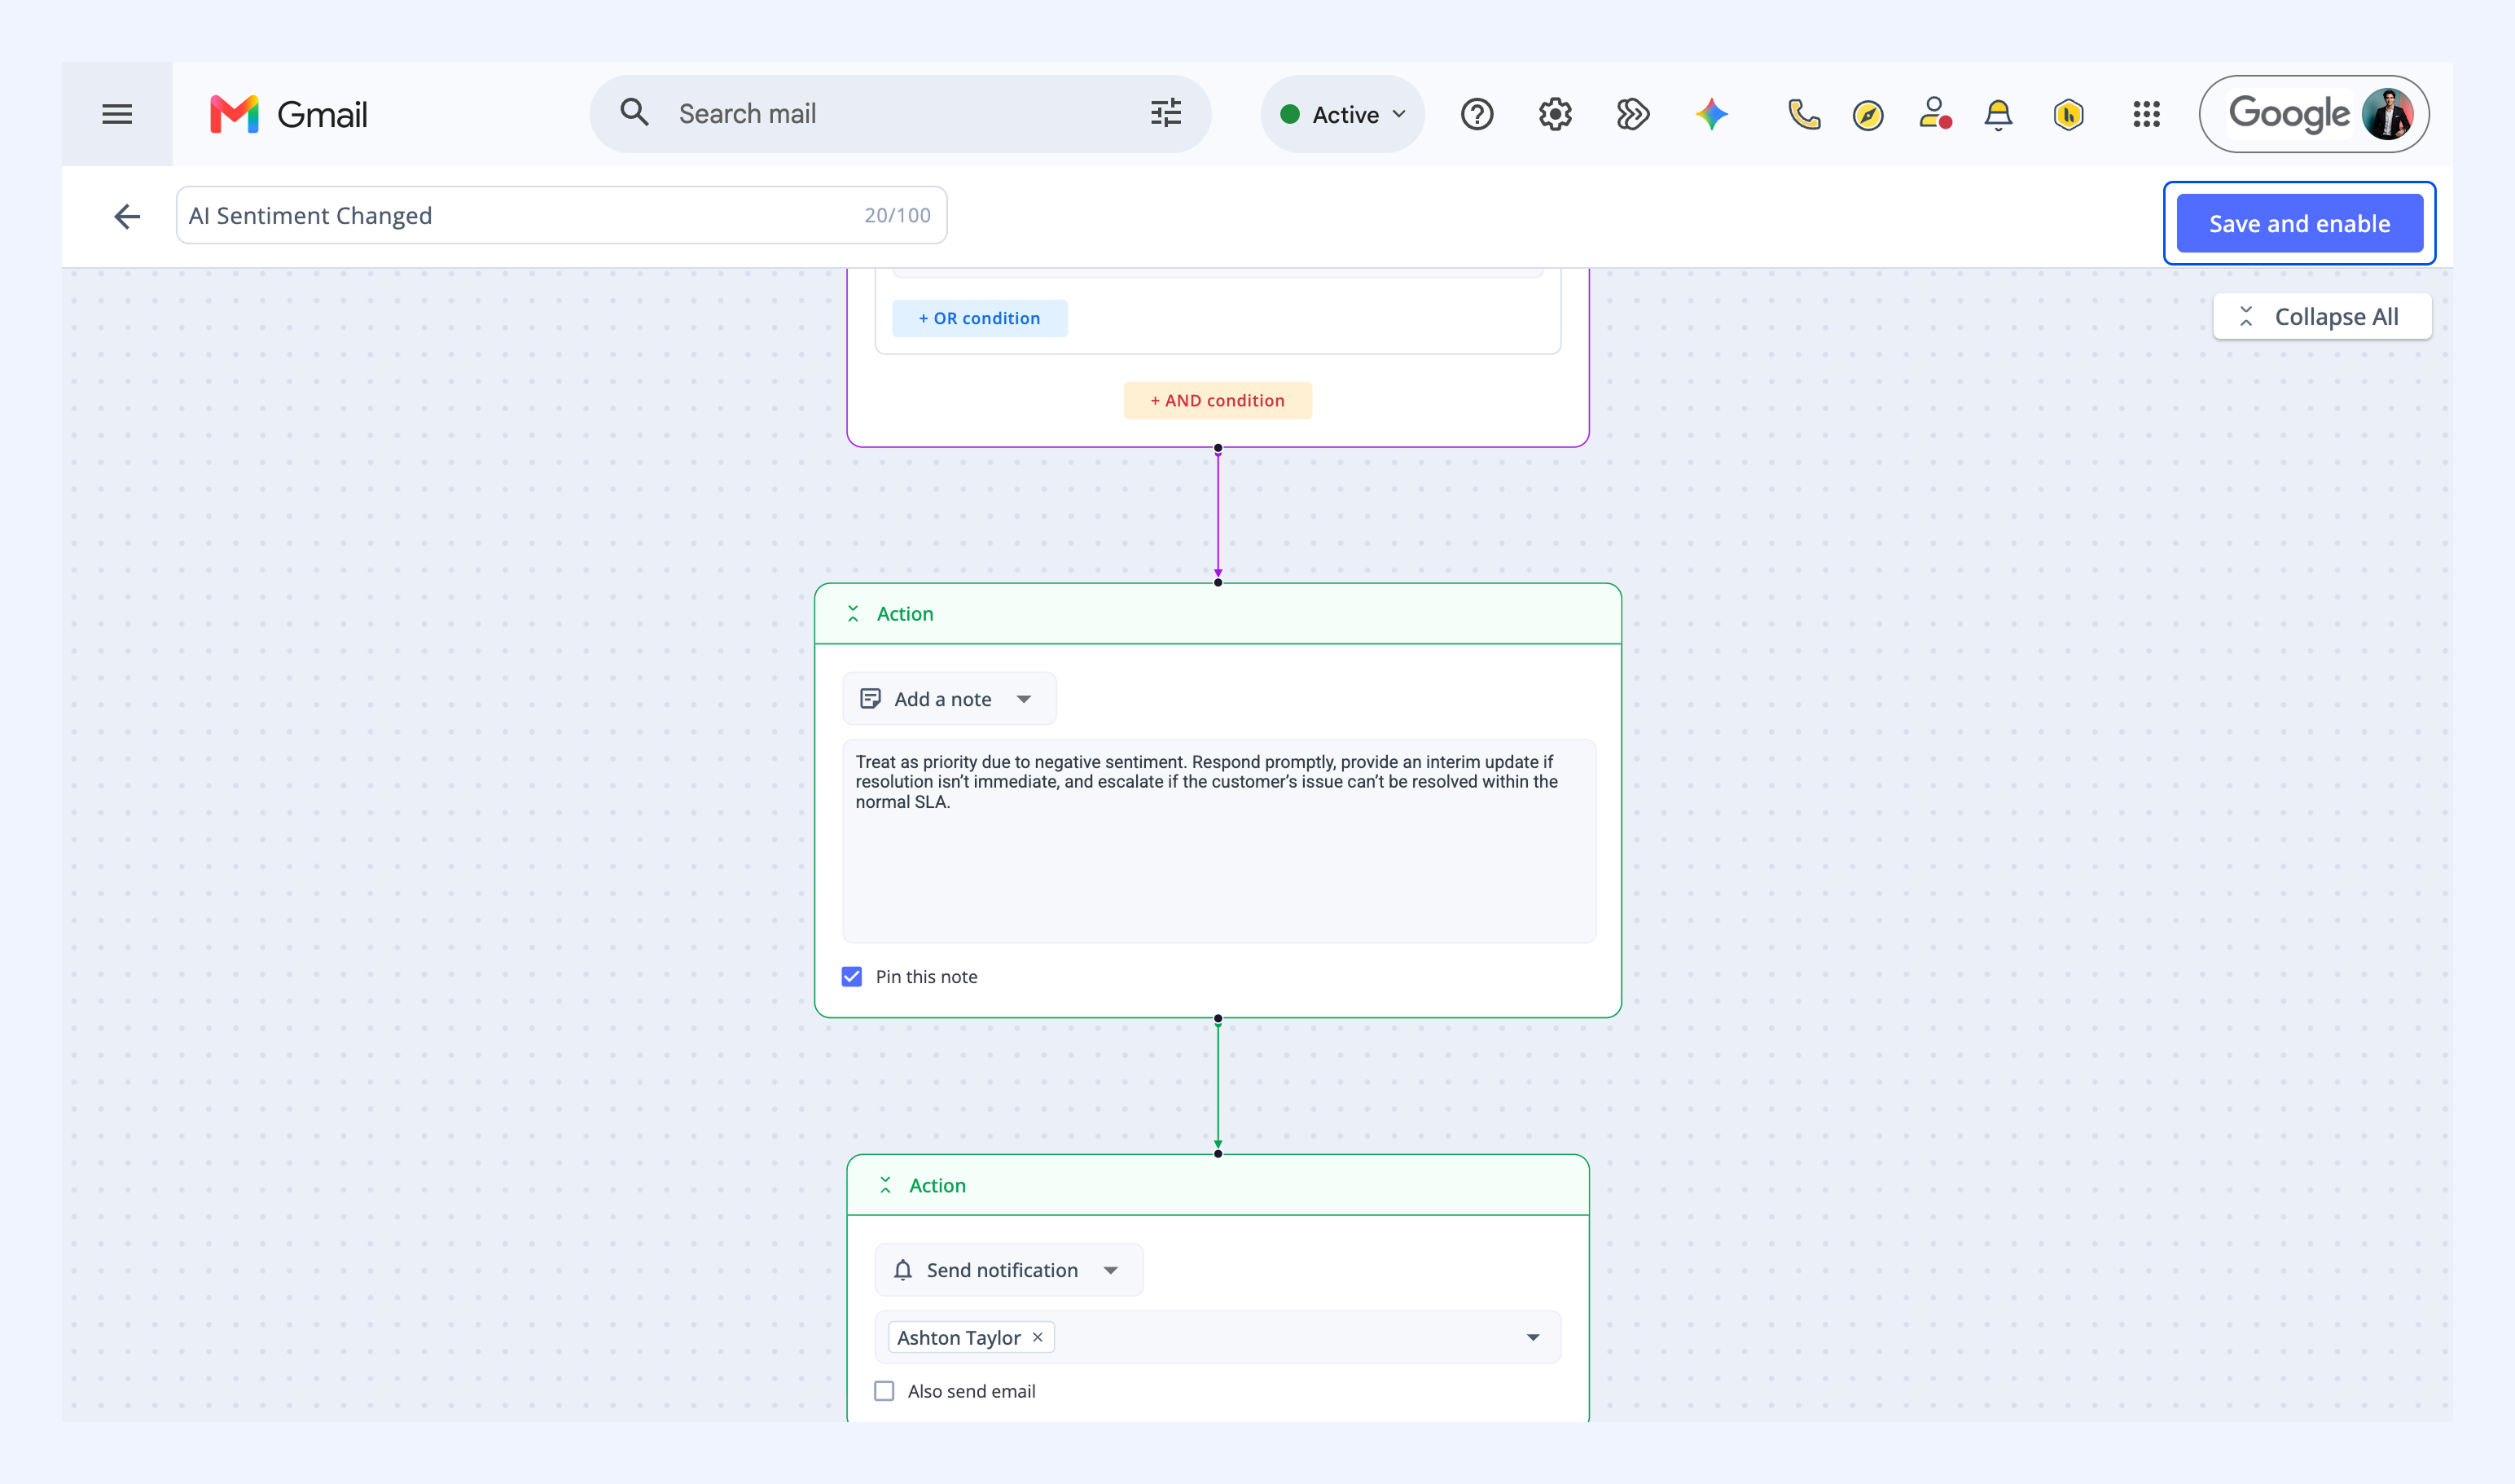
7. Click Save and enable to activate the Automation.
Related articles
Creating SLA-based Automations
Creating CSAT-based Automations
Creating time based Automations