Adding a contact form
Sometimes, users may not find the exact information they need in your Help Center. In such cases, it’s important to give them a way to reach your team for help or feedback.
You can do this by adding a Contact form, which lets users raise and submit tickets directly from the Help Center.
Enable the Contact form
Help Center Admins can enable ticket submission by turning on the Contact form setting.
Step 1: Enable the Contact form
1. In the Help Center Settings, go to Site Settings.
2. Turn the Contact form toggle on.
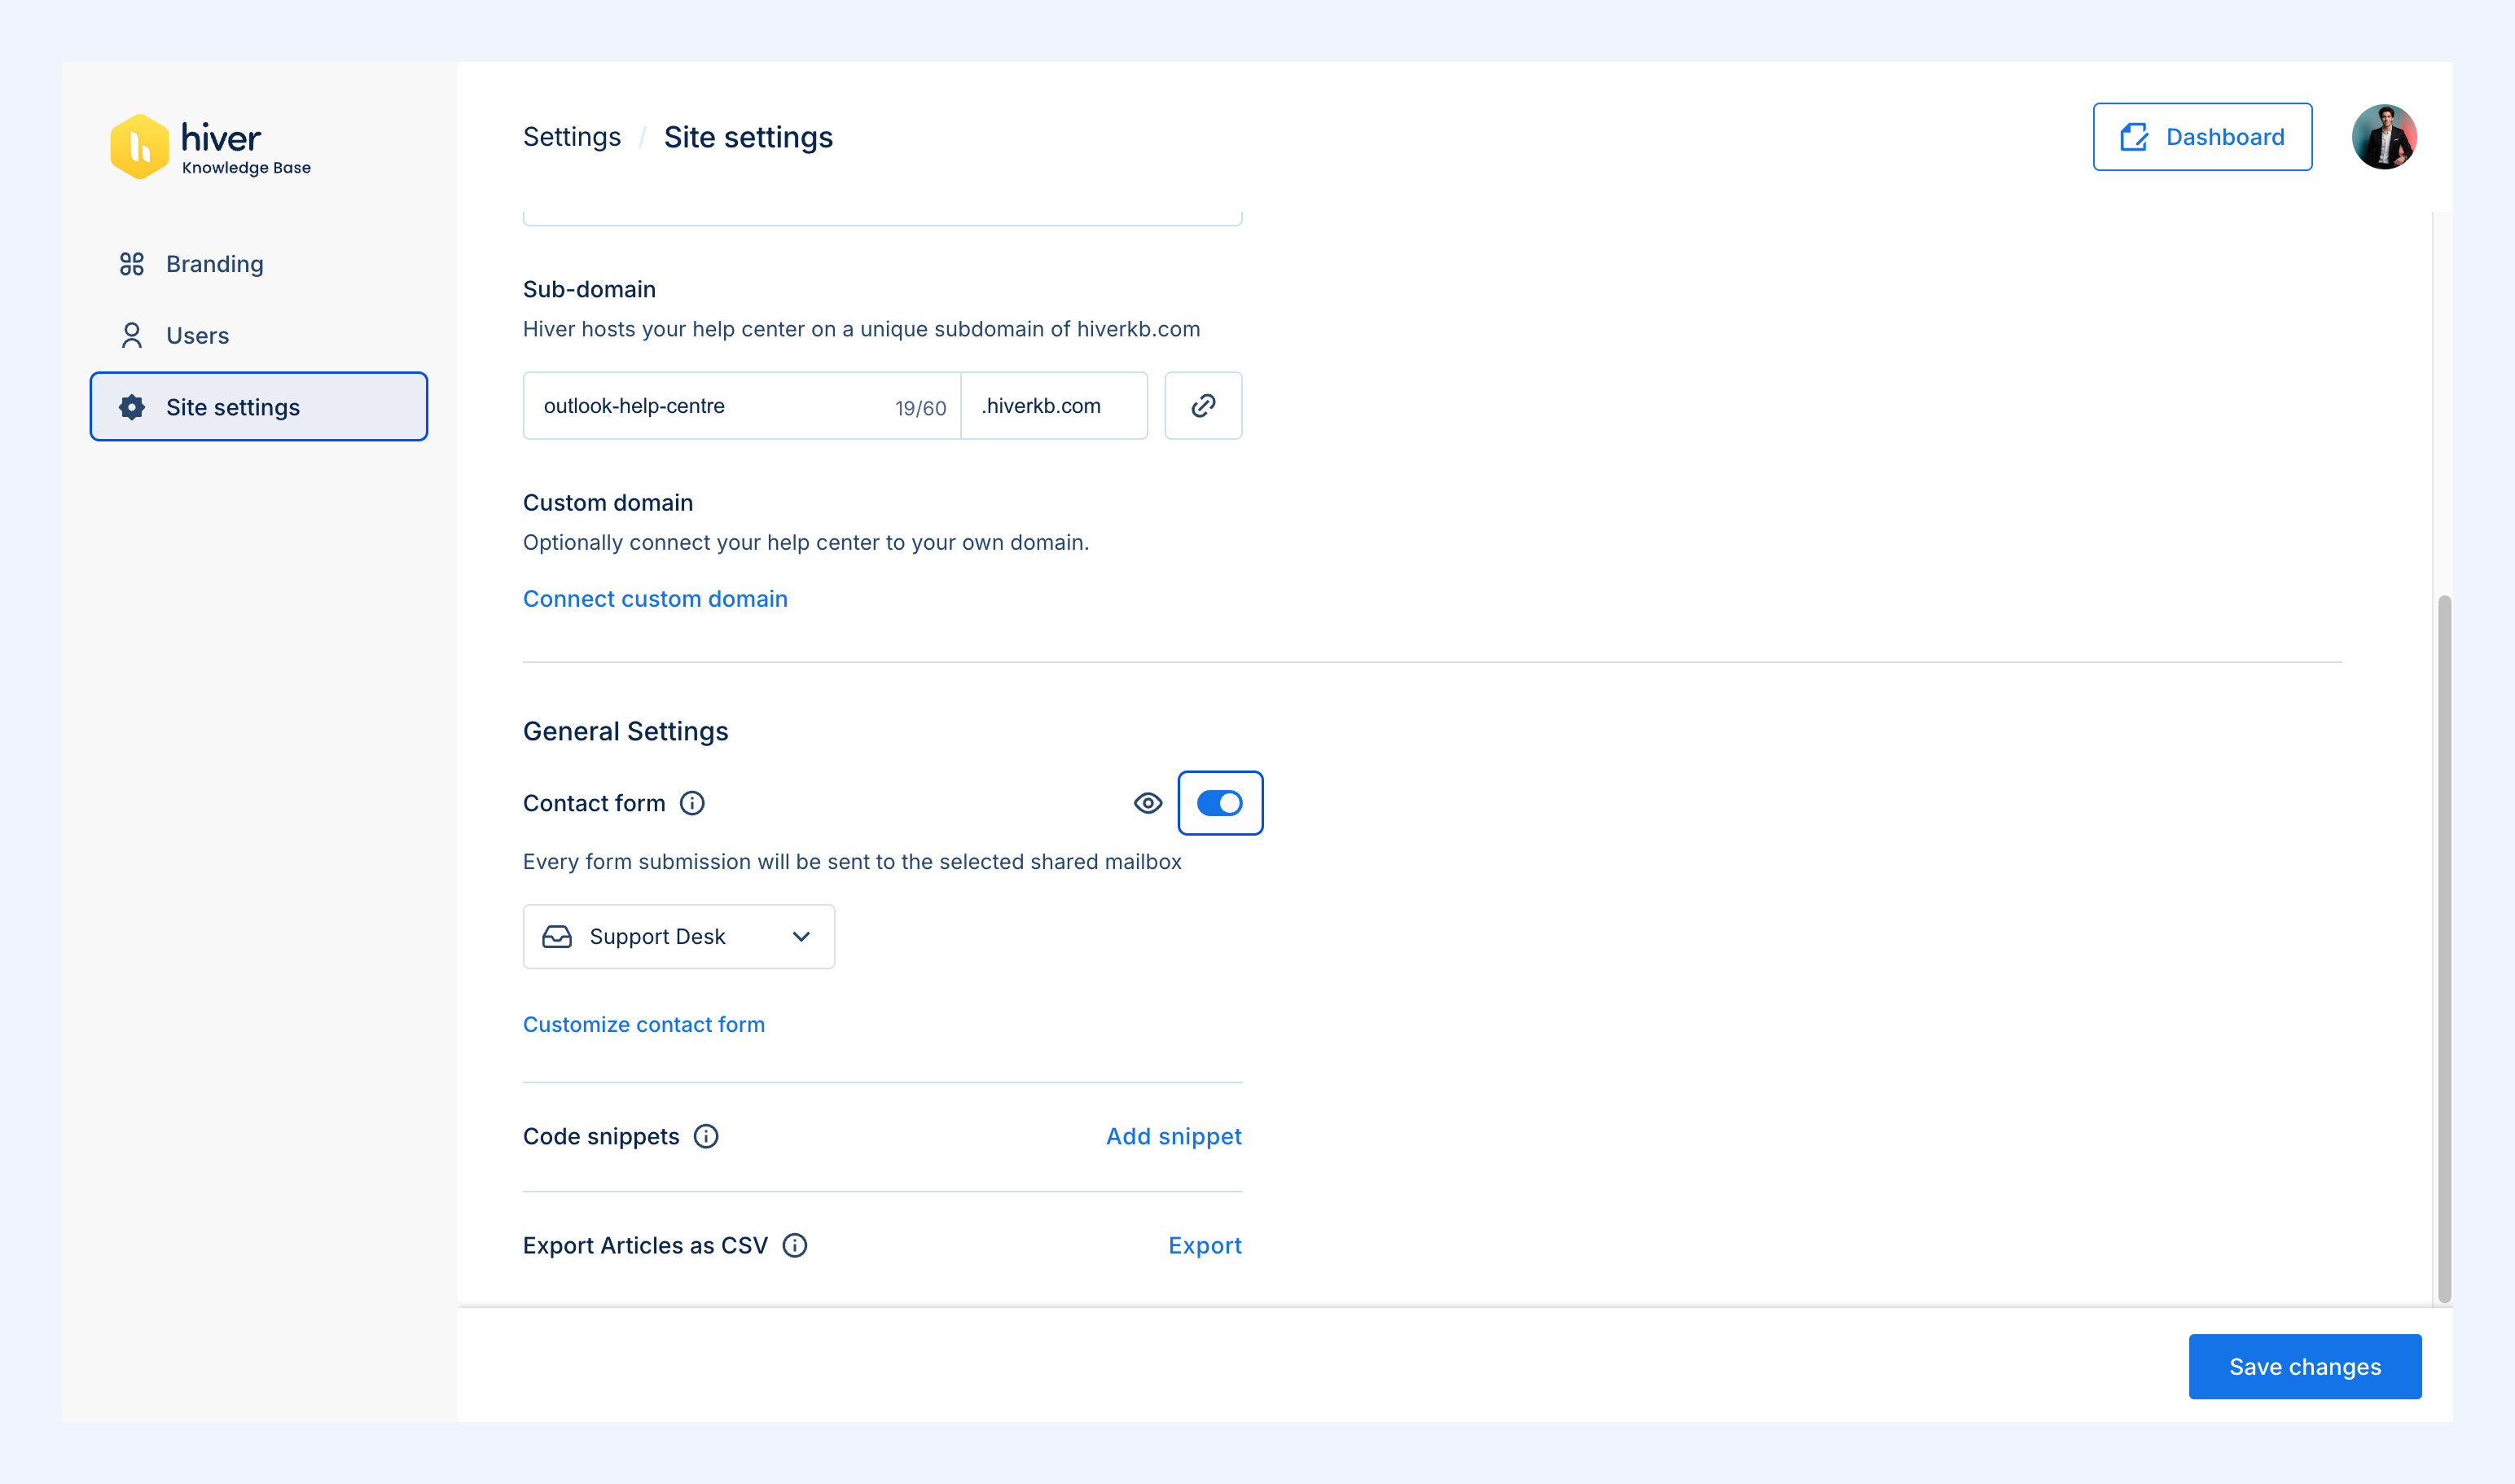
3. Select the Shared Inbox that will receive the tickets raised through the Help Center.
4. Click Customize contact form.
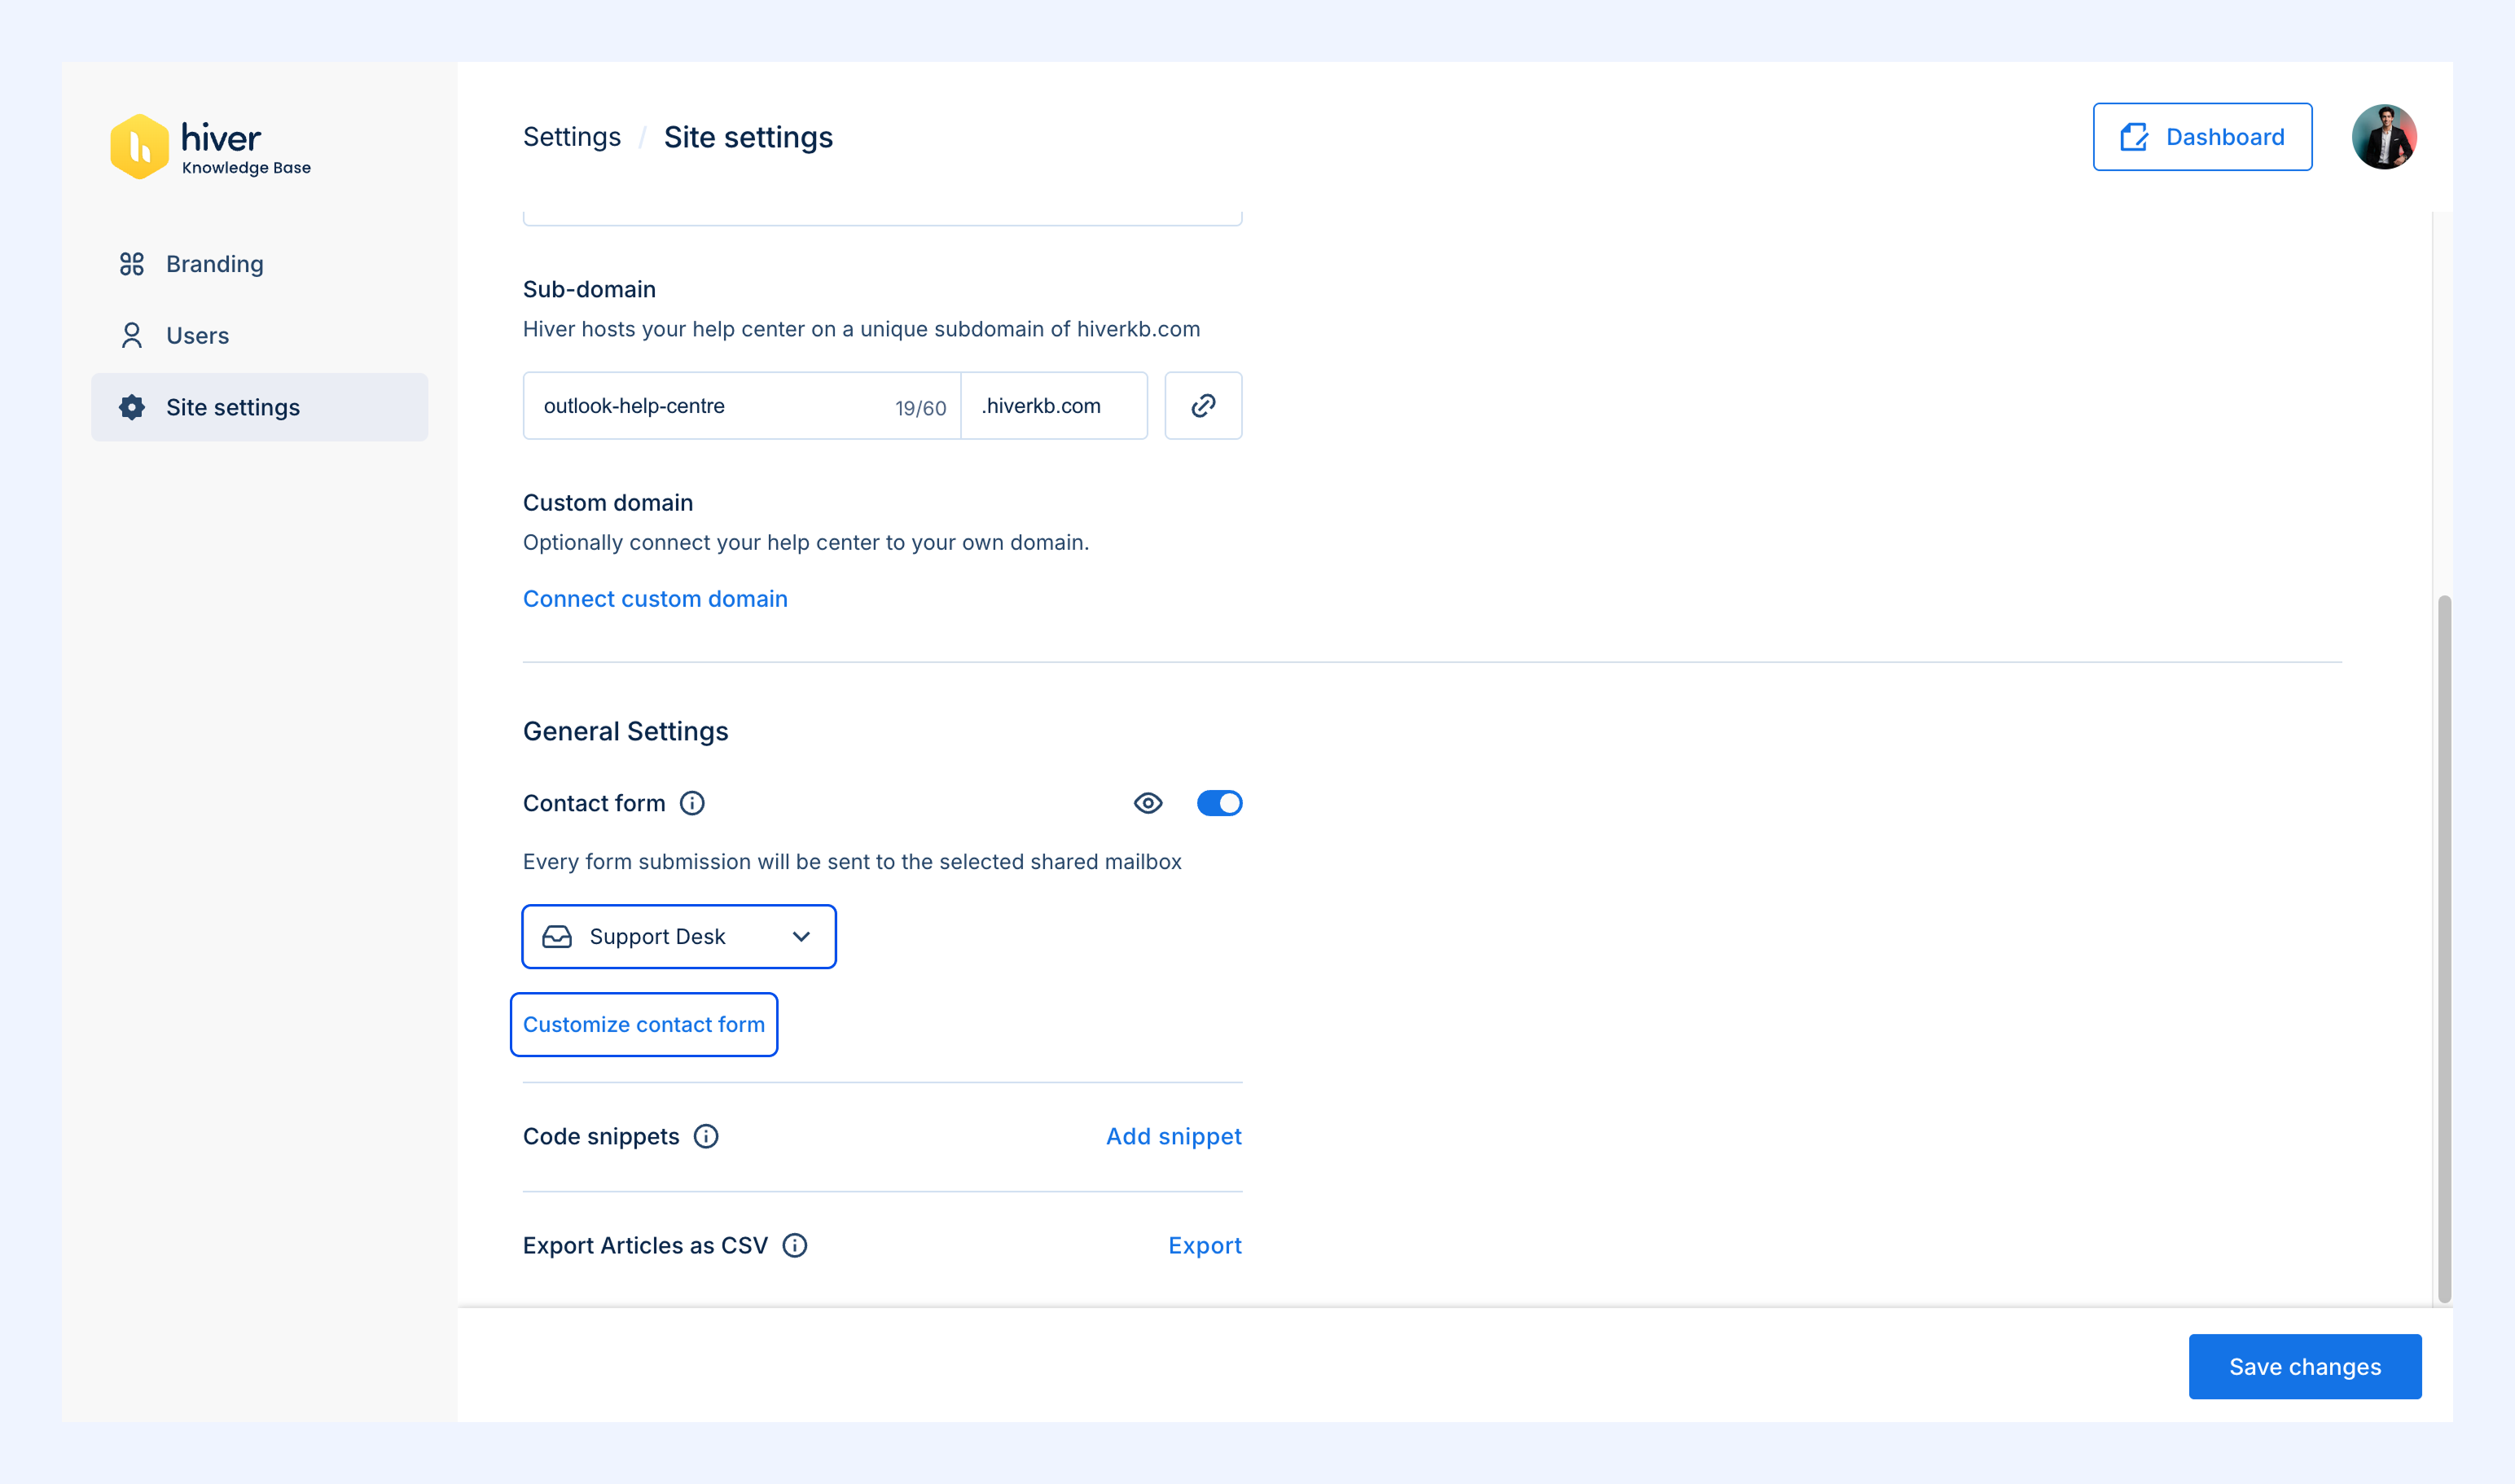
Note: The Shared Inbox dropdown lists all active Shared Inboxes in alphabetical order. By default, the first inbox in the list is selected.
Step 2: Customize the form
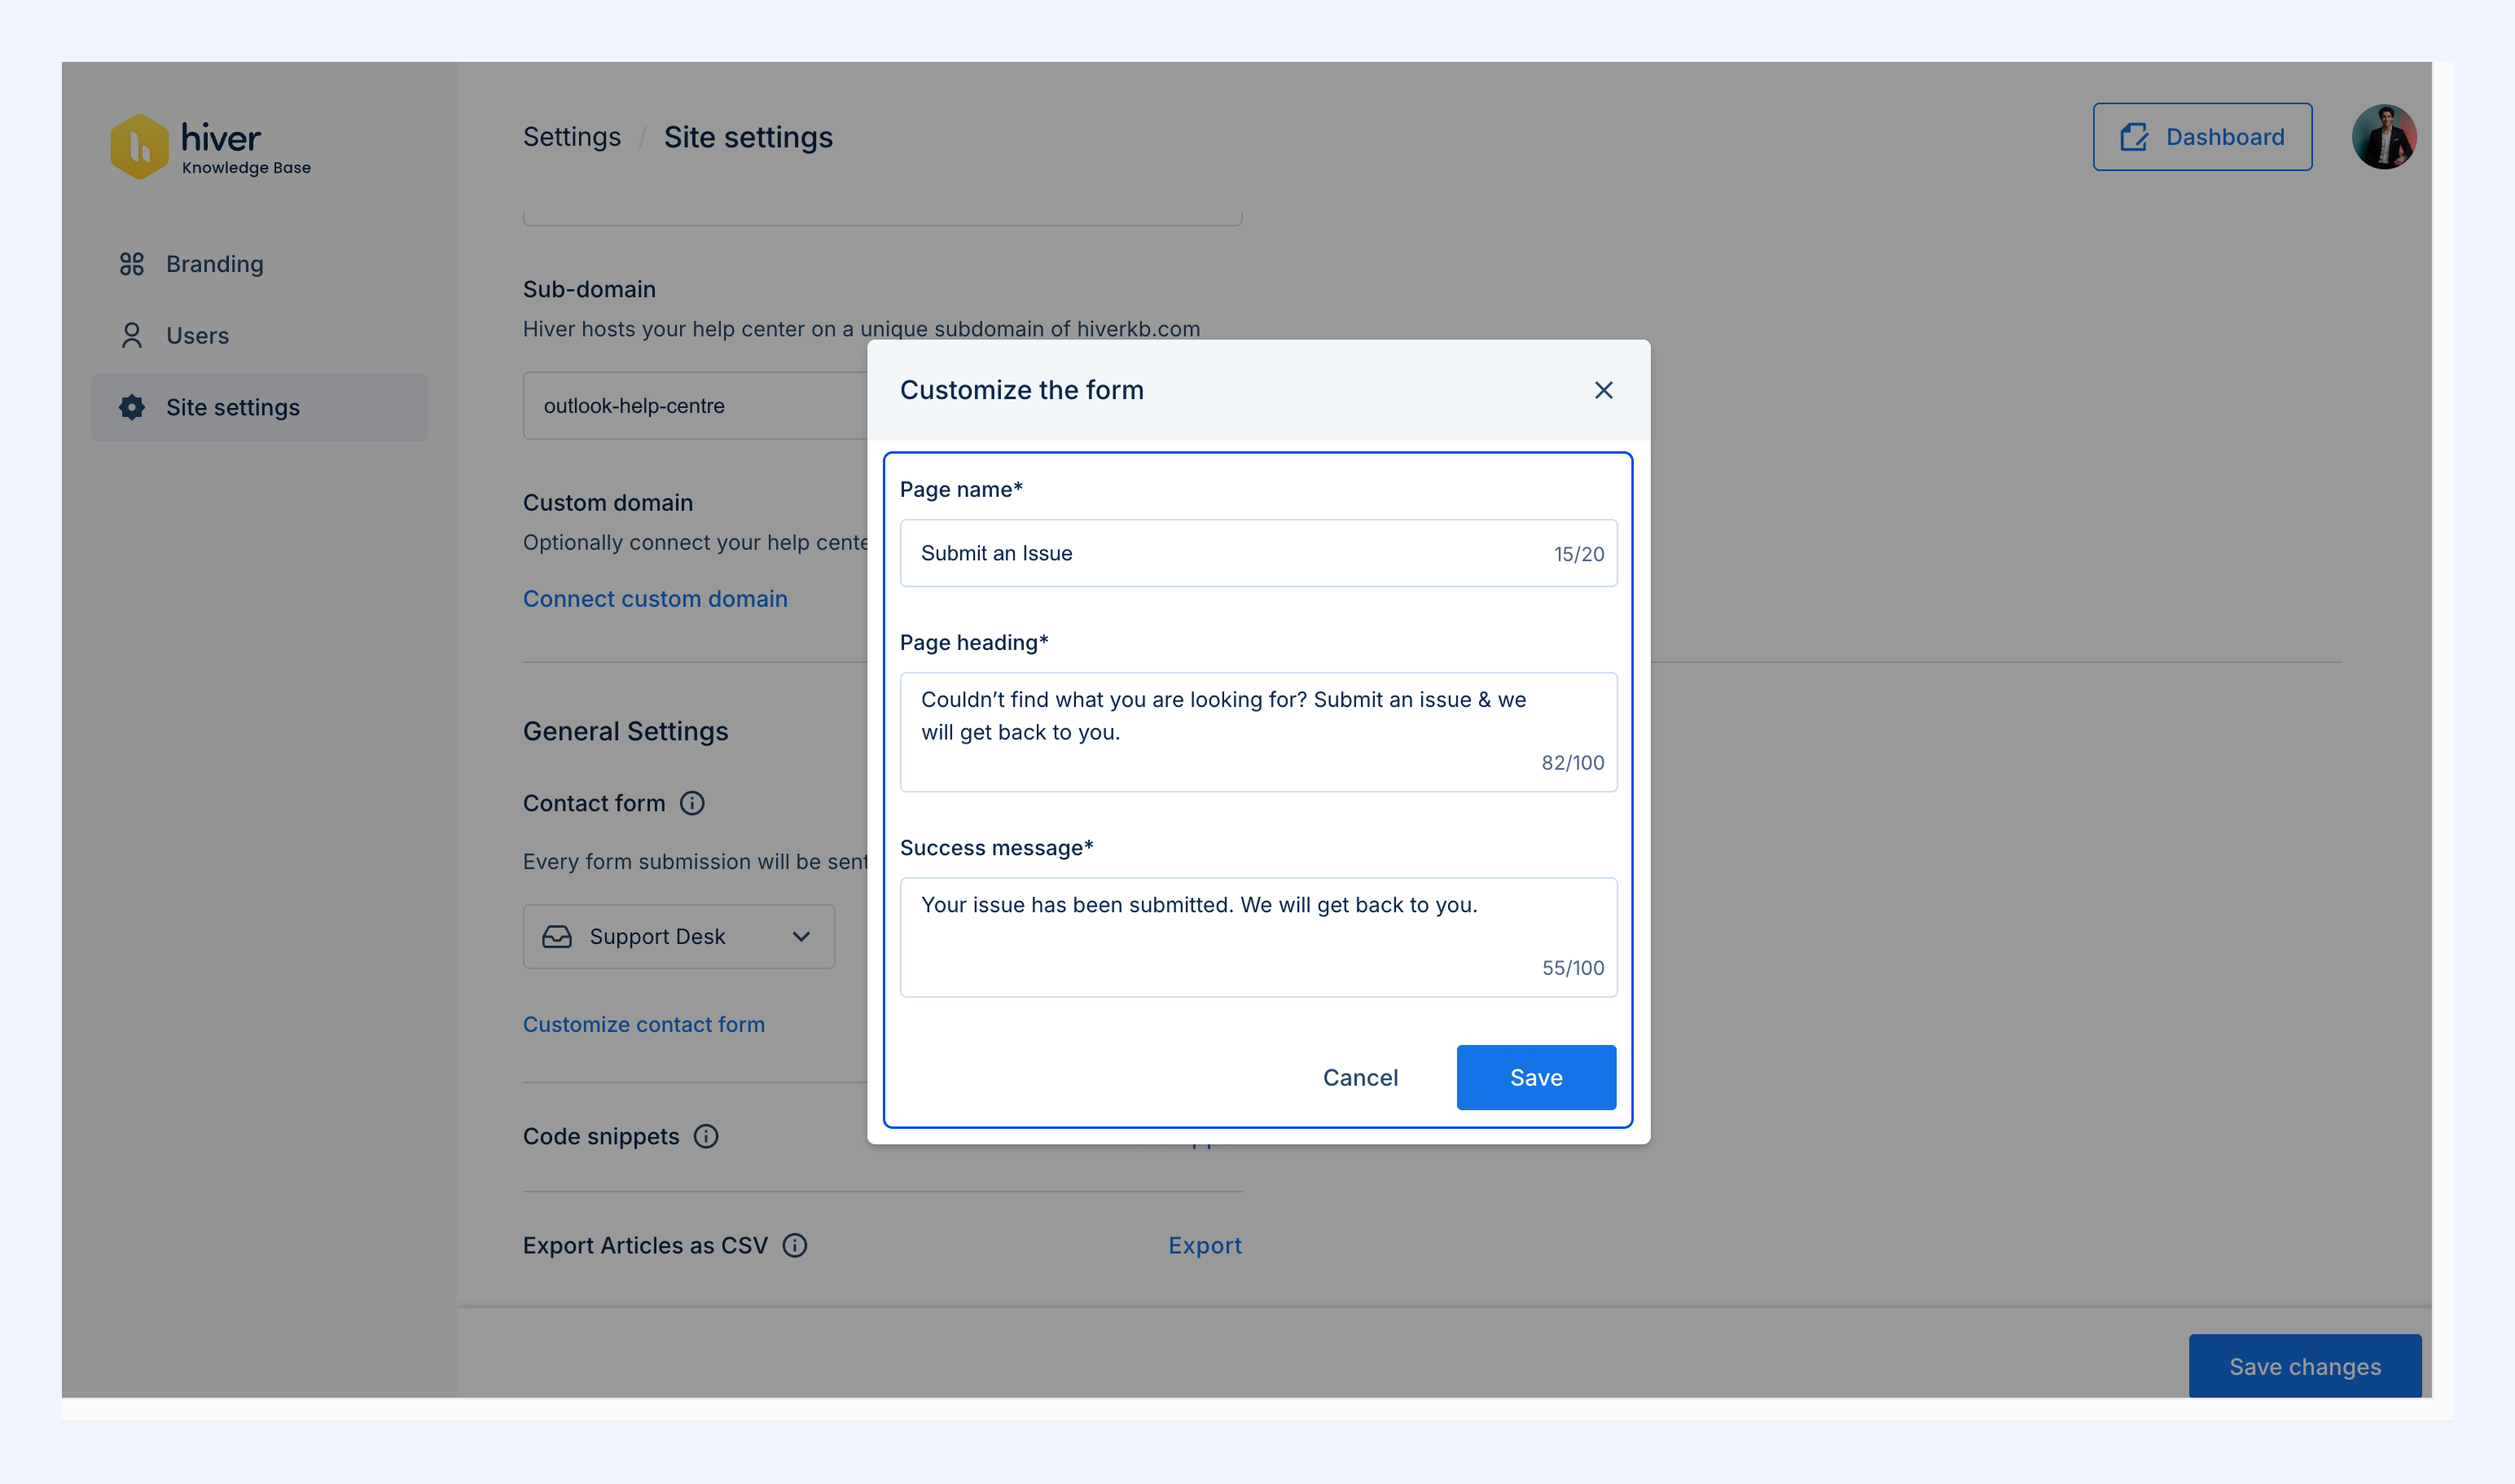
1. In the Customize the form popup, add the following details
- Page name
- Page heading
- Success message that users will see after submitting their request
2. Fill the form, and click on the Save button.
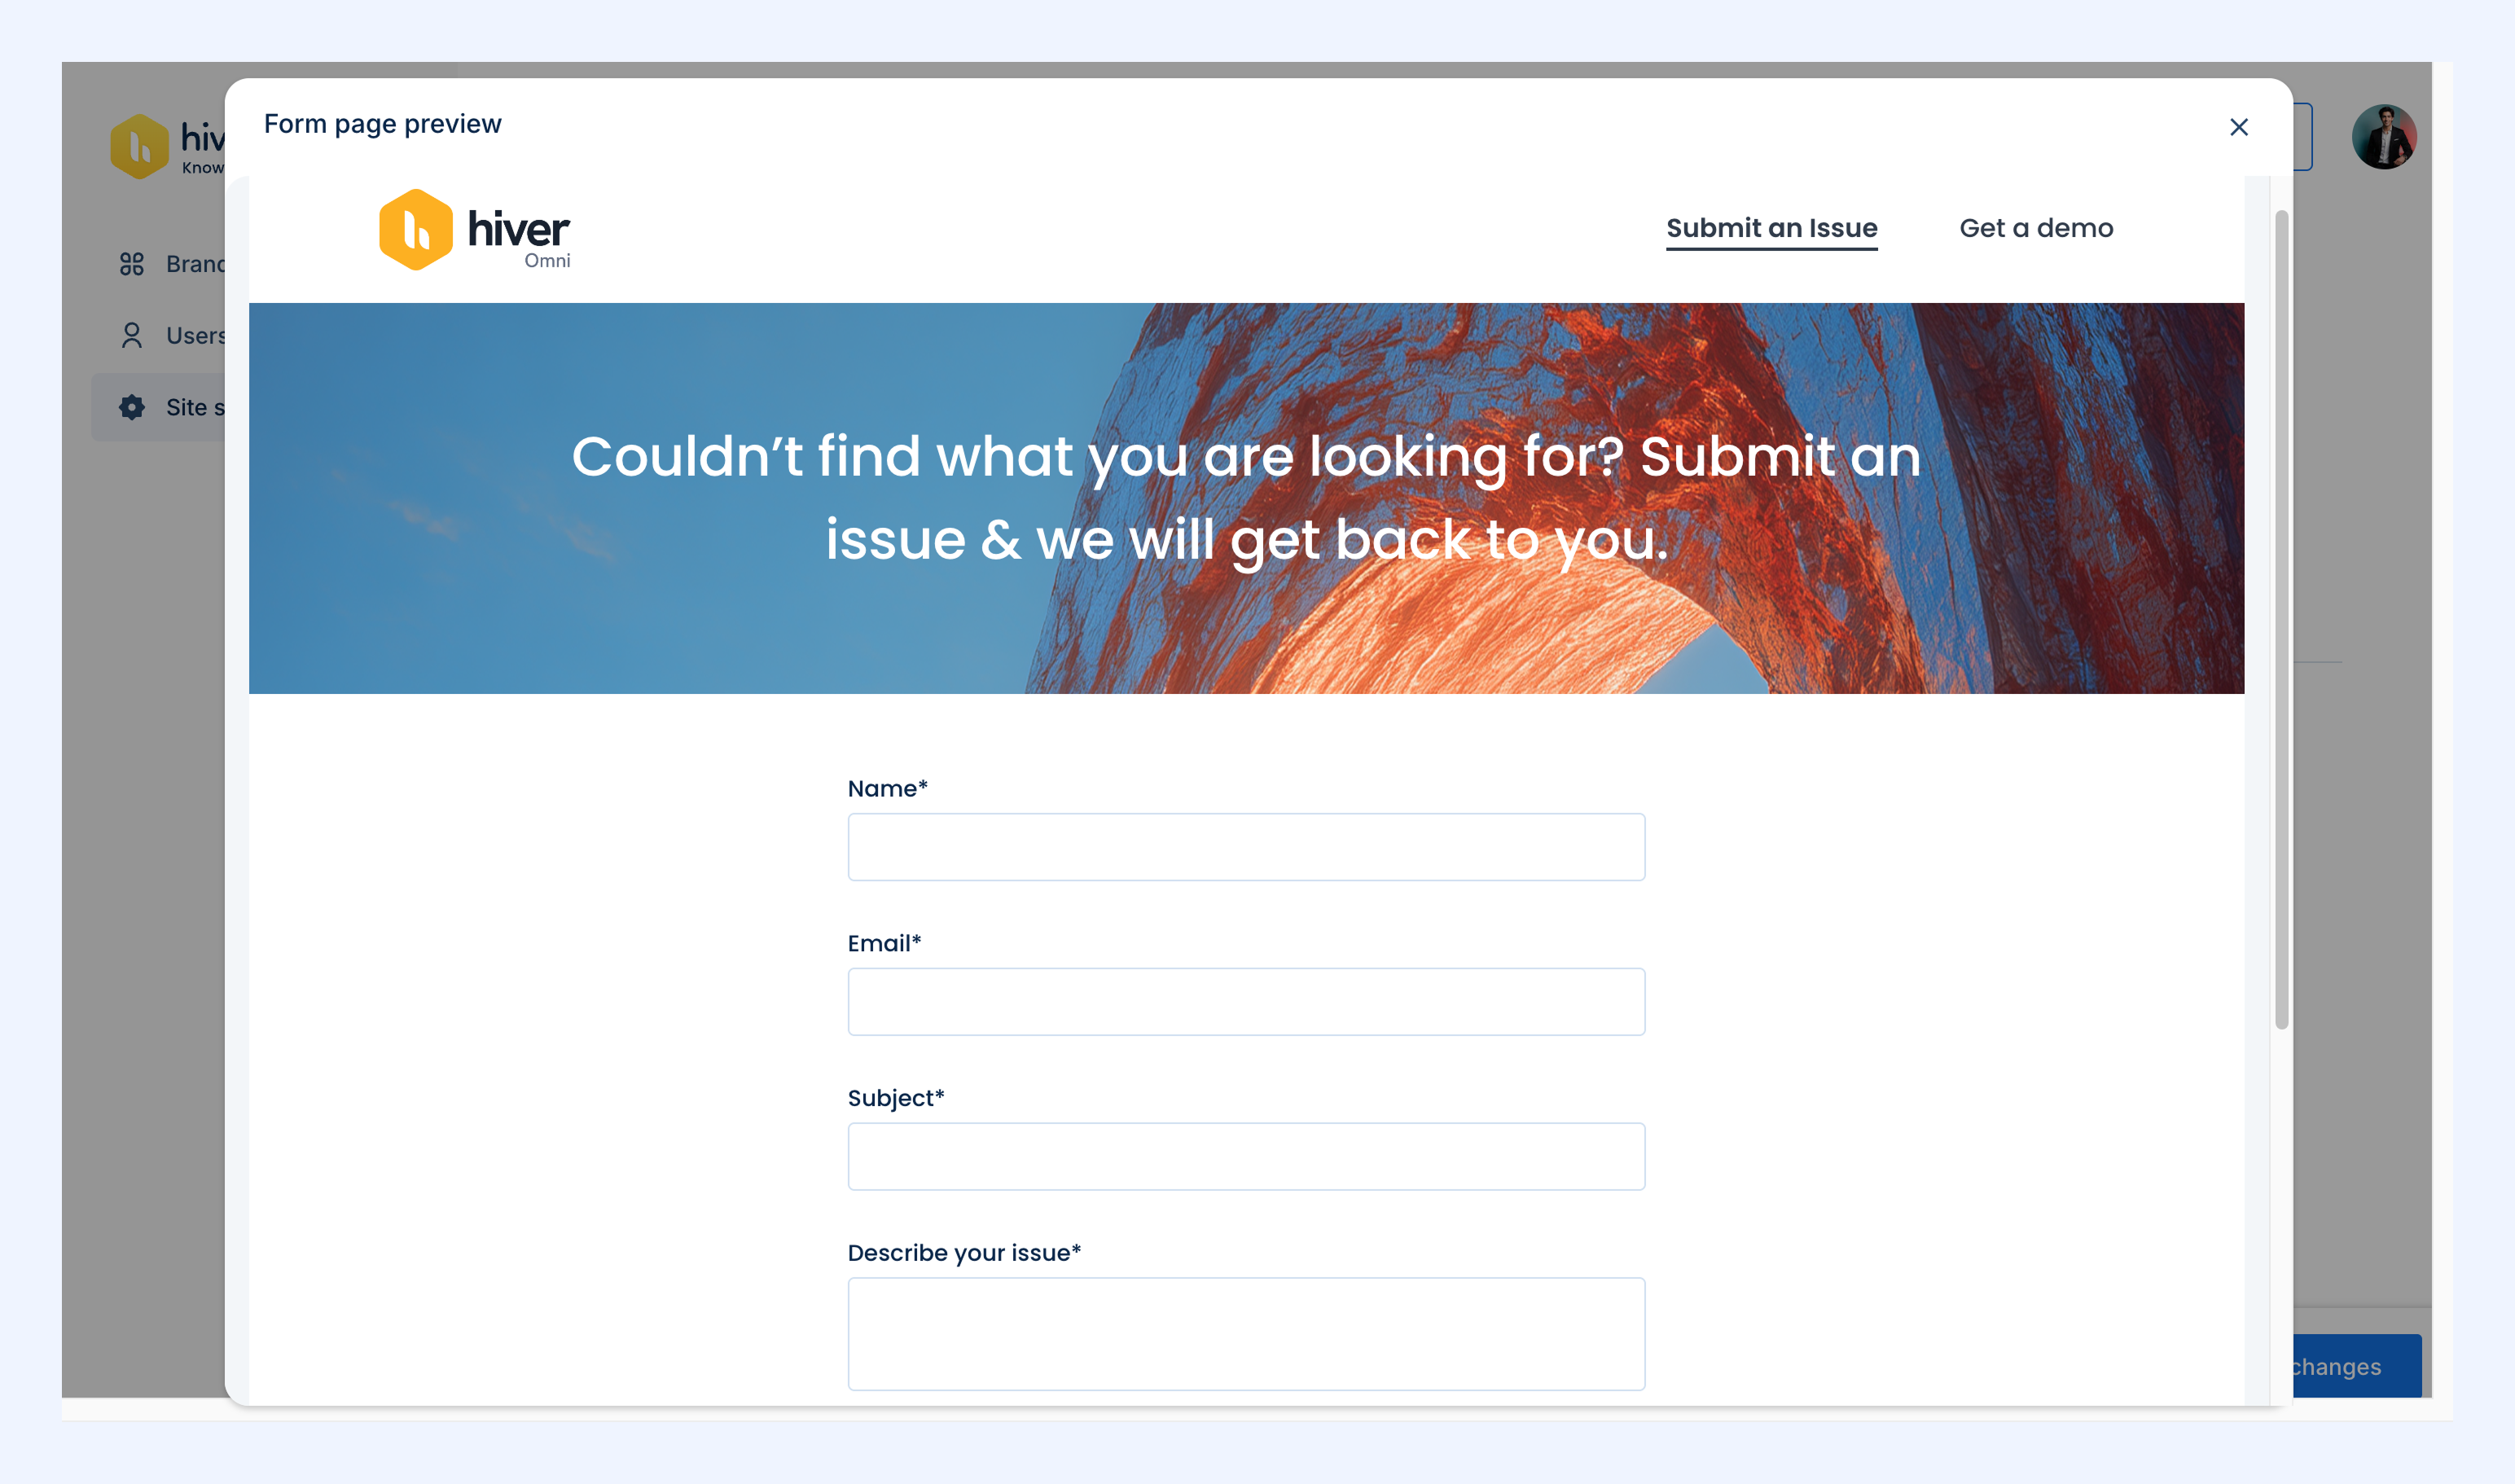
3. Use the Preview Page icon (eye symbol) to review the form’s appearance.
Note: If the selected Shared Inbox becomes inactive, an error message will prompt the KB Admin to select a functional inbox.
Appearance on the Help Center website
Once enabled, a new page titled Submit an Issue is added to the Help Center.
A navigation link to this page also appears in the website’s main navigation bar, ensuring users can easily find it.
Submitting a request
Your customers can raise a request by filling out the form on the Submit an issue page. The form includes the following required fields:
- Name: The customer’s name
- Email: The customer’s email address
- Subject: Accepts alphanumeric and special characters (maximum length: 30)
- Description: A brief explanation of the issue, accepts alphanumeric and special characters (maximum length: 200)
After submission
When a request is submitted, an email is sent to the selected Shared Inbox with the following configuration:
- From: form-submission@hiverkb.com
- To: Shared Inbox selected by the KB Admin
- Reply-to: Customer’s email address
- Subject: Help Center inquiry: {subject entered}
- Body: Hi, a new issue has been submitted by {name} ({email}). Description: {submitted issue}.
If the Shared Inbox becomes unavailable
If the selected Shared Inbox is found inactive:
- The Contact form page is automatically disabled.
- The navigation link is hidden.
- Direct access to the page returns a 404 error.
To restore functionality, the KB Admin must select an active Shared Inbox. Once updated, the Contact form page will be re-enabled automatically.