Publishing articles
Articles are support documents that address common customer queries and issues. You can create and publish them in your company’s Help Center to help customers find answers quickly, without having to contact your support team.
This guide walks you through how to organize, create, publish, and manage articles in Hiver’s Help Center.
Creating and managing categories
Before you create your first article, you’ll need to set up at least one category.
Categories help you organize articles by topic so that related information is easy for customers to find.
Note: Each article can belong to only one category.
Your Help Center supports both parent categories and nested subcategories, allowing you to create a hierarchical structure that makes it easier for customers to navigate related content.
- Parent categories appear at the top level of your Help Center navigation.
- Nested subcategories are organized under parent categories, helping you group related articles within a broader topic.
- Each category (parent or nested) can contain its own articles.
How to view categories
- Categories appear in the left column of your Help Center dashboard.
- Subcategories appear nested below the parent category.
- Only categories that contain at least one published article will be visible on the public Help Center.
- Newly created categories appear at the top of the list.
- When you log into the dashboard, the top category is pre-selected, displaying its articles in the main panel.
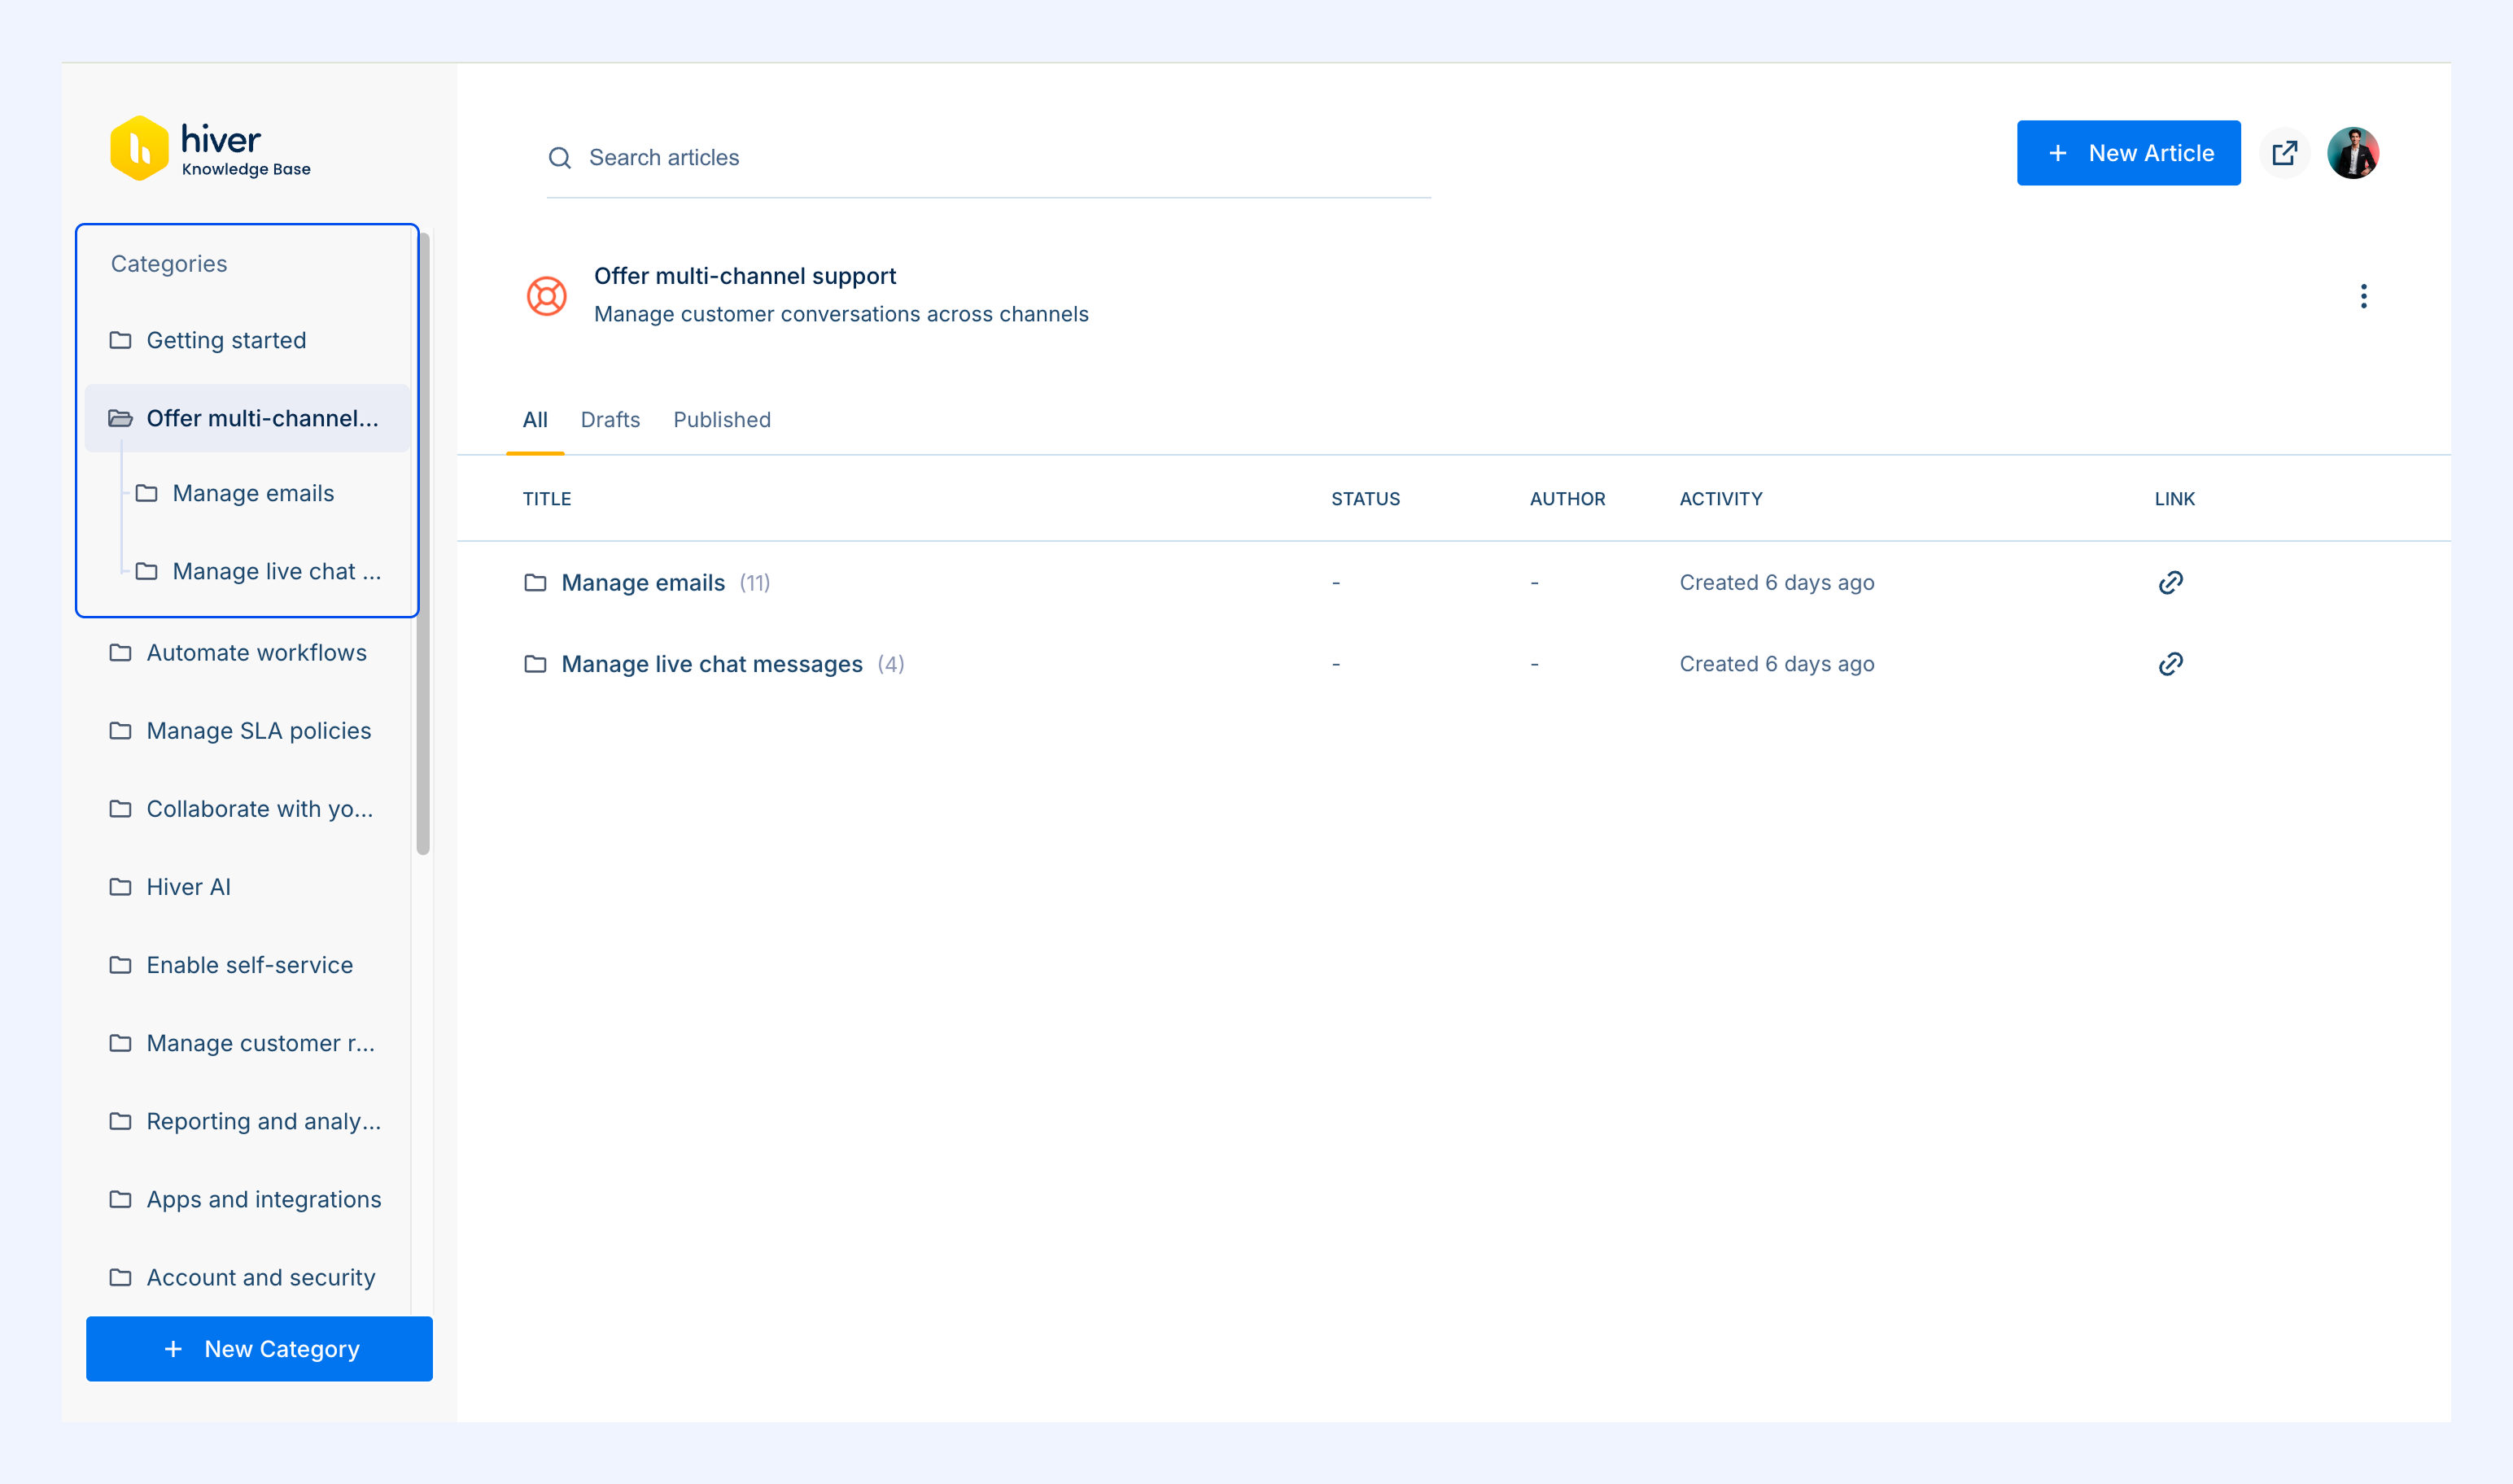
Creating a parent category
1. Go to your Help Center dashboard → New category.
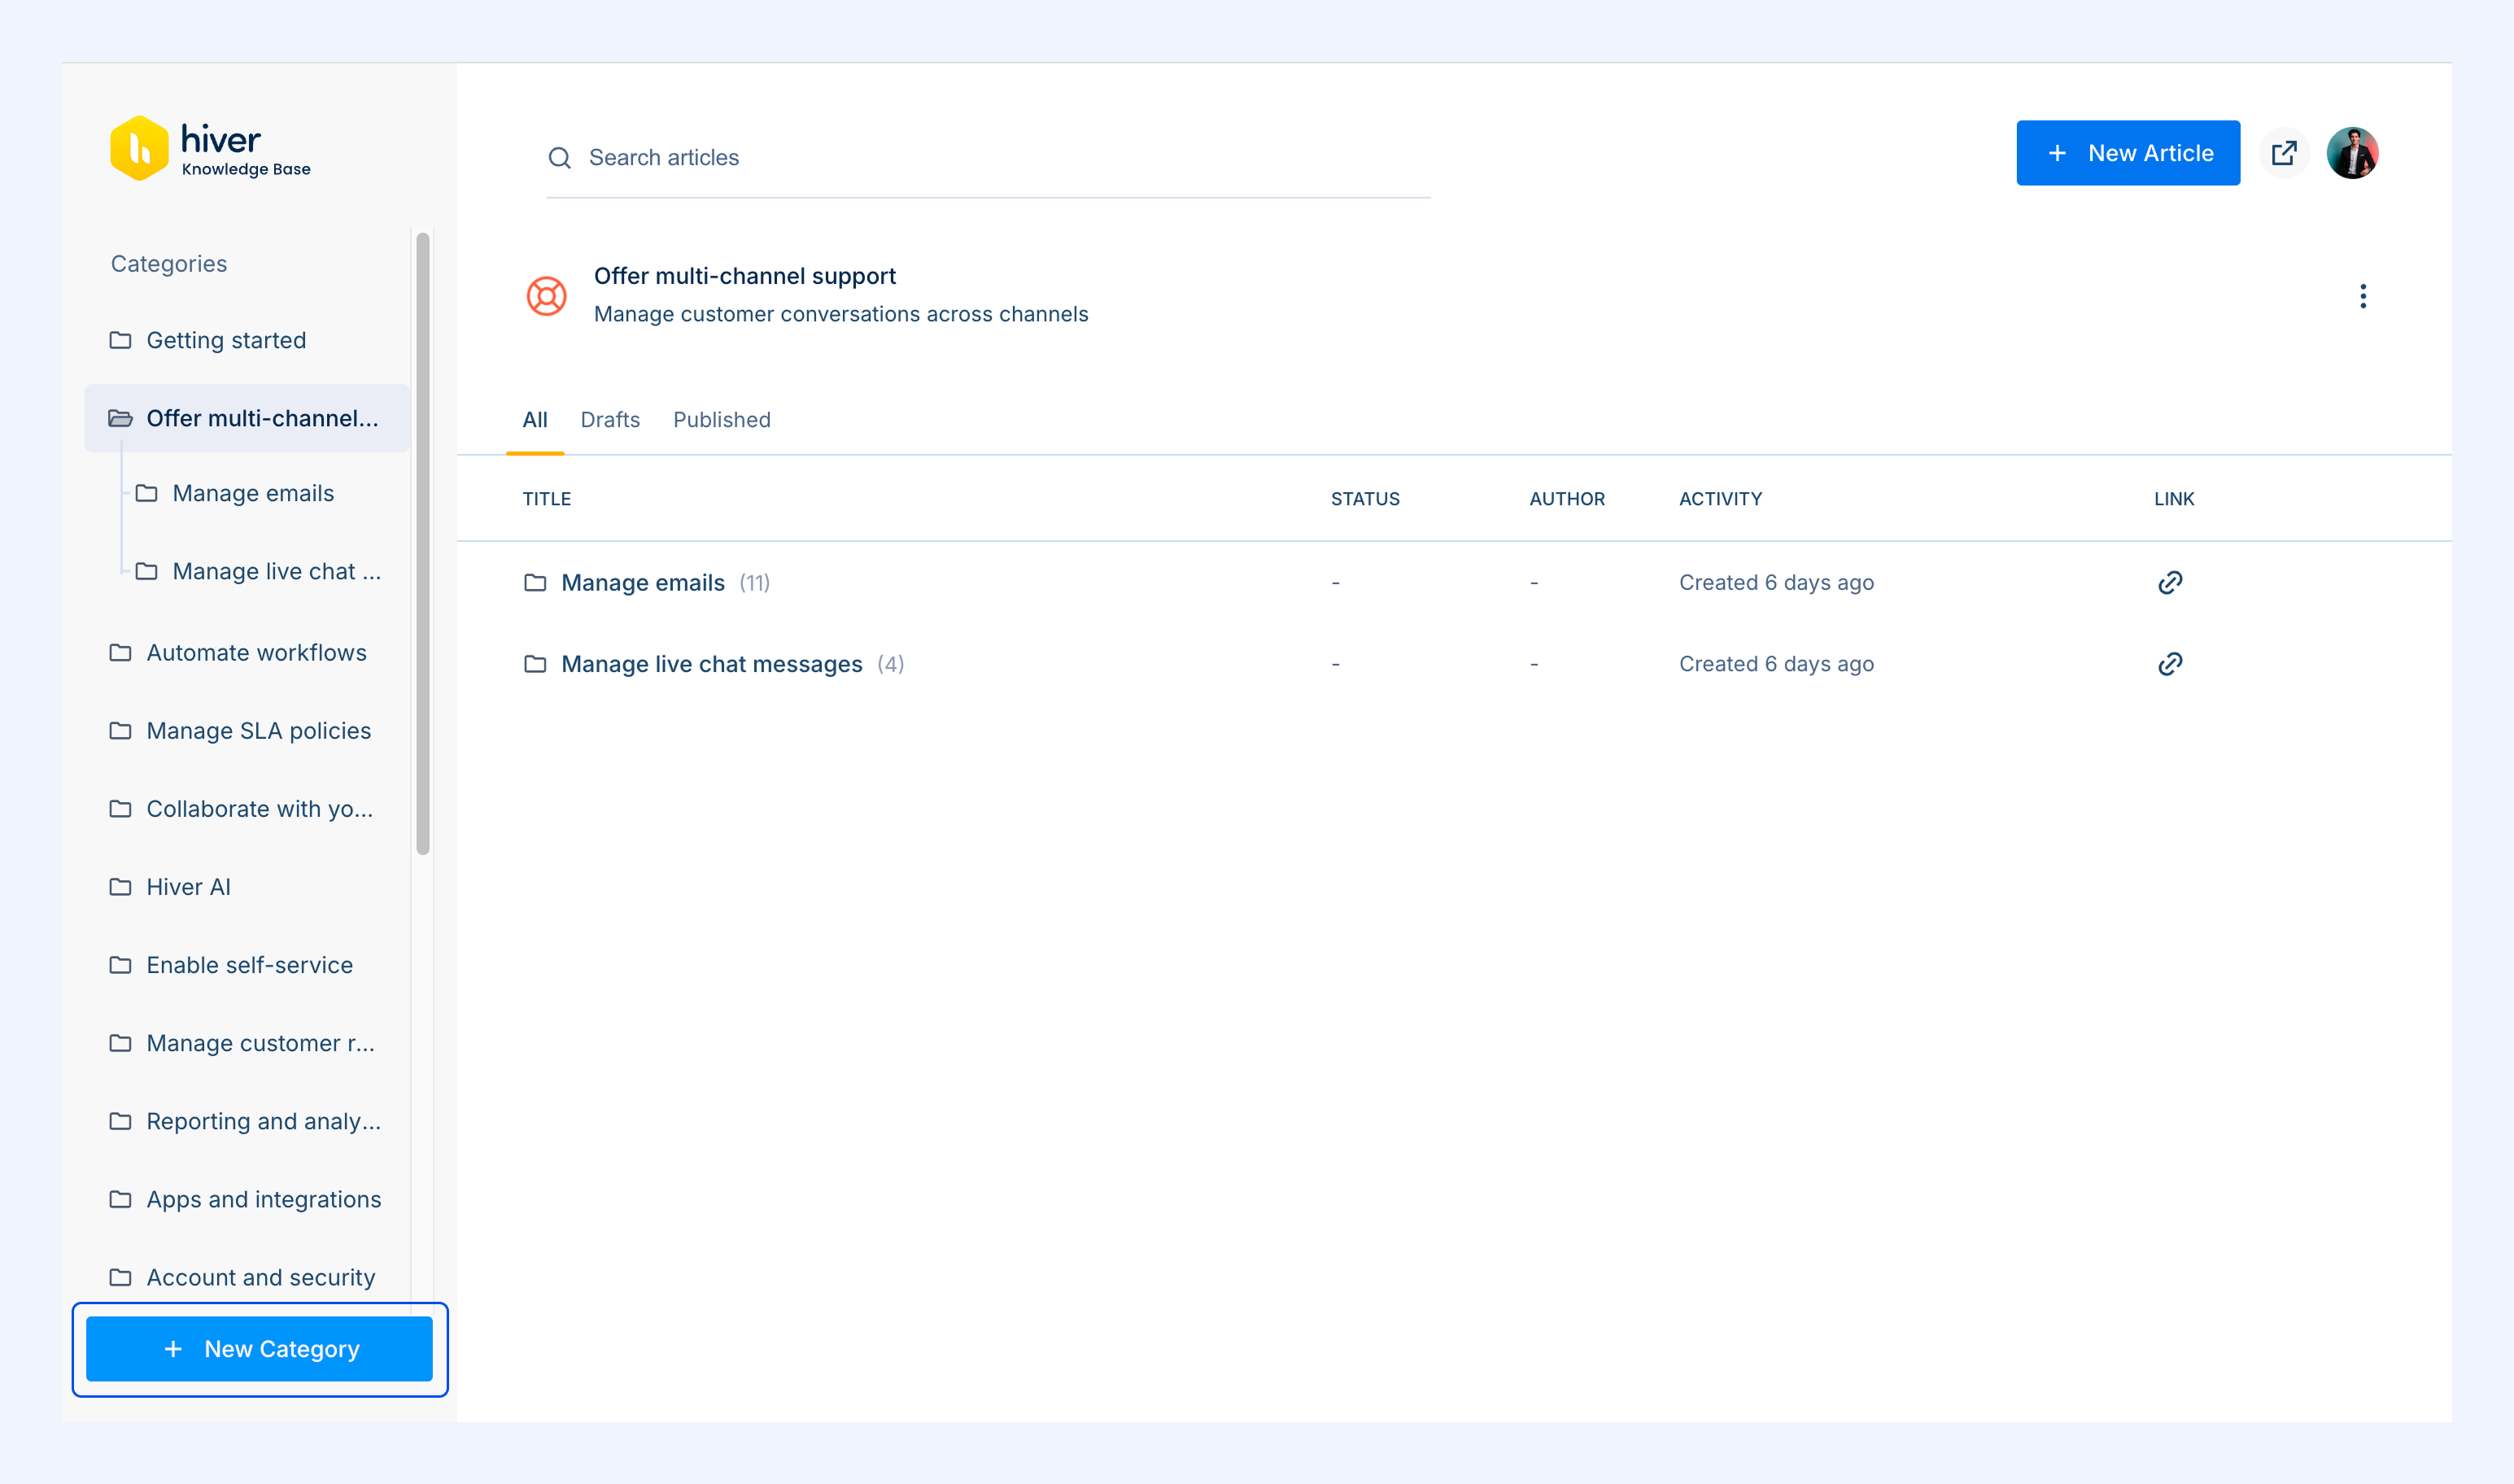
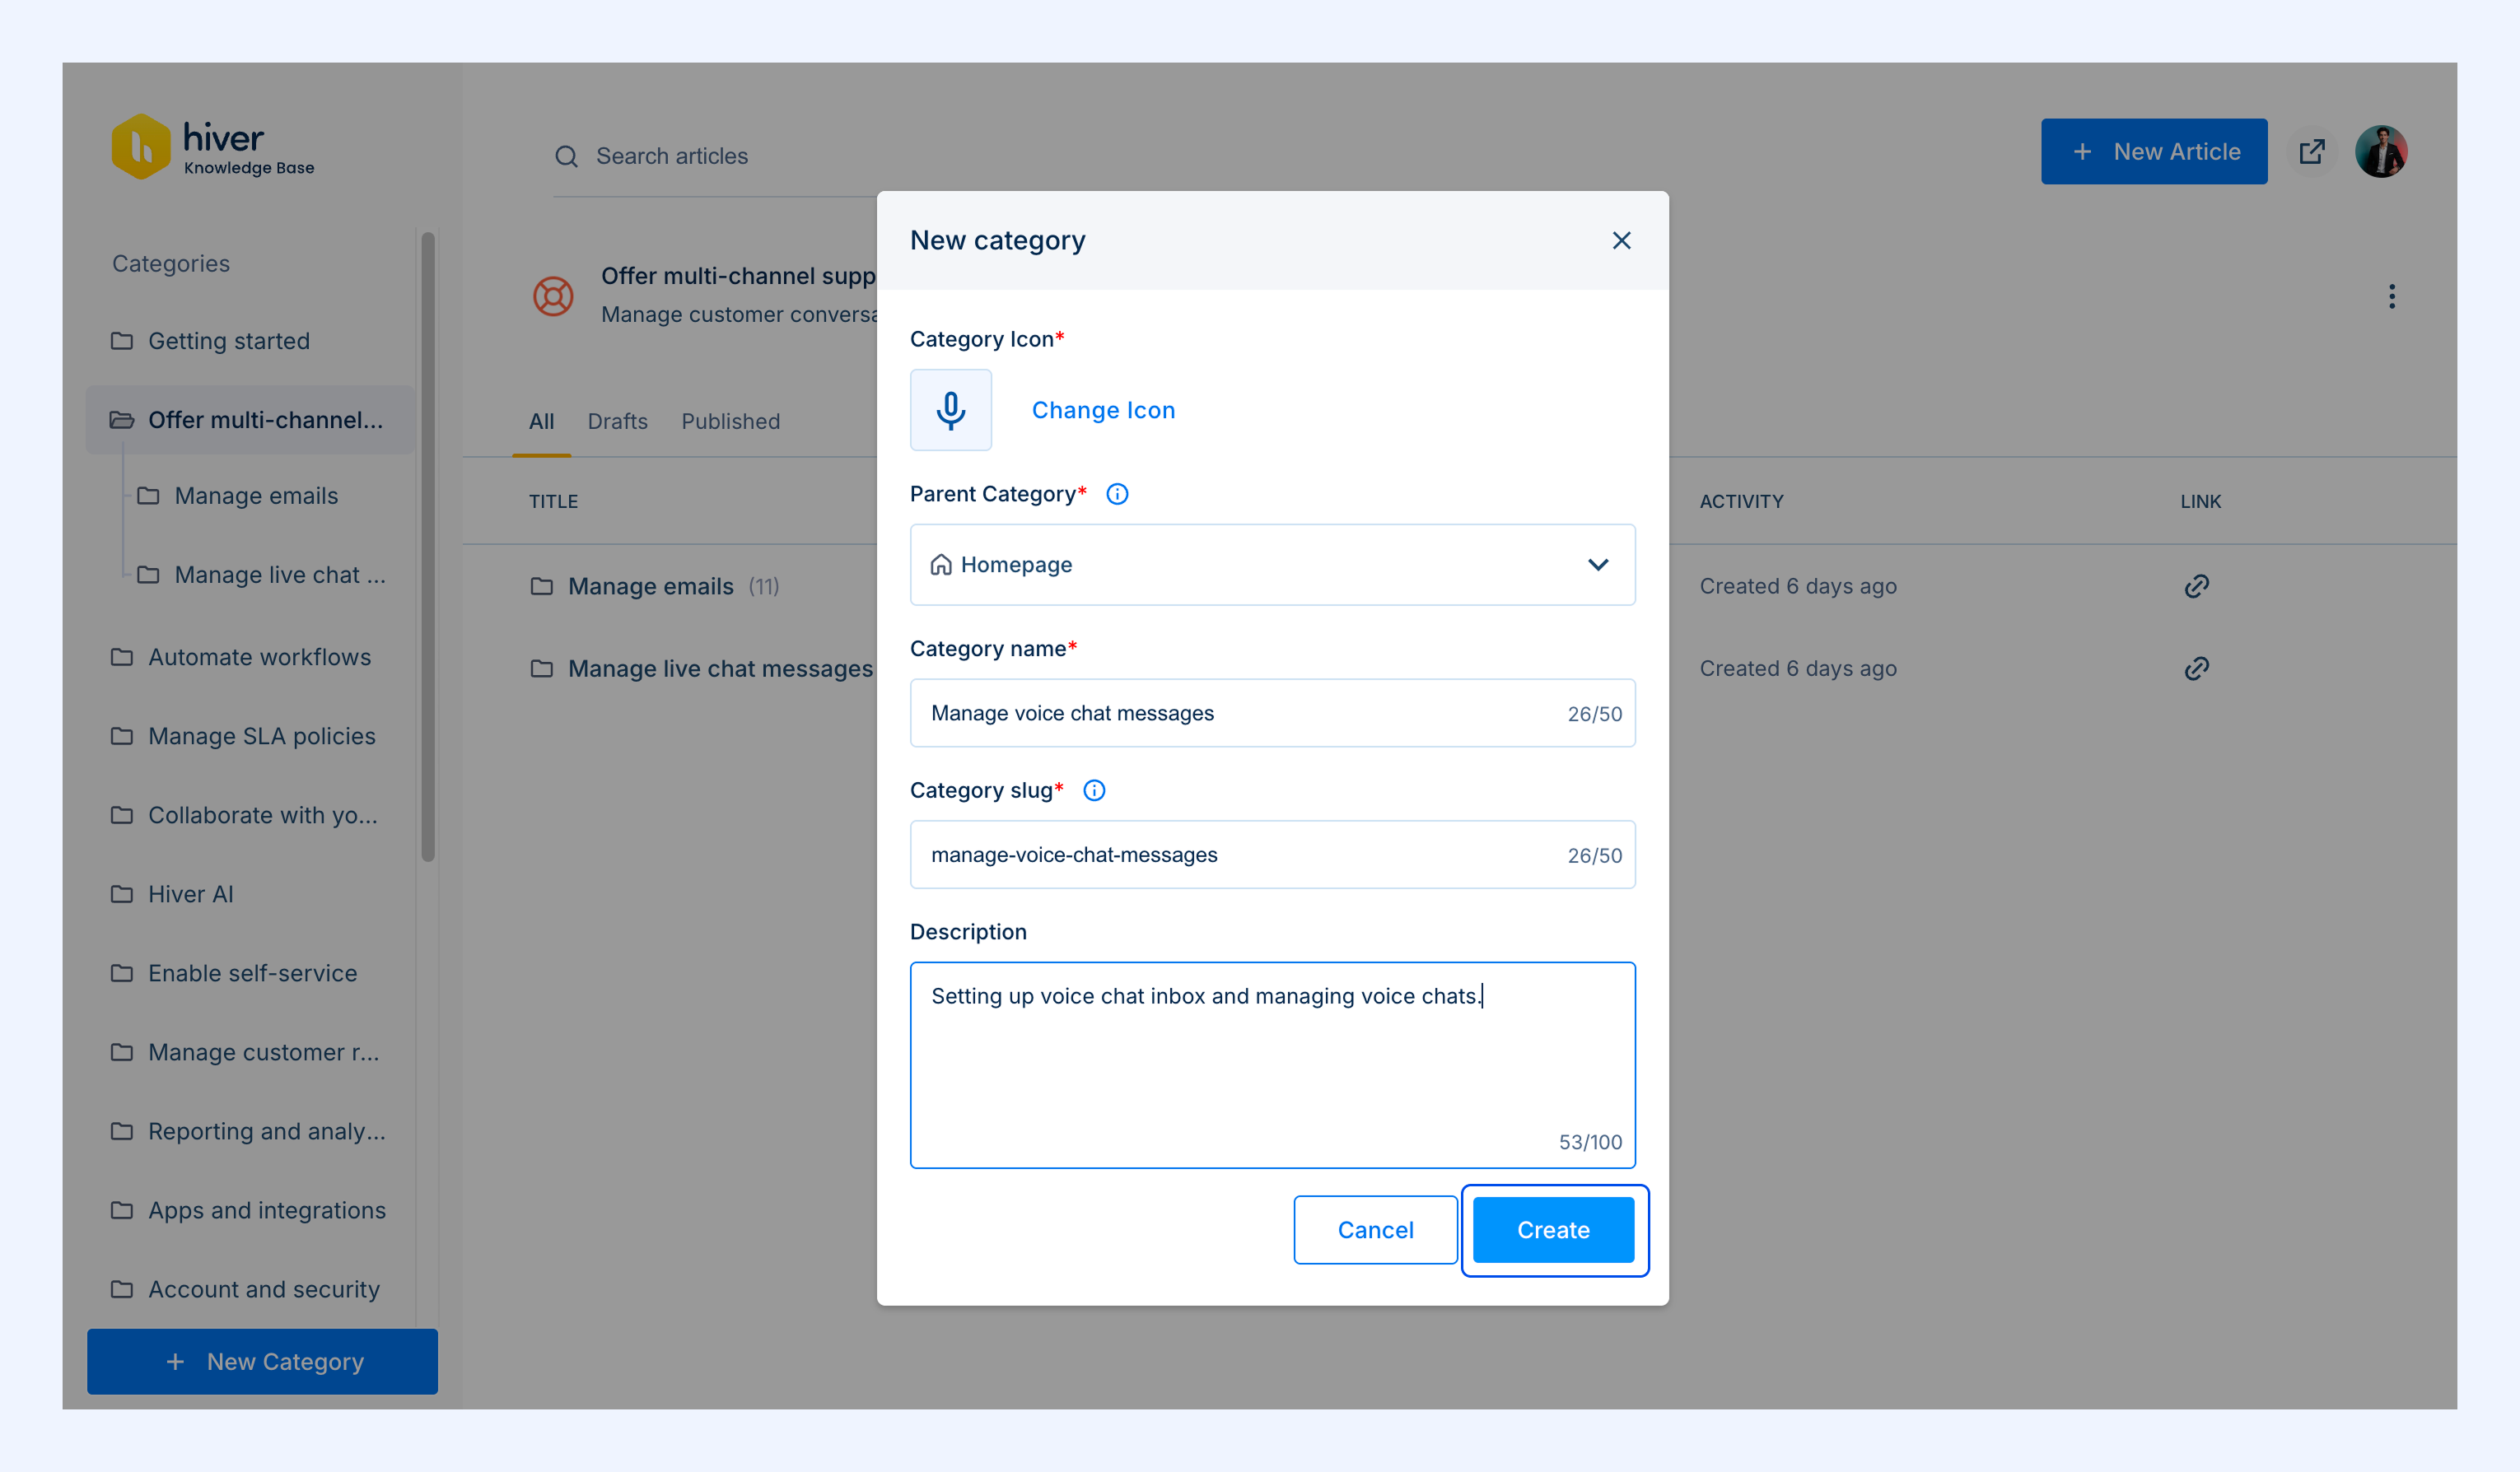
2. Fill in the following fields:
- Parent Category: Select Homepage from the dropdown to create a parent category.
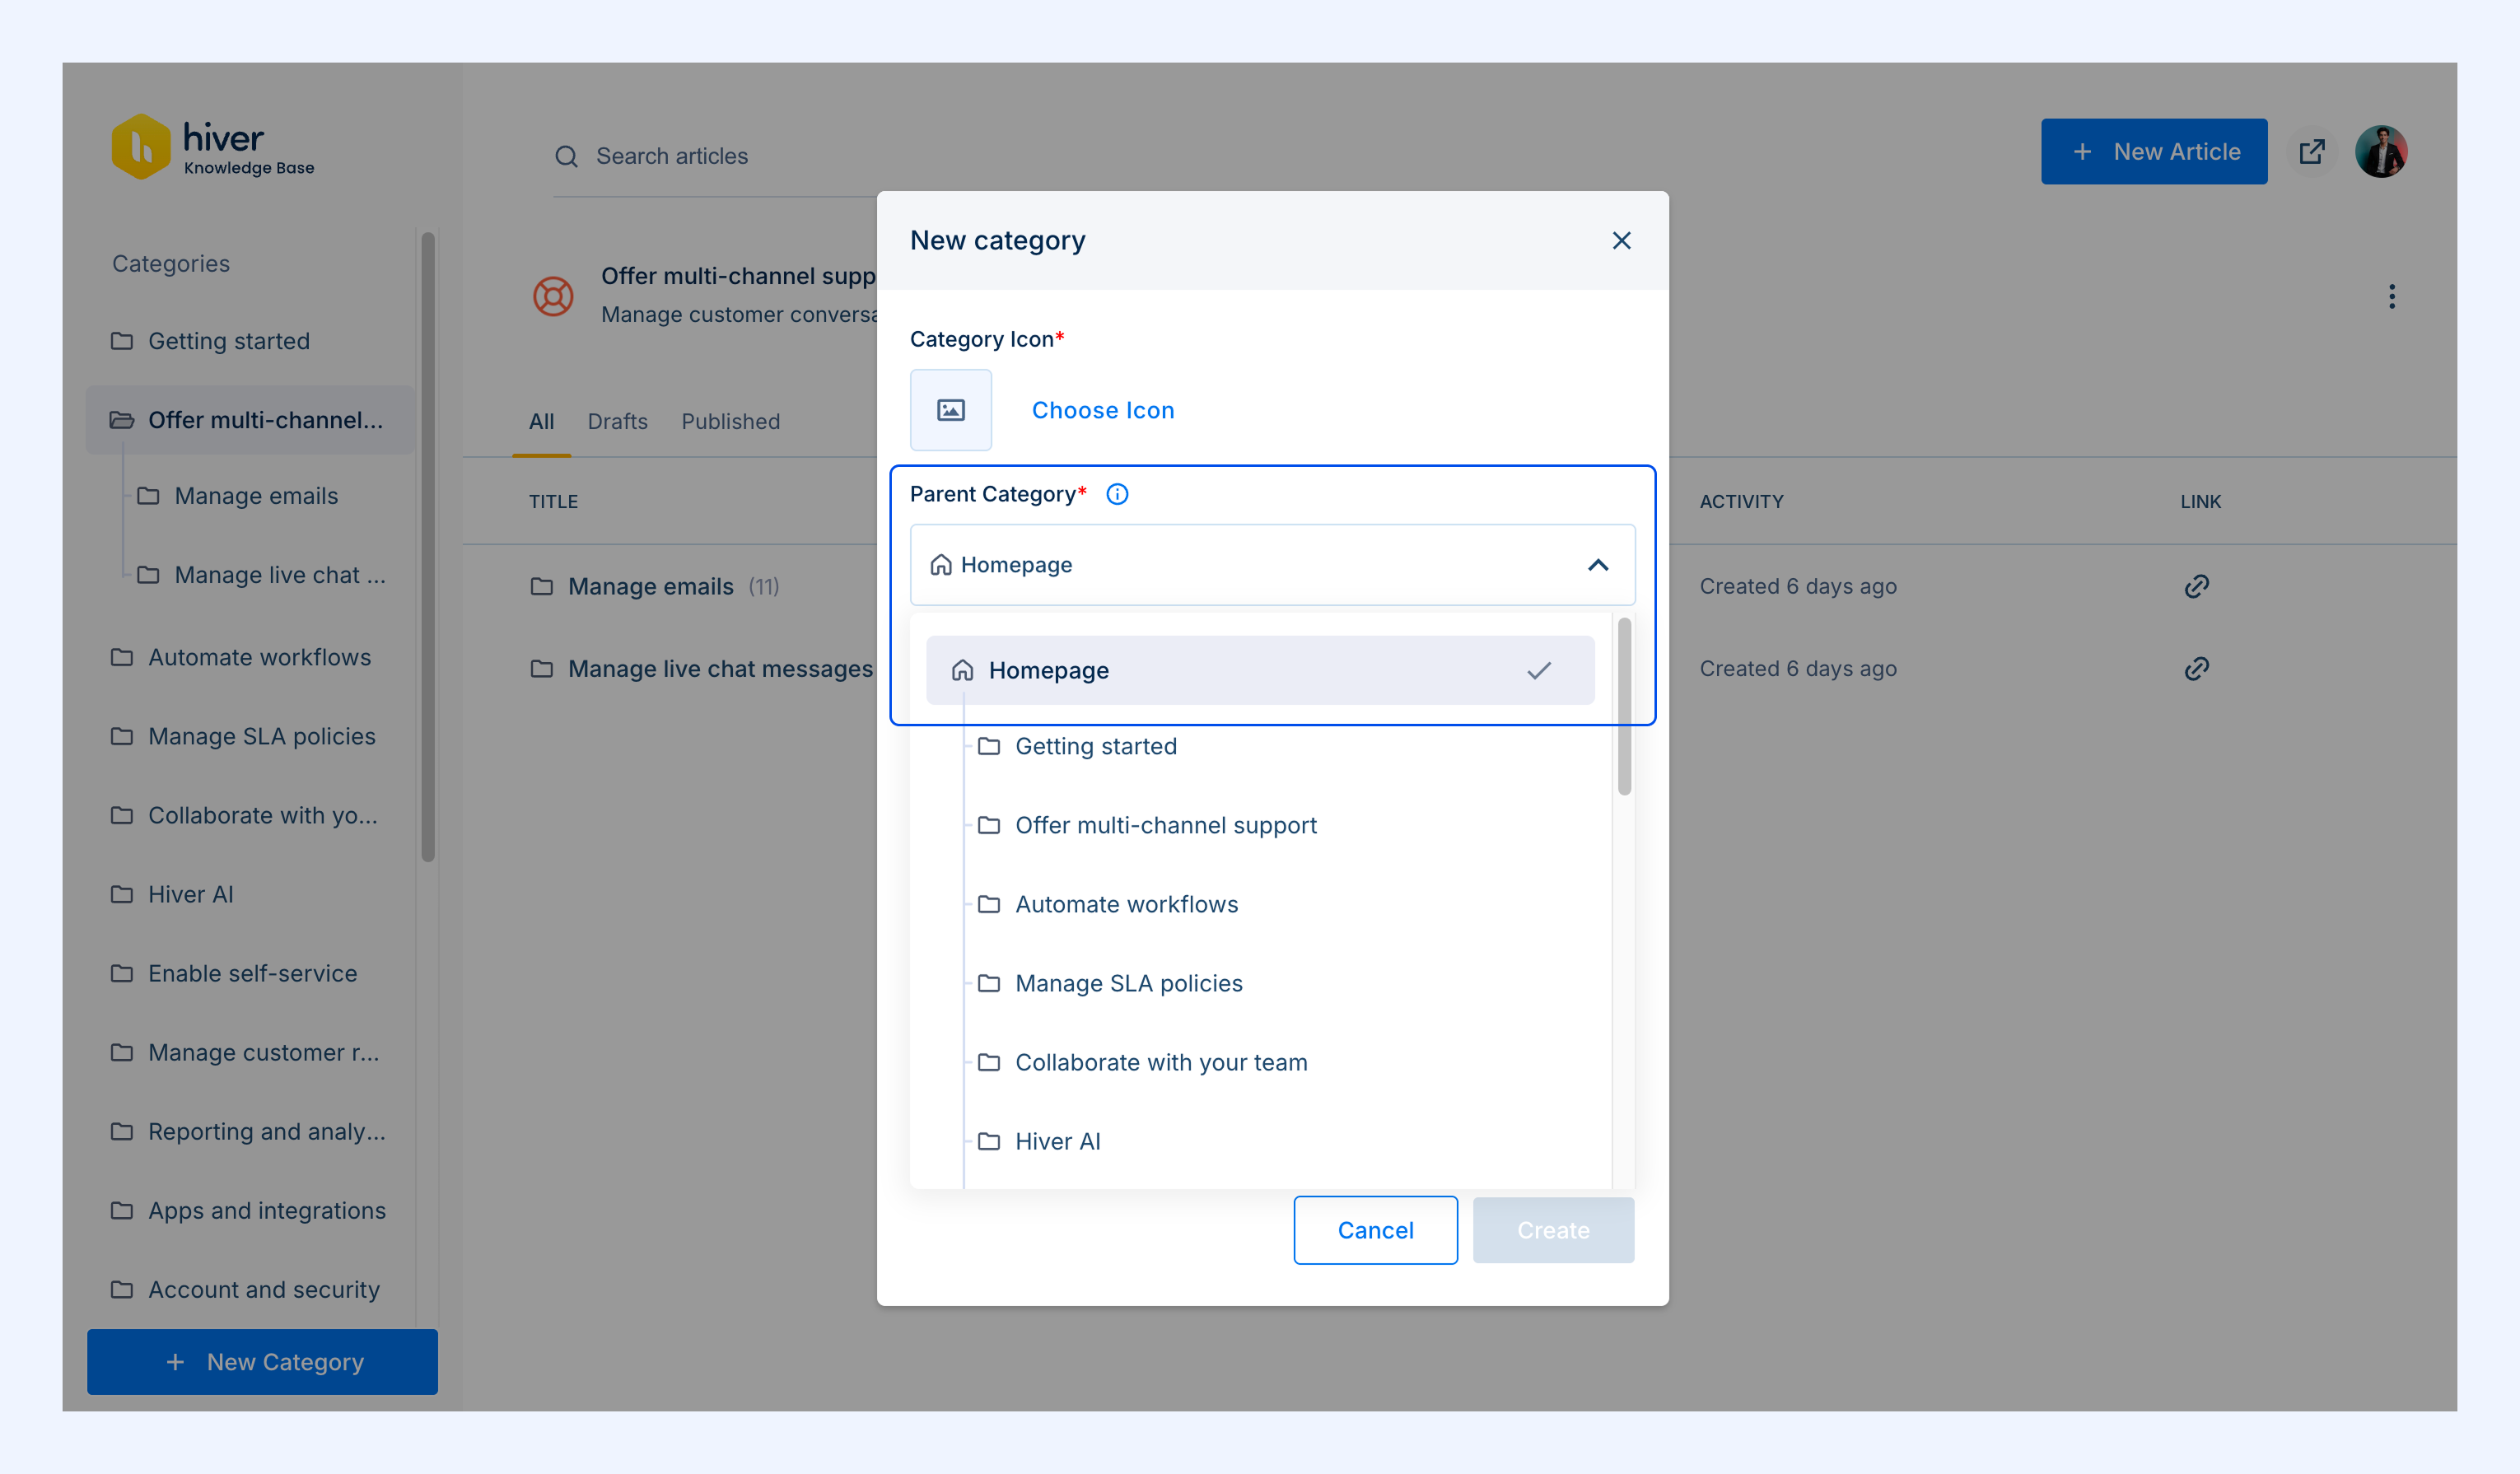
- Category Icon: Upload an icon or choose one from Hiver's icon library.
- Category name: Must be unique.
- Category slug: Automatically generated from the category title and can be edited at any time.
- Description (optional): Add details to describe what the category covers.
3. Once you're done, click Create.
Creating a nested category
1. Go to your Help Center dashboard → New category.
2. Fill in the following fields:
- Parent Category: Choose the existing category you want to nest this under (instead of Homepage).
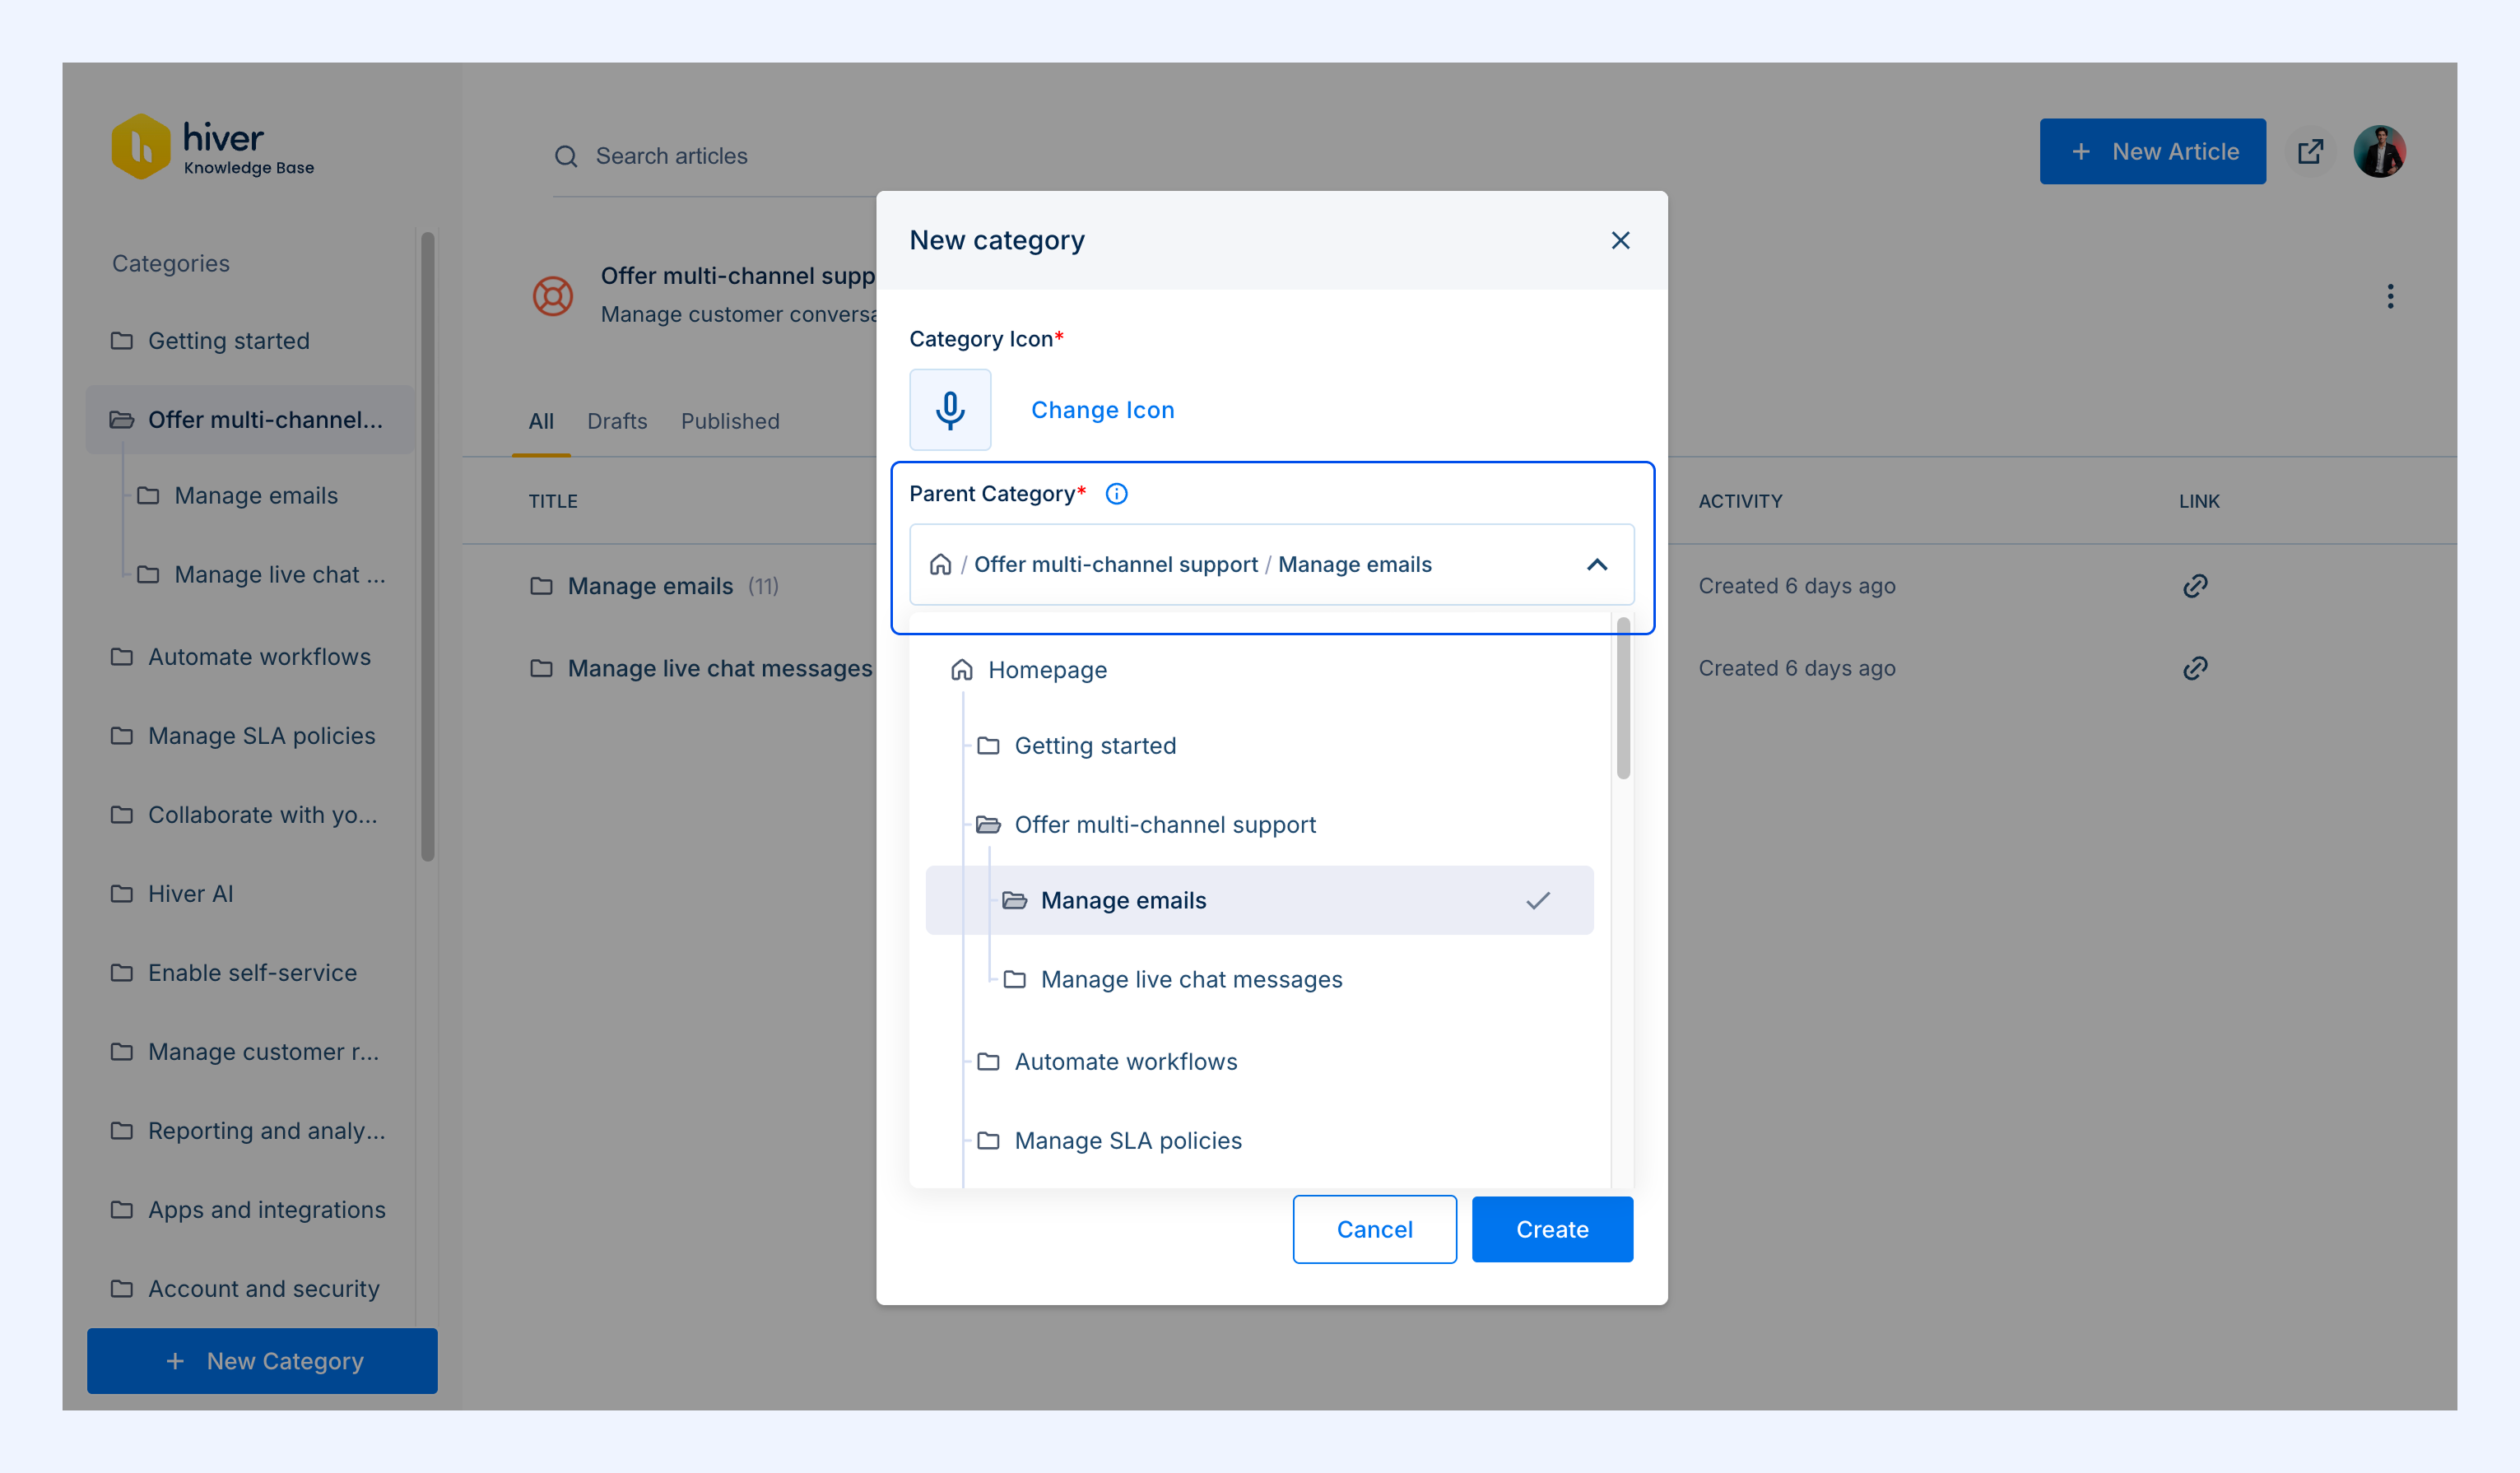
- Category Icon: Upload an icon or choose one from Hiver's icon library.
- Category name: Must be unique.
- Category slug: Automatically generated from the category title and can be edited at any time.
- Description (optional): Add details to describe what the category covers.
3. Once you're done, click Create.
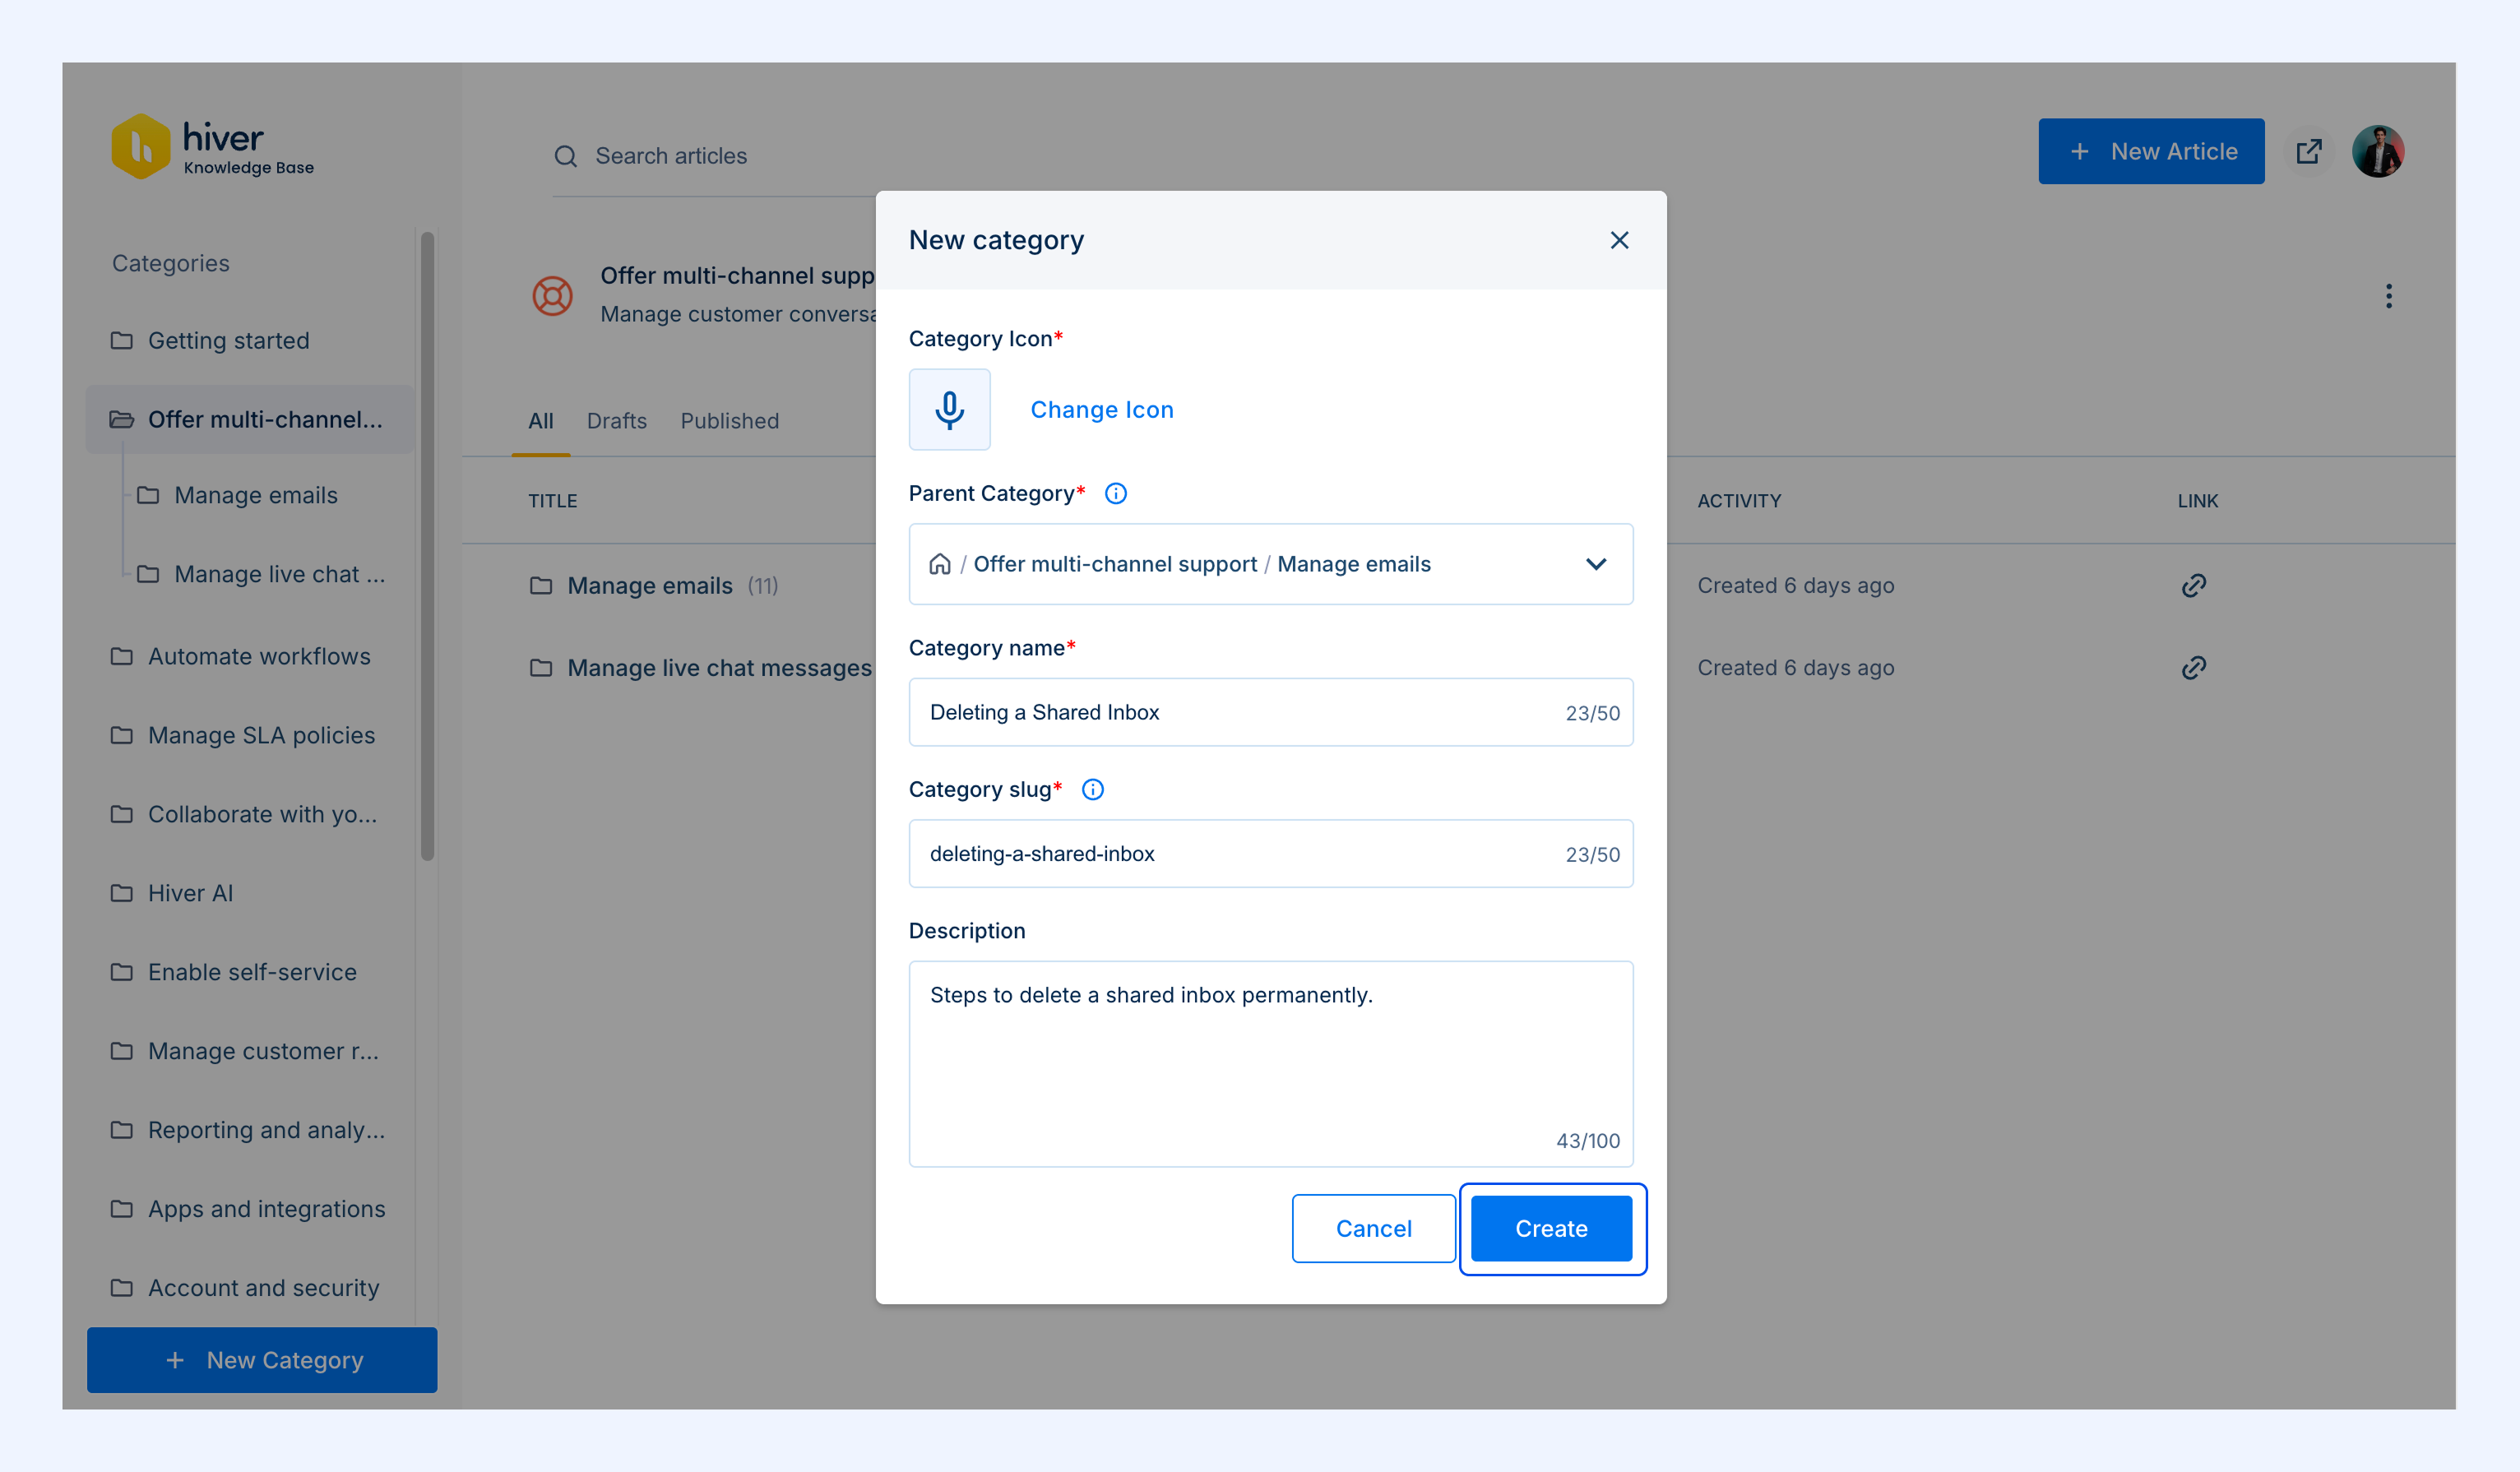
The subcategory will now appear nested under the parent category in your Help Center navigation.
Creating articles in parent and nested categories
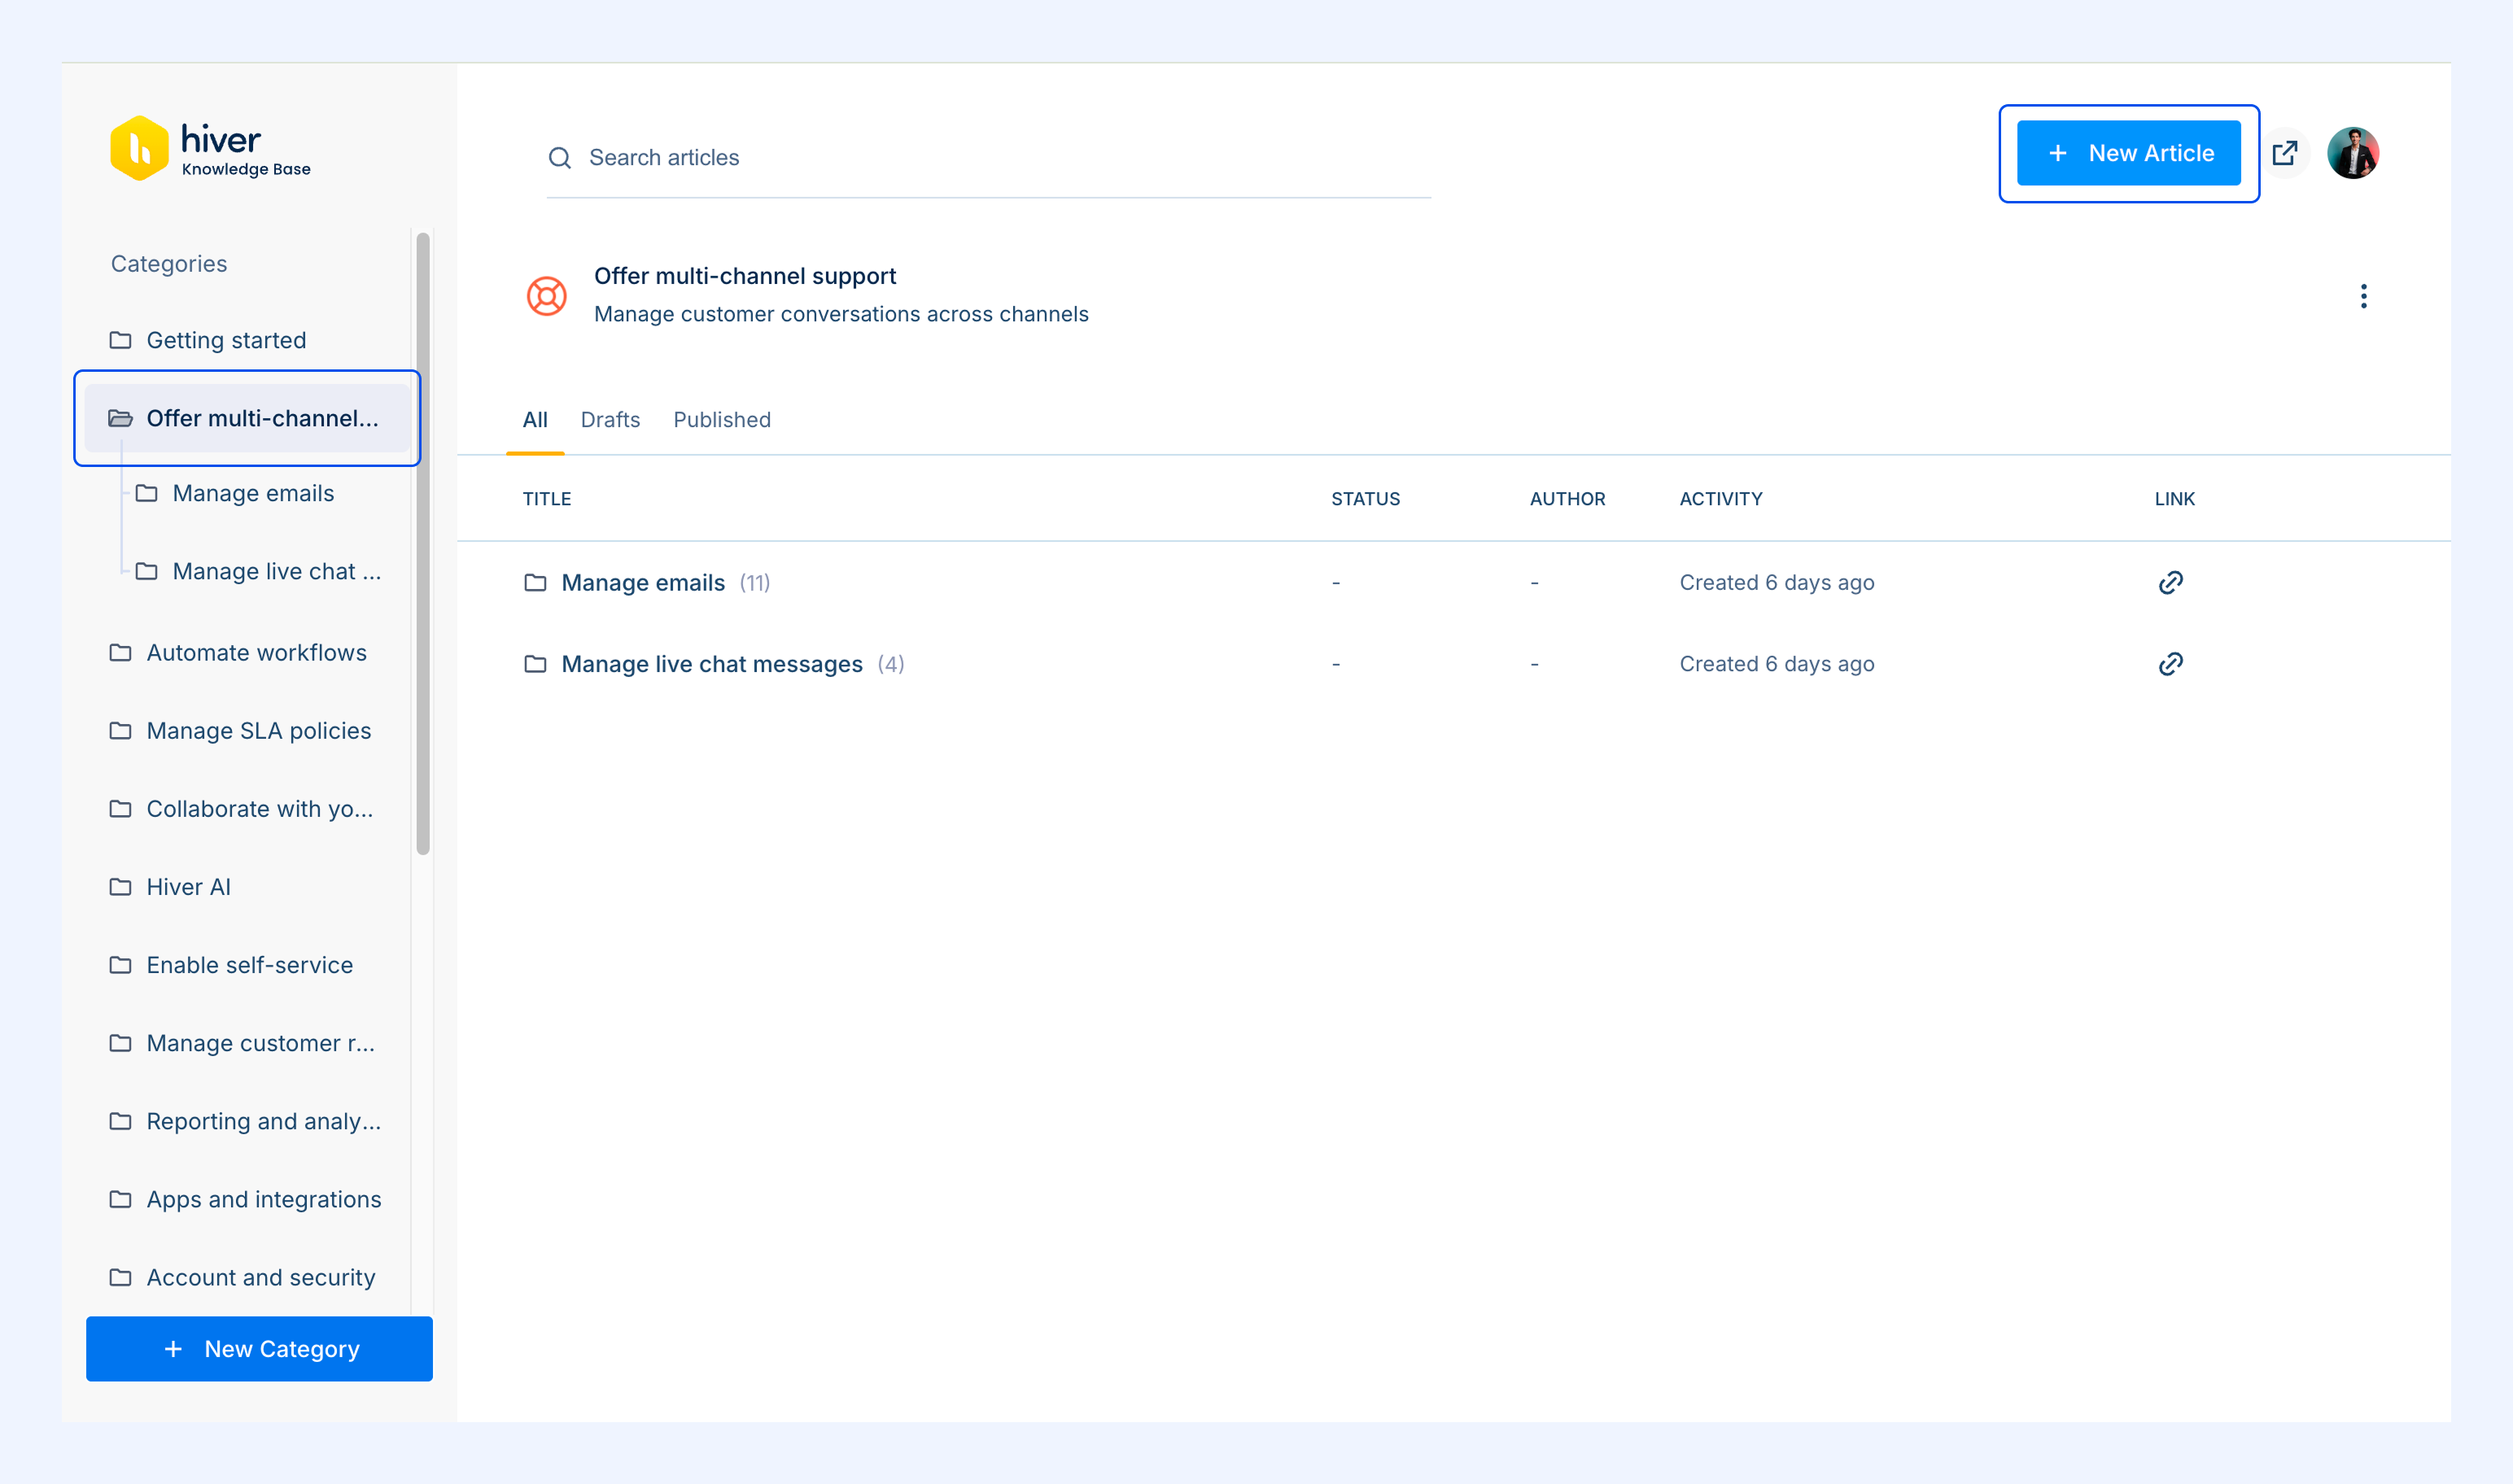
- To add an article to a parent category, select the parent category from the left panel, then click New Article.
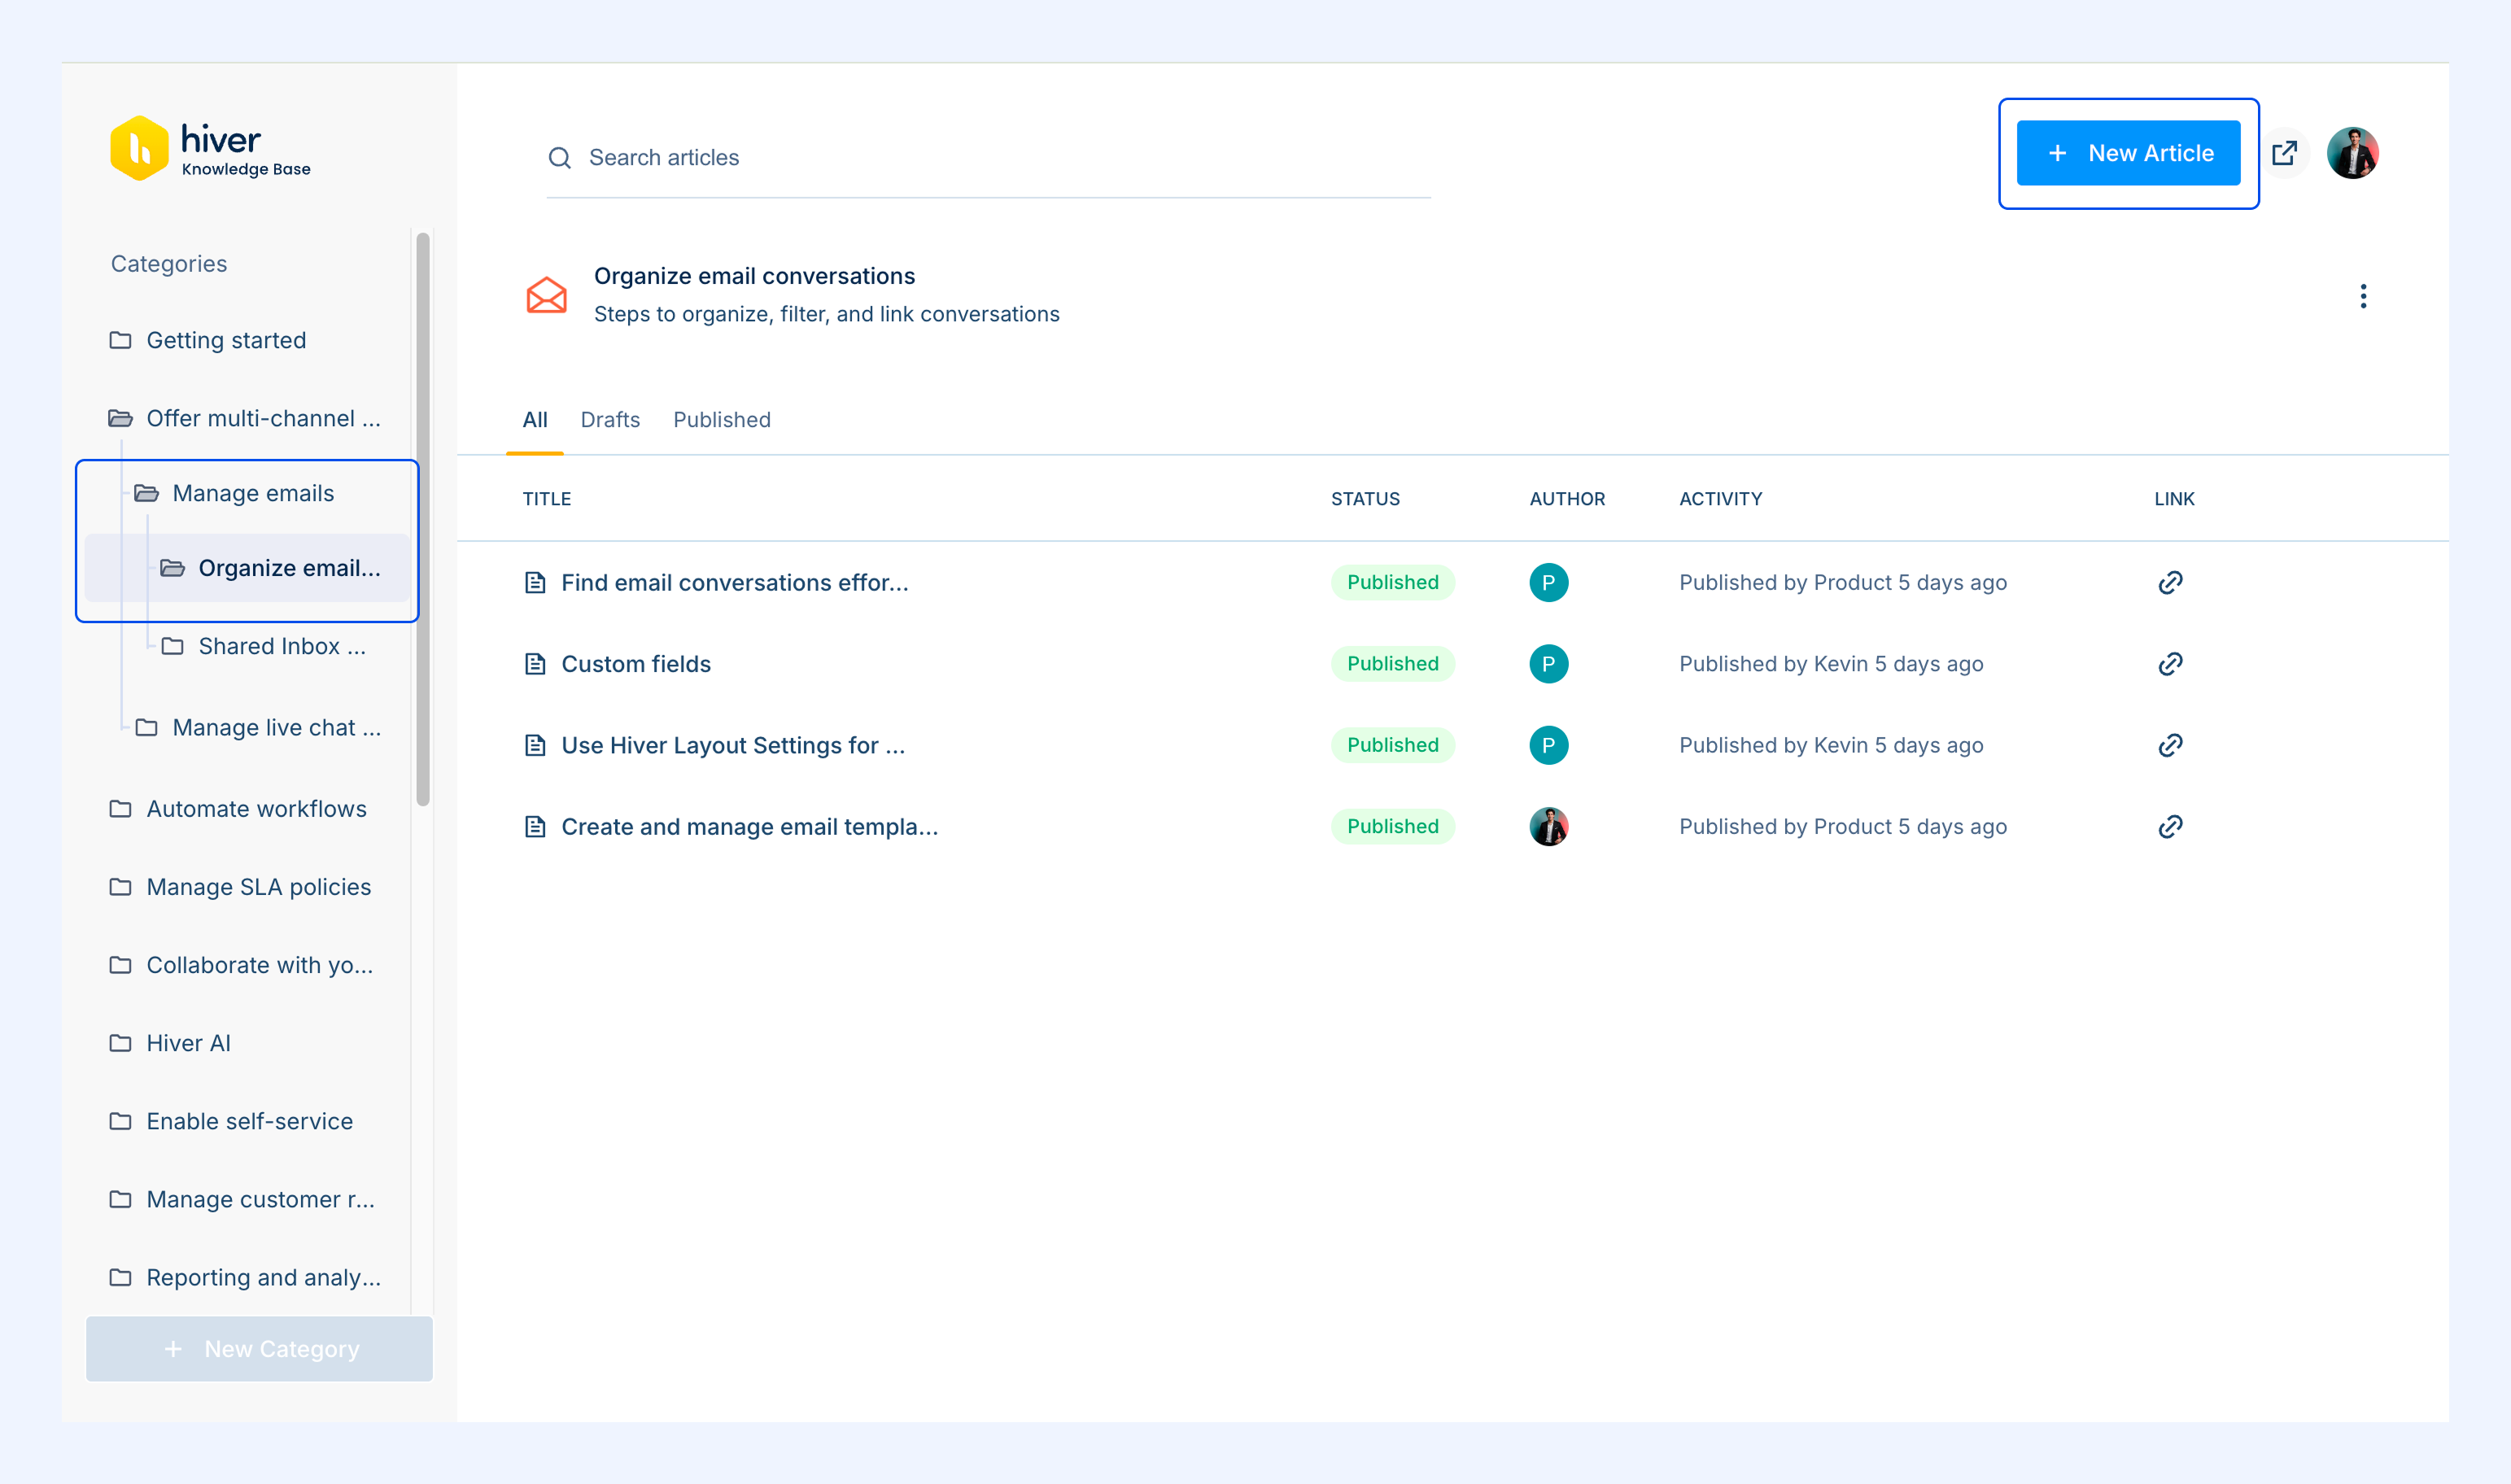
- To add an article to a nested subcategory, expand the parent category, select the subcategory, and click New Article
Managing categories
You can easily make changes to your existing categories.
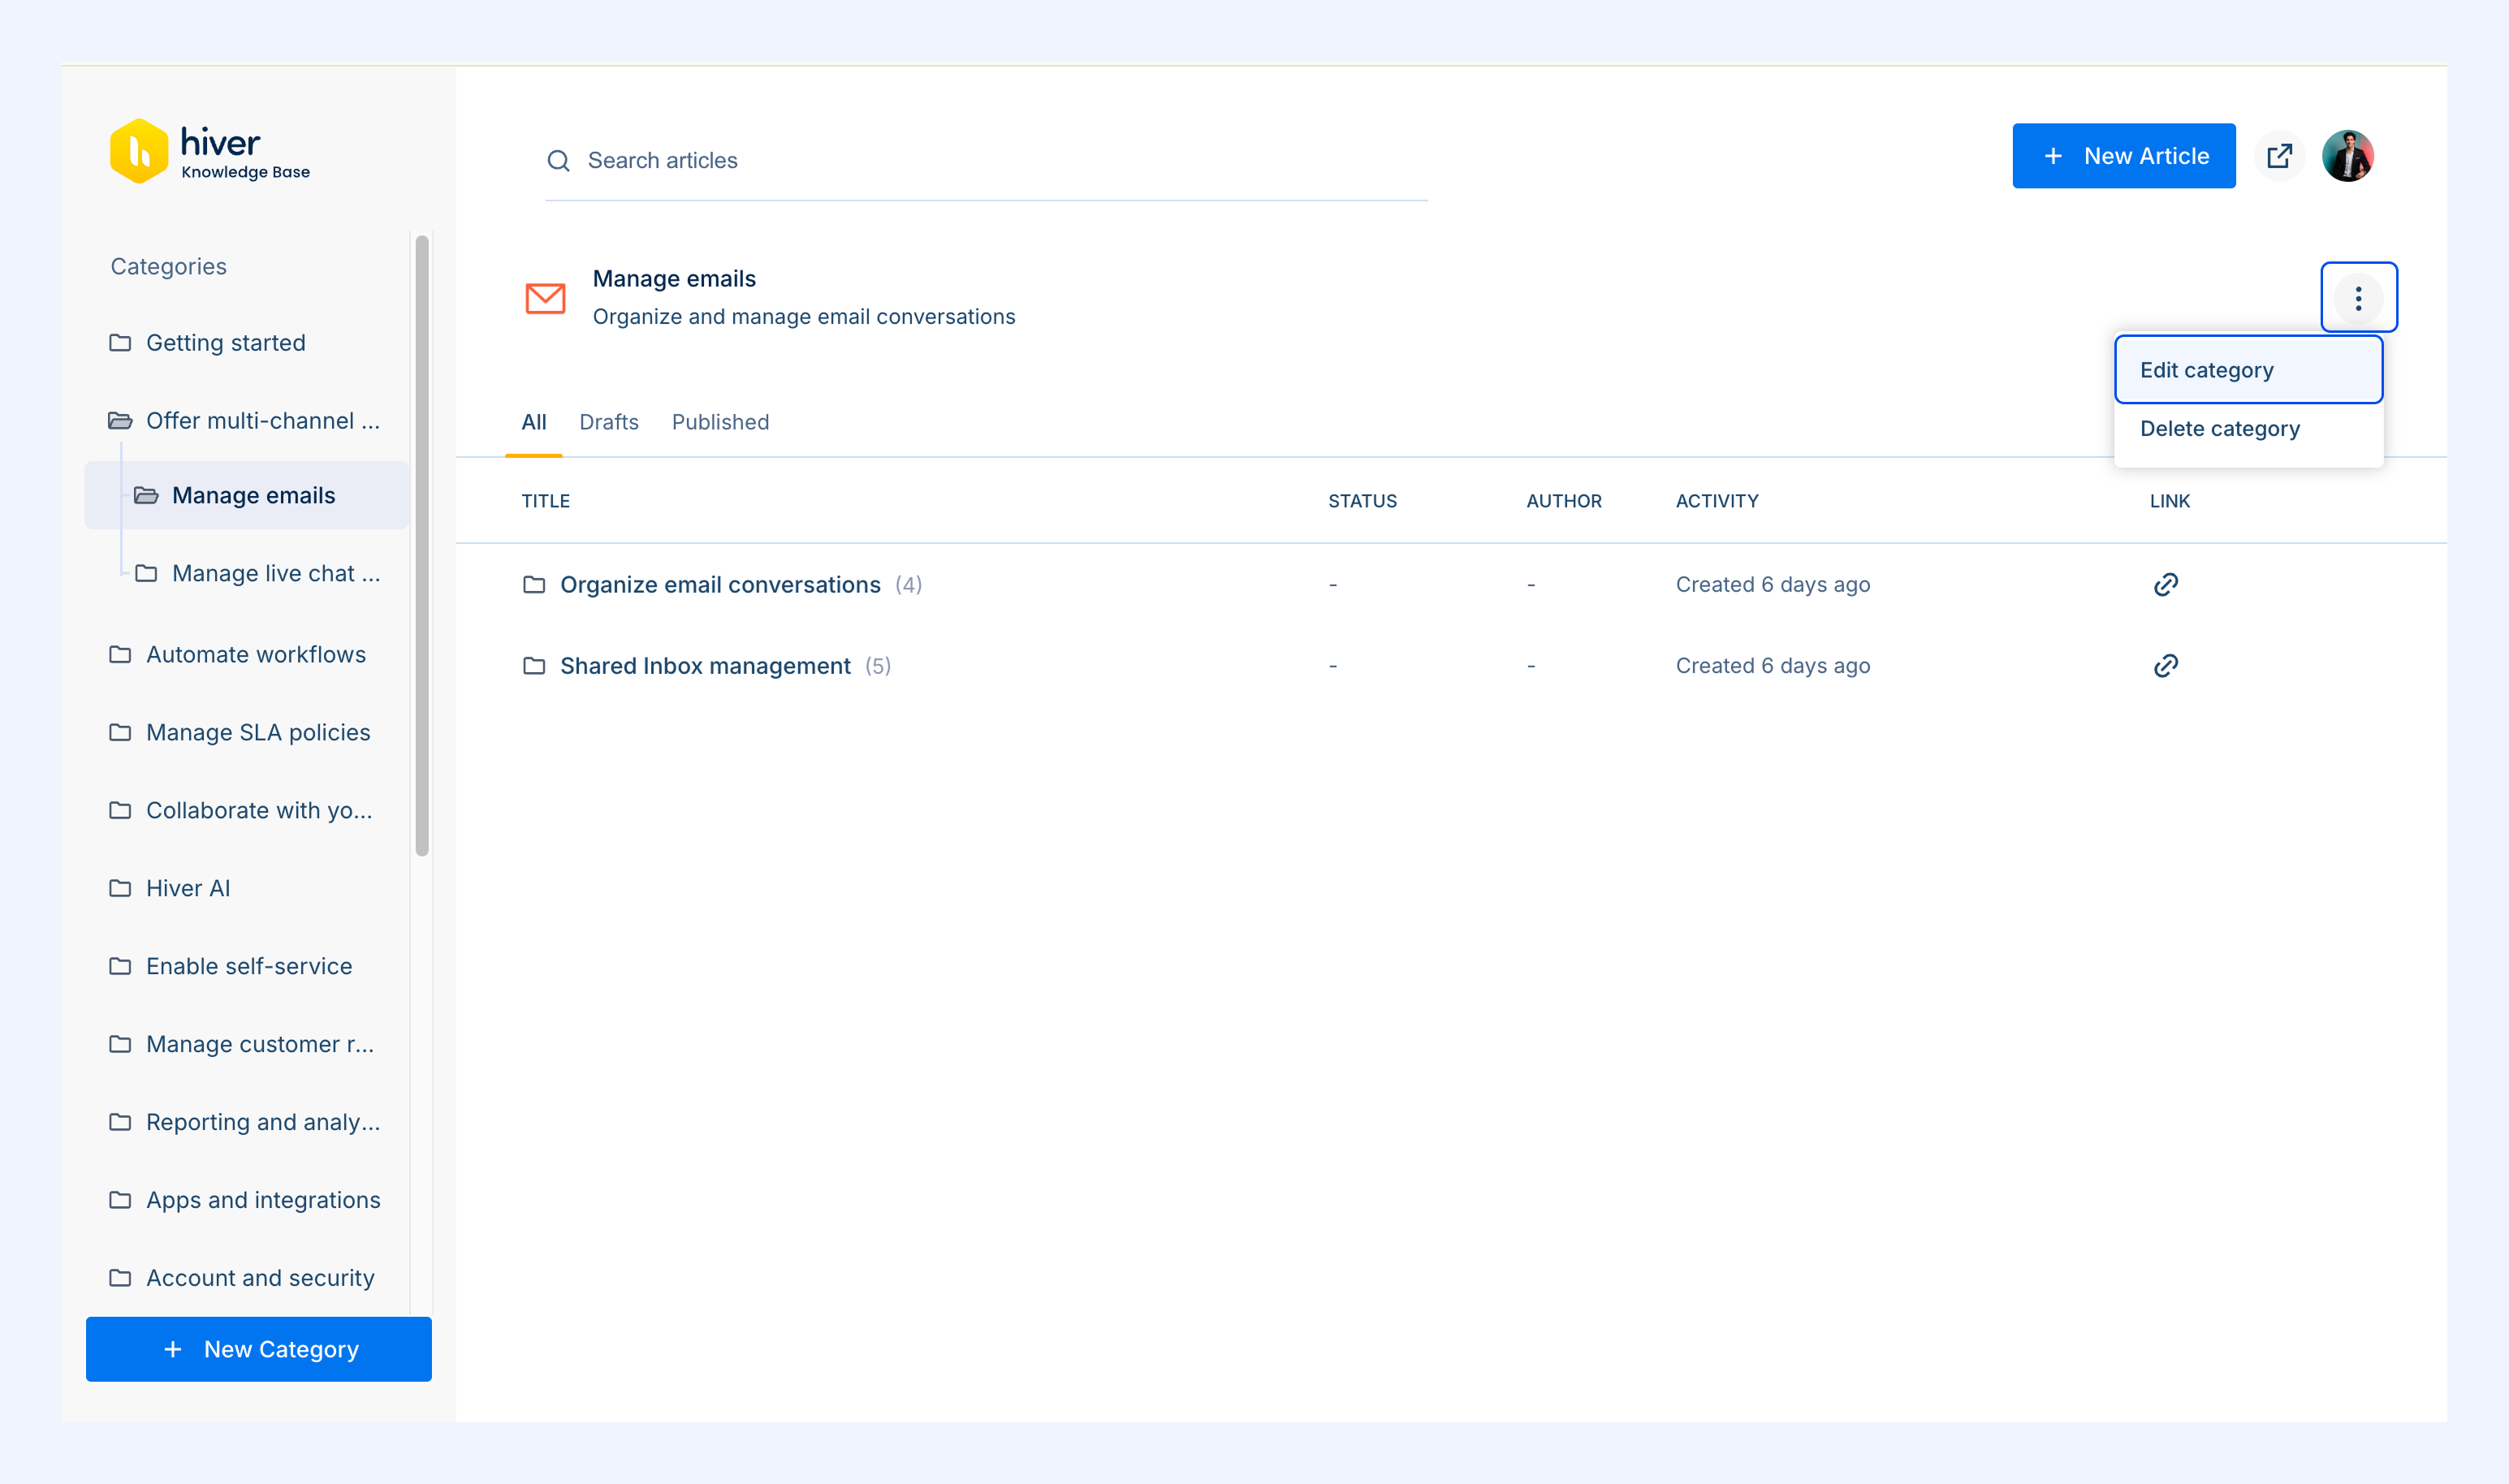
- To edit a category: Hover over the category name, select the three dots icon, and click Edit category.
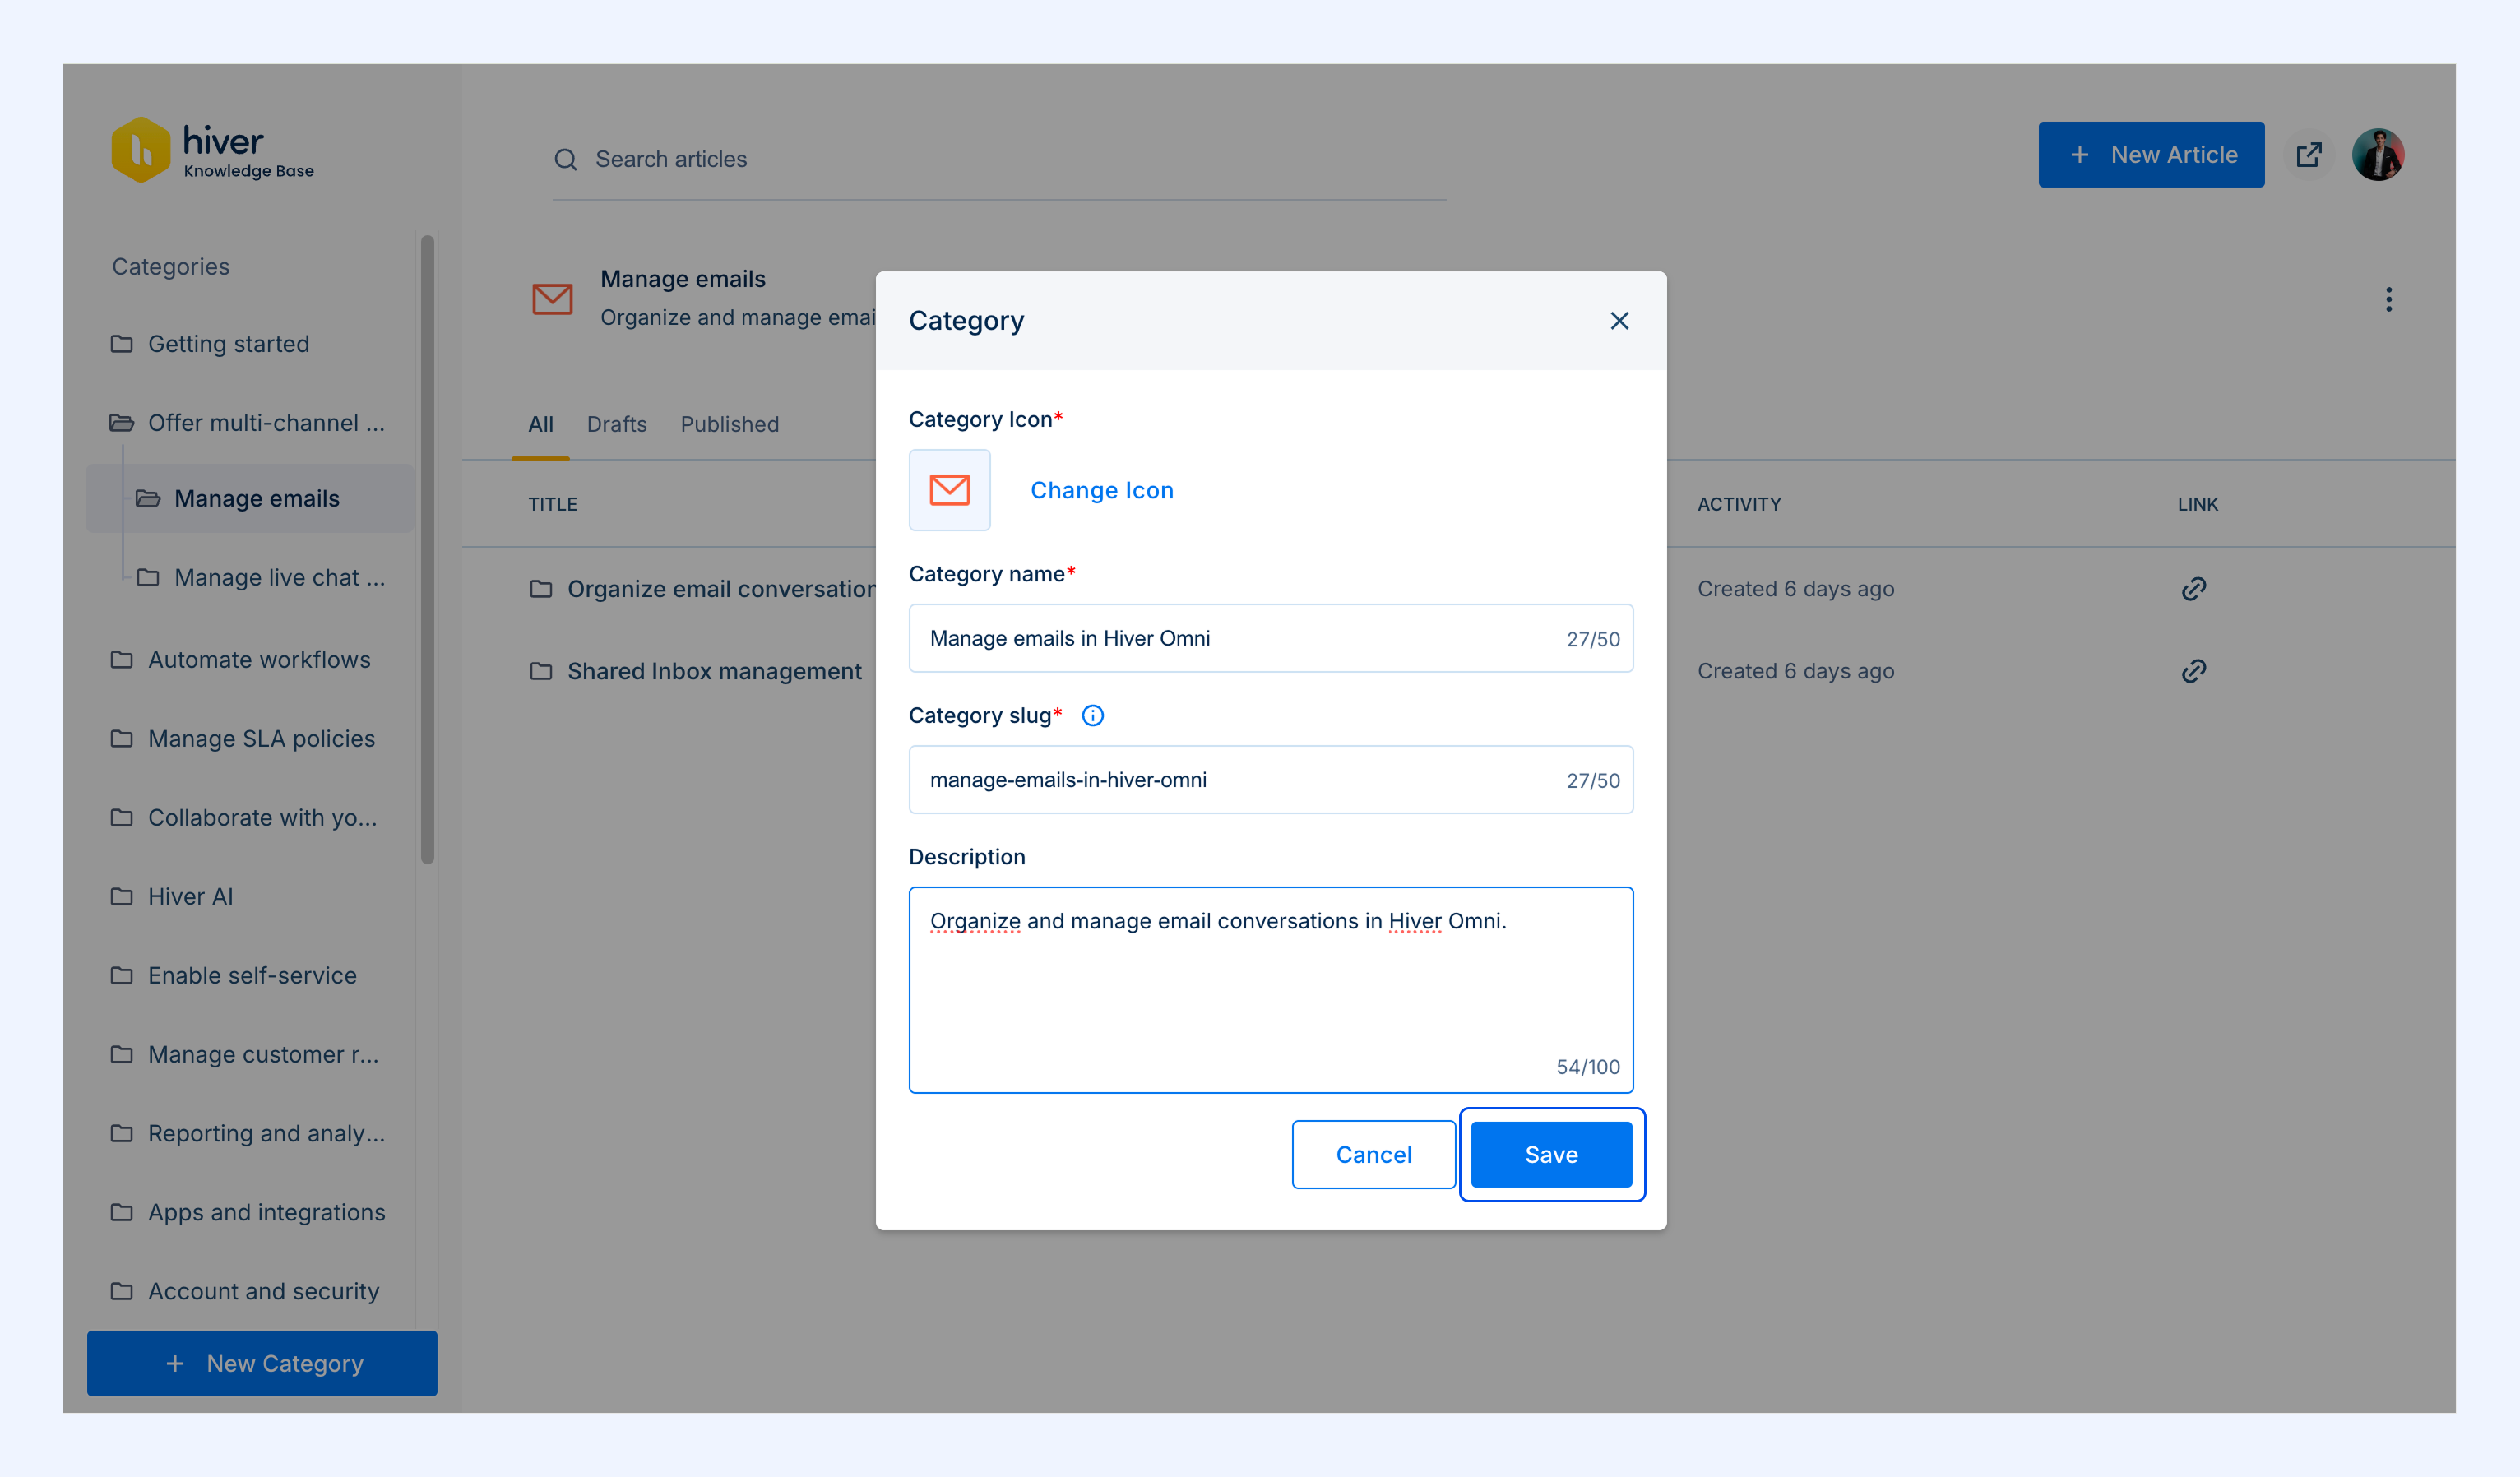
- Update details and click Save.
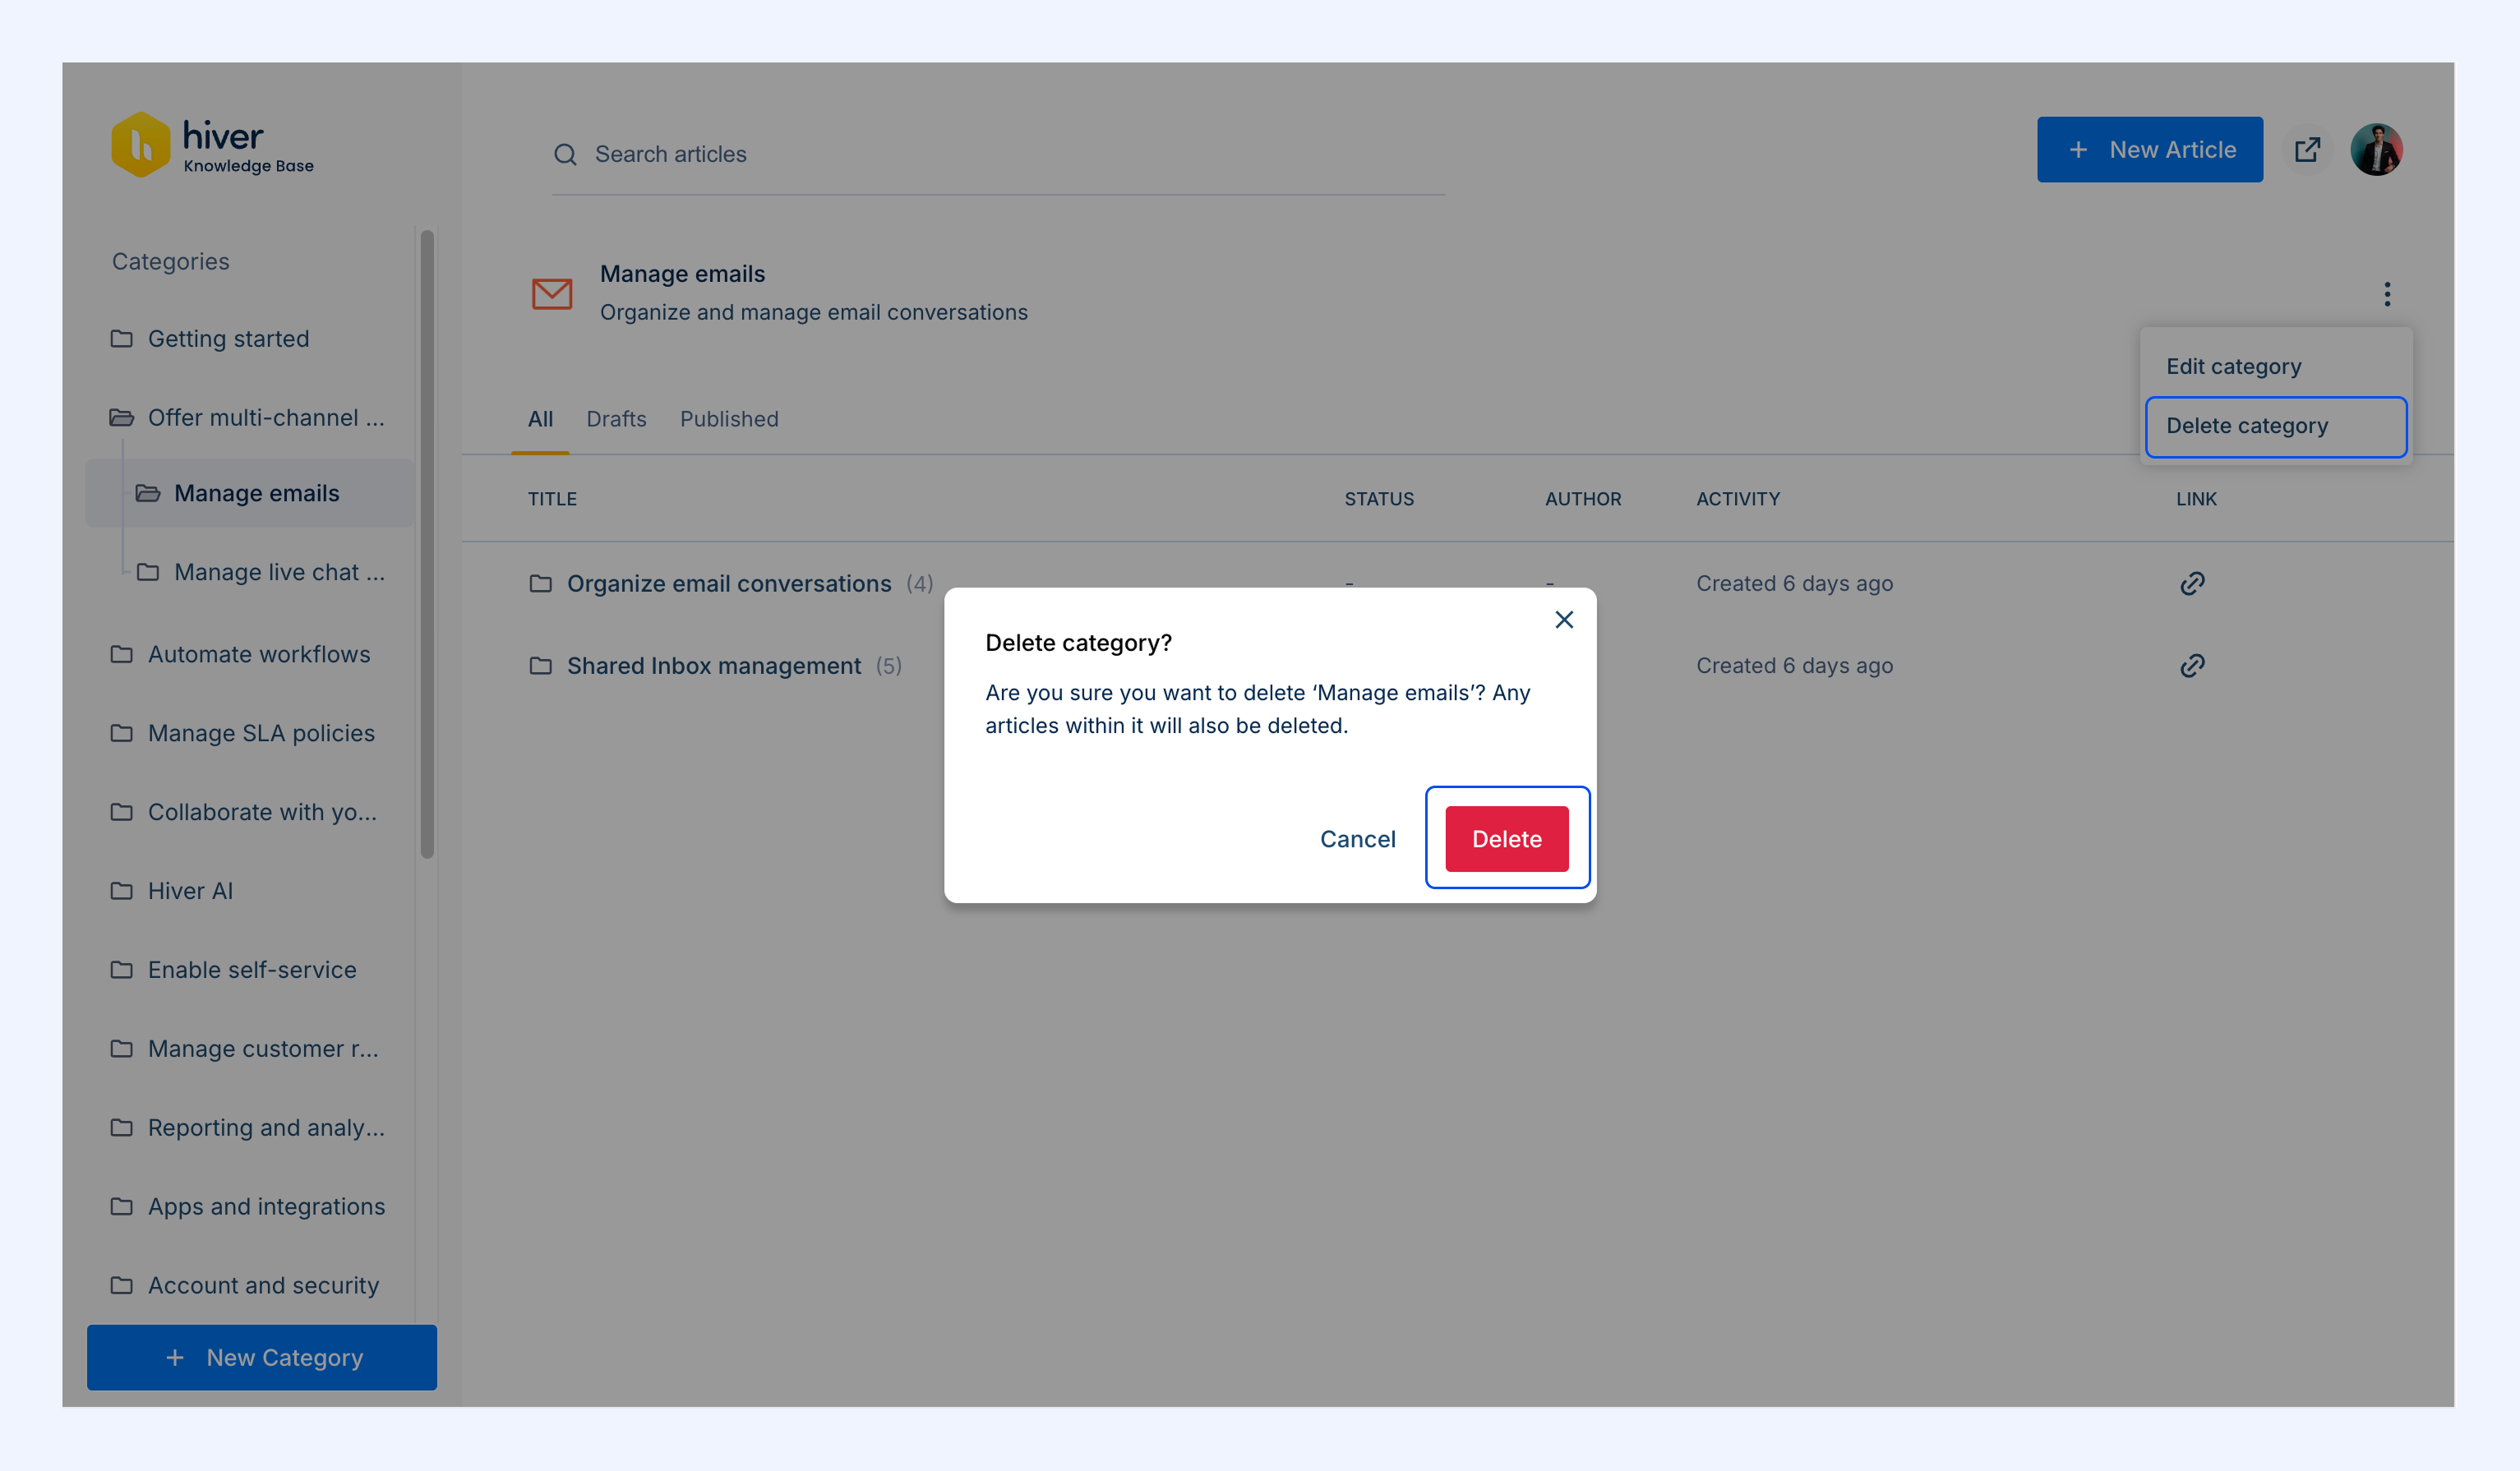
- To delete a category: Click the Delete option from the same menu. Confirm the deletion when prompted.
Note: Deleting a category will also delete all articles within it.
Publishing and unpublishing articles
Once your article is ready, you can publish it to make it visible in the Help Center or unpublish to move it back to draft.
Publishing an article
1. When your article is ready, click Publish.
Once published, the article’s activity log will note: Published by {username} {time ago}
2. The article’s state will change from Draft to Published.
To publish, ensure the following fields are filled:
- Title
- Author
- Category
- Slug
Tip: Once you publish an article, all headings styled as H2s are automatically added to a table of contents that helps readers jump between sections without having to scroll through the entire guide.
.png)
Unpublishing an article
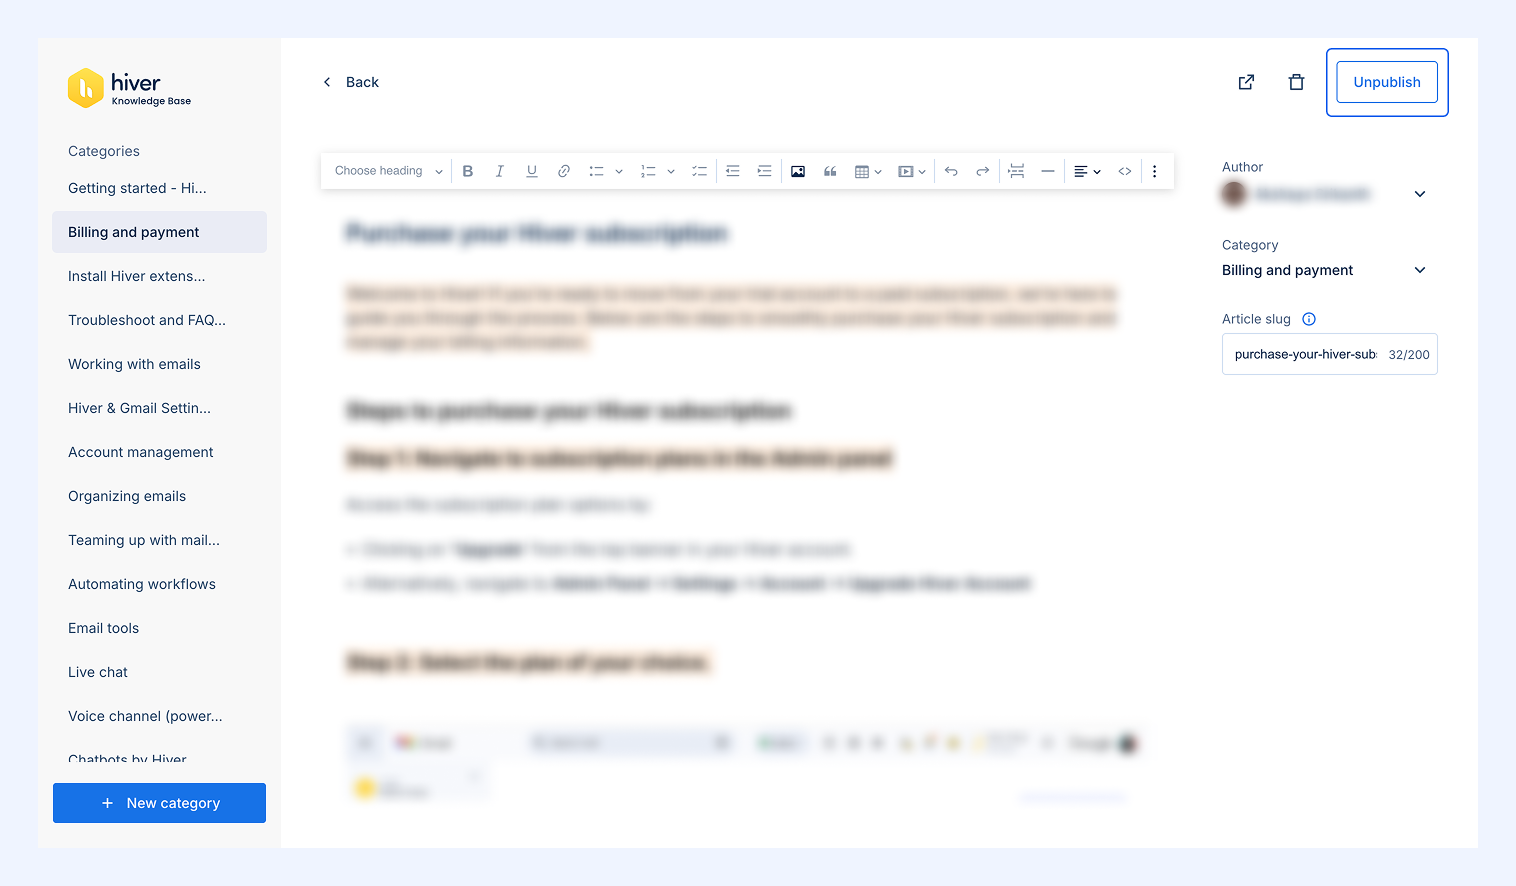
If you need to remove an article from the Help Center, click Unpublish.
Note:
- The article’s state will change from Published to Draft.
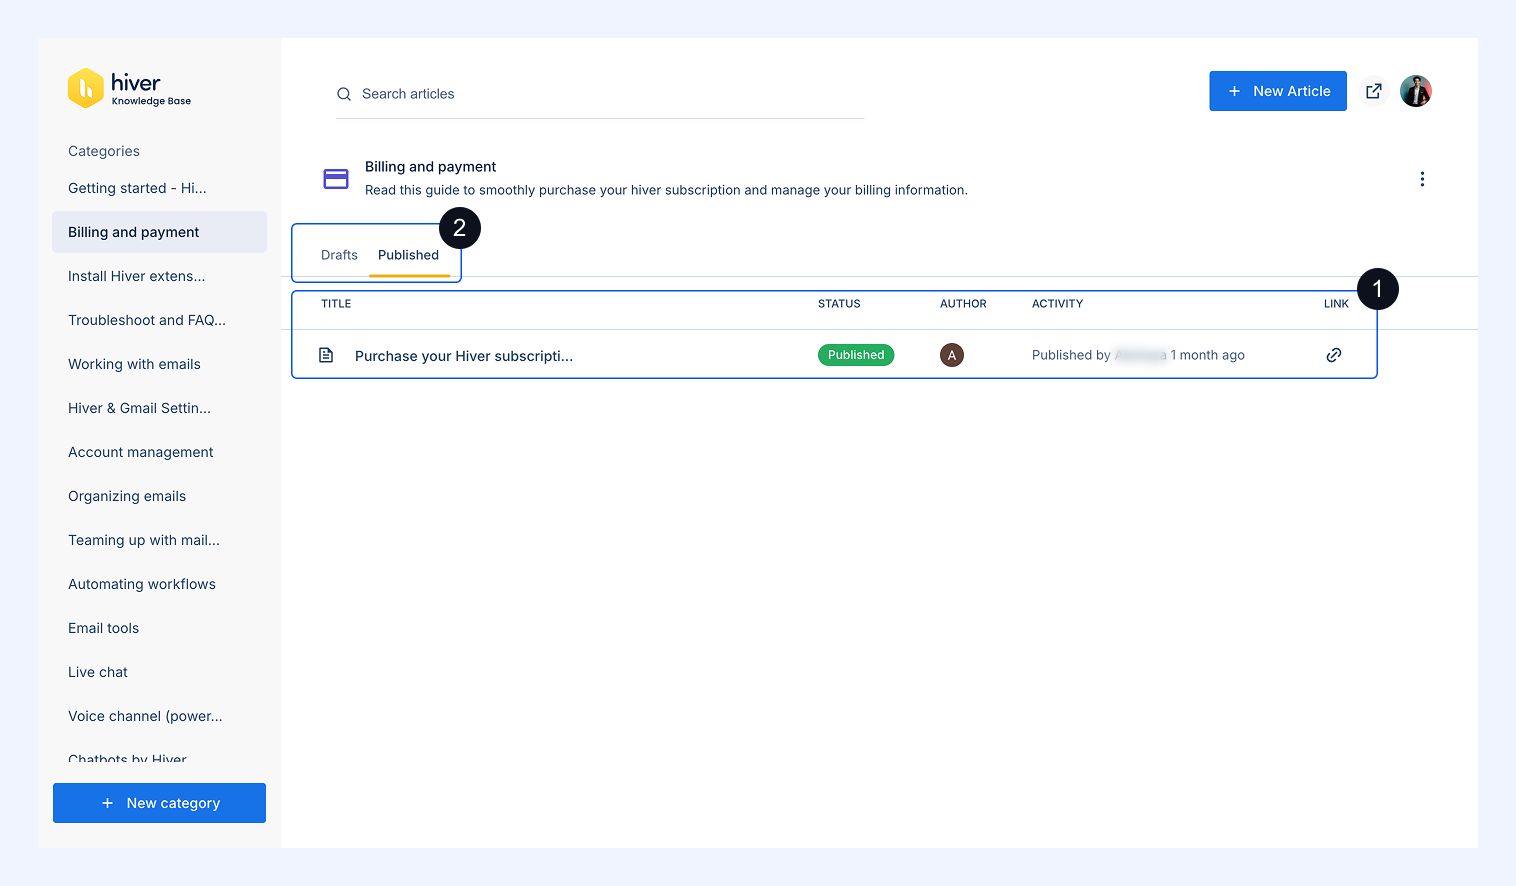
- You’ll be redirected to the Drafts tab for that category.
- The activity log will show: Unpublished by {username} {time ago}
Editing articles
You can edit any article, even after it’s published.
To edit an article,
1. Go to the category containing the article.
2. Open the Published tab and select the article.
3. Make changes to any field (Title, Author, Category, Slug, or Content).
Once you start editing:
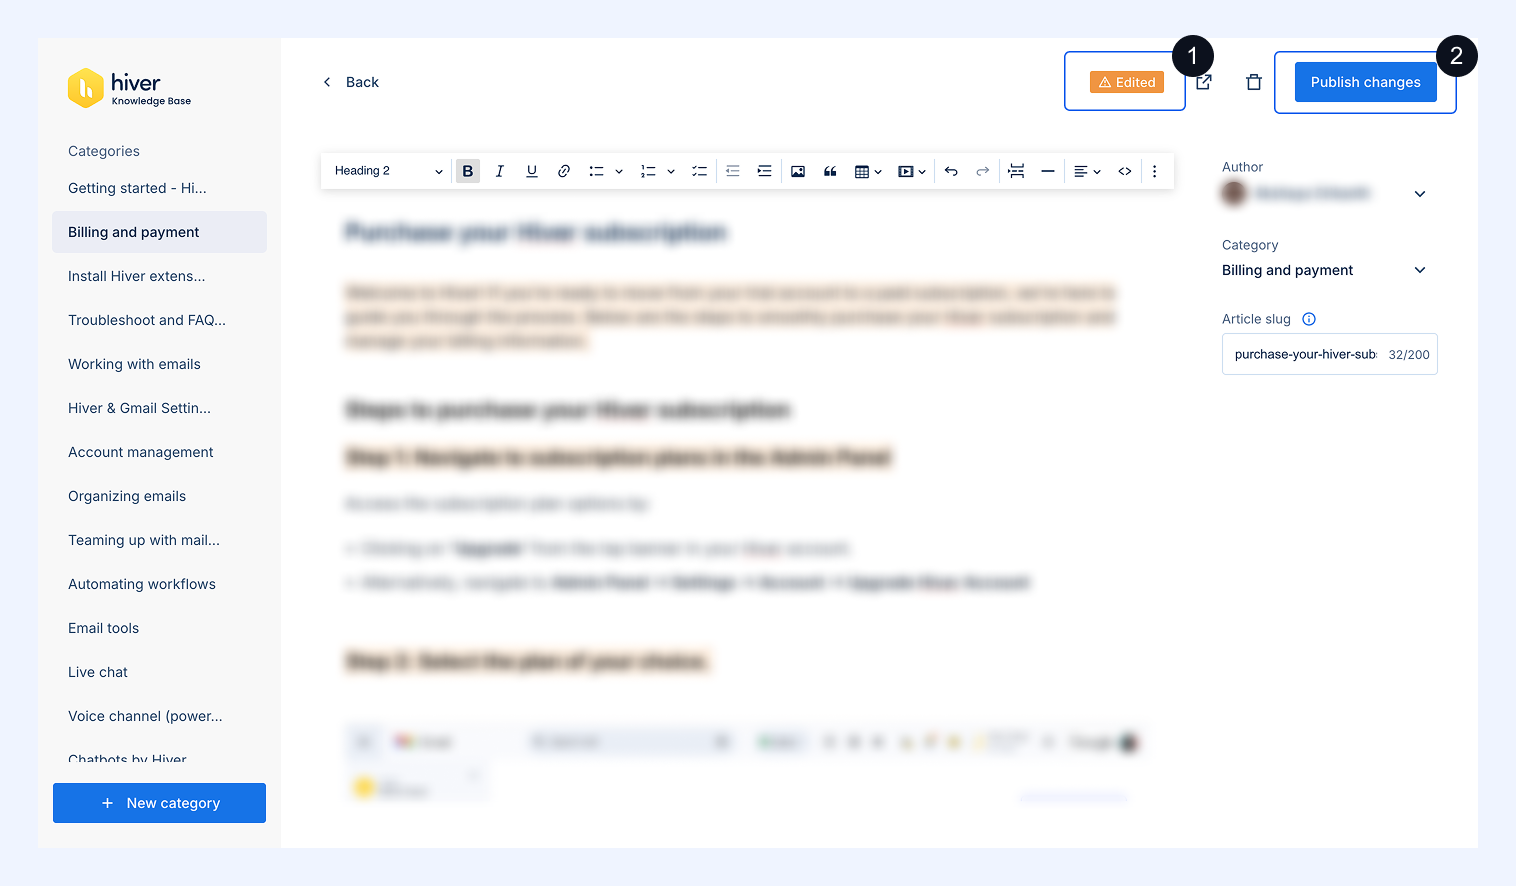
- An Edited tag appears at the top of the article.
- Click Publish changes to save and update the live version.
If you try to exit before saving:
- You’ll see a prompt to Discard Edits or Keep Edits.
.png)
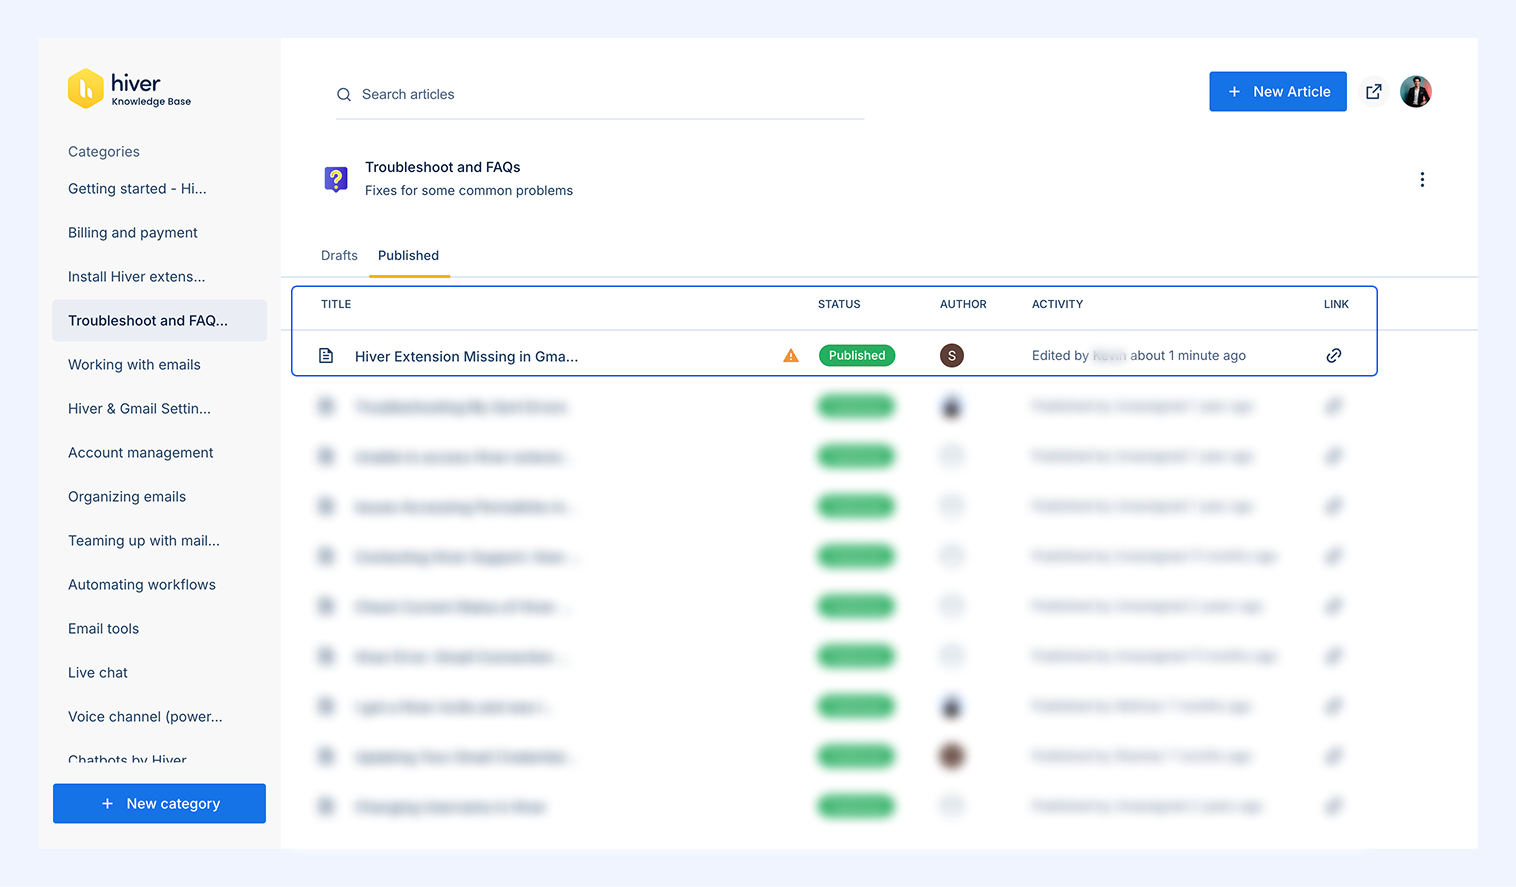
- Choosing Keep Edits will retain your changes but mark the article with a small triangle icon indicating pending edits.
- Once you publish, the Edited tag and triangle icon will disappear.
Best practices for writing Help Center articles
Creating clear, helpful content improves customer self-service and reduces support requests. Keep these tips in mind when writing your articles:
- Keep it concise: Use short paragraphs and simple language.
- Be consistent: Follow a uniform format and tone across all articles.
- Use action-oriented headings: Help readers find solutions quickly.
- Add visuals when possible: Screenshots or GIFs improve comprehension.
- Review regularly: Update outdated information or UI changes.
- Avoid jargon: Write in customer-friendly terms rather than internal language.
- Start with intent: Identify the user’s likely question and answer it within the first few lines.
Exporting articles
Admins can export articles from Hiver’s Help Center as a CSV file.
To export:
1. Go to your Help Center dashboard.
2. Click the Settings icon.
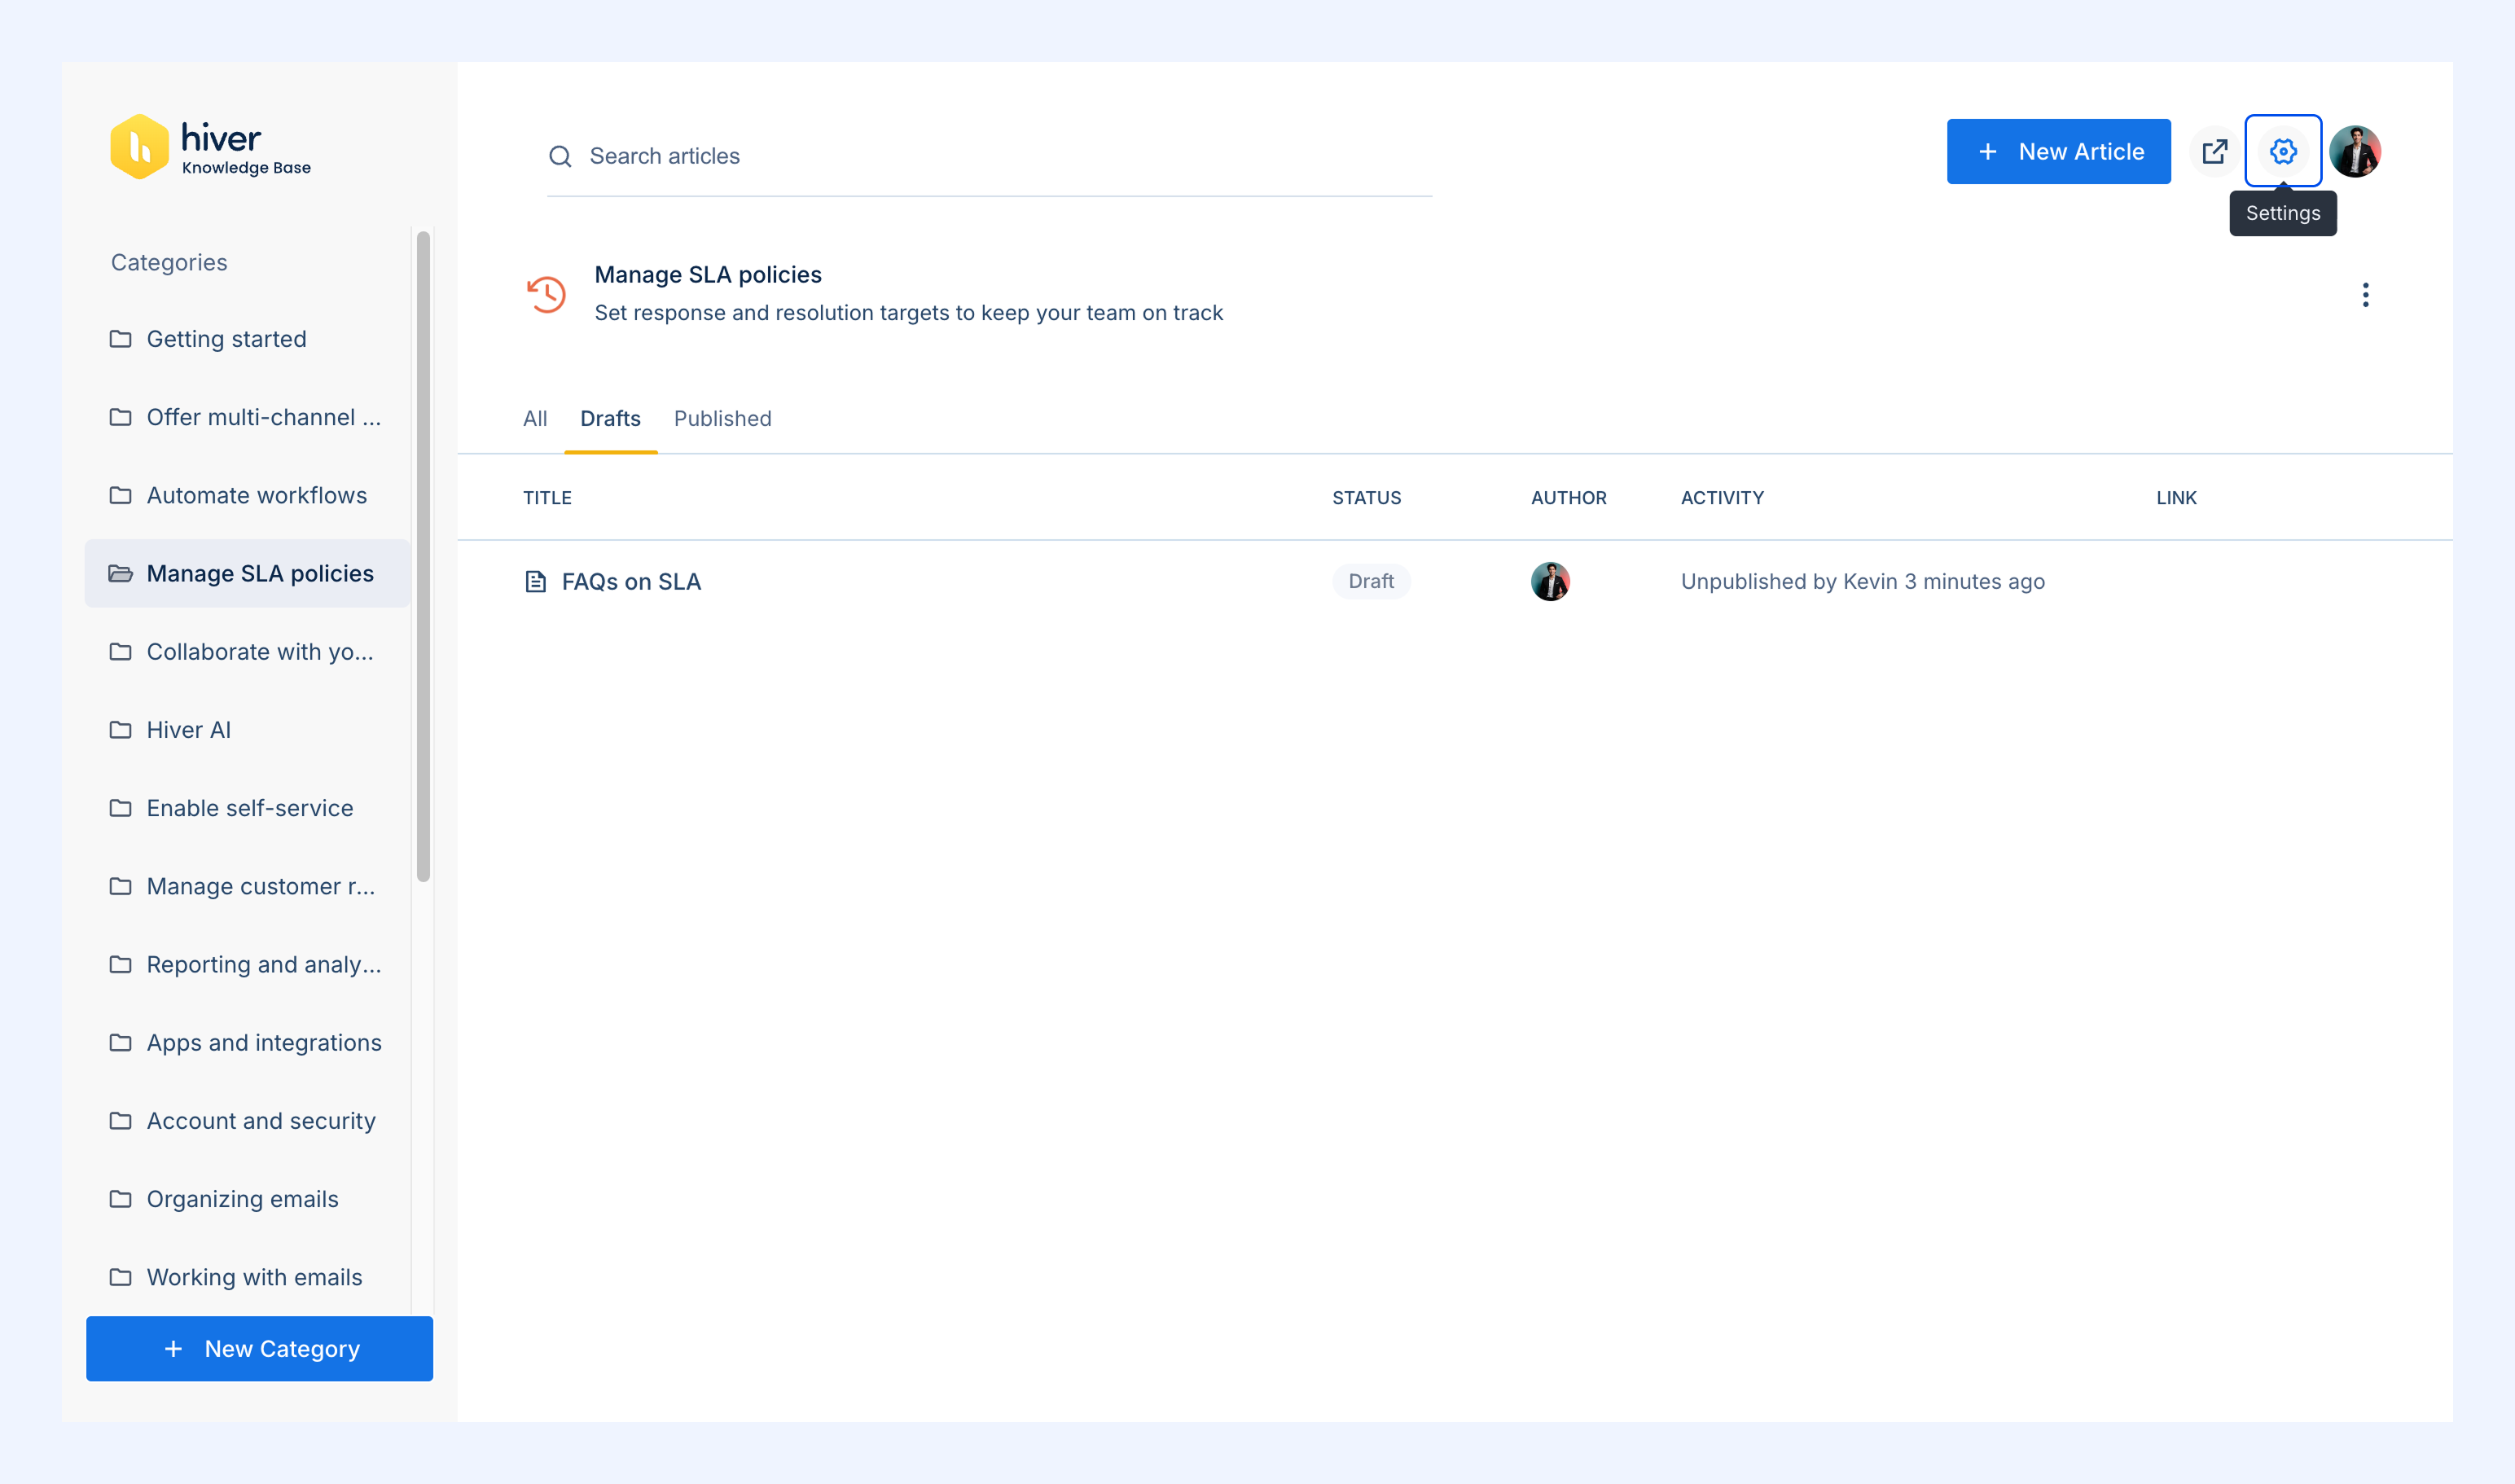
3. Under Site settings → Export Articles as CSV, click Export.
.png)
4. A CSV file will be generated and downloaded automatically.
The exported file will include these columns:
| Field name | Description |
| article_id | Internal ID of the article |
| article_title | Title of the article |
| article_excerpt | First 1000 ASCII characters of the article |
| is_published | “Yes” if the article is published, “No” when it is a draft |
| author_name | Assigned author’s name, or “Unassigned” if no author is set |
| category_id | Internal ID of the category the article belongs to |
| category_title | Title of the category |
| created_at (UTC) | Article creation date (yyyy-mm-dd) |
| updated_at (UTC) | Last updated date of the article (yyyy-mm-dd) |
Need help with your Help Center?
We’re here to guide you in creating, managing, and publishing articles effectively.
Email support@hiverhq.com for assistance with article setup, category management, or best practices.