Setting up a custom domain
A custom domain lets you host your Help Center on your own website instead of Hiver’s default domain. For example, instead of acme.hiverkb.com, your Help Center can appear as help.acme.com.
This helps you:
- Maintain consistent branding
- Build customer trust
- Offer a seamless, professional experience
Prerequisites
Ensure the following before connecting your custom domain:
- You own a registered domain (e.g. acme.com).
- You have permission to add DNS records with your domain provider.
- You are an Admin on your Hiver Help Center Dashboard.
Steps to connect your custom domain
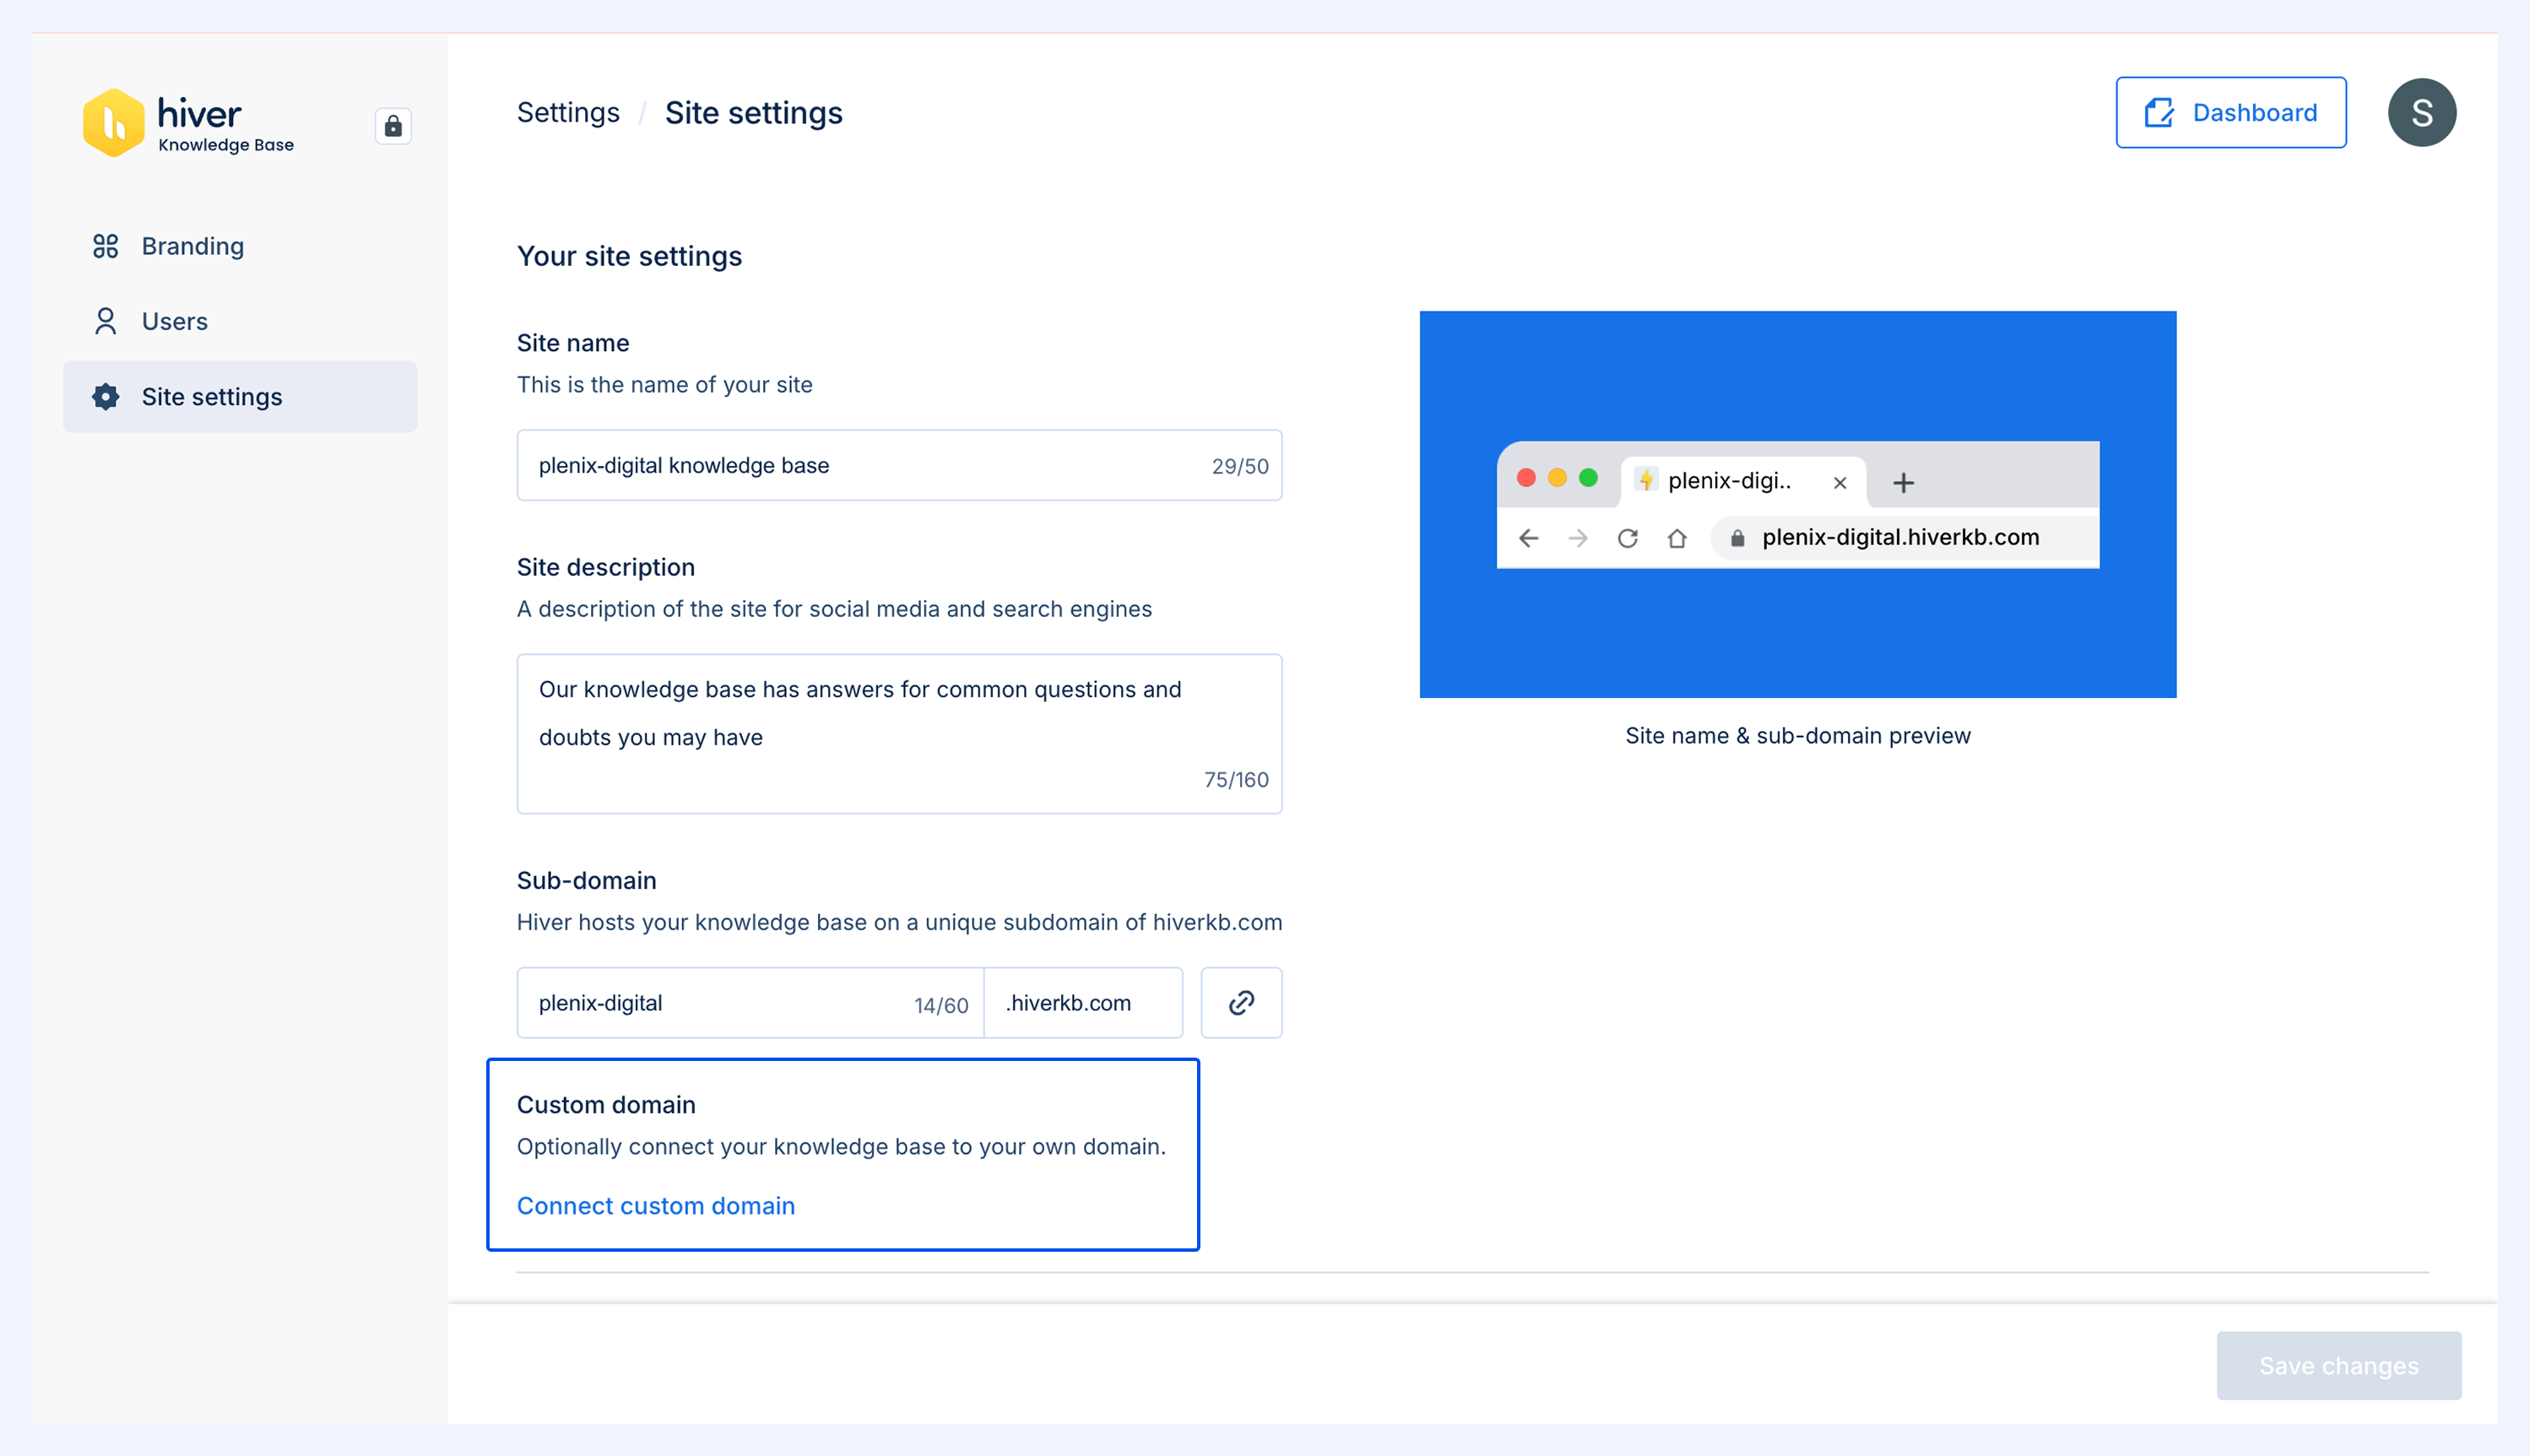
1. Open Site Settings in your Help Center Dashboard and click Connect custom domain.
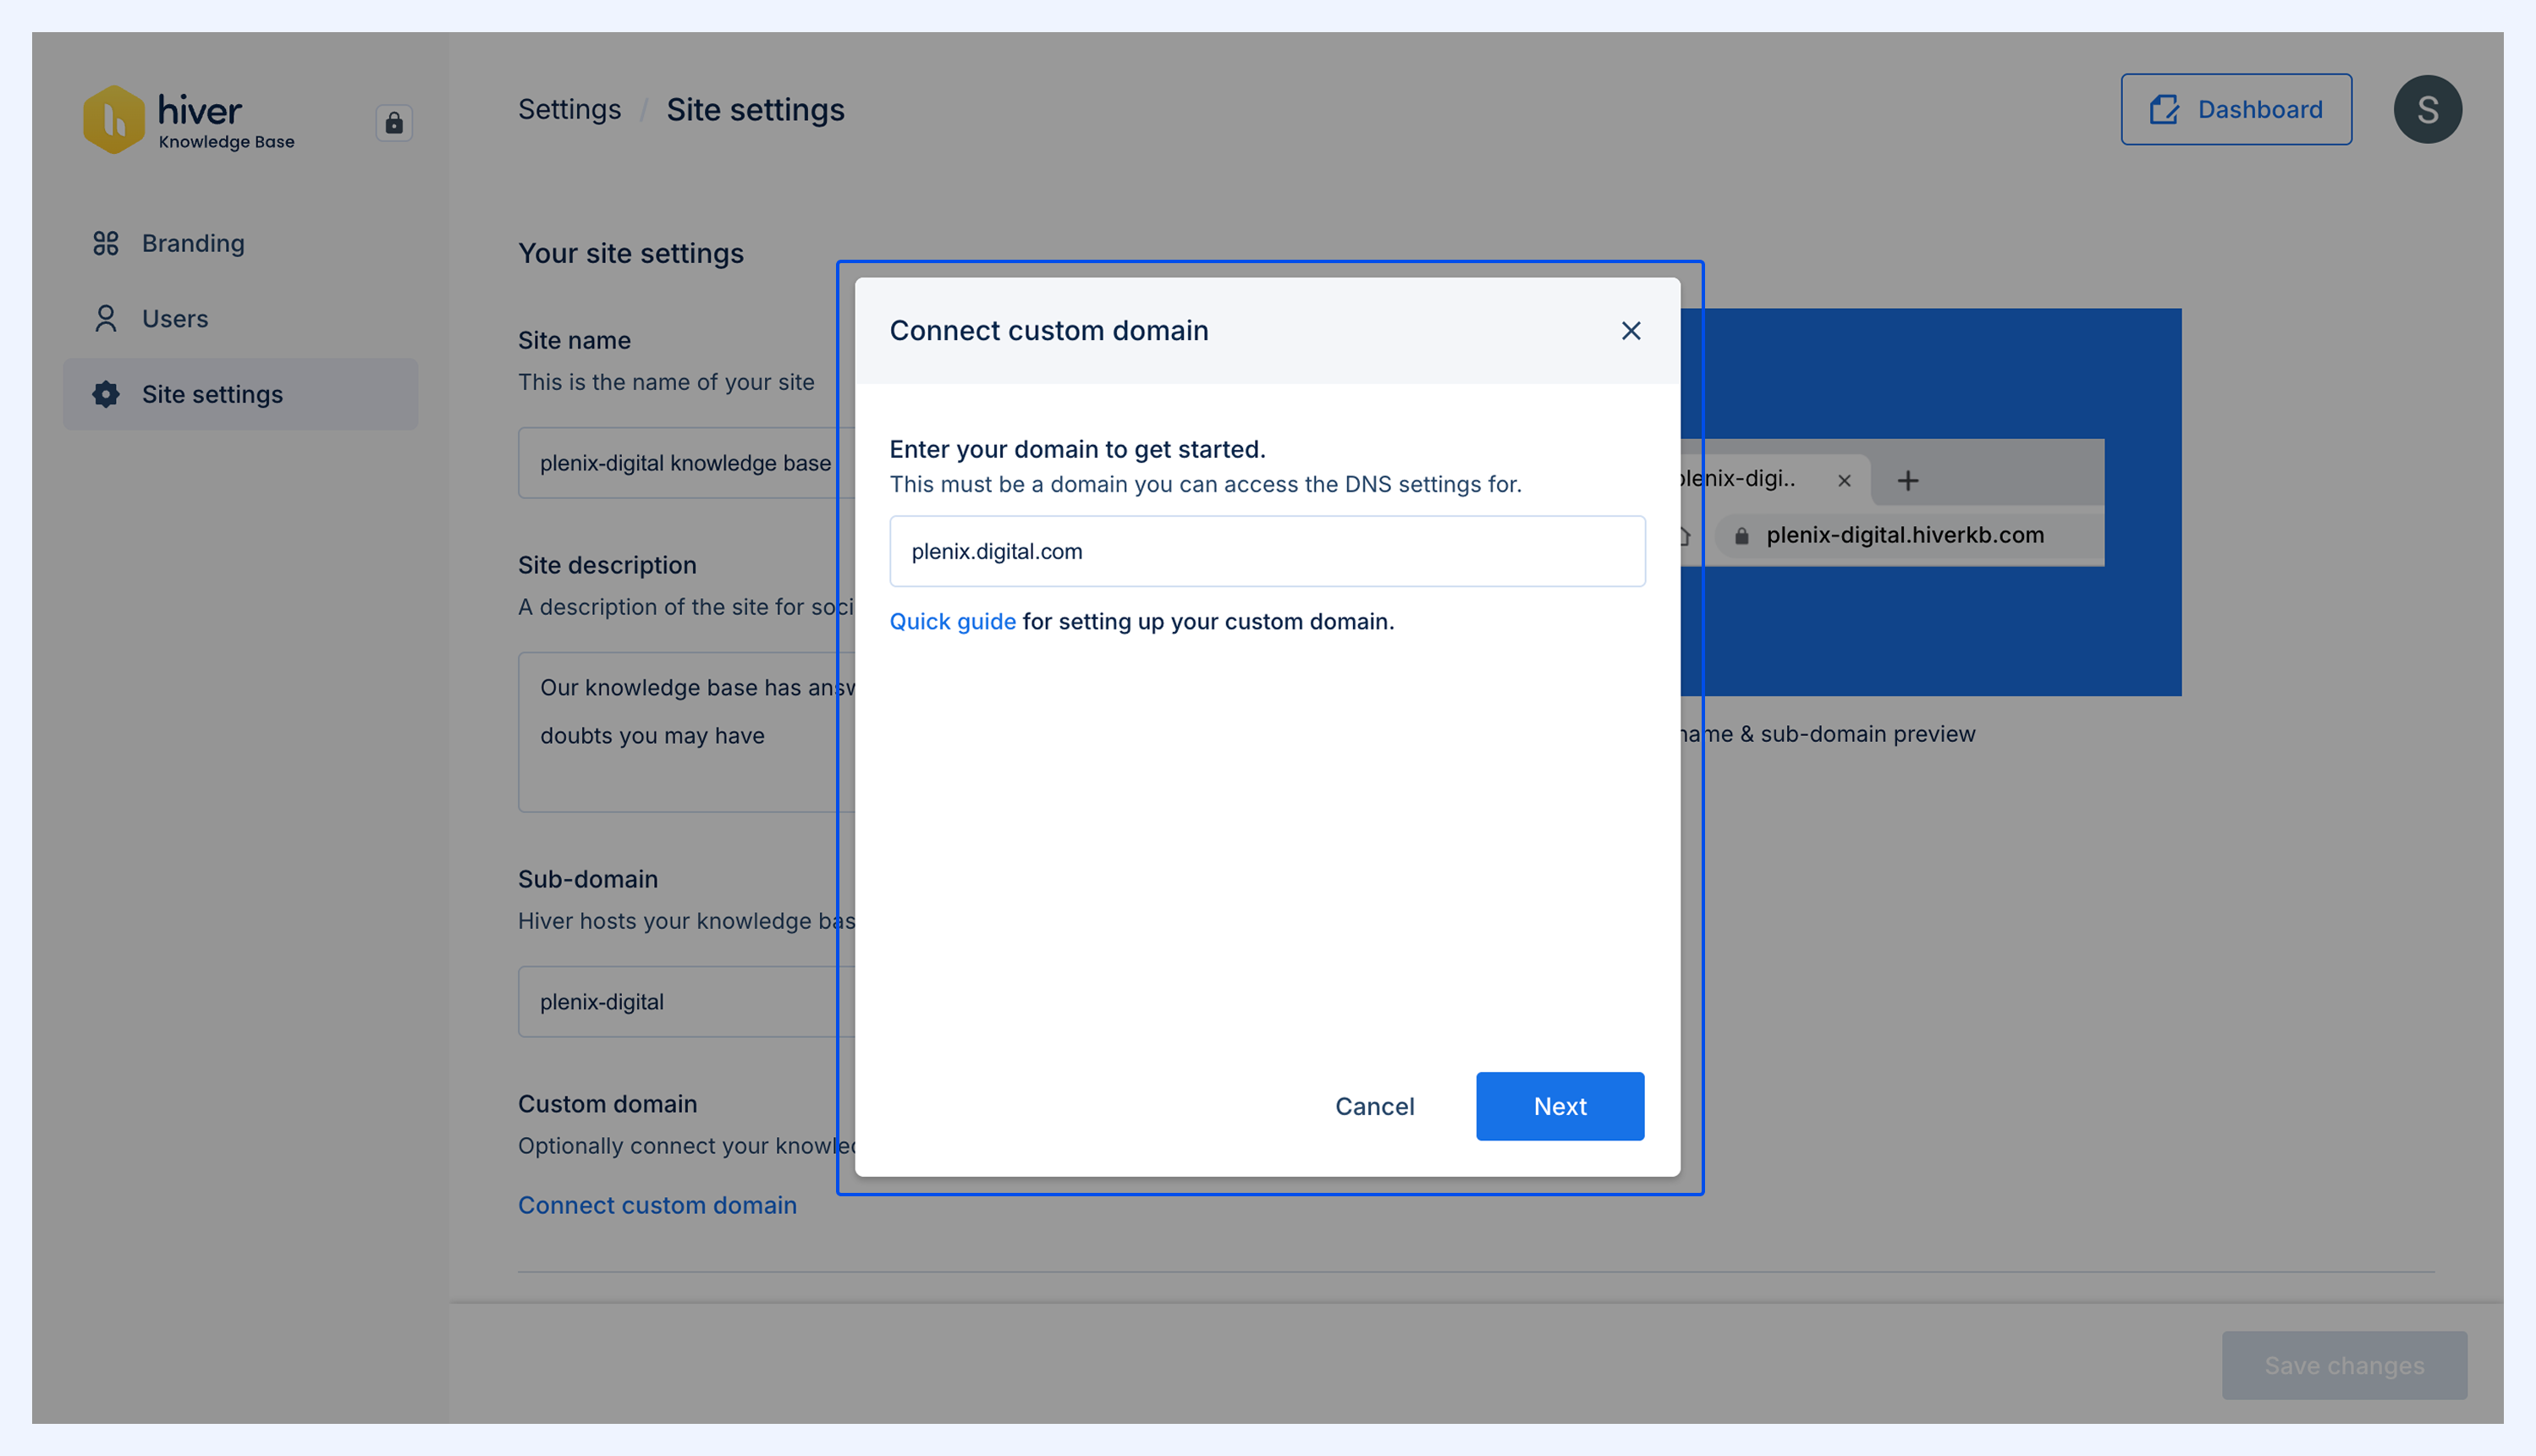
2. Enter your custom domain or subdomain (for example, help.acme.com) and click Next.
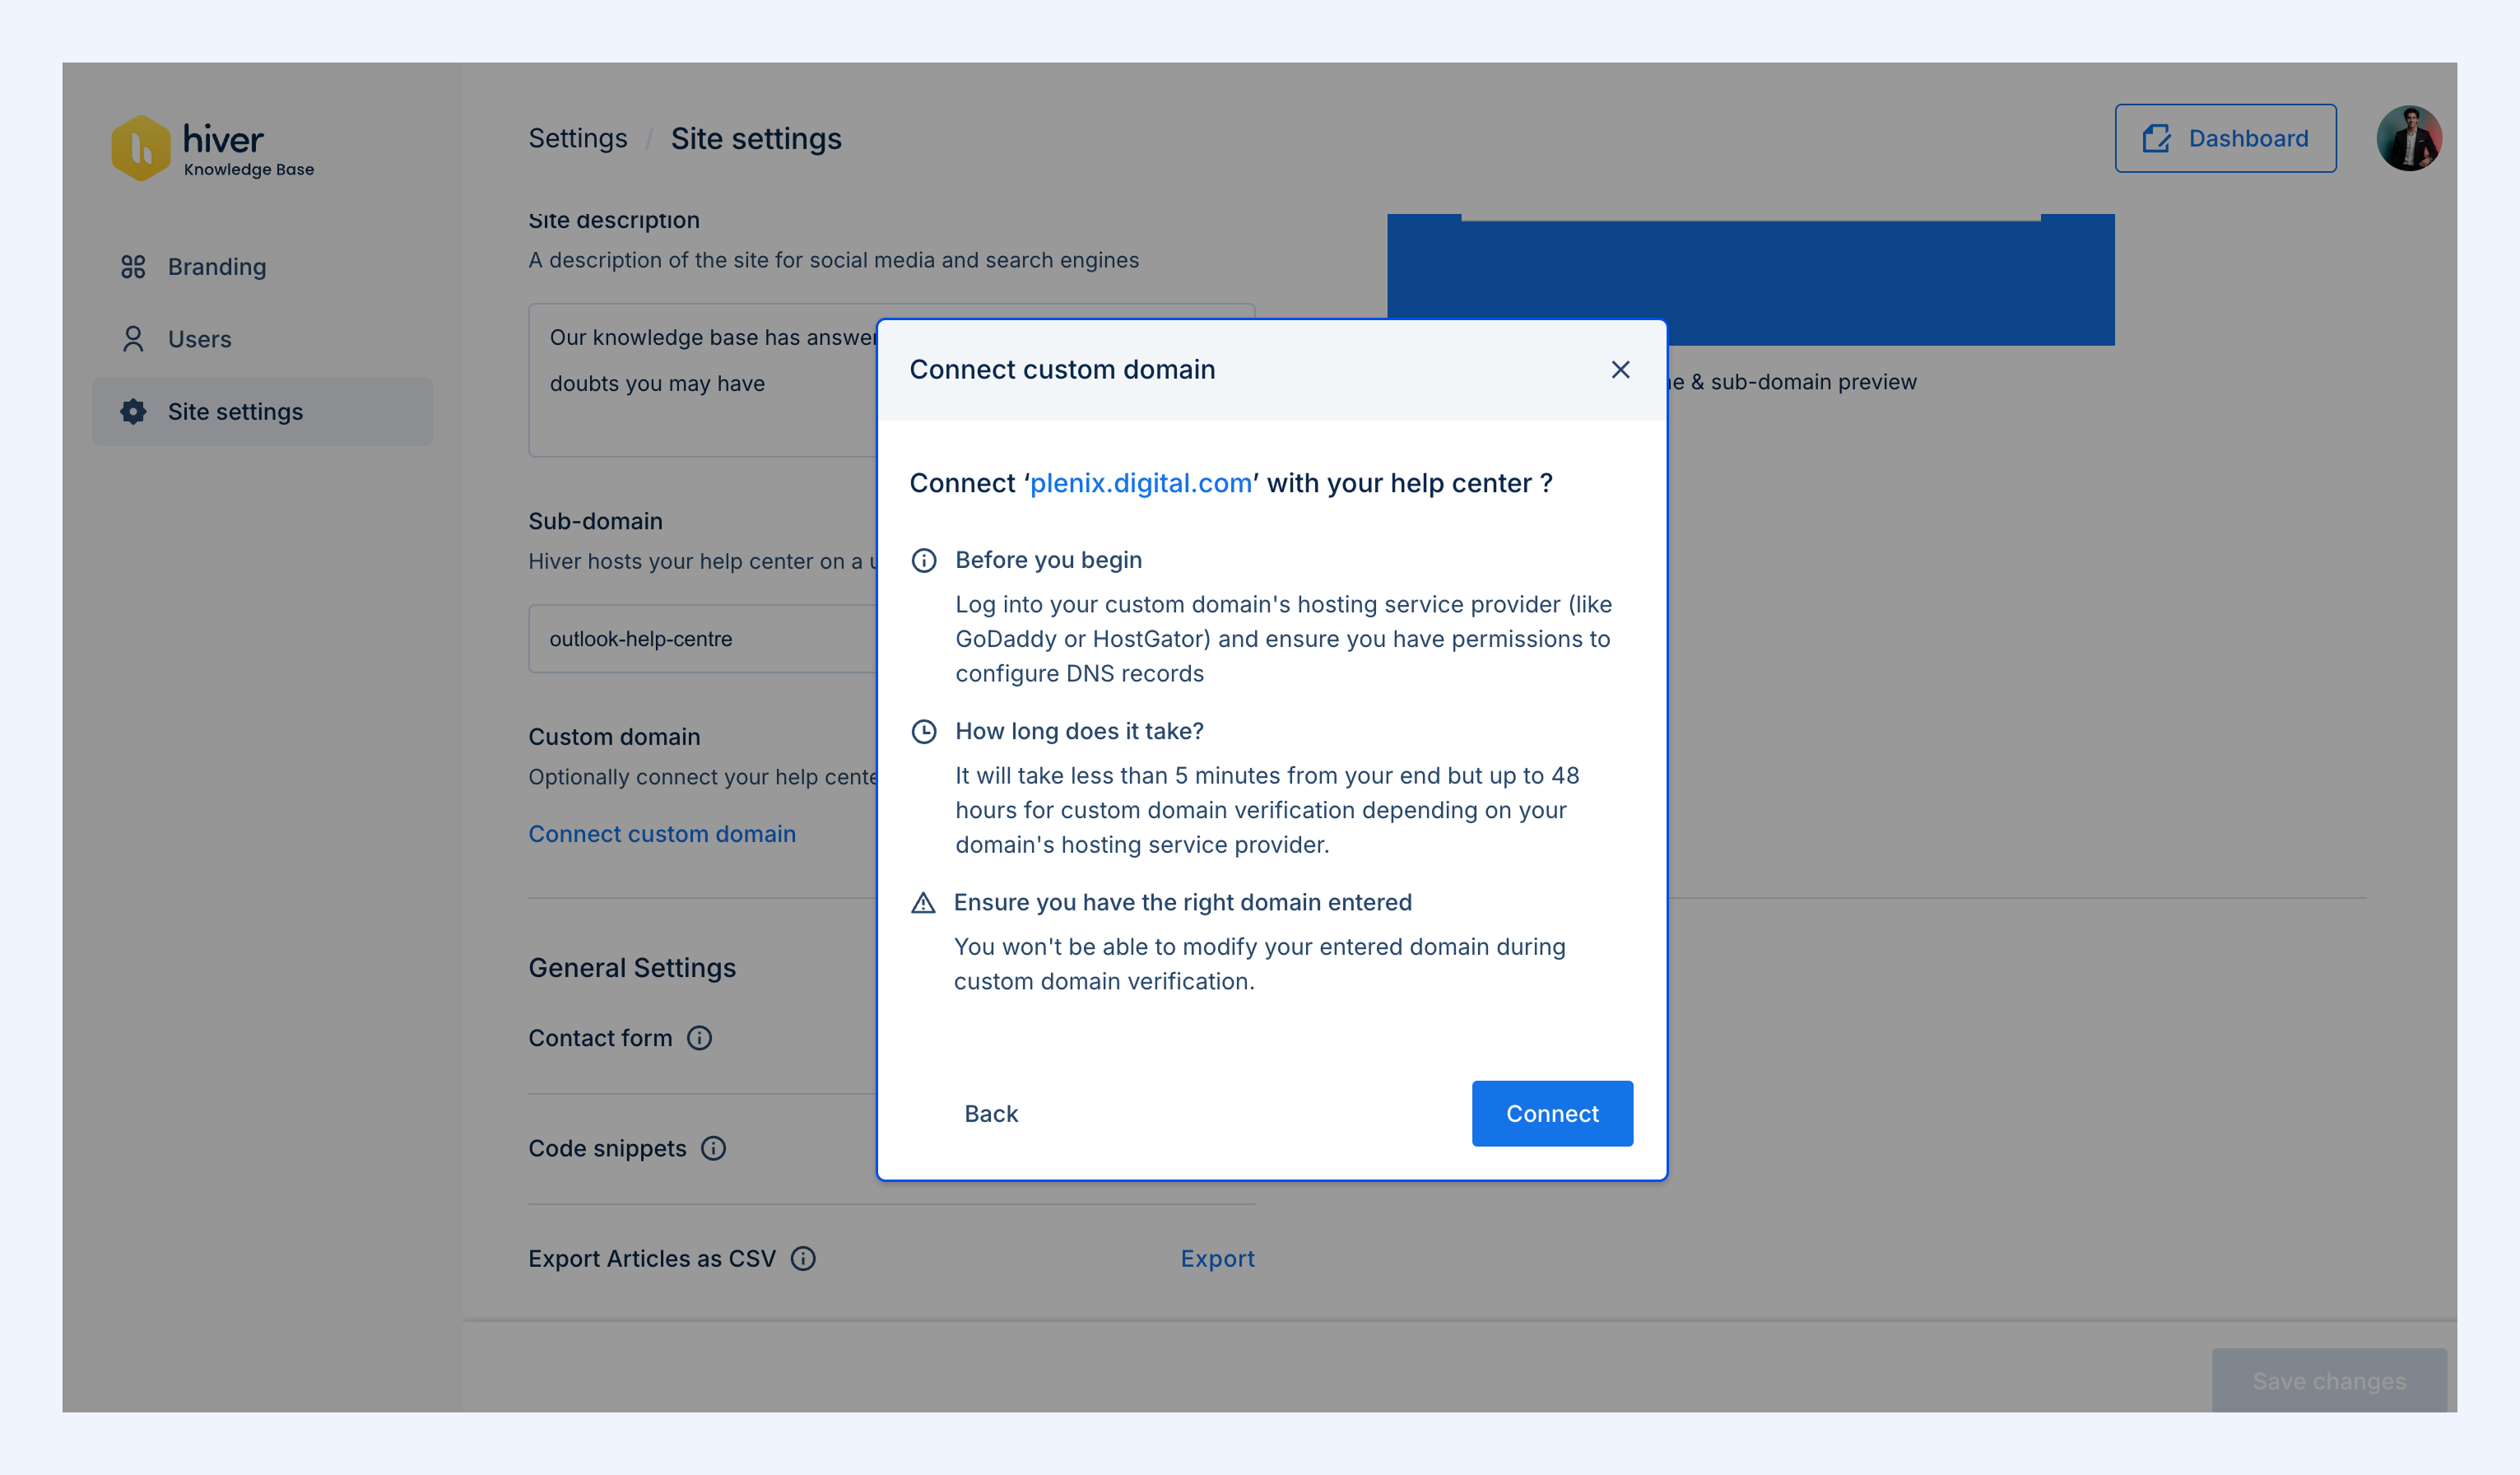
3. Review the verification checklist before connecting:
- Log in to your domain hosting provider and ensure you have permissions to update DNS records.
- Confirm that you’ve entered the correct domain name in Hiver. You won’t be able to modify this during domain verification.
Note: Domain verification can take anywhere from 5 minutes to 48 hours depending on your domain provider.
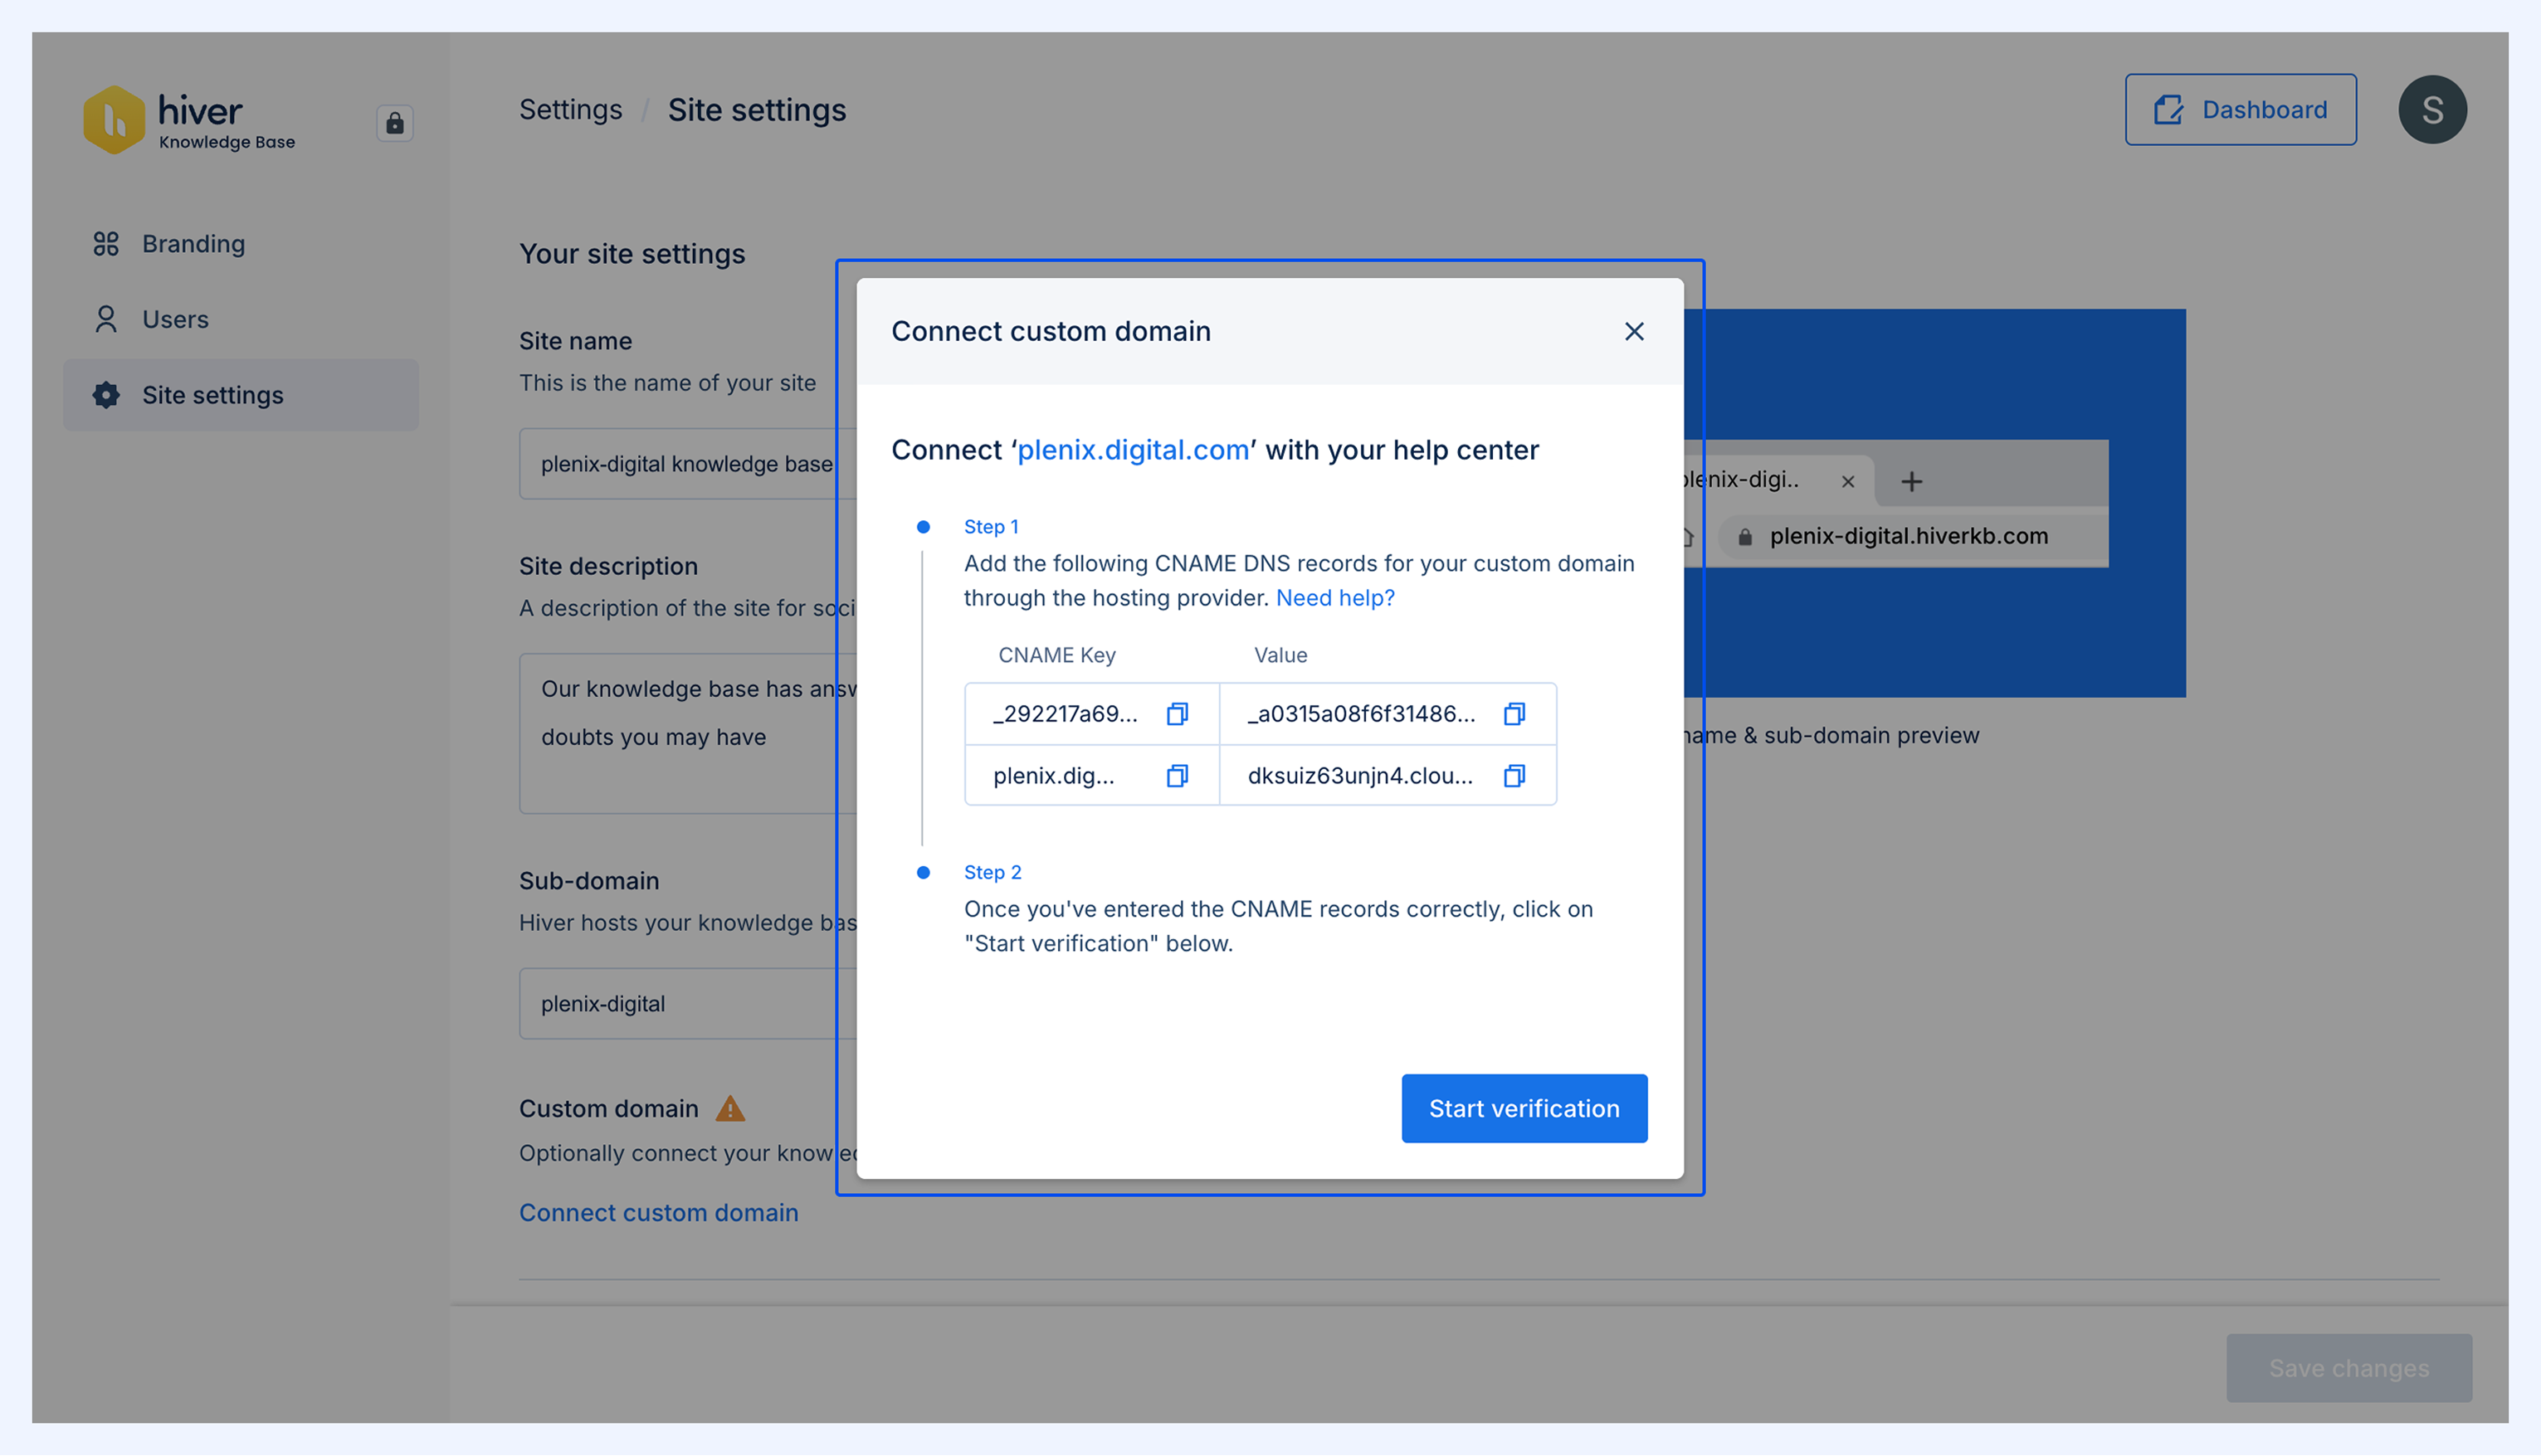
4. Next, you will receive two DNS entries (each with a Name and Value). Go to your DNS provider and add these entries:
- Set Record Type to CNAME
- Enter the provided Name and Value
- Save the changes
Note: Some providers auto-append the domain name. If so, remove it from the Name field.
5 Click Start verification.
6. Once verified, you’ll see a green checkmark confirming the setup is successful.
After setup
Once the custom domain is connected, all Help Center URLs will automatically update to use your new domain.
For example:
acme.hiverkb.com/getting-started/adding-users → help.acme.com/getting-started/adding-users
The setup timestamp and the admin details will be recorded for reference.
If setup fails
If verification fails, it may be due to missing or incorrect CAA (Certification Authority Authorization) records. These records specify which certificate authorities are allowed to issue SSL certificates for your domain.
How to check CAA records?
Run the following command in your terminal:
dig example.com CAA +short
If your domain does not return a CAA record that includes your certificate authority, you’ll need to add one manually.
To add a CAA record:
1. Log in to your DNS provider.
2. Go to your domain’s DNS management settings.
3. Add or edit a CAA record to authorize certificate issuance for your domain.
4. Save your changes and wait for DNS propagation to complete.
If you still face issues, contact support@hiverhq.com for assistance.
Next steps
Add a Contact Form to Your Help Center