Customizing your Chat Inbox
Once your Chat Inbox is set up, you can manage how your team handles incoming chats and customize the behaviour of your widget.
This article explains each setting available for managing and customizing live chat in Hiver.
To access your Chat Inbox settings, go to Hiver Settings → Admin Panel → Shared Inboxes, and select an inbox.
Note: Chat Inbox is a legacy feature and is only available to customers who signed up before May 18, 2026.
Participants
Participants helps you manage which team members have access to the Chat Inbox. You can add or remove users at any time, based on who should handle customer conversations.
- To add teammates, click Add User and choose existing members from your organization or invite new ones using their email addresses.
Note: Newly added users receive an email notification and will see the Chat Inbox in their Gmail account.
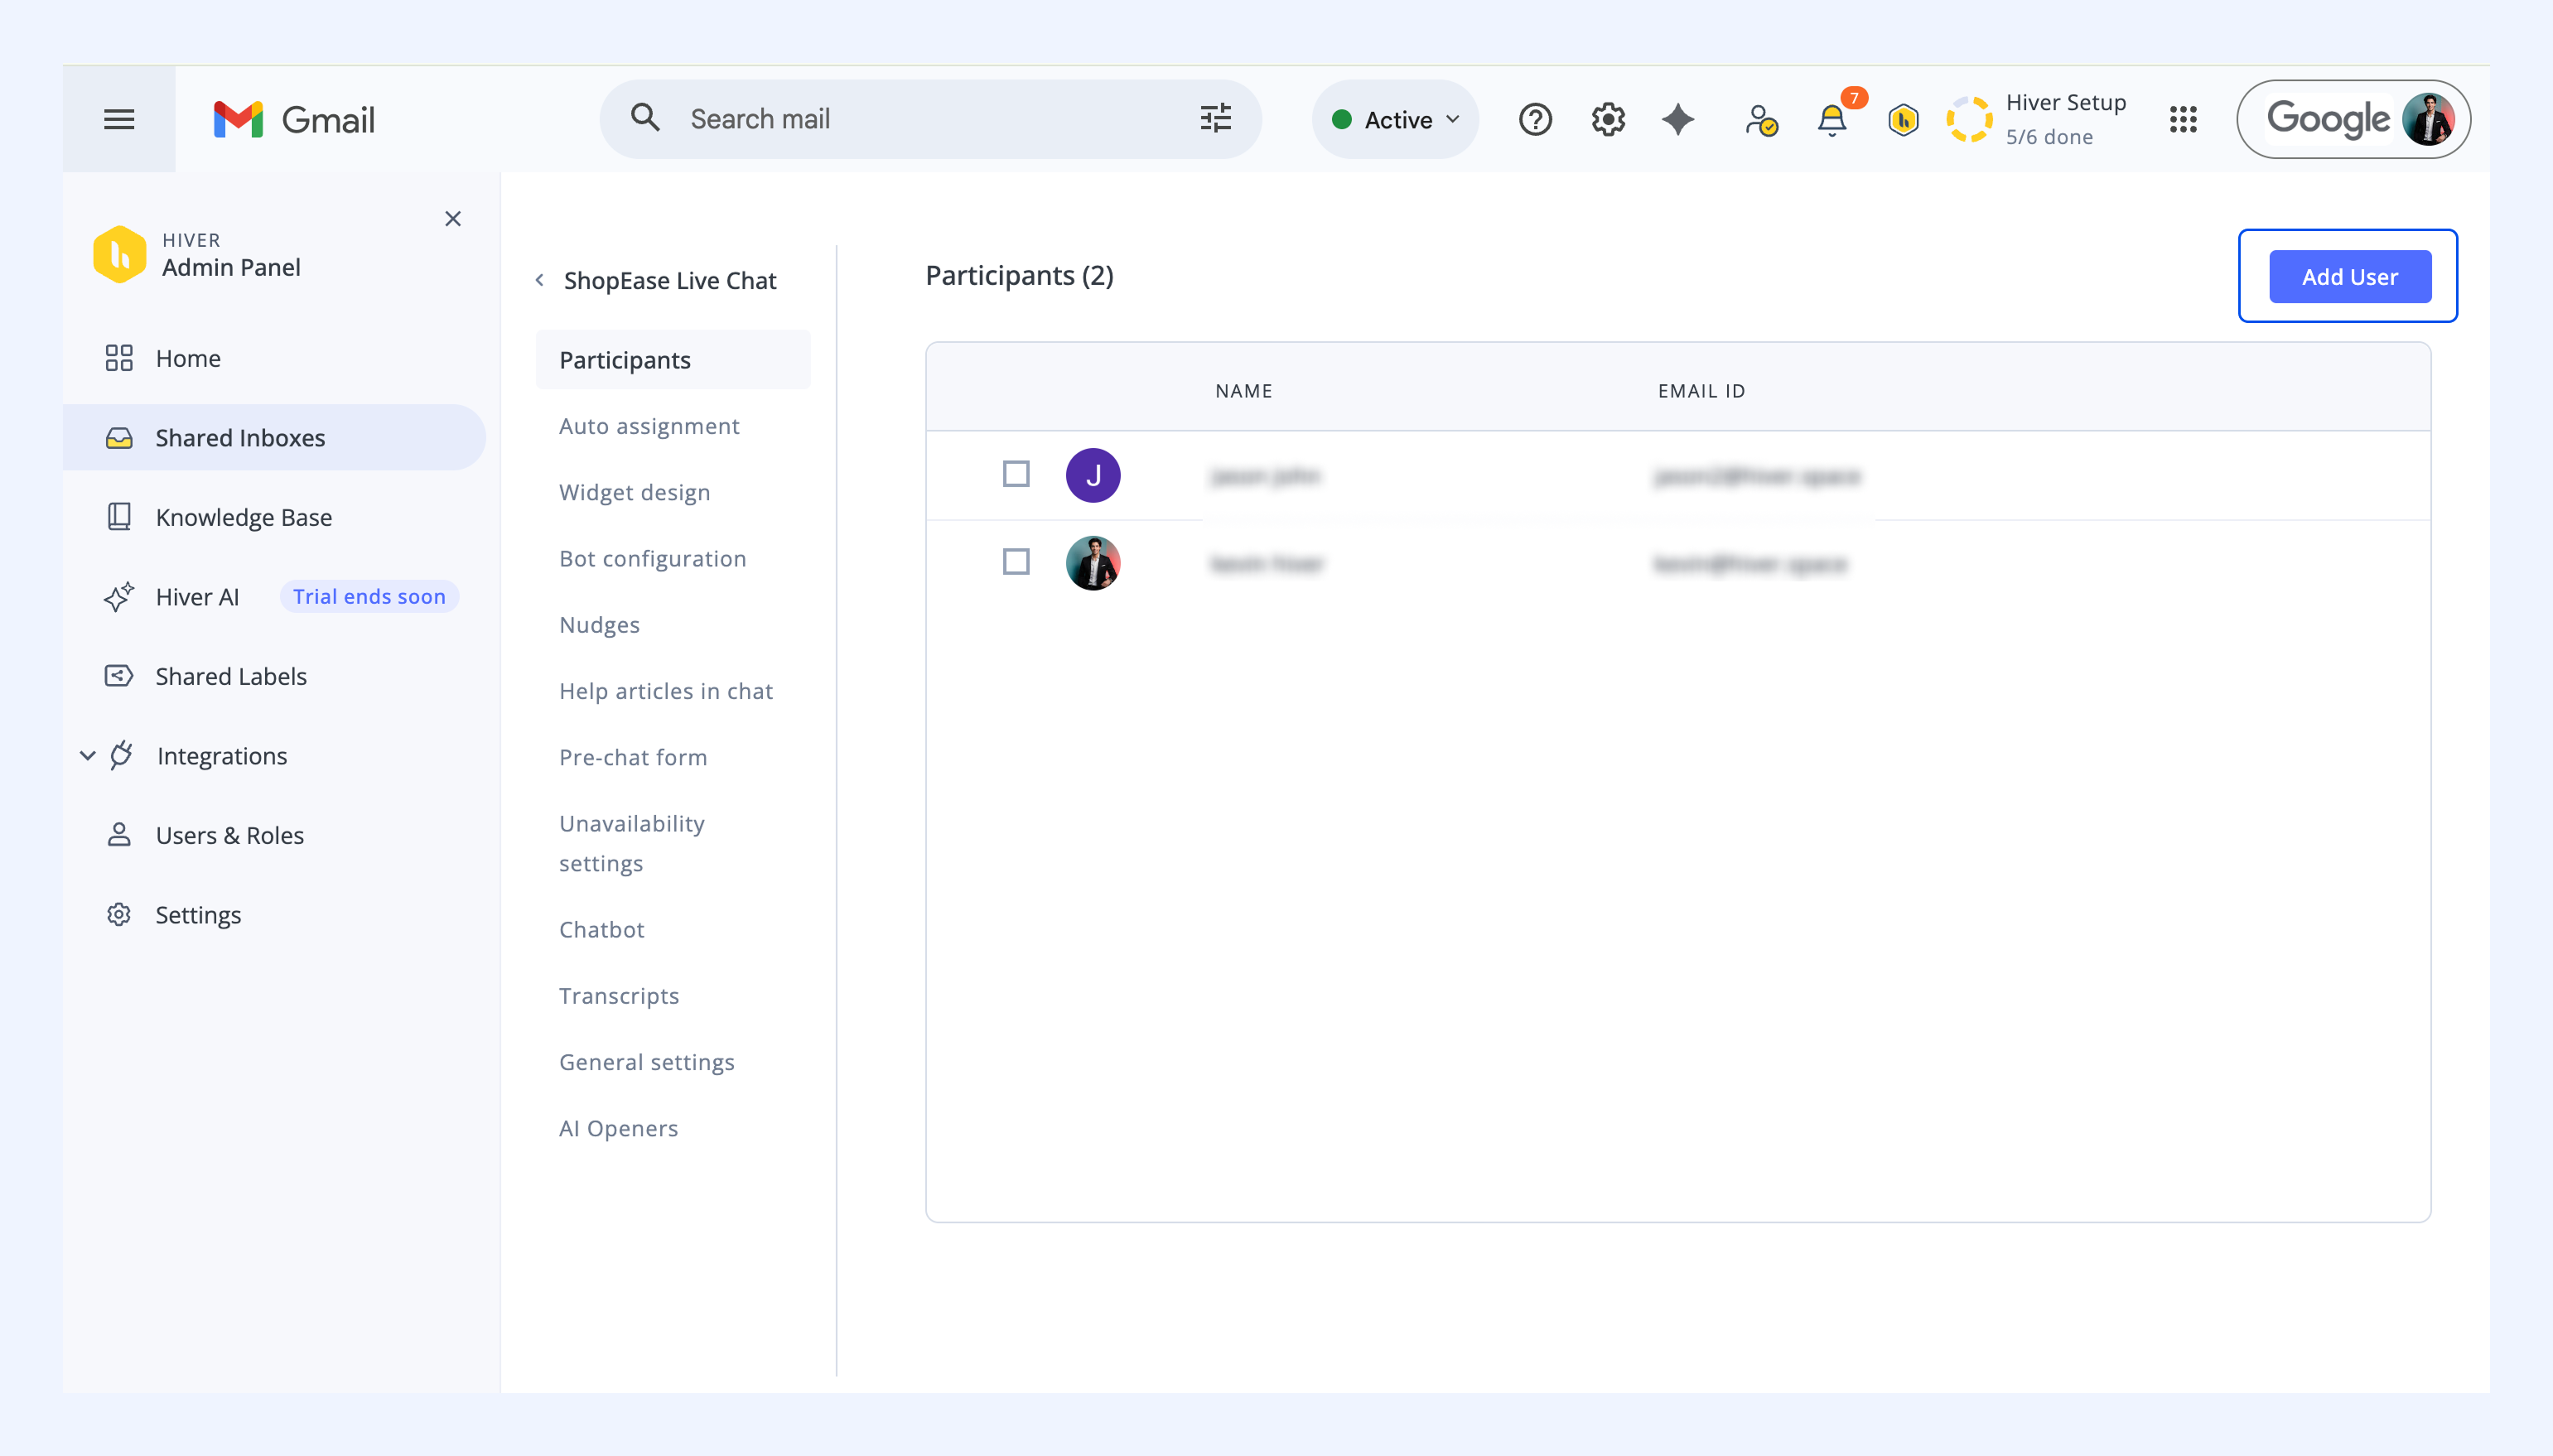
- To remove a user, select their name, click 'Remove,' and then confirm your action.
Auto-assignment
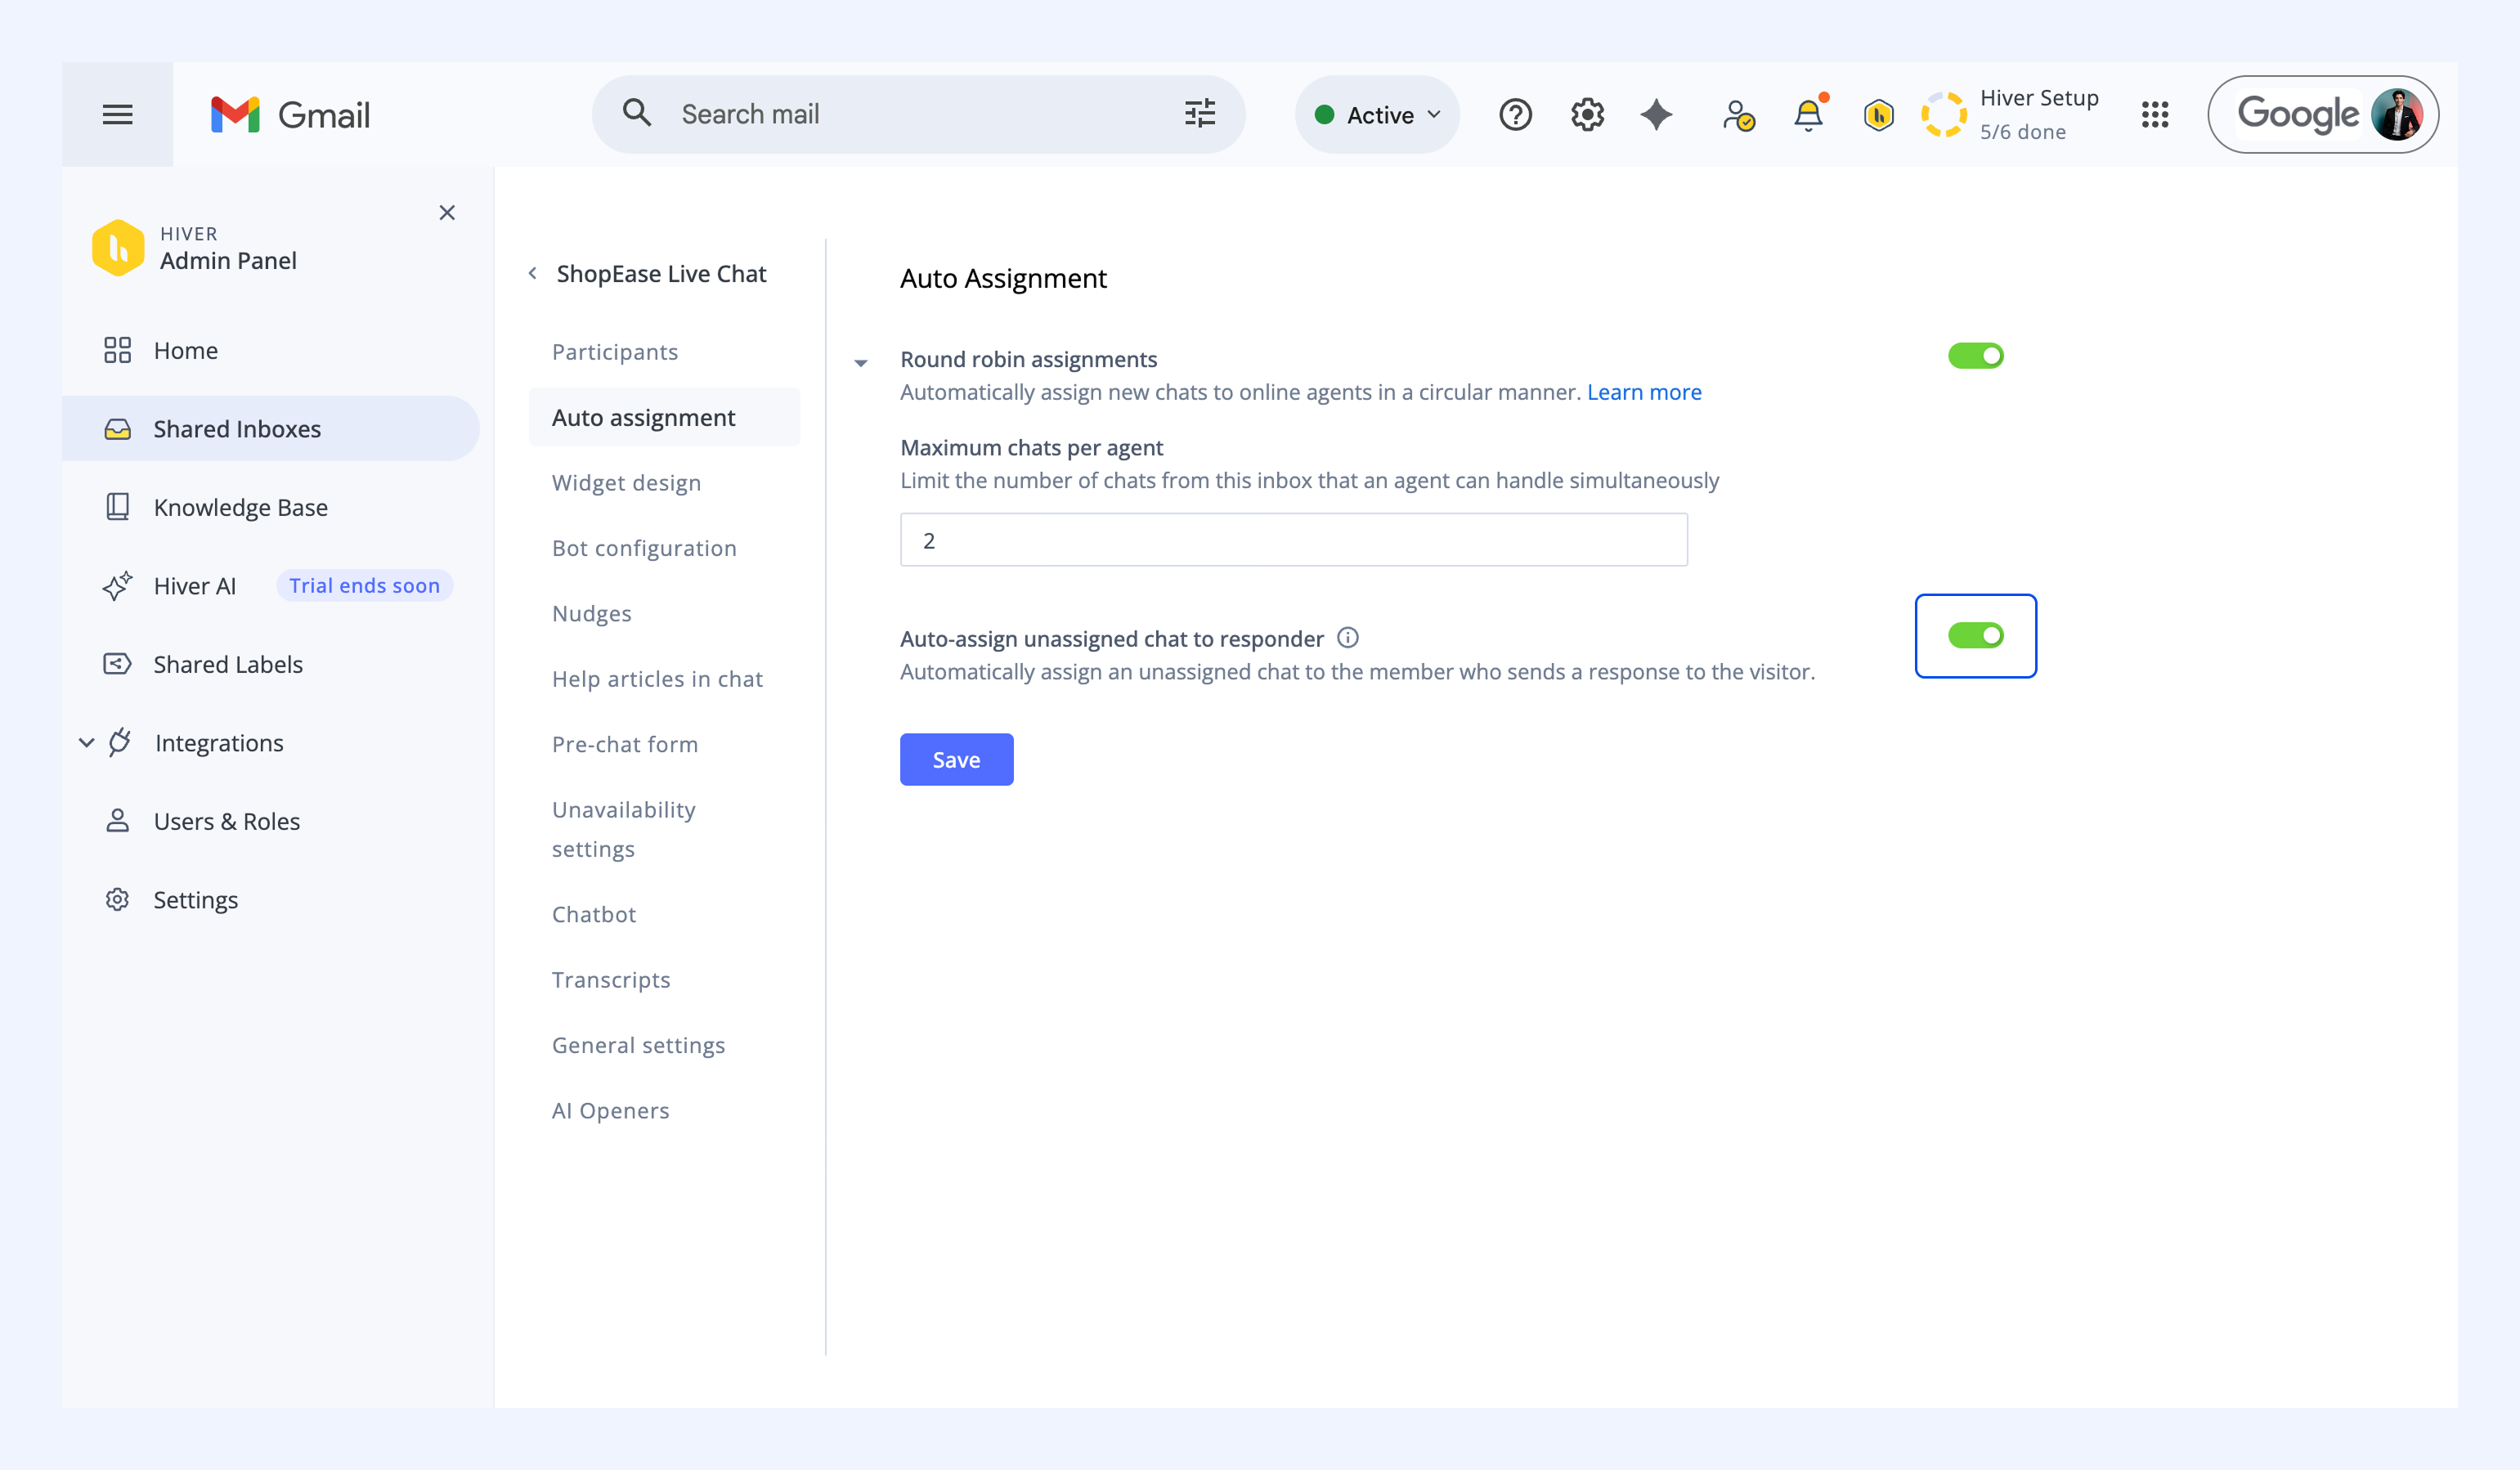
Auto-assignment helps distribute new chats efficiently among available team members.
There are two ways to assign conversations within a Chat Inbox automatically:
- Round robin assignment: Automatically routes new chats to online agents in a circular sequence, ensuring fair distribution.
- Auto-assign to responder: Assigns an unassigned chat to the agent who first responds to the visitor.
You can enable or disable these options according to your team's preferred method for handling incoming messages. Learn more about auto-assigning chats.
Widget design
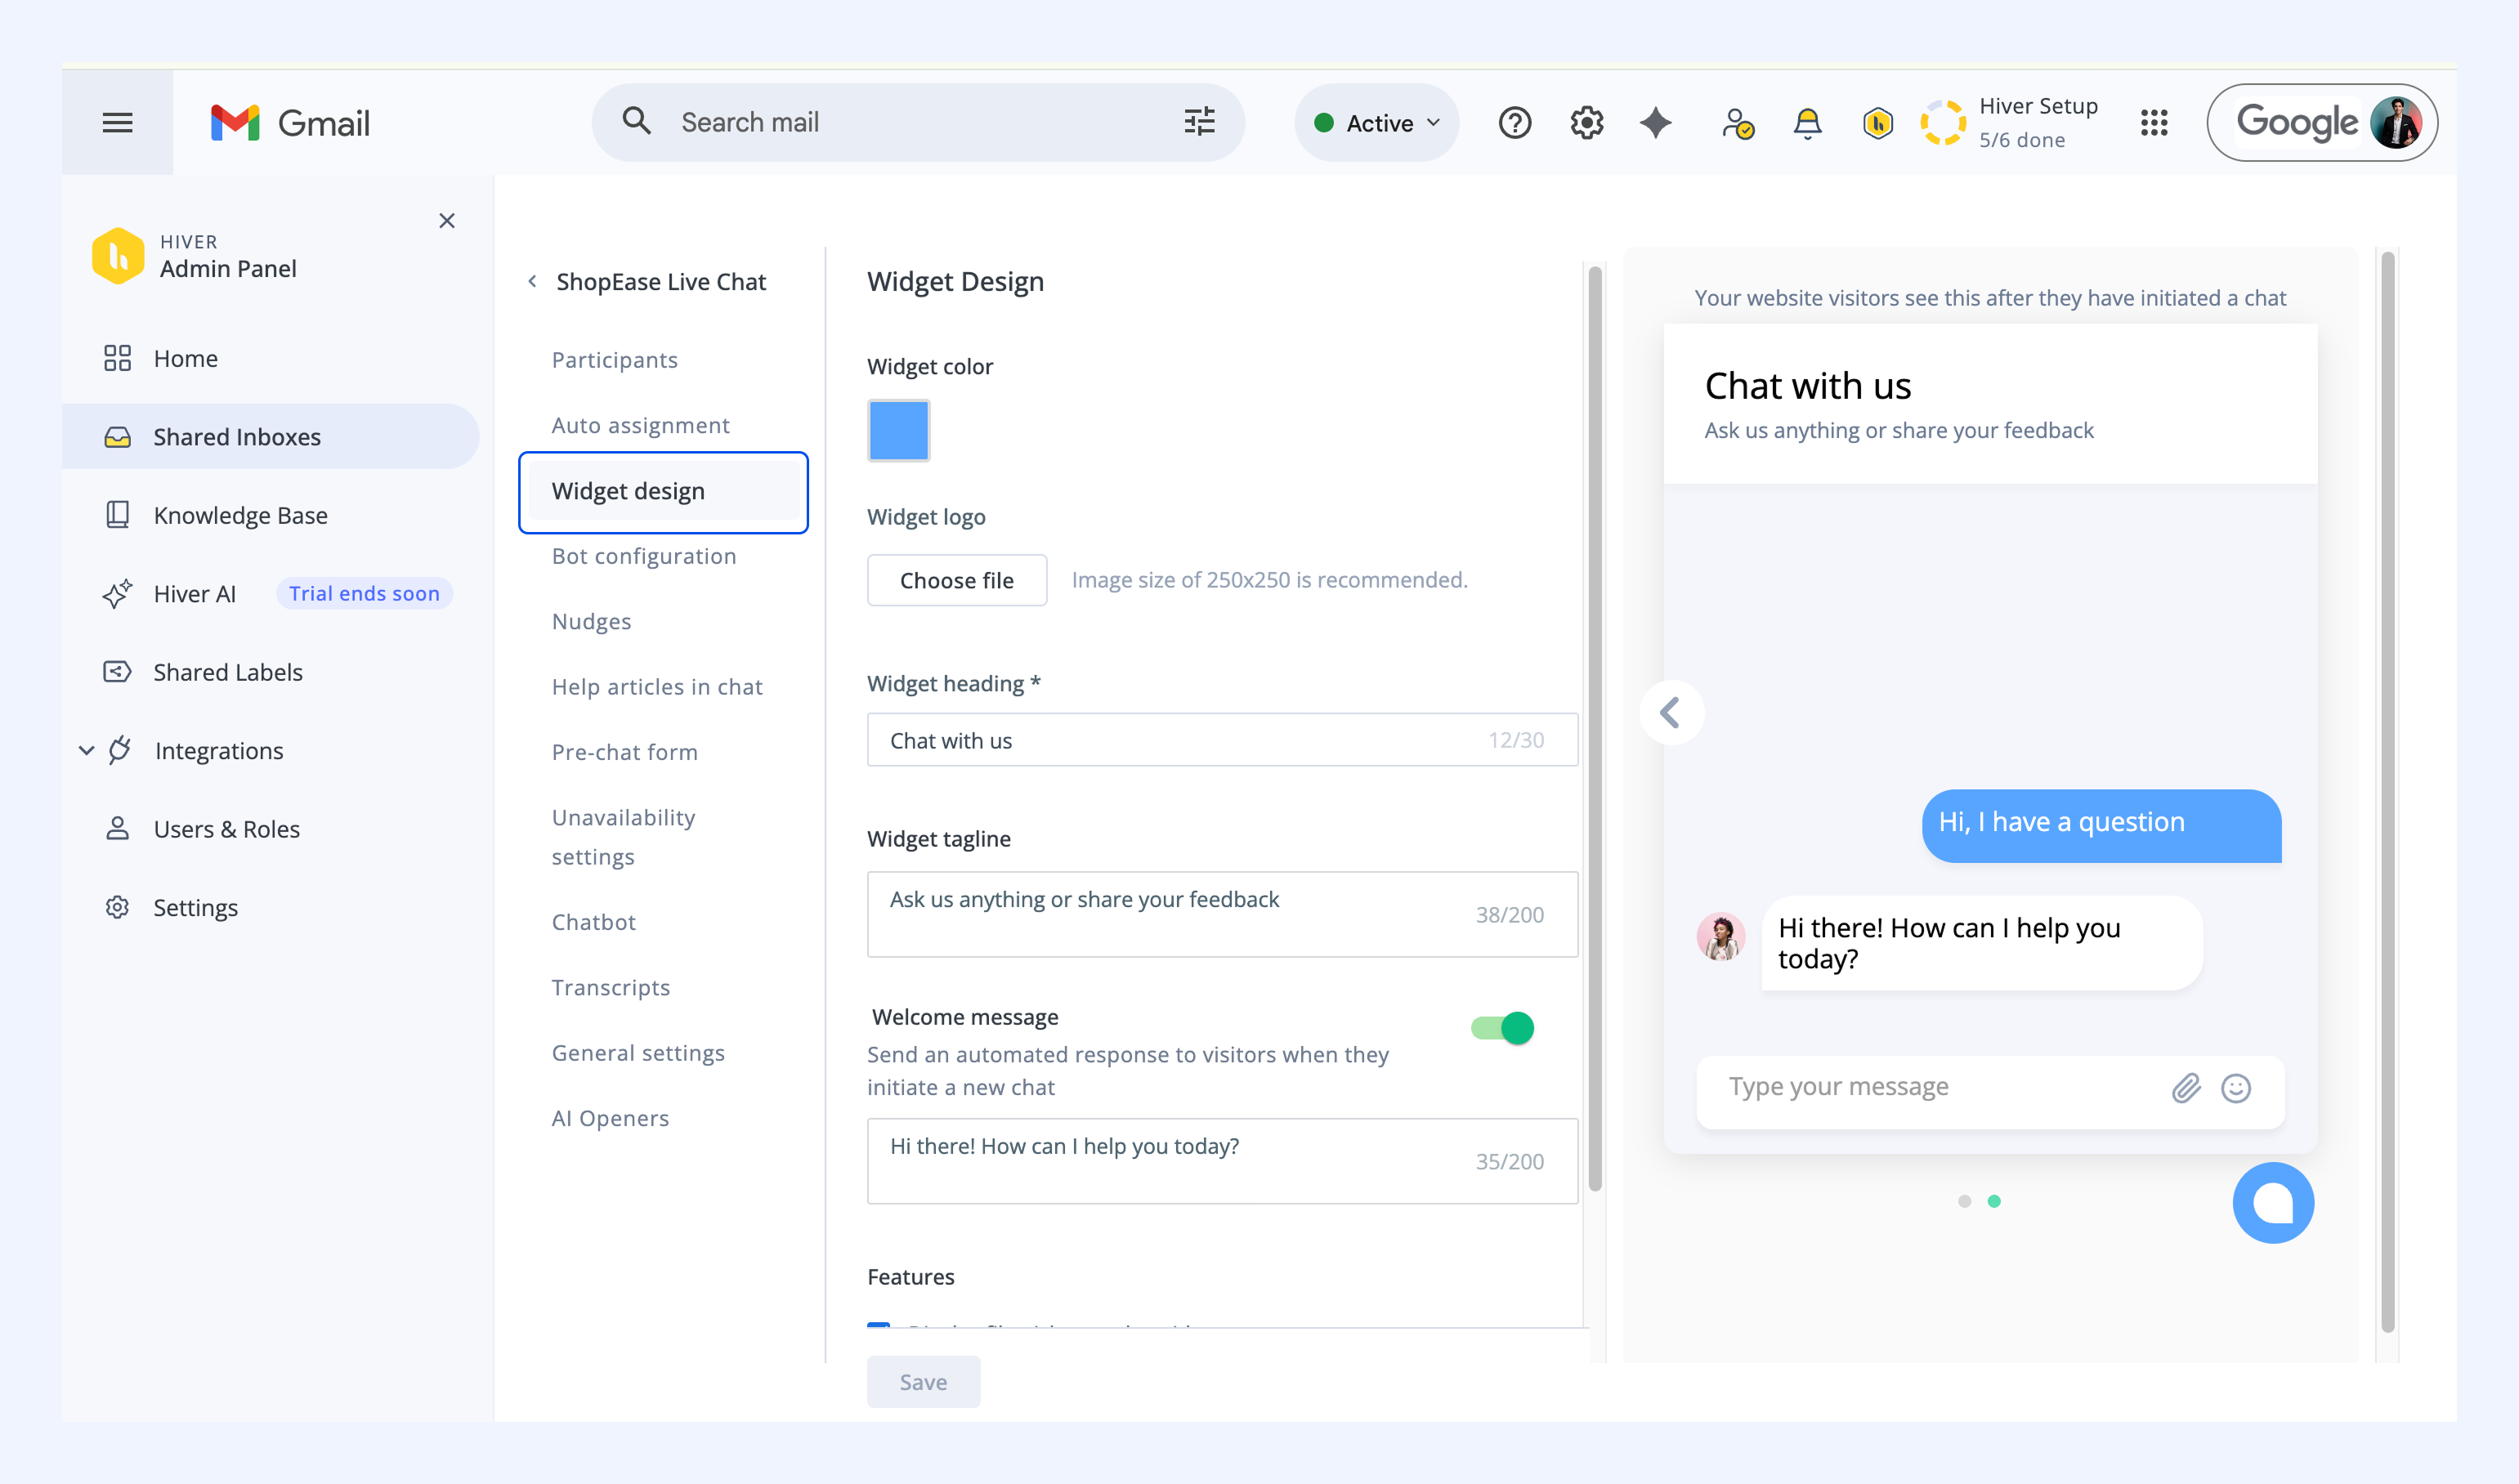
Customize the look and feel of your chat widget after it has been created and make visitors feel welcome. You can update the widget’s color, logo, heading, tagline, and welcome message and enable or disable the following features to enhance your visitors’ experience:
- Display file picker: Allows visitors to upload attachments during a chat.
- Display emoji picker: Enables emoji usage in conversations.
- CSAT survey: Automatically sends a customer satisfaction survey to the visitor once a chat ends.
Changes are reflected in the live preview on the right, helping you see exactly how the widget will appear to visitors.
Bot configuration
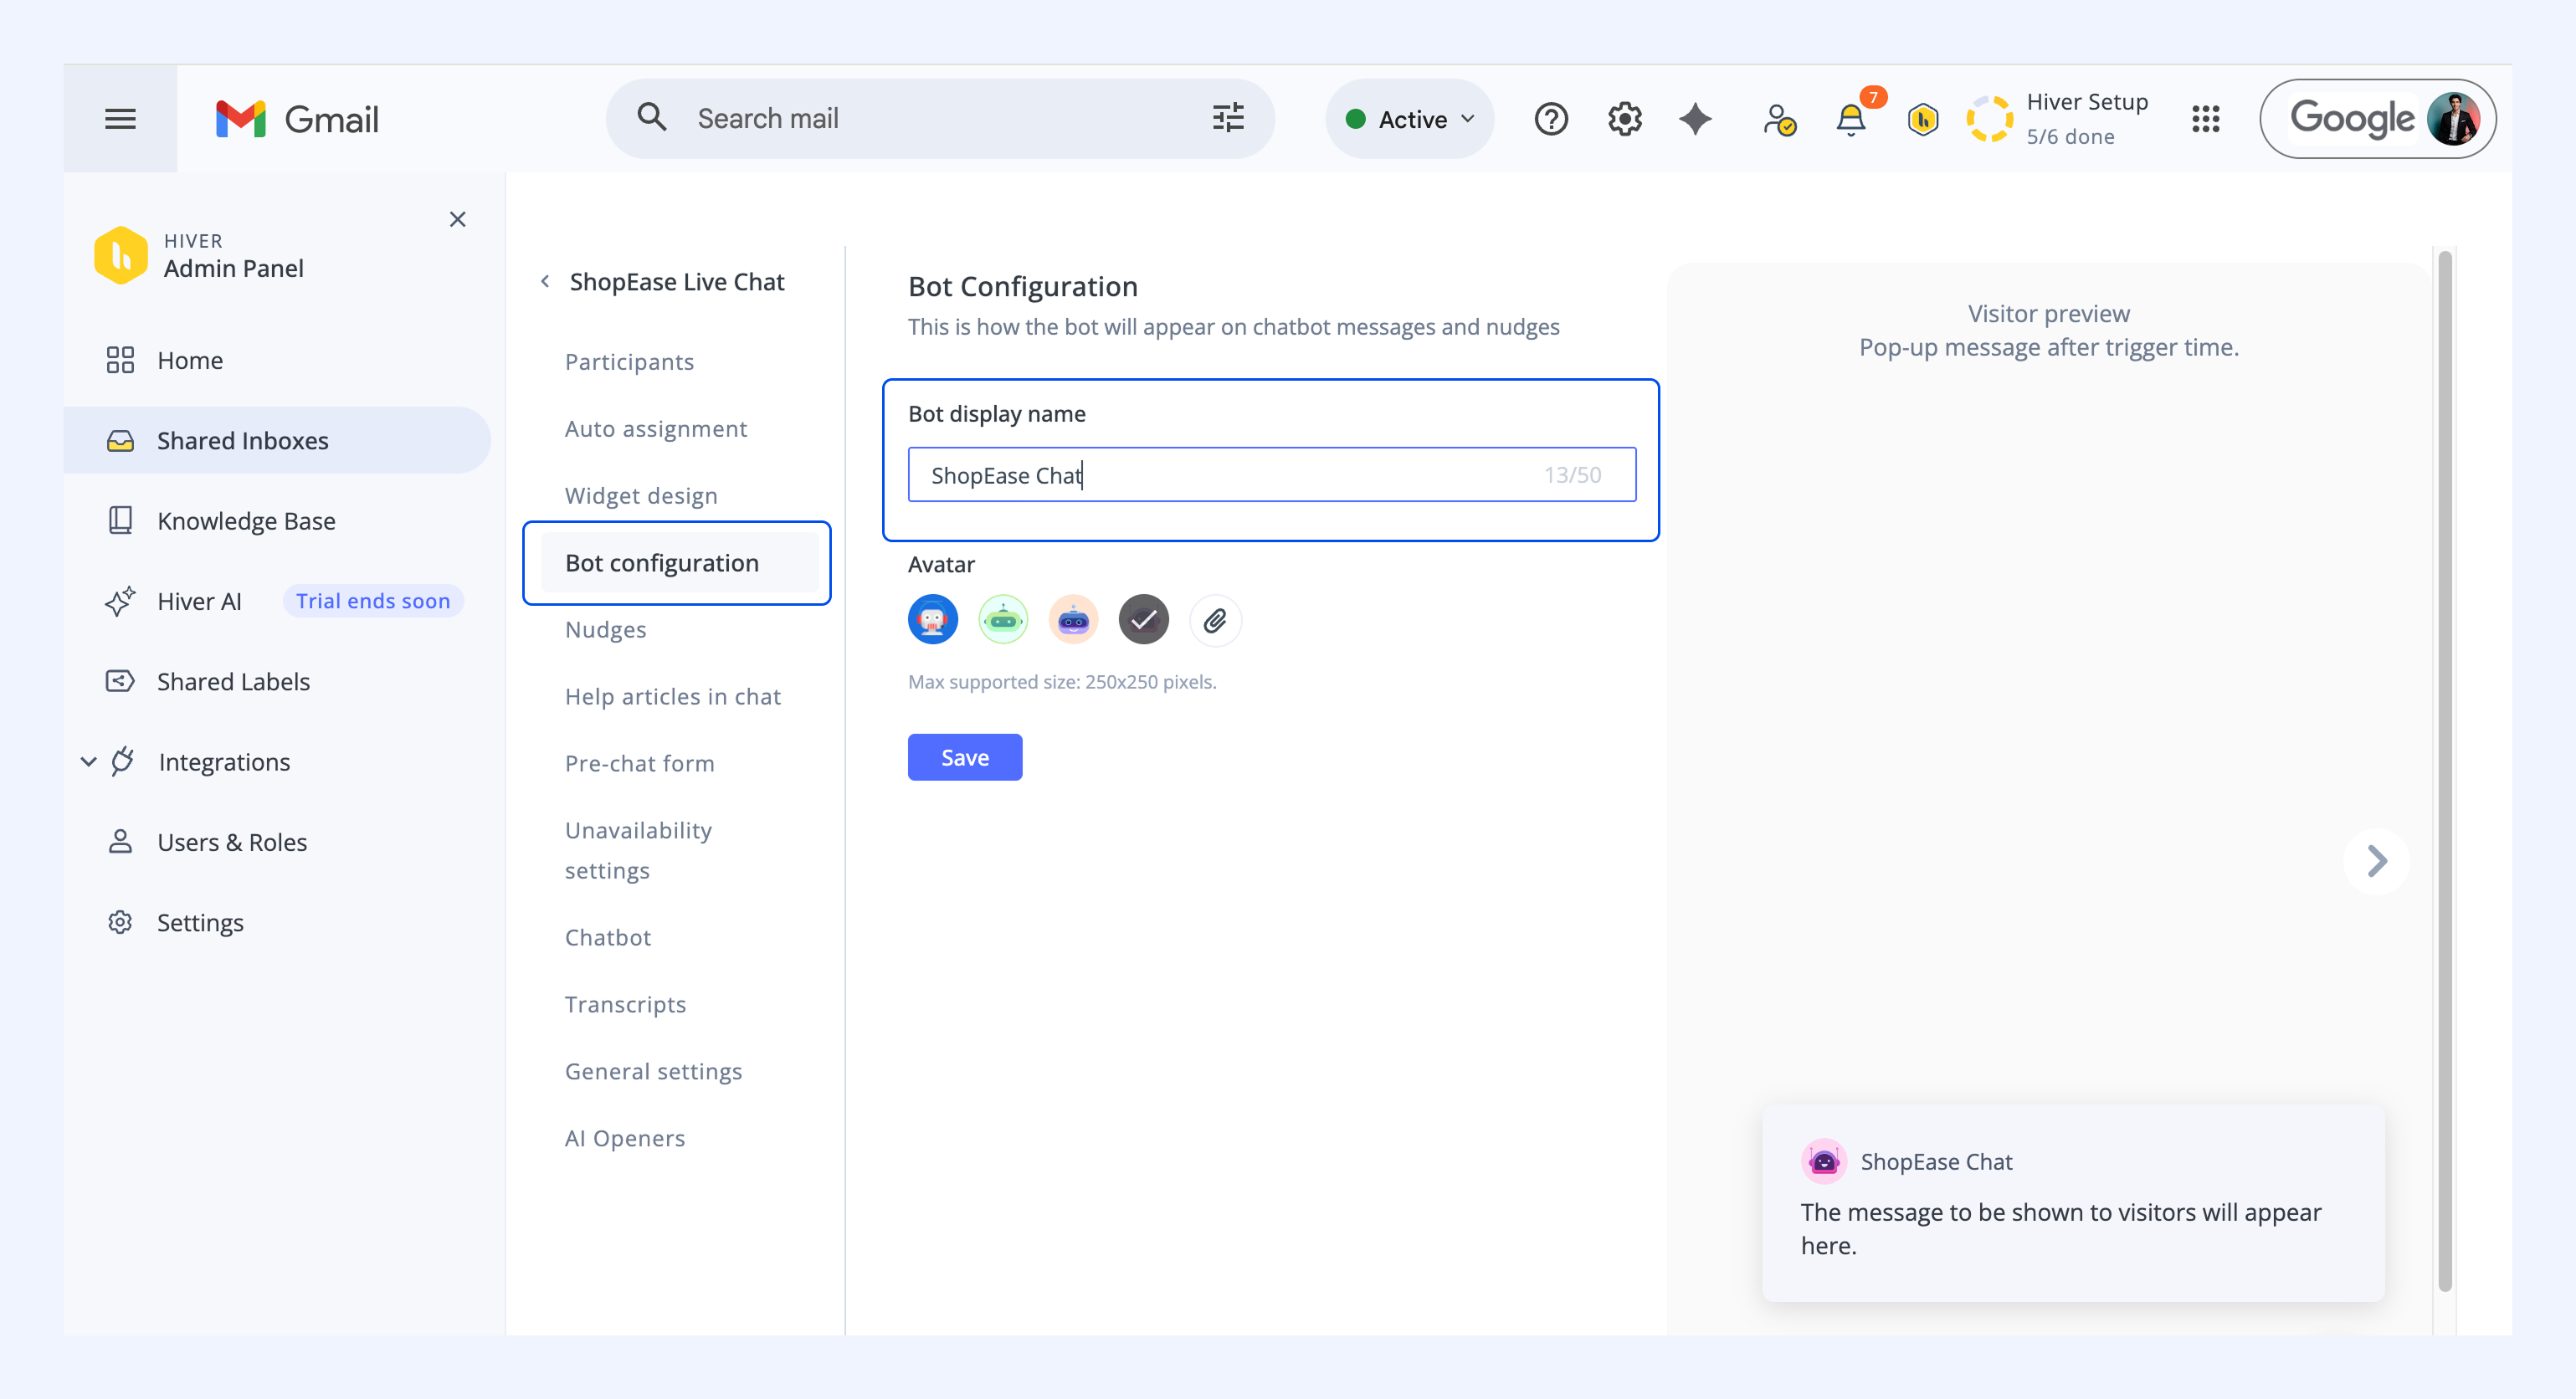
Bot configuration lets you change your chatbot’s identity and appearance after your Chat Inbox has been created. You can update the bot display name, bot avatar, and preview.
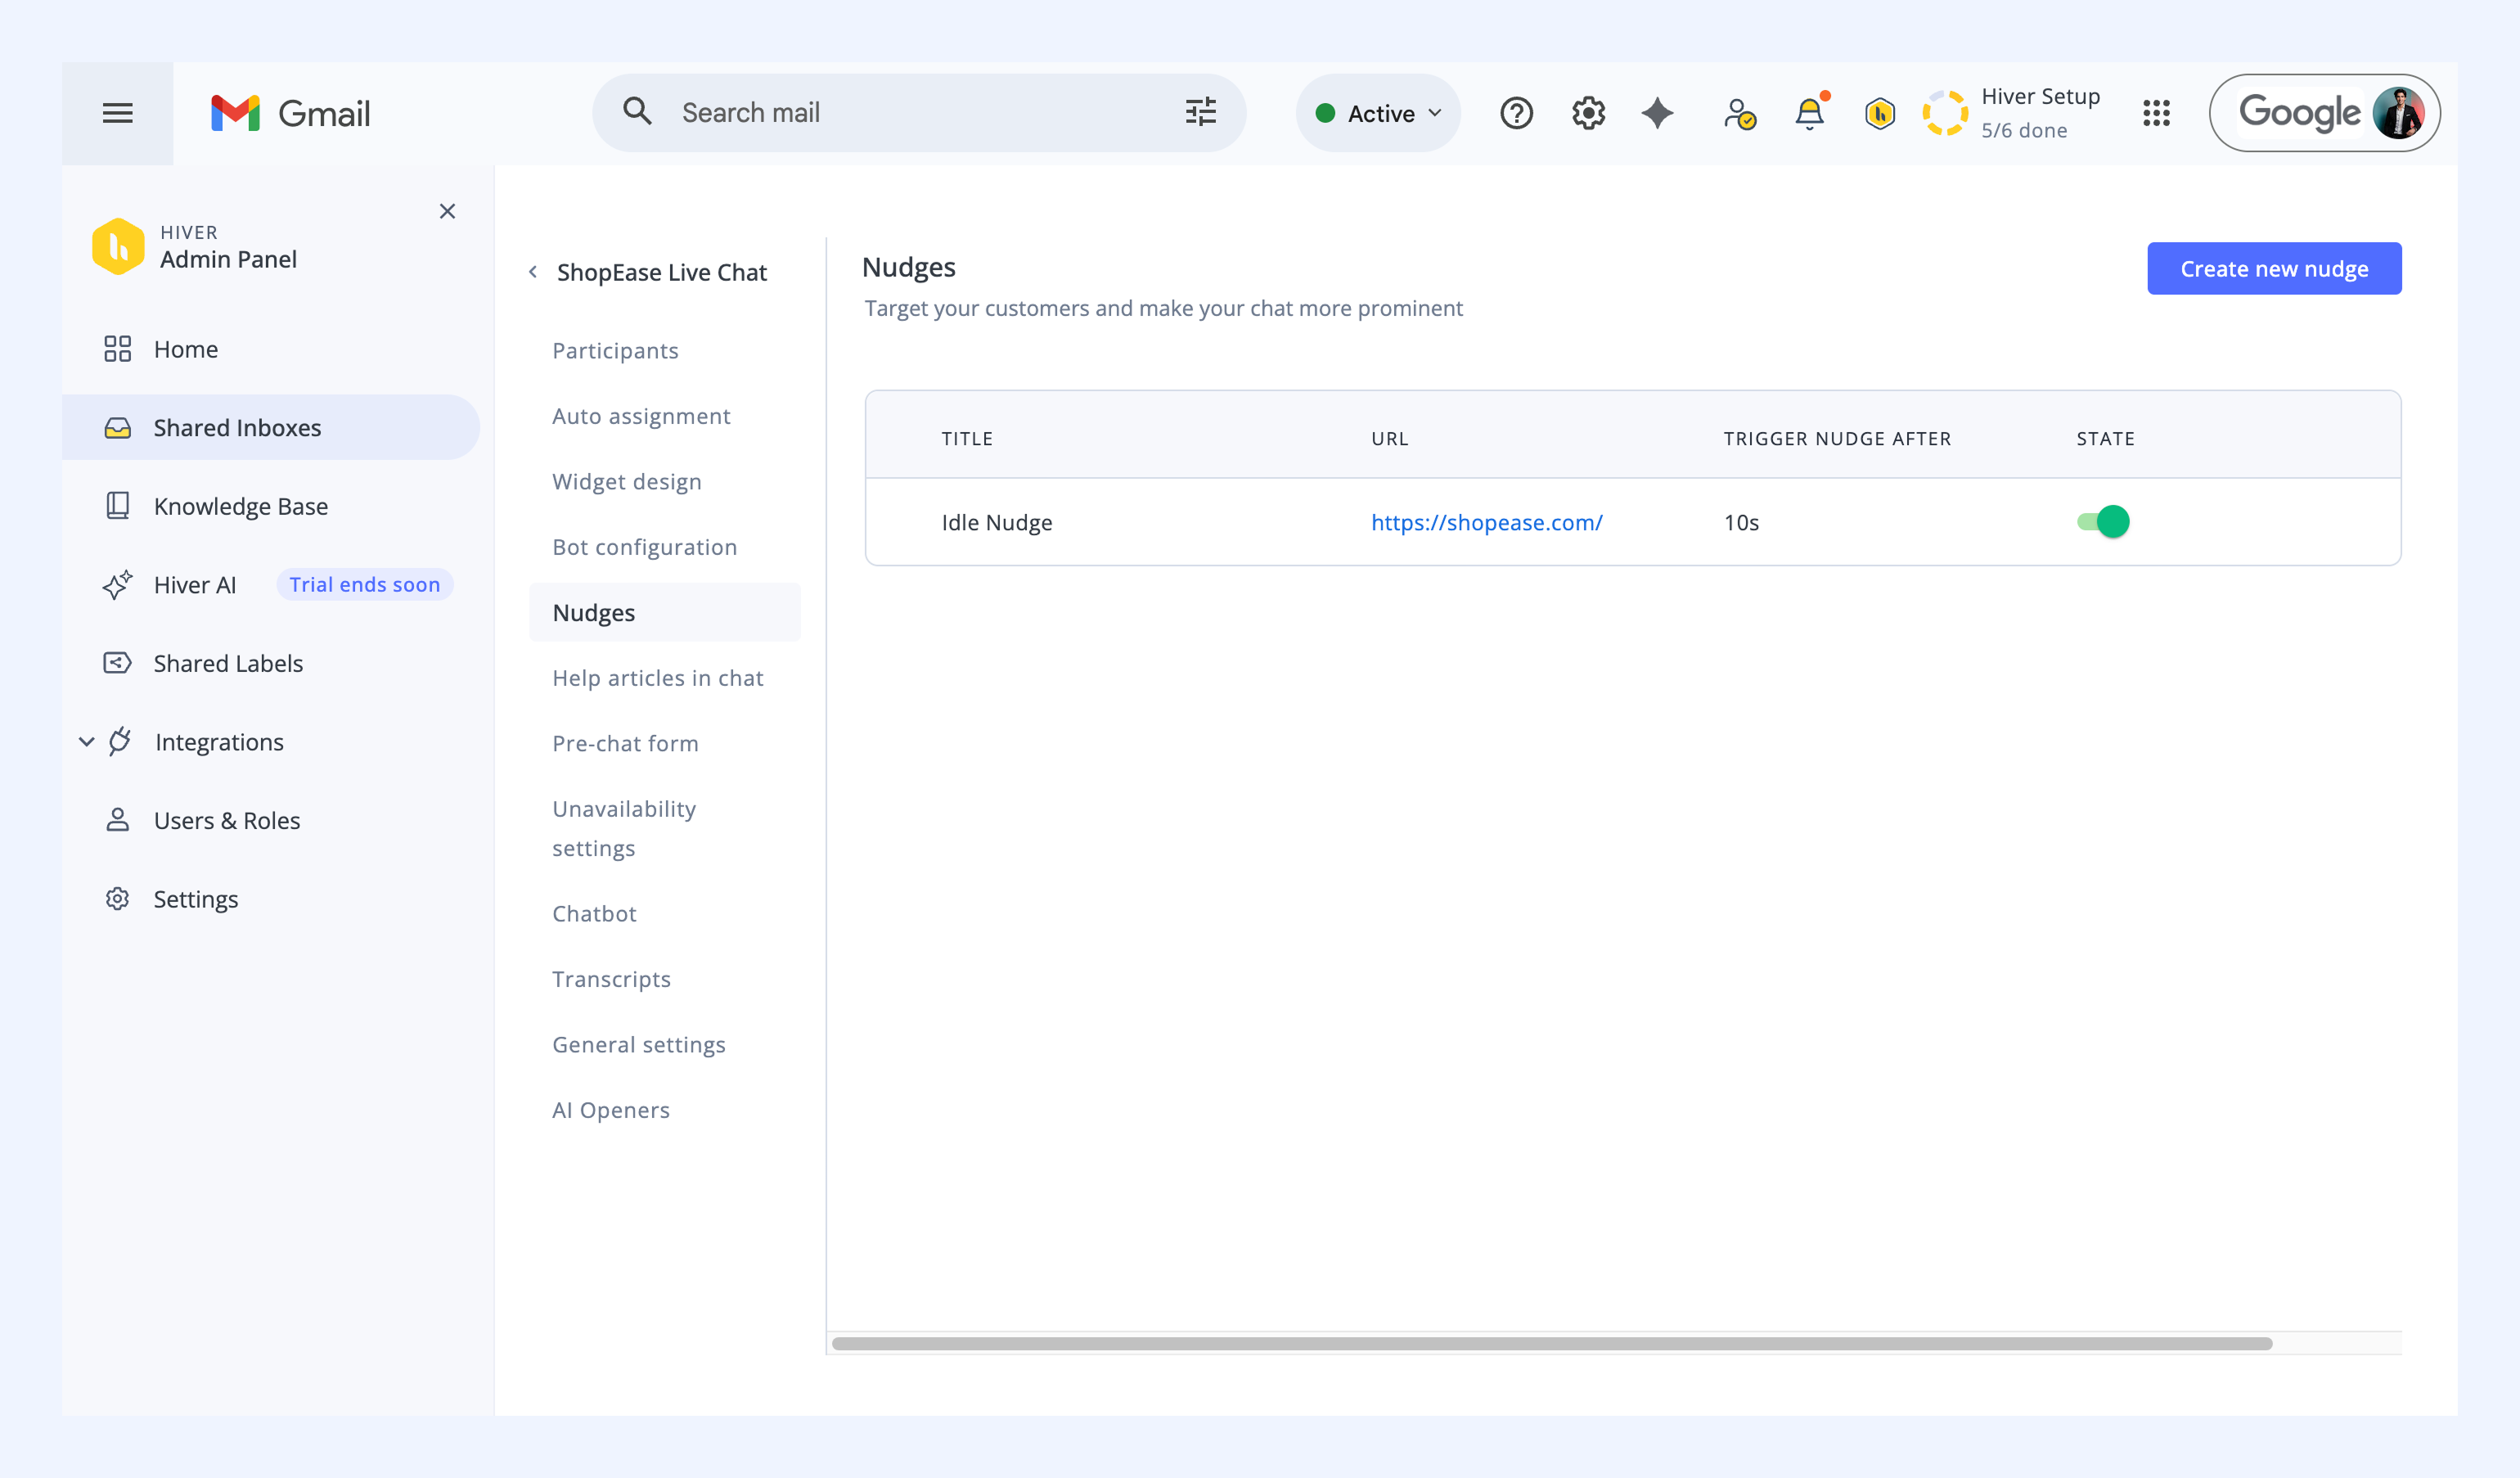
Nudges
Set up small, friendly prompts that appear in the chat window based on visitor behavior or time spent on your website. Learn more about nudges in live chat.
Help articles in chat
If you have a Knowledge Base set up on your website, you can connect that to your chatbot and instantly share relevant help articles with visitors. Learn more about setting up a Knowledge Base.
This helps resolve common questions more quickly and allows your team to focus on more complex chats.
Learn more about help articles in a live chat.
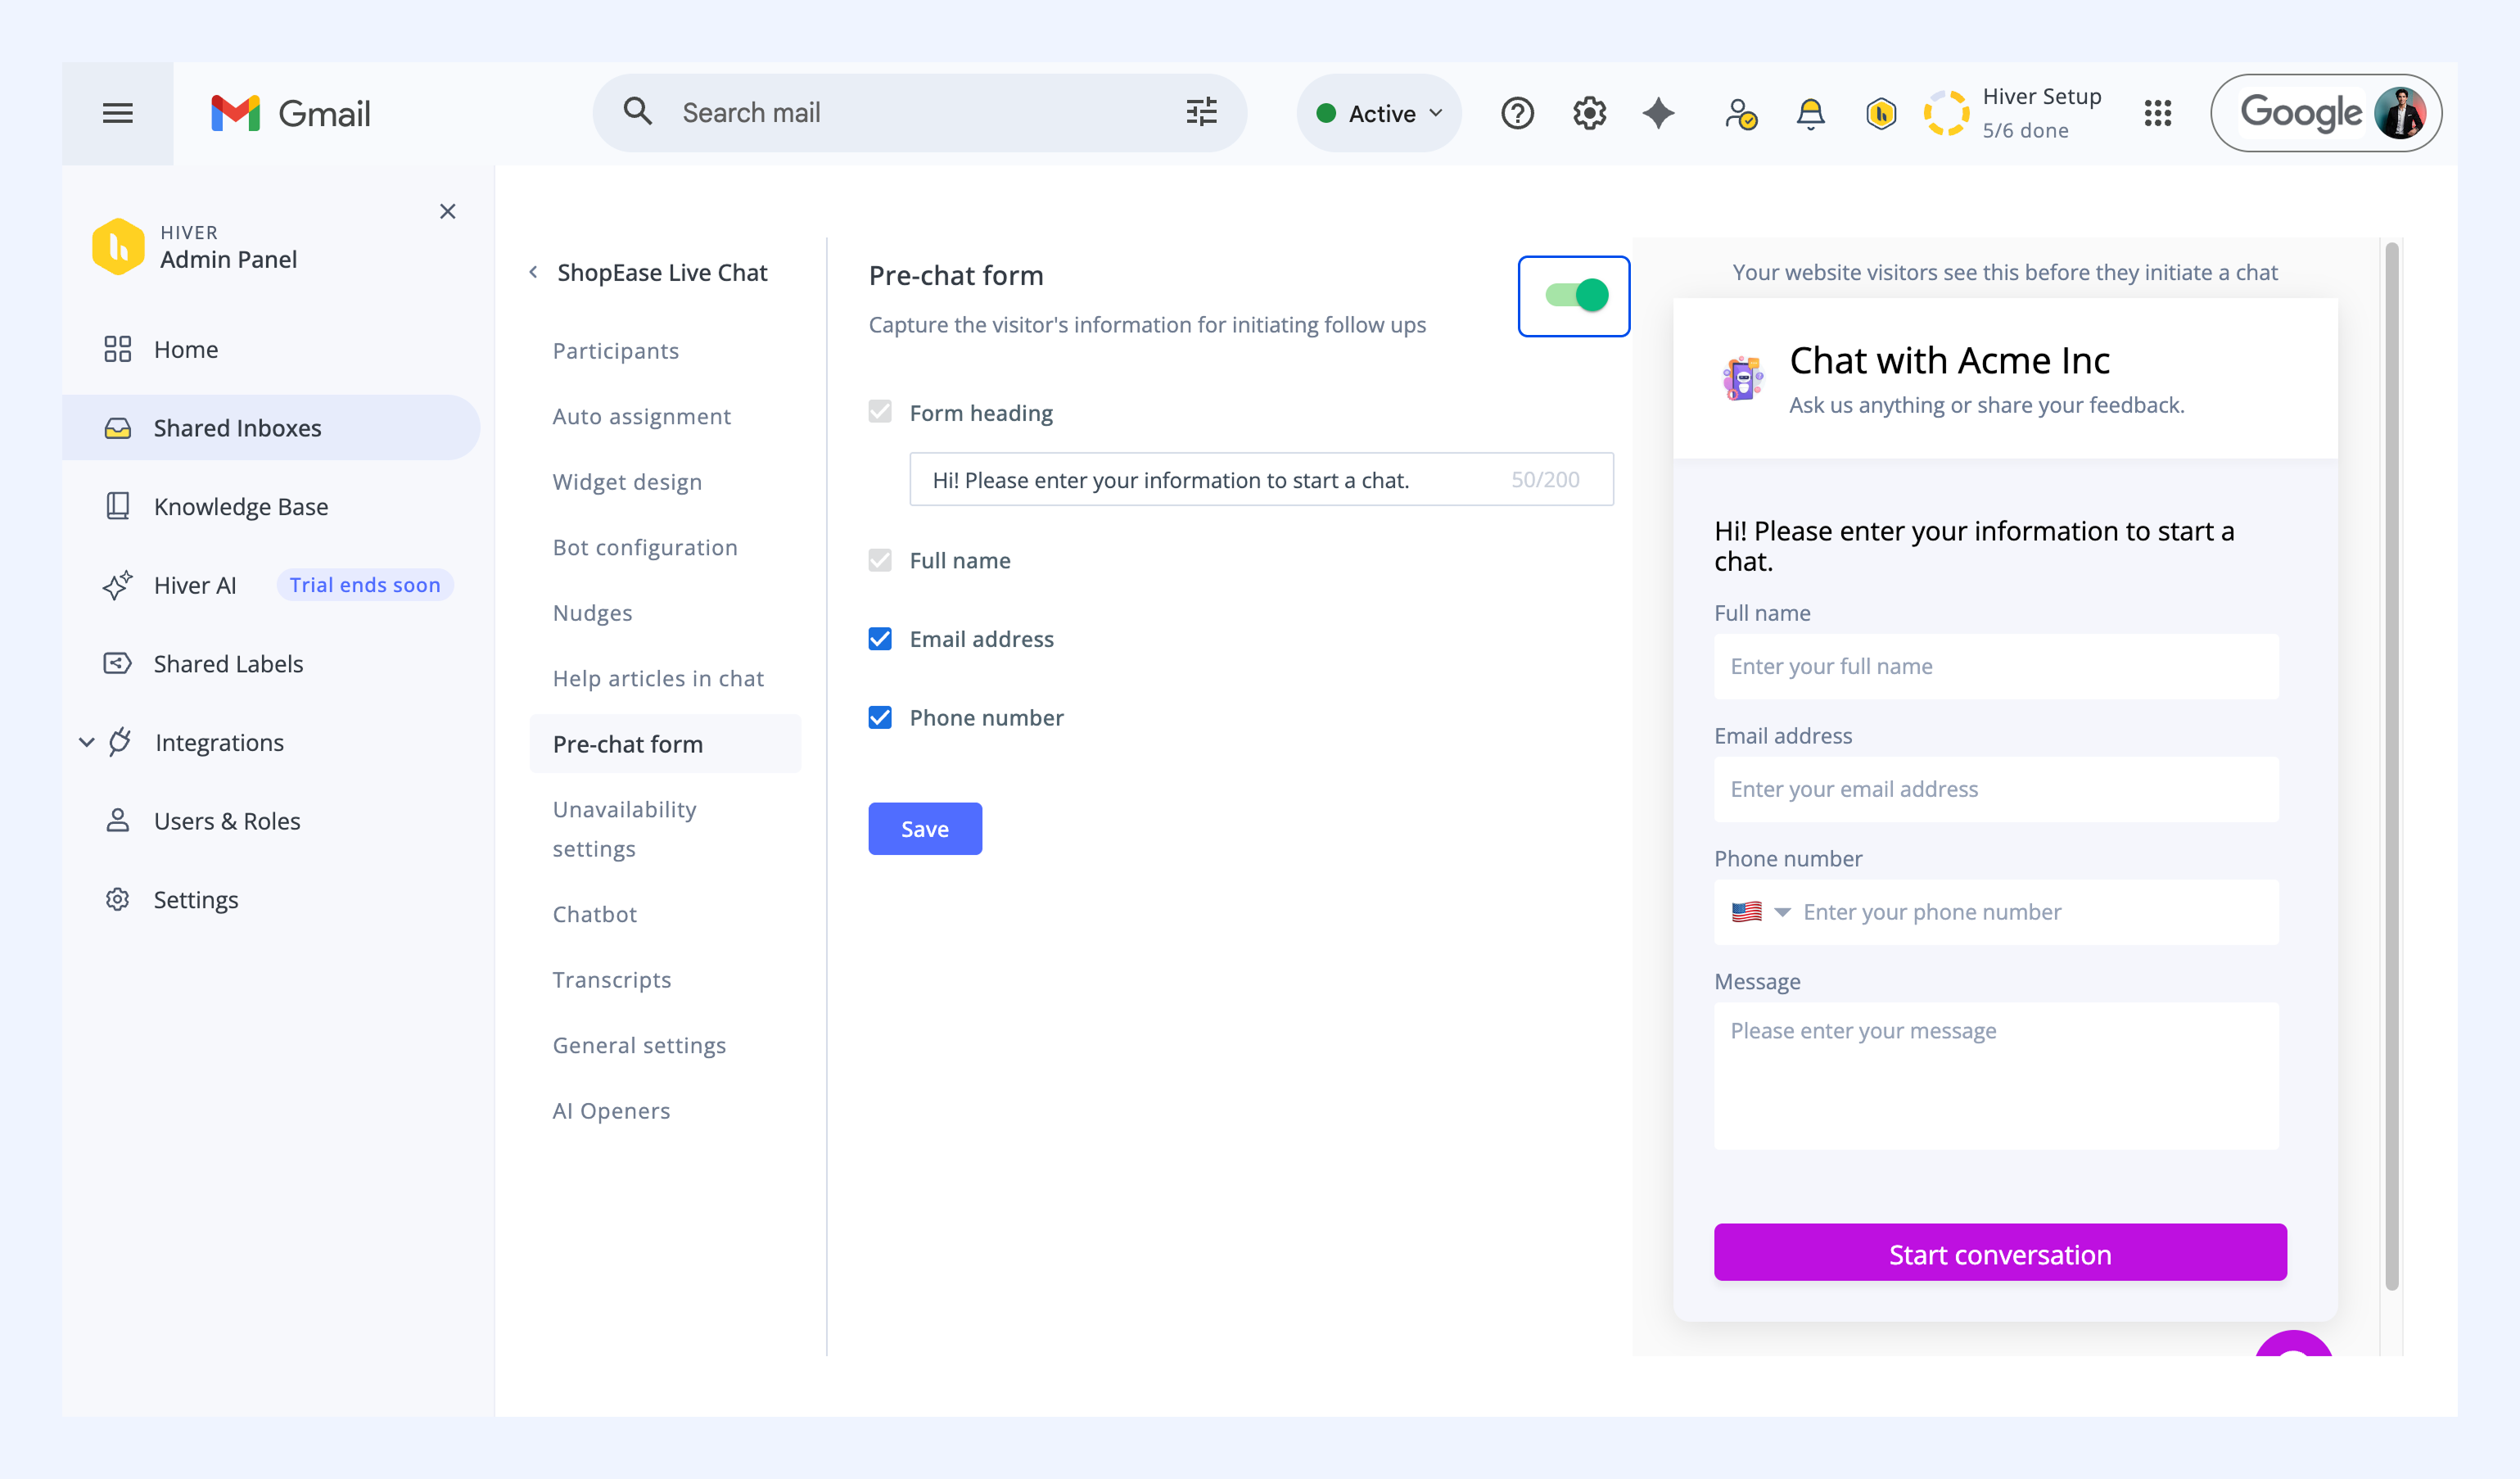
Pre-chat form
The Pre-chat form collects basic visitor details like the customer’s name, email address, and phone number before a chat begins. This helps your team personalize interactions and follow up later if needed.
You can enable or disable the form, and customize what information it requests from visitors.
Unavailability settings
You can define Unavailability settings to manage how your chat widget behaves when no agents are available or when it’s outside business hours.
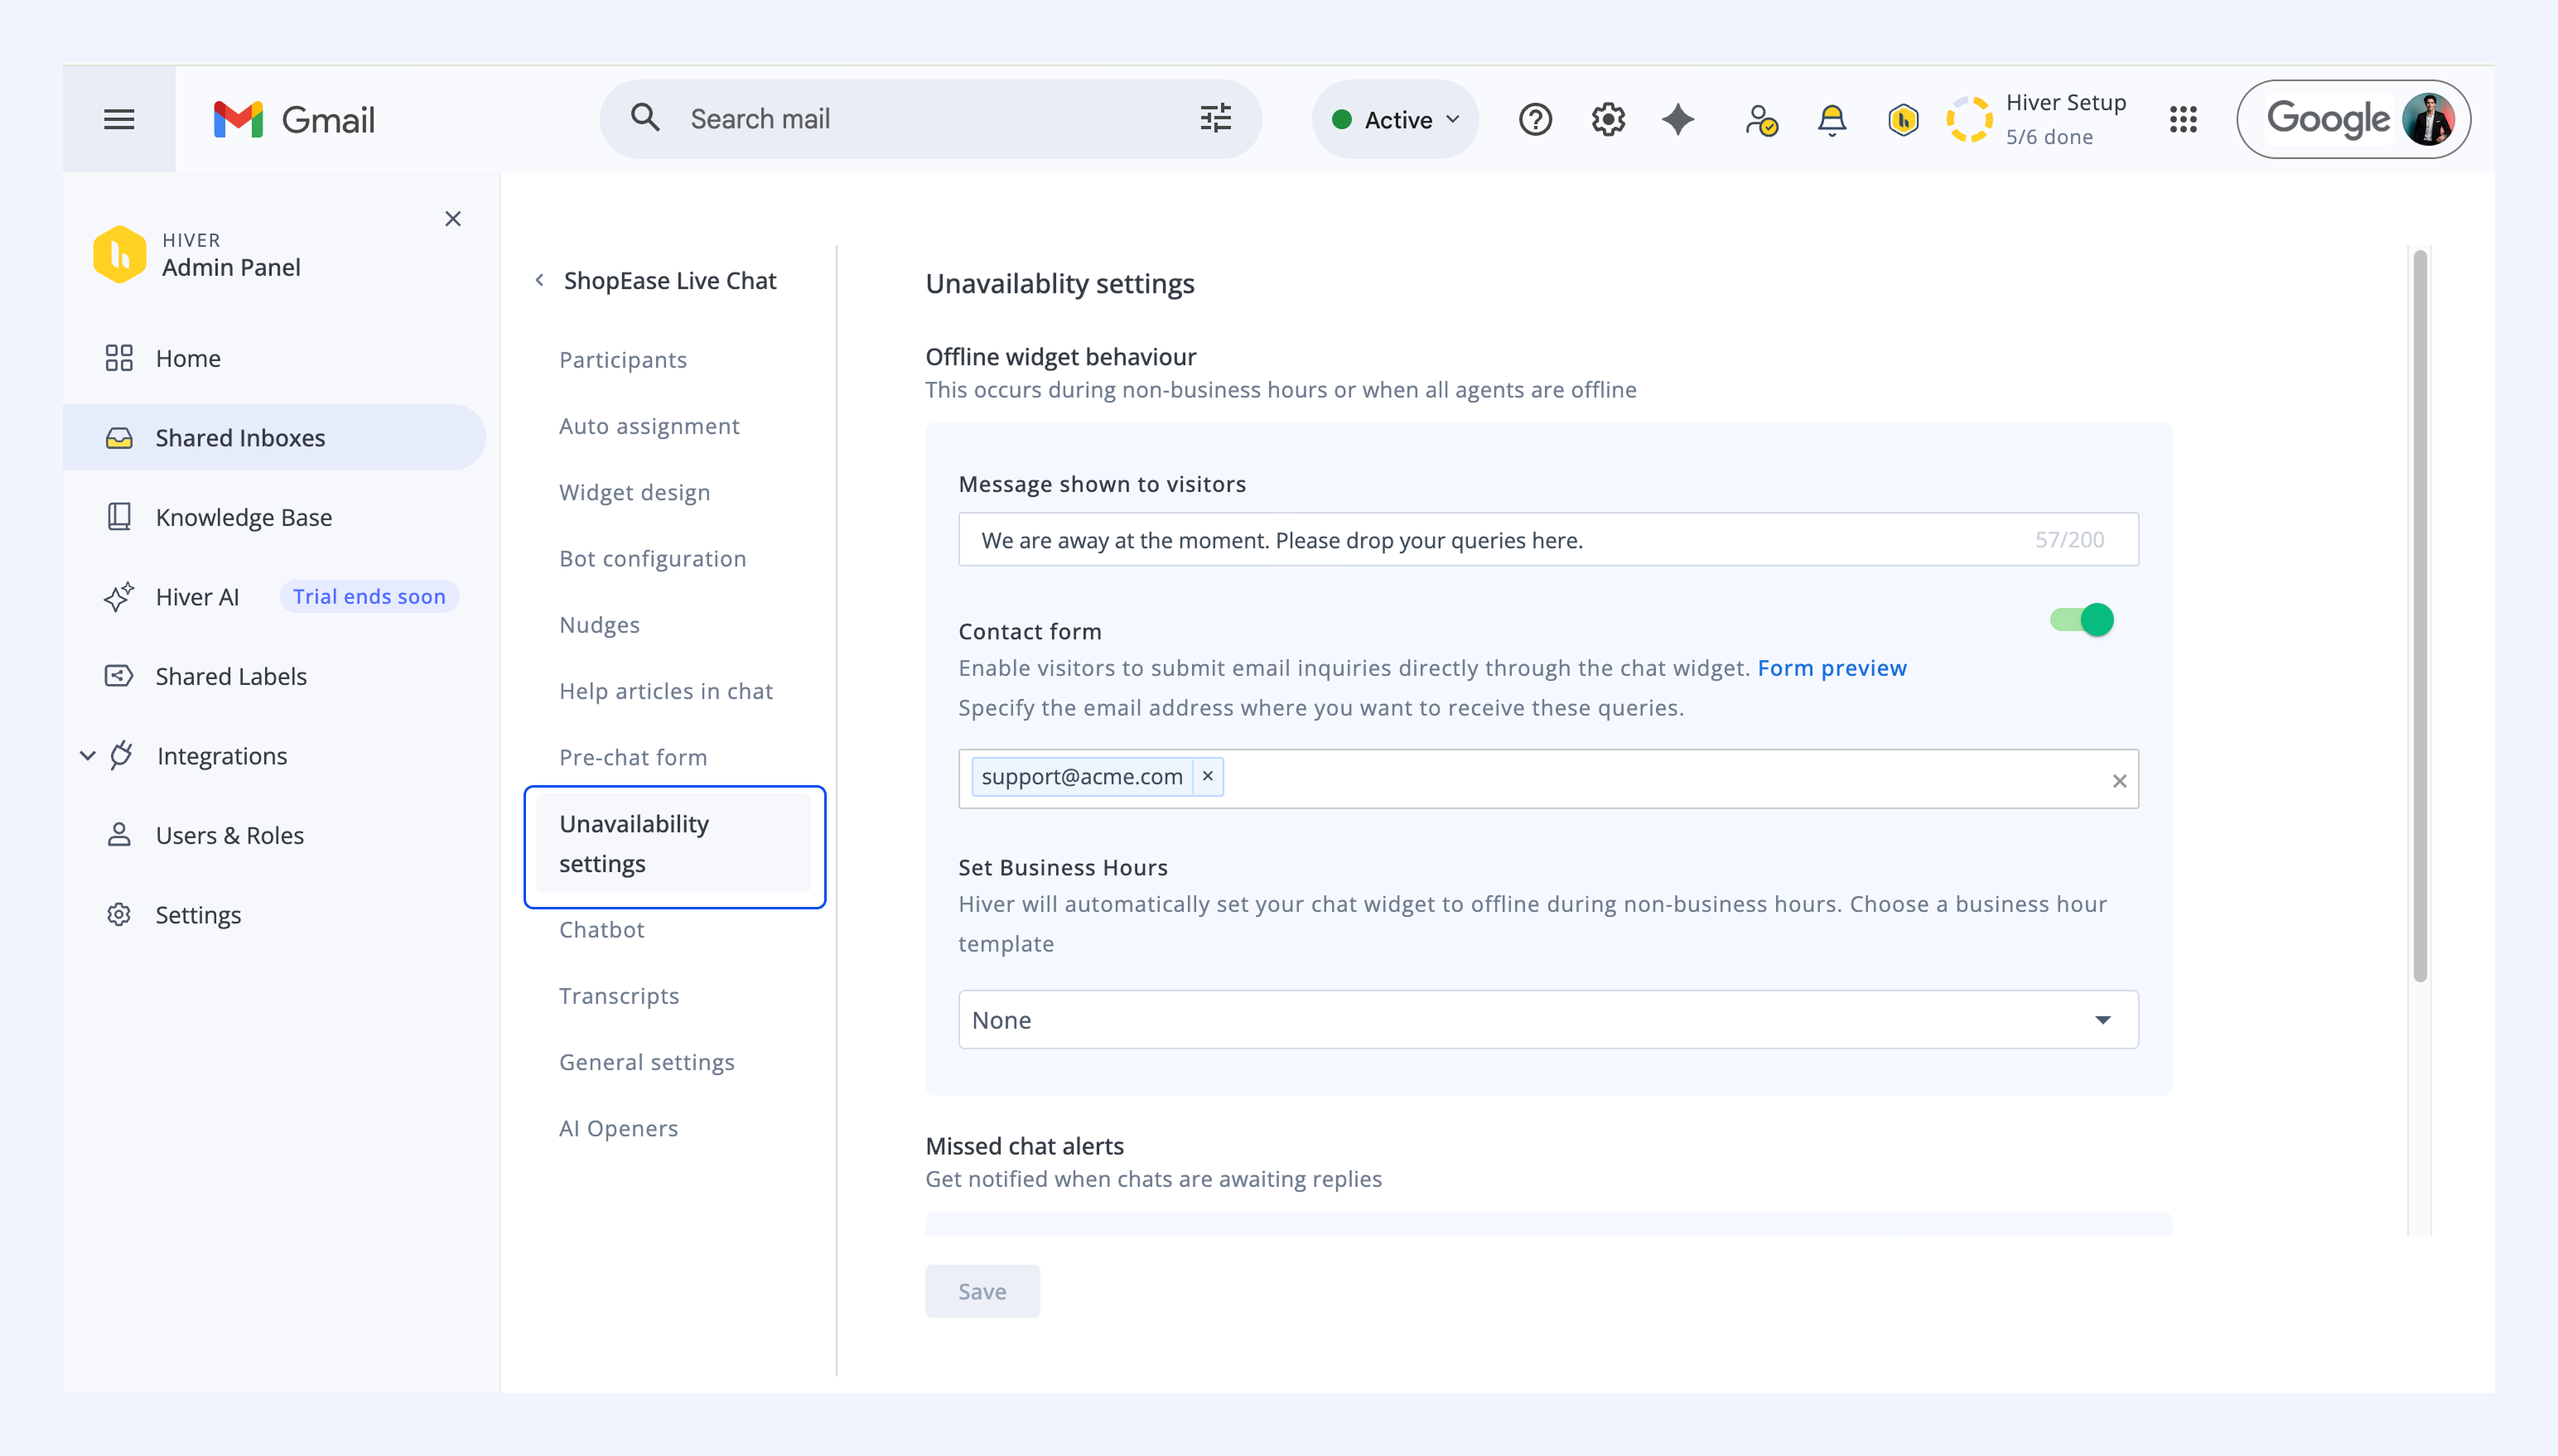
Custom offline message
You can edit the message displayed to visitors when all agents are offline. This message appears directly in the chat widget and lets visitors know your team will get back to them soon.
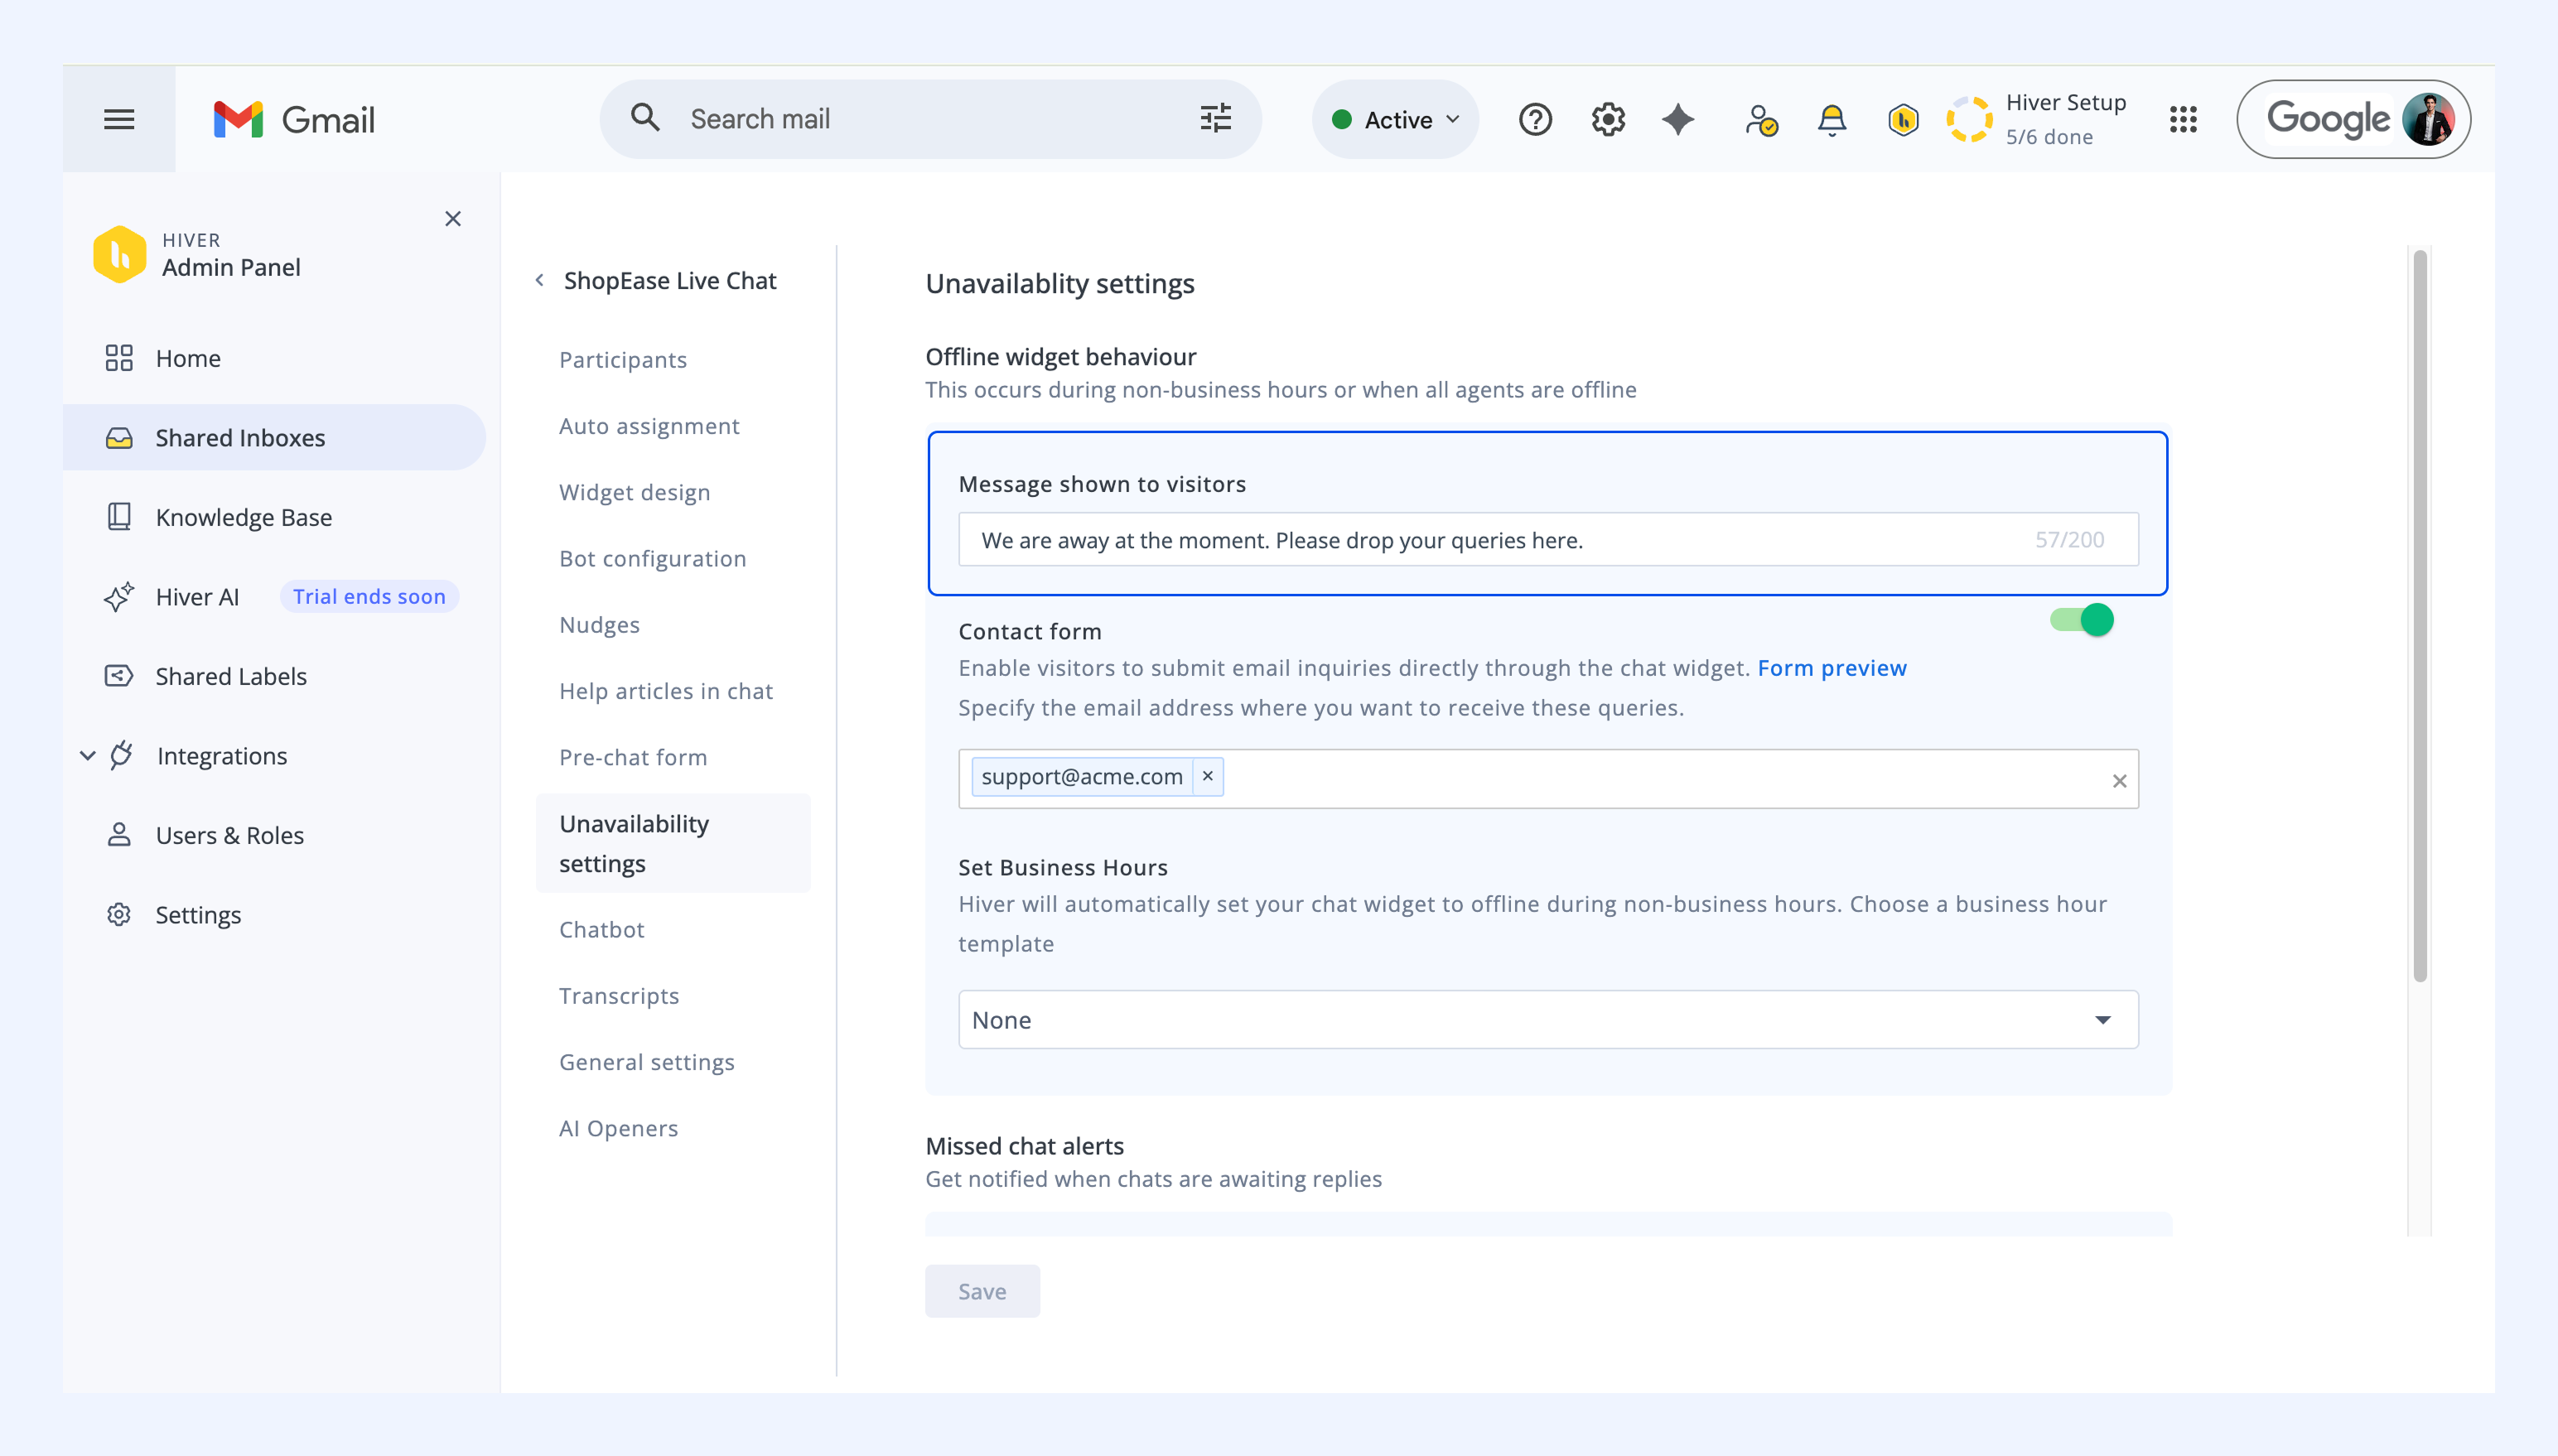
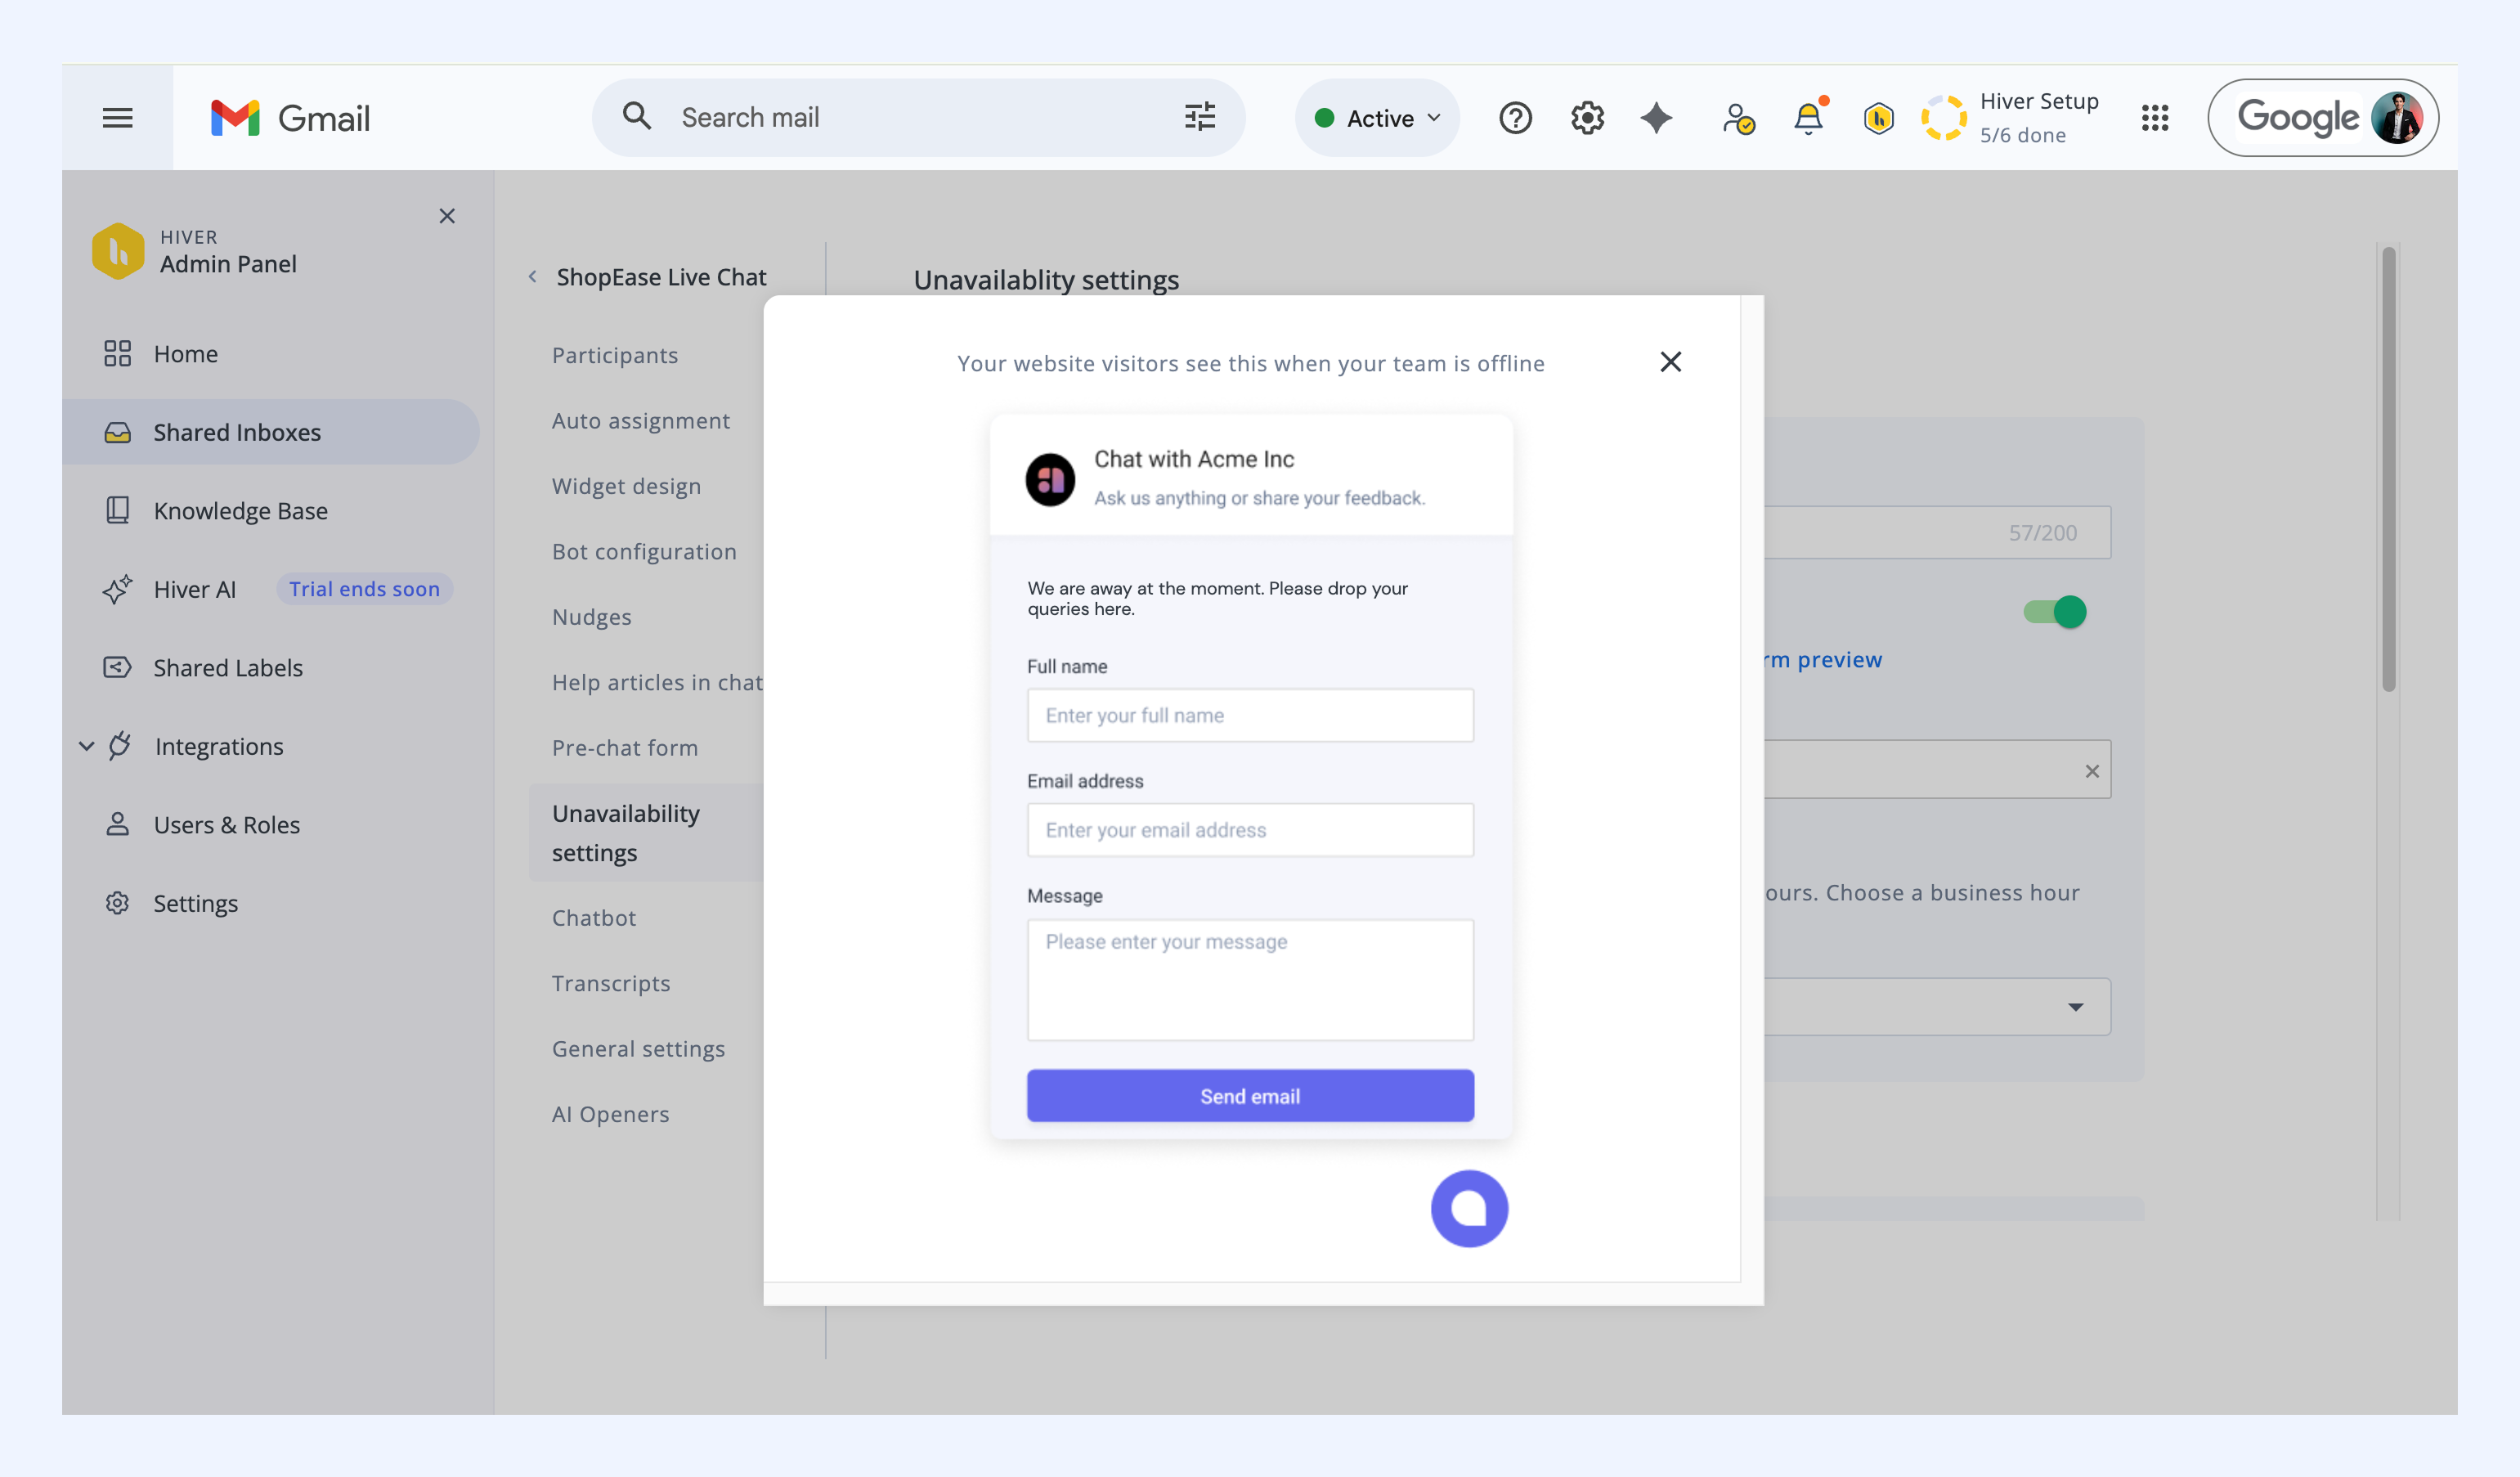
Contact form for offline visitors
You can enable a contact form so visitors can leave their details when the team is offline. Messages submitted through this contact form are sent to the email address you specify.
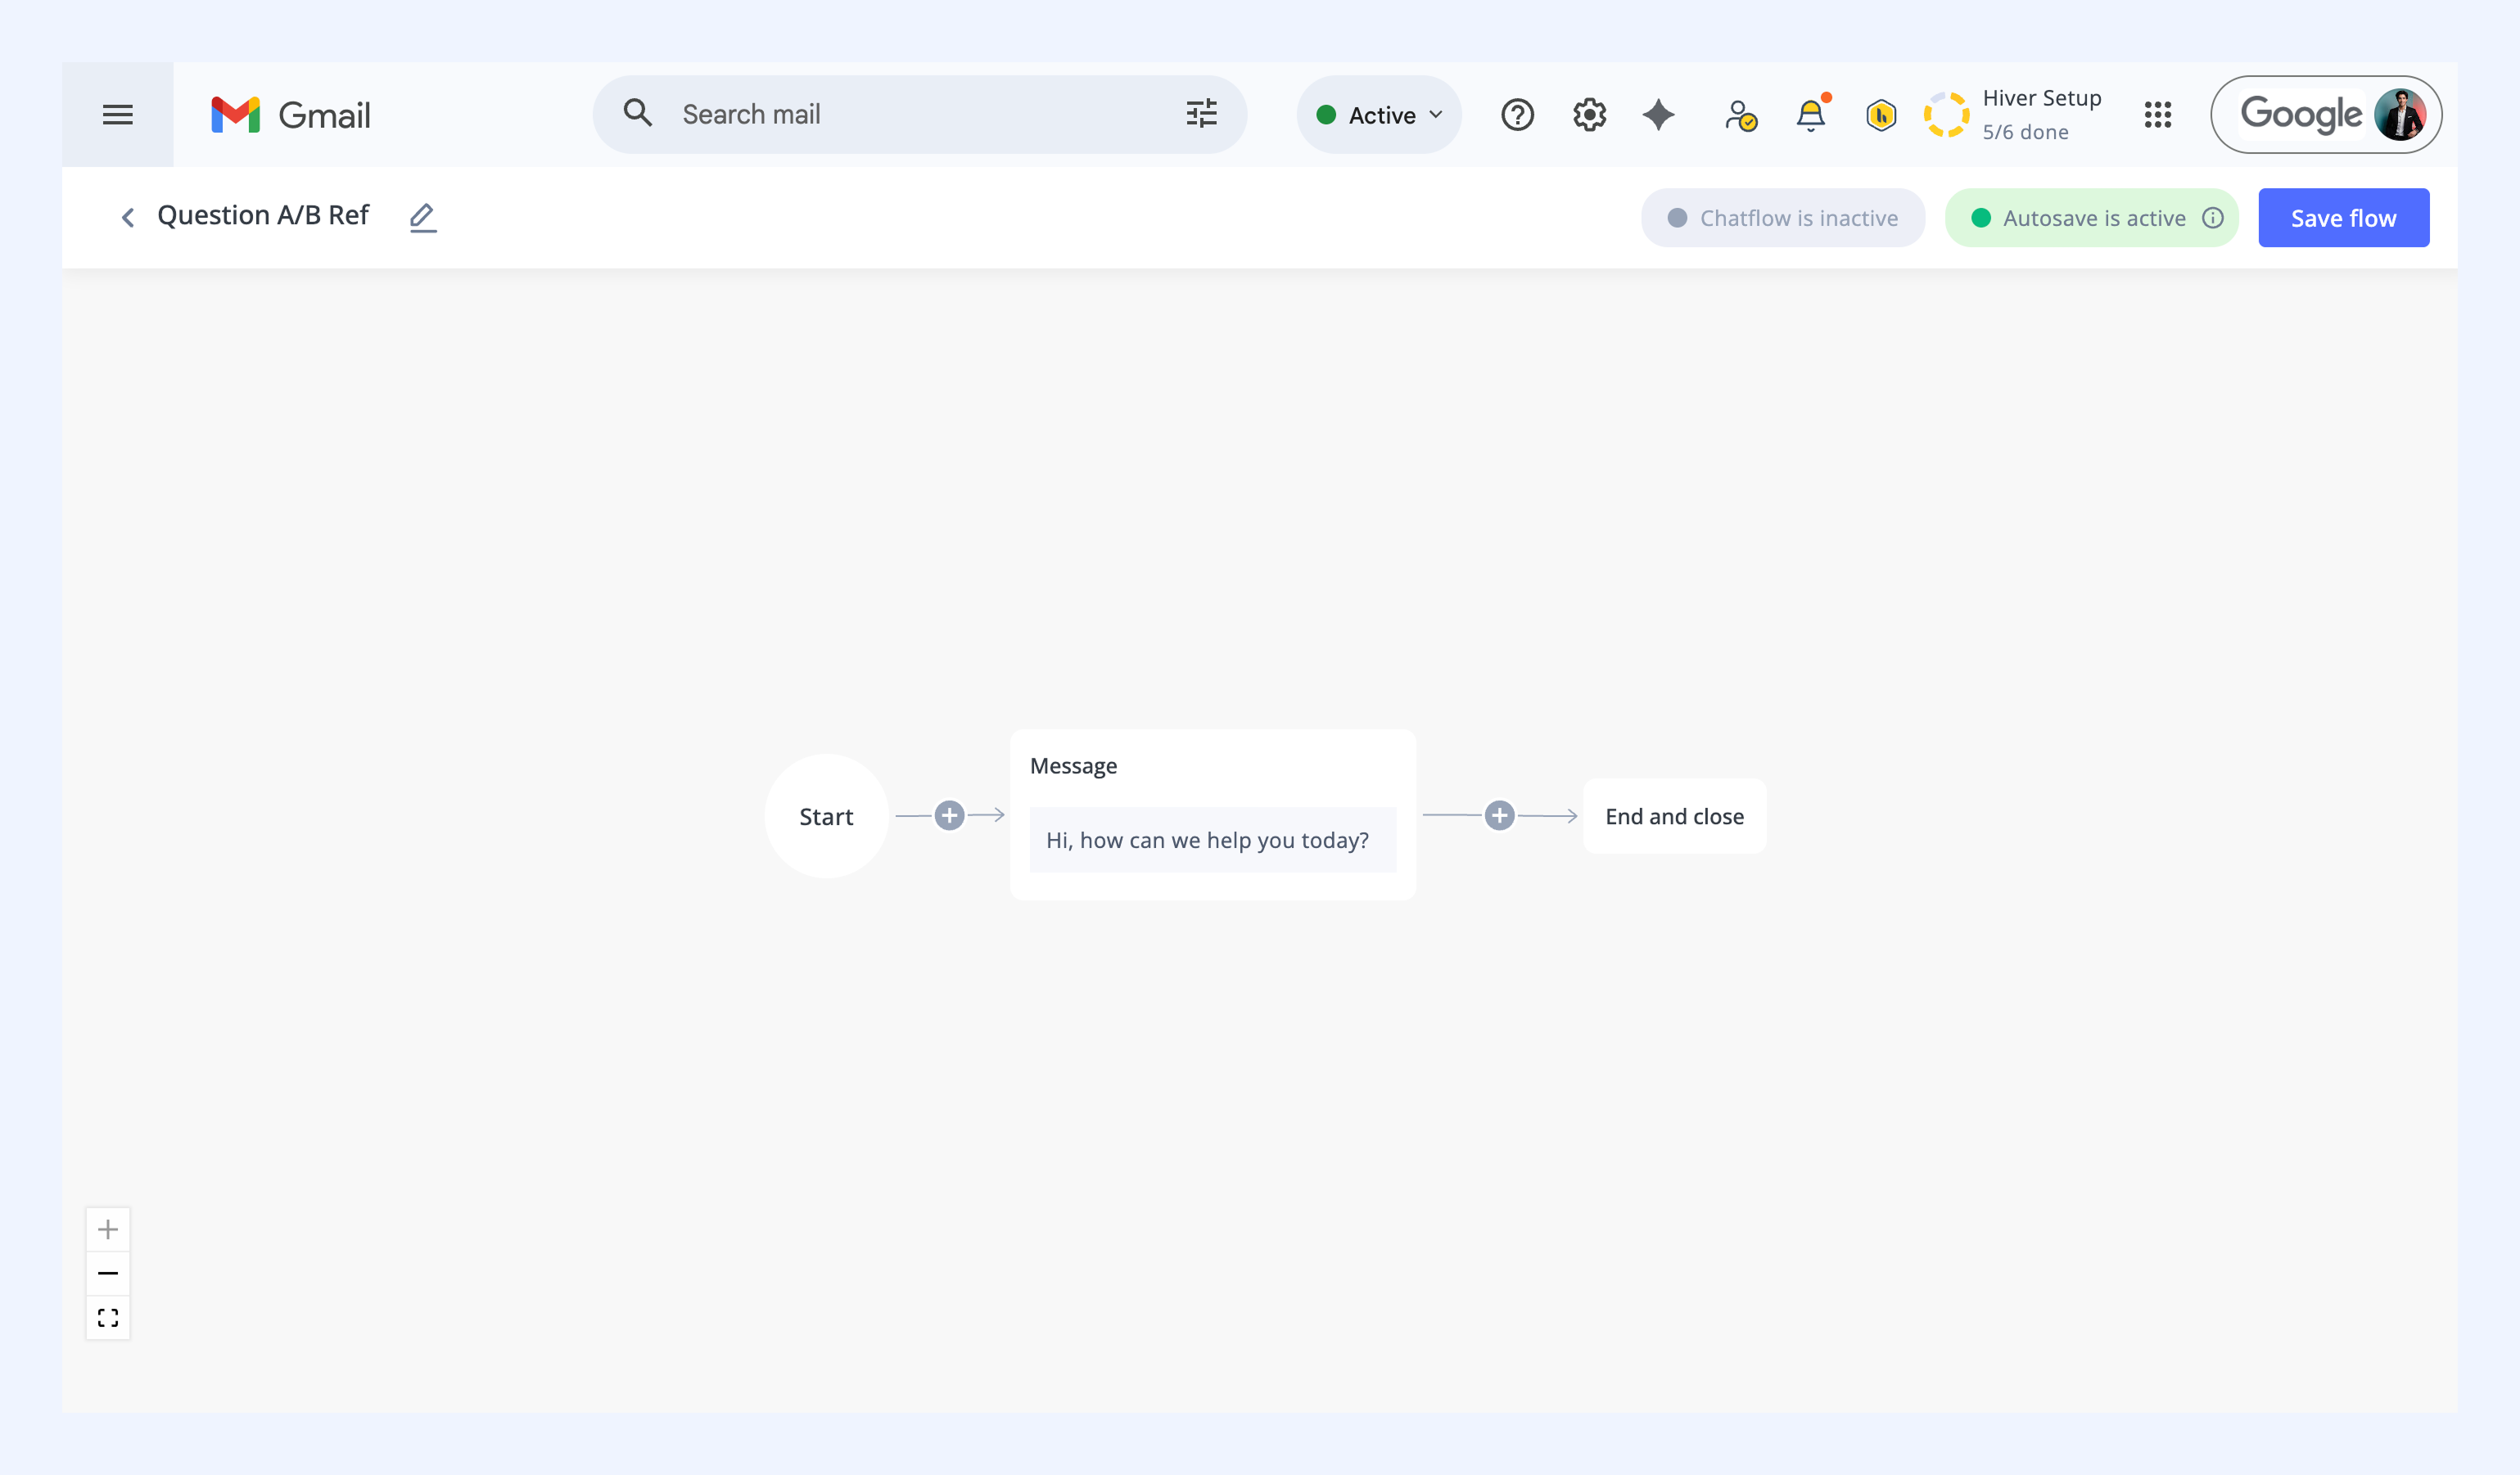
Business hours
If your team follows fixed working hours, you can set up a business hour template and apply it here. When business hours are active, the chat widget automatically switches to offline mode outside those times. Learn more about business hour templates.
Missed chat alerts
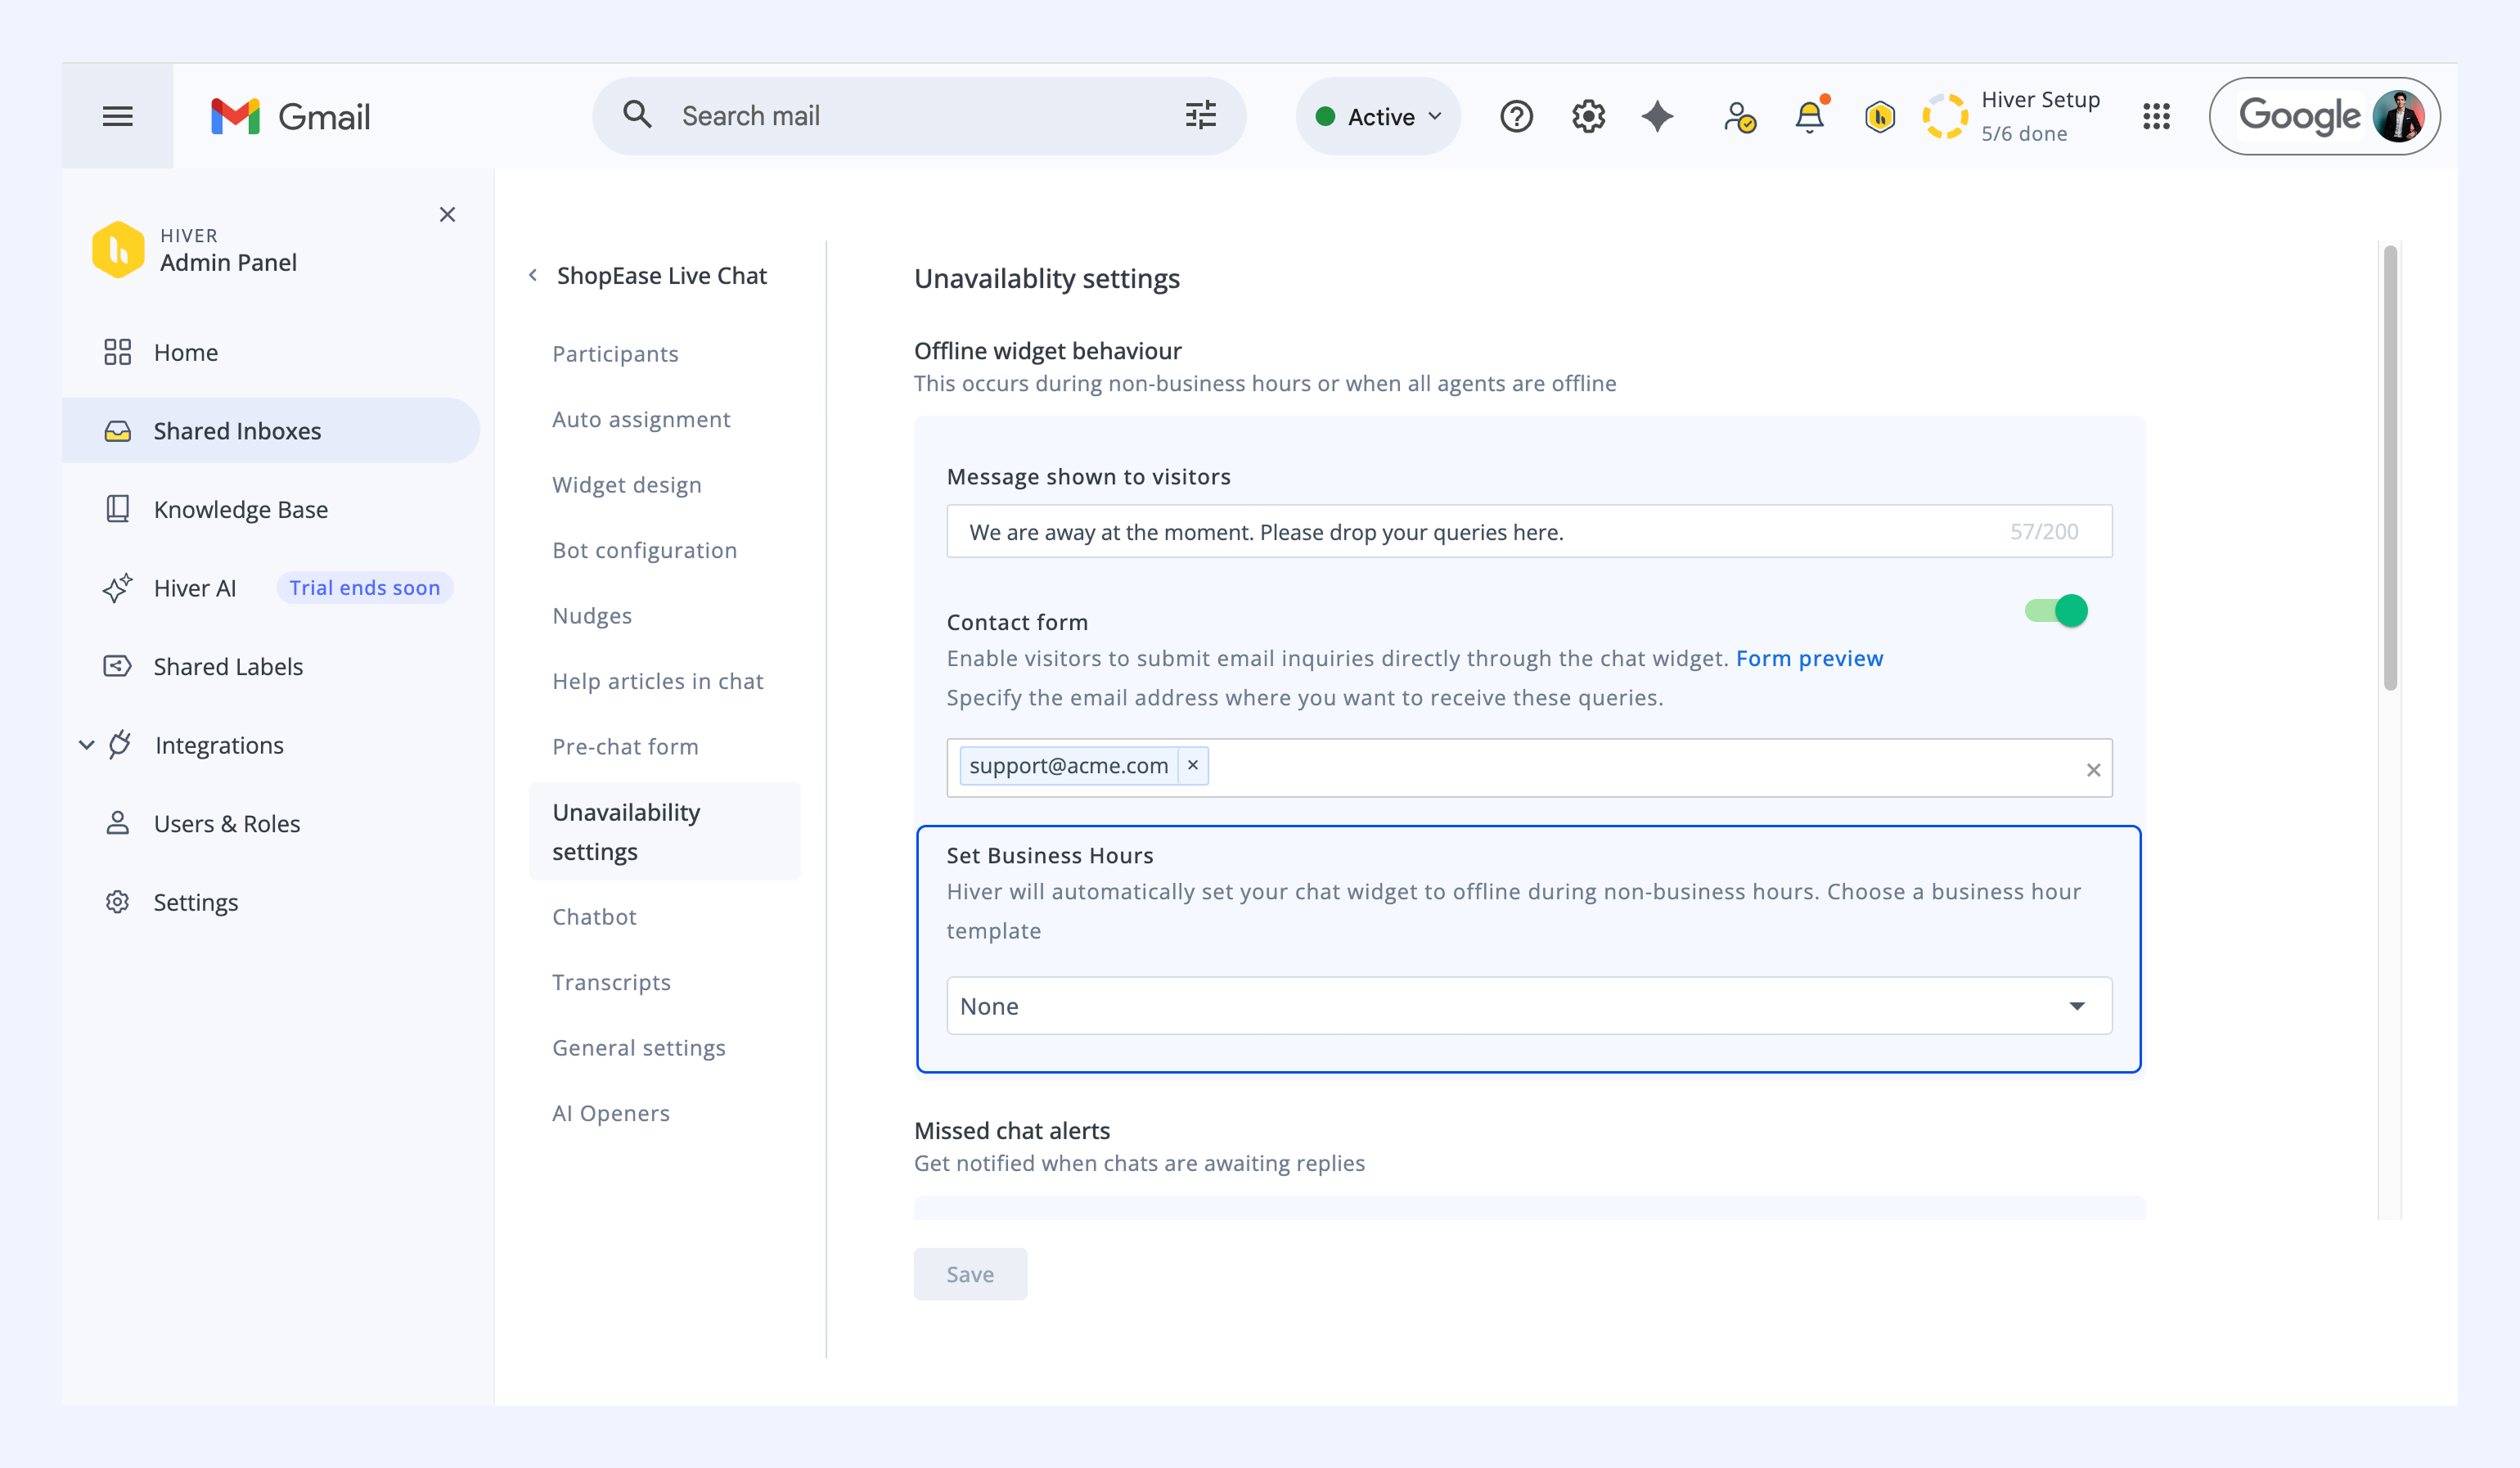
Set up alerts and actions when chats remain unanswered for an extended period. Options include:
- Send a reminder for chats awaiting the first reply: Sends an email alert to selected members if no one responds within the set duration.
- Mark chats as missed: Flags a chat as missed if not acknowledged within the specified time and sends a message to the visitor. You can customize this message.
- Set Chat Inbox to offline after multiple missed chats: Automatically marks all agents unavailable after several consecutive missed chats to prevent more unresponded visitors.
For each setting, you can define time intervals and specify email recipients for alerts.
Chatbot
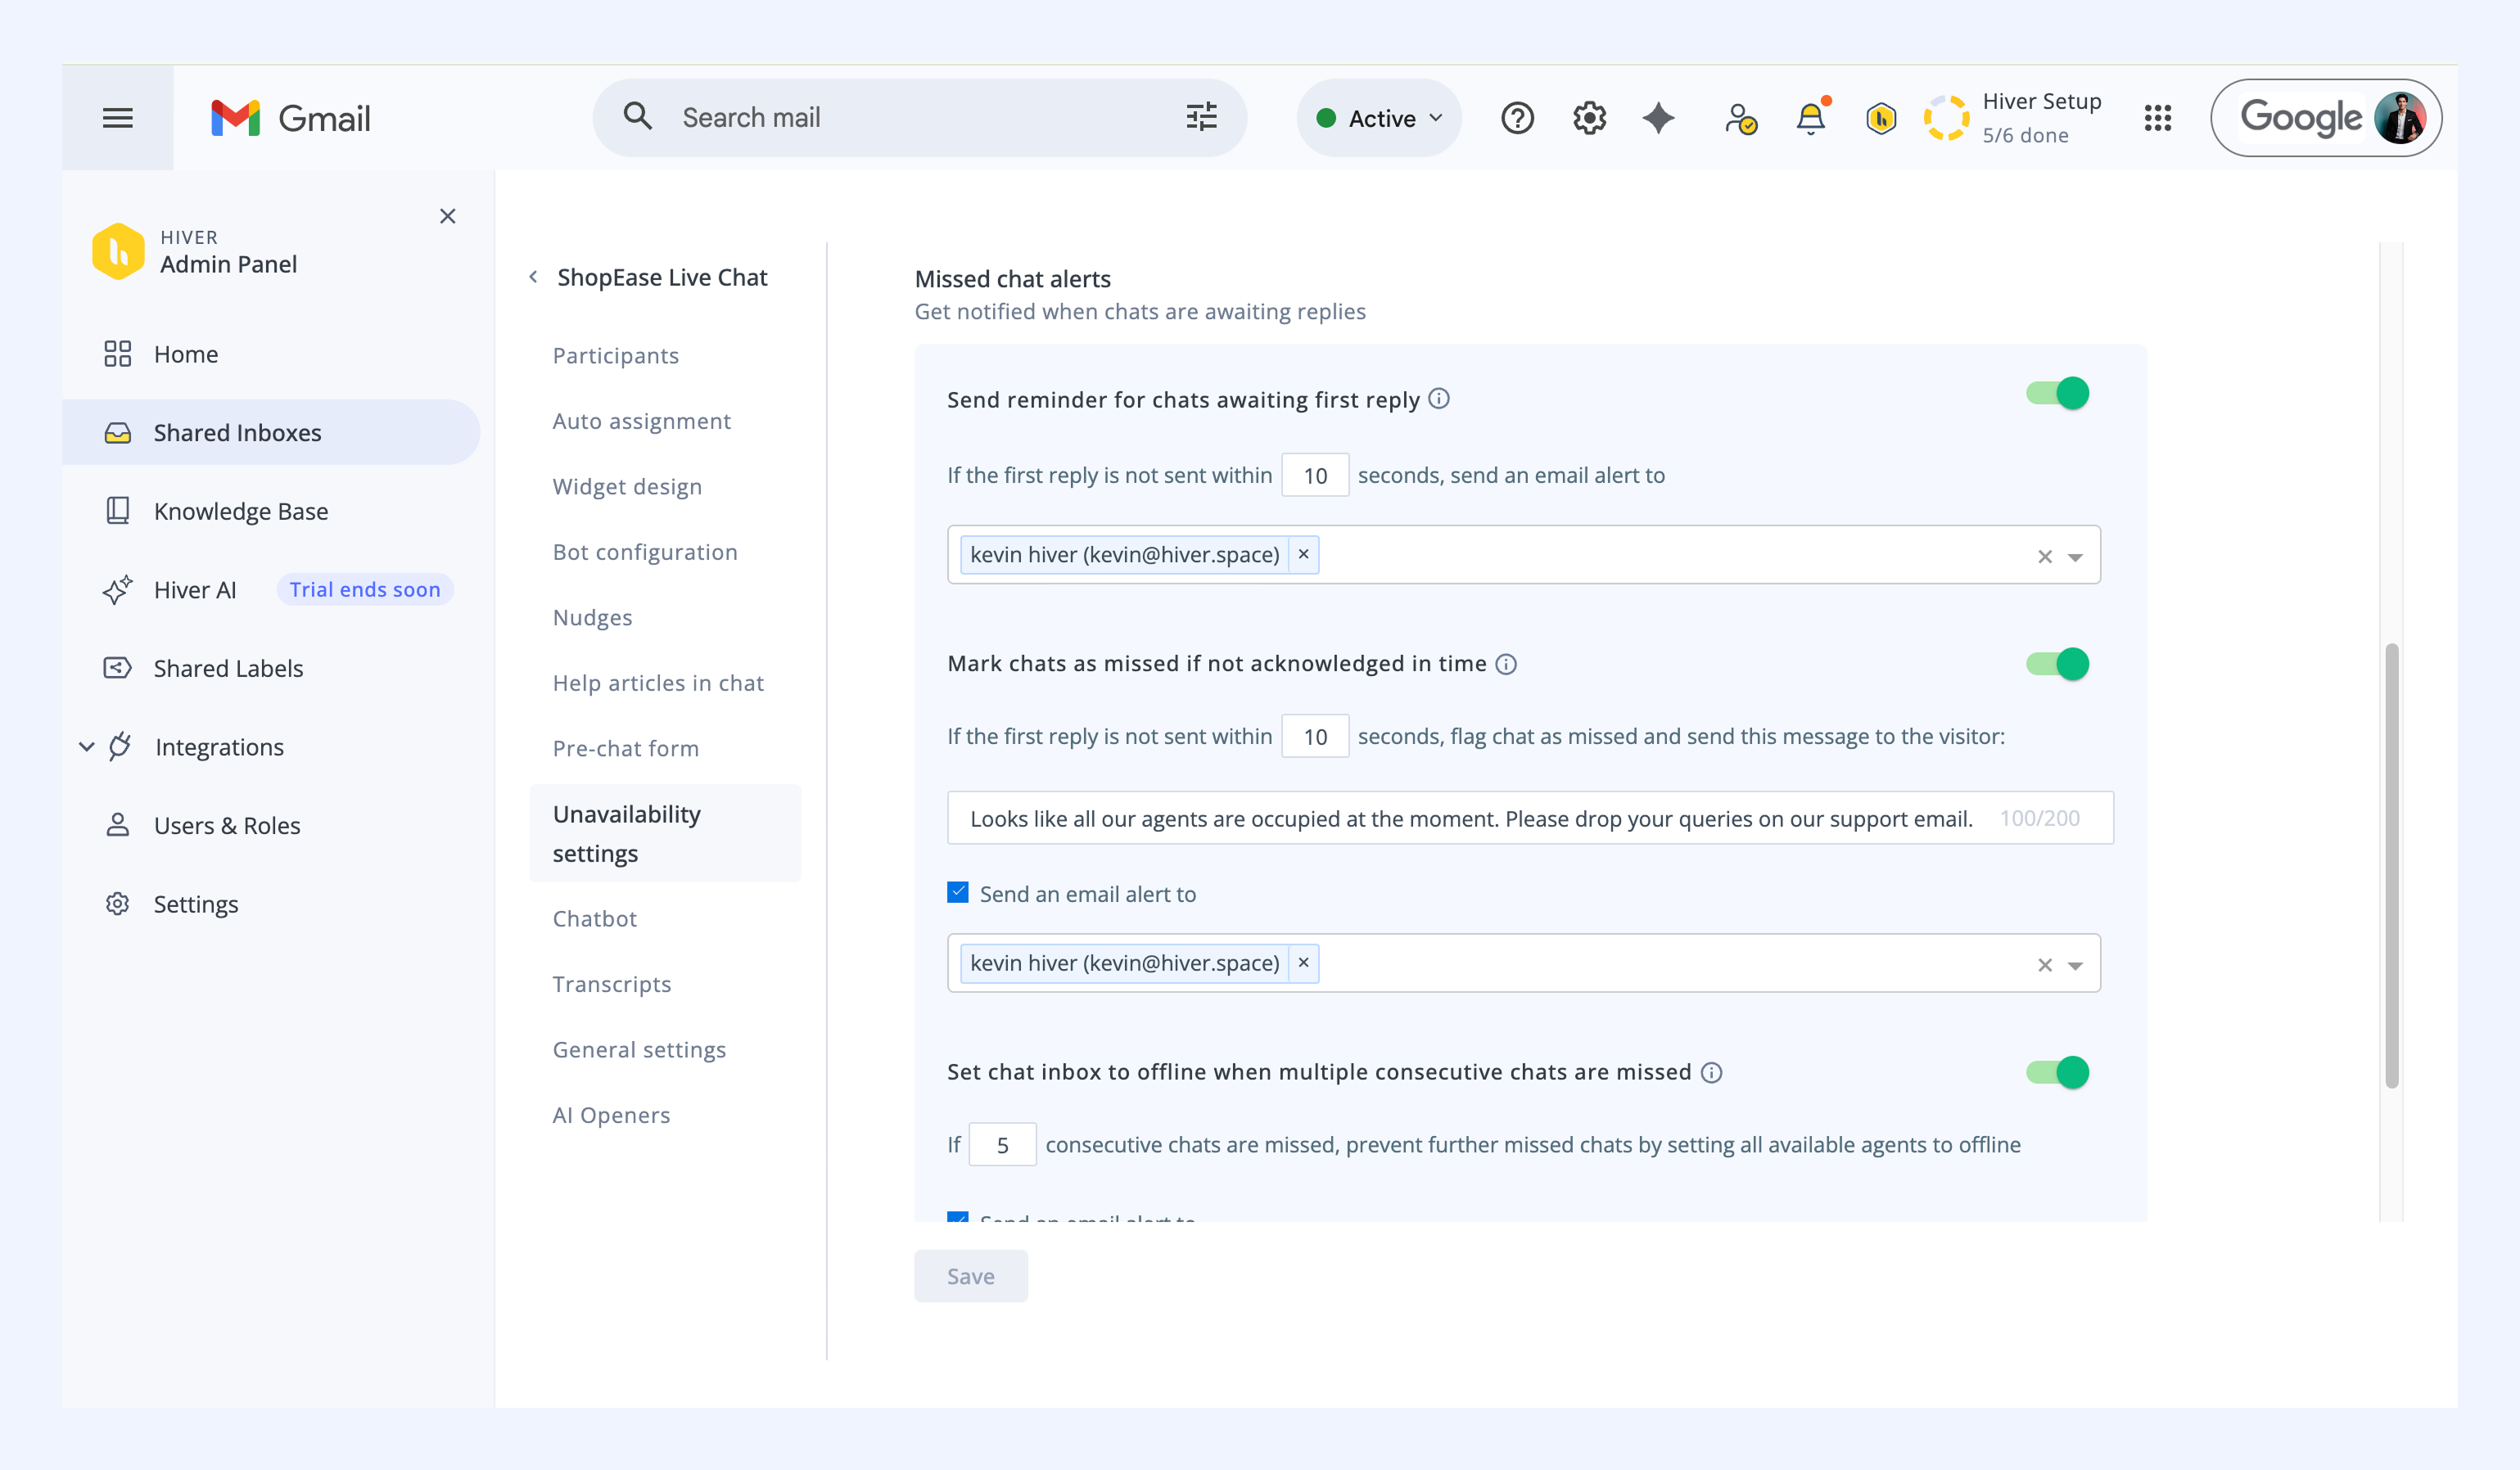
You can create and manage automated chat flows that engage visitors, qualify leads, or direct them to the right team. You can set up multiple chatflows using different triggers — for example, based on the visitor’s page, behavior, or time on site.
Each chatflow can include a series of automated questions and responses designed to assist visitors before a live agent joins. Learn more about Chatbot flow.
Transcripts
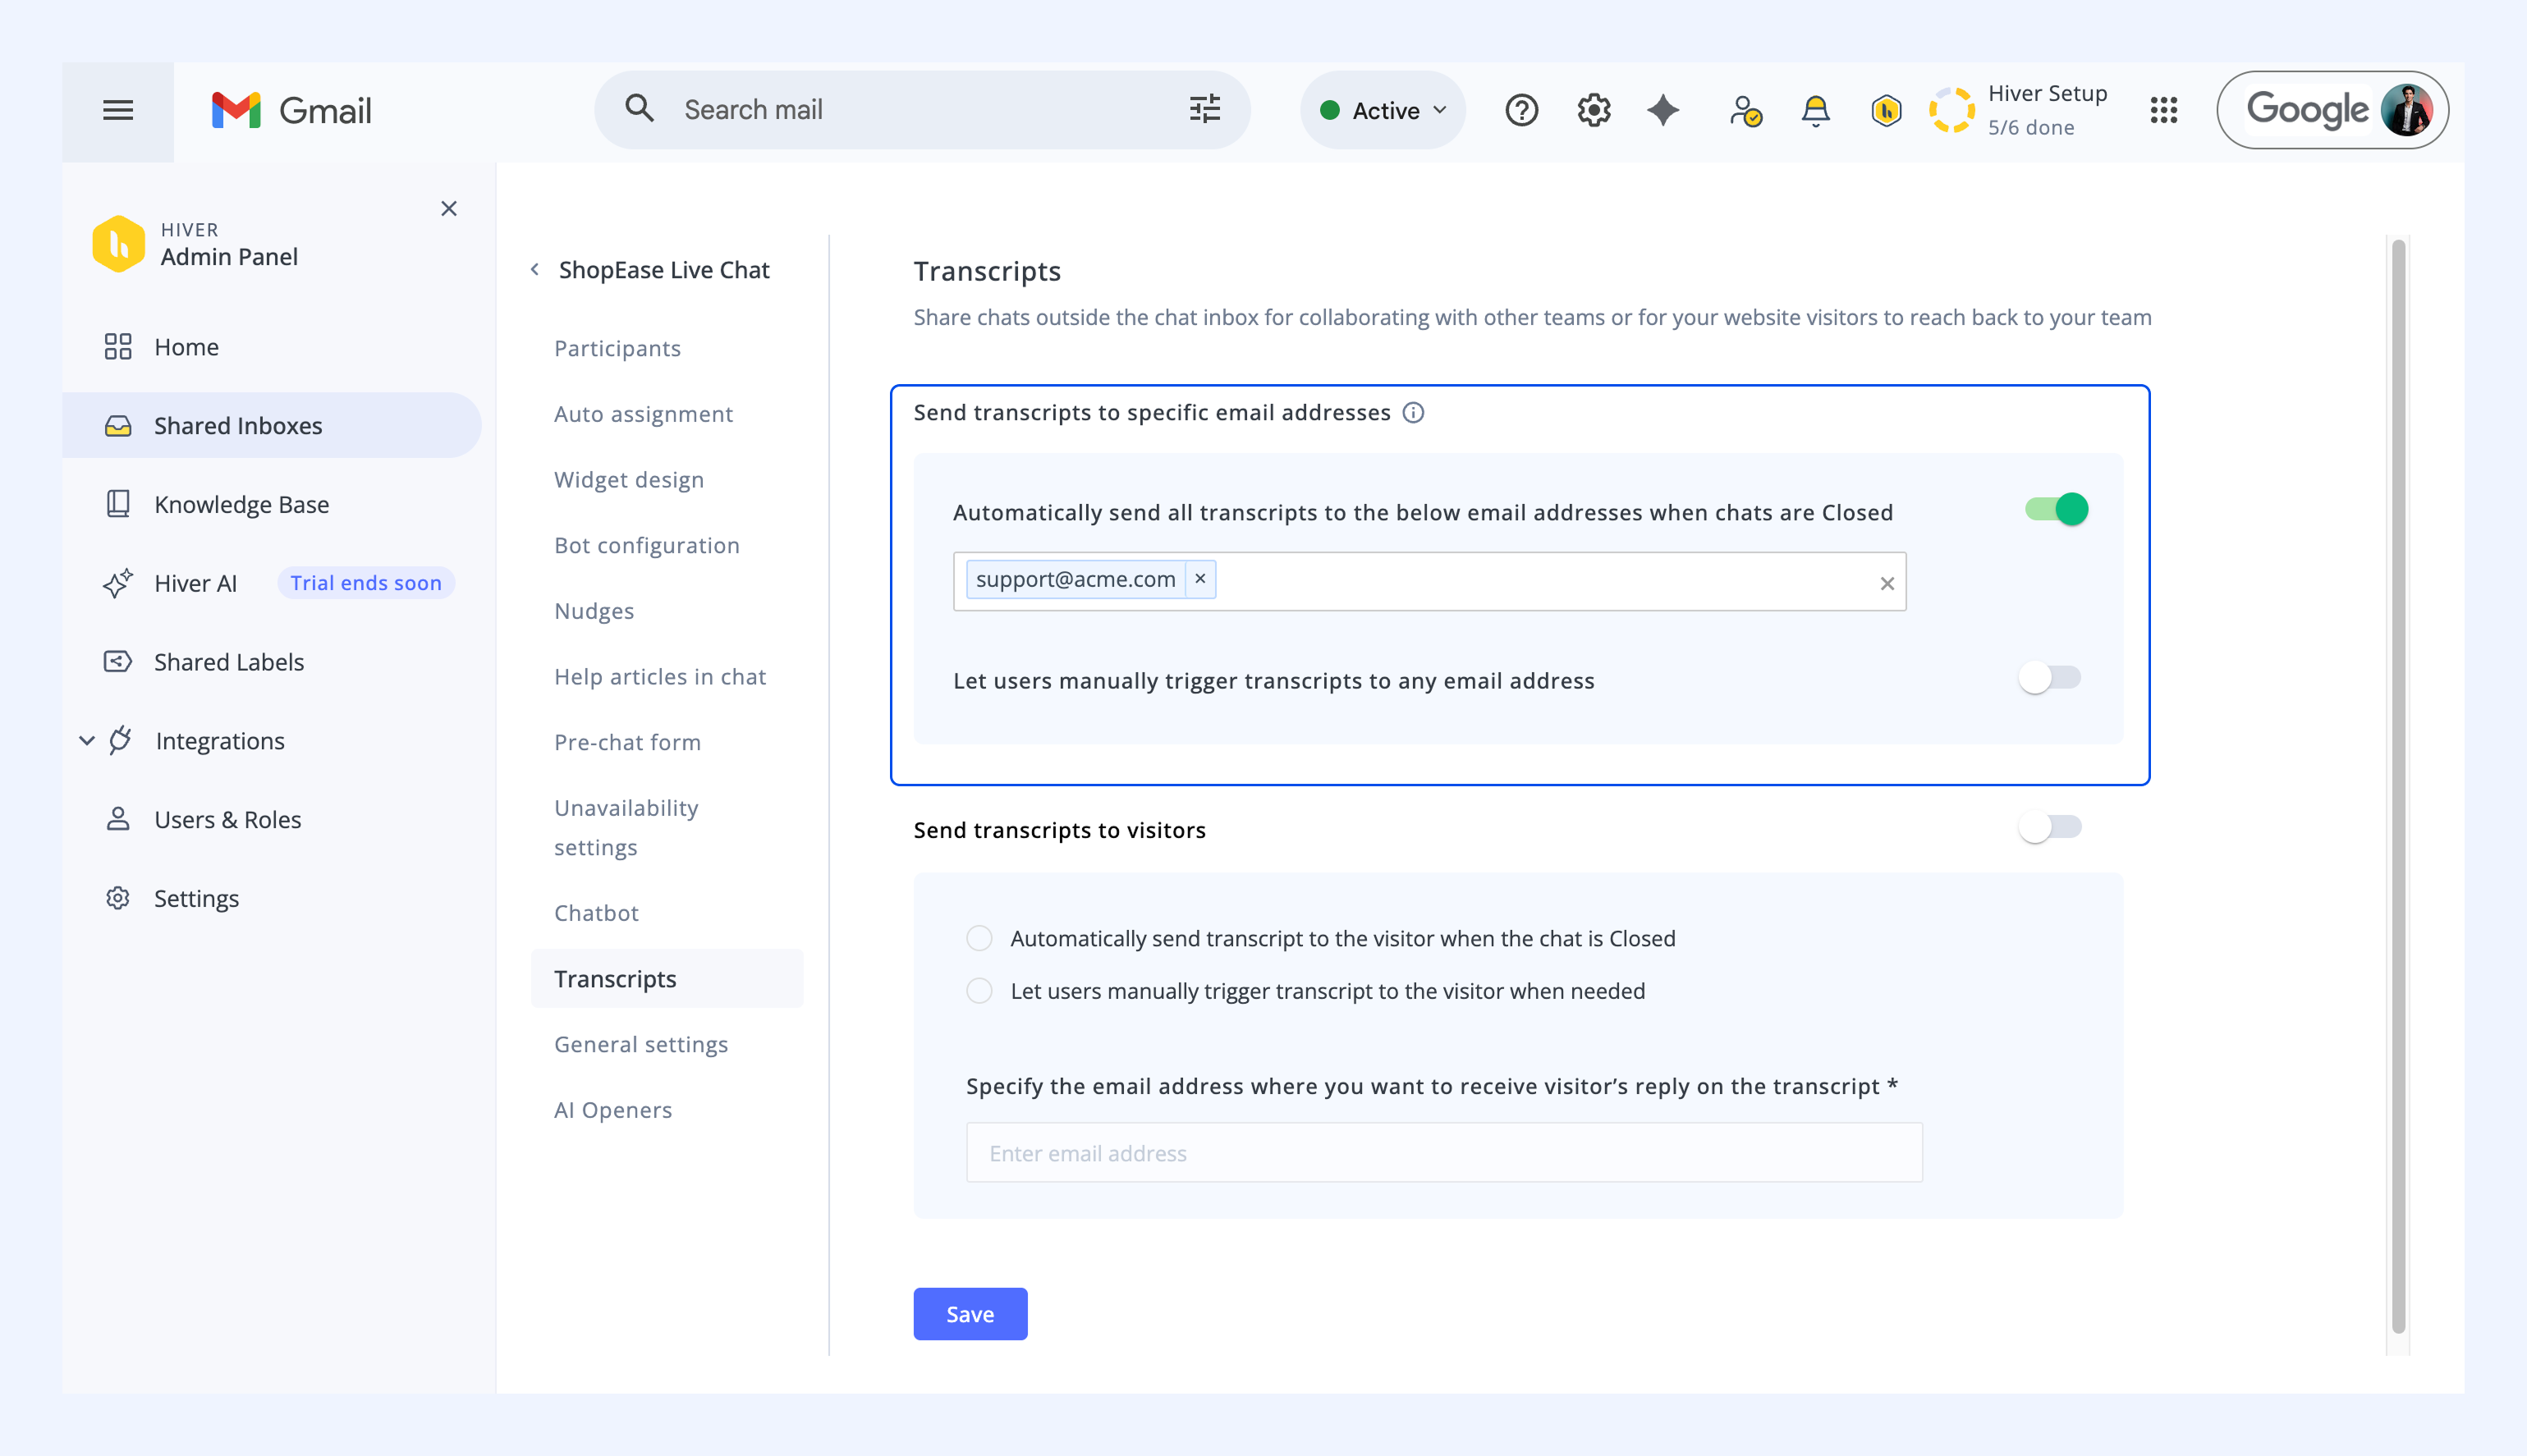
Transcripts record chat conversations and make them easy to share internally or with visitors. They help teams collaborate and give visitors a reference after their chat ends.
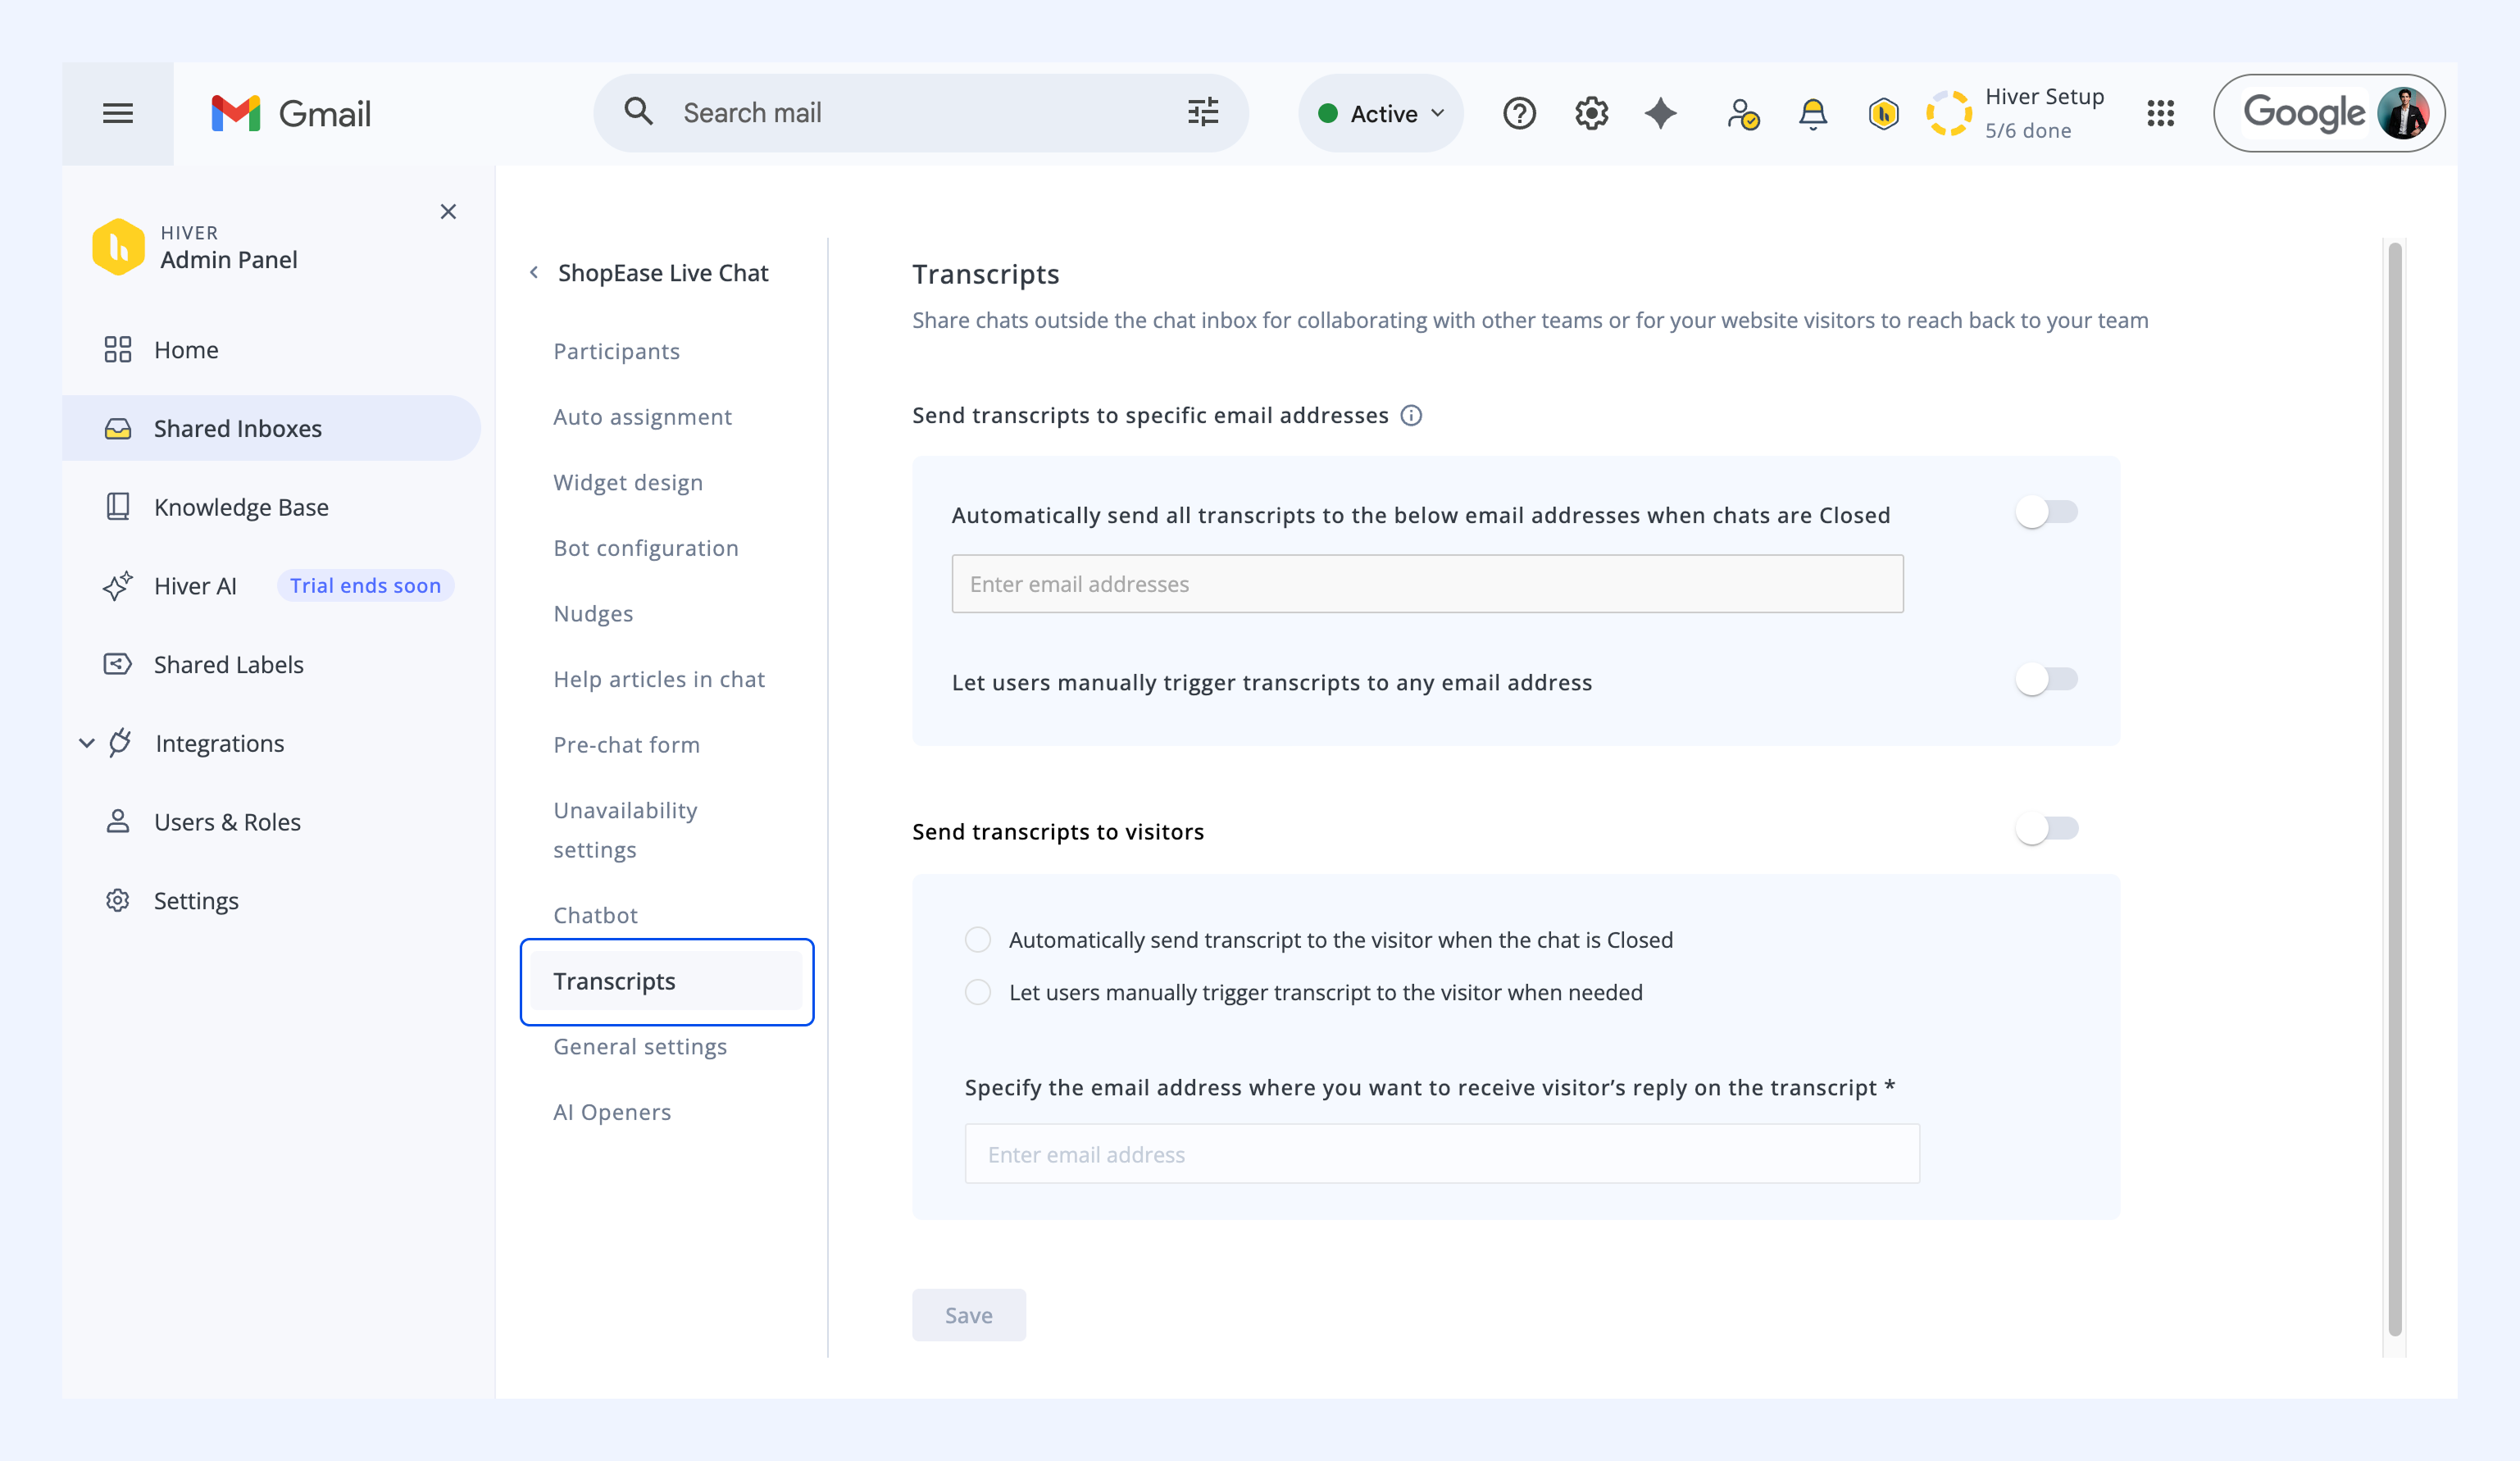
Sending transcripts to specific email addresses
You can automatically send chat transcripts to a Shared Inbox, such as support@yourcompany.com, or allow team members to manually send them to other addresses when needed.
Transcripts are only sent once a chat is closed. You can choose to:
- Send automatically: Send transcripts to visitors when a chat closes.
- Send manually: Let team members decide when to send a transcript.
If you enable automatic sending, you can specify which email address should receive visitor replies to the transcript.
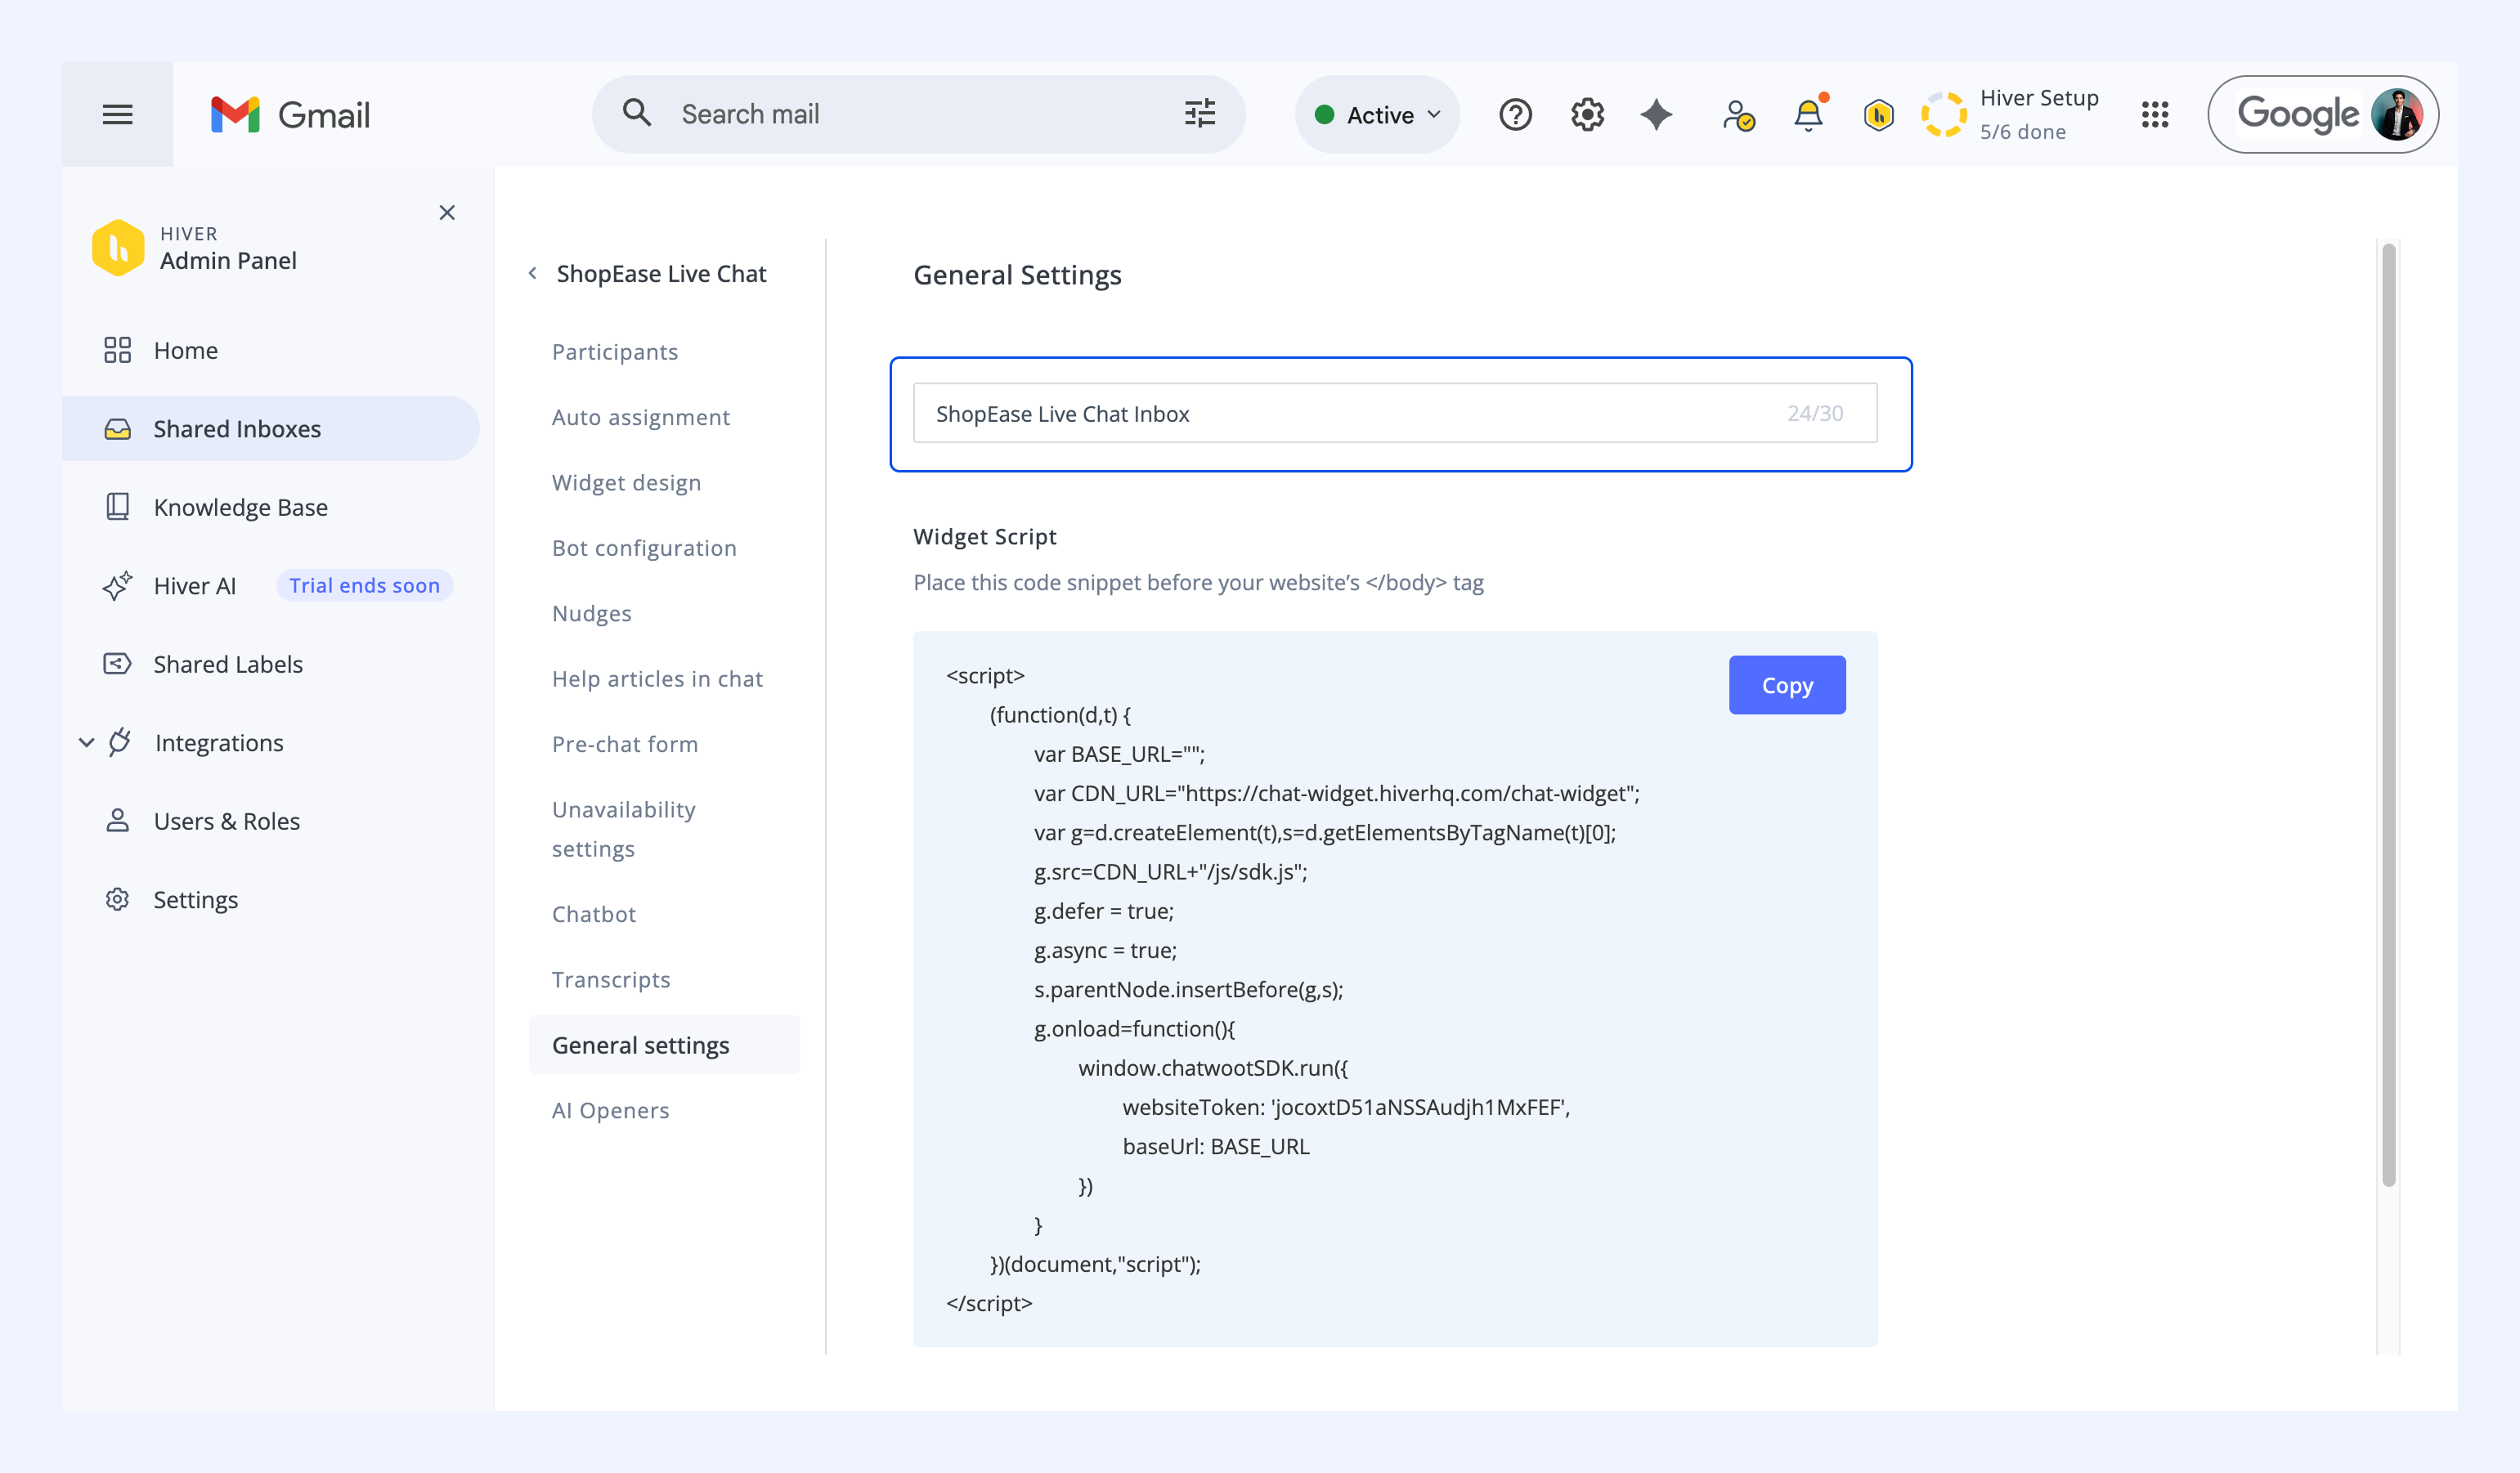
General settings
General settings include basic options such as renaming your Chat Inbox and copying your widget script to add it to your website.
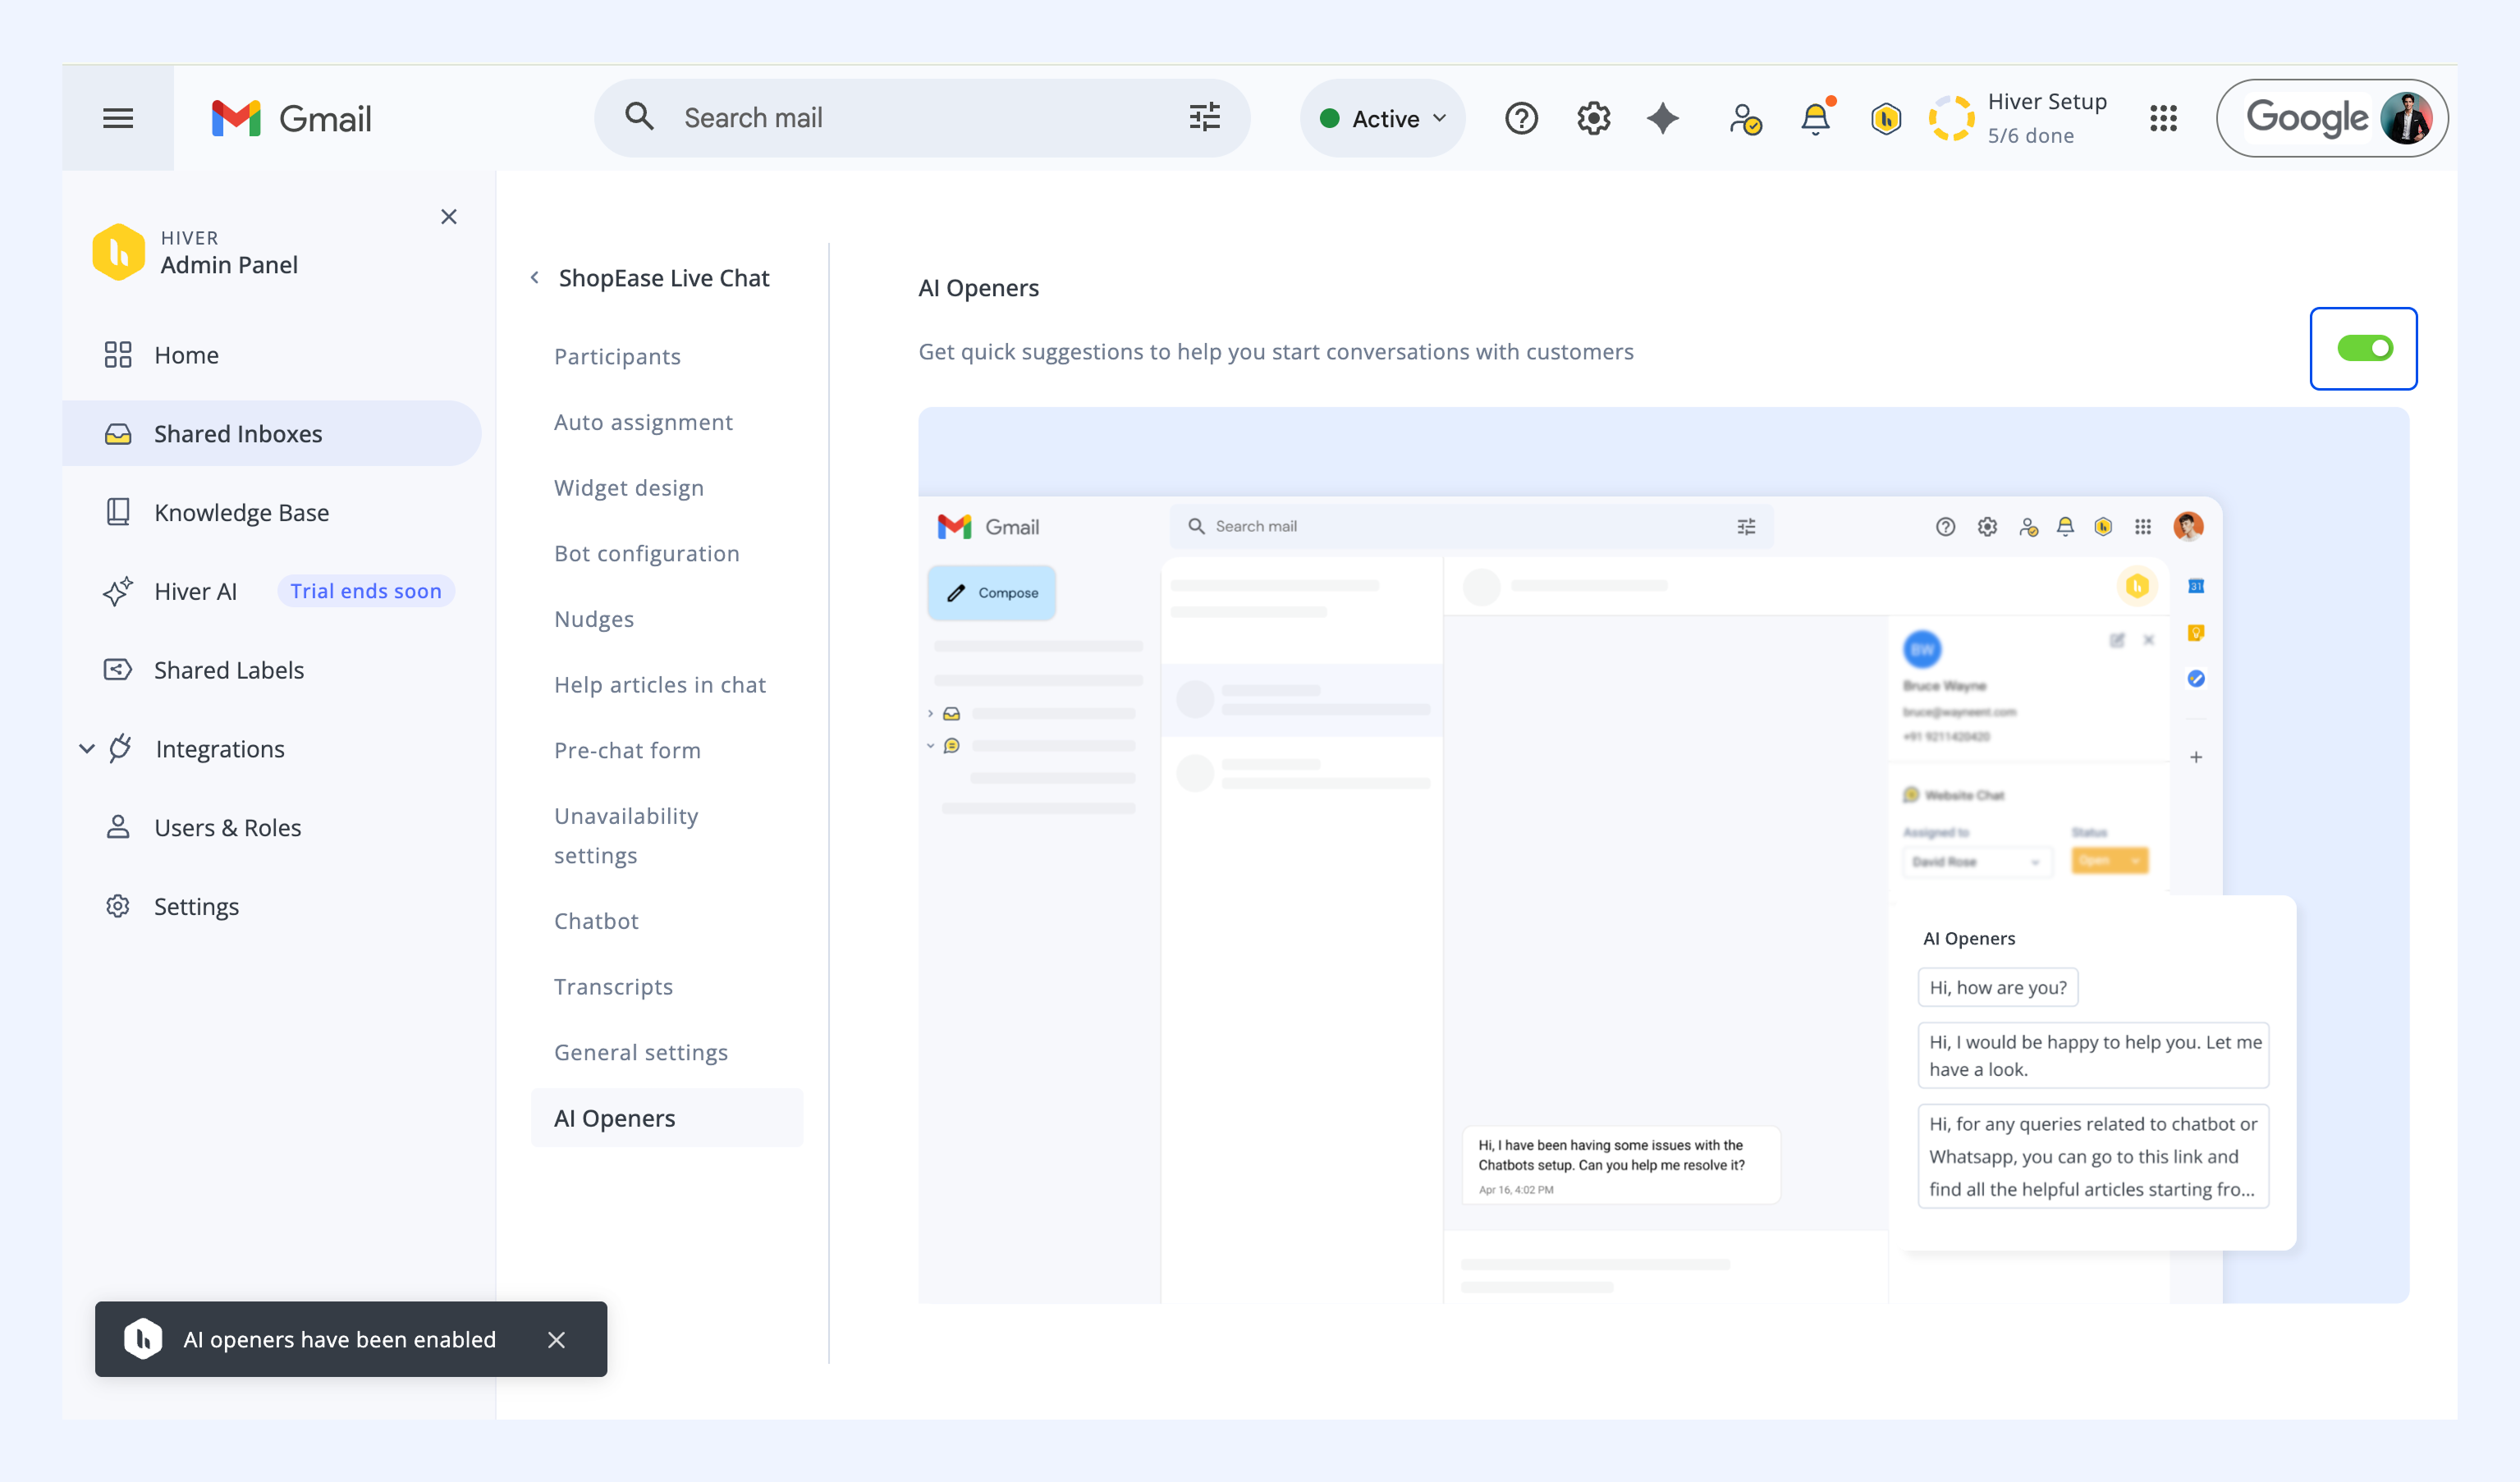
AI Openers
Enable AI-generated suggestions to help agents start conversations naturally and respond more quickly. When enabled, Hiver suggests short, context-aware messages based on the visitor’s query or chat history, assisting agents to respond more quickly.
Chat notifications
Manage when you receive chat alerts from My settings.
Go to Hiver Settings → My settings, then enable Desktop notifications for chat. If you’re turning this on for the first time, your browser may prompt you to allow notifications.
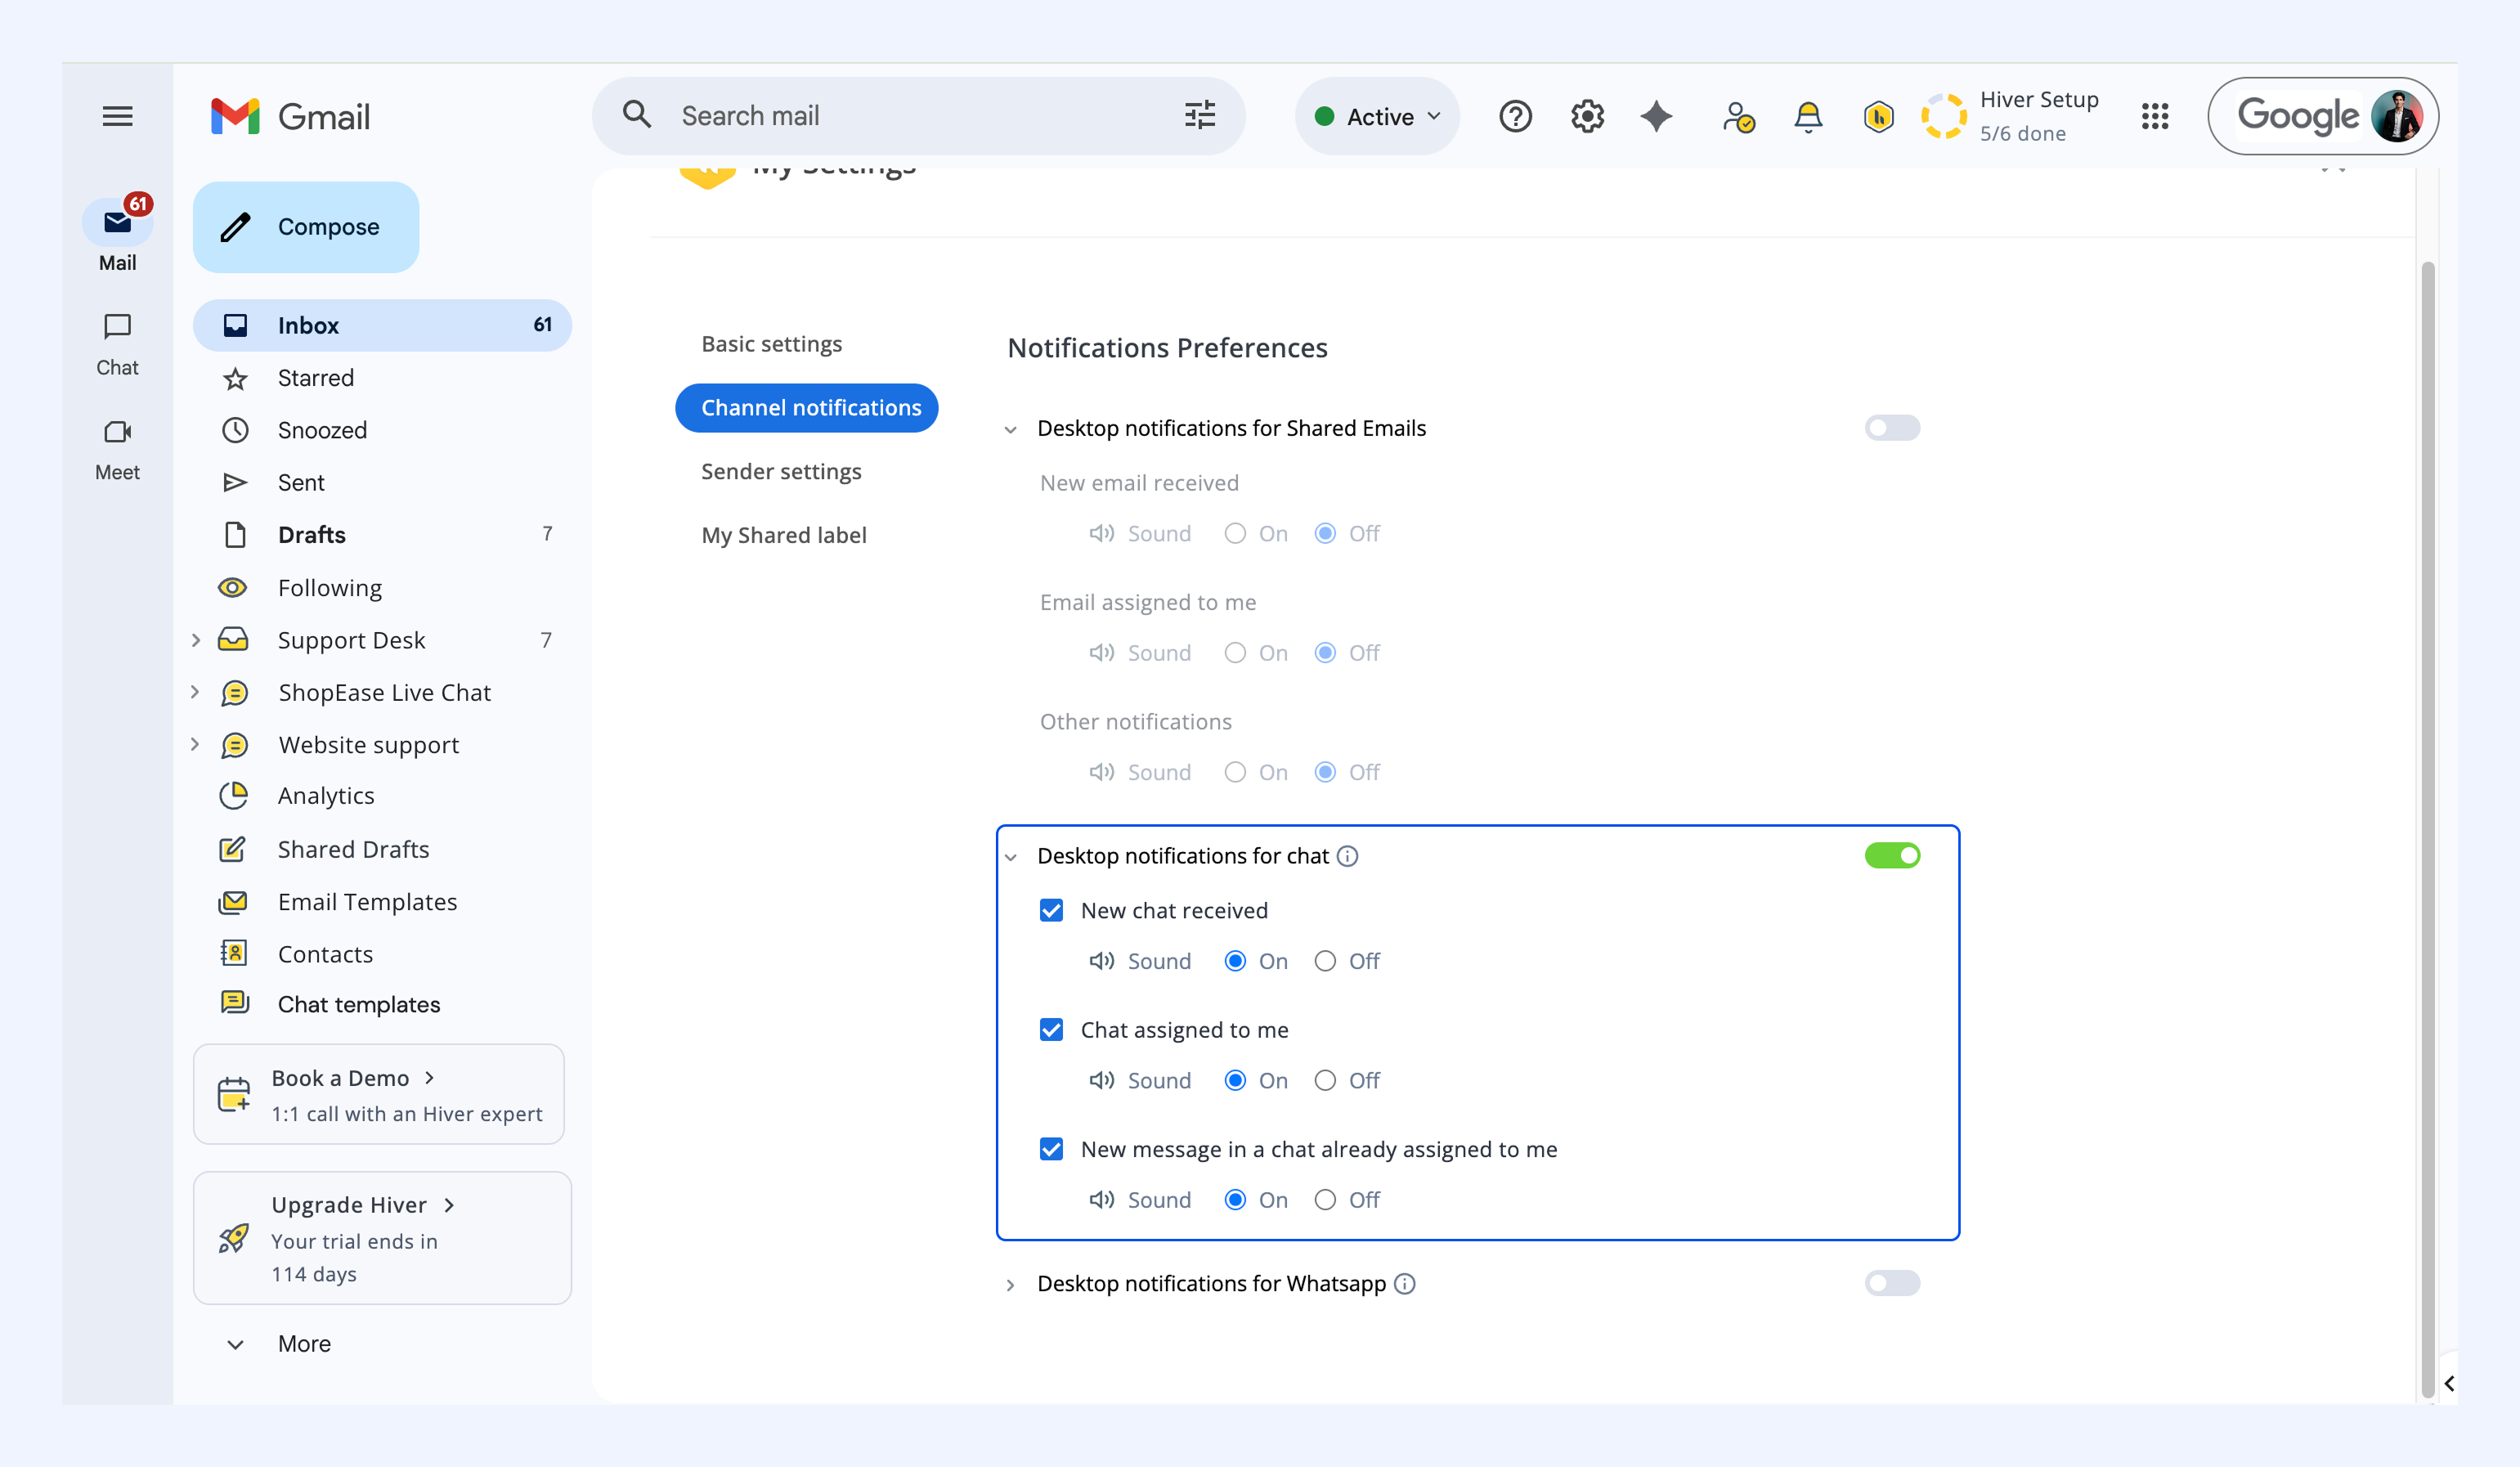
You can choose which events trigger desktop and sound notifications:
- New chat received – Alerts you when a visitor starts a new chat.
- Chat assigned to me – Notifies you when a chat is assigned to you.
- New message in an assigned chat – Alerts you when a visitor replies in a chat you’re already handling.
Related articles