Auto Assigning chats
Auto Assignment distributes incoming chats to available agents automatically in a round robin method. This ensures faster response times and balanced workload across your team.
Note: Chat Inbox is a legacy feature and is only available to customers who signed up before May 18, 2026.
Enabling Auto Assignment
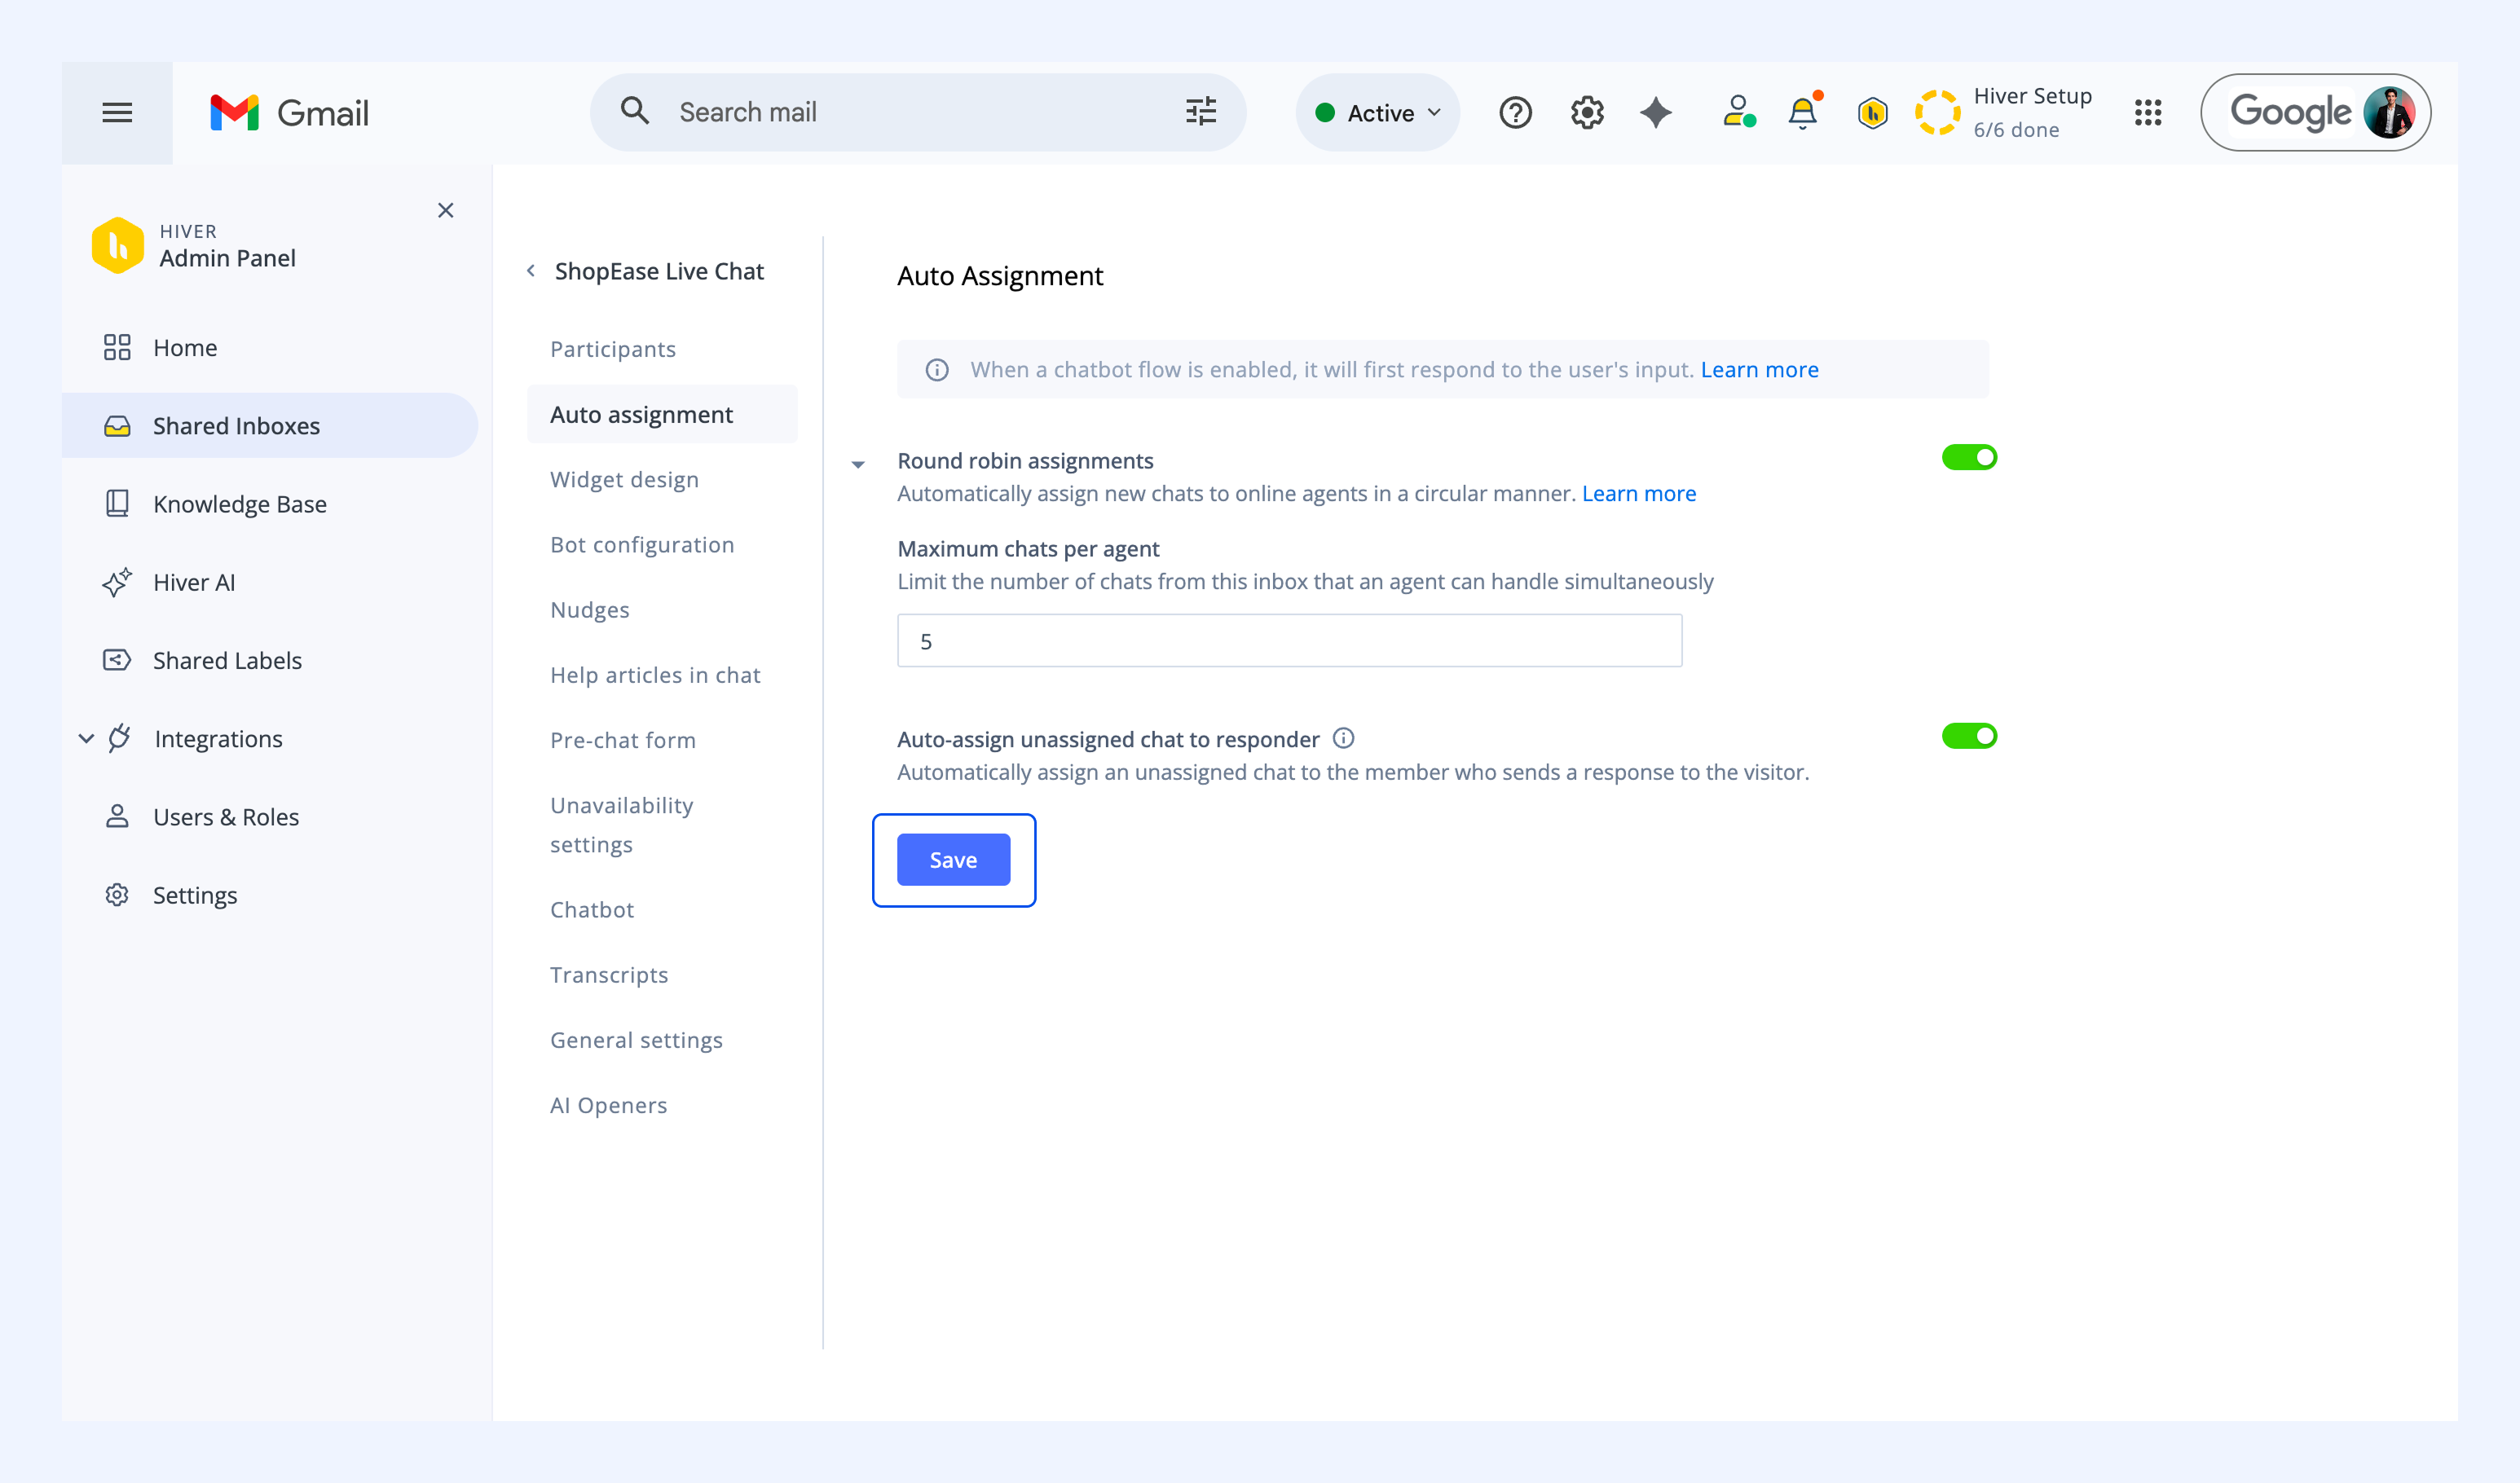
1. Go to Hiver Admin Panel → Shared Inboxes, and select a Chat Inbox.
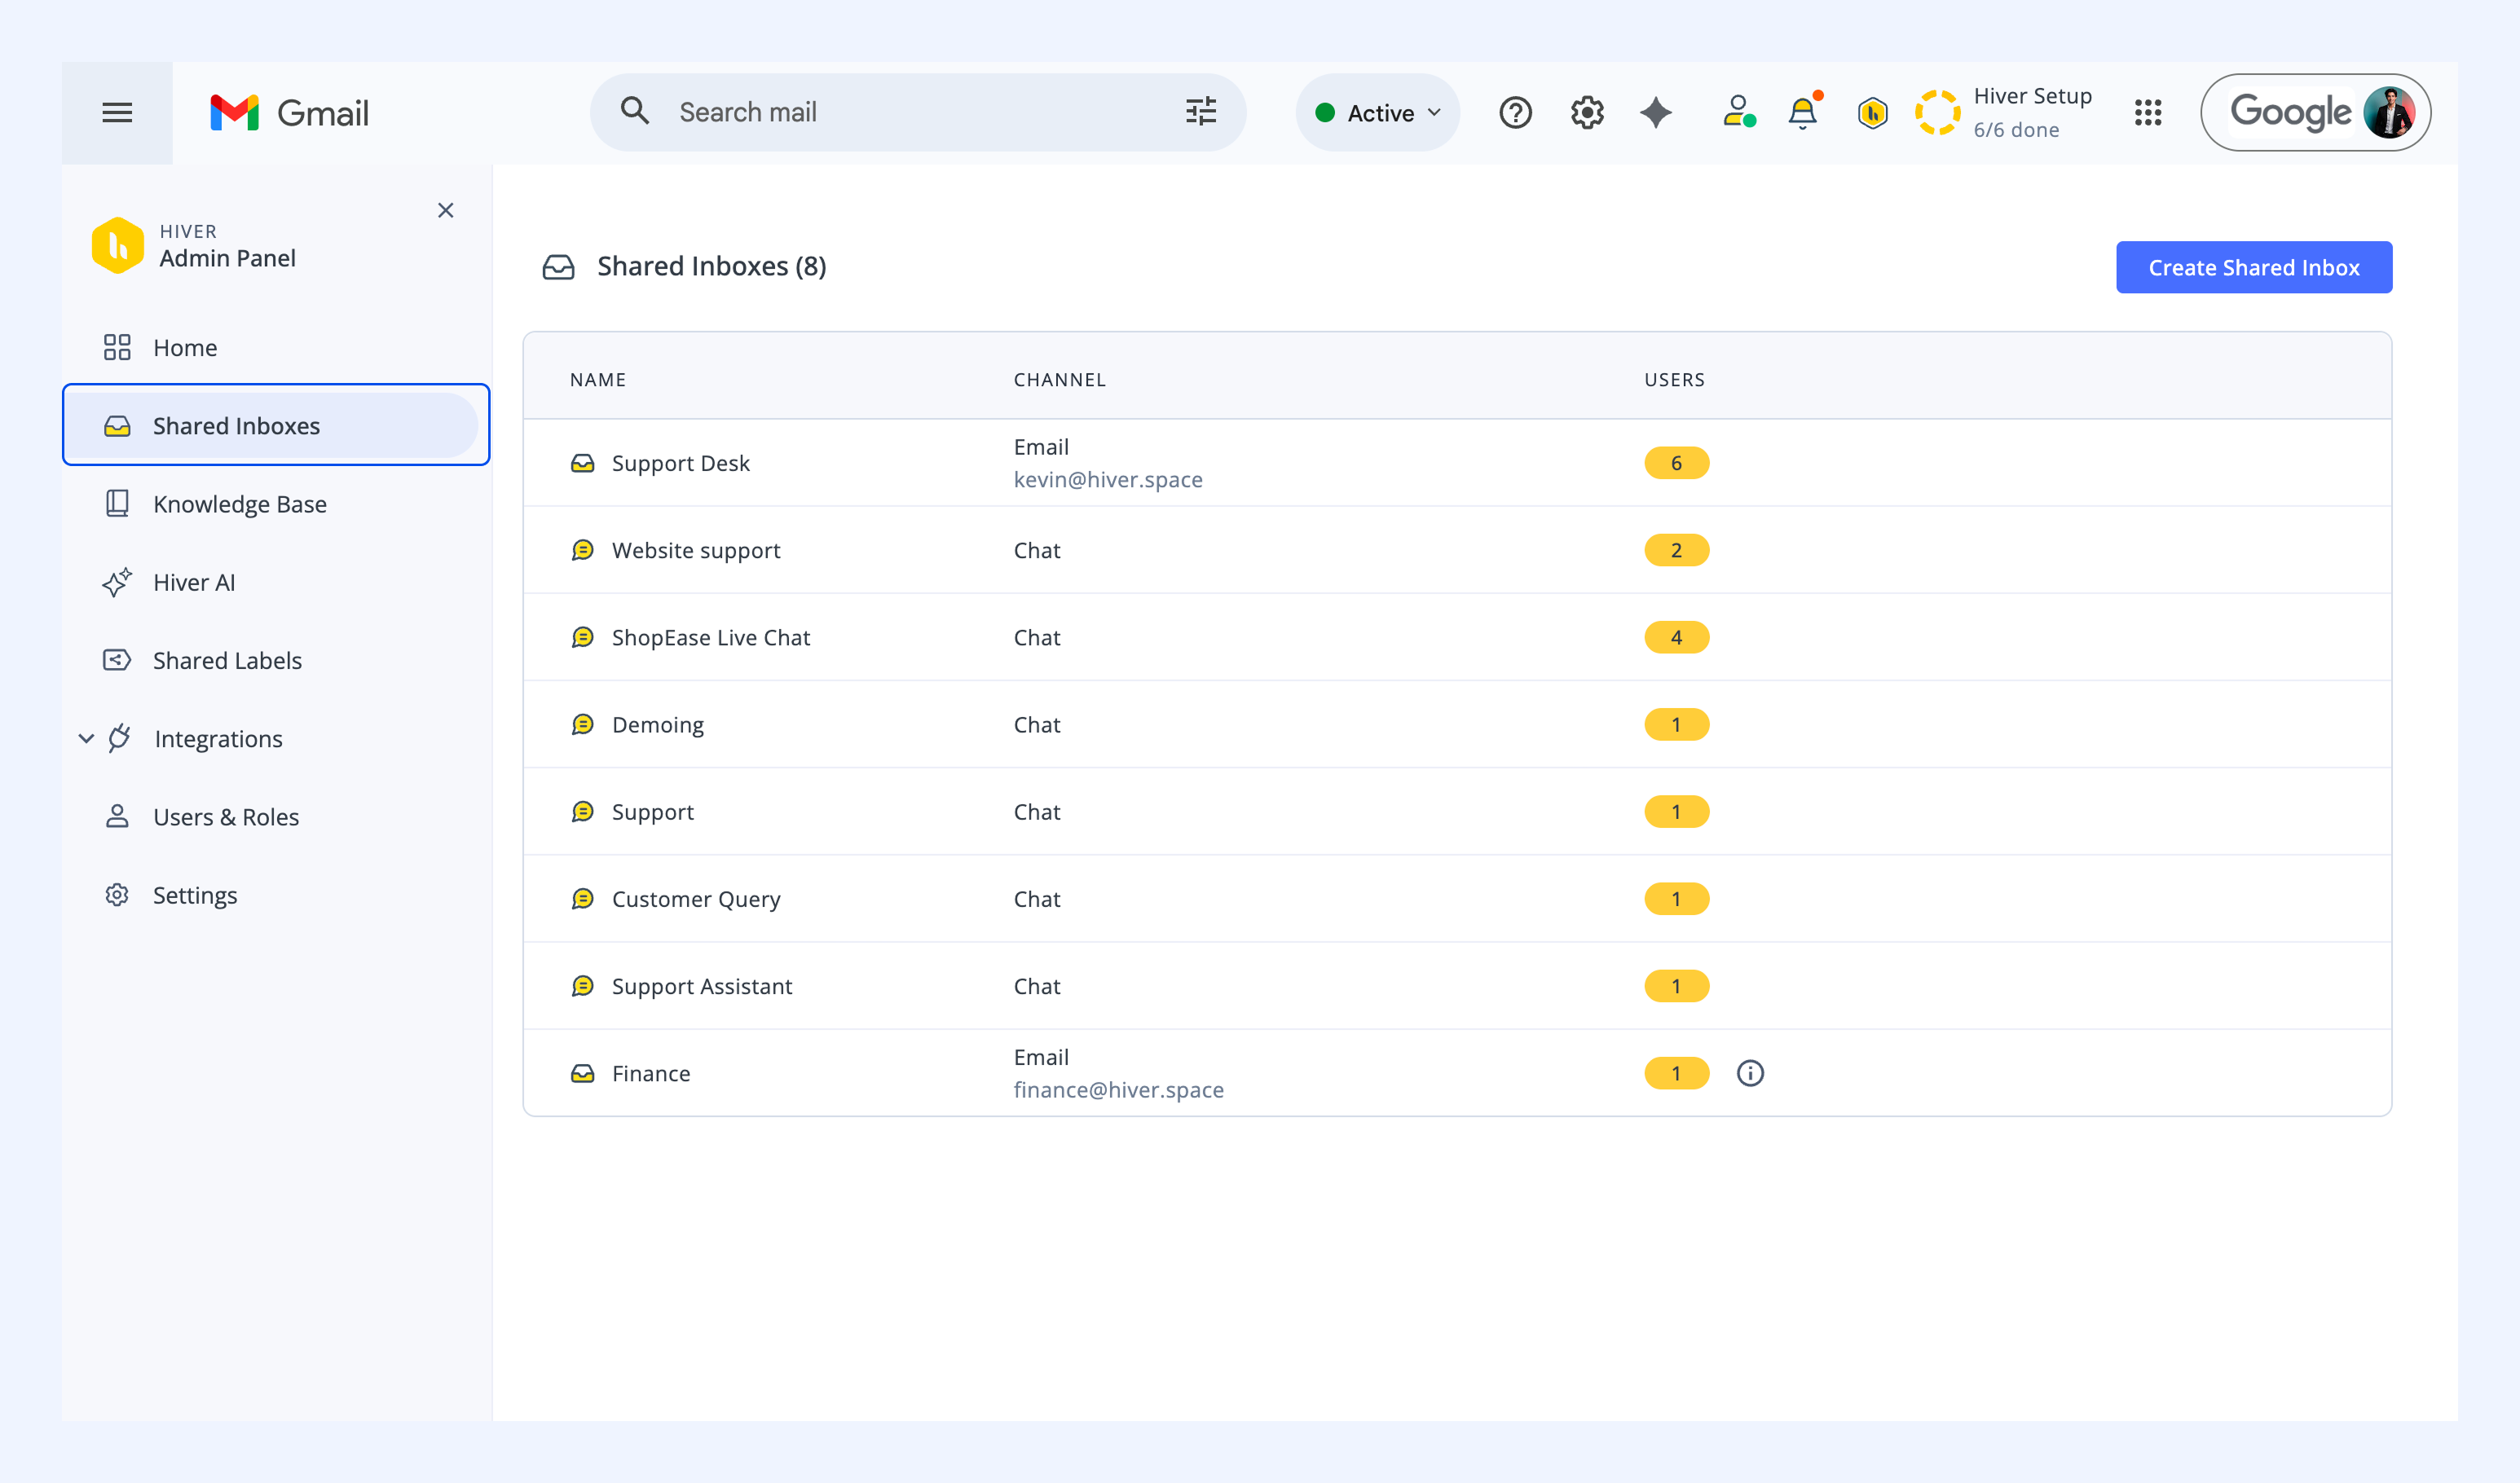
2. Find the Auto Assignment section.
3. Enable Round robin assignments.
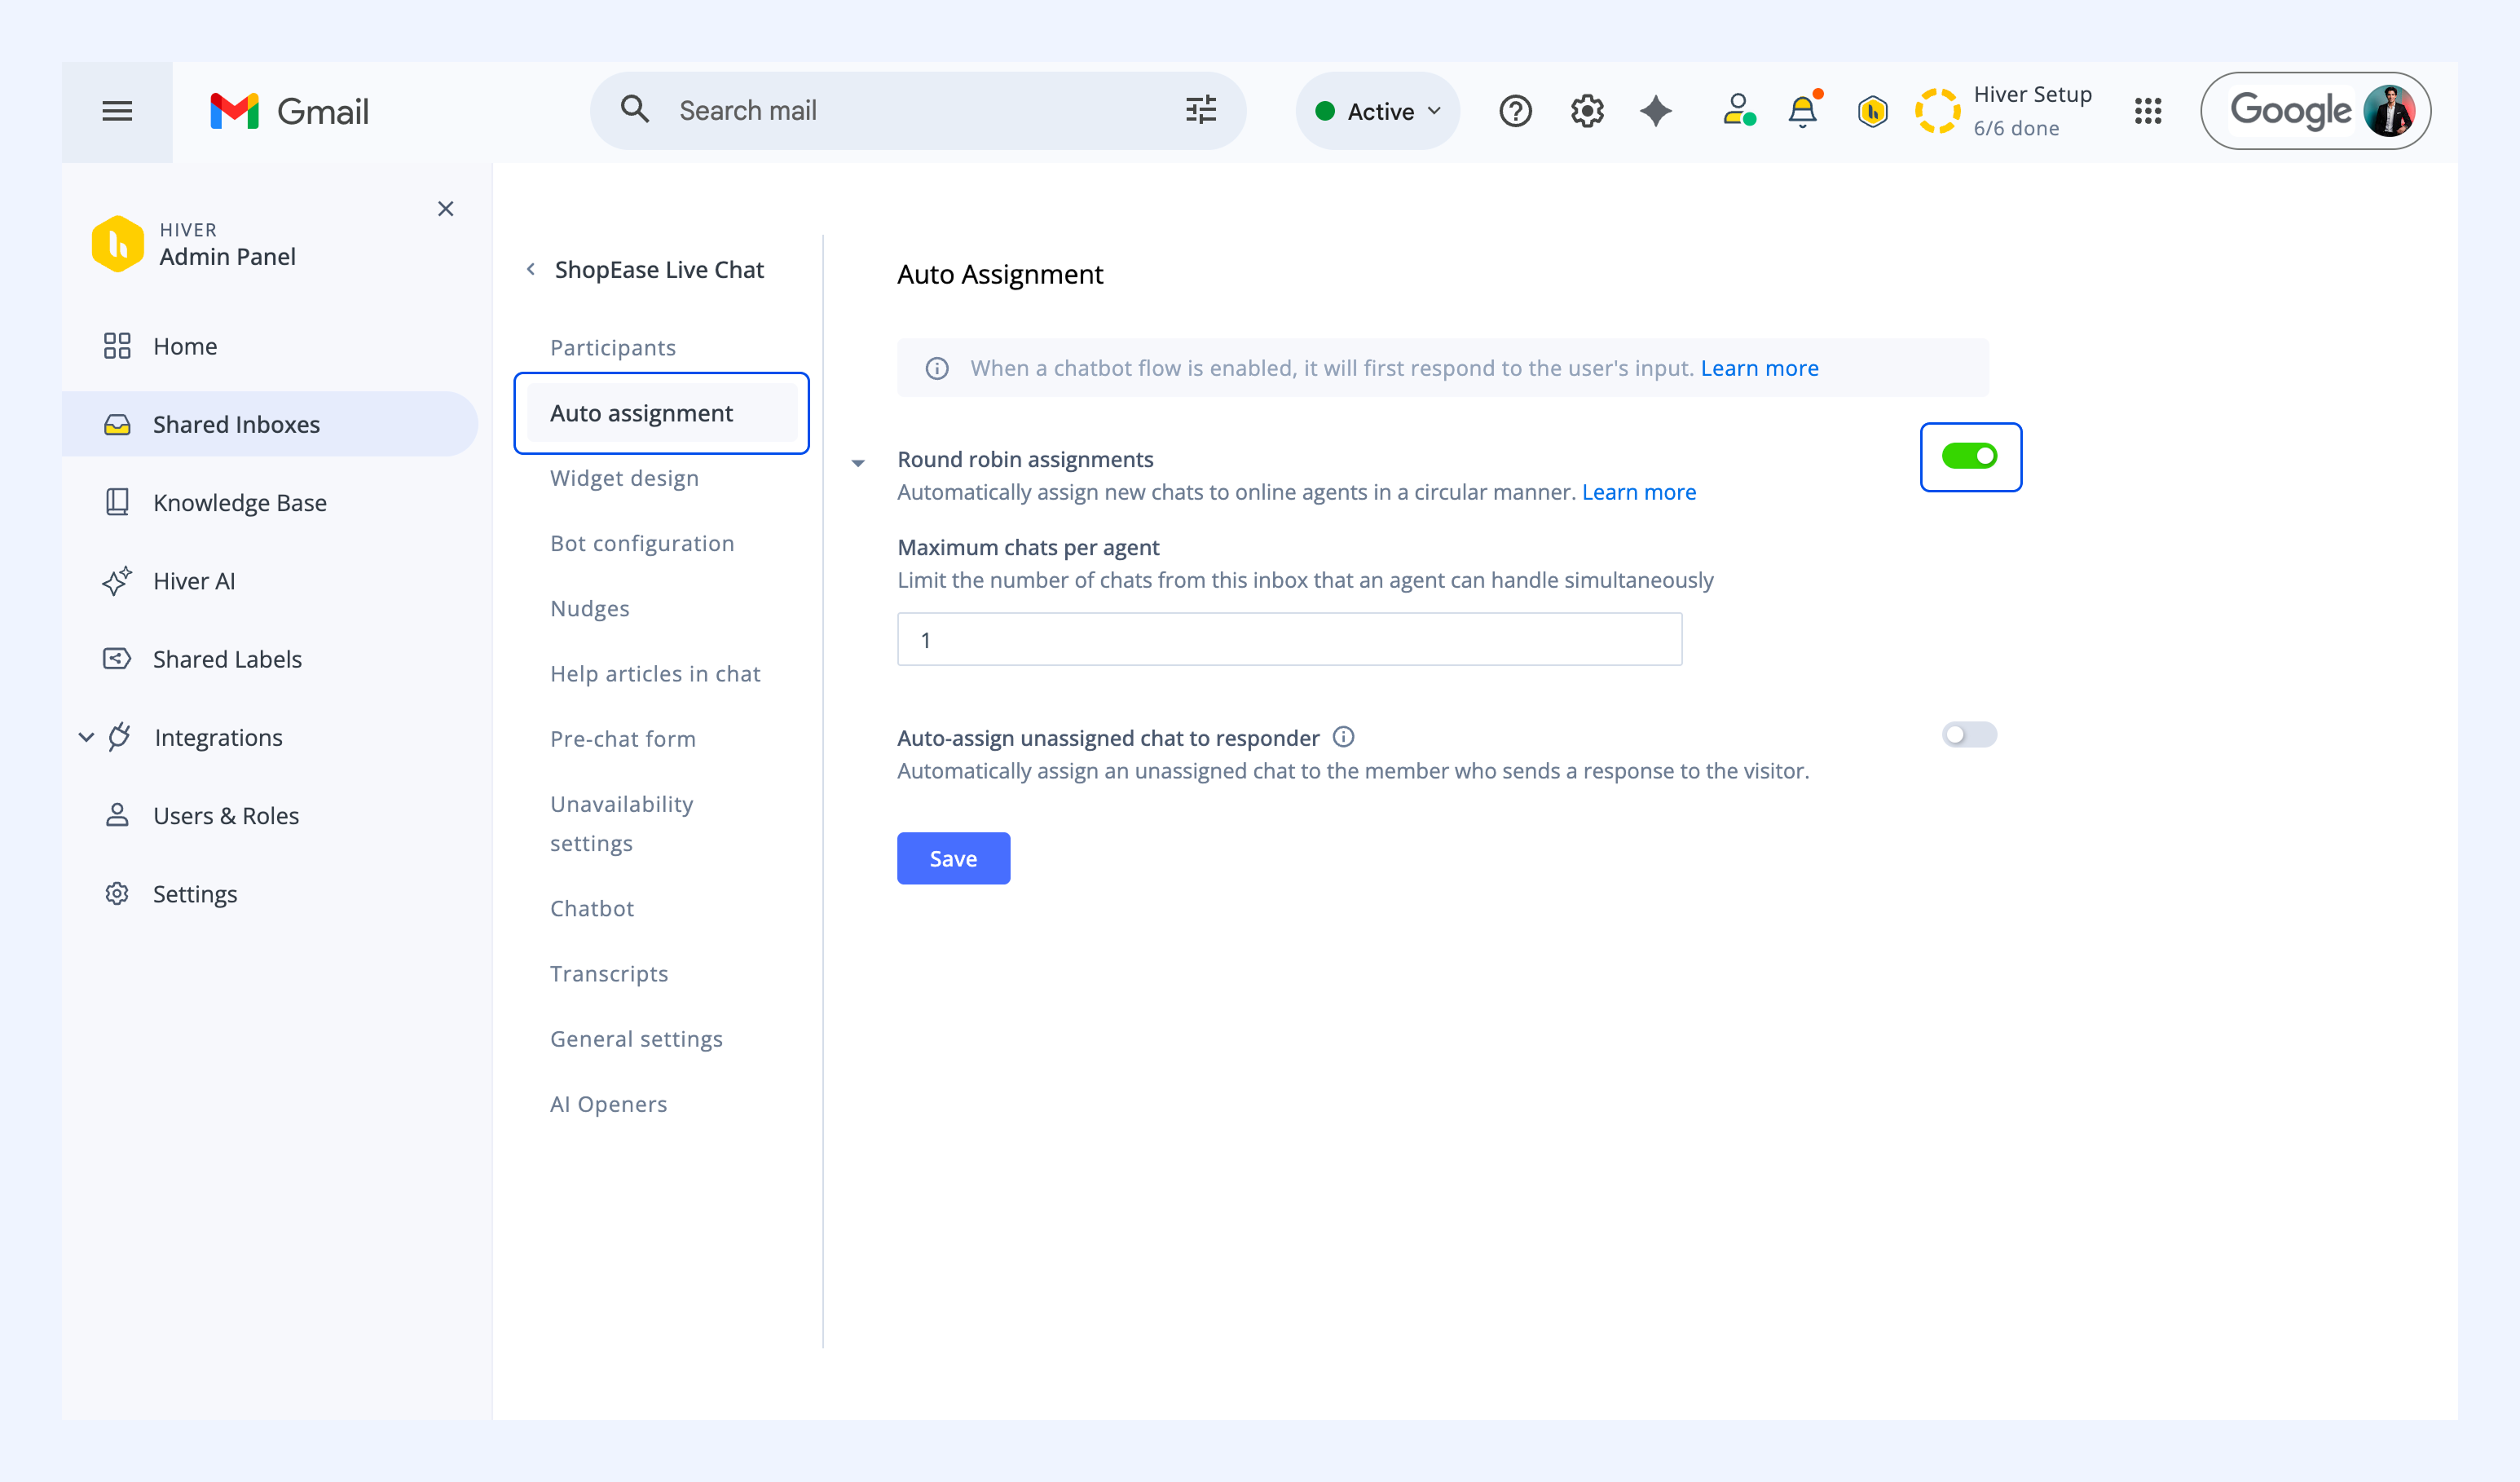
4. Choose how many chats each agent can handle at the same time to ensure they aren't overwhelmed during busy periods.
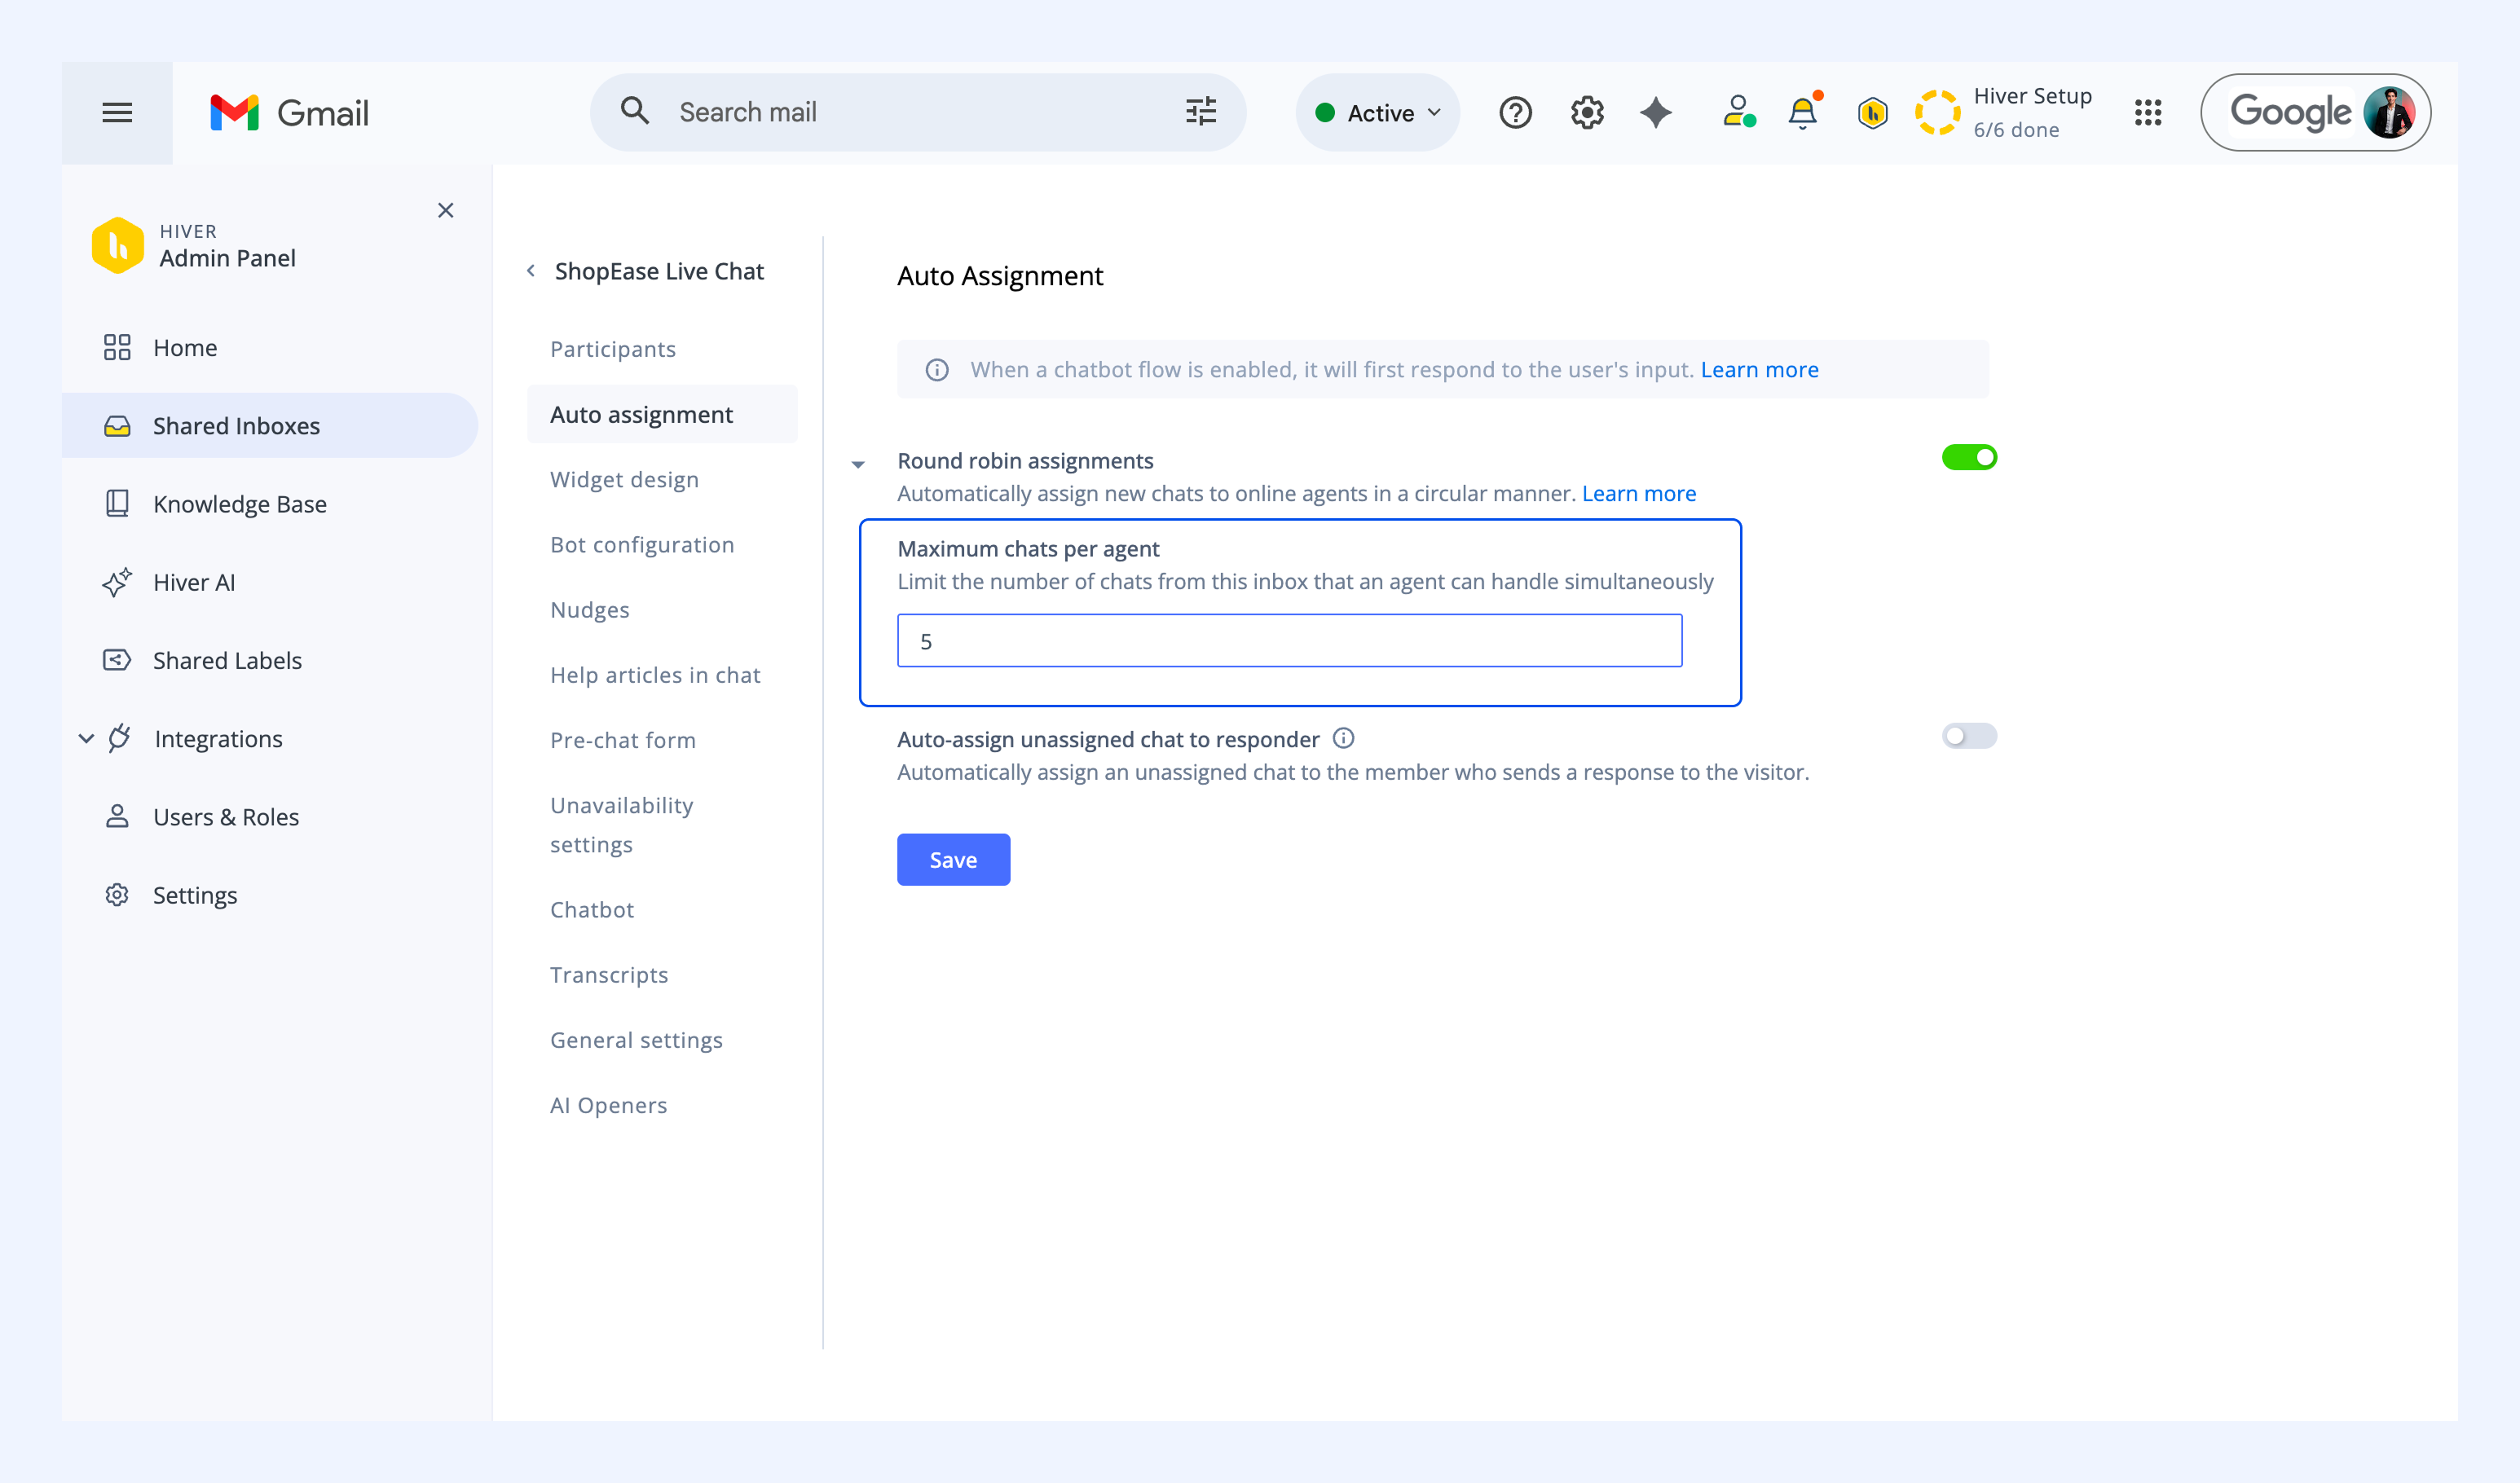
5. Turn on the Auto-assign unassigned chat to responder toggle to automatically assign a chat to whichever agent replies to the chat first.
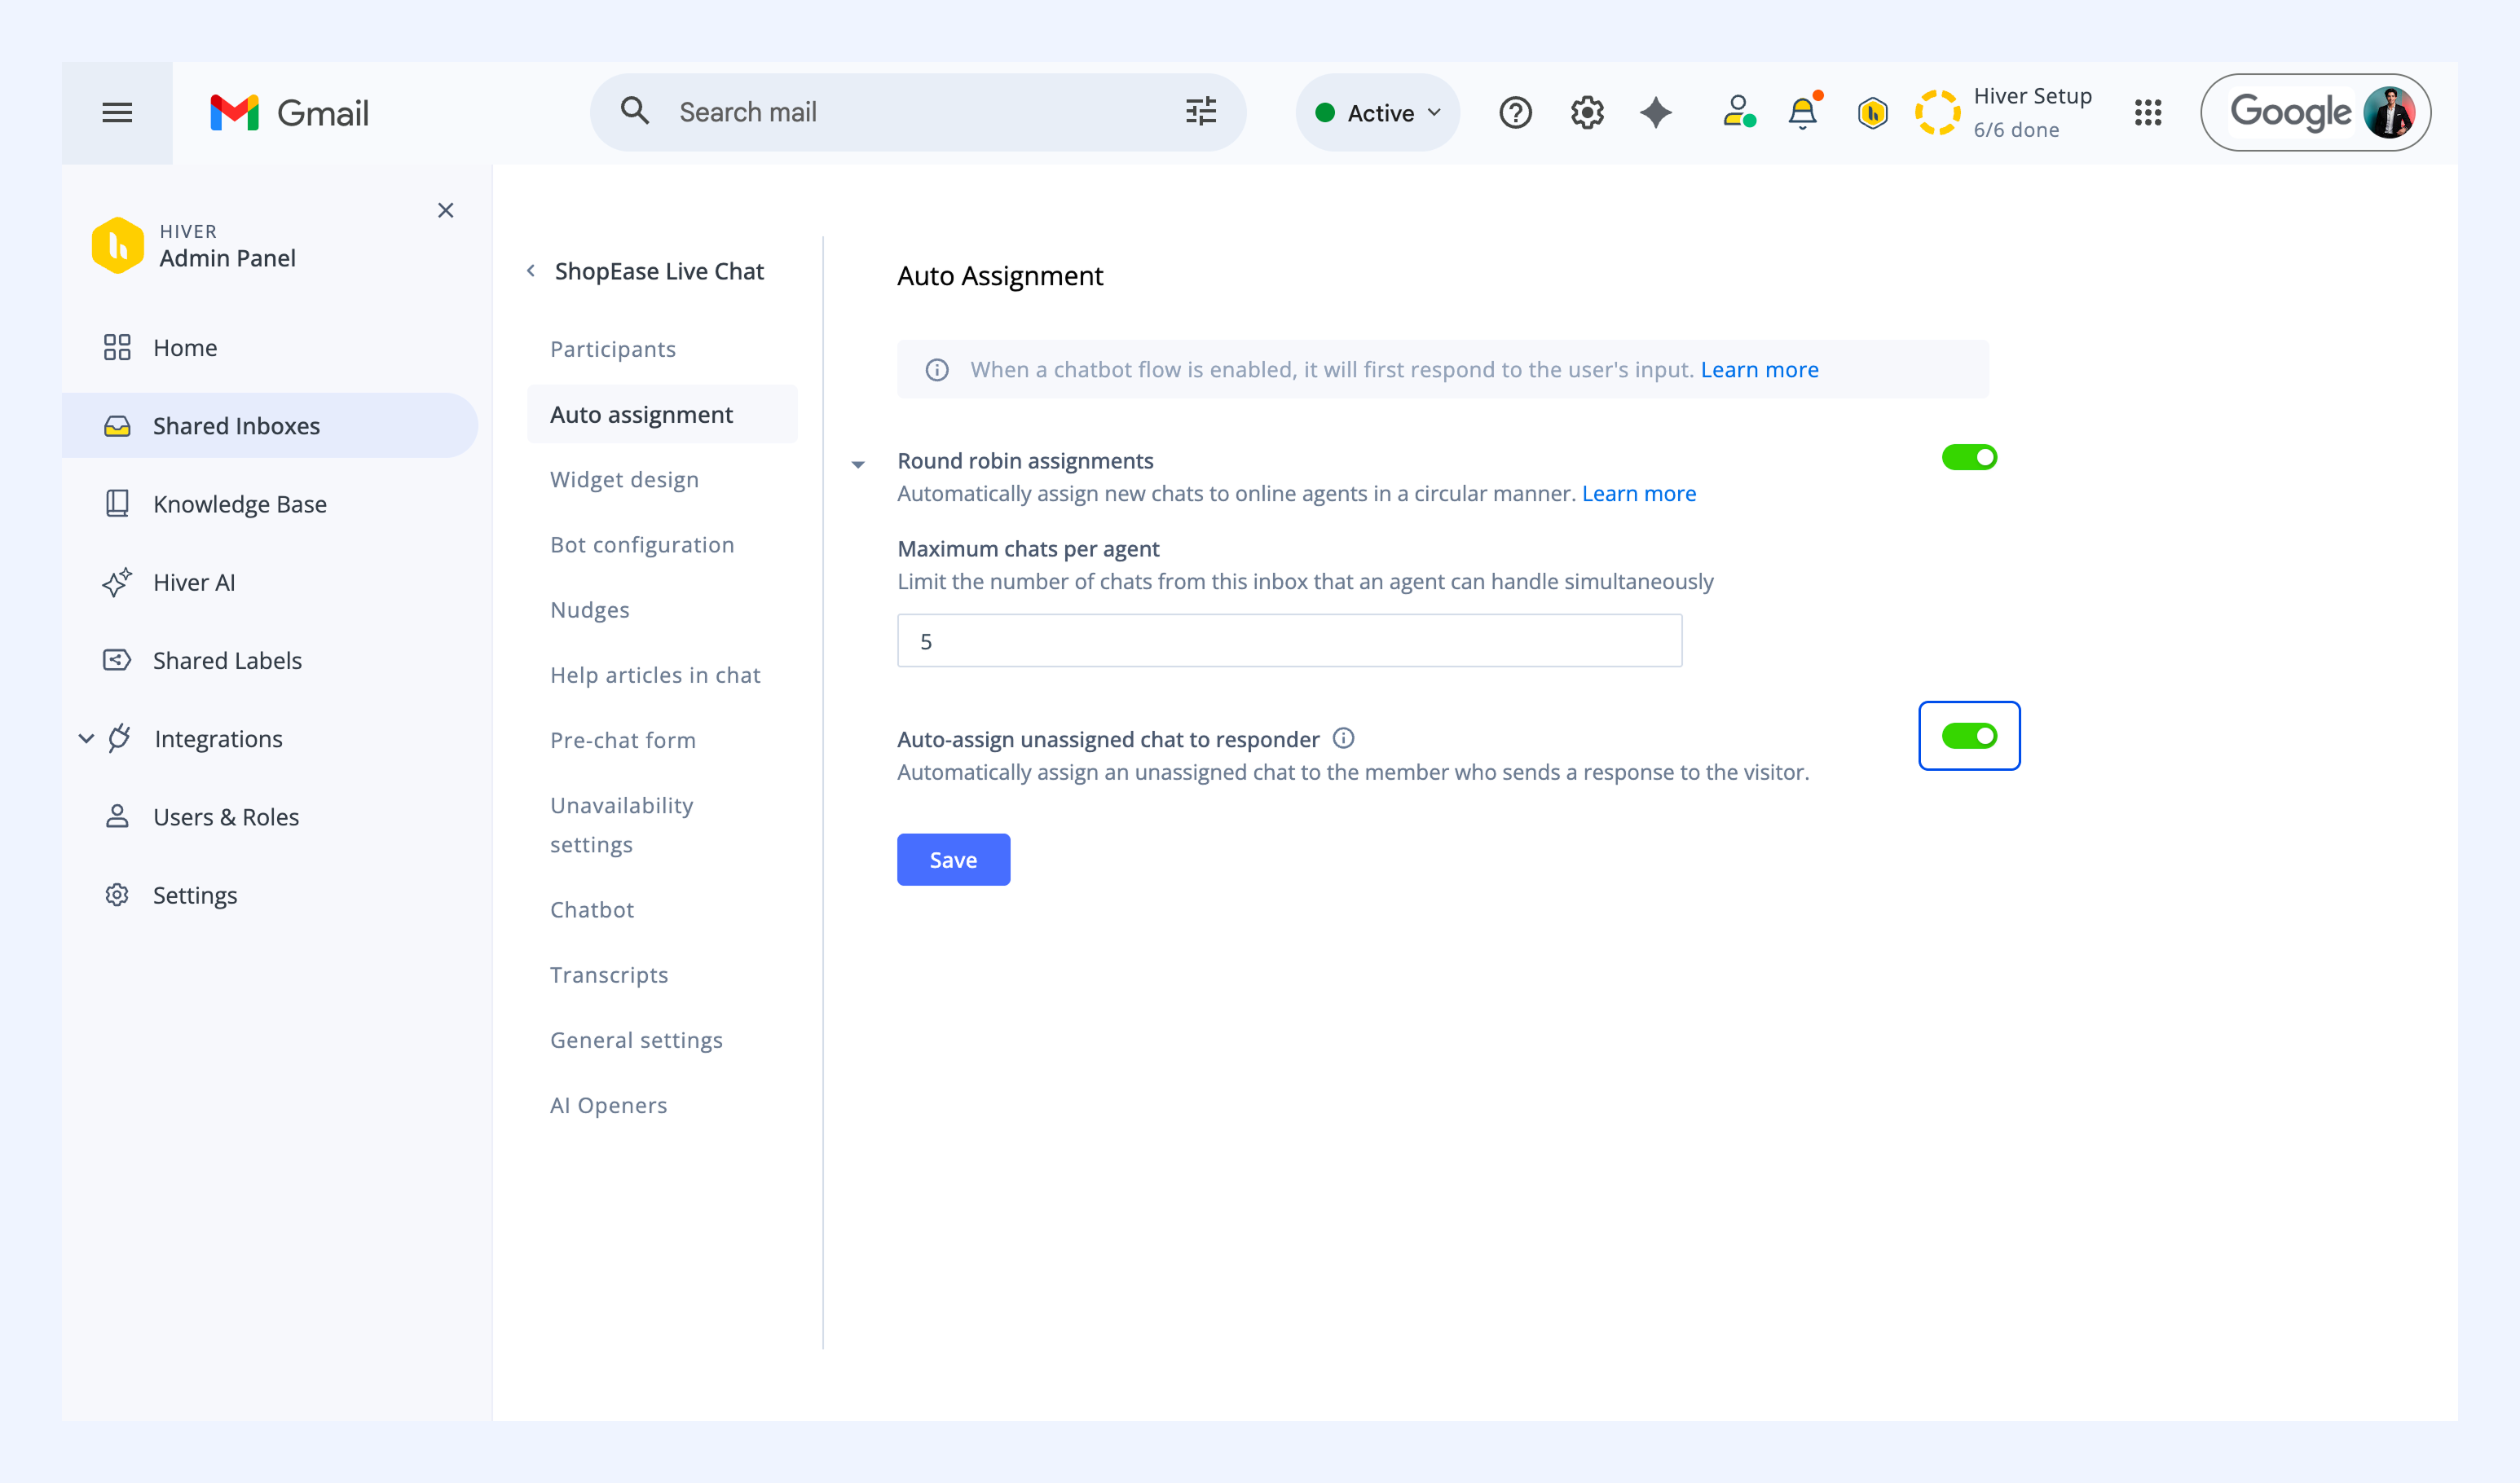
6. Click Save to apply the Auto Assignment settings.
Manage chat availability for team members
Availability for chat can be managed either by admins or by agents themselves.
For admins
Admins can set availability for their team members directly from the top bar:
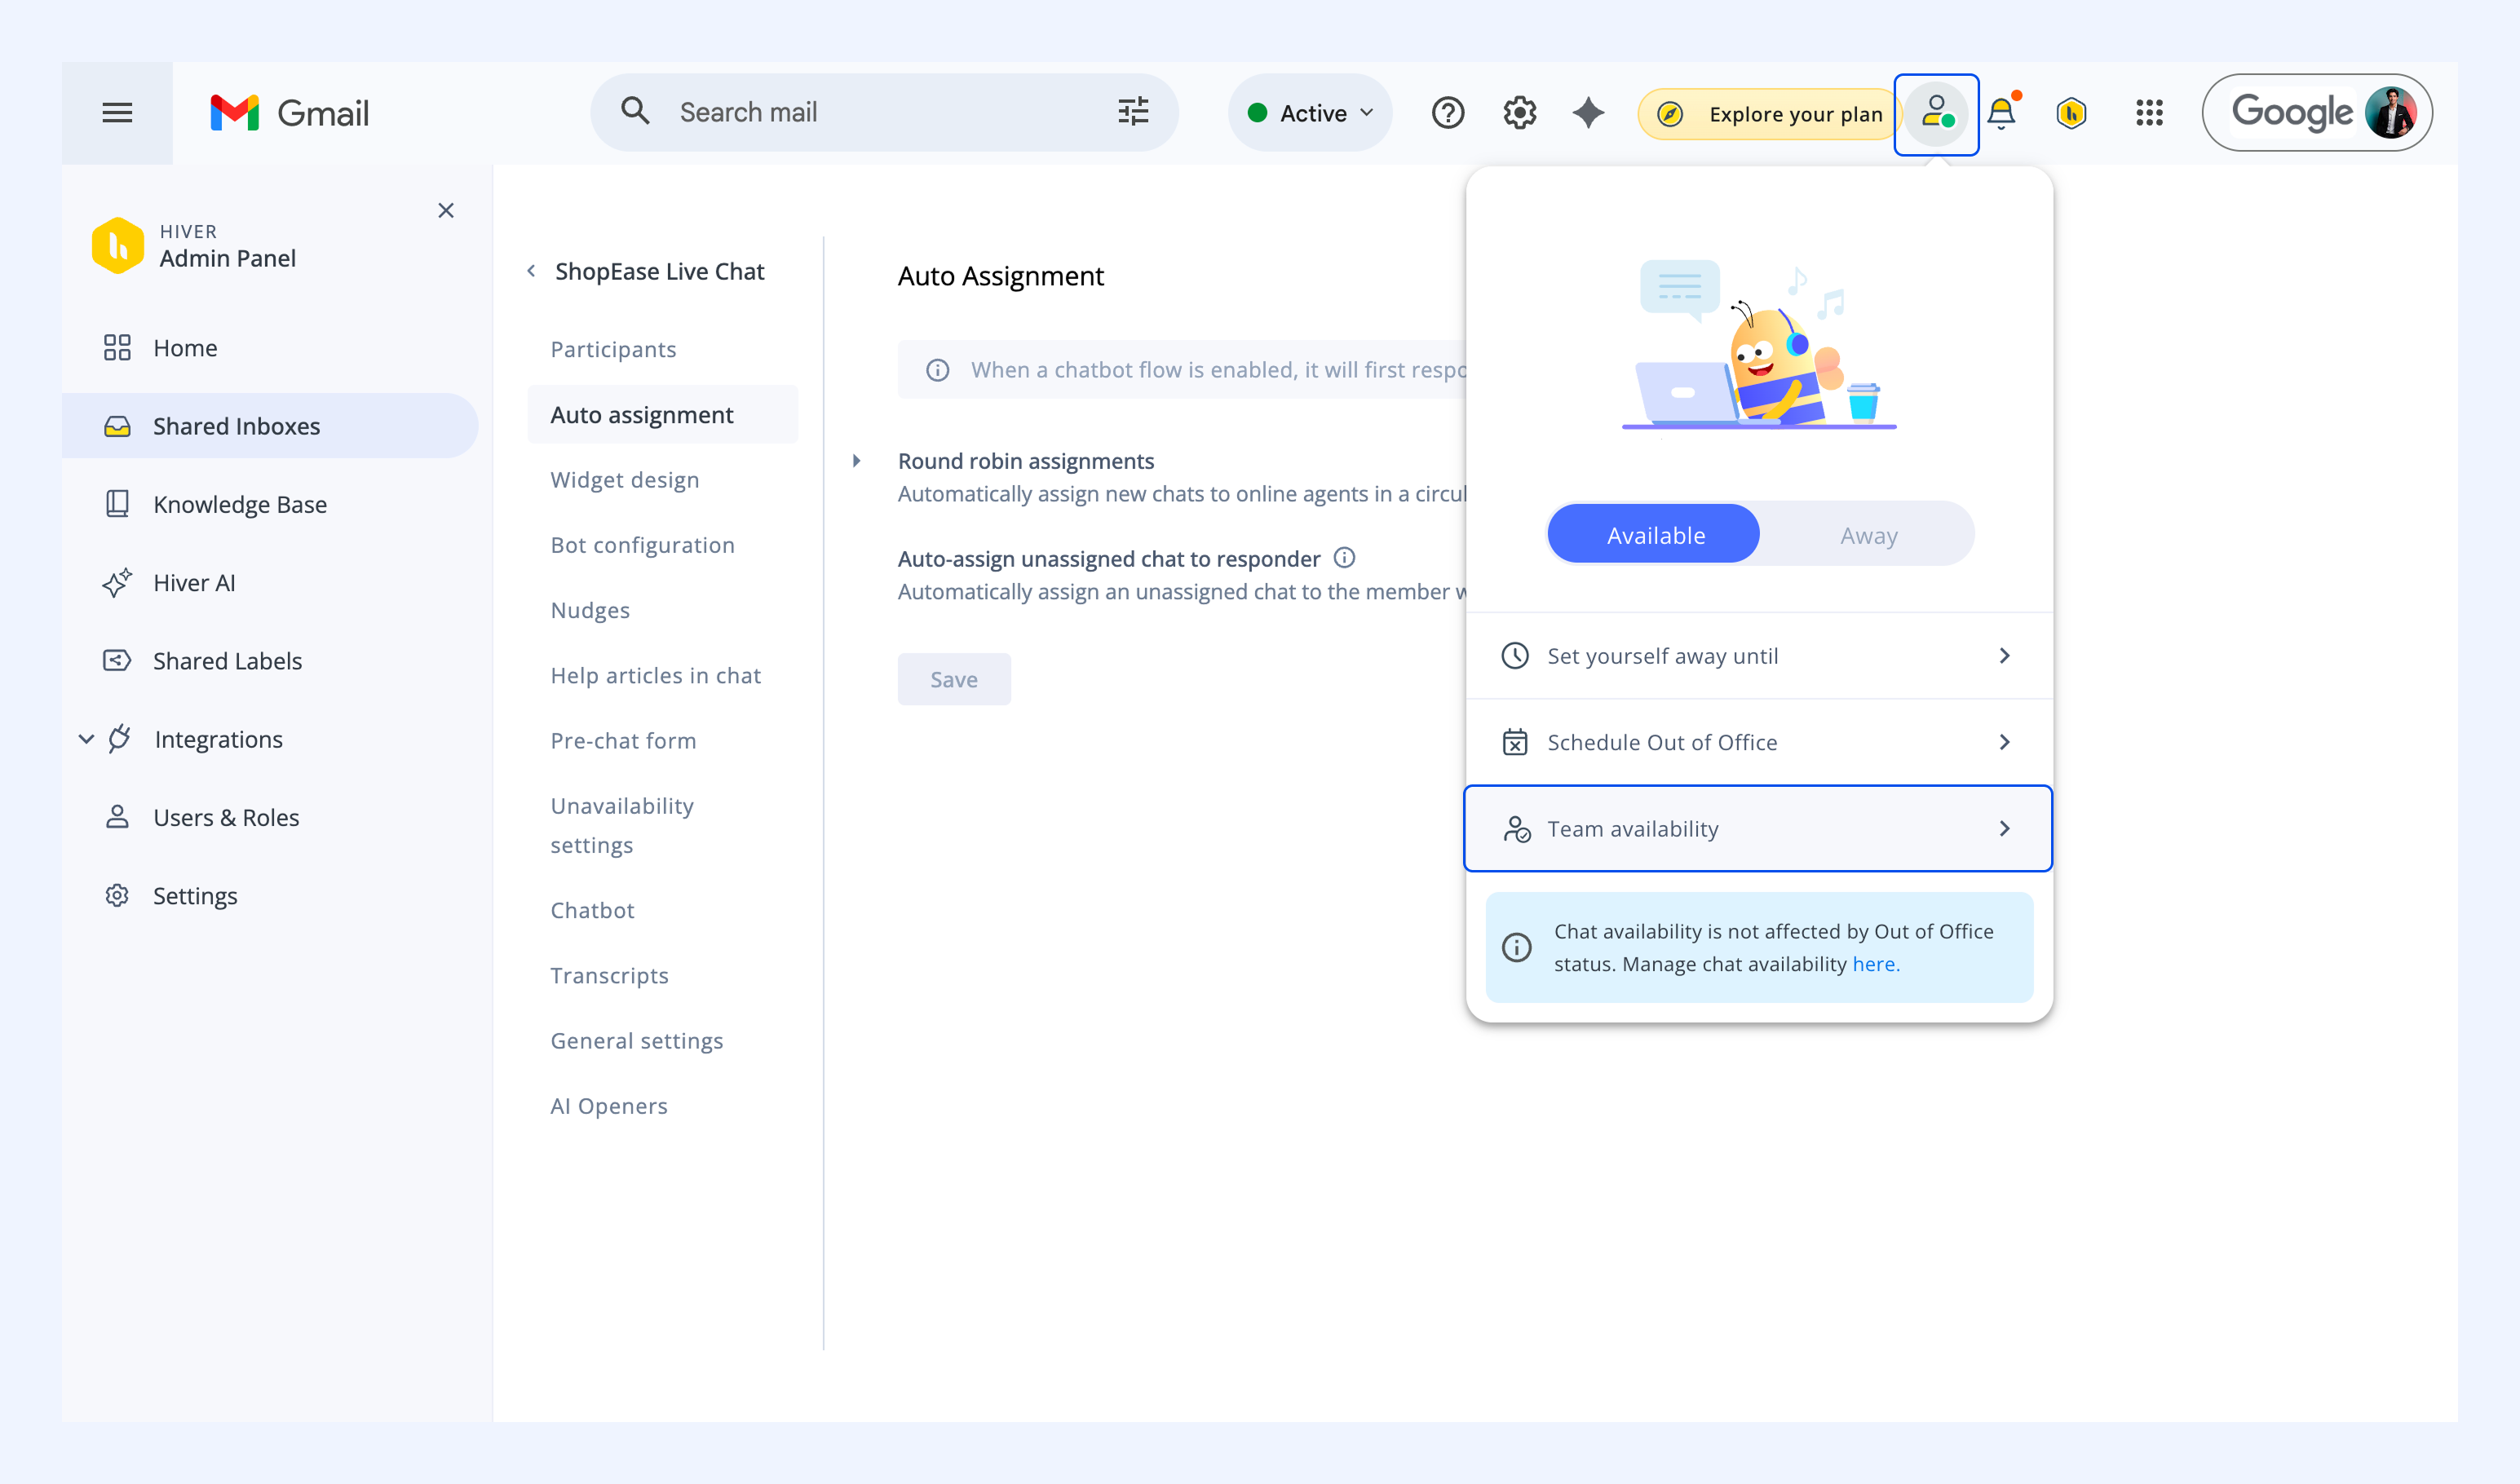
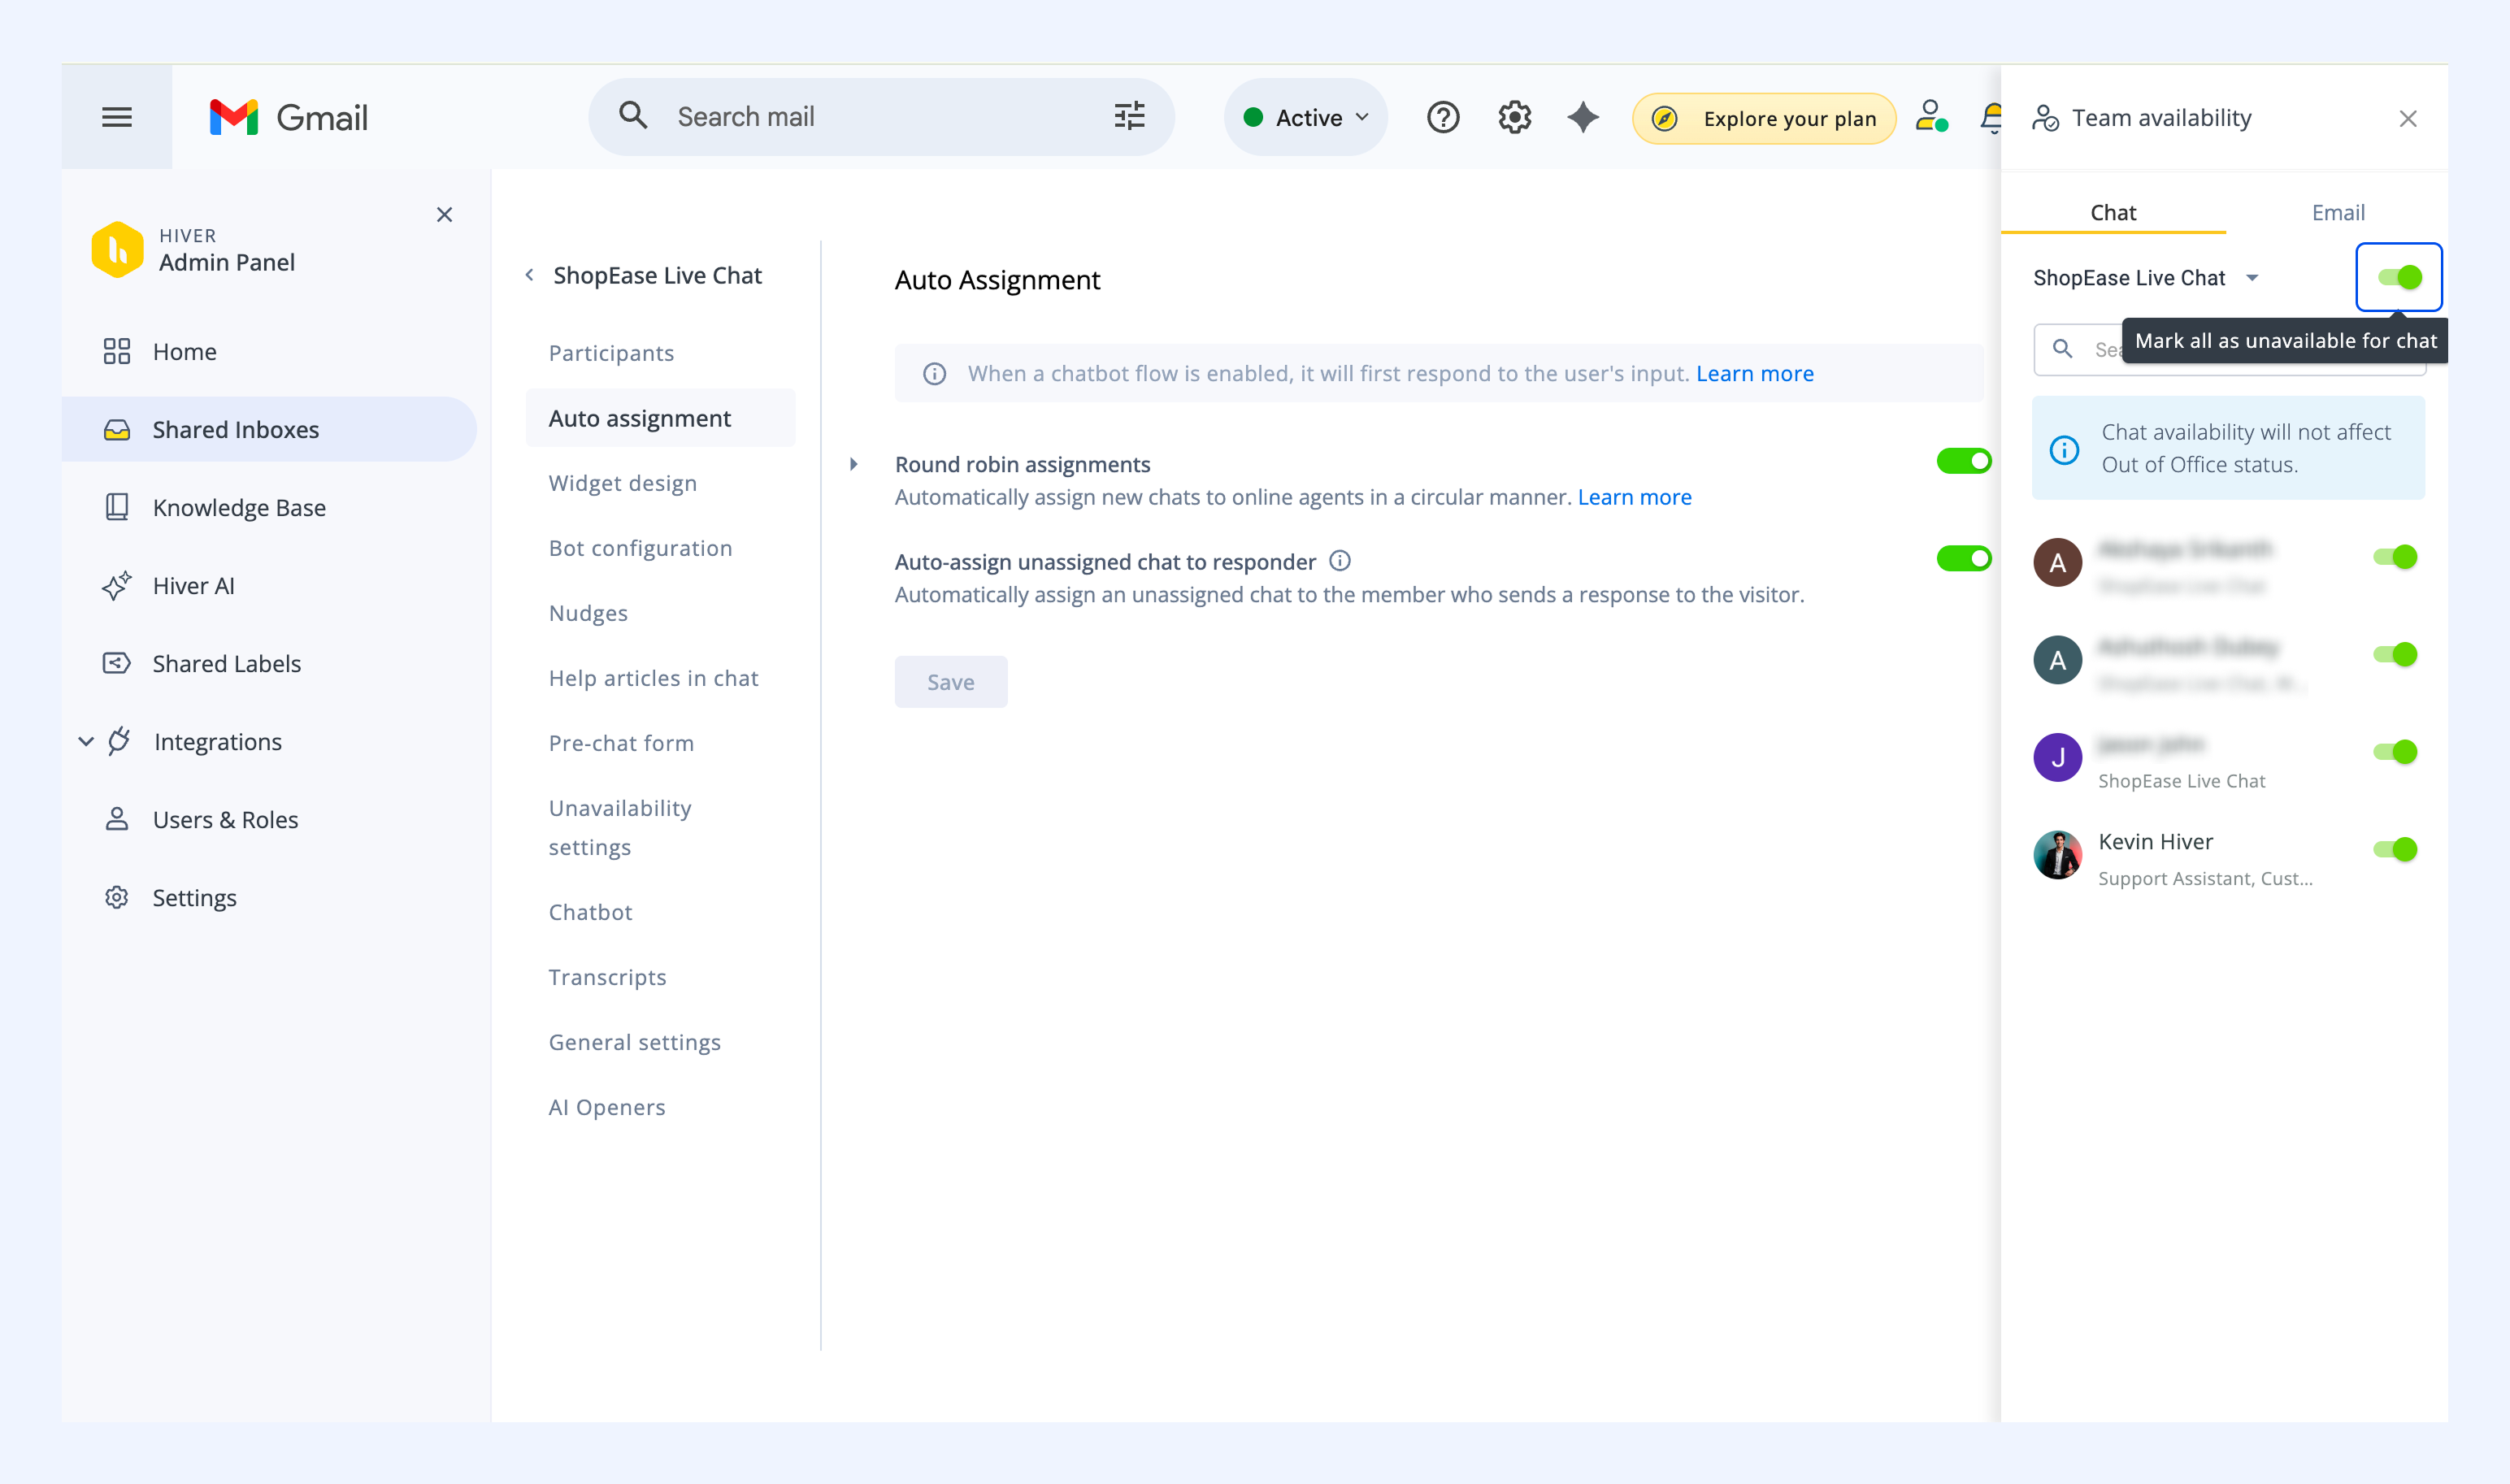
1. Open the profile menu on the top bar and select Team availability.
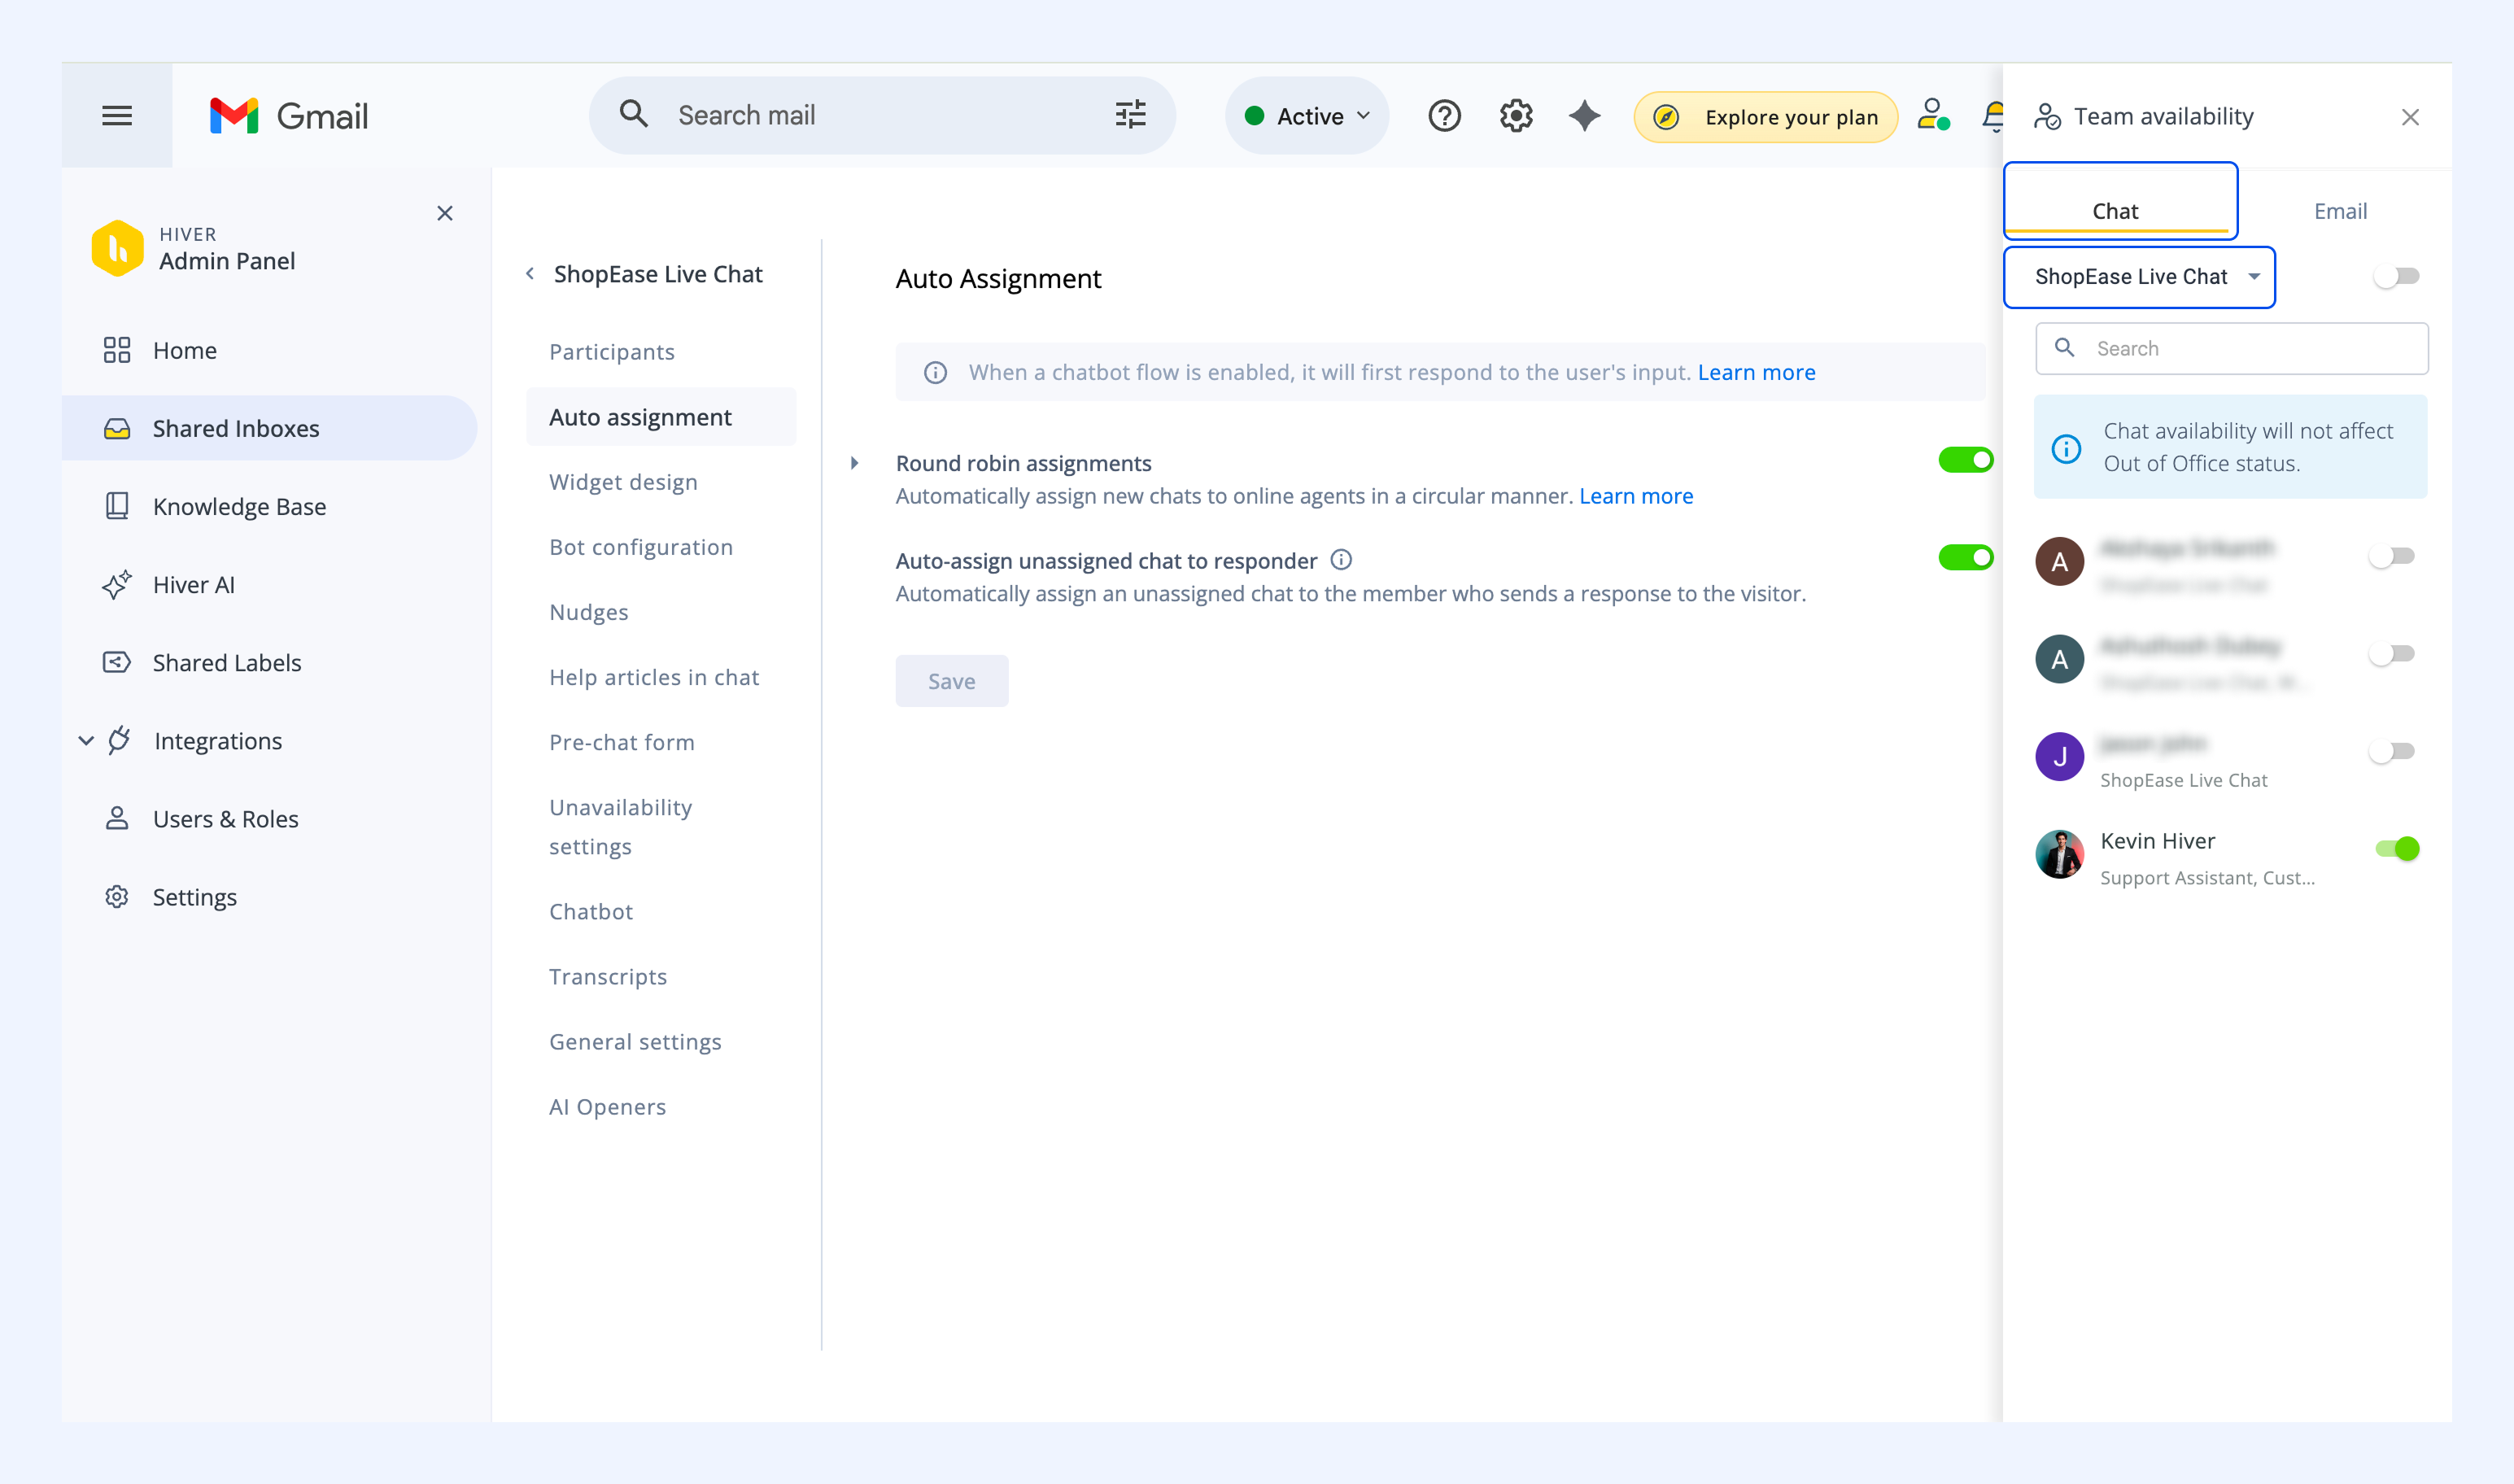
2. Go to the Chat tab and pick your live Chat Inbox from the dropdown.
3. Use the toggles next to each member’s name to mark them as available or unavailable.
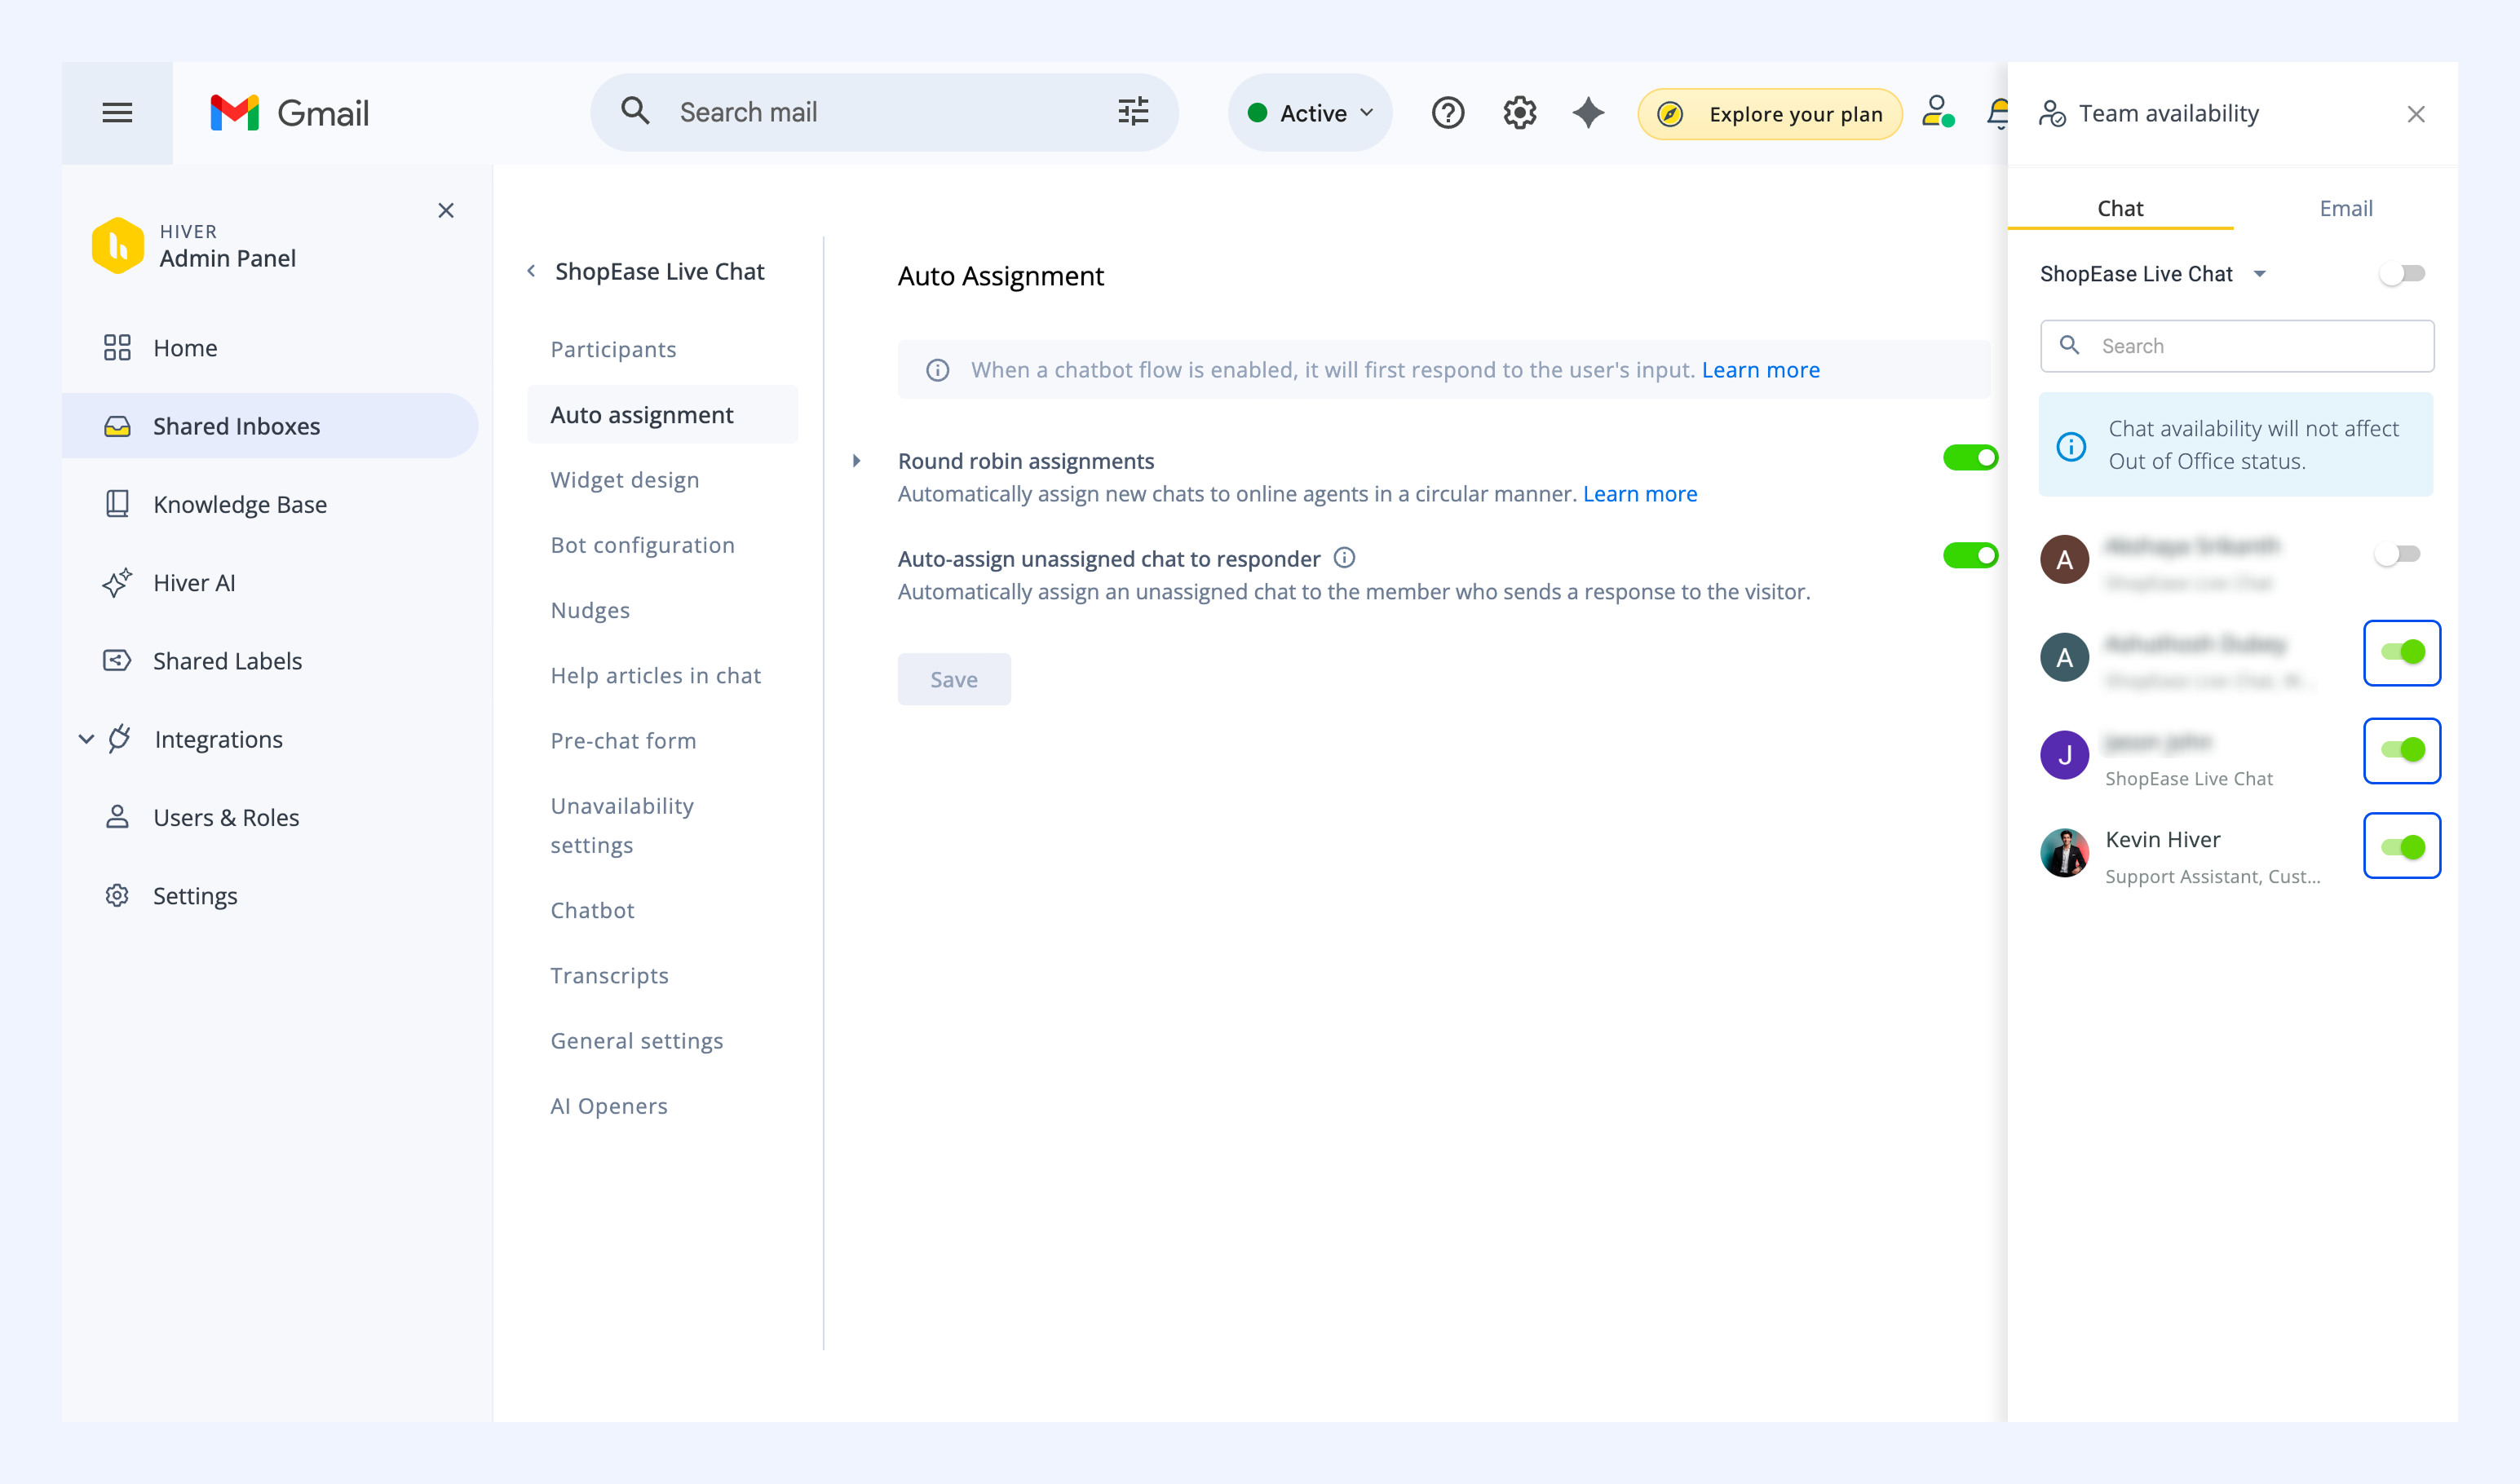
Tip: Use the toggle next to the inbox name to update everyone as available at once.
For agents
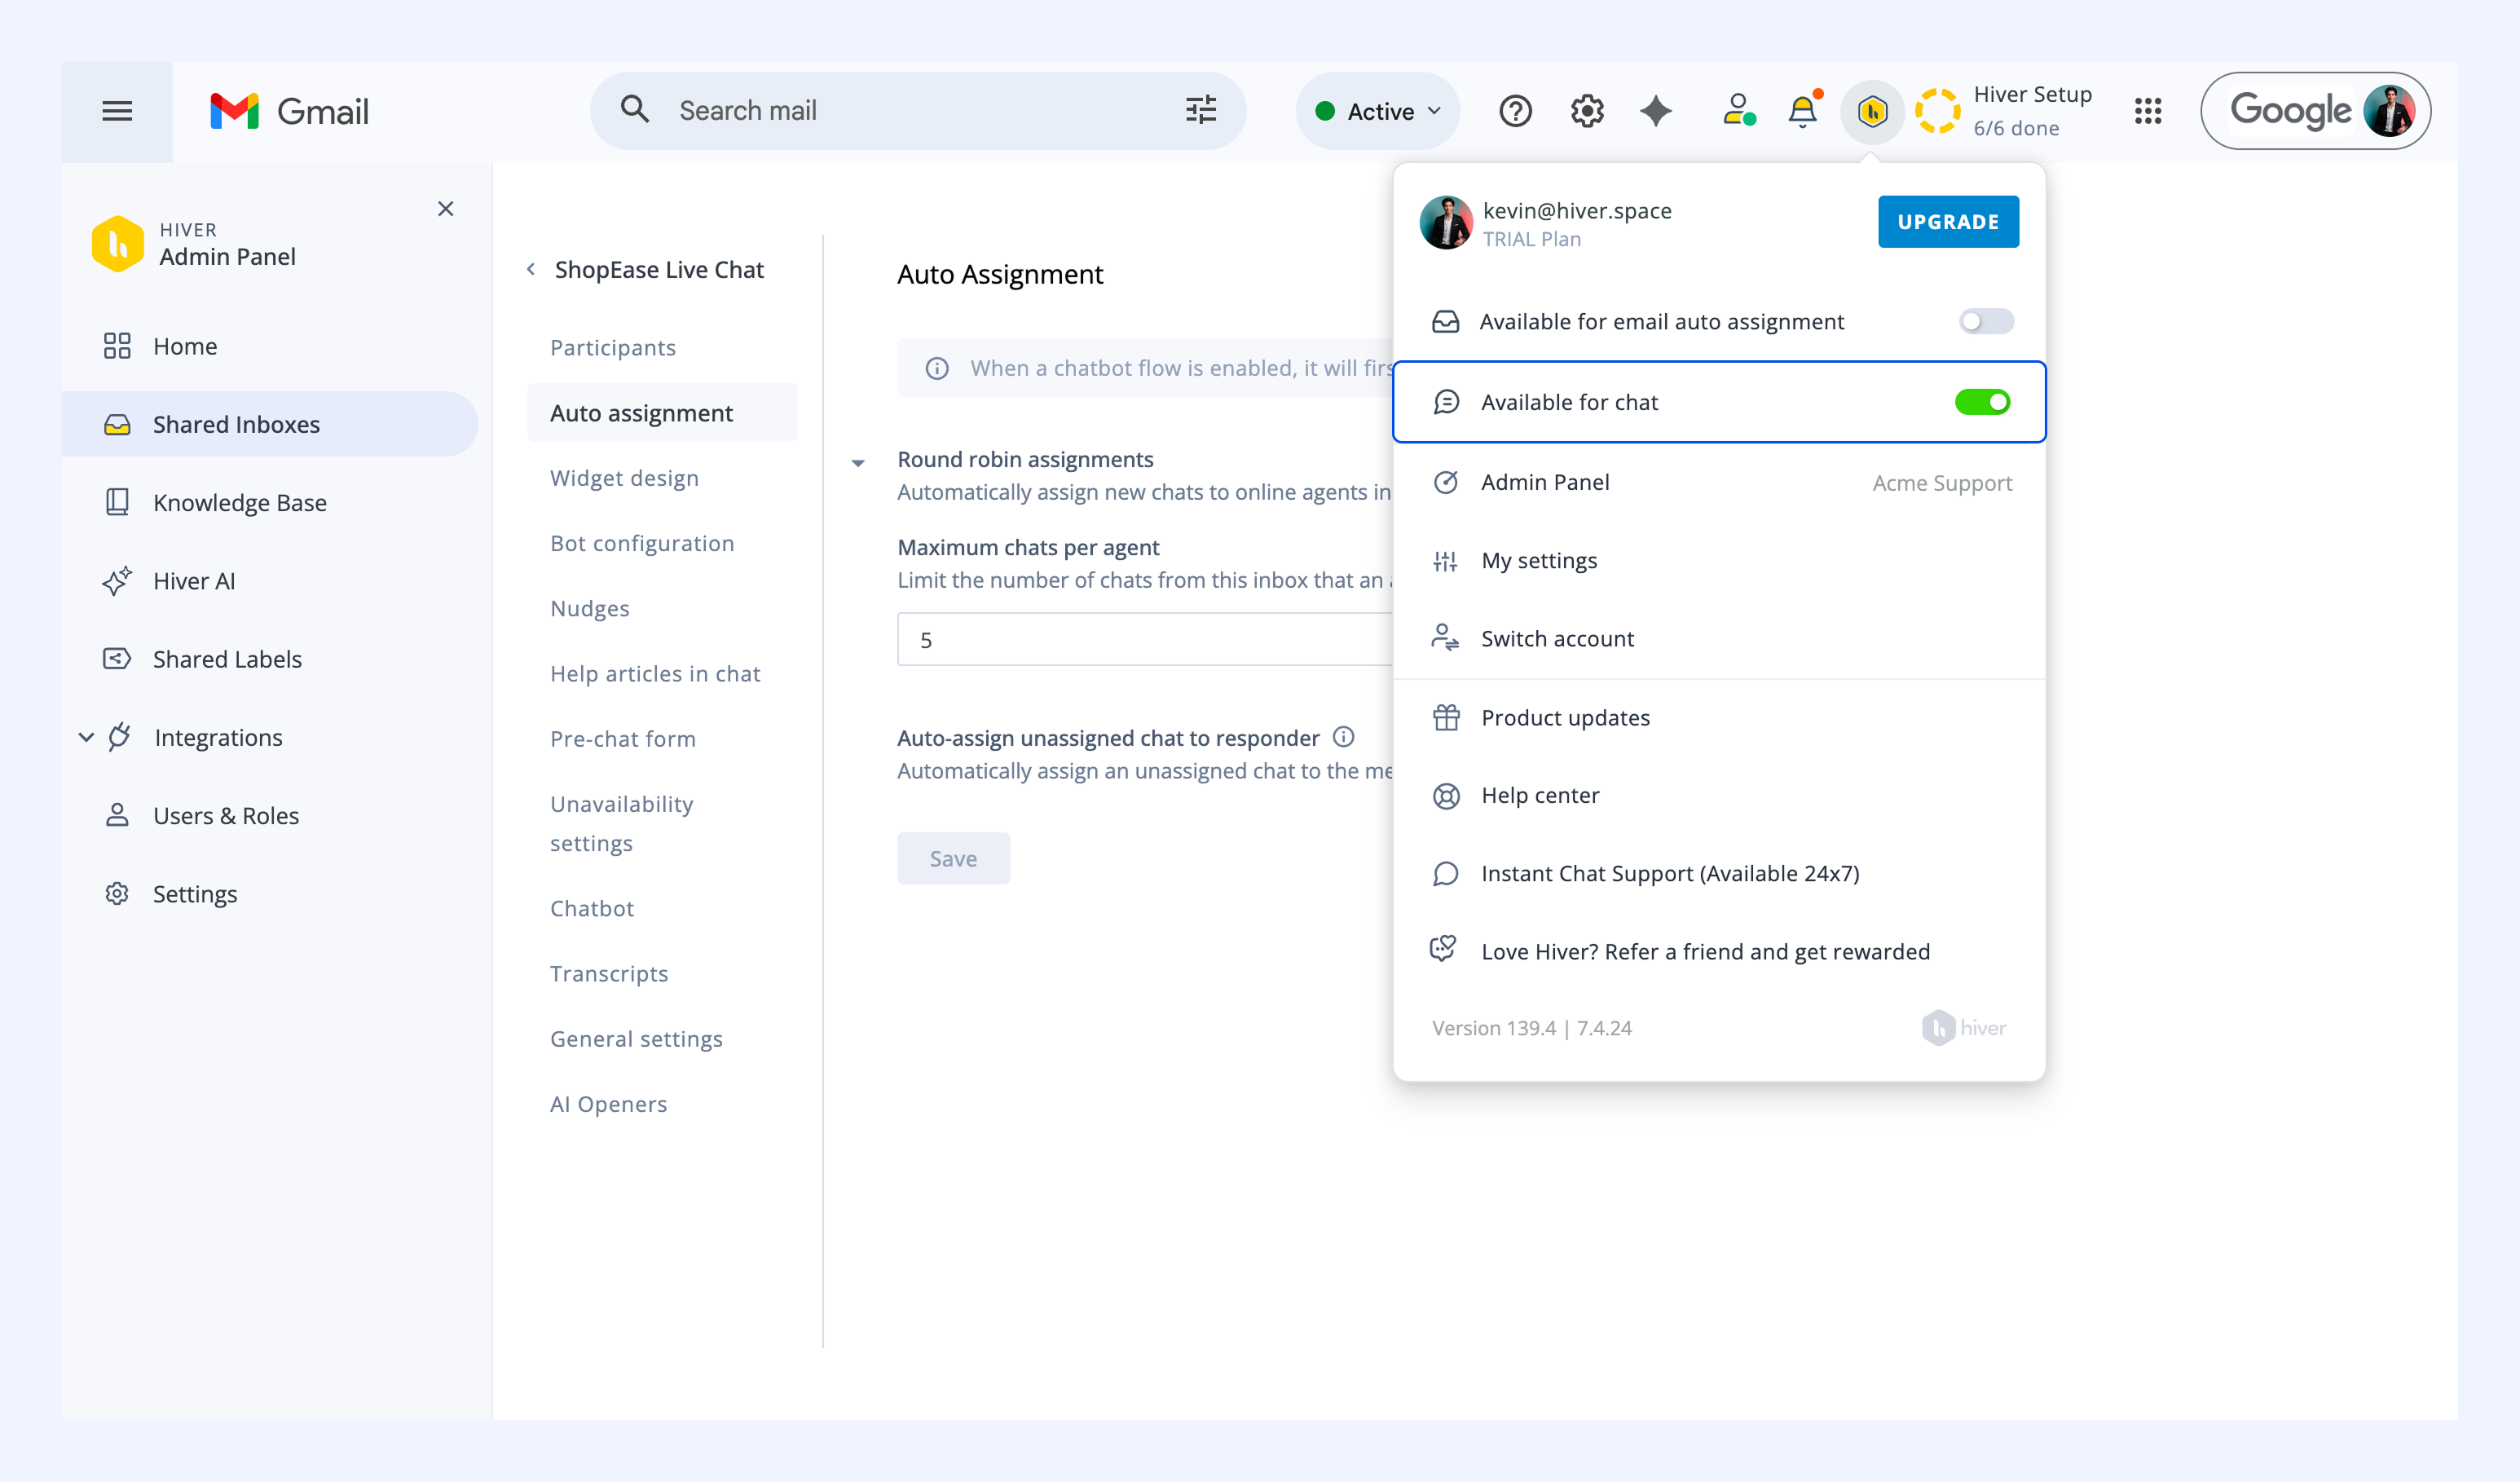
Agents can manage their own chat availability from their Hiver settings.
1. Click the Hiver settings icon.
2. Turn on the Available for Chat toggle.
How manual assignment works
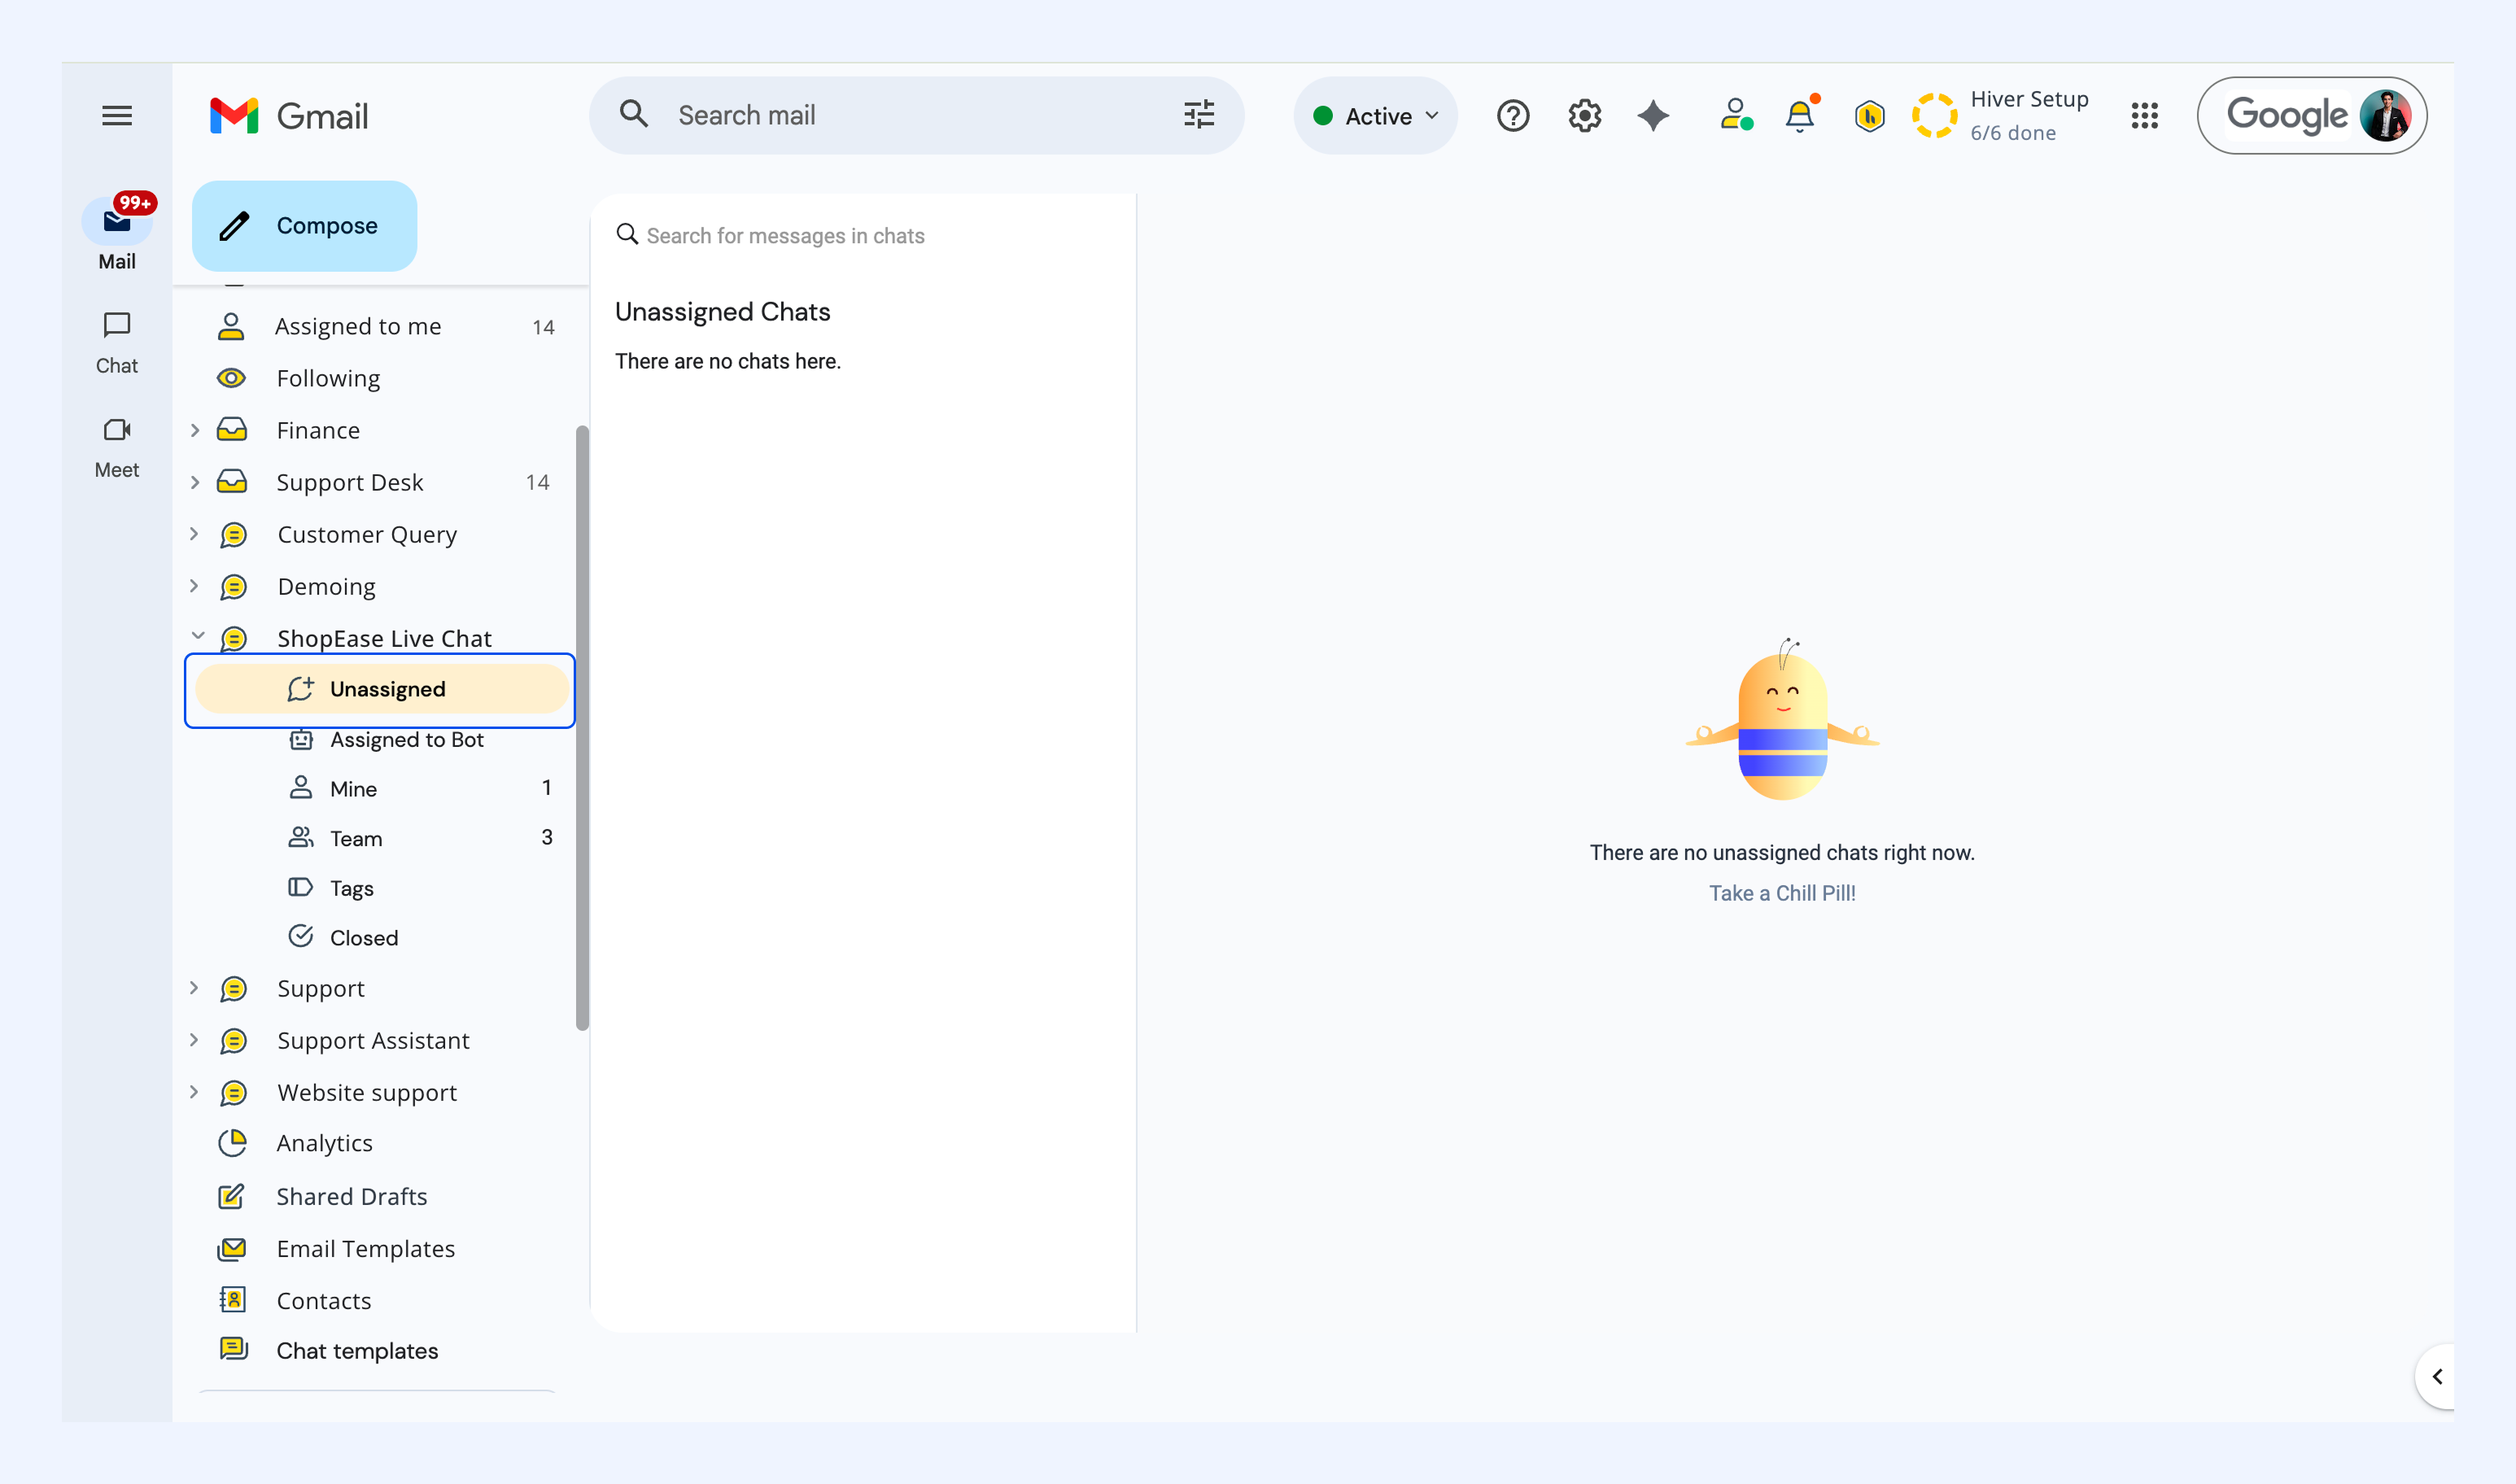
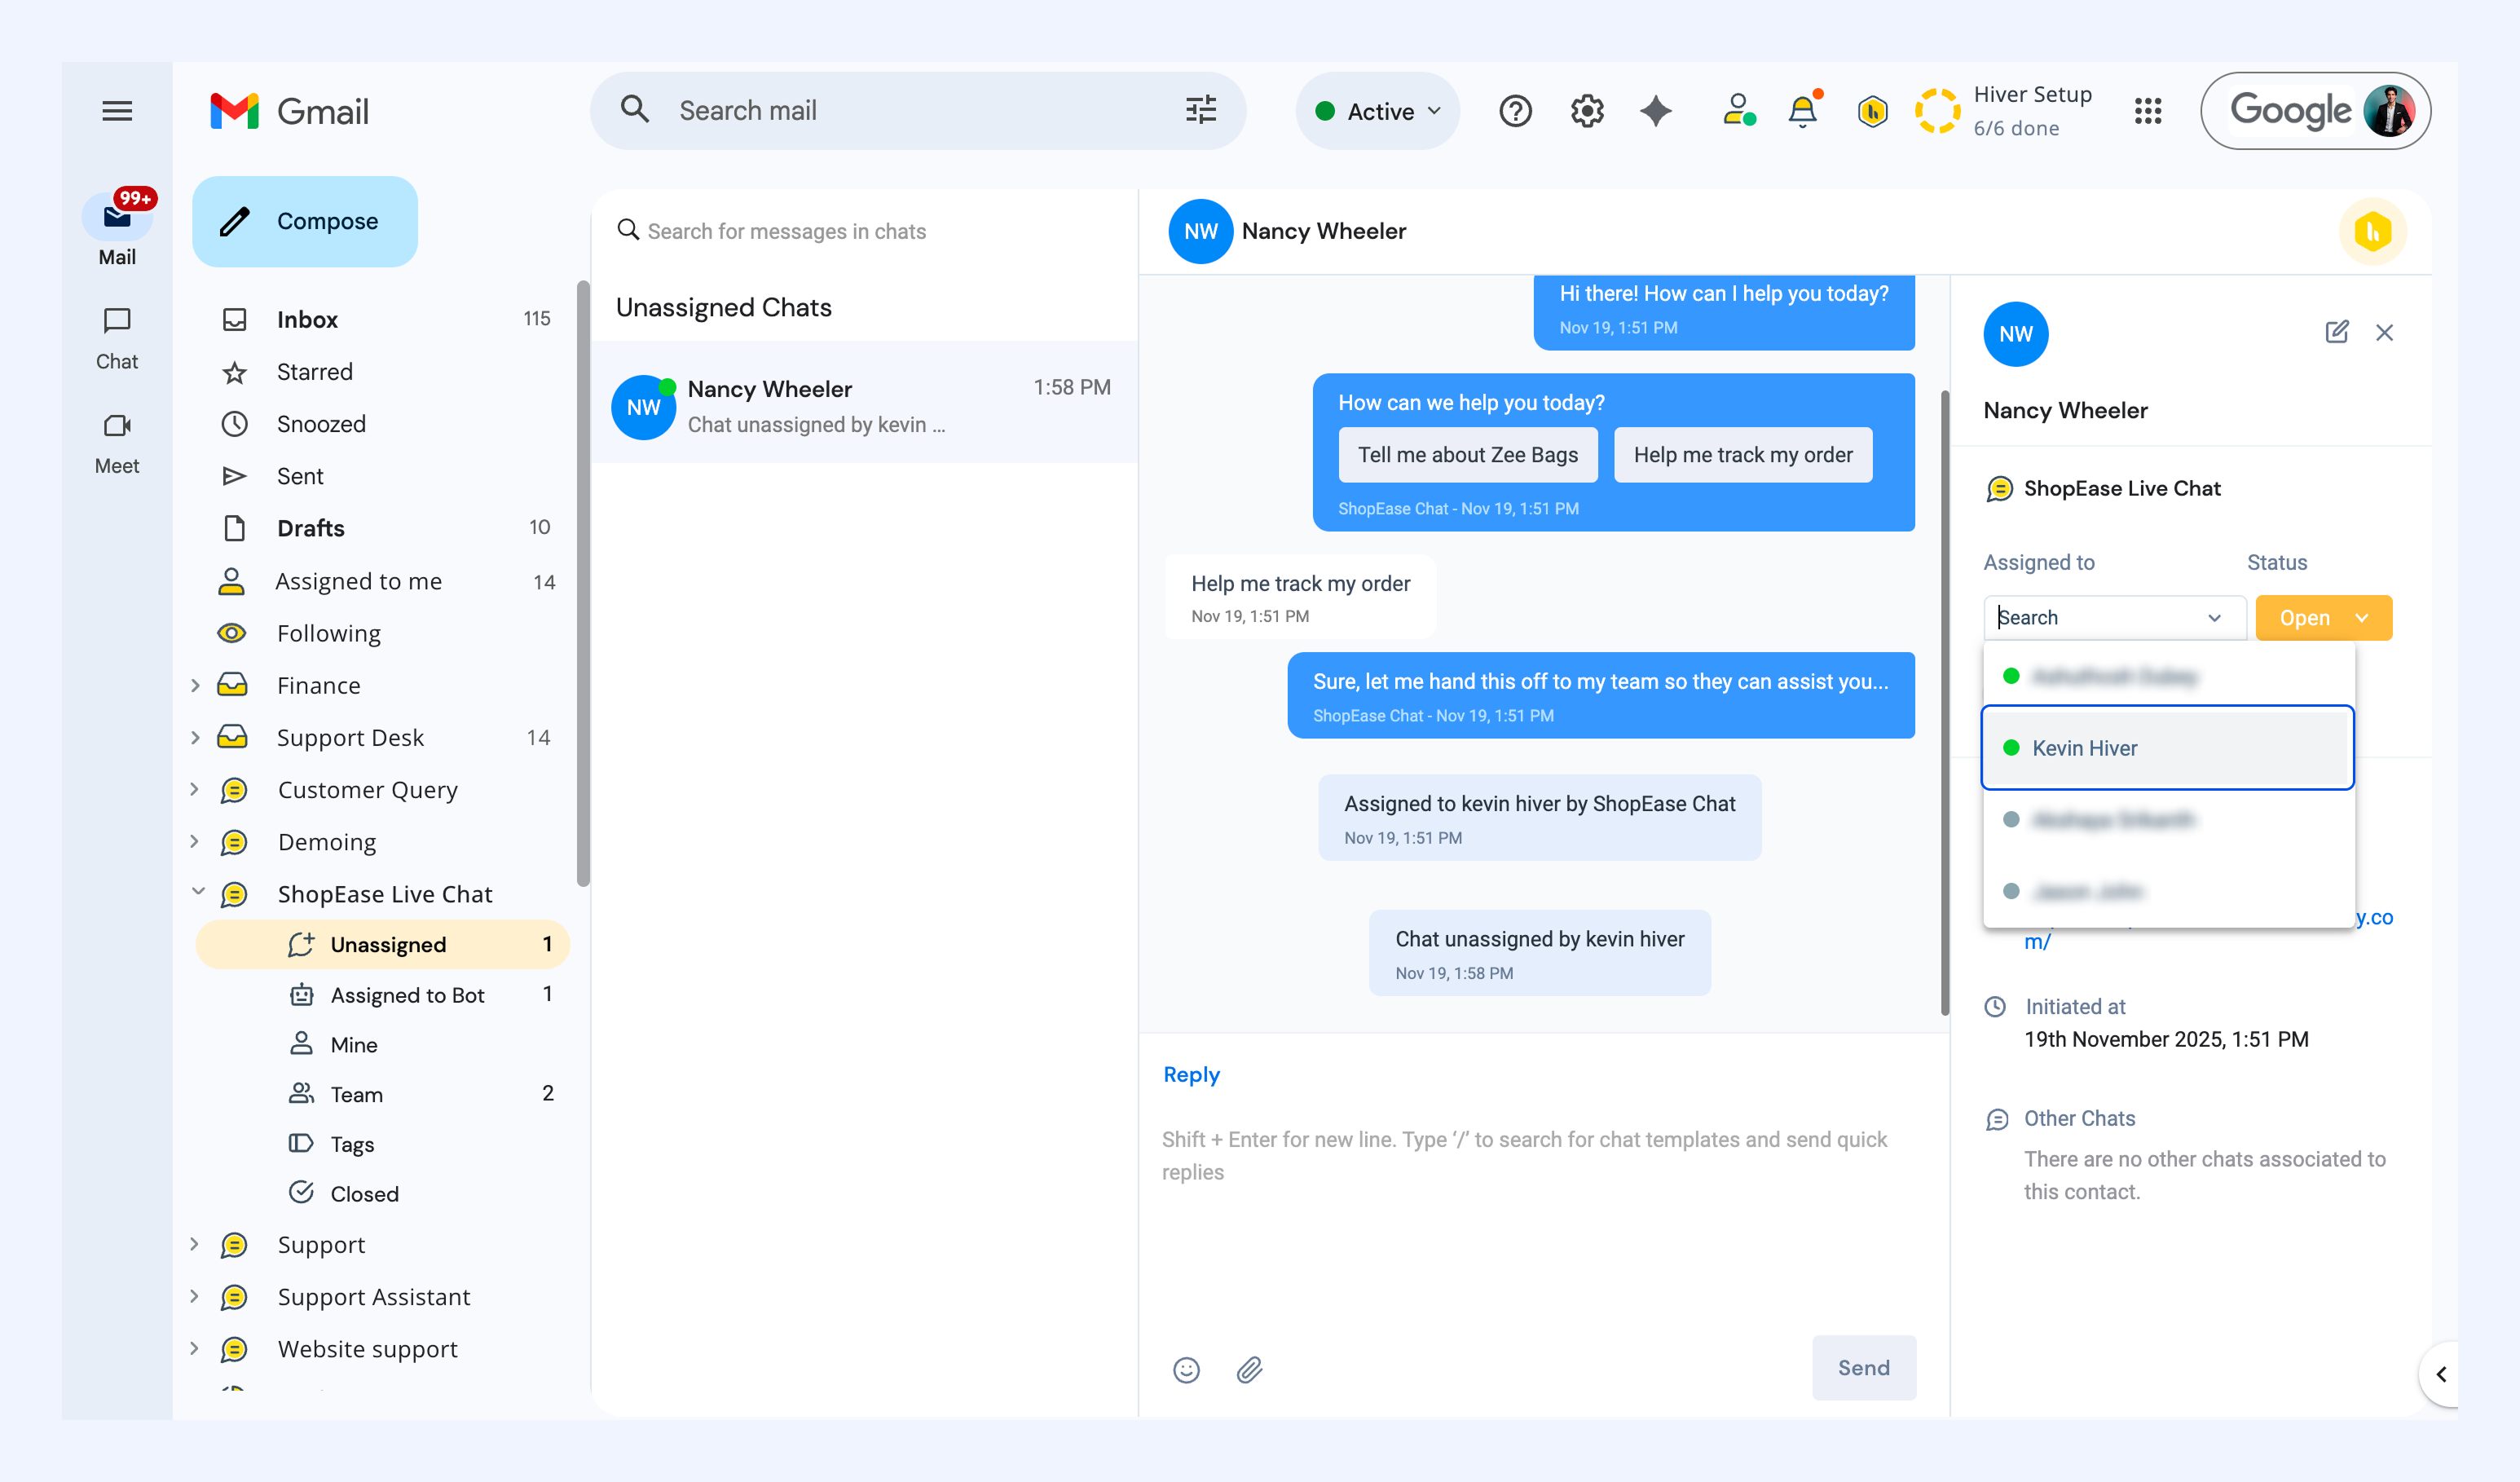
Without Auto Assignment enabled, new chats appear under Unassigned in your Chat Inbox sidebar.
Chats can be assigned manually in two ways:
1. By admin/supervisor: Assign chats directly to agents from the Assigned to dropdown.
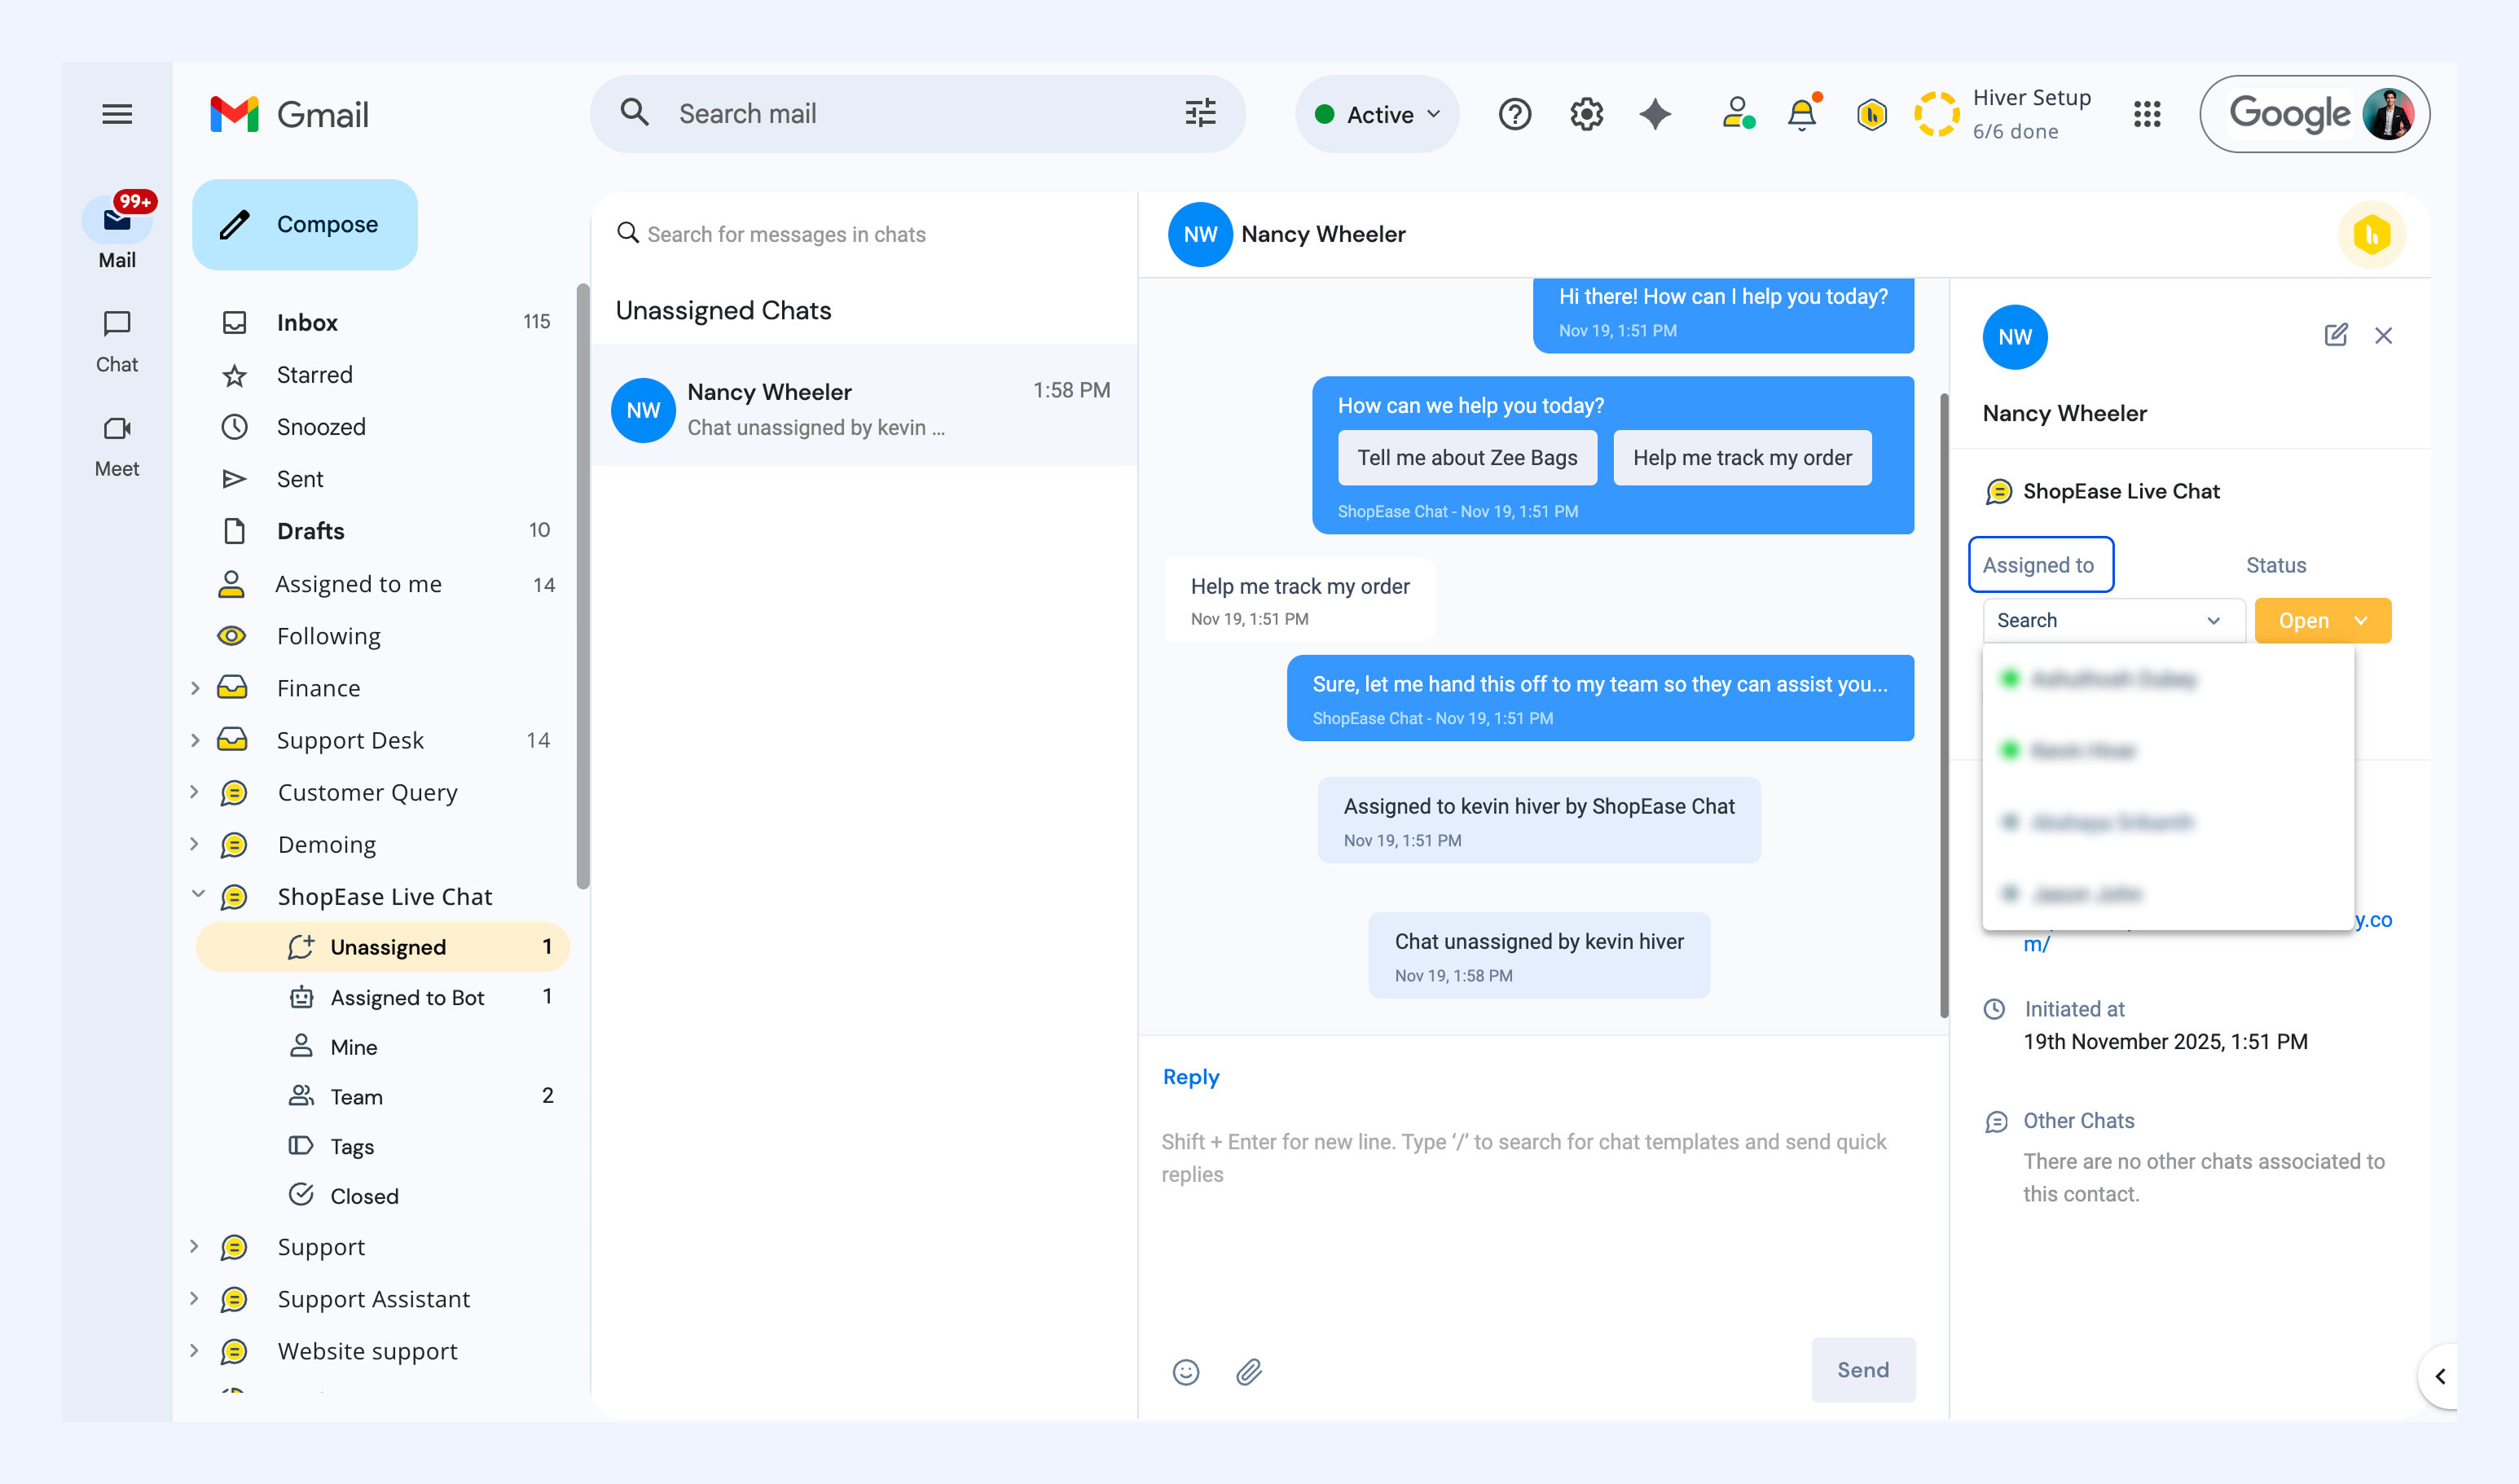
2. By agent: If you've set your chat status to Available for chat, you can:
- Click Unassigned in the sidebar.
- Select a chat from the list.
- Open the chat and use the Assigned to dropdown on the right panel to assign it to yourself.
How Auto Assignment works
Chats are assigned only to available agents. Here's how the system distributes them:
- In a Round robin system, available agents receive incoming chat requests one after the other, ensuring a fair and balanced workload among all team members.
- The system counts any active chats an agent is already handling before assigning new ones.
- If chat volume exceeds the combined capacity of all available agents, extra chats remain unassigned until capacity frees up.