Using Email Templates
Handling recurring customer queries can be repetitive and time-consuming. With Hiver’s Email Templates, you can create and reuse ready-to-send responses for common situations. This helps you respond faster, maintain consistency in tone and content, and reduce manual effort.
Permissions to manage Email Templates
Role | Permissions |
All users | Can create their own Email Templates. |
Admins | Can view, edit, and delete all templates, including private ones. |
Non-admins | Can view and edit only the templates they created or that were shared with them. |
Custom roles | You can create a custom role with specific permissions:
|
Setting up a folder
Creating a folder helps you organize templates effectively and make them easy to find for your team.
Hiver automatically creates a Shared with All folder where templates are accessible to everyone in your account. You can create additional folders for specific teams or purposes, such as billing, feature requests, or sales and hare these folders with all team members or limit access to selected users based on your needs.
To create a template folder,
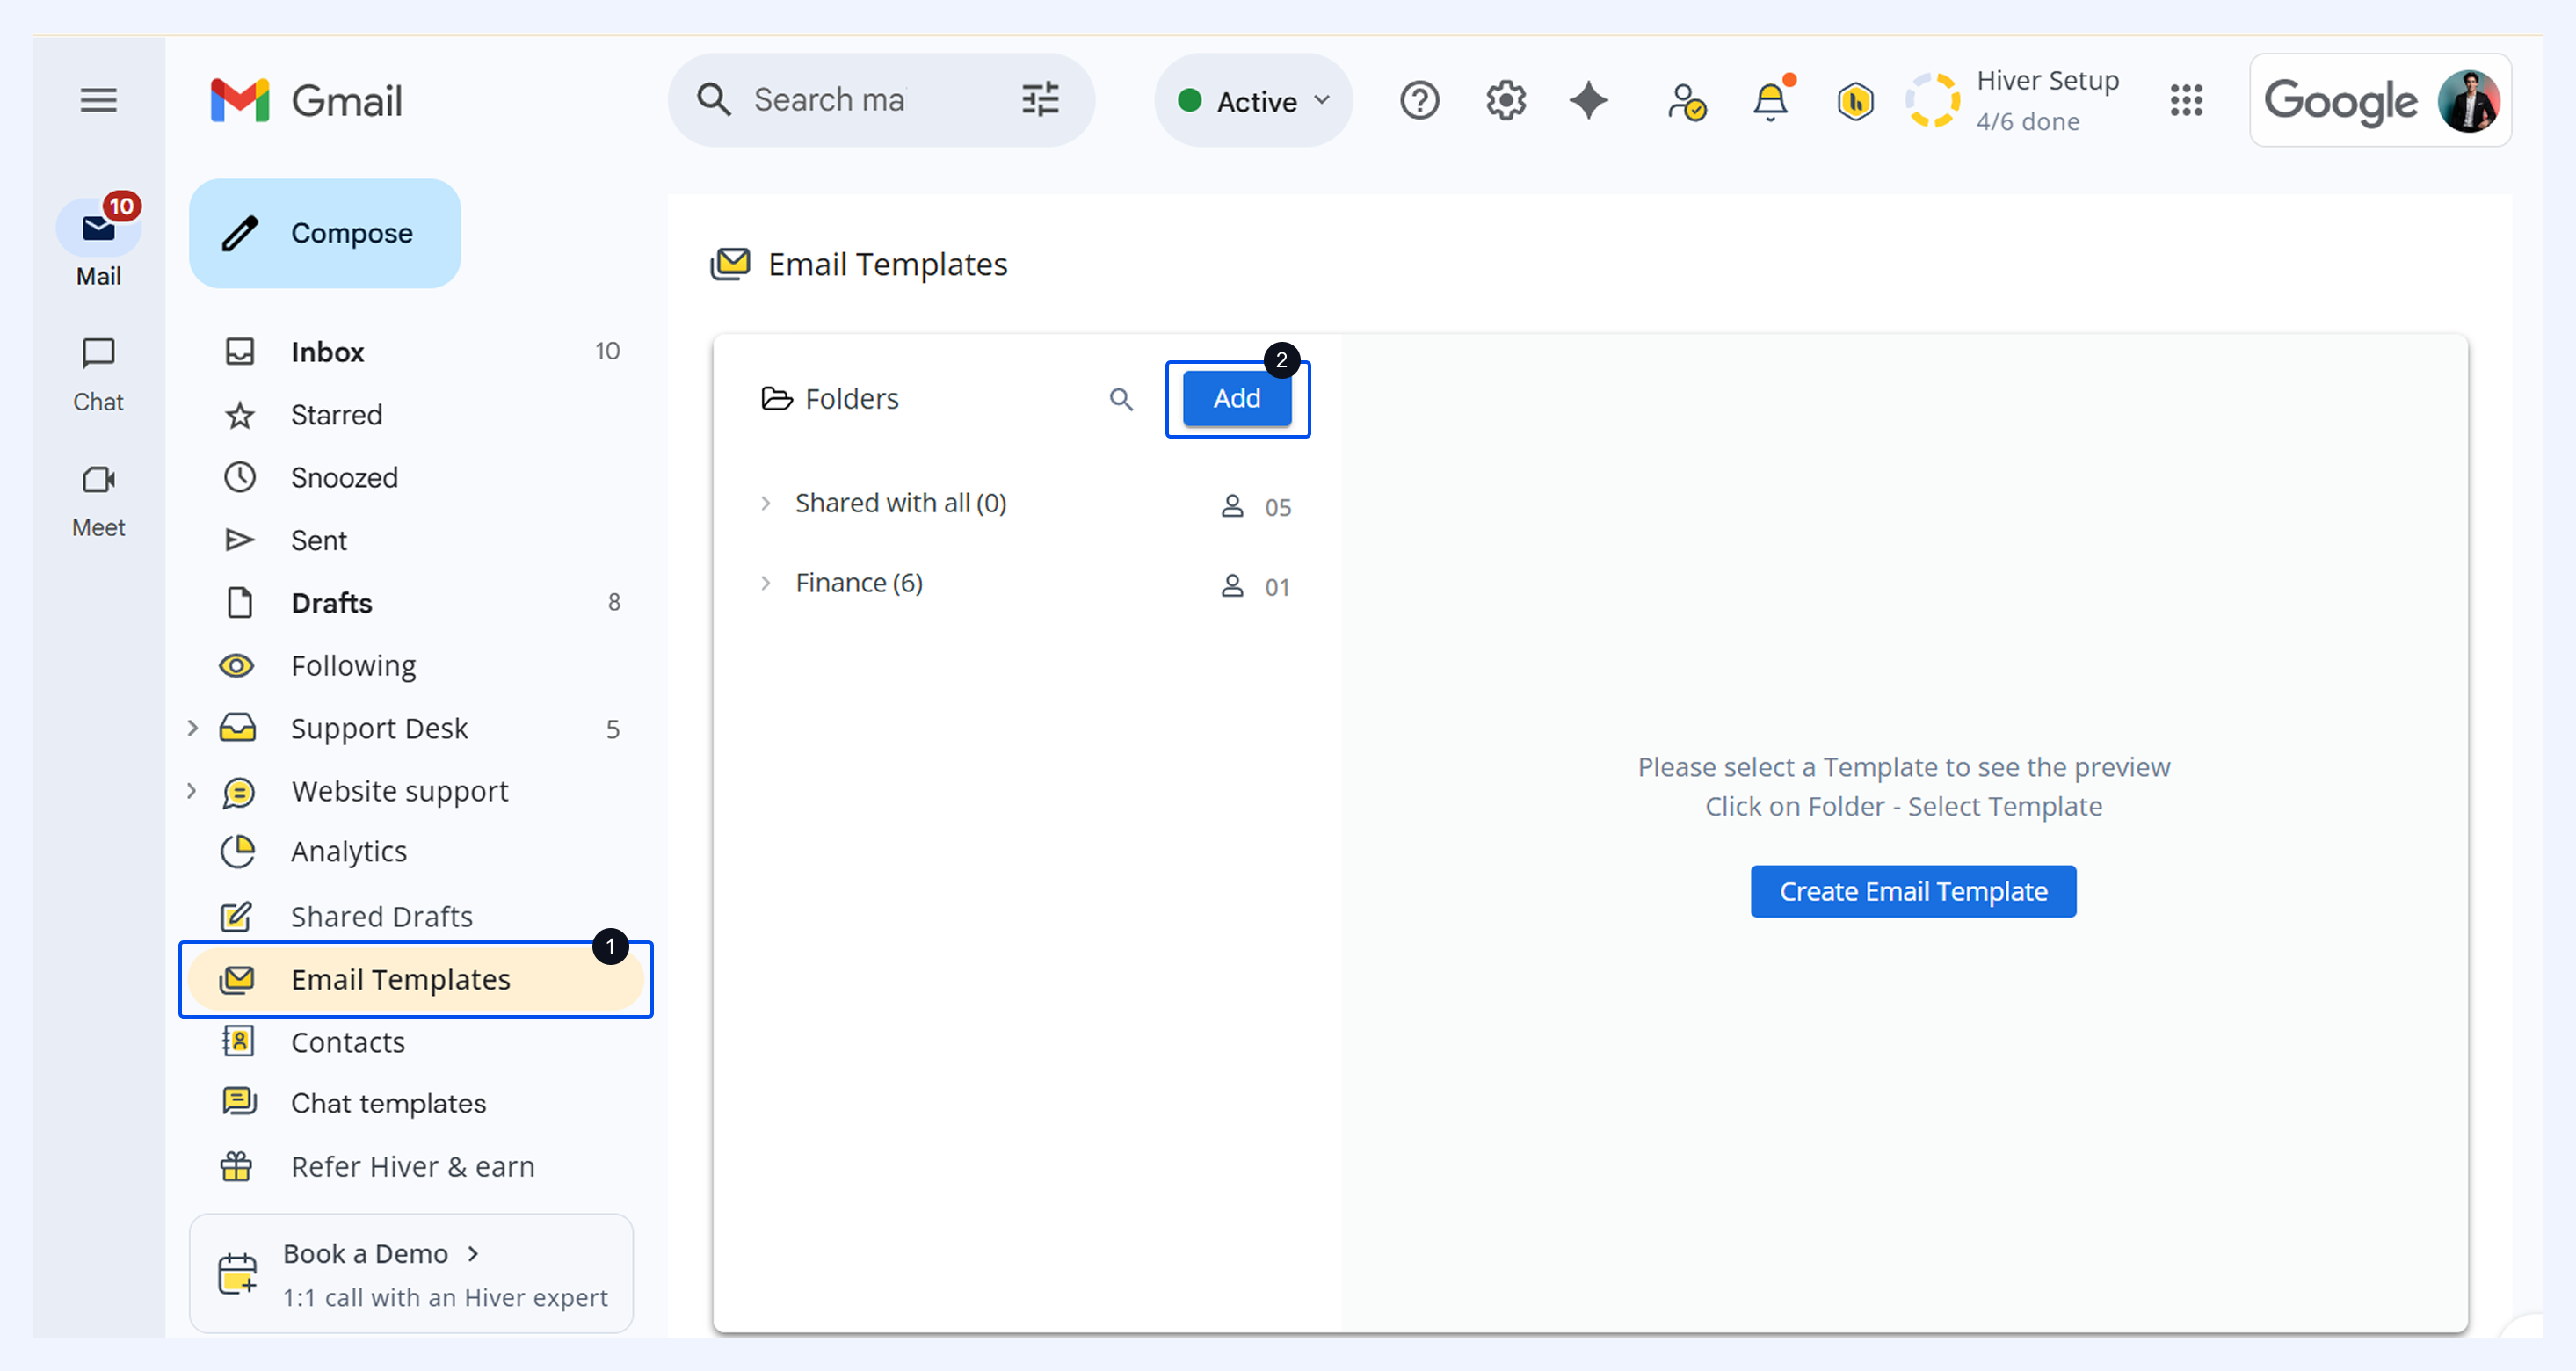
1. Go to the Email Templates section in the left panel and select Add.
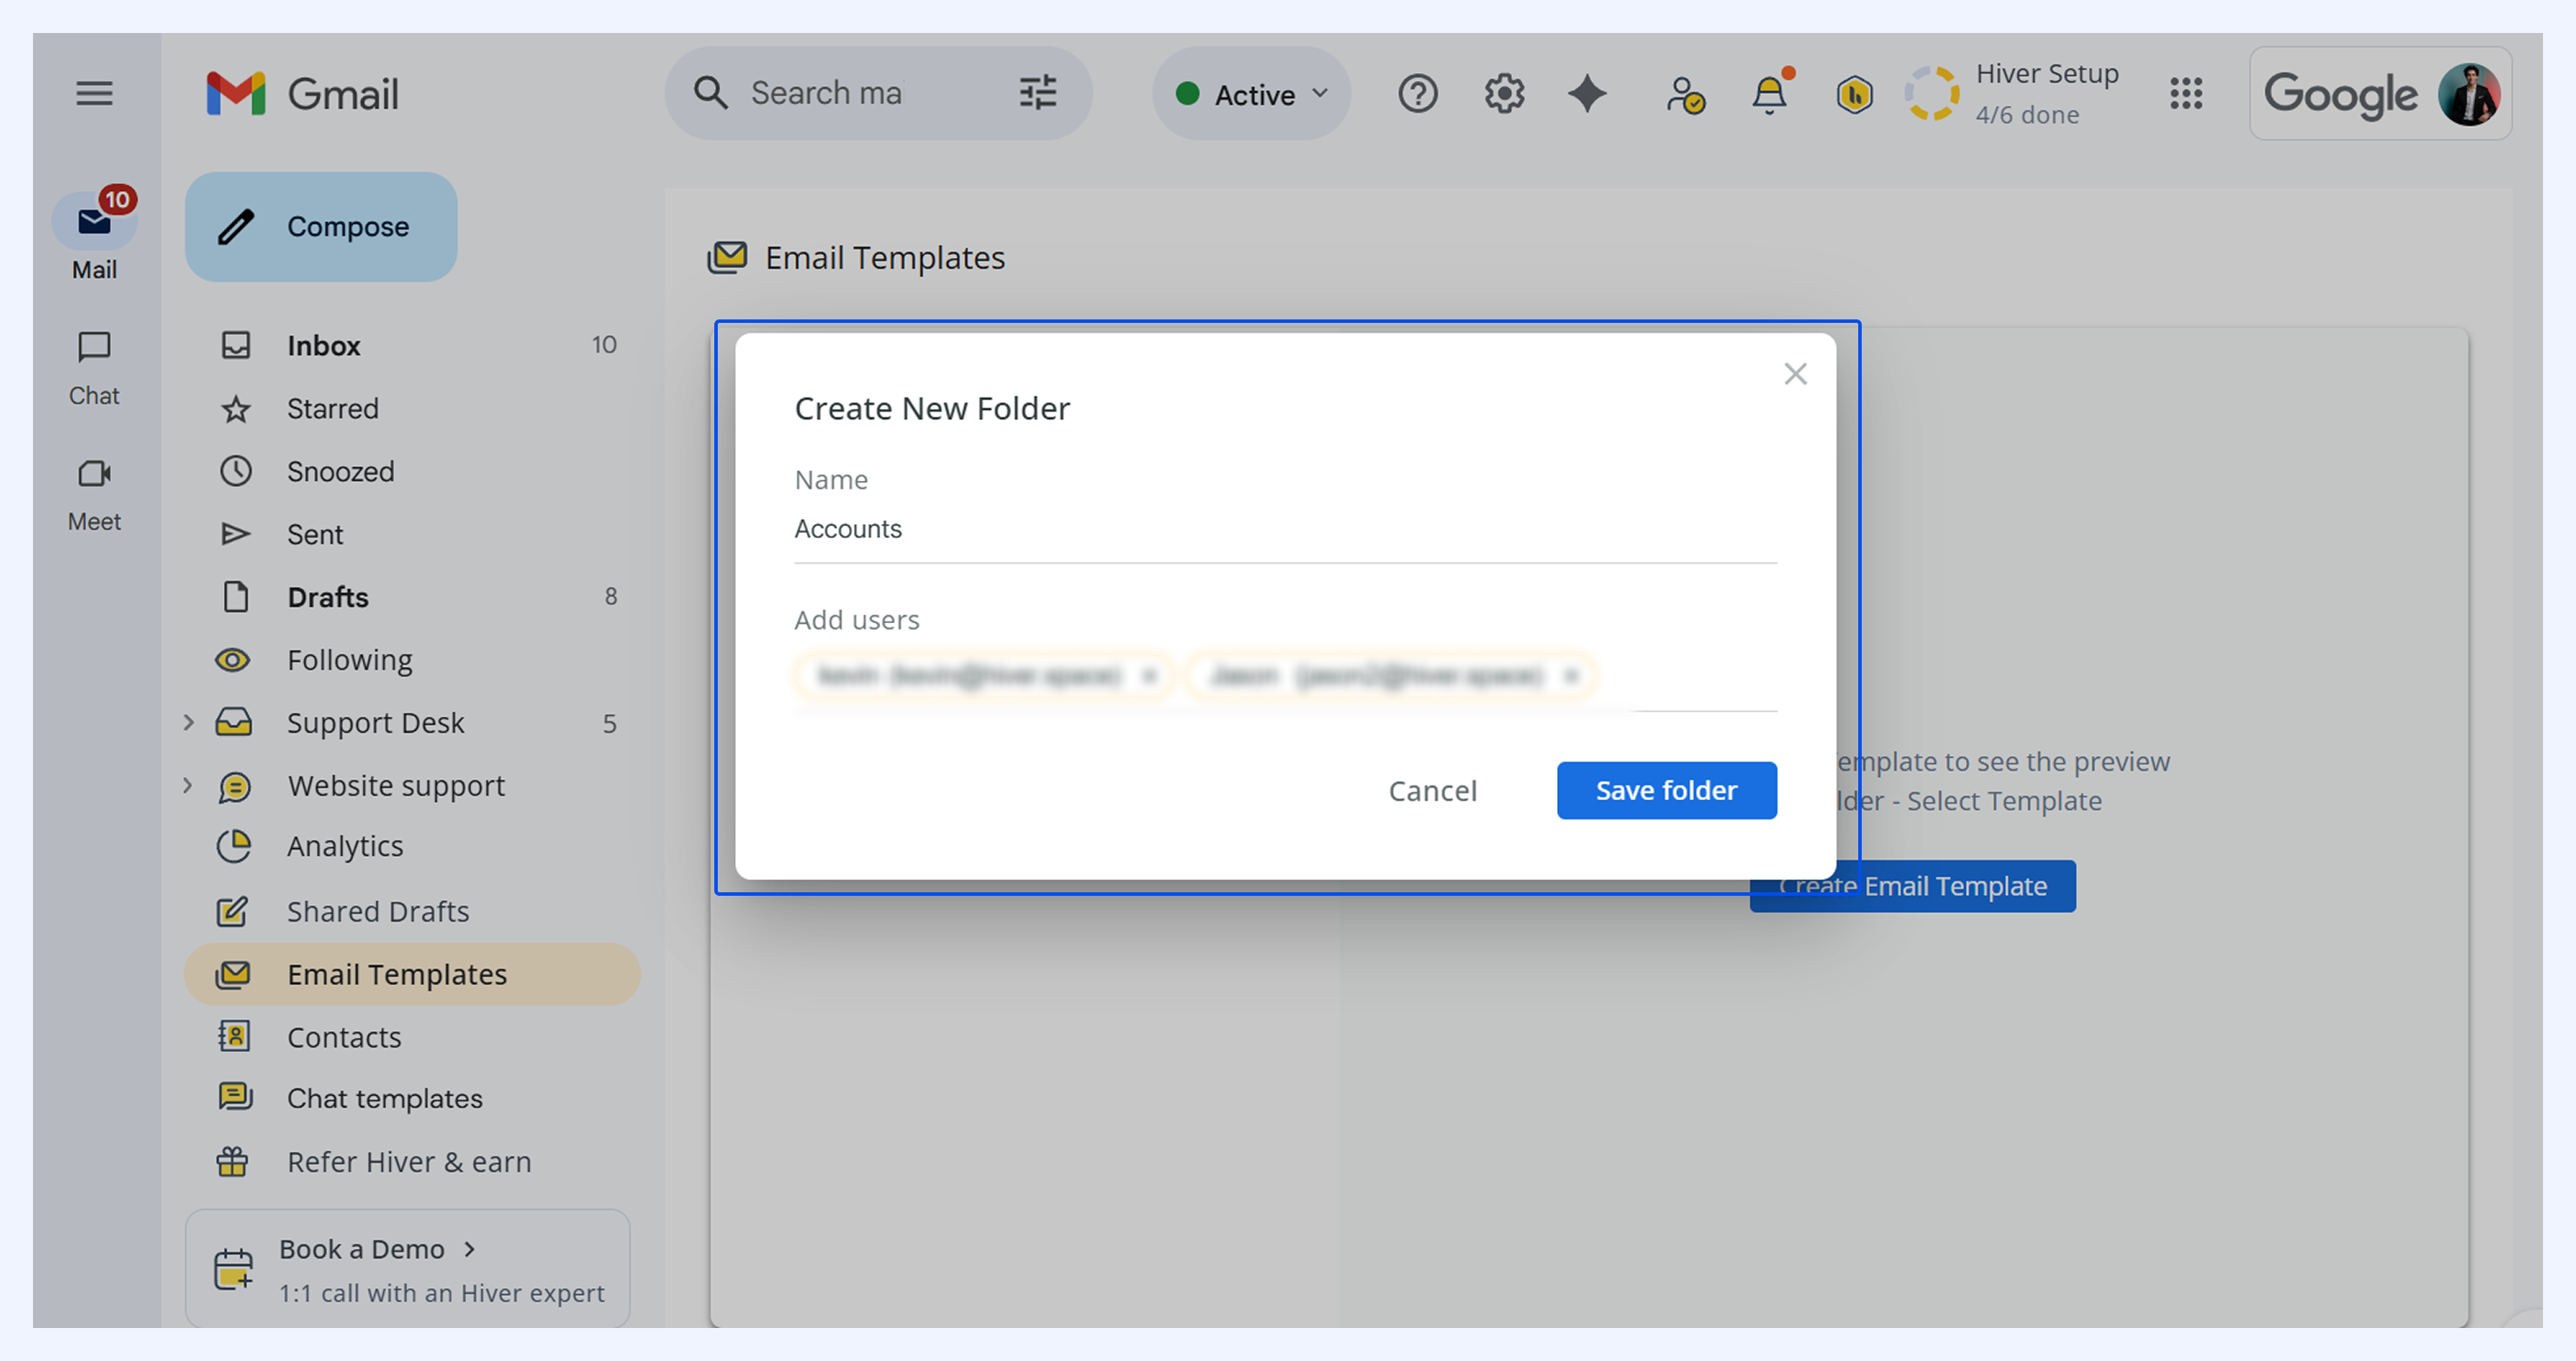
2. Enter the folder name, select who to share it with, and then click on Save folder.
Creating Email Templates
Follow these steps to create an Email Template in your Hiver Shared Inbox:
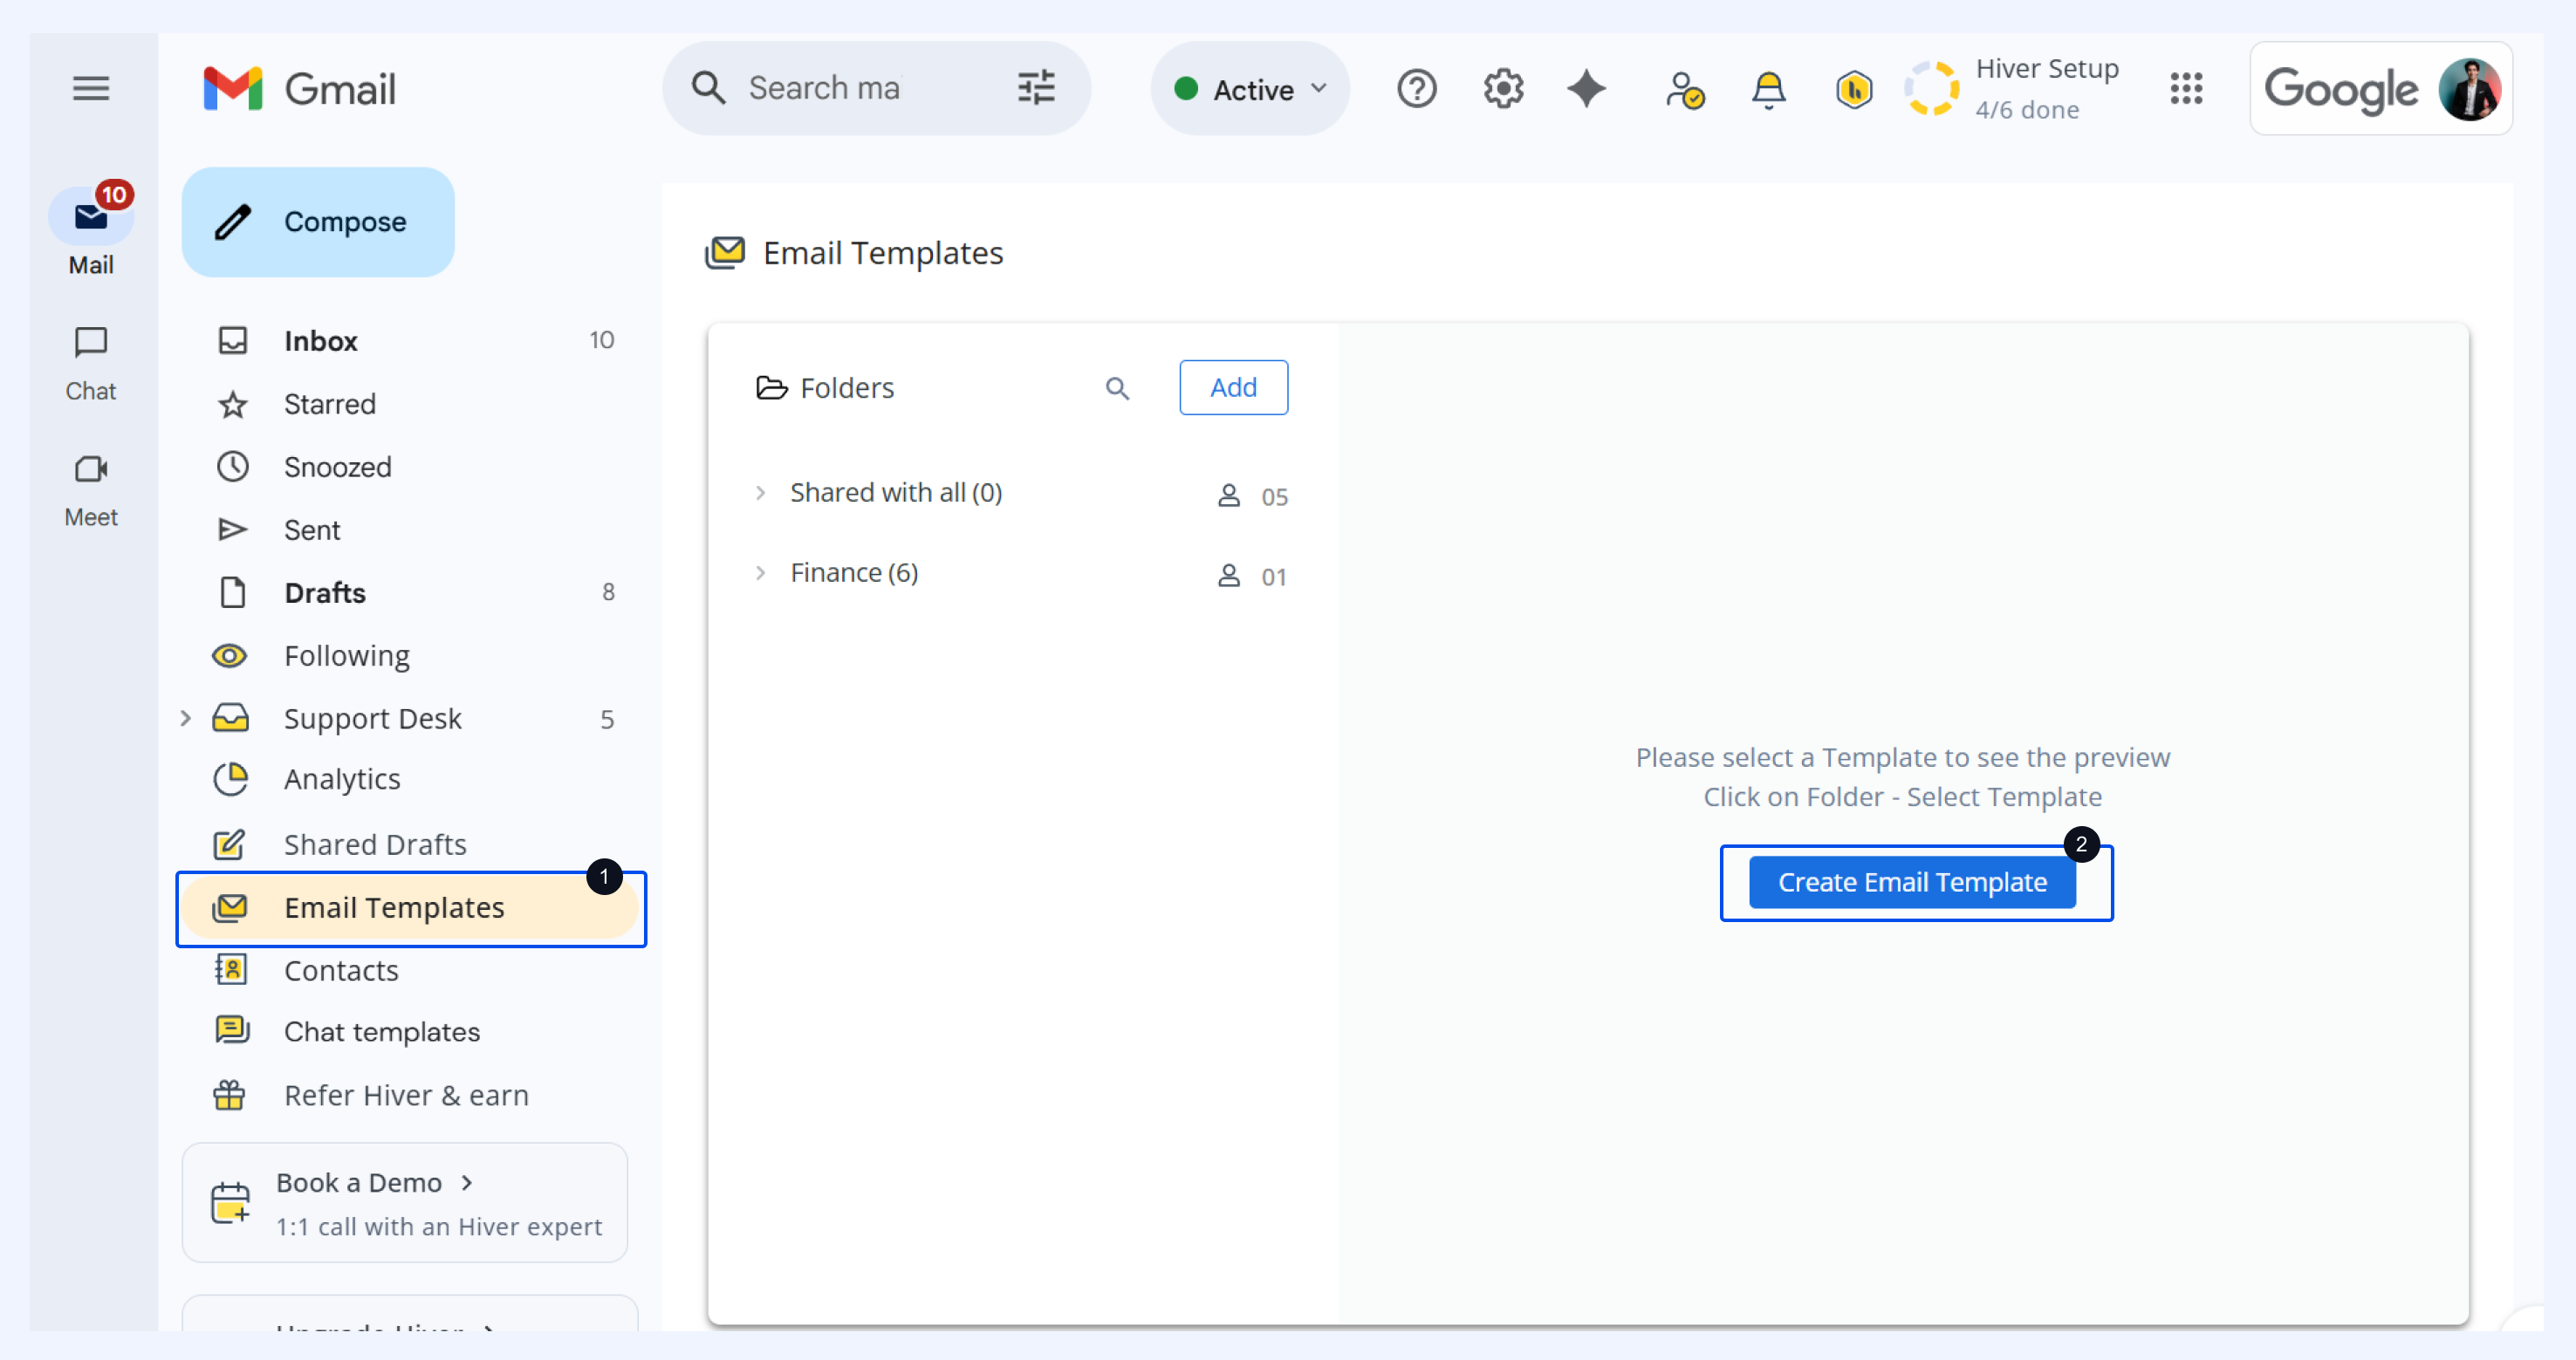
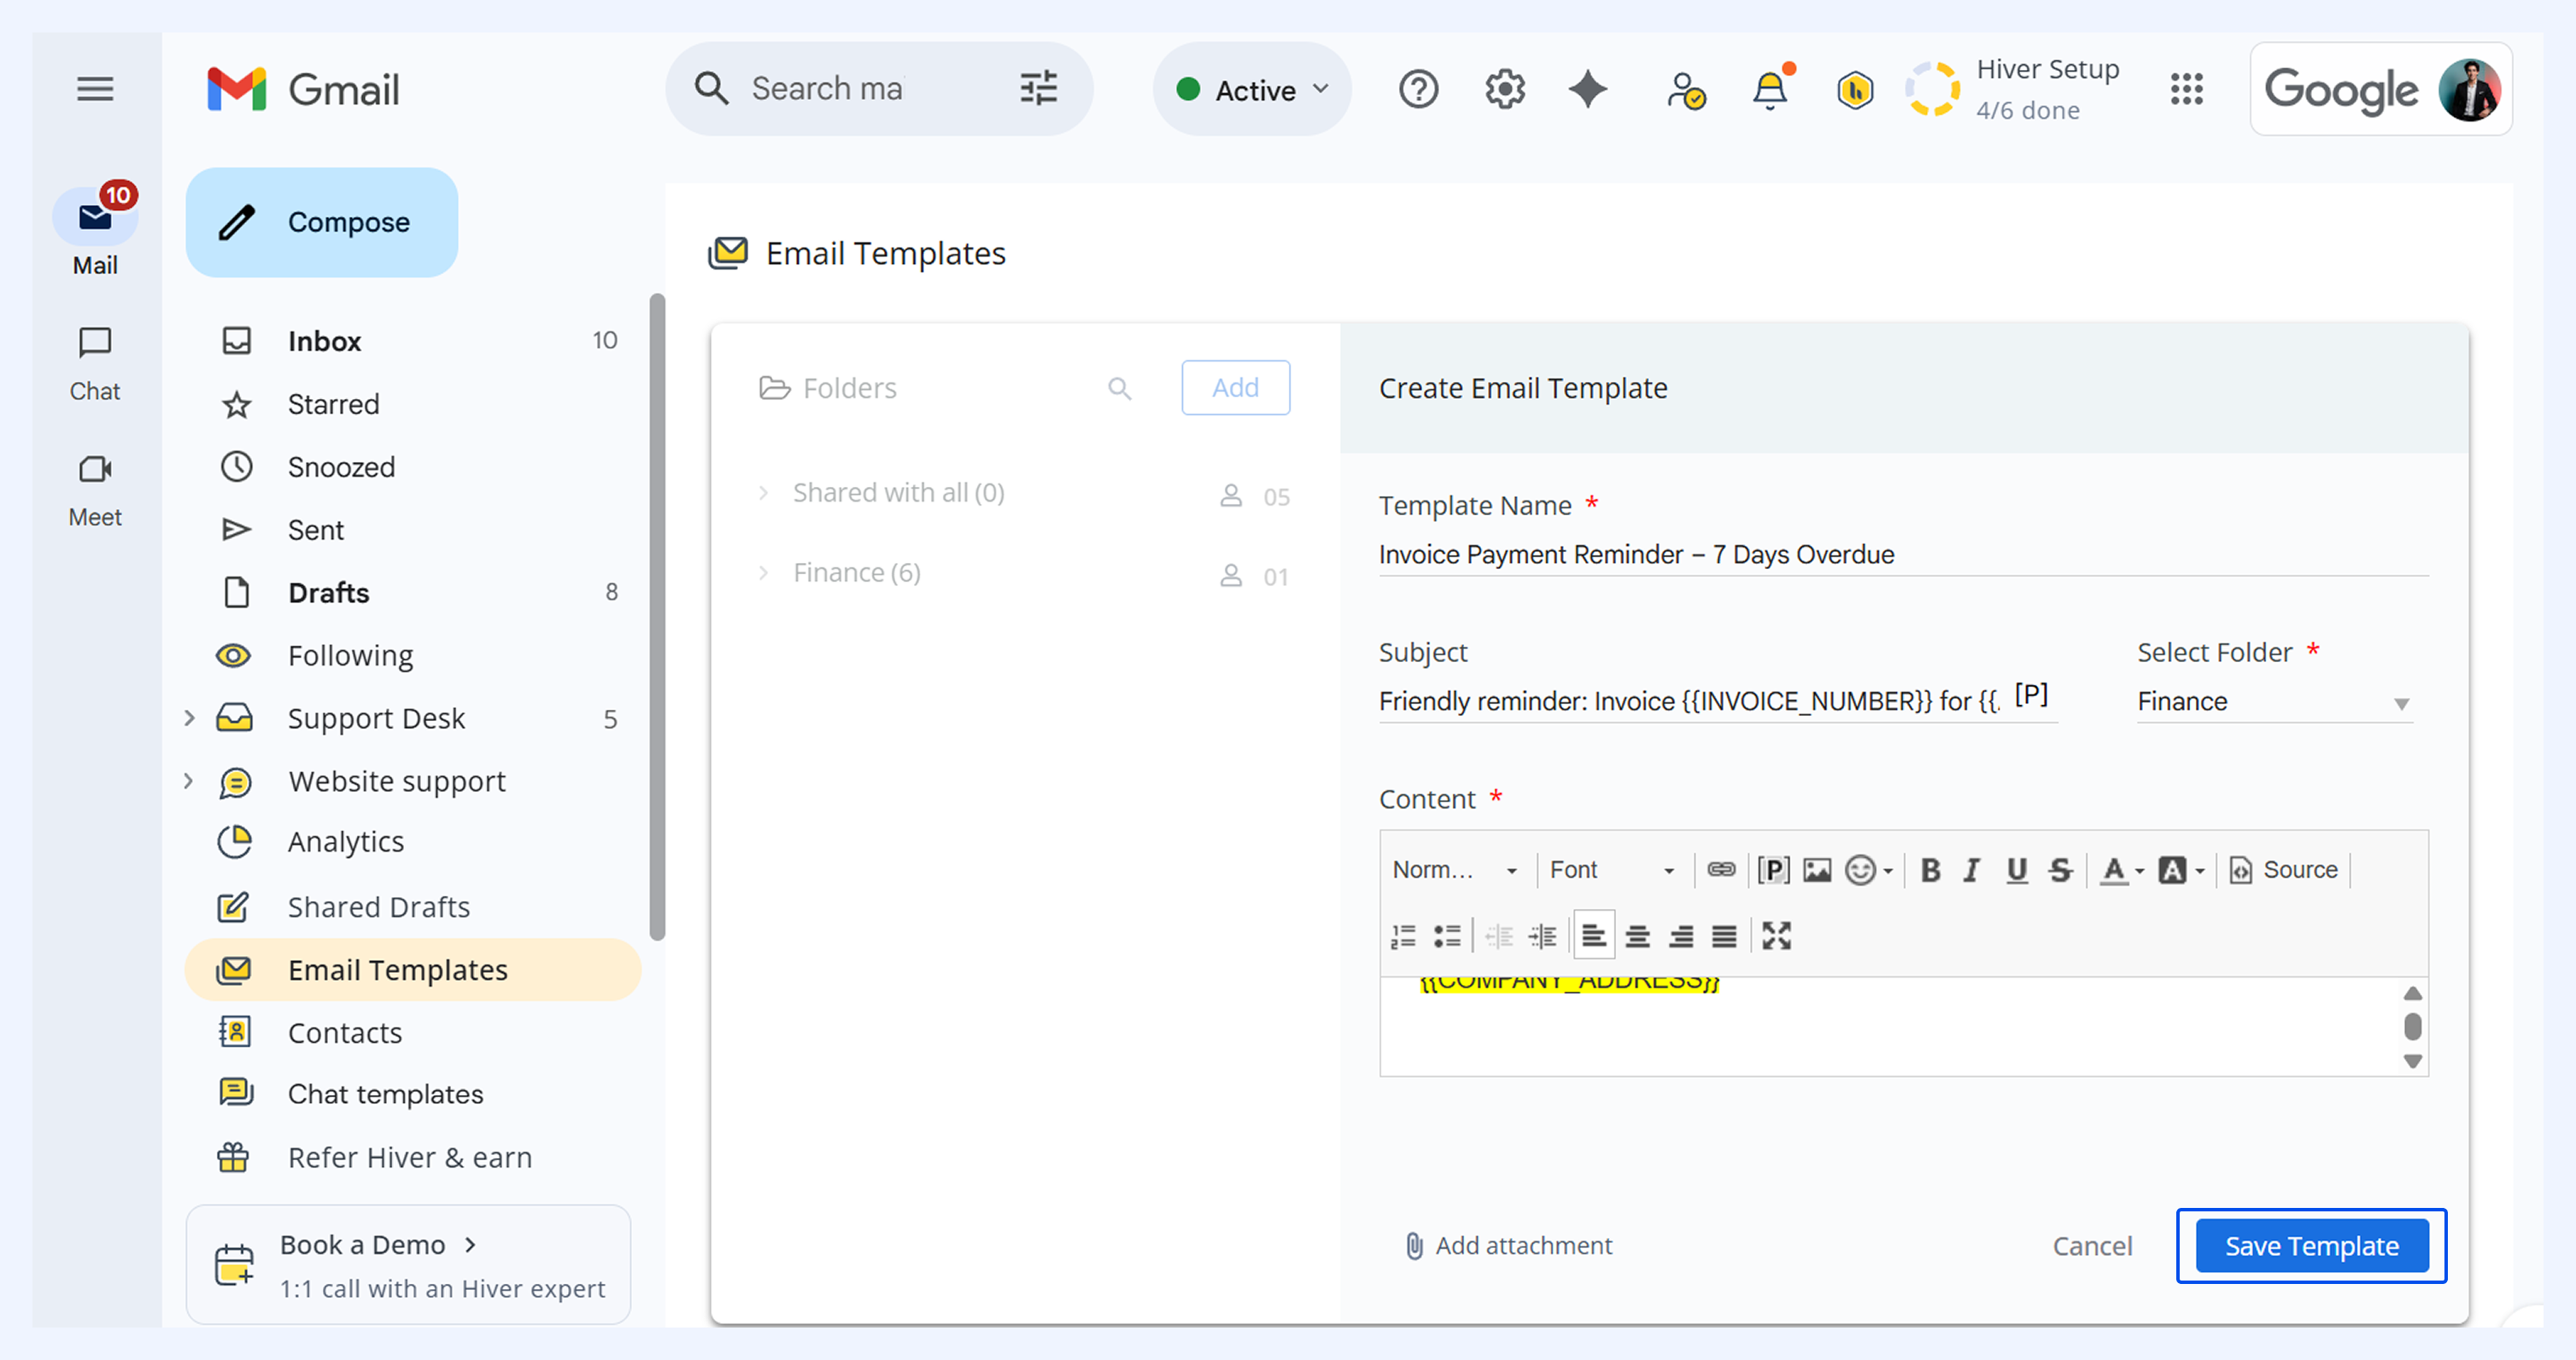
1. Select Email Template → Create Email Template. You can also open your desired folder → click Create Email Template.
2. Enter the template name, subject, and content → select the folder → Save Template.
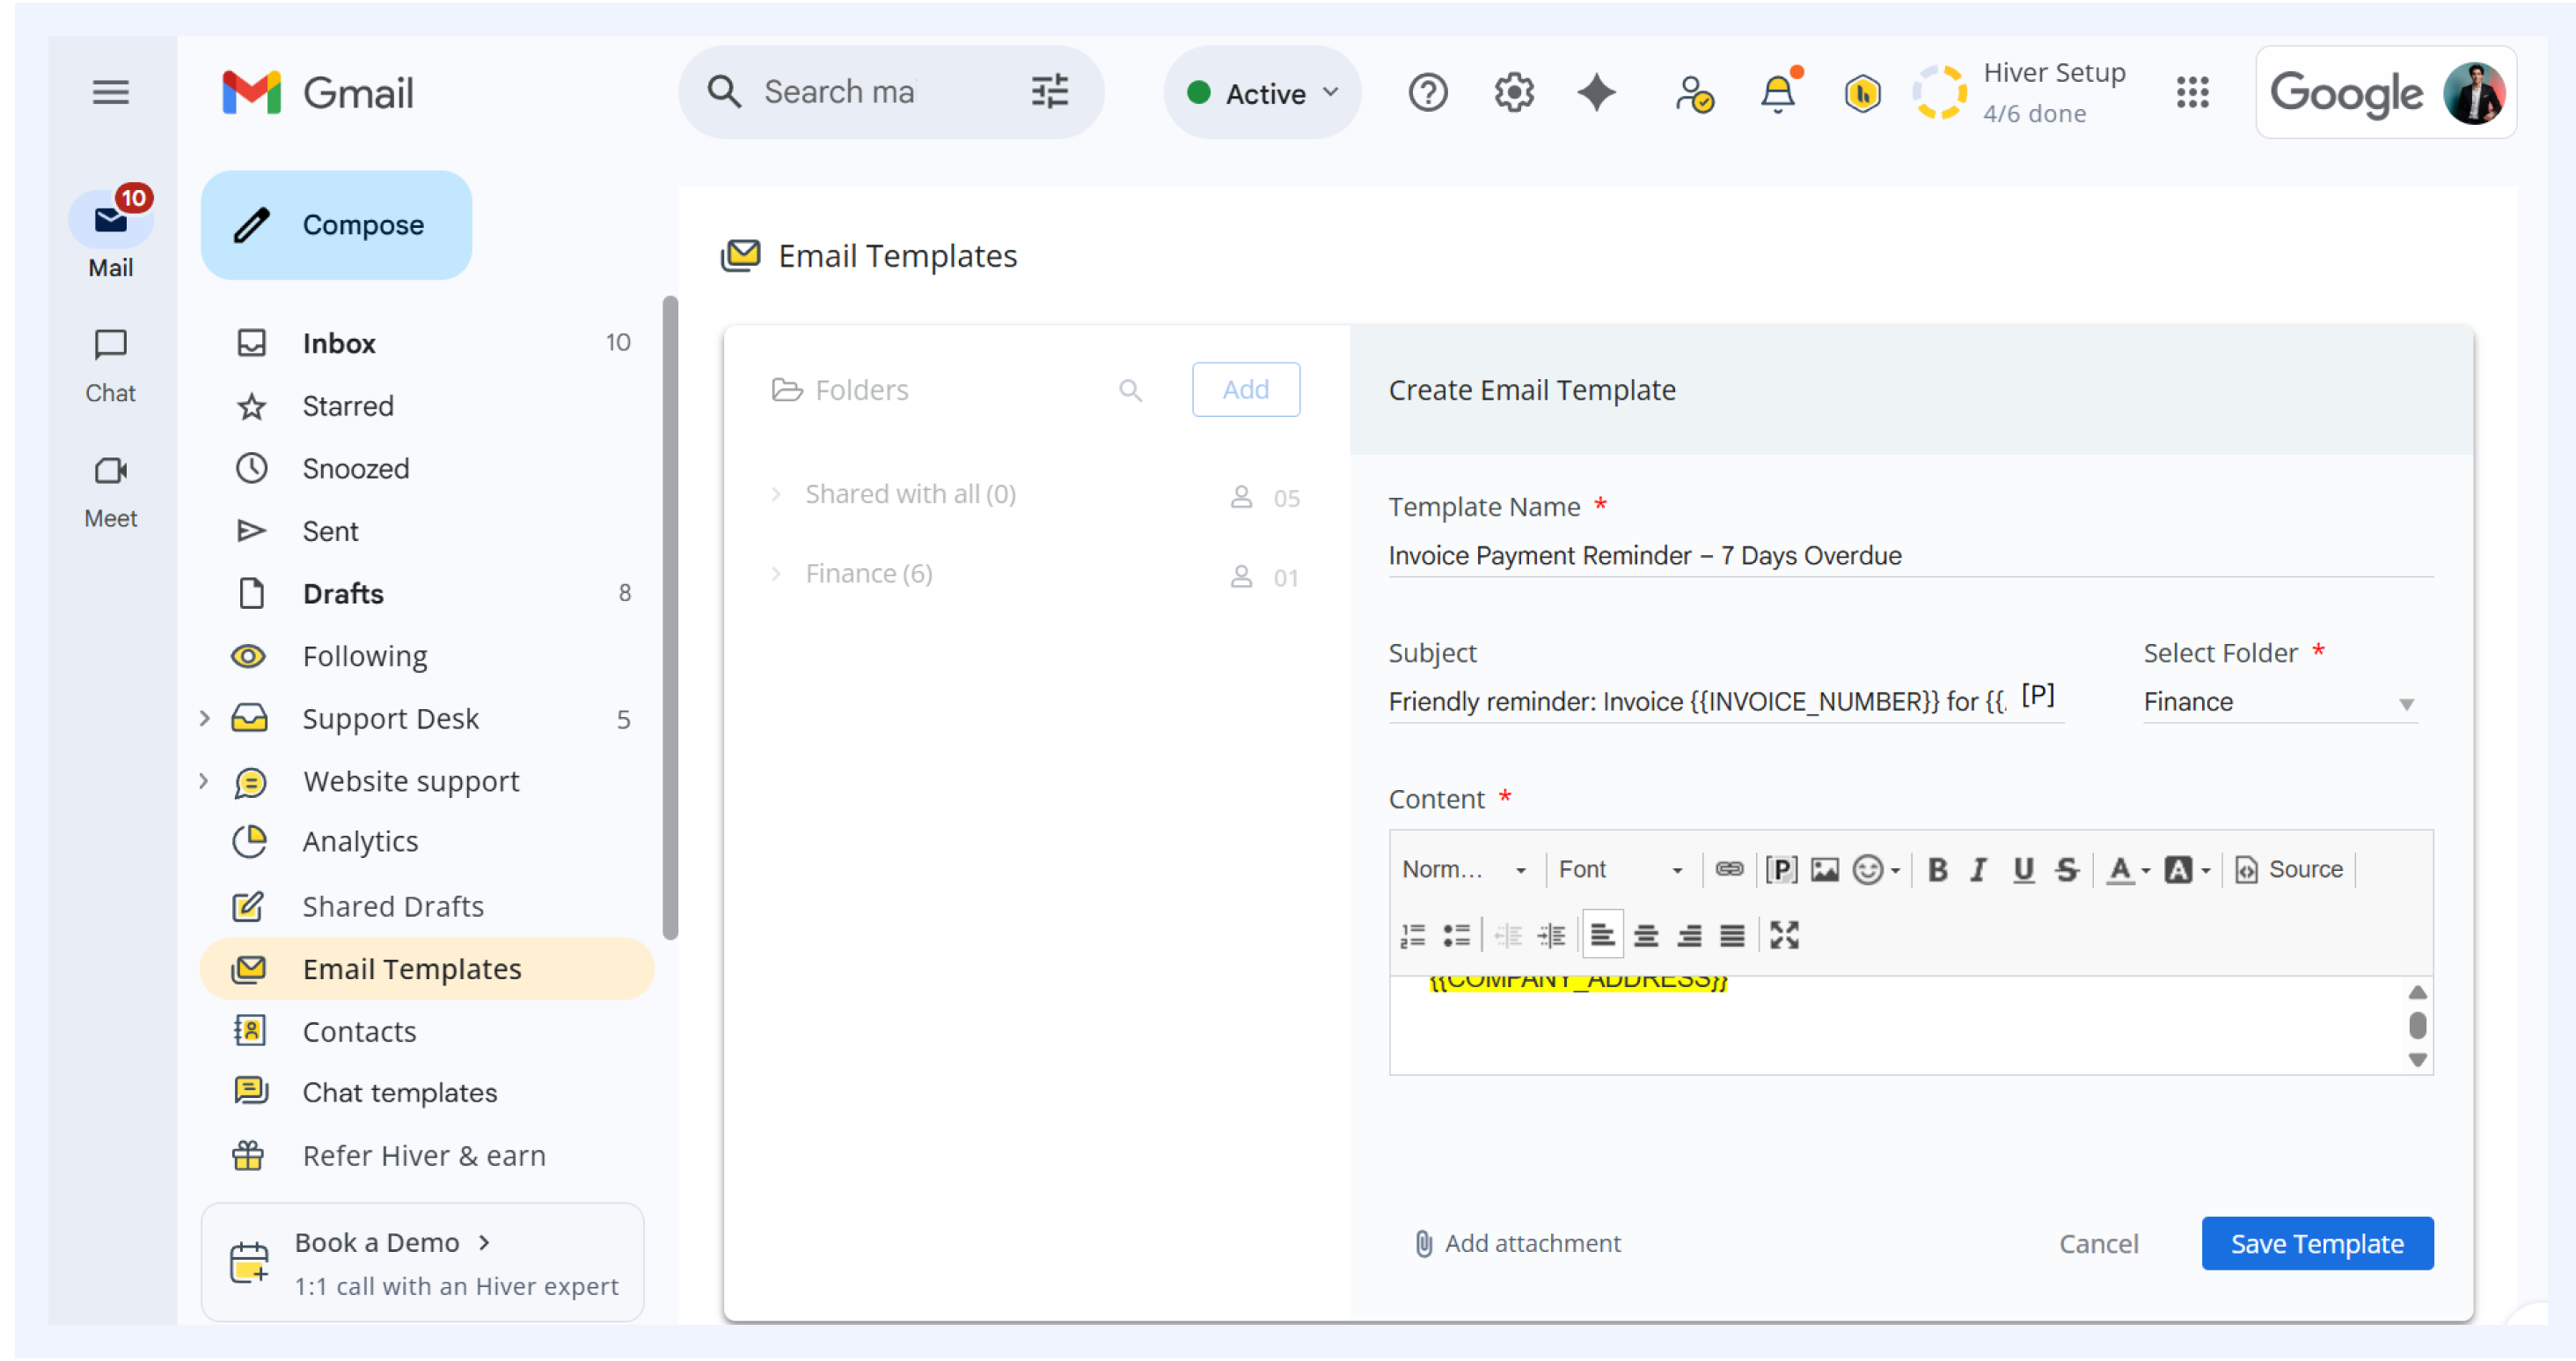
Note: The subject line appears in your actual emails, so make it clear and relevant. The template name is used only for internal reference and searching purposes.
Options to enhance your templates
Hiver offers these additional options to enrich your email templates with files, personalized placeholders, and custom HTML formatting.
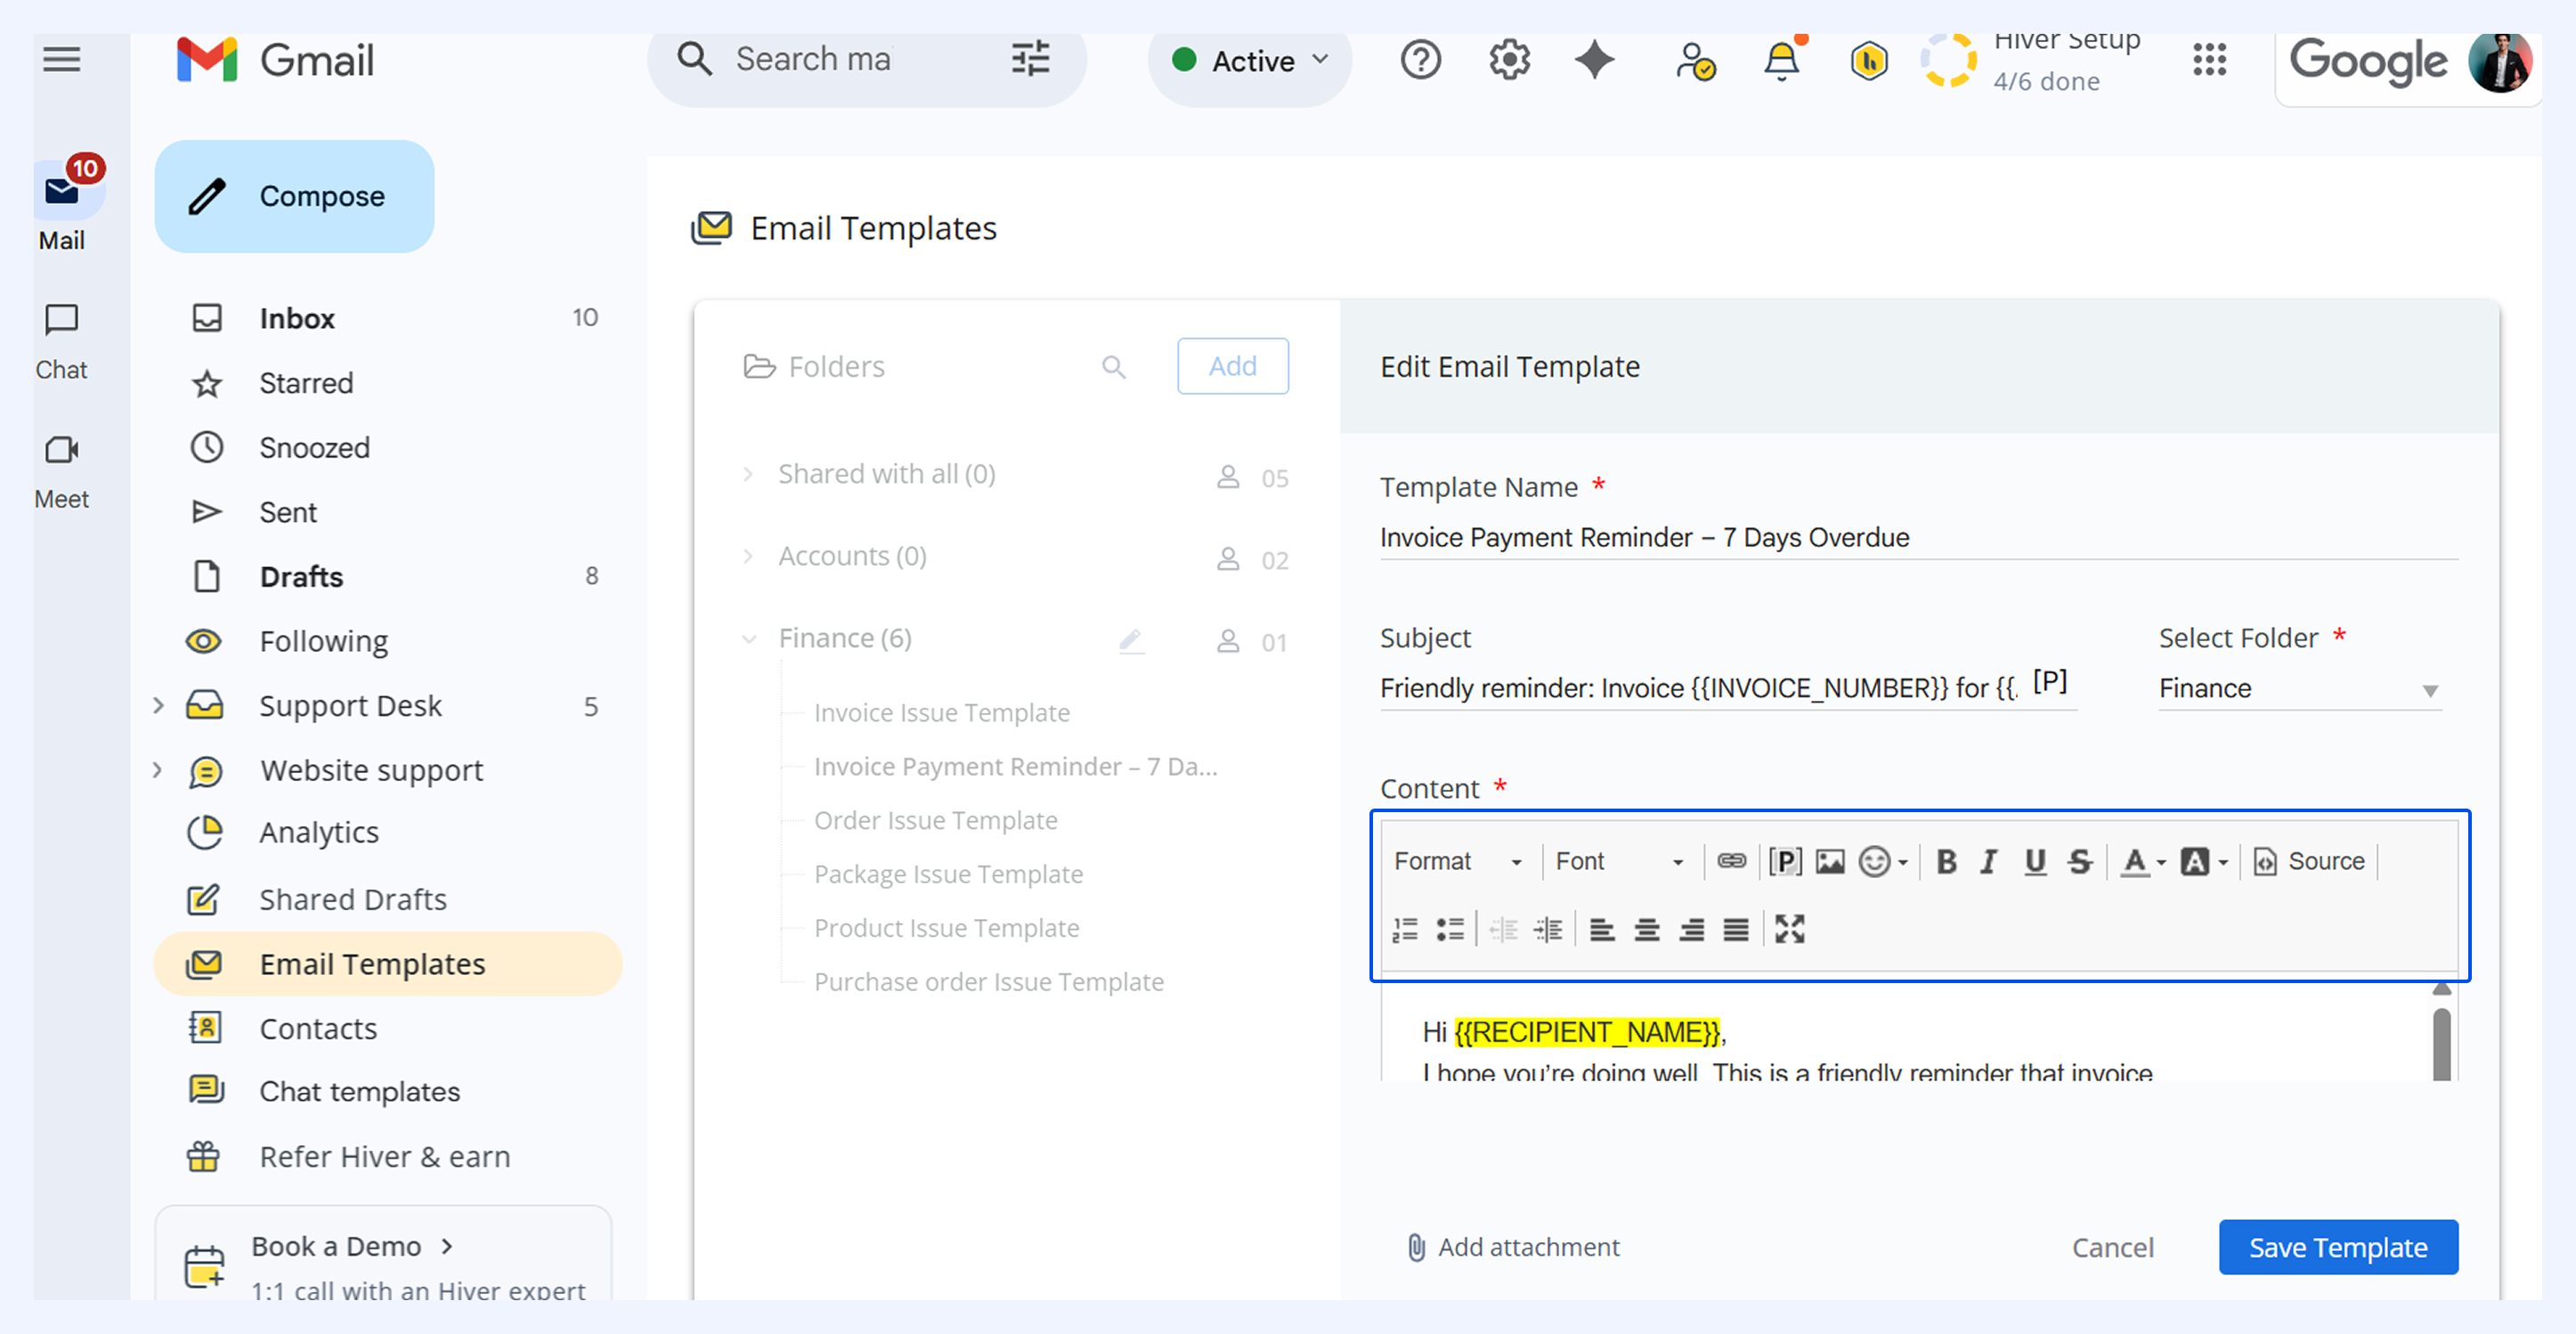
1. Attachments: Add images, videos, PDFs, and documents directly to your templates by selecting the attachment icon. With that, ensure your customers receive all necessary files automatically without manual attachment each time, reducing errors and saving time.
2. Autofill variables: Automatically populate recipient information from the ‘To’ field when composing or replying to emails using the following variables:
| Value | Variable | Fallback option |
| Full name | {{user.fullname}} | {{user.fullname; fallback=hello}} |
| First name | {{user.firstname}} | {{user.firstname; fallback=user}} |
| Last name | {{user.lastname}} | {{user.lastname; fallback=}} |
| {{user.email}} | {{user.email; fallback=}} |
3. Hyperlinks: Select any text in the template body and click the link icon to add URLs.
4. HTML source editor: Click the <>Source icon to edit the template's HTML code directly.
Editing your templates
You can modify existing templates to keep them relevant and up-to-date as your workflow or communication needs evolve. Here's how to edit the template:
1. Open the Email Template folder and select the template to edit.
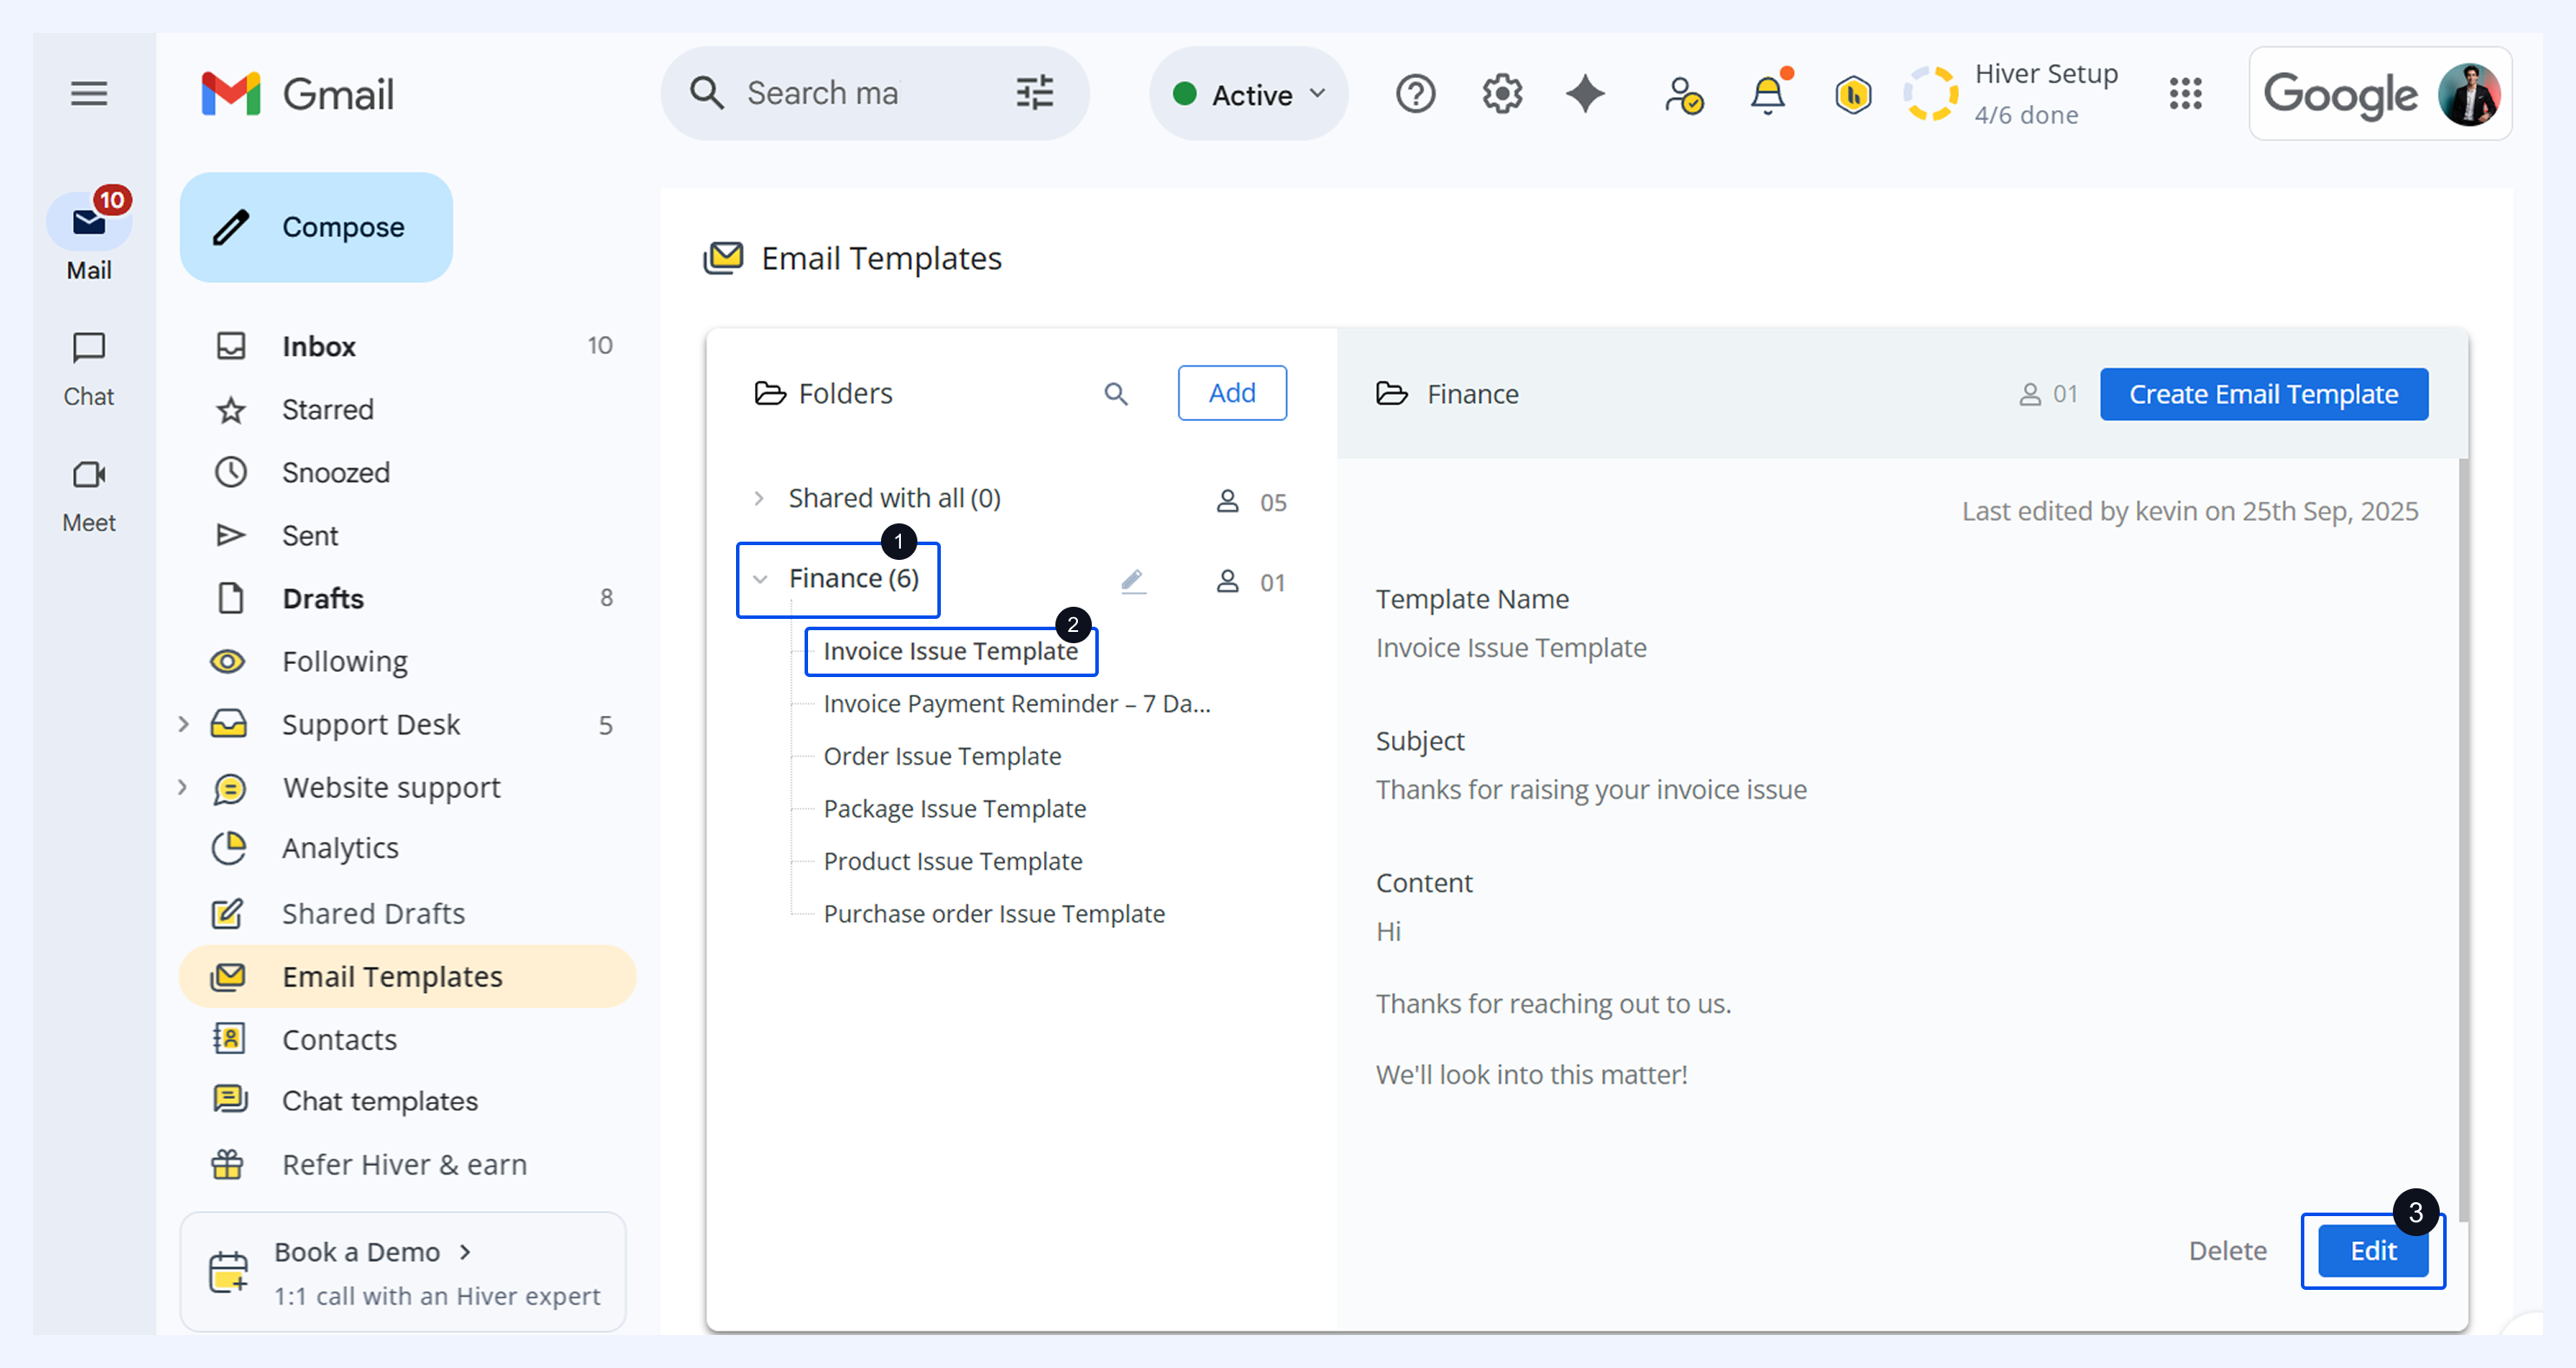
2. Make your changes (if you want to move the template, use the dropdown to select a new folder) and click Save Template.
Composing messages using templates
You can use your saved templates in two ways: send pre-built templates directly or customize them with personalized information for the specific situation. To use a template,
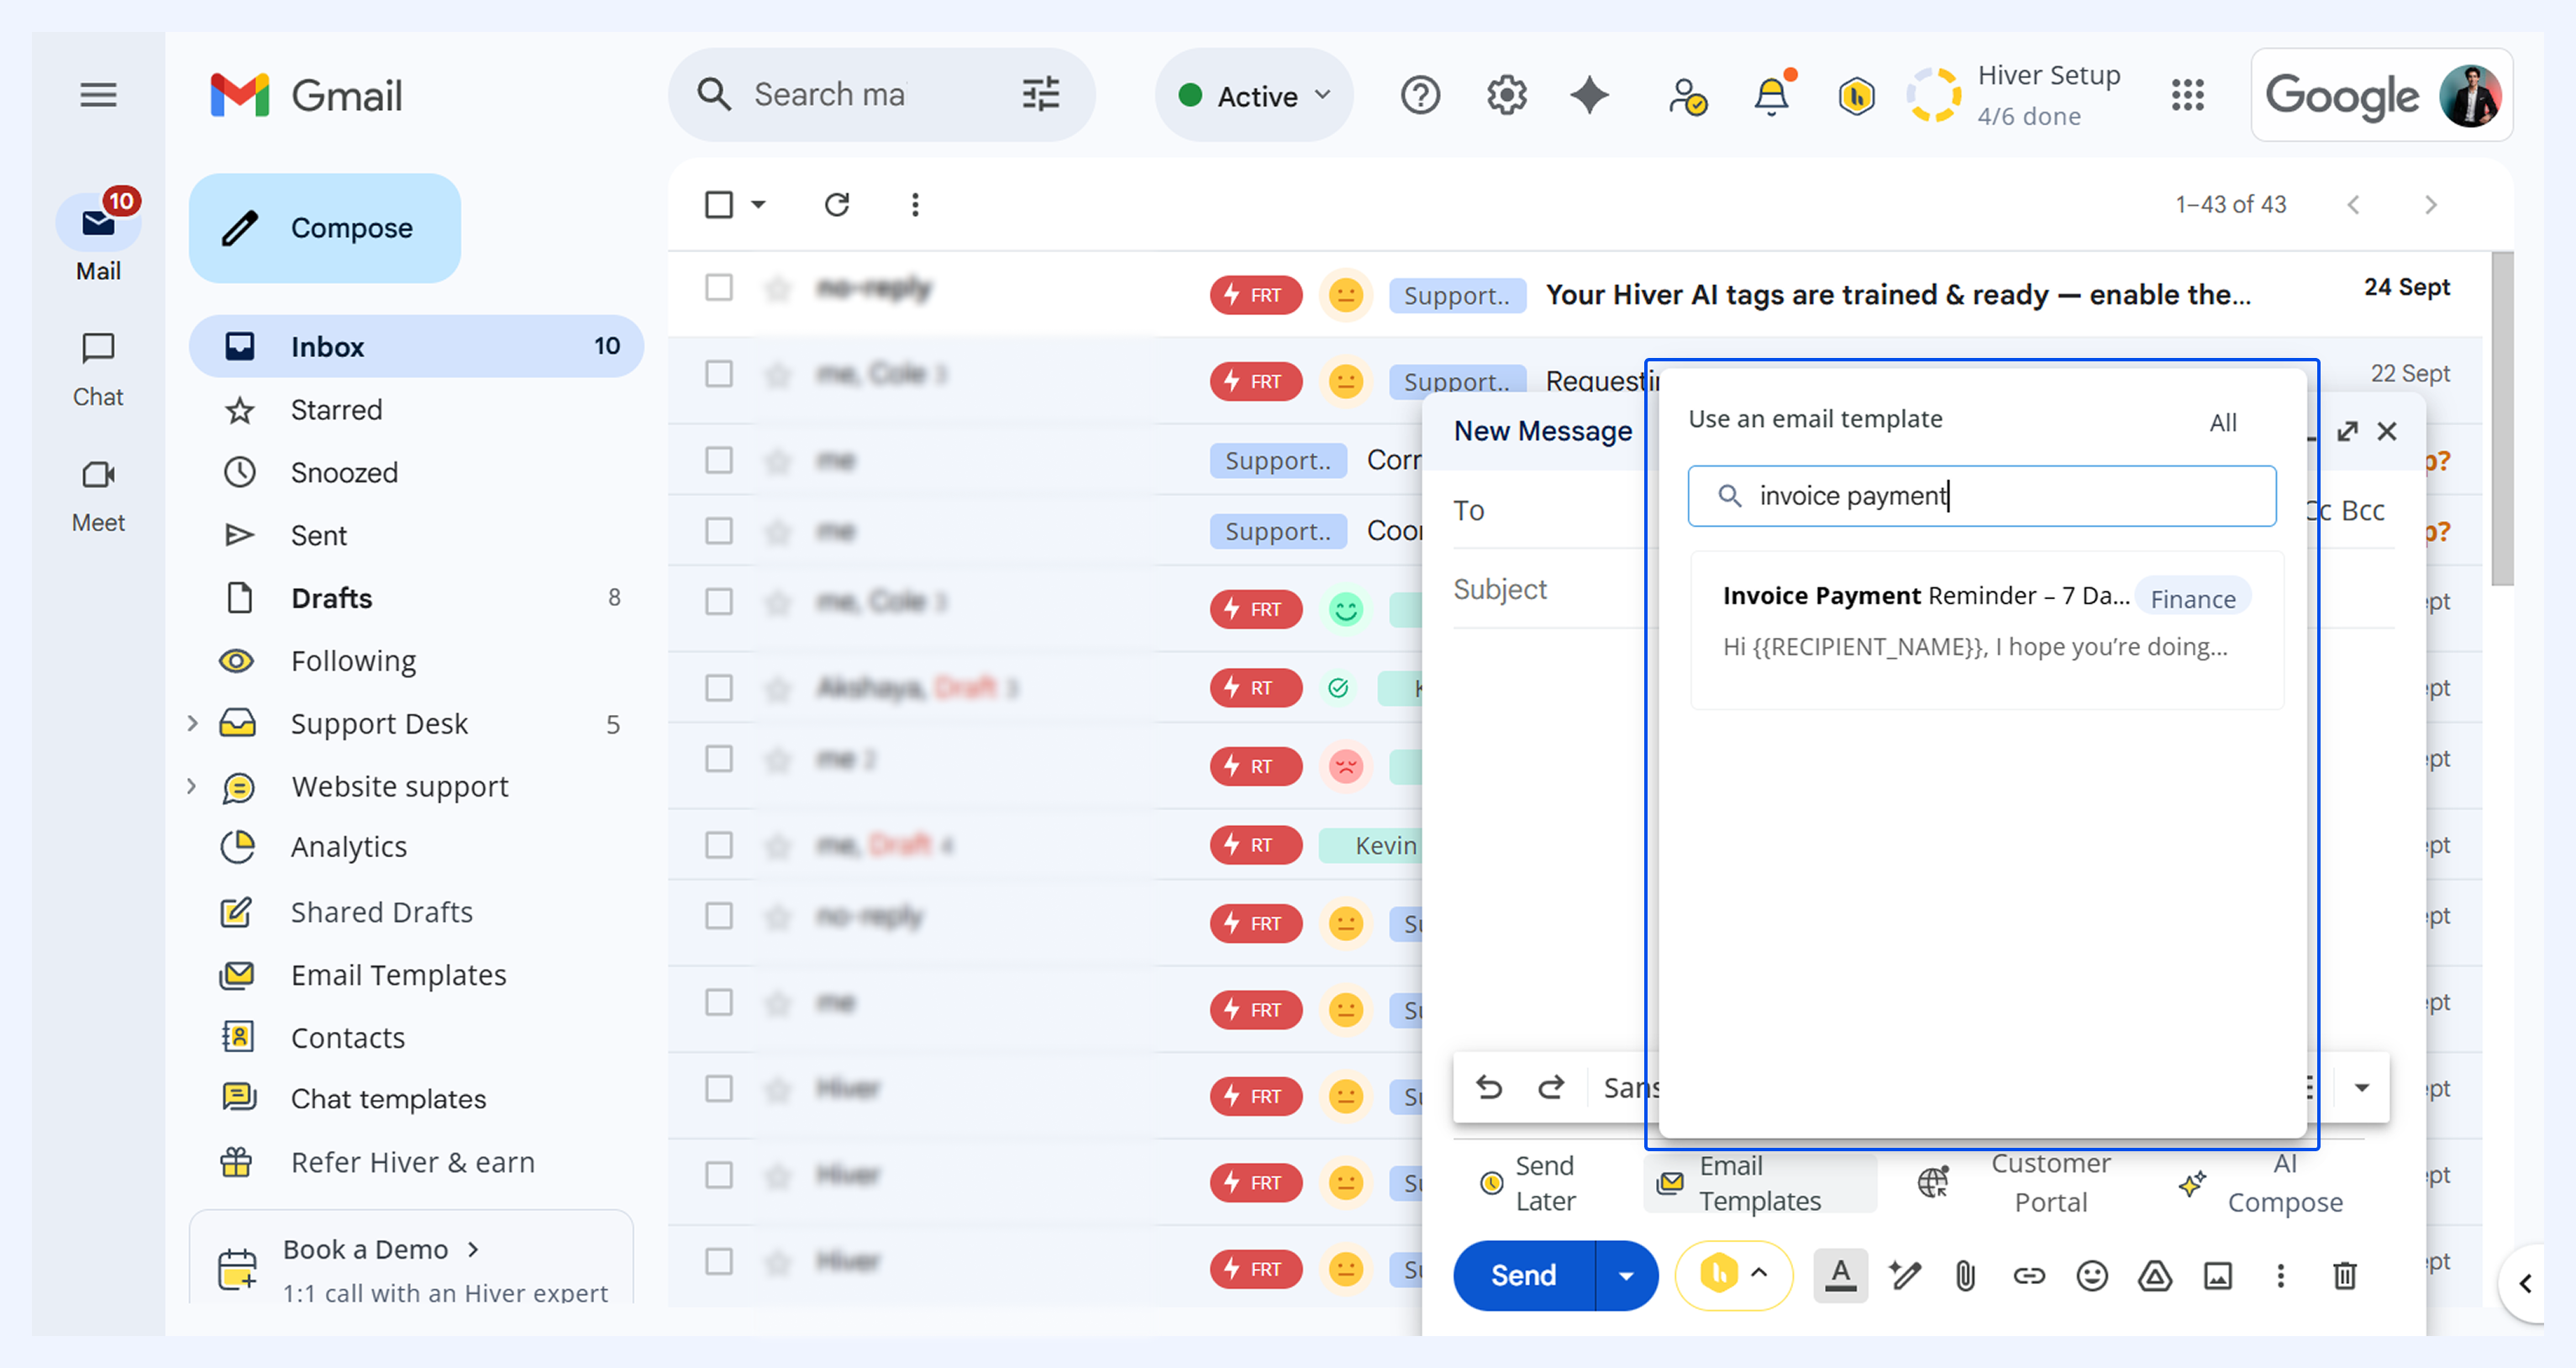
1. Open an existing message or create a new one, and then select Email Templates.
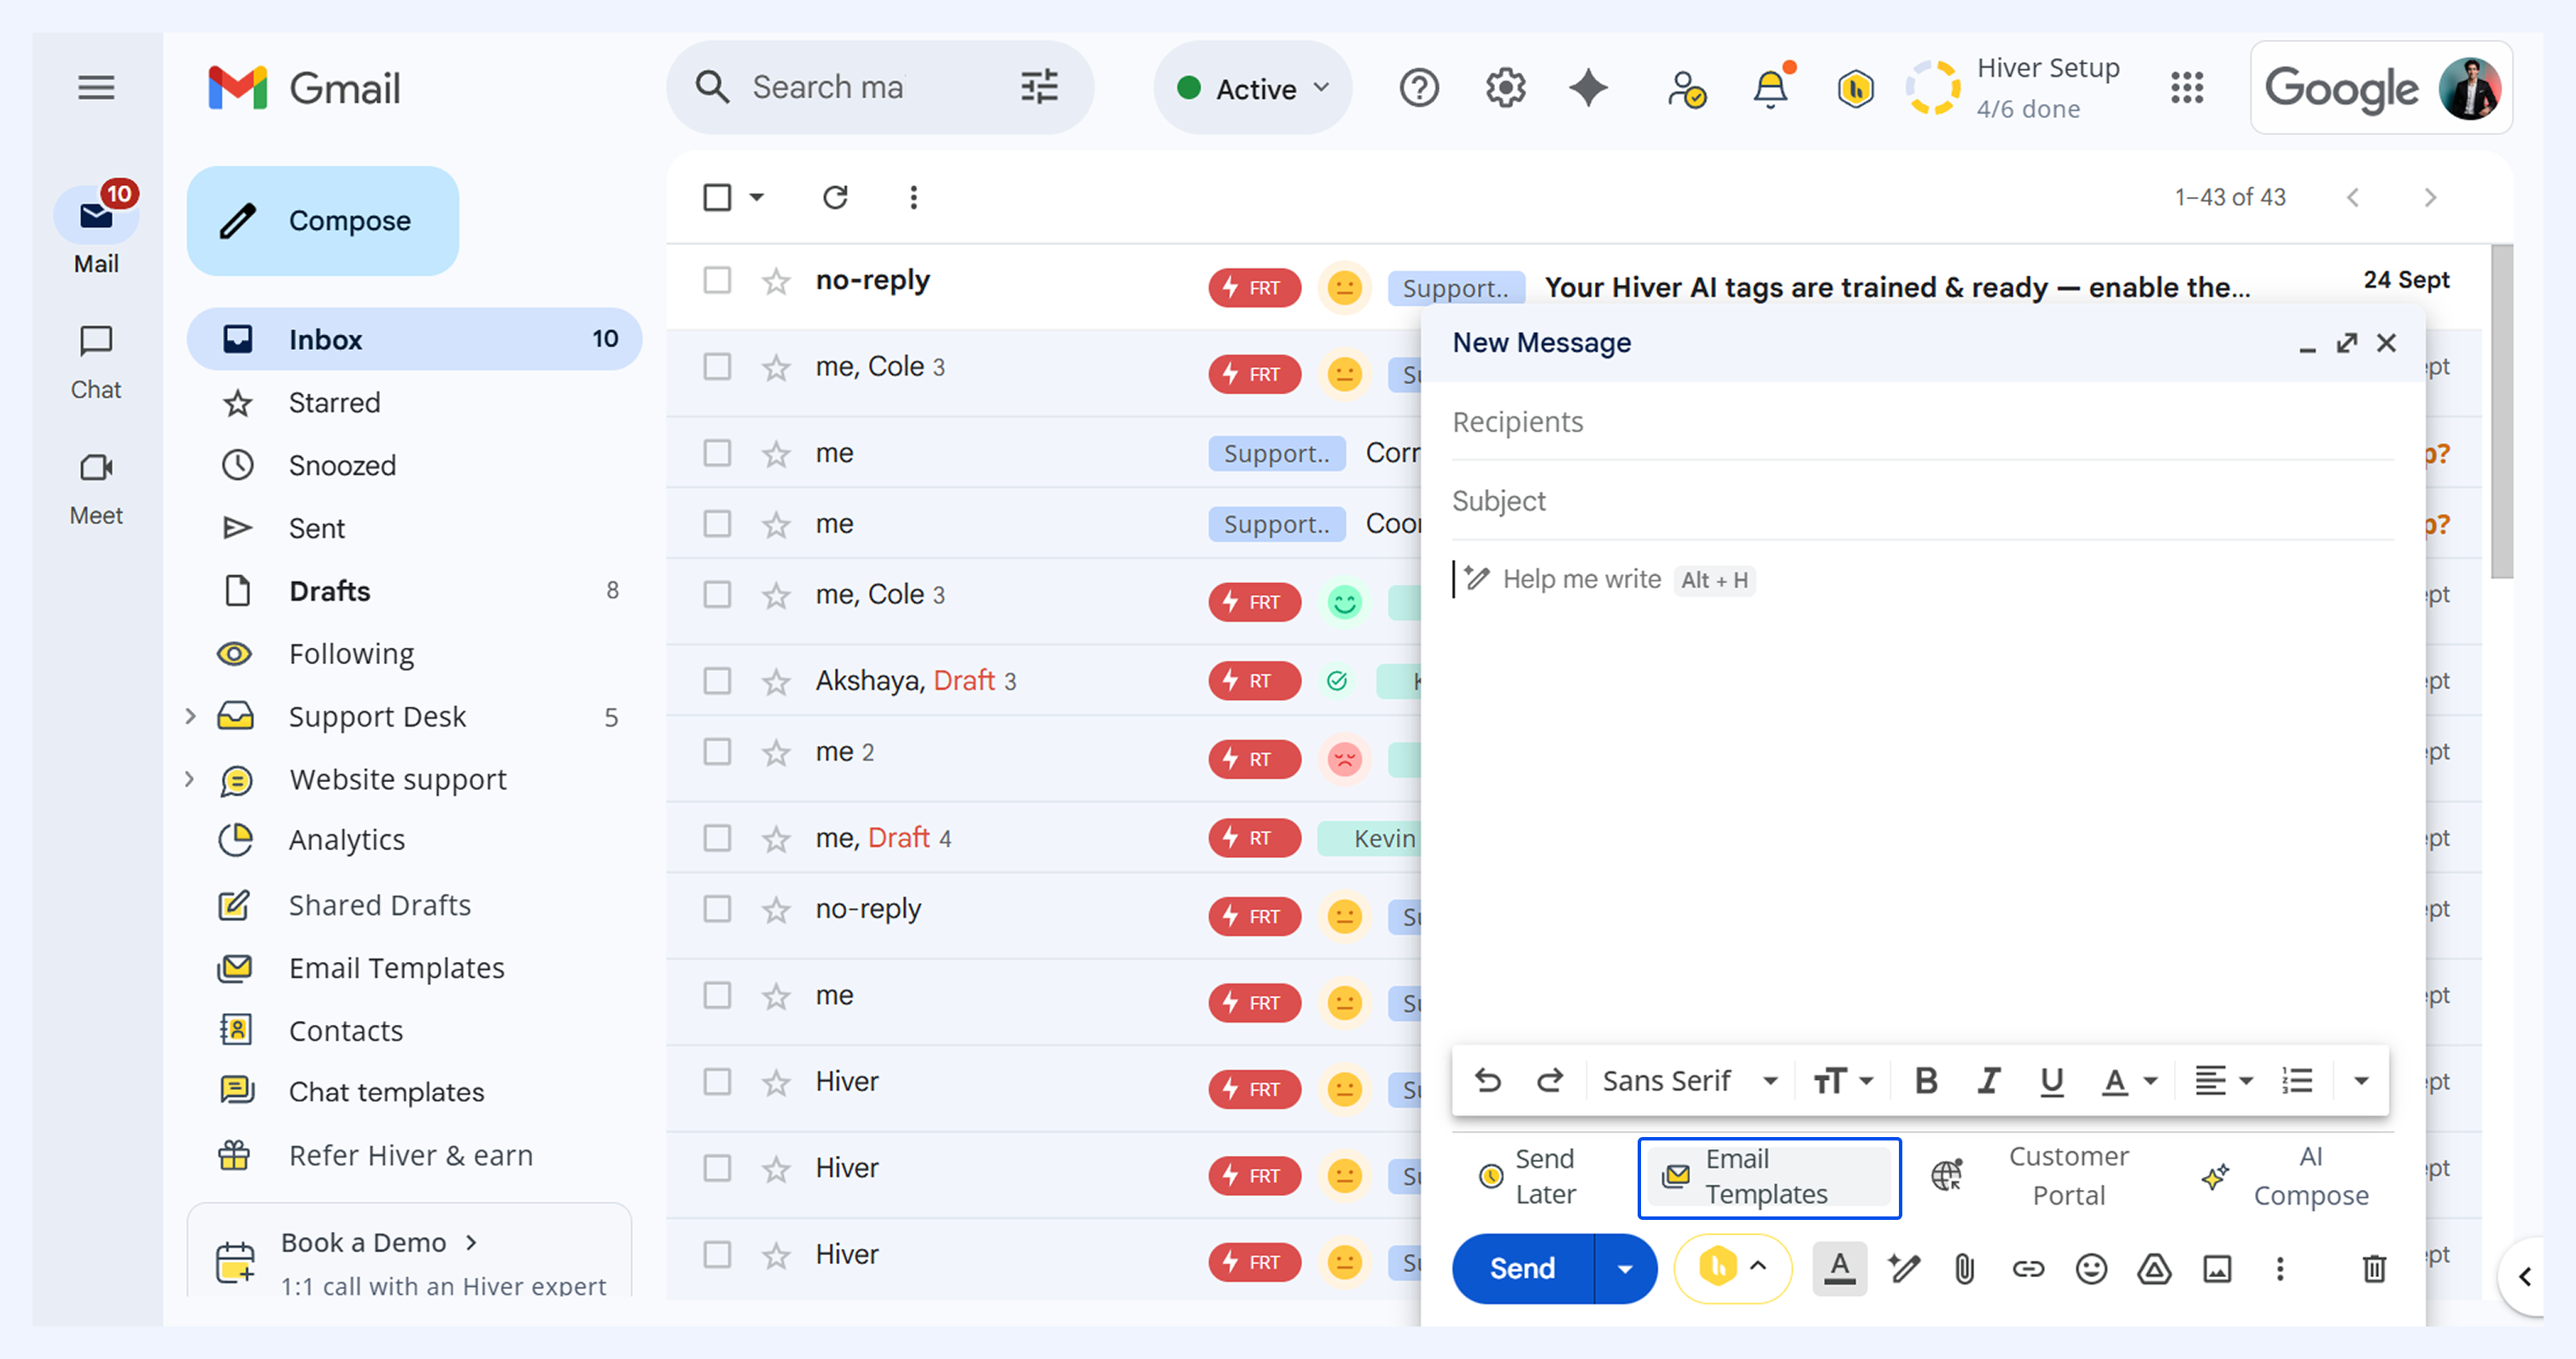
2. Type your template name or subject in the search bar.
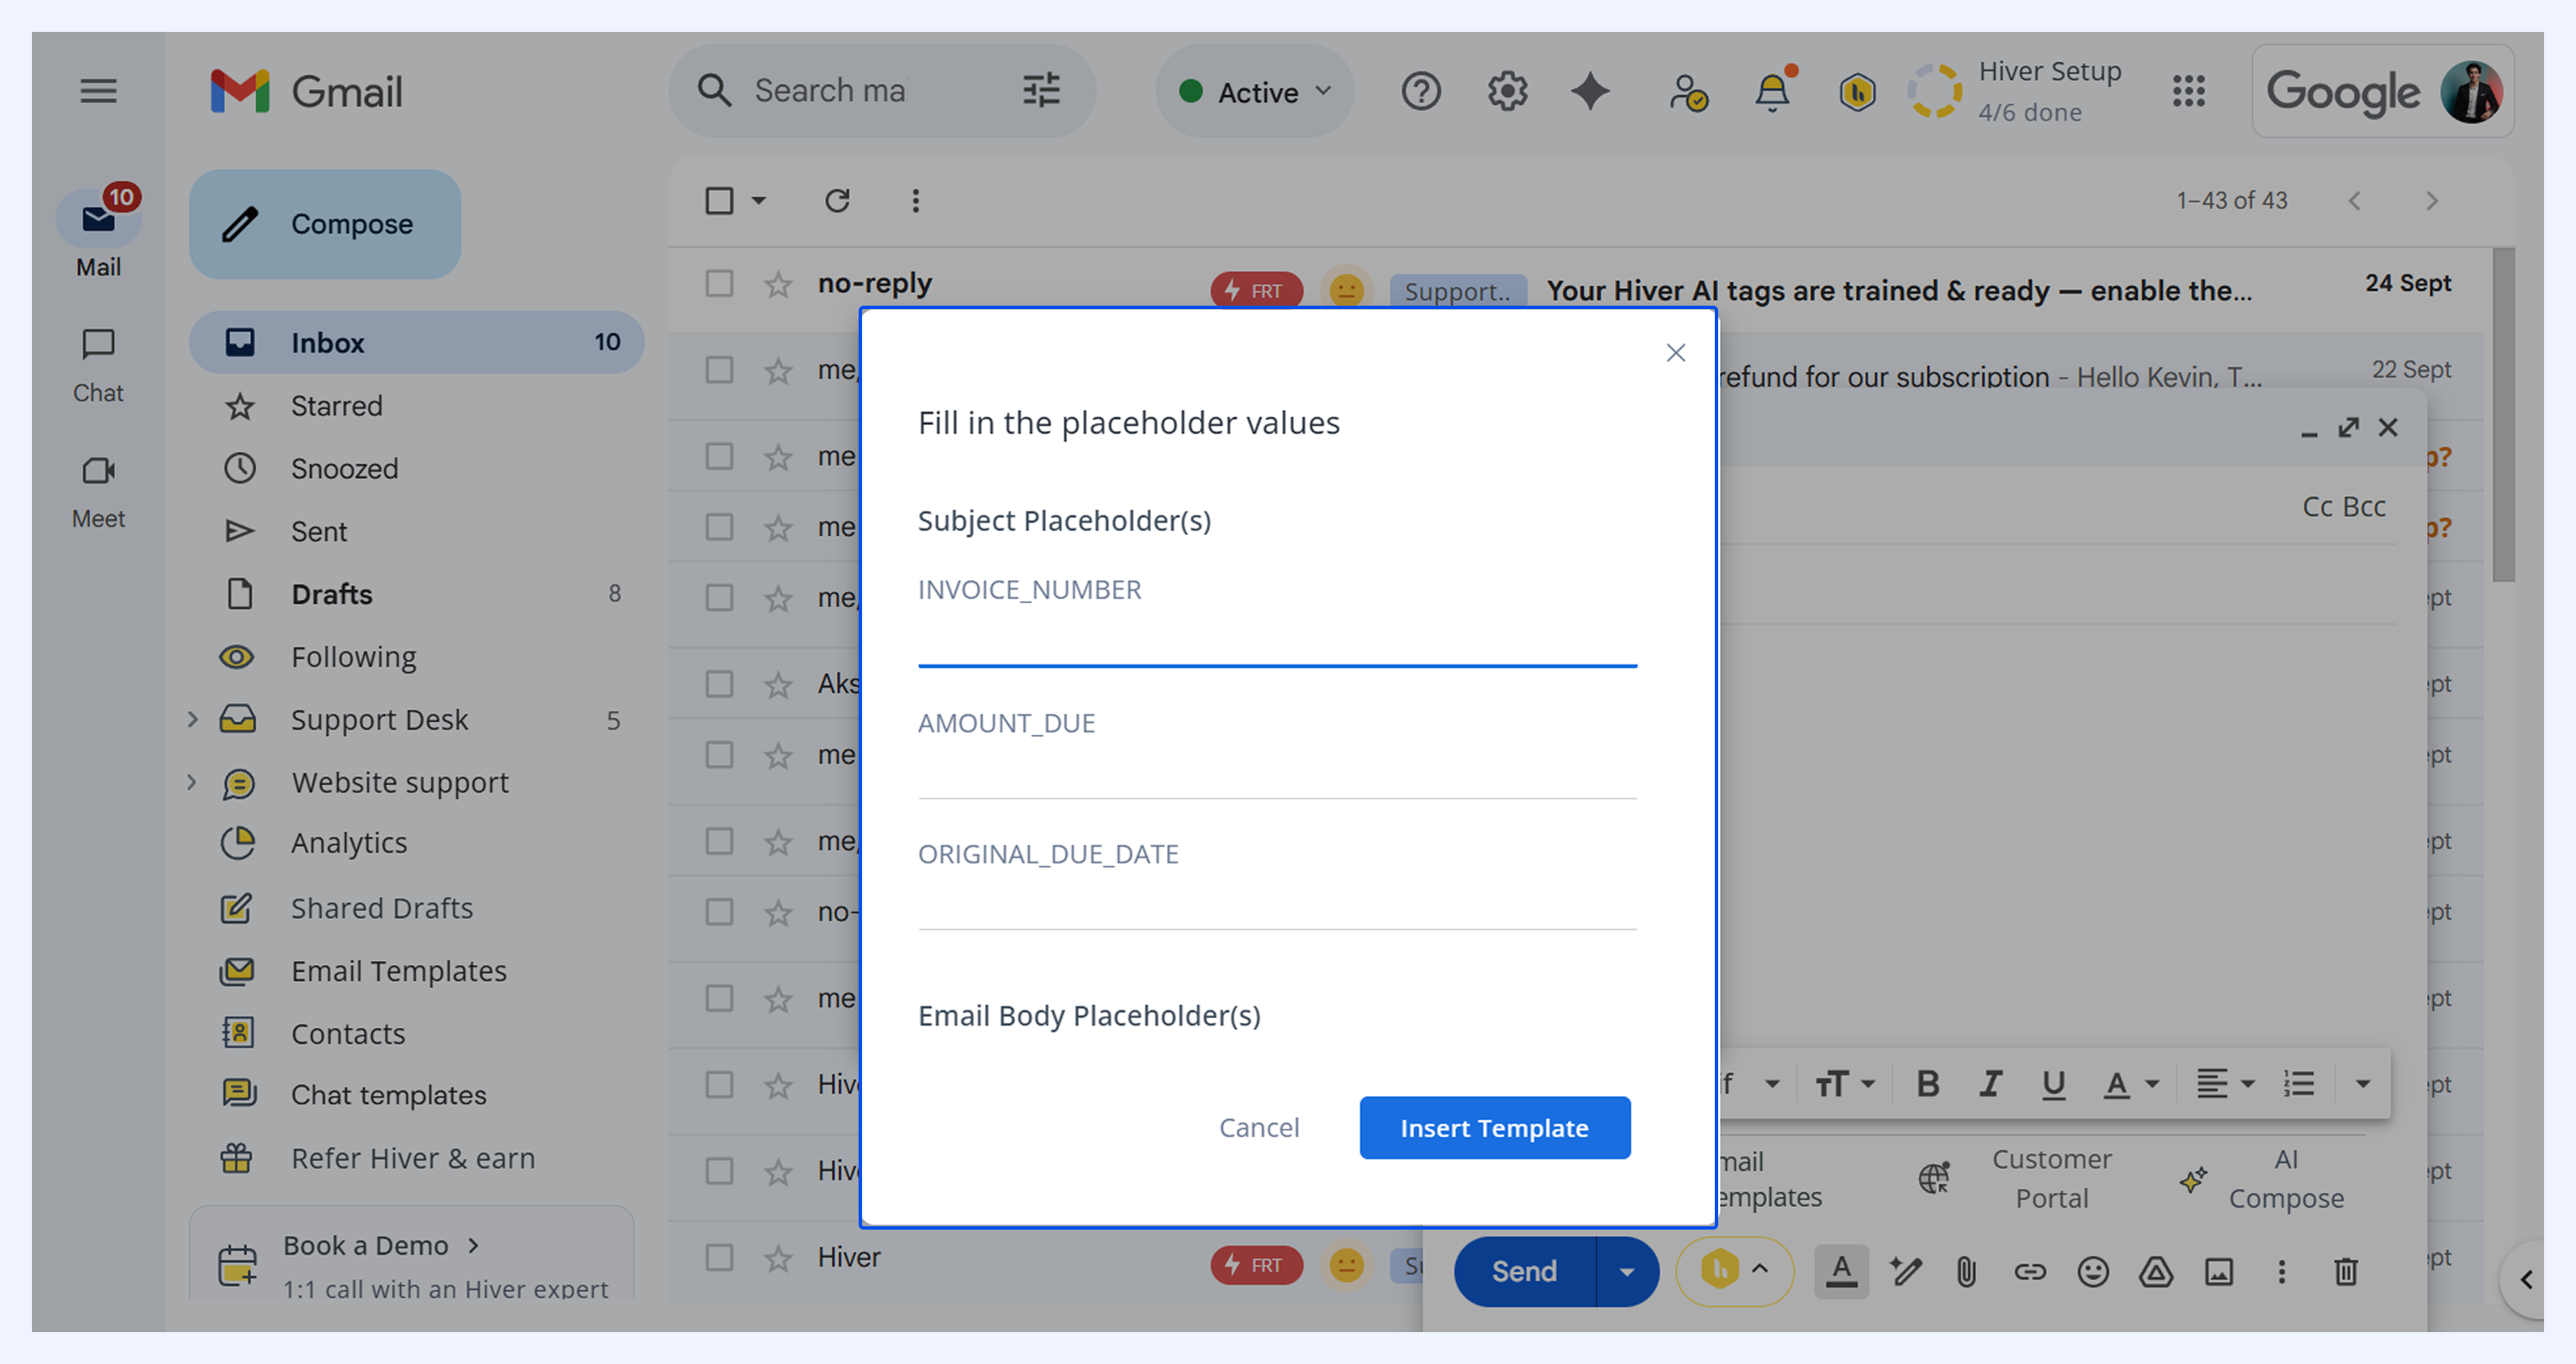
3. You will then be prompted to fill in the placeholder values and then click Insert Template.
Note: Email Templates saved for your Shared Inbox can be used to reply to private emails that are not added to Hiver.
Next steps
Requesting and obtaining approvals
How to collaborate on a conversation in Hiver