Getting started with AI Sentiment Analysis
Hiver's AI Sentiment Analysis reads the tone of your conversations and tells you if customers are happy, frustrated, or just checking in. This helps your team jump on urgent issues, celebrate wins, and understand trends.
Prerequisites
To access AI Sentiment Analysis:
- You need Admin or Shared Inbox Admin permissions.
- This feature is available on the Pro and Elite plans for customers who signed up on or after December 22, 2025.
Understanding AI Sentiment Analysis
AI Sentiment Analysis reads every conversation that comes in and figures out the customer's tone. It looks at the words they use to tell if they're appreciative, neutral, or upset. You can pick either a 3-point or 5-point scale for how detailed you want it to be.
Here's what it does:
- Why hasn't this been fixed yet? → Negative.
- Appreciate the quick help! → Positive.
- Just following up on this → Neutral.
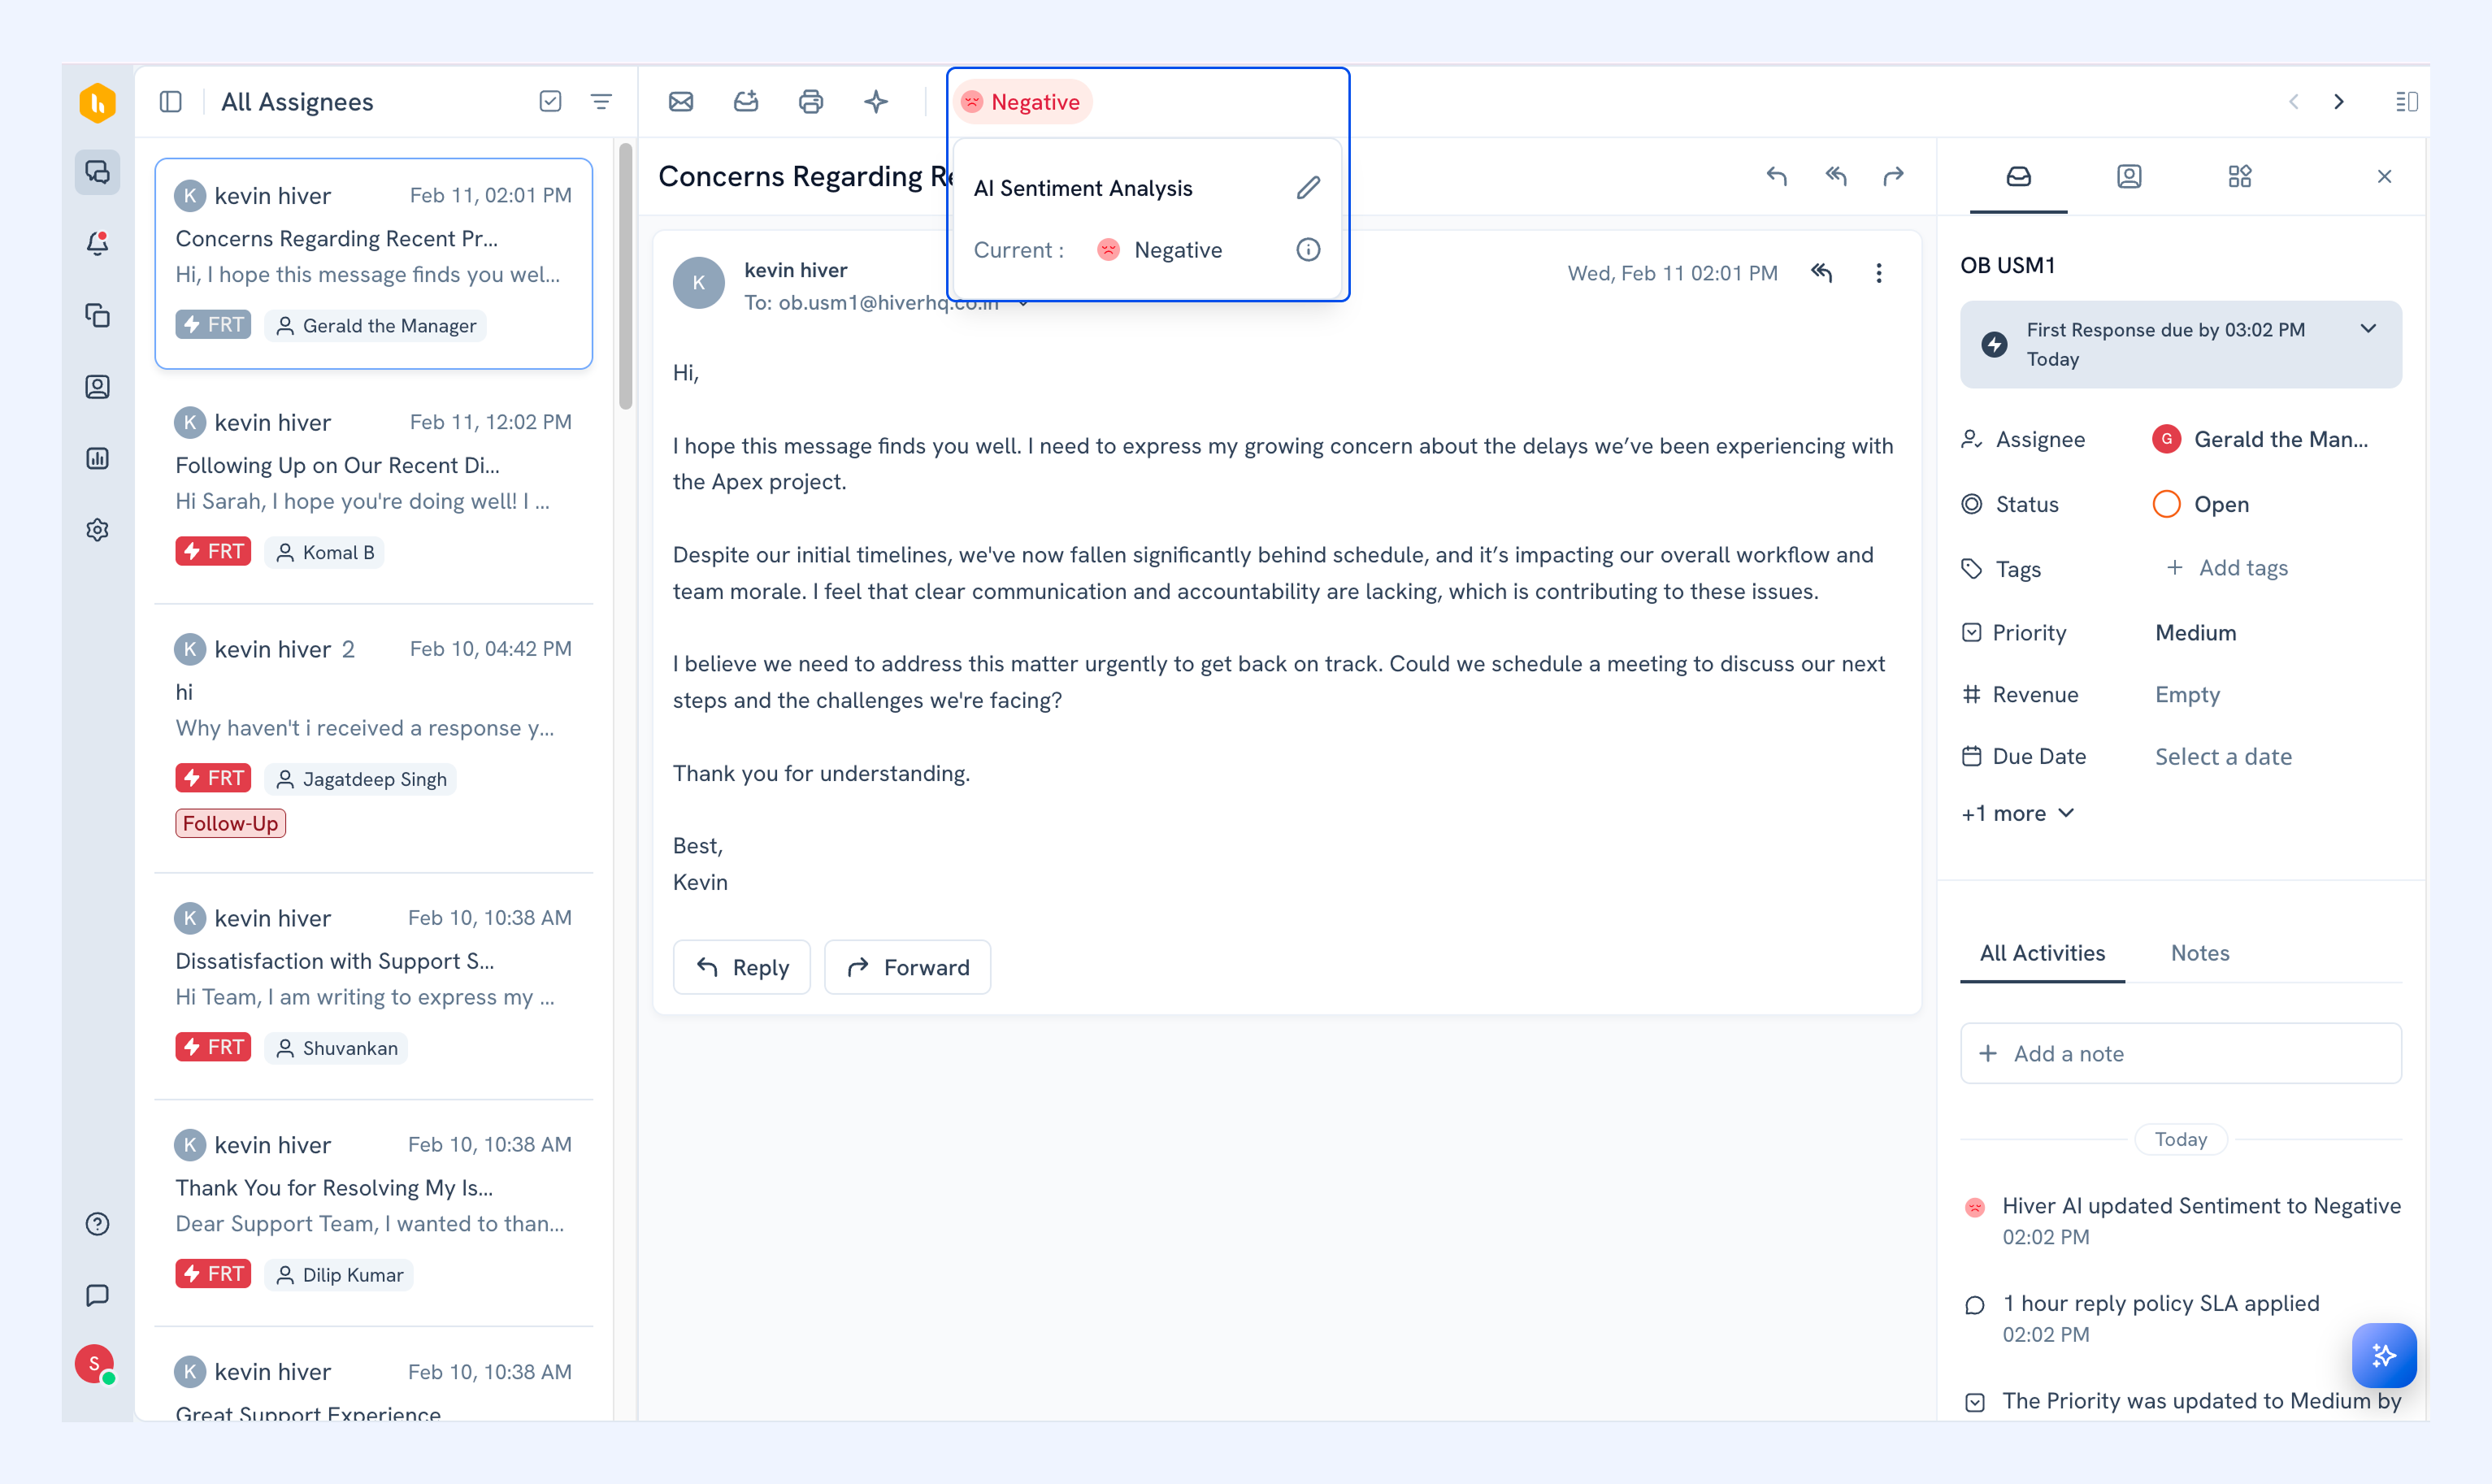
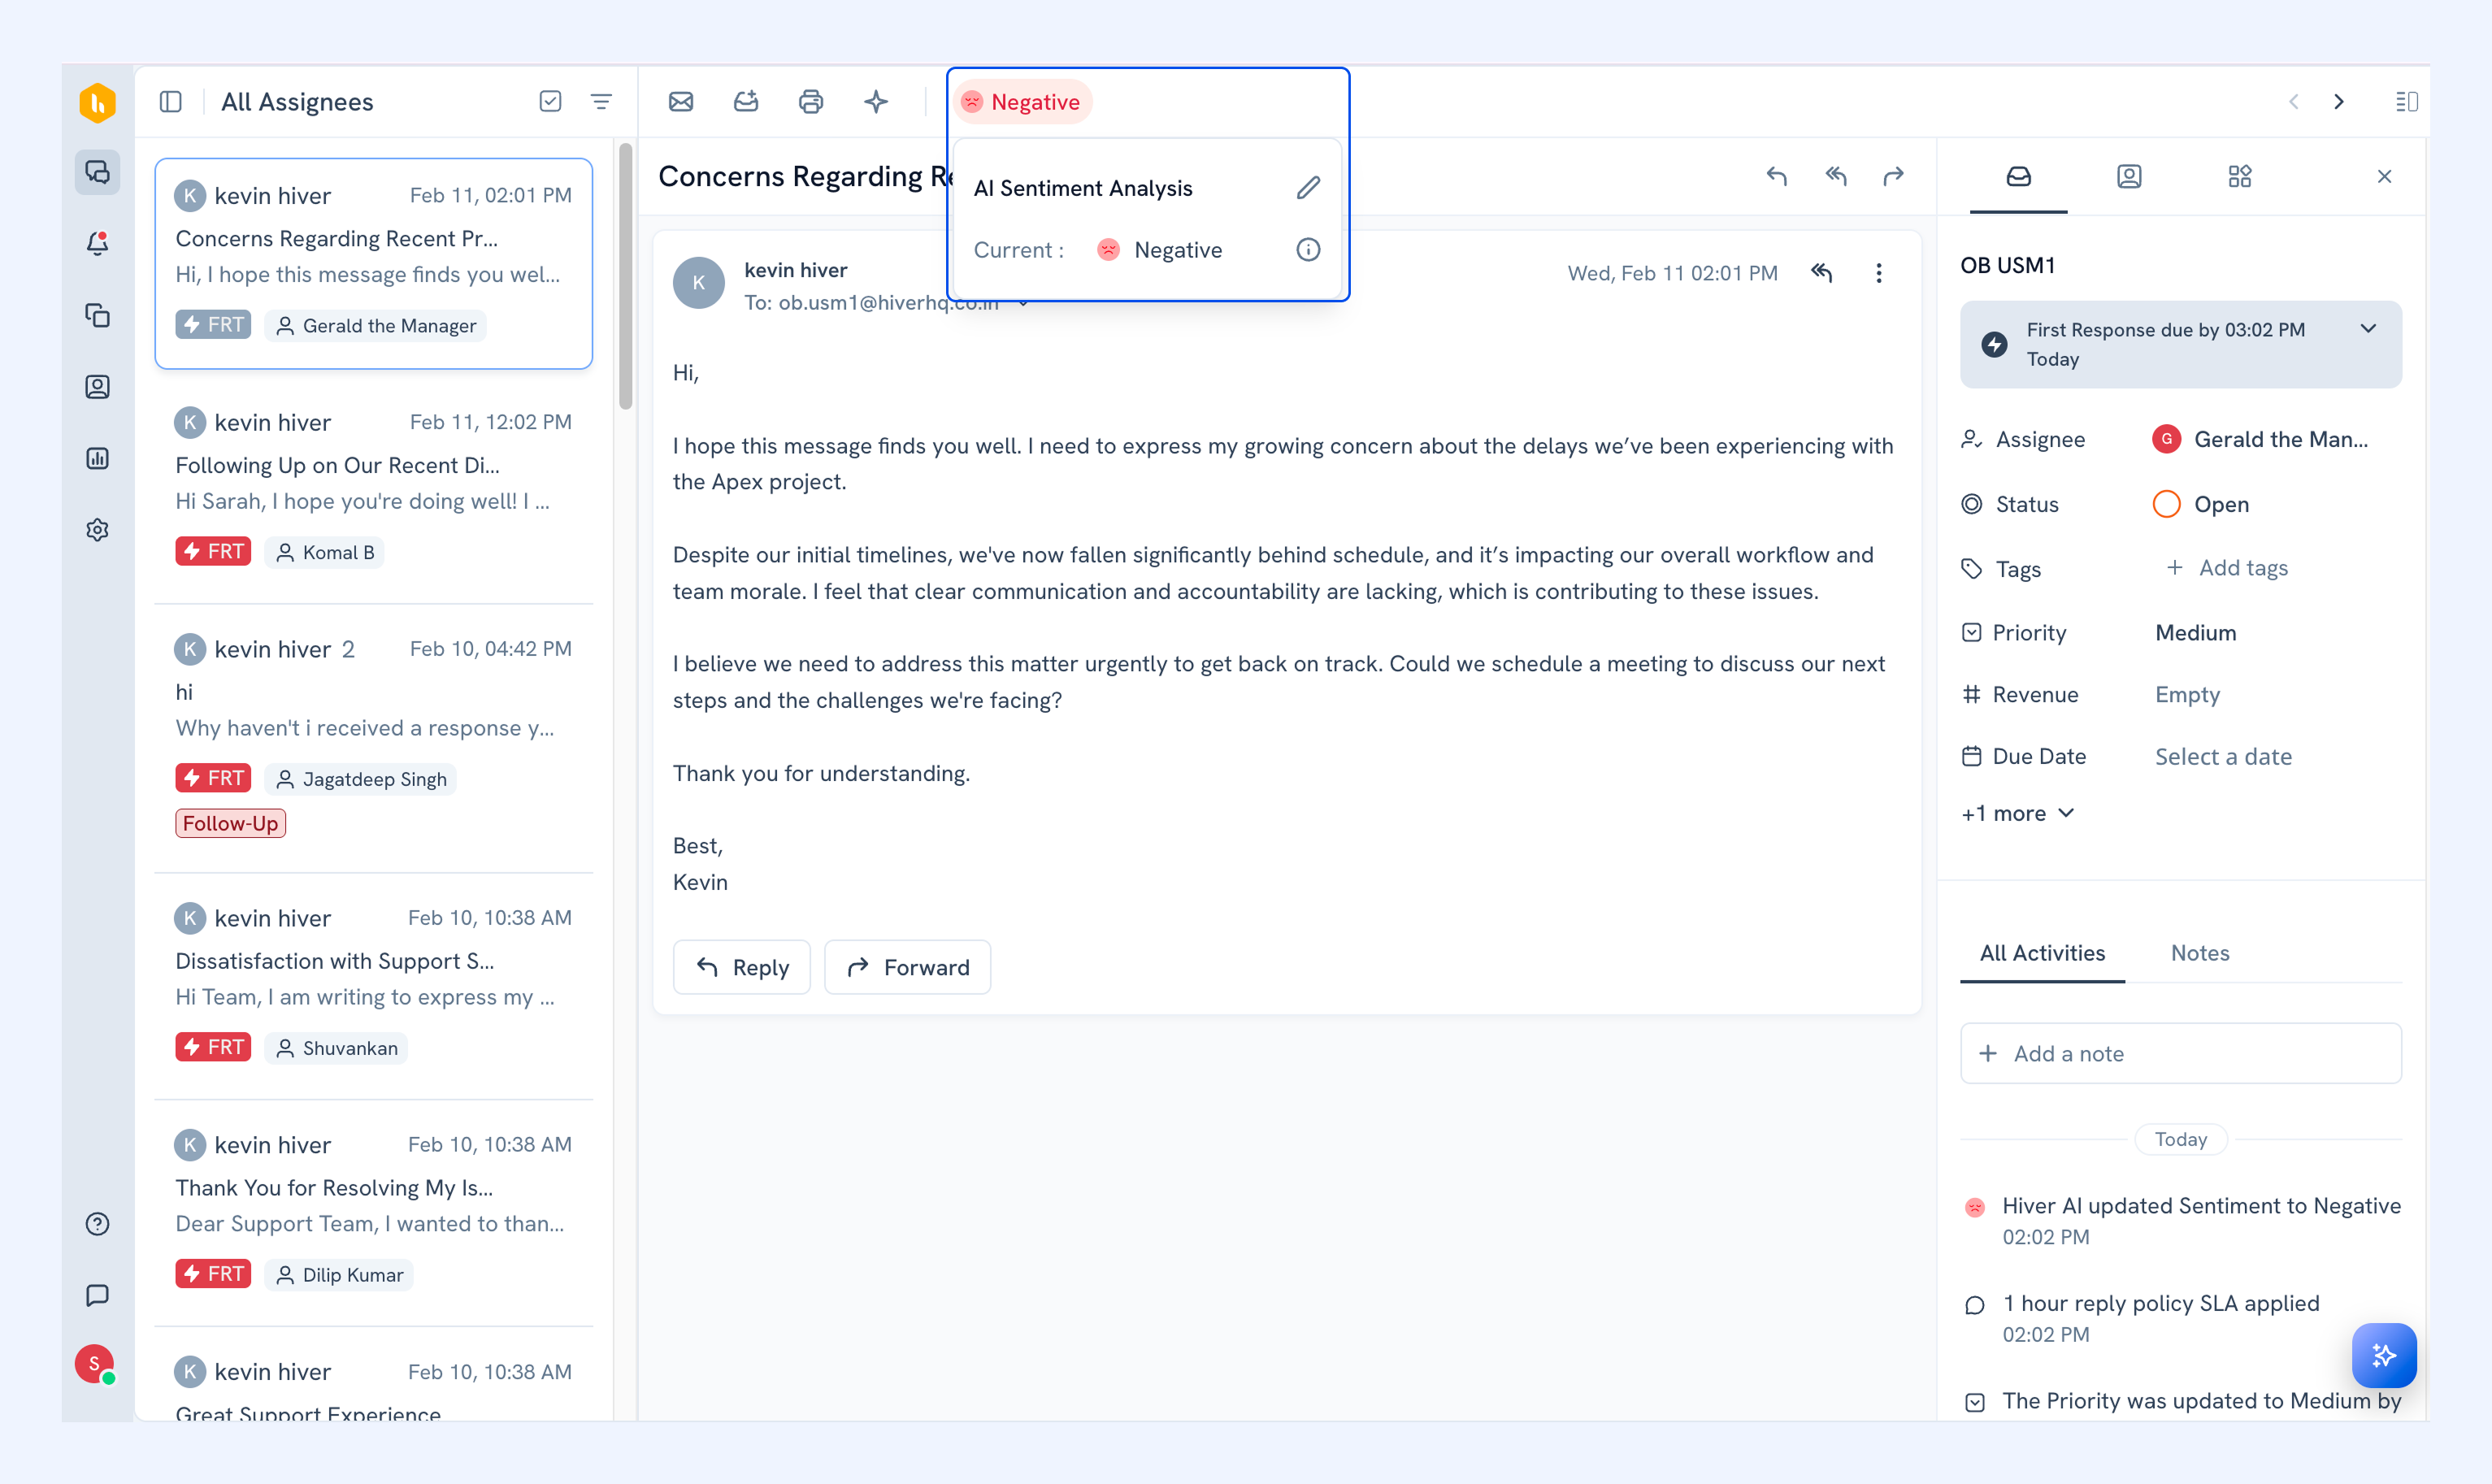
The sentiment emoji shows up when you open a conversation.
How to set up AI Sentiment Analysis
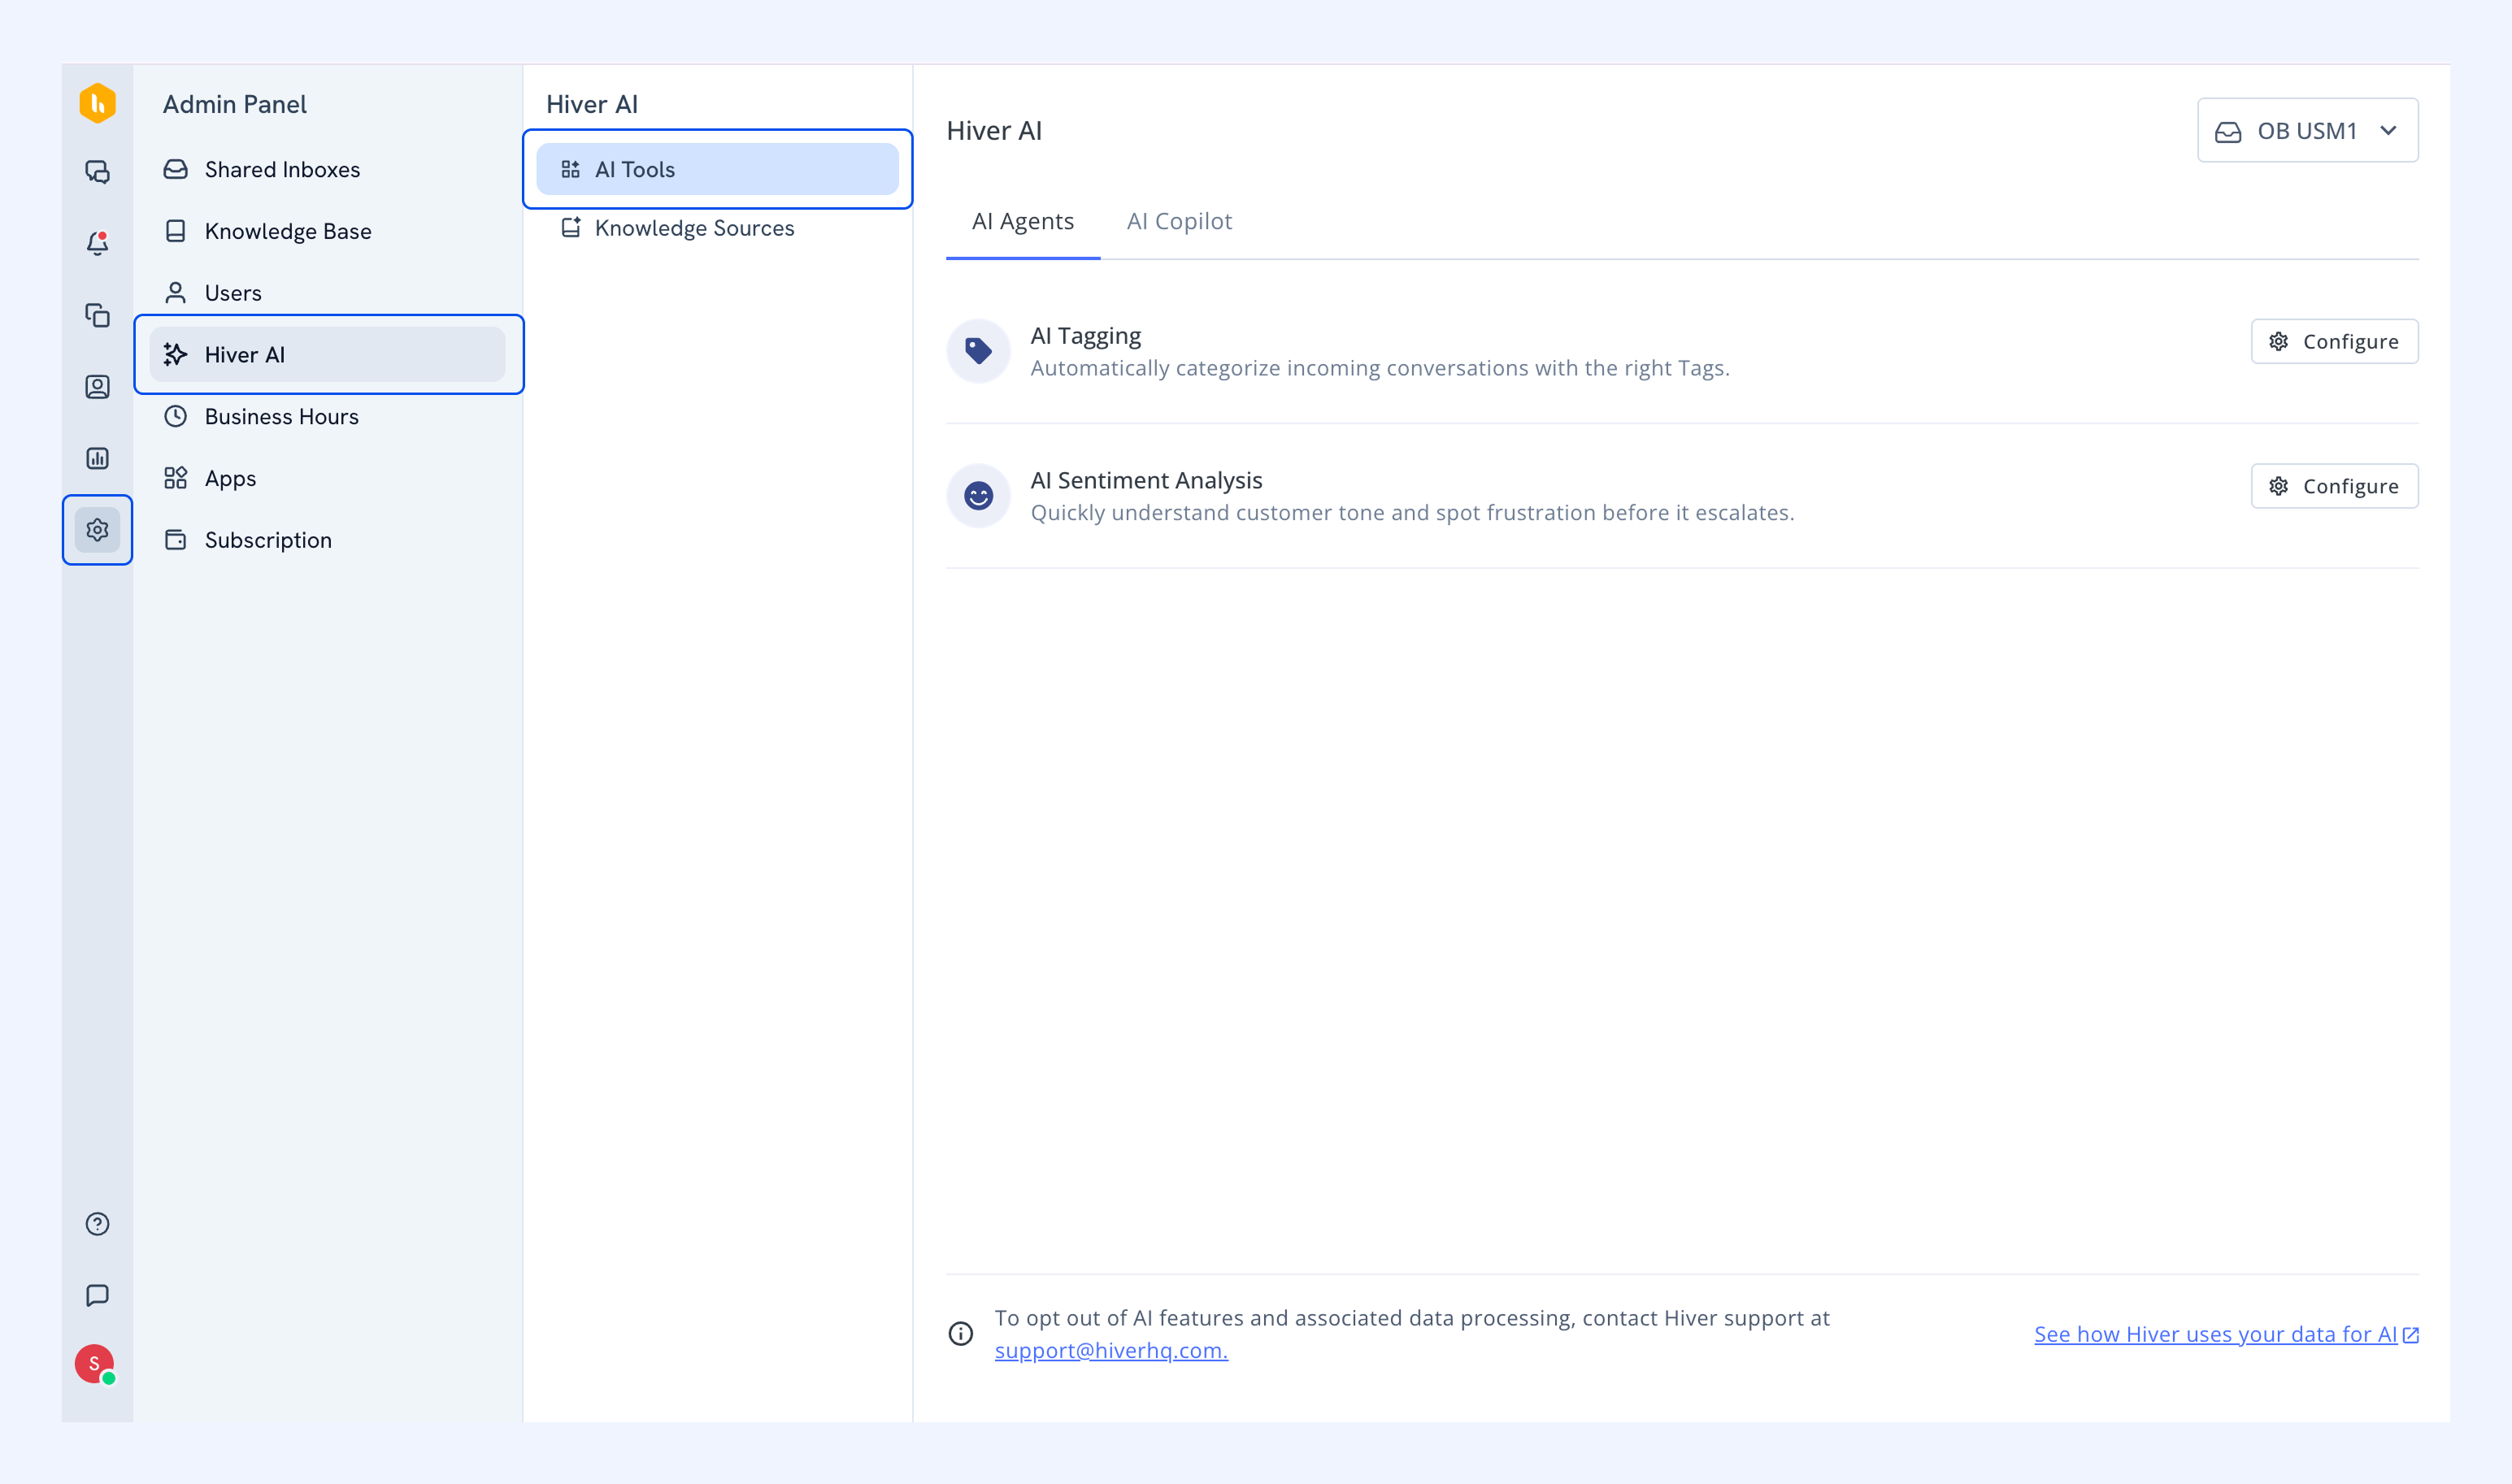
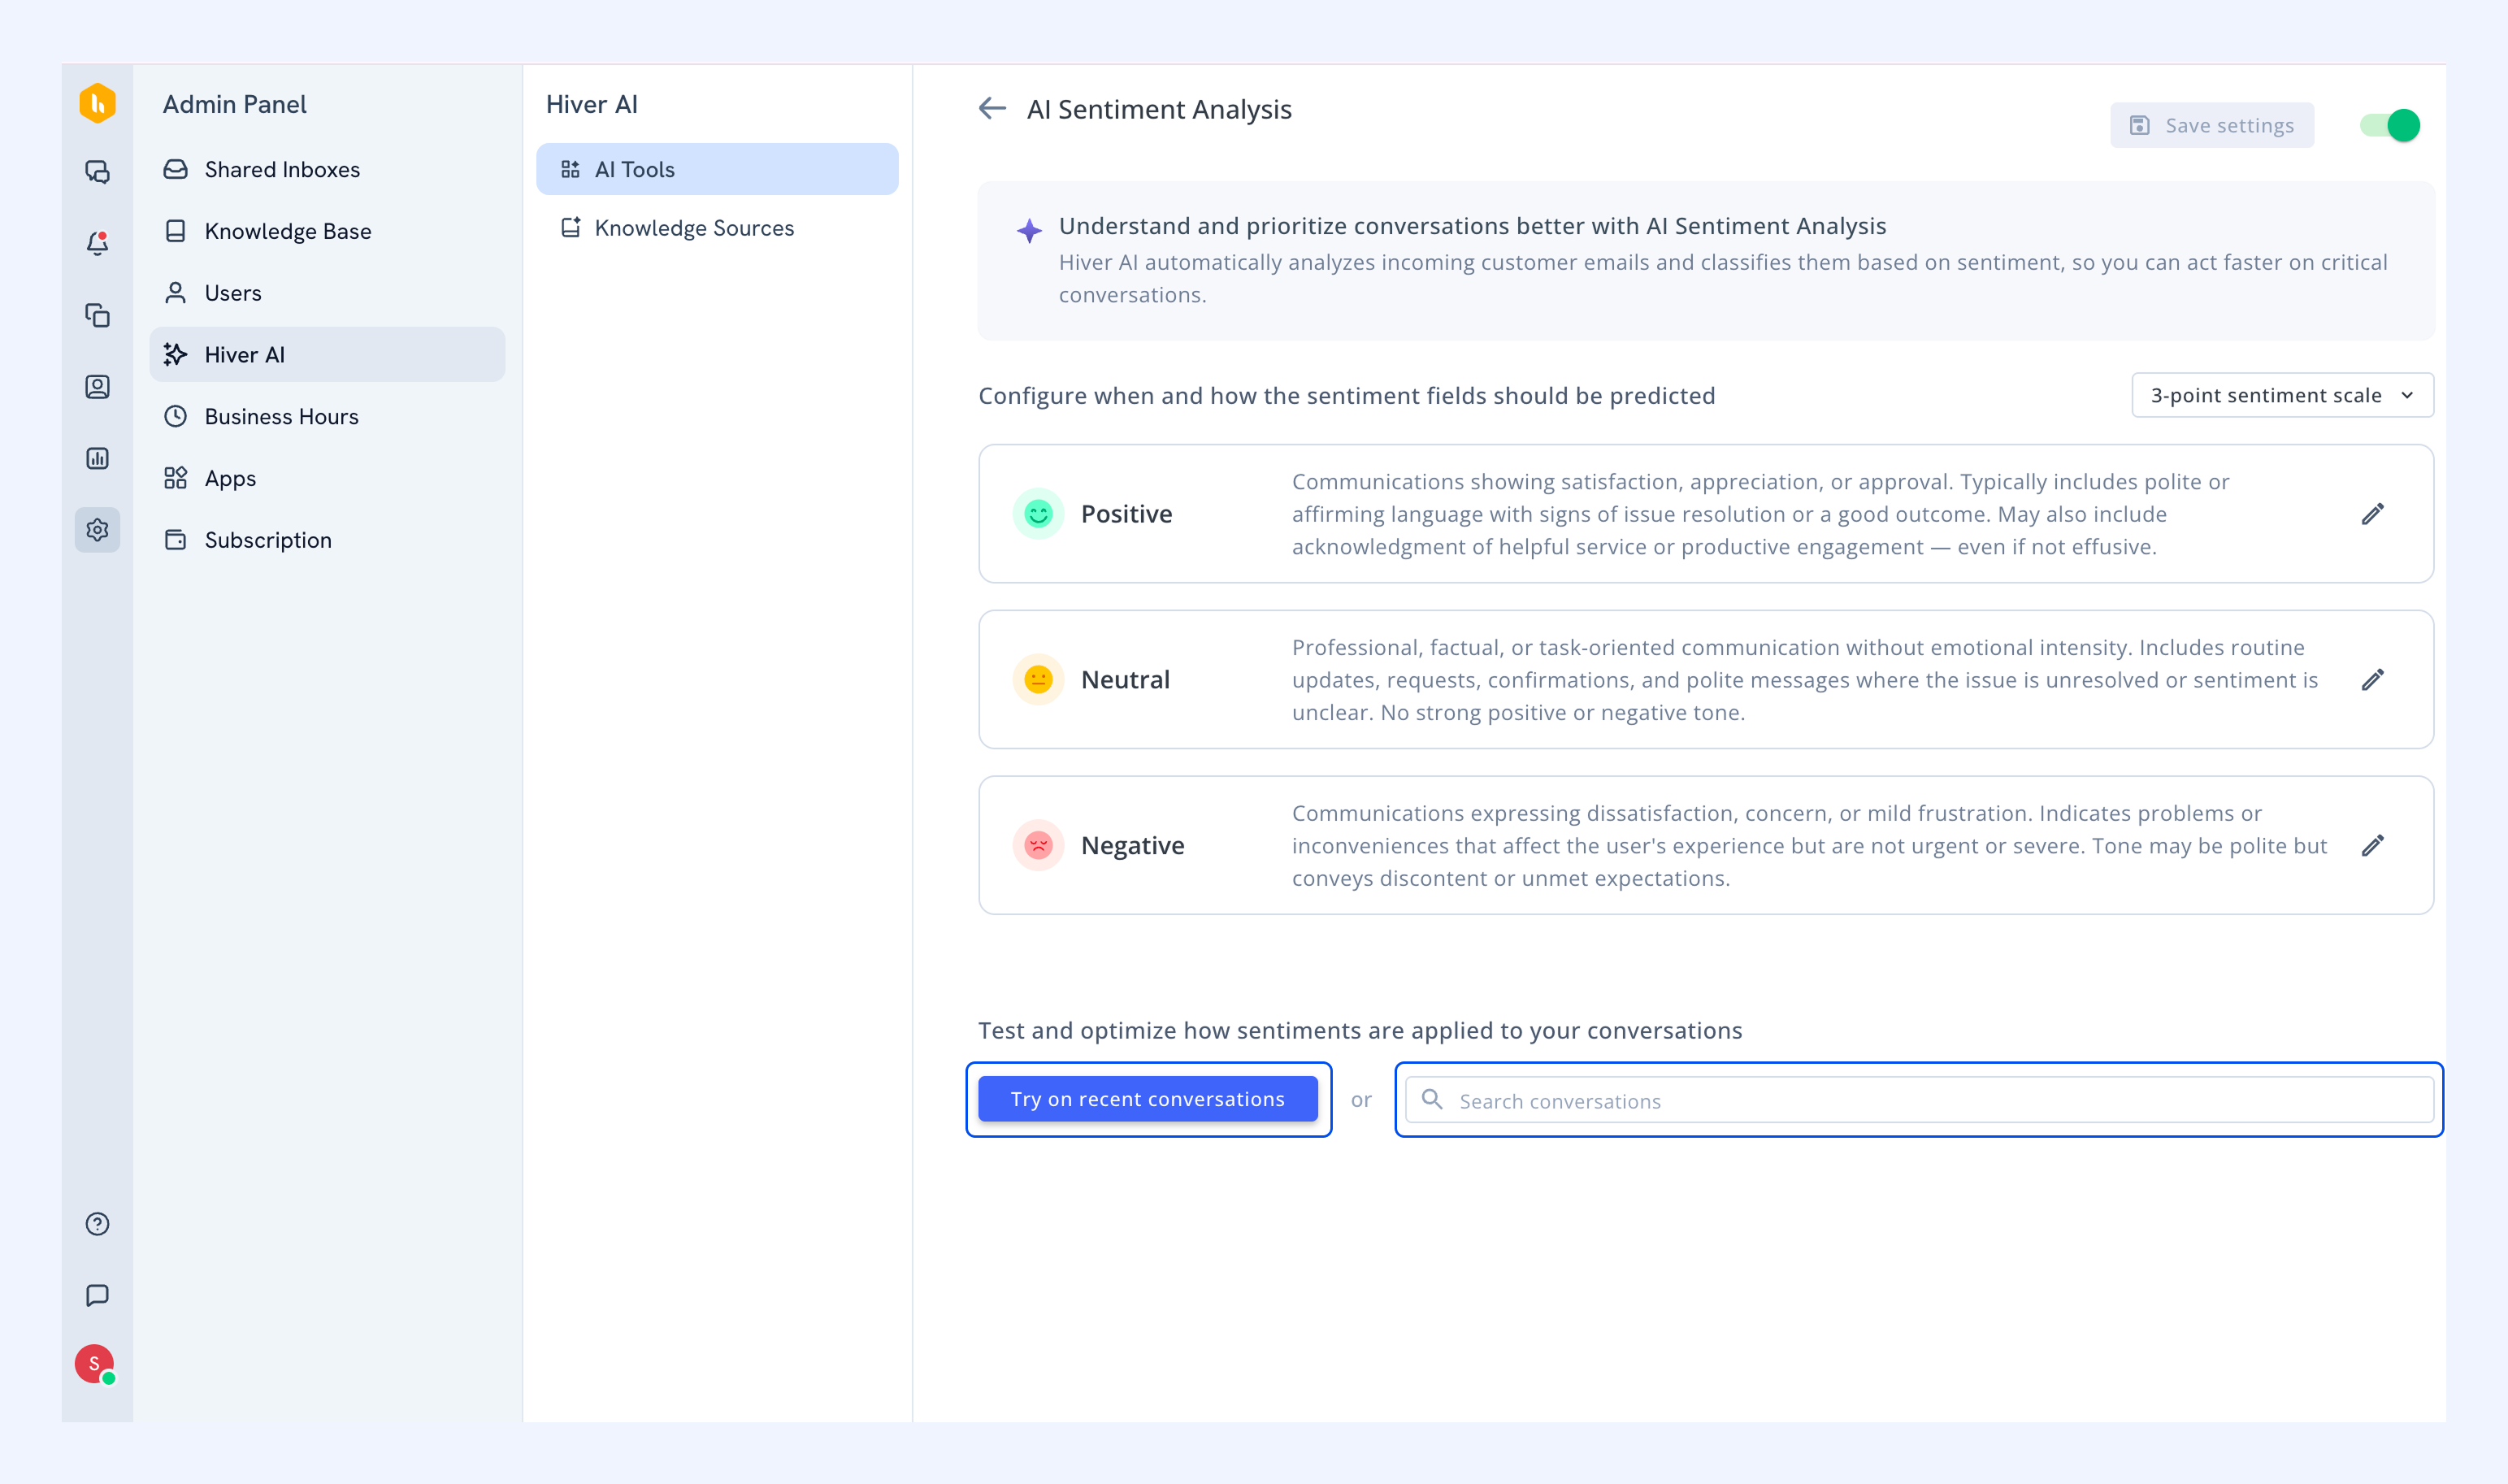
1. Go to Admin Panel → Hiver AI → AI Tools.
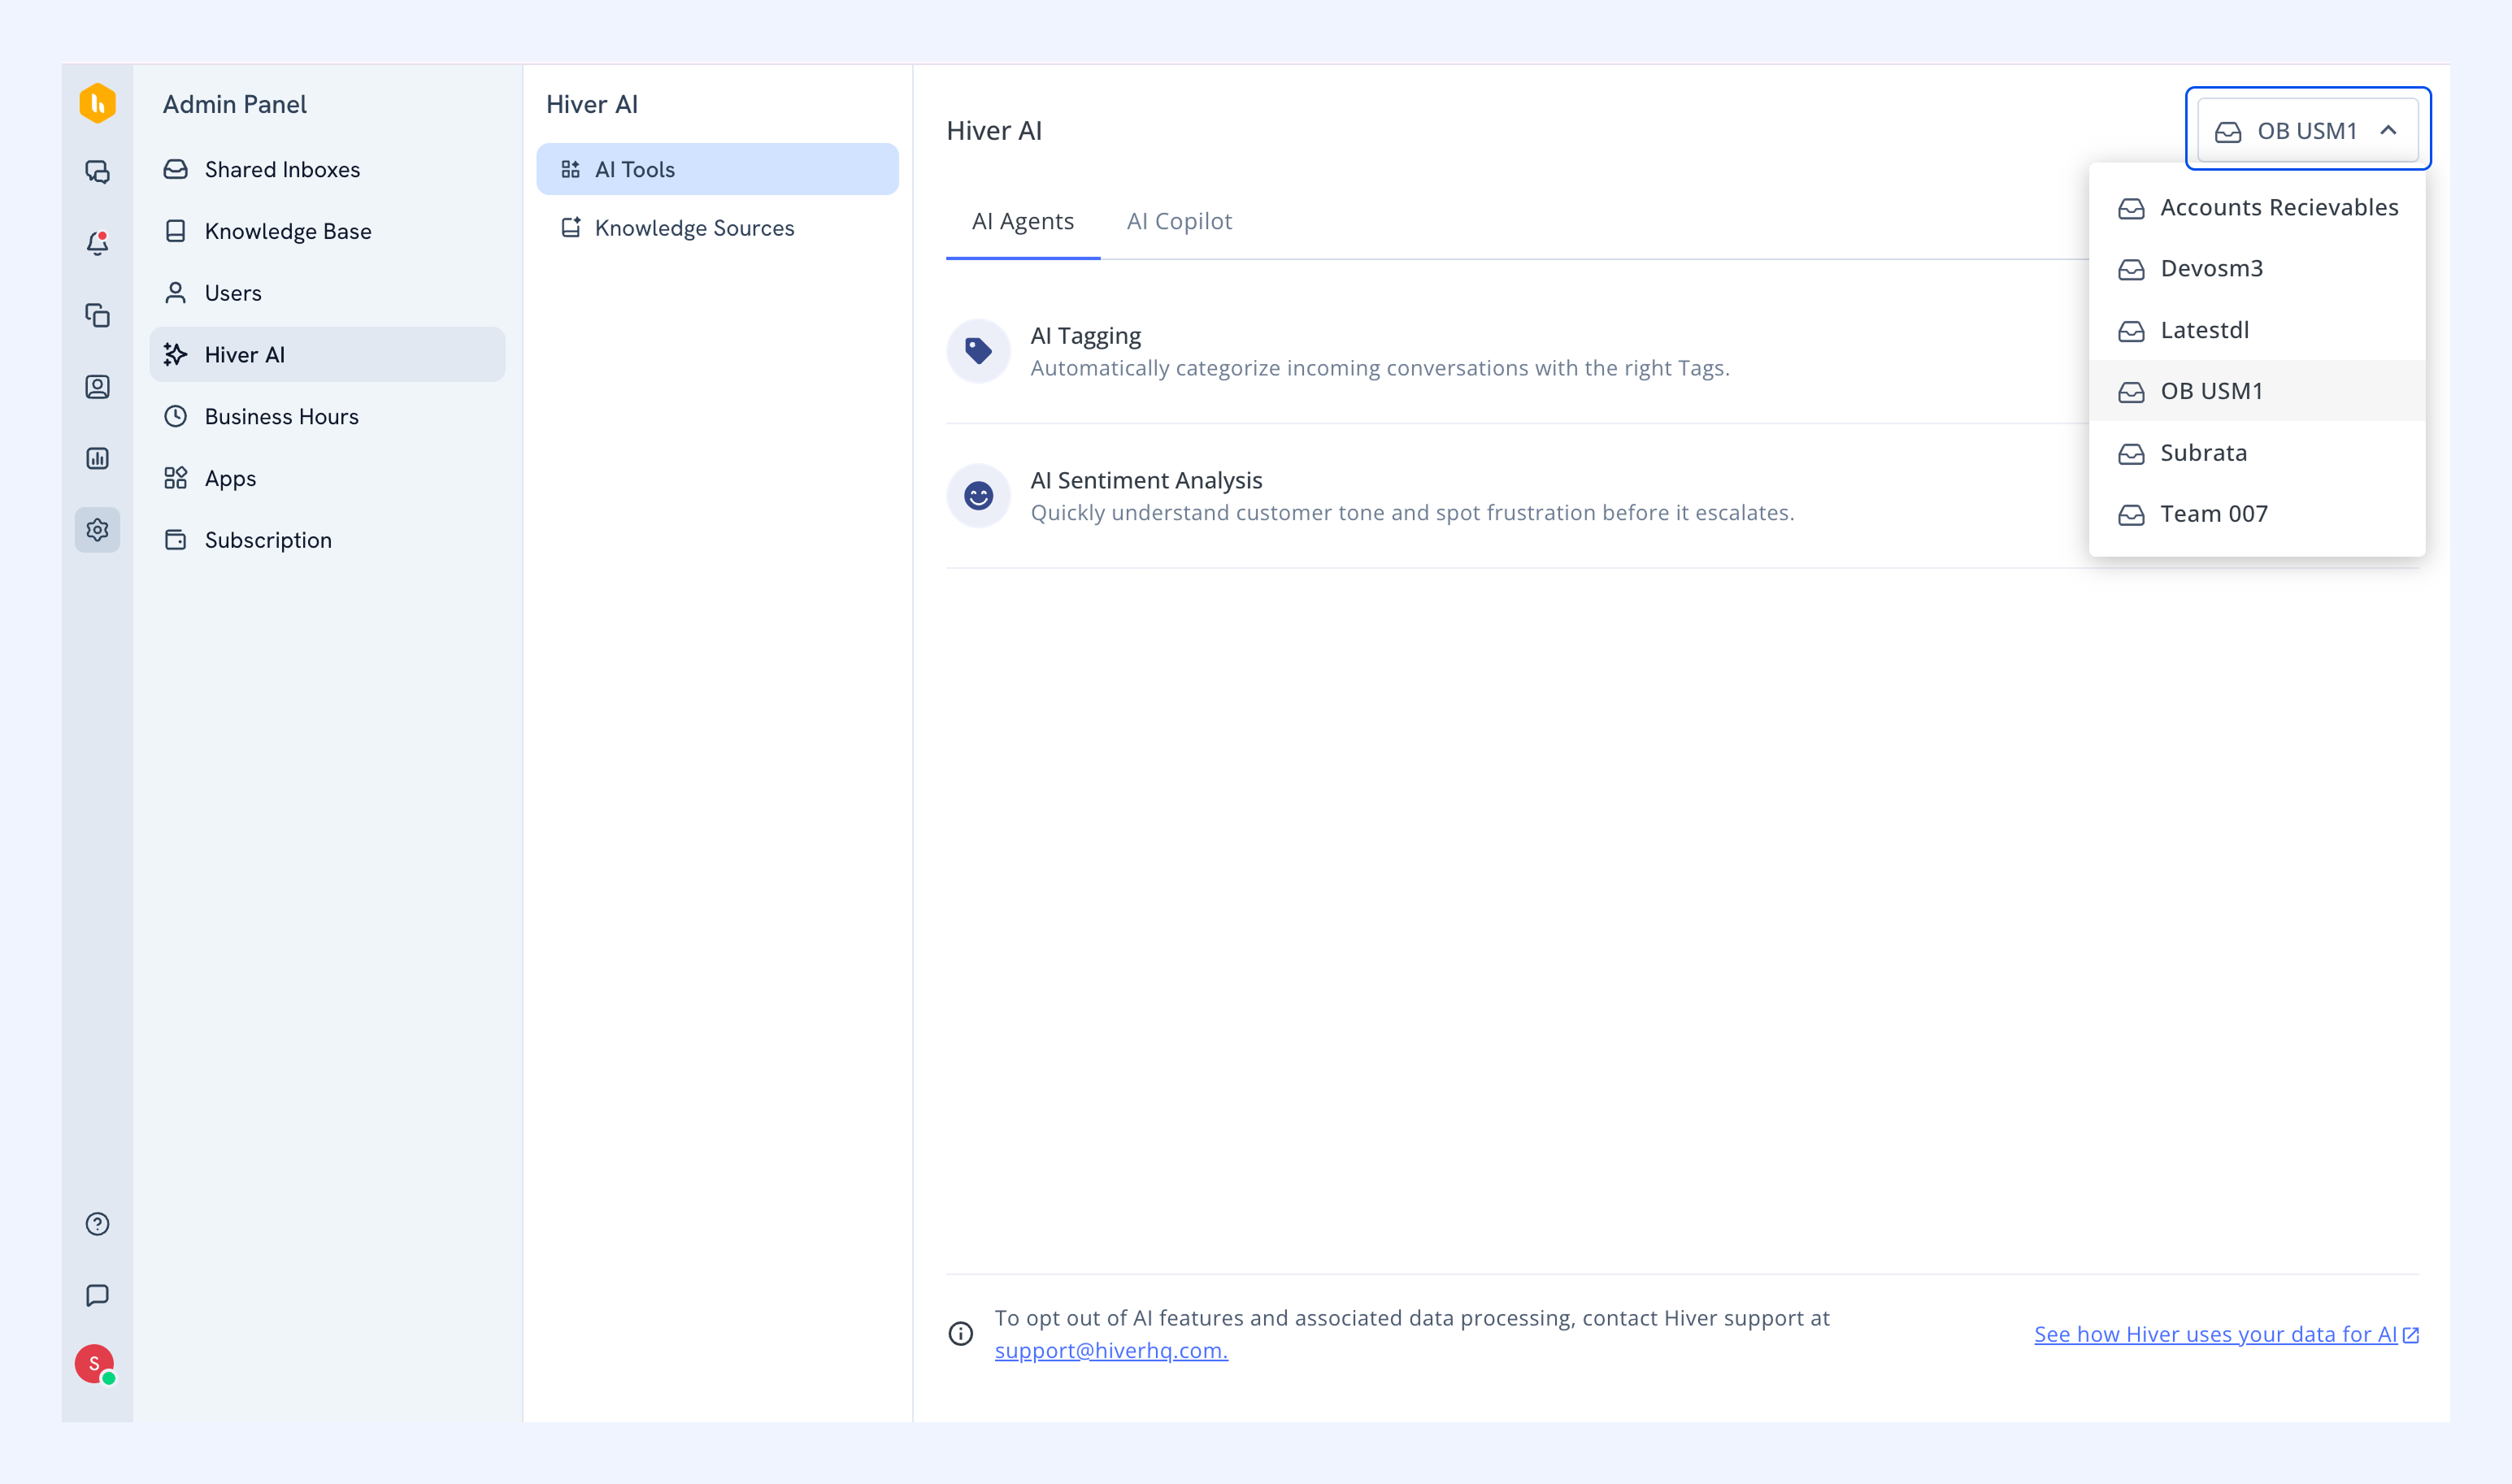
2. From the dropdown, select the Shared Inbox for which you want to enable AI Sentiment Analysis.
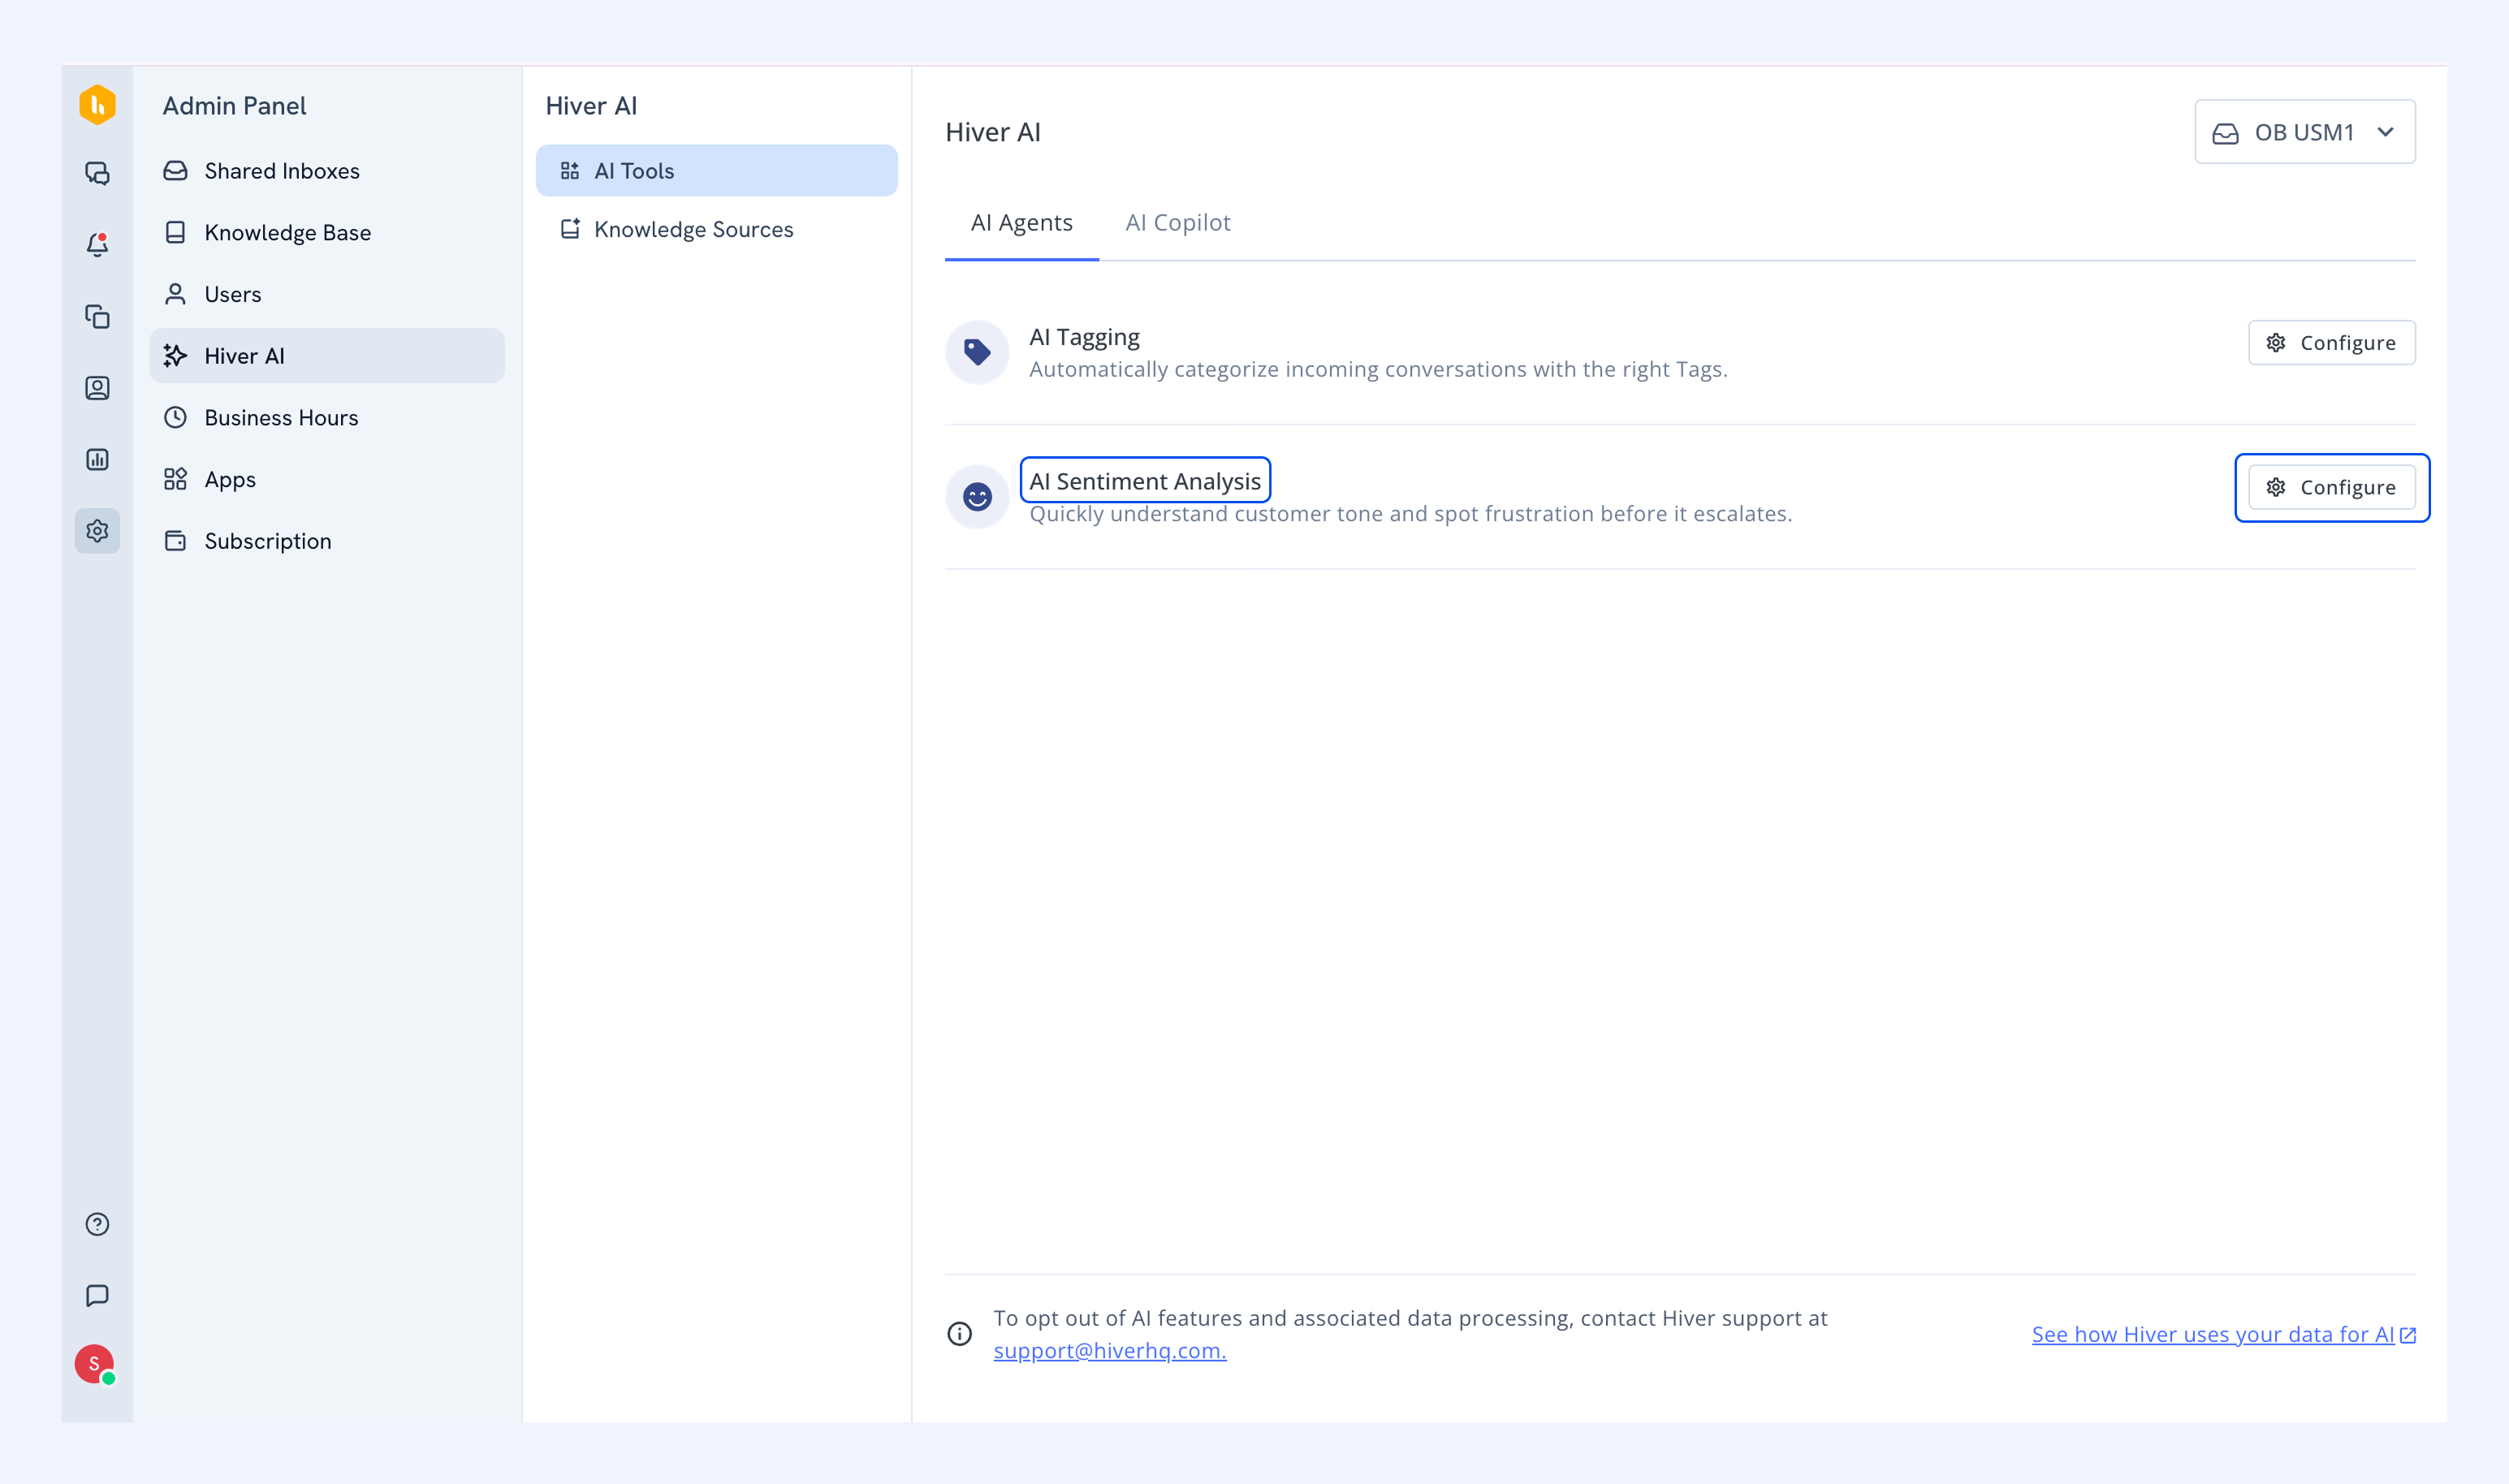
3. Find AI Sentiment Analysis and click Configure.
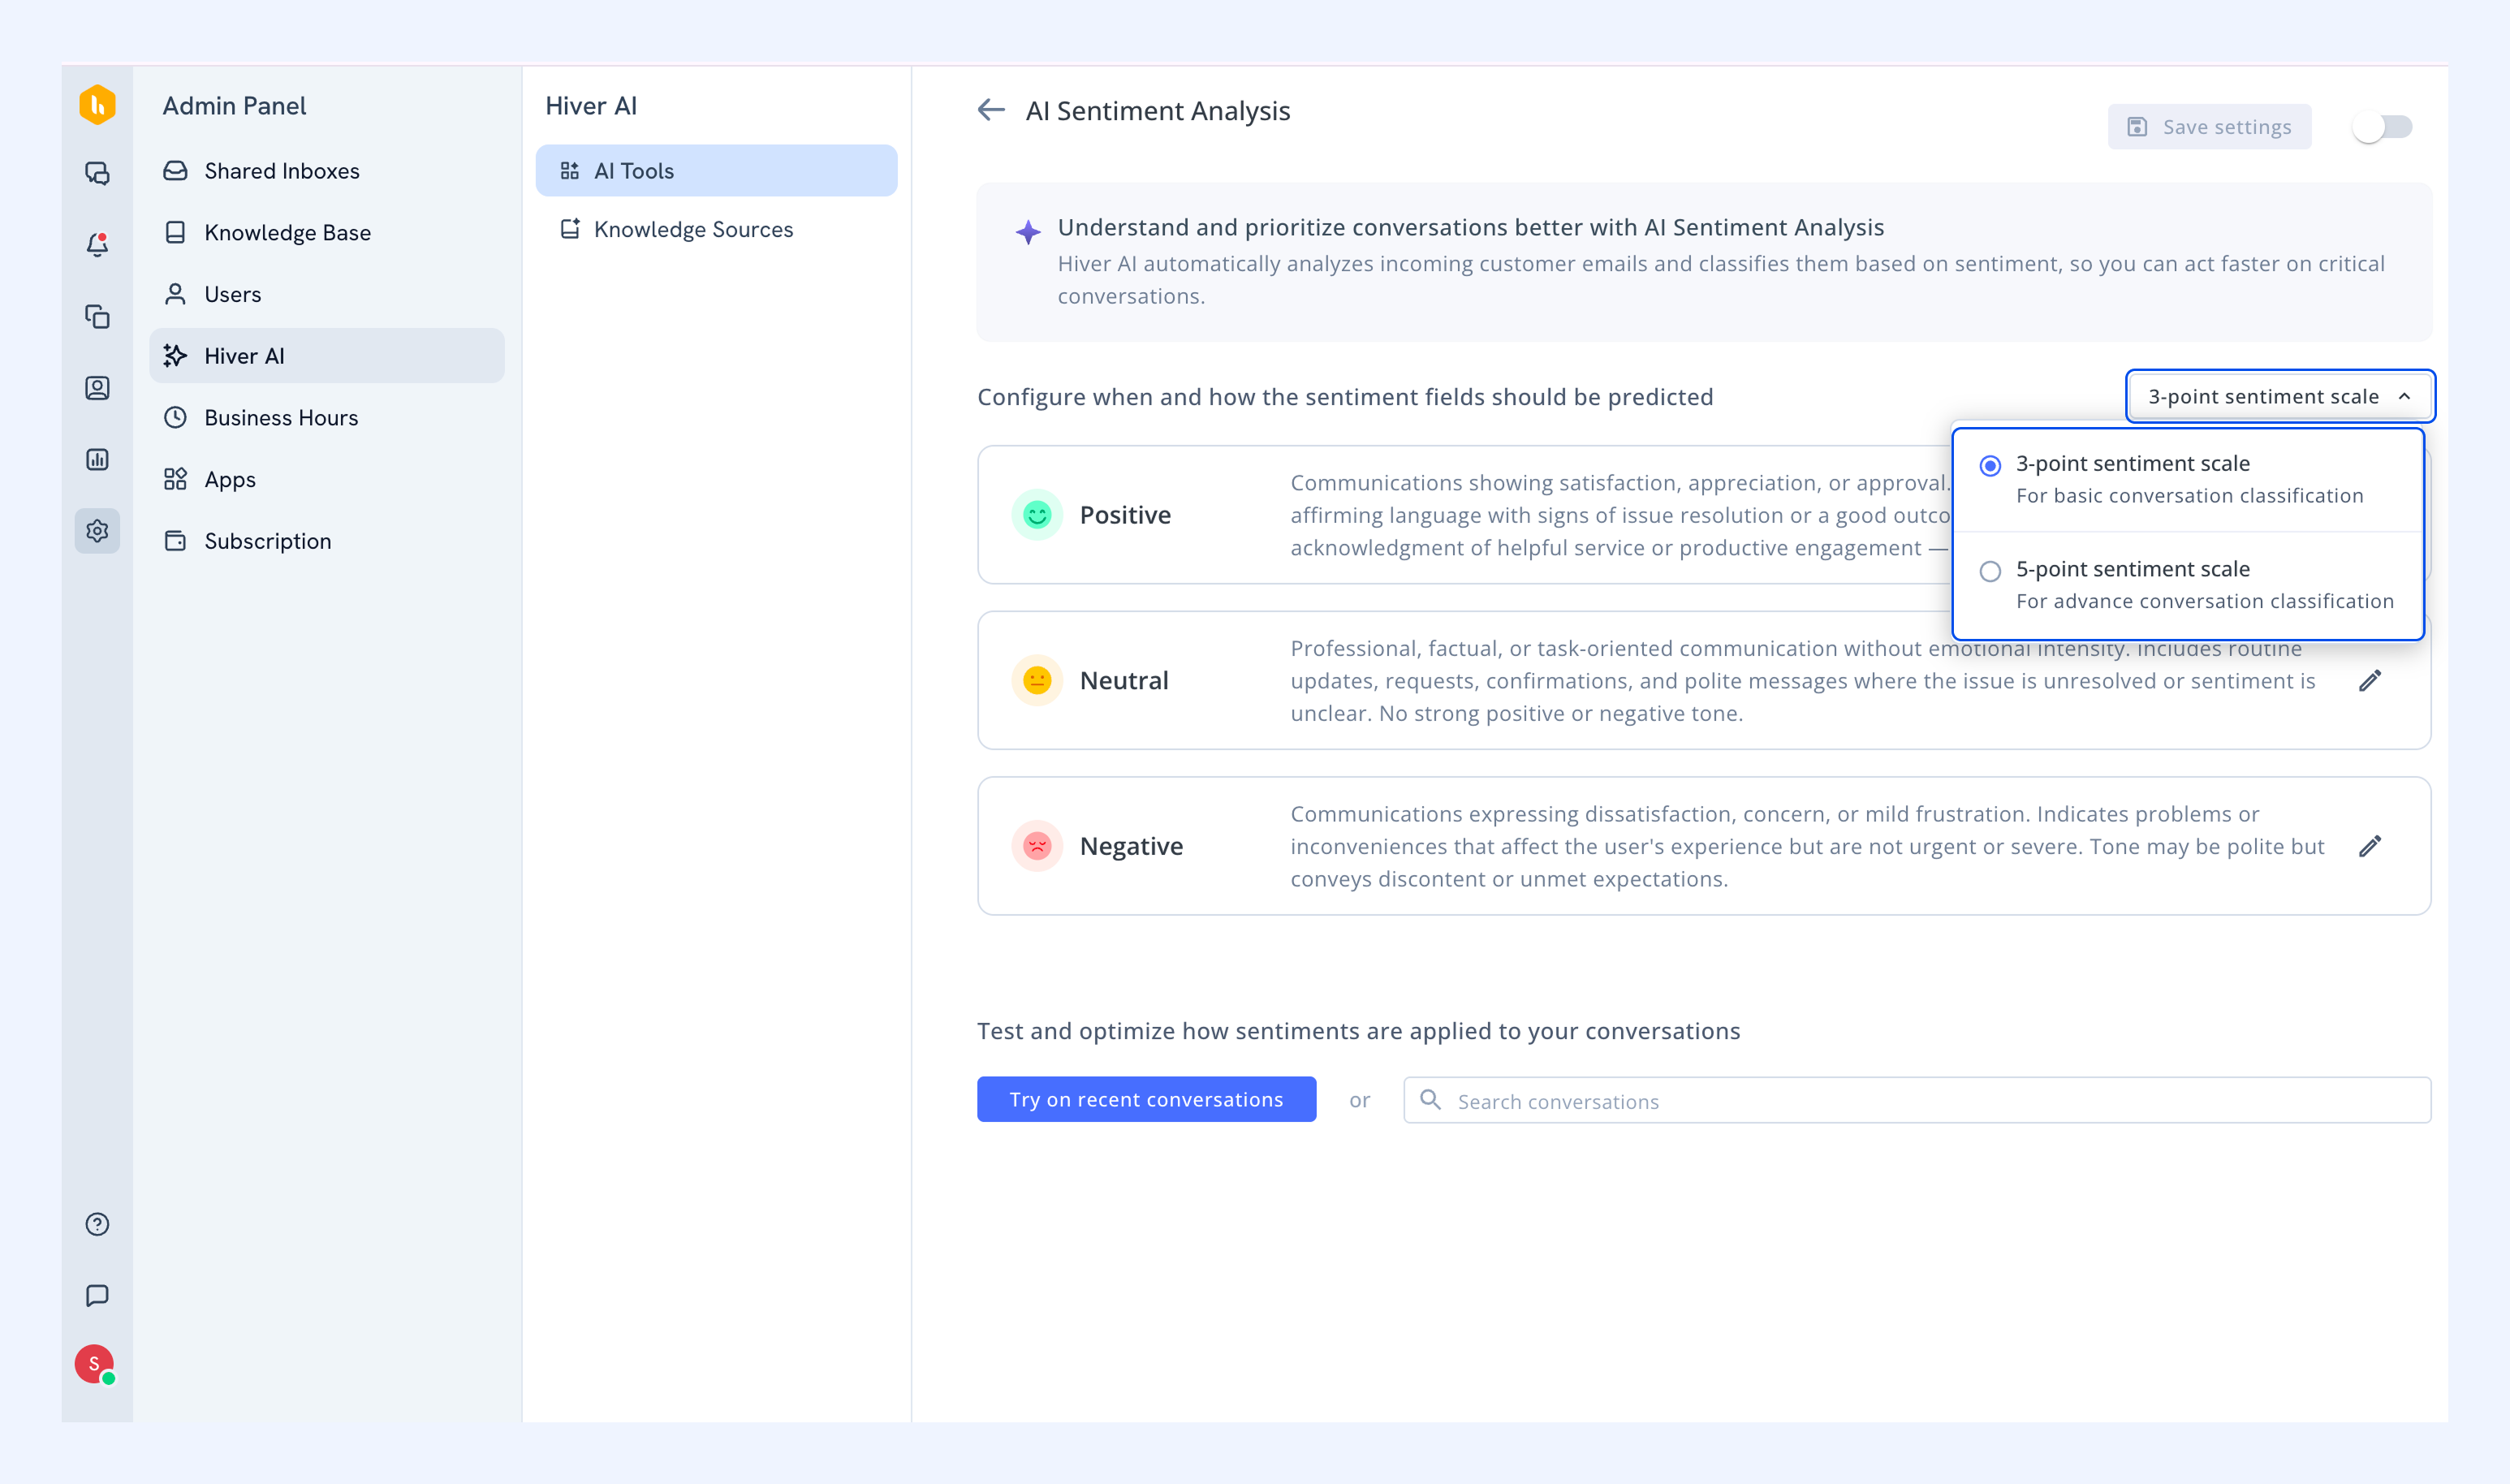
4. Pick between a 3-point (Positive, Neutral, Negative) or a 5-point (Very Positive to Very Negative) scale.
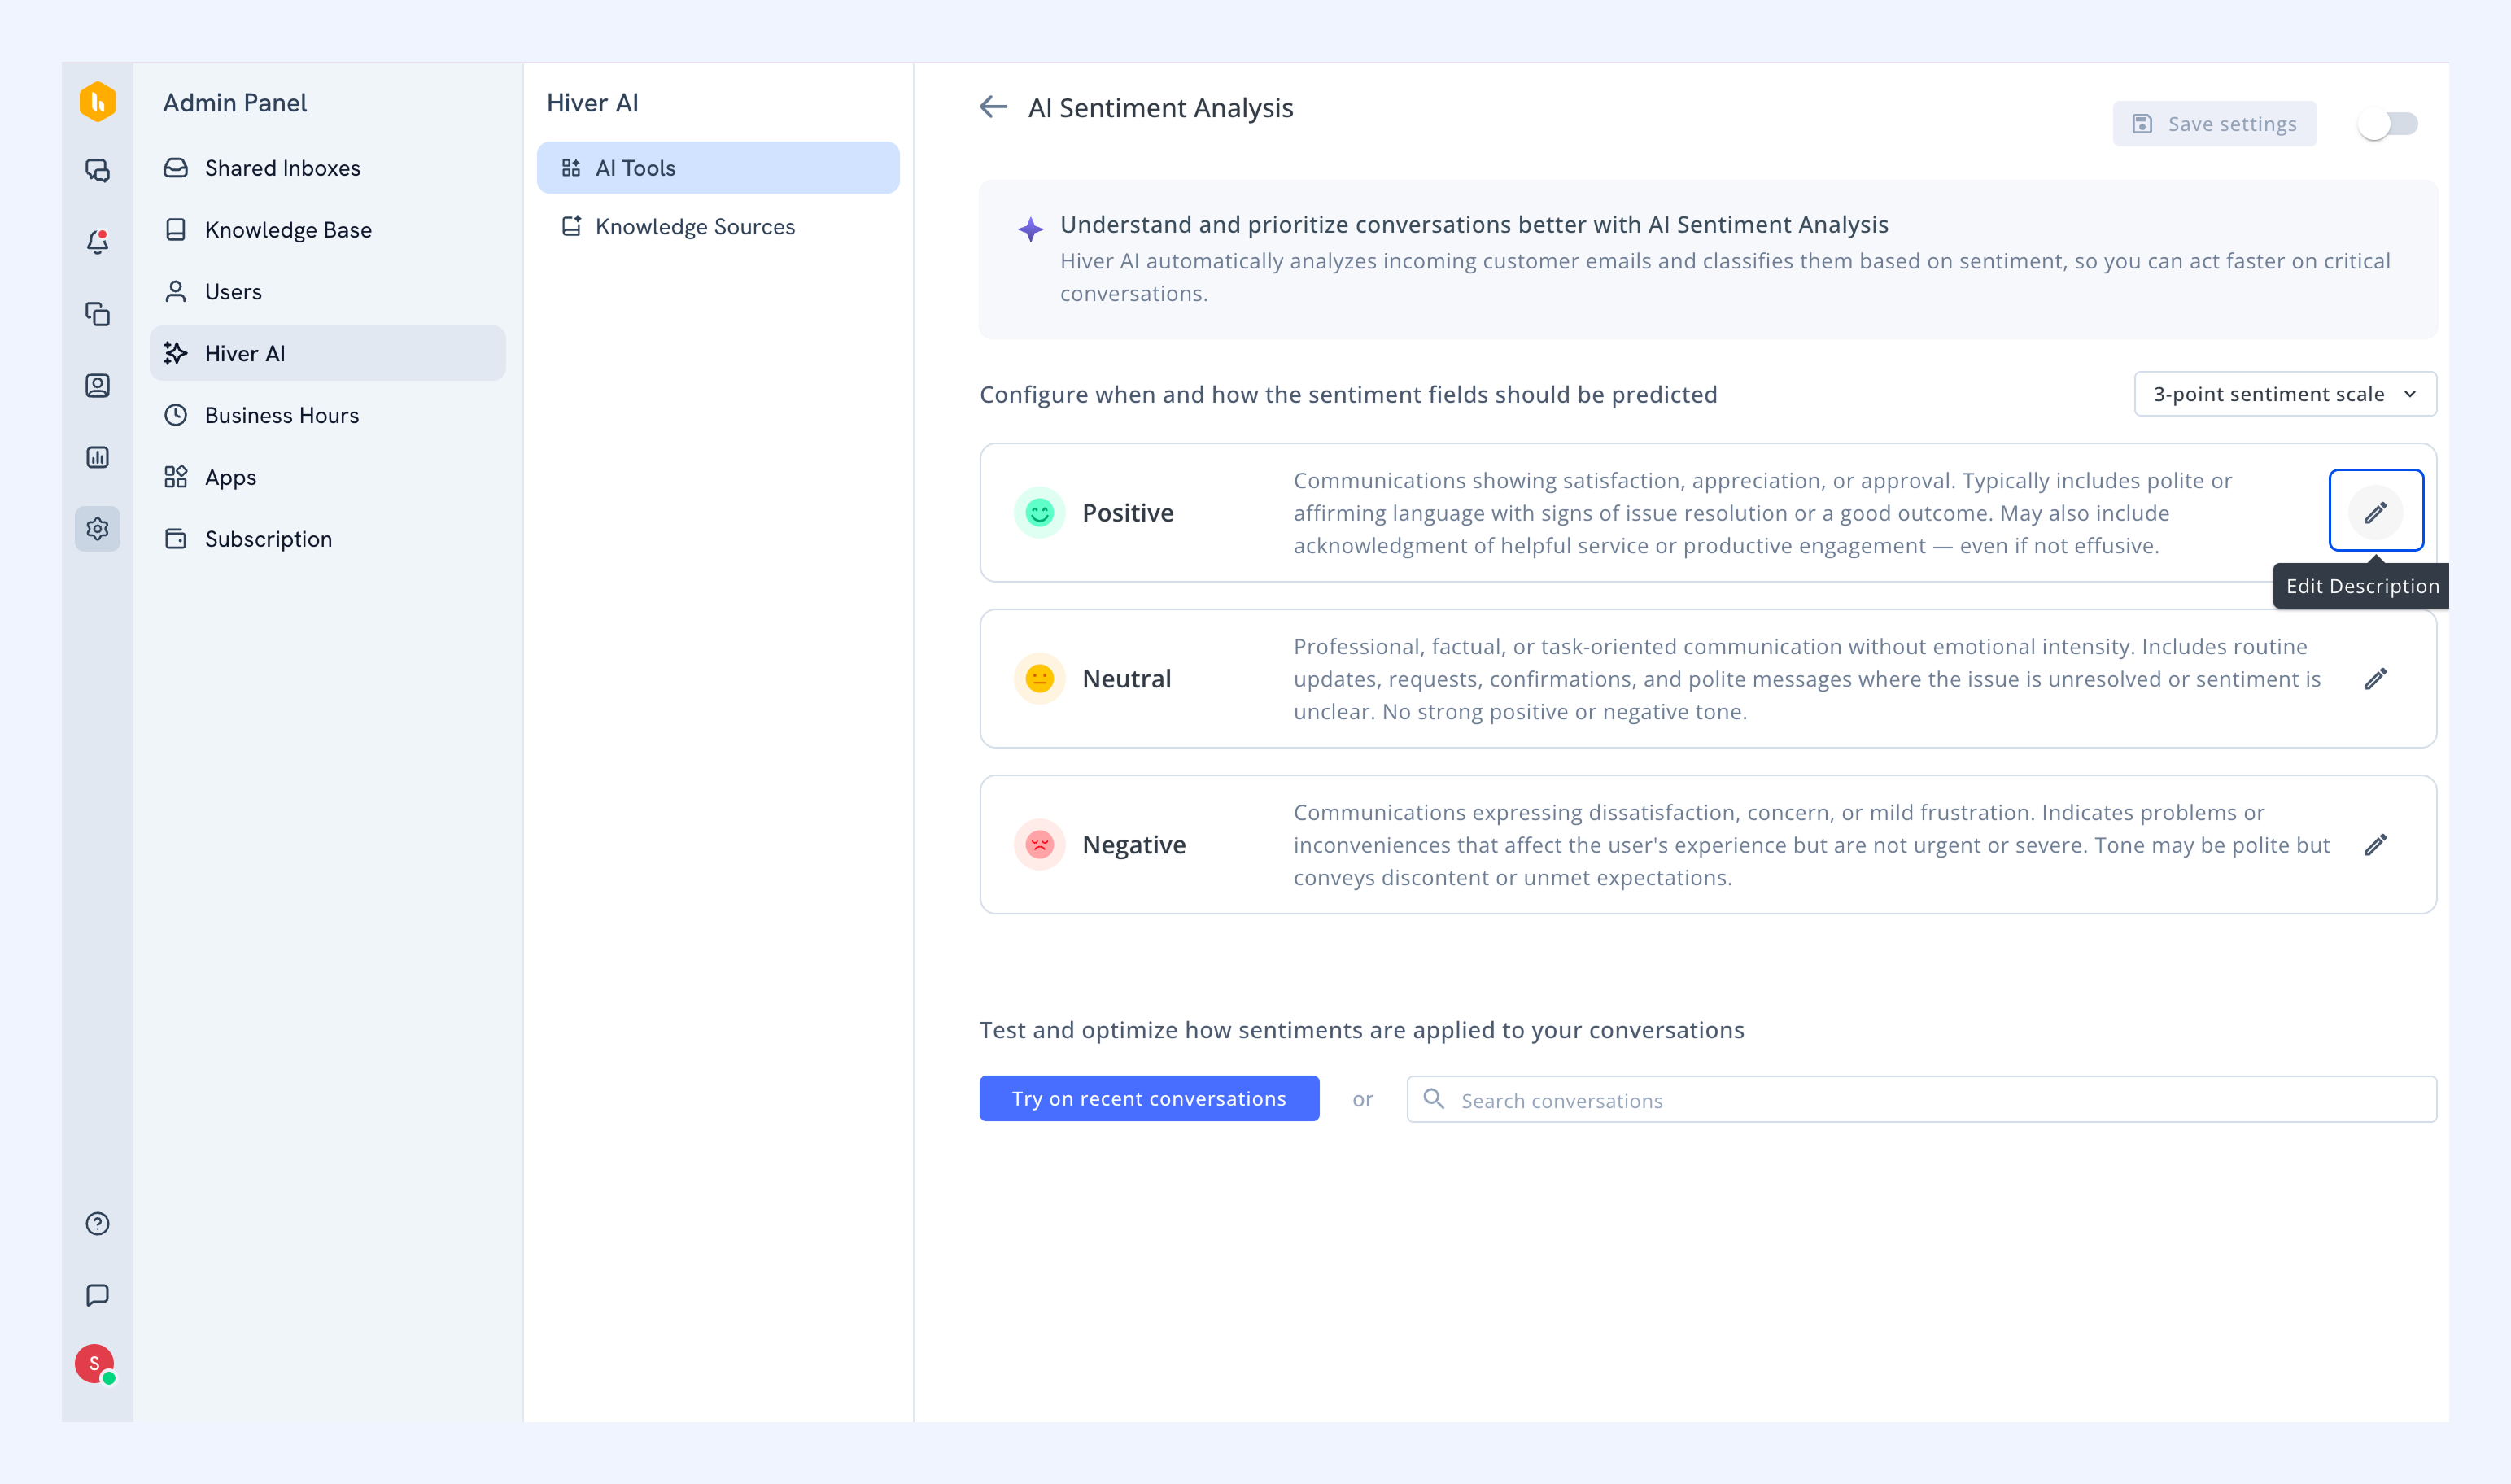
5. You can stick with the default descriptions or write your own. To customize them, click the pencil icon next to each sentiment field.
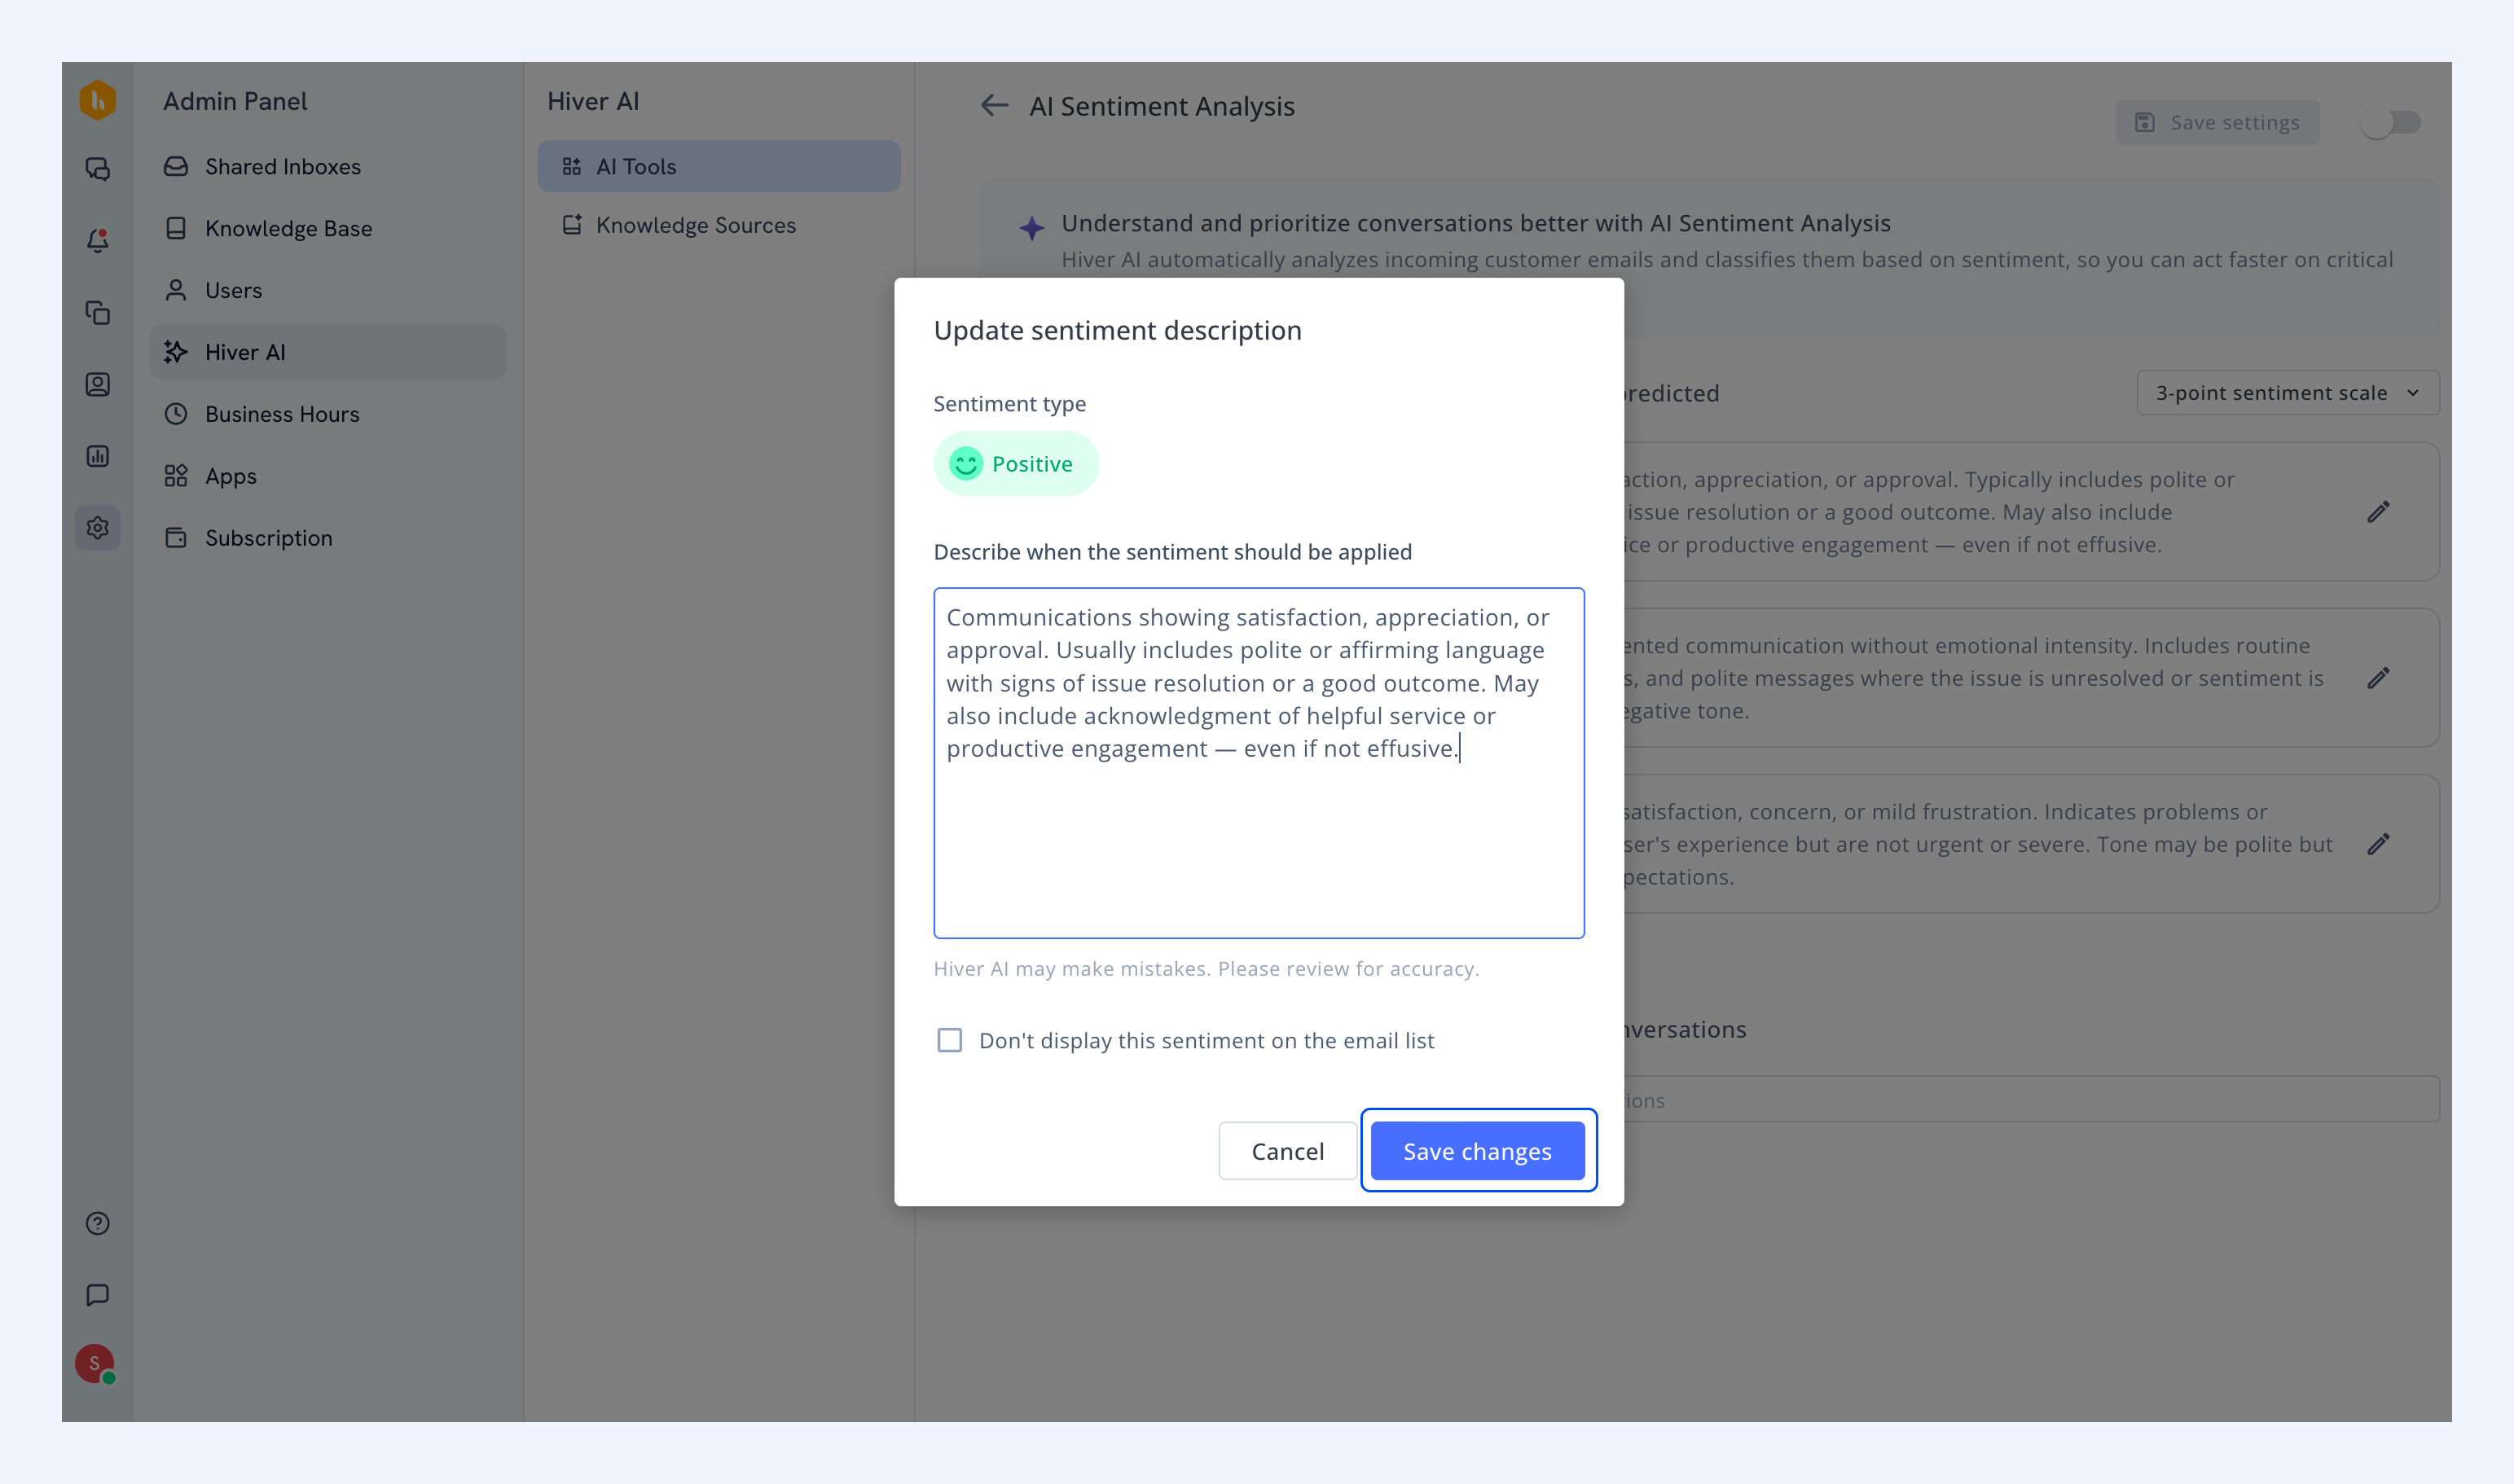
6. Edit the description and click Save changes.
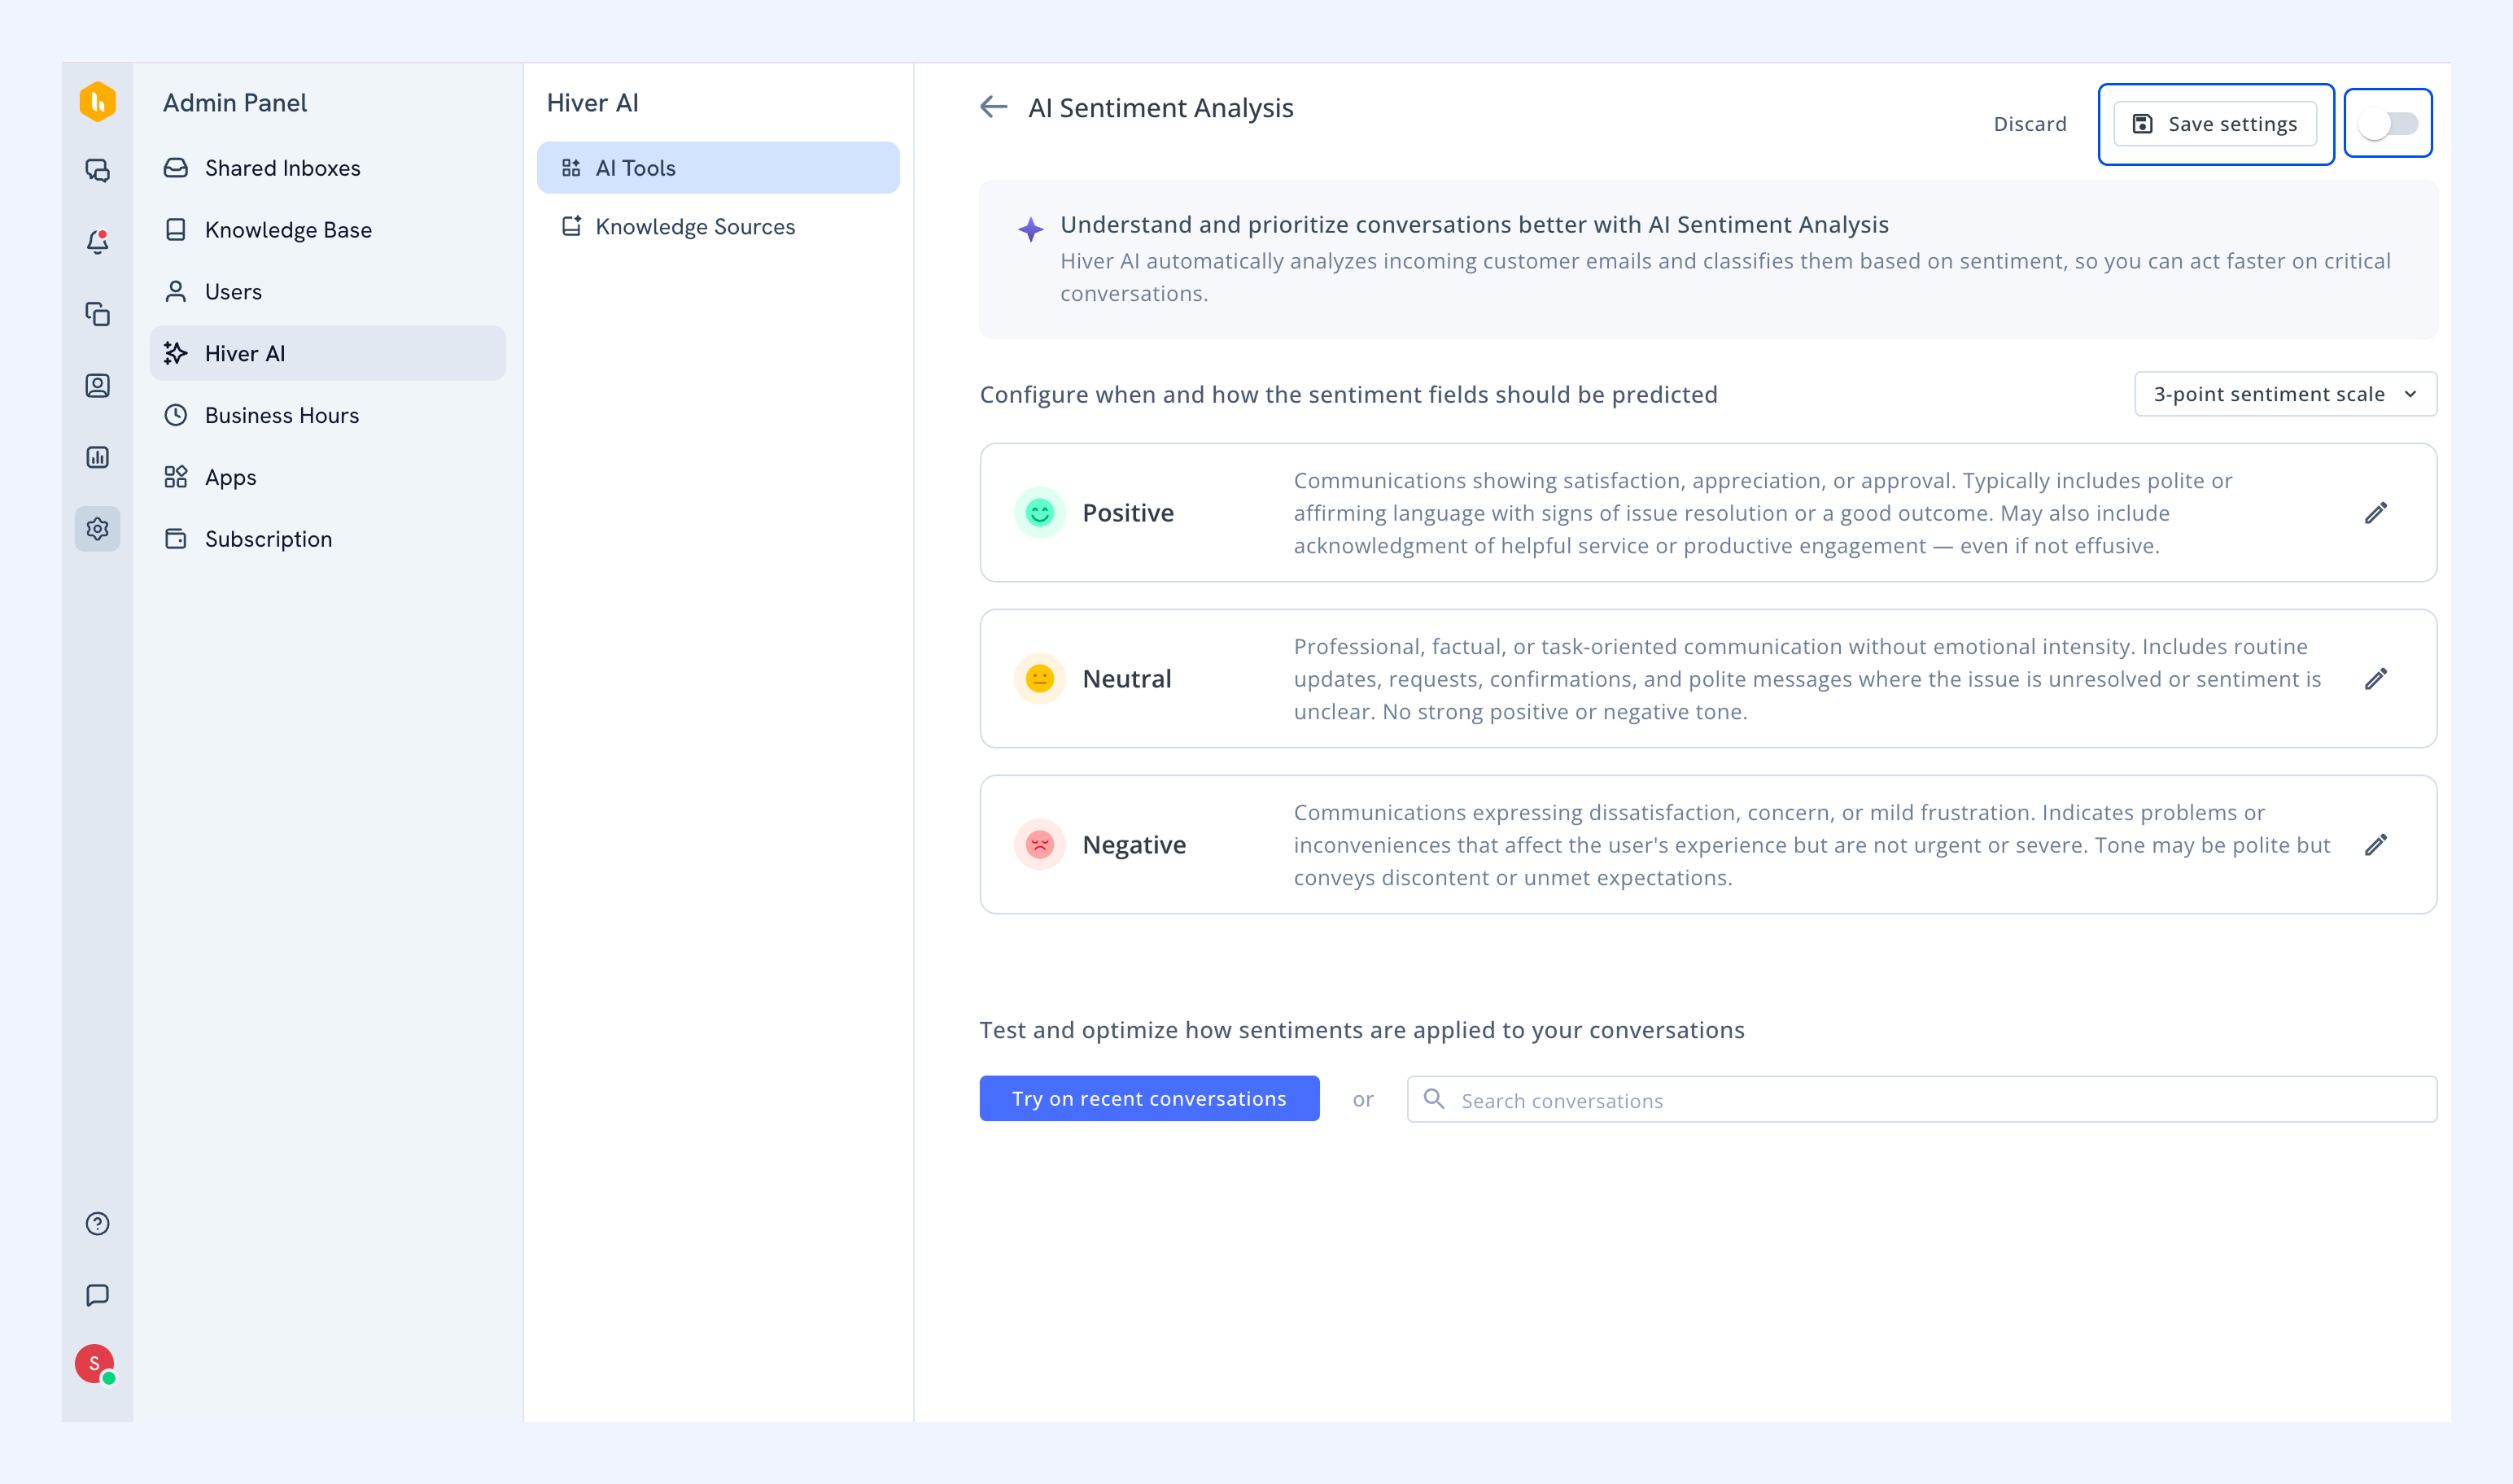
7. Click Save settings and turn on the toggle to enable AI Sentiment Analysis.
Testing AI Sentiment Analysis
1. Click Try on recent conversations or search for any conversation you want to test.
2. Look at the conversations that pop up and check if the sentiment is correct.
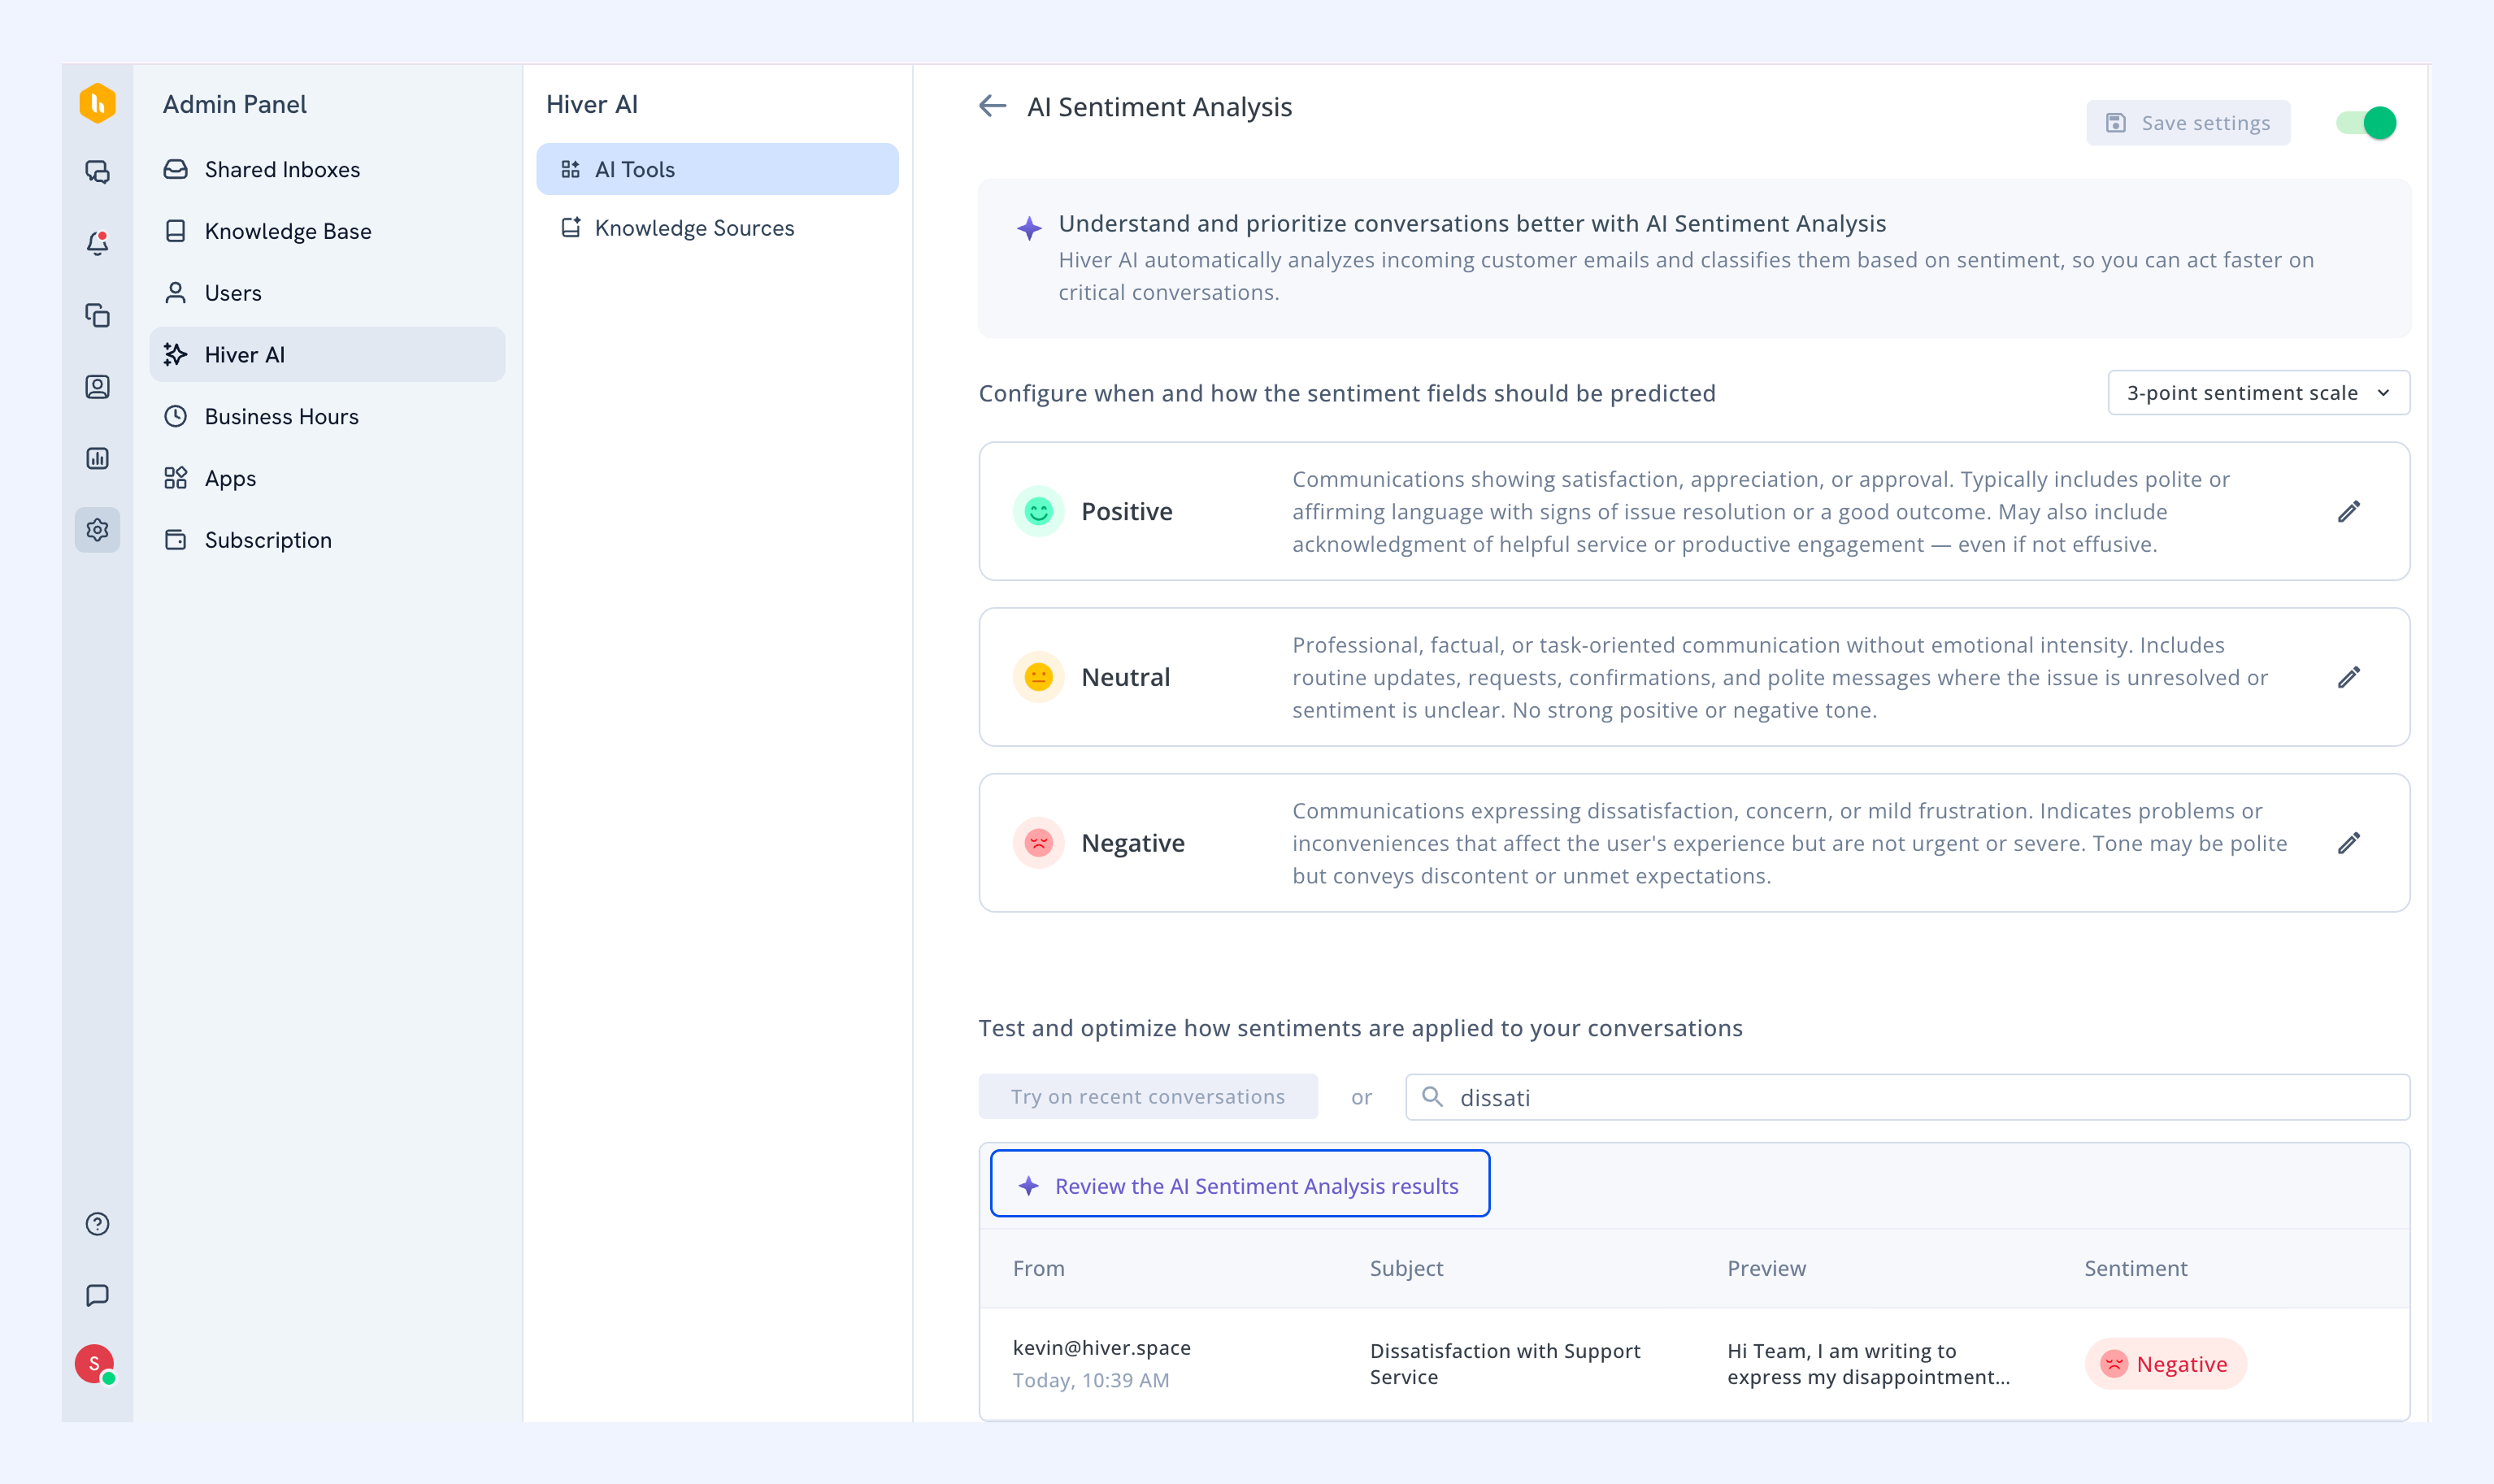
3. If the sentiment looks wrong, go back and click the pencil icon to rewrite your descriptions.
4. Test again to see if it's better.
5. If it’s better, save your settings and turn on Sentiment Analysis for all future conversations.
Managing conversations with Sentiment Analysis
Once it's enabled, you'll see the current sentiment in the conversation details. Open any conversation, and you'll see the sentiment displayed in the top panel.
Understanding sentiment updates
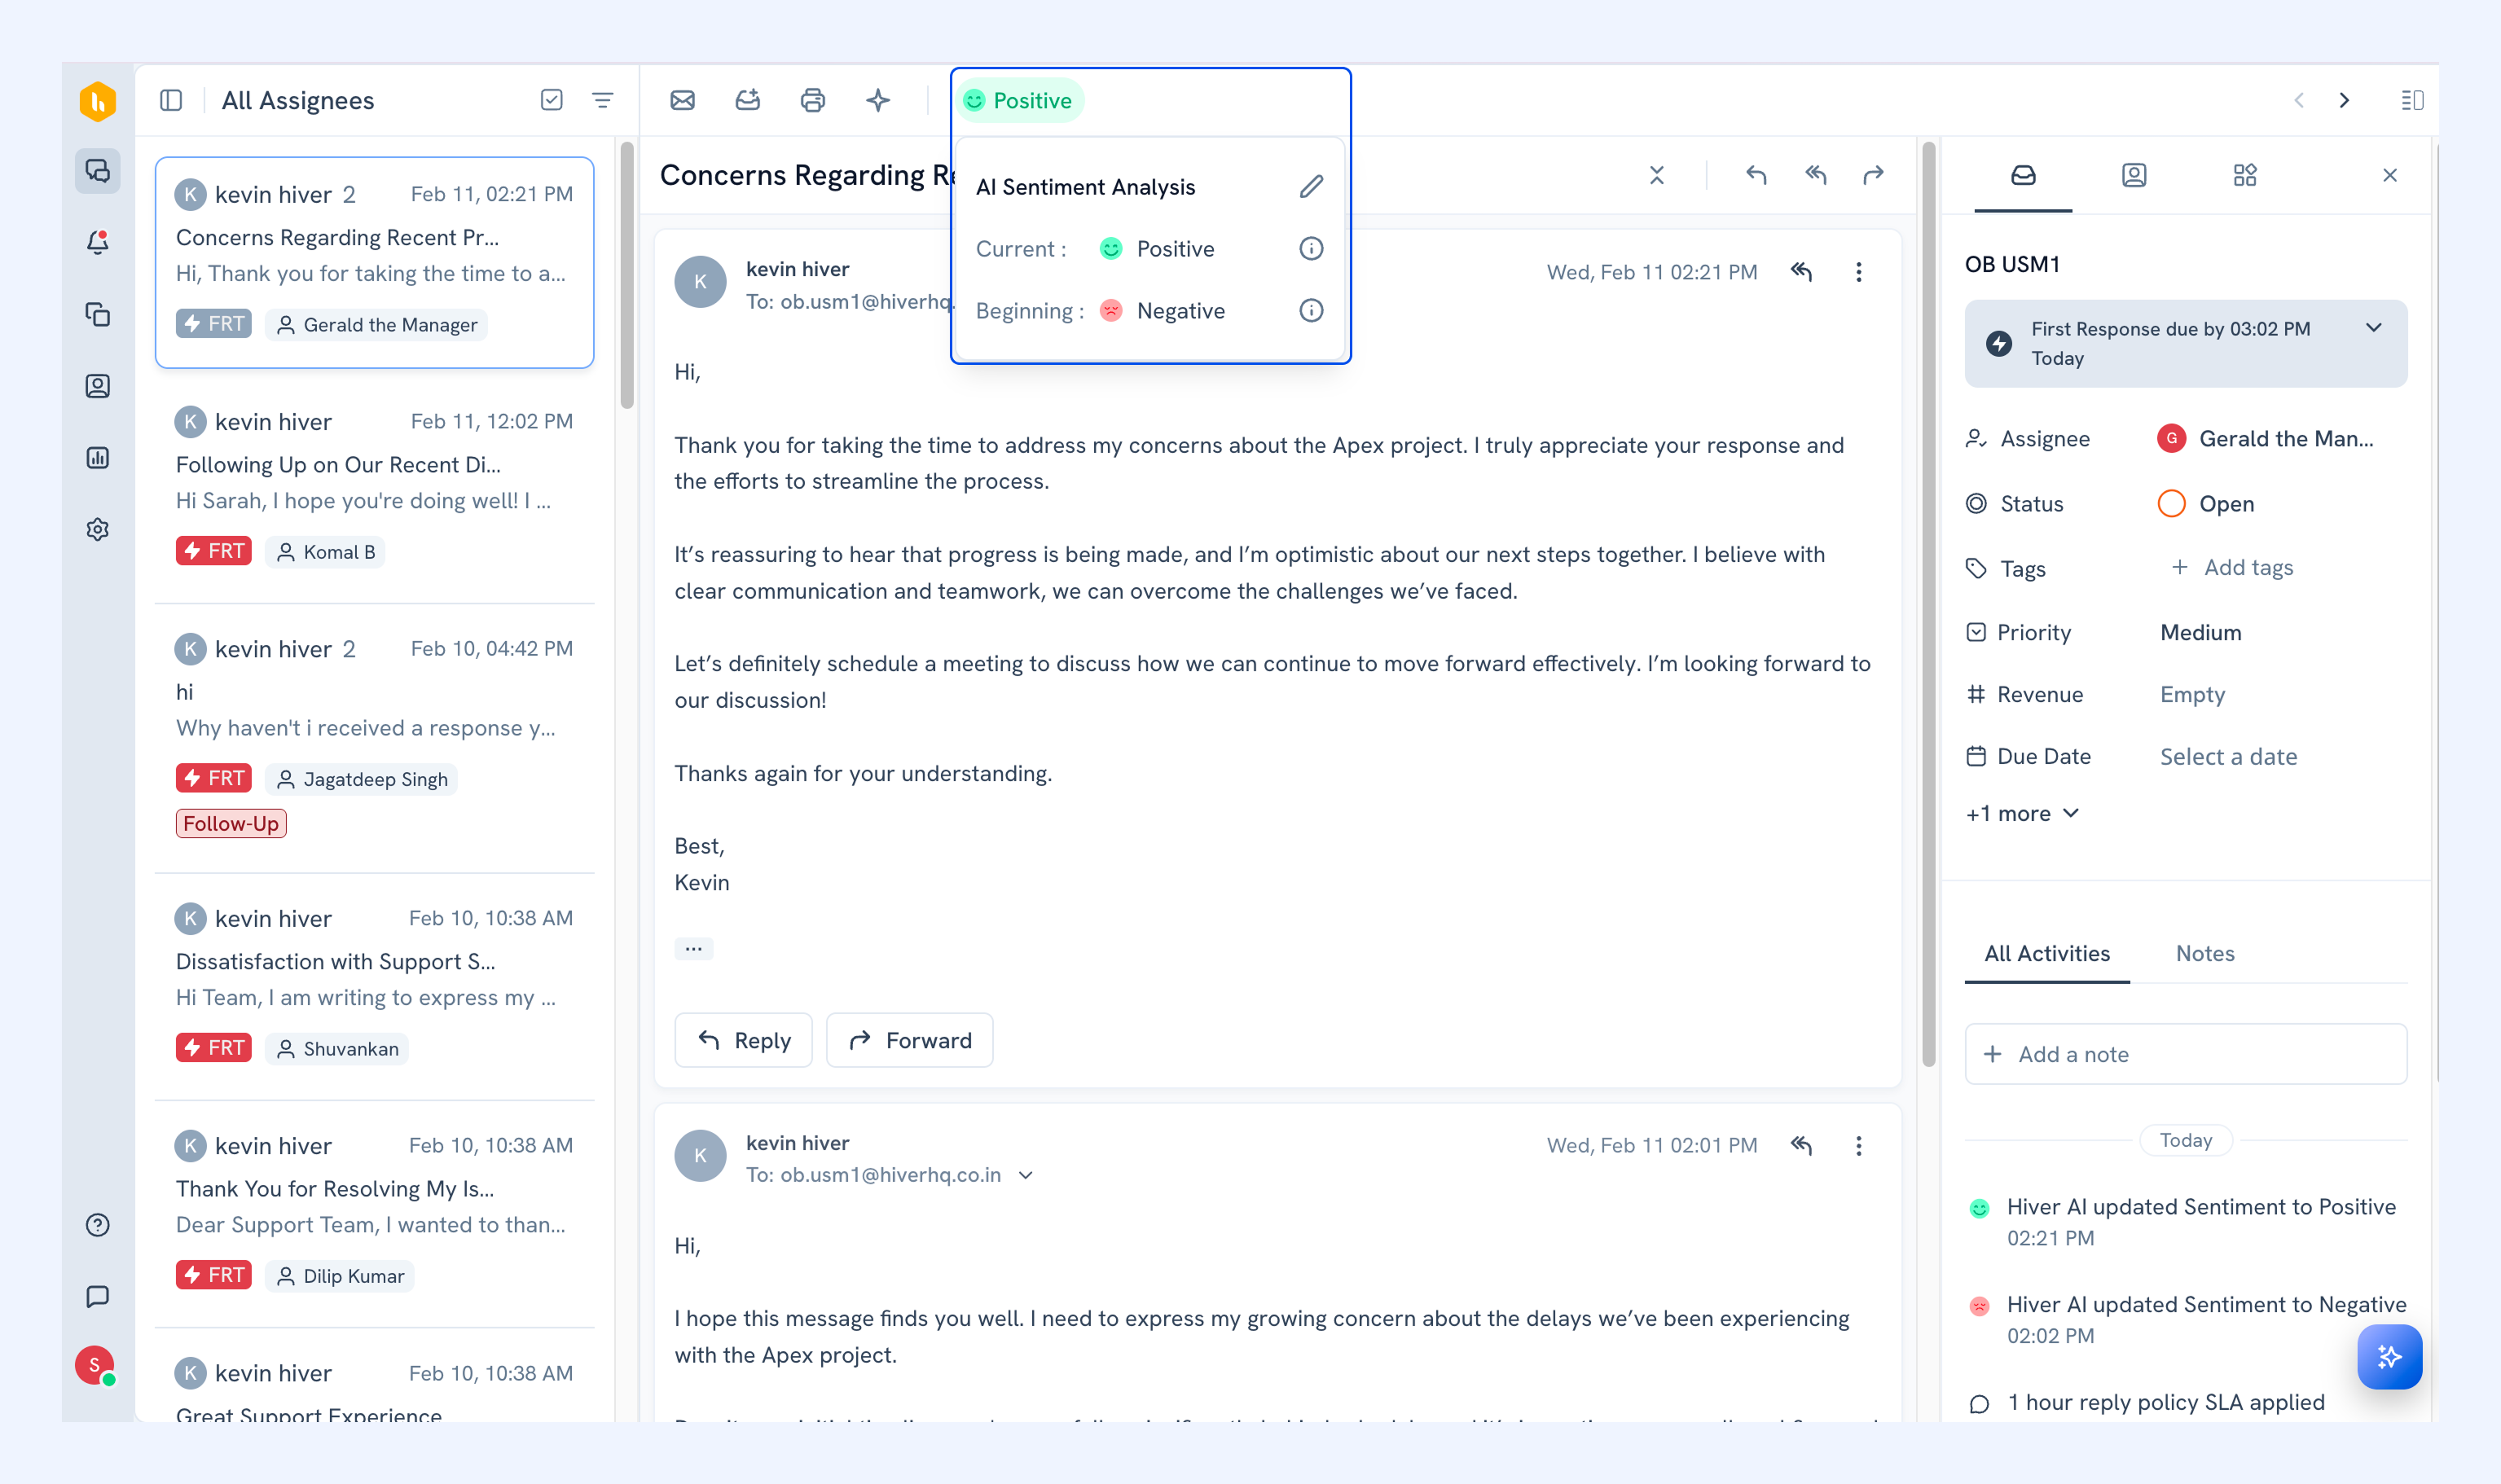
The AI continuously monitors your conversation thread. As new messages come in, the sentiment automatically updates to reflect the latest tone:
- Beginning sentiment: Shows how the conversation started.
- Current sentiment: Shows the latest tone based on the most recent message.
You can click on the sentiment indicator to see both the beginning and current sentiment.
Correcting sentiment
If the AI assigns an incorrect sentiment, you can manually update it:
1. From the sentiment indicator in the top panel, click the tick icon.
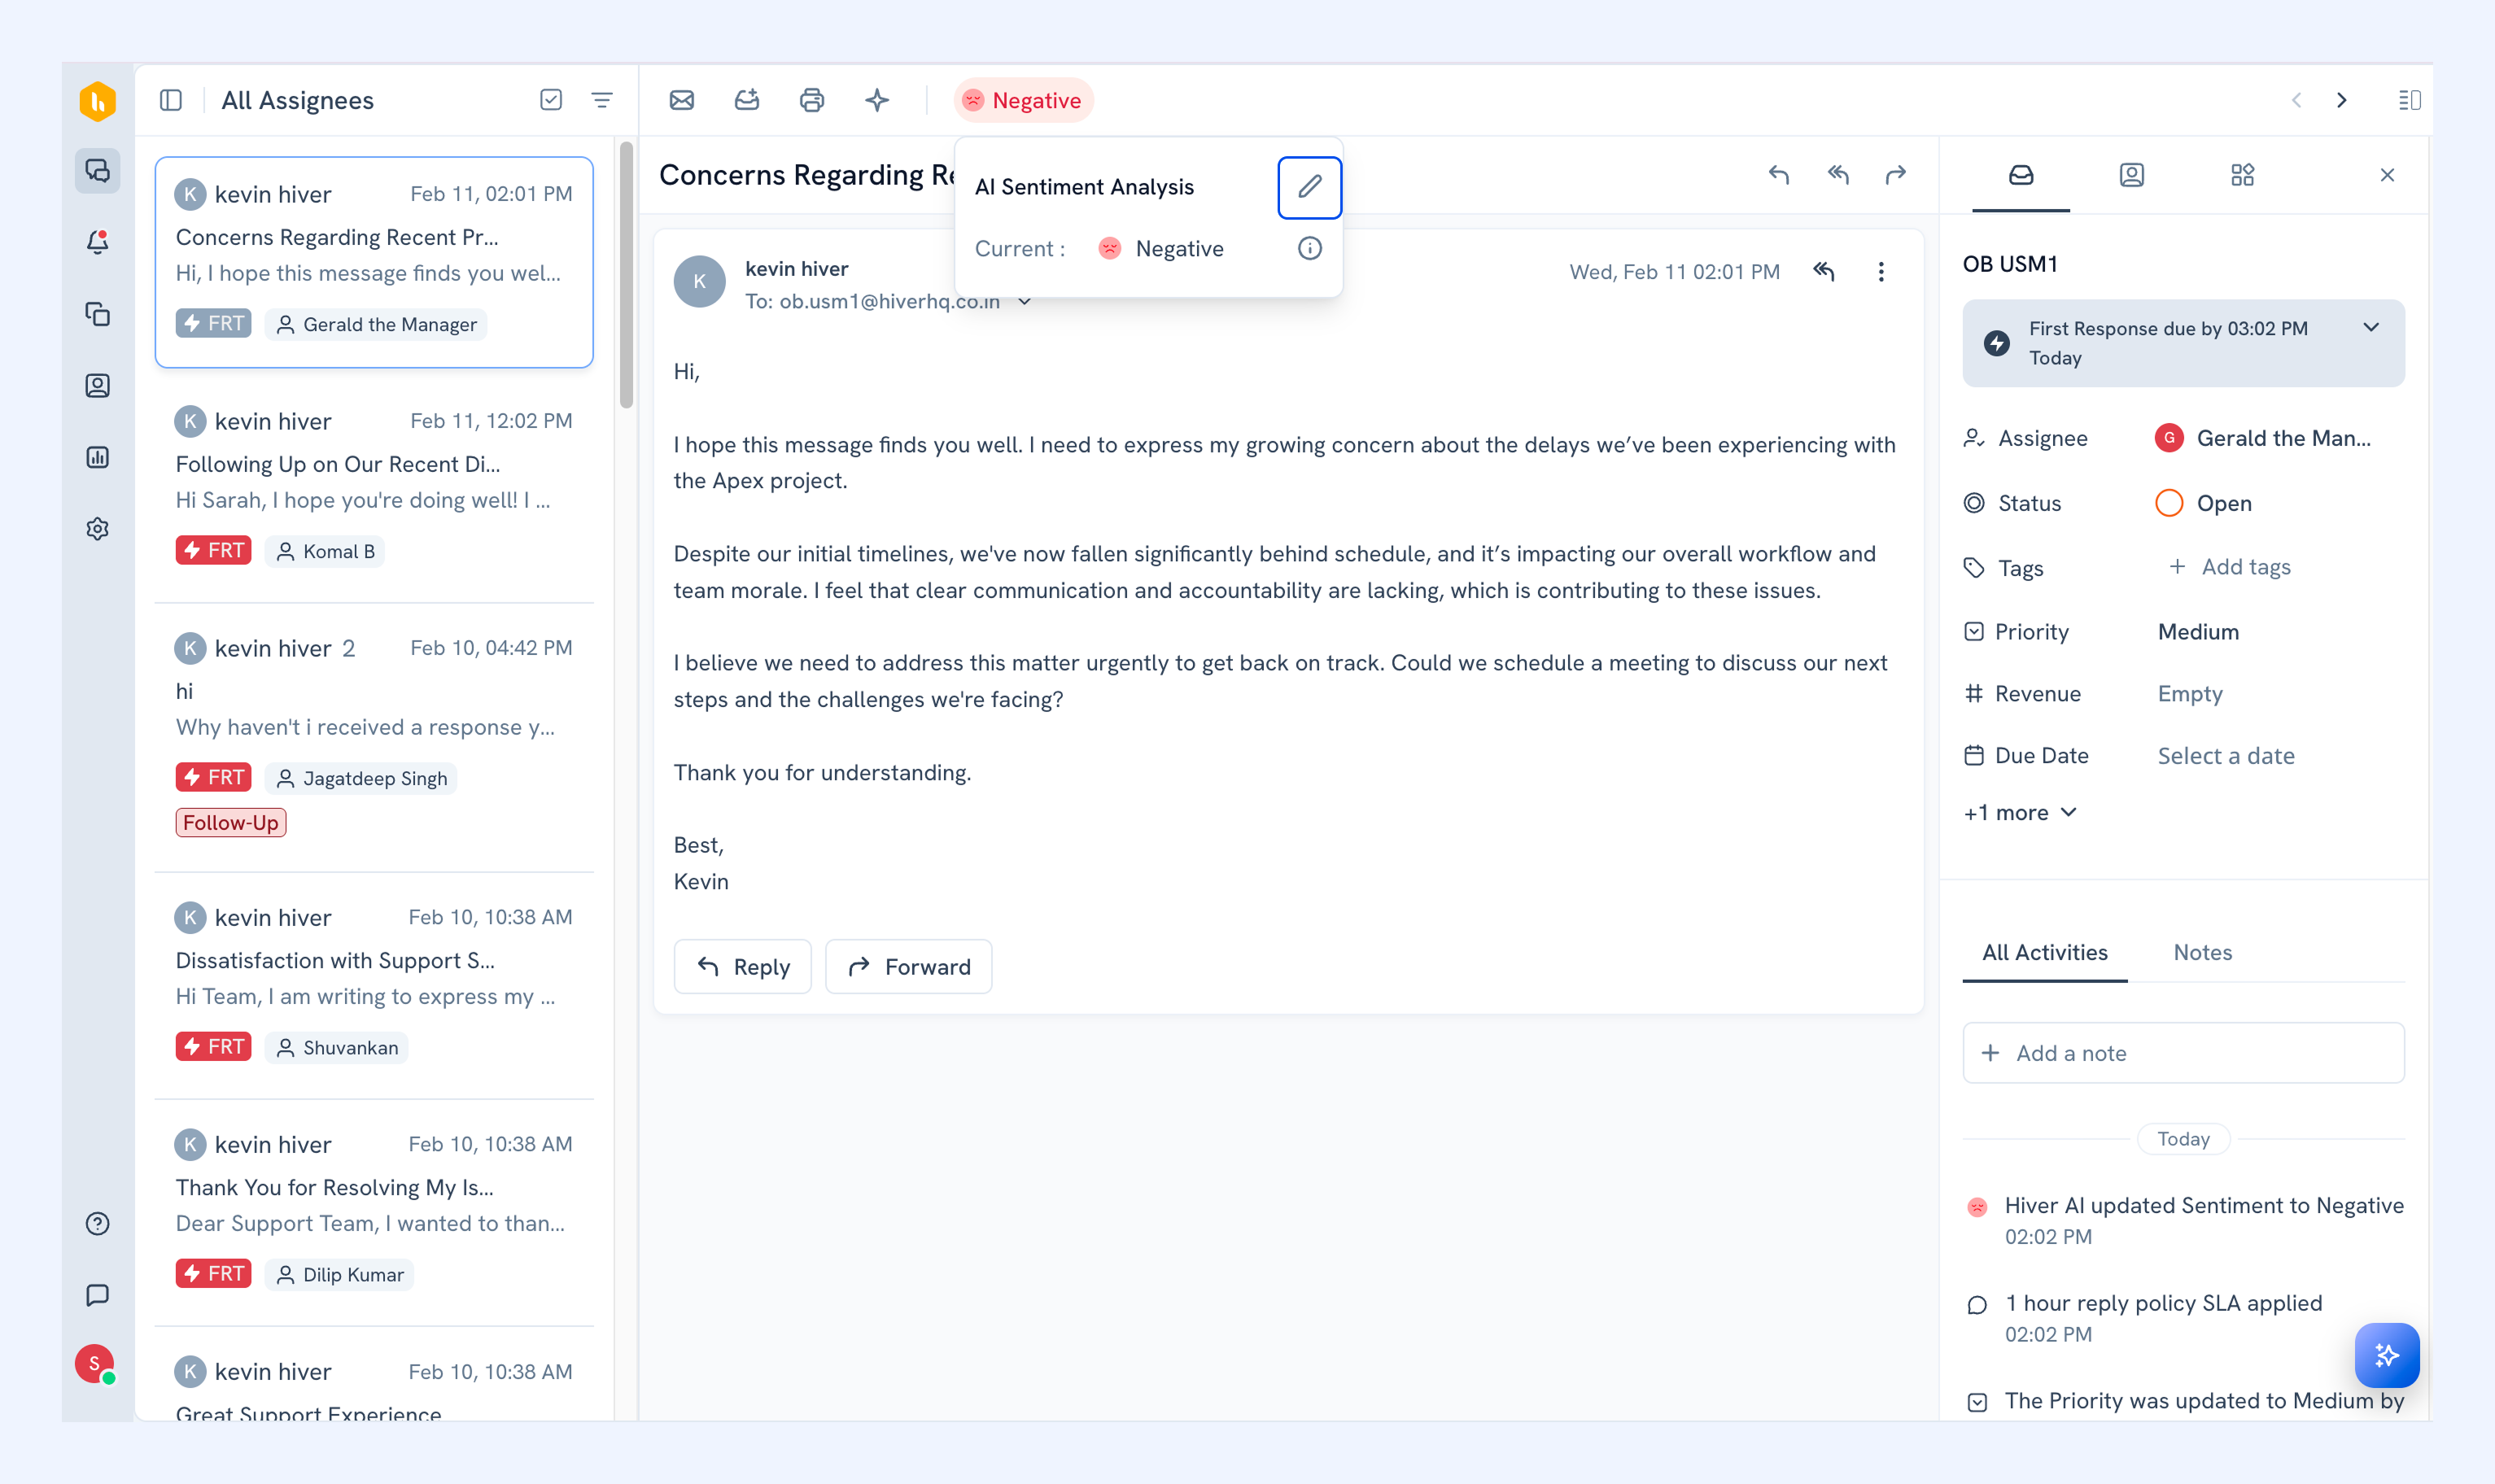
2. Select the correct sentiment from the available options.
3. (Optional) Add a note explaining why you changed it under Reason for edit?.
4. Click Save changes.
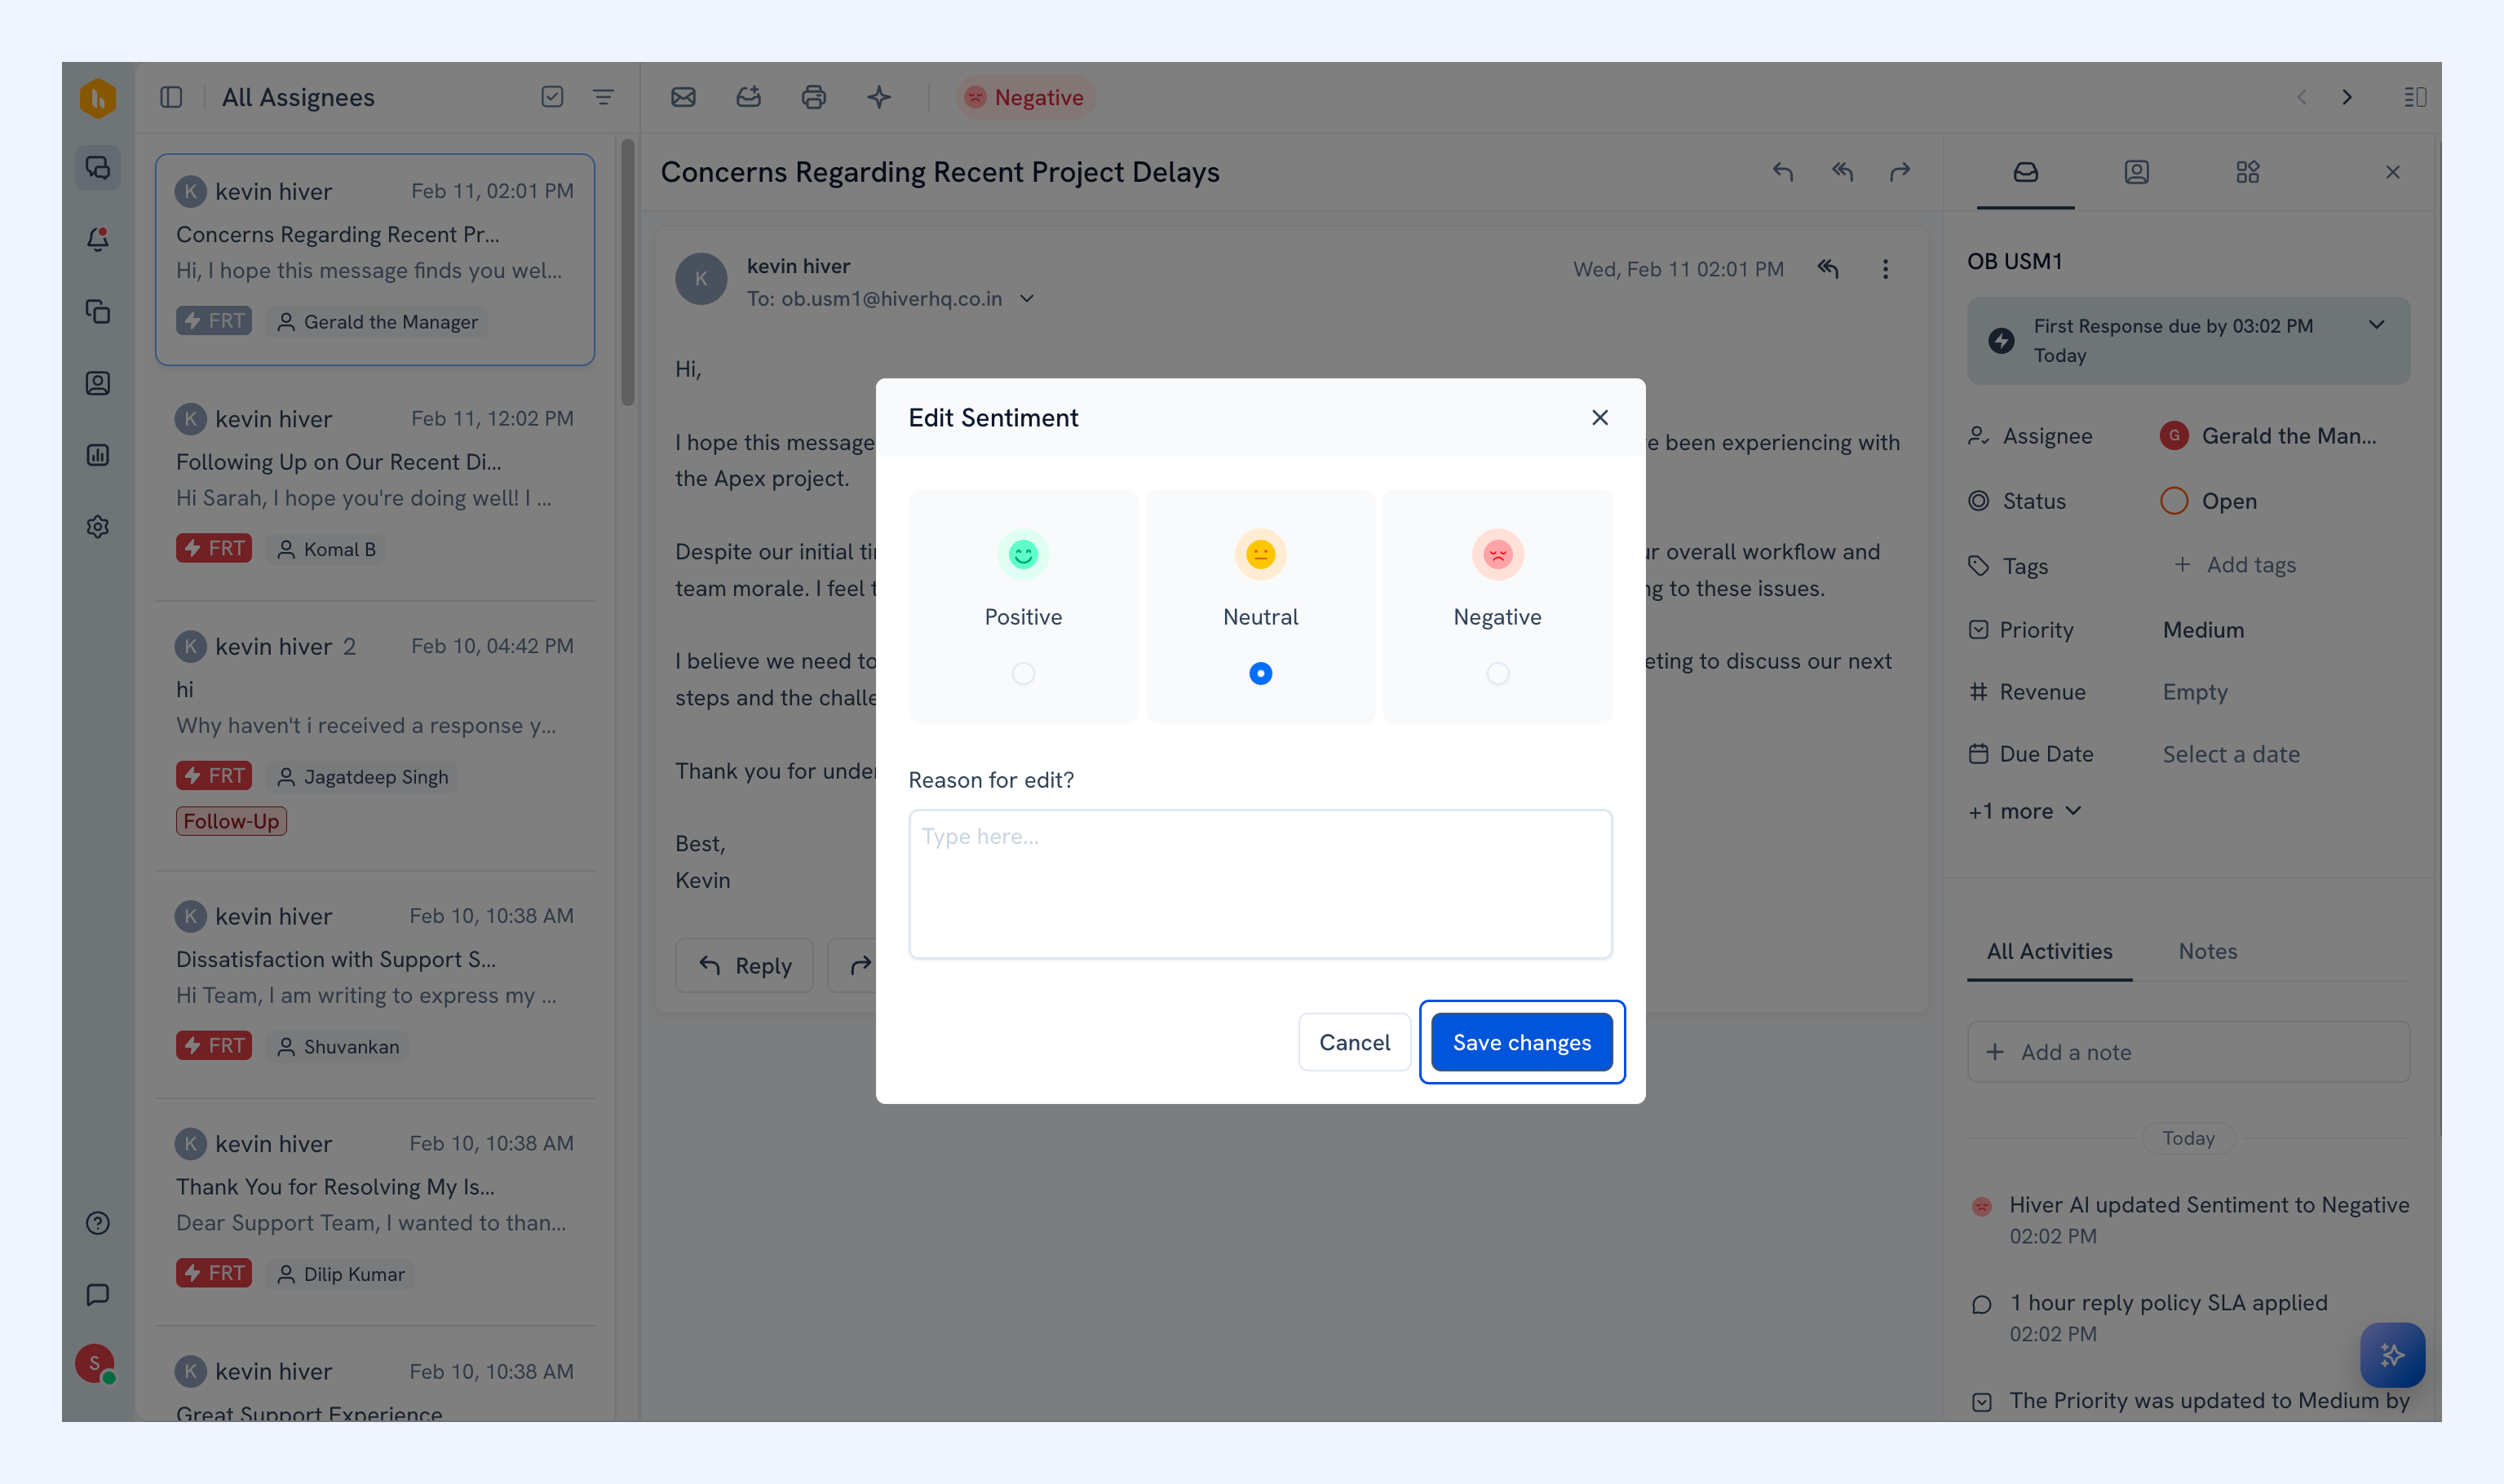
Your correction helps improve the AI's accuracy over time.
FAQs
1. Will sentiment be applied to replies and follow-ups, too?
Yes. The AI checks every message in the conversation, including all the back-and-forth replies.
2. Can I use sentiment to trigger automation rules?
Not yet, but it's coming soon. When it launches, you'll be able to set up automations based on how customers feel.
3. Can agents update the assigned sentiment?
Yes. If the AI gets it wrong, agents can change it right from the conversation. They can also add a note about why they changed it.
4. Can I use sentiment data with analytics?
This is rolling out soon. Once it's live, you'll be able to see sentiment trends across all your Shared Inboxes.
5. How many sentiment levels can I choose from?
Two options: a 3-point scale (positive, neutral, negative) or a 5-point scale (very positive, positive, neutral, negative, very negative).
Next Steps
Using AI Compose in Hiver Omni