Organizing conversations
Hiver’s Views give your team quick, focused access to conversations that match specific conditions — for example, all unassigned, open conversations. By giving you a filtered list of conversations, views help your team stay on top of priorities, respond faster, and reduce the time spent searching through the inbox.
Hiver comes with standard views by default, and you can also create Custom Views to match your team’s needs.
Default views
You can use Hiver's built-in default views to quickly find specific conversations. To access default views, select a Shared Inbox and click All views from the expanded menu.
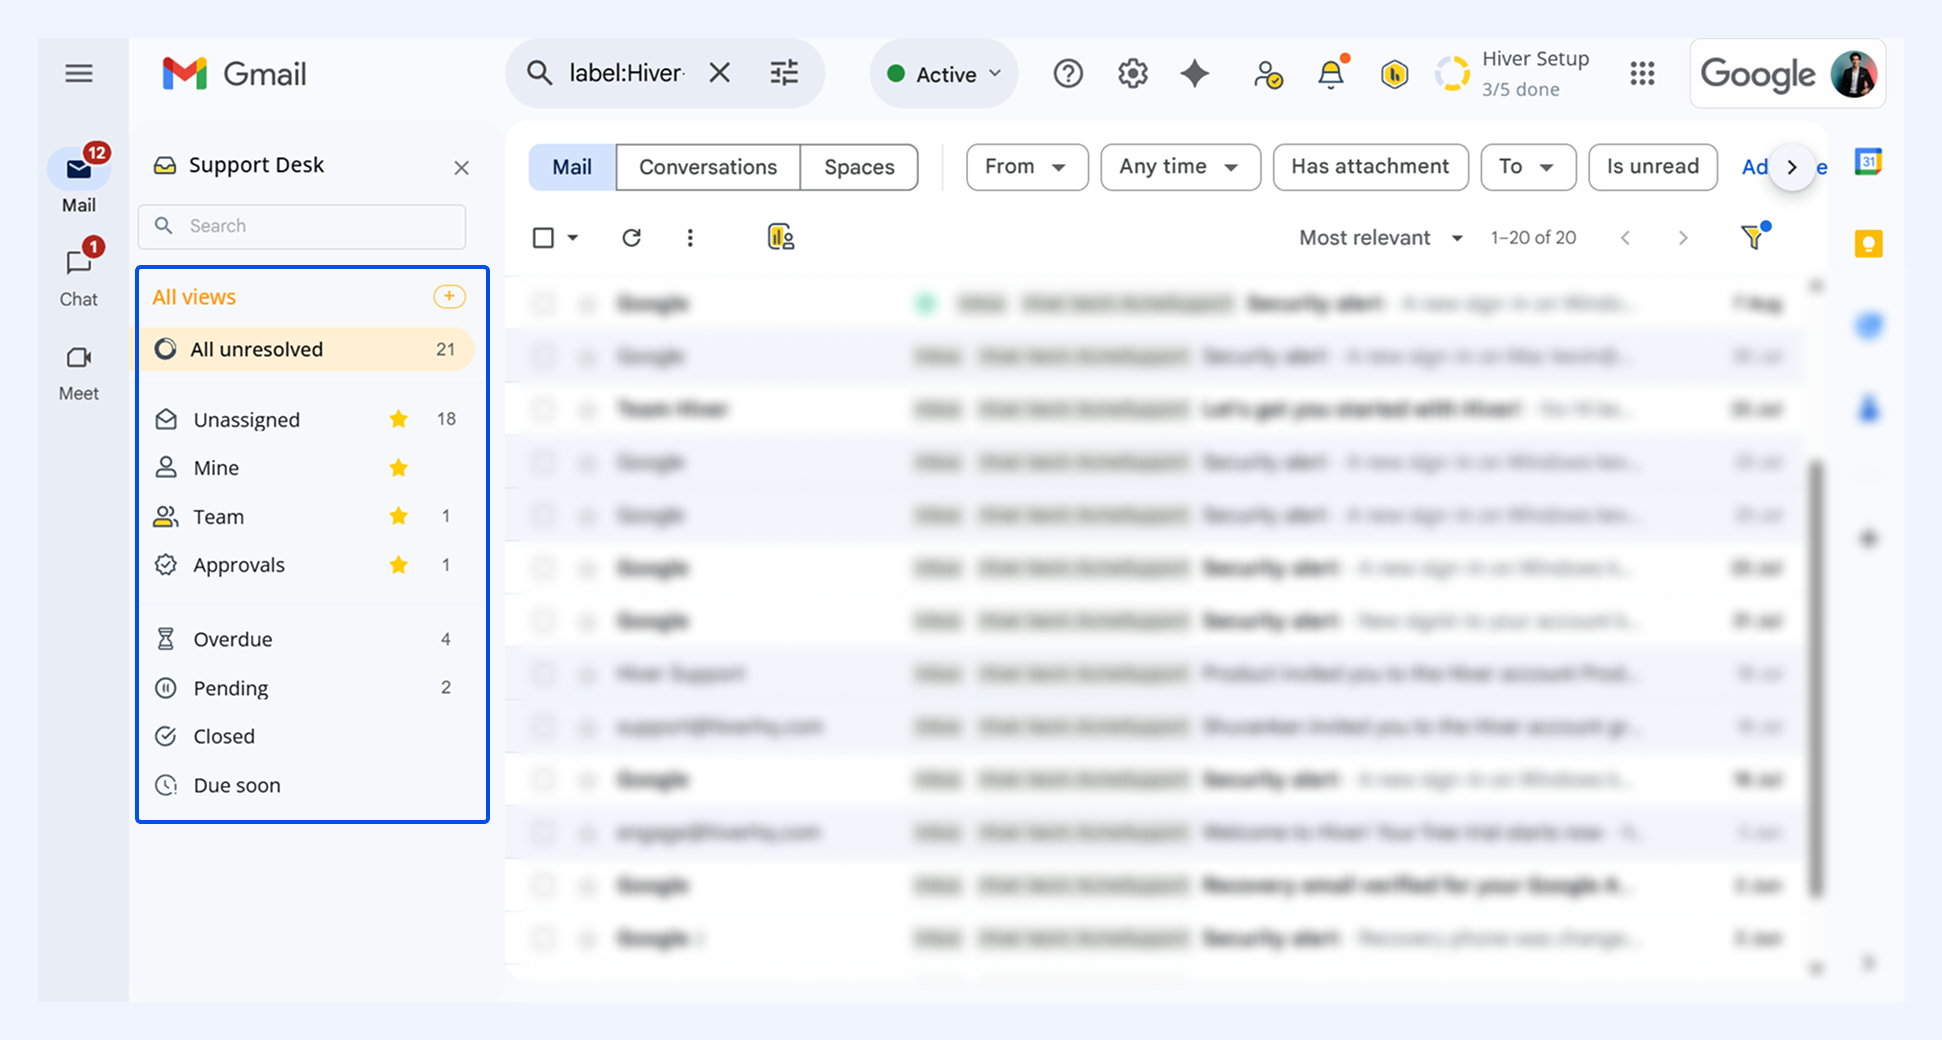
Hiver’s default views include:
- All unresolved: All emails that have not been closed
- Unassigned: Emails not yet assigned to any team member
- Mine: Emails assigned to you
- Team: Emails assigned to your team
- Approvals: Emails requiring approval
- Overdue: Emails past their SLA deadline
- Pending: Emails marked as pending
- Closed: Emails that have been resolved
- Due soon: Emails approaching their SLA deadline
Note: Default views cannot be modified.
Assigned to Me
If you’re a part of multiple Shared Inboxes, you’ll see a view called Assigned to Me. This view displays all open conversations assigned to you across your Shared Inboxes.
You can customize this view by:
- Using the Shared Inbox dropdown to choose which inboxes to include.
- Using the Status dropdown to filter conversations by status (open, pending, or closed).
Search for conversations
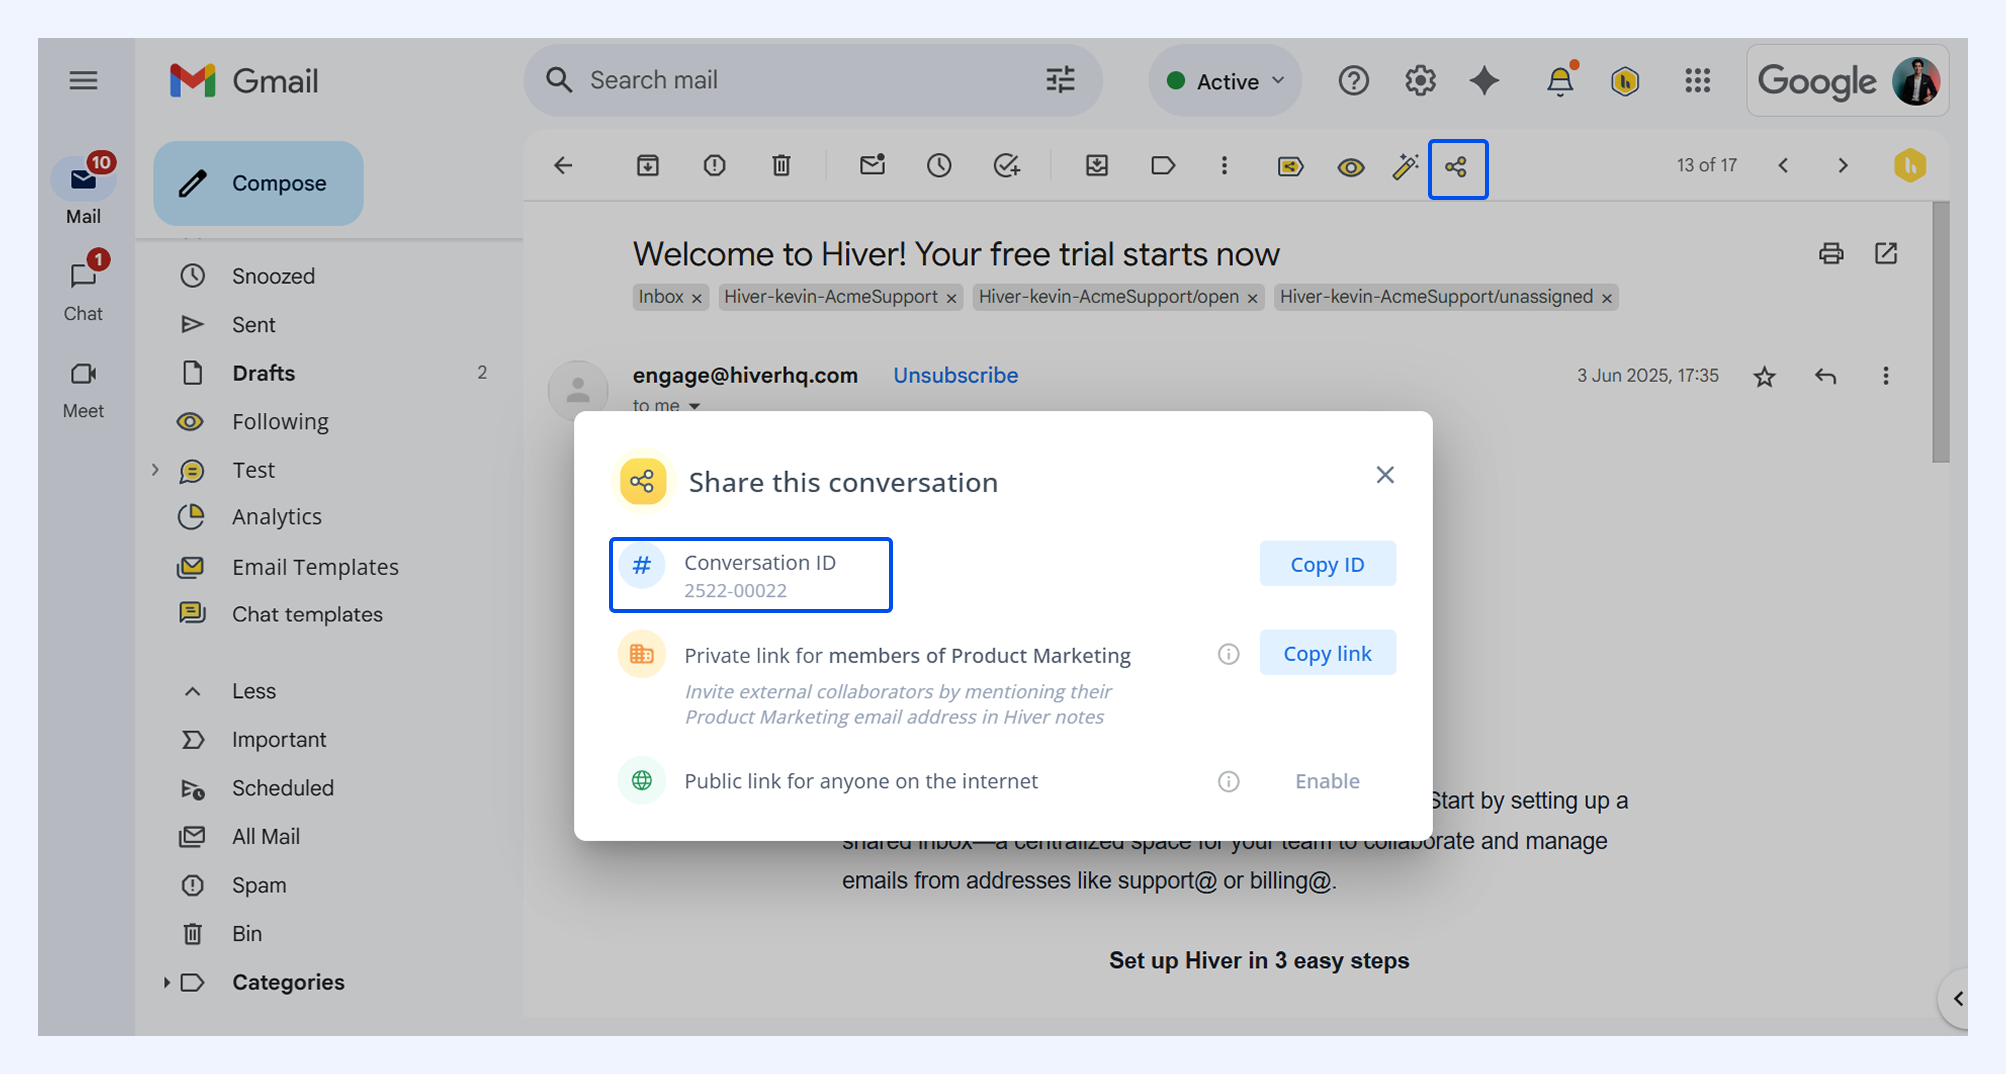
To search for specific conversations in your inbox, you can use its Conversation ID. You can find and copy this ID by clicking the Share conversation icon on any email thread.
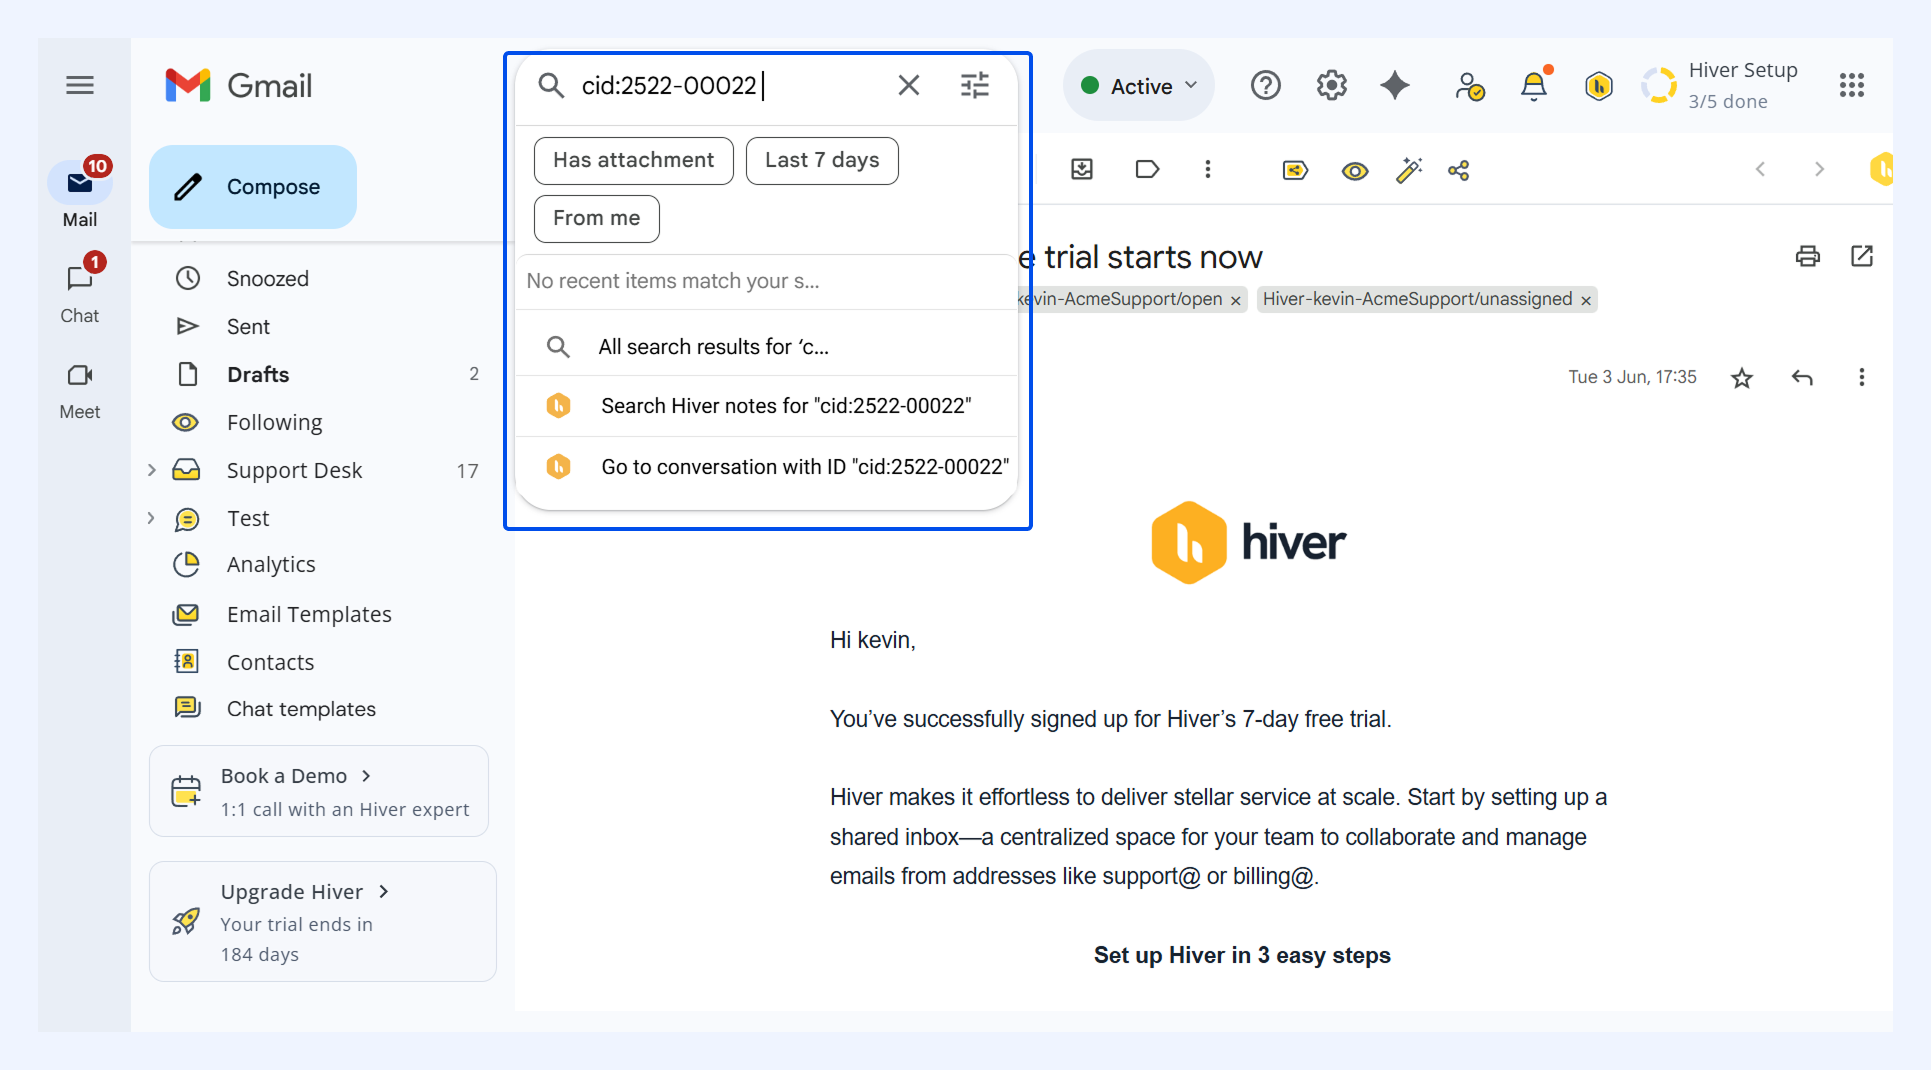
To search for a conversation by its ID, enter 'CID:' or 'cid:' followed by the ID number in the search bar. For example: CID:2234-A123.
Filter conversations
You can filter conversations based on different criteria such as assignee, status, and tag. To filter conversations, select the Hiver filter icon in the right-hand corner.
1. Based on the assignee
Filter conversations according to who they're assigned to. For example, you can find all emails assigned to specific team members, such as John or Jane.
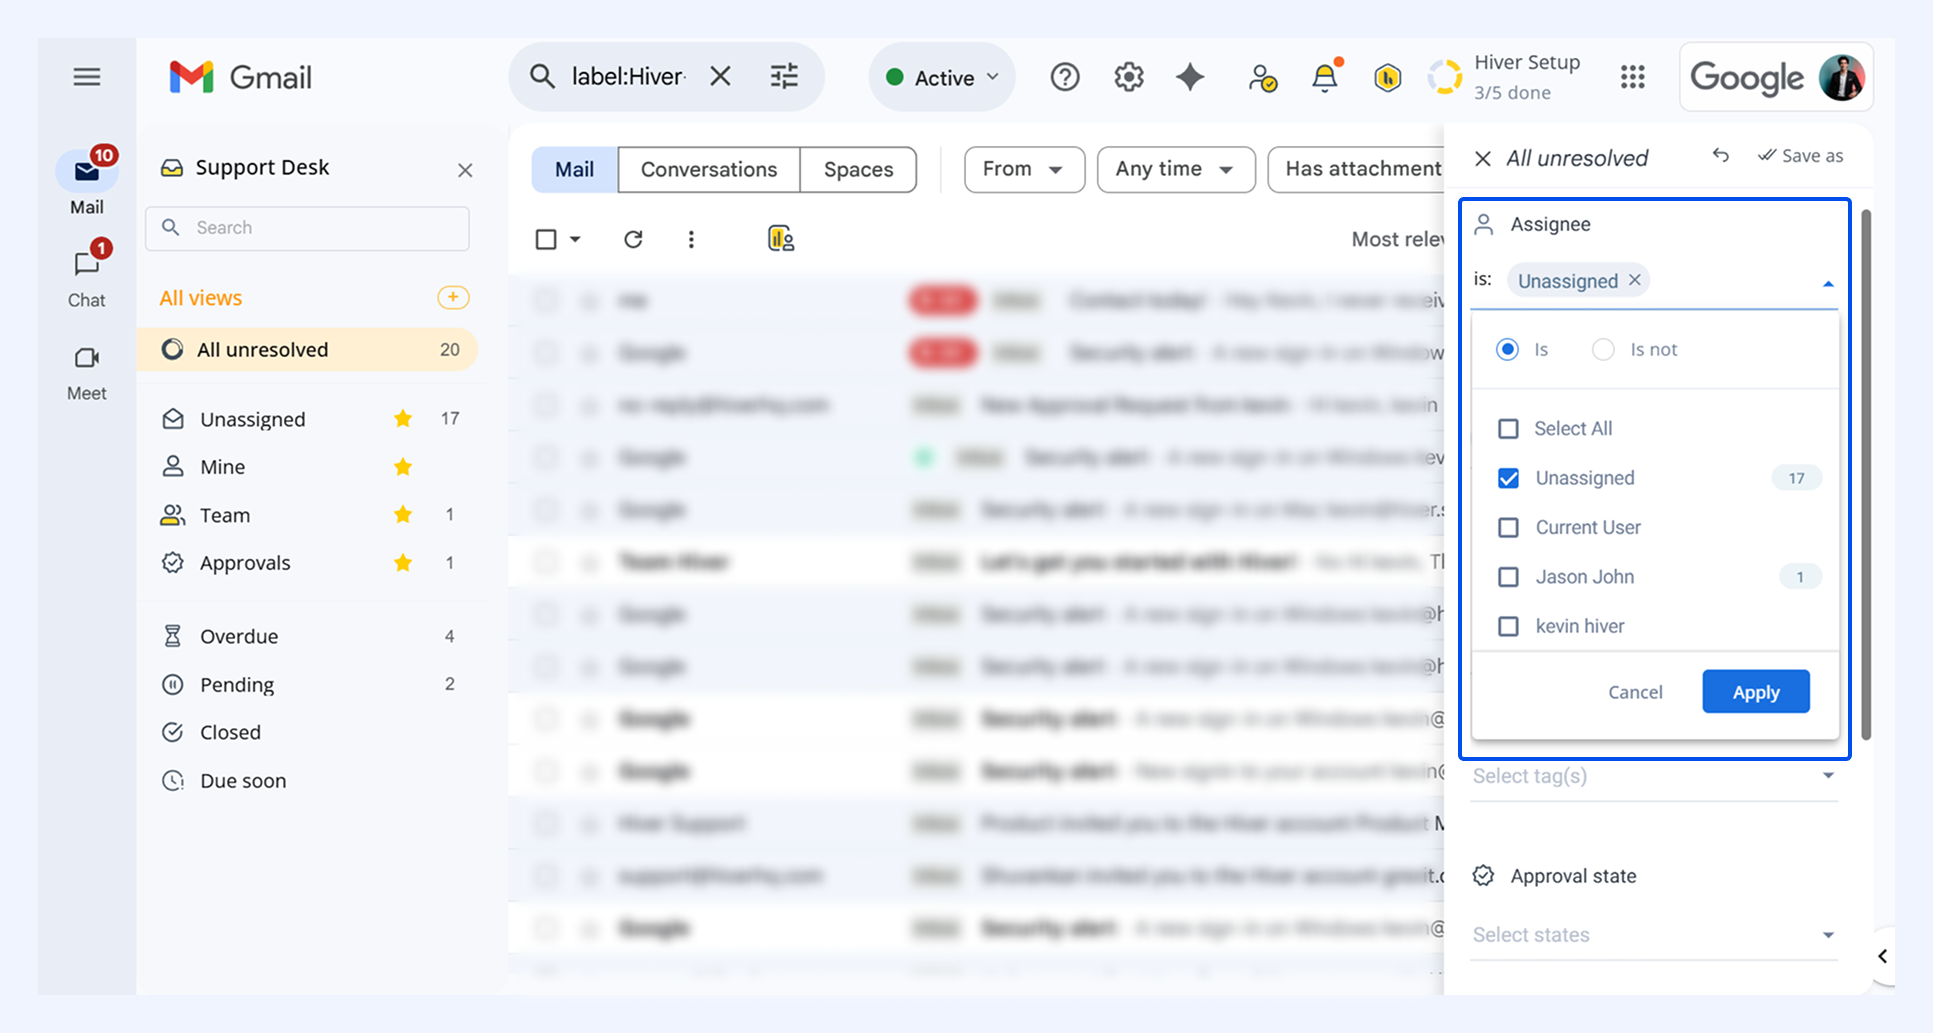
When using this filter, you have two main options:
- Select the ‘is’ option to view conversations assigned to specific members.
- Select the ‘is not’ option to exclude conversations assigned to specific members.
When you select multiple team members, the filter shows conversations assigned to any of those selected users.
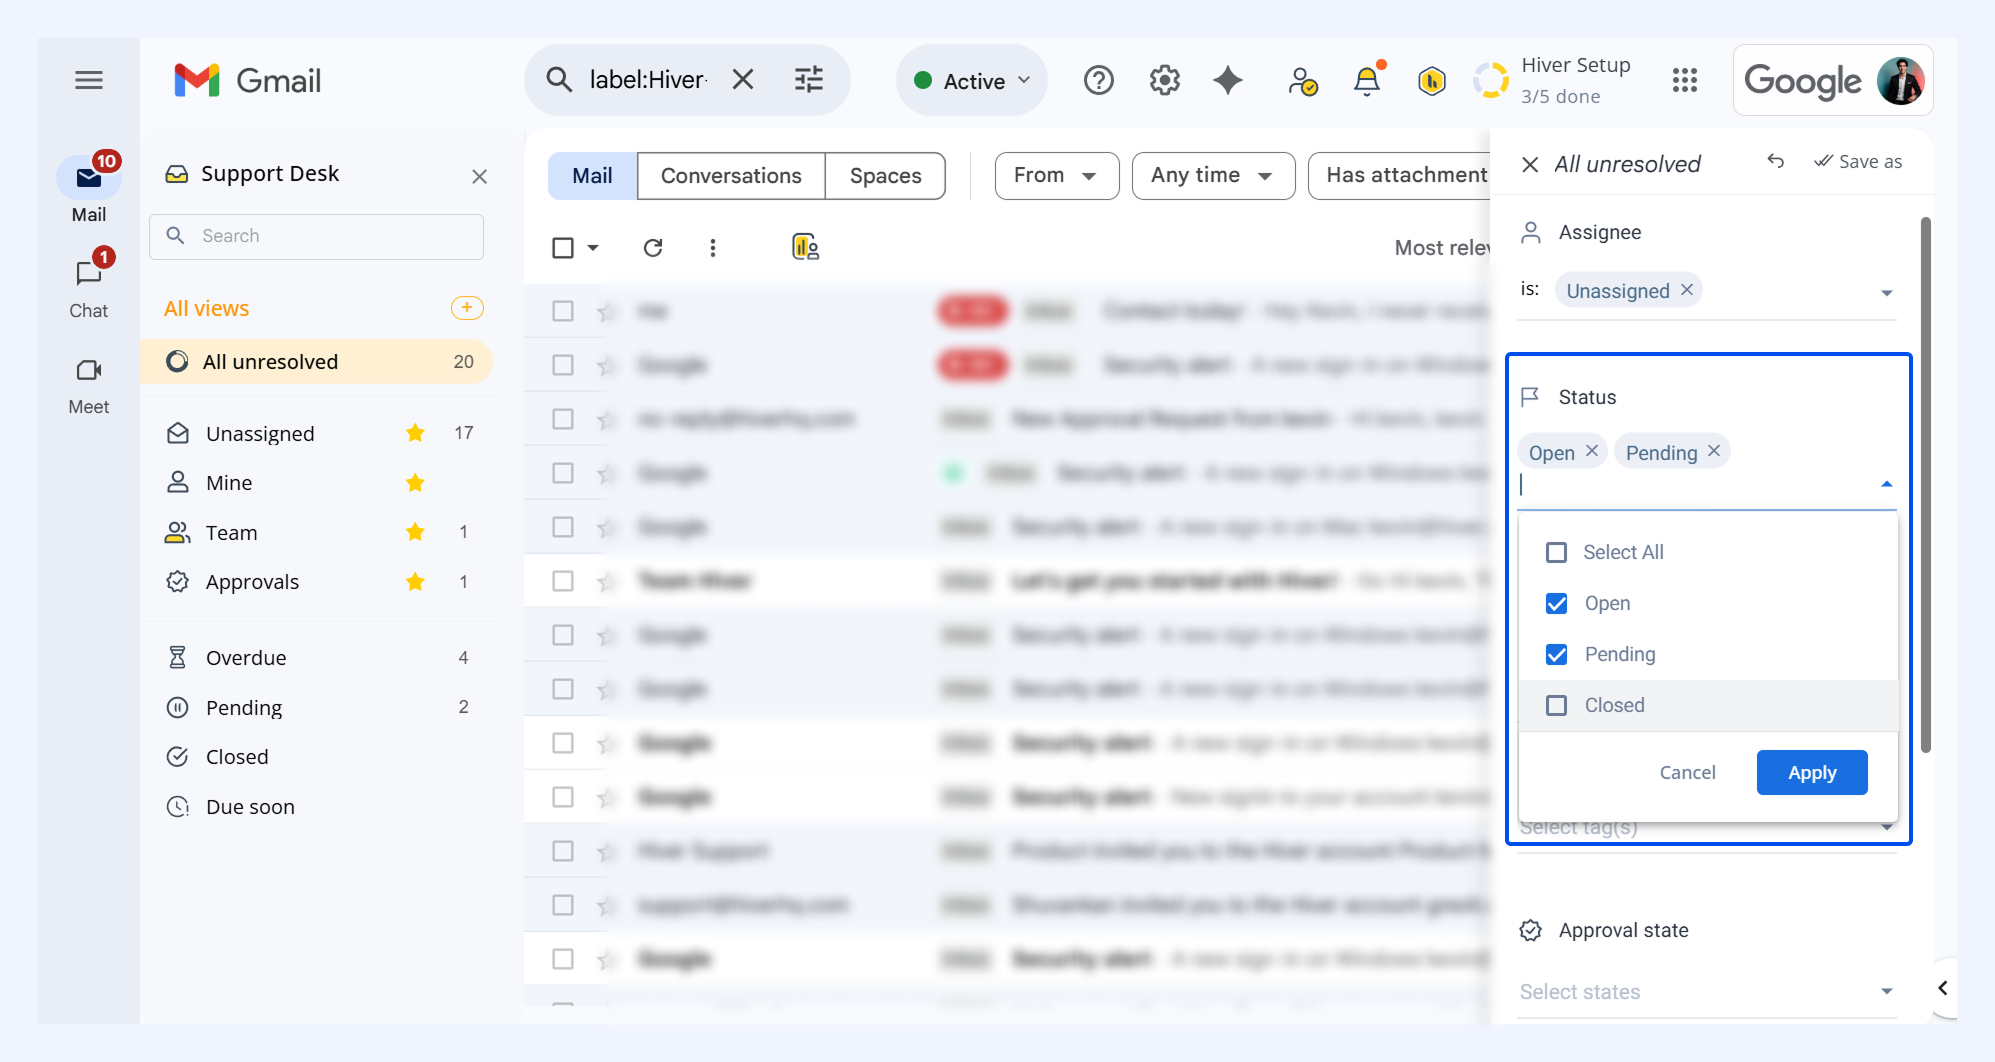
2. Based on status
Filter conversations by their current state, such as open or pending. This allows you to refine results based on where conversations are in your workflow.
- When selecting multiple status options, the filter shows conversations matching any of those statuses.
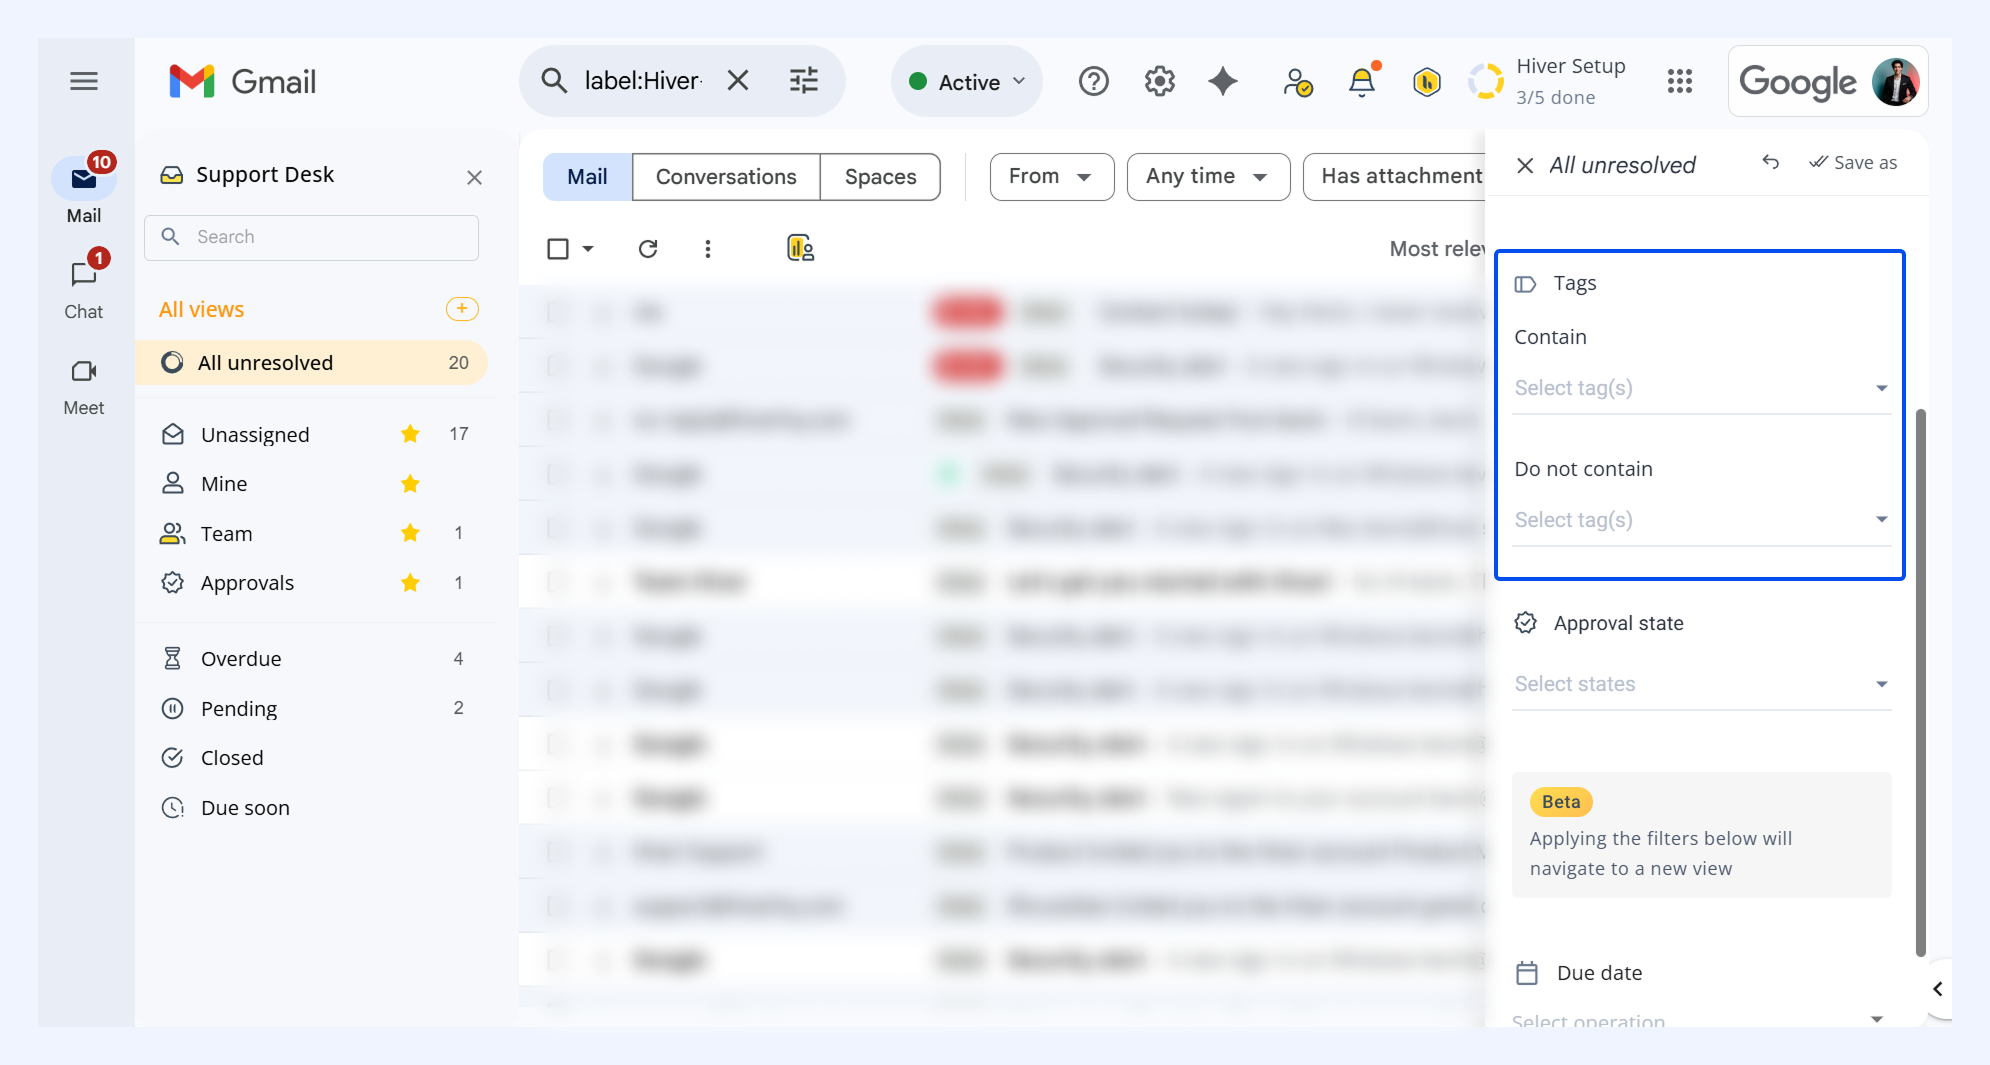
3. Based on tags
Filter conversations using tags to find emails with specific labels or exclude those with certain tags. Select ‘contain’ to find conversations with your chosen tags, or ‘do not contain’ to find conversations without specific tags.
4. Based on the approval state
Filter conversations by their approval status to view emails with pending, cancelled, approved, or rejected approval requests. This helps track and manage conversations that require or have undergone approval workflows. Learn out more about creating Approval Flows.
5. Based on custom fields
Filter conversations using your organization's custom fields to find emails containing specific data you've set up to track. This lets you organize and manage conversations based on the unique information that matters most to your business needs. Learn more about custom fields.
6. Based on customer sentiment
Filter conversations using AI-powered Sentiment Analysis to find emails based on their emotional tone, such as positive, negative, or neutral responses. Your team can promptly identify conversations that may require immediate attention or special handling based on the customer's emotions. Learn more about Sentiment Analysis.
Create Custom Views
Custom Views let you save filter combinations so you can quickly access conversations that match your most frequent search criteria.
To create a custom view:
- Select Shared Inbox → All views → Create View (+ icon) to open the filter panel.
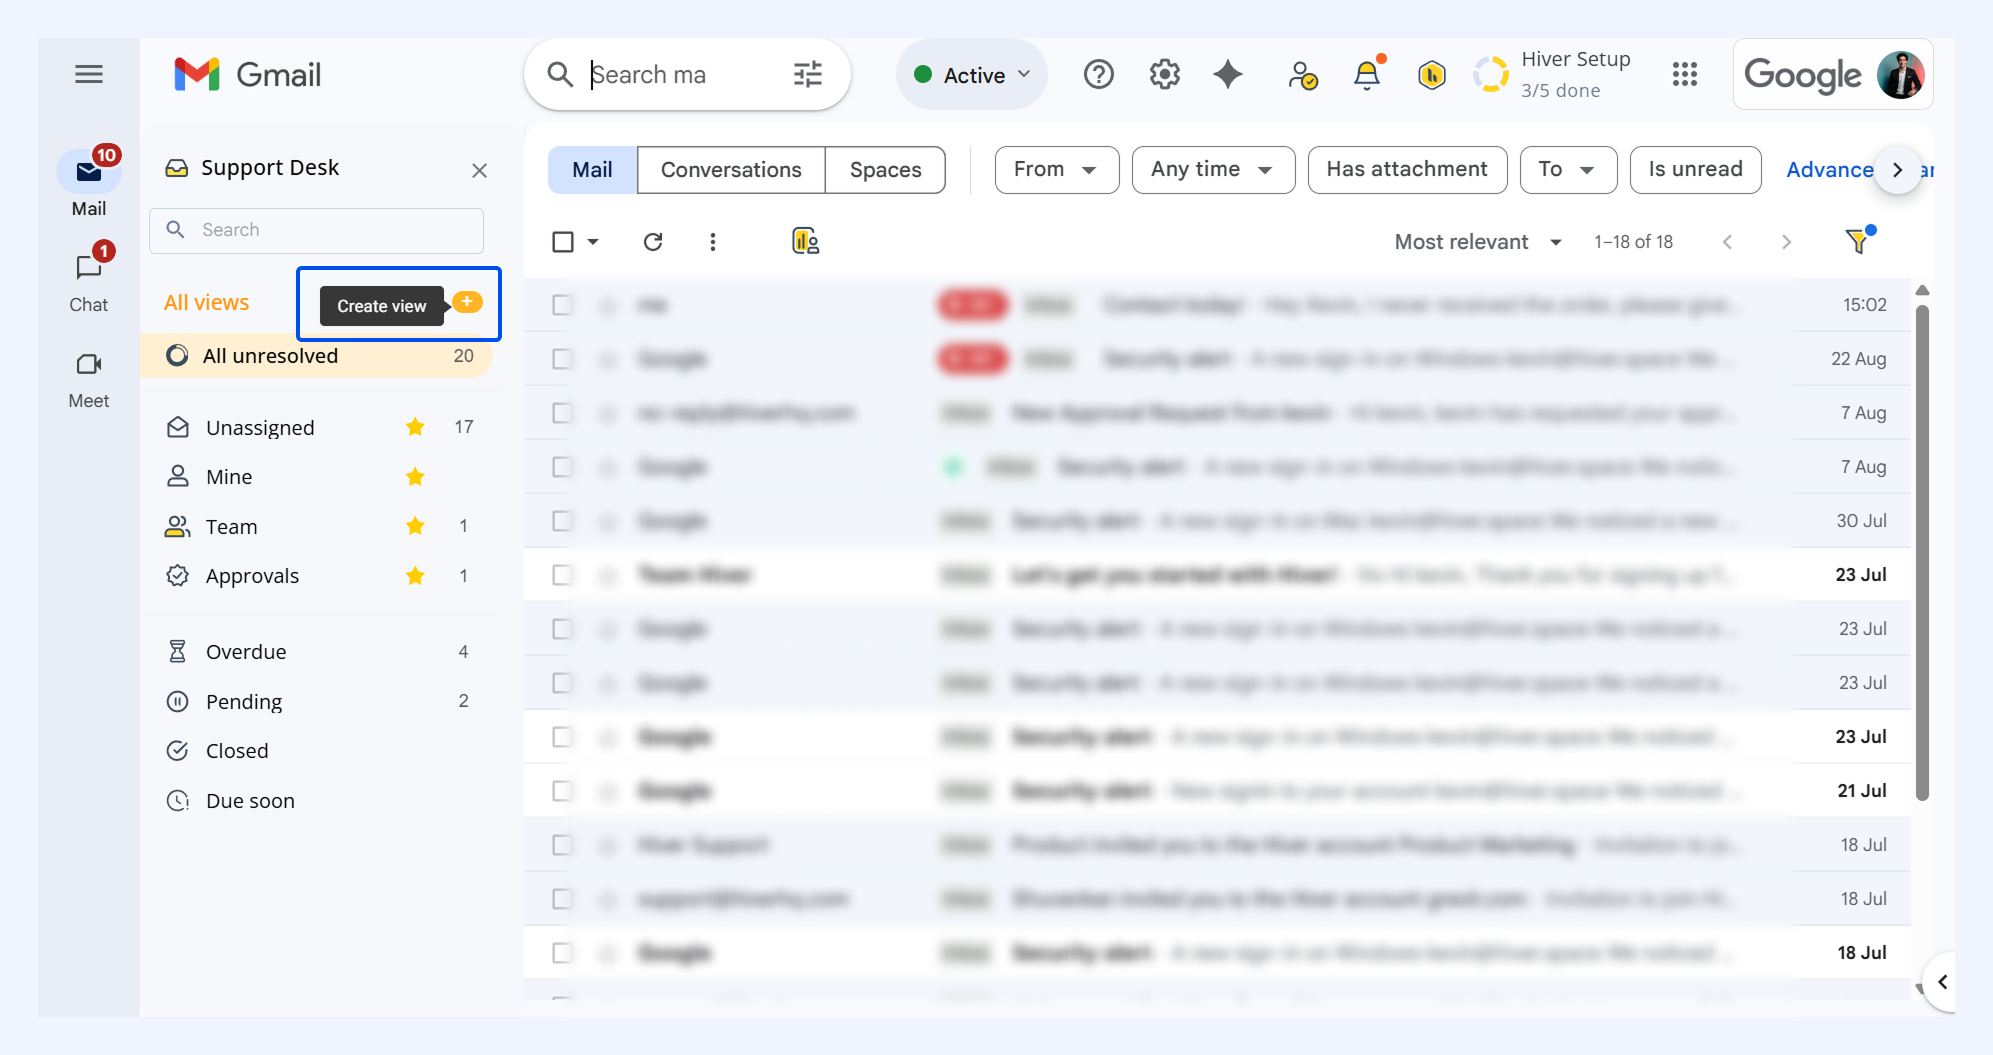
- Apply your filters and click Save as.
- Give your view a name and choose between the two visibility options:
- Select ‘visible to - all users of this shared mailbox’ to create a shared view accessible to your entire team (Shared Views).
- Select ‘visible to - me’ to create a private view only you can access (Private Views).
- Click Save to create your custom view.
Note: Only Admins can create and edit shared views.
Mark views as favorites
Mark your most-used views as favorites for immediate access without searching through the complete view list. To manage your favorite list:
- Click the star icon next to any view to mark it as a favorite. You can have up to 5 favorite views at any time.
- Rearrange favorites by dragging them to your preferred order.
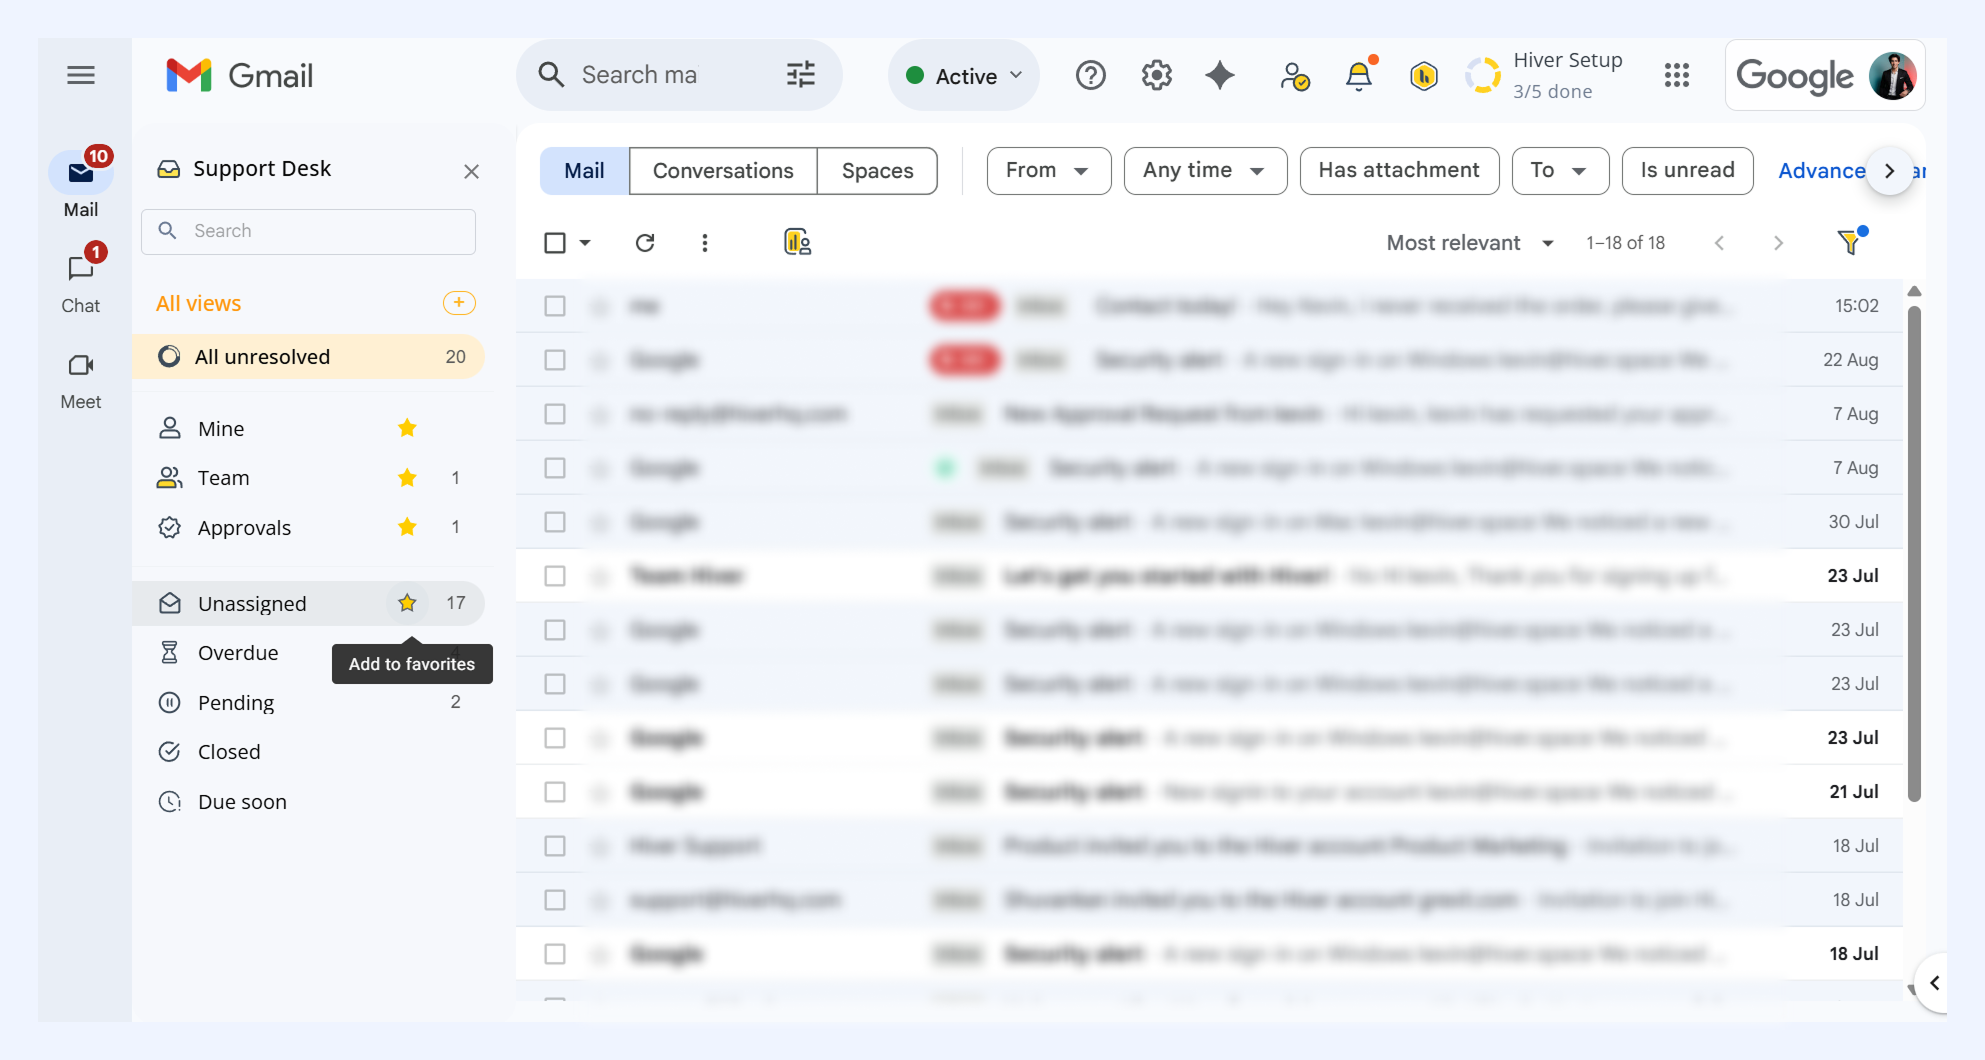
The count of conversations in your top favorite view appears next to the Shared Inbox name when collapsed.